HOLIDAY DONATION DRIVE - SUPPORT MSW - DO YOUR PART TO KEEP THIS GREAT FORUM GOING! (89 donations so far out of 49,000 members - C'mon guys!)
×


Bedford
-
Posts
1,297 -
Joined
-
Last visited
Content Type
Profiles
Forums
Gallery
Events
Everything posted by Bedford
-
 More paint

-
Looks great, have you started a new ship this year yet?
-
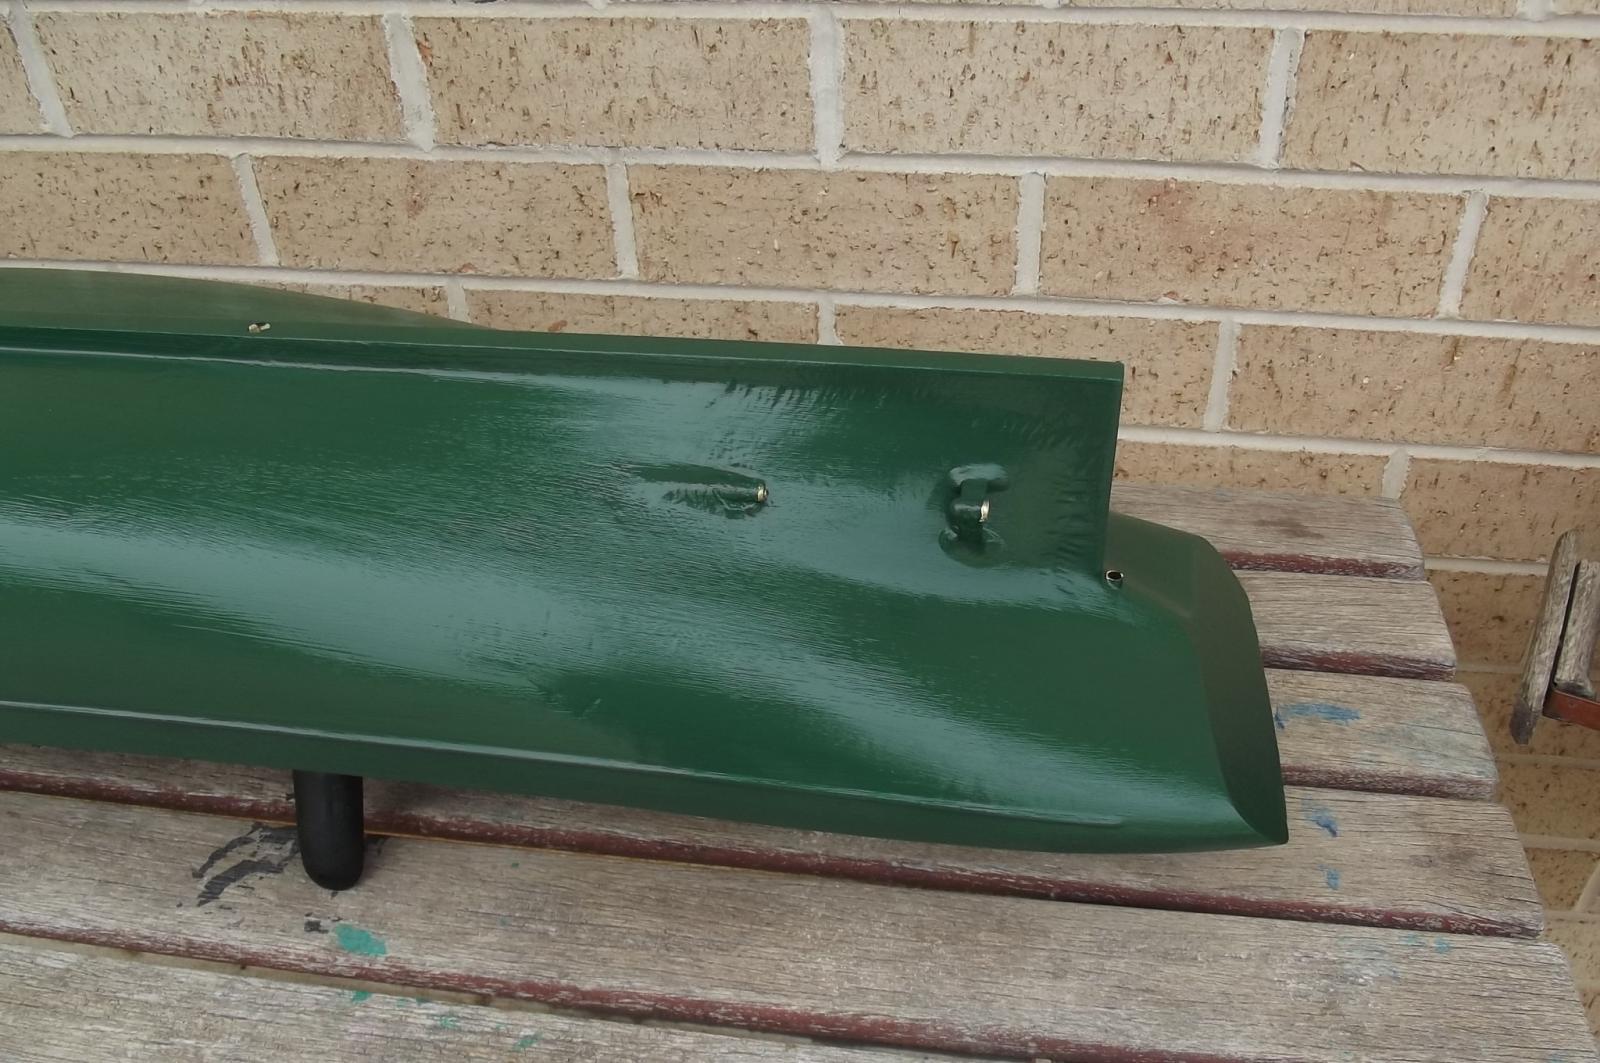
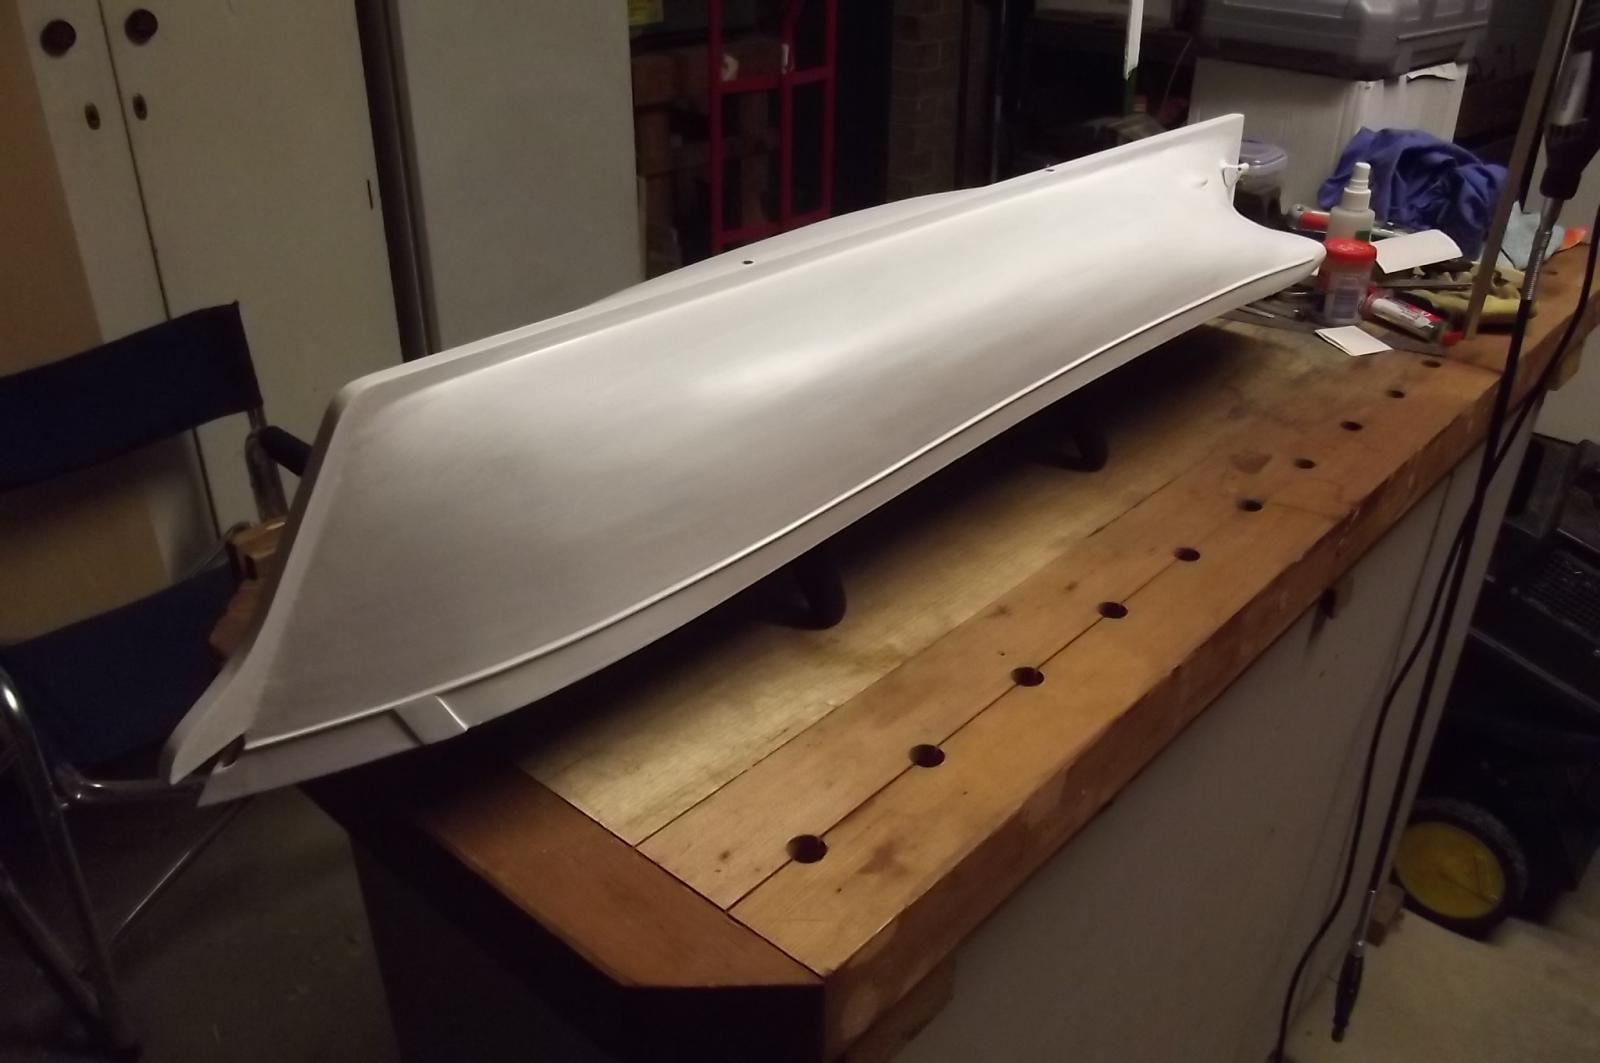
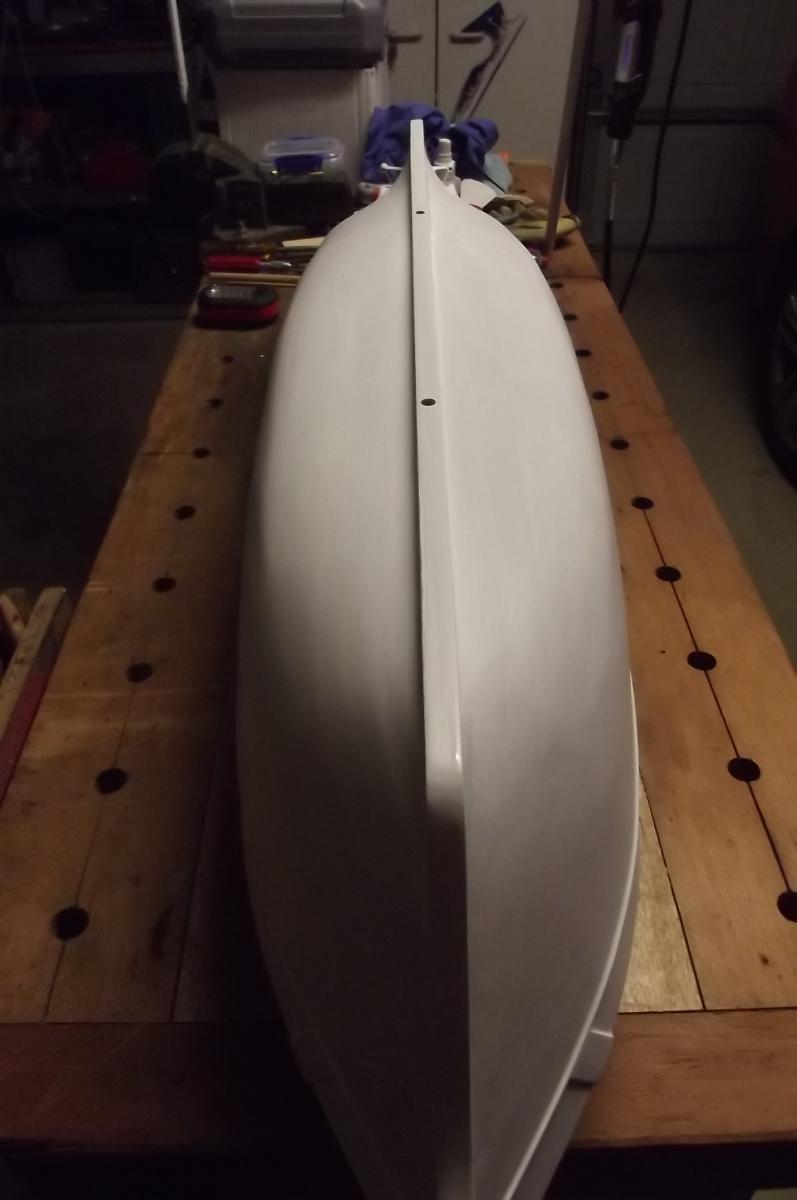
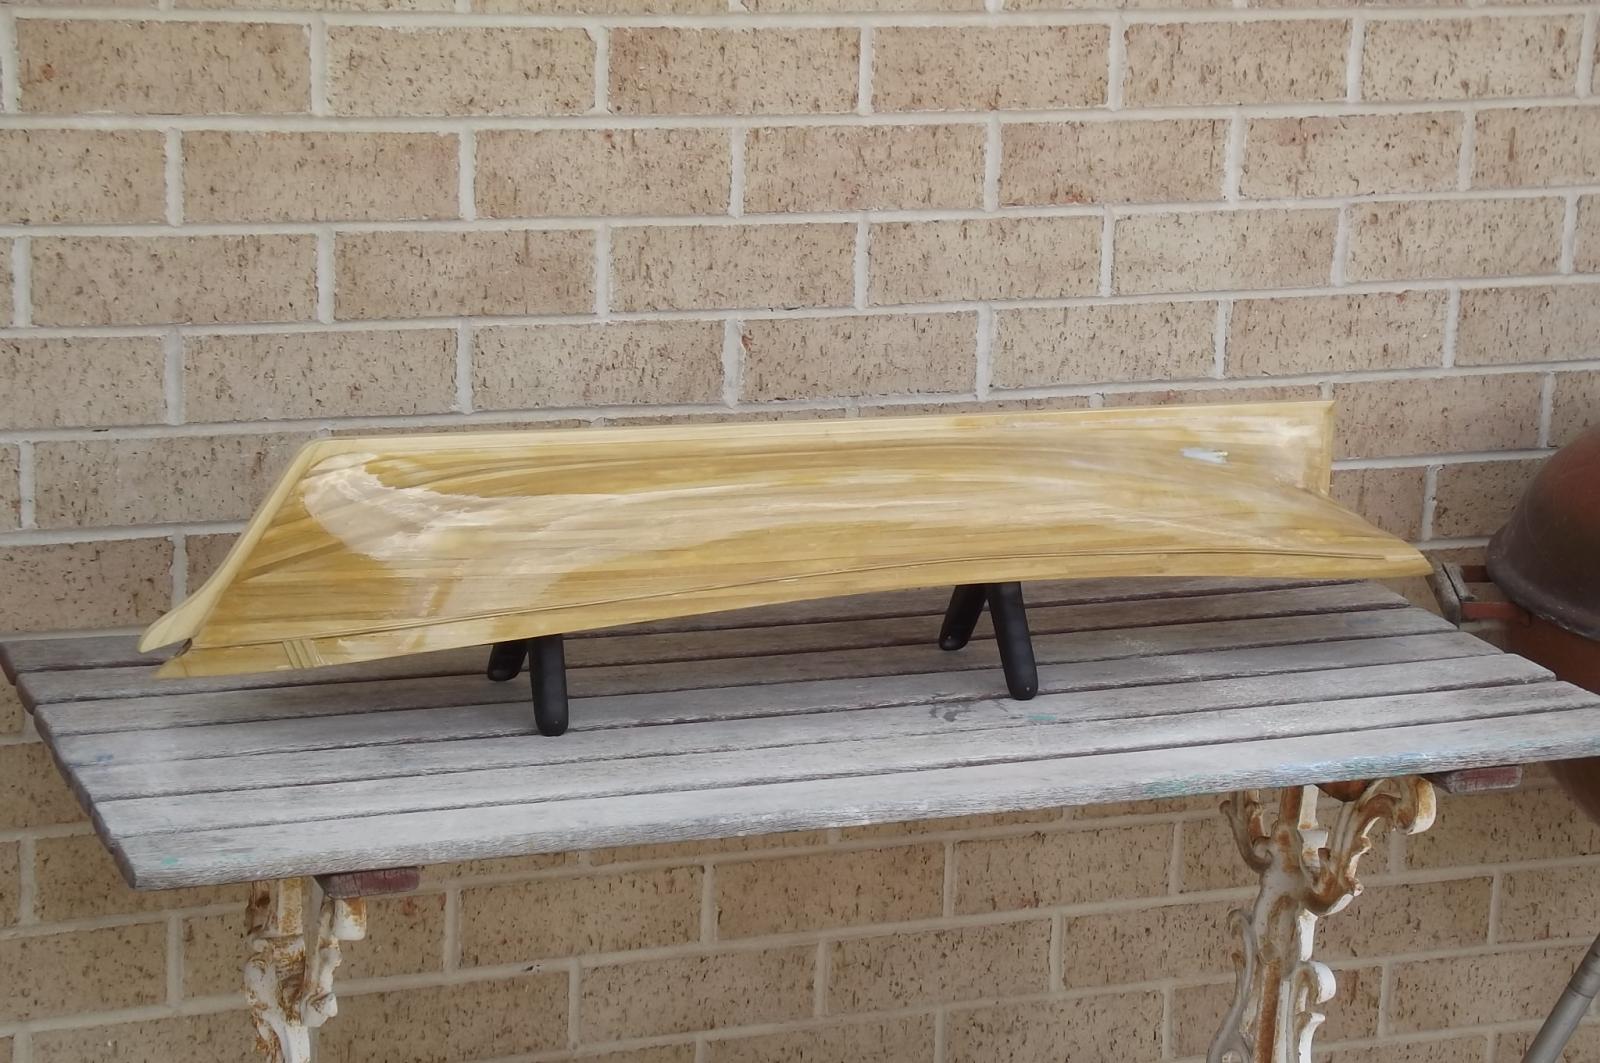
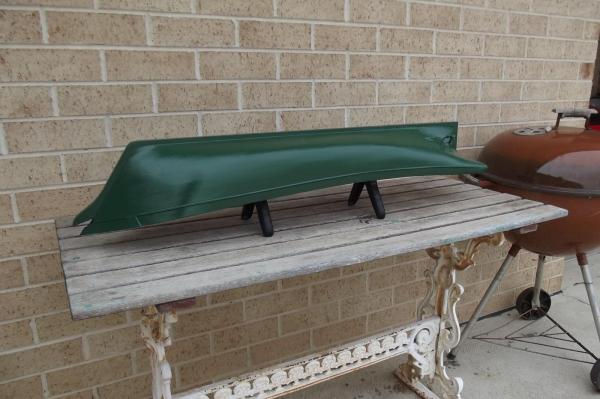
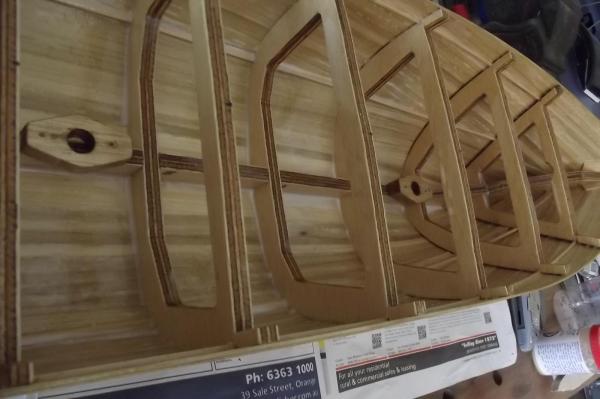
As promised, the timber grain is gone. Two coats of primer have been applied. Oh, I have also attached the outer bearings for the prop shafts, drilled the holes in the keel for mounting the sailing keel and mounted the rudder tube. In the close-up of the stern section you can see where the edges of the fibre glass are obvious, it looks worse in the pic, you just can't get rid of that without heaps of resin coats and sanding and that would have been difficult to do in this area without wearing through the edges of the keel etc, besides it is on the bottom so I can live with it.


-
What a novel concept, love it!
-
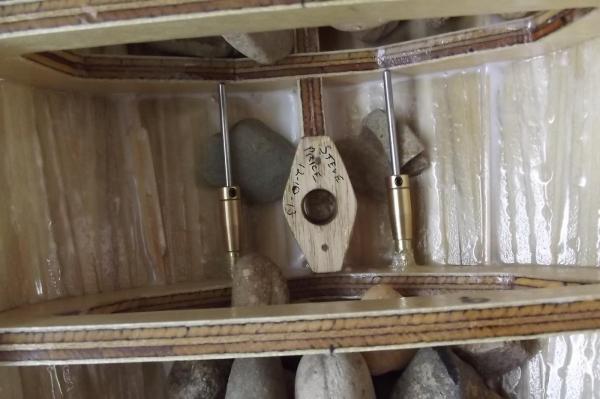
That's some good info Jerry, thank you very much. Space is not an issue in this build, the beam about 100mm behind the fore mast is 200mm so I have plenty of room to play. Like you I am thinking that last one looks good but if it doesn't give enough travel what about incorporating the Jimie James idea to some extent. That would increase the pull. A high torque servo should handle the job I would imagine, especially if the Jimie James idea means a shorter arm on the servo.
-
I have calculated the sail area today, maybe not dead accurate but it would be pretty close to 510125mmsq That is just over 0.51 metres squared or 791 square inches so a bit more sail than you carry from memory Floyd. However my centre of force is much lower than that of a modern yacht style of rig and in stronger winds I can reduce sail. Sails = 495 in sq Top sails = 144 in sq Stay sails = 152 in sq So I can run with sails - 495 Sails and top sails - 639 Sails and stay sails - 647 All sails - 791 I am no sailor but I would imagine the top sails would be used only in lighter winds, depending on how she handles the wind. They will not be able to be set without the mains up first.
-
Thanks Jerry, that is food for thought. This is basically what I am going for, I had not considered sliding the sheet as you suggest but it is something to remember. I am really going for the correct method of having two sheets which then run to either side of the hull as you suggest. The rest of the sails will most likely be run the way Floyds are.
-
Thanks for the pics Floyd. It is interesting how you have your sheets set up, you are doubling the pull by way of anchoring the ends of the sheets to the hull. This really shows the torque of the servo. The more I think about it the more I realise I am going to have to have two channels for the sails because I want the stay sails to operate properly. One channel can operate the sails and top sails the same way you do but the stay sails will require a two way pull, ie:- each will have two sheets which will need to be attached to opposite sides of the servo horn. There is a pic of how it works early on, I took it on board the james Craig. Welcome back Robbyn, hope you had a good xmas. Yes the float test was brilliant if quite daunting. It went pretty much as expected though. The two big things panned out for me, no water ingress at all and I know how heavy she can be, it is as simple as she can displace a lot more water than she will weigh therefore she will float. If she weighed more than the water she can displace she would sink. I didn't want her to ride too low in the water because there is not a lot of freeboard so as she heels over in a breeze the deck could end up wet and I want to try and avoid that. The odd bit of water on the deck will be ok but I don't want it in the water constantly. I am off to Sydney for a few days to see dad so no progress other than thinking for that time. I will take the schooner and show him as he is quite interested in it. He has built "Le Hussard" and when I built the "Schooner for Port Jackson" I reduced the plans to fit on an a4 page and faxed them to him jokingly suggesting that should be his next build. Next time I went to sydney he had made it in that size, not bad I thought.
-
So this is the schooner Floyd referred to http://www.modelsailboat.com/rc-sch1.html She is similar in length, masts are of similar height so sail area is going to be similar although mine will be spread over 3 masts and 3 stay sails. This is 2.72Kg mine will be 5.7Kg This is a very interesting comparison. Obviously mine will be slower because it has to displace more water as it moves but that's fine, it really makes me wonder about that sailing keel though. I reckon I could almost get away with no additional keel at all and just have all the ballast lining the sides of the hull. I won't though. I know I need a bit of keel below for lateral stability or she will just blow sideways across the lake, maybe a lighter folded steel winged keel....... Damn you Floyd, giving me so much to think about Seriously though this is getting very interesting, I am now confident that one servo will easily handle the sails so it is getting simpler.
-
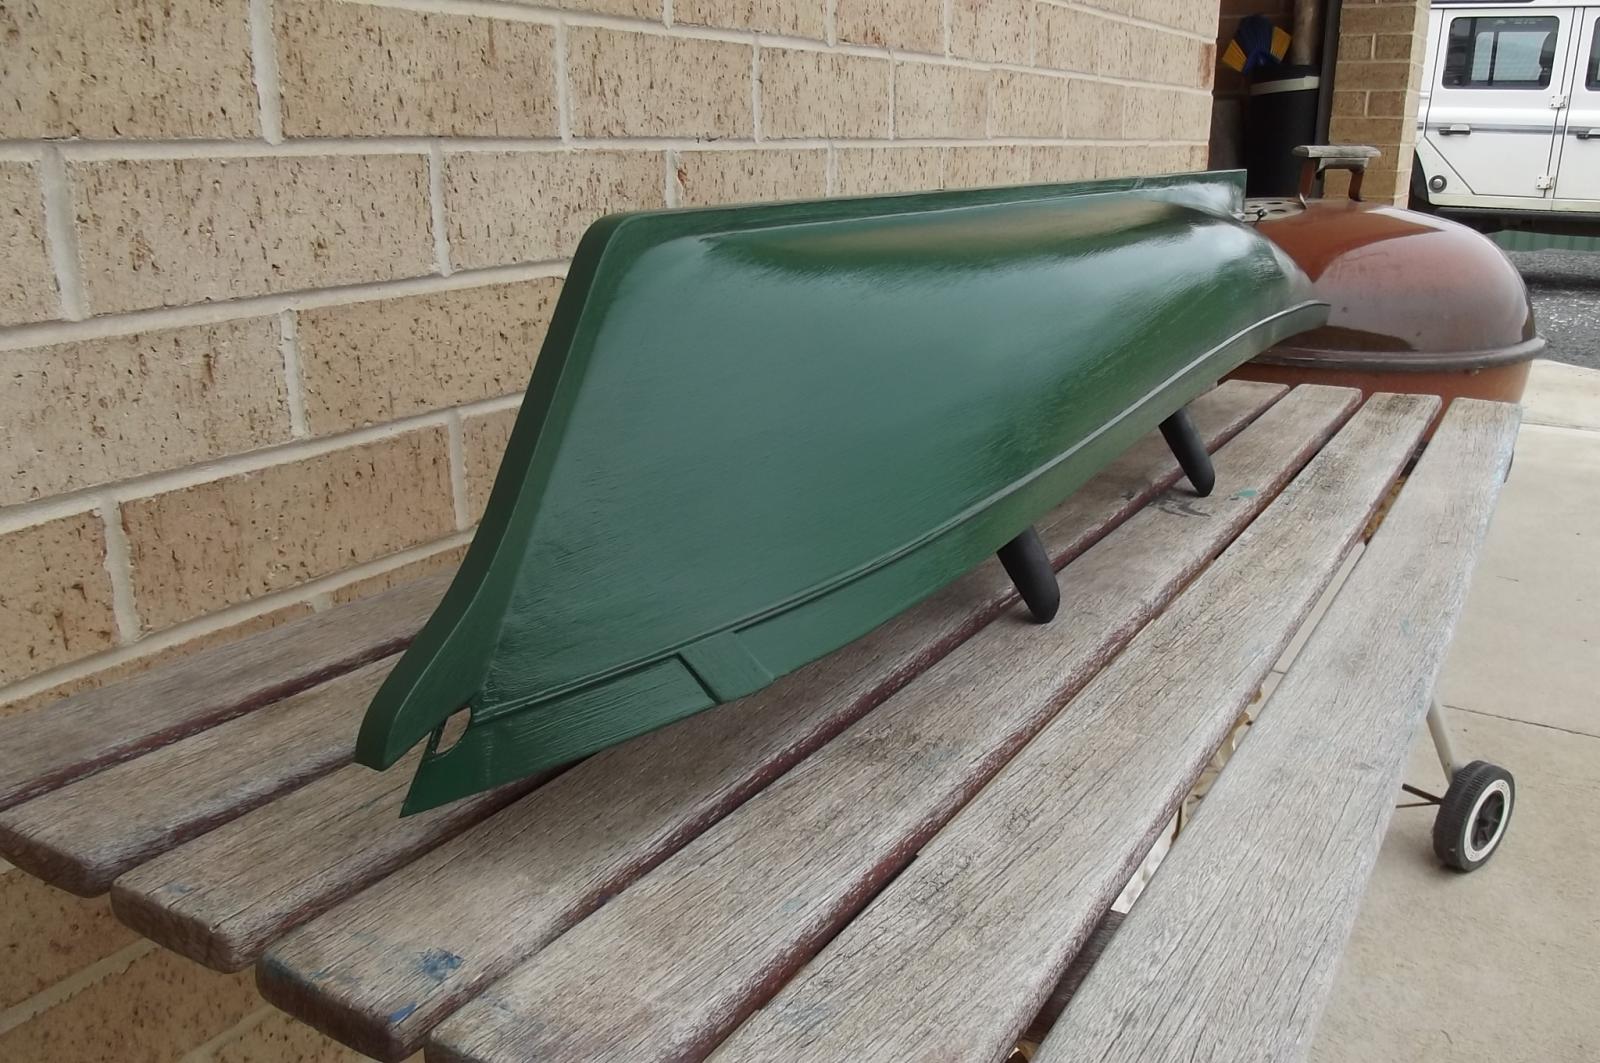
Floyd, thanks for the input. To add a link just highlight the web address at the top of your screen then copy and paste it into your reply. If you go back to my first post you will see the rig I am aiming for. The sails will have a boom and a gaf and the top sails will attach to the gaf so it should act as one sail. The stay sails will not be club footed but I have seen how they work and I think it should be fairly easy to replicate. I've seen a ship on here that does it and it works well. Remember that if I ever have a problem coming about because of sails I can just hit the motors for a few seconds. My aim is to have her work reasonably close to the real thing, speed is not the issue. Having said that I am keenly reading and thinking about what you are saying, you know more about this than I do. I will watch the vid and see what I learn. I can always change the rig once it is made if it doesn't work well enough. John, Yes Brunswick Green, an old standard. I had it in my head from the word go and I think it will be perfect, yes it is readily available from bunnings but the red is not, it has to be mixed and while I know Bunnings can do that I don't trust their random staff to know what primer I need to make it take properly to the epoxy finish. I know I can rely on the guys at my local trade paint store. AVS, she was always going to be painted, I can't stain her now anyway, nothing can soak into that timber now. She is sealed well and truly. Bob, as with Floyd, keep it coming. I take it all on board and work with it. I need to find my sail area, I think I worked it out before.
-
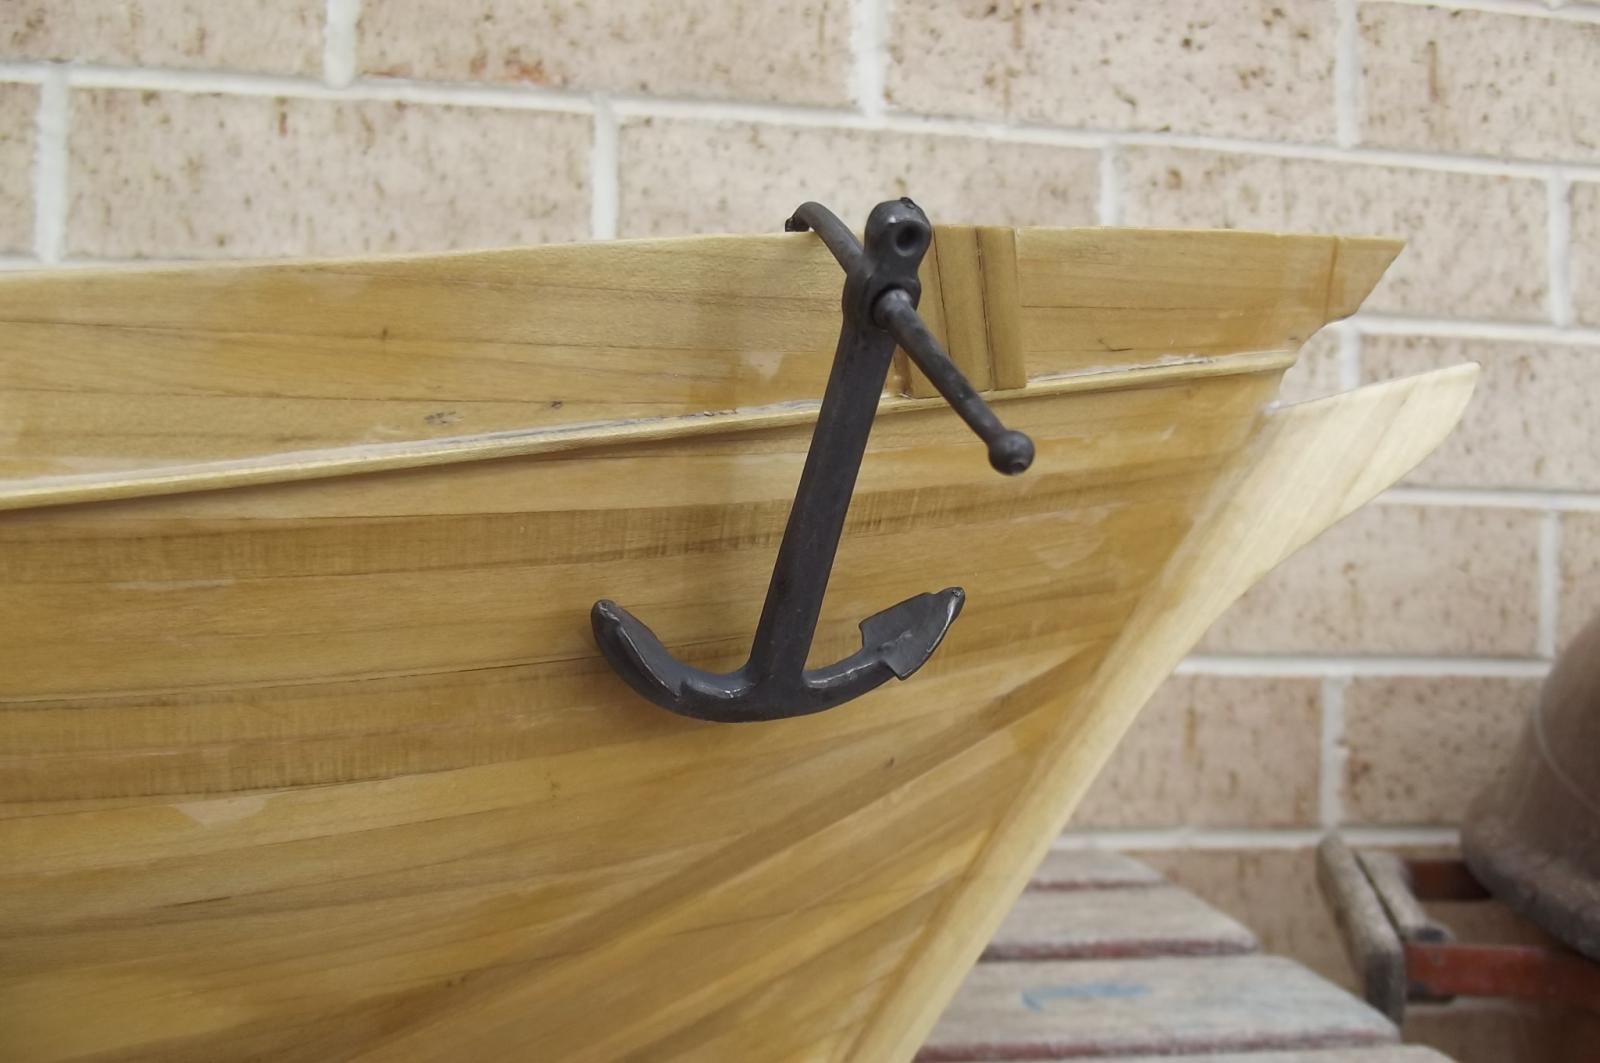
I got my replacement prop shaft today along with the correct type of anchors, I like the anchors they look good and weathered. Take a good long look at the carpentry skill in the planking because this is the last time you will see it. The colour scheme Now I just need to find somewhere open to get said paint. All the trade places closed at midday because it is xmas eve, Hope they re-open before the new year.


-
Good info Floyd, thanks. I will have to work out how much throw I need and see if the horn type servo will do the job, it would make it a lot simpler. I could just attach sheets at the correct point along the length of the horn to get the correct ratio of throw. I wasn't sure those servos would be powerful enough. I will appreciate all info you can give me in this part of the build Floyd, thanks! So much to think about !!!
-
Oh to have such a pond. I would have no dramas if that where the case. I could run all the sails from the one winch servo, such as this. http://radiosailingshop.com.au/index.php?main_page=index&cPath=16&zenid=5215e44b516b53f9e9977c2097bb744f Graupner also have a good sail winch servo but it appears to be no longer available. I can turn drums to the sizes I need so as long as I work out all the pulls exactly I should be able to make one servo control them all. I may take an idea from a model of the Banterer I have seen on here whereby the servo is mounted in one end of the hull with the axis on the horizontal so it can drive a winching assembly that runs the length of the ship. Being a square rigger that system is far more complicated than it sounds but my schooner should be quite straight forward. I got a few goodies in the mail today, pics later.
-
She's a schooner Floyd, no square rigged sails. Yes the motor or motors will just be a back up to make sure I can make her go where I want her to mainly because I have no sailing experience.
-
Not sure how many chanels yet, there are a few ideas up my sleeves that need proving. I made the masts in advance to do this but just seem to be going ahead with the whole thing so I guess I need to get into proving my ideas before I go much further. Definatly rudder Motor control, just thinking forward and reverse, don't need speed control. Two lots of sail servos, tops will be controlled by mains and staysails will be seperate to mains although probably could be in conjunction, mmmmmmmmmmm more to think about. There are a few other things I would like to do but testing must be done first.
-
I keep talking about the ballast and that is the way I work, talk it out, think it through, keep considering new input as I progress and learn. When I tried to pull her over with the mast she really did resist quite a bit, however in doing so she slipped sideways in the direction of the pull. My thinking is thus :- because she has such a broad, almost flat bottomed hull through midships the longitudinal C.O.G. shifts to leeward as she is pushed over and the windward side of the hull is forced upward. The effect of these two actions is that as the C.O.G. shifts further leeward the leverage of the ballast on the windward side increases because it is further and further from the fulcrum. The force applied by all that ballast is considerable. This and the fact that she slipped sideways quite easily is making me think I should revert to my original plan which was to get some mild steel plate cut to size to run the length of the keel and simply deepen the existing keel. I have the specific gravity of mild steel in my build notes so I can easily work out exact dimensions to make it. The beauty of this type of keel is that it is easy to make, the angular force on the ships keel will be less because it is directly under the keel instead of 300mm or so below, leverage multiplies force. and it can be launched and retrieved much closer to shore as well as being much less likely to become entangled in weeds than a fin keel. It will also improve lateral stability, ie:- she will be harder for the wind to push sideways. So I may end up putting any heavy items against the outer hull and adding ballast along the outer hull as well as placing the steel plate keel below. I am trying to think of a safe way to test this theory so I will see how I go. I have seen video clips of these wide hulled cargo ships with a keel like I mention sailing quite well so I think you only need a deep fin keel for the slender hulled ships where the C.O.G. and internal ballast has far less effect.
-
I've got to tell you Floyd, it was nearly me that got float tested instead of the schooner. By the time I was done it was cooling down so I started bucketing it out to the poor plants in the garden, they needed it more than I did. Now onto the control systems planning and fitting out. There is going to be a LOT of thinking done for a while to make damn sure I allow fittings for everything I have to. If I leave something out it might never fit in later.
-
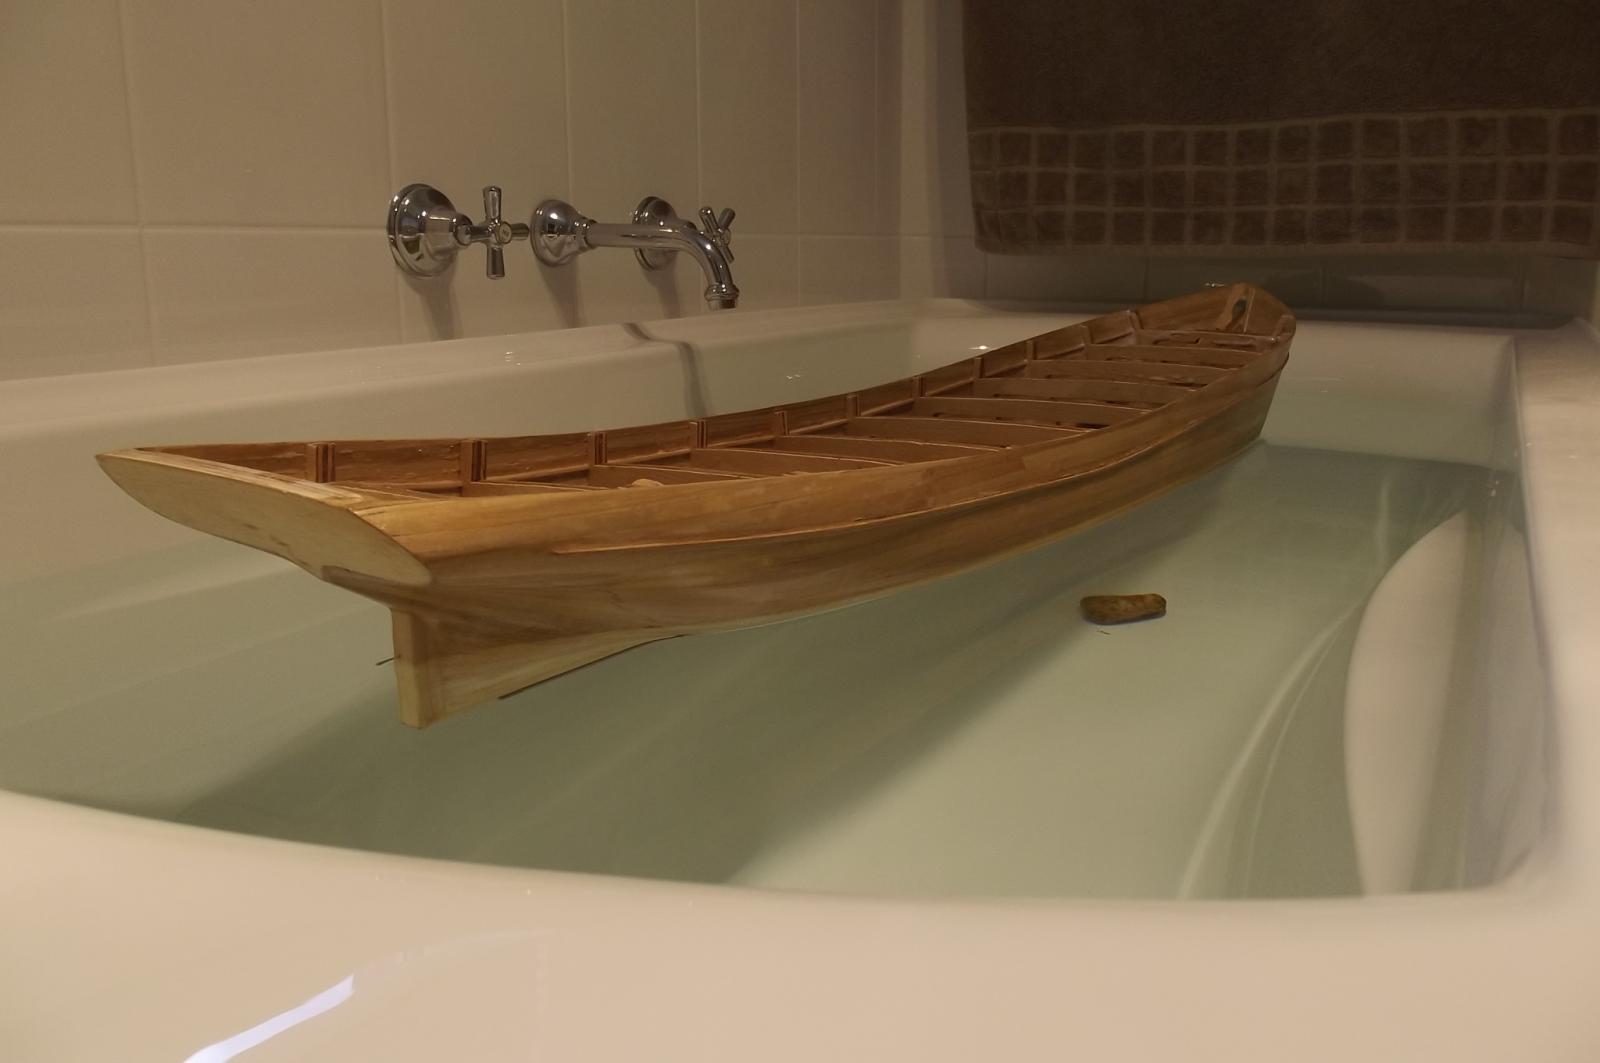
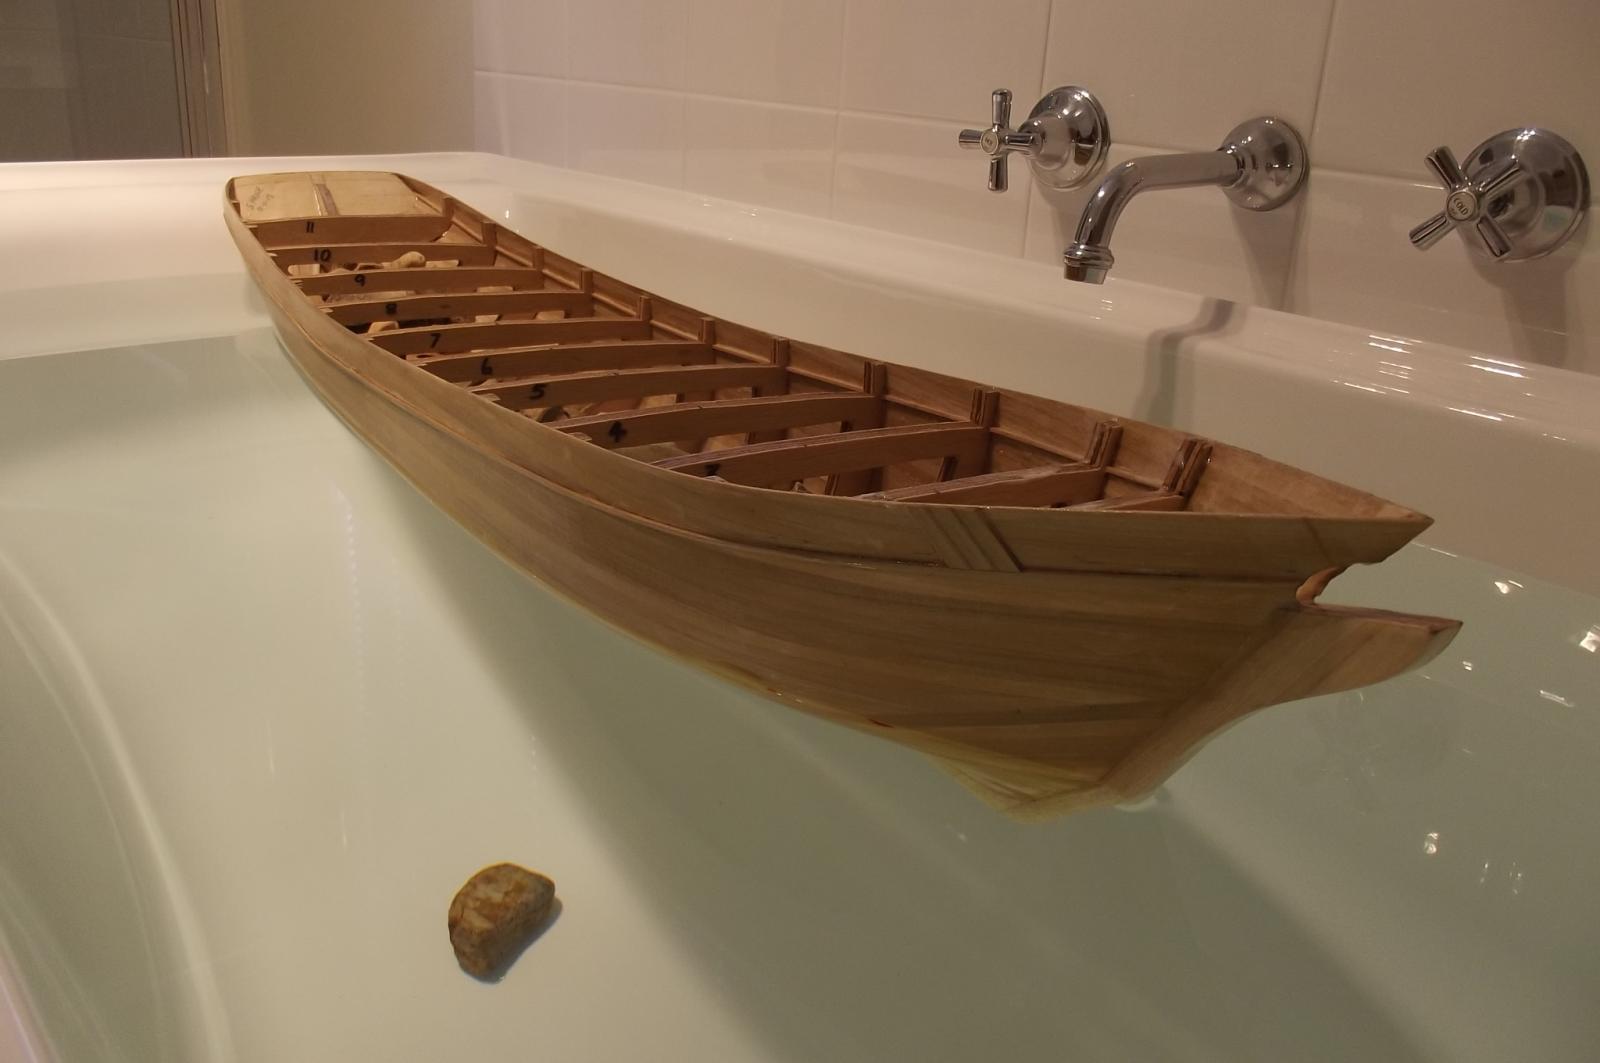
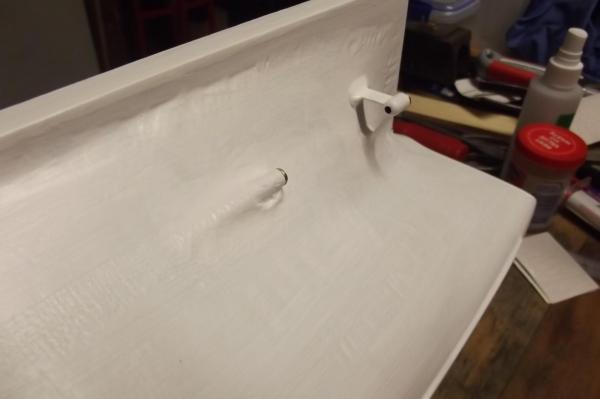
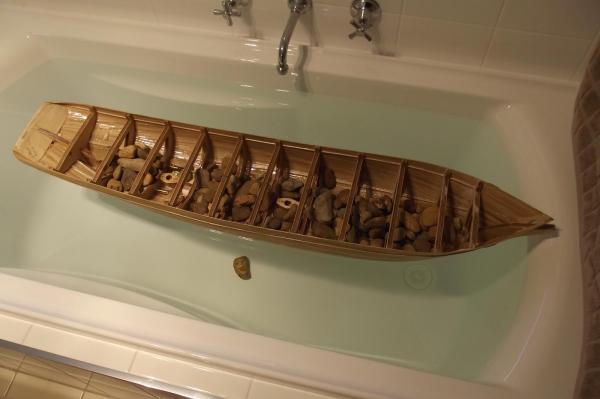
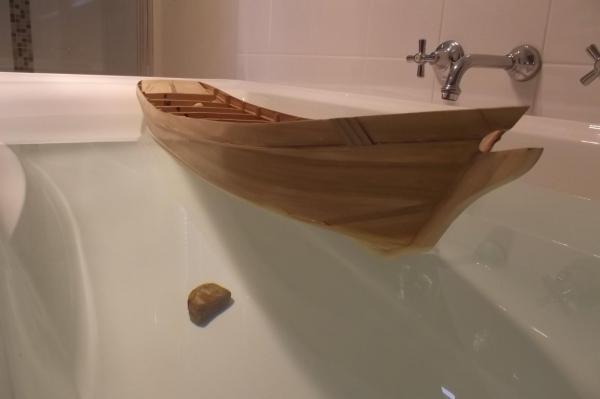
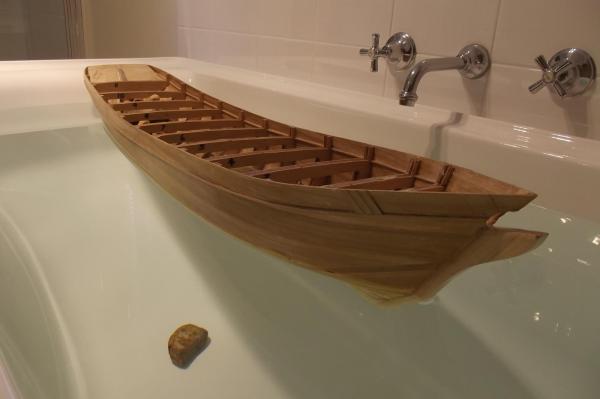
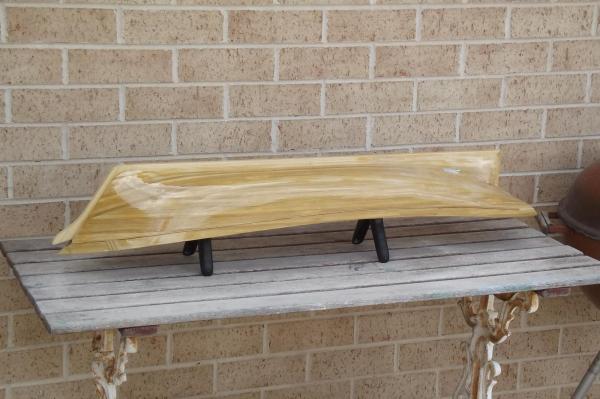
Yeah I must admit, I came home today, drove into the garage and there she was on the bench and I thought WOW that looks good! The epoxy has given it a warmer tone and it is beautiful. My son saw it today and said the same as Hipexec but he then saw the pencil marks preserved for all time under the epoxy, there is filler there too that you can't really see in the pics as well as traces of glue. I had always intended to paint it so I didn't worry about keeping it "clean" so it has to be painted. I never paint my static ships because I love the timberwork but this is different. She has reached a milestone.......... Today she went down the slipway. This is empty, you may be able to see a small black mark on the stern post, this is the sailing water line, she has a lot of ballast to take on yet. After carefully putting rocks into her I finally got her to that line, one rock missed the boat, as it were! Not a drop of water got in, not even through the shaft seals, I did add a smeare of vaseline (petroleum jelly) to them. It was a very strange feeling, putting on of my tallships into the bath tub. It felt wrong to be honest. But I am so happy with it. The placement of the rocks to get her to float level along her length confirmed what I thought, the centre of gravity is forward of centre so this will be considered when attaching the fin keel. I did put a mast in at one point and try and pull her over but she resisted quite well, makes me wonder if my original idea of just extending the keel along her length by adding mild steel plate would work, I may have to find a way to test this concept. On another note I have been wondering how much weight she would be able to carry and have been guessing about 6kg all up, I weighed all the rocks when I pulled them out of the hull and she will weigh 5.7Kg all up and could easily run to 6Kg if I had to. I am now confident that I will be able to put plenty of ballast below the hull to keep her upright because at present I have 4.25 Kg to play with.


-
Yeah, I fear I may have to install my deck in a cool room....... I have finished the epoxy coats. The Glass cloth on the stern left the hull looking messy as anyone who is familiar with its use would undestand, you have a beautiful smooth wooden hull then in one place you have this cloth with frayed edges in the finish, yuck! I sanded it as much as I dared, or could be bothered in this heat, and then did the coat over it with micro spheres mixed in and it smoothed it all out pretty well ! Just a light sand then a normal coat over the entire exerior this morning and it is done. Seems a pity to have to paint over it all now................
-
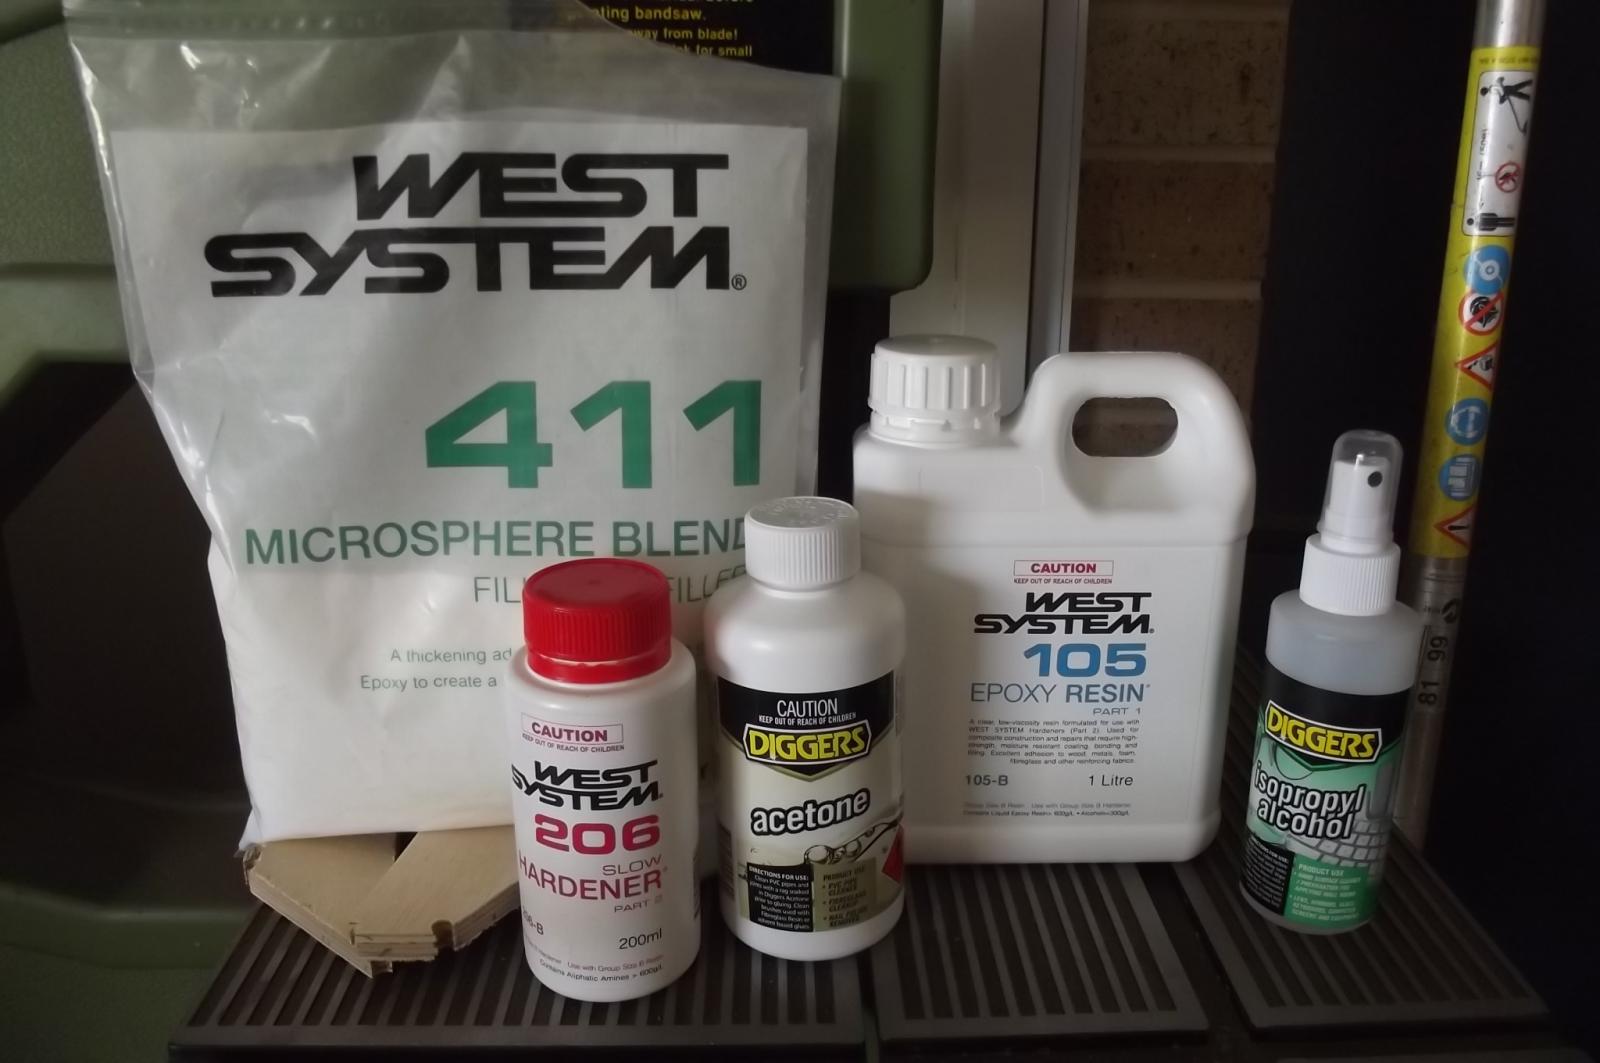
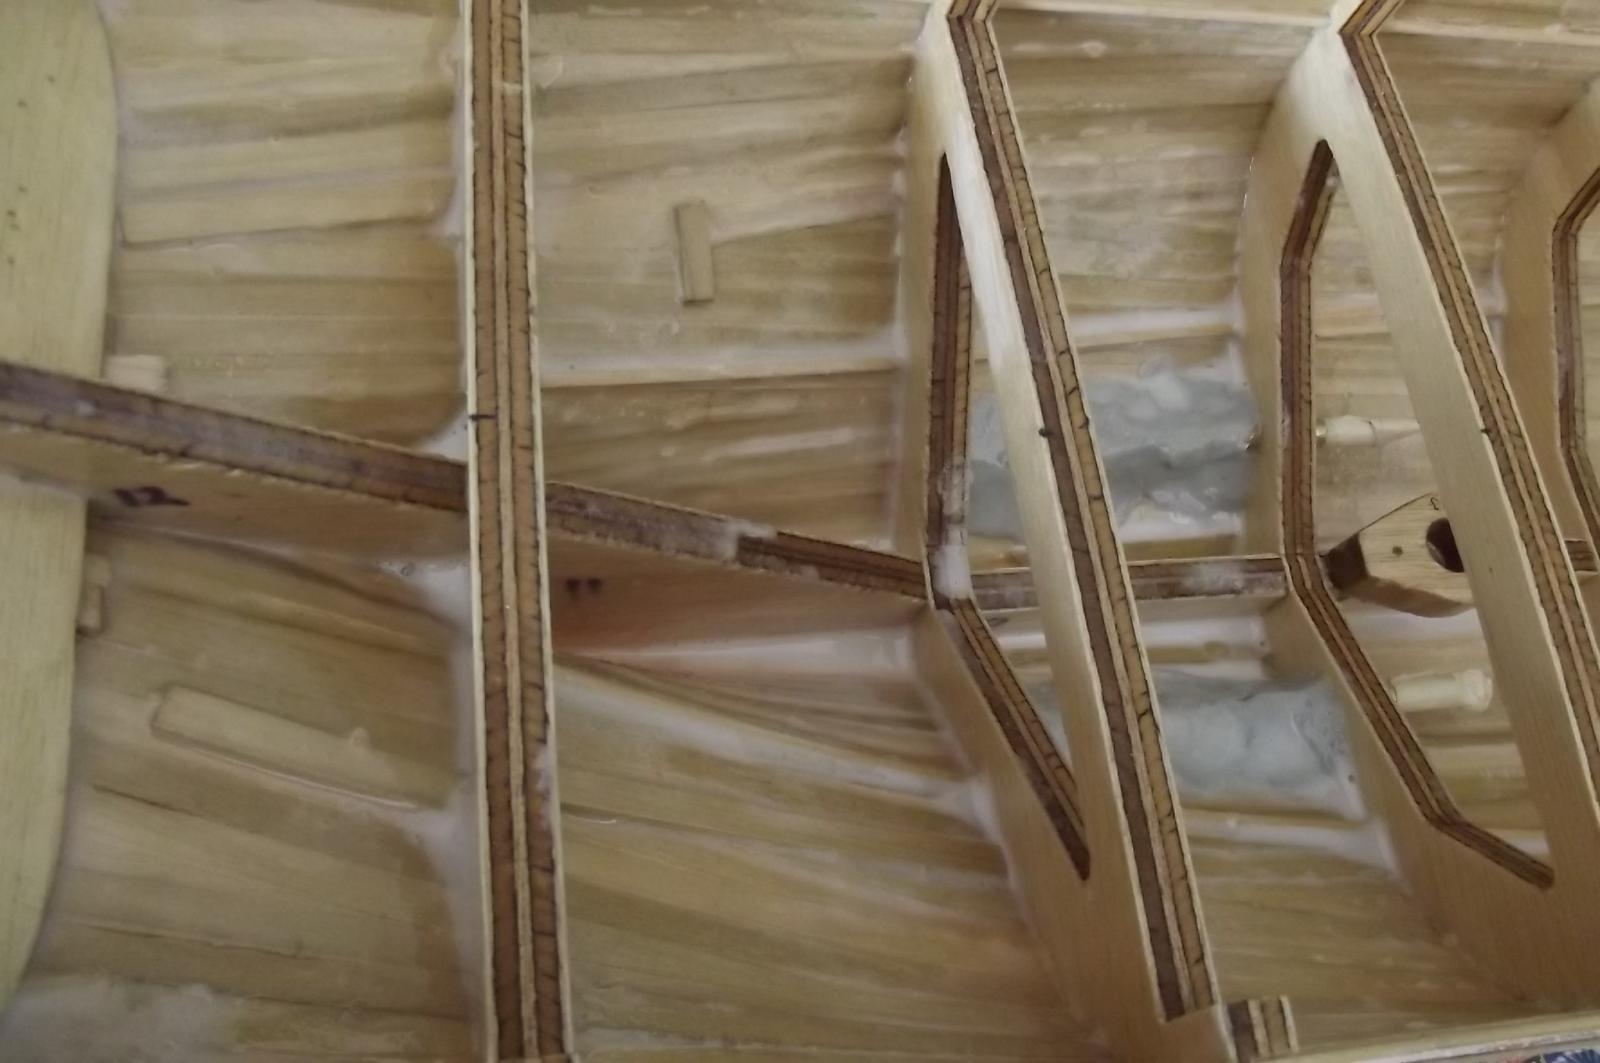
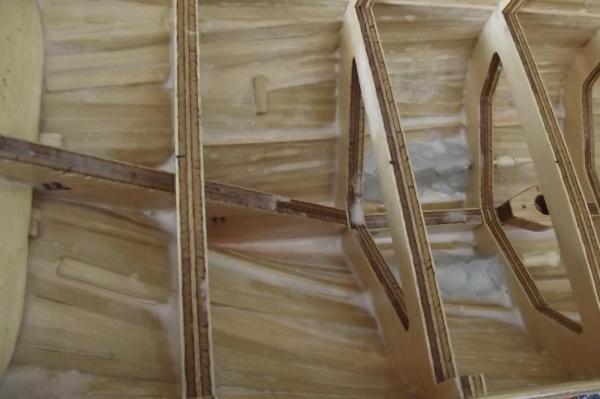
I last used fibre glass and epoxy resin in my late teans, so long ago, I am finding that with a more thoughtful approach and the right stuff it isn't that bad to work with. Climactic considerations aside. The micro sphere filler is working beautifully and having isopropyl alcohol and acetone at hand means not much mess. Very cheap paint brushes help too, I clean them by binning them and reaching for a new one. Here you can see how the mixture with micro spheres is filling the gaps nicely, I am using it at about the consistency of honey. The forward ribs need more filler in the aft part of the joint to the planks. There is a very good reason I did not "fair" the entire width of the rib and that is because the line drawing I got the shapes from shows the profile of the hull at that precise point at 90 degrees from the keel. Given that the ribs are 10mm thick if I had faired the entire face of the rib I would have effectively moved the profile astern by 5mm so I only faired the forward half up front and the rearward half astern. My next epoxy mix will be one of simmilar consistency with which I will go over the glassed area on the exterior to reseal what I have sanded and fill the glass sheet better to allow sanding back to a smooth finish. The micro spheres are supposed to sand well. Then once I have coated those two patches of cloth I will add more micro spheres to really thicken the mix and prop the hull up on its bow so I can fill the gaps on the rear faces of the forward ribs.

-
It's not uncommon to get -4 deg C here in winter with max of 6or 7 but we don't get much snow. Our normal summer range is about 26 to 30 but we are getting into the mid 30's and that's hot for us. Probably hotter in the garage too. I used to work for a large company that occasionally did stuff like wearing a promo T shirt. they did it one winter and someone from head office rang to ask how the promo was going, are we all wearing our T shirts? I replied "Madam, when I come to work in the morning it is minus 4, do you think I am wearing a T shirt" Glad I don't live in Sydney, they are getting into the mid 40's and this side of Aus is humid.
-
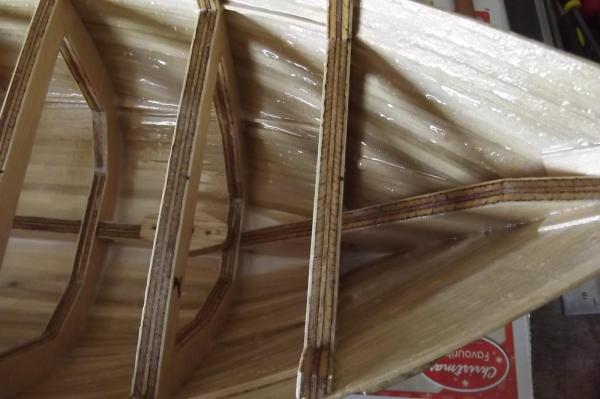
Well so much warm epoxy, nature did that for me. When I fitted the prop shaft tubes I used Araldite, 5 min epoxy adhesive. I only got about 30 to 40 seconds after mixing to use the stuff before it started getting hard. I should have know better than to start applying fibre glass in this heat. I have done the second coat on the exterior this time without thinning and I added fibre glass to the rear of the hull to strengthen the area the prop shafts come through. I got the first side completed then started the second side, I got 65% of the glass done and the resin started to harden so I had to mix a second batch quickly so I could continue. Some of the glass would not fully accept the resin as it had been partially wet in the previous batch so it will need sanding and redoing but even the rest of that side with the new batch of resin didn't go as well as the other side. I had little lumps of gel appearing as I went and just had to go at it madly and hope for the best. I will have a look at it in the morning and see how bad it is, thankfully I am planning to sand and paint but I fear there will be a lot more sanding than I hoped for.
-
All these compliments on my planking..... I will be embarrassed to show my filling work around the prop shafts now. I did put more effort into accurate fitting than usual and took my time, the old carpenters law, measure twice, cut once.
-
Sailor, it is 32 degrees C here at the moment, (sorry Floyd) so there is quite enough heat in the epoxy I reckon, I am only mixing small amounts and it is starting to get warm by the time I am finished each coat so I don't think it would be wise to add any more heat to it. Thinning it a little with acetone seems to be working quite well.
-
Yes the exterior looks great but you should see the interior. You will in the future as I start fitting her out. Next step is to fit the prop shaft tubes, I want to do this now because I will use a bit of fibreglass cloth around them in the next coat of epoxy to really strengthen that area because the planks are now weekened there and there will no doubt be a certain amount of vibration when the motors are running.