Bedford
-
Posts
1,299 -
Joined
-
Last visited
Content Type
Profiles
Forums
Gallery
Events
Everything posted by Bedford
-
 I have been otherwise occupied for the last few days, yesterday I was just about to start work on the schooner when my son knocked on the door and said "wanna come 4wd'ing" uuuuuuuuuuummmmmmmmmmmmm, yeah! Only 10 mins from home is a nice place with plenty of variety but I didn't get home til 7:30 and was a bit tired so didn't touch it. Today, on my way home from work and my son rings, "Dad, can you do me a favour"? mmmmm, what? "Come and get me unstuck" He was about 20K's out of town up a track he should not have attempted on his own and I had to winch my car around his so I could winch him out, 3.5 hours after I left work I got home! No work on the schooner tonight either ! Wish me luck for tomorrow.
 -
Never mind Bob, I wish I lived around the corner from you so I could learn more. That works beautifully. Steve
-
Bob, yes all the hardware will be accessable via deck houses and hatches but the running rigging will be in brass tube which will be fixed in the hull and never be seen again, this way I don't have rigging running through a bunch of blocks below deck which could be a maintenance nightmare. I have to make sure it is all aligned where it needs to be and everything fits and works freely before I fit the deck. I think that if I build another such model I will approach the hull / deck / control and rigging from a VERY different angle, the idea is rattling around in my head now but it is way too late to do it with the schooner.
-
As Douglas Adams said, "You live and learn, well at any rate you live" You are definately learning so much, keep it coming please.. Steve
-
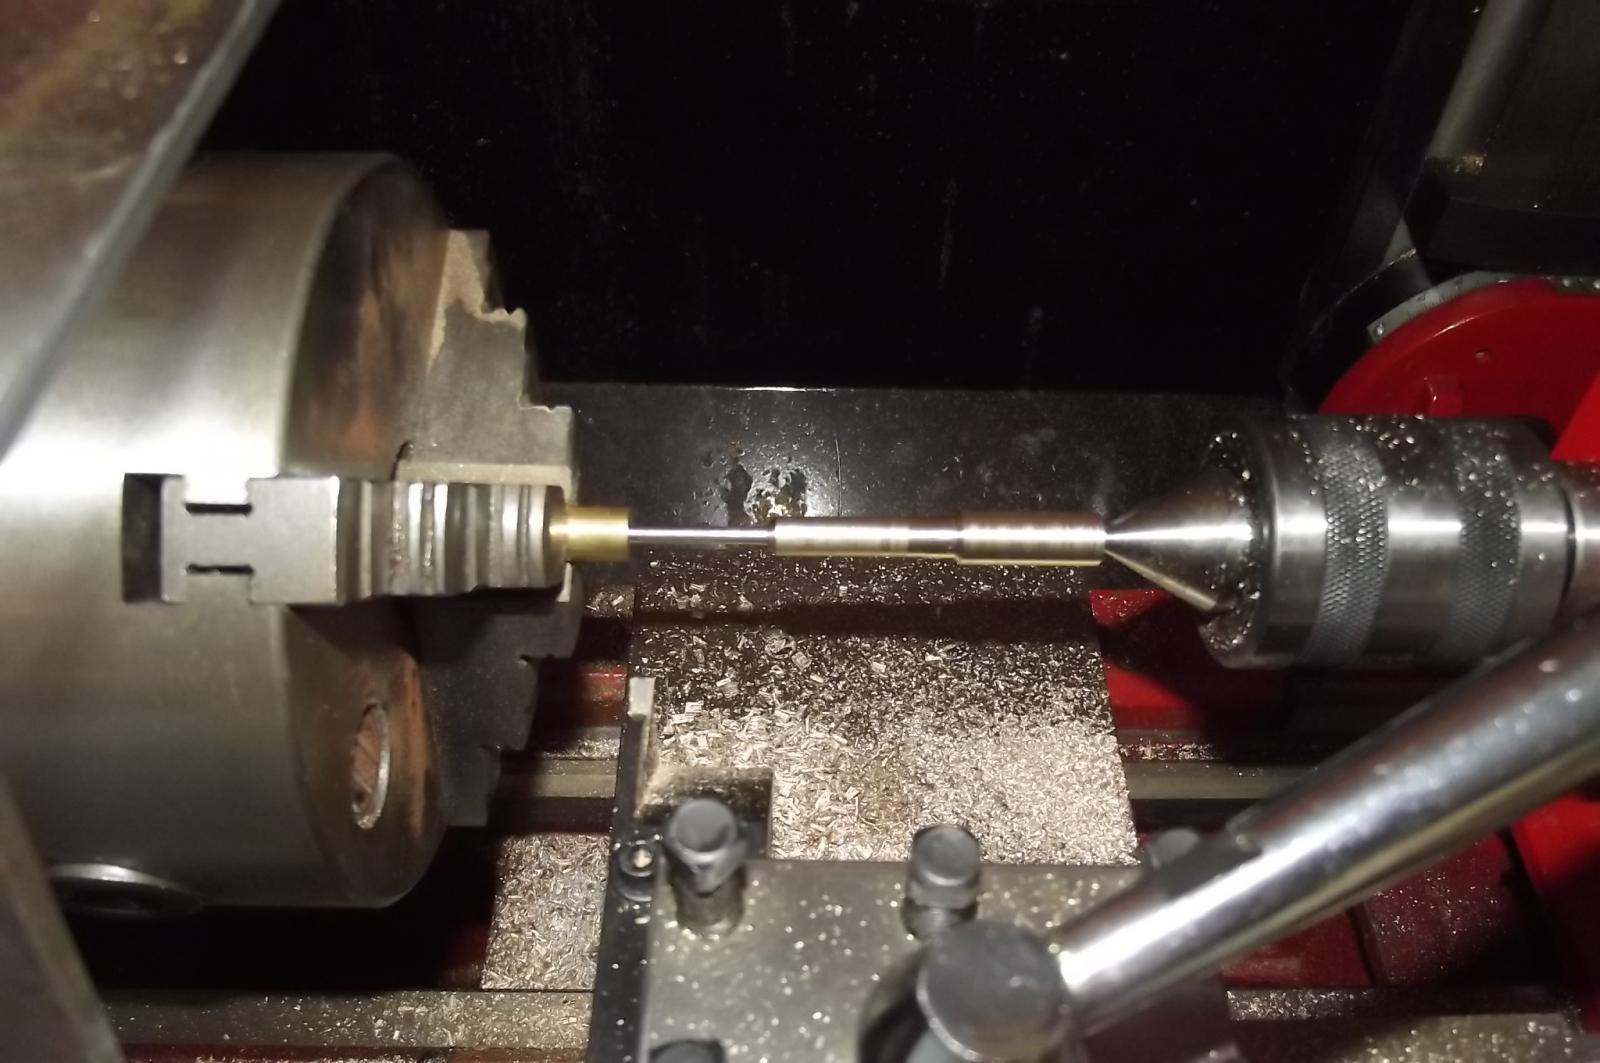
It always intrigues me how you see these shapes inside the stock material. I guess that comes witha lot of machining experience. Steve
-
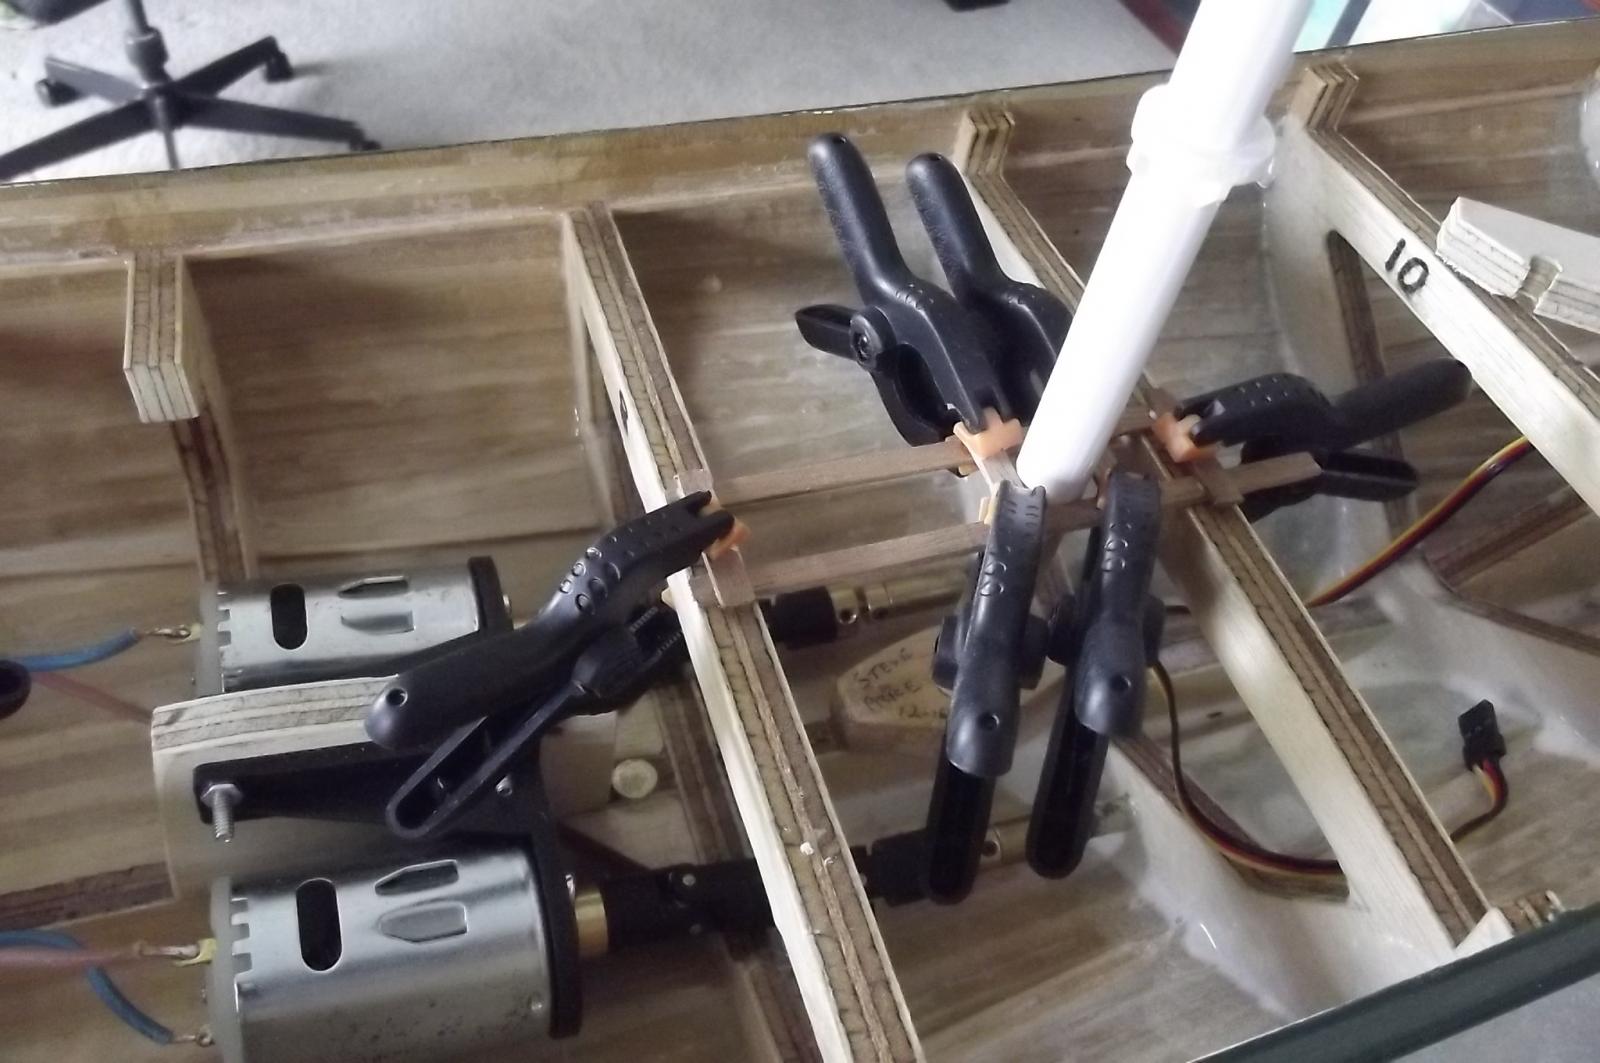
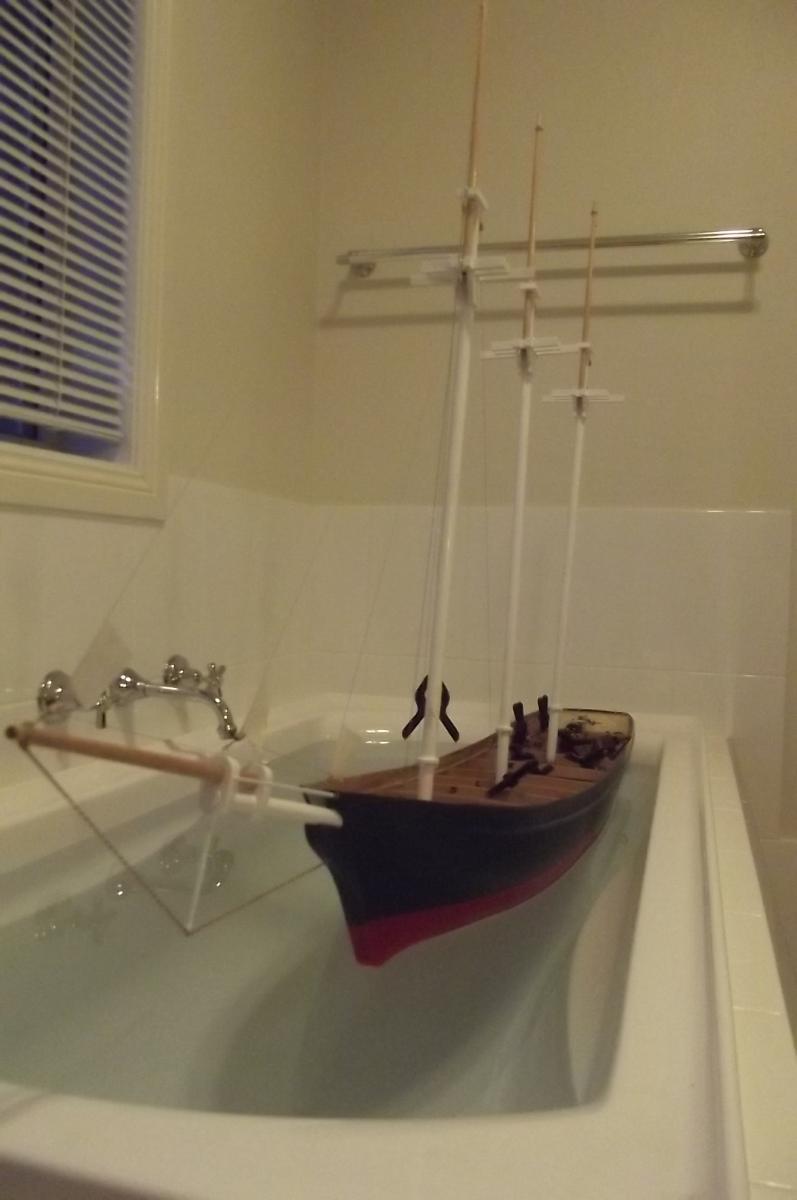
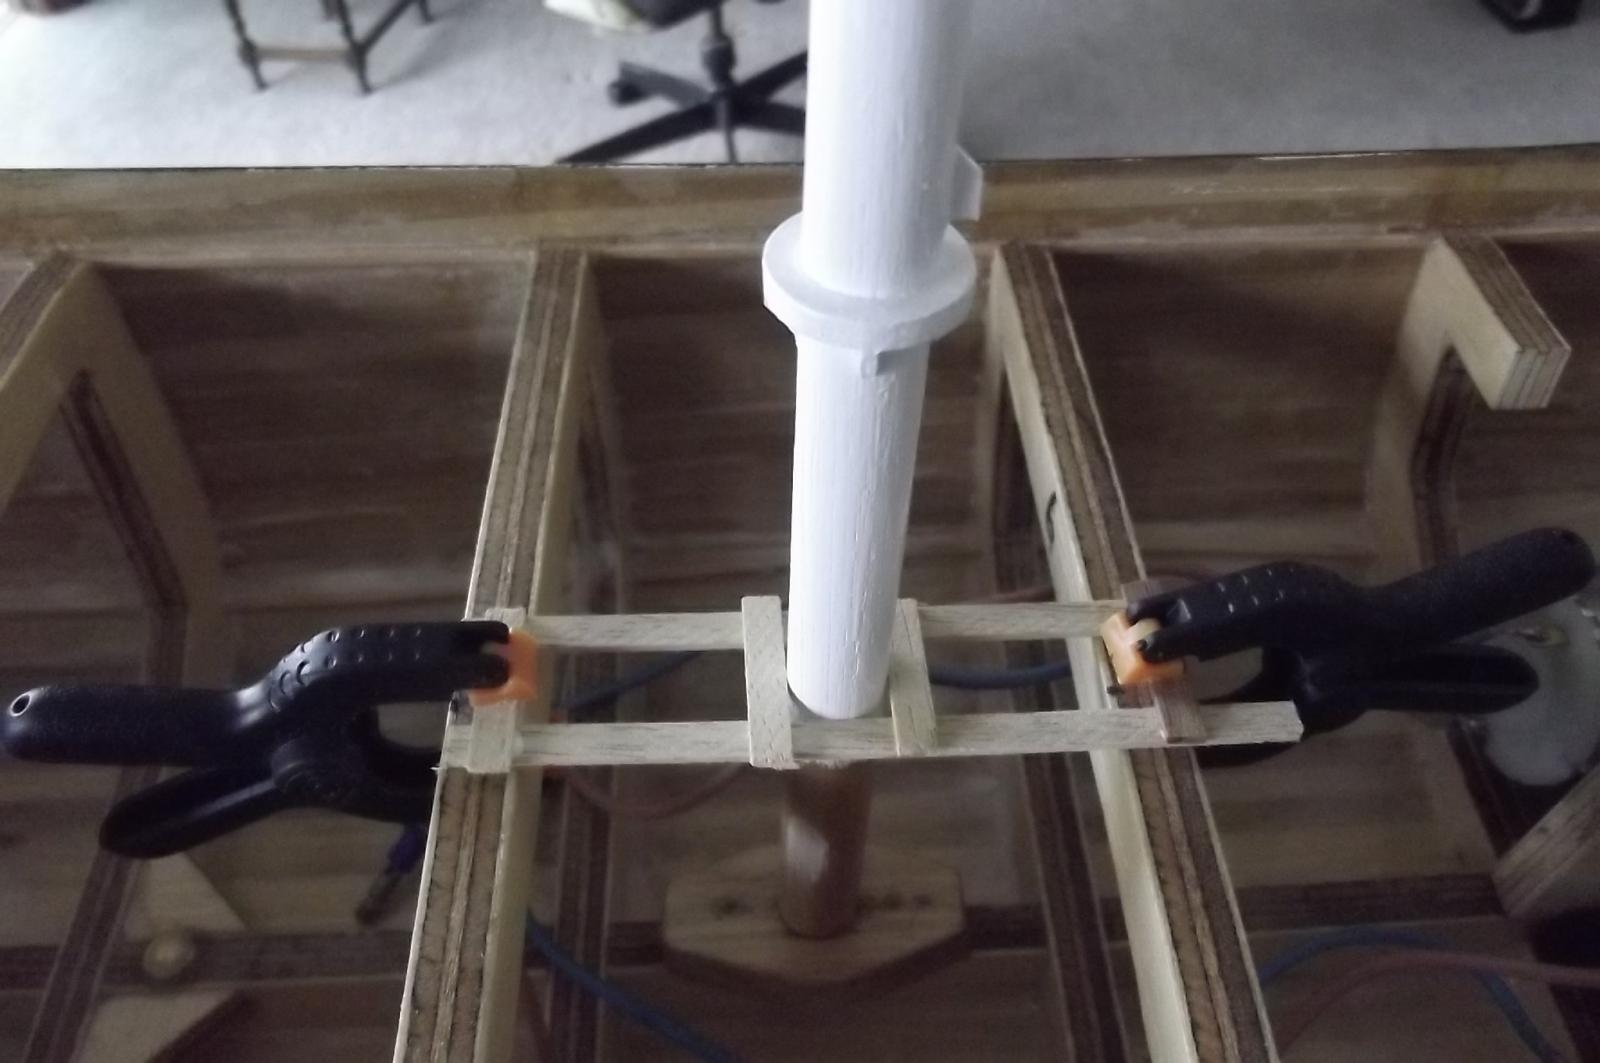
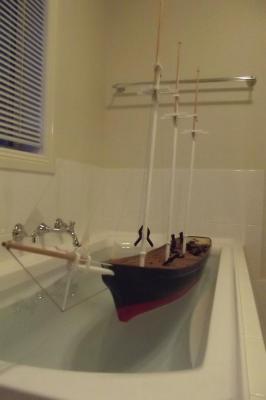
I was going to move the motors forward when mounting them permanently, this would have meant no cutting ribs and it would have helped move the centre of gravity forward but this involved making drive shaft extensions, I made one that would fit over the 3mm prop shaft and reduced down to fit into the 3mm coupling on the double cardon joint. I was concerned though because a double cardon will allow the shaft to move sideways so it could bend out of true under power which would be catastrophic so I ditched that idea and cut out some ribbing and mounted them with the couplings direct onto the prop shafts. After fitting the motors I floated her in the bath and powered her up to make sure the motors and props were operating properly and freely. Holding the stern down to the correct water level I powered her up to a reasonably high speed and the motors sang in harmony like a twin engine plane does (for anyone who knows what I mean) this told me they are well ballanced and should not cause the handling issues the mis-matched smaller motors did. I also made frames to locate the masts in the correct position so I can move onto the next phase of construction. Before I can fit the deck I need to rig her and get all the operating systems fitted and working properly. Then I can close the hull. This means partially fitting the standing rigging and fitting the running rigging then unshipping the lot so I can fit the deck and deck houses etc.


-
Again, beautifully made Michael, lessons being learned left, right and centre here.
-
Beautiful work Michael, You keep comming up with great ways of doing things and the details are brilliant. Steve
-
Mark, you are of course right. The whole idea of sea trials is to find weak links and induce the failures that are impending and to that end it was an extremely successful trial. Especially given that no harm was done to ship or systems. I would hate to see that smoke rising slowly through closed deck houses etc with a deck on and the hull closed and no idea just how bad it is. I took her out again yesterday evening for a trial with the smaller motors fitted without the reduction gearboxes and while they are more than capable of driving her to scale speed and then some, they seemed to make her harder to control. On return to shore I noticed that the starboard motor starts before the port motor, they should be the same. When ramping up the speed very slowly there are probably 200 revs in the starboard before the port starts and this matches the handling issues. Obviously the starboard is pushing harder than the port motor so I will ditch them and re-fit the larger 540 can motors knowing that they will effortlessly handle her under any conditions.
-
You are doing some great things Michael, pity about the timbers but it's all about trial and error, especially with a scratch build. I am sure you will get it perfect. Steve
-
Yes Michael, new model, heaps of hours and thought, not to mention $ put into it and SMOKE rising! I was lucky she was back into shallow enough water that I oculd get to her fairly easily and thankfully no more smoke rose so I wasn't in too much of a panic. I was going to gently motor in past the rock and end the trial but she had to get pushed in past it. John, yes the low speed looks right and will be most commonly used but having all that power in reserve means the auxilliary power will have a good chance of overcoming the wind should the need arrise. After the test I moved the throttle servo to a variable auxilliary channel on the radio because then I can just set the speed where I want it and forget it. With it on the same stick as the rudder you tend to be powering up and down and even into reverse accidentally while steering. Most importantly while she is under sail I won't accidentally engage the motors. At this point I envisage motoring out until she is free to navigate and then raising the sails and vice-versa when bringing her in. Yes, the splash near the tree was the platypus. I know they are out there and I have gone out many times and sat quietly in the late afternoon hoping to see them but they are ellusive little buggers and to date I have never actually seen one properly.
-
Happy to say she remained as dry as a bone throughout the test. It appears that the coupling on the motor shaft was a bit too close to the motor and under thrust conditions it rubbed on the motor itself causing it to bind up. This led to a high current draw from the motor which in turn burned out the battery lead before any other damage was done, thankfully. I have re-attached the coupling and replaced the lead and all is well.
-
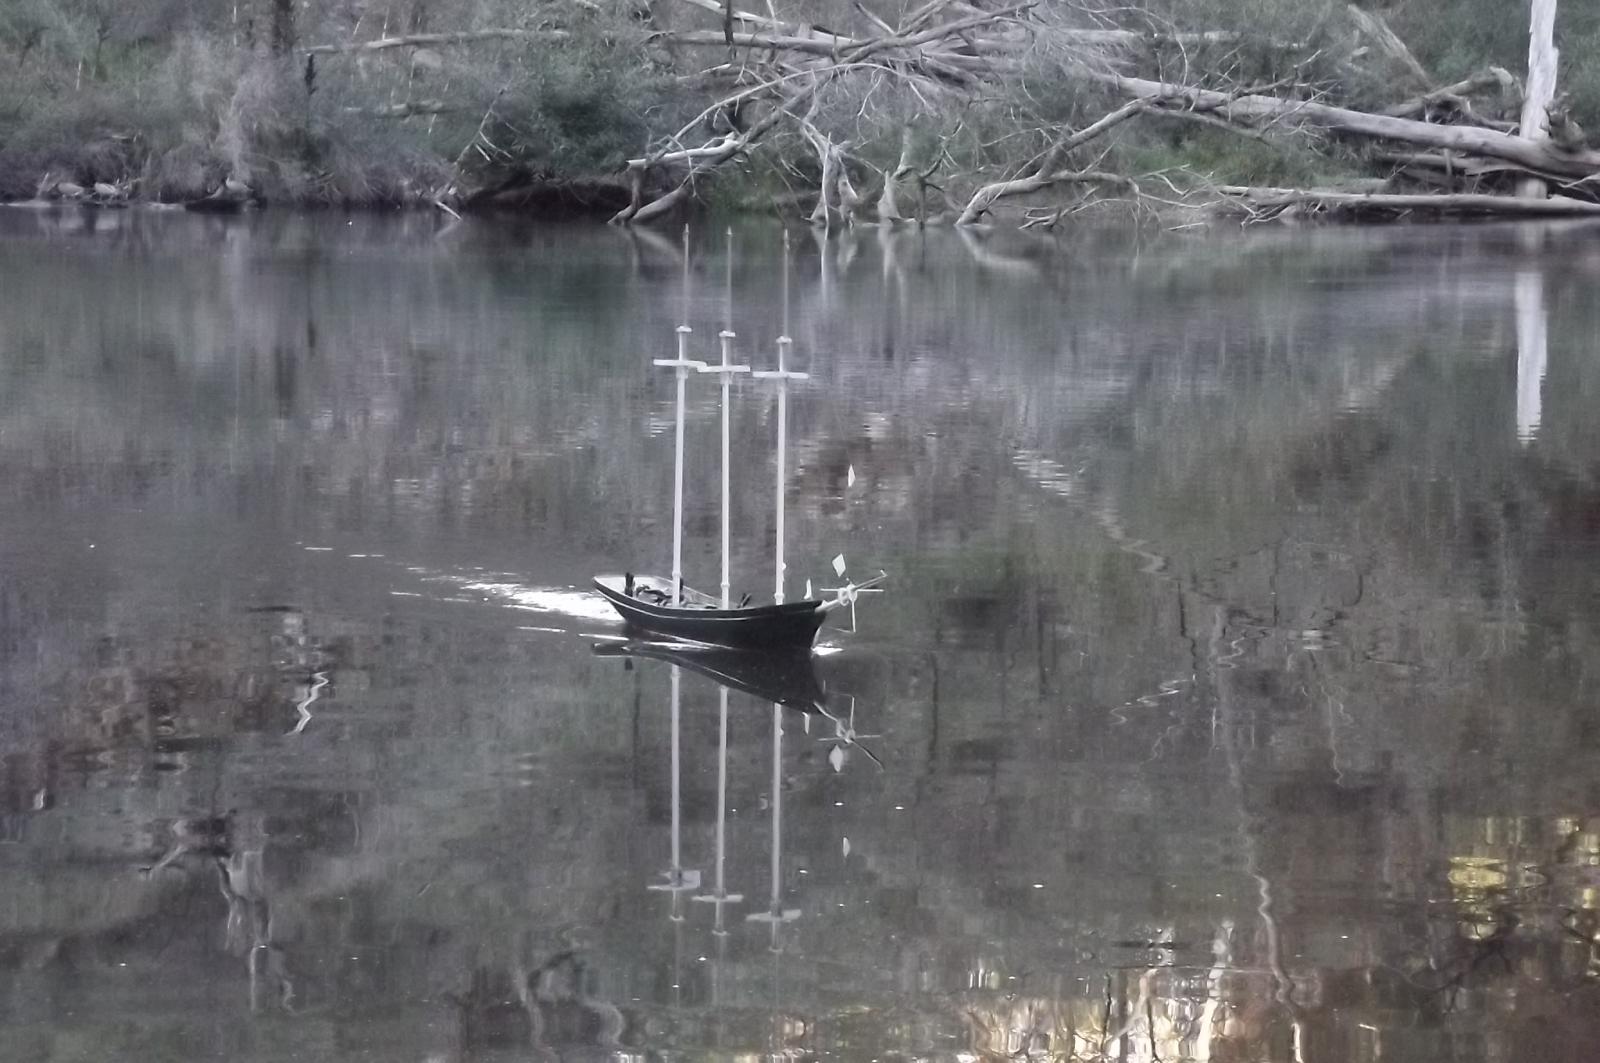
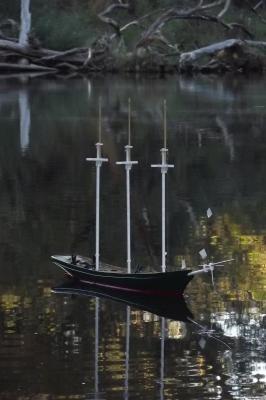
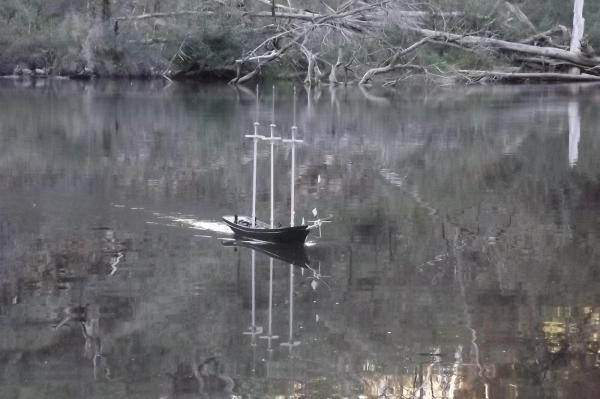
So, to part two of the sea trial storey. Sorry the camera was not level but you get that in the bush with only rocks for tripods. Generally this is at fairly low speed which is more than adequate but she has much more go than that which means she will be able to drive against the wind if I need to. At the end I was heading in and gave her full power but she didn't speed up properly and sounded odd. Keep an eye on it right to the end. Pay attention to the upper left quadrant at 1:30, that is a platypus, not that you can really see it. http://youtu.be/IIeqyICrH-4
-
I do admire your determination Robbyn, well done. I am sure it will help you through the comming months too. Steve
-
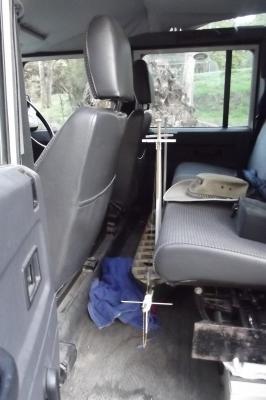
You and I are alike in that the joy is in the building. We have slightly different goals but our models may only sail a few times, just because they can. I mentionned earlier that I may have something to show............. Does it fit in the car? Easy, granted if she had shrouds on they would be fouling on the seat but I could make a simple centering cradle to prevent that. There's more but I need to sort the details first.

-
It really is amazing what we can find lurking in the wood isn't it?
-
Thanks Michael and Bob, I relish the challenge this build provides me. Michael, will your cutter be R/C? Steve
-
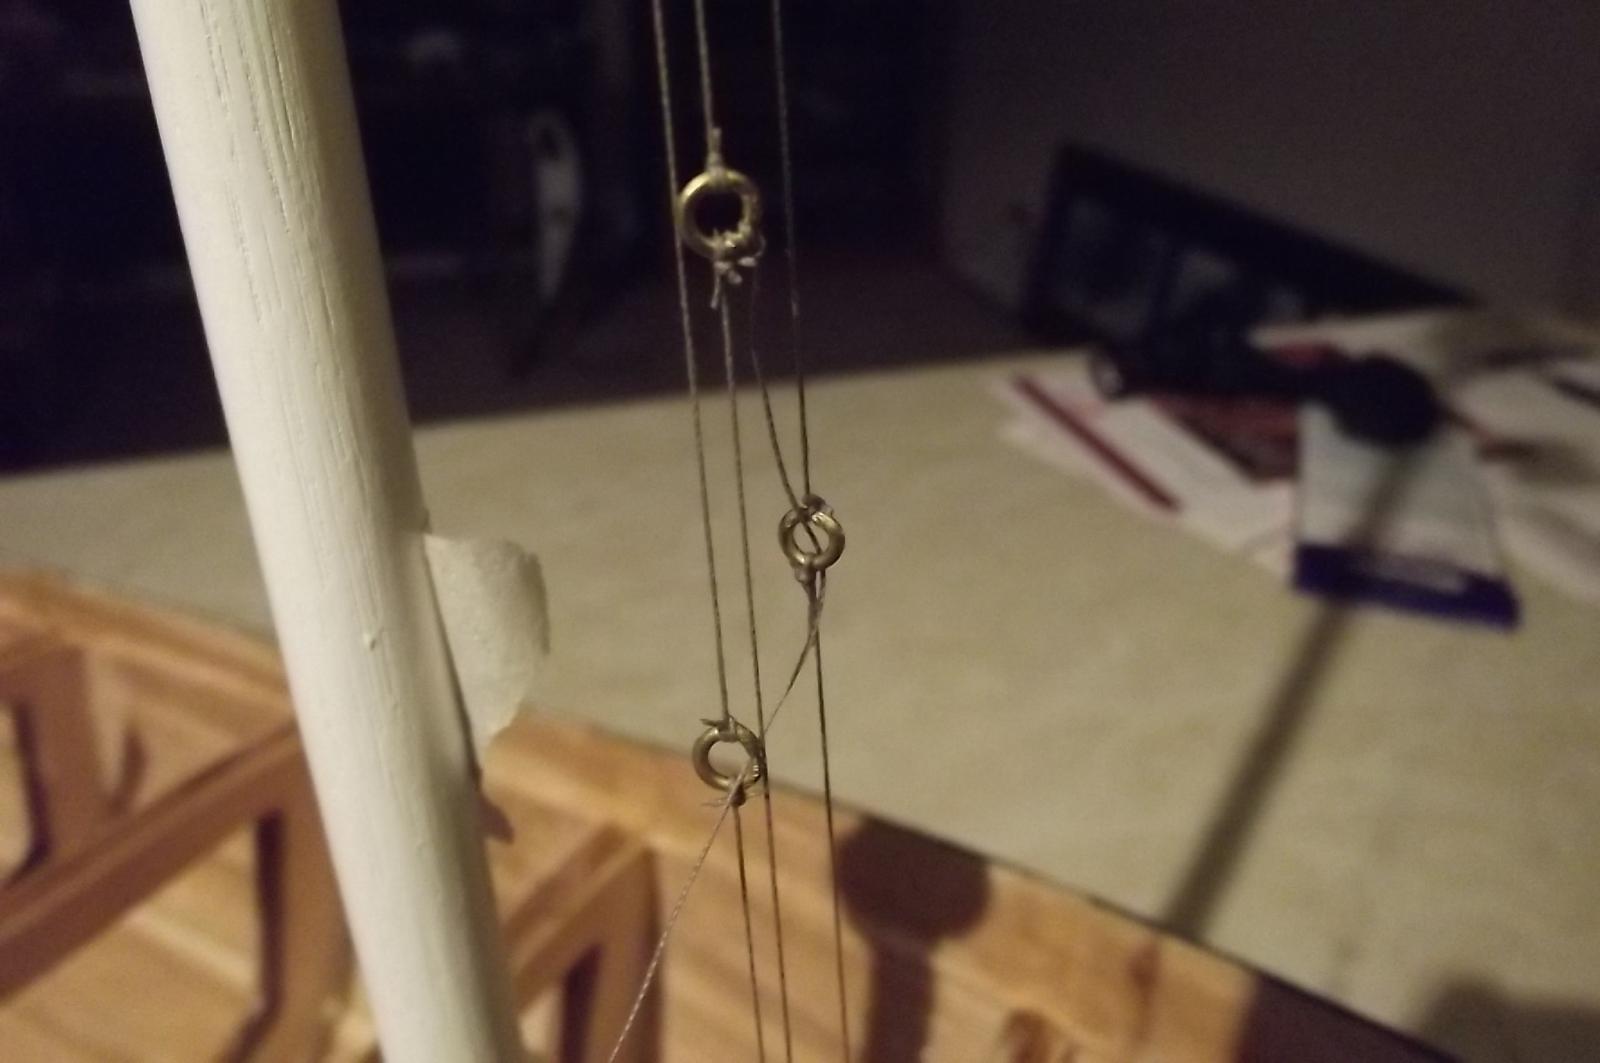
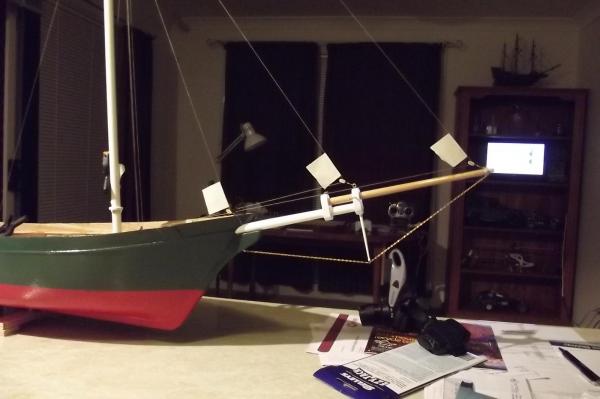
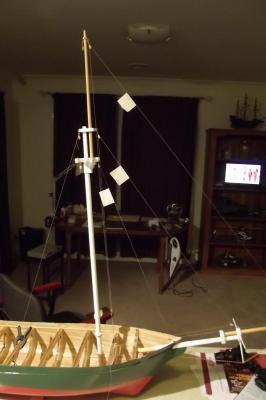
Hey Jerry, I've got another one for you! Not as clever as the stays'l sheets but a simple way to raise and lower the stays'ls without having to turn three different diameter winch drums. Recap - all the sails on this ship are in lots of three and the course and tops'ls are basically the same relative to each other so one pull will handle the course and one for the tops'ls but the stays'ls are all different sizes and travel different distances up the stays so I was thinking I had to turn three different diameter drums for the one servo. These would stack one on top of the other and give the different rate of pull needed for each sail. Better idea ! I know it isn't quite scale but then this is "stand off" scale. I tie a brass ring into the halyard for each sail immediately below the block on the mast. The halyard/lazy jack forms a closed loop for the lower and upper stays'l and the halyard for the top stays'l runs through the rings on the other two and goes to the servo drum. Therefore the top stays'l is the only one that is directly connected to the sail winch servo. As it is pulled down the ring in it catches the ring in the upper stays'l halyard and starts pulling it down and then catches the ring in the lower stays'l halyard and pulls it down. By setting it up with the rings in the correct place on the halyards they all pull down to the same spot and the sails raise to their correct height. The trouble is going to be in lowering the sails because the rings won't pull the previous one up. I think a lanyard linking each ring at the correct distances will do the job. So the top stays'l halyard will go up the mast as the sail is pulled down, when the lanyard reaches it's limit it will start pulling the upper stays'l halyard and so on. My only concern with the lanyard is that it may get blown around while slack and get fouled on the tressle or deck furniture. If this is the case I may need to use a chain for the lanyard because it won't blow around as much. Failing that I could put a small sinker on the lower ends of the lanyards to keep the thing tight. Time will tell. First pic, the tape on the halyards represents where the top of the sail would be. Lowered. Raised. You can see the ring with the halyard passing through it just under the block for the upper stays'l With sails raised all three rings would be together just a bit above the deck. Also.............................I MAY have something interesting to show tomorrow. Steve


-
You are doing lovely work there Michael, I check this thread every time I log in.
-
Count me in Robbyn, I am back on board for this build. Looks like you have made a good start. Steve
-
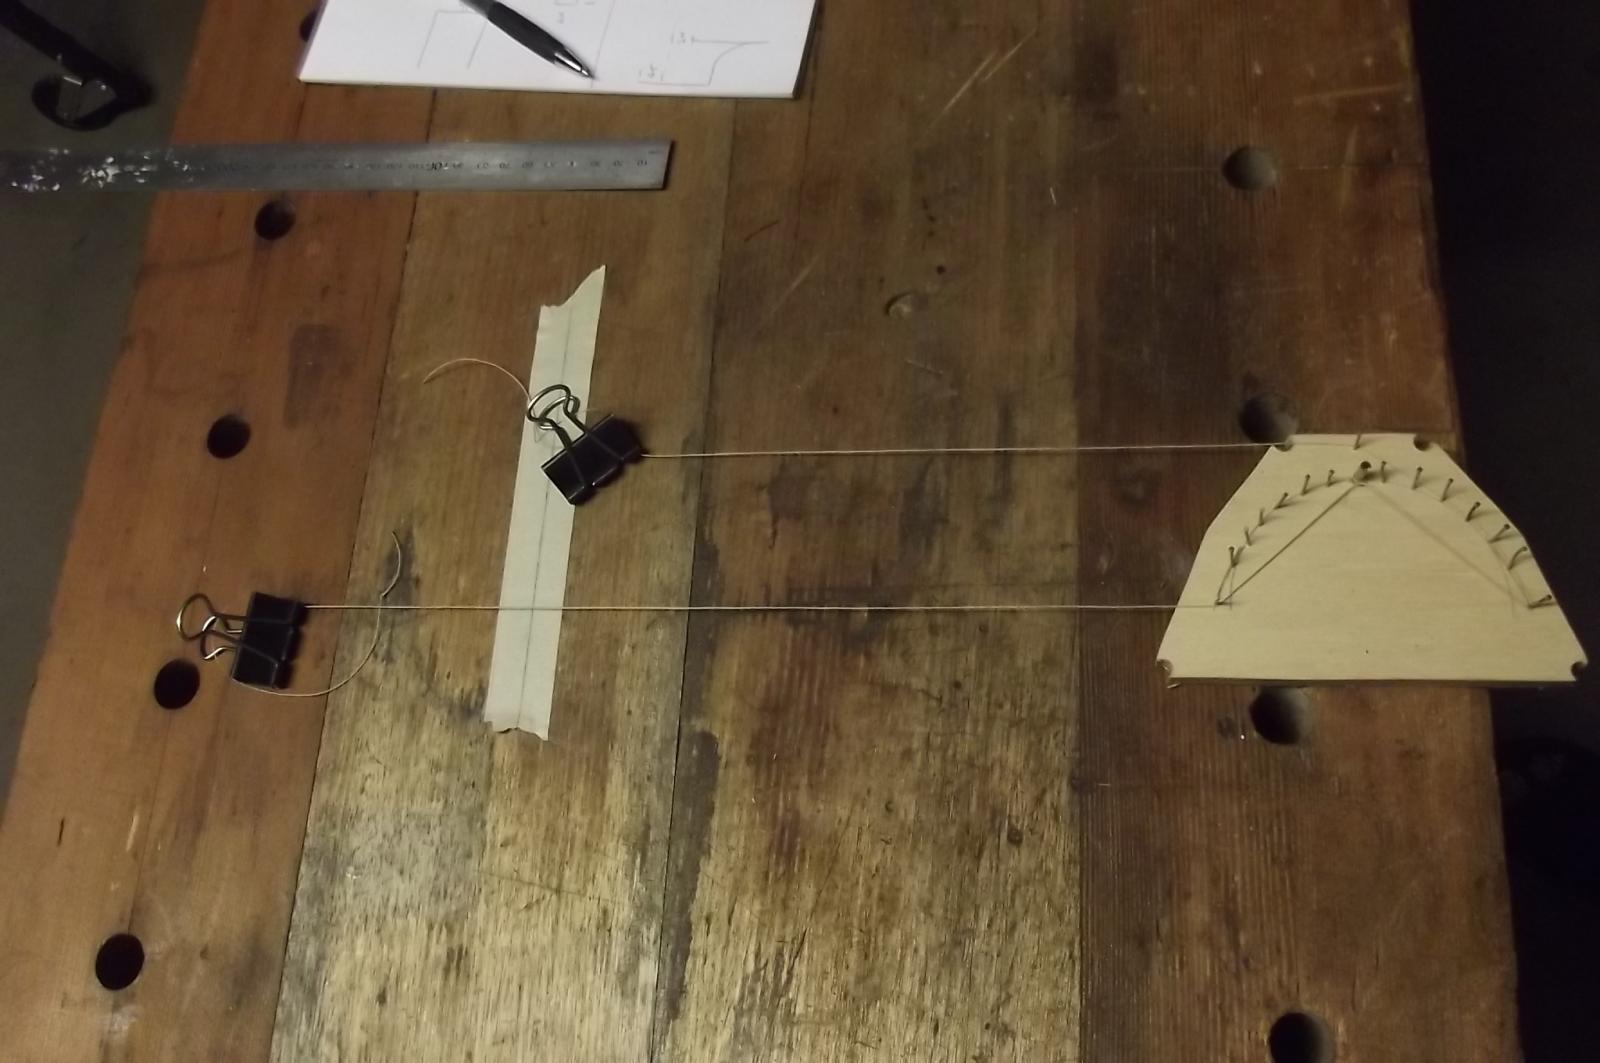
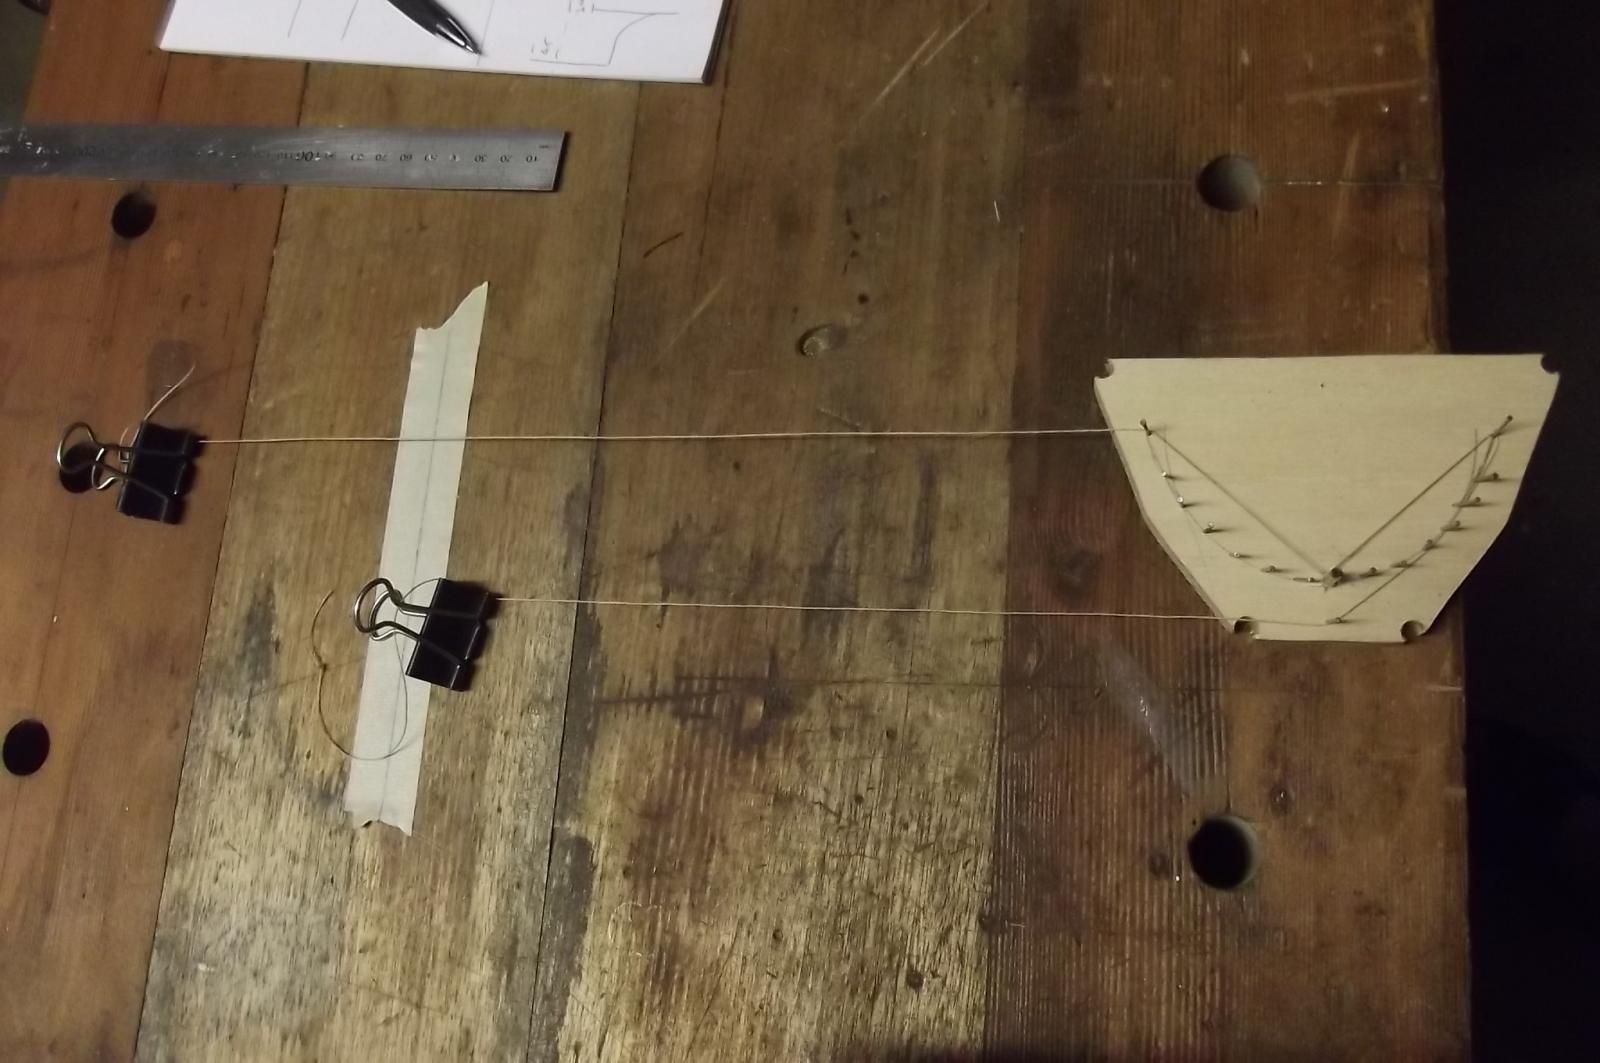
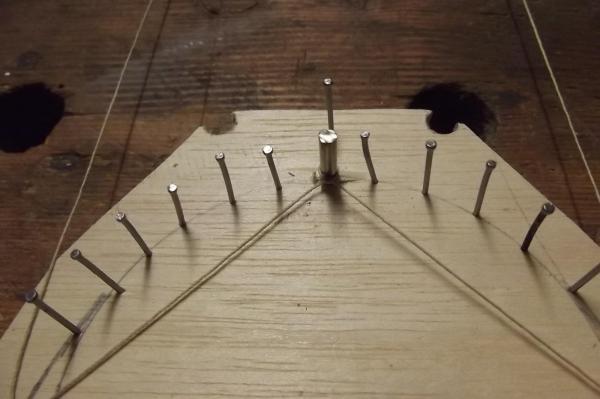
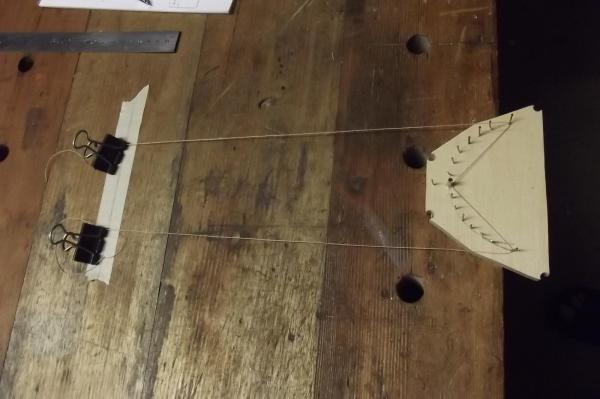
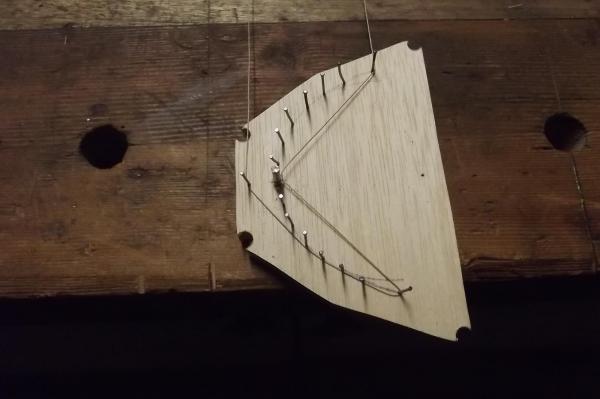
Waiting for parts to turn up from the UK again............. There was discussion on page 14 from memory about the difficulties involved in controlling the differential feed required for the stays'l sheets. The problem is that as the sails cross the stay in the course of tacking the lee sheet has to take up while the windward sheet has to go quite slack so it can cross over the stay and remain slack. Therfore the servo has to let out more line than it takes in. This leads to some very complicated control movements as per the posts on page 14. Me being me I always look for an easier mechanical solution. Tonight I found it ! This is going to get a touch technical but it is pretty straight forward. First, I have about 150mm of width in the fore cabin to play with and the device I made to test my principal is 90mm across so it will fit in easily. I was thinking I would need a curved sheet guide to provide smooth exponential in and inverse exponential out feed but it turns out that the rotary movement of the end point achieves this naturally. What I am saying is that I started with a curved line of nails but ended up realising that I just need to attach to the end of the arms, ie where the last nails are in the pics. The large pin in the centre is the pivot so this is where it would attach to the servo, the lone nail out from the pivot pin adds to the inward pull. Now that that's as clear as mud, look at the following pics, you can see the position of the clamps on the faux sheets when the control device is centred. When the device is turned through 90 degrees you can see that the inward pull is significantly less than the outward feed. The same occurs in reverse when rotated to 90 degrees in the opposite direction. You can see how the sheet goes out around the single pin infront of the pivot. I would imagine making the centre of this pin adjustable so as to have adjustment of the in pull. The further from the centre the greater the pull. With the test rig I achieved a differential feed of 60mm, ie 30mm in and 90mm out! So I need to buy yet another servo, one that will travel through 180 degrees, and make the "L" shaped servo horn with an adjustable pin, no biggy ! I will probably need to make a guide out of brass wire so that as the servo rotates and pulls in the slack sheet the guide will make sure it comes back up onto the servo horn. If you followed all that, you win a banana ! Steve


-
Beautiful work Michael, it looks like a great scale to work in. I have handled lignum vitae once, at the old Sydney Maritime Museum they had a piece of about 75mm square and maybe 600mm long. It is so heavy and smooth, unlike any other wood their is. I would love the opportunity to work with a piece of it.