Bedford
-
Posts
1,299 -
Joined
-
Last visited
Content Type
Profiles
Forums
Gallery
Events
Everything posted by Bedford
-
 I just noticed the foam work cradle you have for the SF. Love that idea ! I have made an adjustable work stand which is very useful but sometimes when you are working on this side and that, turning it constantly, the stand can be a pain. I shall have to keep my eyes open for a suitable piece of foam ! The ship is looking good Robbyn, the riggin is a big job, don't think you will have it knocked over in no time. Steve
 -
I never mind a question, hell, I have asked thousands !! If your solder says "solid" then it is not resin cored and you would need flux. Personally I would consign it to Davey Jones' Locker and buy some resin cored. Resin cored will say "resin cored" and if it is an old roll and you can't read the label then pull on the end, stretch it until it breaks. You should be able to see the resin cores. There are normally a few cores that are like veins running through the length of the solder. It is brown so easy to see. If not sure then heat up the iron and melt some solder, the resin will become apparent as a brown fluid around the solder.
- 773 replies
-
- 2
-

-
- san francisco ii
- artesania latina
- (and 1 more)
-
I have never added flux to a solder joint I have done at home. The resin in the solder is more than adequate.
-
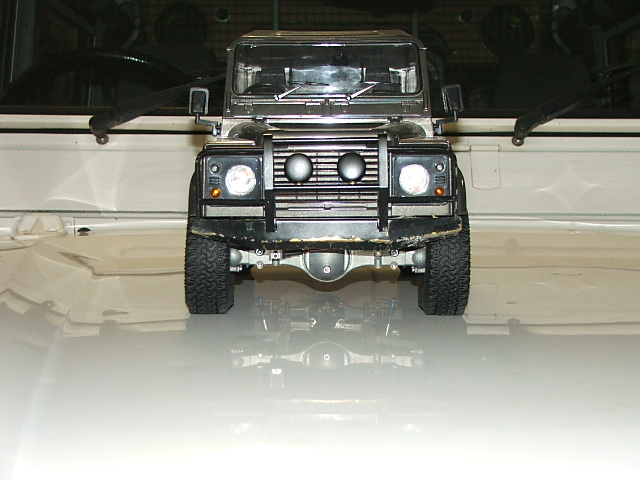
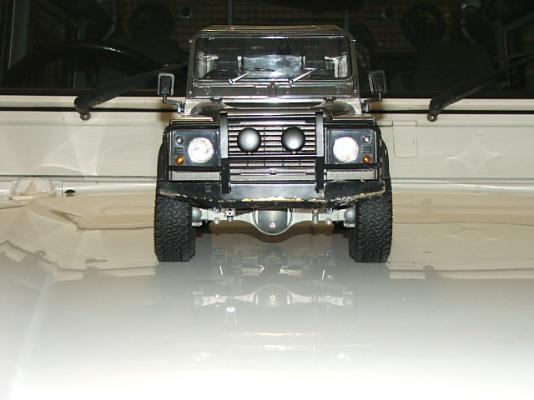
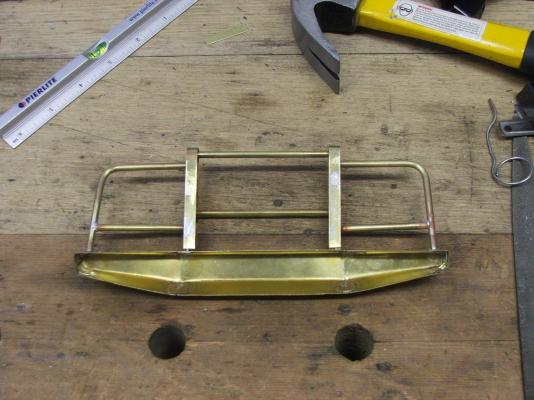
OK ! Soldering. I am an electrical fitter, I have made thousands of solder joints with copper and 60/40 resin cored solder. Forget silver solder for non load bearing joints, you don't need it and it may require specialised heating implements and flux. Copper is made to be soldered with 60/40 resin cored, they go together like peas in a pod. Use a mains powered iron, 25watt should be good. MAKE DAMN SURE THE COPPER IS CLEAN!!!! I use wet and dry sanding paper to make it shiny and don't touch it where you are going to solder. Do not set it up on a wooden board unless you are well and truly used to doing it as if you take too long the wood will start to burn and the smoke will wreck the joint. DO put solder on the iron first, just a little, this increases the contact area between the iron and the job and the heat transfer is much more efficient. For small jobs you may find the initial blob of solder on the iron is sufficient, you will see it flow onto the joint when the job is hot enough. Solder flows to heat so if you need to add more to the joint then do so on the edge of the joint and it will flow in. If I was doing those joints I would use a wood base but use a household tile and after sanding the copper clean bend the "U" with tools and leave long ends on it so you can tape it down. Then bend a very short right angle into the shaft part and tape it down so the "L" is in place against the "U" The reason for the "L" is to give more contact area to the joint. Meanwhile the iron has been getting hot. Touch the solder to the iron and if it melts quickly the iron is hot enough, touch the solder carrying face of the iron to the job and hold until you see the solder flow. You can add more and if it only flows to such an extent that the blob has ceased to be a blob and started to flow but wont spread then definately touch a bit more solder onto the joint because that will add flux and help the solder flow. If you get the joint hot enough then when you remove the iron I would drag it down the shaft and this will thin the excess solder down along the shaft rather than leaving a huge blob. It is worth noting that solder has a high lead content so use it in a well ventilated area but more interestingly to modellers, it can be trimmed with a sharp knife. ROBBYN, BE VEWY, VEWY CAREFUL I made this using an electric iron as well as a larger gas heated iron, it was 50/50 from memmory, resin cored solder. Fitted to a 3.5Kg vehicle, I can lift the car by the bullbar and it is brass, not copper, copper is easier to solder.
- 773 replies
-
- 2
-
-
- san francisco ii
- artesania latina
- (and 1 more)
-
Absolutely beautiful
-
Yes Lami, info please! I saw this on the home page and had to find the build log. There is so much I would like to know about this build. Steve
-
Good on you for doing the scratch building Robbyn, in my view that's what makes you a good modeller rather than just someone how puts a kit together. Re your bike trip I have one question.............................how are you going to safely carry the SF on a bike so you can work on it while you are there
- 773 replies
-
- 2
-
-
- san francisco ii
- artesania latina
- (and 1 more)
-
Yes I an saying DO NOT attach the dead-eyes and chain plates yet because you have no accurate way of getting the correct angles. Not sure what you mean by "racks"
-
Robbyn, Robbyn, Robbyn....................... I am sure I have said this before but it has to look right to you. If someone else looks at it they will be overwhelmed with all the detail there is to see and all the fine detail work you do will not really be noticed anyway. You do it for YOU. when it comes to doing the chain plates keep in mind they need to continue in the line of the shroud through the shroud table and onto the hull, don't mount them vertically. To this end I don't attach the chain plates until I have the masts stepped and standing.Then run a shroud line from its point of attachment on the mast, down past its deadeye location on the shroud table and to the side of the hull. This will give you the correct point of attachment to the hull to get your angles right, every one will be different. I am sure there are other ways to get it right but this is how I started doing it long before the interweb thingy and it works so well and is so simple, Now, tools...... You NEED to get yourself a razor plane or mini plane whose blade is an old fashioned razor blade. It has myriad uses and you will find it invaluable if you know how to use a plane, ie with the grain instead of against. You will find it a great tool for tapering the masts and yards, start by planing the last 20% and turn the dowell as you go, go around two times making sure the second time takes off the edges left by the previous cut. Then start again planing the last 40% making sure you get good shavings all the way, then do 60% and so on, you will end up with a nice taper which can easily be sanded to a good smooth taper..
-
Love the grating, well done and I love the third pic above, the whole weather deck from the bow. Looks great!
-
Catfalls is another term. If you think of them as cats paws and the lines dropping from them as the cats claws you will see where the name comes from. Now, stop dreaming and get back to work !
- 773 replies
-
- 1
-
-
- san francisco ii
- artesania latina
- (and 1 more)
-
Yes Robbyn you will learn a lot as you go, as I have said, I have the CWMorgan and the plans and instructions are to say the least - some form of plan and or instruction. I will tackle her one day though and I will do what I do which is make her to a form that looks right to me. There are so many beautiful ships to build though aren't there? Steve
-
Now that we have run amok with your thread Robbyn I will just wish you were here and let you get back to your build, it is coming along well and the gun ports look great. Steve
-
Did you drill through the beak and dowell it yet Robbyn?
-
I fear we will find this more and more as manufacturers find ways to cut costs by using generic parts across the range on a "that'll do" basis. We had this discussion with the rudder hinges earlier. I wonder if there is one manufacturer who will stay true to scale, they would cost more but be worth it. Steve
-
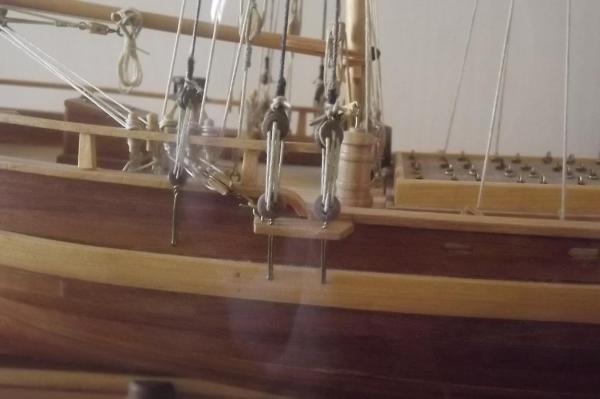
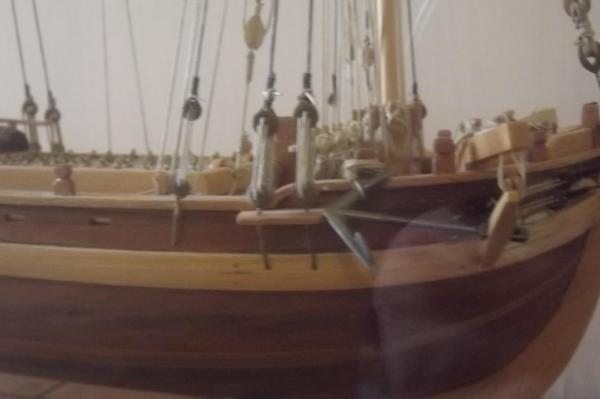
Glad it worked Robbyn. I mentioned "flexible beach" that's what they call it at MS here in Aus. Next time you order timber get some, probably about 5mm x 1.5mm, sorry, you guys who ditched imperial rule centuries ago but still keep imperial measurements will have to convert that yourselves These are pics of my first model tall ship "Schooner for Port Jackson" from the supplier I mentioned above. The pics are not great because she is behind glass but if you look between the lanyards or ropes that attach the shroud lines to the hull you will see a piece of timber on the bulwalk bent down to follow a step in the sides. This is flexible beach and I bent it with the domestic iron by just soaking it in warm water for about 10 minutes then placing it flat on the table with the iron on it, back and forth a little with the iron then just hold it down with the iron and bend the plank upward around the edge of the sole plate of the iron, move the iron a little and bend some more etc to get the appropriate radius. It was so easy to bend and work with. Like I said, first ship, first real tight wood bend and dead easy, first go was perfect. This is excellent timber for bending. Keep it seperate from any other beach you have though because it looks the same.
-
I have no idea how hot a curling iron gets but I would imagine not very. From the look of your profile pic you wouldn't have any other use for one though
- 773 replies
-
- 1
-
-
- san francisco ii
- artesania latina
- (and 1 more)
-
Have you made any progress with this Robbyn ? You should find as you make a few models there will be timber left over from each, never throw this out as I am sure you would appreciate. It becomes very handy in subsequent builds. For future reference there is a type of "beach" that is very flexible and although a bit dearer than most woods it is well worth it and I get it from MS as required. In this instance though if you do not have a planking iron, and I have never seen the need, get it nice and hot and wet and lay it flat on a suitable surface and iron it with your domestic steam iron. Rub it over the piece once or twice then working from one end rub it forward about two inches and then back to the start and hold it down firmly as a clamp for the wood and start bending the plank, moving the iron back and forth between bending efforts. When you have a bit of bend holding in the timber move the iron over it again and keep working your way forward. You will find this easier if you don't cut the timber to length first as you will have more to work with and hold on to and the process takes practice to become accurate with so cutting after bending is the best option. I start from the tightest radius end and work my way out so I need about two inches infront of the bend to allow holding the plank down under the iron. Hope this makes sense. Steve
-
Nice progress Robbyn, looking good. Yes it is always better to inset doors and the like so they don't just look stuck on. Good on you for going above and beyond. Steve
-
Robbyn, mail order is your friend. There is a place here called Modellers Shipyard and their website lists all the timbers and dimensions they have available and they post every day, I am sure there would be a few such places there and they advertise on this website. I would also imagine that it would be a fair bit cheaper in the U.S. than here too. You will be able to order whatever individual pieces your heart desires. You won't find the timbers you want locally but online there will be plenty. Steve
-
Wow, you must have appreciated it to thank me twice
-
Hey Robbyn I don't know if this would be helpfull or not but I posted consctruction pics of the replica Endeavour made in Perth in 1993, http://modelshipworld.com/index.php?/topic/1207-endeavour-replica-construction-pics/ If nothing else you can see just how woefully inaccurate the rudder hinges supplied with a kit are. It might help with the line of external timbers though. Steve
-
Yeah, this is one of the benefits of not having a dog !! I am not sure but a good model ship supplier that sells ships decorations separately for the scratch builder might be your best bet for a replacement. Steve
-
I have been tossing around the colour scheme for mine as I normally don't paint my ships, I like the beauty of the timber. The Caroline will be special and needs to look it's best and colour will be required to bring out the full beauty of the ship. I have thought I would do pretty much what you have done but was toying with leaving the white off below the water line. Having seen yours I think that will work nicely.