


Dave B
-
Posts
120 -
Joined
-
Last visited
Content Type
Profiles
Forums
Gallery
Events
Posts posted by Dave B
-
-
Hi all,
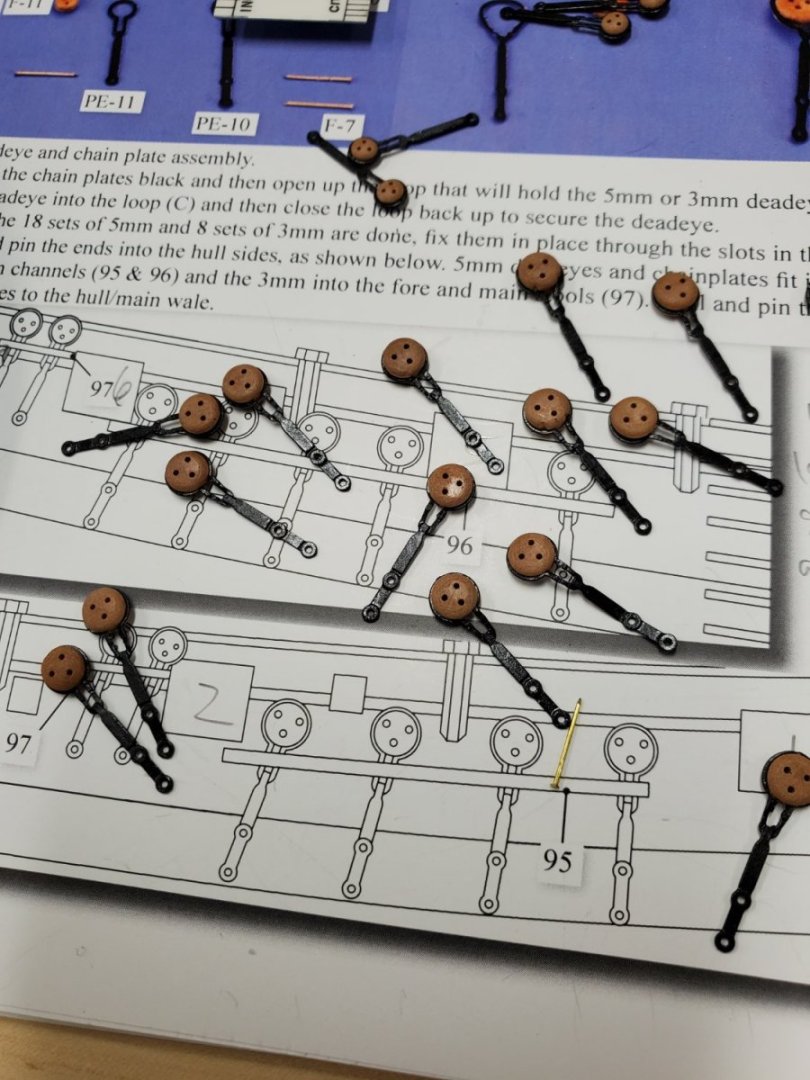
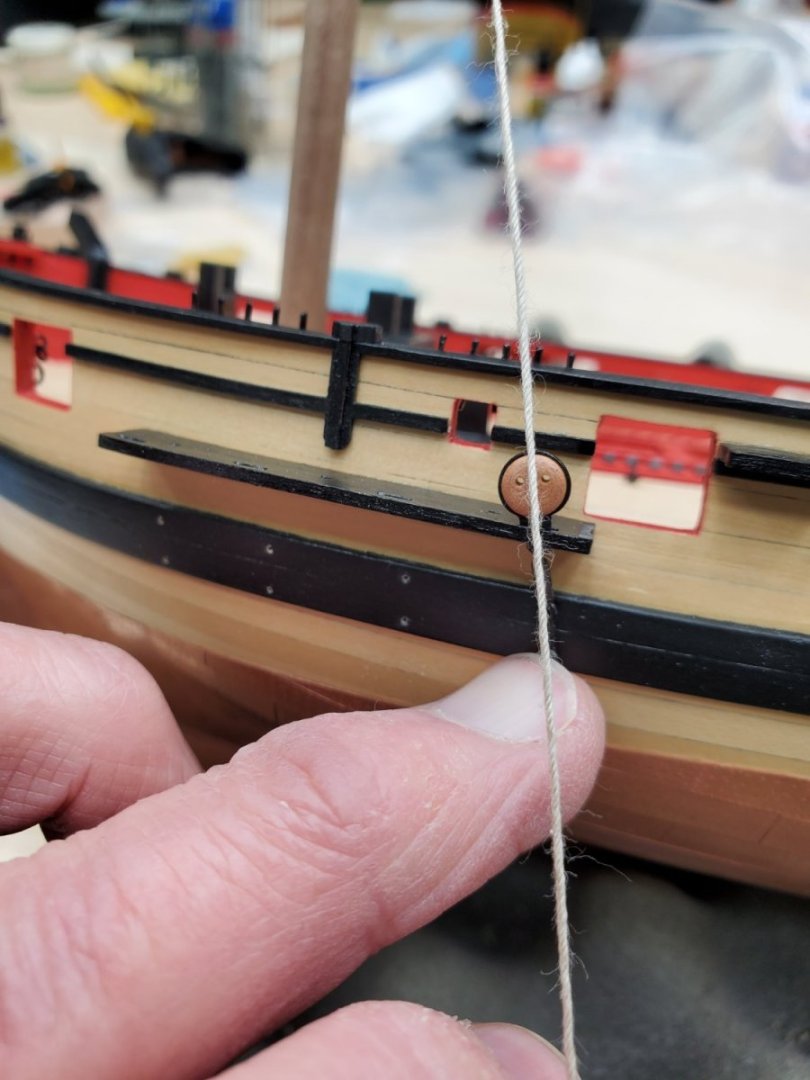
I'm working on the chainplates with deadeyes now. I have seen others use this method with a piece of string to get them lined up correctly for the point of attachment, hopefully it is close anyways.
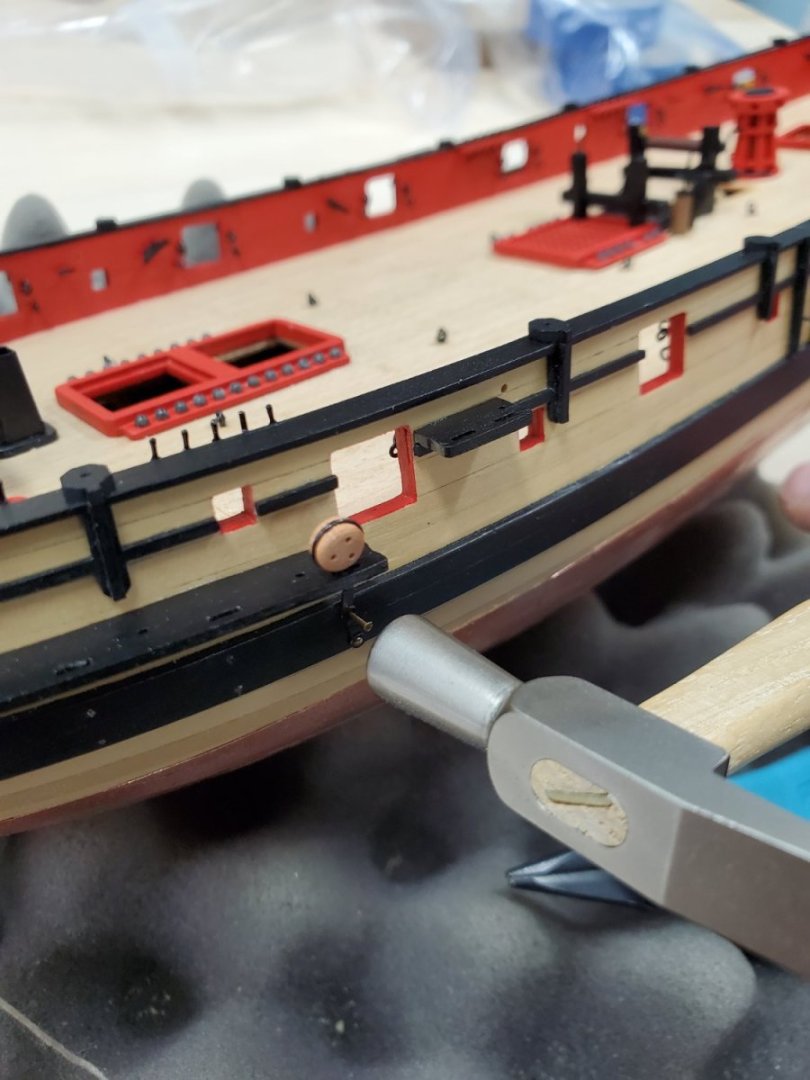
Usingmy miniature hammer gently on the nails into pre-drilled 0.45 mm holes.
Dave
- CiscoH, Prowler901, etubino and 6 others
-
 9
9
-
Thanks for all the thumbs ups!
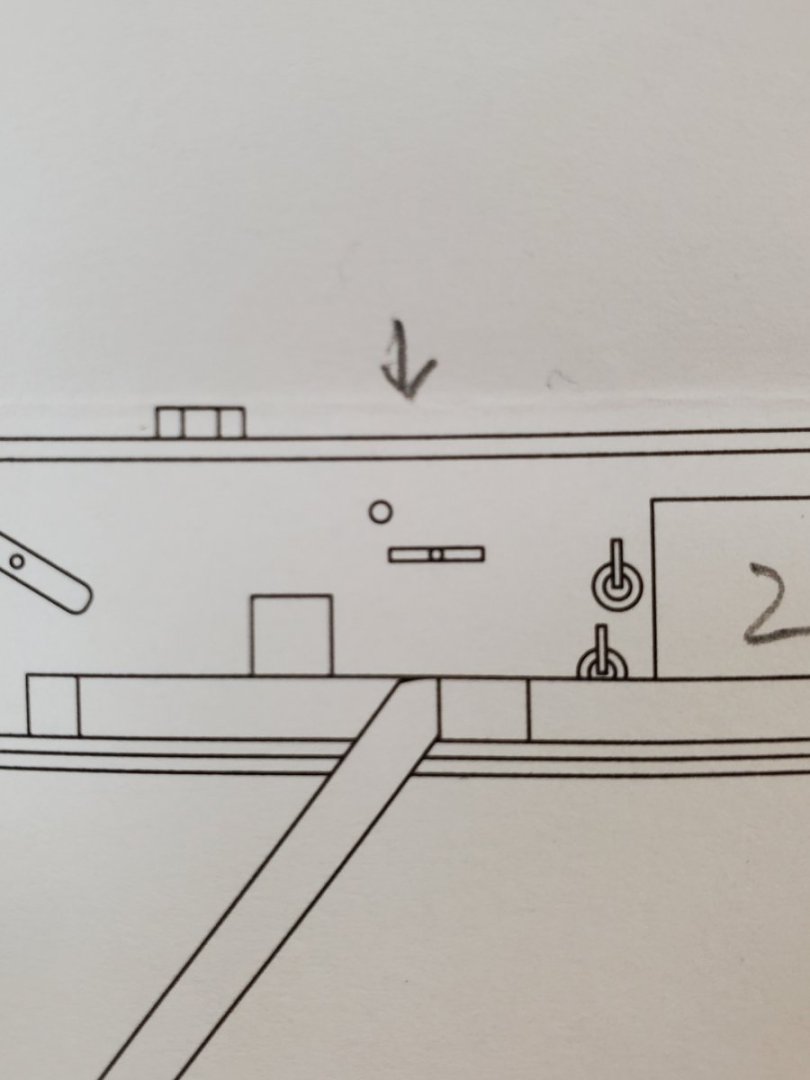
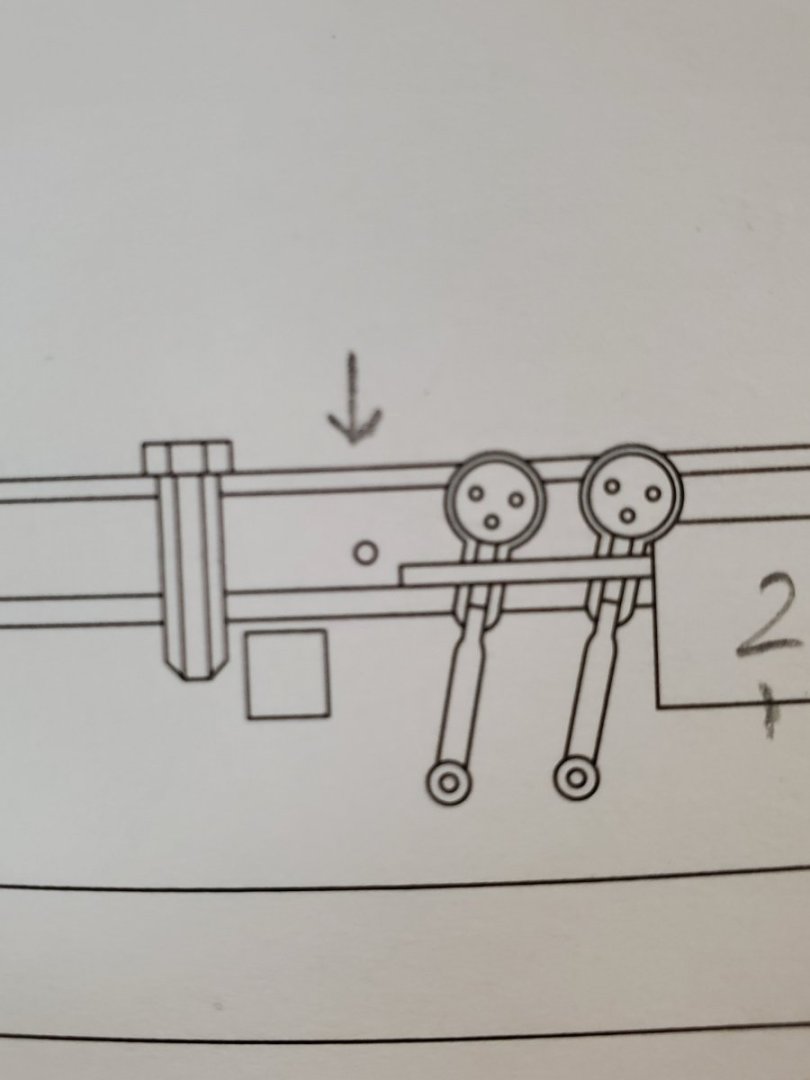
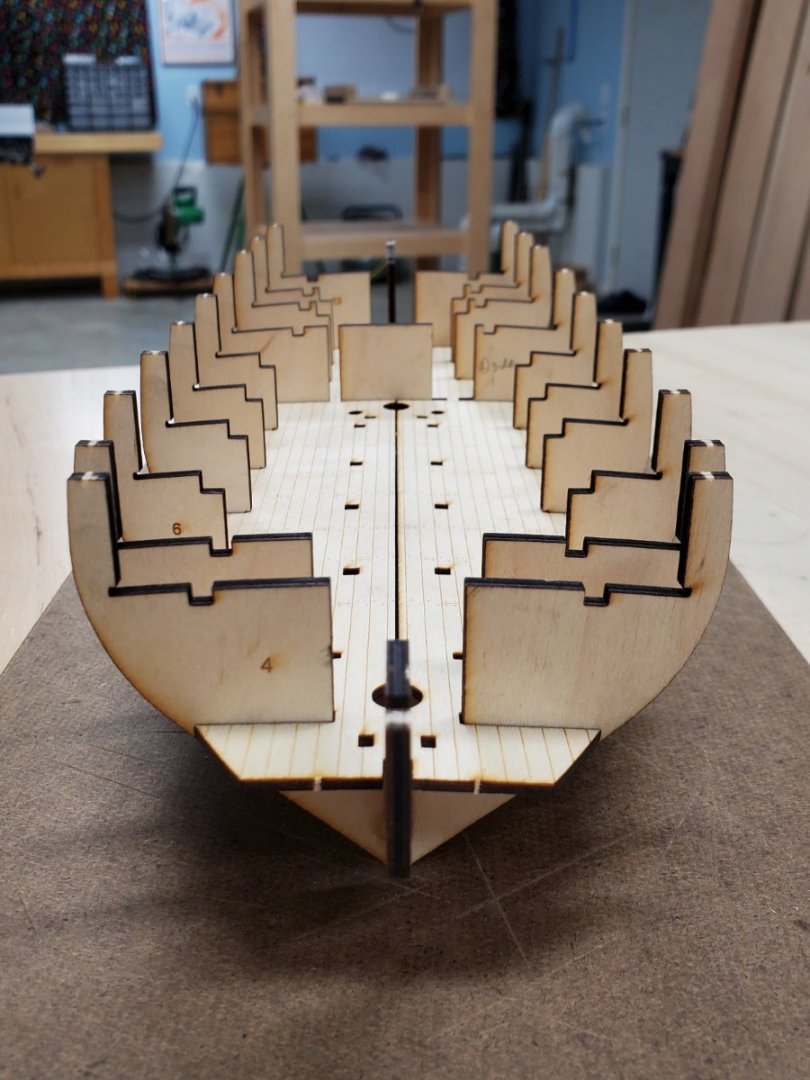
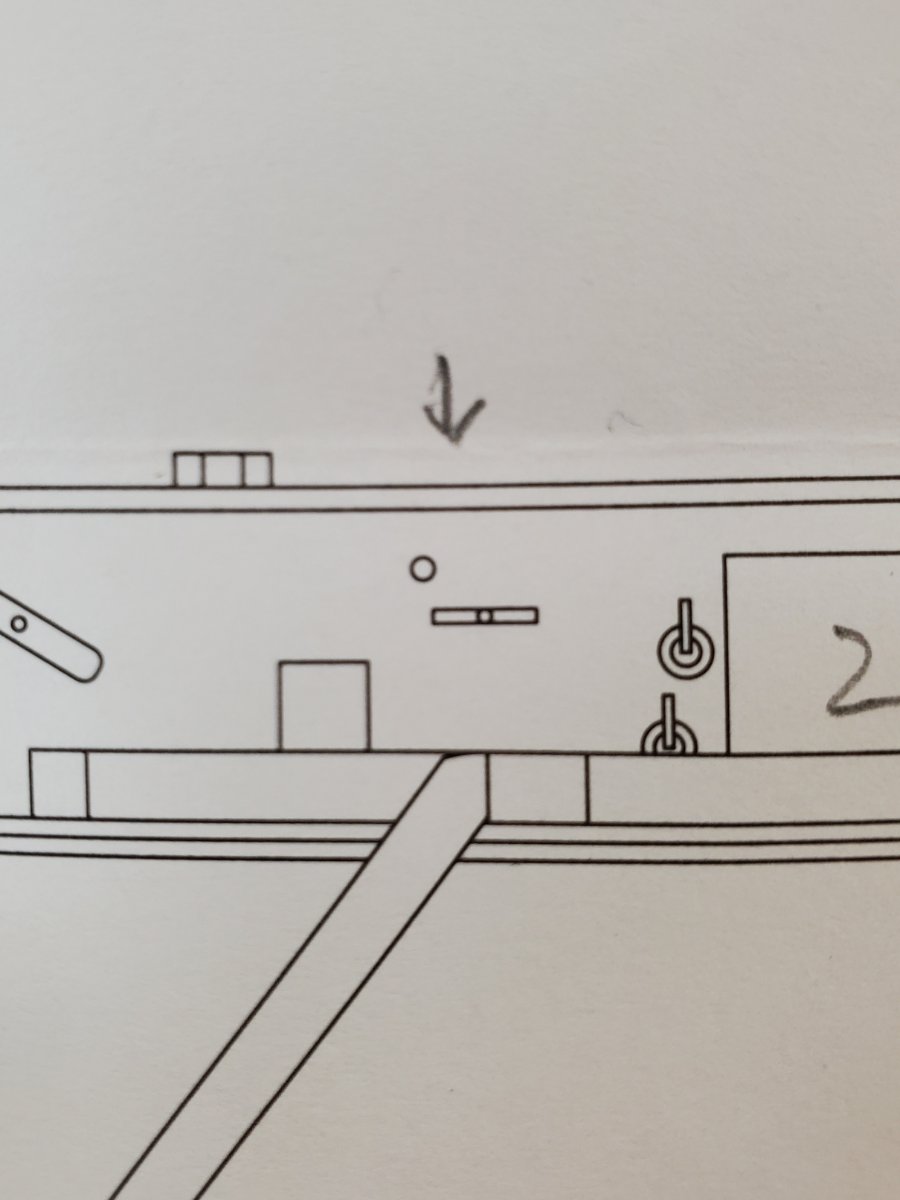
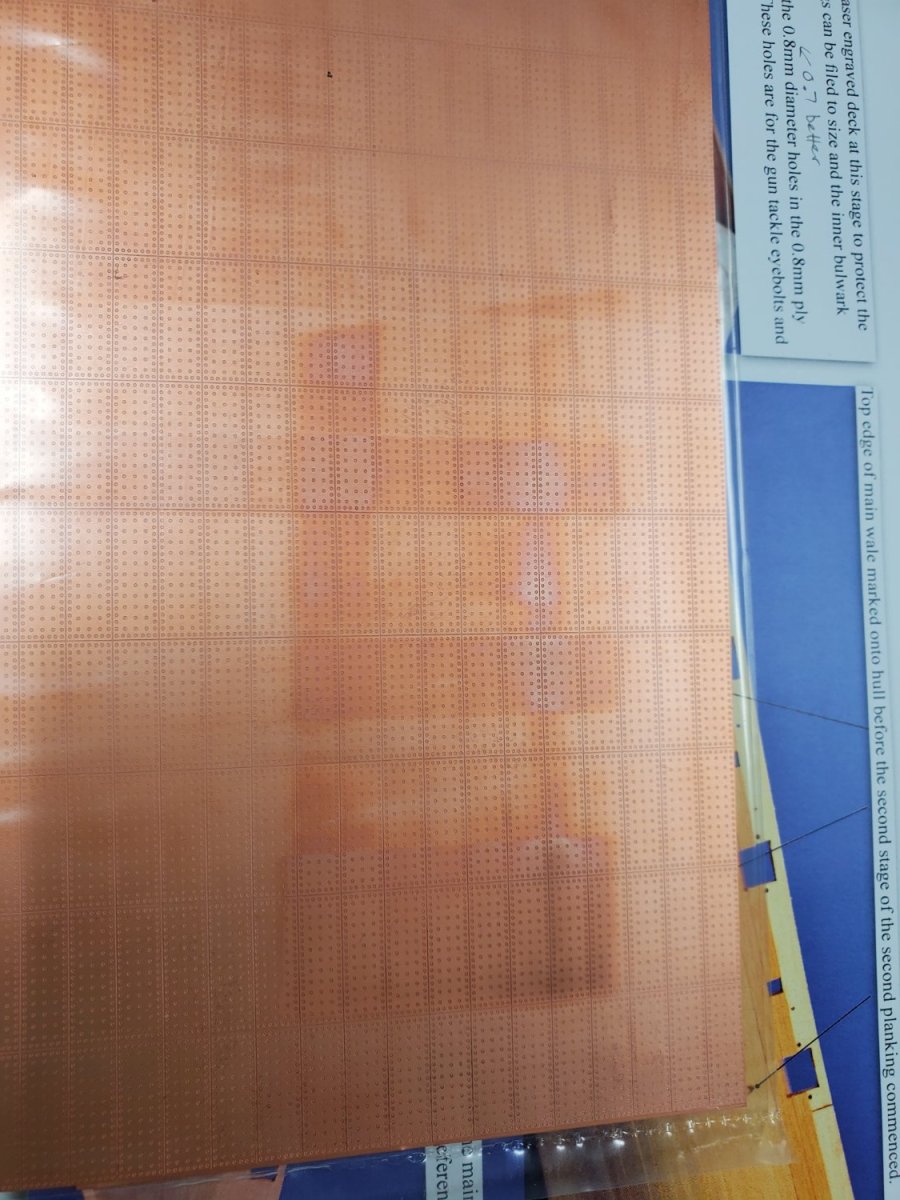
Quick question...I just noticed on the plans these little holes that must be for rigging lines later on that I had missed. I think I see on the rigging plan where some will go through these holes. There are 4 on each side of the ship that I can see.
To get the right size for the holes, I assume I just measure directly off the plans? I'm glad I noticed these before I did too much more because they would be harder to get to with more stuff in the way. I'll have to be careful not to have any splintering while drilling them too.
-
Hi all,
I've completed all the channels, attached with glue and little pins as instructed and they feel nice and secure. Also did the little interior rails and I've been working on the cannons lately and will update those soon.... Have had a little more time in the shop lately so making some progress.
Dave
- ccoyle, whitejamest, KARAVOKIRIS and 1 other
-
4
-
Thanks for the positive feedback everyone!
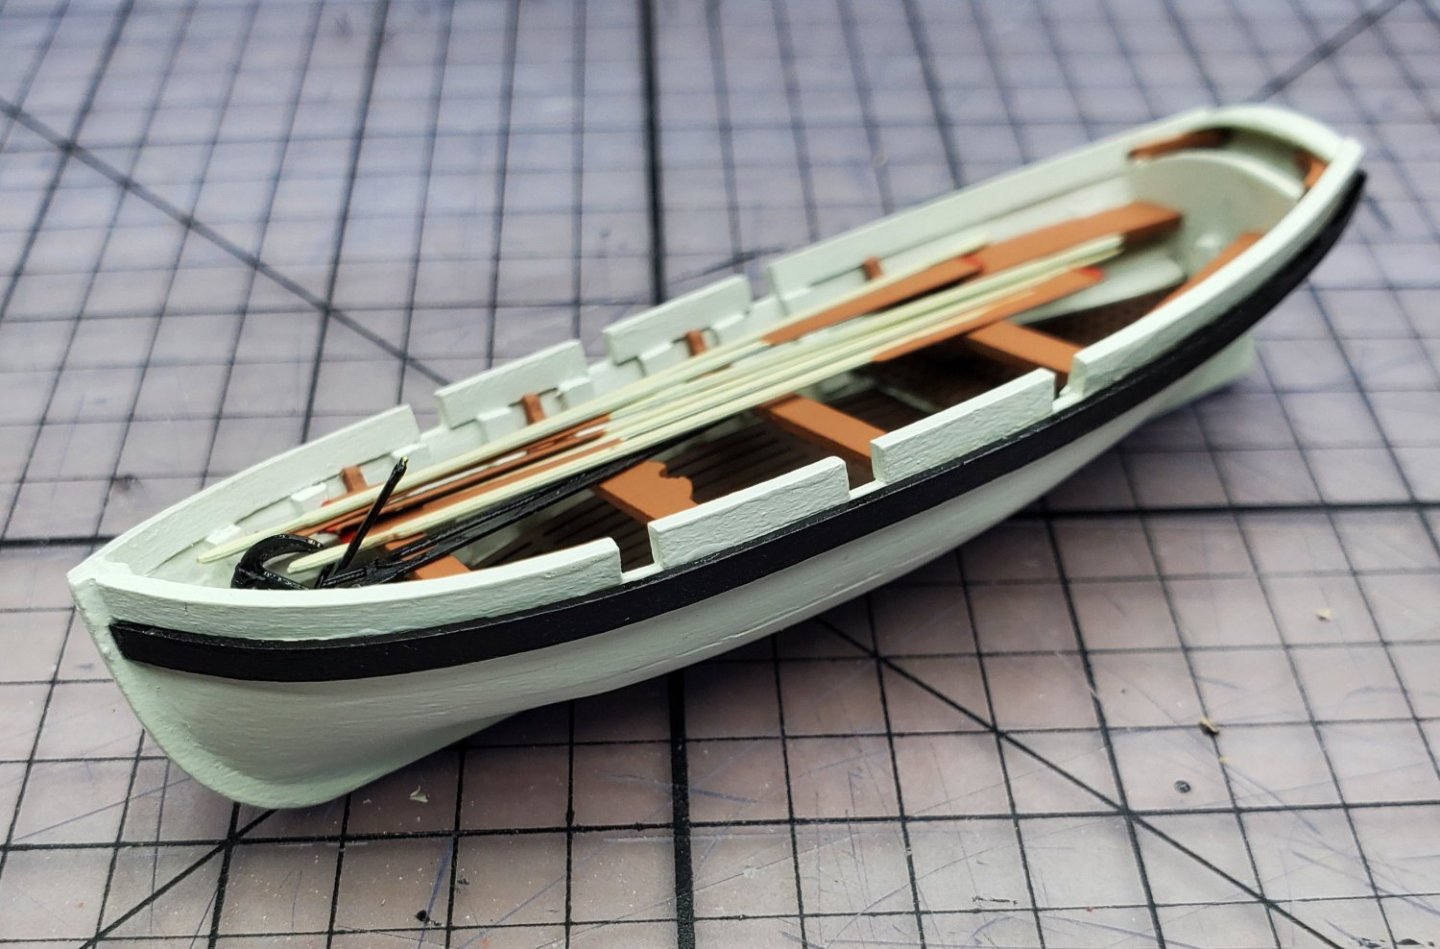
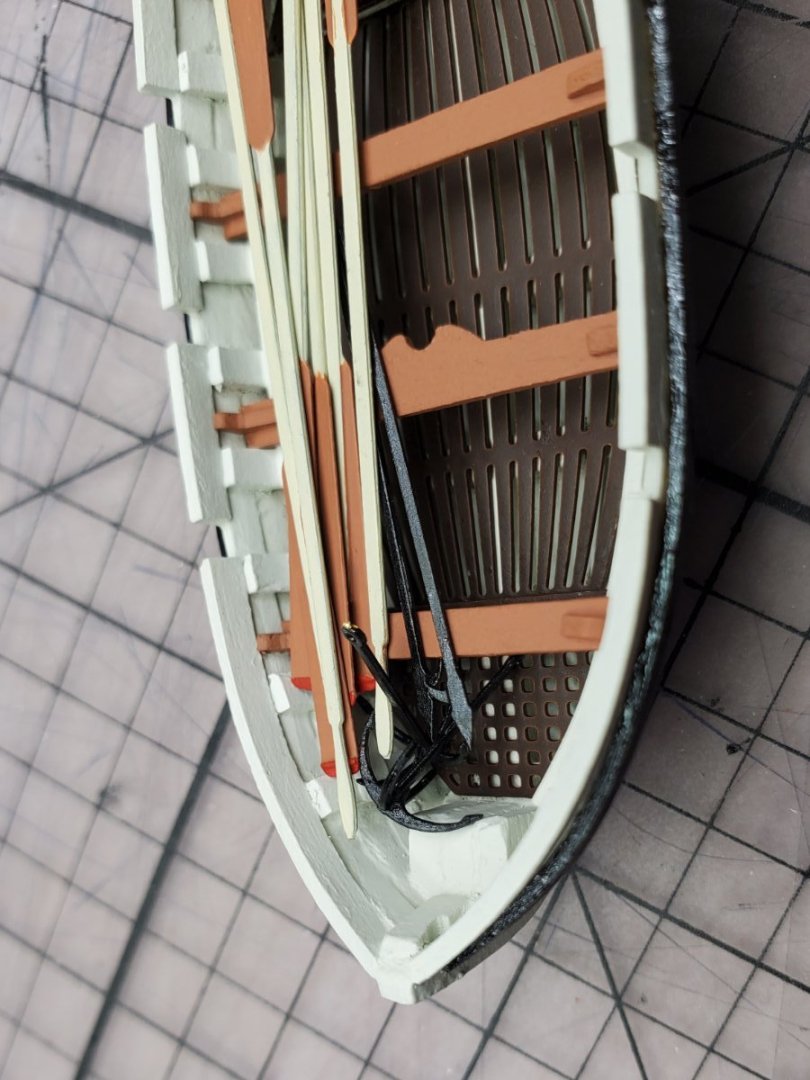
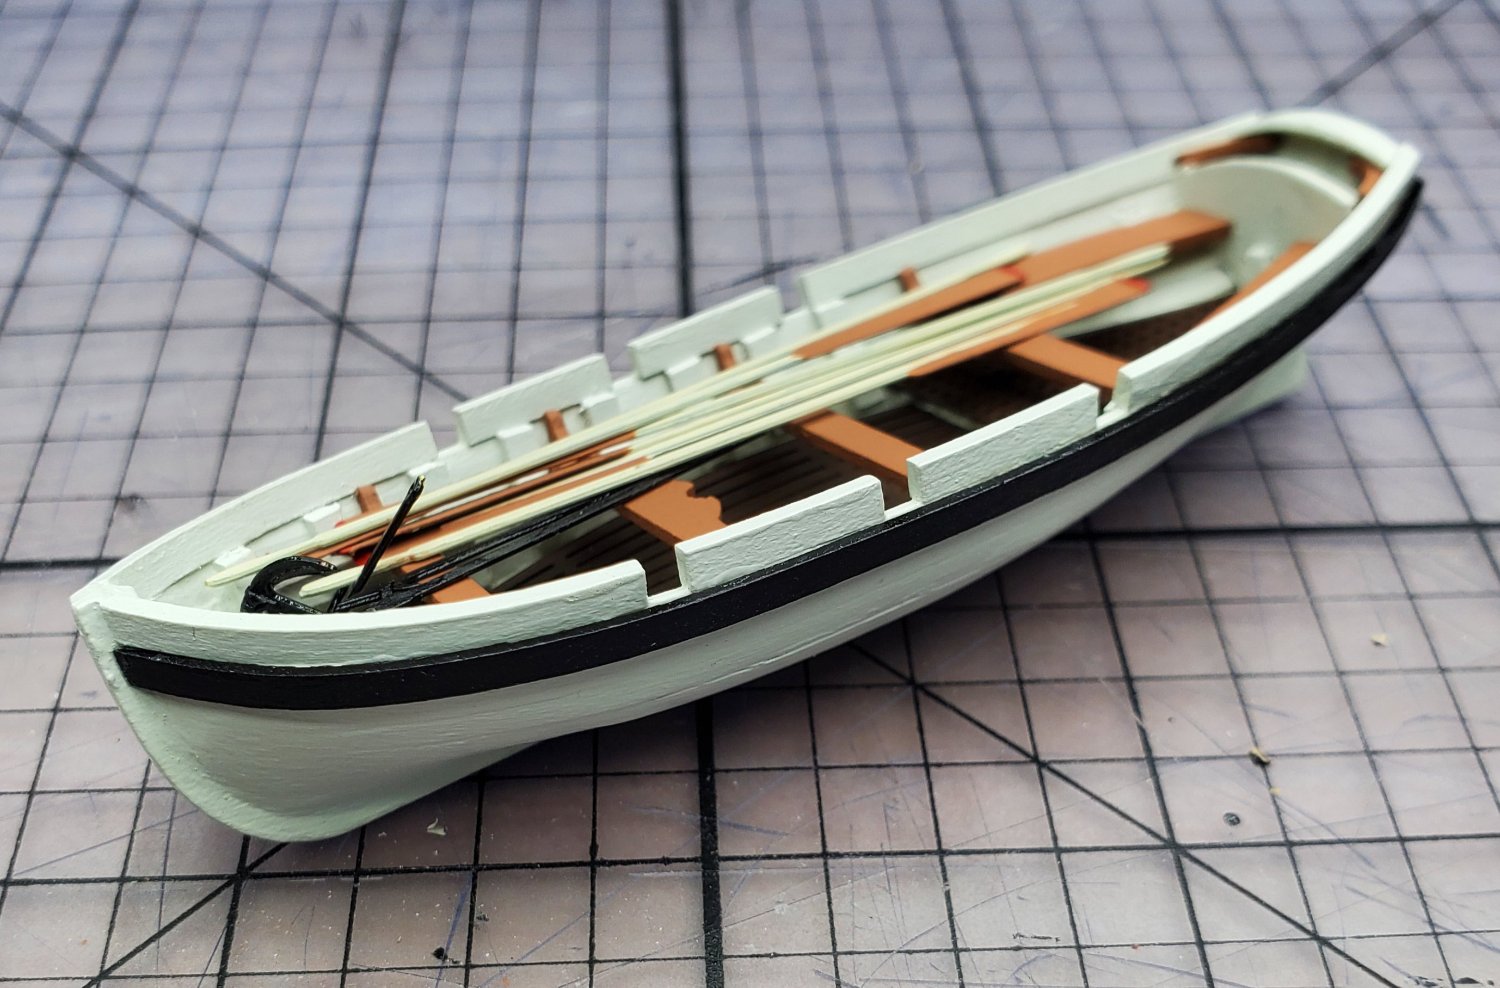
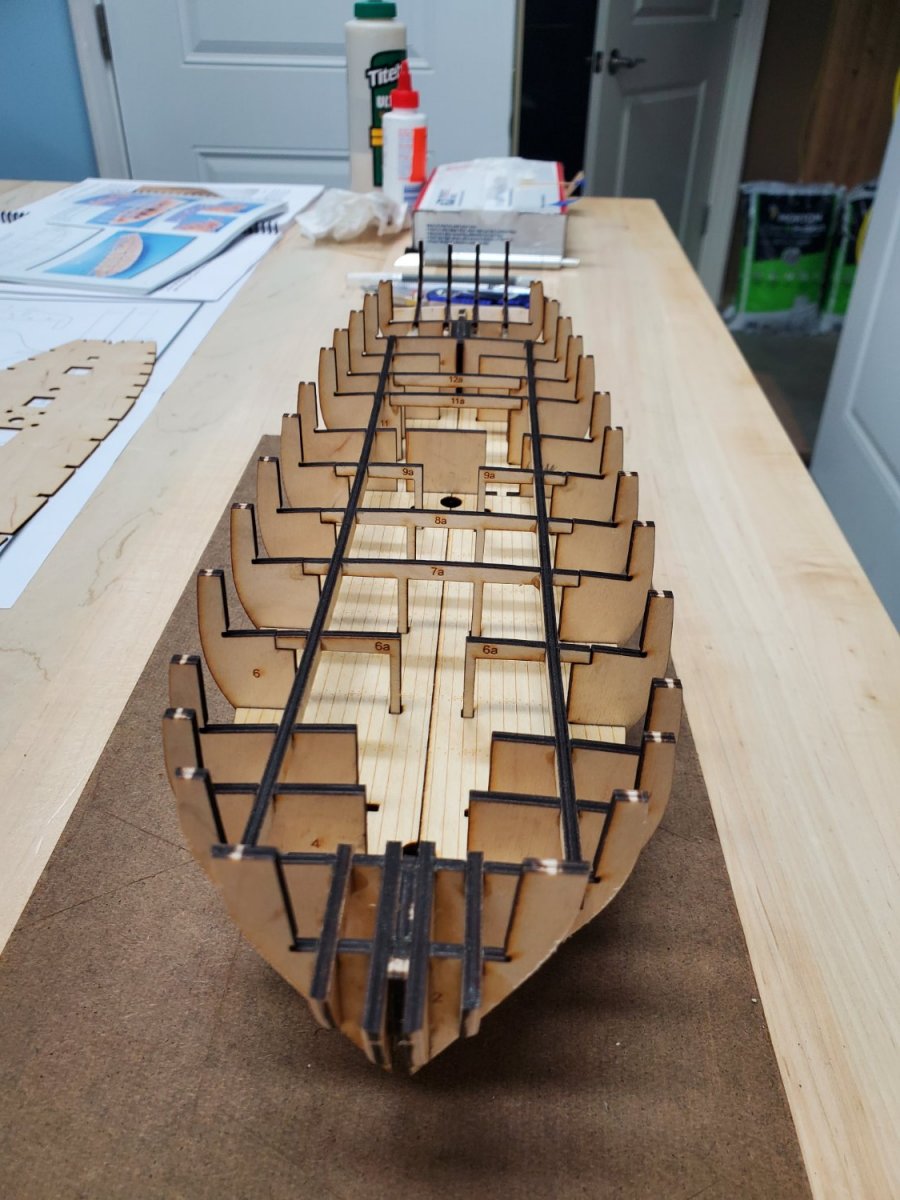
Making this little boat was more challenging than I expected.
I worked on it over the course of several weeks while doing other things. I forgot to taper the planks early enough and ran into some difficulty with that, should have followed the instructions better.
I did find it easier to glue bulkhead pieces to the base which kept everything steady and aligned while working on it and was easy to remove.
Dave

- whitejamest, KARAVOKIRIS, DB789 and 4 others
-
7
-
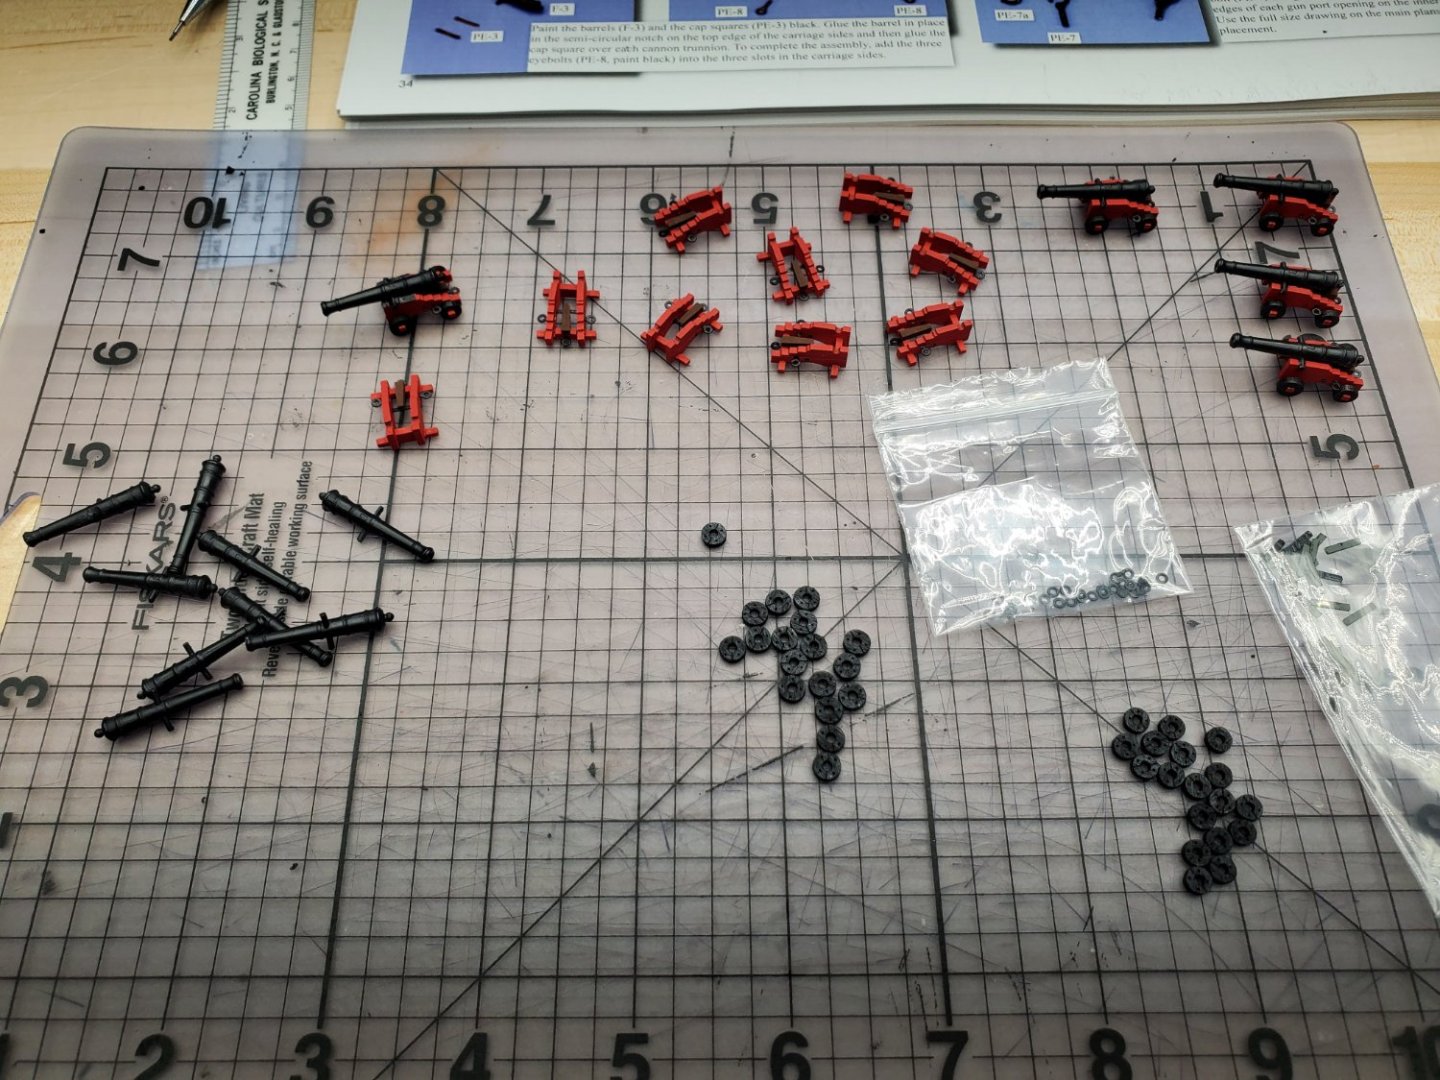
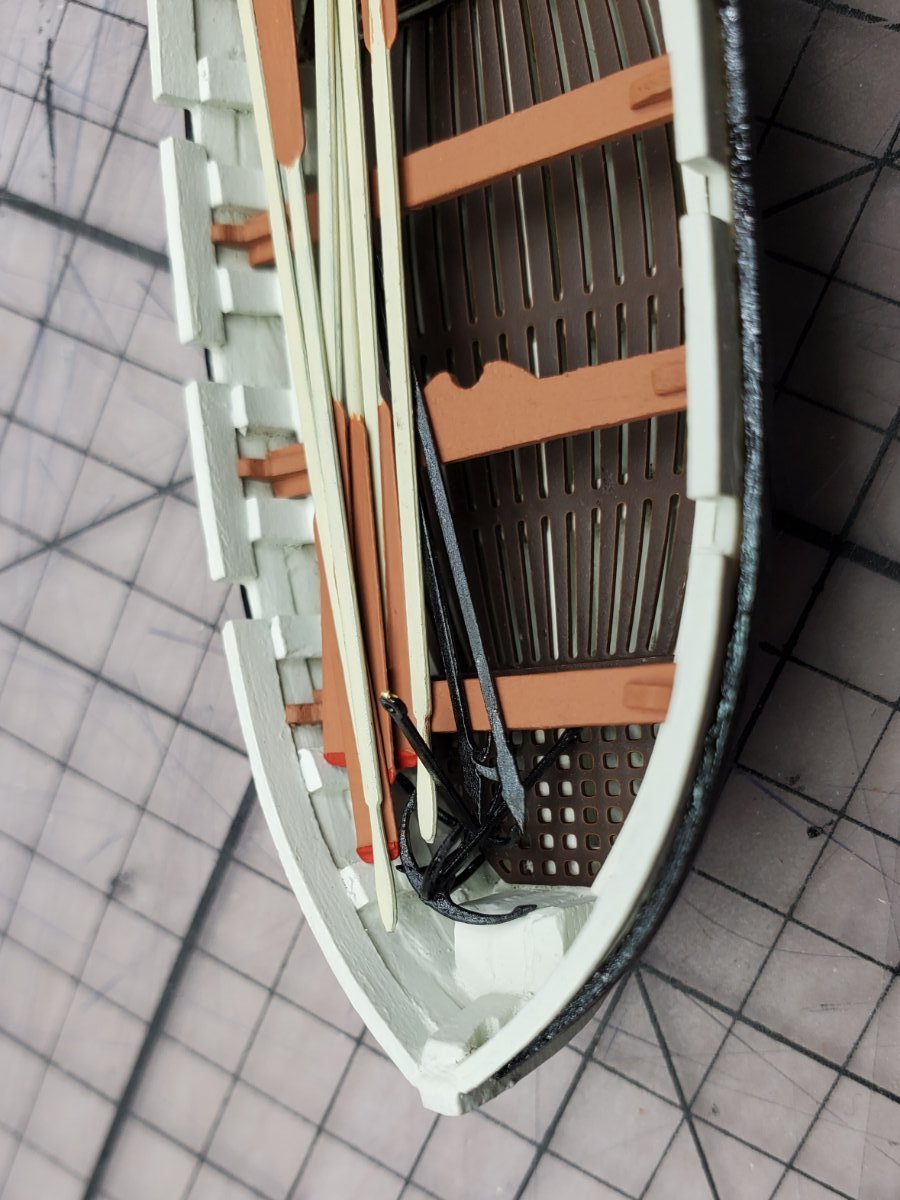
Next I moved on to the cannons and anchors and other small items for the deck.
This may be a silly question, but why are there 4 anchors rather than two? I only see two on the box photo unless I'm just missing something. I made 4 as instructed though. They were fun to make and I like the look of the black paper the kit provides, which is definitely a lot easier than bending little bits of metal!
Dave
.thumb.jpg.bef235447a828bafadd21bd16b6f6b01.jpg)
- BenD, ccoyle, Oldsalt1950 and 4 others
-
7
-
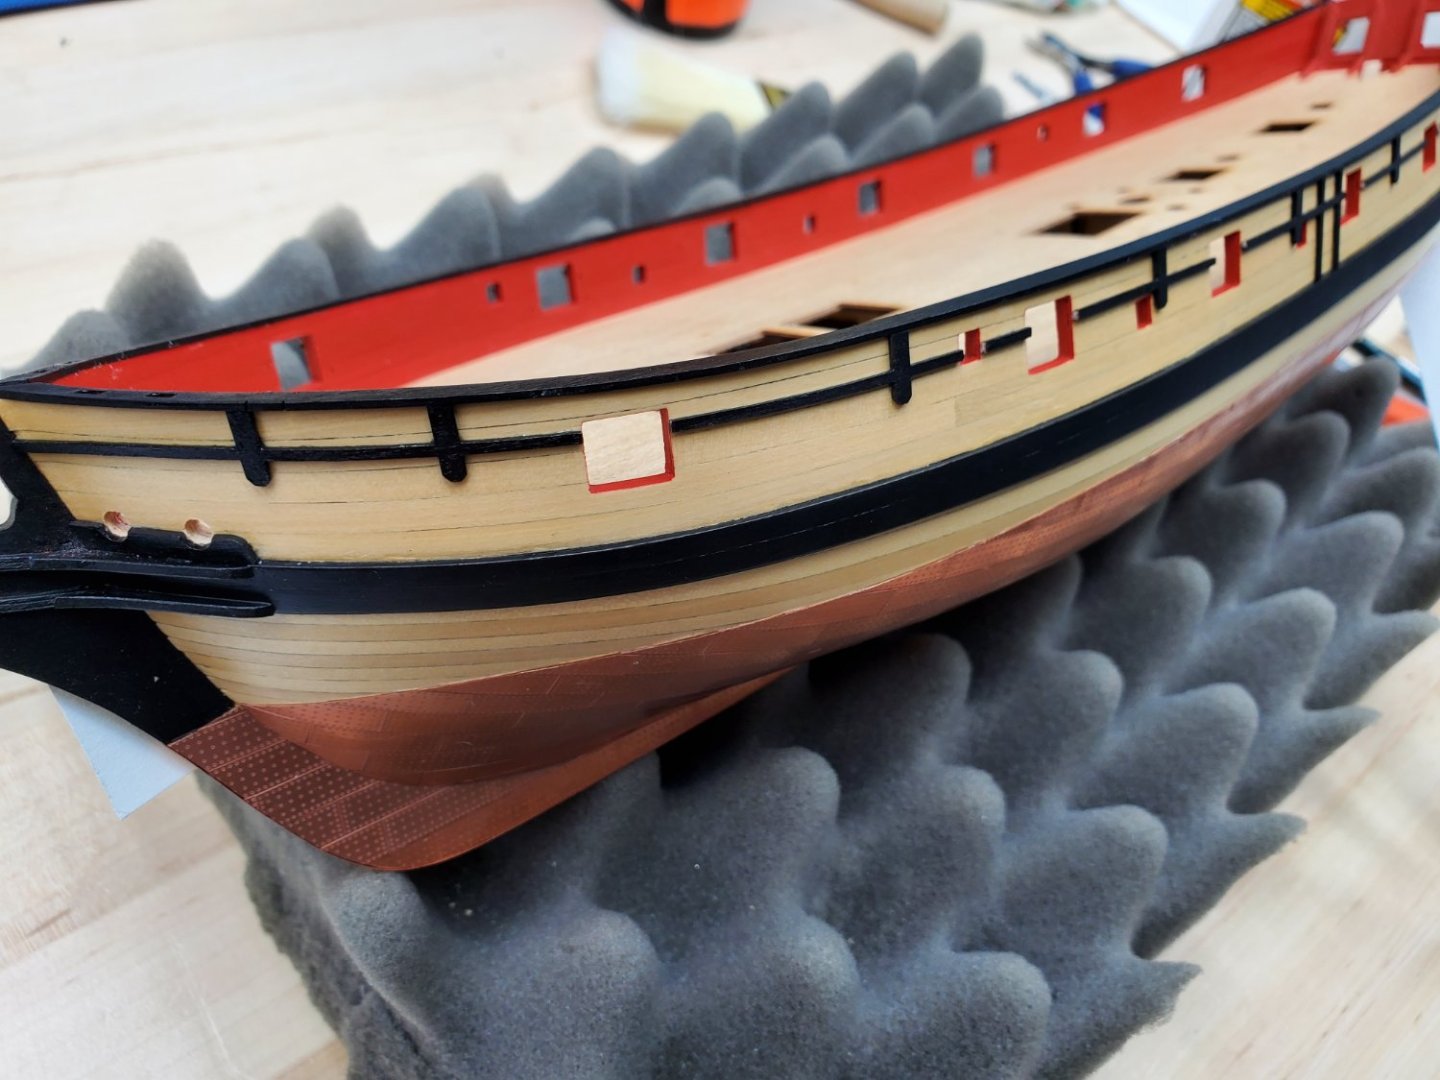
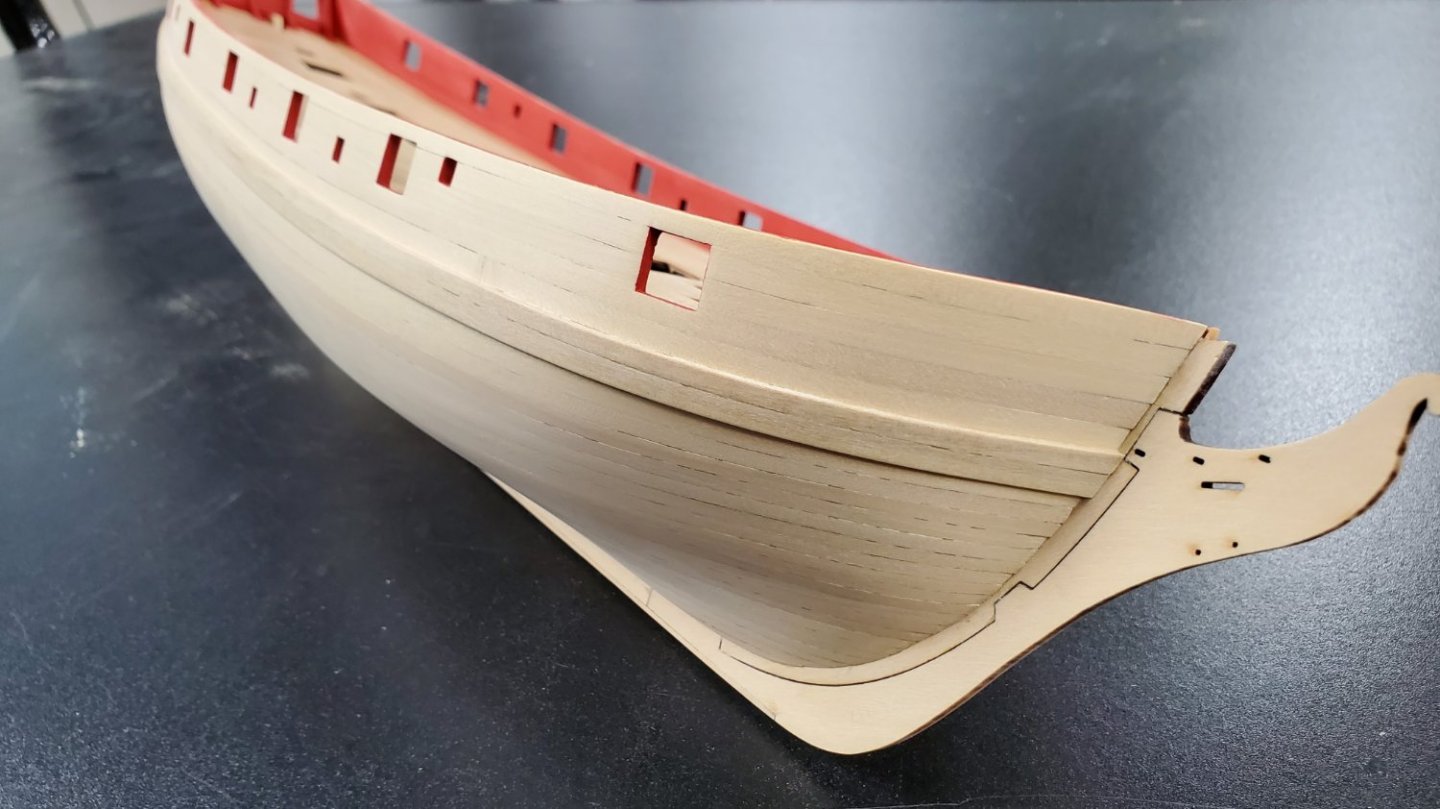
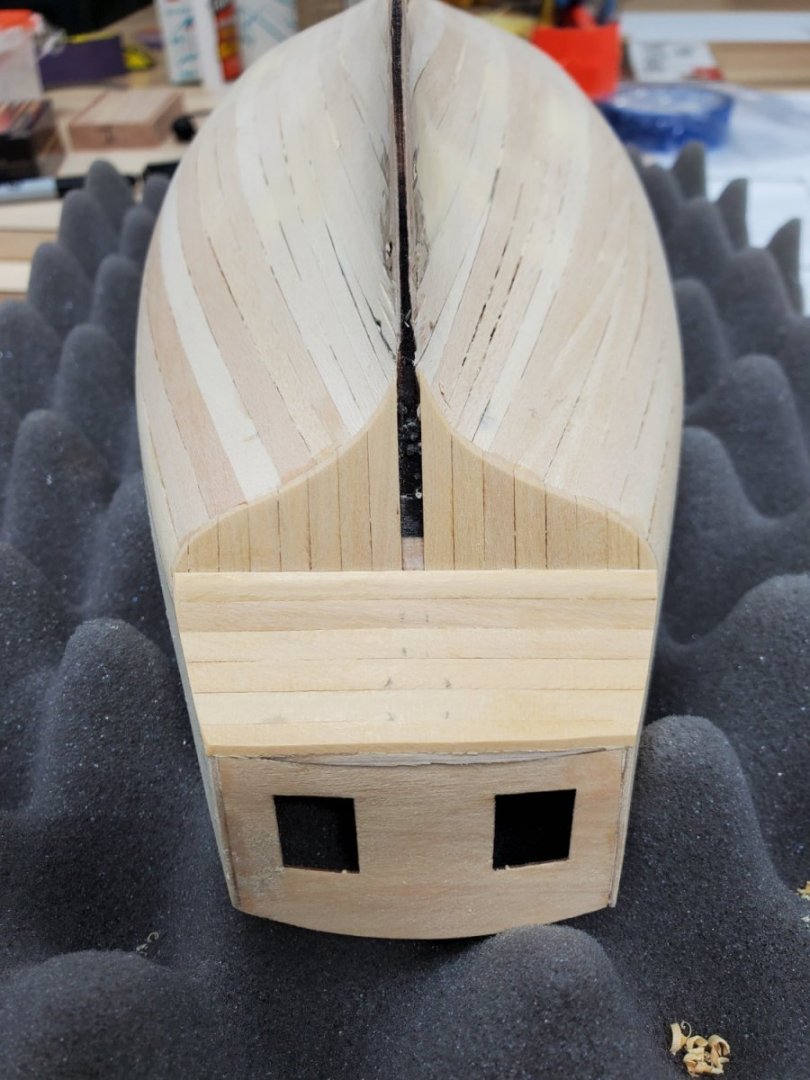
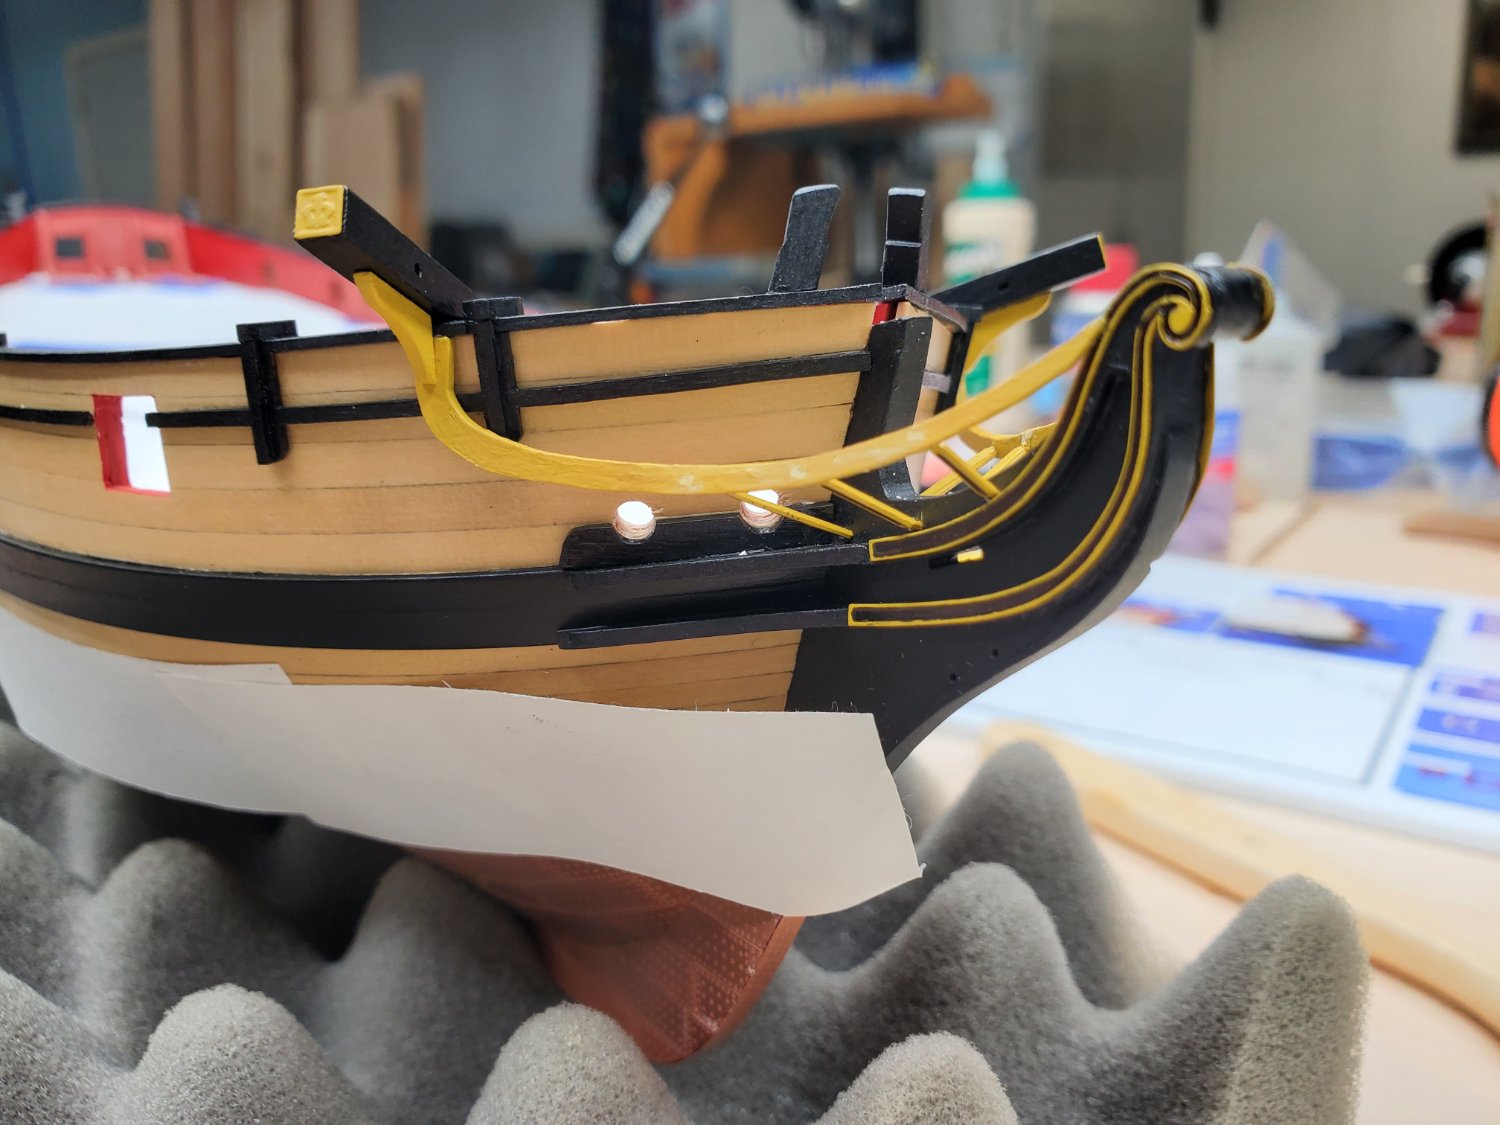
Well I've been making some progress but realized it's been over 3 months since I posted any updates!
I finished up the details on the outer part of the hull which added a nice look to it, I'm happy with how this turned out. Some parts up there at the bow were a little tricky to get in place and all attached to each other but I think it's close enough. Had to adjust a few of those parts a bit but nothing major.
Thanks for looking!
Dave

- Prowler901, etubino, KARAVOKIRIS and 3 others
-
6
-
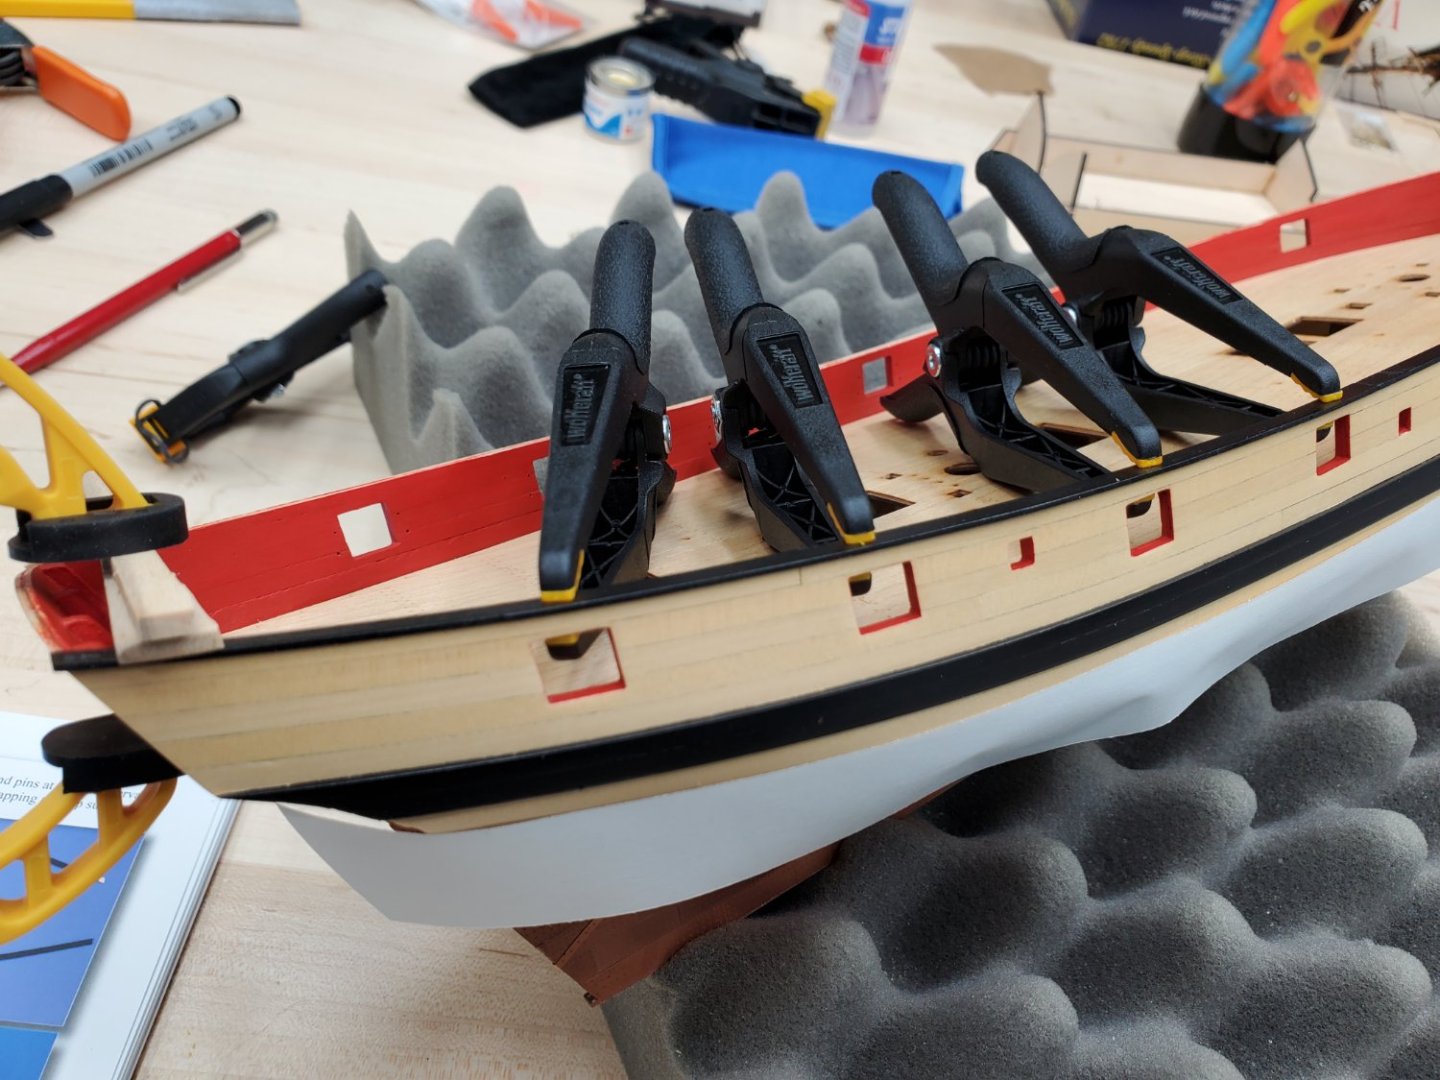
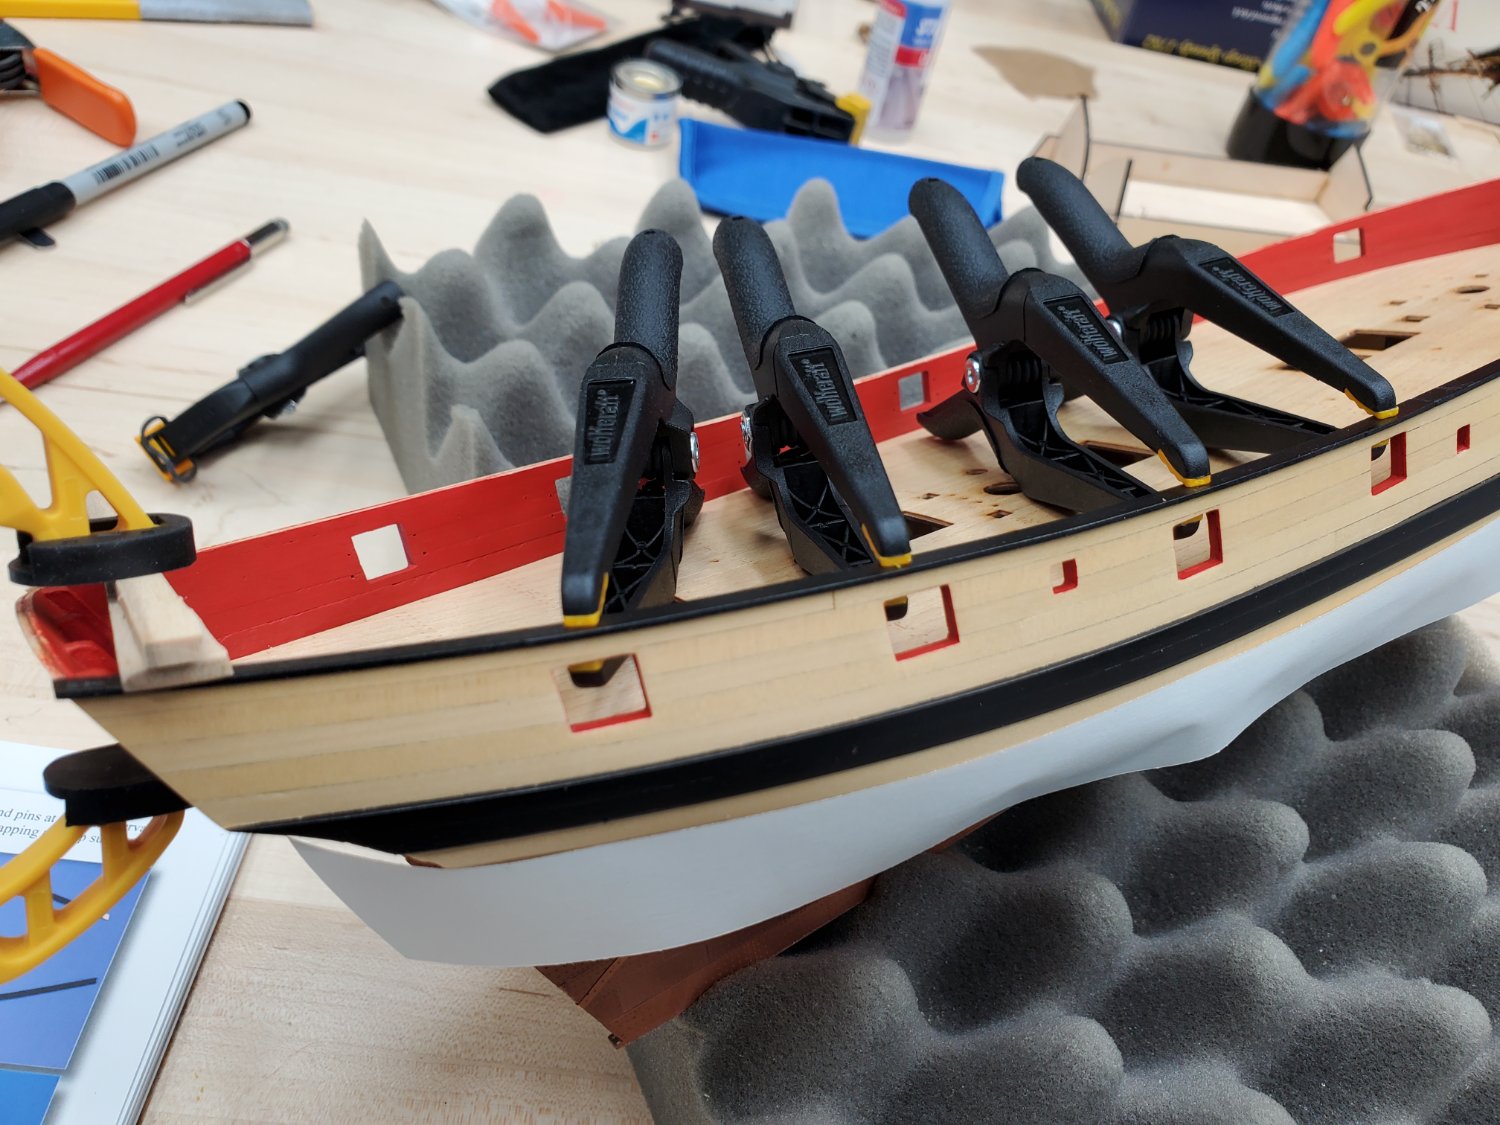
Attaching the railing parts. Went smoothly, parts fit really well.
- Paul Le Wol, Oldsalt1950, CiscoH and 3 others
-
6
-
-
Thanks Captain. That sounds like great advice. It was already becoming less noticeable with each coat (I have 3 coats of the black paint on there now).
On the other hand I'm ready to move on to the next step. I'm just glad my taping job worked to keep paint off the other areas.
I will definitely remember your suggestion for future builds though!
-
Thank you James! And for the likes too!
Here's my latest photo of some progress after painting the wales. I can see that I didn't quite do enough "filling and sanding" that was supposed to remove any gap between the two strips and there's still a visible groove in areas. But I'm happy with it overall.
I'm using the Humbrol paints recommended in the instructions and they are really easy to use, it's my first time trying that brand.
Dave
-
-
-
Thanks everyone.
Working on the rudder. I found getting the hinges lined up to be a little tricky. Temporarily attached for now.
- etubino, ccoyle, KARAVOKIRIS and 7 others
-
10
-
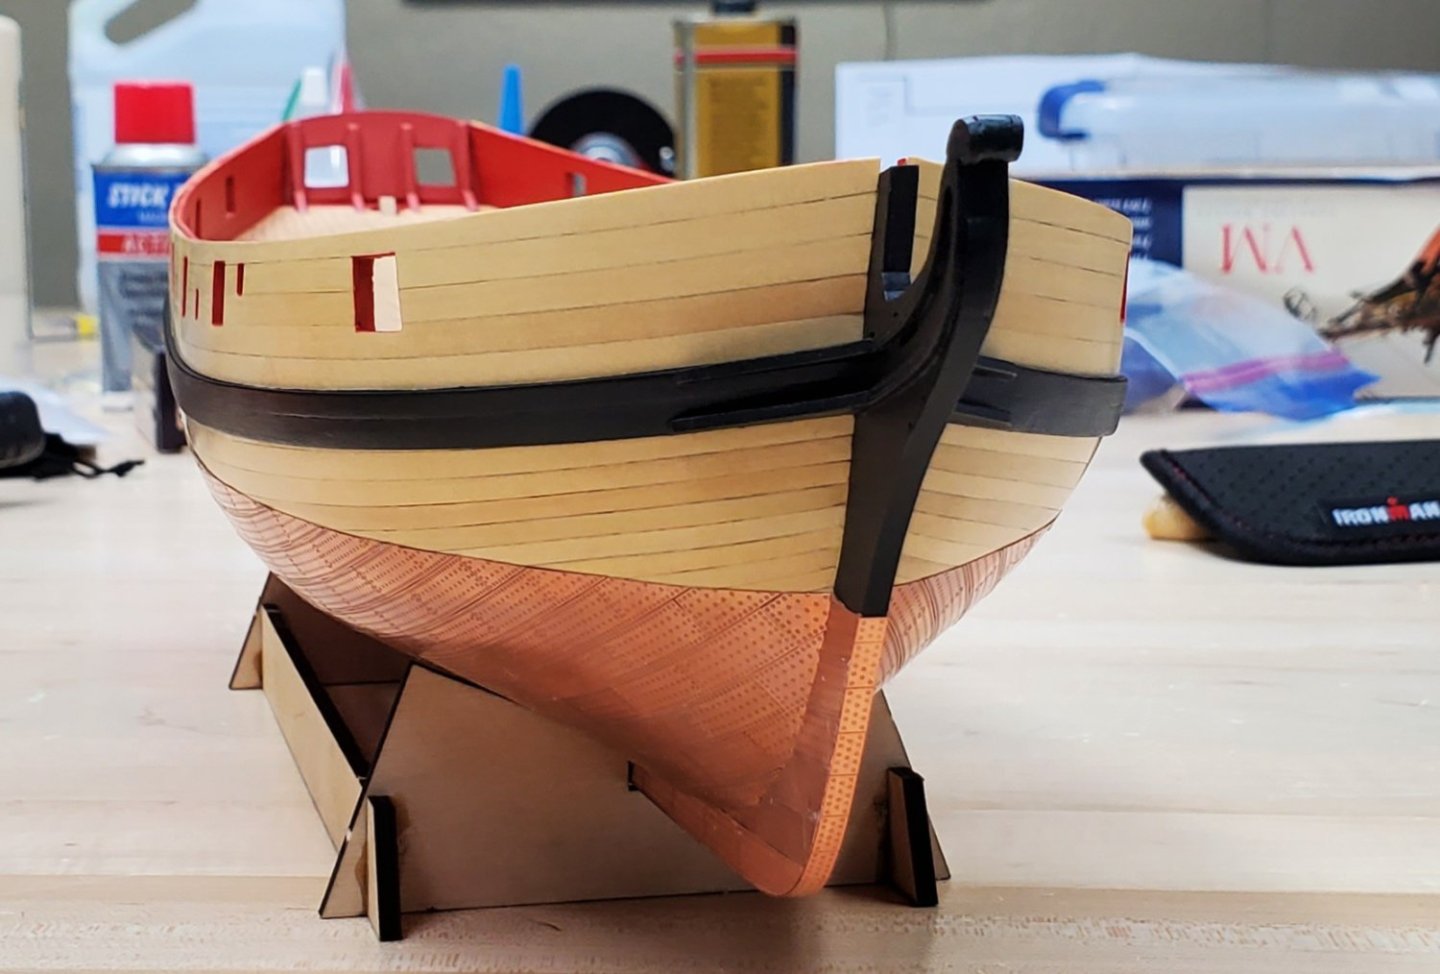
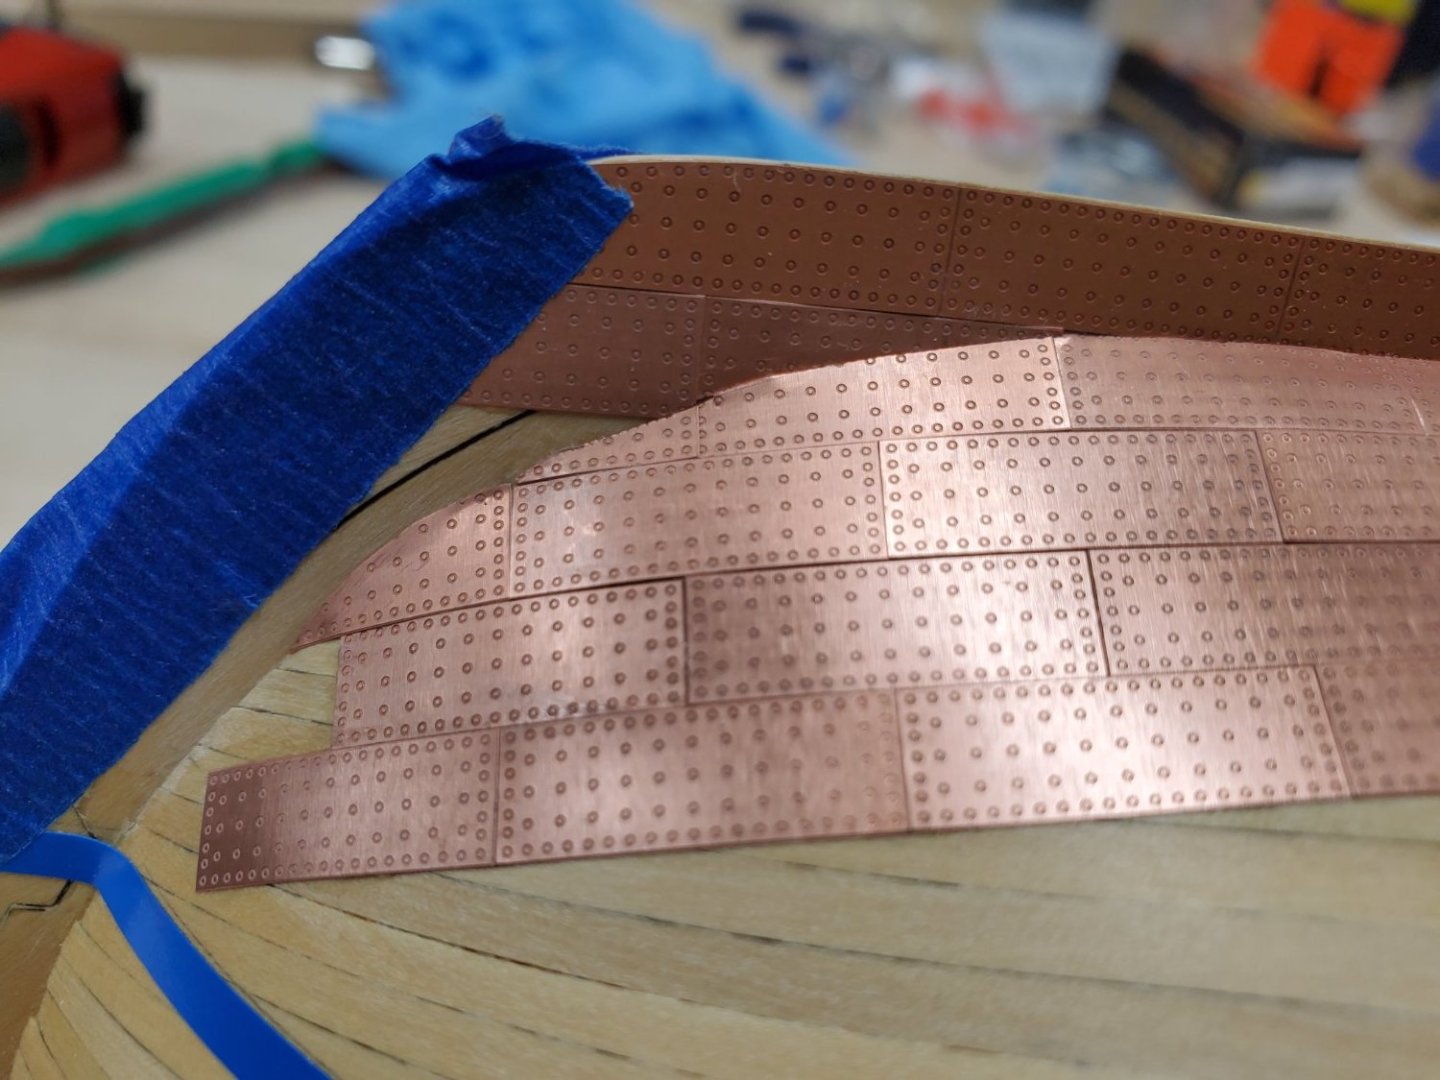
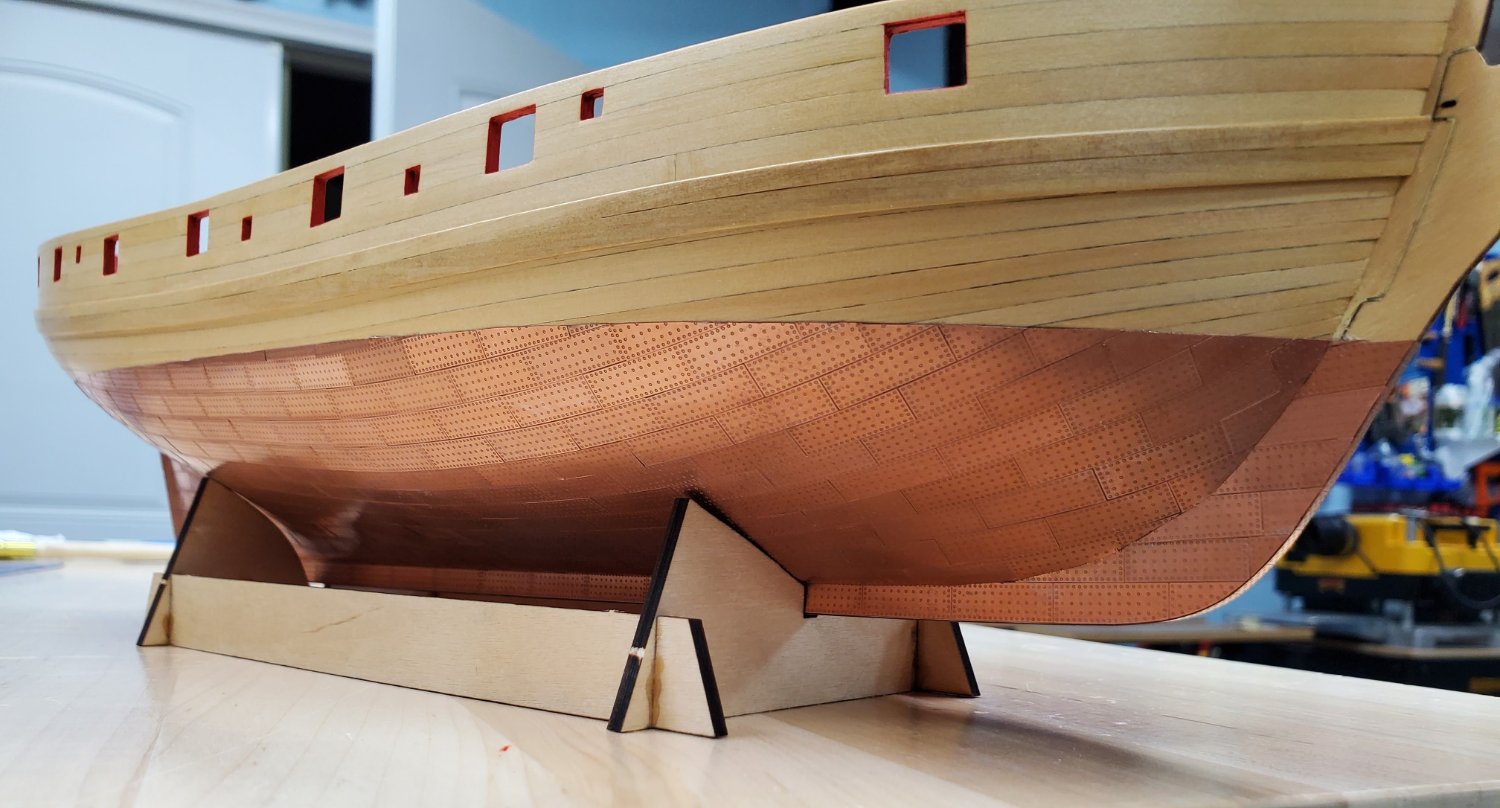
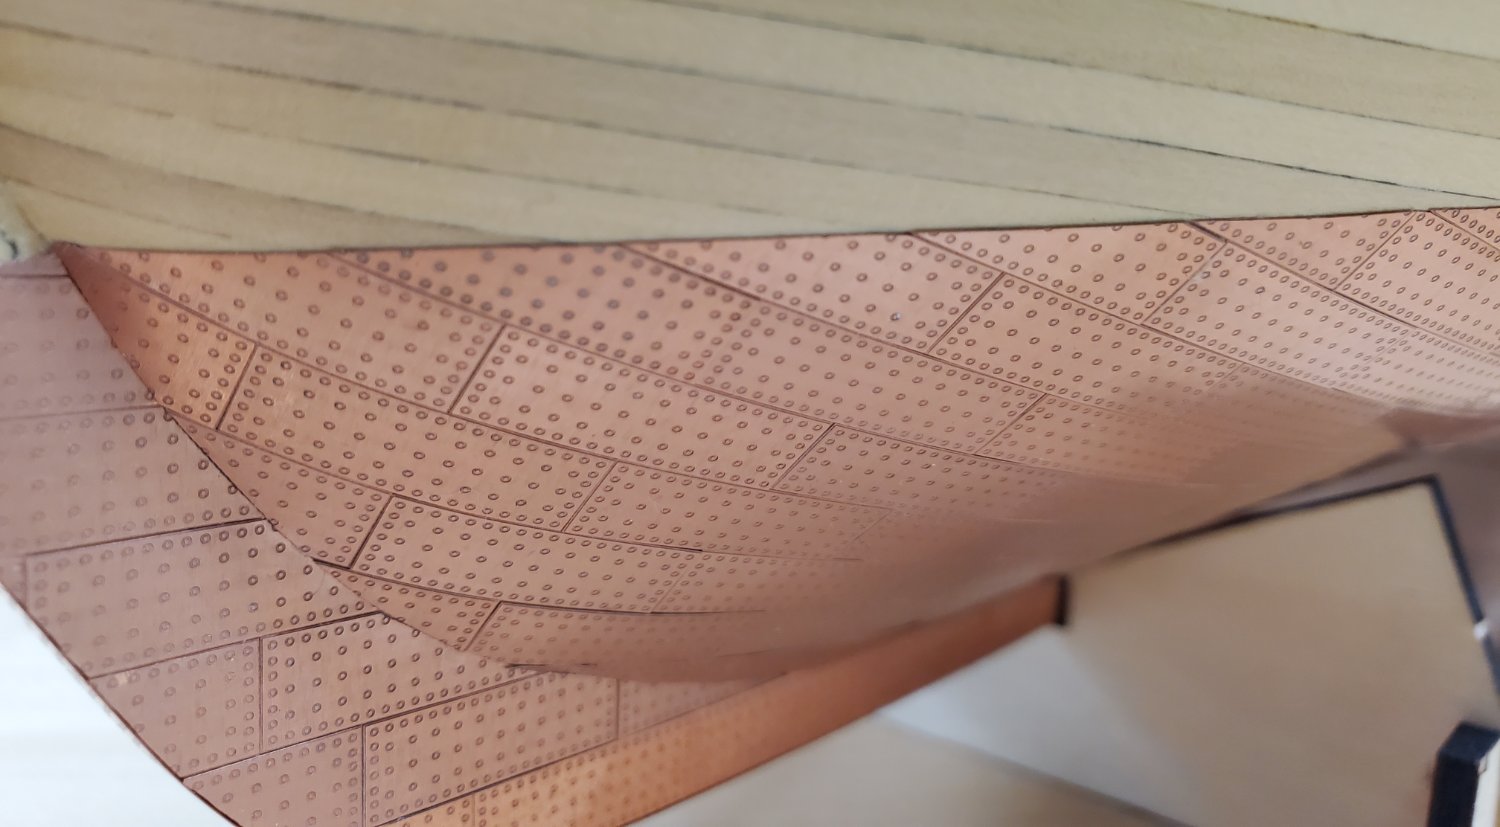
I've completed the copper plates on both sides of the hull!
After taking a long time to do the first side, the second side went much more quickly. I got much better at cutting the plates where needed with my Xuron cutters which sliced right through them. Definitely some tricky parts but overall I'm happy with it.
I see that some people put a clear coat of some kind over the copper and I'm open to suggestions on that if anyone has any.
Just have to copper the rudder parts and then on to something new!
Dave


-
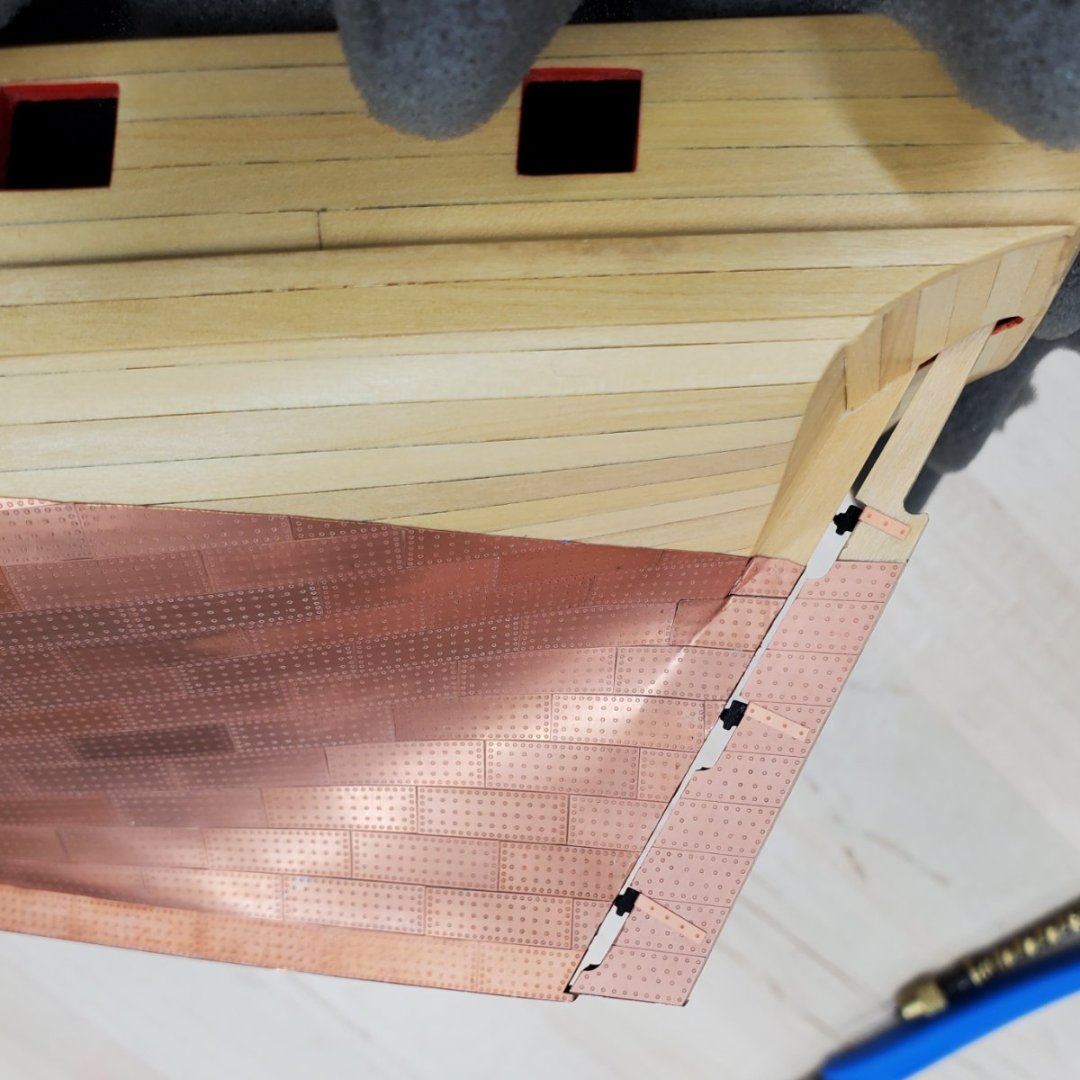
Starting on the copper plates! These little plates are really nice. They are easy to work with due to being so thin.
CA glue seems to hold them really well but if needed I can pop one off and re-attach.
It looks like you just add one row on top of the other with no tapering of the plates until the top is reached.
With each row I get faster too. It's kind of fun actually.
One thing I probably should fix is that I didn't realize until I took a closer look at the on-line manual that the plates at the bow should be bent to fit and not cut there. I didn't notice that in the paper manual. Or is it OK how I'm doing it?
Dave
- Prowler901, Mr Whippy, ccoyle and 5 others
-
8
-
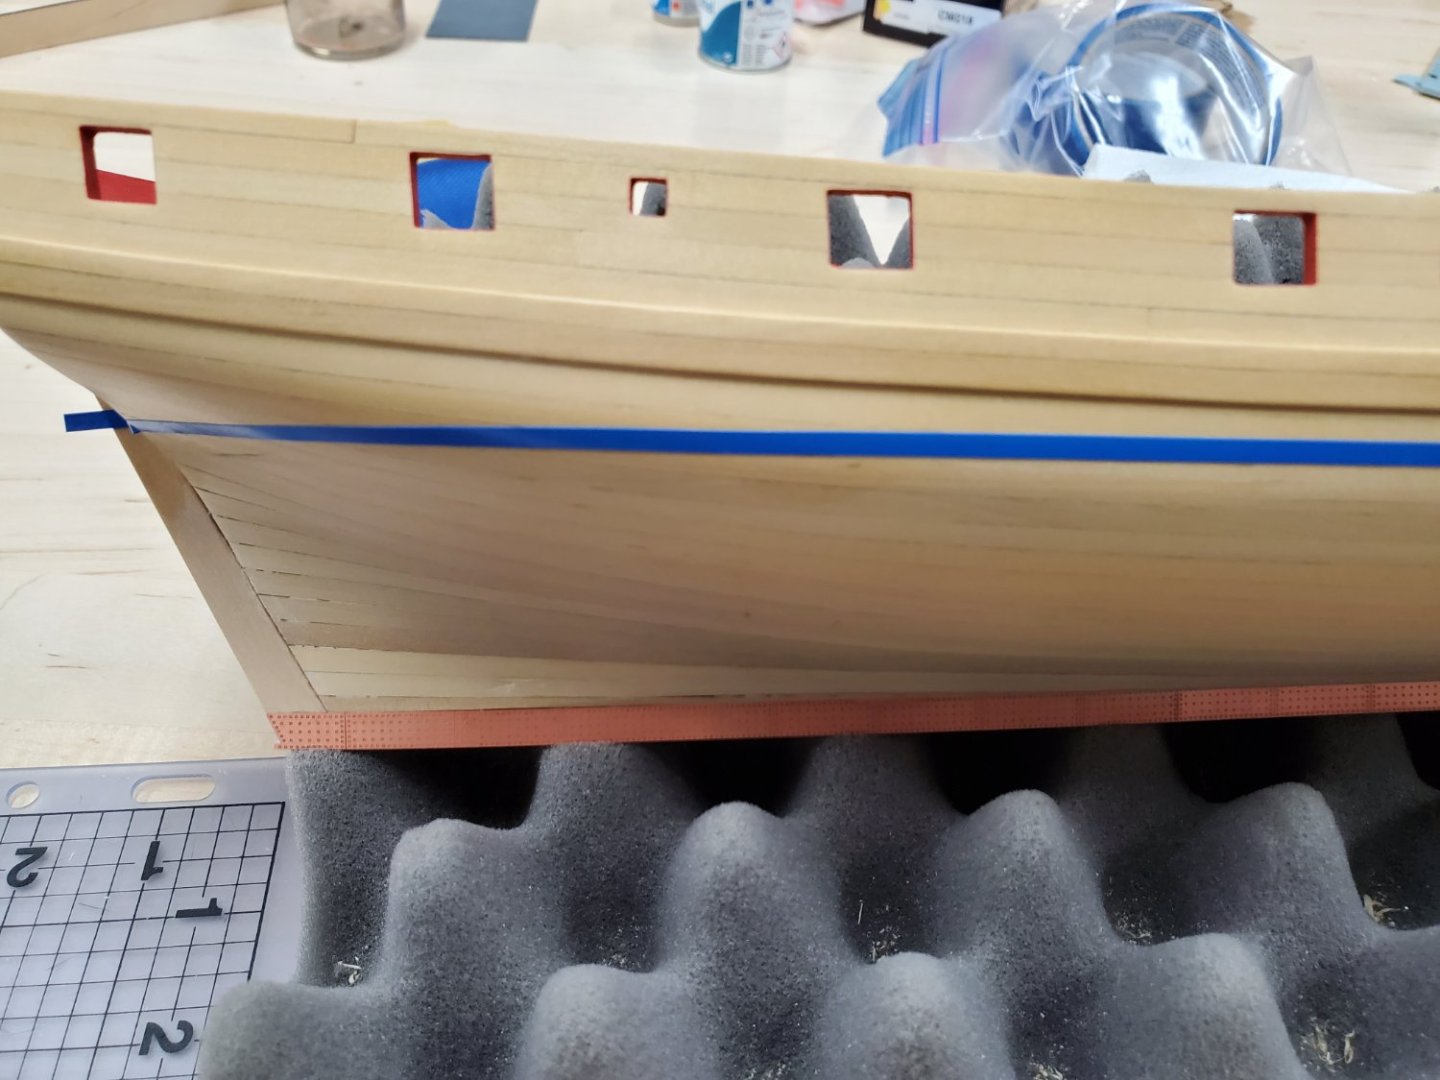
Keel and other parts added and I've marked out the waterline which was a bit challenging to get correct but I think I've got it (not shown in photo)
Will soon be starting on the copper plates!
I have been reviewing the previous build logs for tips on that process. I considered leaving them off but I think I will proceed with coppering since I've never done that before.
By the way, I was able to clean the copper plates easily (from my prior post).
Dave
- Mr Whippy, etubino, Paul Le Wol and 5 others
-
8
-
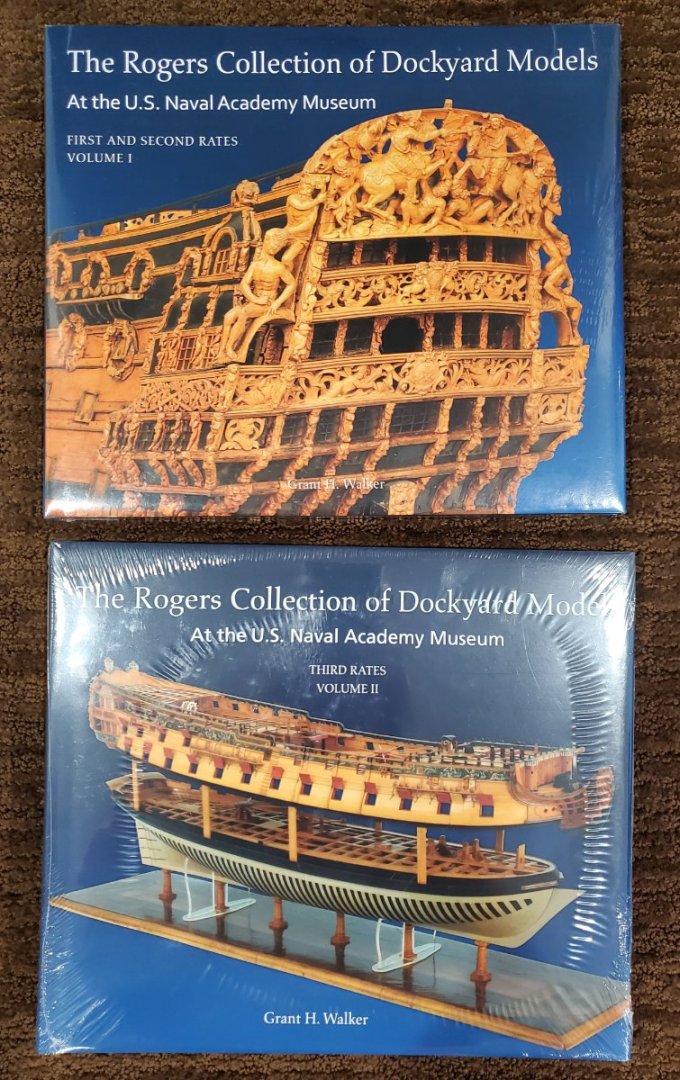
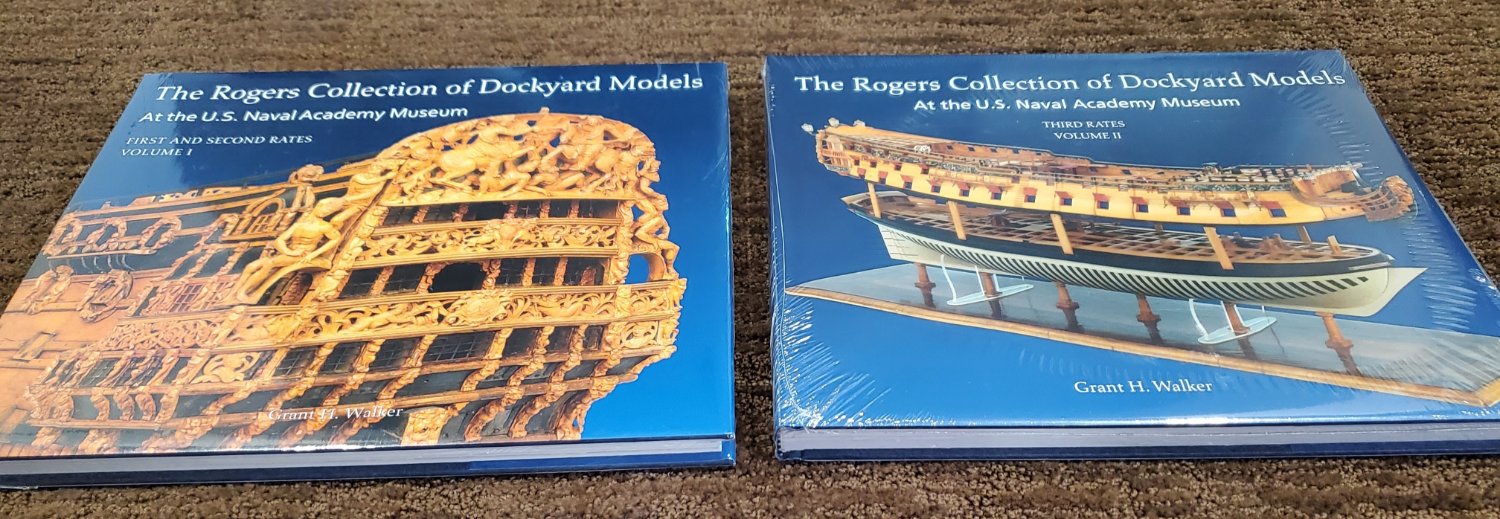
I have an extra copy of these books due to an order mixup a couple years ago.
Both volumes are in perfect condition and still sealed in the outer protective wrap as they arrived.
I never opened this set, only my other set of the same books which I have read multiple times and thoroughly enjoy.
I will ship them in the original box which protects them well.
Asking $150 for the set which includes shipping to USA addresses.
Dave

- mtaylor, VTHokiEE, Ryland Craze and 2 others
-
5
-
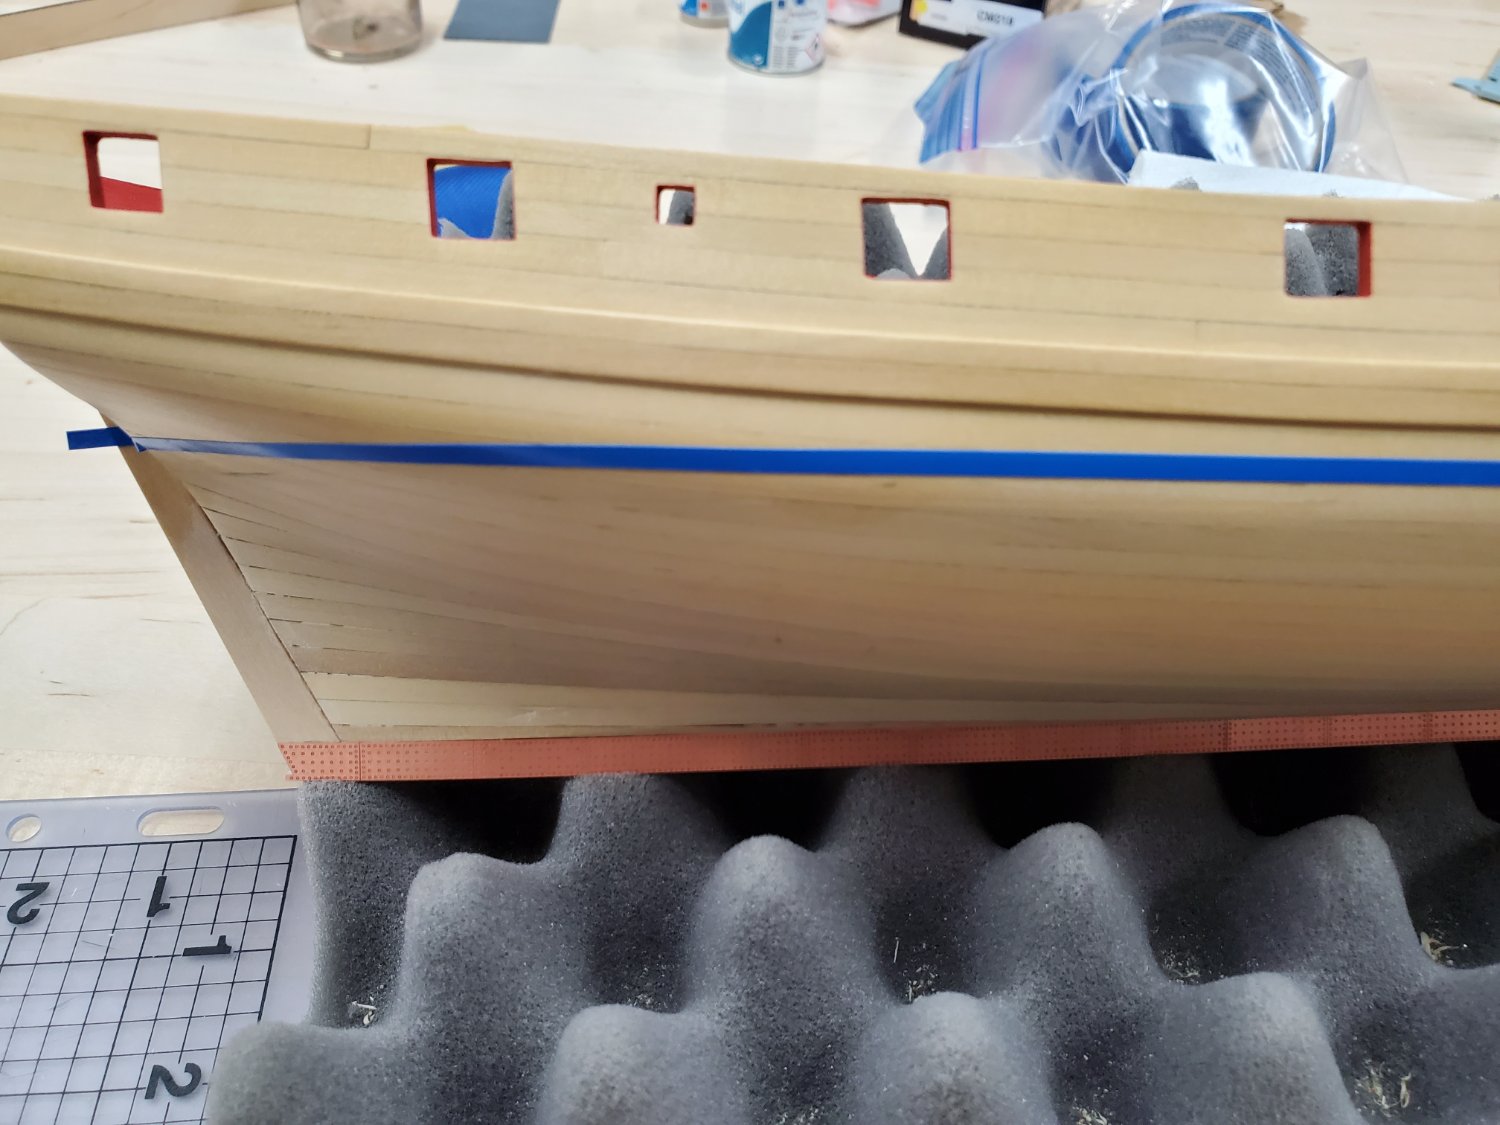
Thanks CiscoH and everyone!
Here's the second layer of planking completed. I had just rubbed mineral spirits on it to catch any glue splotches which is why it appears a little shiny in the photo but that's evaporated now.
Now I'm finishing the painting the inner bulwarks area. I'm using the recommended Humbrol red paint and it's taking quite a few coats. Maybe I should have used a primer first. It's my first time using this Humbrol enamel paint, which does look really nice and is easy to brush on but seems to needs multiple coats to look even on the wood.
Since it's coming up soon, I do have a question about the copper plates. There is discoloration of some of them as seen in the photo below and I assume this is nothing to worry about. But I'm not sure how to make them all look the same, or at least close, and if I should do that now or after they are installed?
Thanks,
Dave


- PaddyO, KARAVOKIRIS, ccoyle and 5 others
-
8
-
Beautiful work!
I went back and saw where you were debating and experimenting with what type of topcoat finish to use on the hull. Did you end up using the WOP or something else?
-
Thanks everyone for the nice thumbs ups.
Latest update:
I've been working on the second layer of planking and it seems to be going well so far.
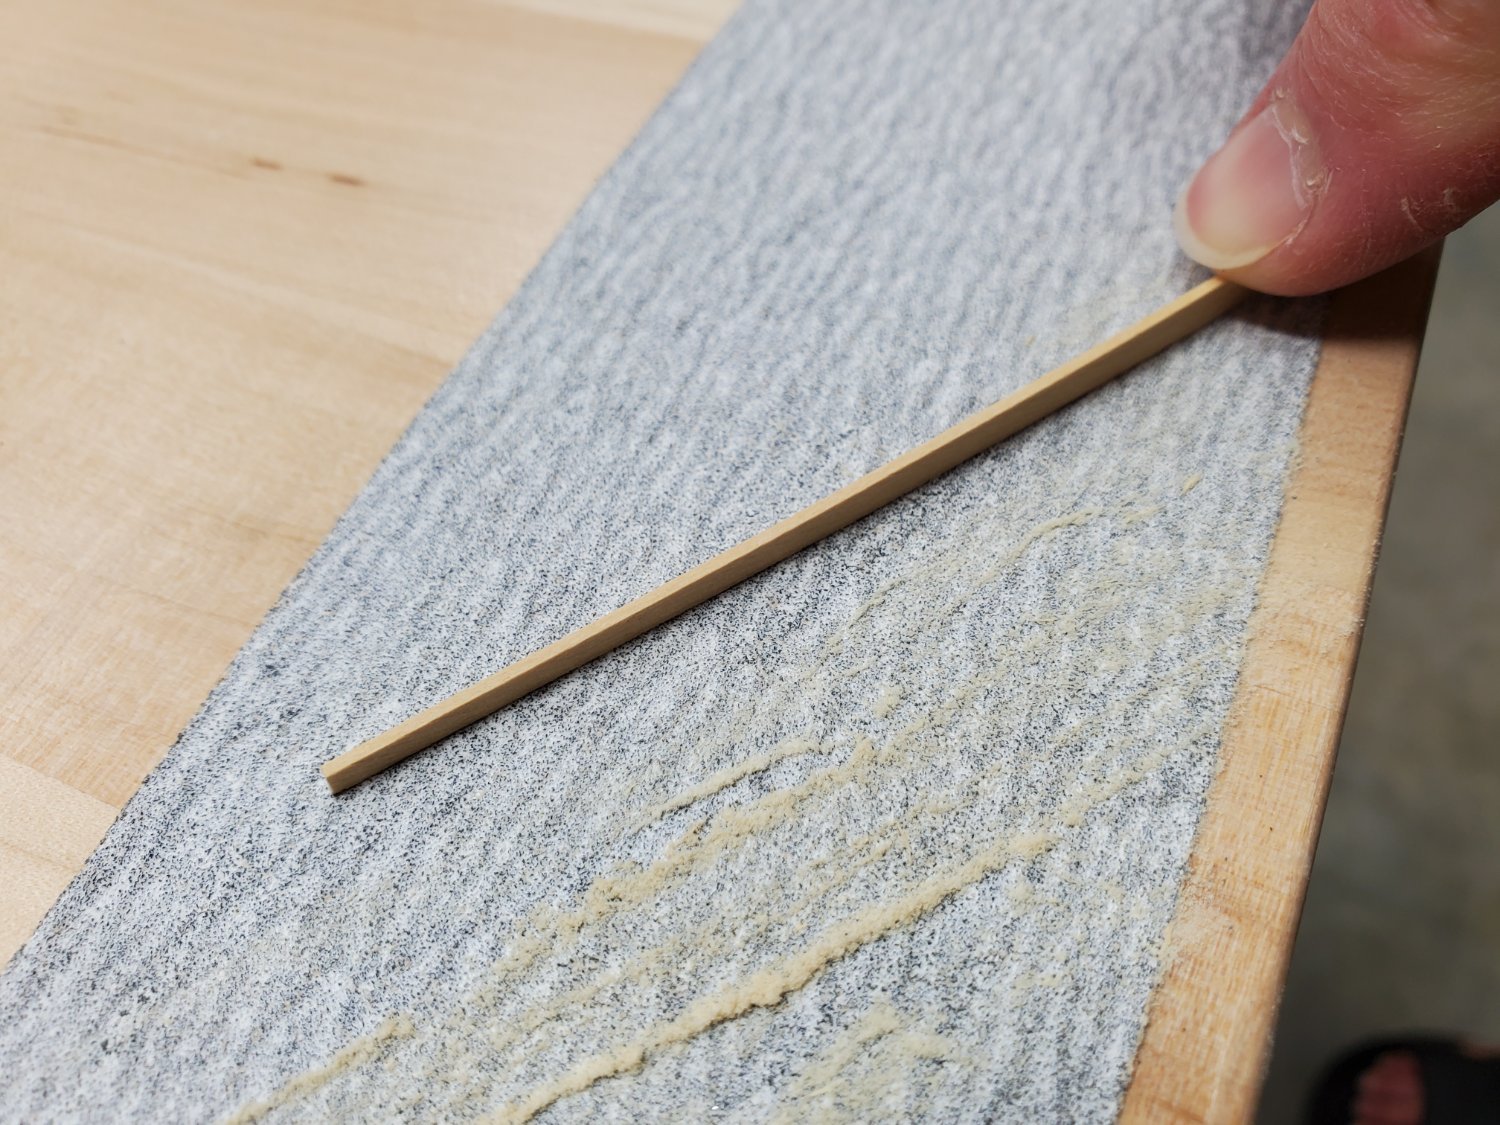
Following the instructions, I use a utility knife with a nice sharp blade to make the tape after marking where to start it.
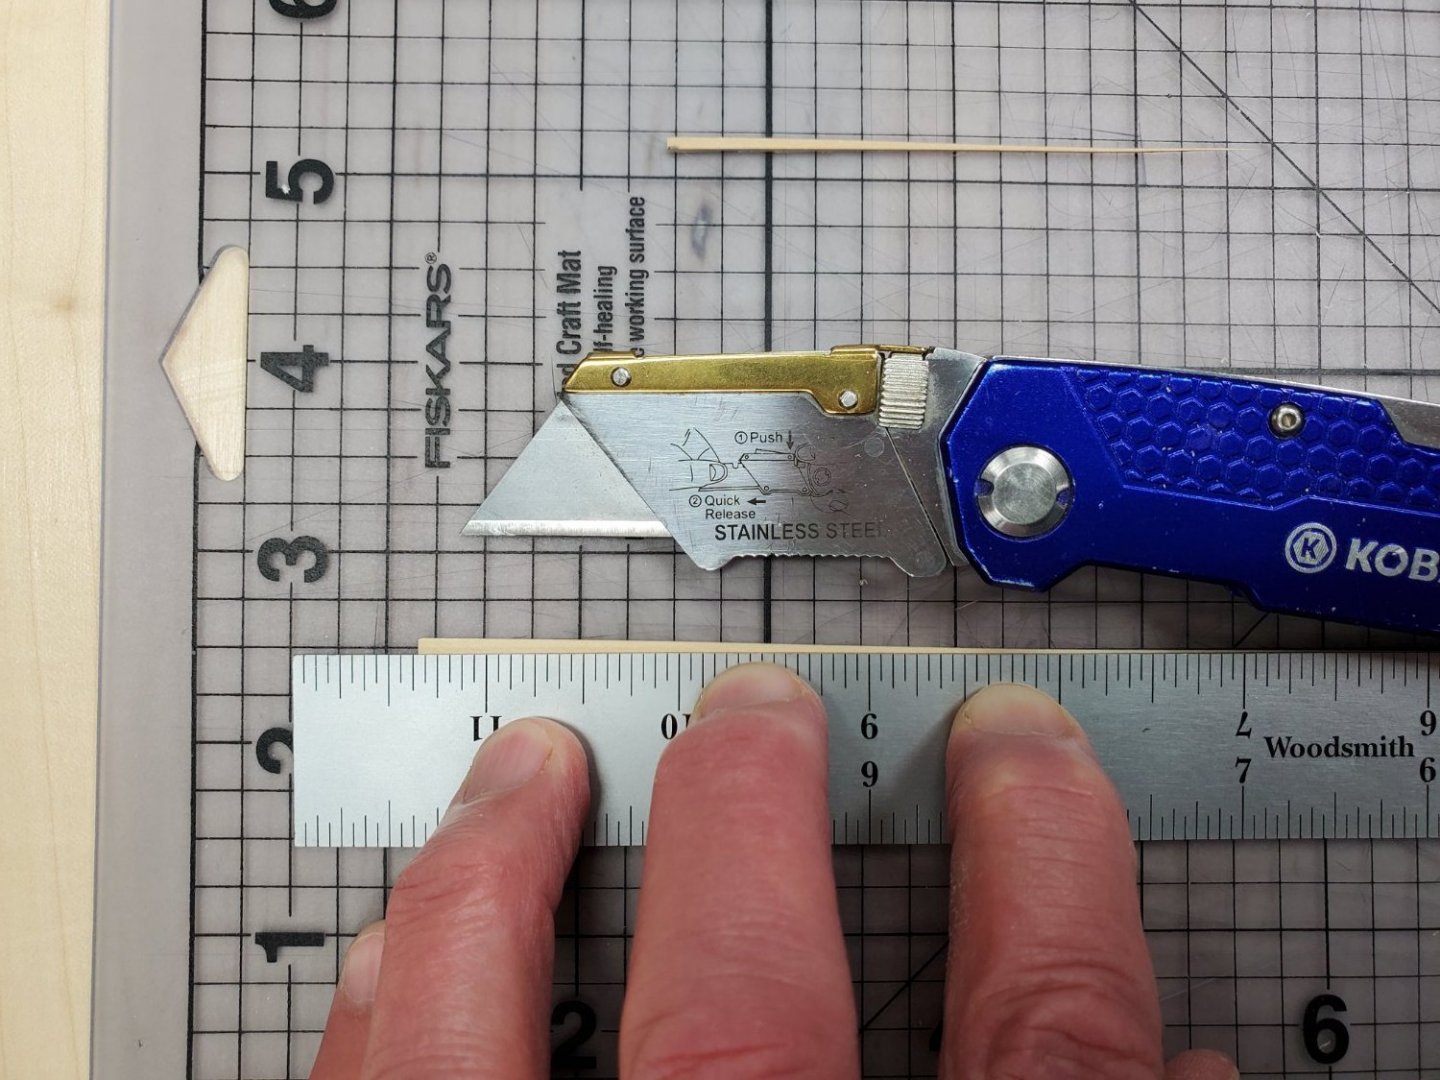
Then I slide the edge back and forth on some self-adhesive 180 grit sandpaper stuck to a flat table top. I use two hands to do this in reality, not one, so that I can apply some slight downward pressure as I do that while holding it perpendicular. This makes a nice smooth transition from where I made the taper cut to the rest of the strip.

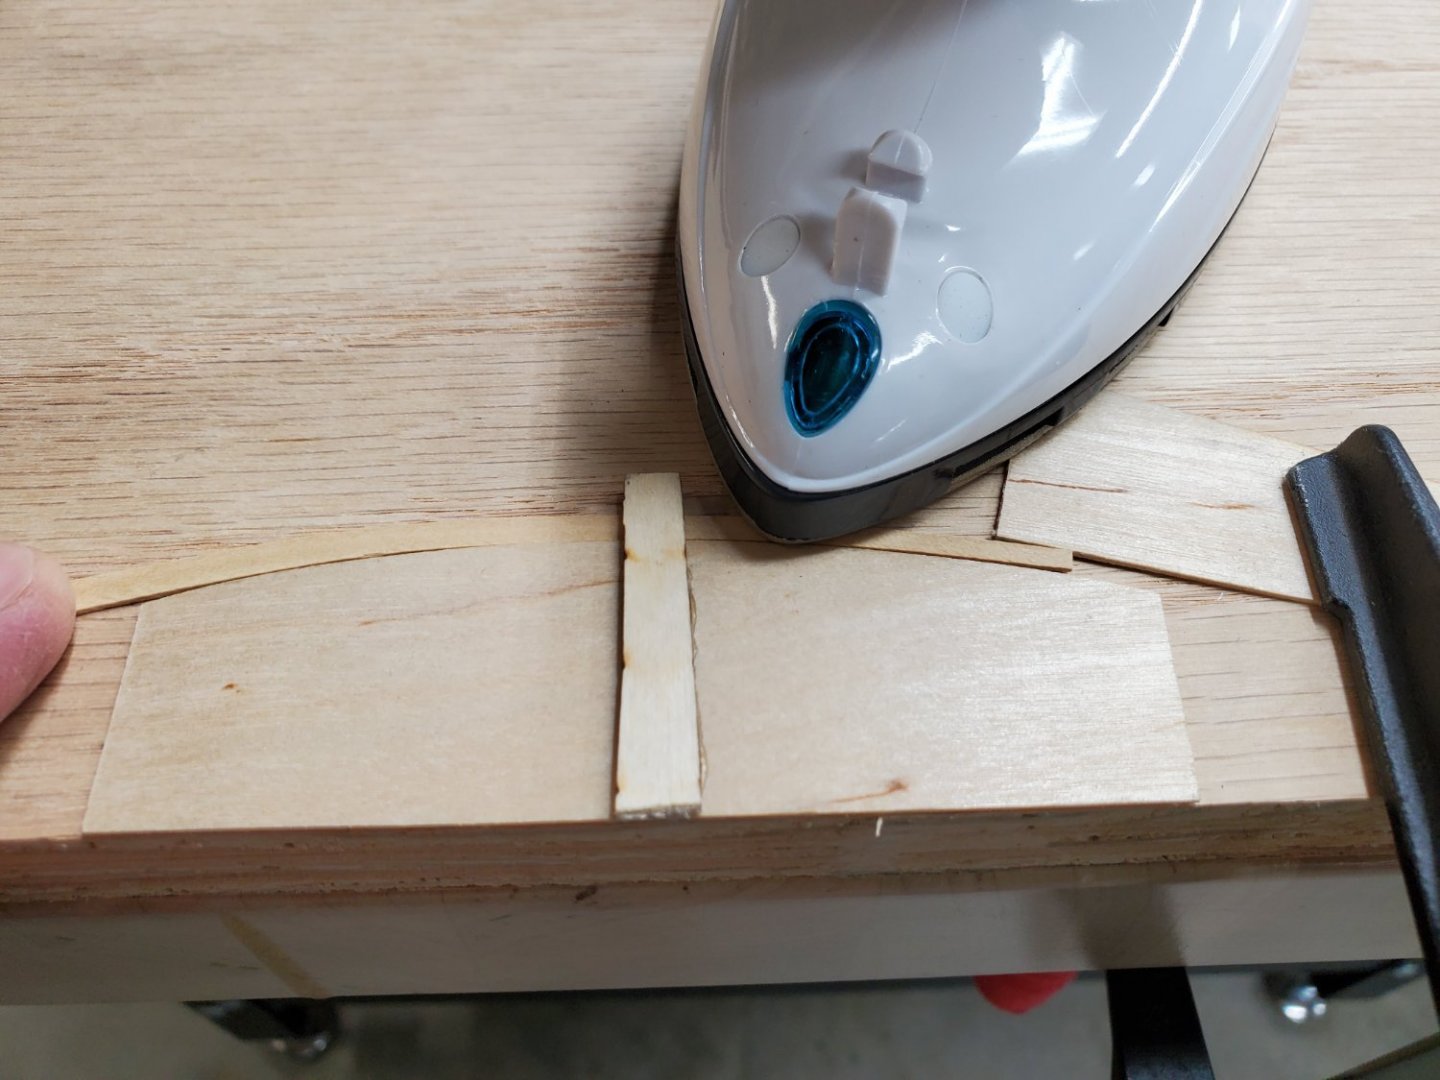
Then I use the little iron method to edge bend as demonstrated in other build logs. I made a little jig to make this easy to do with one hand on the iron. Then I use my standard plank bender iron to make the bend the other way and get it to match the shape of the bow area.
I've been using stick fast brand thick ca glue mostly, and medium worked just as well, as stated in the instructions. I use those little plastic micro tips to apply it. I do about 1/4 of the strip at a time. I hold it for 5-10 seconds then move to the next section. I find that I have only about 2-3 seconds to adjust it if it isn't in the exact spot I want it. (I don't have any debonder...need to get some)
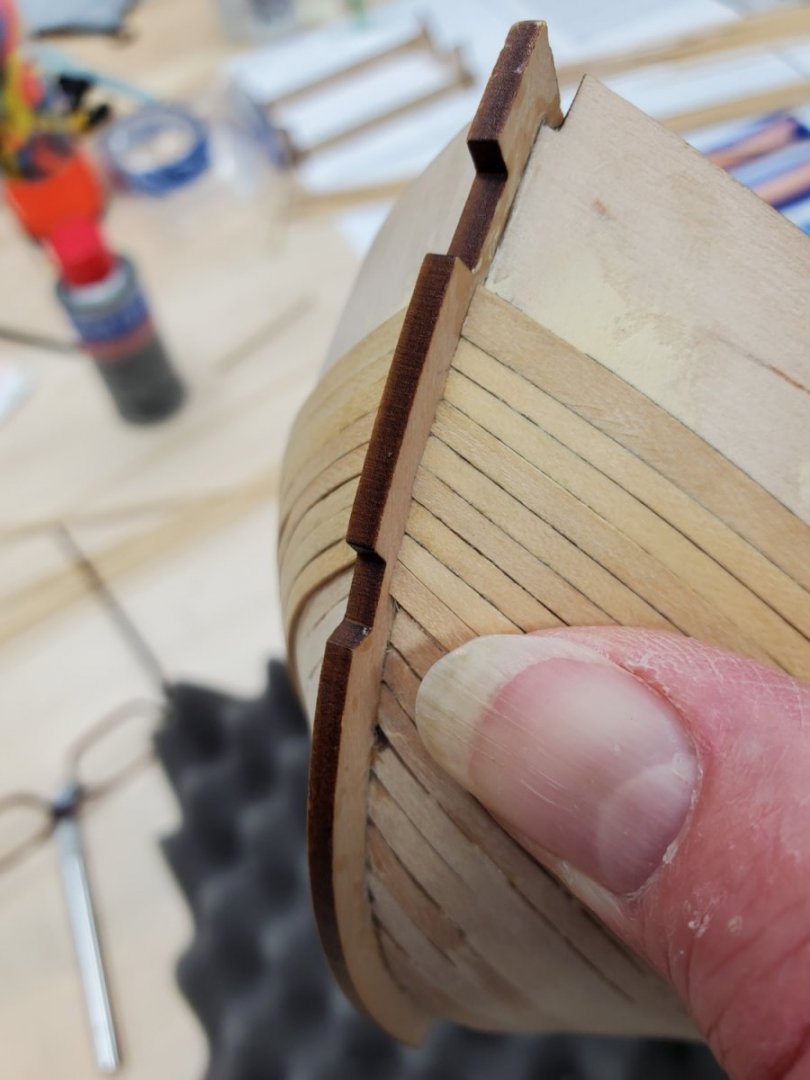
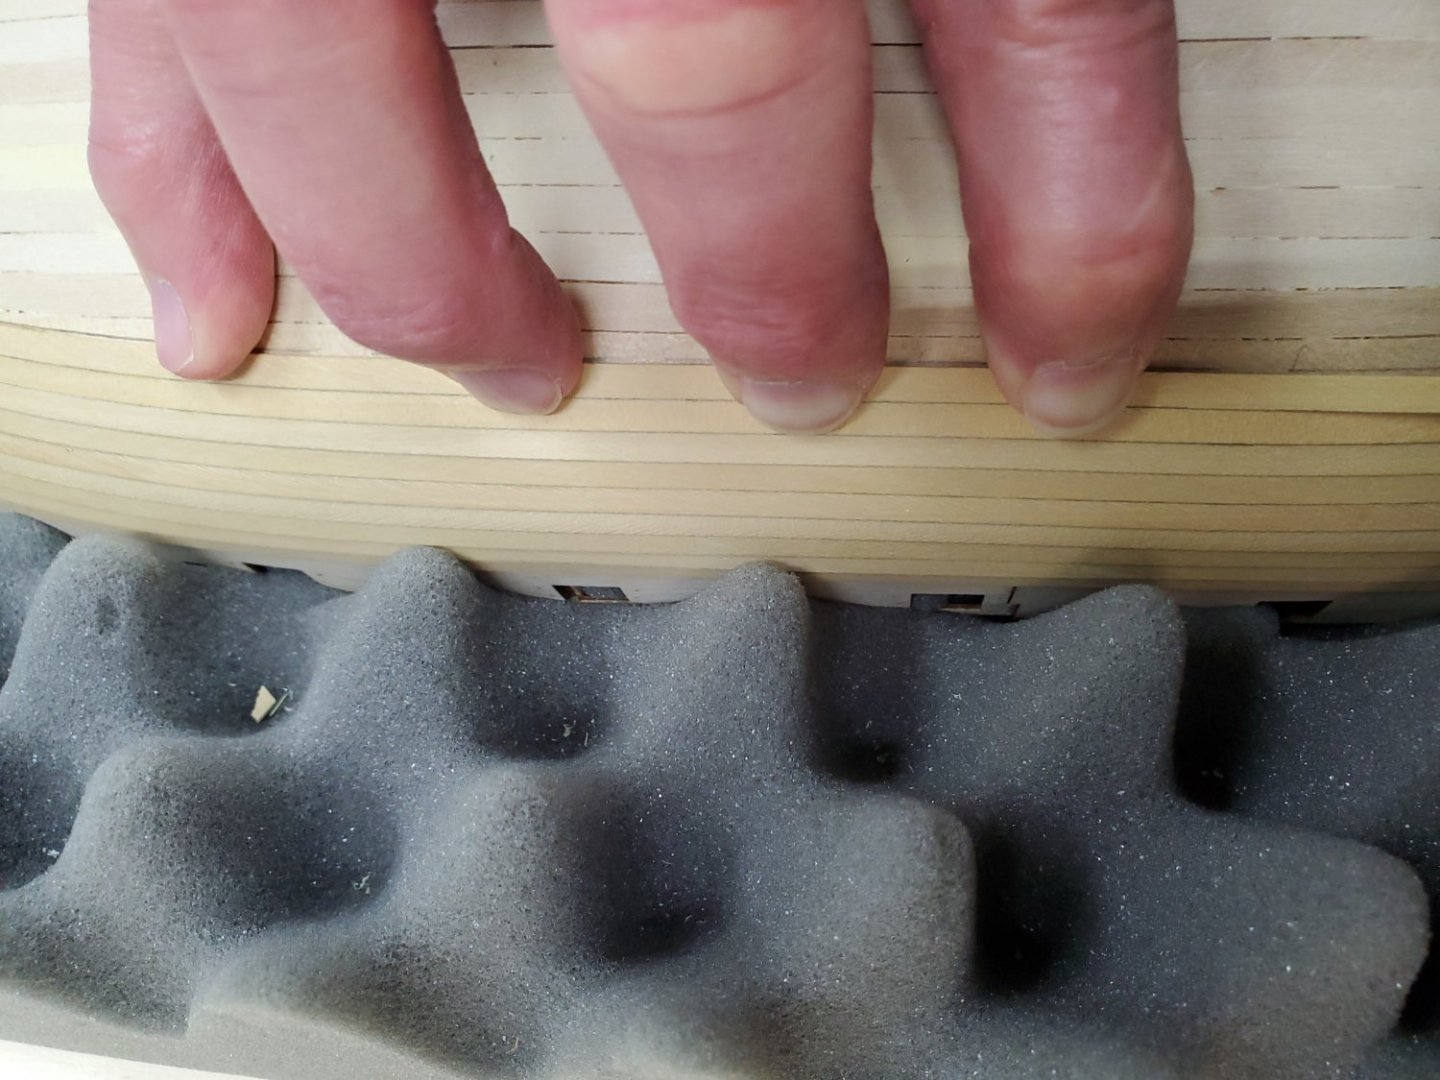
By the way, that foam cushion works great to allow me to apply a fair amount of pressure without damaging anything.
Thanks again to all the other build log submitters, very helpful to have those to refer to as I proceed.
Dave
- GrandpaPhil, ct mike, Mr Whippy and 5 others
-
8
-
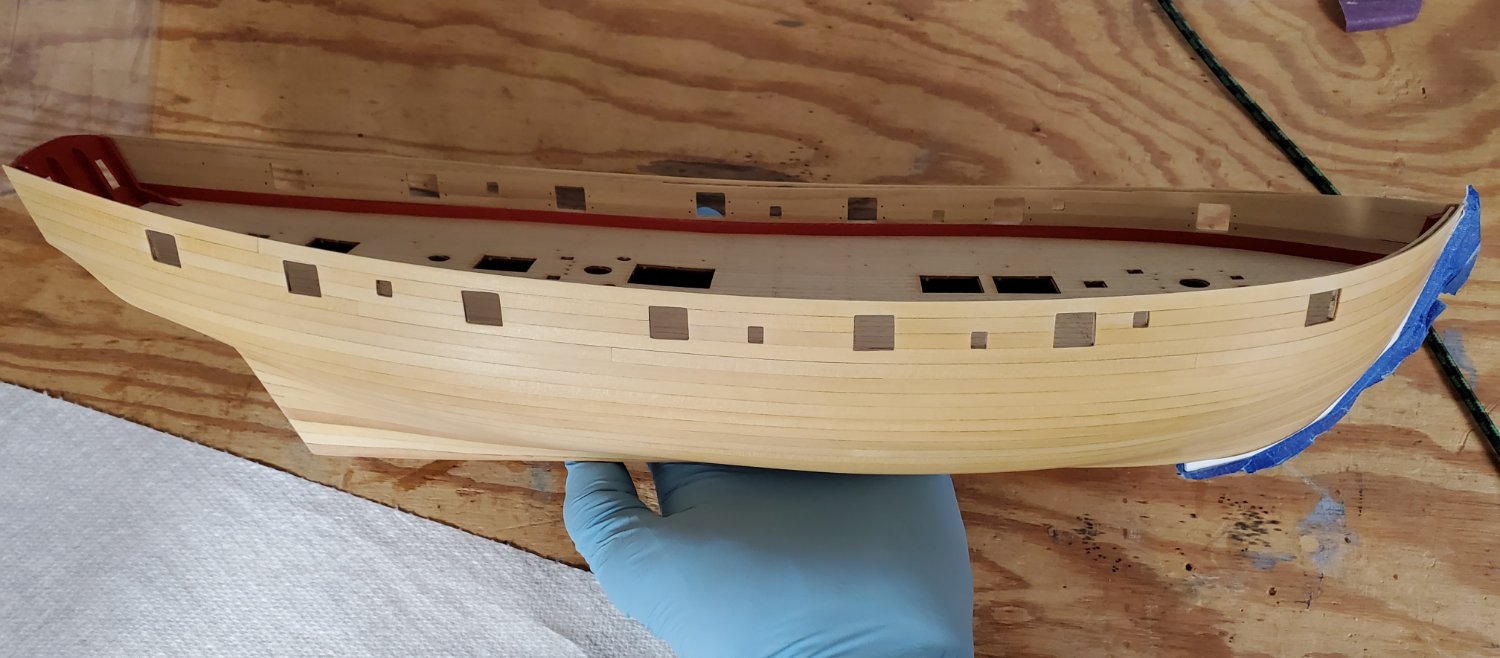
Thanks for the likes!
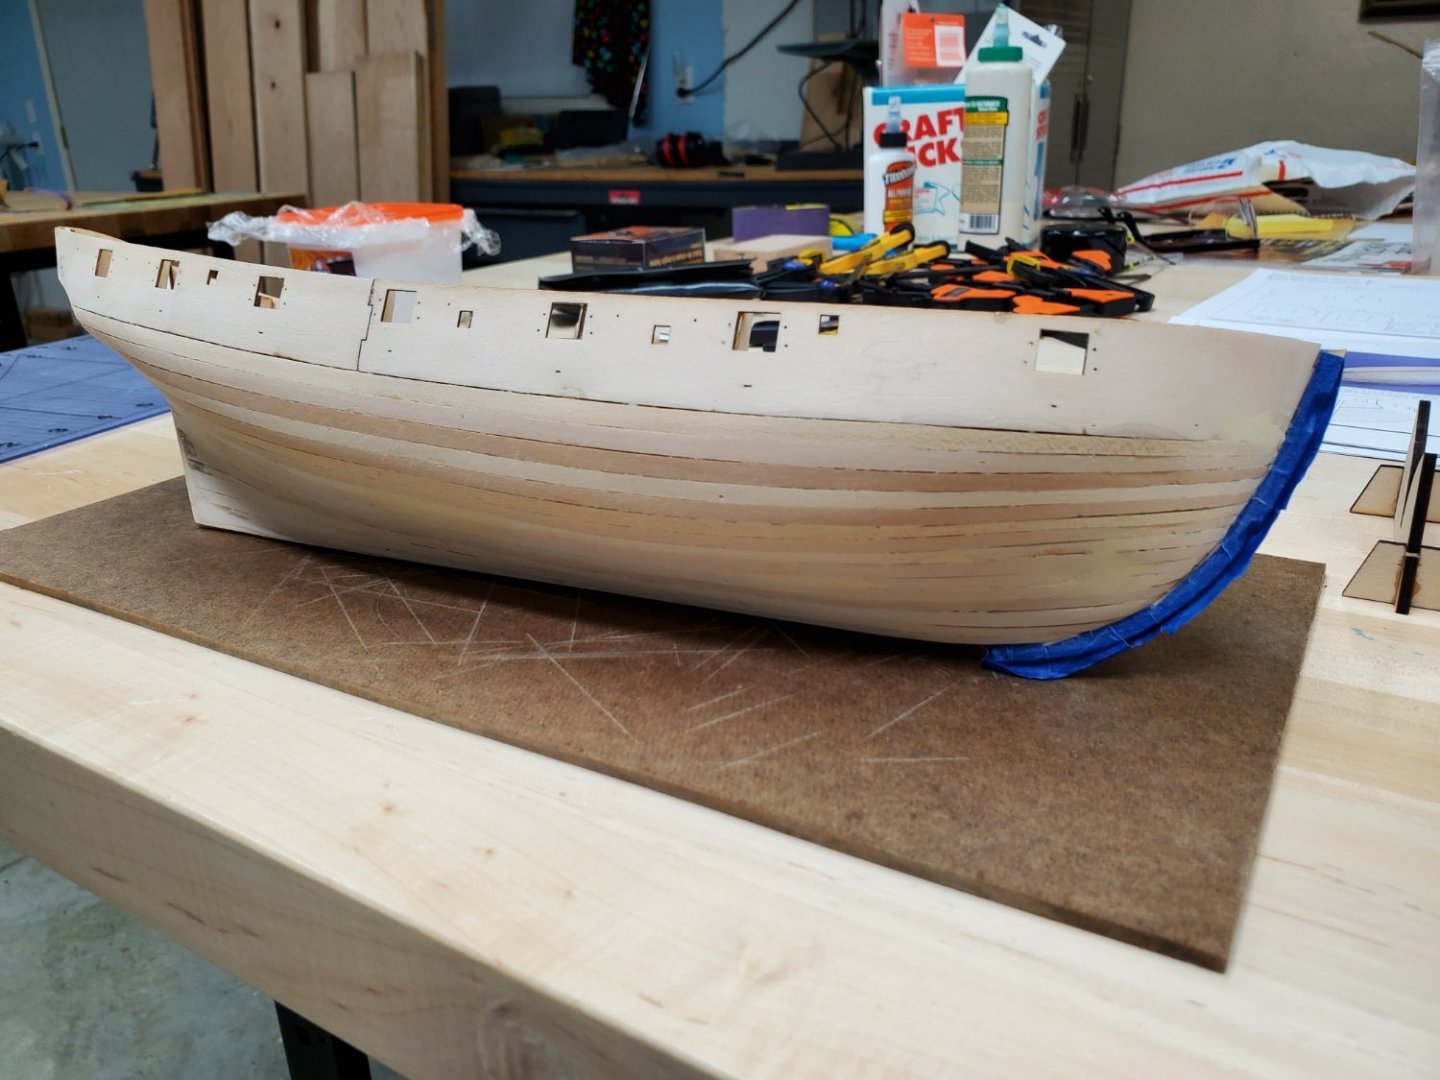
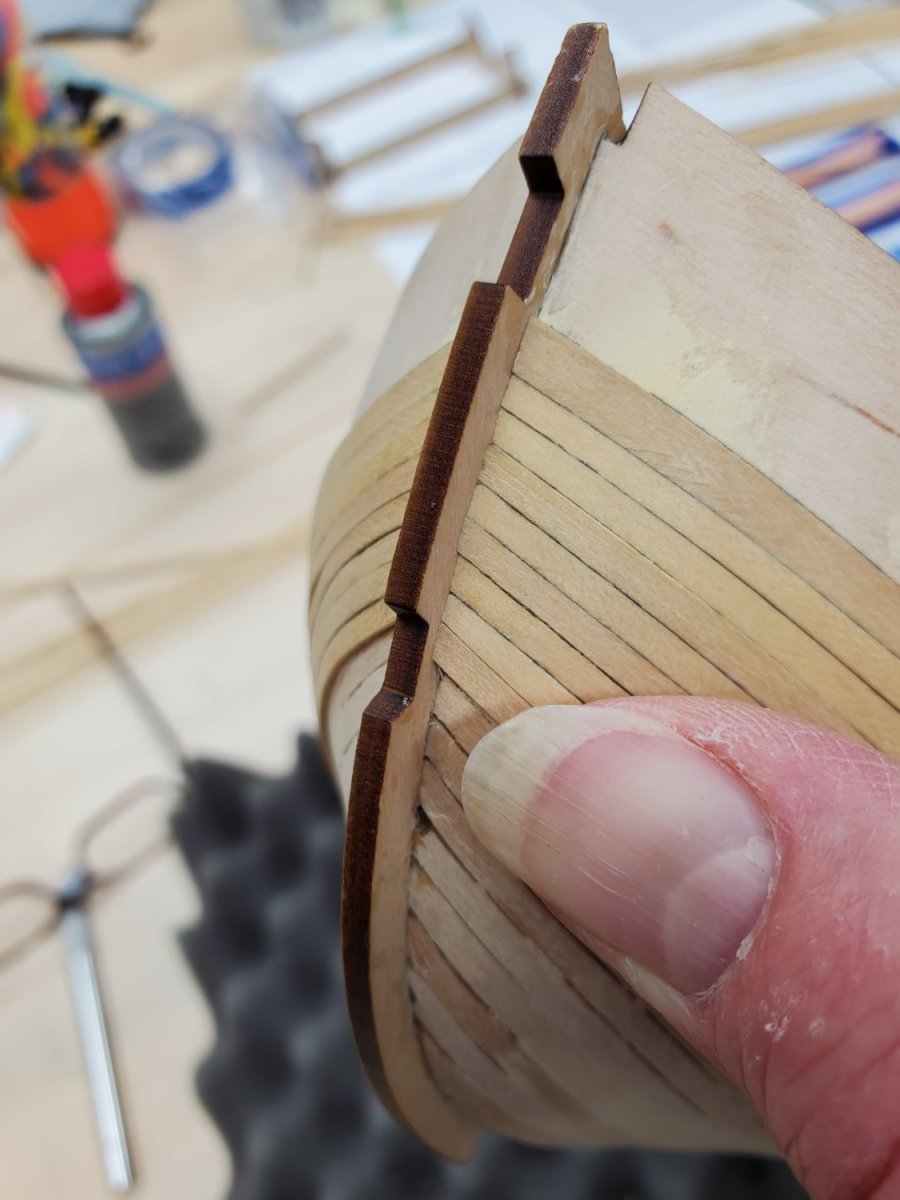
Added a couple photos of progress from last month showing the first layer of planking.
I found the utility knive method Chris uses to be quite effective with always having a sharp blade and taking multiple light cuts and firmly holding a steel ruler to guide the cuts. It seemed to work even without soaking the planks or just very brief soaking.
I'm not onto the second layer of planking and will add more of those photos soon too and be all caught up to where I'm at currently.
- Gregory, KARAVOKIRIS, BenD and 10 others
-
13
-
I have started to build my Speedy kit and so far it's been a joy to work on. I have not had any difficulties so far that I couldn't figure out from looking at other build logs or more carefully reviewing the instructions.
It's my first kit from Vanguard Models and I can see why they have quickly become so popular. I'm hoping that once I complete Speedy I will have gained enough skill to finish my Niagara kit that has been at a standstill for many years.
I'm sure I will have questions as I progress further.
Thank you to all who have posted the previous build logs. I have read all of them!
Dave Barnard

- CiscoH, GrandpaPhil, Oldsalt1950 and 8 others
-
11
-
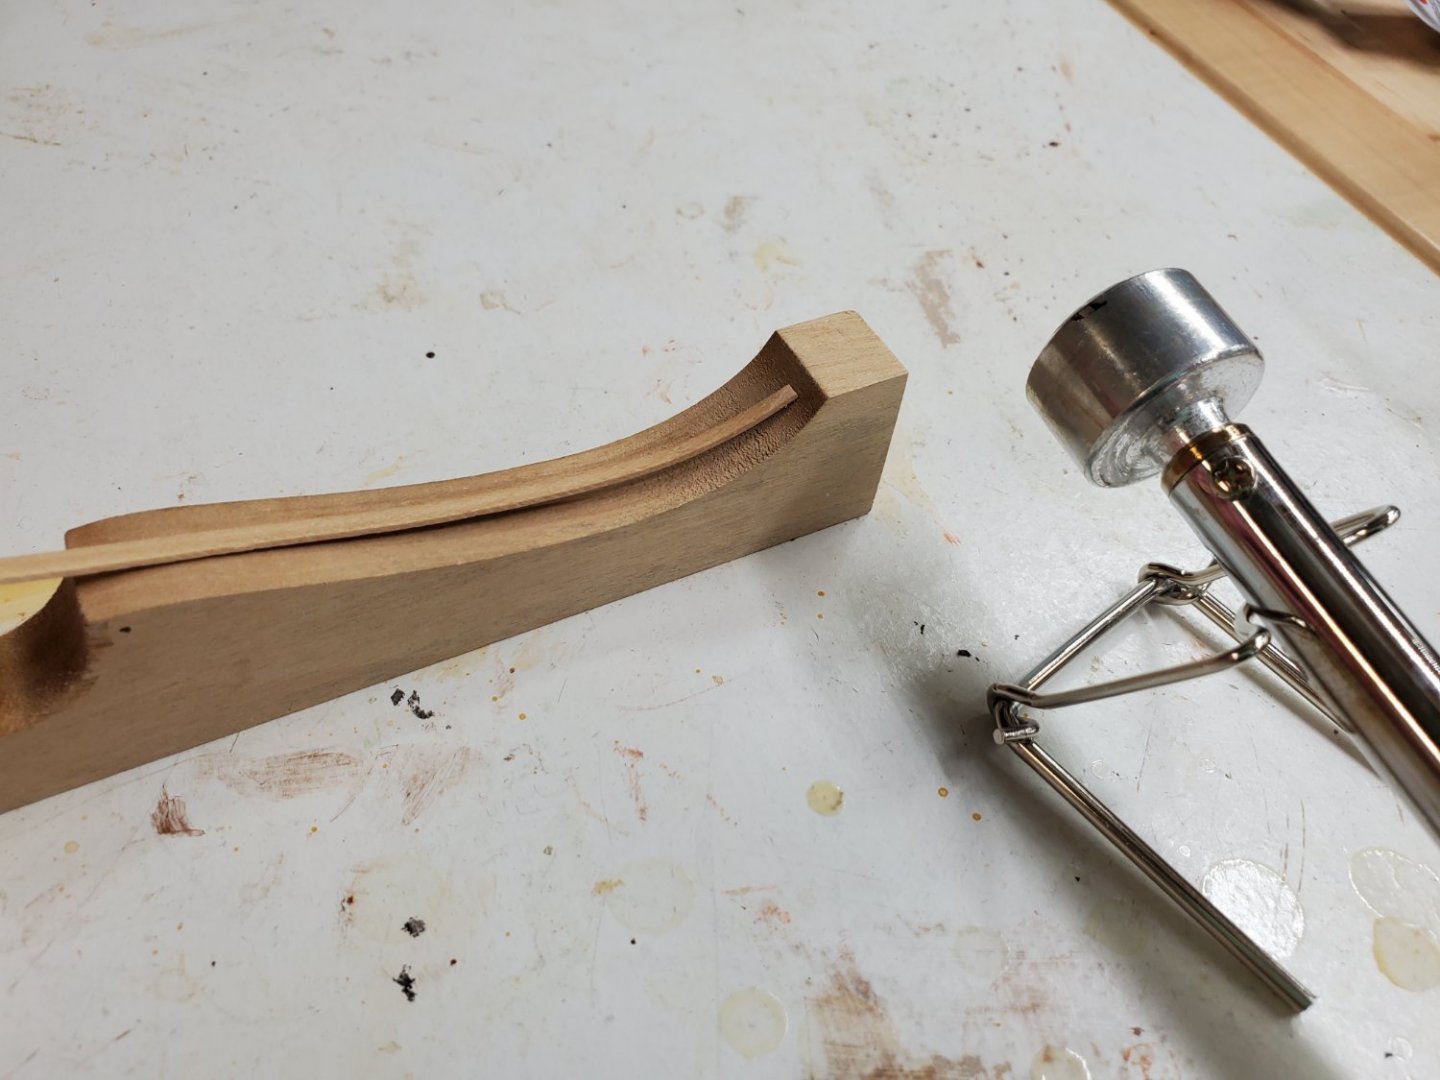
I did sell the building slip I mentioned above, had an inquiry recently so wanted to state this is sold. Thank you.
- mtaylor, Canute and Scottish Guy
-
3
-
Holding for you BikerMart, thank you.
- mtaylor, Scottish Guy and Canute
-
3


.jpg.d2ee9dd9d860e384a35ed496bfa1516d.jpg)


HMS Speedy by Dave B - FINISHED - Vanguard Models - 1:64
in - Kit build logs for subjects built from 1751 - 1800
Posted
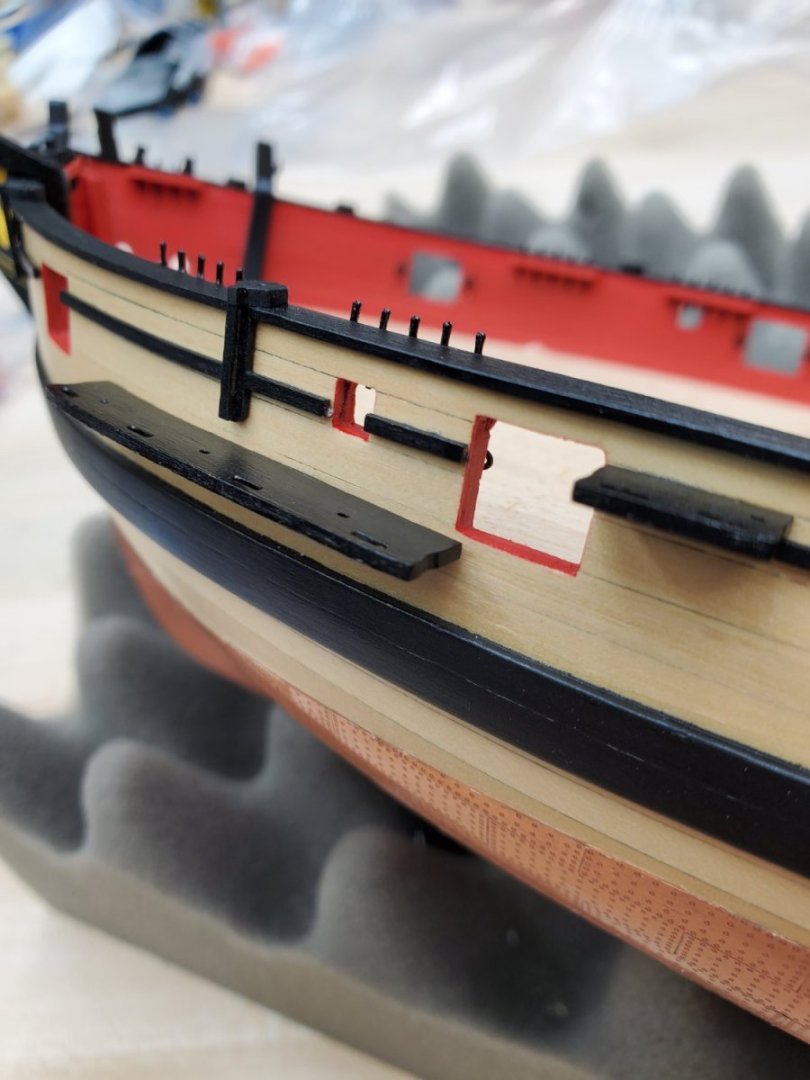
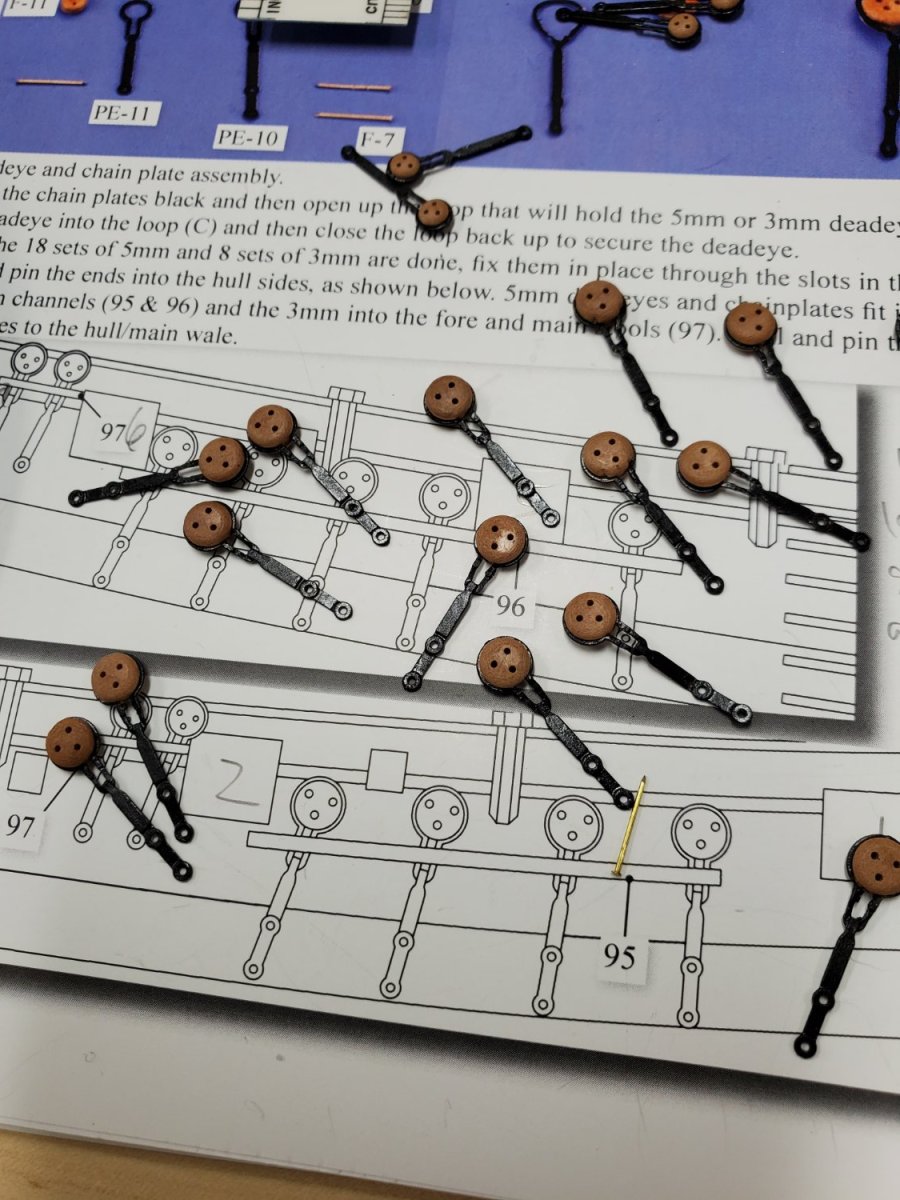
Well I finished up the chainplates recently which I enjoyed working on.
I thought I'd show how I dealt with the problem I was going to have of how the bottom of them was going to end up slightly below the wales as a couple others have experienced.
I just put a little curve into them as needed and it seems to look OK to me, better anyways than extending too far down. One more thing to remember to try to avoid having to deal with on future builds.
Dave