


Katsumoto
-
Posts
419 -
Joined
-
Last visited
Content Type
Profiles
Forums
Gallery
Events
Posts posted by Katsumoto
-
-
-
1 hour ago, mtbediz said:
Amazing work. Congratulations.
Thank you my friend! I am doing my best!
")
-
Beautifull ship and you did a awsome job on the planking part! Don’t mind the speed, the sharpness and cleannes of your work is only what’s important. When your model is finished,, that is what other people will notice, not the speed of the build.
Keep following along the way sir, if you don’t mind...
-
-
-
11 hours ago, Tim Moore said:
Beautiful work Peter. Museum quality craftsmanship.
Thank you Tim. Appreciated!
-
very clean work Sir! Excellent job so far. I'll keep following along the way if you don't mind.
-
-
1 hour ago, MESSIS said:
drop by and I ll sail you away. May be not on a yacht as the size and class of Sir Winston but still on a sail ship that knows the cypriot troubled sea.
Ps.your outstanding work of your amazing build, made me thinking to buy the S.Maria kit of AL....
I’ll drink to that...

The kit of Amati is better quality, but wasn’t availible at the time I wanted to start with my build, so I ended up with another AL kit. I’m sure you’ll succeed building a beautifull ship if you decide to do the AL version.
")
Many thanks for the compliments!
-
-
-
20 minutes ago, nikbud said:
I am so nicking this idea!
Lol!!

-
10 hours ago, nikbud said:
As expected, amazing work Sir!
I am going to take a lot of tips from this build to use on my own build. I especially like how you made/attached the channels (Rusten).
I have always shied away from having pins showing on the hull, but you are changing my mind, they look great!
Thank you Sir!
Channels, I'll remember the name. Thank you for that as wel.
I agree with you there about pins and nails on a model on this scale. Whatever you do, they almost always look out of scale to me.
In this case these nails represents some kind of big nails or bolts and do look fine on this model. So I took a gamble and hopefully paid off a bit!
regards,
Peter
-
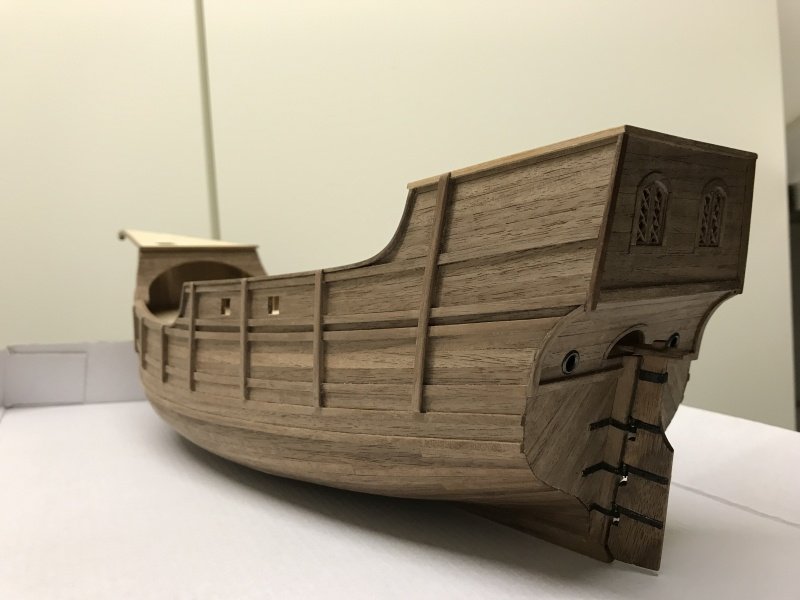
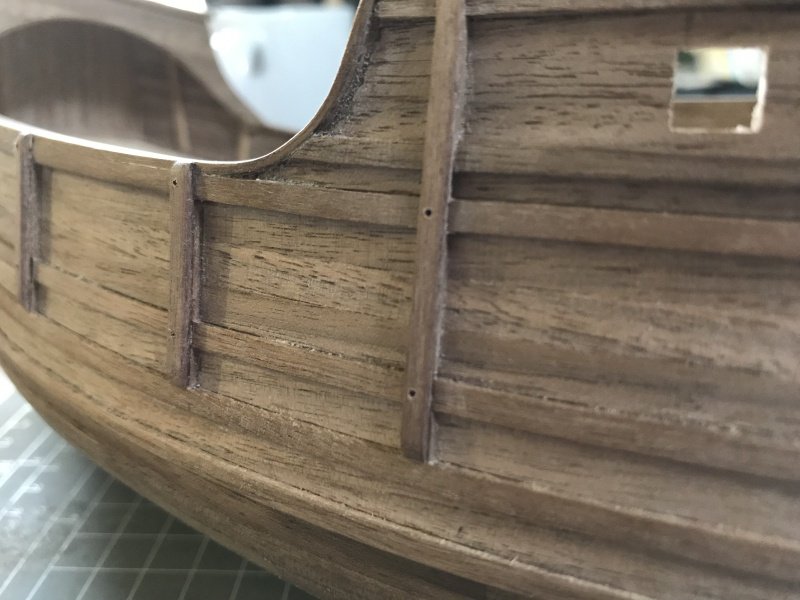
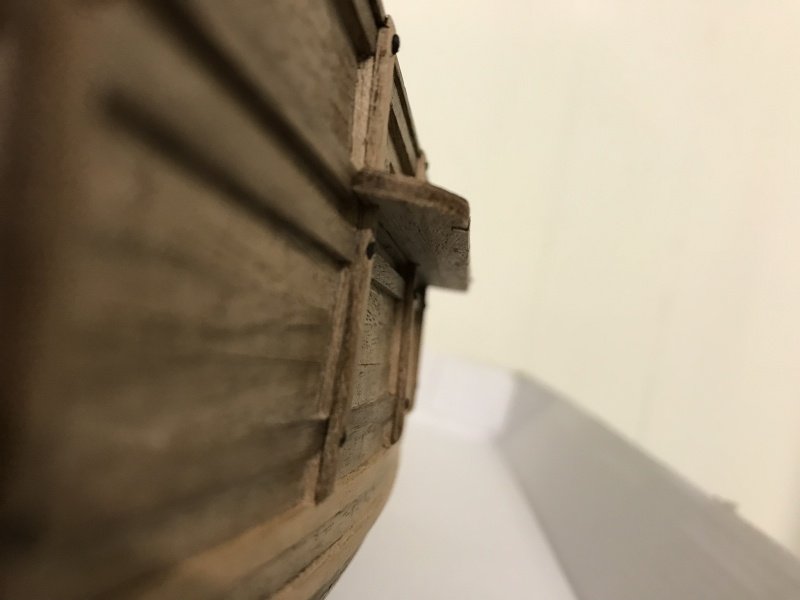
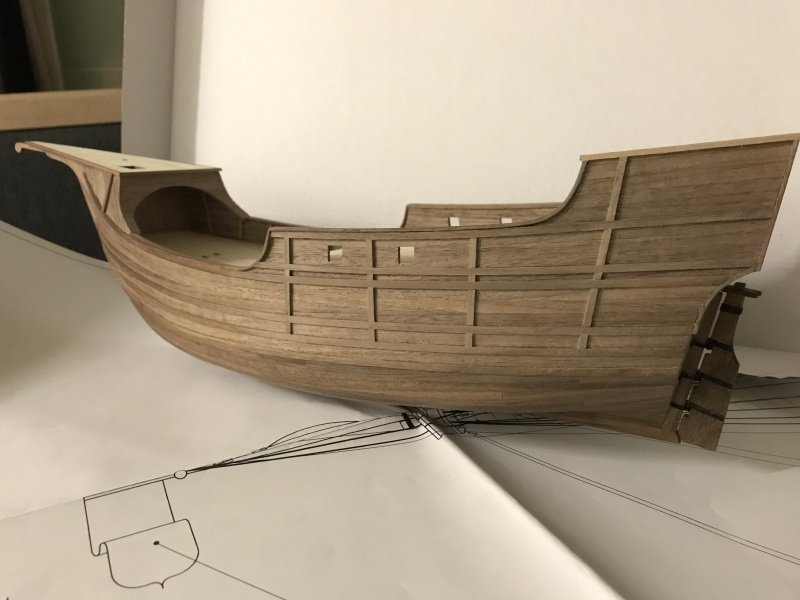
**Nailed it!?**
Hello friends, just a tiny update from the shipyard...
Let's continue where I left off...
So, the first layer is done on one side. I've copied it to the other side as well.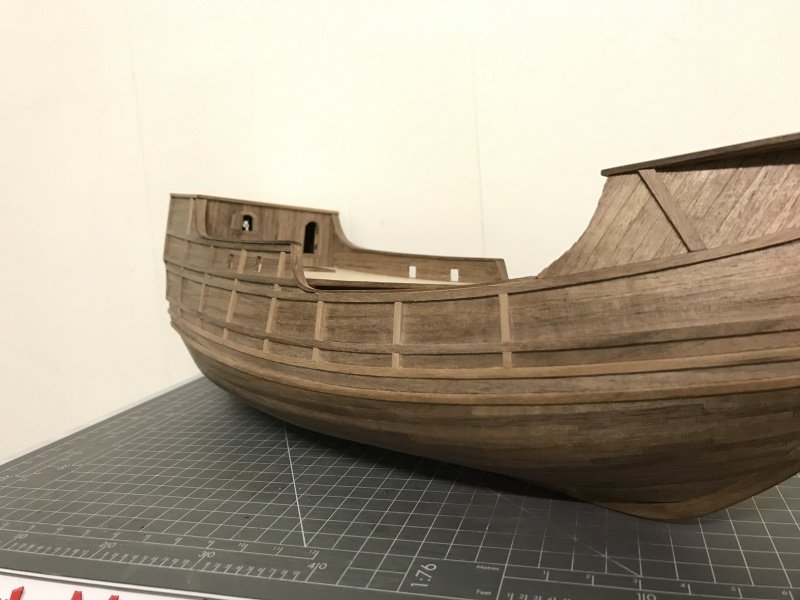
Both sides first layer finished....Now the second layer!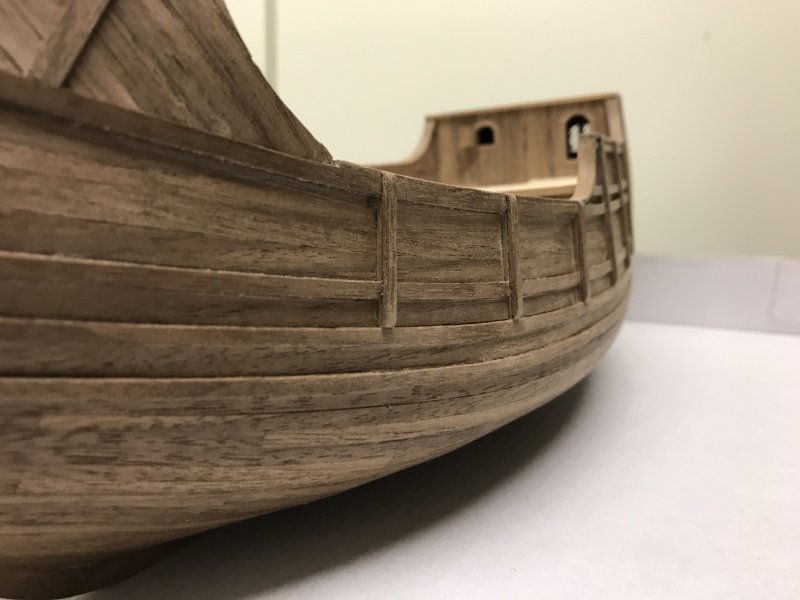

Then I used a small handdrill 0,5mm to drill some small holes...
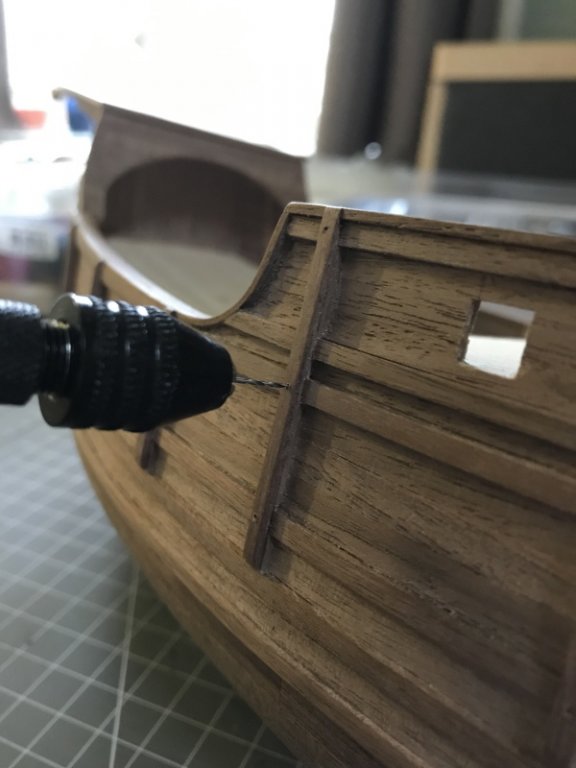
I painted the head of some nails black....
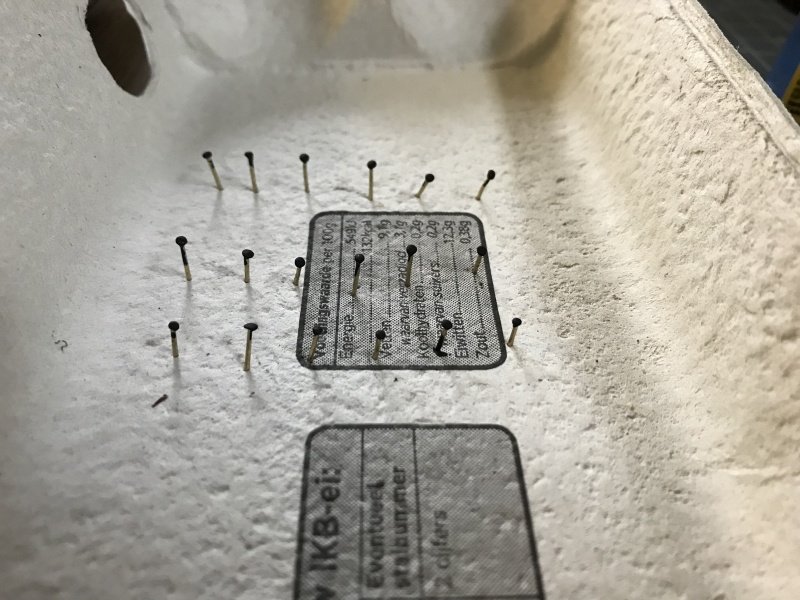
After drying I placed the nails on the ship. Just a small tap with a hammer was all it needed.
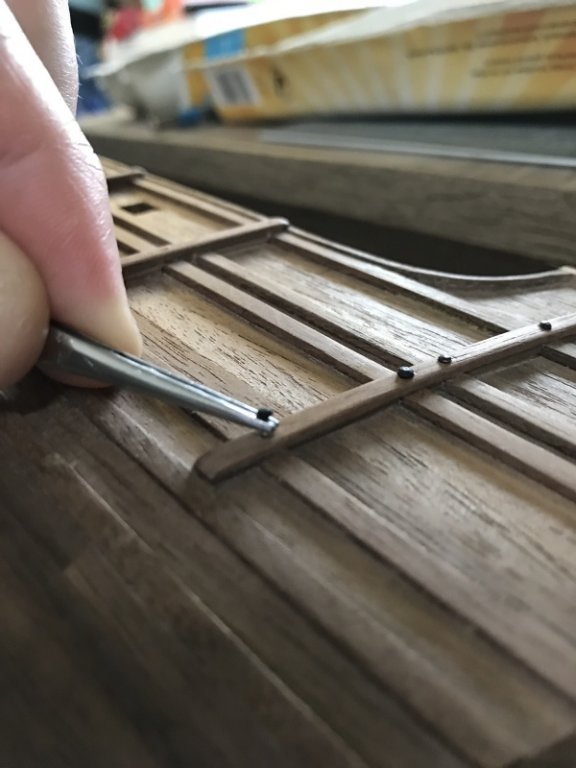
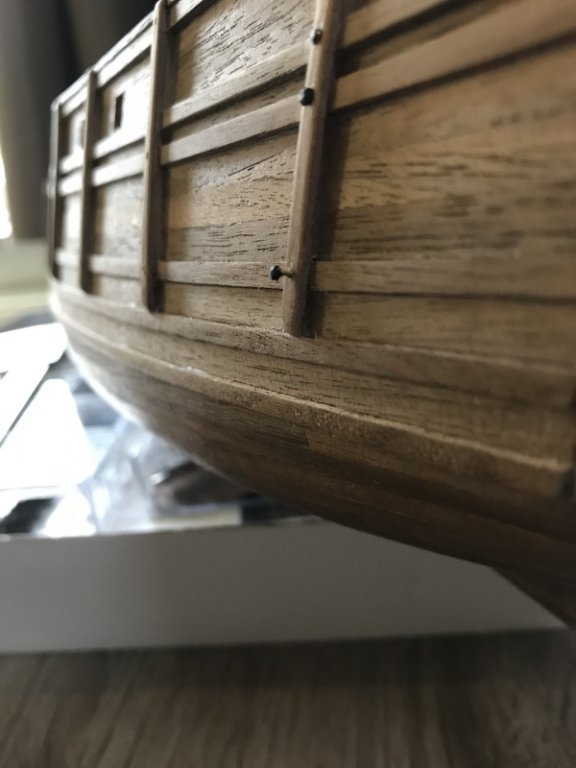
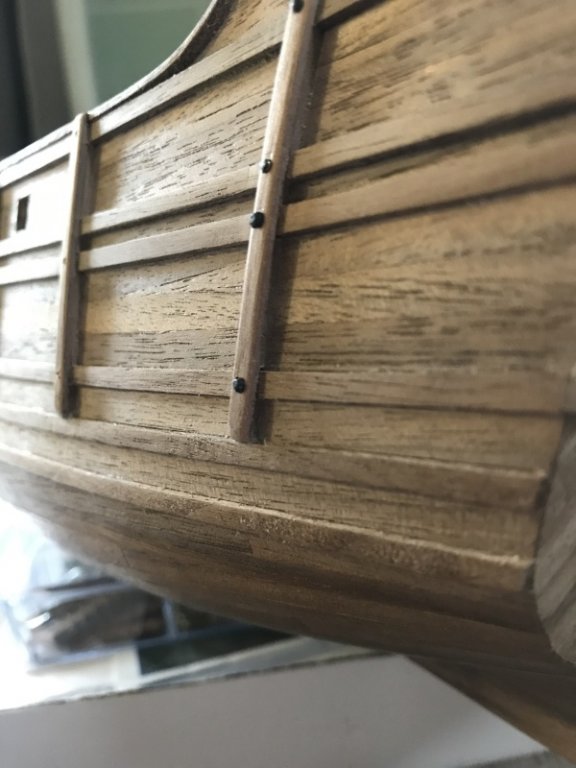
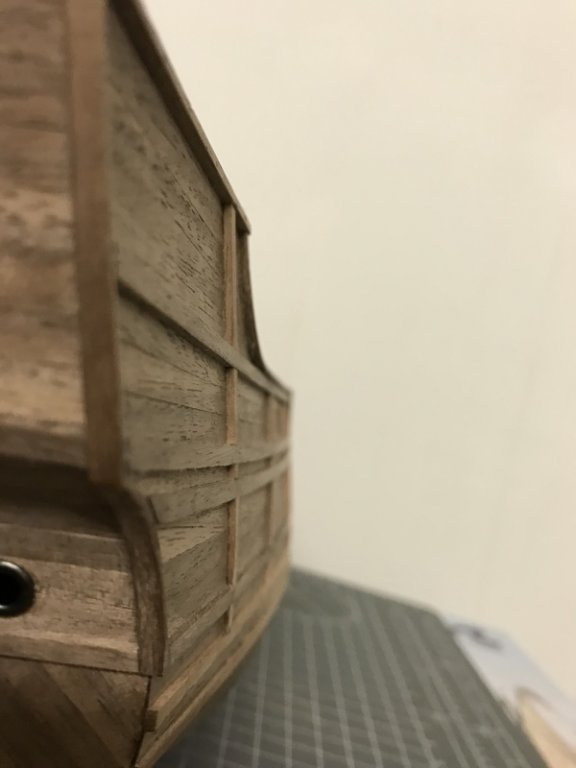
So, nails finished. Going forward with the planks that holds the dead eyes. I don't know the English term, but in Dutch we call these "Rusten"I wanted to let them curve with the ships wales. So I used some nails to fixate them in the right place.
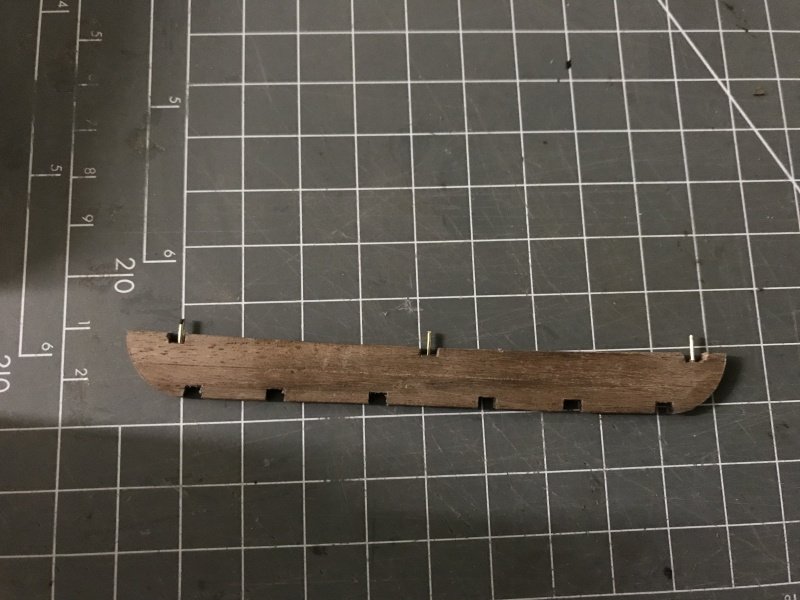
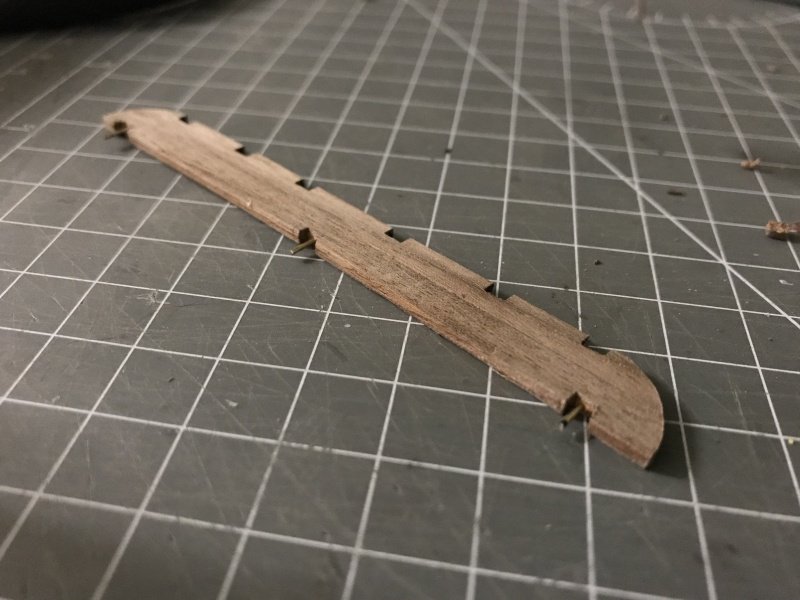
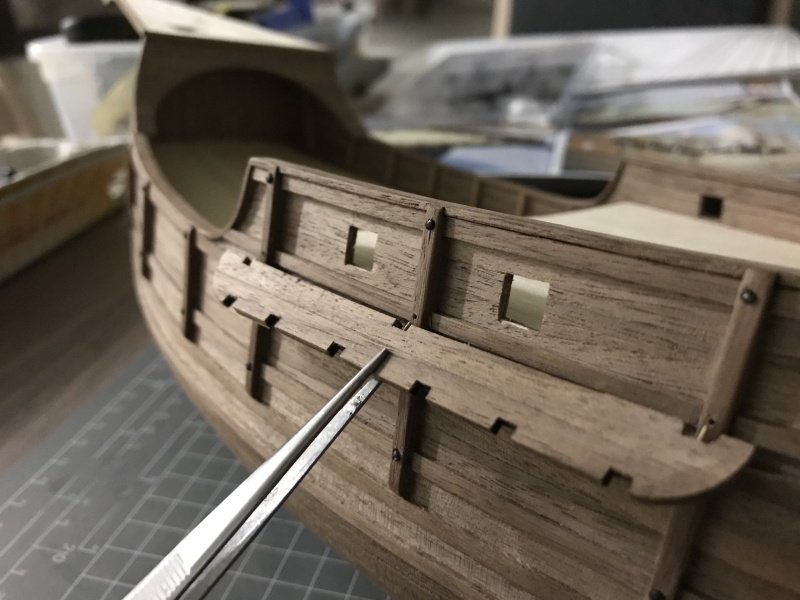
Between my fingers I gently curved the board so the pins would get into the drilled holes.
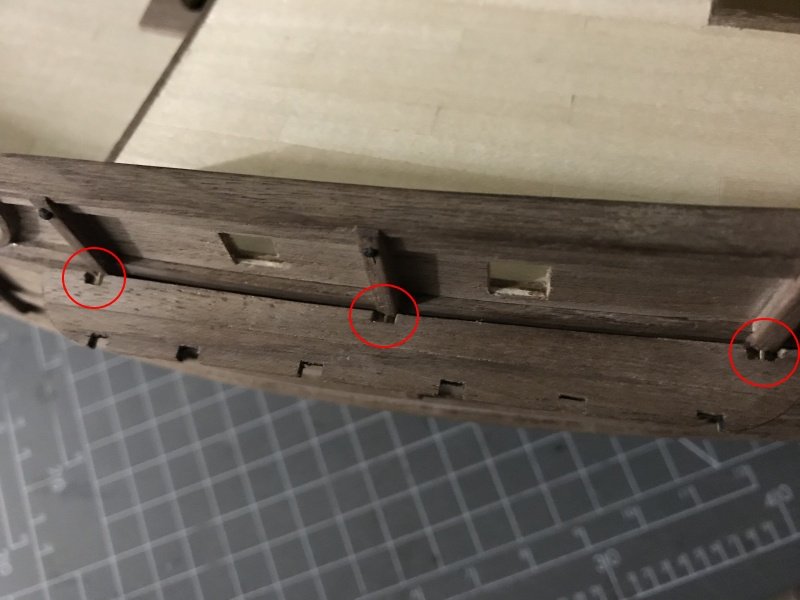
Just a few taps with the hammer did the trick!
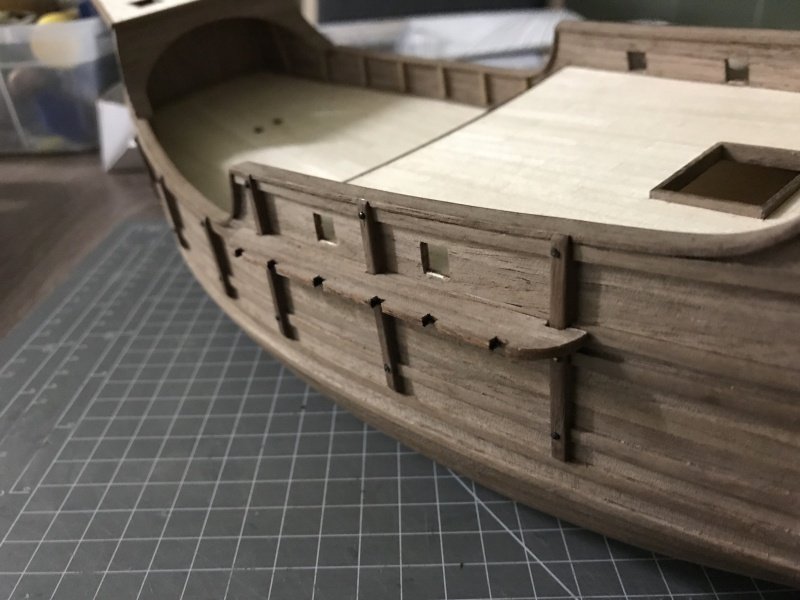
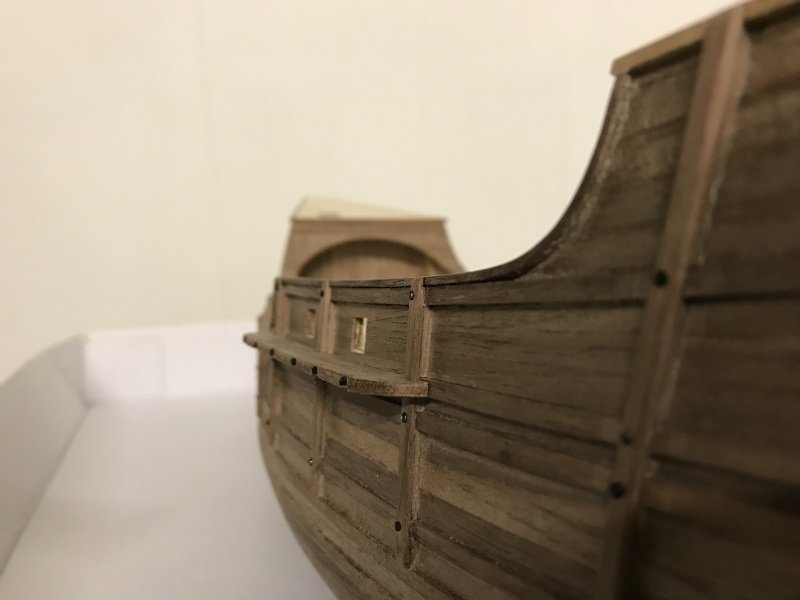
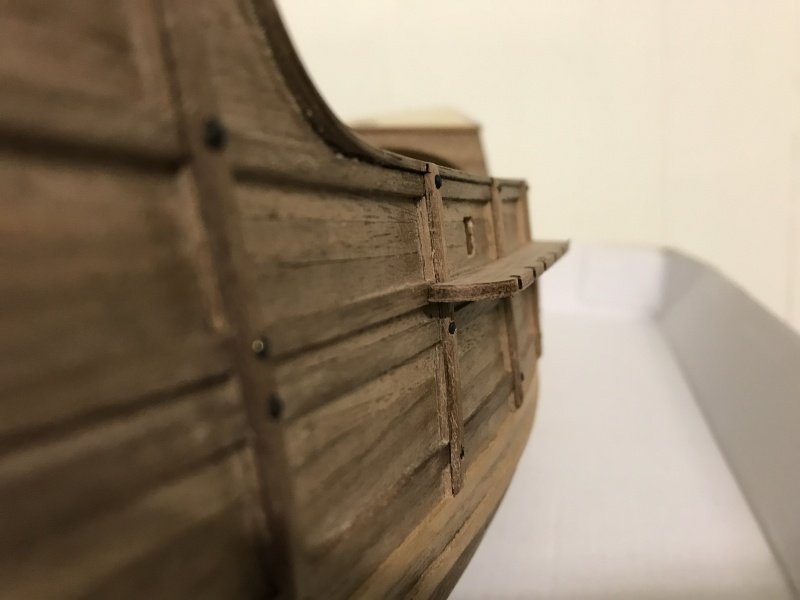
that's it for today....see you guys around!Ciao!
Peter
- BLACK VIKING, glennreader, mtbediz and 10 others
-
 12
12
-
 1
1
-
-
Nice work. The beach veneer is also a nice add-on. She will be a lovely ship!
-
Hi Snoepert,
You are going fast....lightspeed!!
I see a lot of joint's not nicely closed and finished, maybe it's the speed?
How's the overall quality of the kit? Looks to me like AL standard quality which is usually fine!Keep up the progress sir and good luck with the rigging!
regards,
Peter -
Just read the entire log. Nice work so far but to bad Anja couldn't continue. She was off to a very good start!
How's the overall quality of the kit? I don't have any experience with Occre only Artesania Latina (AL) Occre and Artesania Latina share the same history so I think it should be fine?
good luck with the masts, yards and all the rigging you are about to do next.....She is a very big ship to rigg!
regards,
Peter -
I have build the Endeavour instead of the Rainbow. It is quite similair. A very good kit of Amati but the quality of the sails is terrible.
nice job so far!
regards,
Peter
-
-
5 hours ago, nikbud said:
Stunning! Incredibly neat work. Your work is a joy to see, Sir!
I love the crisp lines.
26 minutes ago, Wallace said:This is more like a "scratch" build than like something out of a box. You are using the plans but adapting and improving the model using your own innovations. Truly magnificent Peter.
Thanks guys! It helps that the kit itself is a pretty straight forward build. So it almost get together by itself. Just a bit of some creativity and glue is all she needs. The difficulty lies in the part of getting the work clean and crisp.
It is a fun build so far, with some small challenges I have myself to blame for most of the time...

-
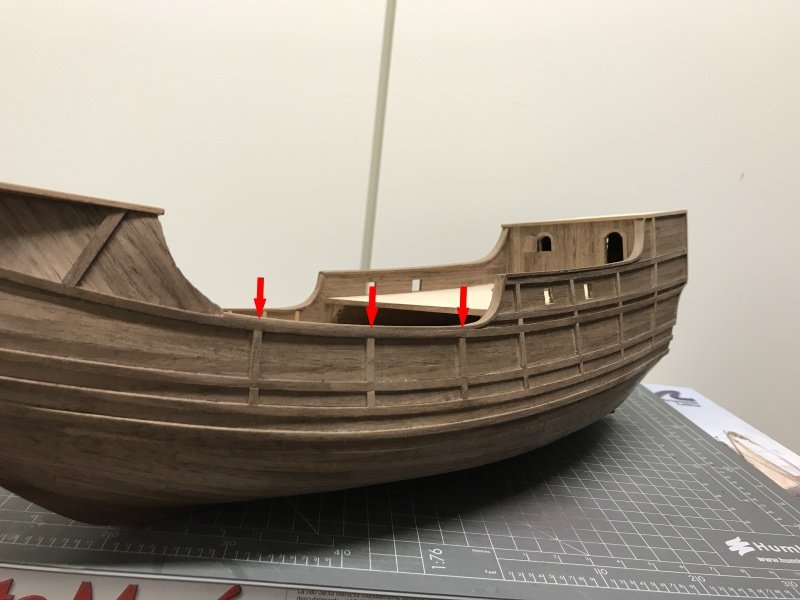
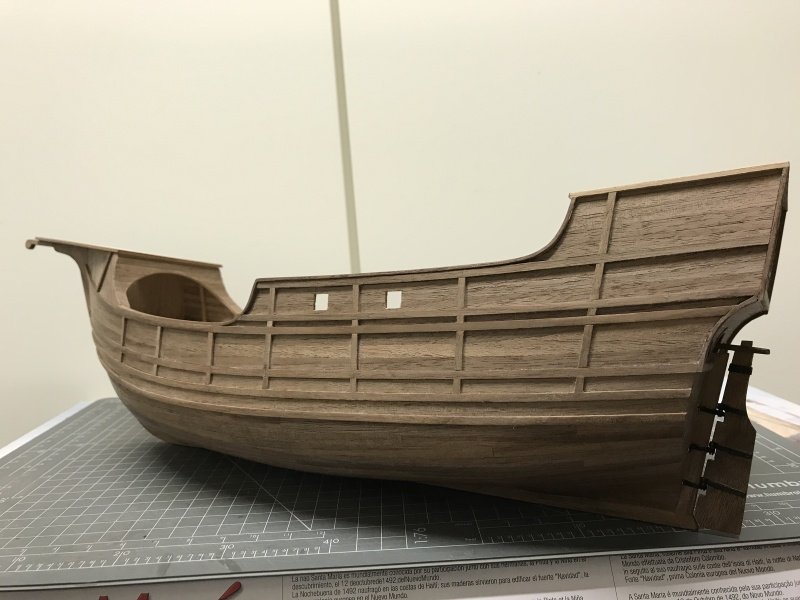
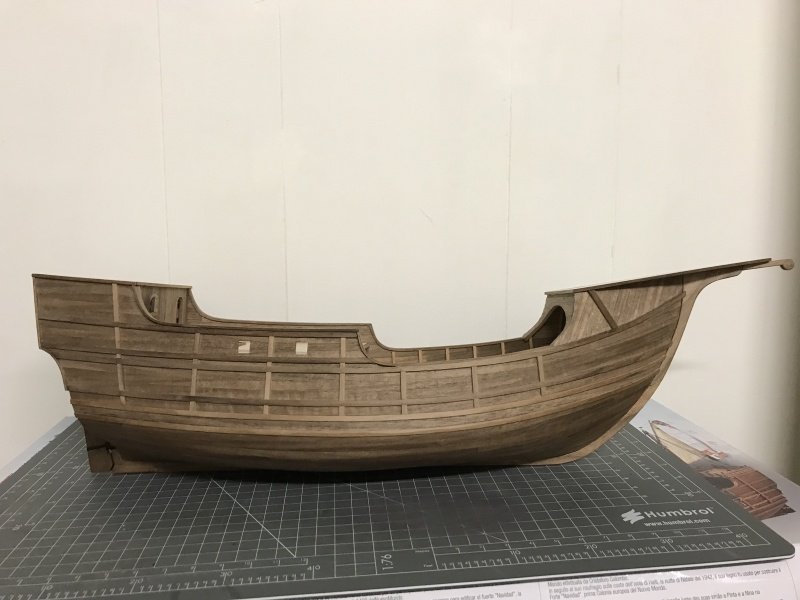
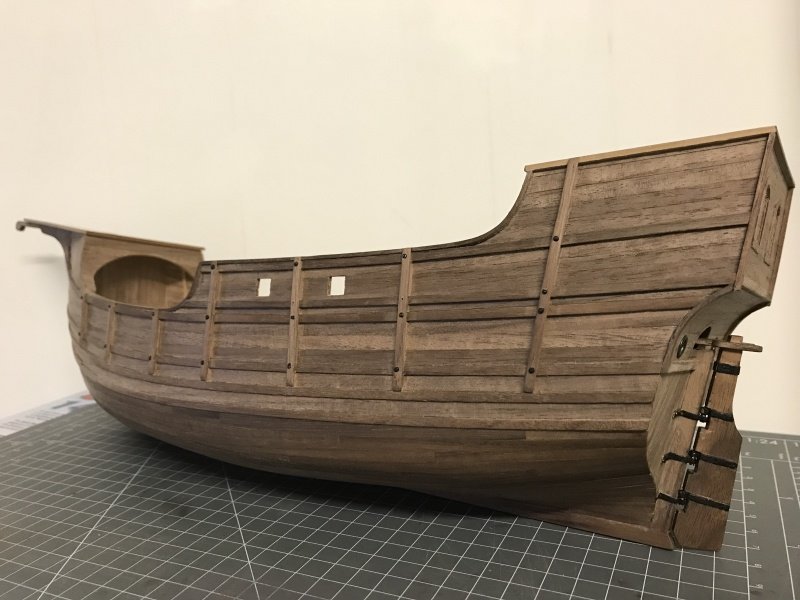
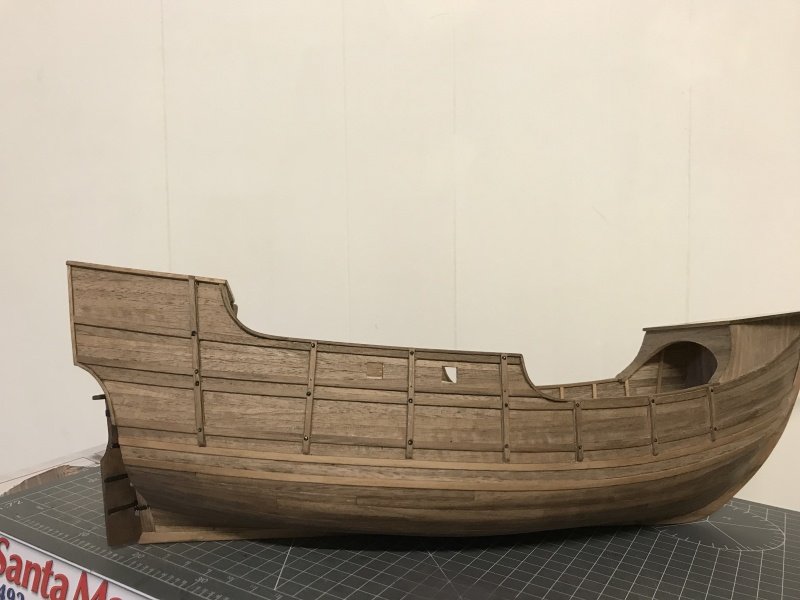
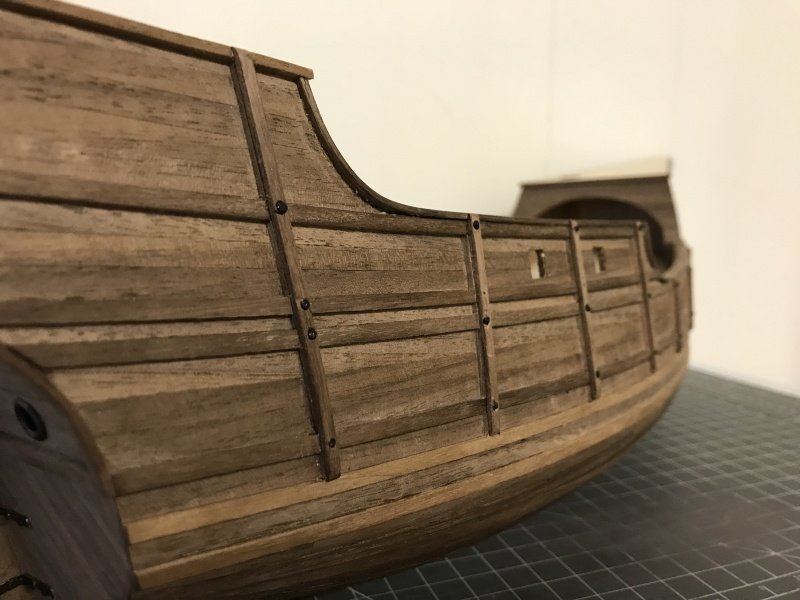
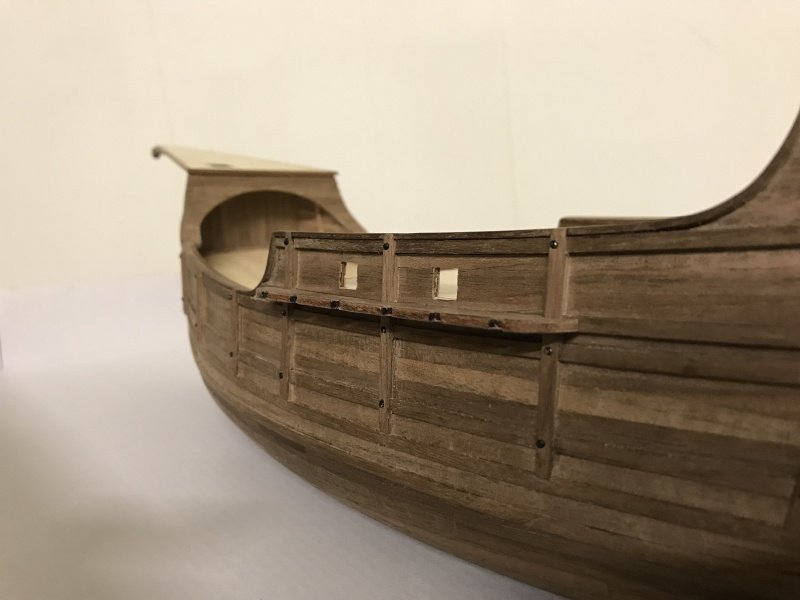
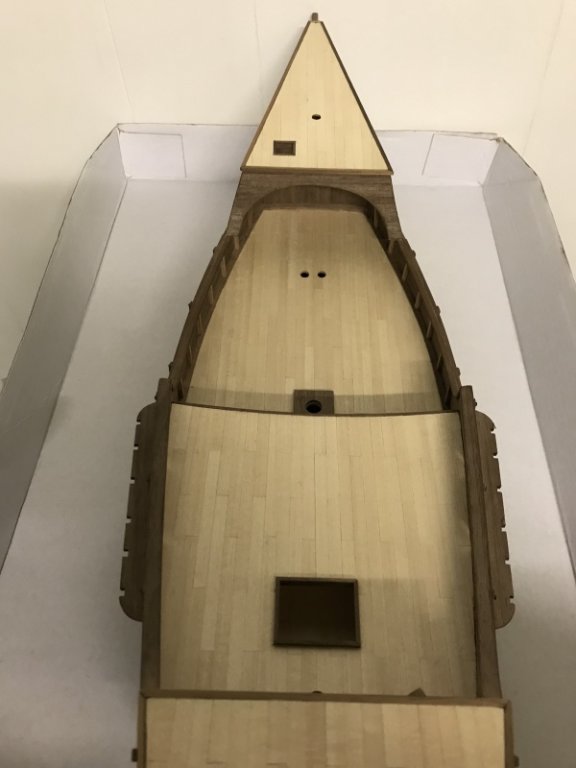
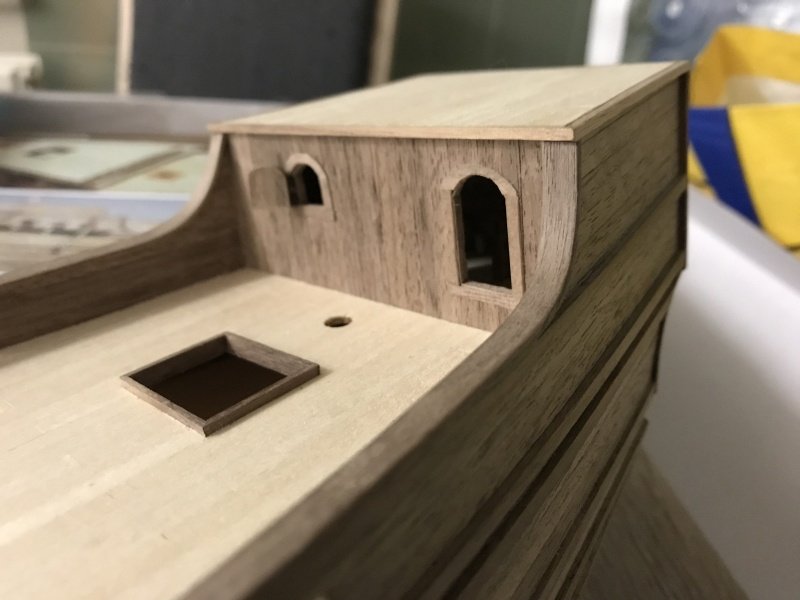
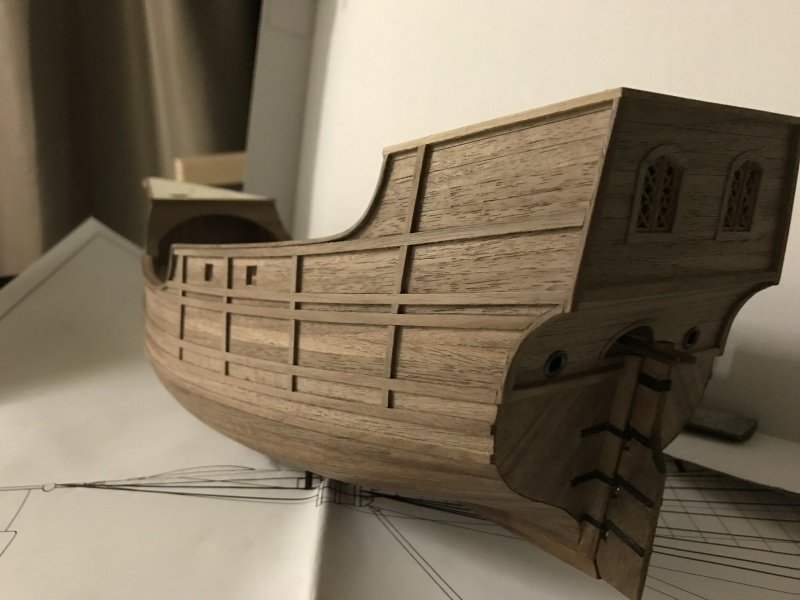
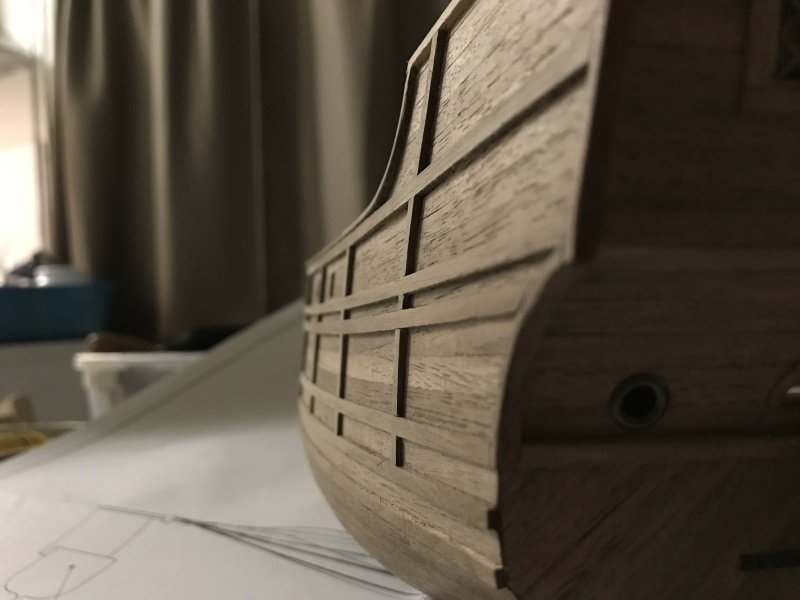
**Chapter 12 - Railings**
Hello Sir's!
Last week I was busy doing some work on the SM regarding the railings. This was a tough job because I wanted to make them differently than the kitmaker suggested them to do. I wanted to make them out of a solid strip of walnut instead of constructing them from small parts and then glued together.
For the upper railings I did the following. I took some boiling hot water and placed the strip of walnut into the water. I plied the wood in the water until in curved in the right form. I took the strip out of the bowl and placed it wet on top of the bulwark and shaped the strip in the needed form and clamped it in place so the soaked wood can dry...

In between I focussed on some smaller tasks. I took some of the rosewood parts and covered them with some walnut veneer until the railings dried.

So, after the upper railings were dried, I glued them on the ship.
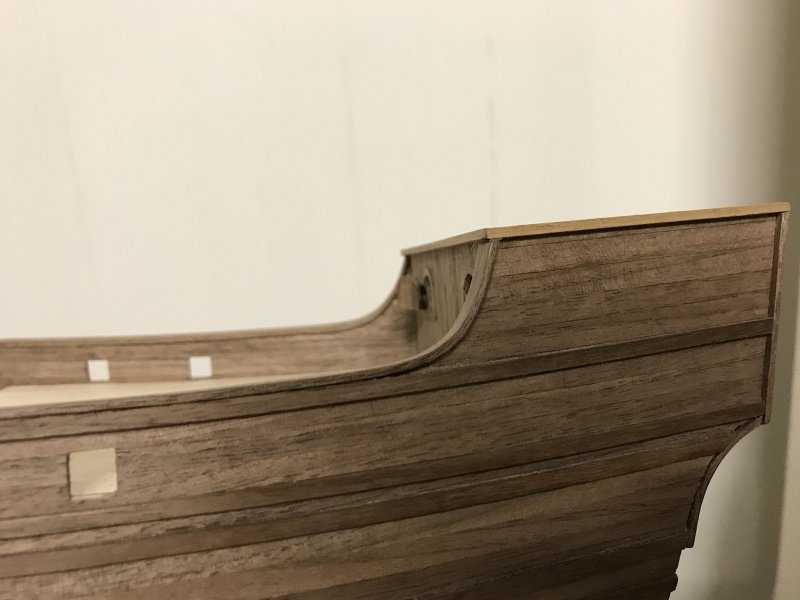
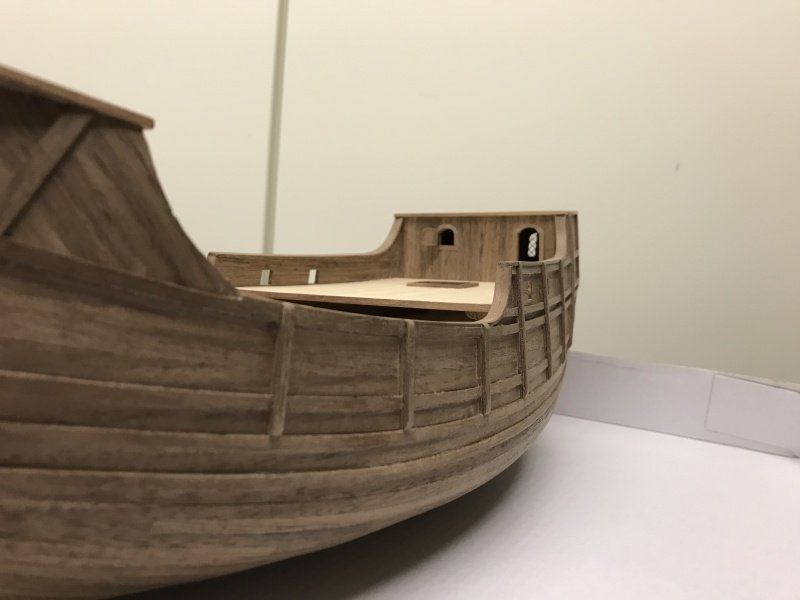
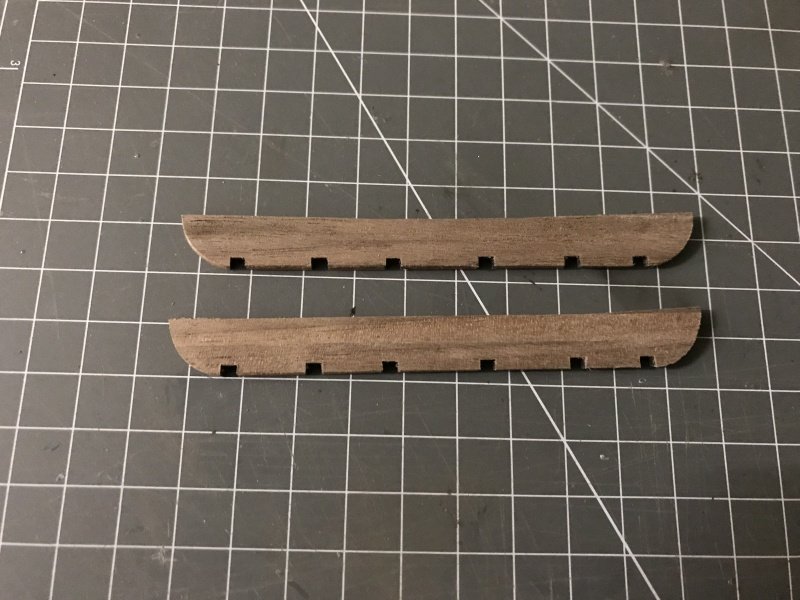
Time to move on to the bottem railings. I used the same technique of the boiling water to curve the wood into the right shape, placed the wet on the ship and let it dry. This time the railings consists out of two smaller strips of walnut. This is done so it can follow the curve of the hull. When glued together, you can hardly see the difference between the upper and lower railings.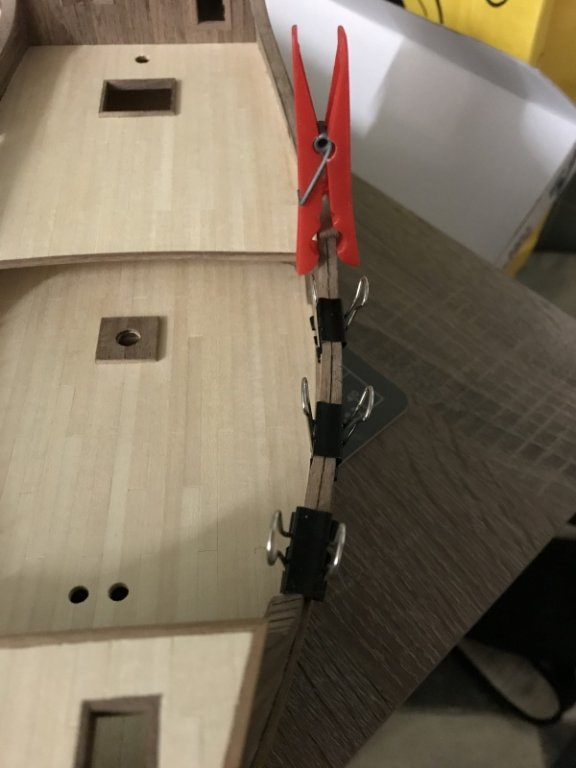
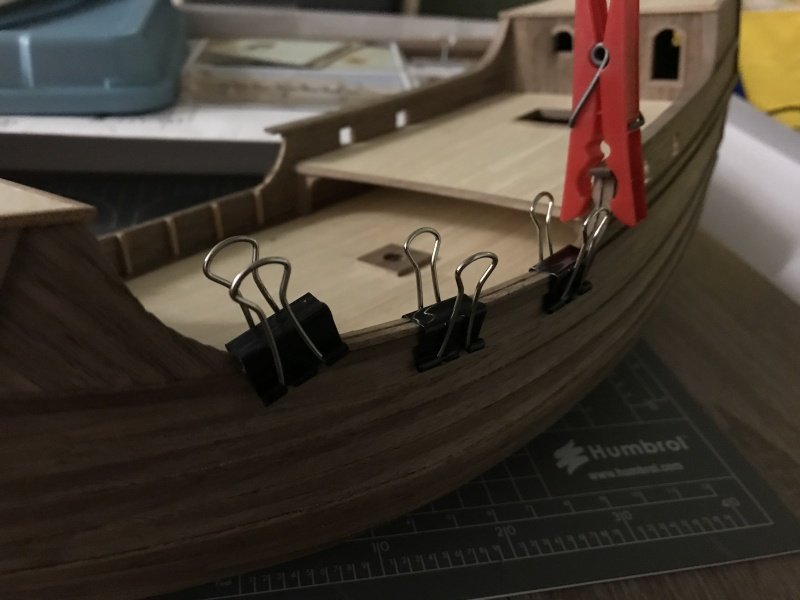
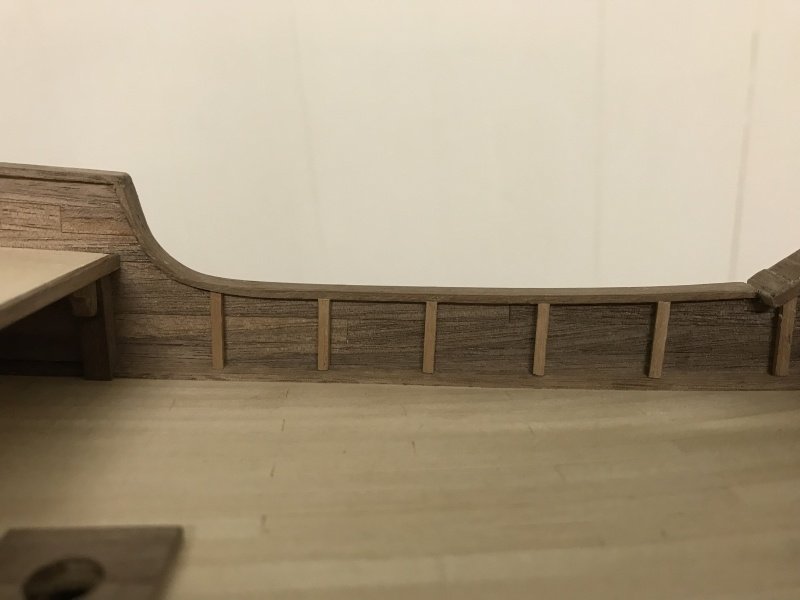
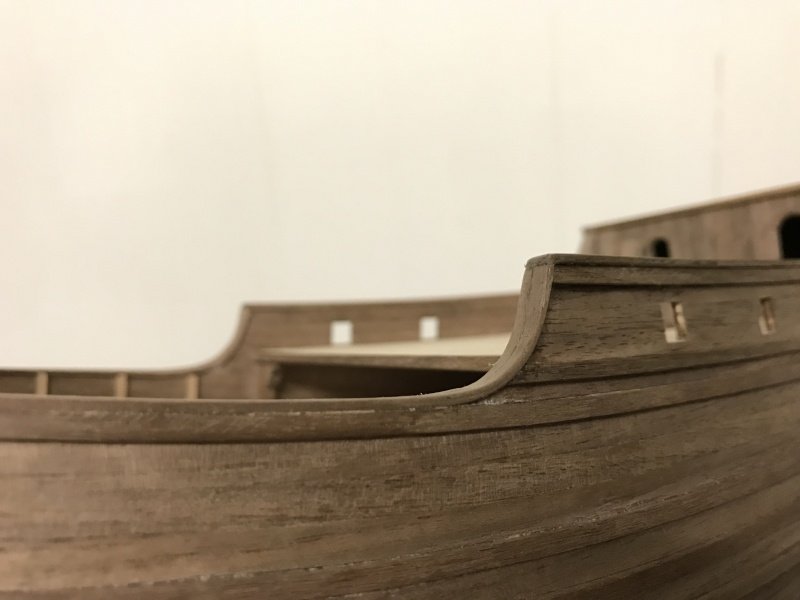
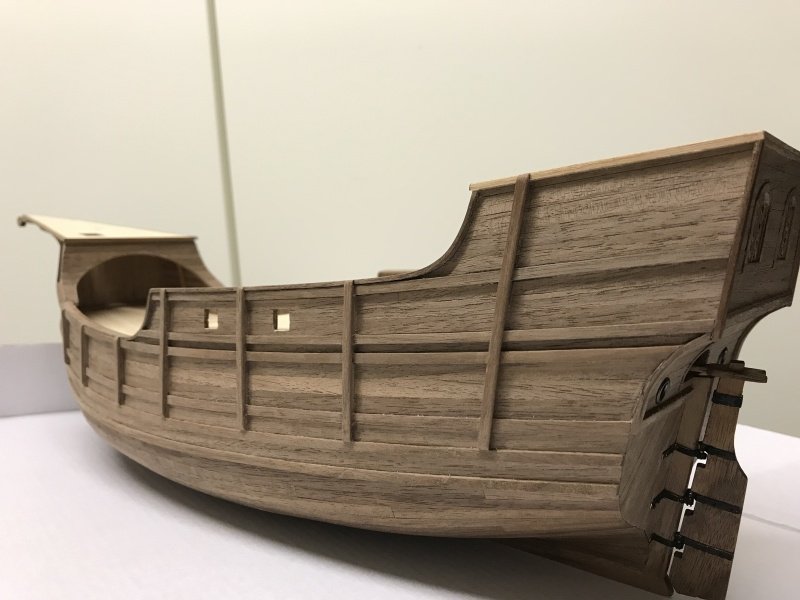
So, some pictures to show the end result and the flow of the railings into each other...
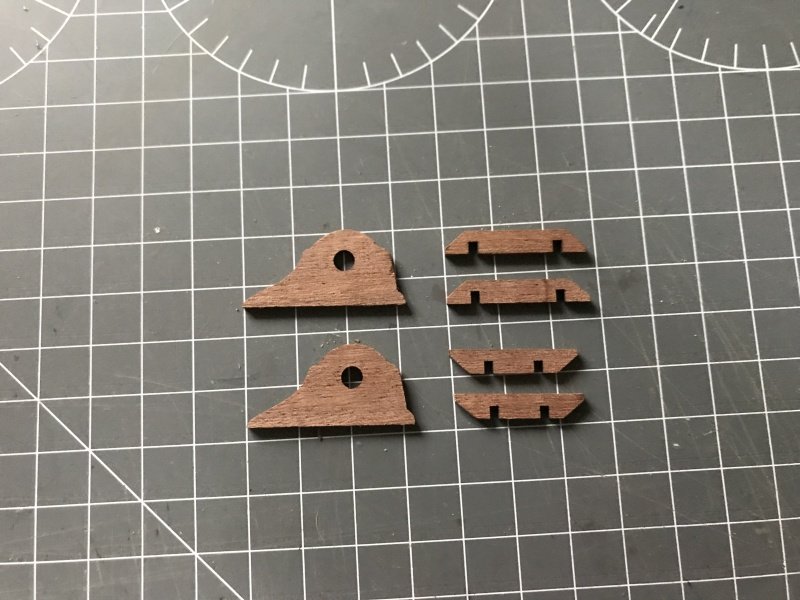
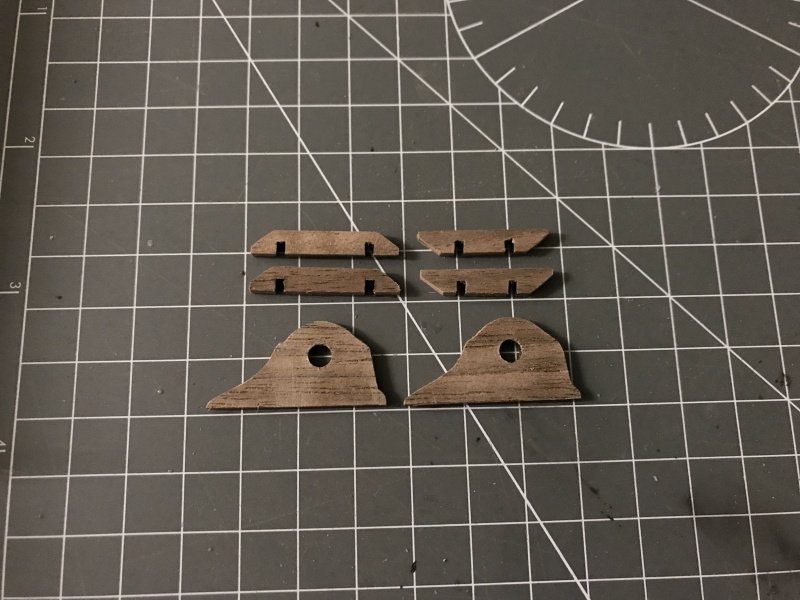
Time to place some reinforcements on the hull. The kitmaker wants me to construct them again from two seperate strips of walnut placed on top of each other. I only placed the bottem ones yet and is shown on the next pictures...
Until the next update. Thanks for all the nice replies, personal messages and likes! You guys Rock!
Regards,
Peter -
-
3 minutes ago, Wallace said:
If there is such a phrase - meticulously fantastic! The intricacy and attention to detail is worthy of praise sir. Very well done. I will repeat myself too - you are truly an inspiration.
You give me too much credits Sir, thank you!
Santa Maria 1492 by Katsumoto - FINISHED - Artesania Latina - scale 1:65
in - Kit subjects built Up to and including 1500 AD
Posted
**The little things matter...**
Hello shipmates! Good to see you again...
Thank you for all the positive feedback, reactions and cheers from you guys. I really appriciate it!
Today the update is all about the "little things" on a ship. Things that matter because they compliment the ship and thus gives the overall apperance a boost.
I'll start with the little boat that should be placed on deck somewhere. The kitmaker AL provides a cast metal one which isn't to bad. AL suggests to paint the hull of the boat. I decided to plank the hull with walnut veneer. I used CA gel glue to stick the wood to the metal. It's not the best glue for the job, but it worked.
the other side as well..
Both sides finished...
Aft, stem and keelson's turn...
...and the endresult!
Time to move on to do some work on the windlass...
I have stained the parts into a walnut colour...
The axel of the windlass didn't fit, so I reduced the diameter of the axel.
*A poor man's lathe...*
Next, I'll started on the capstan. I did not want to use the brass roundbar included in the kit for the handles. So I decided to use toothpicks instead.
The toothpicks are a bit out of scale. I have no lathe and the parts are to small for a lathe anyway....so I used my cordless powerdrill to be a lathe for a moment...It's all about useing your tools to the max I think!
I used two sanding blocks to reduce the diameter to the required 1,5mm, while the drill was on.
After giving it some colour...
I used a pin vice to drill the holes in the capstan...
And then all the parts together...
Finished for this weekend. Time to go, see you next time and thanks for watching!
Peter