


Katsumoto
-
Posts
431 -
Joined
-
Last visited
Content Type
Profiles
Forums
Gallery
Events
Posts posted by Katsumoto
-
-
Lovely model. Very well done sir! A masterpiece.
-
-
Very high standard on your rigging work! Great job sir!
- Peta_V and Old Collingwood
-
 2
2
-
4 hours ago, MESSIS said:
@Katsumoto thank you dutch friend. Am still waiting to hear your new shipyard plans.... after discovering America!
Christos
Thanks Christos, the next project has to wait for a little while...America is a big place they say....
")
-
I really like the deck on you ship! Well done sir!!!
-
great, great model(s)....really impressive!!!
- Ekis and Old Collingwood
-
2
-
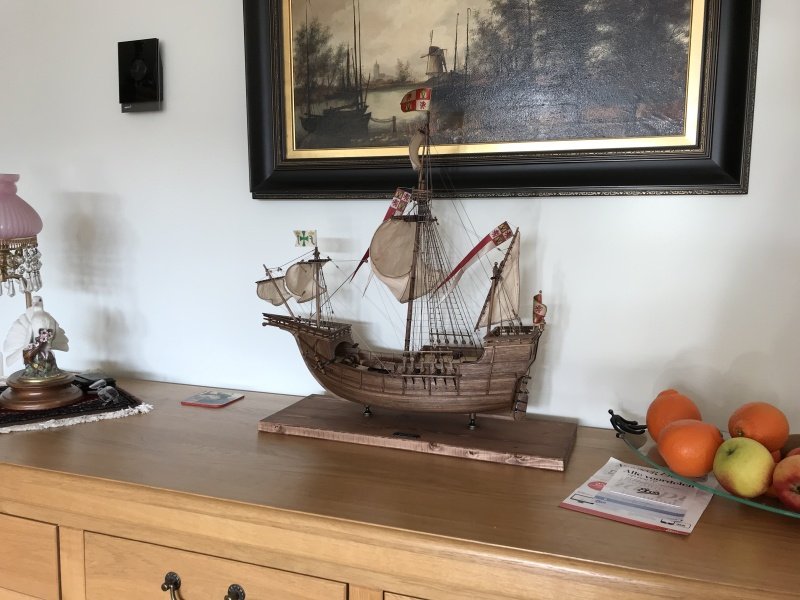
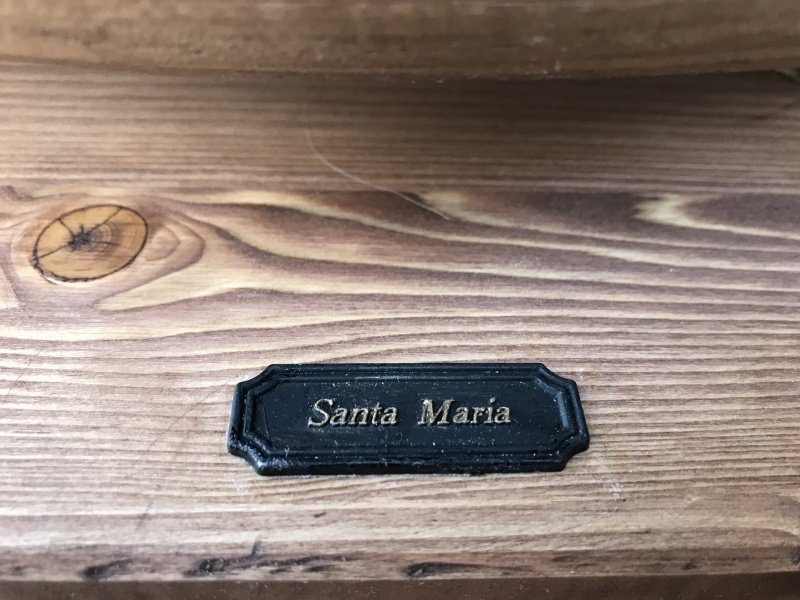
**A new home**
To all my friends, thank you for all the positive replies and feedback. I'm truly honoured and touched by your warm and loveing words.

This weekend the ship was send to her latest location and placed in the living room at my parents place. They love it!!!
I made two people very happy.
Peter
-
Superb build....grand model! The colors, sails I love it!
- Old Collingwood, TOM G and Ekis
-
3
-
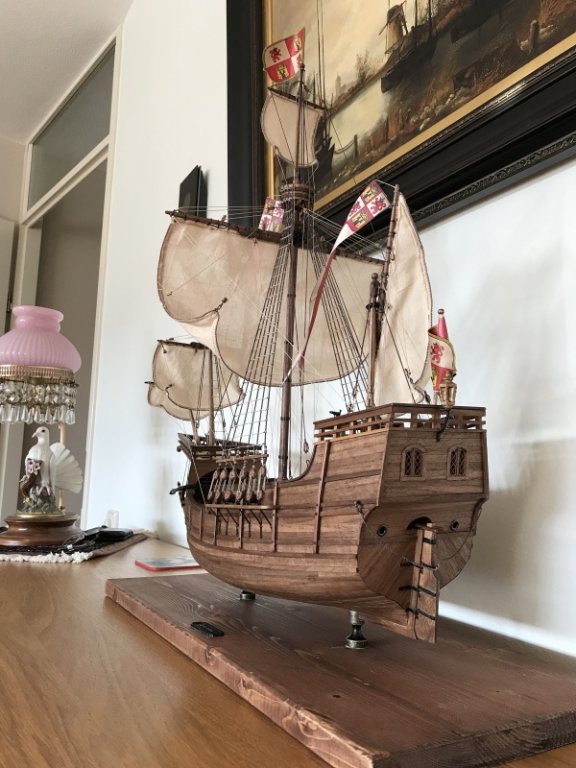
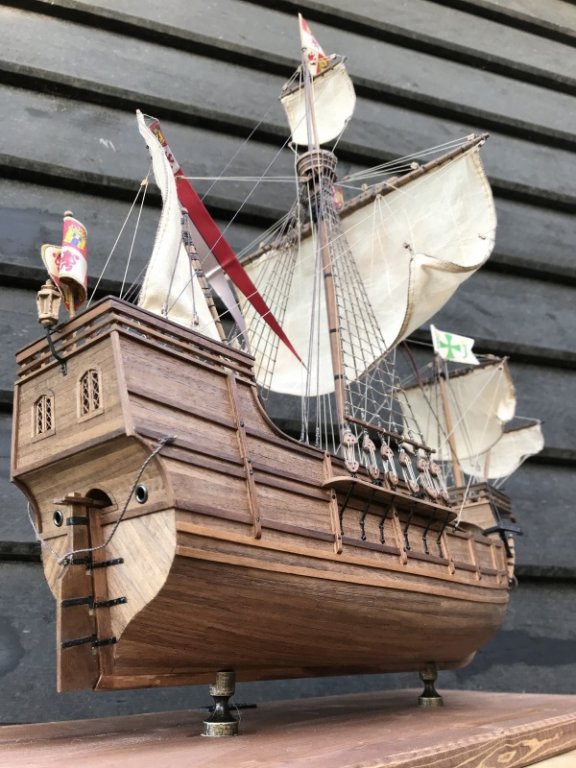
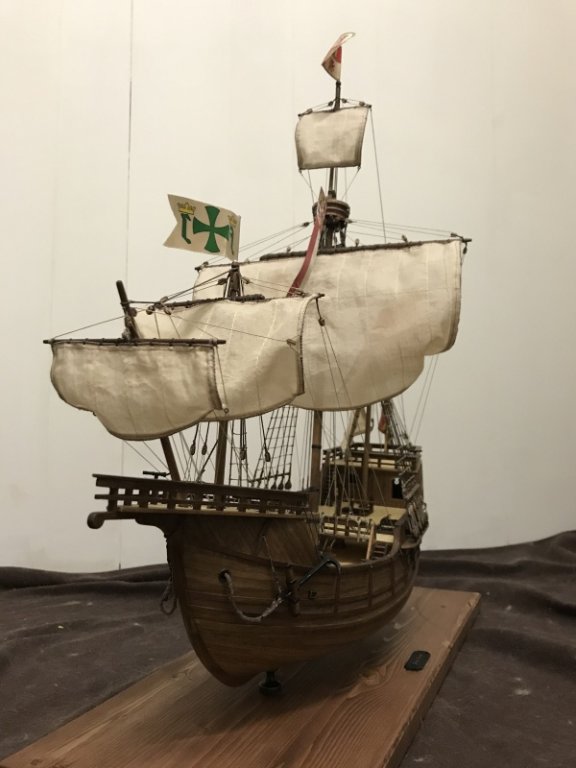
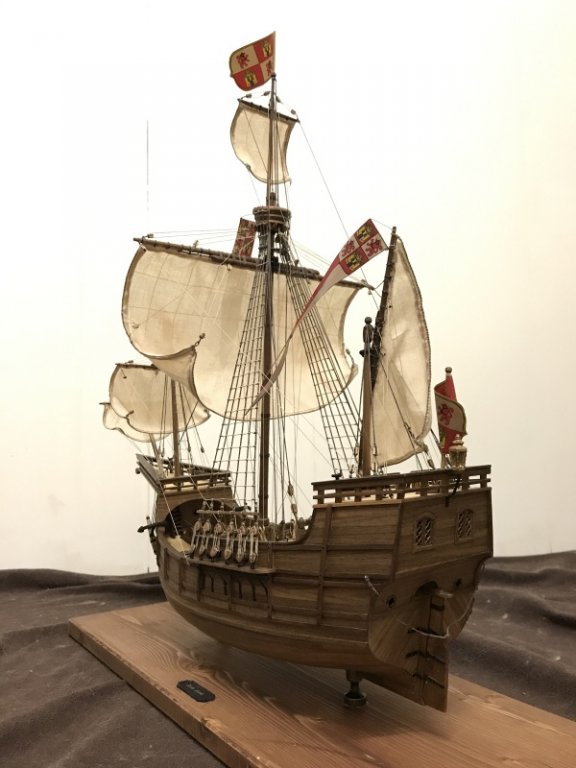
***The last chapter - Set sail - Finished***
Goodmorning my friends!!
The photoshoot of the completed model....here we go!
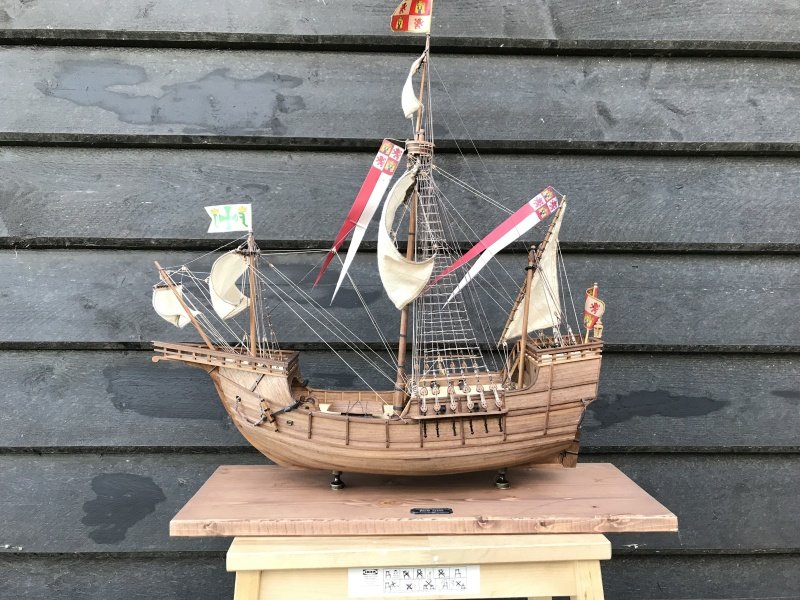
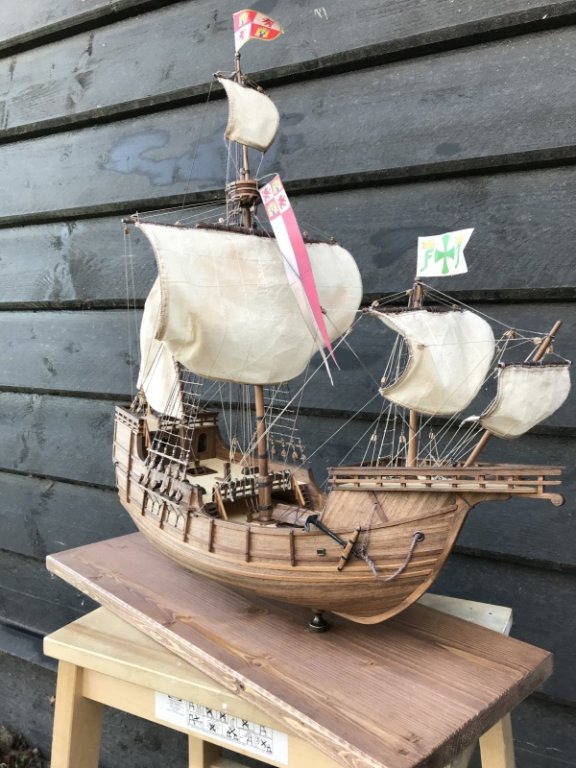
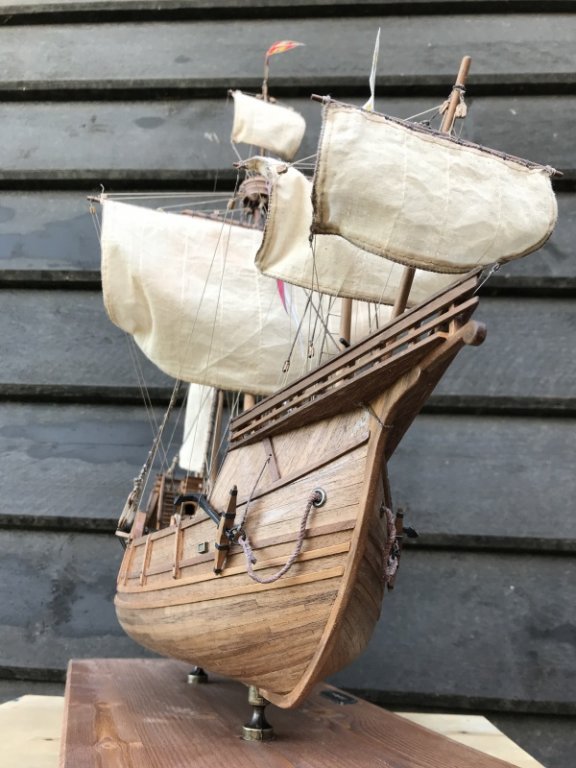
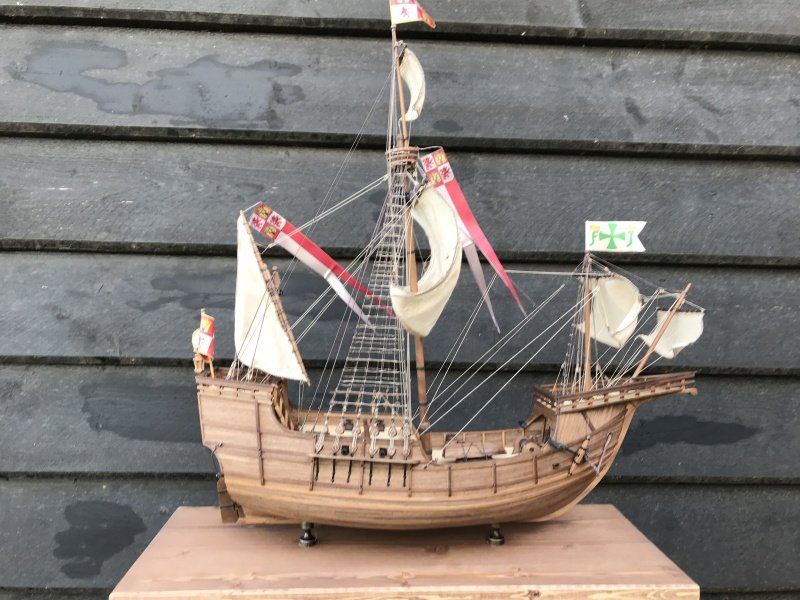


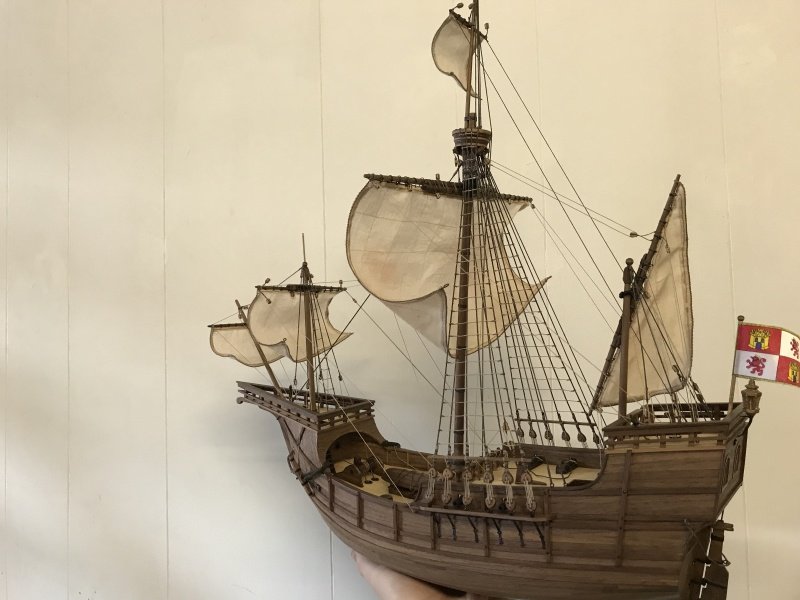
- The End -When I started with the build of this model, I had a specific goal in mind. I needed to finish this model within 8 months, it must be within budget (150USD) and I must enjoy the creative proces. I did all that so my mission is a succes!
During this build I've learned many things and I've enjoyed the building process very much, but I'm truly blessed with all the friends whom I met during this build. In particular I want to thank you guys, for all the nice comments, replies, questions and likes. You made me feel special!
I really hope you guys and also girls liked my log and maybe helped you in a way for your own model! Sharing knowledge is what is all about I guess!
For my next project, you have to wait a few months. But stay tuned and we will meet again!
Untill now, Bon Voyage Christopher Columbus!

See ya later!
Peter- GrandpaPhil, zappto, glennreader and 15 others
-
17
-
 1
1
-
1 hour ago, MESSIS said:
Dutch Colombous.. hip hip hura! She is a beauty! She is magnificent! Great work, fine model.
You are at last almost ready to sail off to the new world. Am anxiously staying tuned to see the final stage and your photographic skills.
I assume the last update will be the moment we light up the fire works....
Christos
Ps. I saw the amati model, not yours of AL and the sails had red crosses on them. What about this model, it doesnt have any?
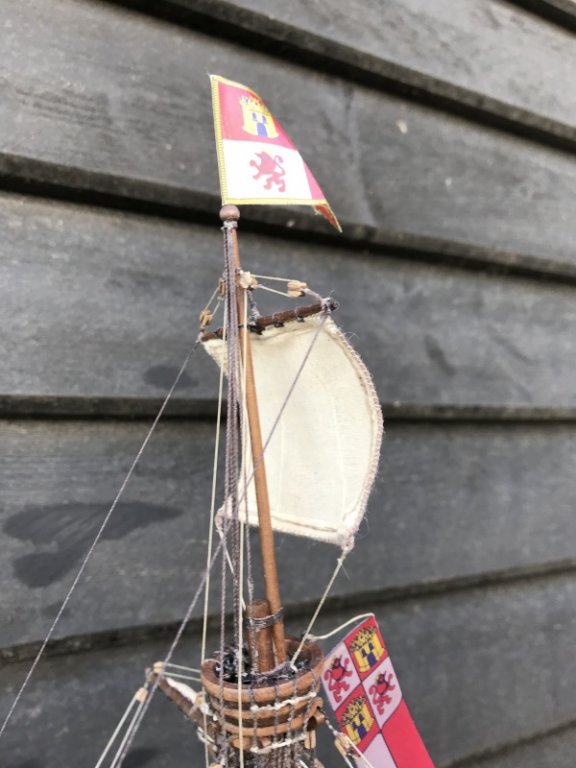
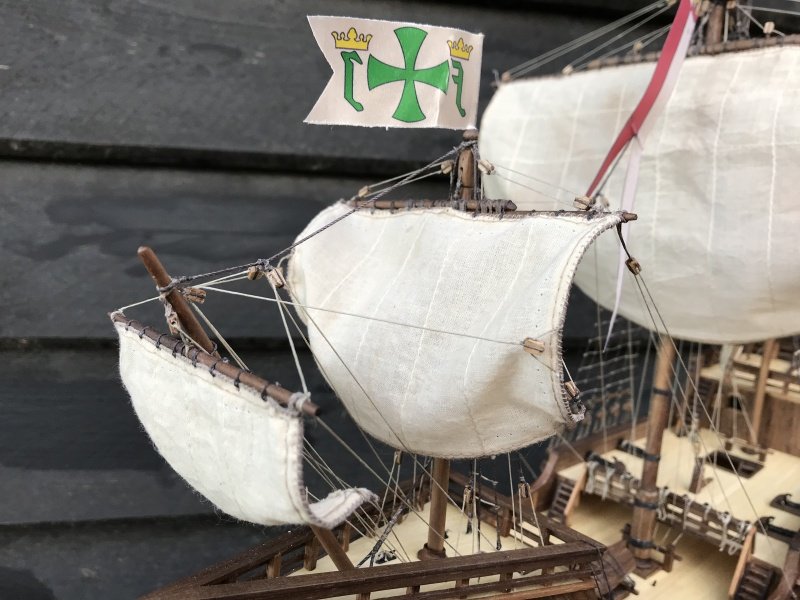
Thank you for the conplements. I decided not to go with red crosses on the sails, due historical vagueness about the truth of red crosses on the Santa Maria..
- CaptainSteve and MESSIS
-
2
-
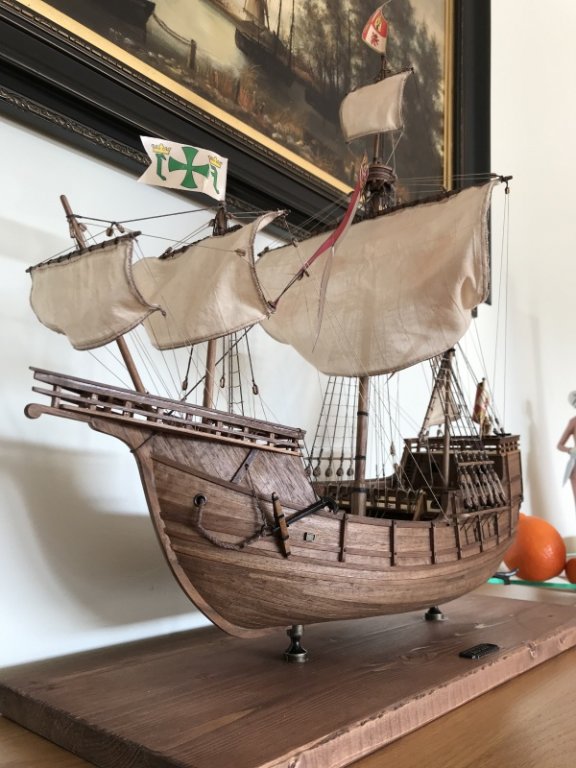
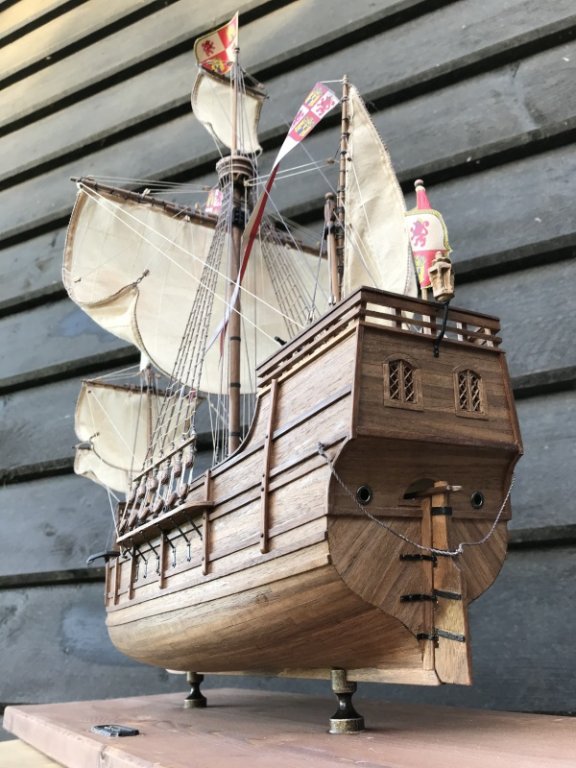
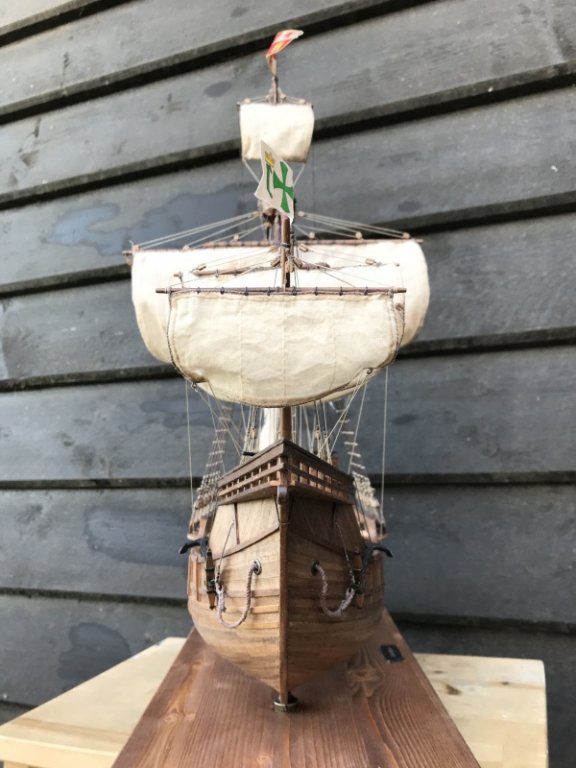
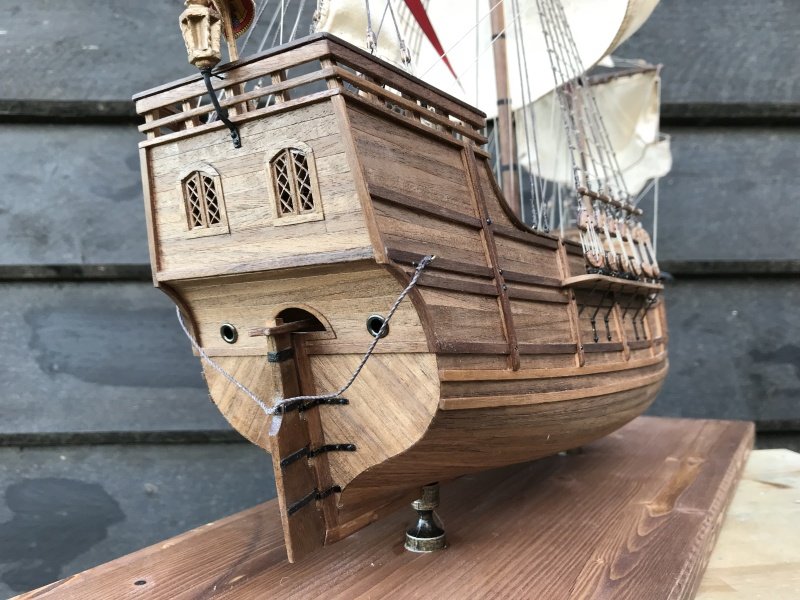
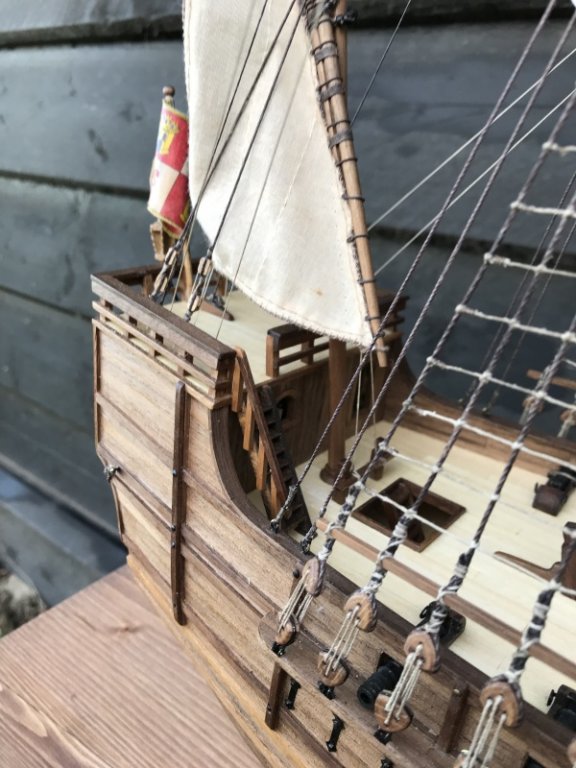
**The final Chapter - Aesthetics over Function...**
Hello my friends,
Today I've finished the build of the Santa Maria. The journey has come to an end so to say and what a ride it has been. For me a big milestone because it's been a while since I've finished a model ship and just in time before the big move starts to our new home!
But, it's not the last update of this ship because I have to make a photoshoot by daylight what I will do first thing tomorrow!
But first, some work has to be done...so here we go!
I've ordered some new rope for the Santa Maria so I can continue with the rigging.

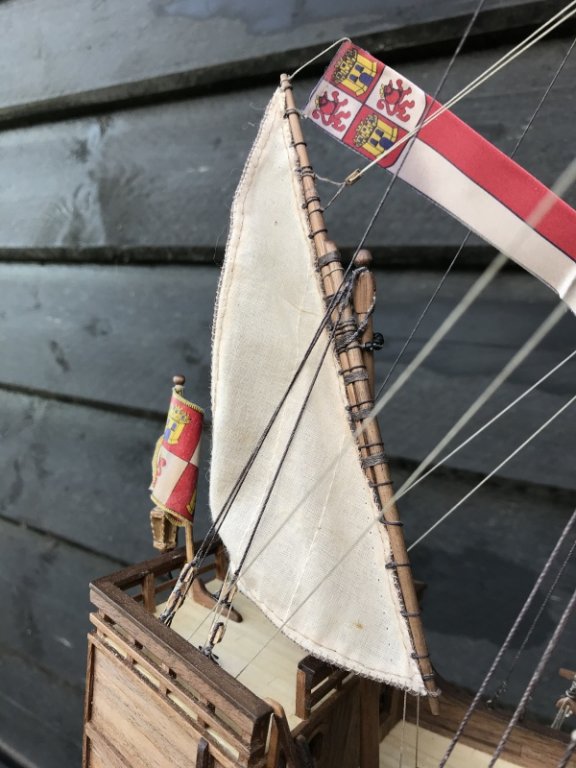
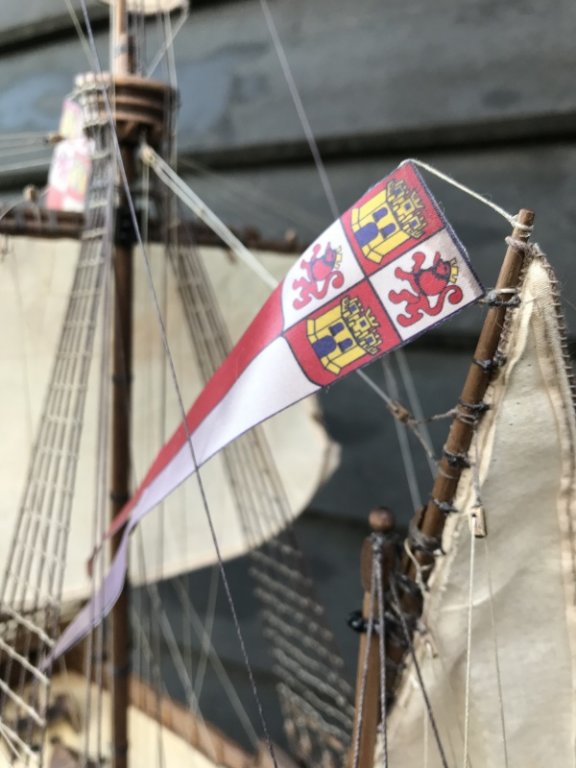
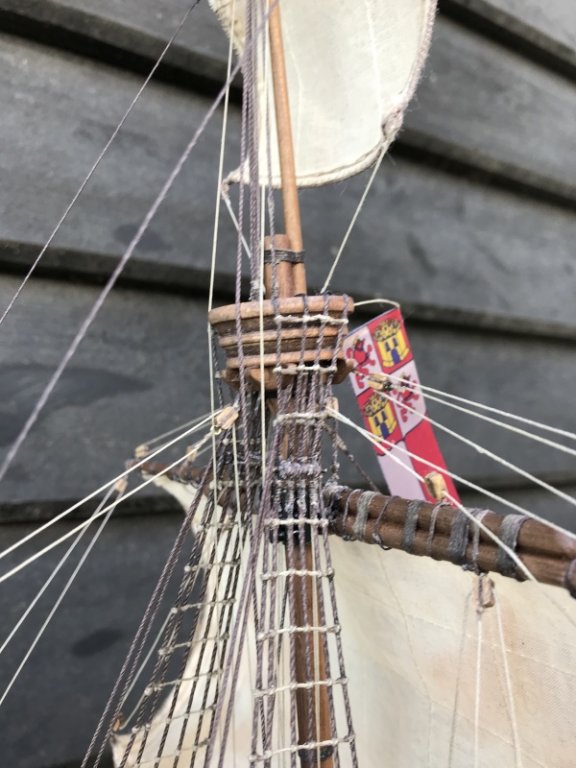
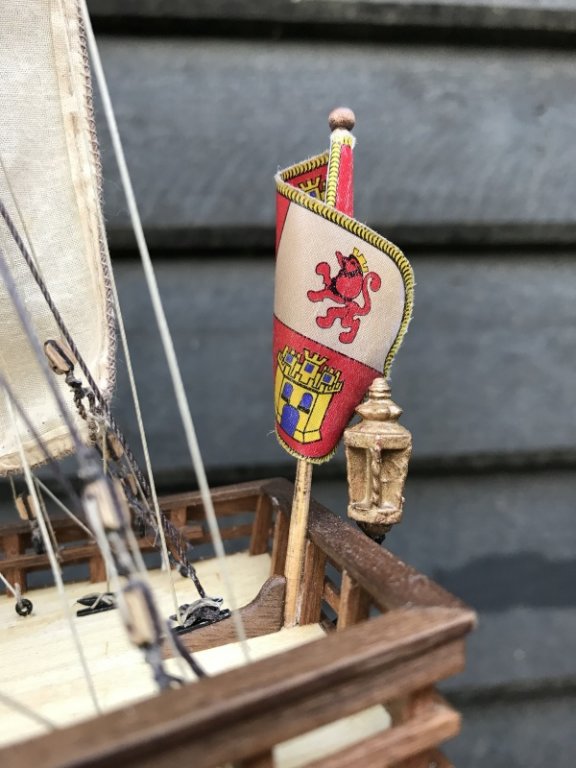
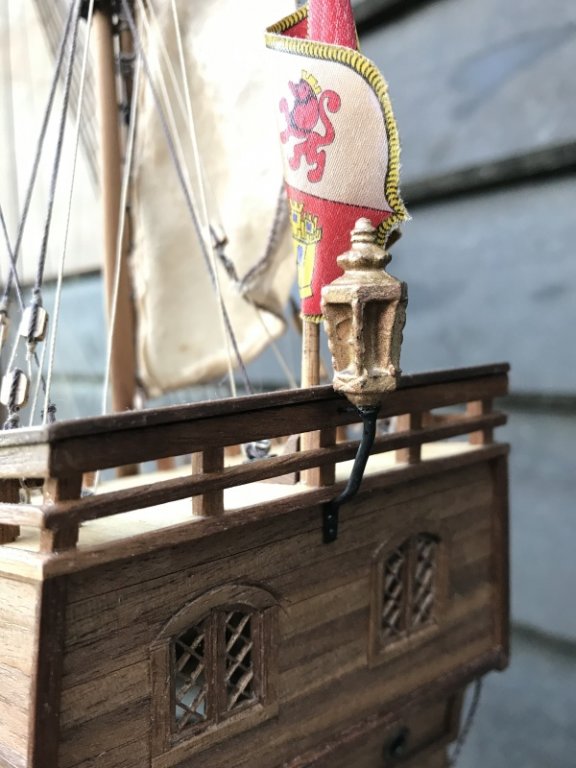
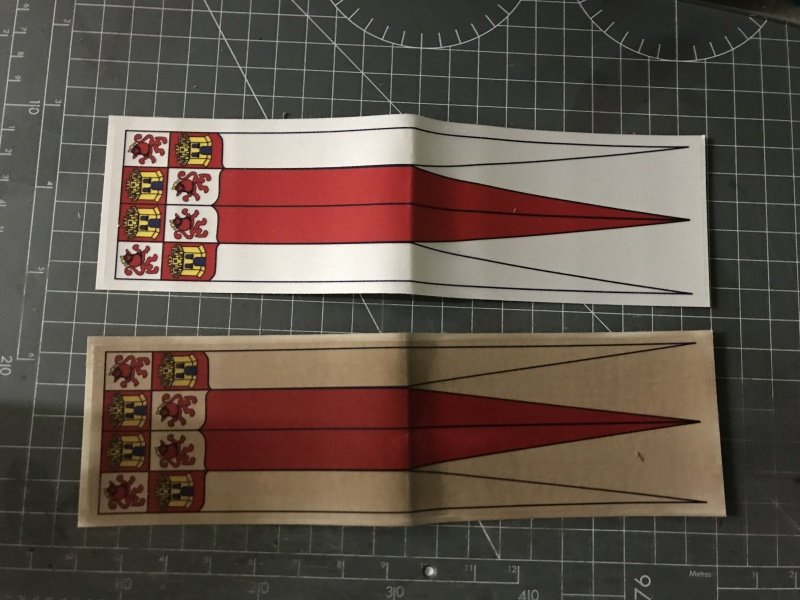
Next I turned to the pre-fabricated flags included with the kit. they are made of a synthetic fibre and they are hopeless....won't complement the model at all. I still need to use them in a sort of way. So eventually I came up with an "easy" solution. I used a woodstain for "ageing" the fabric and it worked!!
It's time to raise the flag(s) and set sail to the new world! Bon voyage!
Next update will be a complete shoot of the model, like I said earlier....stay tuned!
regards,
Peter- Binho, marktiedens, vossiewulf and 9 others
-
12
-
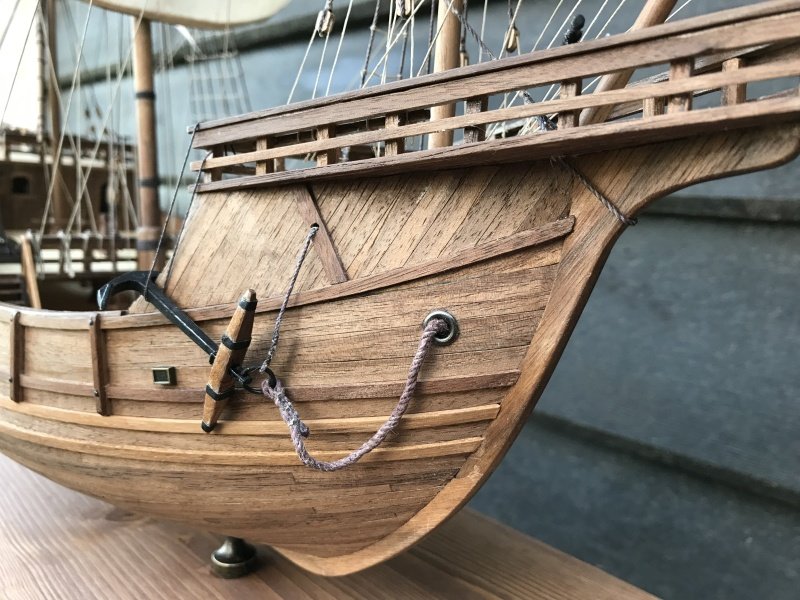
She is growing! Beautiful work. Do you paint the top black?
-
Ooh yes! That’s a pretty sight! Look at that “rear end”...of the ship I mean...😬
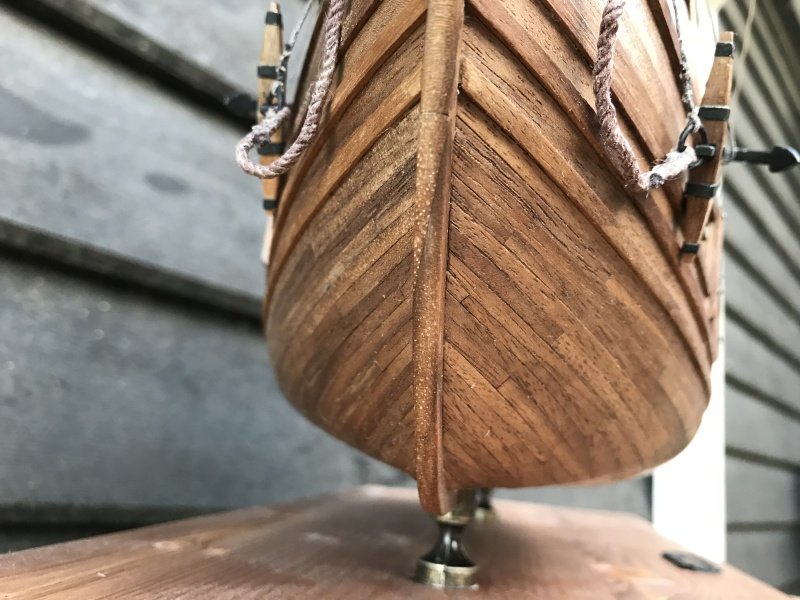
also the stem is very nicely done sir! Great job!
-
-
Clean and crisp work. With some experience you will become an excellent shipbuilder.
-
Well, well well.....nice work Sir. Clean lines and clean work. When this ship is finished I believe you are ready for a more complex vessel.
When bending wood, there will always be a little recurve, so make sure you make the mold more curved than it supposed to be.excellent work so far...keep it up Will!
regards,
Peter
-
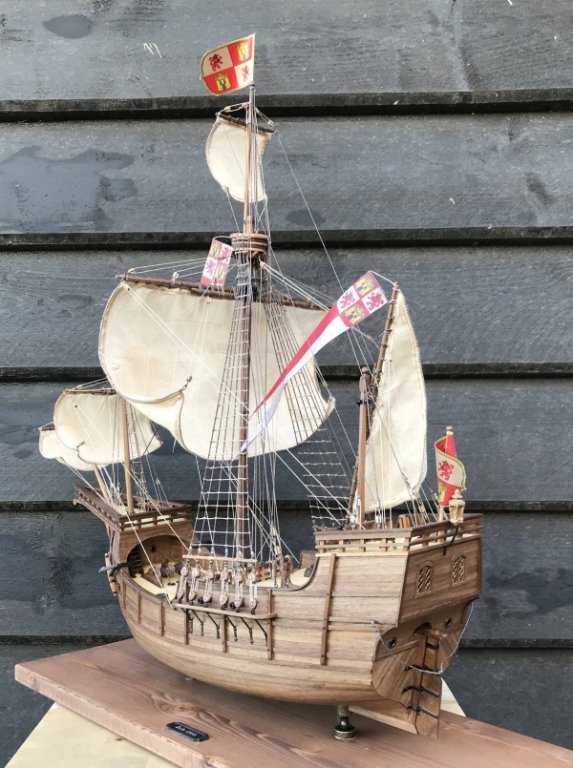
27 minutes ago, MESSIS said:
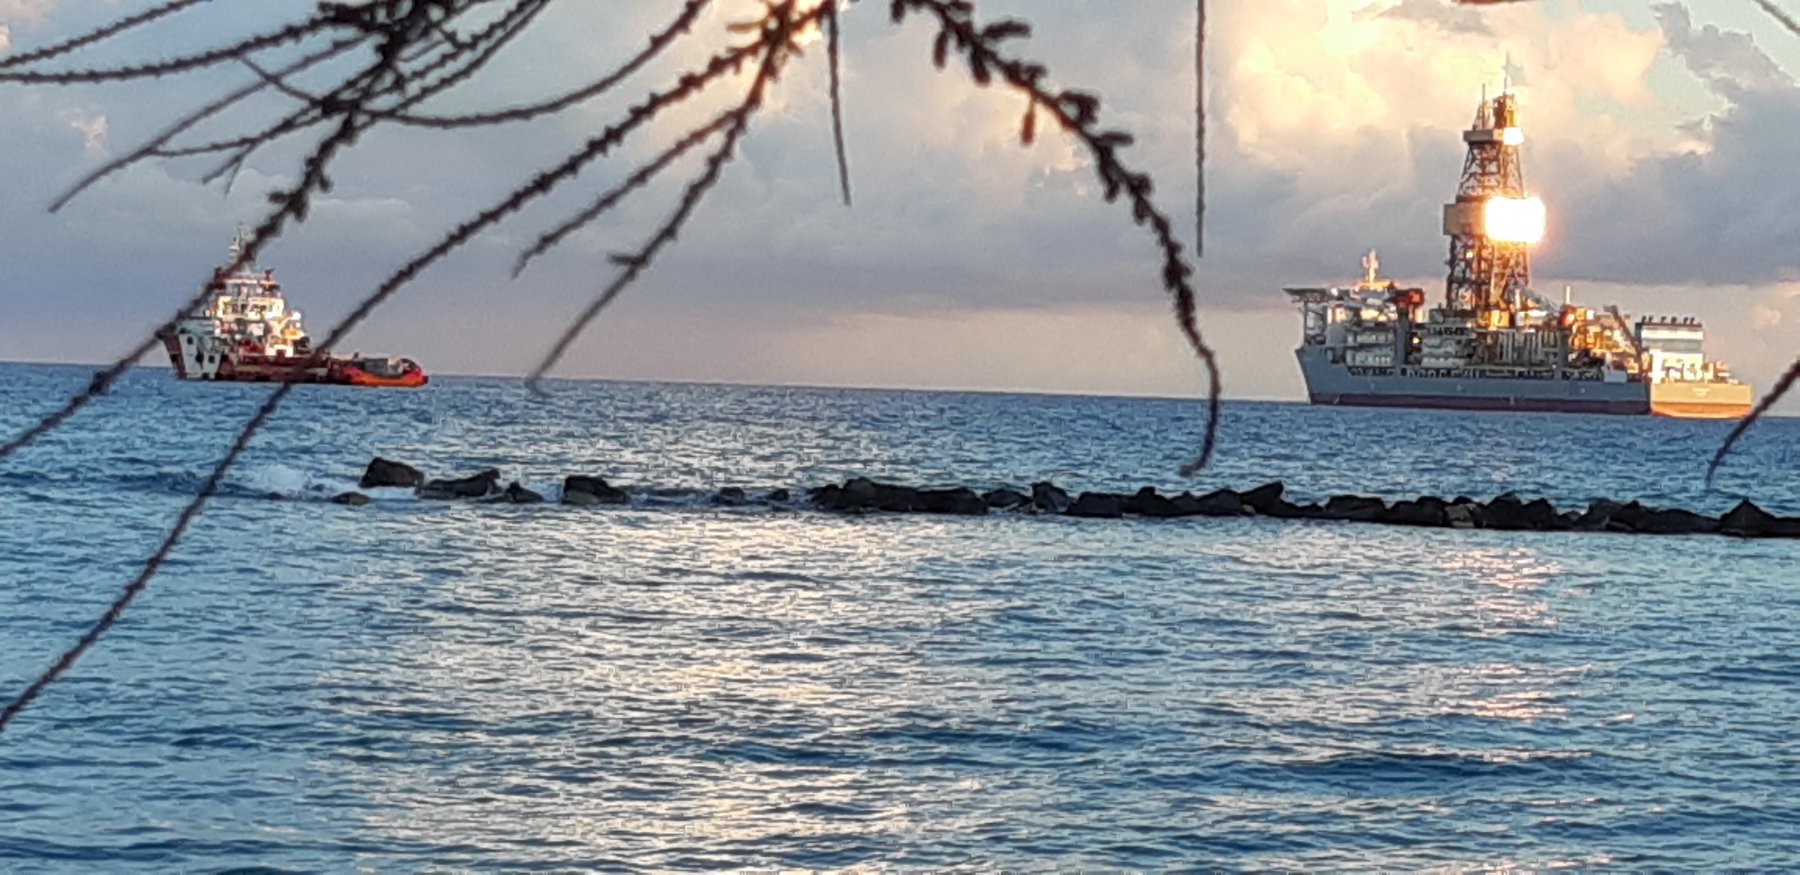
Gunwale almost done with 14 planks in total. Though today the shipyard, as I already mentioned, has closed for two weeks.... the shipyard master will be busy by the visit of his grandson -a three months old petit officer, not of the Cyprus Navy, he is a British subject.
Limassol its now spring over 18° C. and the colours of the sea are beautiful! (picture: Limassol Port, harbor tugboat is piloting Natural Gas Drill platform)


Lovely site, just stunning! Have fun with the visit of your grandson! What a gift that must be...😉
-
38 minutes ago, MESSIS said:
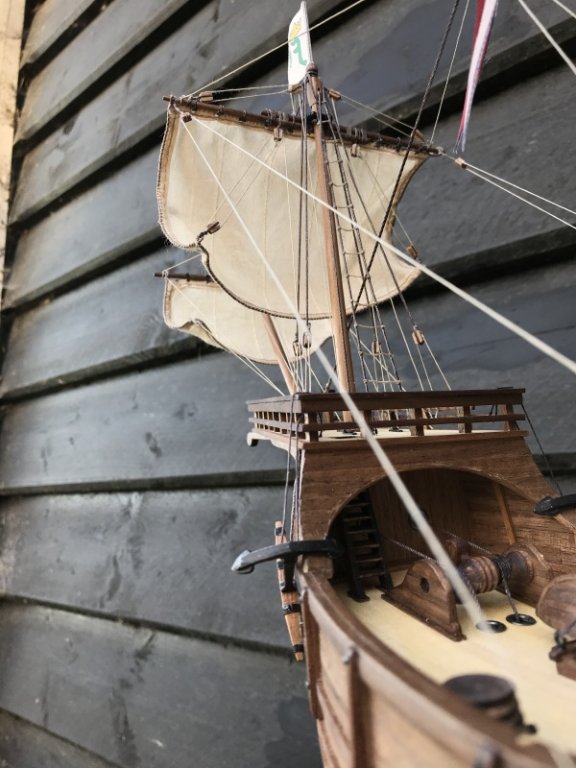
Love it Peter! It became a very beautiful model. Did you weathered the sails? The colour fits great.
Yes, I used the tea stain trick. Some love it, some don’t because tea has tannen into it and it can slowly deteriarate the fibers of the cloth of the sails. a ship I made years ago don’t show any damage on the sails whatsoever.
thank you my friend, also for the trigger to emulate wind into the sails.
-
10 hours ago, Backer said:
Well done Peter
The finish is in sight 🏁
Yes, it is...almost there! Thanks my friend!
10 hours ago, kier said:Nice sails Peter, with a great technic included.
. Well done
Hi Kier, thank you I hope you liked it!
9 hours ago, nikbud said:Excellent work on the sails Peter, She looks fantastic, a real masterpiece.
You, Sir, have set a standard I can only wish I could emulate.
Best of luck with the rest of the rigging.
👍👍🧙♂️
I need all the luck I can get, so send it to me please. Thanks for the compliments sir!
8 hours ago, Wallace said:I can only second what the others have already said Peter, very nicely done sir. That sail "trick" does lend a certain dynamic to the build I must say.
Thanks Mark, I didn’t know the outcome before I started with the sails, so I’m pleased with the results so far.
- BLACK VIKING and Baker
-
2
-
-
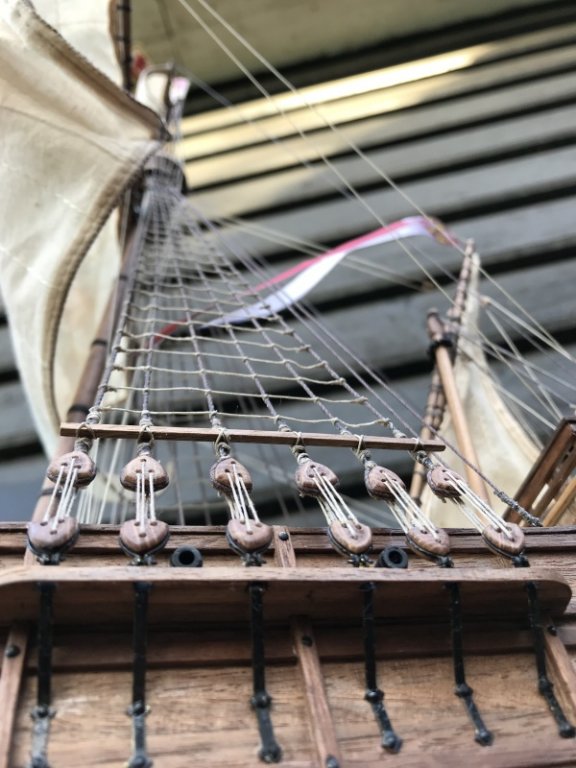
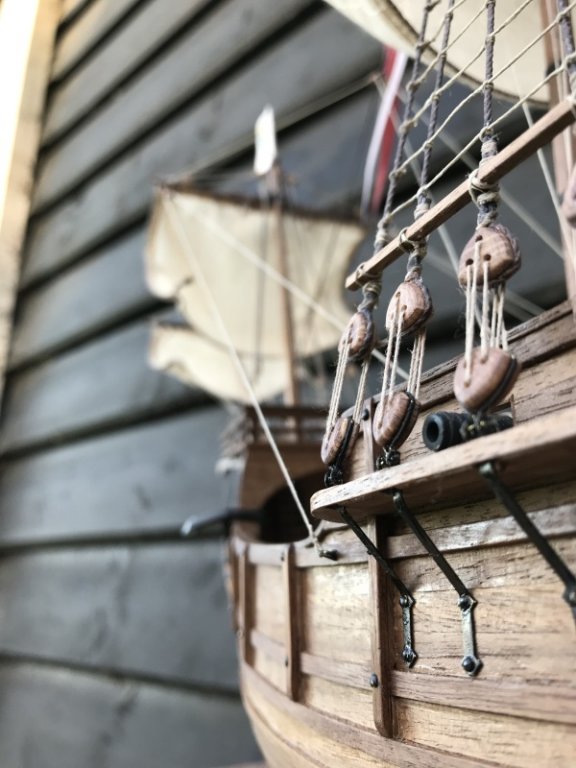
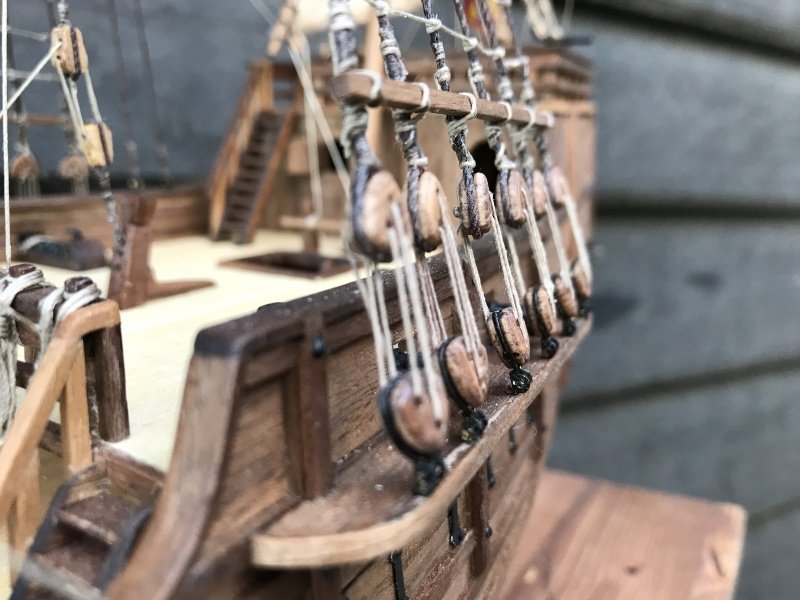
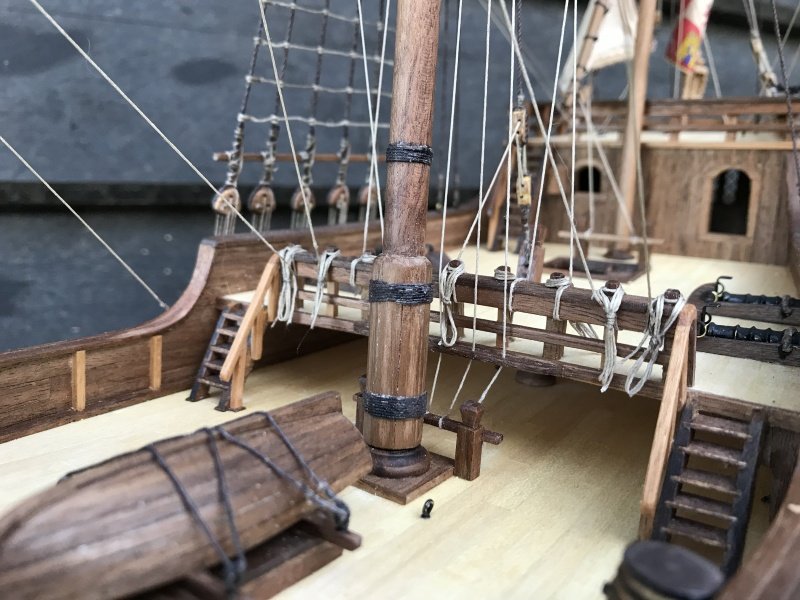
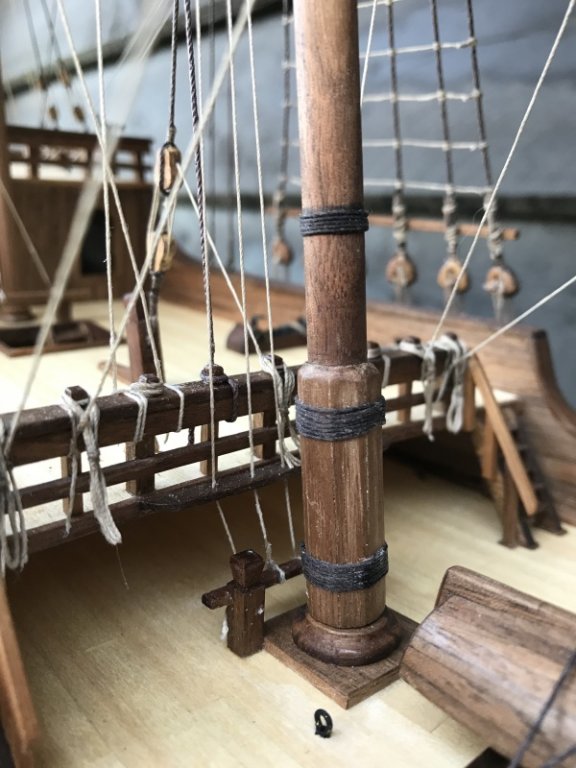
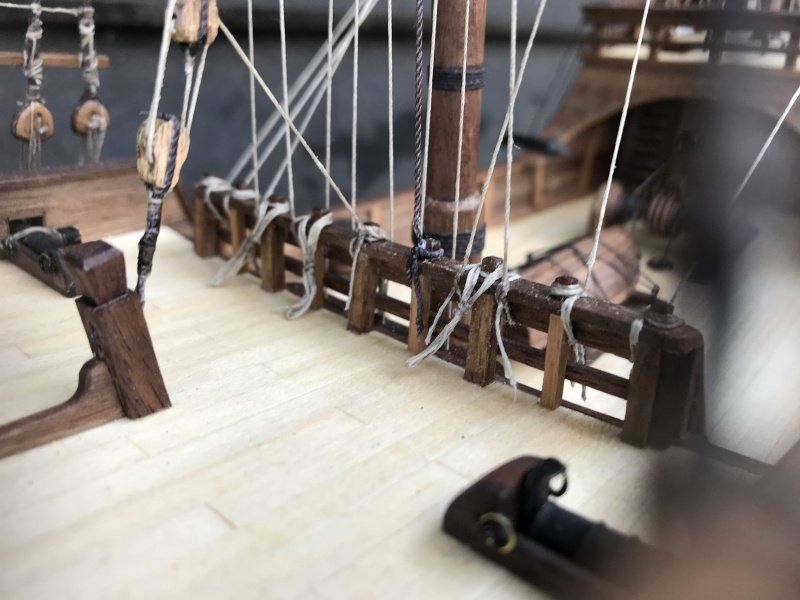
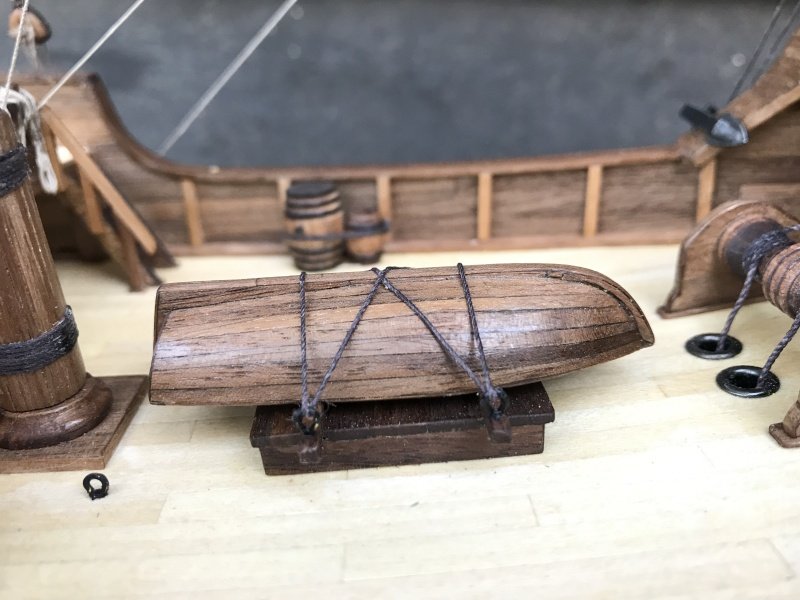
**The end of a rope....**
Hello my fellow mates,
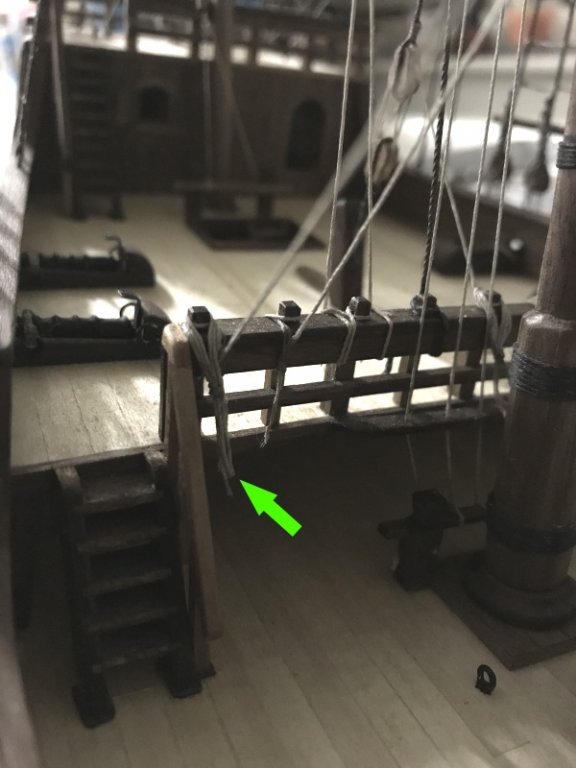
A new update from the Santa Maria shipyard. It is one of the last episode on the yard. I think maybe two more updates after this one and then she will be finished. But for now, a small glimp of her current state.
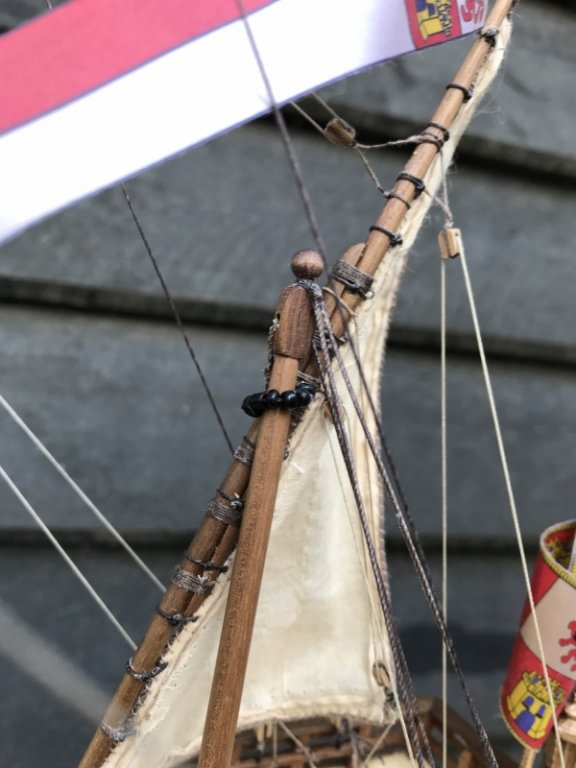
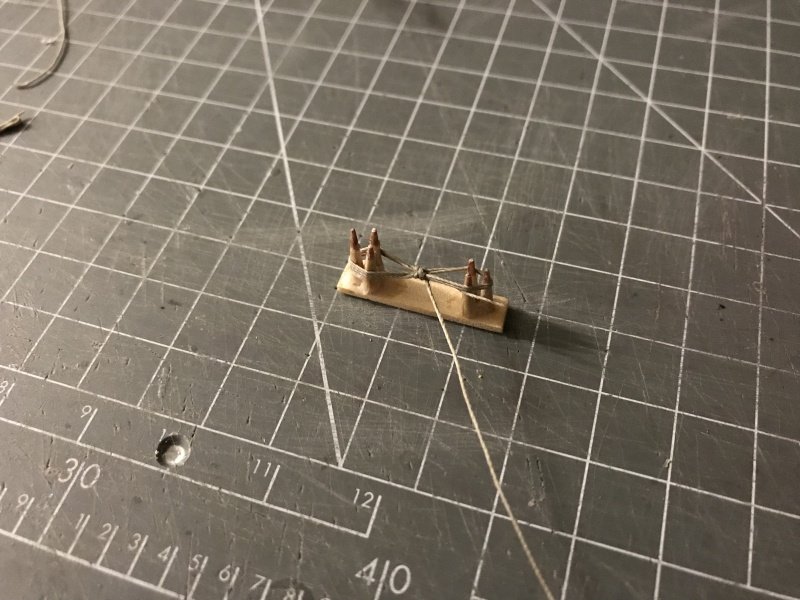
I start with a few pictures how I attach a block to a piece of rope...
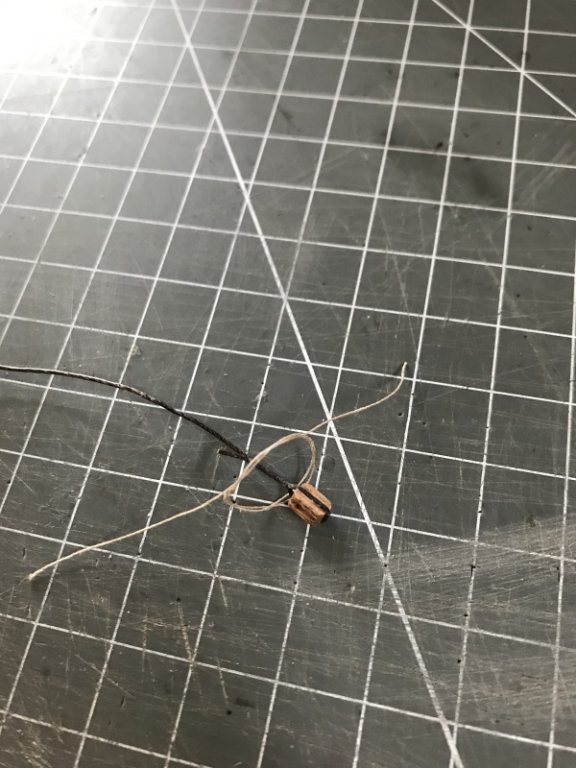
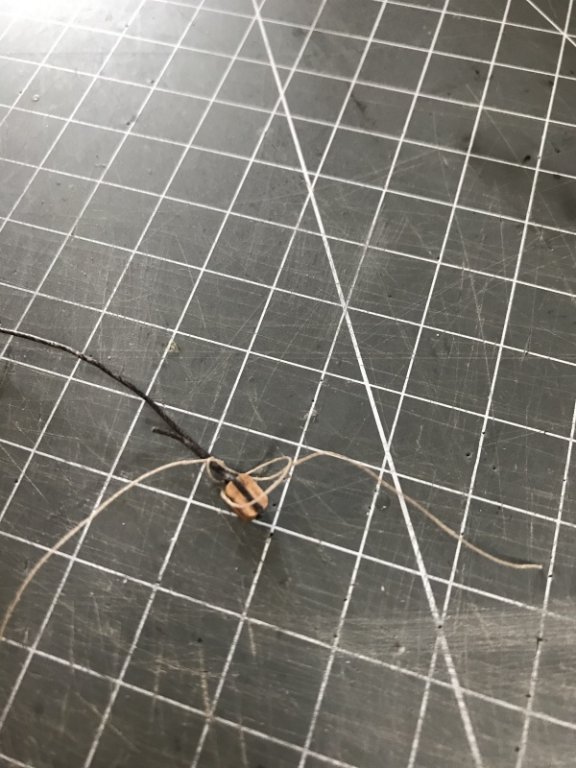

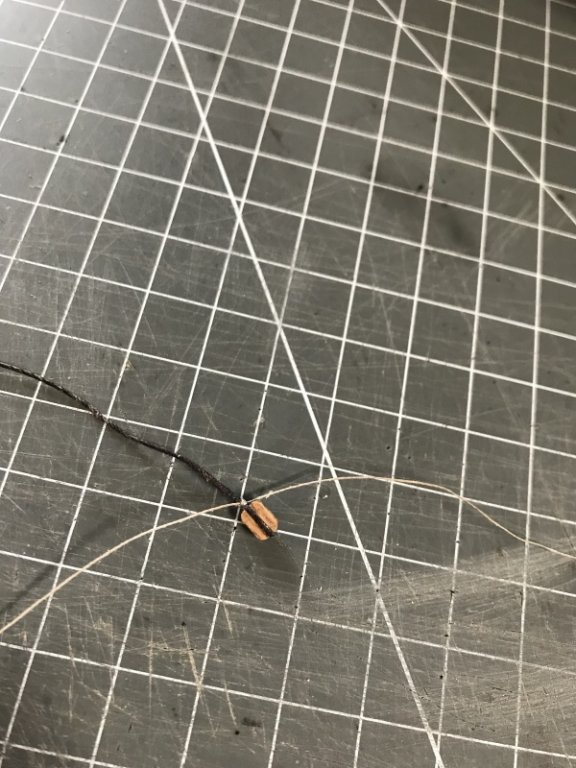
After this, I attach the block to the bold rope of a sail.
Some violin blocks in action, they hold the main yard.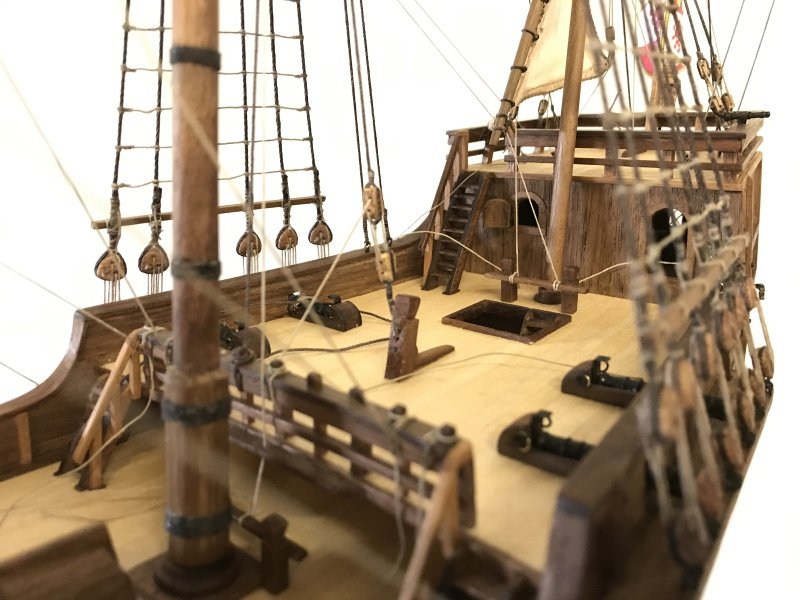
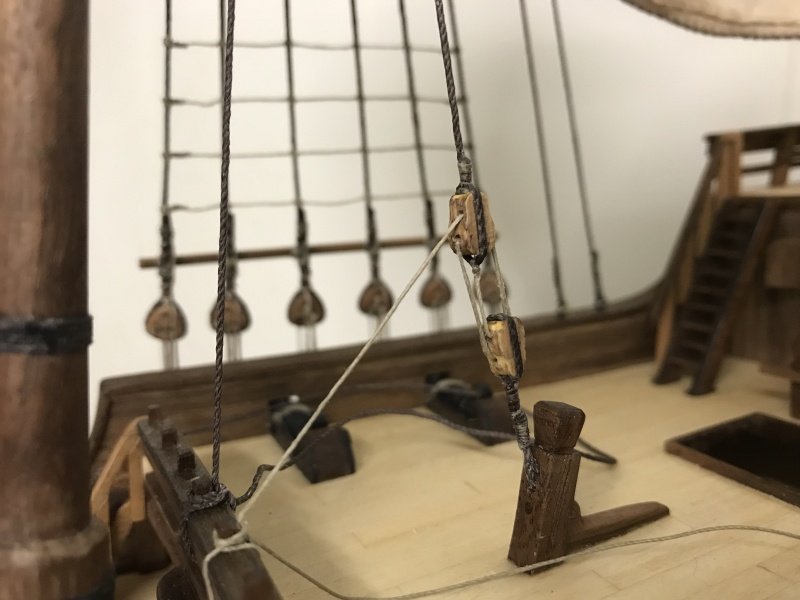
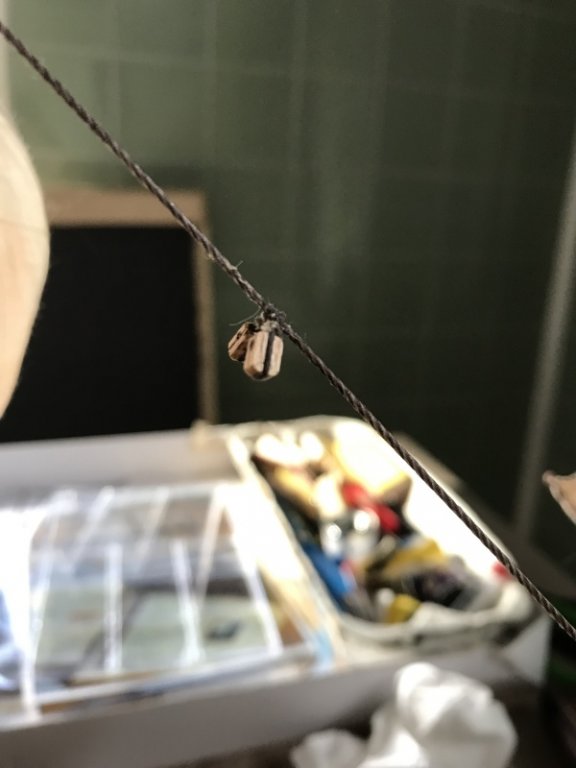
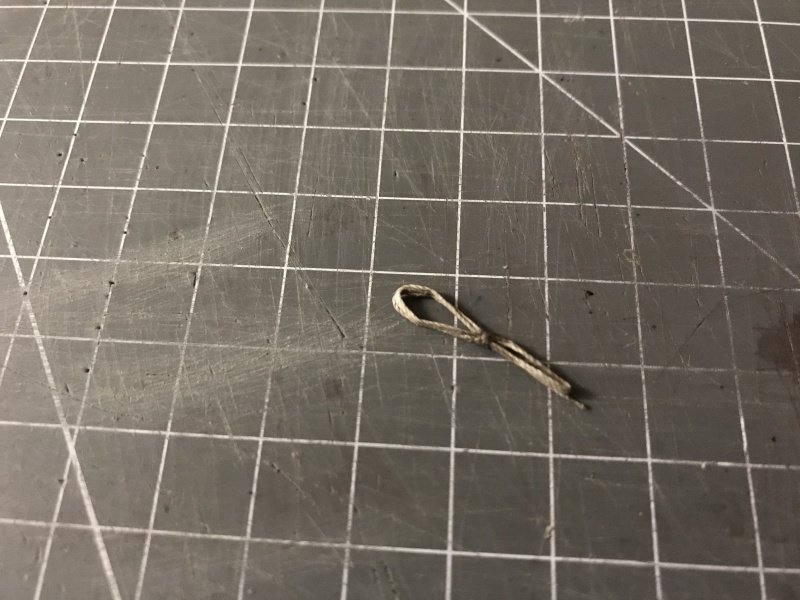
I found it difficult to get glue on some parts of the ropes. I do not have a needle and syringe, so I use a piece of brass wire and bend the end part in a oval shape. I put the CA glue on the oval part of the wire and press it against the knot of the rope.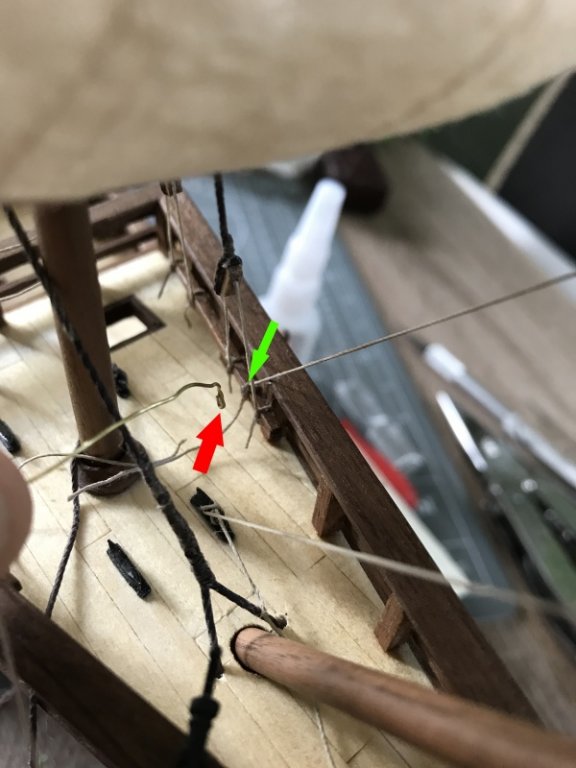
Then Murphy shows himself.....no more rope.....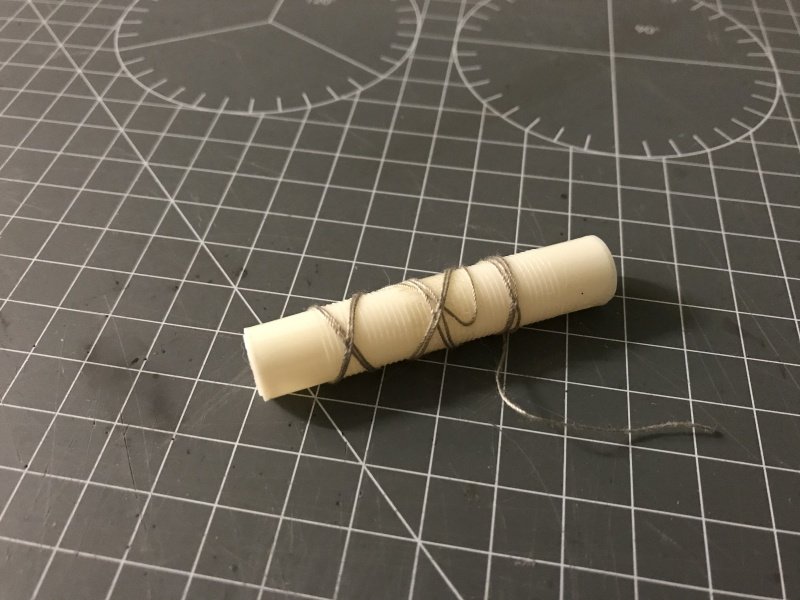
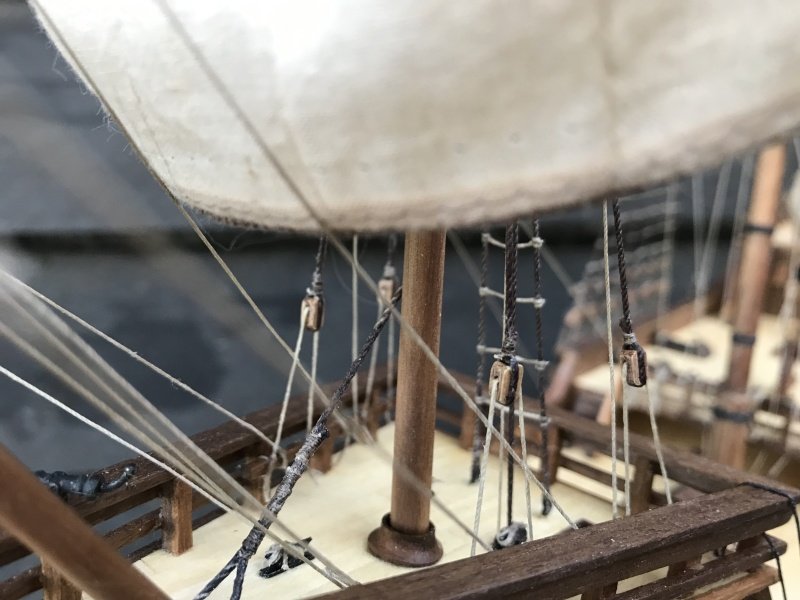
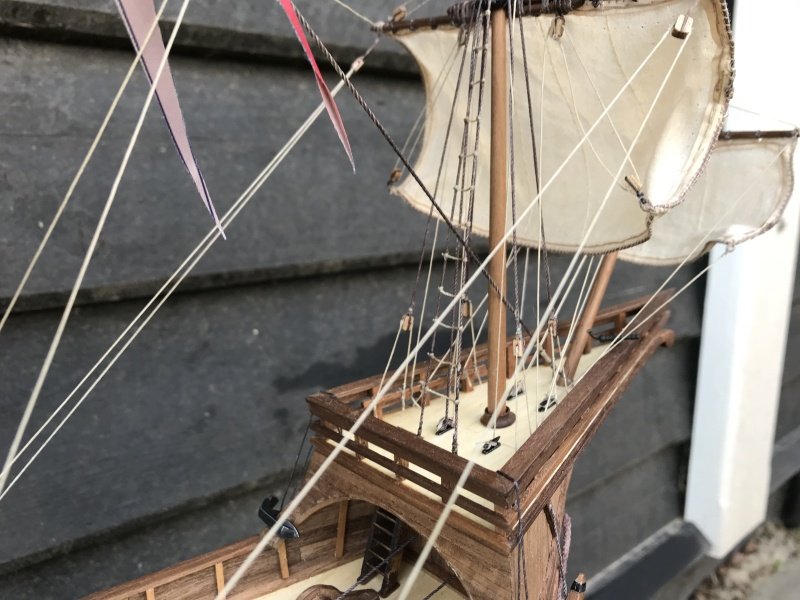
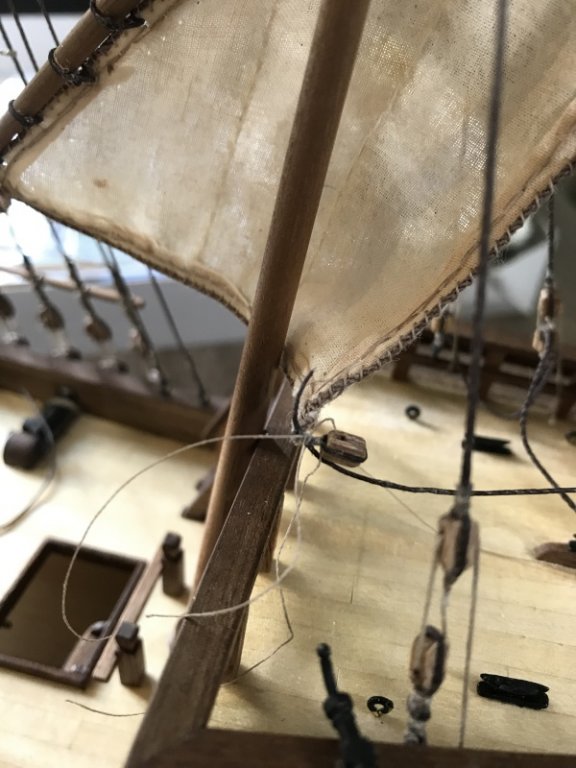
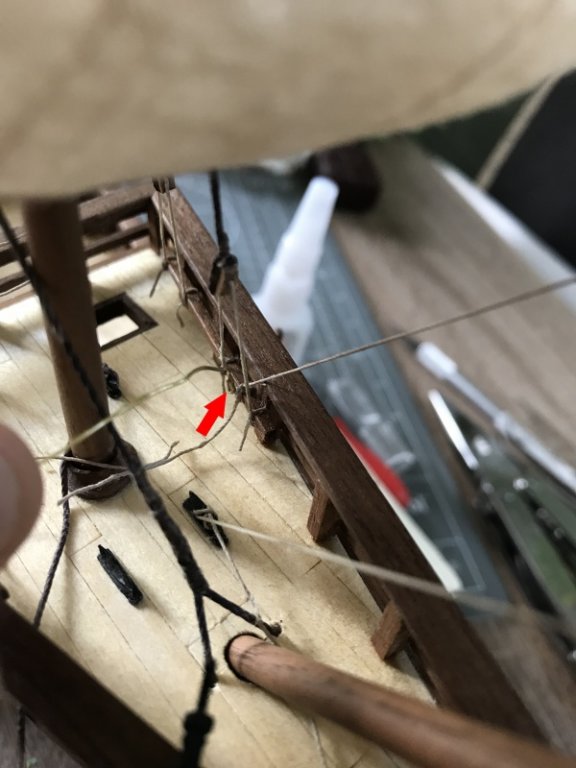
So I ordered more rope of the same colour and thickness. In the mean time I thought about the sails. I wanted to do it a bit differently than just attach the sails to the yards and let them hang as if there's no wind. Like hanging your clothes on a line to dry....
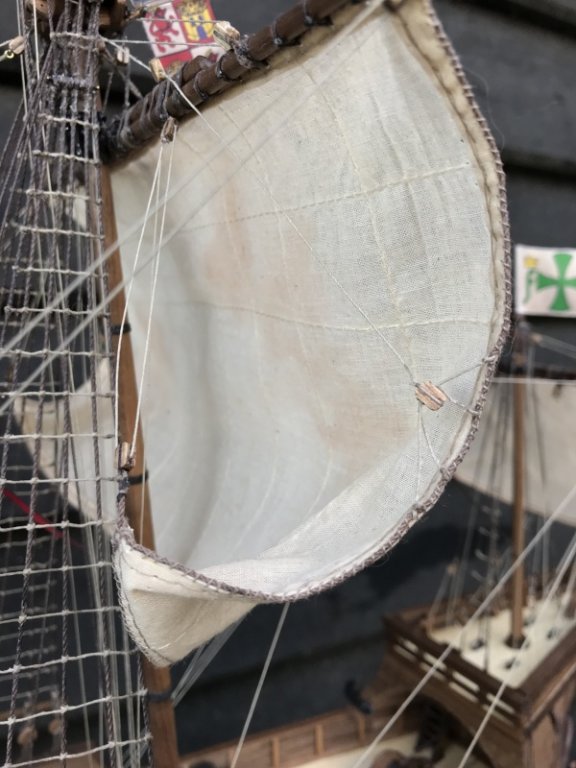
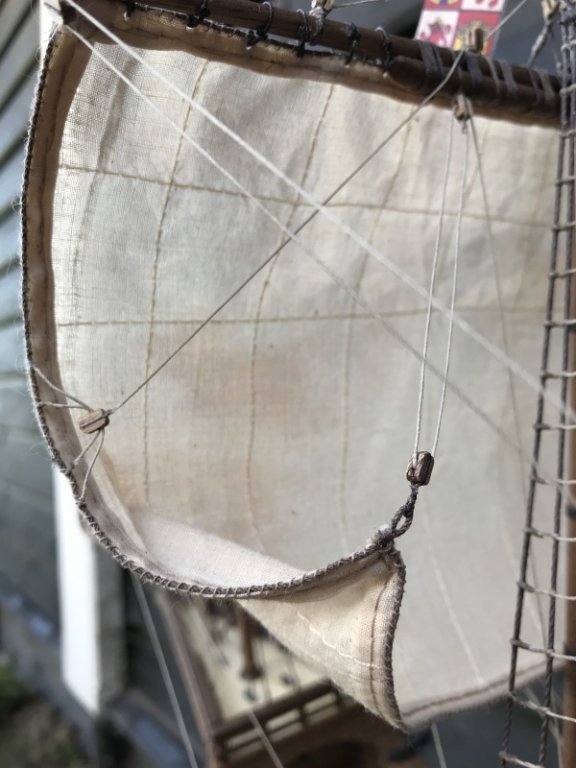
Messis or Christos my Cyprian friend brought me on ideas to simulate if the wind is blowing into the sails. To achieve this, there are several methods, but I choose the method which I can do with the material I have in stock. "brass wire"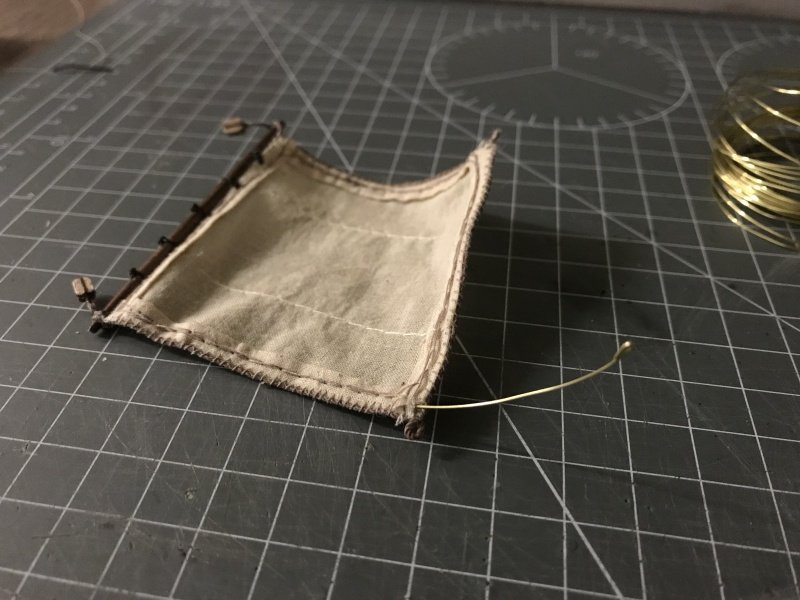
Now I placed some brass wire into the seem of the sail, I can bend the wire and give the sails some volume. I only put the wires into the sides of the sails. Not the bottom or the top!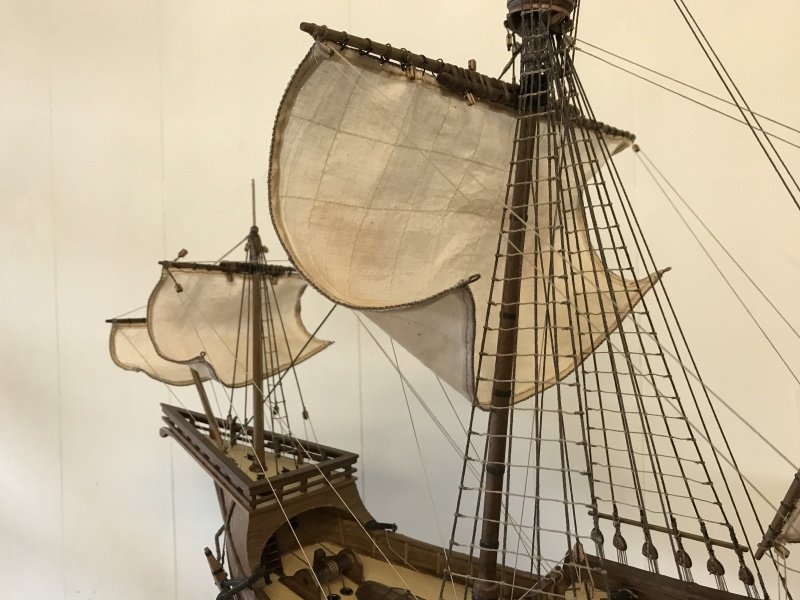
So, this was it for this weekend, hopefully I receive the ordered rope pretty fast so I can continue with her....Stay tuned....
regards,
Peter- CaptainSteve, nikbud, Scottish Guy and 8 others
-
11
-
On 2/18/2019 at 1:21 PM, SteveColes said:
1 for 1 against. Any other thoughts? Please🙏
So, what do you prefer?
Let that choice be leading. I personally like them without.
Peter
-
4 hours ago, Binho said:
I really like your Santa Maria, looking really good! My Dutch is rusty, but prachtig! Heel mooi gedaan
Looking forward to see how it turns out with the sails on.
Thank you Binho! Your Dutch is spot on, where did you learn it?
-
Well Cyprian, I’ll take a seat for this one. Building the same ship twice must be love for the ship!
this 2nd kit of AL comes with paint and Figueres?
good luck and you are on a quick start allready.

HMS Victory by Paragraf – Shipyard – 1:96 - CARD
in - Kit build logs for subjects built from 1751 - 1800
Posted
very very very well done sir!!! It's a hard task to do and you nailed it! respect!!