


Katsumoto
-
Posts
419 -
Joined
-
Last visited
Content Type
Profiles
Forums
Gallery
Events
Posts posted by Katsumoto
-
-
-
7 hours ago, nikbud said:
Amazing work as always.
Everytime you post more progress you show me something I want to incorporate into my own build. You are also setting a standard that I can only wish for!
Did the chainplates come with the kit? I will need to find some similar, the ones in the Pinta kit are poor in comparison..
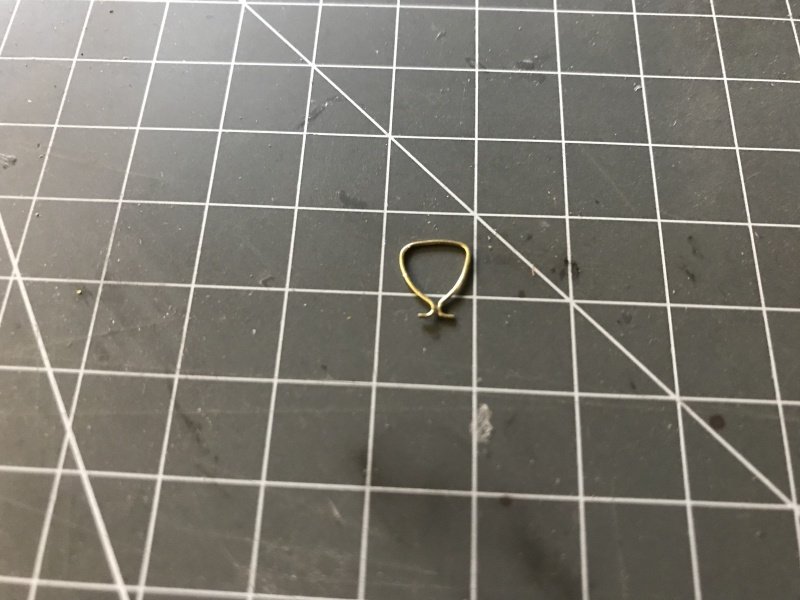
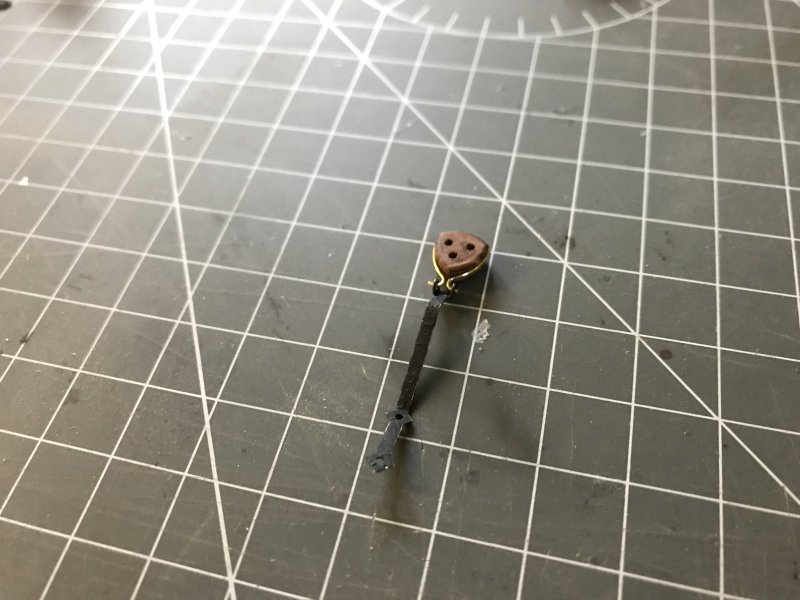
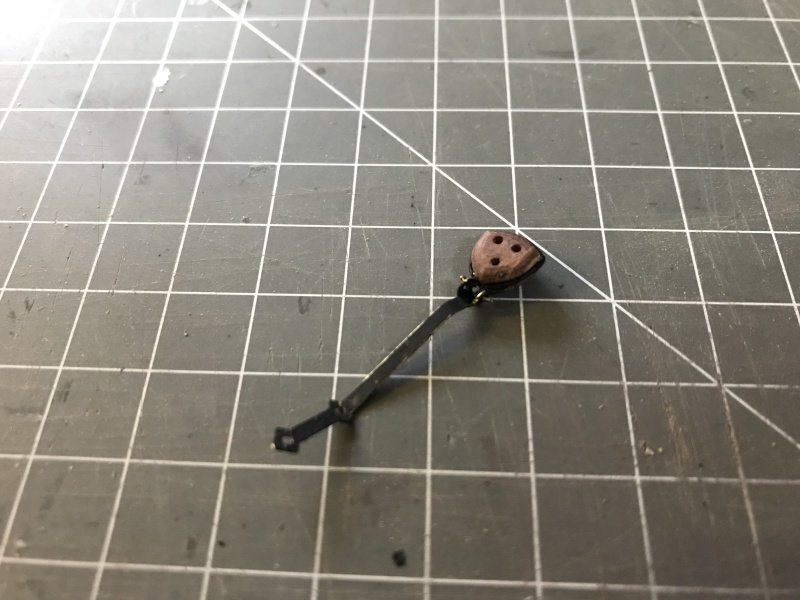
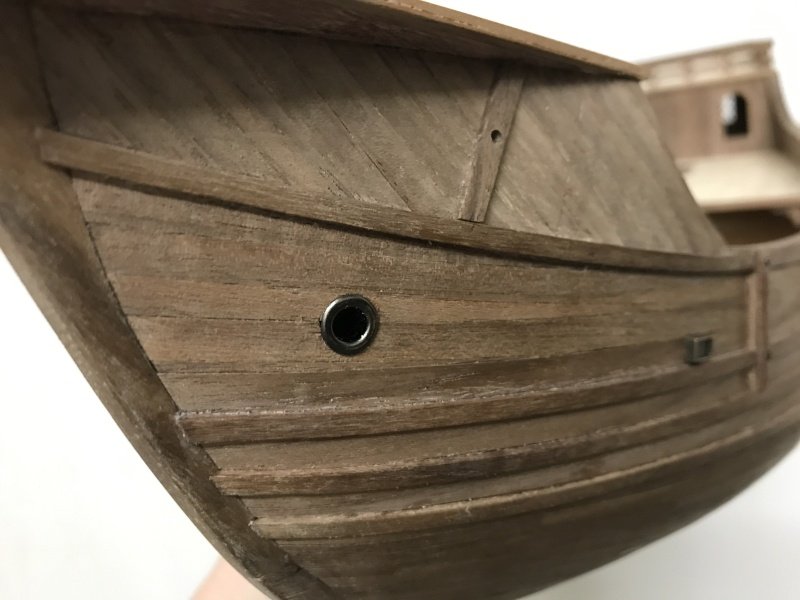
Thanks Nikbud I am sure you will accomplish the same quality with your ship mate, she looks stunning. The chainplates comes with the kit. The solution to connect the deadeyes to the chainplates is of my own making. The kit provides rope to tie the lower deadeyes to the chainplates. I will only use rope on the upper deadeyes what makes sense ofcourse.
-
10 hours ago, MESSIS said:
Thats precision work!
Well done Dutchman.
Thanks Cyprian! 😉
8 hours ago, Wallace said:I can only agree, just so precise and clean. A true inspiration sir. Your railing turned out very well, the water worked
") I like this model, it was this ship that got me interested in wooden model ships quite a few years ago. Your build sets the bar very high but it is certainly something to strive for
I like this model, it was this ship that got me interested in wooden model ships quite a few years ago. Your build sets the bar very high but it is certainly something to strive for
Thank you Sir. The Santa Maria got you into shipmodeling you say? What is it about this model that got your attention? I think you’ll do better with your Victory. 🙂
-
**Stairs**
Hello Sir’s,
After seeing Patrick’s design in his last post, I have tried to find a way to construct this solution. Here is how I have done this.
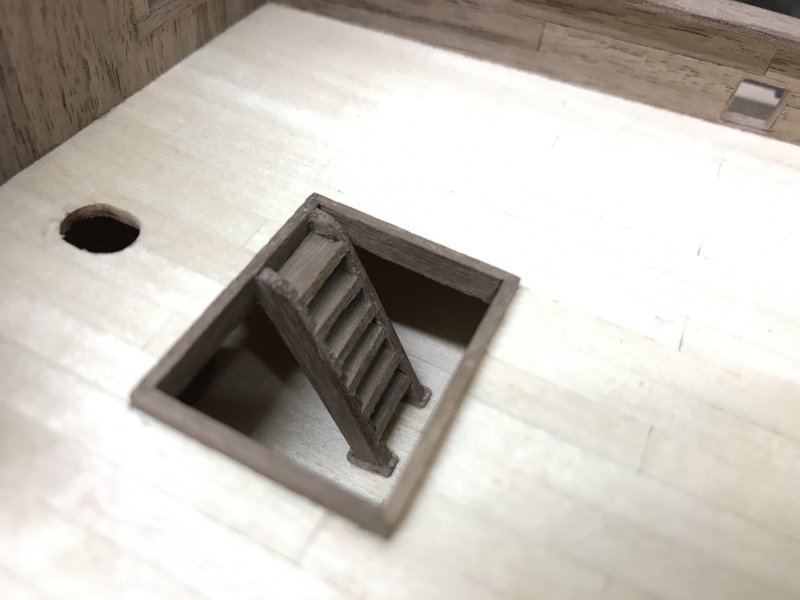
Further along I made the stairs. So the handrails are the same wood, but a bit lighter. This wil darken up a bit after a while.


I had to make a stair out of walnut because of the extra stairs I needed. This was not included in the kit, so had to make one.
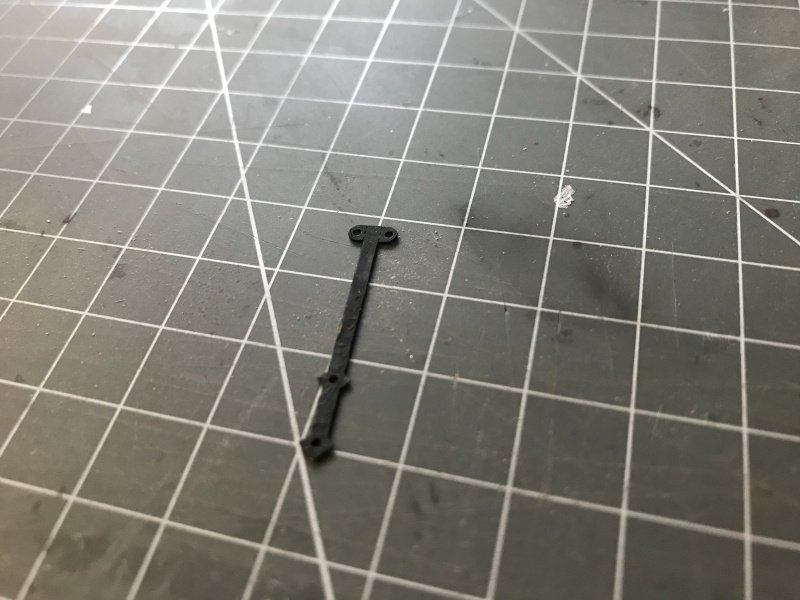
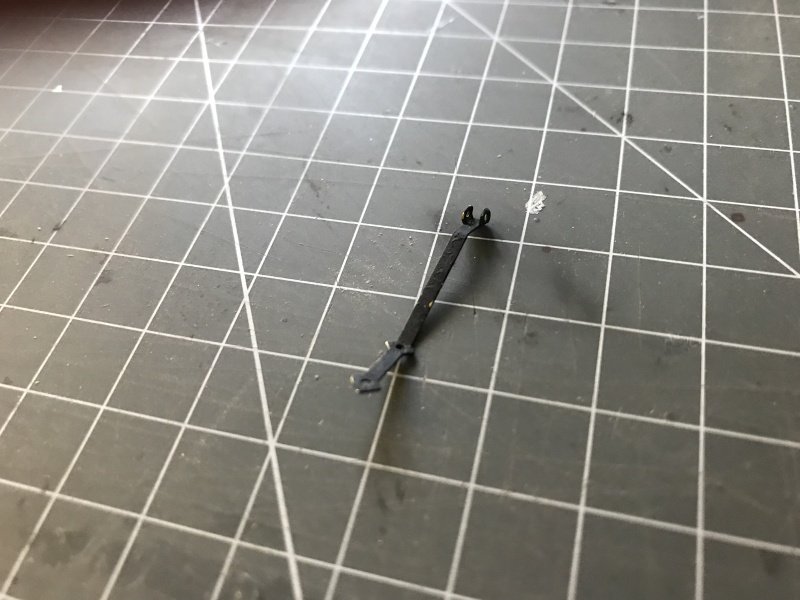
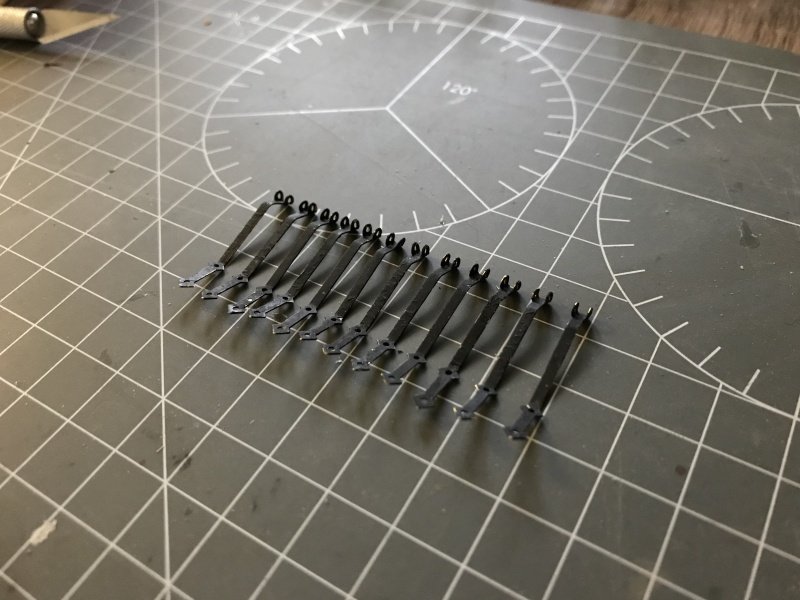
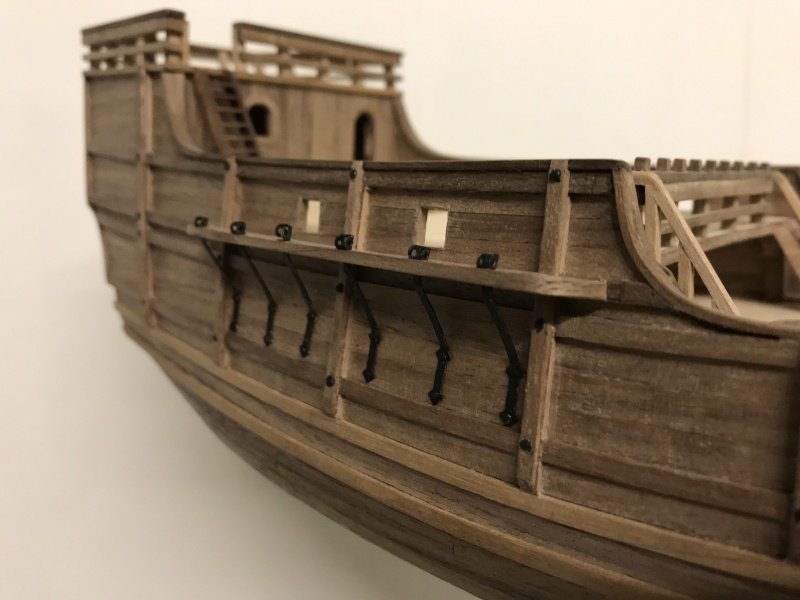
While working on the stairs and railings, I made a start with the deadeyes and chainplates.
On the ship...
That’s it for today Sir’s, more to come later this weekend. Have a nice day and see you hopefully soon!
Peter
-
Lovely view from your balcony! Your ship looks great, and single planked hull which is difficult! Well done!
enjoy your retirement my friend.
-
-
26 minutes ago, Louie da fly said:
Beautifully clean, precise work, Peter. And she looks good, too!
Steven
Thanks Steven!
A sharp knife, a sanding block and some glue does the job perfectly. I’m having fun building and changing her a bit more to my liking. 😉
thanks for stopping by!
-
4 hours ago, kier said:
Hi Peter,
. You state that you have an issue with your top plank. You done the job perfectly, no problem is a problem to you sir.
. Love the pictures.
. kier
Hi Kier,
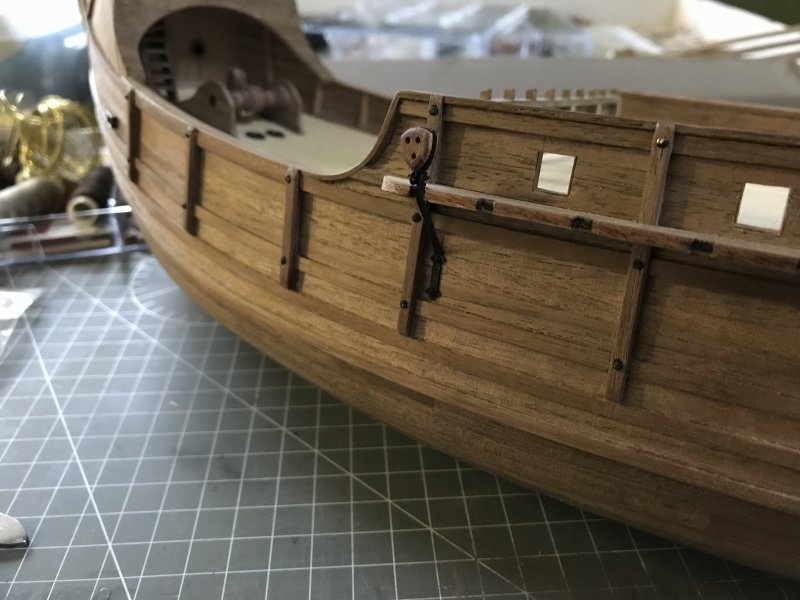
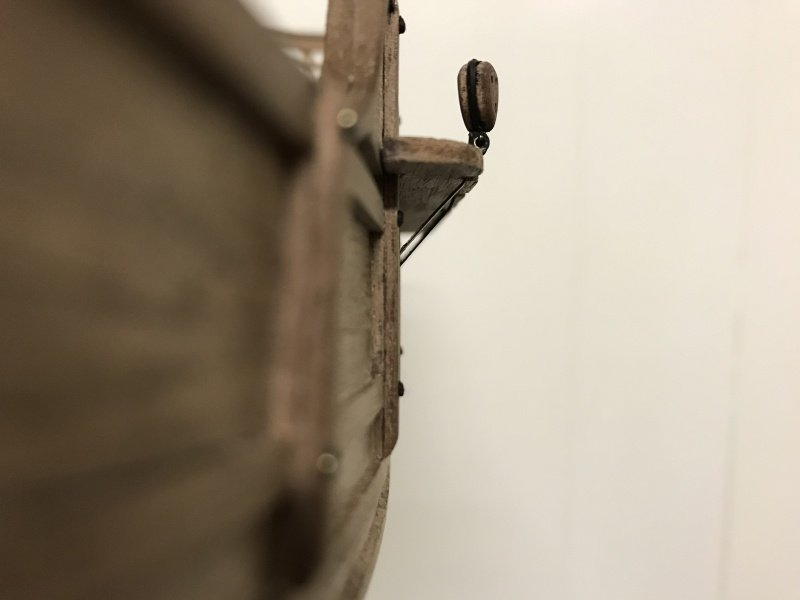
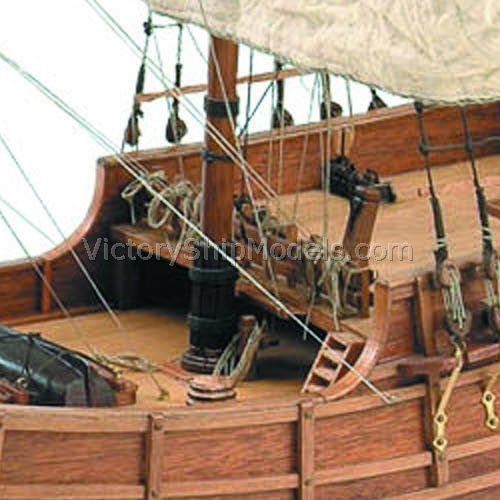
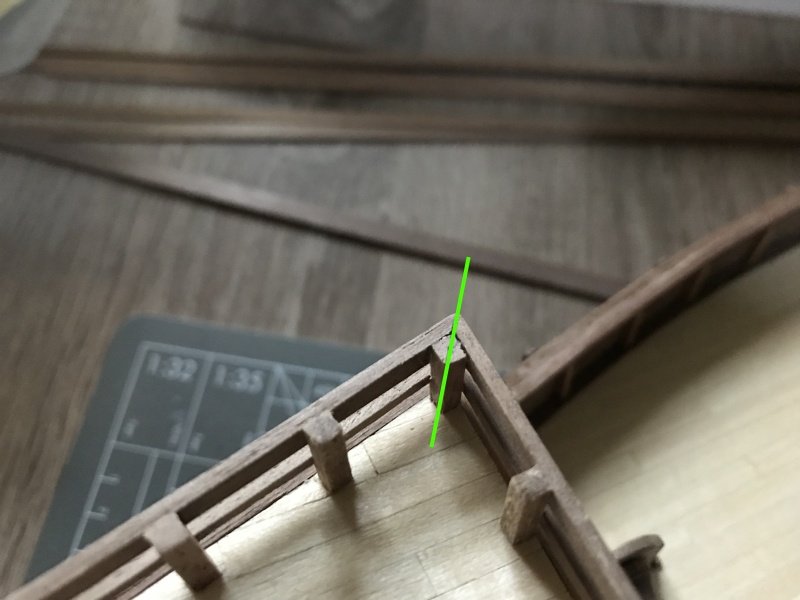
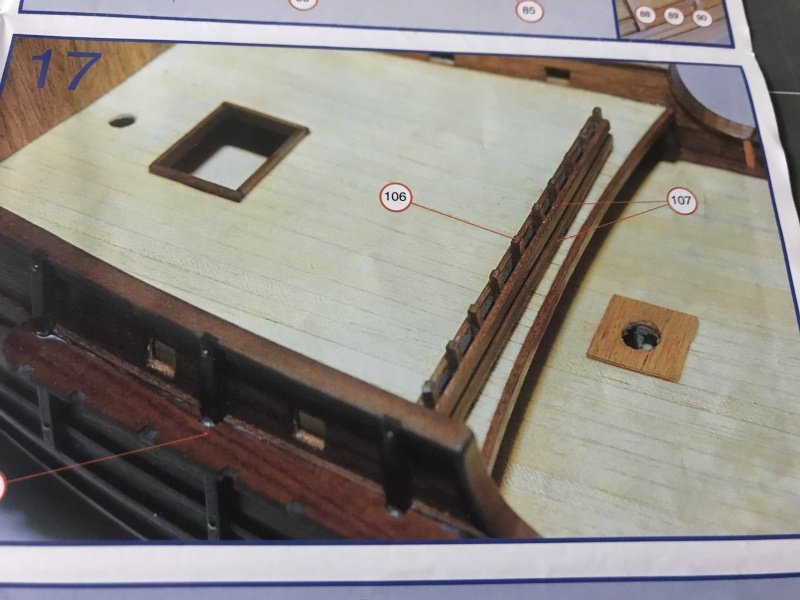
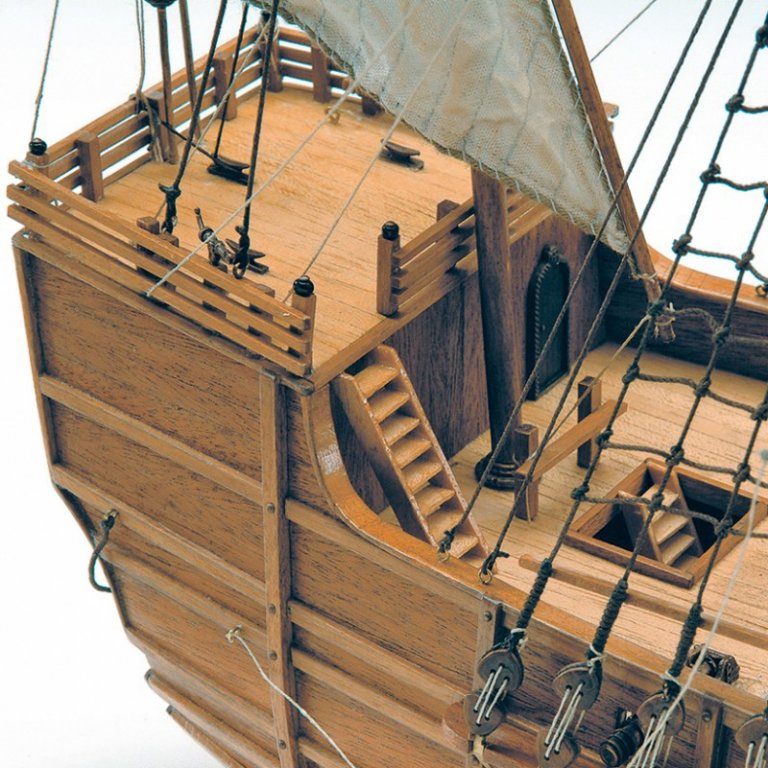
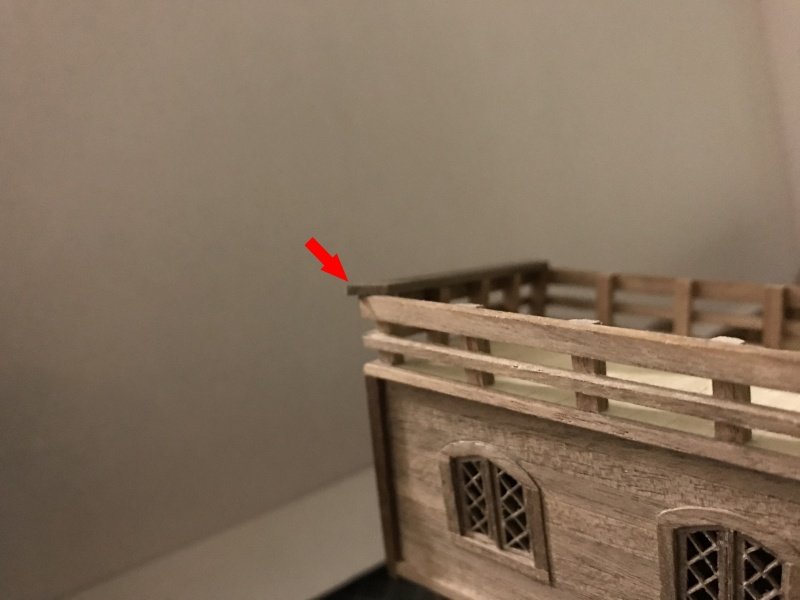
thanks for your kind words Sir! The issue I was refering to, was the top of the railings. I have not a solution to tie the ropes to the fence like it is done on the picture below...if anyone has an idea, please let me know! 🙂
-
**Railings, Railings, Railings.....Rawhide!**
Mesdames et Messieurs - Salut!
Within the Christmas spirit, I bring you a lean and mean update of the ship and I continued on the upper railings. Not much to say, just have a look!
Oh and for the keen observers, I did made a mistake on purpose. I'll explain later, but it is all intentional, but technicaly wrong!
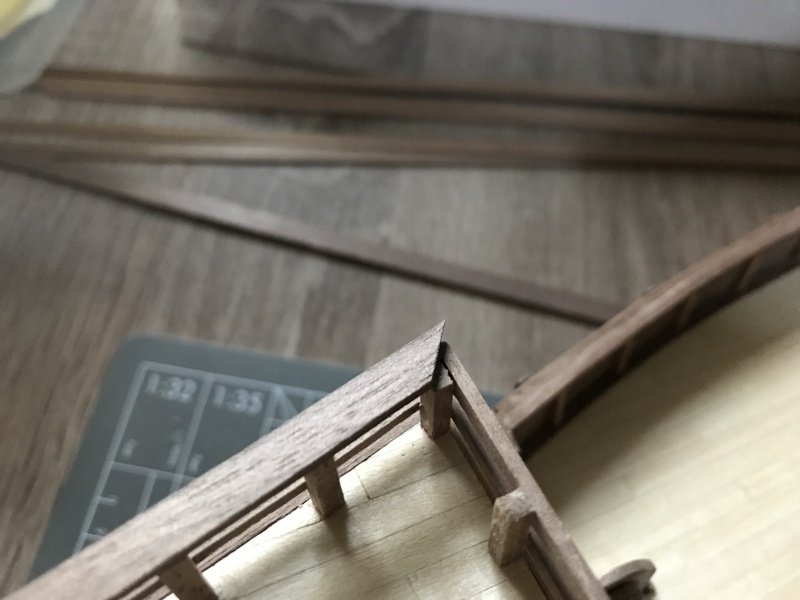
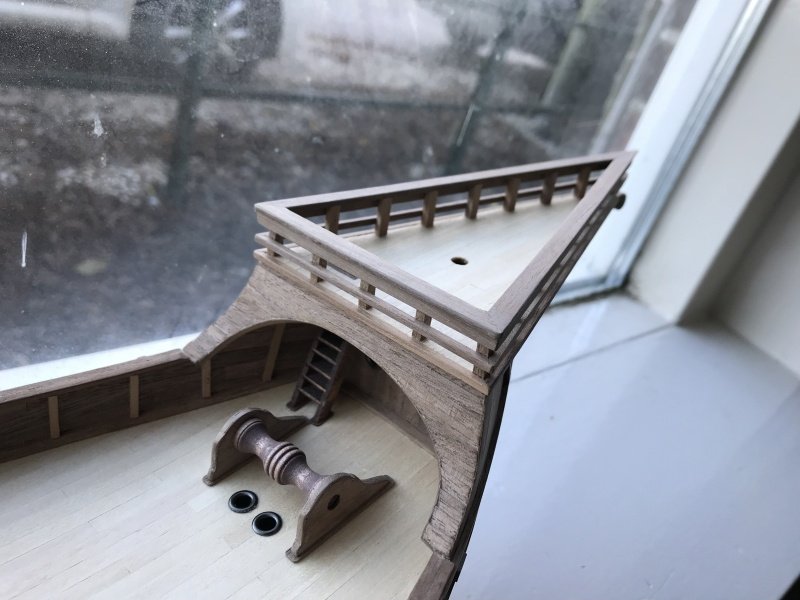
Down the stairs we go...
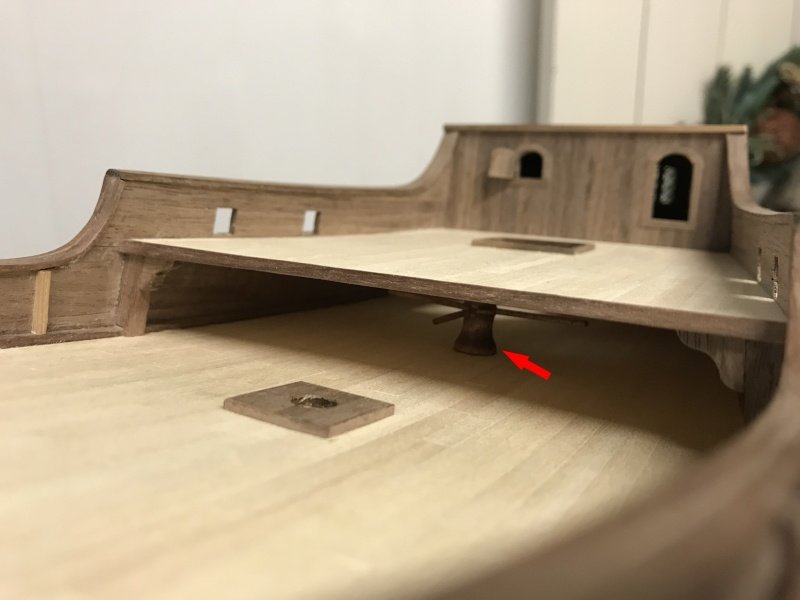
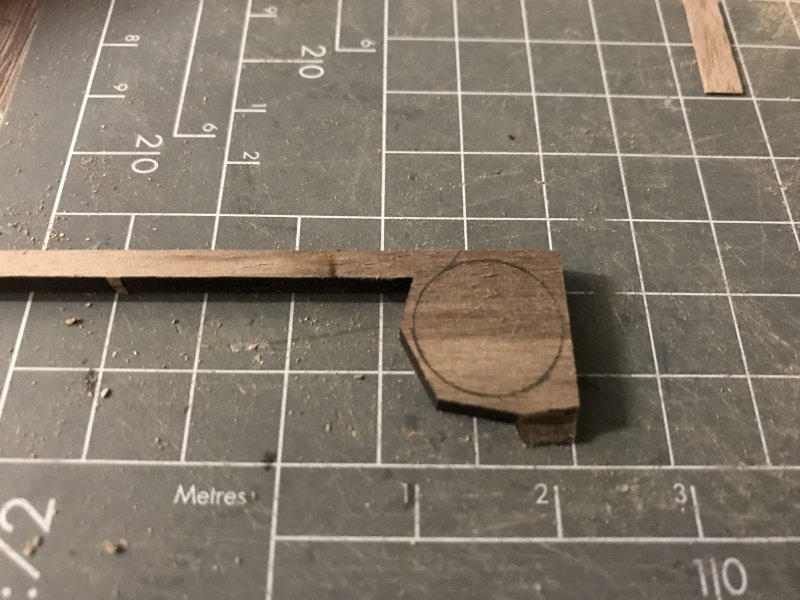
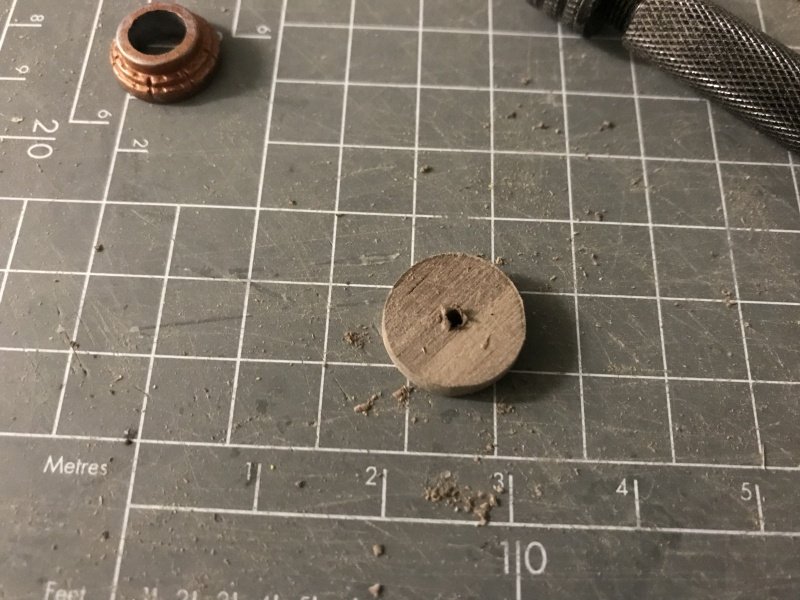
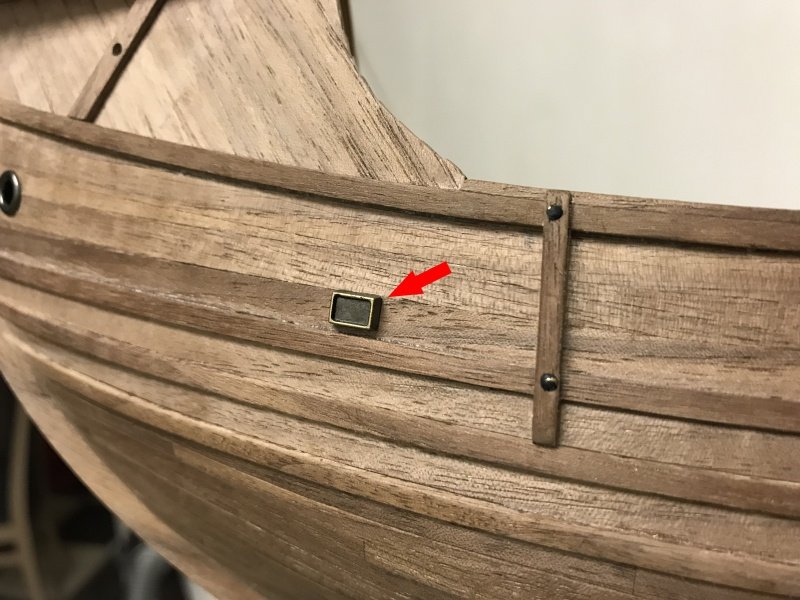
I made a "thingy" for the windlass...to stop the thing when operating it.
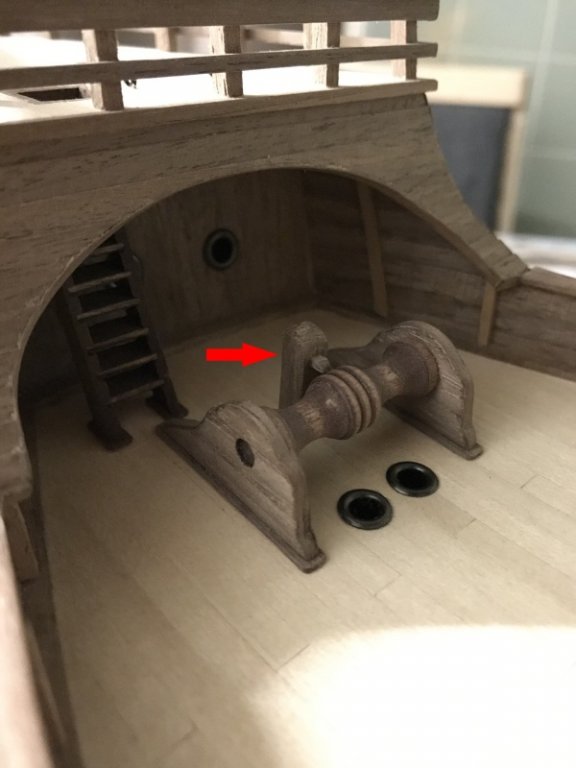
Next....just look...
This is how AL want me to make it...
So I like to continue the style and design I have chosen, so here we go, and oh....it will give me some issues later on when I need to start rigging the ship. But we will cross that bridge when we get there....
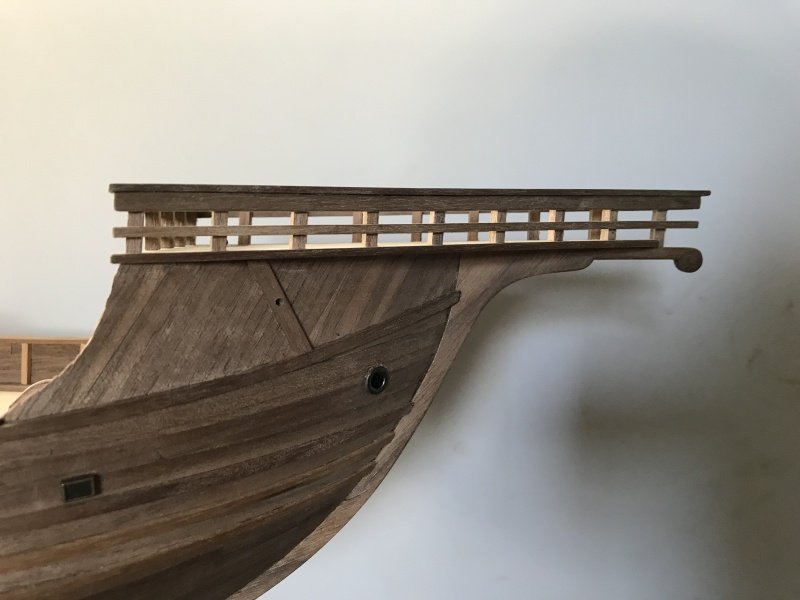
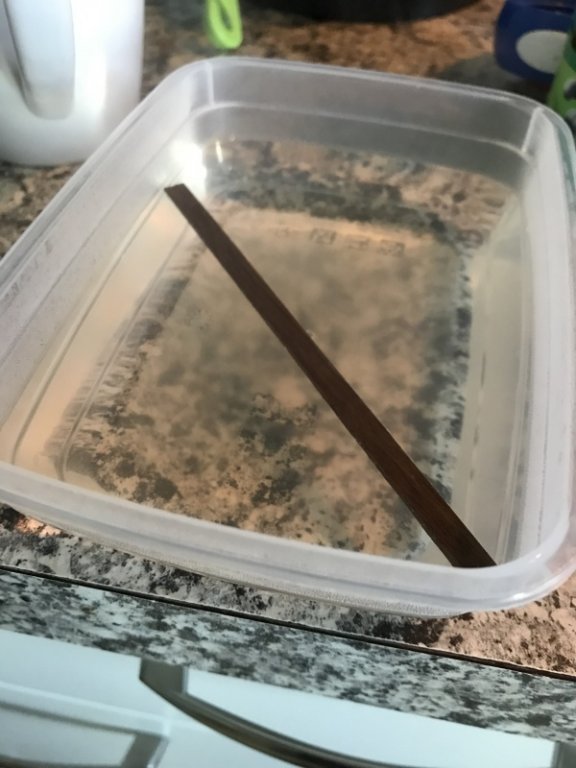
The line of the deck has a curve into it. I want to follow that curve for my railing. The top plank must be bend and thats an issue. It's better to use the spilling plank technique, but I do not have the proper lumber to do that trick. I need to soak, bend and pray it will hold!
Soaking first, just boiling water, nothing special.
.

Phew, made it....now some nice views of the ship...
Thats it folks...
Adieu!
Peter -
21 hours ago, Wallace said:
Yes, I can only agree with B.E. here Peter. I really like your modifications and am totally impressed that you do all this without power tools sir.
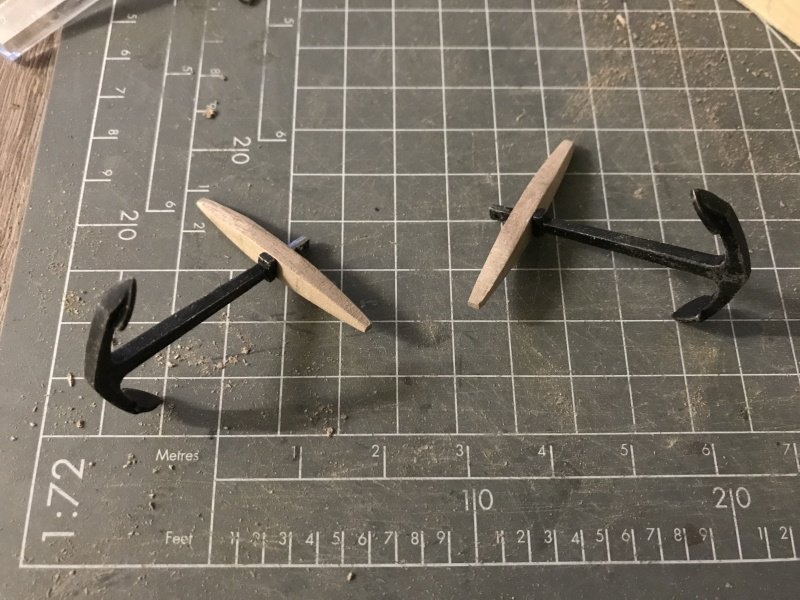
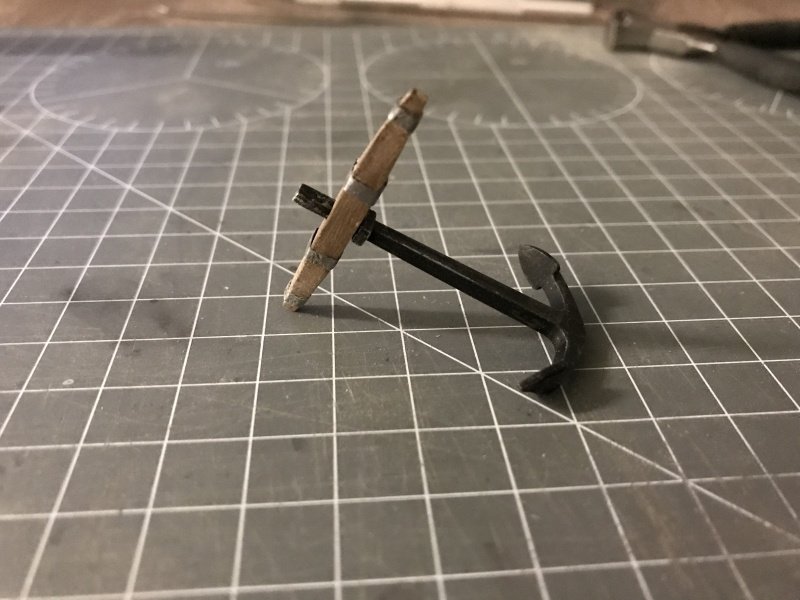
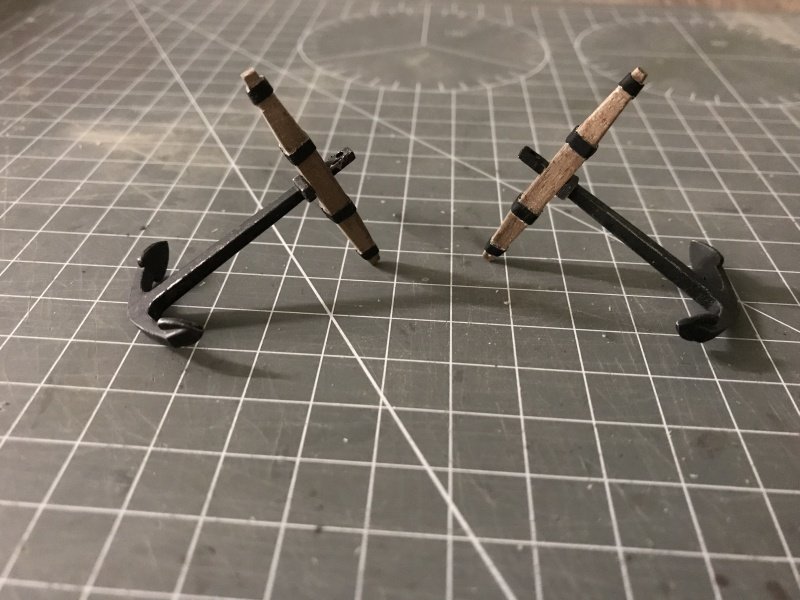
Your anchor construction was first class, they look great. I wish you too a very peaceful Christmas and a healthy New Year.
Thanks Wallace, I am looking forward on your planking job on your Victory! Don’t keep us waiting too long... 😉
Marry christmas to you and your family as well. May the new year be good and prosper for you!
-
7 hours ago, MESSIS said:
Dear Dutch Colombus,
I wish you and your family merry Christmas and a happy new year.
And have a safe journey to the "Conquest of Paradise". It happened 1492 and is still happening again and again.... like Ulysses and Ithaca, it always happens what we choose to happen.
I wish you and your family also a merry Christmas and a very good and healthy new year!
together we conquer the world!
-
2 hours ago, MESSIS said:
Great modification the railing! I agree that AL had a bad taste as its original design. The thing I liked though its that you didnt took their design for granded. Thats what I would (or most people) propably have done... I believe wouldnt thought of redesigning it, I was just going to follow their "know better" design . Well done!
Now overall the build: The ship untill now... if I may say...has the sense of a master piece!
σας ευχαριστώ!thank you again Messis Sir! I like the kit so this helps to make something out of it. 😉
It was a real Puzzle figureing out the railings. Glad to see you find it an upgrade as well.
-
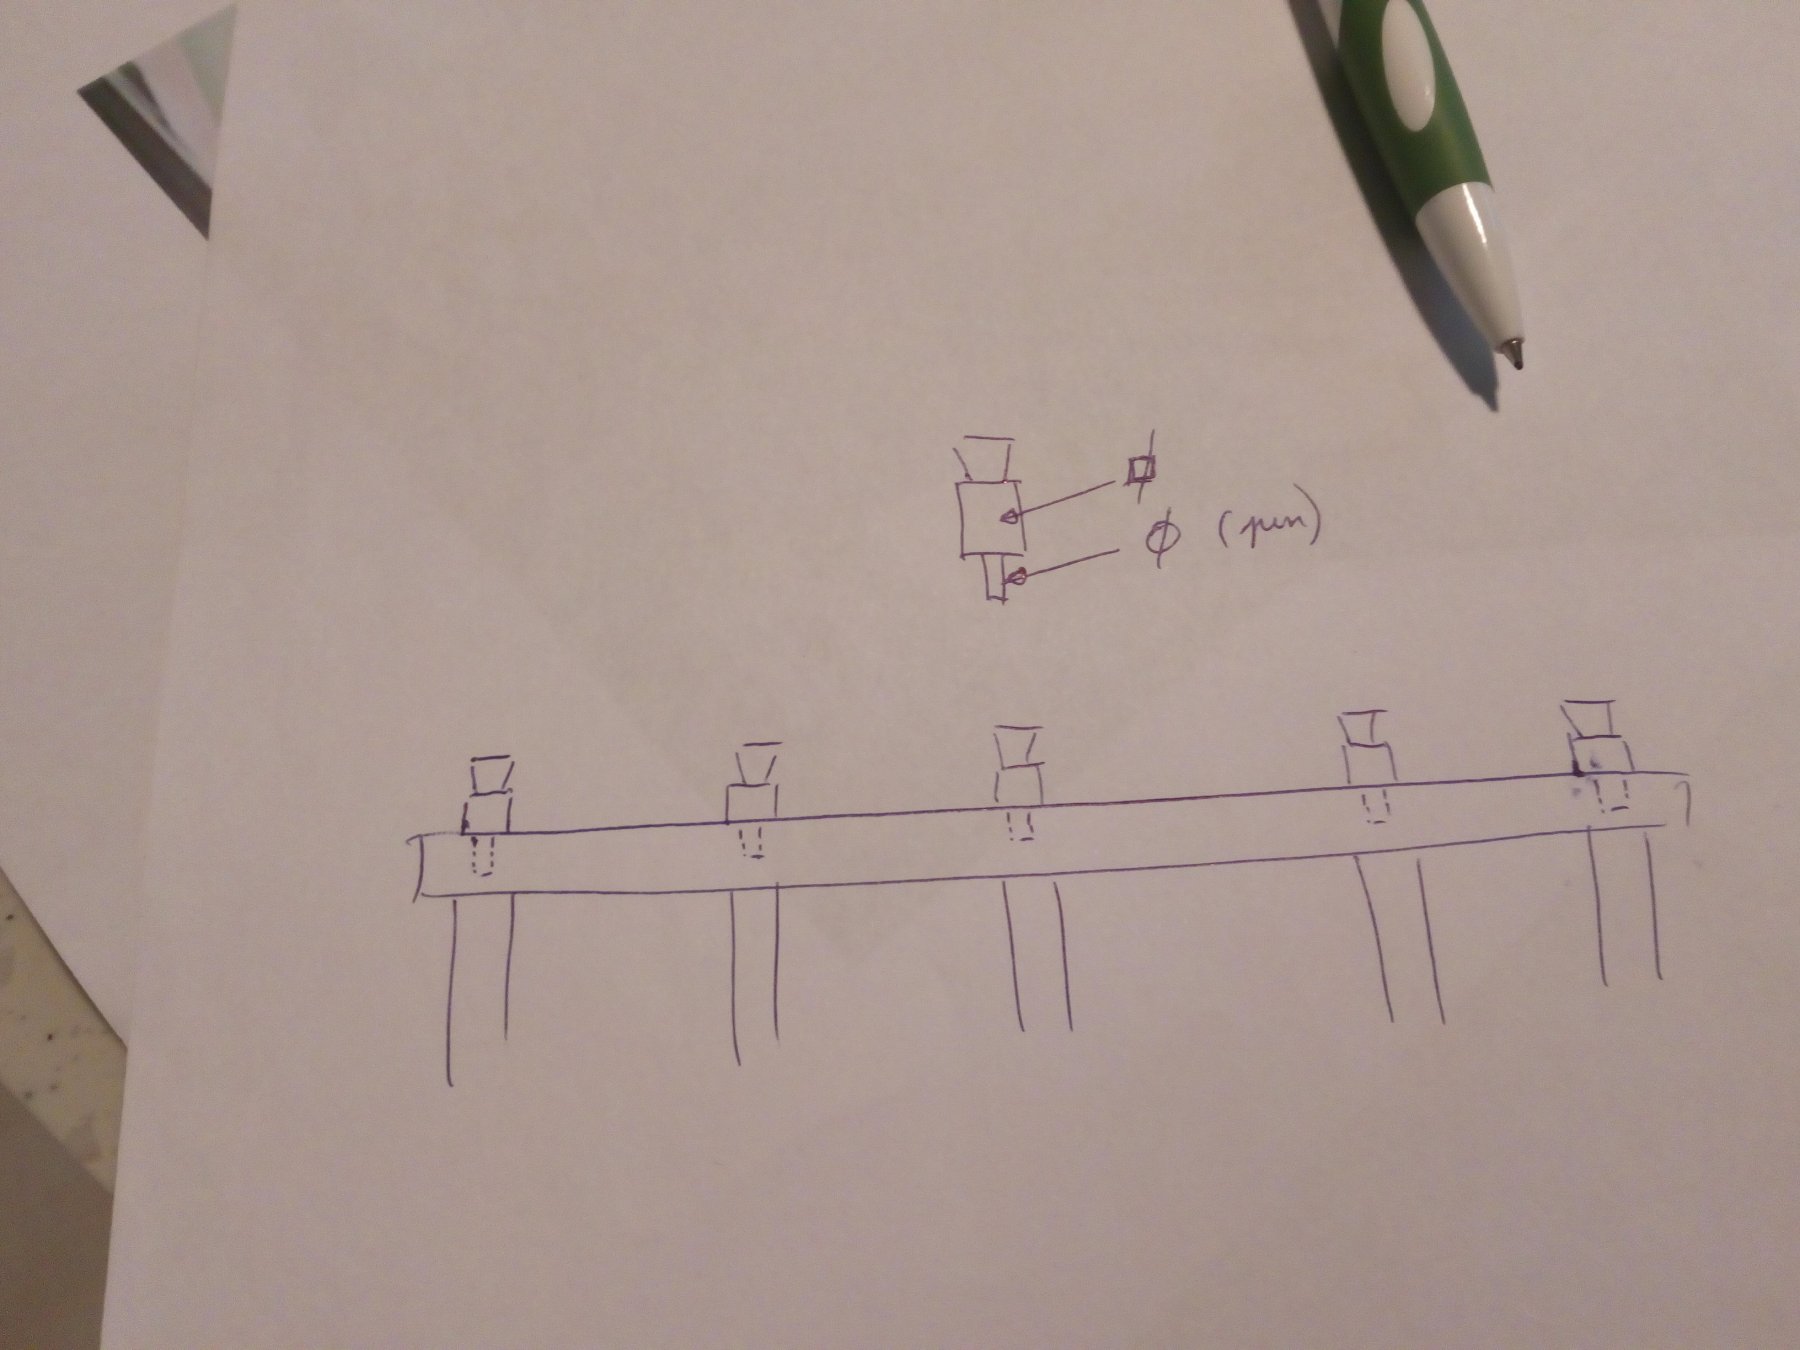
24 minutes ago, Sjors said:
We can open a new topic ?????
Kantklossen and punniken.......
When you need a lathe when you have to work on the masts and you are living not to far away, you are always welcome.
I have also time now.
From Januari I'm only working for a while 4 hours a day in the evening...
So time enough!
Sjors
Thanks Sjors,
very kind of you to help me with the masts! As a matter of fact, I live near Rotterdam, so not far from you at all as a matter of fact.

I will try my “poor mans lathe” first and see if it works, if not I’ll send you a message. Thanks for willing to help, Thanks a lot!
-
7 minutes ago, Sjors said:
Unbelievable.......
Your real proffesion is woodworking????
I think I quite and do some punniken....😝(sorry,don’t know the English word for it) “Spool Knitting”
Sjors
Hi Sjors,
neen ik ben pro kantklosser 😎
thanks for your kind words. You are a good builder yourself and I like your work! After work and in the weekends when I am not entertaining my little kids I can work on the ship. I don’t have deadlines so I can take my time which I believe helps to work neat and tidy.
-
4 hours ago, Backer said:
Well done.
Much extra work, but the model looks much better now.Thanks Backer, it took some time and elbow grease, but it is the result that counts. I’m not speedbuilding, so I don’t matter it takes a bit longer. 😉
thanks for stopping by and your comments! I’ll appreciate it!
-
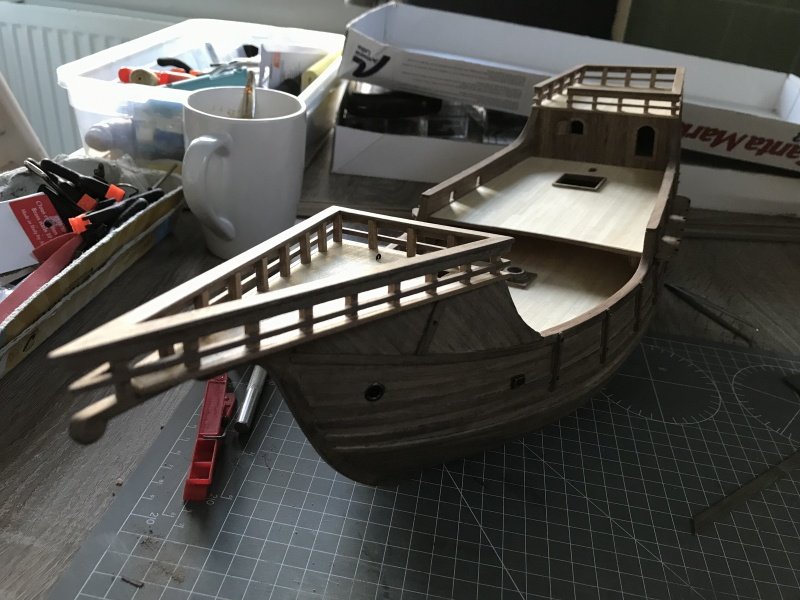
**Chapter ? - Throw away the manual**
Hi guys!
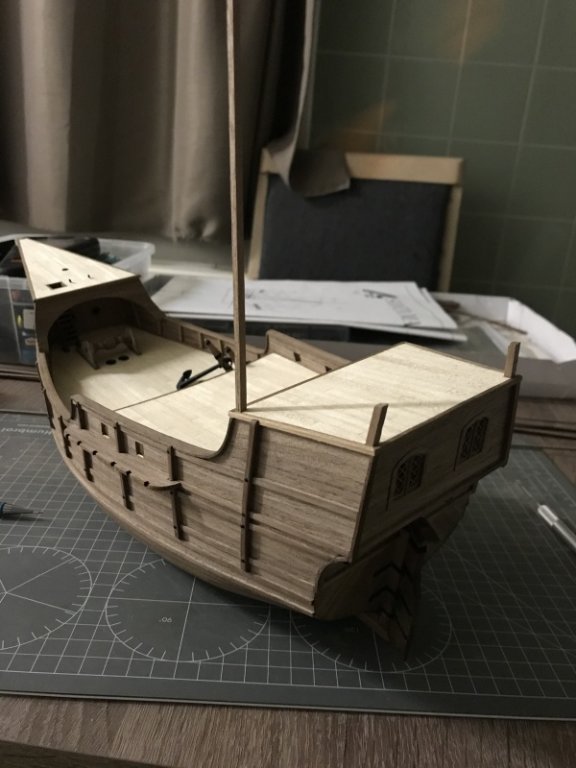
Today a big update with a lot of pictures, 50 to be exact. So take a seat, relax and step aboard!
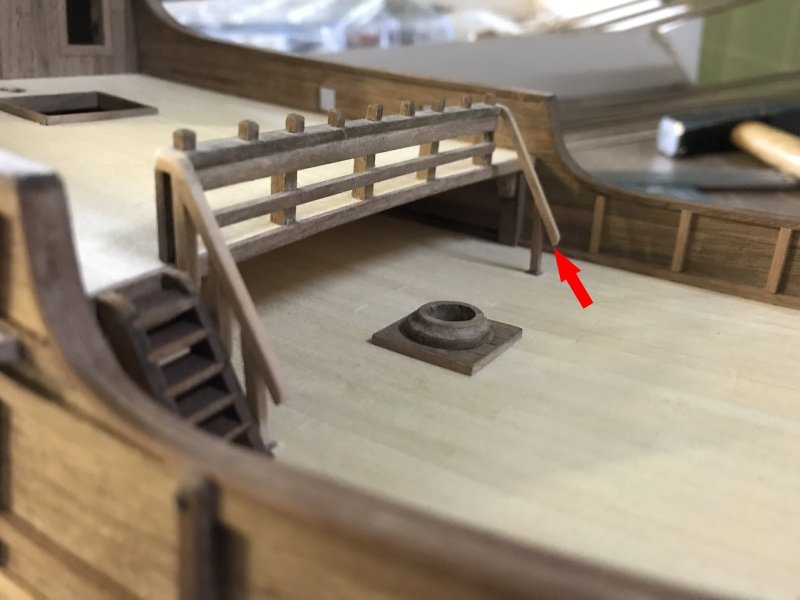
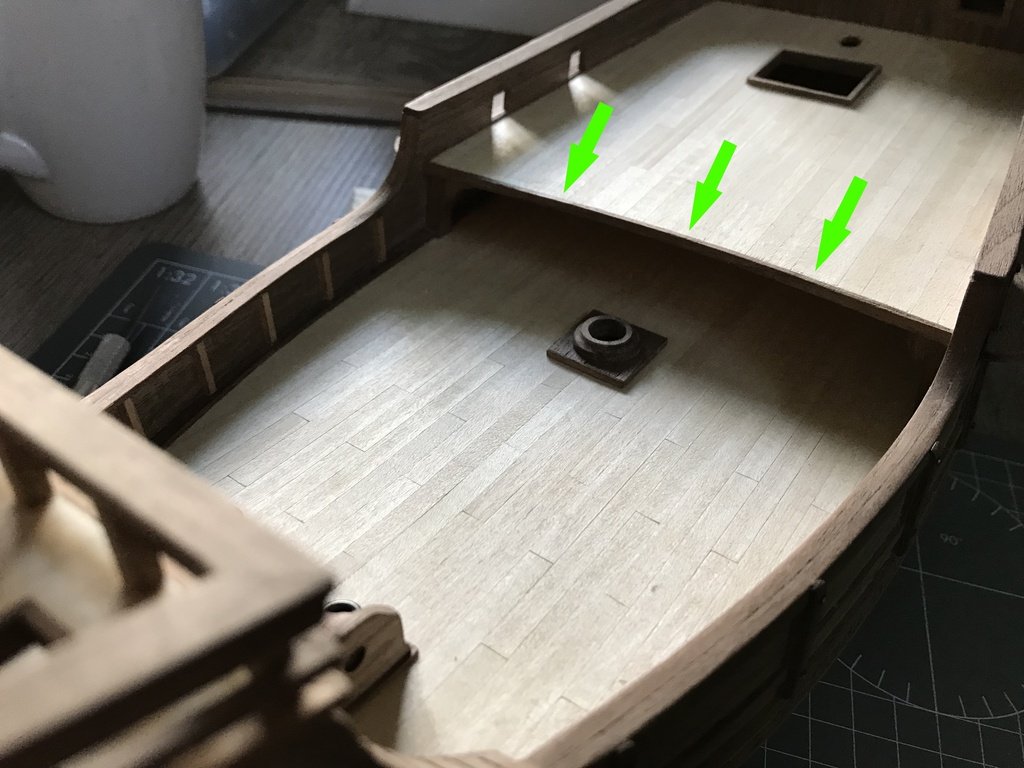
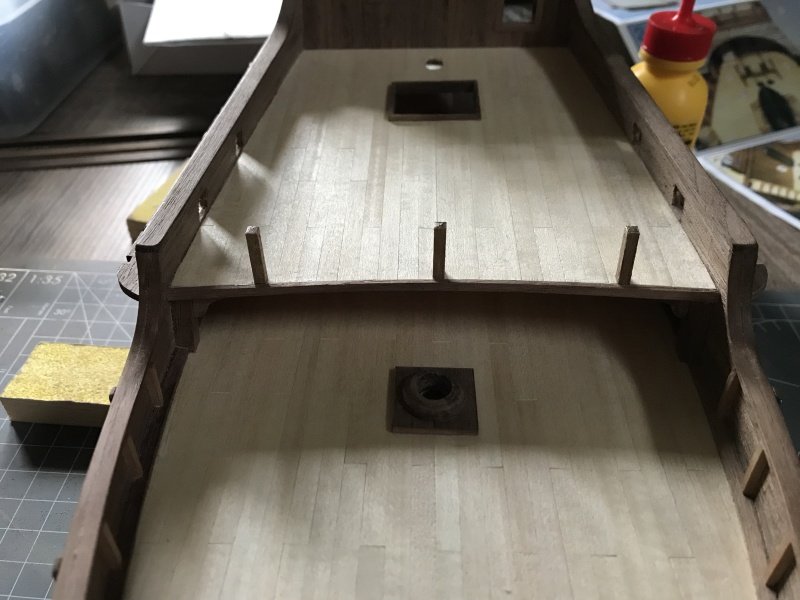
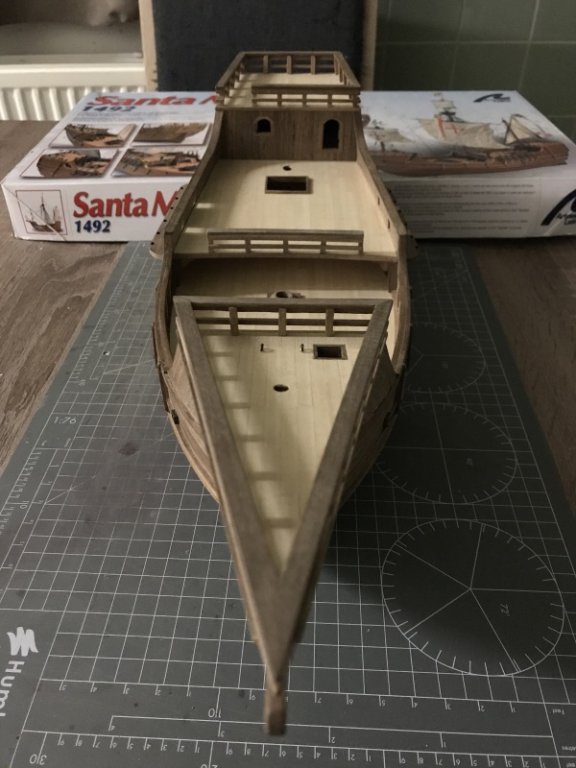
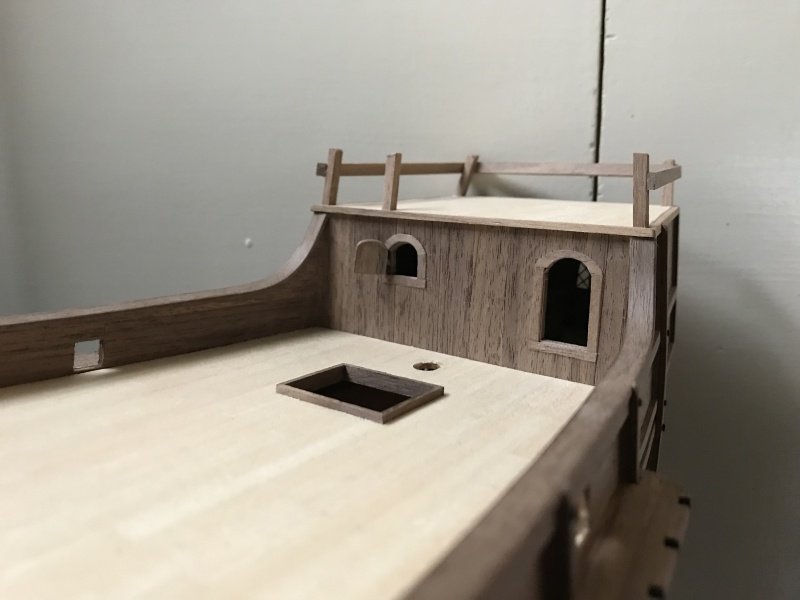
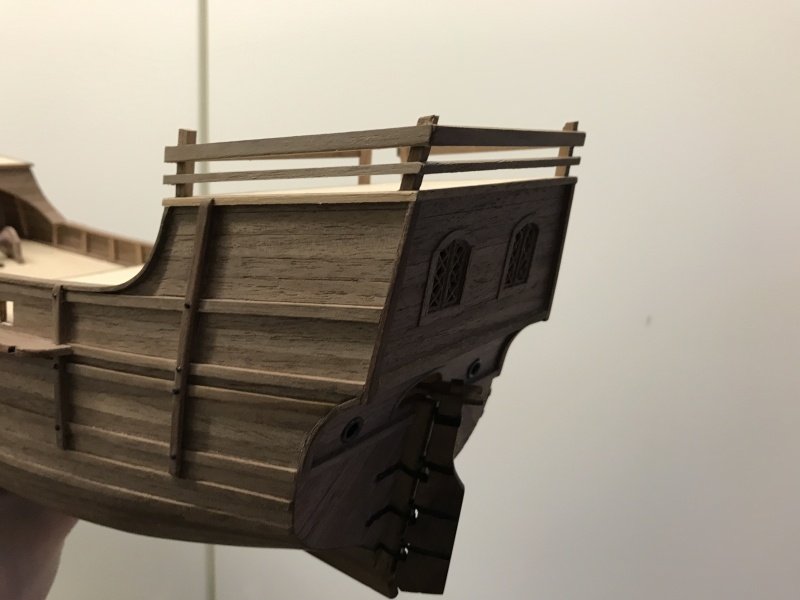
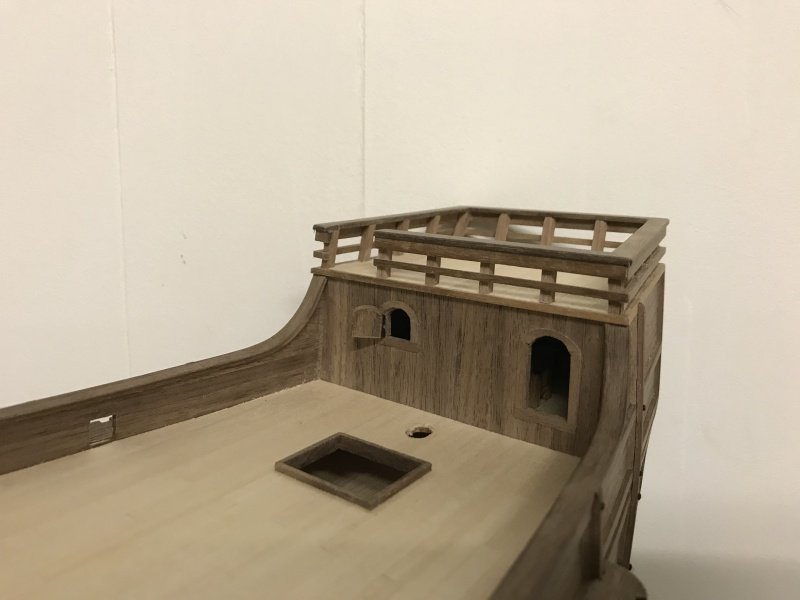
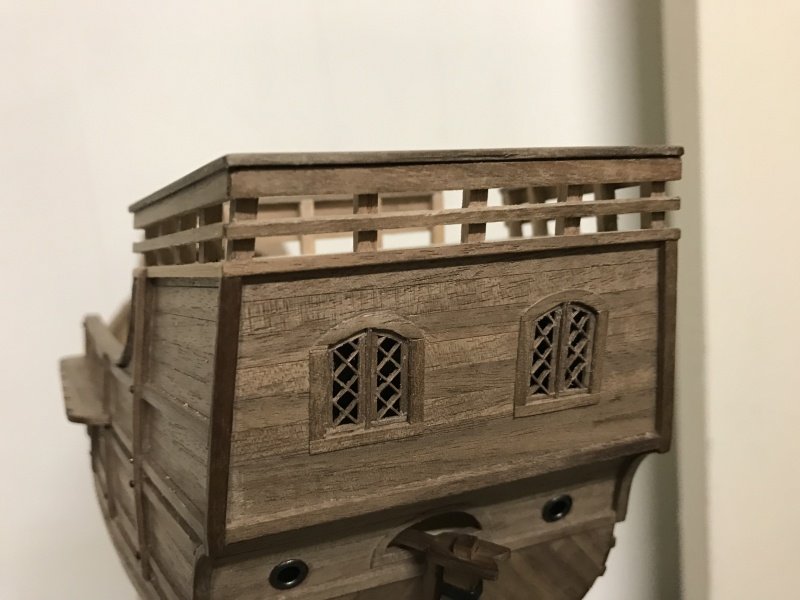
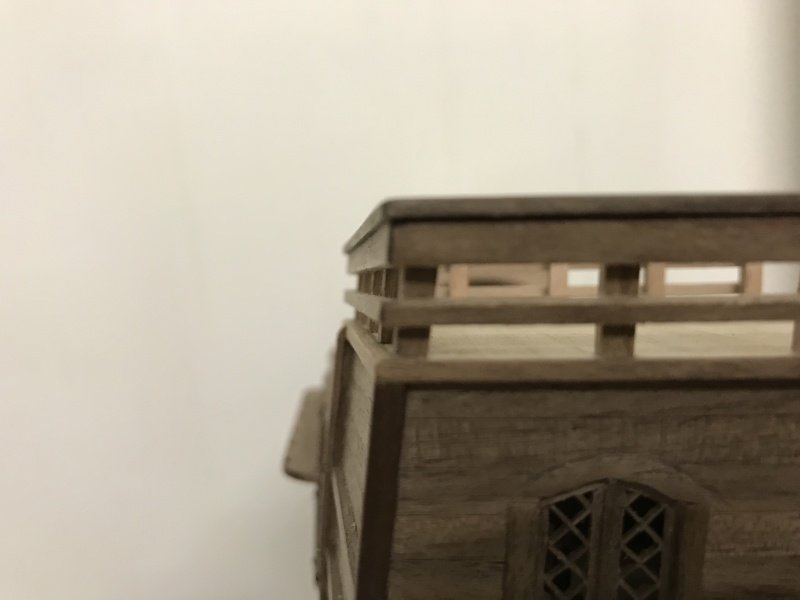
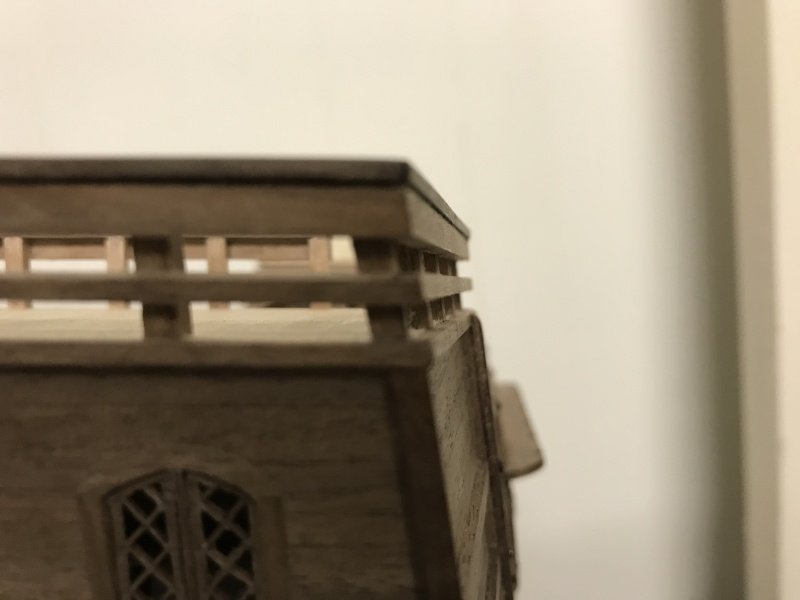
The last few days I really cracked my head on some issues with the kitmaker. For instance, the railings on the sterncastle. These were, how to say, not to my taste at all. So here is an impression how AL designed the railings.
As you can see, there is no toprailing, just three pieces of wood running horizontal on a few vertical placed pieces of wood. I needed to redesign this part...but first some other things that has been done on the ship.... #Cliffhanger
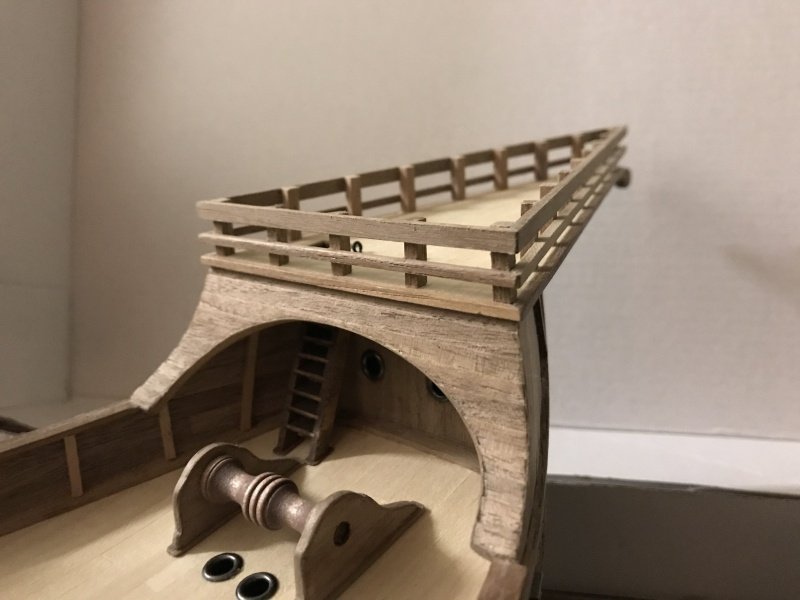
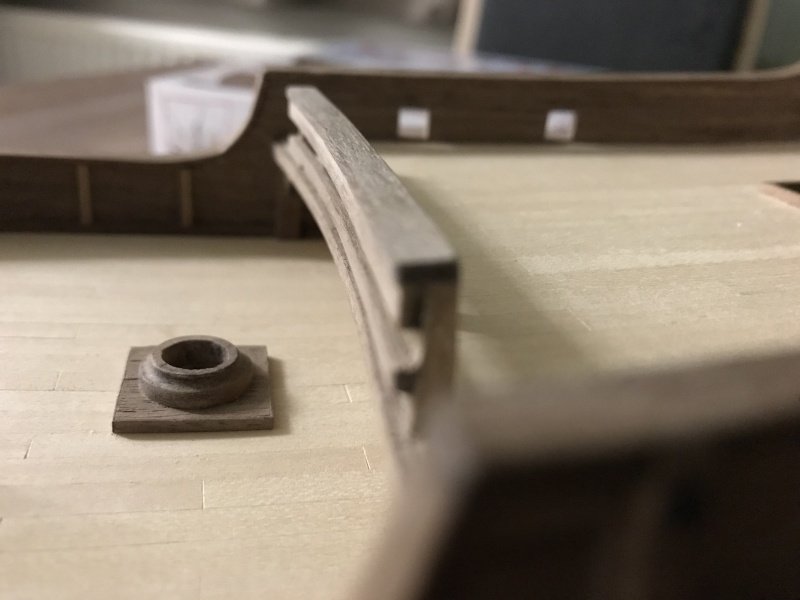
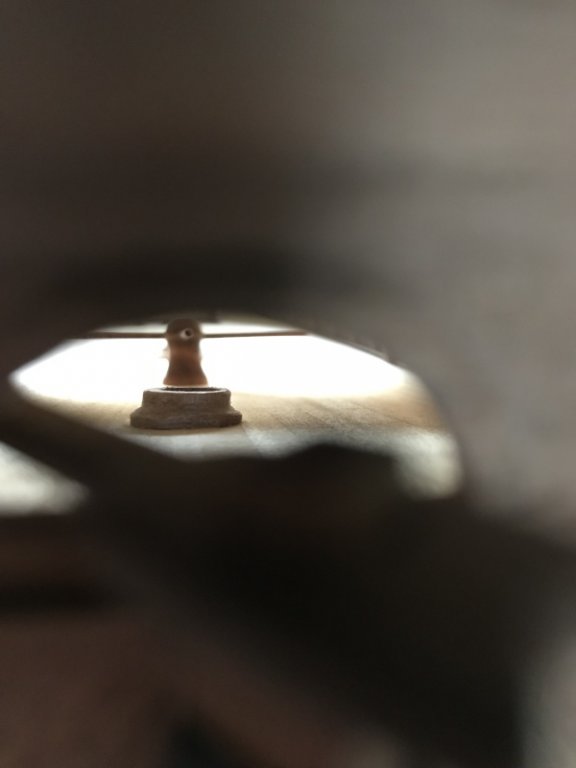
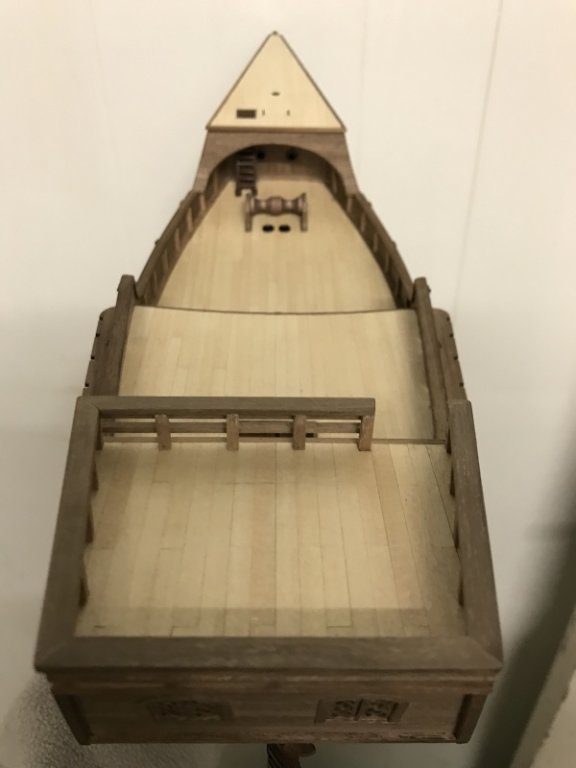
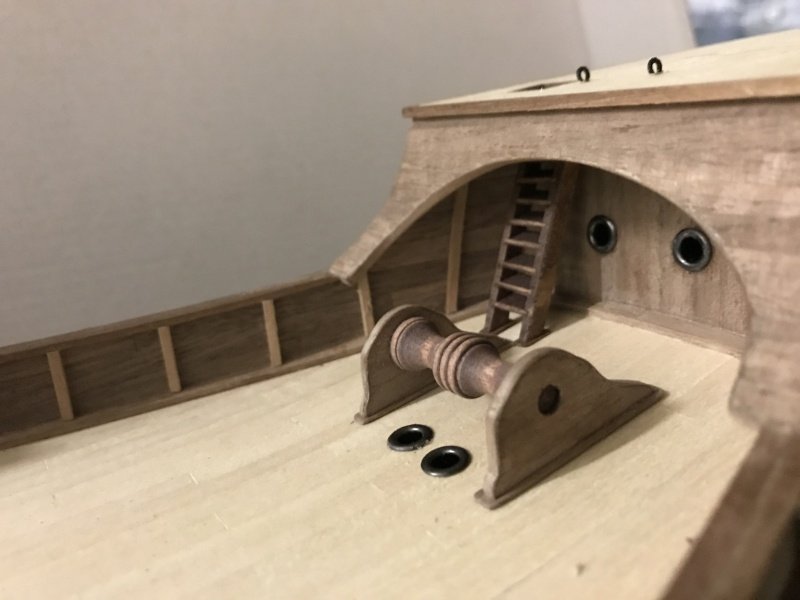
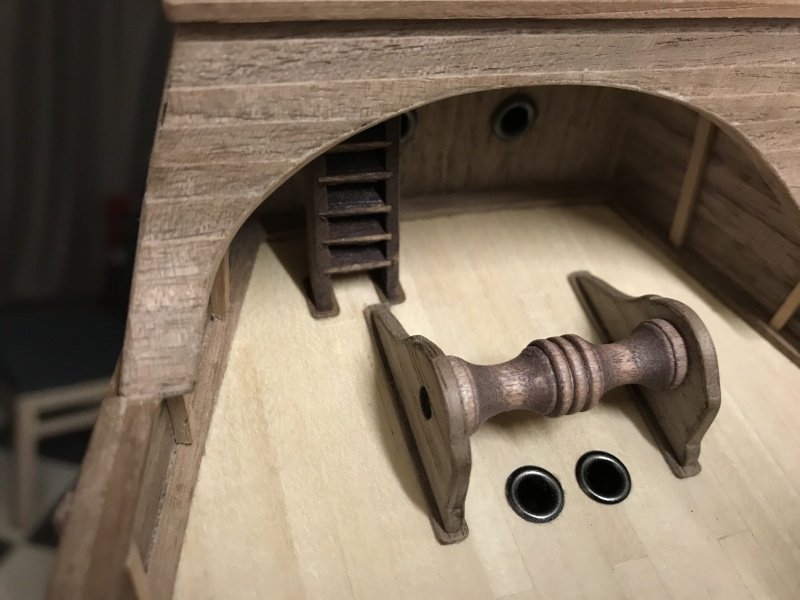
I have placed the capstan!
After the capstan, I decided to change the base of the main mast as well. The kit provides some cast metal parts and I made some new ones from wood.
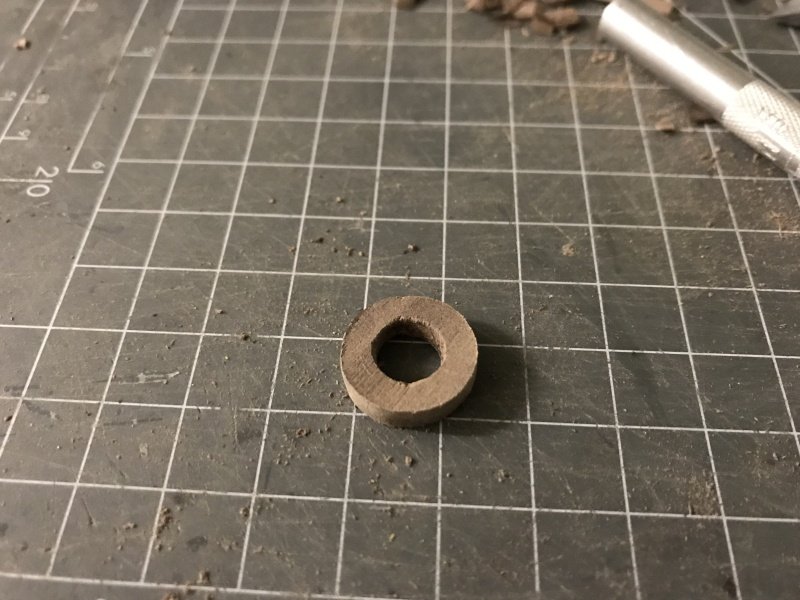
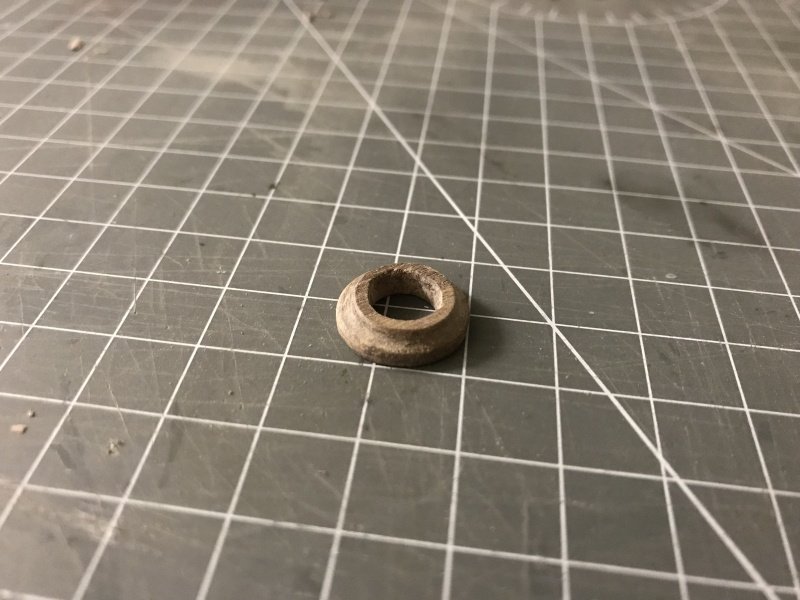
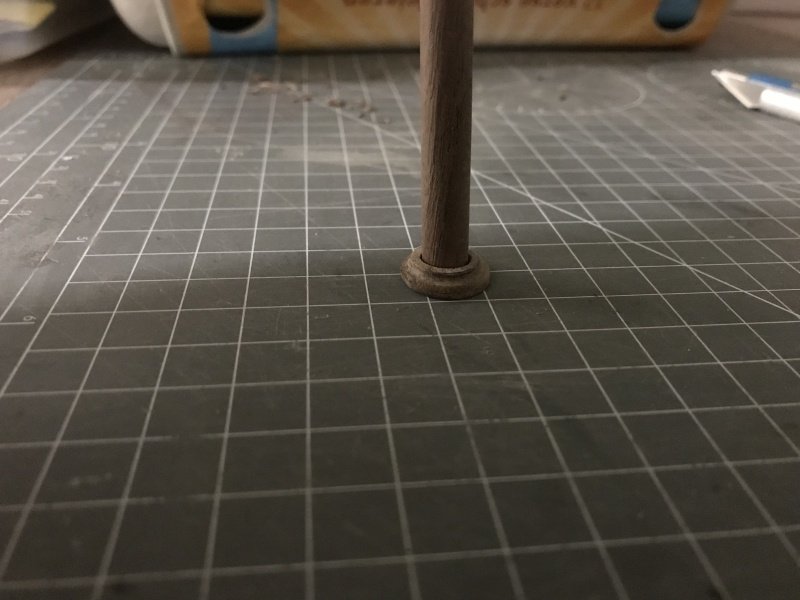
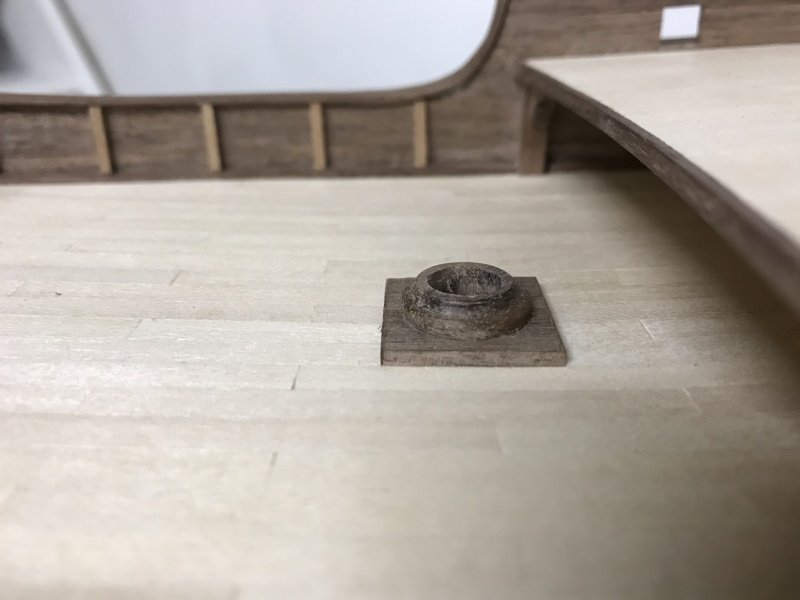
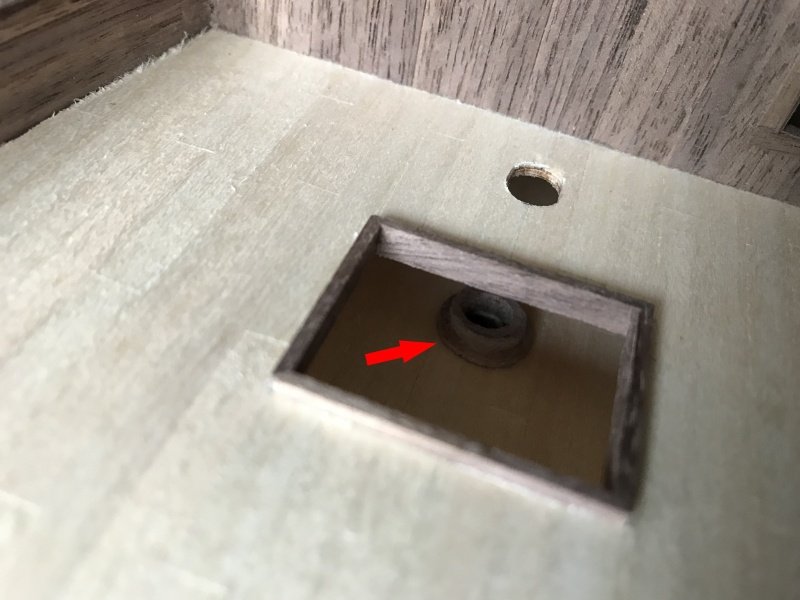
So, after this I looked at the Mizzen mast and saw that the angle was wrong. Further more, the mast hits the upper part of the captains cabin so I needed to change that as well. I made the holes for the mast a bit bigger on both decks and made two news bases for the mast to cover up the holes.
I can now place the mizzen mast in the proper angle and it doesn't hit the cabin anymore. See it as an easy fix...
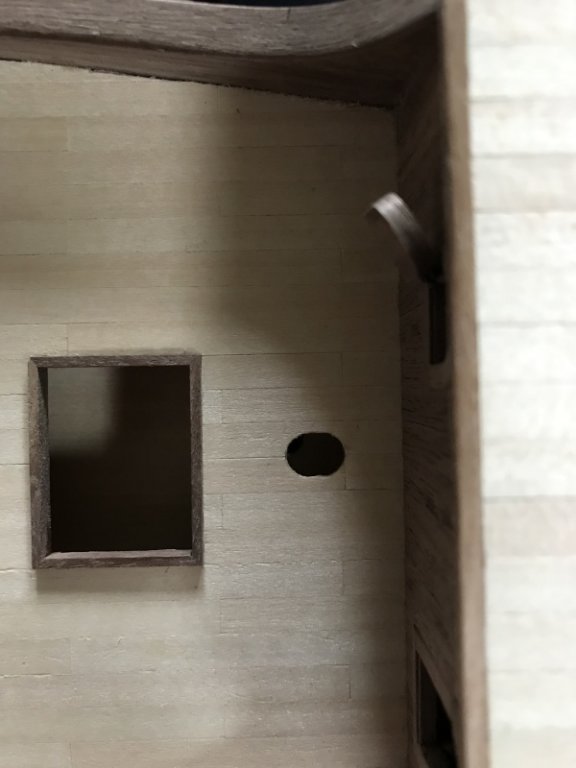
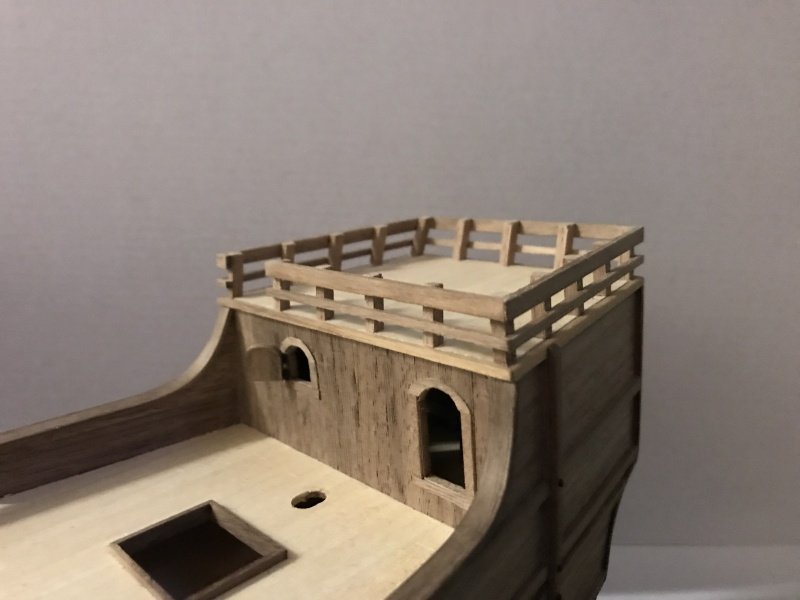
I still need the place the second base, but that's for a later moment. Time to start on the upper railings on the sterncastle.
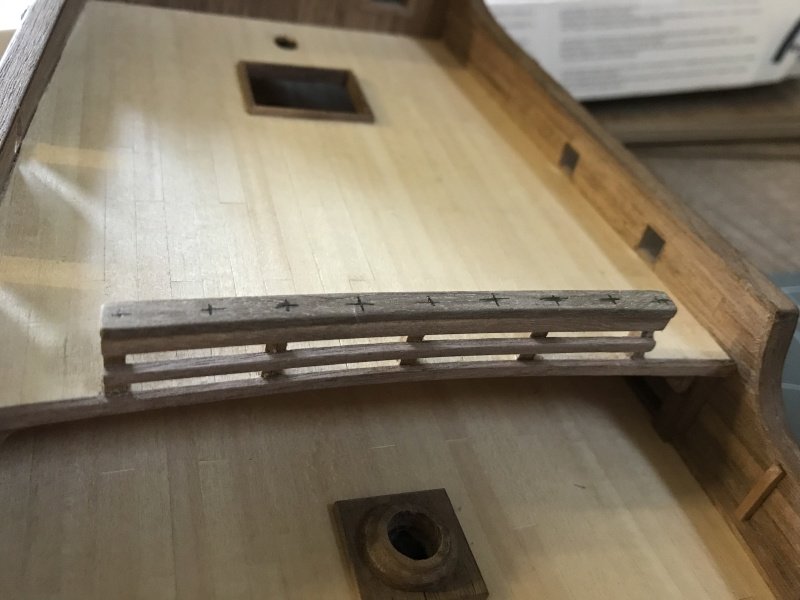
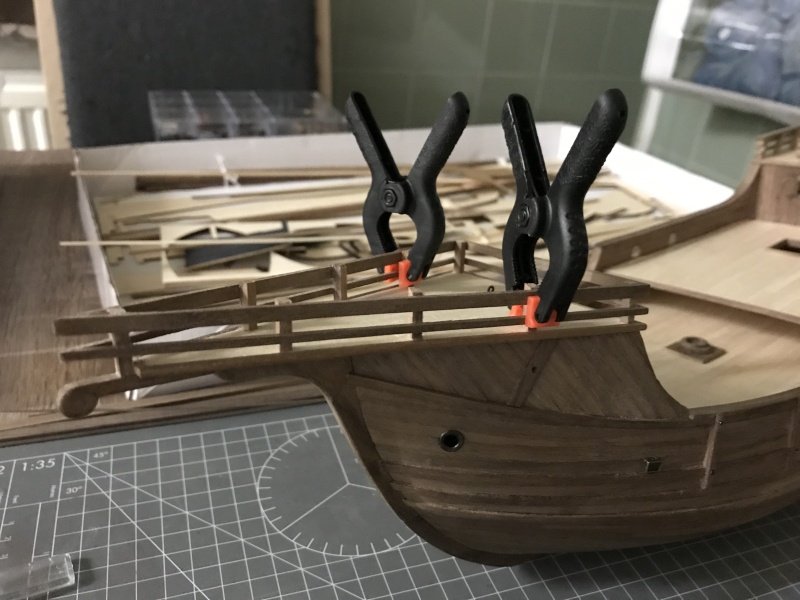
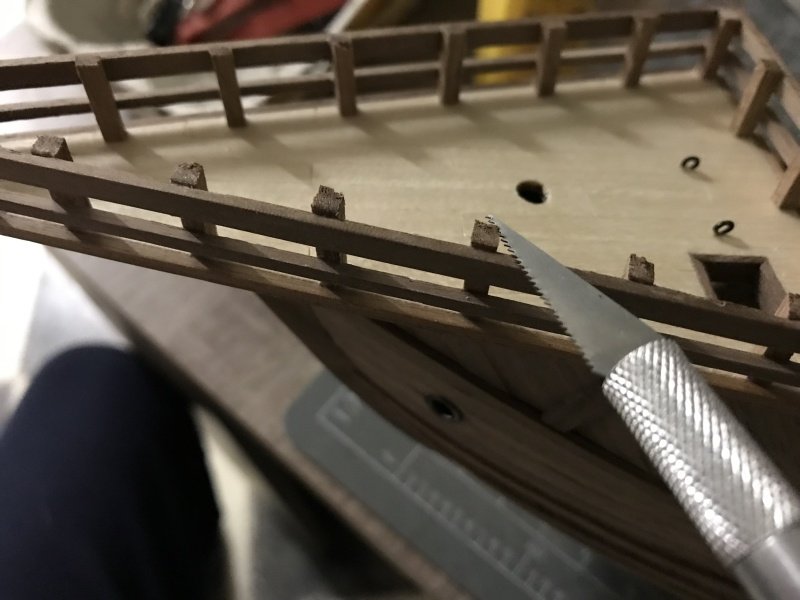
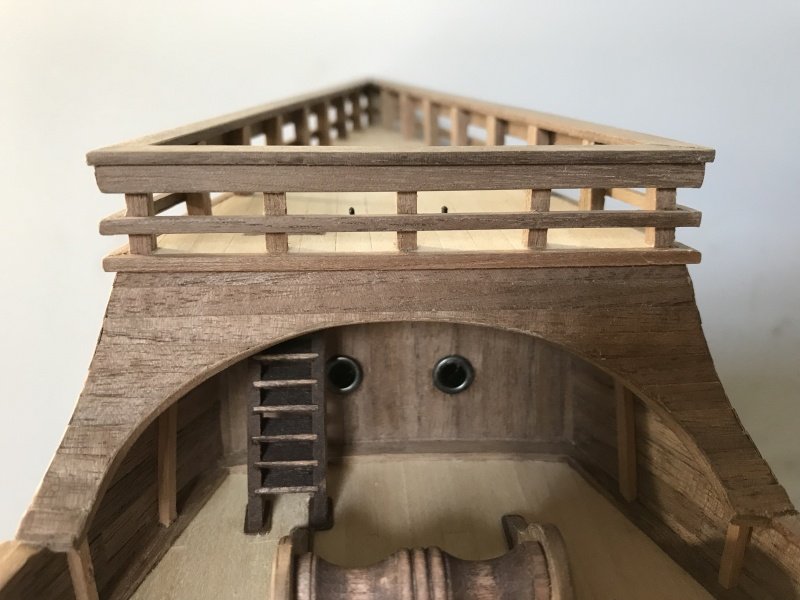
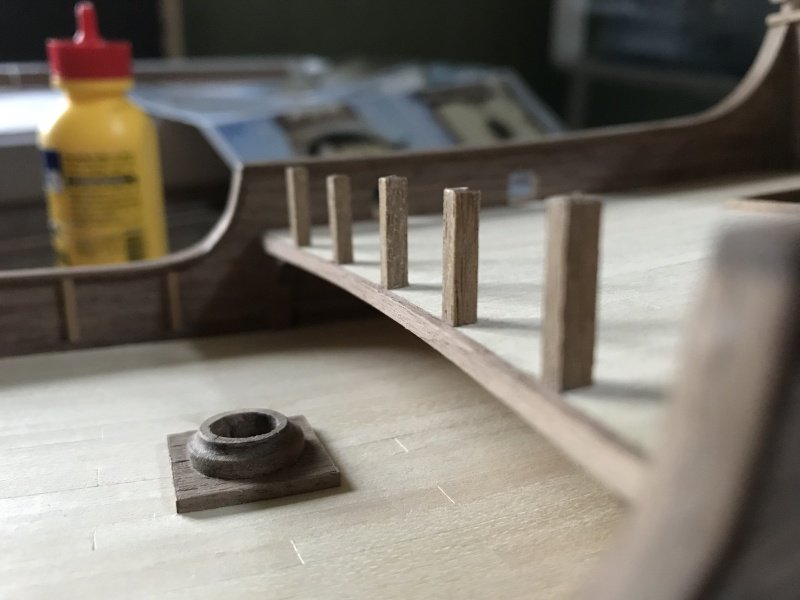
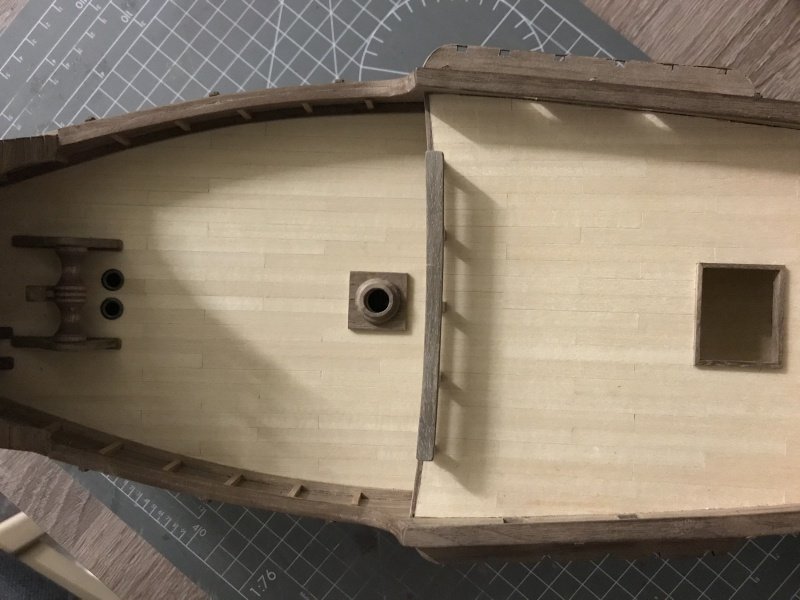
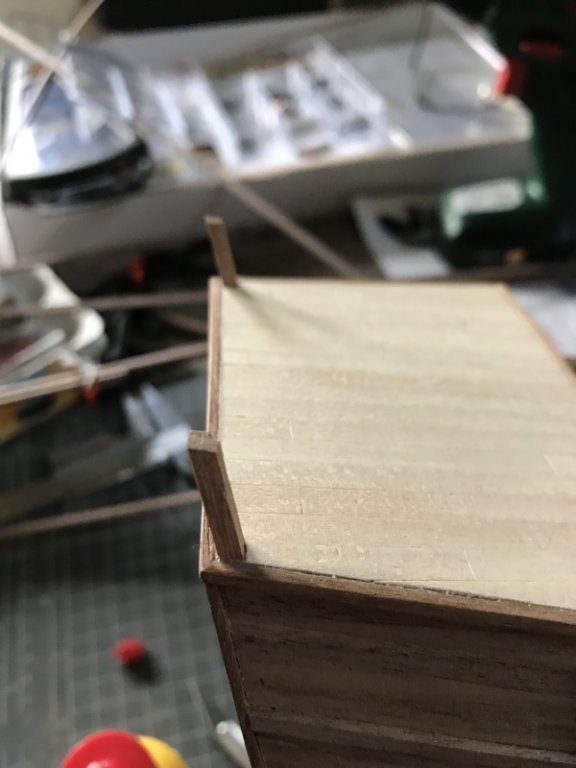
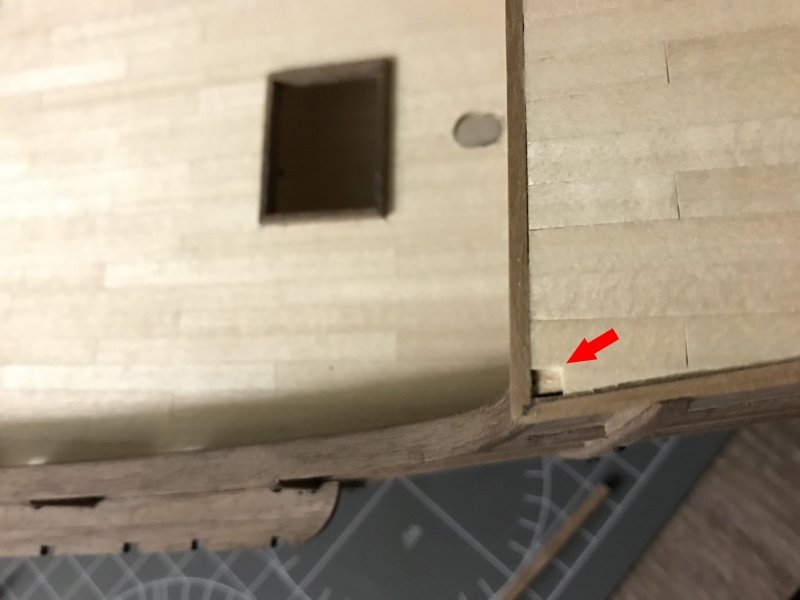
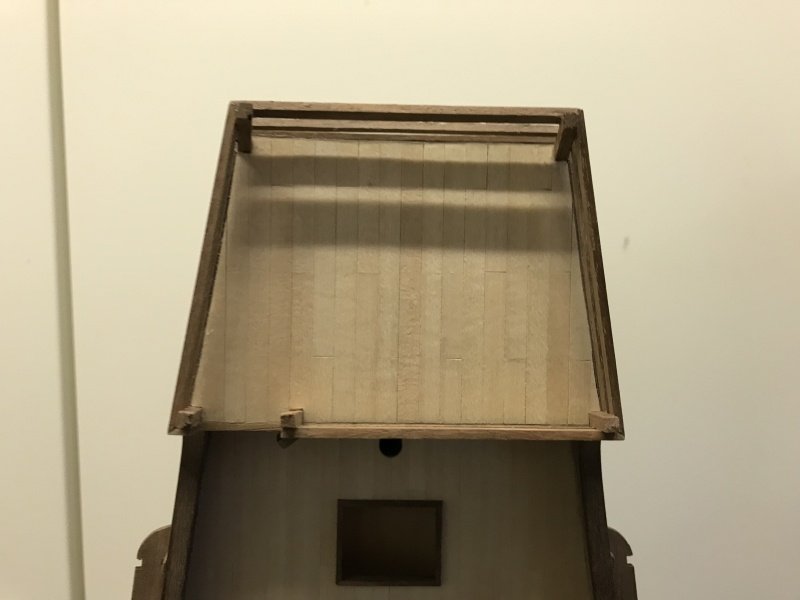
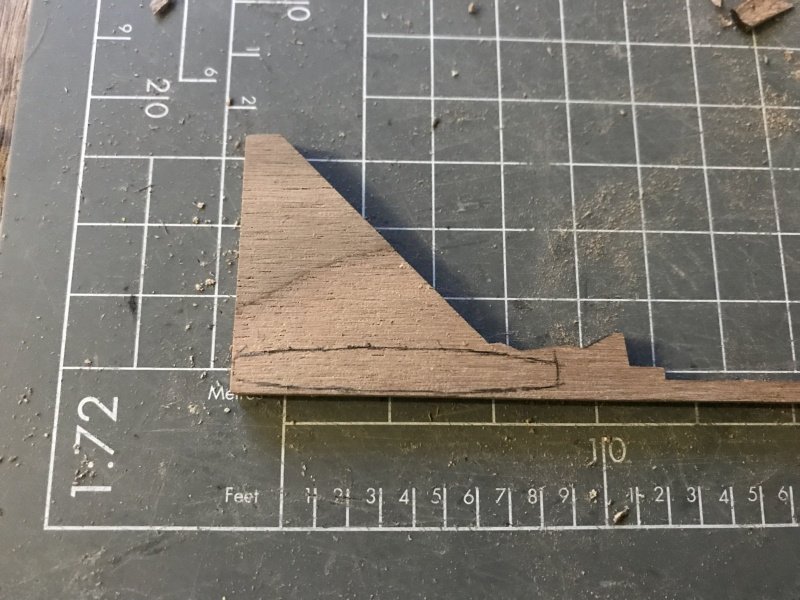
I made some sketches of a new design and made a decision. I had some extra wooden walnut strips, but needed to order some more to get the job done. Having the design ready, now I needed to figure it out how to construct it. The first "challenge" was to construct a solid base and to do this I needed to place the vertical parts first. These parts are lined up in two different angles compare to the deck surface. It's like building a trapezium shaped box. To glue the pieces onto the deck itself, it didn't had the best effect. The angle the parts have and the small glue surface wasn't going to work. I decided to cut away a small part of the deck so I could stick the parts into the deck instead of on the deck. This worked perfectly!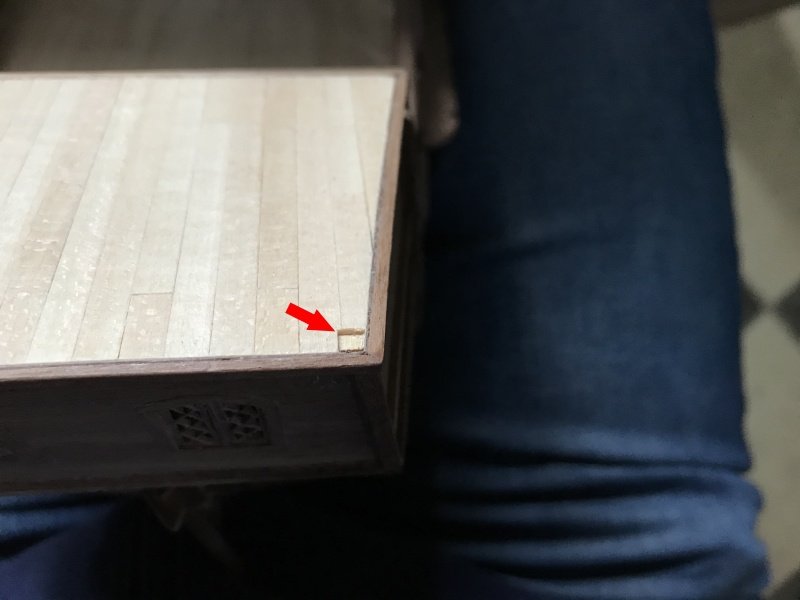
See? I just cut away a small part for the part to fill in and it created a much stronger bond!
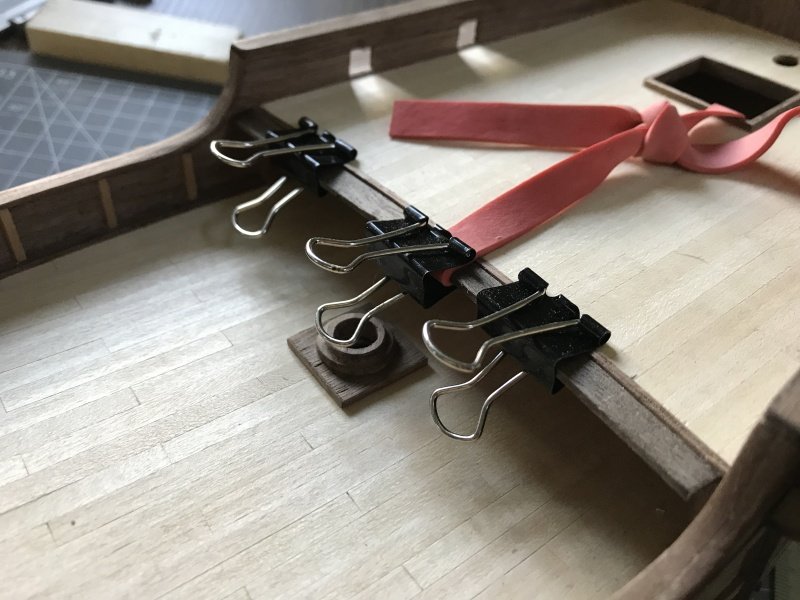
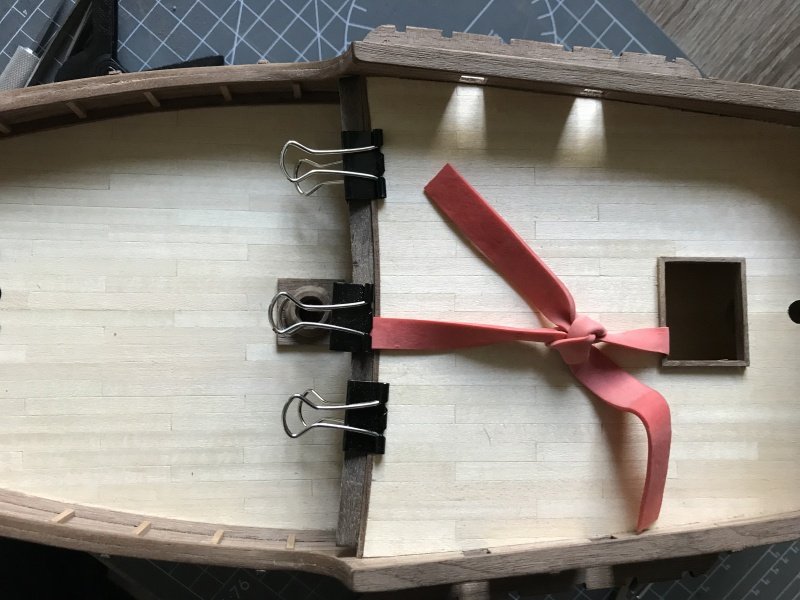
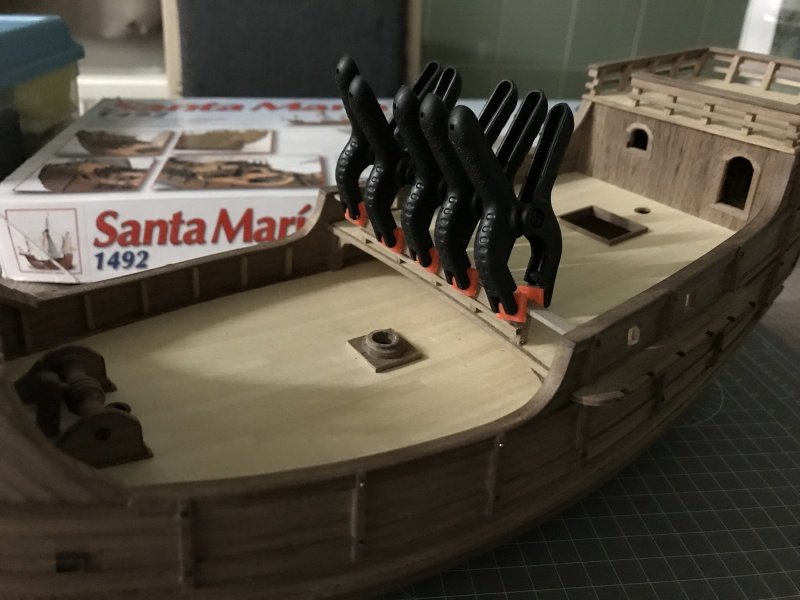
I bought a few new clamps which came in handy...
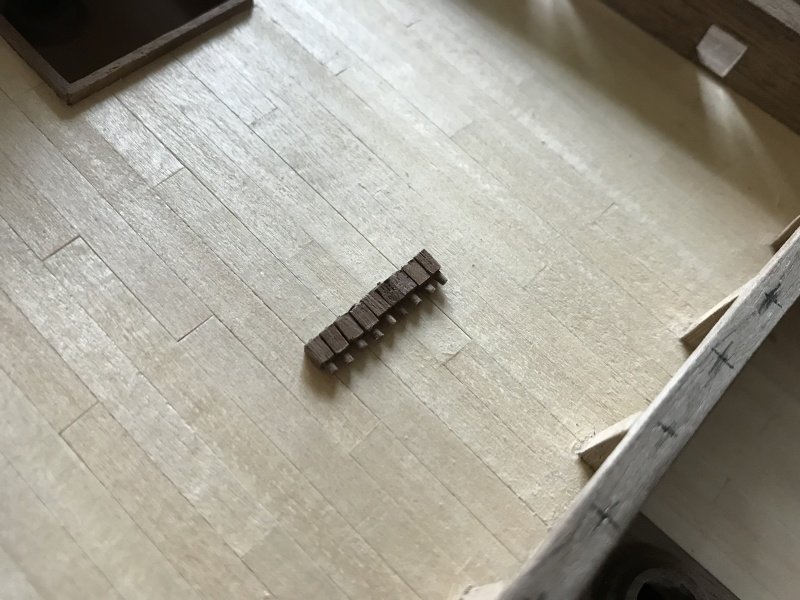
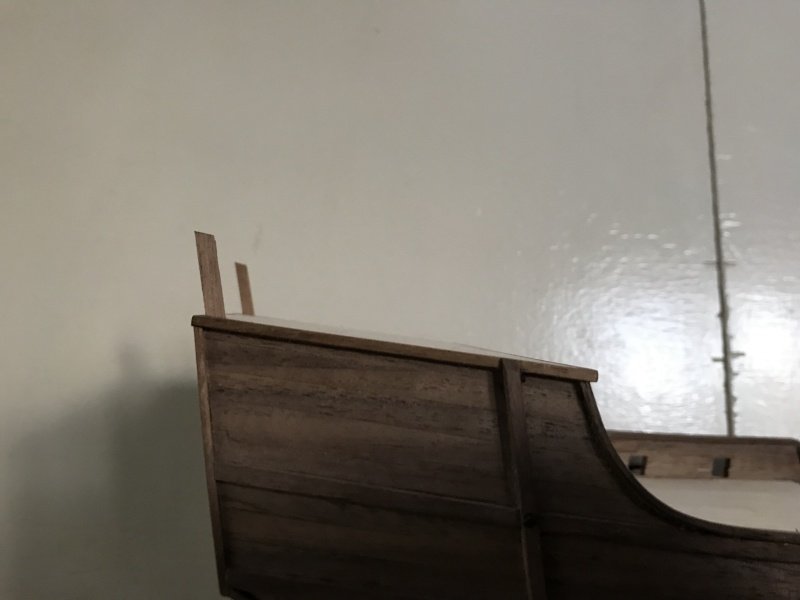
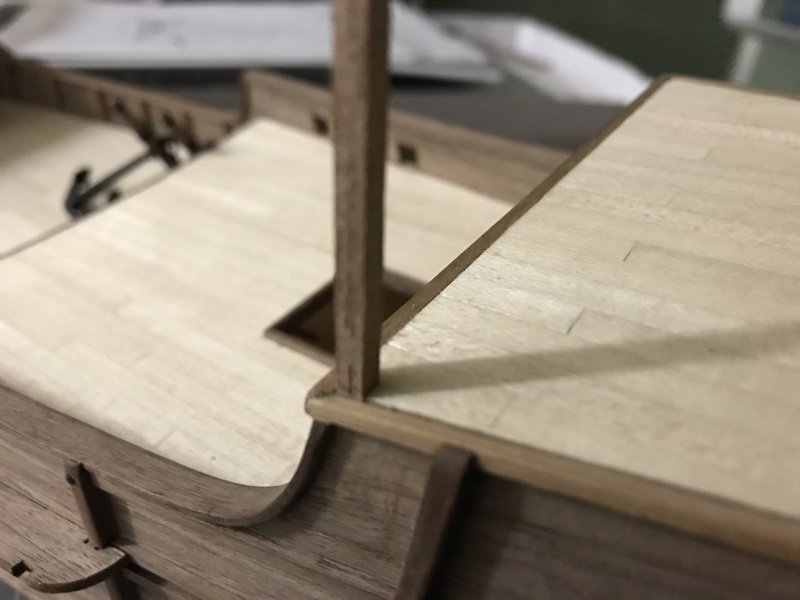
The first part done, the lower part is next...
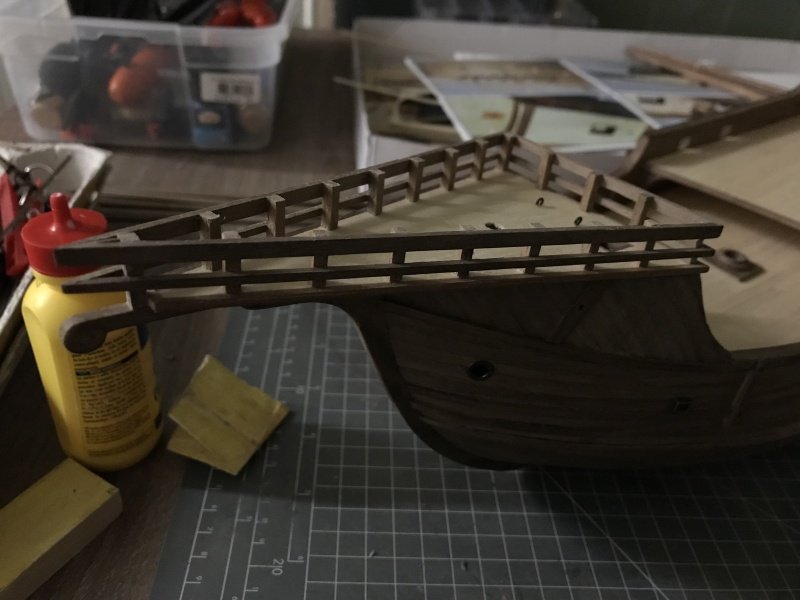
Now the construction is solid and I can place more vertical parts to make it even stronger.
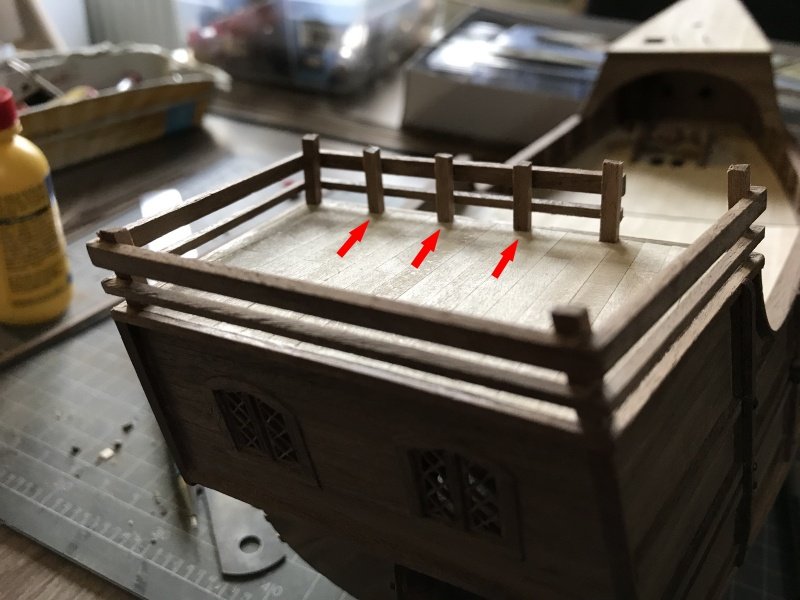
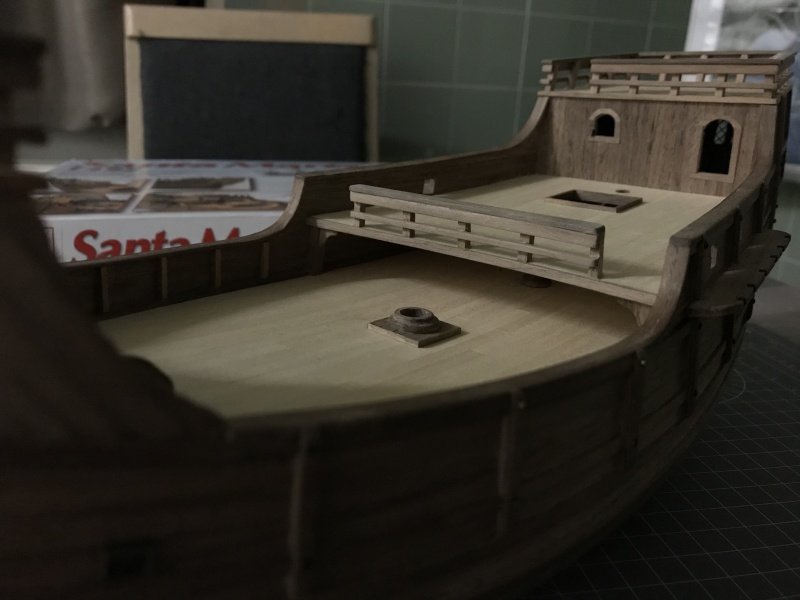
all placed, and as you can see, I kept the vertical parts a bit to long so I can cut them to length later....
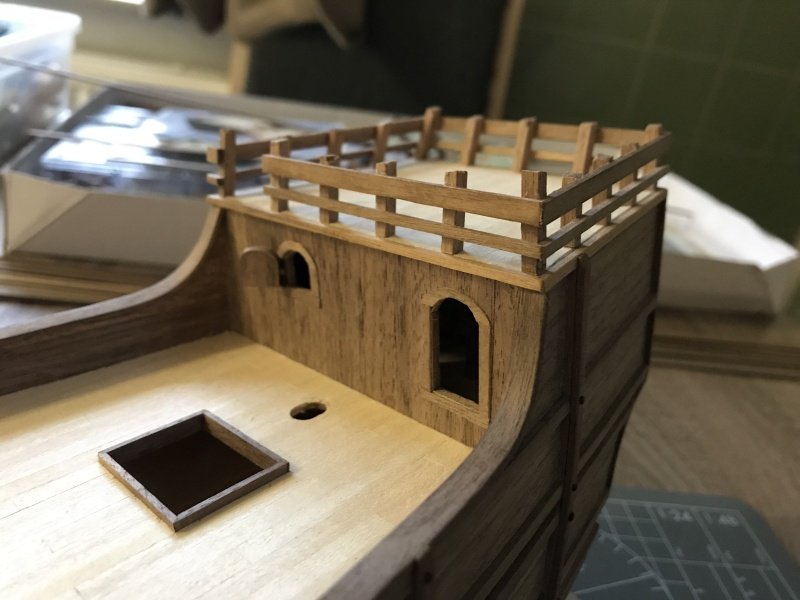
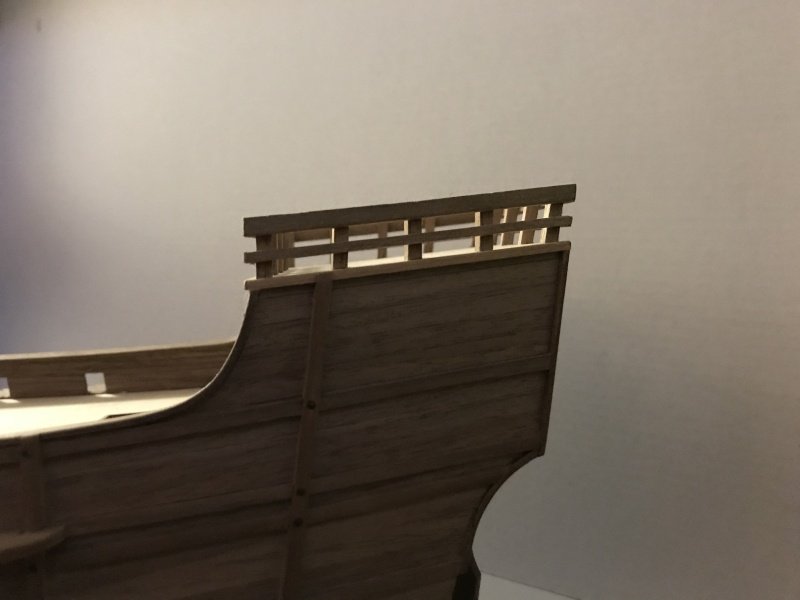
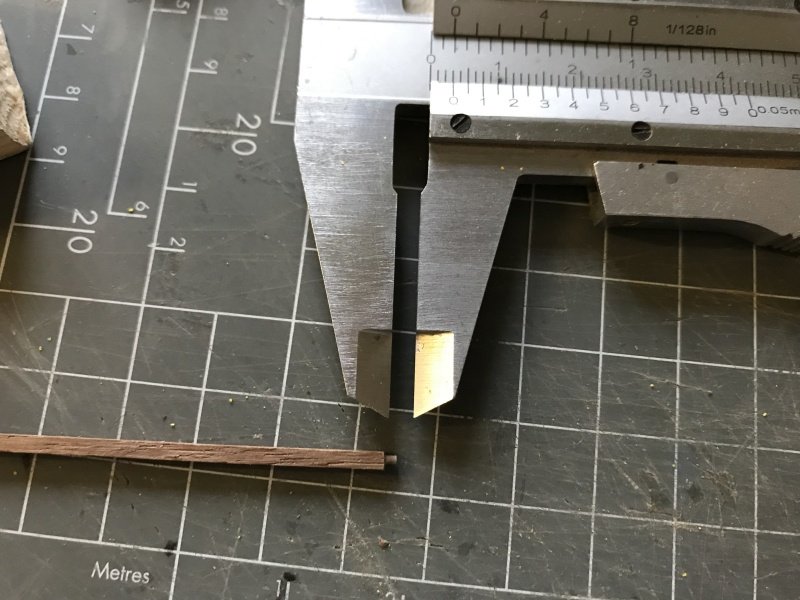
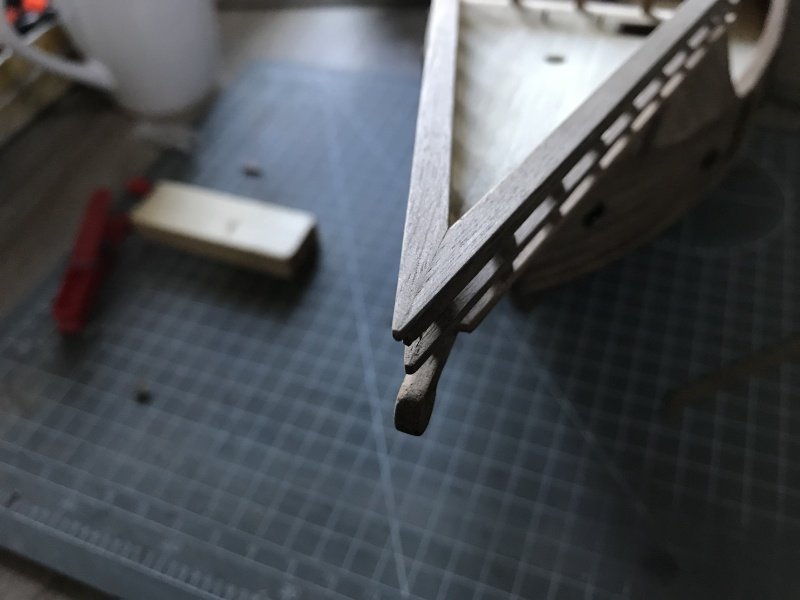
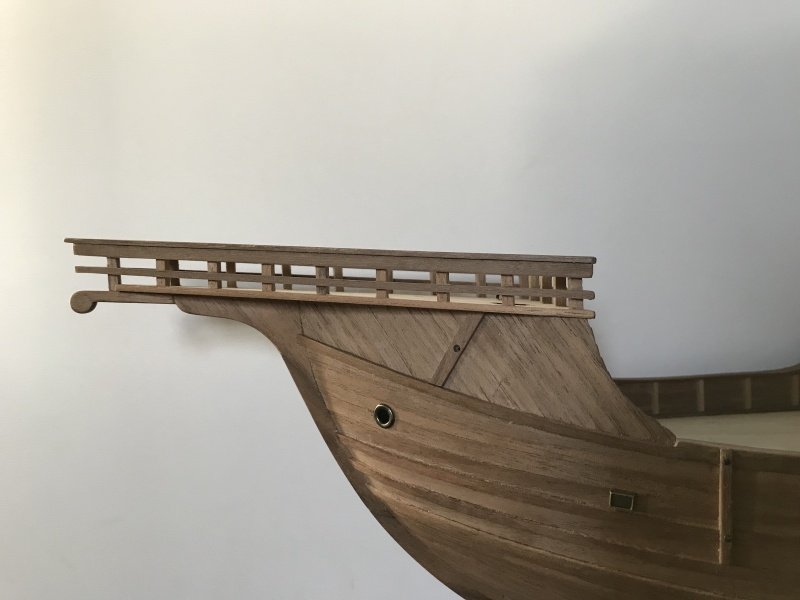
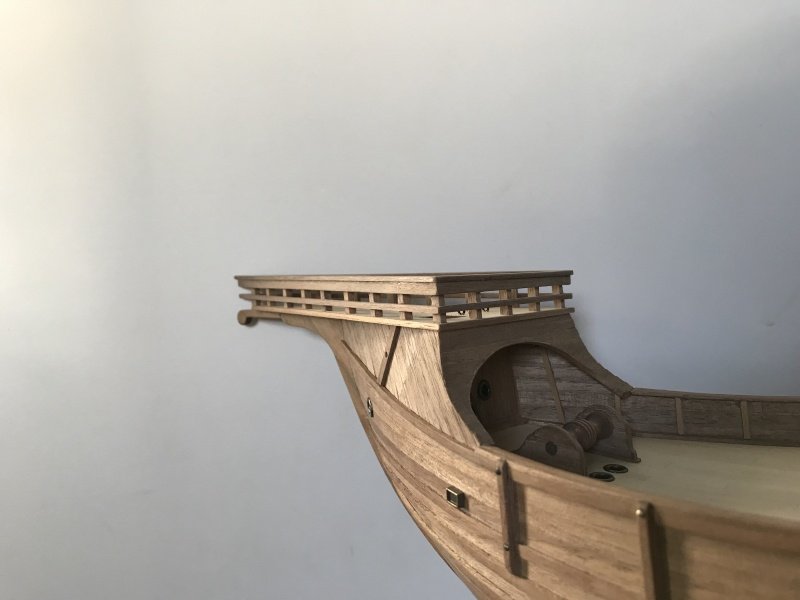
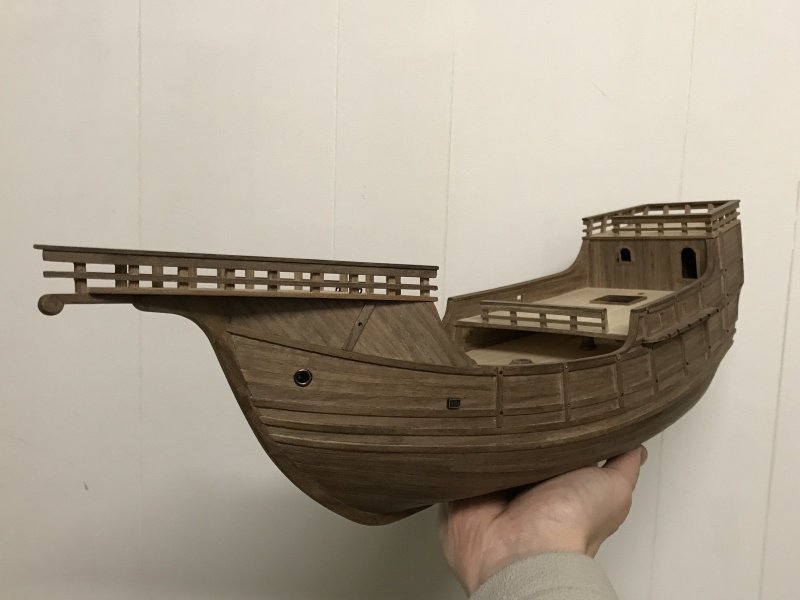
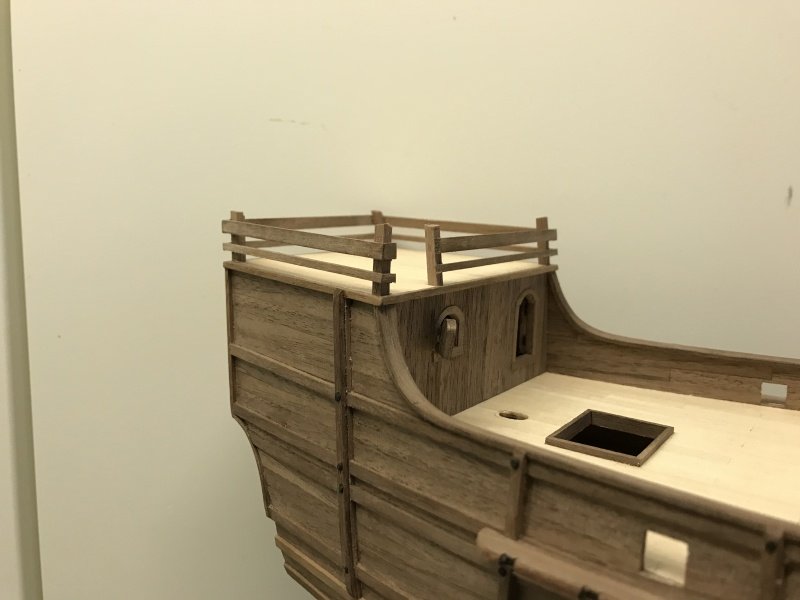
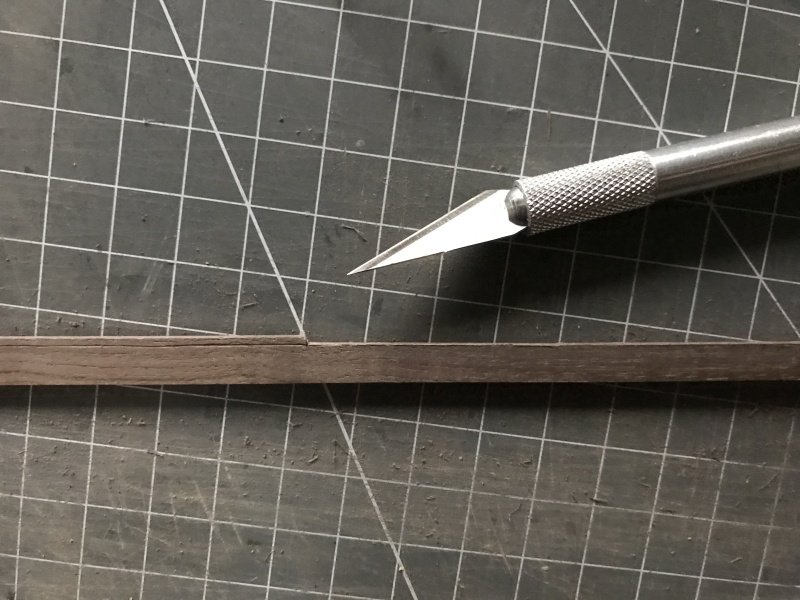
The last part of the desing was construction the upper board of the railings. I've bought some 7x1,5mm walnut strips and cut them to width of 6mm. Since I have no power tools at my disposal, I simple used a knife, ruler and sanding block to get the job done.
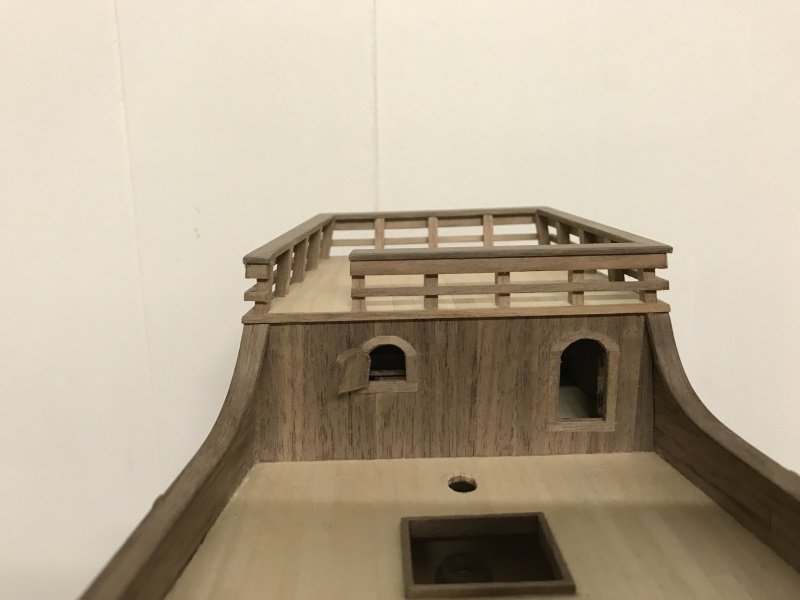
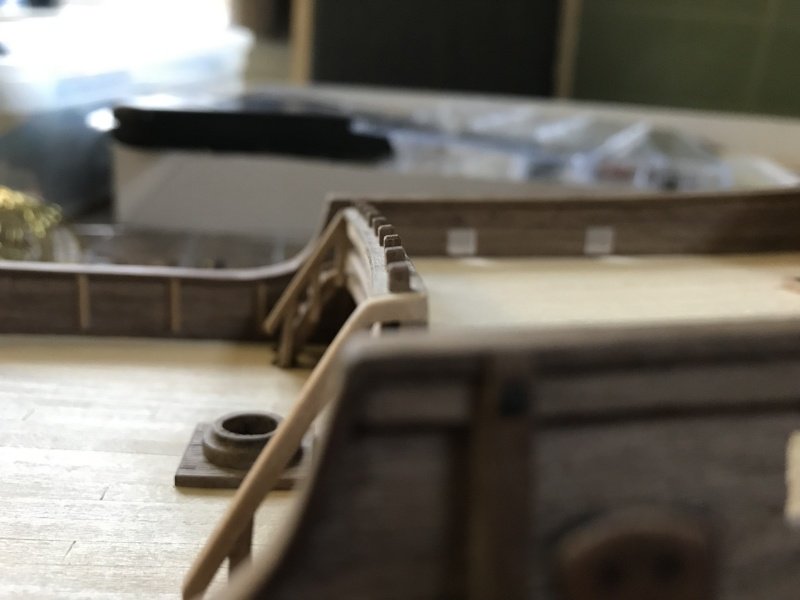
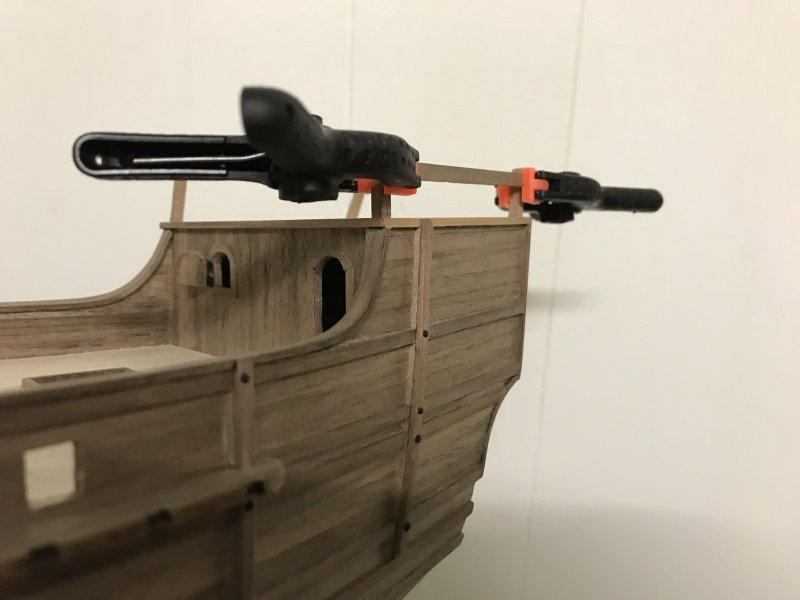
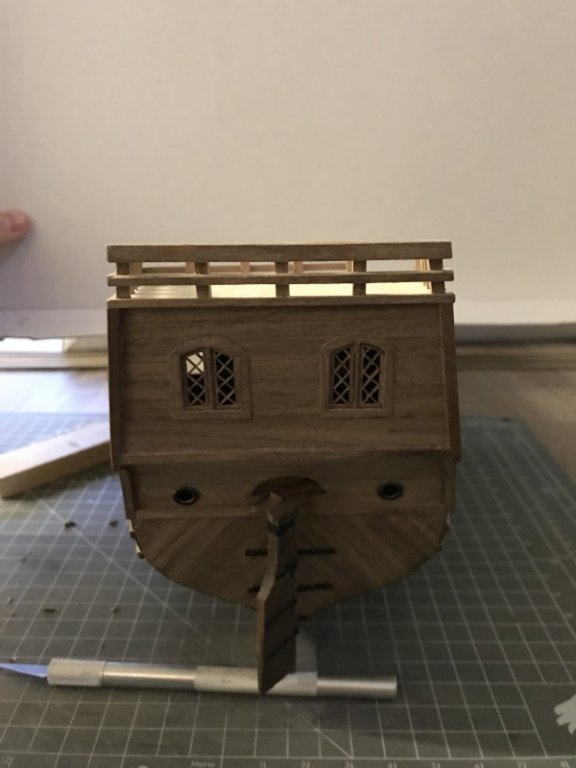
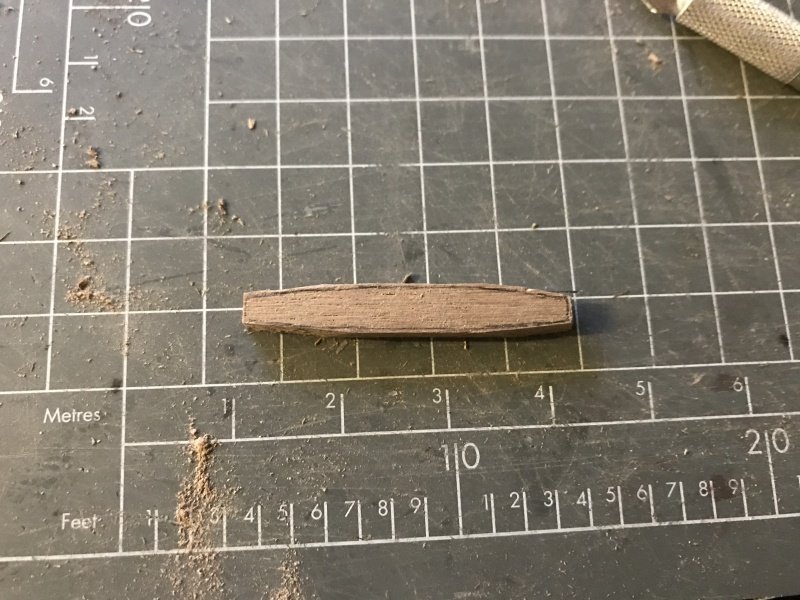
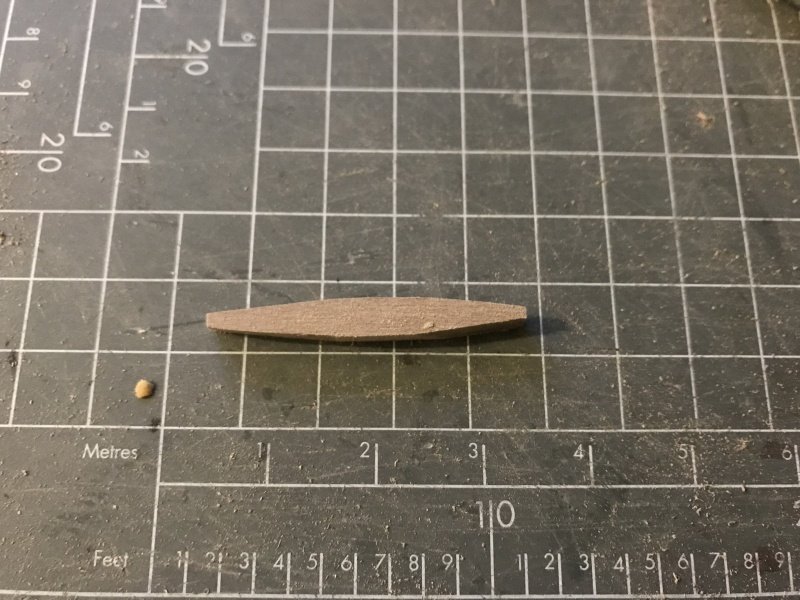
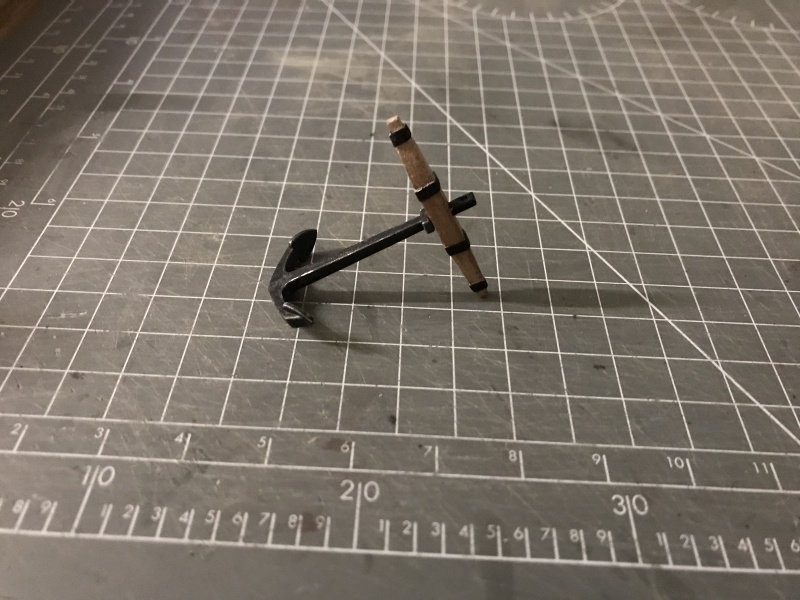
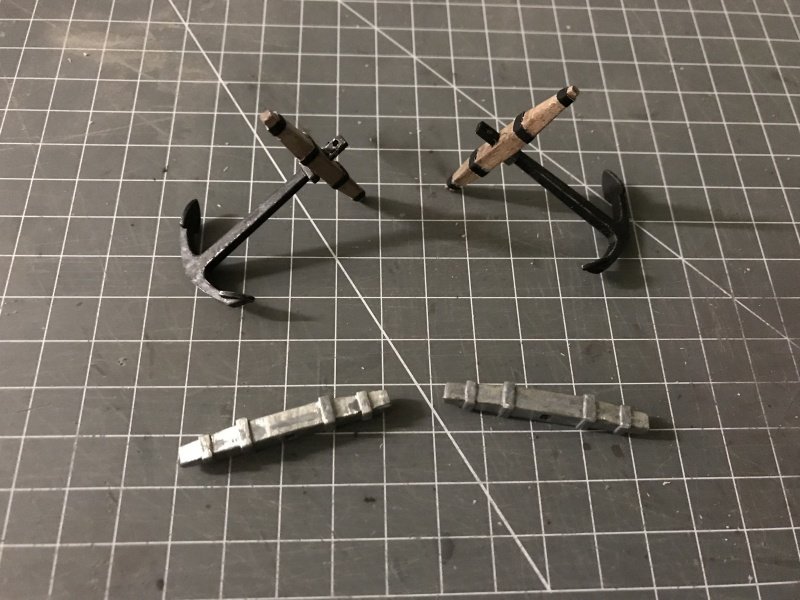
I hope you guys like the improvement. I copy this design to create the front castle as well.Next is to change the Anchors. The kit provides more cast metal parts which I don't use. I made some new ones from scrapwood.

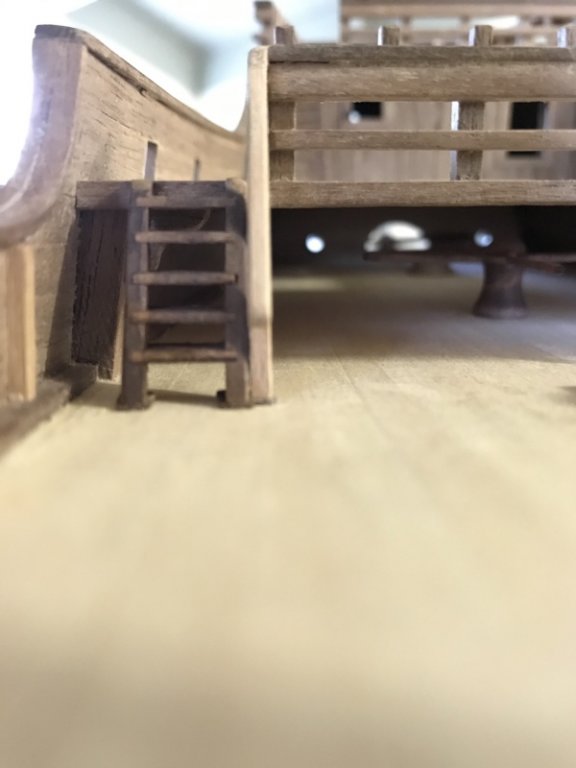
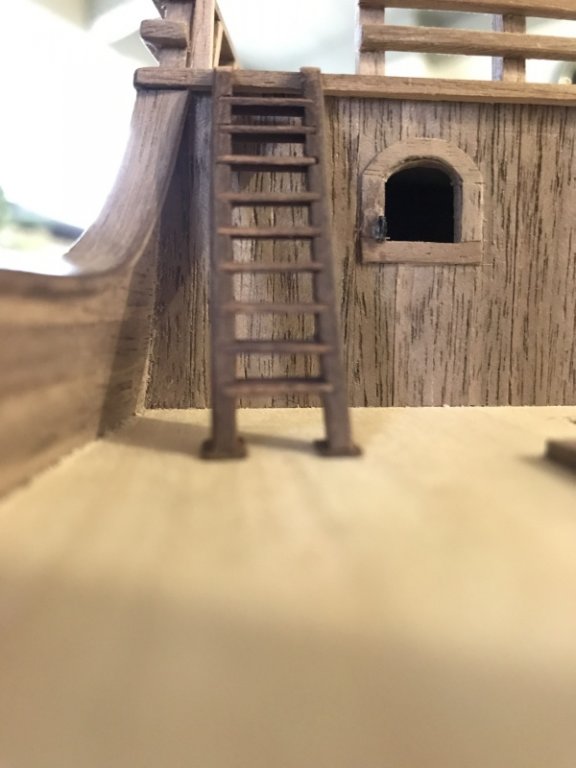
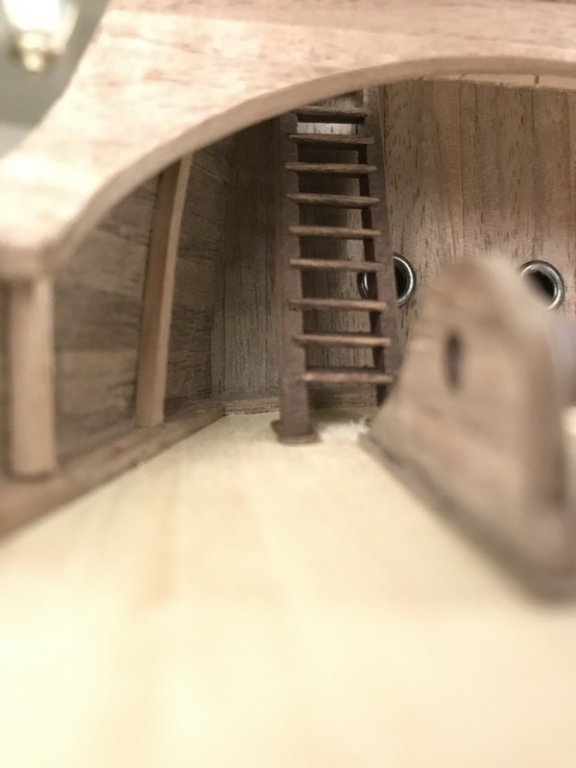
Next are some small parts placed on the ship as well as my first ladder...
That's it for today, I would like to take the opportunity to wish you a very Merry christmas time with your family and dear ones and see you hopefully soon. comments are welcome ofcourse!
ciao!
Pter- marktiedens, Charter33, Blue Ensign and 5 others
-
 7
7
-
 1
1
-
-
4 hours ago, mtbediz said:
Amazing details. Very good workmanship.
Thank you mtbediz!
-
Oh yes! I like the ebony stain more than the usual blue! Well done. Can you explain what you did with the minwax and what it does?
-
I love the fact that you used the natural colours of the wood to get contrast. Very very neat and tidy work. Great great model, you should be proud! ausgezeichnet!
- Bill Morrison, Robert29, Heinz6672 and 1 other
-
4
-
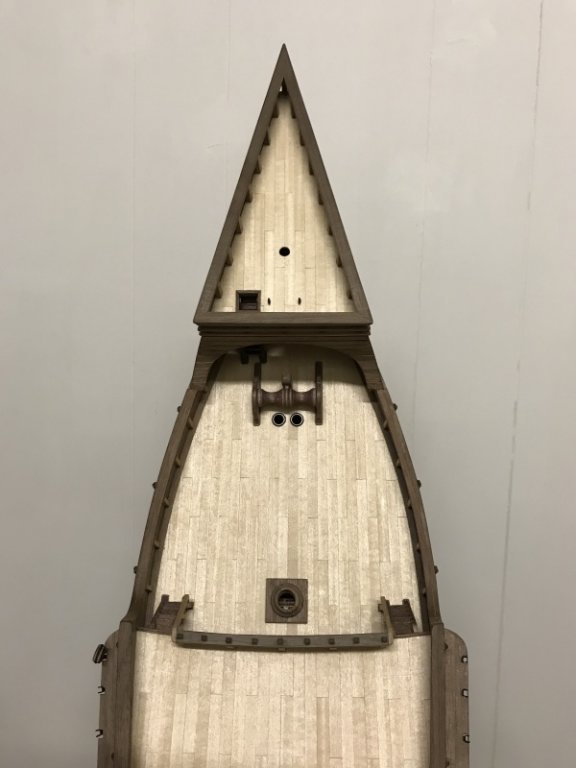
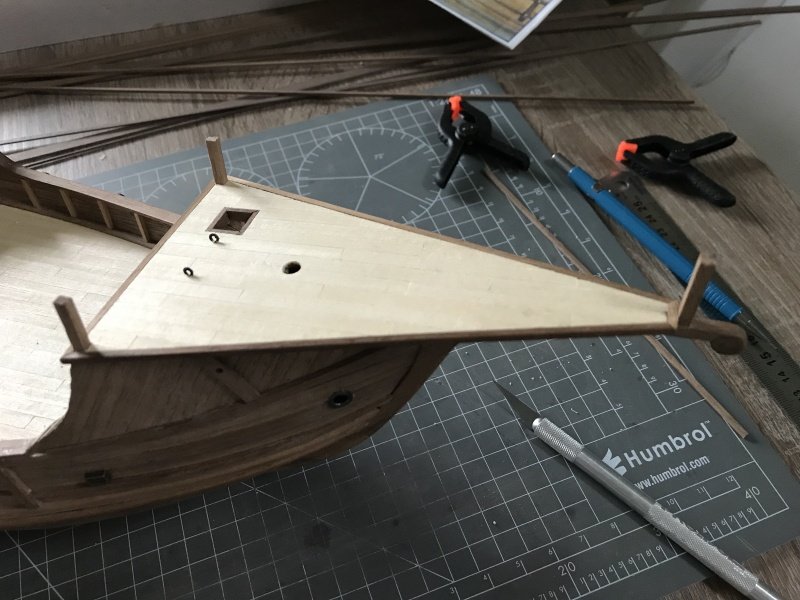
She’s turning into a real beauty! Love the bow section a lot. Very neat work so far Mark!
-
51 minutes ago, zappto said:
This is remarkable job. Beautiful workmanship on the smalest parts!
Thanks Zappto, your Dutch Friesland ship is a work of beauty too!
I’ll try to take my time on the details on this “Tiny” ship in comparison of the real biggies like, Soleil Royal, Titanic, HMS Victory and Friesland. It’s like a practice run for me before to take a next step to such big models.
-
I think that the "MK" kits are superb engineered. I am sure you'll manage the last planking stroke at the keel and make a perfect fit even if the keel is already installed. Great job so far and I toggle along as well.
regards,
Peter
- mtaylor, Canute, Mirabell61 and 2 others
-
5
-
Love the overall appearance of this ship. The LED lighting is spectaculair! Great job! Not an easy vessel and kit.

Liveship Vivacia by Nikbud - Mantua - 1/64 - kitbashed from the Mantua Pinta kit
in - Kit subjects built Up to and including 1500 AD
Posted
Wow, are you making a doll house instead of a ship? Just kidding, it looks great. The way you made the bottles and glass....just great! I am not to fond of paint tho, I preffer stains, but on your ship it works out well. Keep going!")