mgdawson
NRG Member-
Posts
157 -
Joined
-
Last visited
About mgdawson

Profile Information
-
Gender
Male
-
Location
Sydney, Australia
-
Interests
Interested in methodology of achieving desired results eg how to colour cannon, making rope, plank bending
Recent Profile Visitors
-
 kgstakes reacted to a post in a topic:
Tool to Take Measurement Inside of a Hull
-
mgdawson started following Help with translation of rigging term , Tool to Take Measurement Inside of a Hull , Dust collector jig for sanding drum.... and 6 others
-
Tool to Take Measurement Inside of a Hull
mgdawson replied to ChrisLBren's topic in Modeling tools and Workshop Equipment
Another alternative would be a bar gauge, you could knock one up in a size to suit mostly from scrap. Similar function as the telescopic gauges shown by tmj. An internet search will find a number of commercial & diy versions, too big for a model ship but different design ideas to make your own. I found a take down rifle cleaning rod on one of the chinese websites with 90mm sections to make one for the workshop, that'll measure from about 100mm to 1m when I screw all the sections together but after reading this thread I might cut down a couple of the pieces and make a mini one for models. -
Dust collector jig for sanding drum....
mgdawson replied to Sterling59's topic in Modeling tools and Workshop Equipment
This one ? https://www.thingiverse.com/thing:4980160 -
 davyboy reacted to a post in a topic:
You Tube Film on the magnificent sailing barks “The last of the Cape Horners”
-
 Some Idea reacted to a post in a topic:
Sherline Mill Ring Light
-
 paul ron reacted to a post in a topic:
Sherline Mill Ring Light
-
Sherline Mill Ring Light
mgdawson replied to Some Idea's topic in Modeling tools and Workshop Equipment
Hey Mark, nice job, I picked up a couple of those, one for my mill & one for the drill press. Everyone, if you're looking for these, search for 'Angel Eyes' on the chinese stores, there are all different sizes, they're actually sold as car headlight surrounds. Mark D -
Which club ? Gotta say the old varnished timber boats were much prettier than the modern plastic ones. Mark
-
 Keith Black reacted to a post in a topic:
My newest Challenge
-
 mtaylor reacted to a post in a topic:
My newest Challenge
-
My newest Challenge
mgdawson replied to James Flynn's topic in Building, Framing, Planking and plating a ships hull and deck
Hi James The diagrams on the left are called the body plan, as mentioned above the left side of the body plan show the contours of the hull from midships to the stern and the right side shows midships to the bow. If you look carefully at the left side the midships curves on the 2 body plans are slightly different, the lower one has 11 curves drawn and the upper only has 10 and if you overlaid them you may find other differences. Perhaps try putting the text between the 2 body plans into google translate it may give you a clue as to what's going on. As Jim mentioned check out the article on reading ship lines plans, if you don't already, you really have to have your head around those concepts. Mark -
 Canute reacted to a post in a topic:
Heater for sealing the end of rigging rope.
-
 wefalck reacted to a post in a topic:
Heater for sealing the end of rigging rope.
-
 mtaylor reacted to a post in a topic:
Heater for sealing the end of rigging rope.
-
Heater for sealing the end of rigging rope.
mgdawson replied to DaveBaxt's topic in Modeling tools and Workshop Equipment
I have a couple of gas powered soldering irons which come with a knife tip for cutting synthetic ropes etc. Probably a bit clumsy for model work but a small flat or chisel tip, say 1mm, should do the job nicely and you've got a multipurpose tool into the bargain. -
Heater for sealing the end of rigging rope.
mgdawson replied to DaveBaxt's topic in Modeling tools and Workshop Equipment
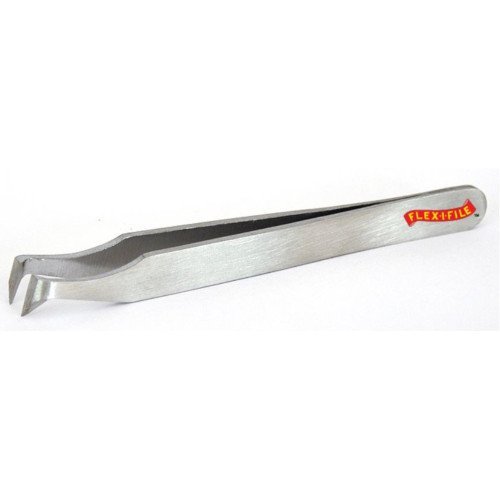
I noticed these a little while back, the description says they're for cutting plastic sprues but they look like they'd be good for rigging, I haven't used them so can't comment further. $US19:99 each. Fine Precision Trimmer Ultra Fine Precision Trimmer -
Help with translation of rigging term
mgdawson replied to Papa's topic in Masting, rigging and sails
Hmm ChatGPT says pretty much the same thing, maybe it's the bosuns belaying pin for giving slackers the hurry up 😂 -
Had a look in Anatomy of the Ship - Diana, it lists 8' 18 pounders on the upper deck, 7'6" 9 pounders as chase guns on the f'cstle & 7' 9 pounders on the quarterdeck plus 32 lb carronades on the f'cstle & quarterdeck, unfortunately it only has carriage drawings for the 18 pounder & carronades. Perhaps one of the other AotS books has the requisite drawings.
-
Keep Brass Shiny
mgdawson replied to SilversaxMan's topic in Metal Work, Soldering and Metal Fittings
Google translation :- Zapon varnishes are thin, transparent nitro varnishes based on highly viscous cellulose nitrates (collodion wool), which are dissolved in highly volatile solvents such as amyl acetate, ethanol and ethyl acetate. They are usually colorless, but can also contain dyes.[1] They are usually used to protect metals such as brass, bronze or silver from oxidation (to prevent tarnishing). Zapon varnishes are unsuitable for use on iron or steel as they have no rust-protecting effect. They are also used as a varnish and for painting wood, glass and leather. The process of treating with zapon varnish is called zaponing. Zapon varnishes can be harmful to health and are usually highly flammable. A similar product is nail polish. Mark -
Hi Greg Just wondering what paints you used on the collins, particularly the bronzy colour on the topsides, it looks like a good starting point for a project I'm considering. Mark
About us
Modelshipworld - Advancing Ship Modeling through Research
SSL Secured
Your security is important for us so this Website is SSL-Secured
NRG Mailing Address
Nautical Research Guild
237 South Lincoln Street
Westmont IL, 60559-1917
Model Ship World ® and the MSW logo are Registered Trademarks, and belong to the Nautical Research Guild (United States Patent and Trademark Office: No. 6,929,264 & No. 6,929,274, registered Dec. 20, 2022)
Helpful Links
About the NRG
If you enjoy building ship models that are historically accurate as well as beautiful, then The Nautical Research Guild (NRG) is just right for you.
The Guild is a non-profit educational organization whose mission is to “Advance Ship Modeling Through Research”. We provide support to our members in their efforts to raise the quality of their model ships.
The Nautical Research Guild has published our world-renowned quarterly magazine, The Nautical Research Journal, since 1955. The pages of the Journal are full of articles by accomplished ship modelers who show you how they create those exquisite details on their models, and by maritime historians who show you the correct details to build. The Journal is available in both print and digital editions. Go to the NRG web site (www.thenrg.org) to download a complimentary digital copy of the Journal. The NRG also publishes plan sets, books and compilations of back issues of the Journal and the former Ships in Scale and Model Ship Builder magazines.


