

DominichSteven
-
Posts
19 -
Joined
-
Last visited
Content Type
Profiles
Forums
Gallery
Events
Posts posted by DominichSteven
-
-
-
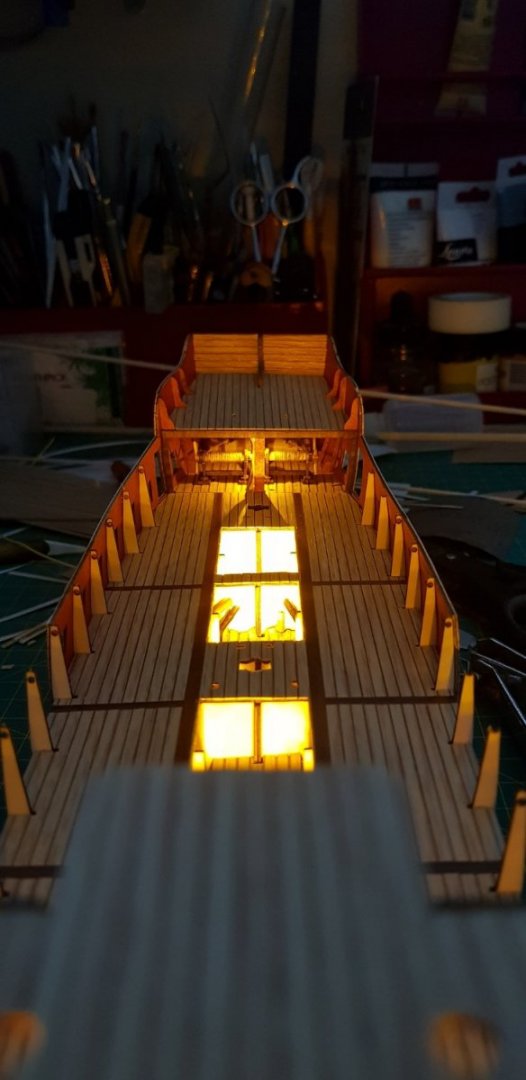
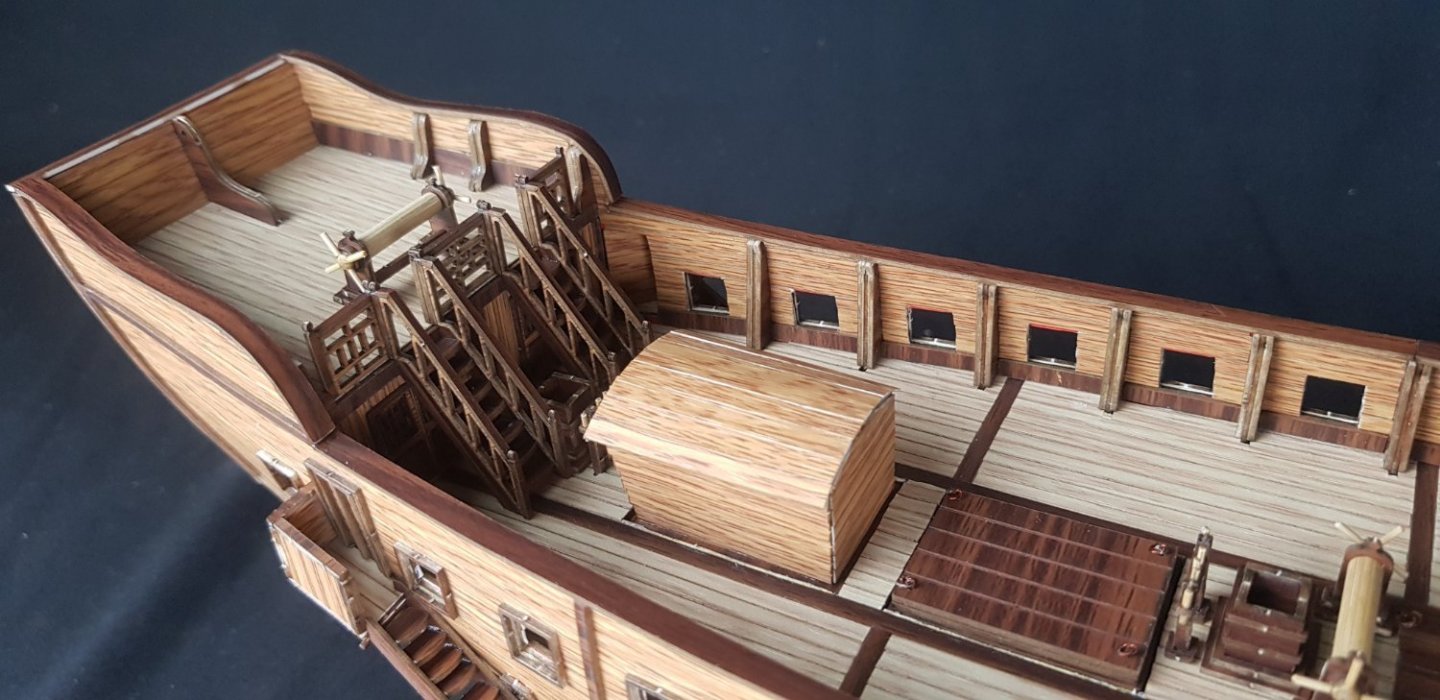
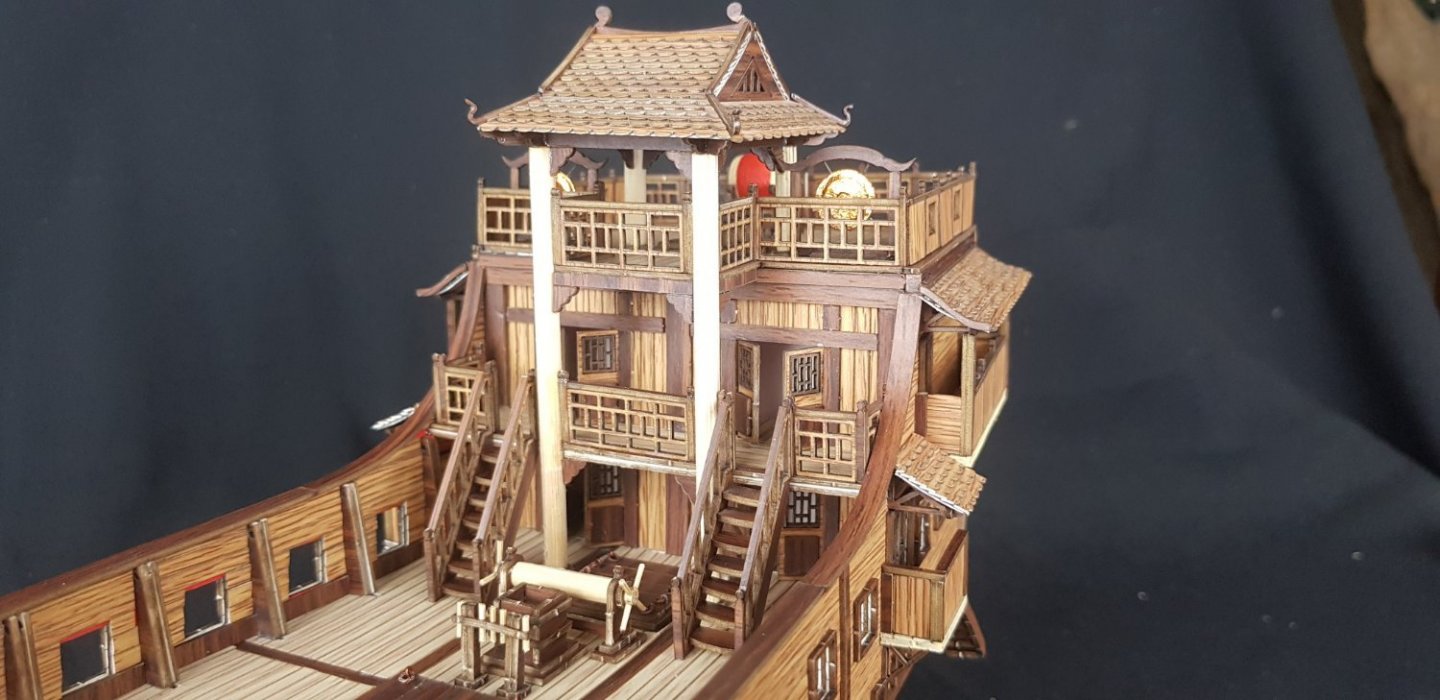
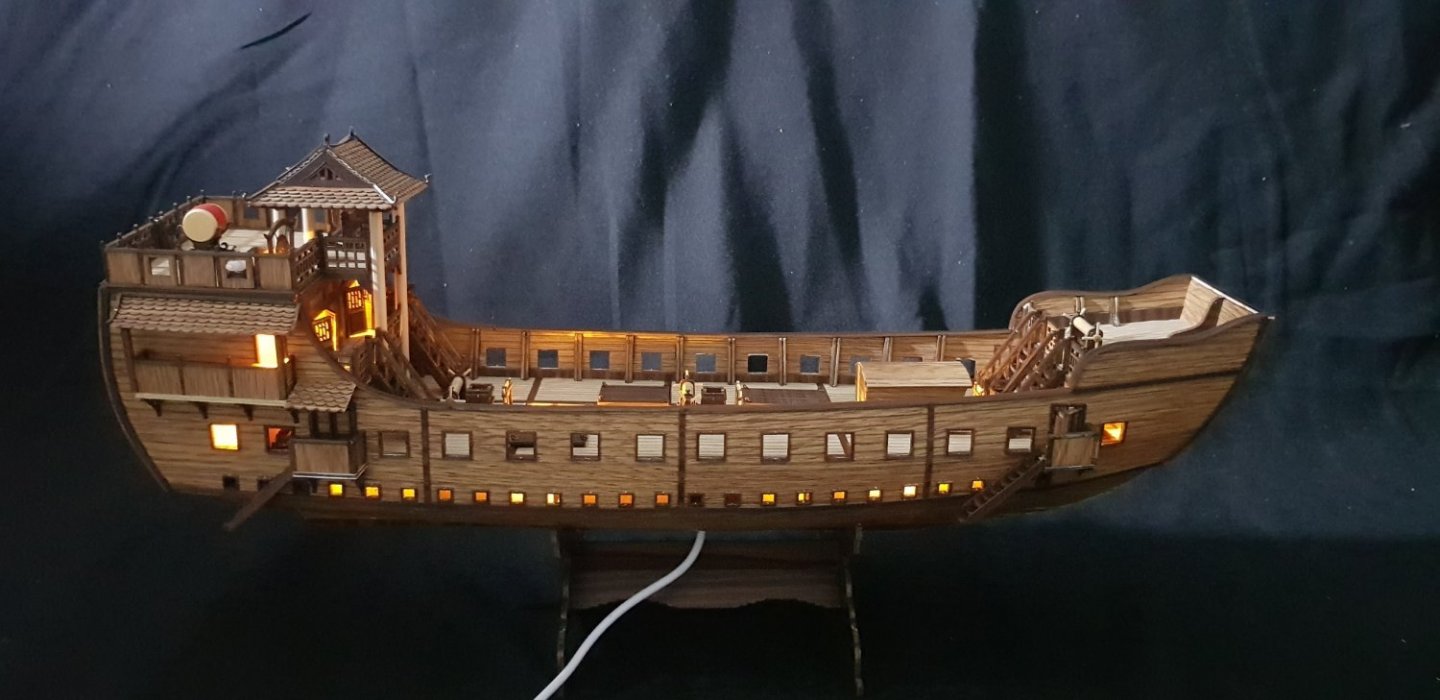
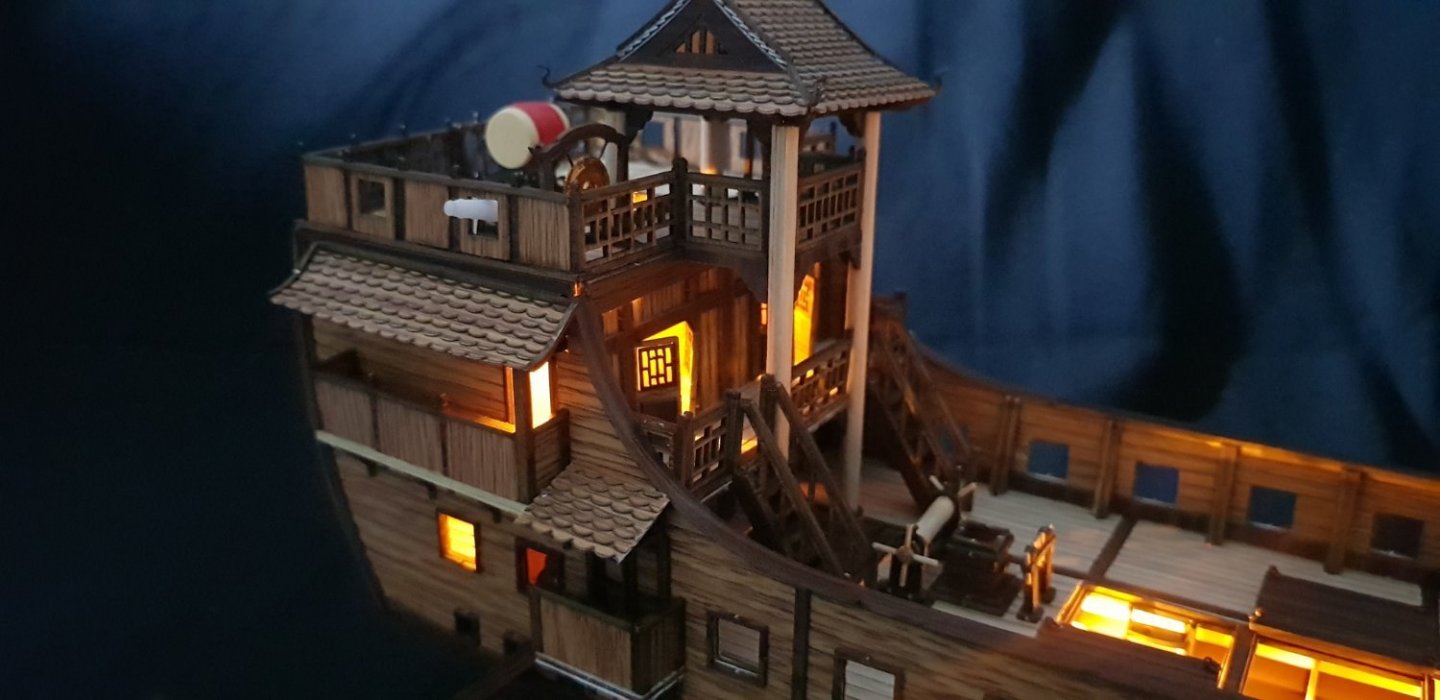
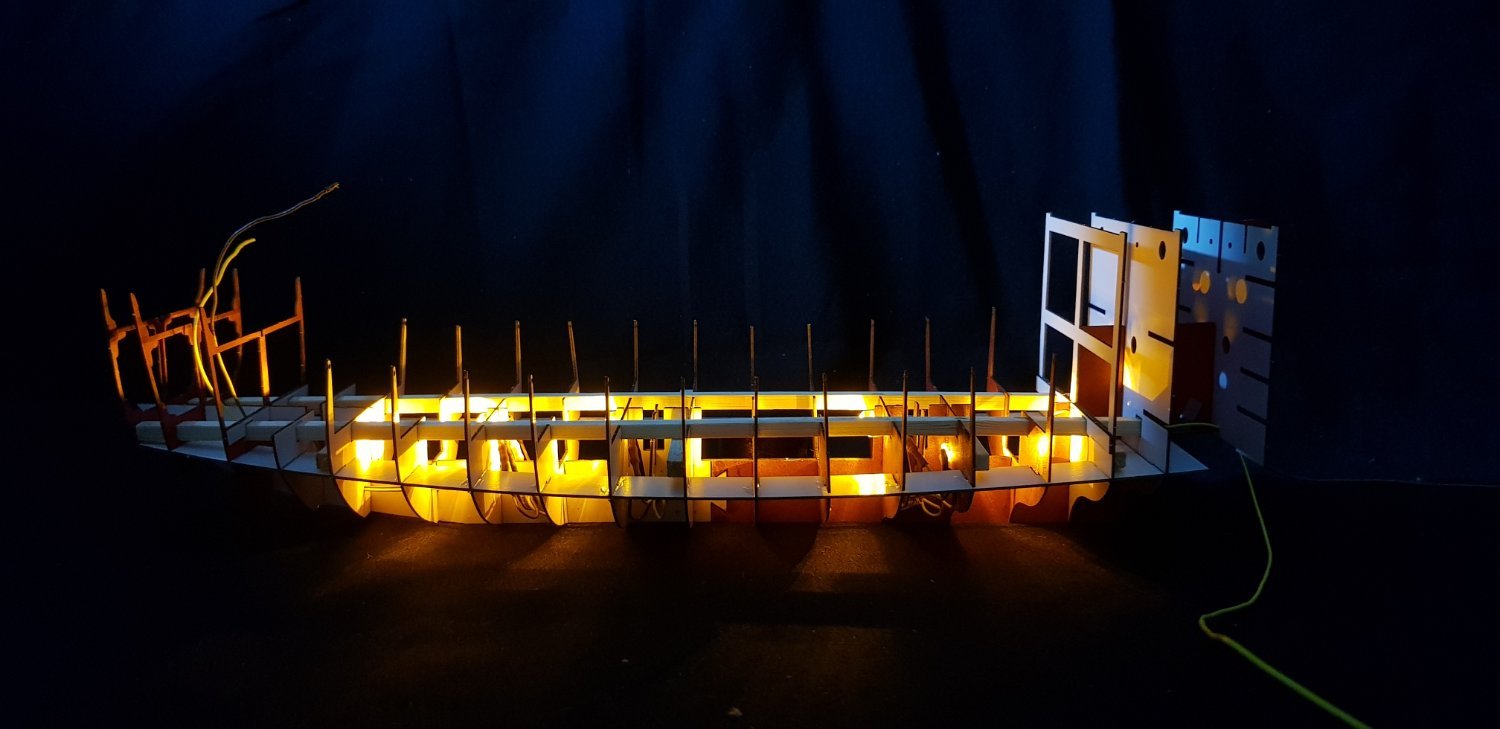
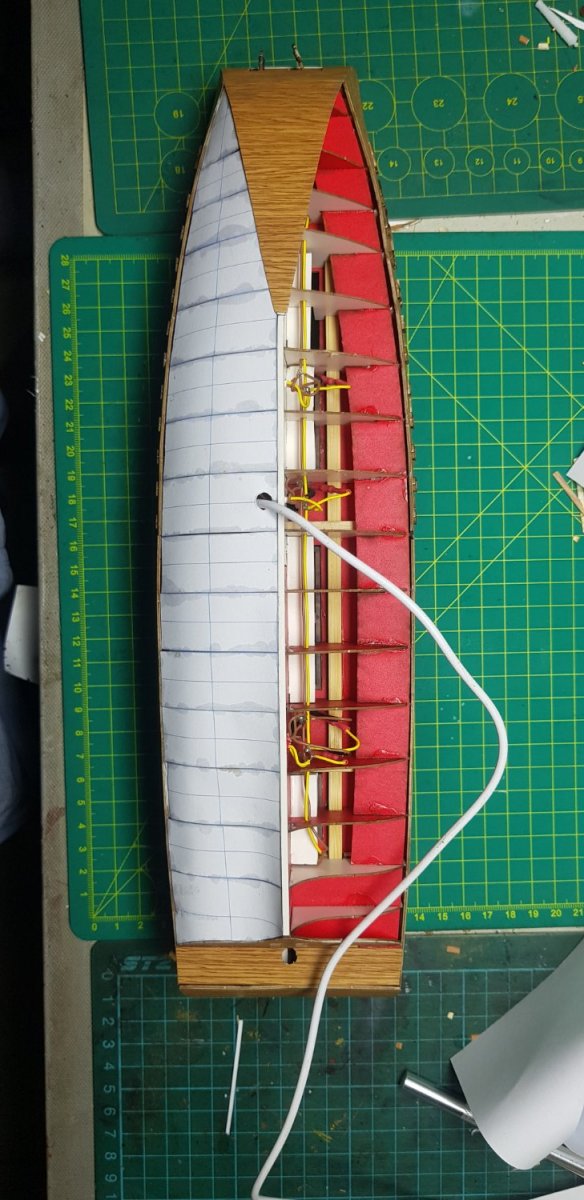
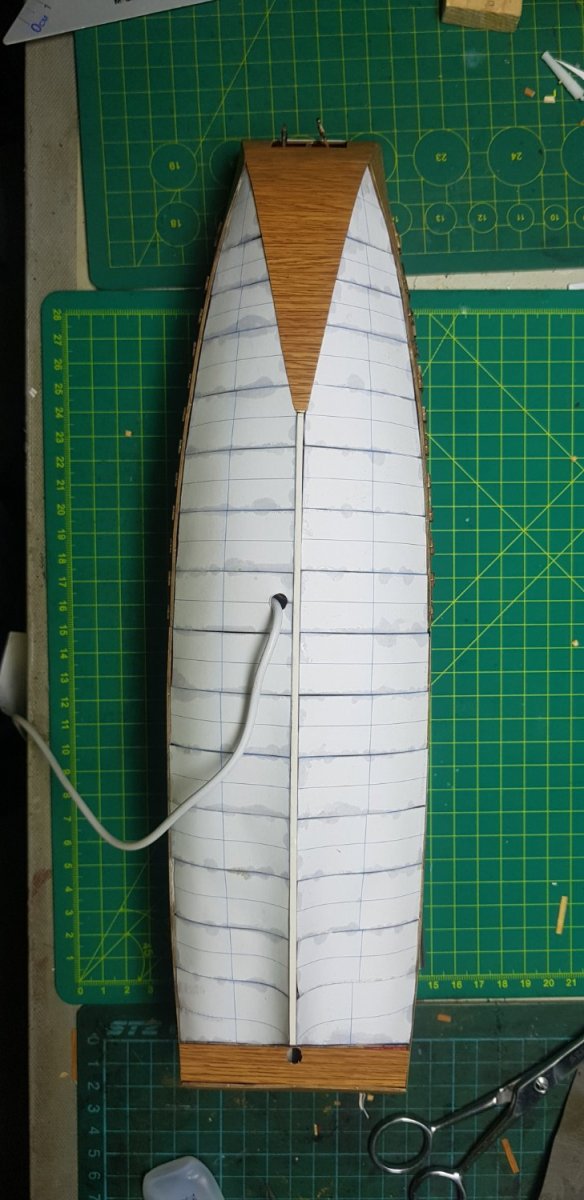
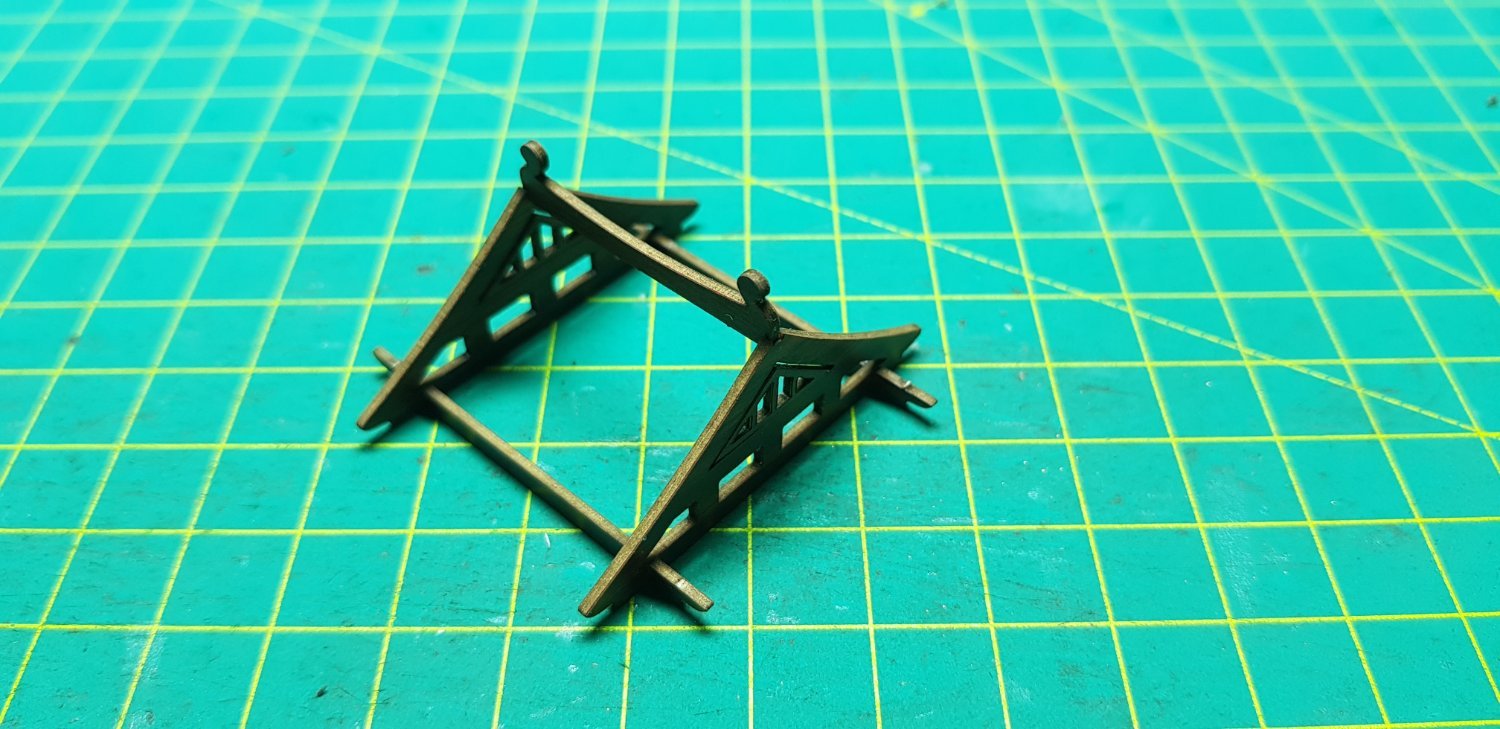
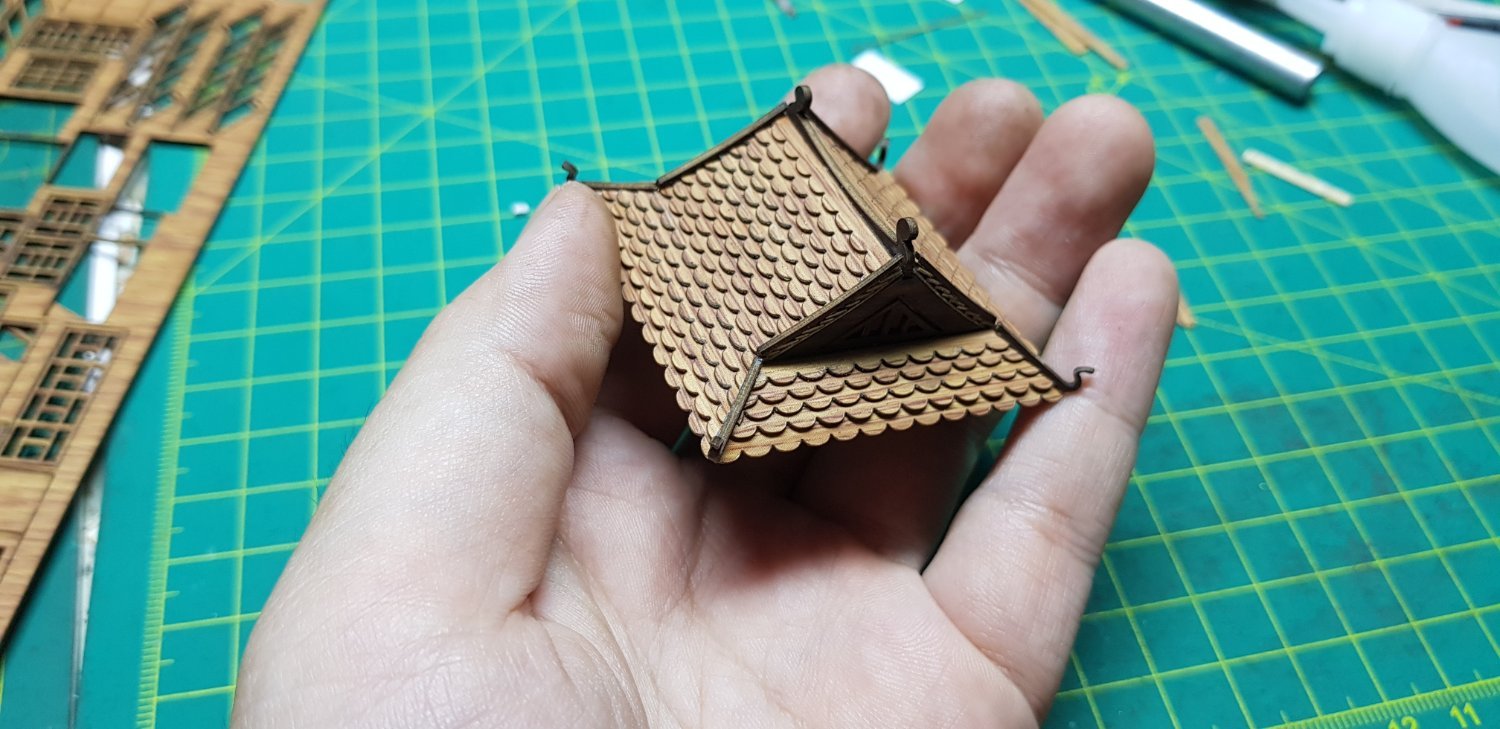
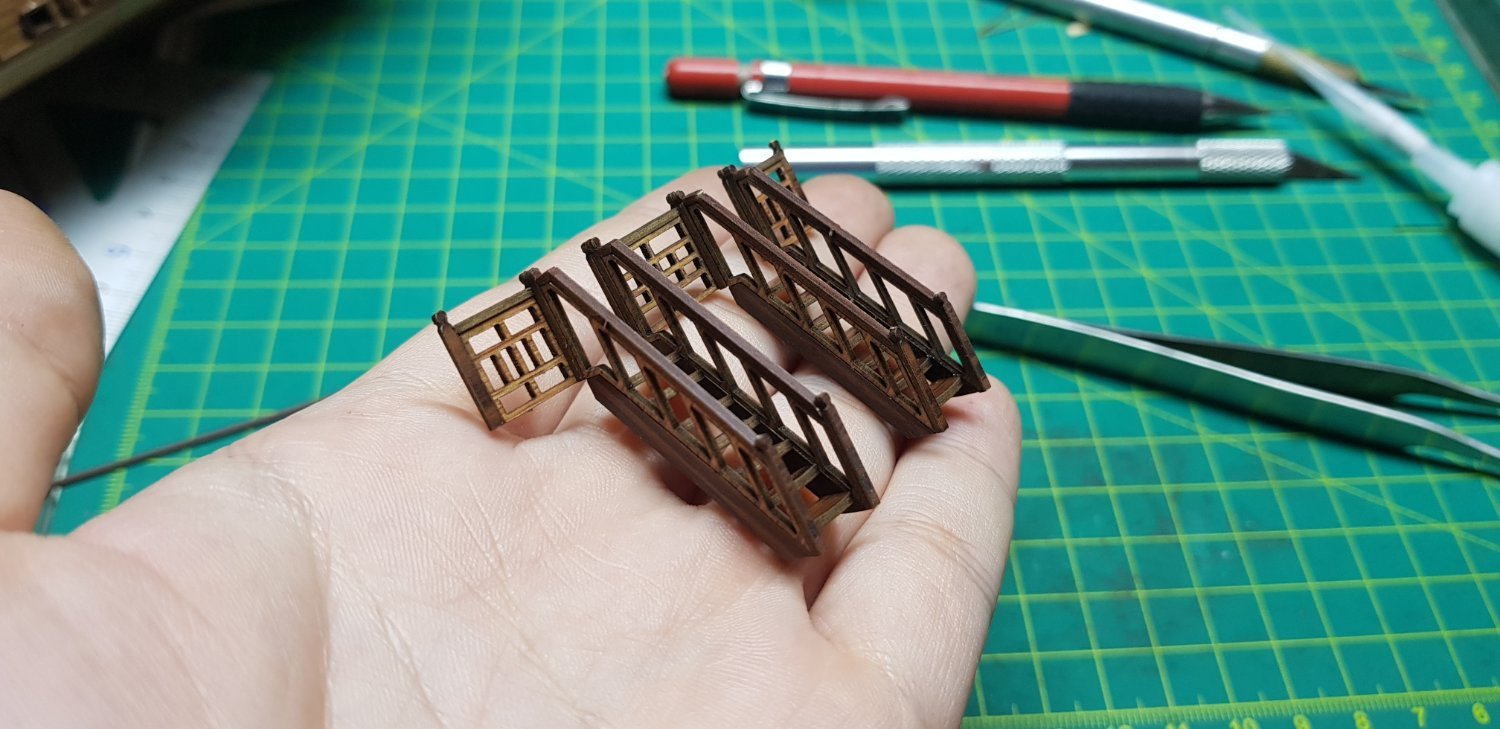
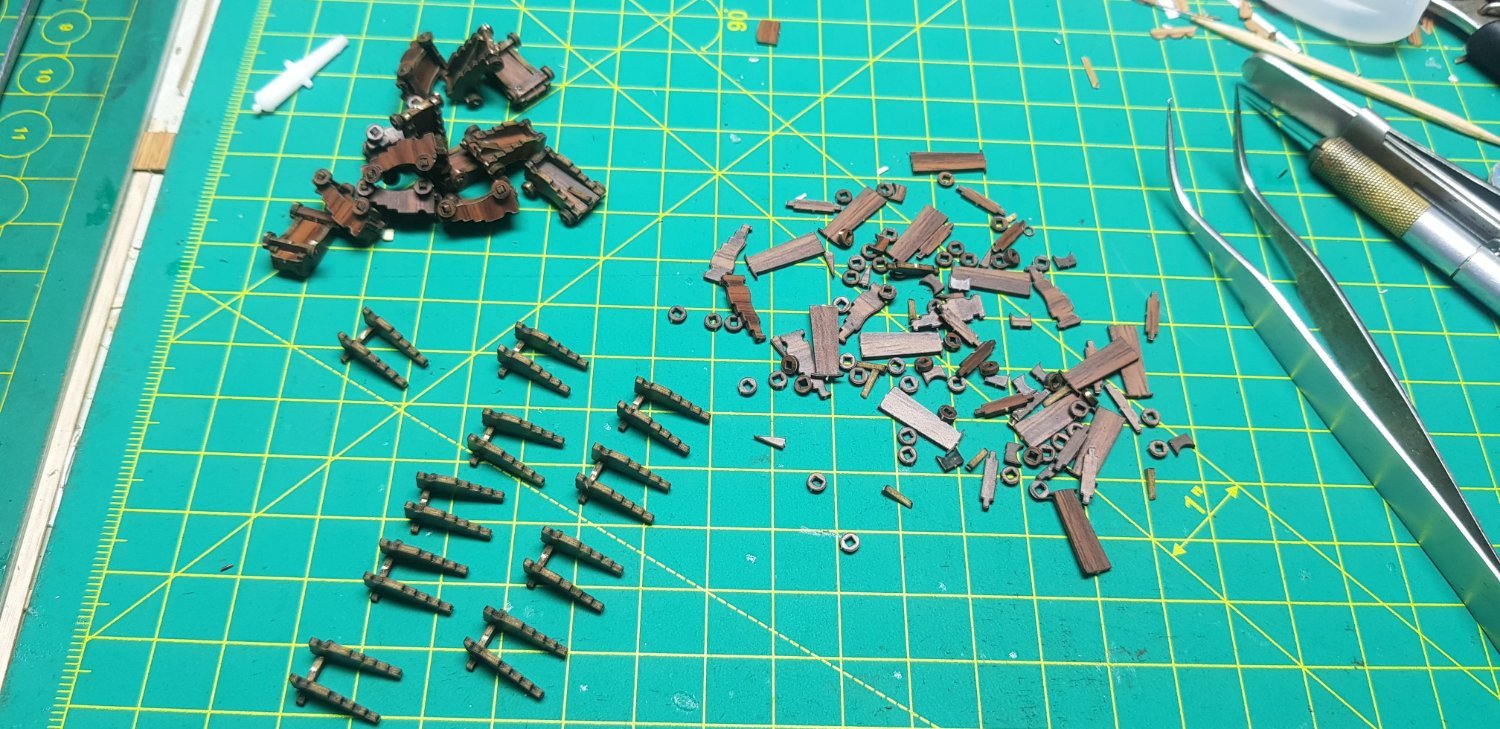
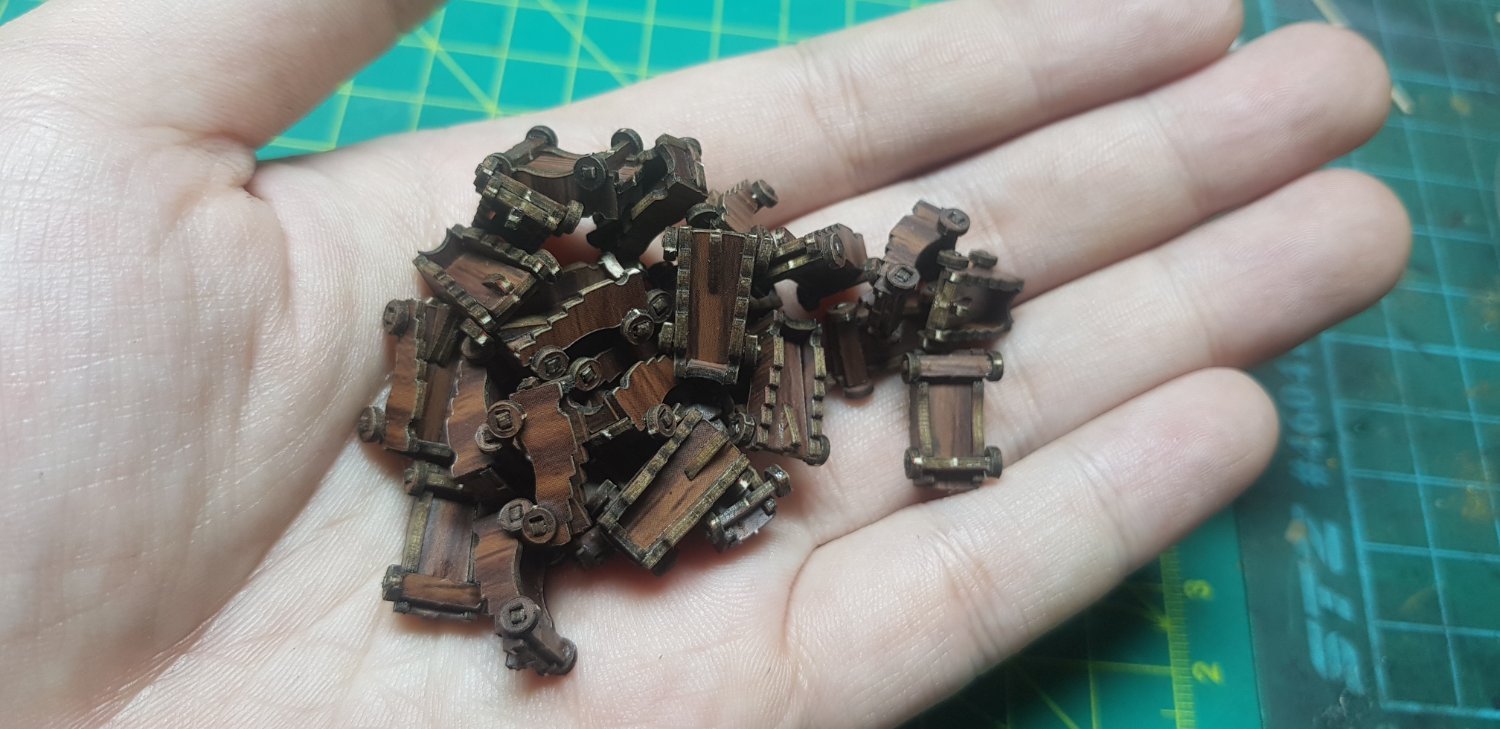
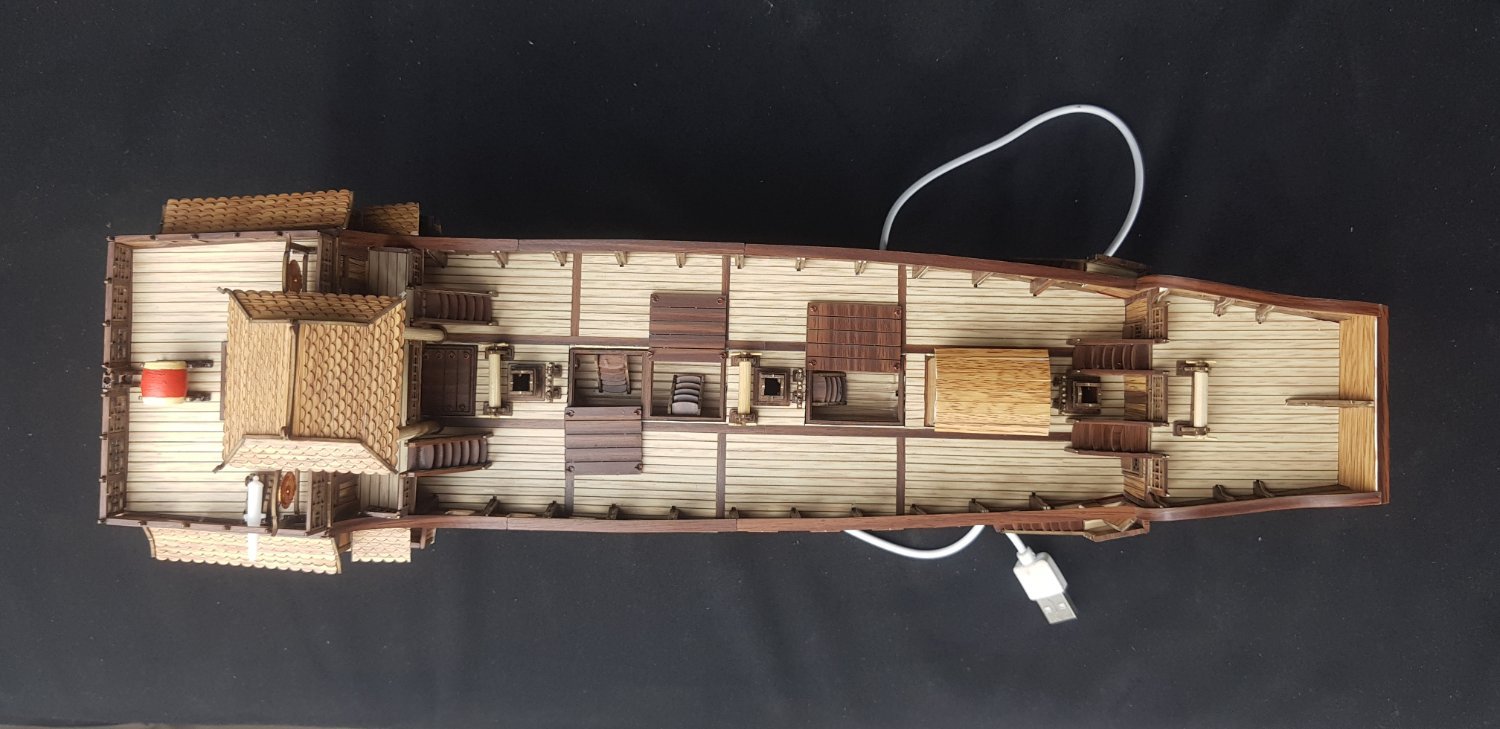
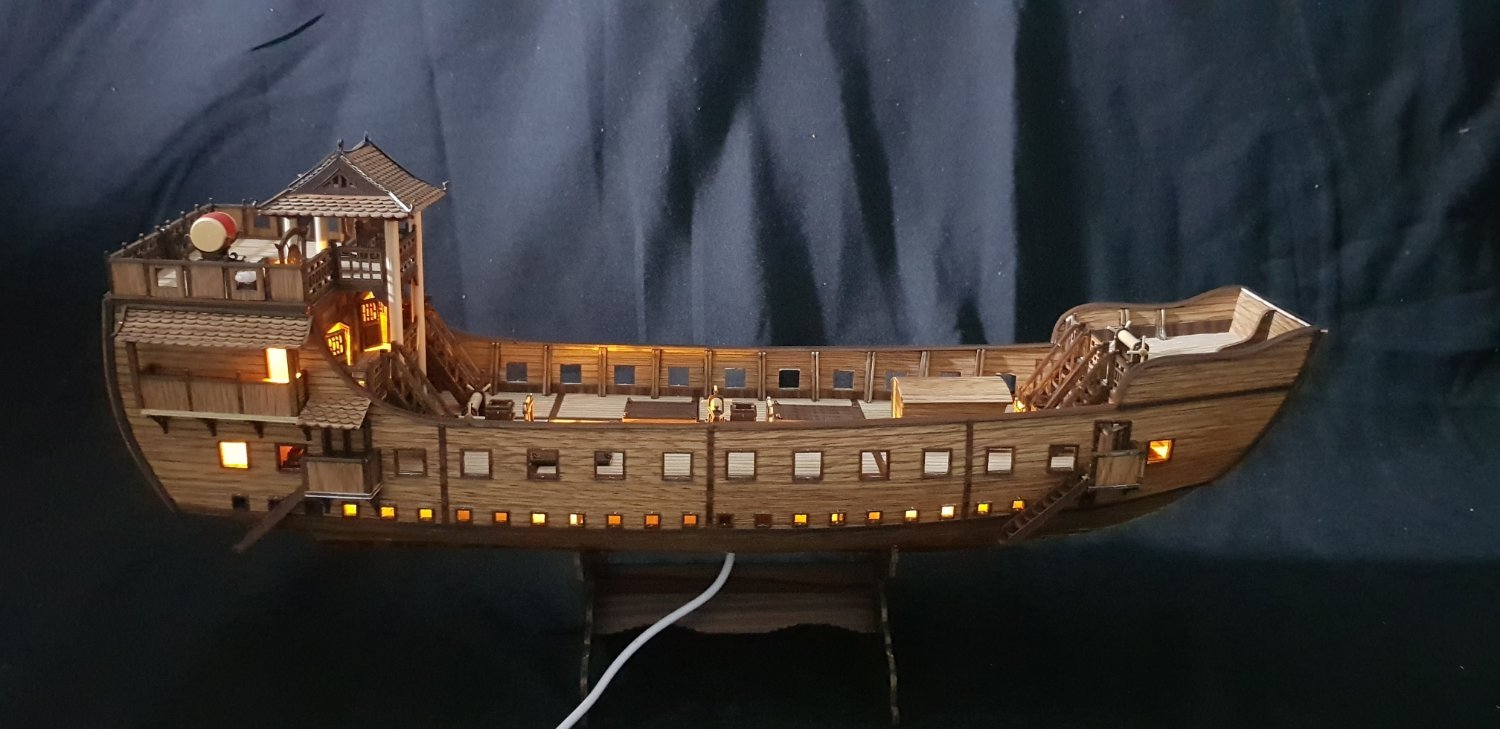
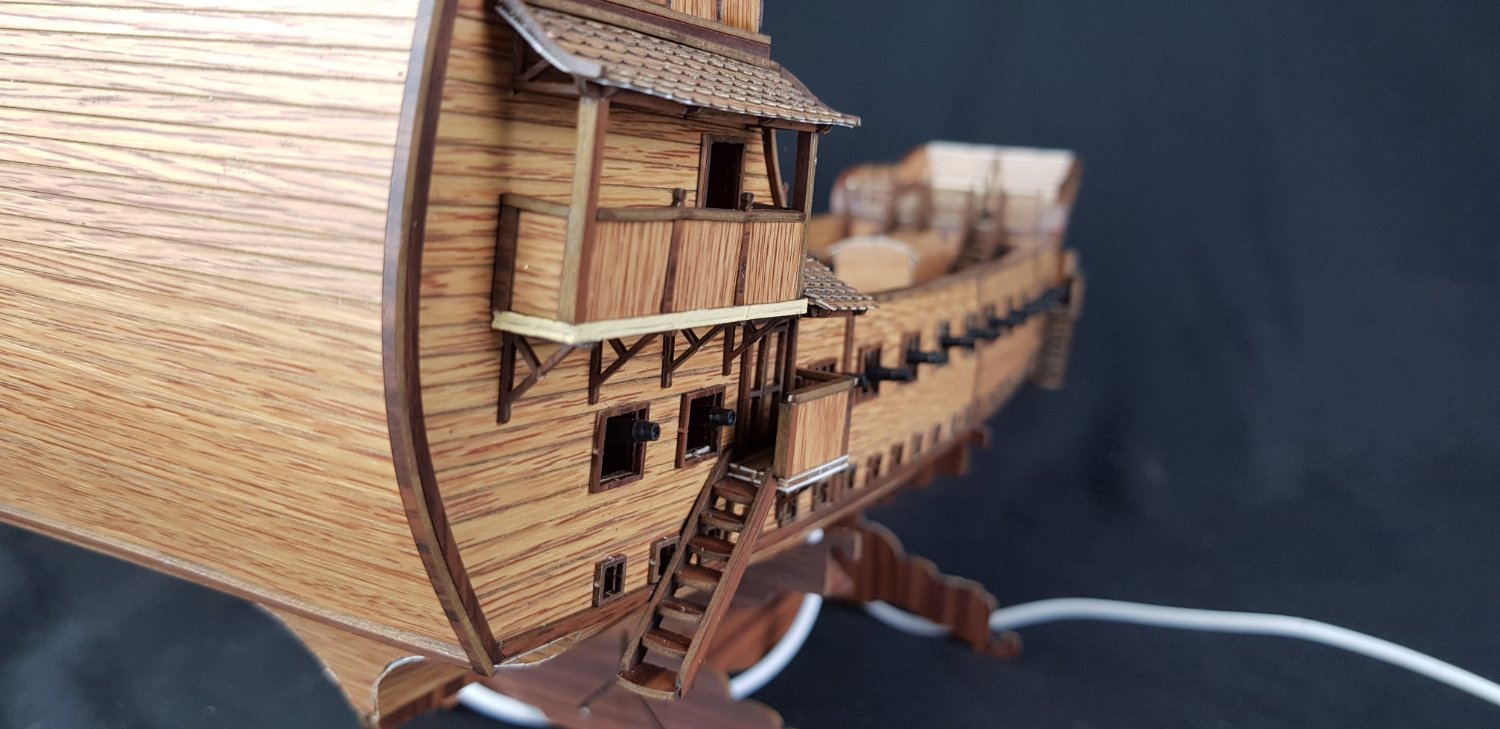
After 1 week of assembly and testing, the product finally took shape. All details are ok but still need to tweak a bit to make it smoother. The upcoming work of sailing and drawing embossed motifs also consumes a lot of time to look up the patterns of the Tay Son dynasty.
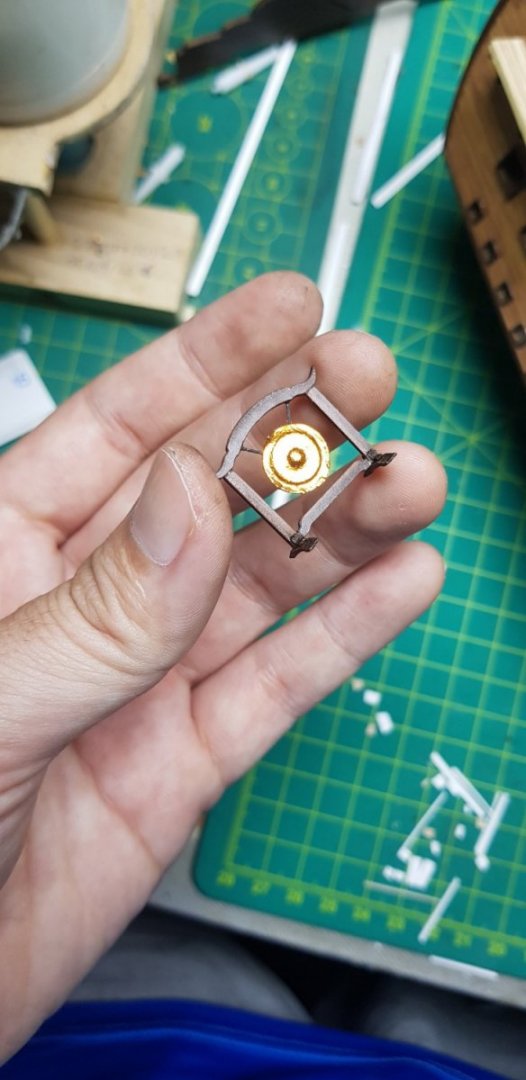
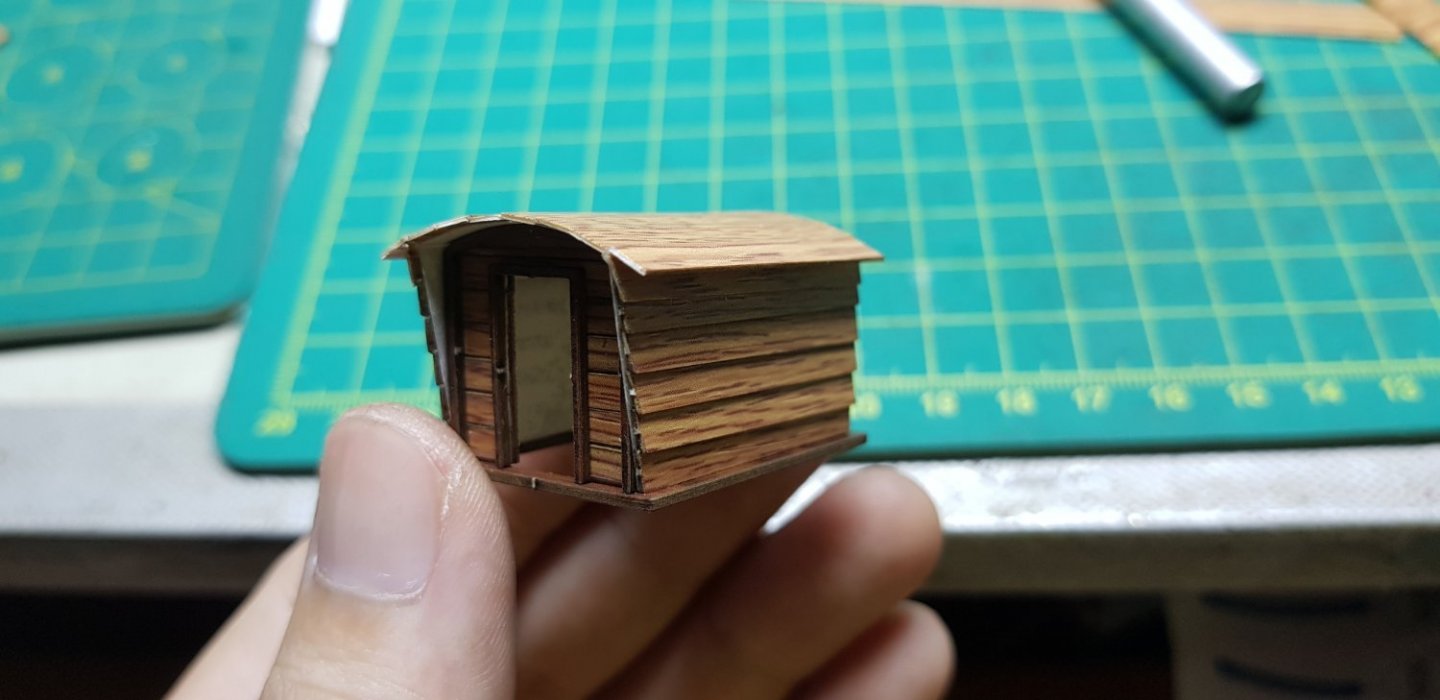
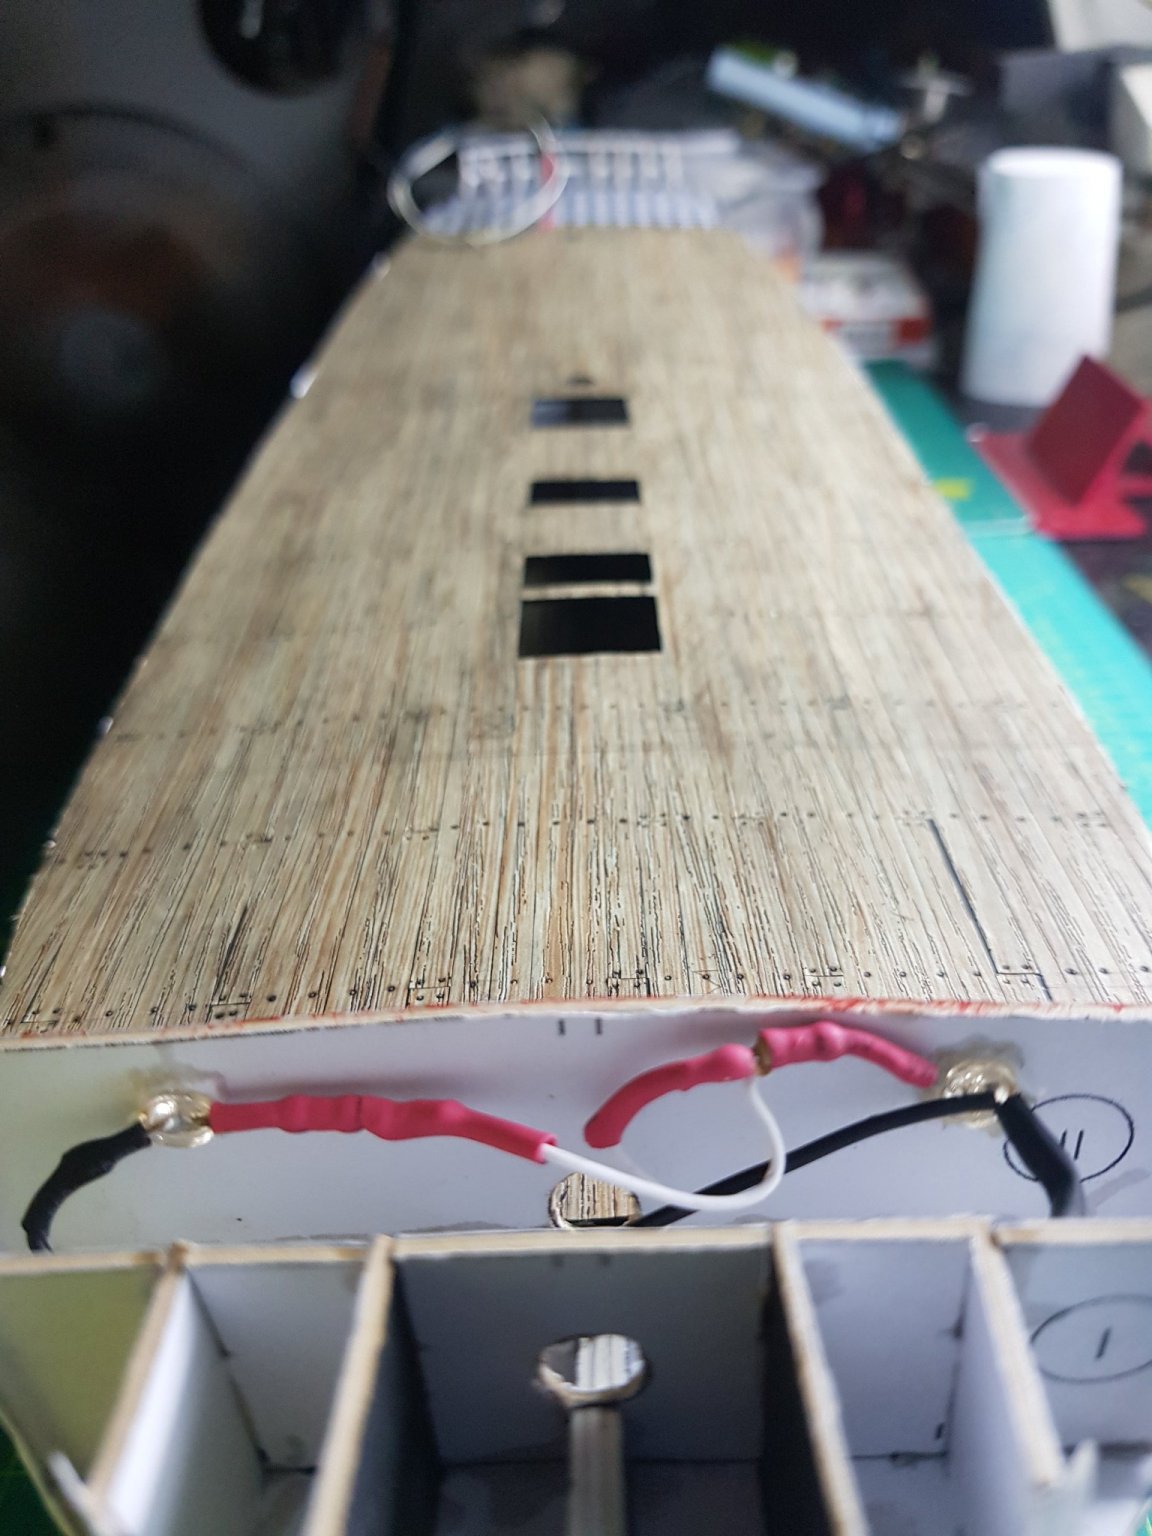
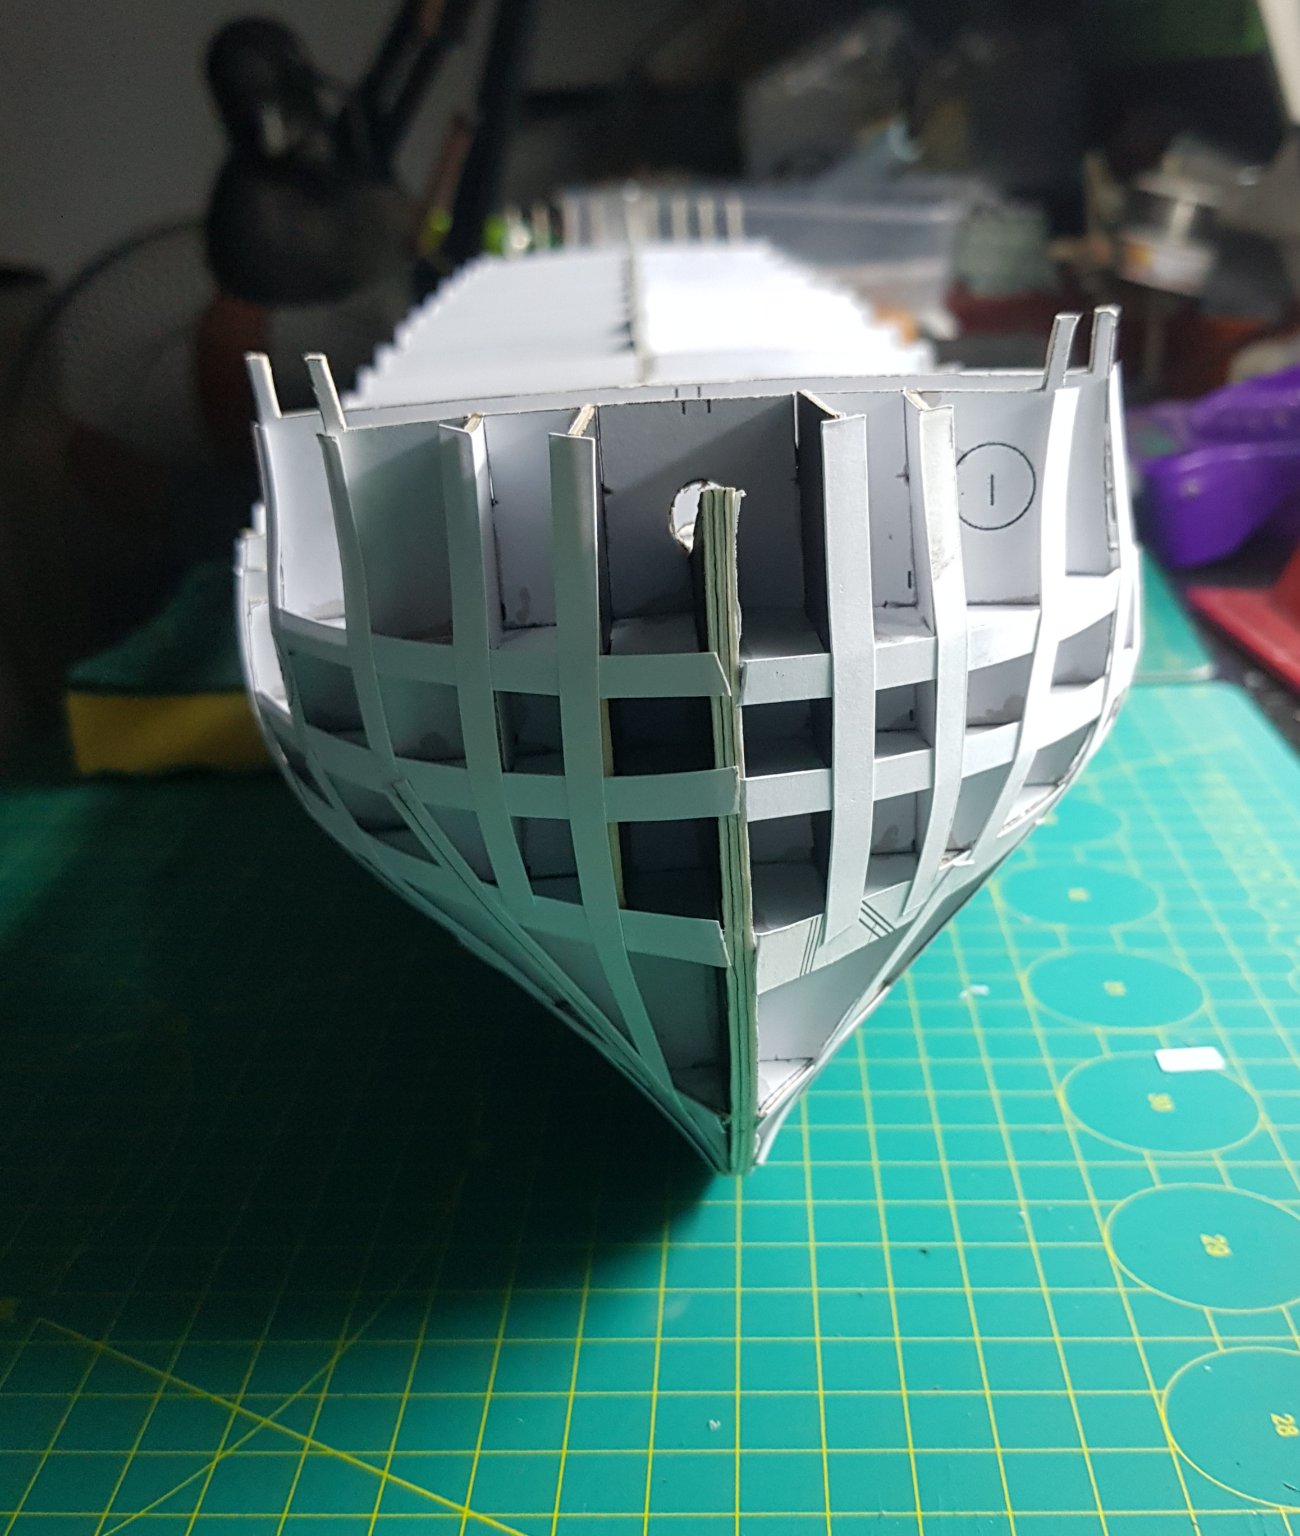
I had to cut a kit to put the led positions


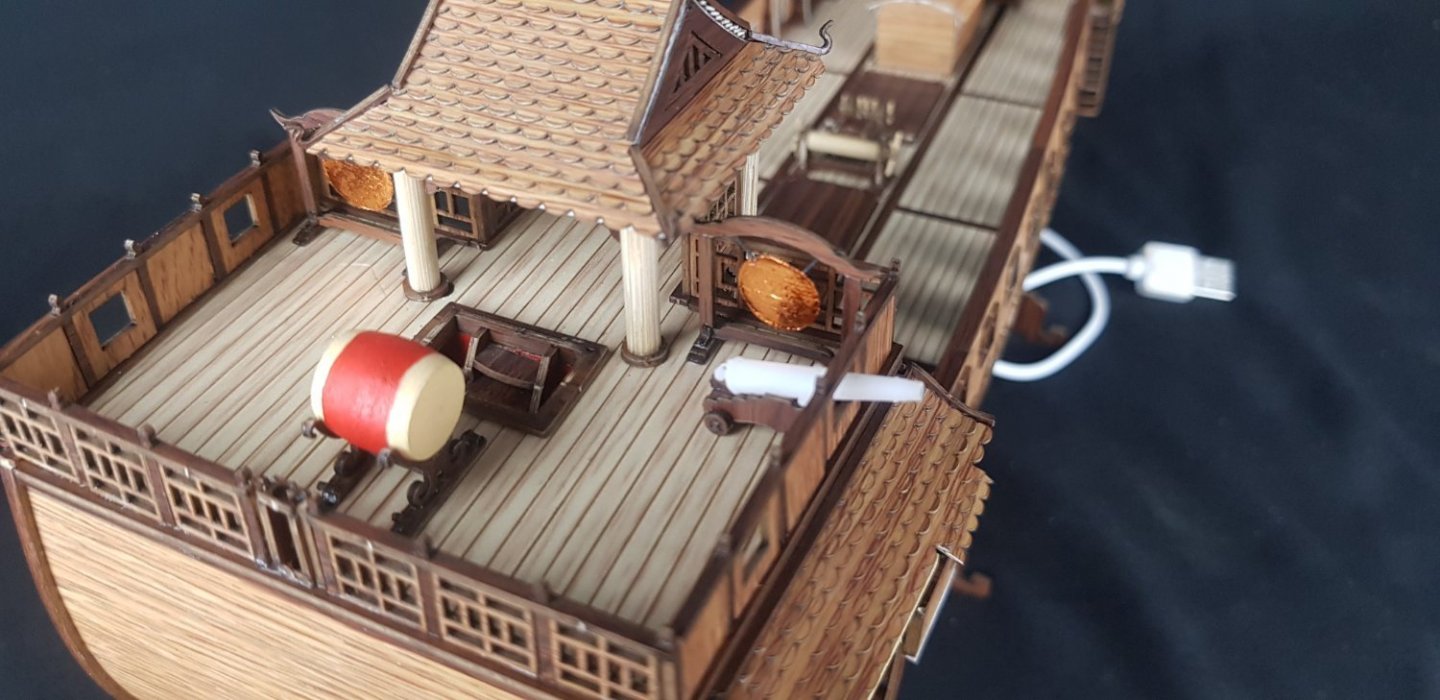
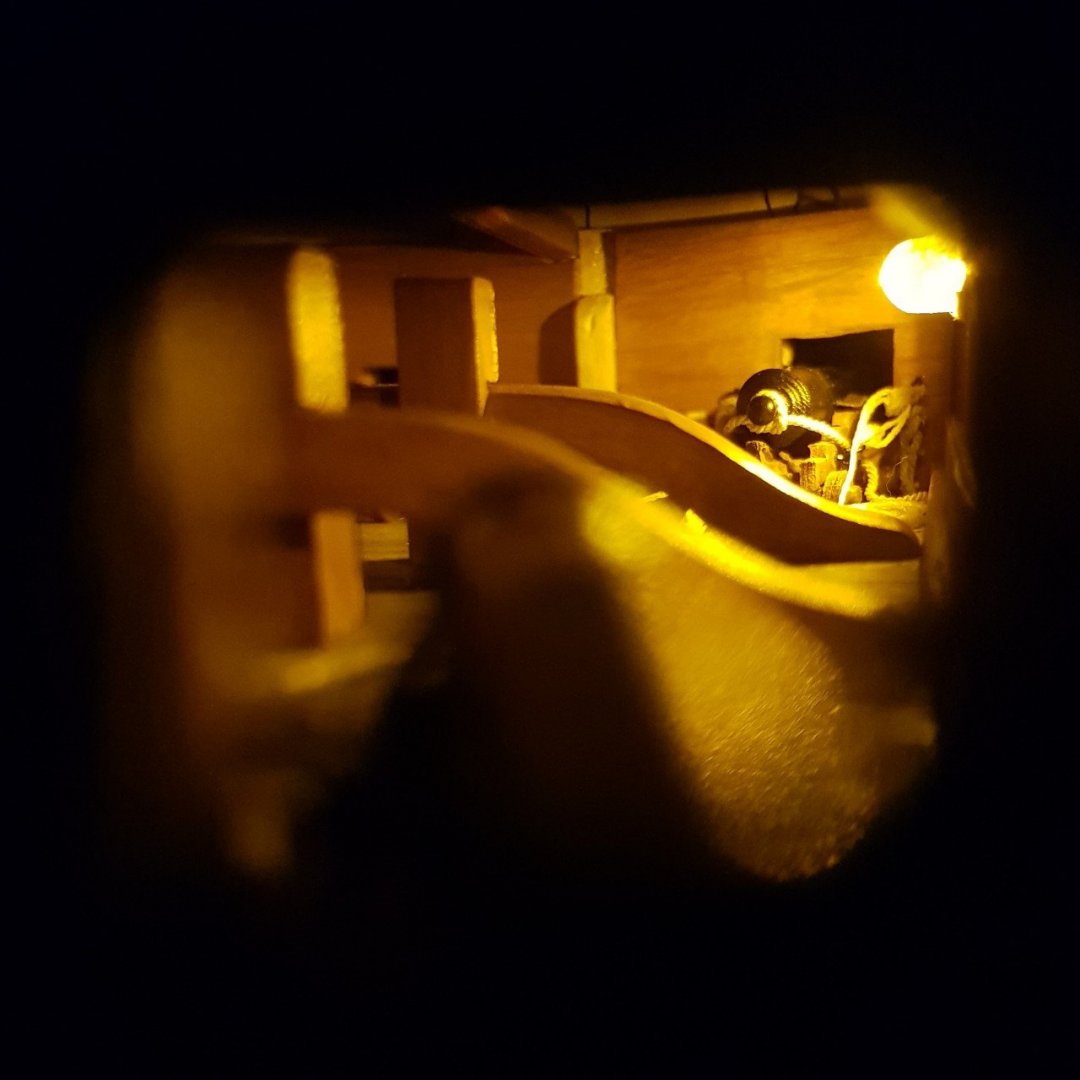
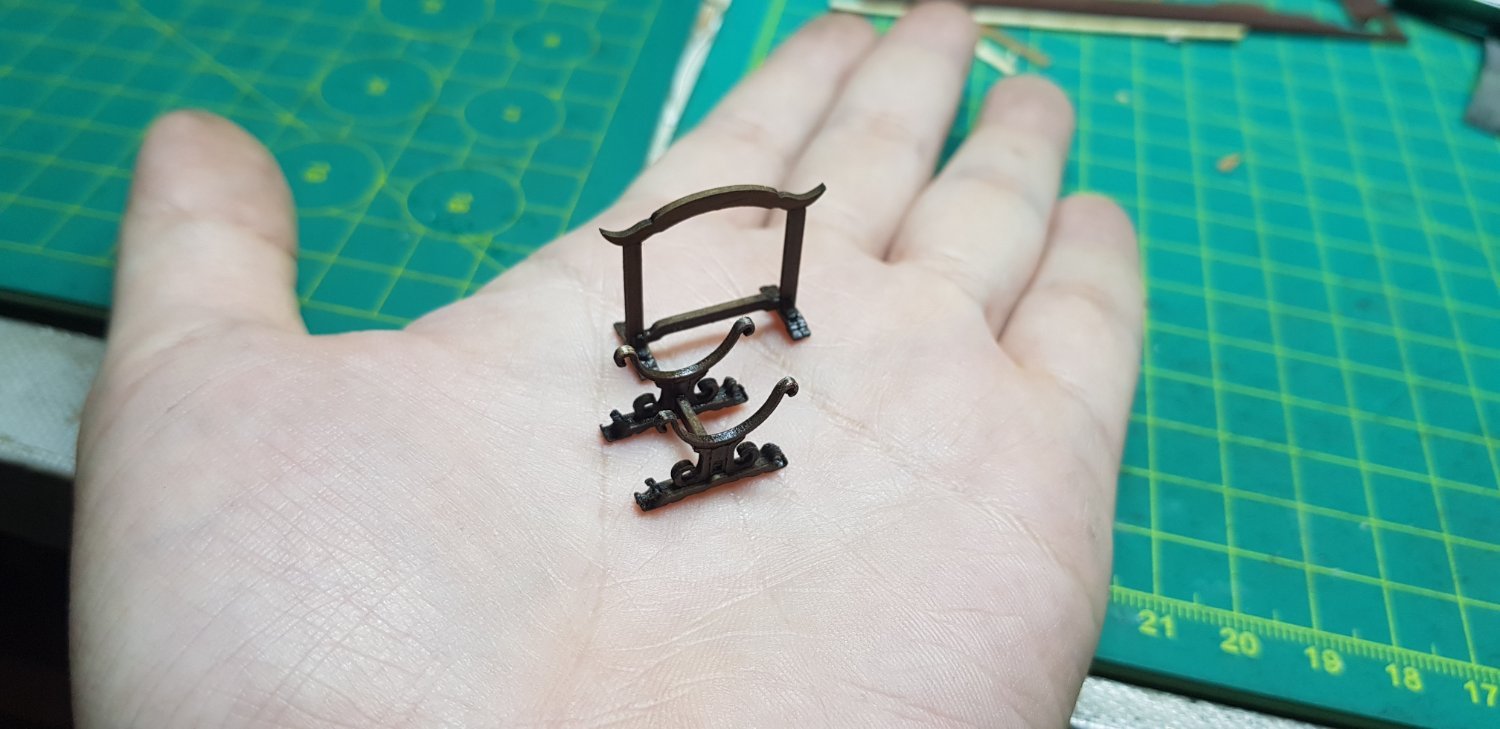
This is the Asian anchor salvaged from the Red River in Vietnam


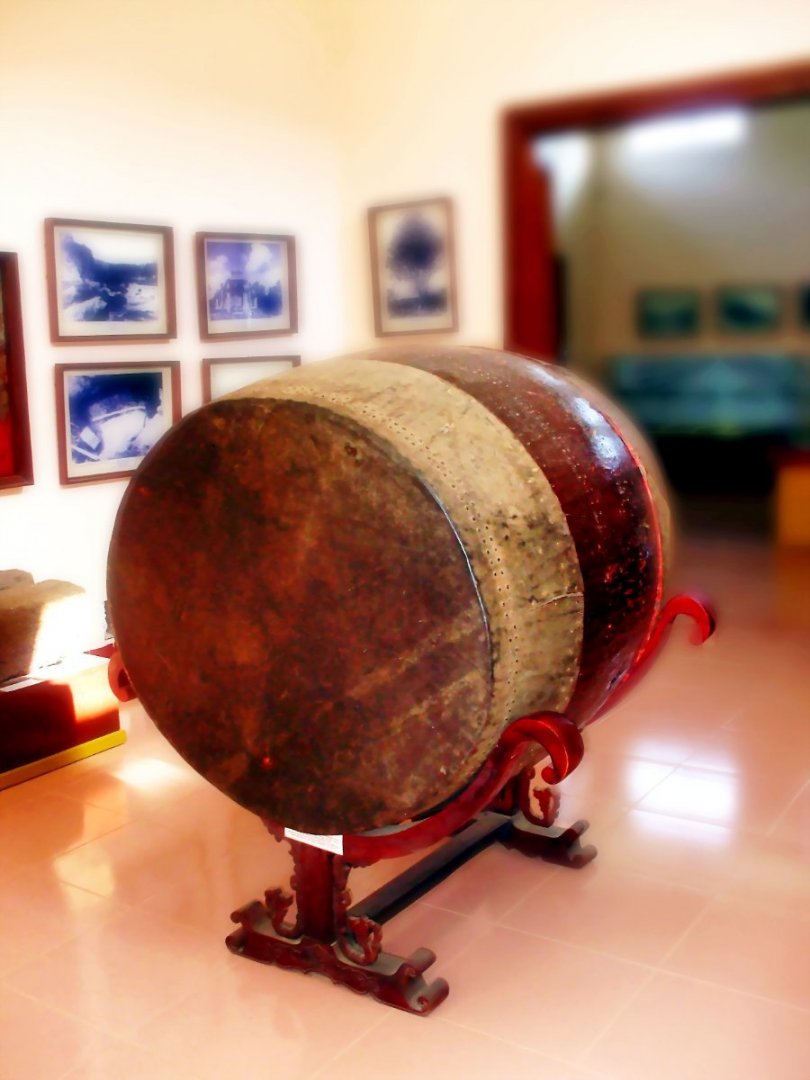
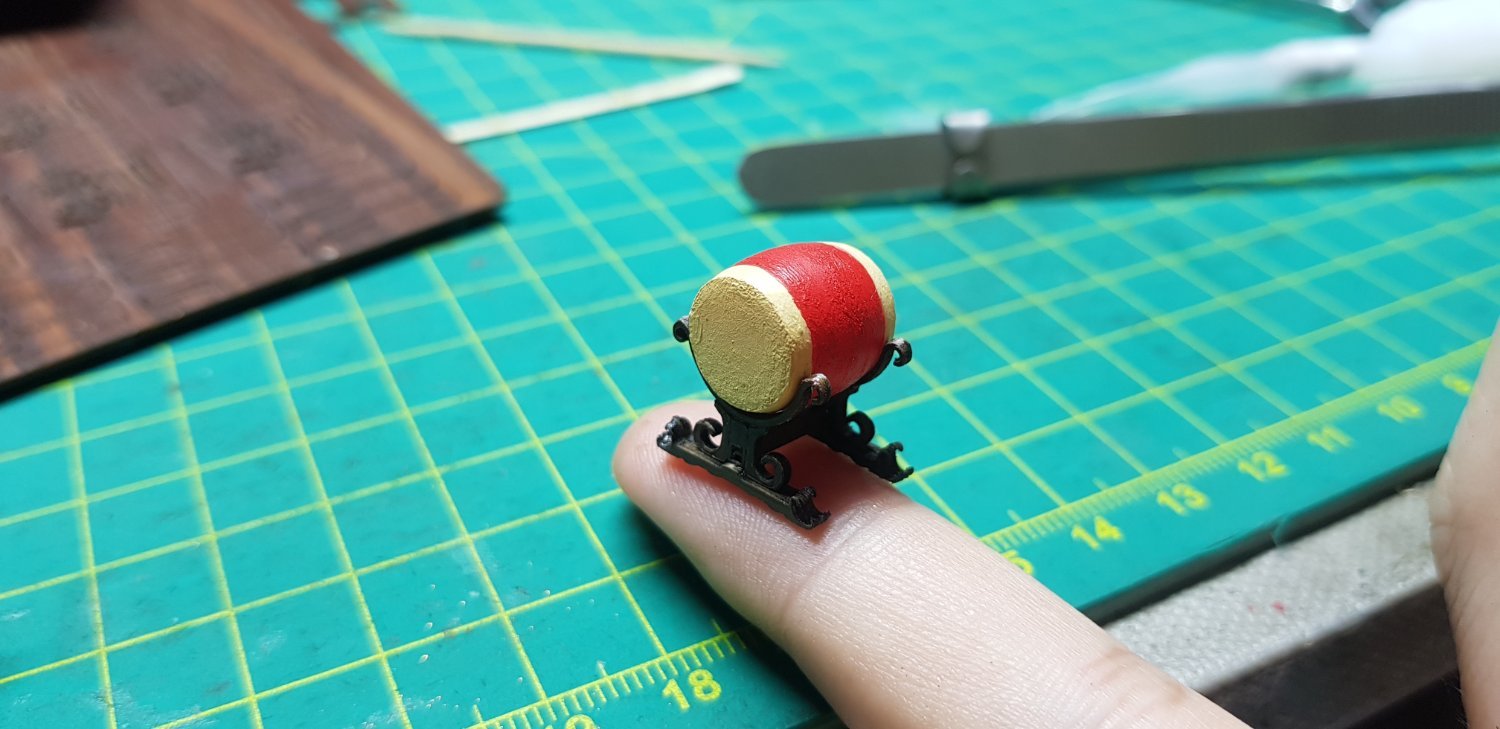
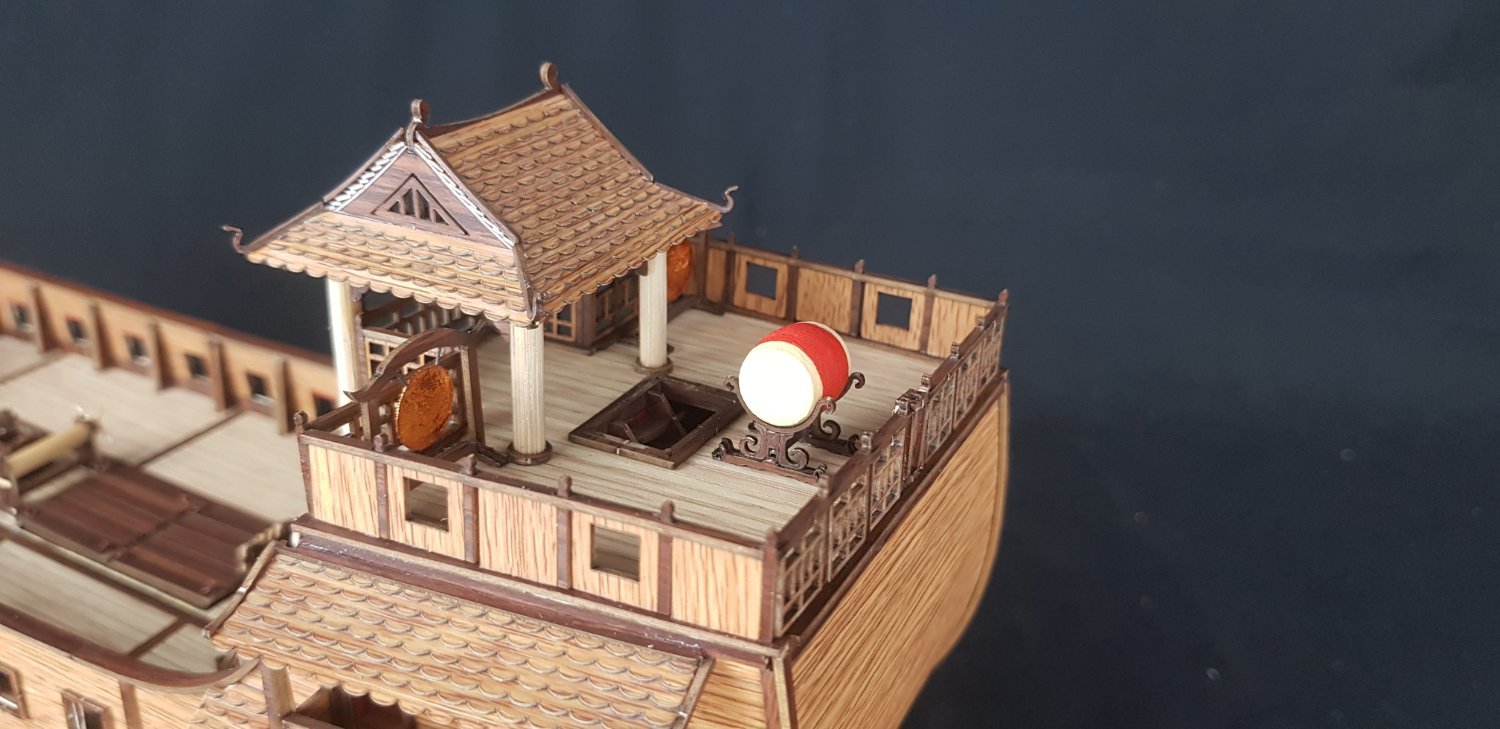
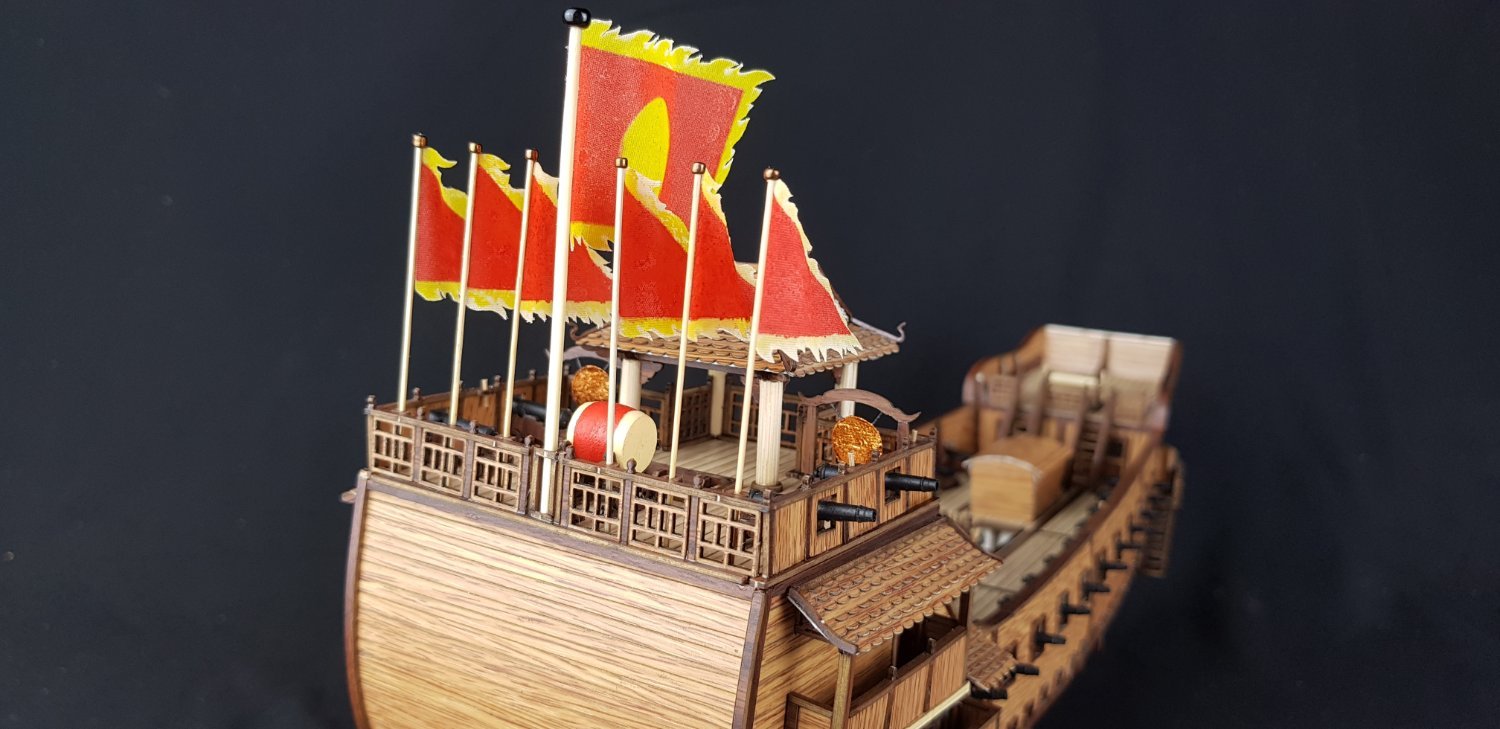
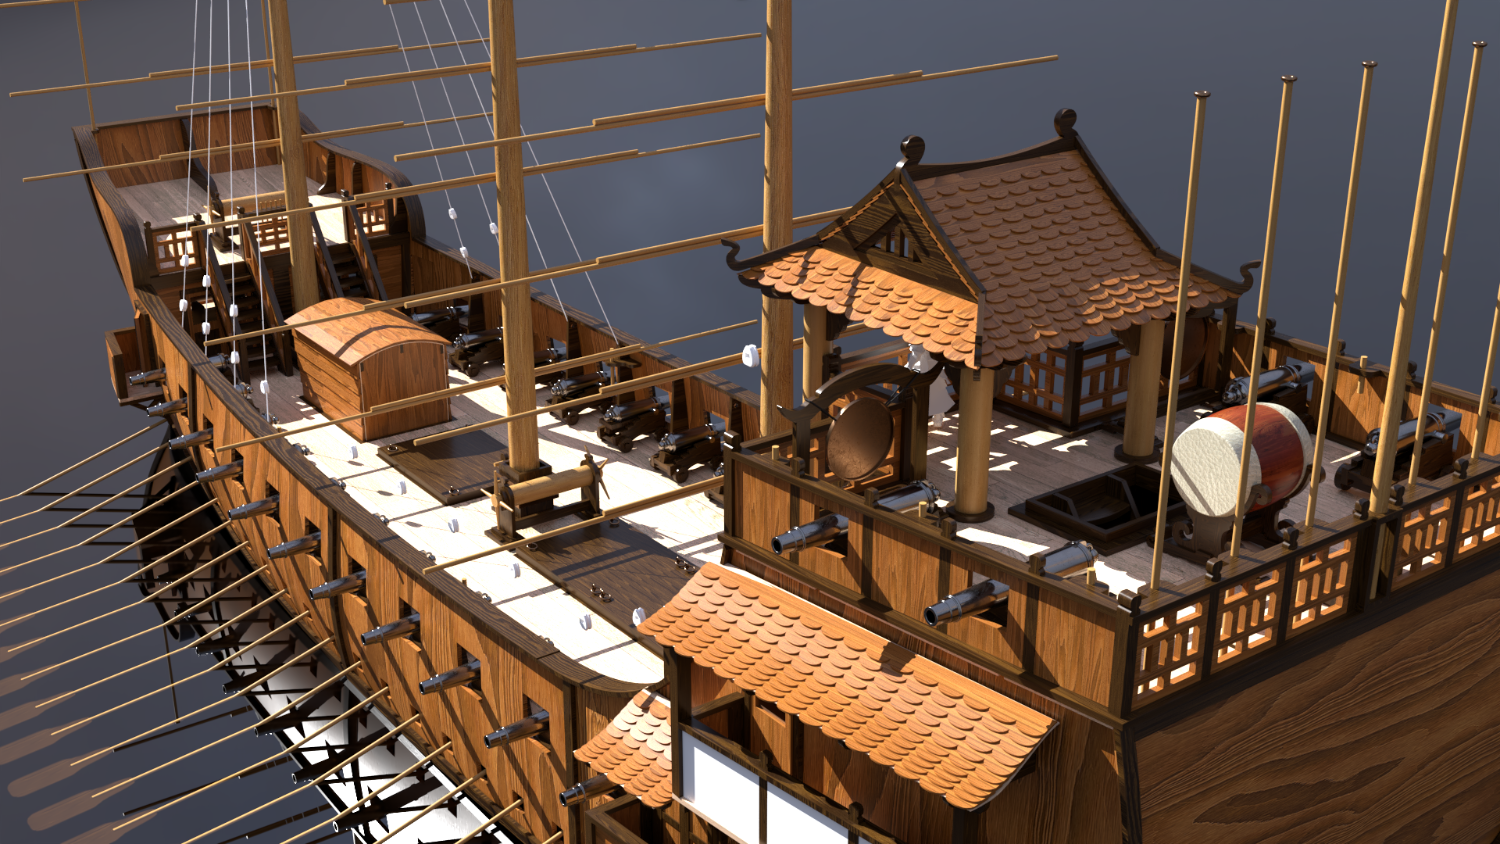
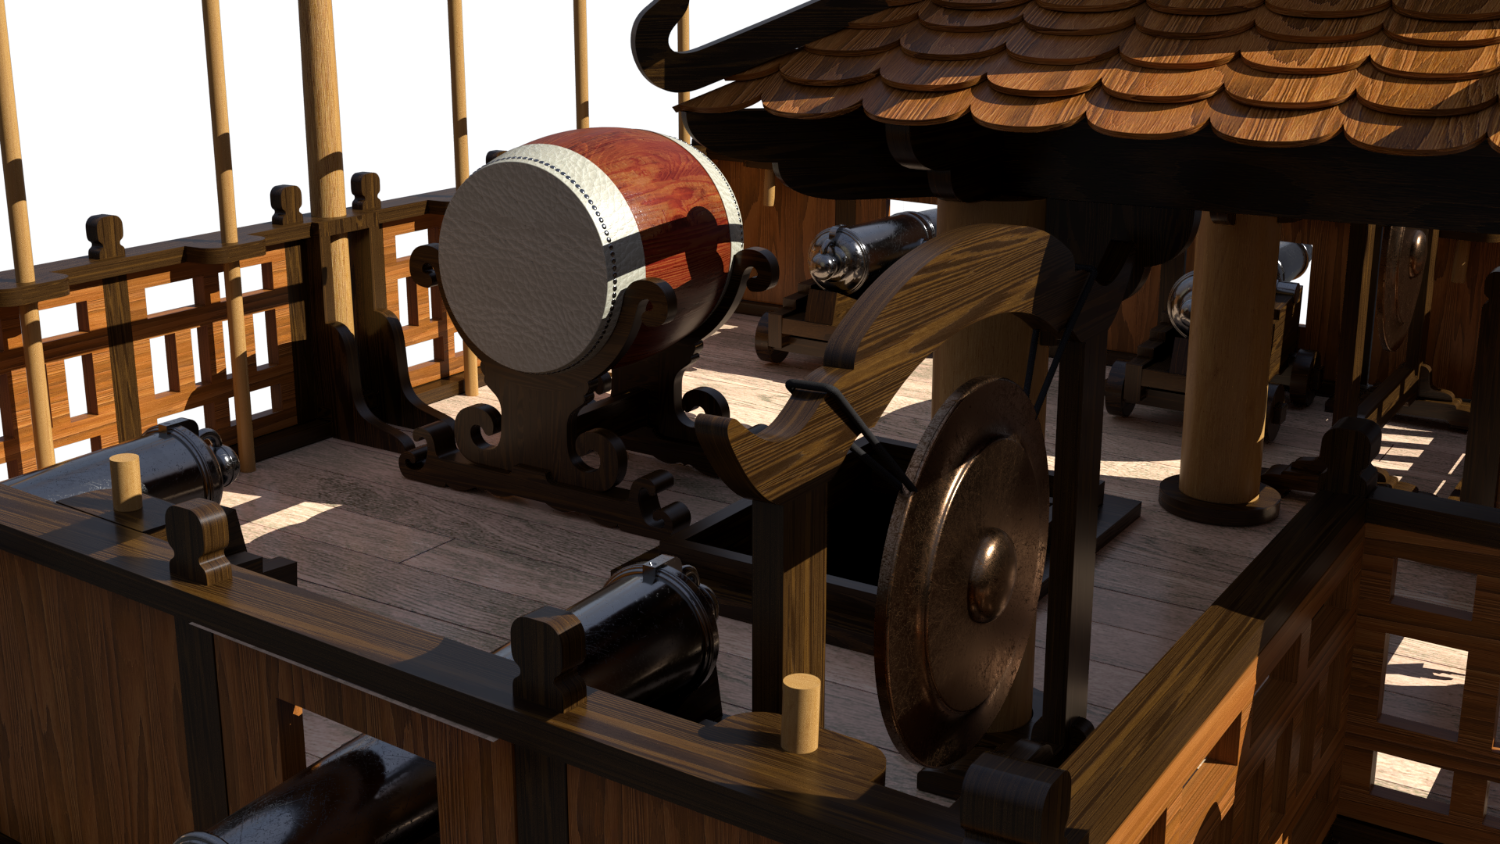
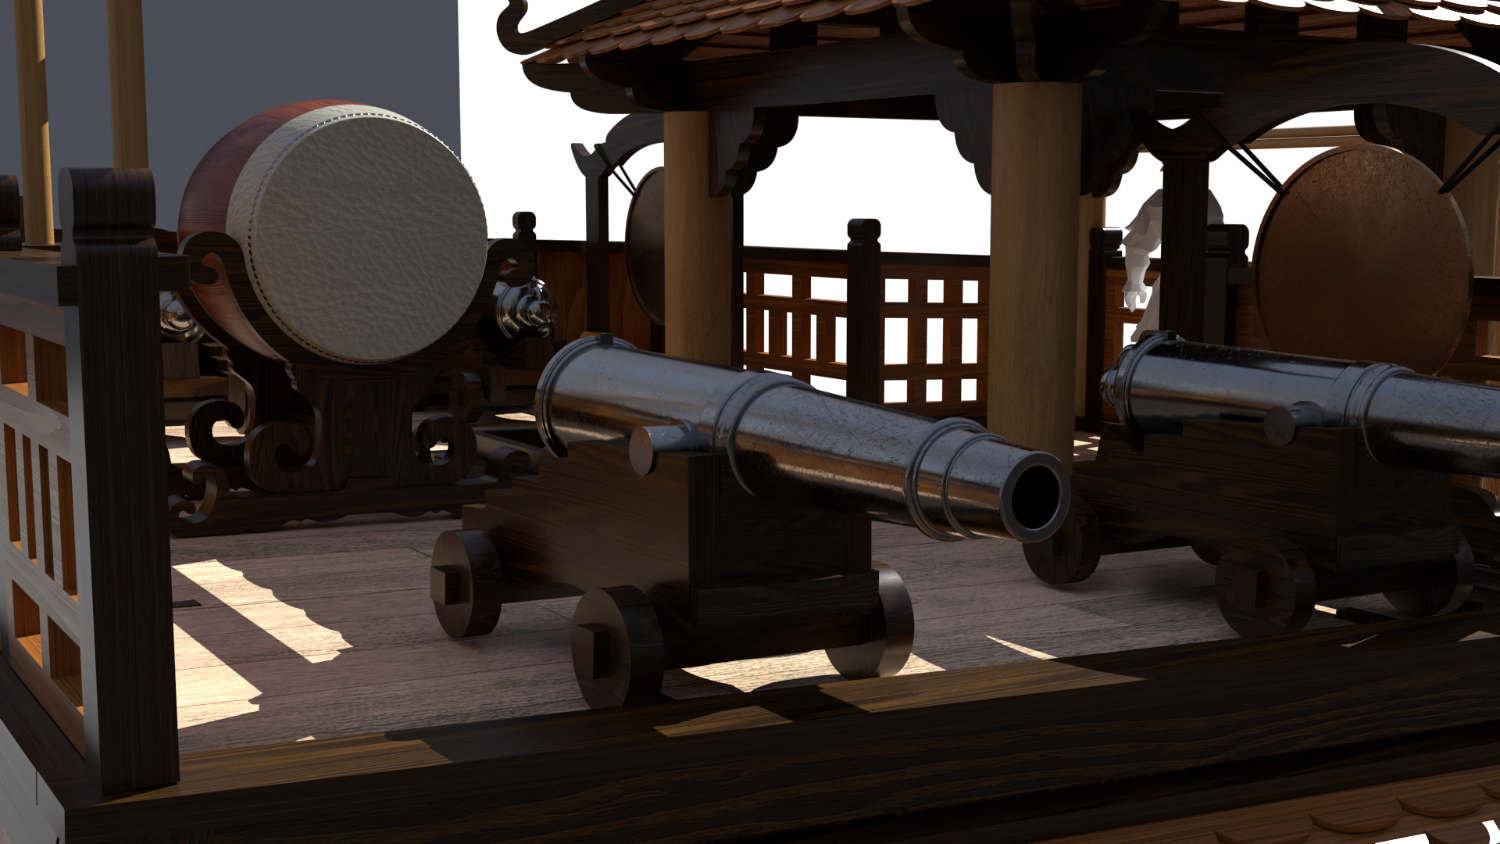
This is the ancient battle drum and gong of the Tay Son dynasty kept at Quang Trung museum, Binh Dinh province, Vietnam


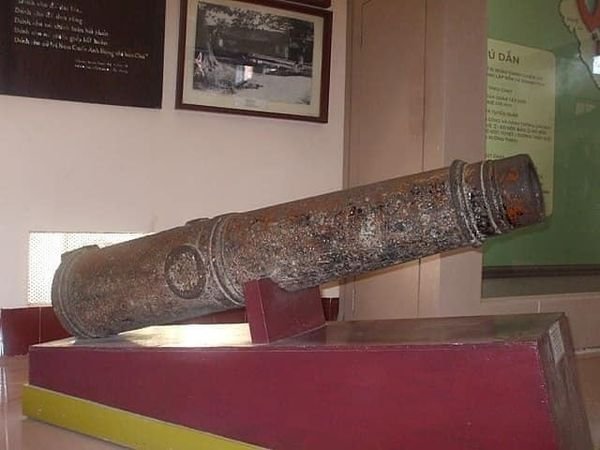
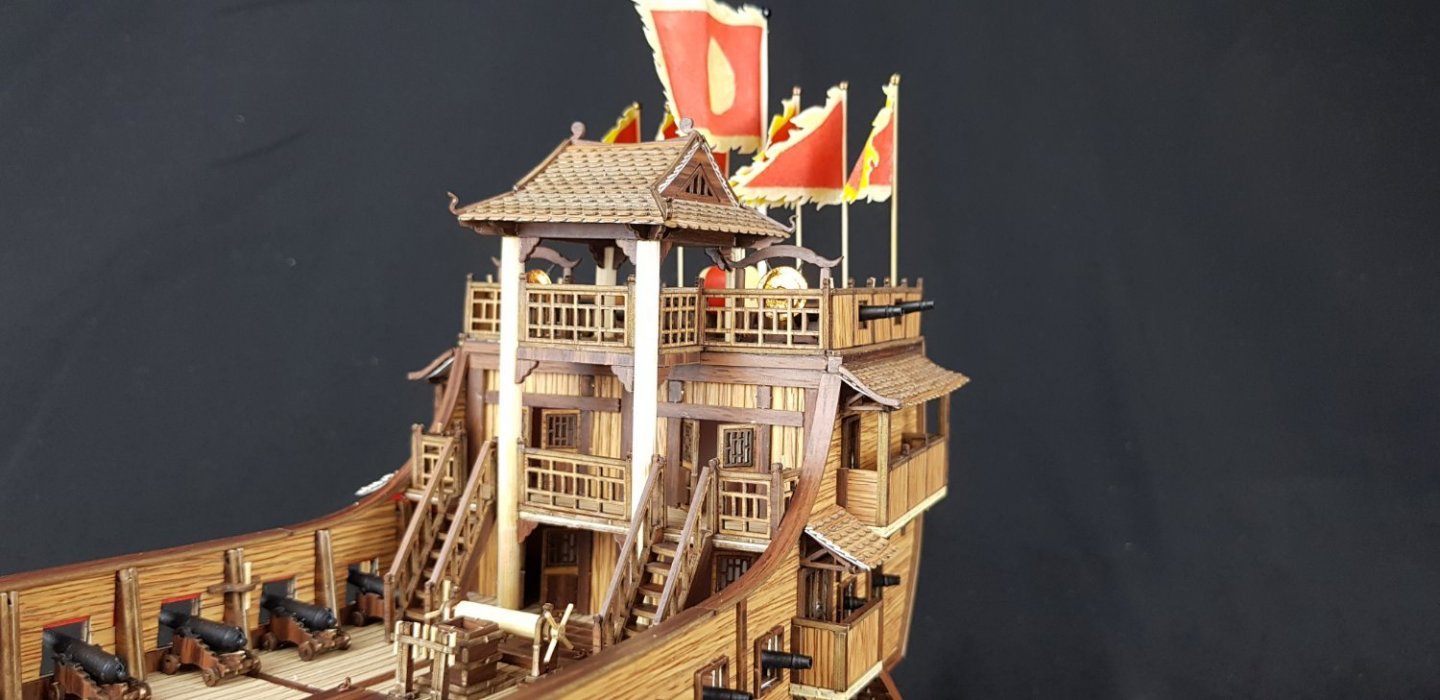
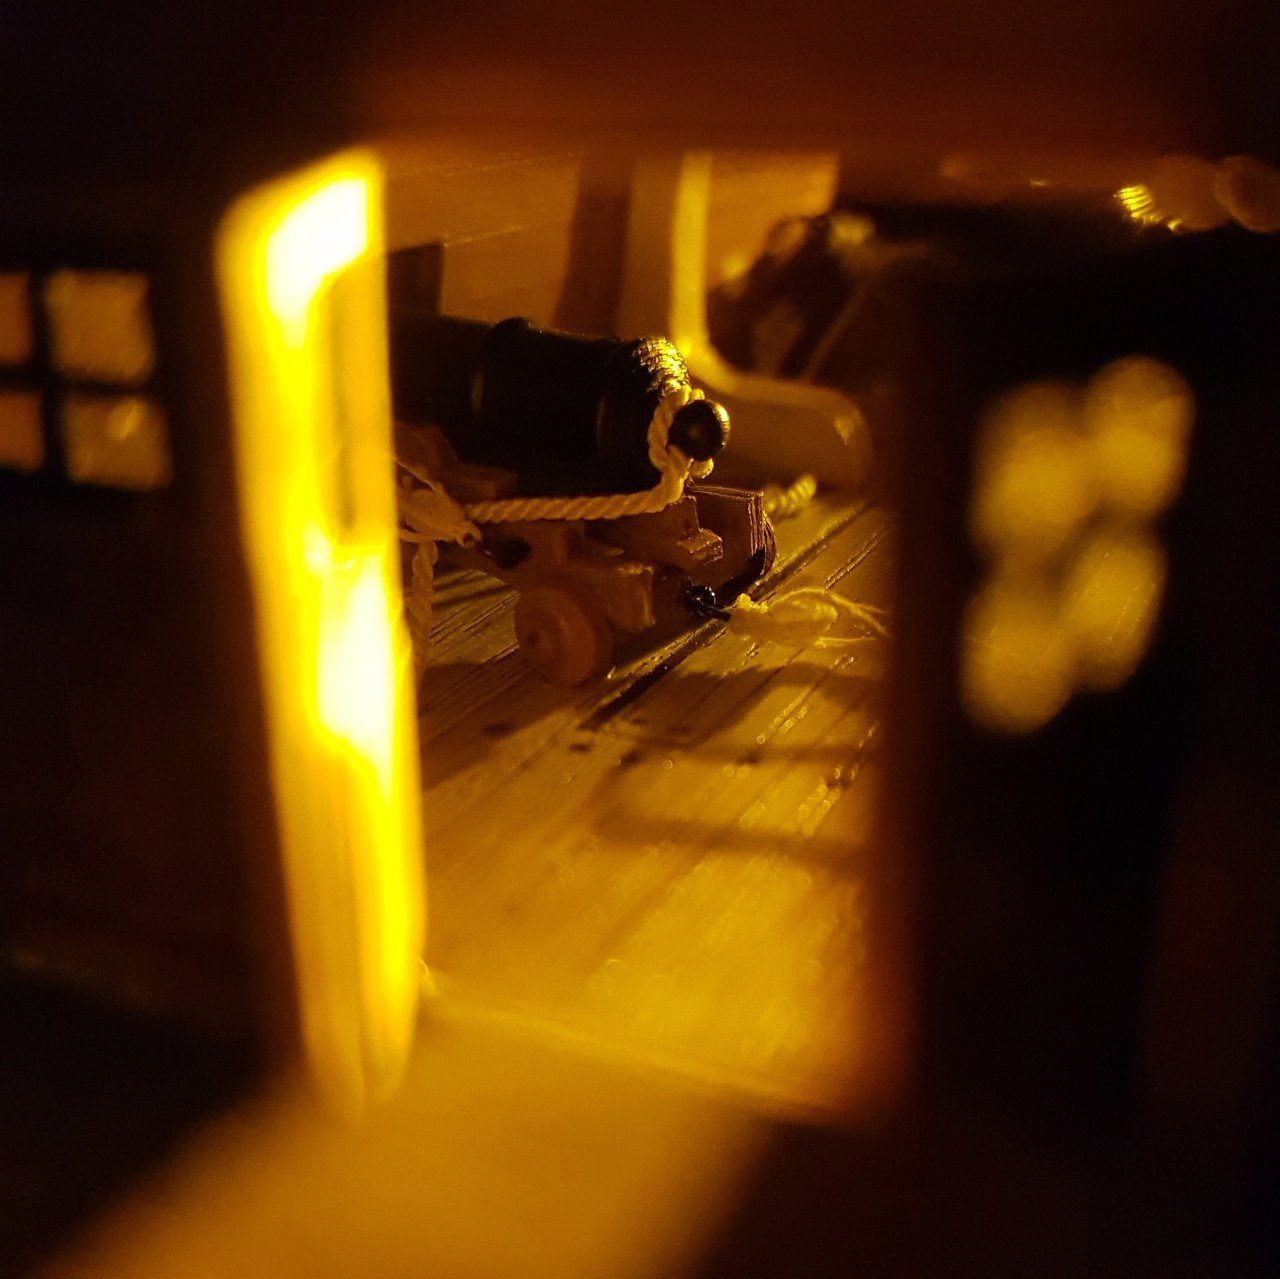
Cannons of the Tay Son Dynasty at Quang Trung Museum, Binh Dinh Province, Vietnam


- Siggi52, Prowler901, GrandpaPhil and 4 others
-
 5
5
-
 2
2
-
2 hours ago, von_bednar said:
That's an amazing looking ship and a really impressive design work! If you turned that into a paper kit, or even a pdf to print at home I would buy it!
Will be following along for sure!
Definitely I will make a complete kit as I did a kit like this link. I use a laser co2 and a 3D printer to create the parts.
- von_bednar, ccoyle, GrandpaPhil and 1 other
-
4
-
-
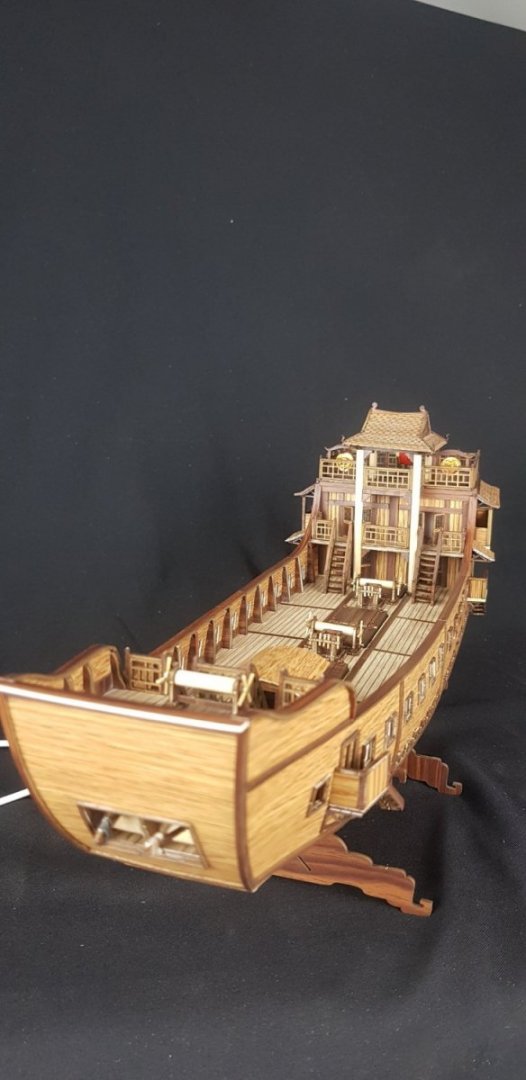
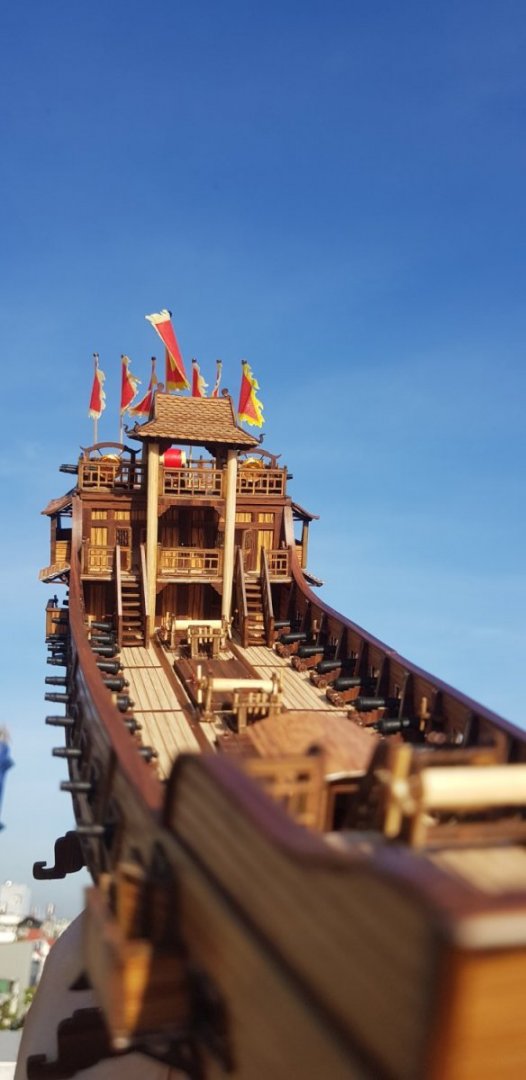
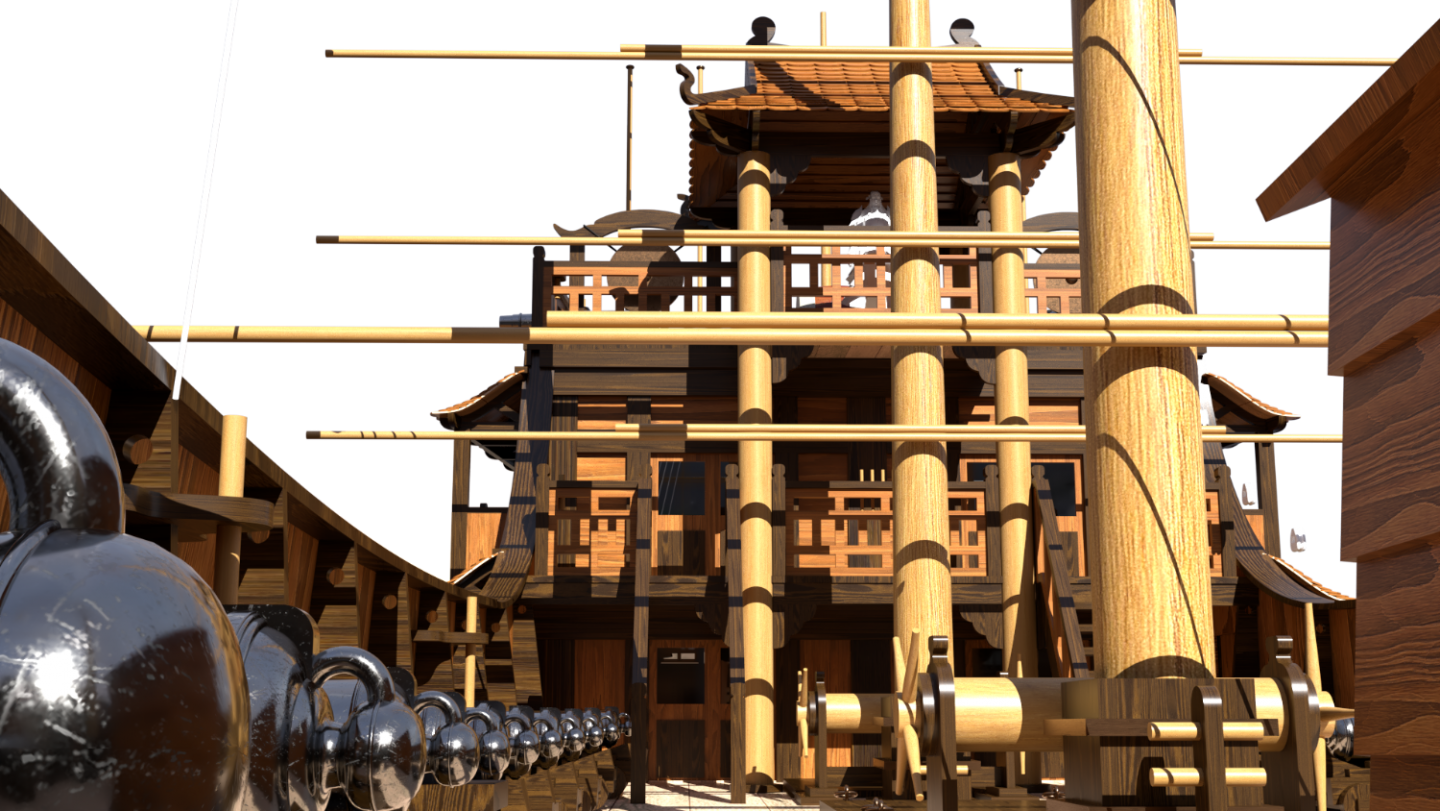
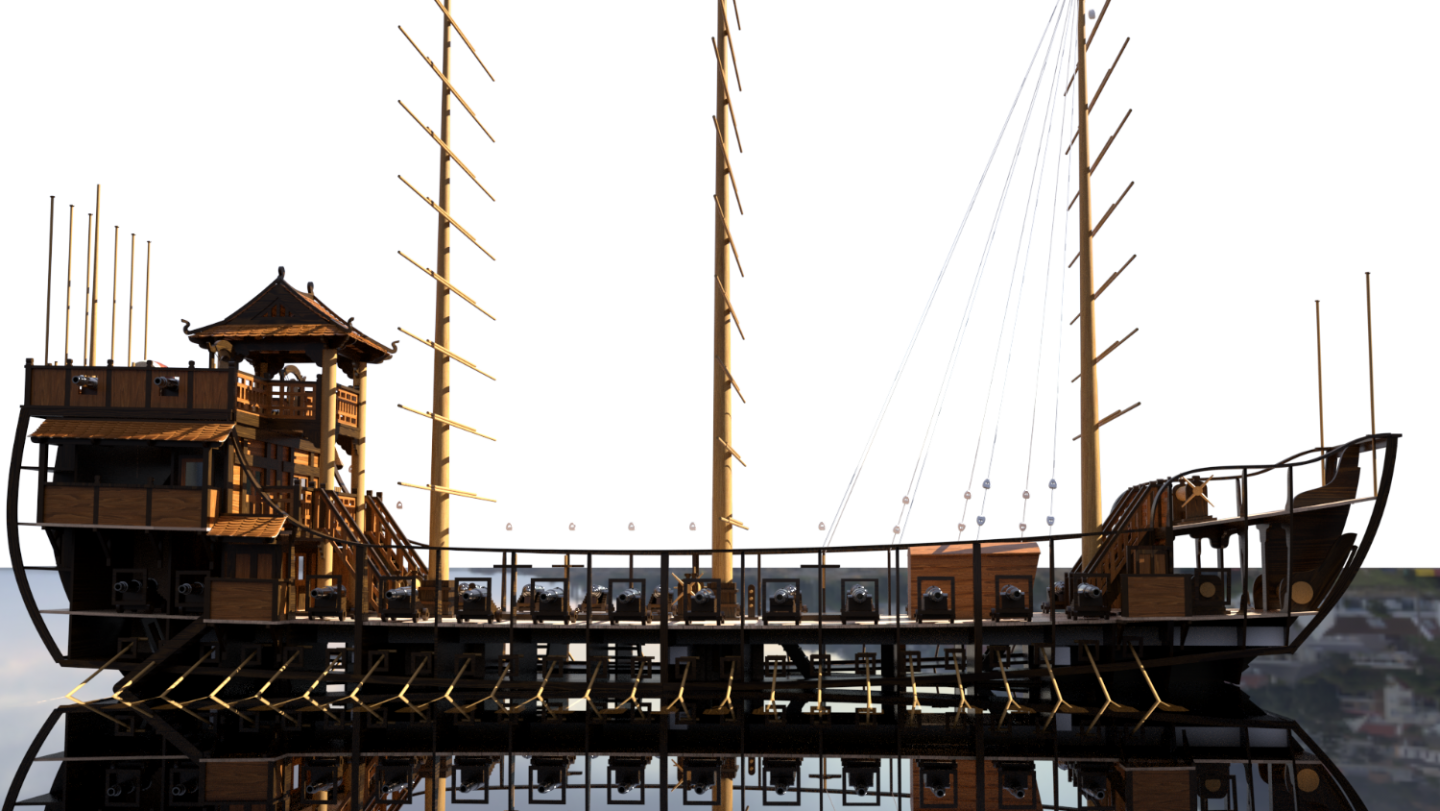
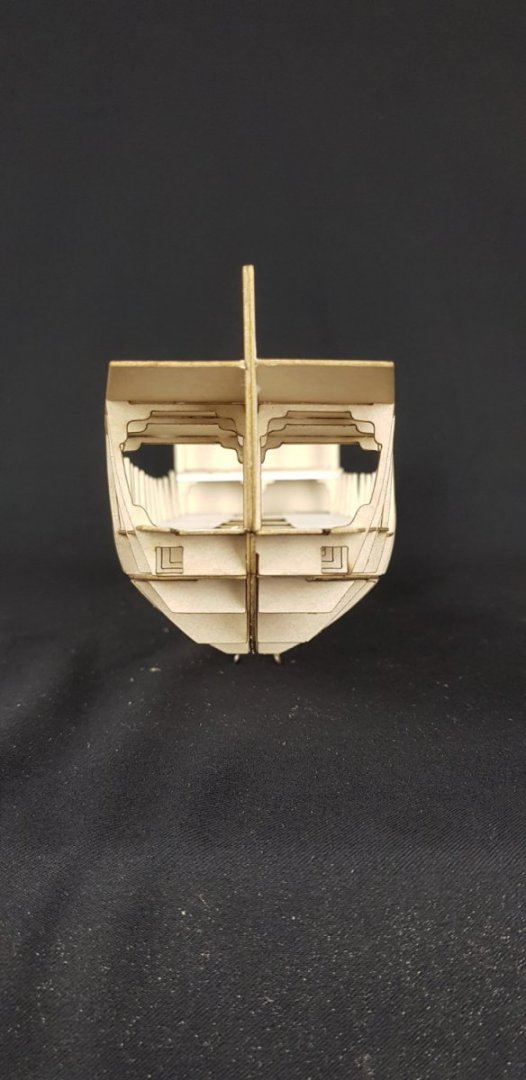
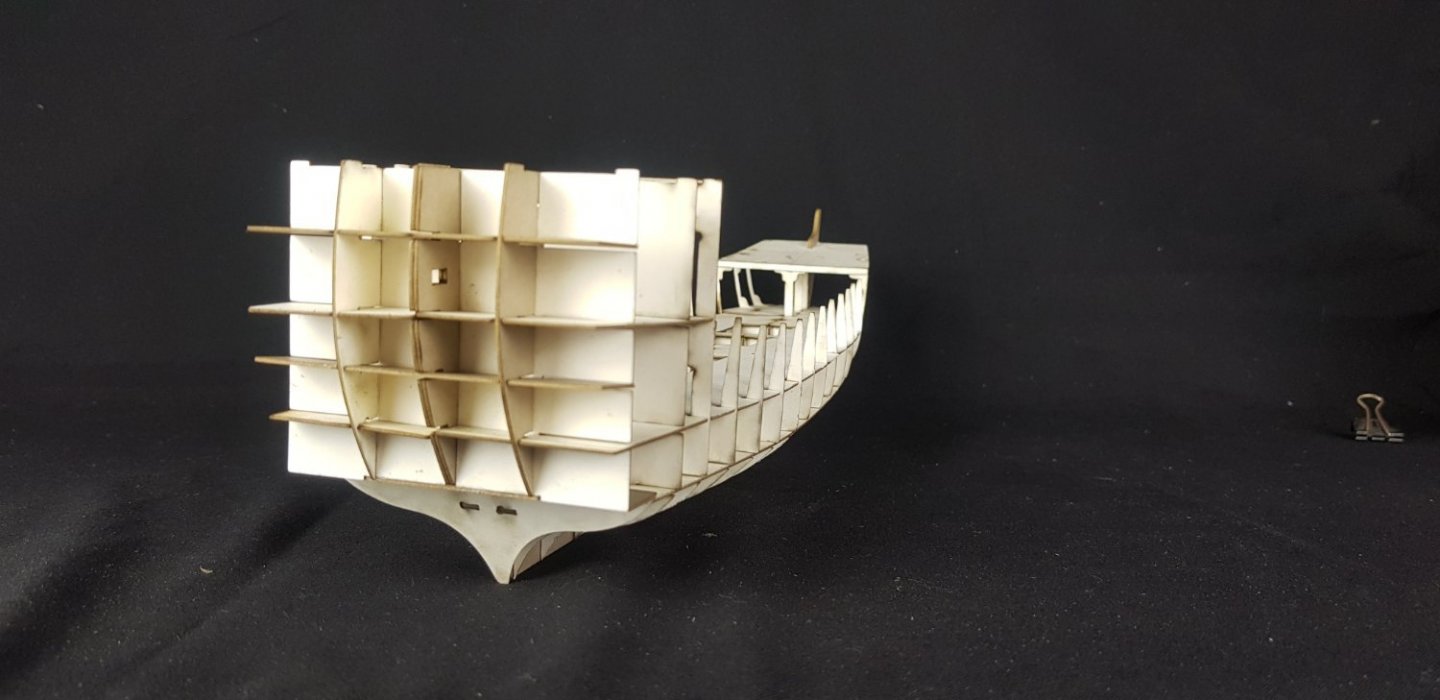
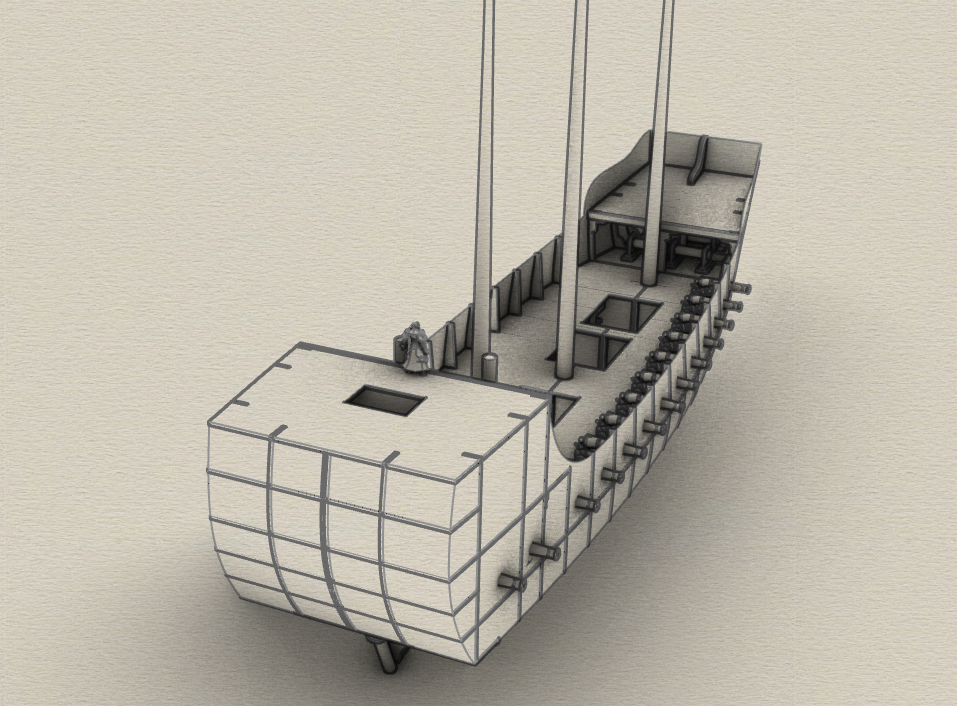
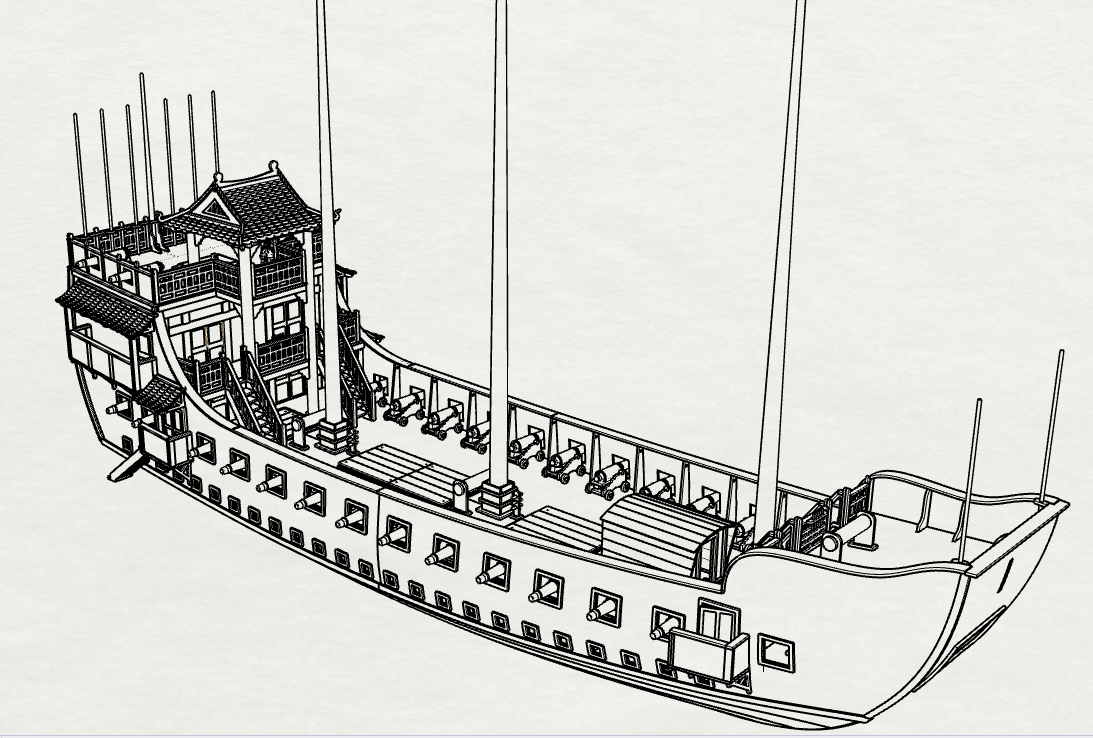
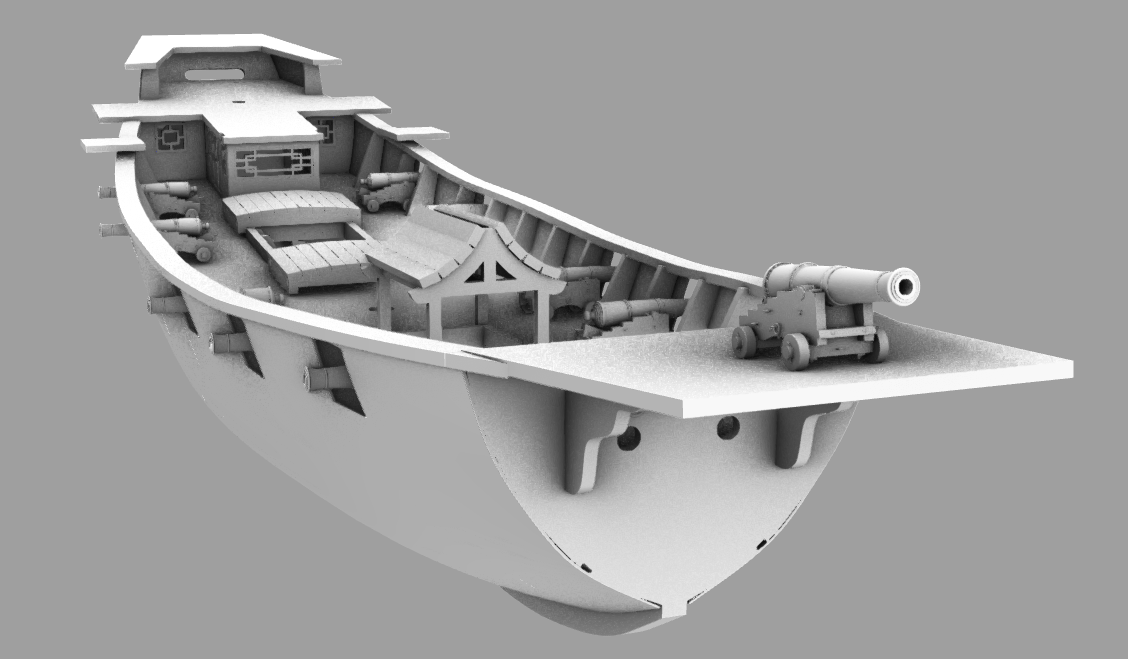
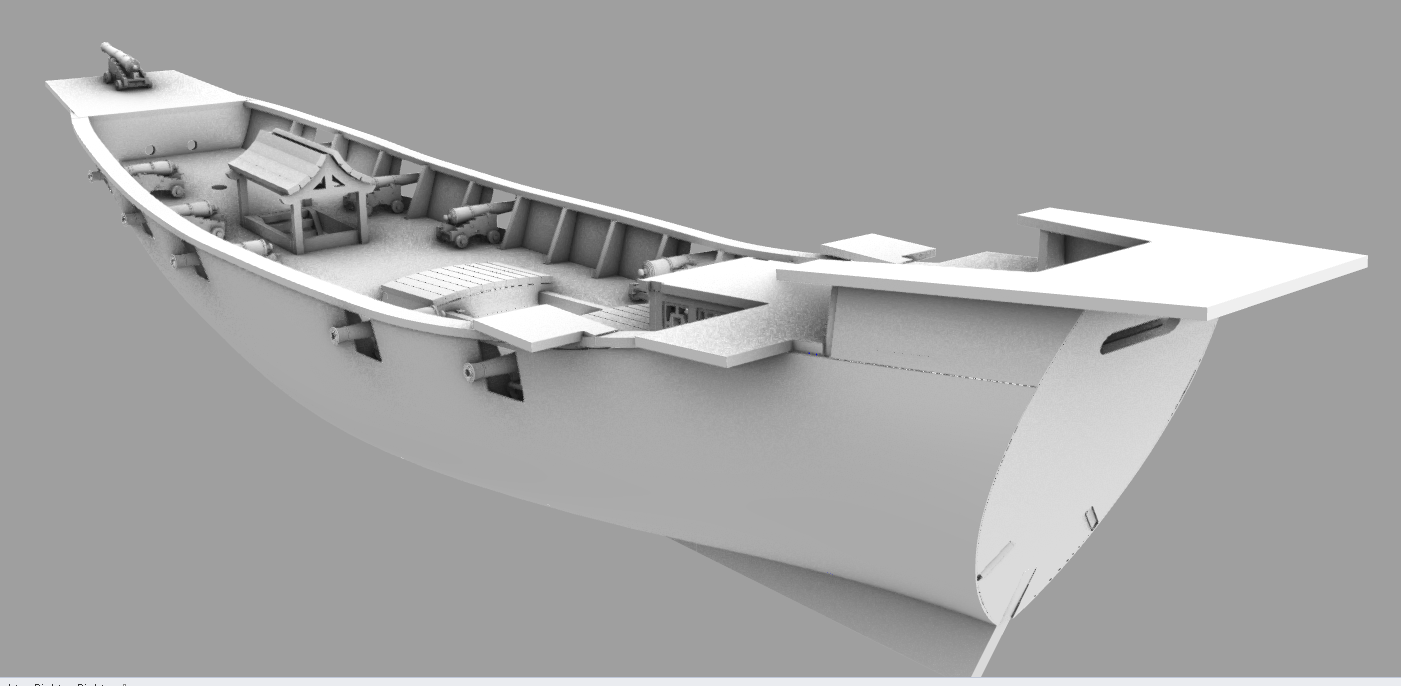
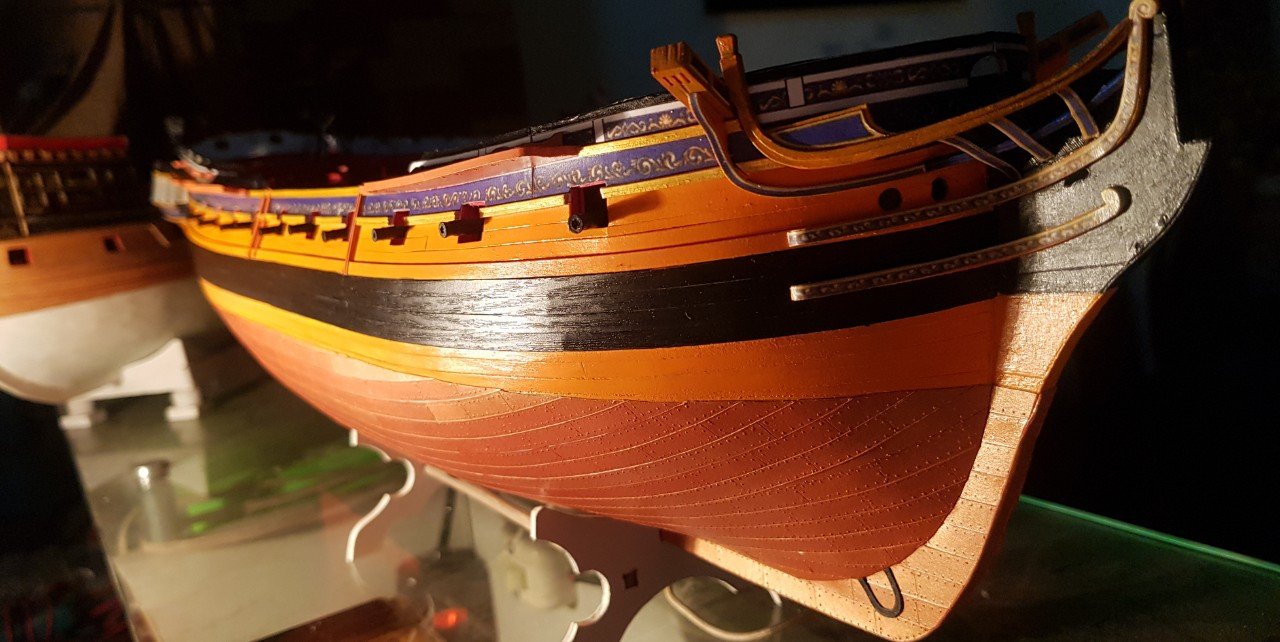
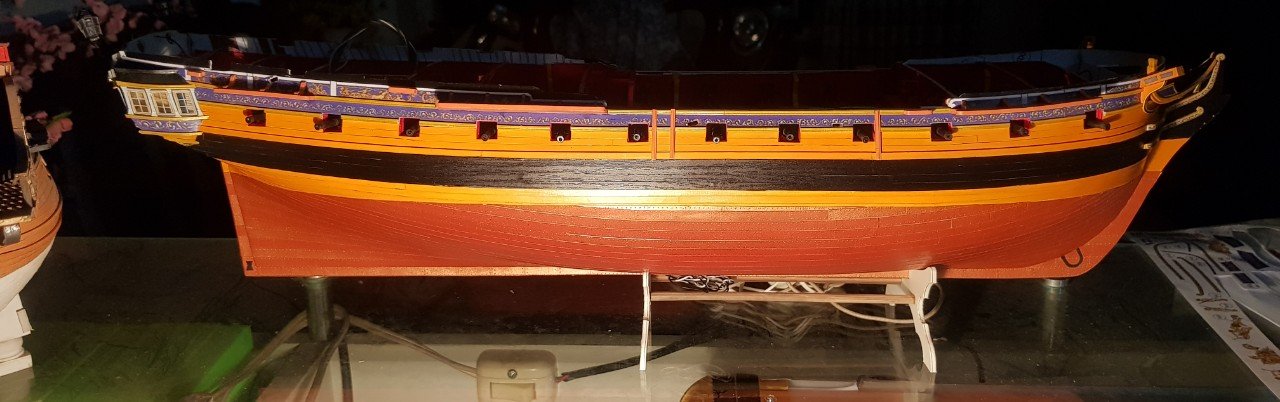
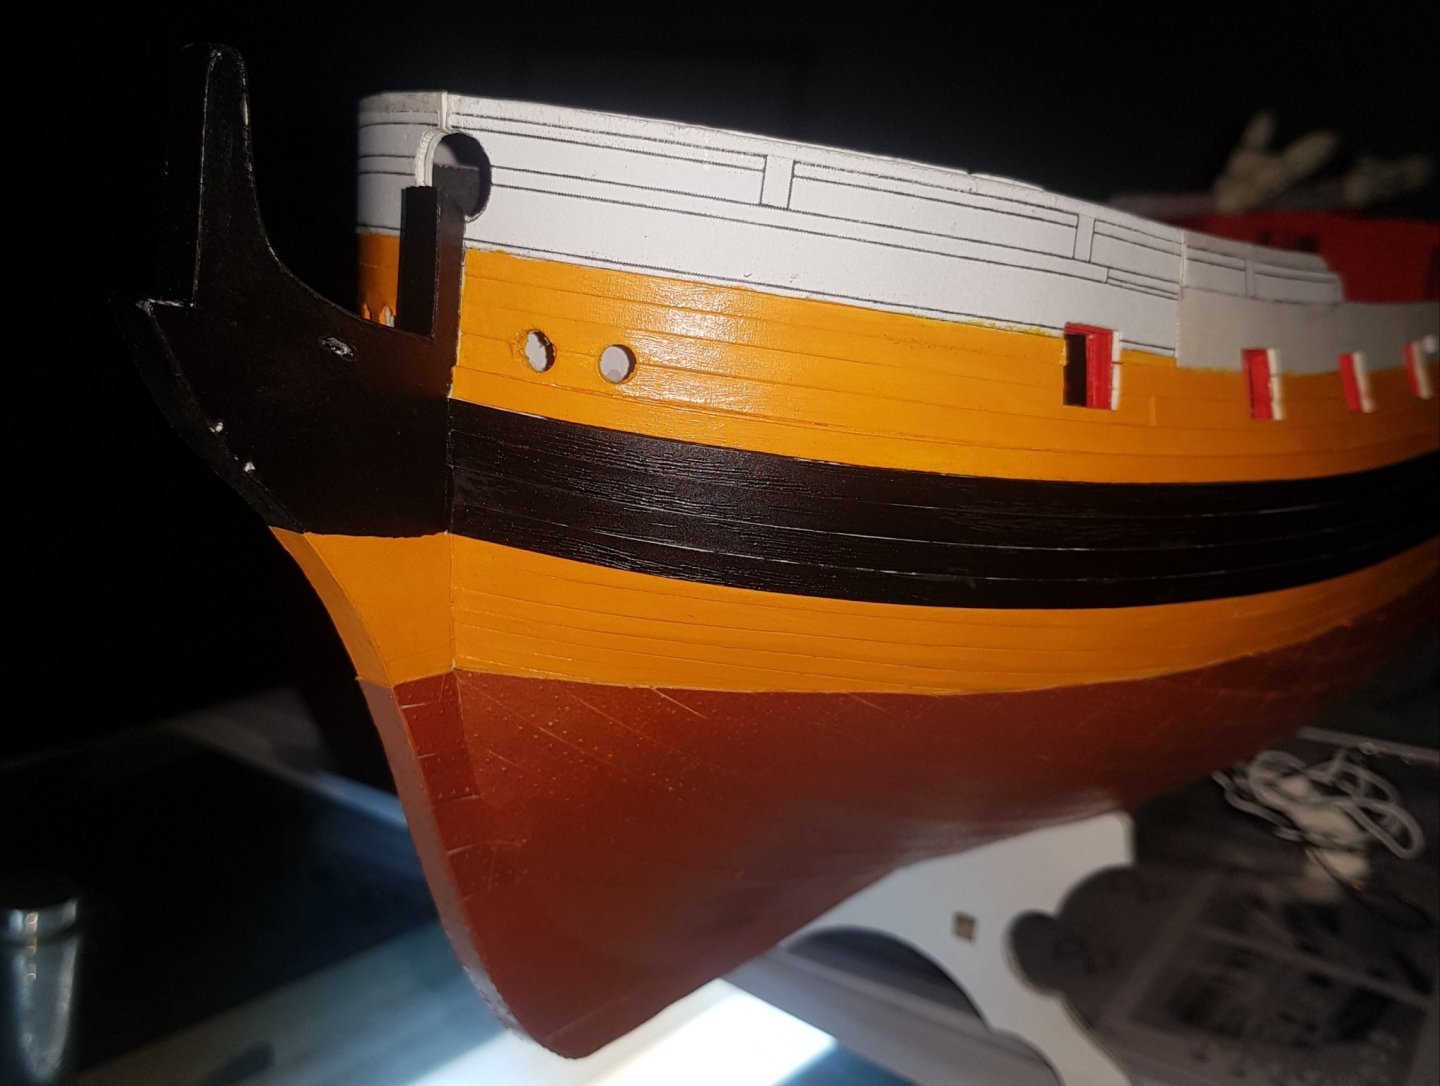
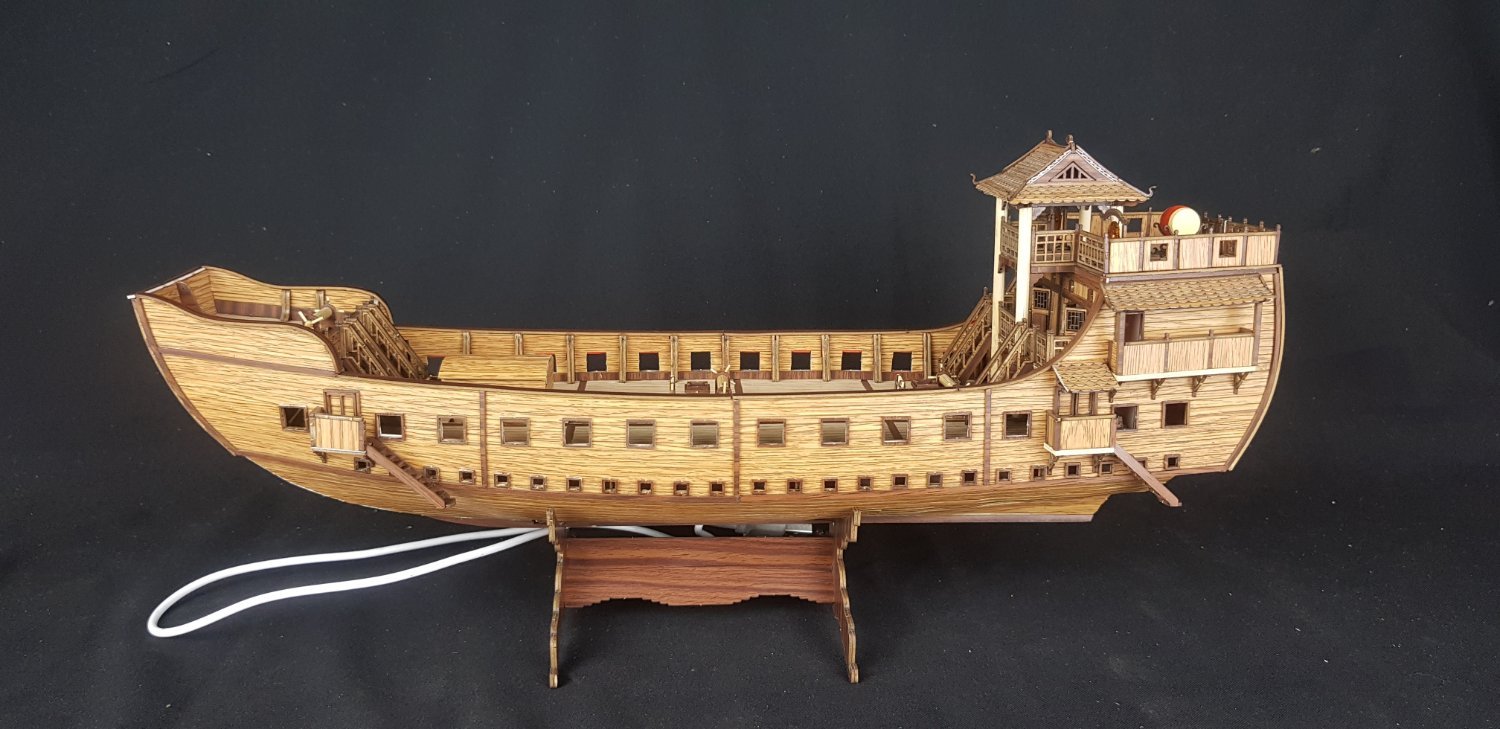
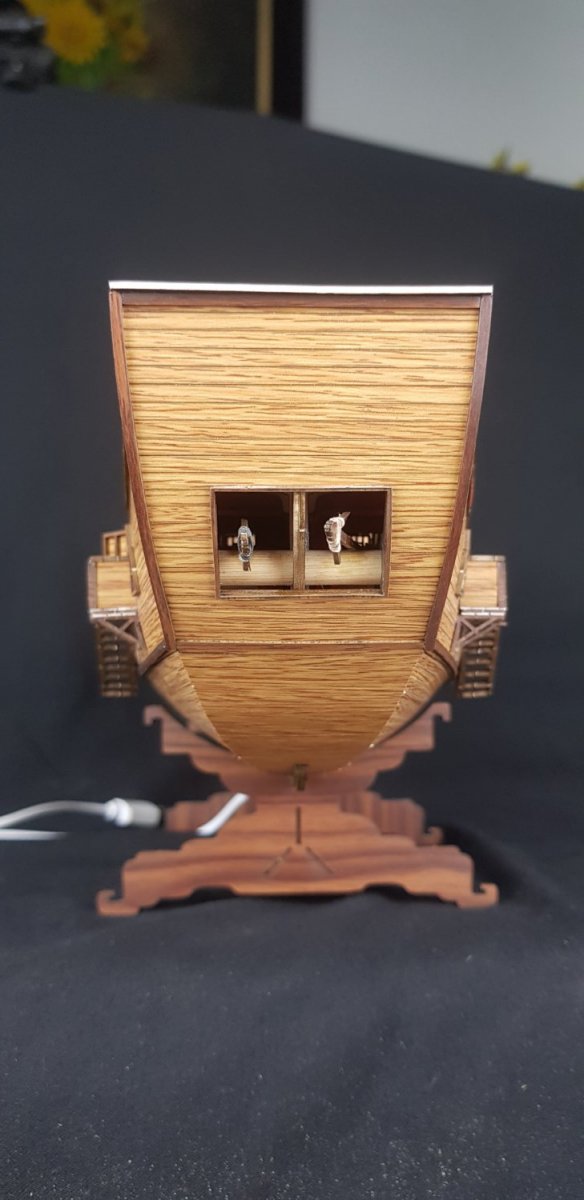
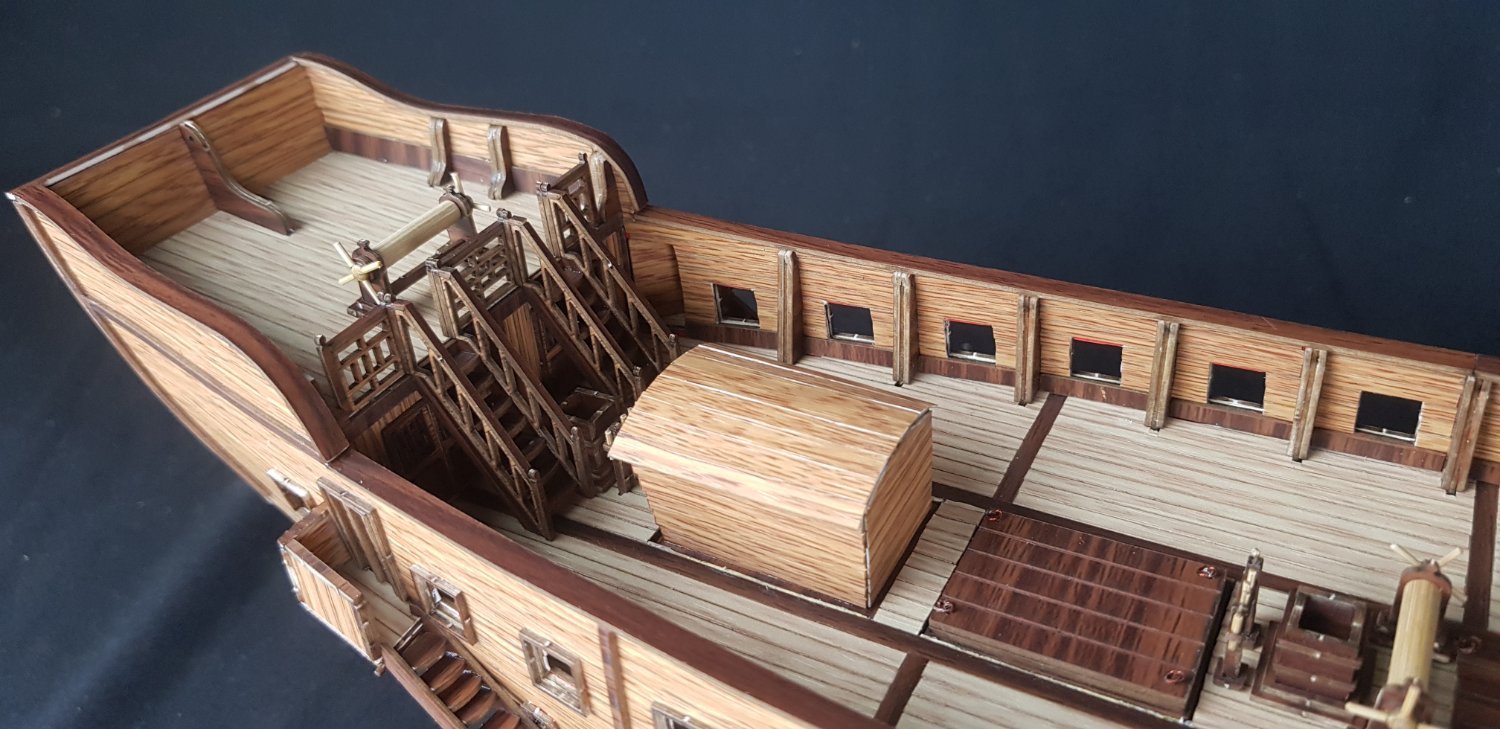
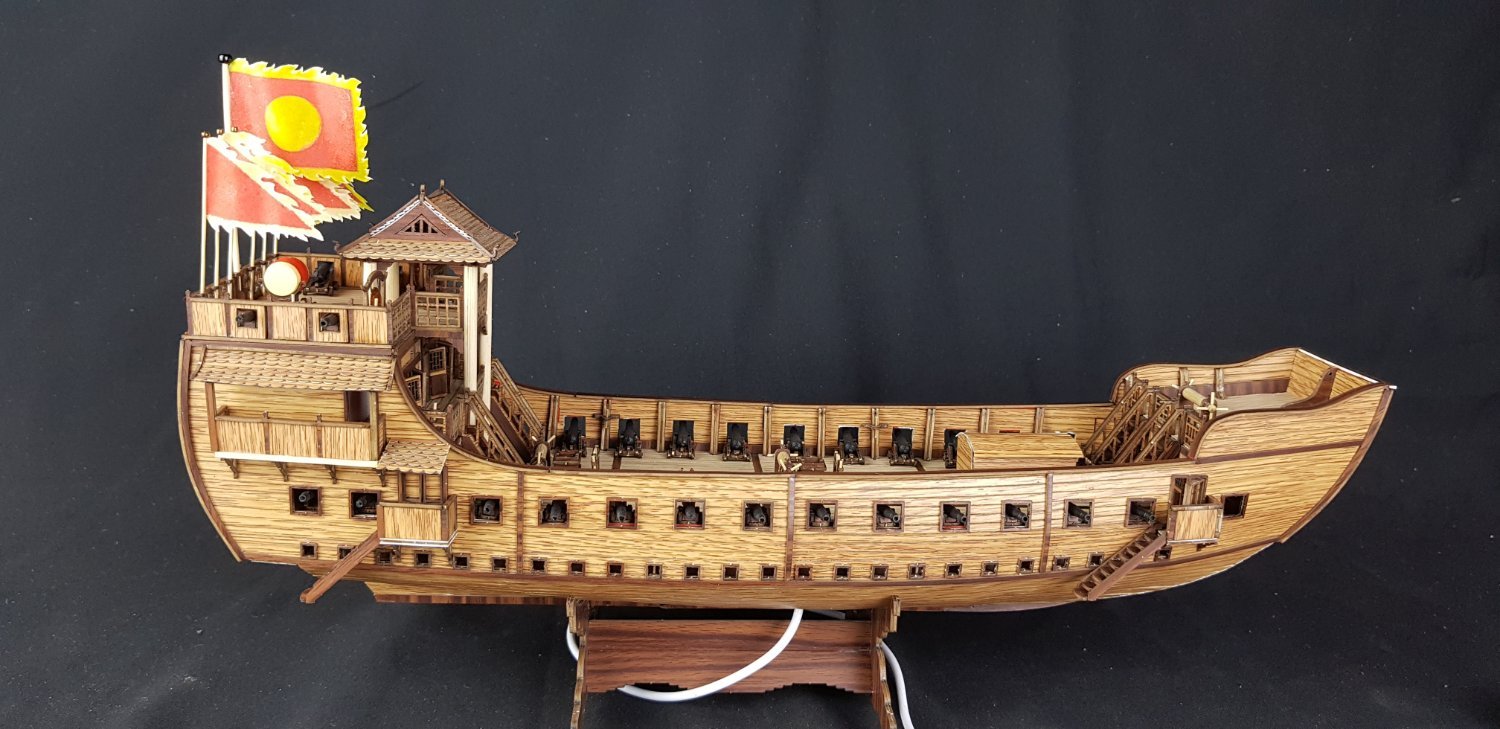
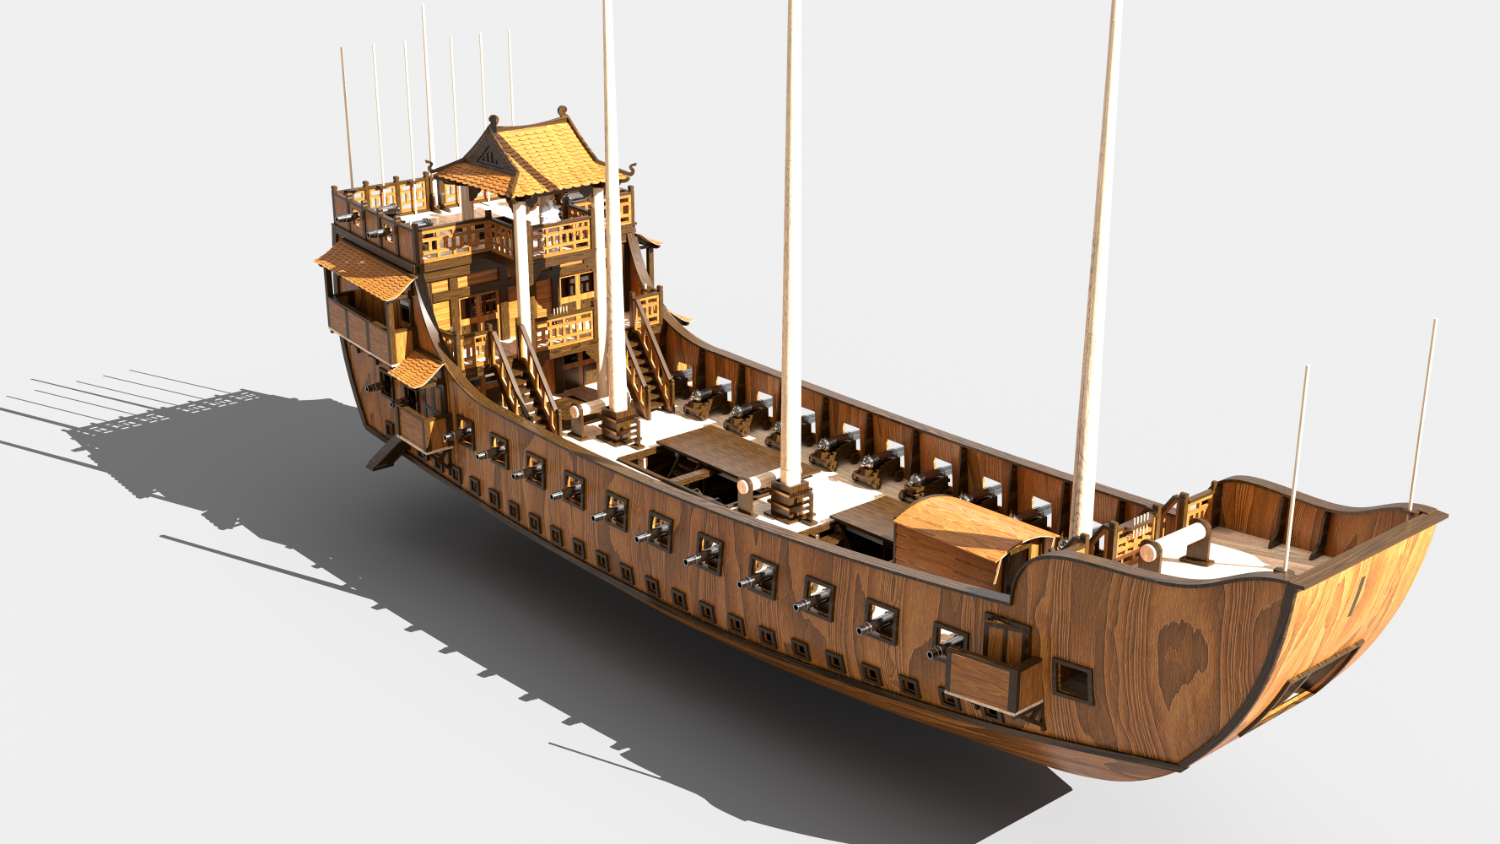
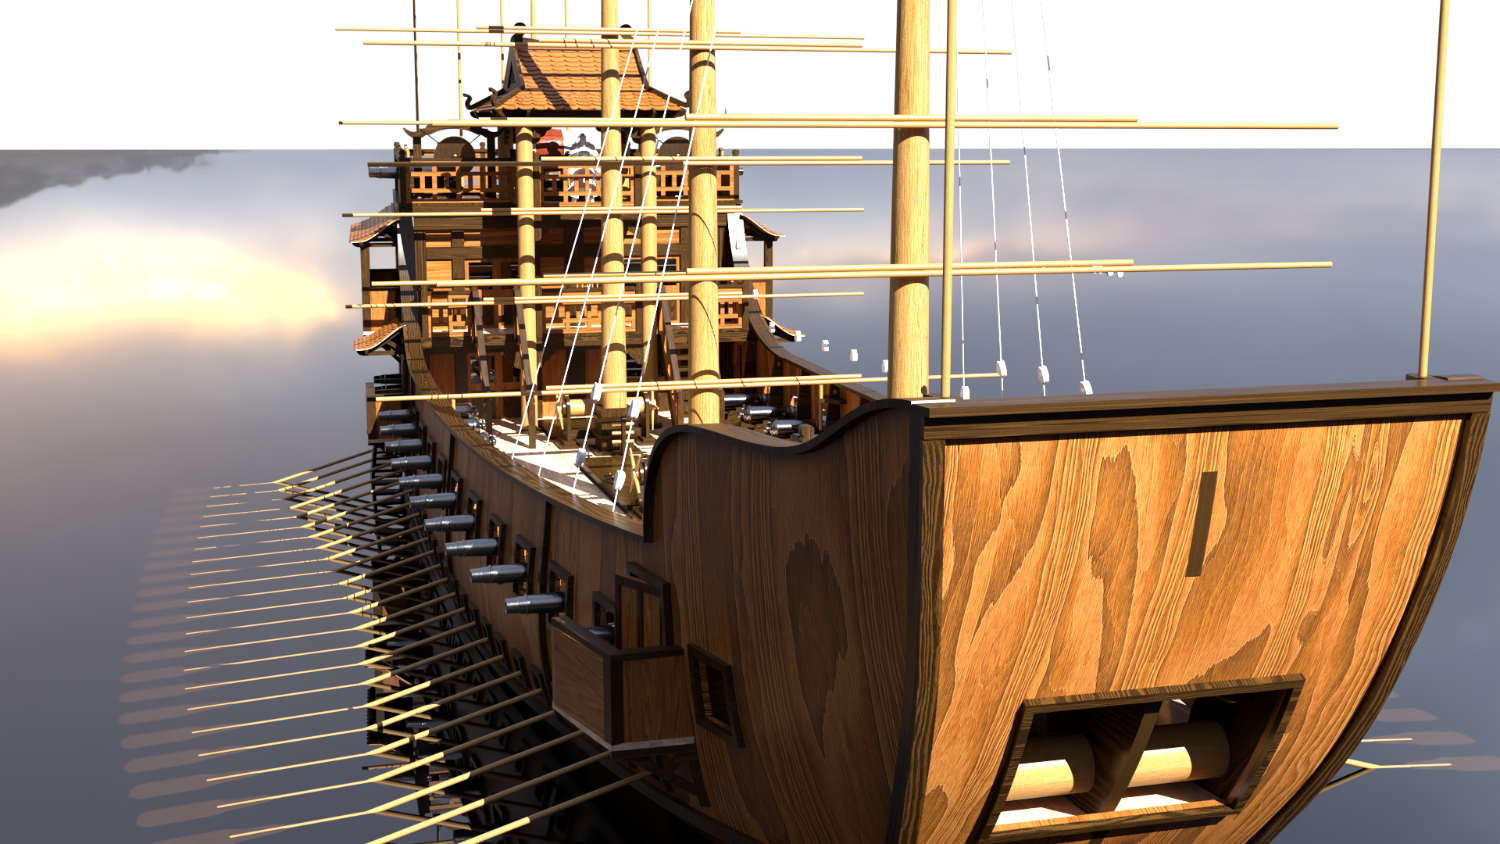
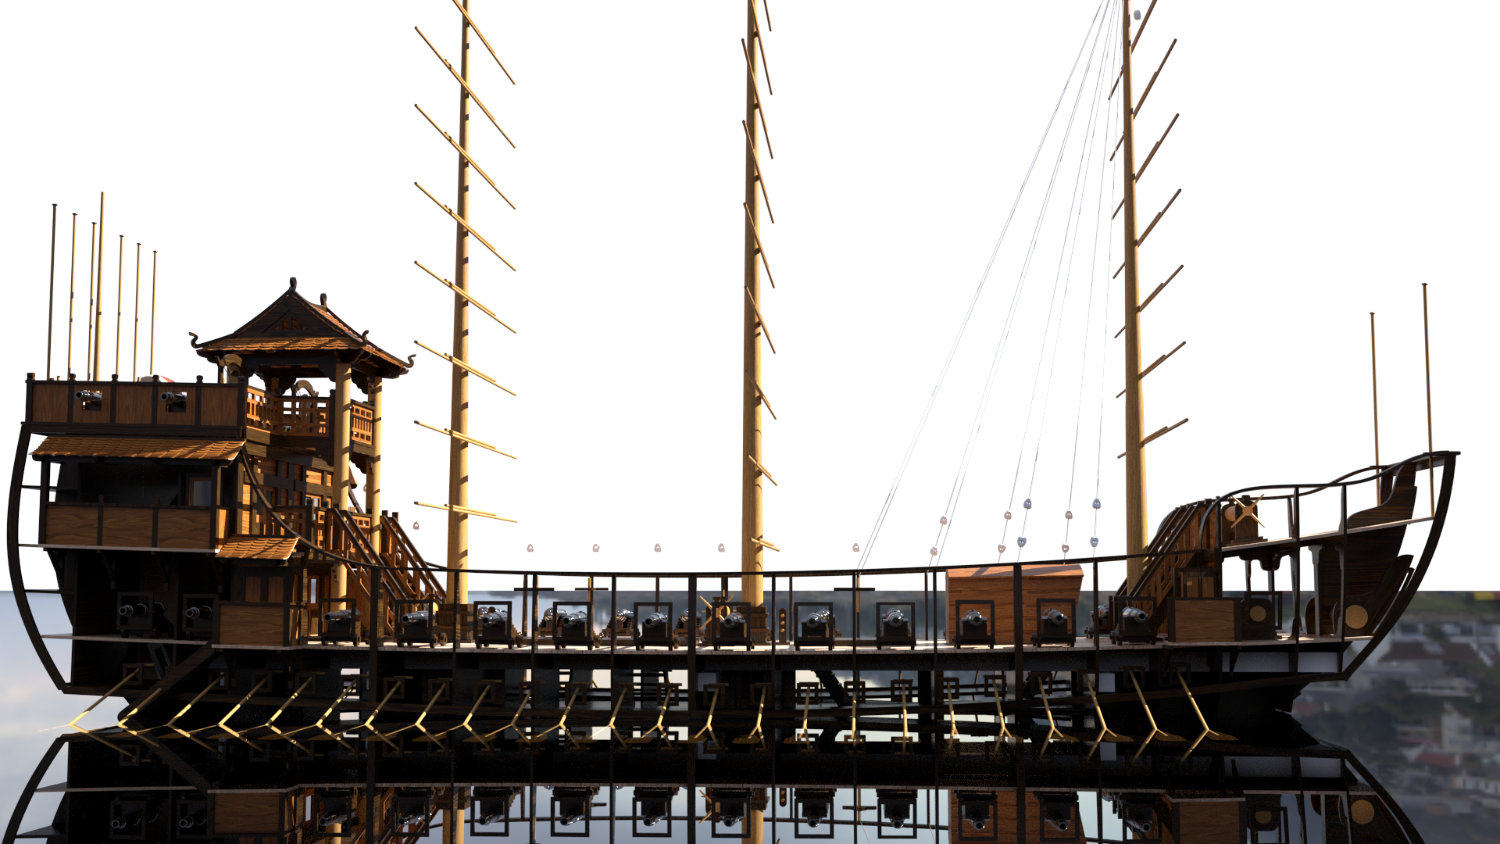
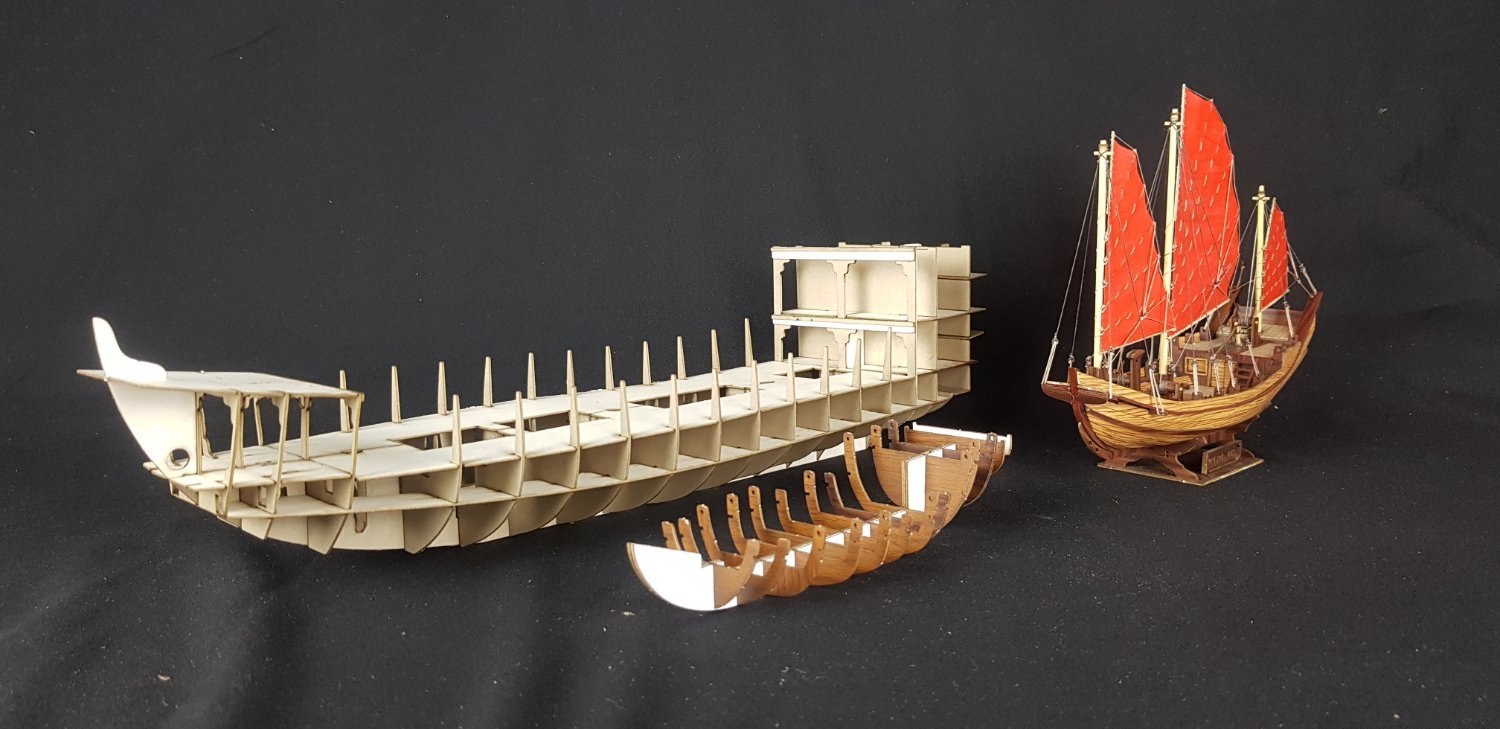
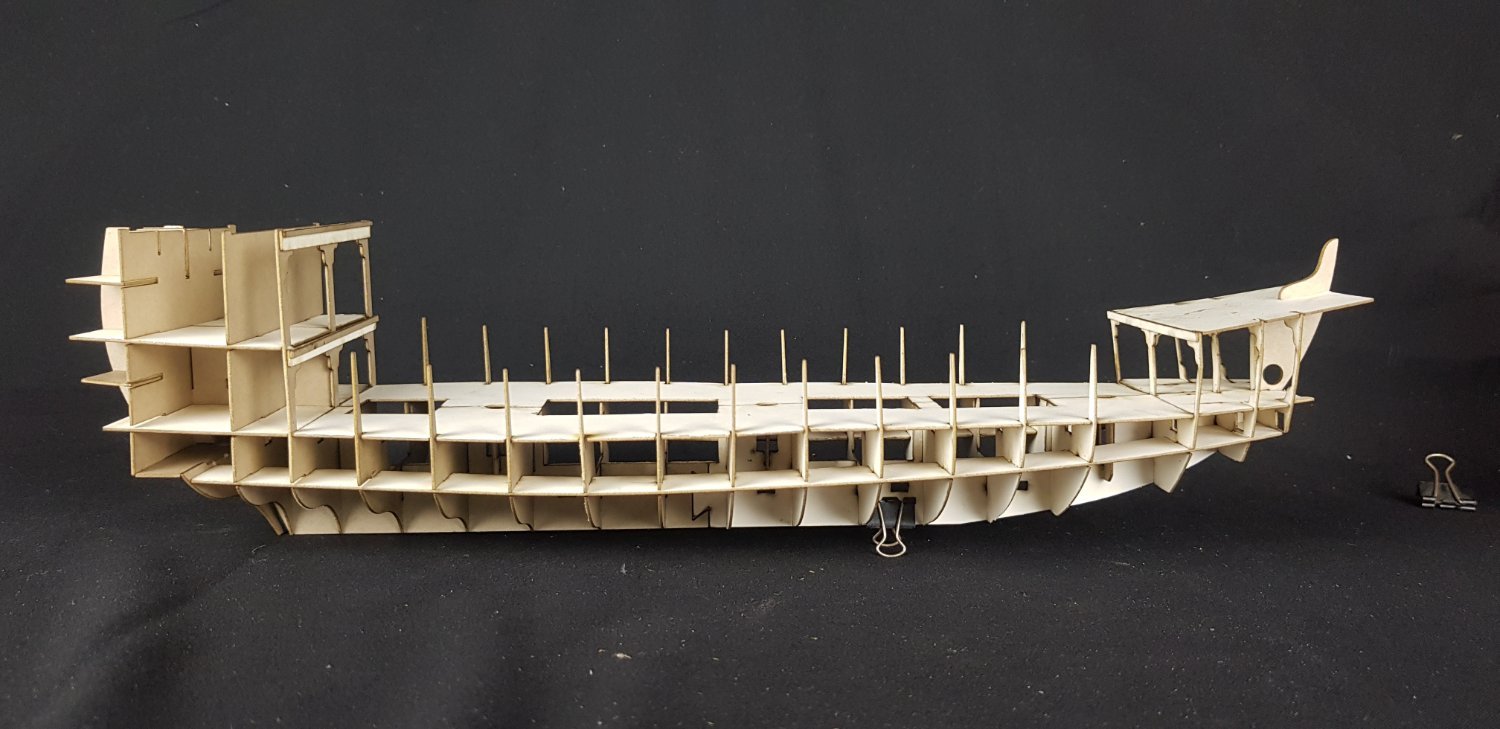
Hello friends, I am continuing another project about a Vietnamese warship. Dinh Quoc is the name of the largest warship ever serving the Tay Son Navy, and the Nguyen Dynasty called it "Dai Hieu". There is no document that accurately describes this type of ship (most of the documents about the Tay Son Dynasty were destroyed by the Nguyen Dynasty). But according to the surviving documents, it can be affirmed that Dinh Quoc was not inferior in size to the ships of the line belonging to the naval forces in Europe at that time. In a letter to his friend Laurent Barizy dated March 2, 1801, Jean-Baptiste Chaigneau, a French officer serving in Nguyen Anh's army boasted that his troops had destroyed the Western fleet. Son, including one equipped with 50-60 heavy cannons. (wiki)
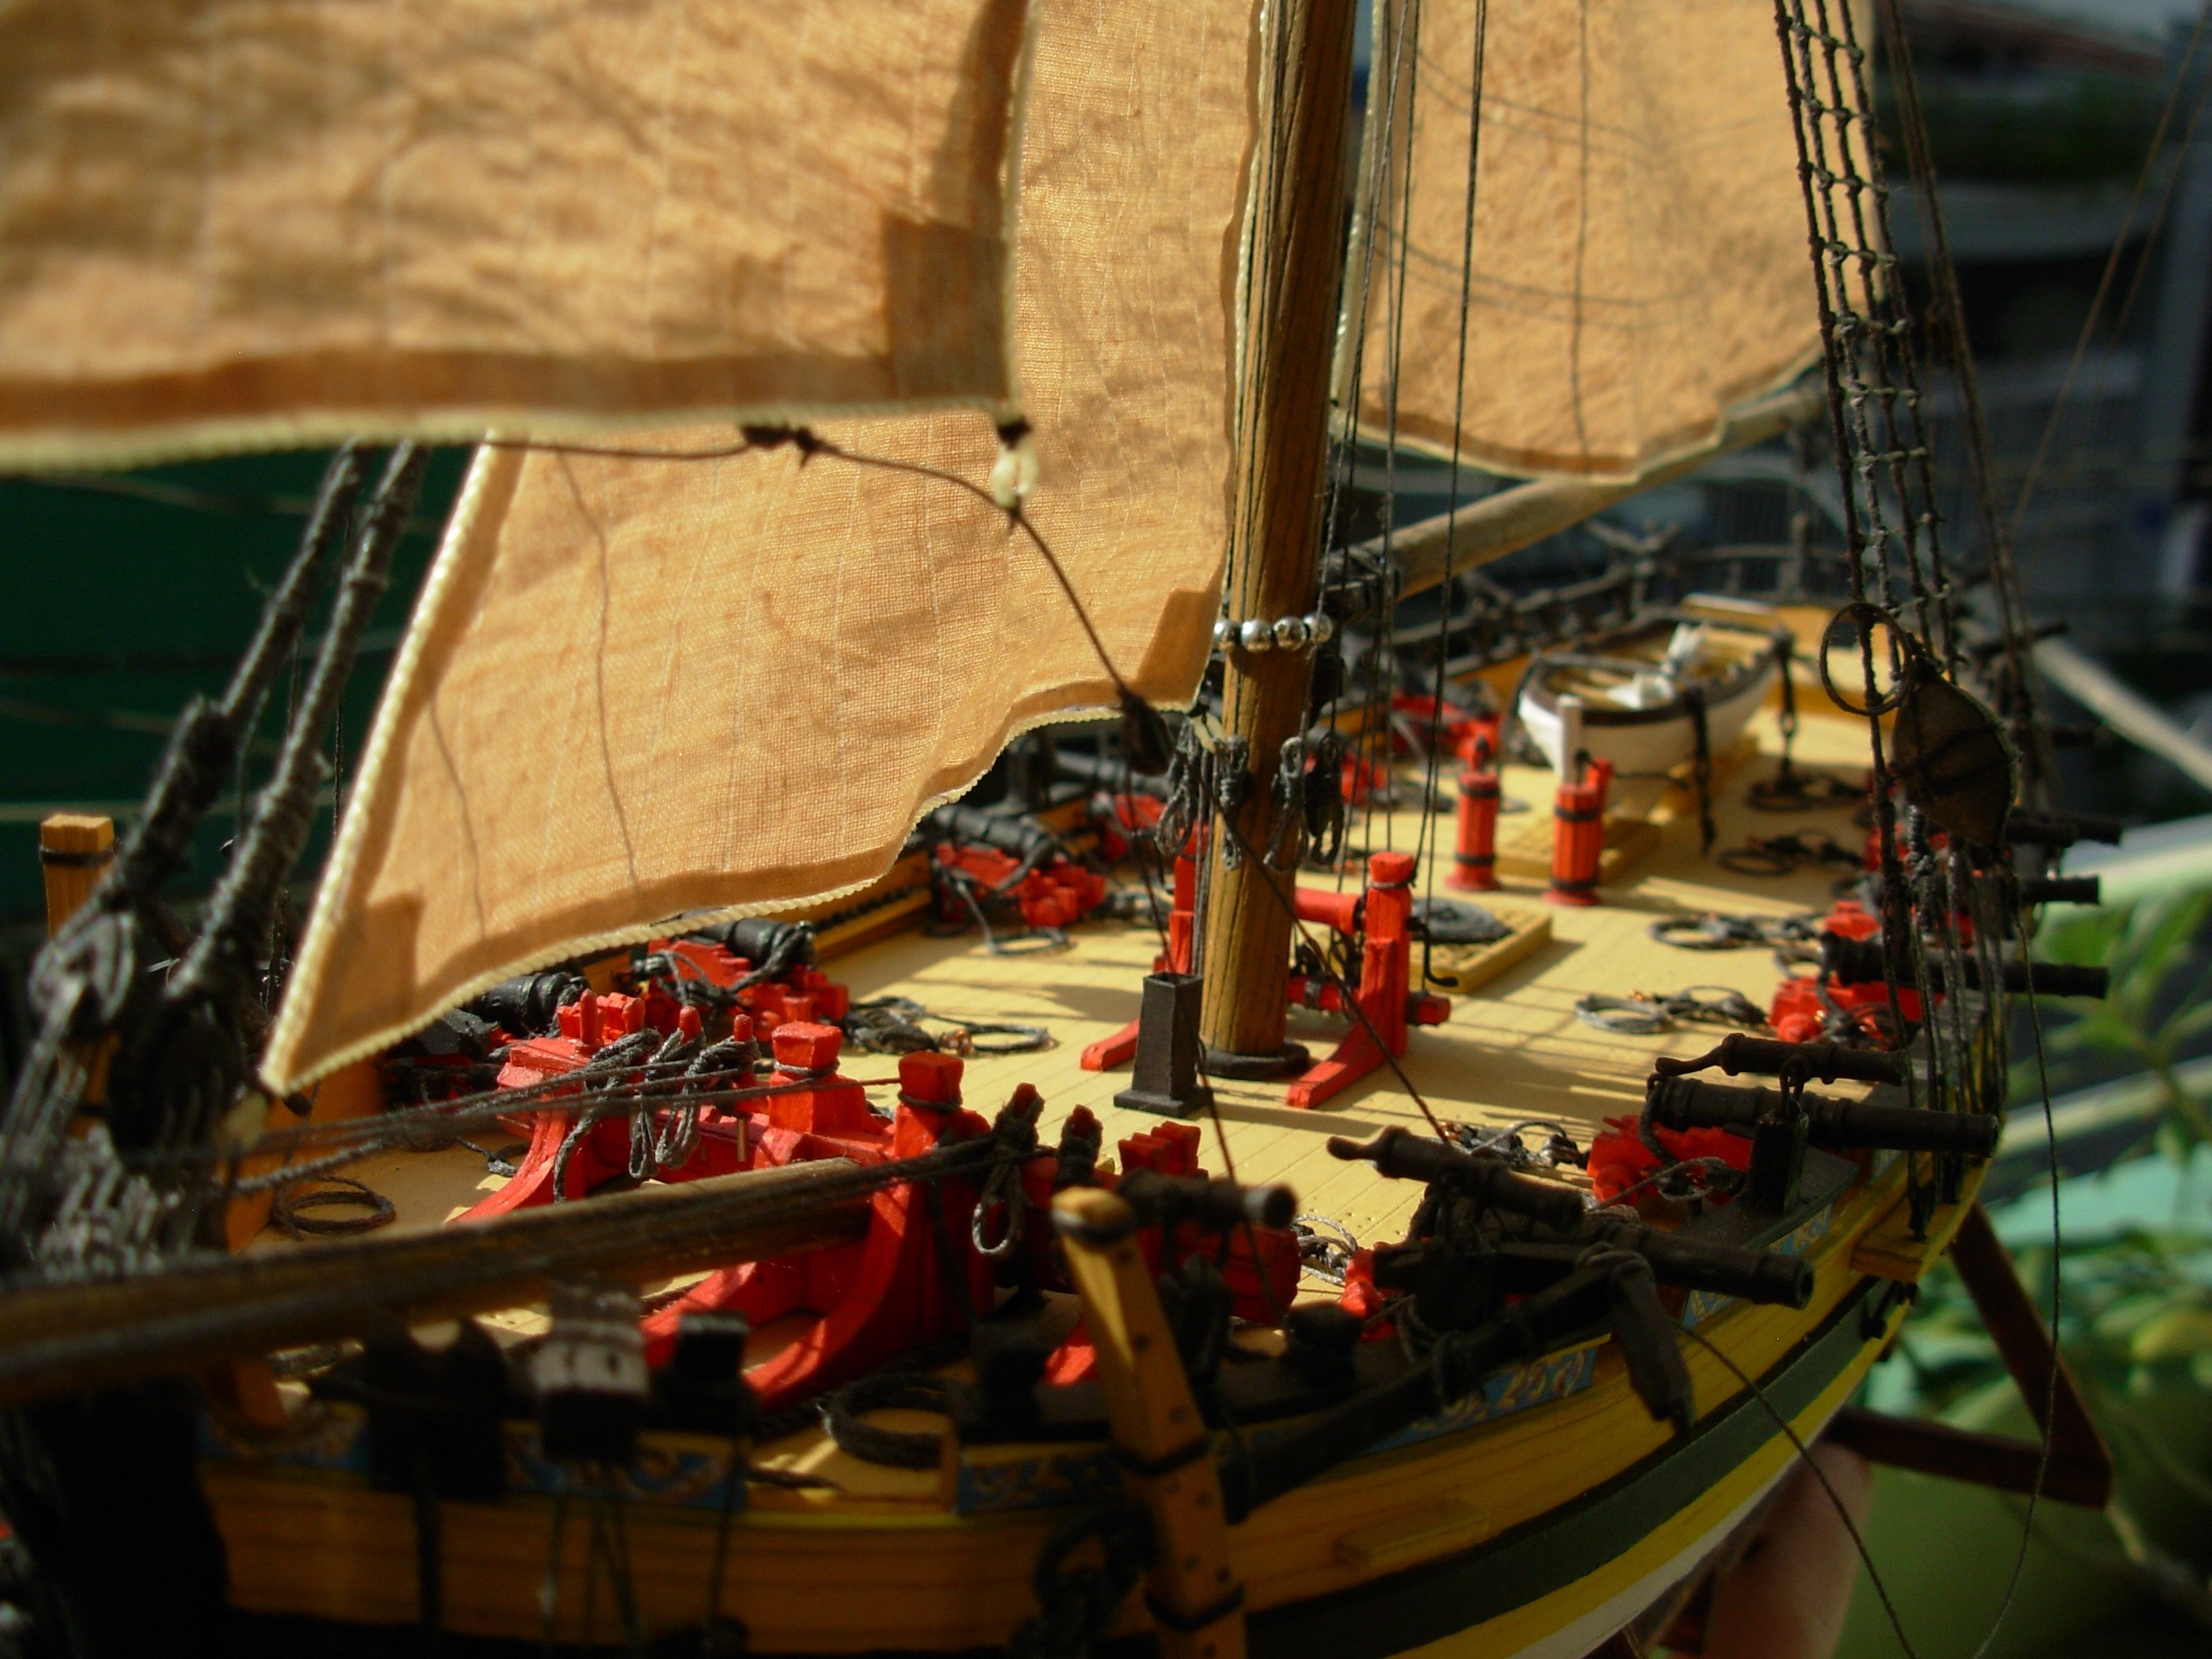
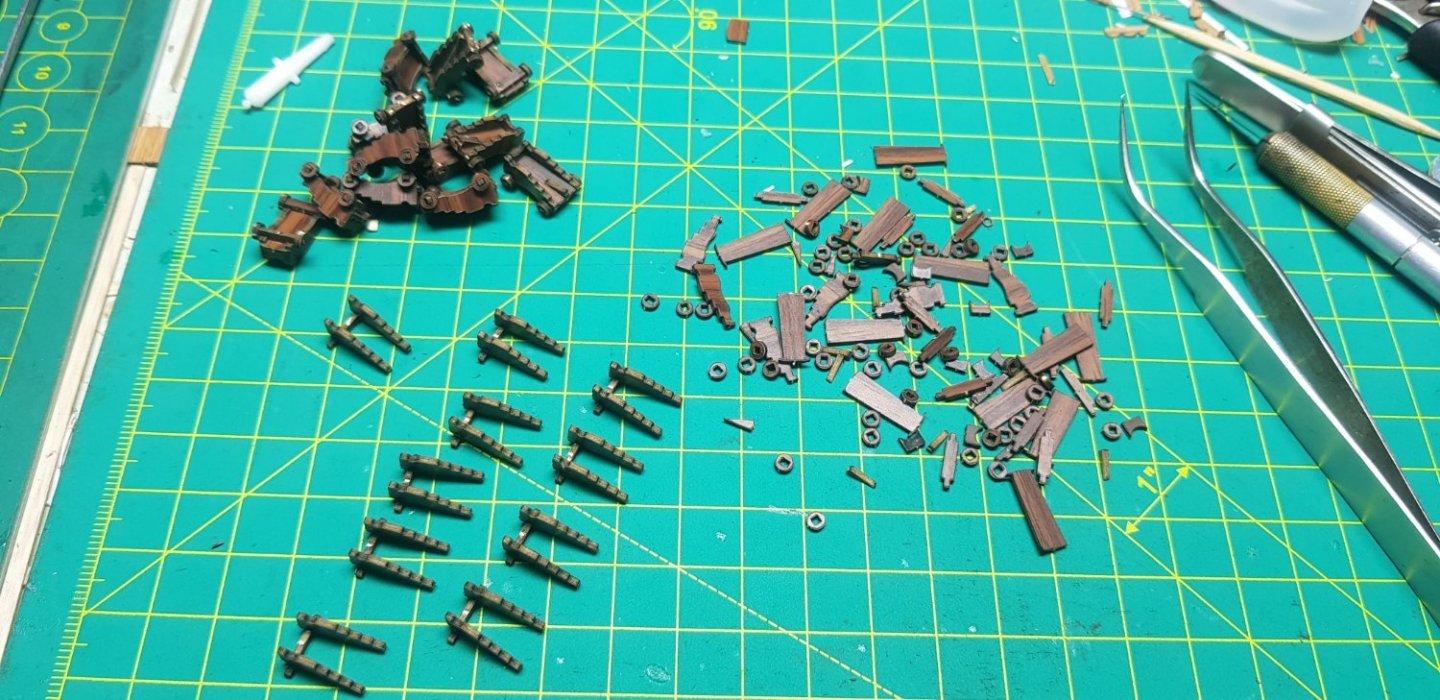
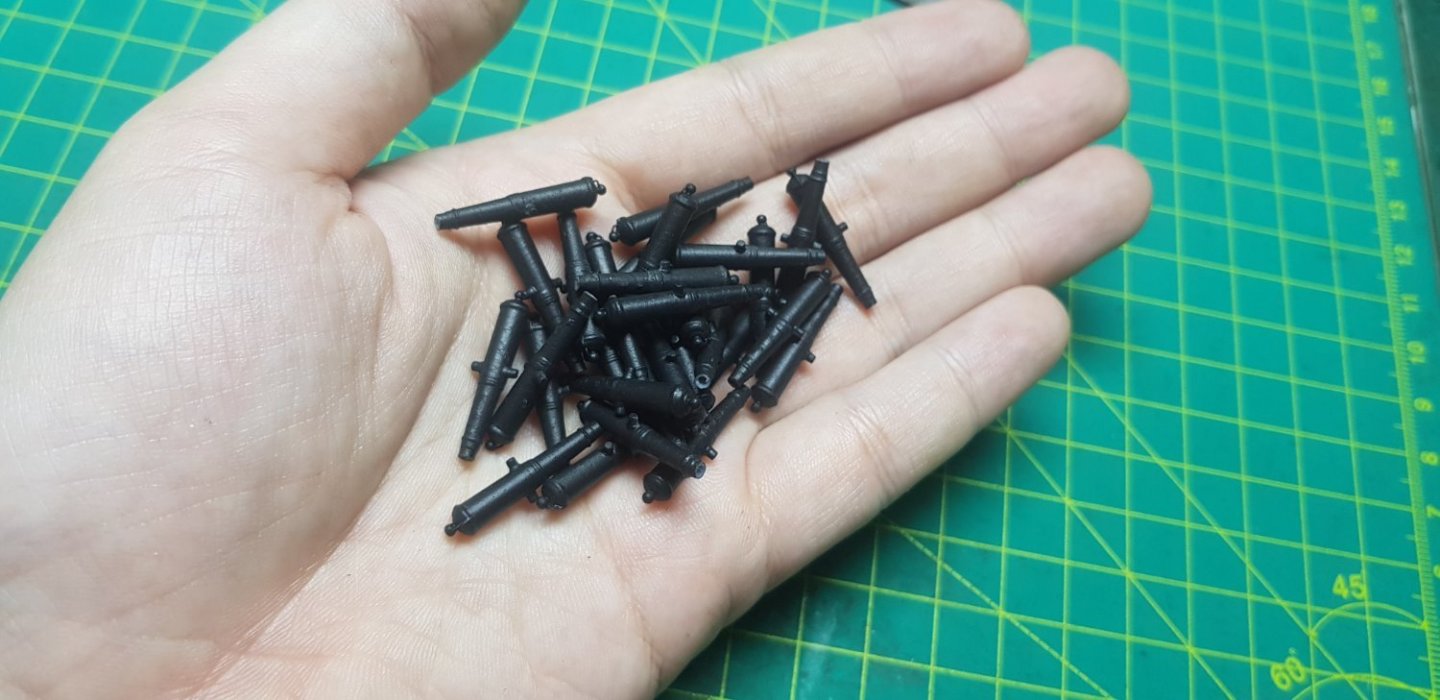
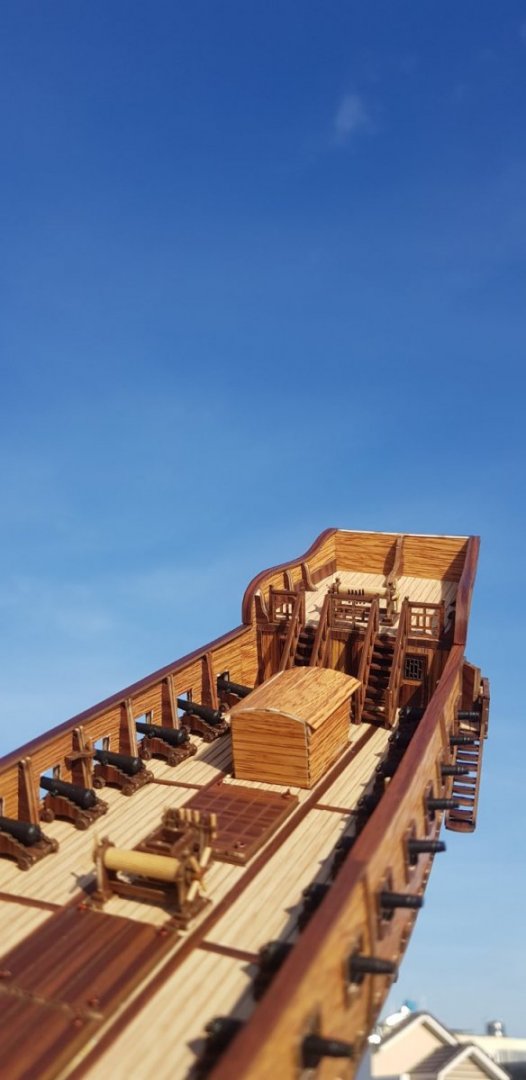
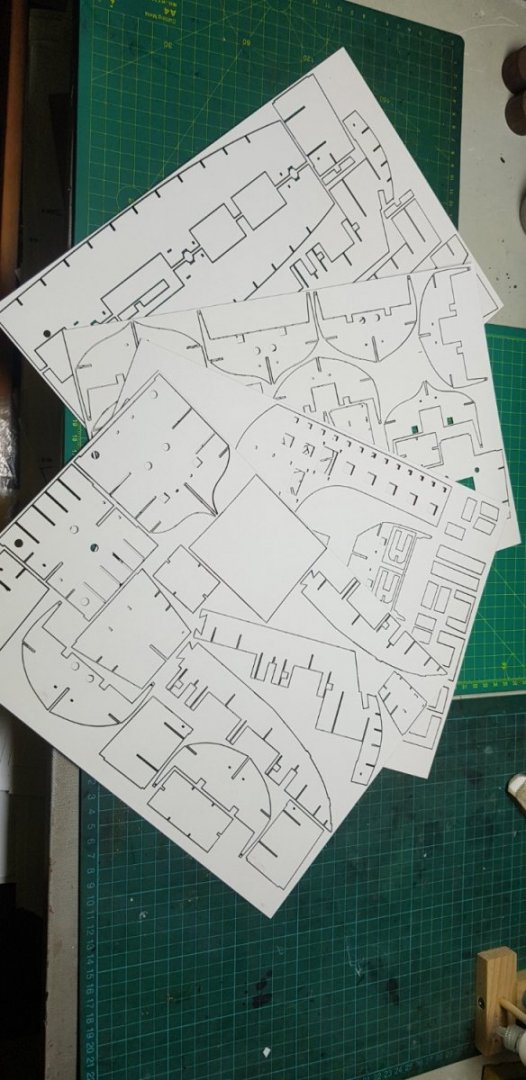
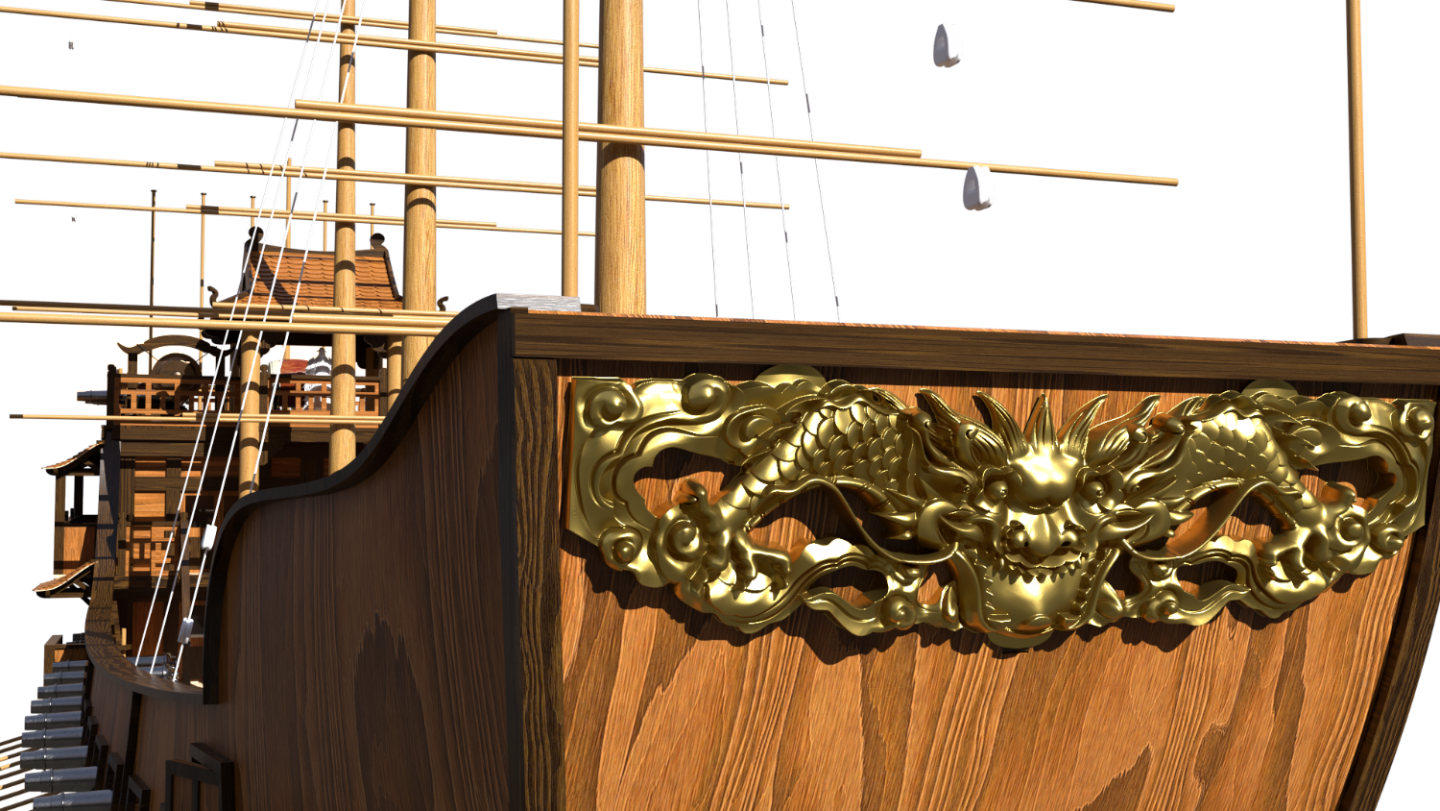
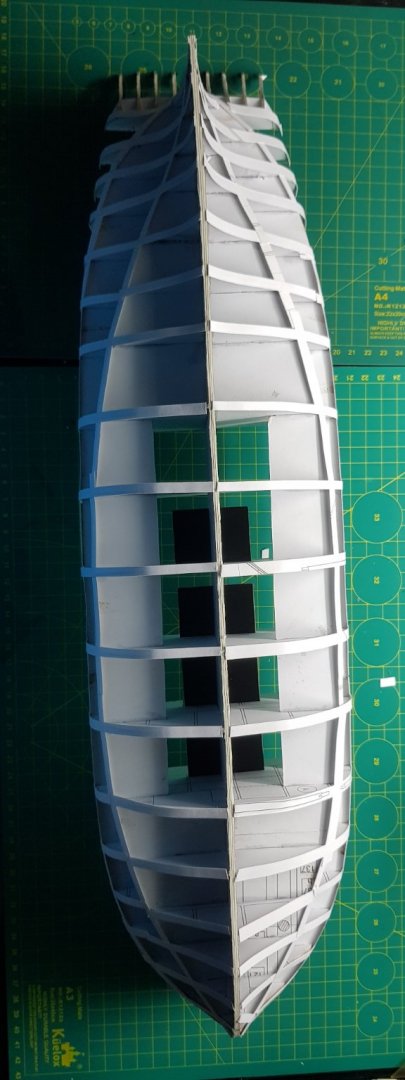
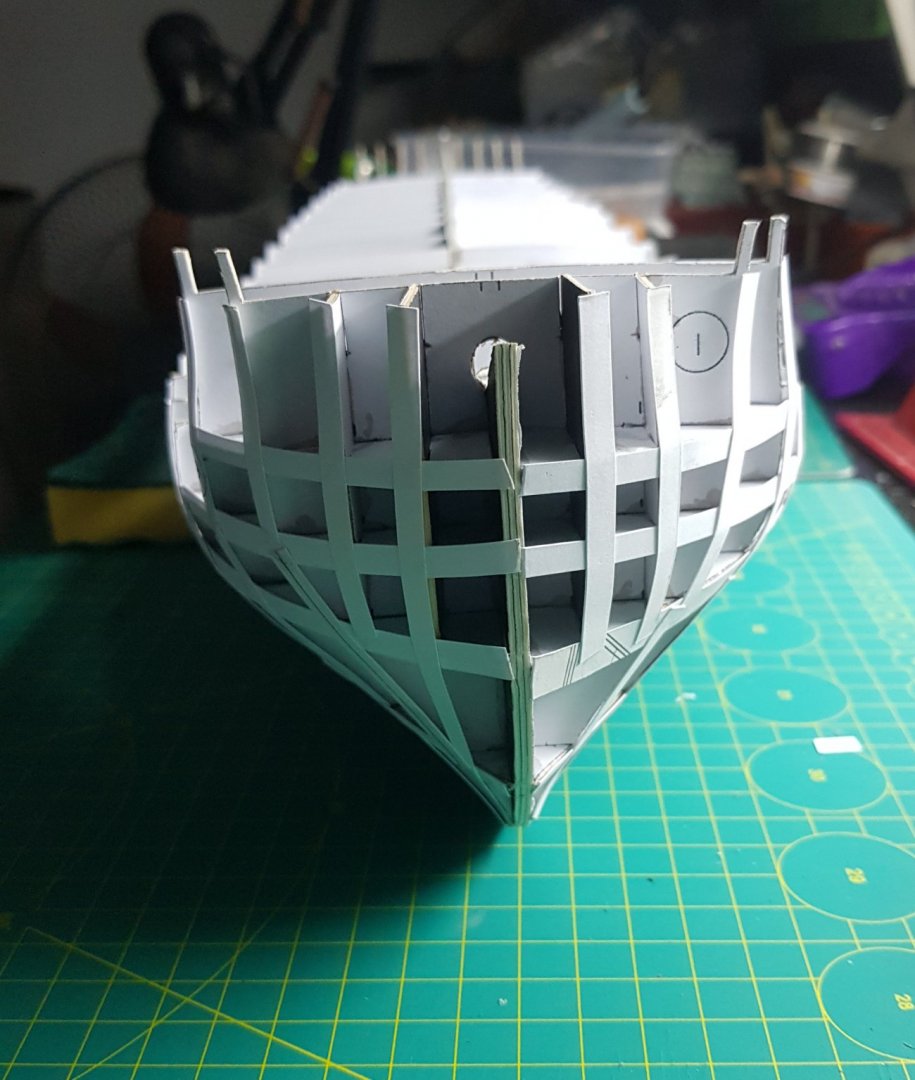
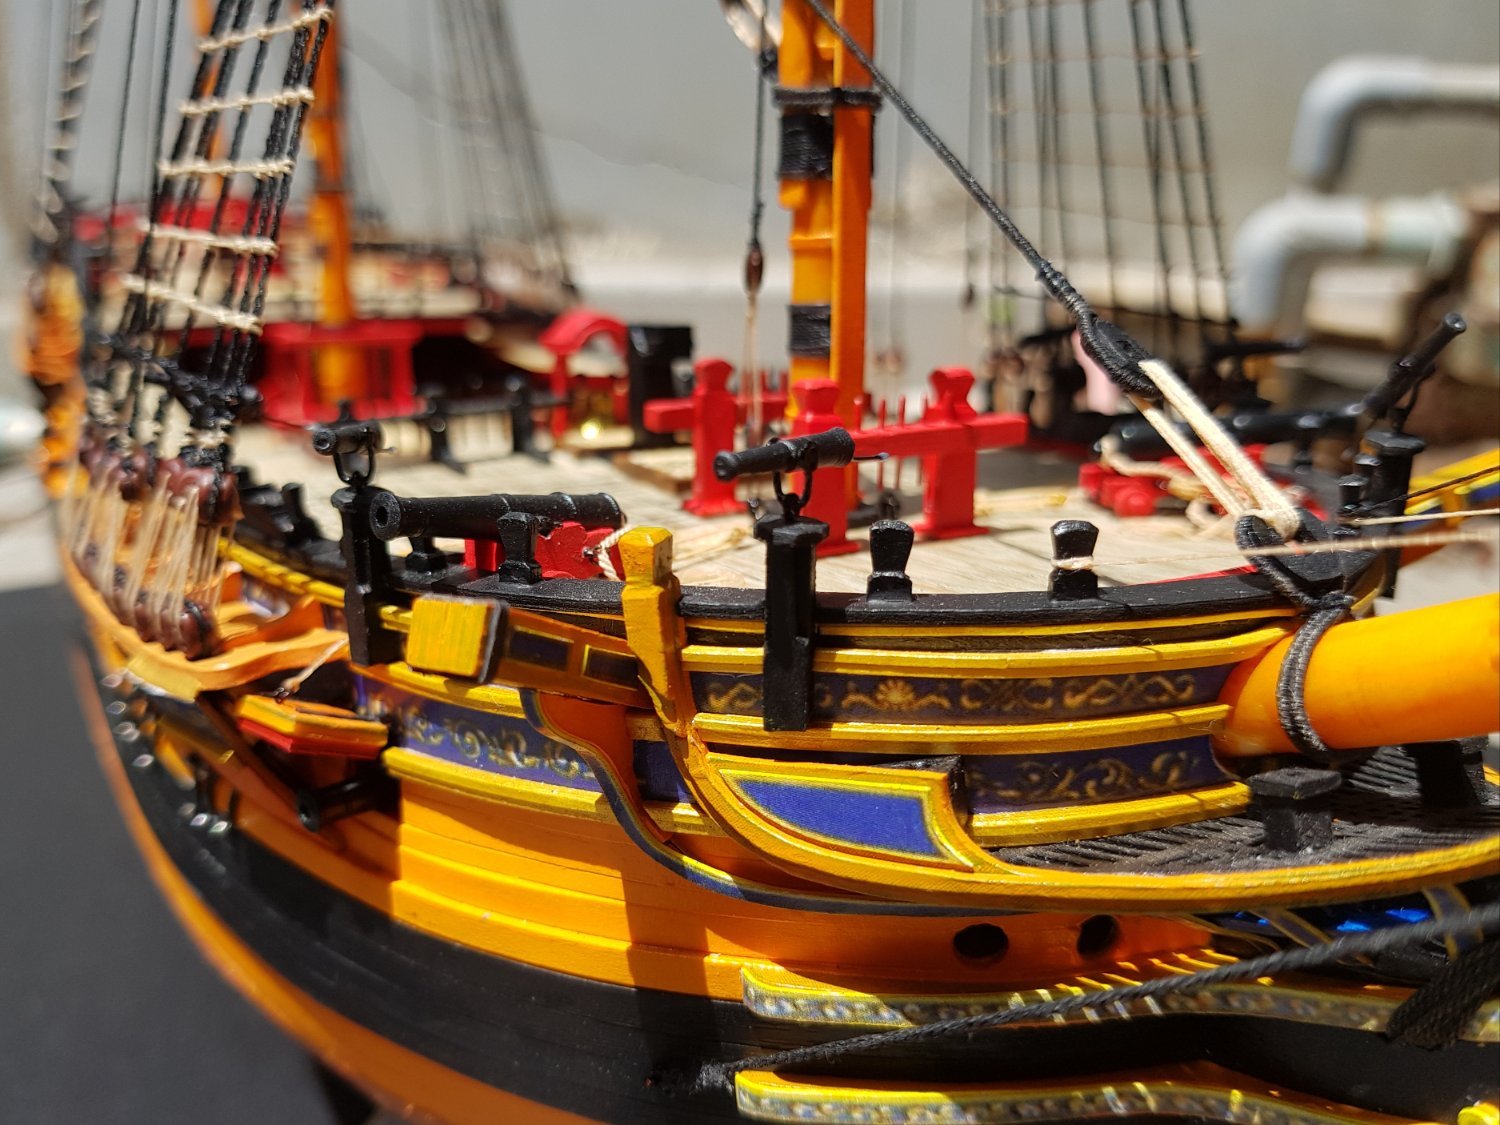
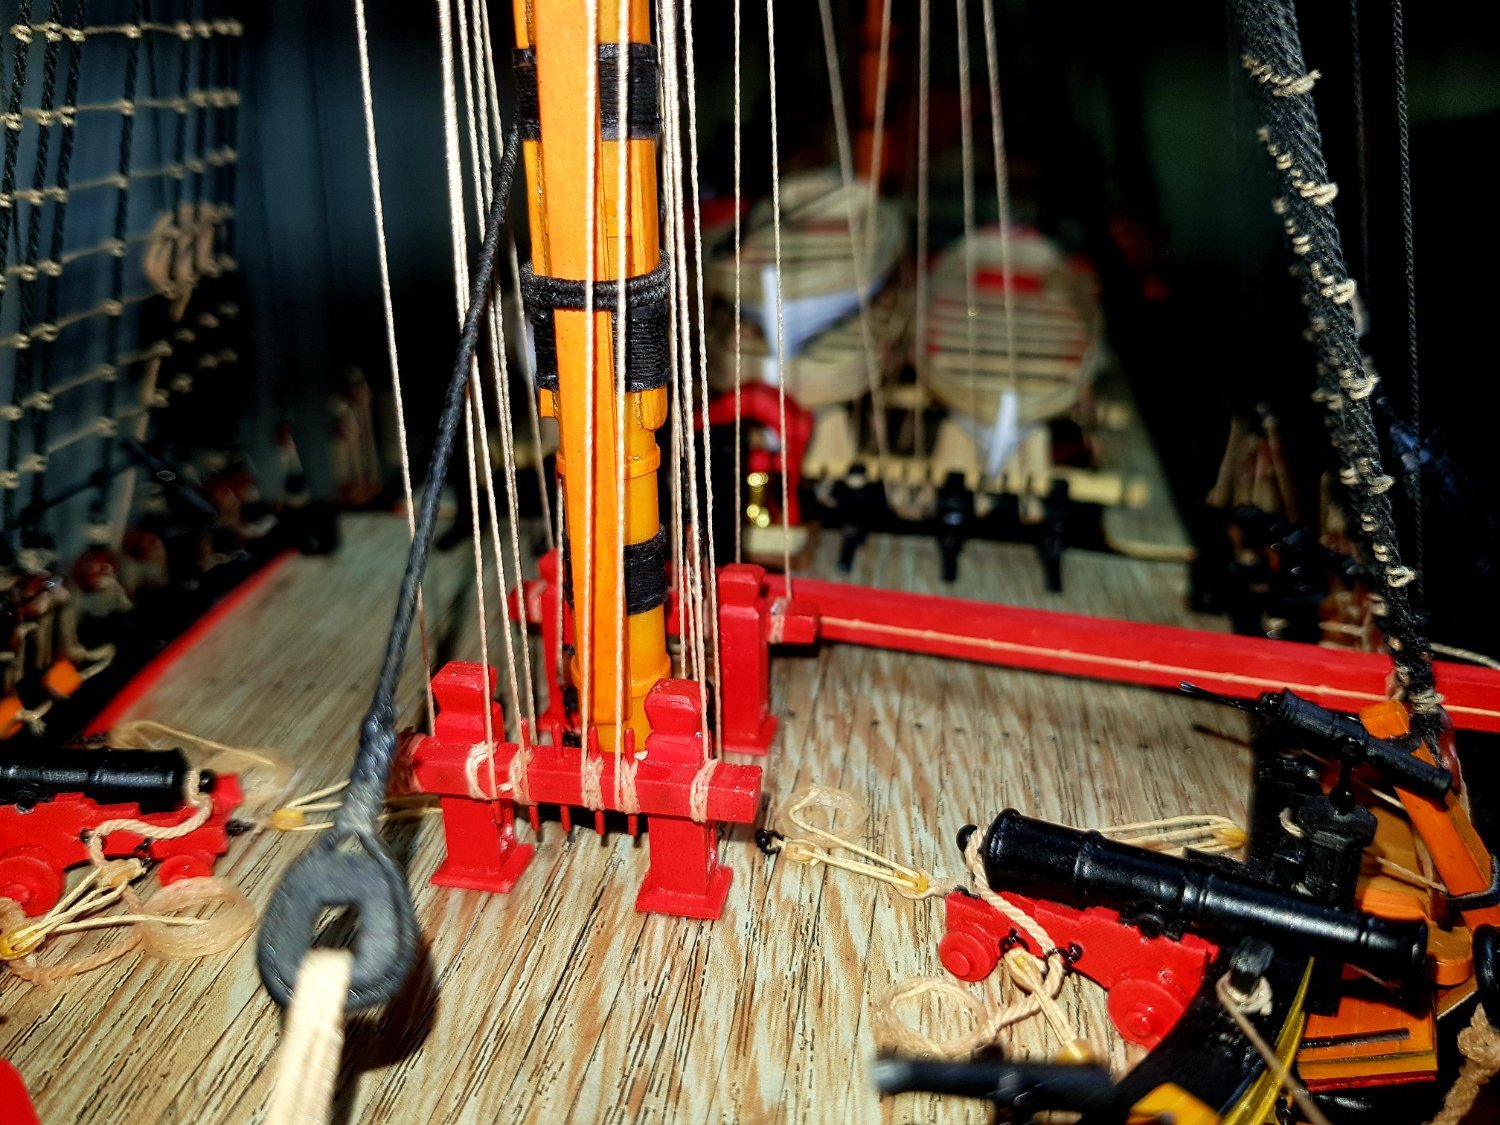
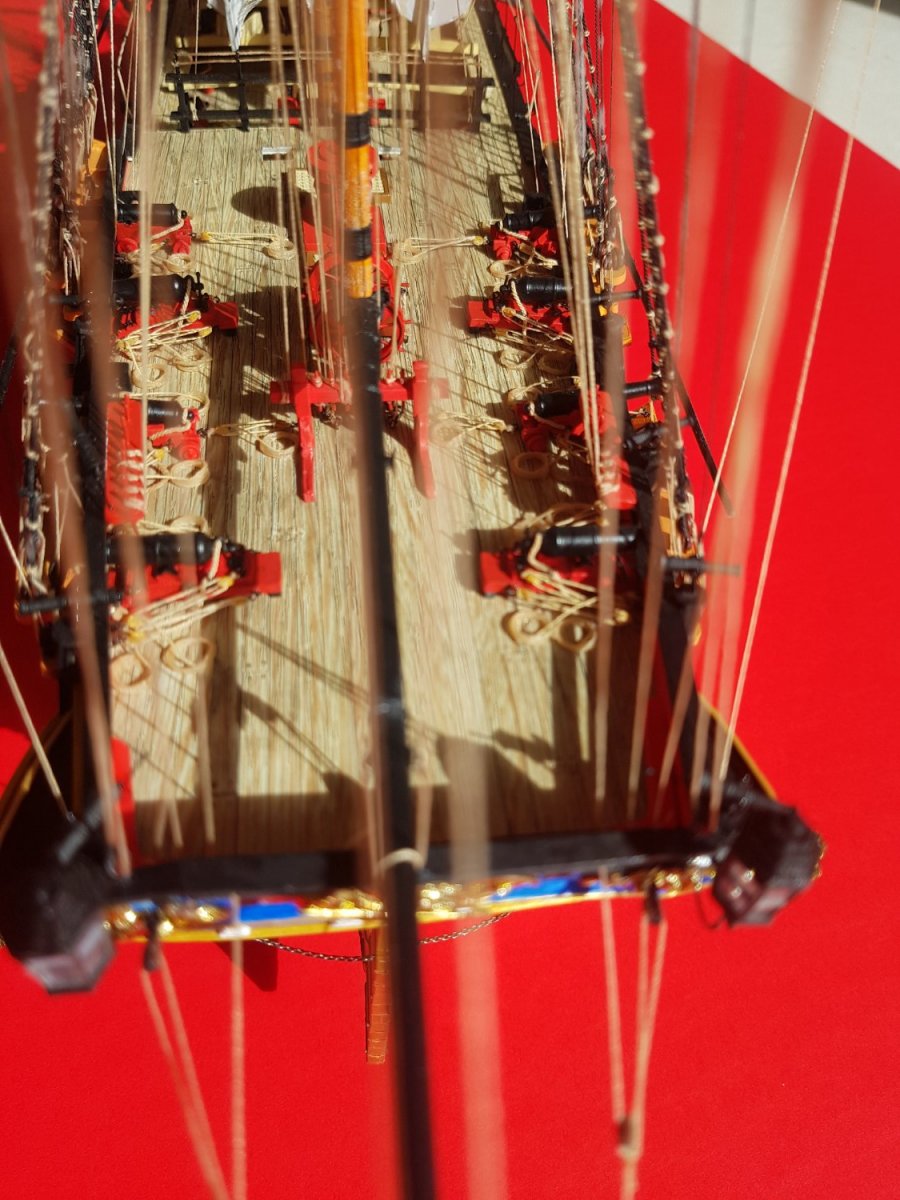
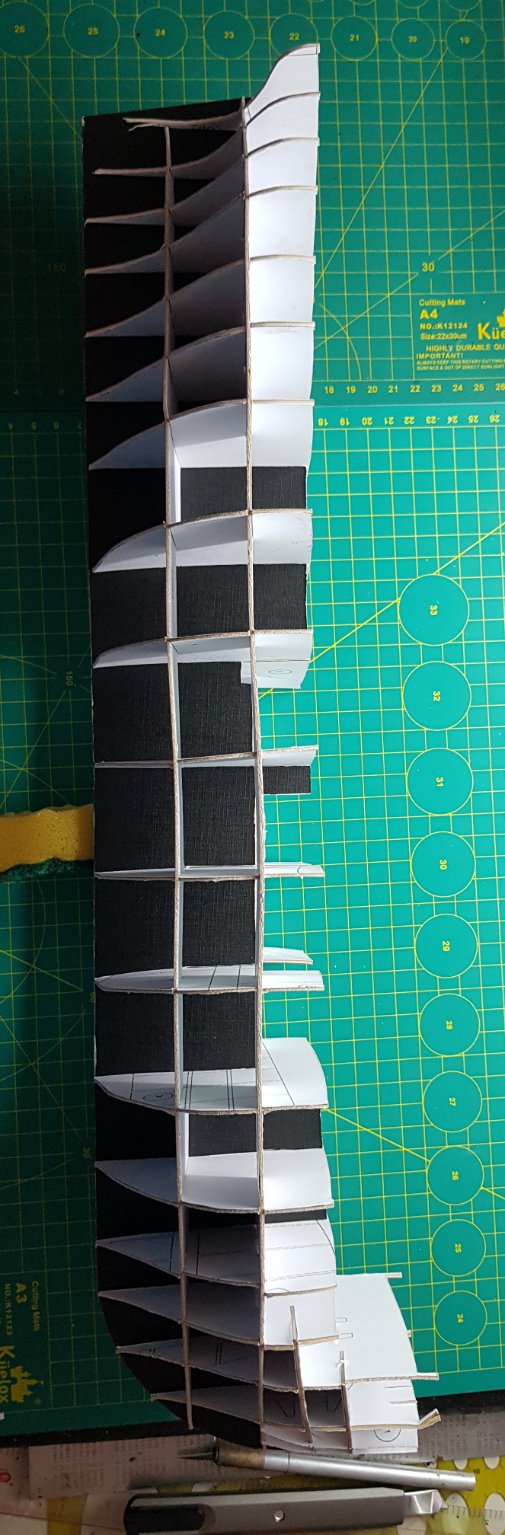
I shortened the design to about 30 cannons and the scale 1:100, I relied on the remaining historical documents to create this boat. This is a project that takes a long time to restore the design that is almost gone, but still retains the most original shape and design of the 18th century Vietnamese warship.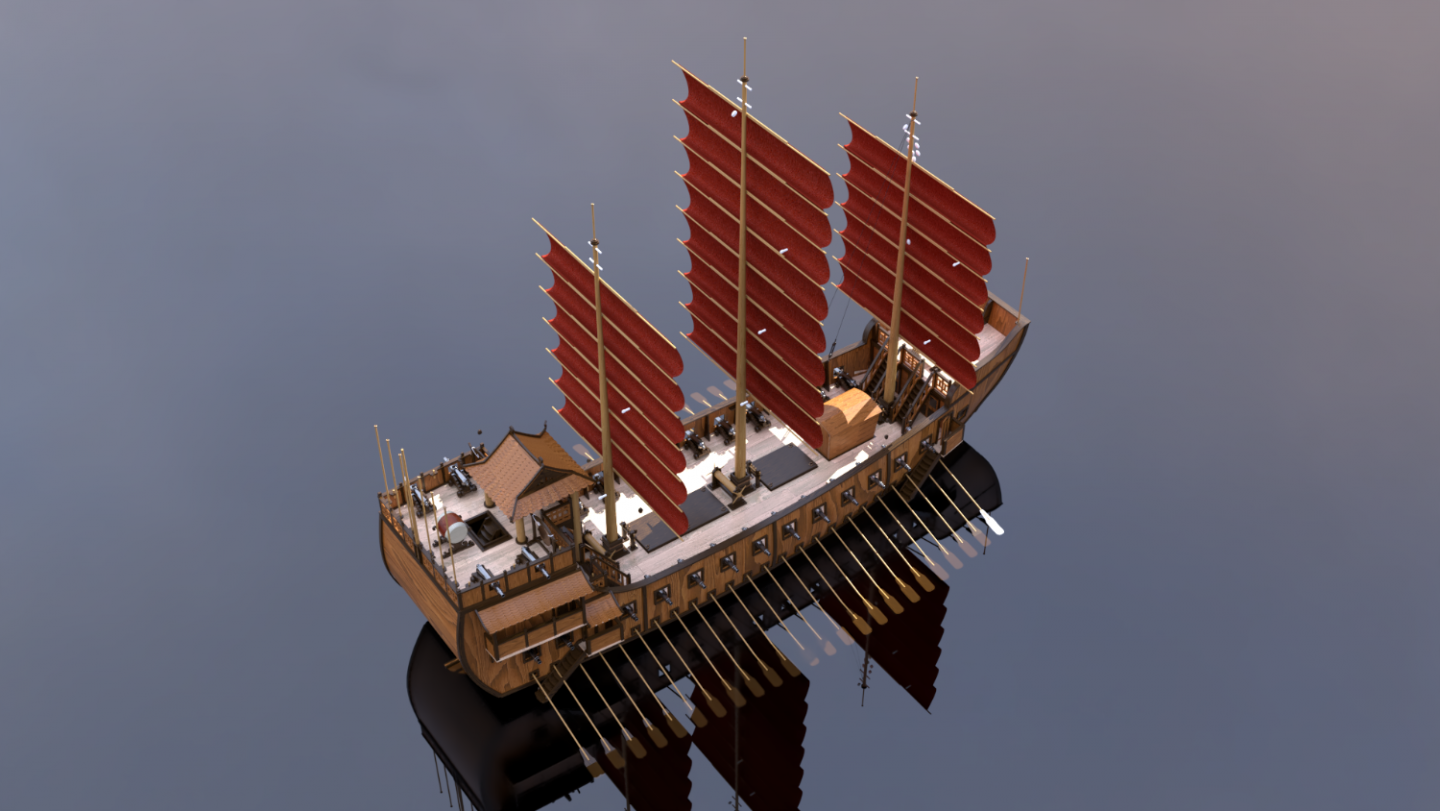


- reklein, Harvey Golden, Siggi52 and 3 others
-
6
-
On 3/19/2022 at 11:19 AM, Keith Black said:
Very nice.
Thank Keith.
- Keith Black and mtaylor
-
2
-
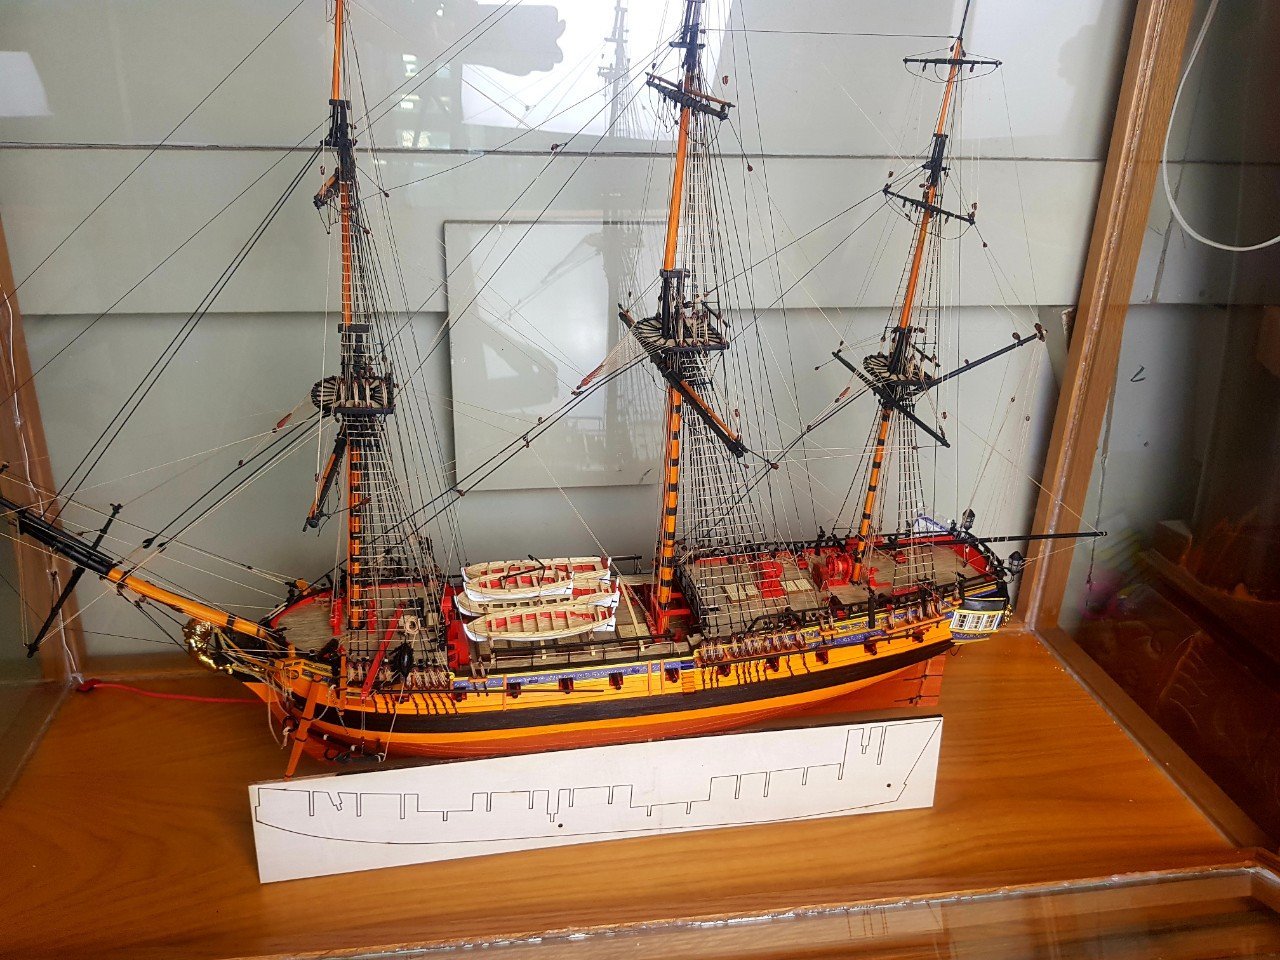
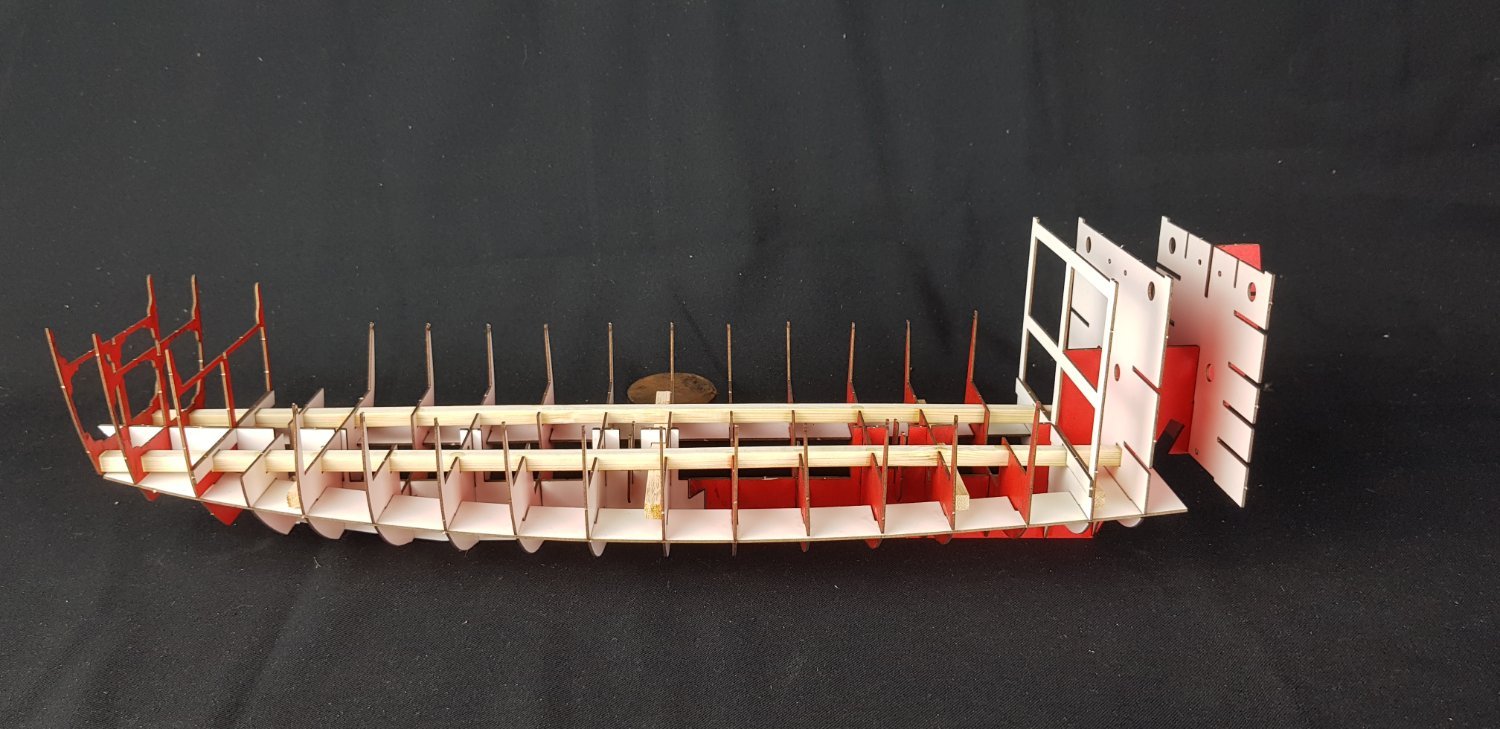
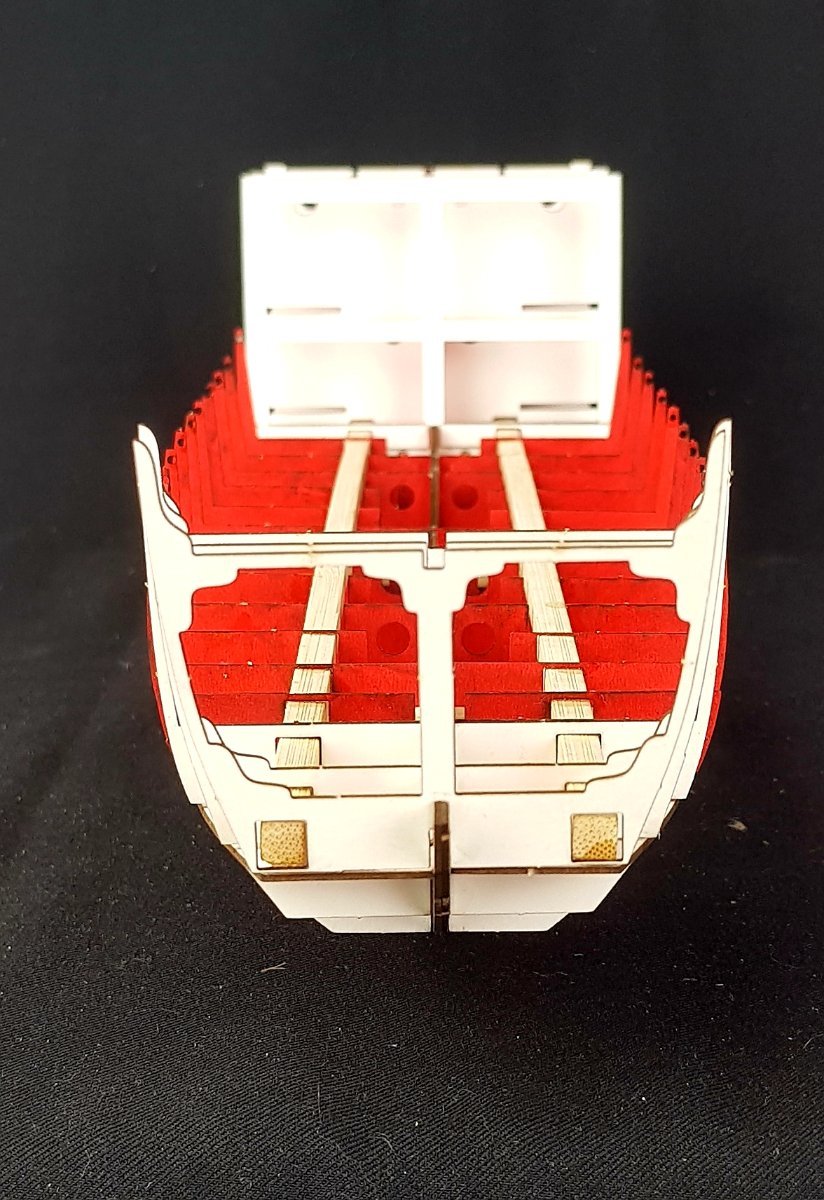
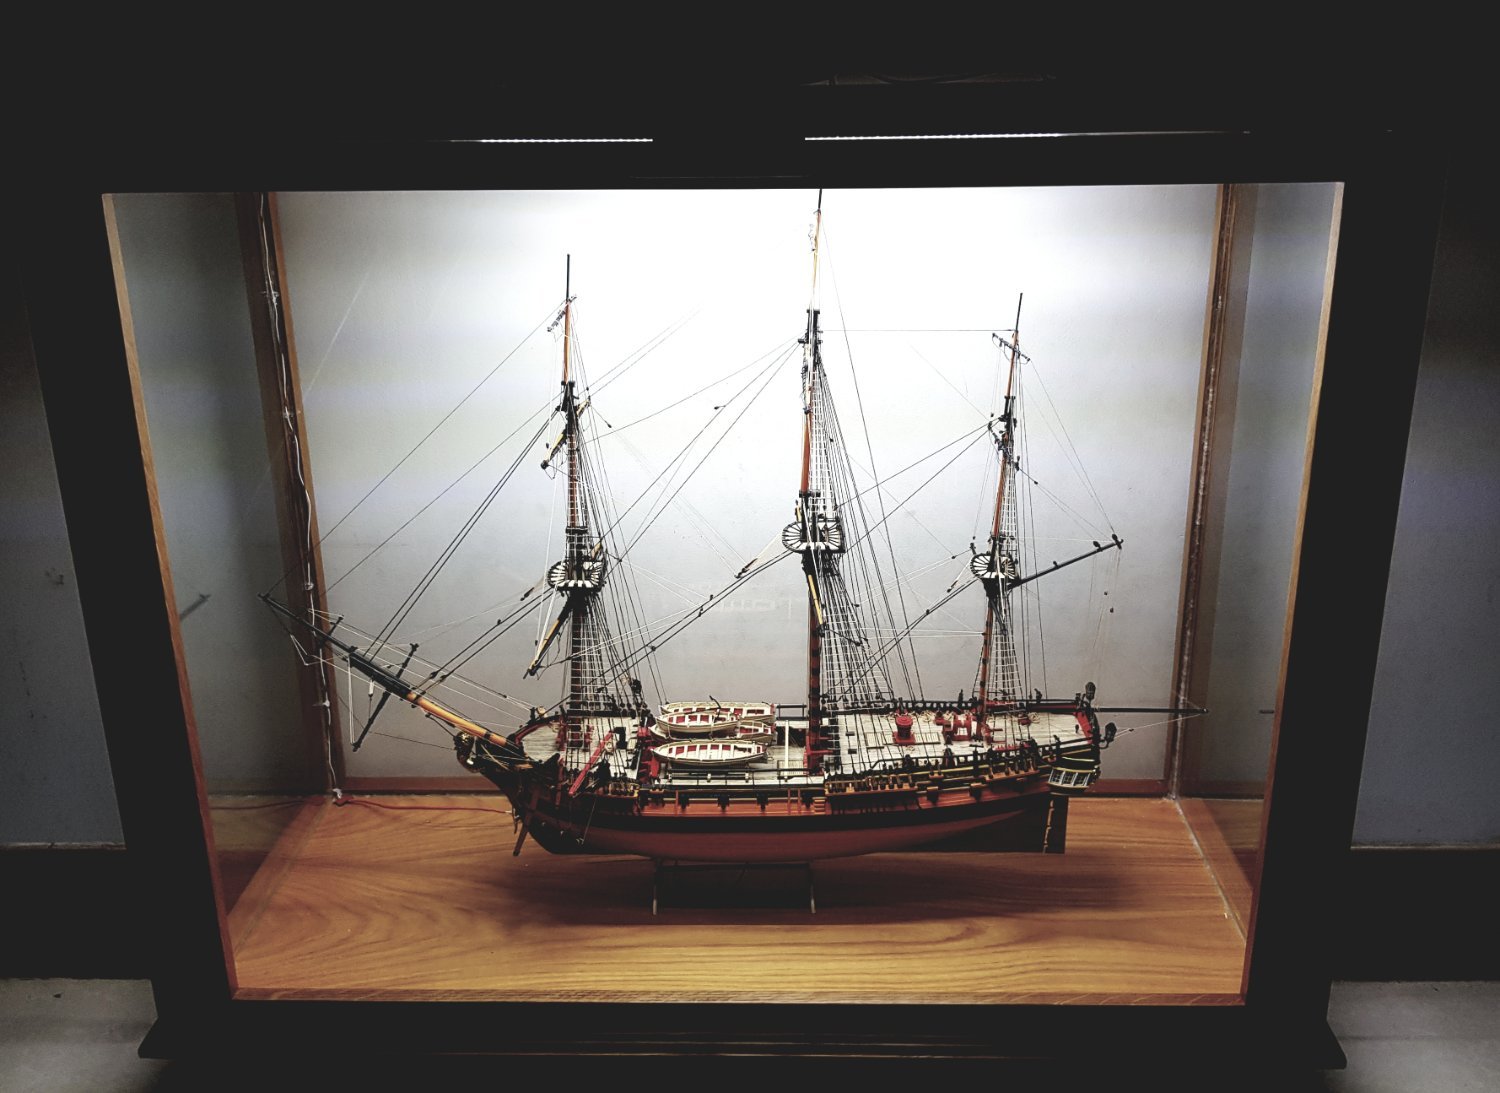
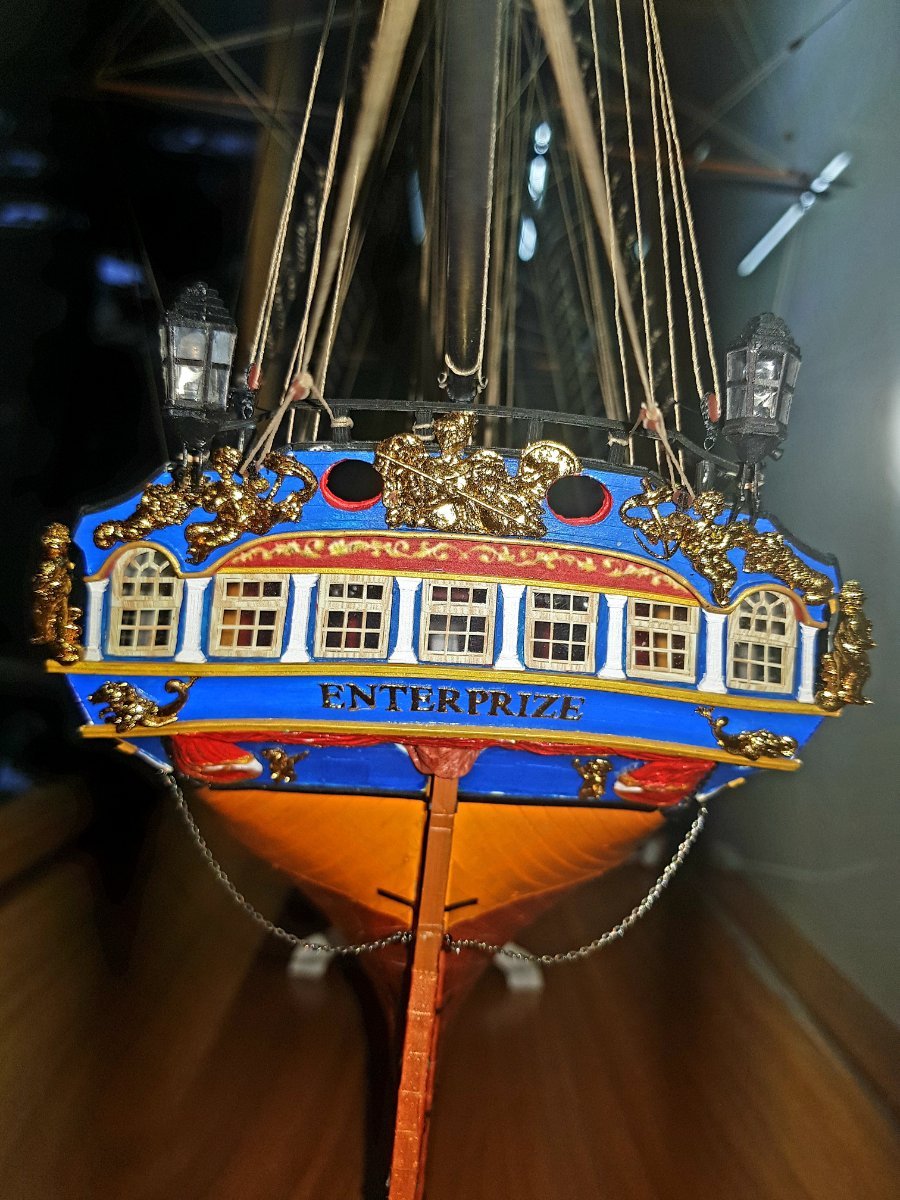
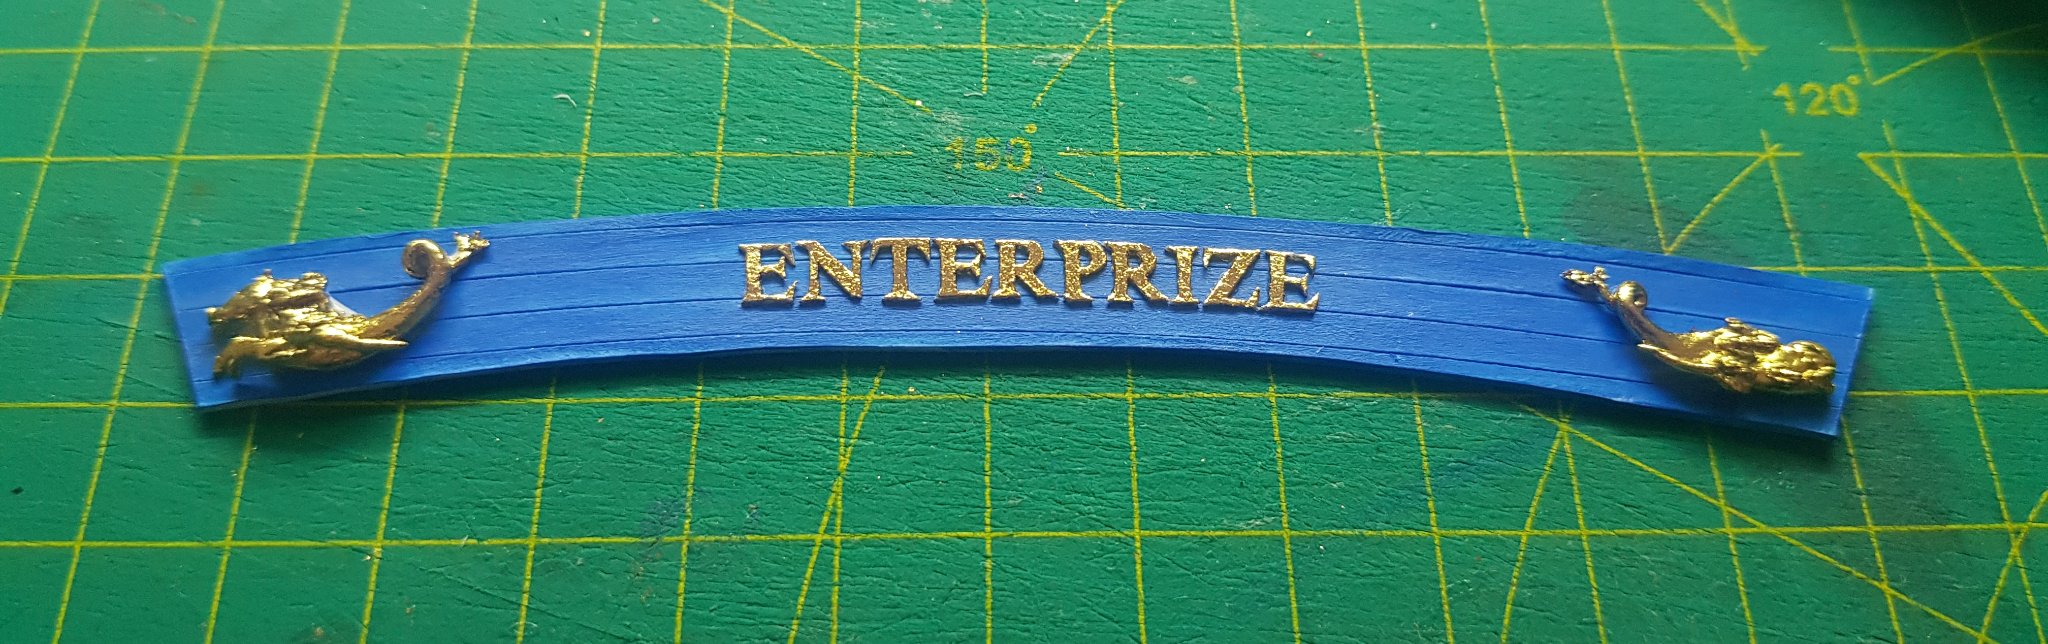
Hello everyone, after completing the HMS Enterprize I realized that I am quite interested in building 3D models. So I started this project with little knowledge of 3D programs and completely learned them on youtube.
I built this project to be able to make a model builder kit so after done the model if anyone wants to buy this model kit please contact me. And of course there are full building instructions with pictures as well as structural designs.
I build this ship will change the texture and add some parts so it will be very different from the ships sold in the market.
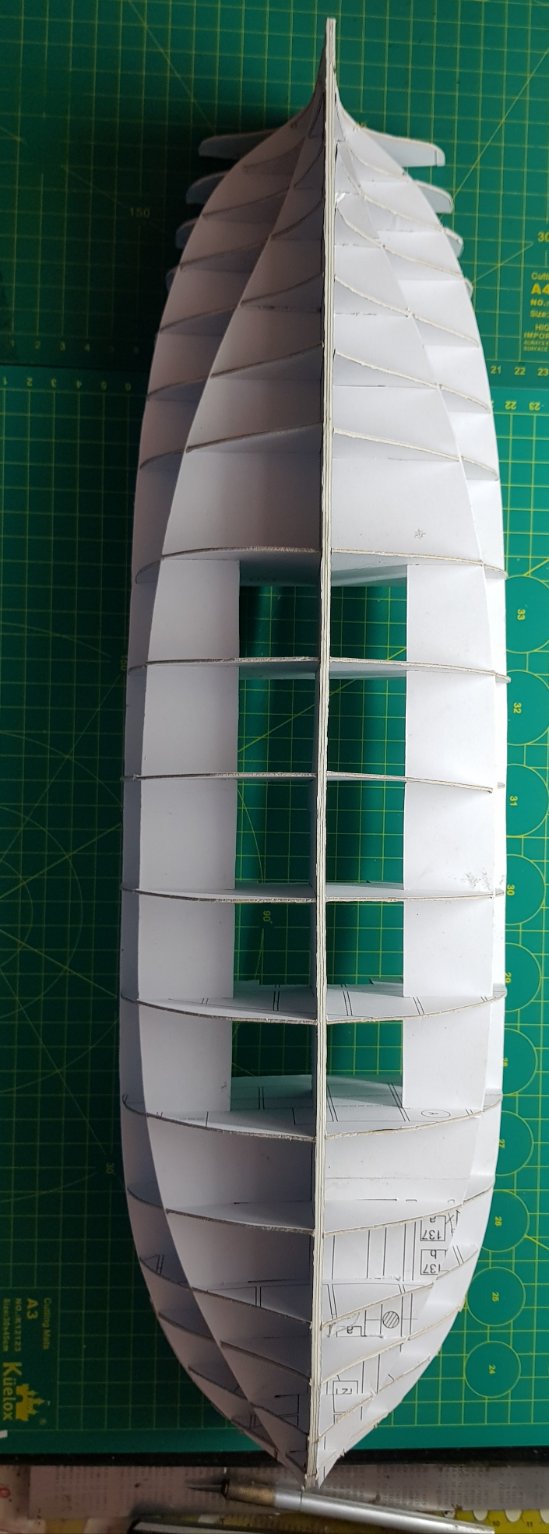
I first built this ship model on 3D program and now there are many programs that can be designed like 3Dsmax or Sketchup...
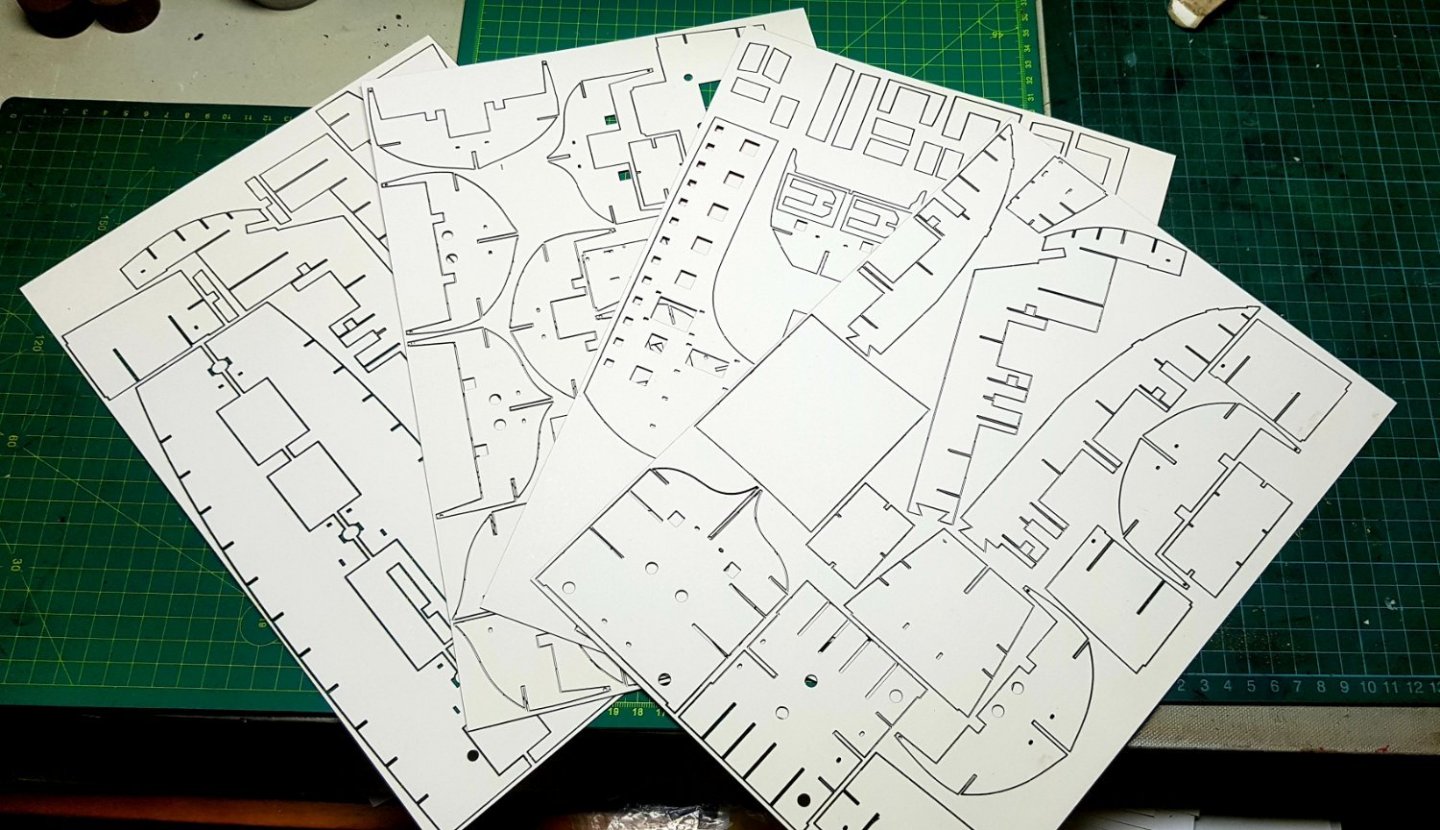
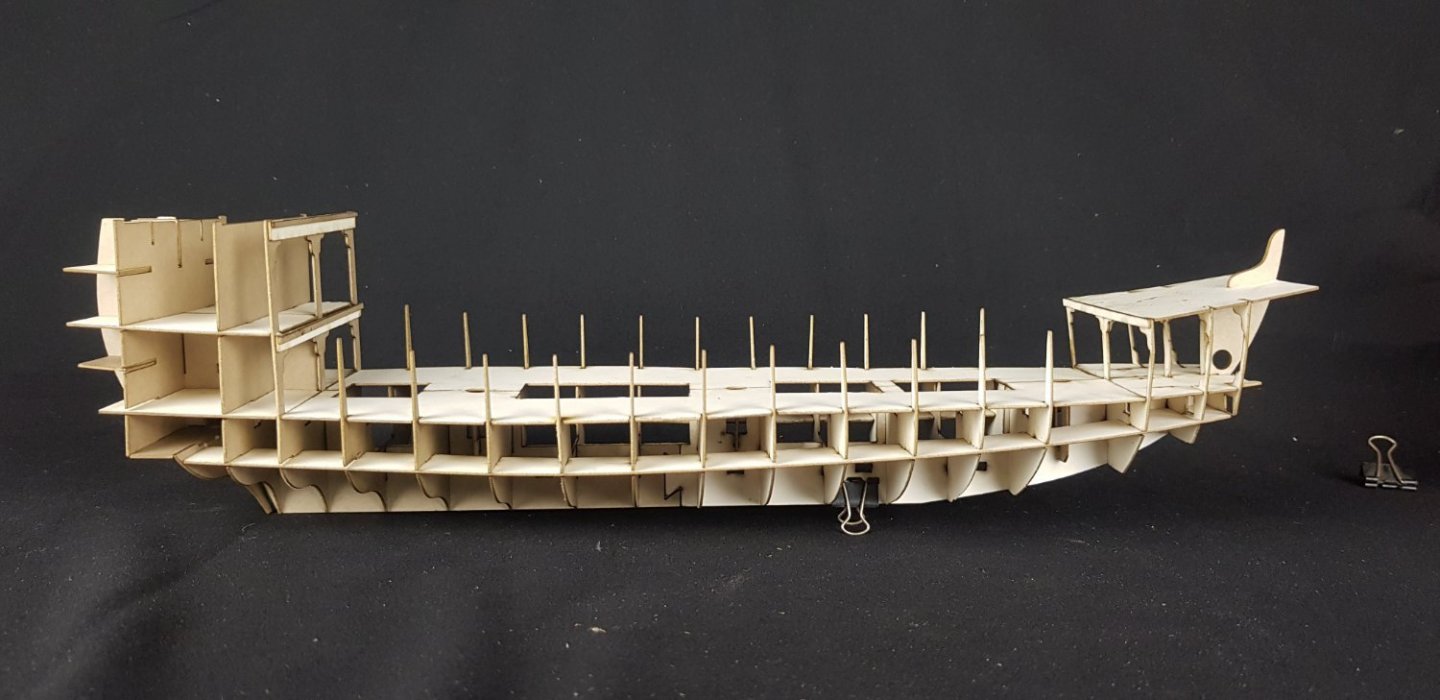
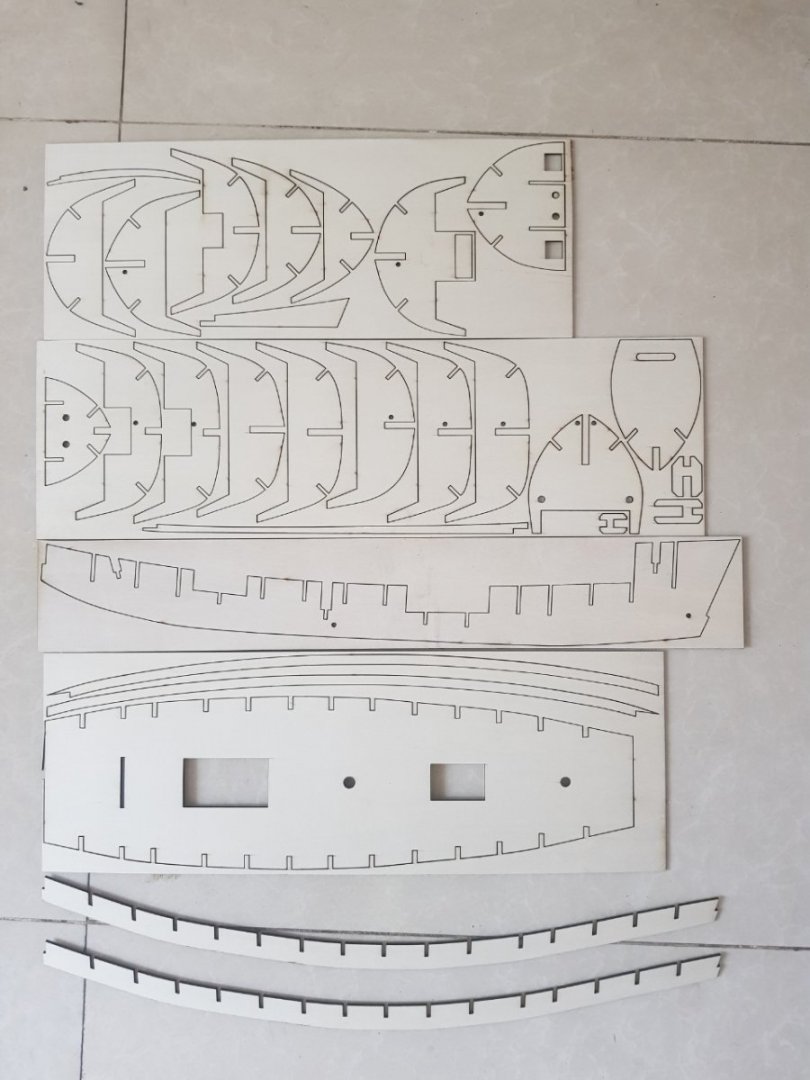
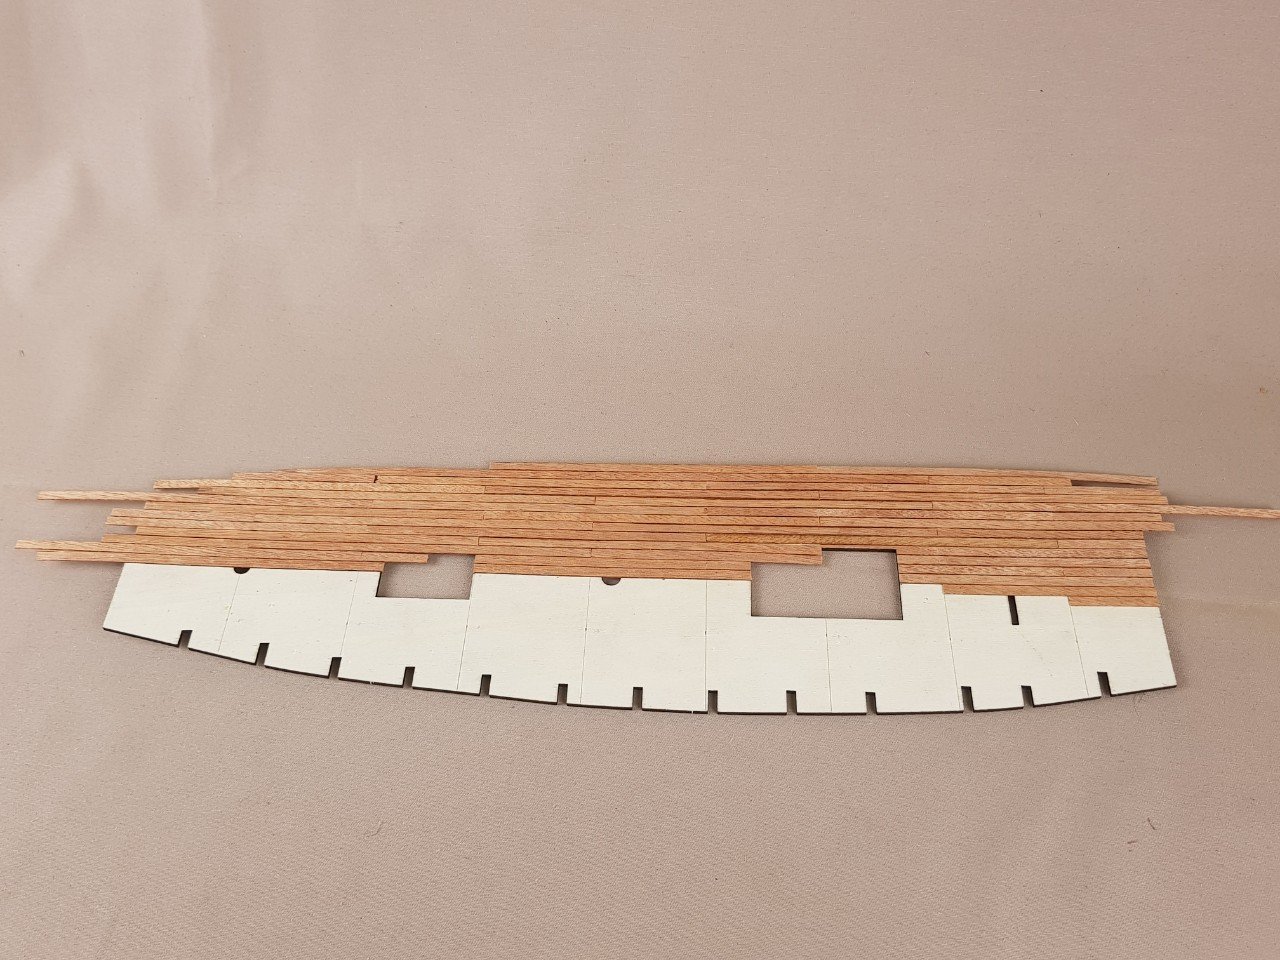
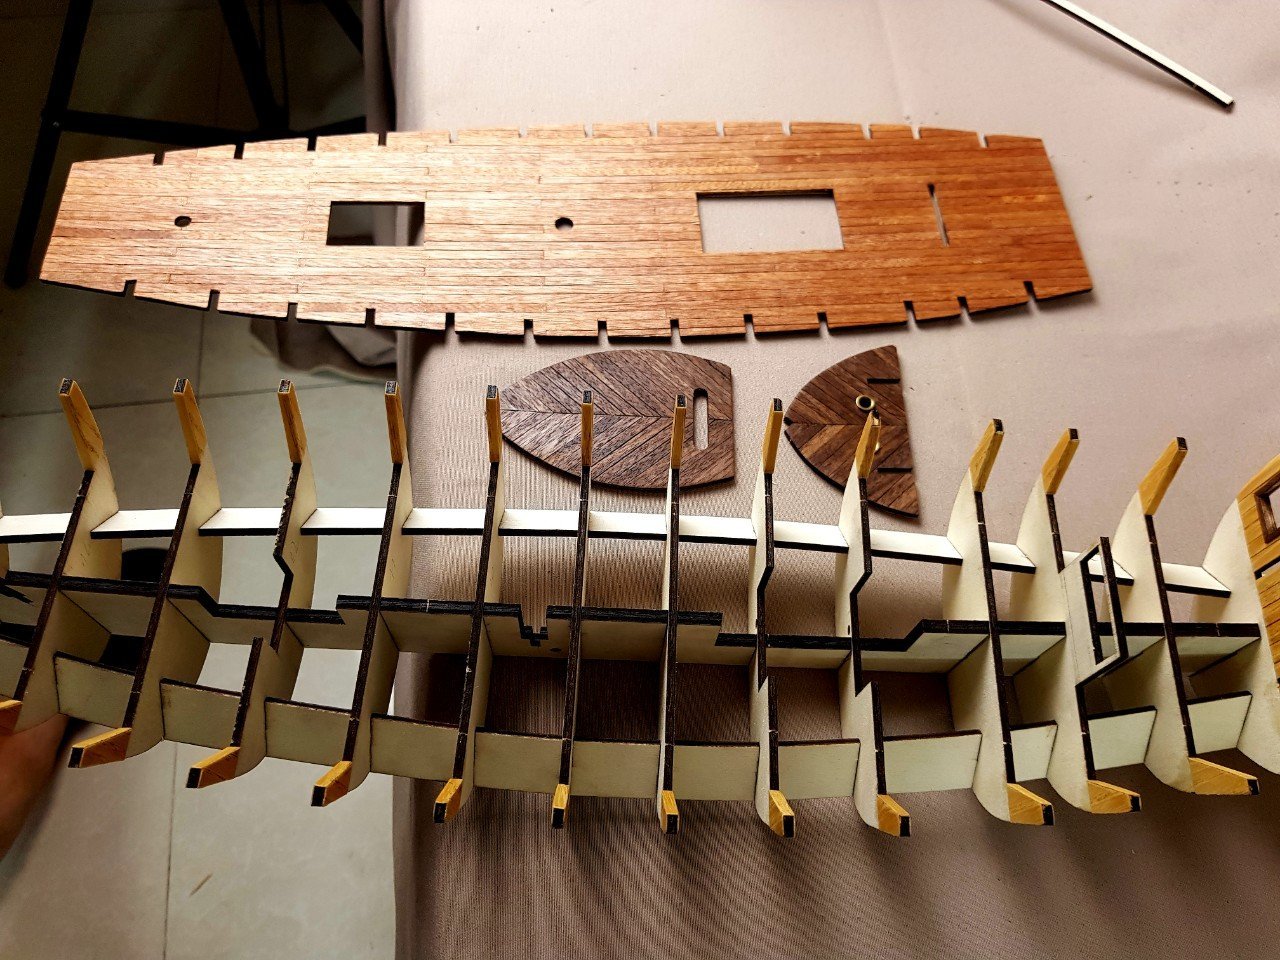
Then use a laser cutter to create the main skeleton and deck surface.
the scale looks pretty big compared to the Enterprize
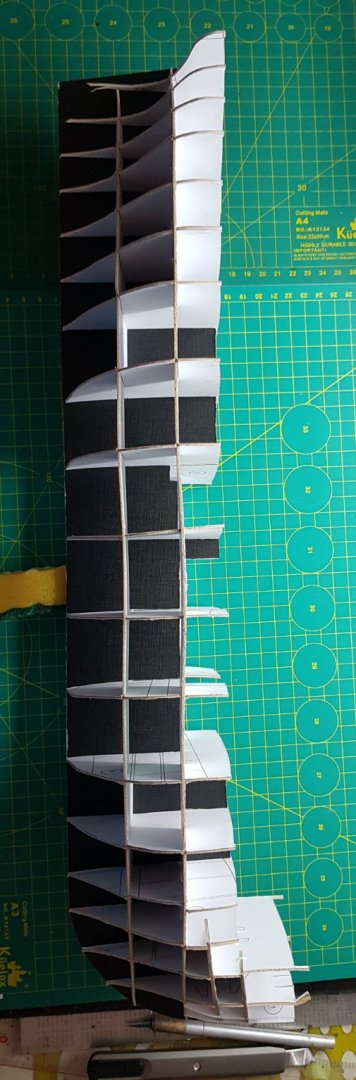
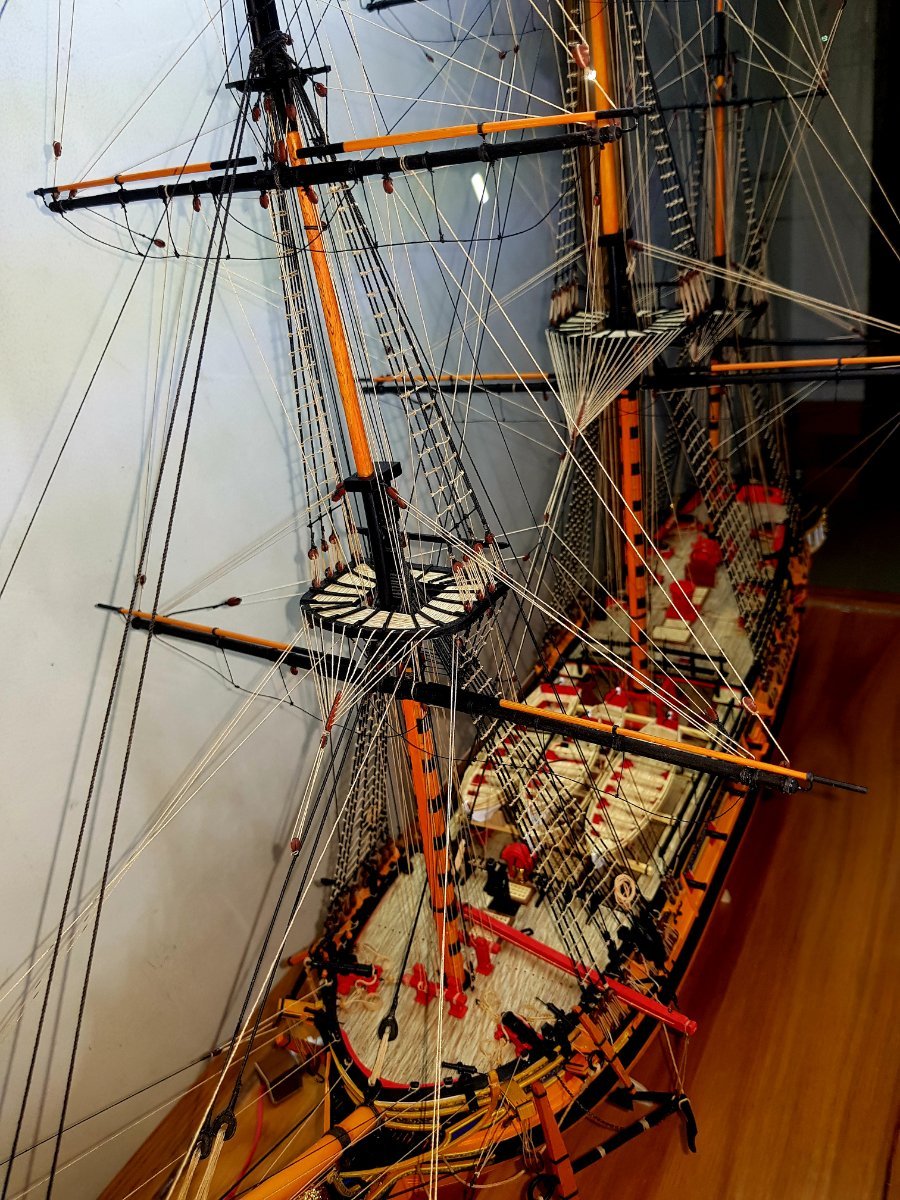
I adjusted the transverse skeleton on the side of the ship to the oblique skeleton to increase the ability to fix the main skeleton and it seem good.
.jpg.7178b545288e6e03c530ed5bc59bdf68.jpg)
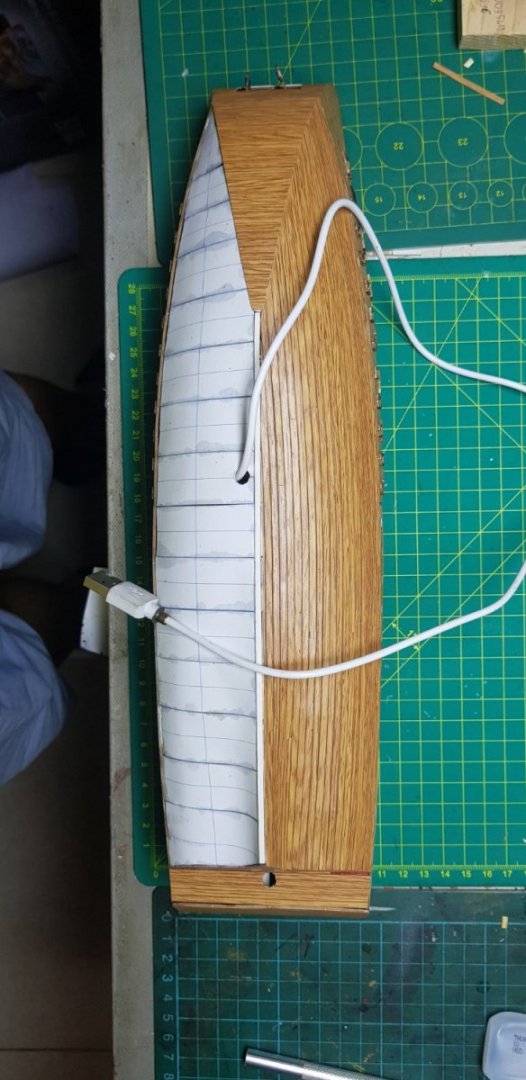
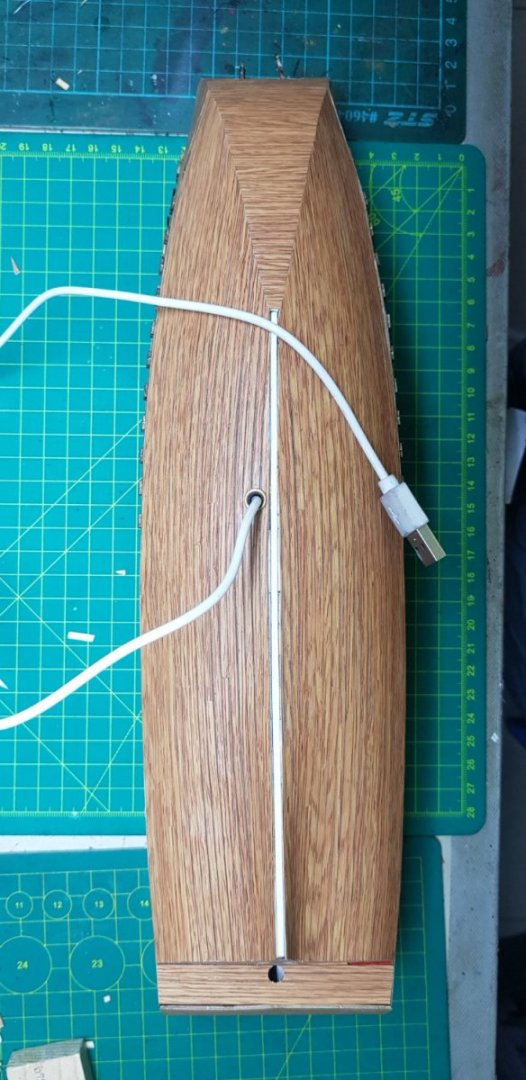
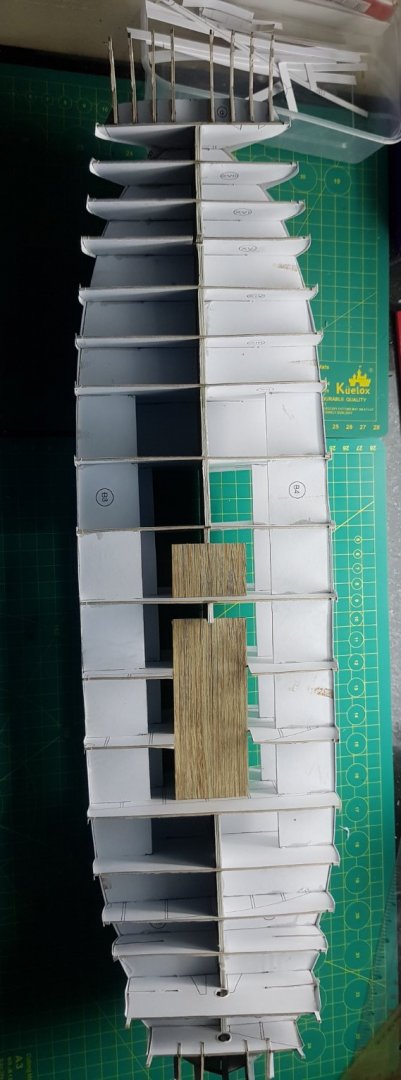
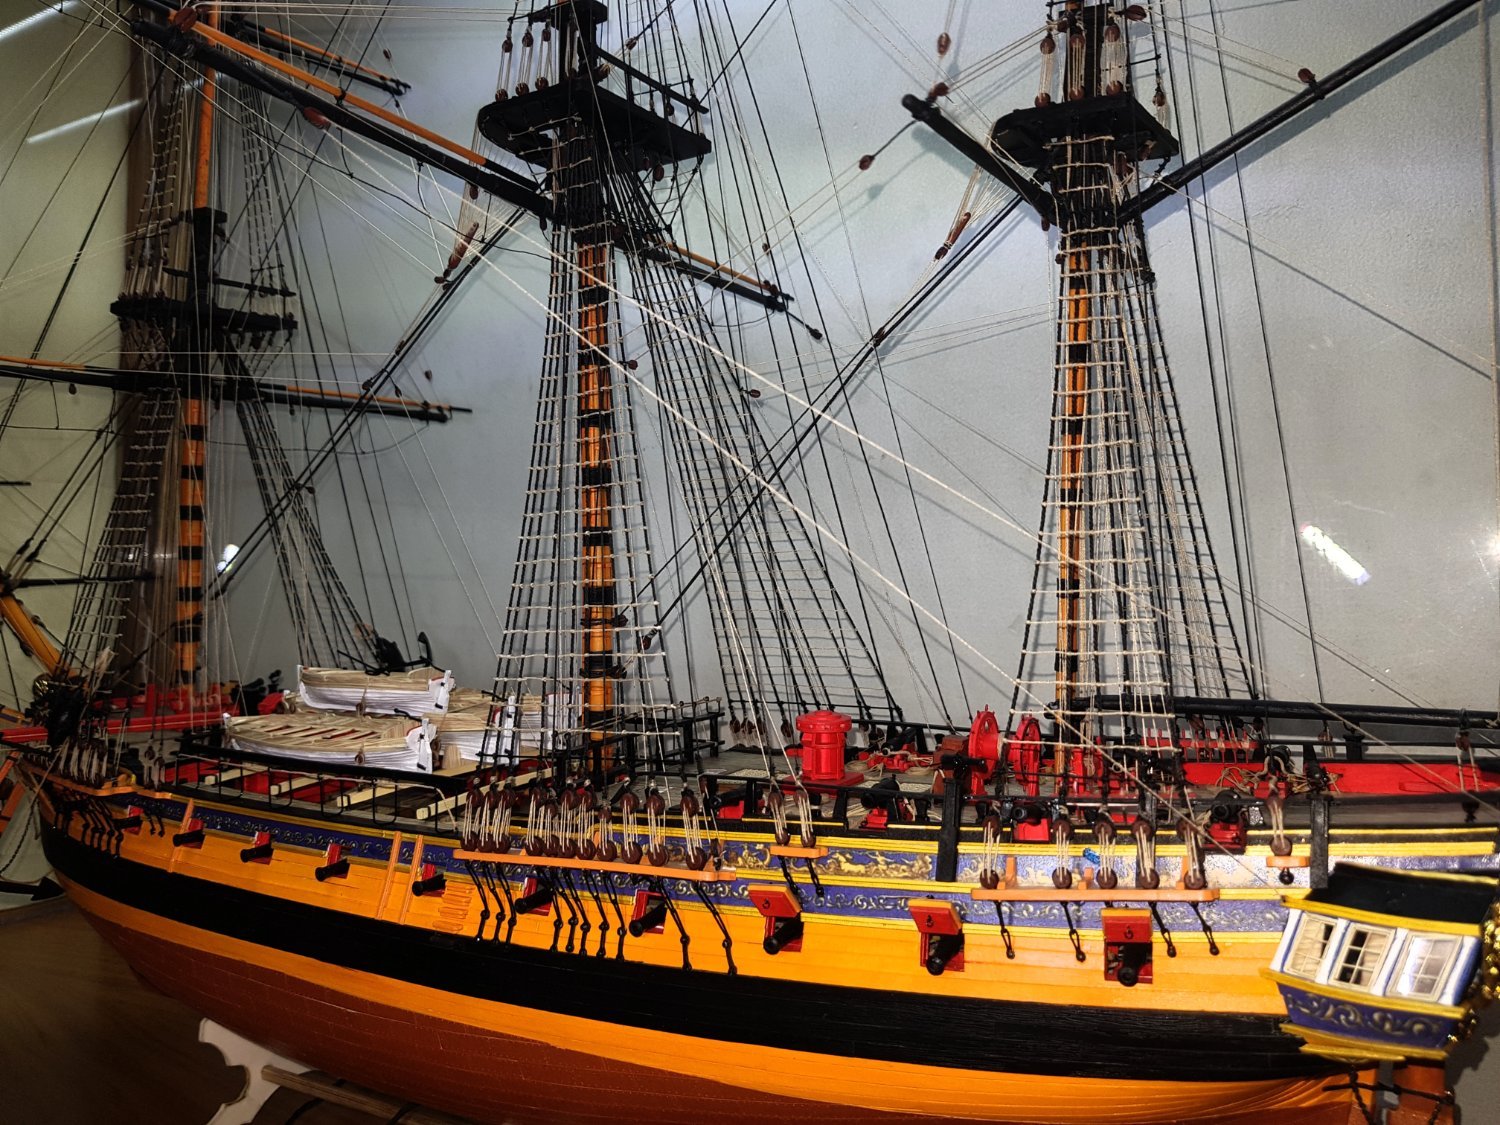
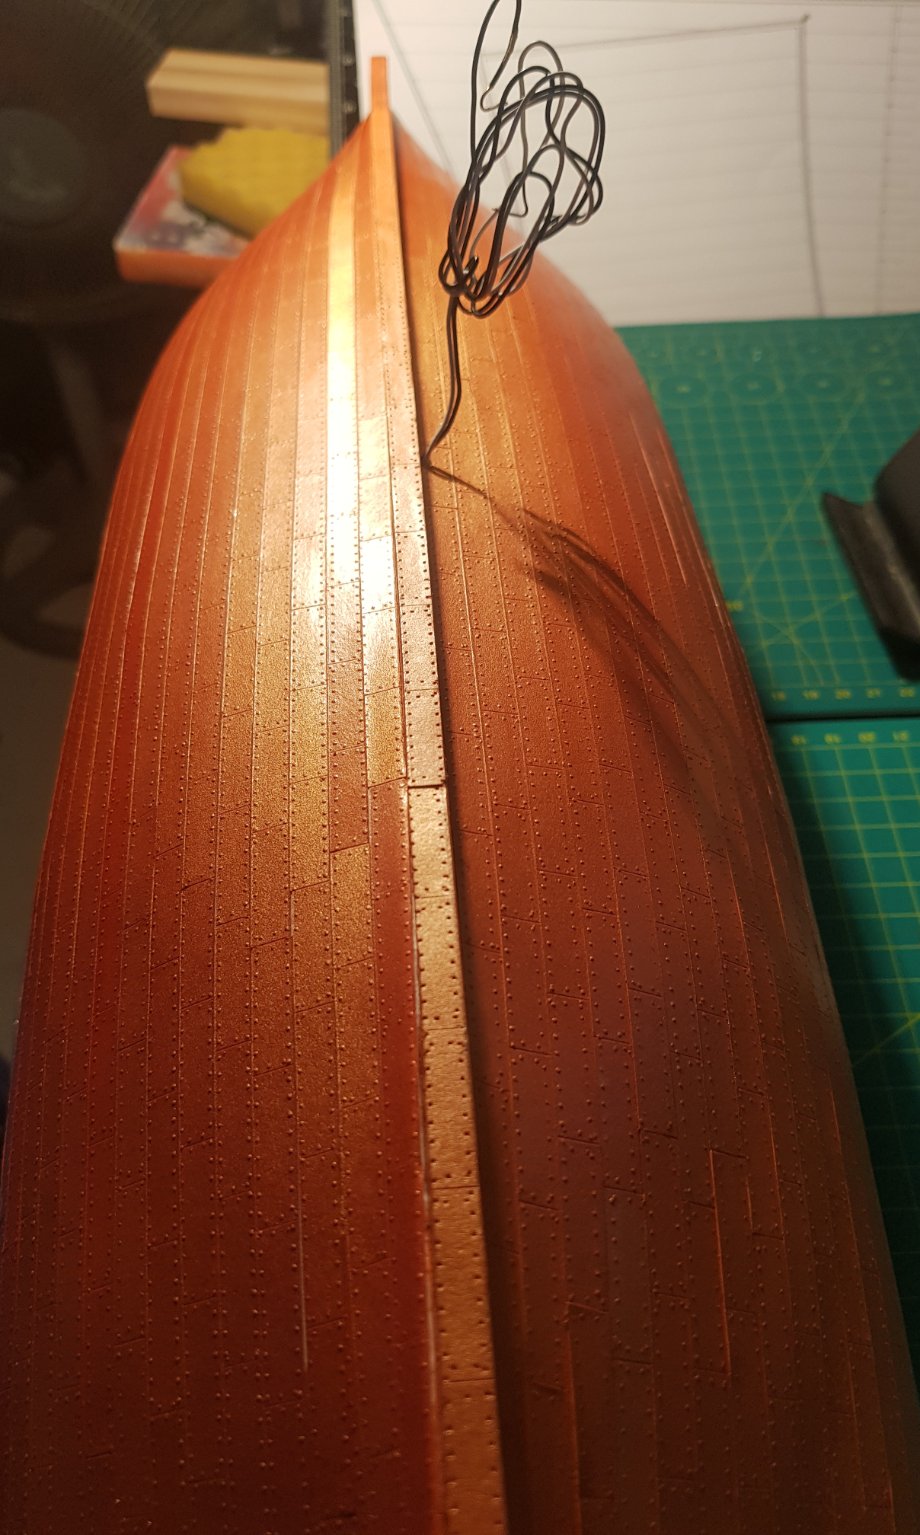
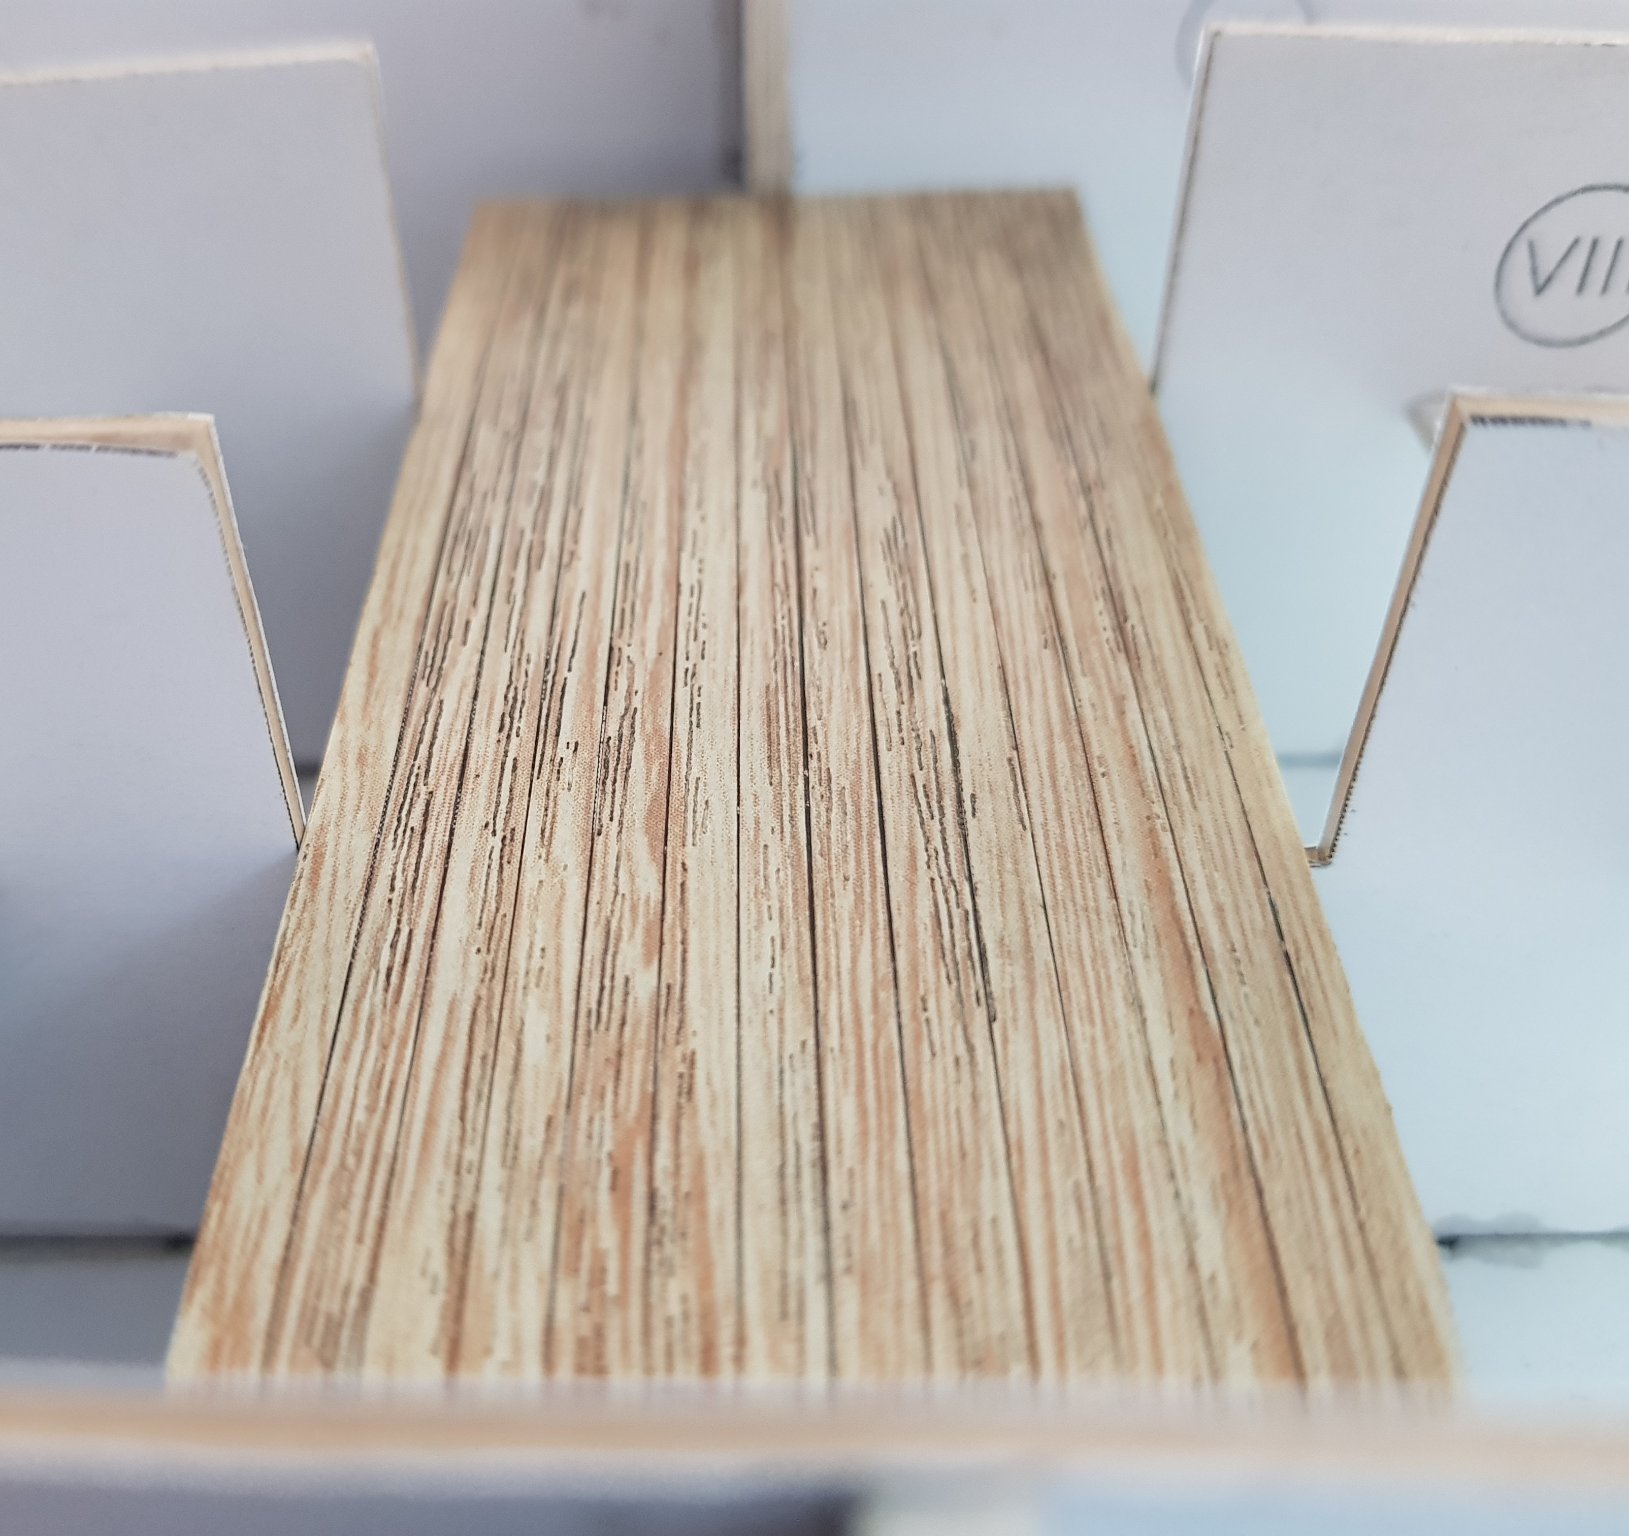
then came the decking, I used sapele wood because they have a nice color
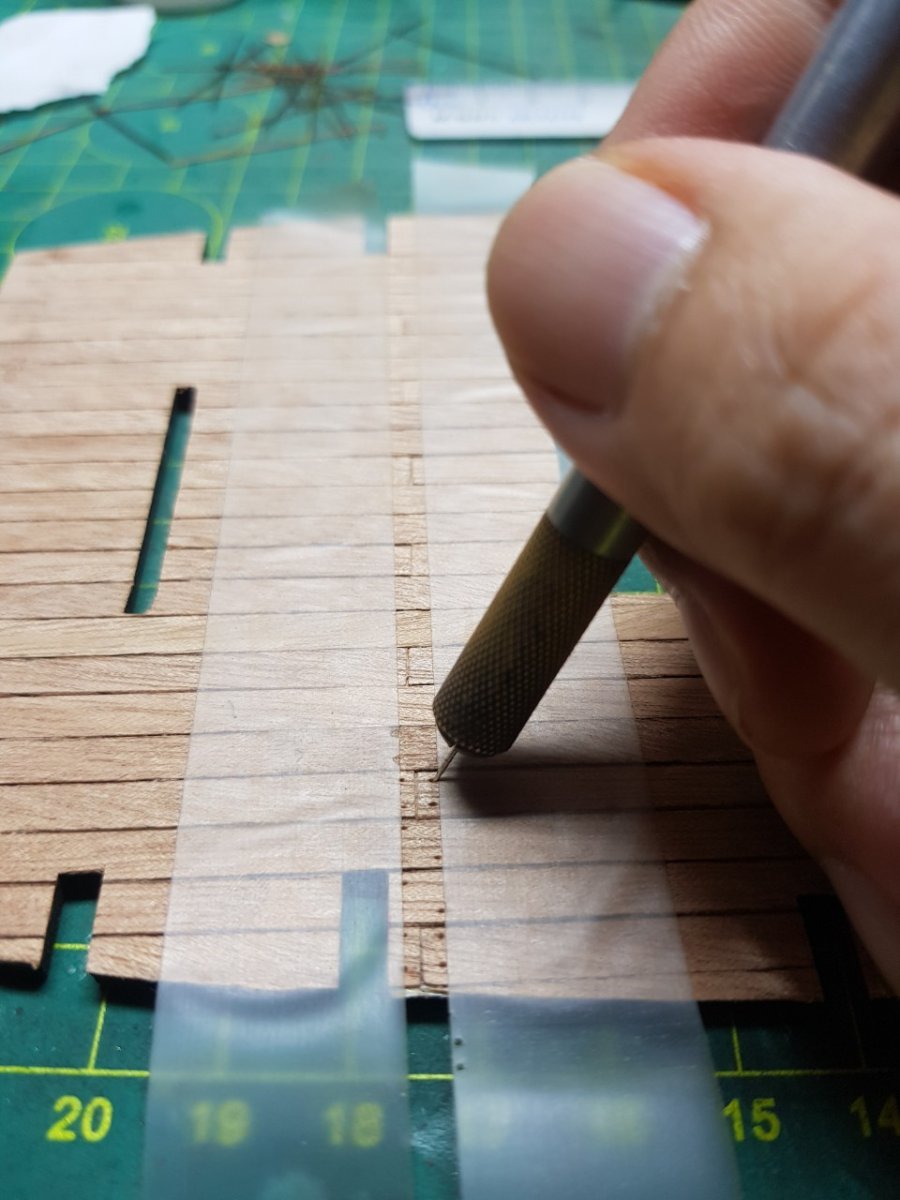
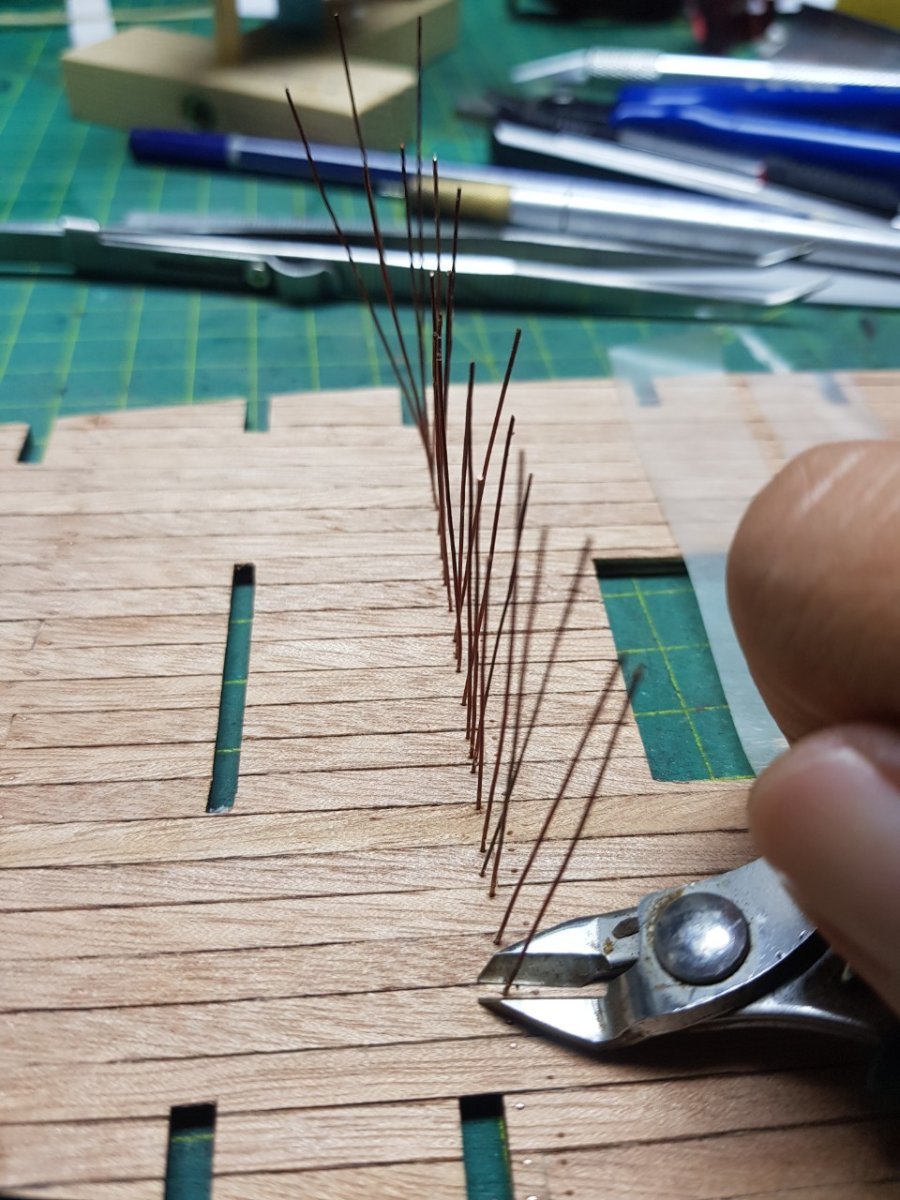
I use 0.4mm copper wire to make the nail


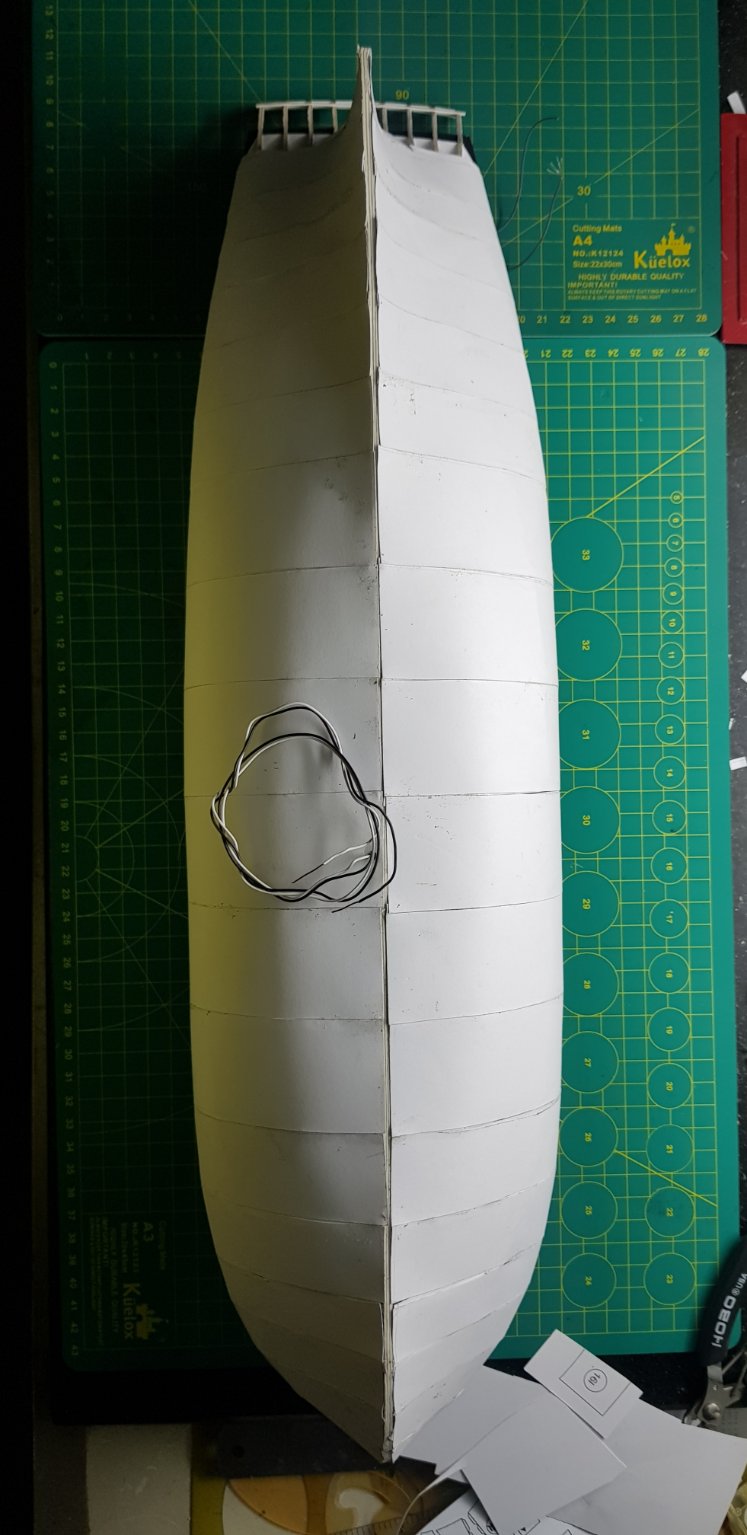
the hull part I use wood walnut and I have to admit it's really nice
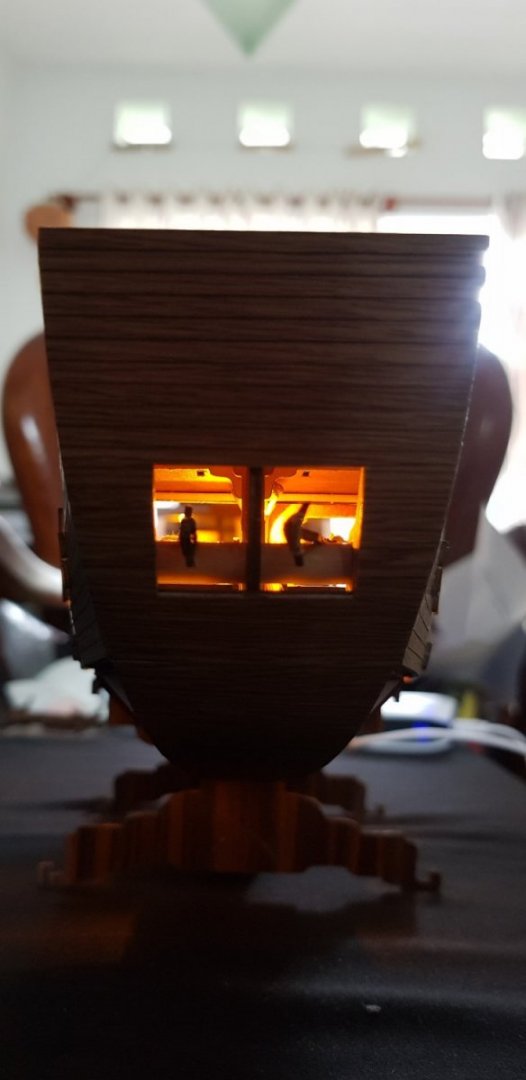
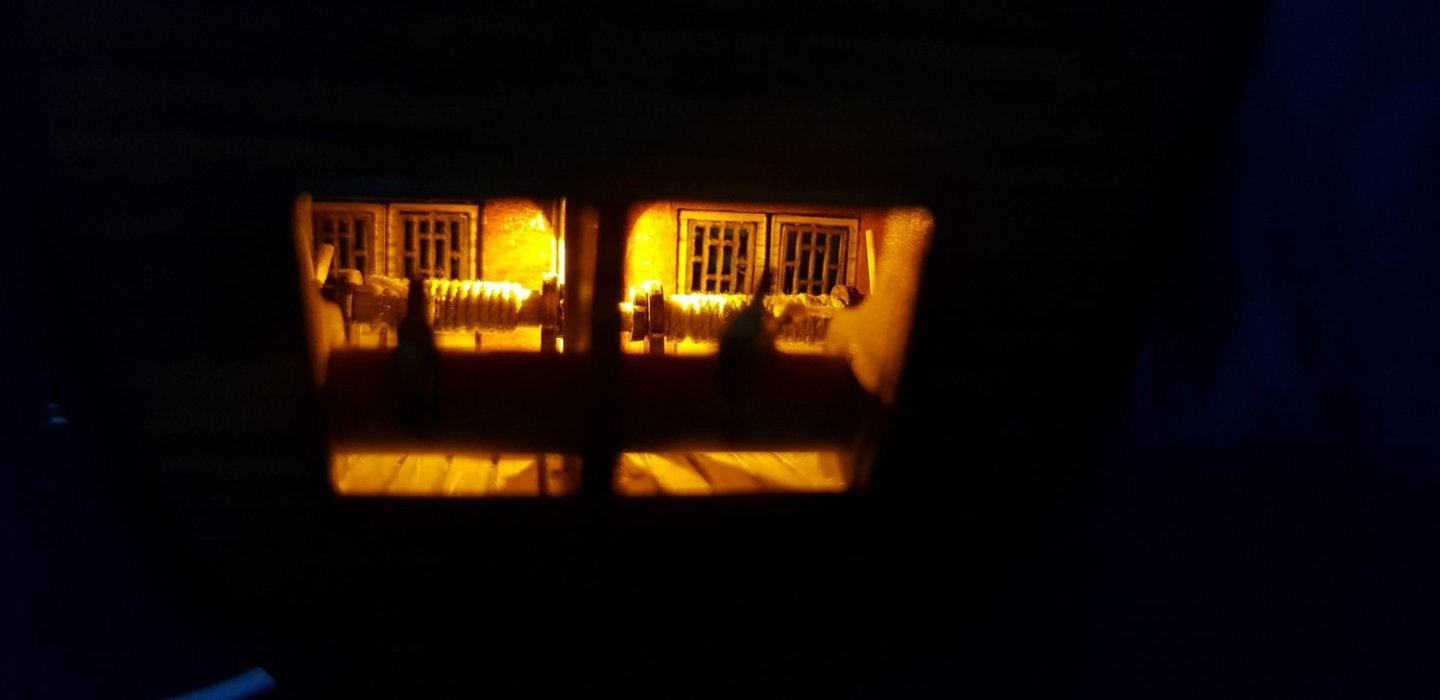
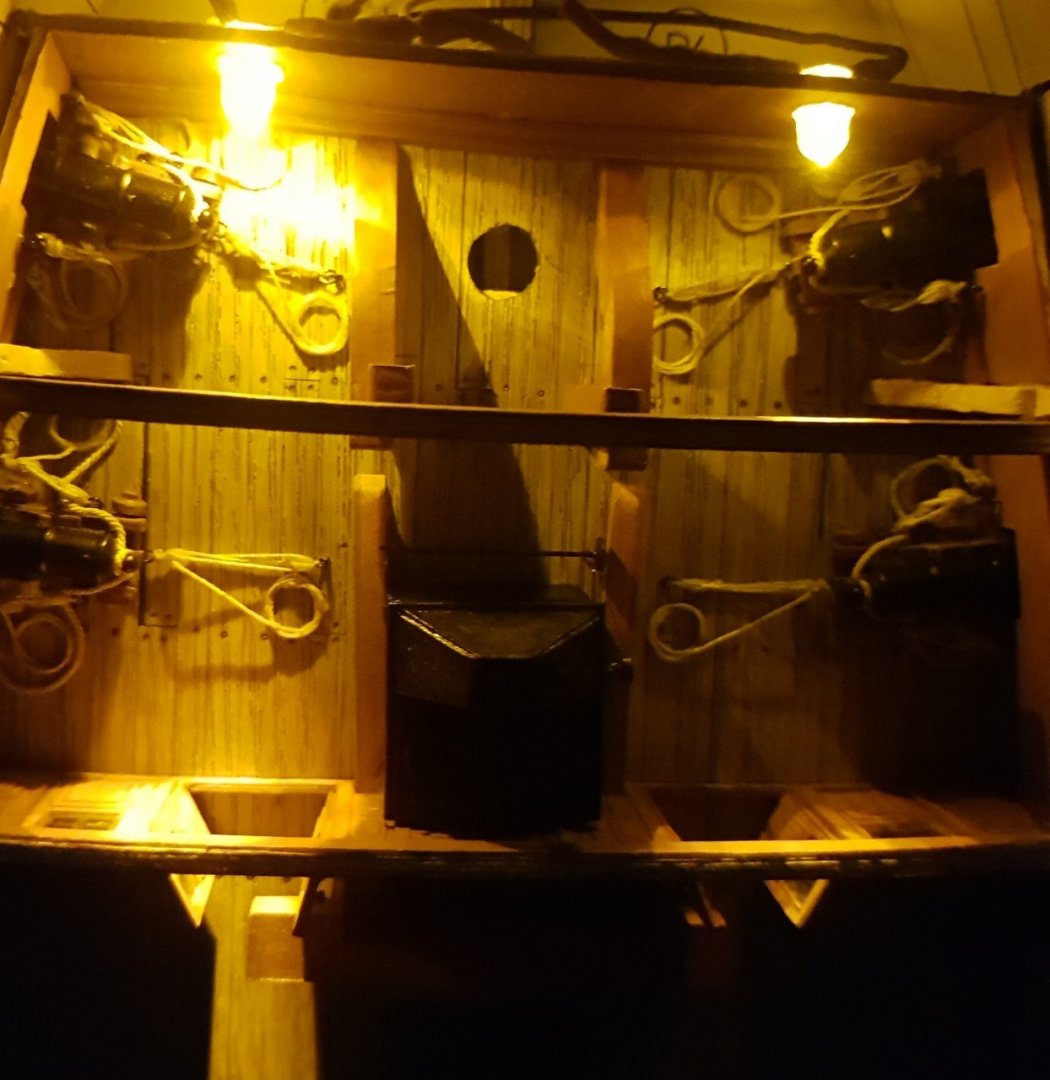
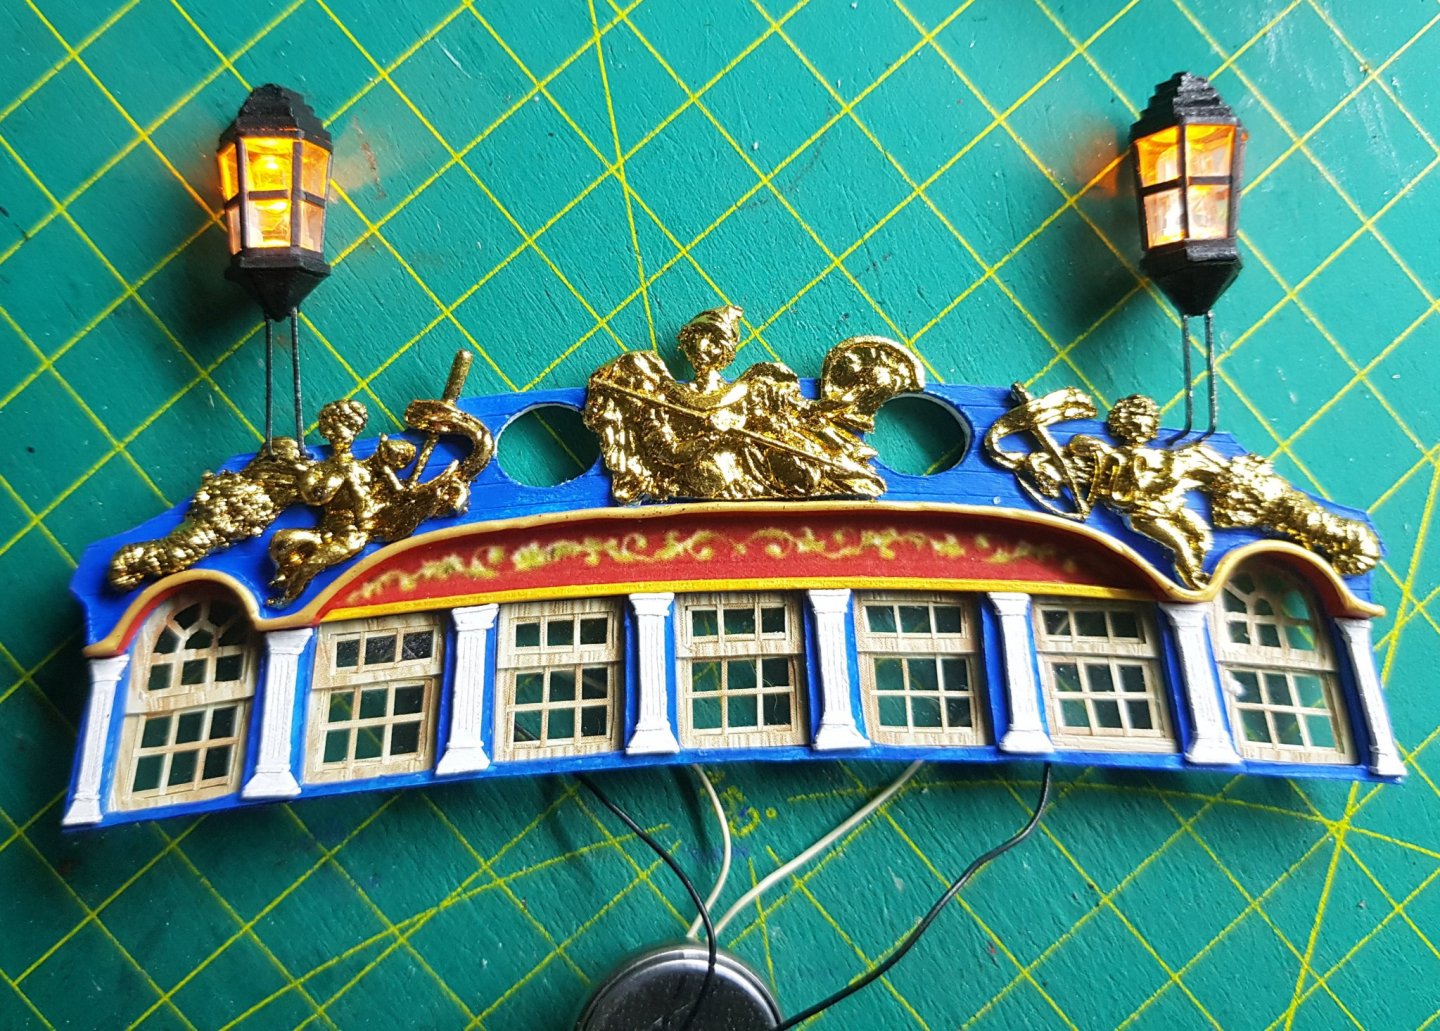
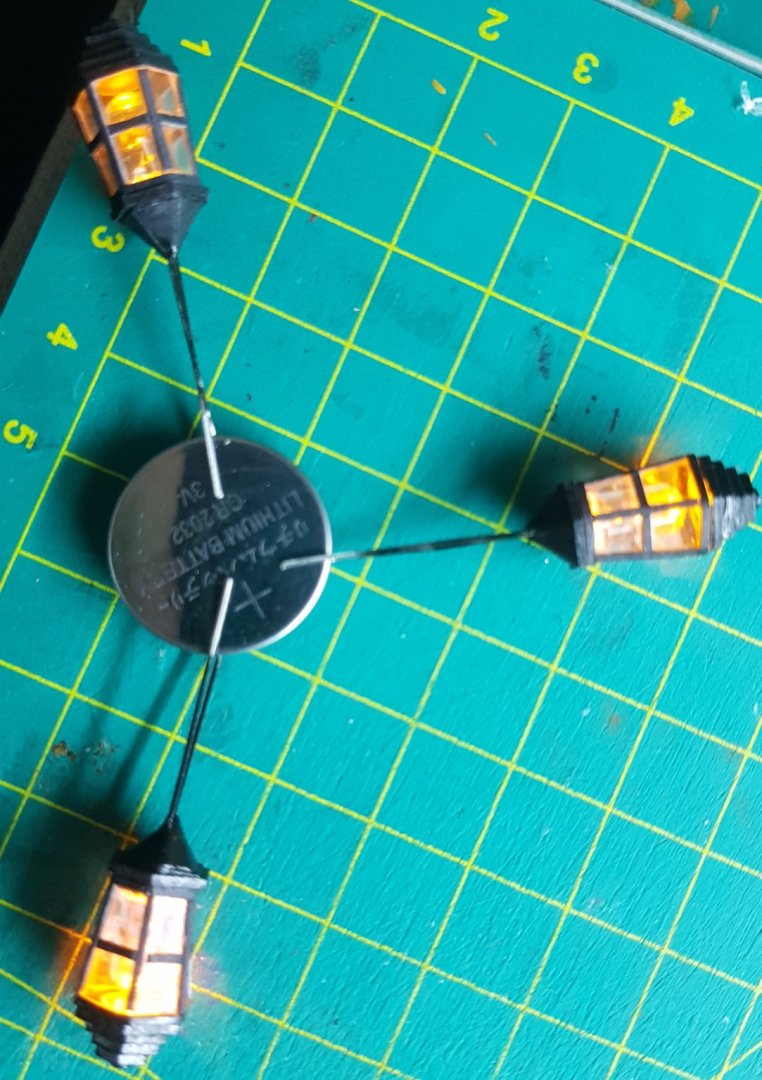
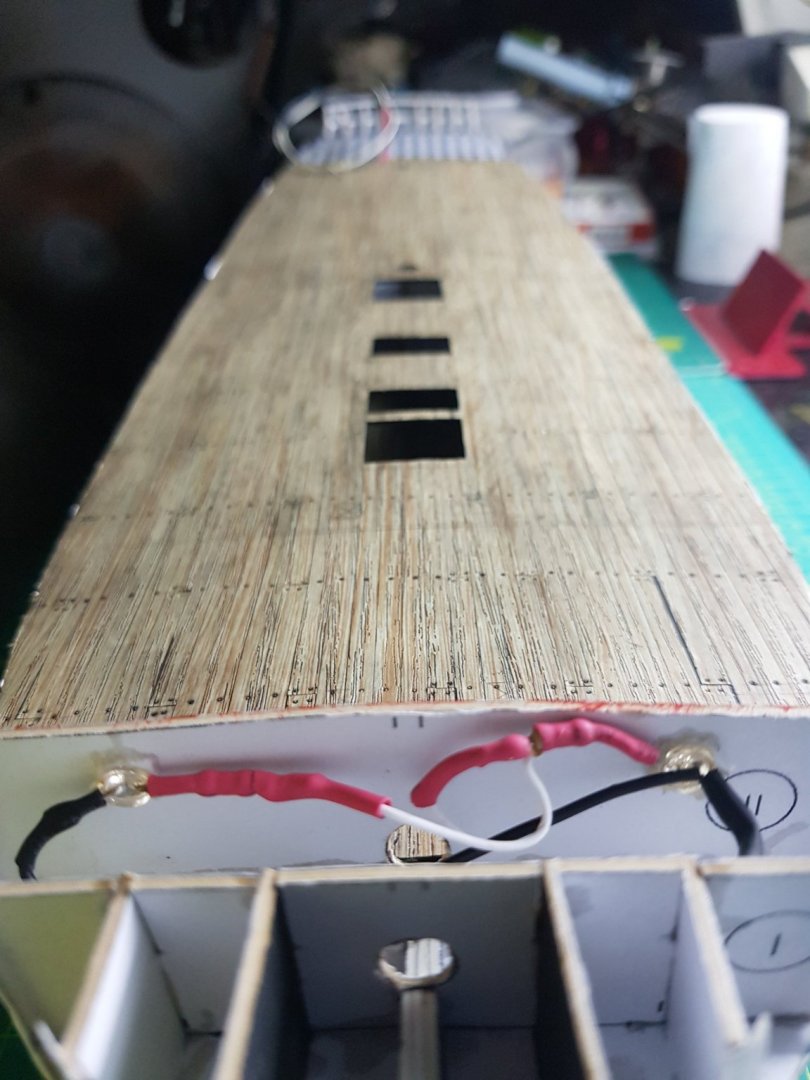
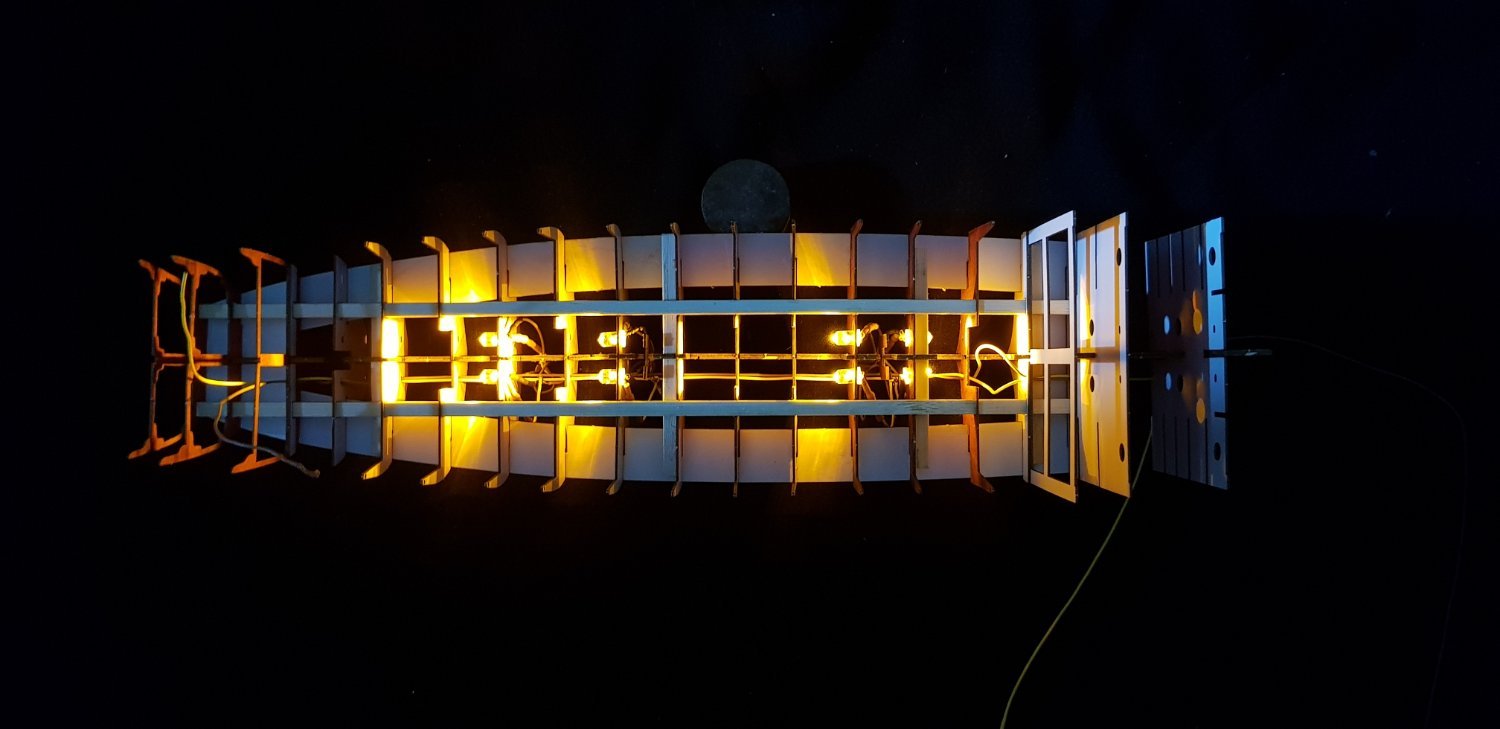
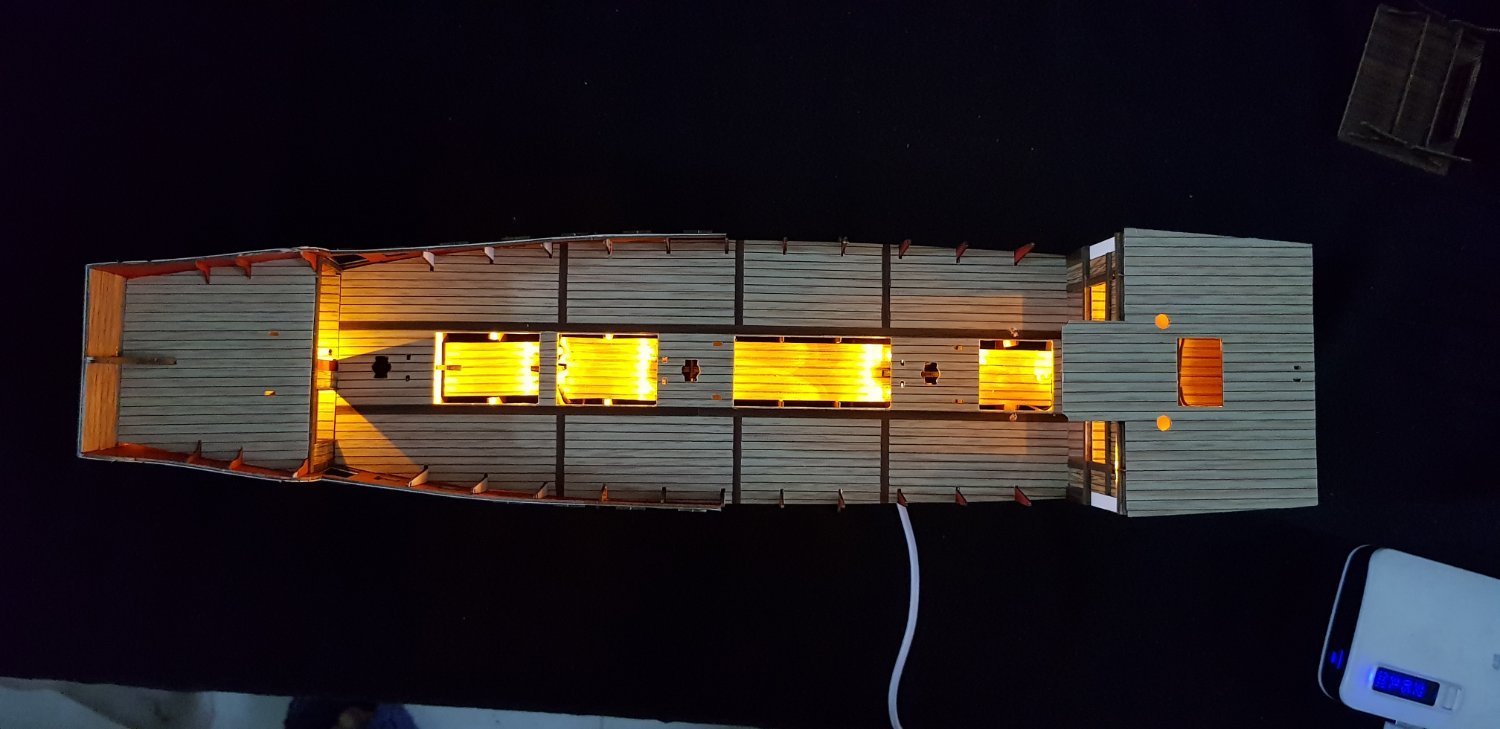
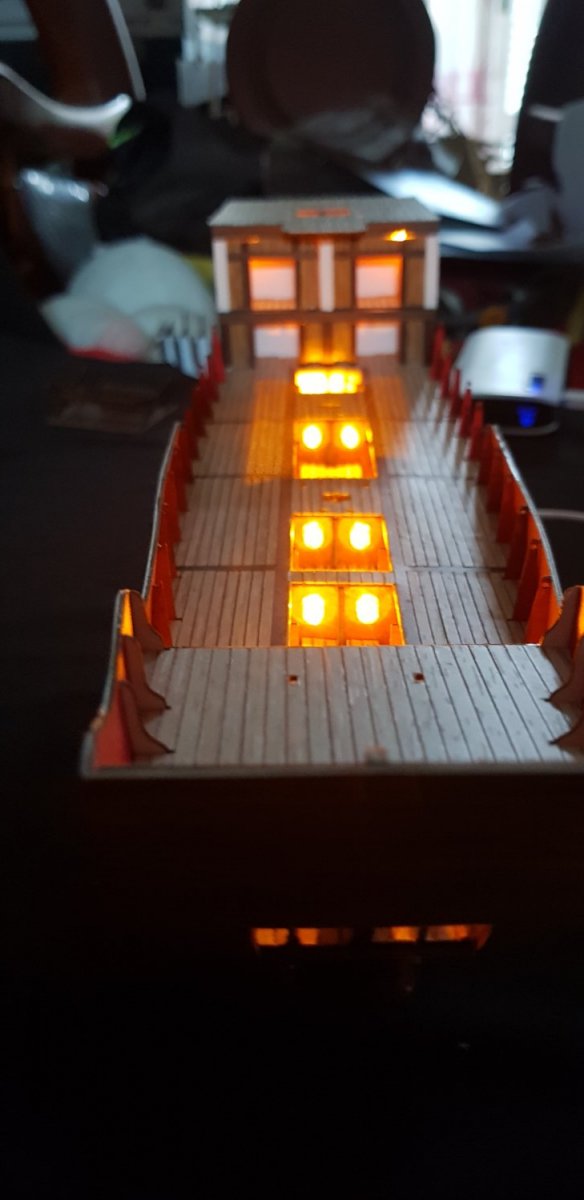
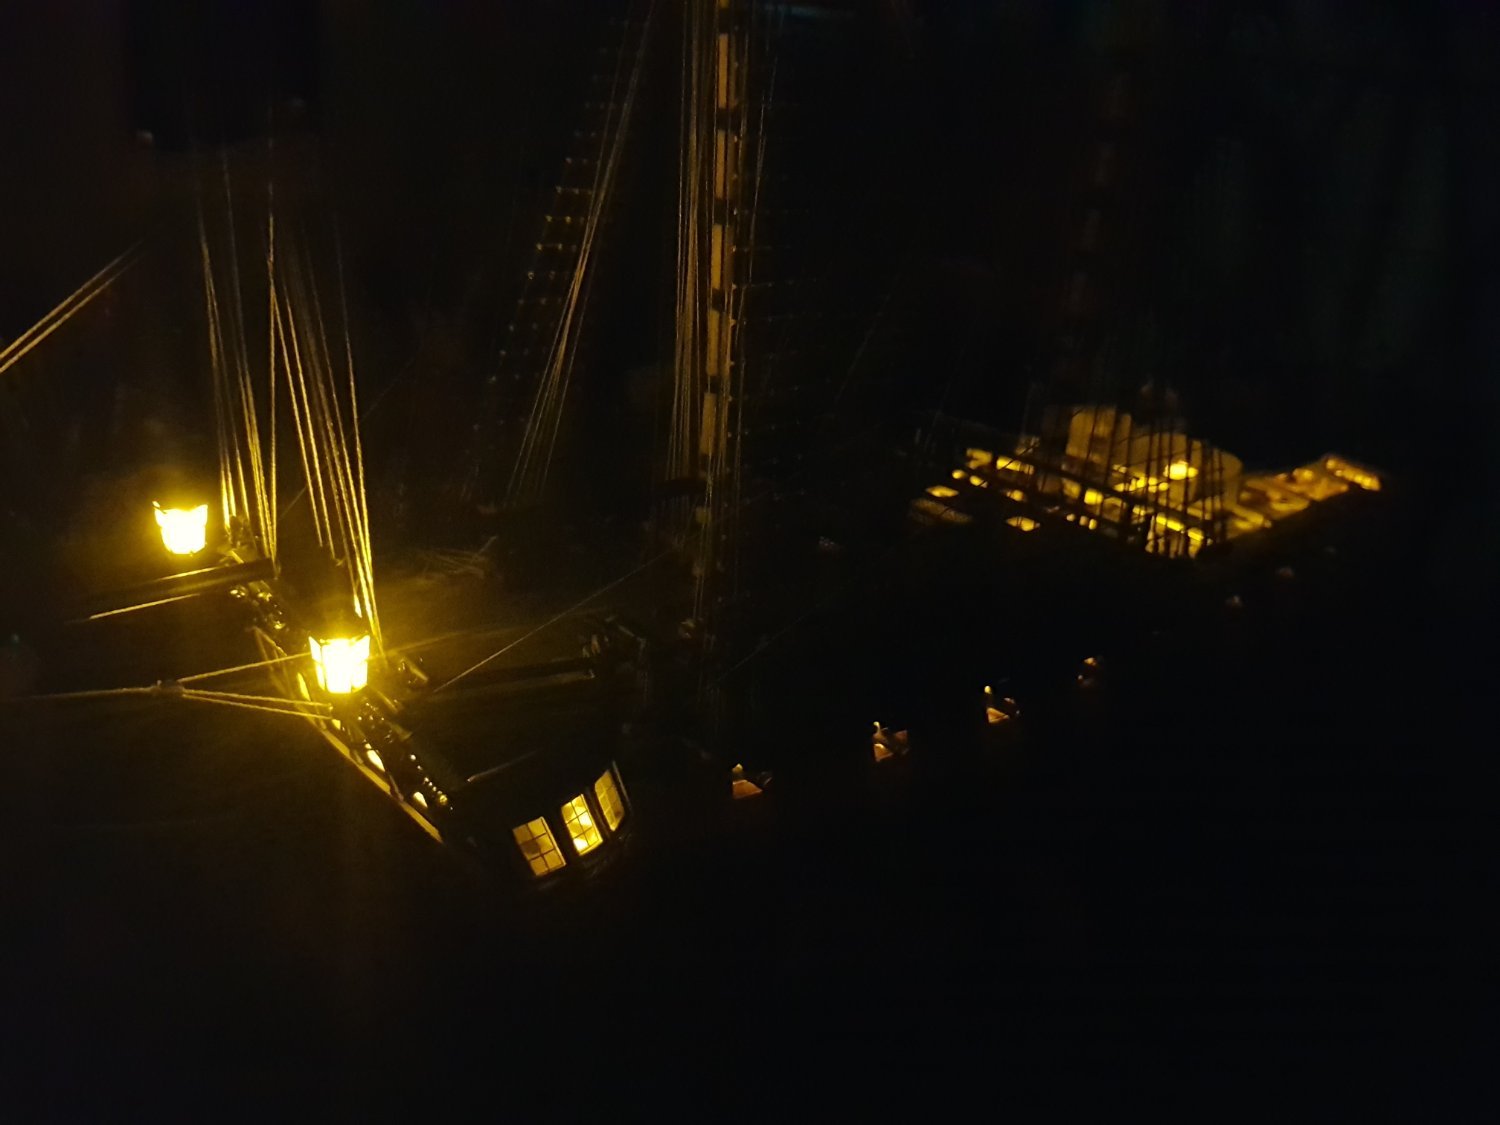
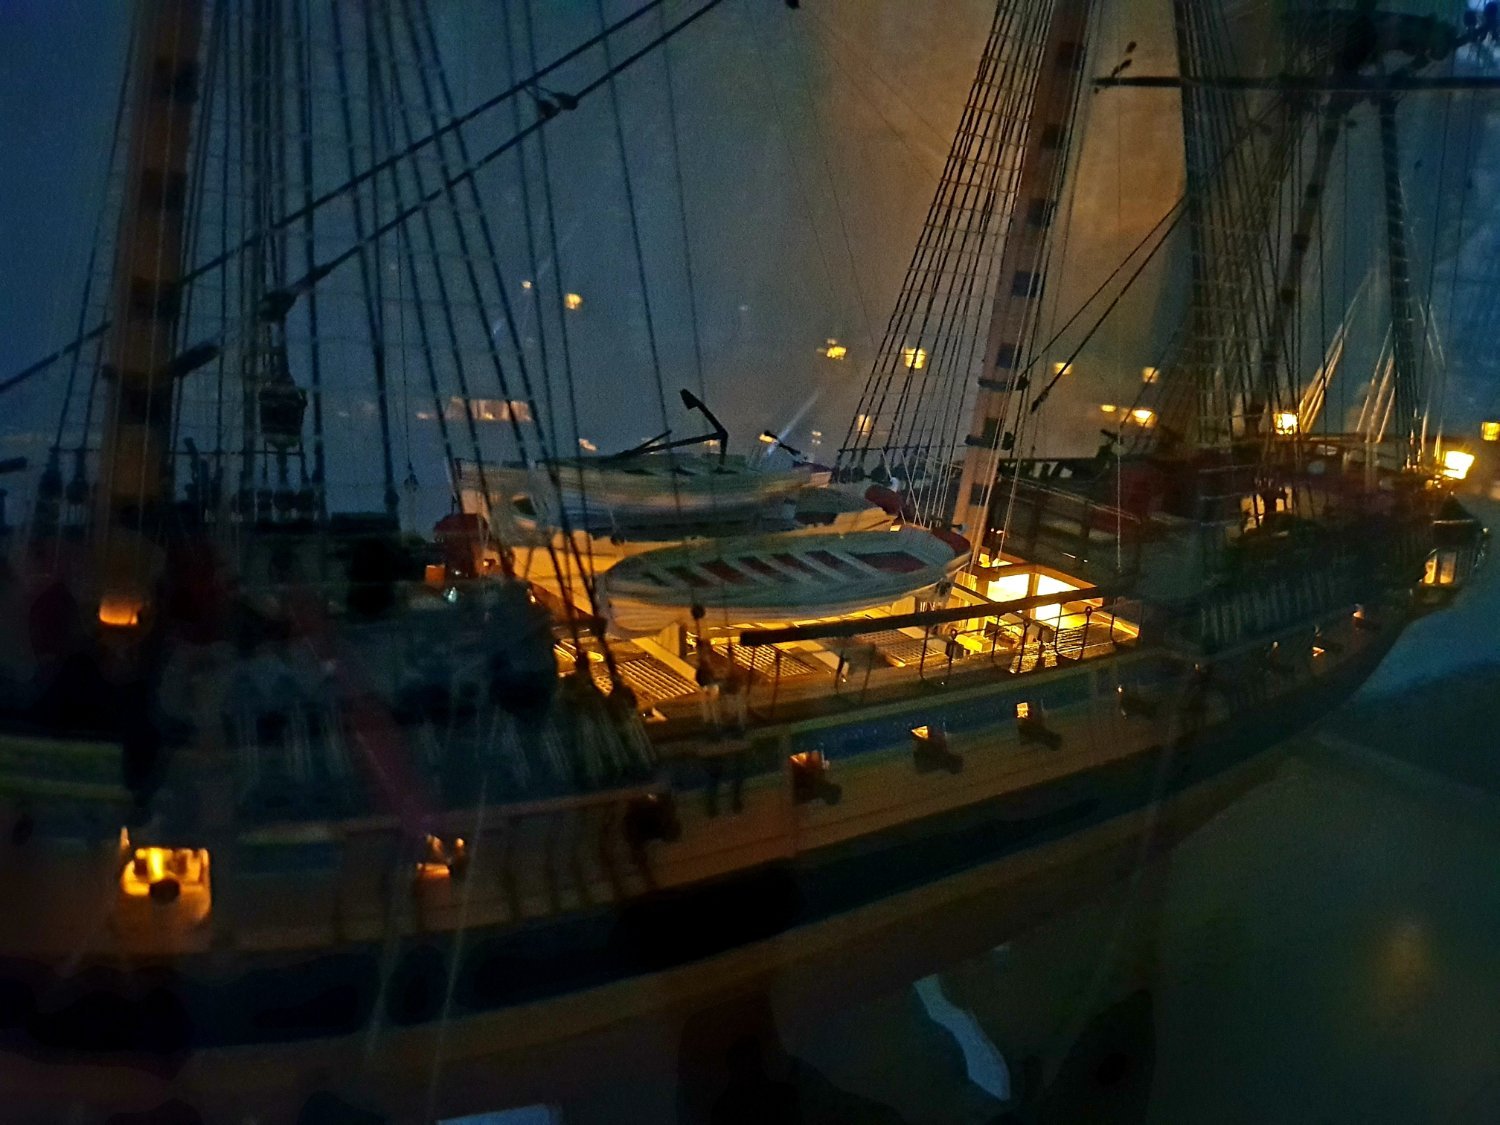
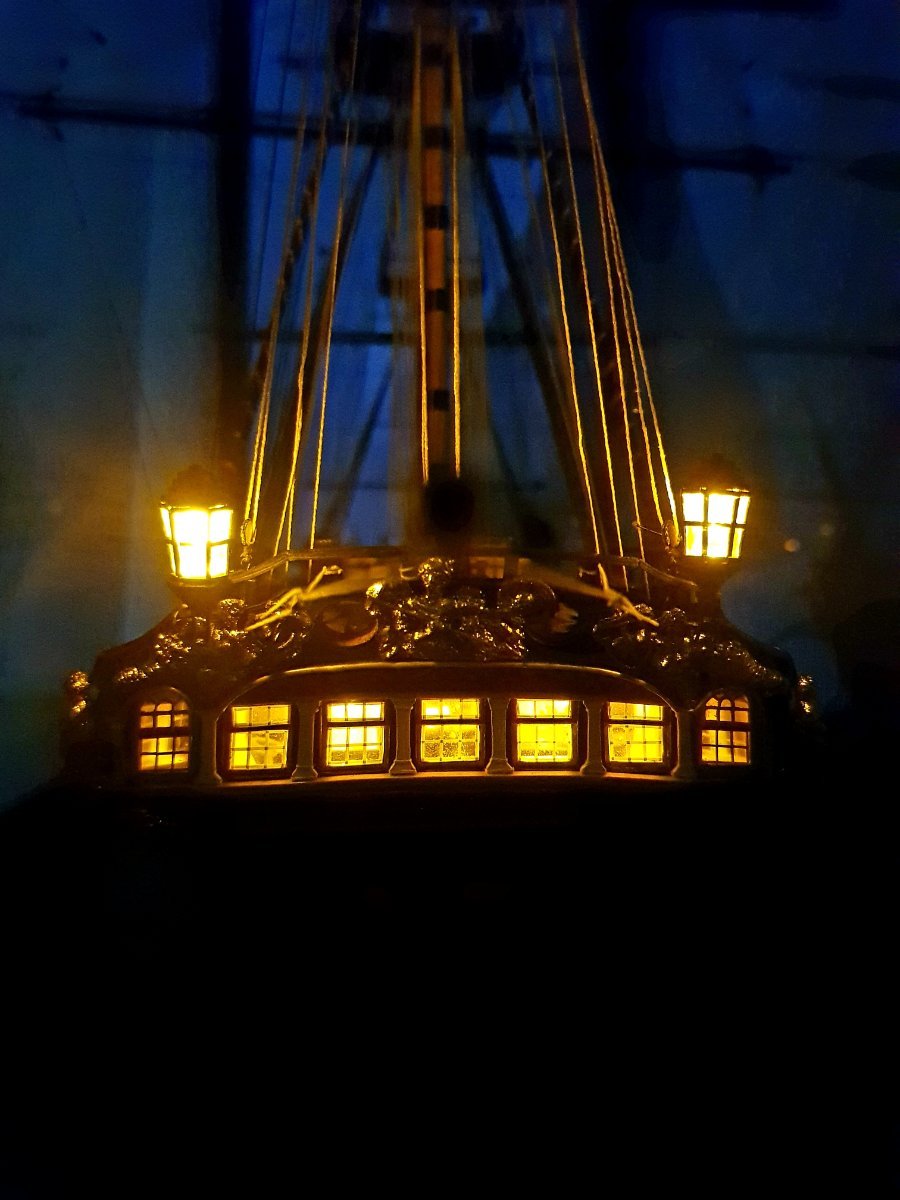
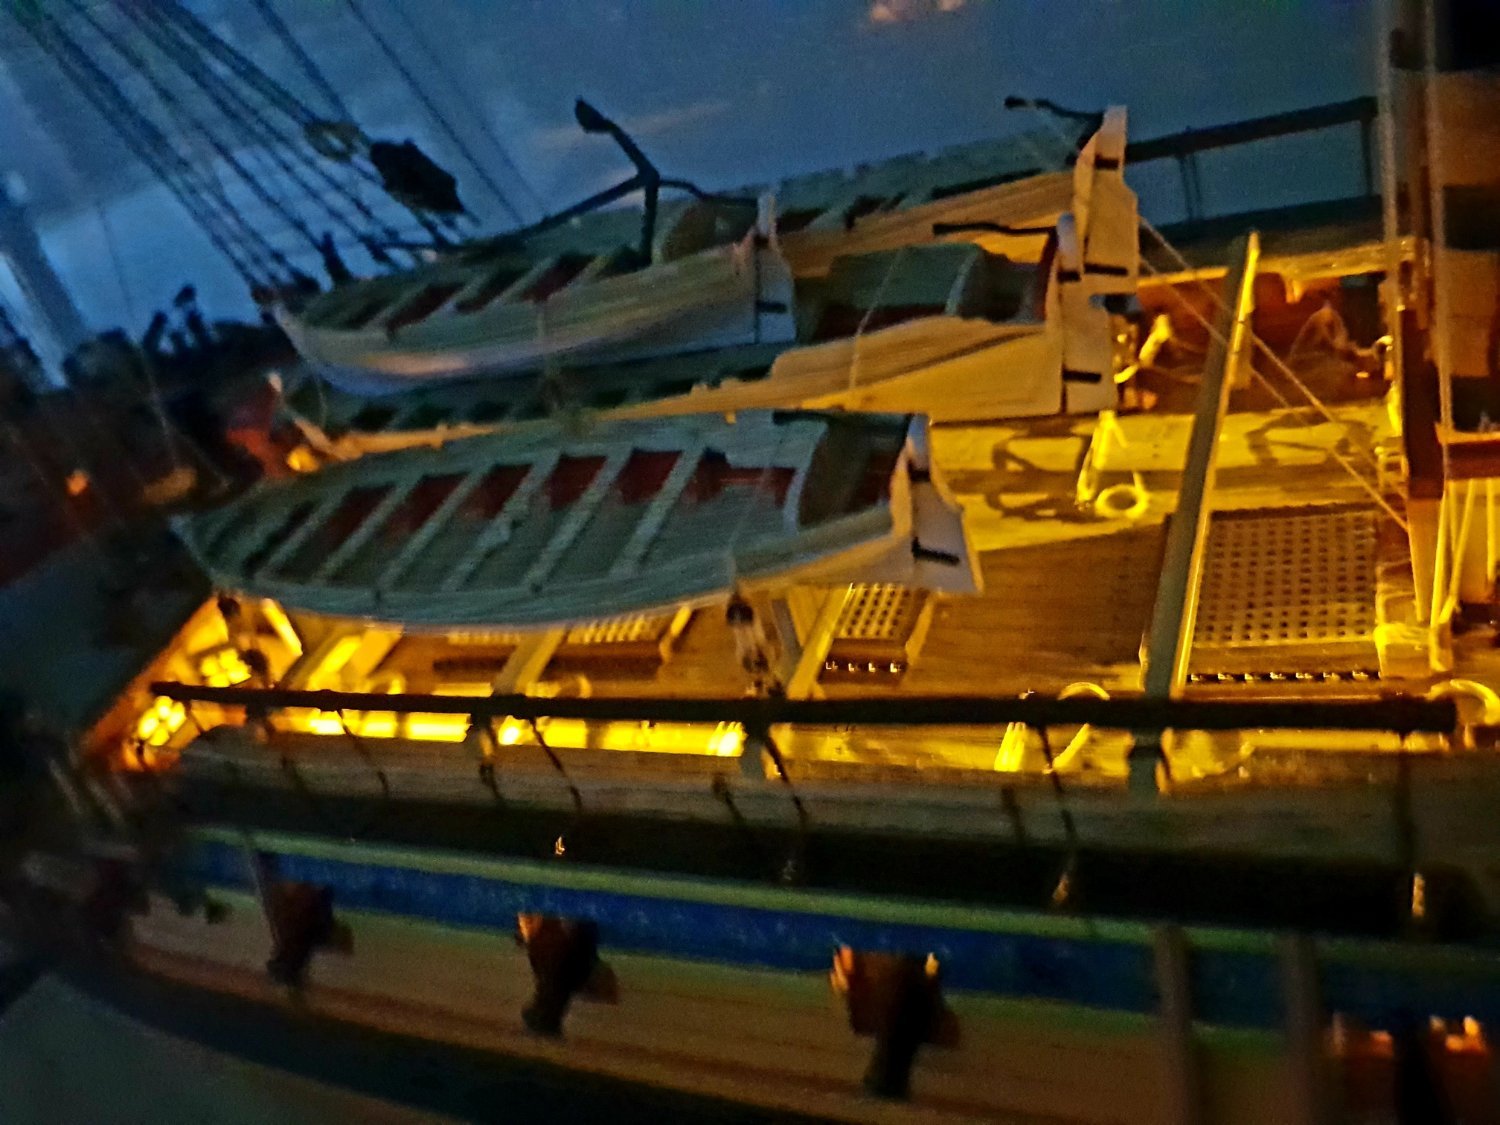
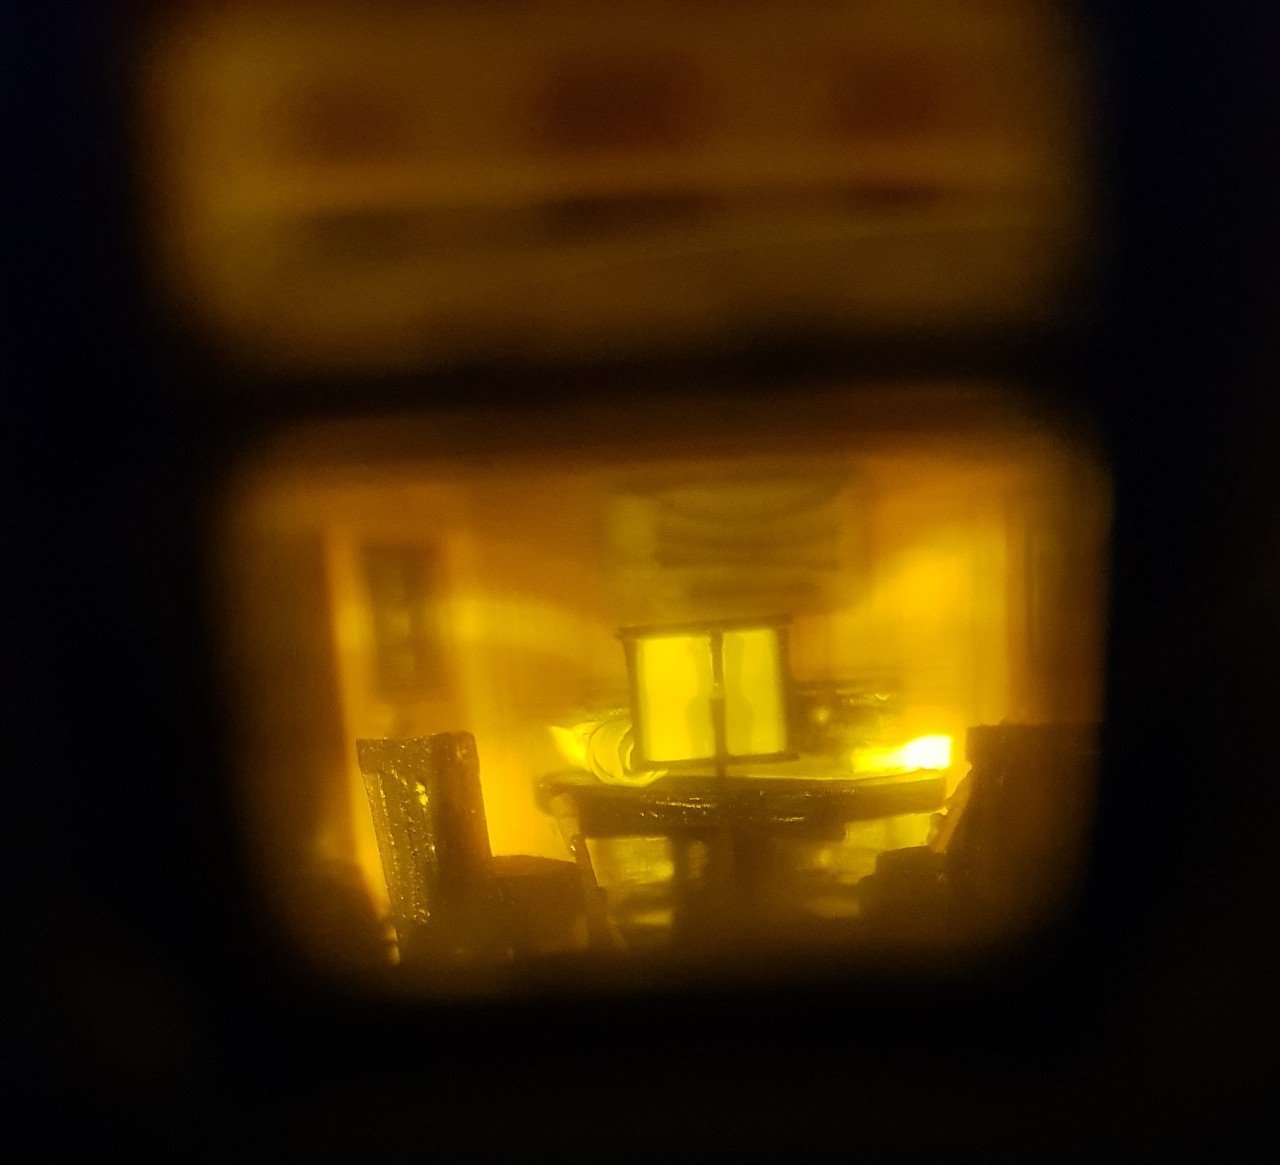
And of course, the lights can't be missing
.jpg.5f5323b8bd459790216a1daf41a33af7.jpg)

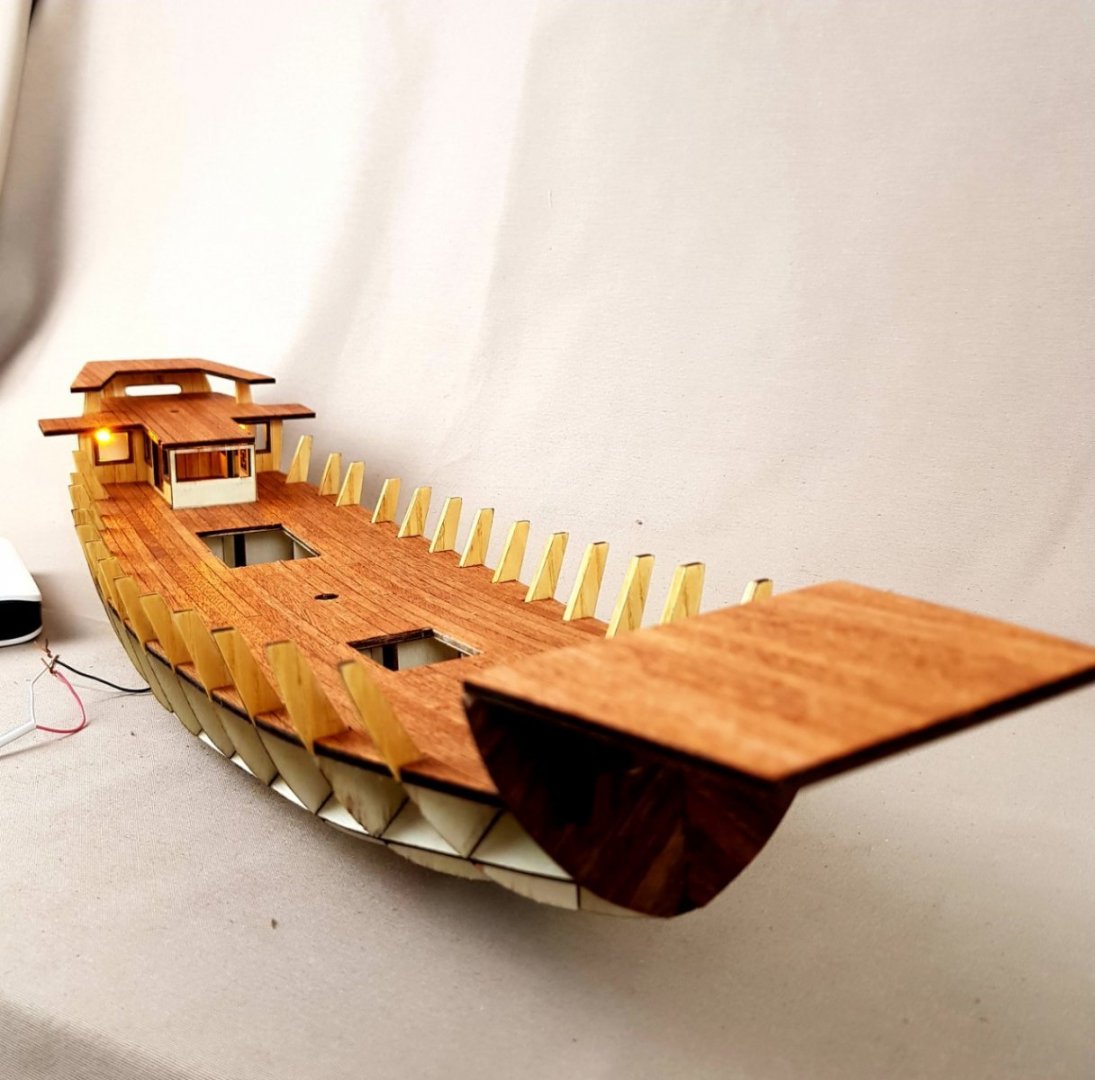

That's all I've been able to do for the past 2 weeks.
Tobe continue...
.jpg.d438b67e0bd202649c1a3a3ba1c3f44c.jpg)
-
-
-
17 hours ago, maaaslo said:
largest scale Shipyard does is so called SuperPlans edition. they did 3 models. I have one of those at home. Funny enough, it is also Enterprize. scale is 1/72. One could think your approach is even better. it will allow you to add details that on smaller scale are a bit too hard to do
Thank Mr Maaaslo. As you say, 10 years ago I built this ship and realized the 1/96 scale was too small so I gave up. Later I thought that it was not necessary to do the correct manufacturer's kit scale, so I enlarged the rest of the kit to the A2 paper scale and felt quite satisfied with the details.
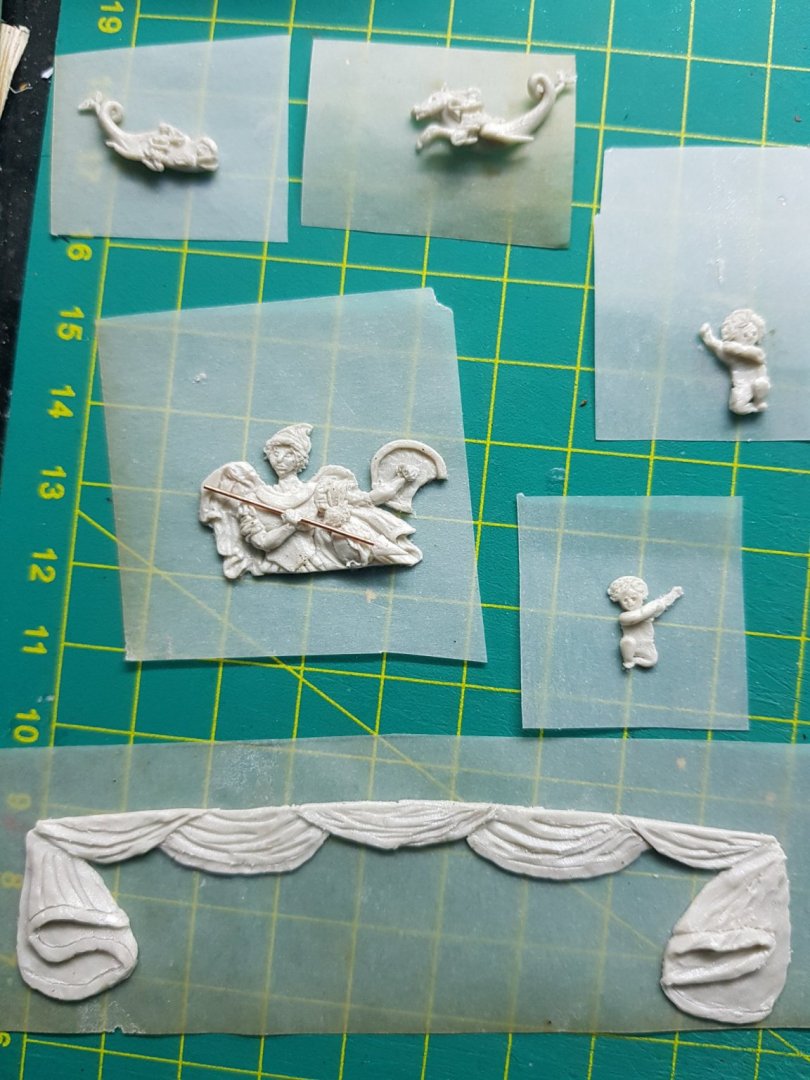
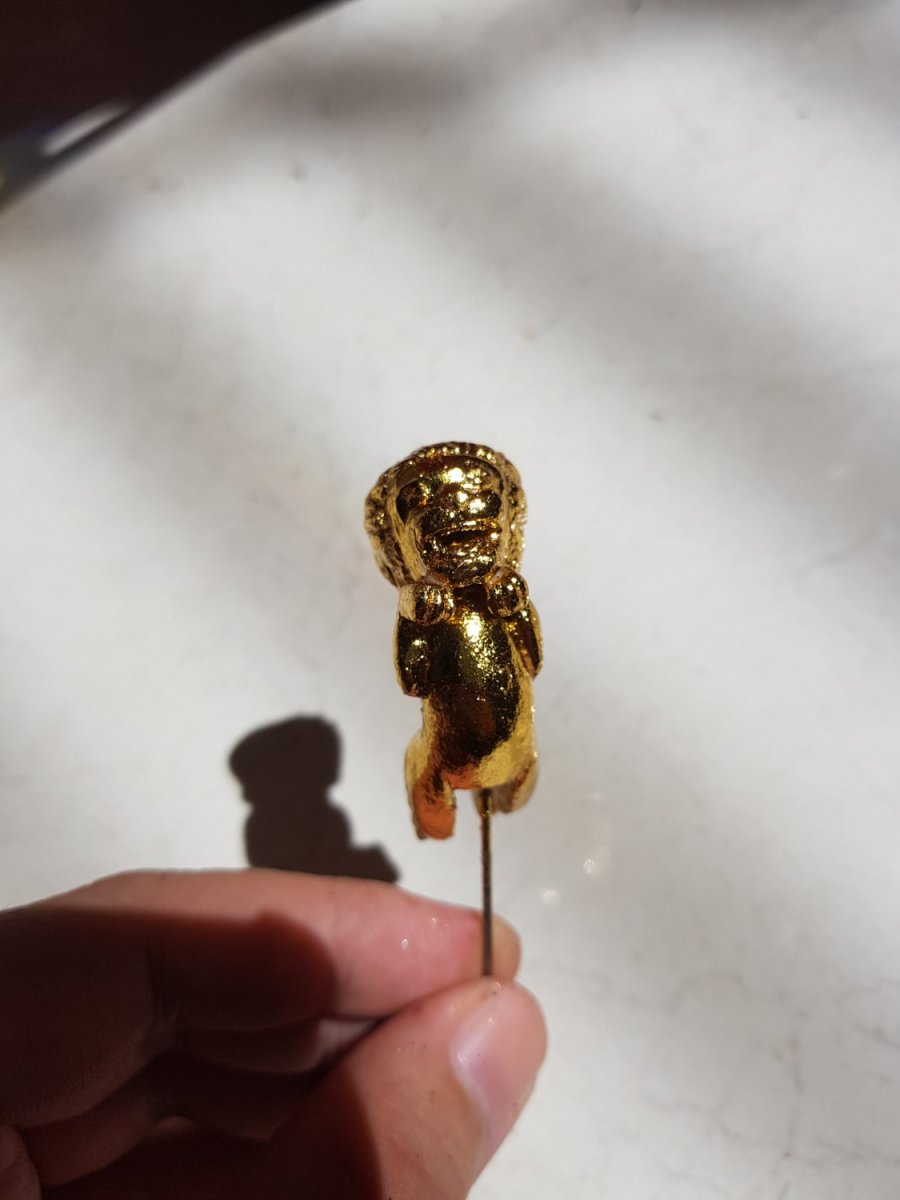
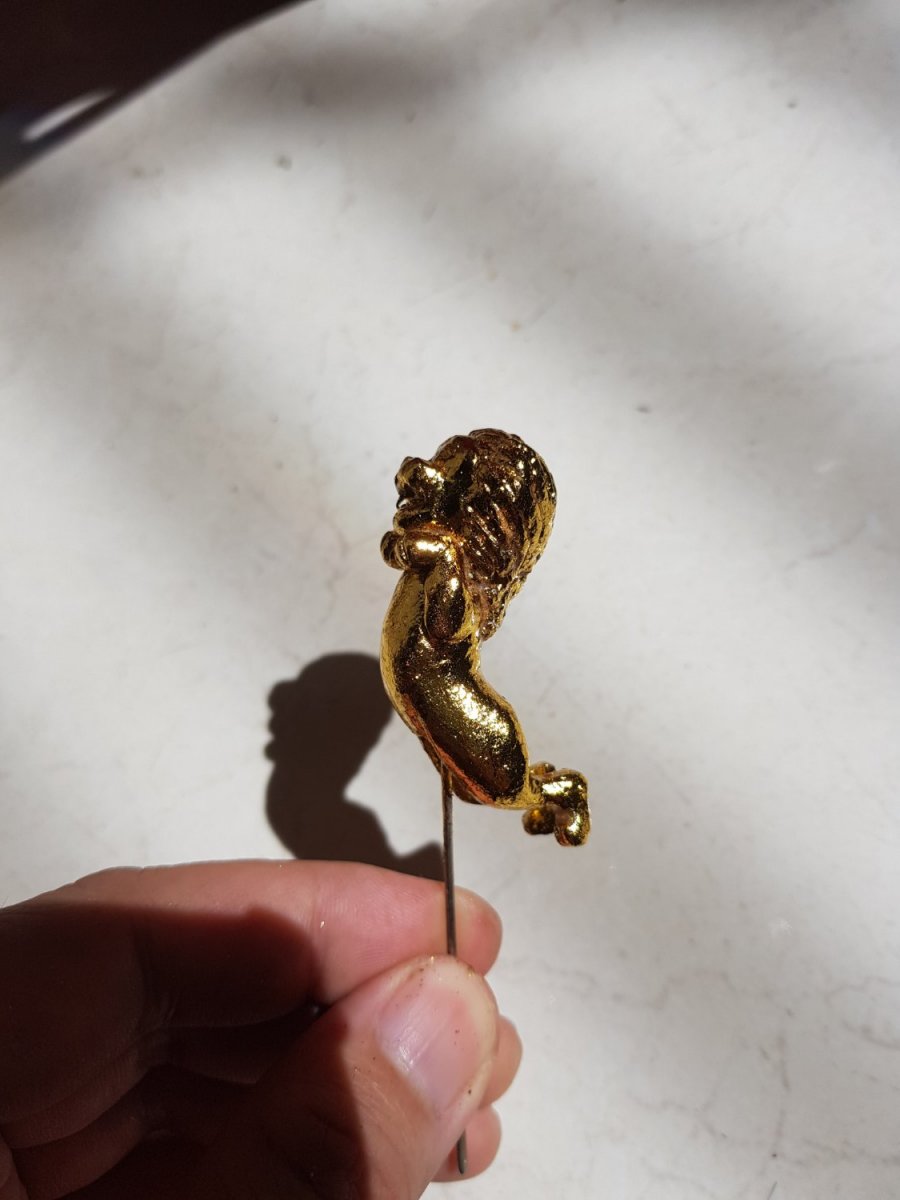
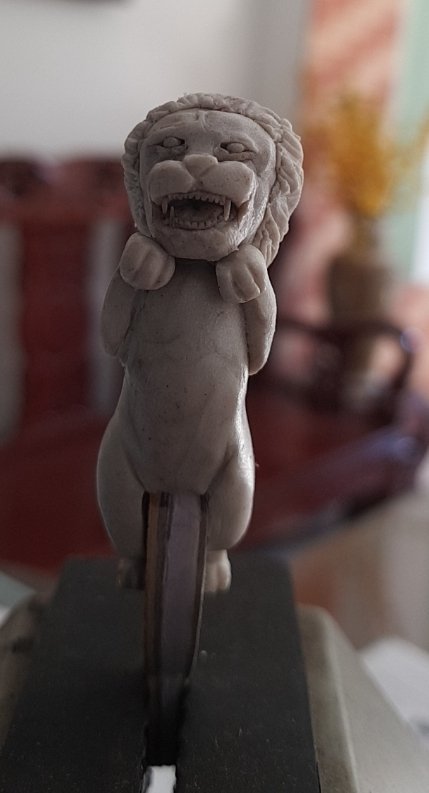
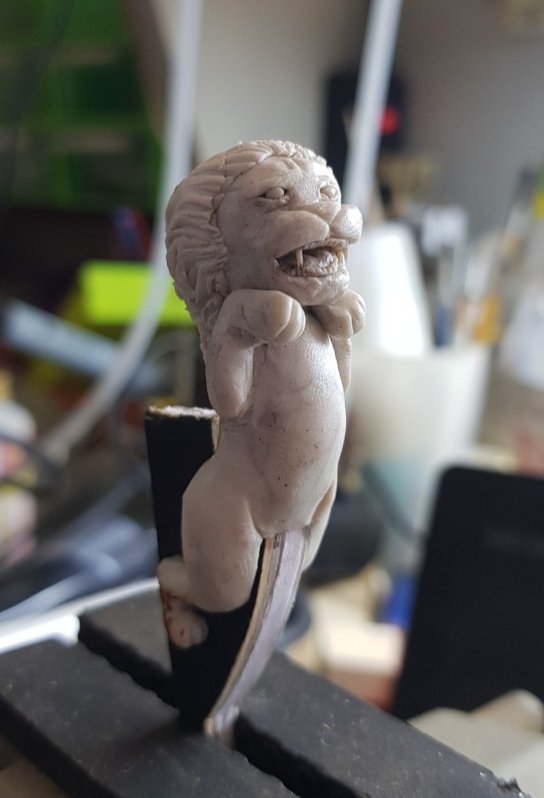
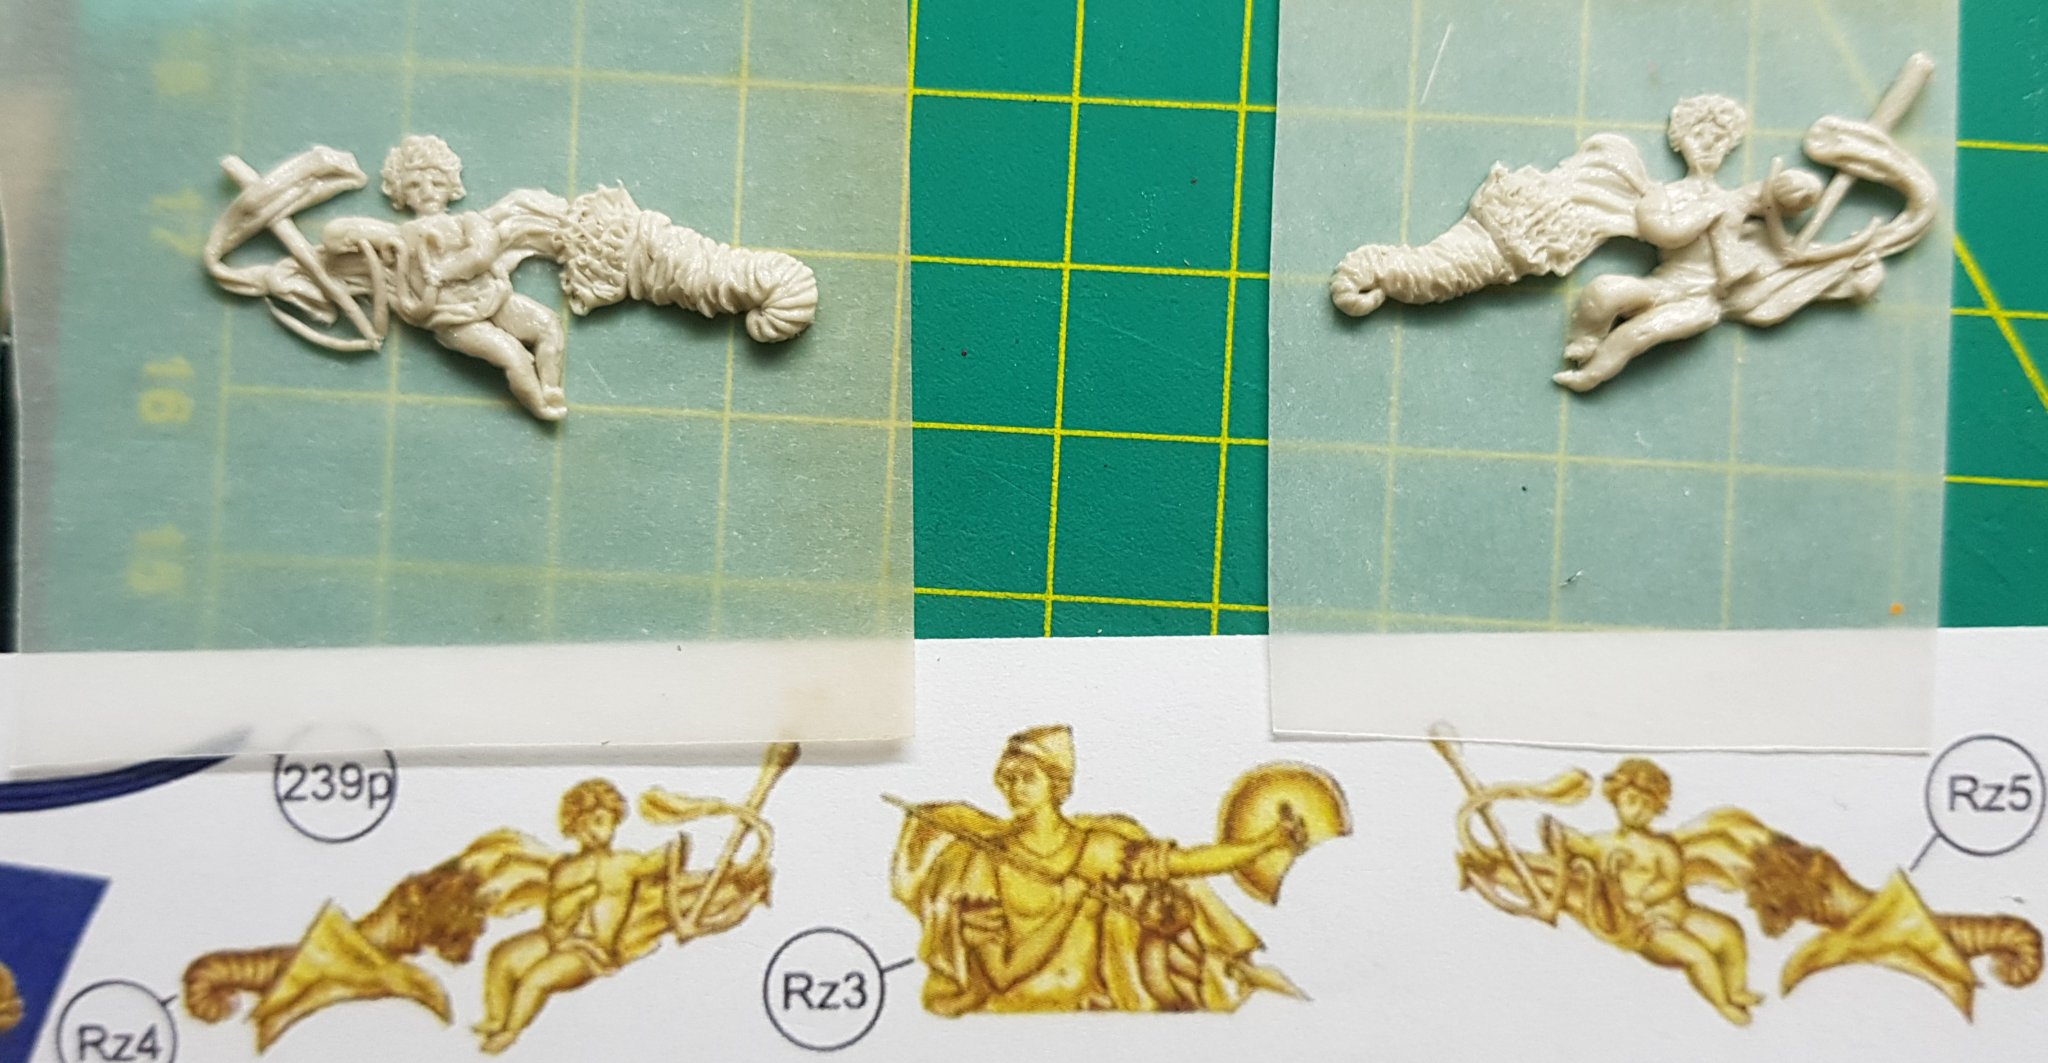
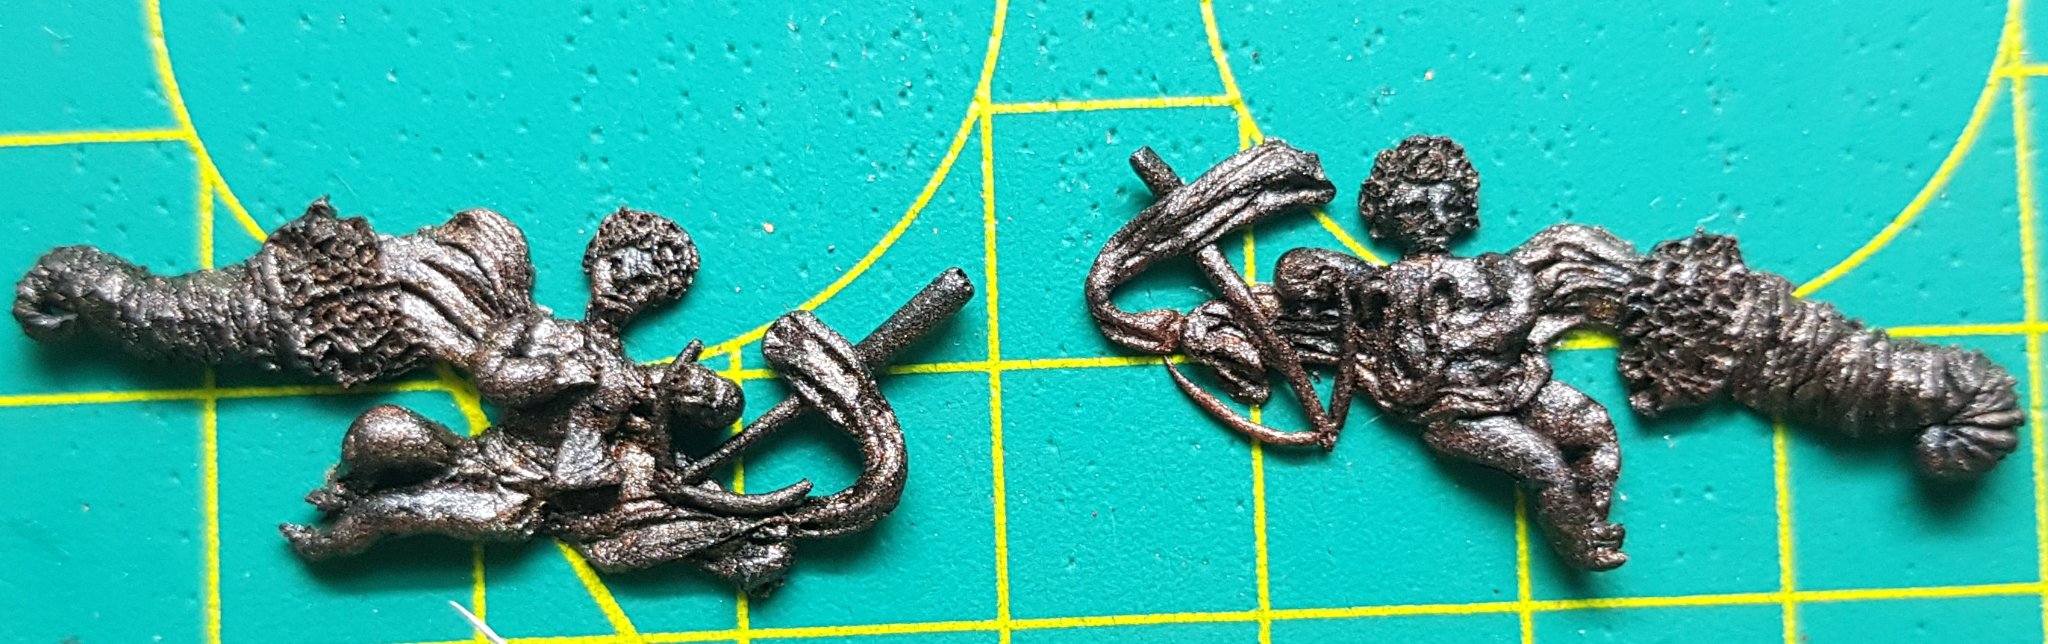
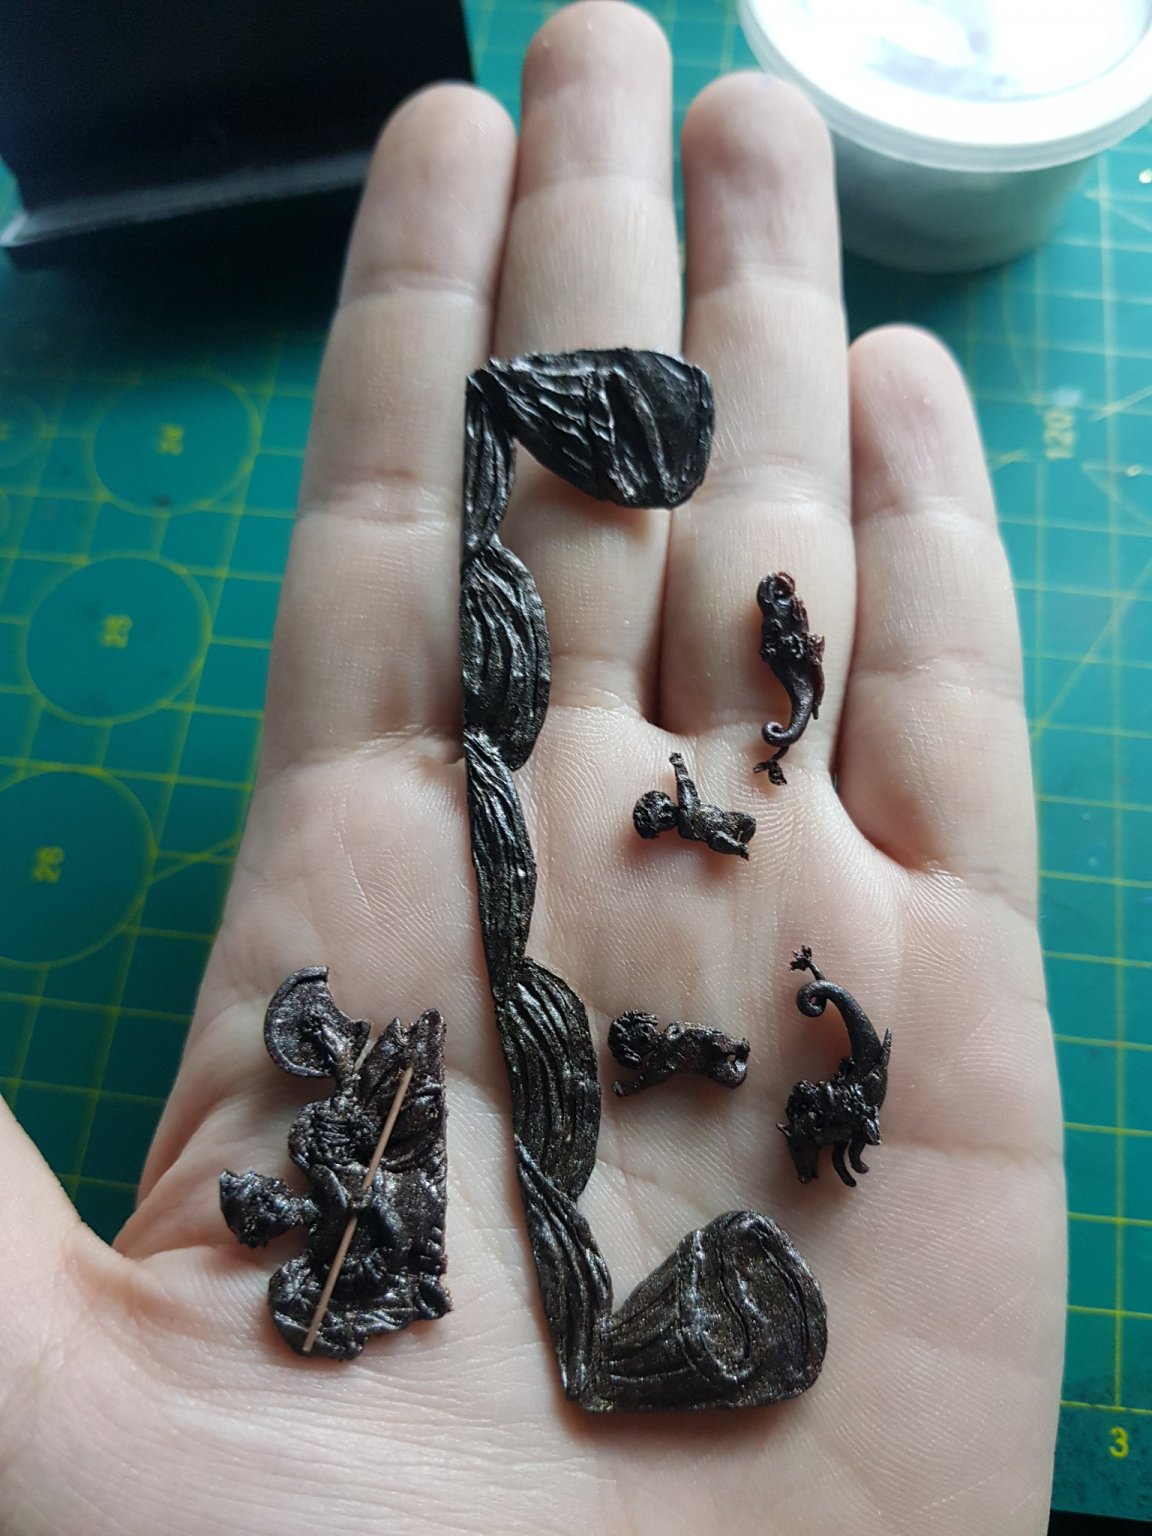
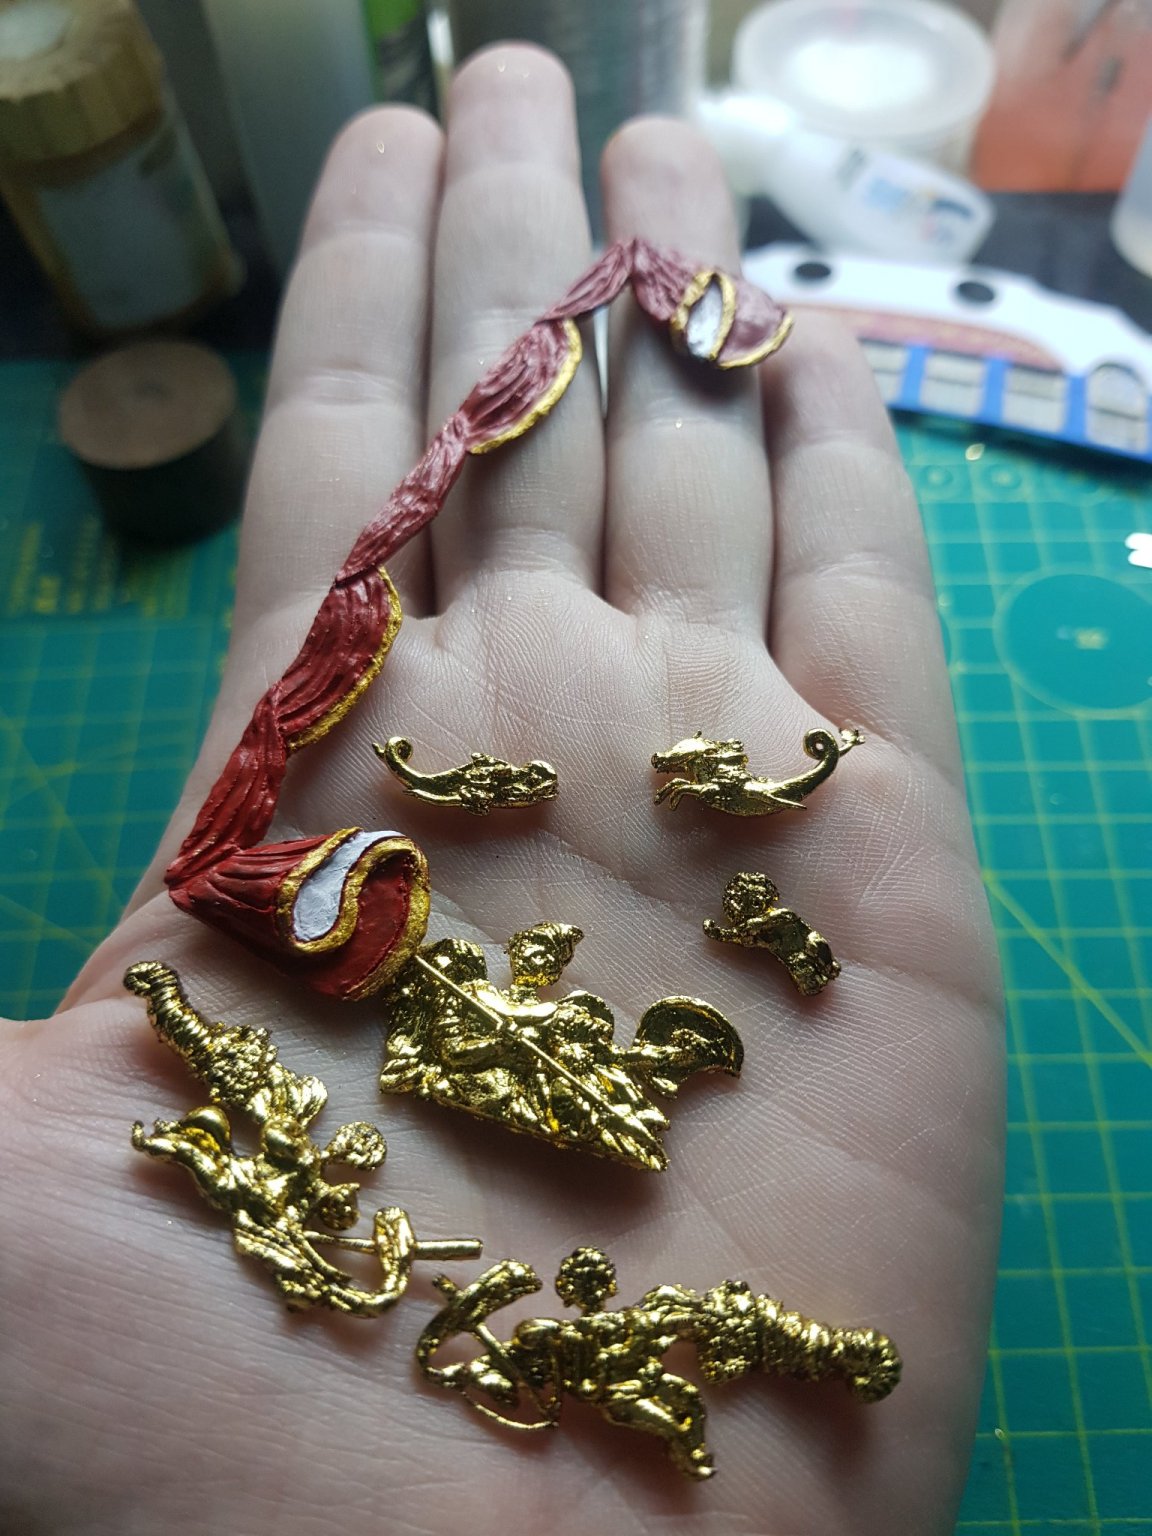
Ms. Doris is an artist, I have learned a lot of techniques from her posts in this forum and many other forums. She inspired me in amazing sculpting techniques. That's why I followed suit, this is the first time I sculpted statues so there are many more things to practice.
17 hours ago, maaaslo said:although, I don't think you will manage to finish this beauty in 5 months.
I agree with you about this, it seems like it's been a long time since I've been making sailboat models so the timing of completion is messed up.
- Matt D, GrandpaPhil and catopower
-
3
-
Please continue to enjoy some of the latest pictures I have made in the past time. I am still learning and testing and I hope someday my model will be as good as the experts on this forum.
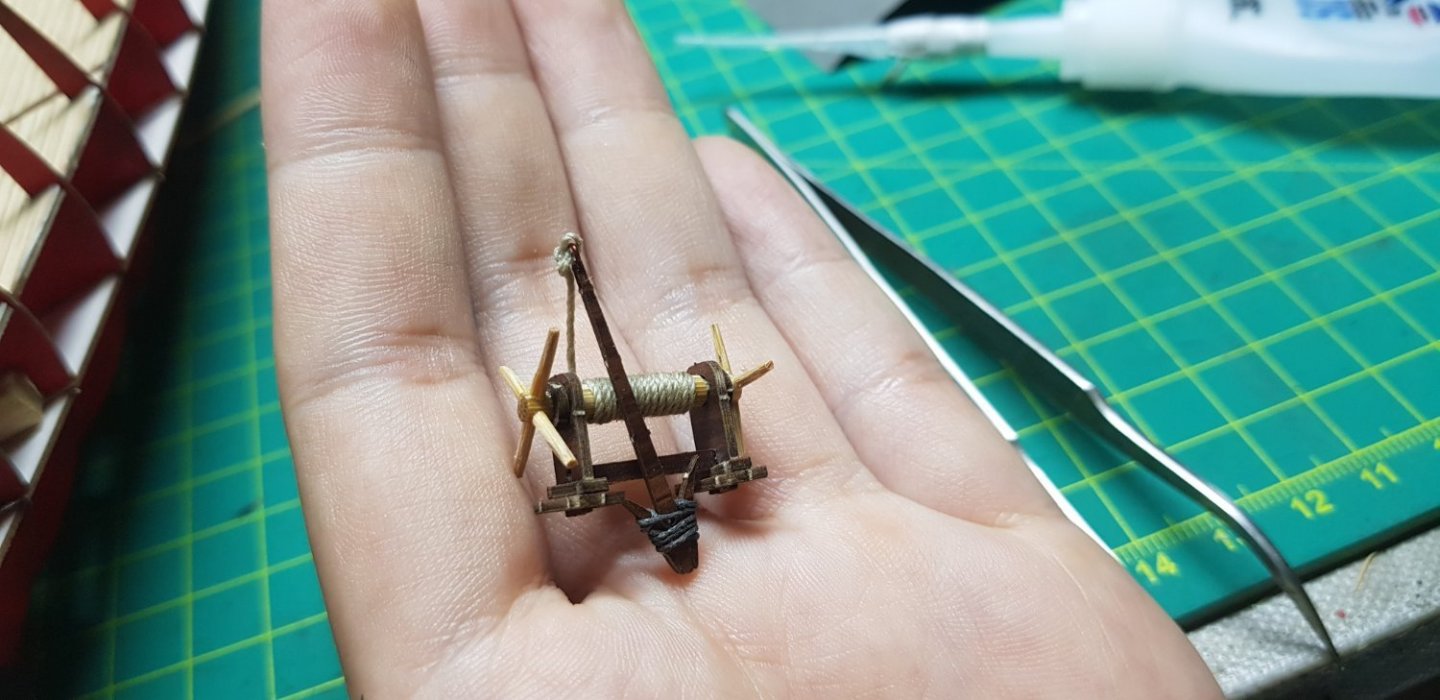
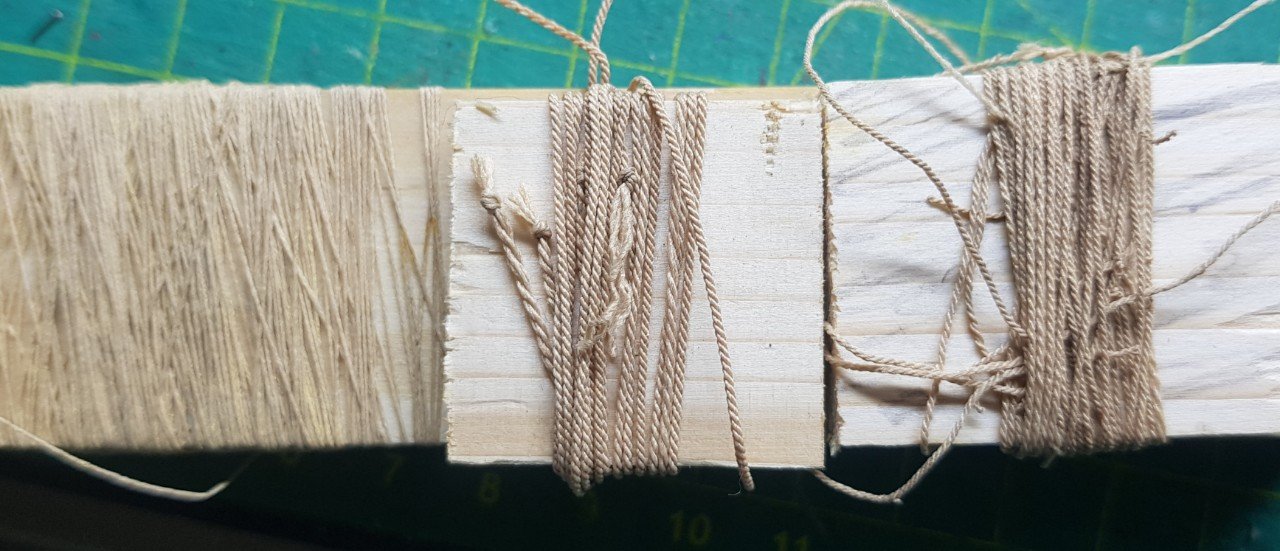
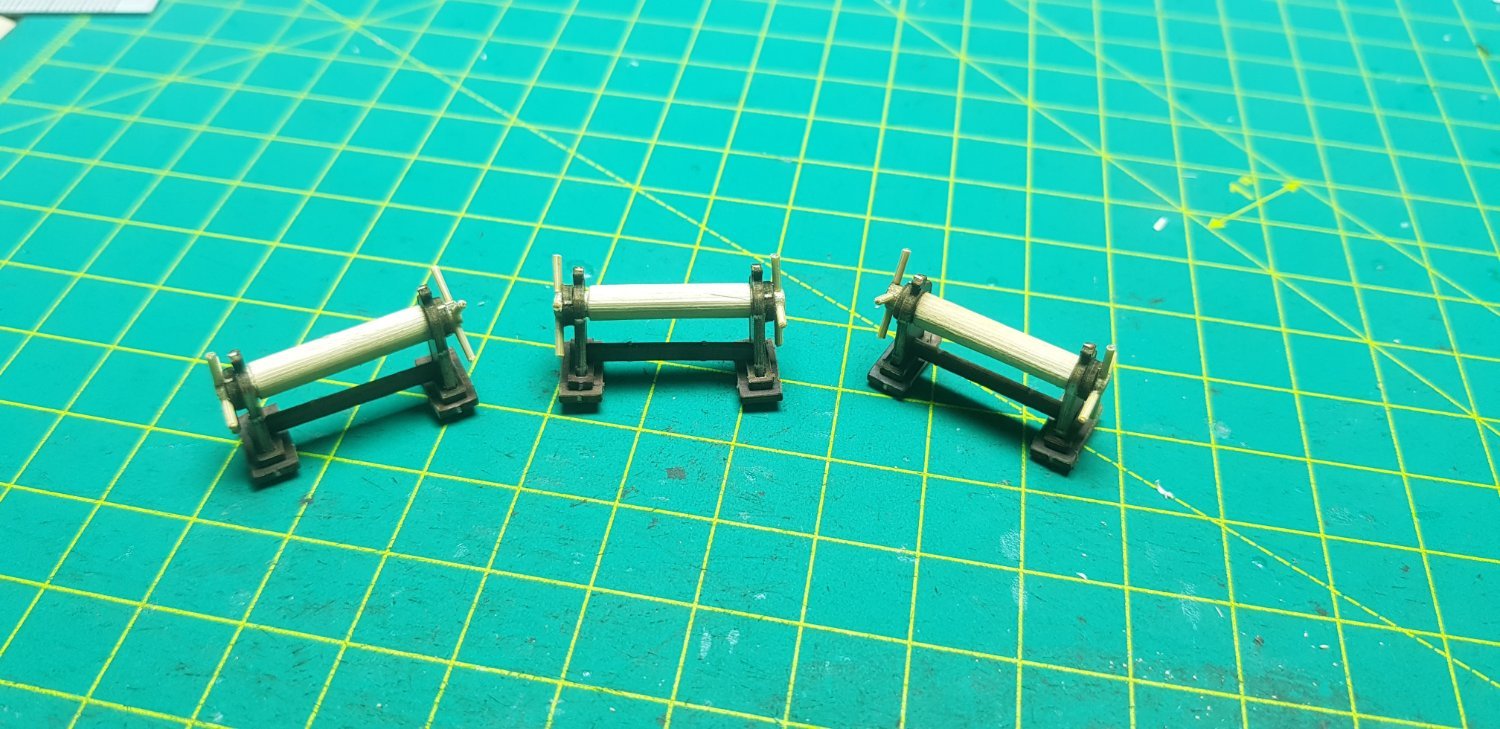
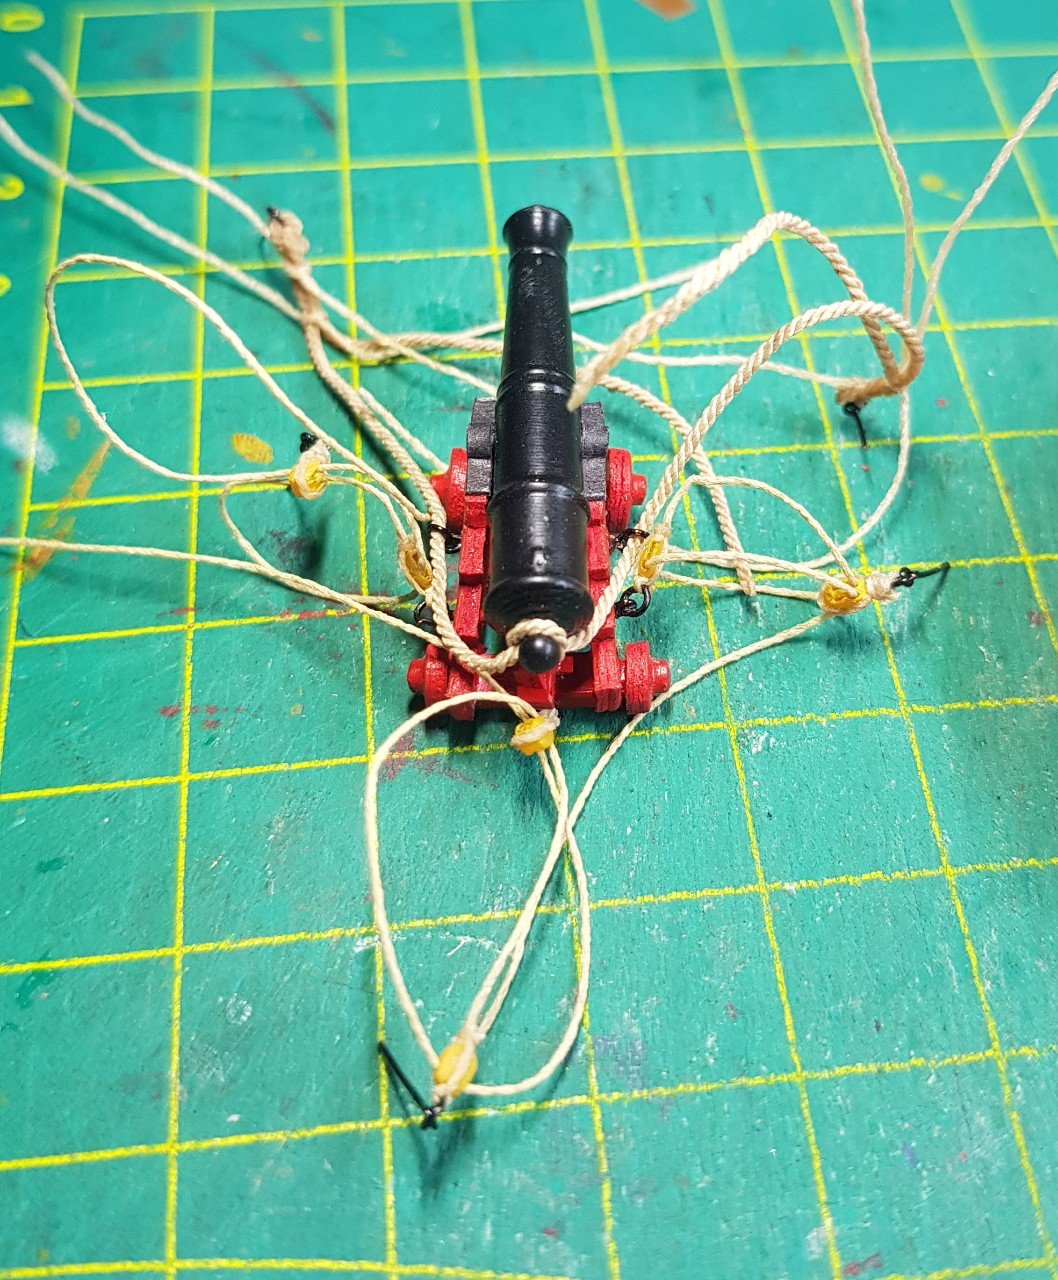
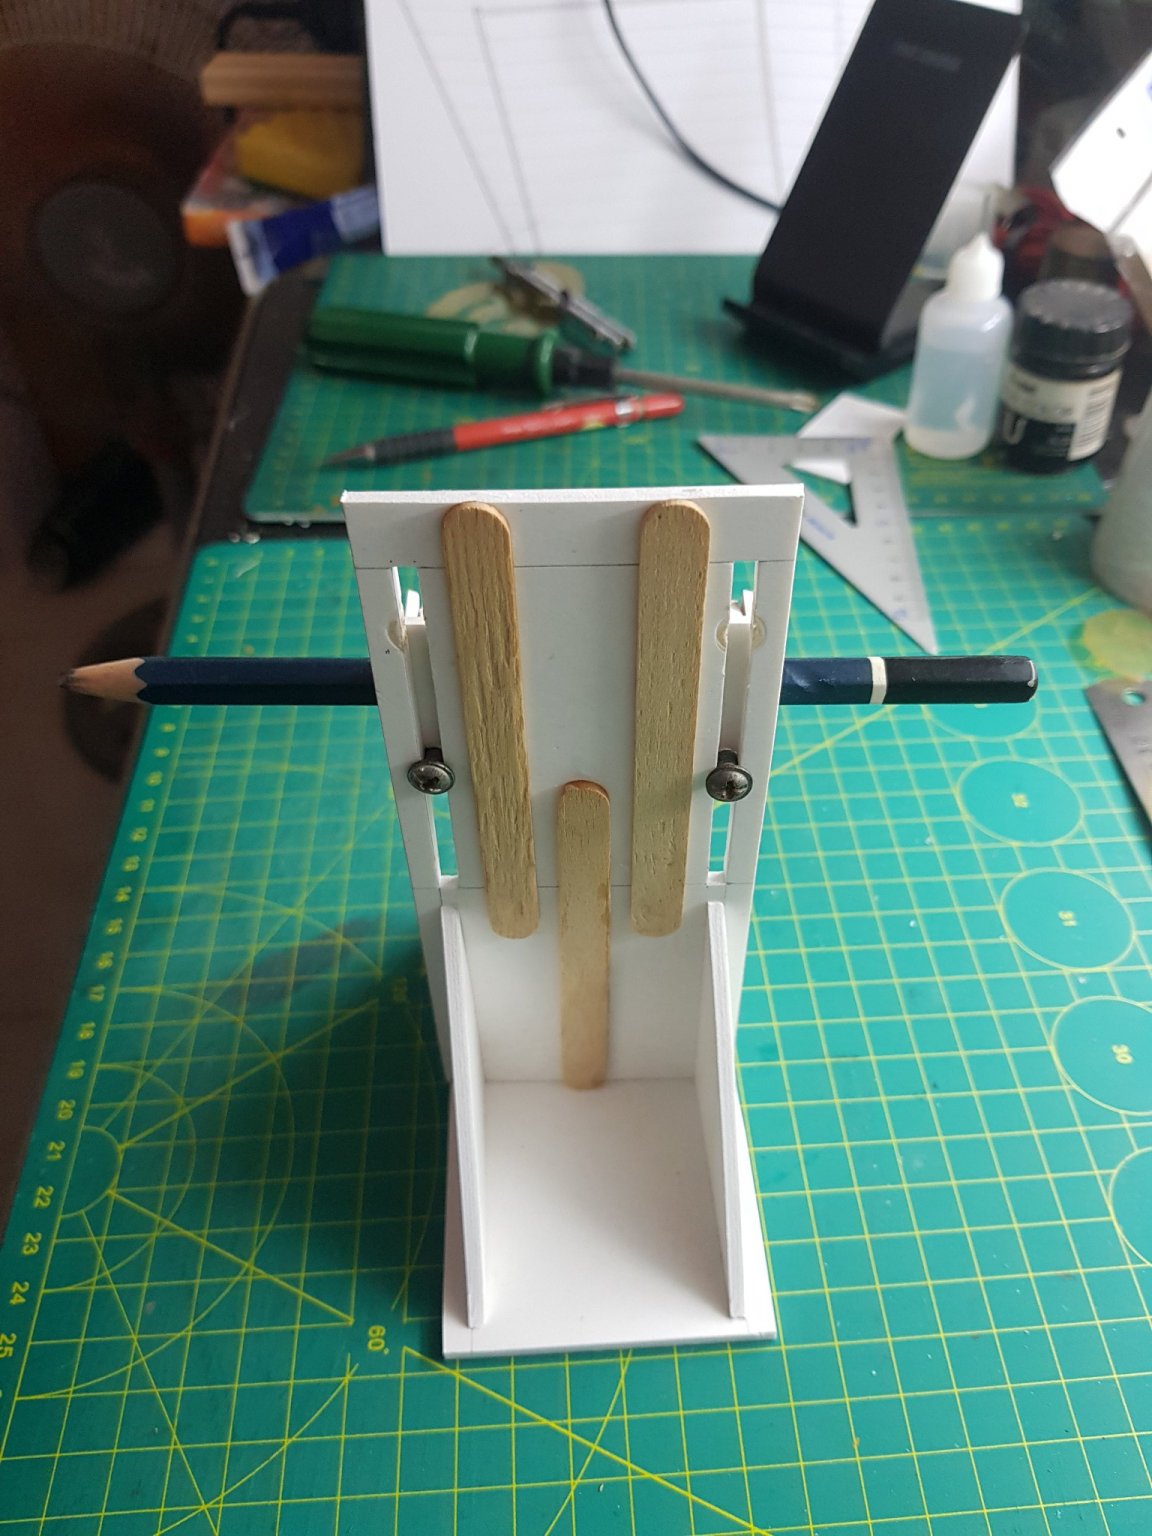
I used the motor of a broken mini drill with a motor alternating switch and motor speed regulator circuit to build this rope winding machine. On the surface it is uncertain, but it is quite adequate for wrapping small threads.
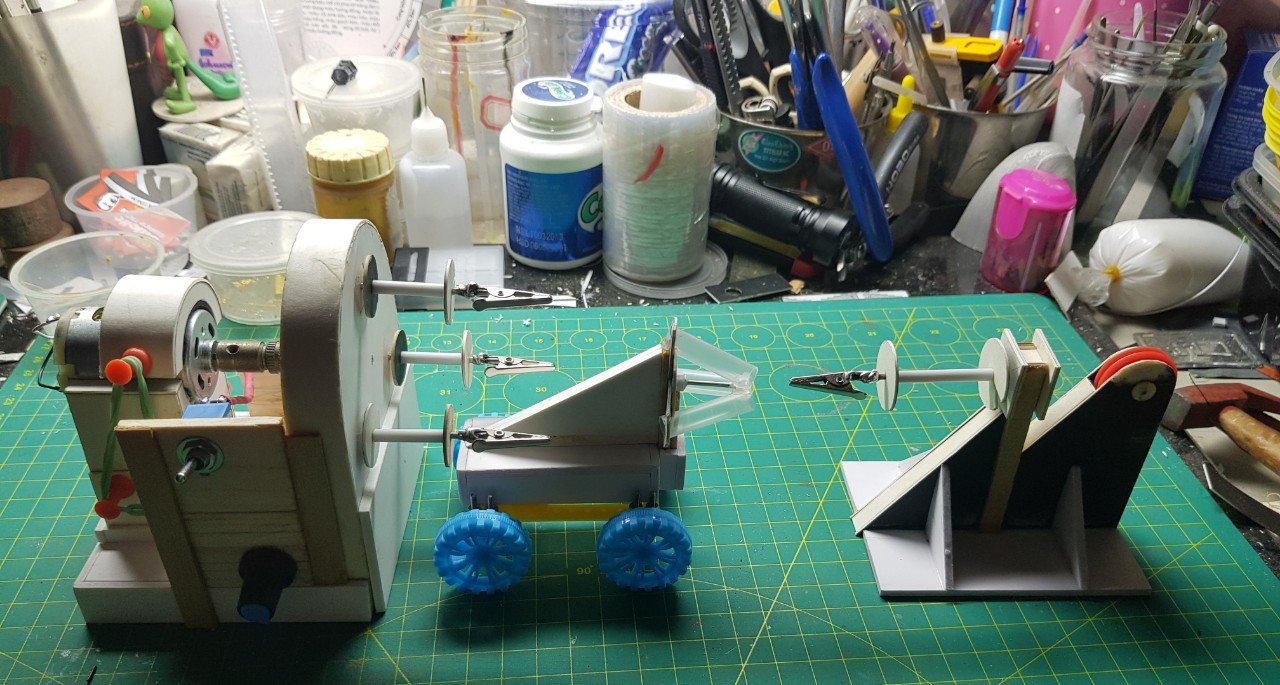


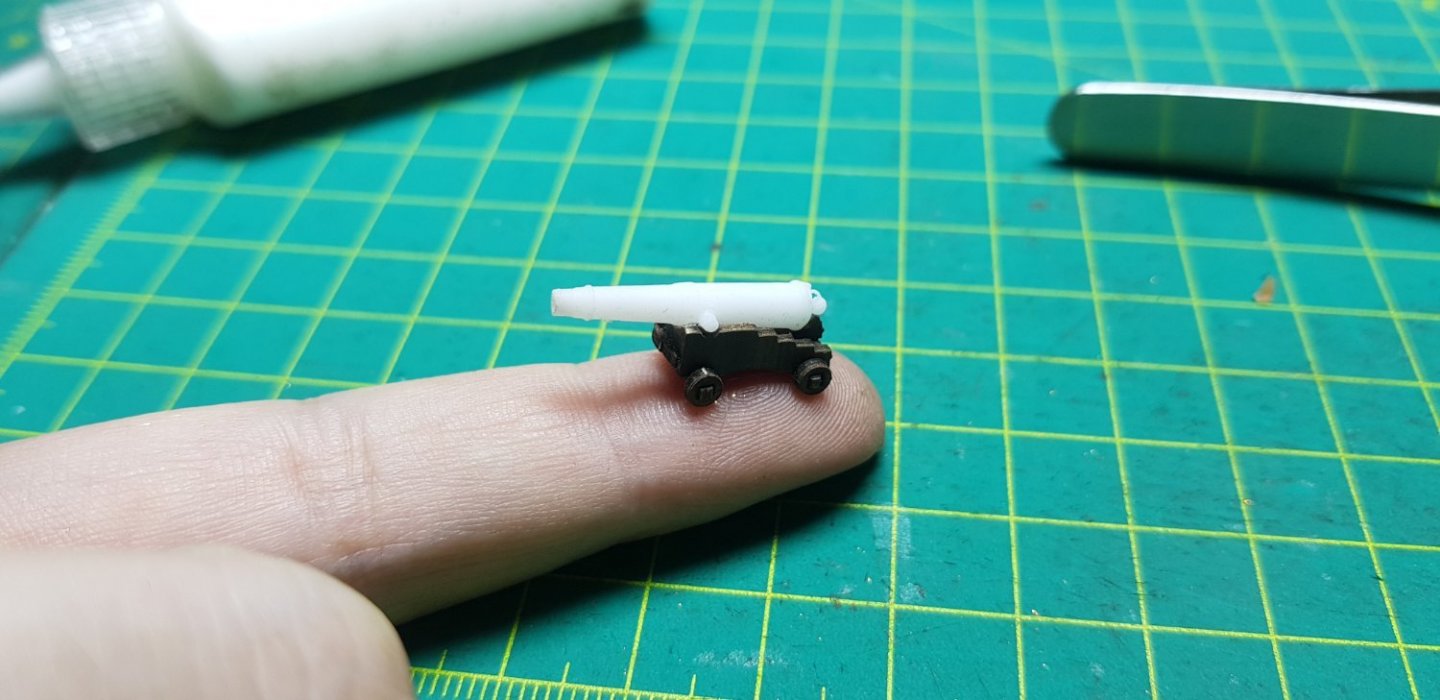
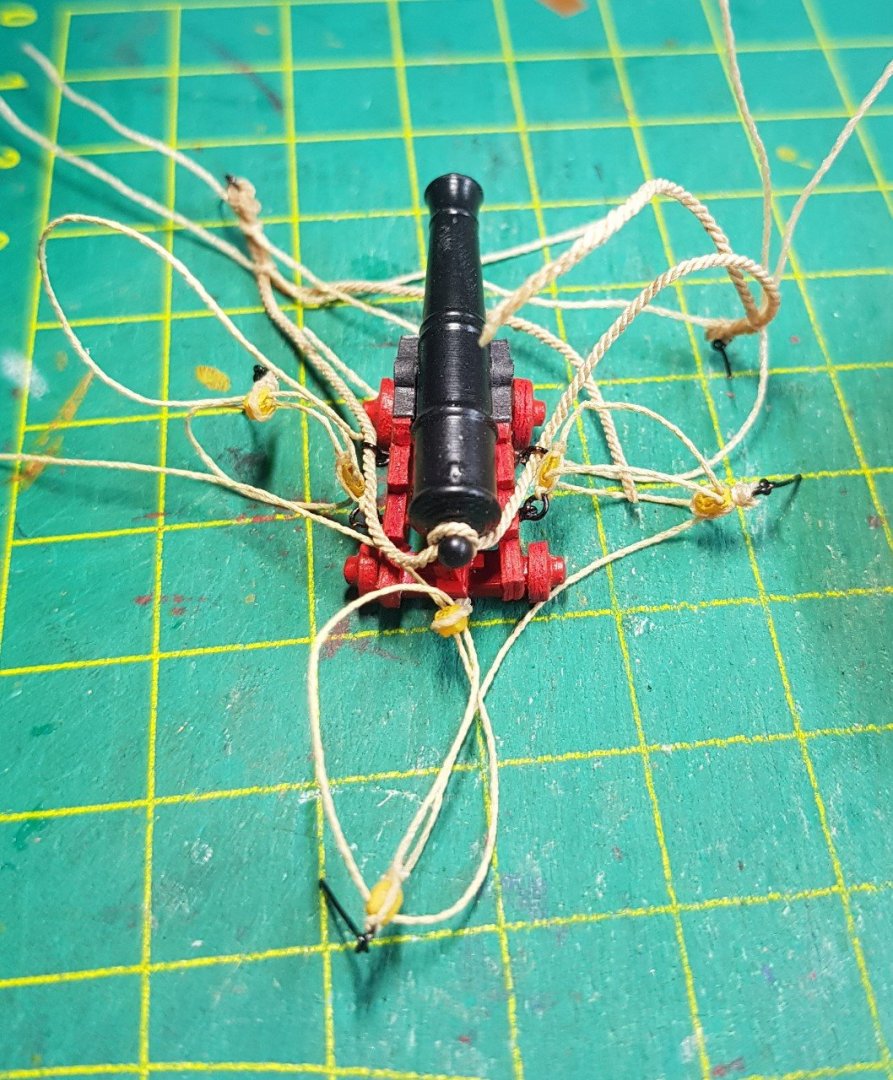
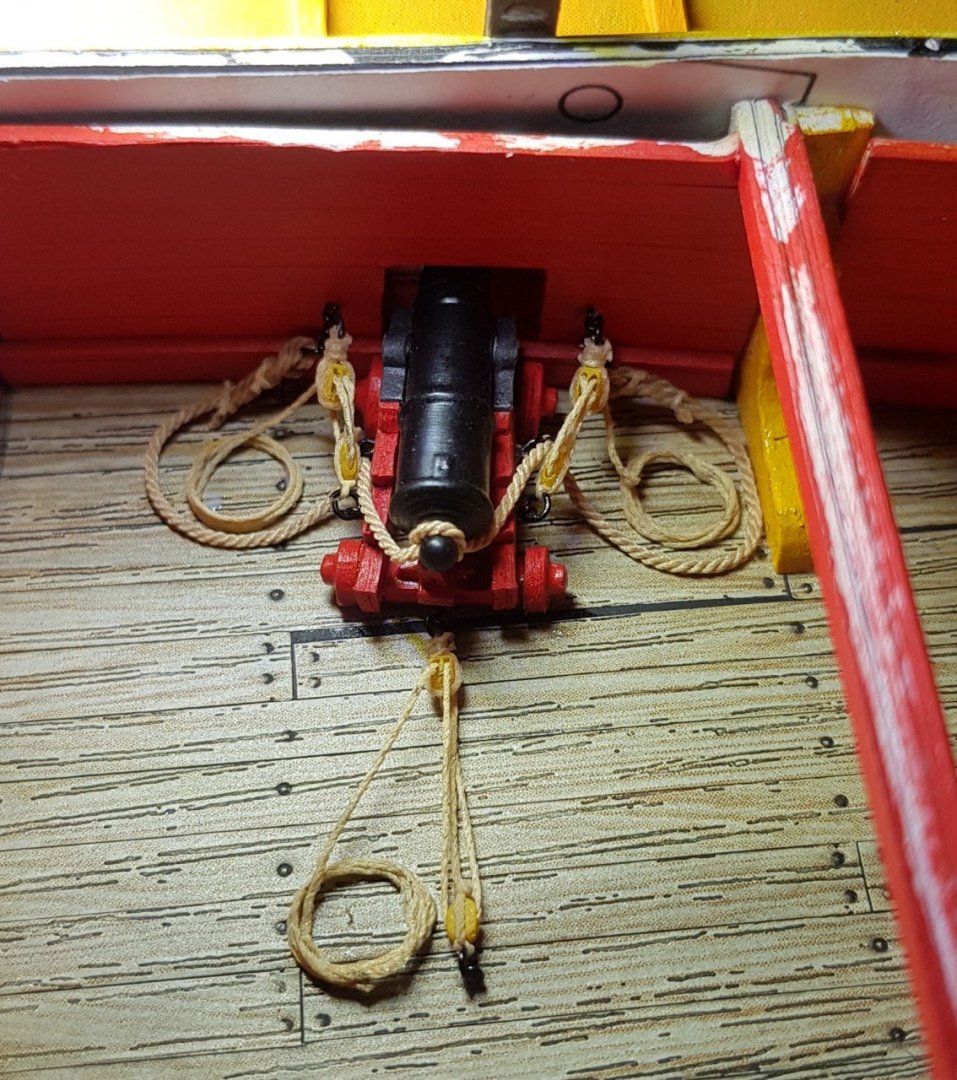
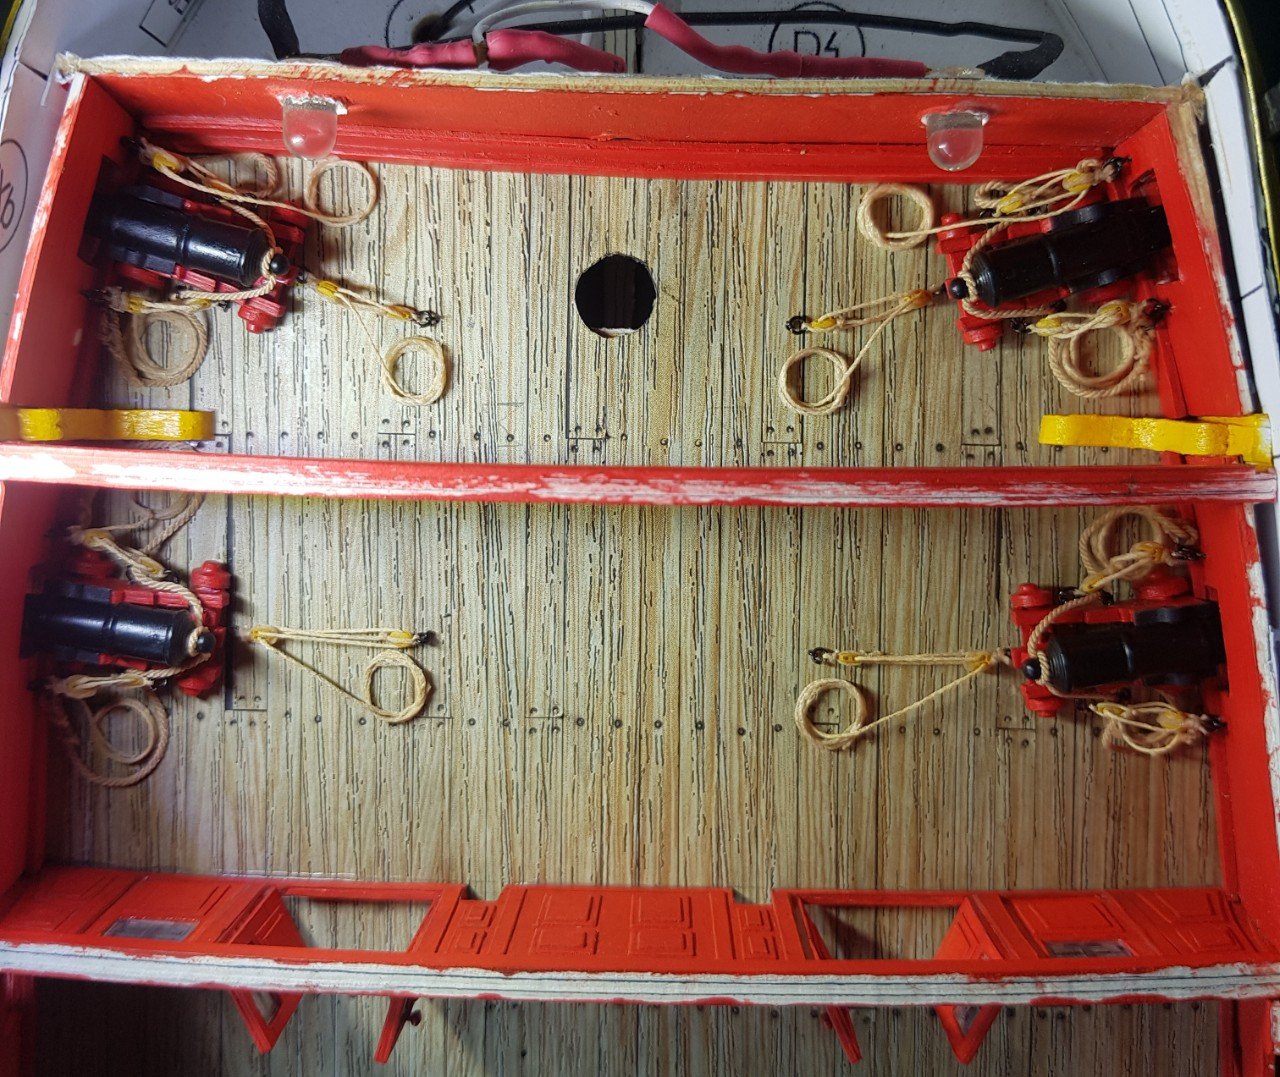
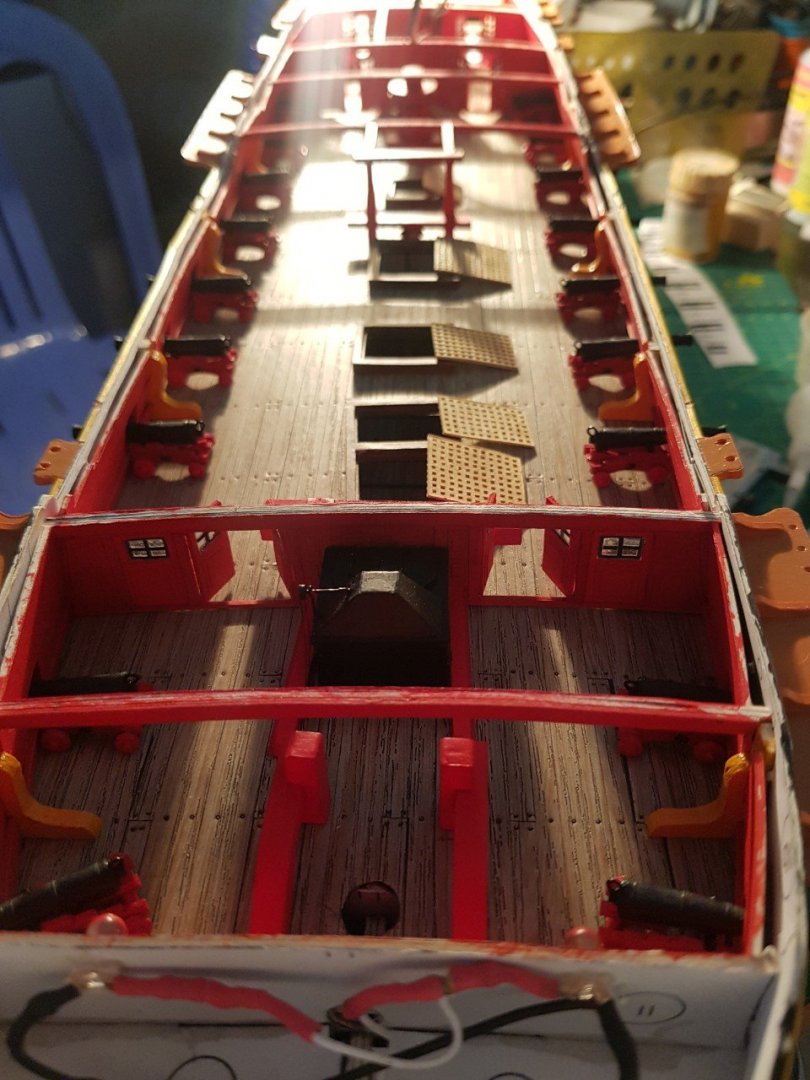
It took quite some time to tie the cannons, so now I can only tie up 4 cannons. Probably the end of this month to complete.

...
-
On 3/16/2021 at 3:21 PM, quyen99sky said:
Đắng cấp quá bác ơi (y)
Hello Quyen, I didn't expect you to be on this forum. It was a big surprise for me because the number member of Vietnamese joining this forum is small and you was find my post in this large forum.
- quyen99sky and mtaylor
-
1
-
 1
1
-
Hello friends
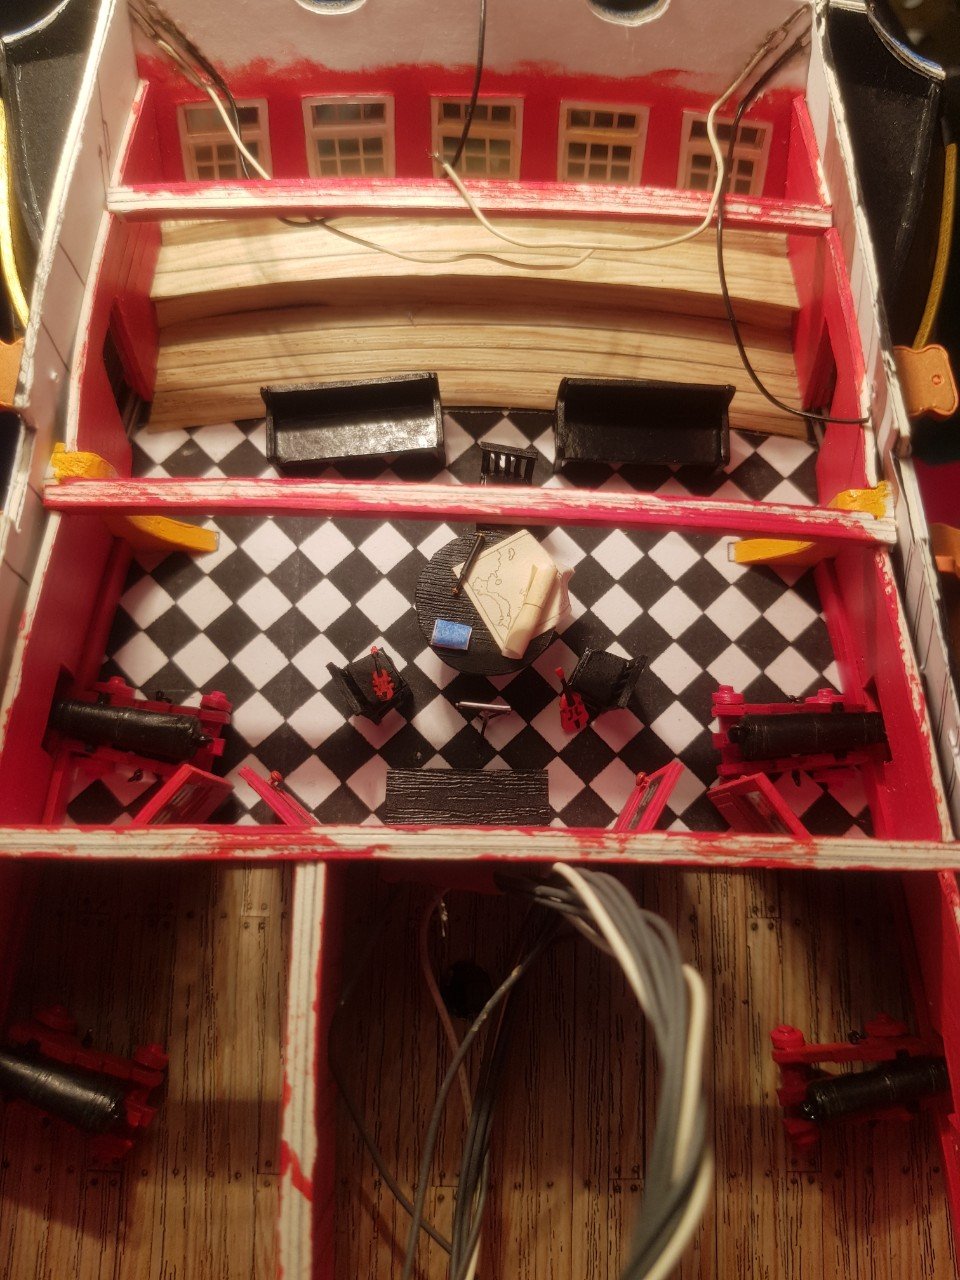
Currently in Vietnam is on the Lunar New Year holiday so I have time to spend with my ship, here's what I have done in having done so far, and I hope to finish all the cannons this vacation.


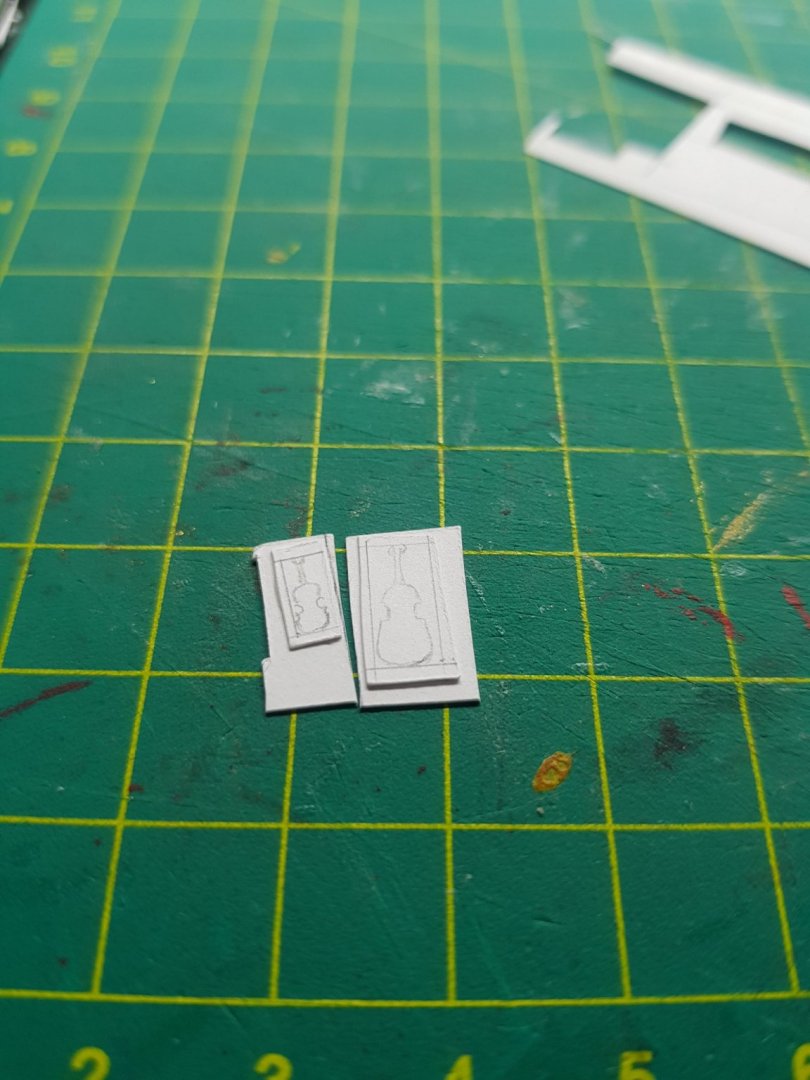
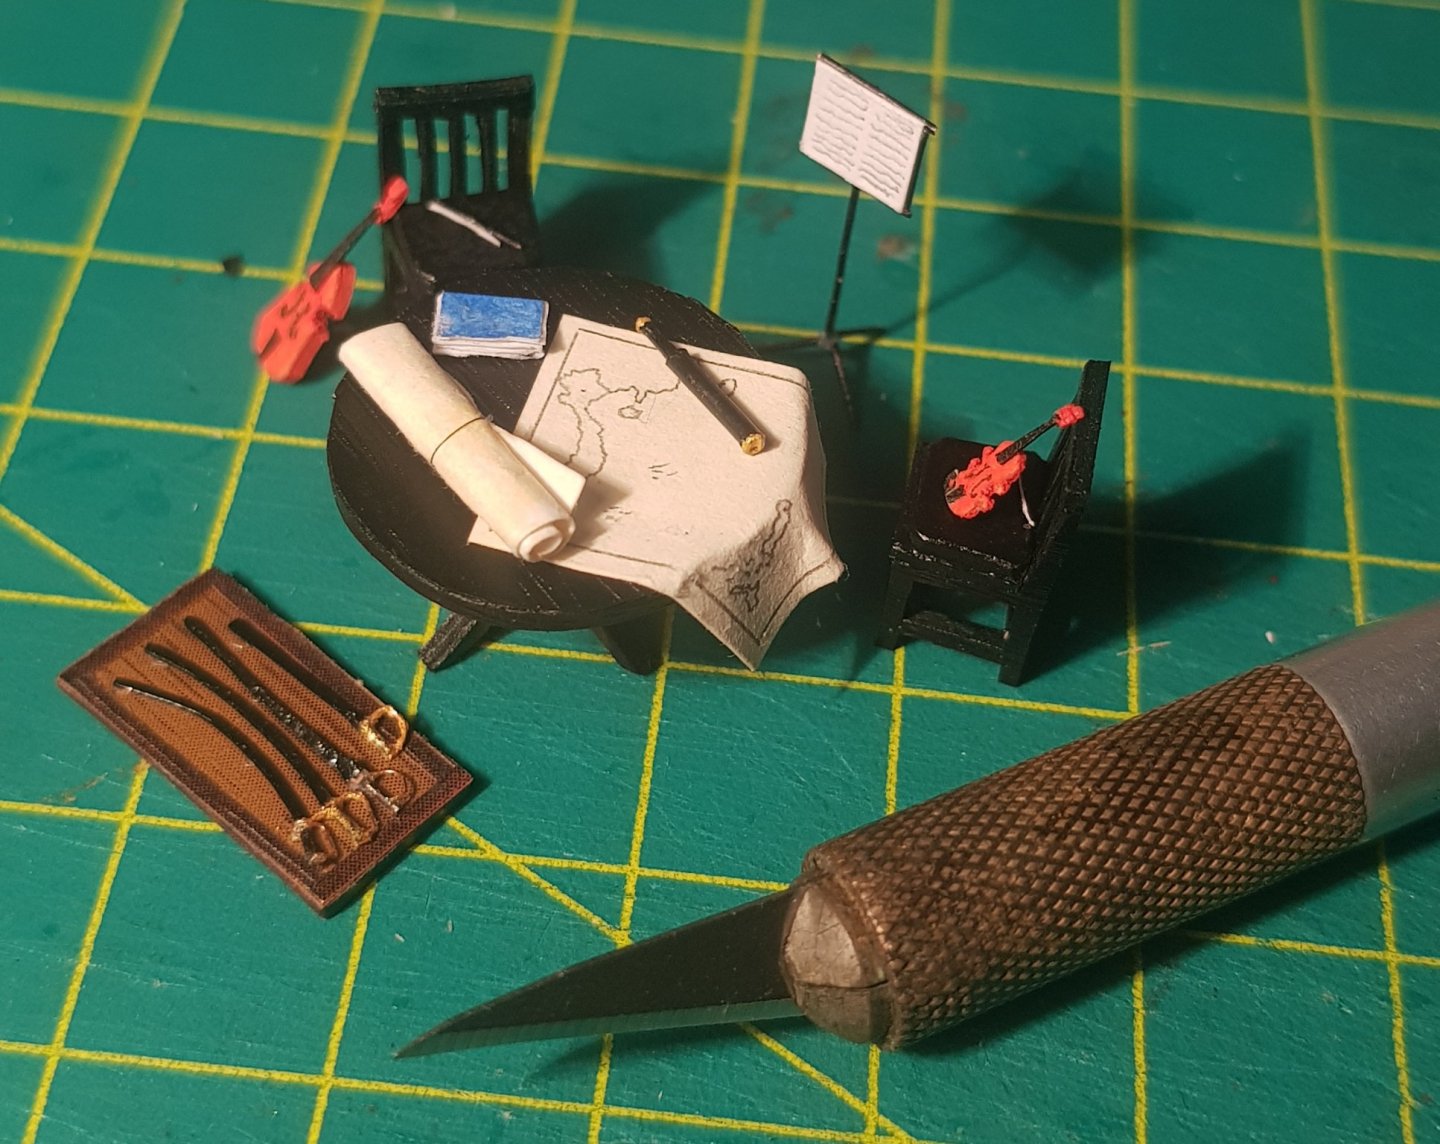
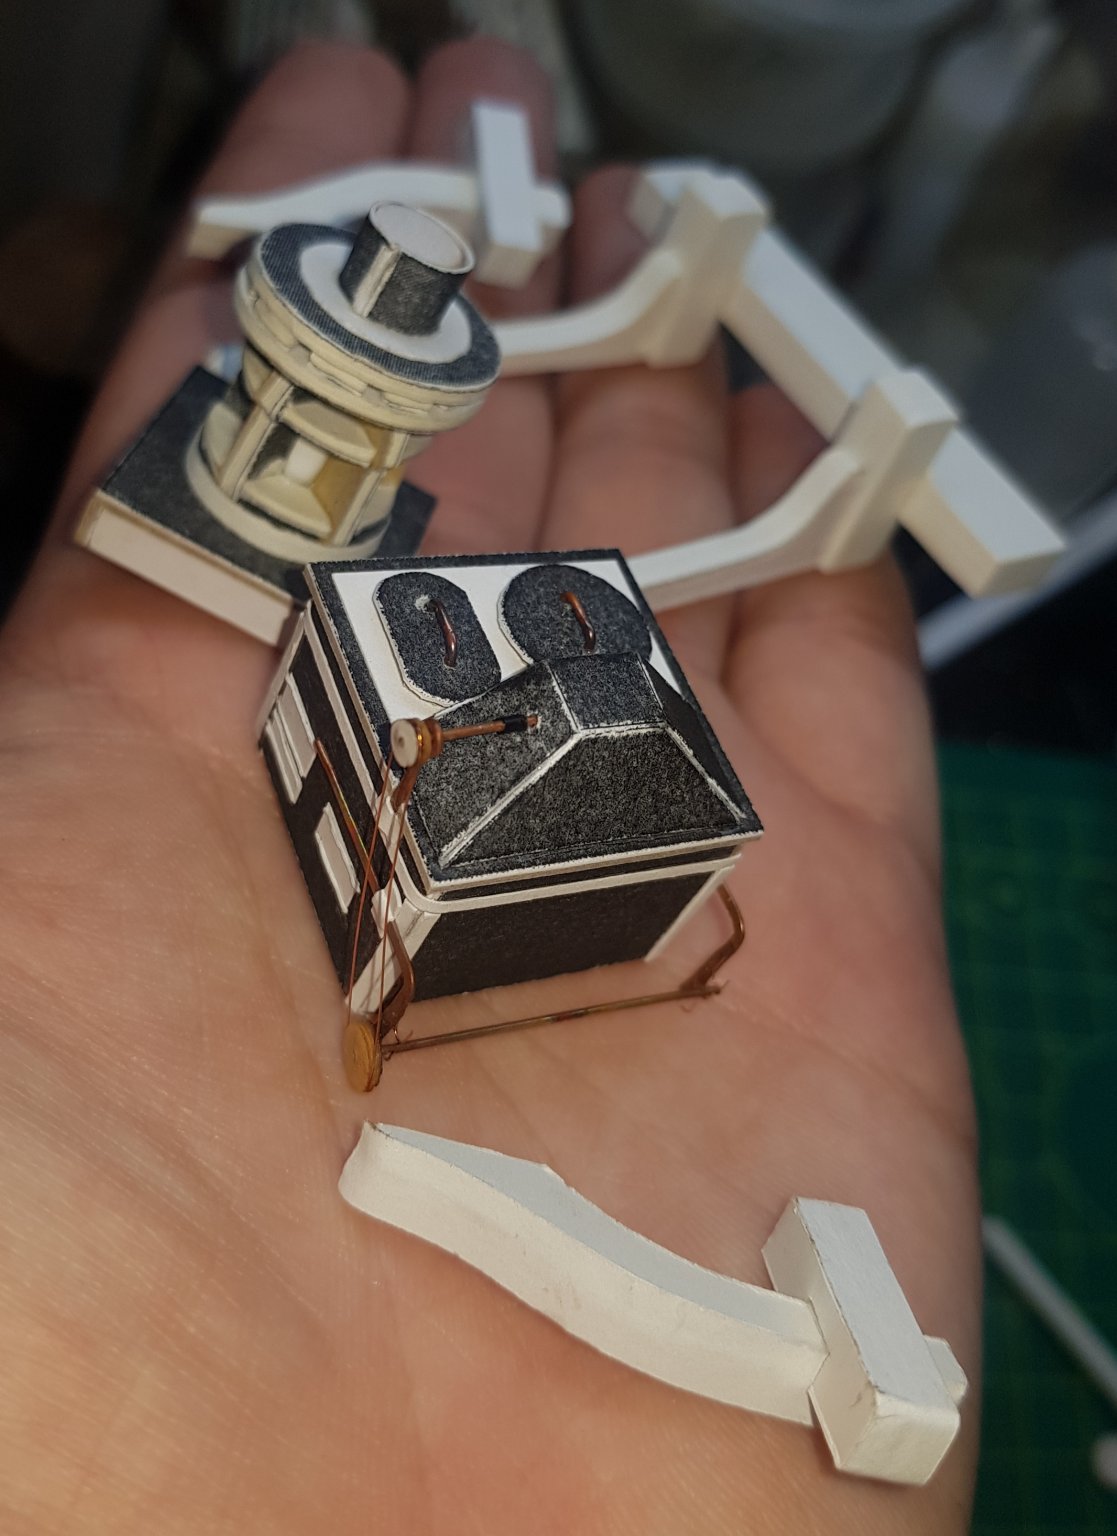
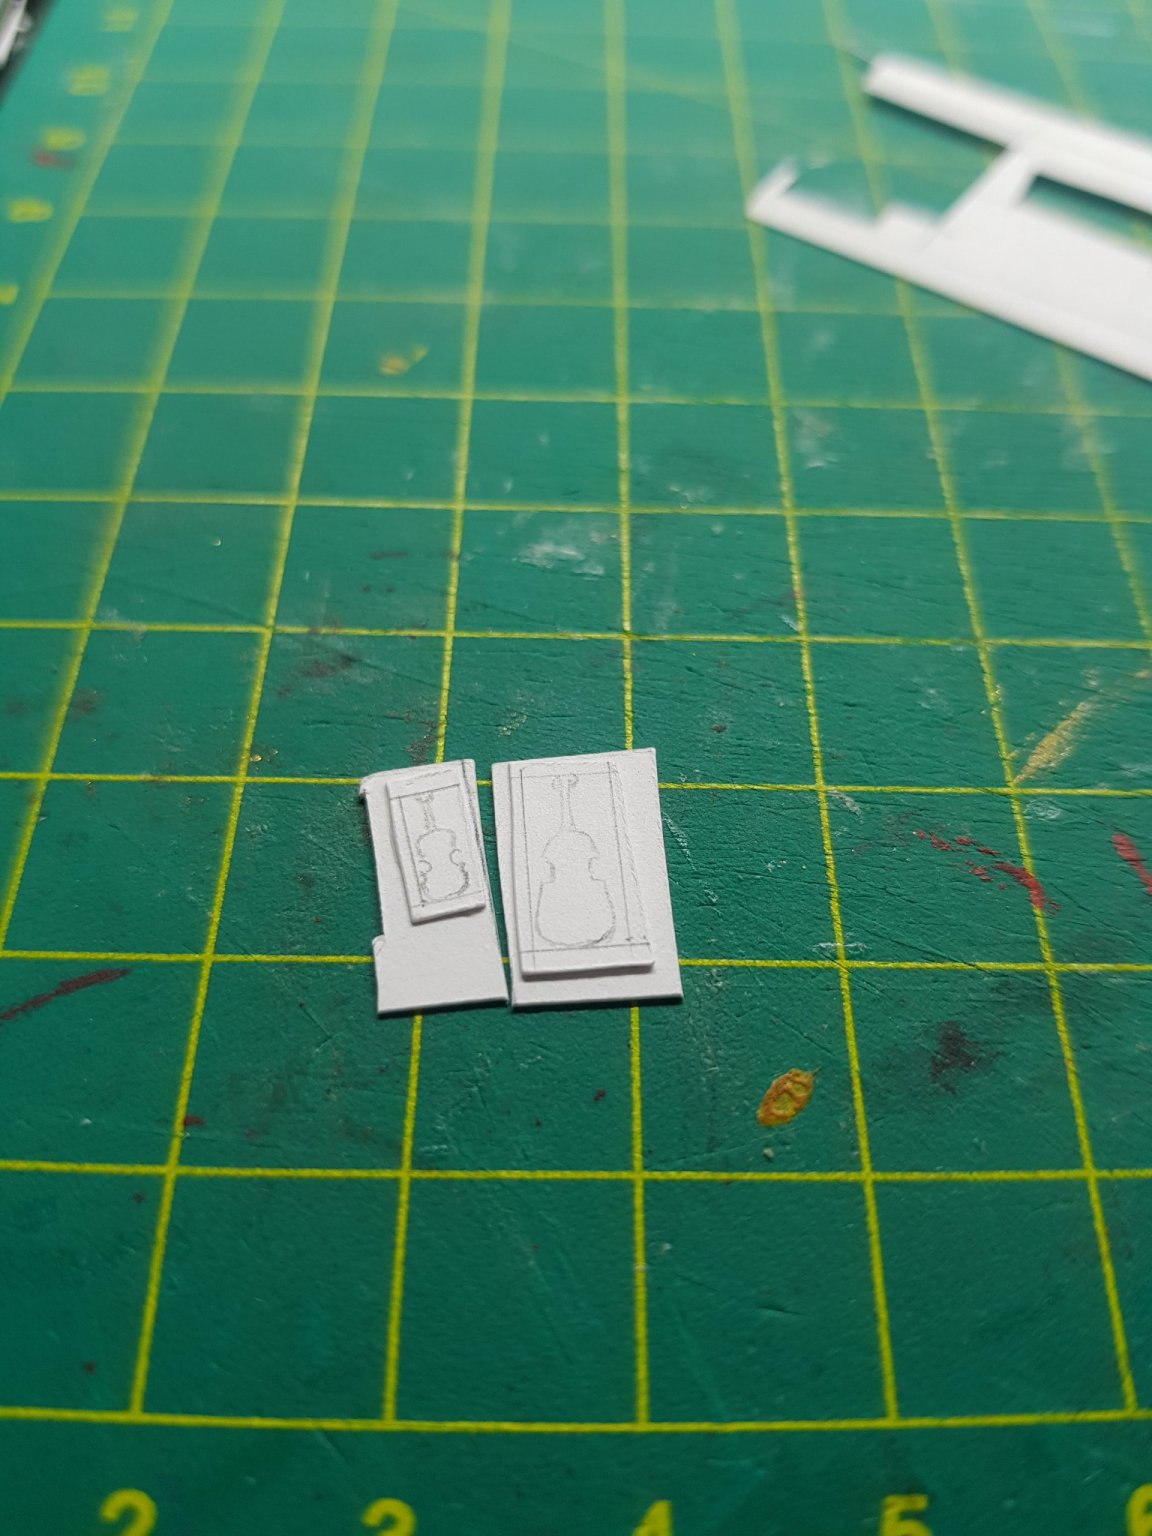
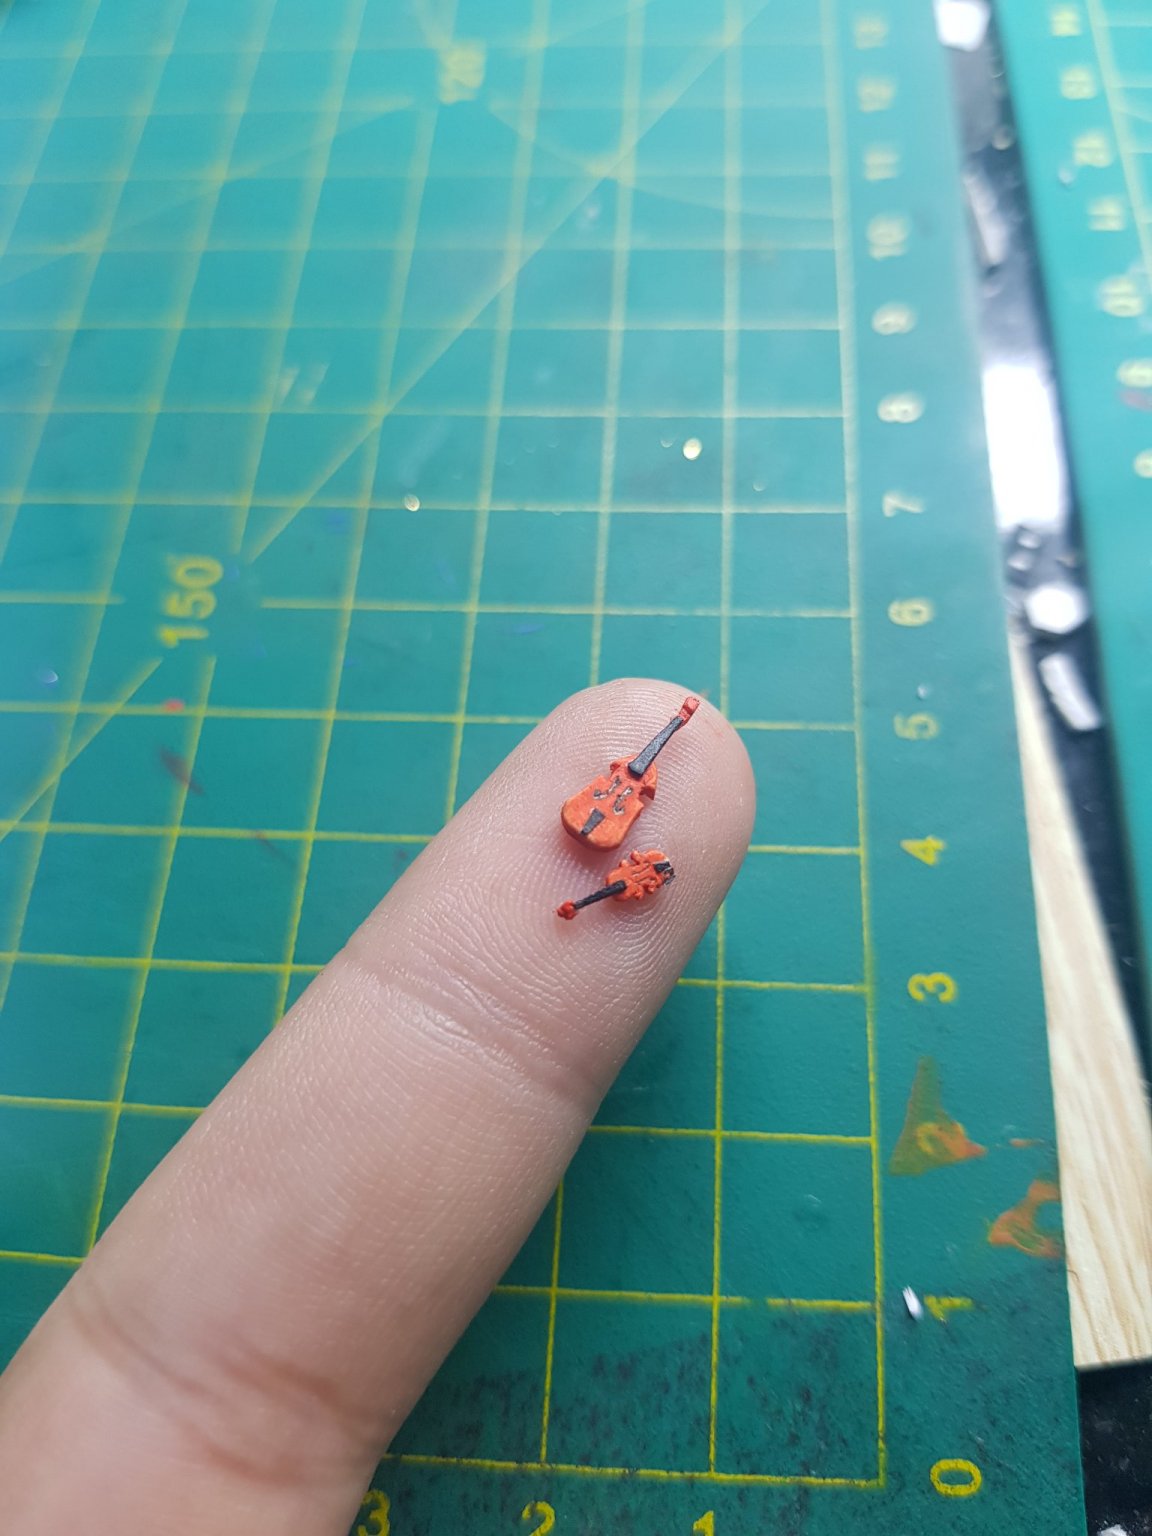
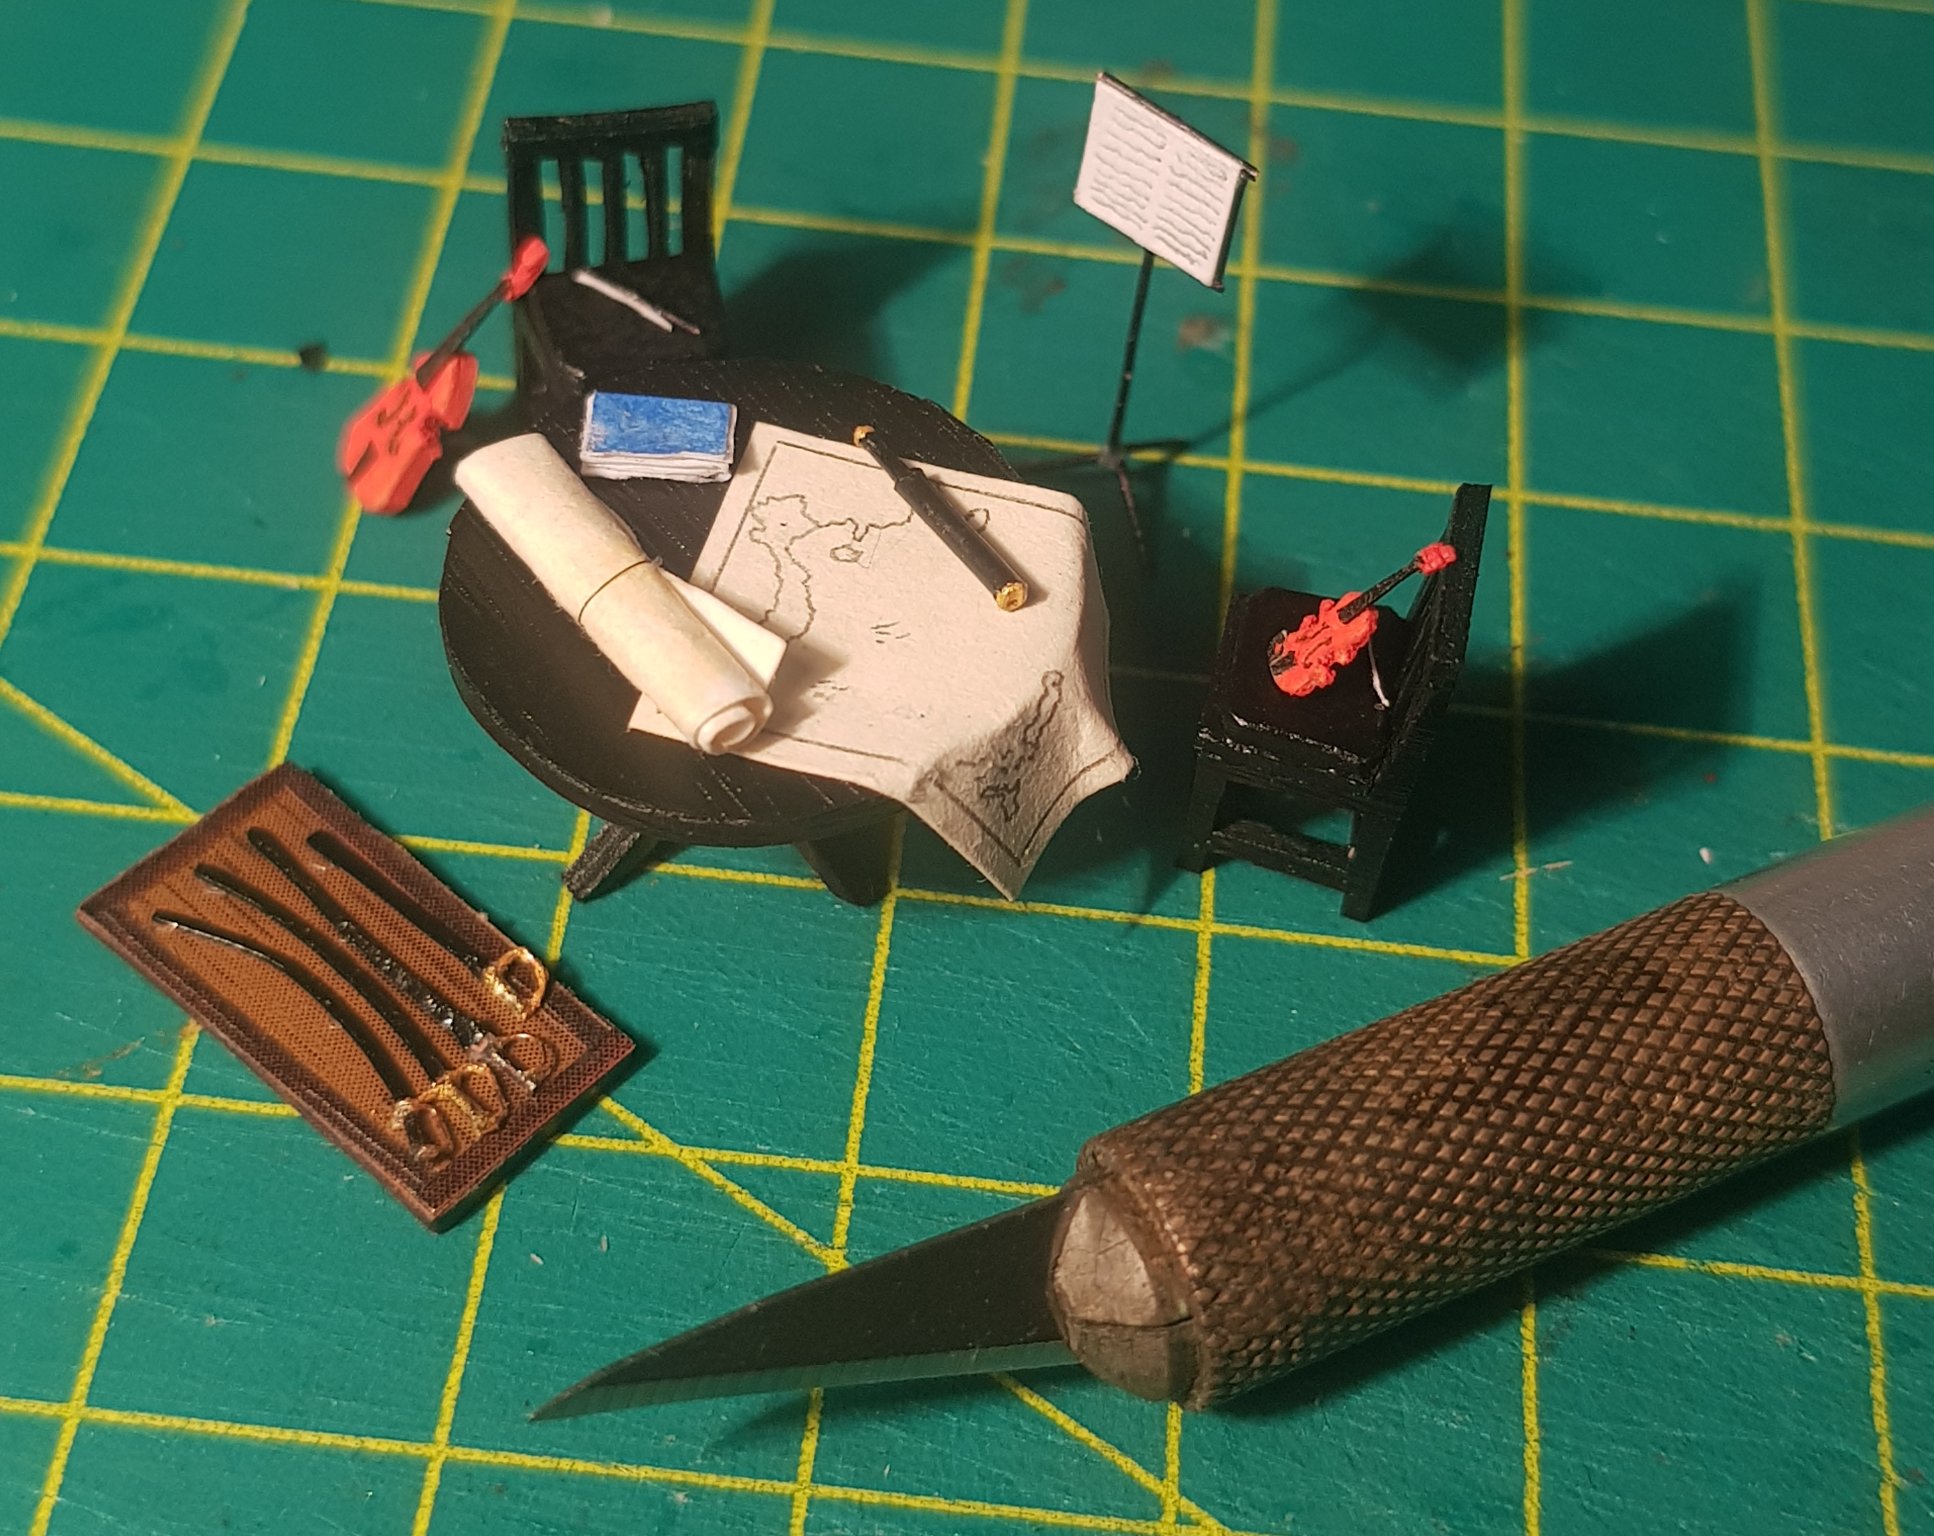
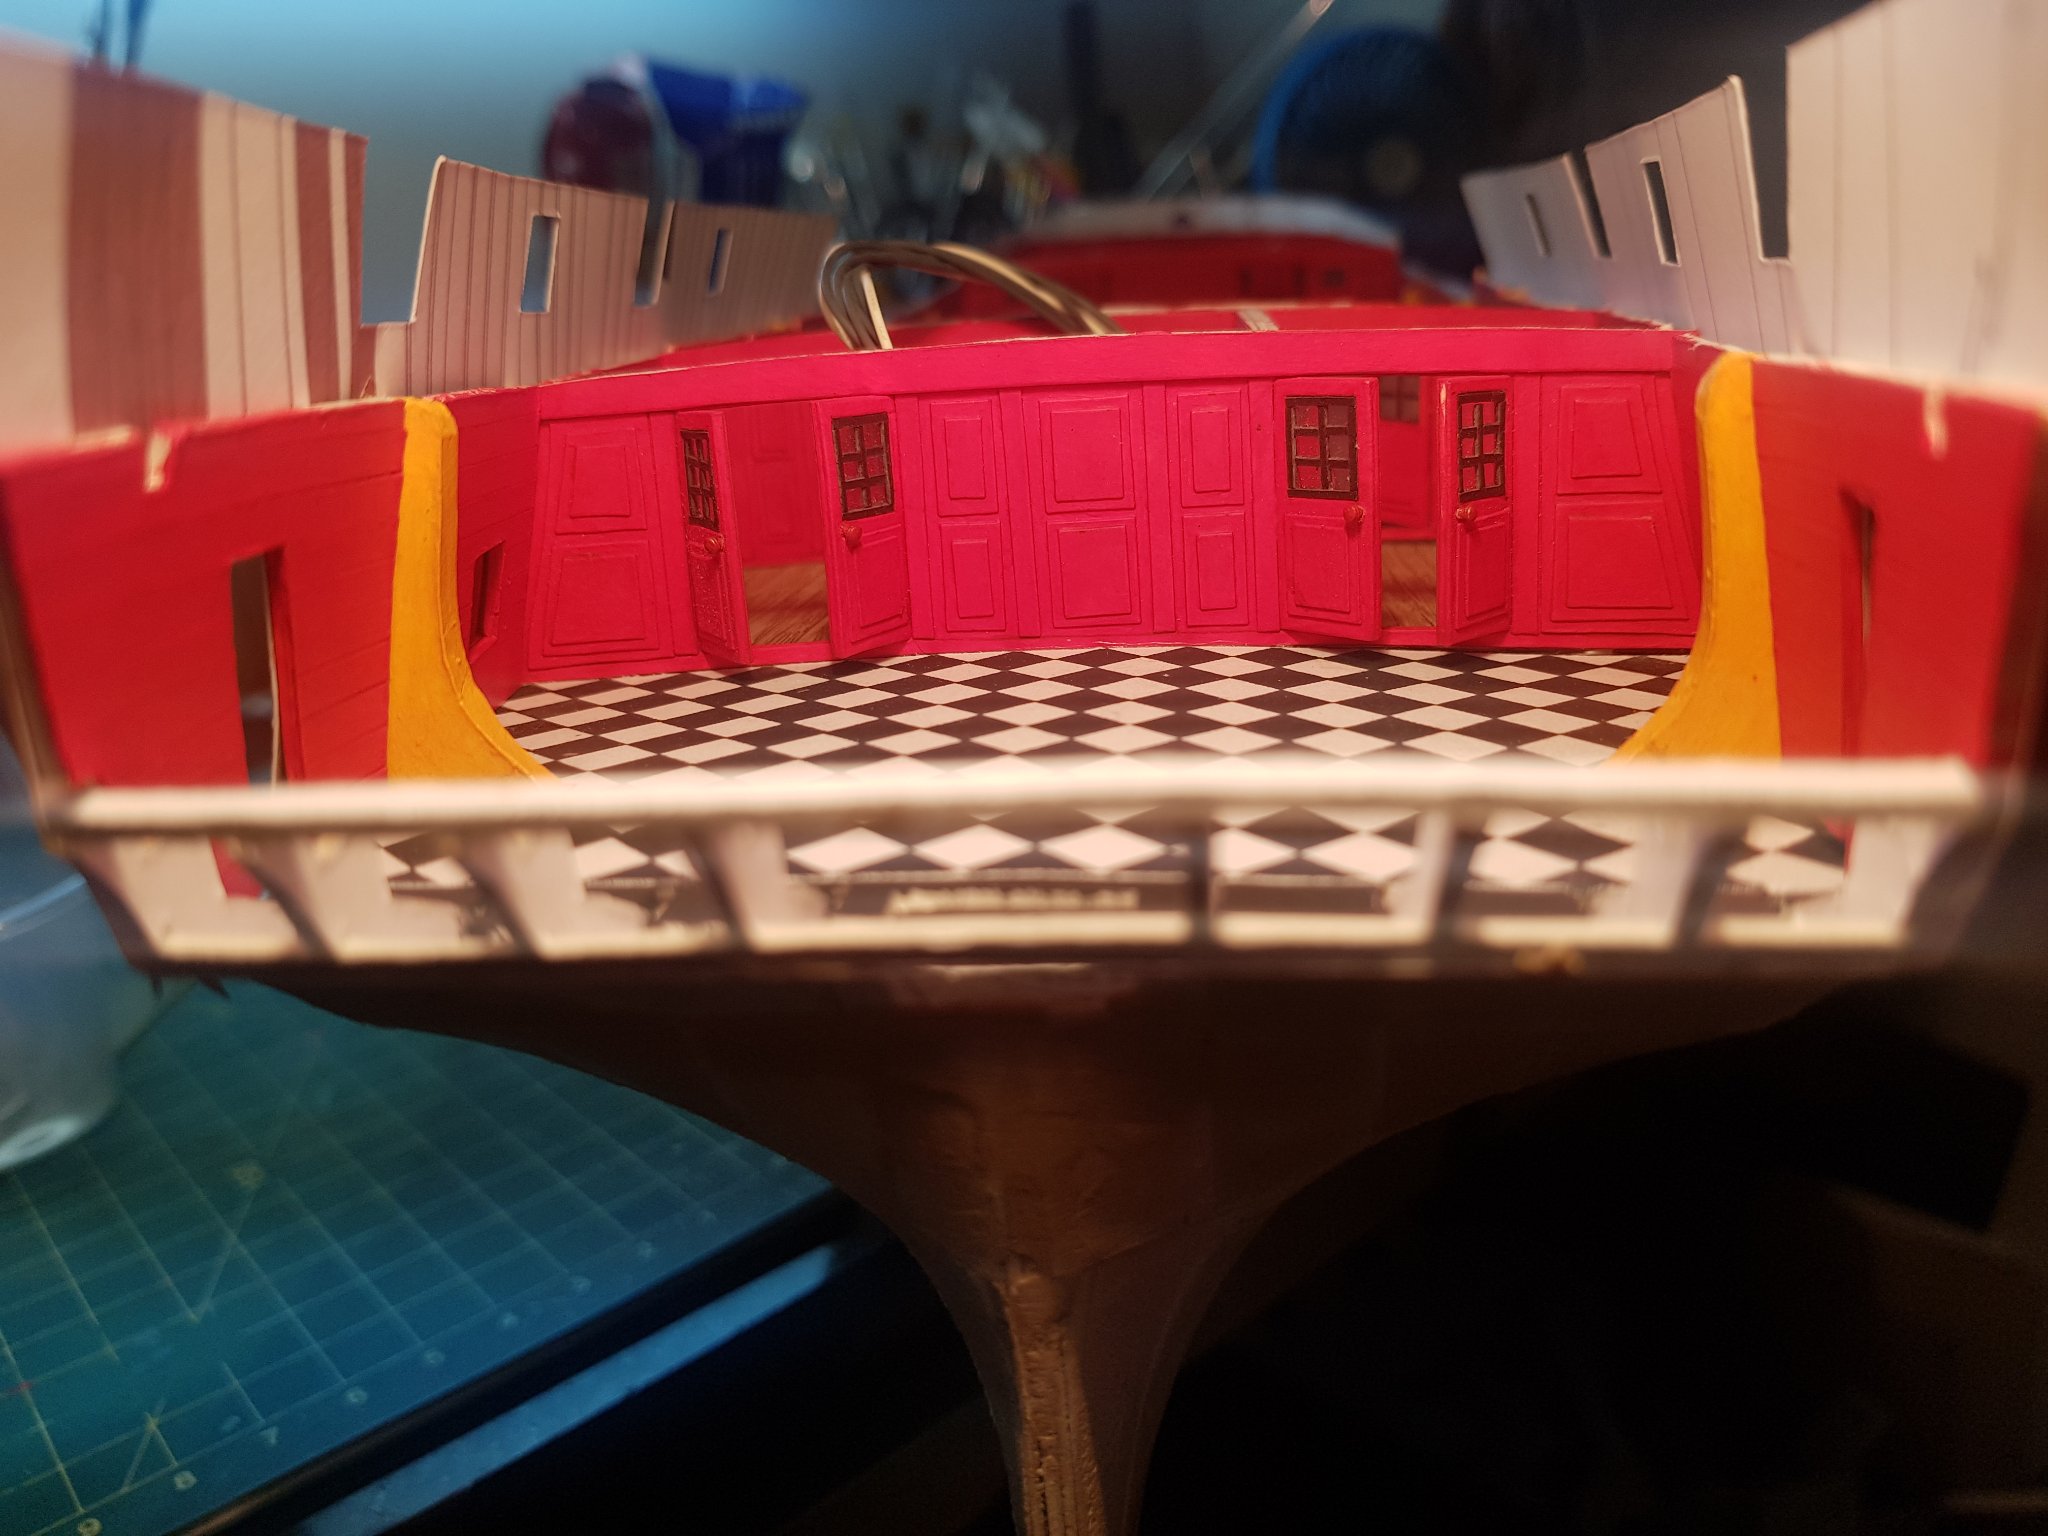
You are probably familiar with the movie "Master and Commander: The Far Side of the World" right, I am extremely impressed with the friendship and teamwork of the captain and the doctor so I made a violin, a Contrebasse and 4 swords of captain.

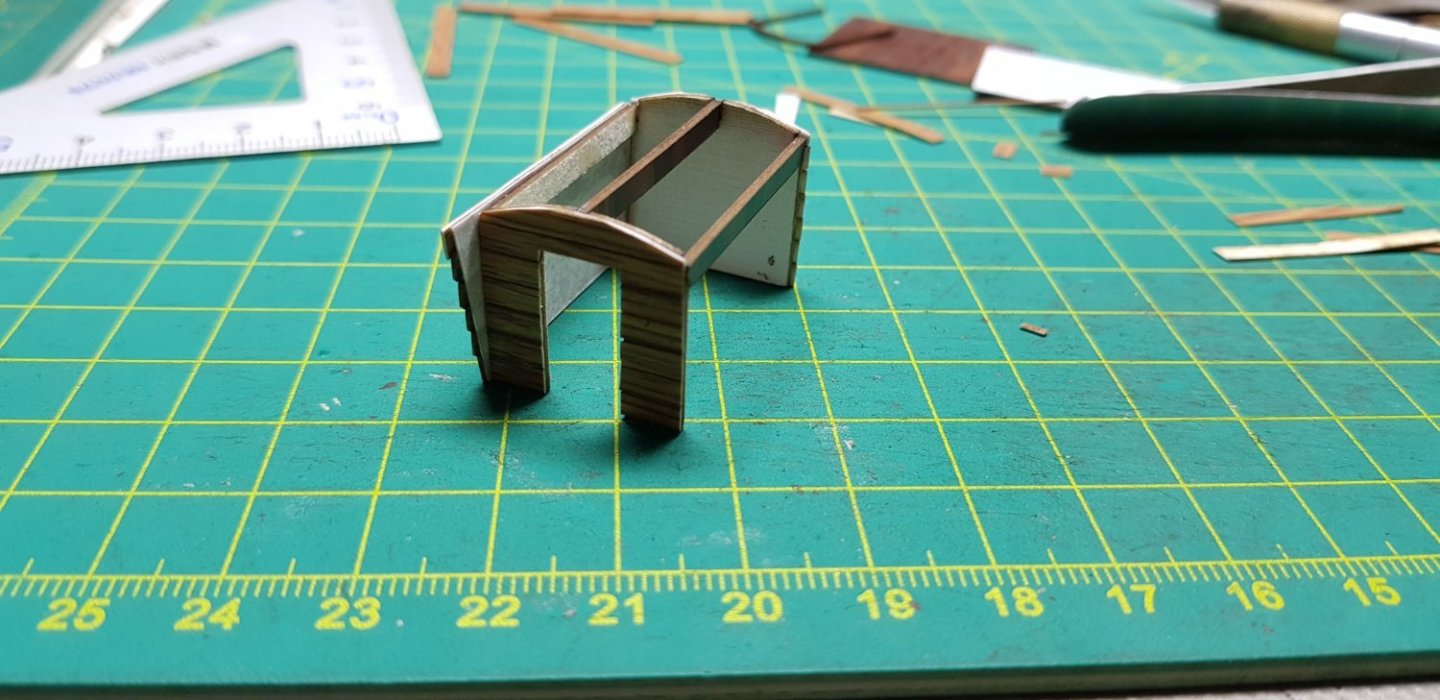
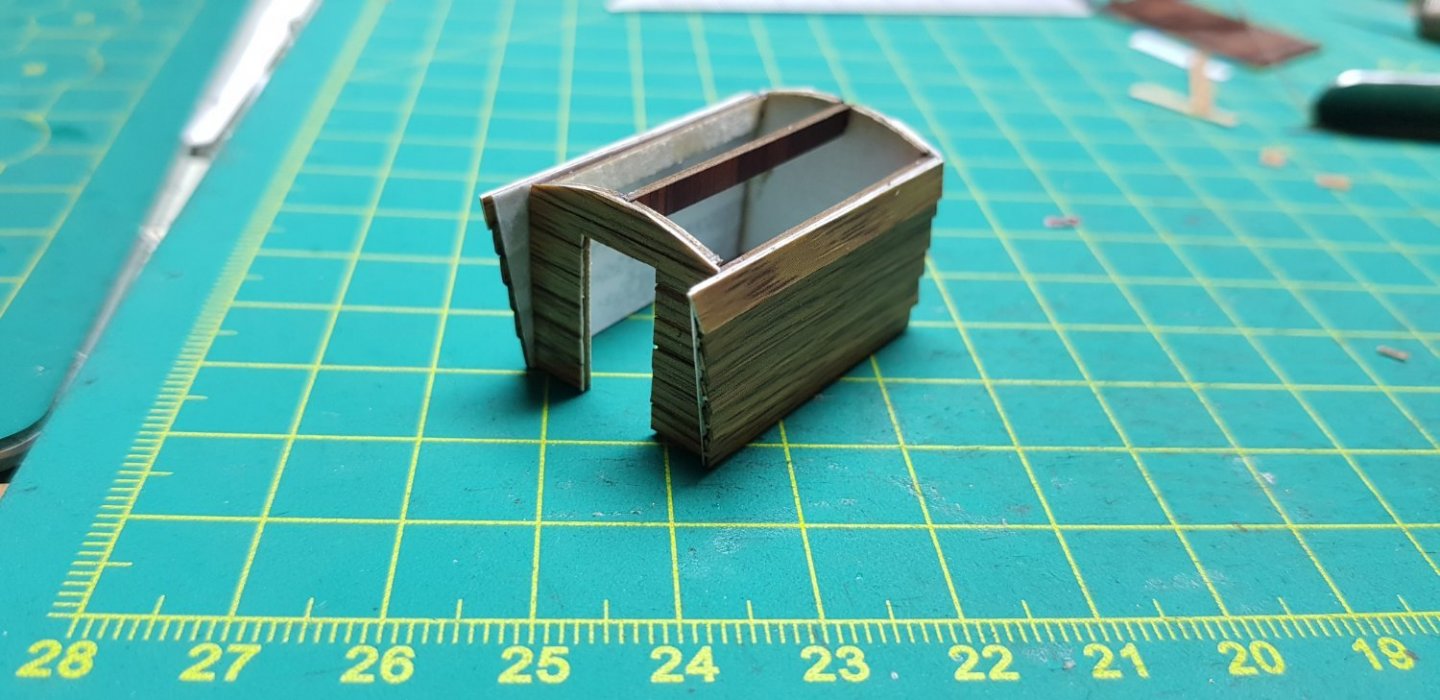
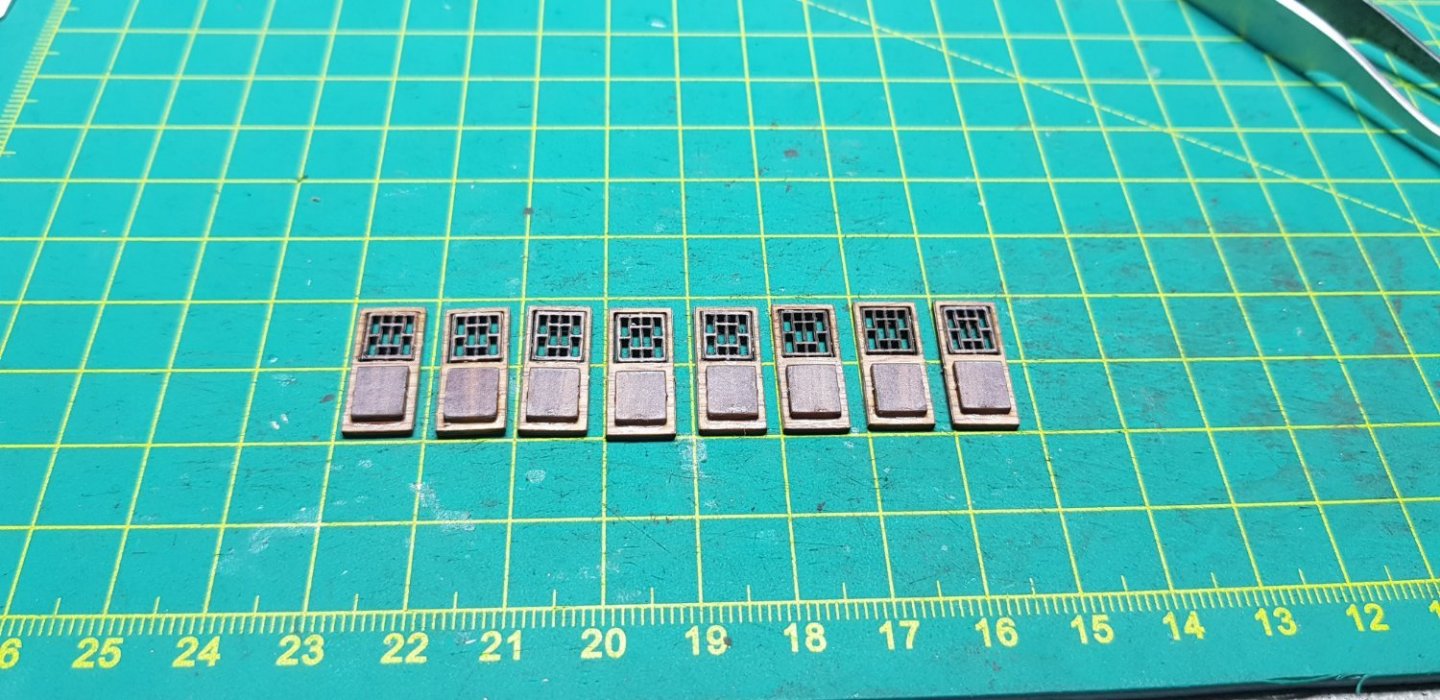
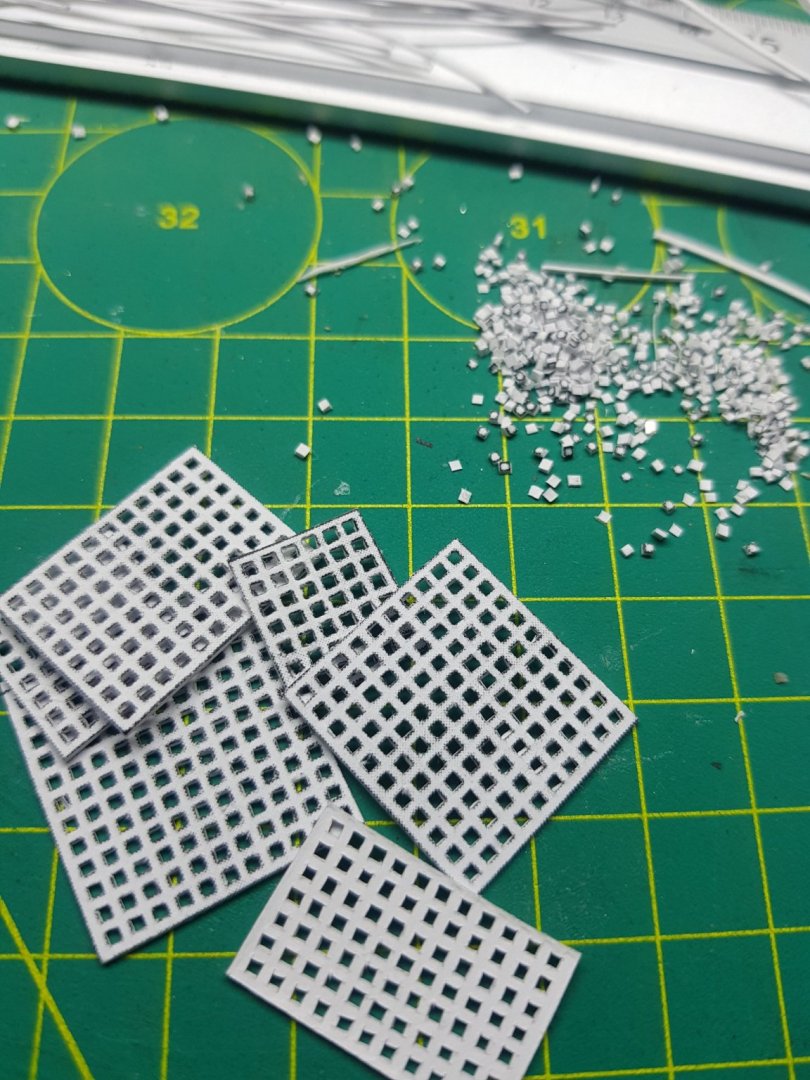
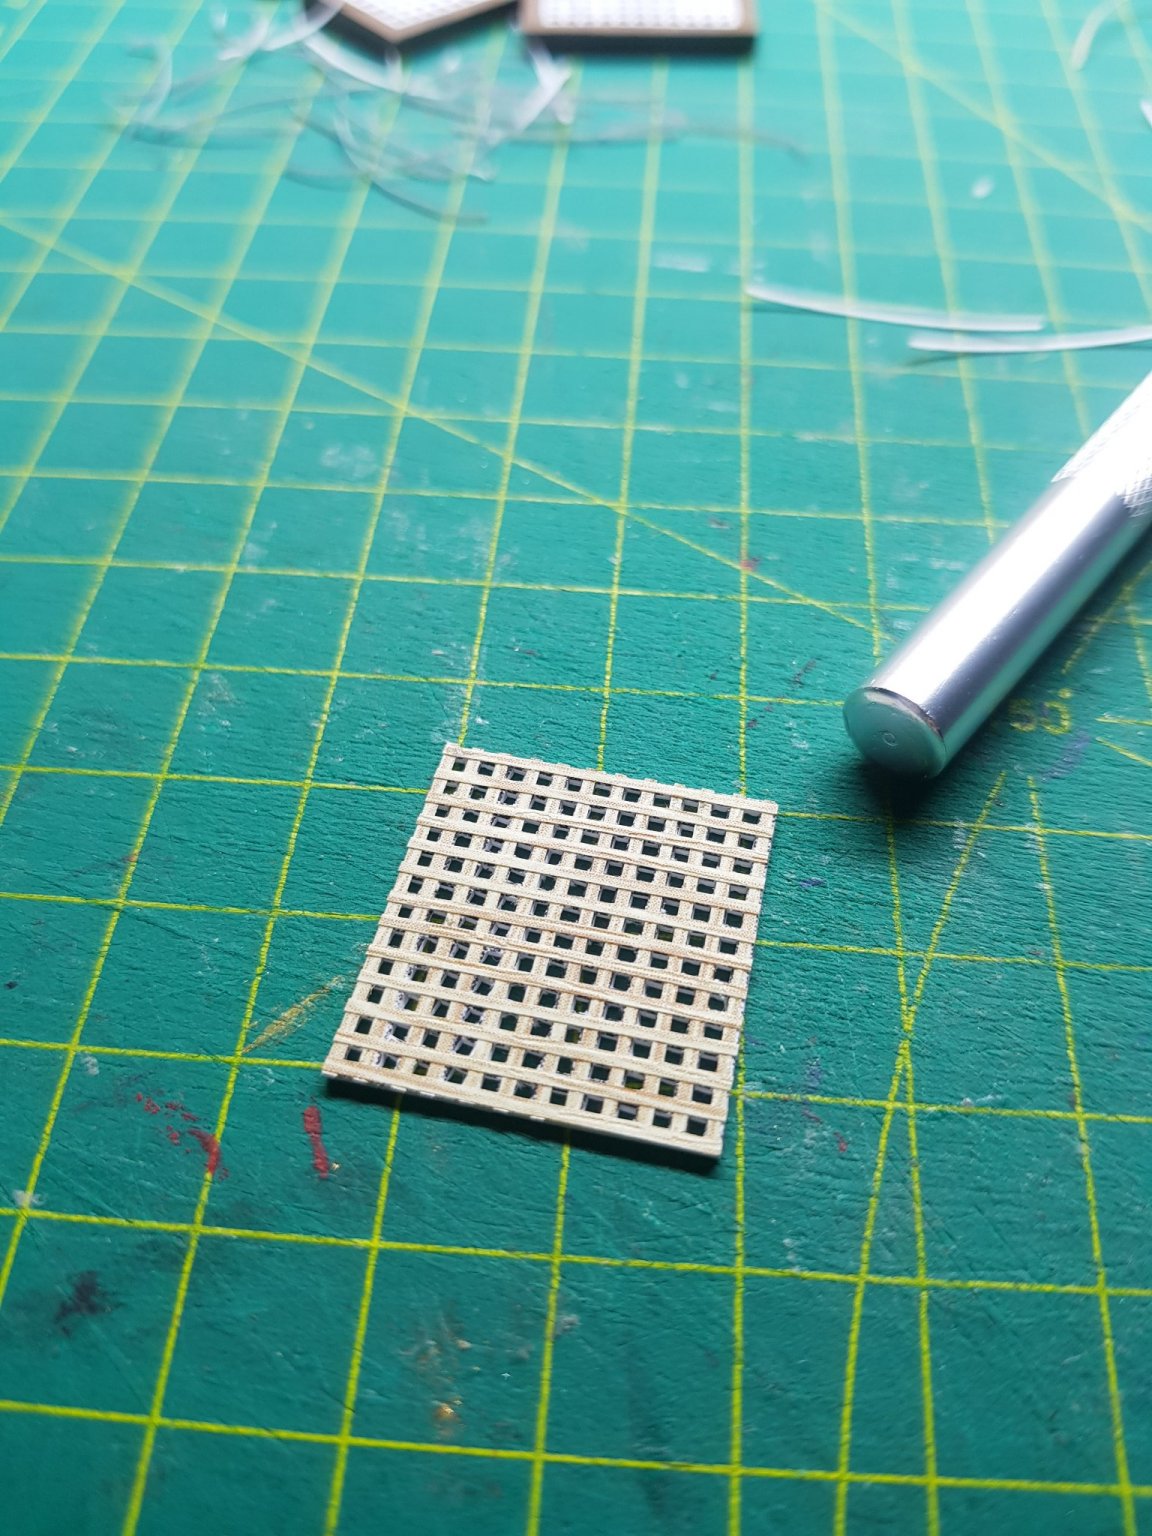
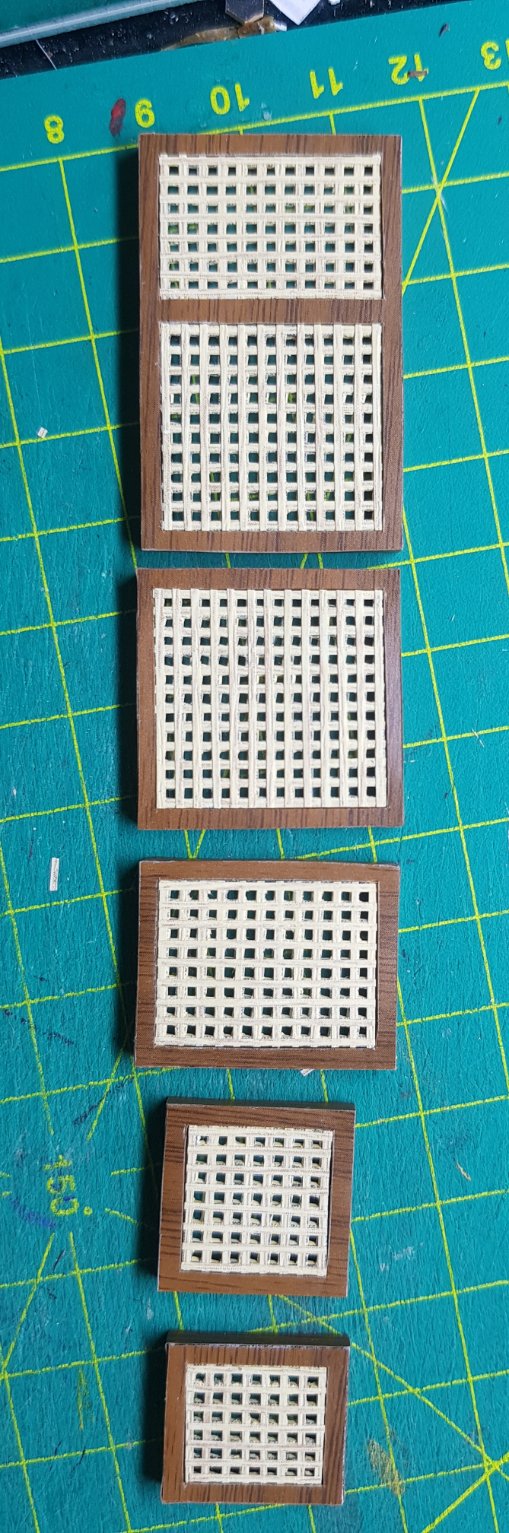
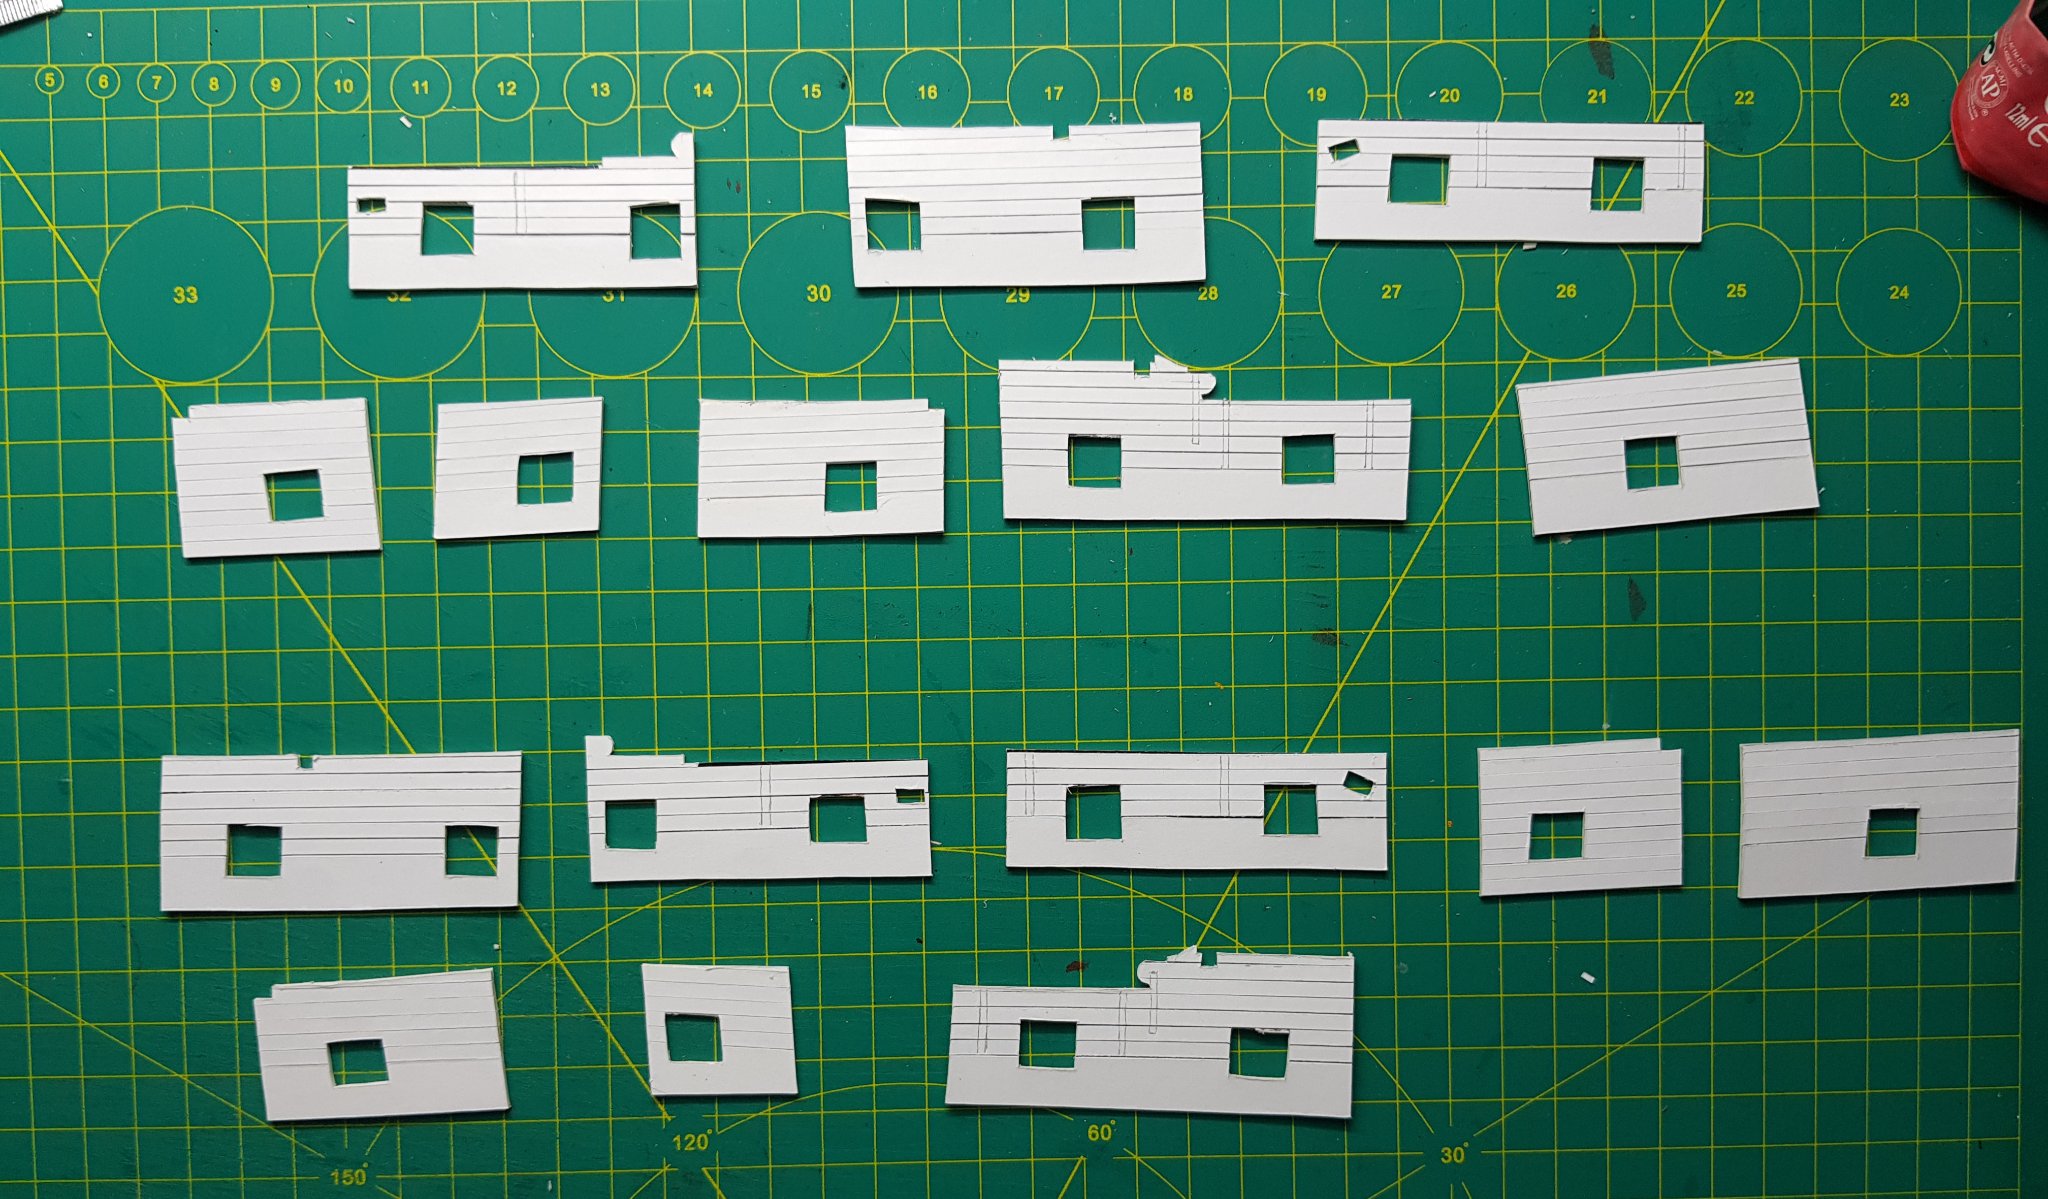
the hatch cover was a tough experience for me as it took me 10 hours to be able to punch holes in it.
However I am not satisfied with them yet, so I cut the decal into strands and then stick it on.


.
-
-
This is all I work in a month, I think I did it faster than planned. Because I can only work on evenings and weekends and I intend to finish this ship within 5 months.
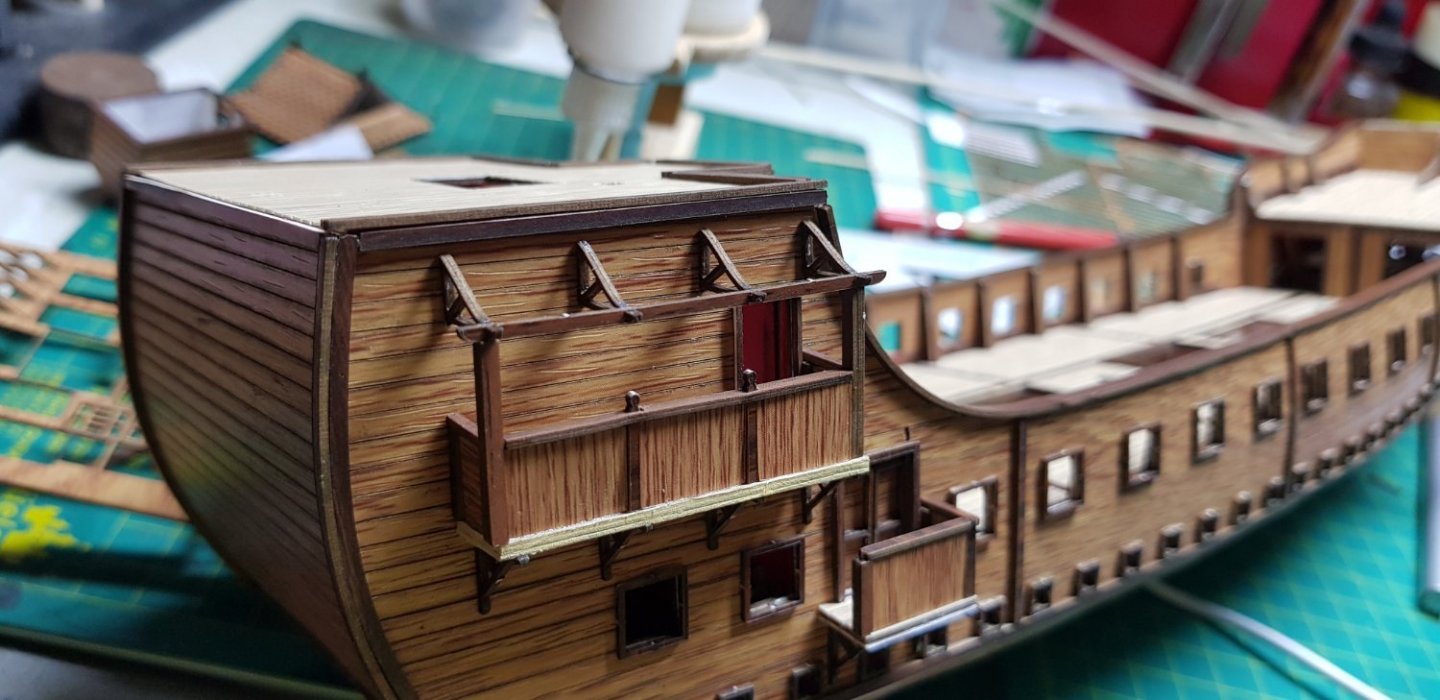
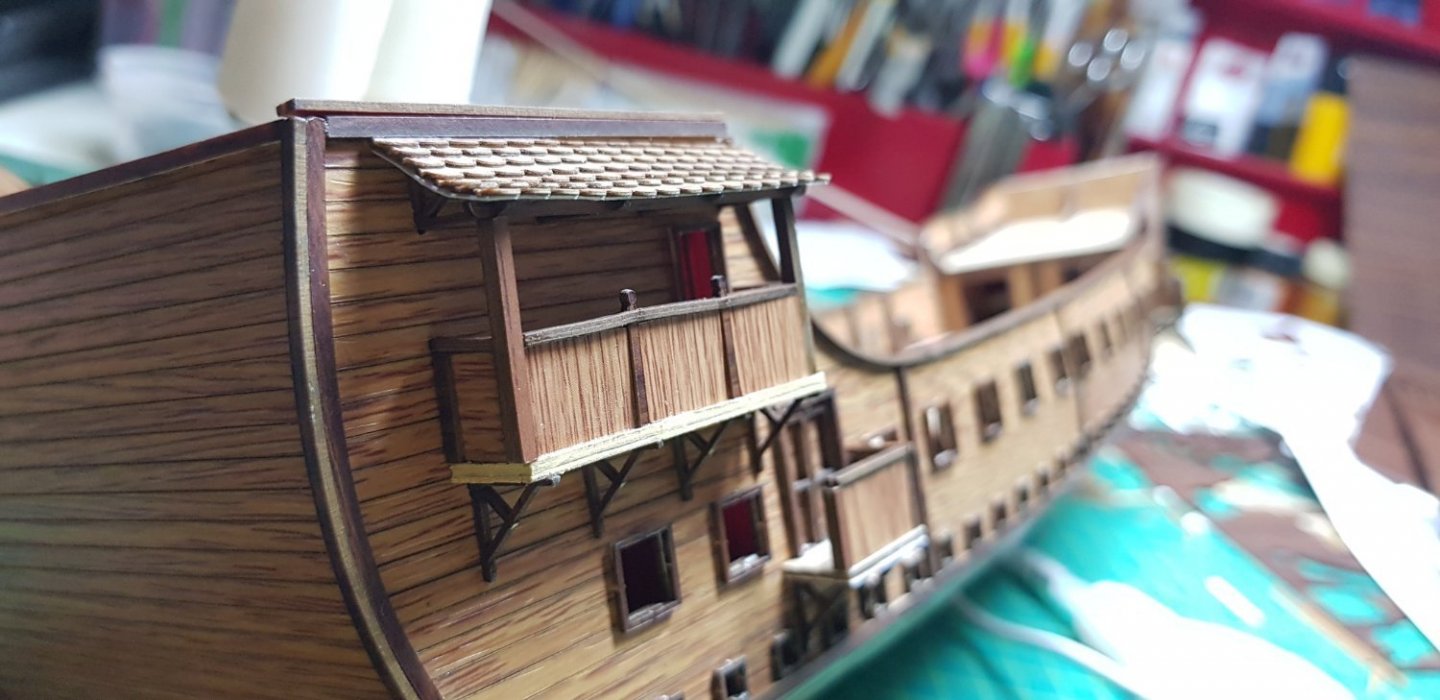
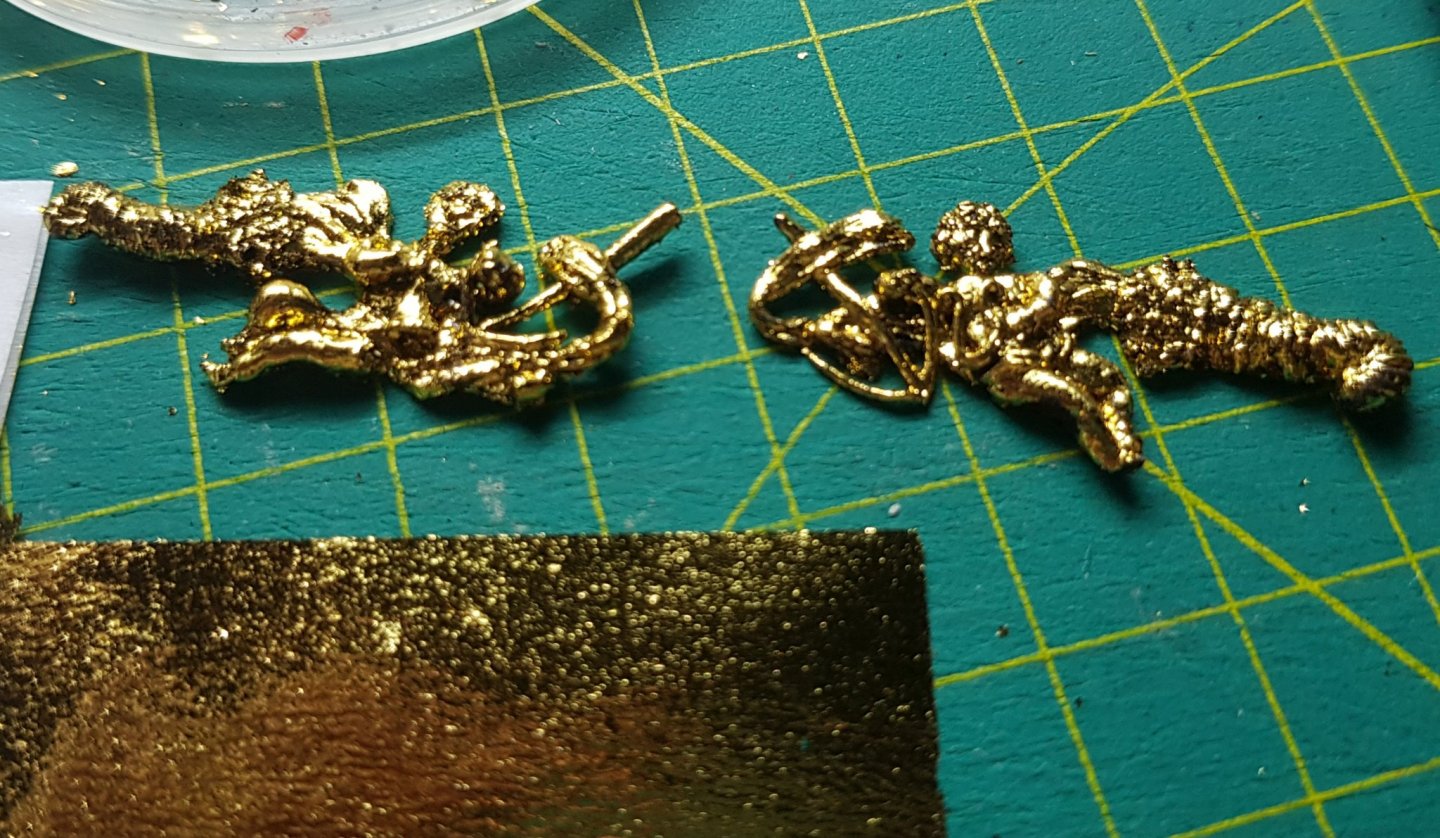
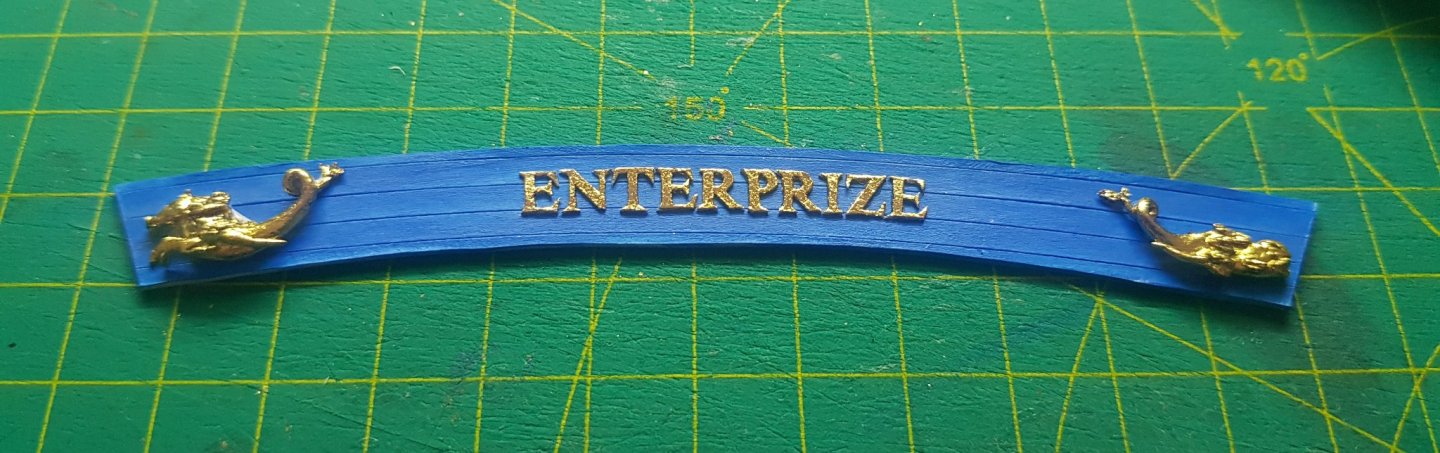
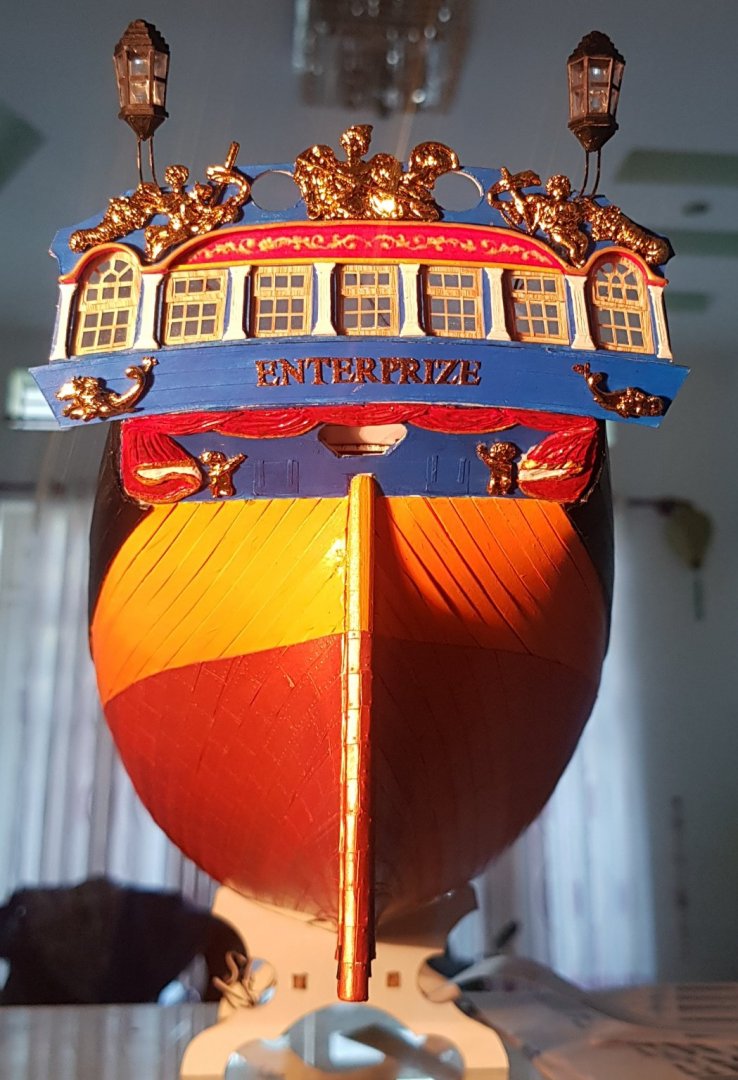
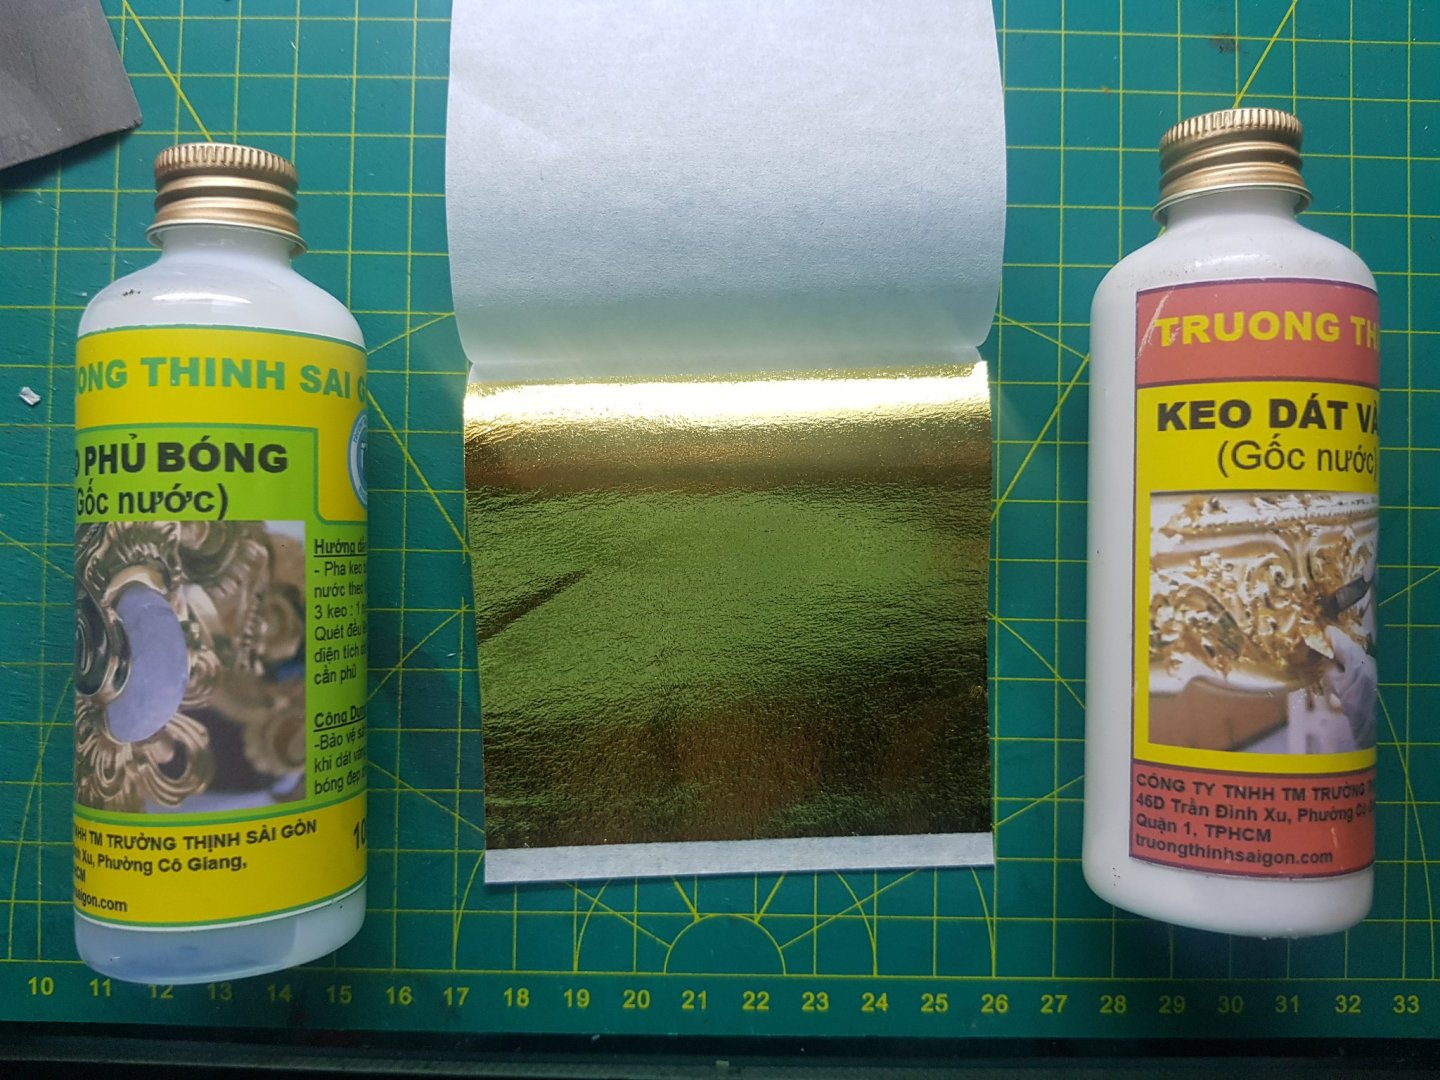
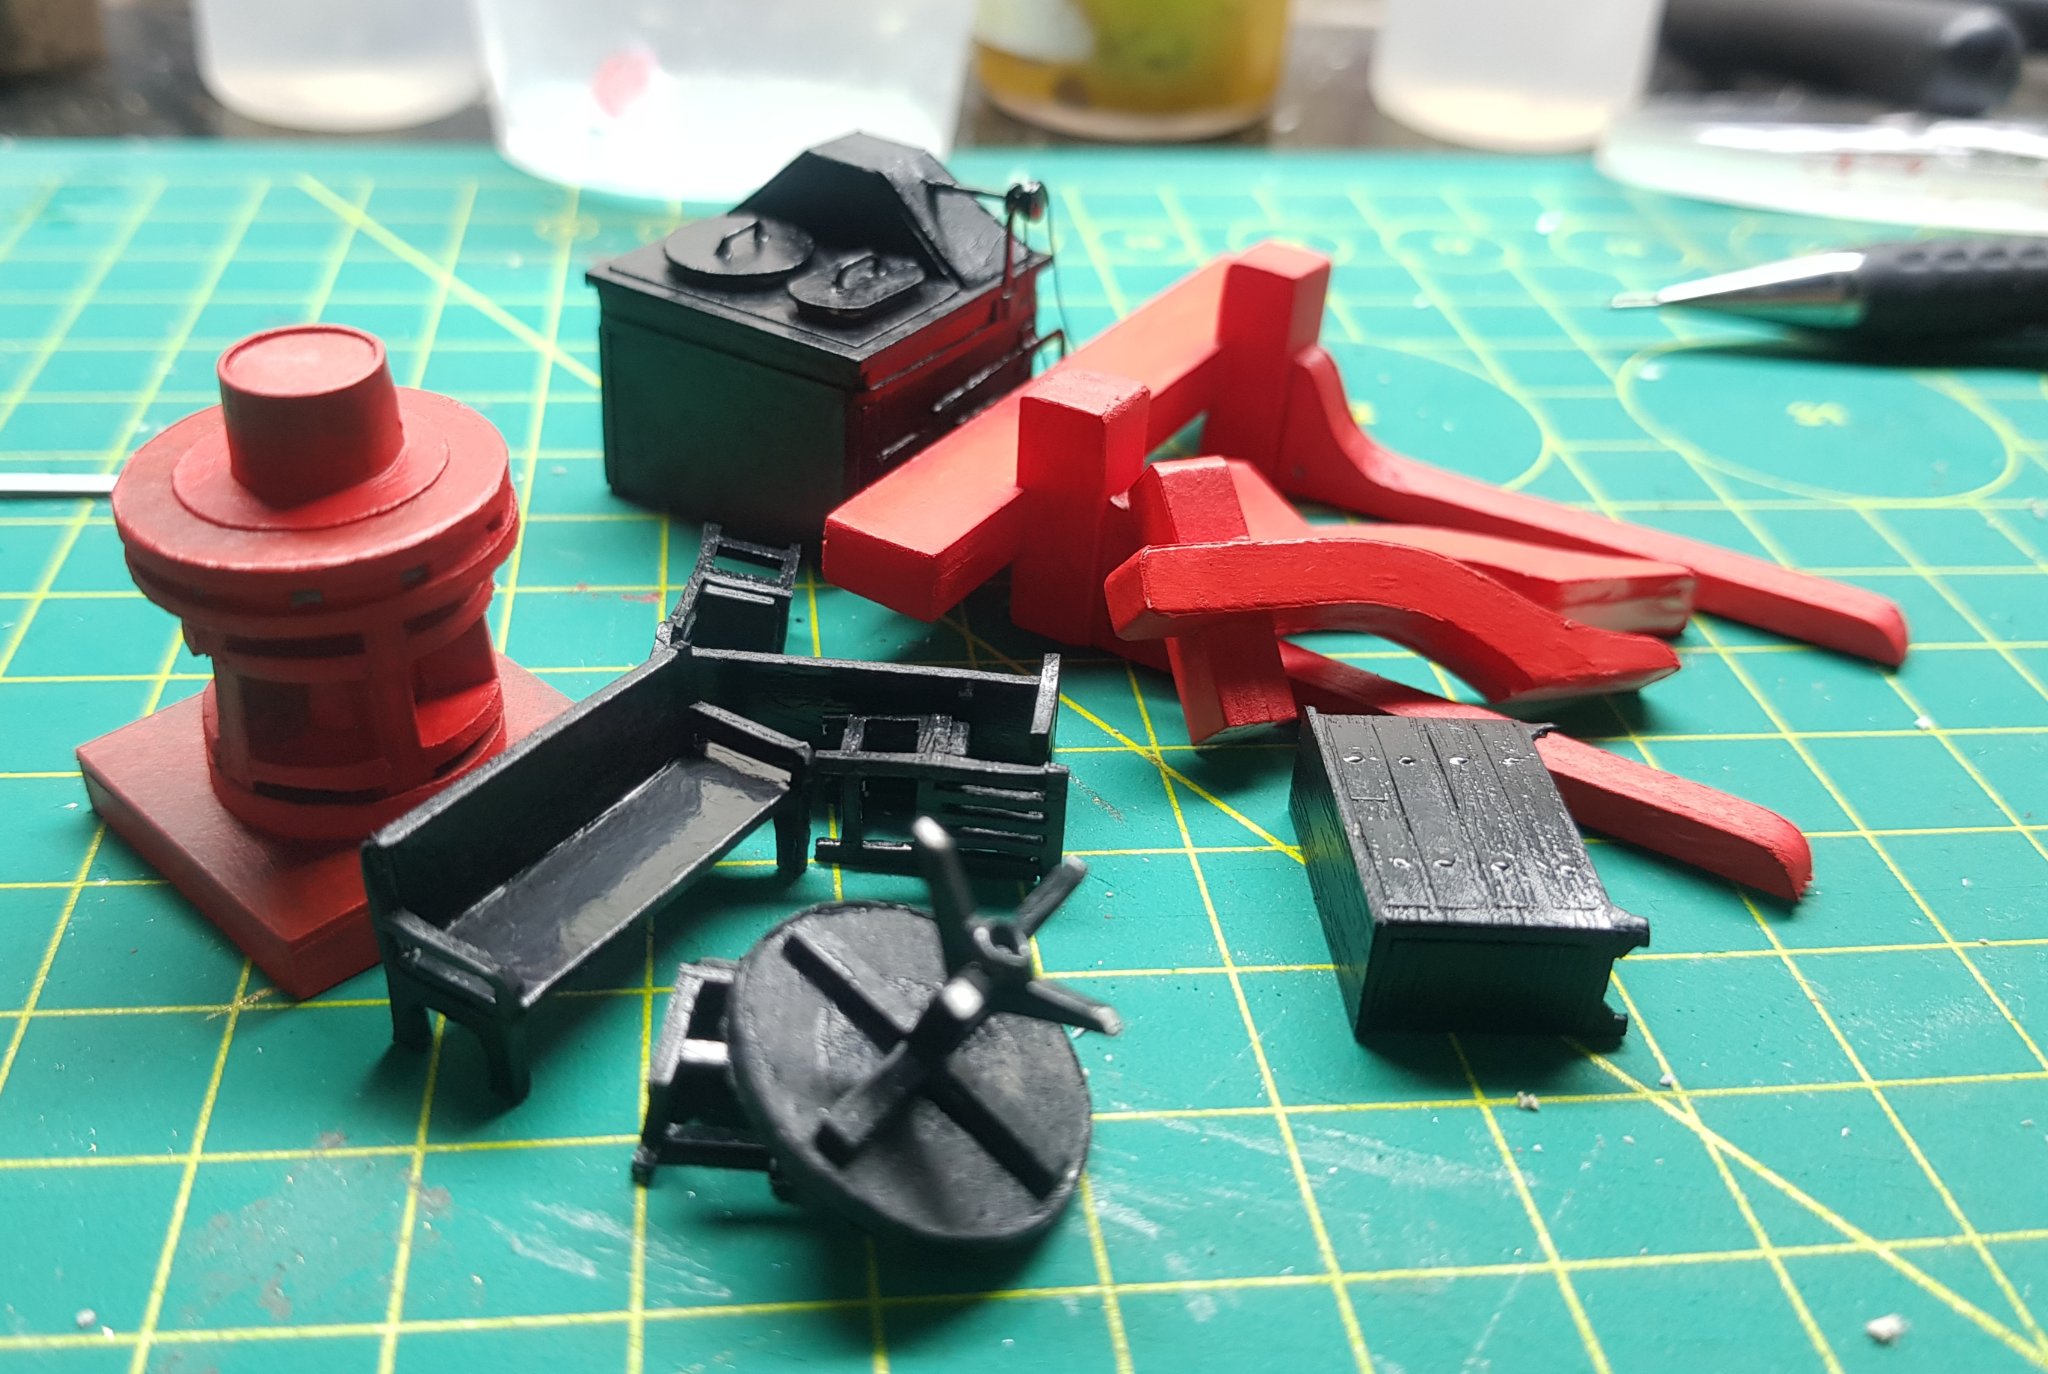
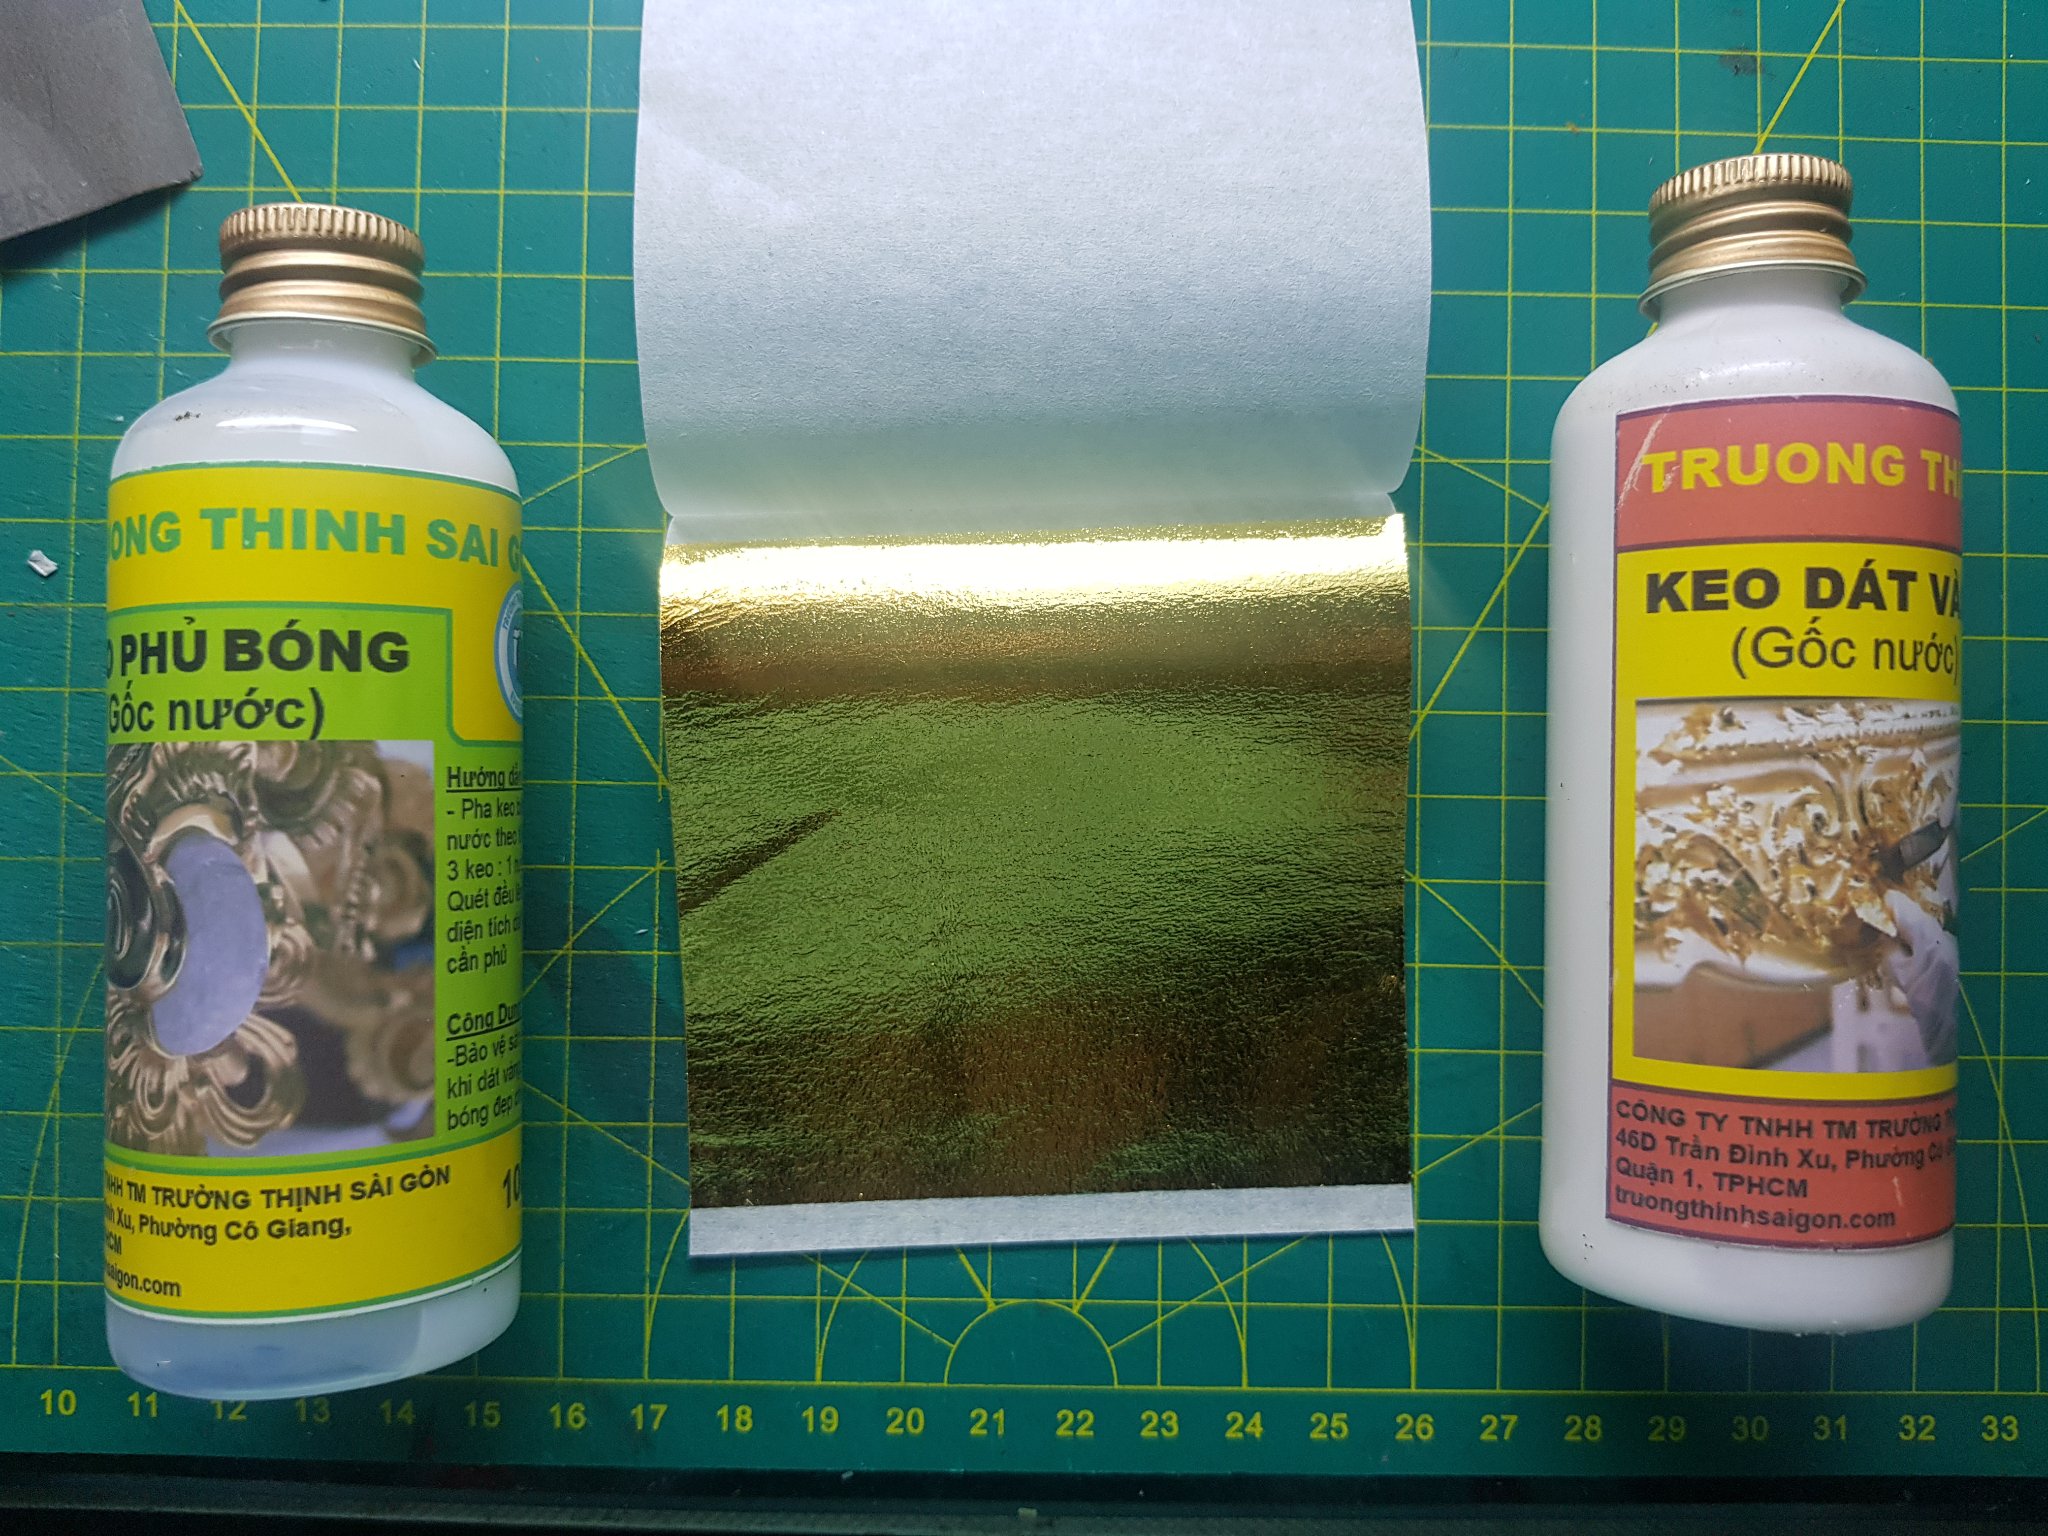
I use polymer clay to sculpt decorative motifs and use gold leaf to coat the exterior. This work seems more difficult than using alchemy paint but the finished product after gilding looks luxurious.


-
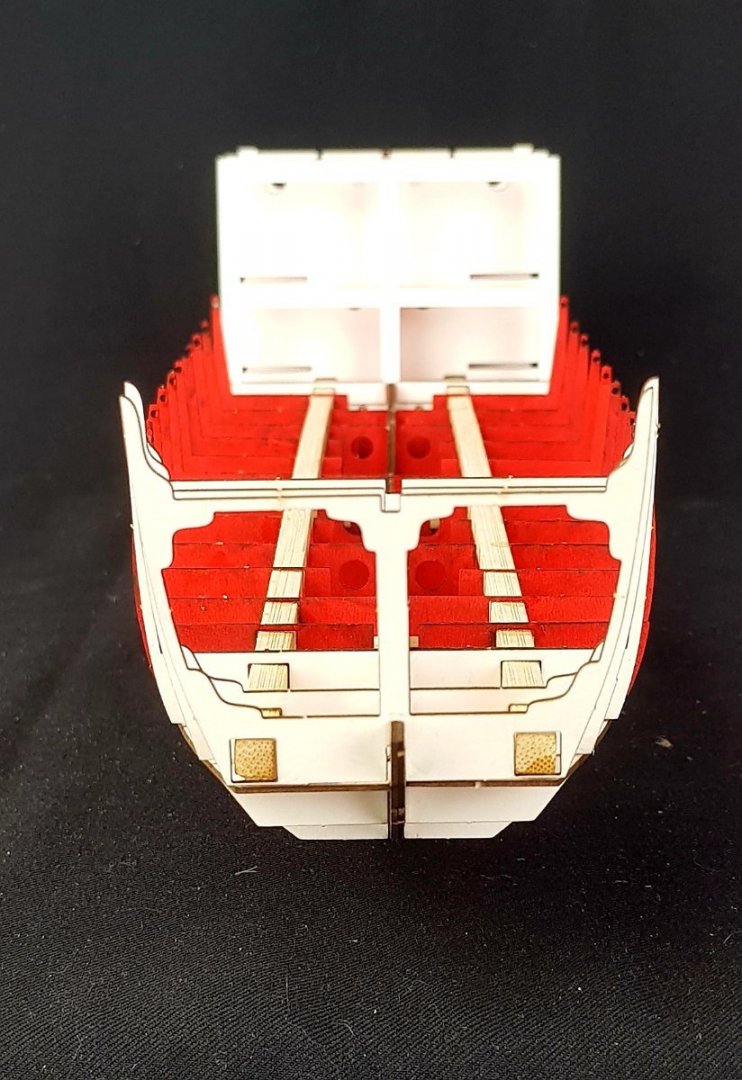
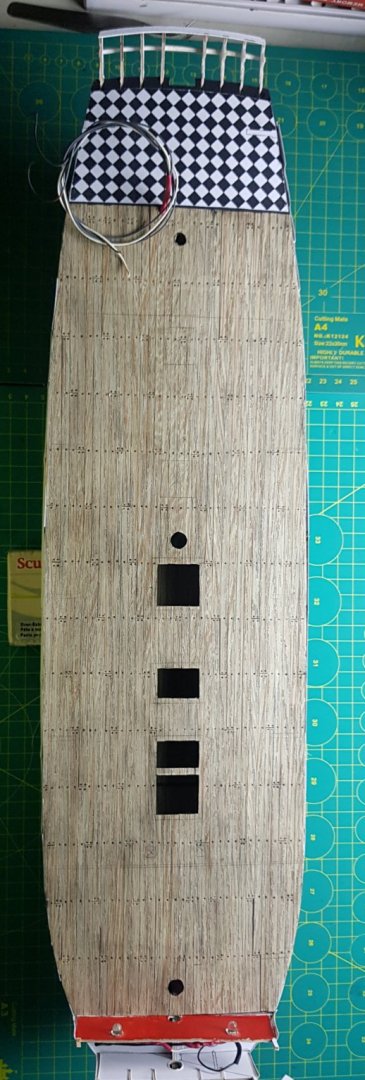
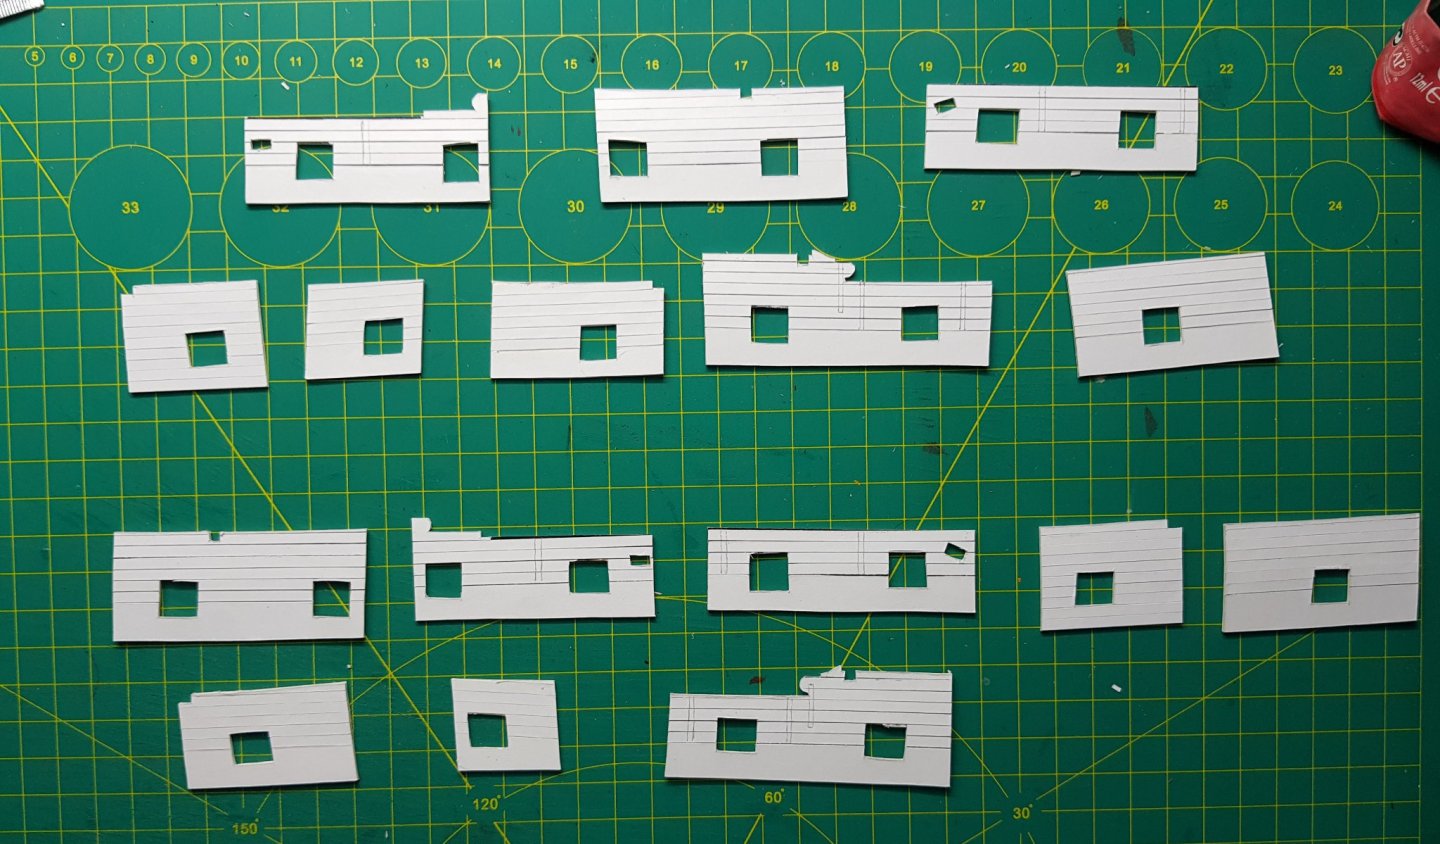
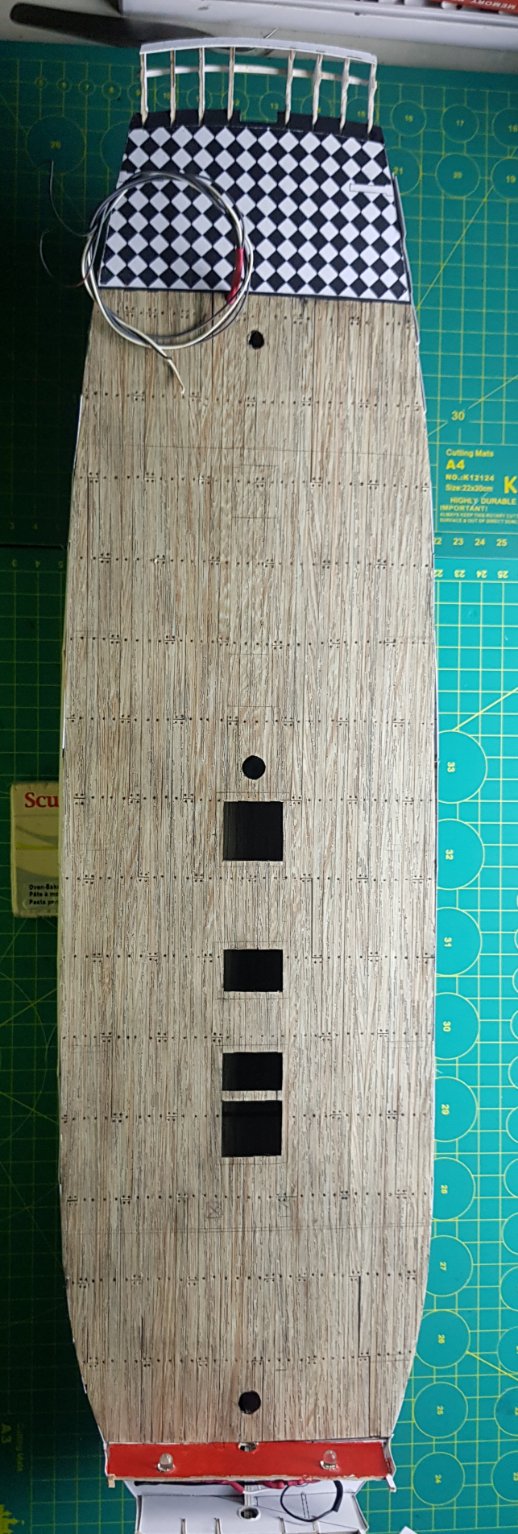
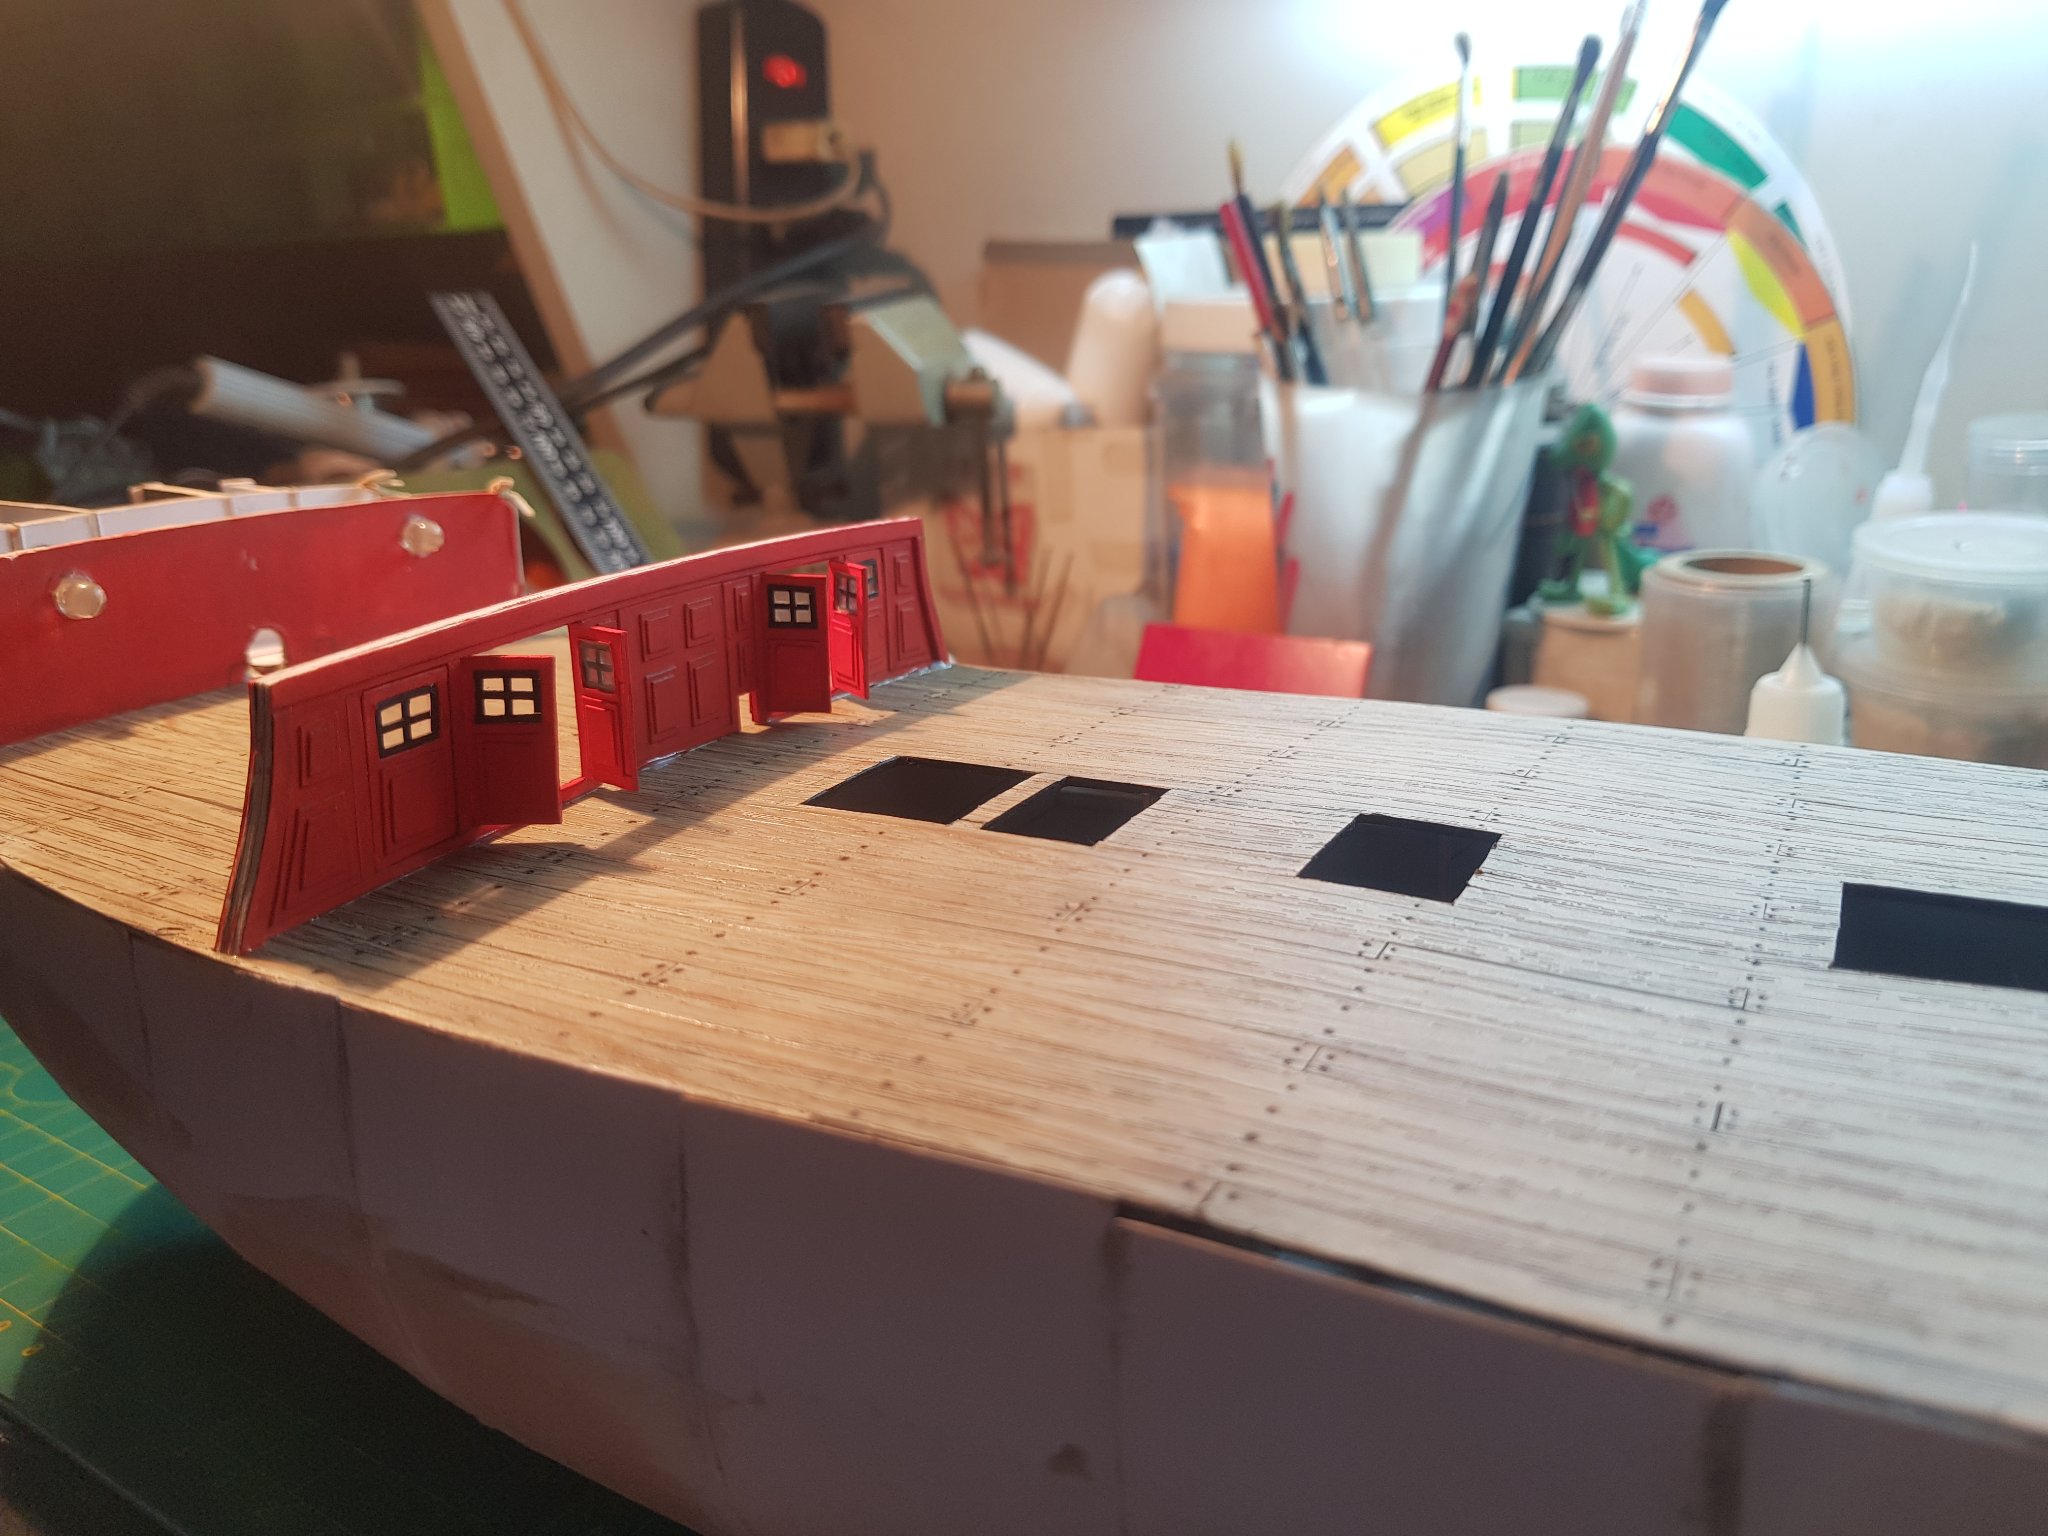
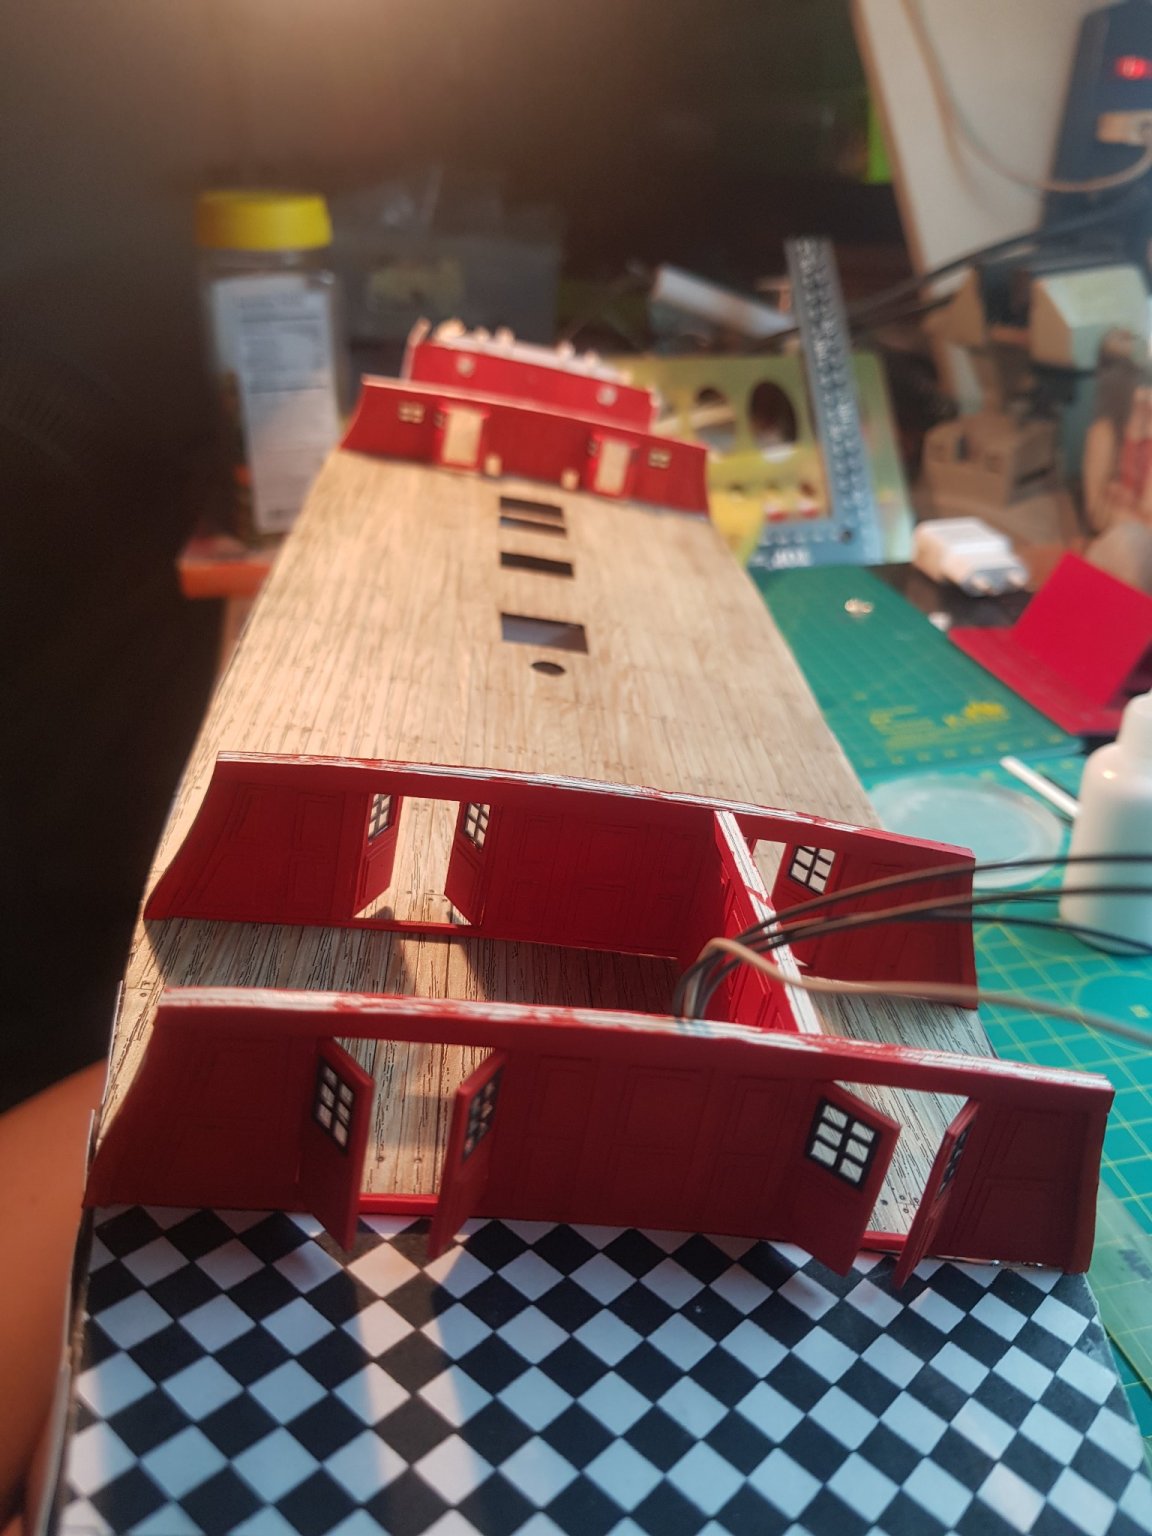
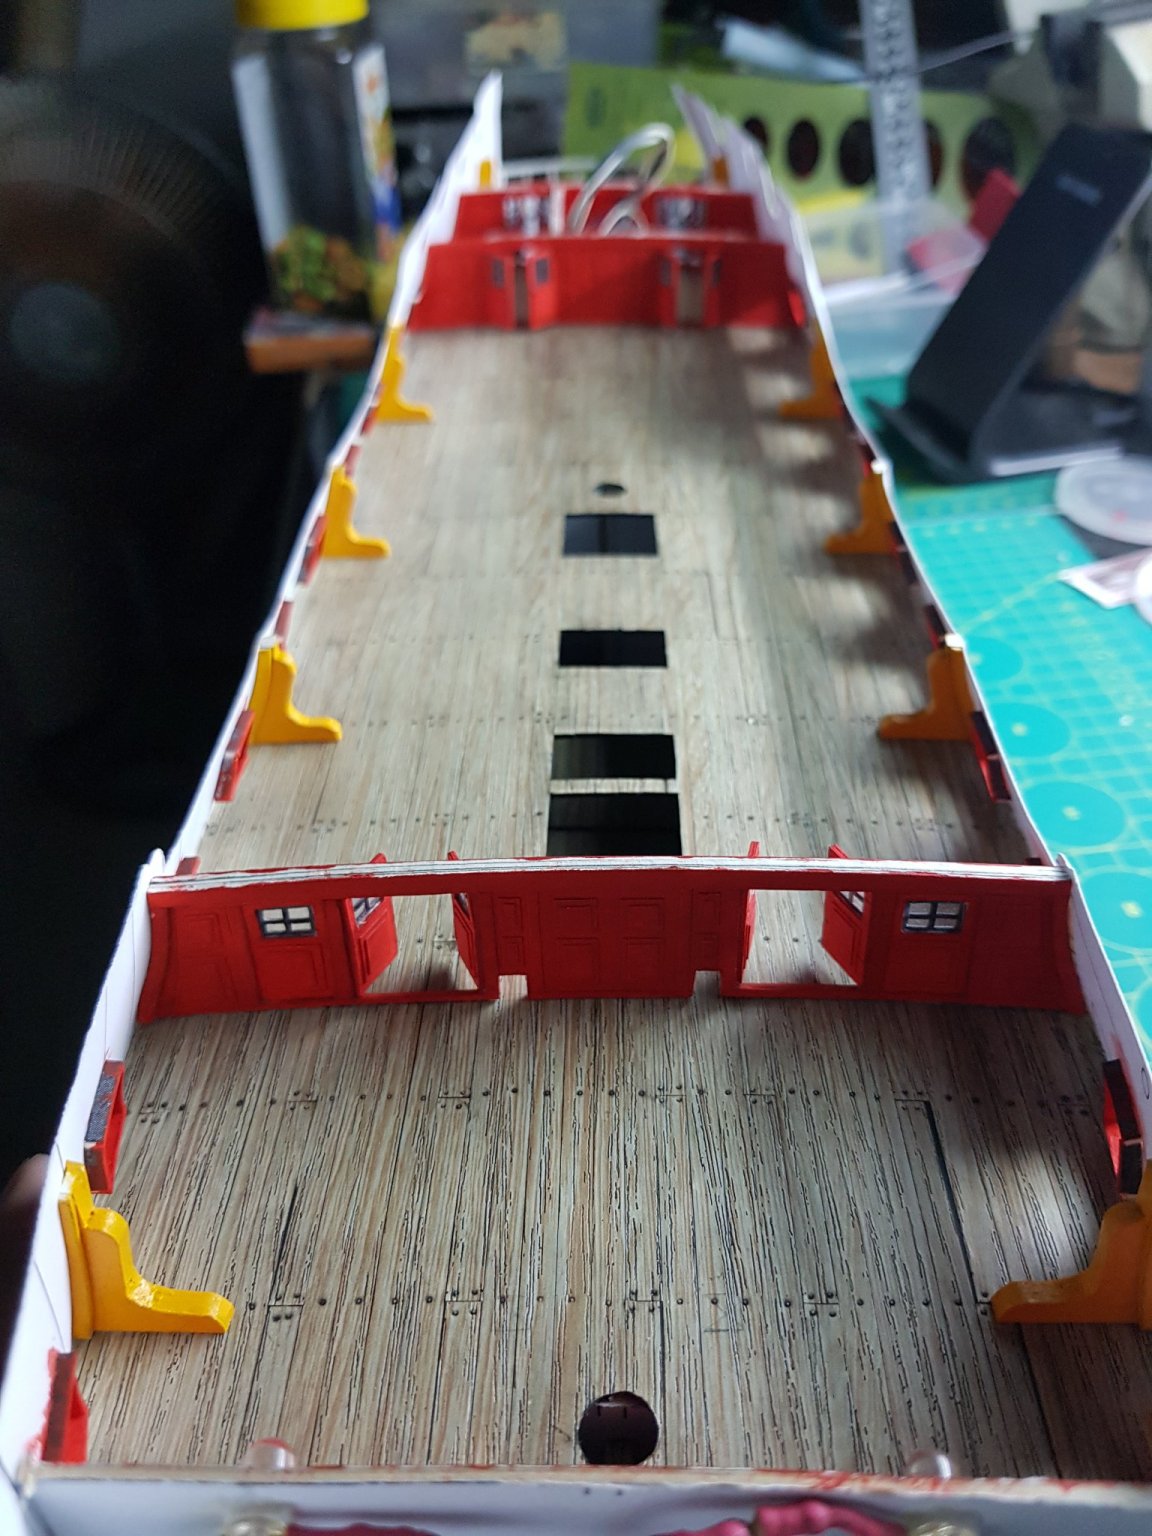
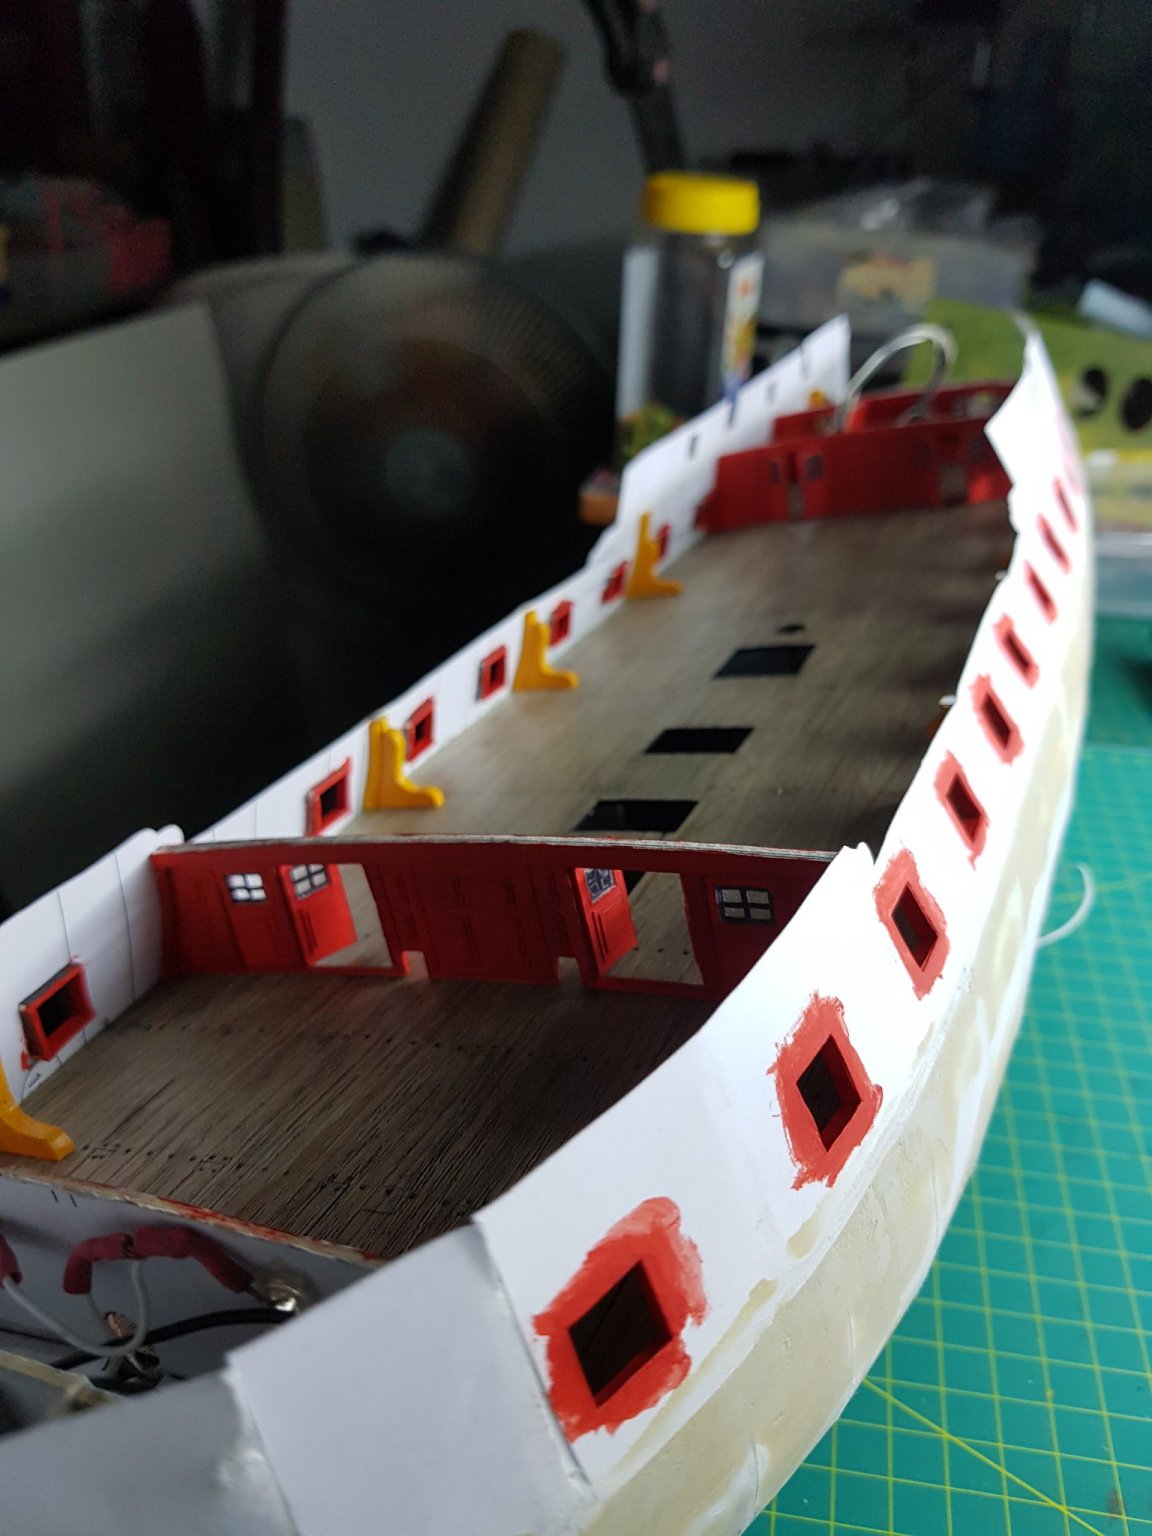
I started making the decks with using 1mm cardboard and decal, however in the process I forgot to look at the instructions so the deck was thinner than the kit. When using decal paper for flooring I think it is not really suitable if using water-based glue as it is not sticky, however this will be solved if I cut off the parts of decal that have direct contact continued with the details on the deck.

I used Master Pastel and water to accentuate the rivet details on the deck, however I still feel dissatisfied because it seems that the Master pastel that I use clings quite a bit to the floor color. seems a bit black compared to what I intended.
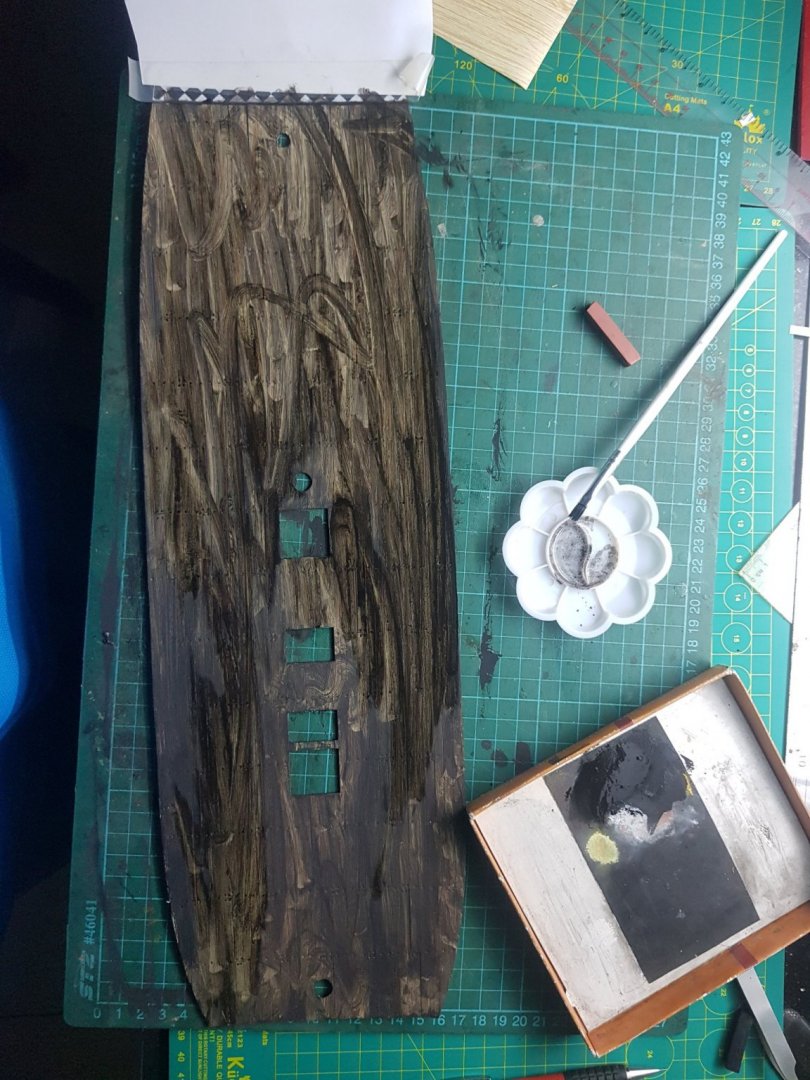
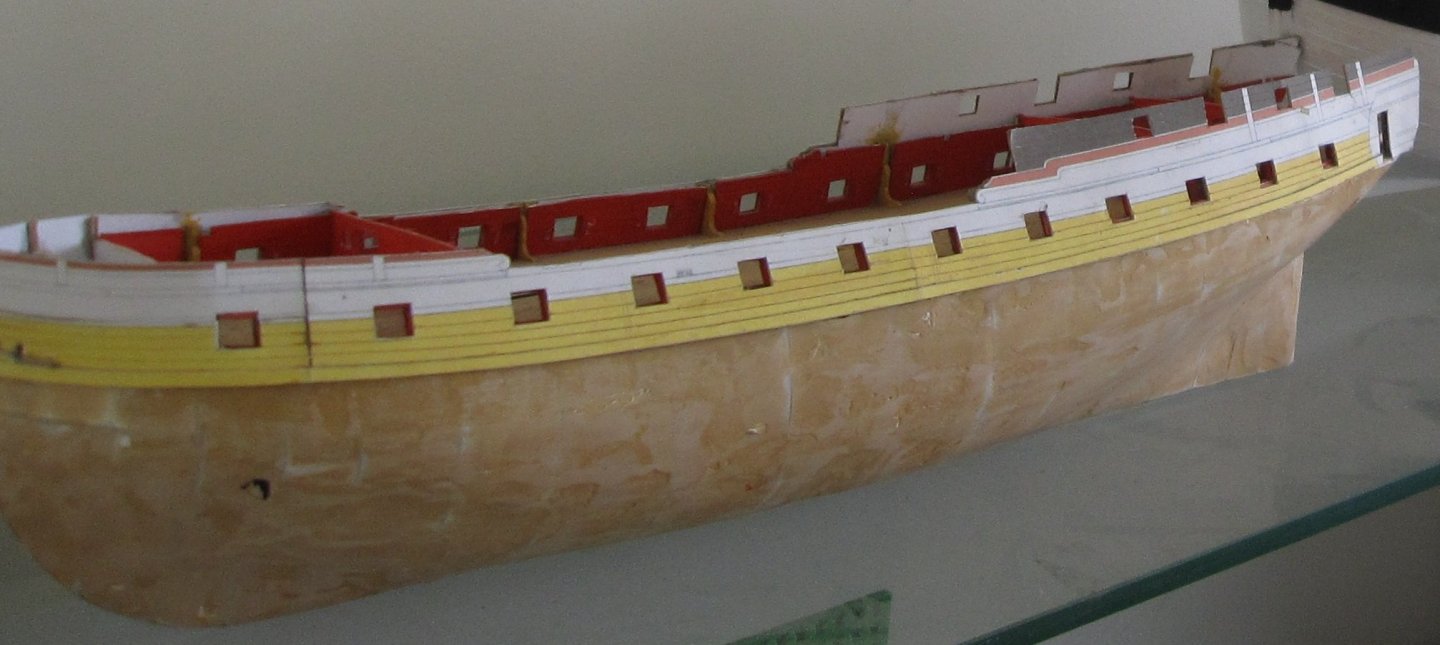
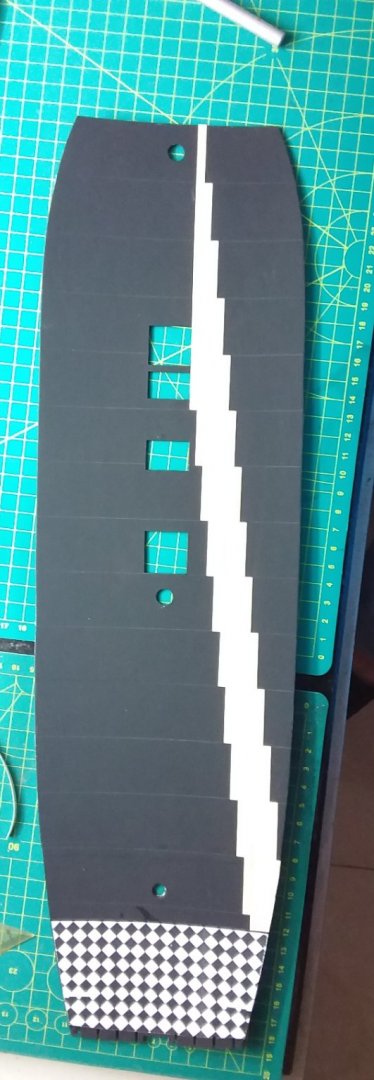
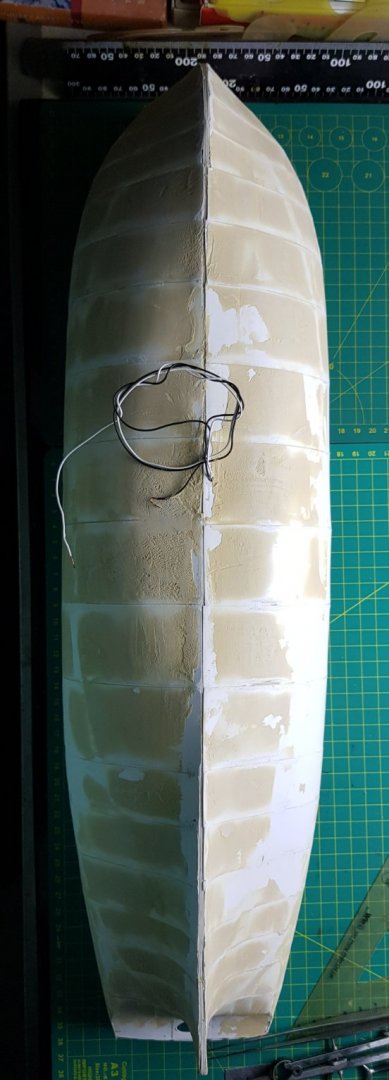
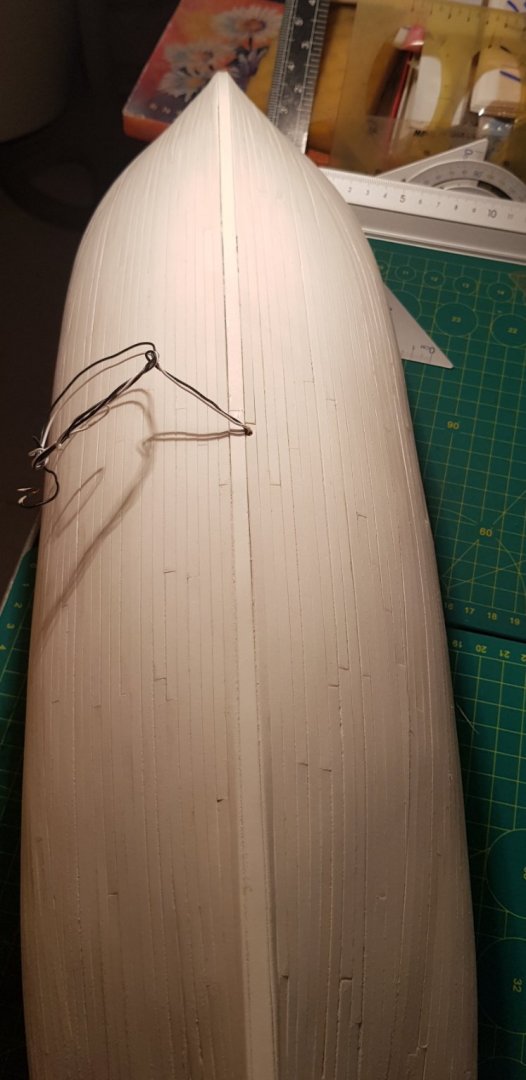
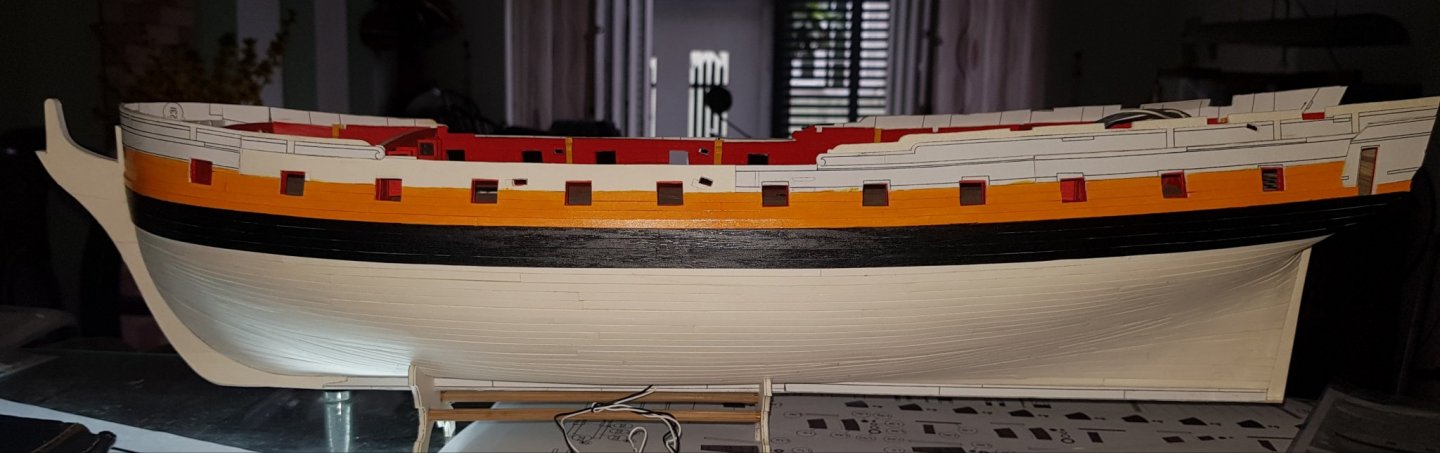
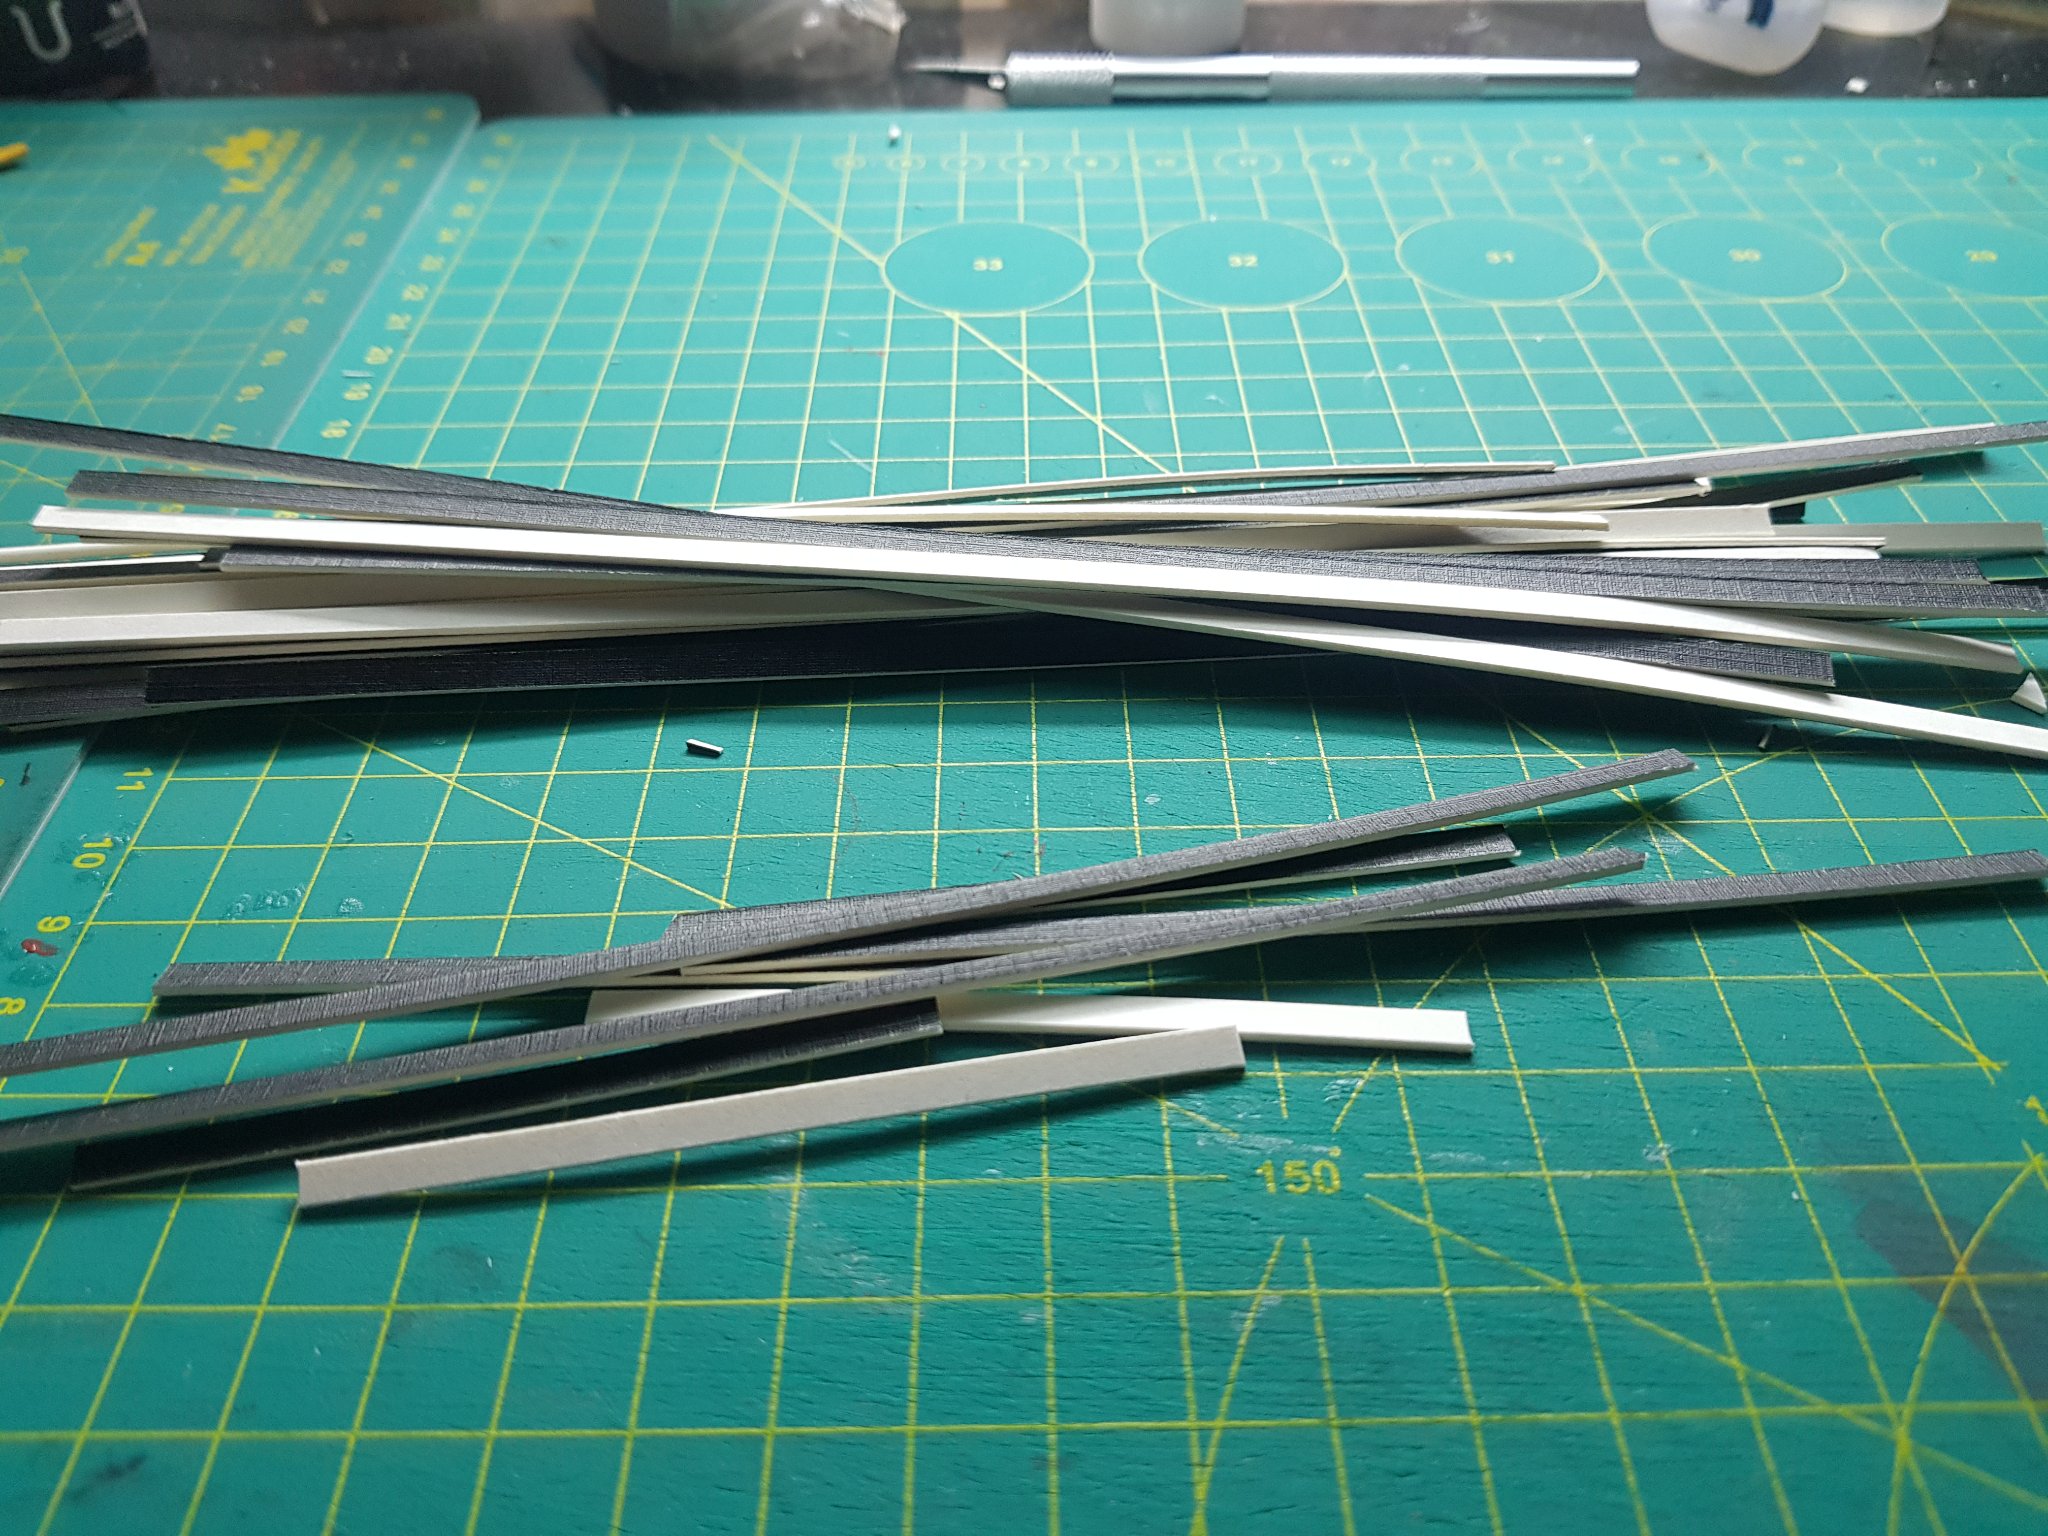
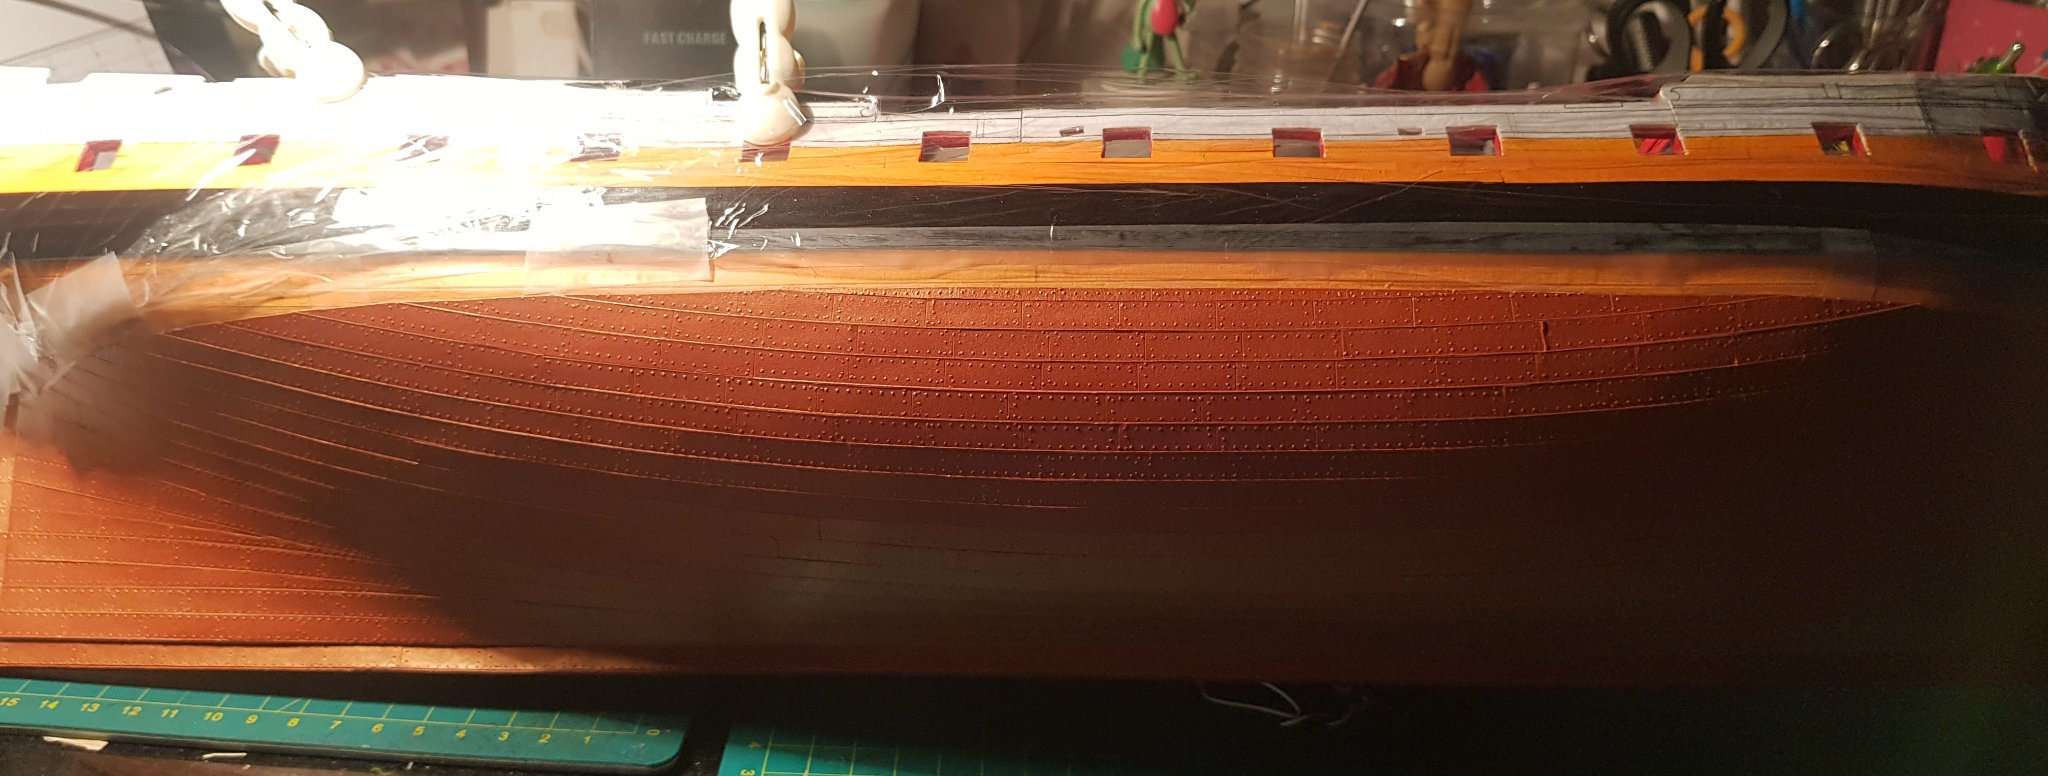
after making the decks I began to wrap the hull with 300gsm paper

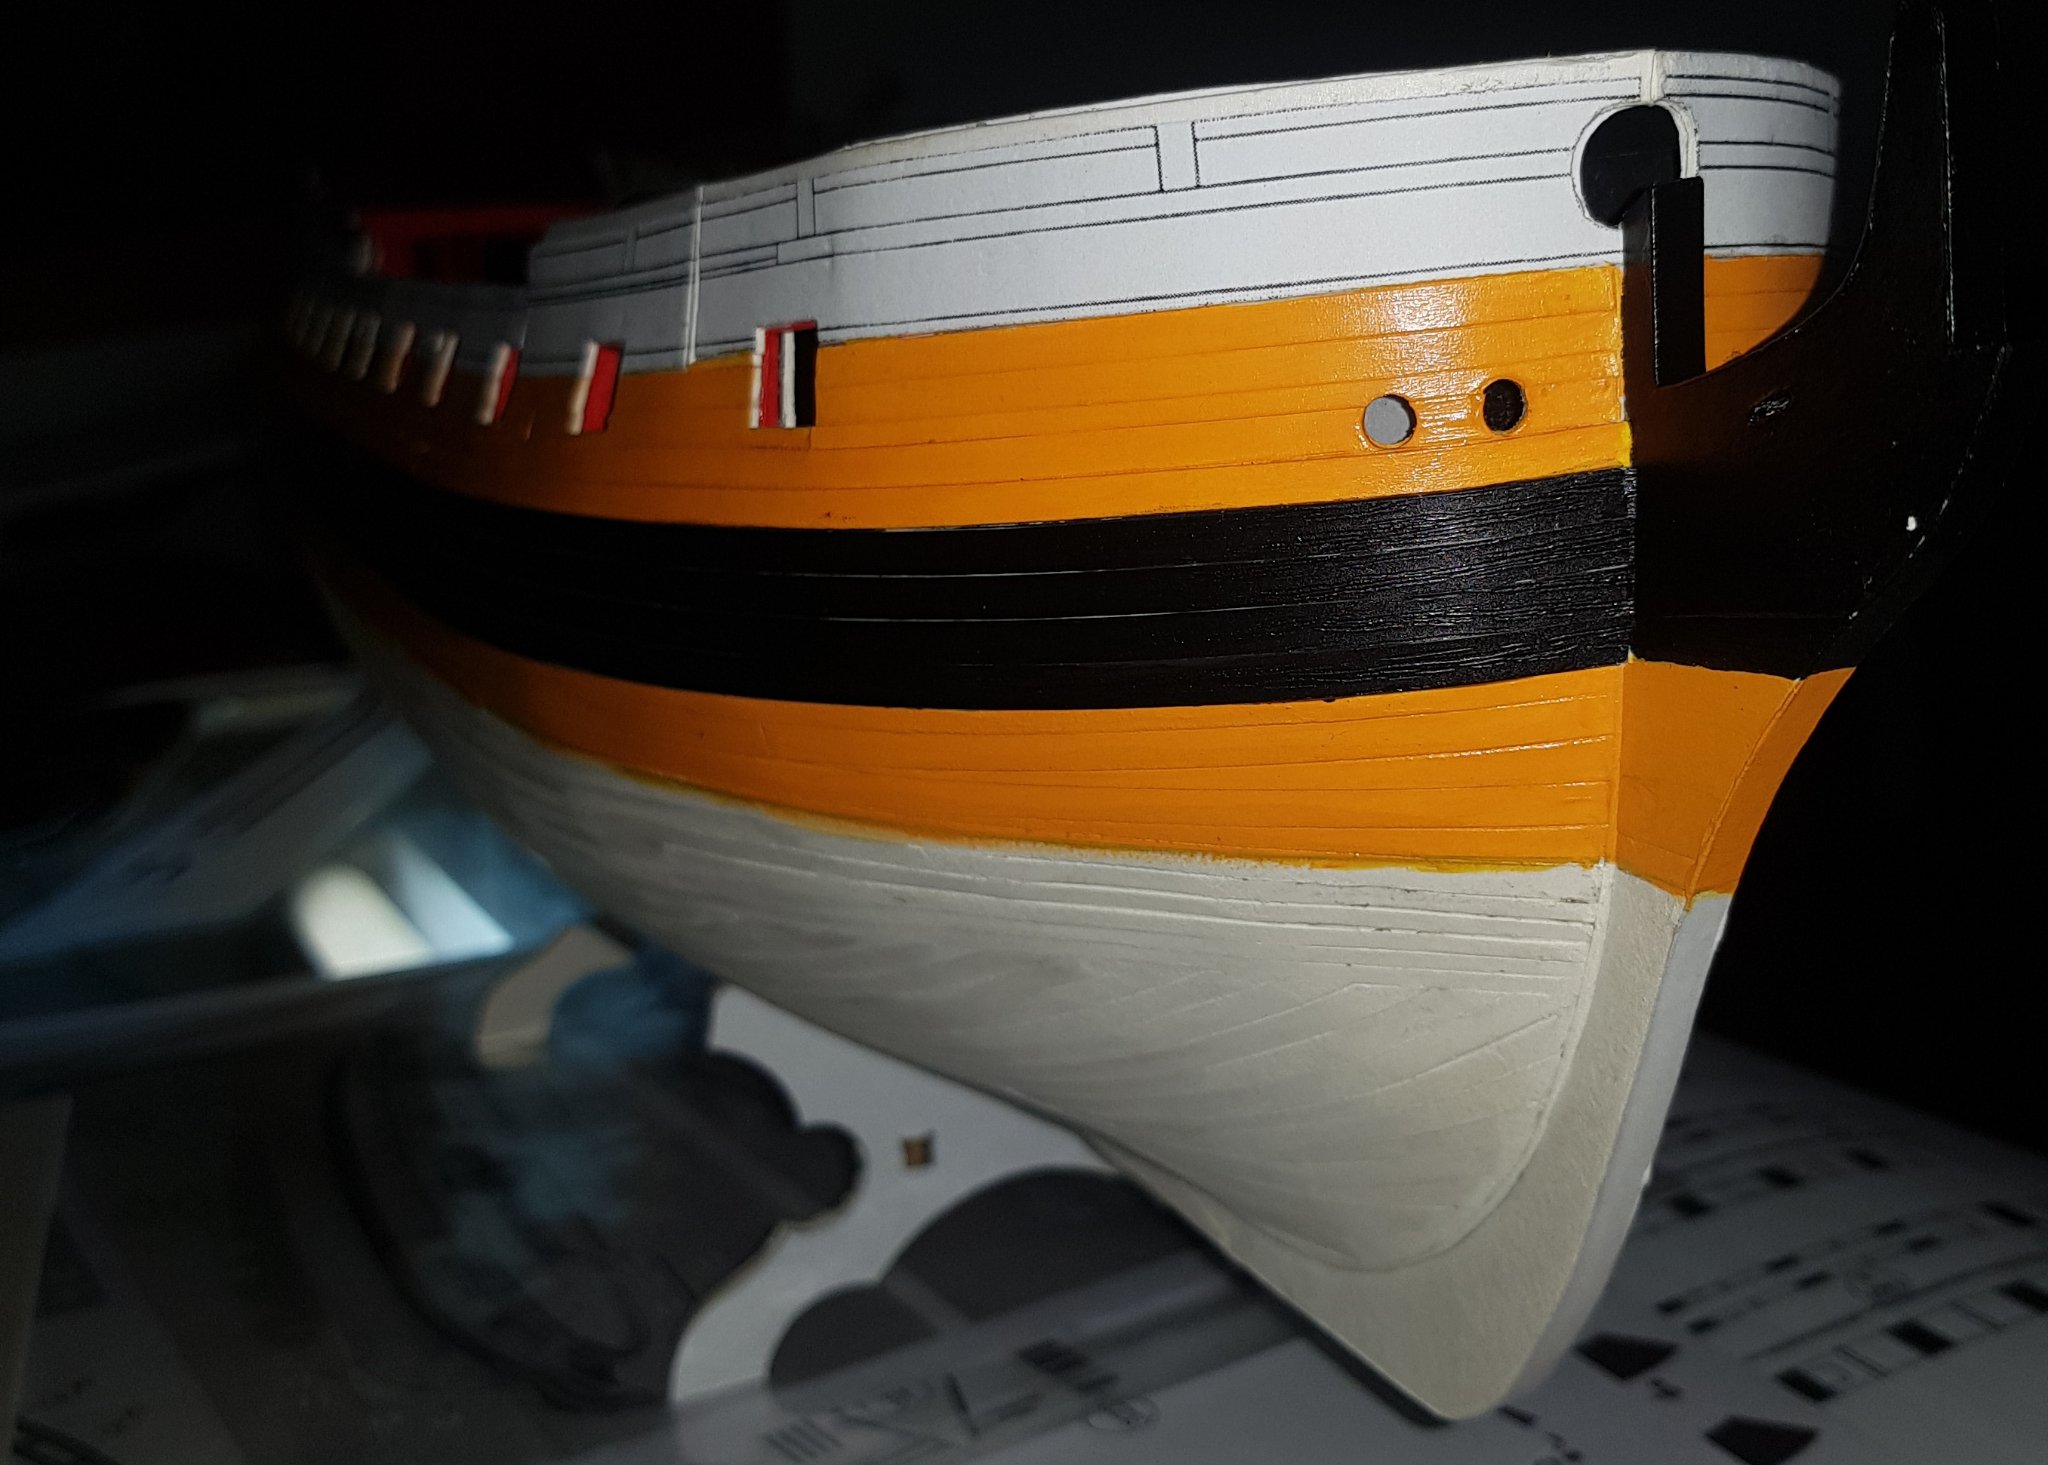
I used Matit putty to fill the protrusions on the hull
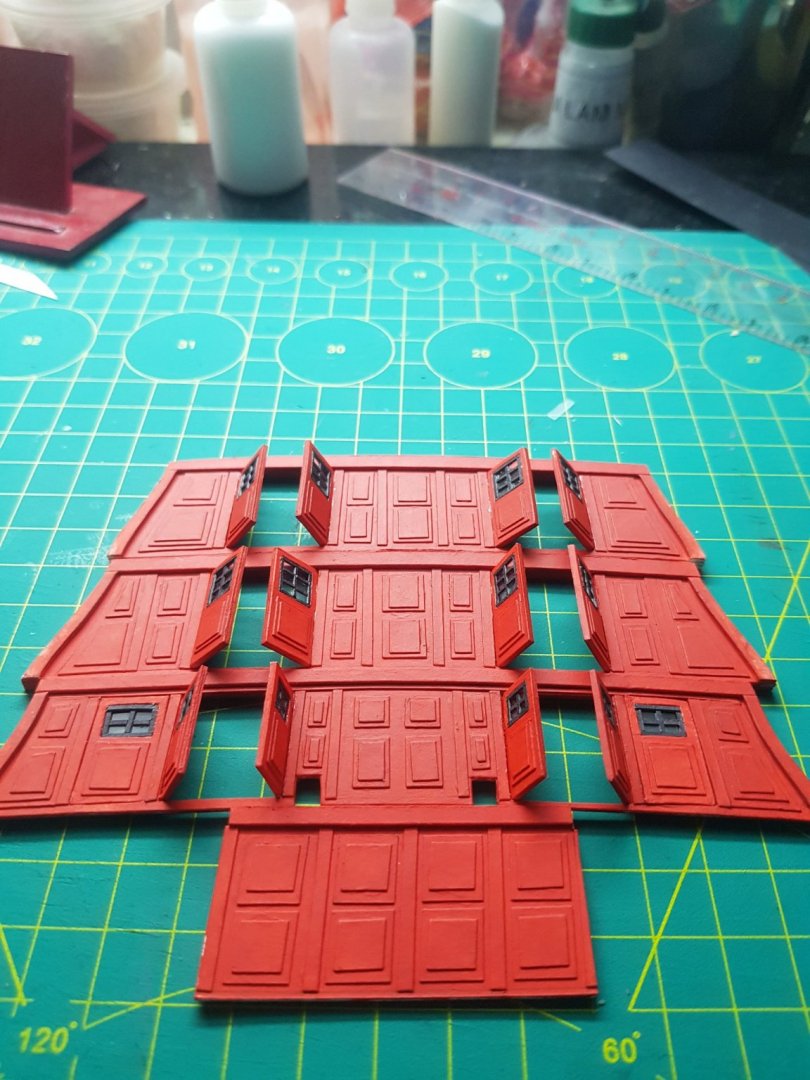
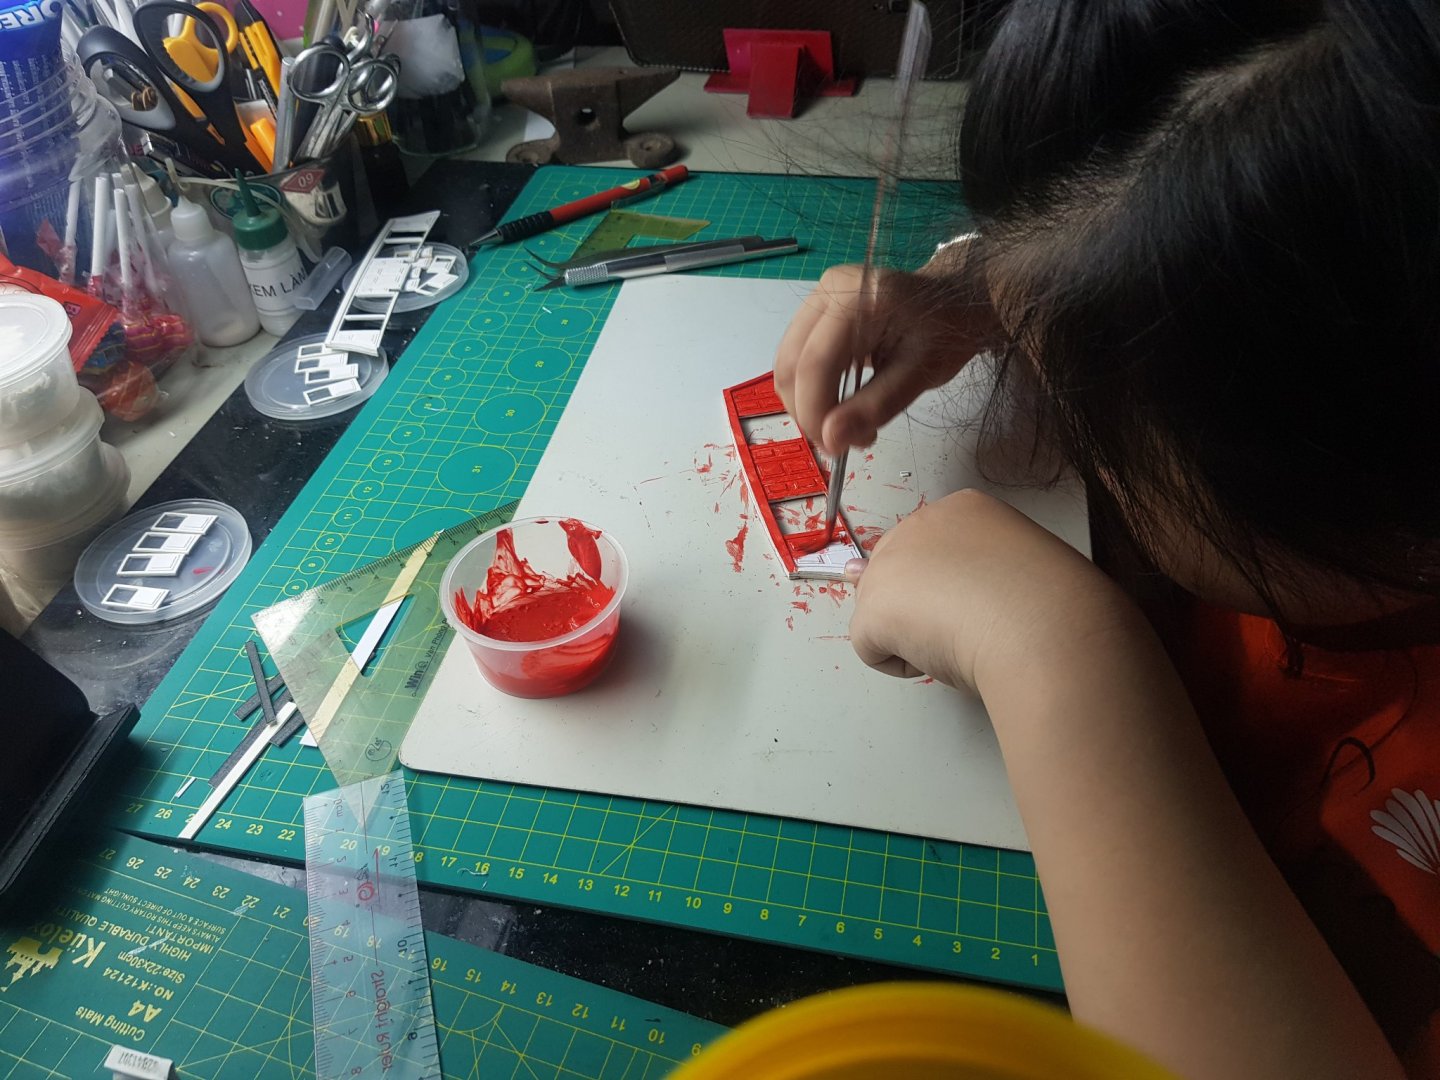
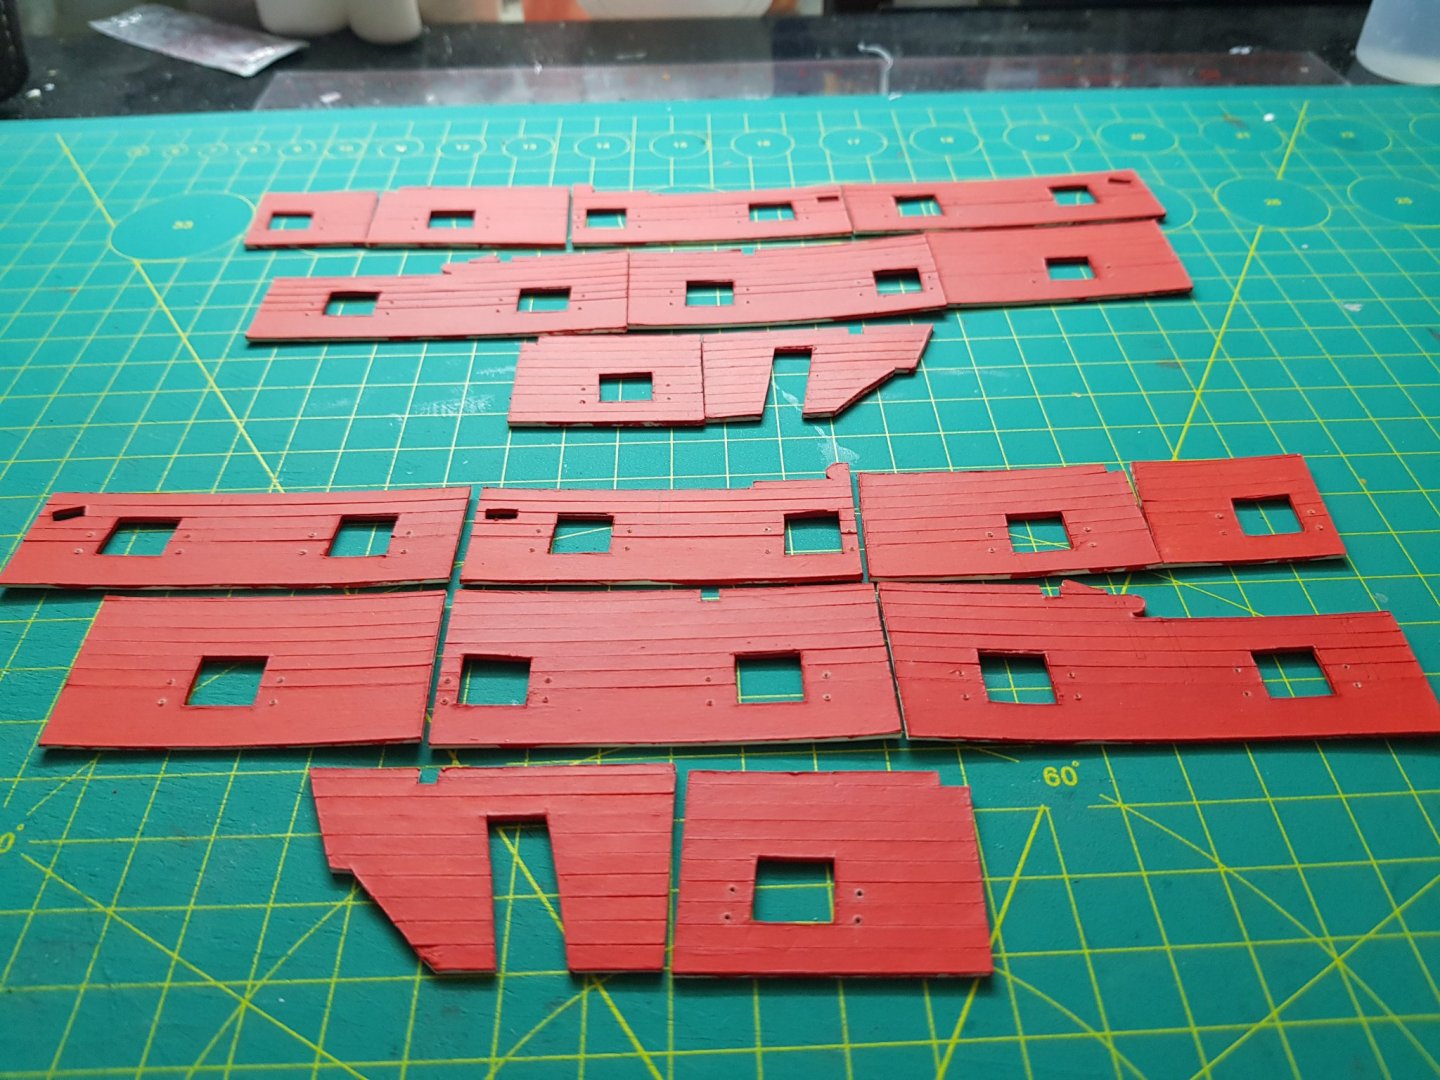
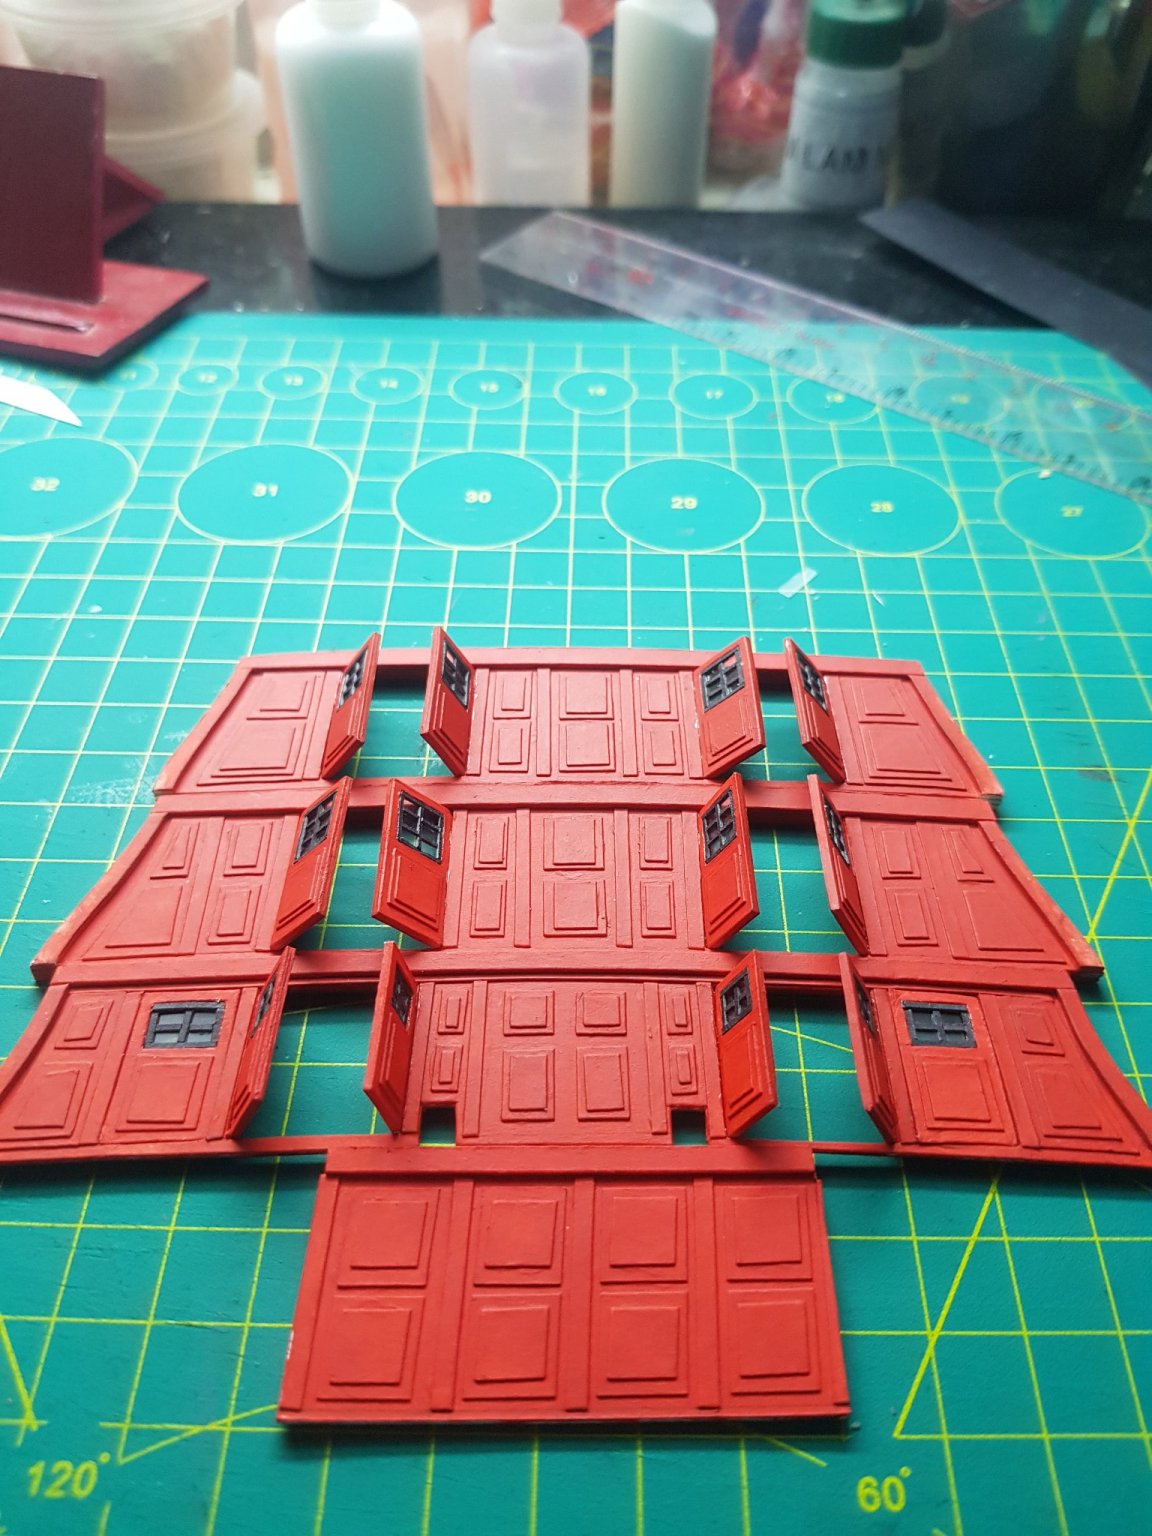
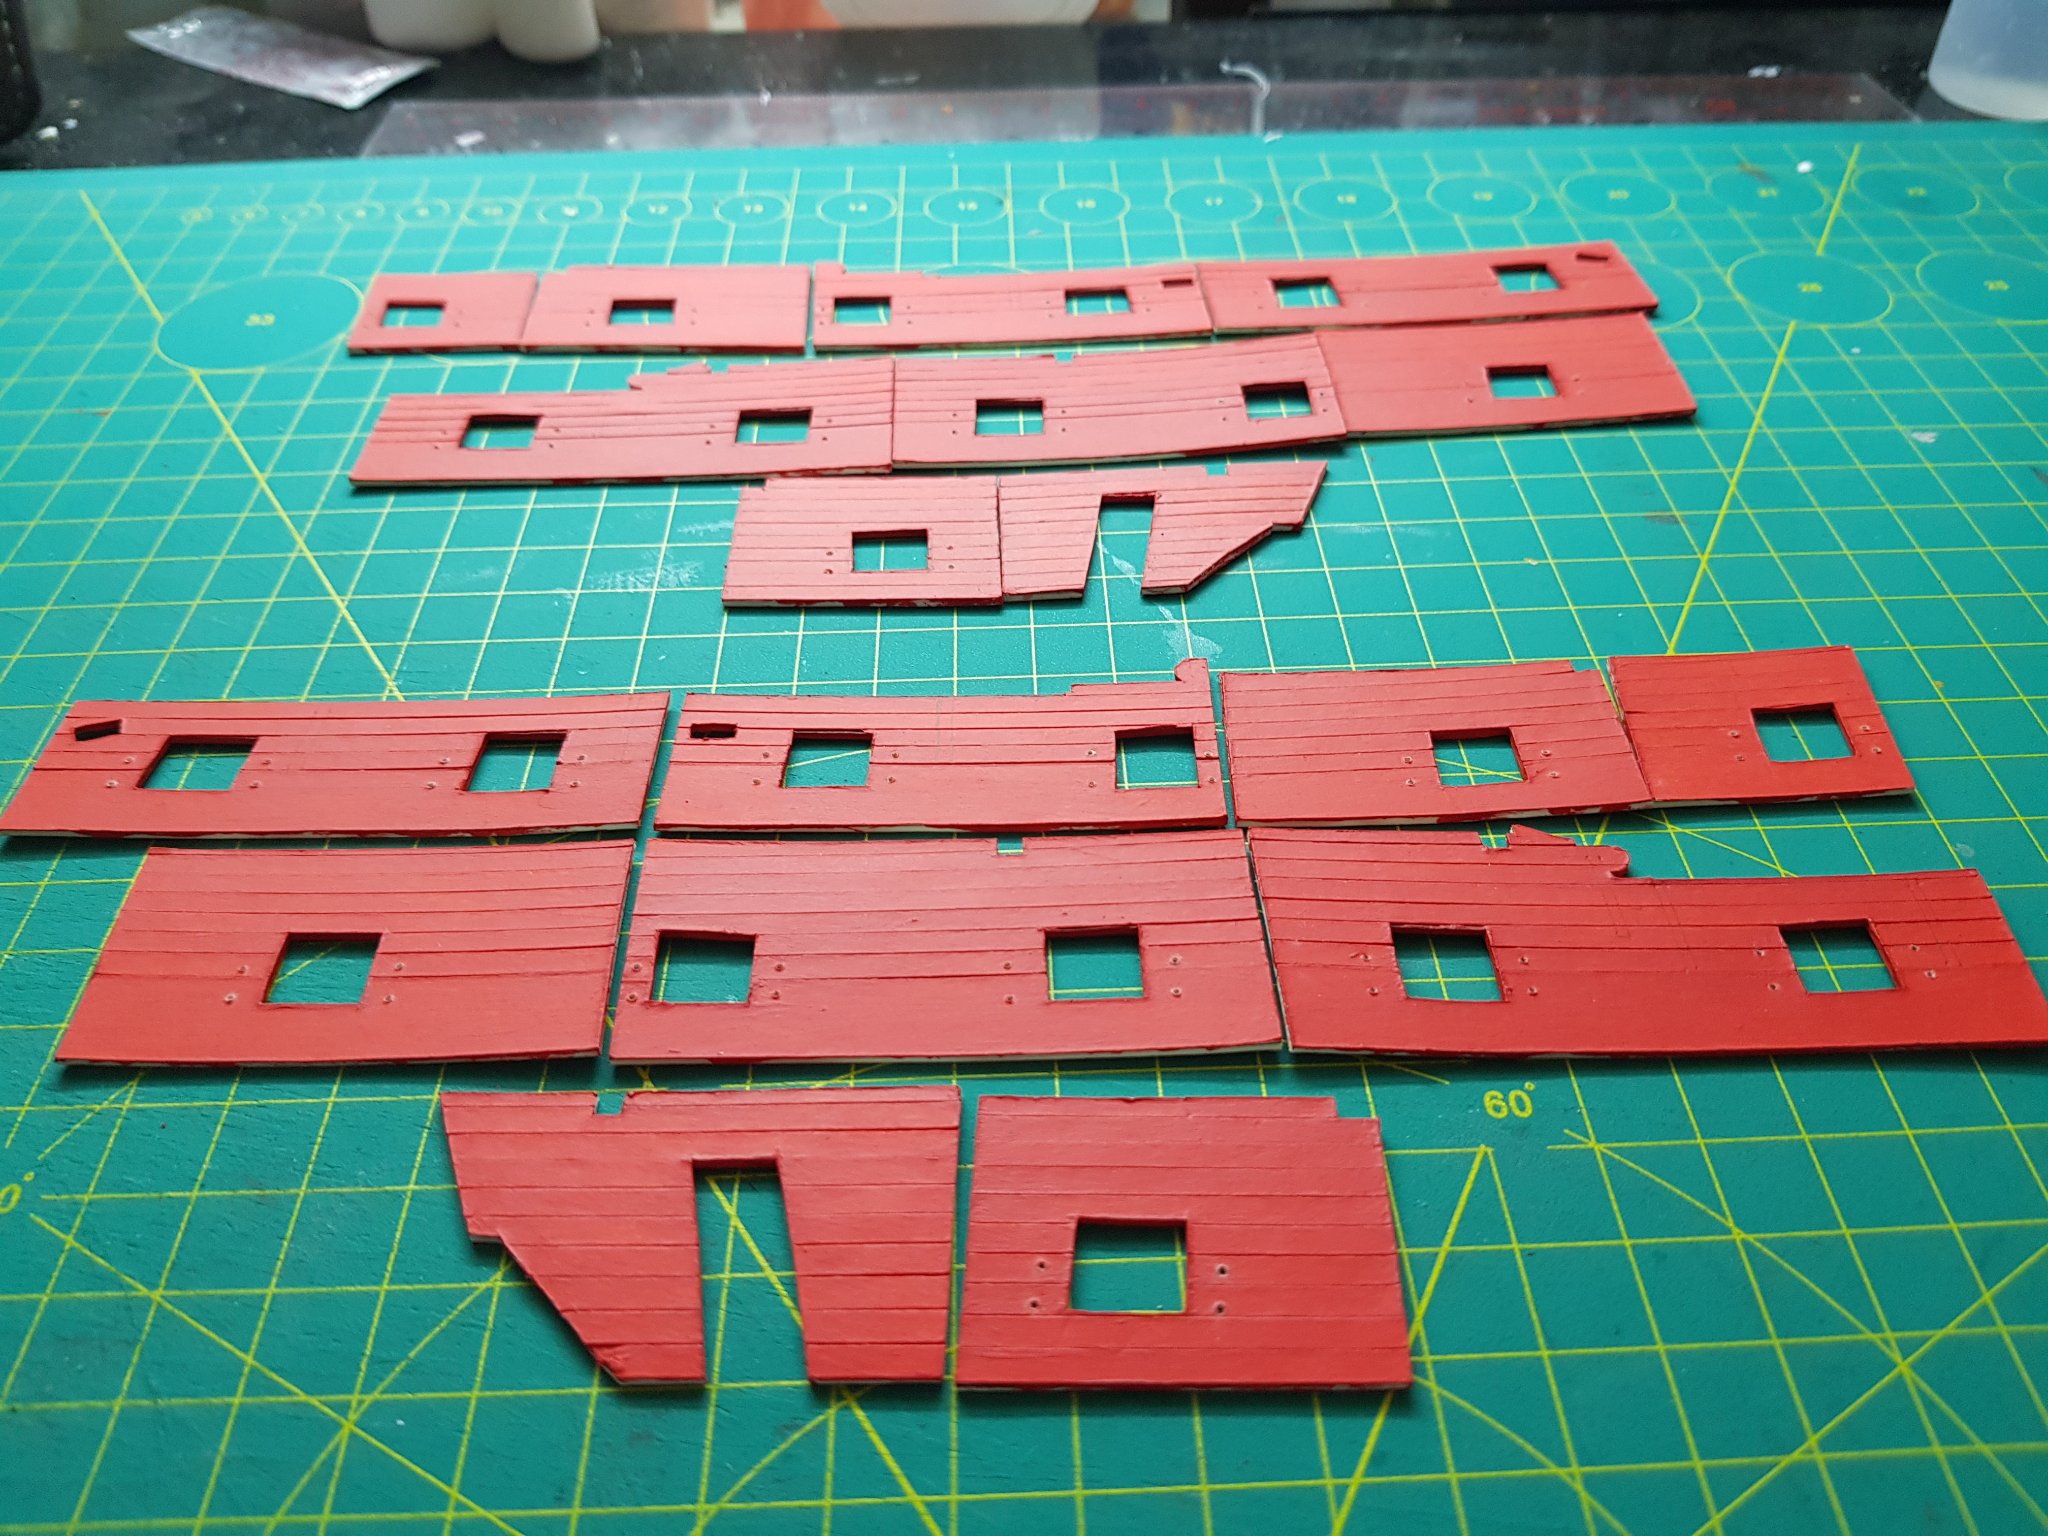
I spent a lot of time with these details and I used the red color as shown in the instructions of the kit and with the help of my little angel finally finished coloring. She seemed to be interested in joining me in coloring :)).
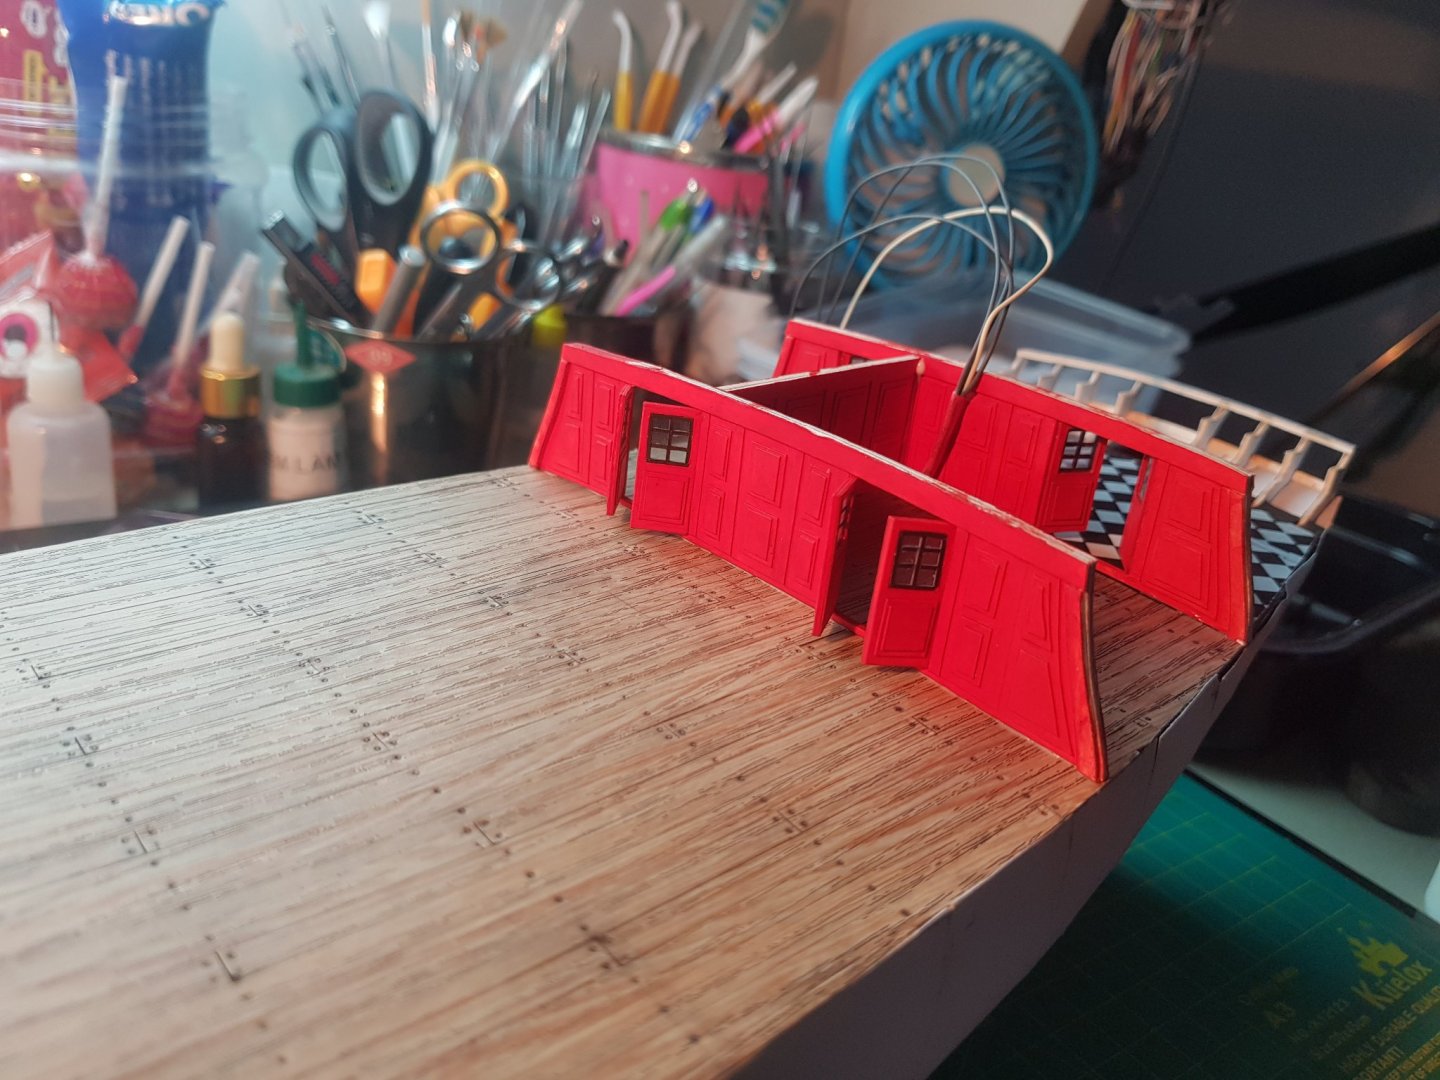


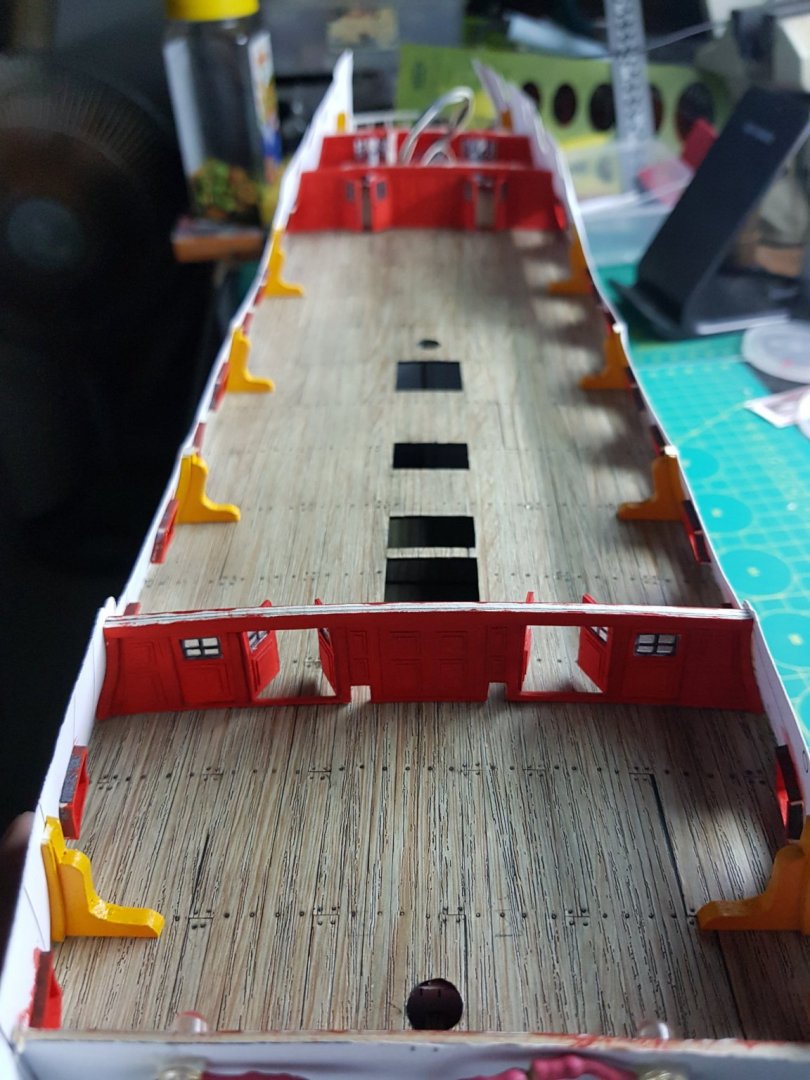

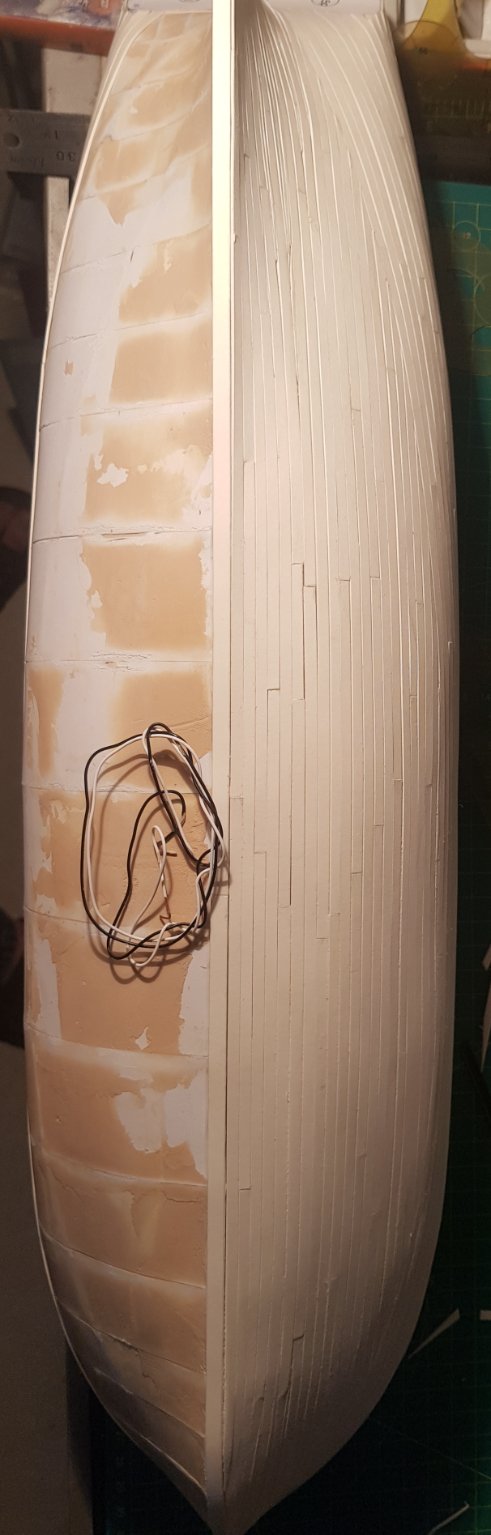
And then there was a layer of 1mm cardboard, which hurt my fingers and it took me three nights to fully wrap the hull. however, the result is quite smooth.


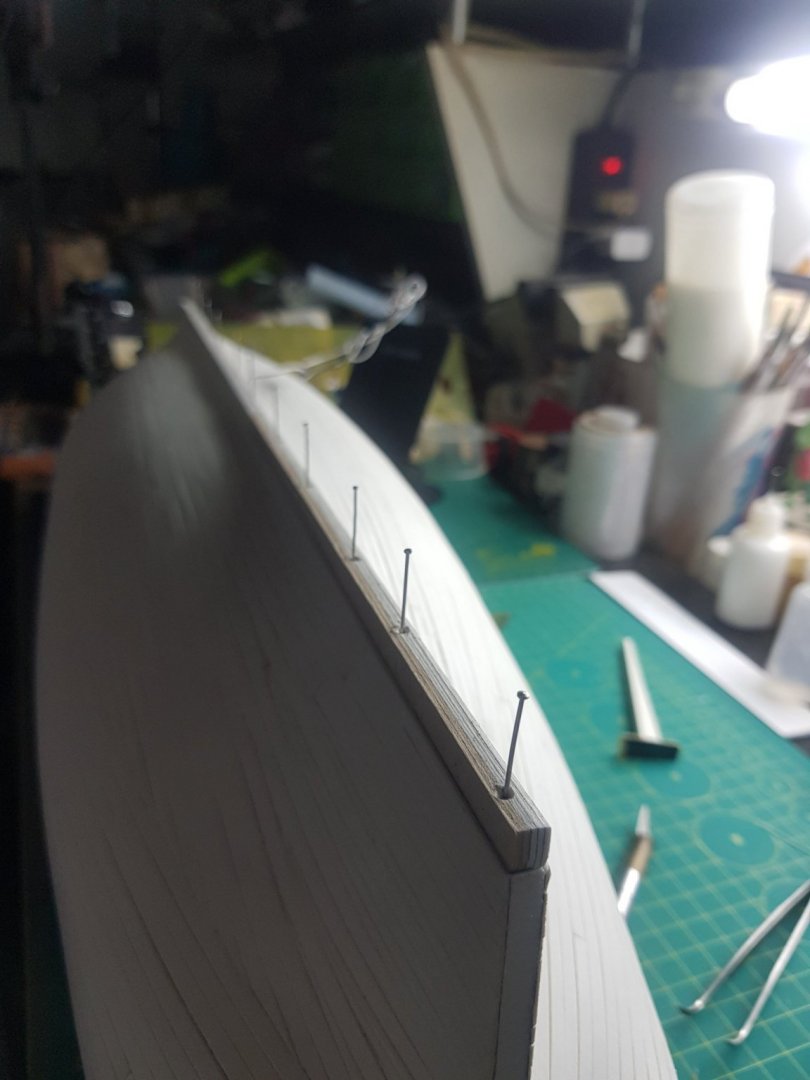
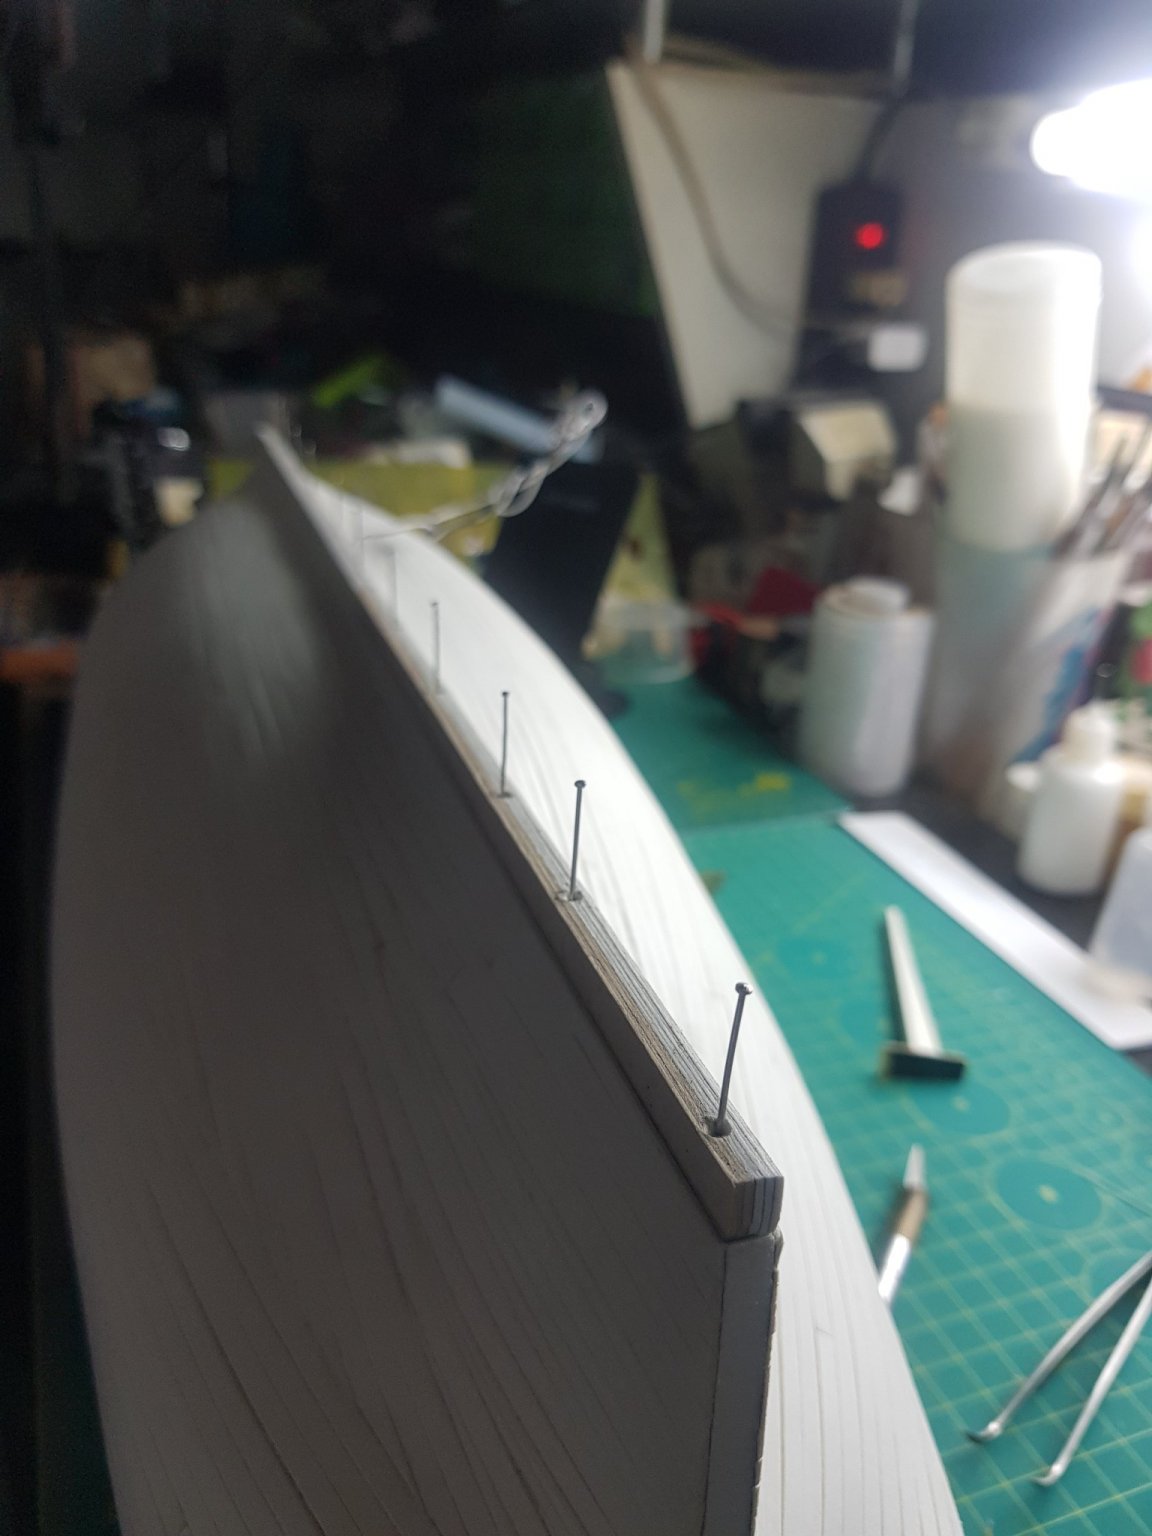
I fixed the outer backbone with these studs because I don't think the glue is strong enough for this part.
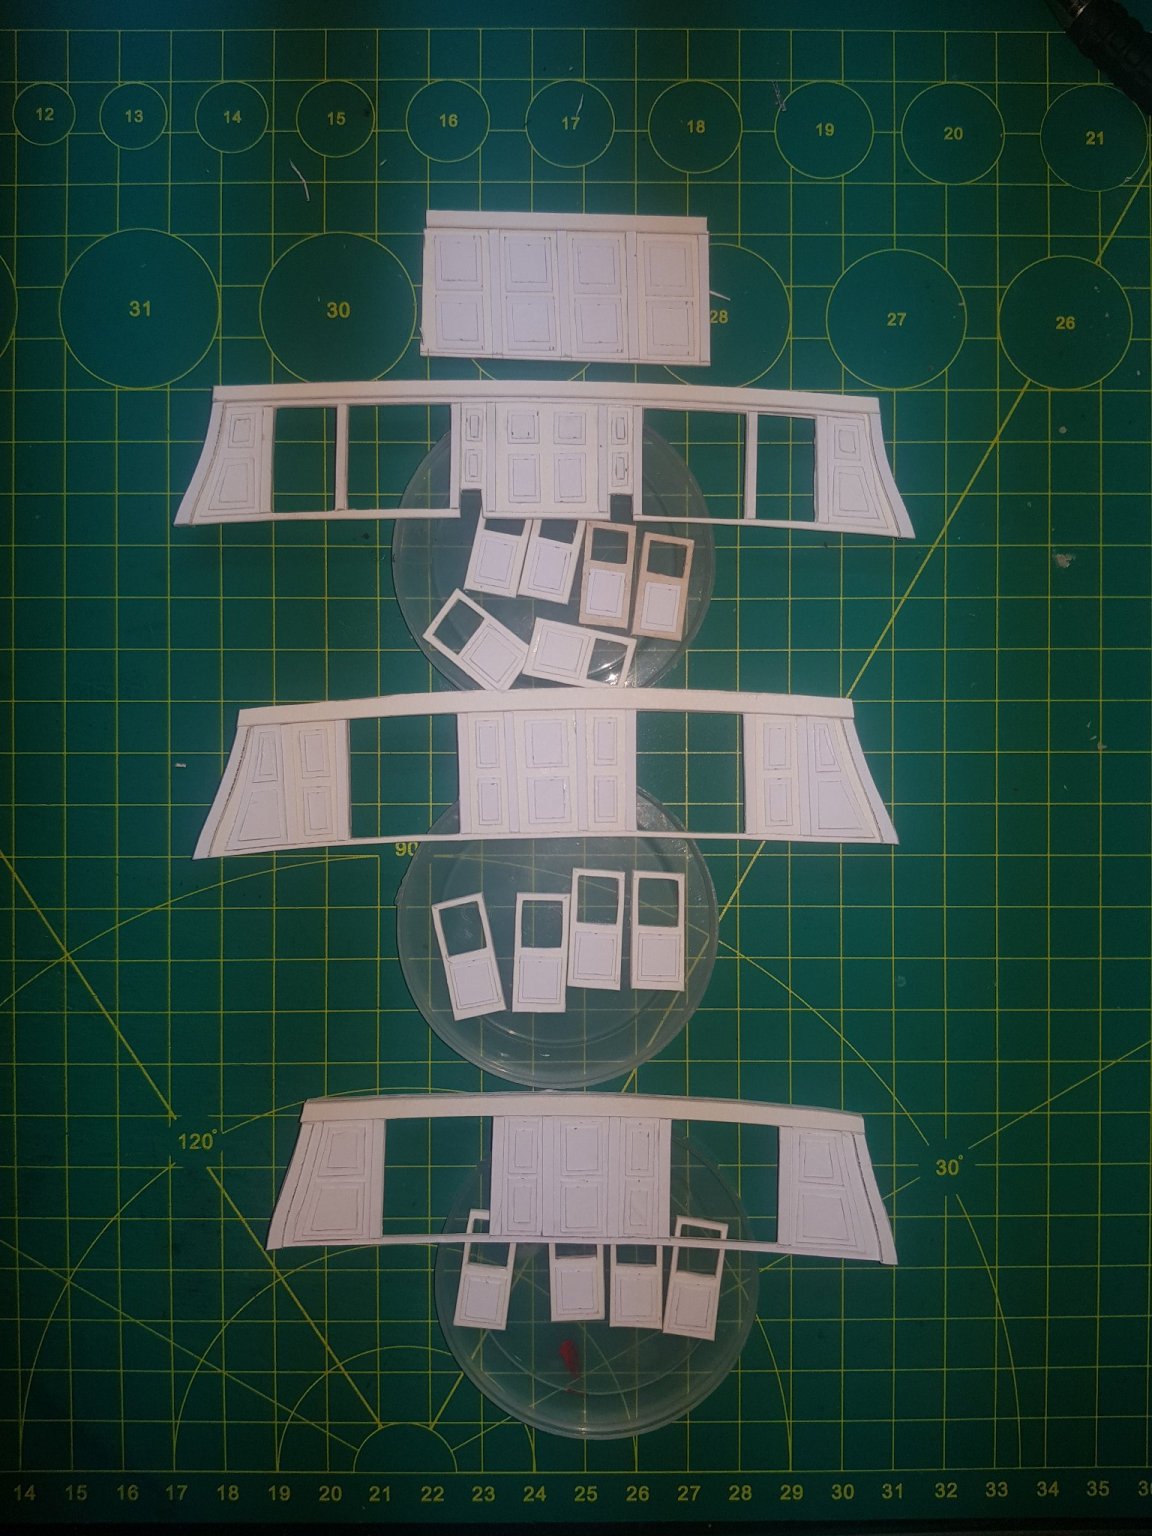
Followed by the boatside on the left and right sides of the ship

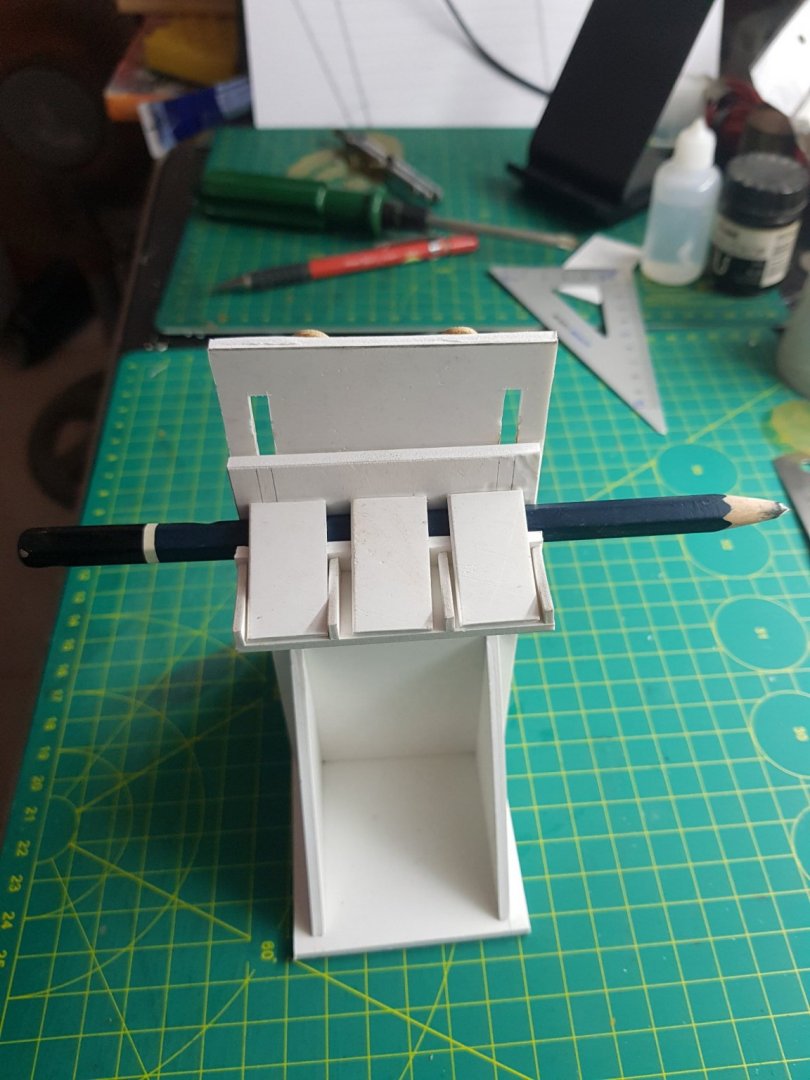
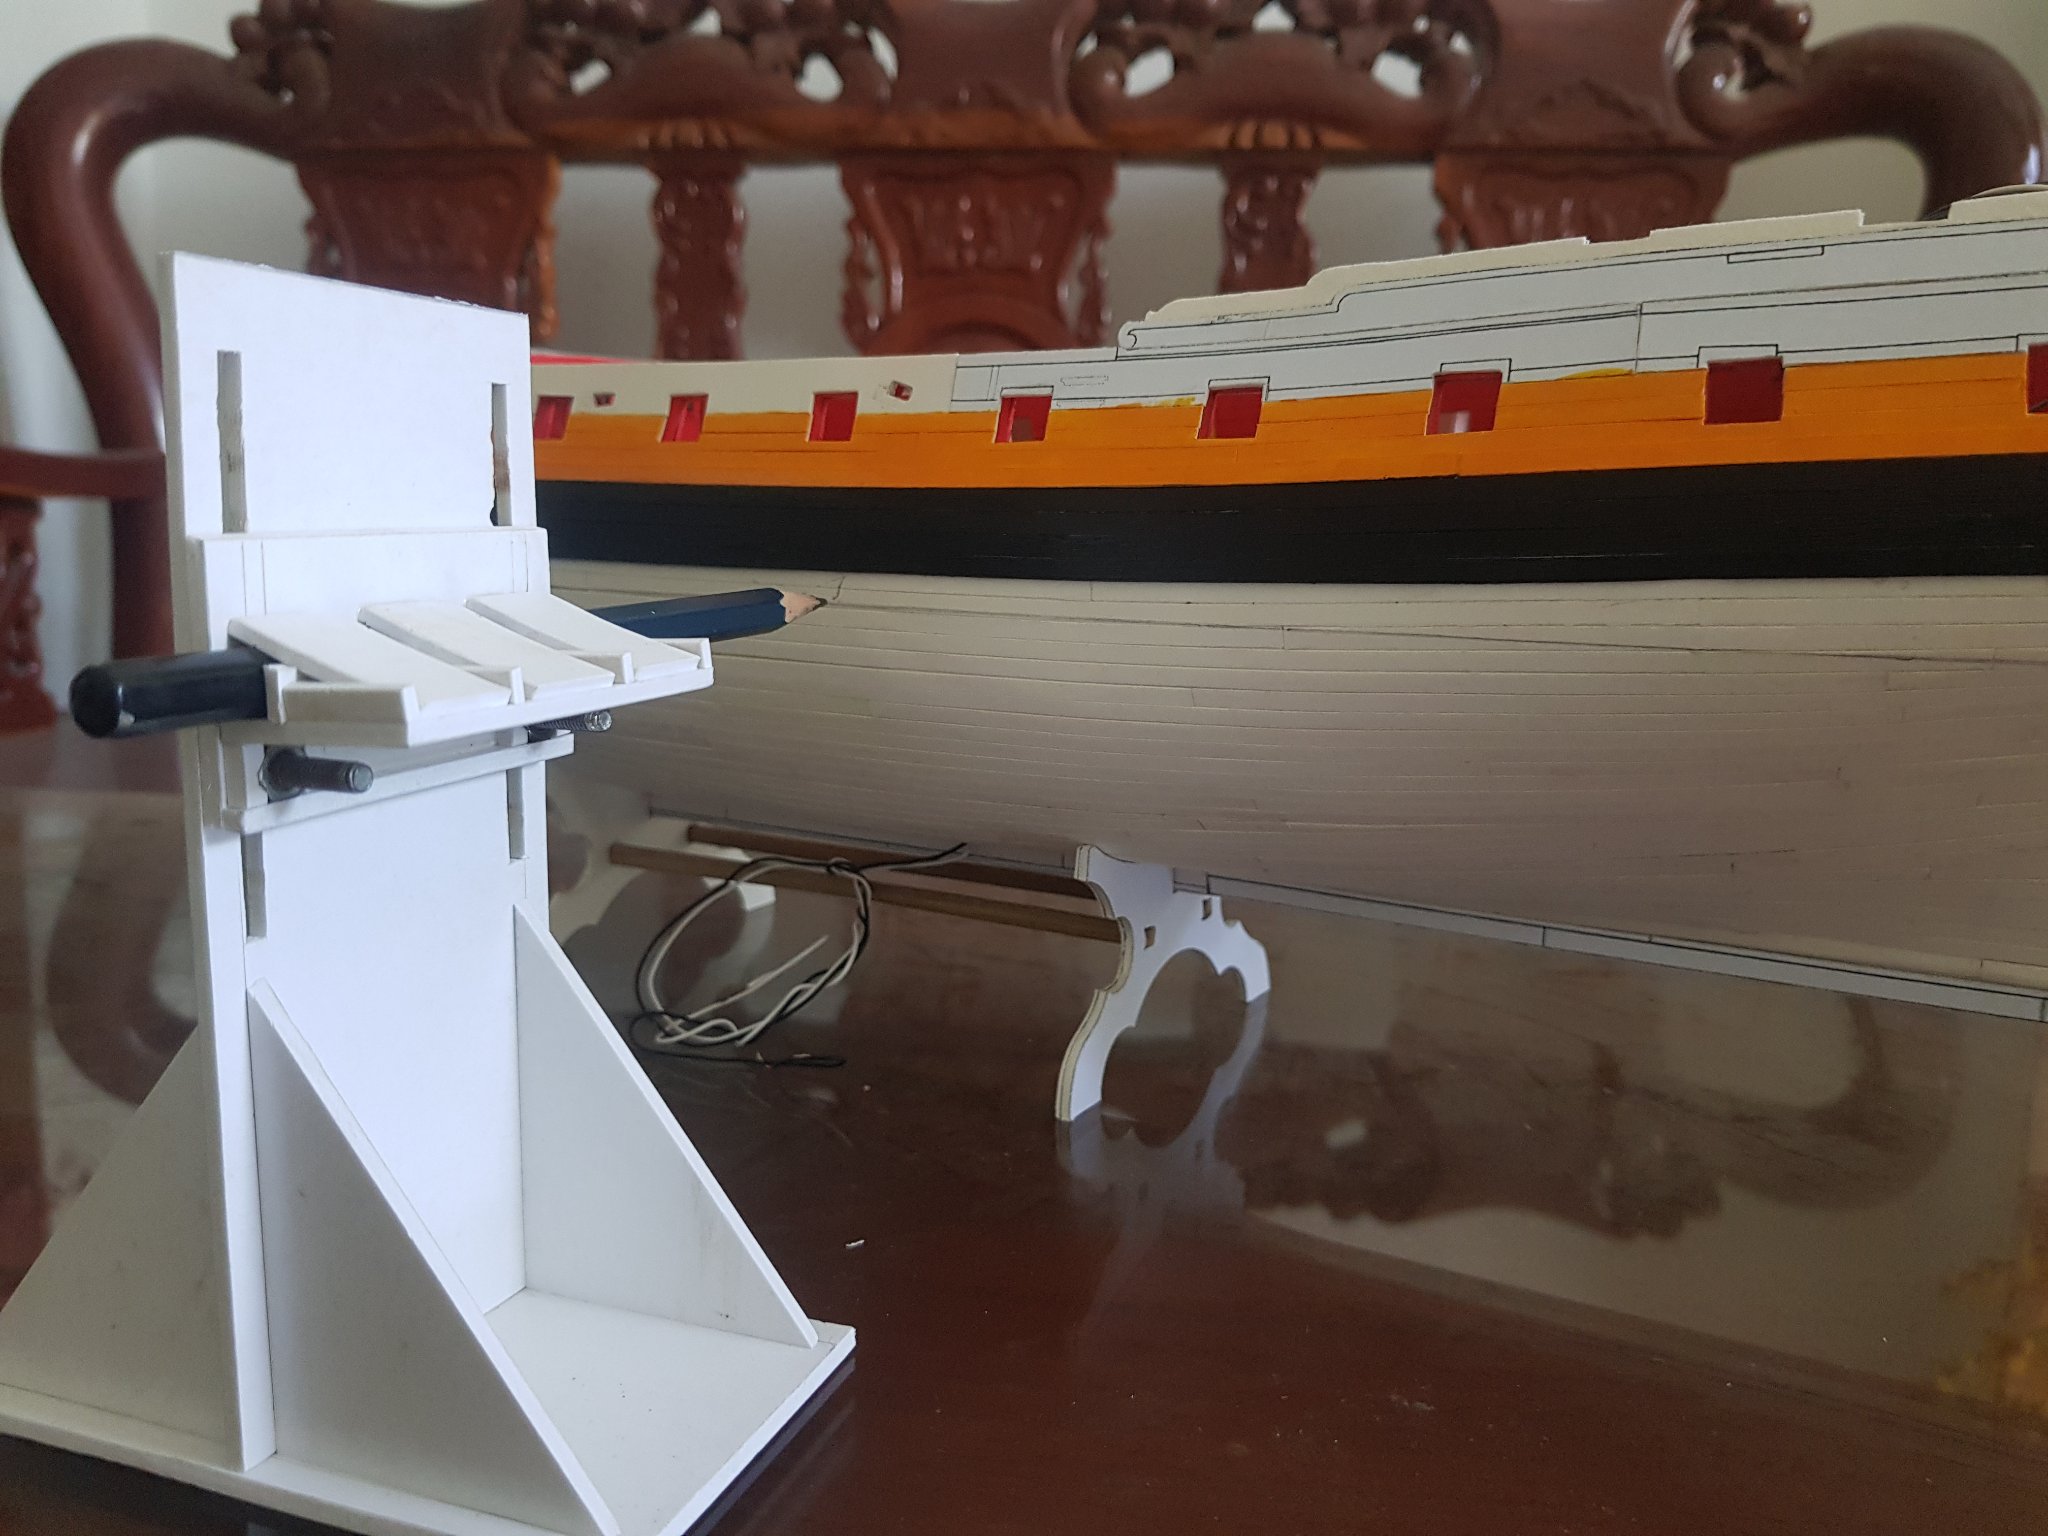
I used this homemade tool to identify the submerged hull


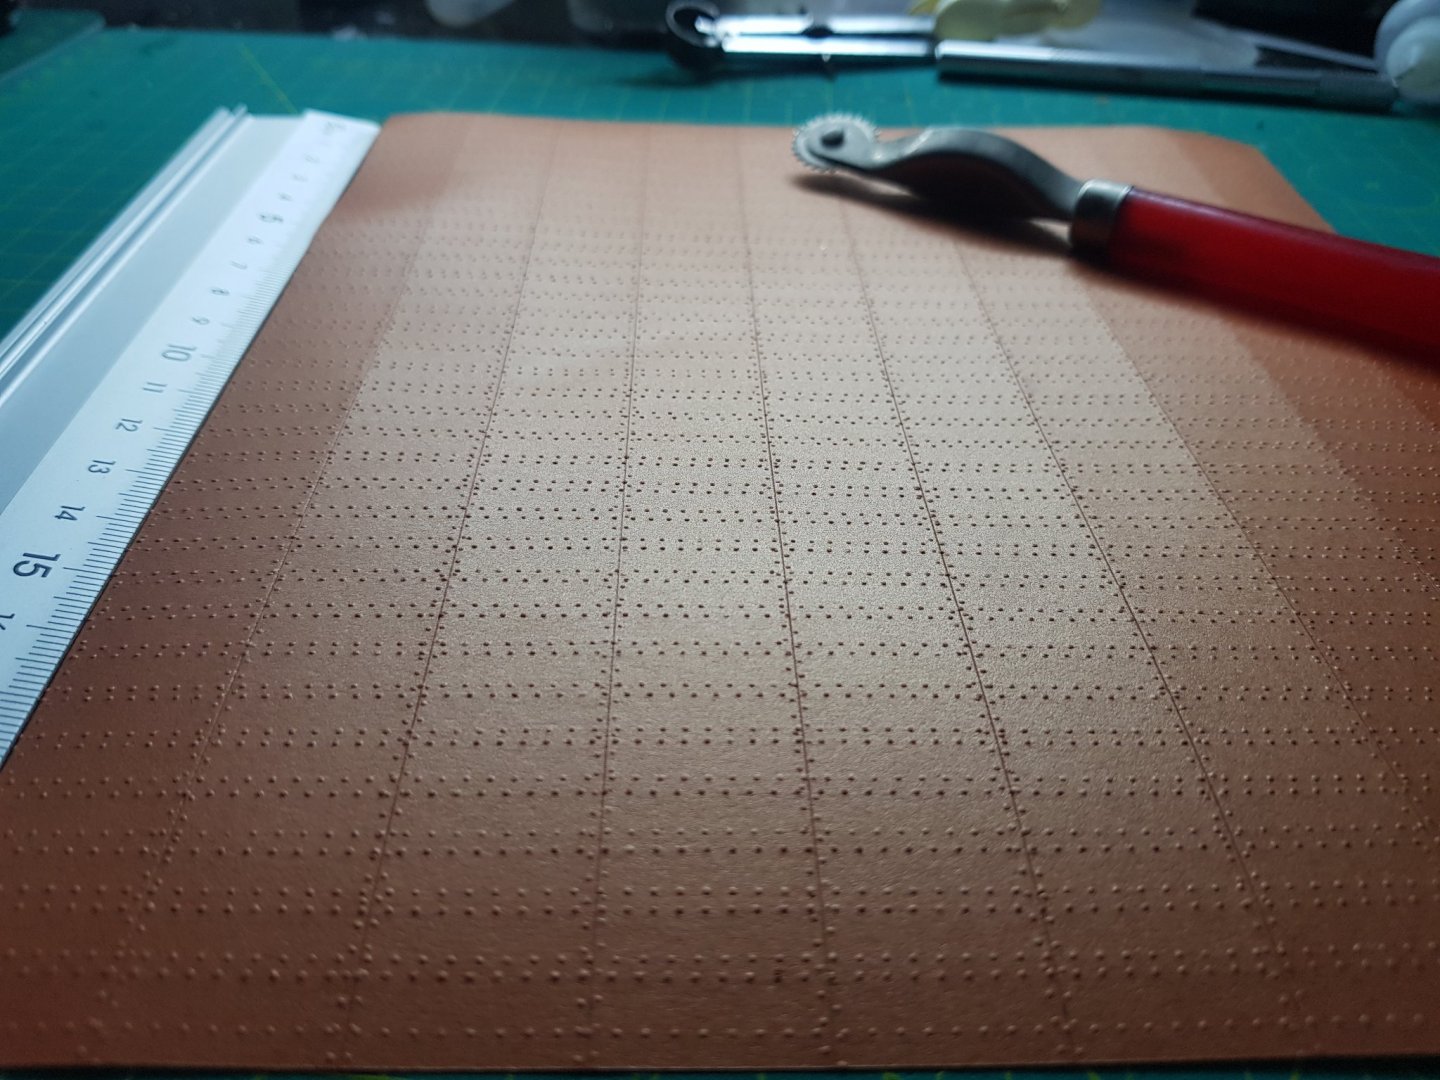
I use metallic copper paper and an indentation tool (the main function is to make needle mark marks in leather) and it took me 3 consecutive nights to get it done. I use a glossy finish to protect the color from fading over time.


to be continued...
-
Hi, I am 34 years old and live in Vietnam. This is my first post on this forum, hoping to get acquainted with everyone. My English is not good, so most of the time I use google tools to assist with translation, hoping for your understanding.
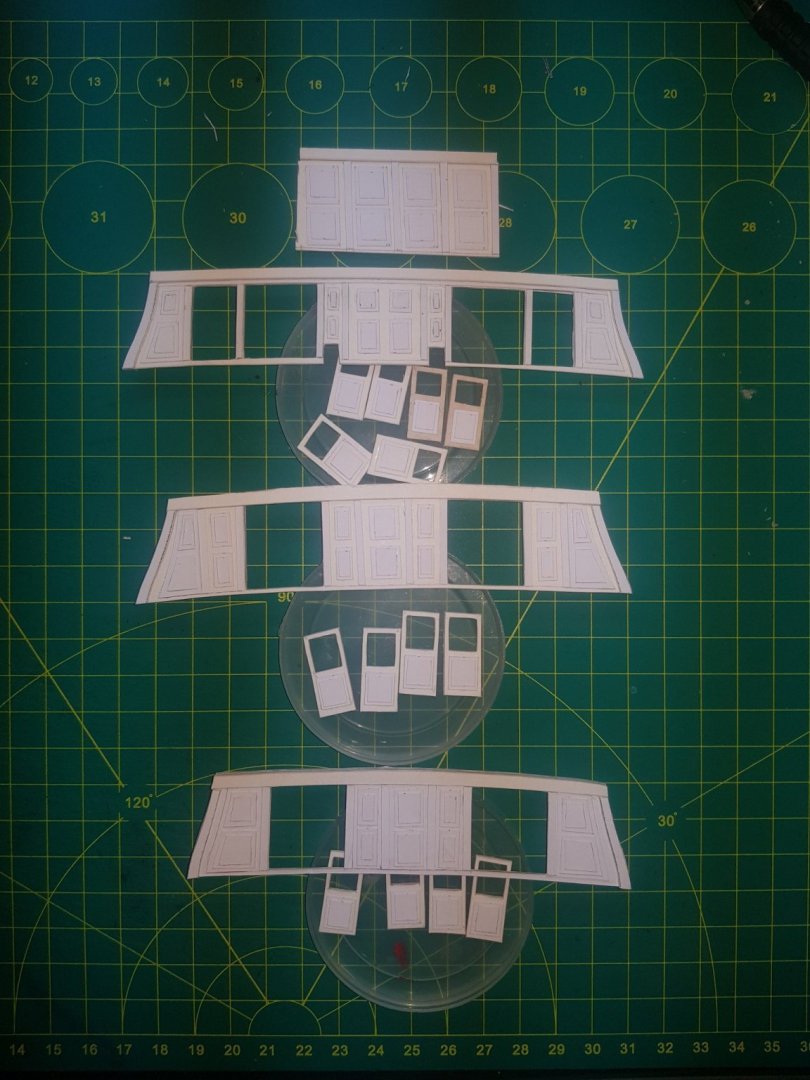
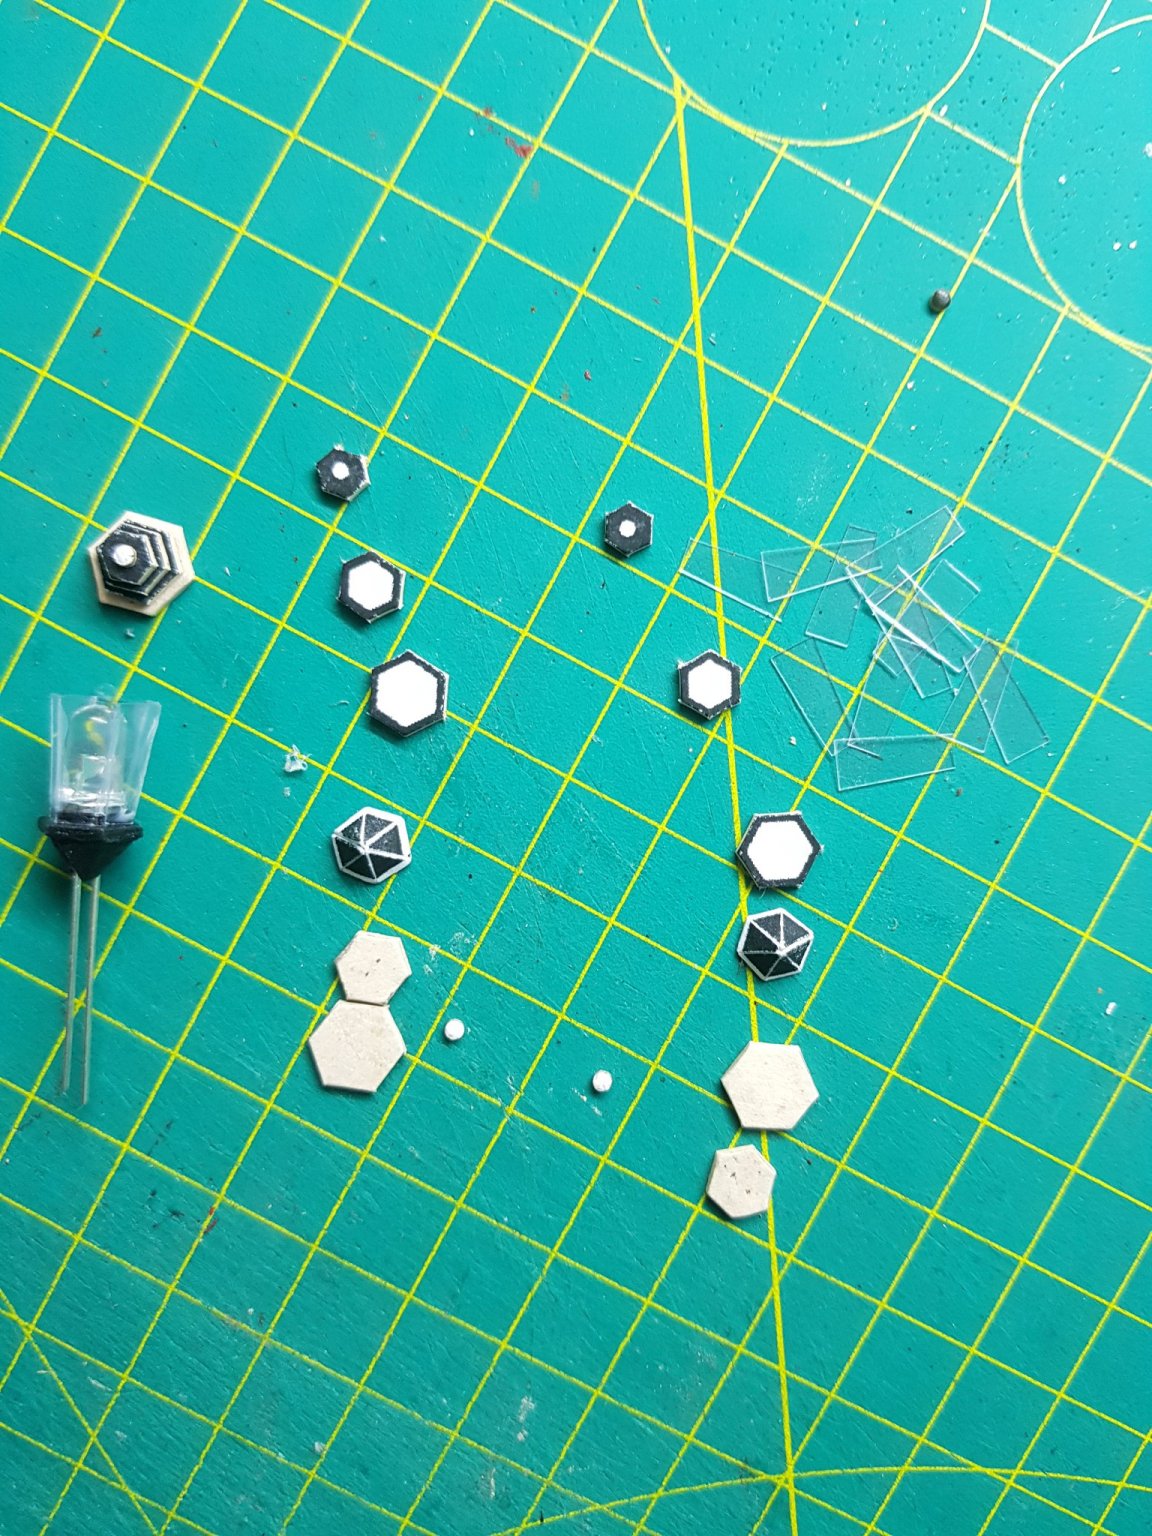
When I received this kit I realized the detail part was too small for me so I zoomed in to 1:64 to make it easier to do. However, when I launched the Kit I realized that the thickness of the parts had changed a lot and I had difficulty checking their size. But I don't think this is important so here are my first results: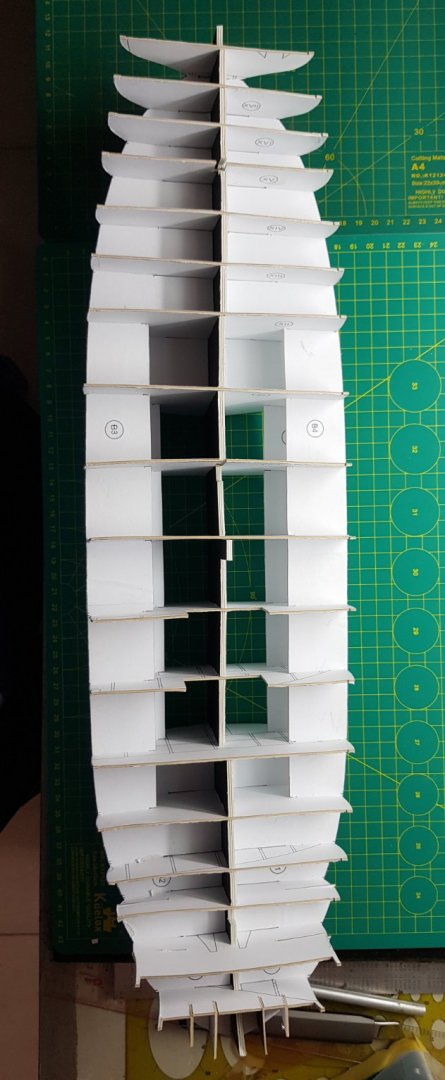


- catopower, Rudolf, chris watton and 9 others
-
12


Dinh Quoc 1801 by DominichSteven - FINISHED - 1:100 - CARD - Tay Son Navy - Viet Nam
in - Build logs for subjects built 1751 - 1800
Posted
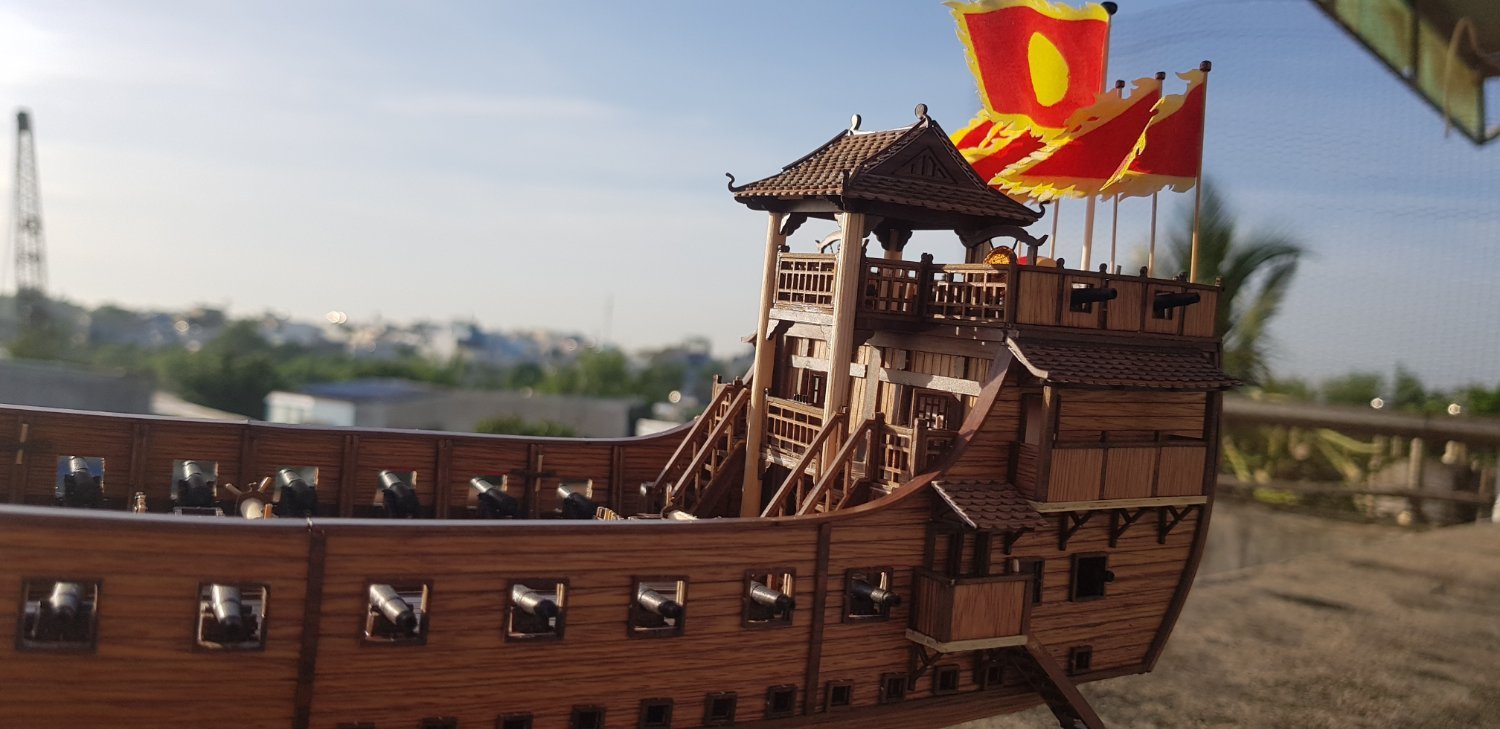
I finished my ship including the gilded reliefs on this ship. This project of mine is not big, but it took several months to complete.
Here is the link to review the kit made by me: