Geoff Matson
-
Posts
720 -
Joined
-
Last visited
Content Type
Profiles
Forums
Gallery
Events
Everything posted by Geoff Matson
-
 Looking good Jeff. Glad you are back. Your Conny looks great! Looking forward to watching your progress.
 -
Welcome to the group. It looks like you are off to a good start. Hang in there and take your time. It is a long build. Have fun making sawdust.
-
What a great case. You did an excellent job!
- 1,354 replies
-
- 6
-

-
- constitution
- model shipways
- (and 1 more)
-
Hey Jeff, It is great to see you back at it. I missed your build log. I am again in limbo. My wife has me doing some crown moulding the house. Funny how the wife's list interferes with my modeling. This time I am planning on working on my Conny at least some time during the week. Have fun and look forward to your progress.
-
Great job and congratulations on a great model. I look forward to your next project.
- 742 replies
-
- 5
-
-
- constitution
- frigate
- (and 1 more)
-
Hello Larry, welcome to MSW. One thing about the constitution that I think most modelers don't realize is how long it takes to build her. The build will be a major commitment on your part. You basically have a box of wood and strings. I have been working on and off for over eight years now. You are looking at a model that will be over four feet long and over three feet tall. Once the major build of the model is finished you are looking at a large rigging job. You will have three full masts to ring and also a bowsprit. The great part of building the Constitution is most of the steps are like mini kits in themselves. The ships boats are great mini kits, the cannons are the same thing. Your modeling skills will be challenged when you come to coppering the hull. For me the Constitution has been a great experience so far. I started out by building Model Shipways Armed Virginia Sloop. Great build to warm up with and only one mast to rig. 😀 The best thing you can do is look at the build logs on MSW and see how the other modelers have done. Just remember to have fun and learn.
-
It is always great to have another Constitution build start up. Welcome, and I look forward to your posts.
-
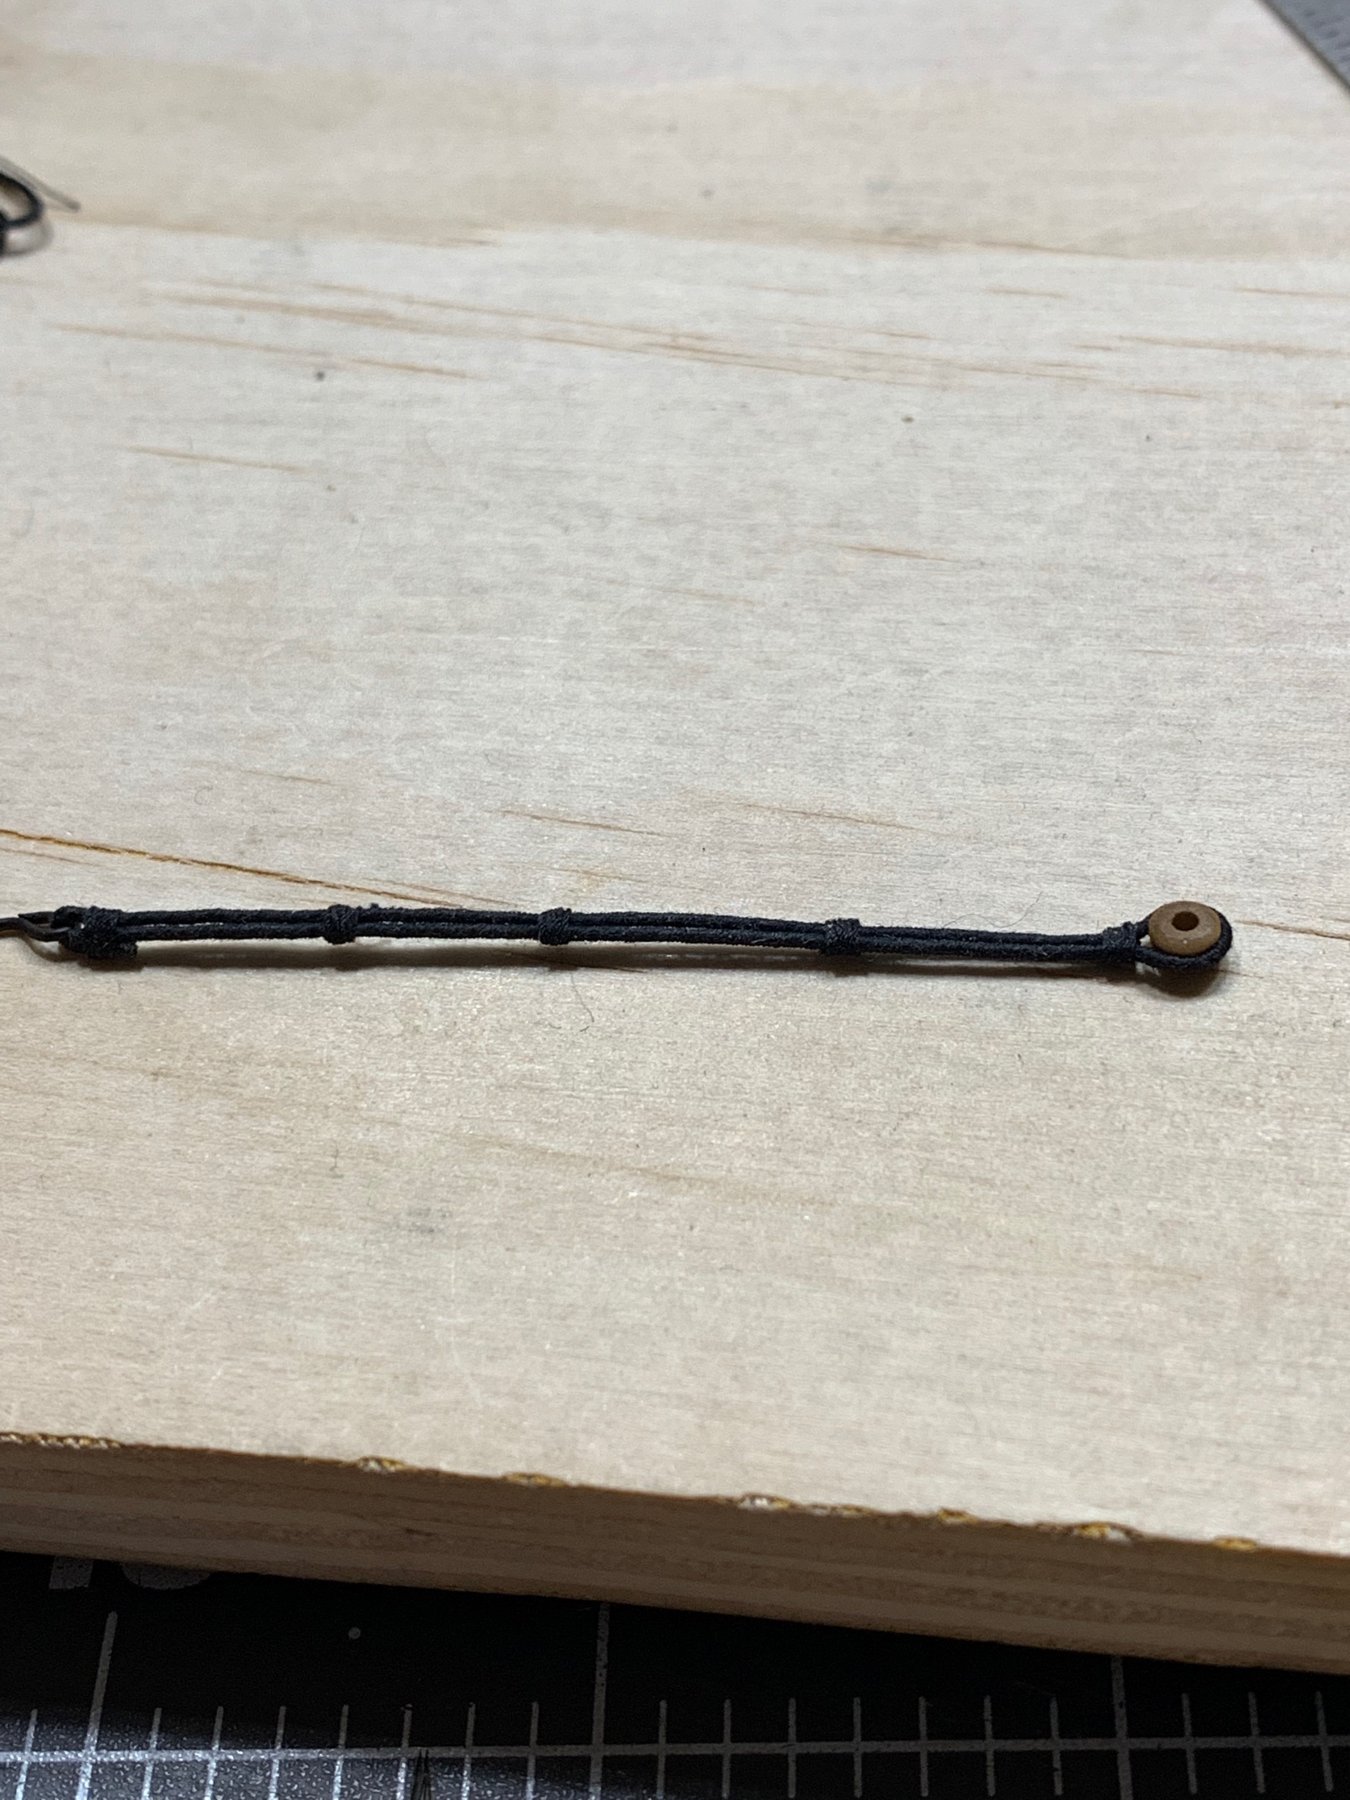
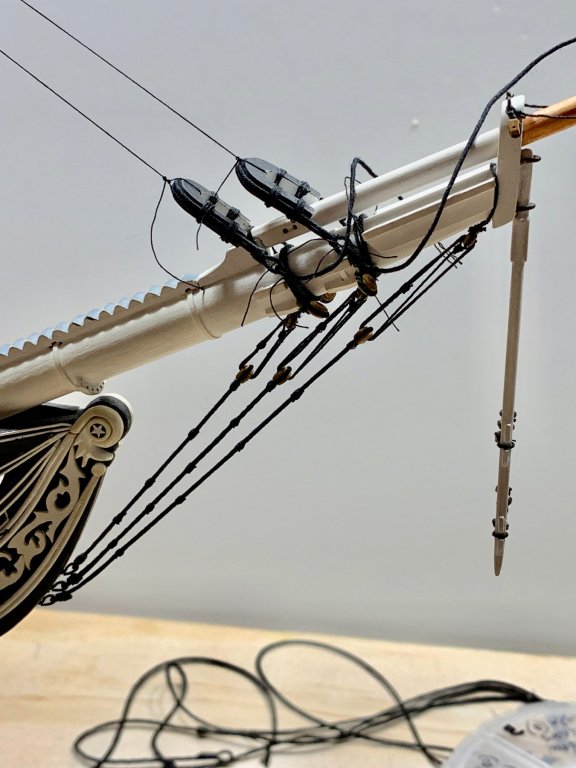
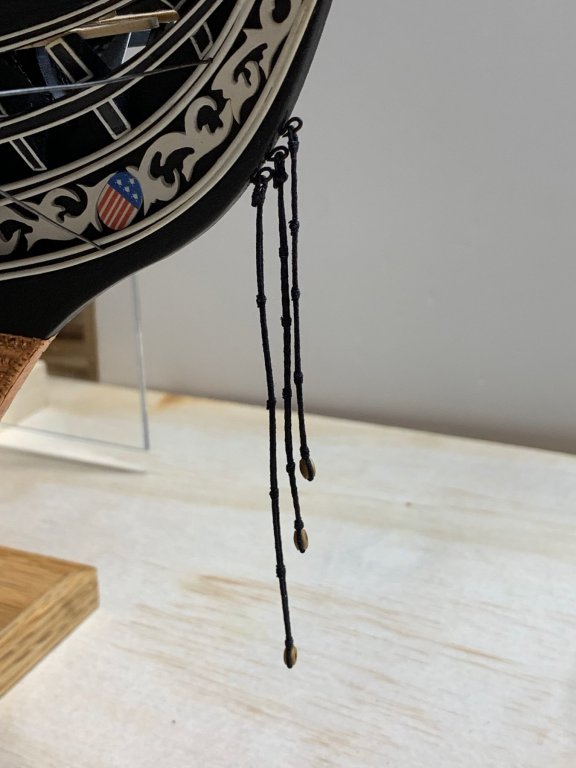
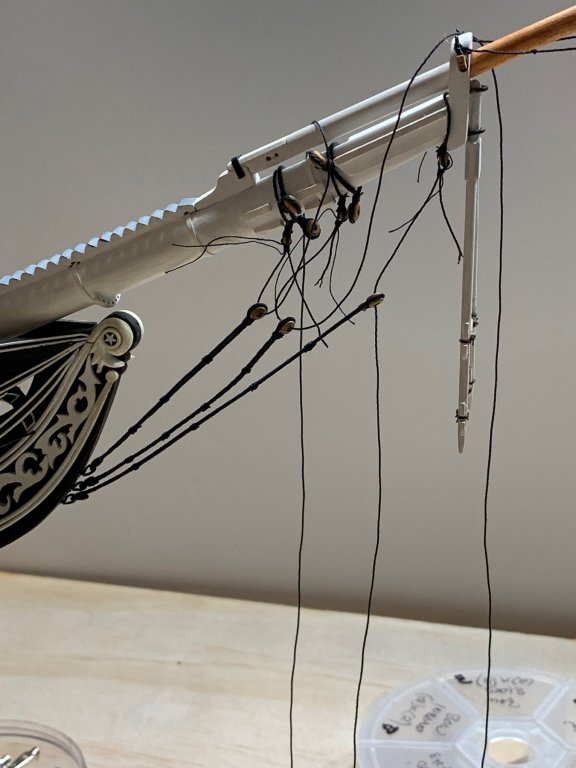
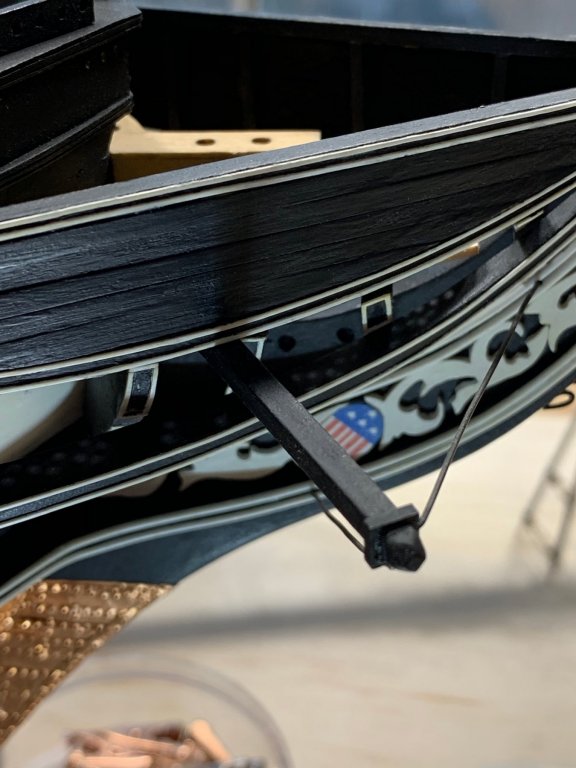
Here is my latest update. Having the open hearts in place on the bowsprit made attaching the bobstays a lot easier. I attached them from the top down.
-
I have my open hearts made and placed on the bowsprit. It worked out adding them now and not having to fight with the bobstays in the way. The thin line running to the foremast is just a place holder for now. Now that I have this done, I will go back and finish the bobstays.
-
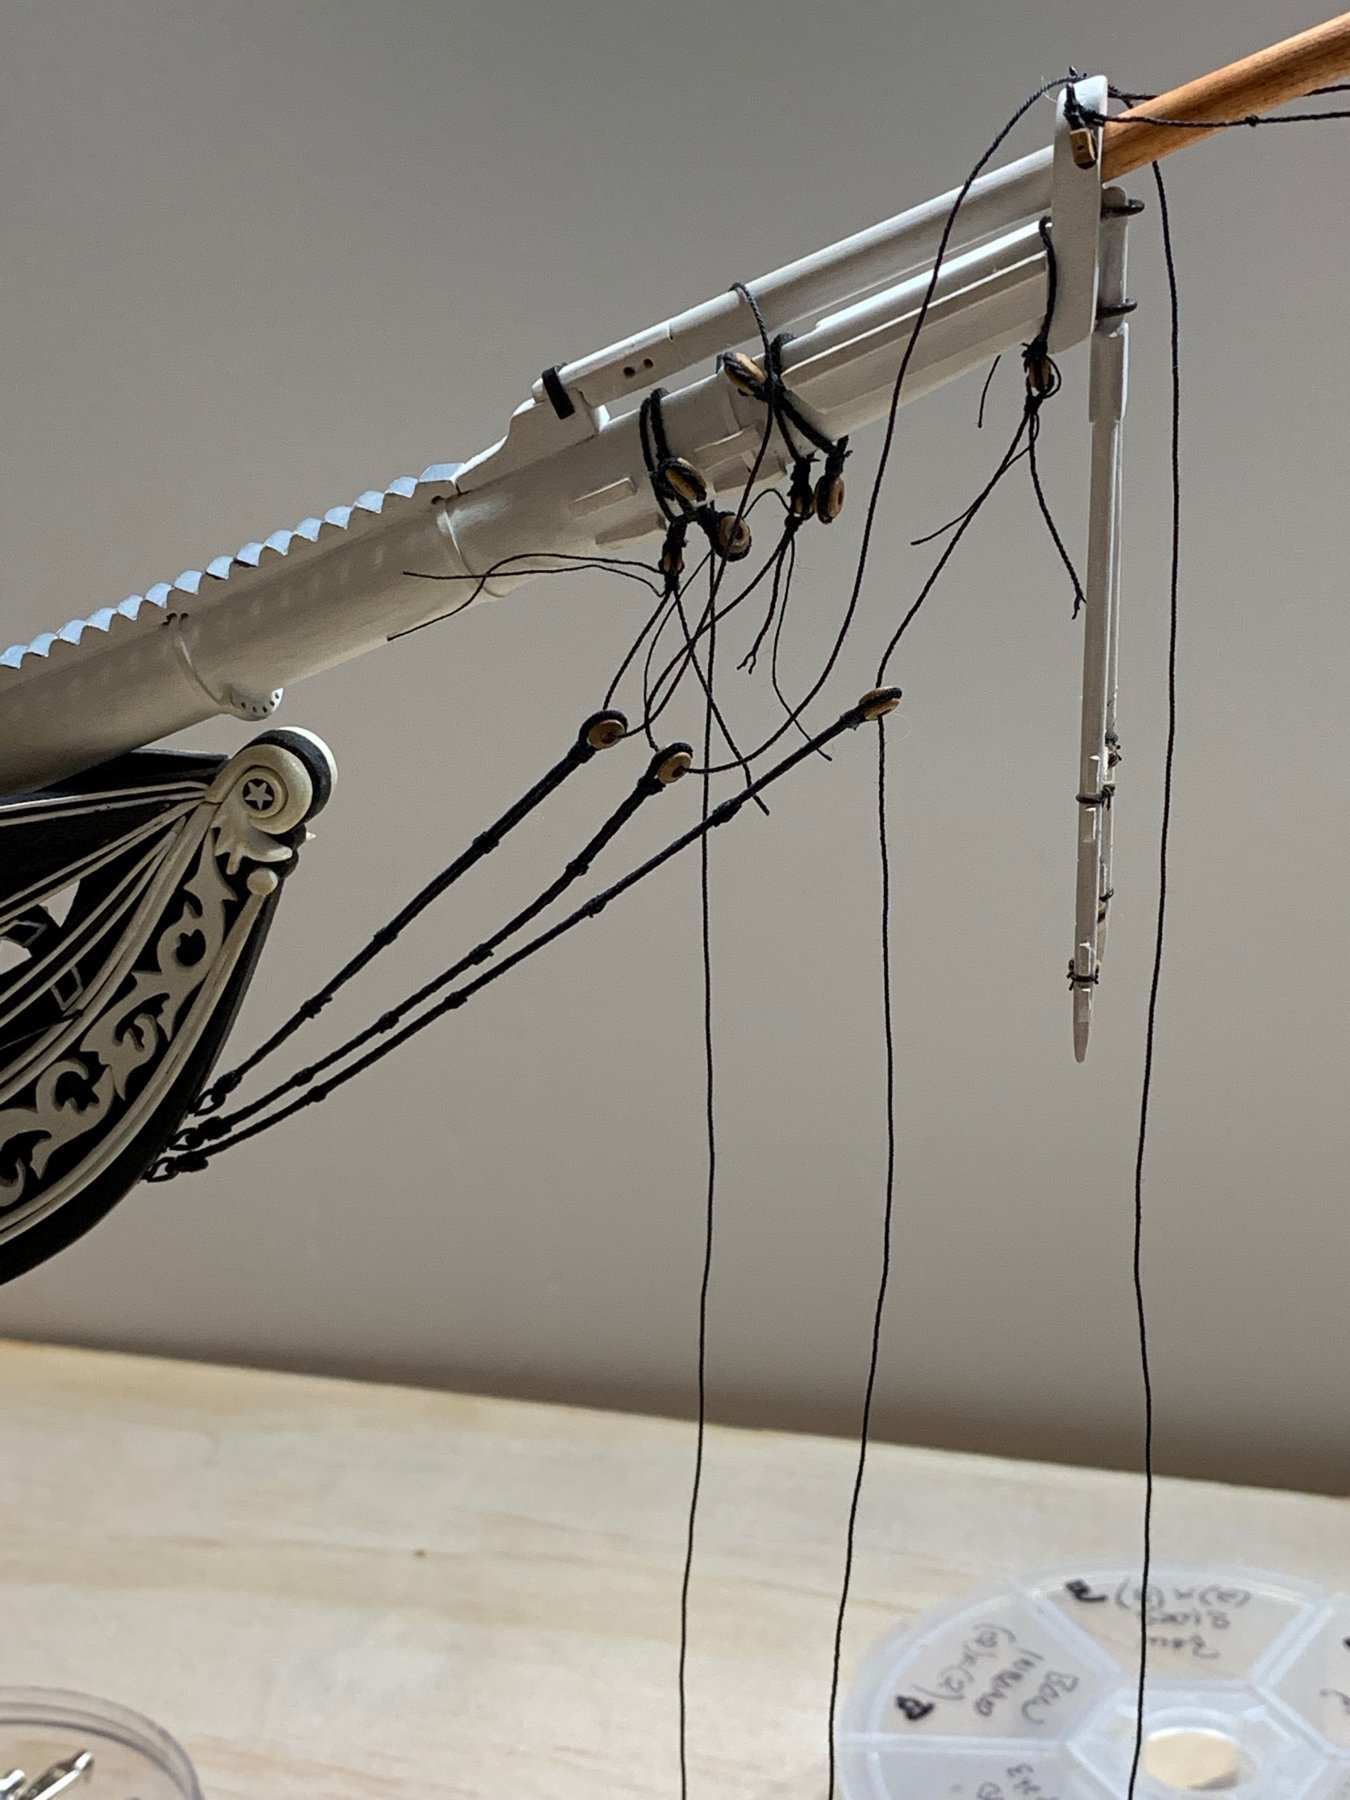
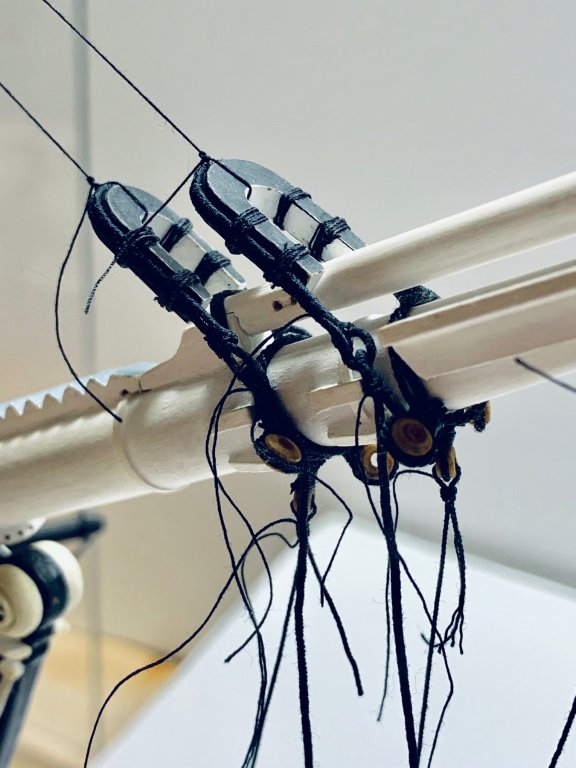
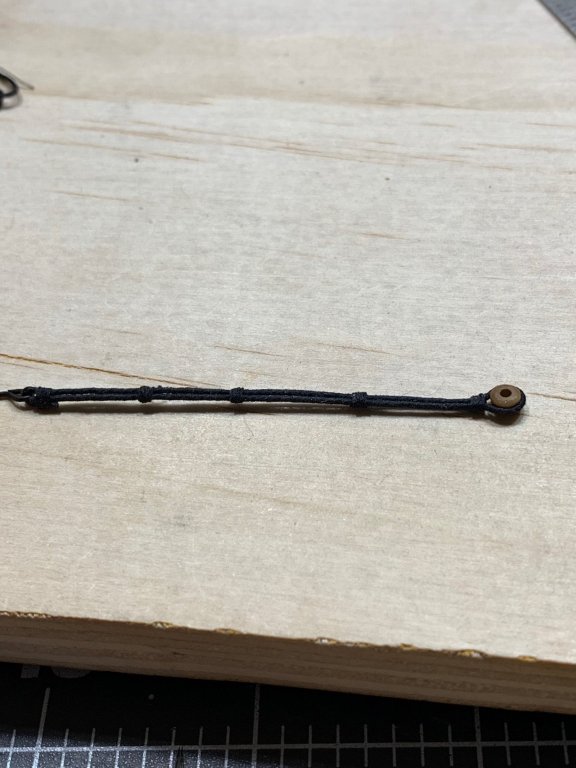
I am now working on the bobstays. I had already rigged the bobstay collars on the bowsprit. i like to do as much rigging off of the model as I can. Again I will let the pictures do the talking. Once I was happy that all would work out as planned, I discovered a potential problem. All the bobstay rigging would be in the way of rigging the fore stay hearts. I decided to stop at this point and work on the forestay hearts.
-
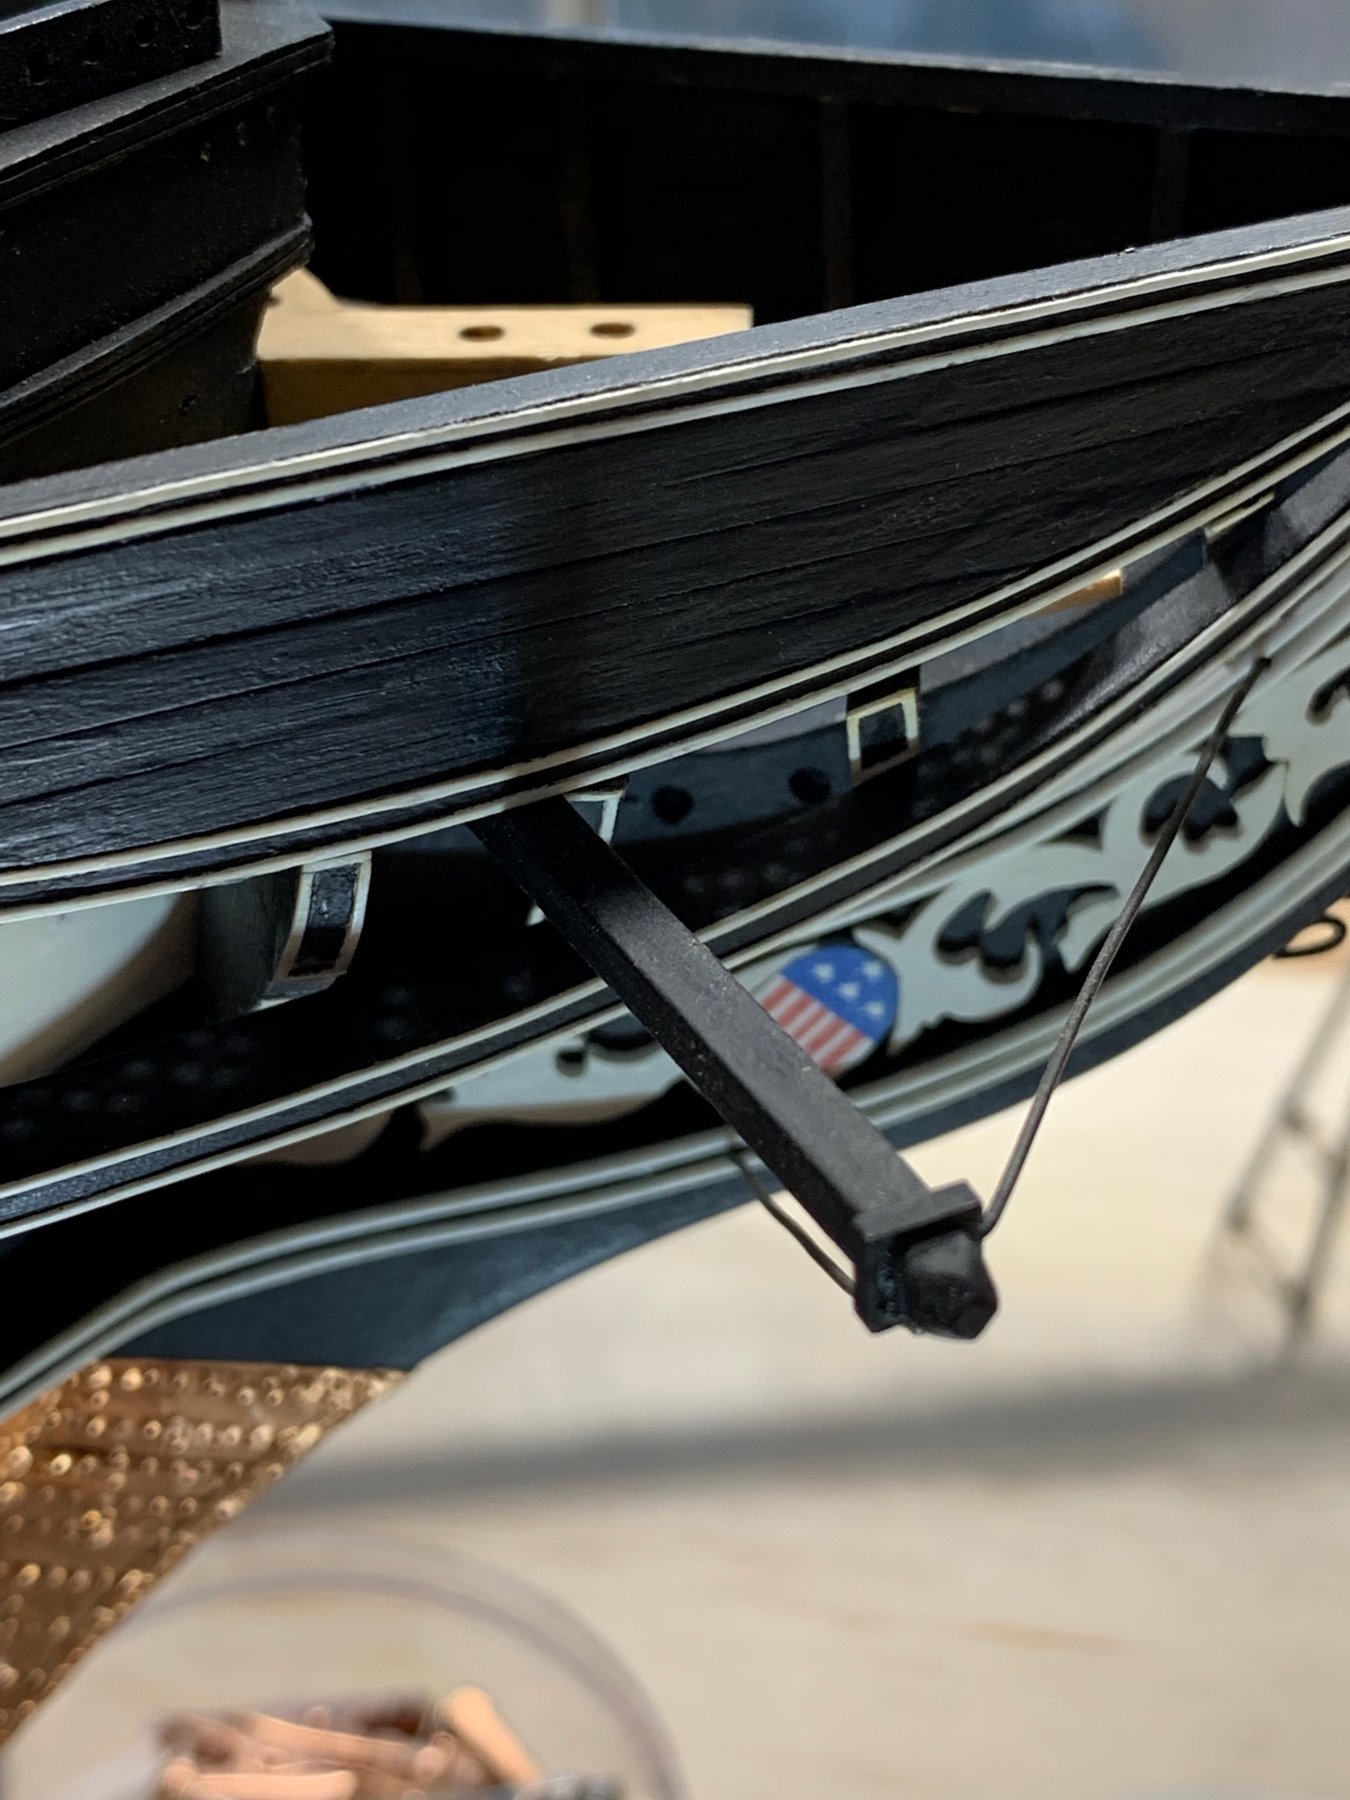
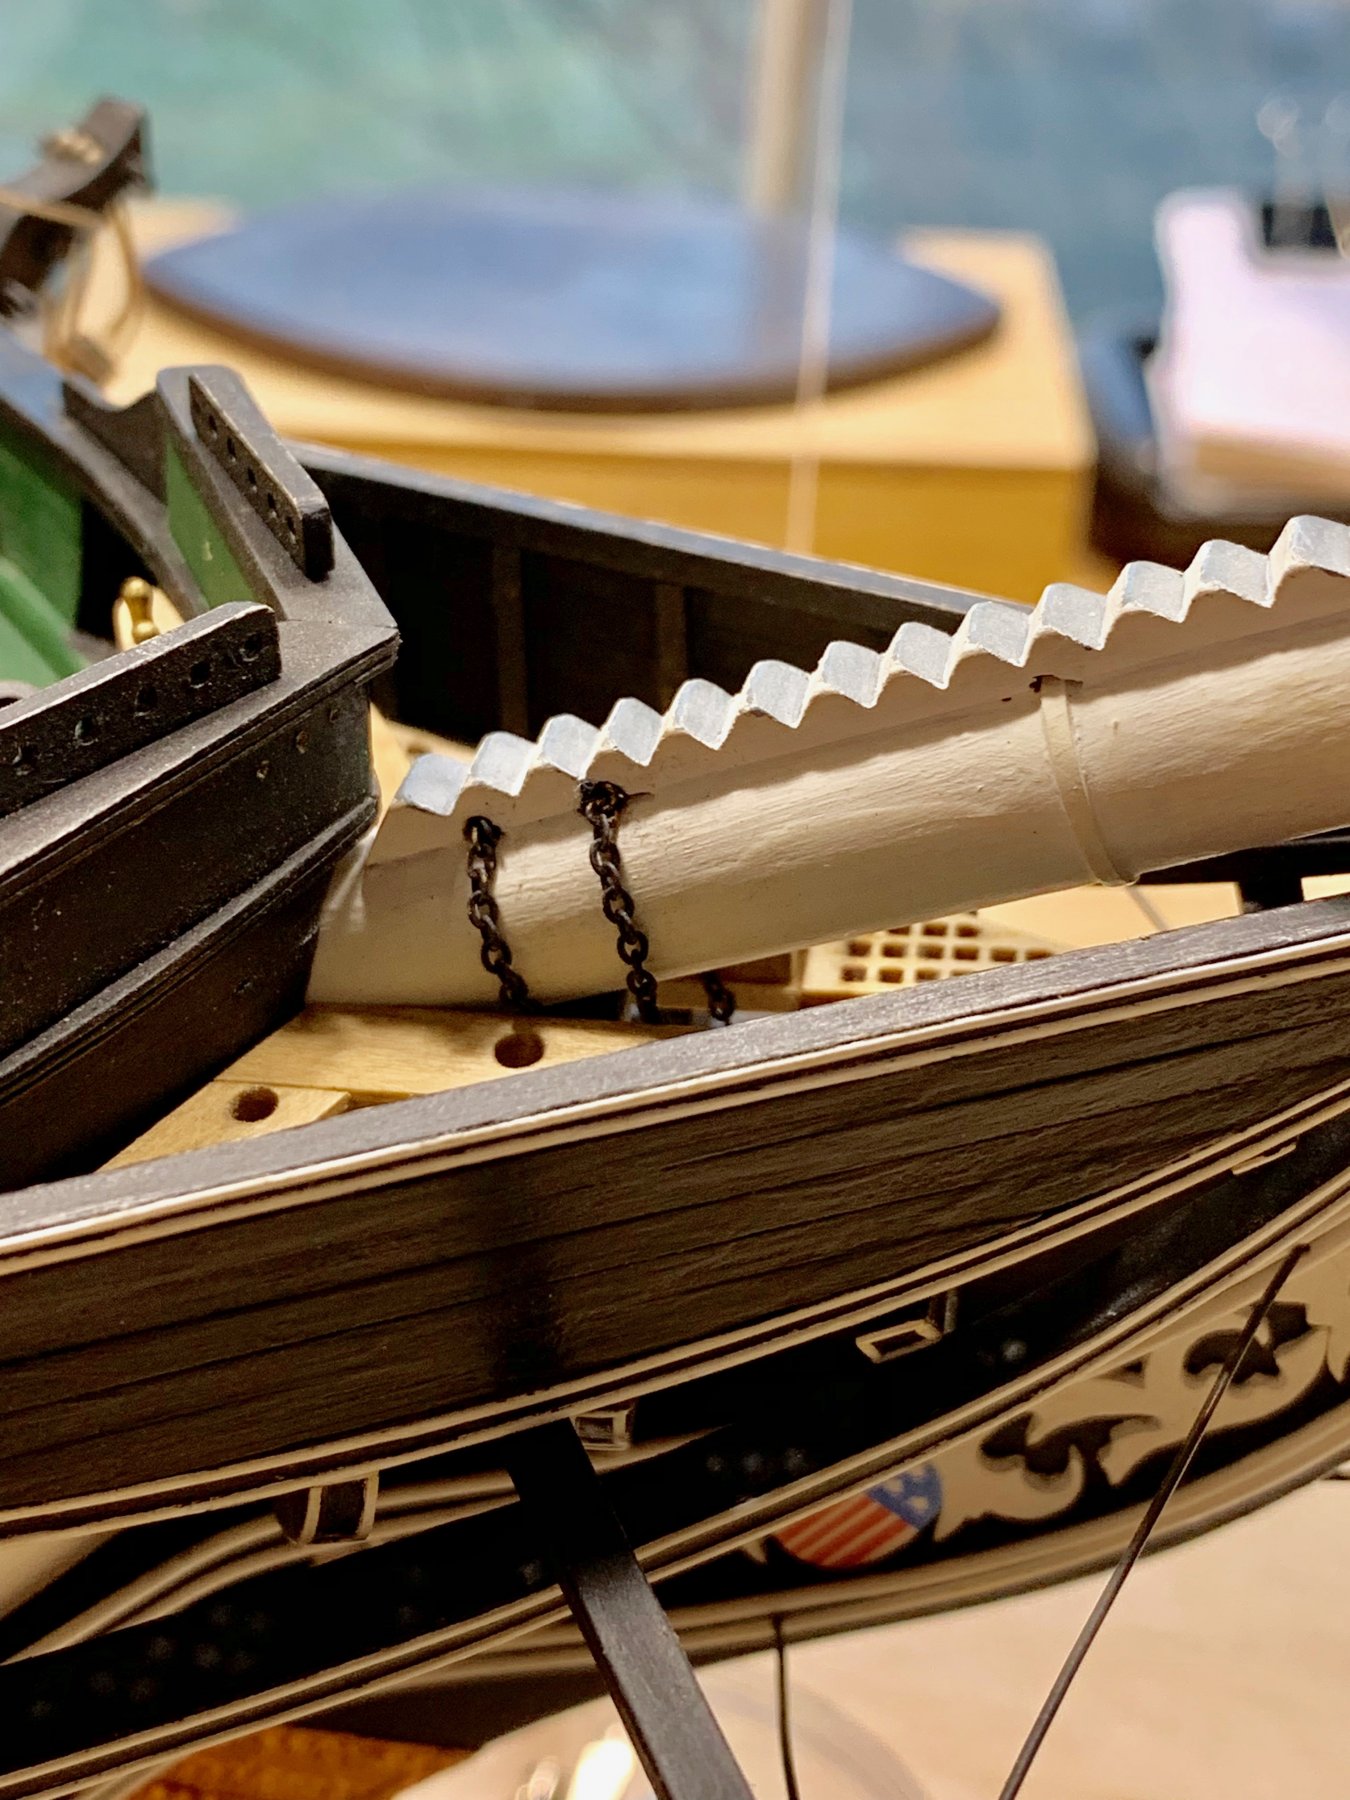
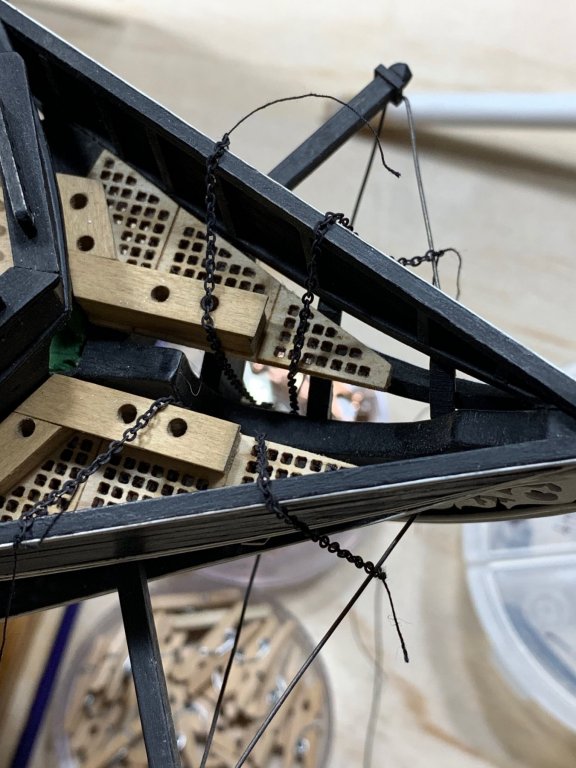
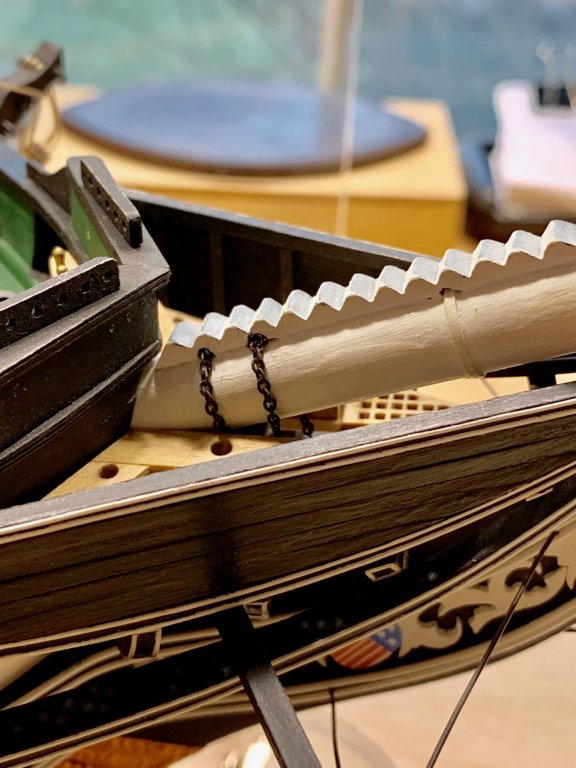
Well, I ran into a planning problem I did not think of. I need to install the chain gammoning to the bowsprit. I checked some of the other build logs and came up with a plan. The main problem was how to get the chain thru the two small holes in the stem. ( I should have wondered what went there ) So, I will let the pictures show how I did it.
-
Welcome to the group. I agree with Ken. Your skills will increase as you build and figure things out. Just go slow and really plan things out. Most importantly, remember to have fun. There are plenty of good build logs to look at. I would recommend reading them before you start.
-
Glad you are back.
-
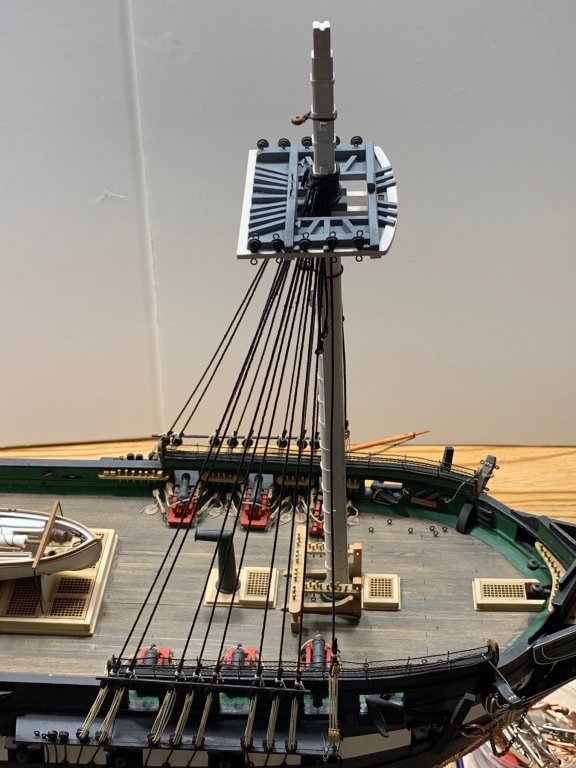
Here is my progress for the week. All the lower shrouds are finished. Some were easy and other parts really kicked my butt, but I got them finished.

-
Here is my latest progress. I have finished the lower main mast shrouds. Things are going well. I have posted two pictures. One has all the threads attached before trimming and the other is the finished product. Now it is on the to the mizzen mast shrouds.

-
If you want to stick with plastic check out https://evergreenscalemodels.com/ They should have what you would need. Hope this helps.
-
jfinan: The kit supplies you with a roll of copper tape. It is up to you figure out what to do with it. Since I started the kit years ago I went with the ponce wheel and tape. I think the ponce wheel is over kill. If I were to do it over I would just do the plain blank plates. At a scale of 1/76 I don't think you would see the bolts. But at the time I thought it looked cool. In the future I am going to try and stay with 1/4 inch scale. That way I think the details will look more realistic. Thanks for the interest.
-
Great job! It is great to see one of the Conny's being finished.
- 1,354 replies
-
- 2
-
-
- constitution
- model shipways
- (and 1 more)
-
Be patient and plan ahead. Have fun.
- 104 replies
-
- 1
-
-
- constitution
- BlueJacket Shipcrafters
- (and 1 more)
-
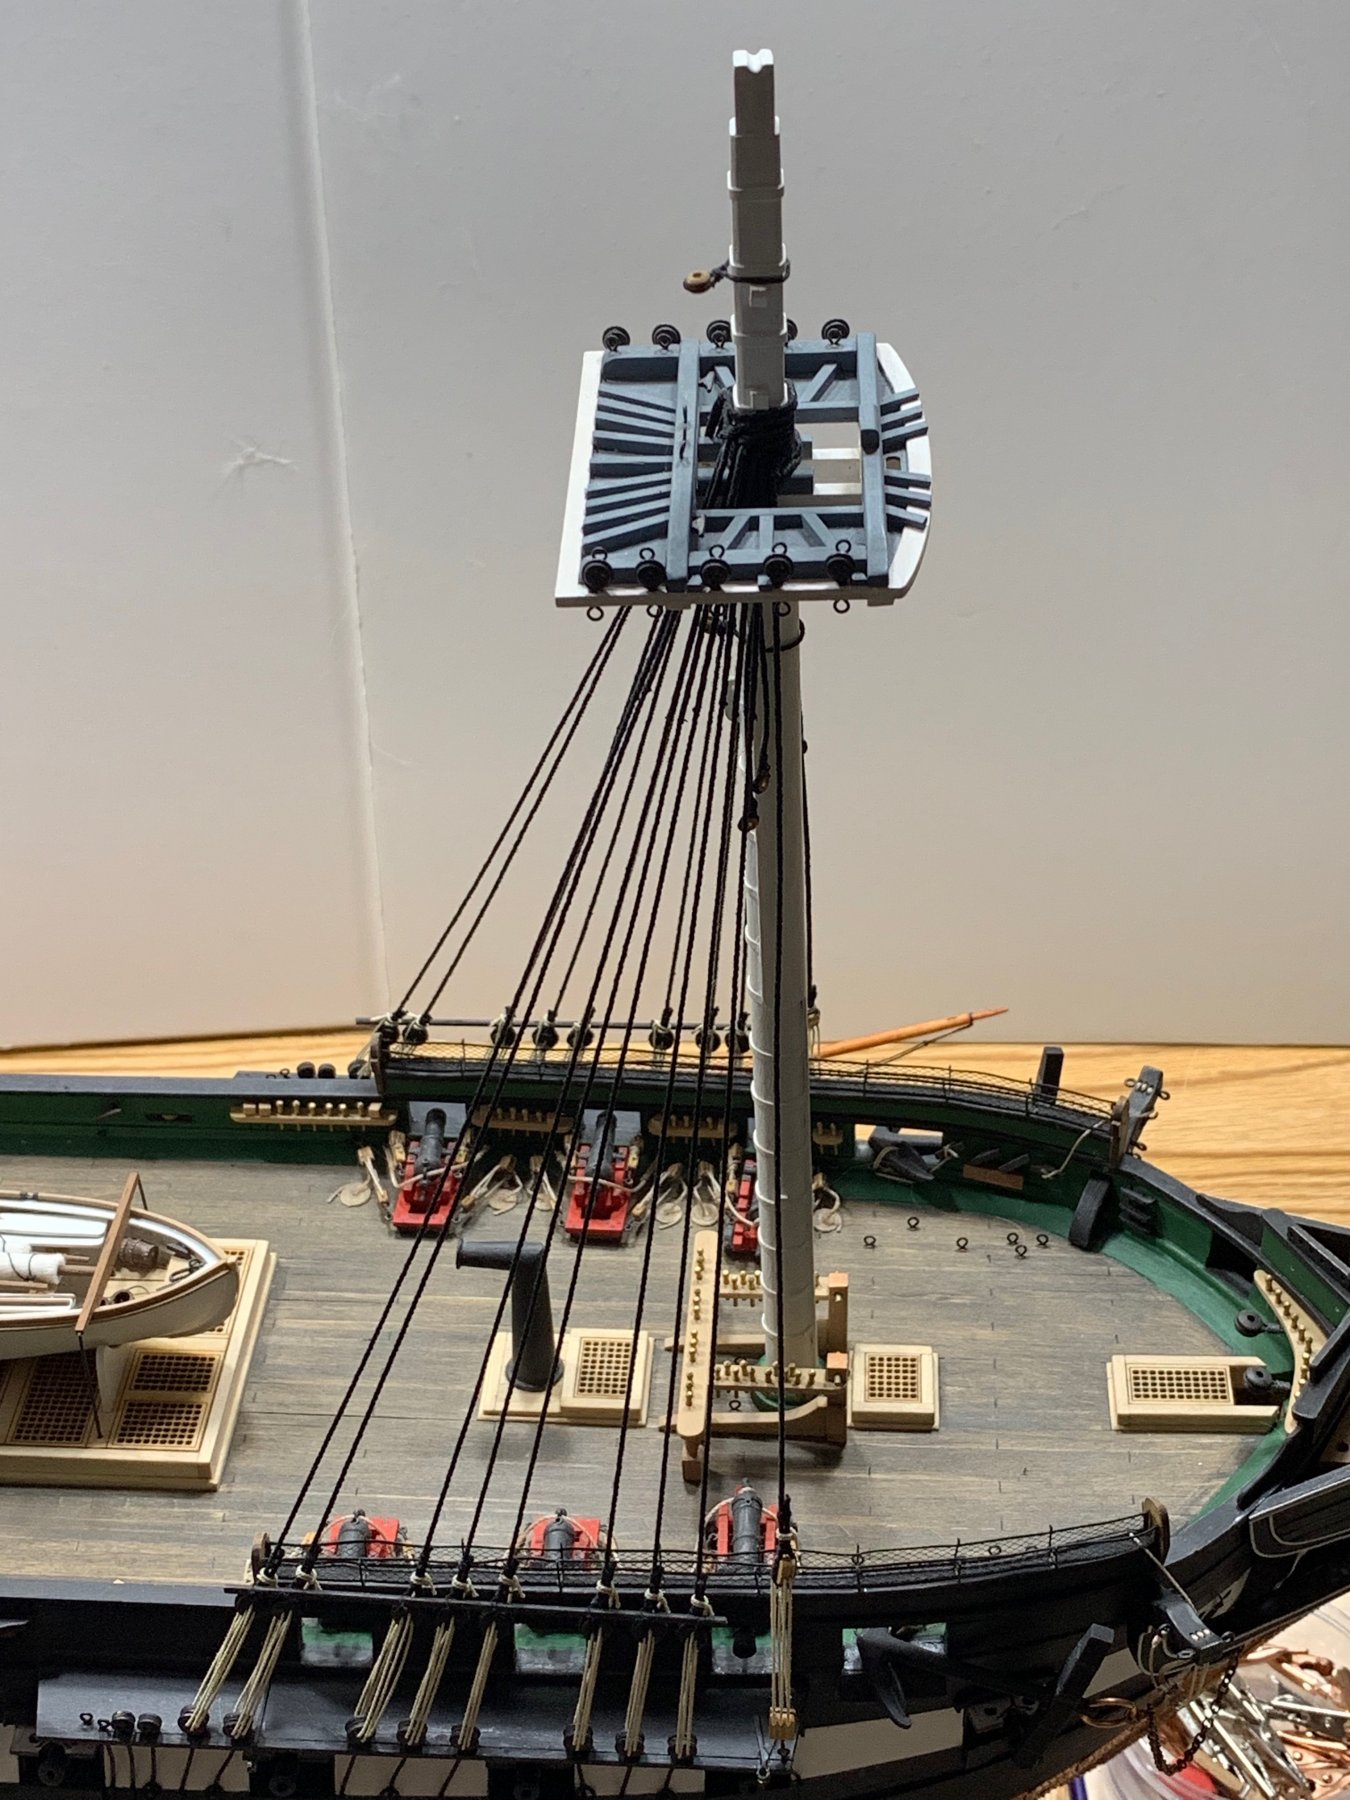
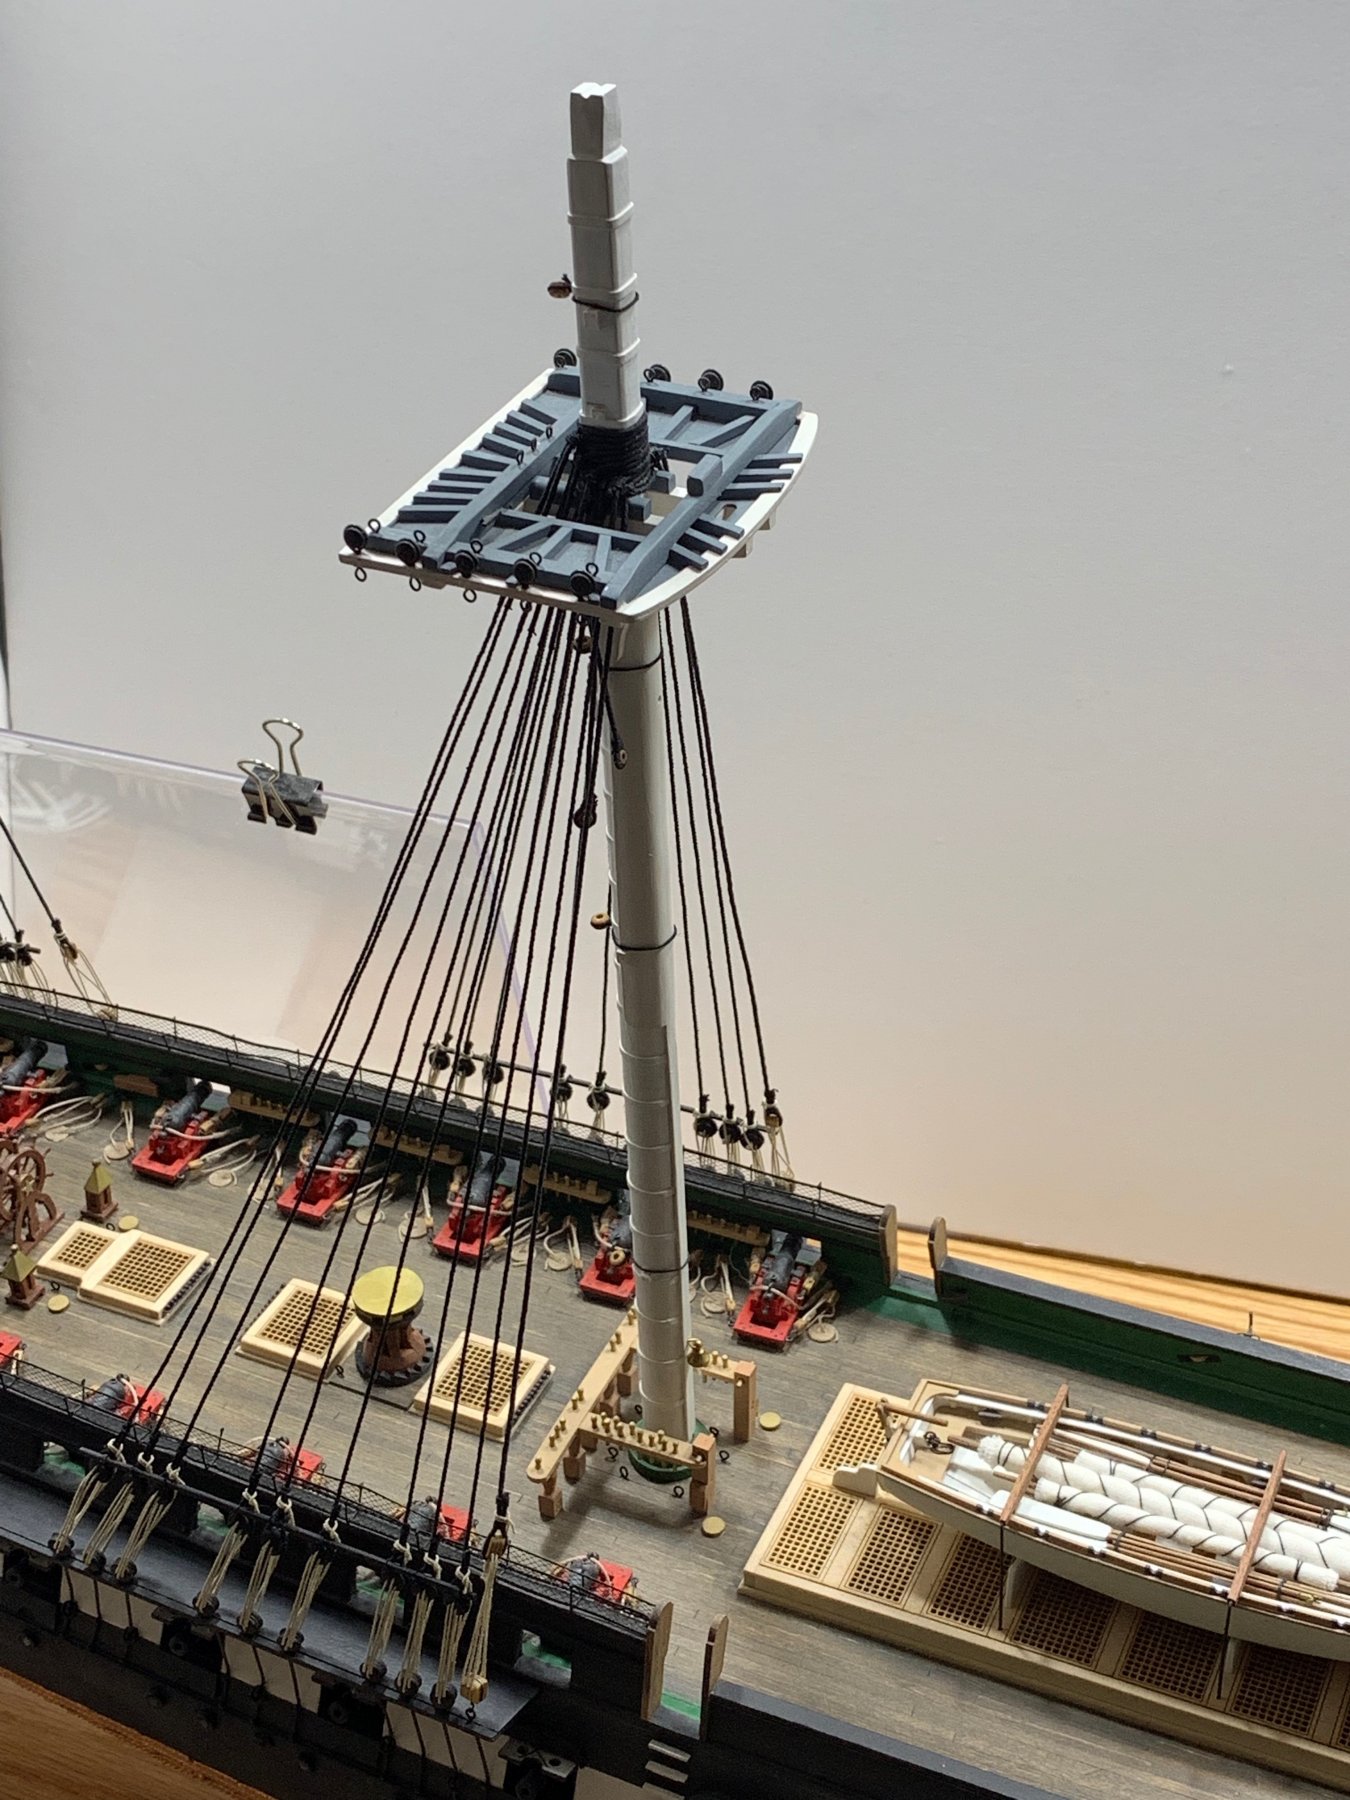
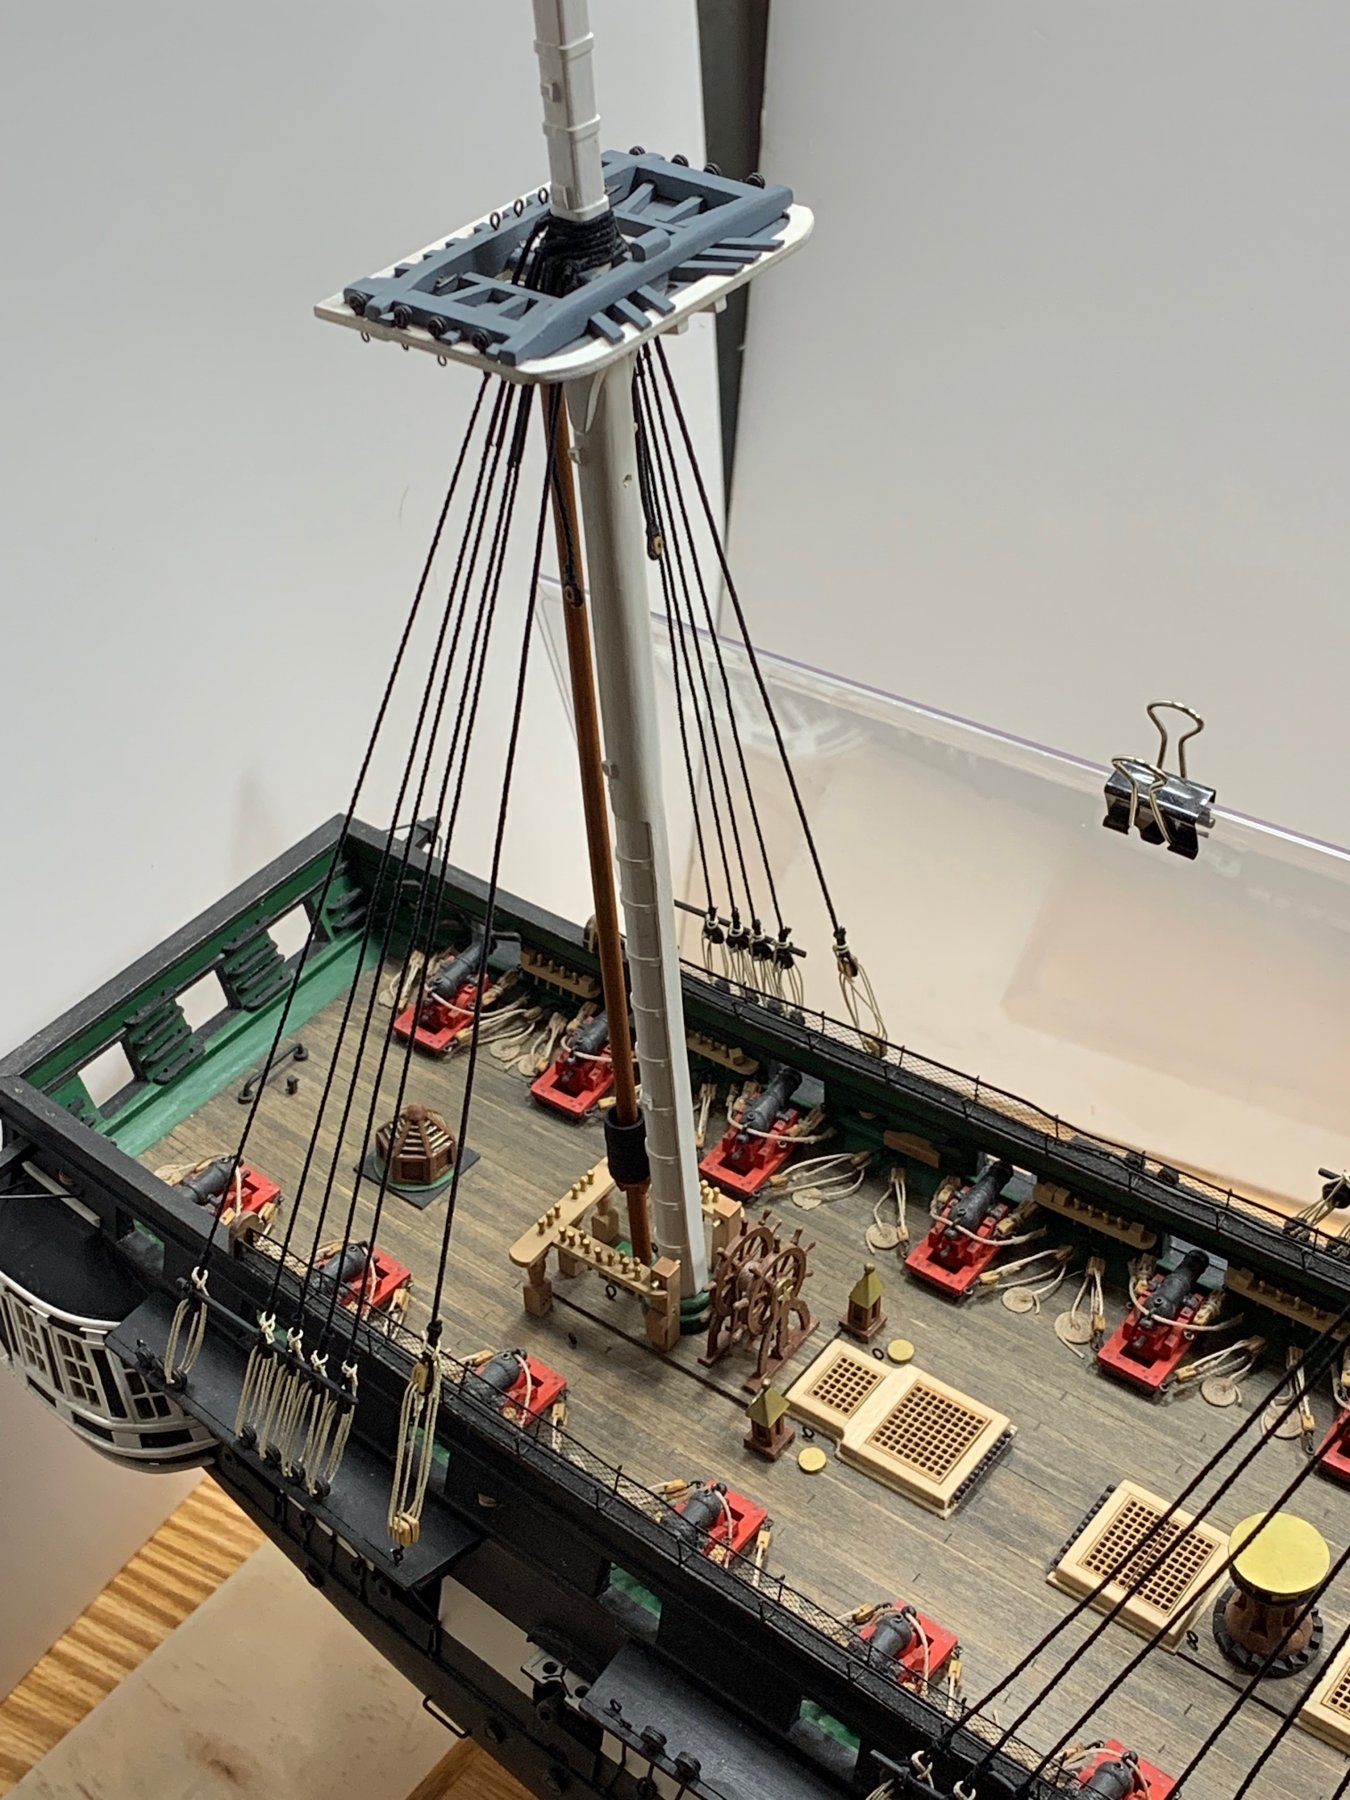
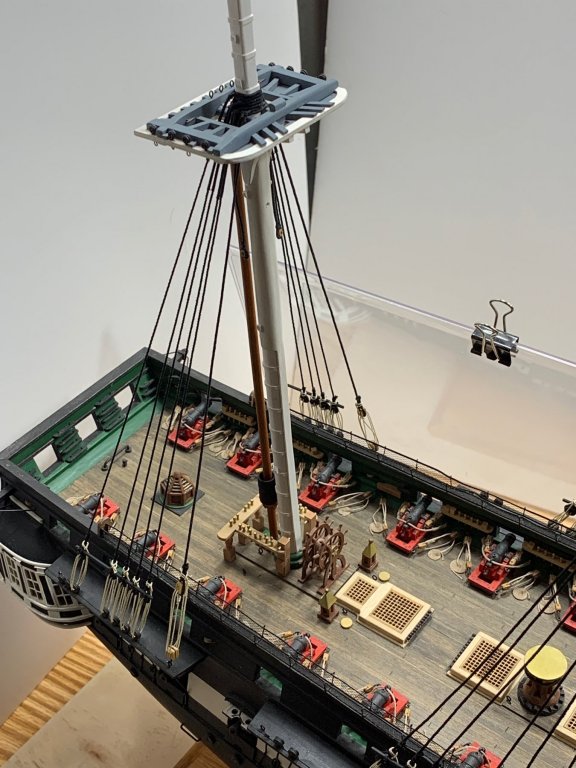
I made some progress this week. I finished the foremast lower shrouds and added the shear pole. Every things was tied and then the knots set with diluted white glue. I was really amazed how the shear pole firmed everything up. This week I will attempt to get the lower main mast and shrouds installed. This whole process is very tedious and I try to work on about one hour sessions and then take some breaks. I am getting pretty good at tying knots with tweezers. 😁
-
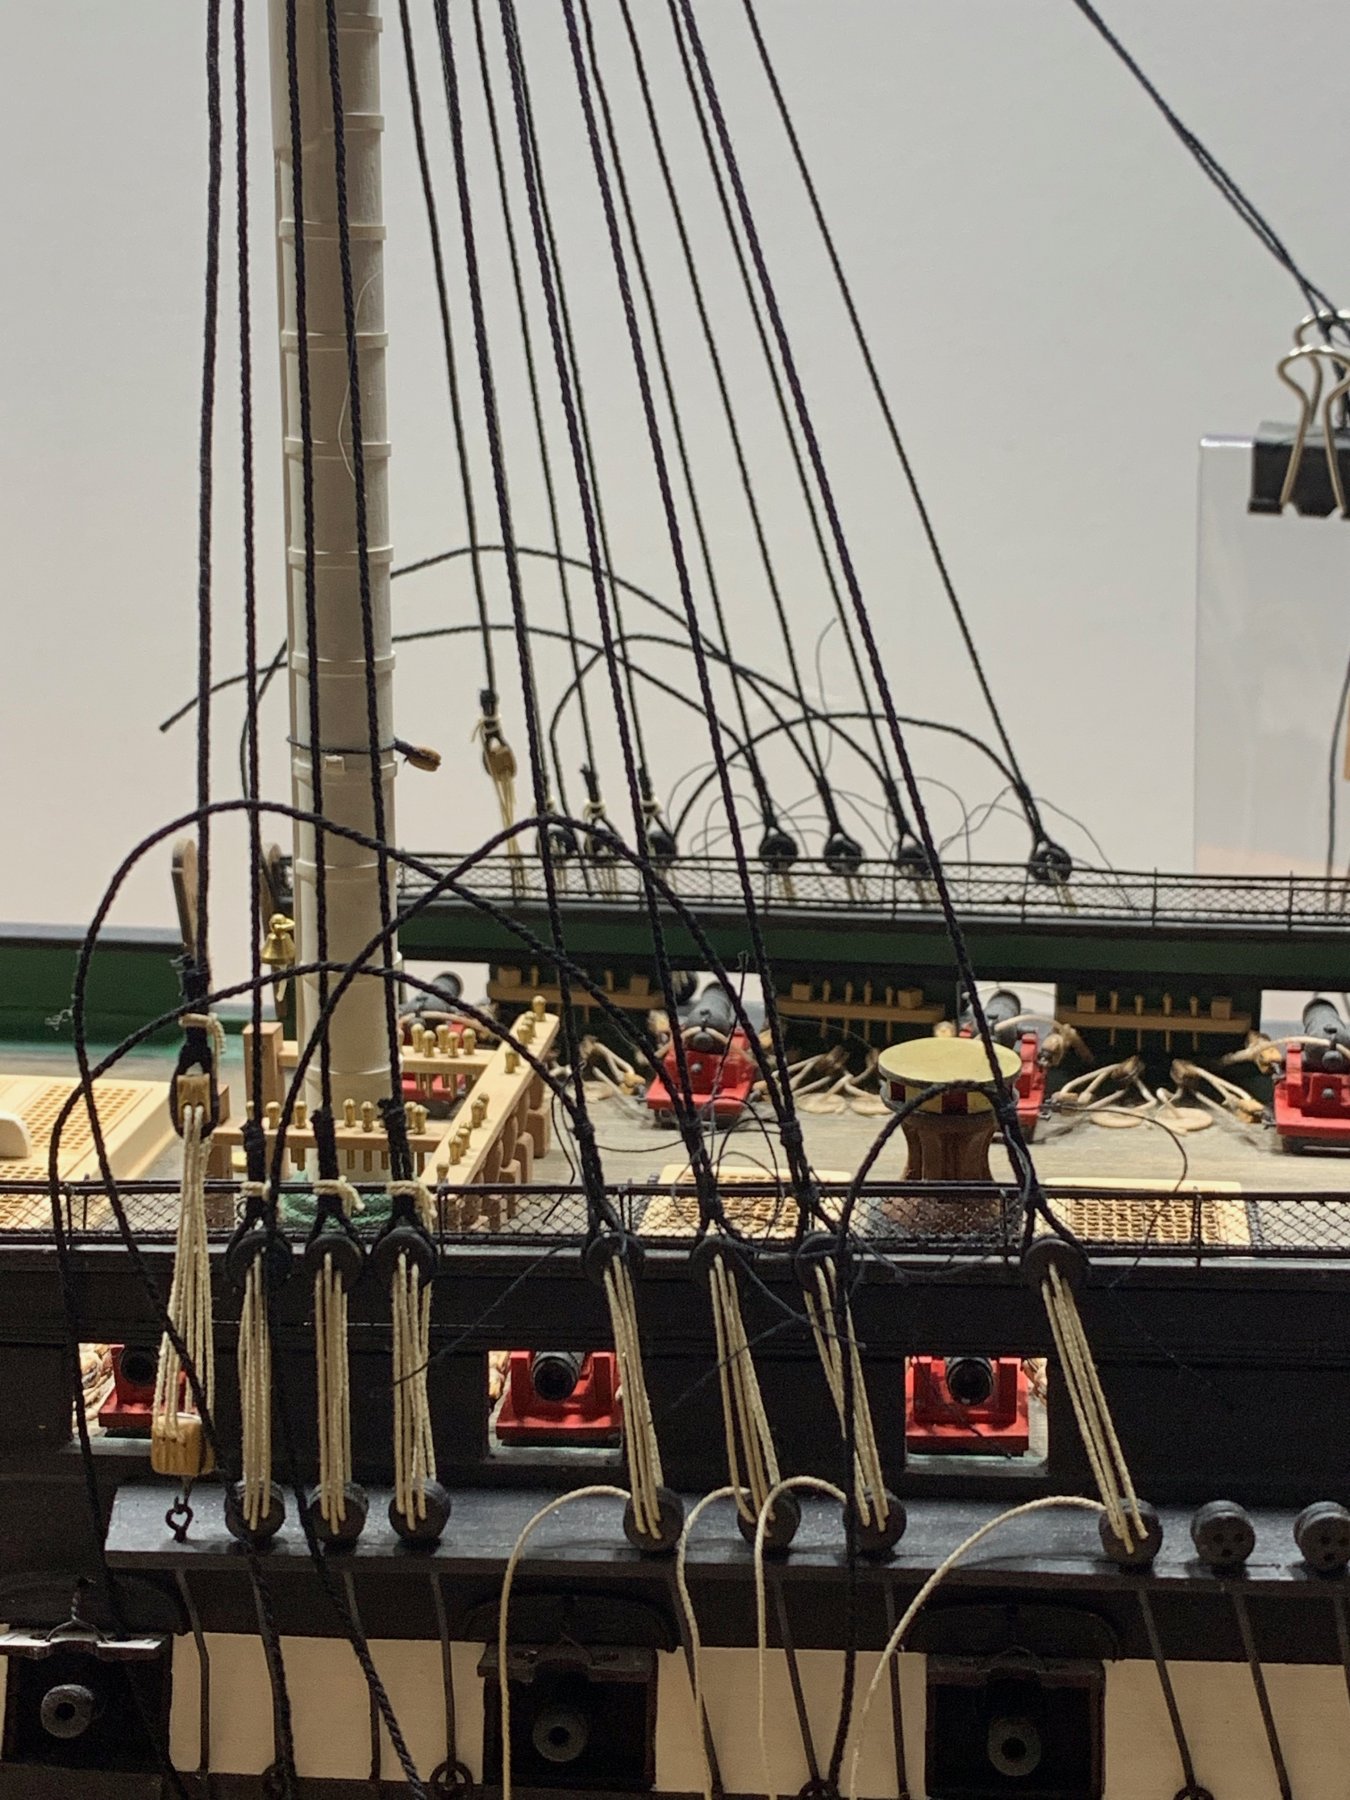
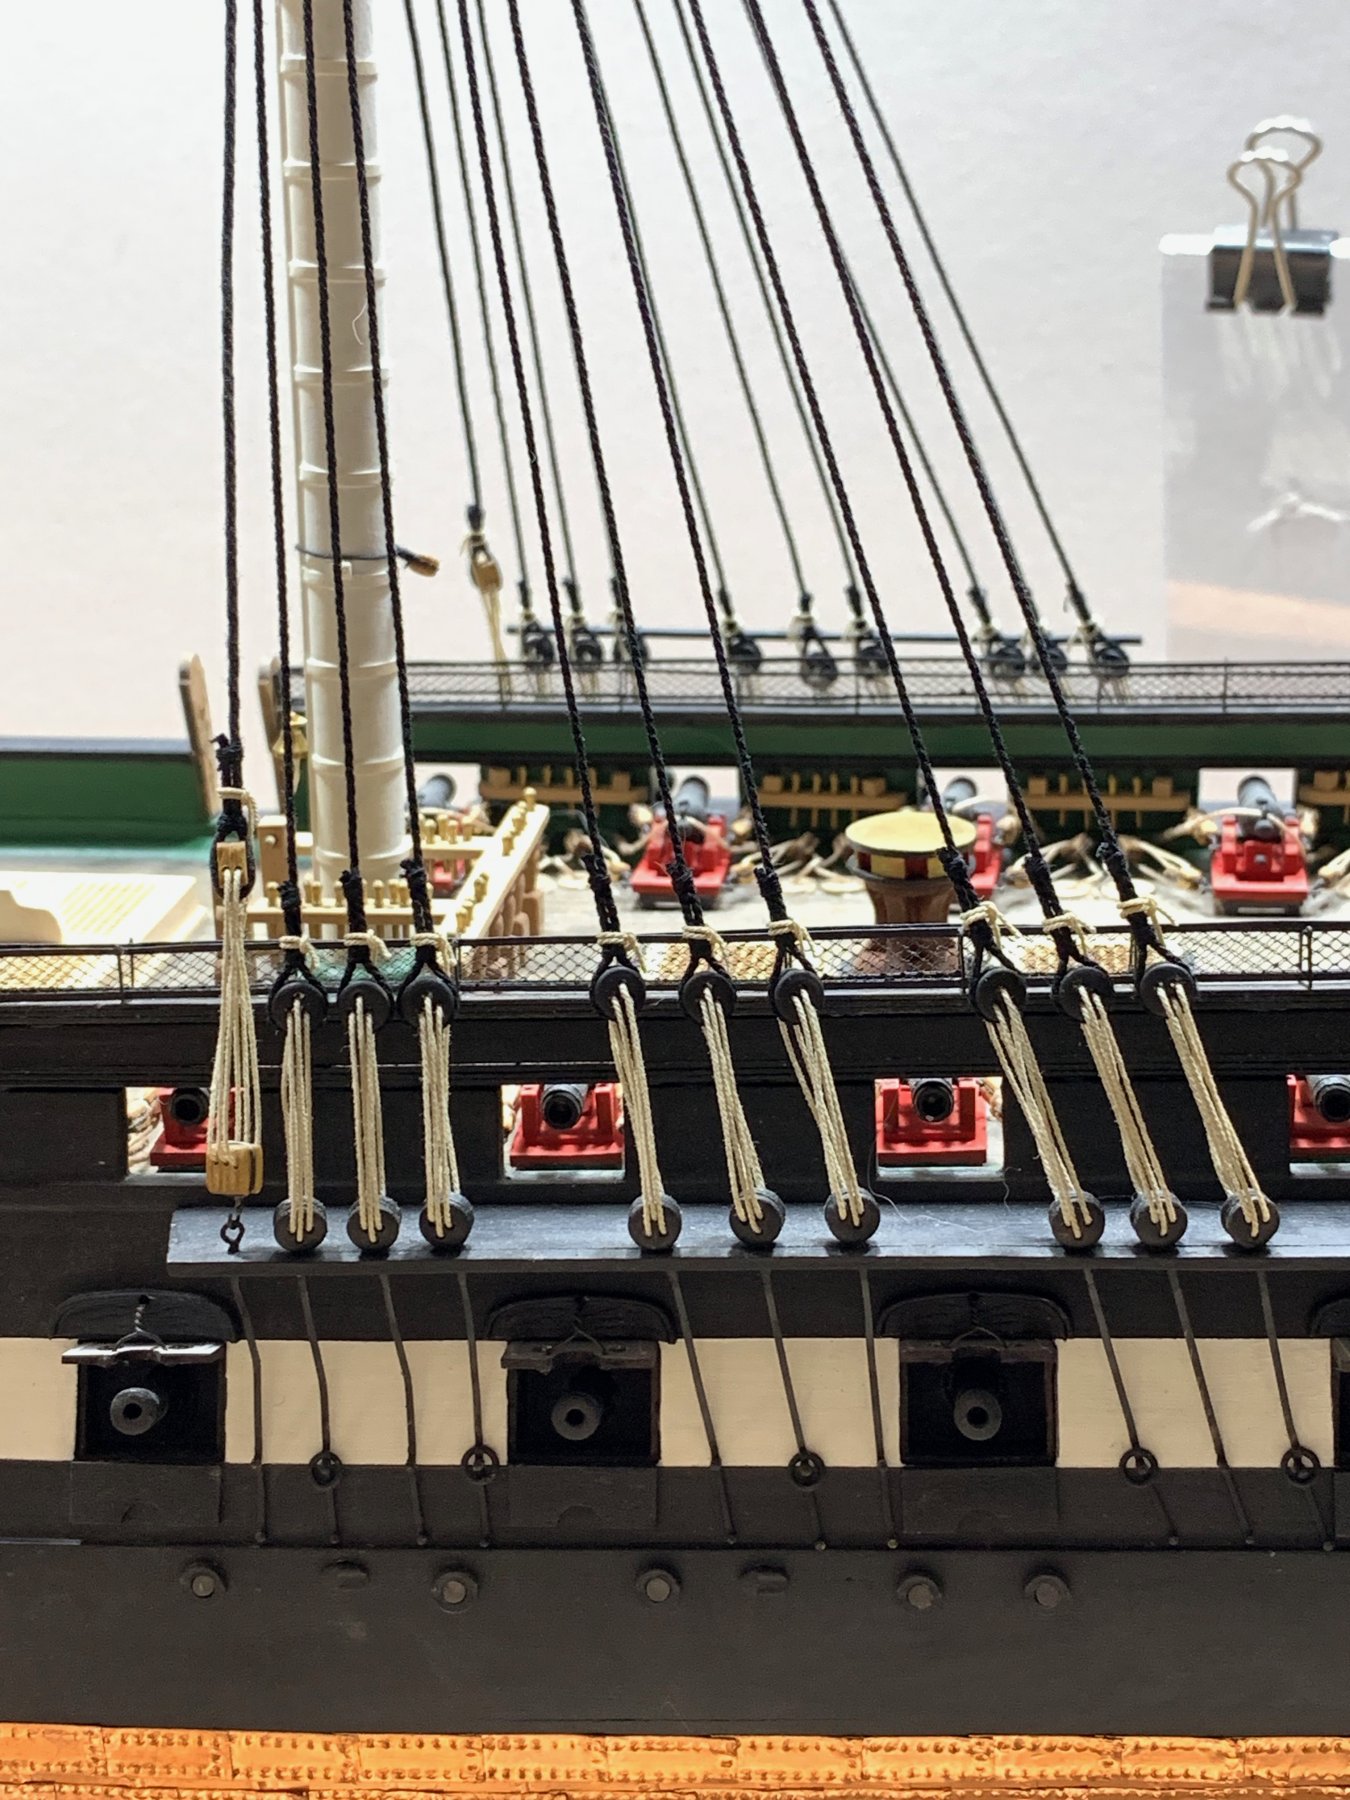
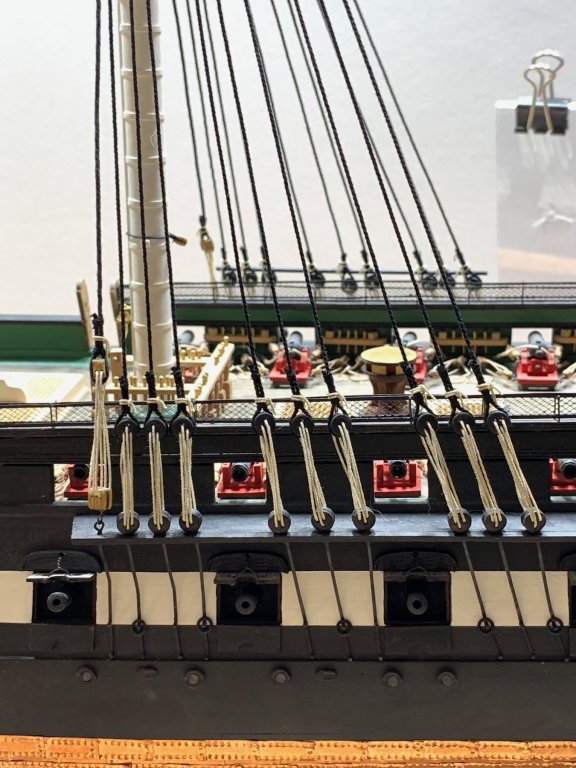
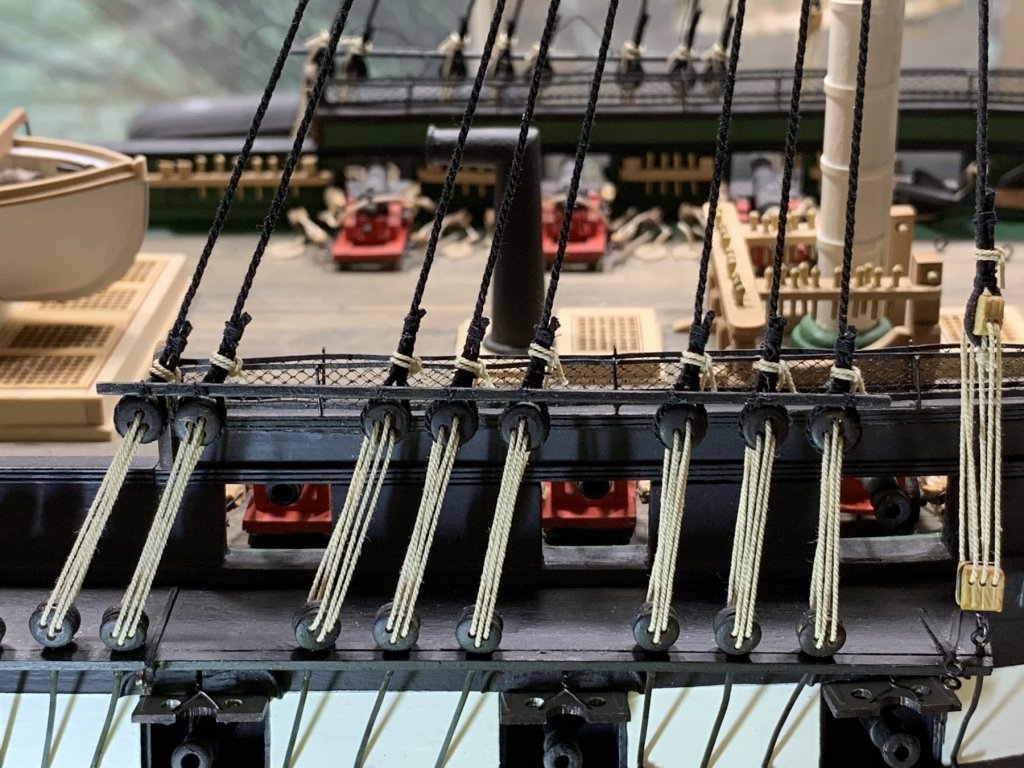
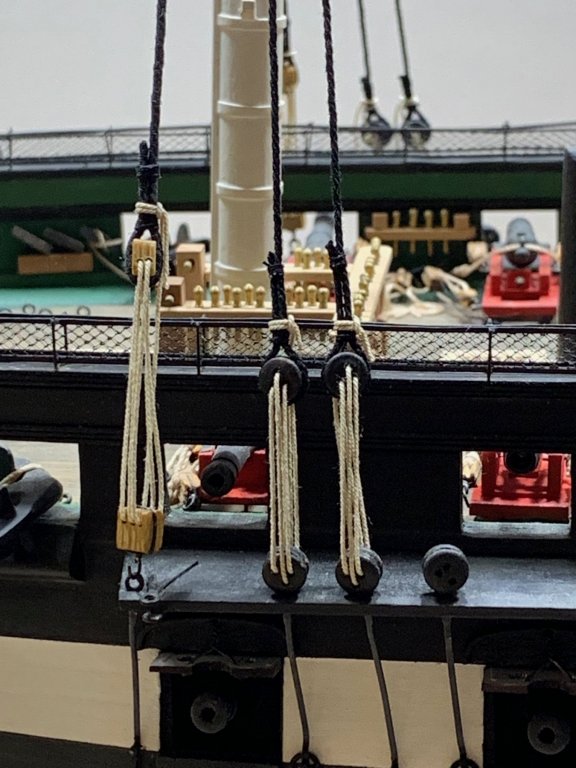
Dave: In the picture, the line with the double and triple block is called the swifter. There is one on the port and one on the starboard. They are single. Then you have the first pair of shrouds on each side. They are paired, two to the starboard side and then two to the port side. I started from the stem and worked aft. Keep pin mind as you work aft the shrouds do get longer. Hope this helps.
-
I got my feet wet over the weekend on the starting of the rigging the lower foremast shrouds. All in all, it went pretty well. My plan is to finish the lower formast shrouds by the weekend. I used my (quik stik) to set my mast. It works well and lets me tweak the mast when necessary. My deadeye spacer is working well. I made all my line with the Byrnes Ropewalk. I chose cotton thread. All my line is tied with actual knots. The knots are then set with diluted white glue. The cotton thread lets the glue soak in. Once everything is set and the way I like it I trim off the whiskers.
-
Getting Back Into The Hobby After 45+ Years
Geoff Matson replied to Tom in NC's topic in New member Introductions
Welcome to MSW. Look forward to having you around. -
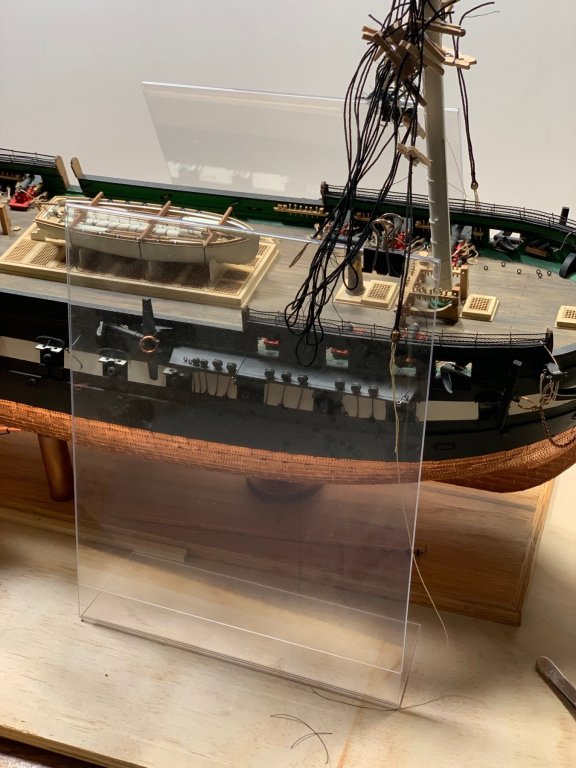
I rigged as much of the lower foremast off the model as I could. Now when I installed the mast I needed something to keep the pre rigged lines off the model and not get snagged on anything. I picked up a couple of those plexiglass picture frames that you slide the pictures in between the plexiglass. I placed one on each side of the model to hold the lines off. Then I could work on the lines without snagging or getting caught on anything. It worked great as I was installing the swifter.
- 1 reply
-
- 9
-