Old Collingwood
-
Posts
11,592 -
Joined
-
Last visited
Content Type
Profiles
Forums
Gallery
Events
Everything posted by Old Collingwood
-
 More primer arrived so i was able to continues with hull both forward and aft, after mixing the paint to a 50/50 mix with distilled water i came across a technique that has helped to level out the paint in a smoother manner, before applying the primer i heated up the section to be painted with a hairdryer first, and i found with a quick thin layer and the hairdryer, applied again after application, the paint was smoothing out nicely and drying quickly. I put on about 5 layers and have left it over night to harden before i give it a light sanding/wire wool keying, ready for more parimer. The idea is to get a smooth even layer that will be hard enough for me to gently improve some of the buried details with my knife, the hull will be ready then for the propper painting OC.
 -
Thanks Joe, lucklely none went on the sides just under the hull. OC
-
Thanks Joe, i wondered if it was down to the layer of PVA i had painted over the hull? OC
-
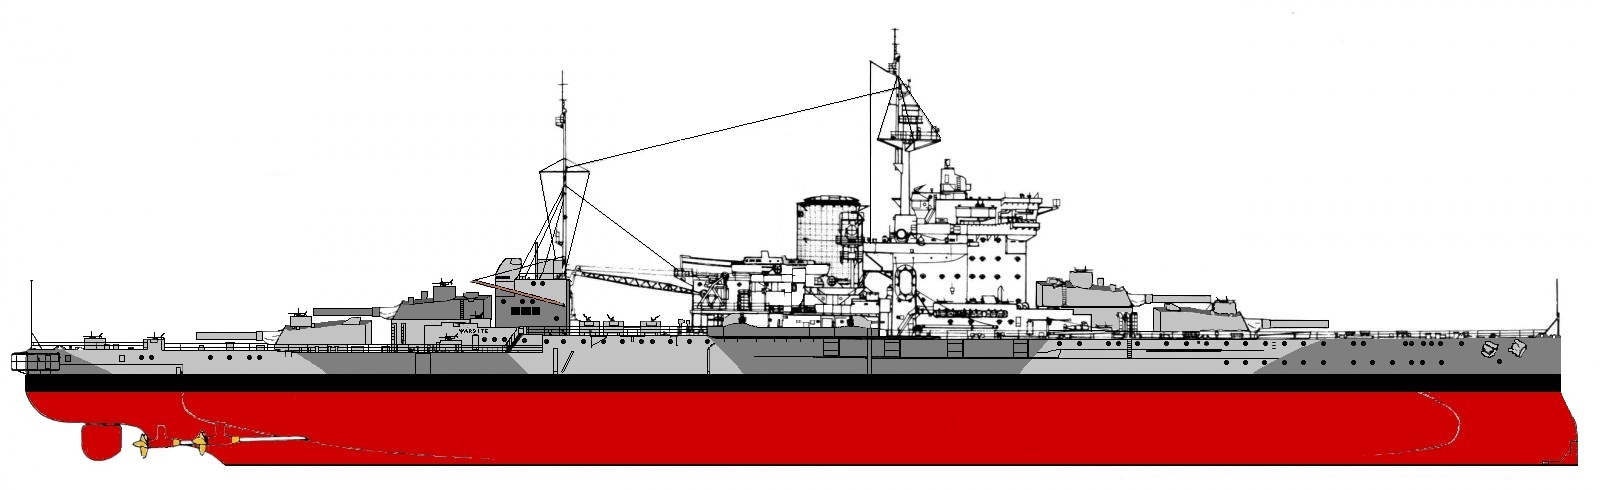
I foregot to mention - i have been working on a plan in Windows Paint, of how i want my build to look, here is the plan part finnished - OC
-
Just a smal update folks - I decided to do a bit more sanding to blend those areas i had painted, well i have it back down now to near clear palstic minus the hull side bow plates they just didn't look right, yeterday i took delivery of some more Vallejo primer so i can do the - Prime/Sand/Prime/Sand dance . But what arrived that realy had my eyes popping out of my head where the turned metal barrals but - WOW are they tiny tiny little things, they are like the tinniest of baby pecsision metal work i have ever seen :o i will need a magnifying telescope to work with these as i was hoping to hold them with a pin or something down the barrals, while painting . They look superb though, oh and the 20mm Orli's i received aswell including the pe framework/shields I think my work will be cut out working on these folks - my appoligies for swearing in advance OC.
-
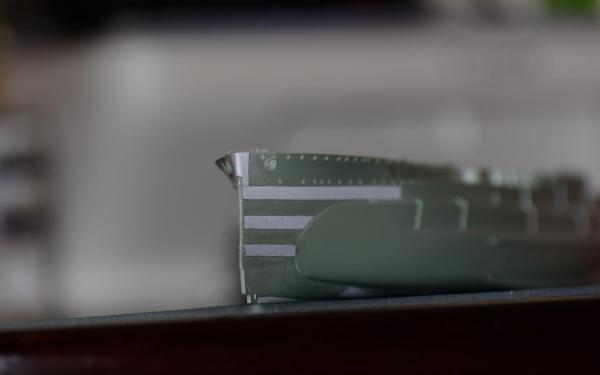
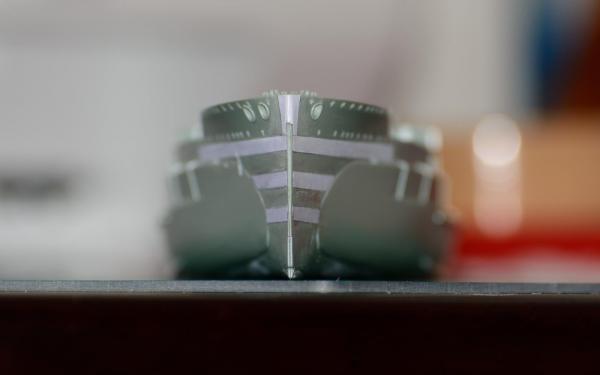
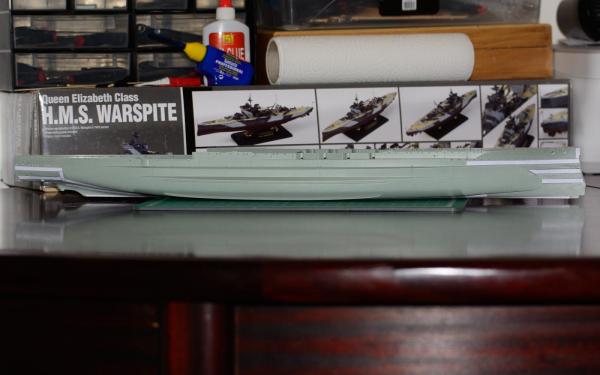
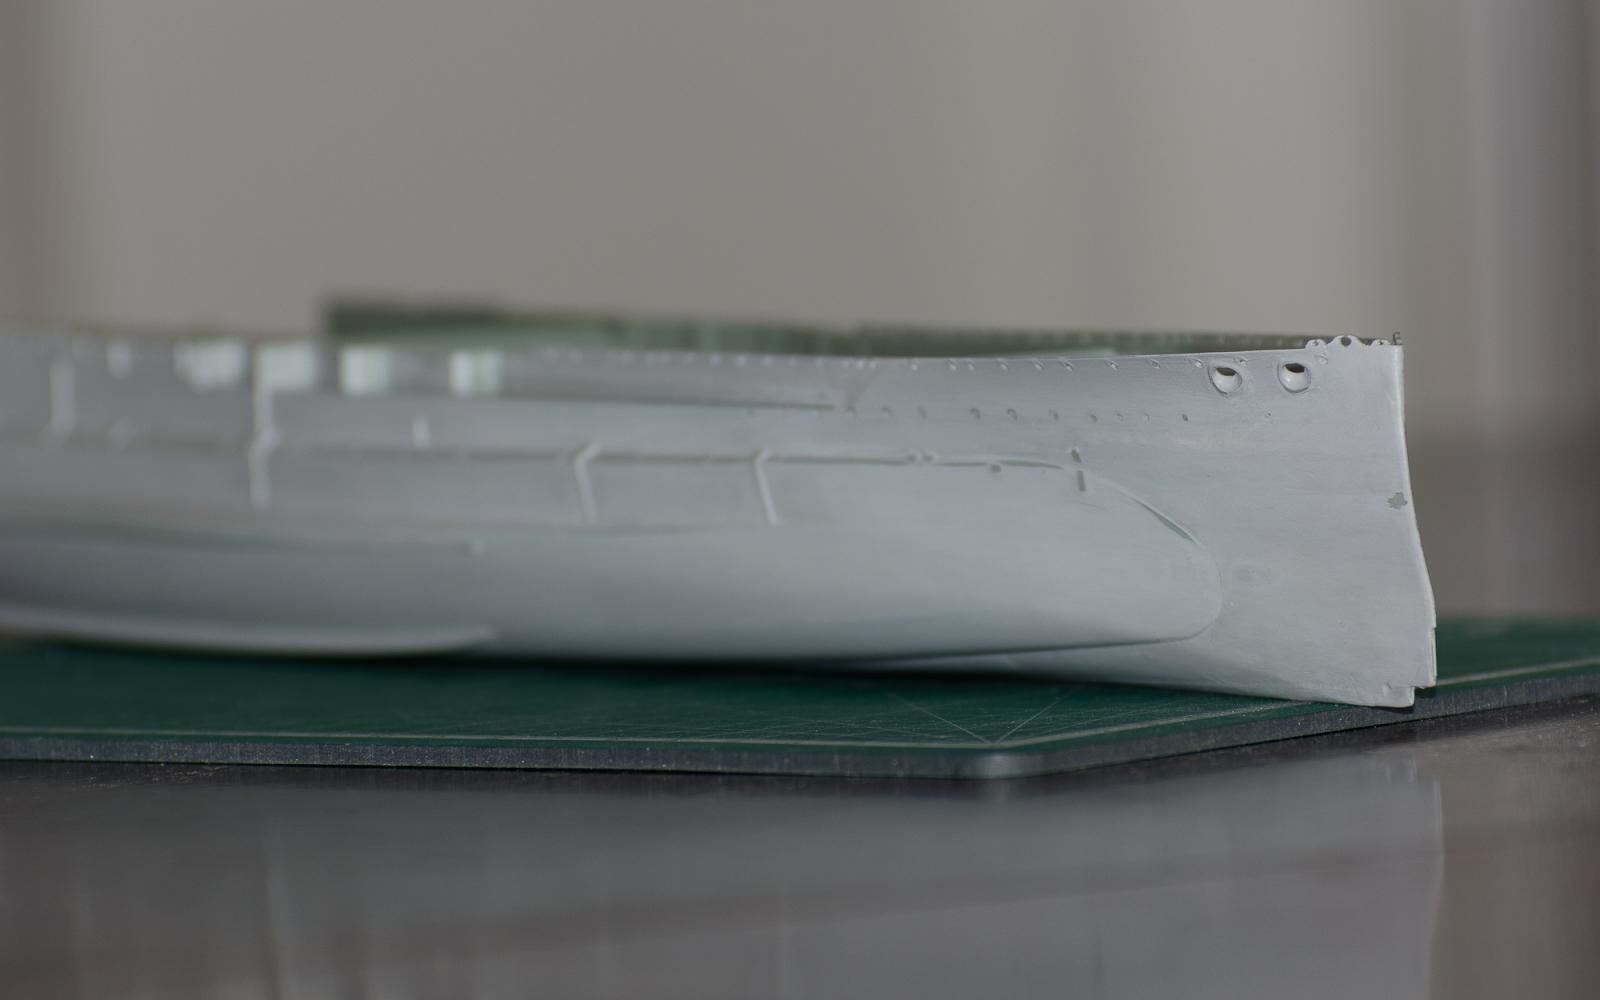
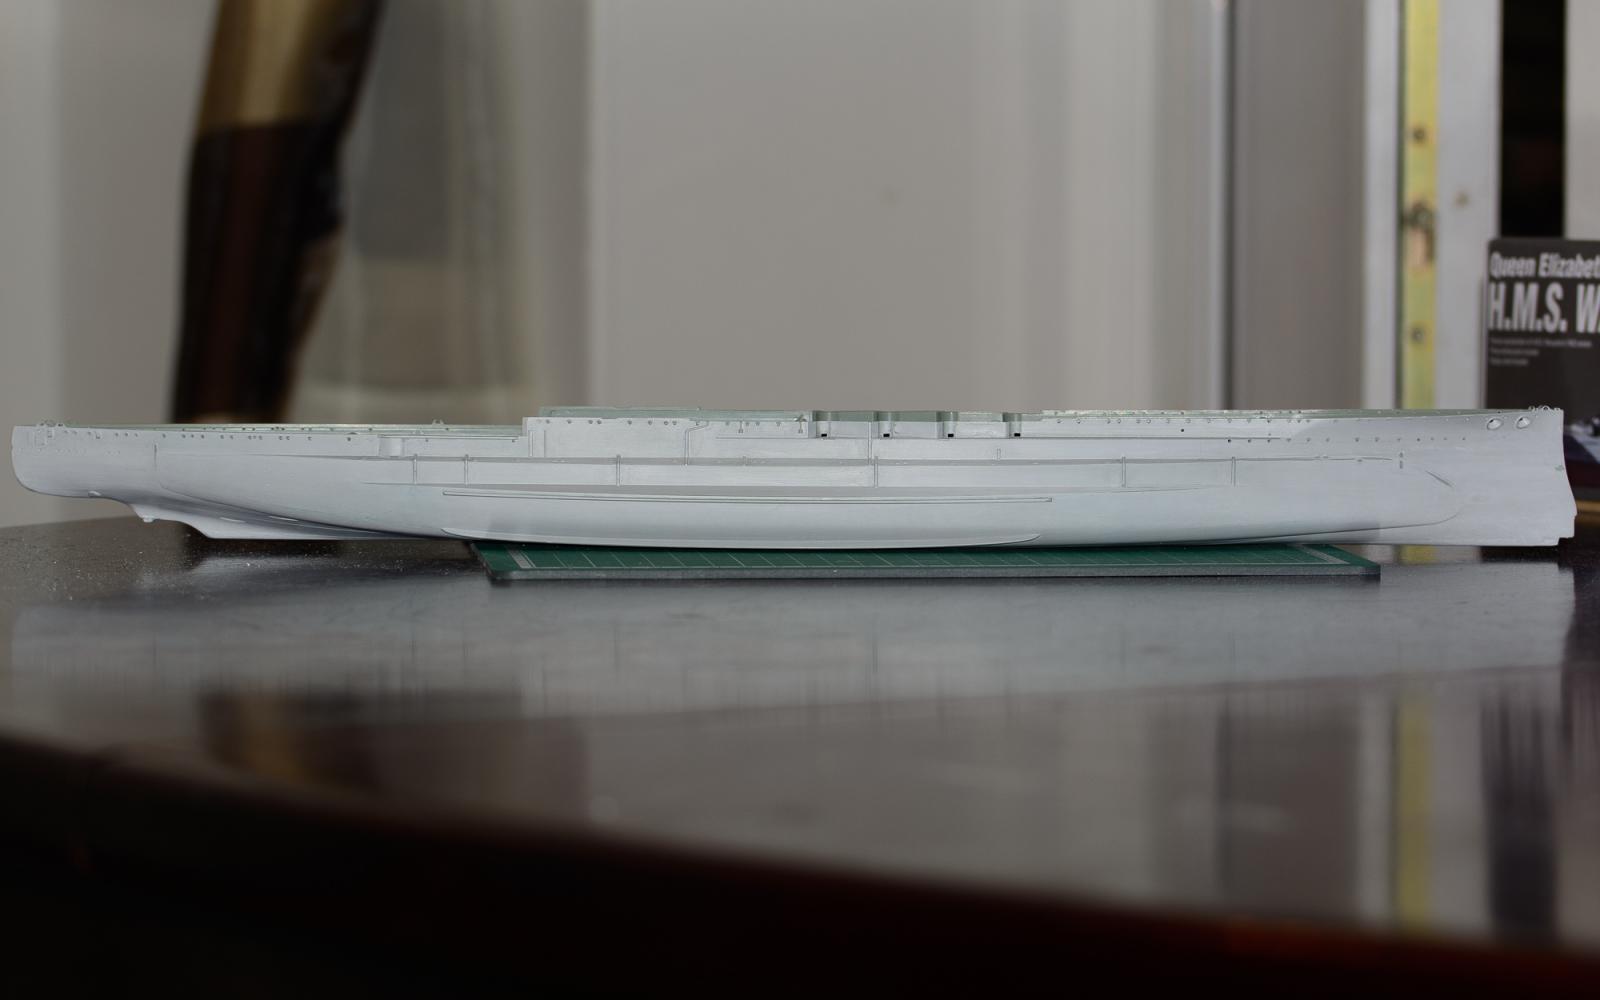
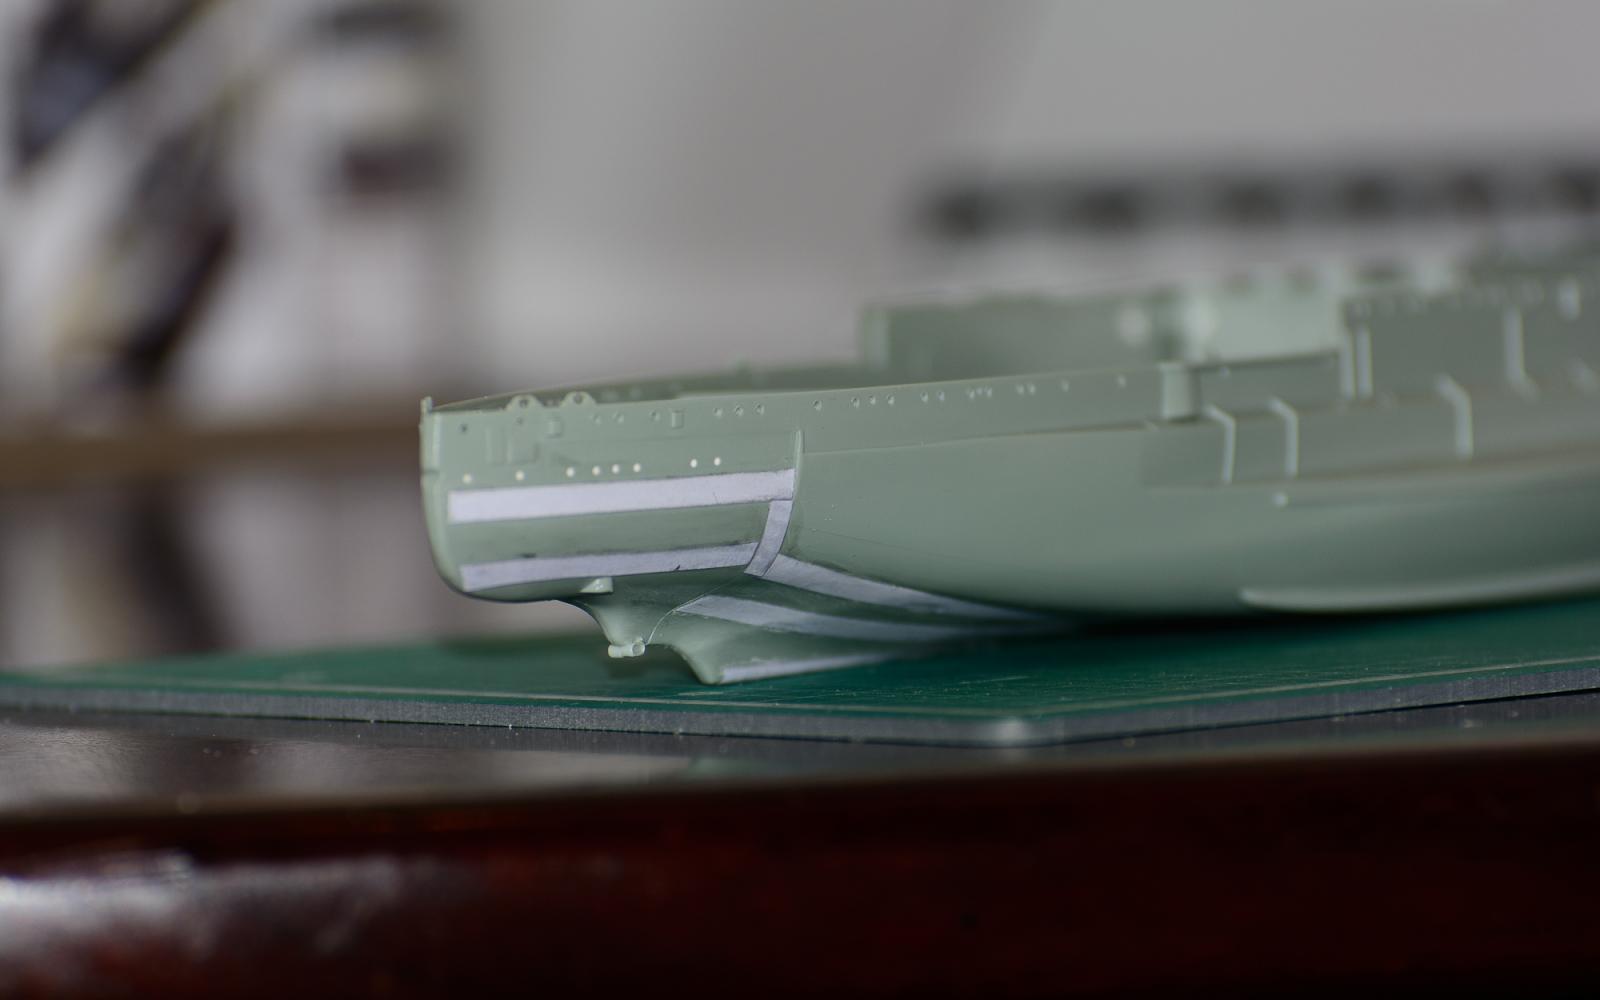
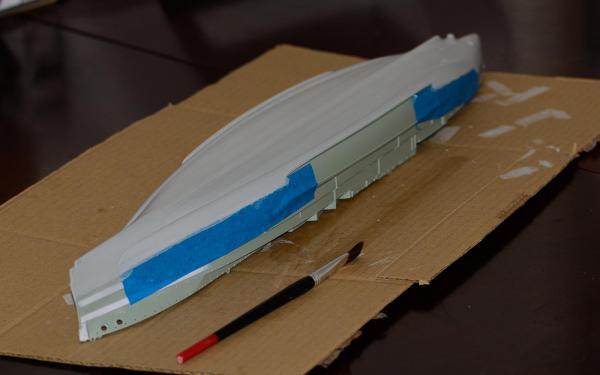
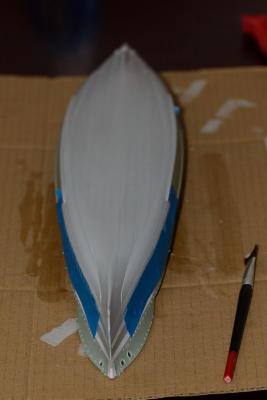
More work today with a bit more sanding then smoothing with wire wool, i also decided to remove a few of the fairleads as firstly some got damaged by my heavy handed holding while sanding, and also because they are larger and set further inwards on the deck area on the real ship. Here are a few current shots that show the current status - one side is 95% primed and ready for its first camo layer minus a small amount of filling near the bow fairleads, and a small amount of primming where sanding has revealed the plastic. OC.


-
Superb work mark It so reminds me of some of the architect drawings i was fortunate to be shown when i spent a week with the RN down at Pompy, this plus a very extensive tour over Victory including some of her normaly closed off areas like the Keel lockers, and ballast keeps It is a credit to yourself and some of the other dedicated history tellers - through their building of sutch beautiful peices of art, and the long standing commitment to achieve realism, i feel honored to share my work here on the site OC
-
I guess i learned a lesson with simulating armour plates at this scale - if using paper make sure it is thinner than printer paper, dont use PVA/White glue to fix them down or wash over them, and only use Poly cement to fix paper down or lightly rub over to seal the paper for light sanding, above all else keep the scale thickness to a minimum as it will stick out like a saw thumb :( OC
-
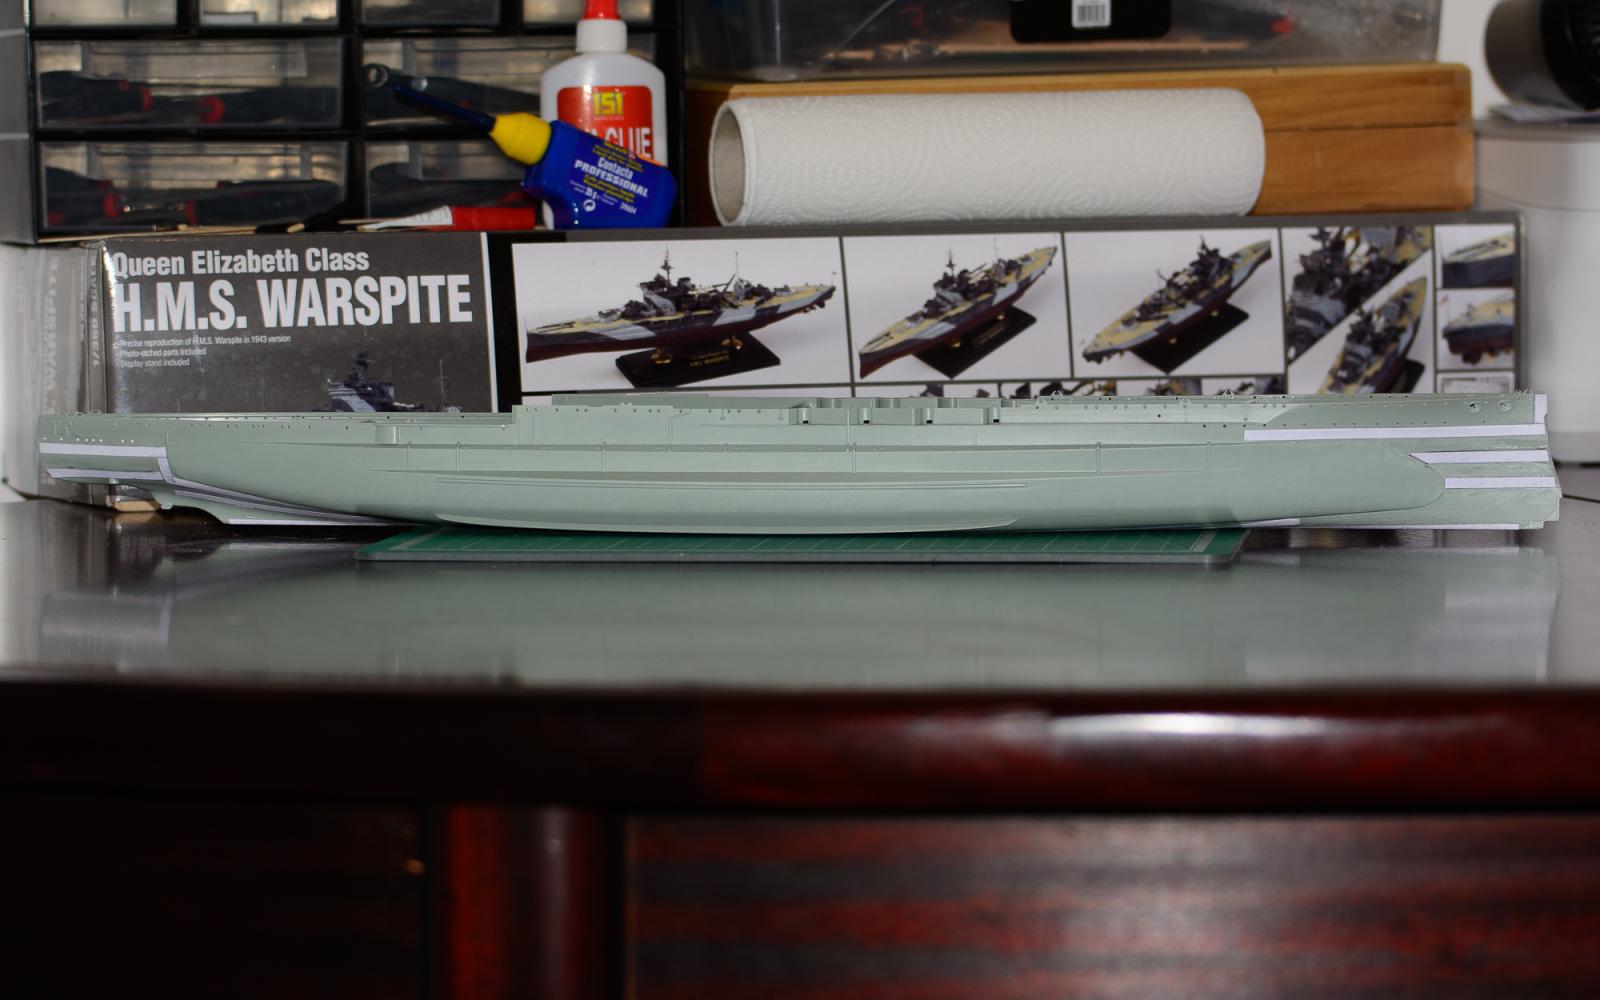
So after a few fun and games with my primer, i think i have cracked it, and one side of the hull is semi primed and sanded minus a small section of sanding on the bow, to blend in all those paper hull plates that were Far to over scale even with just printer paper. OC
-
Hi Mark, Sorry i didn't reply earlier, i thought i gave them enough of a key for the primer, but in hindsight i had put a layer of PVA Glue down that was supposed to seal in my paper strips, could that have affected it by stopping the primer from attaching well? I have sanded key areas well back now and used the last of my Vallejo surface primer, till i order some more, it has settled down a bit better now and sanded ok before my final bit of primer, i will give it a good day to harden then sand it a bit more with 1200 grade. OC
-
Hi Ken, Yep i washed both hull sections with washing up liquid then rinsed off with warm running water and left to dry before working on them, i then glued my paper hull plates on firstly with wttle glue PVA but then had to settle them down with Revell contacta poly cement, i then sanded these down. I am not sure if it may have been areas of white glue that may have stopped the primer sticking well, or just me not giving the primer enough time to fully harden before sanding? OC
-
I am also painting in a sensitive area - the living room with my wife a few feet away so paint fumes or over spray is a deffinate no no, thats why i am applying the acrylic by hand and going a few feet into the kitchen to use the dryer, its abit inconvenient but its the way i have to do it. It will be easier when the hull is finished its prep work, as everything else will be in smaller areas even the camo on the hull, and the superstructer should be easy to paint due to smaller size. OC
-
By hard bake - i mean heat up with a hairdryer to dry the paint after painting, it seems to help the paint flow aswell. OC
-
I am discovering the difficulties in hand painting larger areas, some off it has worked ok, the Vallejo Primer is very tight and does seem to hide brush marks, its just a hard job, i am trying to hard bake the paint on remembering back to my cycle days when bike frames were hot painted on with enamel paints, this made the harder. I dont think i left the Acrylic long enough before sanding though - 15 hours? it was peeling off not sanding smooth even though i washed the plastic with detergent first. OC
-
I tried the Vallejo Primer dilluted it 50/50 with distilled water from a kettle after it had cooled, i applied it in many fine layers with a flat 8cm brush, i let it dry for about 15 hrs and tried to do a bit of light sanding with a fine sanding stick that had been dulled to make it smoother, but it was pulling at the paint peeling away instead of sabding it finely - what could be the problem? OC
-
I carried on yesterday with the hull priming and boy was it a slog i was hand applying a section then into the kitchen to use the hairdryer to speed up the drying process, then back to the table for another layer, this took about 15 trips back and forth, but to be honest i am not all that impressed with the finnish of even the primer at this stage i tried to gently blend in by sanding some primer work from the previous day but i found that instead of the primer sanding fine in stages it just peeled away leaving a line :o. I dont understand why it has done this - unless 15hrs or so was not long enough for Acrylic primer to harden for sanding?, anyway i carried on regardless and primed the whole of one side. This has shown up the plates a little to detailed so i have been trying to blend these in with thicknesses of primer, and when set(properly) i will sand these to blend them. OC.
-
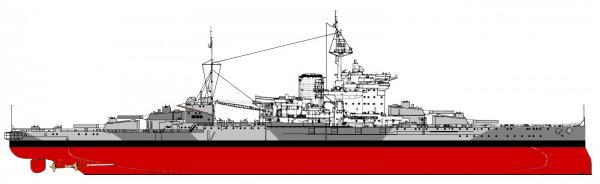
I have a cupple of quiries folks - 1) Warspite had 4-5 external armour plates running from fore to aft each roughly 5 feet thick going by the information i have been able to find on the net. 2) These paltes were fitted at the time she was constructed. 3) She had a torpedo armored bulge fitted over the top of the middle to bottom section of plates later as part of updating her protection. Yet some pictures i have seen have shown these plates following the normal lines as when built, but on the outside of the added torpedo bulges, (how can this be)? Does anyone have any deffiante info on this folkes - or anything else concrete regarding her look in her later life 1944 onwards. Thanks for reading folks. OC.
-
H.M.S. Victory, Heller, 1/100, Onward and Upwards.
Old Collingwood replied to Izzy Madd's topic in Plastic model kits
Interesting thoughtfull work there Izzy, like i have said before - it is amazing what you can achieve with a plastic kit out of a box - some bits and pieces - tolls and a lot of patience in my younger days i have built Her ladyship Vic in a few different forms, from a ship in a bottle, the Airfix version and later the Part Works one by De-Ag, the last one was part made and i had a build going on on here on the earlier forum before it all went ...up. I lost my build and a lot of parts due to a house move. OC -
More coats of primer went on yesterday in the best manner my hand painting would allow its not easy and thank goodness its just the primer and can be gently rubbed down a bit to smooth it out, i have been telling myself that one day i will make the jump into the Spraying world and save my pennies to get one I will be continuing to prime in controled stages and attack the more complex area of the hull, where there is a lot of obstructions that will stop me getting a smooth brush flow last, next stage will be to mask of for the top edge of the boot line and paint the red lower hull in the closest color i have to hand - Admiralty Paints Red Ochre, i understand this is close to Red Oxide and close to RN Anti Fouling Red OC
-
Hi David, The build looks very interesting, i like the idea of the mast metal supports looks like a good idea, i will follow your build my friend. All the best OC.
-
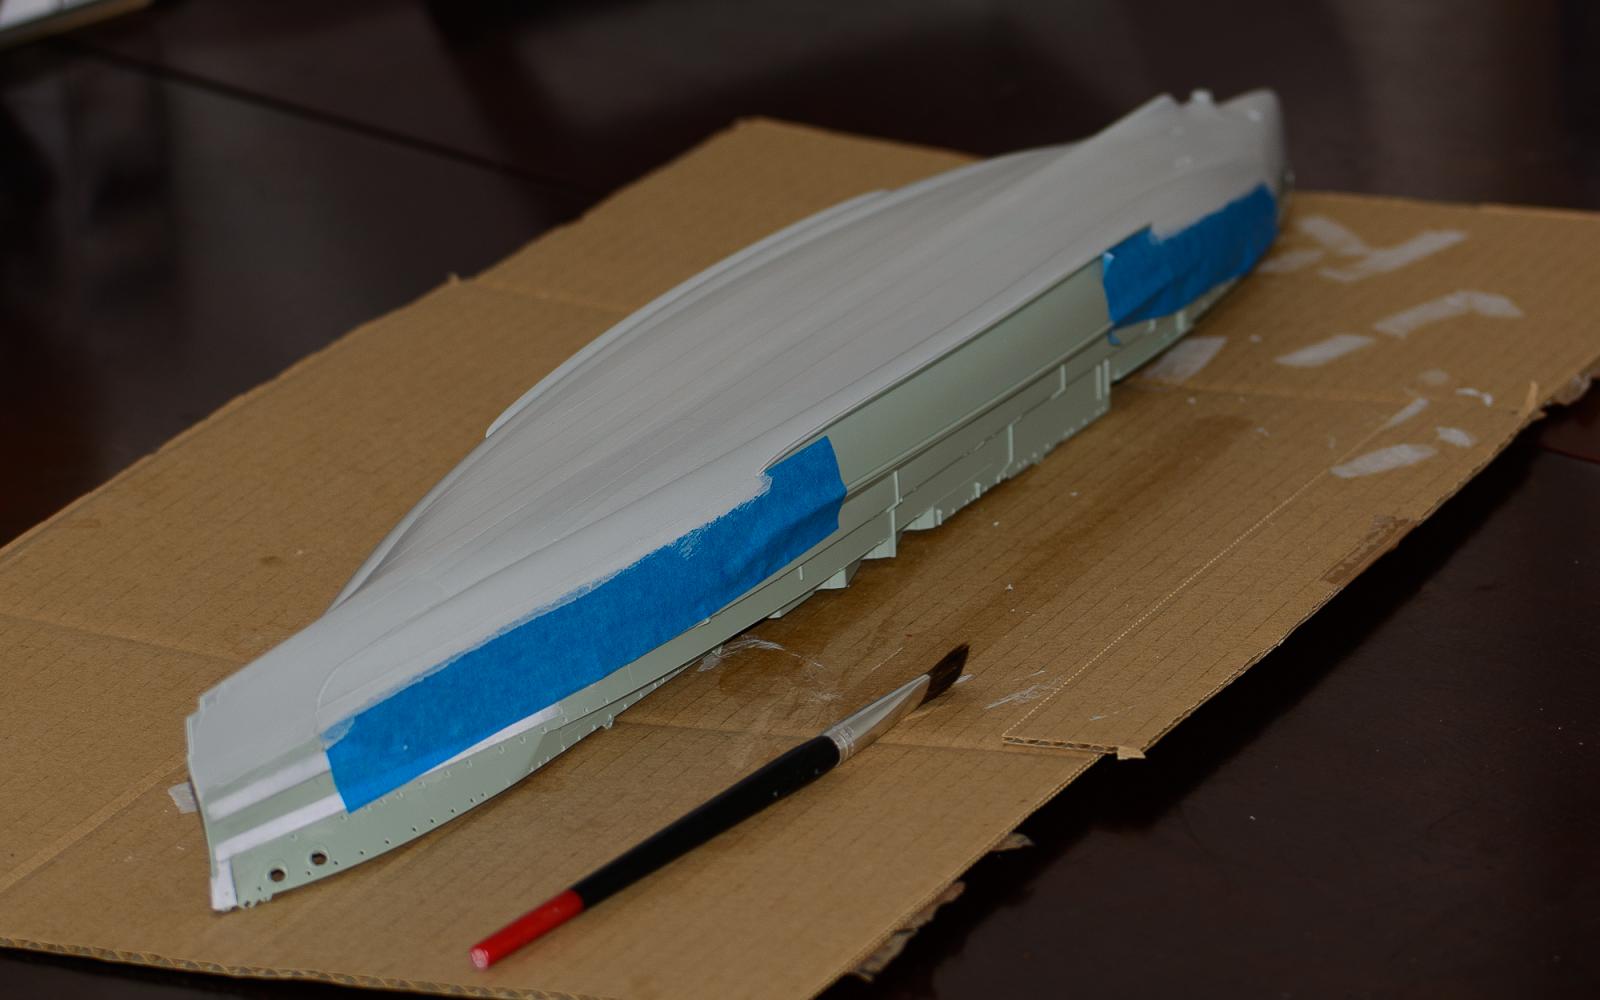
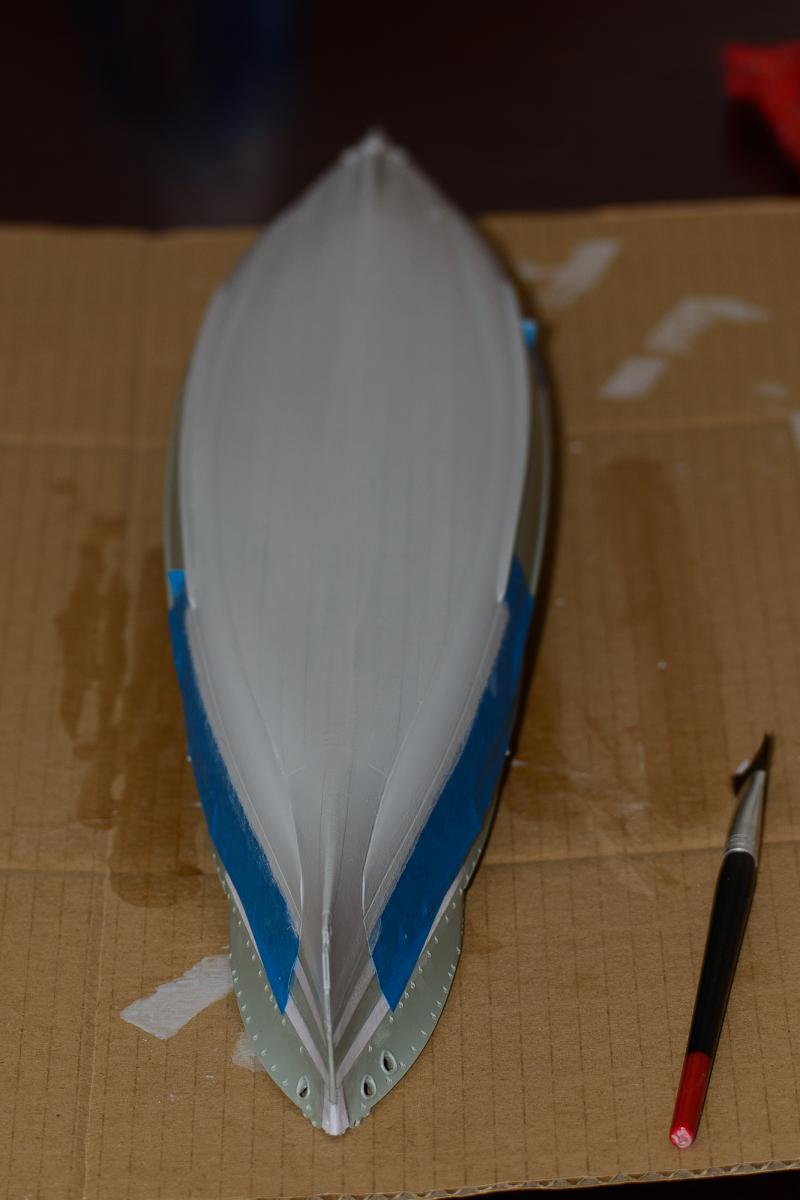
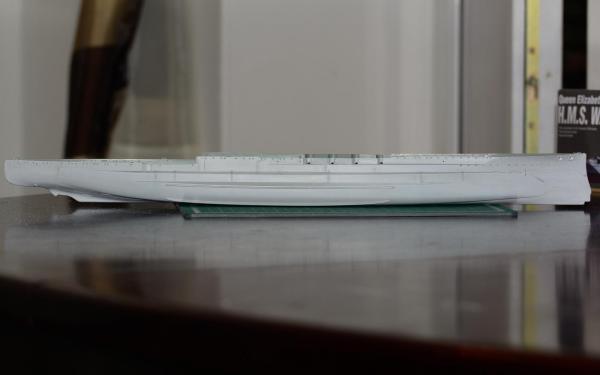
Right then - Primer time because i am hand painting the whole kit because i do not have a sprayer or ever used one, i decided to mask off a section to paint in one go, this i did by masking off the lip of the bilge keel and fore/aft towards the plates i built from paper. This went slowly as i was hand drying after each layer of paint, then a light sand with the rough side of a washing spong(the little multi colored ones we use when washing dishes) the problem i had was a slight nervious approach at first as i was worried about brush marks, and also i was getting a fair amount of brush hairs but i was able to sand these off after. This is the stage with this area after about 10 layers that where diluted 50/50 with distilled water(ex kettle water from many cups of tea and coffee) OC
-
Another update folks that does not warant photos as they have been posted before, the hull is just about ready for its primer(this will be a test of my hand painting abilities) i am just waiting on a section to re glue and some light sanding and it will be ready, in the mean time i have been working on fashioning a scraping tool for the 4inch gun area splinter guards, i had to remove a ridge on a metal fine chisel that will allow me to sit it on its side flat and square and scrape away to reduce the thickness of these guards, because on the real ship i think they were about 2inches thick. I was able to do this but it was tedious work and heavy on my eyes, as i had to do the work under my magnifier stand OC
-
Just an update folks minus pics, i am up still at silly - o - clock as my health makes my sleeping very hit and miss and all over the place, anyway - earlier i have been continuing with the old girls hull plates fore and aft, trying to get a decent blended but noticable profile, this i have been doing by applying a smear of poly - contacta glue with my finger over the area i have worked on, with the aid of mrs c's hairdryer it dries shinny and even quite quick, i then leawnve it a few hours more then sand it with extra fine sanding sticks to balance the profile. This has been a progressive stage and getting there slowly as i want these plates to be seen very slightly, i used printer paper as i thought this would be a good scale thickness compared to plastic card, and with poly cement washes that soak into the paper- just as good at sanding down, just more carefully. Anyway thats the stage i am at till i attend my build at the table again later today :o :rolleyes: OC.
-
Hiya, I discovered the trick with liquid poly( Revell Contacta) as a fixing agent, i worked out my line cut the right size strip then put a thin line of cement before placing the paper strip, i then smeared a small amount with m finger ontop. once set (about a day) i then did a series of light sanding with a fine nail sanding strip, and re smearing of a thin layer of poly cement. OC.
-
I have decided today to continue further down the hull sides both fore and aft with the plating, as i have seen photos showing these plates fitted originaly in a set pattern similar to the hull bottom, these look a bit rough at the moment as they need more sanding and blending to make the plates just noticable and not stand out like slabs. Here;s some more pictures... OC.