HOLIDAY DONATION DRIVE - SUPPORT MSW - DO YOUR PART TO KEEP THIS GREAT FORUM GOING! (Only 20 donations so far - C'mon guys!)
×


Old Collingwood
-
Posts
12,098 -
Joined
-
Last visited
Content Type
Profiles
Forums
Gallery
Events
Everything posted by Old Collingwood
-
 Thanks greg, yep the old girl did have an unusual profile, I will still be some time I feel as I will be concentrating on each small section as a build in thier own. and painting small sub assemblies befor assembley, that way I should be able to get more detail on them - and in an easier fashion. OC.
 -
HEY! That was my idea well - an idea I also used to mark my Boot Line OC.
-
Thanks Carl, its only taken me a year and a half to get to this stage so i guess give it another year and a half and she will be built and in a case. OC.
-
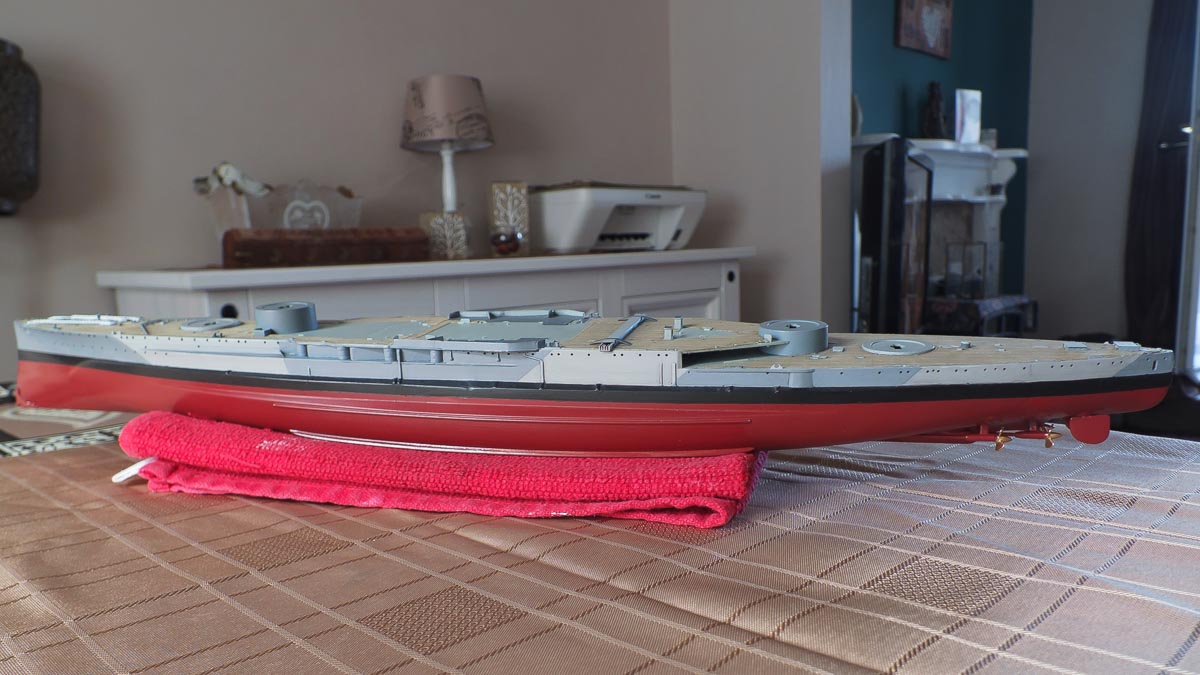
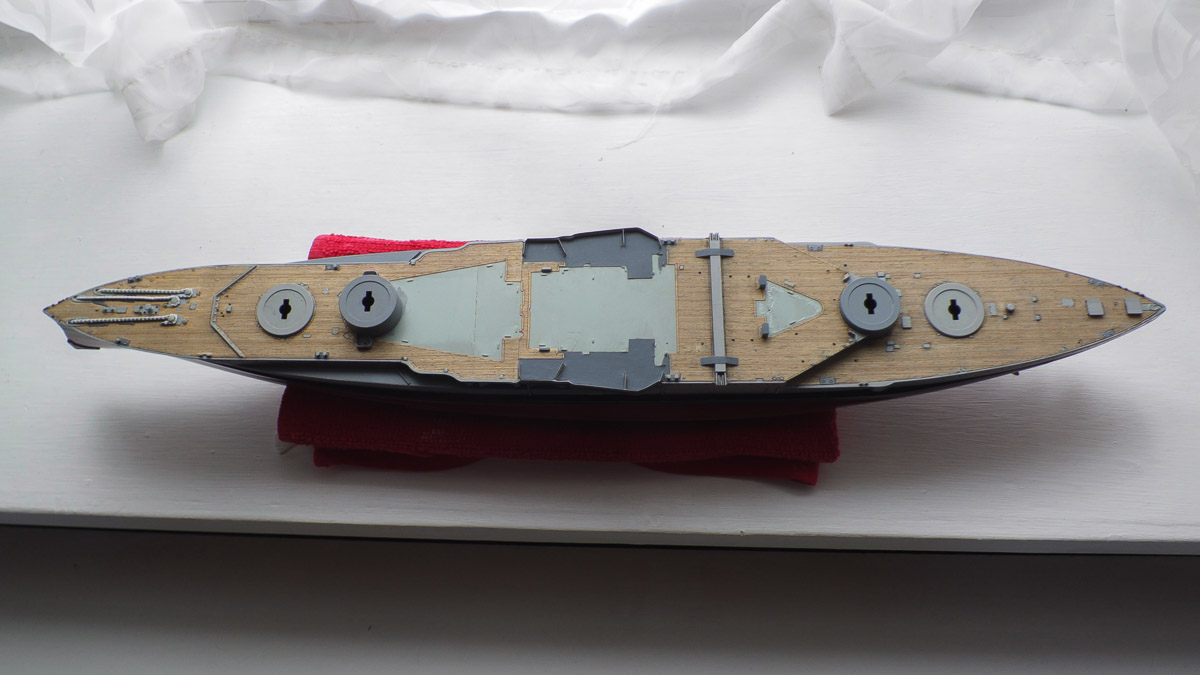
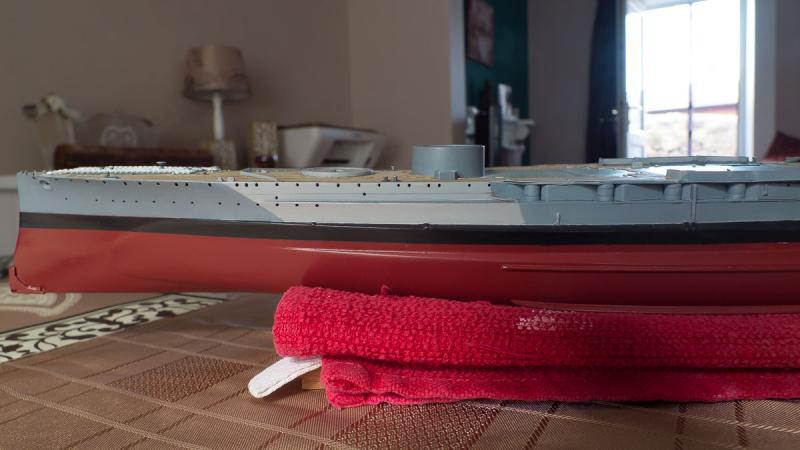
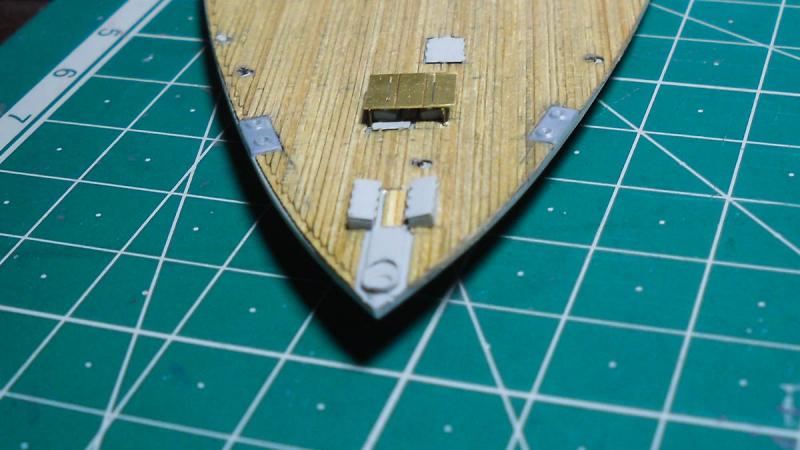
A bit more progress folks including the pictures I promised, I have also fixed down the rear deck so as decks and hull go its all as one now OC.


-
Imagin if they had covered the whole ship in ERA - she would have weighted about 60.000 tons but would have been as tough as old boots OC.
-
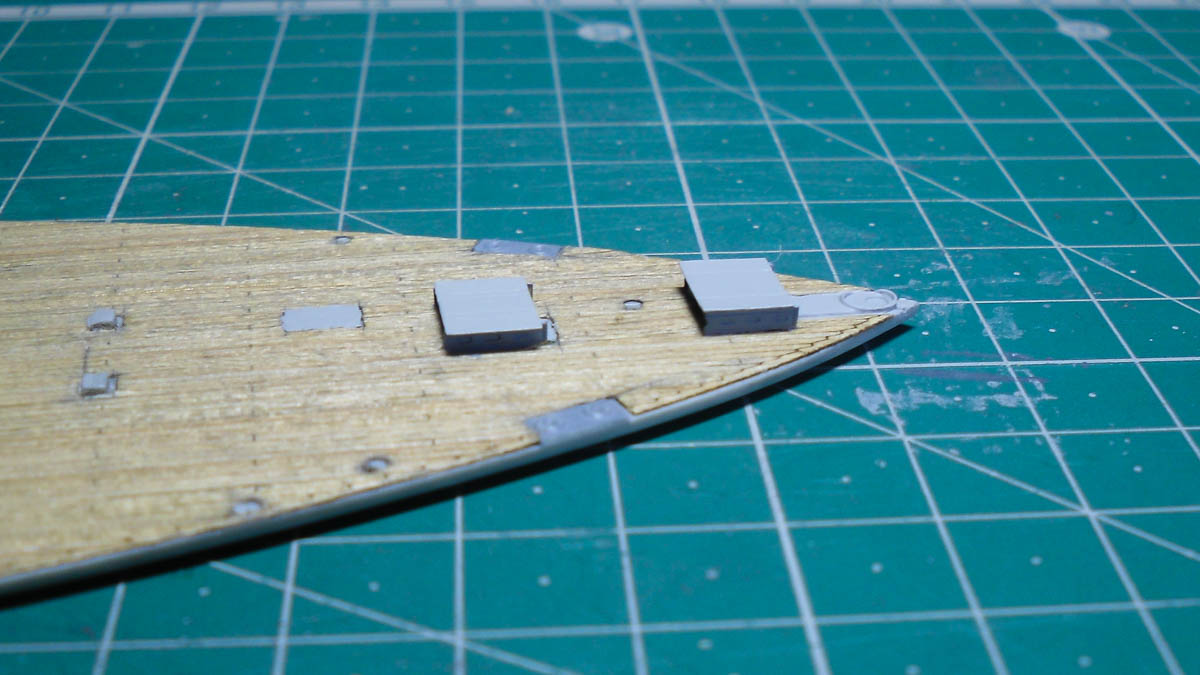
A bit more progress today folks (I will post some pics tomorrow in the light) I found out a way to scribe some armor plate details - starting with the drop down deck (where the 6 inch casemates where) this had a quite destinct line along the edge about half way down, I made a guide for the line with a wooden block taped in position, and ran a needle attached to a handle along the top of the wood to gouge a narrow line, then i ran a pencil along the line to make it stand out a bit. It went well but will need a bit more tidying up as the pencil line is to wide, I did a similar thing in the mid ships area to the side hull, again with a wood block - same tech, and it turned out fine just about noticable, next i formed a box area by gauging/pencil to the extreme bow end near the flagstaff, I finnished it off by adding a couple of small holes in the area. OC.
-
I think they were just placed there early years before the 20mm Orks where fitted to the tops of the turrets, It just got the idea that they may have done a similar thing to the rear hatches - like in my build. OC.
-
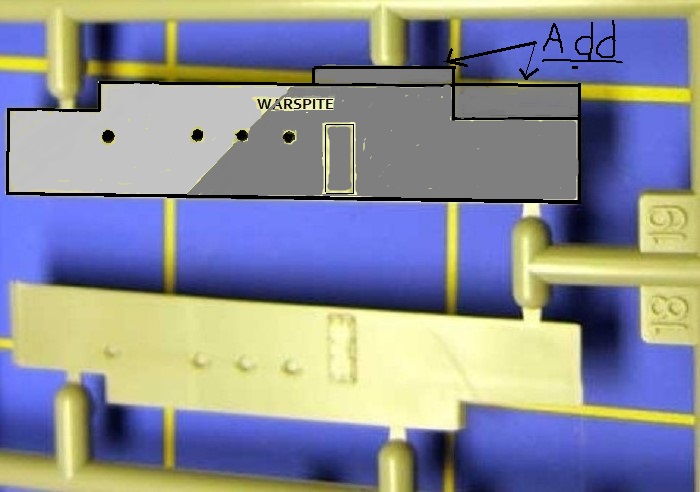
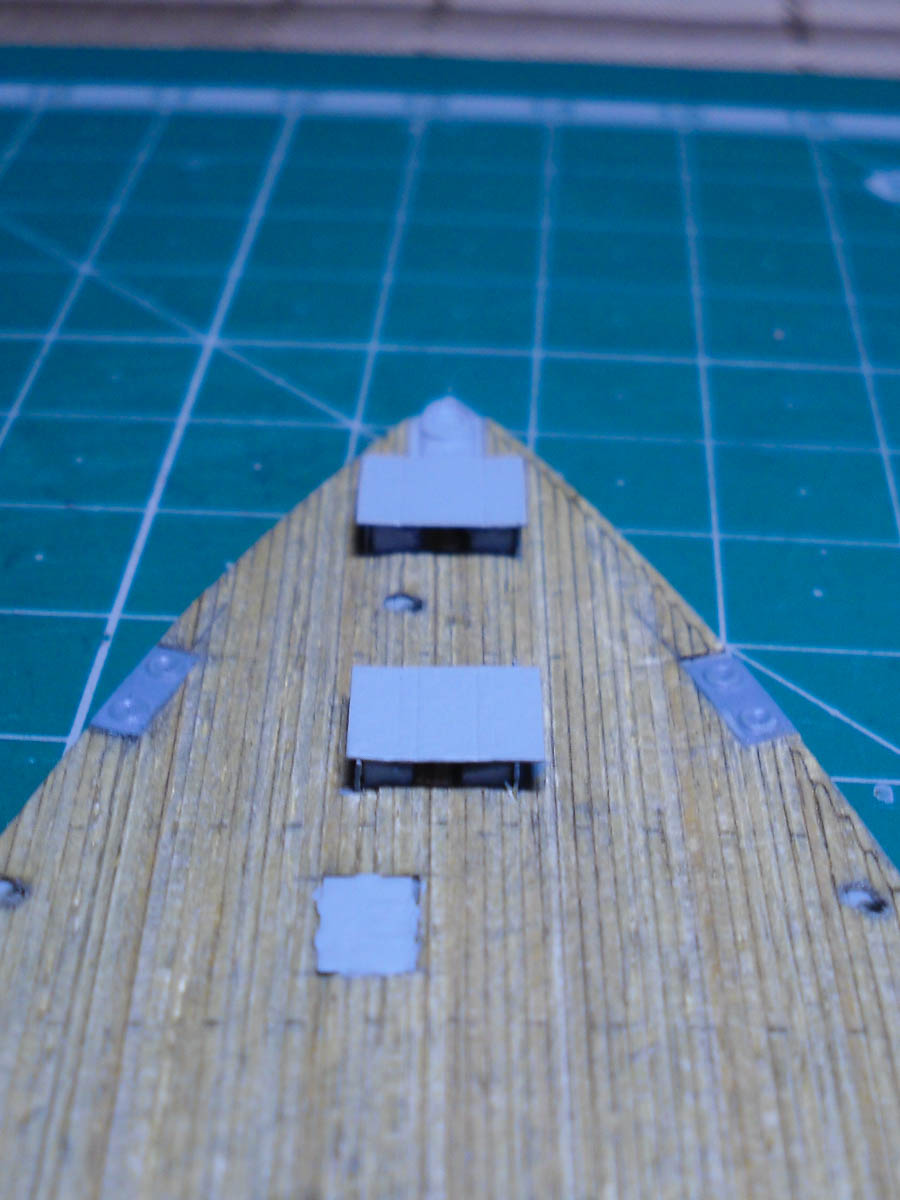
Just to show my way of thinking with the additional armor I added to the rear Hatches - I had seen somewhere that she had some additional plates fitted at times - then I saw this pic - OC.

-
Any thoughts on Rattle Can Flat top coats? I read that Mr Topcoat is quite good in Rattle cans ? OC.
-
Liking your ideas my friend - tend to use PVA either diluted or neat in a glass and applied with a fine paint brush point, or I also use CA but from a fine pointed end to dab just a pin prick amount of CA. OC.
-
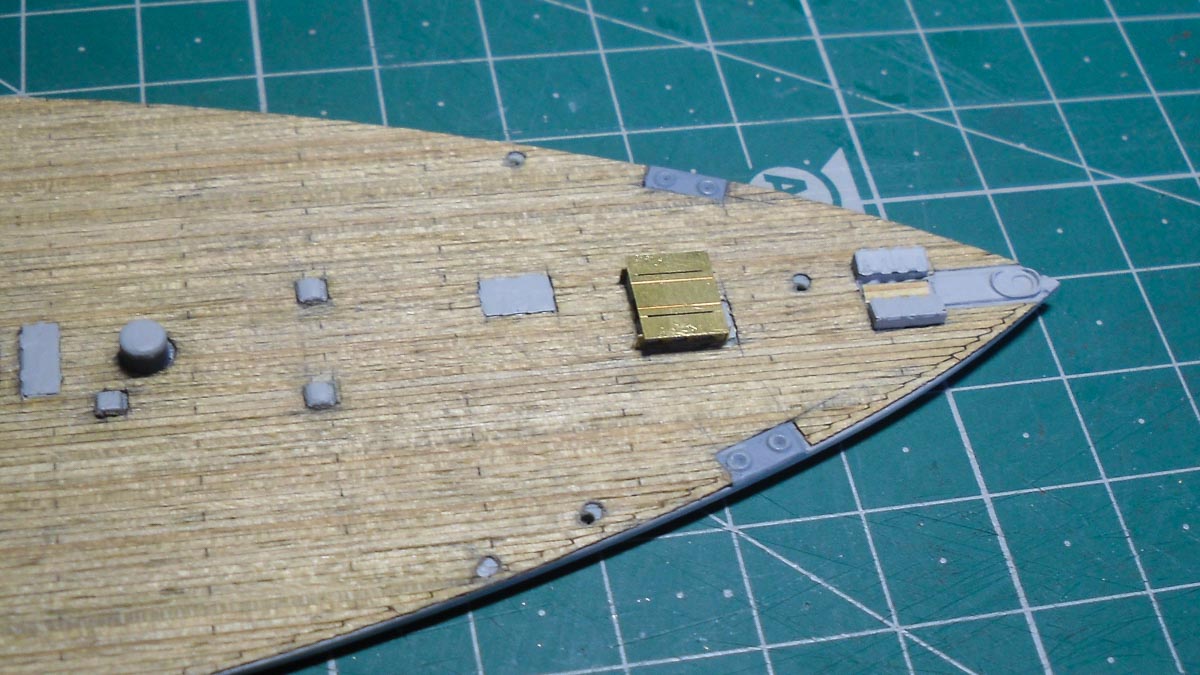
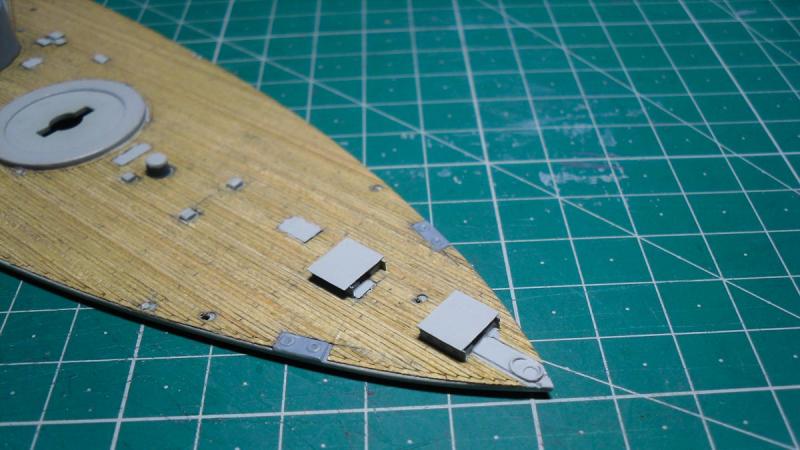
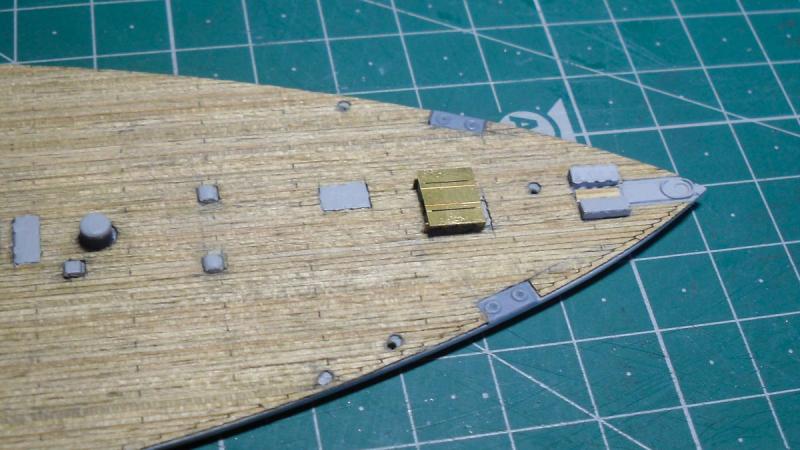
Another bit of progress folks - I created another piece of plating and two side supports, and after using a small amount of CA I glued them in place, I was them able to apply a few coats of paint - this is the result folks. OC.


-
I feel your pain my friend I am Dredding doing my Orks and there sheids - even with glasses and under my magnifier they will be Sooooo difficult. Sometimes I wish you could get certain items Pre-made when they are that small OC.
-
Thanks Carl, I did install my own artistic license as there is no proof that this happened - just me being a bit imaginative. OC.
-
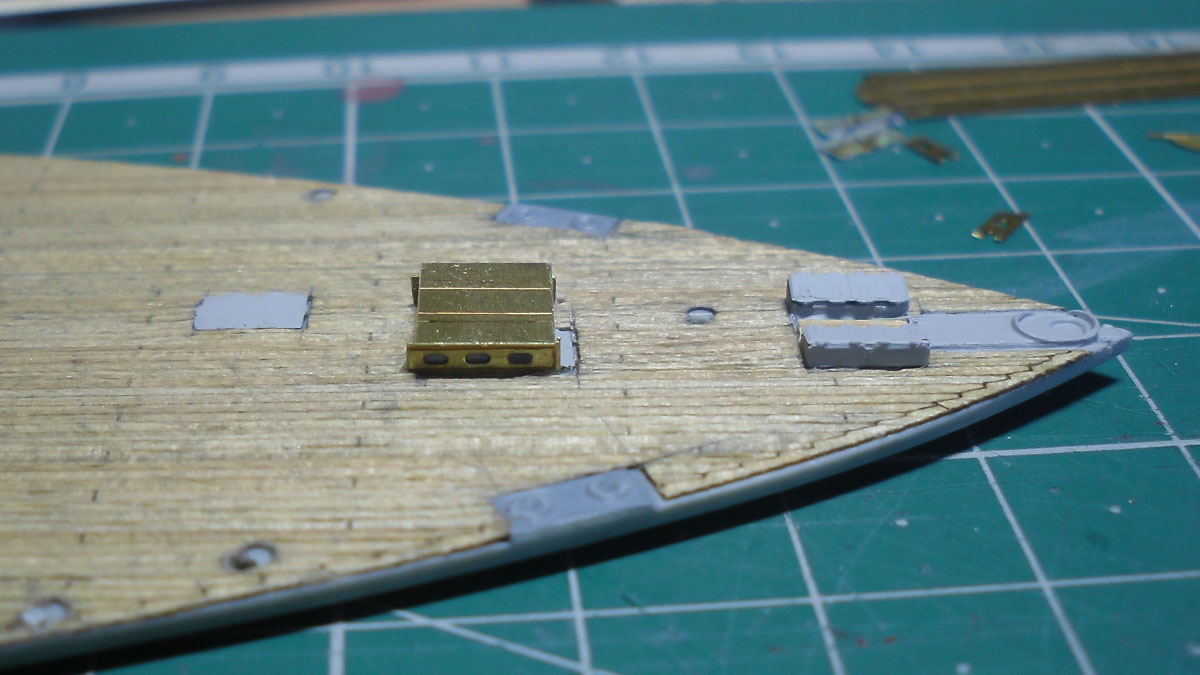
I managed to tare myself away from aircraft spotting and did some more work on the build, I got hold of the PE fret, and found the Catapult frame that I am using for the armour cover plate over the rear hatches, this frame is flat and has perferations at set distances, I chose the section that is closest to the size I needed then scored a line and bent it till it seperated. A bit of sanding and it was the required length, next off was the two edge supports that also needed a bit of shortening, then a gauged a channel in the decking to fit the frame edges, and after a bit of dry fitting I went ahead and glued them in place with a bit of CA, next was the top plate - again with a light application of CA. Here are a few pics of the result folks. OC.

-
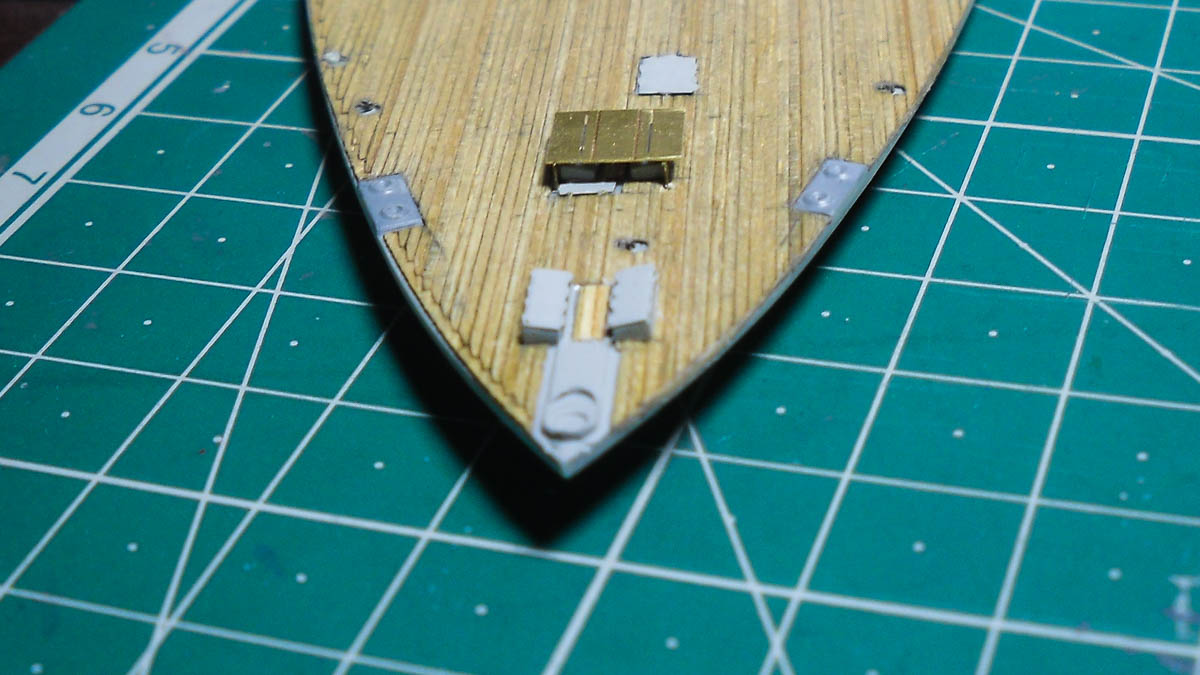
And these are what I might use for side plates to support the plate, again from the PE fret. OC.

-
Just a quick post - This is what I intend to place over my hatches - Its from the PE fret and shows the rough size compared to one of the hatches, the hatch layout is Two across with an equal gap, so after measuring the plate it should fit nicely with a slight overhang. OC.