DONATION DRIVE - SUPPORT MSW - DO YOUR PART TO KEEP THIS GREAT FORUM GOING!
×

Karleop
-
Posts
500 -
Joined
-
Last visited
Content Type
Profiles
Forums
Gallery
Events
Everything posted by Karleop
-
 Hola Ulises You are getting very fast!! At this rate you will end in less than 2 months Saludos
- 786 replies
-
- 3
-

-
- Royal Louis
- Finished
- (and 1 more)
-
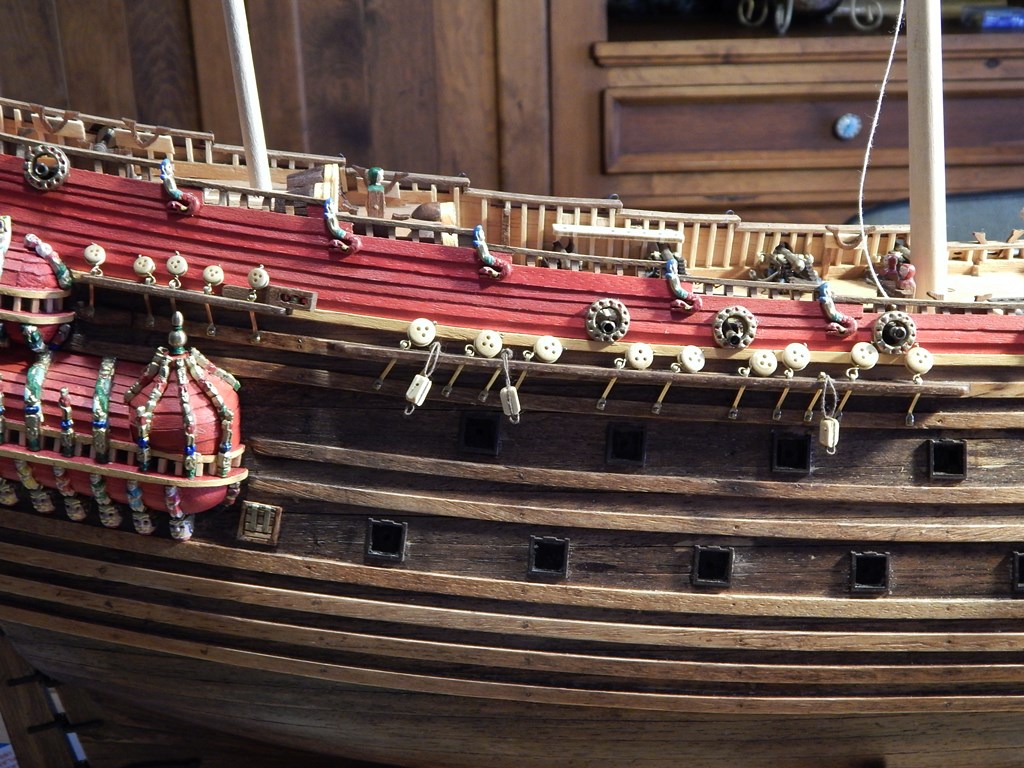
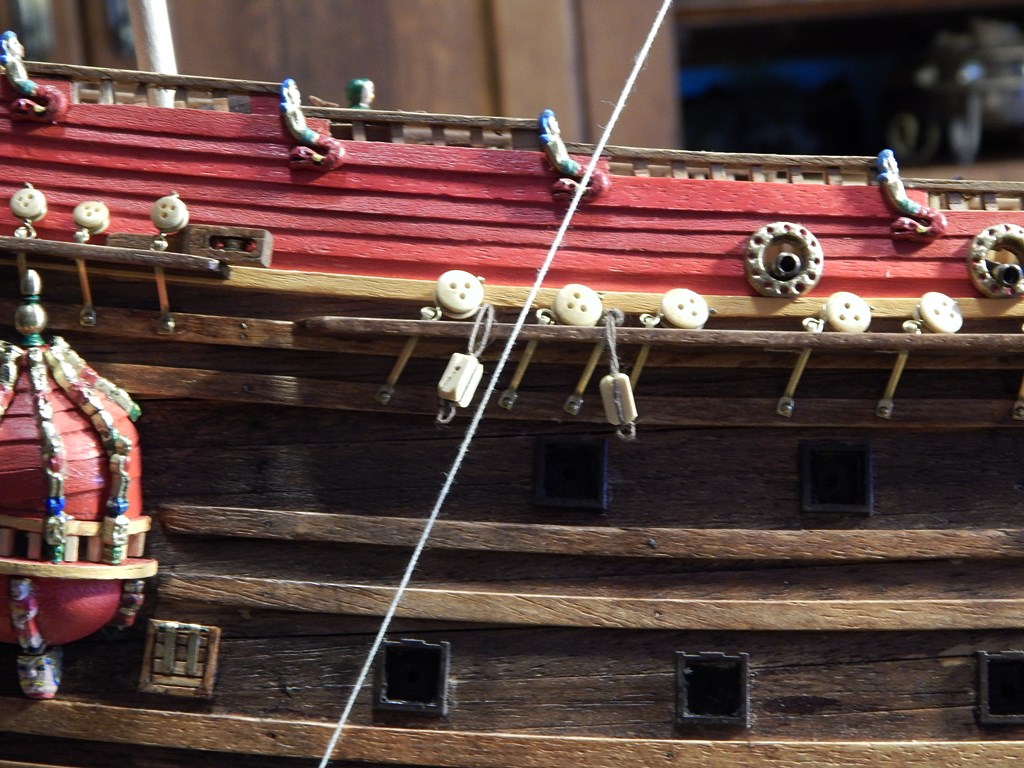
Hi again, Once the location of deadeyes and blocks was determined, I set the corresponding pieces in place. Here you can see the line I use to align the chains Saludos, Karl


-
Hola Rich, as far as I know the two are similar in color and weight, and unless there are for a very specific use I think you can use either. Saludos, Karl
- 1,756 replies
-
- 1
-
-
- constitution
- constructo
- (and 1 more)
-
Hola Ulises, I found this web page with lots of pictures of Royal Louis model, probably it can be of of your interest: http://www.modelships.de/Royal_Louis_I/Royal_Louis_I_eng.htm Saludos, Karl
- 786 replies
-
- 4
-
-
- Royal Louis
- Finished
- (and 1 more)
-
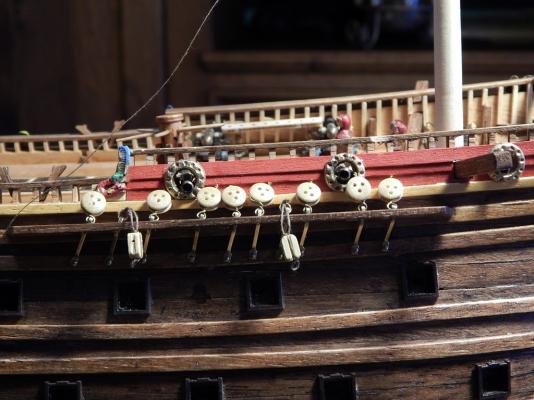
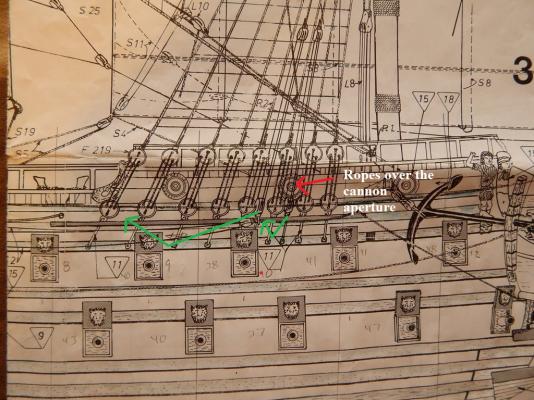
Hi guys: Once the mast in their preliminary position and using a thread as a guide I noticed in first place that some of the deadeyes lay exactly over the cannon apertures, obviously illogical. So, before putting the deadeyes I compare the kit with pictures of the museum and the ones that Matti kindly send me. Results: first, the original ship has also the problem I already mention and second, everyone has its own version. Conclusion: I followed the museum 1:10 model considering specially not interfere with the cannon apertures. For this it was necessary to make new holes for deadeyes and blocks on the chainboard and cover the ones that came originally in the kit. By the way, the lower blocks that are laid over the chainboard and between deadeyes are single and not double blocks as show in the instructions. Saludos
-
I think you must change your workplace, for instance dinning or sleeping room for coset and viceversa, haha!! Anyway good luck with your Royal Saludos, Karl
- 786 replies
-
- 3
-
-
- Royal Louis
- Finished
- (and 1 more)
-
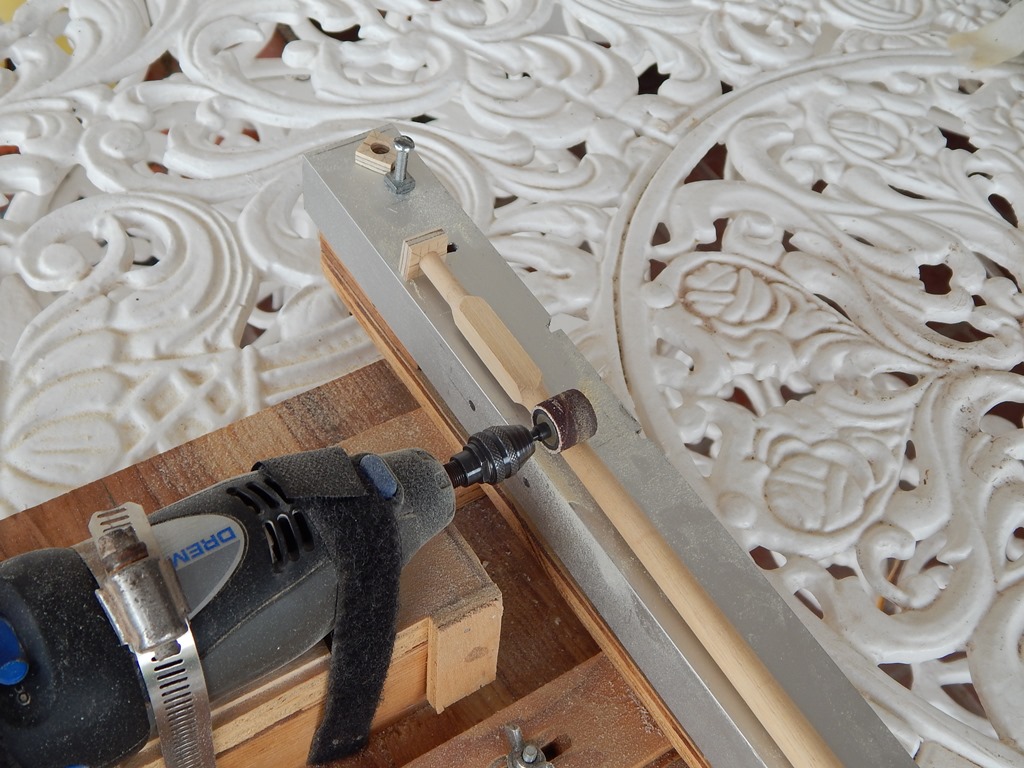
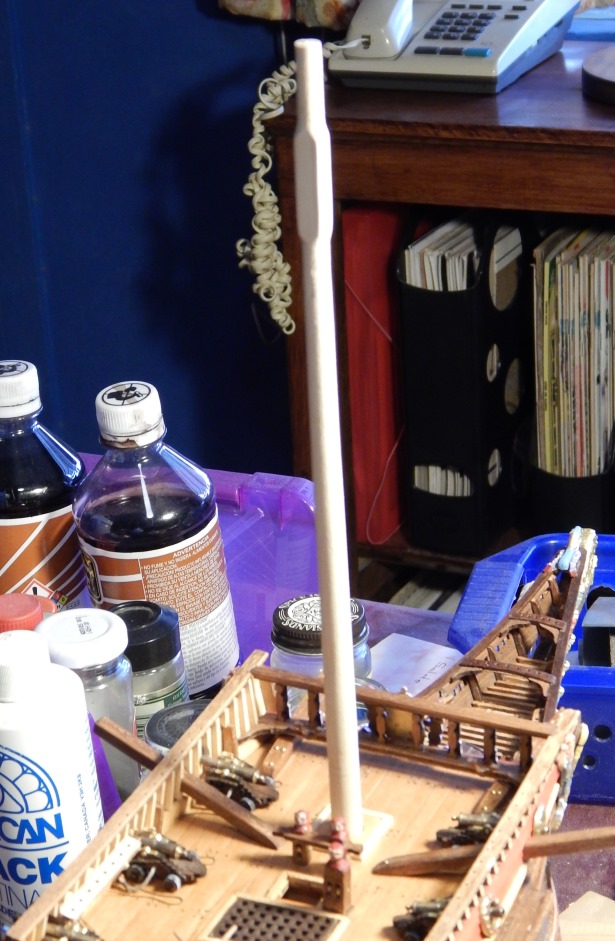
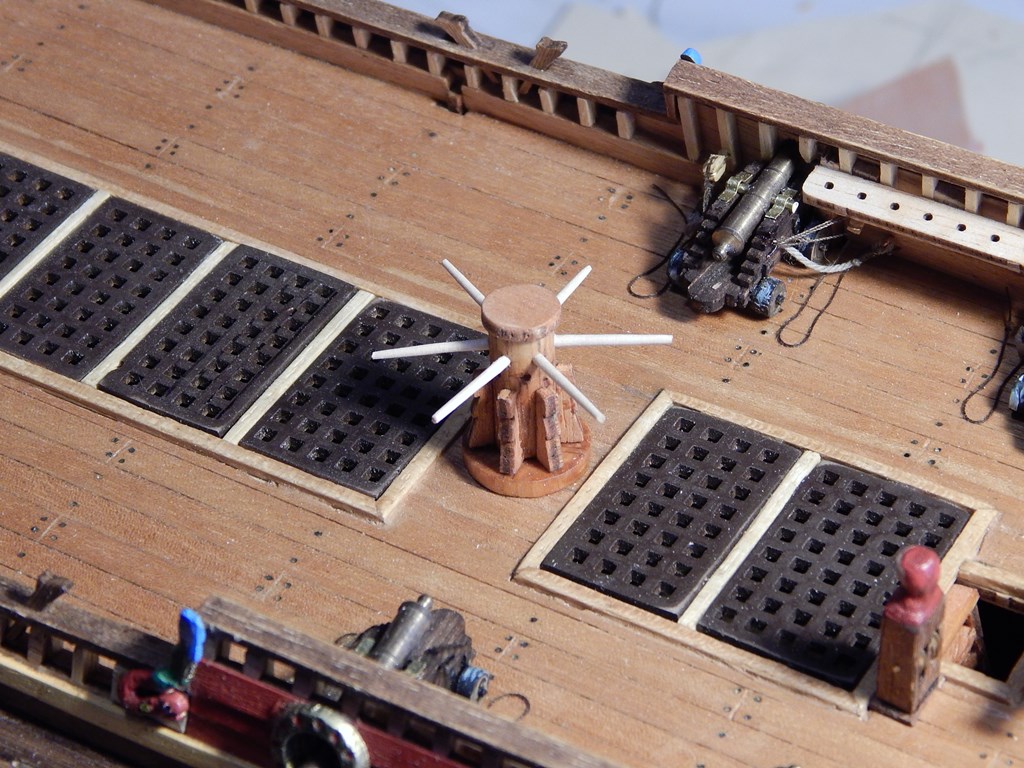
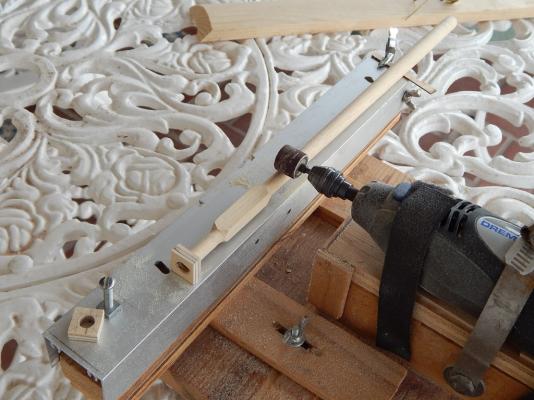
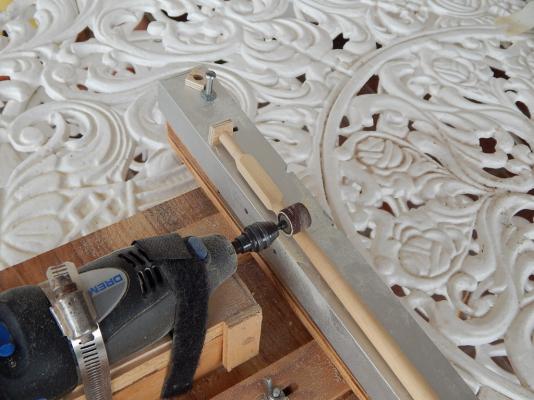
Hi everyone! After finishing cannons and other deck object’s my purpose was to begin the installation of deadeyes over the chainboards. To accomplish this I realized that in first place was necessary to display the masts in a preliminary way to determine the angle of the different shrouds. In the process I decide to shape the upper square portion of the foremast and mainmast outright. To achieve this I used my homemade Dremel base as shown in the picture. Saludos, Karl

-
Hola Dan, nice to hear that you feel better now. I am also starting the placement of deadeyes on the chainboards so I will follow your procedures with interest. Saludos, Karl
-
Hola Rich, when the wood is to hard to bend, like sapeli, the best thing is to cut to the desire shape, (probably gluing some pieces together before the cutting). Anyway, your bow looks very nice. Saludos
- 1,756 replies
-
- 1
-
-
- constitution
- constructo
- (and 1 more)
-
Very nice lantern Mark!! Saludos, Karl
-
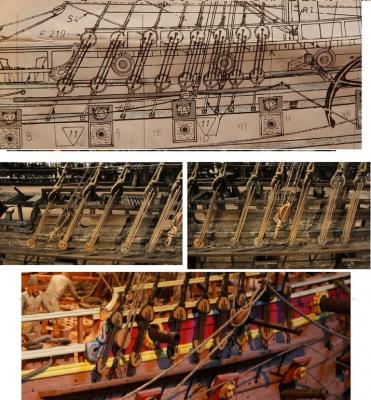
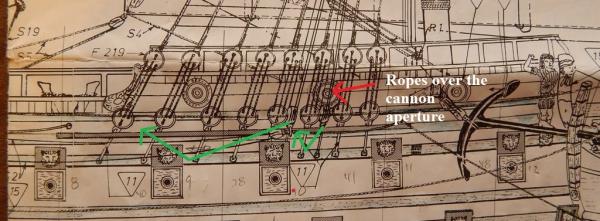
Thank you very much for the pictures. Now we have three versions!! Going from stern to bow: deadeye (de), pulley (pu), cannon (CA) Real ship: de, pu,de,CA,de,de,de,pu-CA,de,de,de Billing: de,de,CA,de,de,de,pu,de,pu-CA,de,de Museum model: de,pu,de,CA,de,de,de,pu,de,CA,de,de I think the more logic configuration must be a combination between the Model and the real in order NOT to have ropes over the cannon aperture. Anyway, what are the purpose of those pulleys?, are they part of the shrouds or where are they fixed? In the only blueprint that came with the kit is´s impossible to discern. Saludos, Karl
-
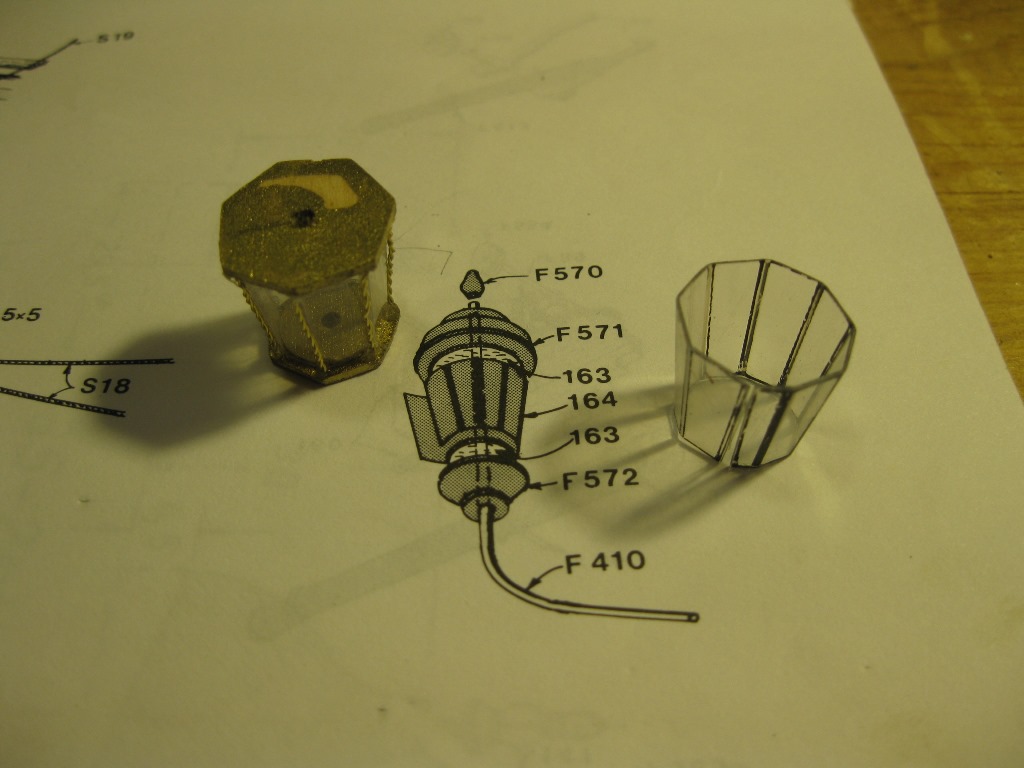
Hi David, the "glass" is the transparent semi-rigid plastic that is use for packing. To shape it, first cut the desire shape and then with a plastic or metalic ruler, as a guide and support, bend it as you want. Saludos
-
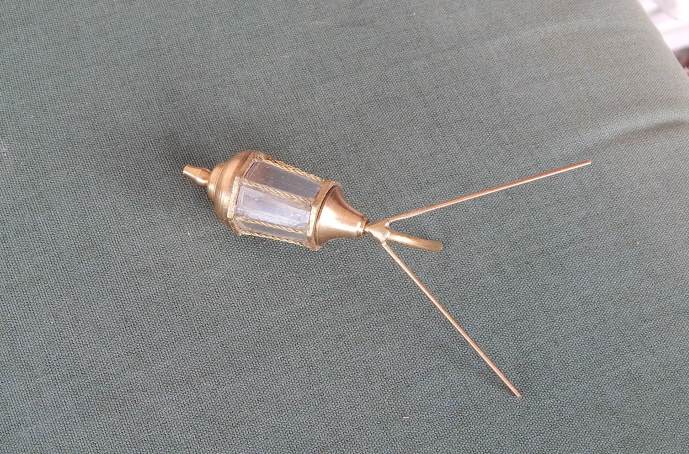
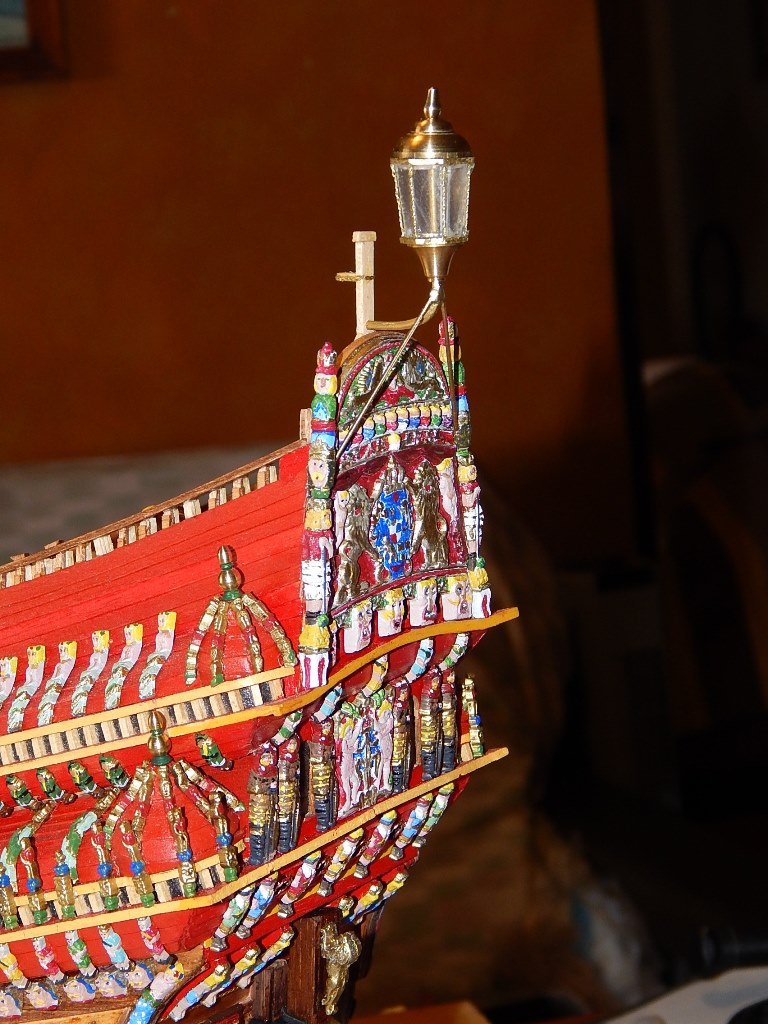
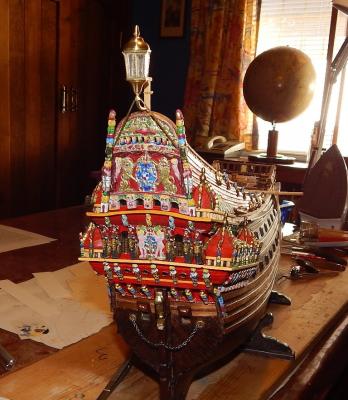
Hola a todos; I just finished the stern lantern. As I already mention, the plastic piece that simulates glass did not fit, I need to make a new one and also added and upper and lower piece to accommodate vertical “ribs”. Here you can see the finished lantern in position. Saludos


-
Hola Matti: In order to put the deadeyes on the chainboards I install the masts in a preliminary way and with a thread figured out where they will be nailed. I noticed that some of them lay exactly over the cannons apertures. Comparing the kit plans and the pictures of the model shown in the Vasa museum there are big differences in the chainboard nearer to the bow , I couldn´t find a picture of the real ship but you can probably tell me whom of the two is right. Saludos

-
Felicidades Ulises, really a very good job have you accomplished. It looks splendid, hope I can see it in real in the near future. Saludos, Karl
-
Hola Colin: I made the HMS Pandora 5 years ago using a kit from Constructo (now discontinued). You are doing a very good job with this ineteresting and nice ship. The copper planking looks great. Saludos, Karl
-
Announcing the Model Ship World Ship Kit Database Project
Karleop replied to SkerryAmp's topic in Wood ship model kits
Hola Adam, you had a wonderful idea in creating this database. It is for great help to search for selecting a new built and compare ships and brands. However, looking at your list I found that there a couple of errors to your Wasa entries: Nation: is Sweden not Swiss Size: the numbers you put in inches are actually cm. (instead of 98 in must be 98 cm or 980 mm) Hopefully this information can be useful. Saludos, Karl -
Opinions wanted... preferences on Endeavour kits
Karleop replied to olliechristo's topic in Wood ship model kits
Hola, I made the Artesania L. Endeavour a couple of years ago, adding some extra details by my own. As always there are little flaws in instructions and materials, but nothing serious. You can see my model in the Gallery (pointing in my signature). Hope it serves of some help. Saludos -
Hola Michael, probably you can make very small holes using gauge 78 (0.016in or 0.406mm) to 80 (0.014in or 0.343mm) drills and then using brass wire of the appropriate size. Saludos
-
Hola Rich, what I made is to fix the upper and lower hinge and then put the others in between. About the nails, you can cut them to the desired size and fix them with a little drop of glue in the lower hinge in order to maintain it in their place. Saludos
- 1,756 replies
-
- 1
-
-
- constitution
- constructo
- (and 1 more)
-
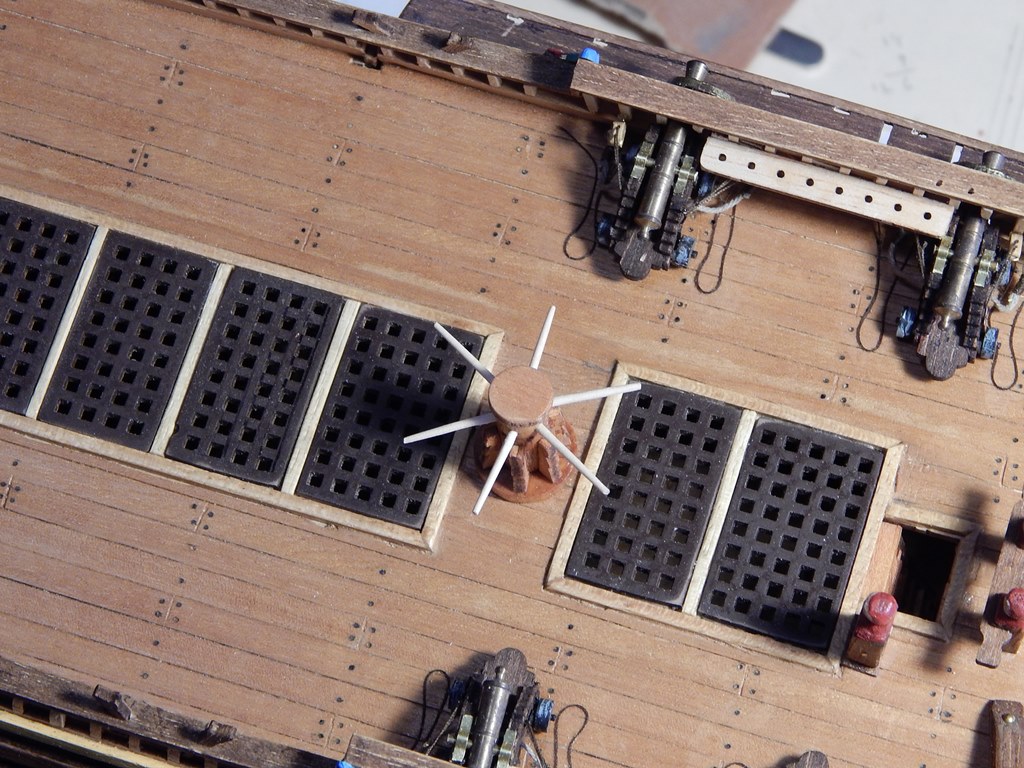
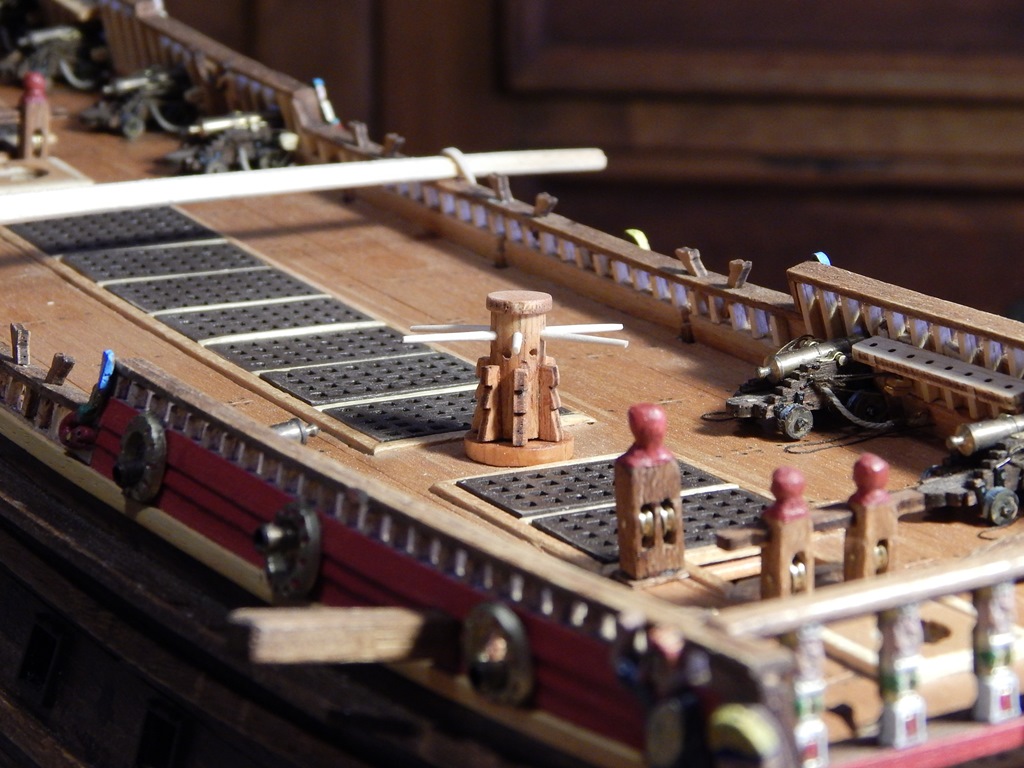
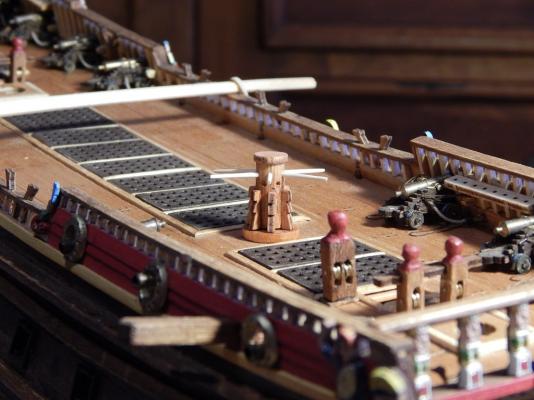
Thanks for your comments Matti. About the capstan: you are right. Seeing the picture of the original it is difficult to see if there were 6 or 8 holes (4 bars) but in the kit indicate the12 holes I already made. Pity I did not noticed before. Anyway, it was a great idea to include the bars. Saludos

-
Hi all, Folowing the idea of Matti about putting bars on the capstan I made the same. His sugestion about making a little shorter the capstan and with fewer holes was also good but I already made it. Saludos, Karl


-
Hola Matti, thanks for your sugestion about making a little shorter the capstan but I had already done, however I like the idea of putting the bars. You can see pictures in my thread. Saludos