HOLIDAY DONATION DRIVE - SUPPORT MSW - DO YOUR PART TO KEEP THIS GREAT FORUM GOING! (Only 20 donations so far - C'mon guys!)
×


rvchima
-
Posts
697 -
Joined
-
Last visited
Content Type
Profiles
Forums
Gallery
Events
Everything posted by rvchima
-
 Harry, A word of advice regarding the PE bridge that surrounds the main mast and covers four boats. You built it back in January. It sits on four thin PE legs. When you attach it, make sure those legs are glued down securely. Use epoxy and scrape any paint from the feet and attachment points. There are about 15 antenna lines that pull vertically on that structure. Mine came off while I was rigging. I am rigging with the nylon line that came with the kit, and am very happy with it. It is very thin (0.20 mm) and fits through the tiny holes in many parts. It is easy to tie and can be pulled tight with tweezers. My rigging is taut enough that I could play a little tune on it. I glue all the knots with a drop of thin CA. EzLine worked well on the Prinz Eugen but would never go through these tiny parts.
 -
Harry, Can you hold the superstructure in one hand and carefully sand the bottom with a sanding block? Try to lower the high spot? If that doesn't work, glue the superstructure in place and fill the gap with Vallejo plastic putty. It comes in a squeeze tube with a long, thin nozzle. It's acrylic so you can clean up excess with a wet cotton swab. I also like the micro disposable paint brushes for clean up & touch up. Afterwards mask the edge with 1/8" tape and touch up the white putty with your gray paint. It will look fine.
-
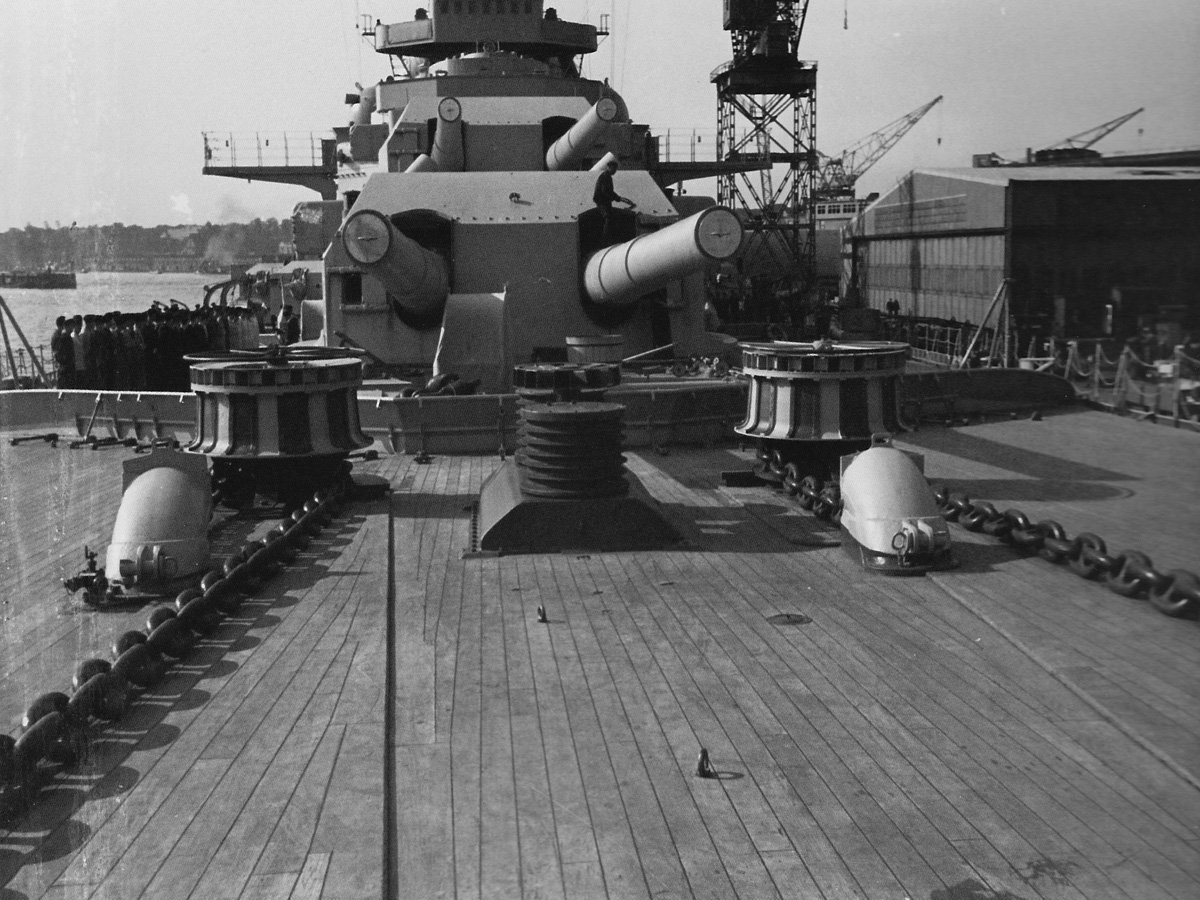
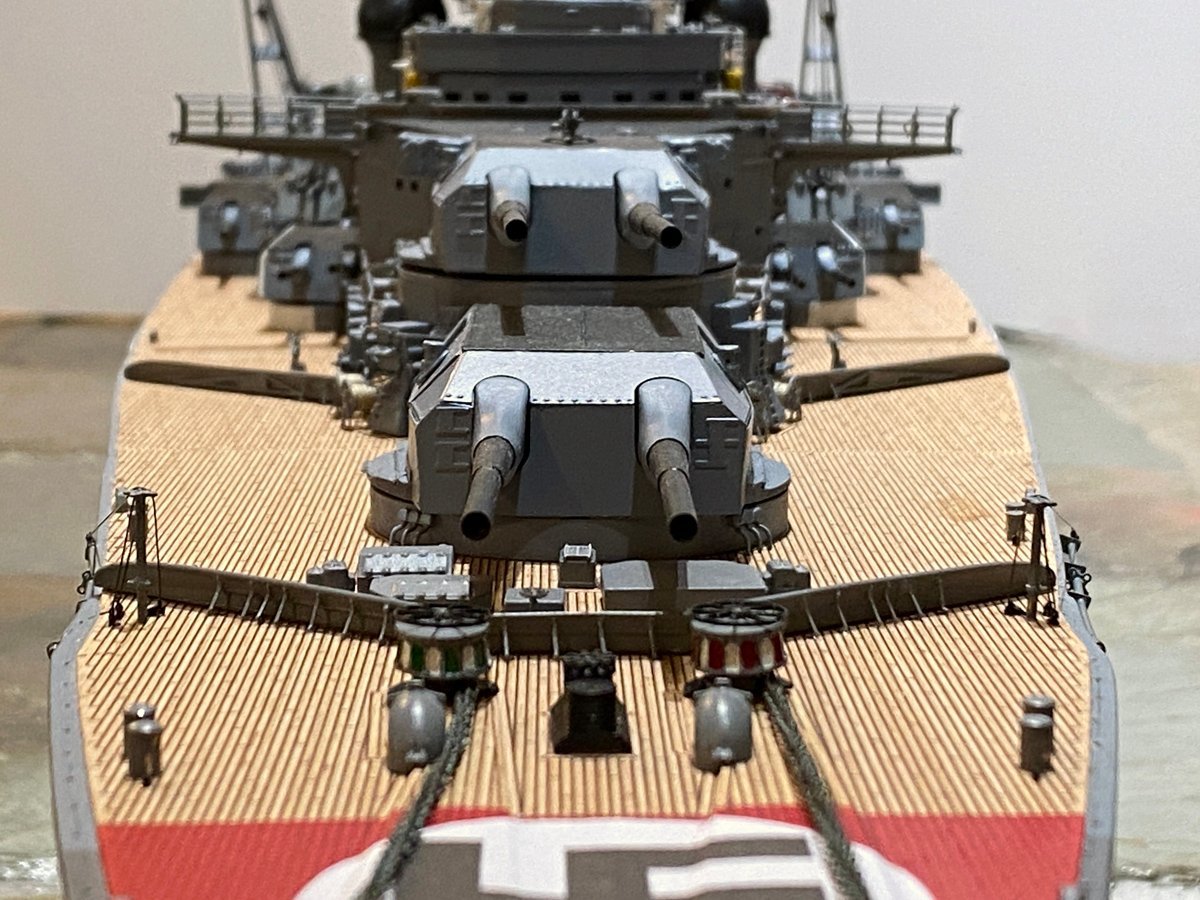
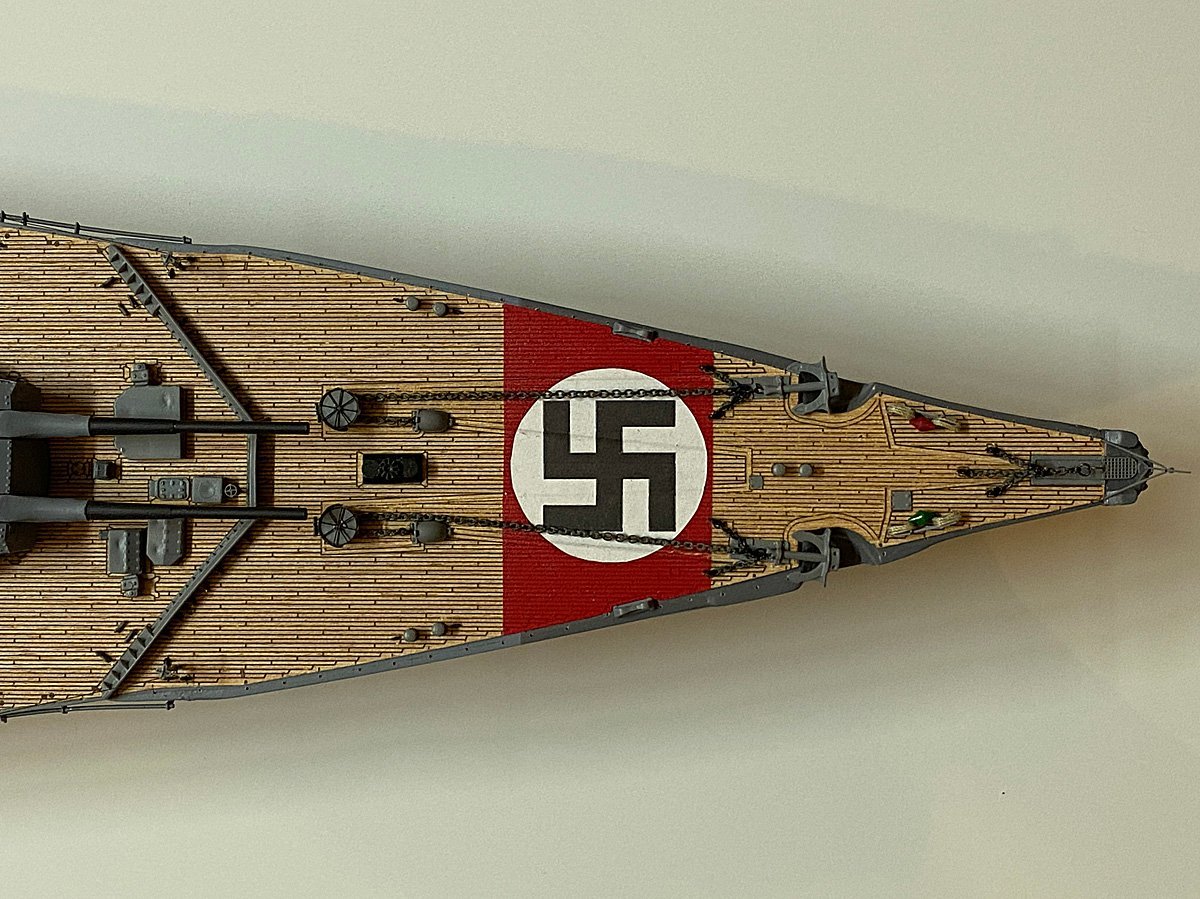
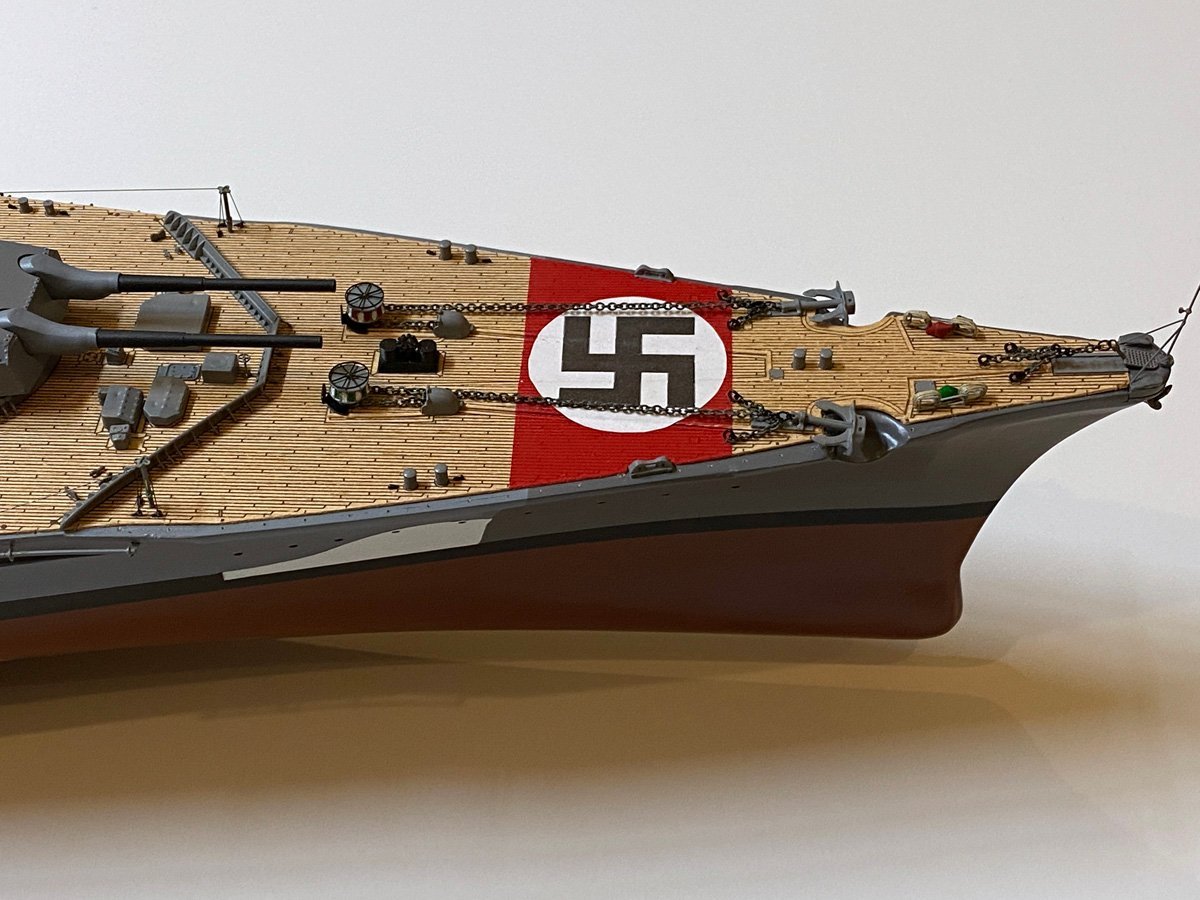
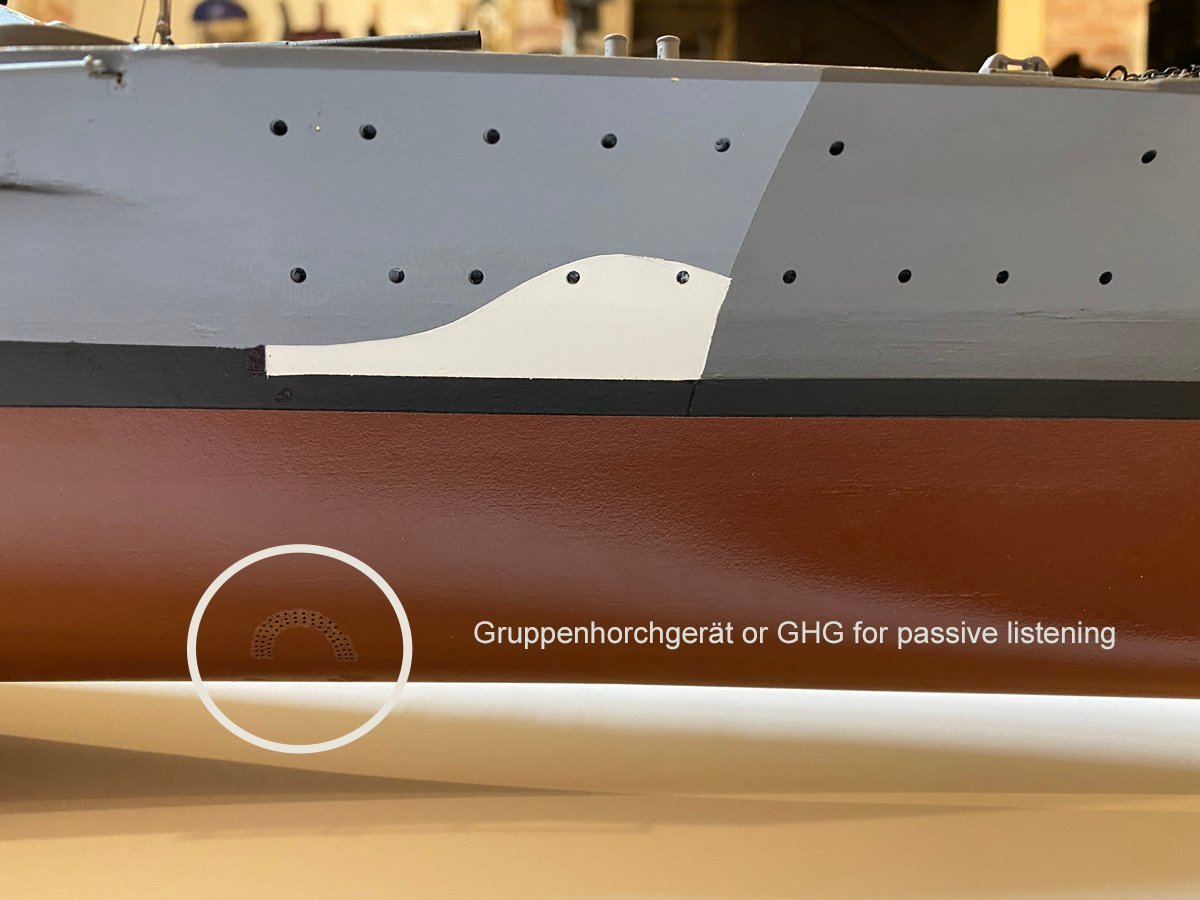
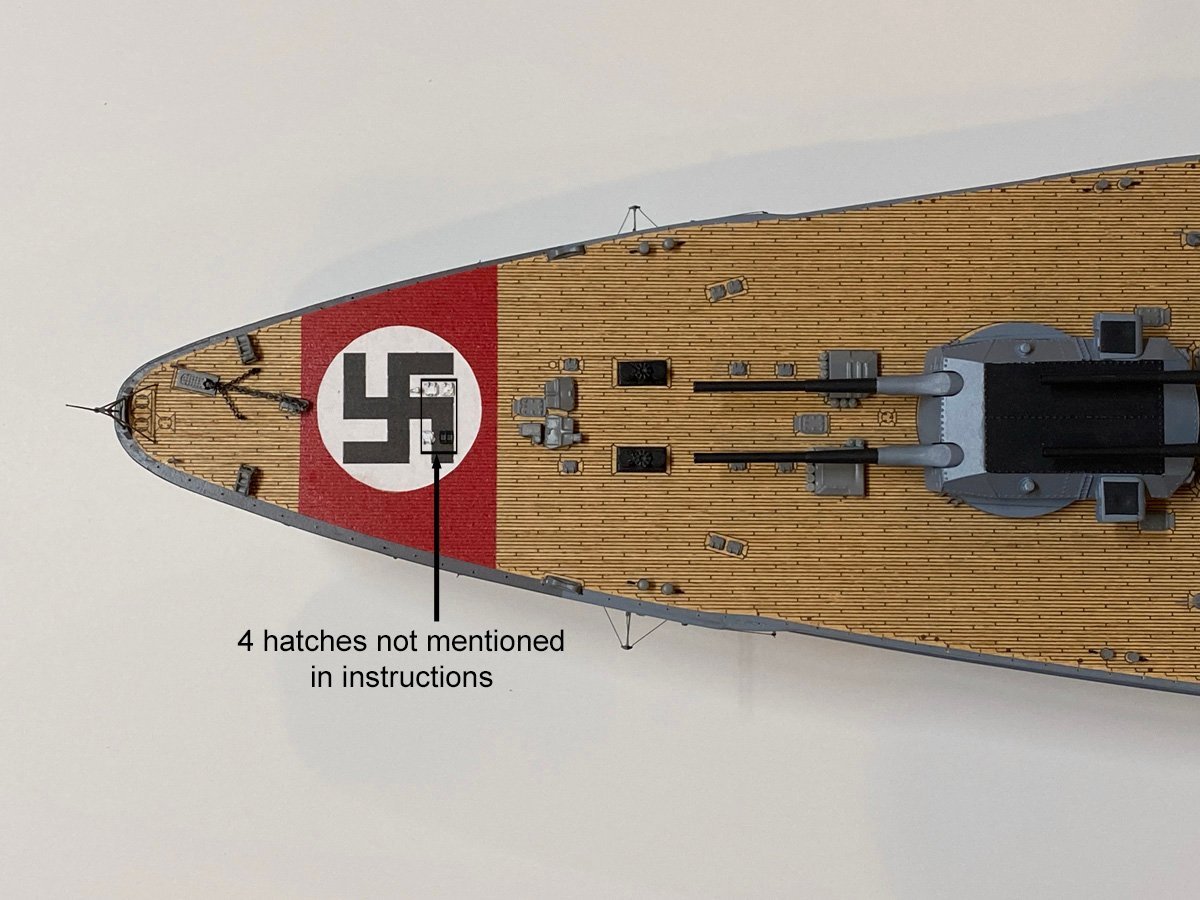
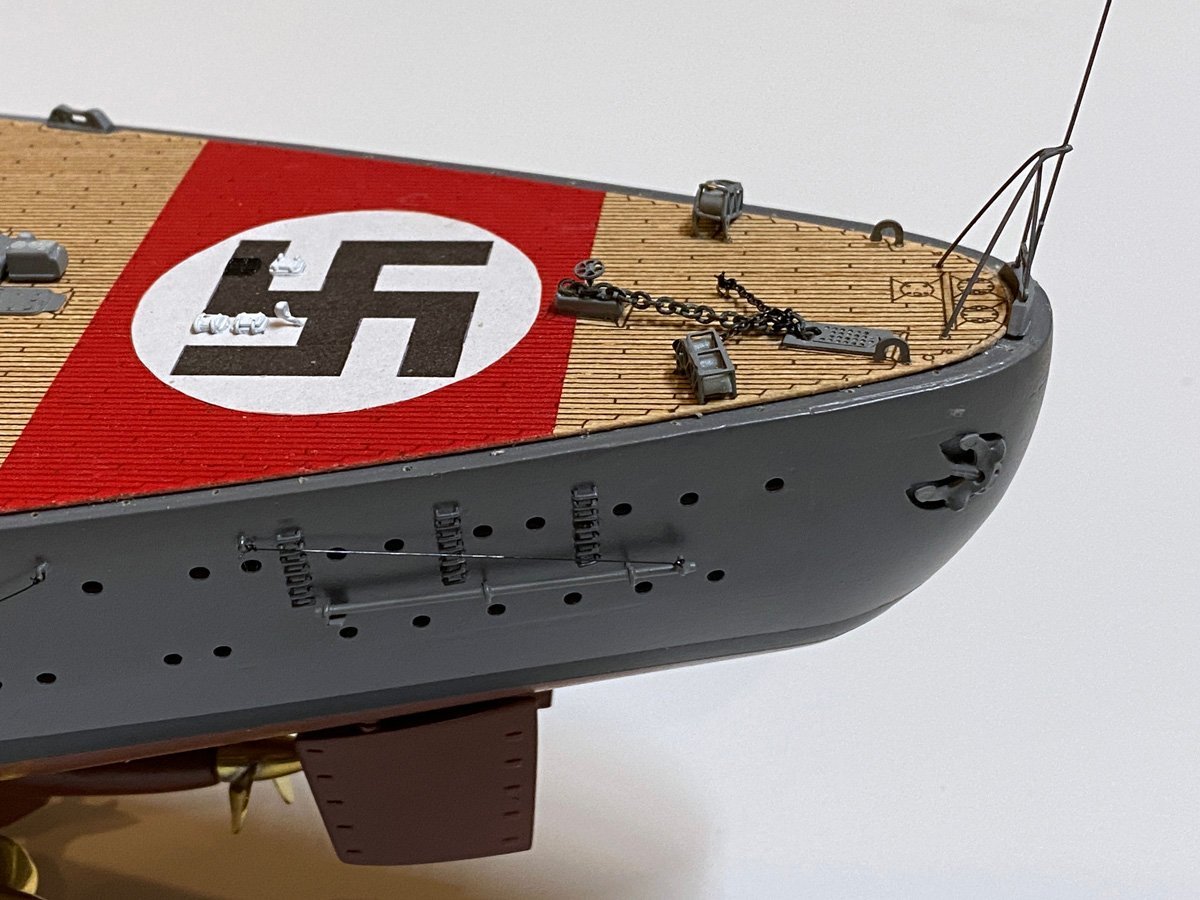
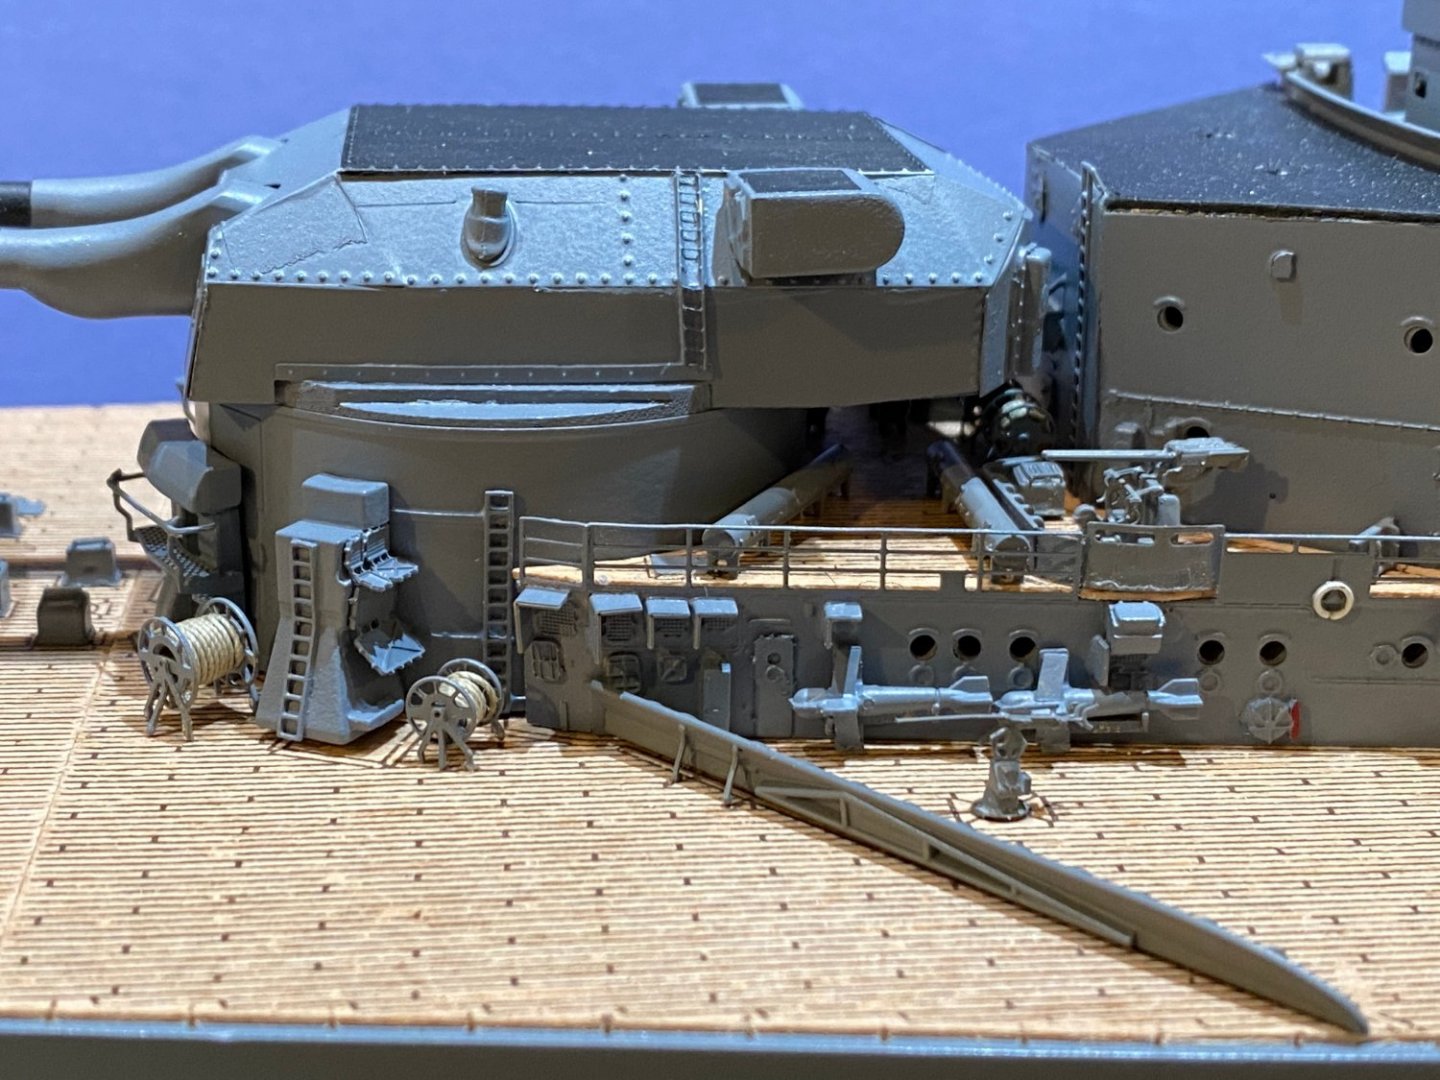
Bow & Stern Details, 500 hours, 217 days I've been working on the numerous hatches, bars, capstans, anchors, etc. on the bow and stern. They just pushed me over the 500 hour mark on this build. Back in April Joe100 asked about the GHG microphone array on the hull. Amati includes two small decals labeled "sound locator system" that go on the hull under the false bow wave. They aren't too obvious. The instructions have you make 10 small hatches for the stern. There are 14 on the PE sheet. I made them all but scratched one and discarded it while installing the 10. Later I saw 4 more over the swastika that are not mentioned in the instructions. I installed the remaining 3, and used a random spare hatch that does not match - the black one. The stern anchor is attached to the outside but does not penetrate the hull. The two little racks hold depth charges. I just built a new, permanent base for the model and am waiting for the finish to dry. There is still quite a bit of rigging to install, and a handrail around the perimeter. It's getting close.

-
Beautiful work on the superstructure Harry. Isn't it nice to see it all coming together? Good luck with the Arados. Make sure that your holes for the landing gear are a snug fit. I had a rough time getting the floats aligned with the hull while the little brass pieces were falling out. Do your plans show the V struts between the floats and wing? I think that I see them in your PE pack, but my instructions neglected to mention them.
-
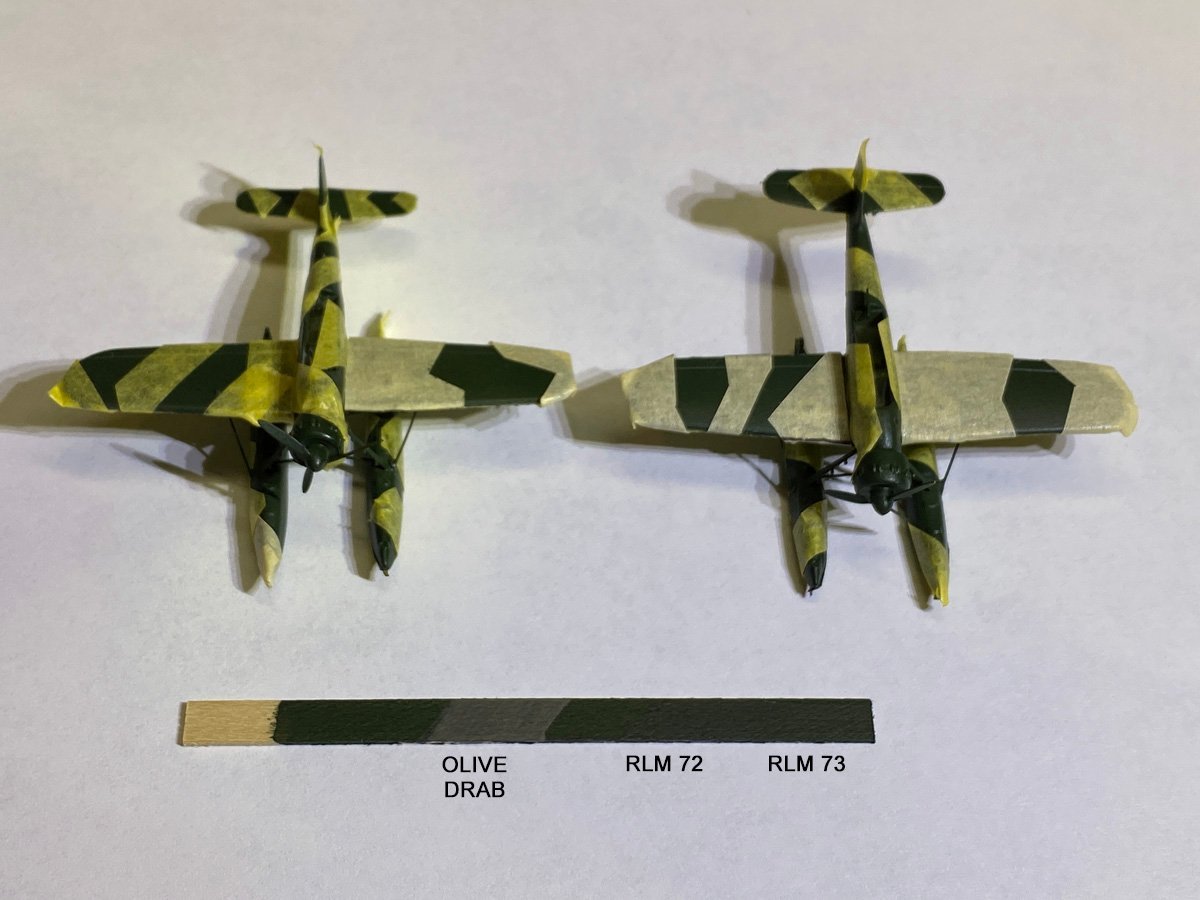
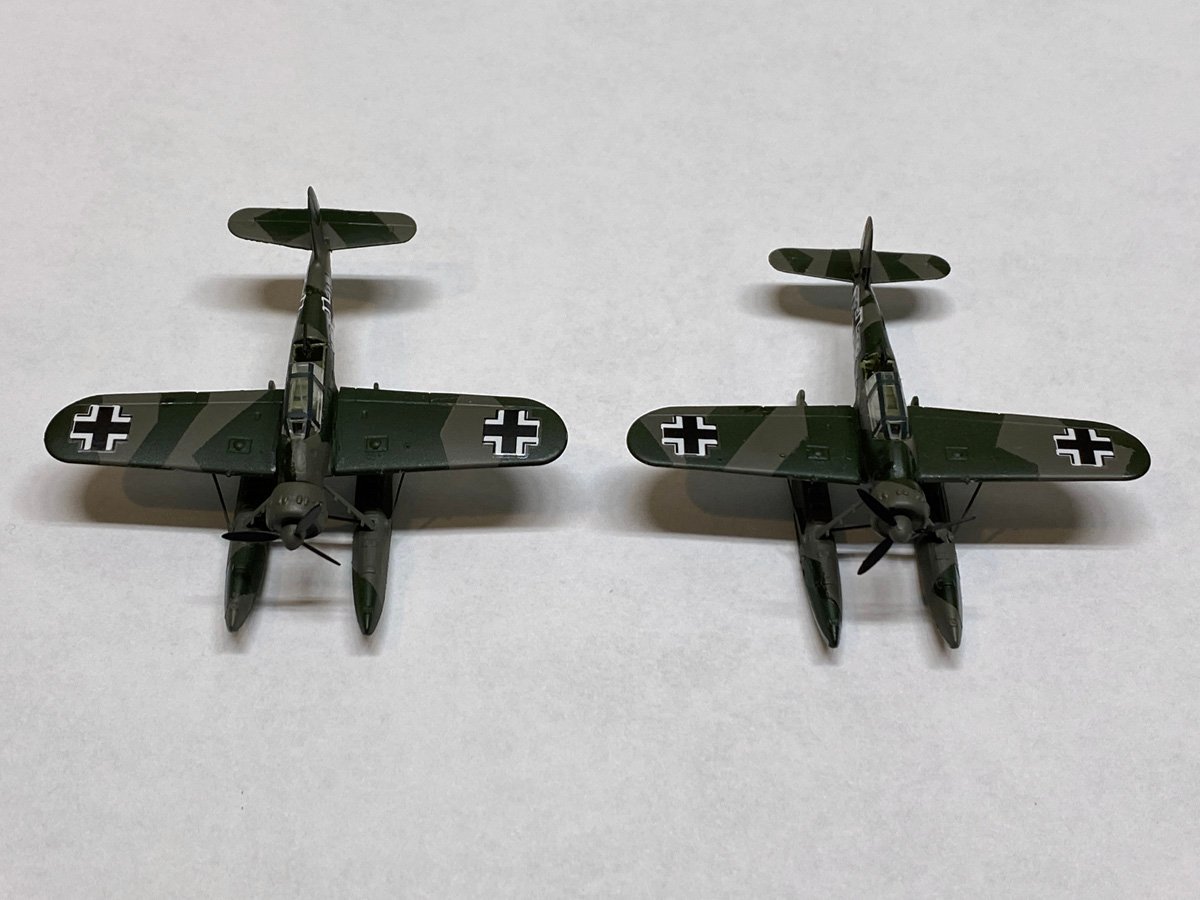
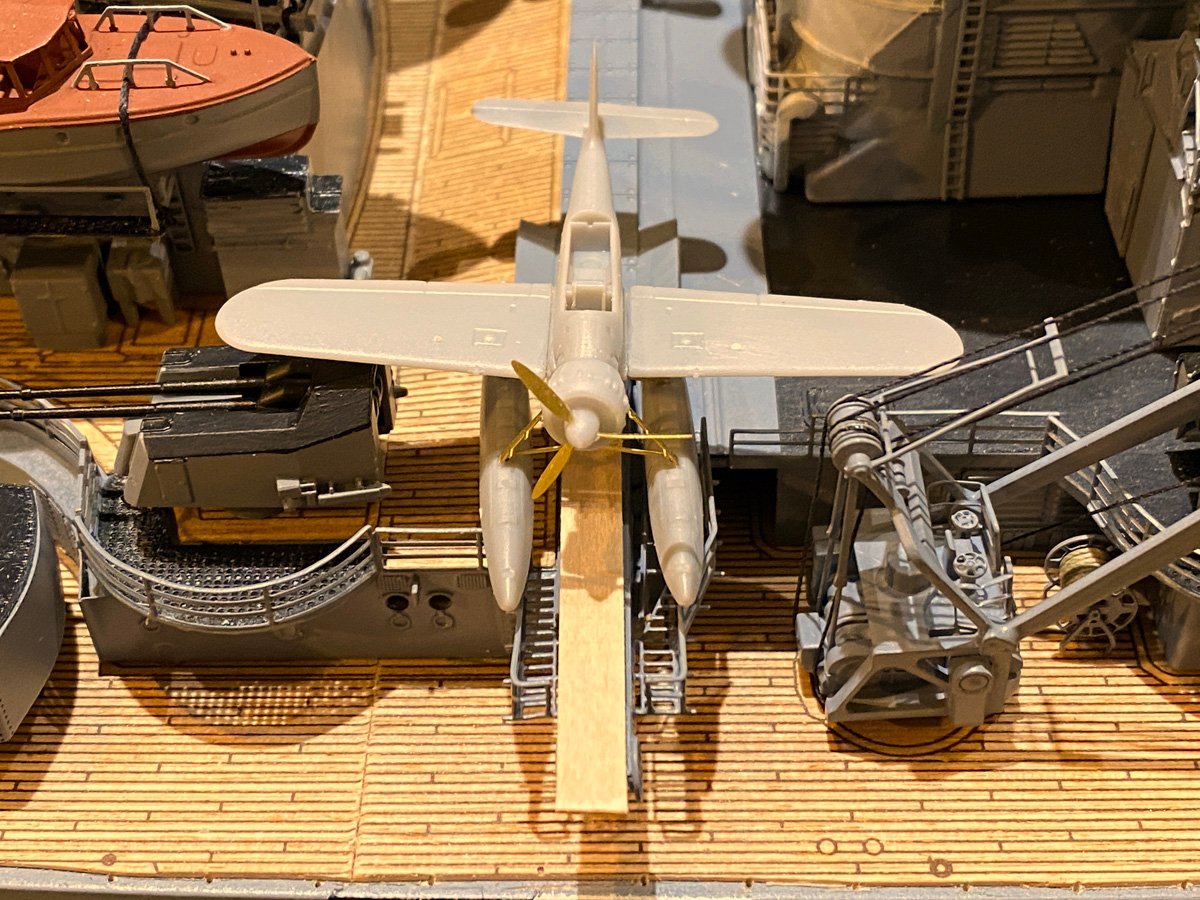
Airplanes Complete It took about 15 hours to build two airplanes. Now I remember why I don't build plastic models. The bottoms of the airplanes are painted sky blue, but no one will ever see them. The tops are RLM 73 (Reichsluftfahrt Ministerium) as per the instructions. The camouflage was supposed to be RLM 72, a slightly darker green. I bought both colors by AK paints in Spain and tested them on a stick. It is painted with RLM 73 first and has a stripe of RLM 72 on top, believe it or not. After spending several hours masking off camouflage, I was NOT going to paint it with a color that no one could see, so I used olive drab instead. Voila! I had to raise the bottoms of the catapult mount 3.5 mm to get the wings above the small guns. The instructions show one airplane with the wings folded back along the fuselage for storage in the hangar. That would have solved the clearance issue, but I like my airplanes with their wings extended.
-
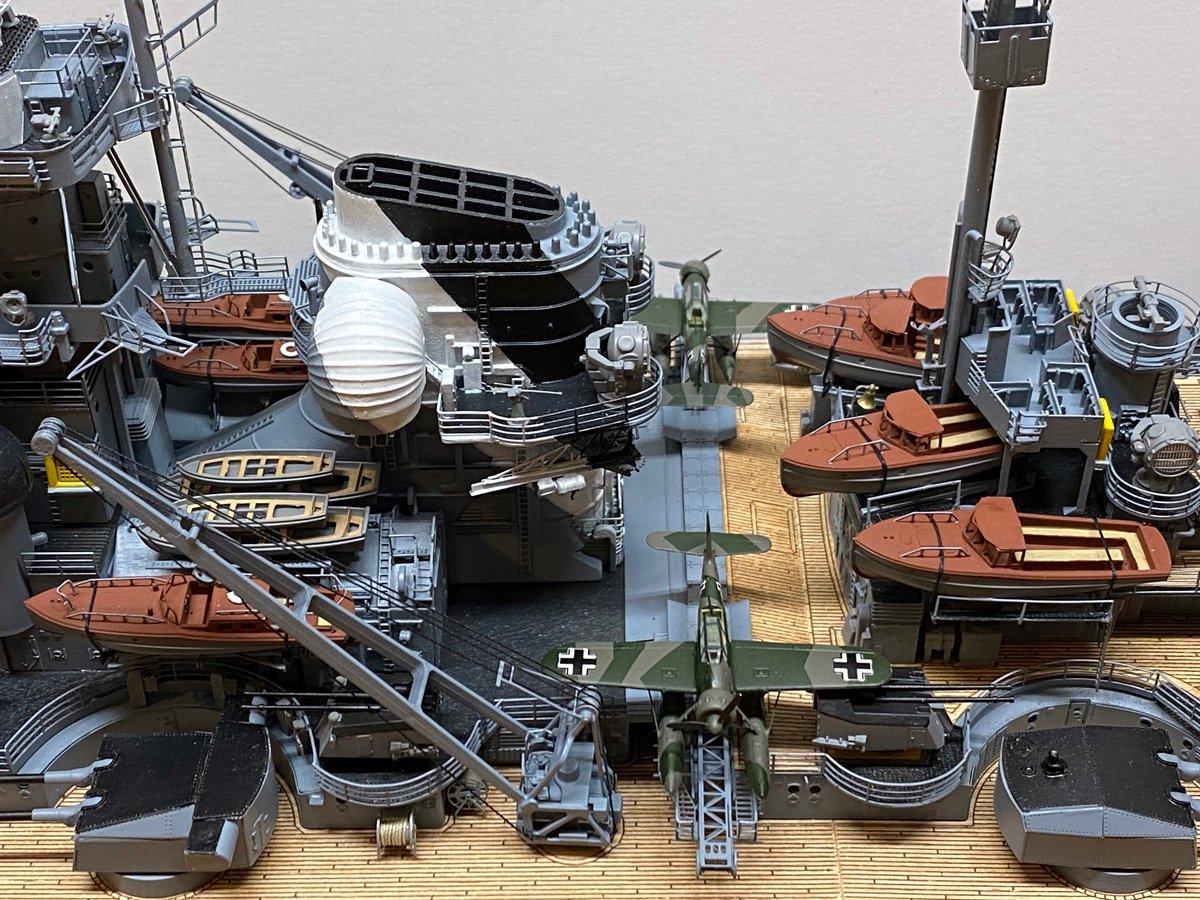
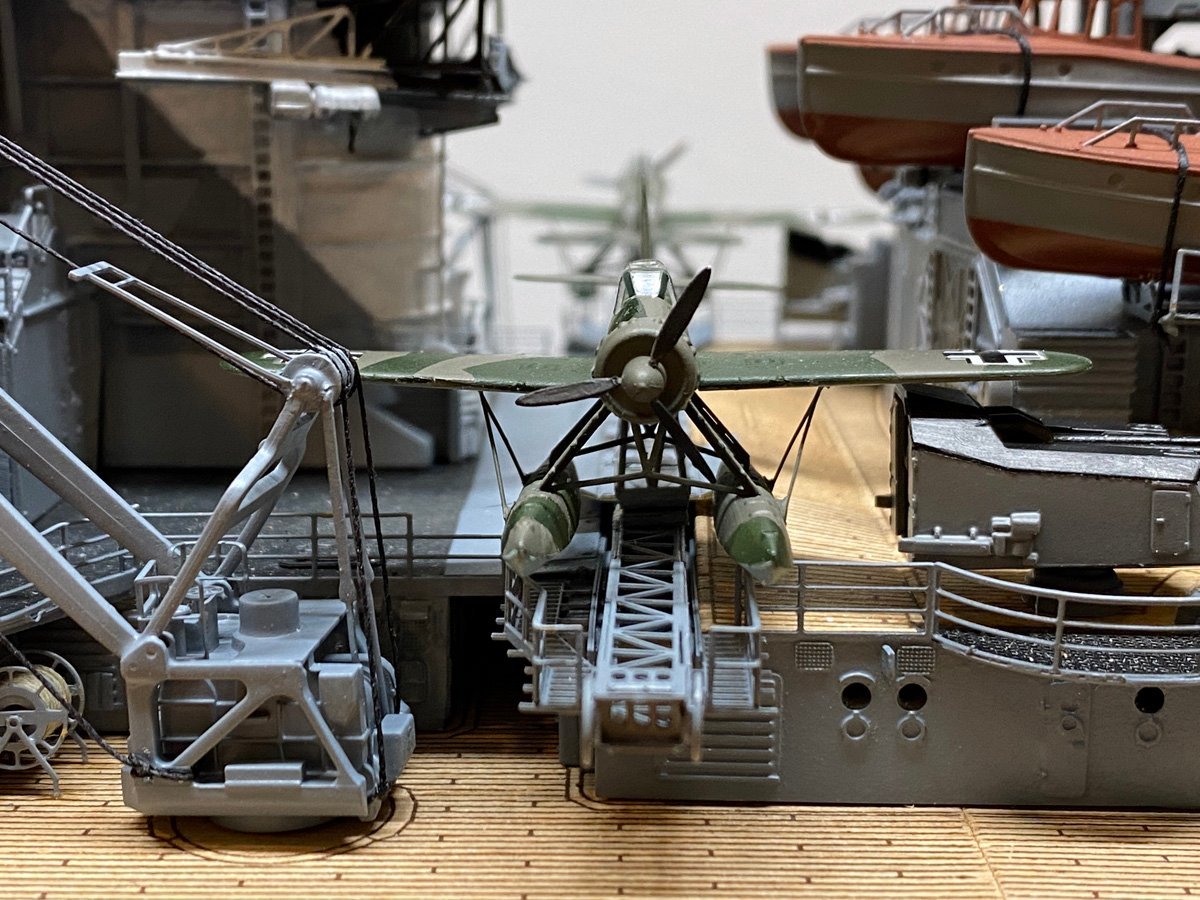
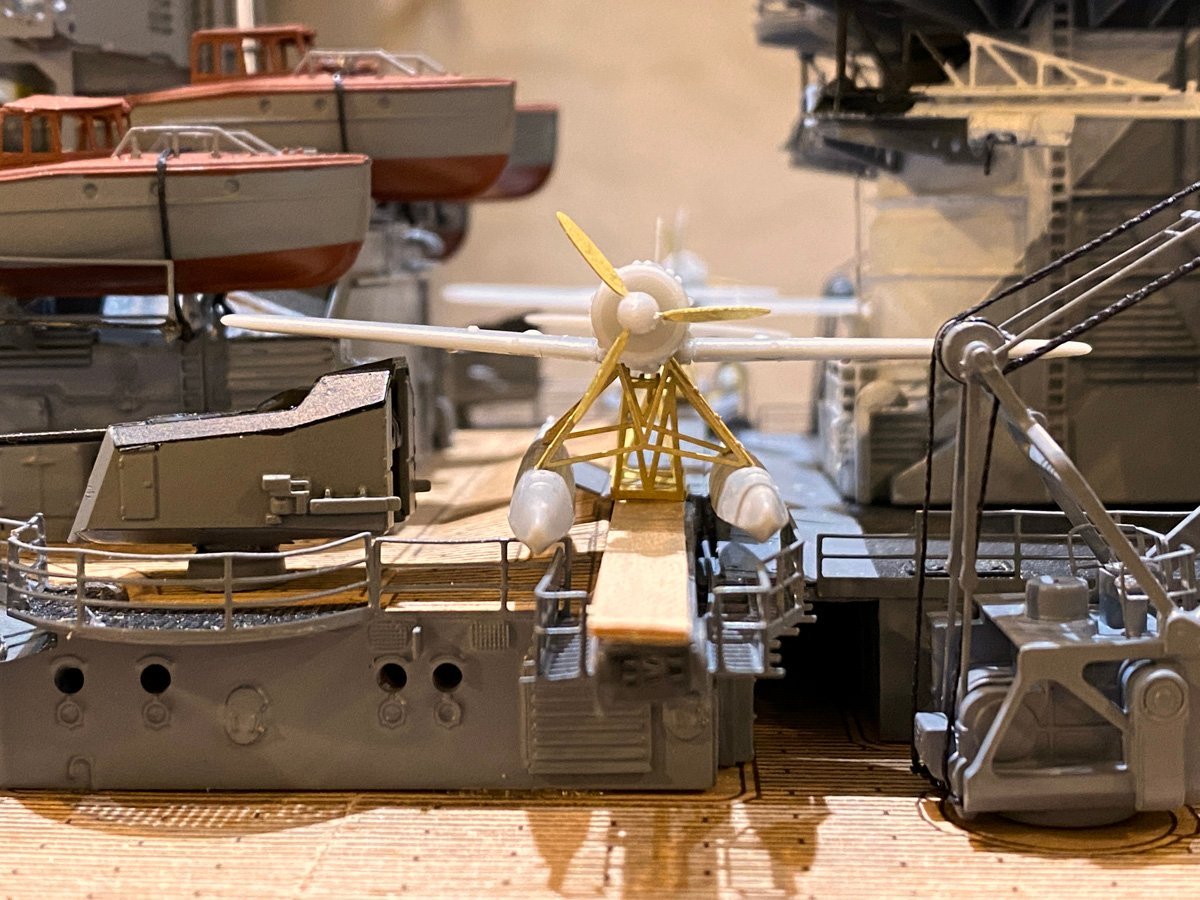
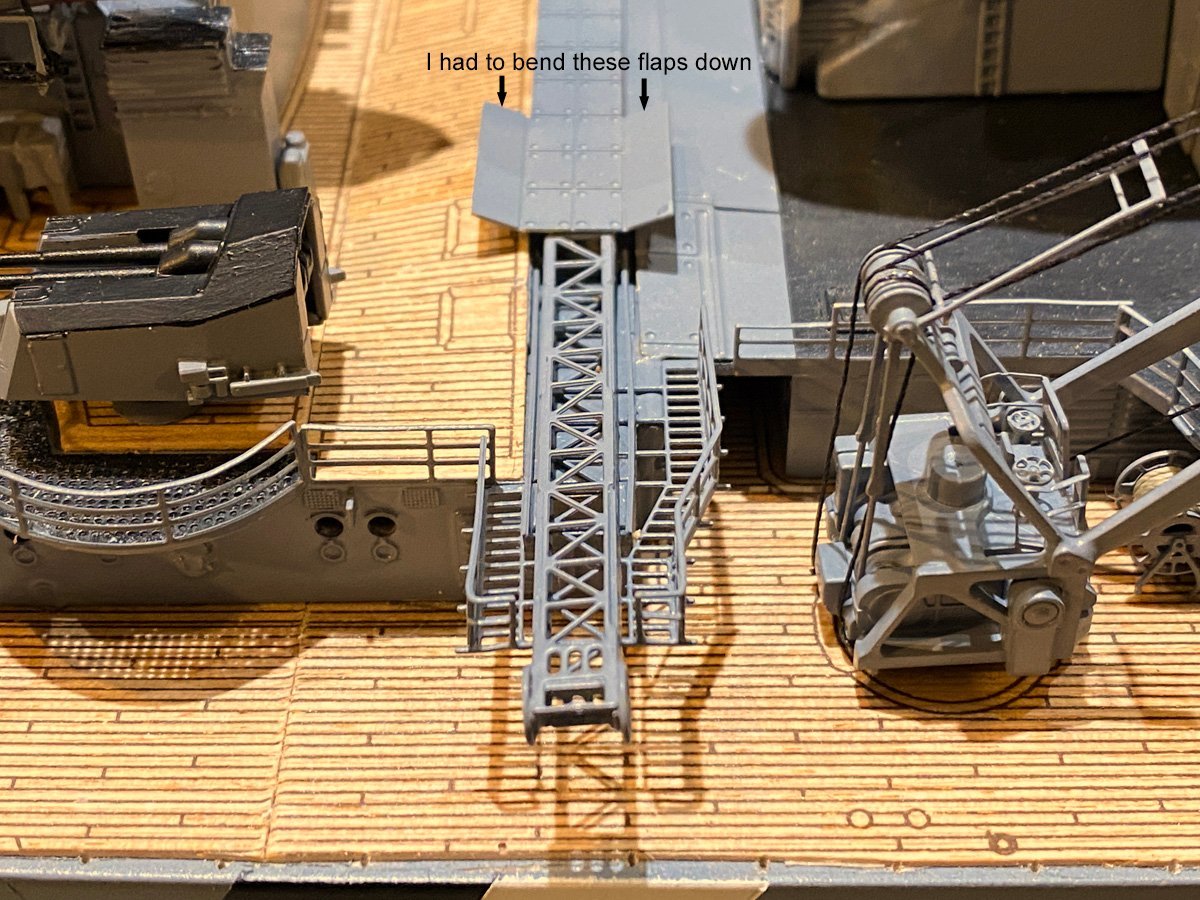
Catapult/Arado Clearance Issues After partially assembling the two Arado aircraft and their catapult mounts, I checked the fit on the catapults. Either the aircraft mounts are too short, or the floats are too low, or the railings are too high, because the floats hit on the railings. I plan to add a 1 mm thick strip of wood between the catapult rail and the aircraft mount. The strip shown in the photo is extra long to help move the plane around while experimenting with the fit. Apparently the cranes had to be collapsed to launch the aircraft, because the wings would totally hit the cranes. Seems like a bad idea when you need the cranes to recover the aircraft later. The instructions show the aircraft attached before the cranes are installed, but the aircraft have to be moved inboard about 1 cm to fit behind the cranes. Then the floats interfere with some upturned ramps that had to be bent downwards. Finally, the Arado should have V-shaped struts between the wings and floats. They are included on the PE sheet but are not shown in the instructions. I had not attached them when this photo was taken, but they are attached now.
-
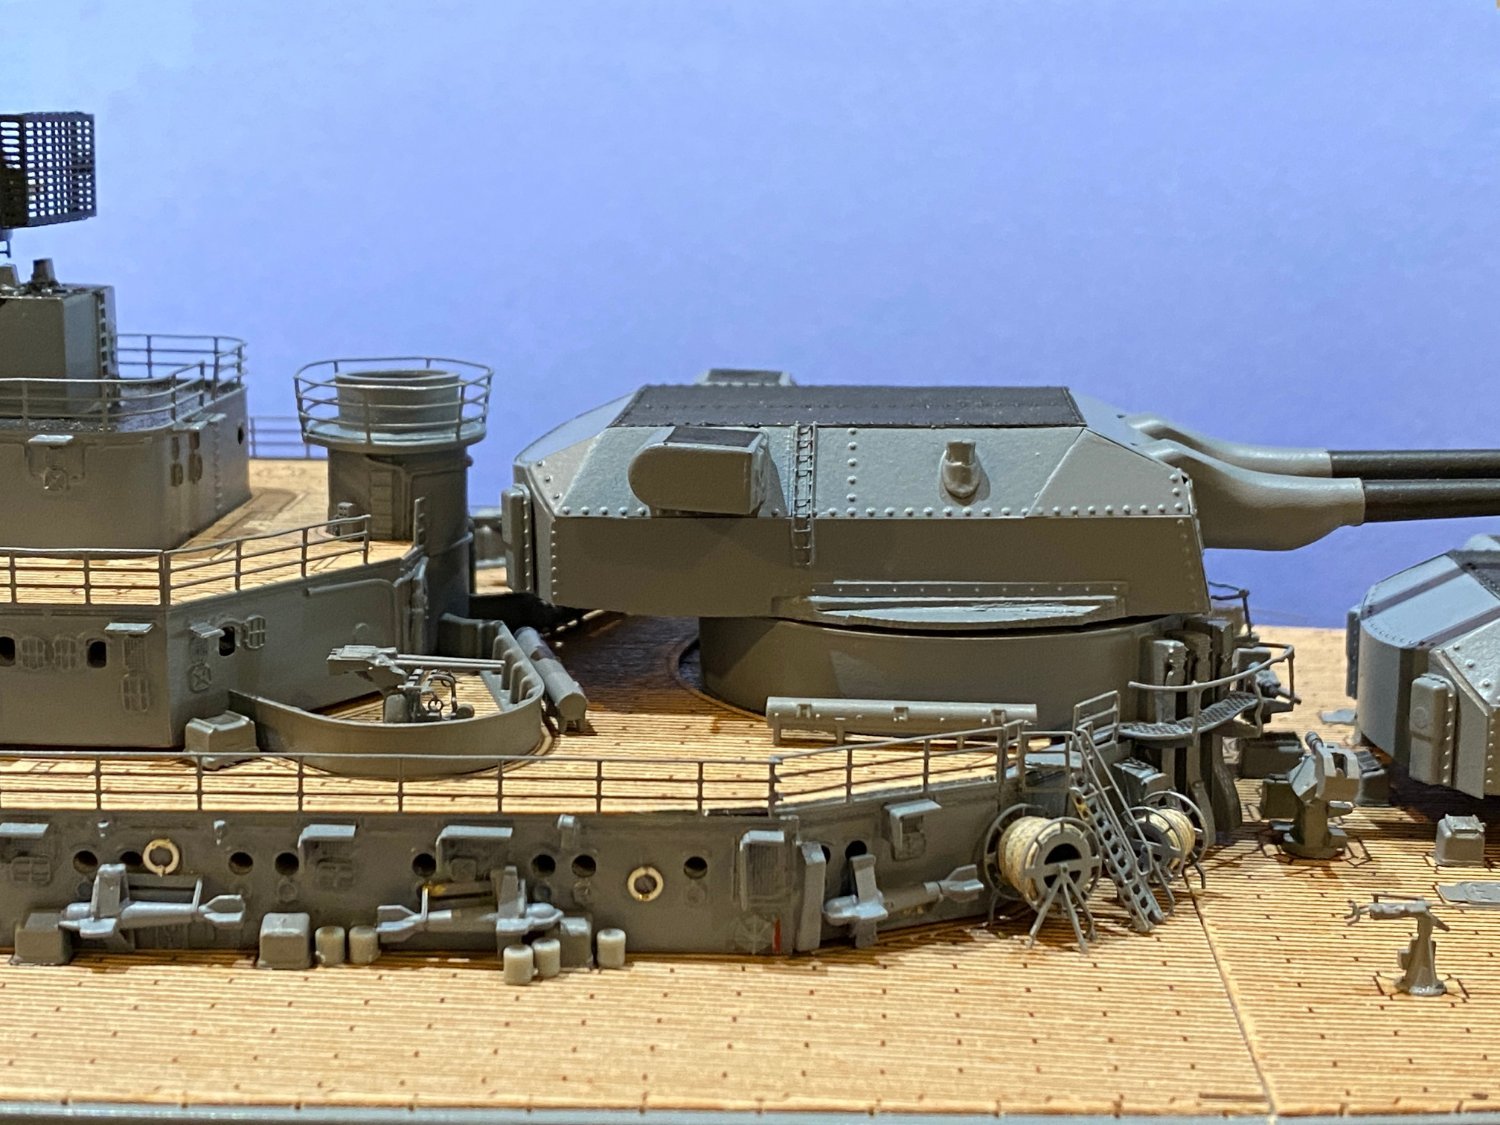
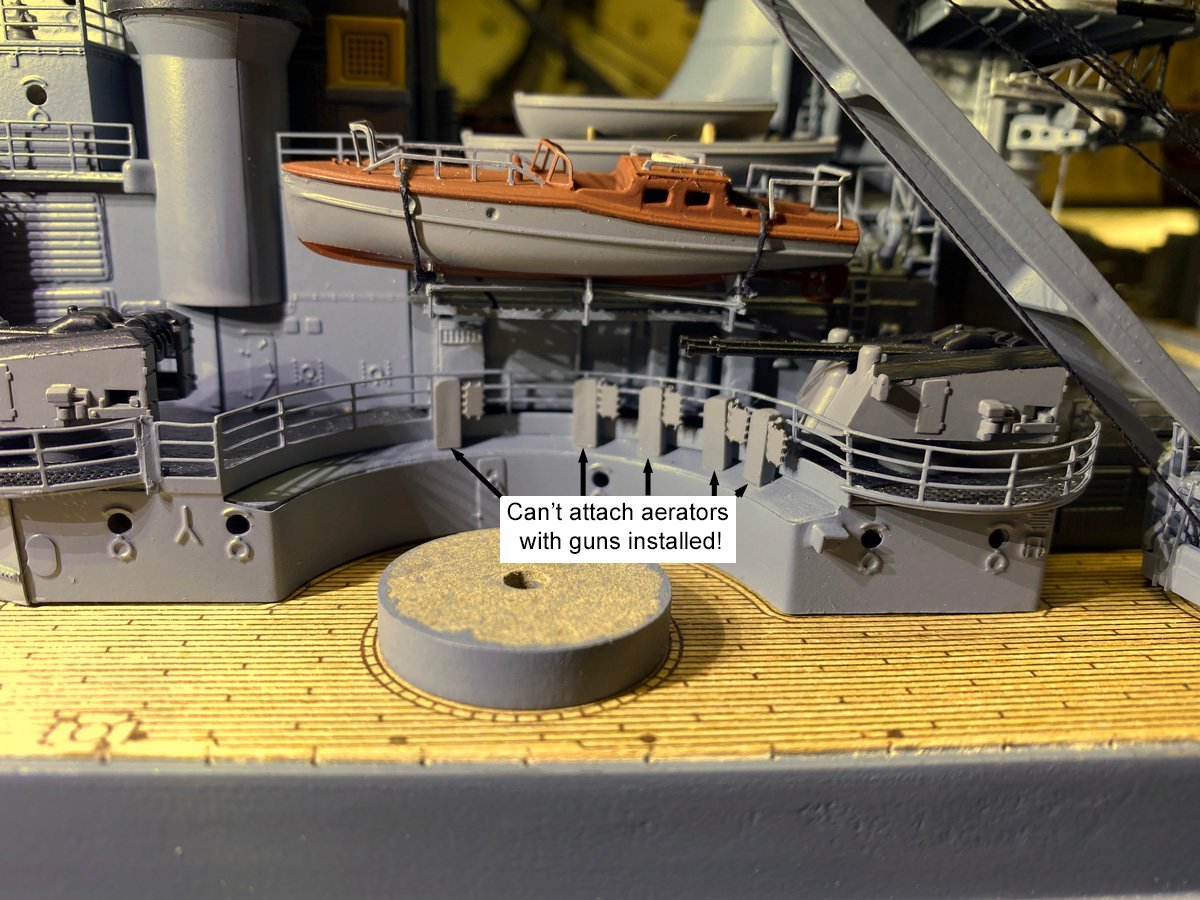
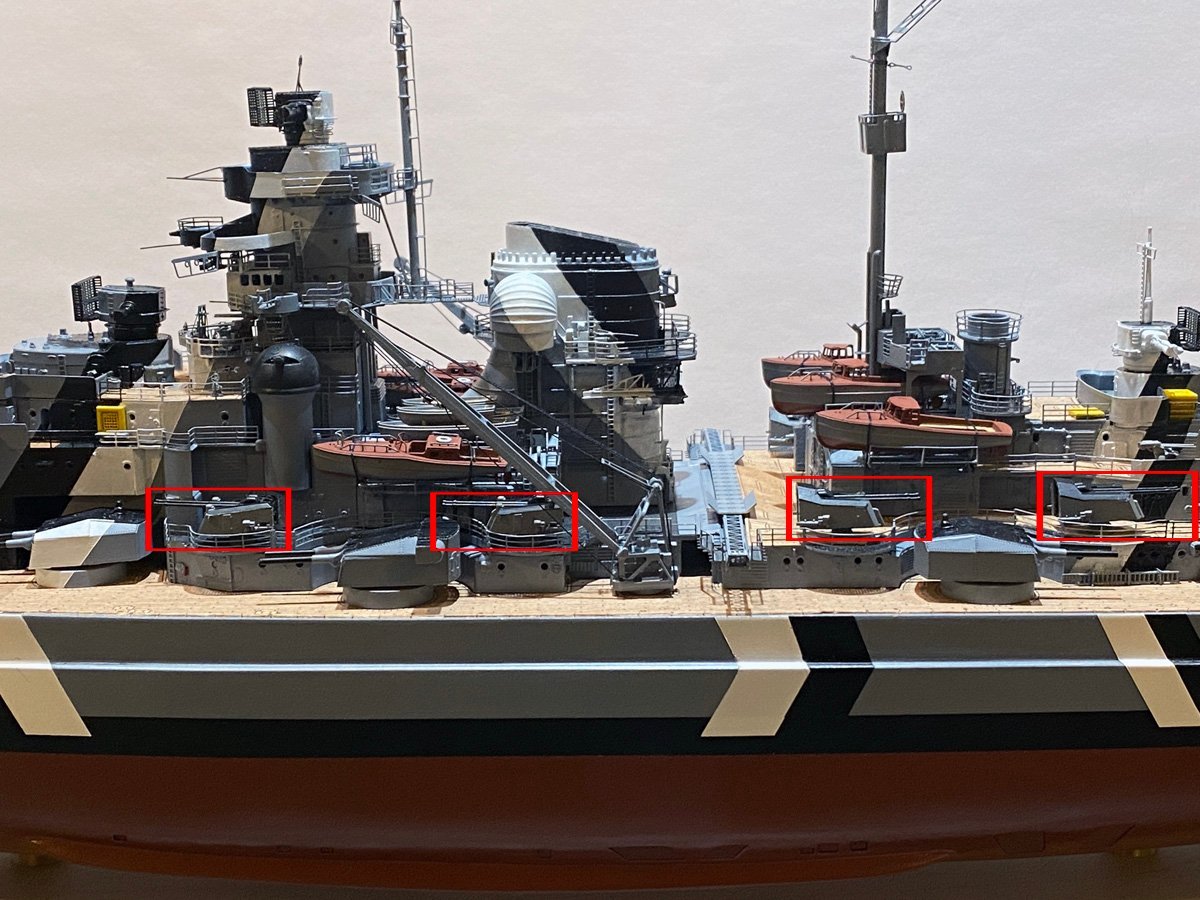
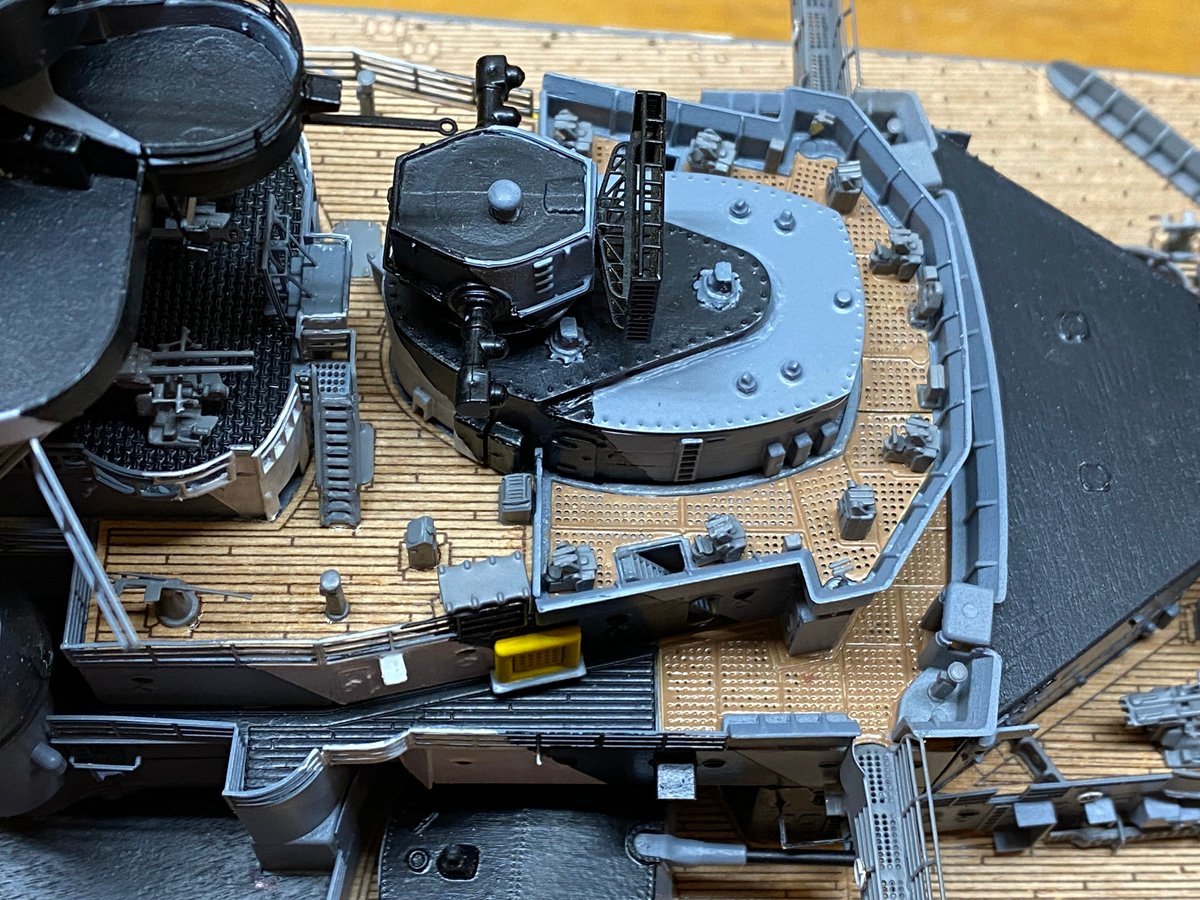
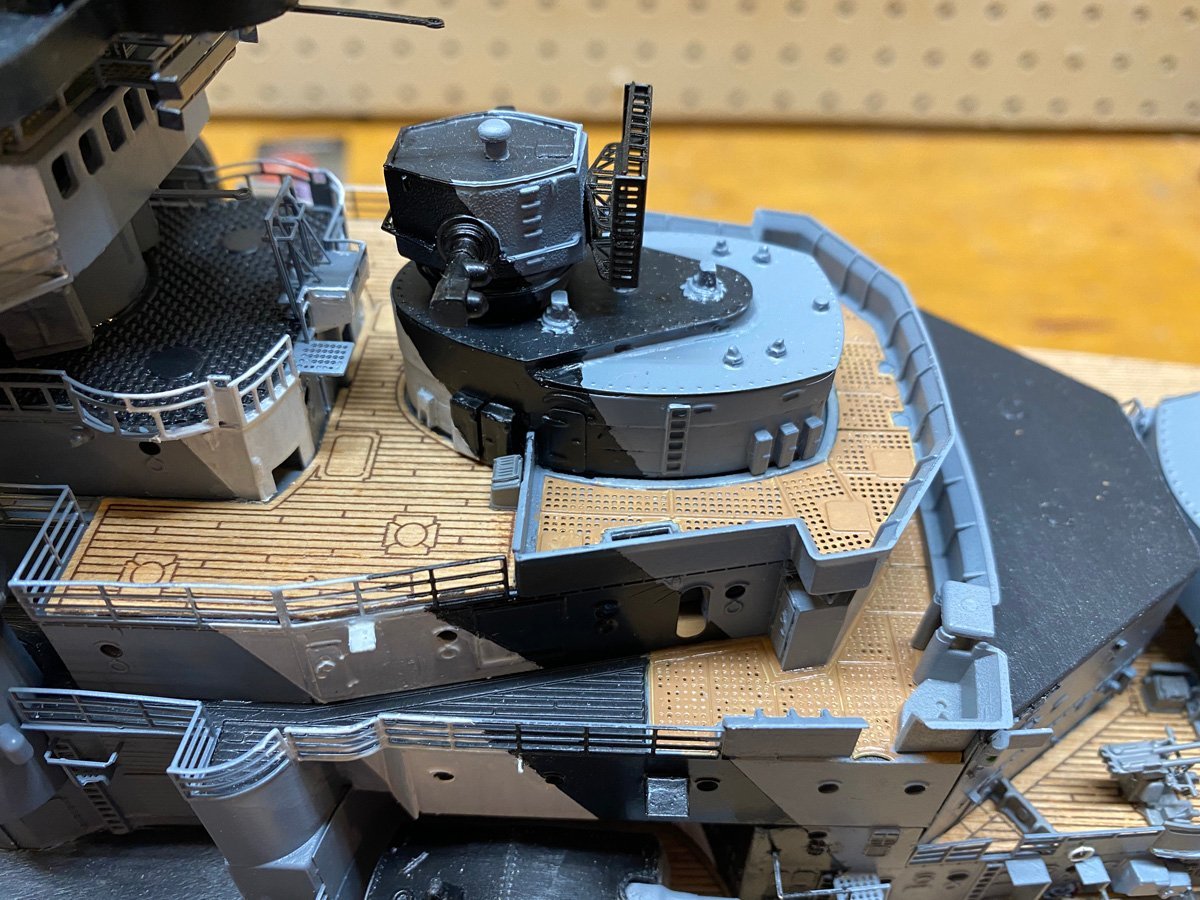
One Reason Not to Work Ahead While installing some of those little parts, I've discovered that some are supposed to fit behind other parts that I've already installed. Like these aerators (ventilators?) that sit behind the secondary guns. Lucky I made those guns removable so they can be rotated.
-
Frankly, I am dreading the 200 or so stanchions. 😳 My gap ranges from 1.5 mm at mid-deck to 3-4 mm at the bow or stern. The holes are right up against the deck most places. Aaagrh! You're wearing me out just reading about this. But keep it up - everything is looking great.
-
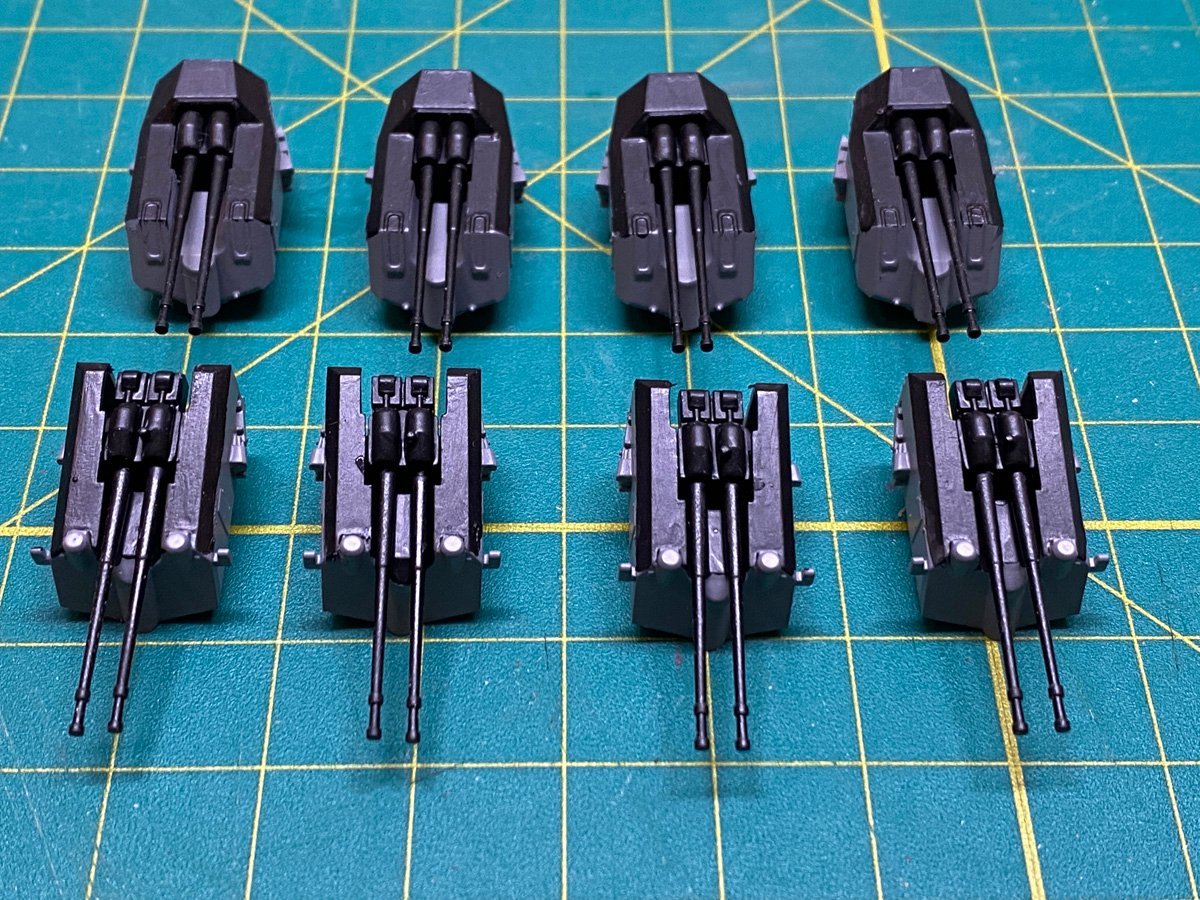
8 AA Guns I just finished 8 AA guns. The model is getting so cluttered with guns that I had to mark them so you can see where they are.
-
OcCre Prinz Eugen I just discovered that OcCre - Ocio Creativo, has announced a 1:200 model of the Prinz Eugen. It has a laser-cut, plank-on-bulkhead hull and lots of photo-etched and cast parts. They are listing it for pre-order at 499,99€, but ModelExpo is taking orders for $399.00 US. It looks like a beautiful model and a perfect companion to the Amati Bismarck. If I hadn't already built the lower-quality Aeronaut kit of the Prinz-Eugen I'd order one today.
-
You need to hide a little treasure inside for some conservator to find 200 years hence.
-
I have been making my own pick-up-sticks using 3-M double-sided tape and whatever size wood sticks I need. I cut off a sliver of tape, attach it to a stick, say 1/16" x 1/8" or 1/8" square, and use that to position pieces. The tape only lasts for 3-4 pieces but it only takes a few seconds to replace it. I've been using the same roll for years.
-
Harry, I've been away from home for 10 days or so, and I got behind on your log. First of all I am so sorry to hear that you had to deal with Covid. I thought that NZ handled the pandemic much better than we did here, and am surprised that you ran into it. I hope that you are OK. Second, beautiful work on the cladding! I really struggled fitting the PE into those round gun ports. Some of my doors in the PE don't line up with the doors in the plastic. Yours look perfect. Rod
-
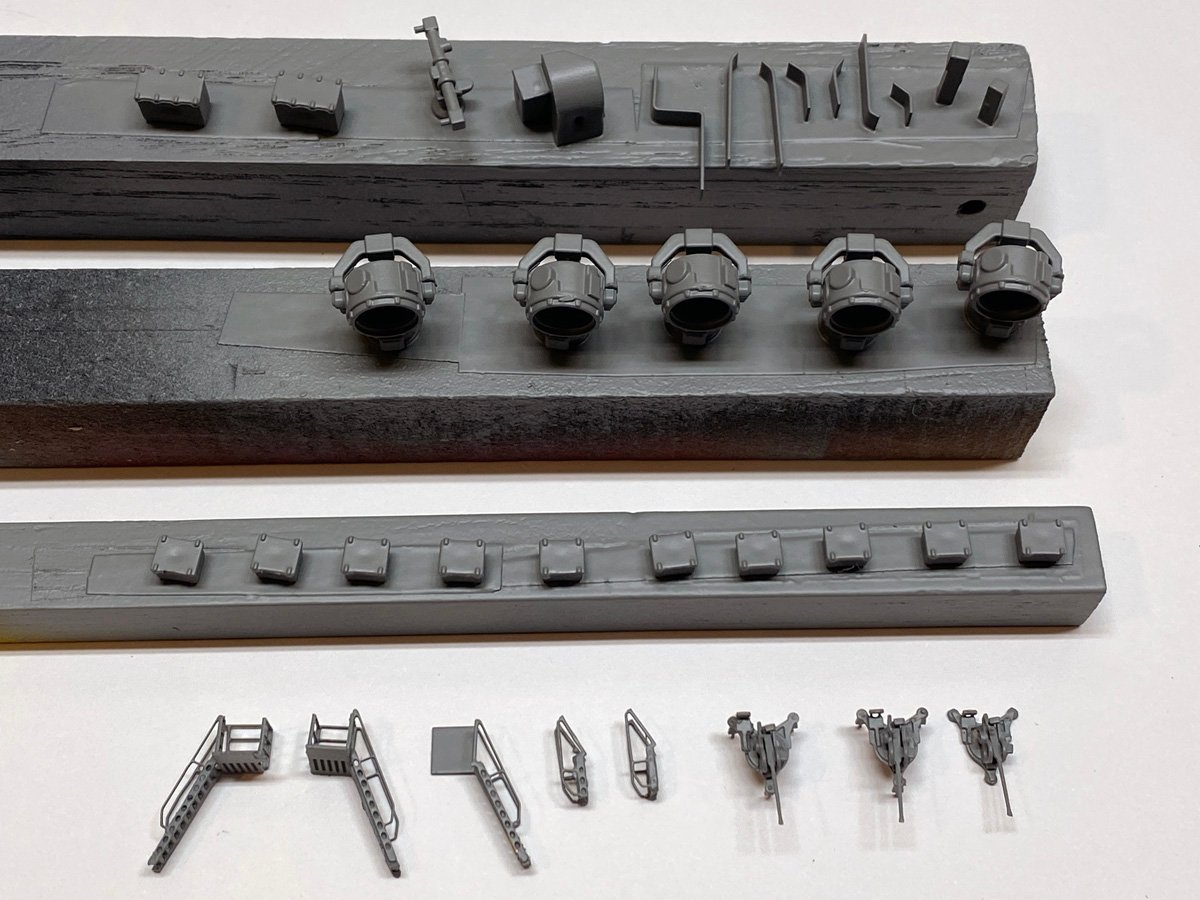
Upper Fore-deck Bits and Pieces I've been away from home for about 10 days but am back to the Bismarck. The instructions have you adding all the fiddley bits one deck at a time, and I just finished the upper fore-decks. Here's a photo of the miscellaneous bits after painting. The PE flying bridges were a bit of work to make, and many of the tiny plastic pieces have a couple of even smaller PE pieces to attach. Here's where they all go: and here's the same view after everything is attached:
- 215 replies
-
- 13
-

-
Harry, I epoxied my boats in place, then lashed them with 0.4 mm waxed black thread left over from a sailing ship. That thread pulls easily through wood blocks but is quite difficult to pull through PE with its sharp edges. You might try a slightly smaller diameter. My kit came with a large spool of very thin black monofilament line. I attached a couple of pieces to the rear mast earlier as per the instructions. The line is so "springy" that it was very difficult to tie, but I think it will be perfect for main deck railings. The jury is still out on all the antennas and other upper rigging. EZline worked well on my Prinz Eugen but I am concerned that it will be brittle in a few years. Does anyone out there have experience with it long-term?
-
Thanks Joe. That box seems too small for the 16" shells. Would it be for other ammunition? There was another device called an ammunition elevator on an upper deck, probably for AA guns. I commented on it on ted99's log because it was a pain to build.
-
Very interesting! It's too late for me but it might help someone else if you could post a drawing for the jig.
-
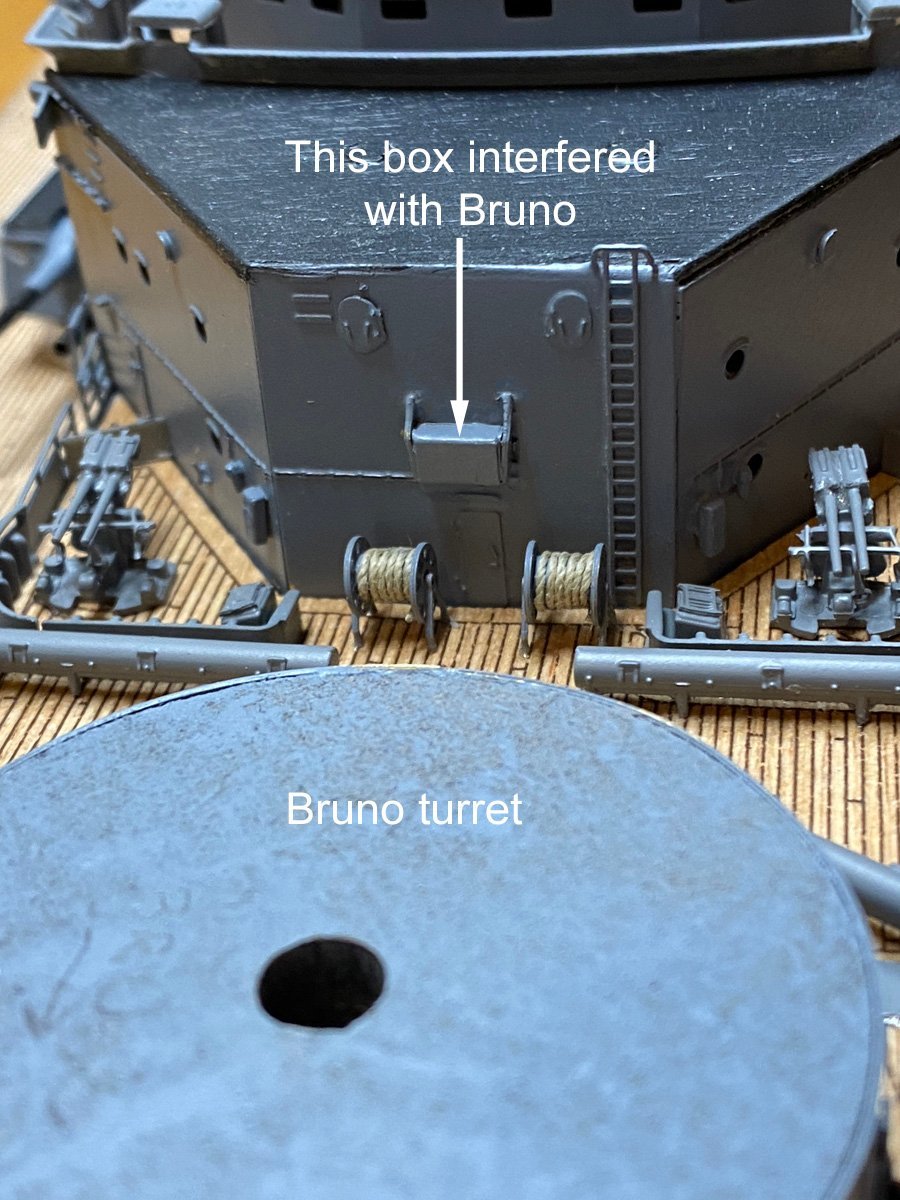
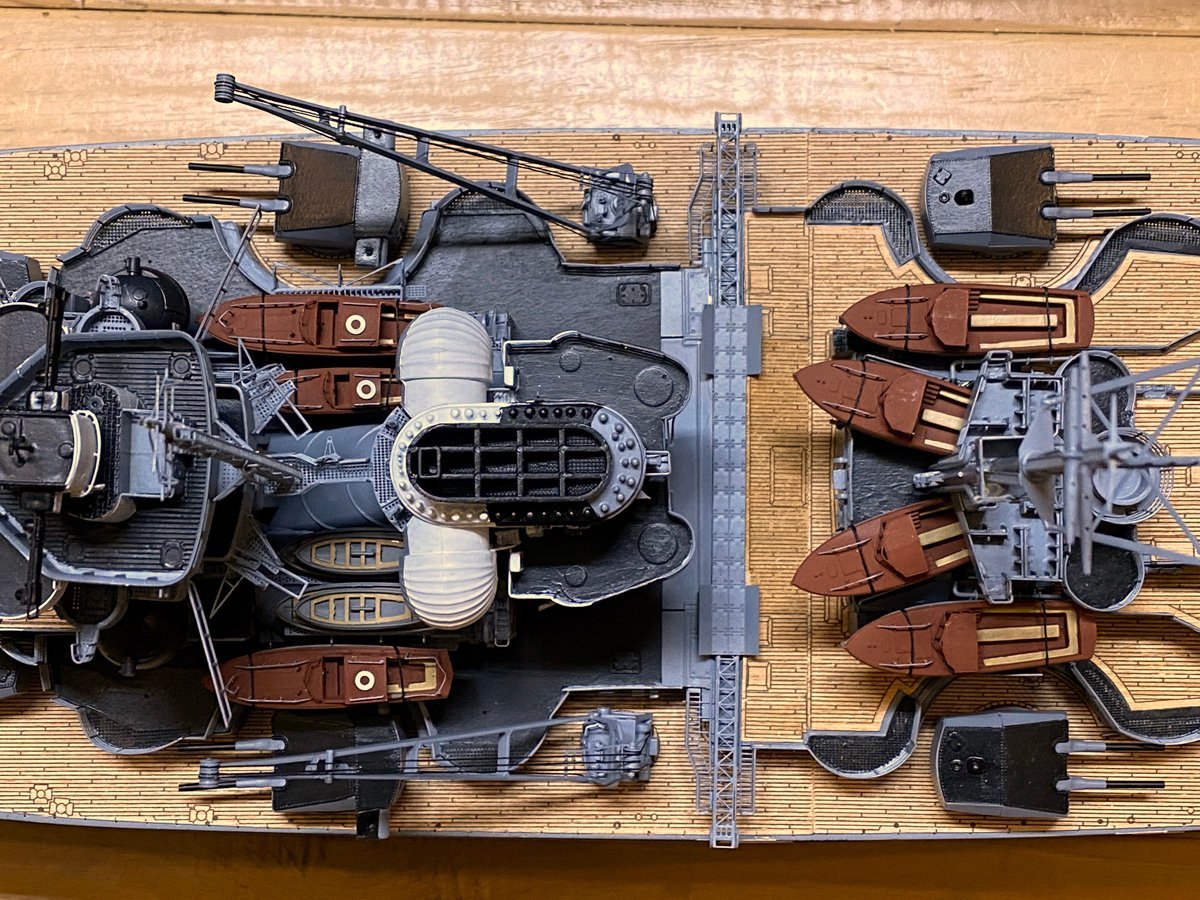
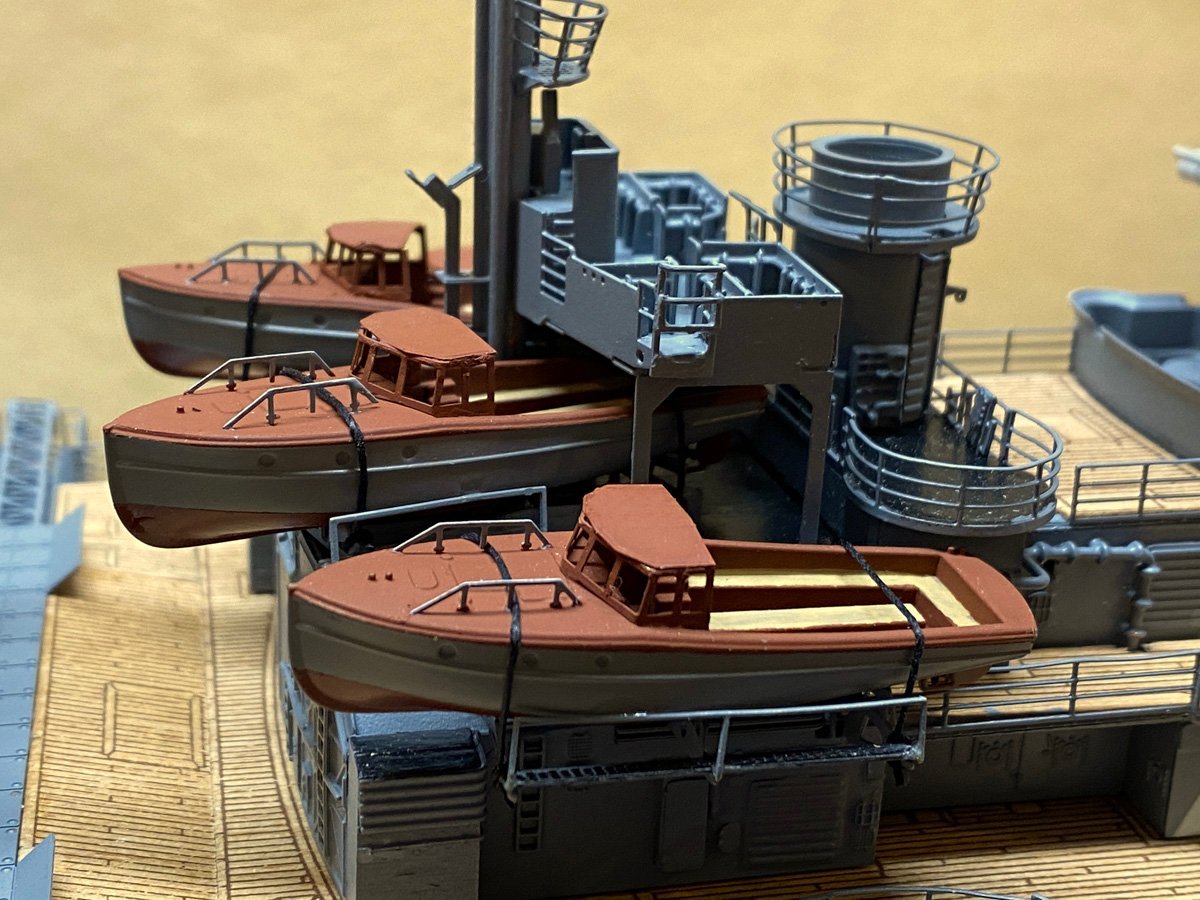
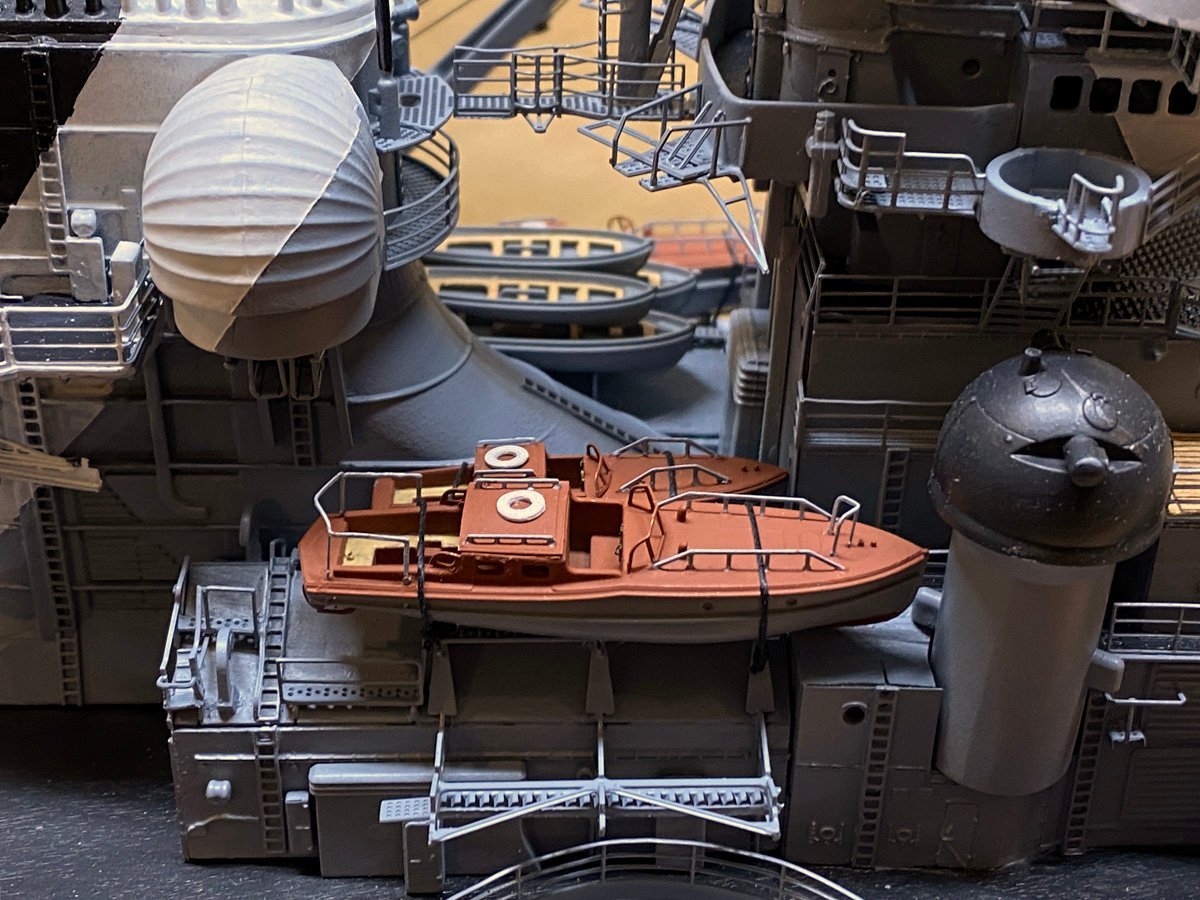
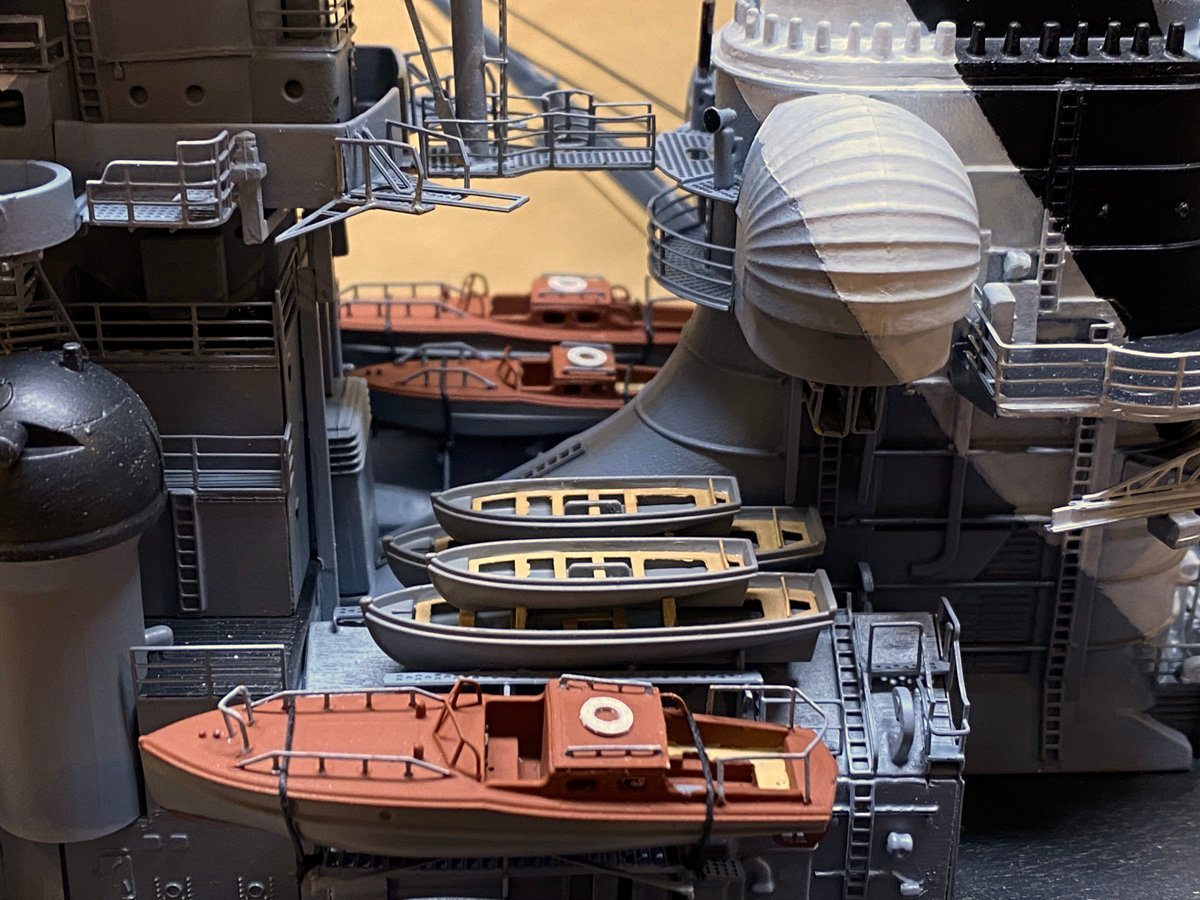
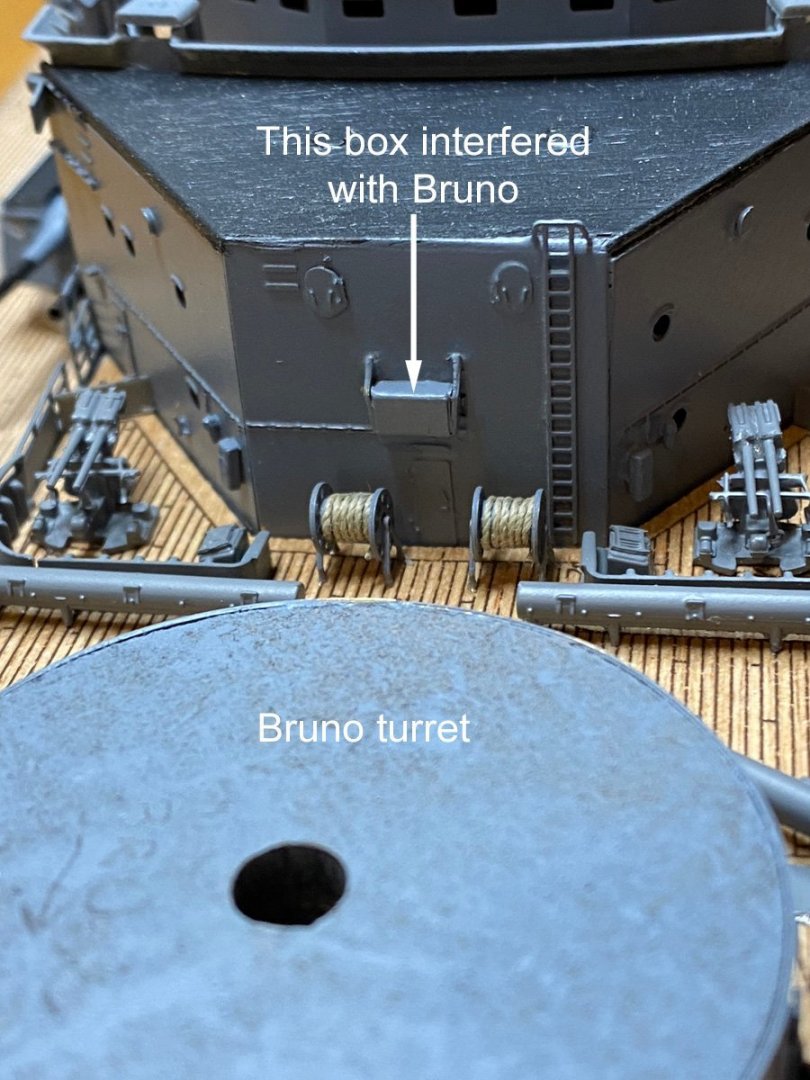
Breakage Ratio 0.36 It's so frustrating. While carefully lashing down the boats I'd hear "boink," as a part that I installed weeks ago fell to the deck. All-in-all I installed 11 boats and broke off 2 rails, one gun barrel, and the entire platform holding the rear mast. Breakage ratio = 4/11 = 0.36. I have to be more careful. Now that everything is repaired, here are the boats in place. I installed the cranes too by gluing a piece of aluminum tubing over a pin on the bottom, and fitting that to a hole in the deck. They can be turned and removed. While I was fixing things I also resized the part that interfered with Bruno turret. I sanded about half of the thickness off the back with a disk sander, reattached and repainted it. Now Bruno turns as he should.
-
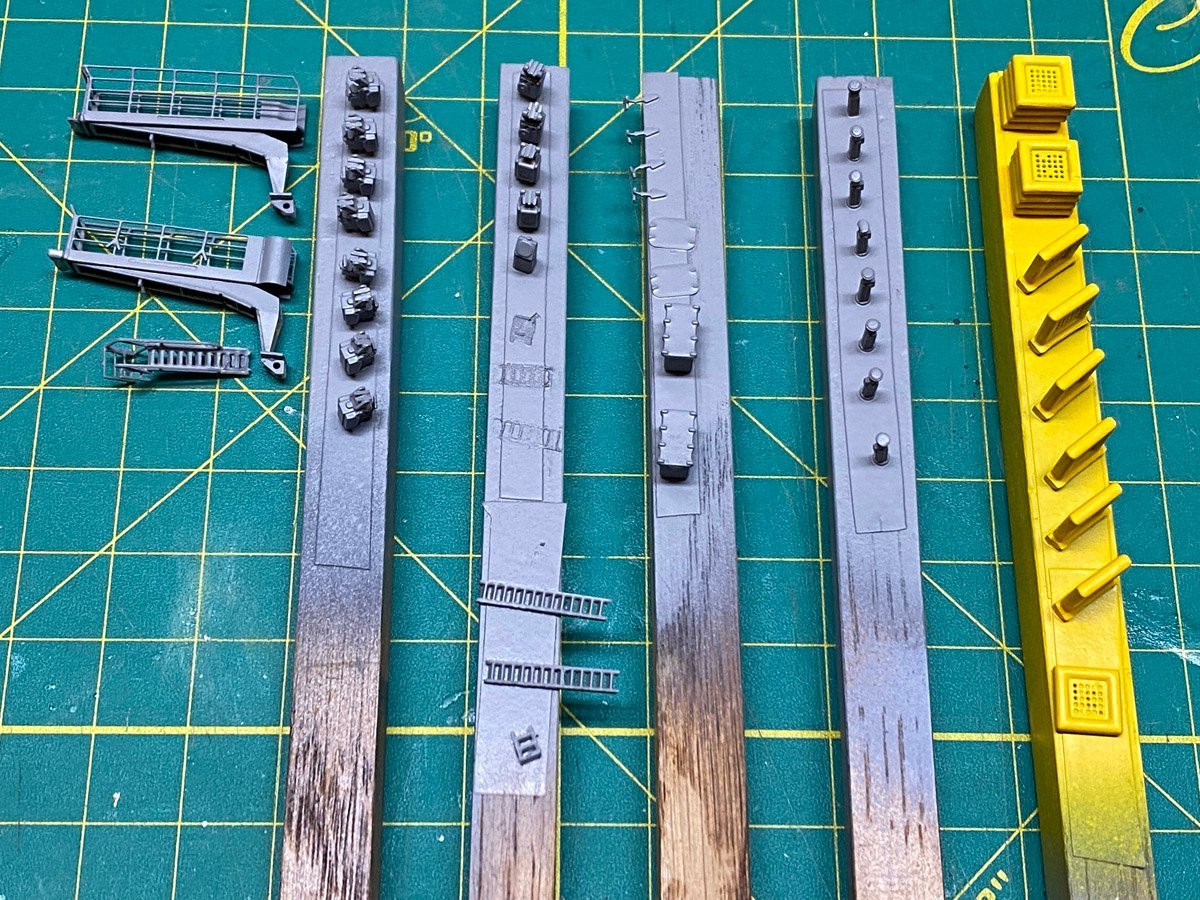
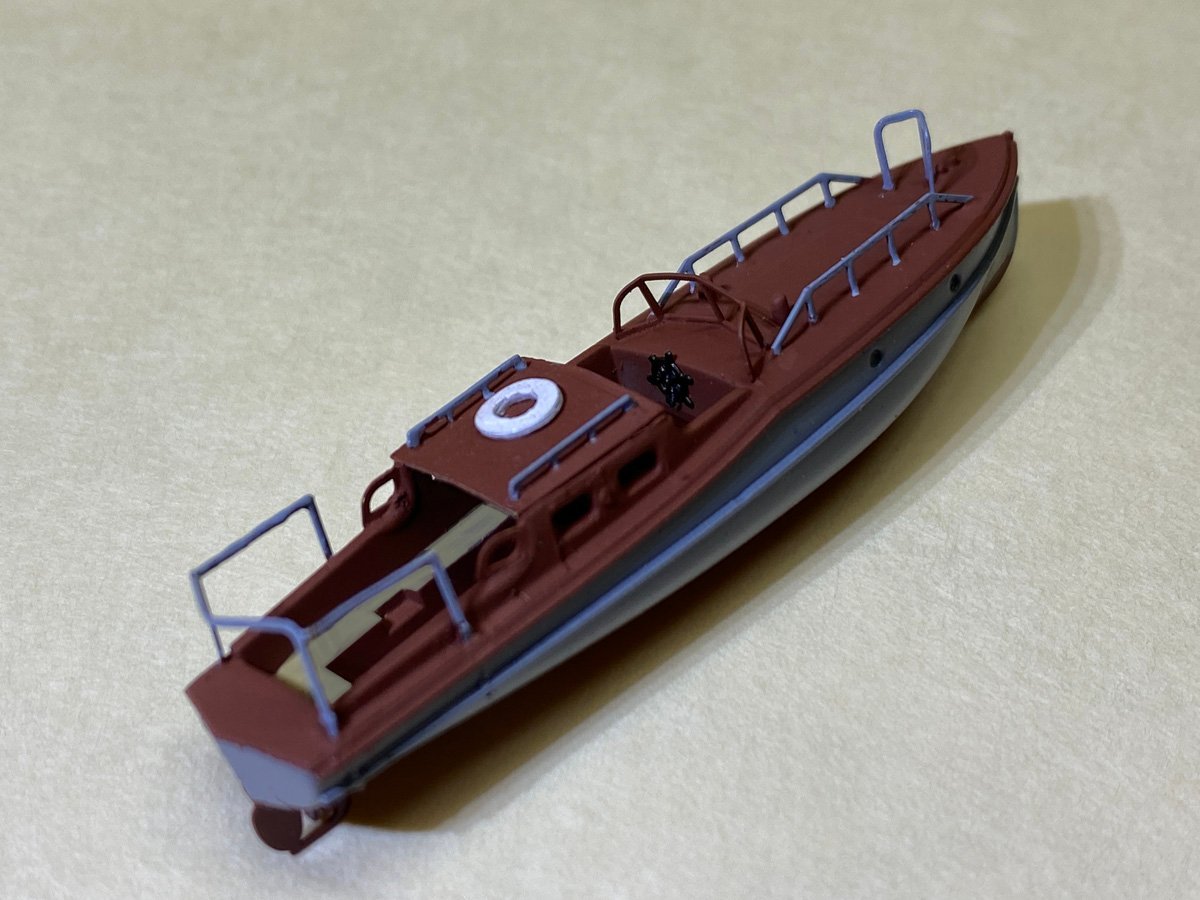
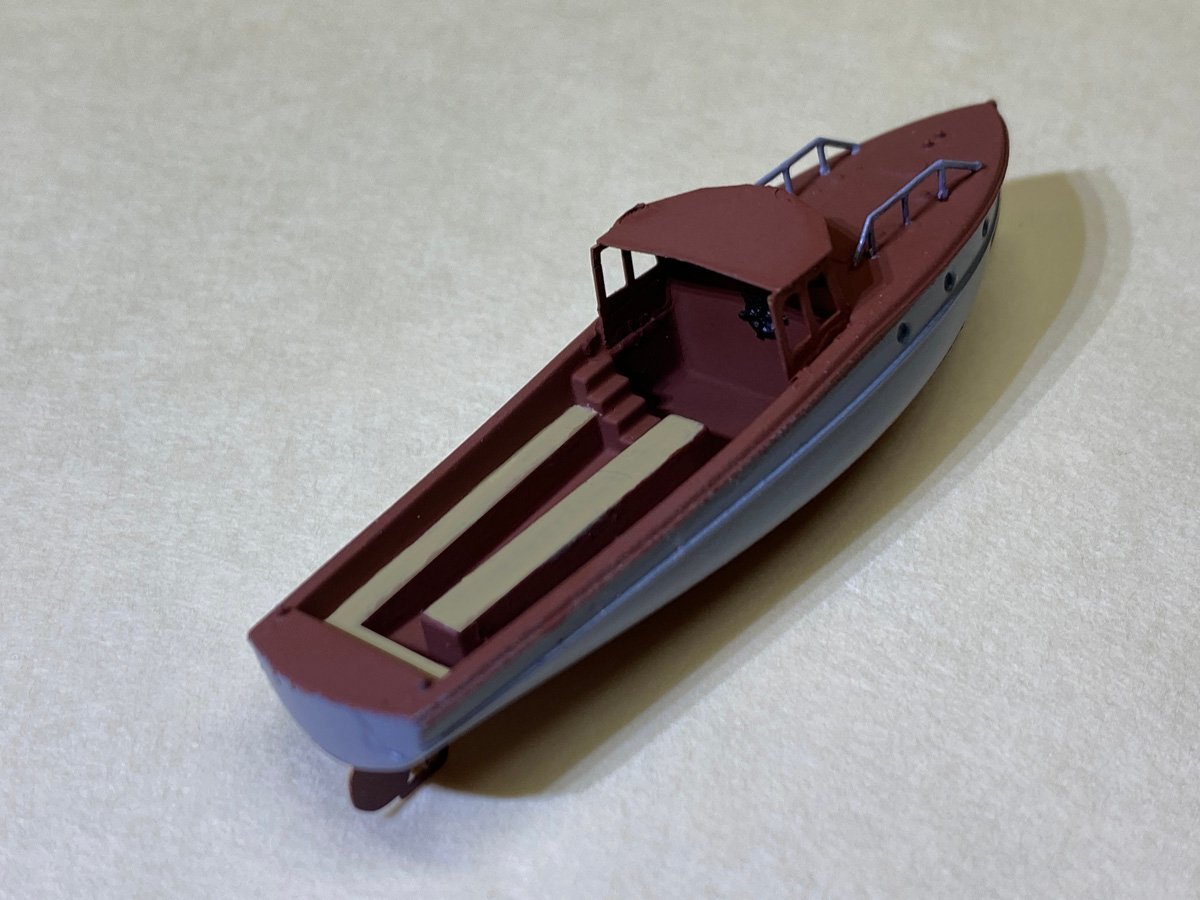
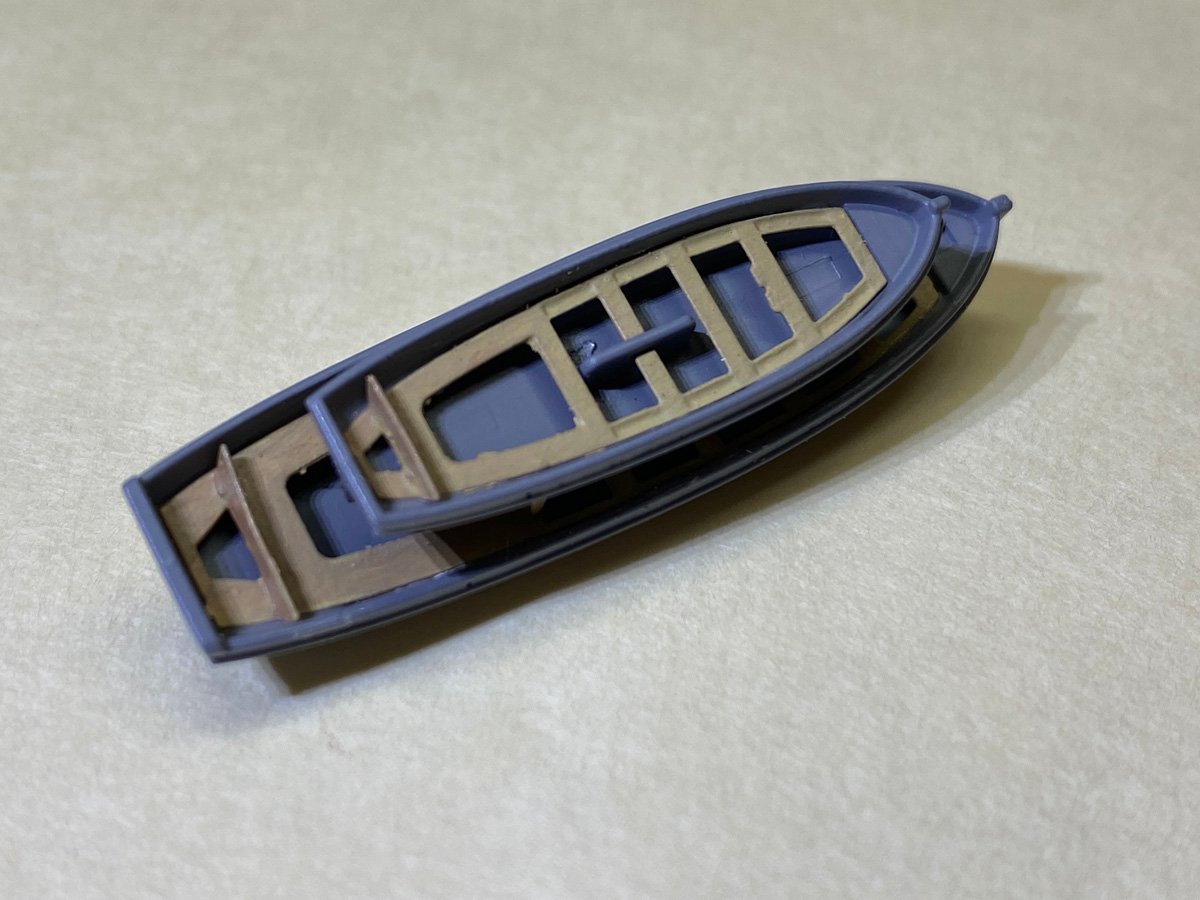
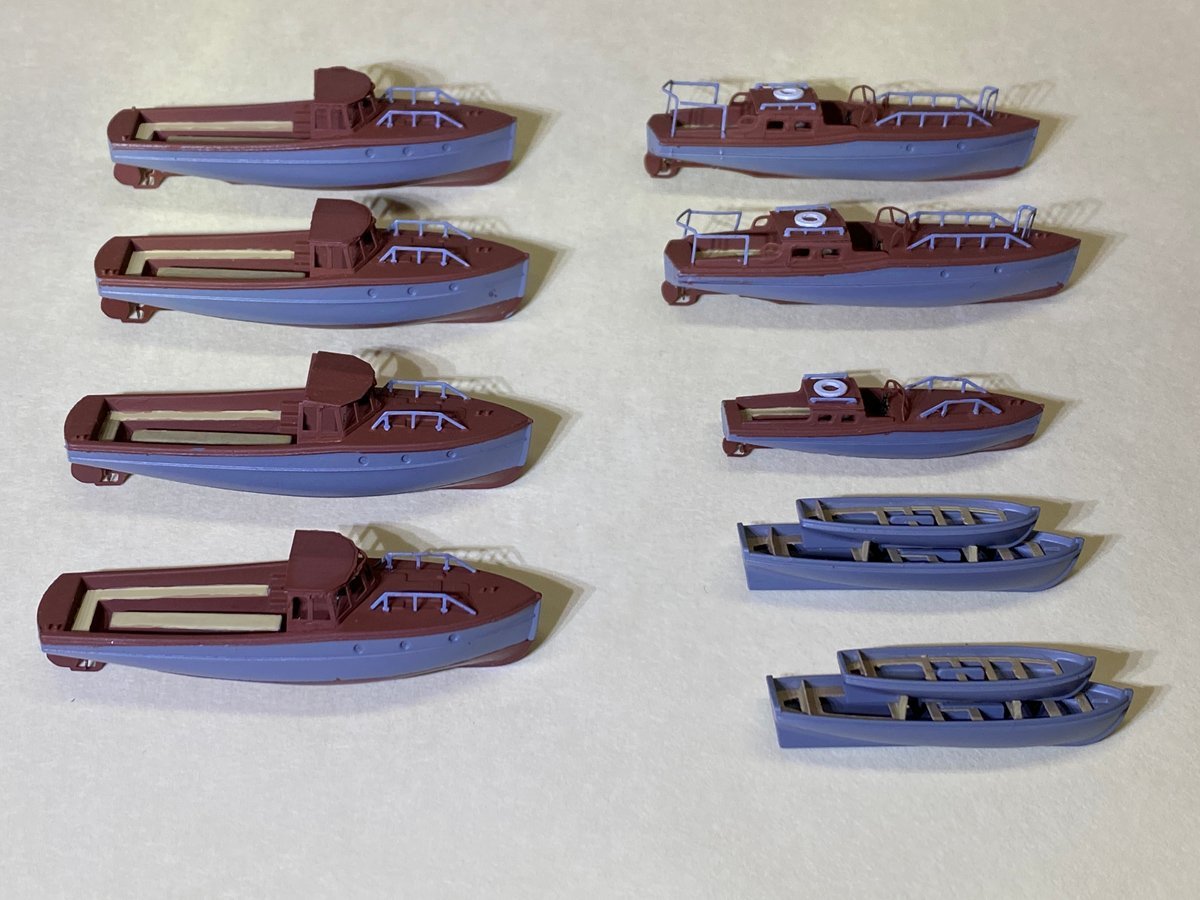
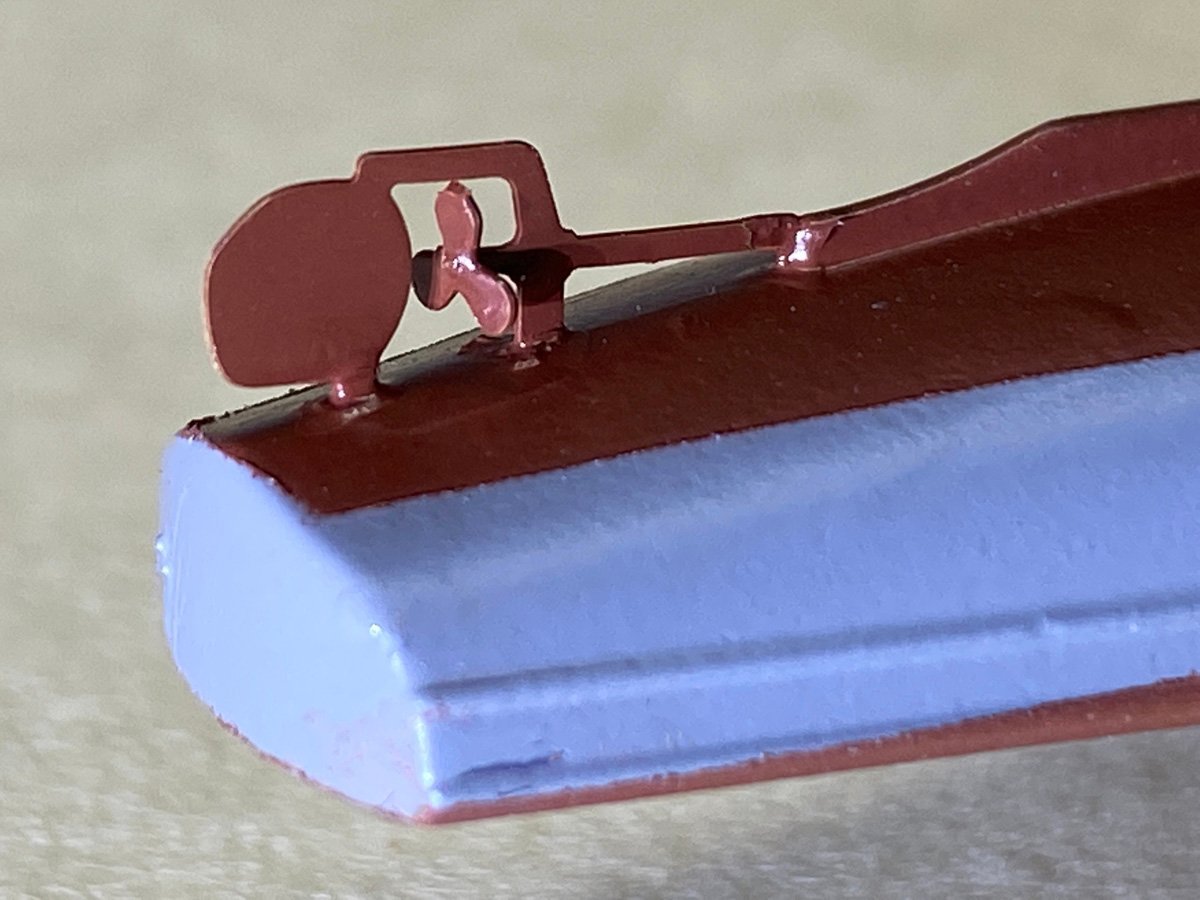
Ship's boats, 395 hours, 174 days I looked ahead in the instructions and there are about 12 more pages of fiddly bits to go 🤪. Harry (hof00) seemed to enjoy building the ship's boats so I decided to jump ahead and give them a go. There are 11 boats, all one-piece molded plastic with lots of PE. Lots of spraying, masking, spraying, masking, hand painting, attaching tiny parts, more hand painting, and touch up. Here's the whole lot. There are three basic designs, 3 motor/officer's launches. Note that each boat has a tiny wheel and a prop. The prop is about 2 mm in diameter and has a hole about the size of a human hair. The instructions say to "enlarge the hole in the centre of the propeller if necessary." The holes have to be enlarged to about .45 mm. Luckily I thought to drill them before removing them from the fret, because I don't know how I could have held them otherwise. Four "connection" motor boats. I don't know what that means. Four simple boats stacked in 2 pairs. Plastic hulls and PE painted separately. These were easy. I have all the lifeboat racks built so I will install the lifeboats next.
-
First of all, I love the photos with all of the PE pieces laying around on the black background. It looks like you took a fire cracker to your model like we all did when we were kids. Second, I don't know what those things are either, but they are a pain to deal with and just hang off into space on the finished tower. You could consider just gluing them down. Finally, your jig for the lifeboat racks is brilliant! I wish that you had gone first so I could copy. Now be careful not to bump those flimsy rails.
-
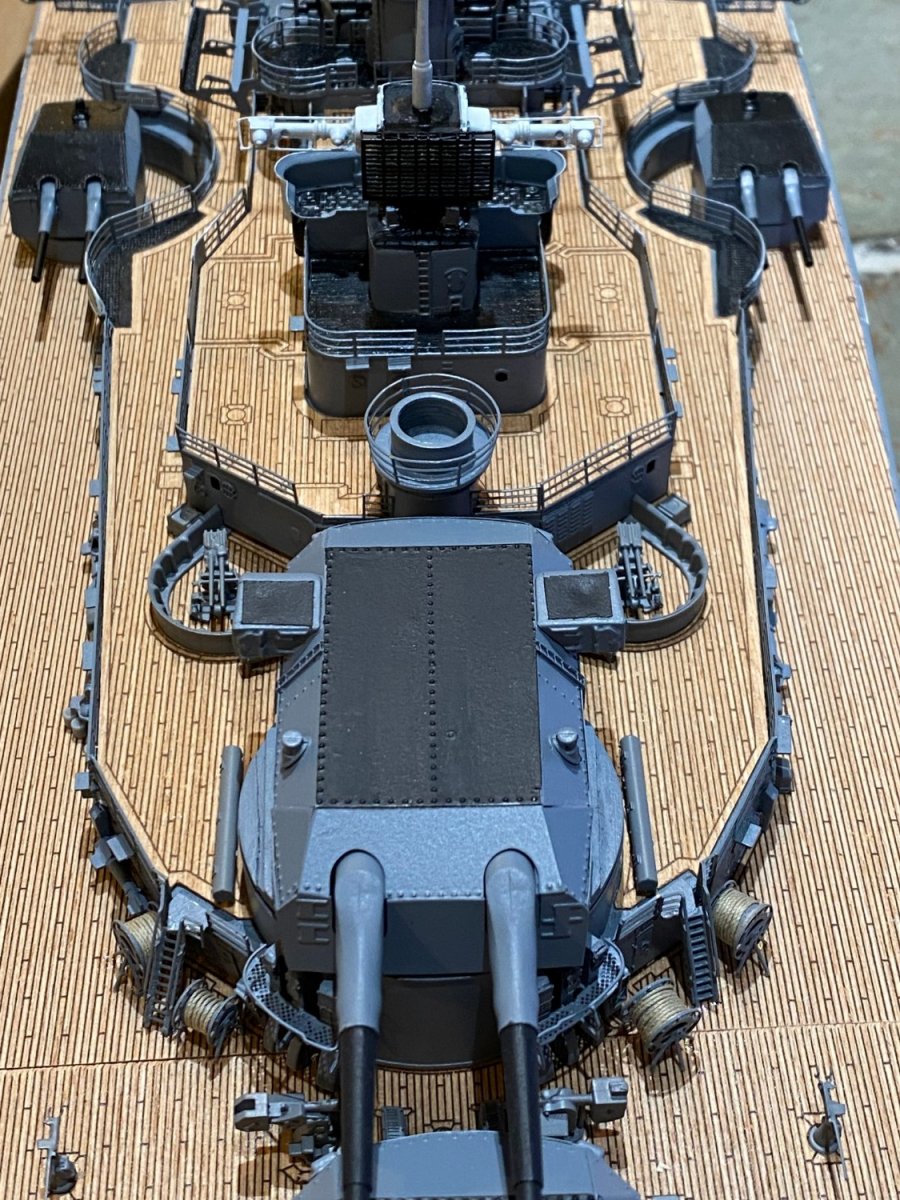
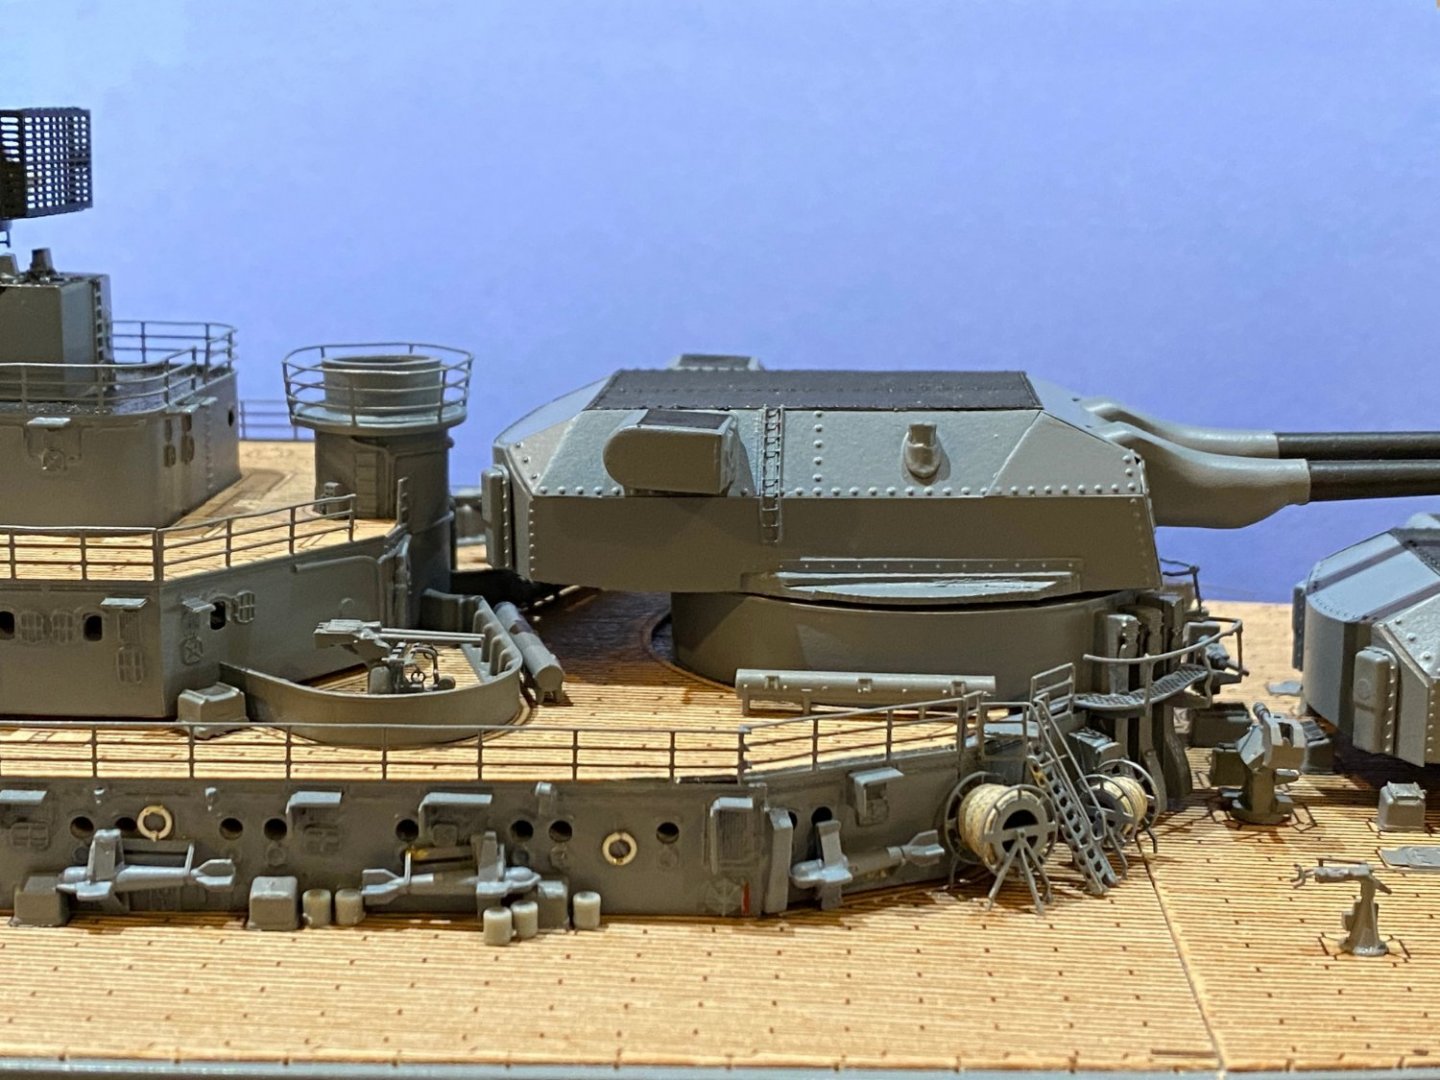
Fiddly Bits Installed I spent a dozen tedious hours attaching all the fiddly bits described above. The model is starting to look like the Death Star from Star Wars. Turret Bruno impinges slightly on the platform behind it and won't quite turn around. I don't think I can fix it now, but other builders should keep an eye on that clearance.

-
Joe100, Thank you for posting this fascinating information about the Bismarck. I think your illustrations are from the AOTS book, which I have but would never have noticed. I will add the decals for the GHG array but will not change the hull for the S-Anlage equipment. Maybe your post will catch the eye of a future builder.