HOLIDAY DONATION DRIVE - SUPPORT MSW - DO YOUR PART TO KEEP THIS GREAT FORUM GOING! (Only 20 donations so far - C'mon guys!)
×


rvchima
-
Posts
697 -
Joined
-
Last visited
Content Type
Profiles
Forums
Gallery
Events
Everything posted by rvchima
-
 Joe, I almost overlooked your post. I'm glad that you're enjoying the build. This is such a nice kit that I am surprised that there aren't more folks building it. Amati does include a small decal set labeled Sound Locator System. It looks like an upside down U made of rows of small black dots. One of the last items in the instructions is to place these decals near the keel below the false bow wave. Would this be the GHG microphone array that you mentioned?
 -
Those supports on the side of the funnel are really hard. Congrats on completing that bit. Rod
-
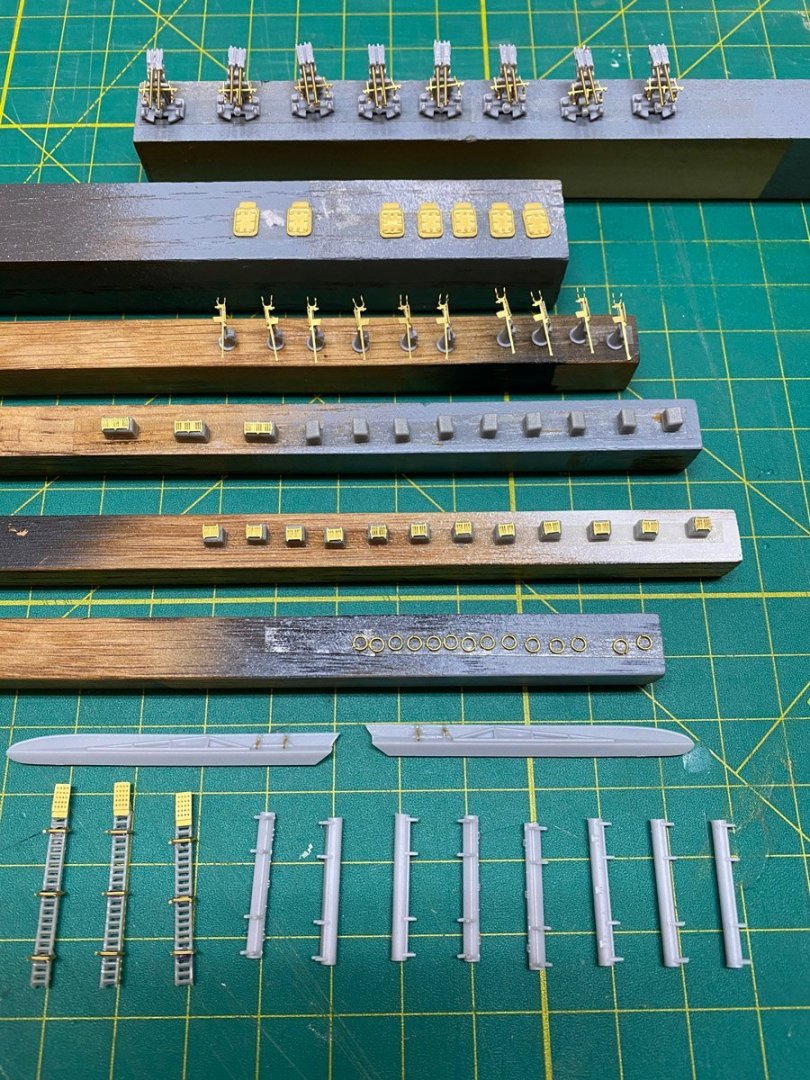
Fiddly Bits I spent the last couple of days building a LOT of miscellaneous deck fittings. I believe that the Brits call them "fiddley bits," which I think is a most appropriate term. Please correct my English if I am wrong. 8 3.7 cm AA guns 5 random hatches 10 2 cm AA guns 3 vents 9 lockers 12 vents 14 life rings (wire rings painted white) 2 breakwaters 3 accommodation ladders 8 spare gun barrels I just sprayed everything. Tomorrow I get to glue all this stuff on the deck
-
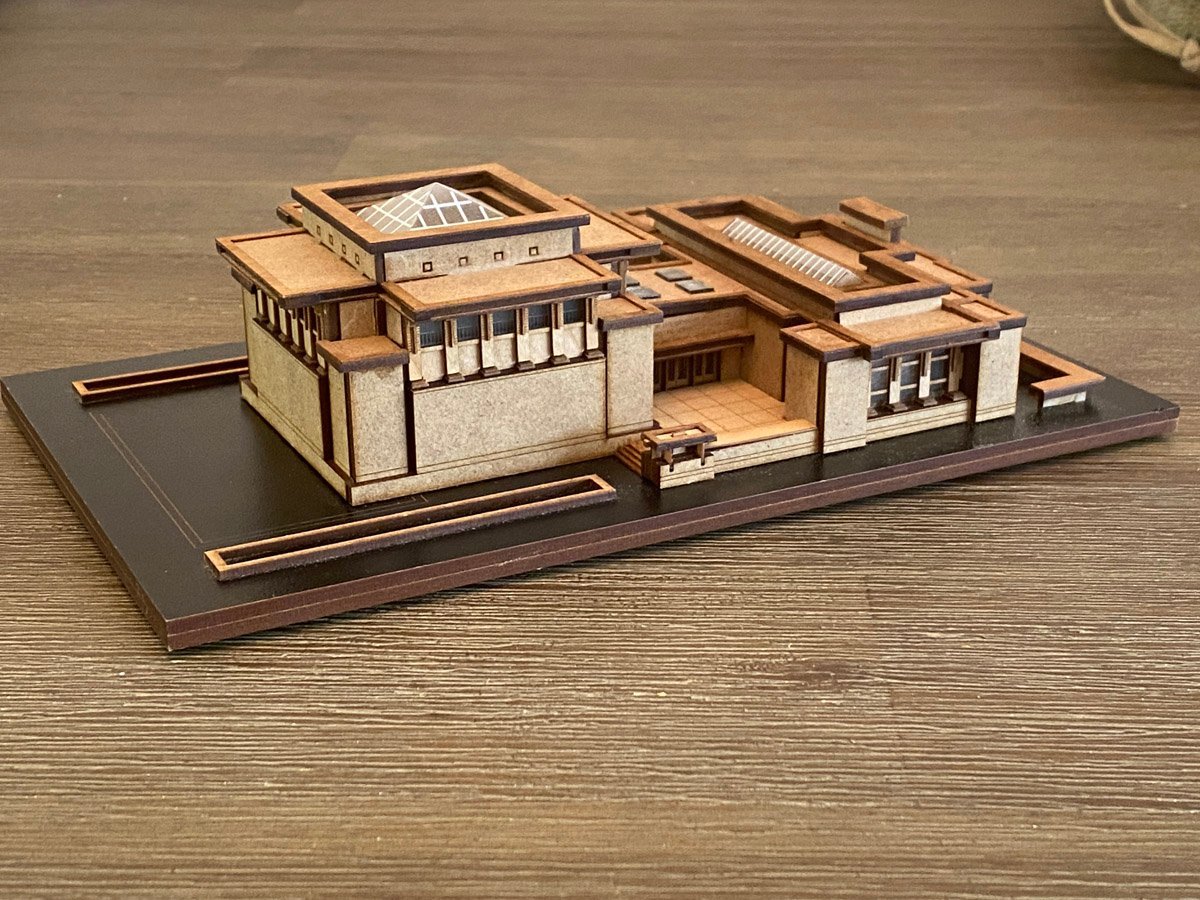
Frank Lloyd Wright Unity Temple I just returned from a month in beautiful Sanibel, Florida. While I was there I completed this model of Frank Lloyd Wright's Unity Temple in Oak Park, Illinois. It Is a beautiful little kit and kept me busy for a few weeks. It would fit on the deck of my Bismarck (sans base.)
-
Harry, I just measured a stanchion and it came out at 0.52 mm. I probably used a nominal 0.5 mm bit. Do you have a digital caliper? They are quite inexpensive and I use mine constantly. I bought a huge set of Chinese metric drill bits from Amazon. They came all jumbled together in the package. I measured them all and sorted them by approximate size. They were not at all what they were supposed to be, but I can usually find something close. I also have a set of precision bits that I use when the cheap ones don't fit. Rod
-
Yves, Your coppering job on the hull is stunning. It certainly sets off that part of the model. I apologize for joining this thread a bit late, but another of my hobbies is stained glass so I have done a lot of work with copper foil. It will darken slowly with age, but probably never turn green. It may pick up fingerprints from the oils on your fingertips so be careful. You can use Lemon Pledge (or Future Floor) to protect the finish, but try it on a sample first. My Syren came with copper foil. I don't remember if it was 3M, but the 3M tape is the best. The excellent instructions by Chuck Passaro described how to make a stamping jig with a rivet pattern on it. It was difficult to make but worked perfectly. Here's a link to my post on the stamping process: I weathered my hull with a solution of vinegar and salt. I wiped it on with a rag, the copper turned green very quickly, rinsed with plain water on another rag, and wiped on Lemon Pledge. The patina has been stable for nine years. Try it on a sample and see what you think.
-
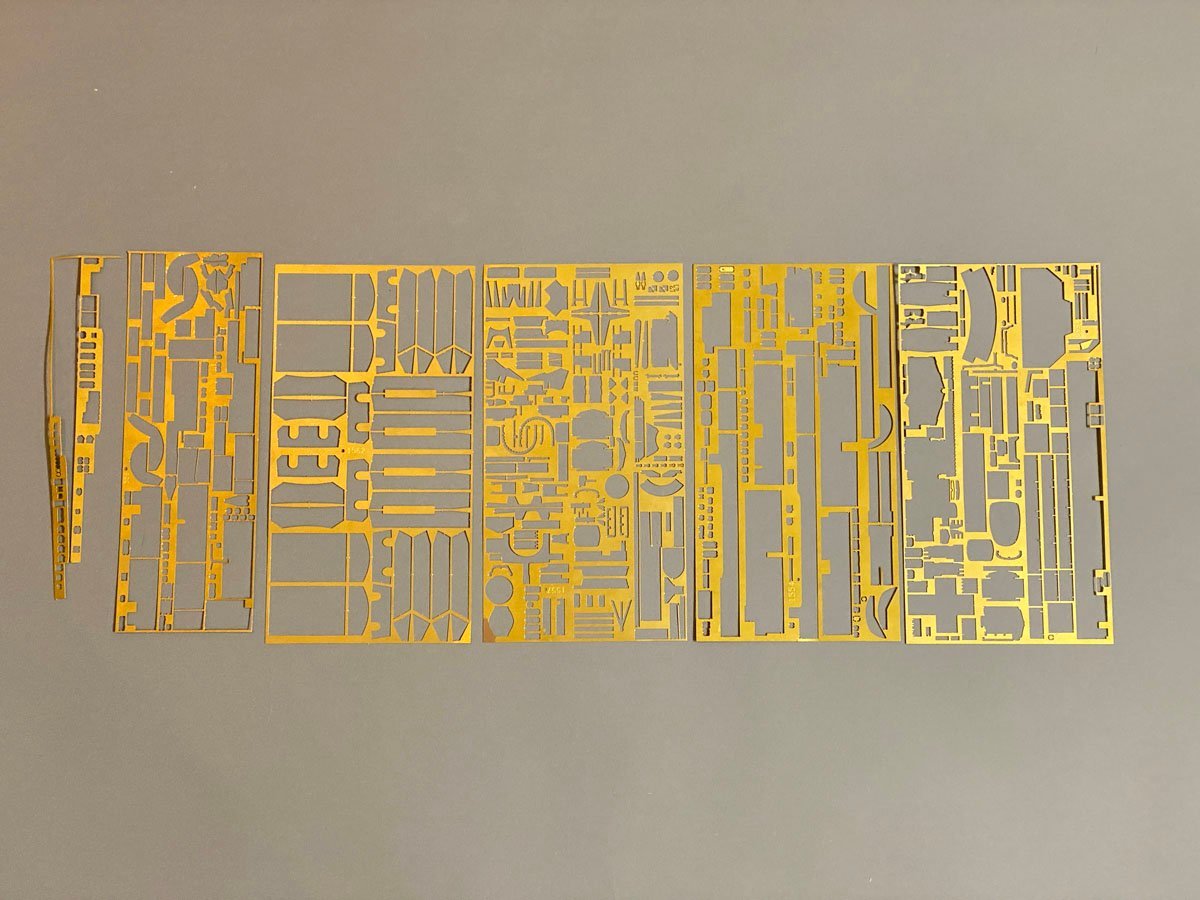
Mine were laid out the same. There must be a problem with the image for the photo etch. I'm glad that yours are OK.
-
Harry, The guns look just fine to me. They are parallel to the deck and to each other. When everything is painted they will look perfect. Rod
-
Harry, I did have trouble fitting the plastic blast bags on the guns into the holes in the brass covering on the turrets - they were about 1 mm too wide on both both sets of guns. I sanded equal amounts of plastic off each side. I think I used my oscillating sander, but it wasn't too hard. I also had to open up the holes in the wooden turret structure with a drill bit to get the pins on the blast bags to fit. Again not too hard.
-
Harry, Your paint job on the hull is excellent! It makes a huge difference in how the model looks, and, I am sure, how you feel about it.
-
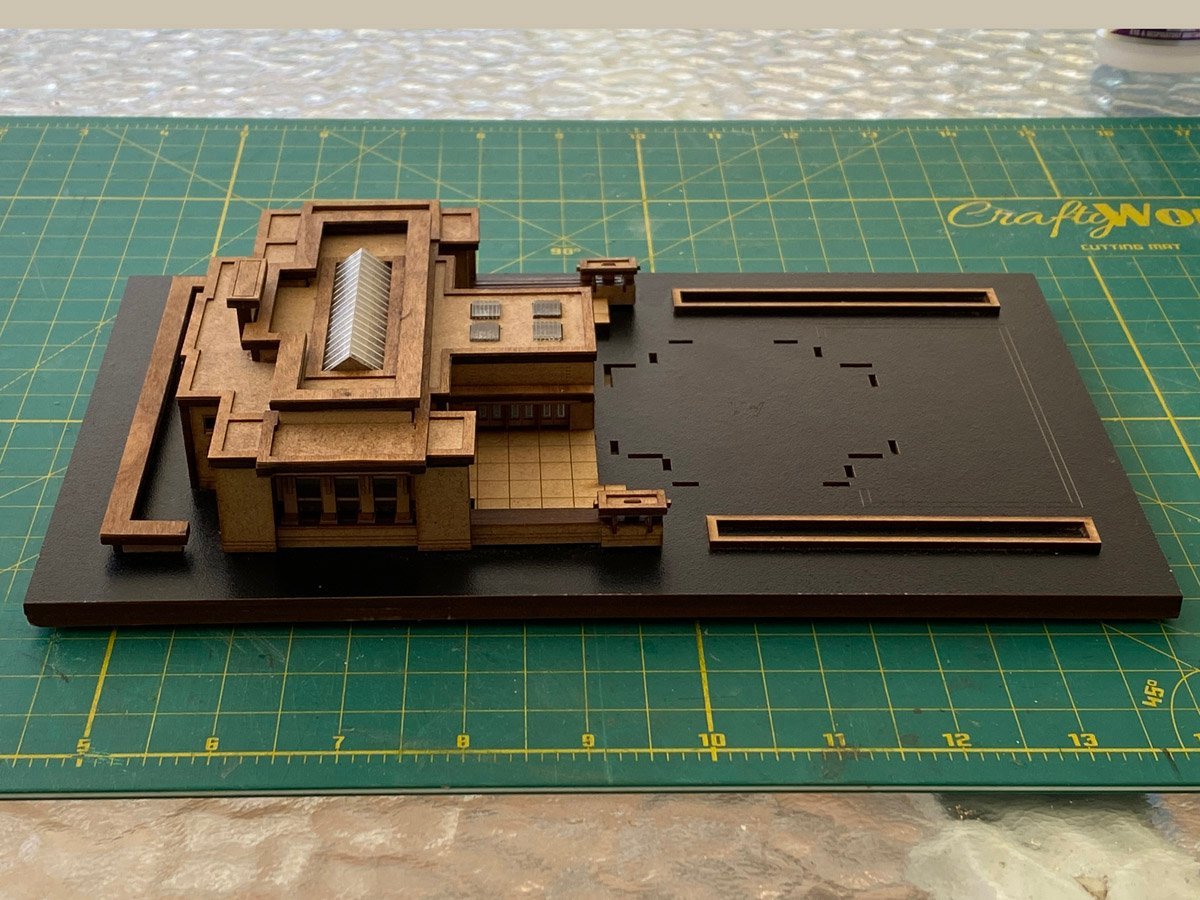
Digression My wife and I are in Sanibel, Florida for awhile. I couldn't very well bring the Bismarck model with me, but I did bring a model of Frank Lloyd Wright's Unity Temple that my sons gave me for Christmas. I got to tour the building in Oak Park, Illinois several years ago. The model is 1/250 scale, laser cut, and many of the pieces have peel-off adhesive on the back. I brought a minimal tool kit in a plastic bin and have been working on the model in the evenings. The model is made by The Little Building Company in Brisbane, Queensland, Australia. They make a series of early Australian houses, several FLW buildings, and an interesting model of the Sydney Opera House. The models are highly detailed but fairly easy to make. I am about 1/2 done with this one.
-
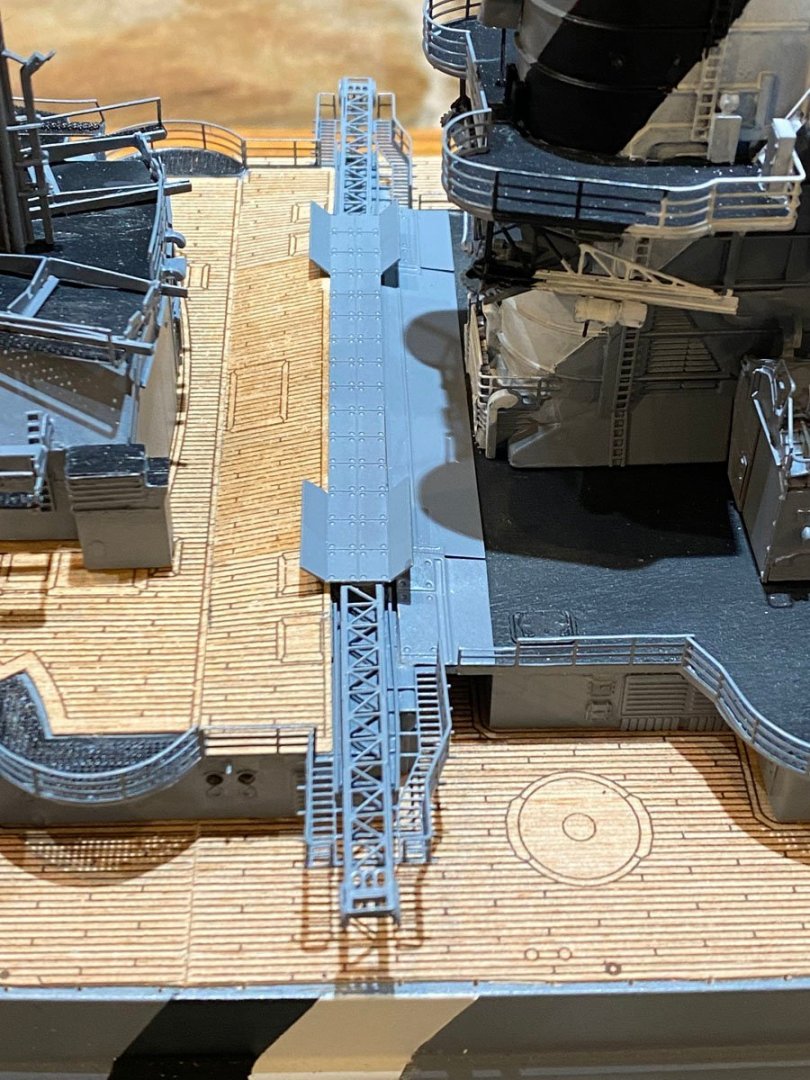
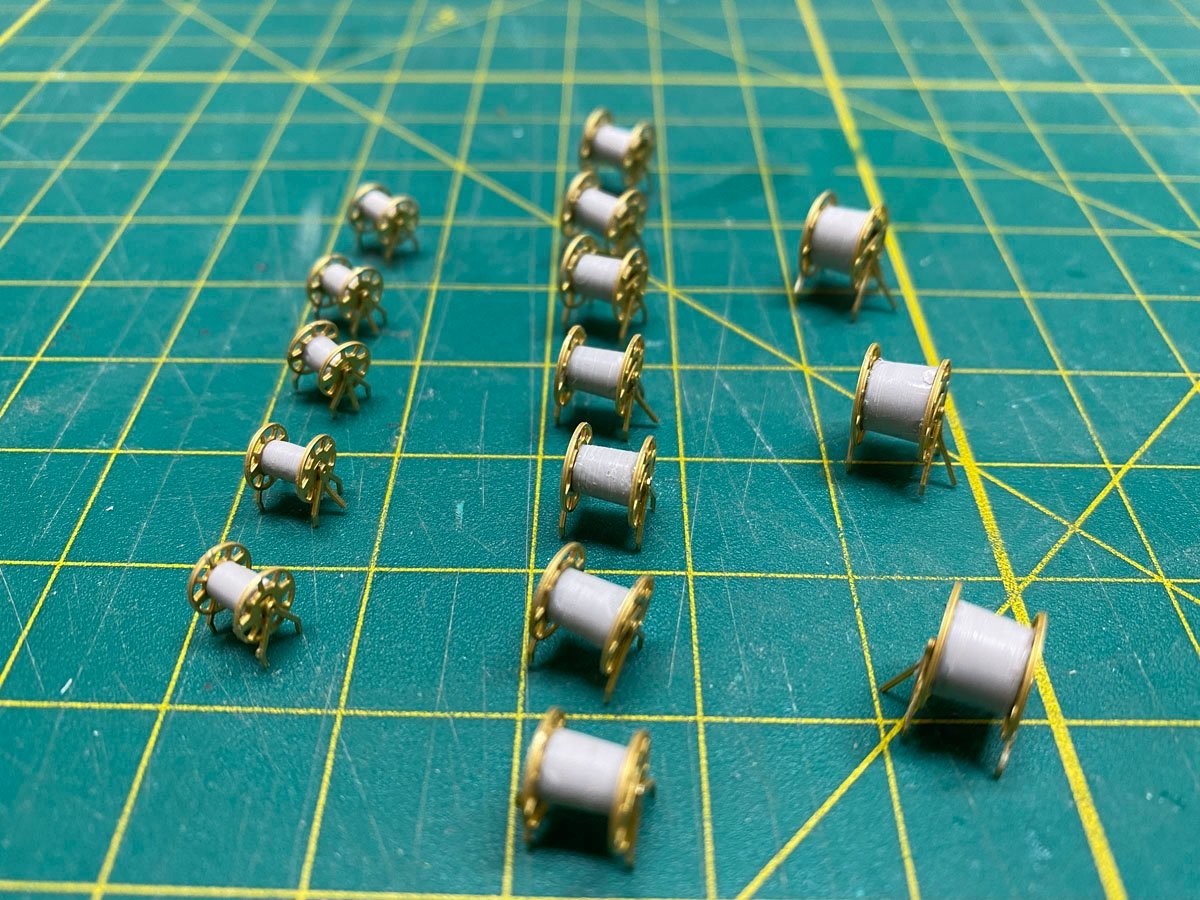
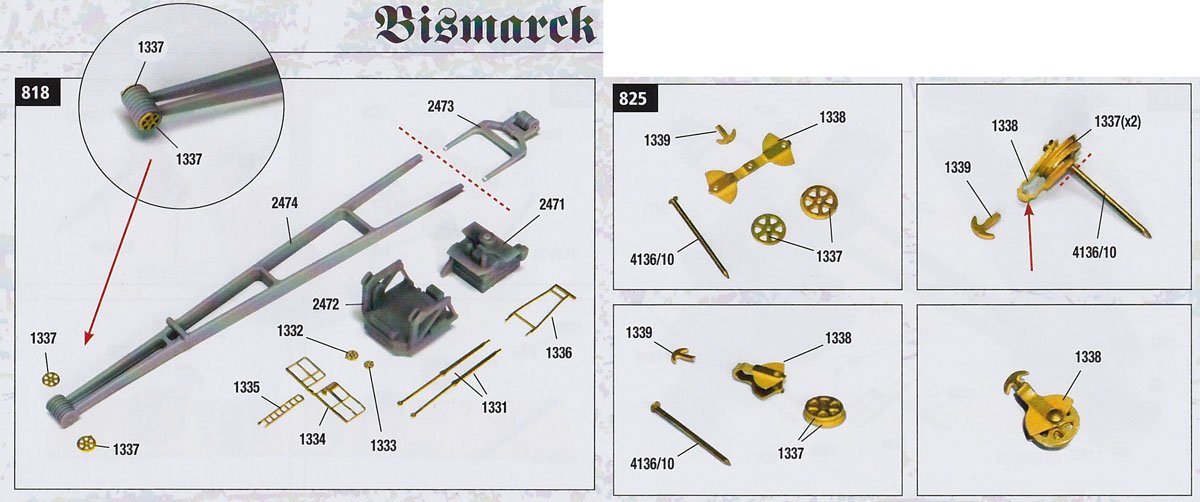
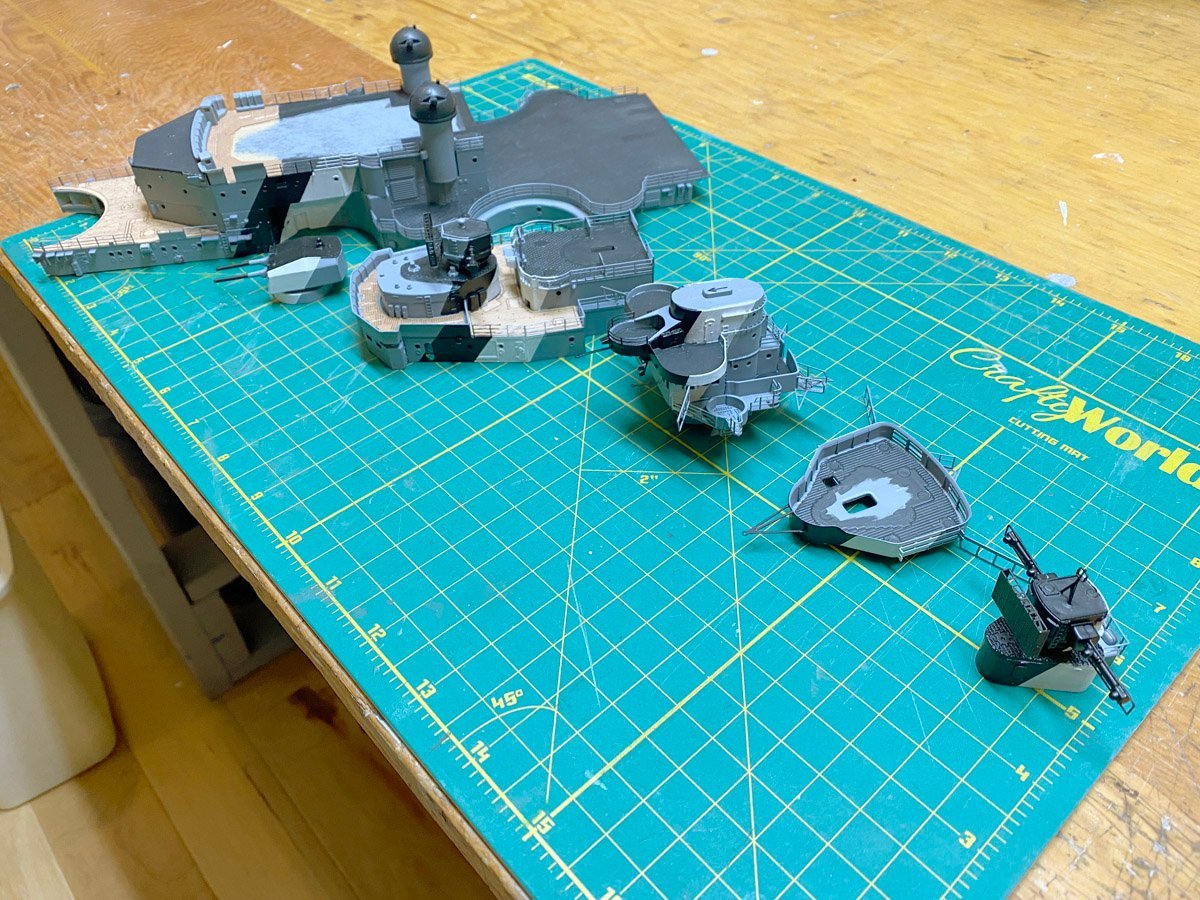
Small Parts The catapults are fairly complicated PE construction but by now I'm getting pretty good at that. The cranes are mostly plastic. The instructions say to put them away for now, but about 20 pages later they are attached. The bottoms look like there should be some kind of mounting pedestal but I can't find anything. I guess I'll wait a while and glue them to the hull. Instruction no. 818 for the cranes shows a pair of tiny pulleys, parts 1337, attached to the top of the crane beam. The instructions don't say anything about them but I cut them out and attached them. On the next page instruction no. 825 has you making two operating pulleys using parts 1337. But they were all used earlier. I had to break them off the beam and reuse them for the later step. Today I made 15 hose reels with either 2 or 3 legs in 3 sizes. I thought it would be tedious but they were pretty easy. After painting they will have cord wrapped around them to simulate hoses. I will be traveling next month so I won't be posting for a while, but I will plan to keep up with other builds.

-
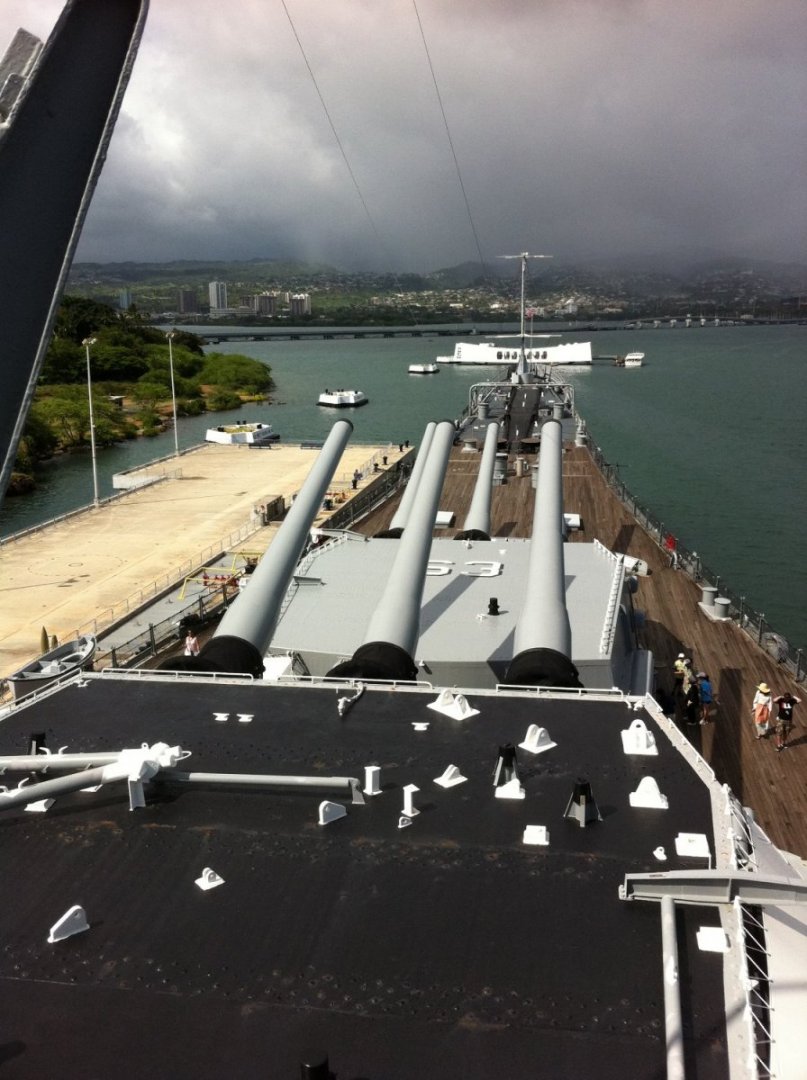
I got to tour the Missouri in Pearl Harbor in 2011, and that's what got me thinking about building a battleship. I haven't built a plastic model since I was a teenager so that was out. Sterling models had a wood model of the MO at 1/196 scale that shows up on eBay occasionally, but you're never sure what you're getting. By now I've worked with enough plastic and PE parts that the Trumpeter kits look very appealing. I will be following your build of the Missouri with great interest. After, of course, you finish the Bismarck.
-
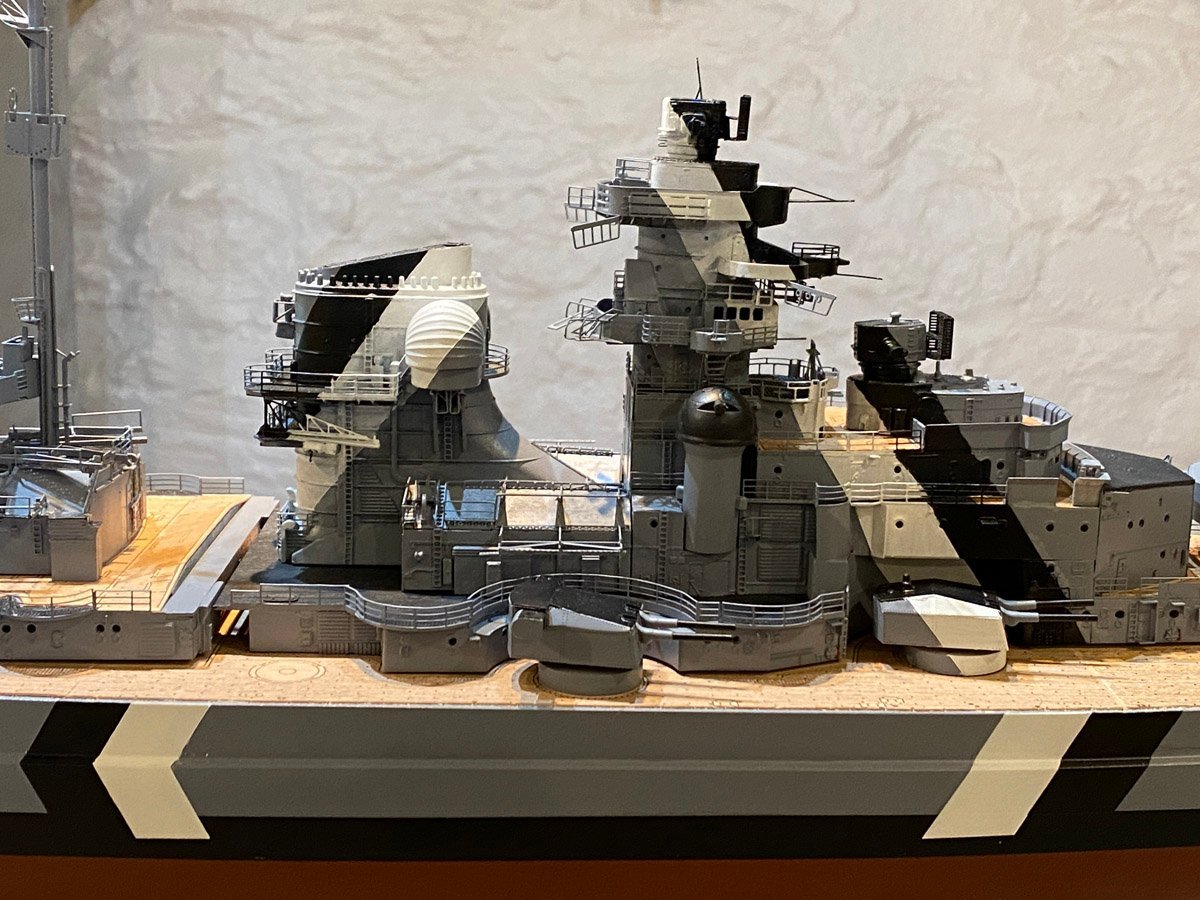
Second Stripe Painted I put in a crazy long day today and got the second camouflage stripe painted. That's the longest and hardest one. I have some travel coming up in March and would like to get the camouflage painting done before I leave. The superstructure still breaks apart into multiple layers. That helps with painting a lot. I still wish that I had kept a couple more layers separate. Here's a side view of the first two stripes. I like the way that the one white stripe extends across the gun. My dog really needs to go out. I'd better call it a day.
- 215 replies
-
- 11
-

-
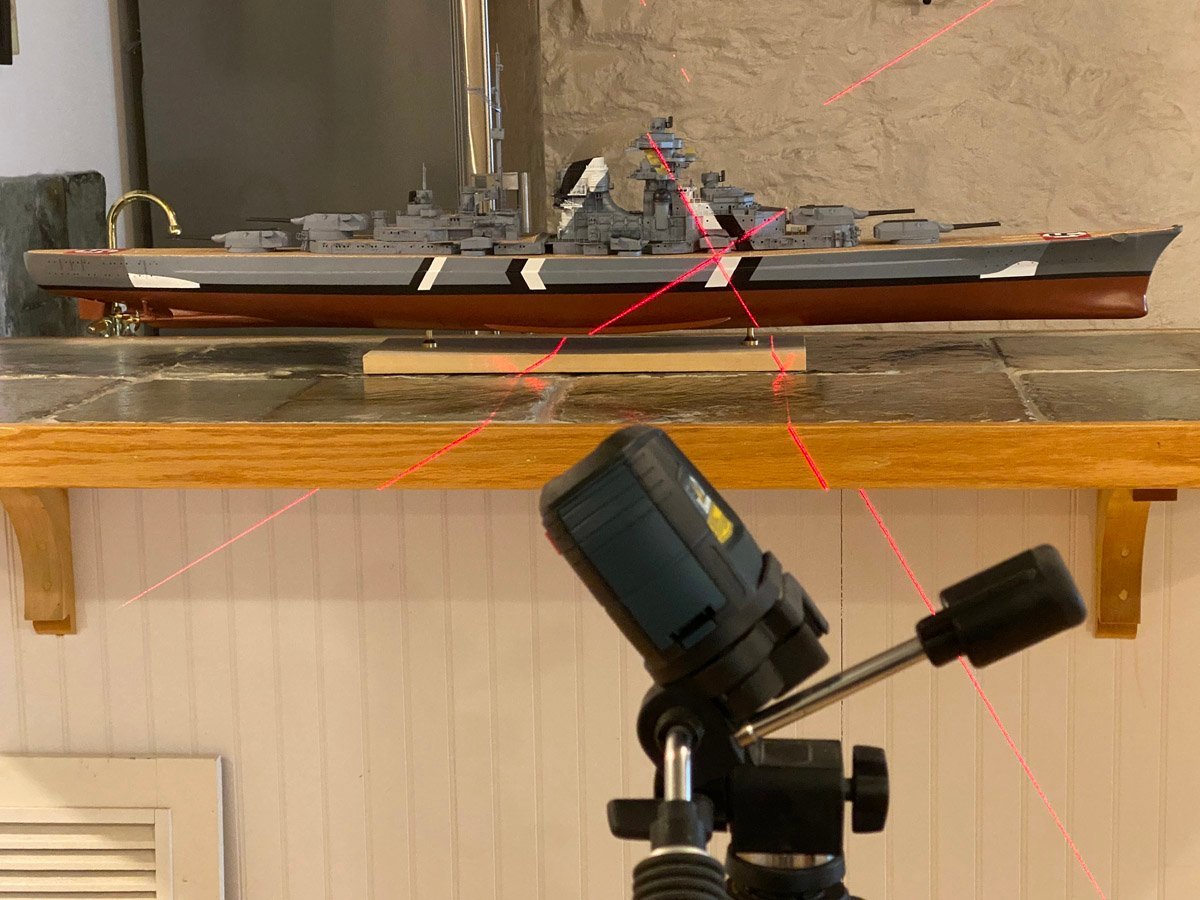
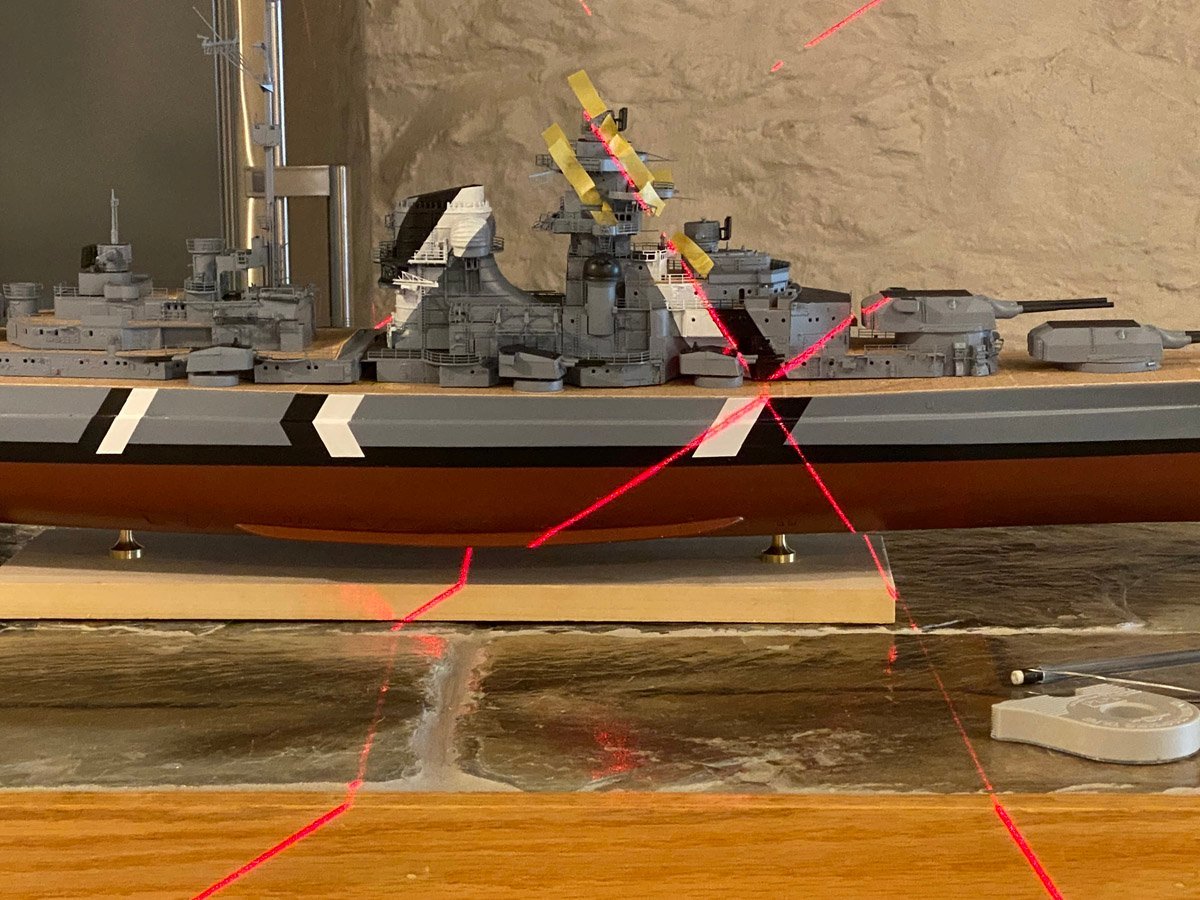
Laser Battleships? No, the Germans didn't have Star Wars, but I did find a brilliant way (literally) to mark the dazzle camouflage stripes on my superstructure - I bought a laser level. You can find them under $17 USD on Amazon, but I bought a used Bosch level (ironically a German company) on eBay. It is "self leveling," which means that the laser hangs on a pendulum to try to level itself. If the tripod is not level within +/- 4 degrees the pendulum bottoms out and the laser flashes every couple of seconds to let you know. My camouflage stripes are steeply angled so the laser flashed continuously. That was pretty annoying and I almost returned the level, but I found that I could work around it. Other lasers can be locked and used at any angle. Tracing the laser beam with a pencil was awkward, but sticking masking tape along the beam was easy and just required some burnishing when I was done. Here's my setup and a closeup. I just pointed the crossed beams at the corner of the stripes already painted on the hull and tipped the beam to hit a good point near the top. The beams are finer in person than they appear in the photos. And just slide the model 1" to get the next line. Here's where everything stands today.

-
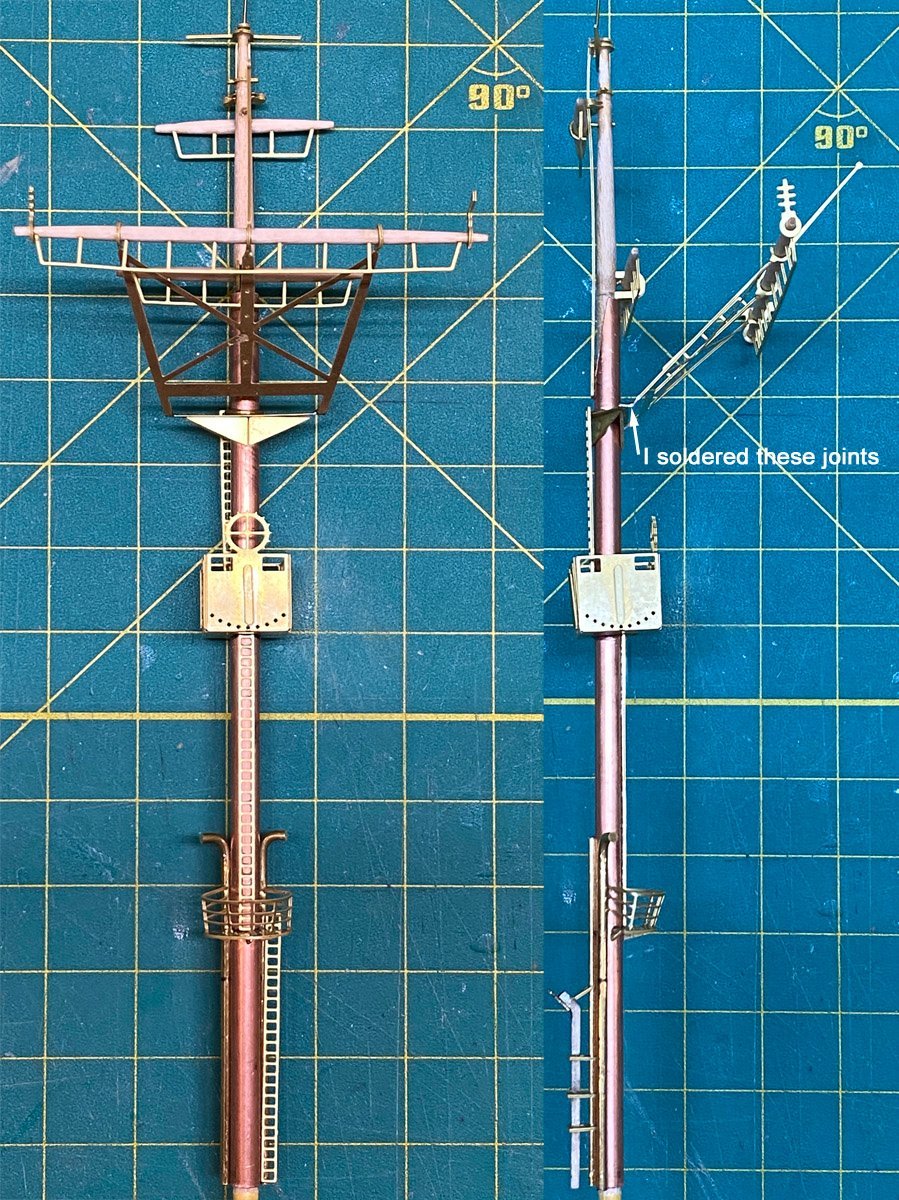
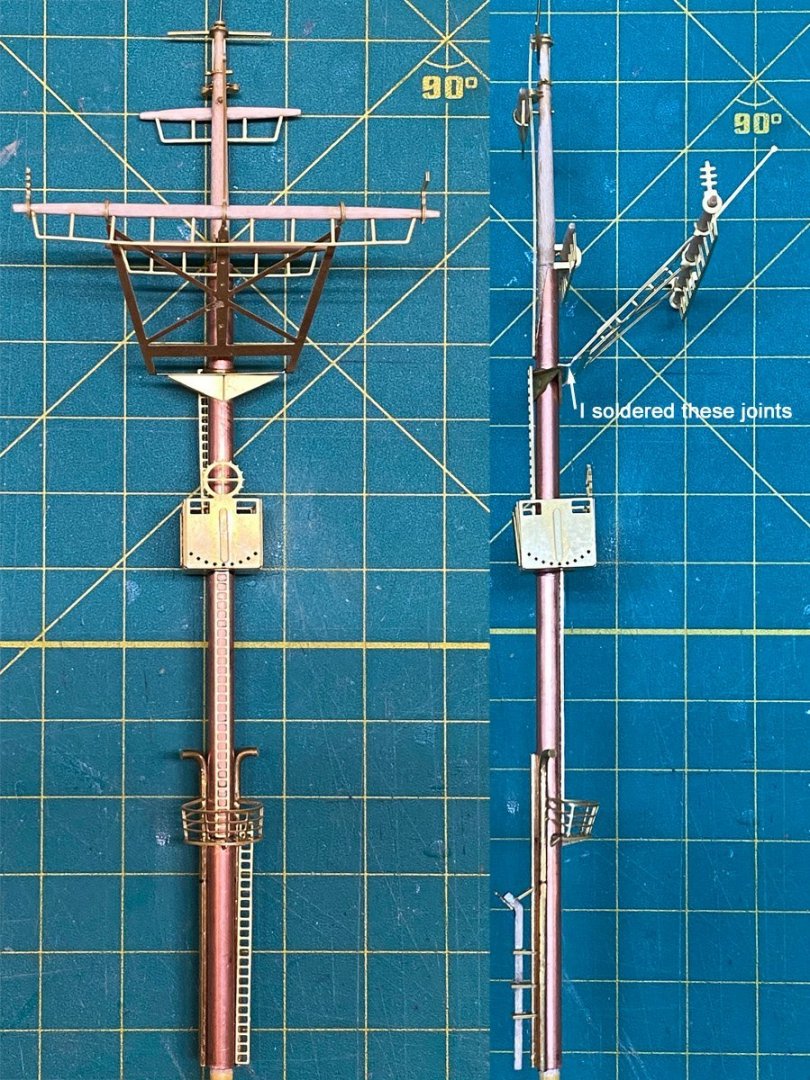
Main Mast Completed The main mast has a lot of fiddly parts to cut, shape, fold, and bend. It was one of the harder pieces to build. The longest yard is cantilevered on a piece of PE brass. I didn't trust the folded joints so I soldered them too. That seemed to help a little.
-
Maybe a breath of salt air. Welcome to MSW Rob.
-
Ha ha! Wait until you build the mast! Your last two turrets are perfect. The little flaps that bend imperceptibly inward at the periscopes were really hard to get right, but yours look perfect. On my turrets I sanded all of the wood structure very lightly on a small disk sander where possible, or with a small sanding block elsewhere. That probably relieved my corners like you did. I applied the bottom strips first, then used my Proxxon oscillating sander with 150 grit paper to bevel the top edges of the brass to meet the mating pieces. Every time Amati says "With a small file ...." I think "With my Proxxon sander ..."
-
I looked up Rimu. It's quite beautiful for a softwood. When we were in New Zealand in 2019 we saw Pinus radiata timbers everywhere, probably heading to China to be made into pallets. We also saw a lot of NZ tree ferns, and when we got home I bought a cute little plant to keep as a houseplant. A year later it was taking over our dining room. I put it on the curb with a "Free" sign on it. I hope that it got a good home. I finished my main mast today, and I must say that it was one of the most difficult things I've ever built. So congratulations to both of us for getting over that hurdle! 🥳
-
Beautiful work Yves! I love the photos of the corvette and sub together. You inspired me to buy a book on 3-D printing. Who knows where it will lead.
- 321 replies
-
- 4
-
-
- Finished
- Flower-class
- (and 1 more)
-
Your turrets look good. Funny that you ended up with some small gaps - I usually ended up with too much brass. But I found that I could cut very thin strips with heavy scissors to make the pieces fit. Of course I cut off the rivet details. 🙄
-
The hull is looking good sir! What kind of wood did you use for the base? It looks like cherry to me.
-
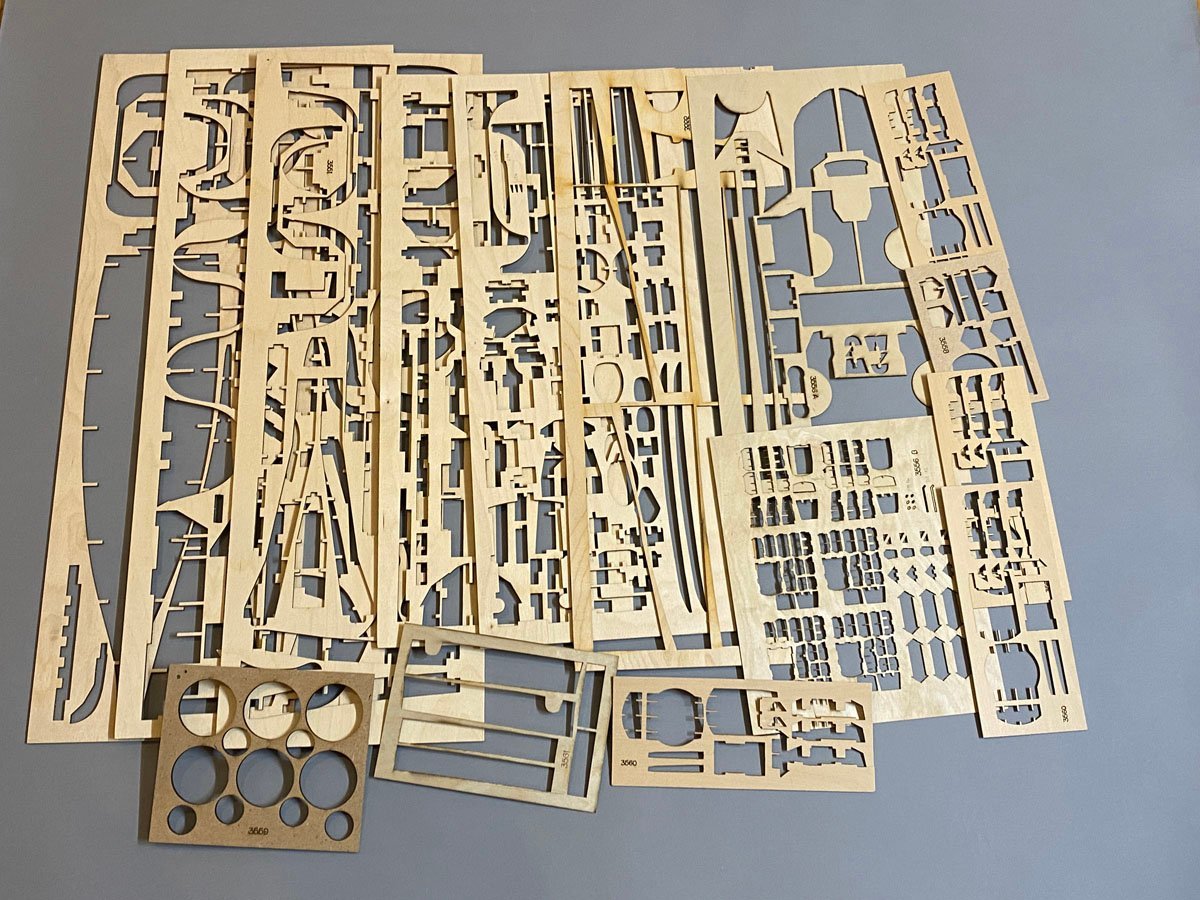
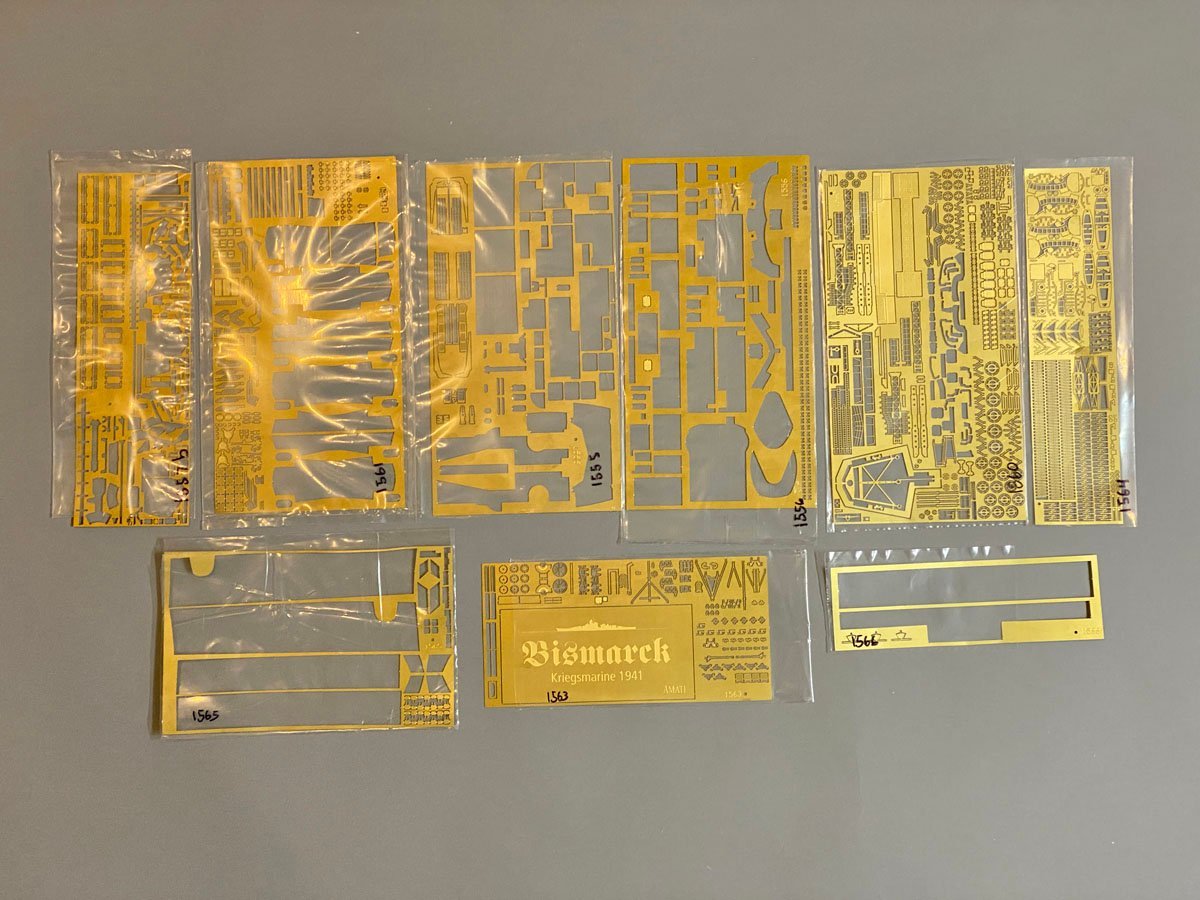
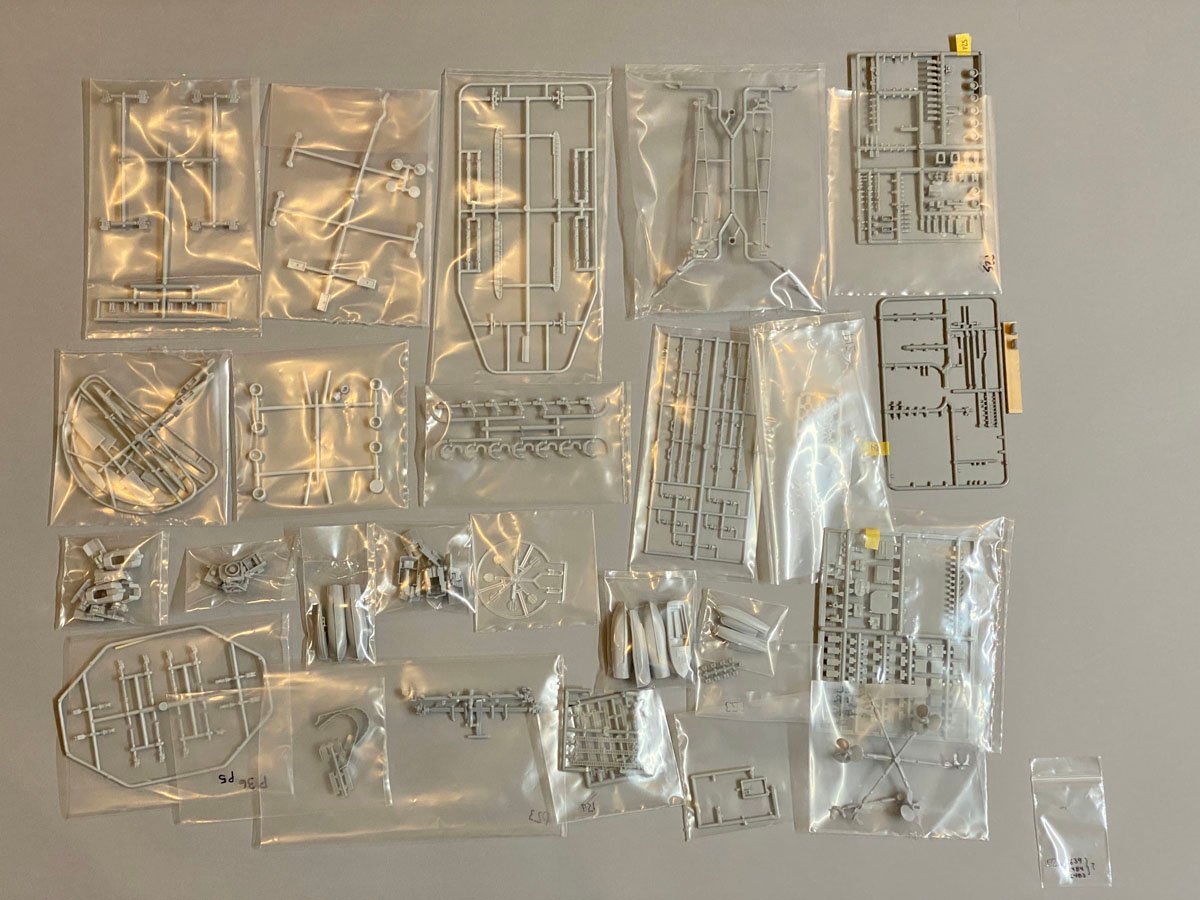
What's Left To Do After 320 Hours and 115 Days The guns finished off my last piece of laser-cut plywood and my 5th sheet of PE brass. I must be nearly done, right? Wrong! I still have several sheets of brass to go and countless sprues of plastic parts. Looks like I'll be busy for awhile.