HOLIDAY DONATION DRIVE - SUPPORT MSW - DO YOUR PART TO KEEP THIS GREAT FORUM GOING! (Only 20 donations so far - C'mon guys!)
×


rvchima
-
Posts
697 -
Joined
-
Last visited
Content Type
Profiles
Forums
Gallery
Events
Everything posted by rvchima
-
 Ted, Is this Holland America's "Voyage of the Vikings" cruise? The itinerary sounds similar. We took that cruise in 2016 and it was one of the most interesting trips I've ever taken. I know that you'll enjoy it. Some advice from someone who just had Covid on a cruise: Get tested just before you go. Wear a mask on the plane and around crowds at airports. Take some rapid test kits. Take cough syrup, throat lozenges, nose spray, and a whole bottle of Tylenol. Pack the liquids in a zip-lock bag. If you don't need this stuff you can leave it behind at the end and have more room for souvenirs. Have a great trip! Rod
 -
I really appreciate all the Bismarck information and very interesting details about the ship. I do wish that I had worked more slowly to take advantage of this discussion. But I know that Harry will use it.
-
I love the exposed brass against the gray parts and black decks on your model. It really highlights all the work that you've put into your model. I had the same experience with color mismatch from the iPhone camera or perhaps all the LED lights in my house. I eventually edited all of my photos in Adobe Photoshop Elements and just ran the "Auto Color Correction" option on everything. That seemed to help a lot.
-
When you don't have any idea what something is, don't you just love how someone on this site has the answer and photos to prove it? Thank you to Joe100, and beautiful work as always Harrry.
-
Those tiny struts are really difficult. You have to attach the top end so that you can paint the entire assembly, but it's hard to get the angle set. Yours look perfect.
-
Looking very good sir! You will never notice the "gap" after everything else is attached. Did you get your PE railings yet? How do they look? It is hard for me to imagine that there are only four part-works issues left to go, but I suppose that you have a great many parts just ready to attach.
-
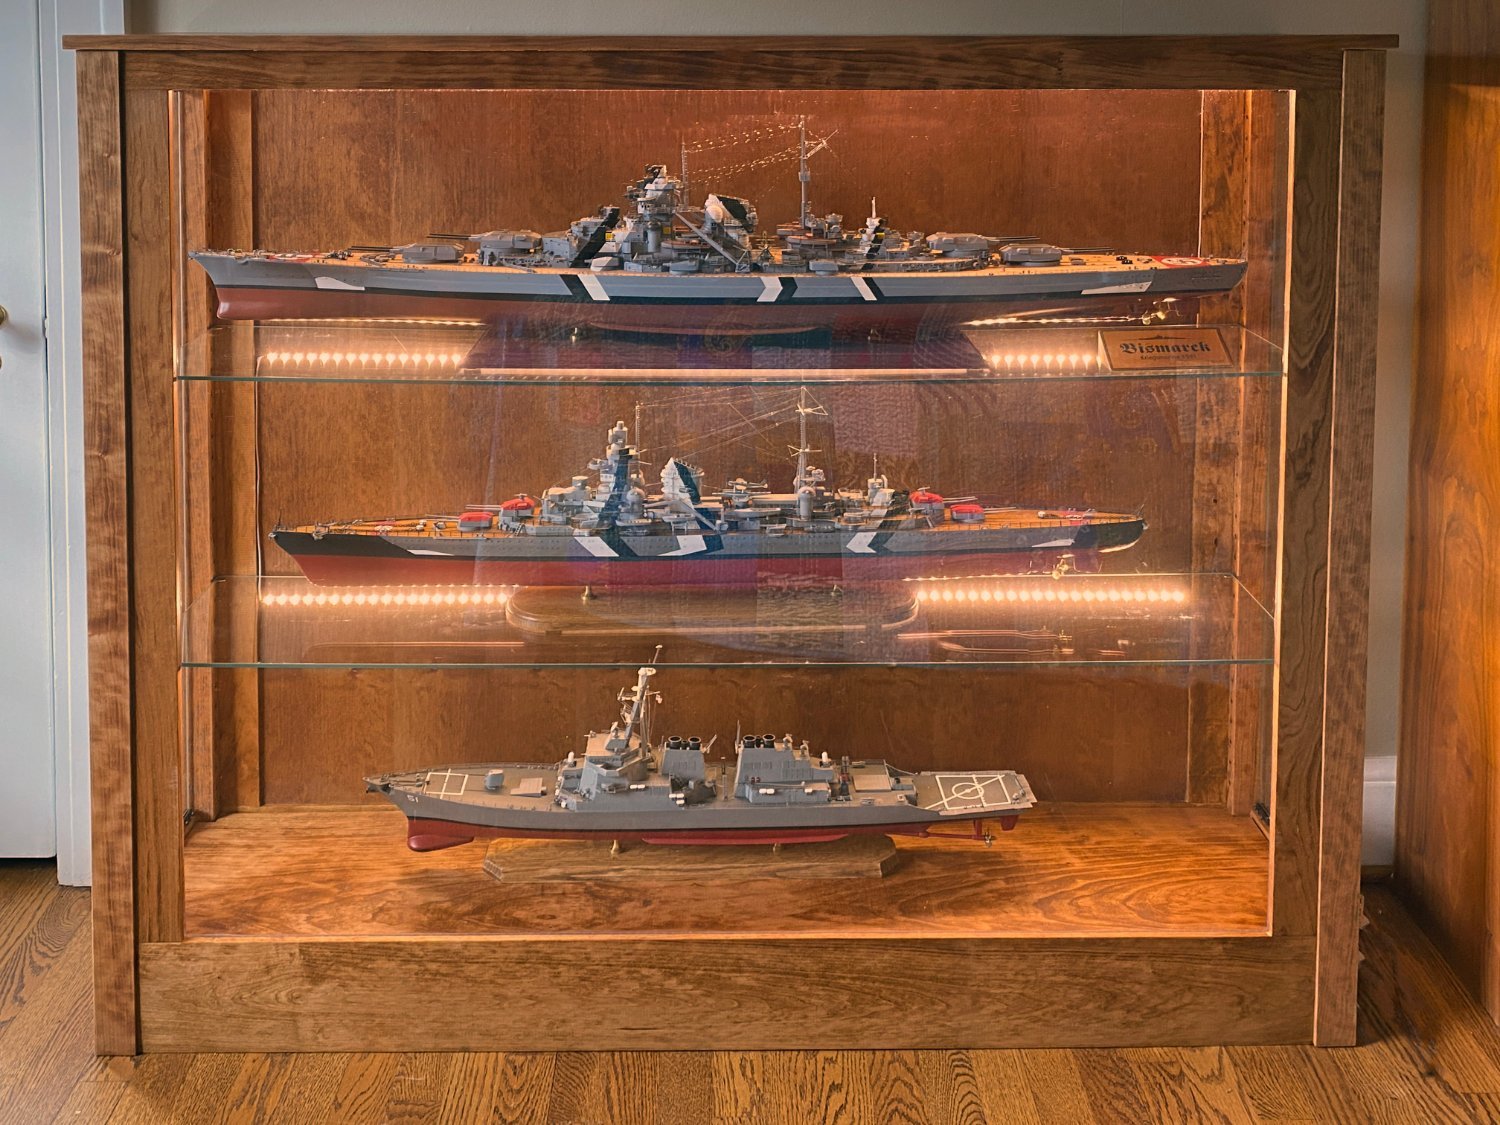
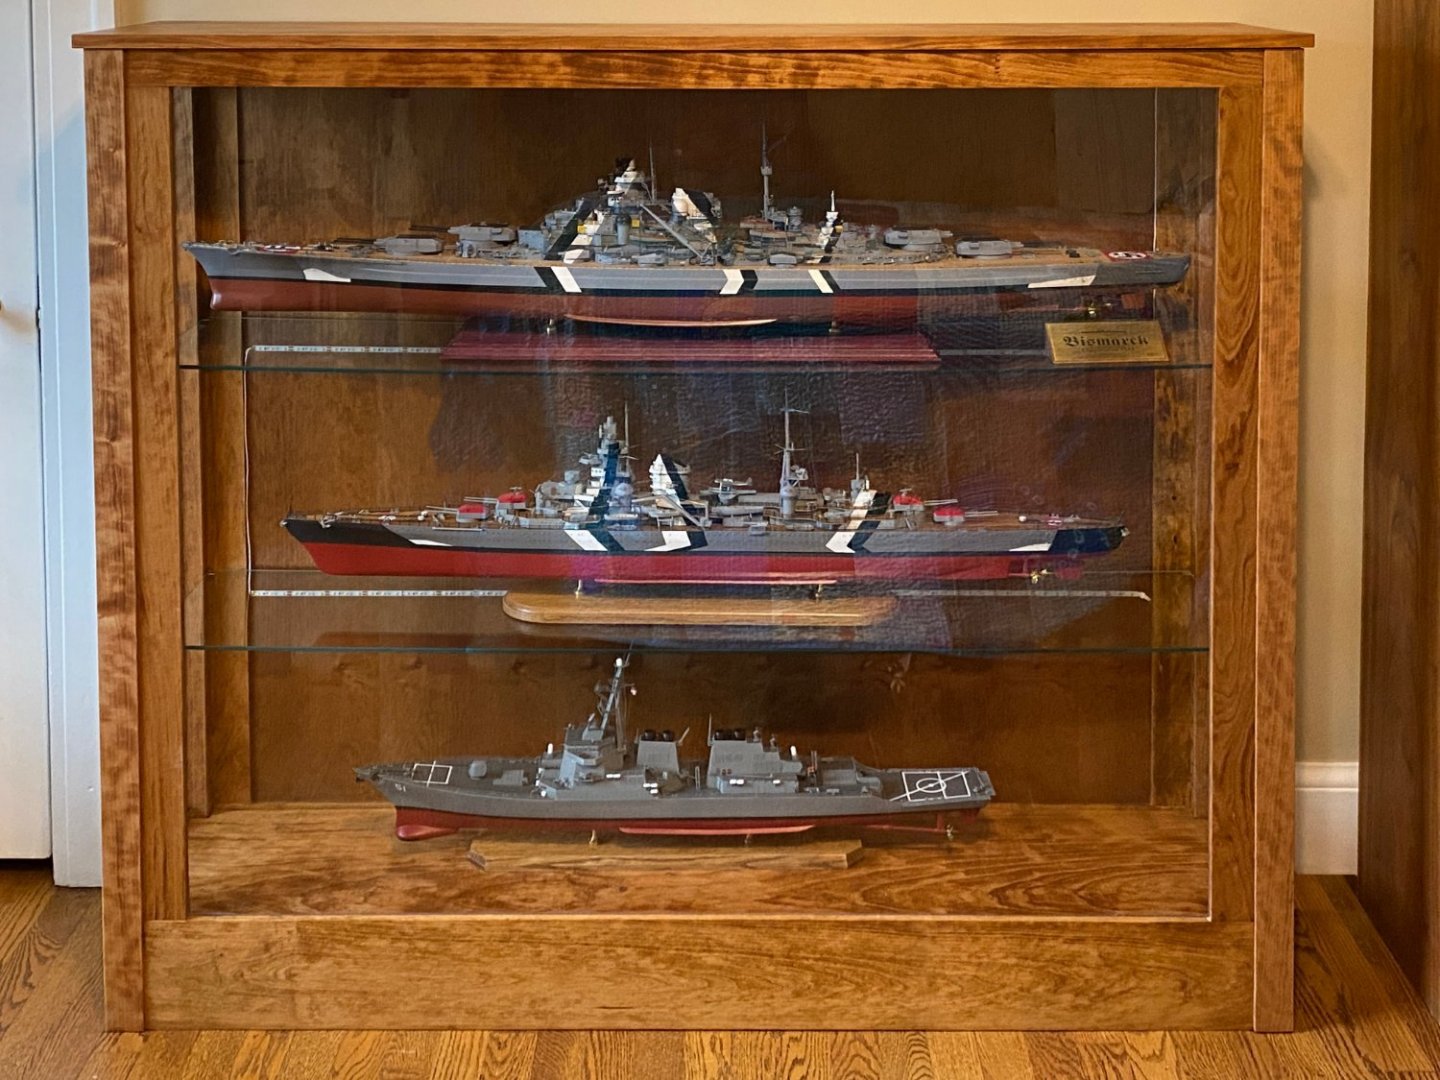
The Best Laid Plans ... I rushed to finish my display case before my son came for our July 4th holiday. We have a nice, finished attic, and my plan was that he and I could carry it up there where it would not clutter up the living areas of our house. We moved it awkwardly from the basement to the second floor entrance to the attic stairs, where there is a full-sized door followed immediately by a steep staircase. Wouldn't you know it, but when we angled the case to go up the stairs it would not fit under the door frame. We studied the situation for a long time and finally decided that that the case was not going in the attic. Luckily we have a guest bedroom on the second floor with room for a display case, and that's where it ended up. My glass shelves and doors all fit perfectly (whew), and so did the three models. The Bismarck and Prinz Eugen are both 1/200 scale, and the Arleigh Burke is 1/196 so they look good together. I could probably squeeze my U-boat in there too but at 1/72 it might look out of place. I put rows of LED light strips over each model. They are very intense, impossible to photograph, and I'll probably never use them. My advice to anyone planning to build cabinets for large models: Make separate cabinets for each model Make them stackable like an old Barrister's bookcase Forget the LED lights

-
Very nice! I like the aluminum paint on the funnel exhausts. I am almost as happy to see this coming together as you are.
-
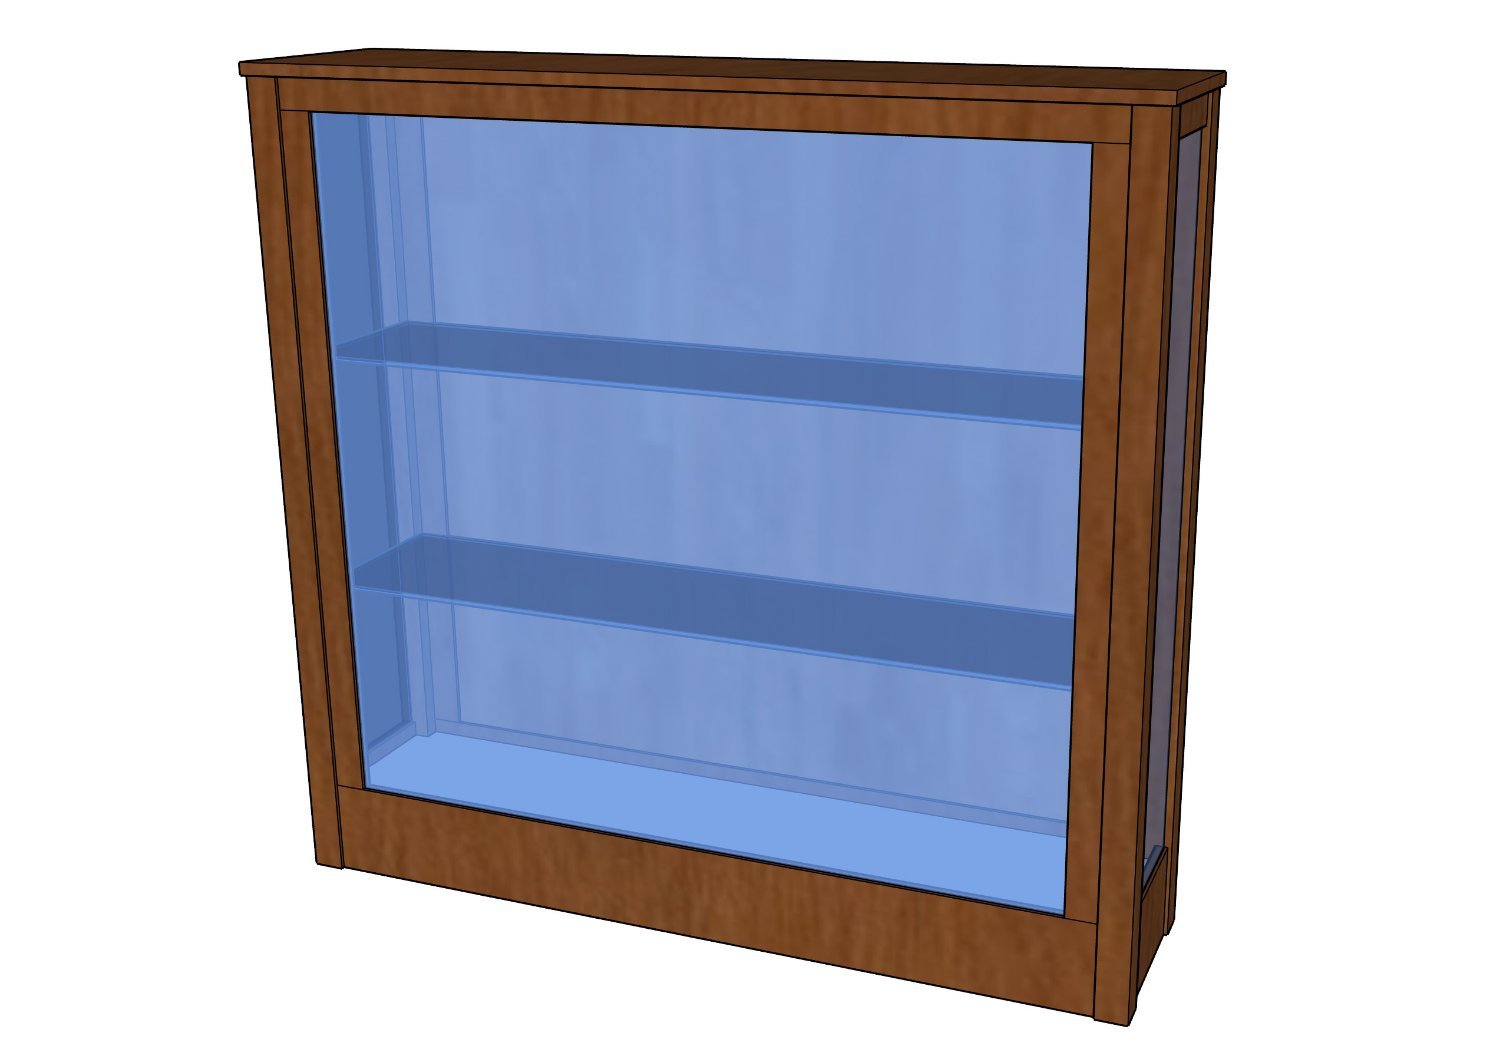
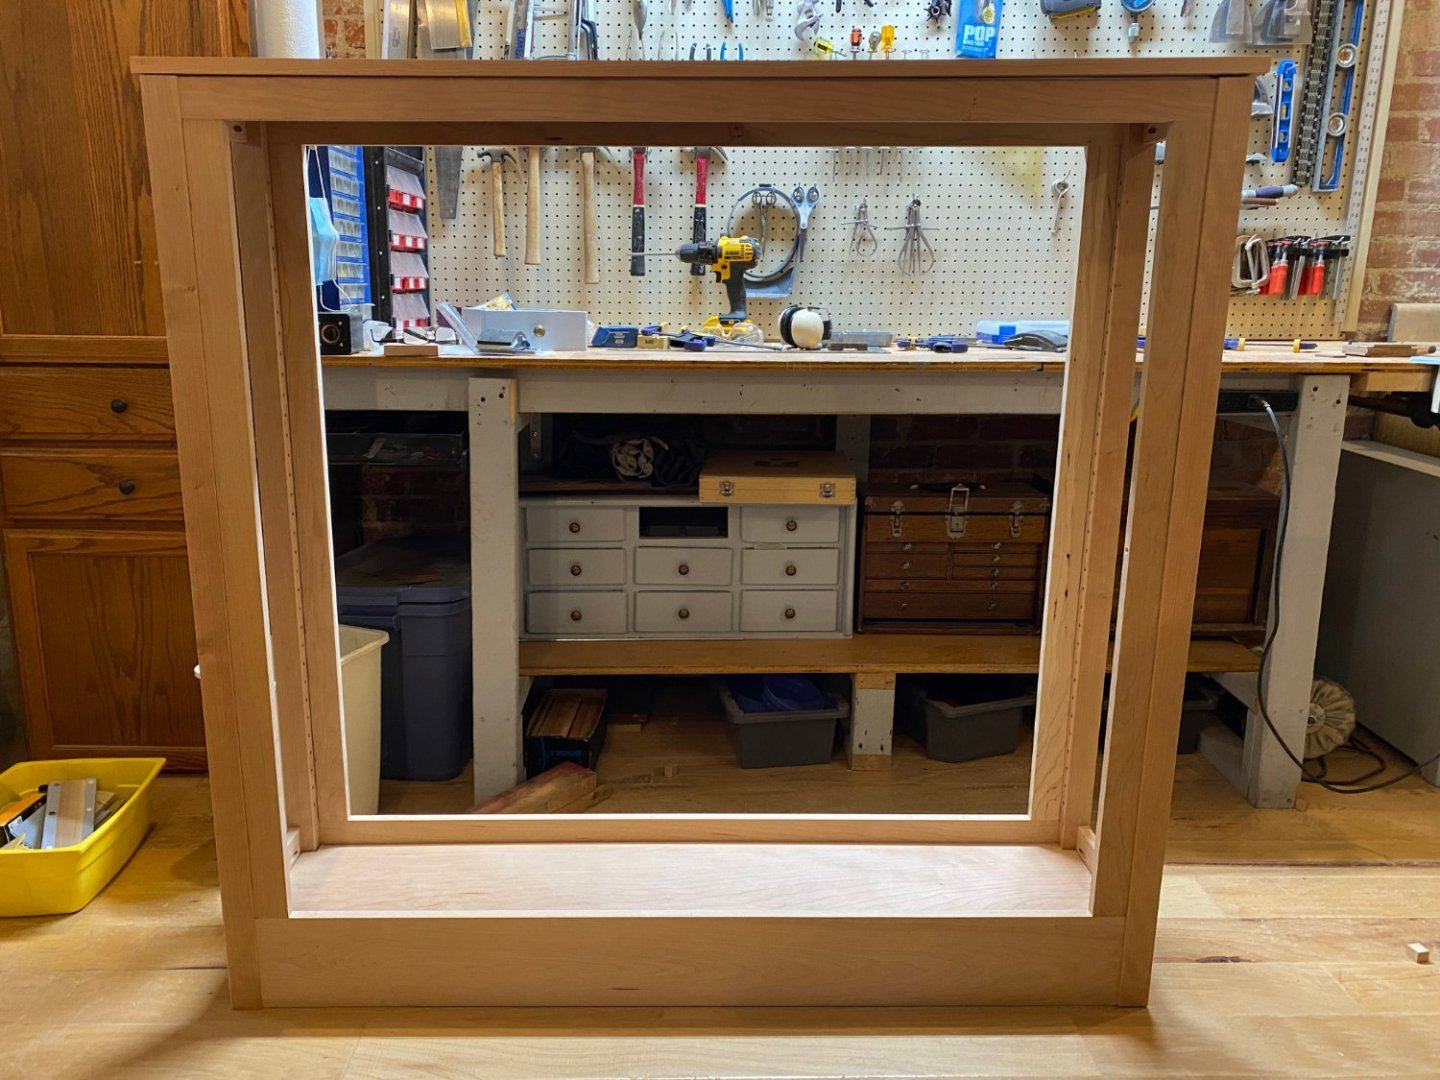
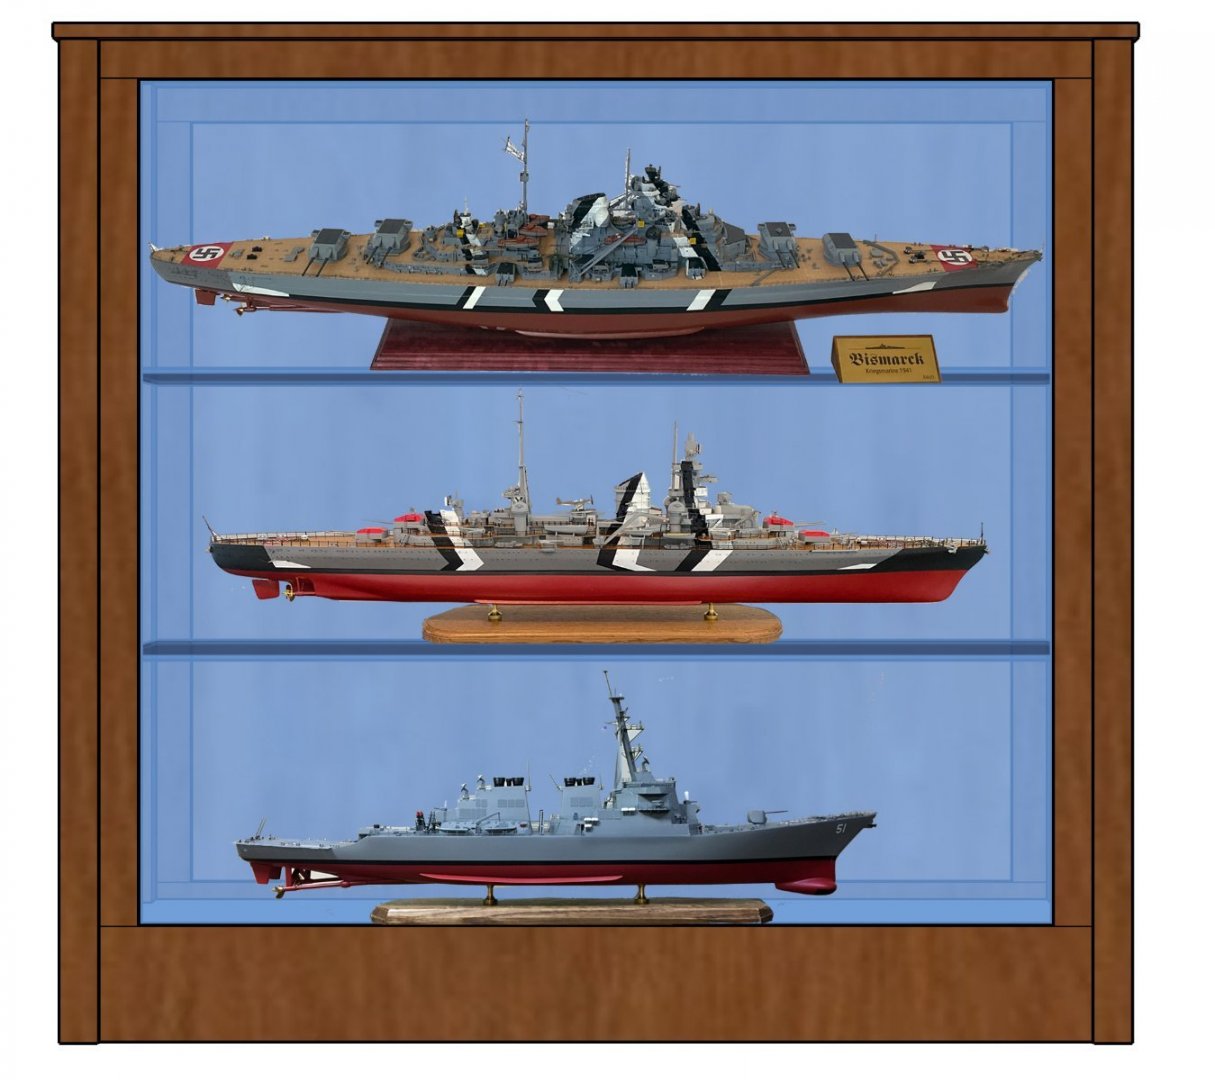
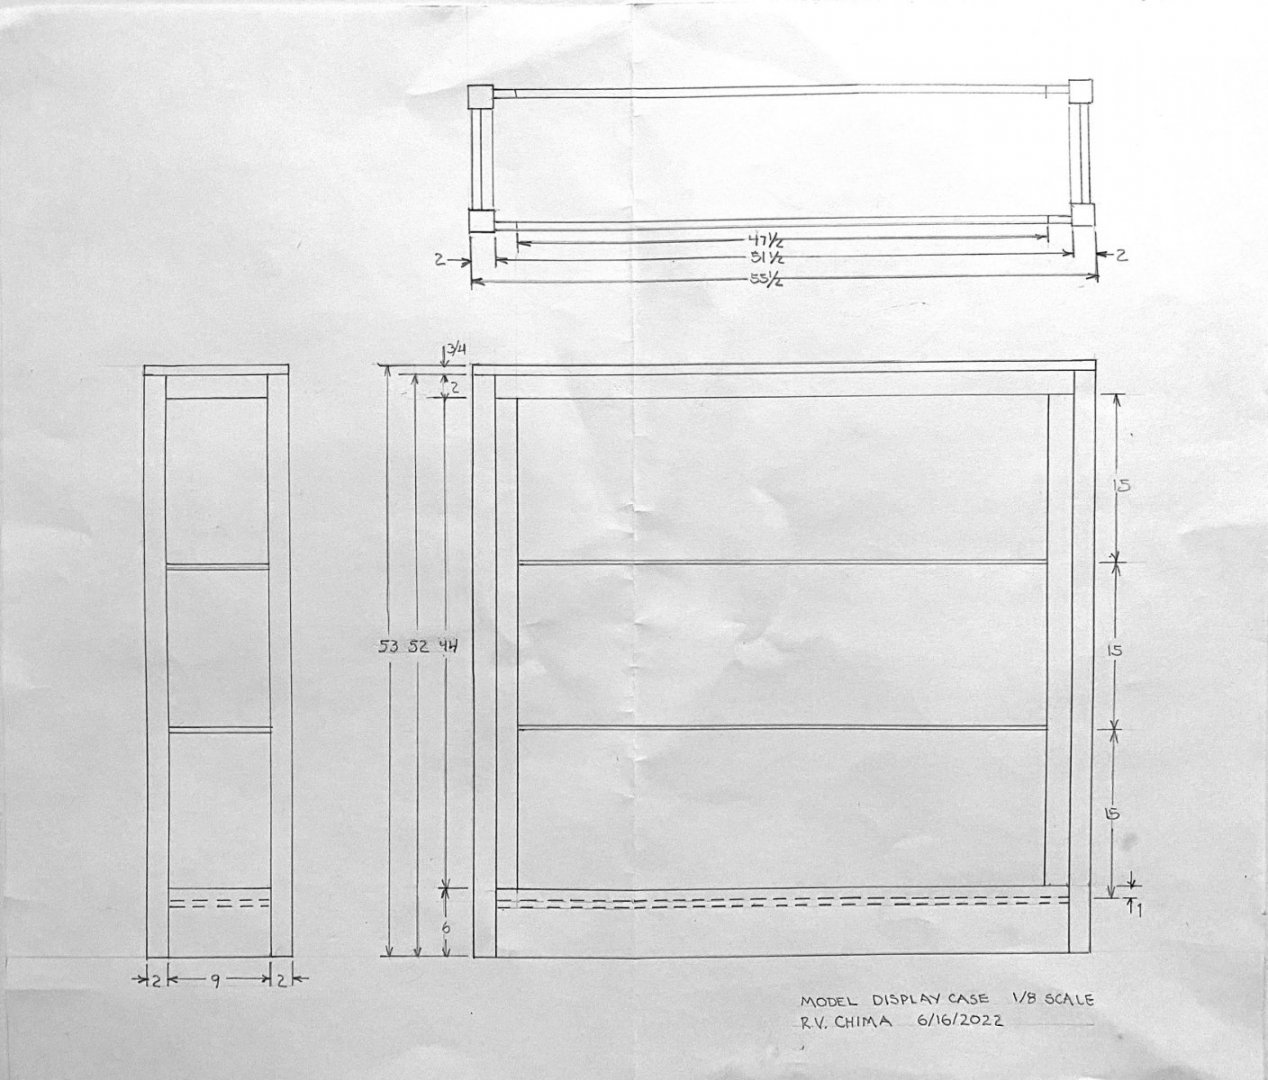
Display Case I am building a display case for my three warship models - the Bismarck, Prinz Eugen, and Arleigh Burke. I started trying to model it in Sketchup, which I have used before. I wasn't happy with my original design so I started over with some simple sketches, and finished with a hand-drawn 3-view. I took a LOT of drawing in high school and one class in college, which immediately became obsolete- except when I want to make something. Here's my final 3-view from 8 days ago. You can see that this is a BIG piece of furniture. The Bismarck is 50" long, but acrylic sells in 48" sheets, so that set the width. The Bismarck will be hidden a little behind the frames. The models are all around 14" high, so there will just be enough height for the three. Later I went back to Sketchup and got some better views. Last Friday I went to the lumber yard and bought $400 worth of cherry. Here's what I've finished since then. A few days ago I ordered hardware and LED lights: $150. Today I ordered 2 glass doors for the sides and 2 glass shelves: $225. I also bought the acrylic front panel $115. I haven't added it all up yet, but I think it was WAY more than I ever expected to spend on a display case. It will keep the dust off of three models, but right now my shop in our finished basement is covered with dust. Final photos soon.

- 215 replies
-
- 11
-

-

-
Your photos look like the Bismarck is trapped in an ice floe. 😀 I don't remember what hole size I used. But cut out one stanchion and test the fit on a scrap of wood before you drill everything.
-
Very interesting! I've never seen anything like this. Some of the products still have you drilling holes though. While you're waiting for the postman, try rigging 4 or 5 of the included stanchions on a scrap of wood. I think that you will find that it's easier than you expect. Spray the entire lot of PE stanchions with primer and one coat of gray first. Use a pin to mark the holes and drill with a tiny drill bit in a Dremel at low speed. The holes don't have to be very deep, so they won't poke through. Maybe 1 stanchion in 20 had to be cleaned out with a bit in a pin vise. I did that after they were installed and just backed up the stanchion with a scrap of wood.
-
Ted, Beautiful work on all the fiddly bits. The decals look perfect. Your model is starting to look very interesting with all the exposed brass. And with the Missouri and the Yamato under the bench, you will be busy for a LONG time! Rod
-
Harry, Nice work on the deck. It looks like the gap is just about right. Some of the stanchions are braced like an upside-down V (a lambda?) with the upright into the hull and the brace a bit higher glued flush on the deck. Cut one out and try it just so you know what to expect. There are plenty of spare stanchions. Don't trust the specified hole dimensions for the turret mounts. Attach dowels to the turrets and then drill the holes undersized so that they fit tight but can still swivel.
-
Ted, I use medium CA on a toothpick to glue parts together or to the deck, then hit the joint with thin CA from a glue looper. Every 5-10 joints the looper gets clogged, so I burn it off with a Bic lighter and wipe the carbon off with a paper towel. I used the same loop for my entire model. Incidentally, the many plastic bags that all the PE and plastic parts come in make perfect surfaces for holding little puddles of CA ready for the next joint. Just don't rest your arm in it. Rod
-
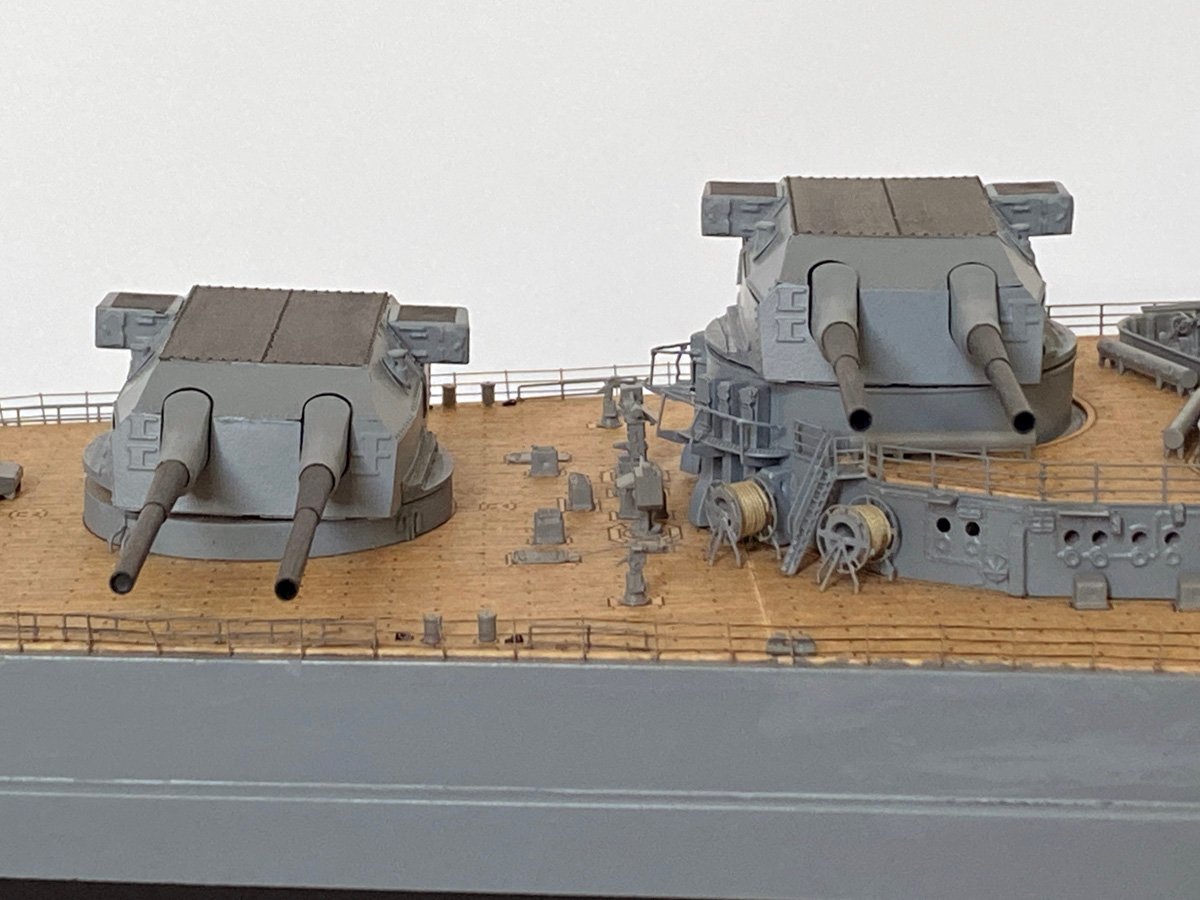
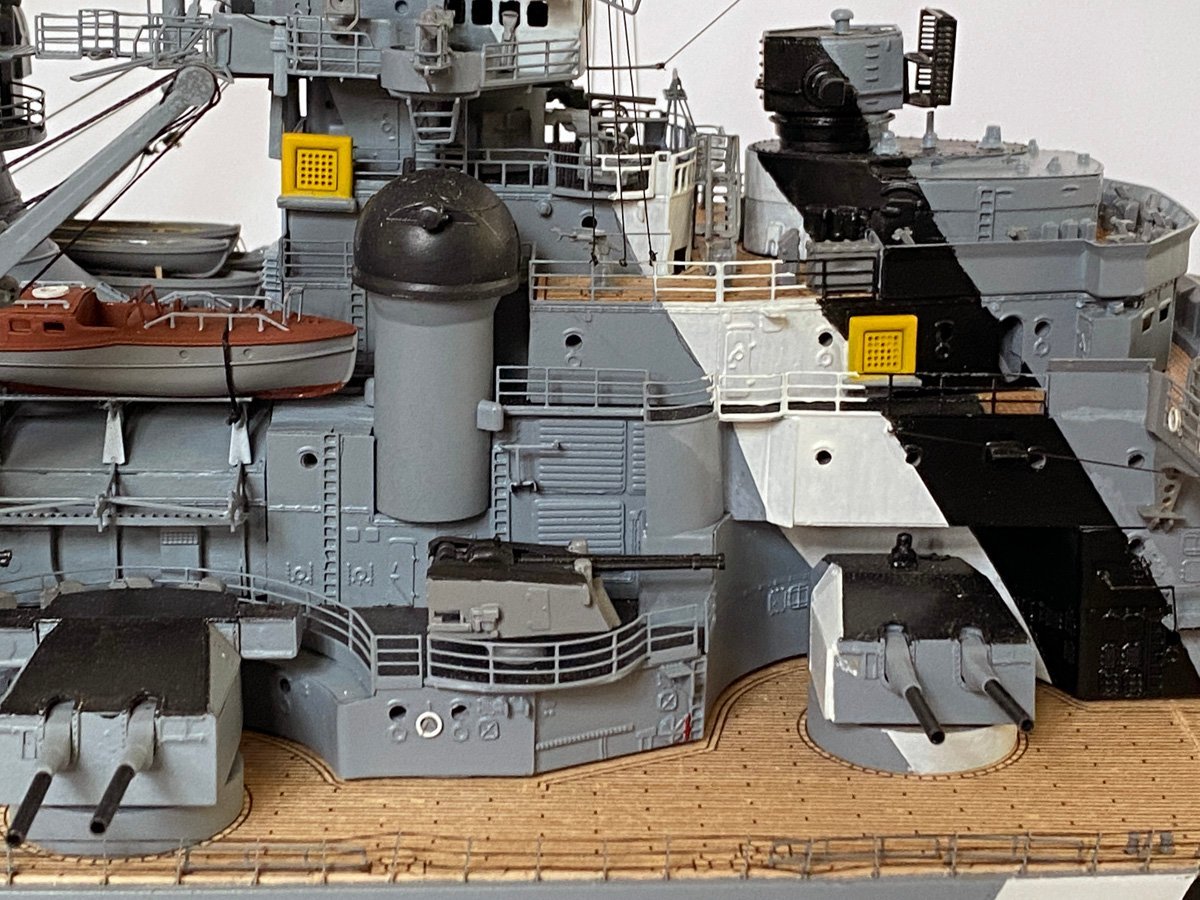
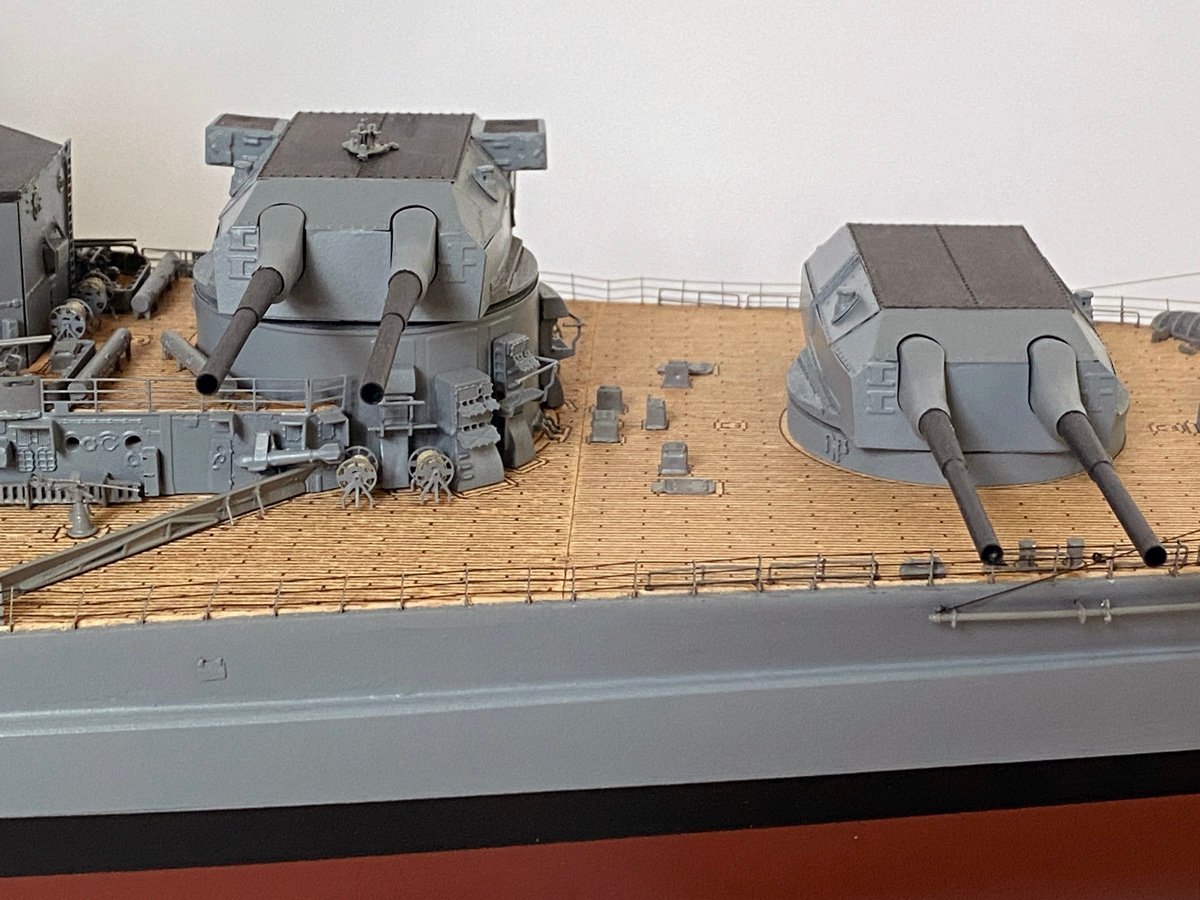
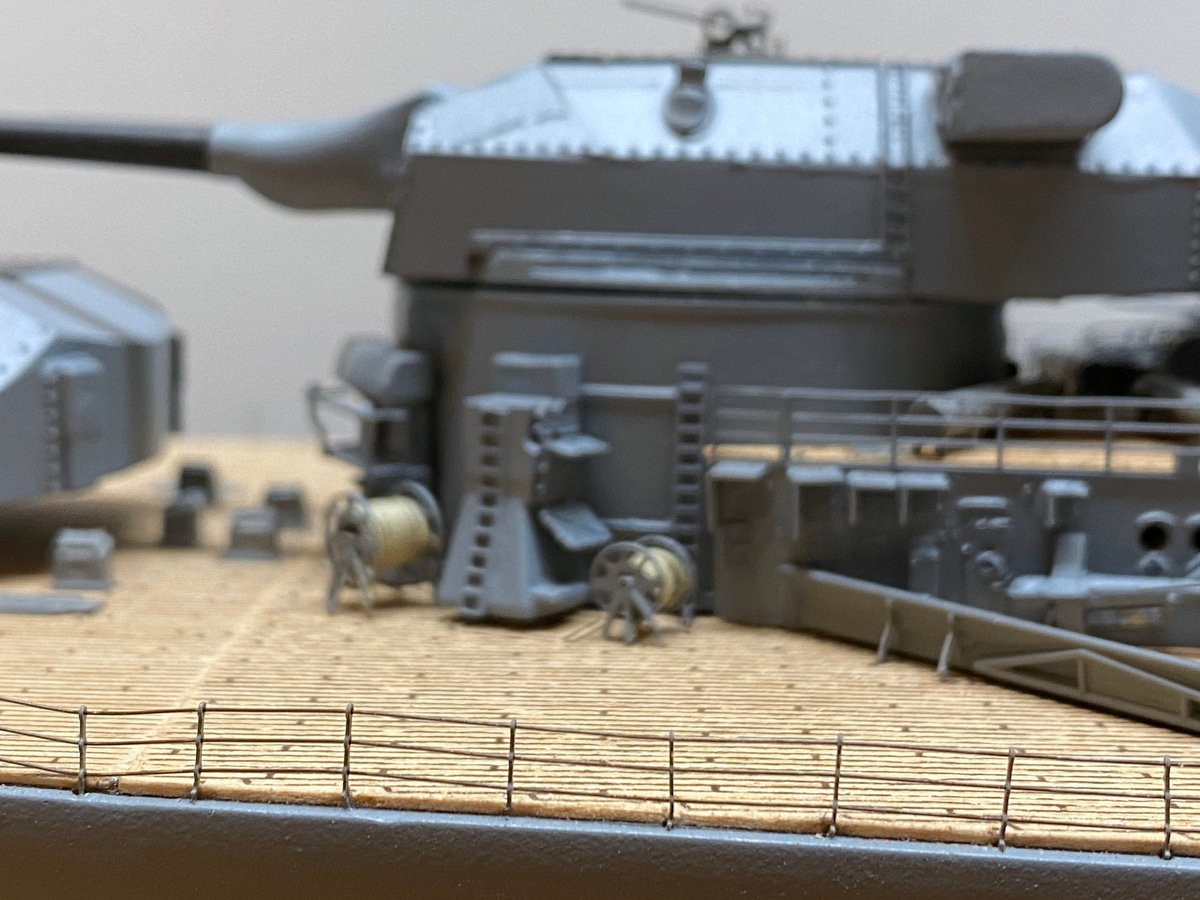
Those protuberances are rangefinders so the gun crew can fire independently of the three main fire control stations. After the ship entered service it was found that the rangefinders on the first turret were frequently flooded with sea water, so they were removed.
-
Hi Chap, Thanks for that!! I could paint these but I don't want to tempt fate, I'd rather have something that I can just "Place" to achieve the desired result. Just had a look at the site, this might just be the ticket!!🙂 (Australia is not too far away so shipping shouldn't be too costly.) Could you please detail exactly the item you ordered? Good to see you back, I was wondering where you had got to.... 🙂 Cheers and Regards, Harry. Hi Ted, Yes, great to see you back! Nothing like moving to spoil a hobby. I'll be following your build with interest. Rod
-
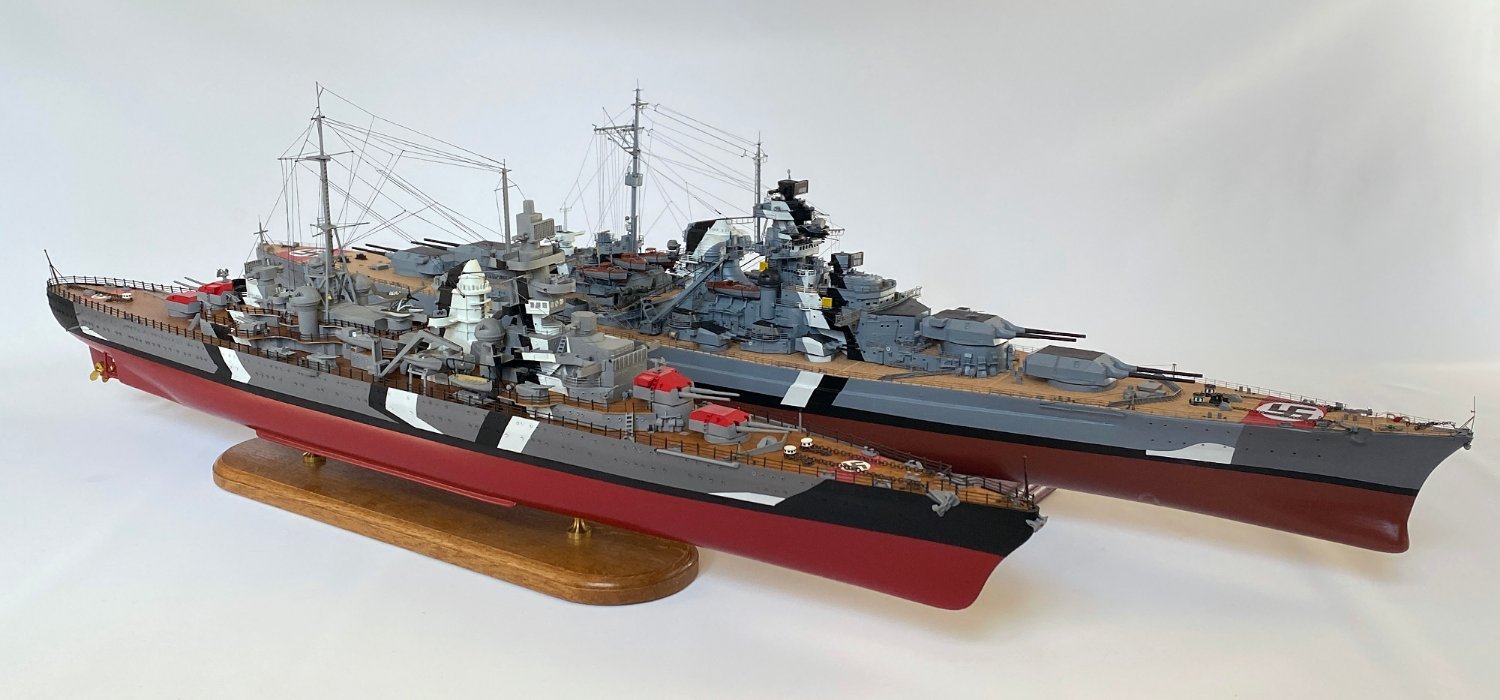
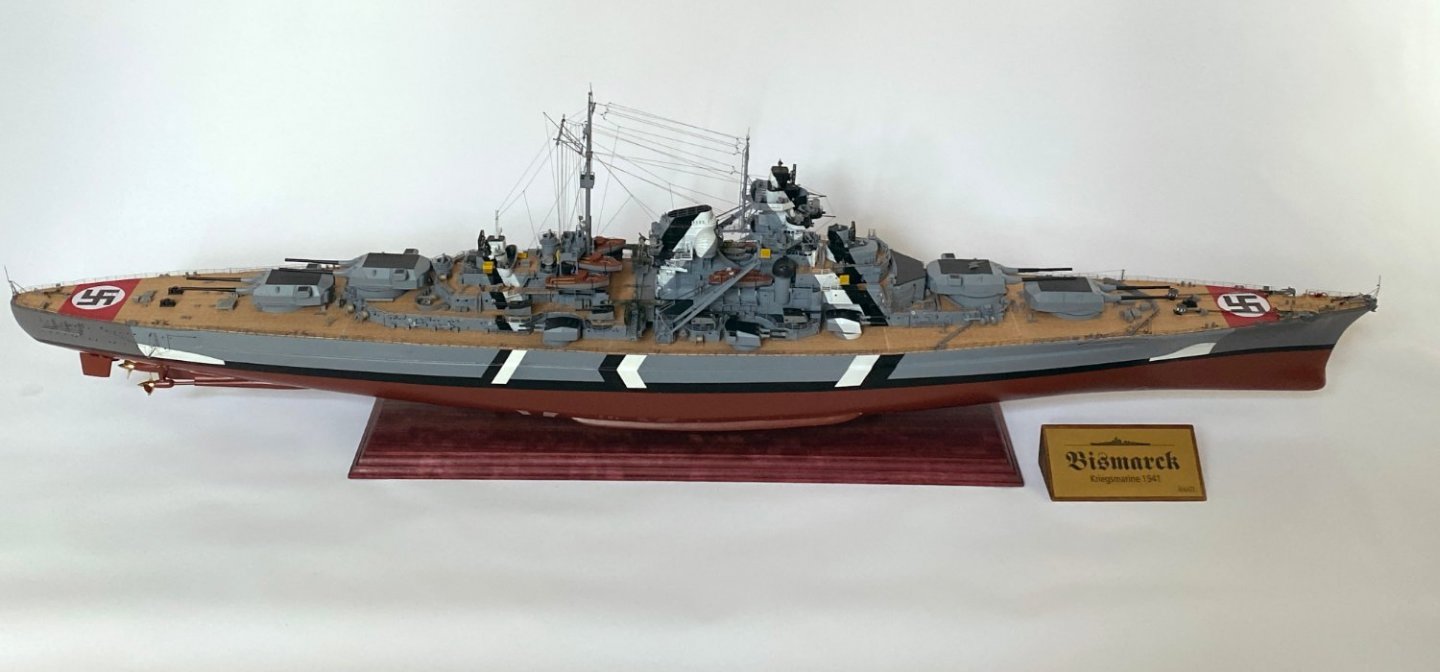
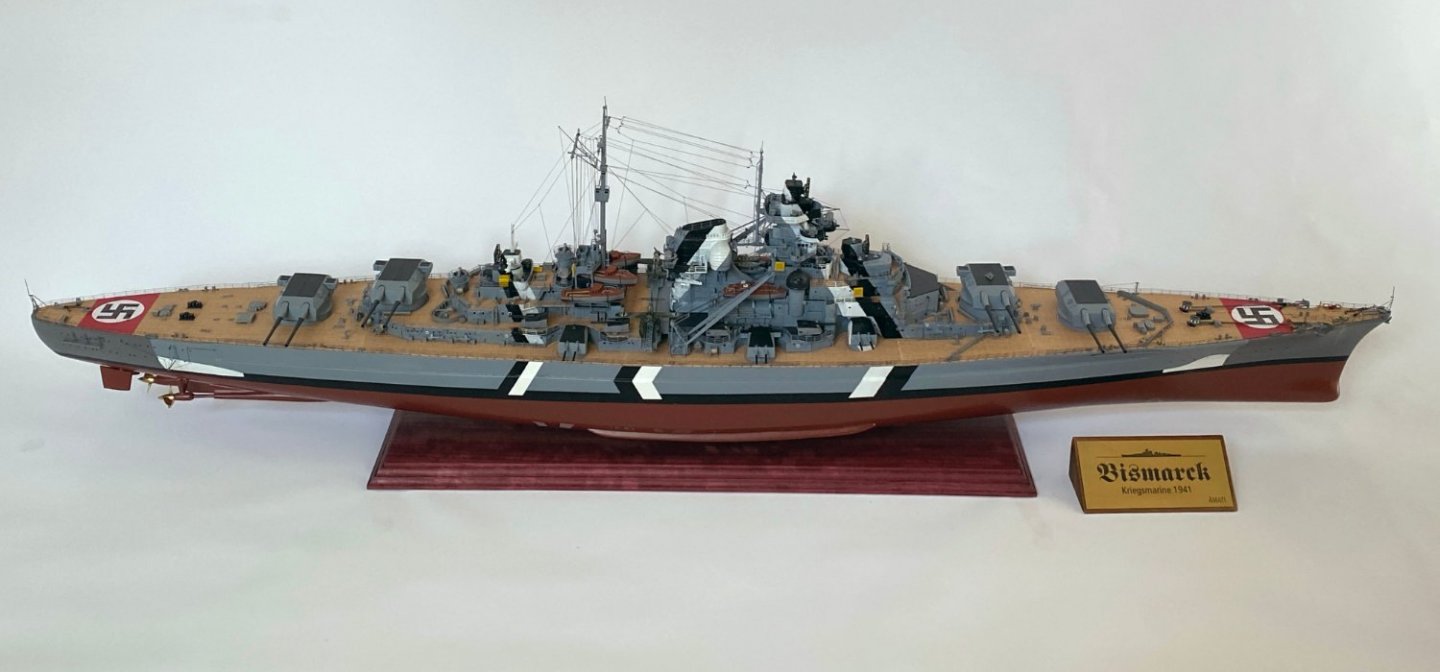
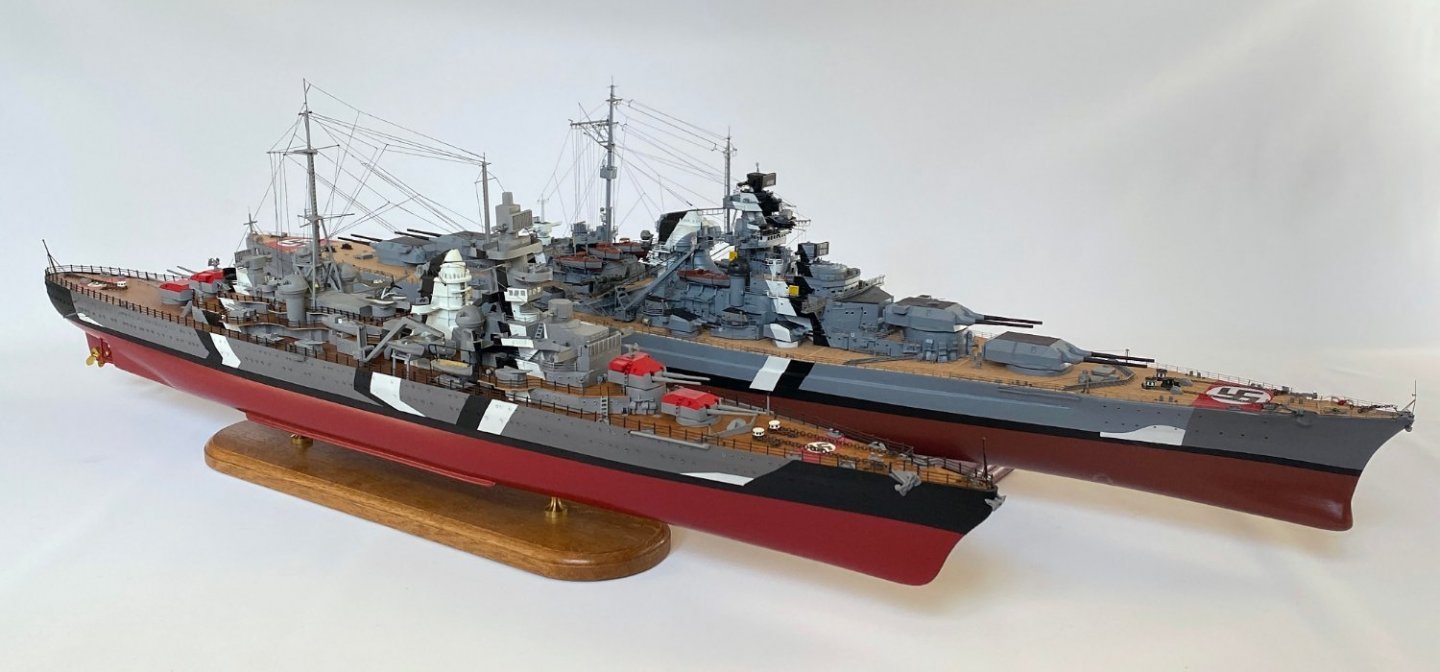
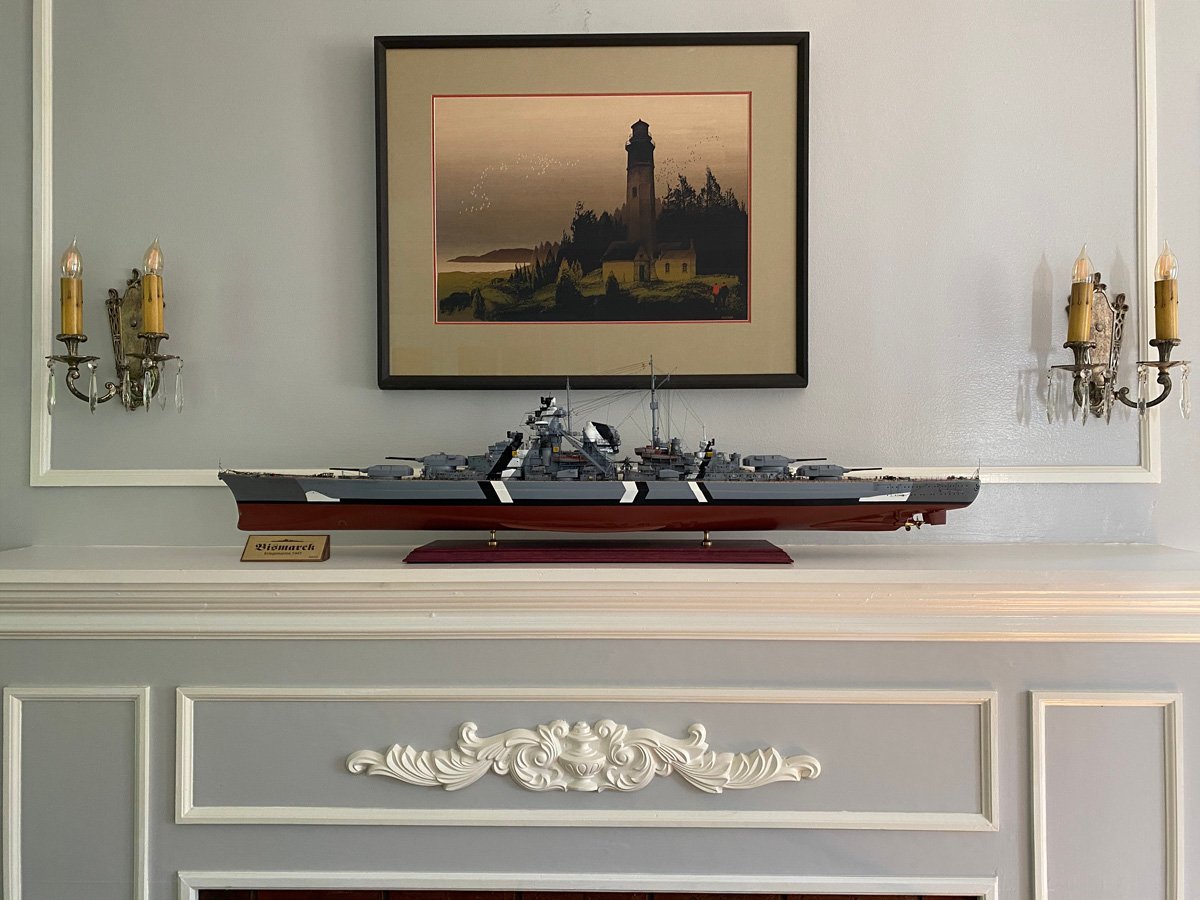
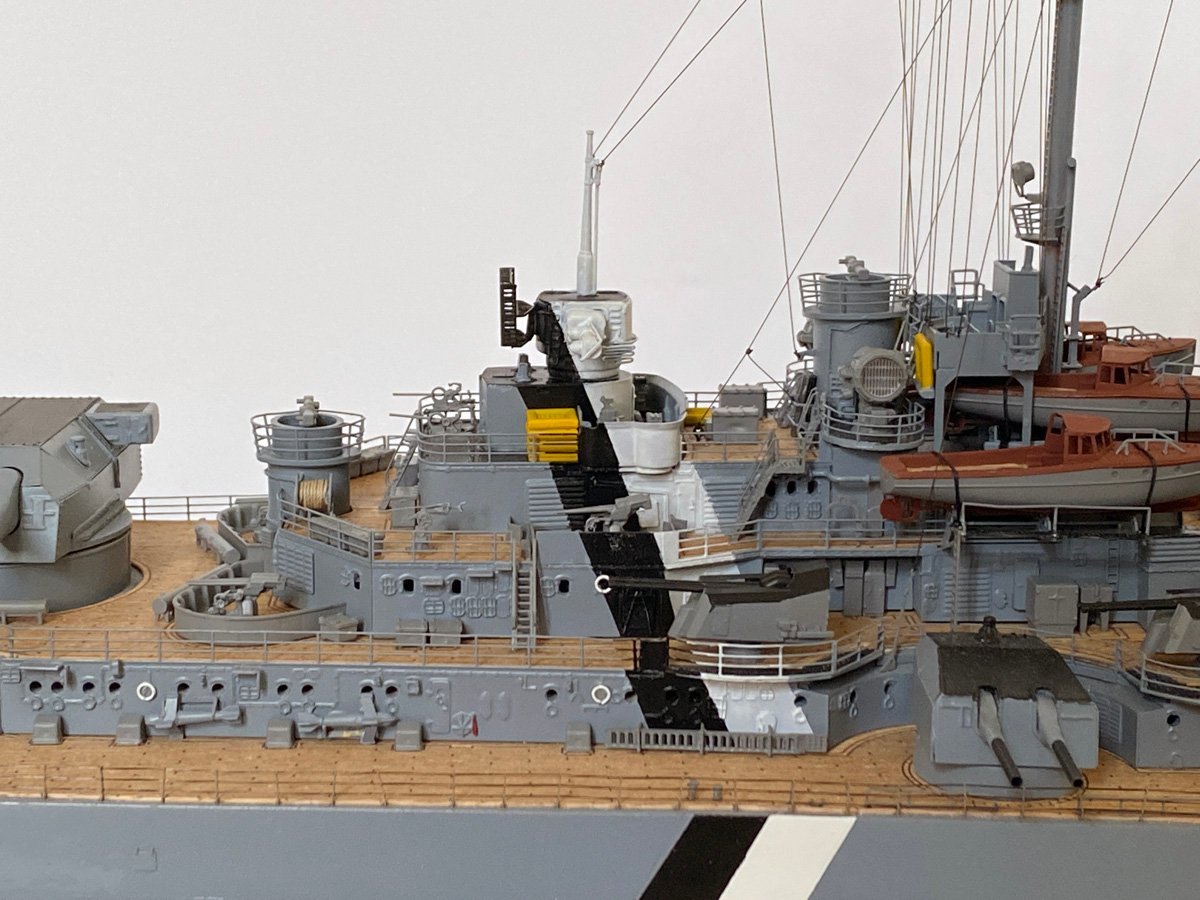
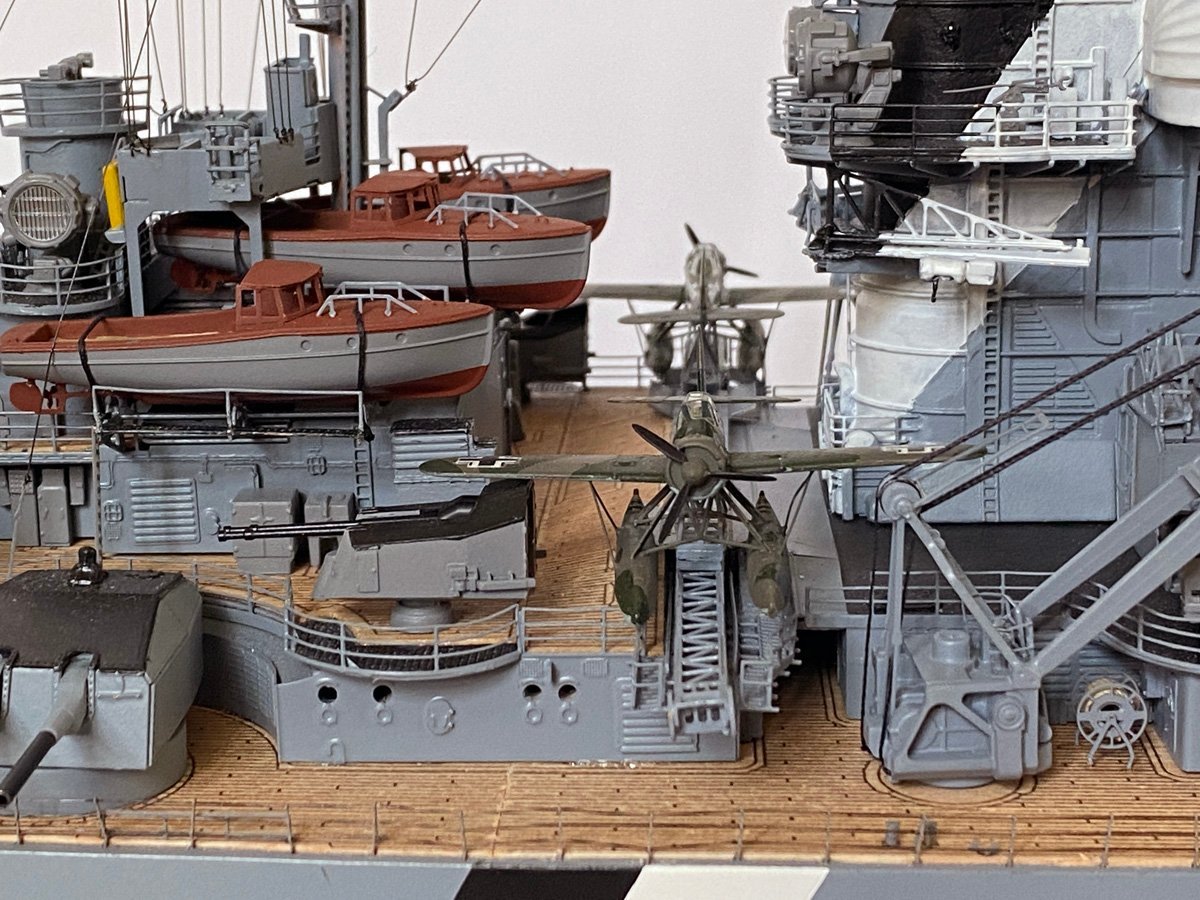
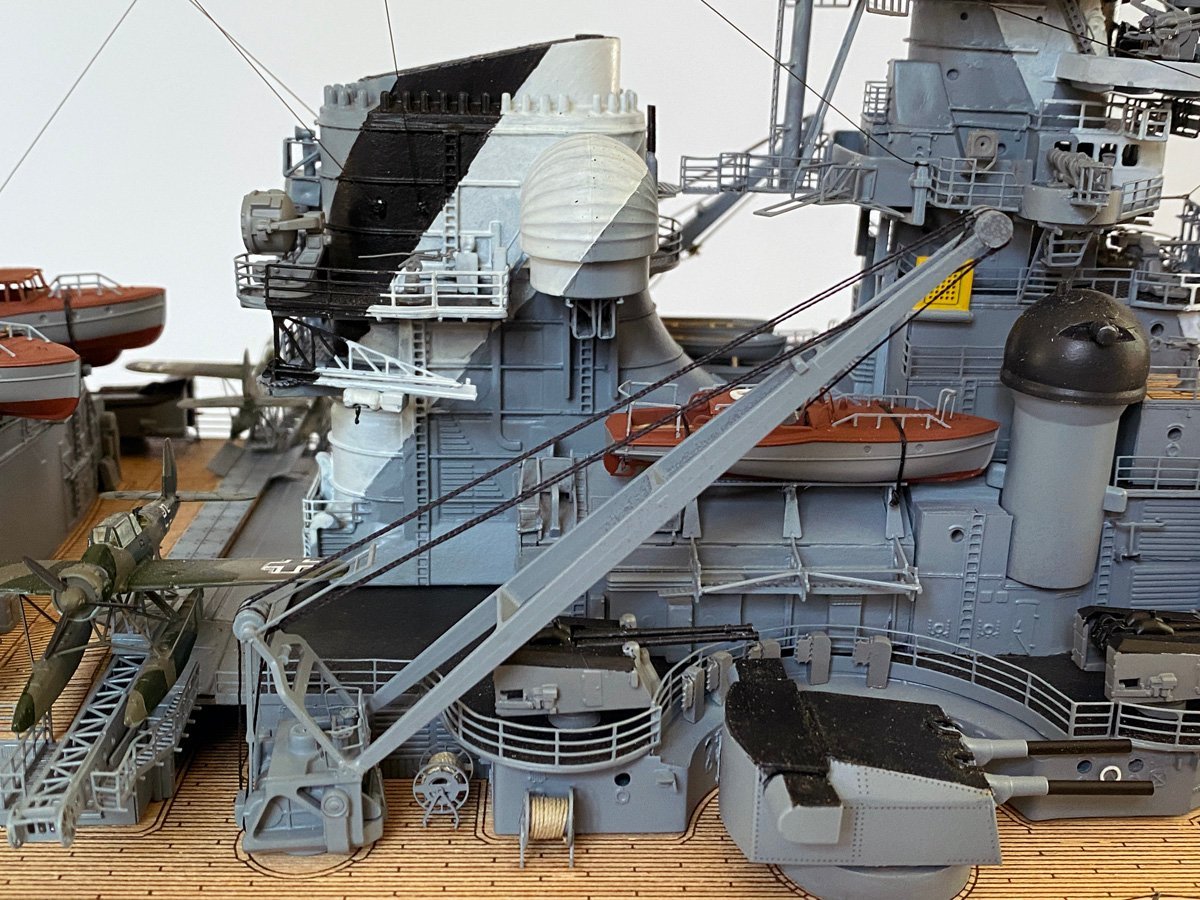
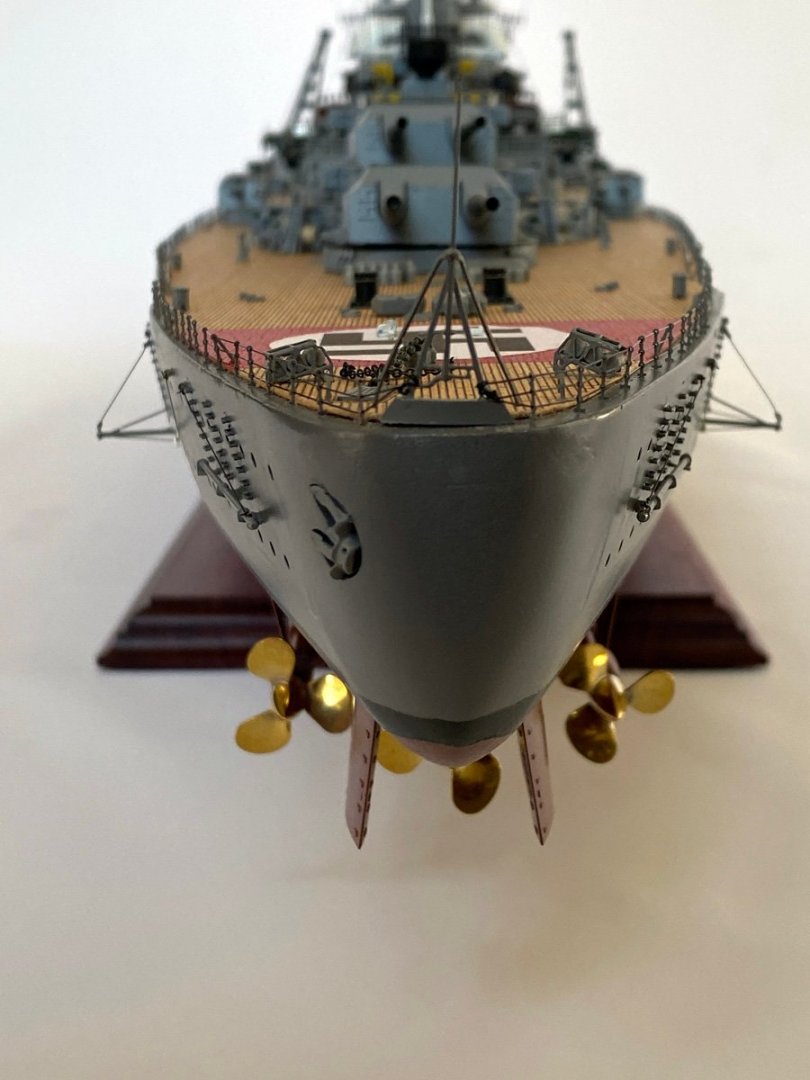
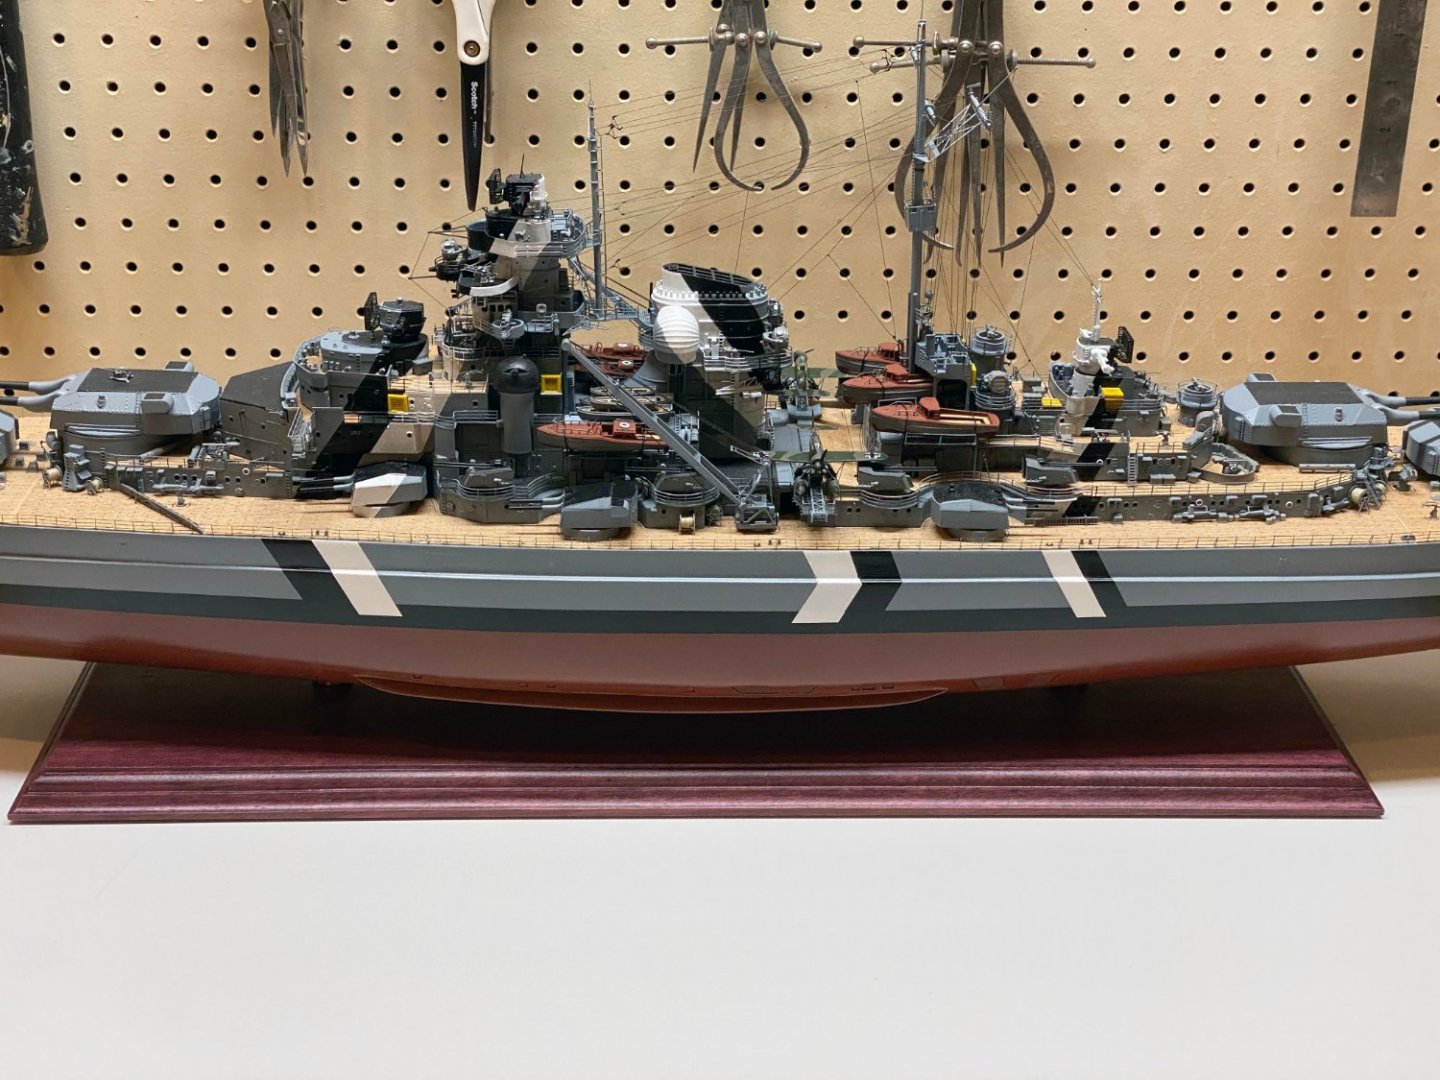
Bismarck by rvchima - Amati - Scale 1:200 - WWII German Battleship - FINISHED 530 Hours, 225 Days The Bismarck is finished and my bench is cleared off, ready to start a new project. I kept a "diary" of my build, and it took me about 530 hours over 225 days. I took off a couple of weeks around the holidays and all of March, so on average I put in about 3 hours per day. Your mileage may vary. This is the most expensive kit I've ever bought at close to $700 US. I also spent around $200 for brass props, glue, paints, and pedestals and wood for the base, so my hobby cost about $5 per day. My wife is happy that I'm not into real boats. This is also one of the nicest kits I've ever built. The wood is excellent, the laser cutting is perfect, and the photo etched parts are superb. The two instruction manuals are the best I've ever seen. The plastic parts were not quite as good. Some had molding cavities that had to be filled, and the many staircases were made from some more flexible plastic that did not glue well. I've made three kits by Amati now - their Bismarck, U-boat 47, and Arno XI Ferrari hydroplane. They were all excellent kits, and I highly recommend any of them. Final Photos All guns to starboard. The Bismarck with the Prinz Eugen "light" cruiser by Aeronaut, both at 1/200 scale. The Bismarck is on the mantle at the moment but won't remain there long. Probably only until my wife comes downstairs.

- 215 replies
-
- 16
-
-
-

-
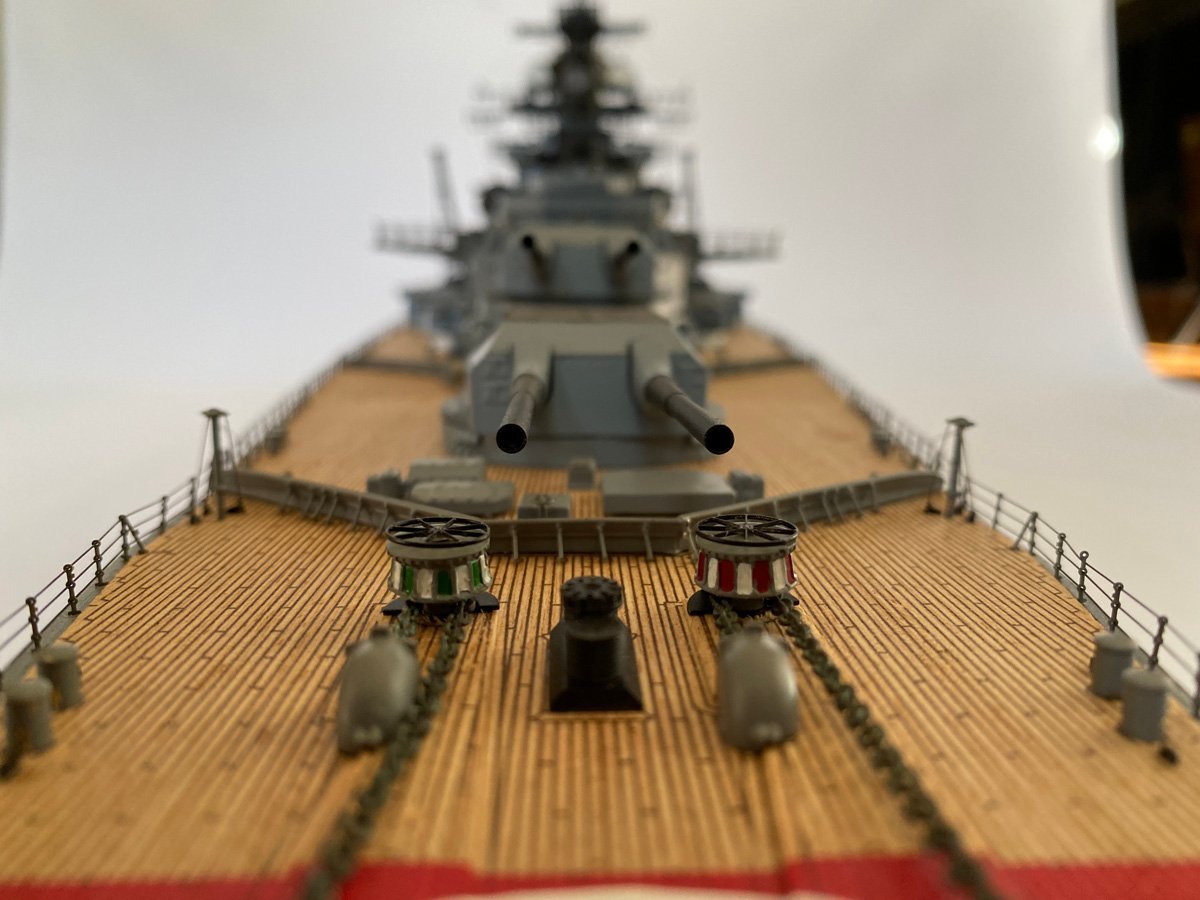
Harry, I made the markings in Photoshop and sent you the file by private message. You should be able to print them yourself.
-
Hi Harry, Thank you for your kind words. It's been a pleasure "working" with you, and I am keen to see your ship finished too. I will keep up with your build log, but if you have questions just message me directly to make sure that I see them. What's next? My wife has me signed up to build a decorative arbor for the garden. A 1:16 Sopwith Camel by Artesania Latina. I've built Model Expo's Fokker Triplane at the same scale. A 1:48 scale Seguin tugboat by Bluejacket Shipcrafters. Mostly wood, almost no PE or plastic to fiddle with. Sorry Harry, I don't know what you meas by "deck transfers."
-
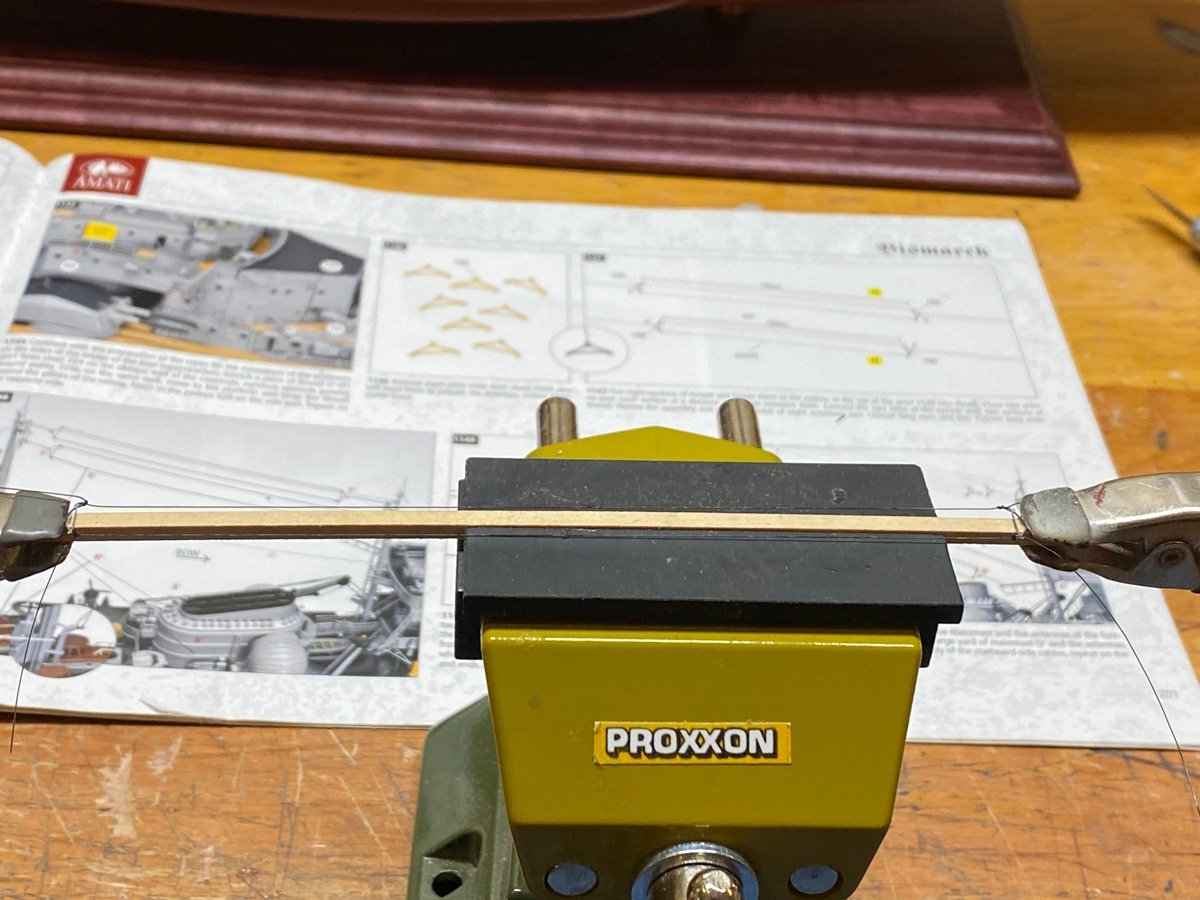
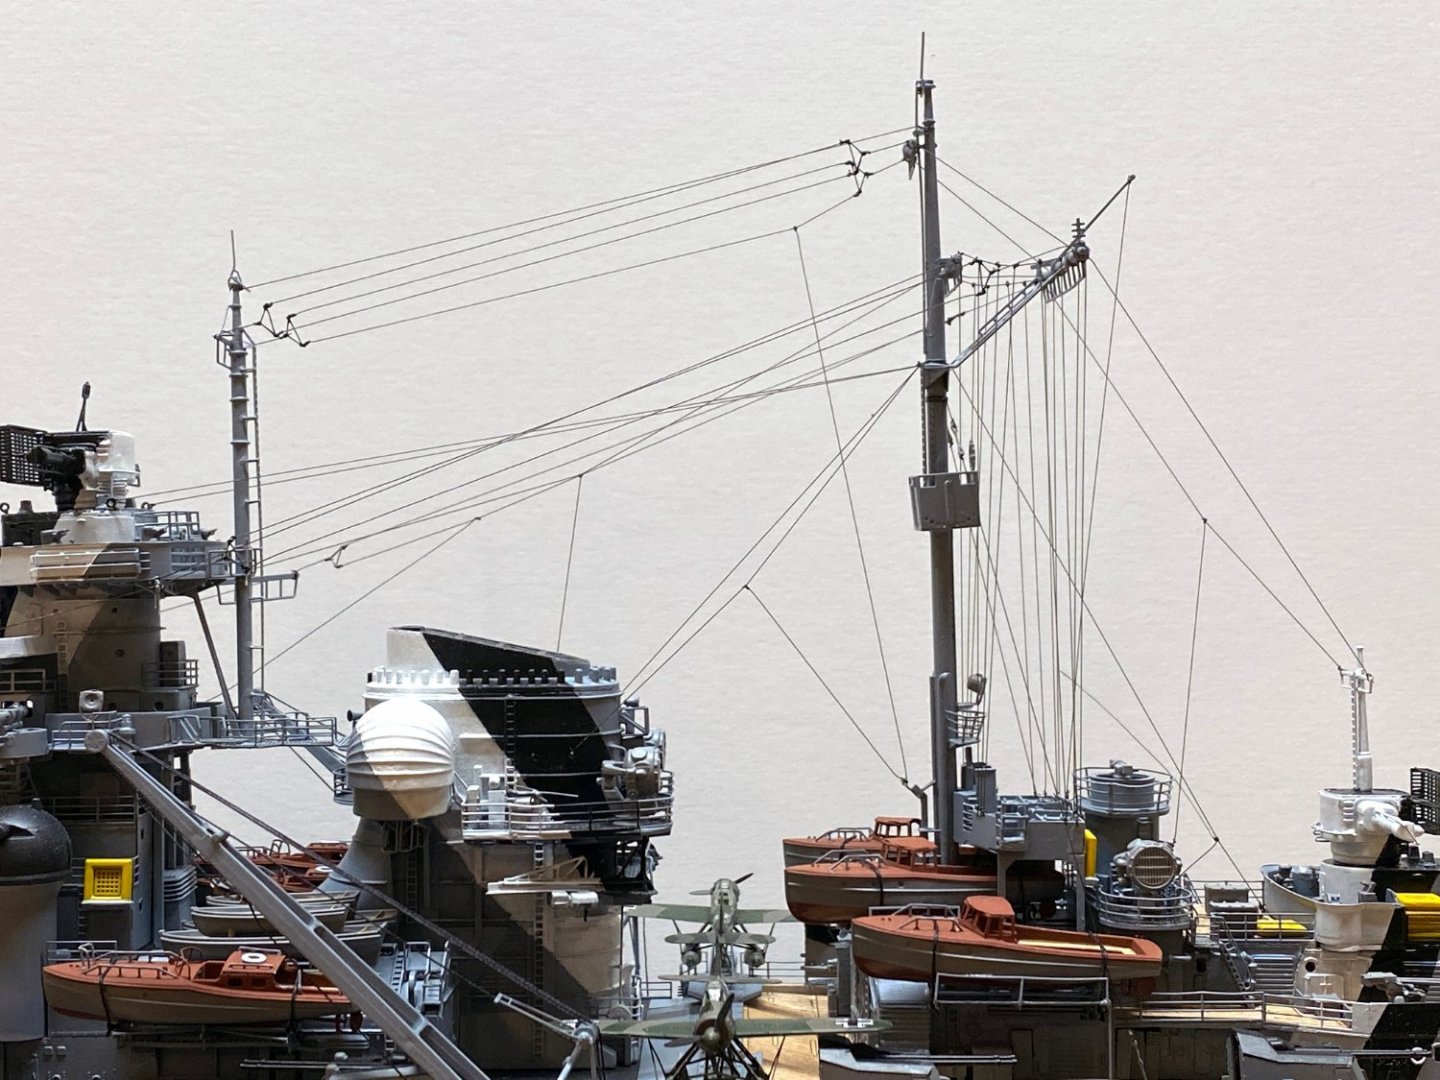
Rigging I finished the rigging yesterday and am working on the handrails. It's all done with 0.2 mm black monofilament line, which has been a pleasure to work with. It's extremely strong, doesn't kink, and glues solid with a spot of CA. There are 4 double antennas tied to tiny triangular PE pieces. I clamped the pieces to a stick to get the two lines the same length. Here's the rigging in all its glory. I left this photo at full resolution so you can see the lines. The handrails comprise about 150 PE stanchions on each side of the ship threaded with three layers of monofilament line. I was dreading this task, but it's only taking about one hour per line. You can literally pull one end of the line and tighten it the entire length of the ship. I finally made a new base for the model using purpleheart wood. The color looks good with the anti-rust color of the lower hull, and it will turn a little browner with age.

- 215 replies
-
- 13
-
-
Ken, I've never had the pleasure of meeting an F-4 pilot before. Thank you for your service, and I hope that you have a relaxing Memorial Day. I just realized that we're practically neighbors, so you might have guessed that I saw the movie at the Asheville Brewing Company. It might be better on a bigger screen but you can't beat the food and drink.
-
Top Gun Maverick I saw Top Gun Maverick last night at a local theater/brewery/pizza place. If you liked the original Top Gun in 1986, you will love this sequel. The action scenes are incredible, (maybe a little too incredible at the start of the movie), and the ending is is a fun throwback to the original. They've eliminated some of the sexist scenes and added a diverse cast, while still allowing Tom Cruise to be a maverick. The mission that Cruise and his students fly is a clear reference to X-wing fighters attacking the Death Star in Star Wars. It doesn't get much better than that.
-
Hi Piet, It sounds like you have finished your Bismarck, so congratulations must be in order! We'd all love to see a photo or three if you can borrow a camera. Rod
-
Harry, My kit came with a small piece of self-adhesive black tape cut into two strips about 0.5 mm wide x 60 mm long. At first they didn't seem to stick very well and I considered cutting down some Monokote (model airplane covering) trim tape. But I ended up using the tape supplied with the kit and it hasn't come off yet. 😟 I had a similar gap between my superstructure and deck, but I don't remember exactly which piece it was or how I fixed it. I think there was enough flat surface on top that I could put a a couple of big C-clamps between the superstructure and the bottom of the hull. Maybe I just put some weights on top. I used 5-minute epoxy for the joint, so the whole thing was done and forgotten in 5 minutes. Sorry I can't be more specific, but I think I just muscled it into place.