HOLIDAY DONATION DRIVE - SUPPORT MSW - DO YOUR PART TO KEEP THIS GREAT FORUM GOING! (Only 20 donations so far - C'mon guys!)
×


rvchima
-
Posts
697 -
Joined
-
Last visited
Content Type
Profiles
Forums
Gallery
Events
Everything posted by rvchima
-
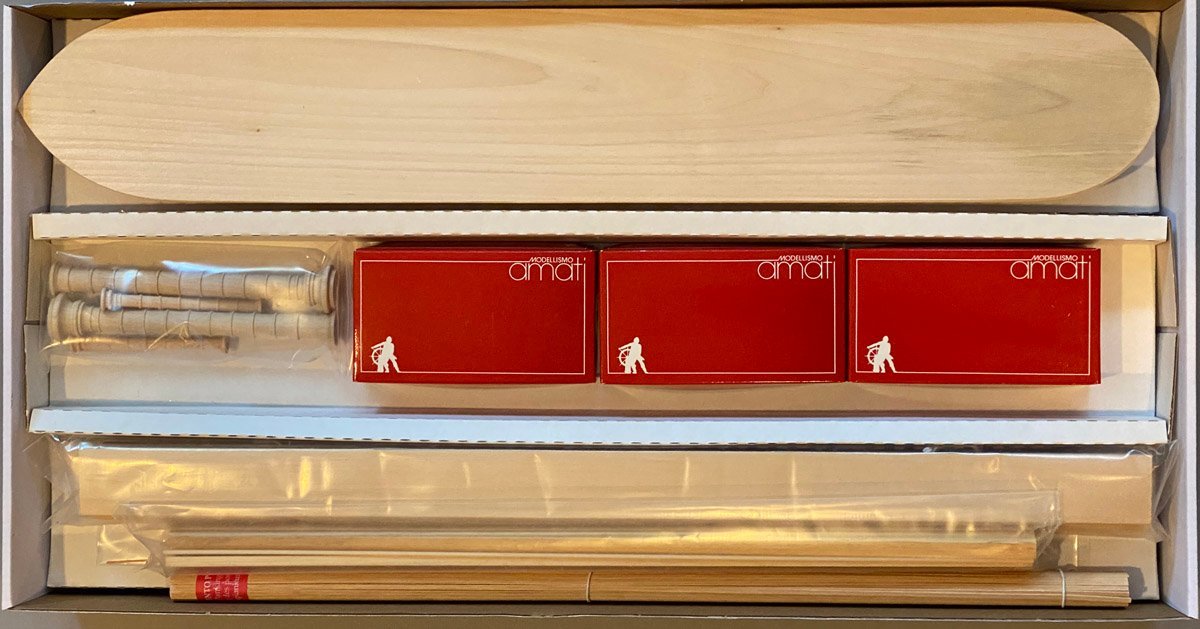
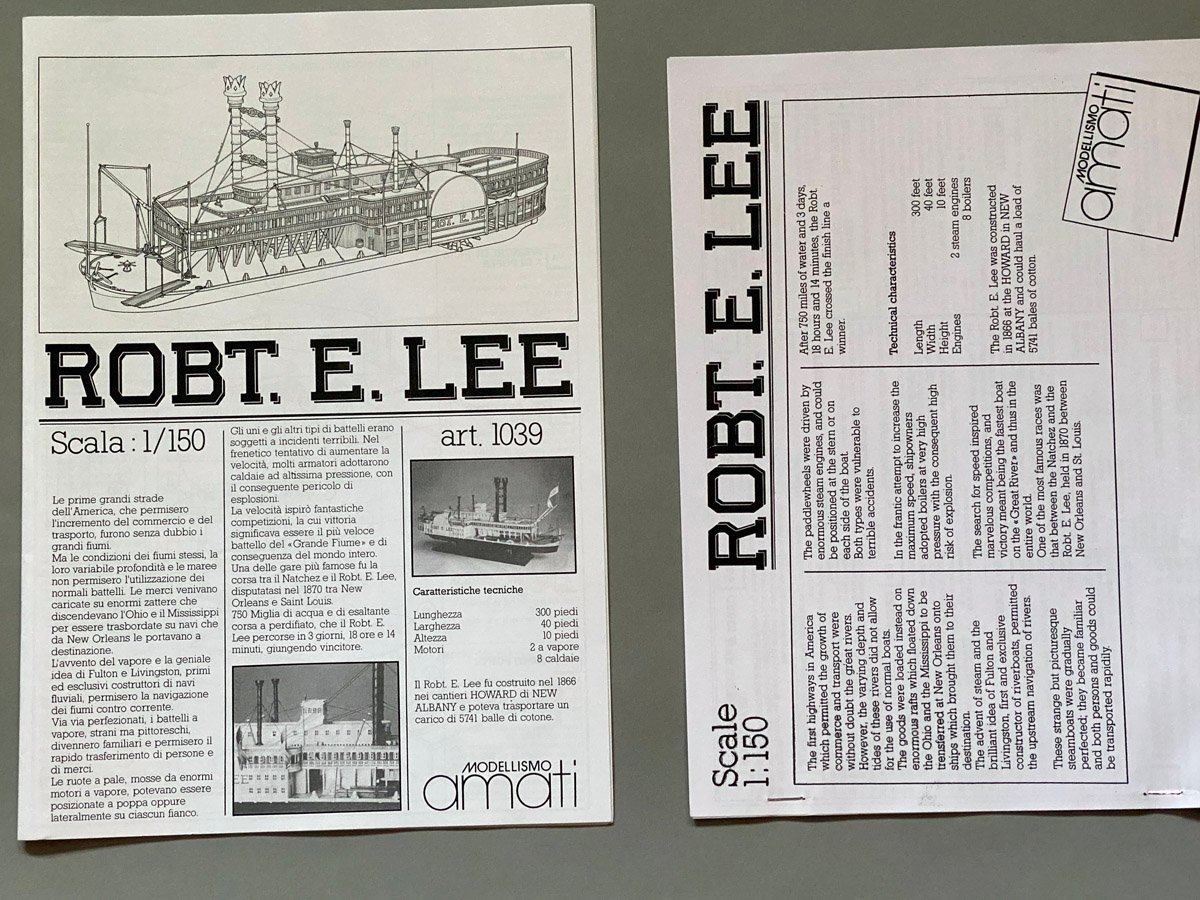
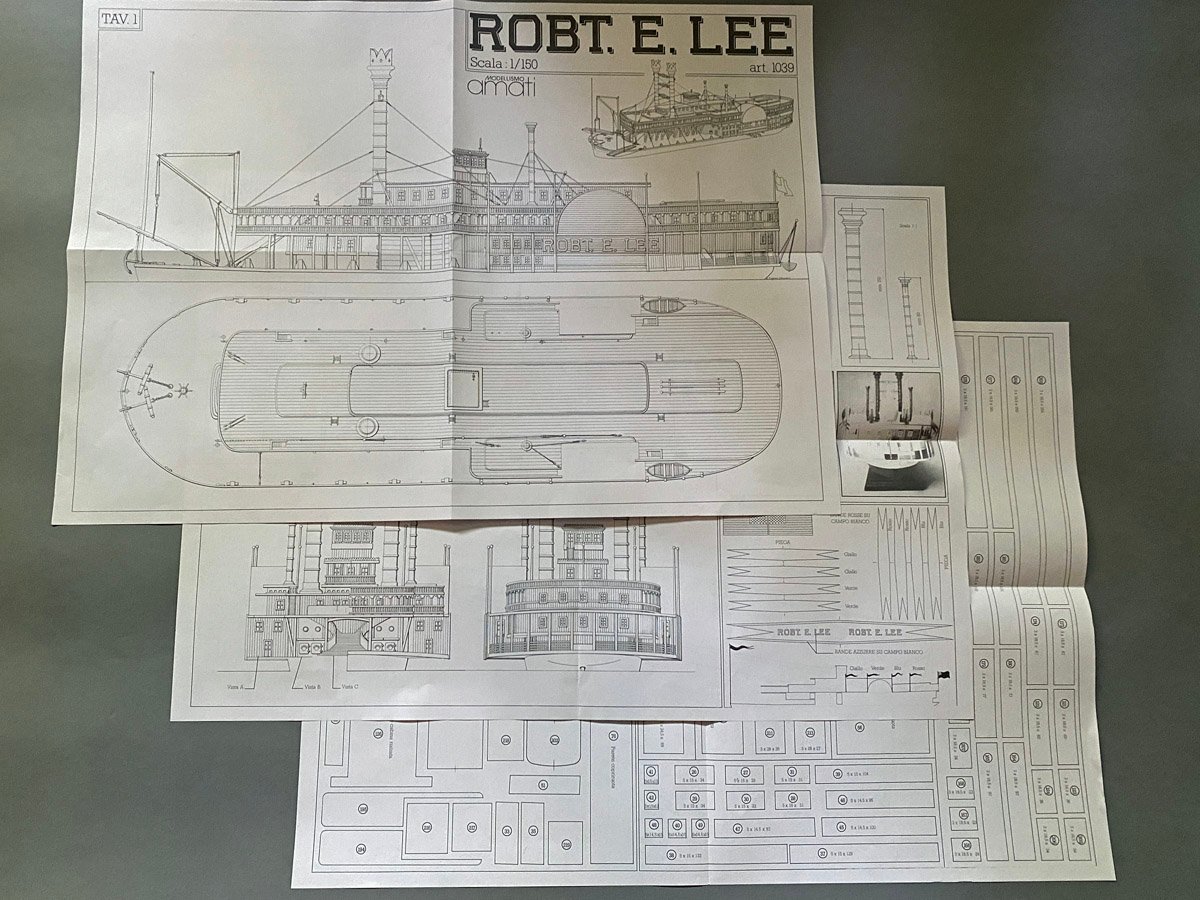
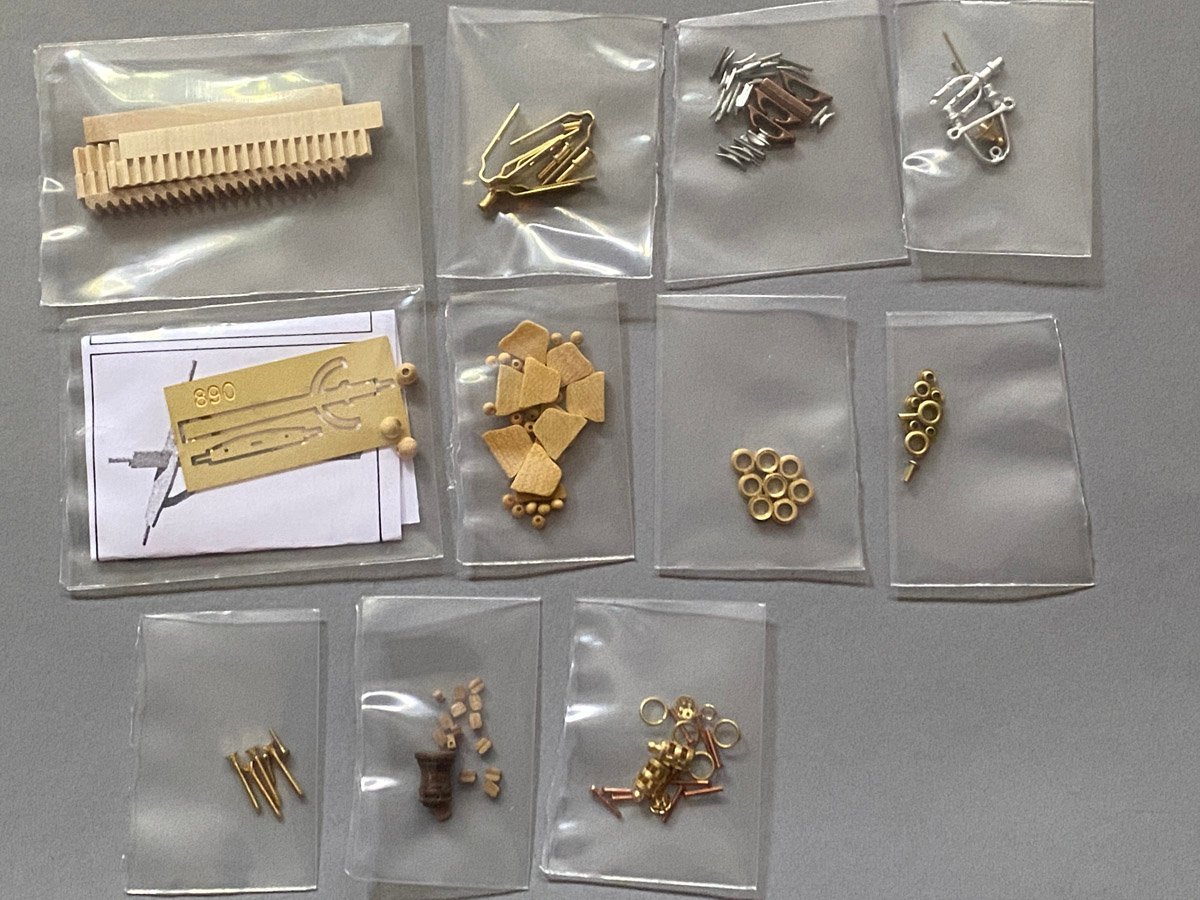
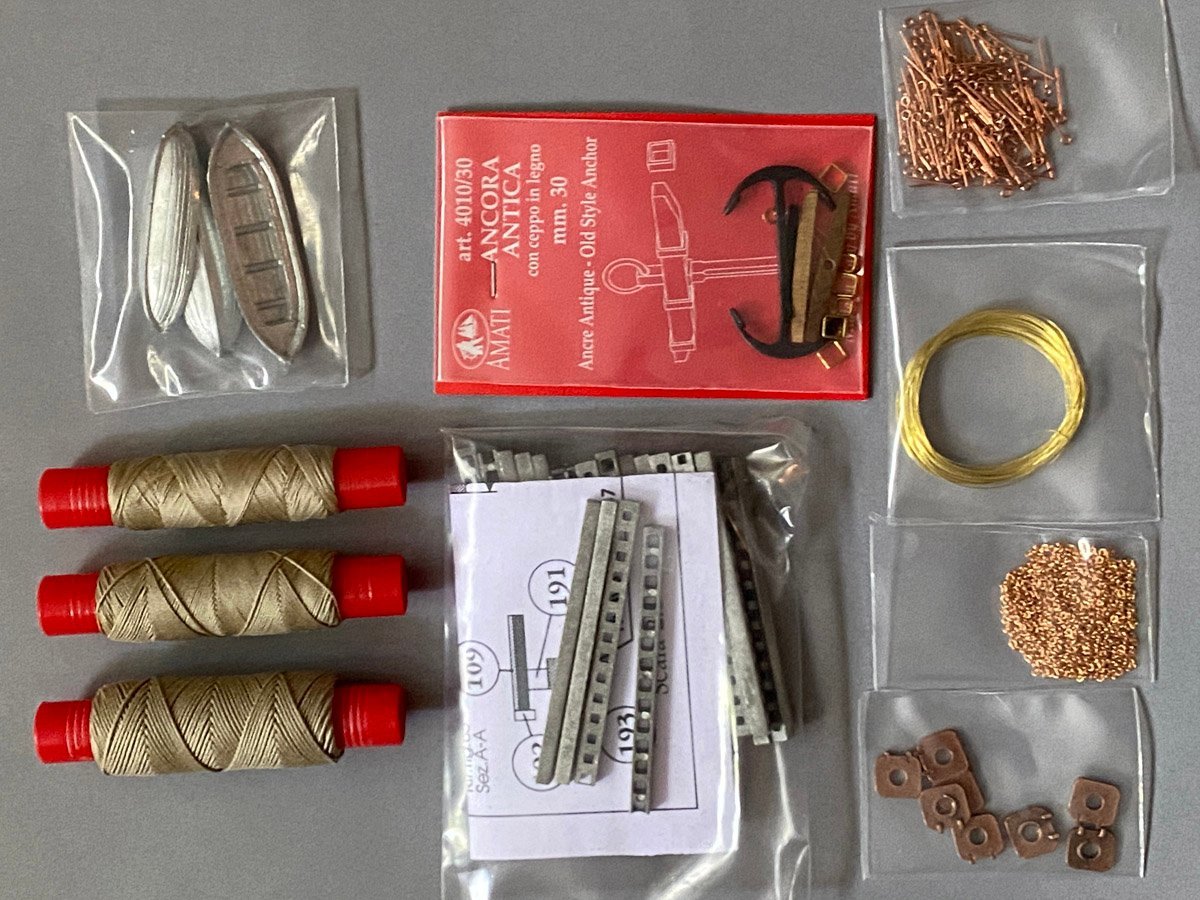
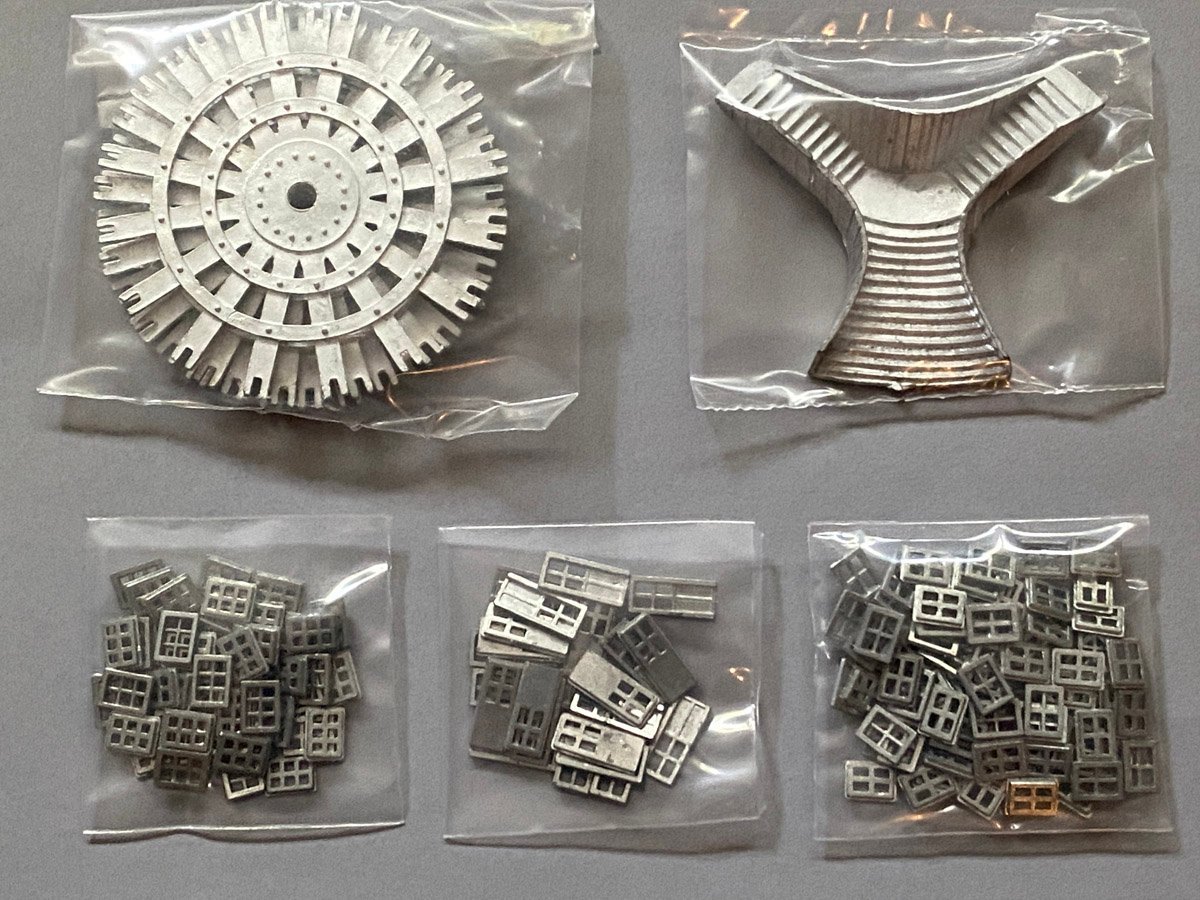
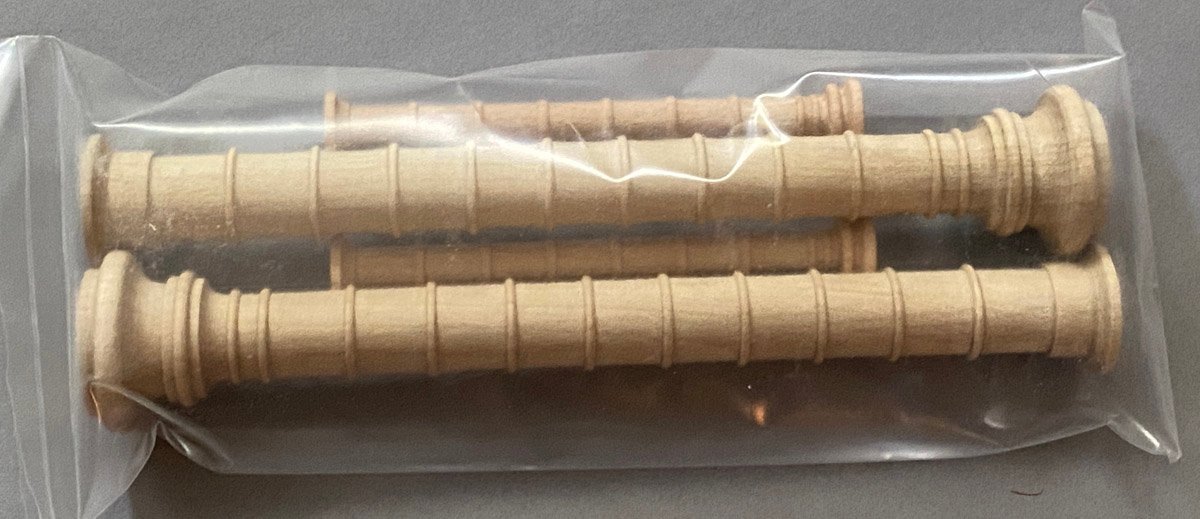
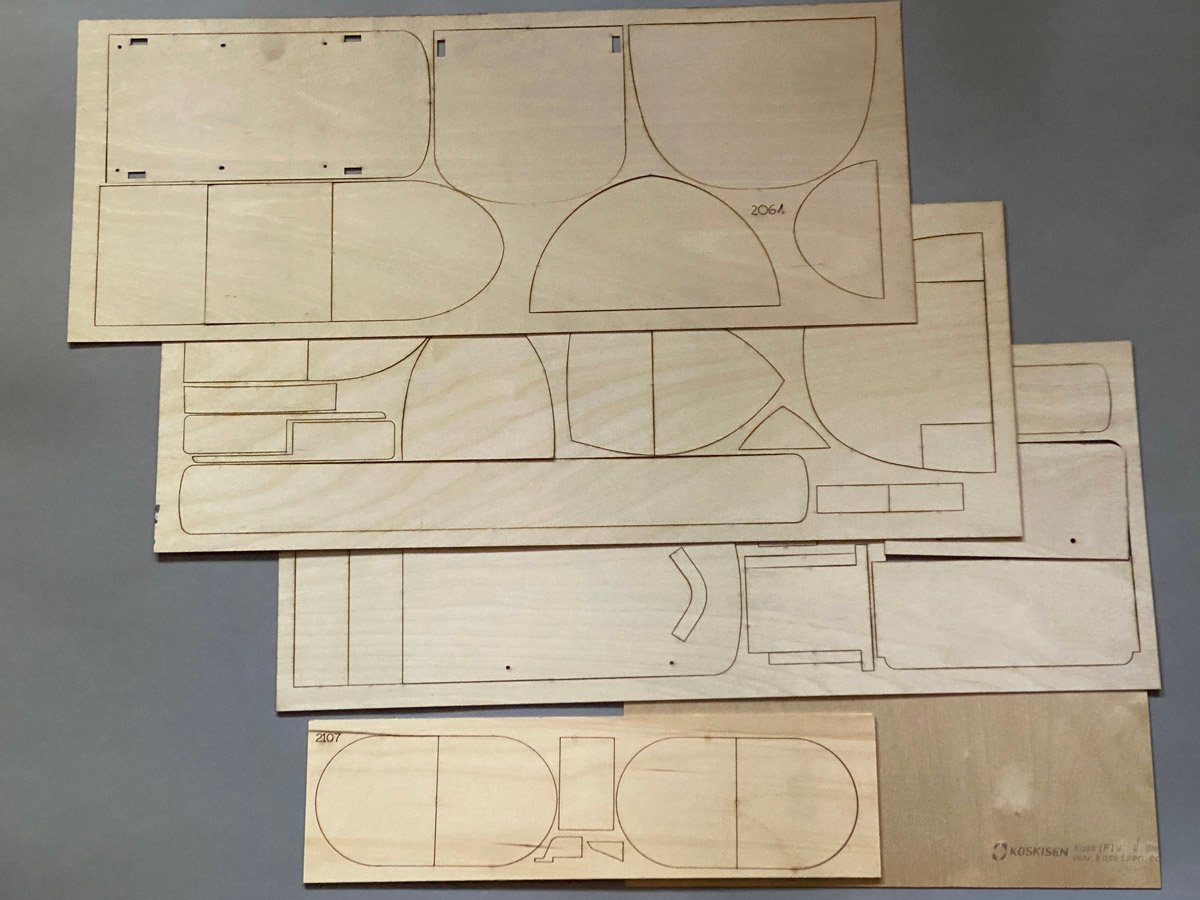
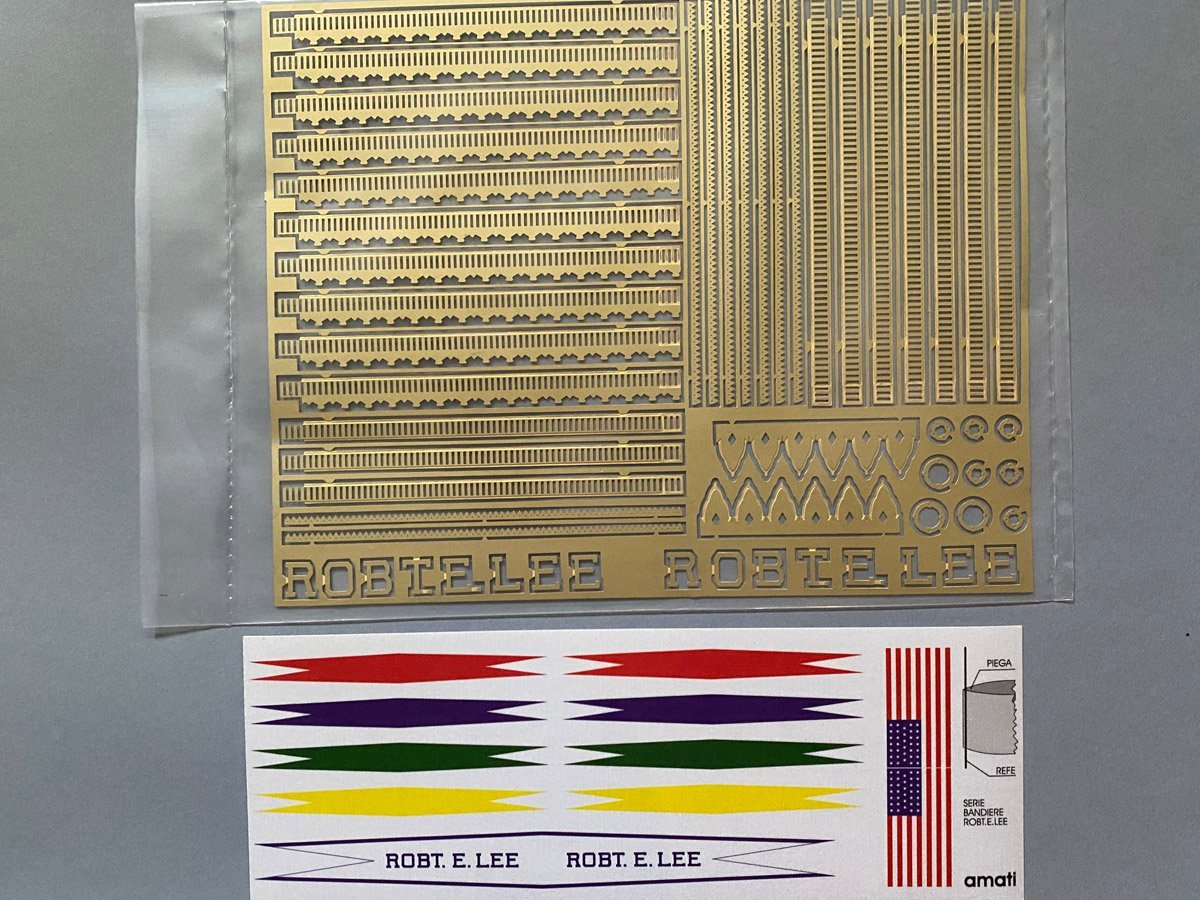
 What's in the Box Amati's kits are packaged like an Apple computer. Absolutely a pleasure to open. Another view of the box. Inside the box. The hull is fully carved from clear white pine about 1.5" thick. The detailed instructions are in Italian but separate sheets have English translations Three sets of plans printed on both sides. Mostly three-views of the ship, but one sheet of full-sized patterns for various parts. The laser-cut parts are not numbered so you need this sheet to identify them. Hull, lots of beautiful strip wood, and some wires. Stairs, hinges, and various cast or machined parts. Rigging, lifeboats, anchors, chains, etc. Seems like the rigging should be black? Cast paddle wheels, doors, windows, and the grand staircase. Turned smokestacks. Laser-cut decks in 1mm ply. And finally photo-etched filigree and printed flags.
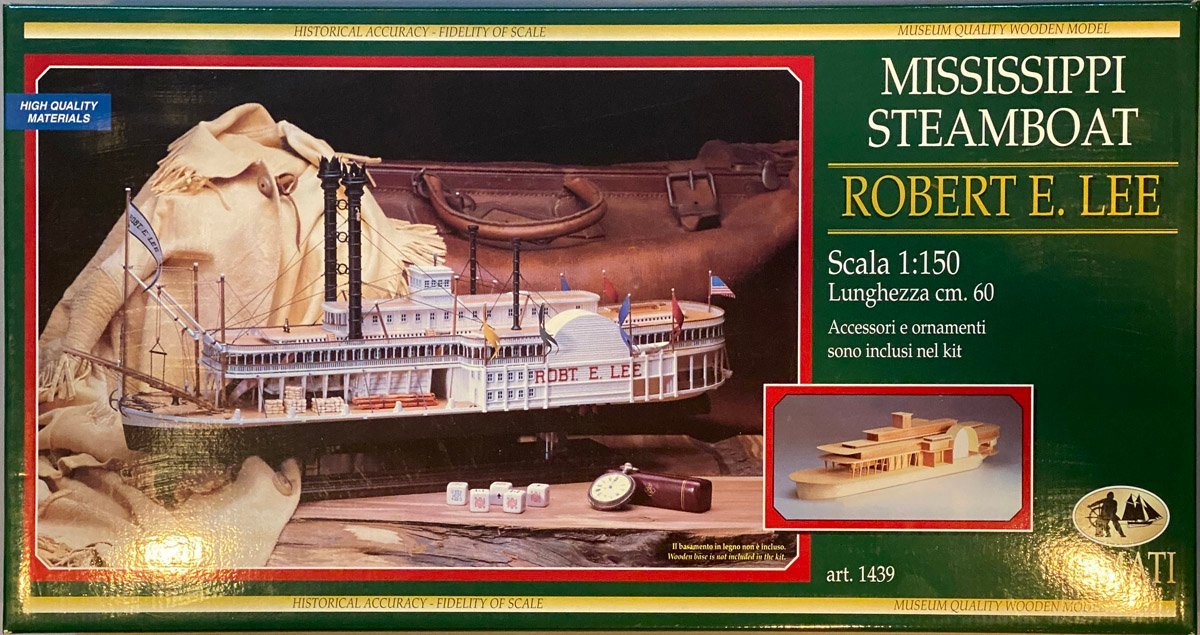

- 58 replies
-
- 5
-

-
- Robert E Lee
- Amati
- (and 4 more)
-
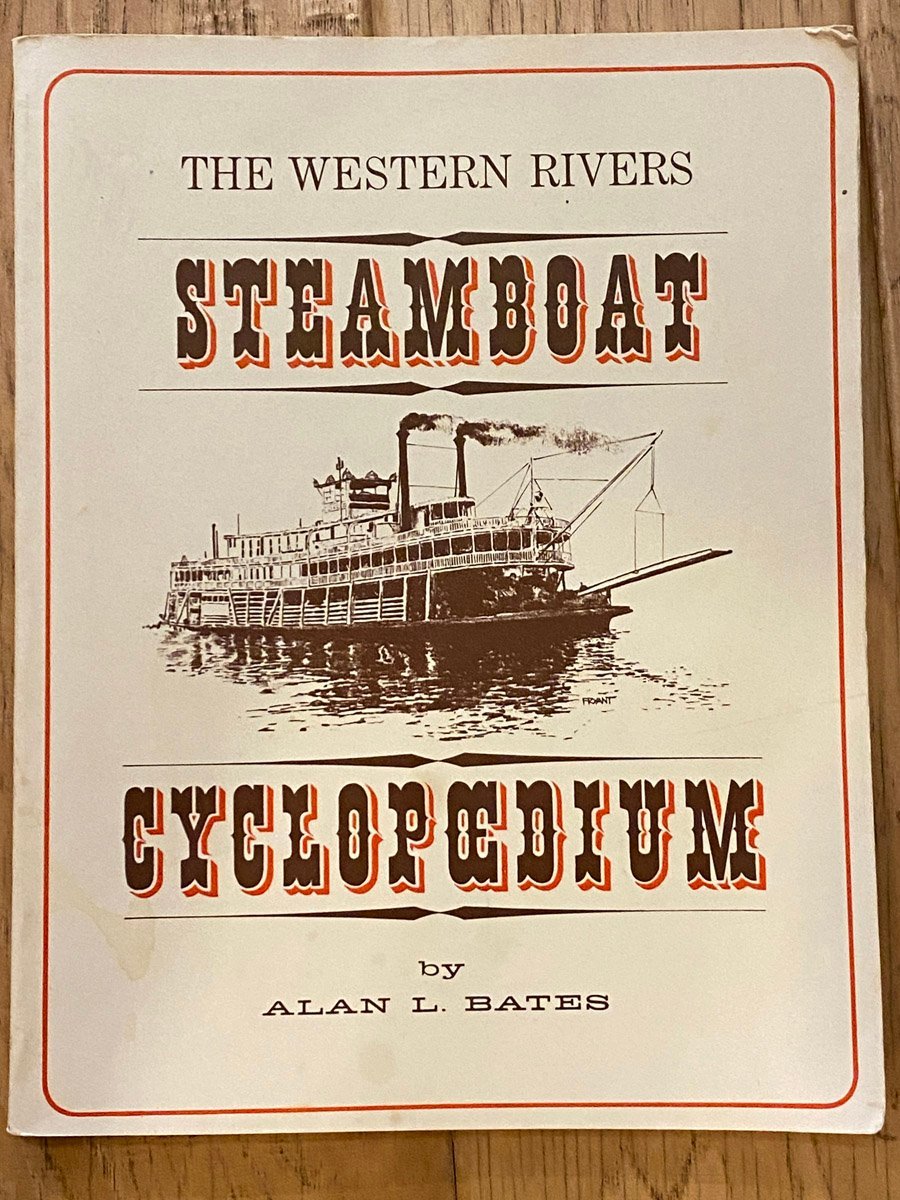
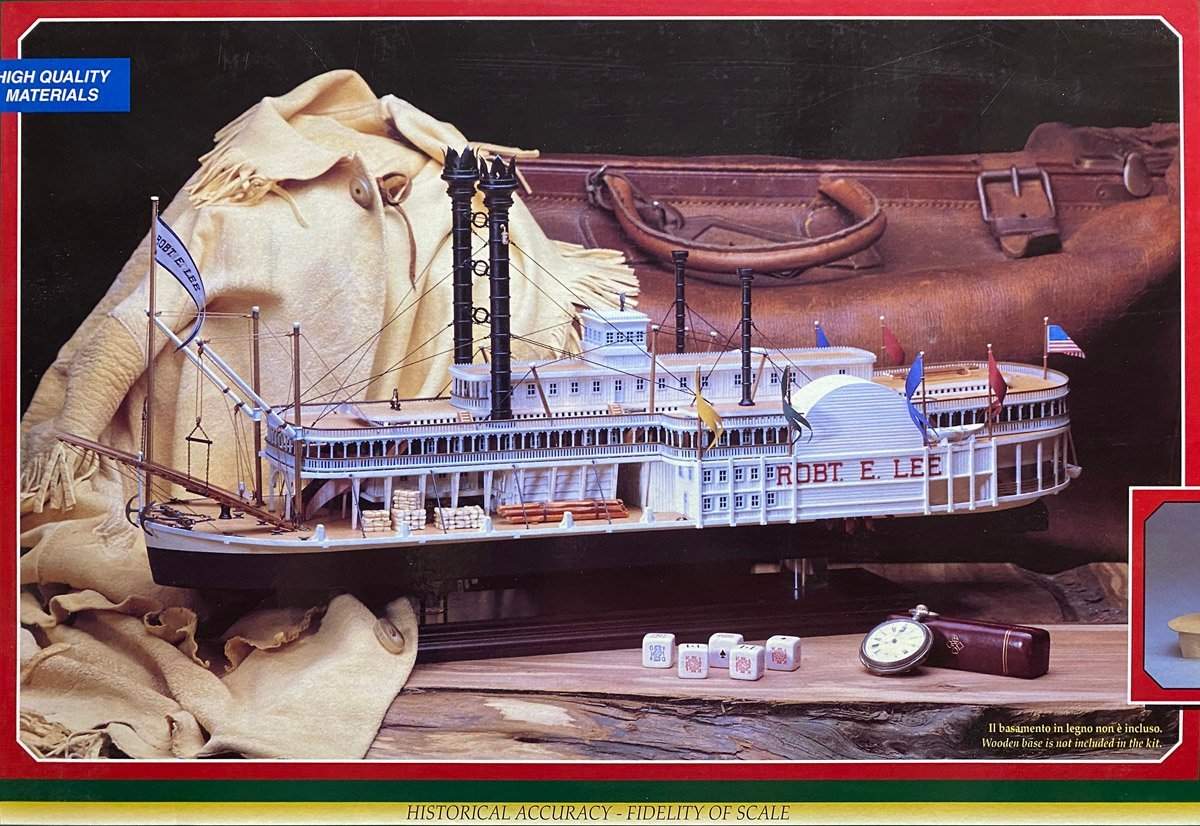
Reference Material The link above by bcochran has excellent historical information about the Robert E Lee. His link introduced me to this book, The Western Rivers Steamboat Cyclopaedium, by Alan L. Bates, Hustle Press, Leonia, NJ, 1968 (I was in high school.) I found a perfect copy of the 2nd printing from 1981 on eBay. The author worked on ferry and excursion boats in the 20s, as a deckhand on towboats in the 40s, and finally as mate on the BELLE OF LOUISVILLE in the 60s. He was an architect by trade and the book is filled with his drawings of steamboat construction. I read it cover-to-cover in one sitting and learned so much. For instance, The hulls were very long, narrow, and shallow, and tended to flex. The engines and wheels were extremely heavy, so the hulls wanted to sag at those points. To keep everything rigid the ships were braced internally with poles, cables, and chains, like a suspension bridge. You can see some poles connected by cables sticking out of the roof of the model on the box top shown above. The stern-wheelers had two double-acting cylinders connected to the wheel at 90 degrees so there were no dead spots. But the side-wheelers had one cylinder on each wheel, so there were two dead spots. They put big paddles at the max-power spots and tiny paddles at the dead spots so the wheel’s momentum could carry it around. That’s a lot of clever engineering for an old boat.

- 58 replies
-
- 1
-
-
- Robert E Lee
- Amati
- (and 4 more)
-
I am starting a build of the Mississippi River Steamboat Robert E Lee. This is something that I don't know much about, and I would appreciate any advice. The kit is by Amati, and the photo of the box top shows the completed model. I have built several Amati kits and know that their attention to detail is superb, so I am confident that this will build up into a beautiful model. There are a lot of build logs of this kit on MSW and a lot more of other Mississippi riverboats, so I will forego the history lesson and post links to the other build logs. This will help me find them in the near future when I am trying to figure out some complicated assembly. Please let me know if I missed your build. Mississippi Riverboat Builds on MSW Robert E. Lee Steamboat by John Ruy - FINISHED - Bluejacket Shipcrafters - 3/32” to 1’ scale 1:128 Beautiful build, vintage kit, good history and discussion. Robert E Lee by rodgerdodger - FINISHED - Amati Beautiful build, ~7 months Robert E Lee by Script - FINISHED - Amati - 1/160 Mississipi Riverboat Beautiful build, incomplete log after system crash Robert E Lee by lazyguy - Scientific - scale 1/8" = 1.45’ Vintage kit finished after 27 years!! Robert E Lee by Mike Dowling - FINISHED - Constructo Plank-on-bulkhead hull, hand-built stairs, natural finish, 4 months Robert E Lee steamboat by bcochran - Pyro - 1/163 Vintage plastic model (1961), lots of historical information King of the Mississippi by john46 - FINISHED - Artesania Latina - scale 1:80 Beautiful build, long, detailed log, modeler passed away suddenly when nearly complete Robert E Lee by Dan Evans - Amati - 1:150 Incomplete
- 58 replies
-
- 2
-
-
- Robert E Lee
- Amati
- (and 4 more)
-
I am also a big fan of canopy glue, but use CA for almost everything else. However, I've never built a card model. Do you use canopy glue or something else for most of your construction? How do you hold the parts together while the glue dries?
-
F4-D Phantom - Dumas - FINISHED - 1/25 Scale
rvchima replied to rvchima's topic in Non-ship/categorised builds
Thanks for keeping an eye on everything Chris! The site asked for tags so I put some in. -
F4-D Phantom - Dumas - FINISHED - 1/25 Scale
rvchima replied to rvchima's topic in Non-ship/categorised builds
Thanks everyone. I built my first model airplane with my Dad when I was 8 so I've made a lot of them. I made a couple of model ships in my teens, but no more until I retired. The ships are usually a lot more challenging but it's all fun. -
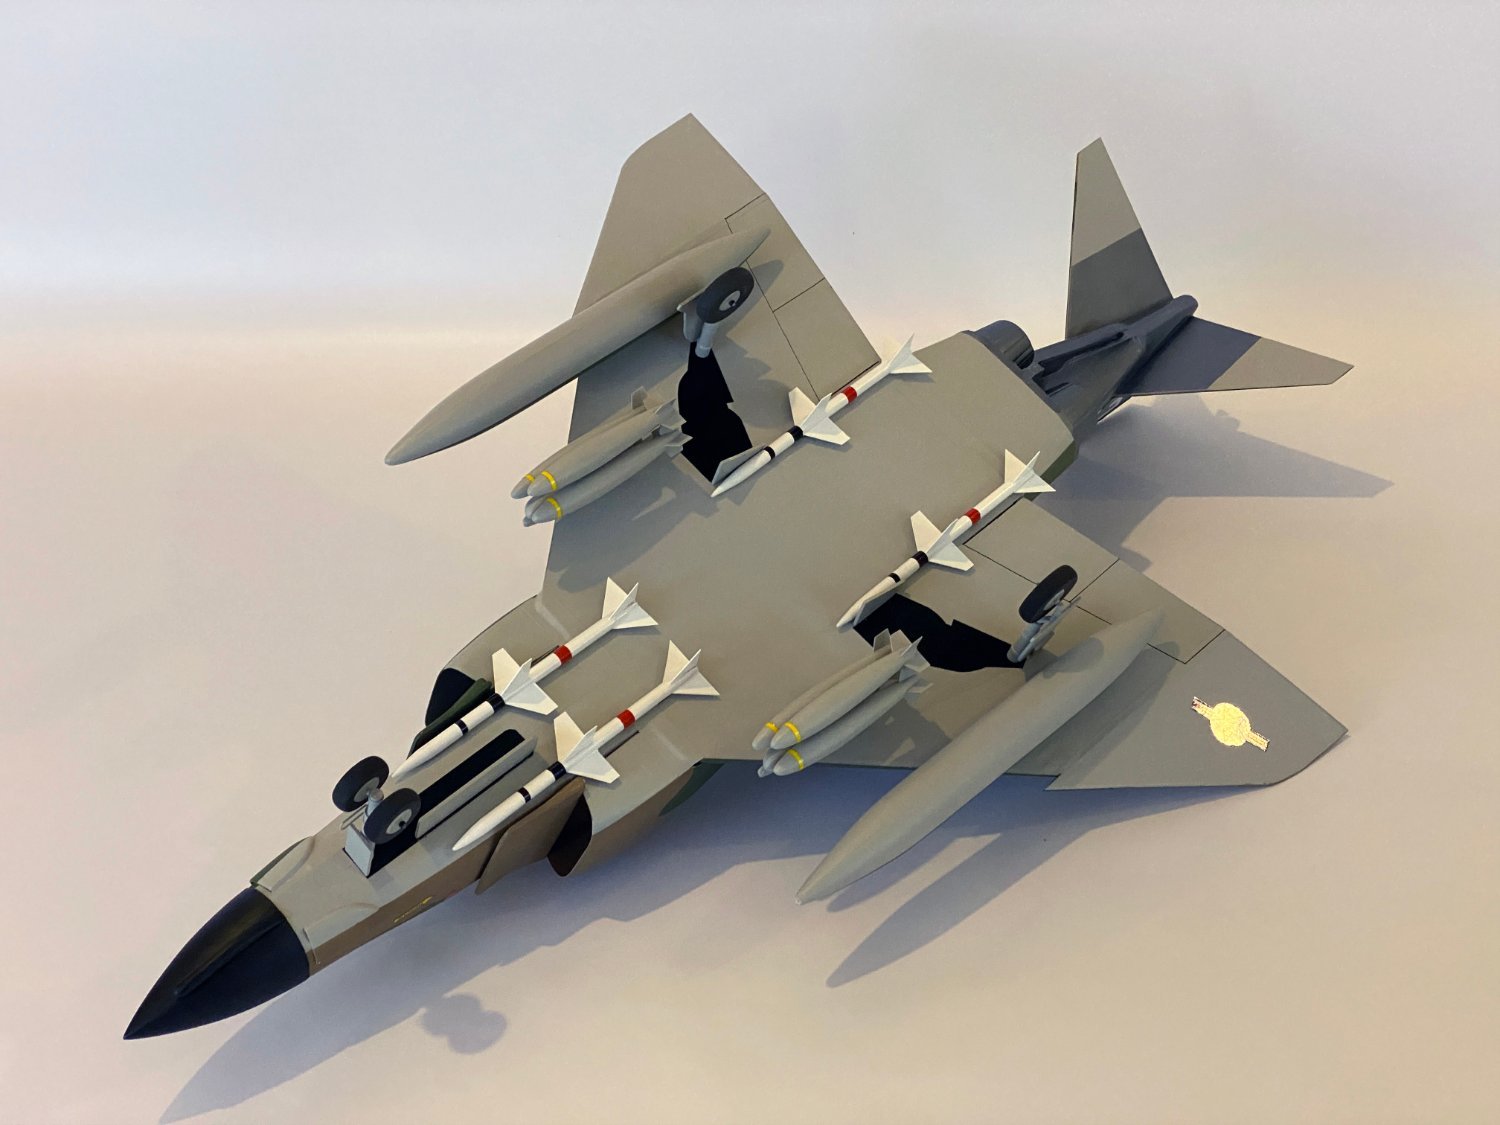
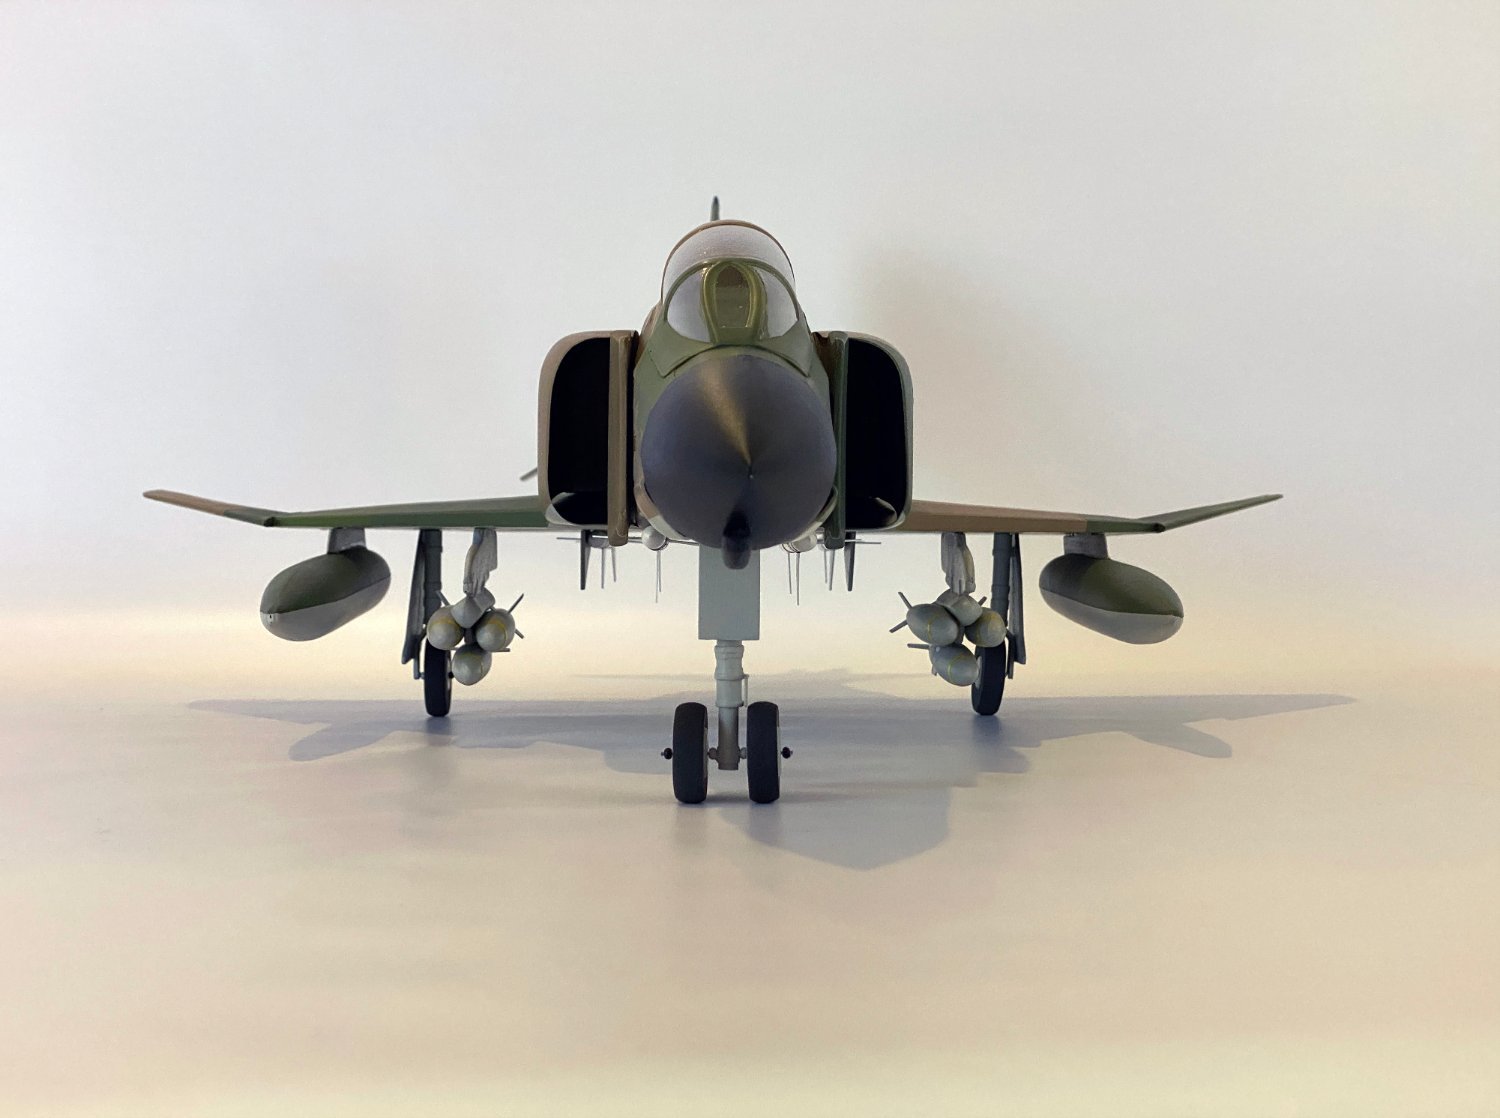
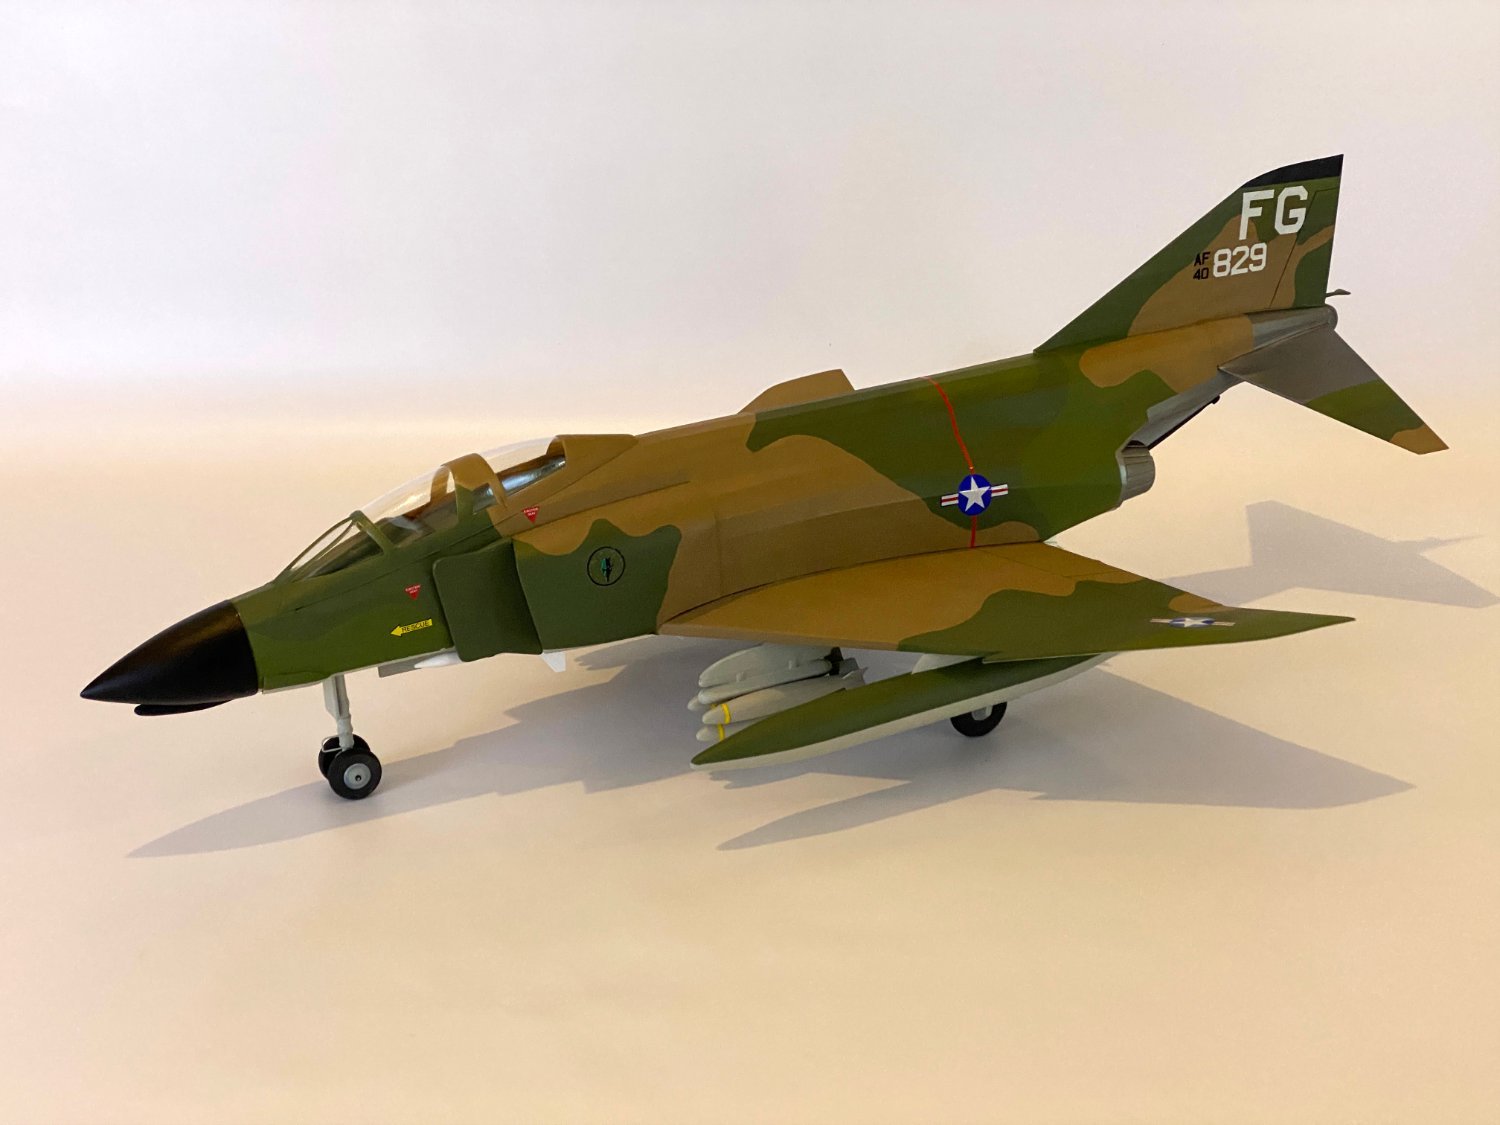
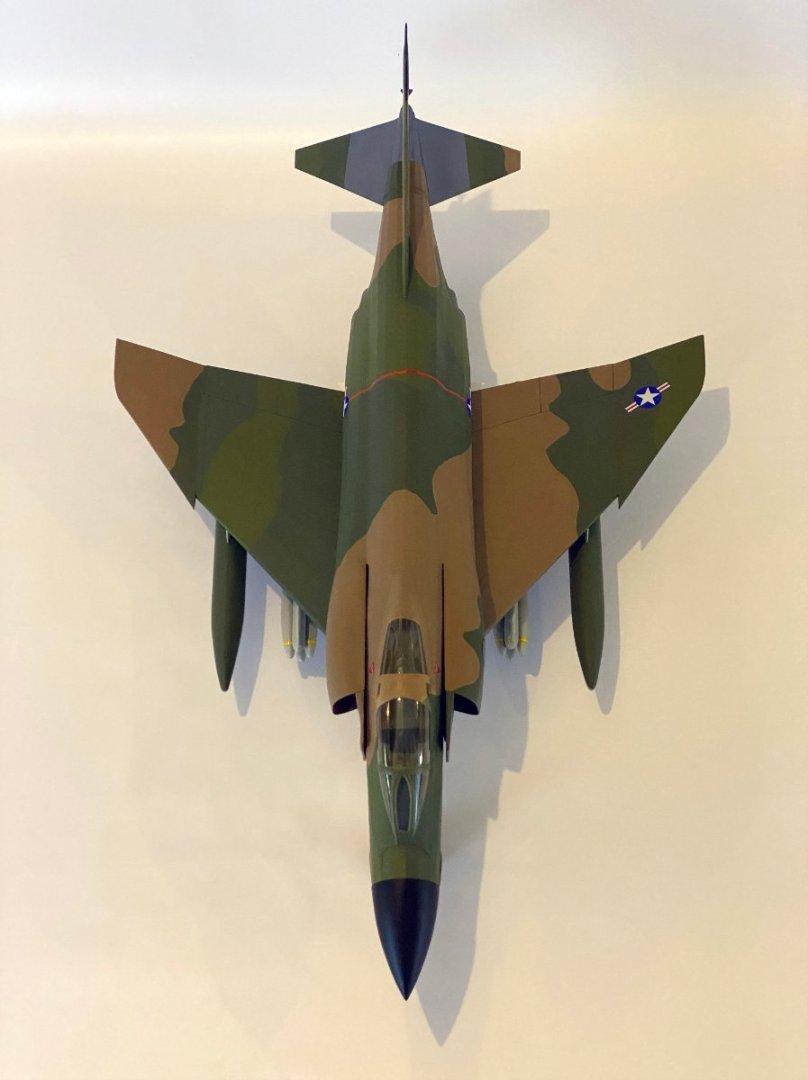
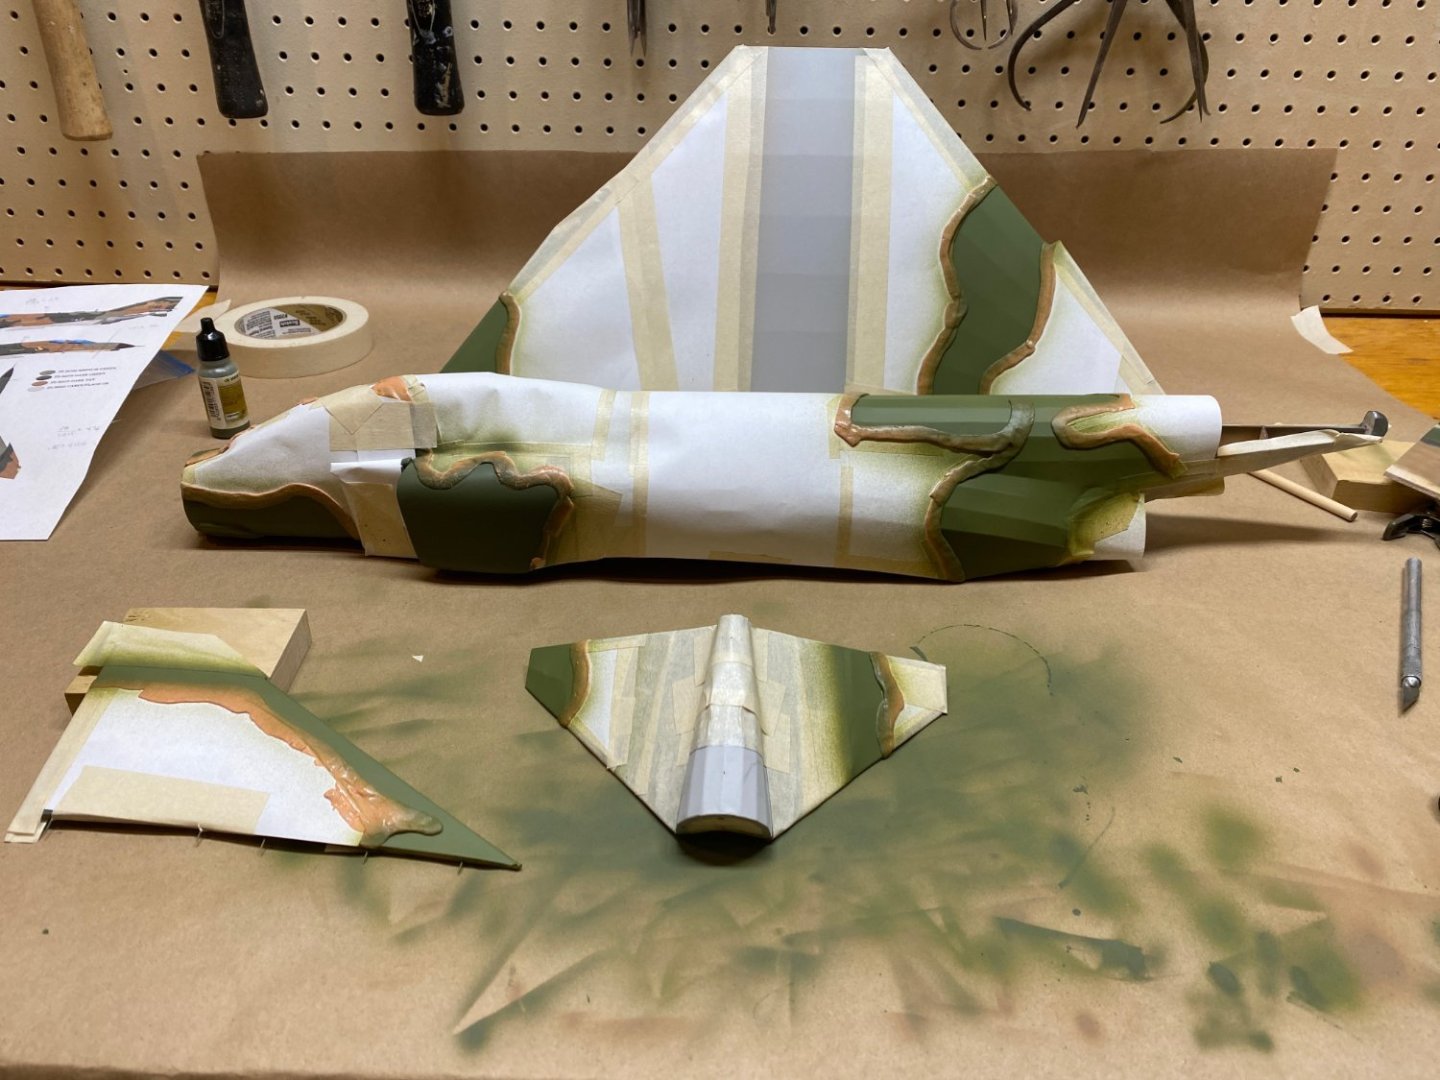
I just finished a "stick and tissue" model of an F4-D Phantom jet in Vietnam camouflage. The kit is made by Dumas Products. They make a nice range of boat kits, rubber-powered aircraft kits, and also a couple of static scale aircraft kits like this one. The kit comes with a nice selection of light-weight balsa, vacuum-formed accessories, and four colors of tissue for covering. Since it will never fly I decided to cover it instead with iron-on Oracote, and since Oracote shrinks very tight I replaced all the stringers with much heavier balsa. Here's the frame before covering: I air brushed the model with Vallejo acrylics, and used Silly putty to mask the camouflage. There are LOTS of YouTube videos that recommend Silly Putty, but I had a lot of trouble with it. Remember when you were a kid and used Silly Putty to lift images out of comic books? Well if you leave it on acrylic paint overnight it lifts some paint and leaves a darker streak. I had to repaint most of my camo. If you remove it immediately it works OK. Here's the paint job in progress: The model is 1/25 scale and 28 inches long, basically "drive-by scale." It looks pretty good if you drive by slowly.


-
Harry, You did it! Congratulations on a beautiful model. I really enjoyed following your build log. You got started before I did, and I got a lot of good information from you. Please let me know when you start something new so I can follow along. Rod
-
Beautiful work on the Yamato, Ted! I am anxious to see a build log for the Missouri. Thanks for showing the photo of your display wall too. I always wonder where builders put these big models. Rod
-
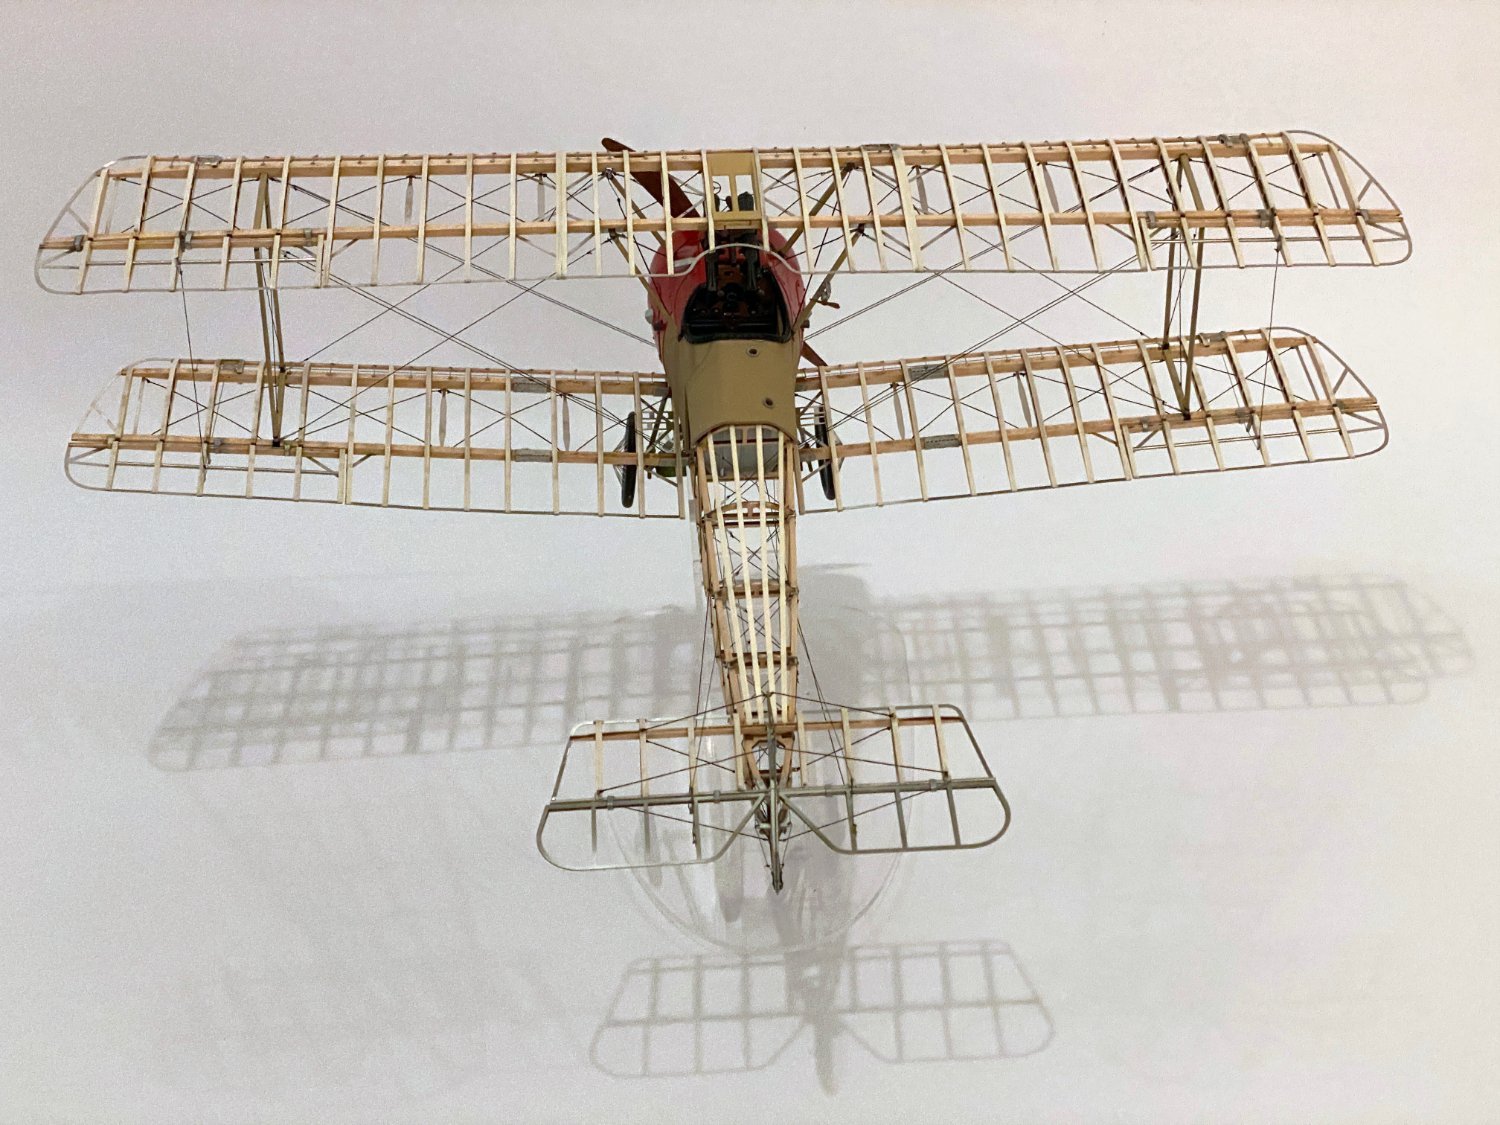
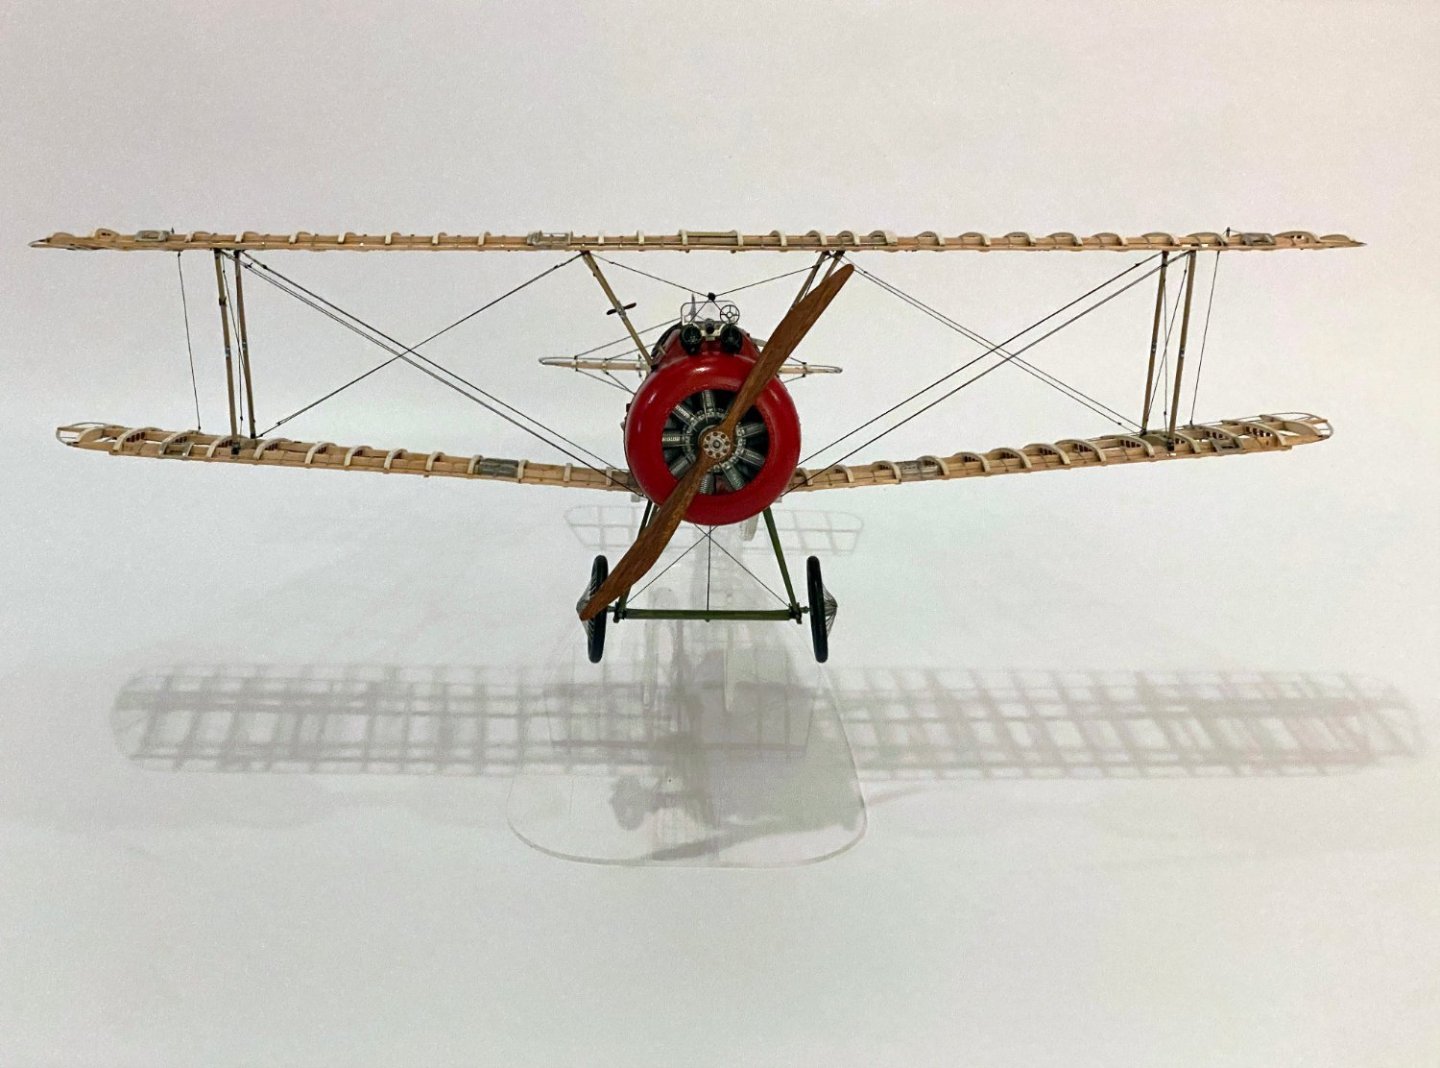
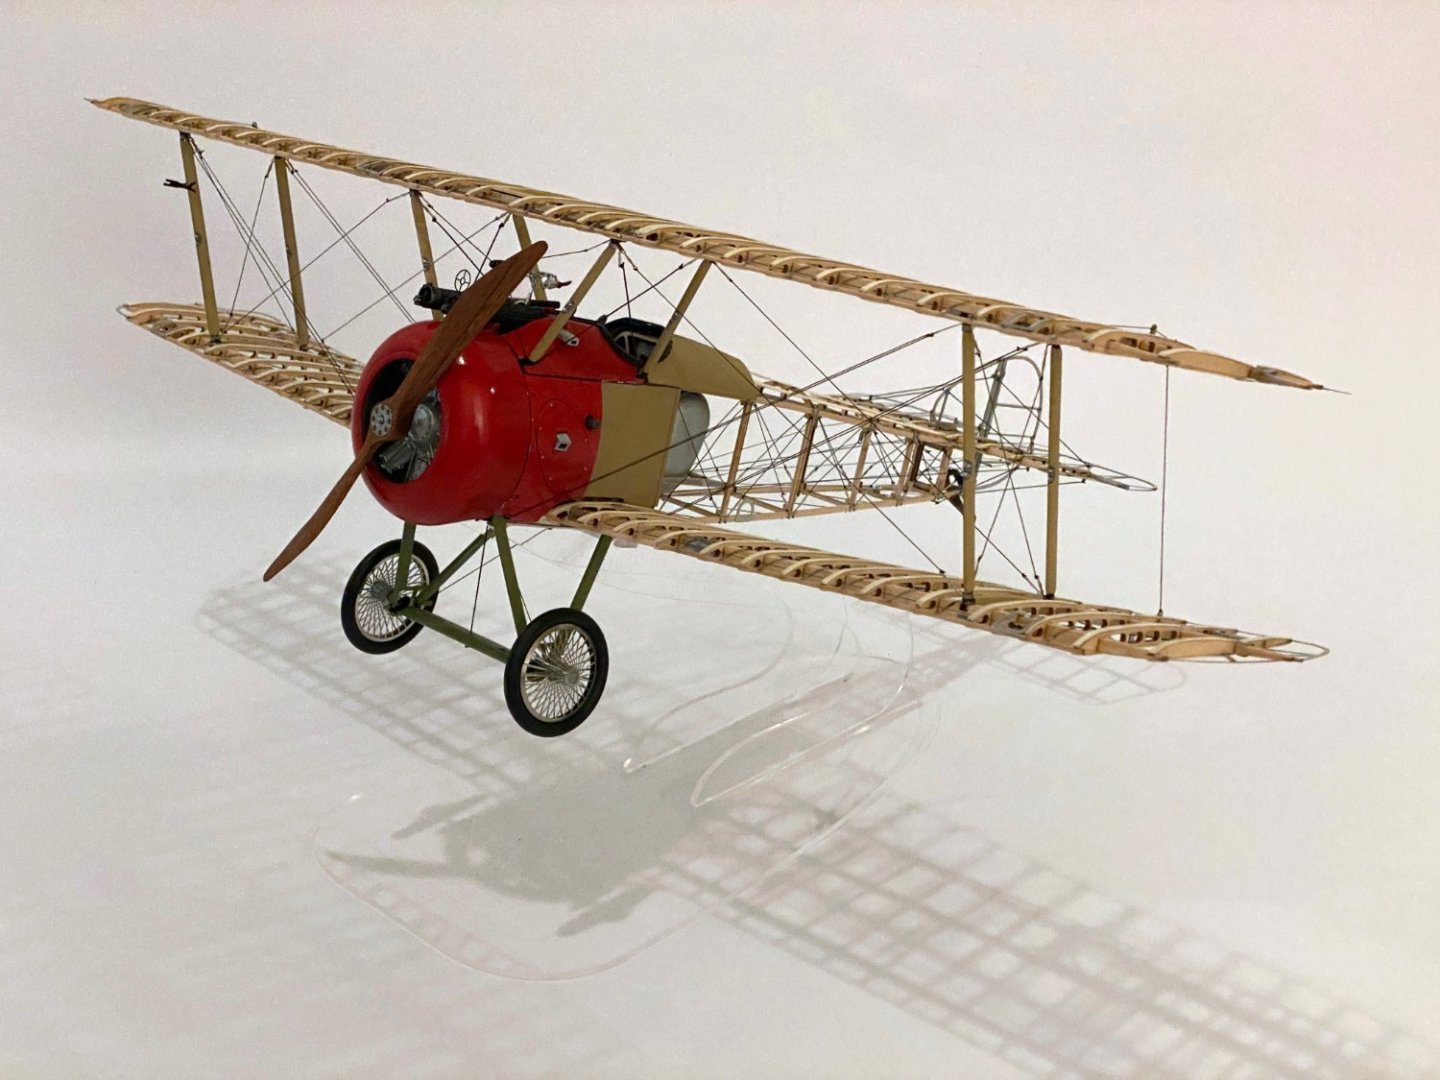
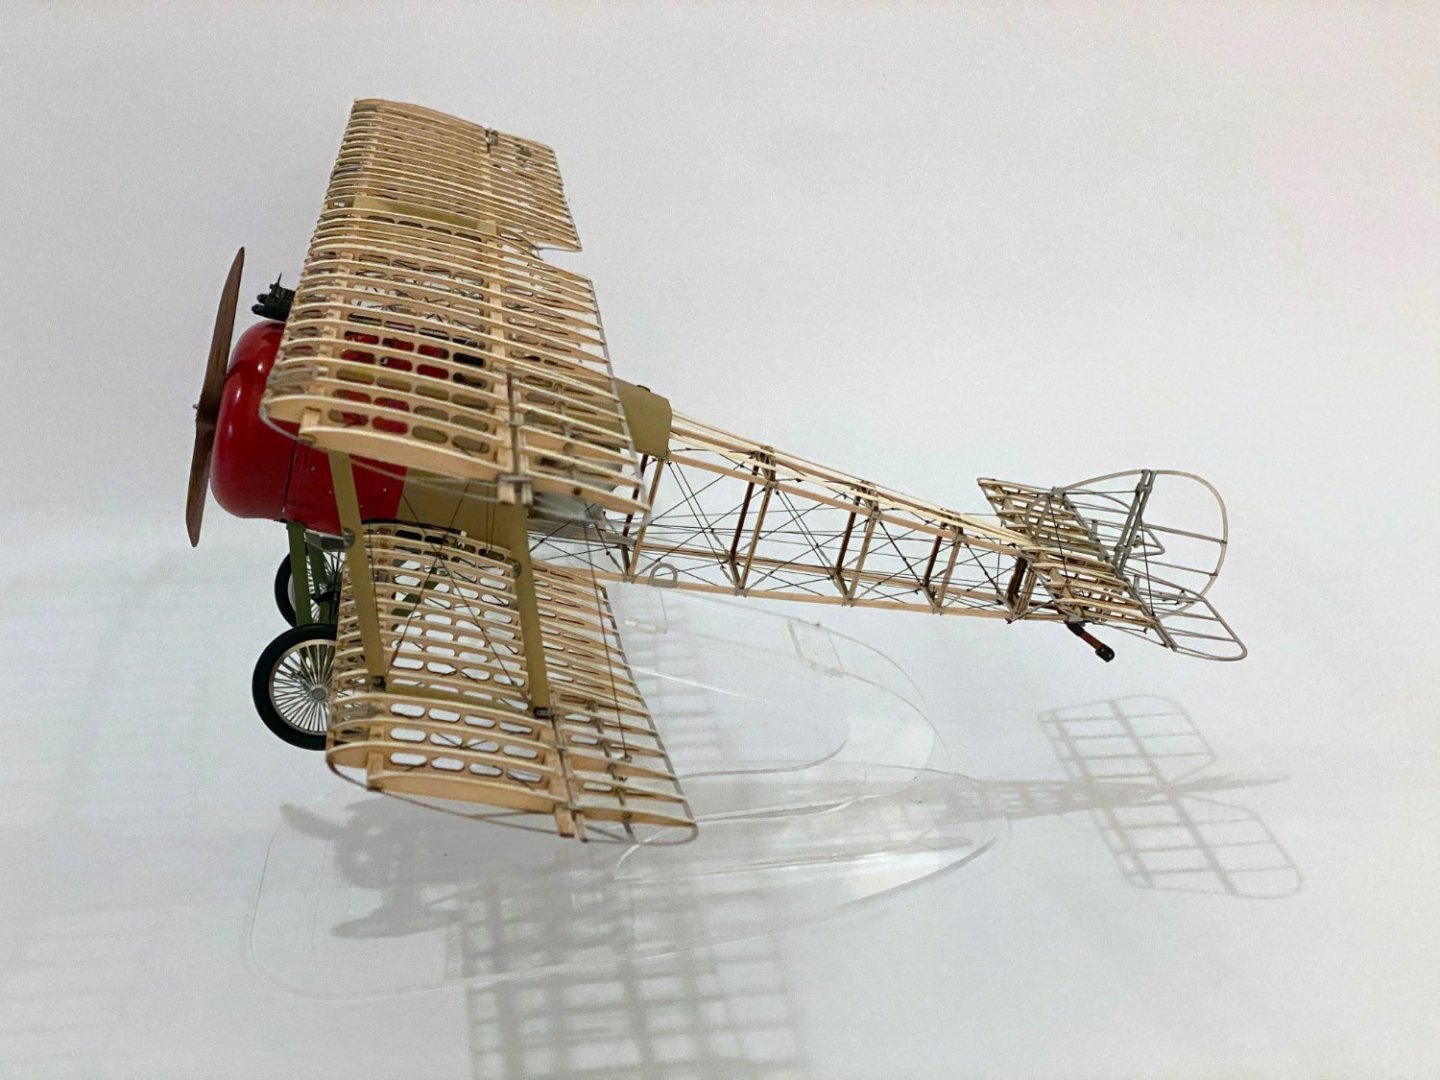
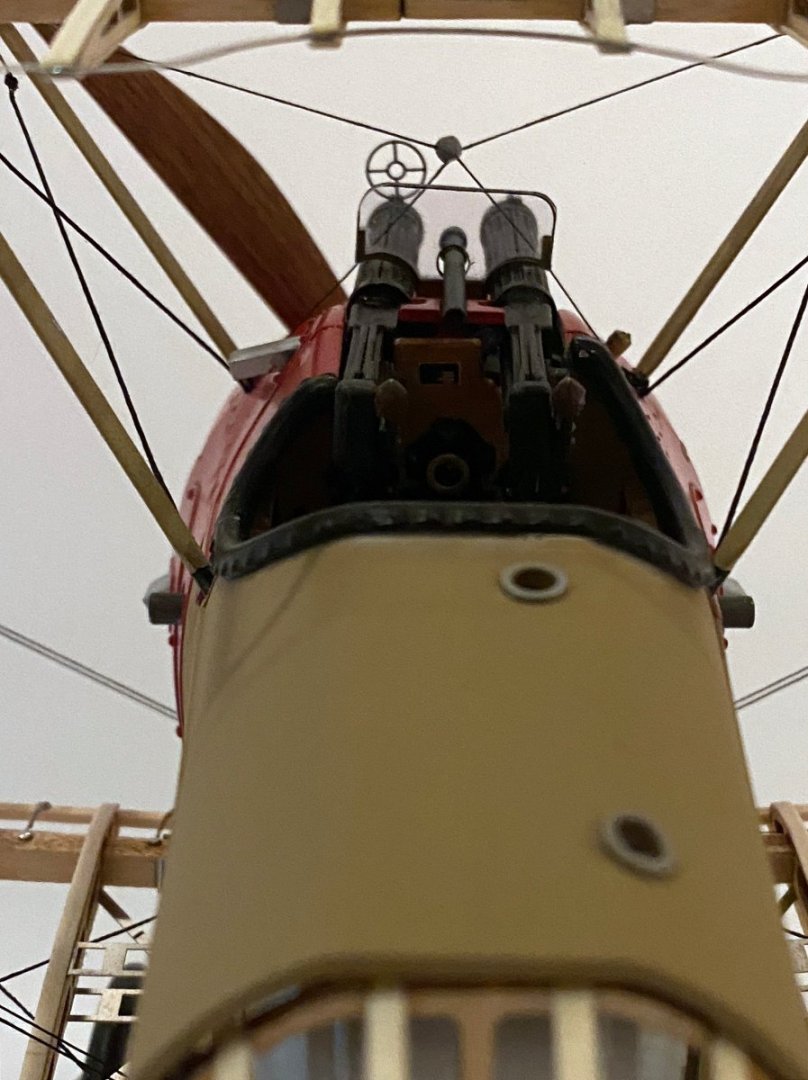
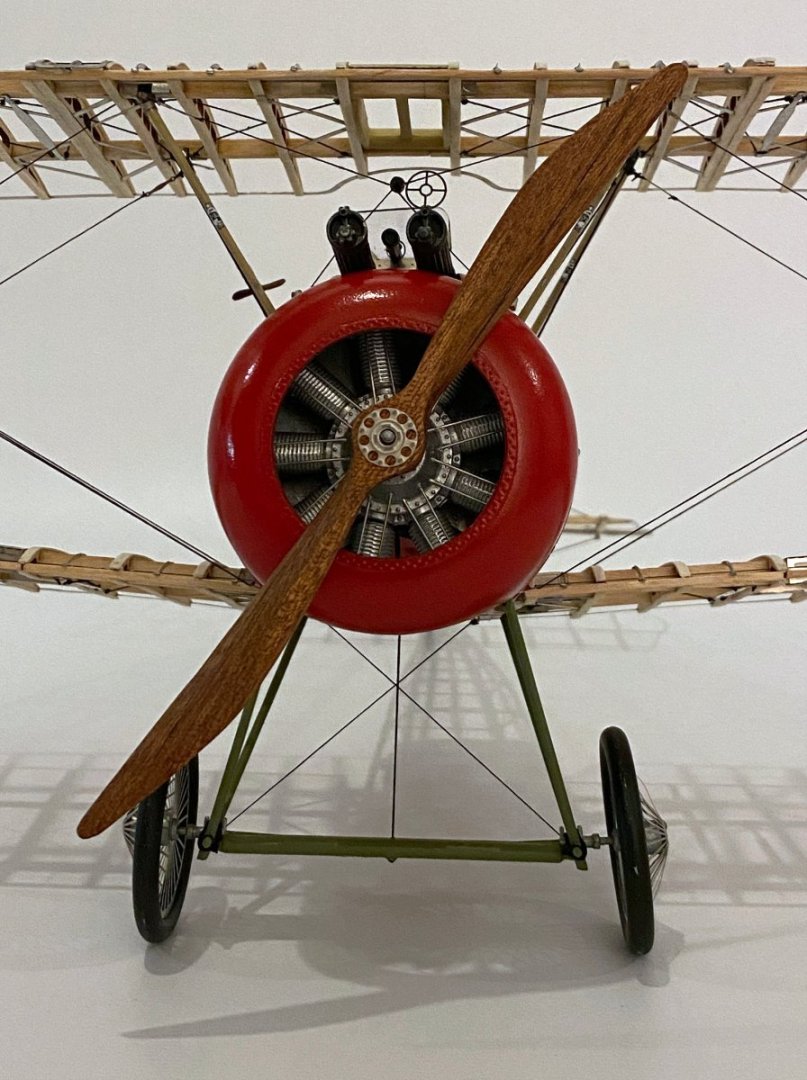
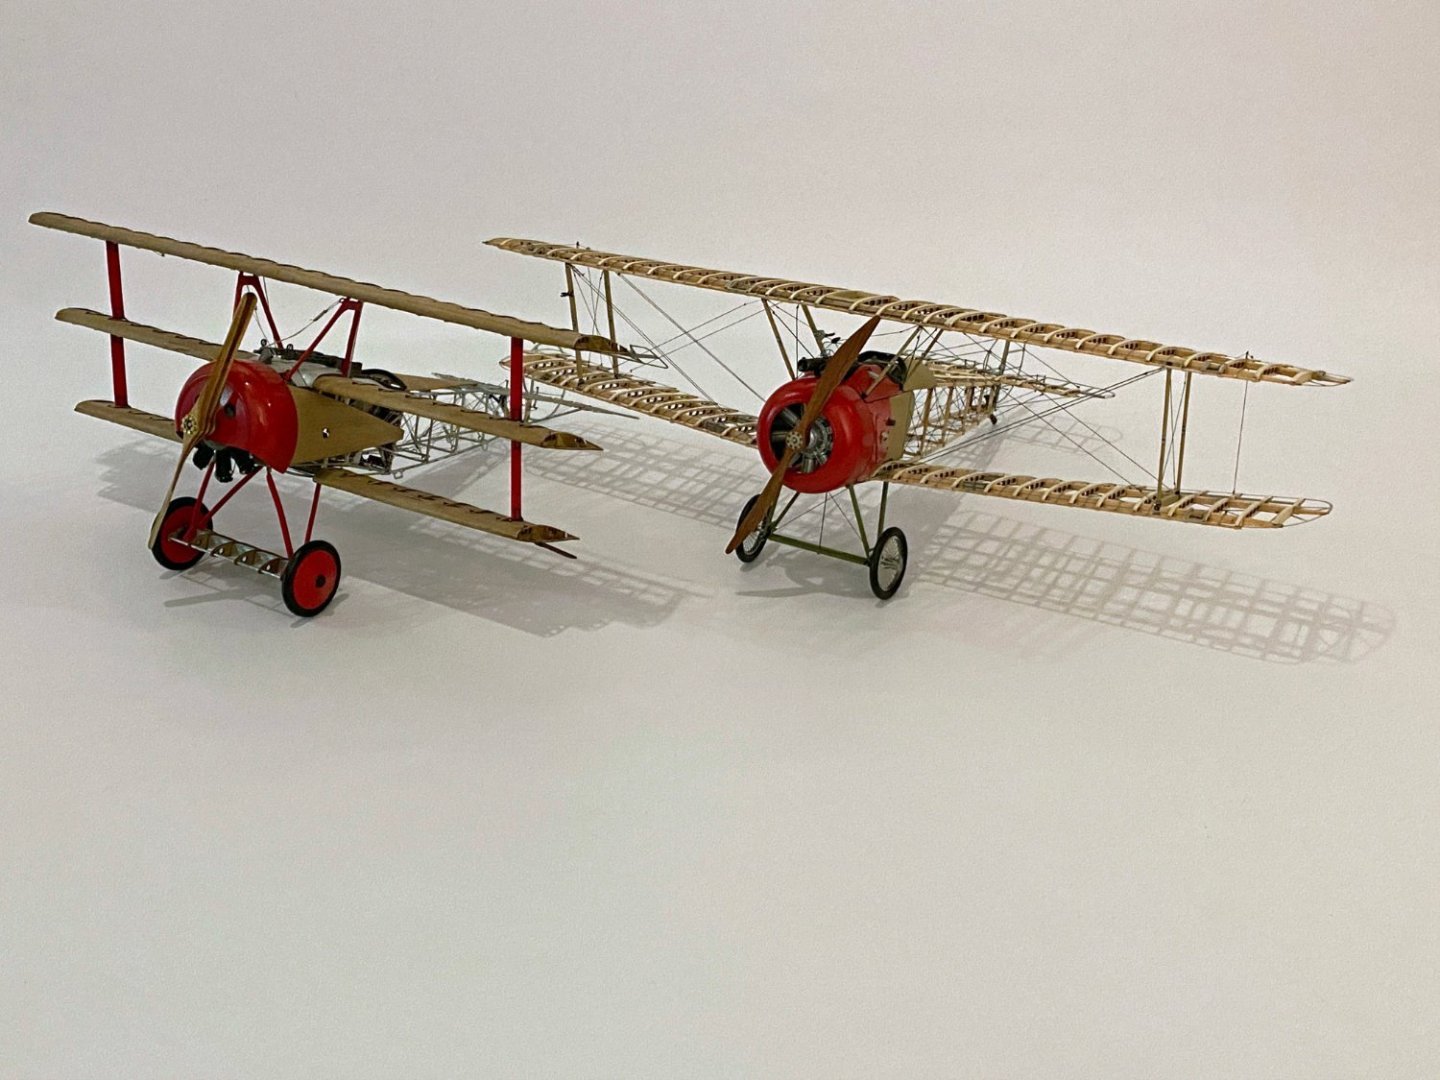
I just finished a "skeleton" model of a Sopwith Camel, you know the one that Snoopy flies. It is a 1/16 scale kit made by Spanish company Artesania Latina. The instruction manual is a pdf file 267 pages long with no text, only photos, so I had to keep my laptop on for 4 months while I built the model. The wood parts are perfectly laser cut. The kit has lots of cast metal parts. The casting is excellent but the parts often don't quite fit together, making it a frustrating build. And it makes me crazy to have cast metal tires, cowling, and wood panels around the cockpit. There are also lots of photo-etched parts like all the turnbuckles that have to be folded in complicated mirror-image shapes. You only get one chance because the parts break if you have to unfold them. The kit came with black monofilament line for the rigging that simply couldn't be tied through the tiny PE parts, and some other fuzzy cotton thread for an unknown use. Luckily I have plenty of spare rigging line. Many years ago I built a similar model of a Fokker triplane "Curse you Red Baron!" but by Model Airways. The models are the same scale and look great together.

-
- 17
-

-
-
Ted, It sounds like an excellent cruise - you can't beat Viking. Please let me know how you like it. One recommendation - take some COVID test kits, bottles of Tylenol and cough syrup, and any other cold and flu meds that you like. If you don't need them you can always replace them with souvenirs at the end. Voice of experience. Rod
-
Harry's Lady, Beautiful work on the rigging! Thanks for all your help from all his friends at MSW. Rod
-
Hi Ted, I just realized that you had started this. I will be following along. What a terrible setback with the broken hull though! But anything you can build you can fix. For blackening brass I use Novocan stained glass patina. They don't have a gunmetal product. Try Brasso tarnish remover for removing your black patina. On my Syren I used a vinegar and salt solution to age the copper bottom. I remember it taking maybe 20 minutes. Then I rinsed the hull carefully with fresh water and put some Lemon Pledge on it. It still looks great after 10 years. Rod
-
Harry, It's too late now but I use Novacan black patina for stained glass to blacken miscellaneous parts. It just takes seconds, but your bleach idea seems to have worked perfectly. The chains, er... cables, look great! Rod
-
I haven't looked in for a while and missed some fascinating discussion about the paint scheme and catch guards.
-
Harry, I have to find a hobby that takes more time and less space. Sounds like one end of the space-time continuum. Rod
-
I love the photos of the ladder emerging between the grates. Did you scratch build the ladder? That's beautiful work on a tiny piece. And how did you mark the treenails on the planks? With a pencil perhaps? Those little details sure make a big difference.
-
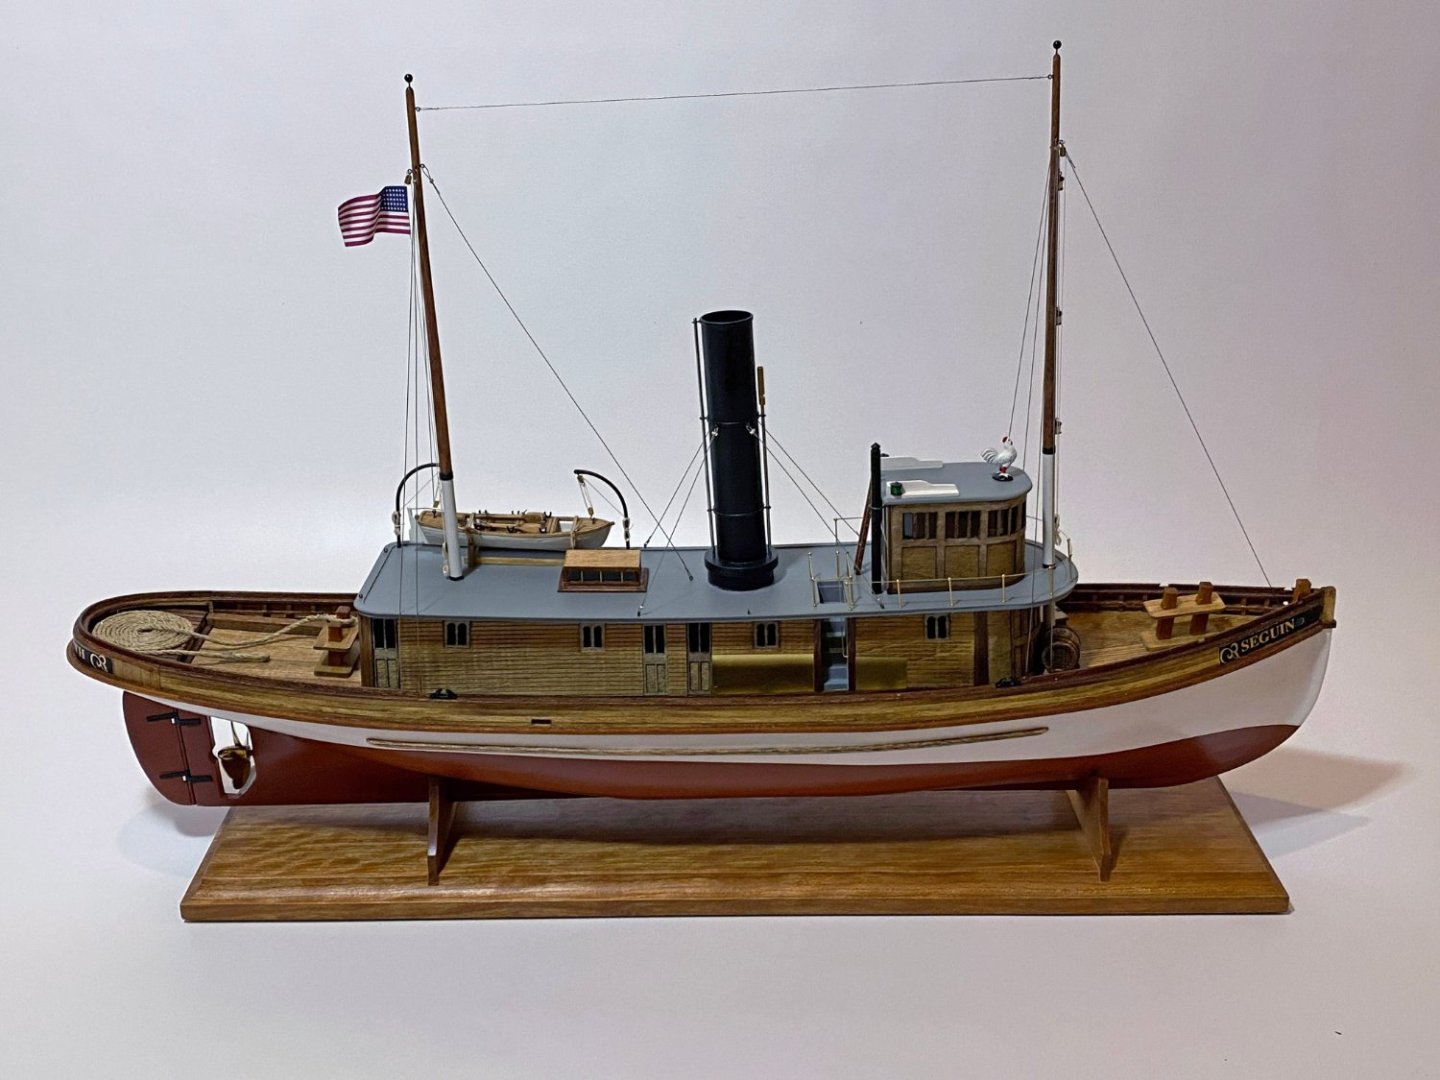
Thank you all for the compliments on my Seguin model. It really was a beautiful ship that can't help but become a beautiful model.
-
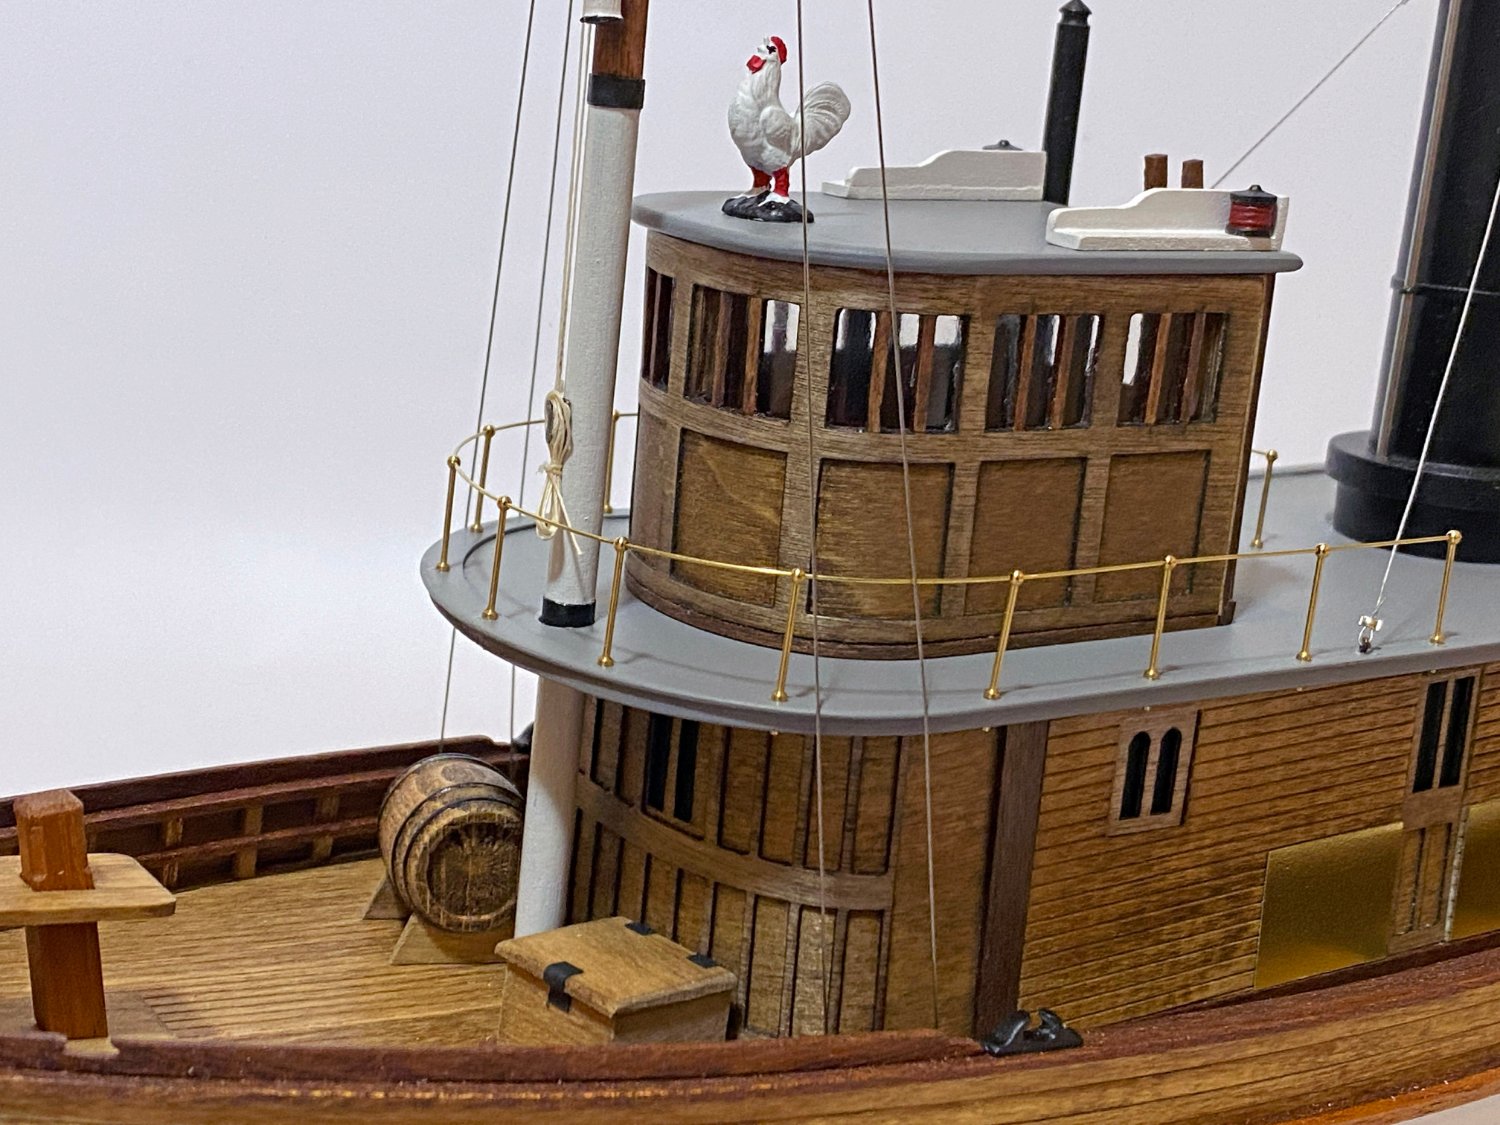
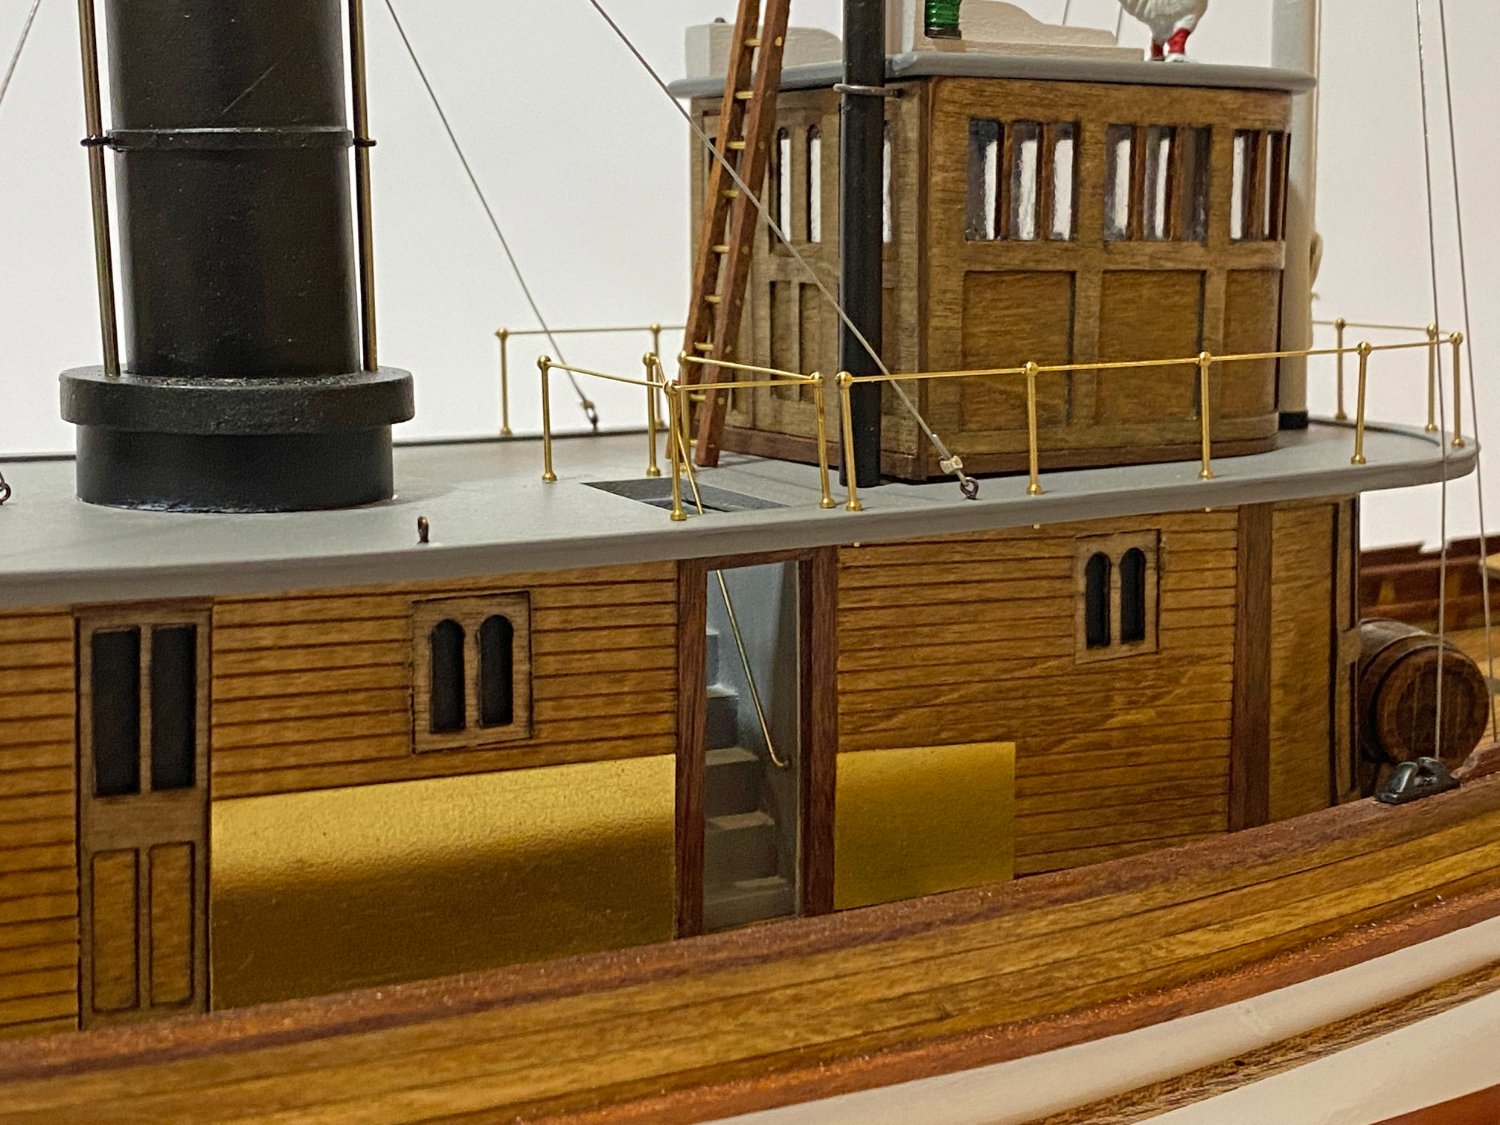
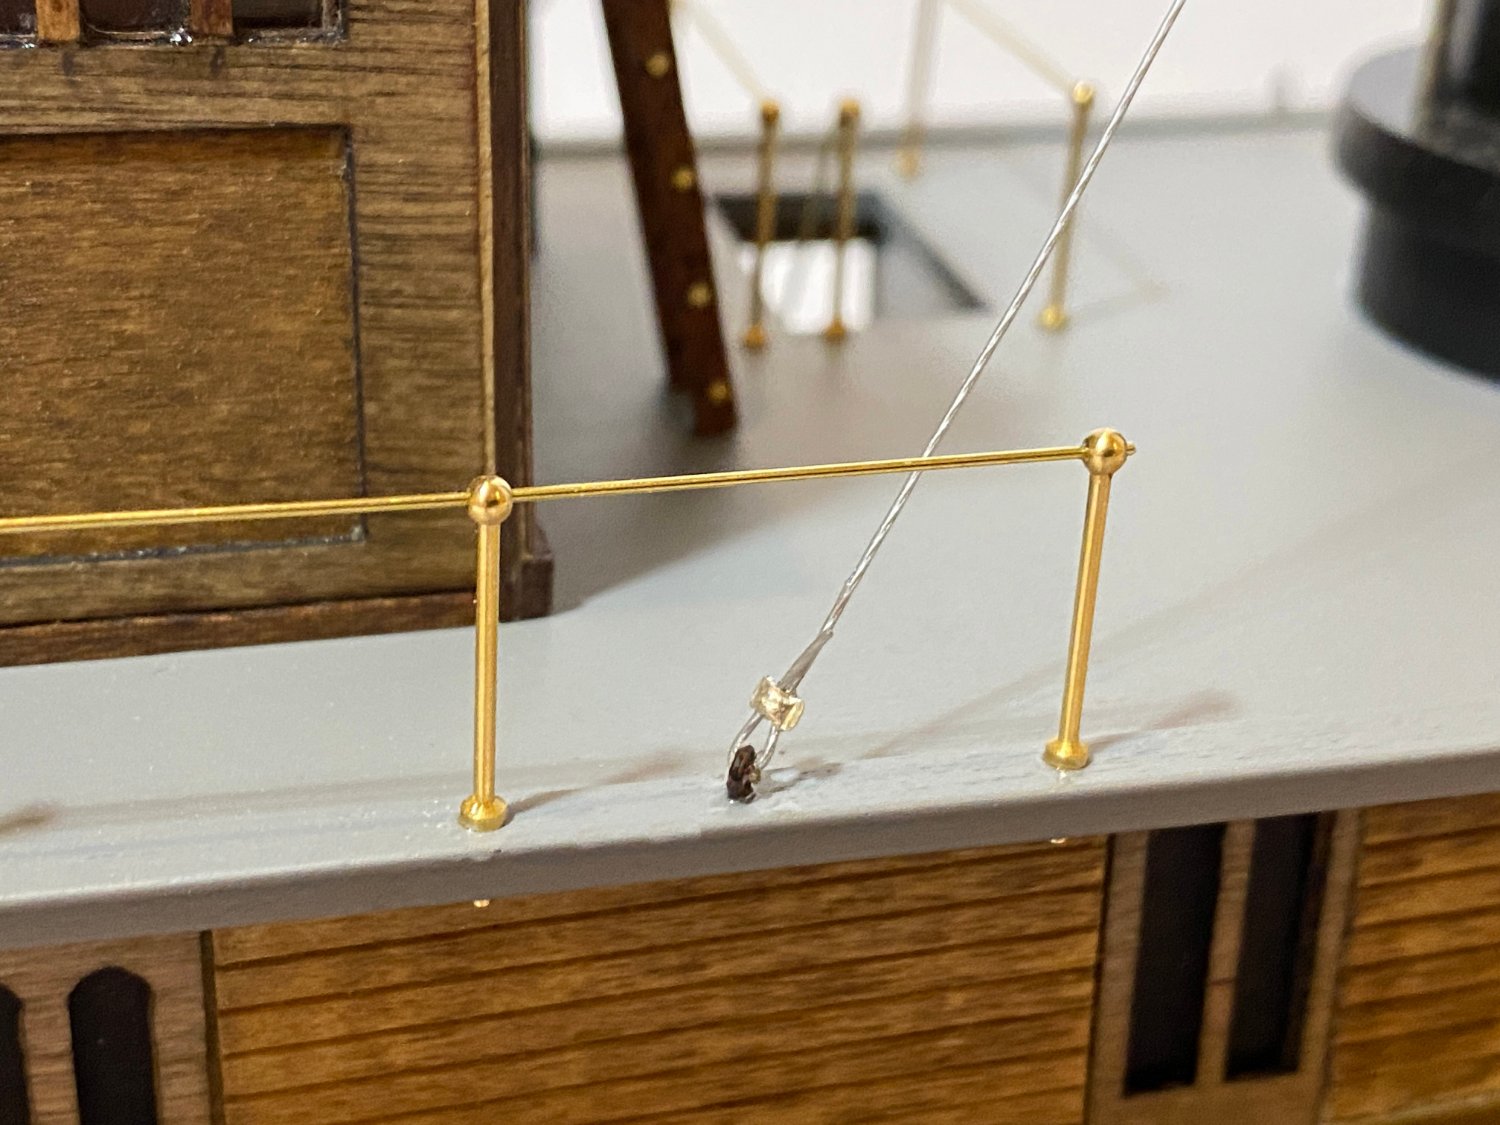
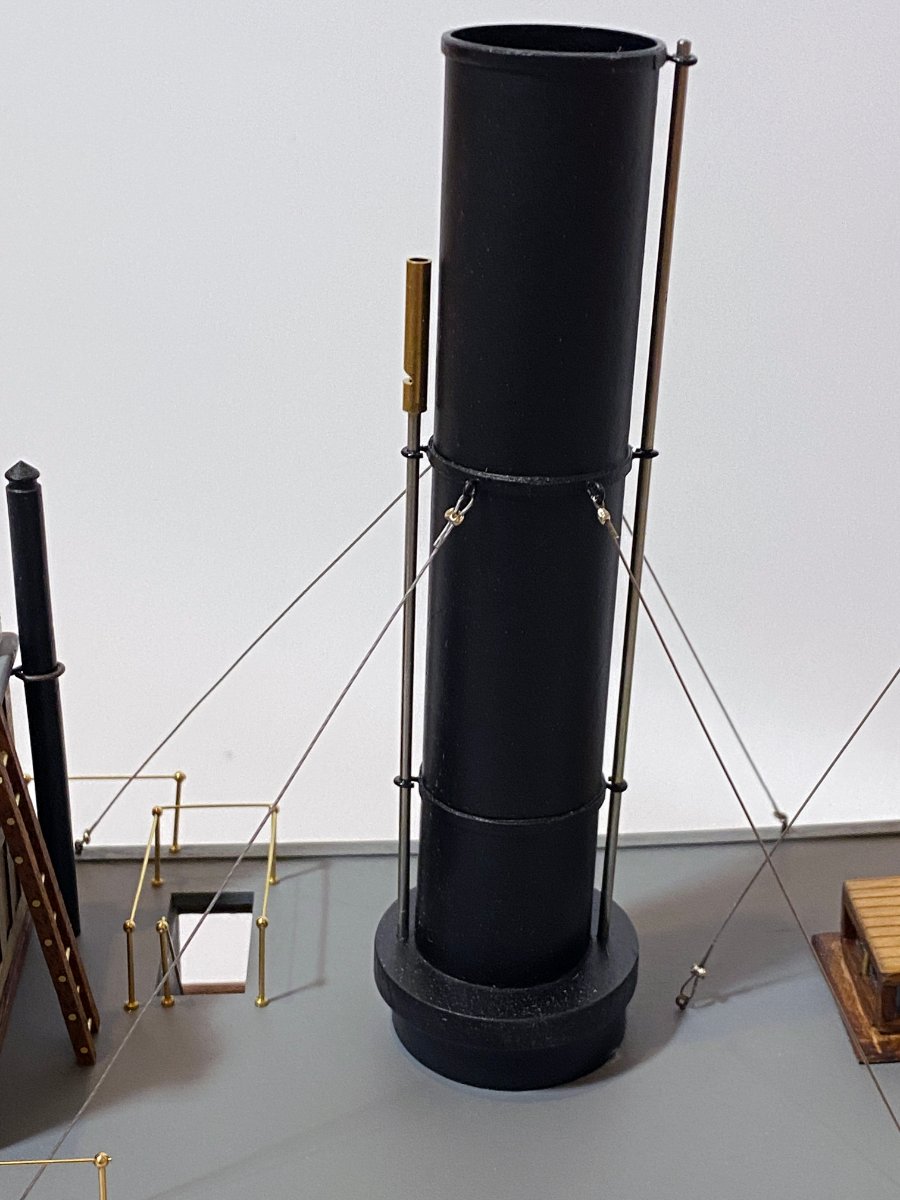
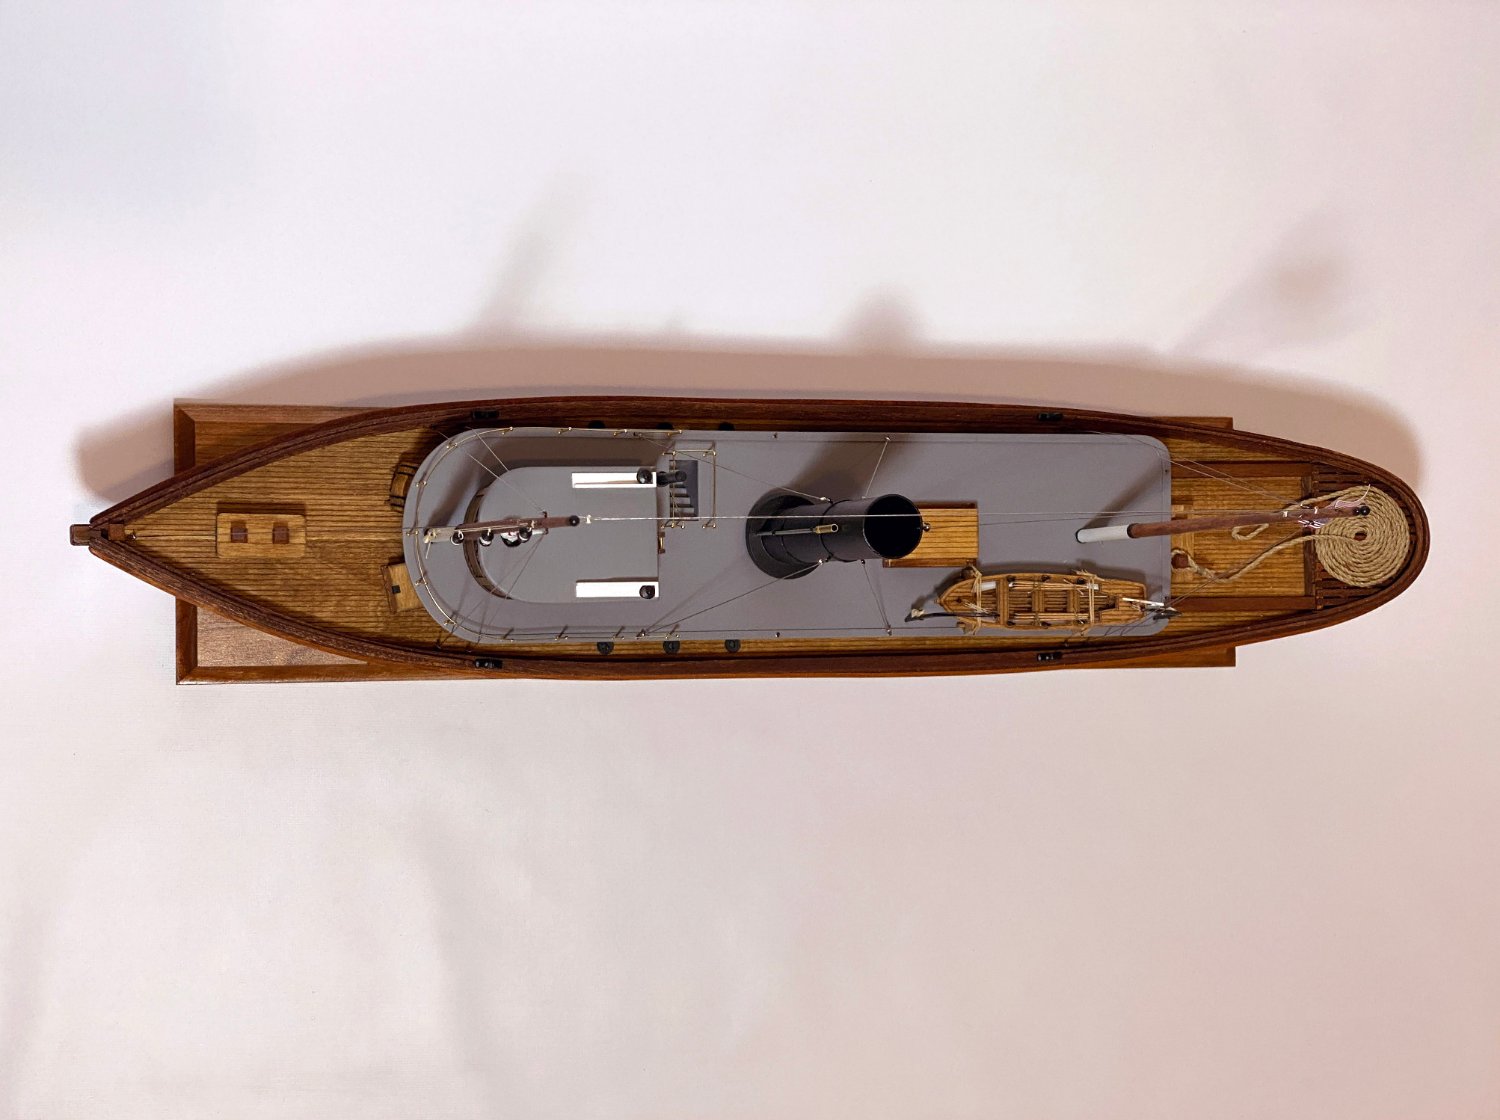
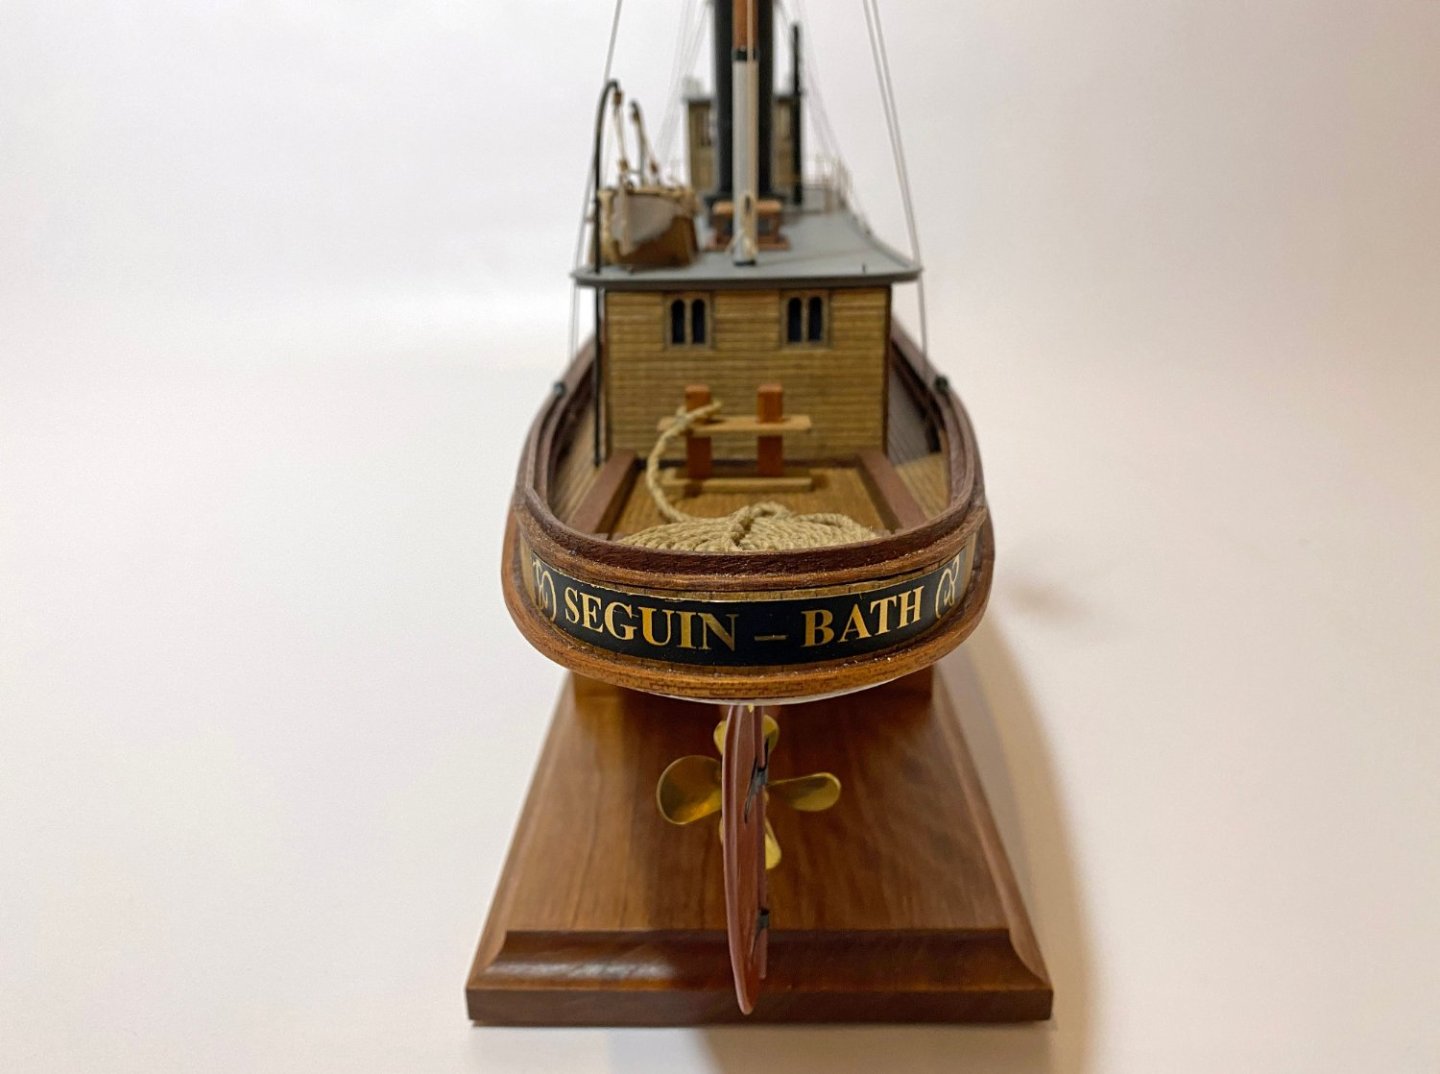
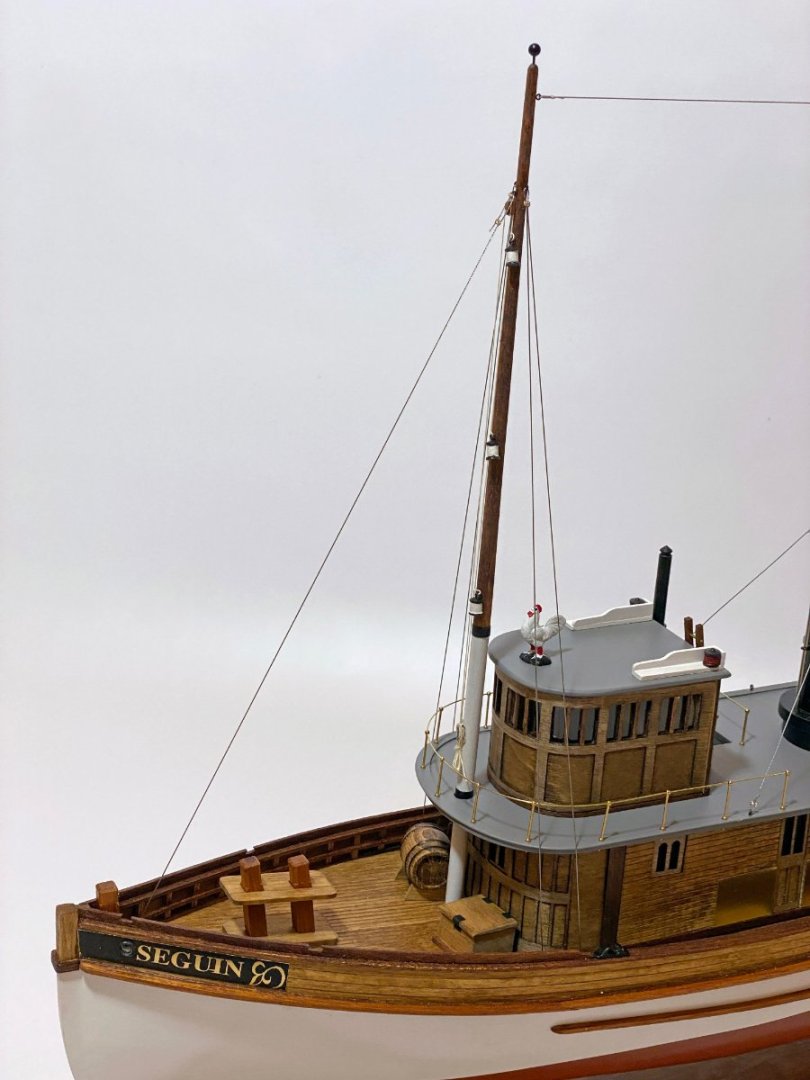
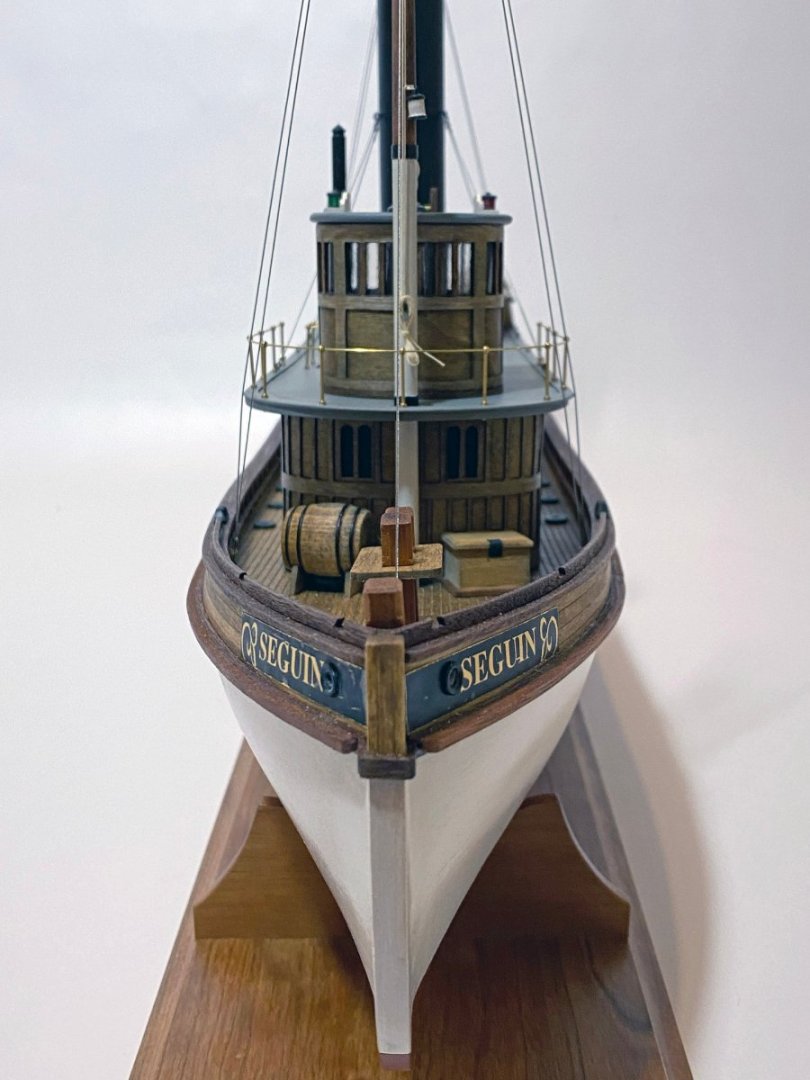
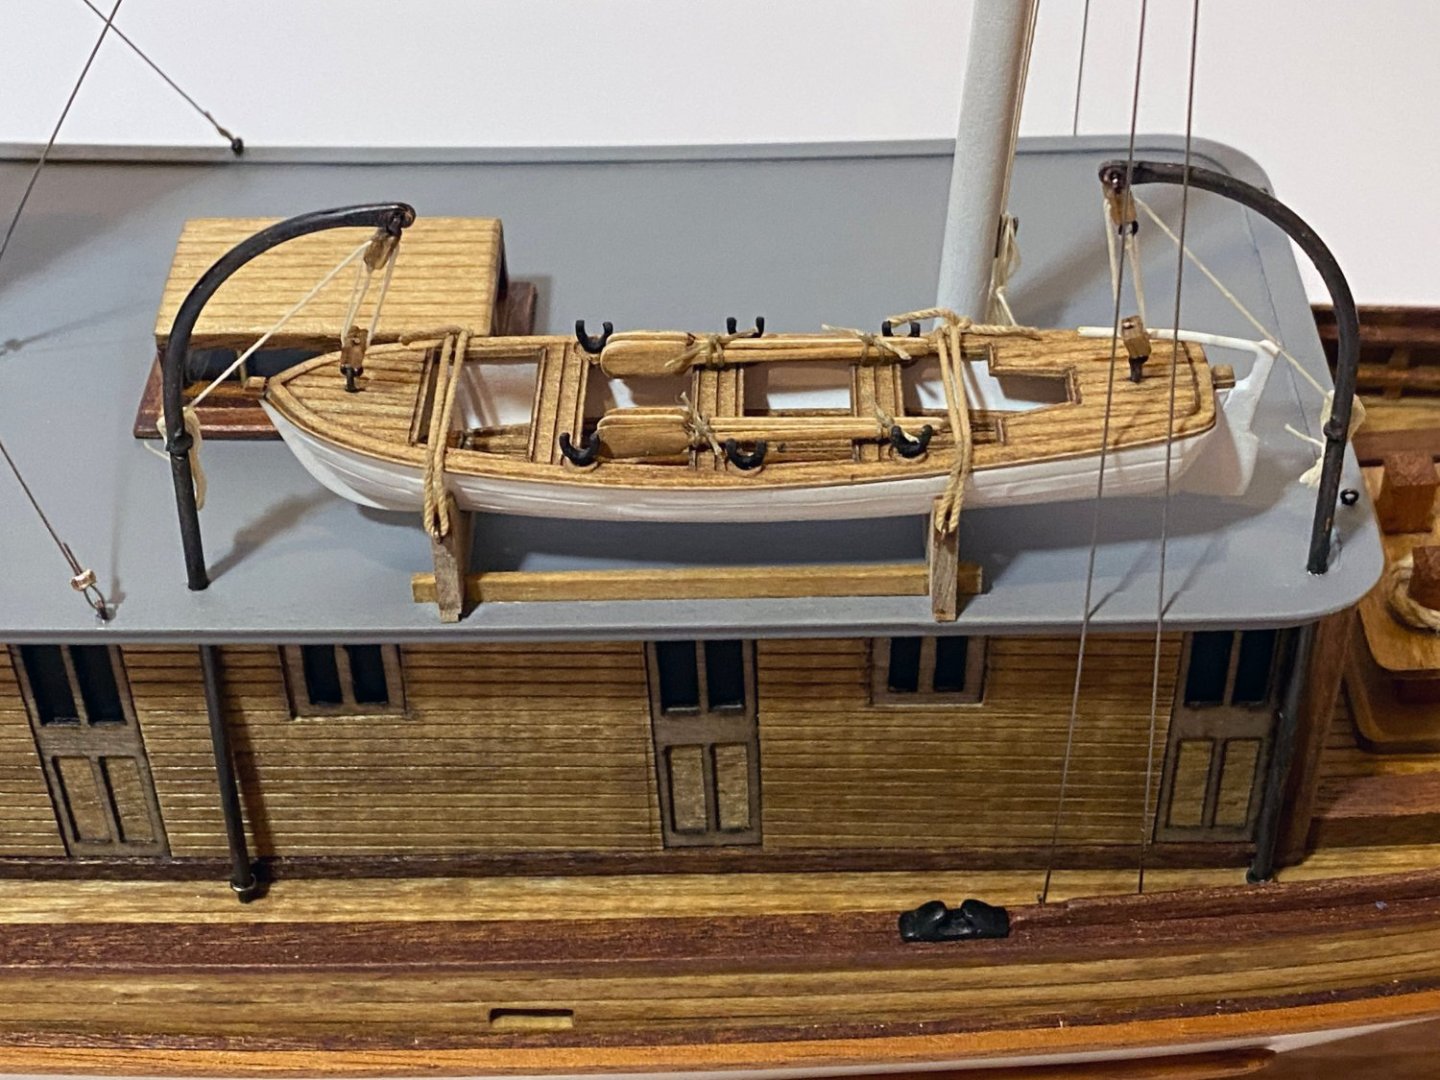
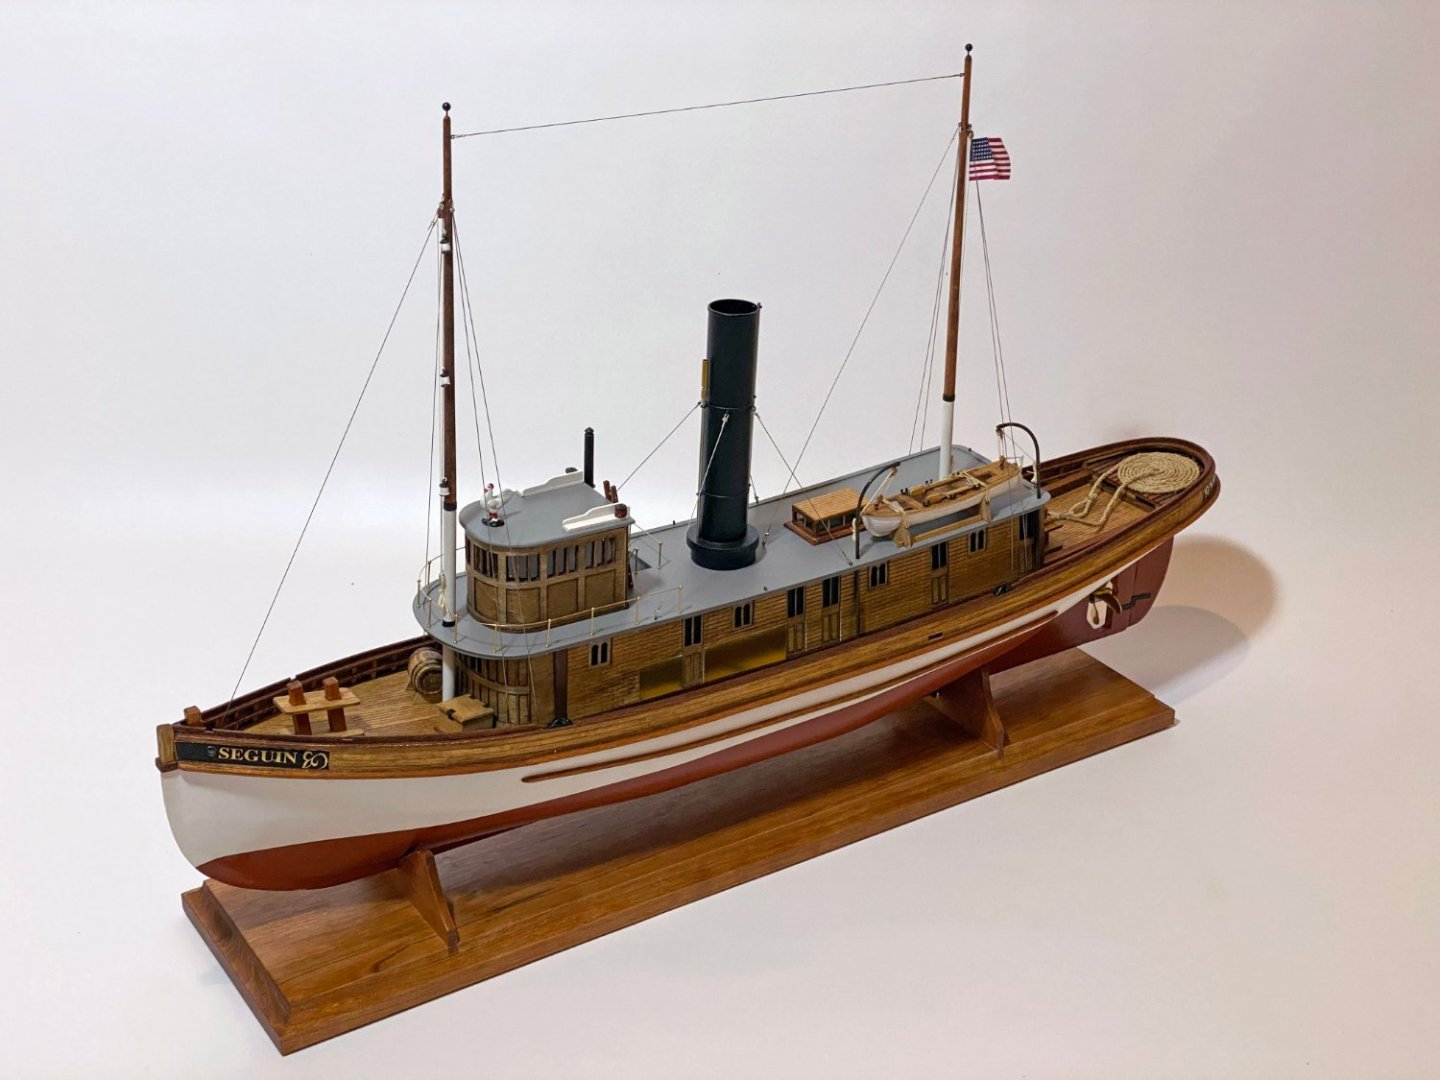
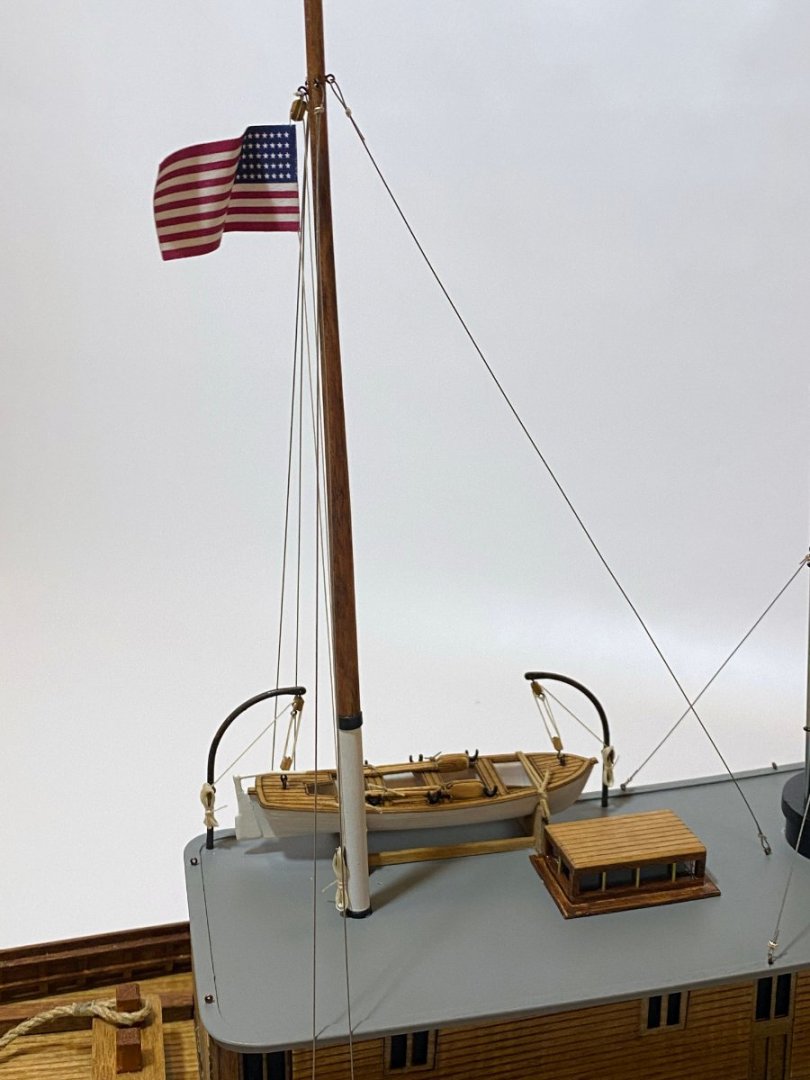
Seguin - FIINISHED, 170 hours, 75 days Today I finished my Bluejacket Seguin model, and I must say that it is one of the prettiest models that I have. All the stained wood, mahogany, and brass make for one beautiful model. After all the research and discussion above, I decided to rig the masts without the gaffs. I simply couldn't figure out what they were supposed to do, and consequently I wasn't sure how to rig them. Instead I decided to hang three navigation lights on the fore mast and a US flag on the aft mast. When the Seguin was built in 1884 the US flag had only 38 stars for the 38 states. I took a few photos of the mast construction and rigging, and then deleted them by mistake when transferring them from my phone. Here then, are photos of the finished model. Port side. I did add a nice coil of rope on the aft grate. Starboard side. Cabin, wheelhouse, pilot house, and rooster. Tugs traditionally had American eagles on the pilot house, but the Seguin had a rooster. The rooster was not there at first, and I could find no photos of the Seguin with both gaffs and the rooster. So the gaffs had to go. Companionway (stairway.) I added a brass rail all the way to the upper deck. Fore mast with three navigation (towing) lights. Almost every photo of the Seguin shows towing lights. Aft mast with the 38 * flag. Stack with stays and steam whistle. Mantua lifeboat. Easy to build and I love the way it looks. It's going to be tricky swinging the rear davit past those mast stays, but that's how they're shown on the plans. The davits were made from some thick brass rod that I flattened and drilled. The kit included some photo-etched brass cleats that I soldered to the davits. The plans and one early photo show the blocks hooked together above the boat, but I rigged them ready to lift. I was also surprised that all the mast stays impinge on the cabin roof. Brass stanchions (railing uprights) by Krick. The Seguin was rigged with wire cable, and the kit came with a spool of very nice, 0.25 mm braided wire. I could have used that, but I had a spool of 0.38 mm plastic-coated bead-stringing wire, a package of crimp beads, and a crimping tool and I used that instead. No good reason. Seagull's eye view. Front view. THE END. (Aft view with the Raeboesch prop.)


- 68 replies
-
- 18
-
-
-

-
Ted, Congratulations on a beautiful piece of work! I love your gold-plated Bismarck. It looks great and certainly shows off your work more than a painted model would. Please message me when you start your next build log co I can follow along. Rod
-
Mark, Thank you for pointing me to the development logs here. I've seen the Facebook posts for the Oregon and Wyoming, but I didn't even know about the Savannah. It looks like three beautiful new kits on the way. Rod
-
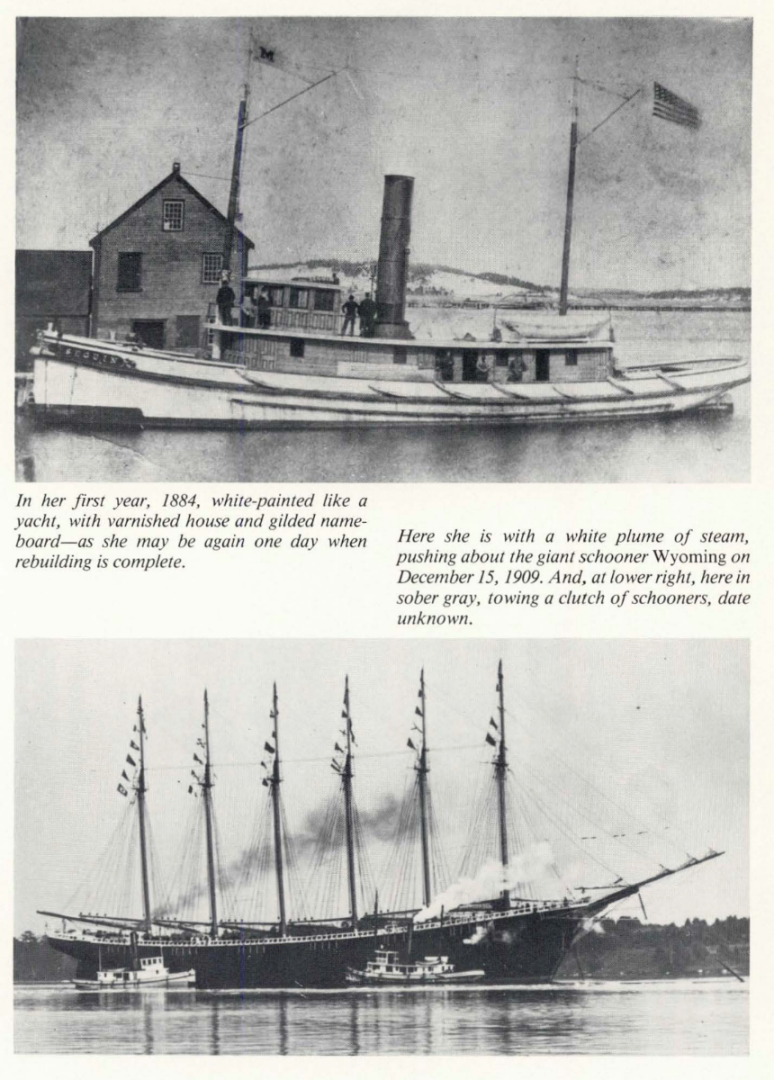
I Found It! After hours of searching online I found a photo of the Seguin in 1884 with gaffs, in Sea History magazine no. 25, Autumn, 1982. I think I'll build the gaffs after all. Better yet there is a second photo of the Seguin pushing the six-masted schooner Wyoming in 1909. Bluejacket is working on a kit of the Wyoming. Check out their build log on Facebook.