rvchima
-
Posts
660 -
Joined
-
Last visited
Content Type
Profiles
Forums
Gallery
Events
Everything posted by rvchima
-
 Hi Ted, I just realized that you had started this. I will be following along. What a terrible setback with the broken hull though! But anything you can build you can fix. For blackening brass I use Novocan stained glass patina. They don't have a gunmetal product. Try Brasso tarnish remover for removing your black patina. On my Syren I used a vinegar and salt solution to age the copper bottom. I remember it taking maybe 20 minutes. Then I rinsed the hull carefully with fresh water and put some Lemon Pledge on it. It still looks great after 10 years. Rod
 -
Harry, It's too late now but I use Novacan black patina for stained glass to blacken miscellaneous parts. It just takes seconds, but your bleach idea seems to have worked perfectly. The chains, er... cables, look great! Rod
-
I haven't looked in for a while and missed some fascinating discussion about the paint scheme and catch guards.
-
Harry, I have to find a hobby that takes more time and less space. Sounds like one end of the space-time continuum. Rod
-
I love the photos of the ladder emerging between the grates. Did you scratch build the ladder? That's beautiful work on a tiny piece. And how did you mark the treenails on the planks? With a pencil perhaps? Those little details sure make a big difference.
-
Thank you all for the compliments on my Seguin model. It really was a beautiful ship that can't help but become a beautiful model.
-
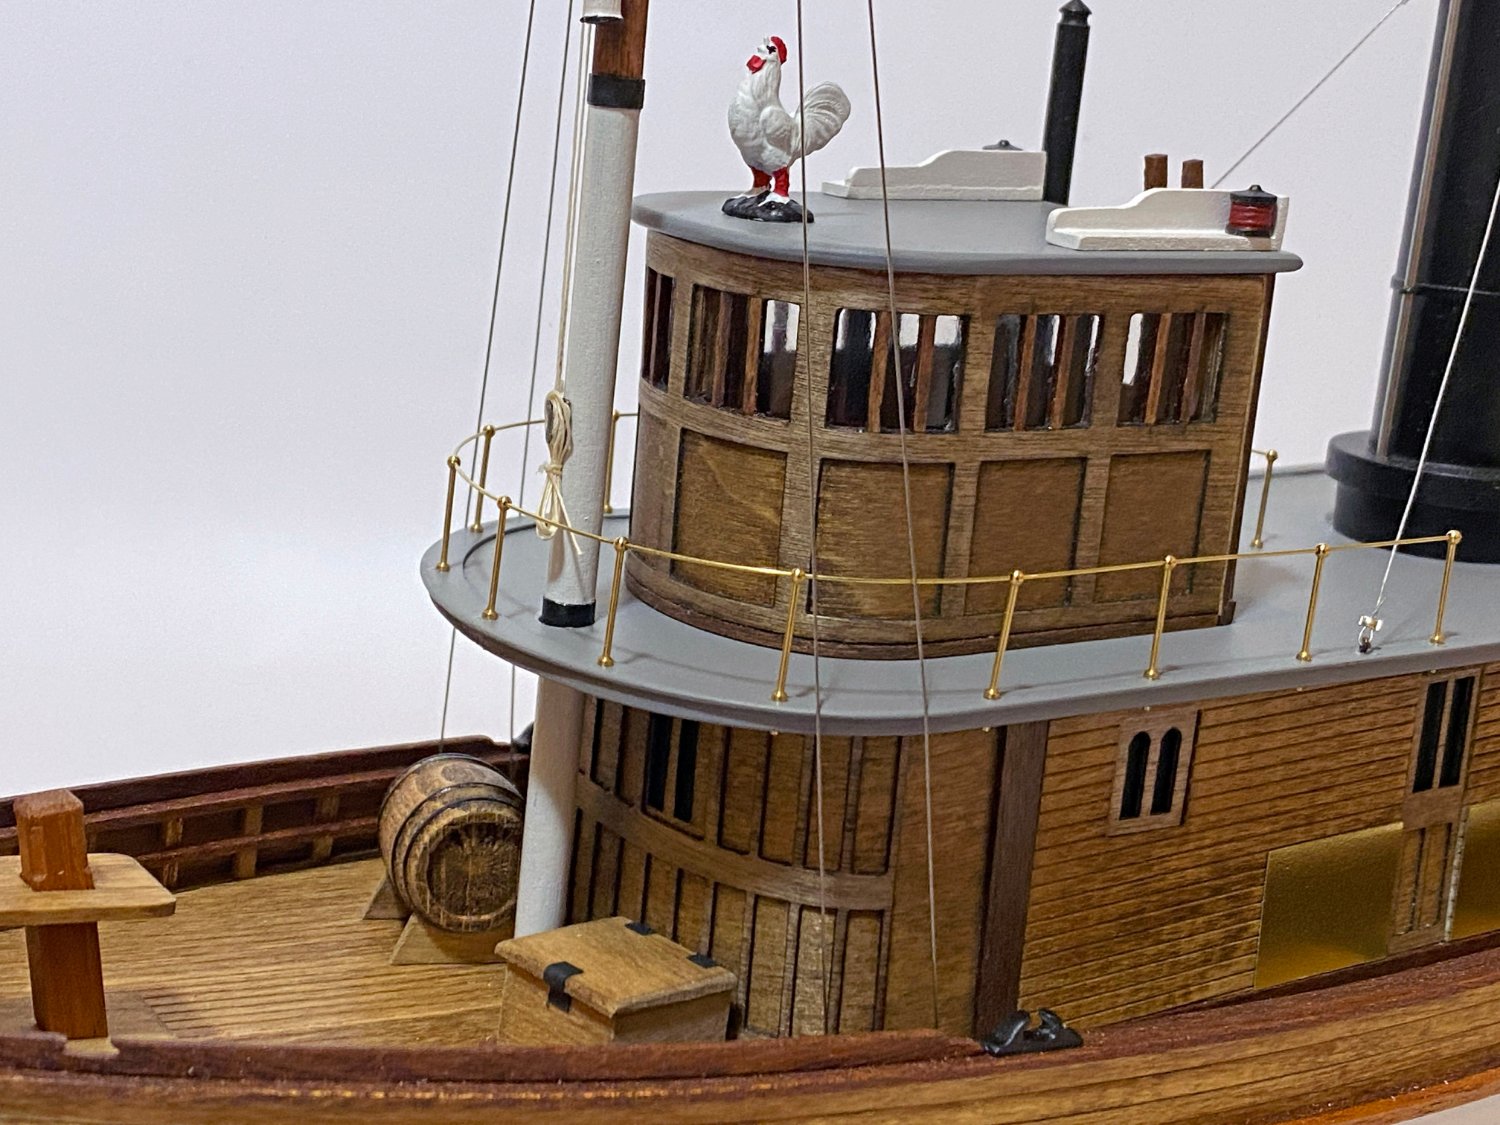
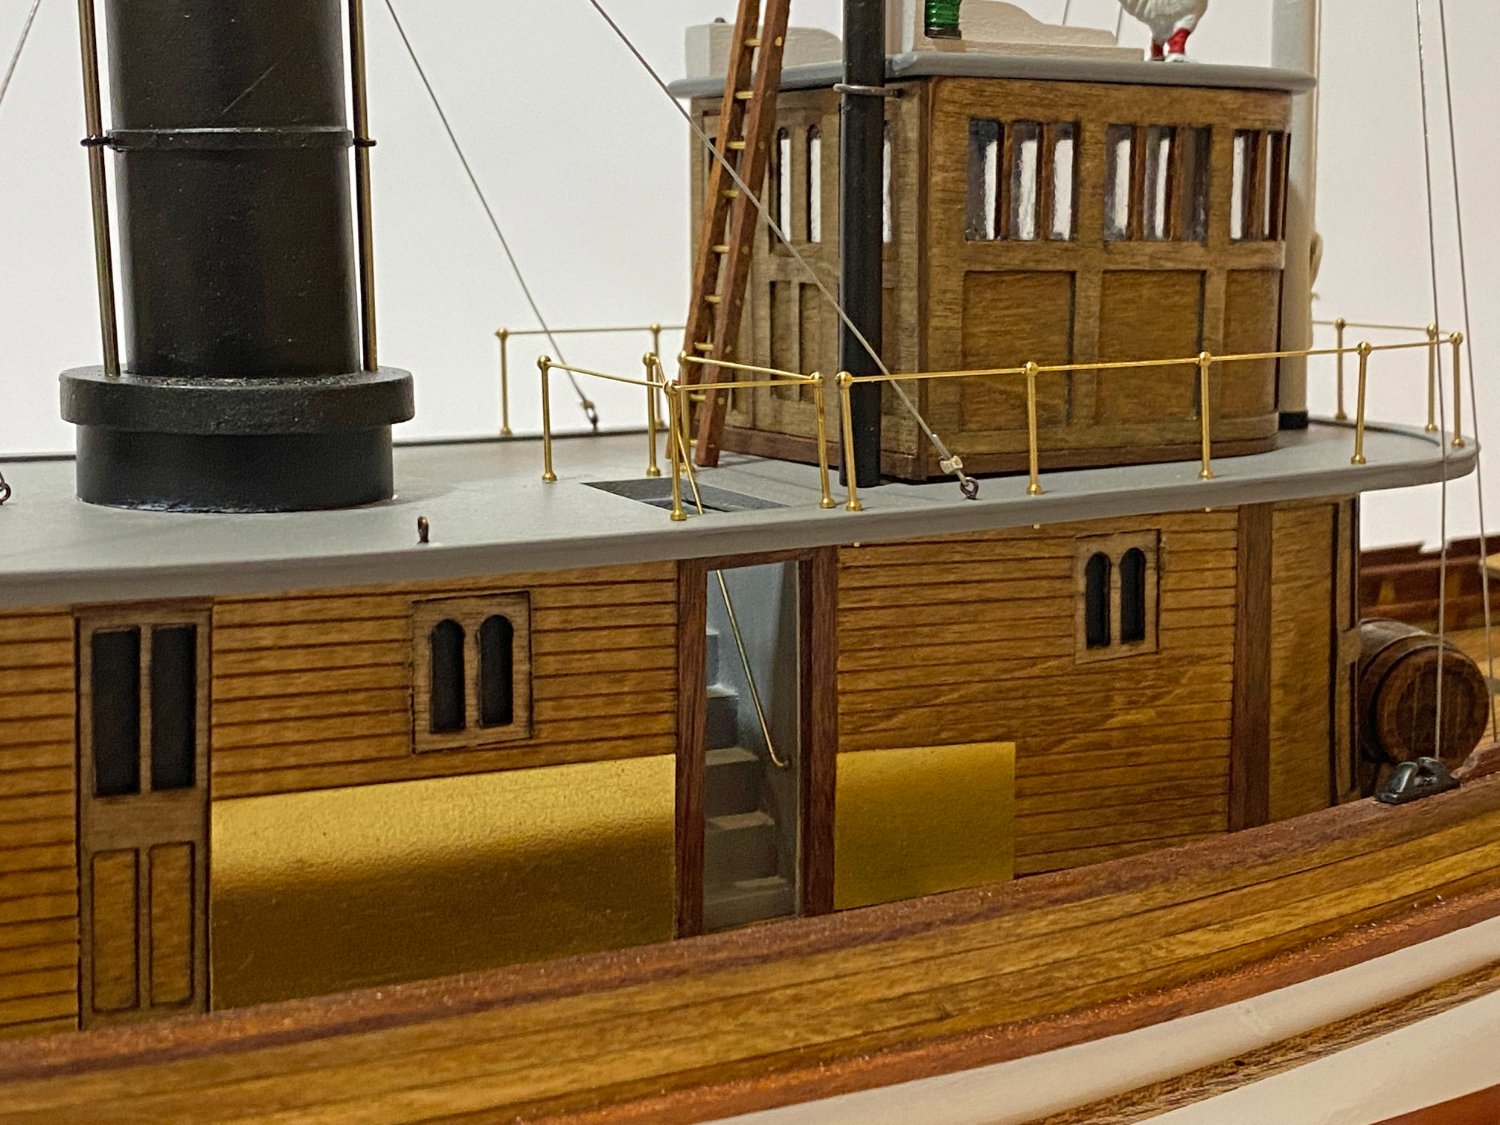
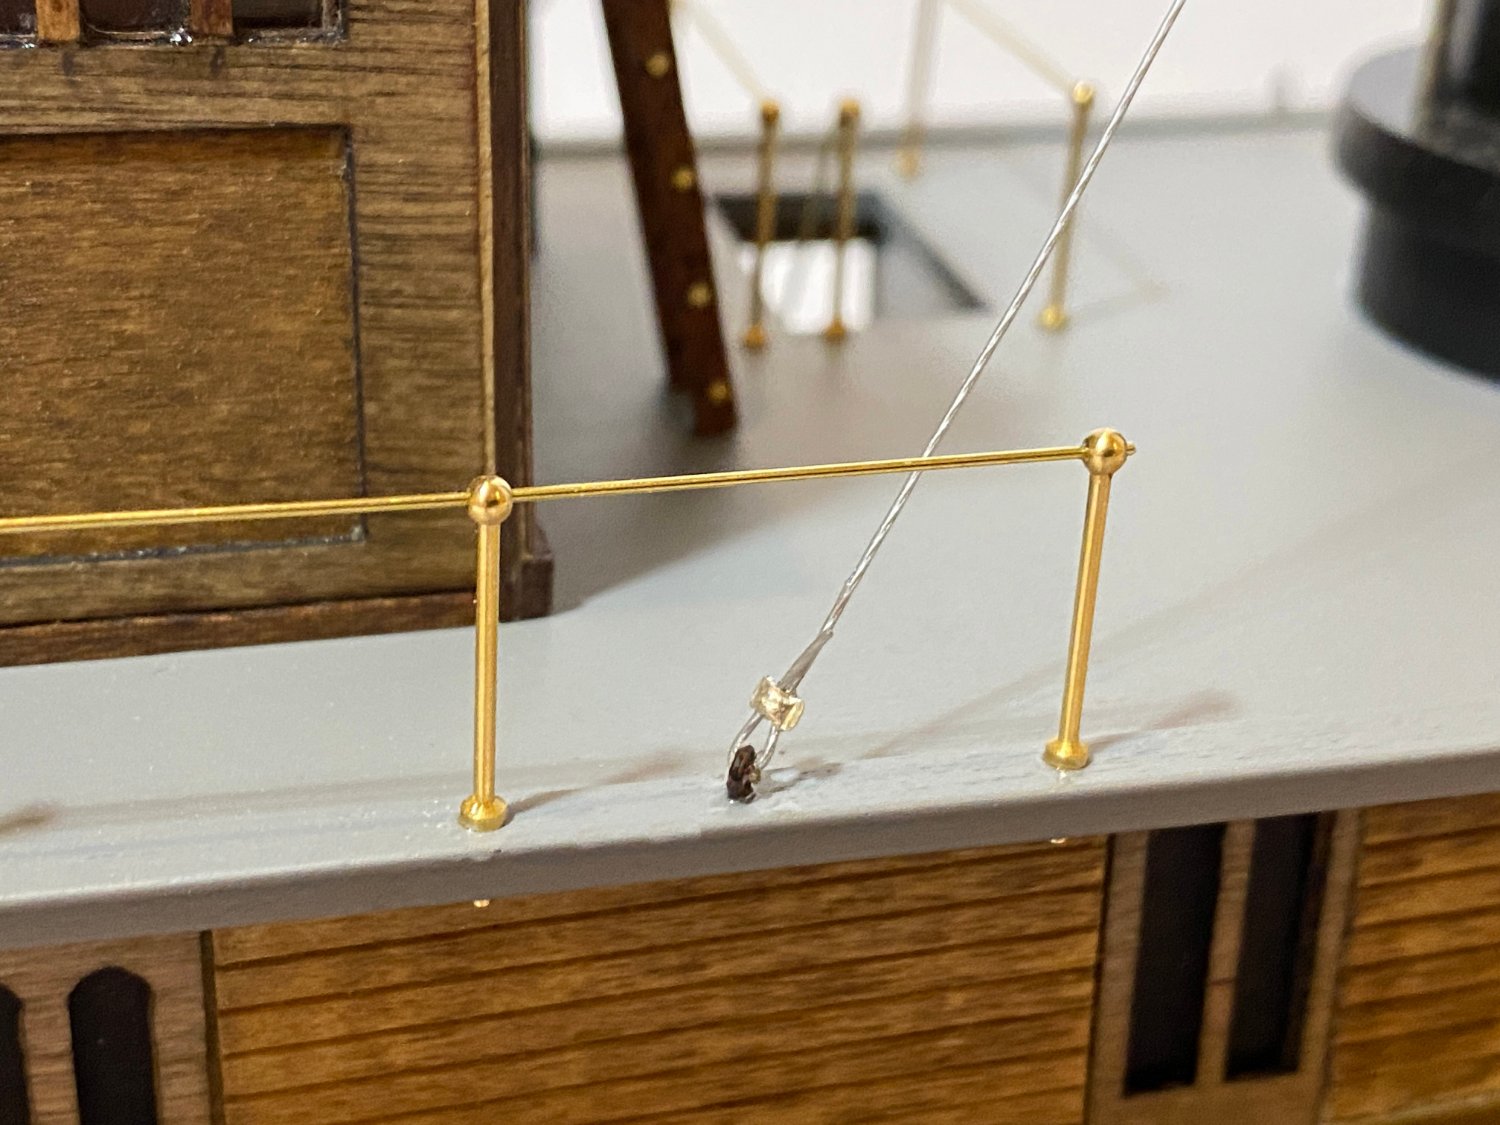
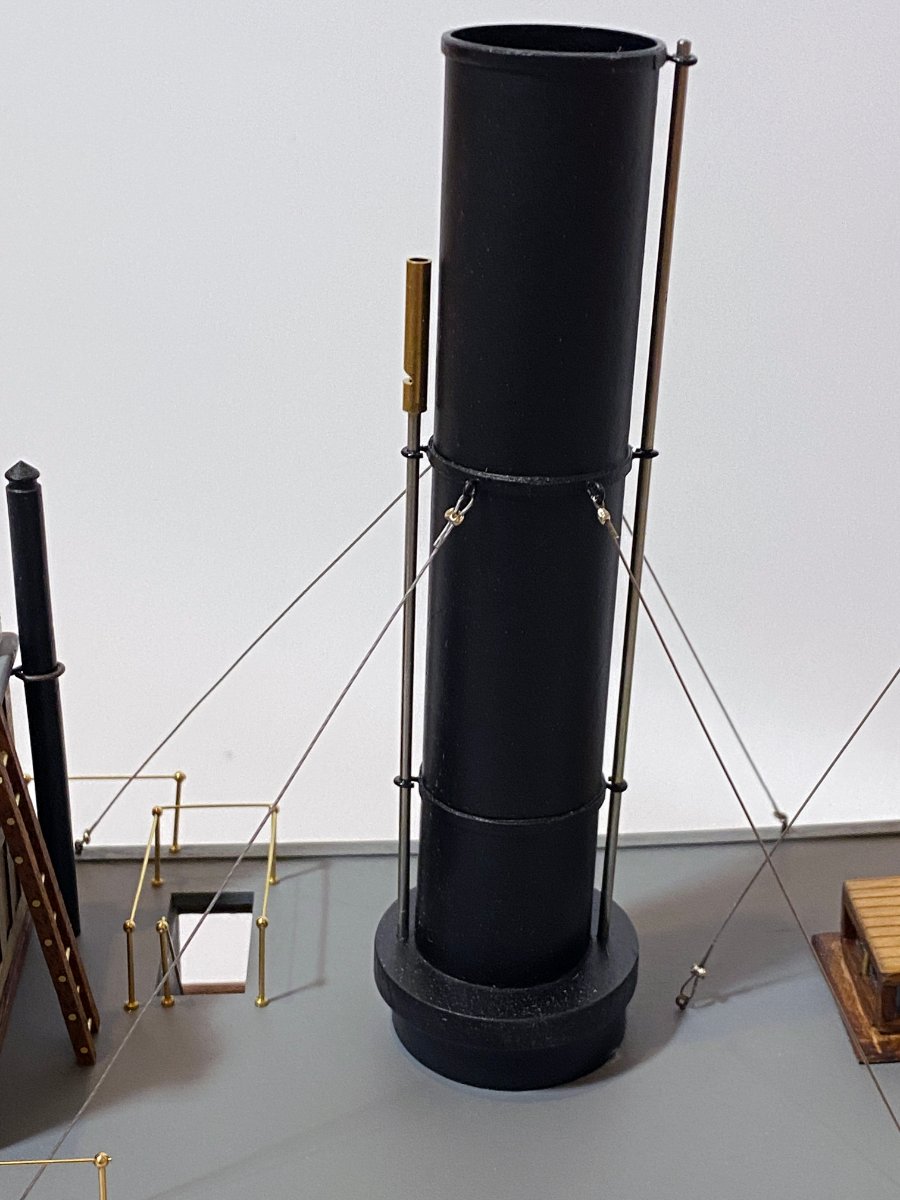
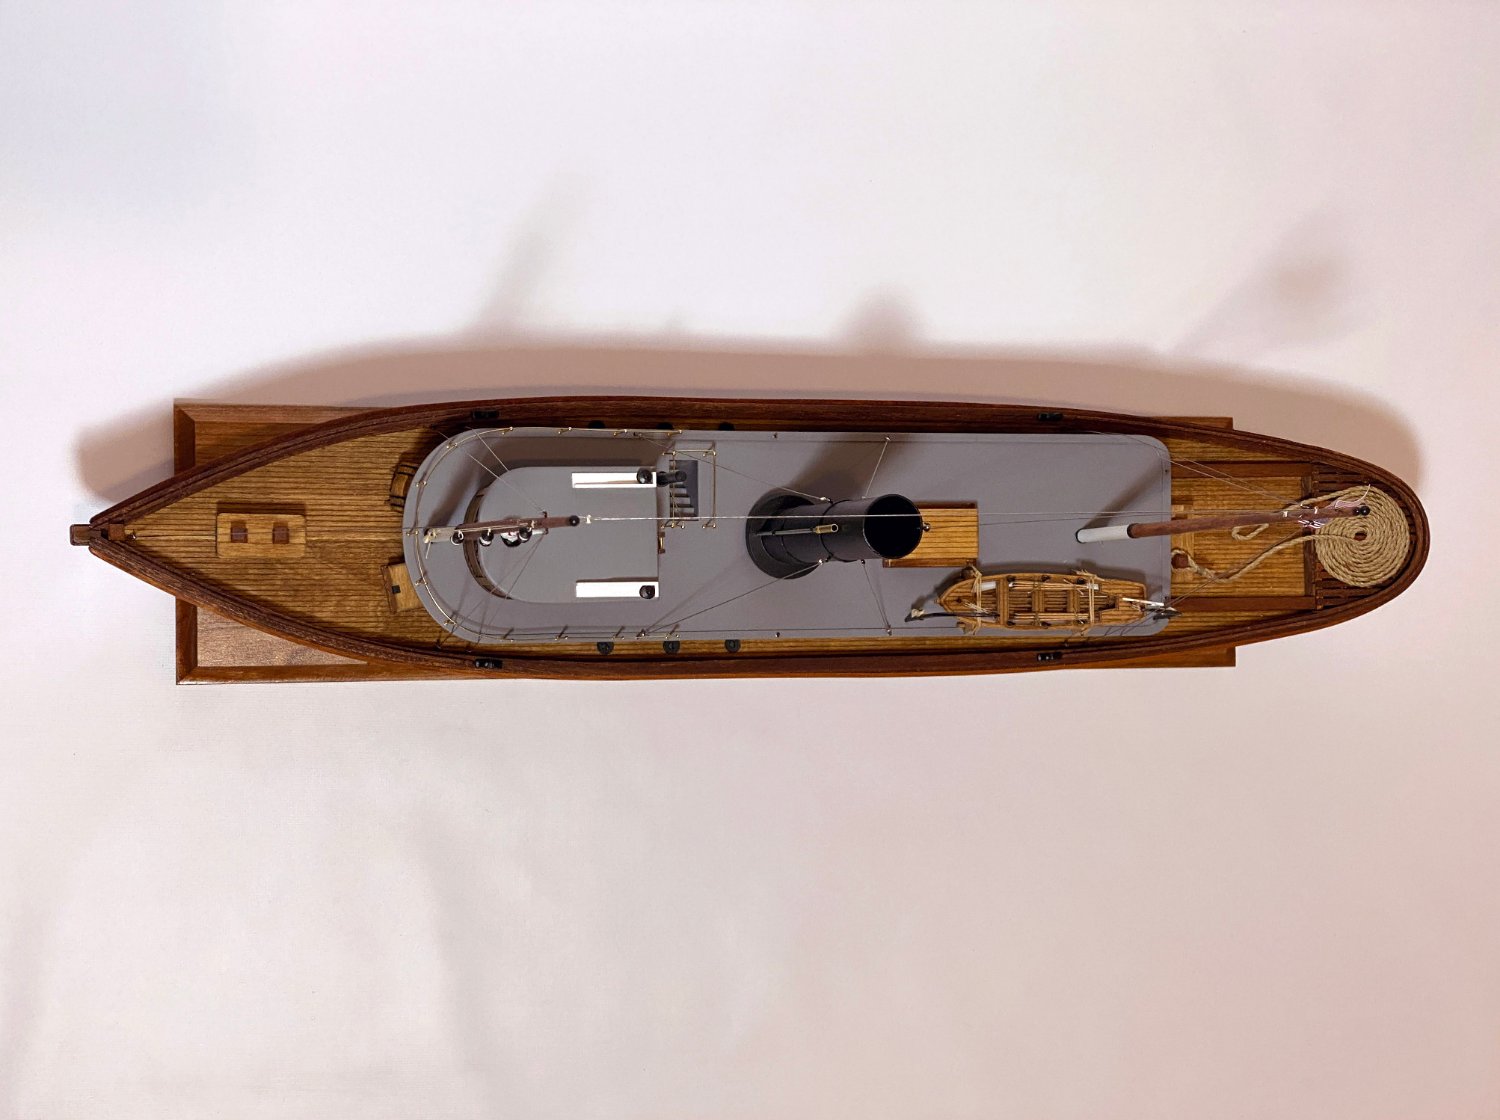
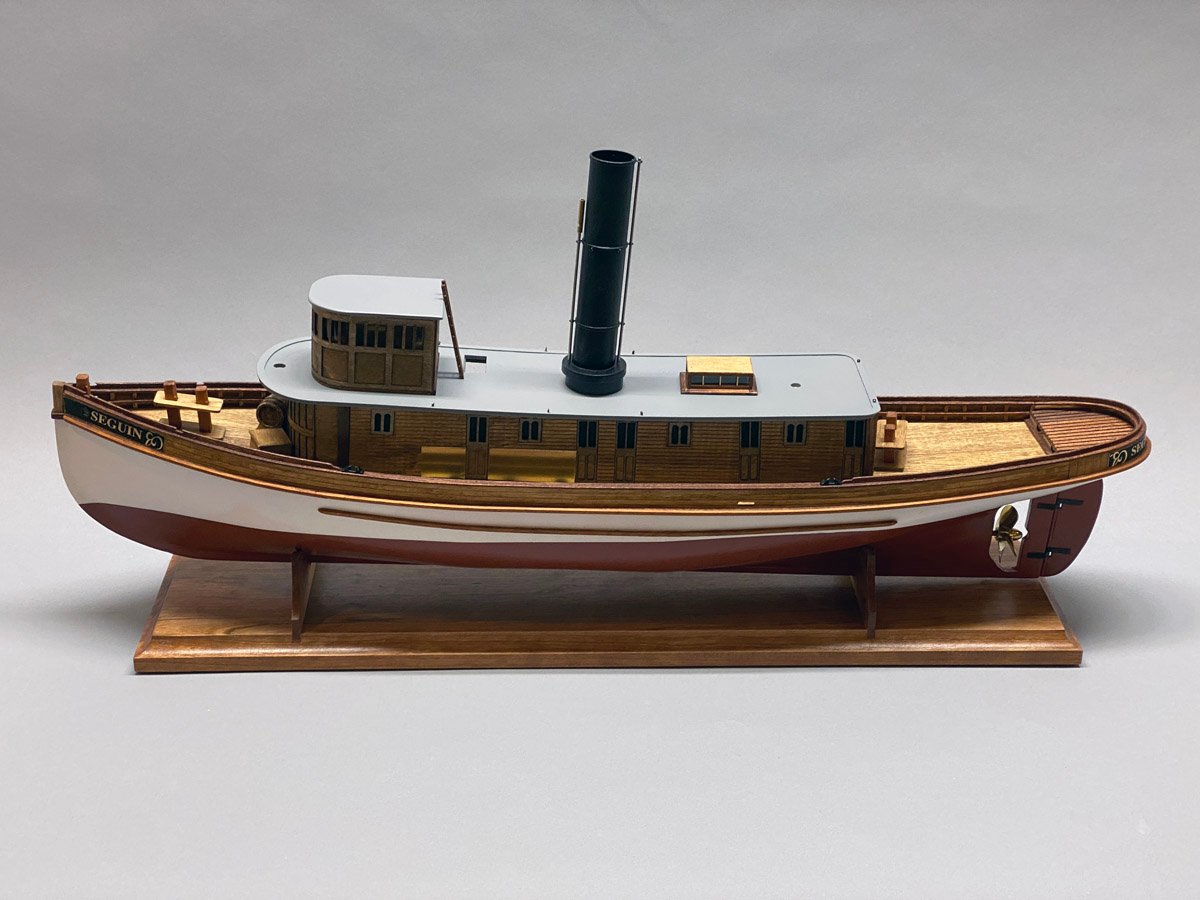
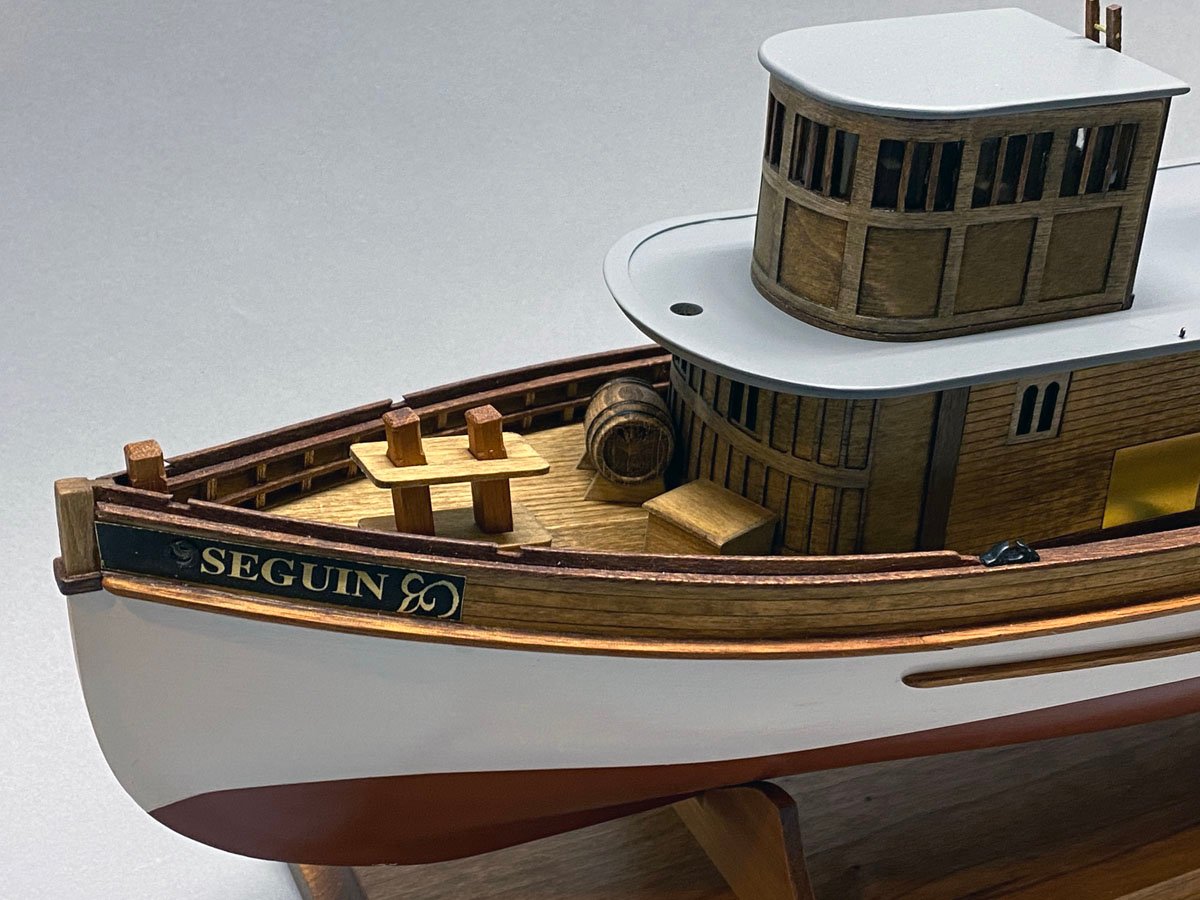
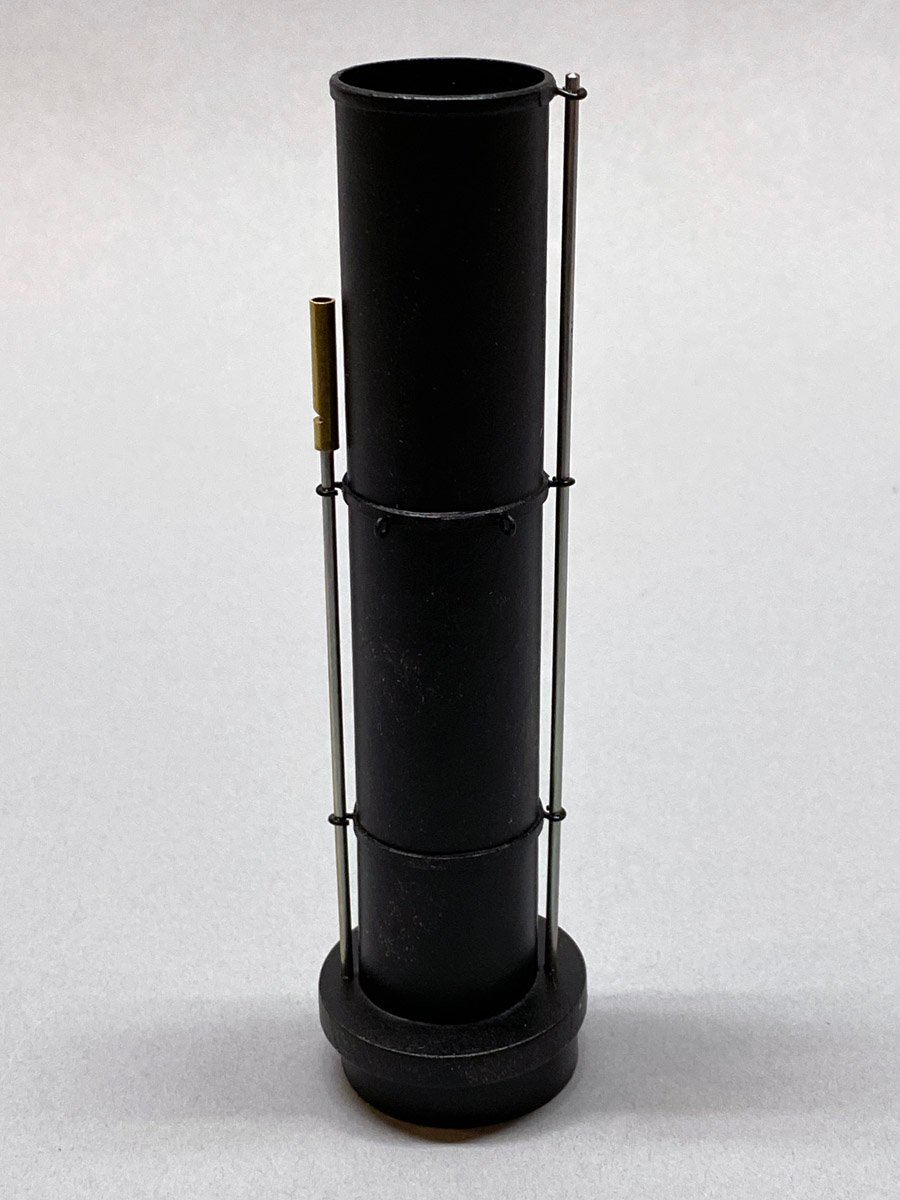
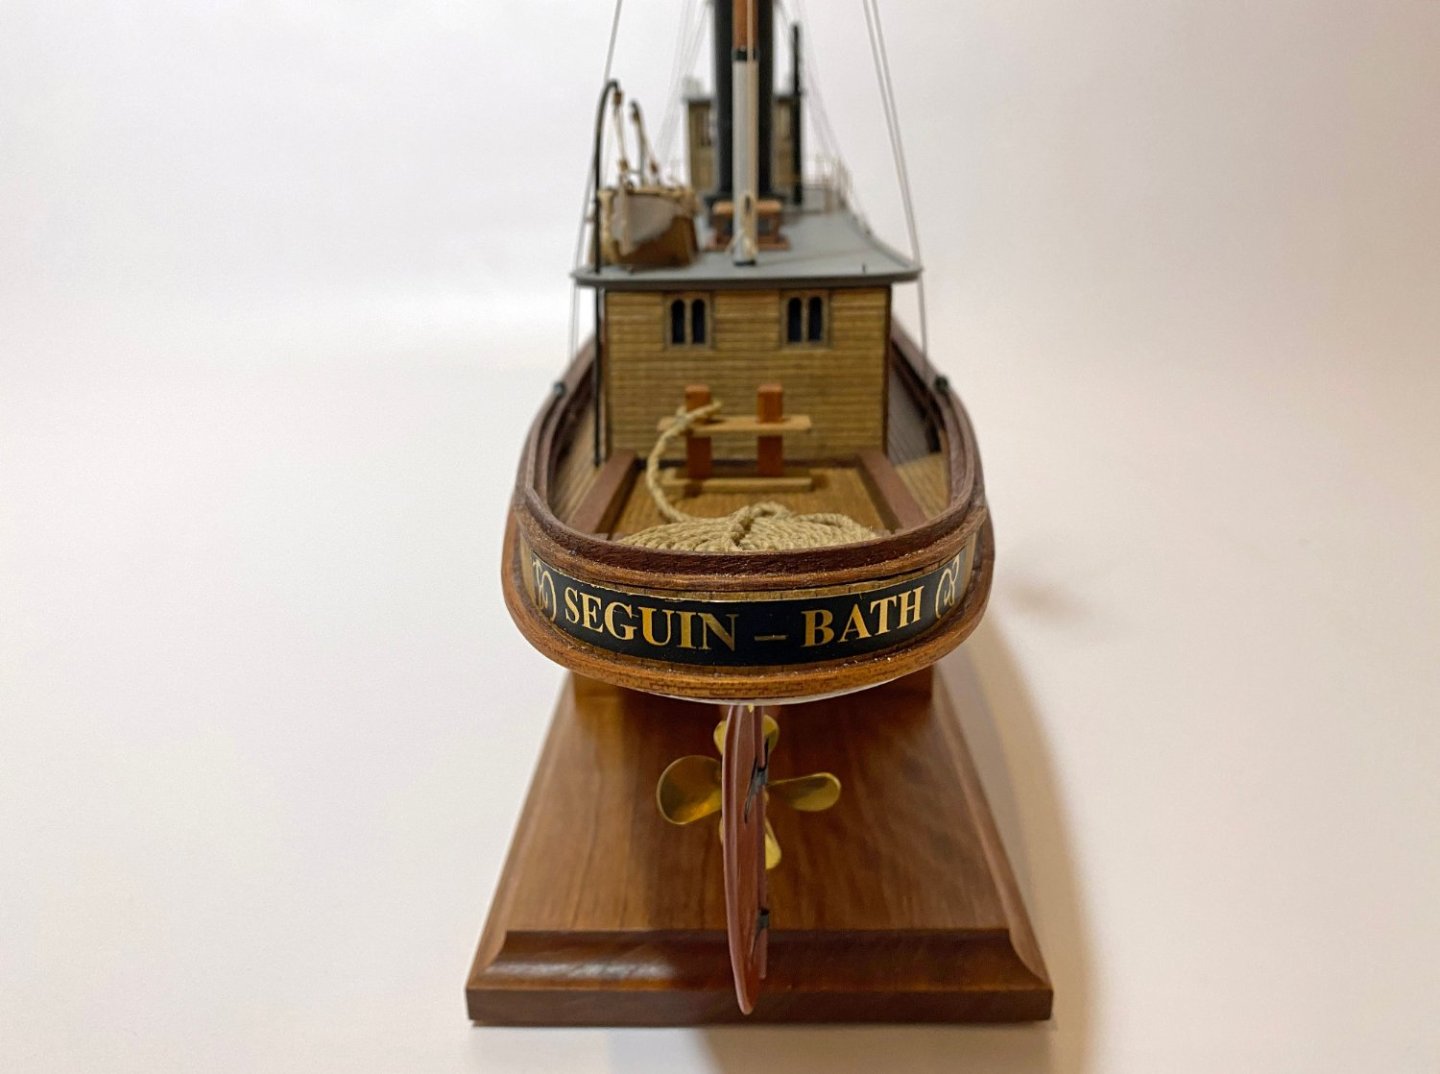
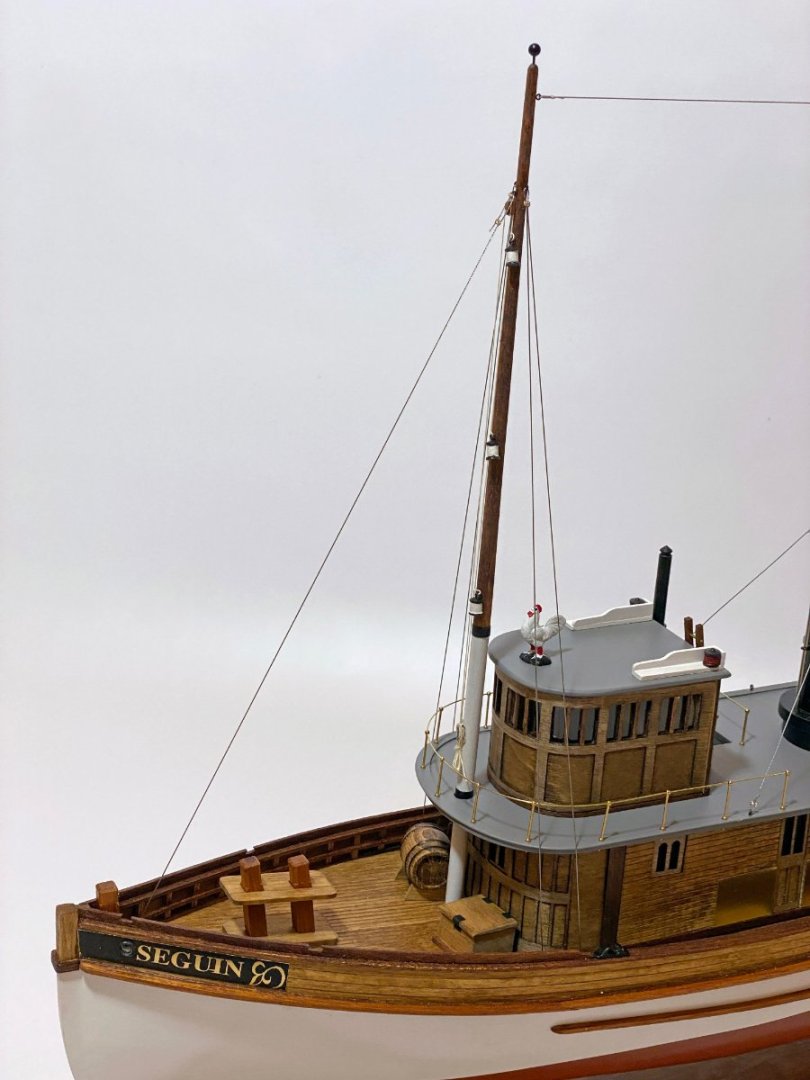
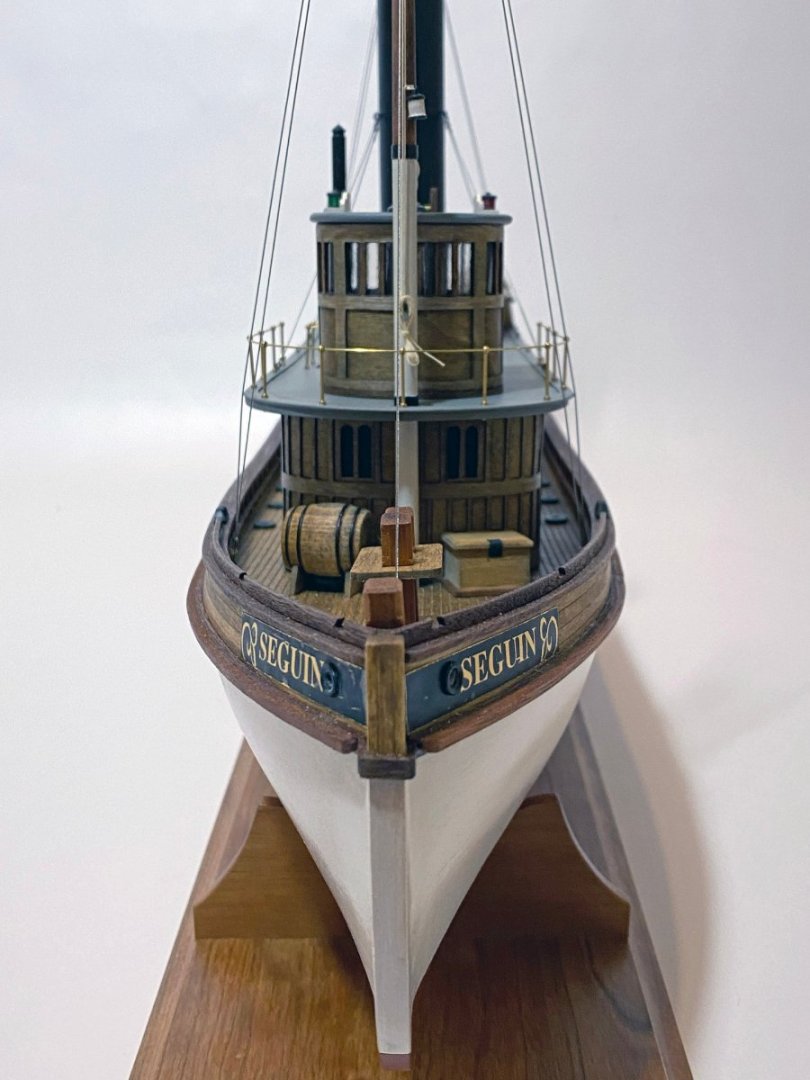
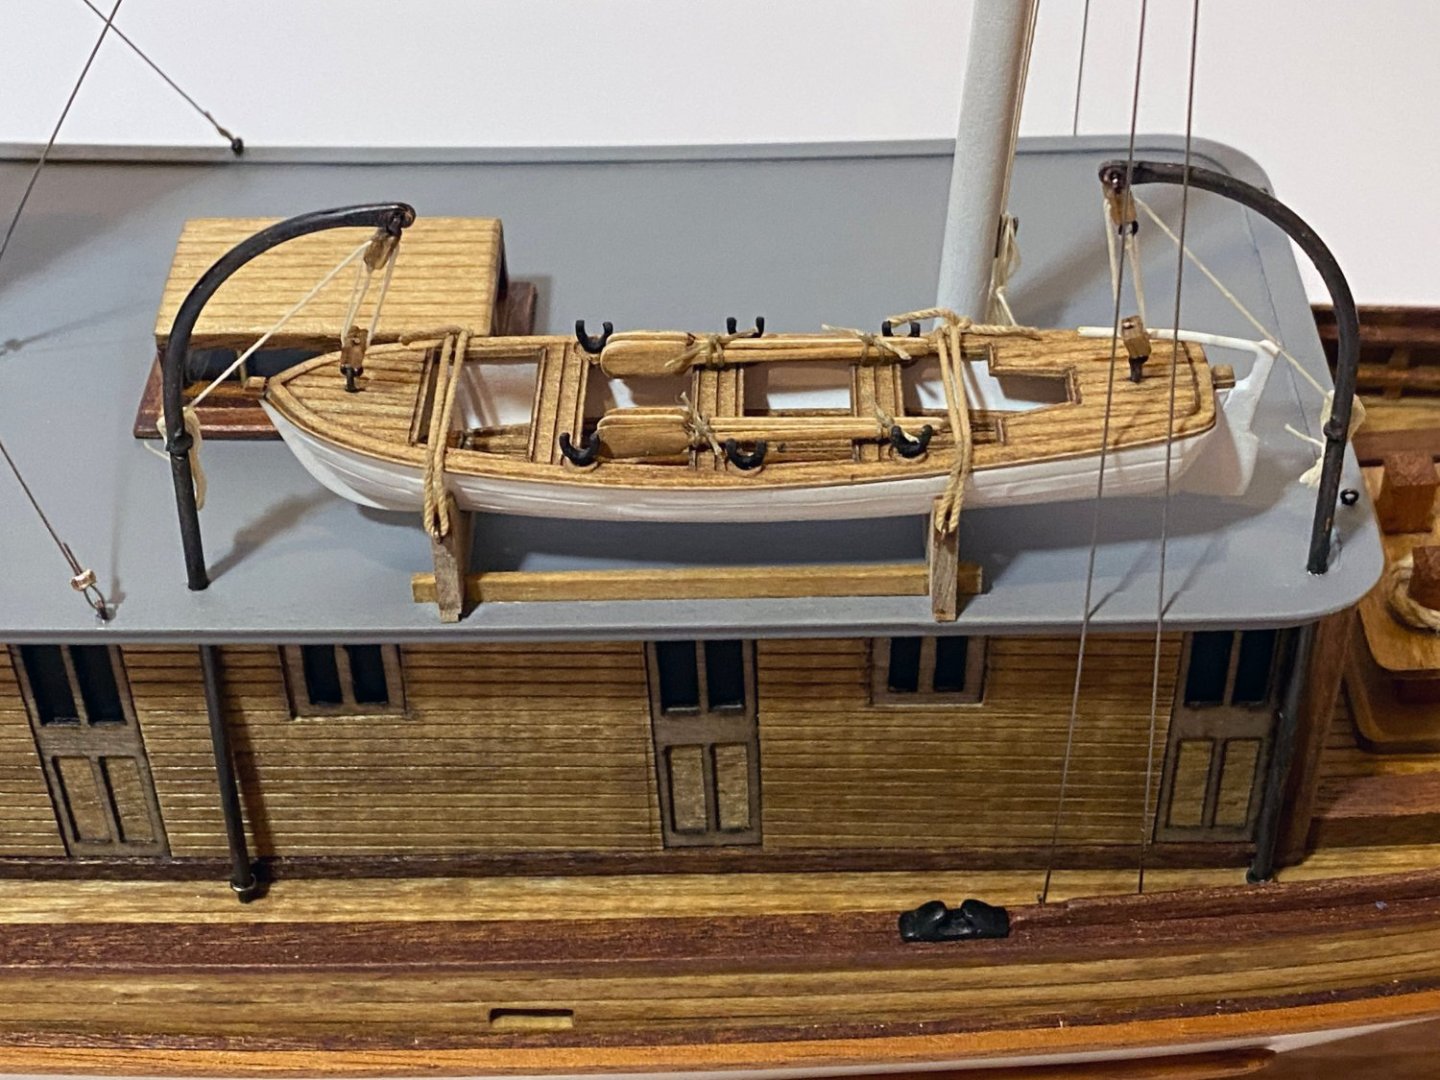
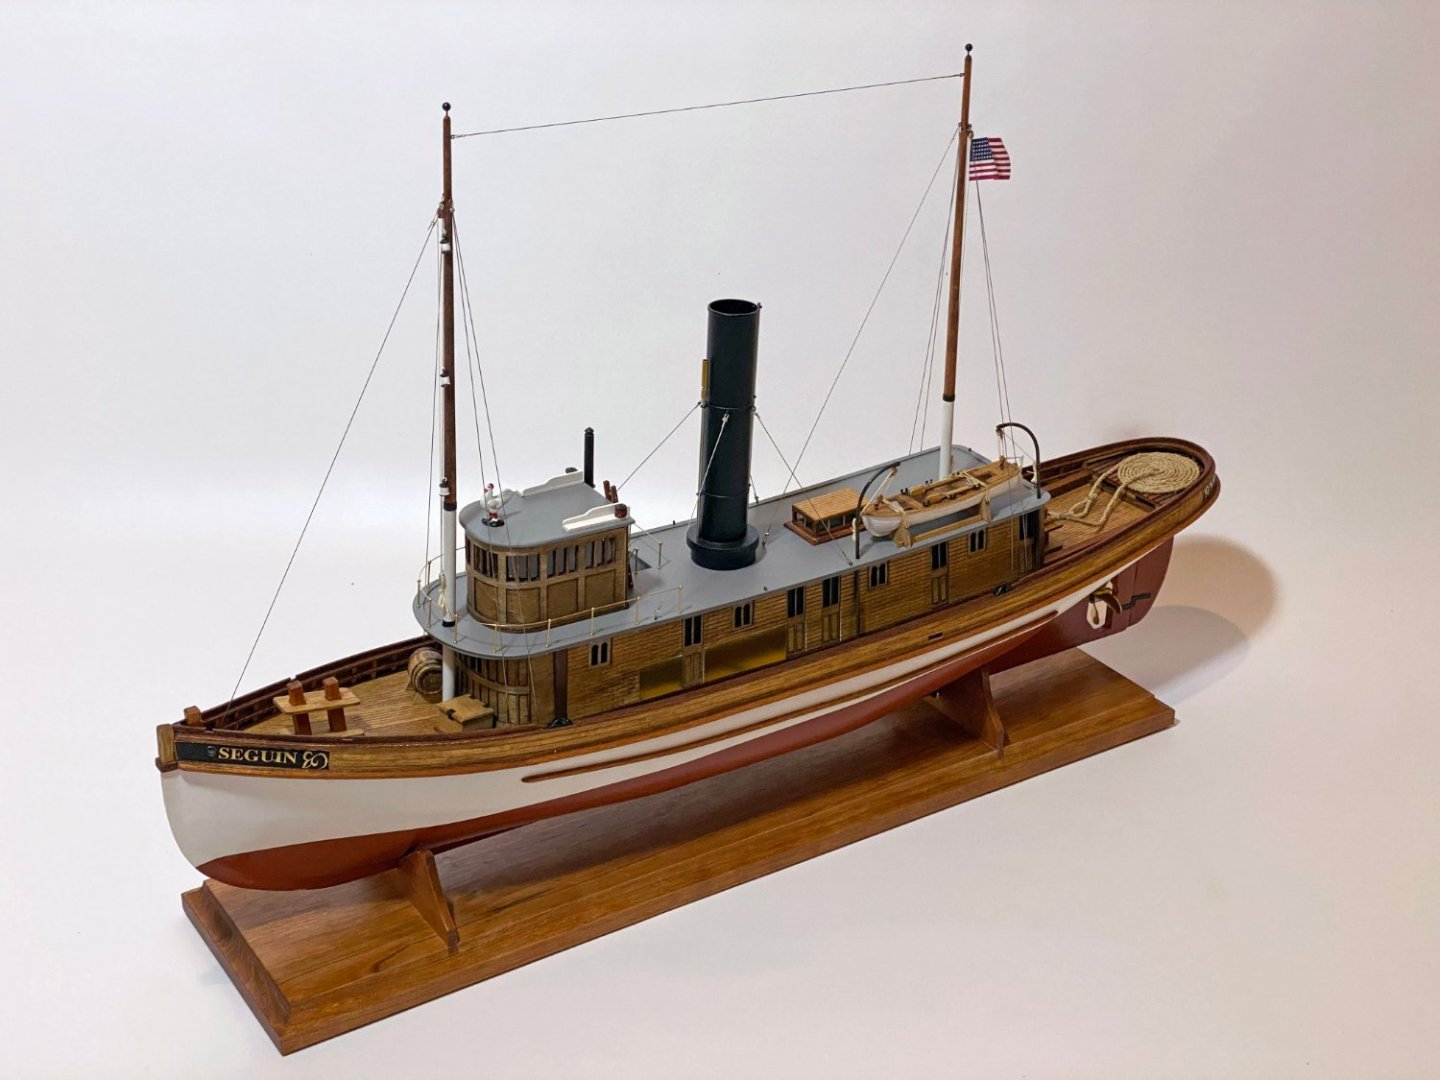
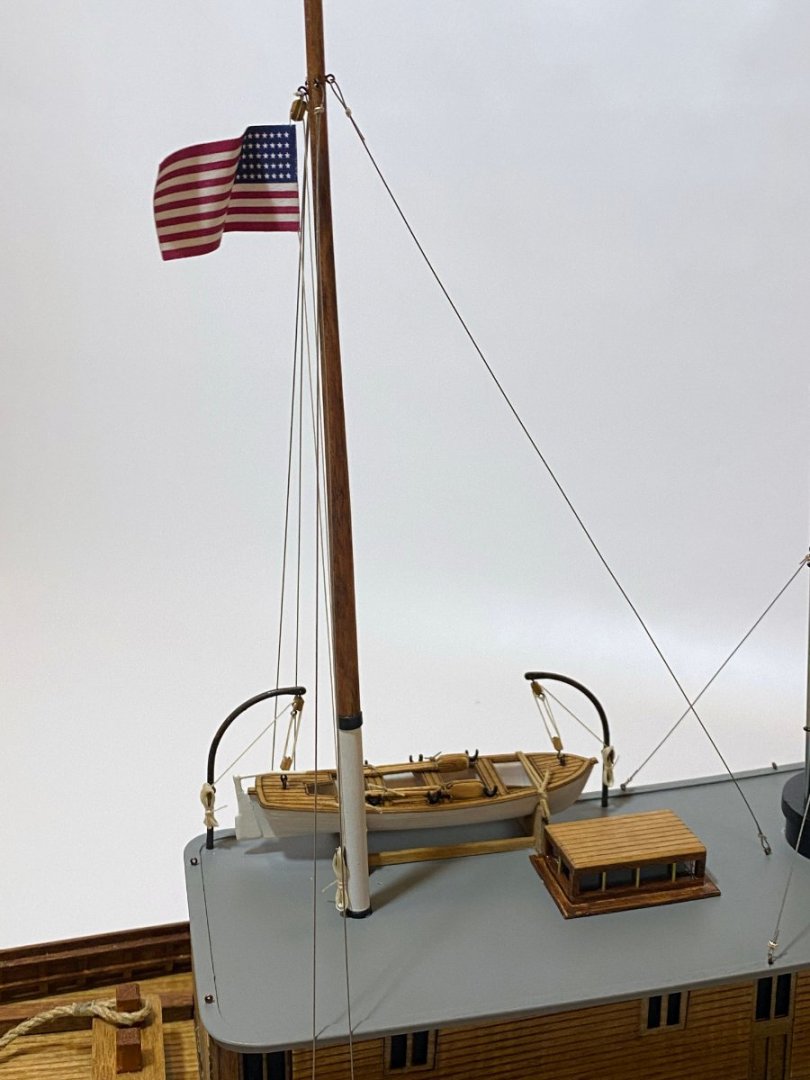
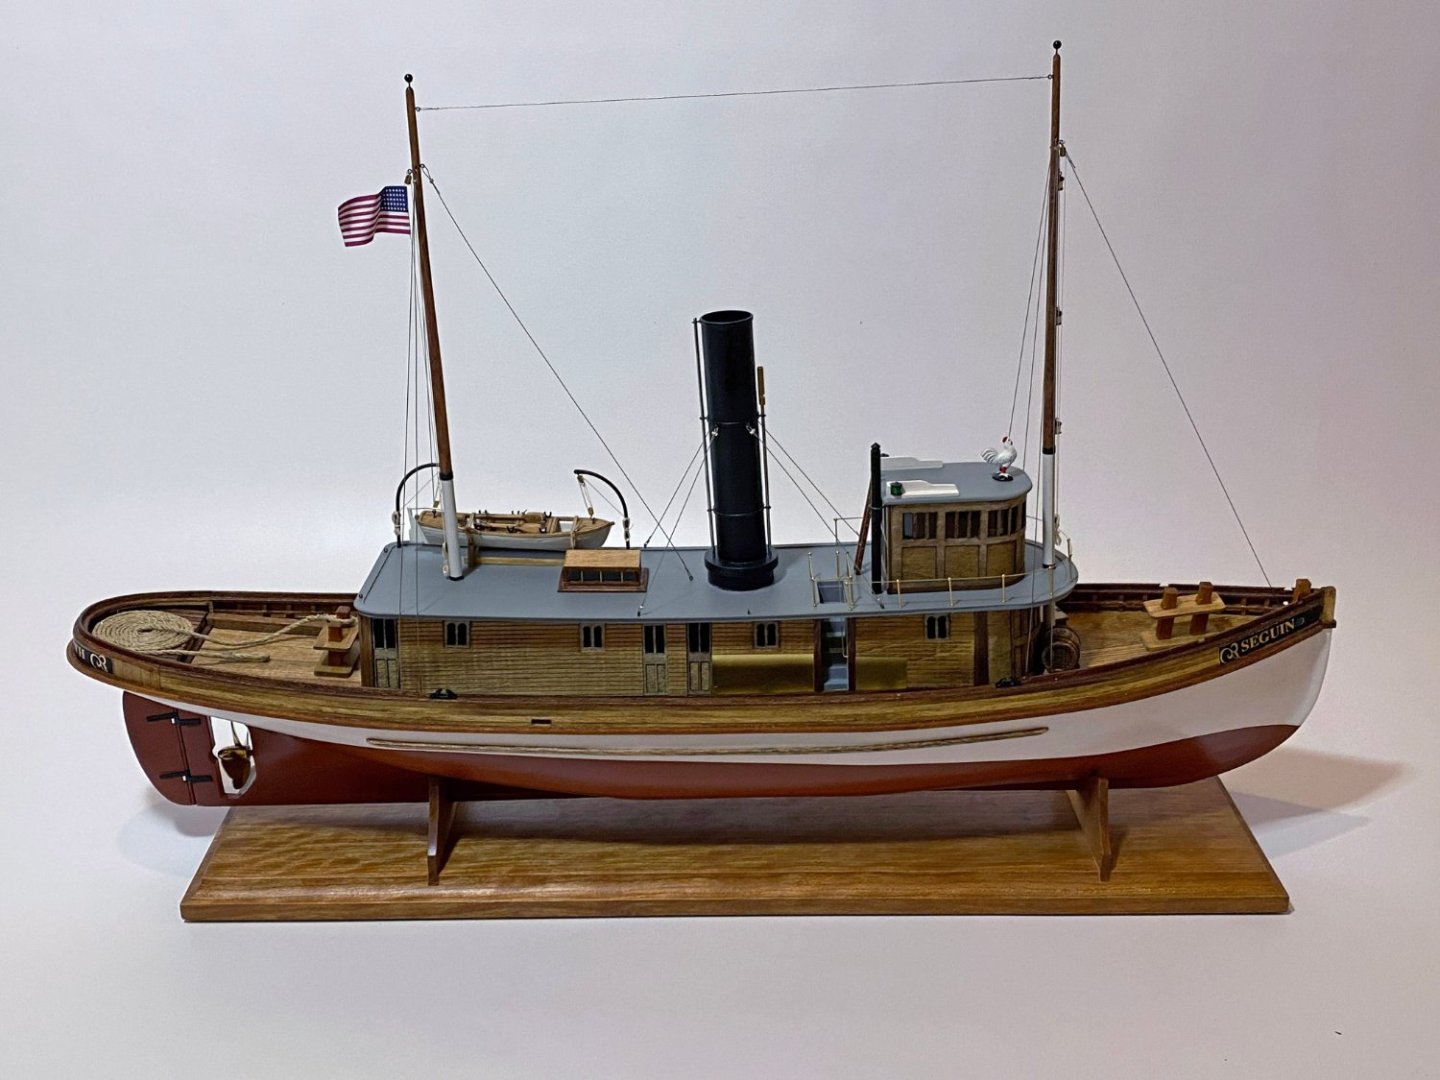
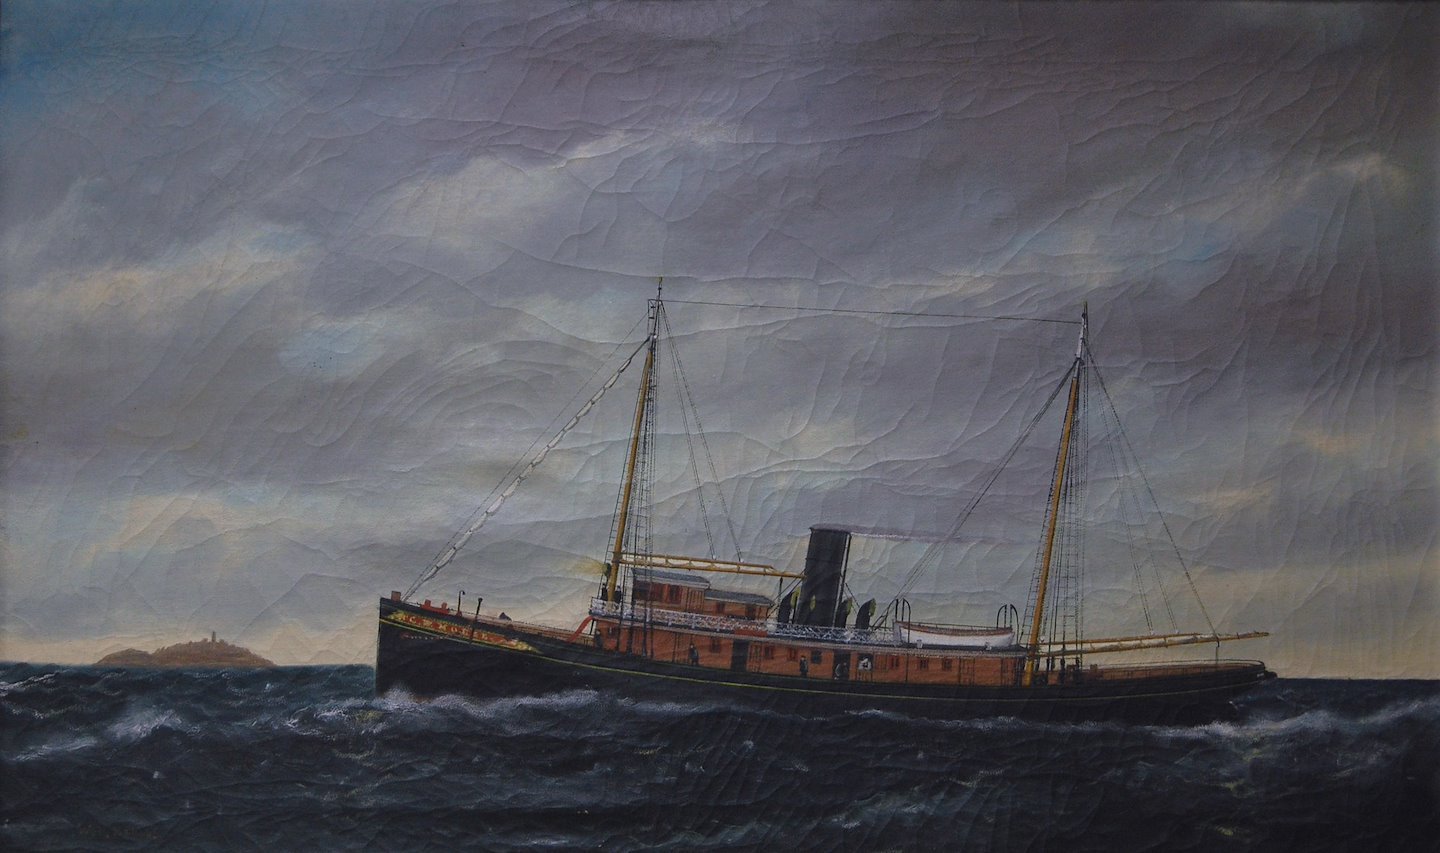
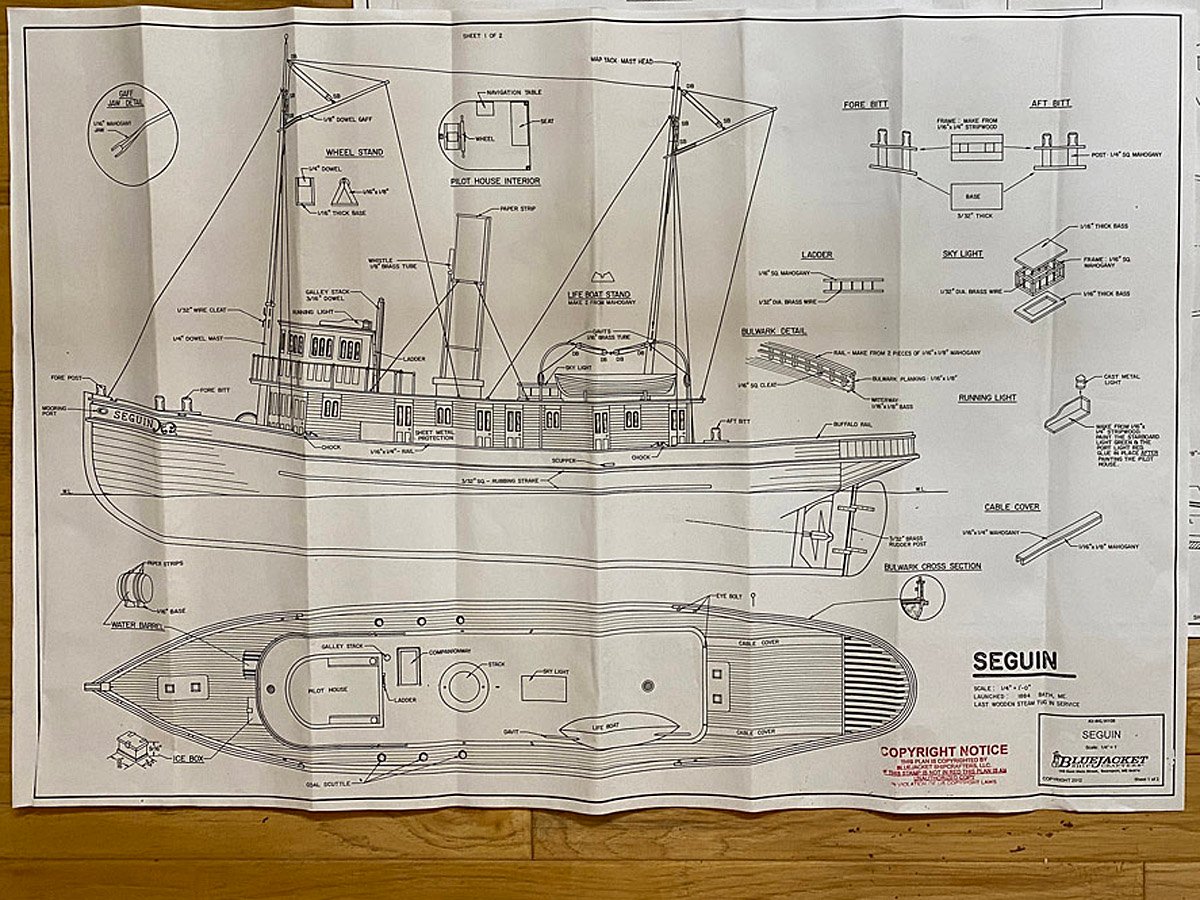
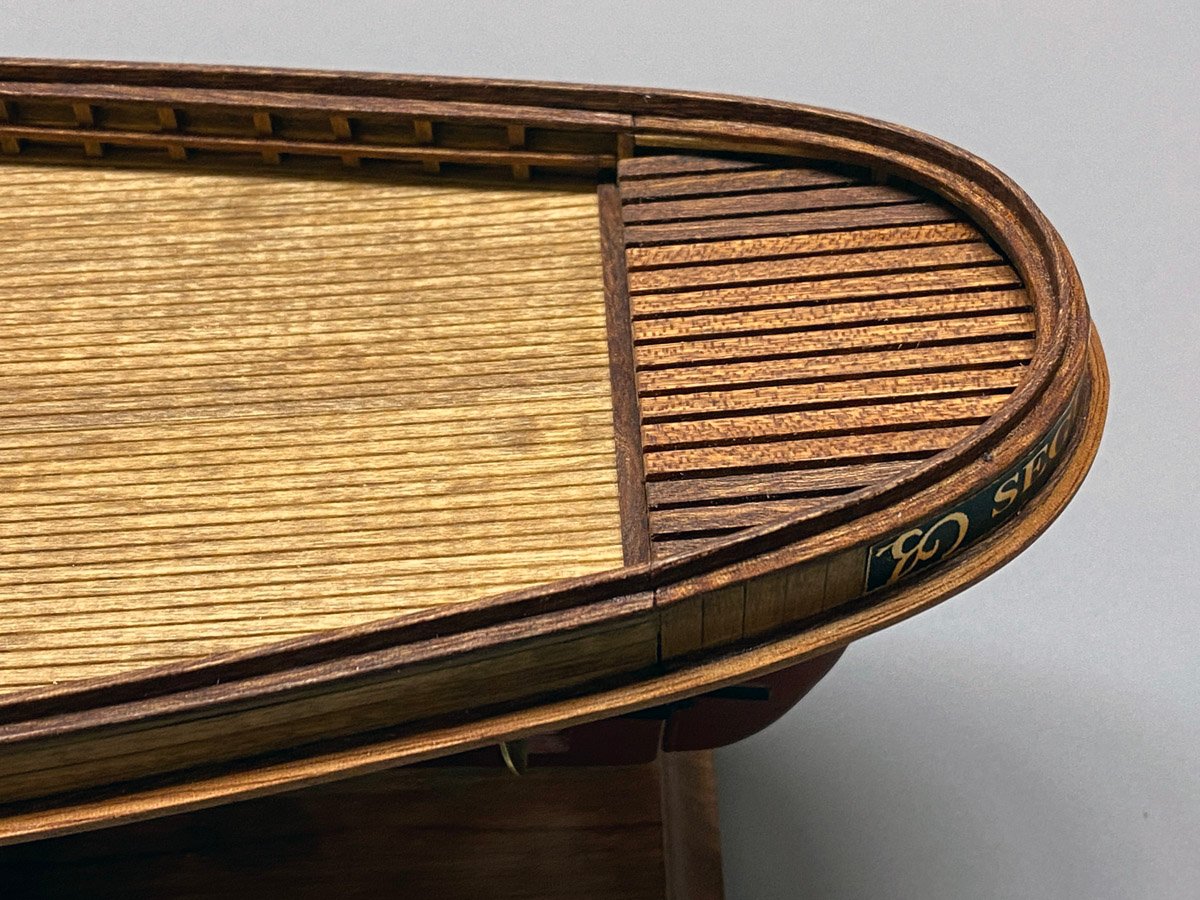
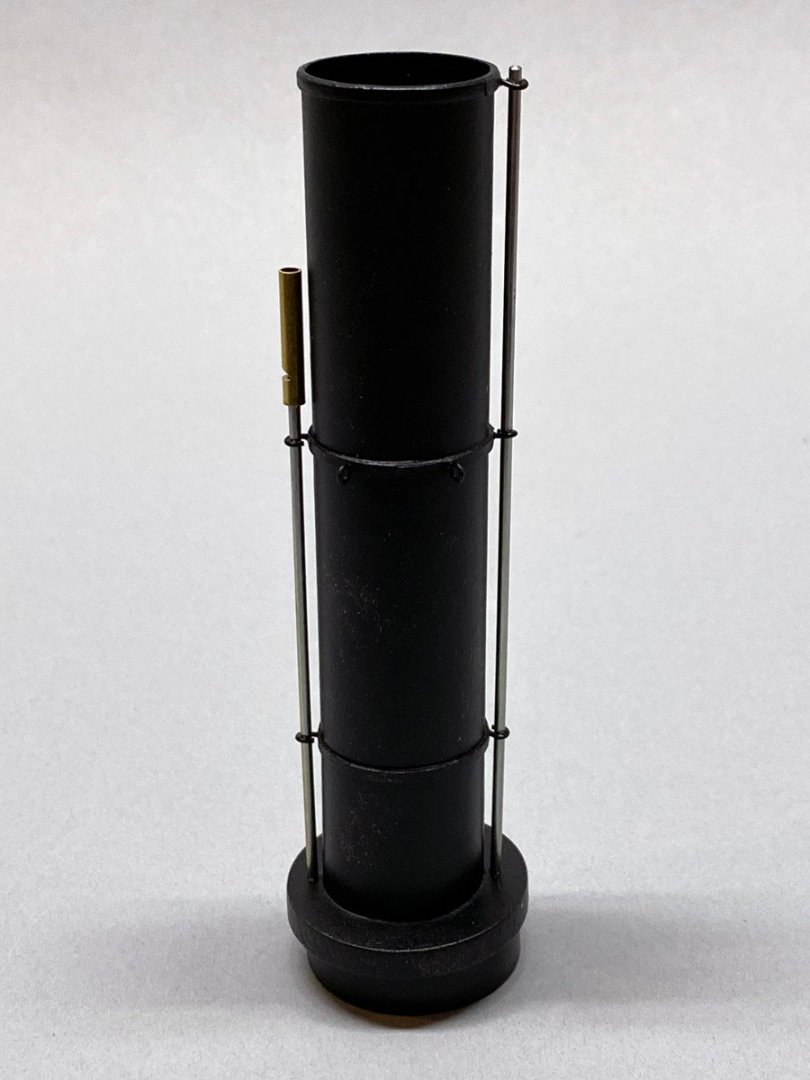
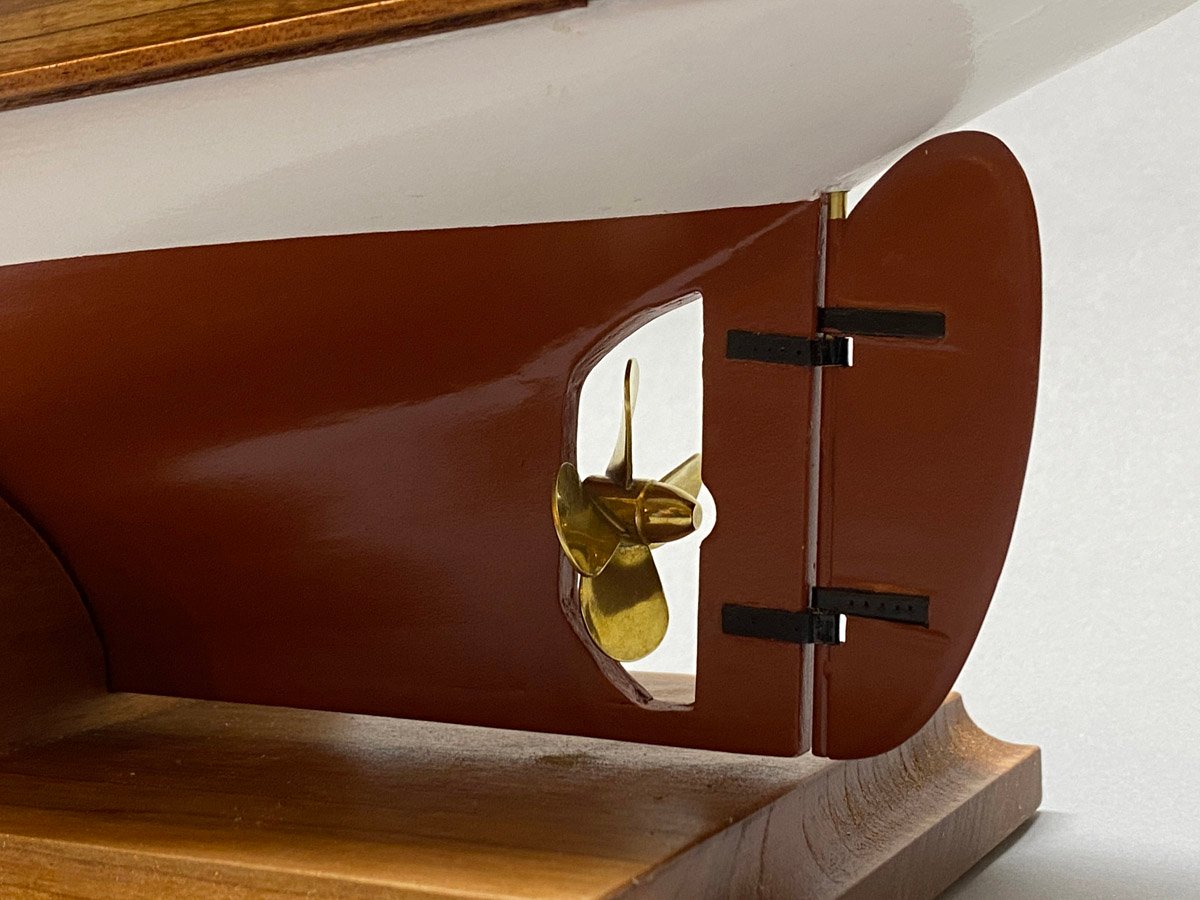
Seguin - FIINISHED, 170 hours, 75 days Today I finished my Bluejacket Seguin model, and I must say that it is one of the prettiest models that I have. All the stained wood, mahogany, and brass make for one beautiful model. After all the research and discussion above, I decided to rig the masts without the gaffs. I simply couldn't figure out what they were supposed to do, and consequently I wasn't sure how to rig them. Instead I decided to hang three navigation lights on the fore mast and a US flag on the aft mast. When the Seguin was built in 1884 the US flag had only 38 stars for the 38 states. I took a few photos of the mast construction and rigging, and then deleted them by mistake when transferring them from my phone. Here then, are photos of the finished model. Port side. I did add a nice coil of rope on the aft grate. Starboard side. Cabin, wheelhouse, pilot house, and rooster. Tugs traditionally had American eagles on the pilot house, but the Seguin had a rooster. The rooster was not there at first, and I could find no photos of the Seguin with both gaffs and the rooster. So the gaffs had to go. Companionway (stairway.) I added a brass rail all the way to the upper deck. Fore mast with three navigation (towing) lights. Almost every photo of the Seguin shows towing lights. Aft mast with the 38 * flag. Stack with stays and steam whistle. Mantua lifeboat. Easy to build and I love the way it looks. It's going to be tricky swinging the rear davit past those mast stays, but that's how they're shown on the plans. The davits were made from some thick brass rod that I flattened and drilled. The kit included some photo-etched brass cleats that I soldered to the davits. The plans and one early photo show the blocks hooked together above the boat, but I rigged them ready to lift. I was also surprised that all the mast stays impinge on the cabin roof. Brass stanchions (railing uprights) by Krick. The Seguin was rigged with wire cable, and the kit came with a spool of very nice, 0.25 mm braided wire. I could have used that, but I had a spool of 0.38 mm plastic-coated bead-stringing wire, a package of crimp beads, and a crimping tool and I used that instead. No good reason. Seagull's eye view. Front view. THE END. (Aft view with the Raeboesch prop.)


- 67 replies
-
- 17
-

-

-

-
Ted, Congratulations on a beautiful piece of work! I love your gold-plated Bismarck. It looks great and certainly shows off your work more than a painted model would. Please message me when you start your next build log co I can follow along. Rod
-
Mark, Thank you for pointing me to the development logs here. I've seen the Facebook posts for the Oregon and Wyoming, but I didn't even know about the Savannah. It looks like three beautiful new kits on the way. Rod
-
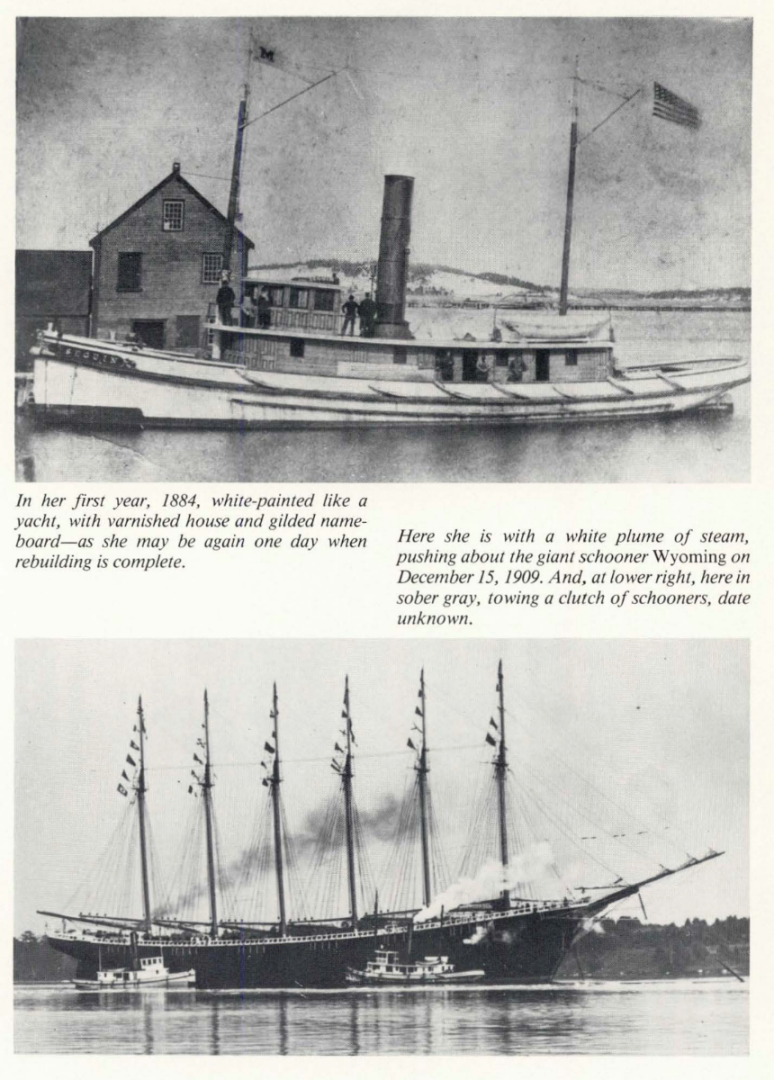
I Found It! After hours of searching online I found a photo of the Seguin in 1884 with gaffs, in Sea History magazine no. 25, Autumn, 1982. I think I'll build the gaffs after all. Better yet there is a second photo of the Seguin pushing the six-masted schooner Wyoming in 1909. Bluejacket is working on a kit of the Wyoming. Check out their build log on Facebook.
-
Why Did Old Steam Tugs Have Masts? After some research I've found a few answers. Derricks could be rigged off the masts for cargo work. After about 1890 yards were left ashore, and staysails and trysails were carried as a "get you home" arrangement. Riding or steadying sails force the hull into the water to reduce the rolling tendency of long, slender hulls. To display three lights indicating that they are towing another vessel. Watch out for a long hawser. The book On the Hawse, A Tugboat Album by Steven Lang and Peter H. Spectre, Down East Books, 1980, has three photos of the Seguin - new in the late 1880s, at retirement in 1969, and unknown date. Two of the photos show towing lights on the main mast. The retirement photo shows the masts proudly decorated with flags. None of the photos show any gaffs. I may leave them off.
-
Thanks Nic. I also have not found evidence of sails. So what were the tall masts for? Perhaps for back up propulsion. Too early for radio antennas. All I can think of is that they were used for hoisting things on board. The lifeboat perhaps, although the davits would be used for that.
-
The plans show masts with upper gaffs that could be tipped or lowered. There are no lower yards for the bottom of a sail, if that is the correct term. I haven't seen any images of the Seguin with sails, but I did find this beautiful painting of the C. W. Morse with sails furled on the Maine Maritime Museum site. It looks a lot like the Seguin. I'm hoping Nic from Bluejacket will chime in.
-
Chris, Yes, I stain everything before gluing so that glue runout doesn't block the stain. Perhaps the stain blocks the glue instead. The stain had dried for a couple of days.
-
Question The Seguin has two tall masts fore and aft with gaffs atop. Were these for sails (on a steamer) or used as hoists ? Pardon my ignorance but I'll be building these soon and want to get them right.
-
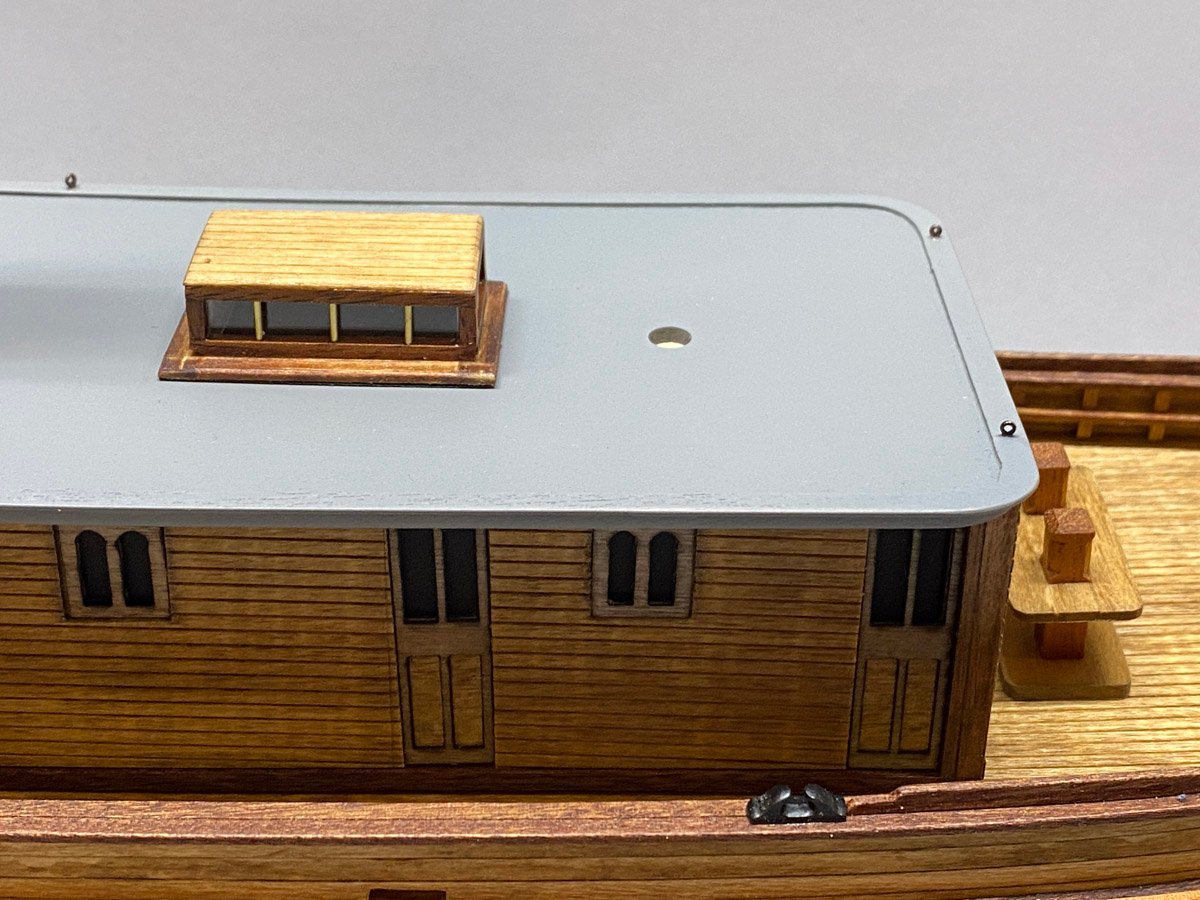
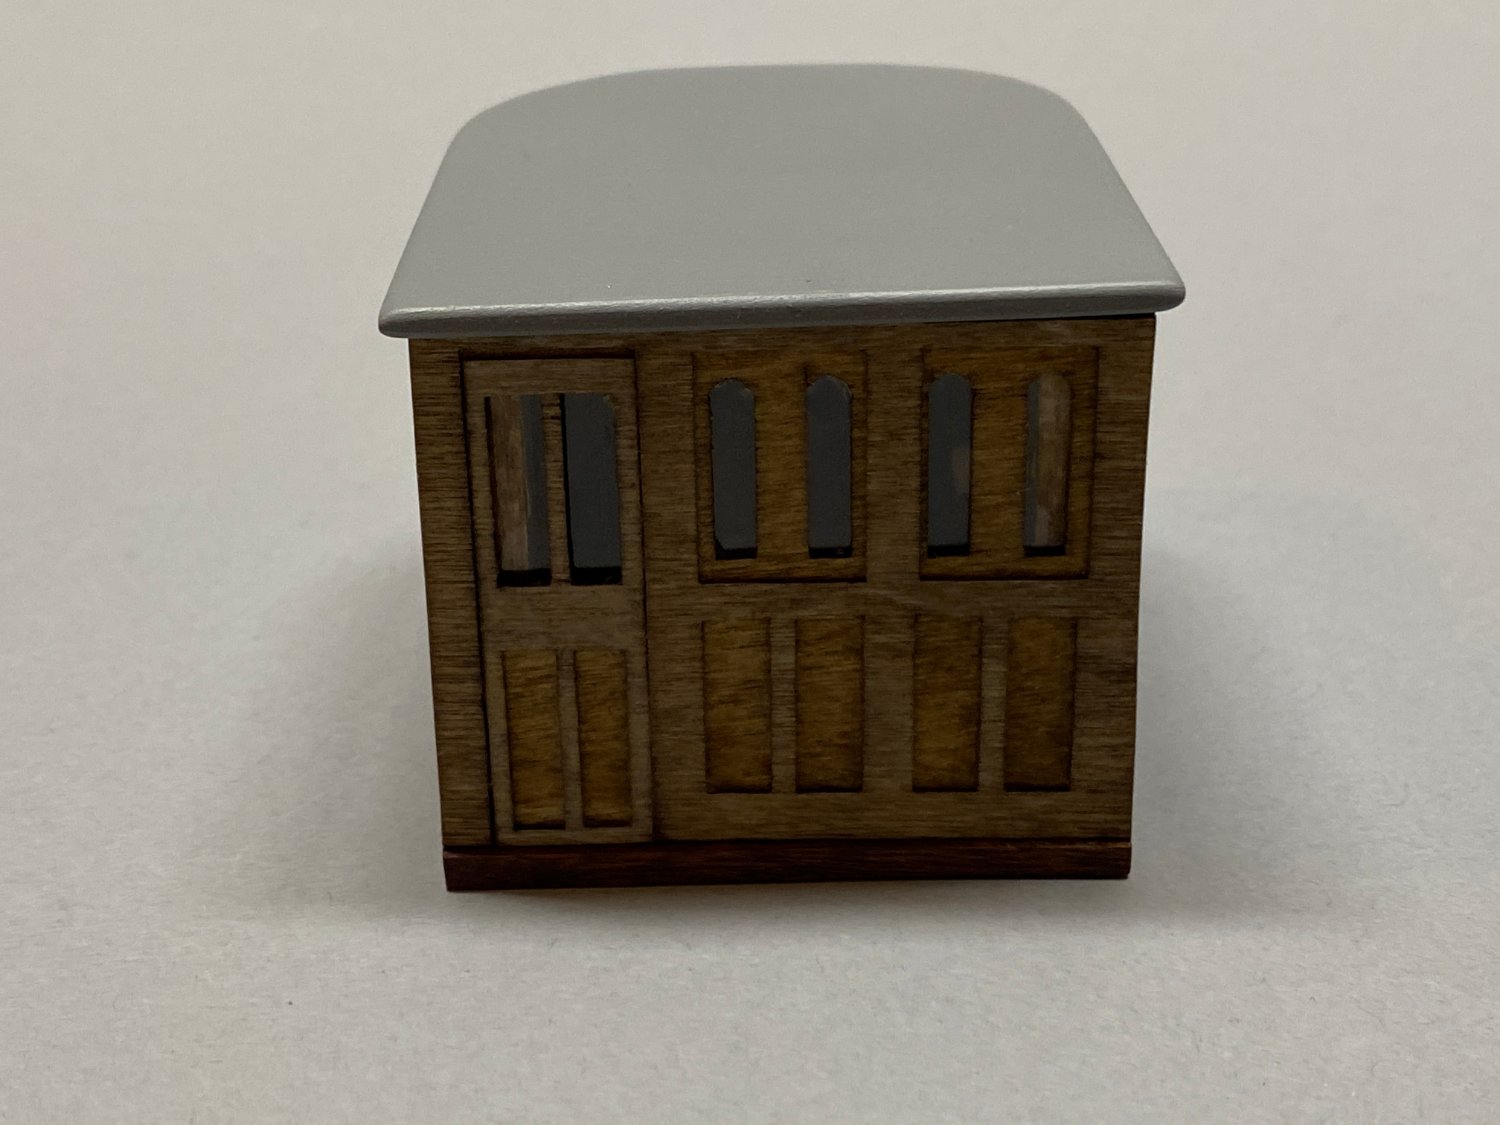
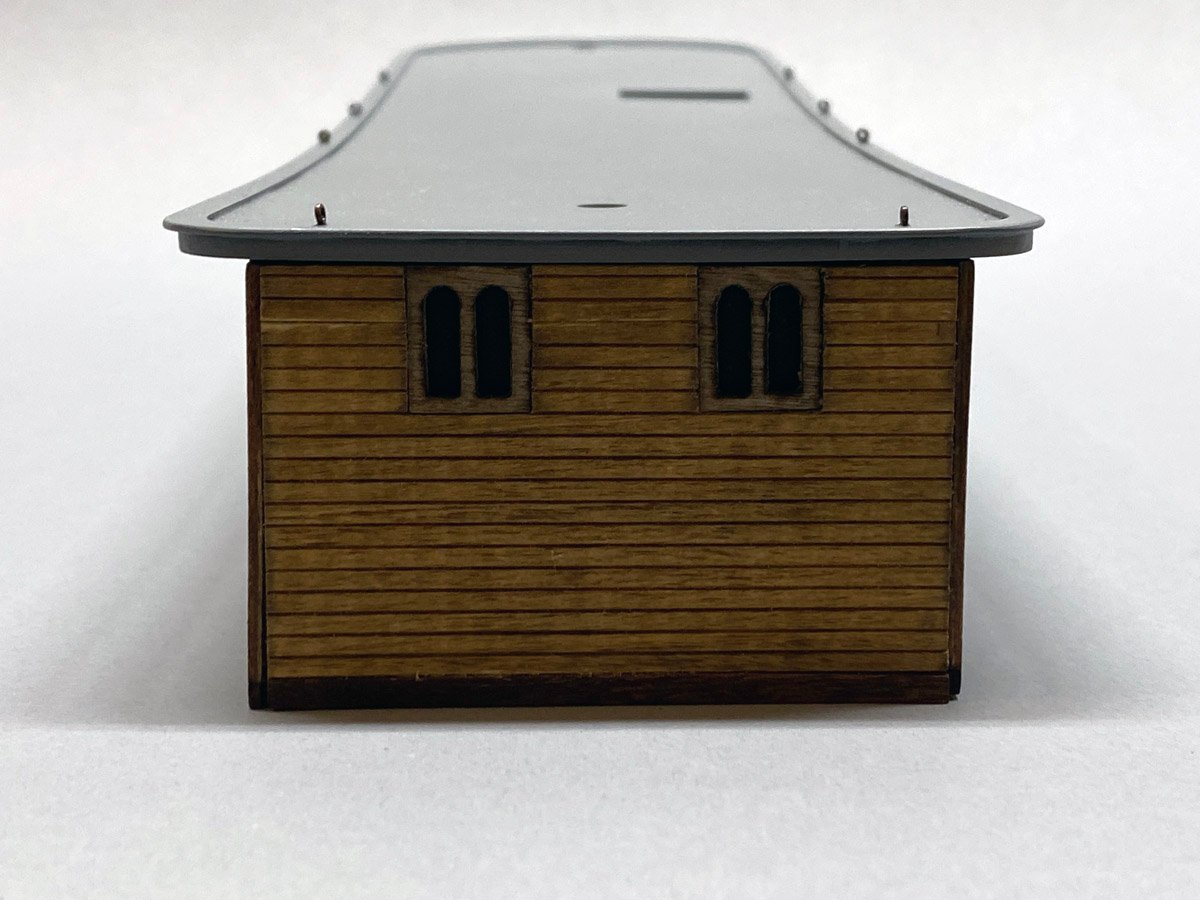
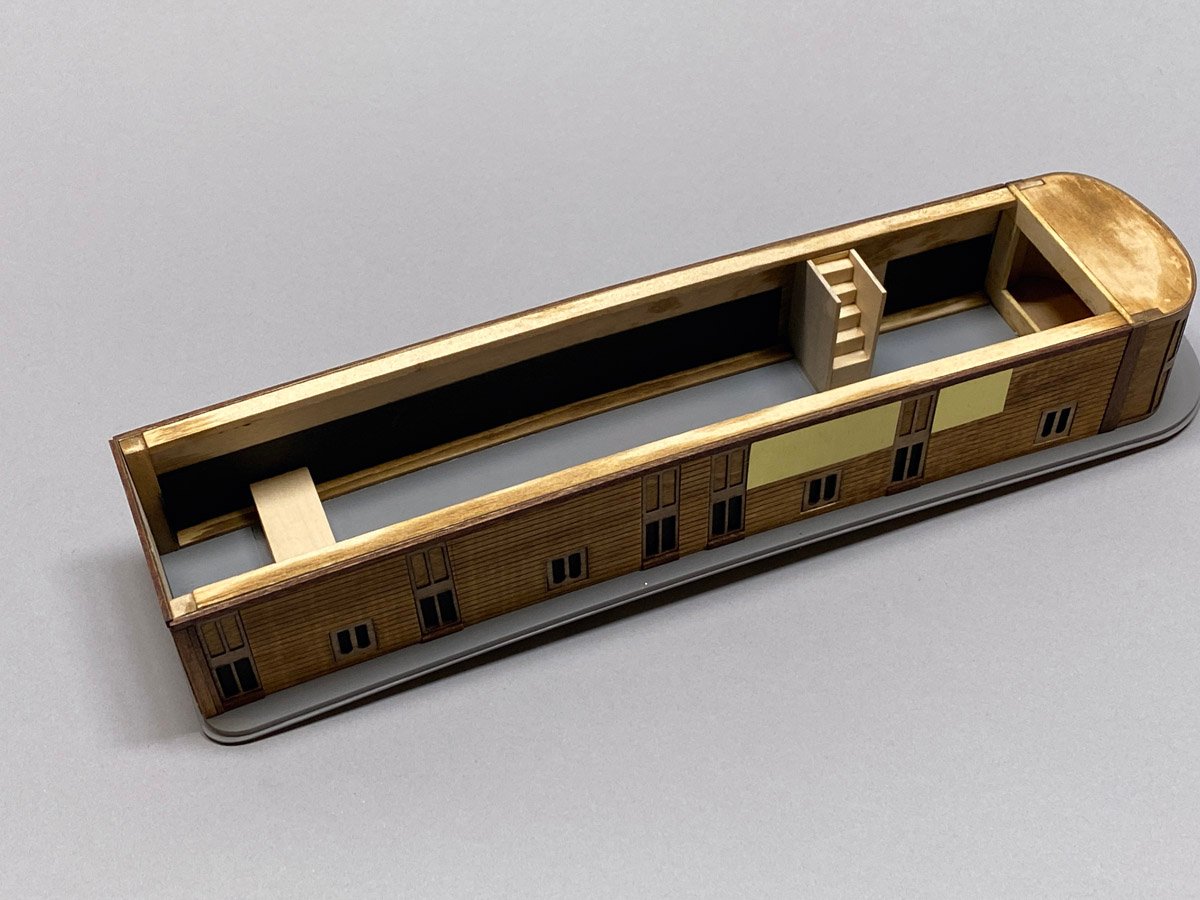
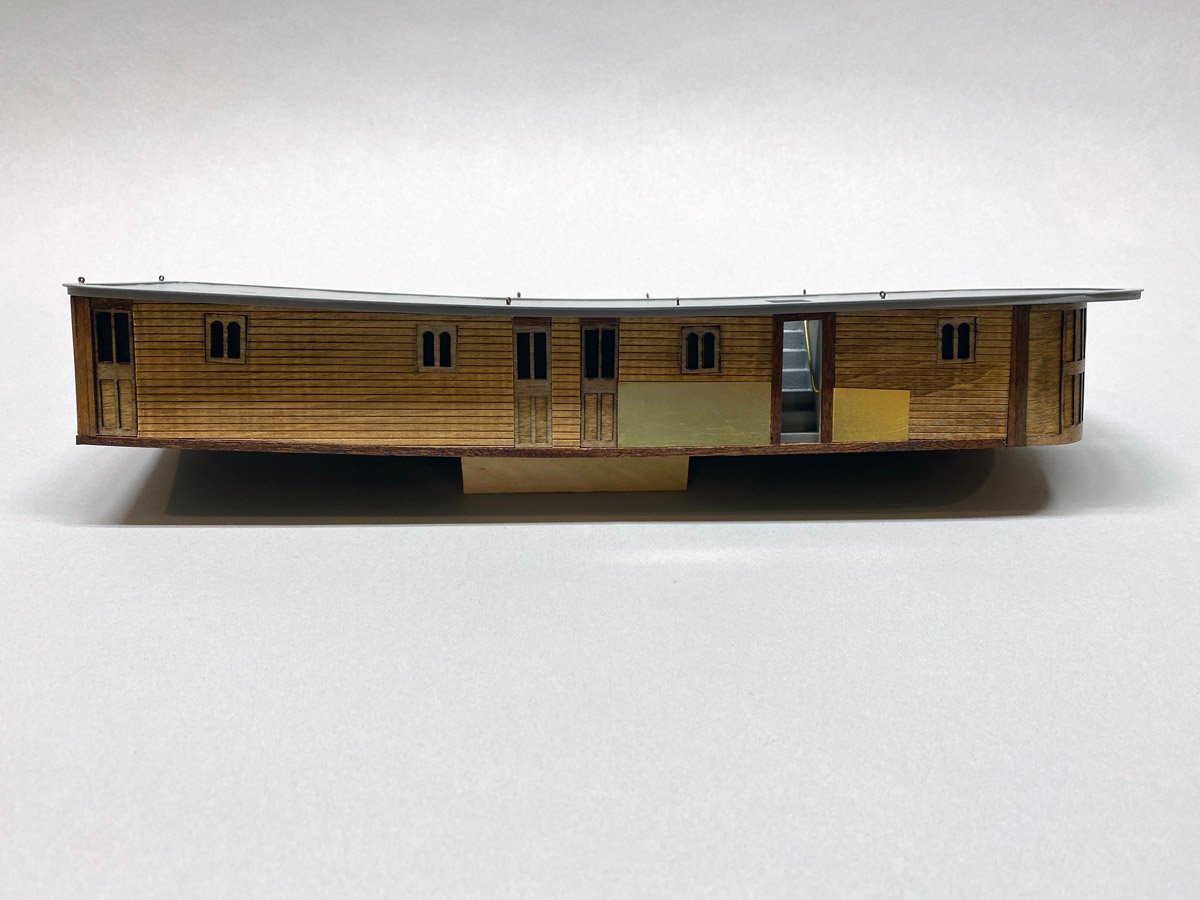
Cabin Complete I started laminating the plywood panels together using 3M Super 77 spray adhesive. It seemed like the perfect way to spread glue on all the laser cut doors and windows, but it didn't work. Pieces like this simply fell apart when I handled them, leaving a sticky mess on the parts. Luckily I only did a few parts before I realized the problem. After cleanup I re-glued everything with Titebond. I put a one-star review on the 3M web site, and they responded with a number to call. After a half hour on hold I talked to a customer service rep who said "Sorry it didn't work for you." Very disappointing. The cabin is very attractive with two types stained wood and brass panels for protection near the coal scuttles. There is nothing to see inside so I covered the windows with black paper. Note that the top and bottom are curved fore-to-aft to match the curvature of the deck.

-
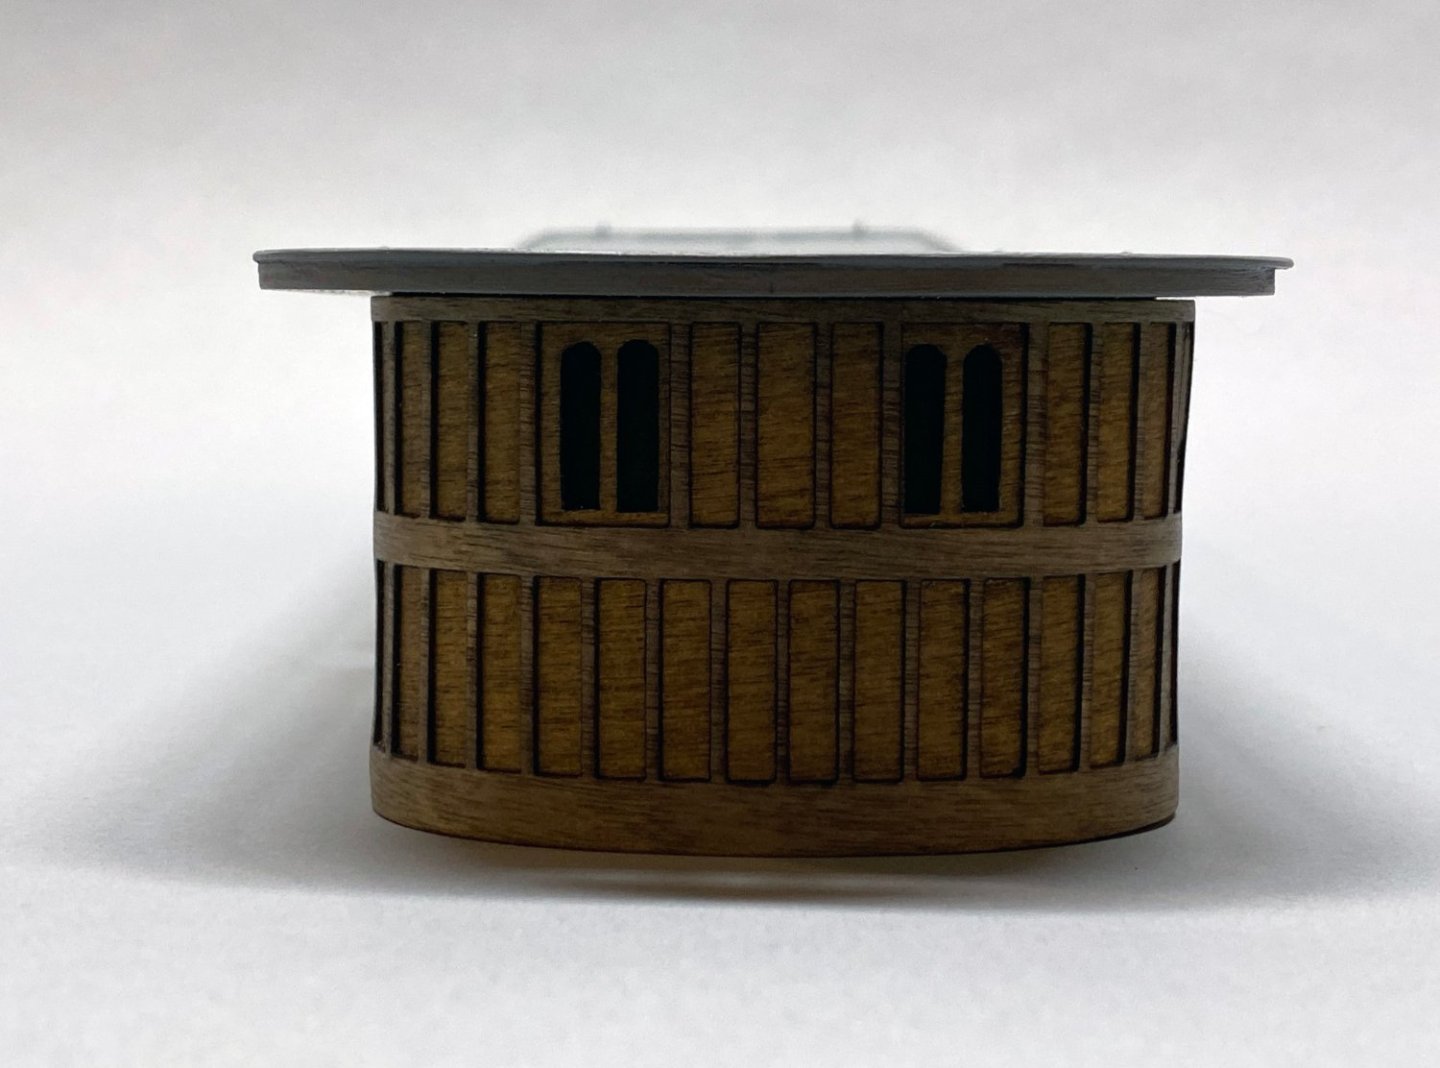
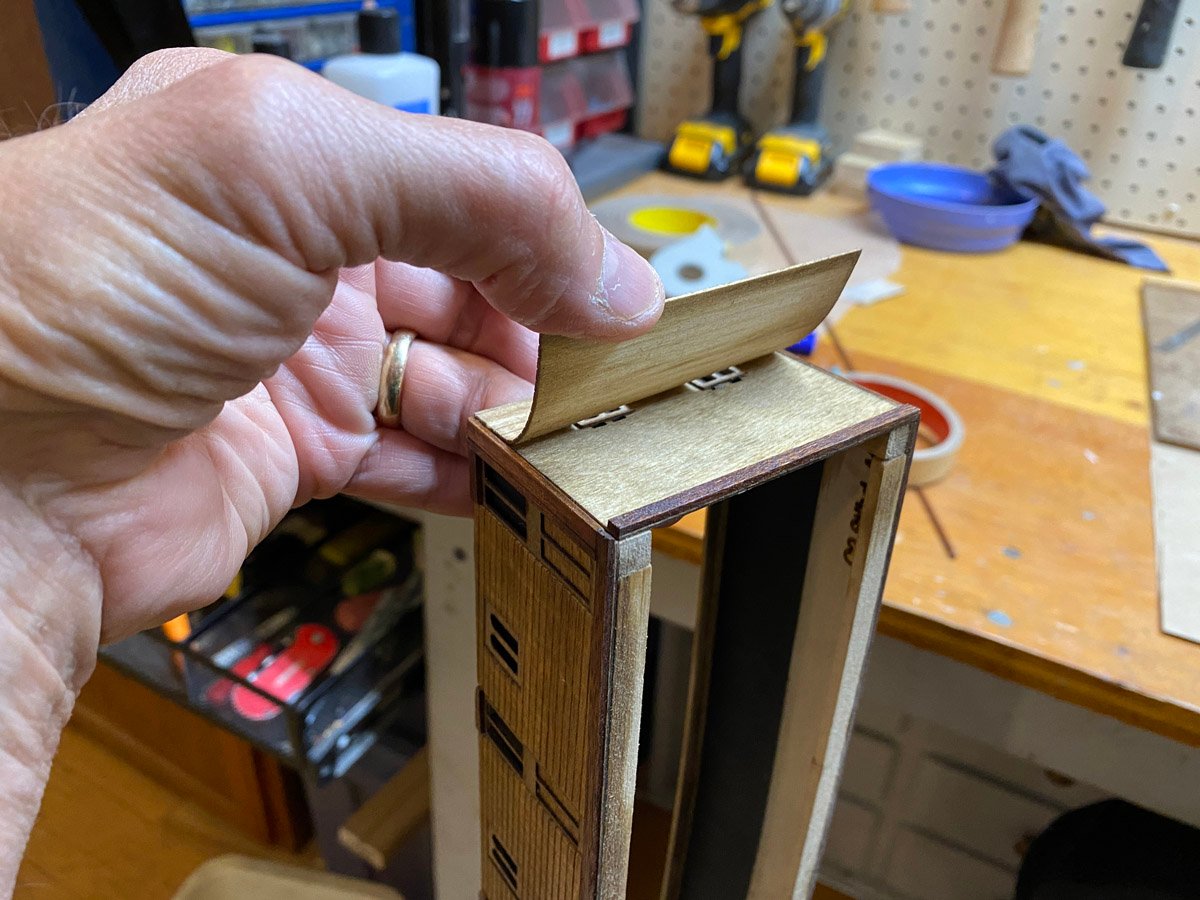
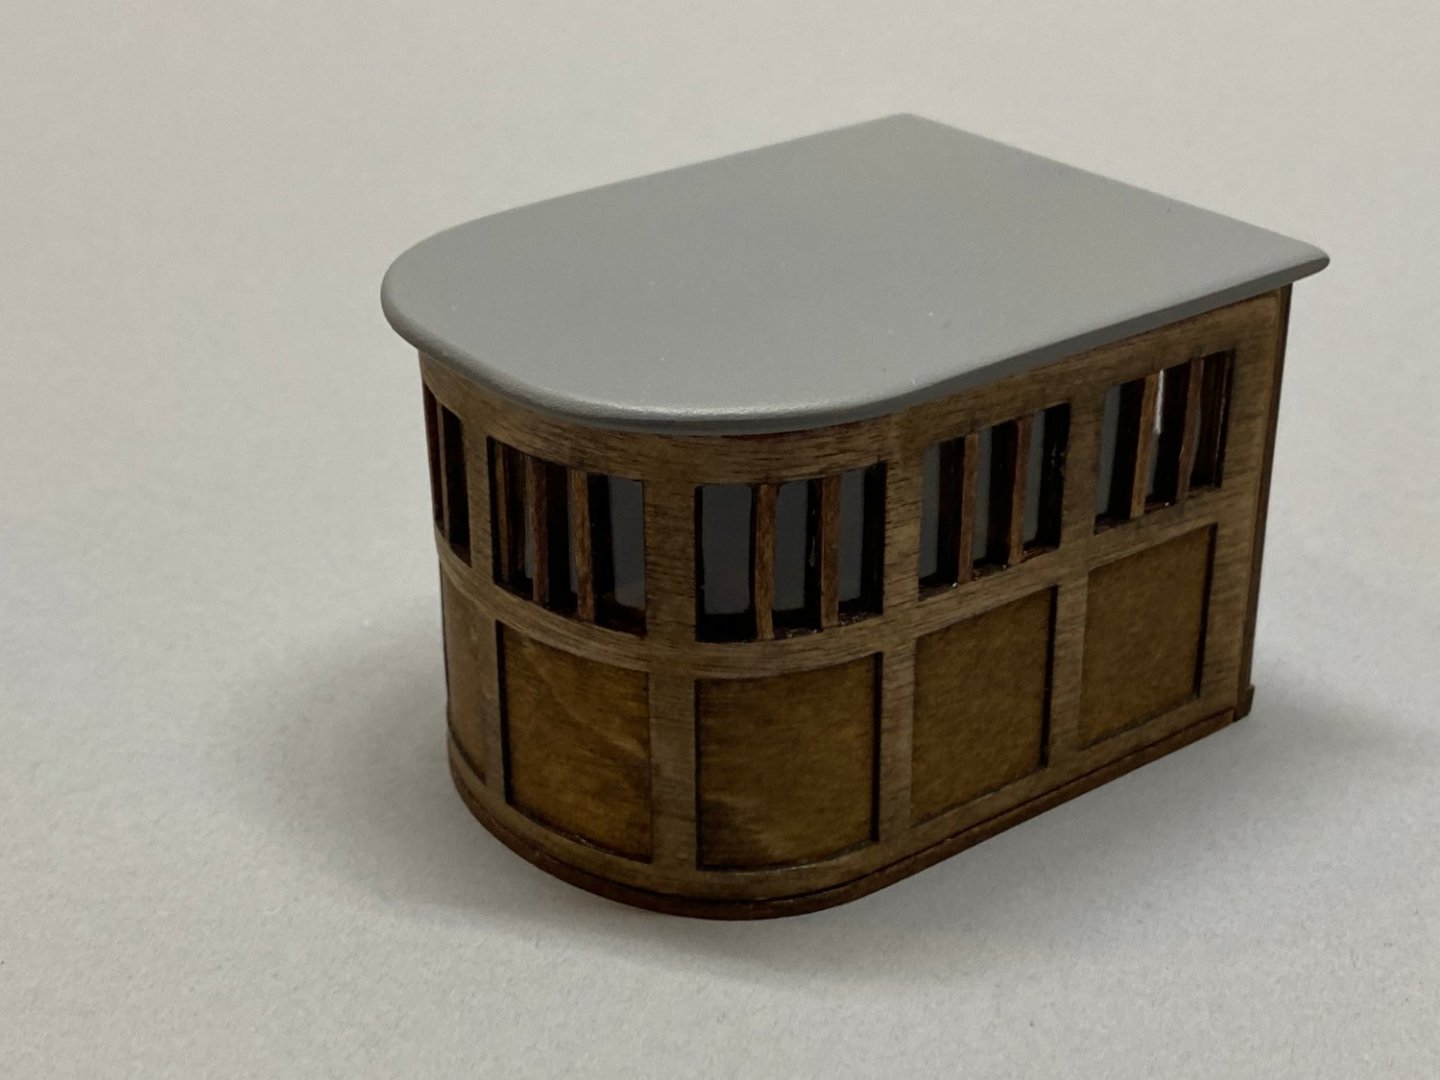
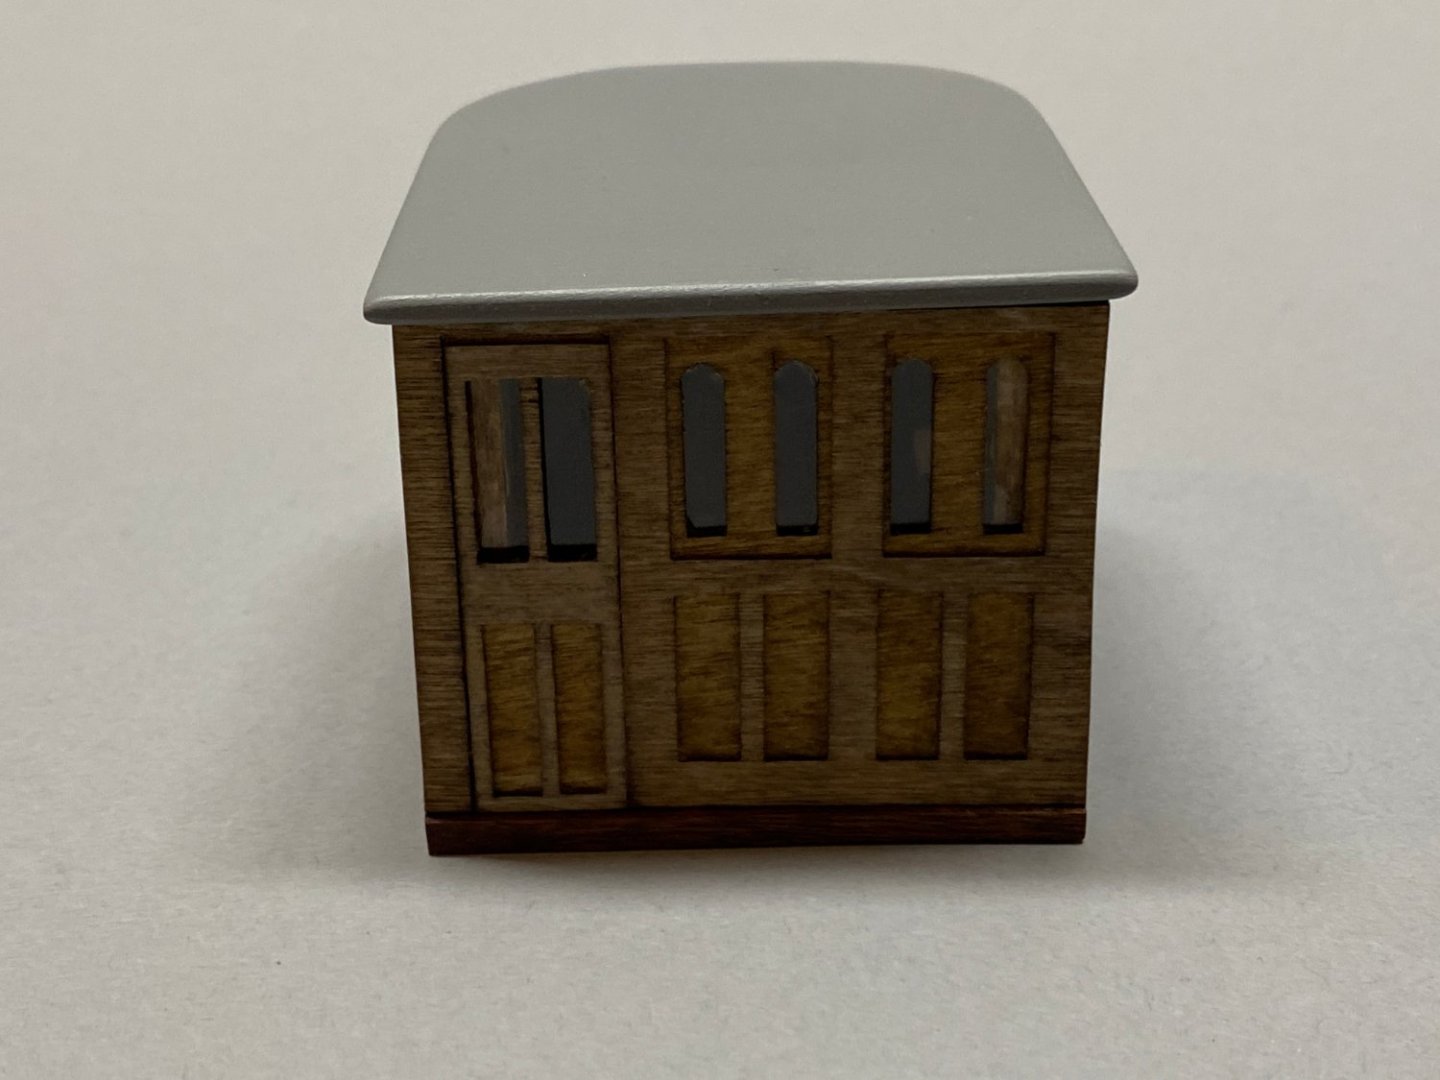
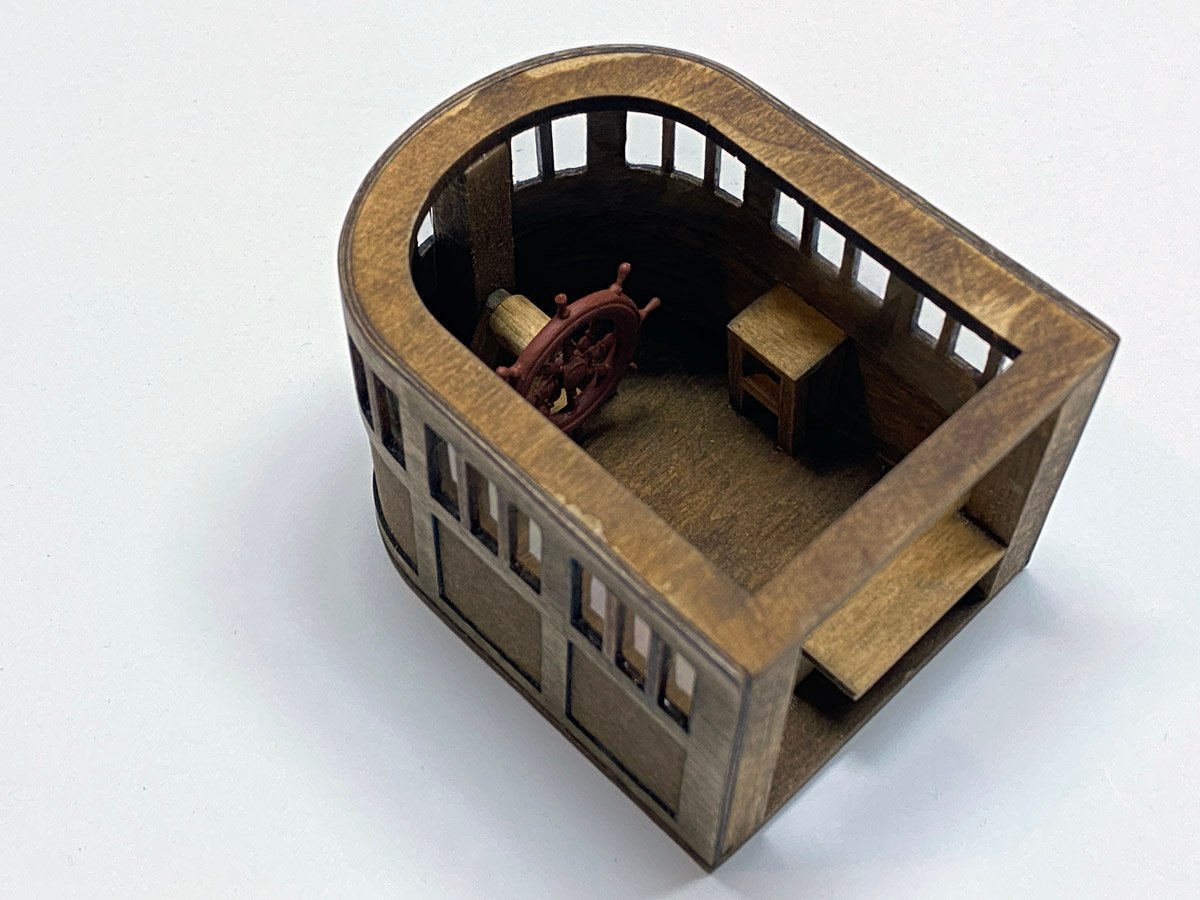
Pilot House Complete The pilot house and cabin are made from two layers of laser cut plywood laminated over a form. The inner layer is structural and the outer layer is decorative. On the pilot house the layers did not align well in the widows - the uprights of one layer obscured the other but I did not get a photo. I tried unsuccessfully to remove the inner layer, but gave up, cut out all the uprights, and replaced them with 1/16" square mahogany. Grate Improvements There was a joint between two deck segments that did not line up with the edge of the grate. Nic said I will put a coil of rope back there eventually, but I covered the joint with a strip of mahogany. Here's the Raboesch prop installed. I should open a Crate and Barrel Store. (Note to readers, Crate & Barrel is a home furnishings store throughout the US.) The stack is made from two segments of model rocket body tube and some random parts.
-
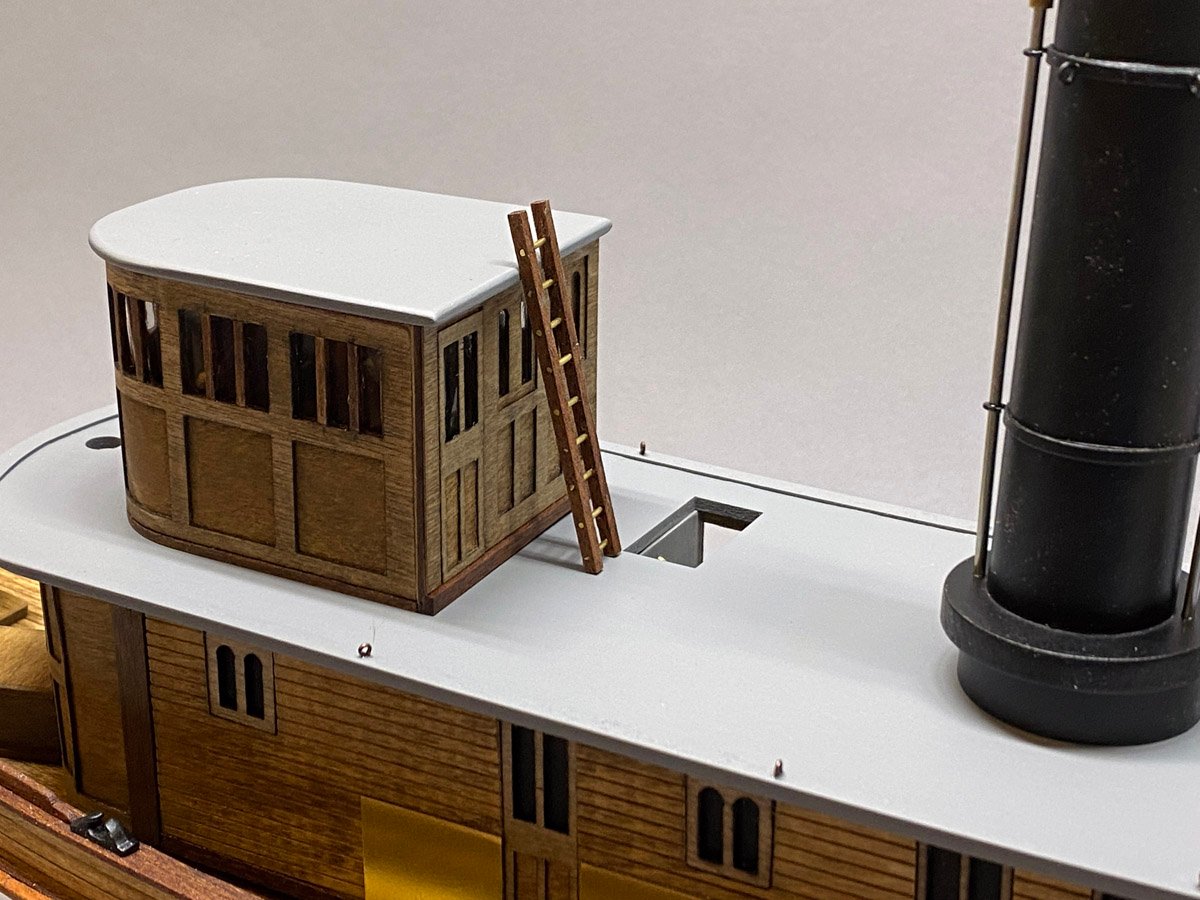
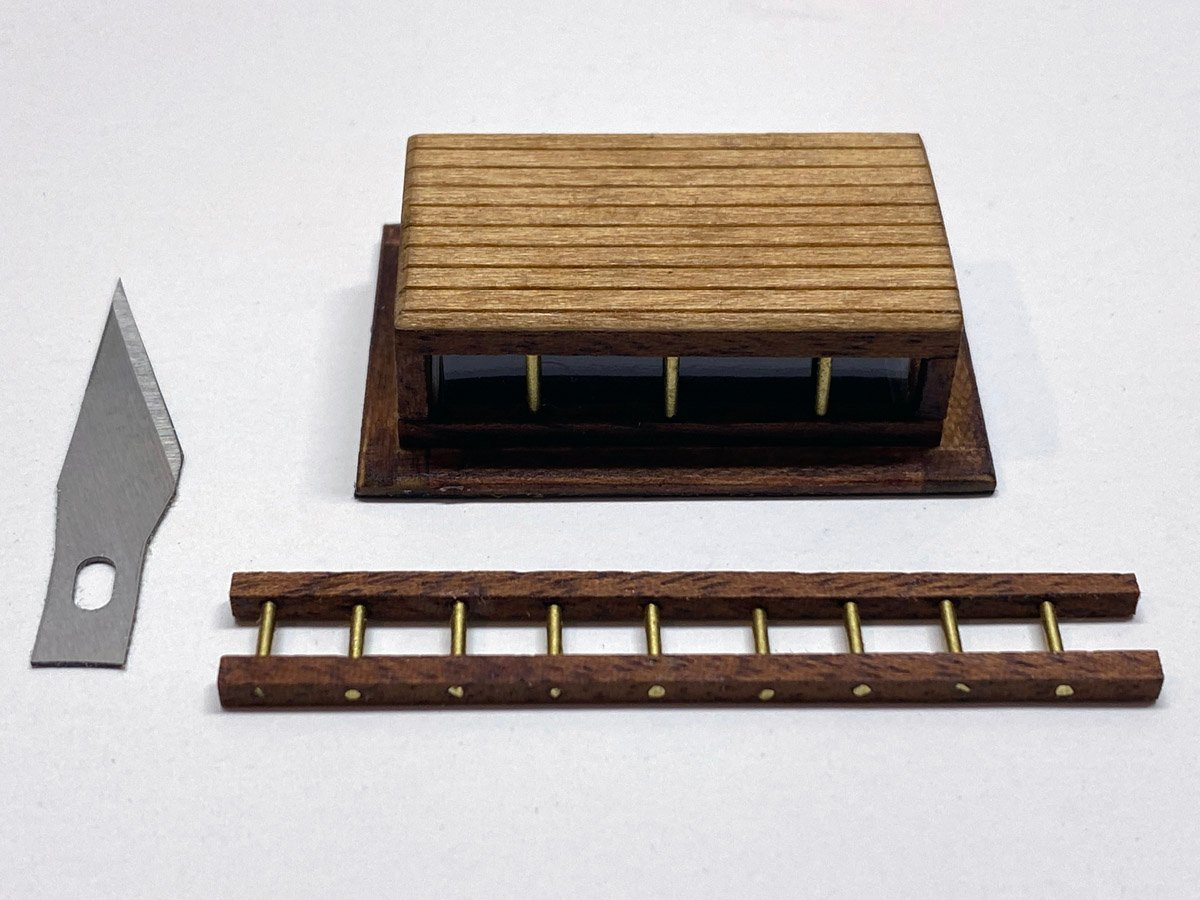
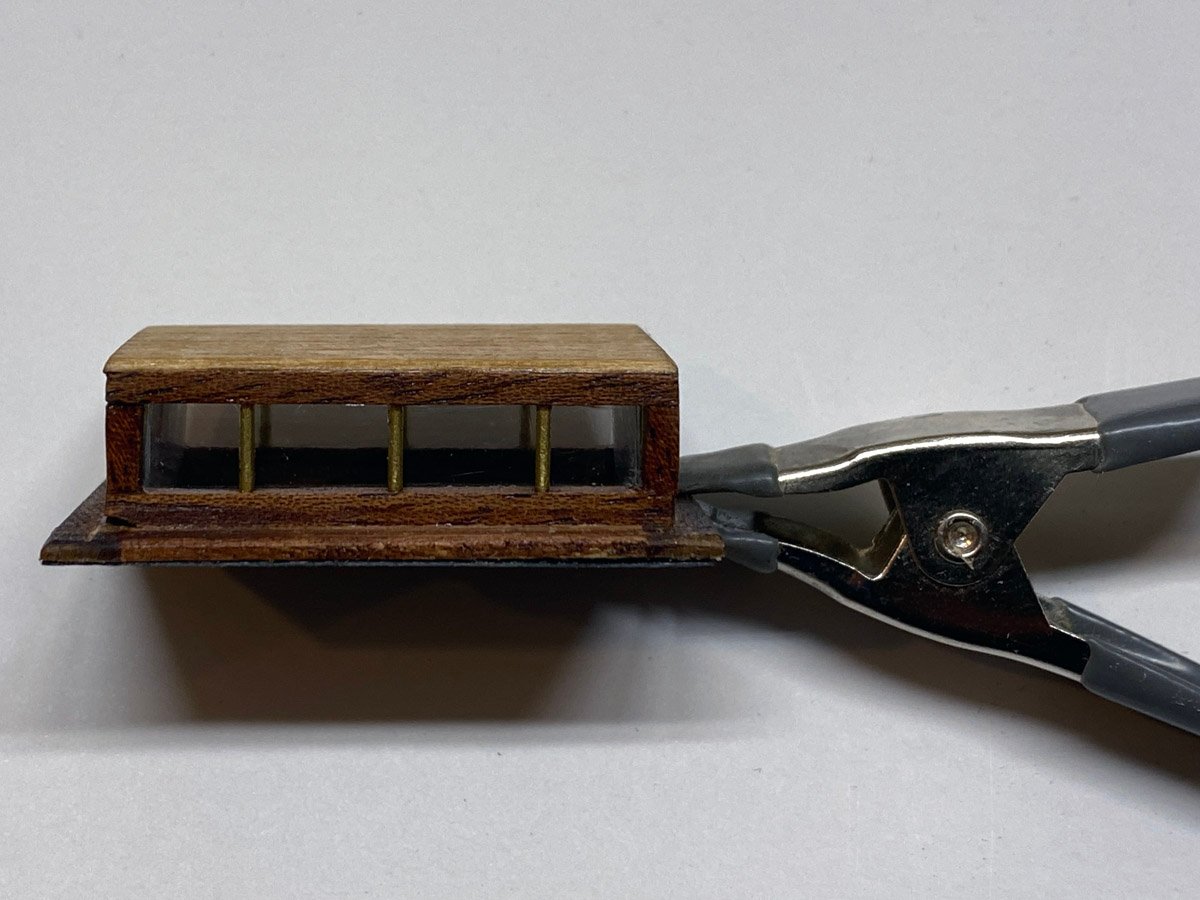
Pilot House & Skylight The pilot house has clear plastic windows with a few pieces of furniture inside. Here it is ready to button up. The skylight and ladder were fun to build. You cant go wrong with mahogany and brass. I put clear windows in the skylight too, but black paper on the bottom since there's nothing to see inside.
-
It must be painful to hide all that beautiful work under the deck. At least you have the photos to prove that it's there.
-
The plans show a lifeboat with a canvas cover, which could realistically be carved from a block of wood. I just wanted more detail. In fact I almost always replace a few parts in any model - we probably all do. I just happened to get everything at once in the mail and wanted to show what I was doing.
-
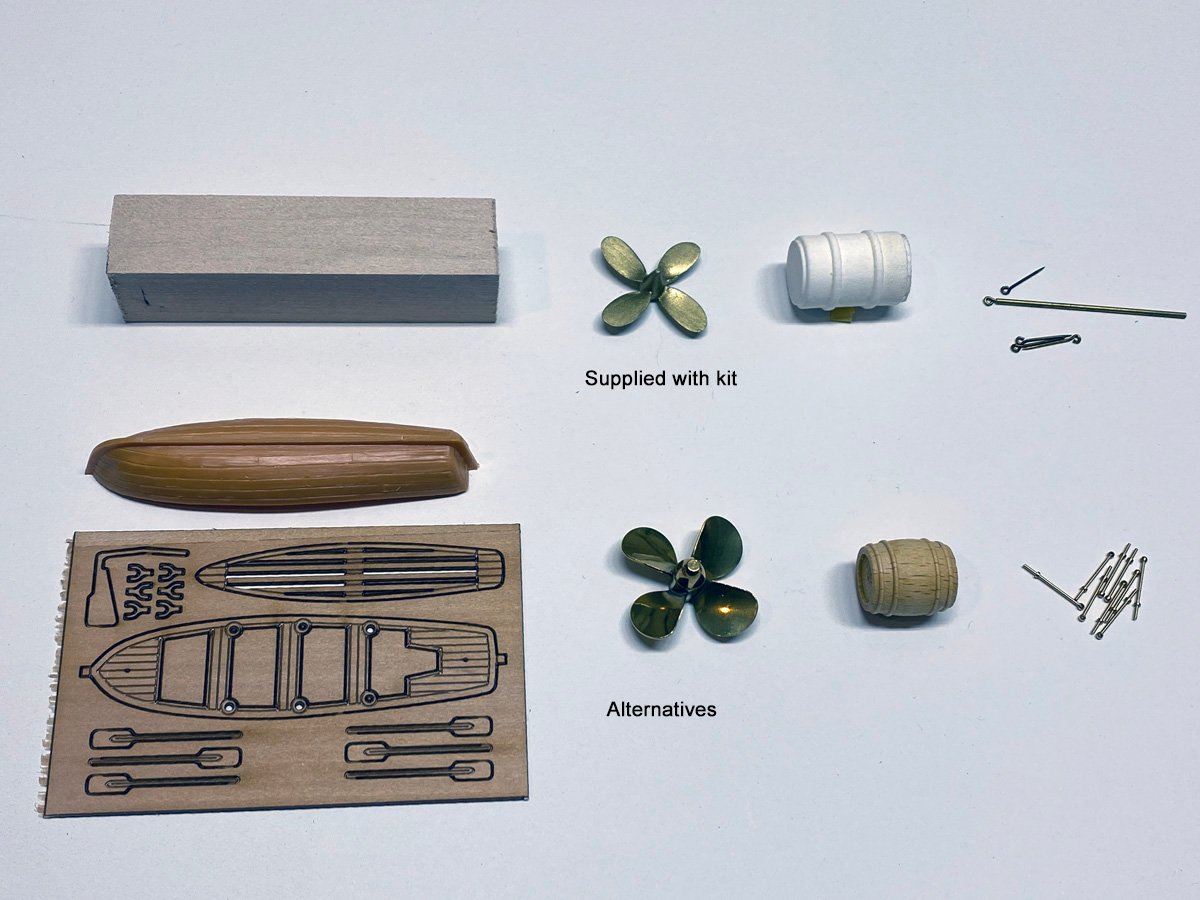
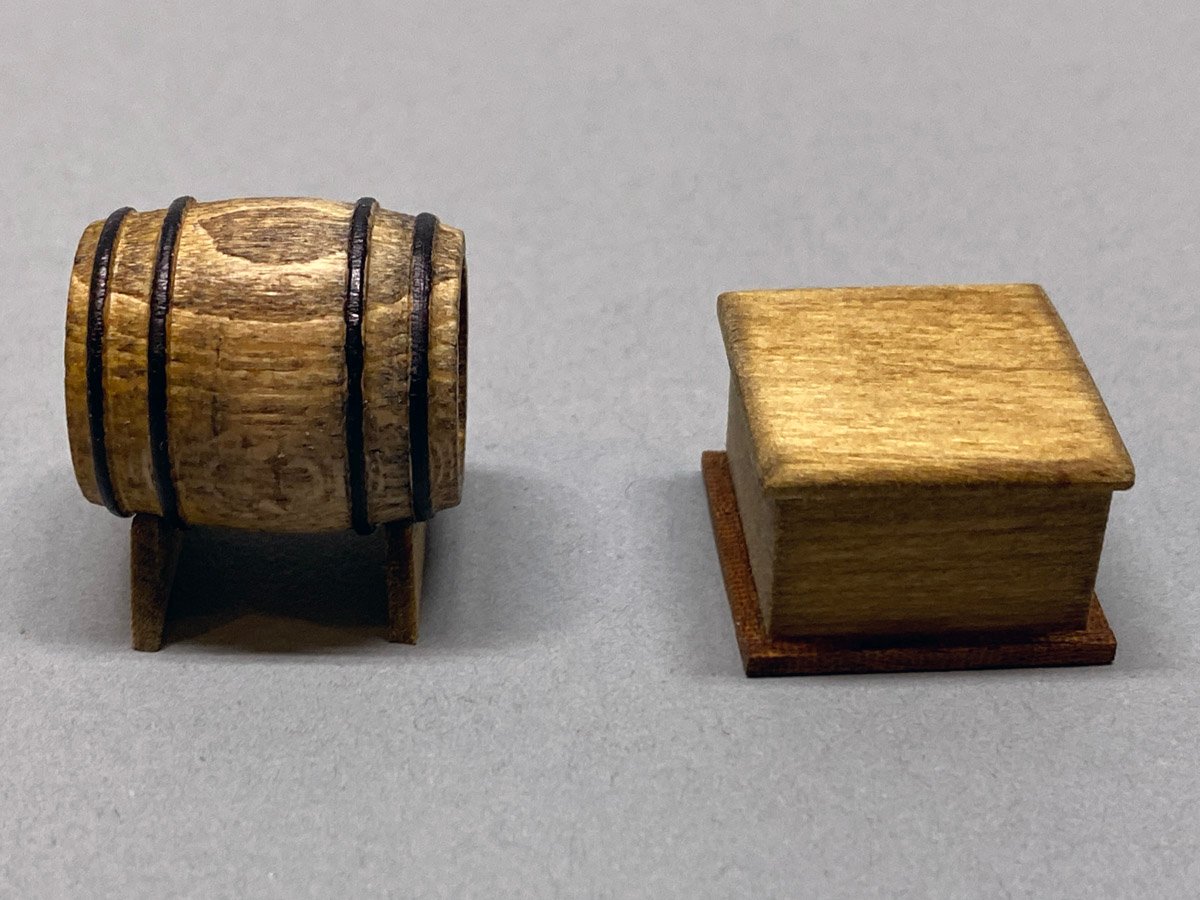
Alternative Parts Some of the parts supplied with the kit were not as nice as I'd like, so I bought alternatives from other vendors. Lifeboat Kit: Block of wood Alt: Lifeboat kit by Mantua with a plastic hull and wooden inserts Prop Kit: White metal prop painted with brass paint Alt: Real brass prop by Raboesch. Shape is not quite accurate but it looks good. Barrel Kit: White plastic barrel that's shaped more like a 55 gal. drum Alt: Traditional wooden barrel Stanchions Kit: Brass tube and bent pins Alt: Turned brass stanchions by Krick