HOLIDAY DONATION DRIVE - SUPPORT MSW - DO YOUR PART TO KEEP THIS GREAT FORUM GOING! (Only 75 donations so far out of 49,000 members - C'mon guys!)
×


Kevin
-
Posts
7,012 -
Joined
-
Last visited
Content Type
Profiles
Forums
Gallery
Events
Everything posted by Kevin
-
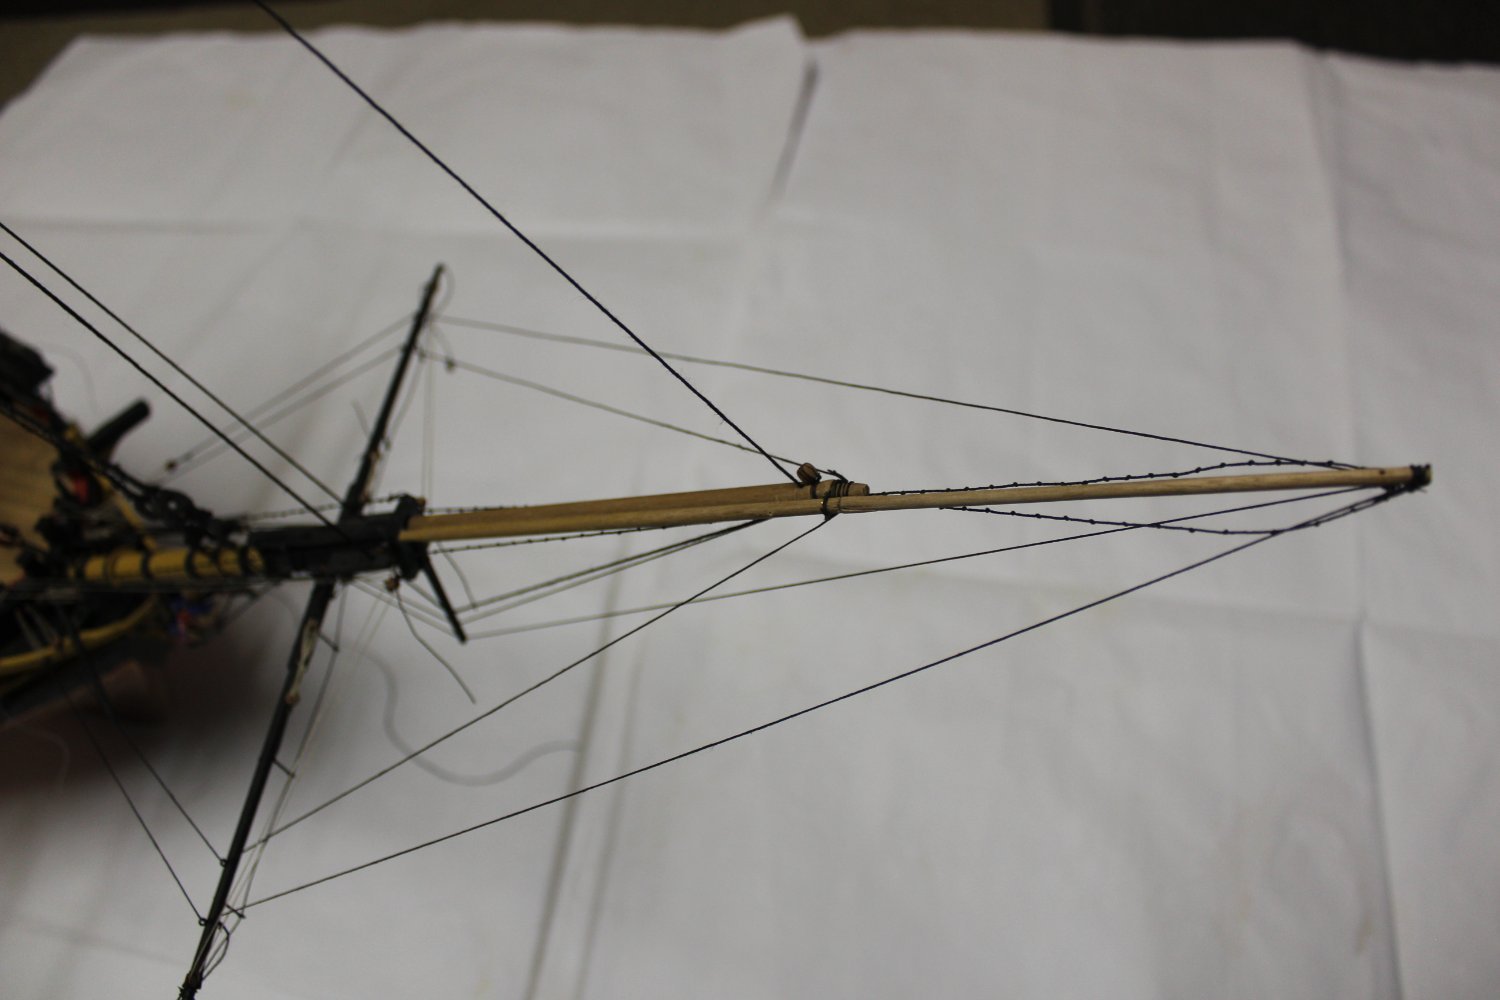
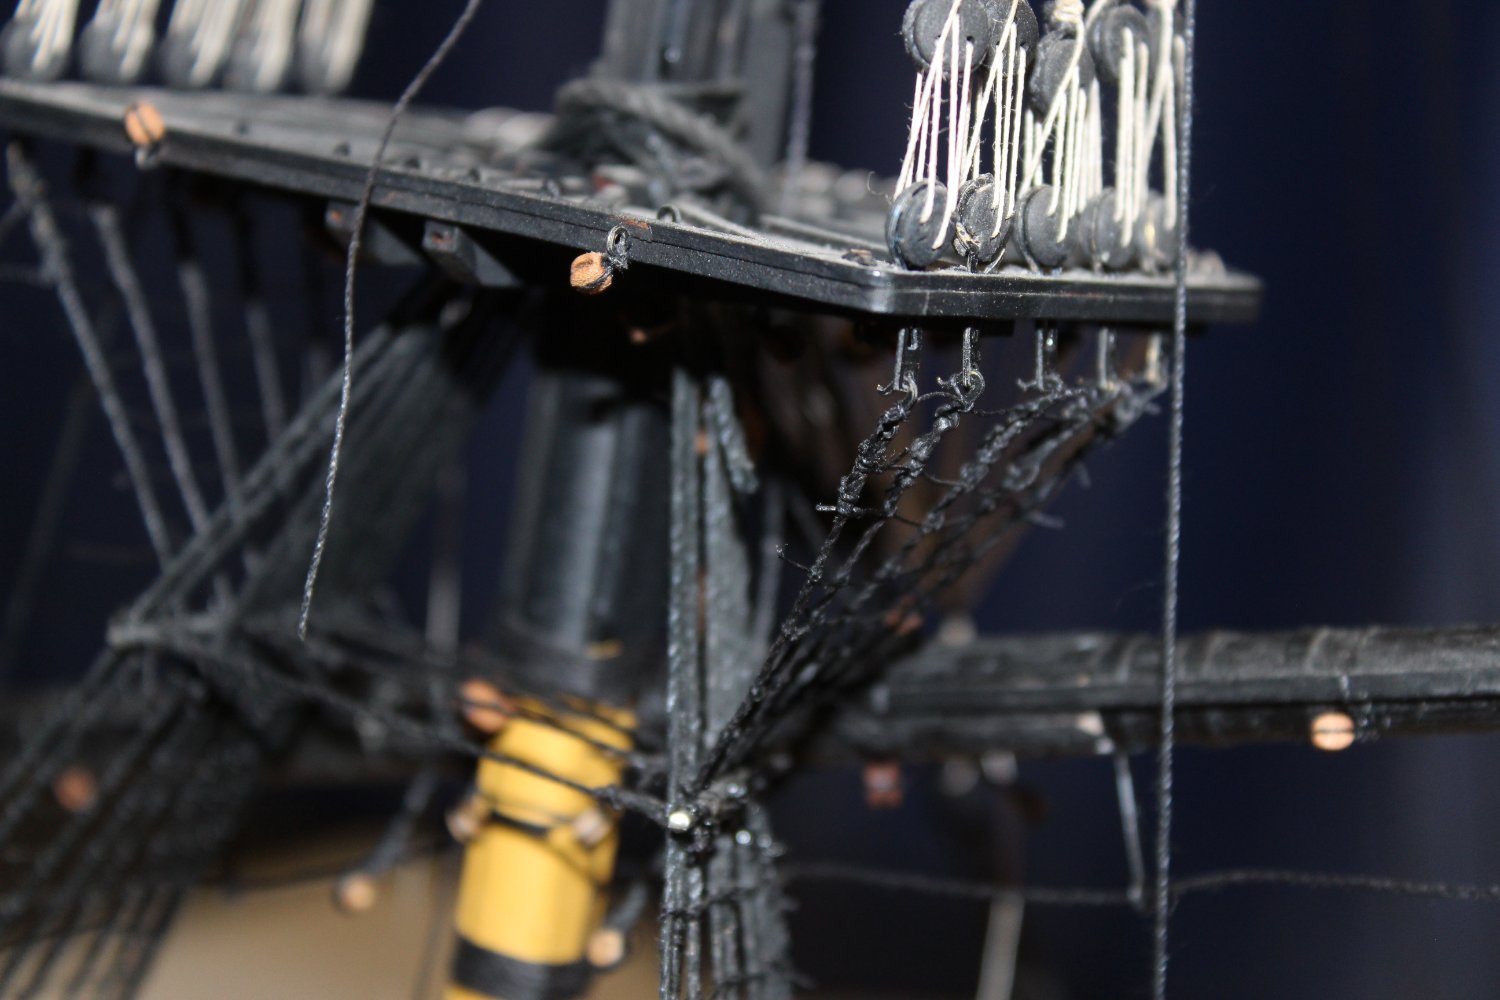
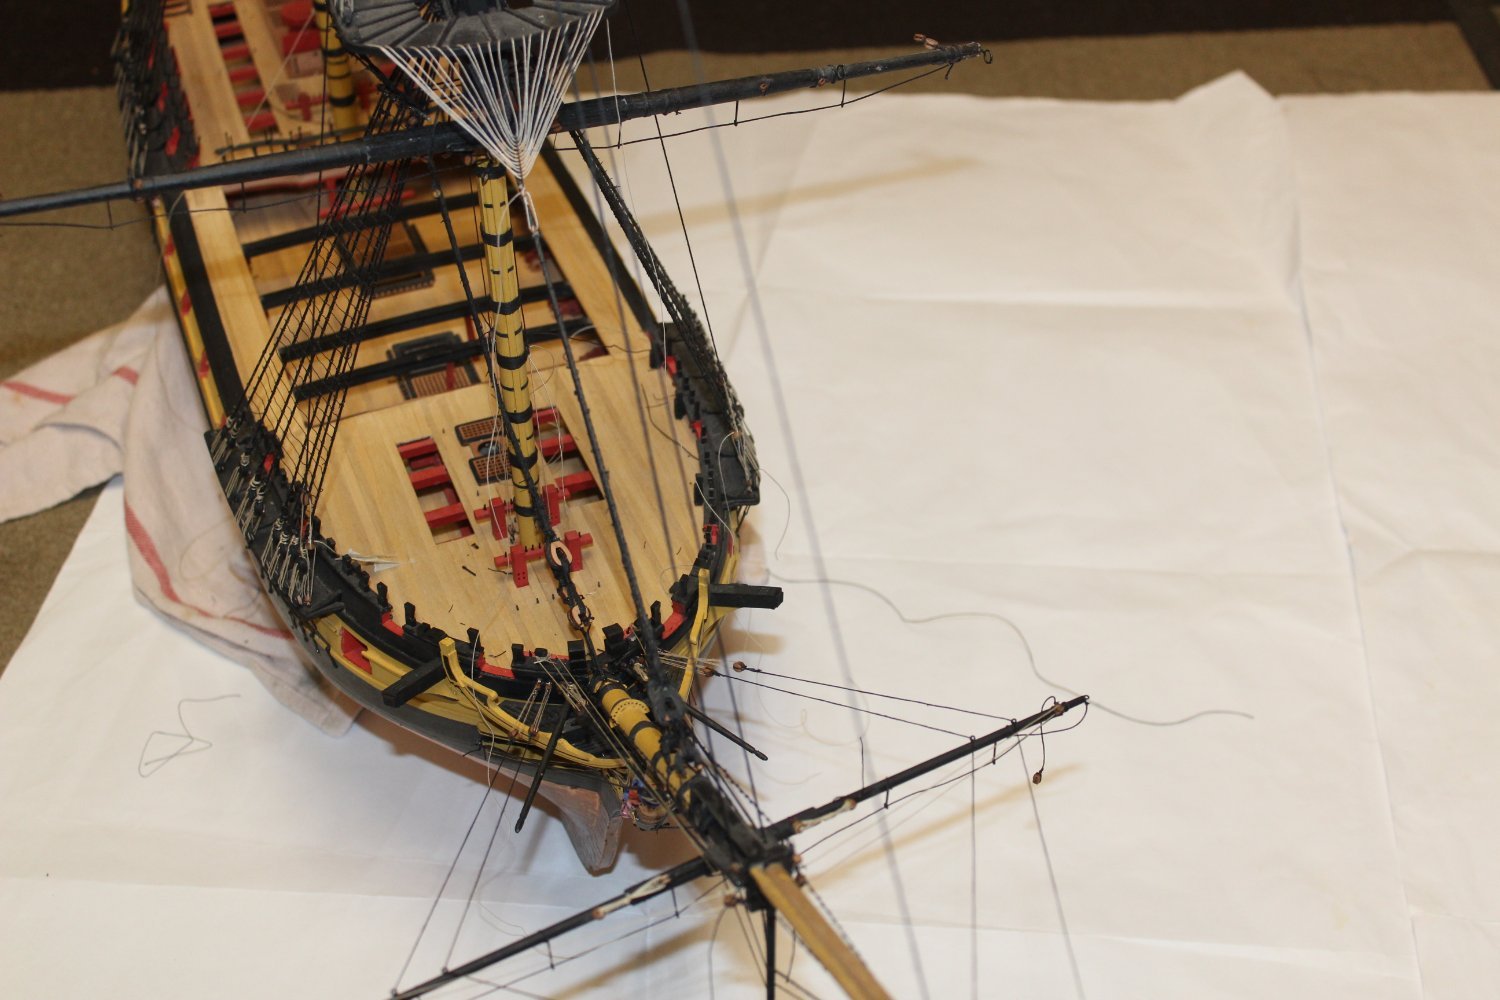
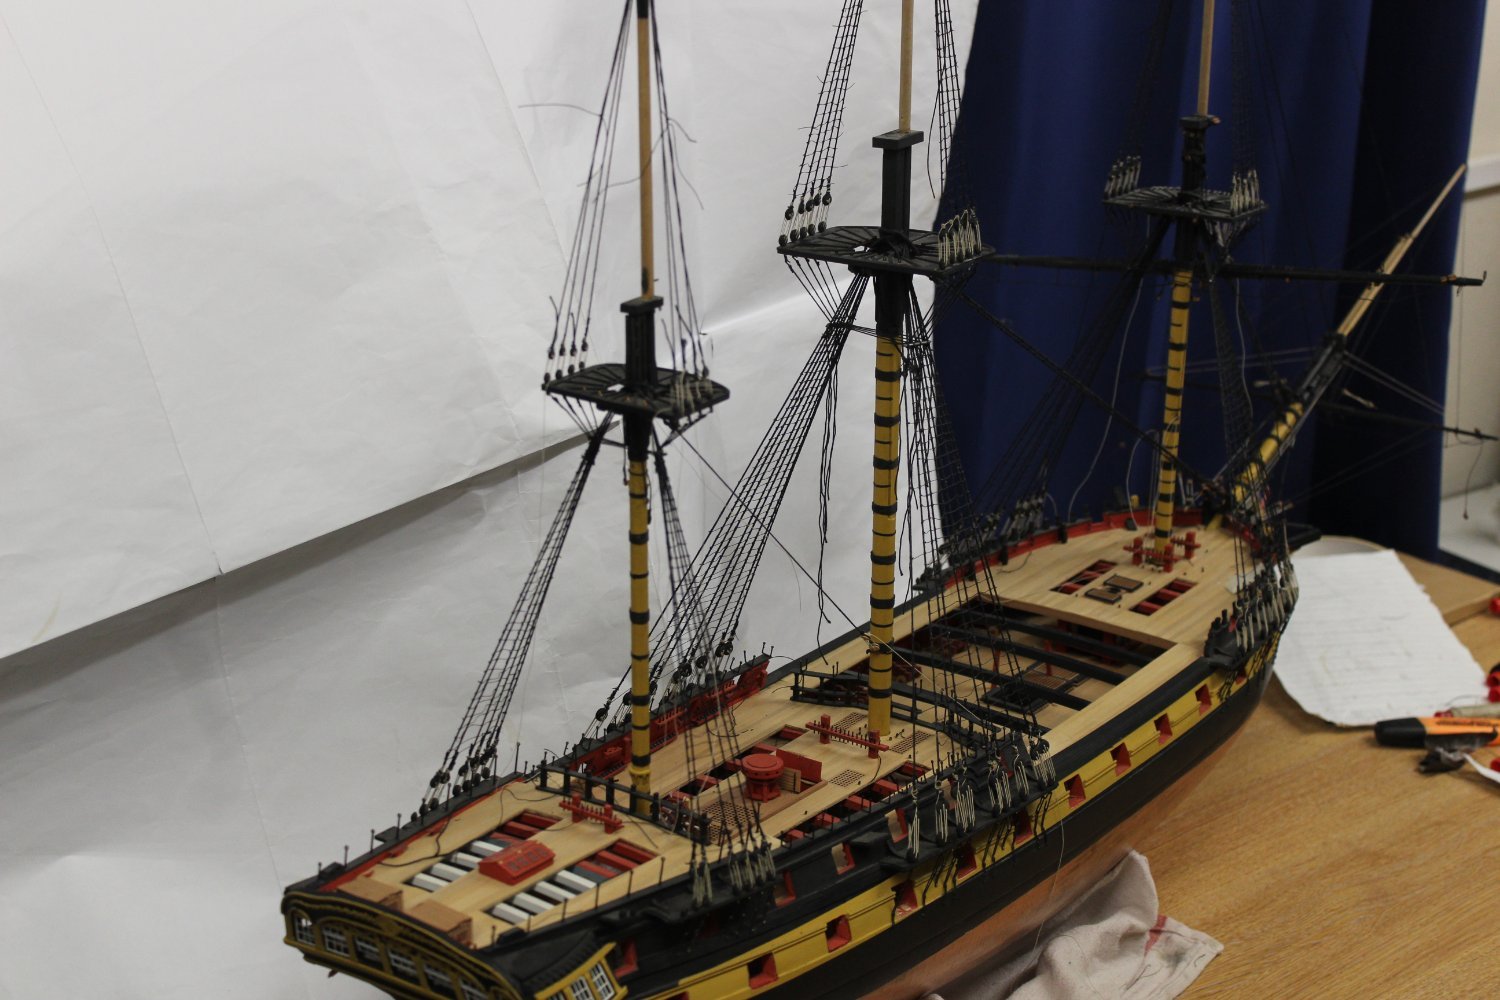
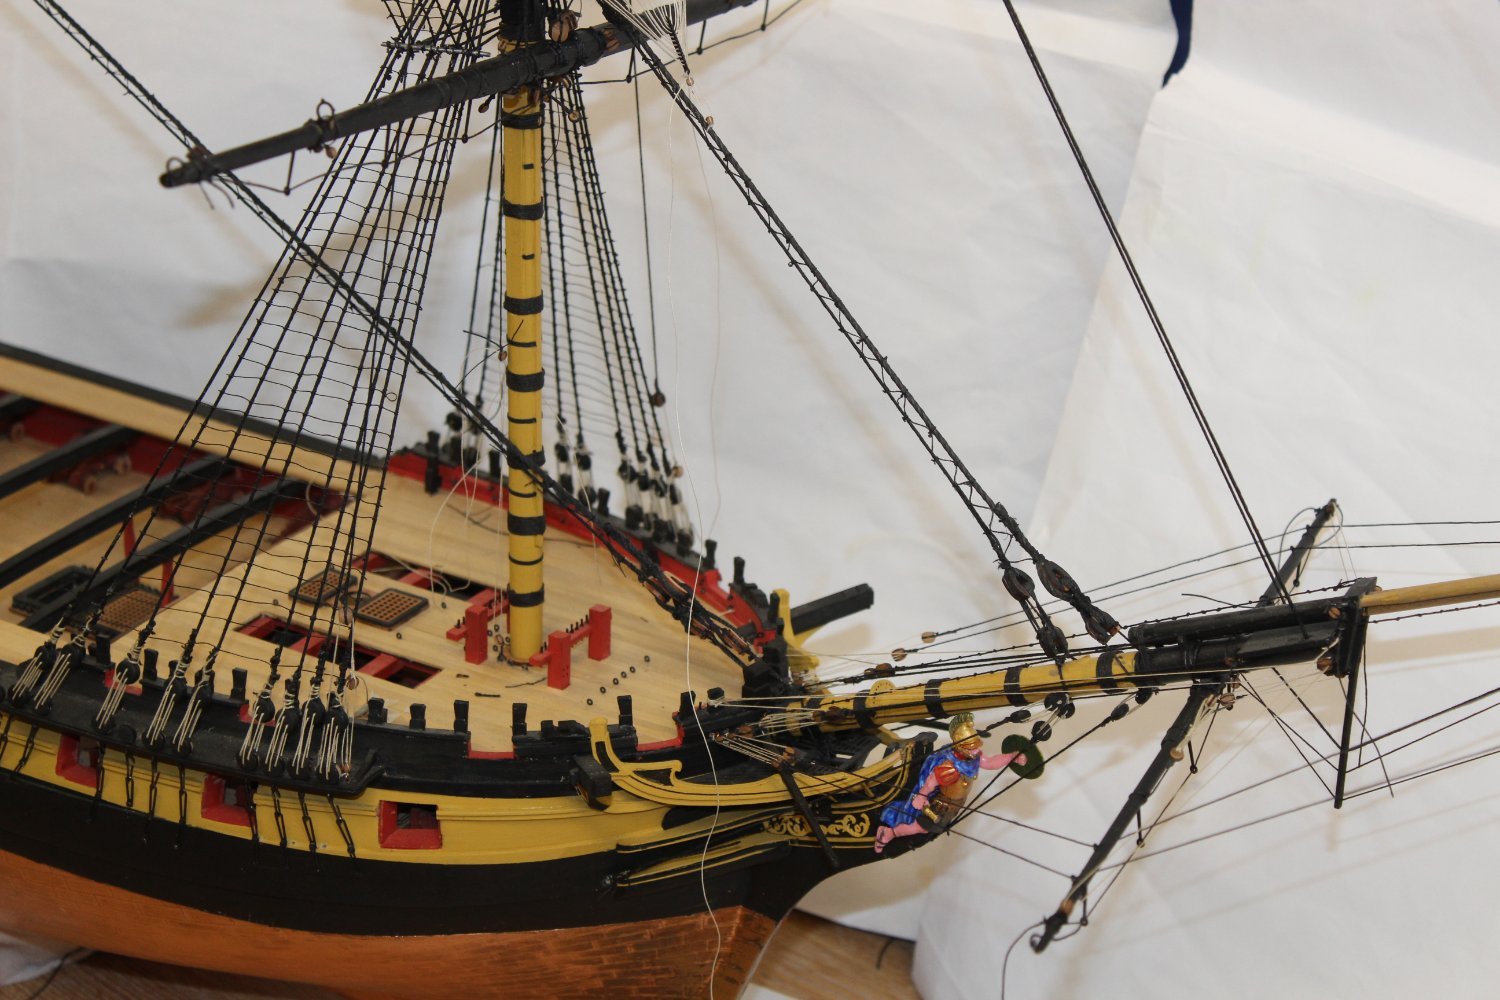
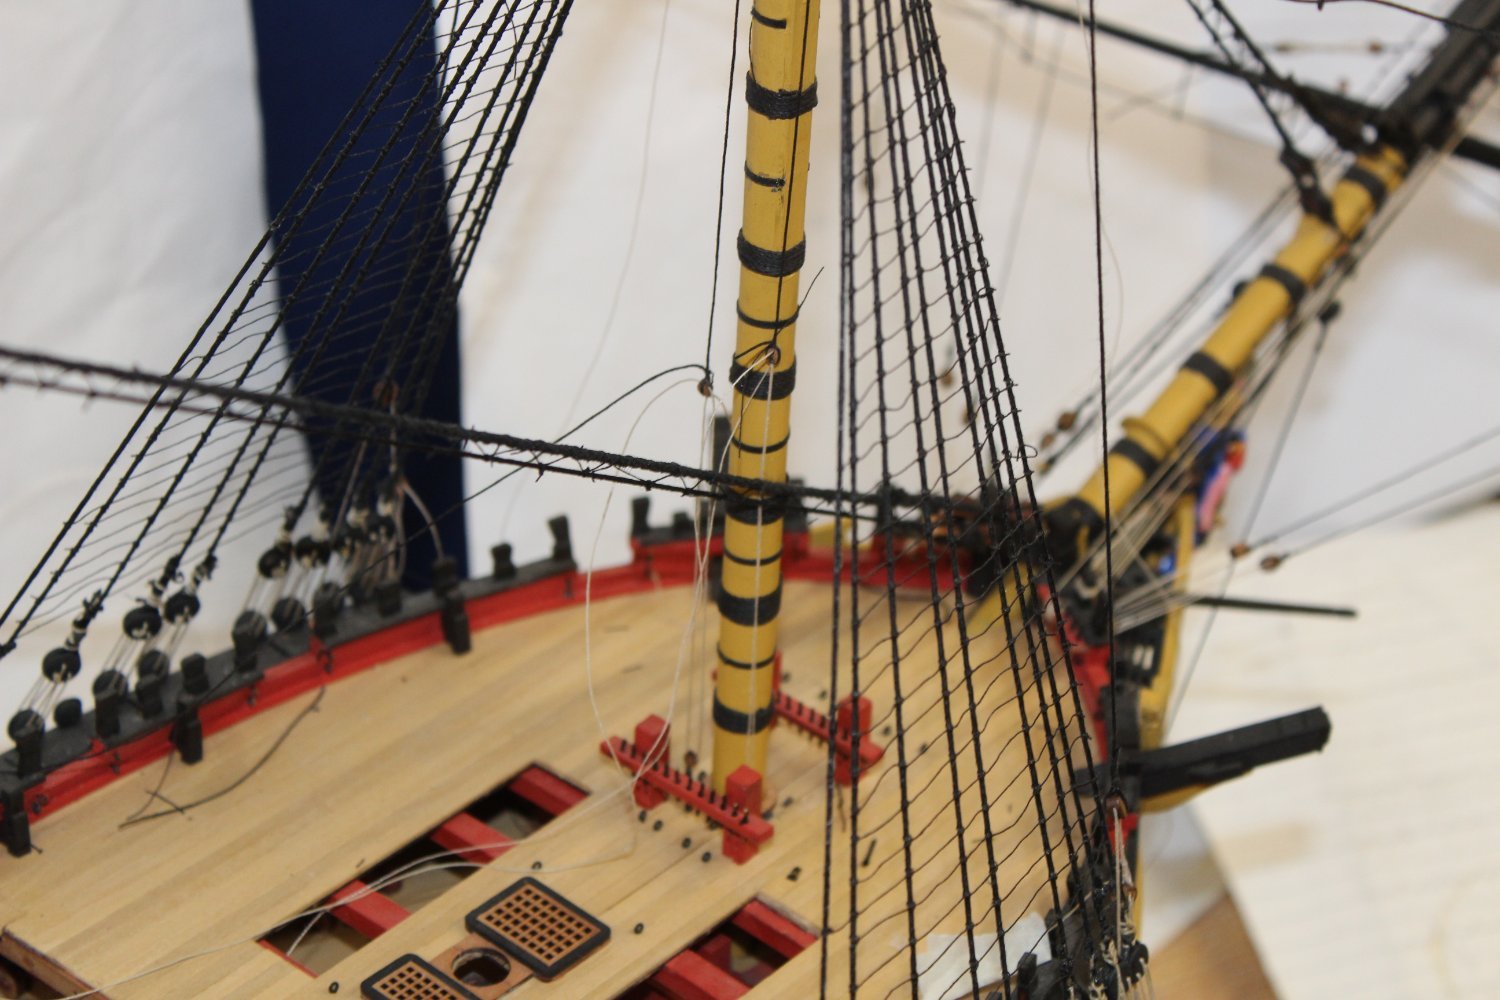
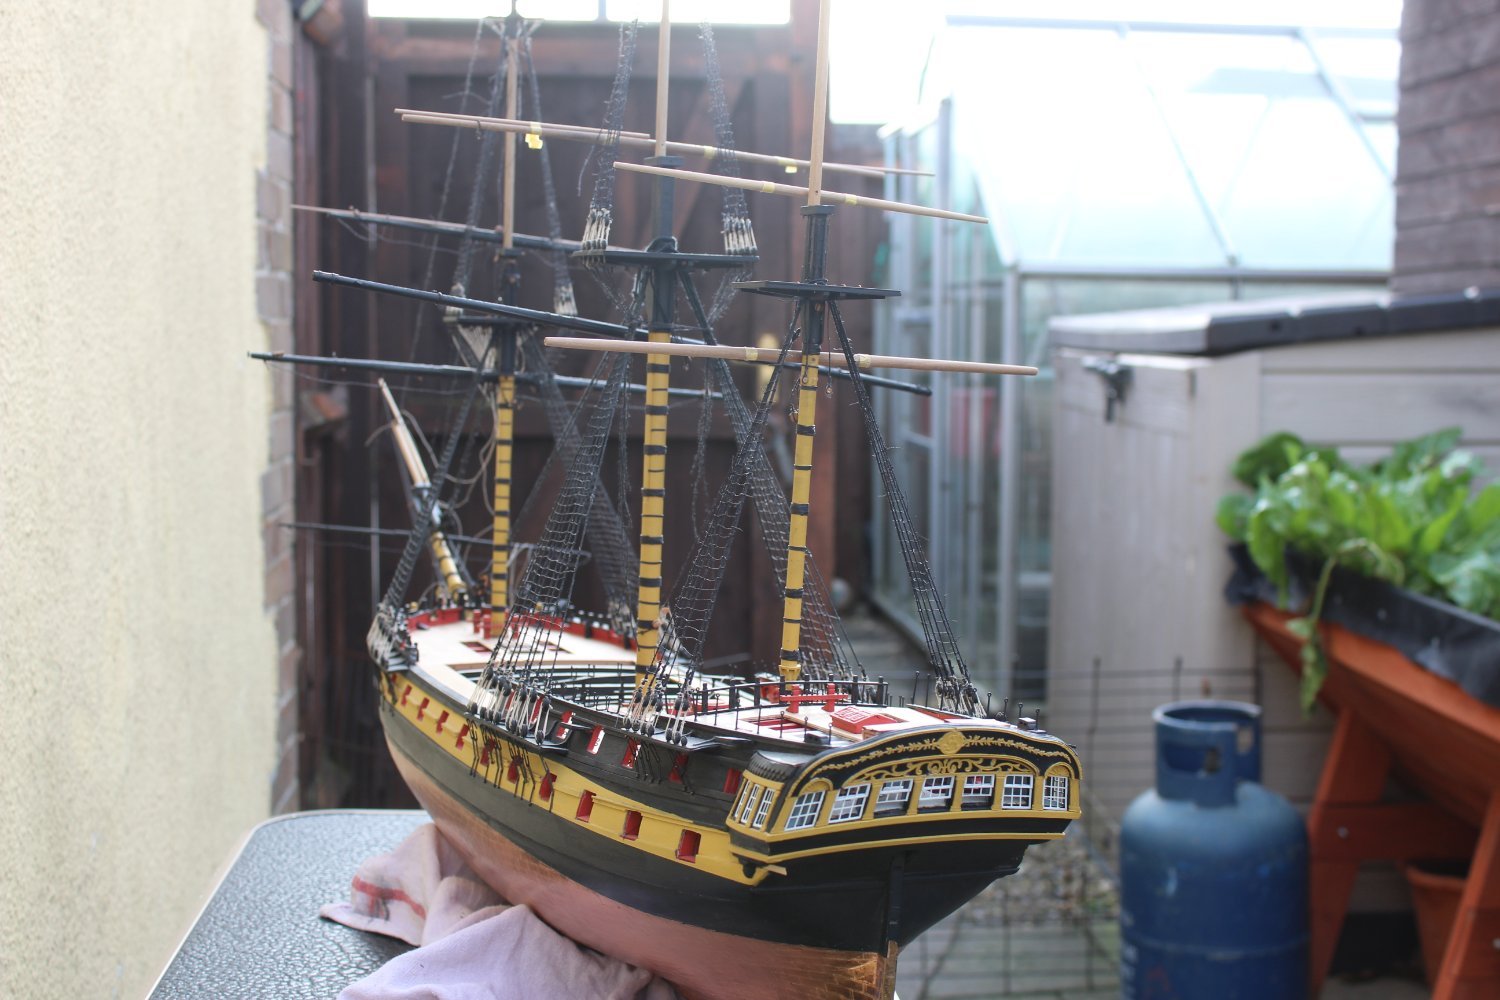
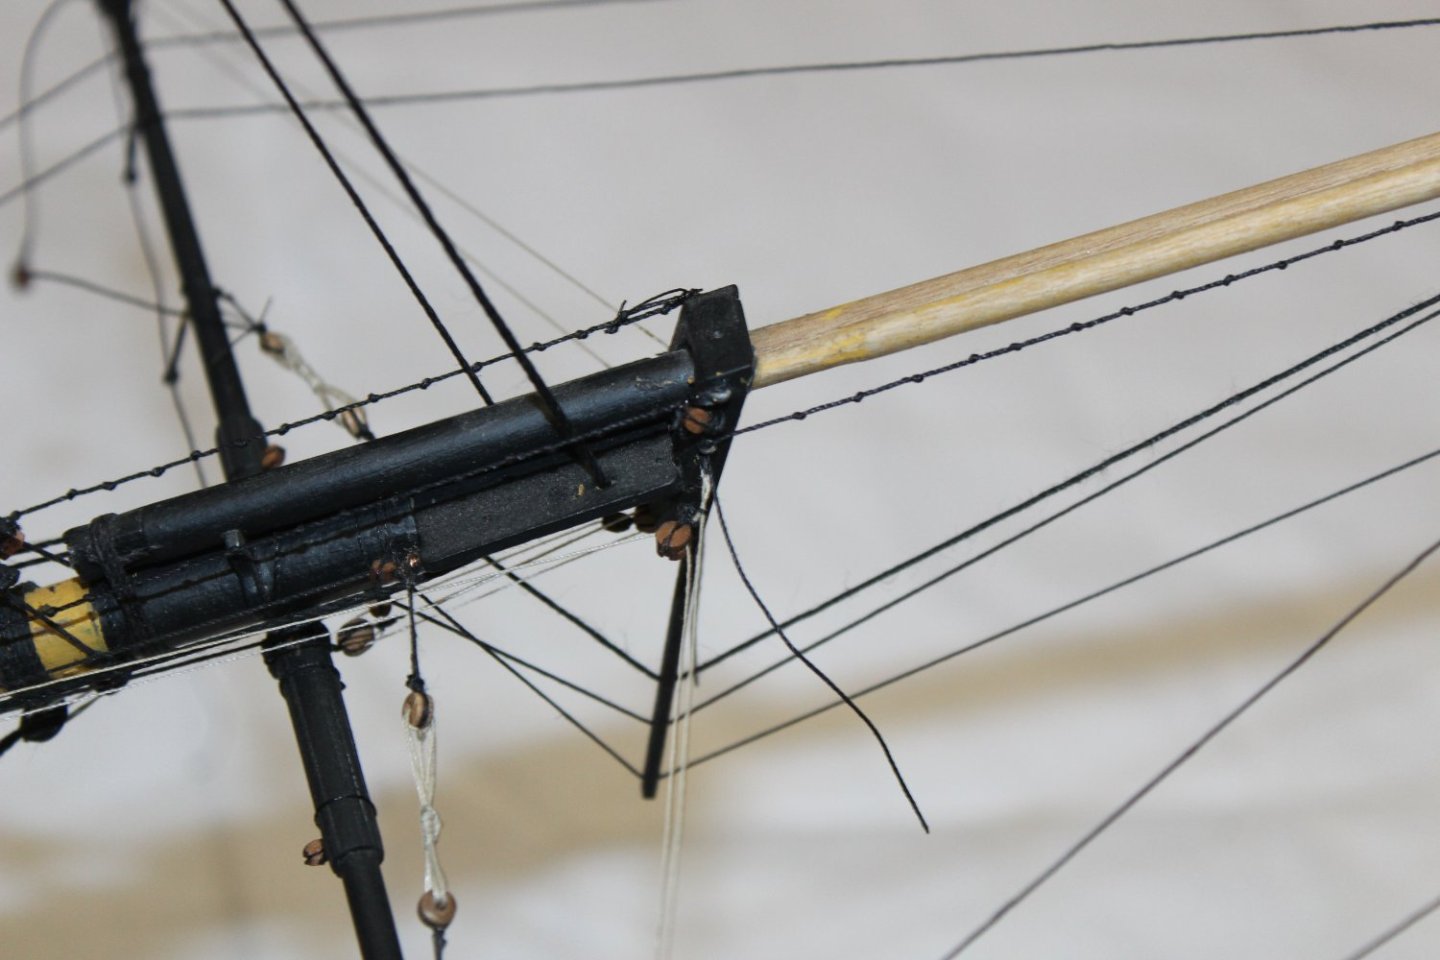
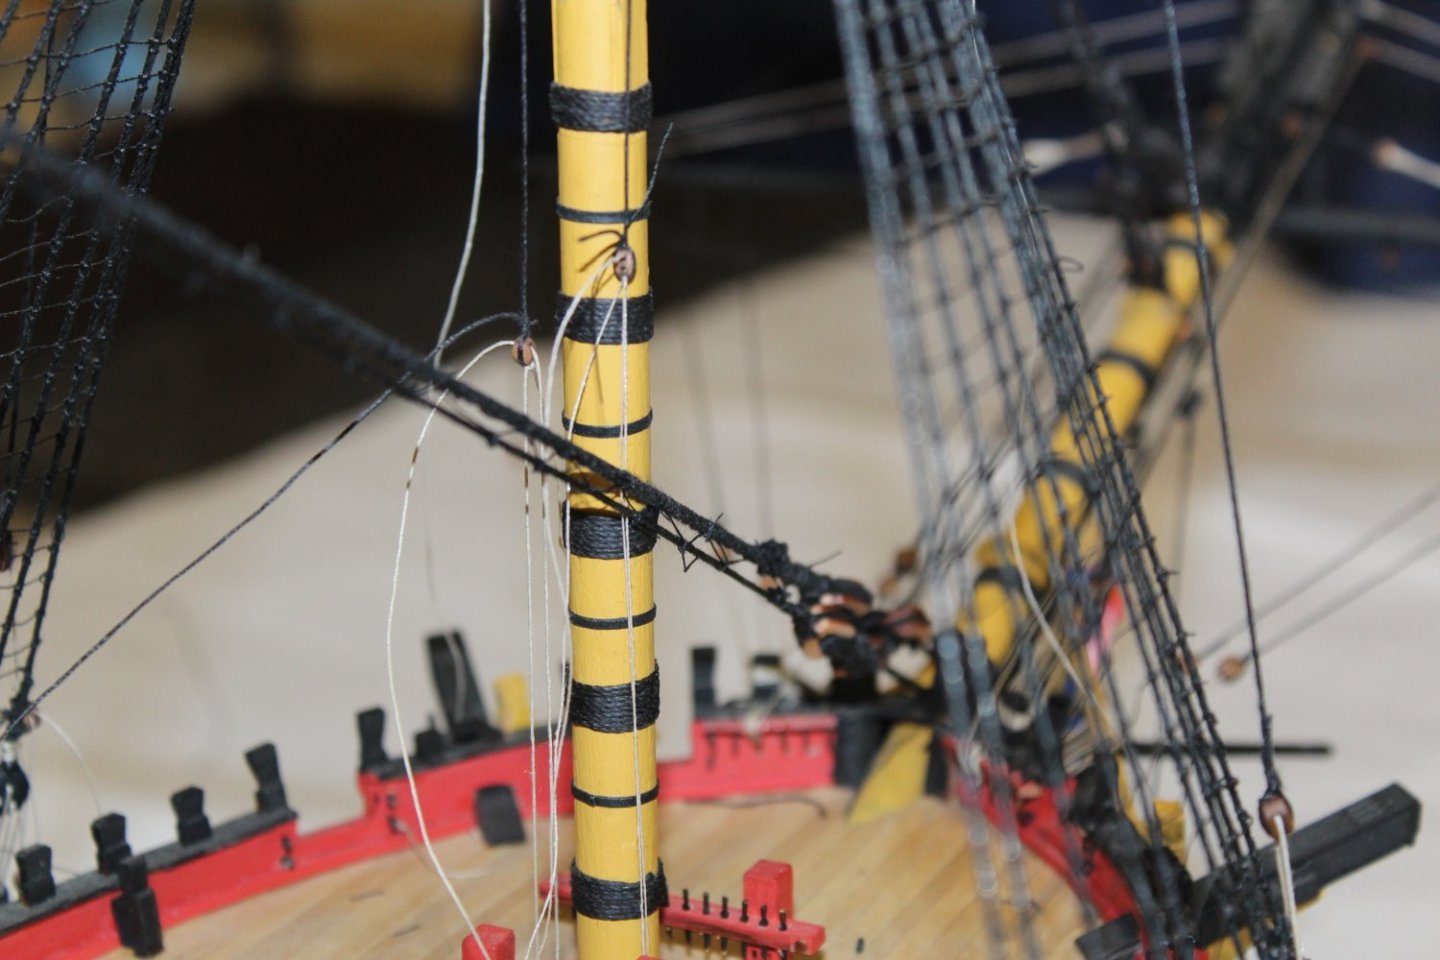
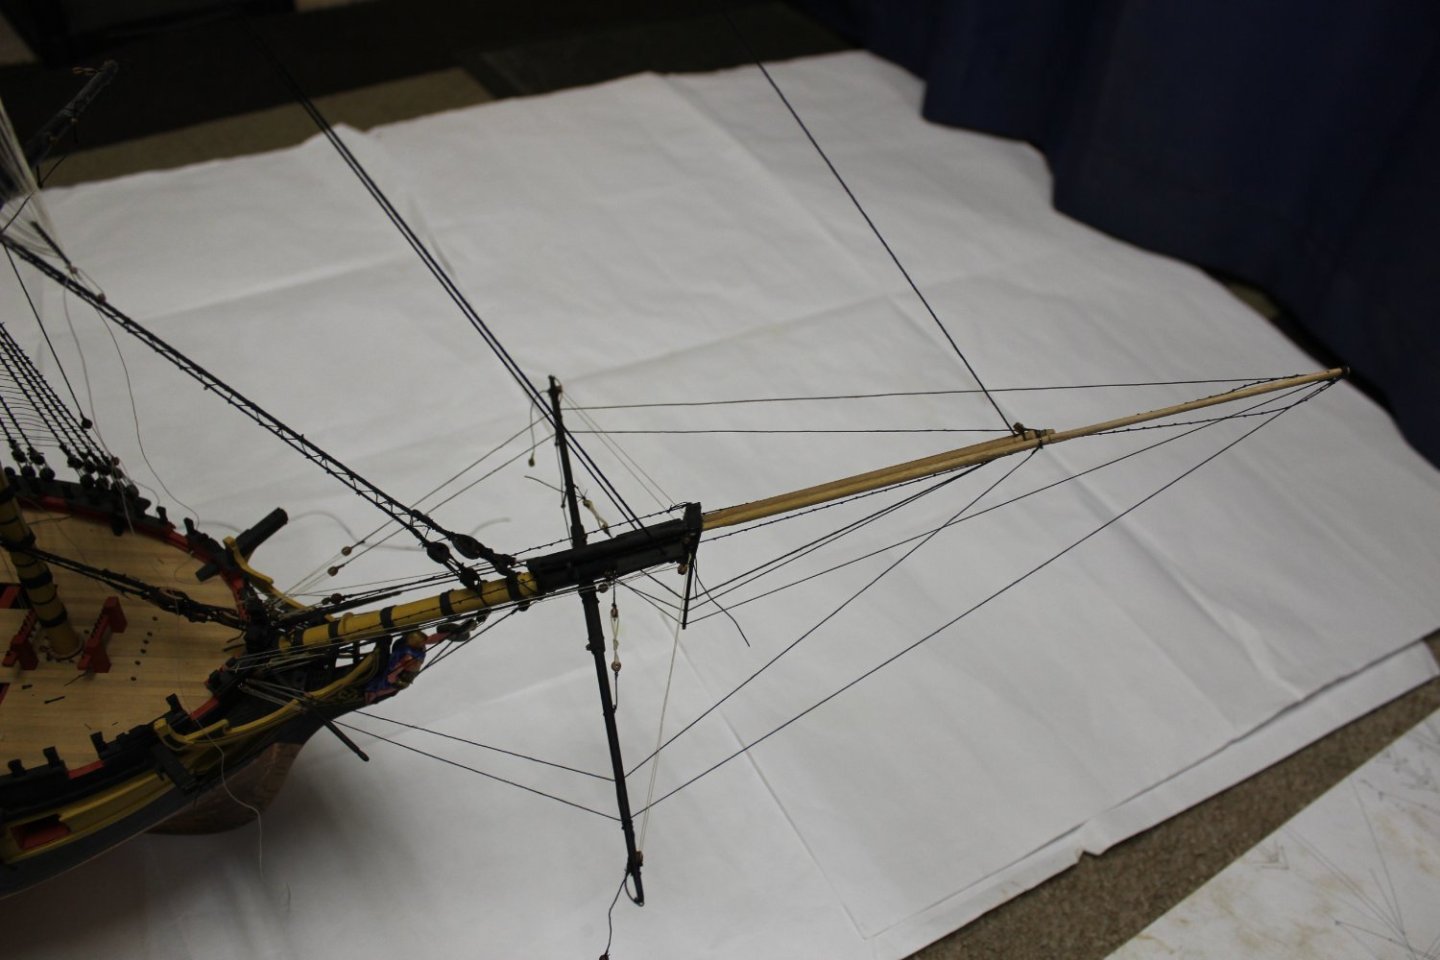
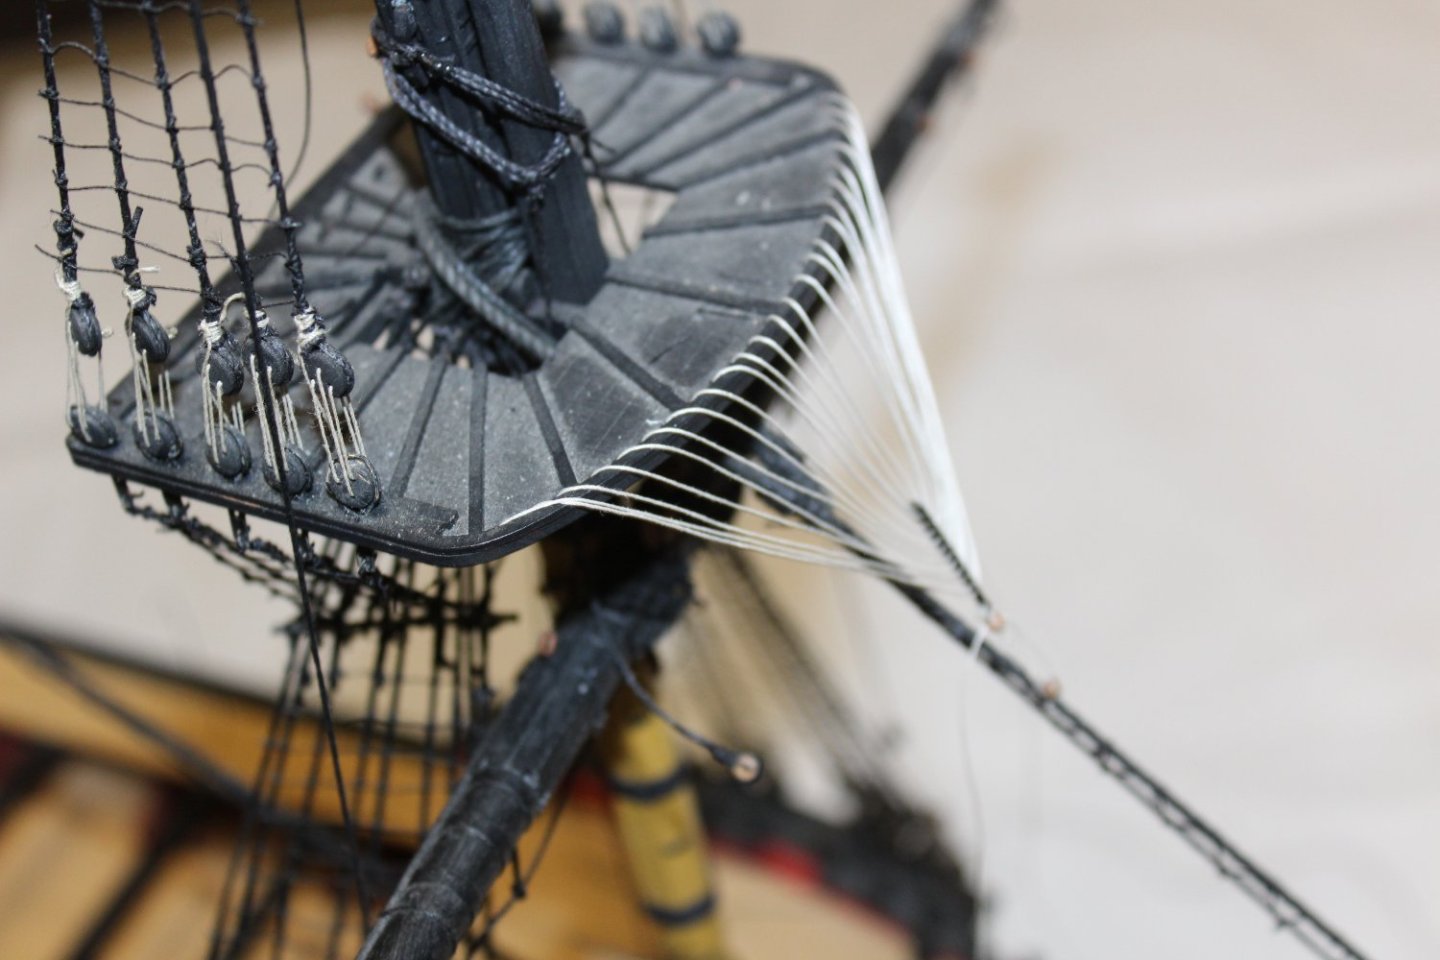
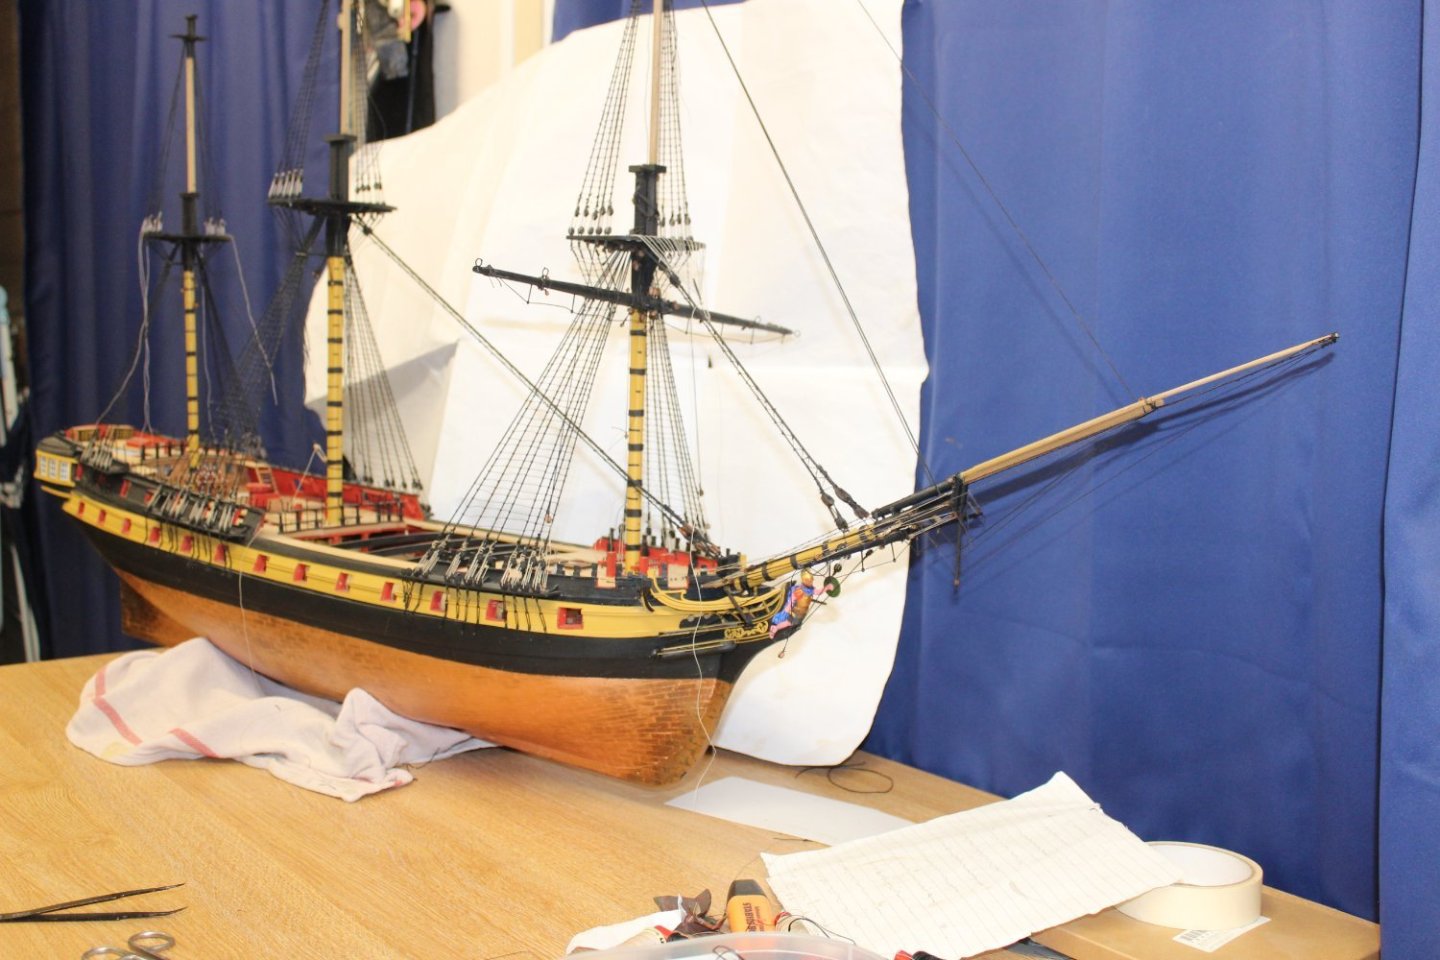
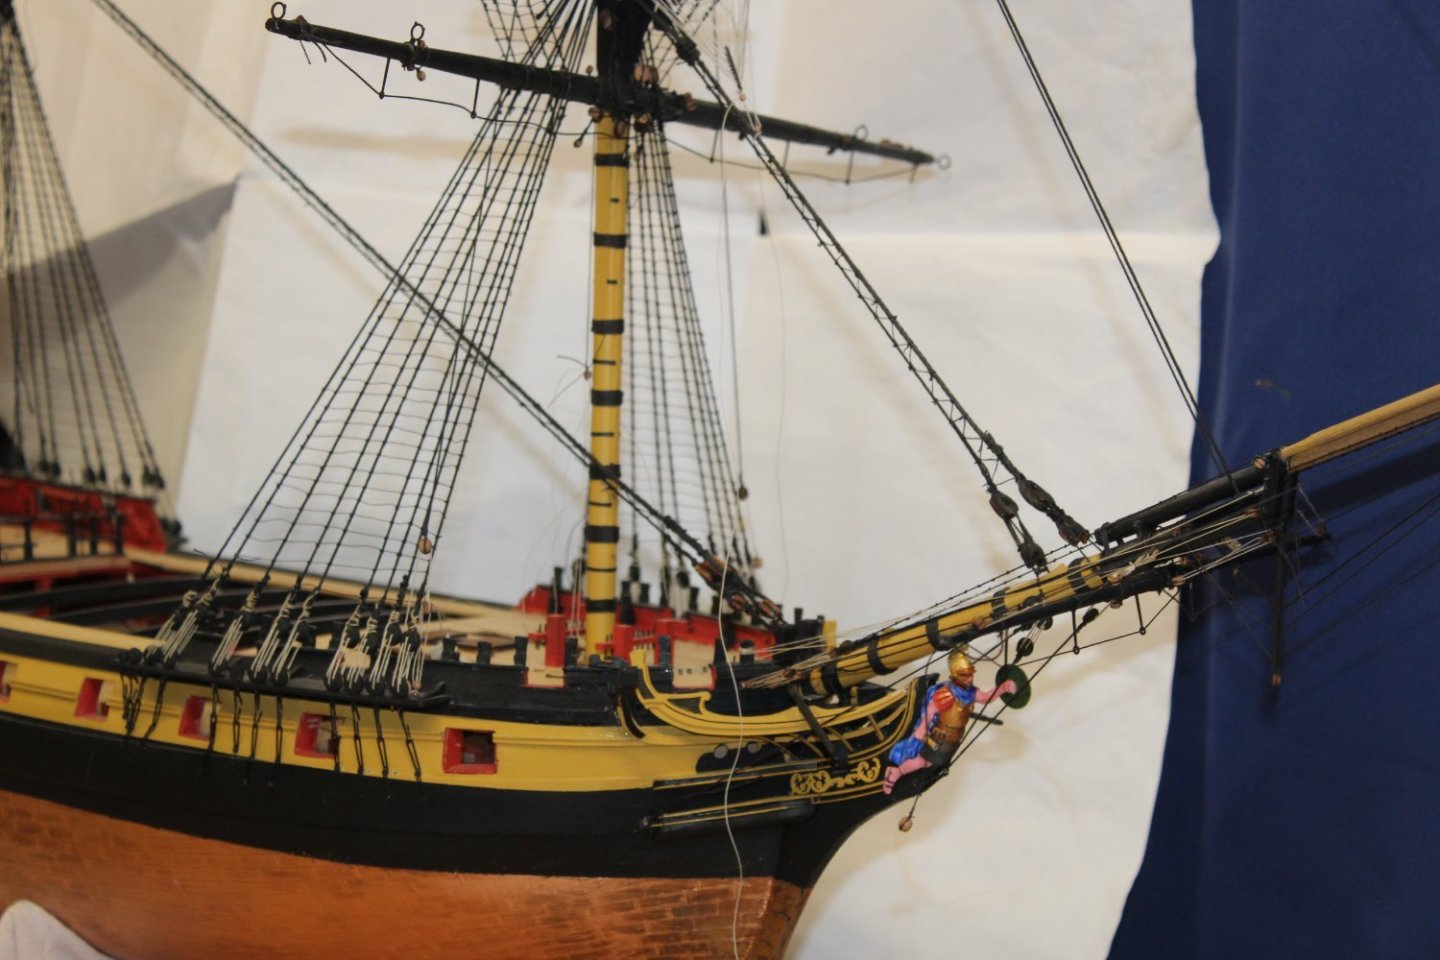
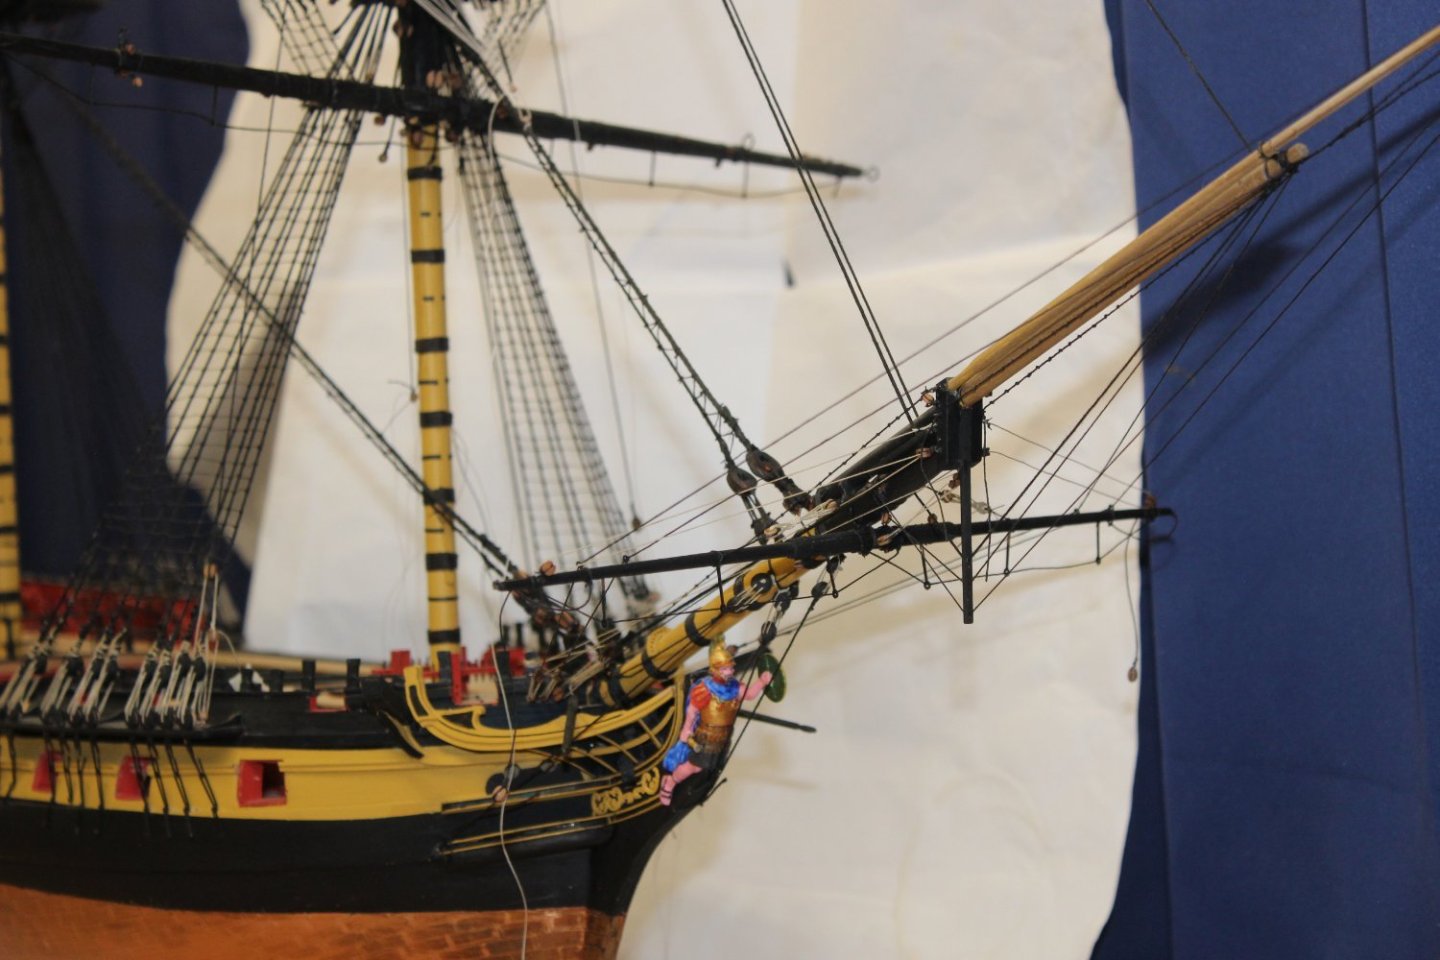
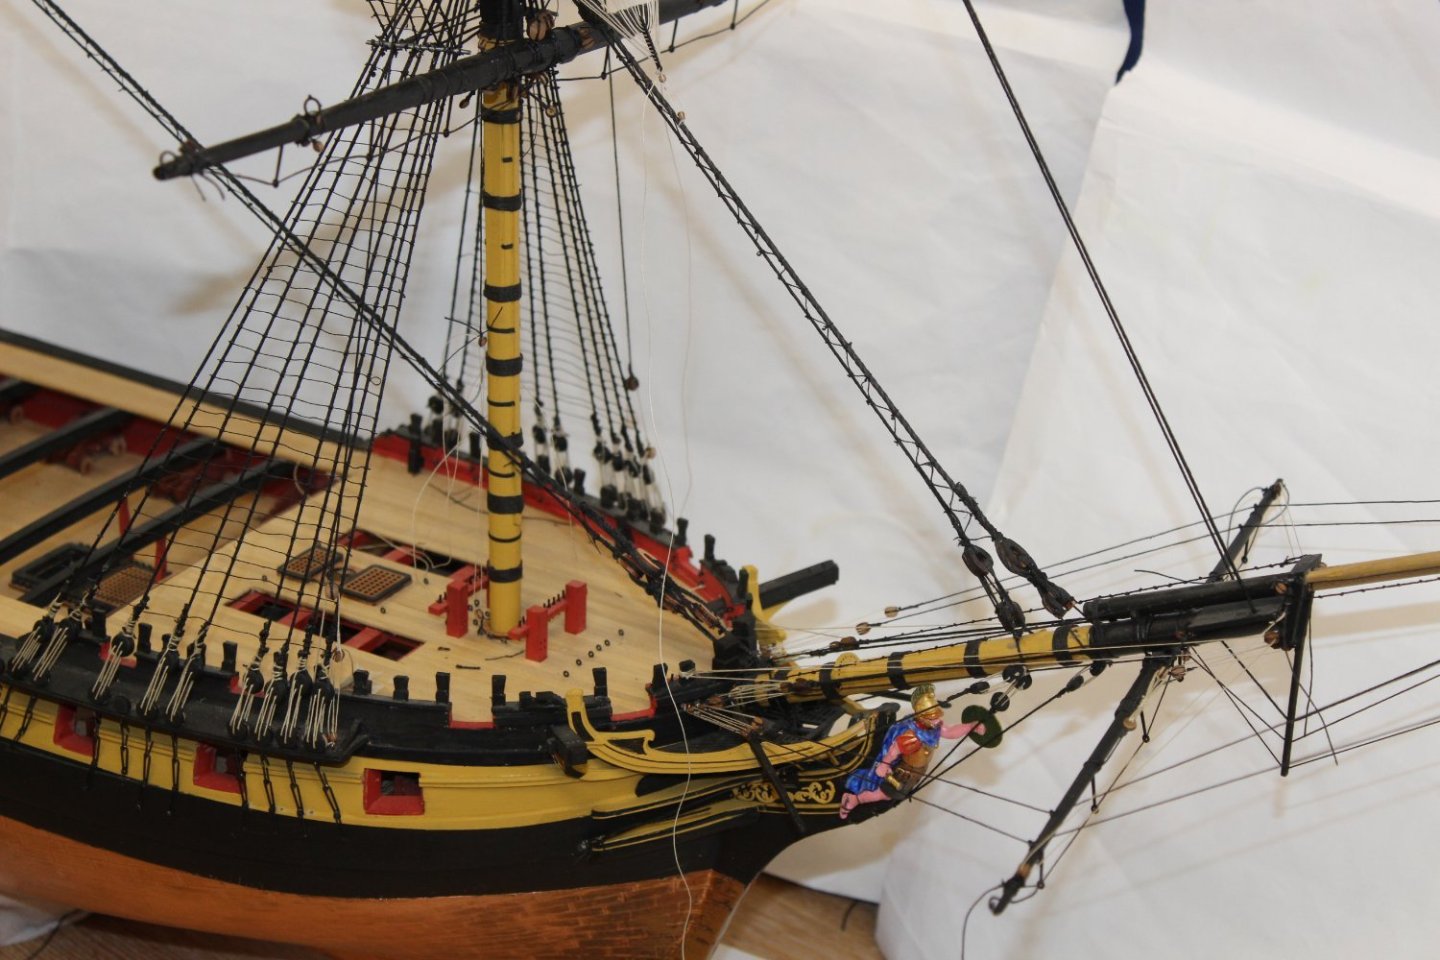
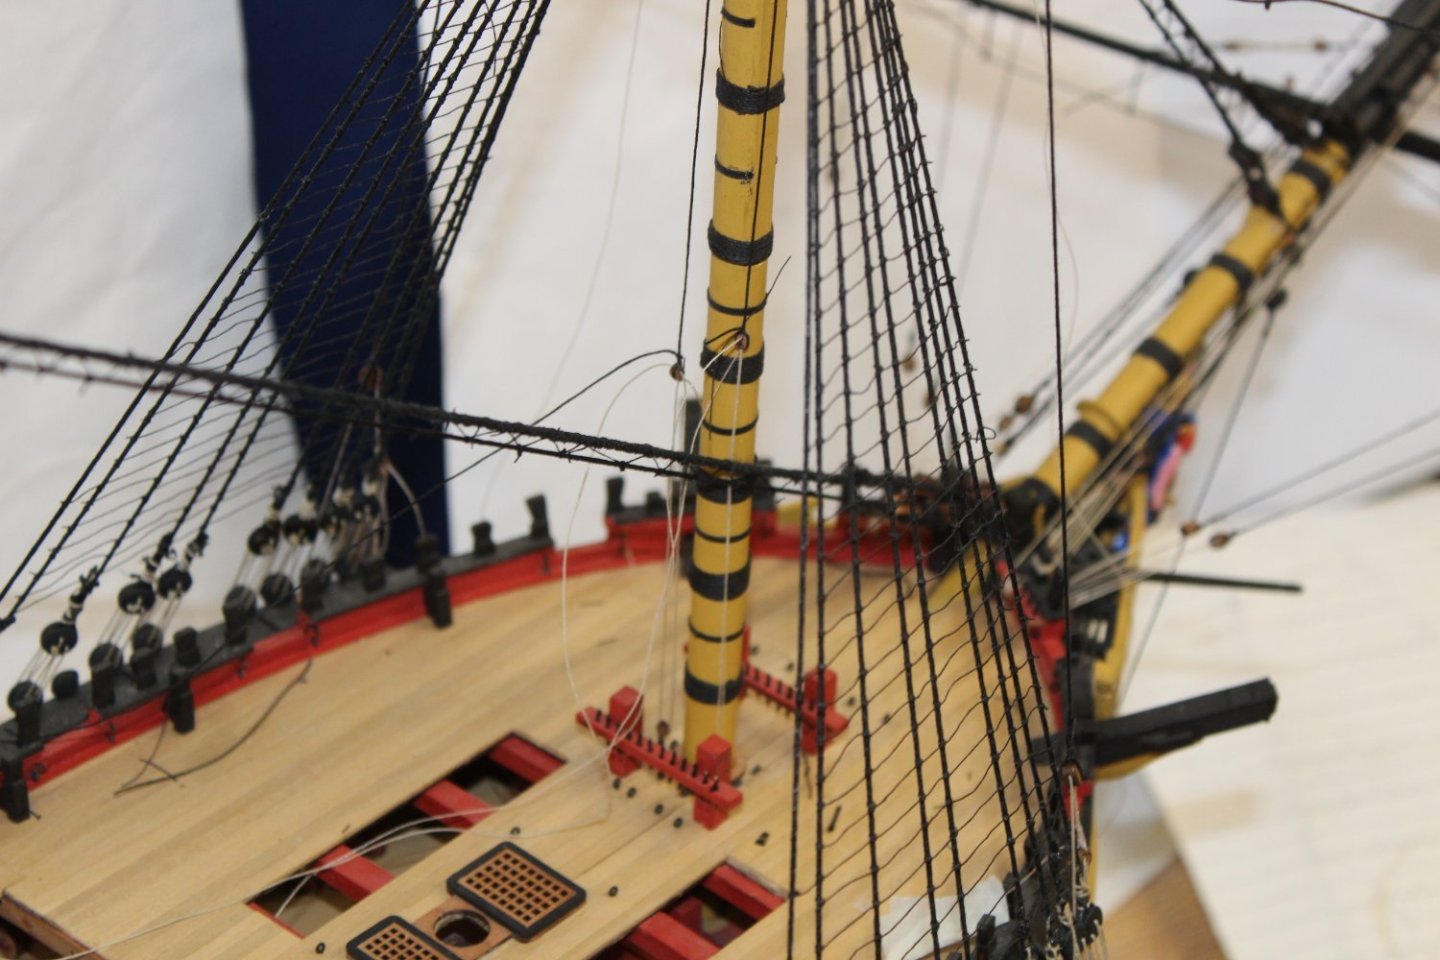
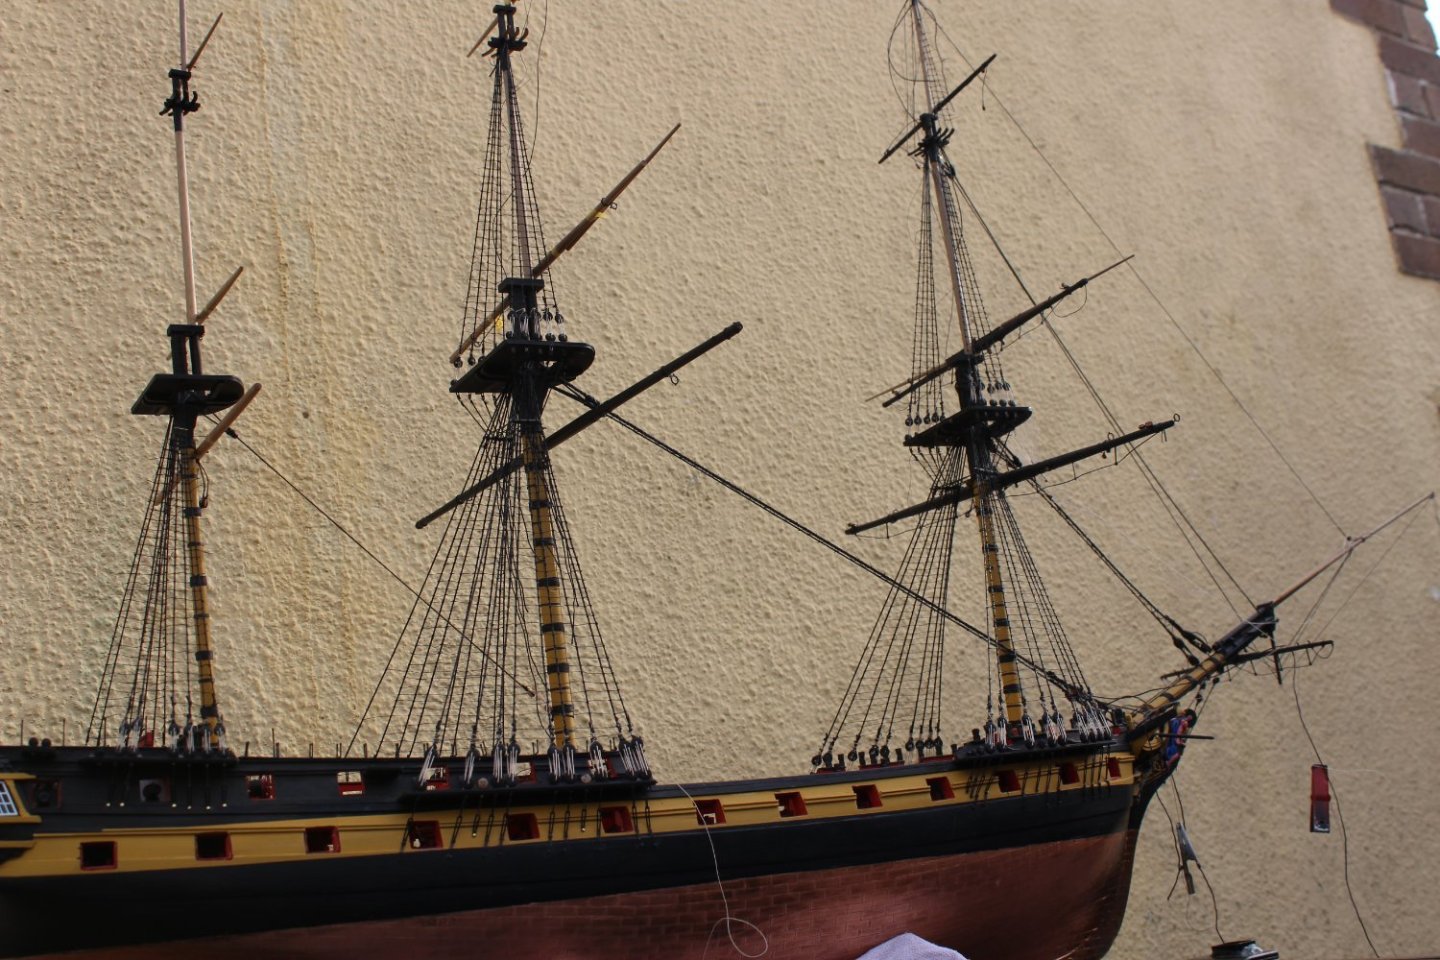
 good evening everyone, day 344-48 sorry about the pants photos, but now the freezer has moved out of the mancave, and its waining, so no wheelie bin, plus the mancave has had a bit of a sort out so i have to find somewhere to take the shots for tonight spent some time tidying up the front end, but even tonight i see the spirit yard is not sitting right i will label up a lot of the lines in the next day or so but today was sorting out the fore mast truss, i have to cut the lines to the jeers to do that, serves me right for not doing it in order (again) horses still to be sorted, but in the right place and lots of loose ends still


- 443 replies
-
- 16
-

-

-
- Indefatigable
- Vanguard Models
- (and 1 more)
-
good evening OC, was never away, lol just lingering on the side-lines, bois are getting on quite well now and will share a same room now, but the young one does tease him a lot, hard to believe he will be six months old tomorrow 7th Feb
- 443 replies
-
- 3
-
-
- Indefatigable
- Vanguard Models
- (and 1 more)
-
Mysterious shipwreck washes up on Canadian coast
Kevin replied to Kevin's topic in Nautical/Naval History
lol -
Mysterious shipwreck washes up on Canadian coast
Kevin replied to Kevin's topic in Nautical/Naval History
Canada shipwreck: Newfoundland locals try to solve Cape Ray mystery - BBC News -
lol you mean tired, over worked, and no time for hobby model making
-
Mysterious shipwreck washes up on Canadian coast - BBC News
- 8 replies
-
- 11
-
-

-
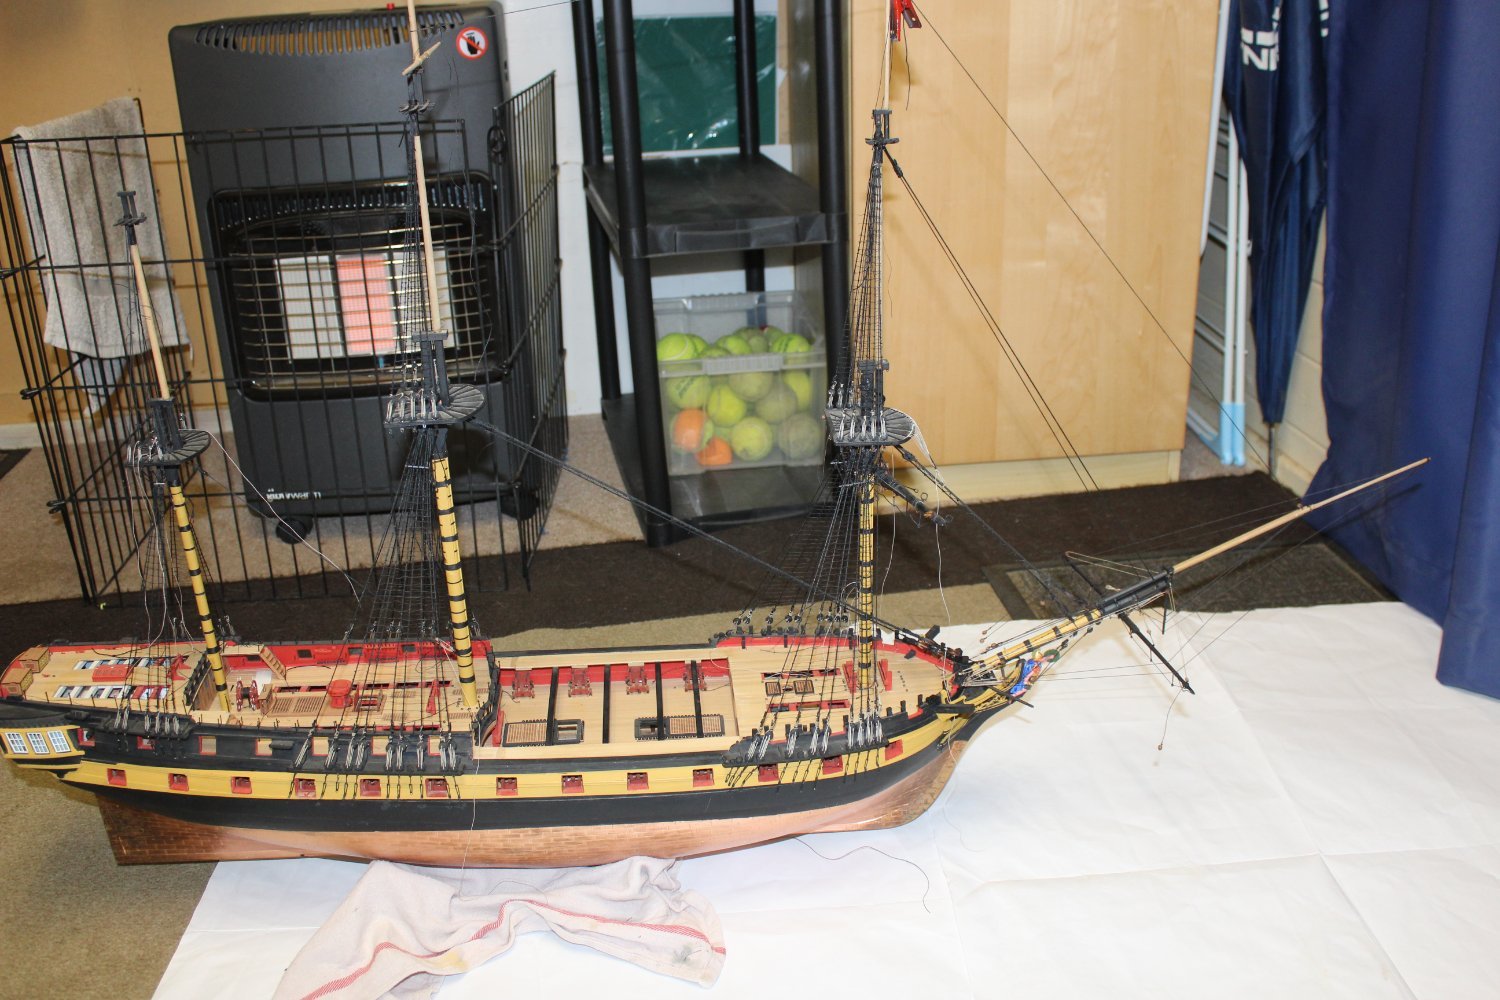
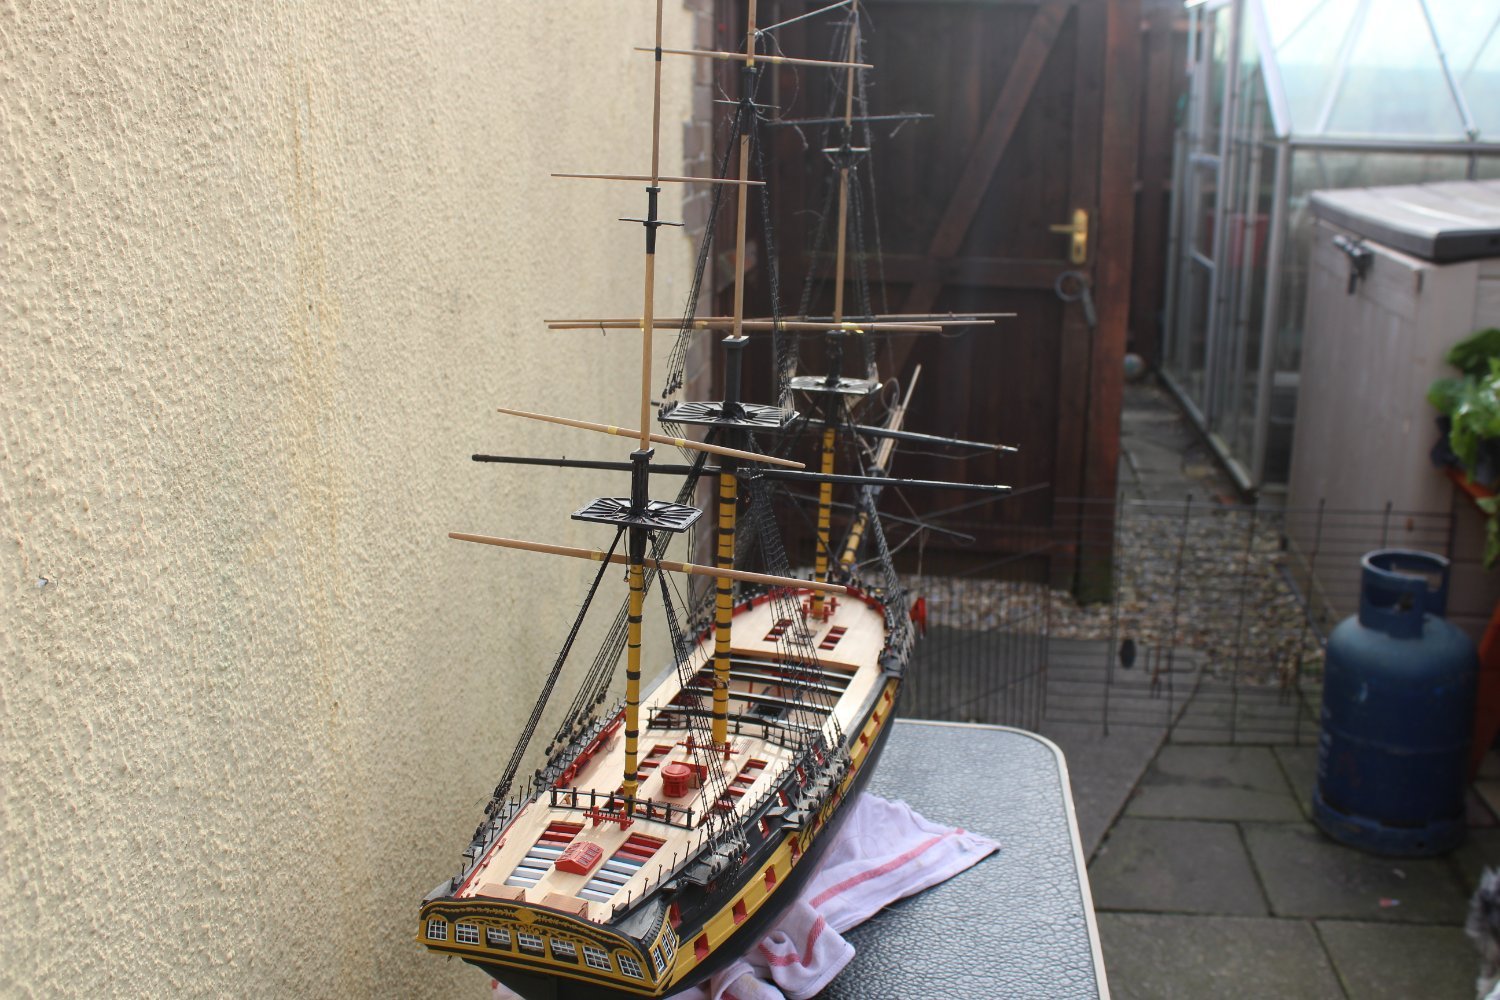
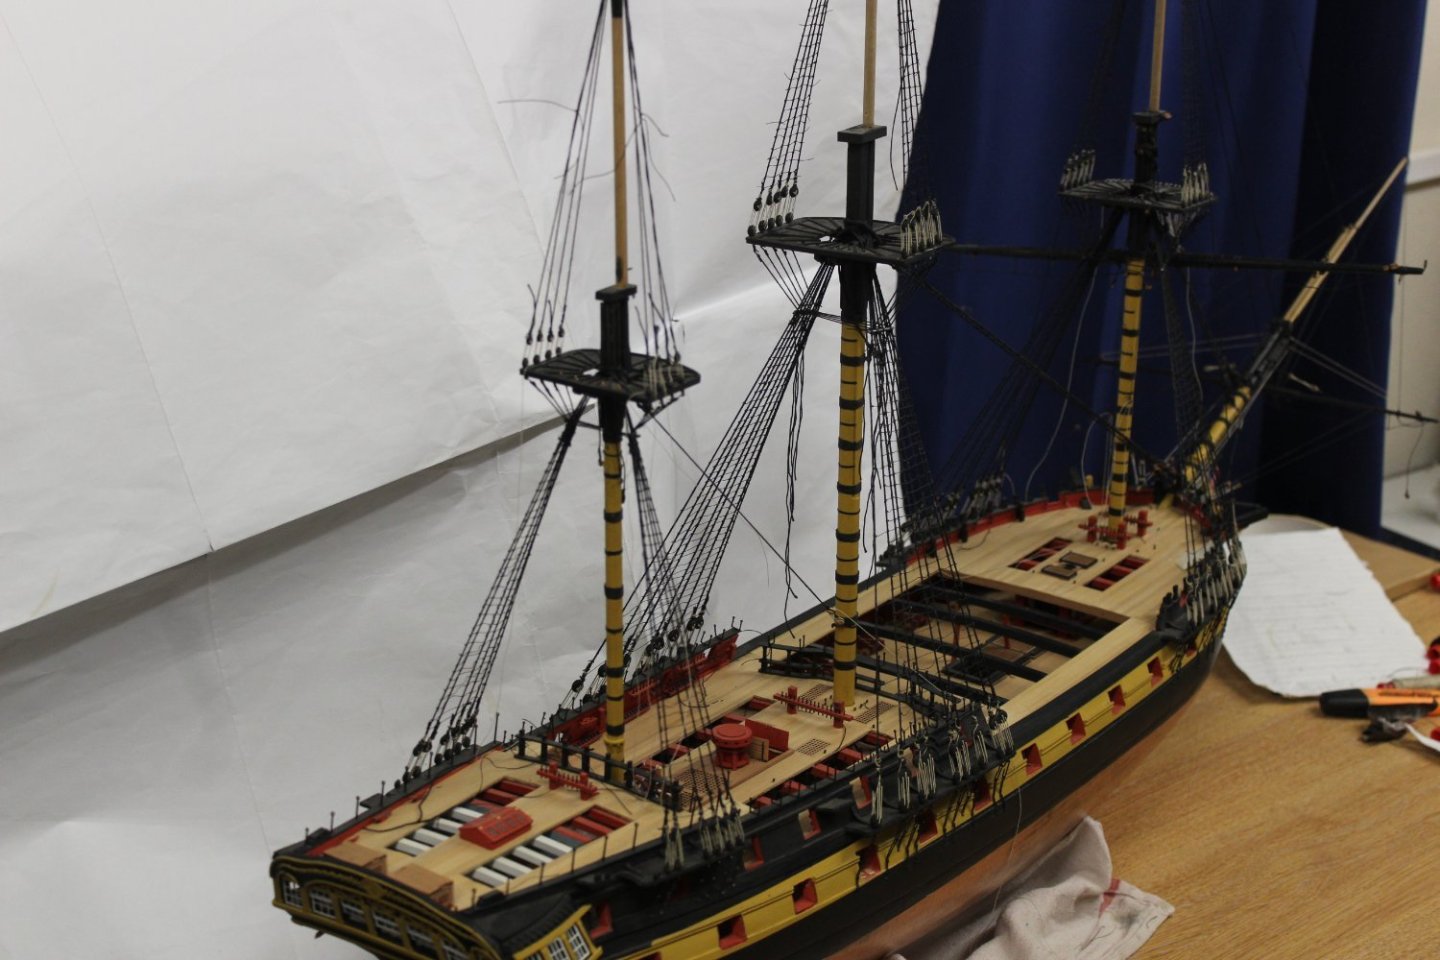
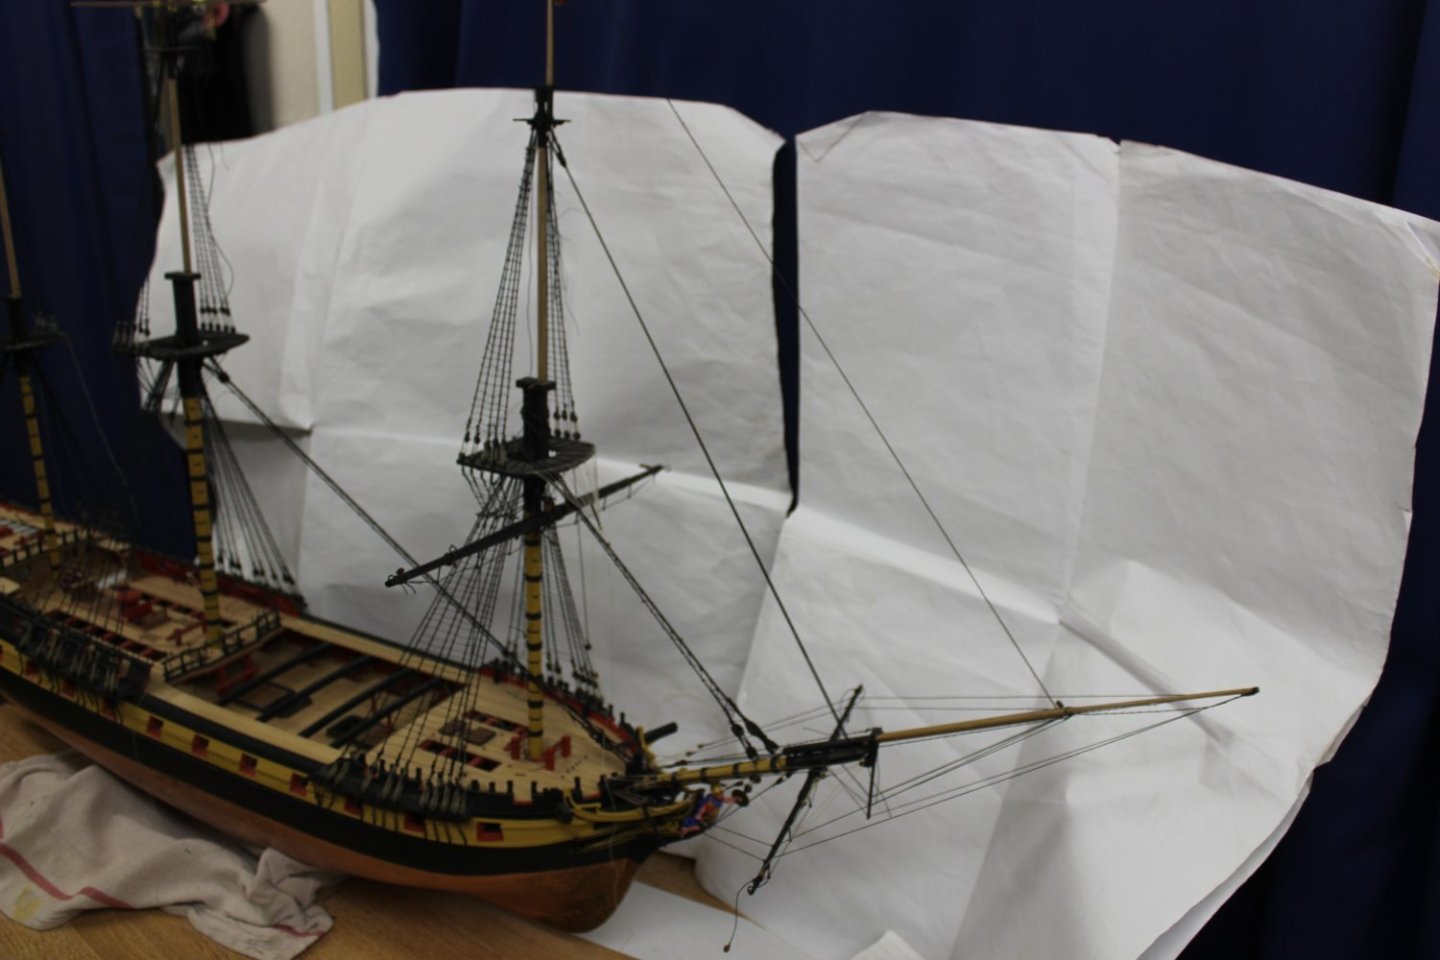
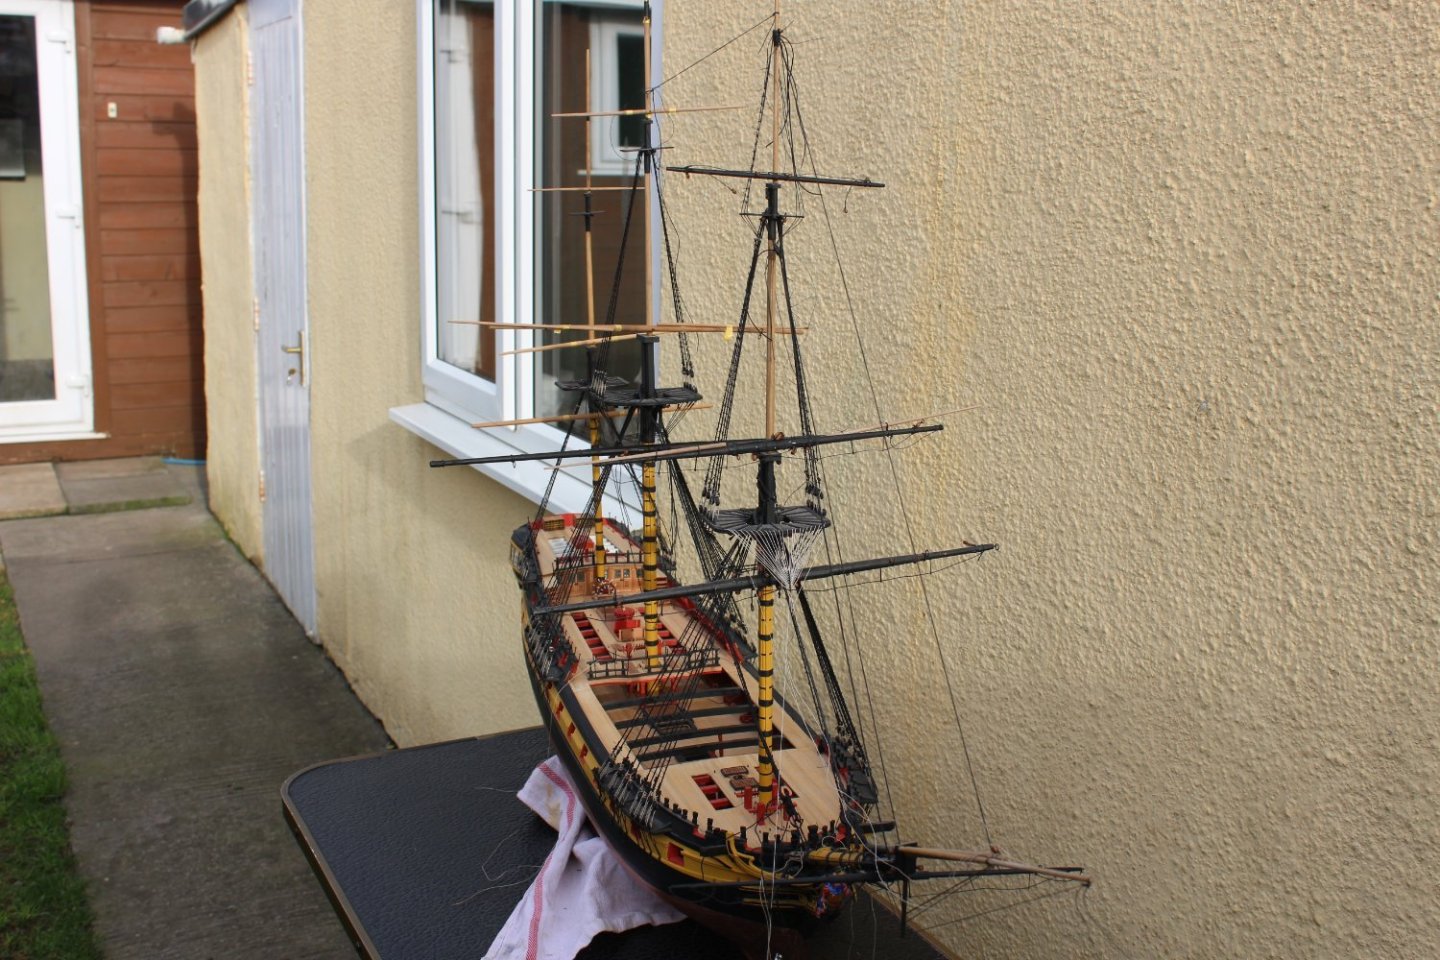
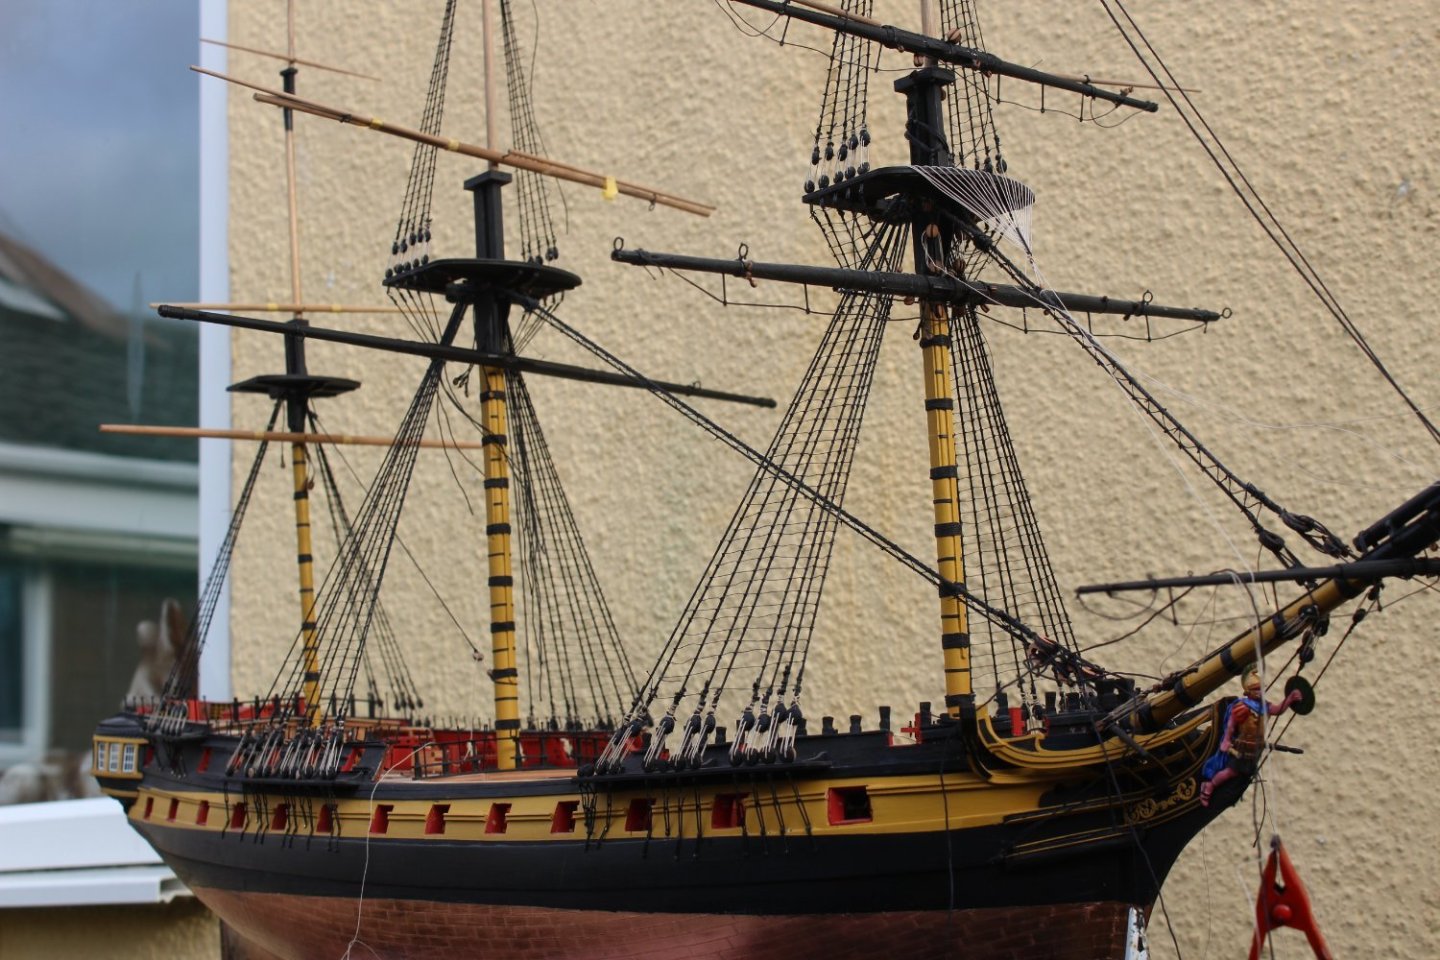
good evening everyone standing rigging day 334-46 (lol about 6 weeks lost to puppy training and OCCRE Loco) well the build went back onto the table a few days ago, it was nice to see her back, even after a short break, it took a while to find out where i left off, but basically im still on standing rigging, here a a few catch up photos


- 443 replies
-
- 20
-
-
- Indefatigable
- Vanguard Models
- (and 1 more)
-
that looks fantastic Chris
-
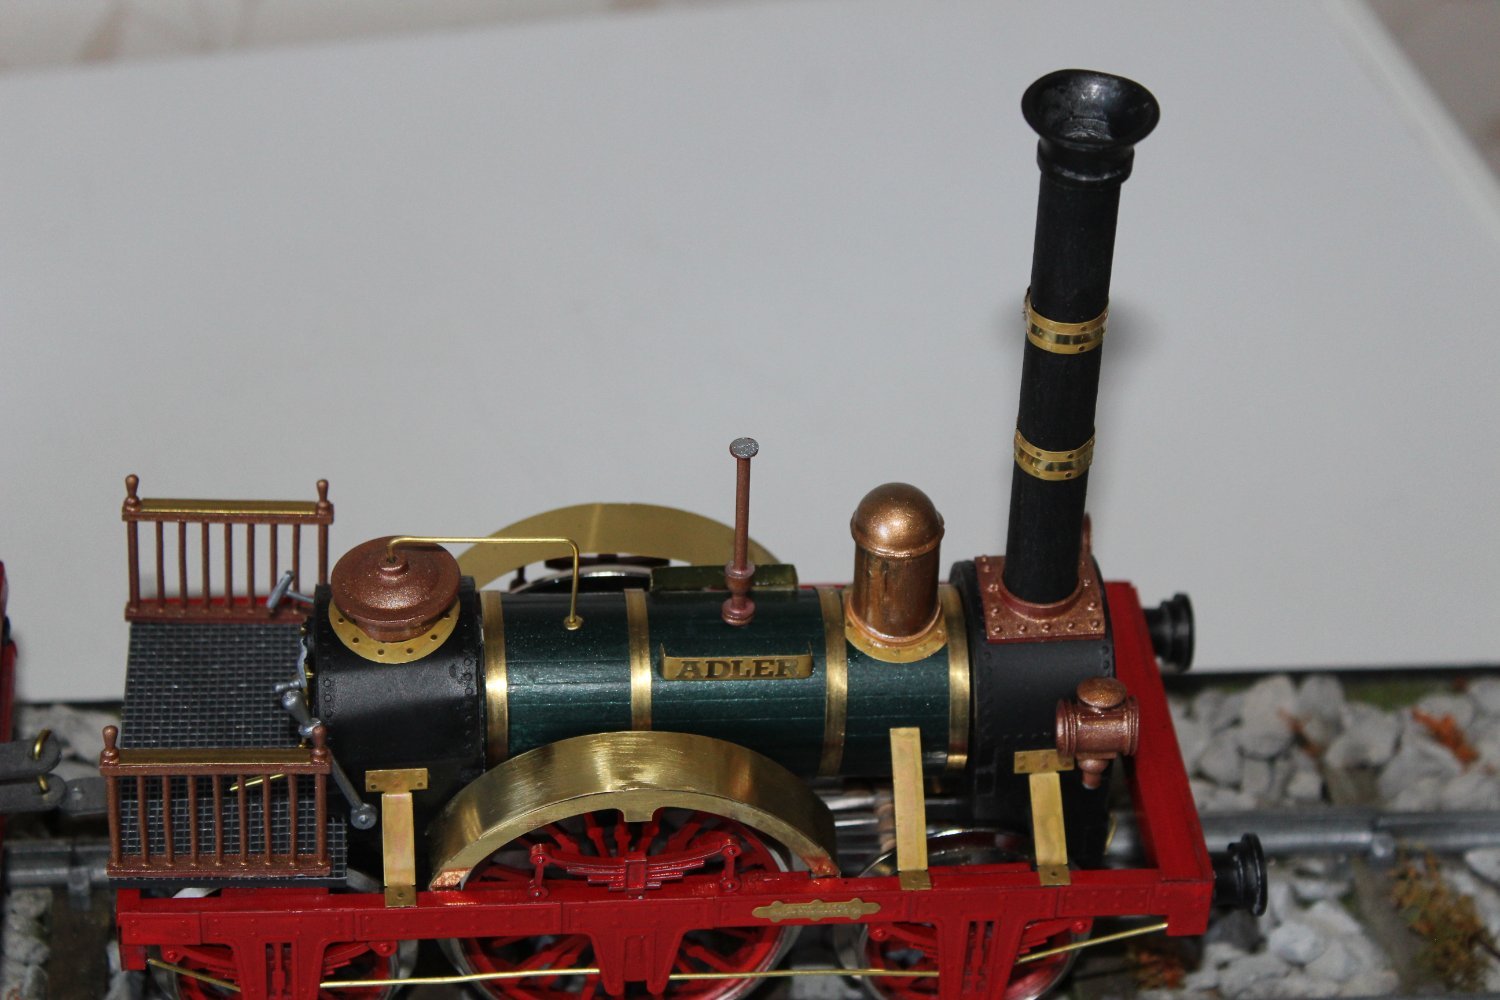
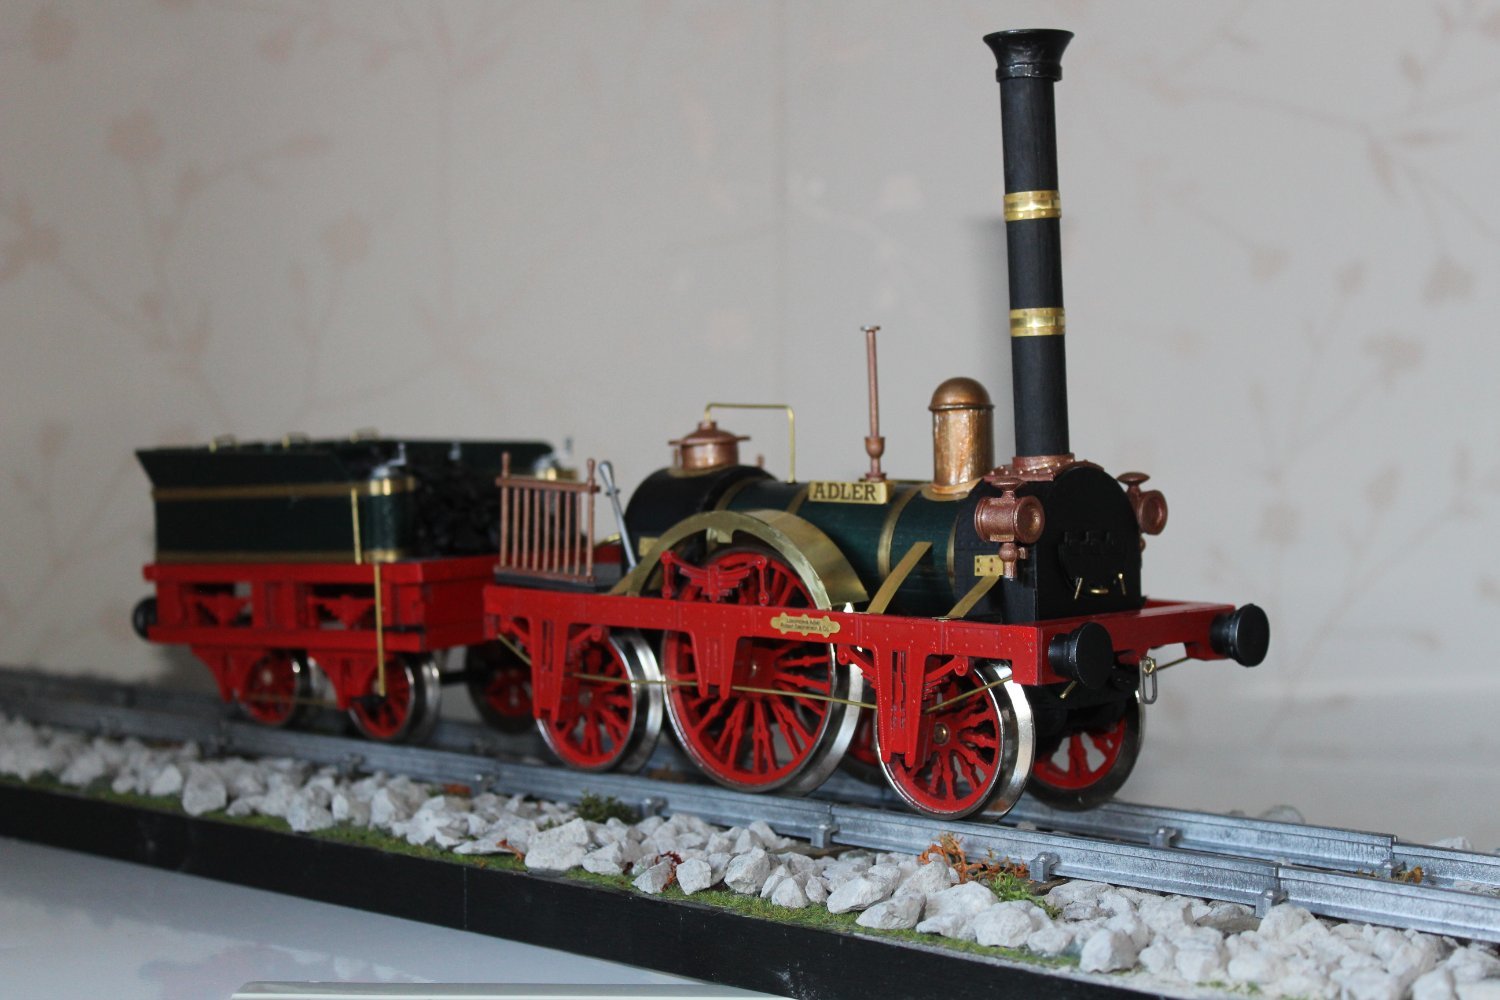
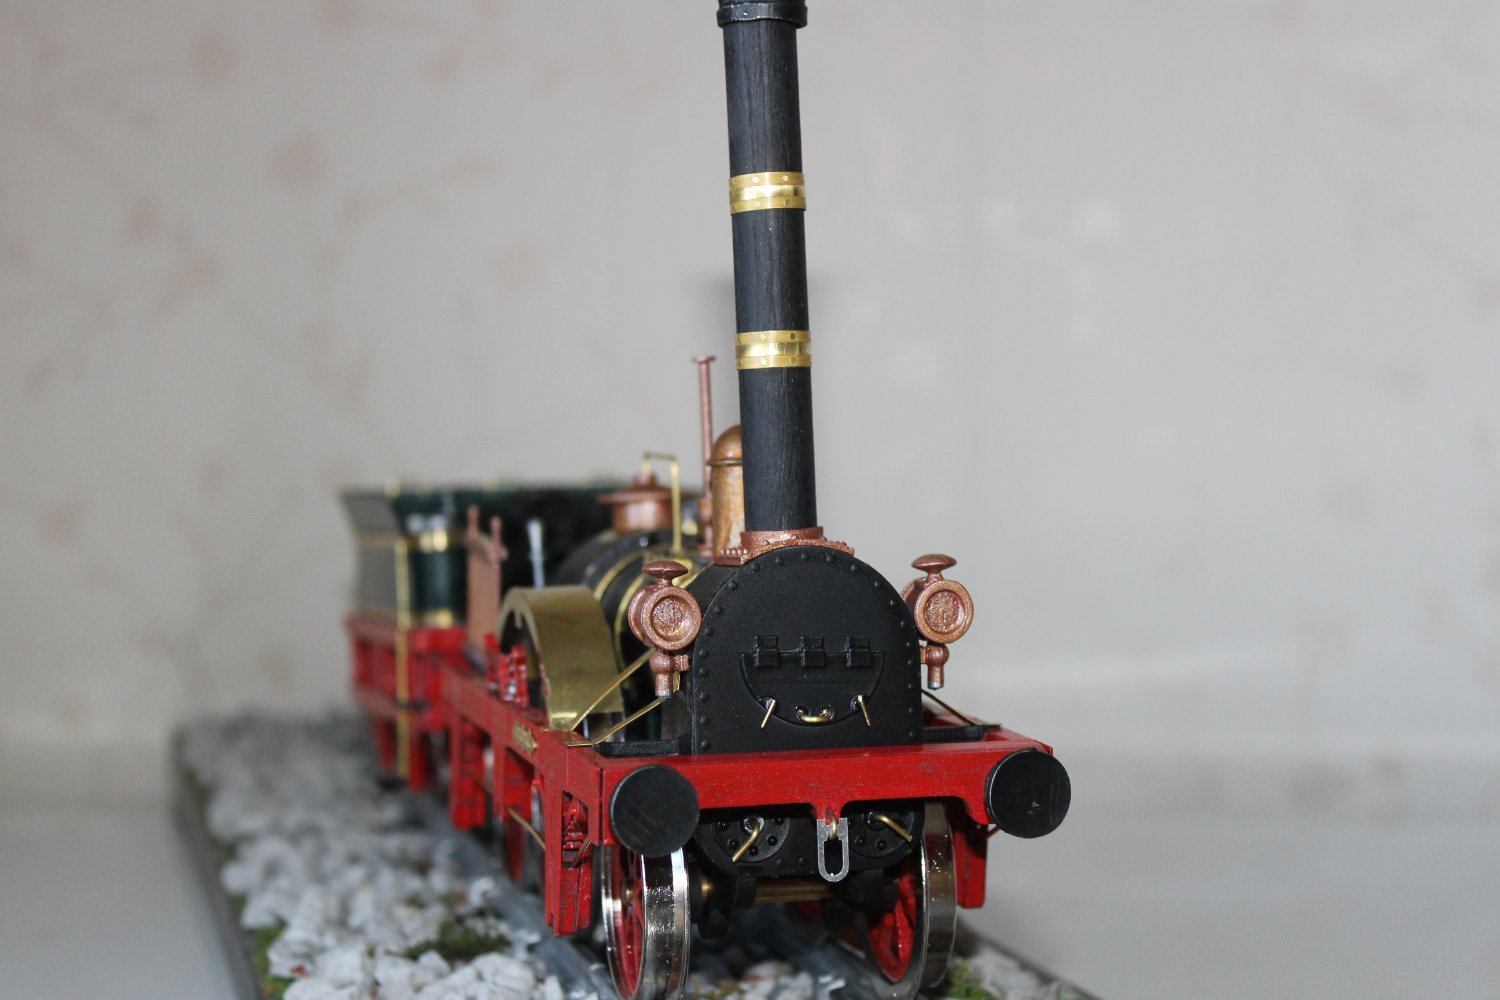
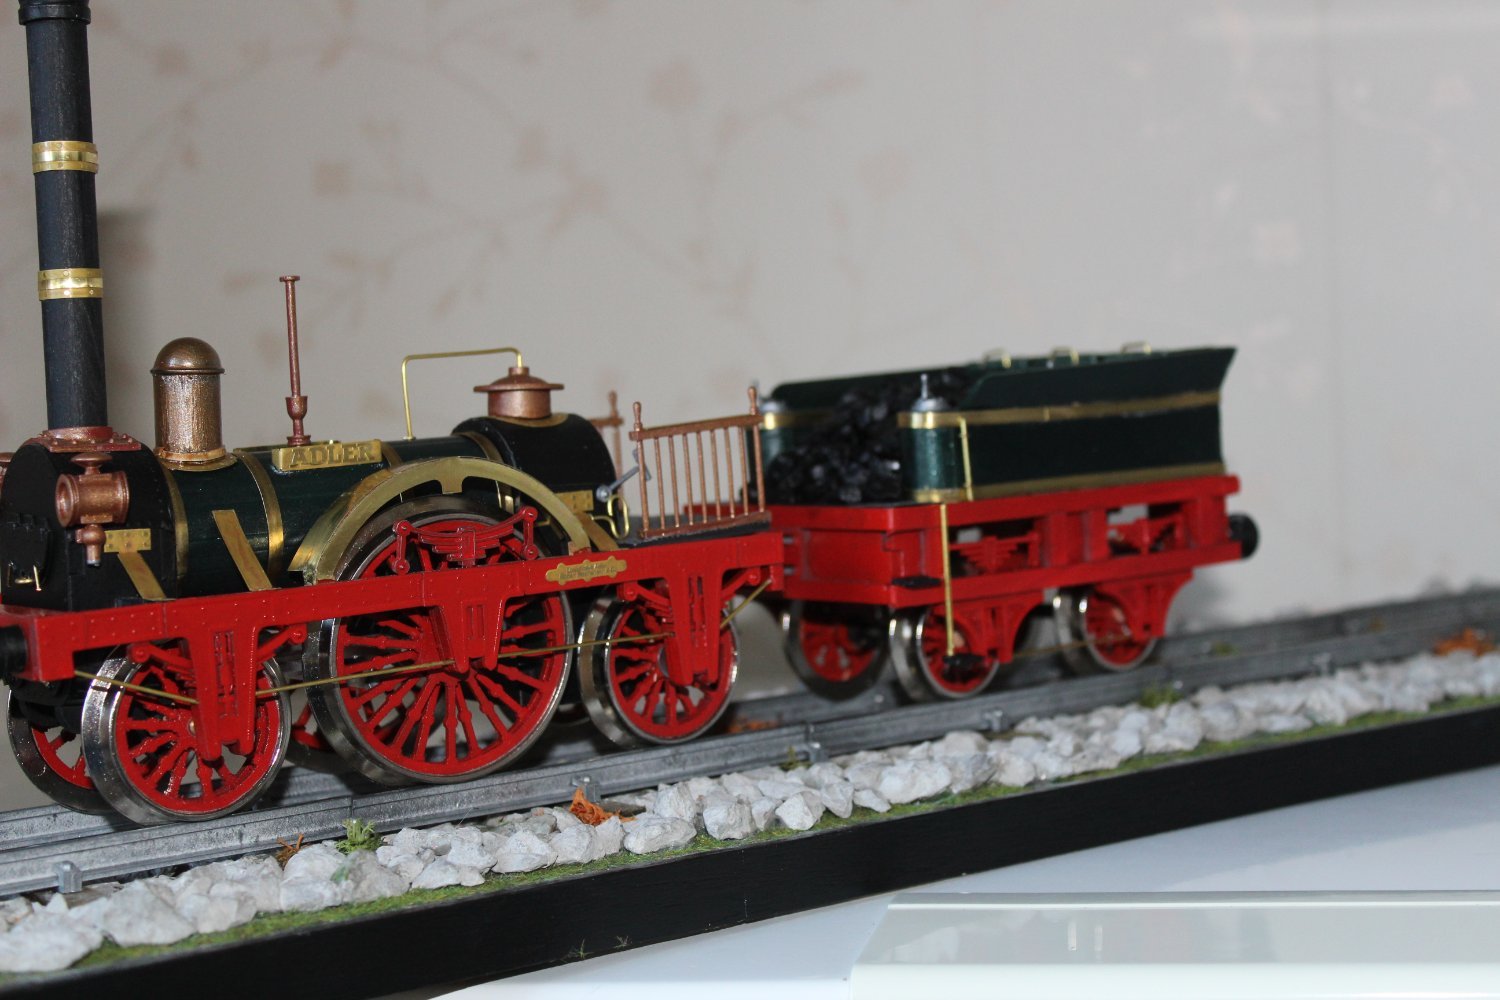
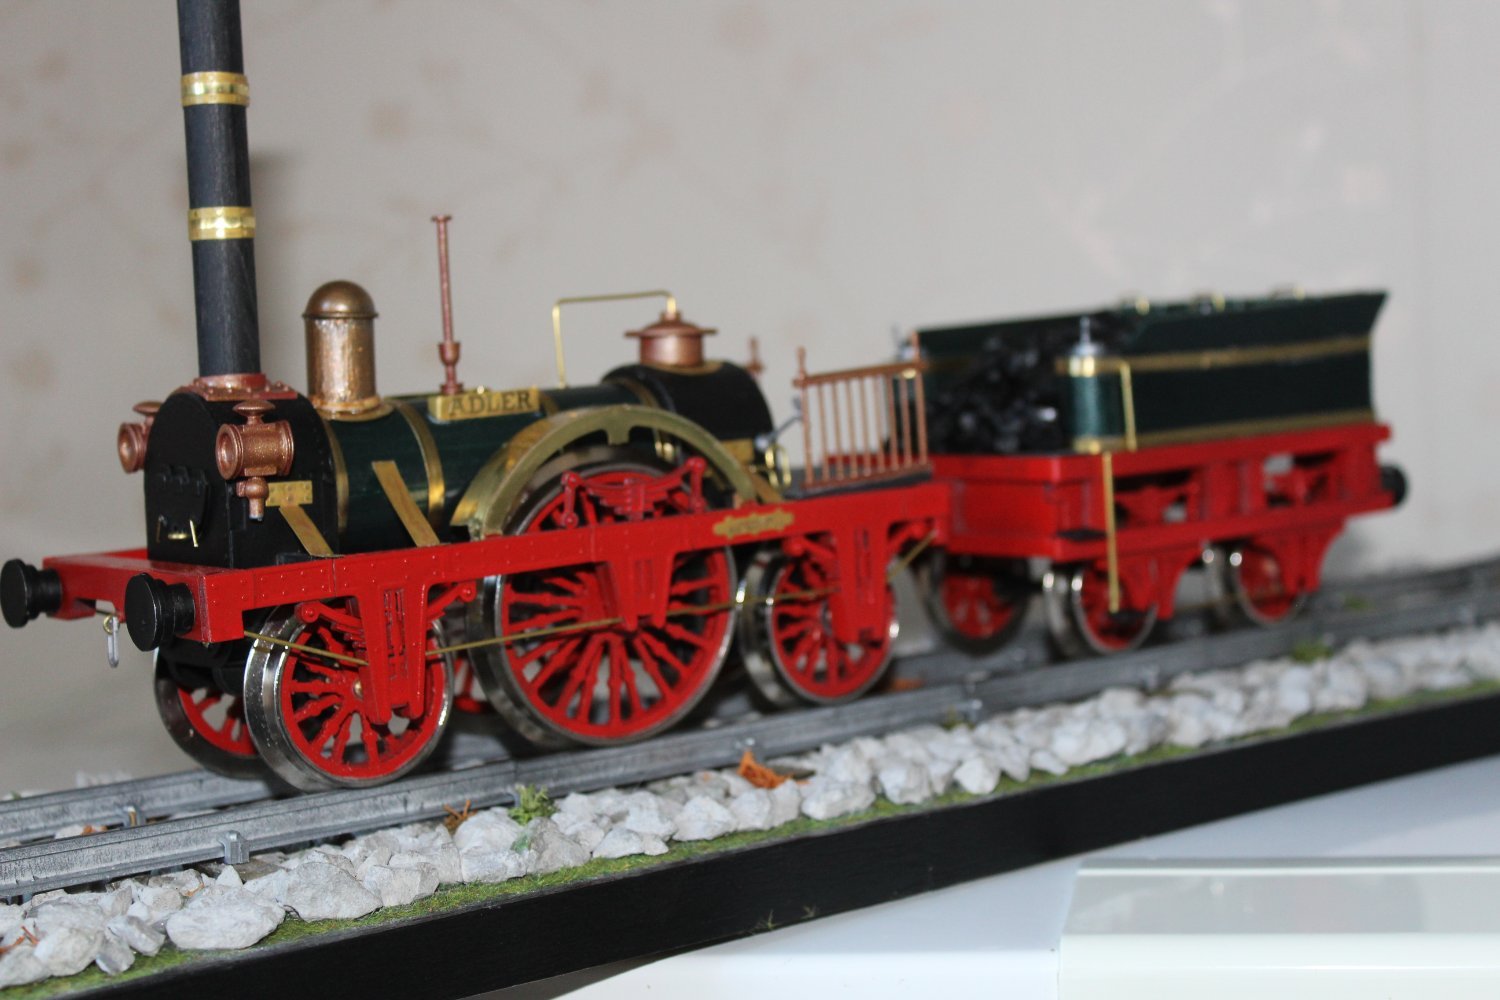
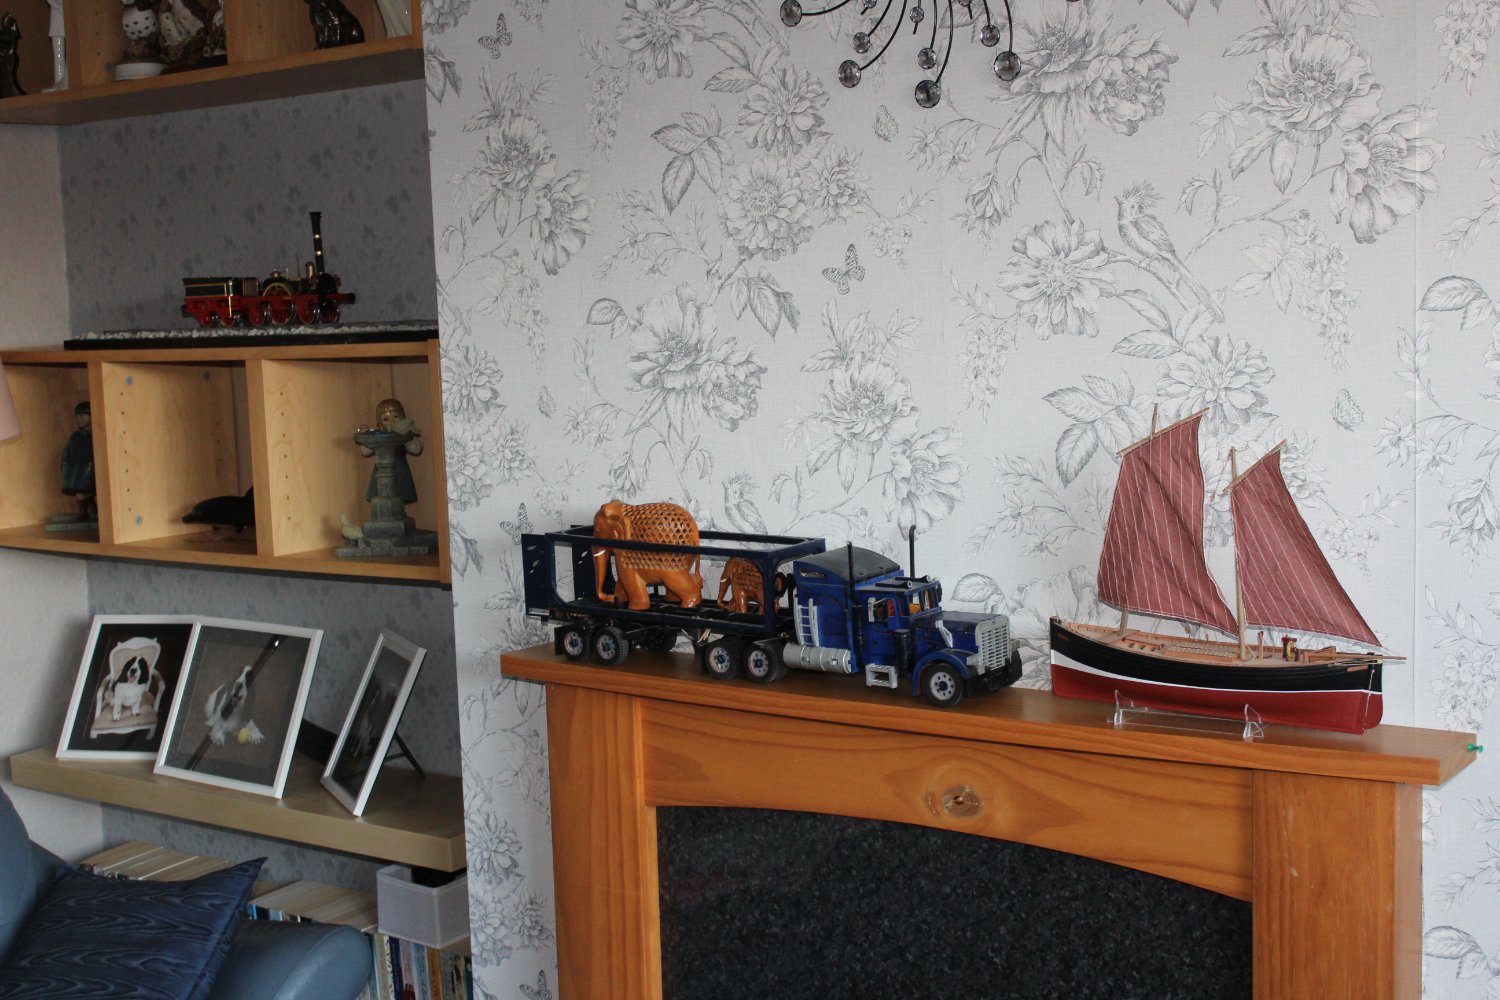
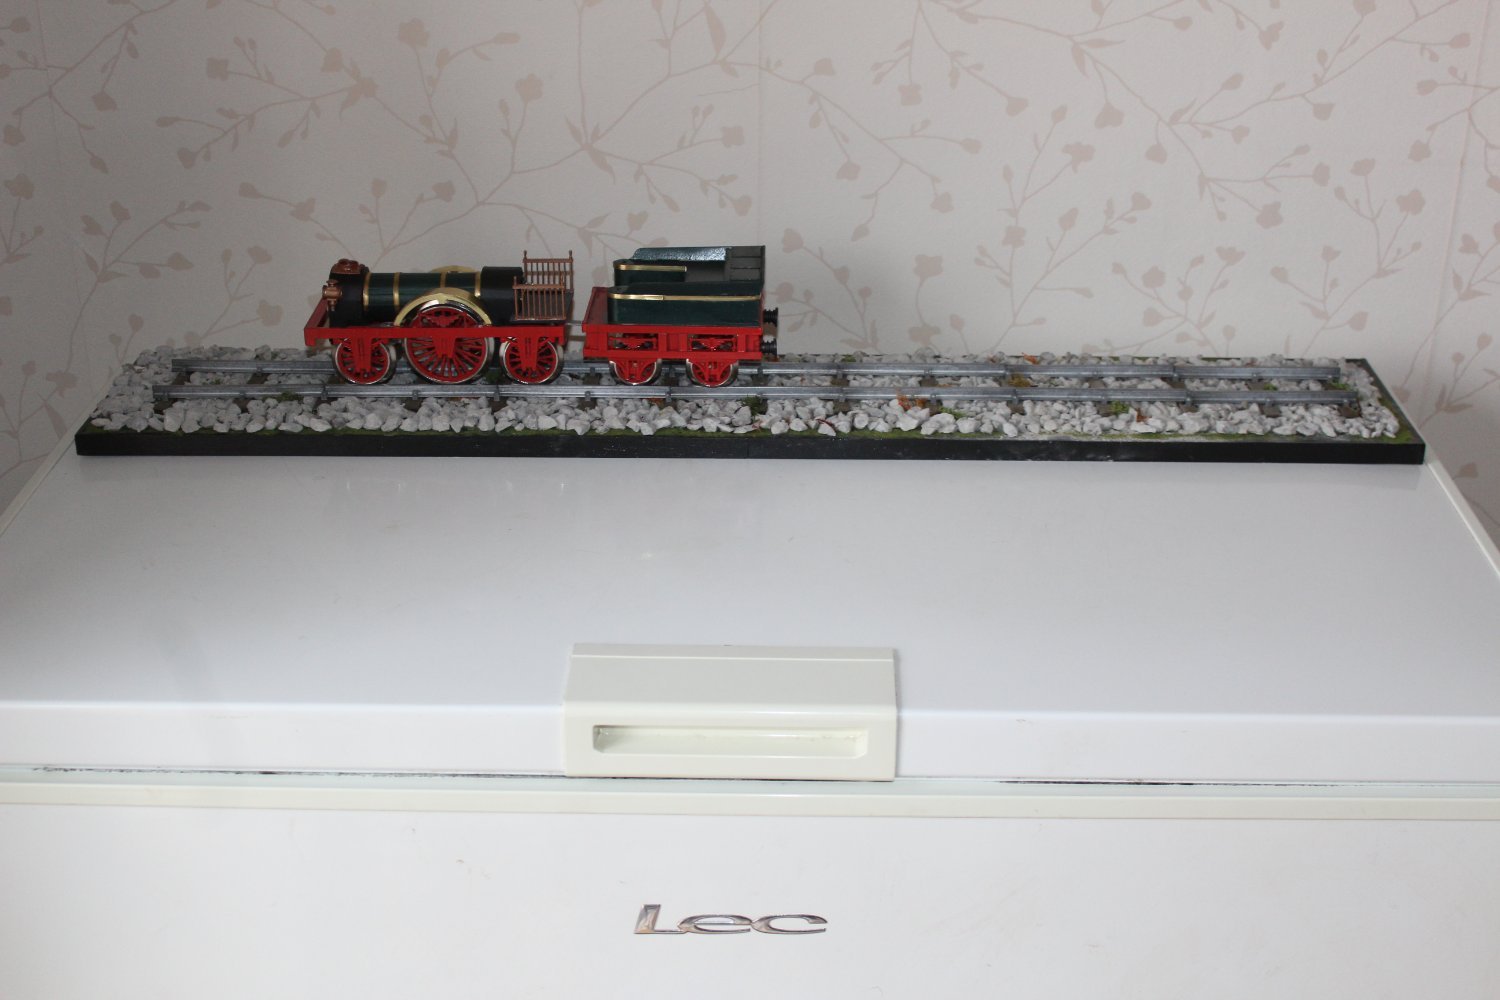
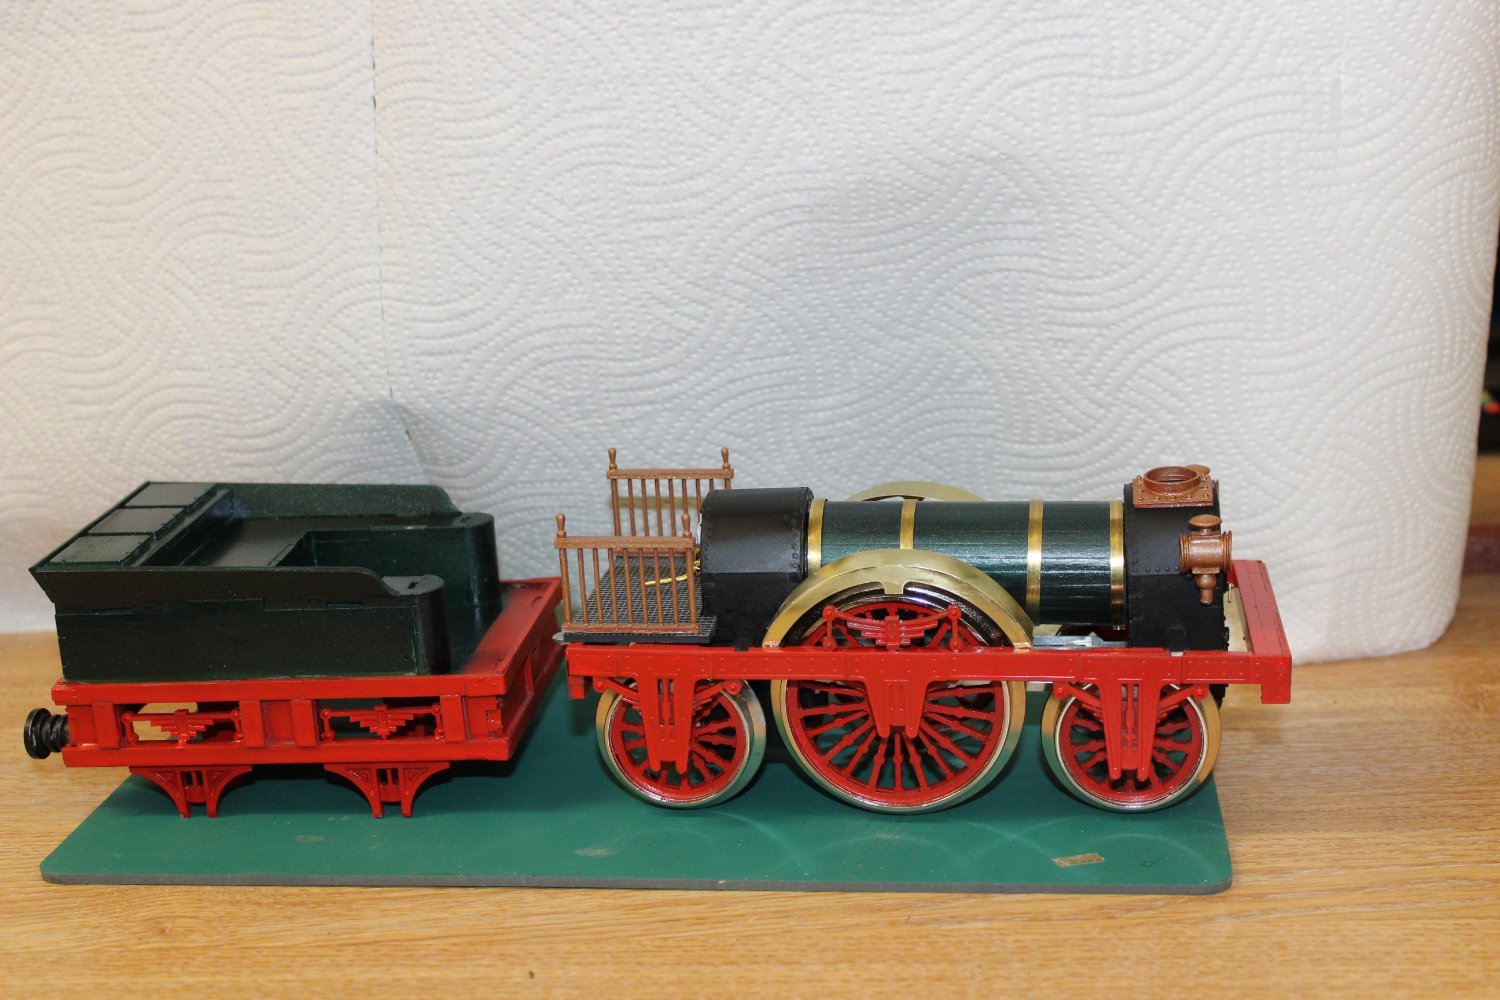
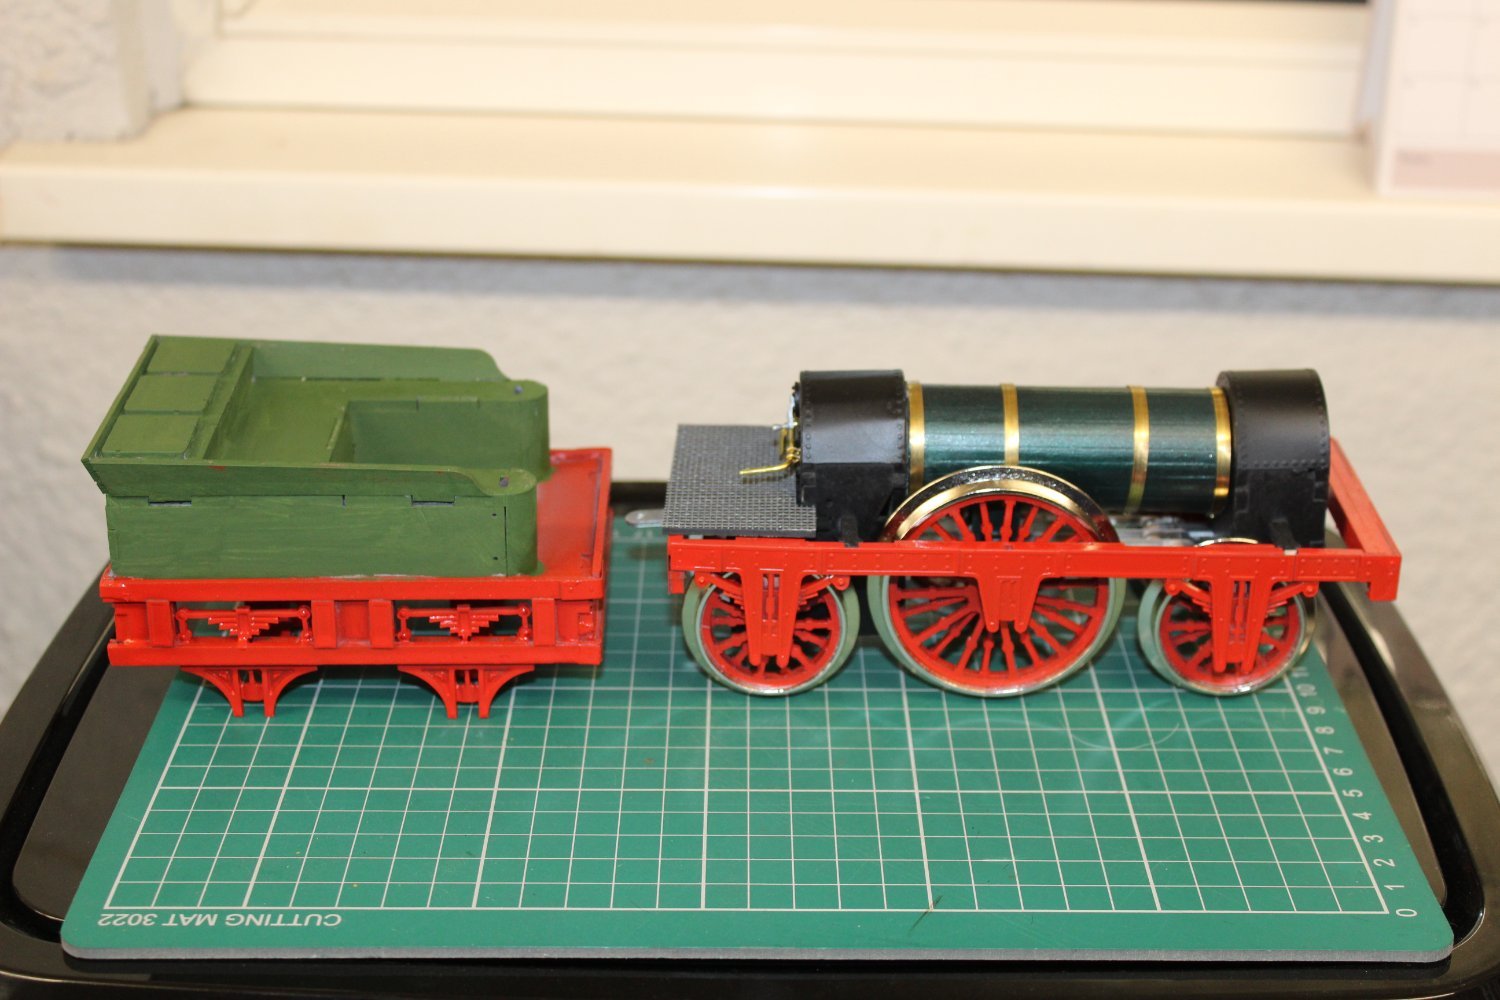
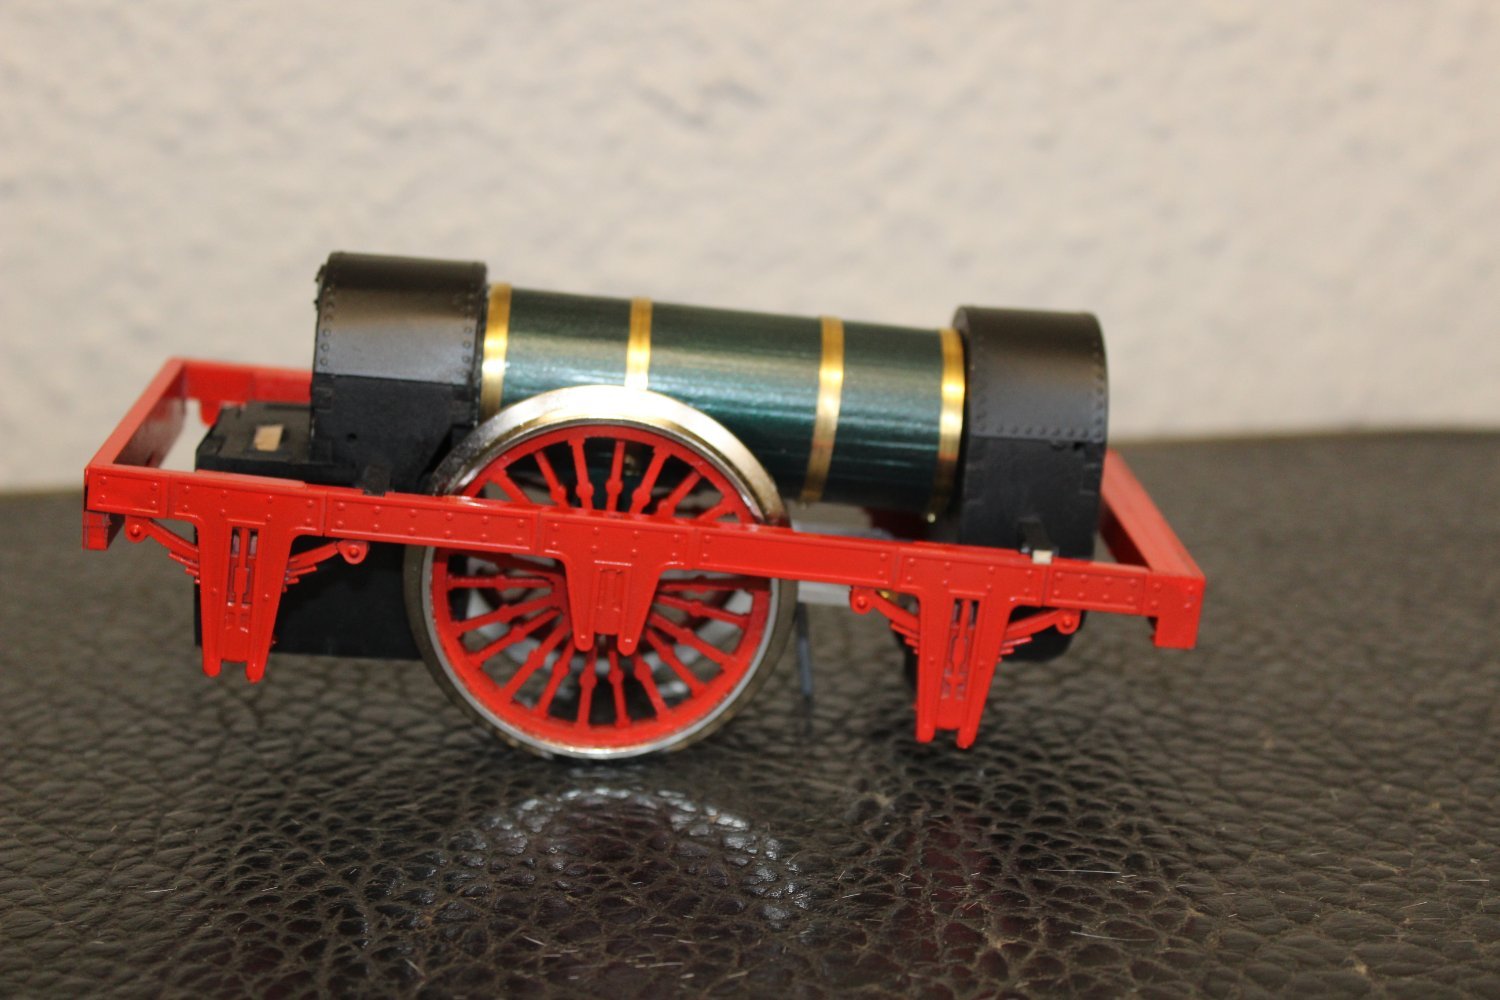
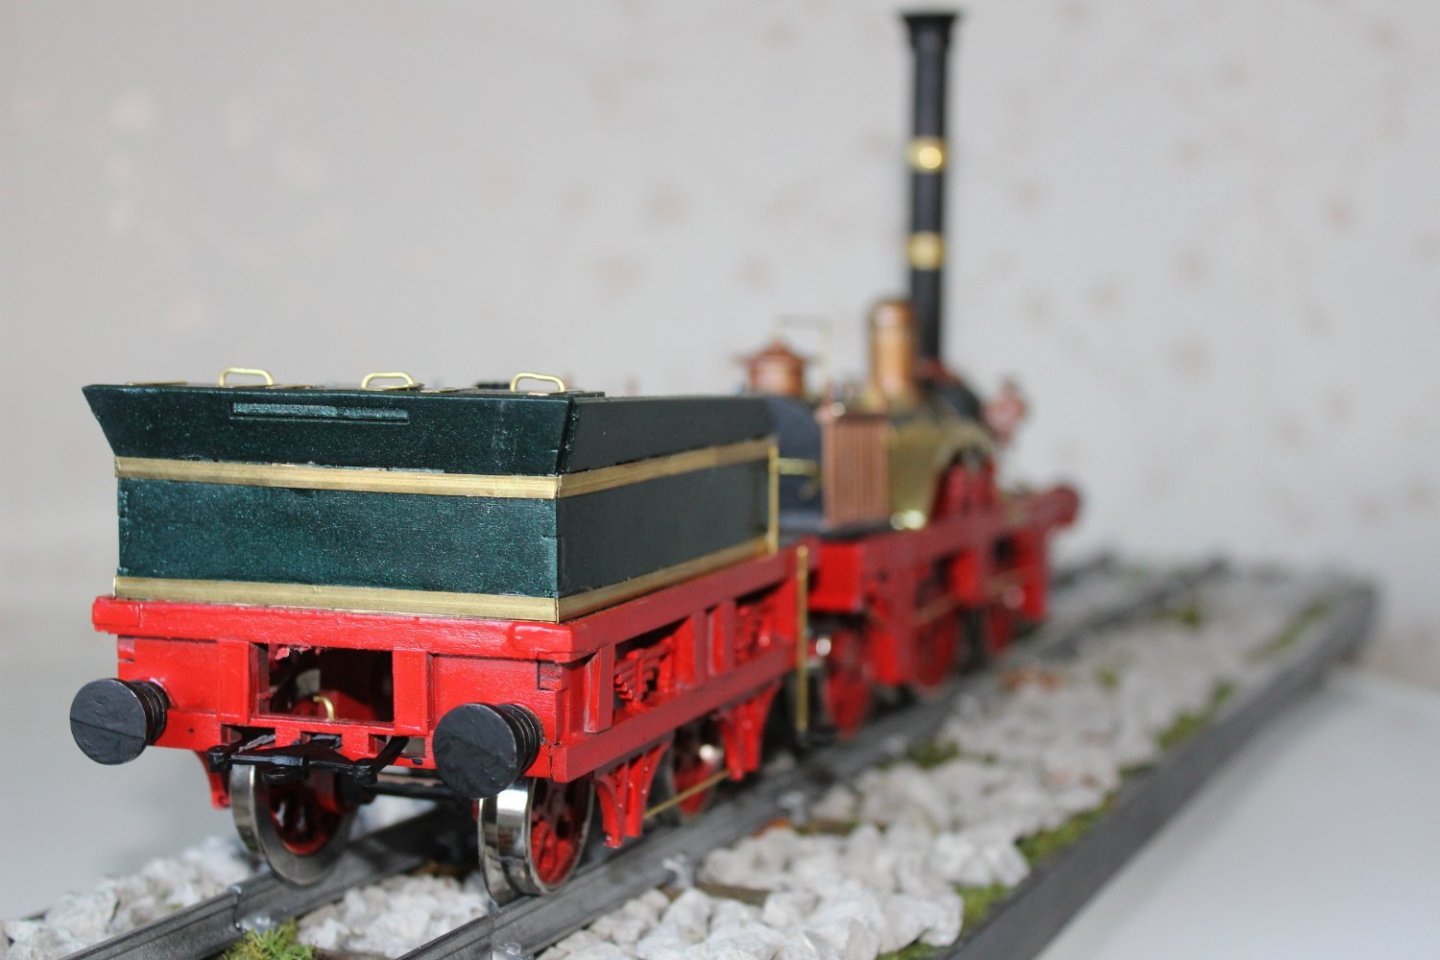
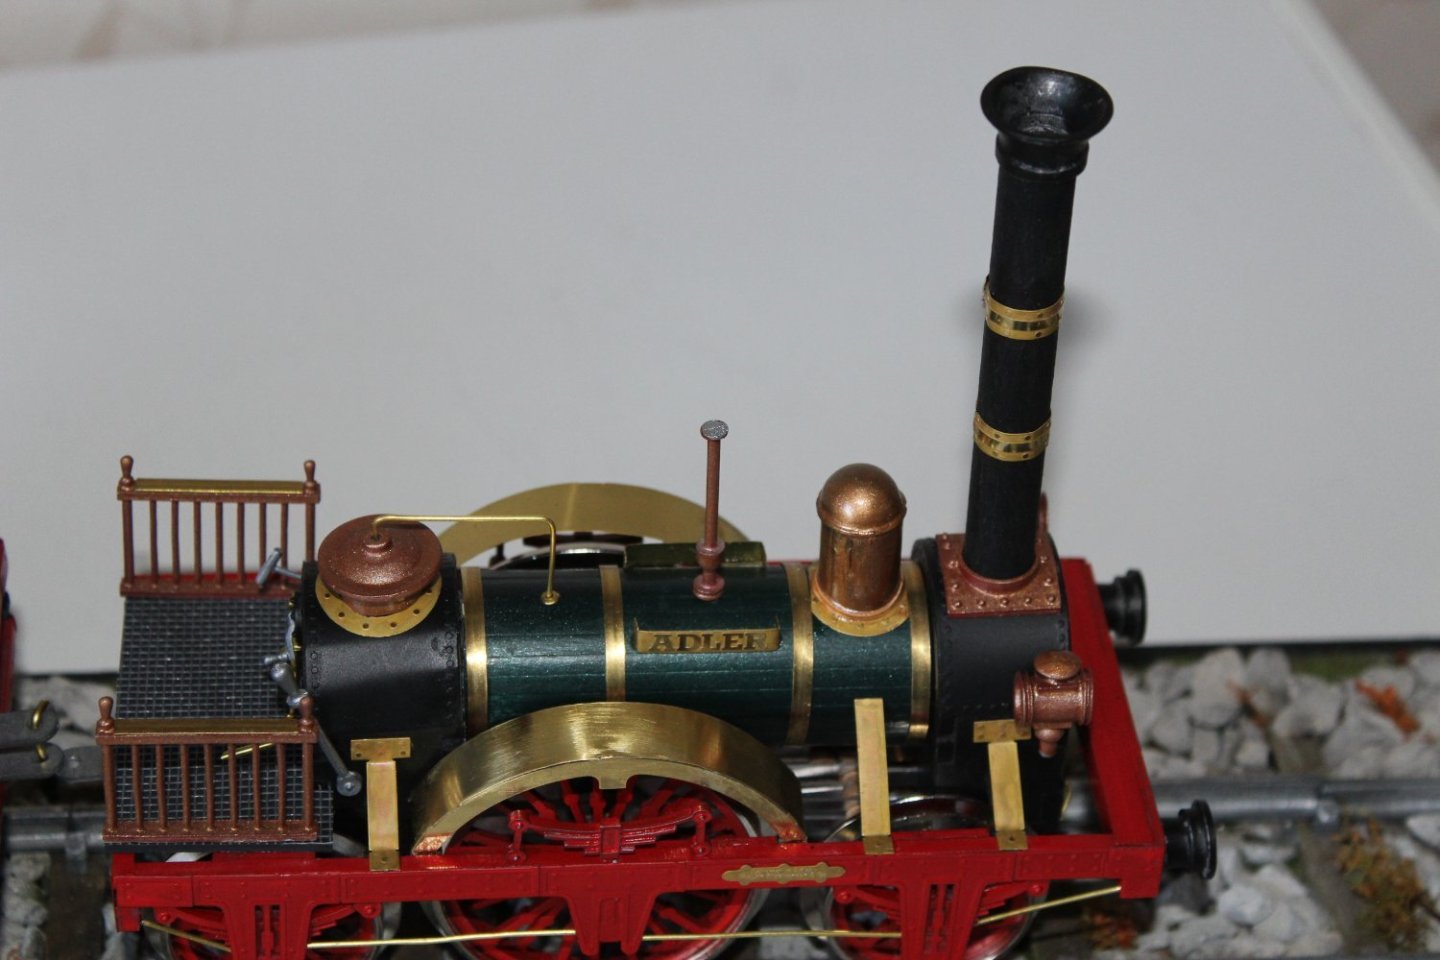
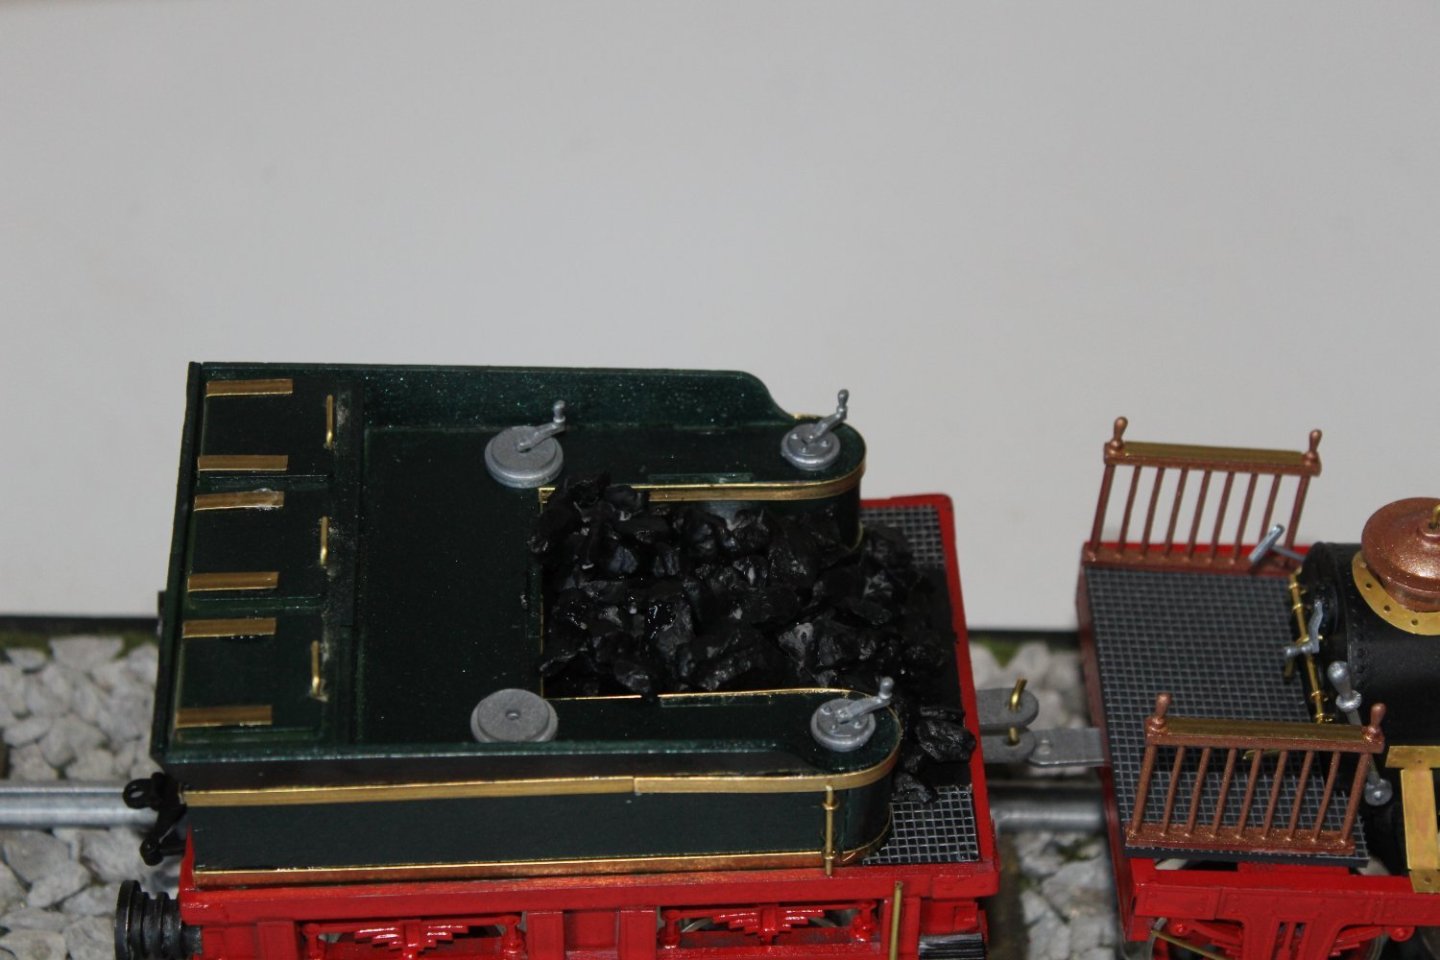
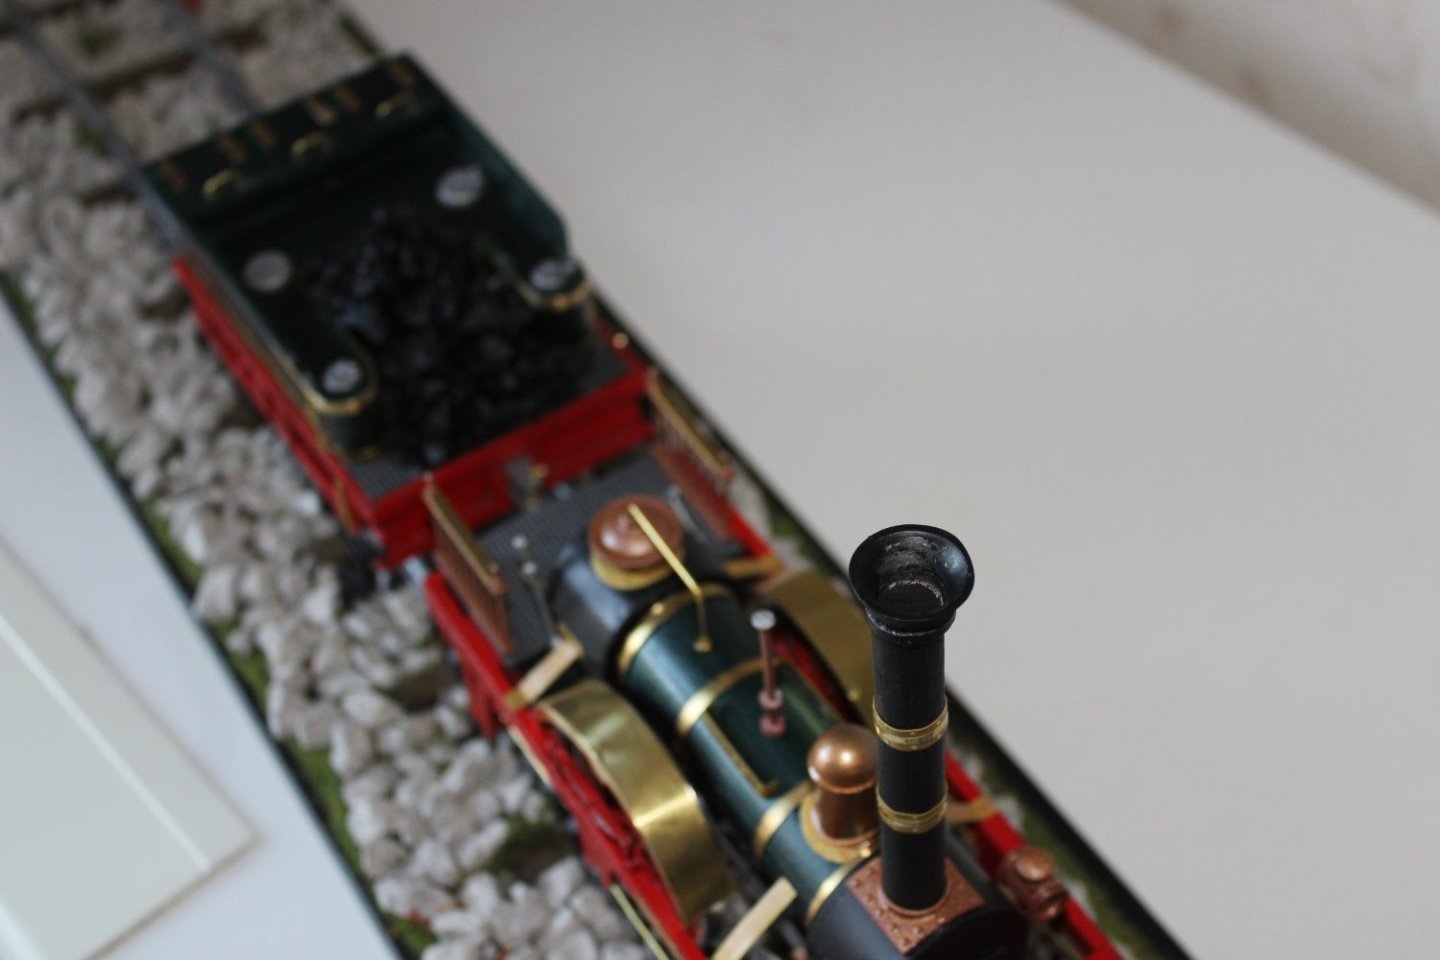
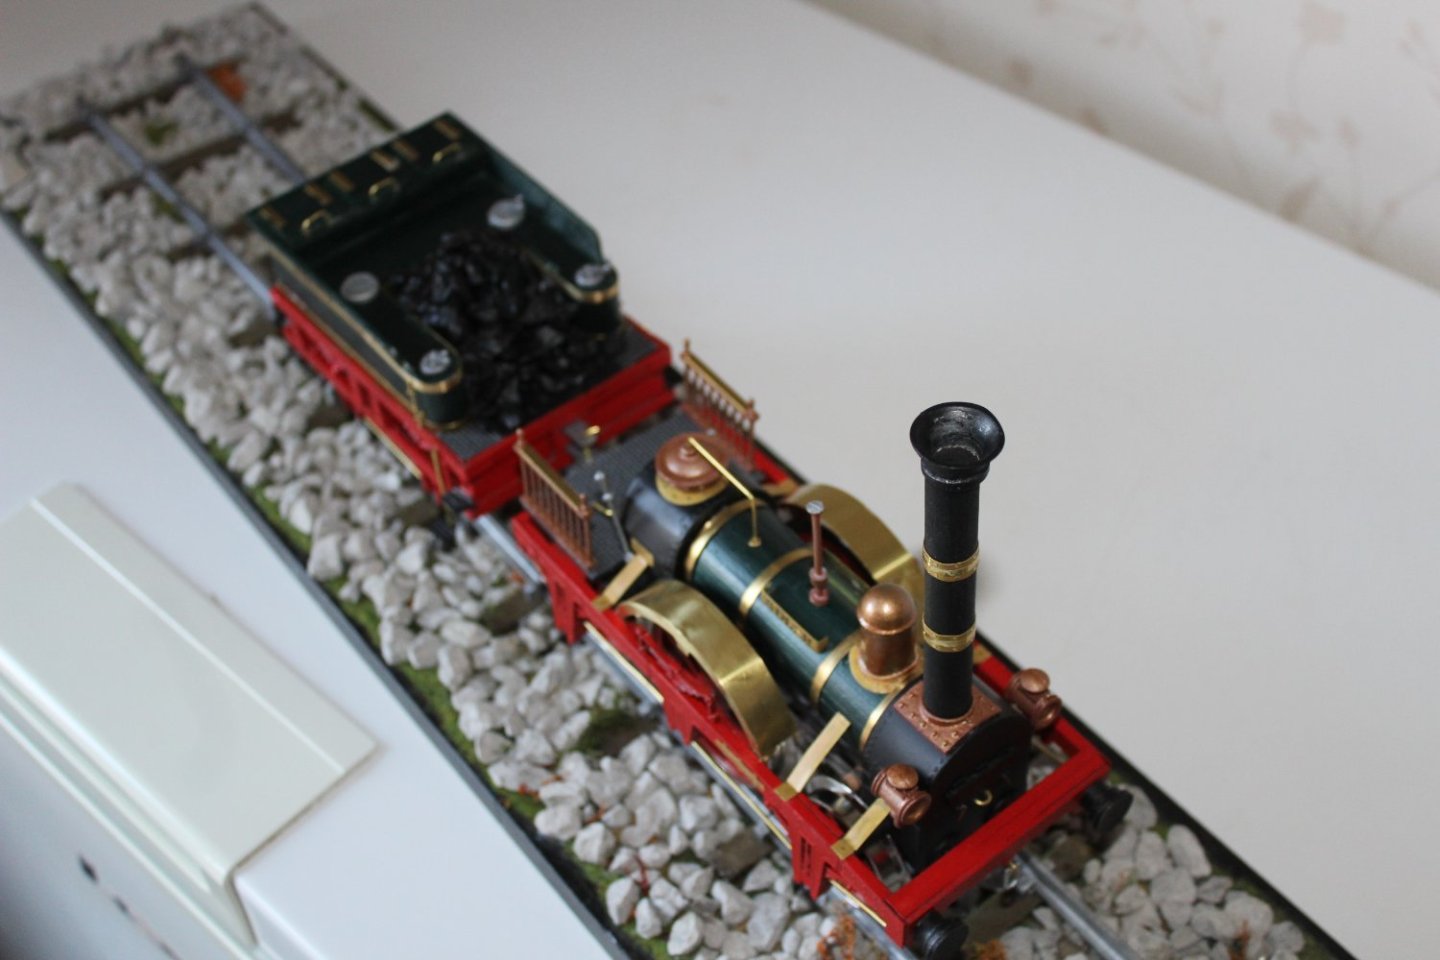
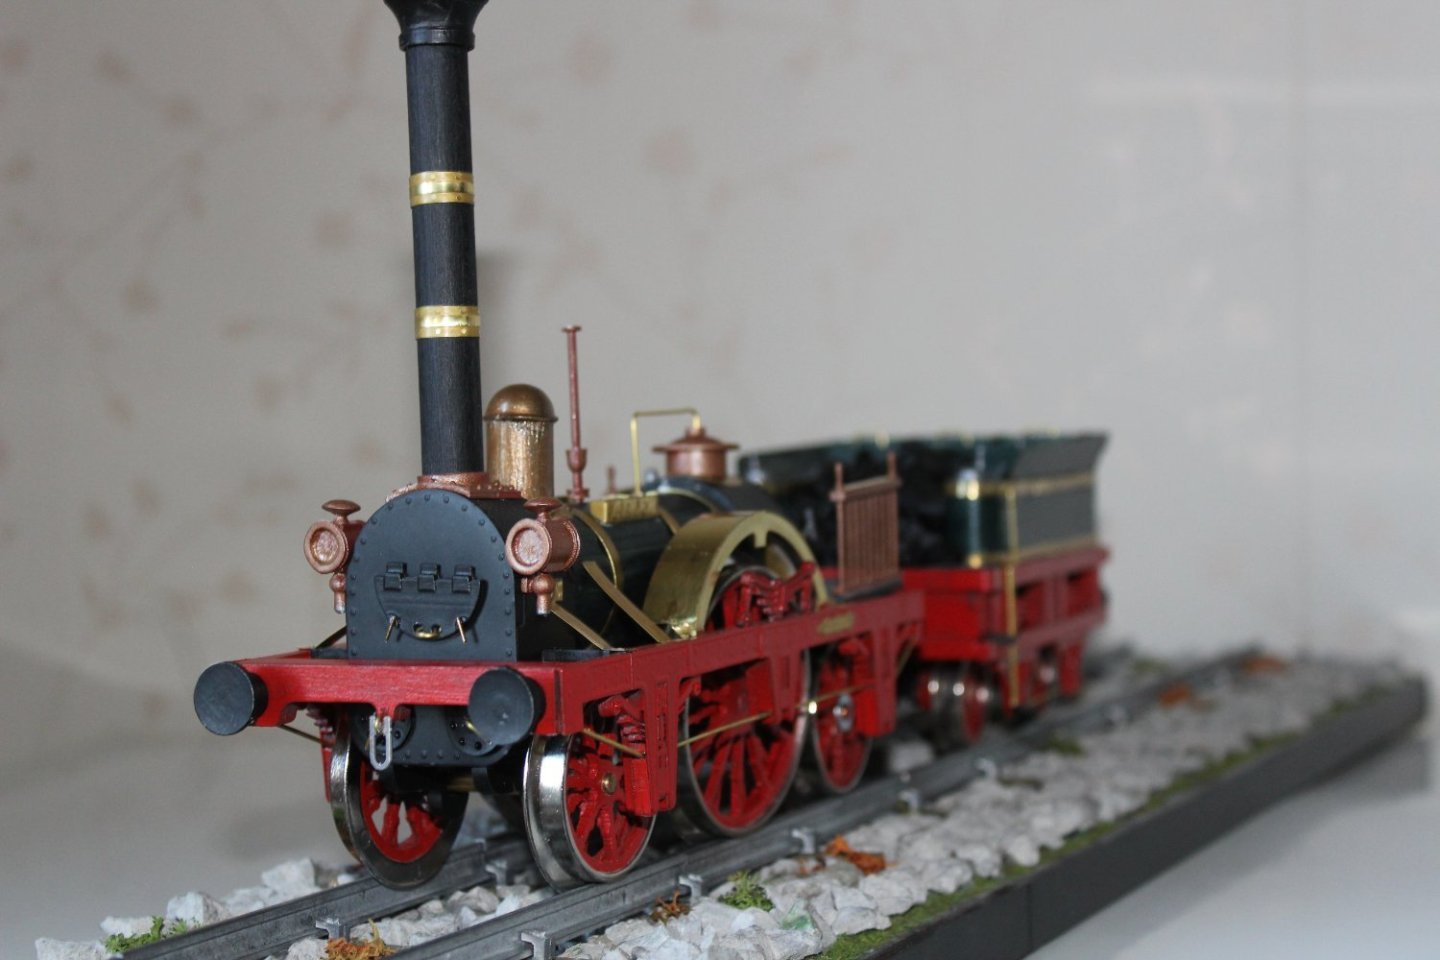
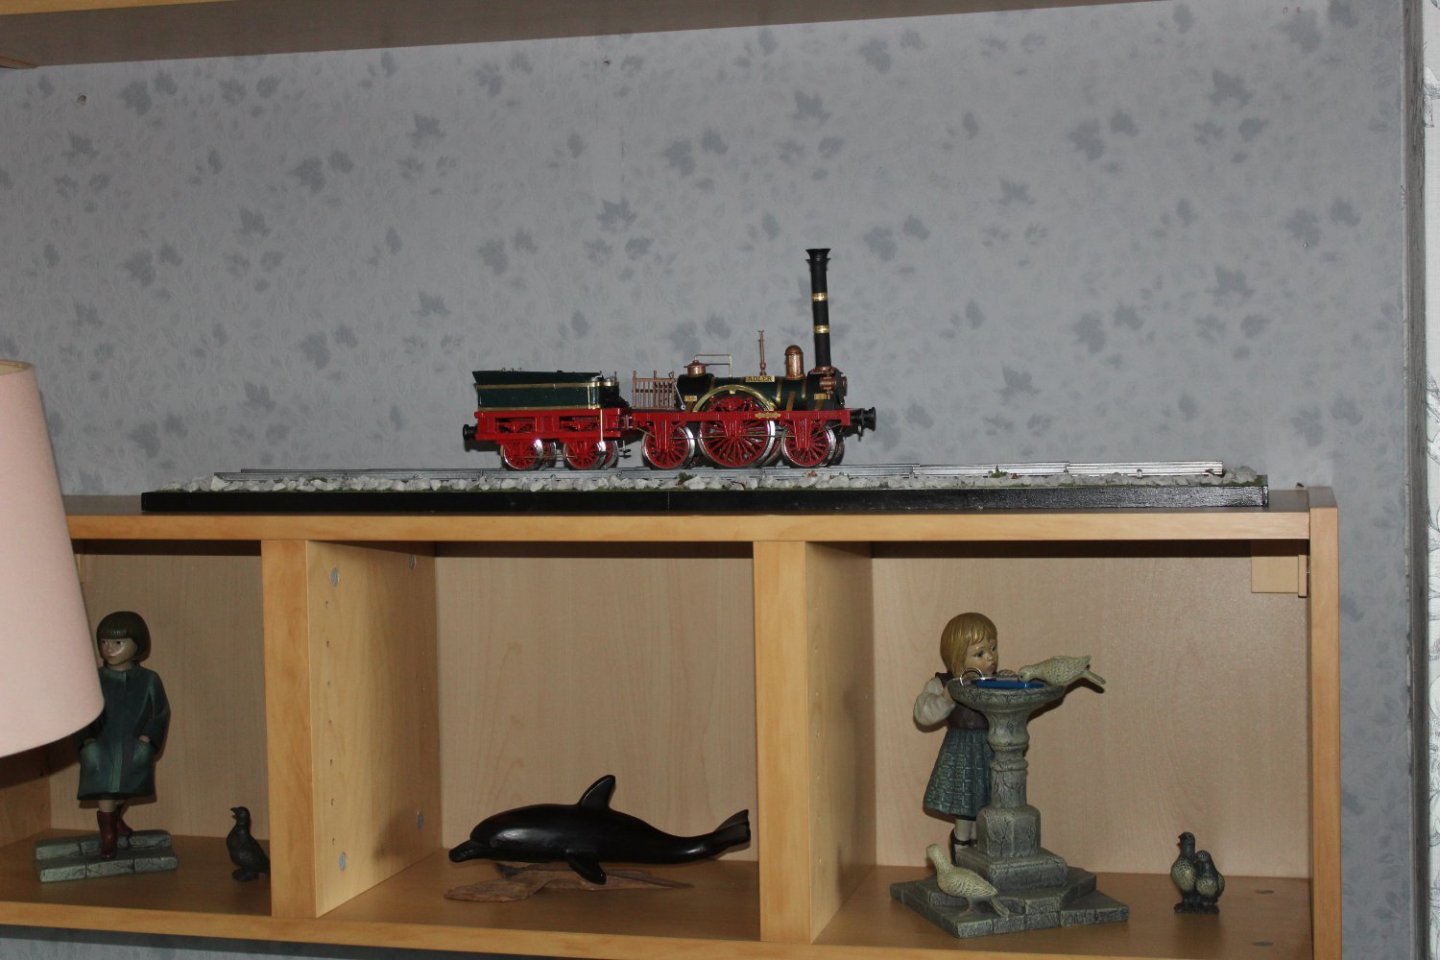
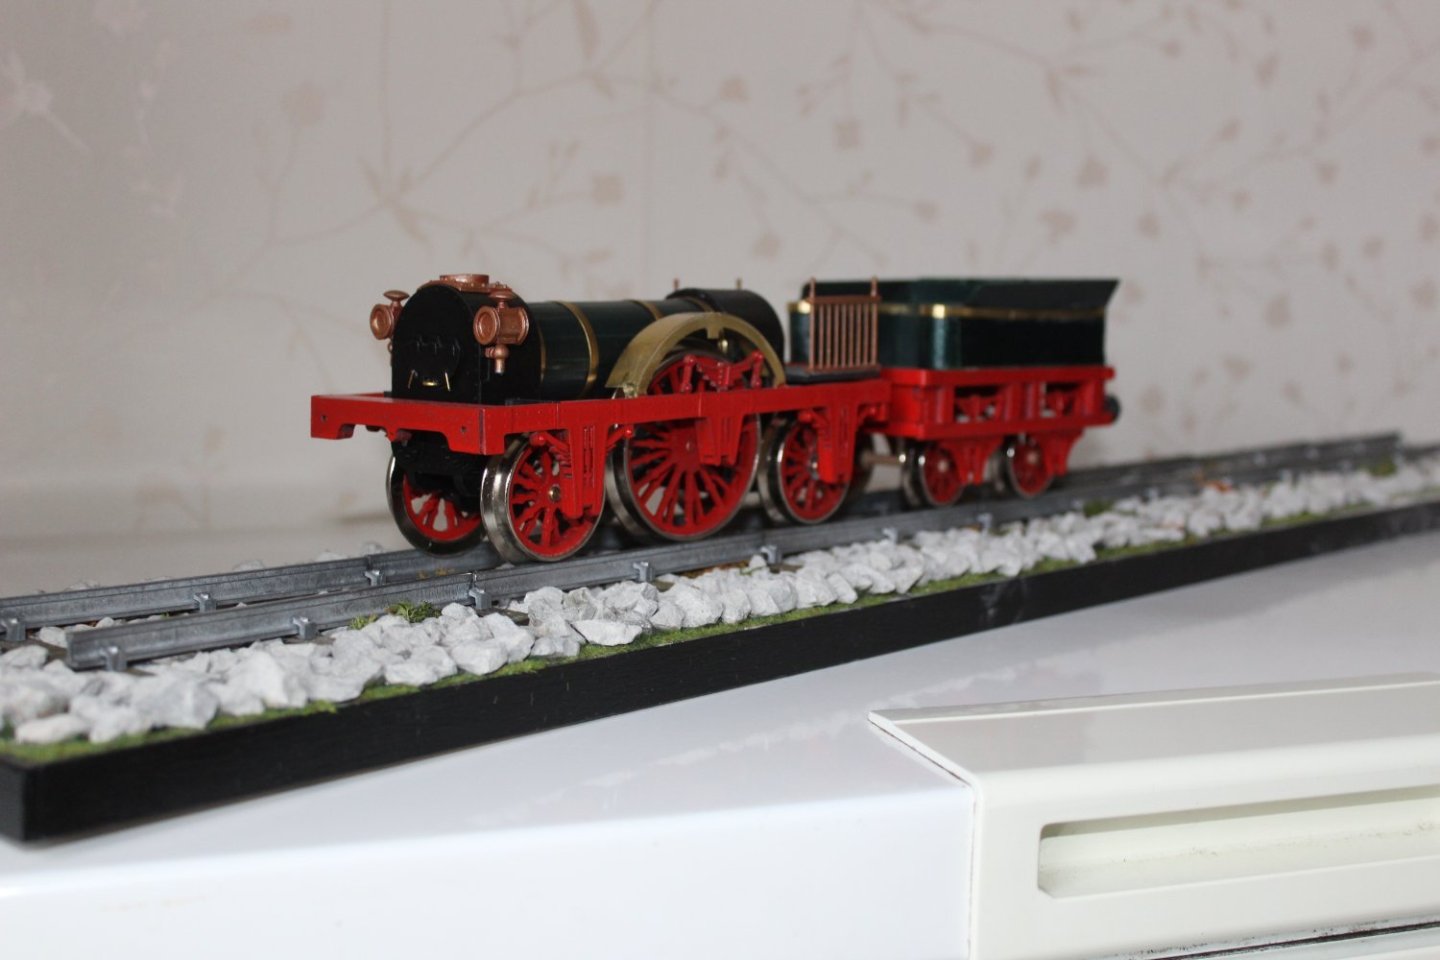
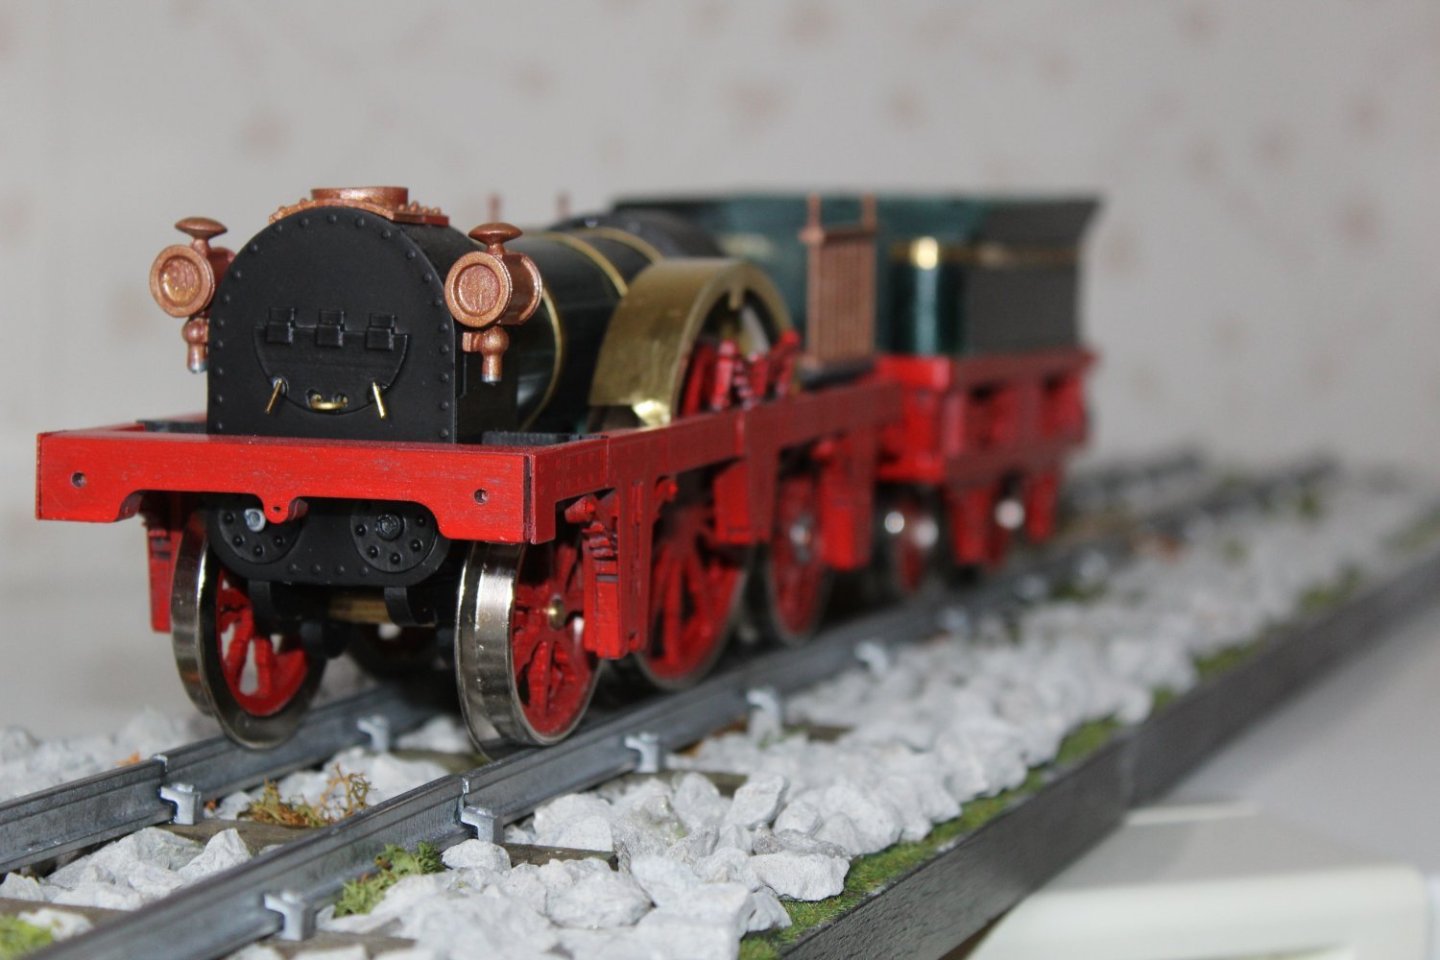
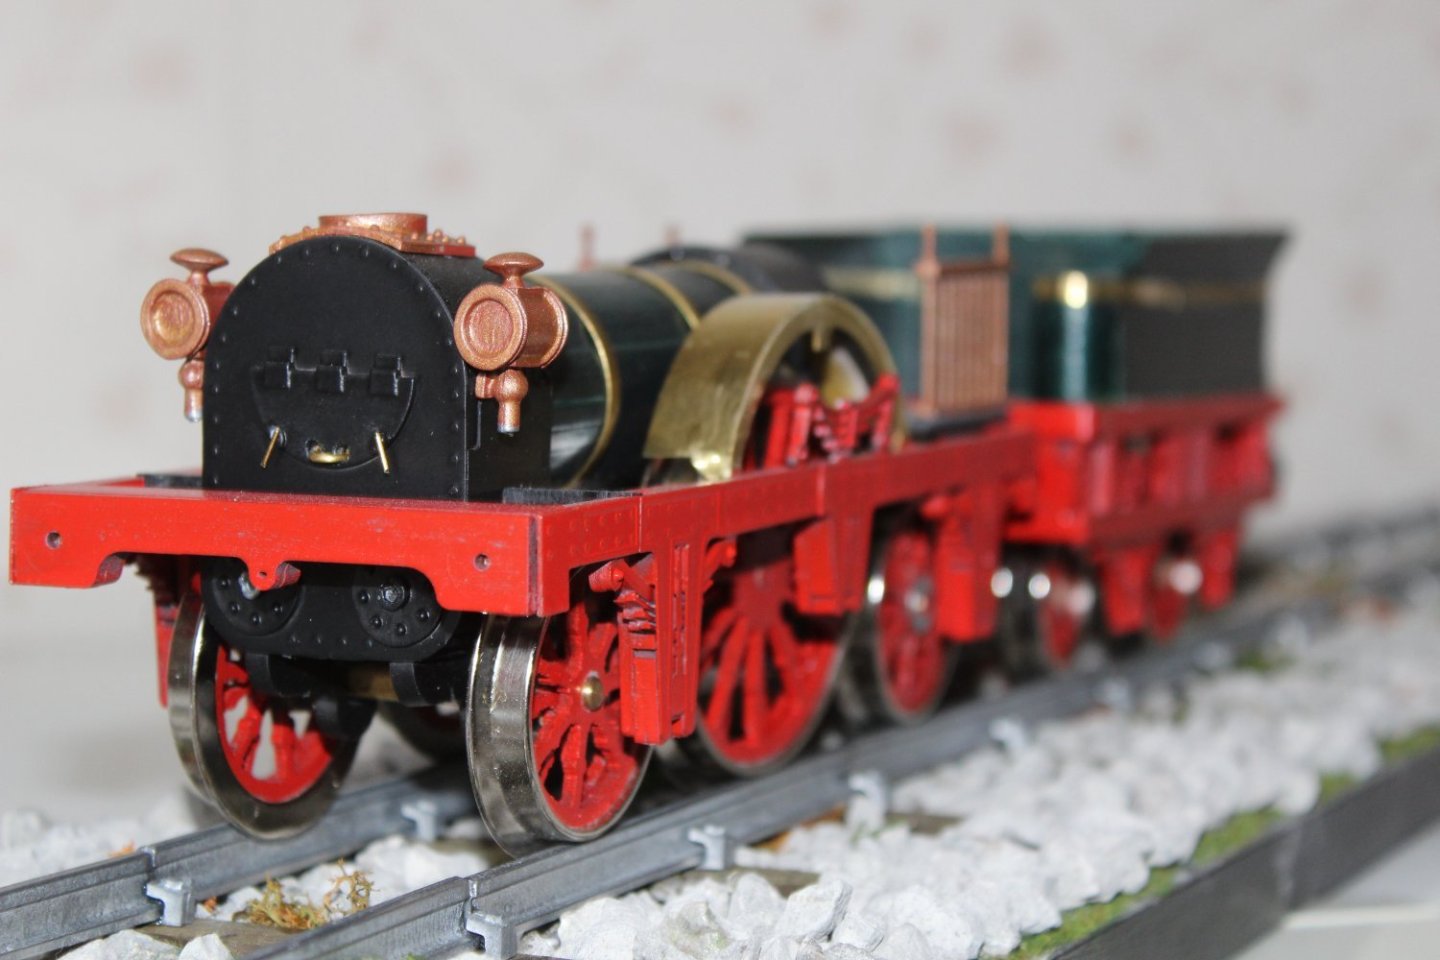
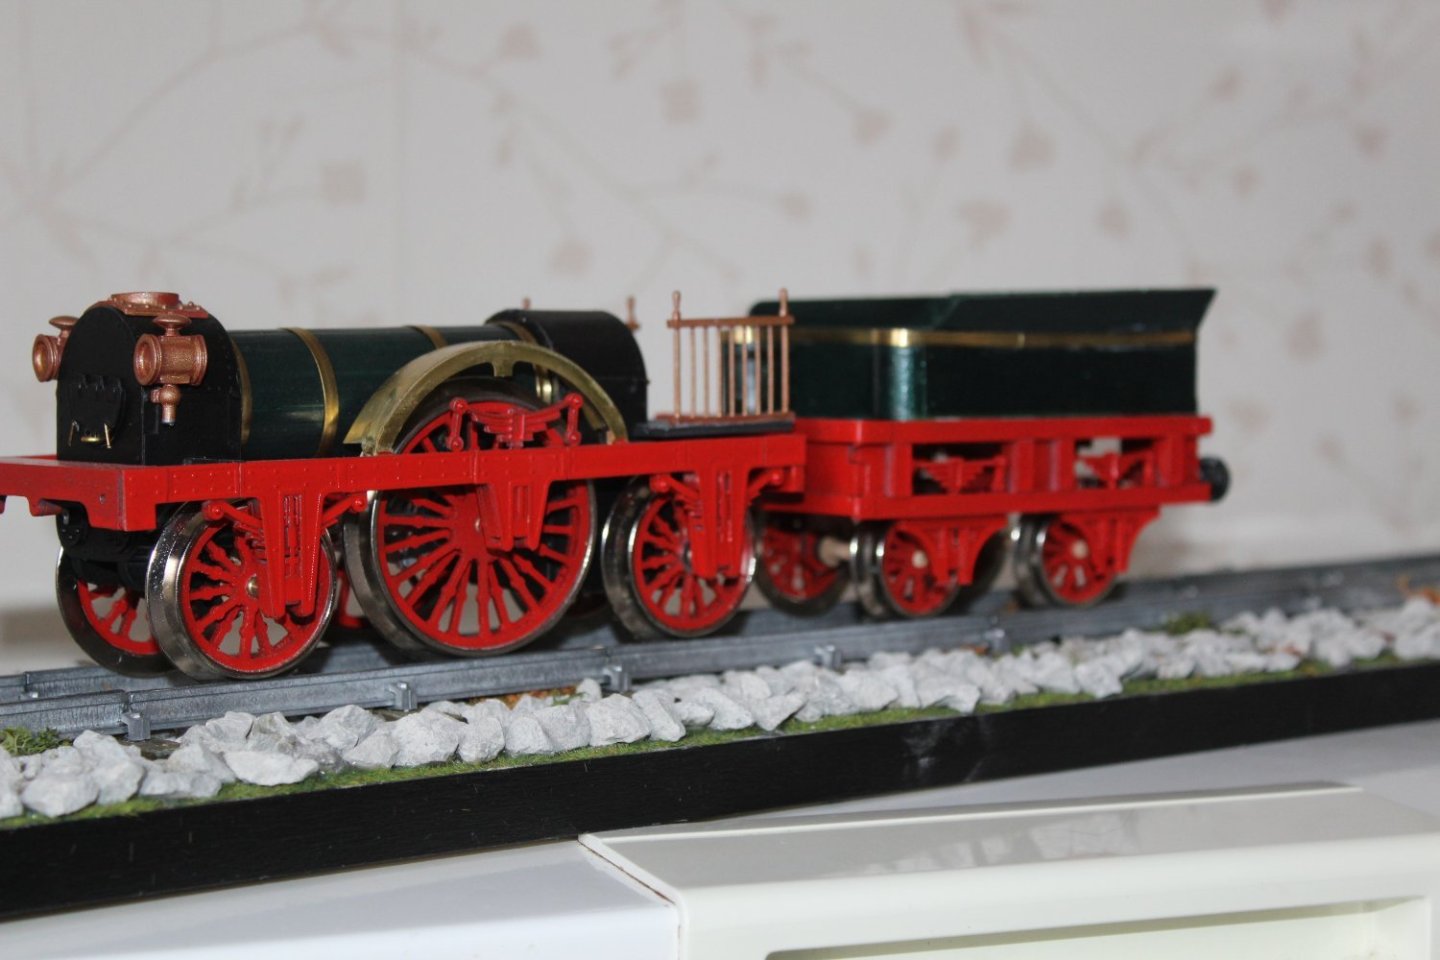
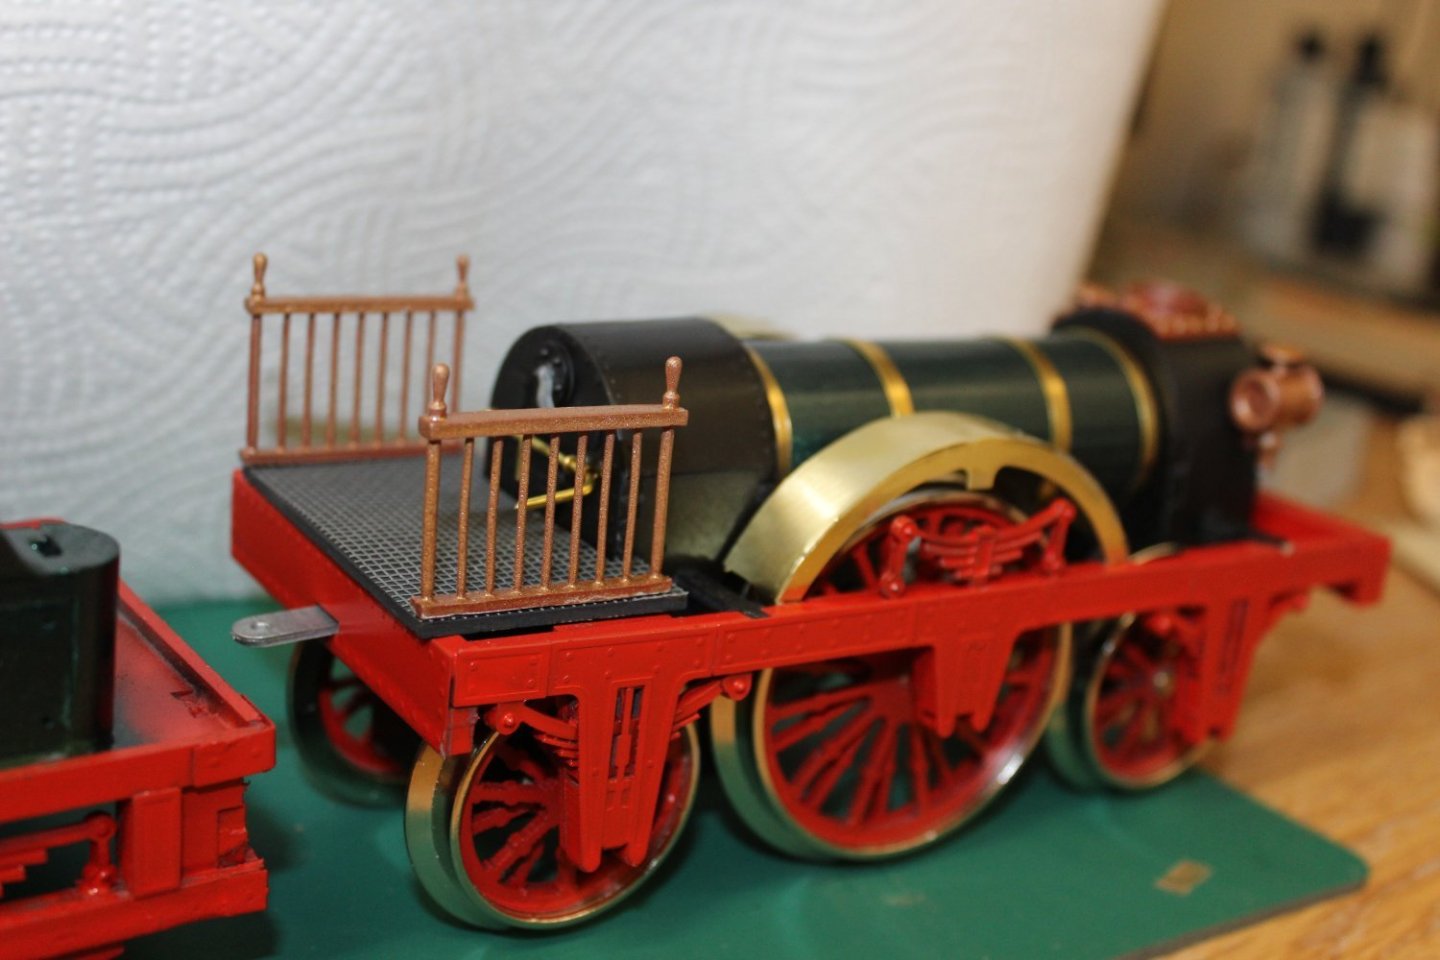
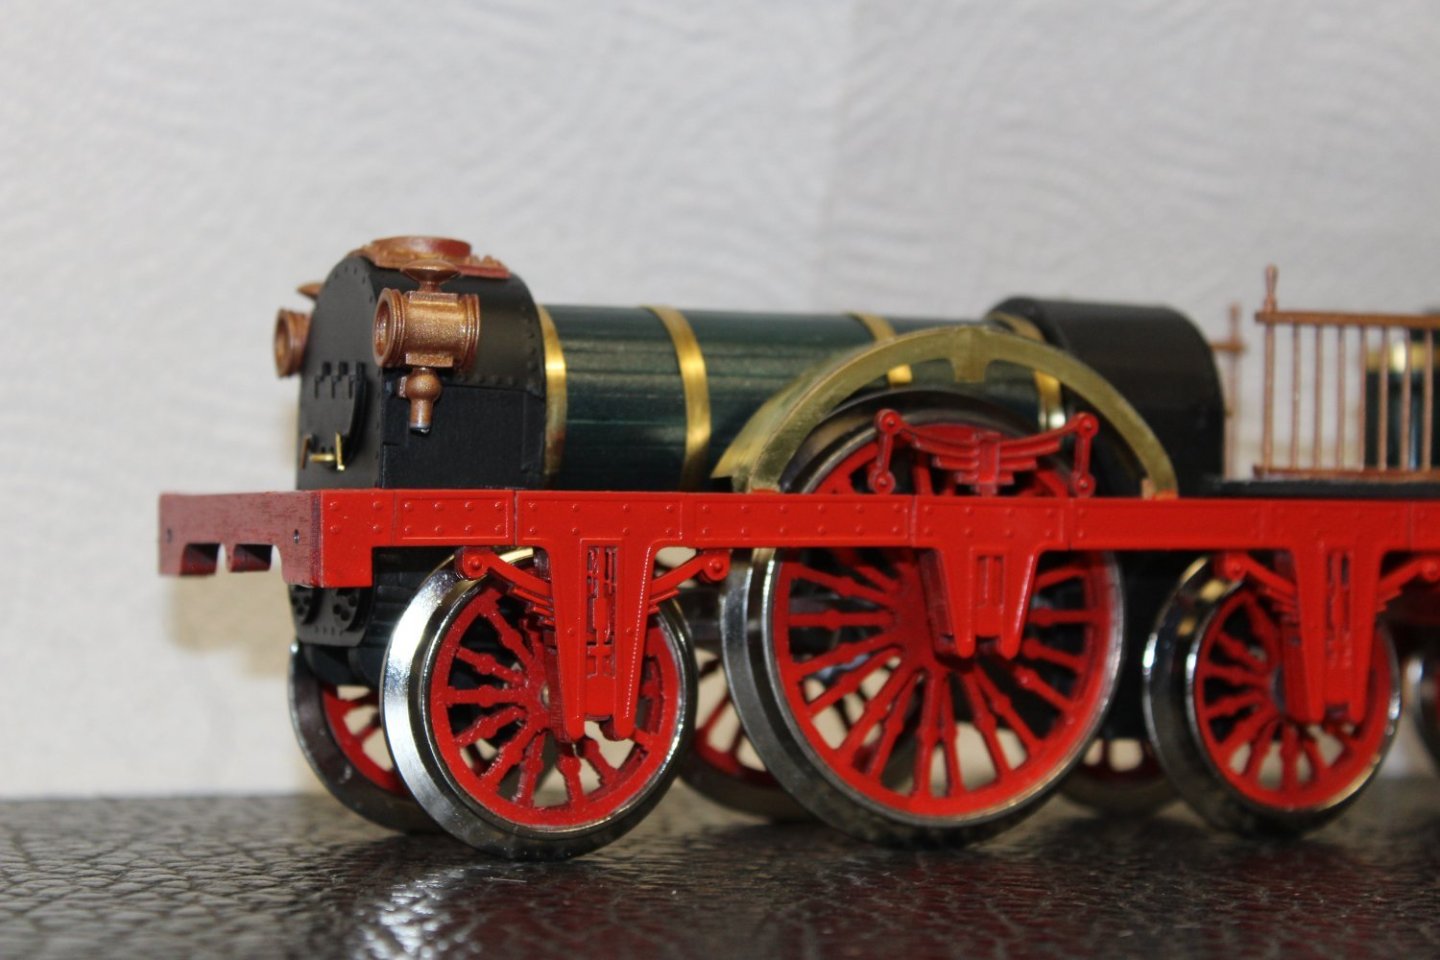
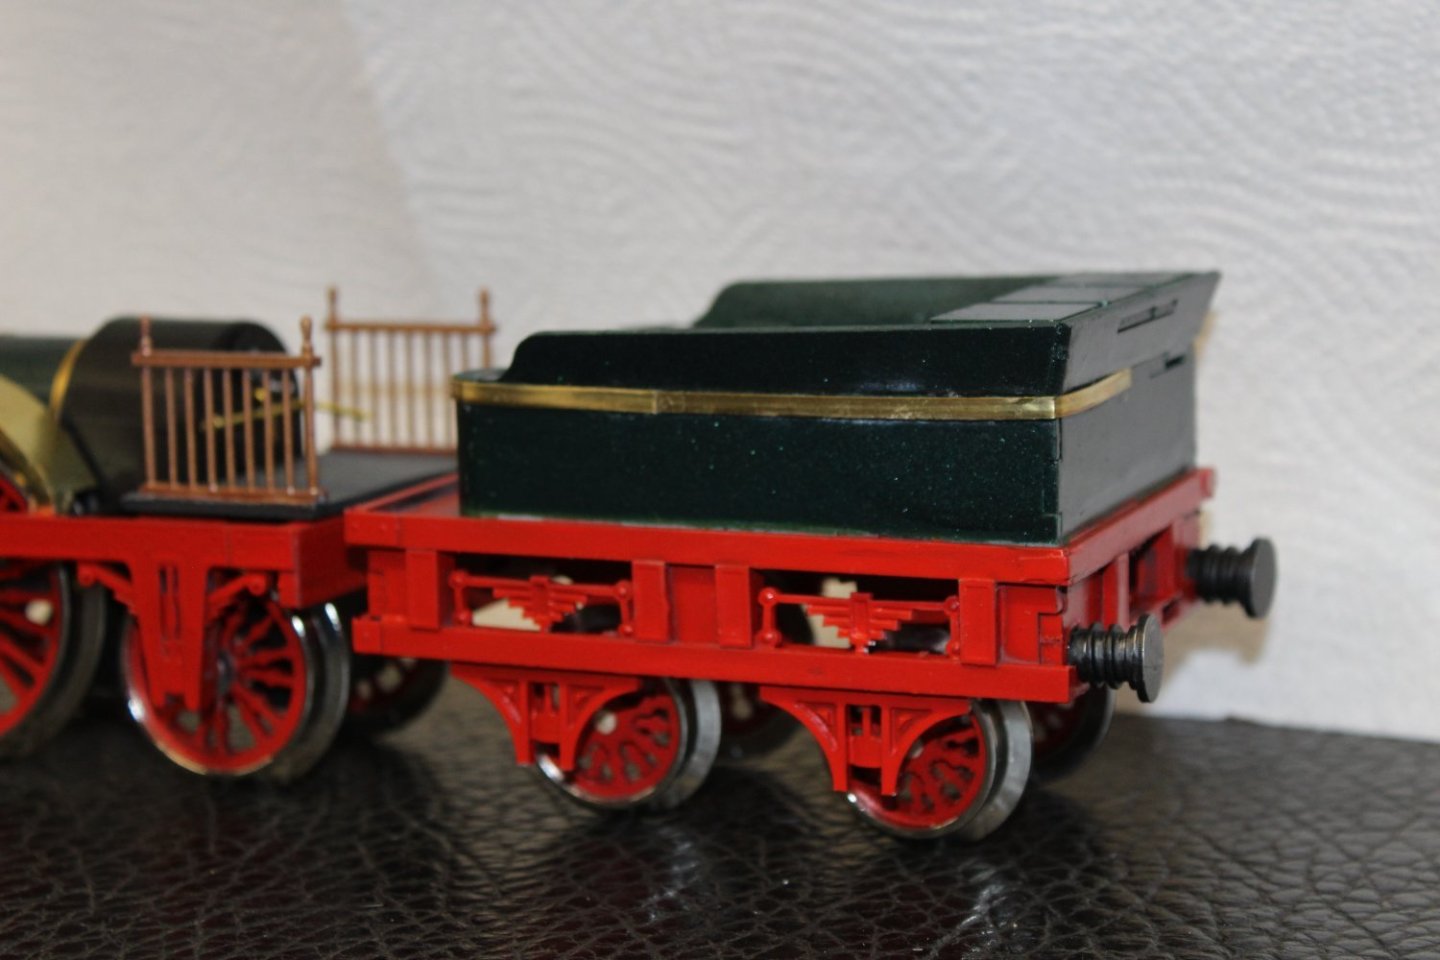
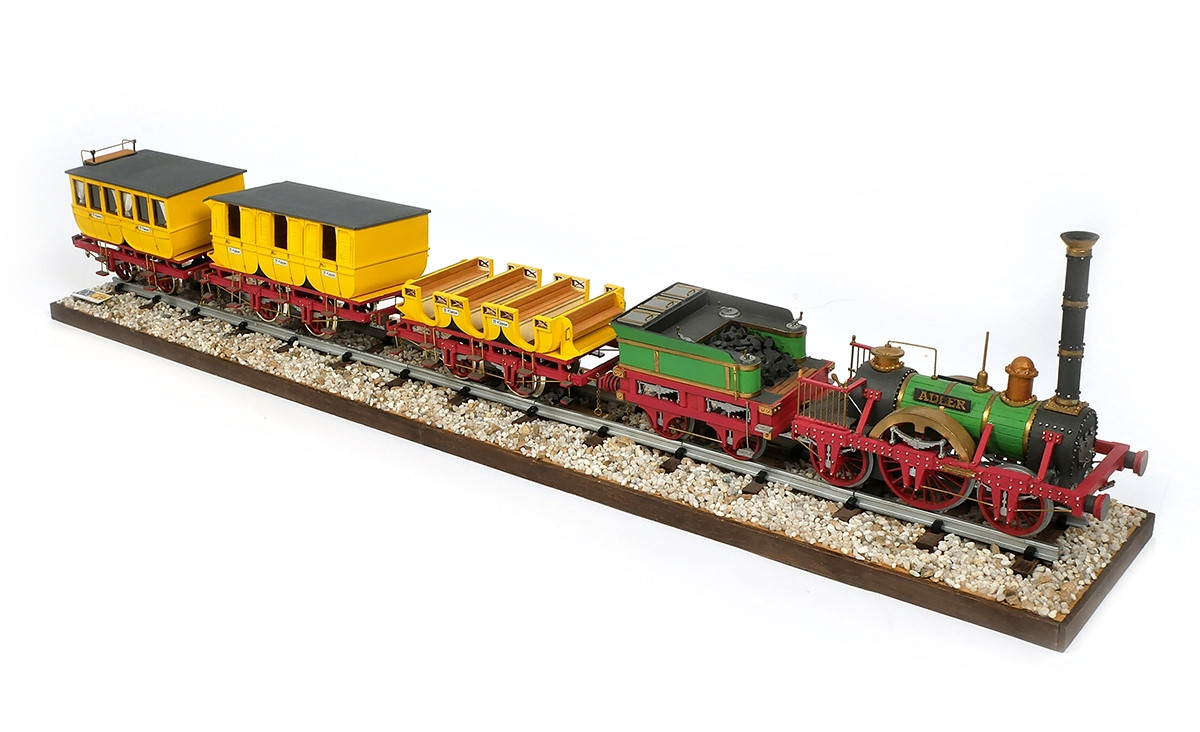
good evening everyone thank you for comments add likes well the desire to do a non ship quick build has been done, and for now the build is complete, i will come back to her one day and add the extra carriages, but this is what i wanted to do for now vajello black primer rattle cans Halfords Red Primer VW Mars Red No.2 Rover British Racing Green Metallic Halfords Ford Arizona Gold


- 26 replies
-
- 16
-
-
-
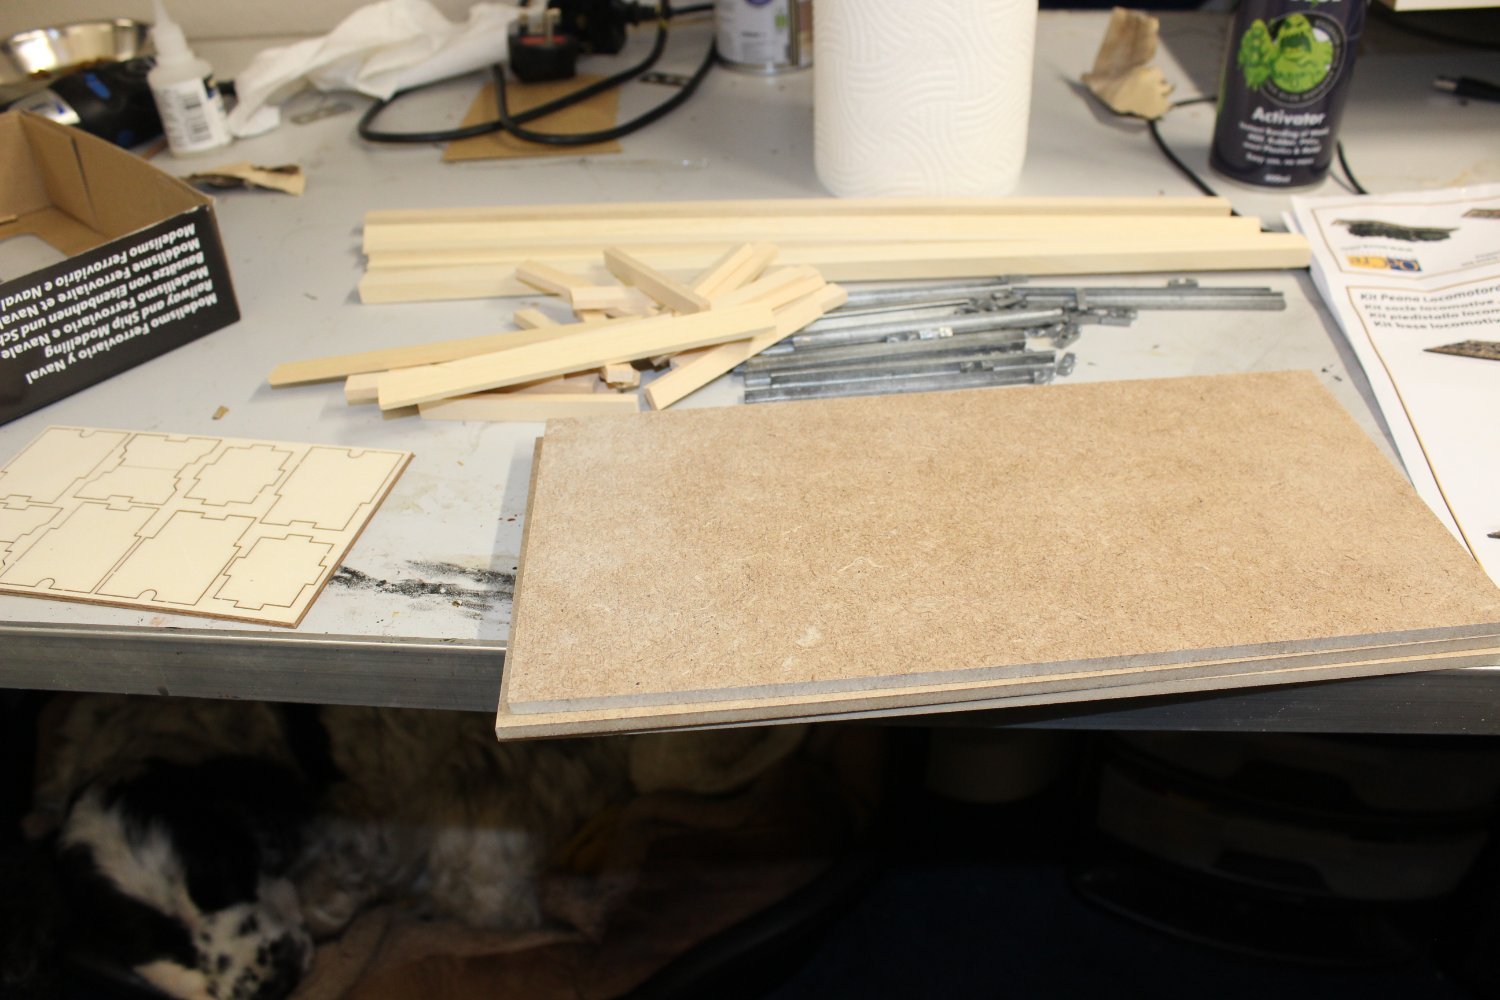
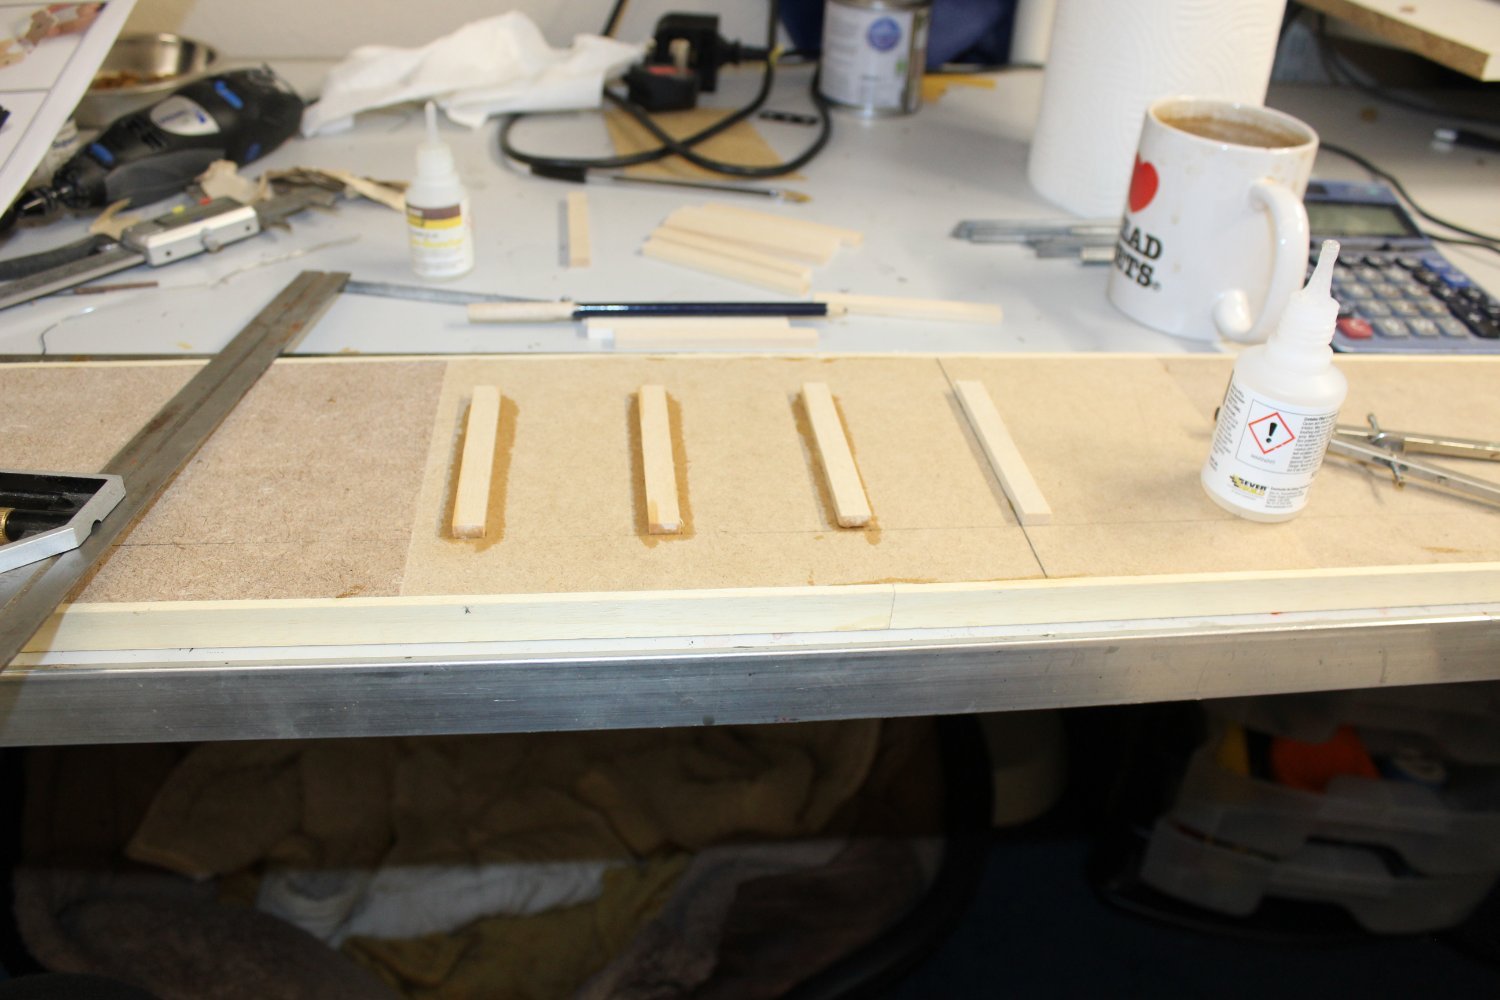
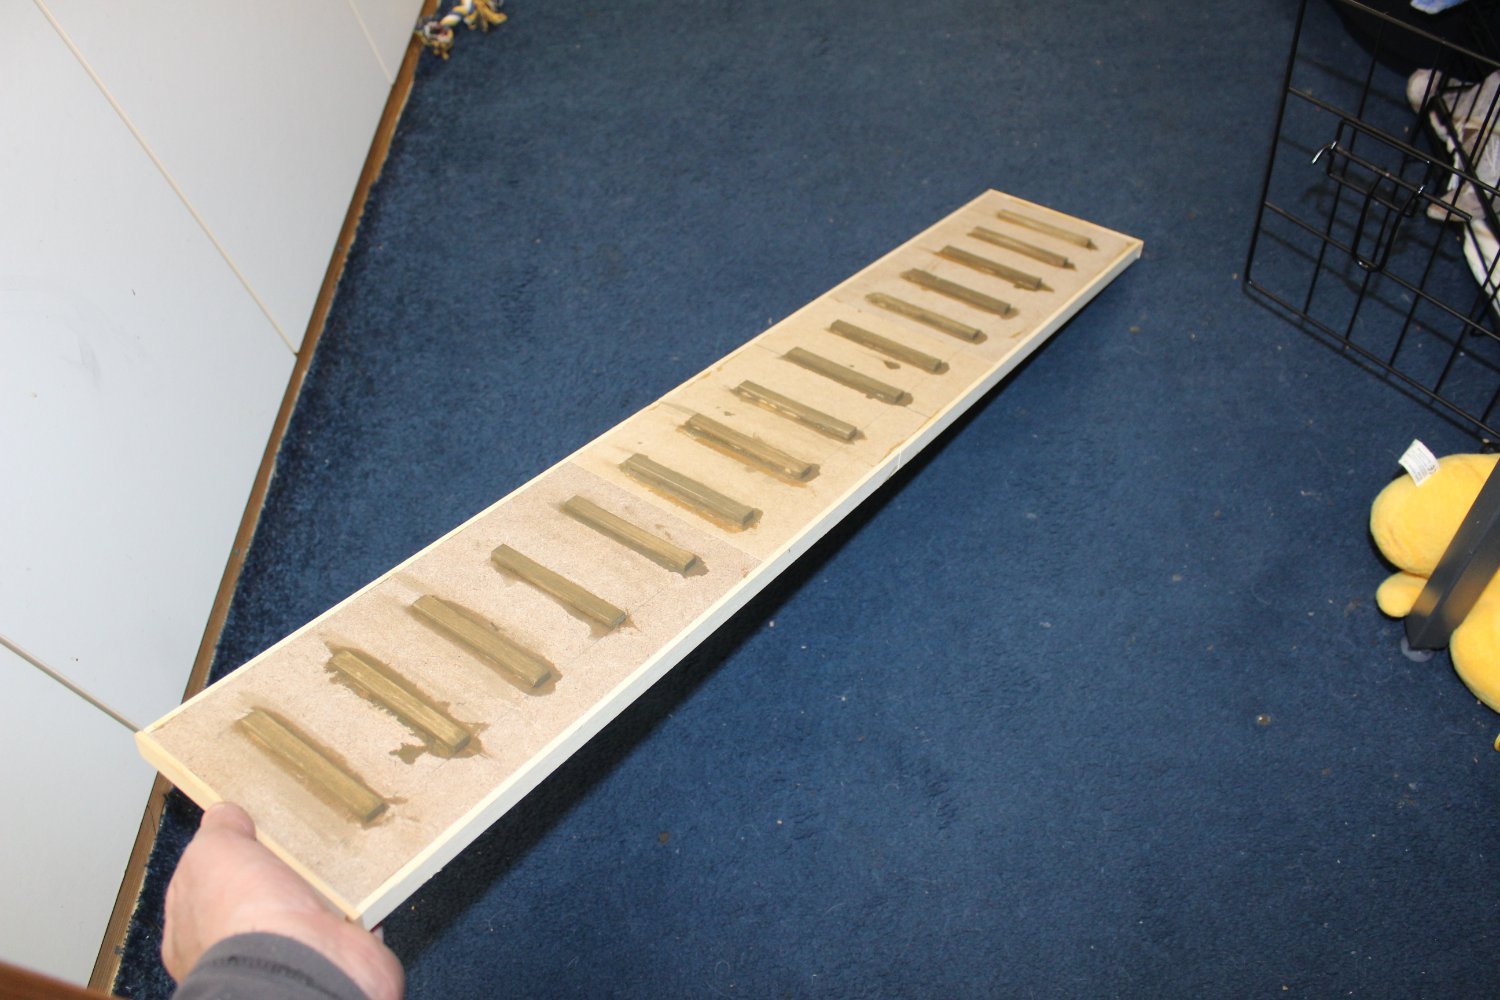
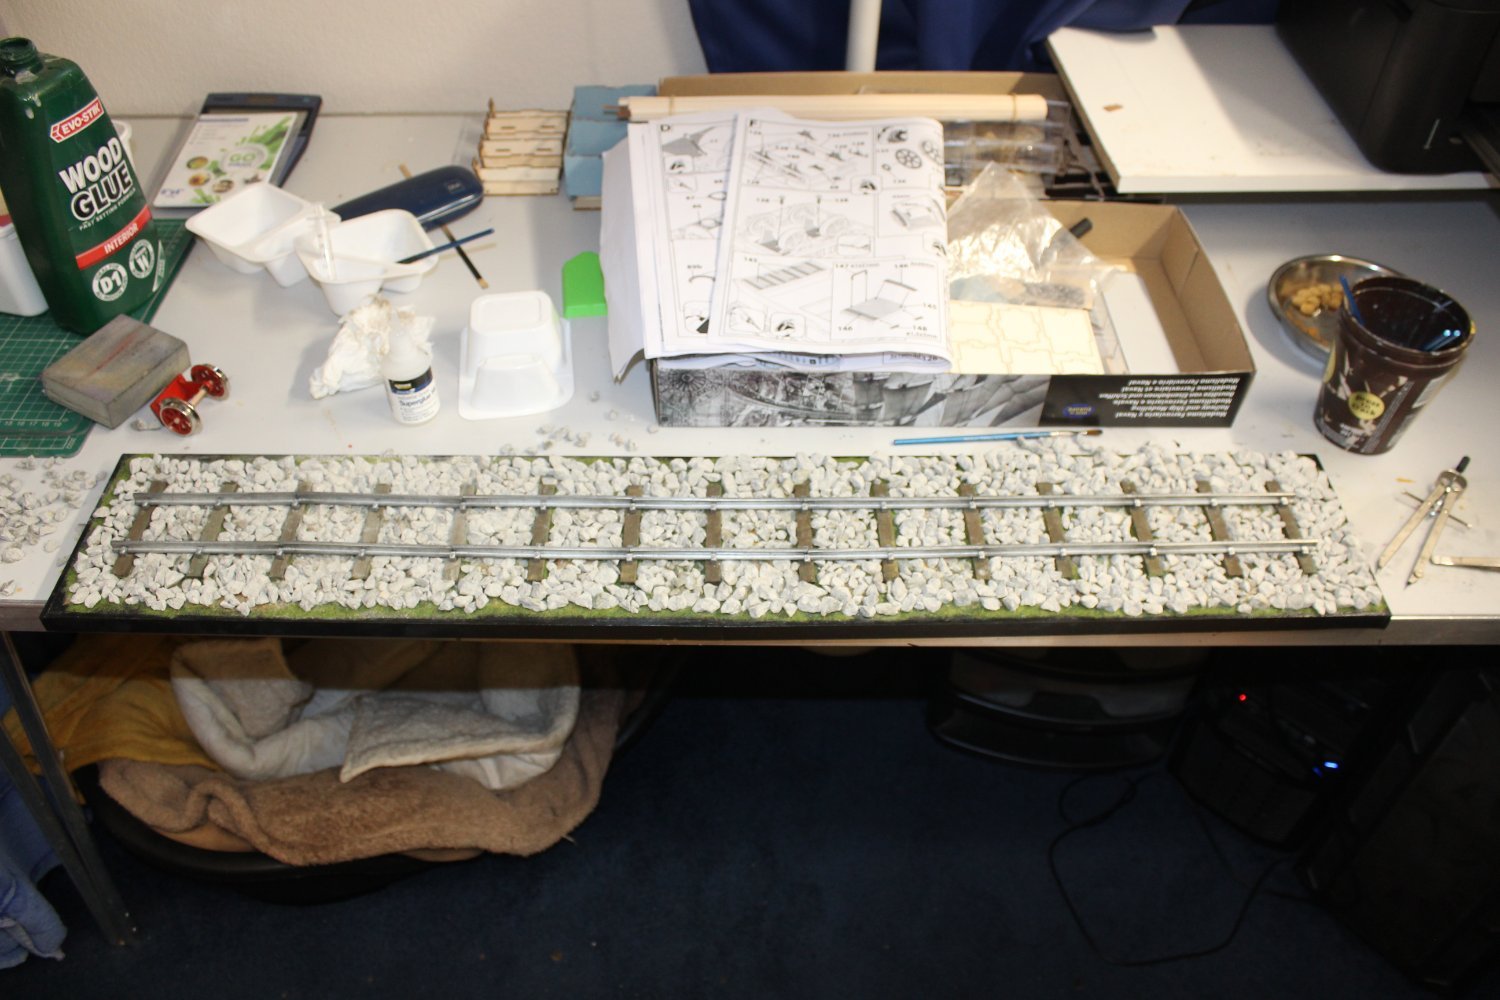
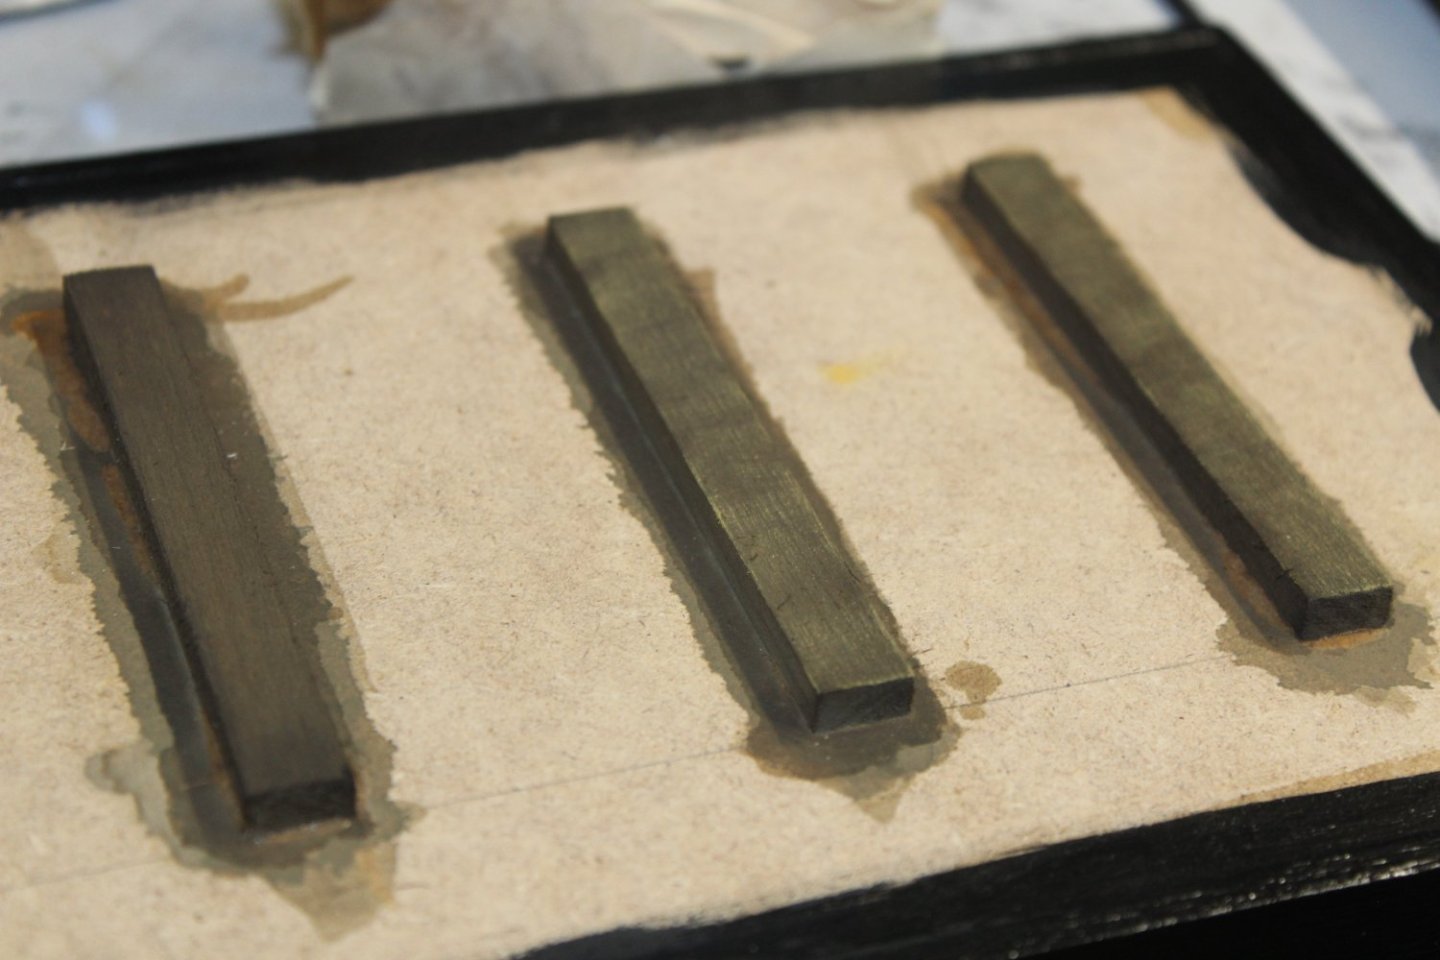
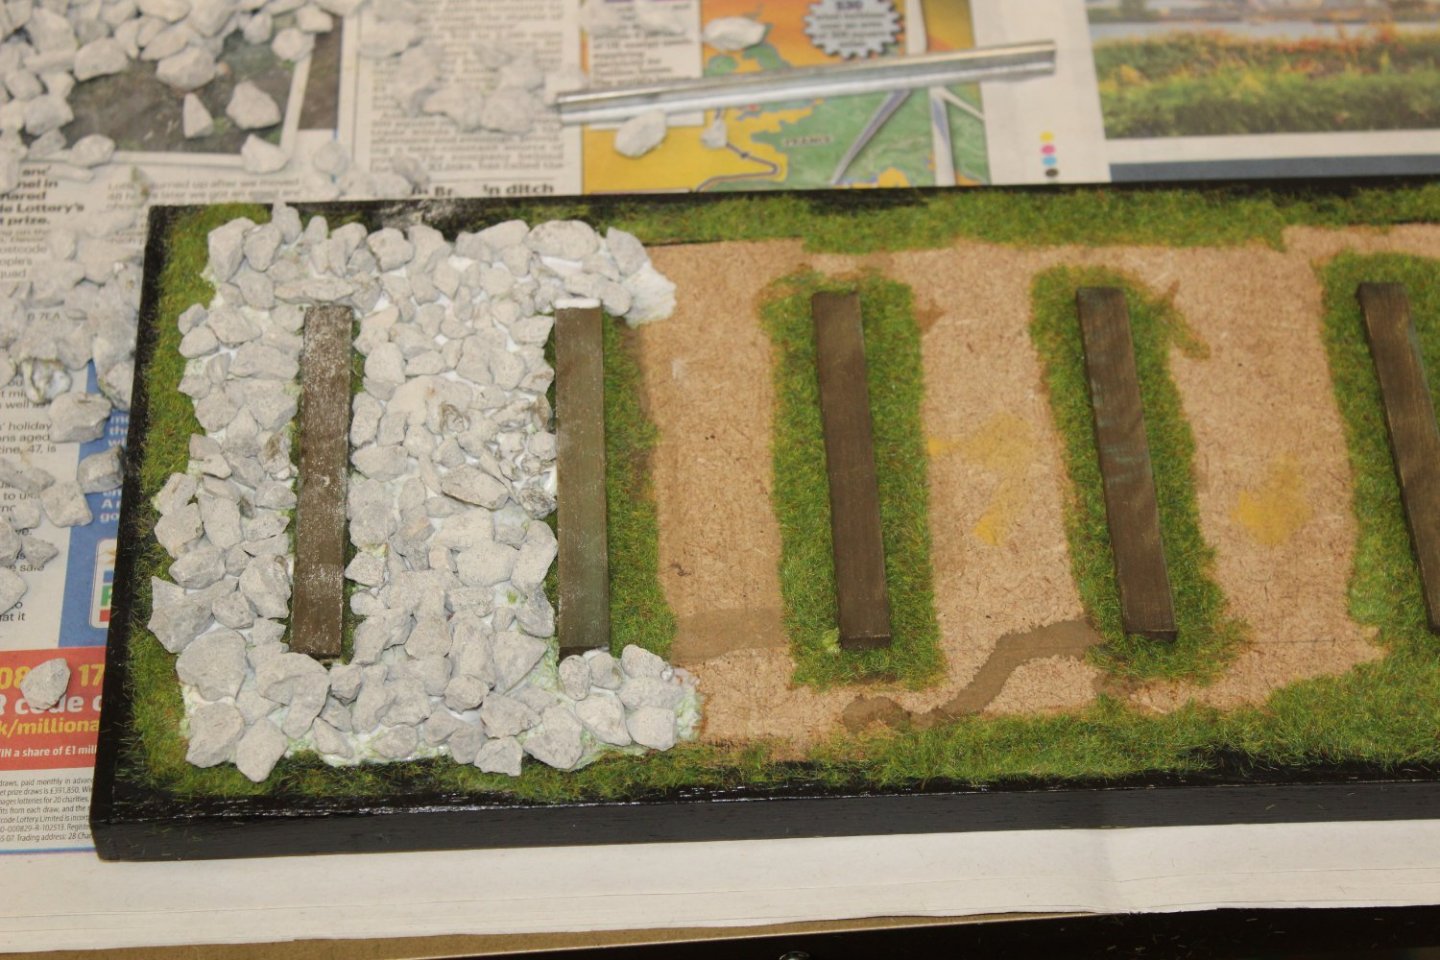
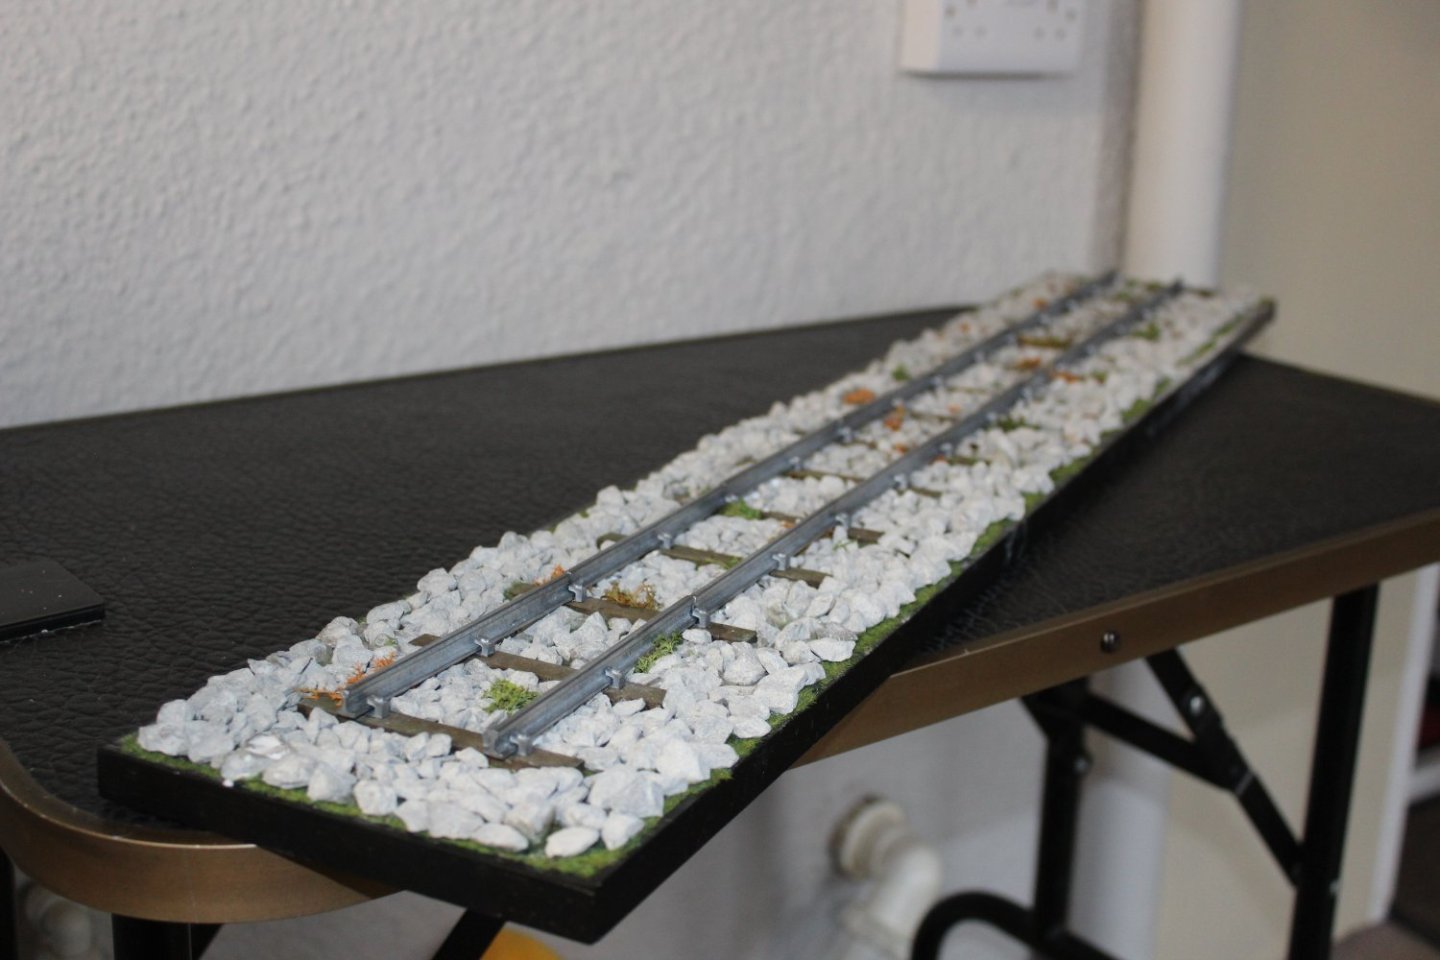
good afternoon my fix off wanting to do something different is already starting to go away, but i need to finish this project from fleabay i obtained the diorama board, the full price is over the top, and contains boards, rails, rail fasteners, sleepers and lots of over sized gravel, i bartered and got a 50% reduction, which is what the true price should be


- 26 replies
-
- 17
-
-
-
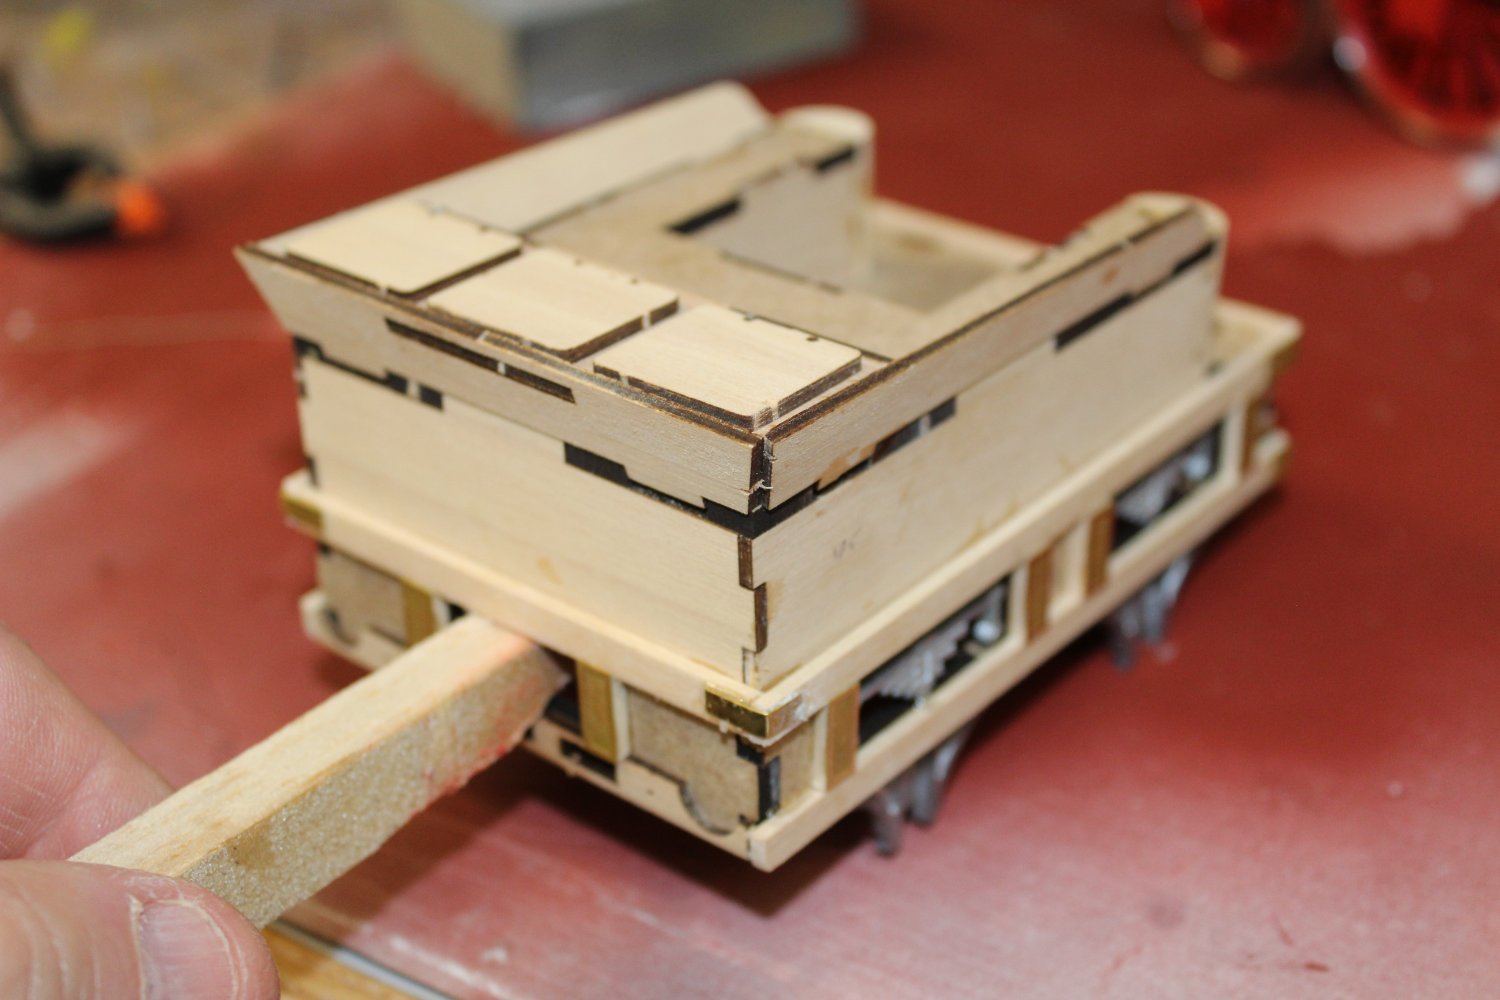
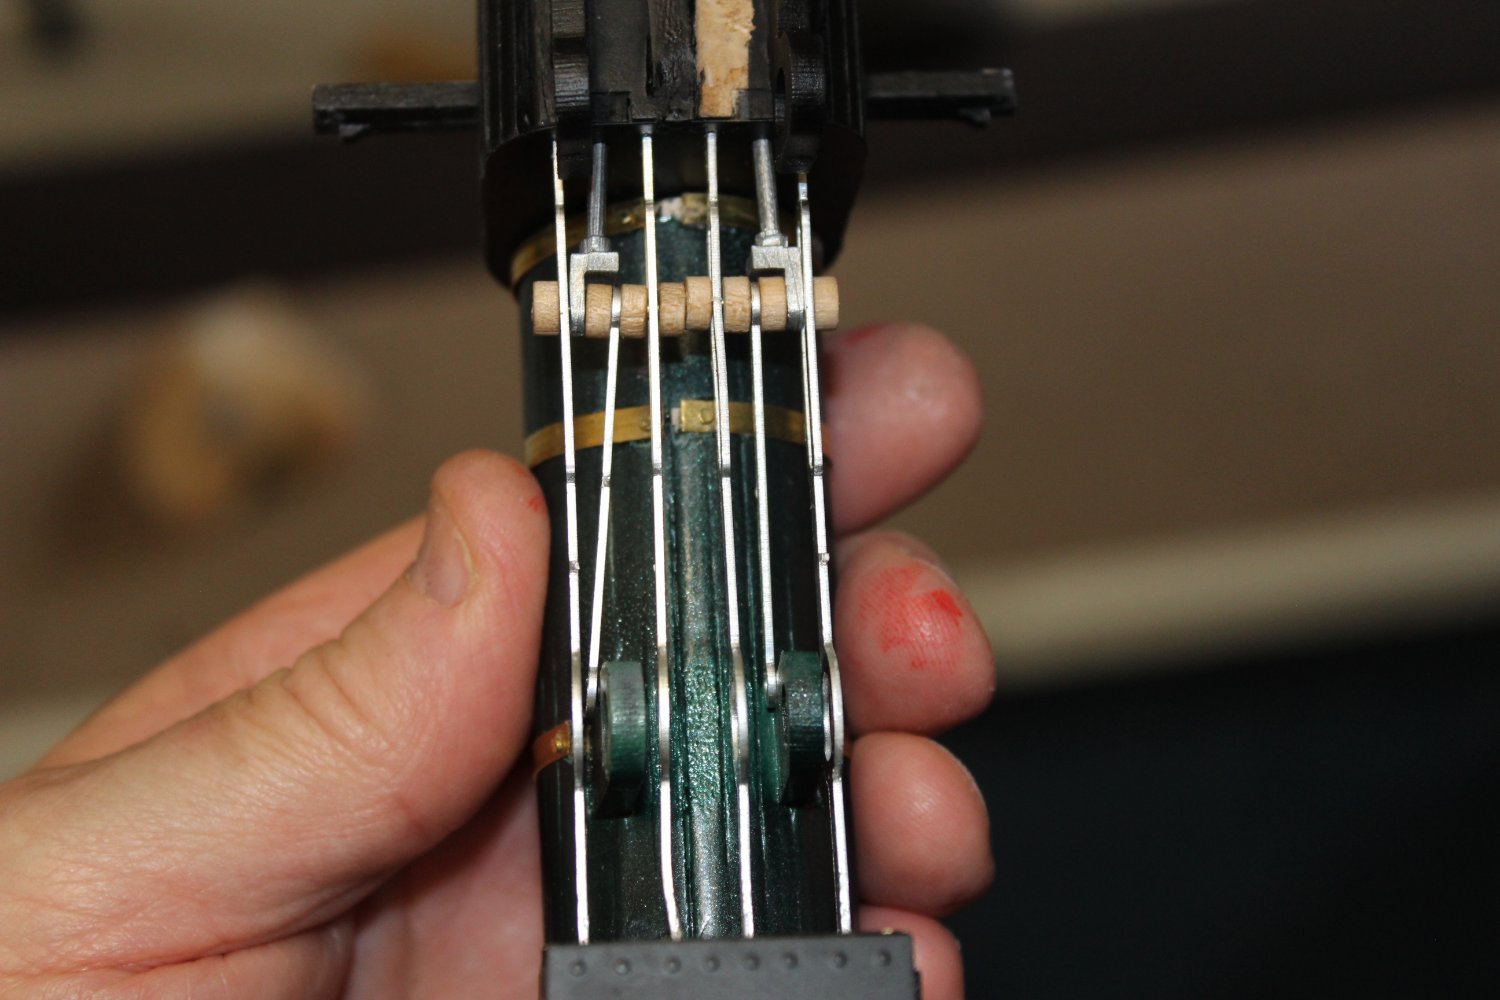
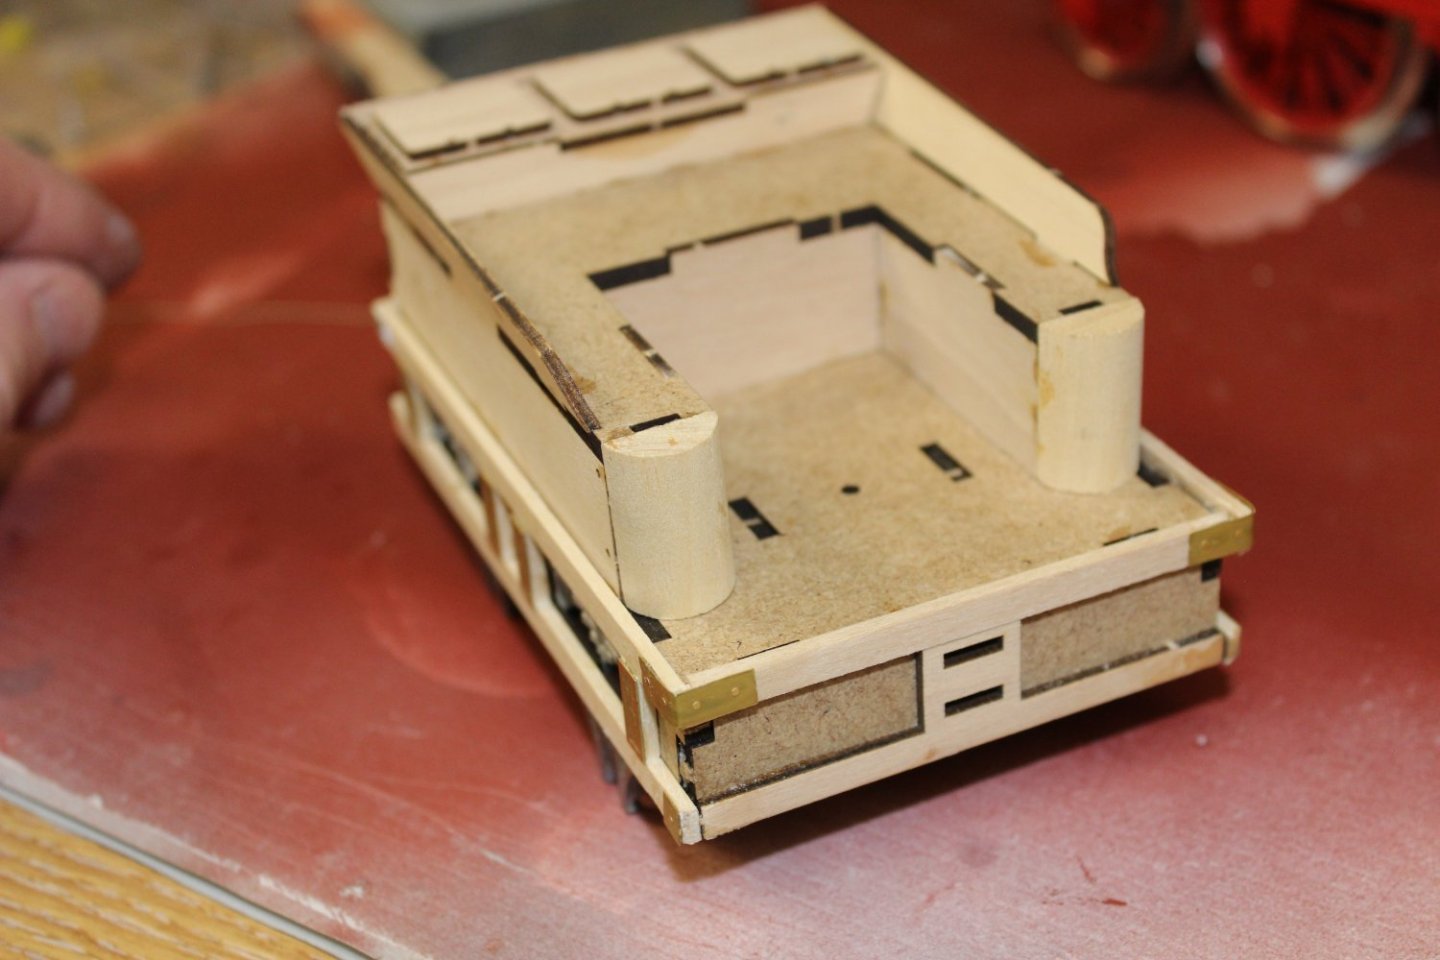
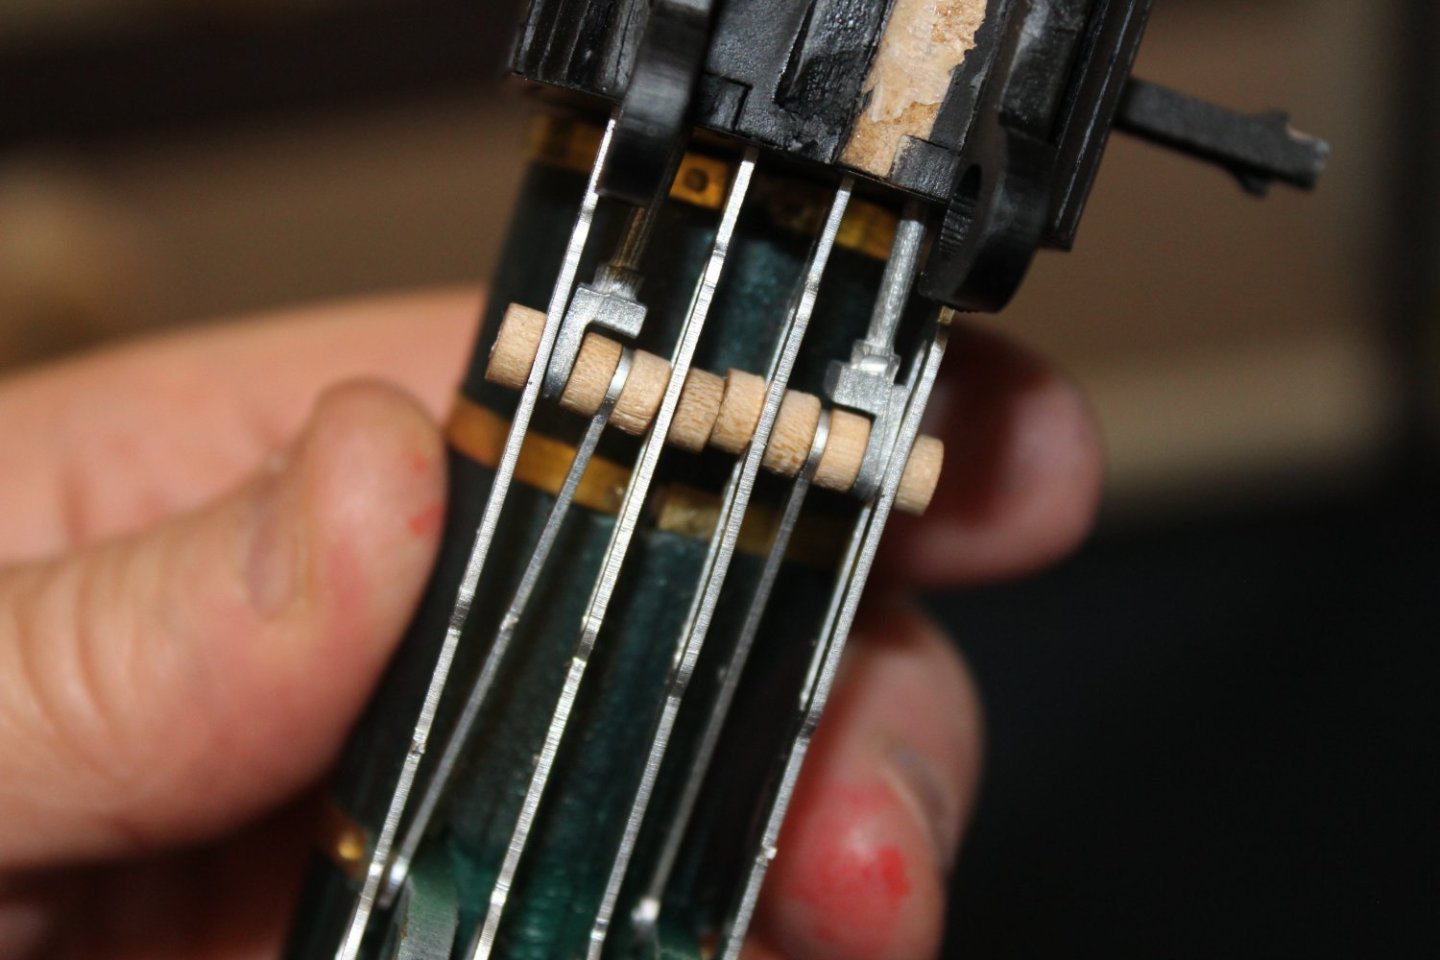
good evening everyone day 7 struggling tonight, in trying to be clever and putting brass strips onto metallic paint, and its just not working, the C/A is staining the paint, so i may have to rethink it, but it looks like im going to have to strip the tender down and redo it


- 26 replies
-
- 18
-
-
Looking for similar kits that resemble these ships
Kevin replied to challenger86's topic in Wood ship model kits
i was/am/maybe/ doing their SD14 SD 14 by Kevin - Marcle Models - 1/70 - Full build March 2022 - Page 7 - - Kit build logs for subjects built from 1901 - Present Day - Model Ship World™ -
Looking for similar kits that resemble these ships
Kevin replied to challenger86's topic in Wood ship model kits
marcle models has a large selection in card, that might help towards research or transferring to another medium Marcle Models Card Model KIt Catalogue - Ships, Aircraft, Military Vehicles, Transport, Architecture, Birds, Automata, Figures and Modelling Tools and Accessories. -
Happy New year Everyone
-
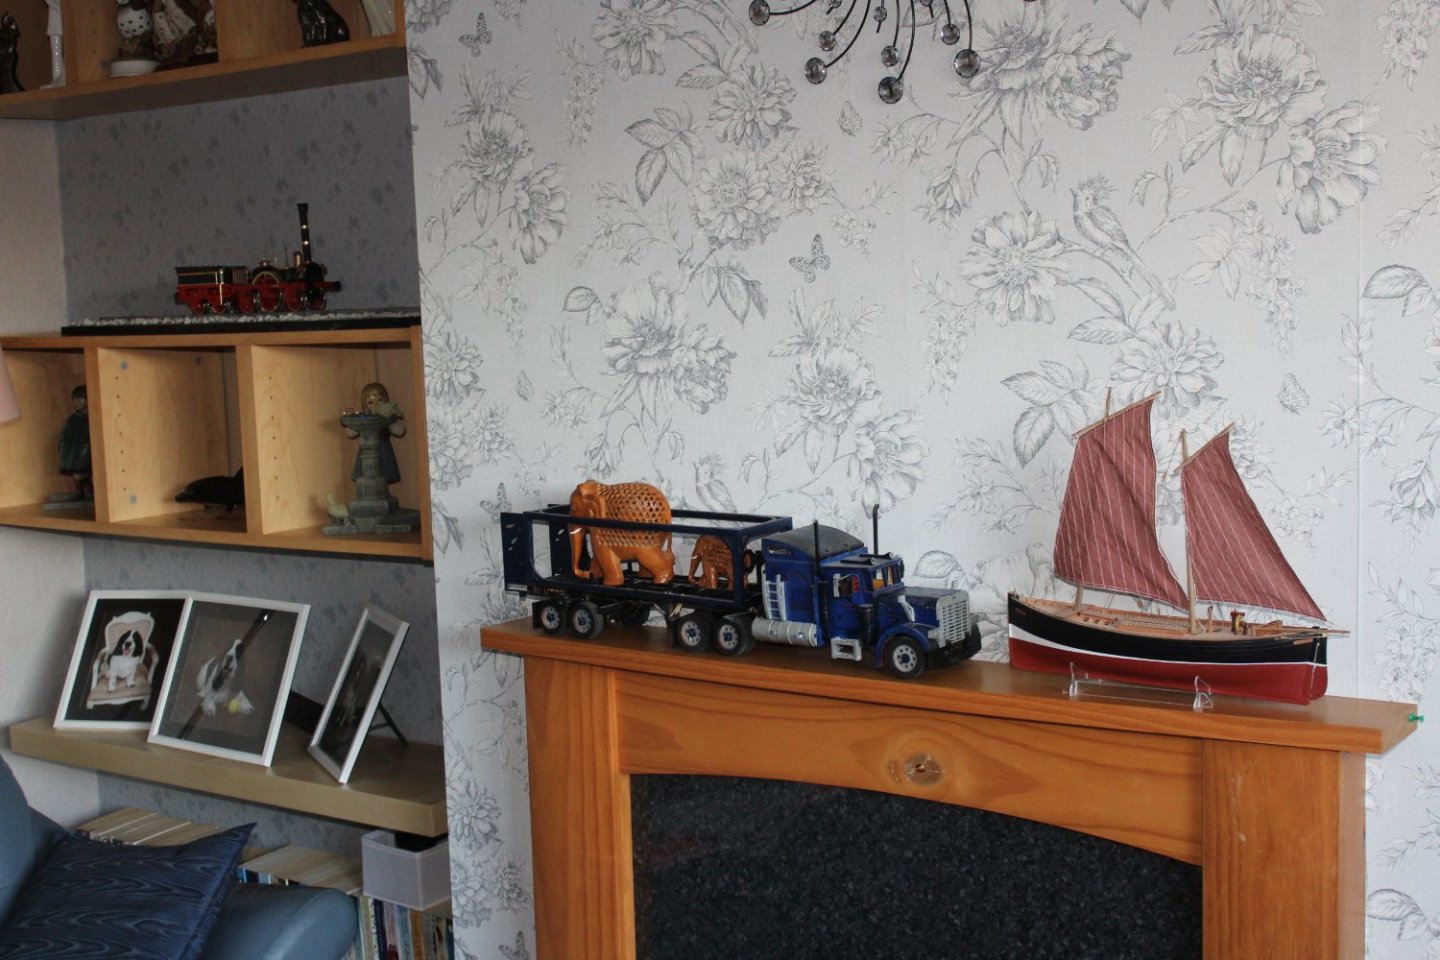
Happy New Year OC to you the your wife, More of the train tomorrow
-
Happy new year to you as well there is no track contained within the kit, but Occre go a diorama setting display board, but pricey, i have just made a fleabay offer on one and getting it for 1/2 the price, will allow me to put the 3 carriages on following the tender
- 26 replies
-
- 11
-
-
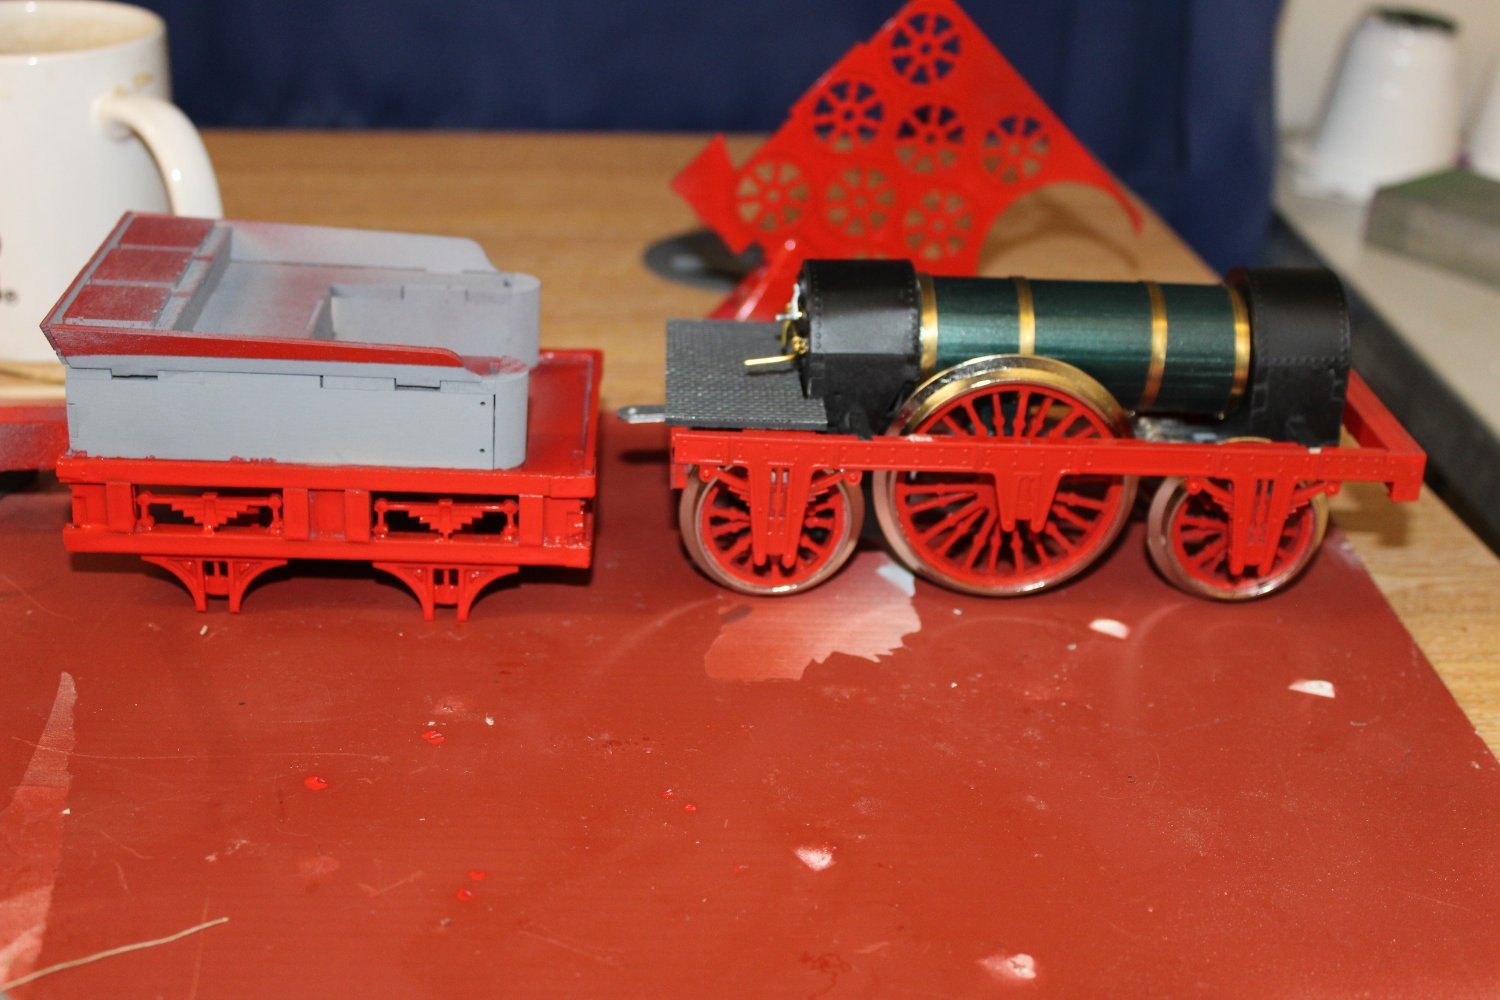
good evening everyone thank you for comments and likes day 5 tender not much to say about this build, fits together ok, and satisfy my need to do something different for a short period of time, looking forward to get back to indy now, hope to complete this in next couple of days rattle can grey primer tamiya XF-5 base coat, top coat will be the same as the boiler


- 26 replies
-
- 13
-
-
good evening everyone, thank you for comments and likes well i got to day 4 without any drama, unfortunately thats about as far as i got today


- 26 replies
-
- 15
-
-
sad to see this come to and end , stunning work
- 366 replies
-
- 3
-
-
- bellerophon
- victory models
- (and 2 more)
-
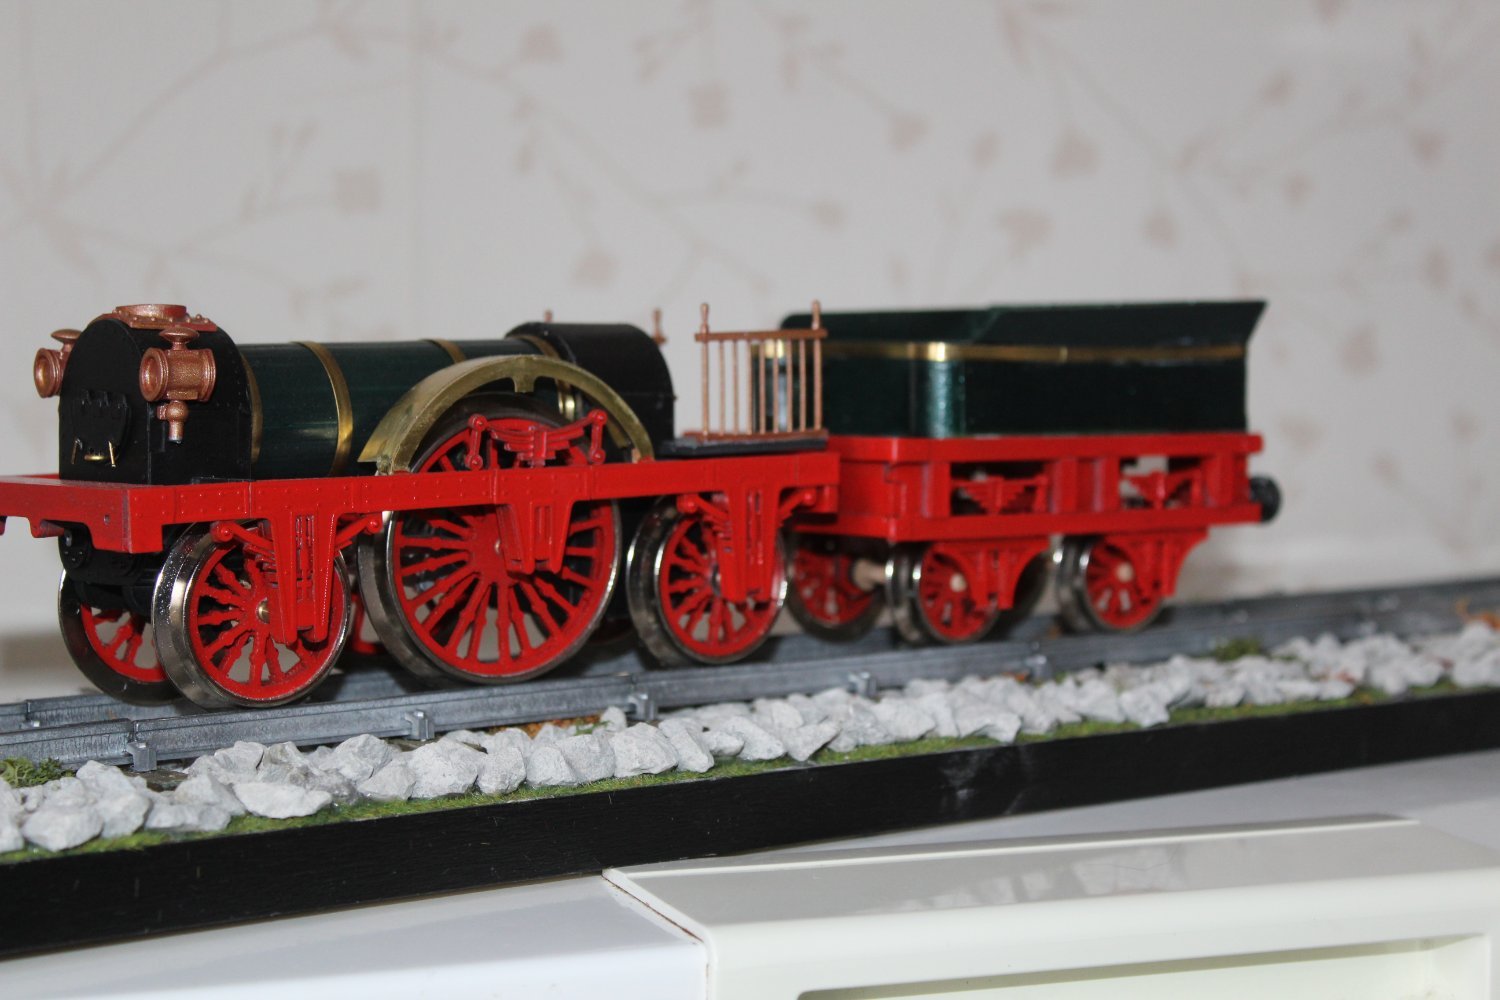
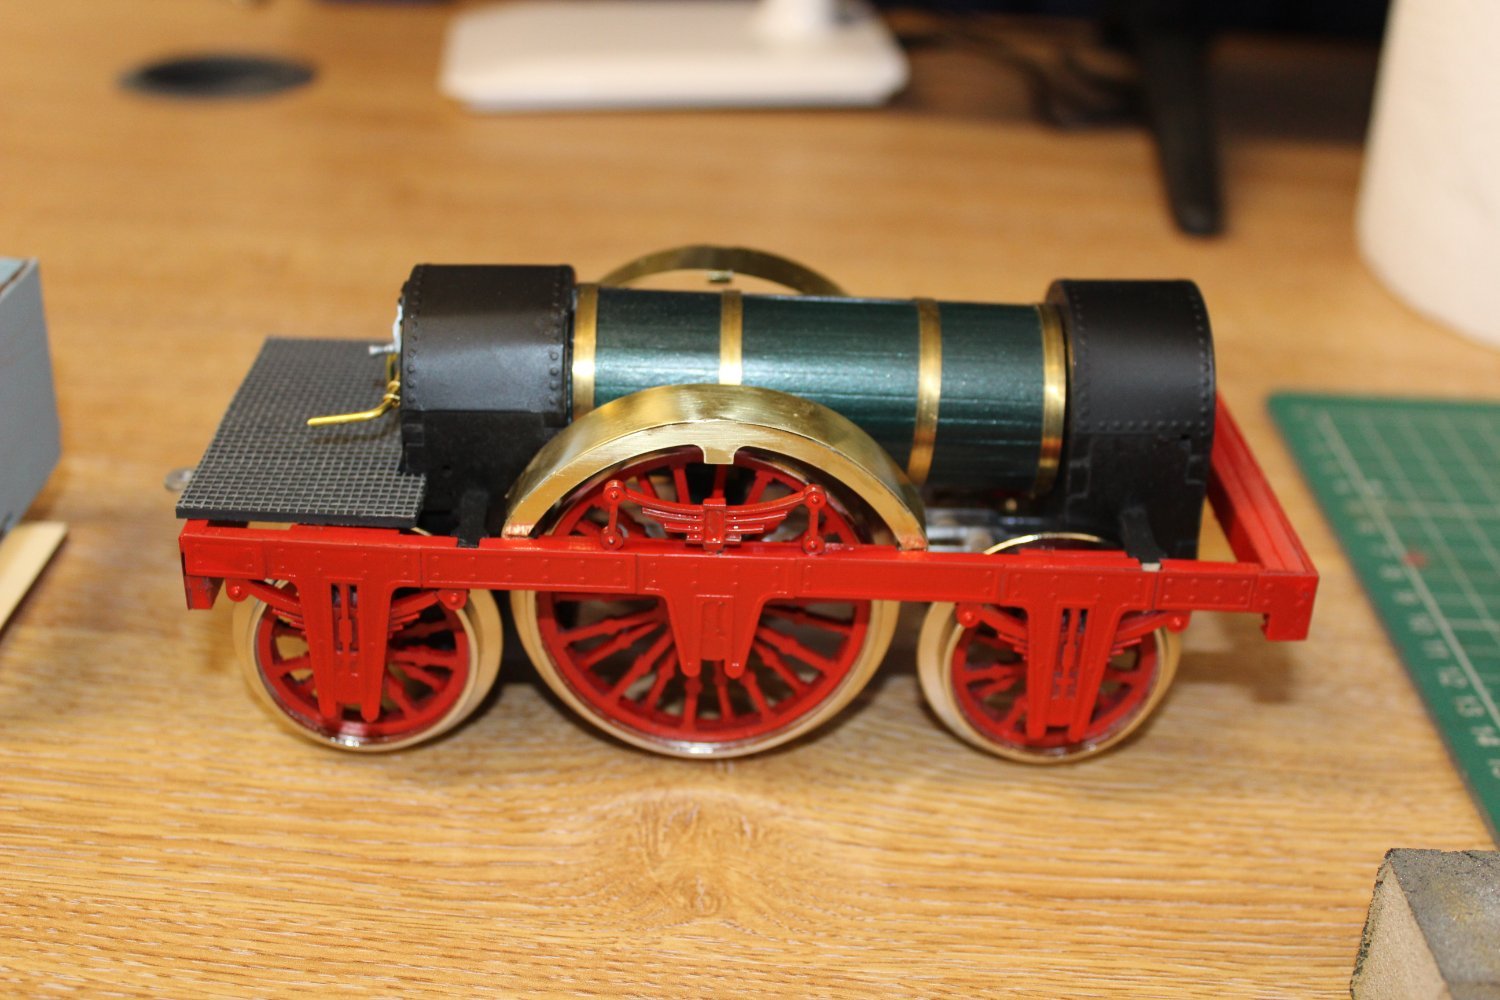
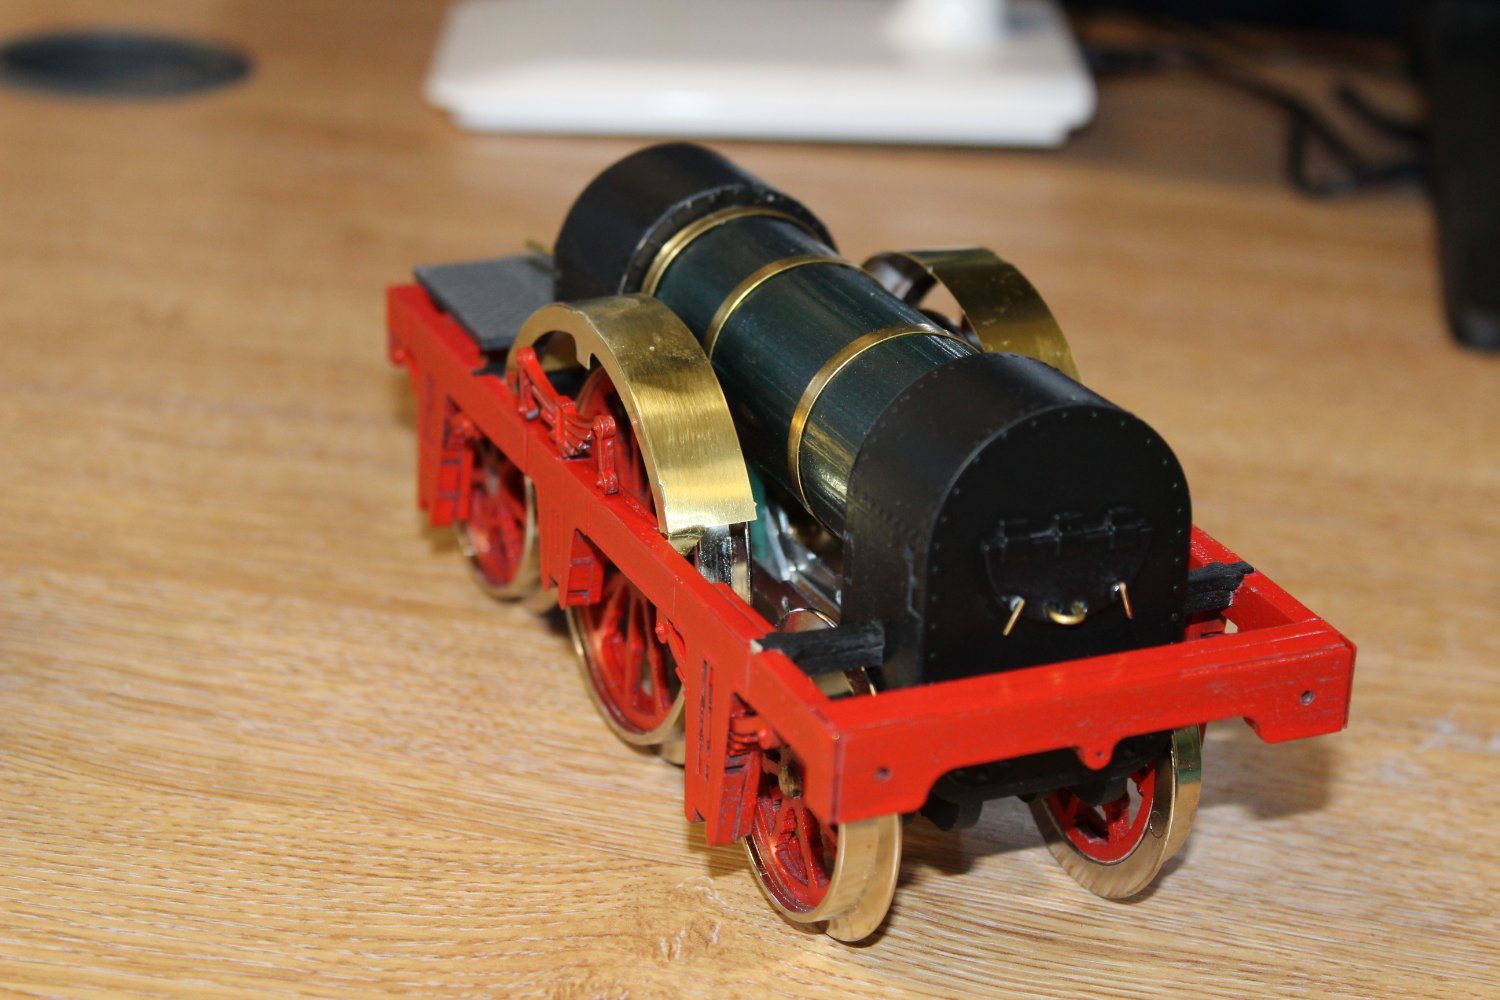
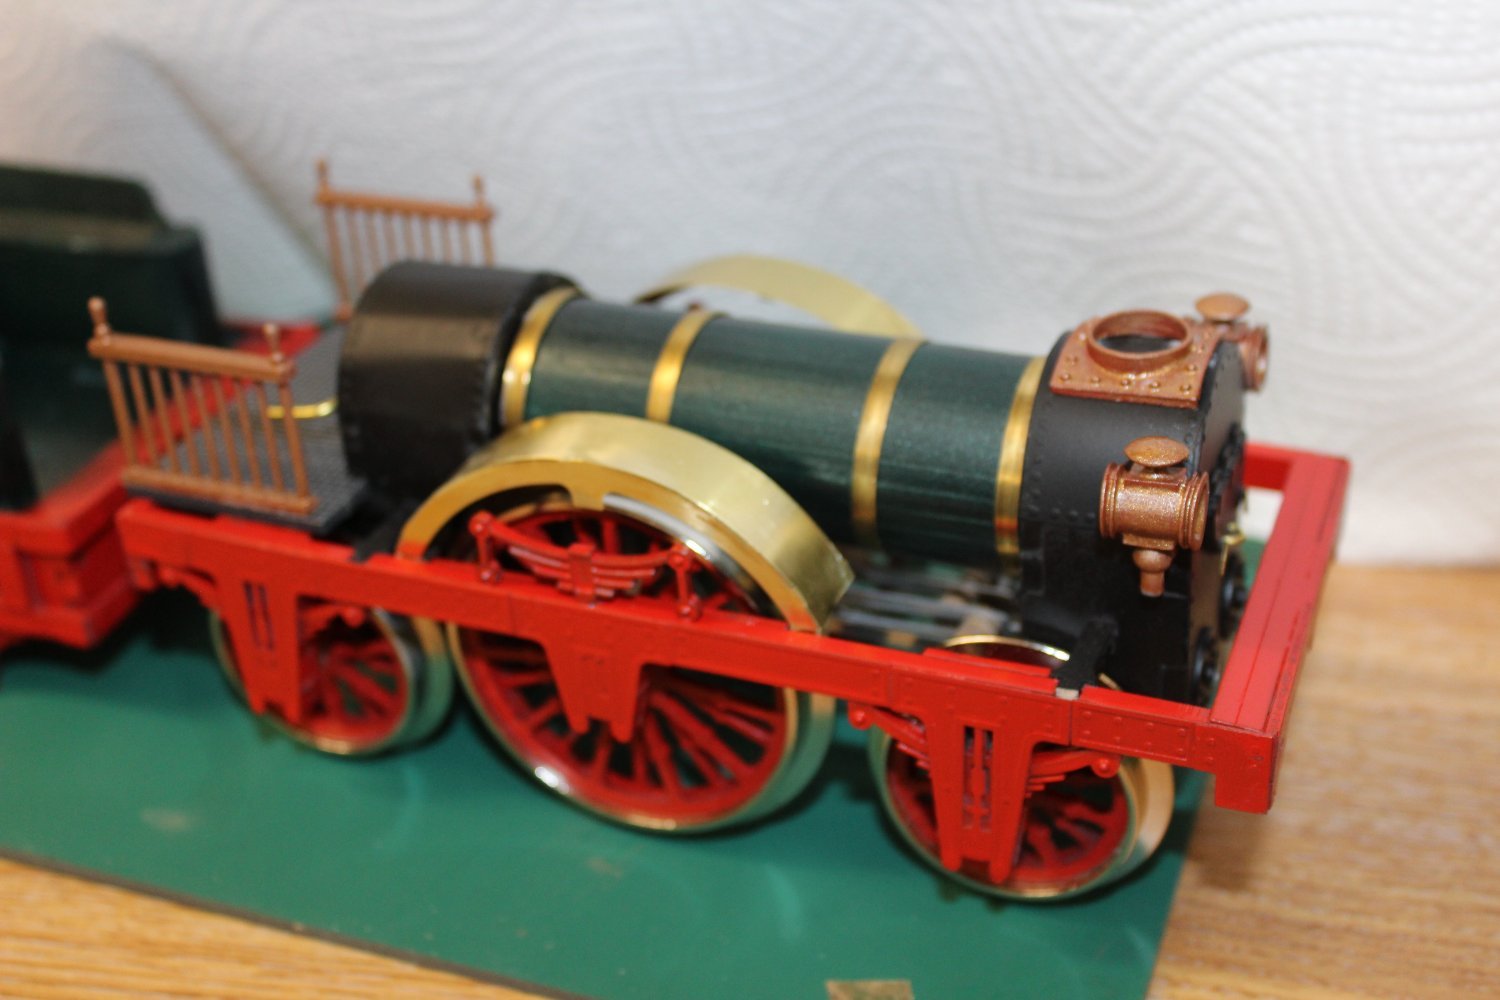
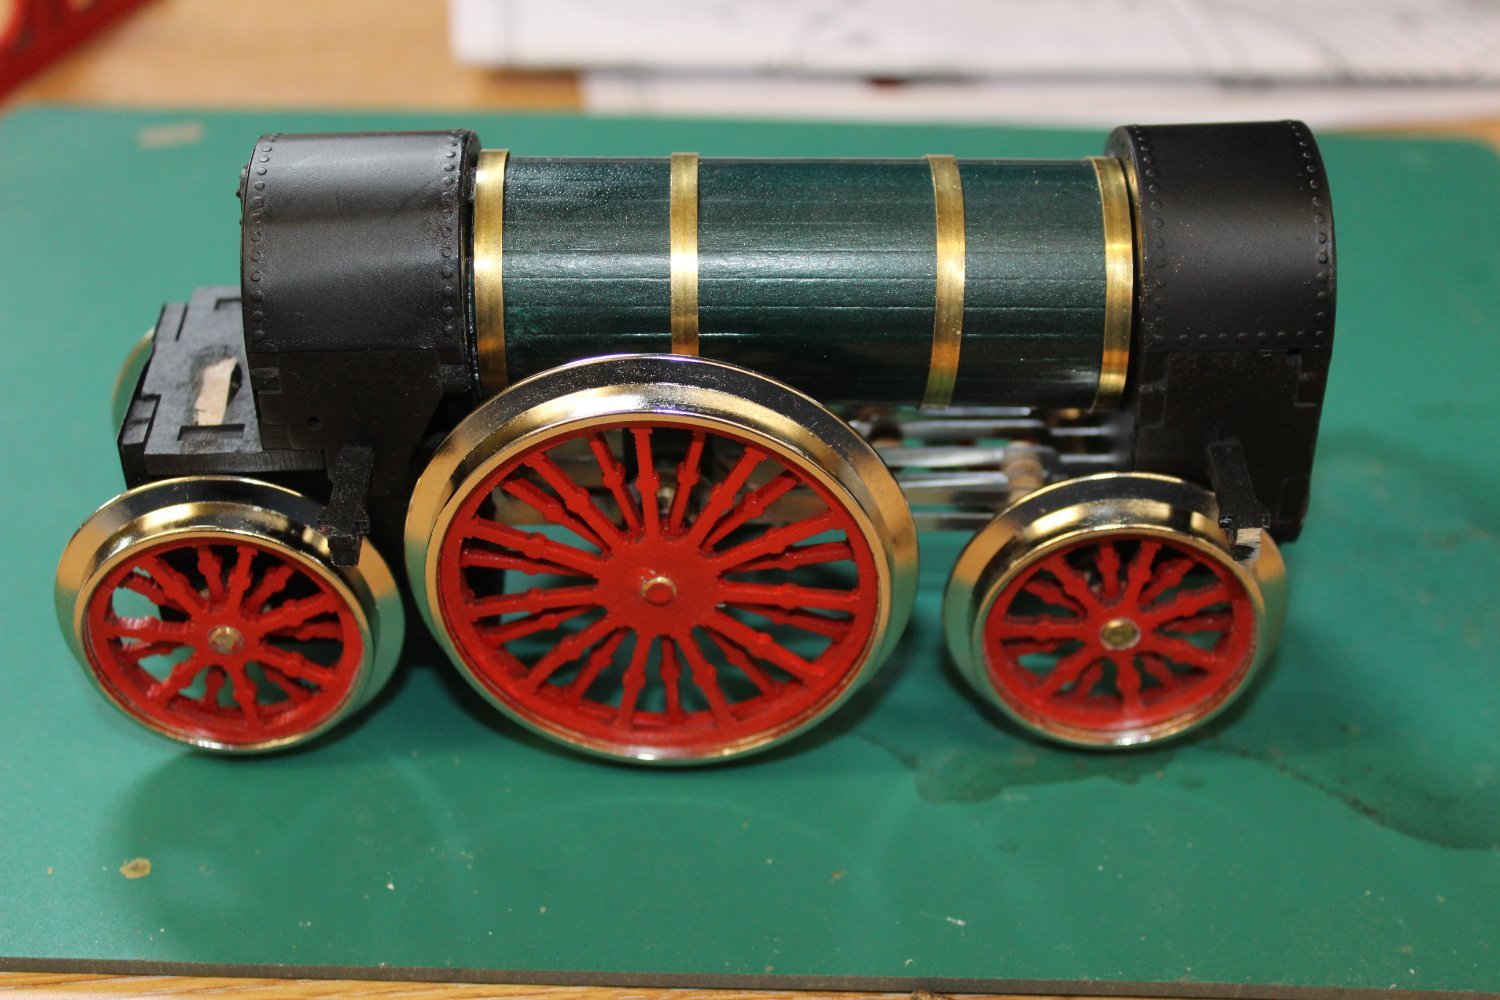
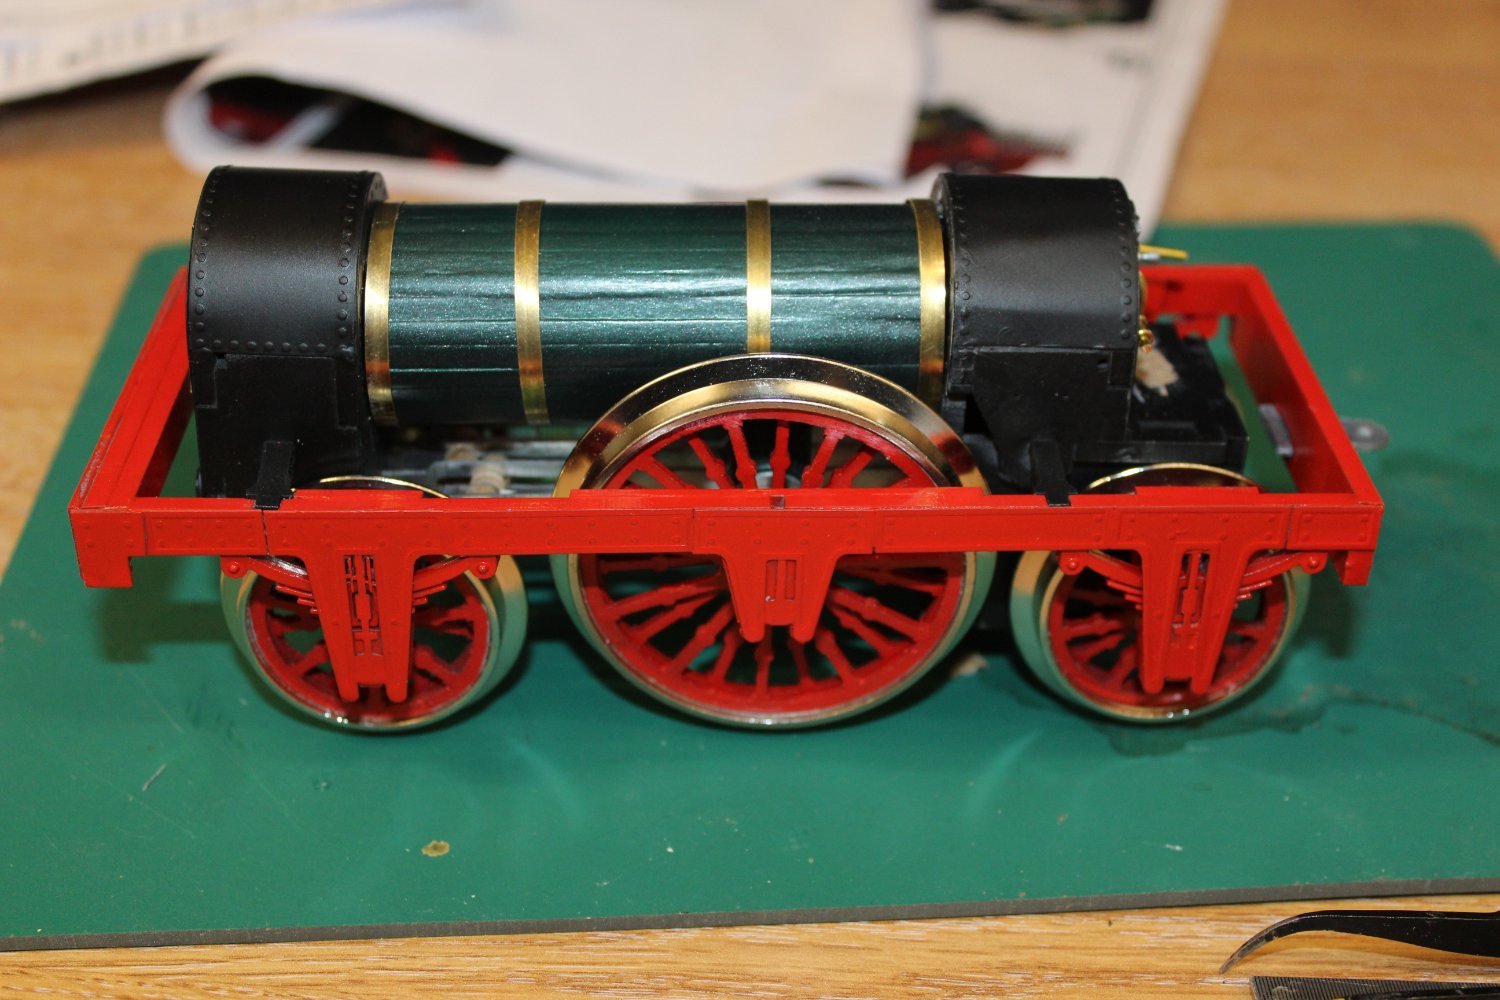
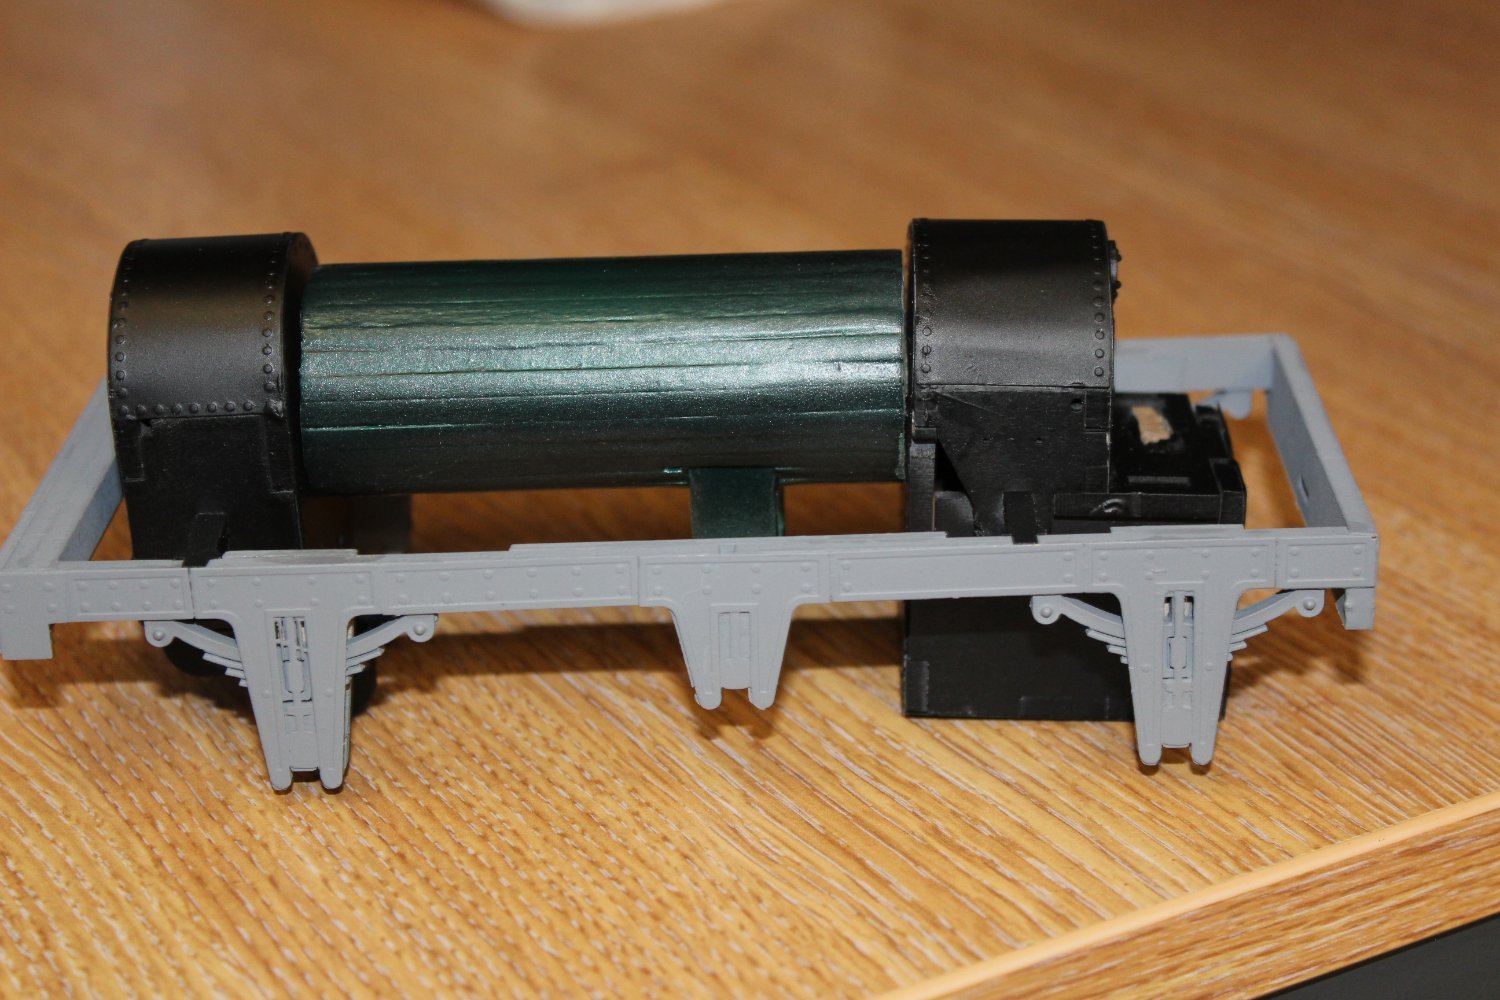
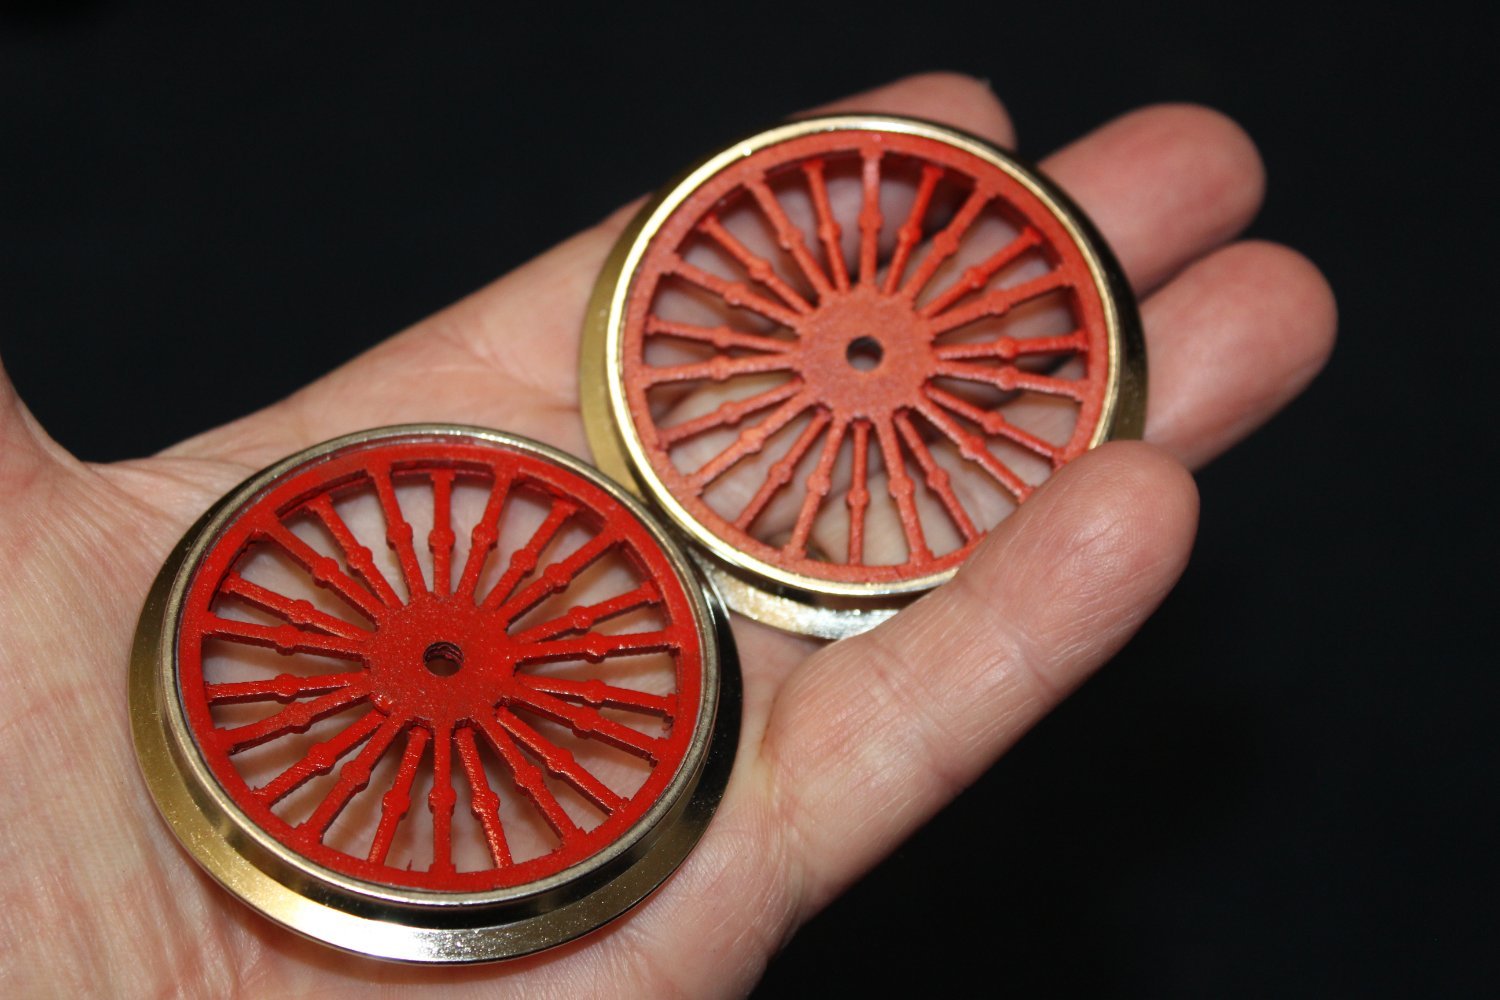
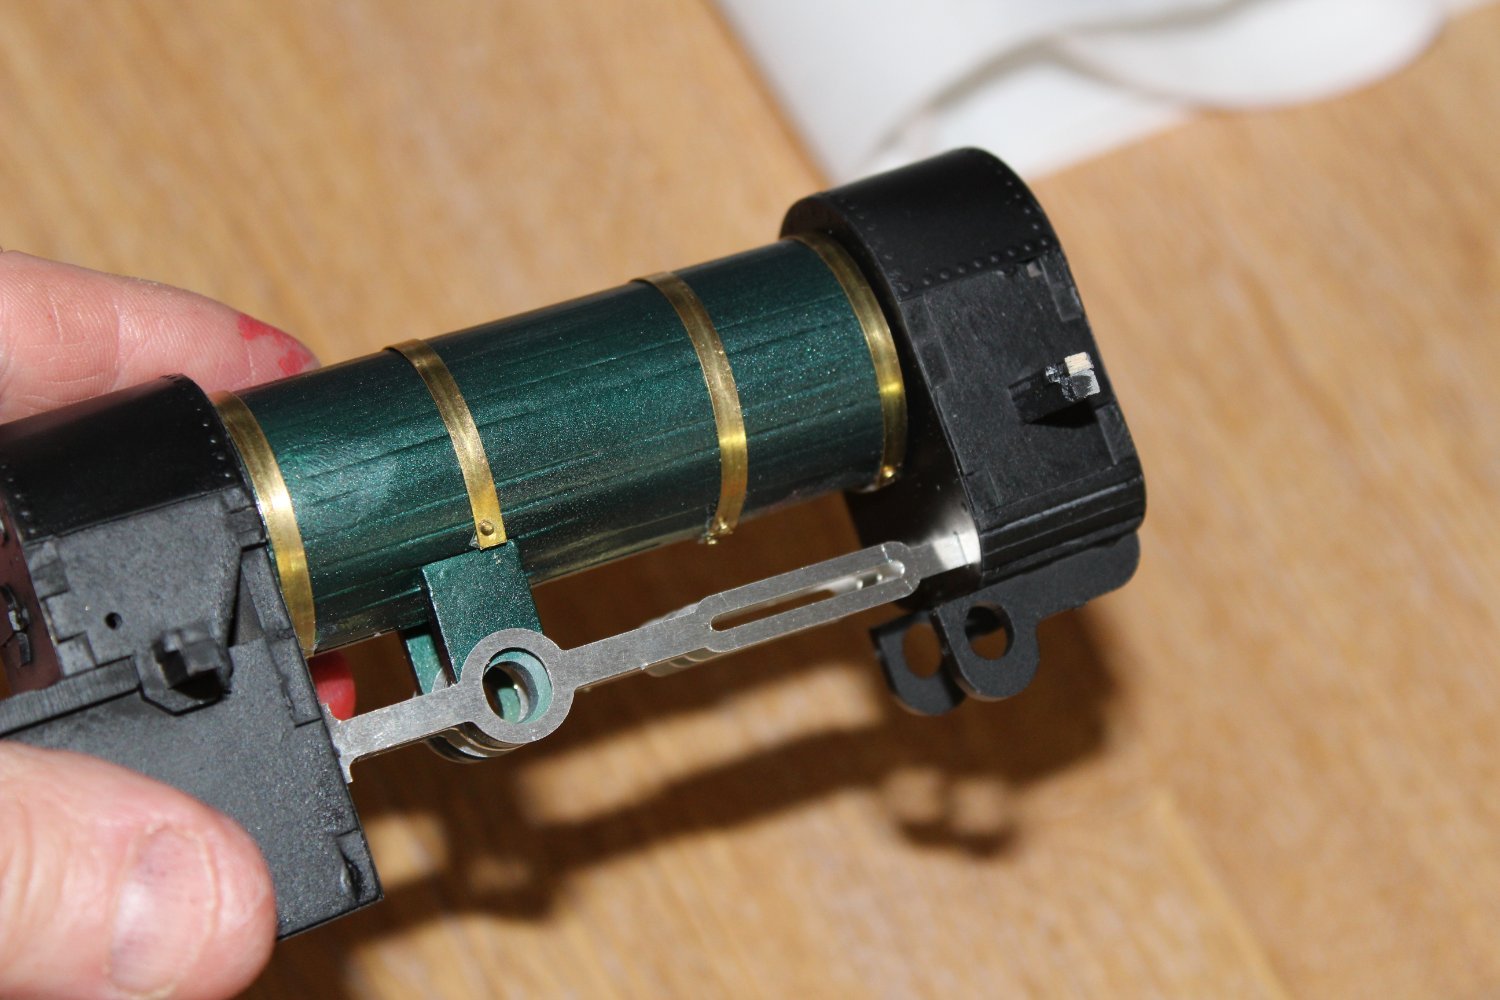
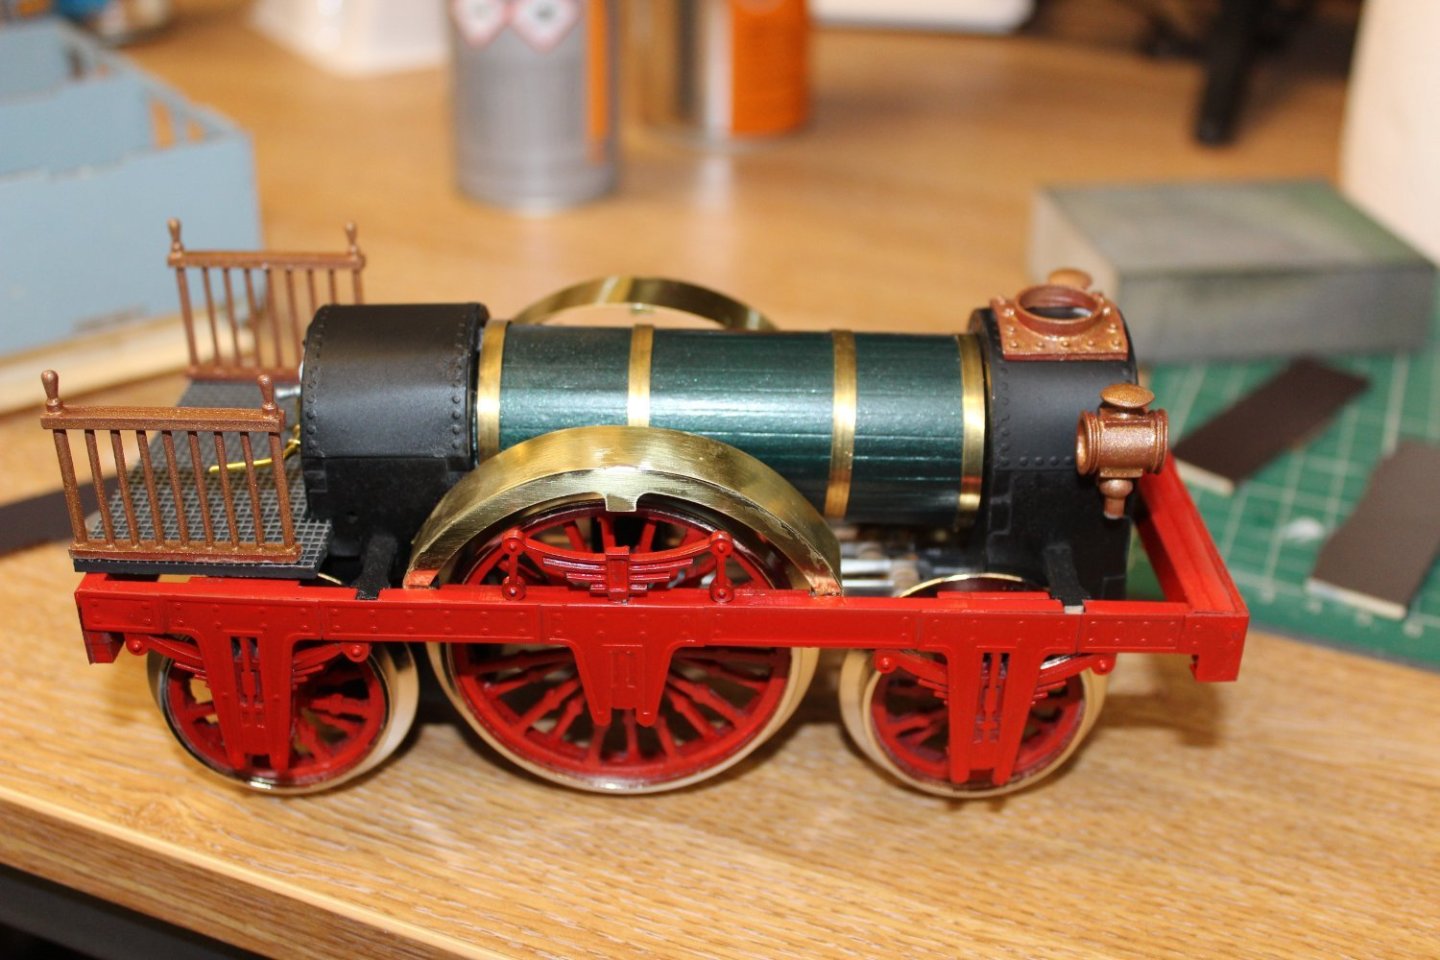
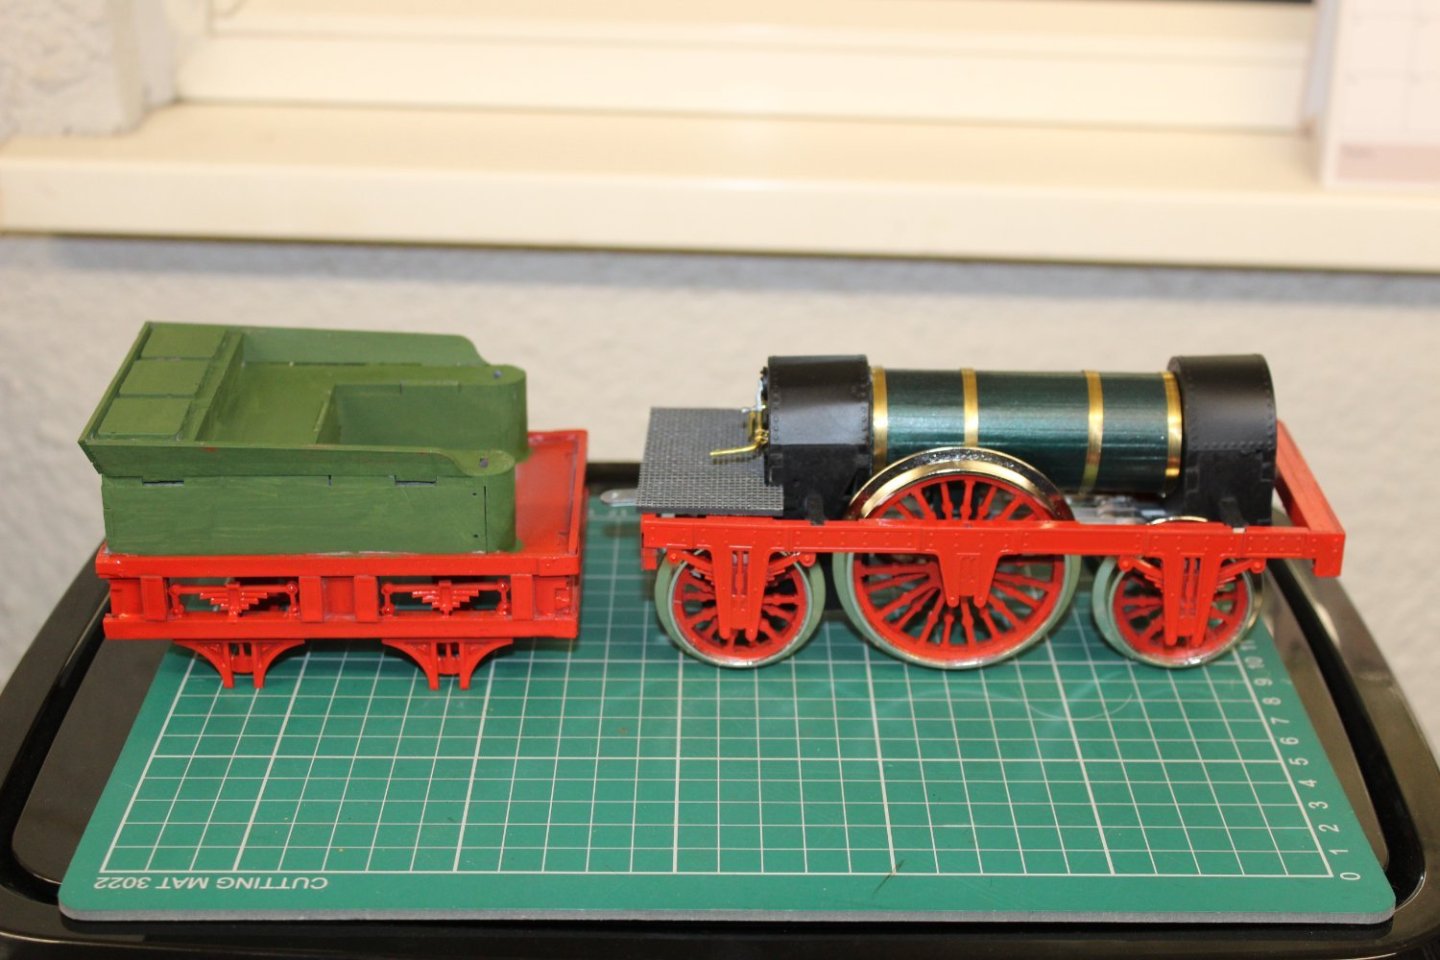
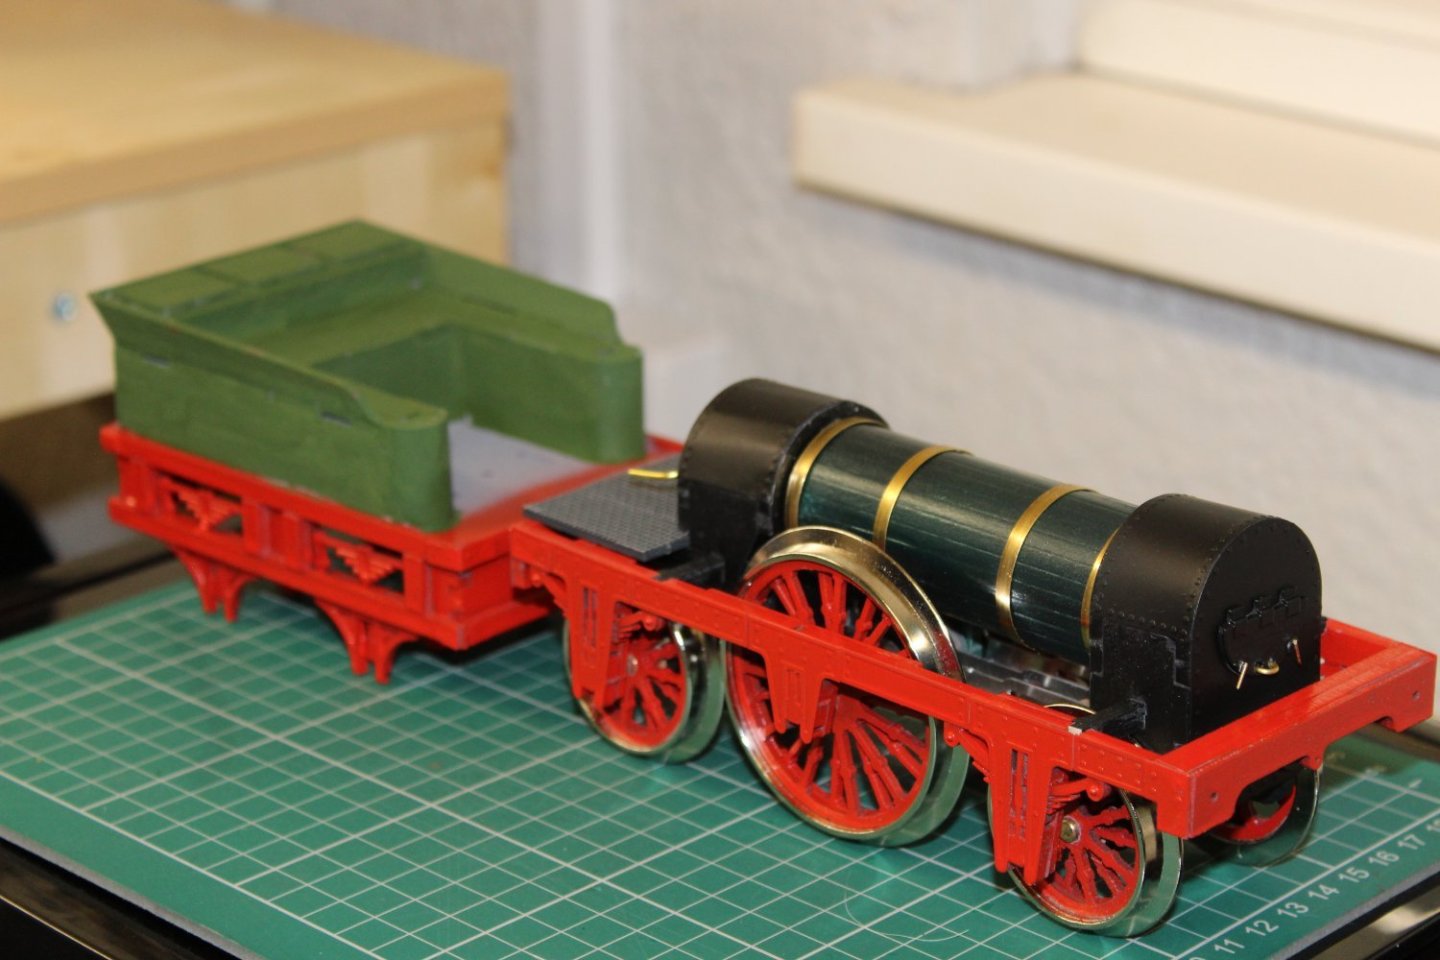
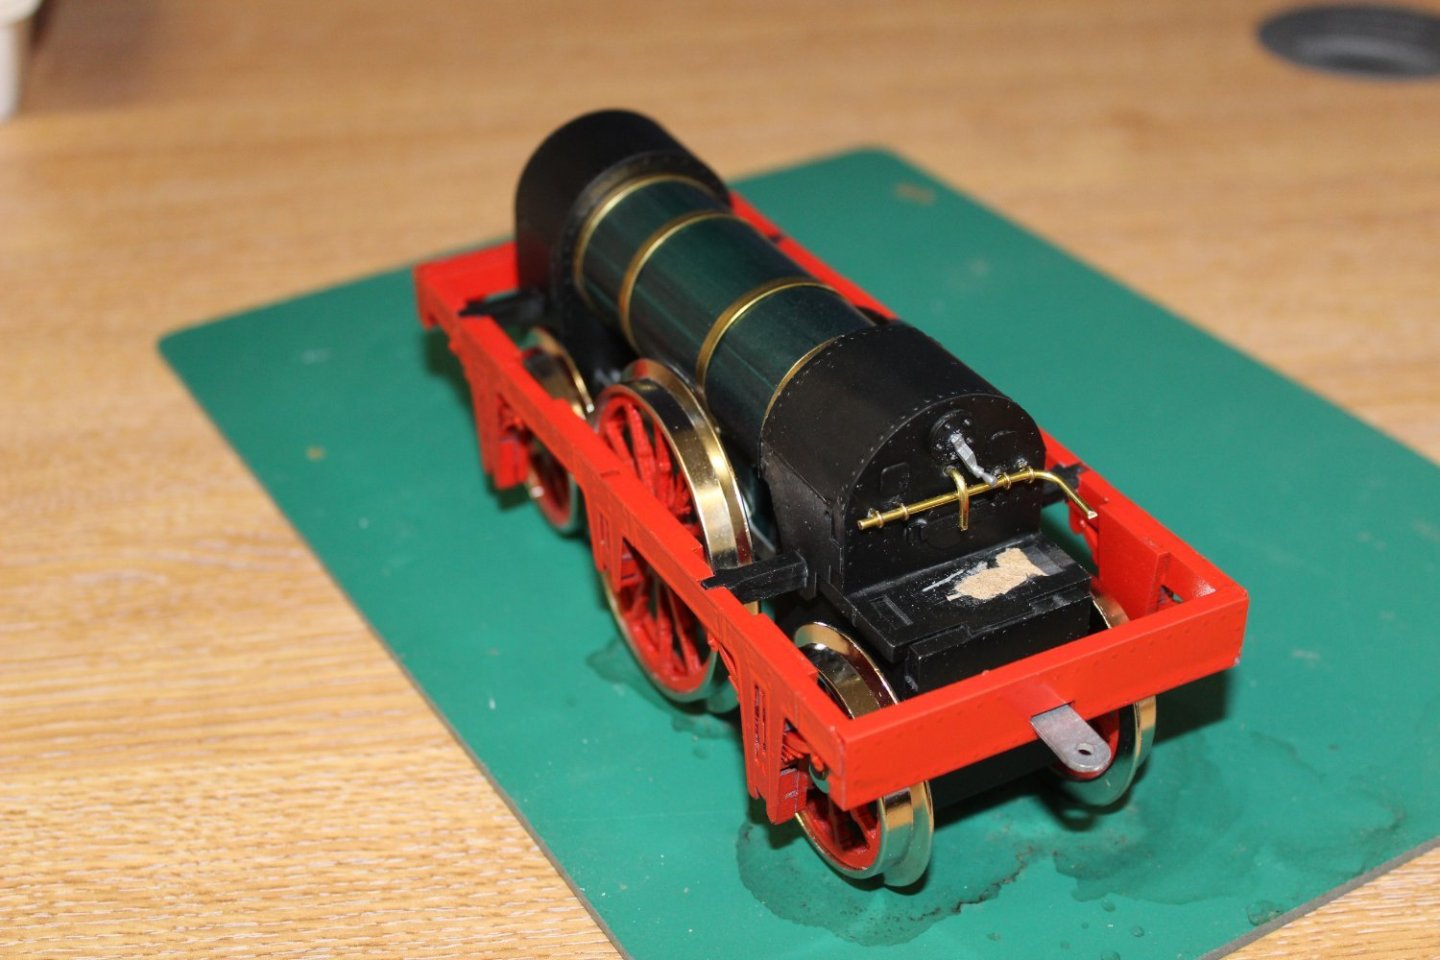
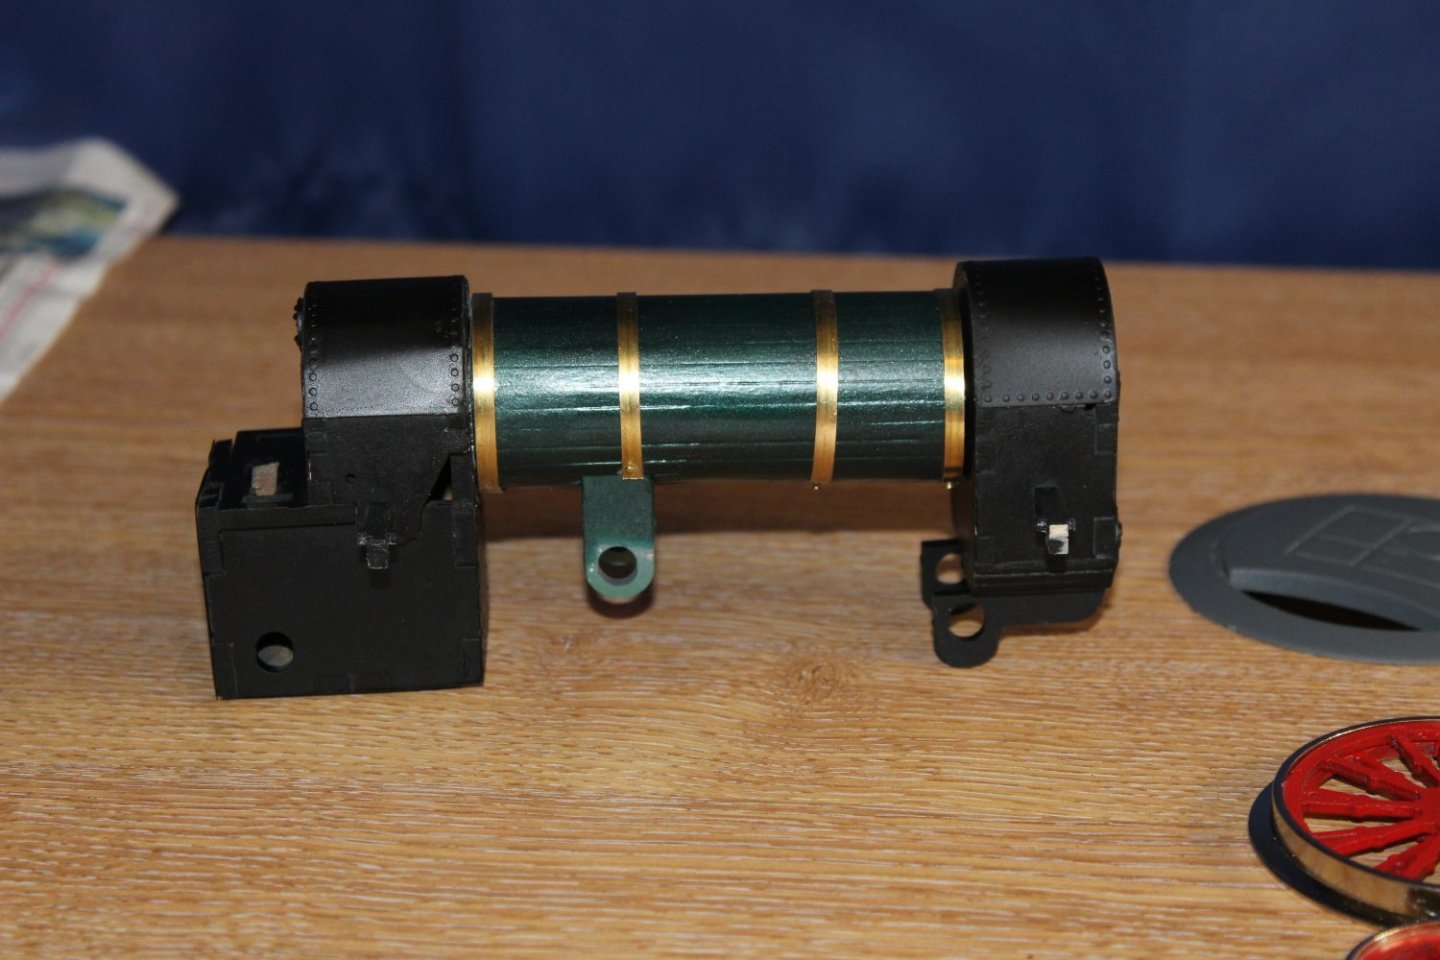
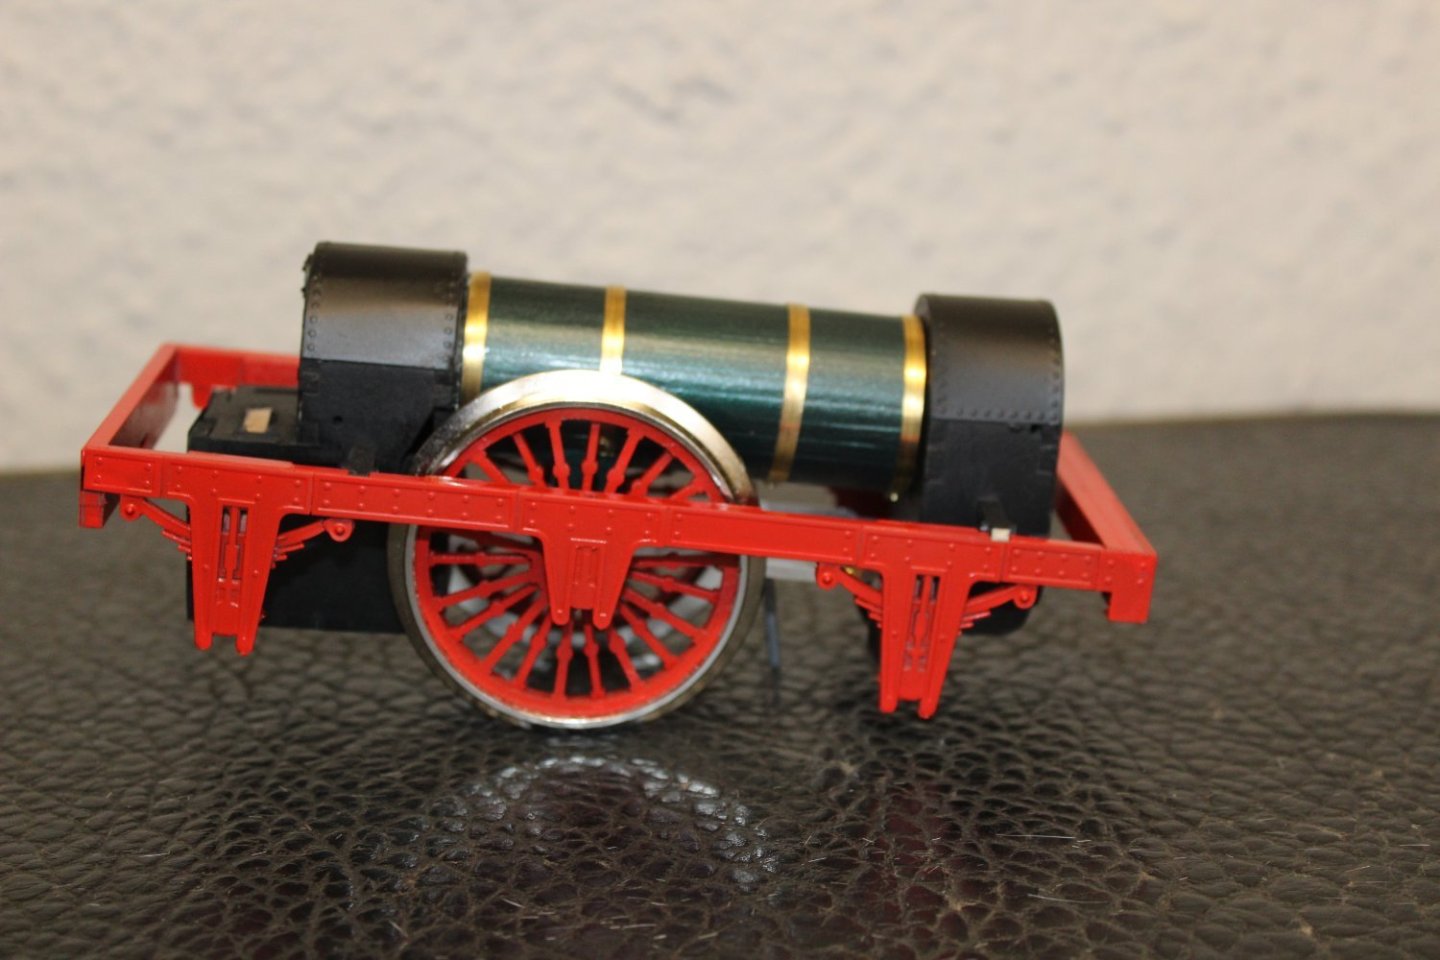
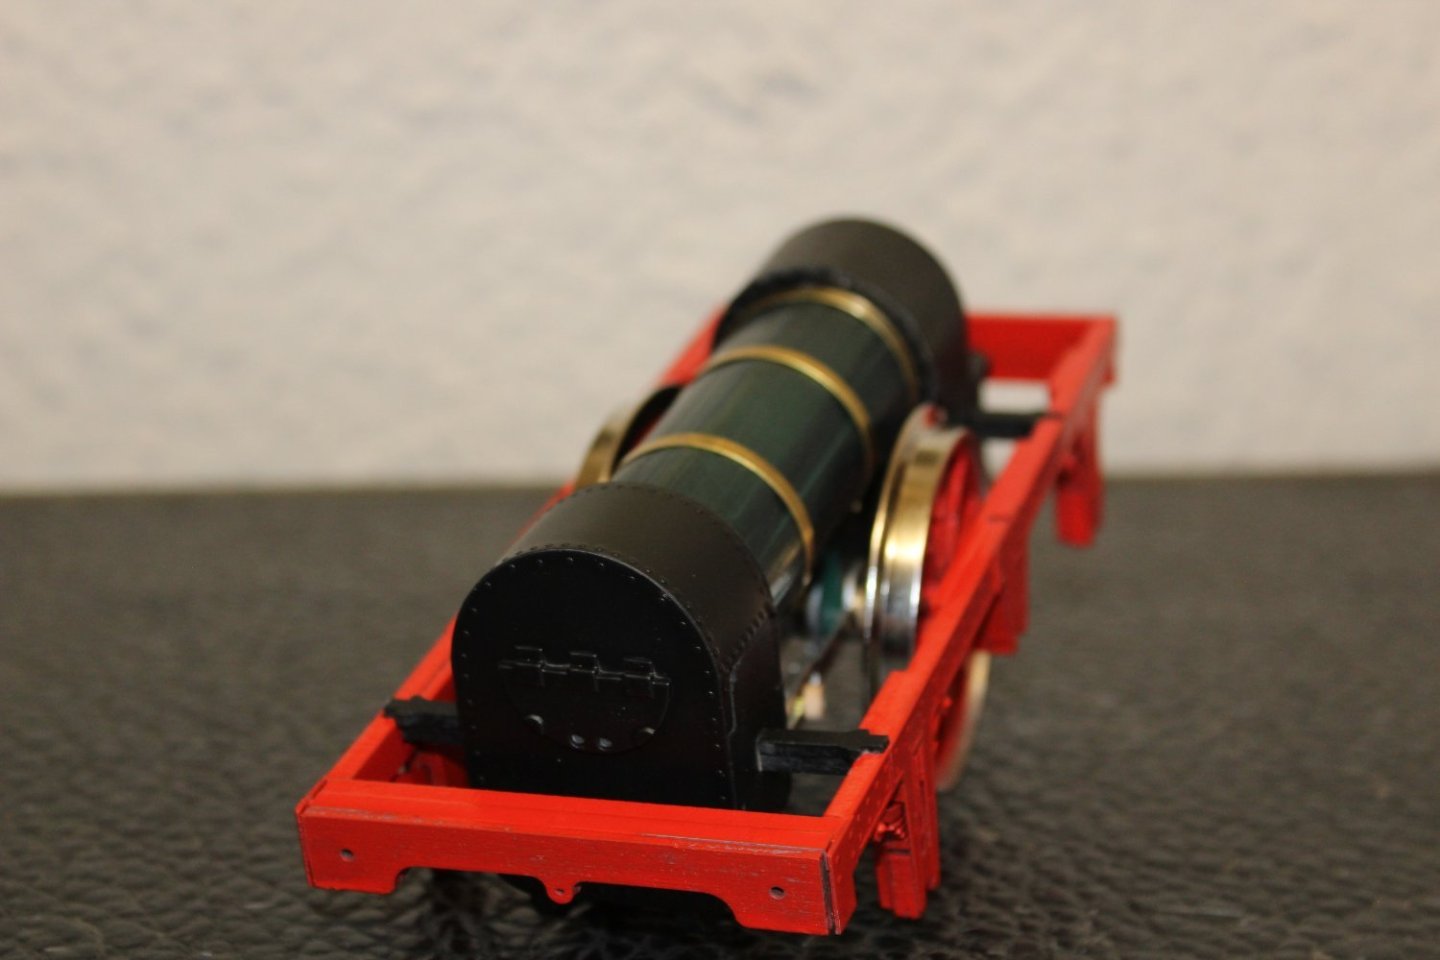
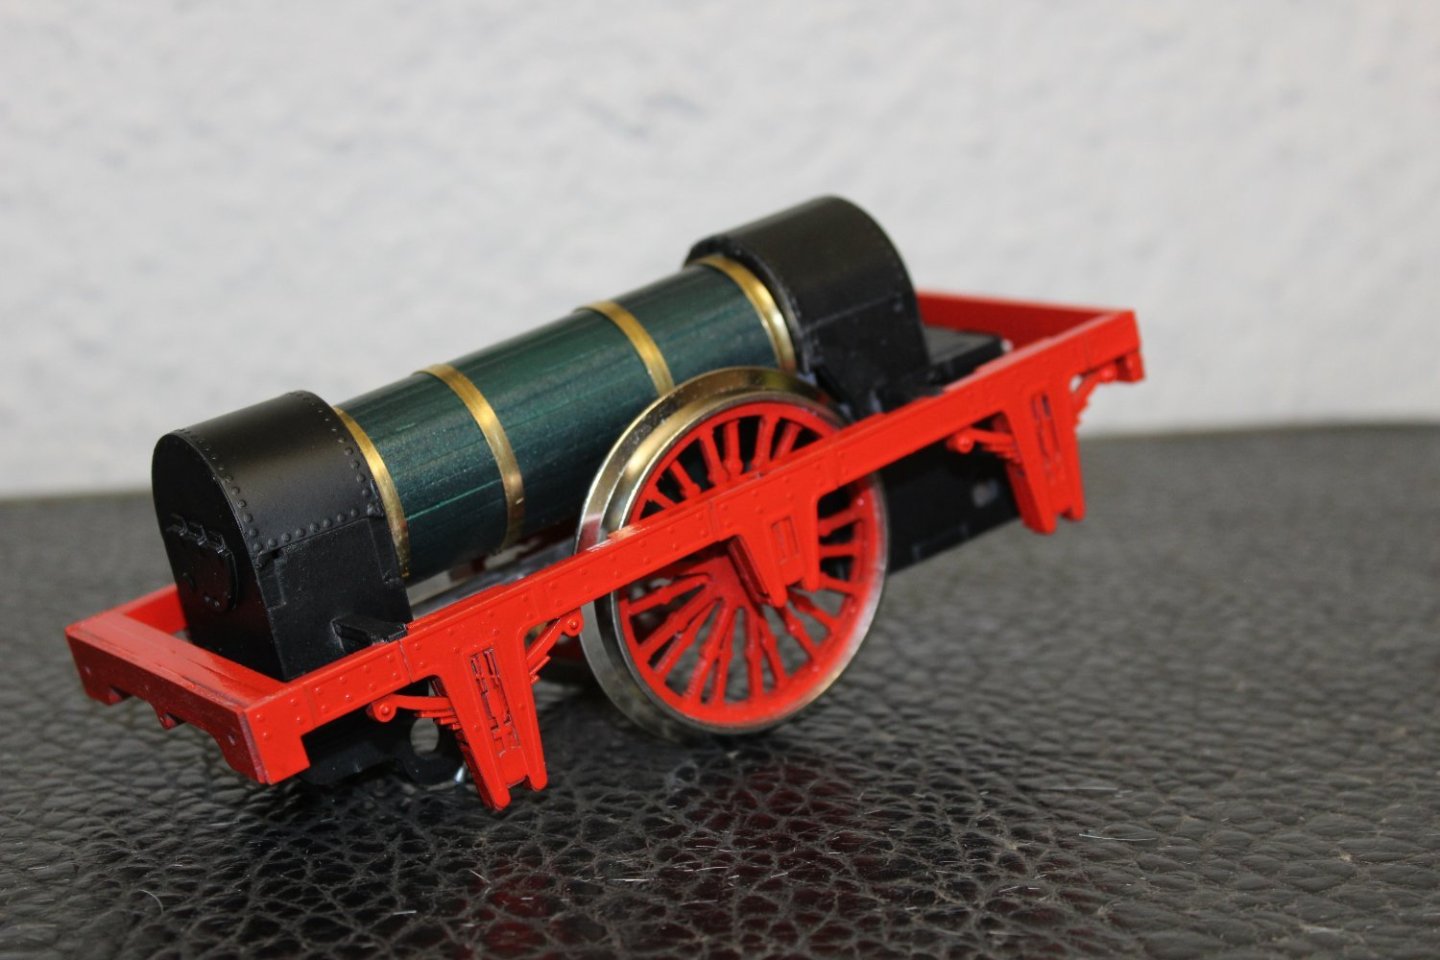
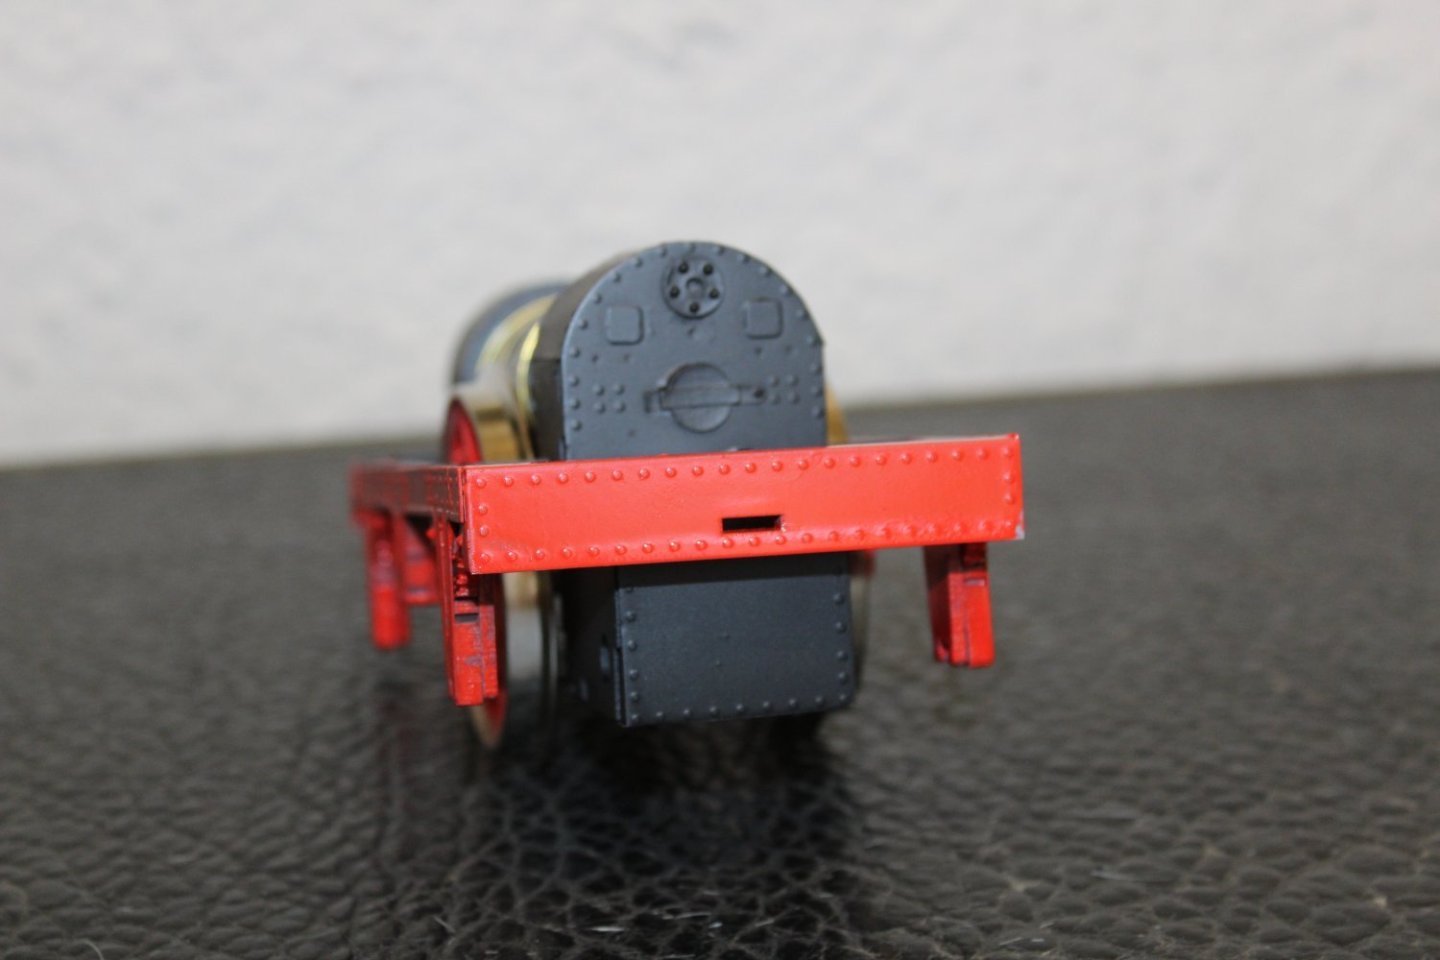
good evening everyone, thank you for comments and likes, and interesting to see new followers to my ever continuing process of purchasing good kits and making them badly lol day 3 ensuring the ends are flat to enable fitting into the chassis wheels being made up brass banding around the boiler, was a pain, trying to avoid marking the paint work running gear another test fit after chassis paint has dried here she is for the another day tomorrow, nothing is fitted yet


- 26 replies
-
- 16
-
-
call me Ian A if you wish, have been called far worse
-
more so than the maritime subjects they cover lol
-
welcome aboard, i am in Bridgwater