


Daliab
-
Posts
136 -
Joined
-
Last visited
Content Type
Profiles
Forums
Gallery
Events
Posts posted by Daliab
-
-
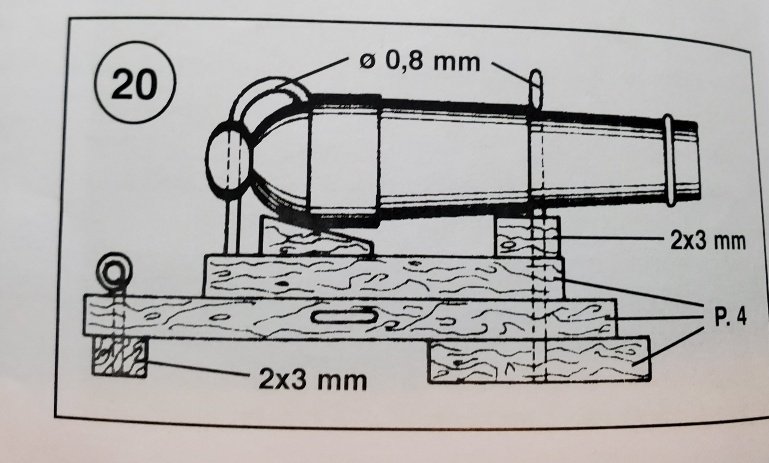
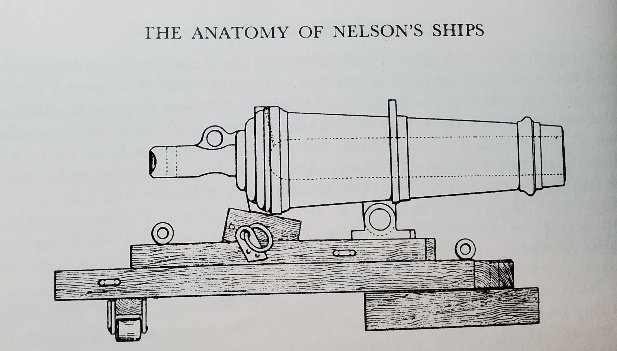
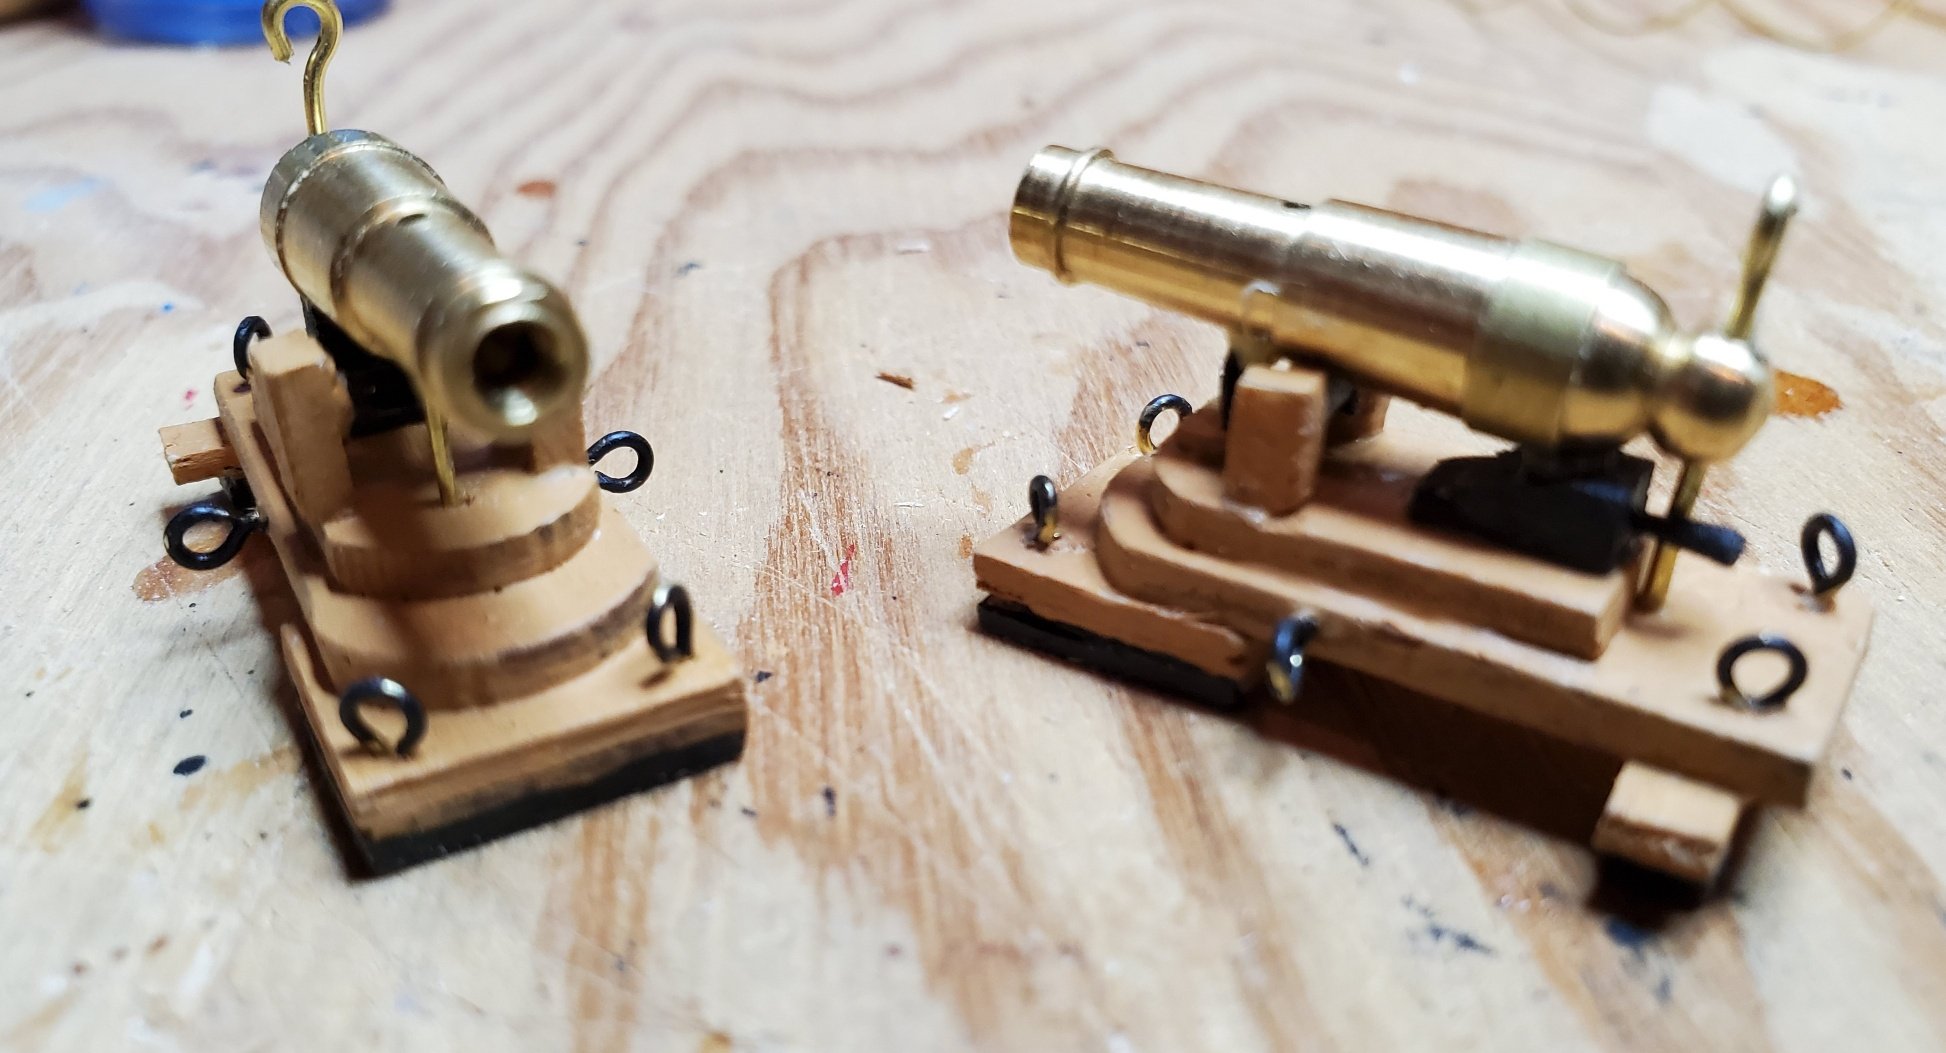
Well this is how I spent my day... building 1 deck gun. I didn't like the suggested way the instructions wanted you to construct the gun so I turned to "the Anatomy of Nelson's Ships" by C Nepean Longridge. This book shows a little more detail and the correct way the cannon should look, although I did claim some artistic license to get it to look more like it should be.

Still.... this is a far cry of carving all of the guns like GramdpaPhil's Victory Build. If you haven't seen them, you should check these out: HMS Victory by GrandpaPhil - Mantua - Scale 1:98 Kit-Bash.
- JayCub, GrandpaPhil and Duanelaker
-
 3
3
-
31 minutes ago, GrandpaPhil said:
I did not use the figurehead out of the kit. I made my own out of basswood and card.
I cut off the bow section and traced the one out of the AOTS which is why mine has a notch. I ended up filling it in with a filler block after I made the figurehead.
It looks like you wouldn’t need to notch the beakhead if you use the figurehead out of the kit.
GrandapaPhil..... to late. I already cut a notch in the bow but kept the piece in case I needed to re-glue it back in place.
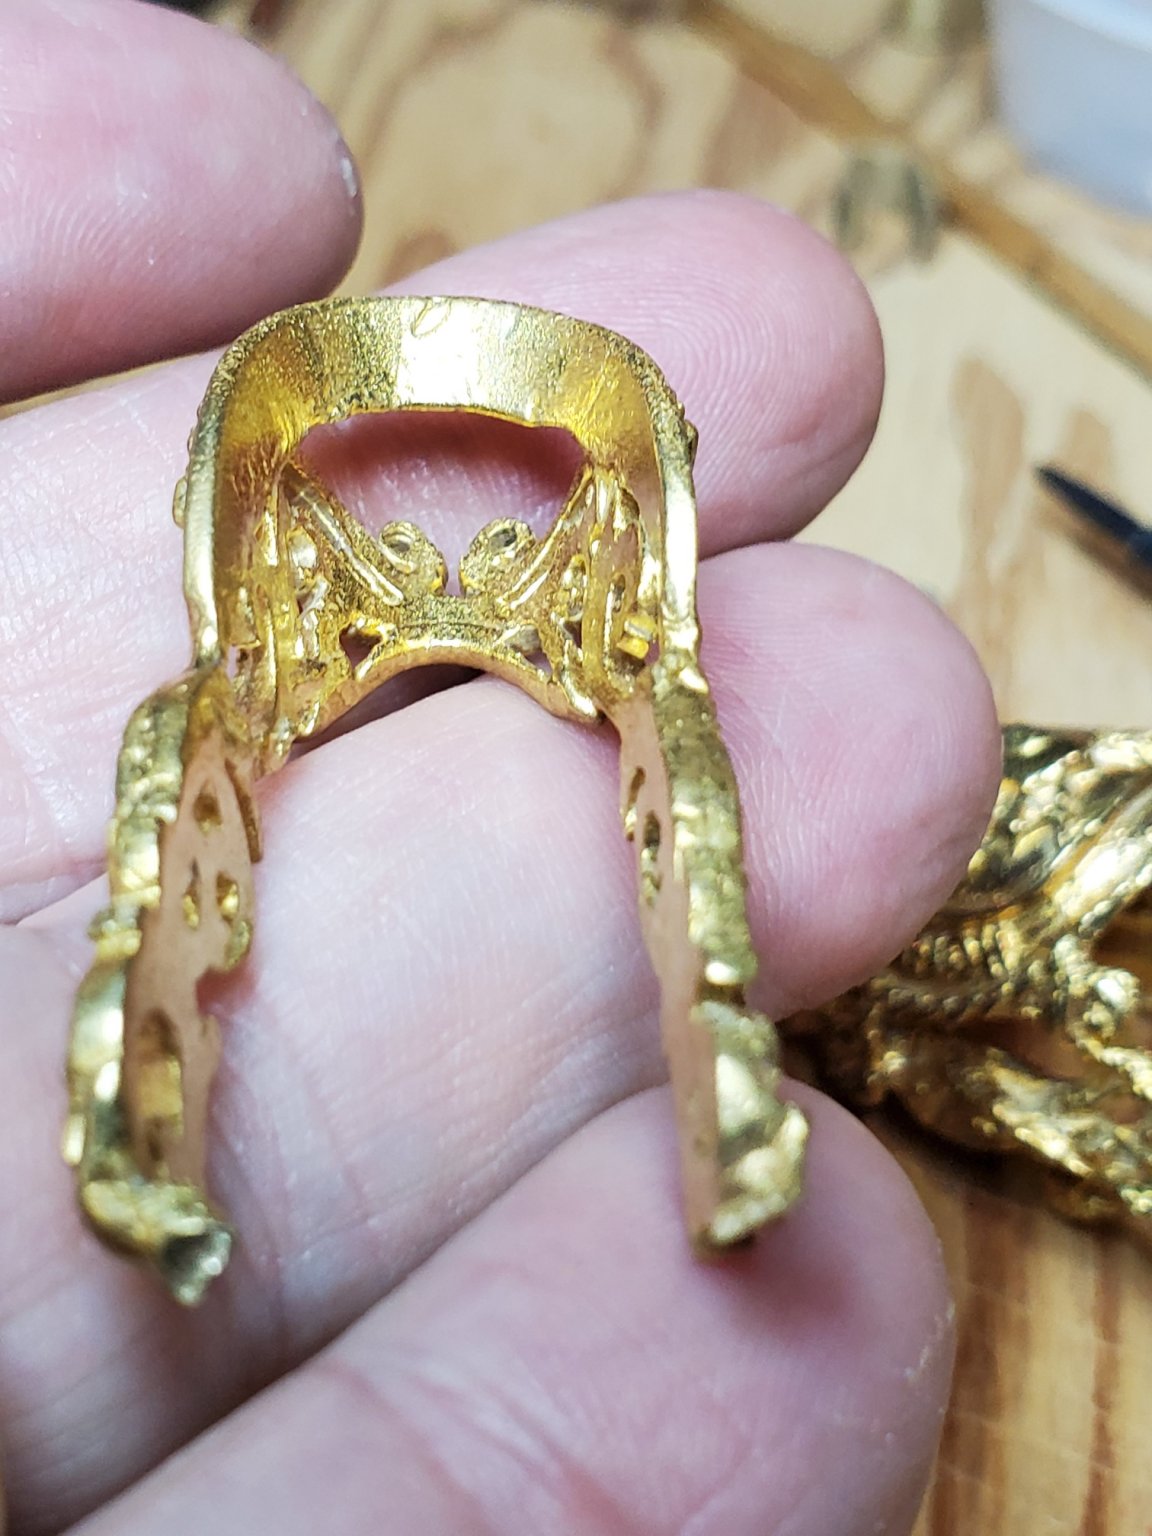
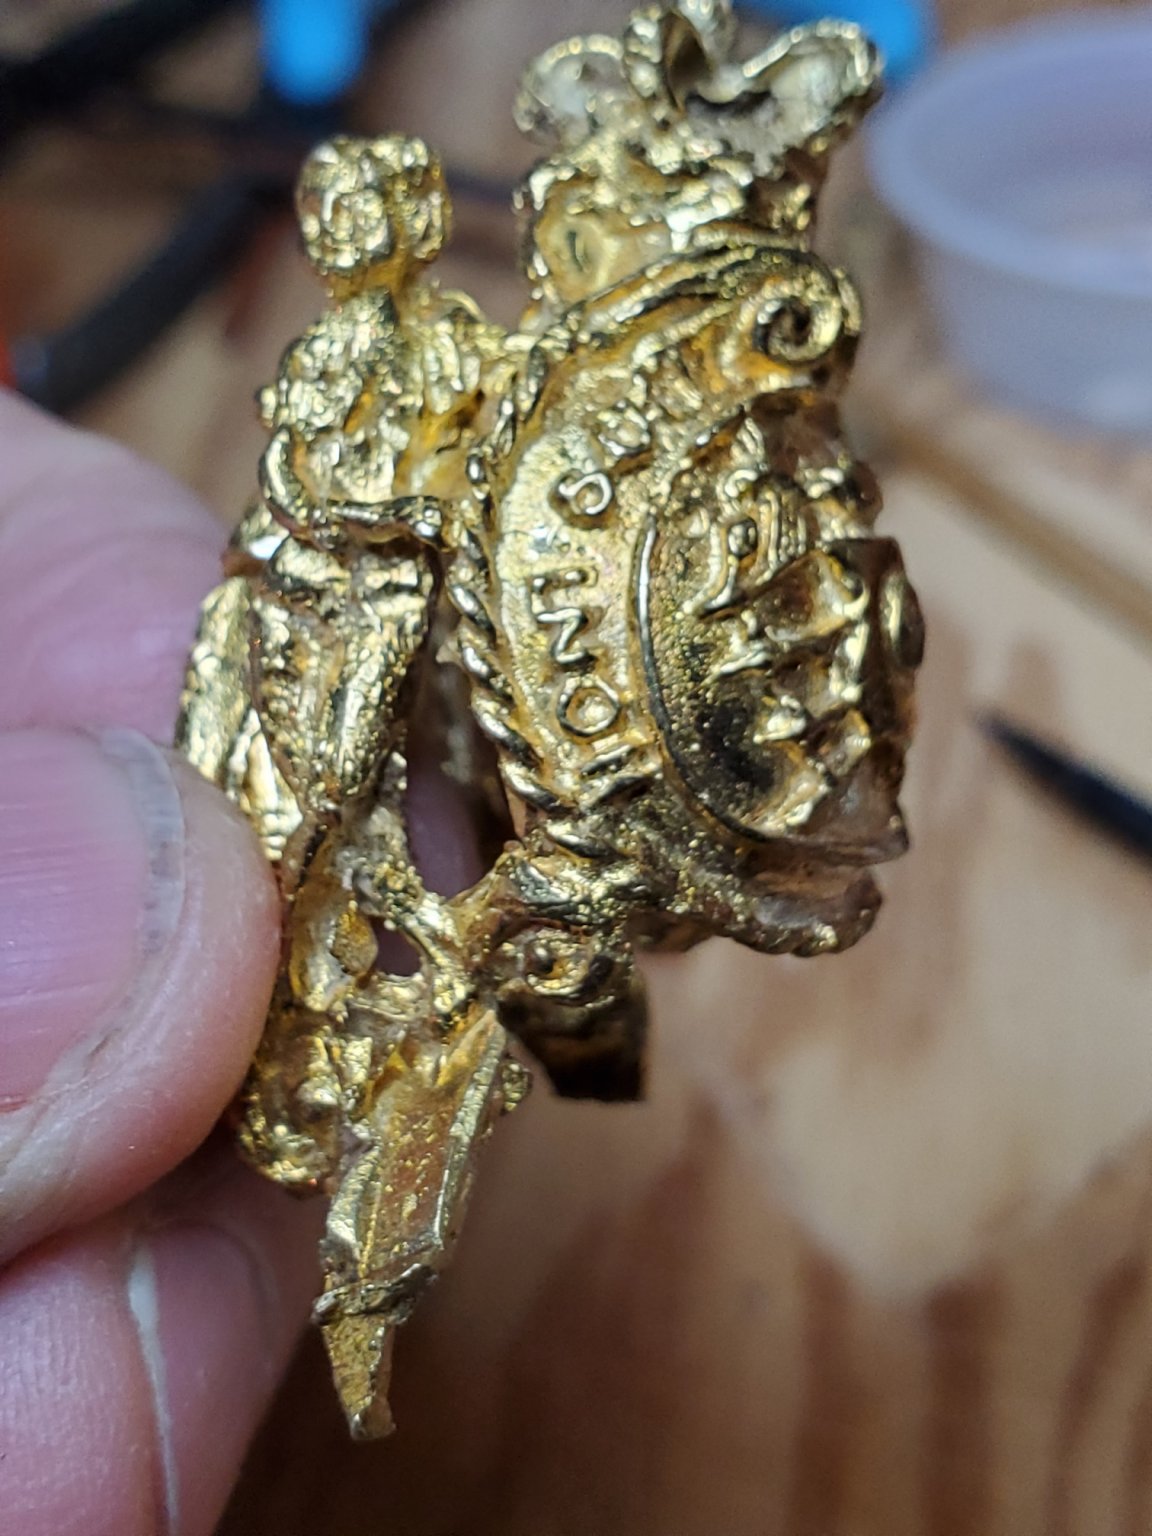
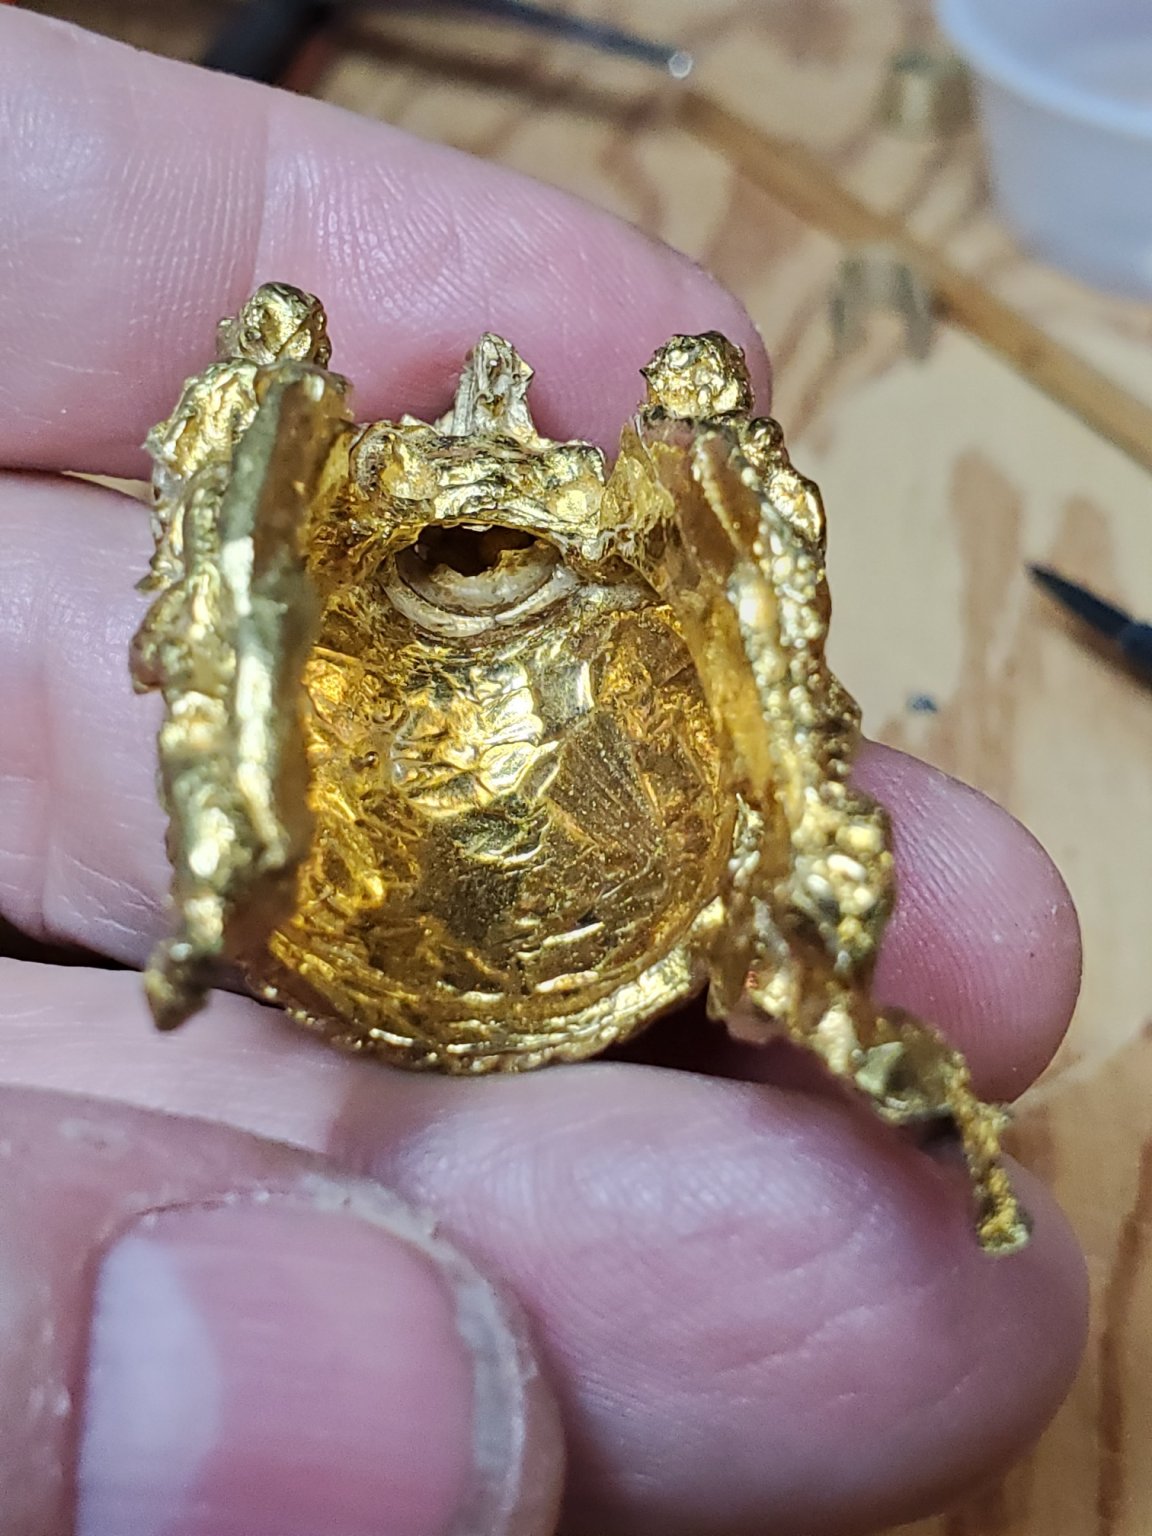
As I stated above..... I used a pair of needle nose pliers and used them inside of the main piece by spreading out the handles to open up the jaws of the pliers to spread the outer sides of the figurehead.
Still thinking it out and looking at the 3 Victory books I have and looking on the internet to see how other folks mounted there's. I'm not in a hurry to mount it. Once I get the bowsprint in place temporarily, I'll get a better idea of the space I have to work with. Thanks for the input.
-
3 hours ago, Jeff-E said:
Hi Daliab,
The figure head castings supplied by Mantua are very thick and need a lot of thinning on the inside of them to get them to sit properly, at least the ones supplied for my bow section of the kit did. I thinned the top one down until the crown sat fully on the stem post and glued it on with epoxy the second piece was widened until it sat underneath it. See the picture below.
However I now believe this is wrong. The instructions in my kit did not mention notching the stem but it would allow the figurehead to sit back more on the stem and the bottom piece to hang straighter and fit tighter against the stem.
Hope this helps.
Thanks for your input. I too can not find any mention of notching the bow section or even how the figurehead should be mounted on the bow. I went and notched the bow based on the picture in the instructions but,I still don't see how this fits. I used a pair of needle nose pliers and used them inside of the main piece by spreading out the handles to open up the jaws of the pliers to spread the outer sides of the figurehead. This help a little bit but don't want to over do it. If I don't figure it out, I may end up gluing a piece to the bow (hidden) that allows the crown portion of the figurehead to rest on it. Your right the figurehead supplied by the manufacturer is really thick and very hard material. Trying to use a dermal, files, you name it to clean up the parts that don't belong. Again... thanks for everyone's input.

-
GrandpaPhil
I've looked throughout the instruction booklet, looked on this site, and even googled the subject on the internet.
For the life of me I do not see how this is mounted on the bow. The figurehead comes in two pieces... don't see anything that the figurehead attaches to.


How and to what is the figurehead glued to?
-
Spent the weekend working on the bow section. The trim was a pain in the neck to put on. Learning a lot of little things that the multi-language instruction sheet didn't cover.... I guess they figured if there was a picture without mentioning it in the instructions would be enough. Notice the notch cut out on the bow where the figurehead would go? Anyone know why you notch the bow?
- JayCub, gieb8688, GrandpaPhil and 1 other
-
4
-
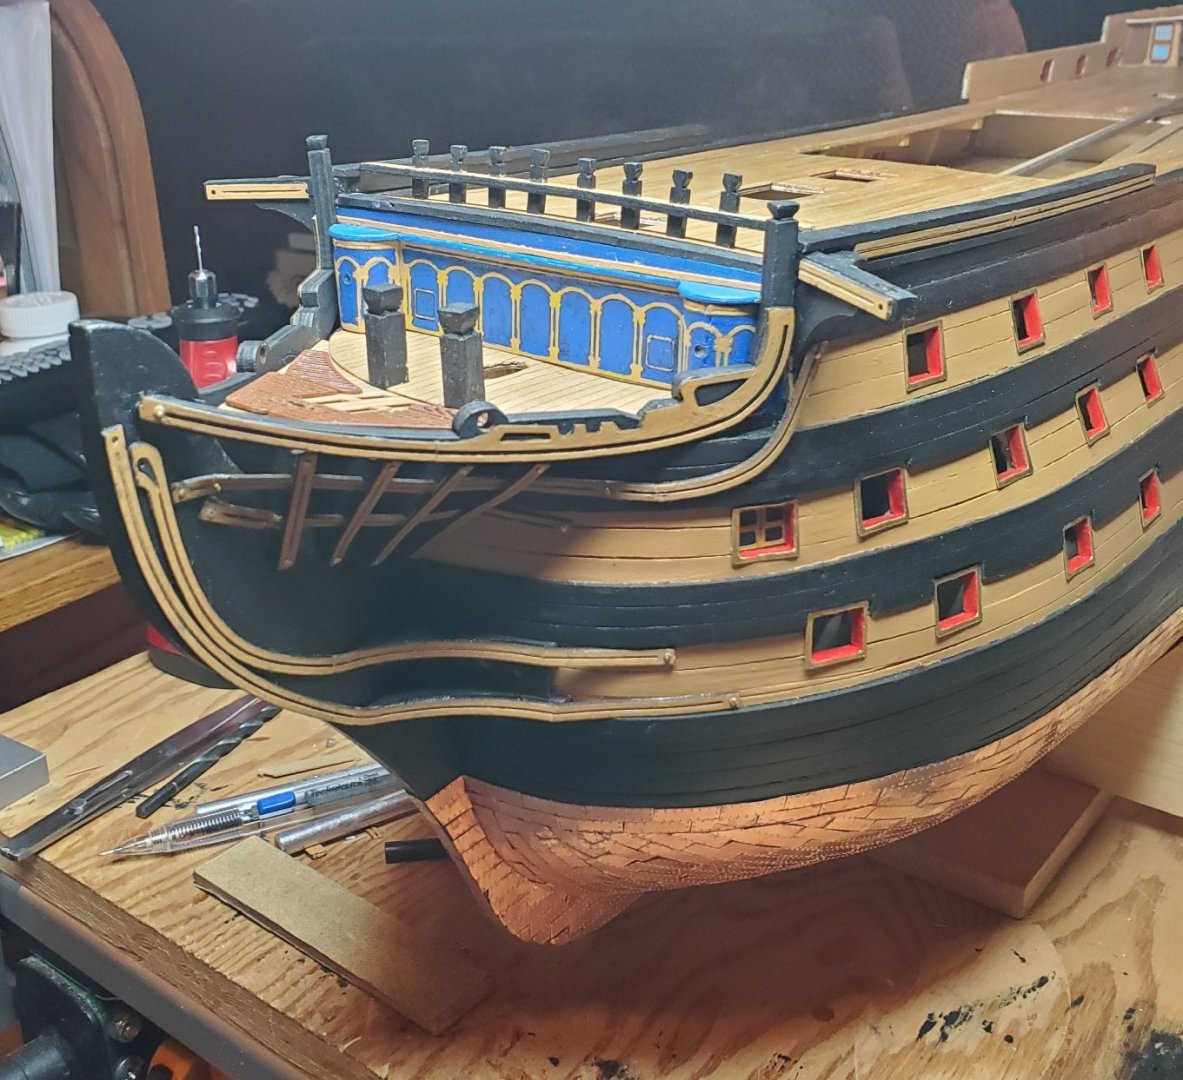
GrandpaPhil.... here you go for your next build. It works great.
2 pieces held together with stovepipe bolts. Cut a channel that is just smaller than the thickness of your keel.
-
1 hour ago, GrandpaPhil said:
Thank you everyone for the comments and the likes!
I am having a blast with this build. It is giving me the opportunity to try out new techniques for my next builds, without having to worry about making mistakes.
The hull is twisted, which cannot be fixed, so I am using the Victory as a learning tool and having a lot of fun in the process.
I will have to revise my carriage making techniques for next time because of some difficulties with the card stock delaminating.
For my next build, during the creation and assembly of my bulkheads and center keel, I want to try to make a deck insert in the lower part of the hull, like Chris Watton does, to give the hull more rigidity and hopefully prevent the twisting issues that I have had in my last two builds, while ensuring that my bulkheads are squared off prior to gluing. I am also going to make a proper building board next time to ensure proper support for the center keel.
GrandPhil
Trying to learn from other's mistakes..... I'm trying get wrap my head around how your last two builds have became twisted. Was the mistake due to not having a brace holding the keel straight? Before I started the build on my Victory, there were lots of cautions about how to prevent builds from getting twisted. A couple of causes from what I read was not ensuring the keel was straight and the other was in the planking process. Planking: Only do a few planks on one side and then plank the opposite side in the same manner. As for the keel, I made my own keel clamp from pictures of someone else's on this website. (would give credit if I remembered who).
I left the build in the vice until I was almost finished planking. Haven't had any issues that I can see. Message me and I can provide you additional pictures and text to make your own if you would like. Hope this helps you in the next build.


-
Received the book Saturday that you recommended entitled Historic Ship Models by Wolfram Zu Mondfeld. You were right.... the book is very informative and read half of it the first night. Lots of information that you can use on the Victory and other builds. Lots of little things that you wouldn't think of to put that extra bit of detail on your model. Thanks again for the recommendation.
-
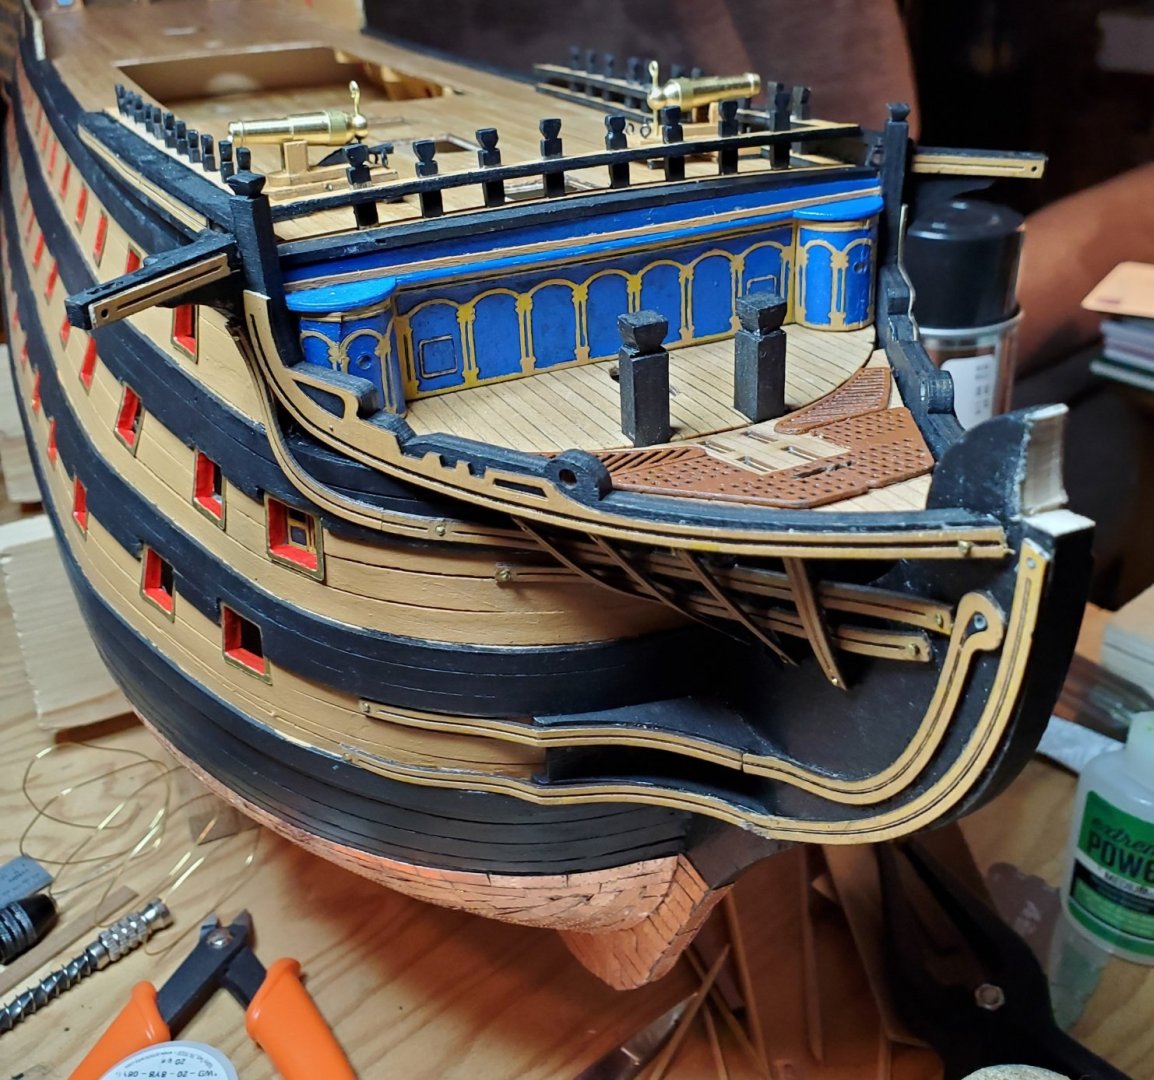
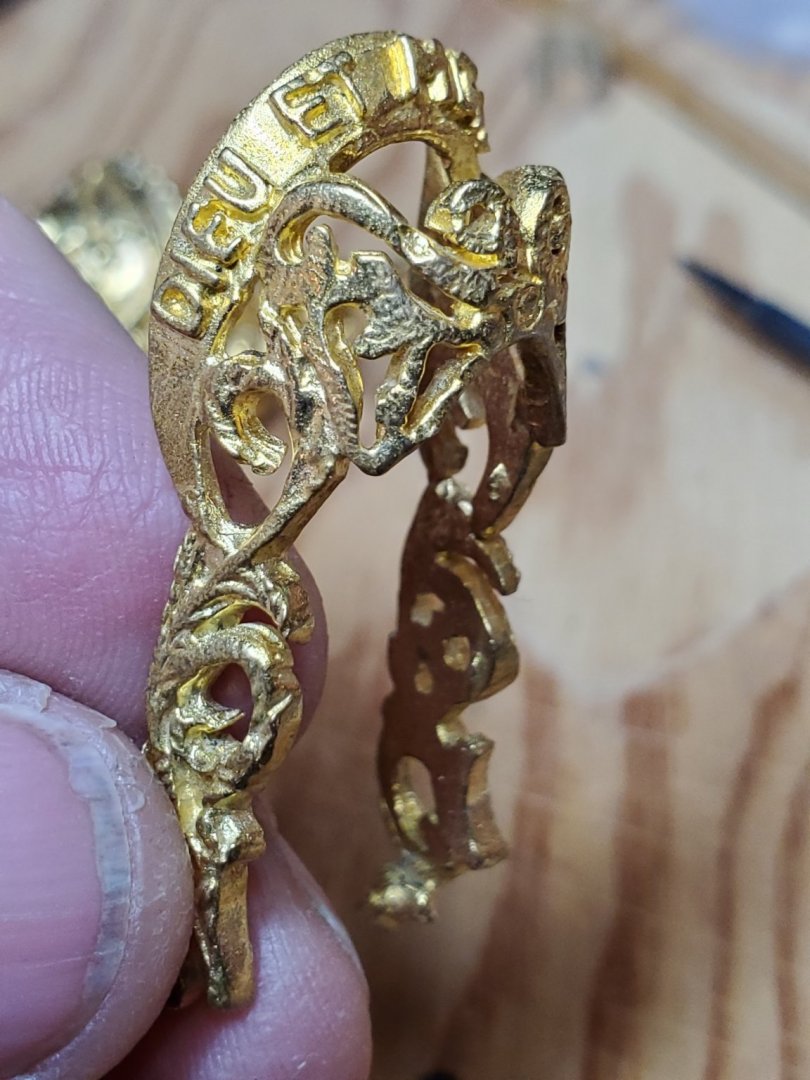
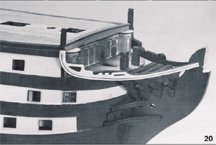
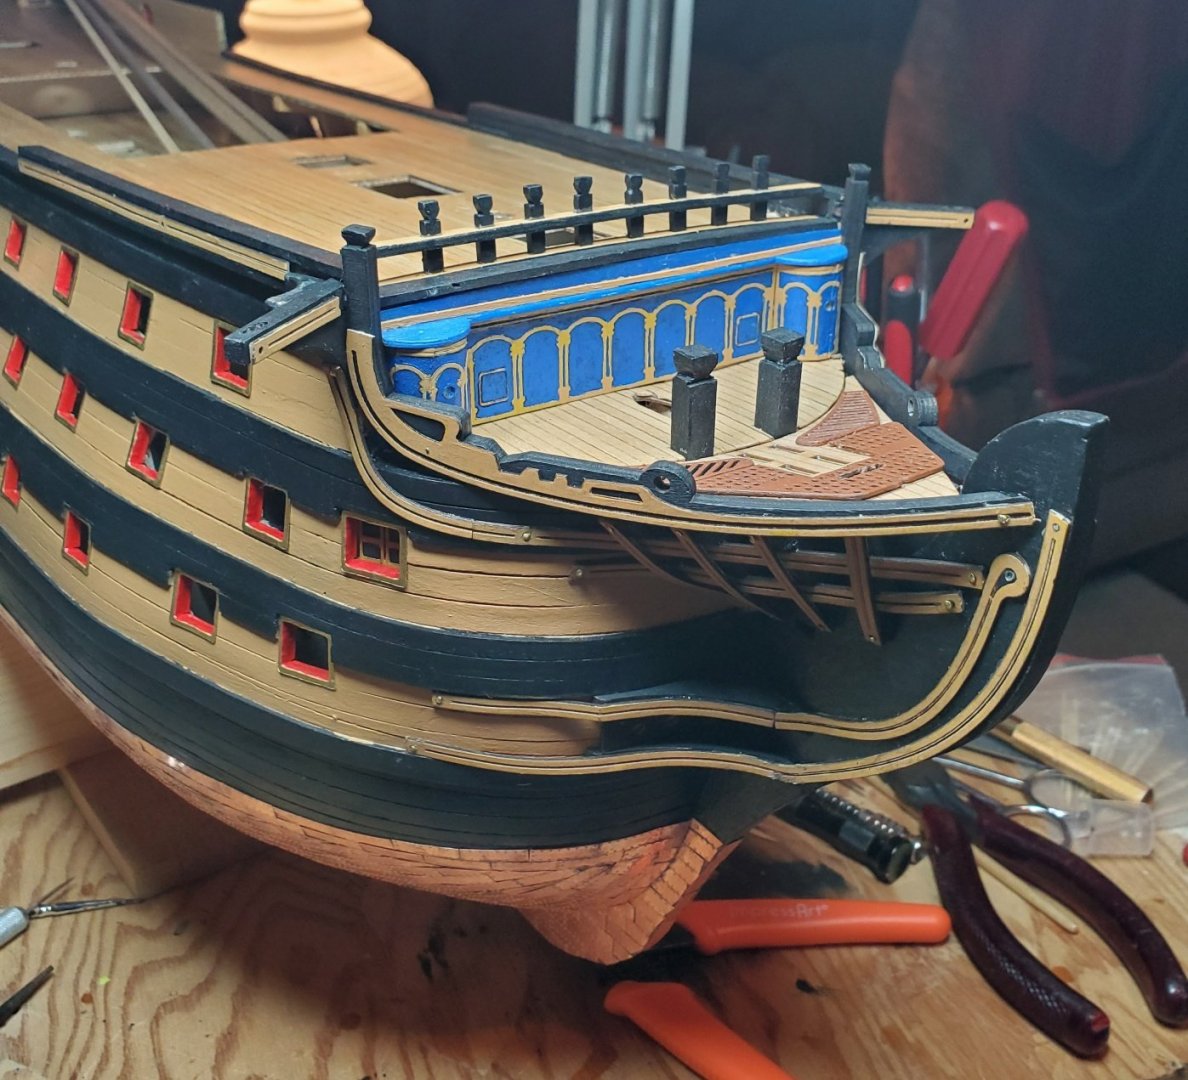
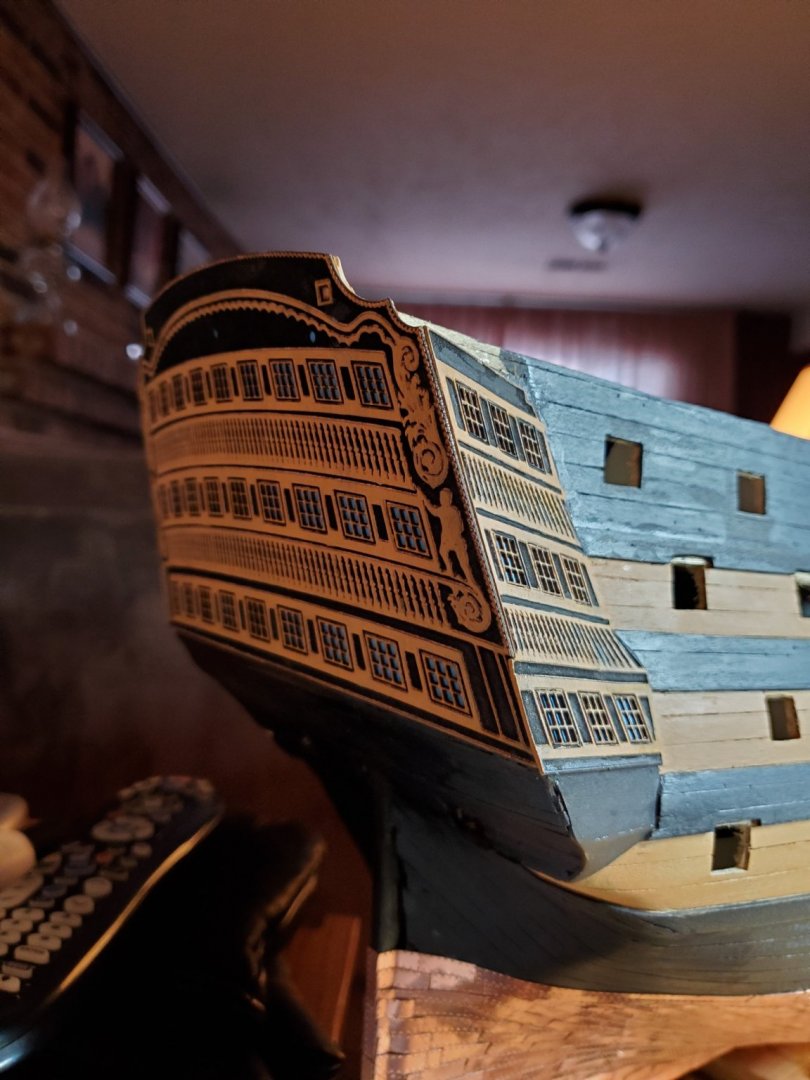
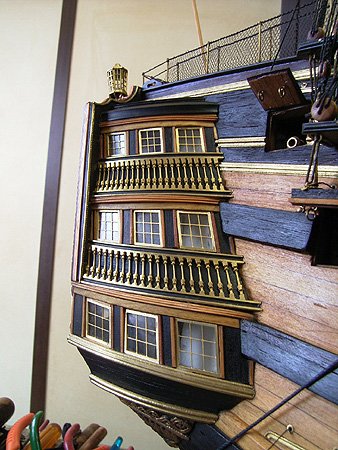
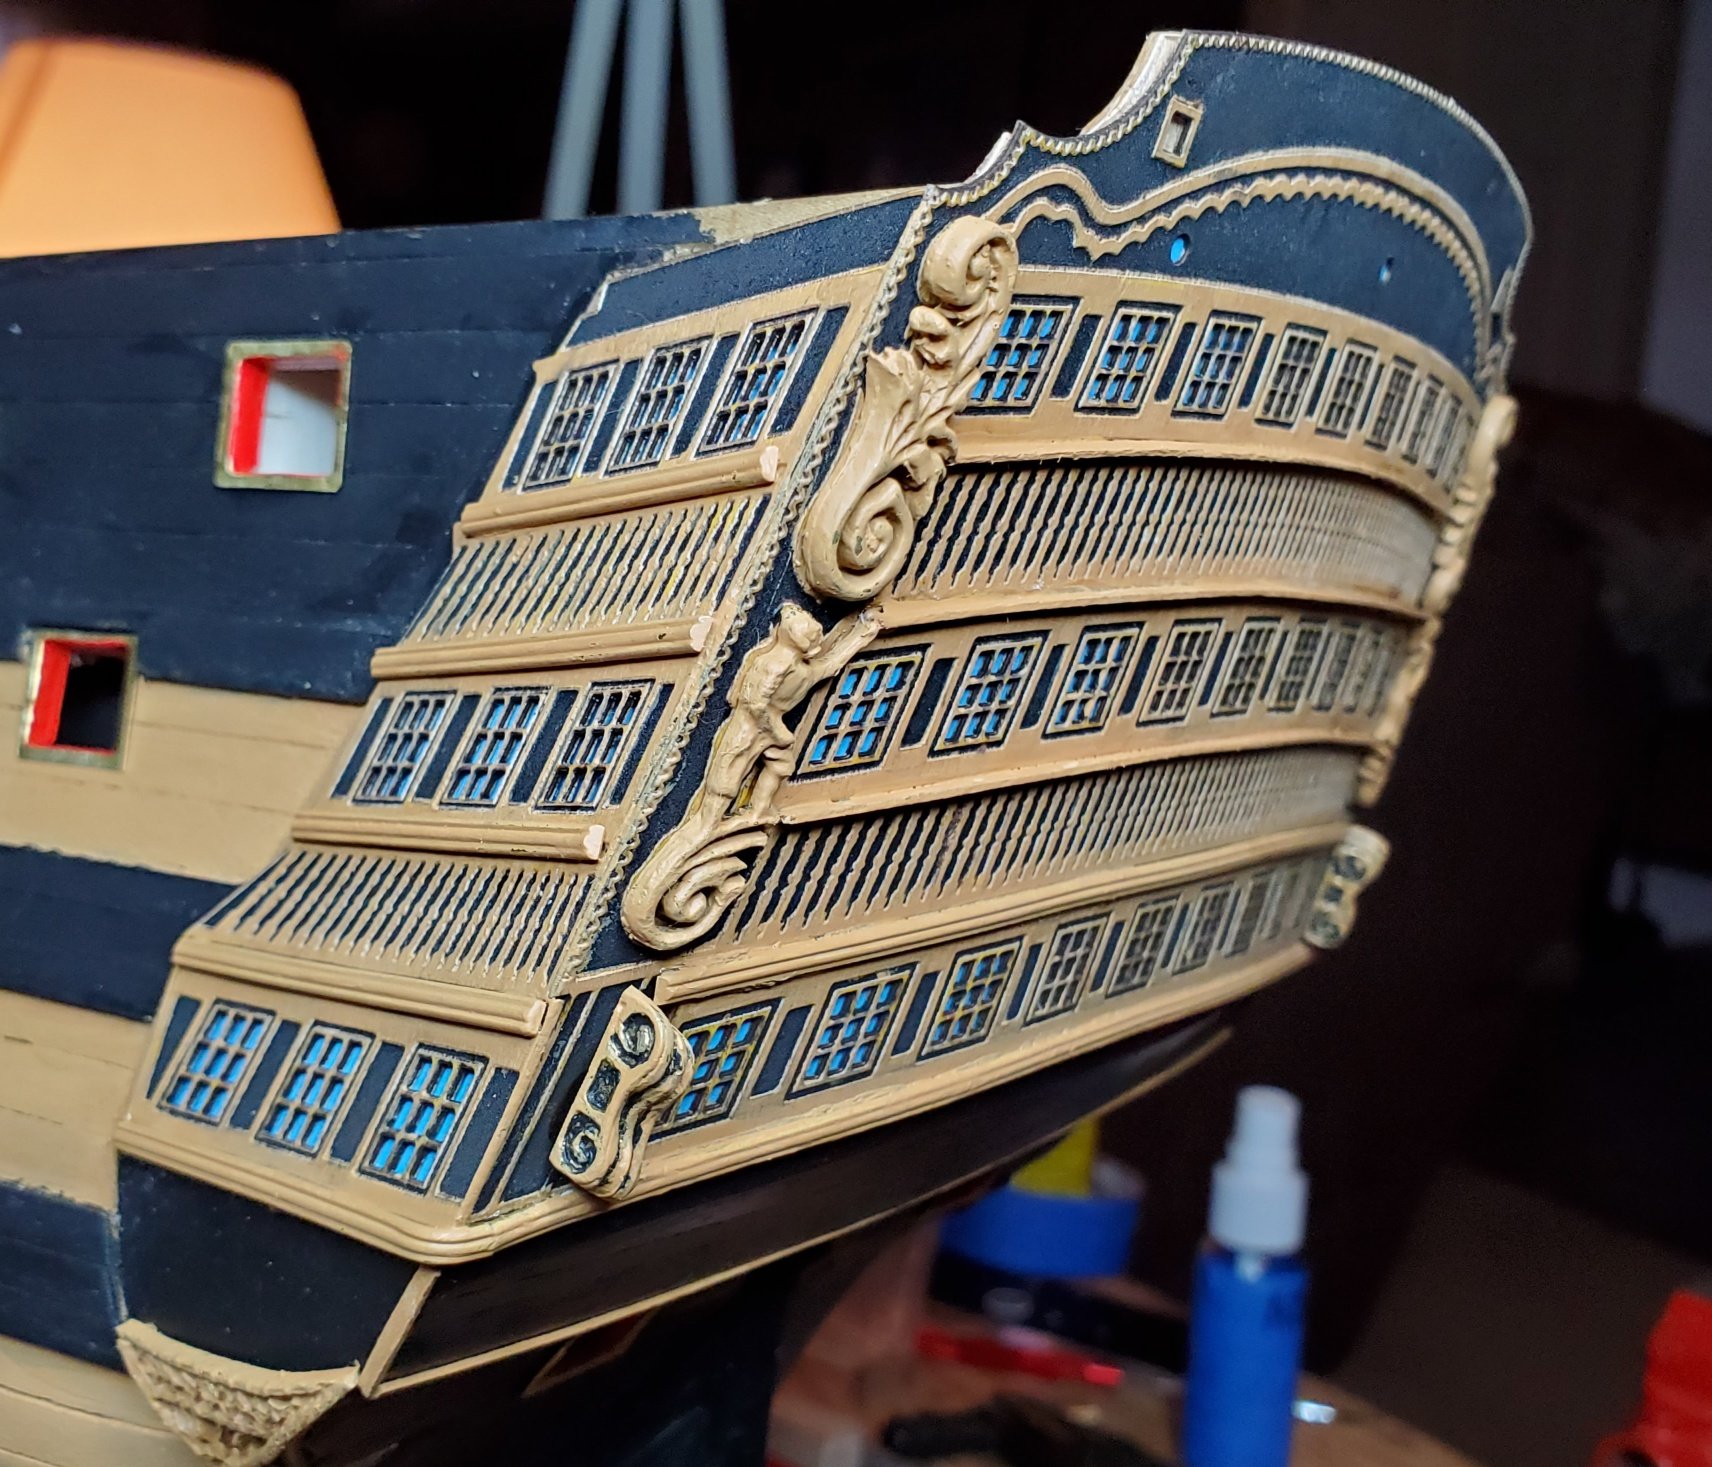
Attempted to dress up the stern of the Victory. As is, the back end did not have any depth to it and really looked flat. Still have to add the lamps, the flag emblem, the name plate etc but to me it looks a little better than it was. Don't know when the company changed the kit from etched brass to laser engraved ply. I will make sure that I will investigate to make sure the kit has what the advertised picture shows .

- Duanelaker, gieb8688, BenD and 3 others
-
6
-
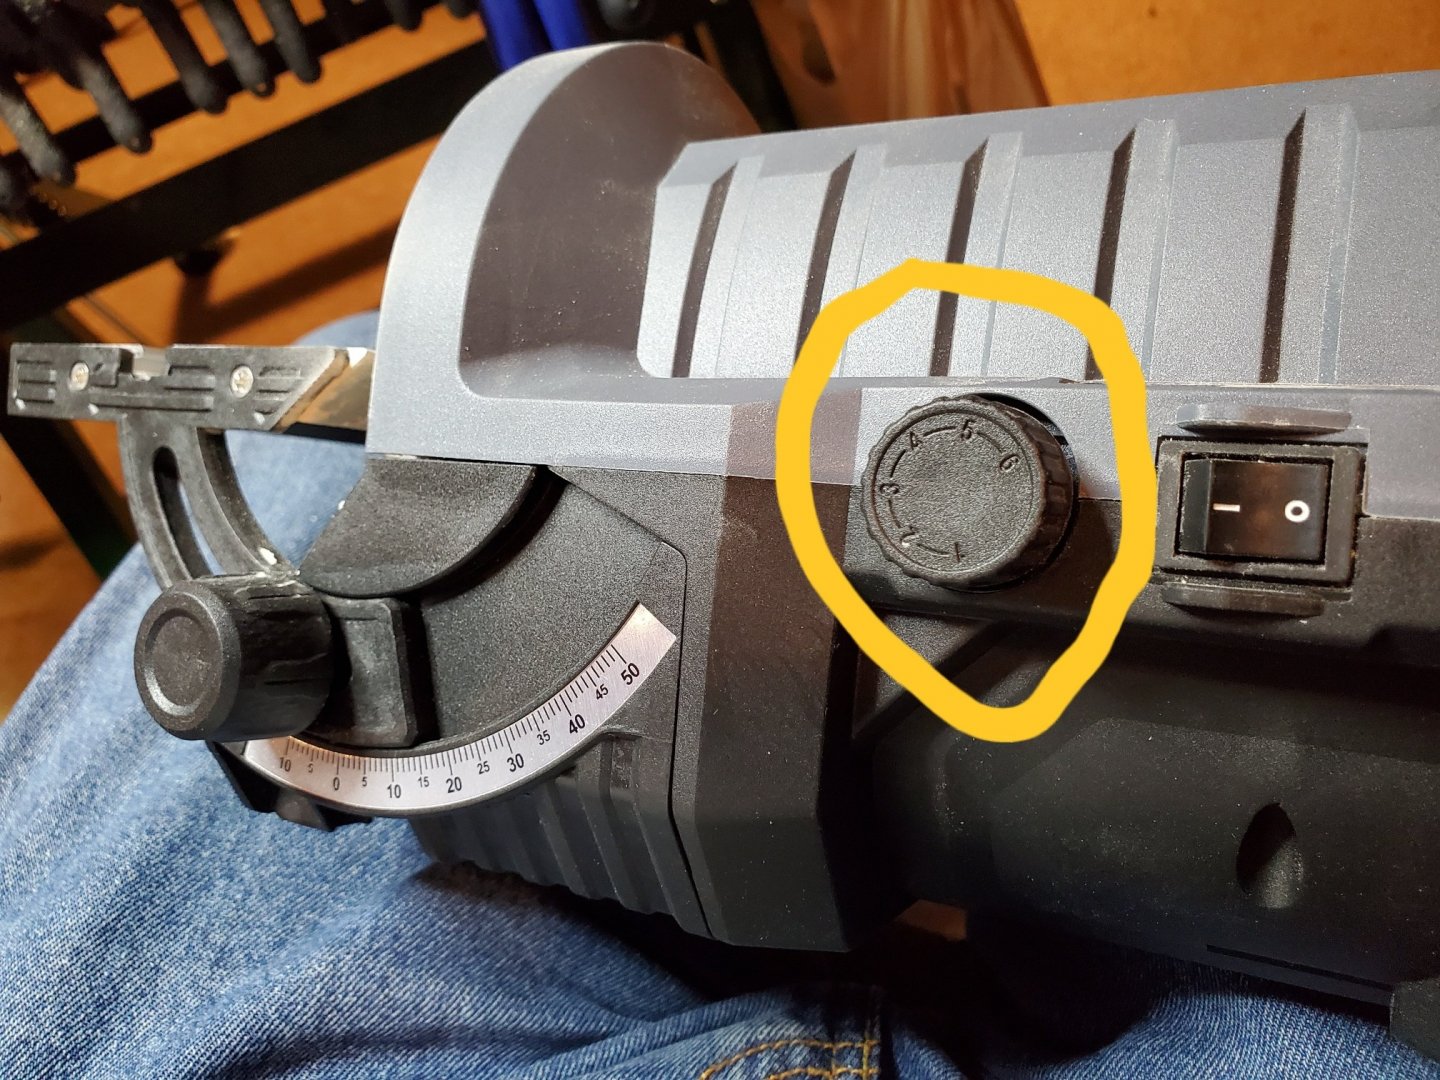
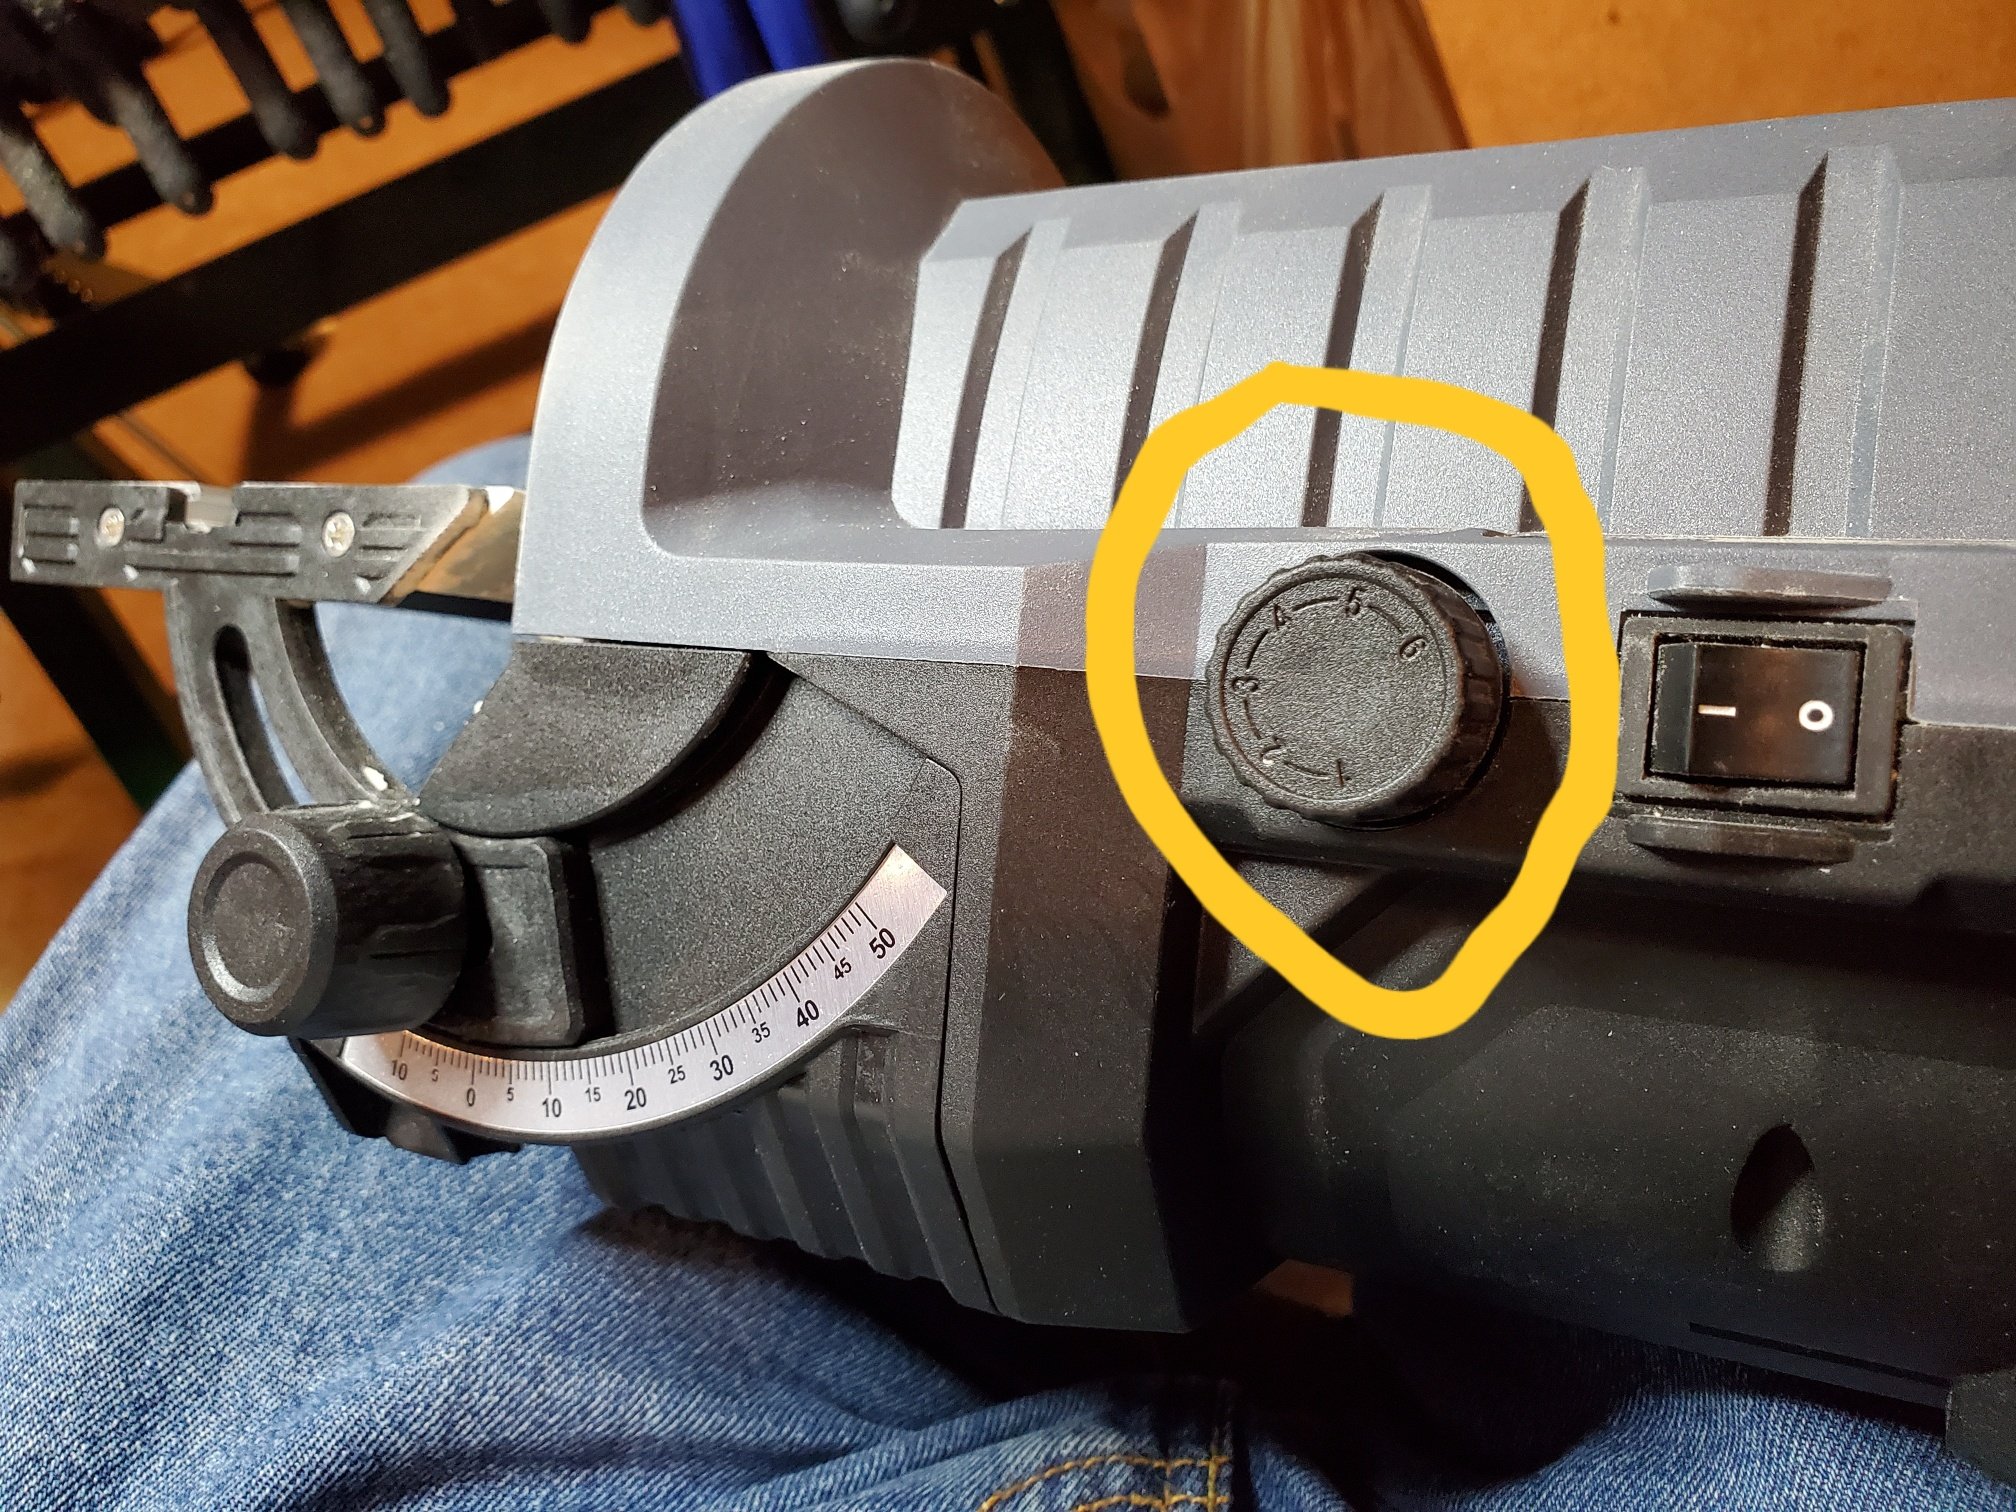
I've had my Performax sander for almost 2 years now and bought it at Menards on one of their 11% rebates. Right now for those in the US, menards.com has them on sale for $39.99 with free shipping to a menards store.
They are great for ship building! Other's have posted that it has a clamp so you can clamp it to the bench, others state that it has two speeds but in fact it is variable speed, and others state the sandpaper is easy to replace with stick on sandpapers. One thing I haven't seen from anyone's post is that this unit has an exhaust port that you can hook up a vac to. I use this in my den and never heard anything from the wife about this causing dust everywhere. For the price, it works for me in a pinch. As the character from Godfather's Pizza would say..... "Do it"
-
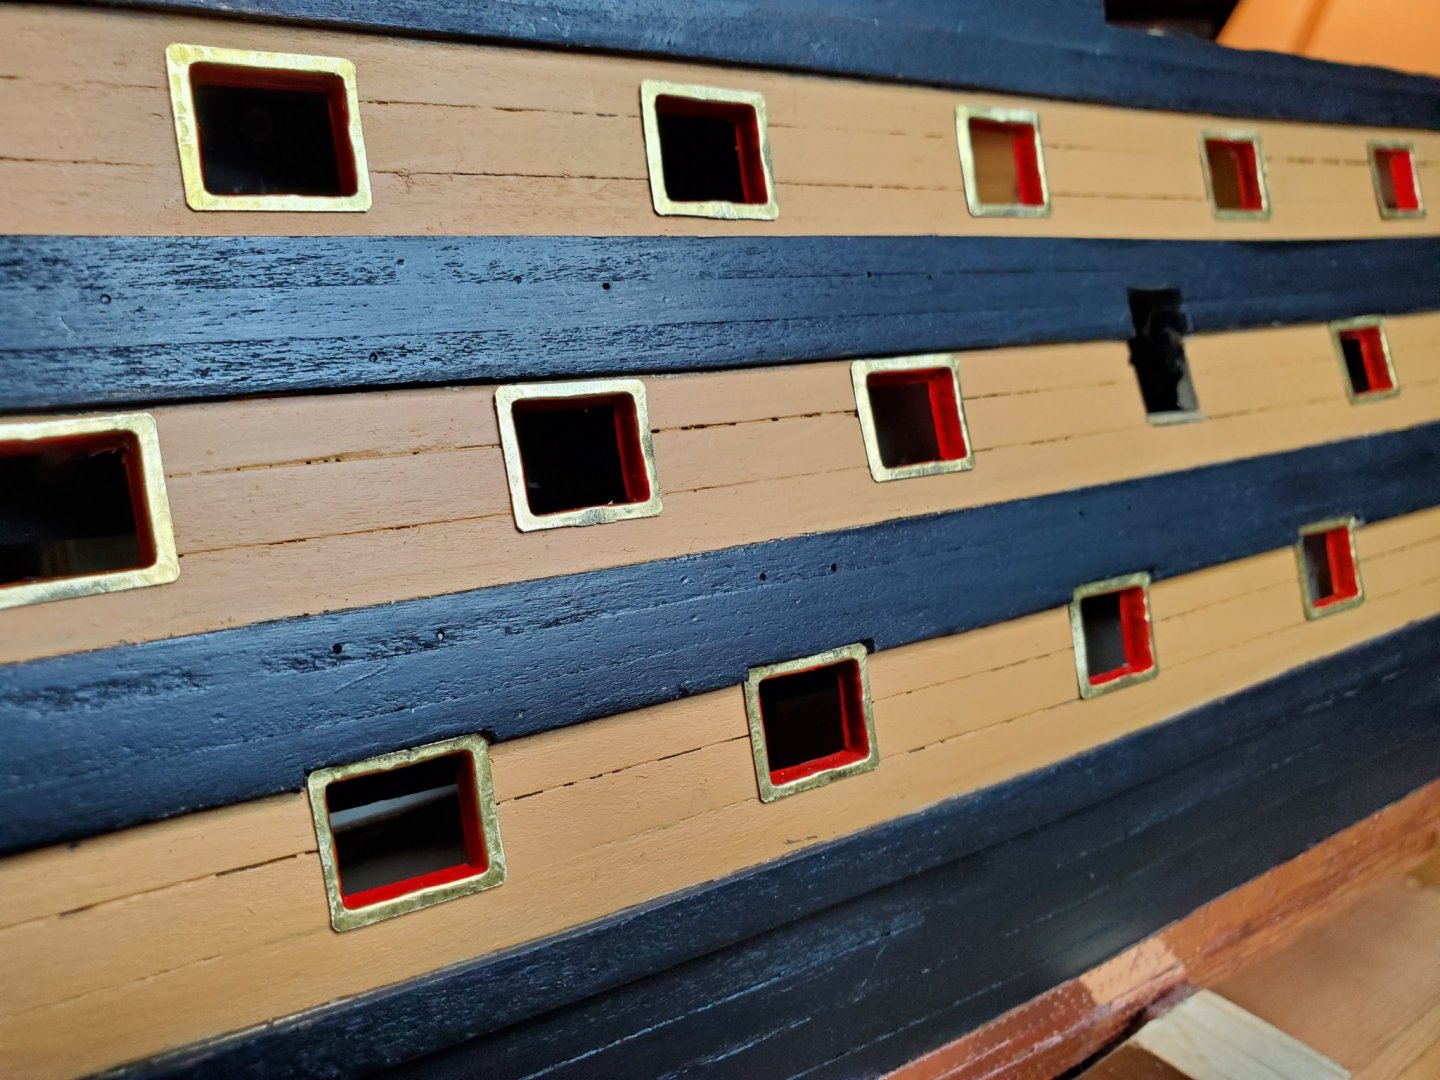
Really happy the way the starboard brass gun port frames look. The extra time I spent making sure that the brass frames fit tight in the openings I cut with a #11 X-acto paid dividends. I wanted them flush to the sides. They popped right in without any issues.
- gieb8688, BenD, GrandpaPhil and 2 others
-
5
-
GrandpaPhil... thanks for the quick response. Big difference between your Vic and mine in the cabin structure layouts.... then realized yours is the same company but 1:98 scale and mine is 1:78 scale. The company made different structural changes from the 1:98 scale and 1:78 scale but we had the same outcome. From your build, the starboard side looked like it snugged up to the side nicely. The plywood piece on yours is also designed differently than mine. It is what it is. To late to change it now. It would destroy the model as it stands now by tearing the whole back cabins off and re-doing it. Besides if I did, it would destroy the laser cut cabins and I would have to scratch build the whole back end. This is only the second model that I've made and "scratch build" isn't in my vocabulary yet. When I come to that, I'll start off with something a little simpler.
This is more like I was expecting. Again, thanks for your response.
- gieb8688, GrandpaPhil and Jeff-E
-
3
-
GrandpaPhil... looking at your build, I see the side cabin panels look like they fit nicely against the sides of your model. When you laid the second layer of planking, did you void that area of planks and ran the planks up to the thin plywood base? From the instructions, it showed the planking going all of the way under the cabin panels. I'm thinking I should have placed the plywood base on the supports first and ran the second planks up to the base..... not under. What say you?
-
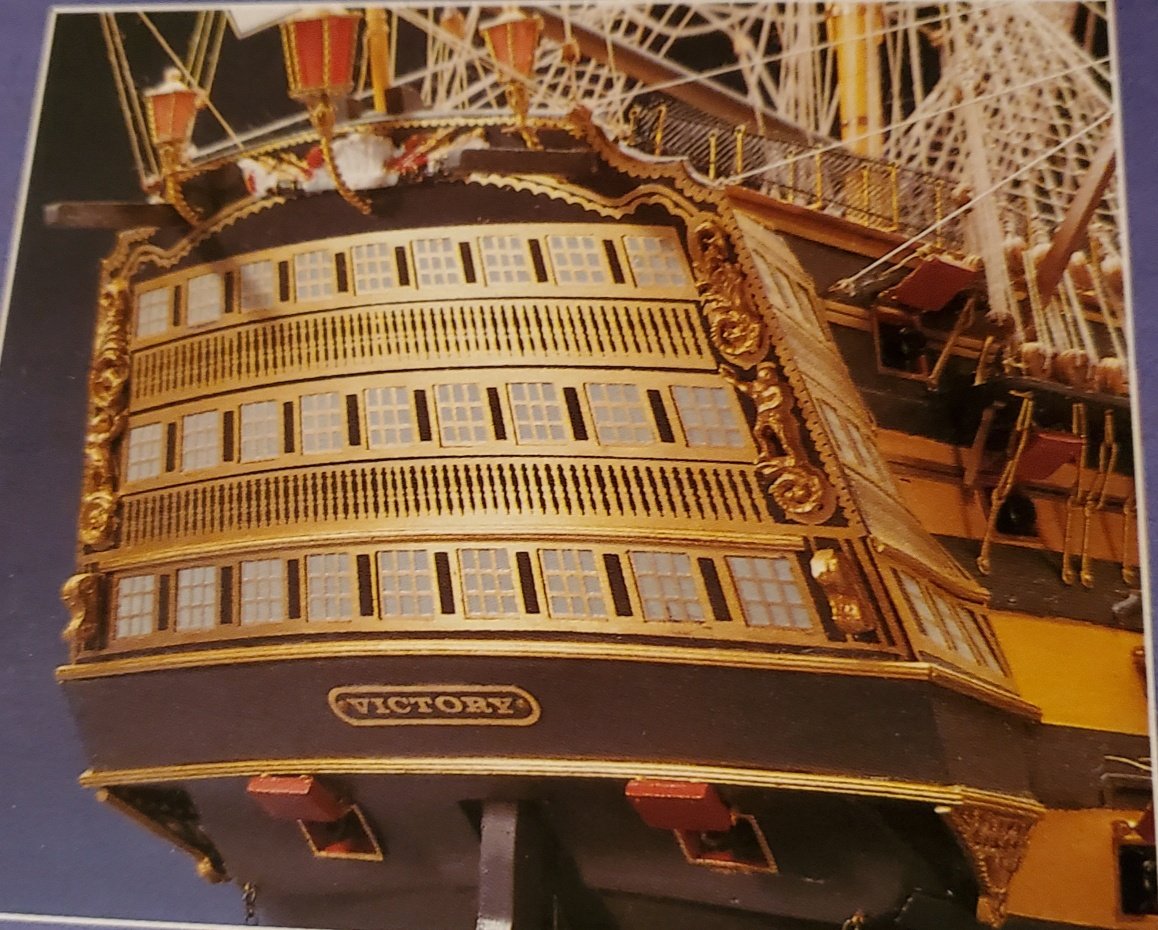
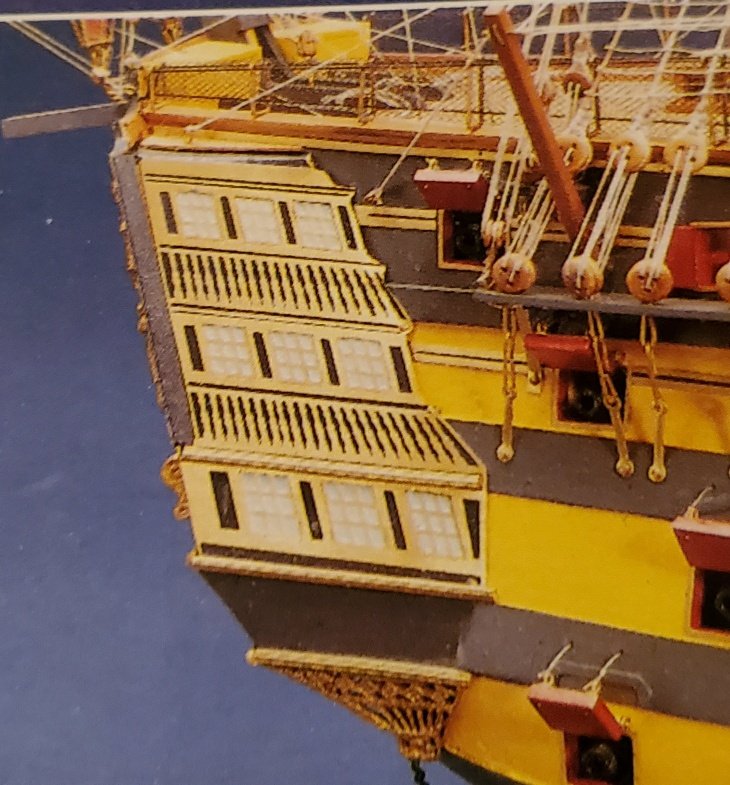
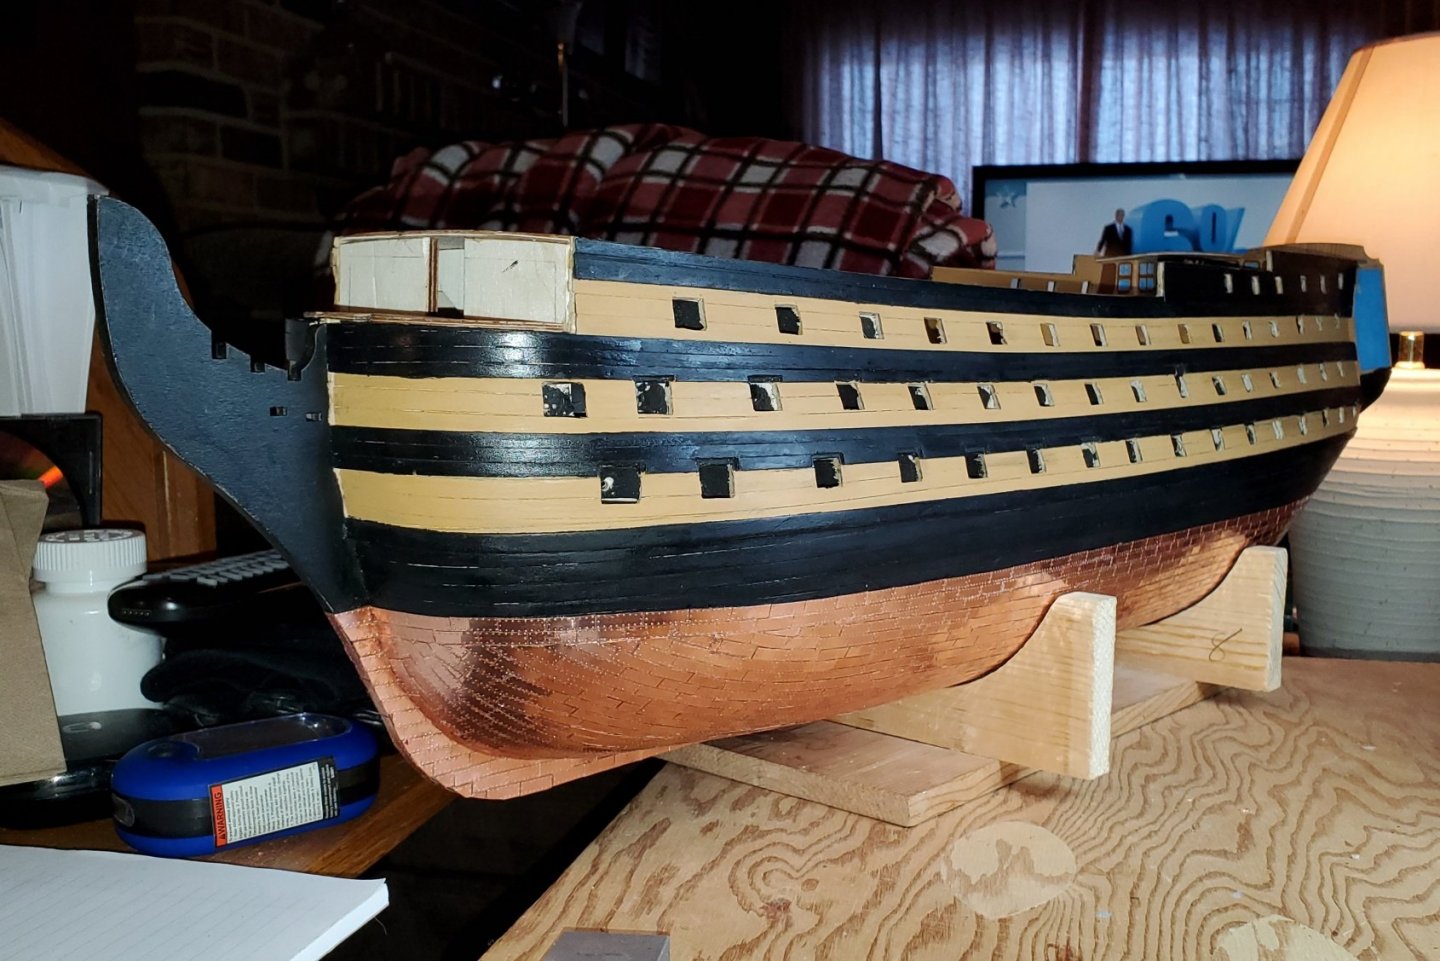
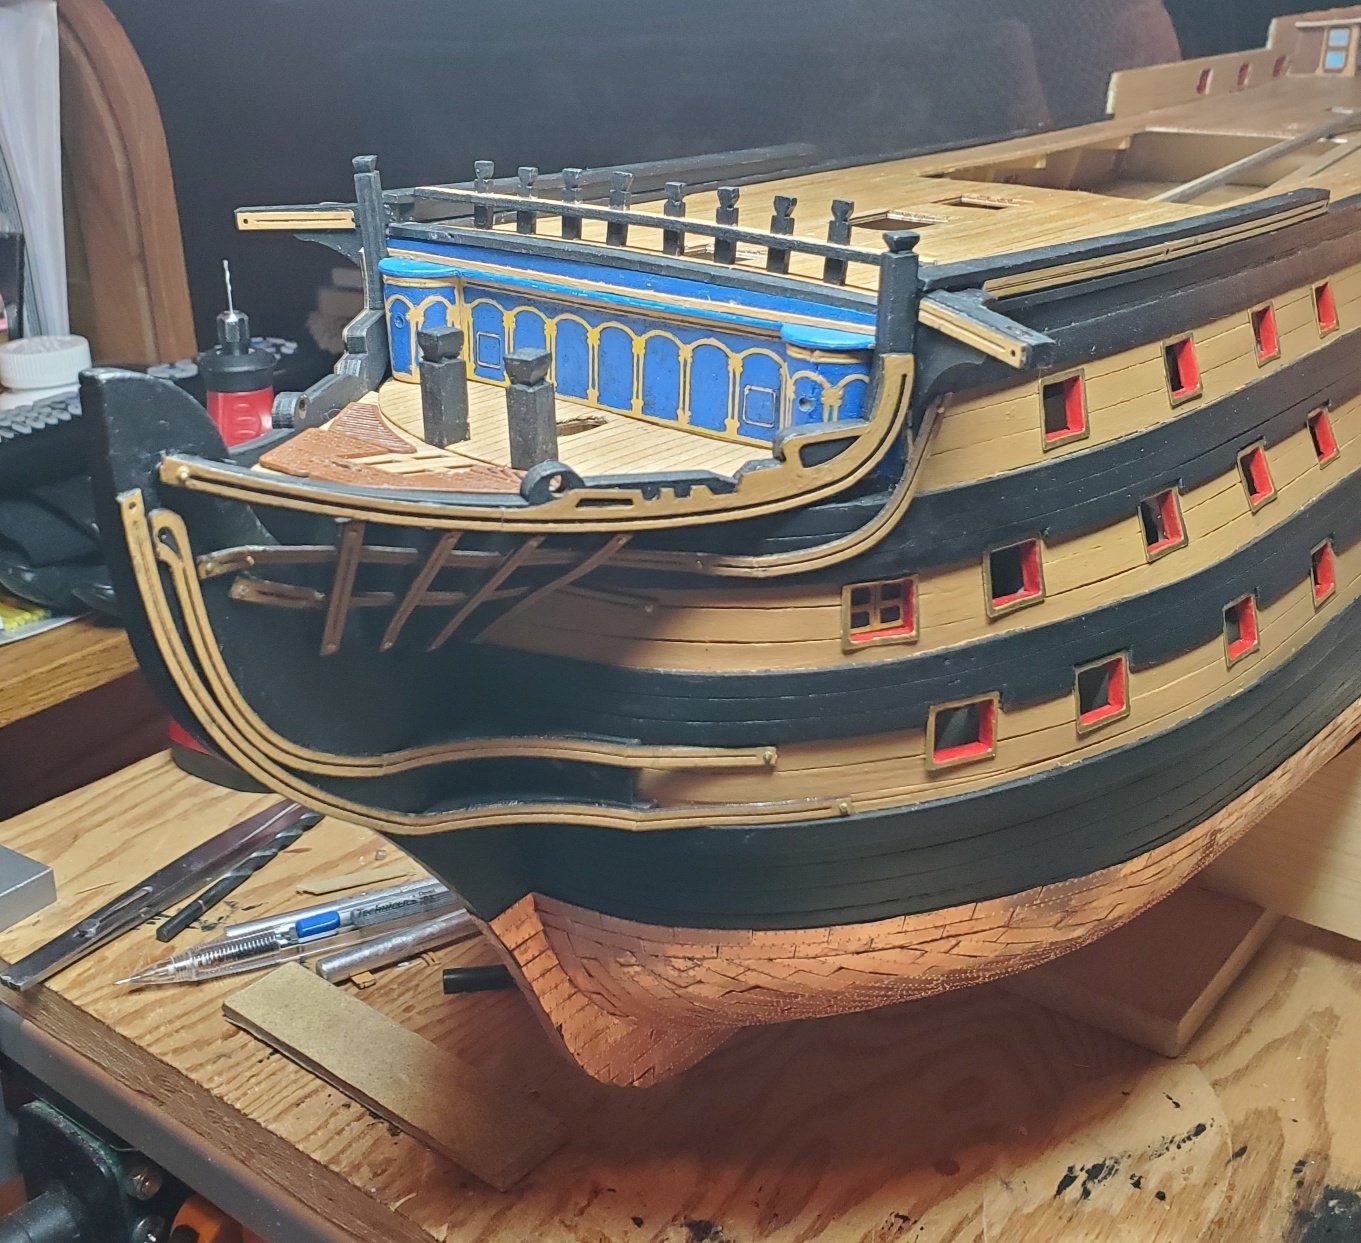
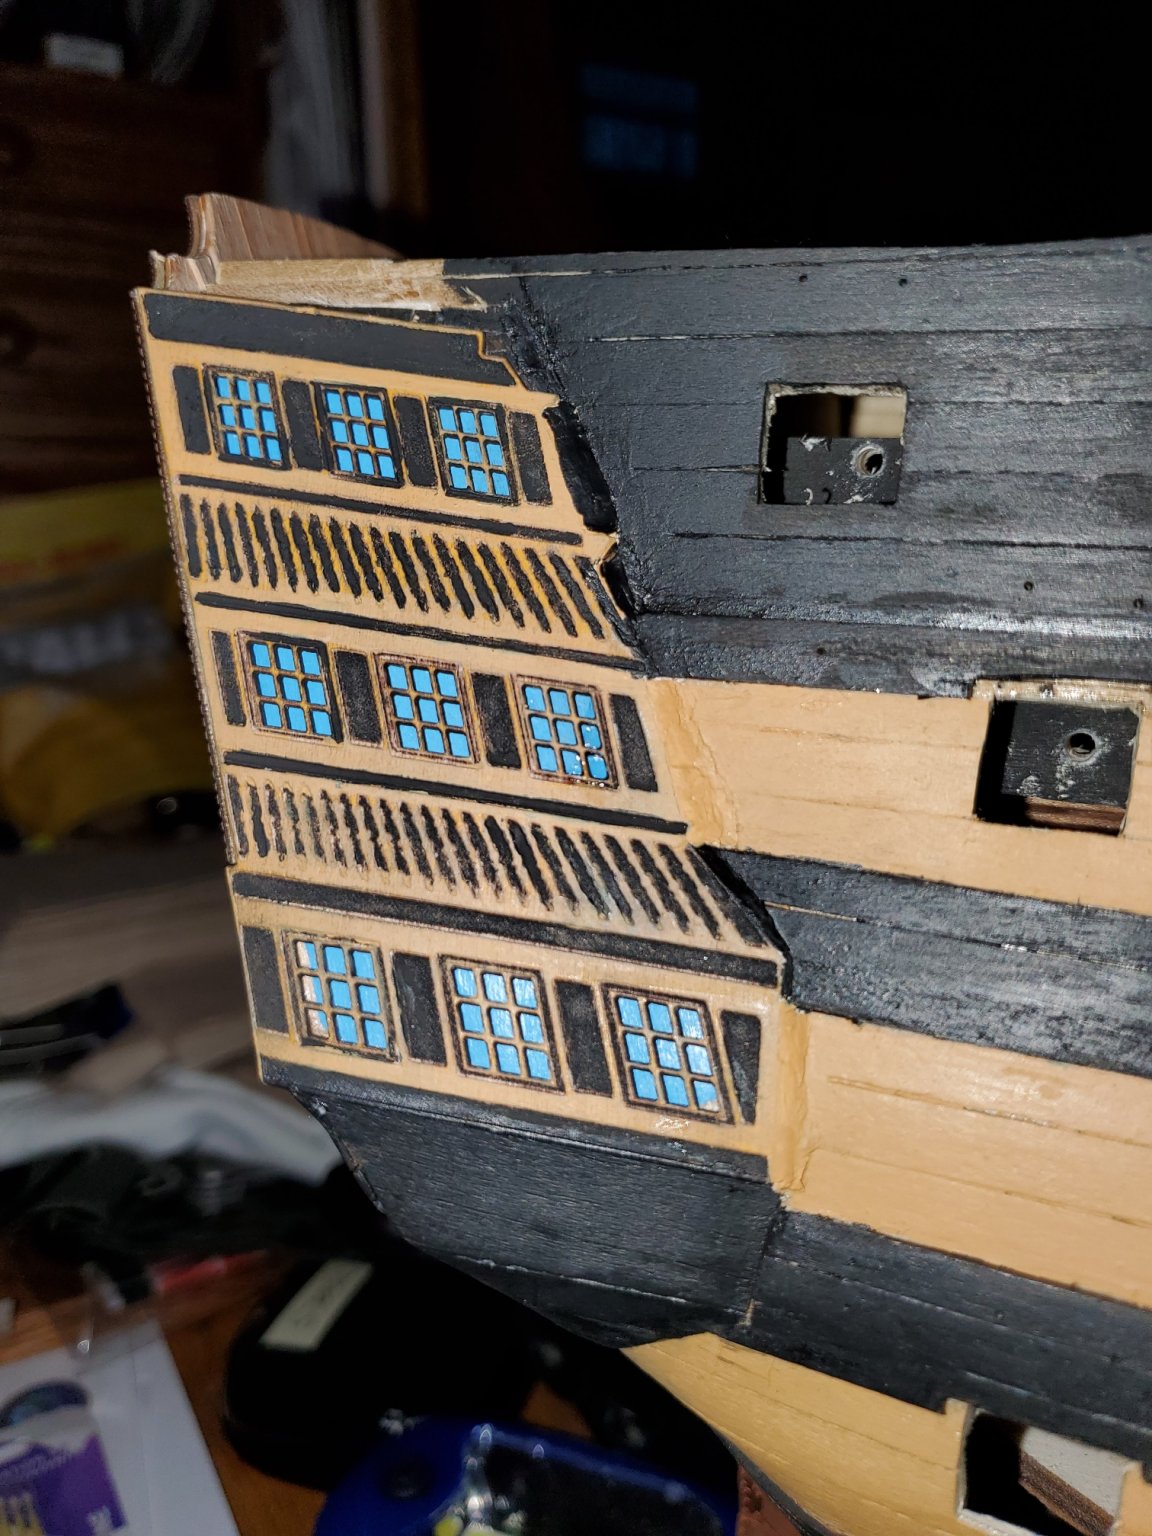
CAUTION: You can't judge a book from its cover. The same goes for selecting a model from the pictures on the box. The below pictures show what Manuta/Panart's HMS Victory #738 model should look and fit when finished.... NOT.
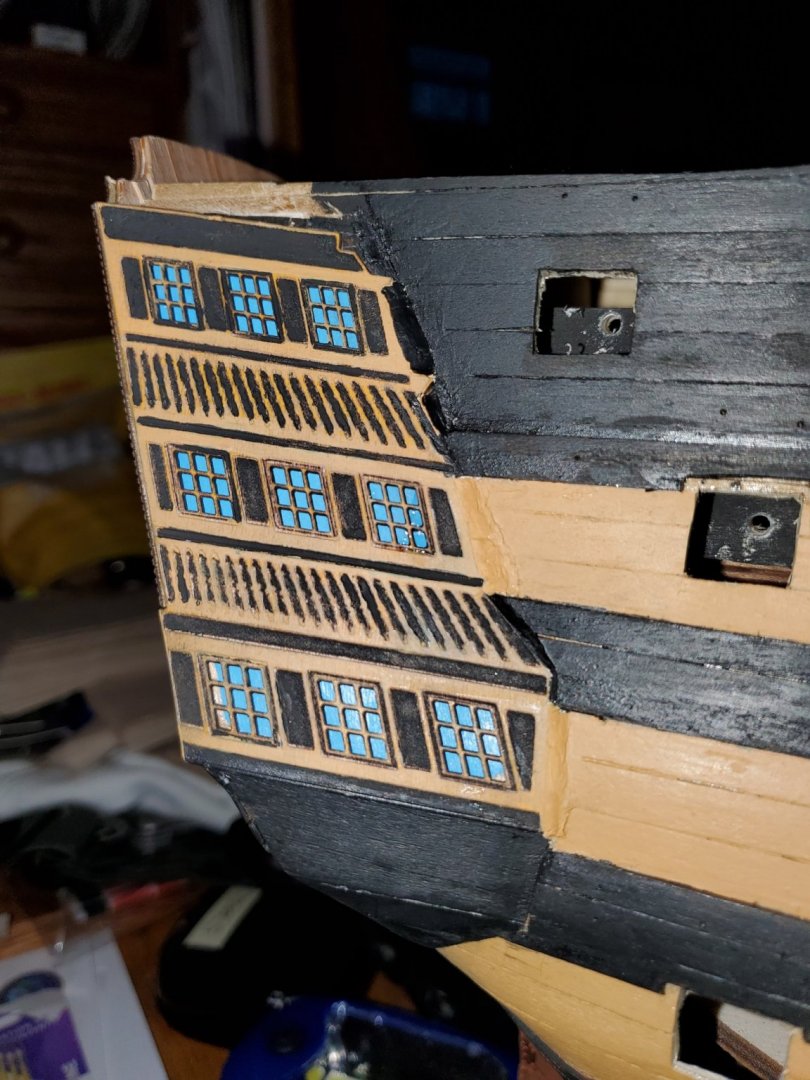
Really not happy the way the stern ended up looking and fitting. The side cabins did not fit very well to the port/starboard sides of the model.... at least not to my liking. From other builds the side cabins are a hit and a miss depending on the manufacturer. I've seen a number of builds that people had to use small pieces of wood or putty to ramp up to the cabins from the sides to make a smooth transisition. I used putty. Without the putty, it would have looked worst. The side panels wouldn't have glued up to the sides and would have left a large gap showing. Just wouldn't have looked finished. Granted I haven't put on the 3D scroll work, figures, and trim that would help dress it up. Will see how it turns out as I move forward.

- GrandpaPhil, Jeff-E and Duanelaker
-
3
-
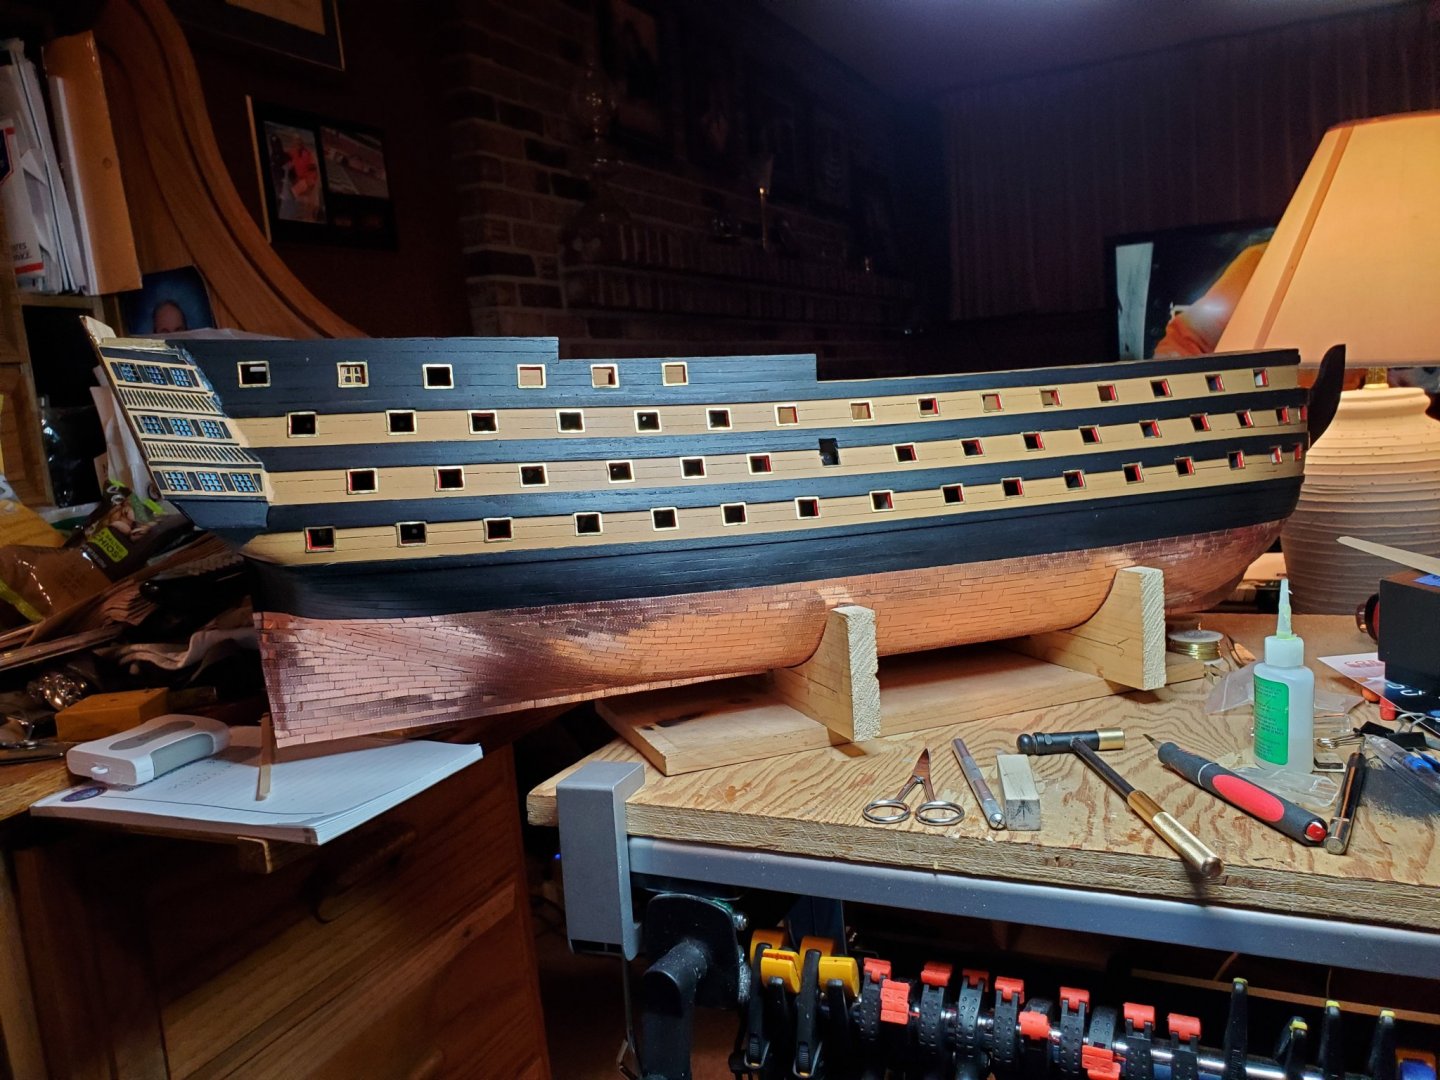
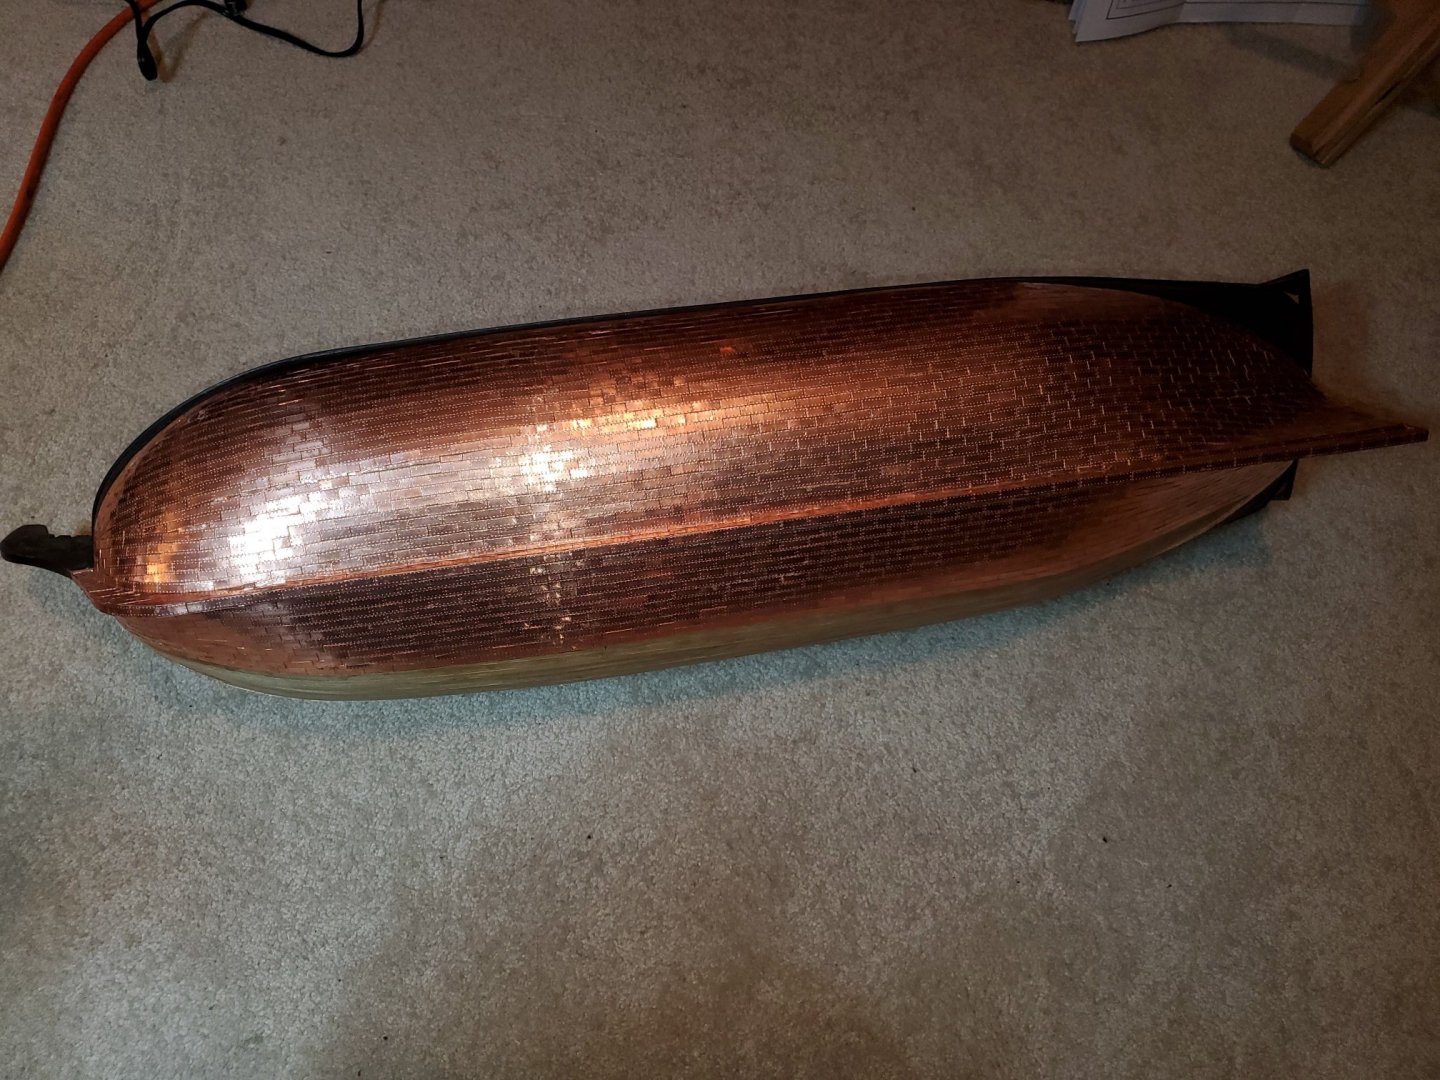
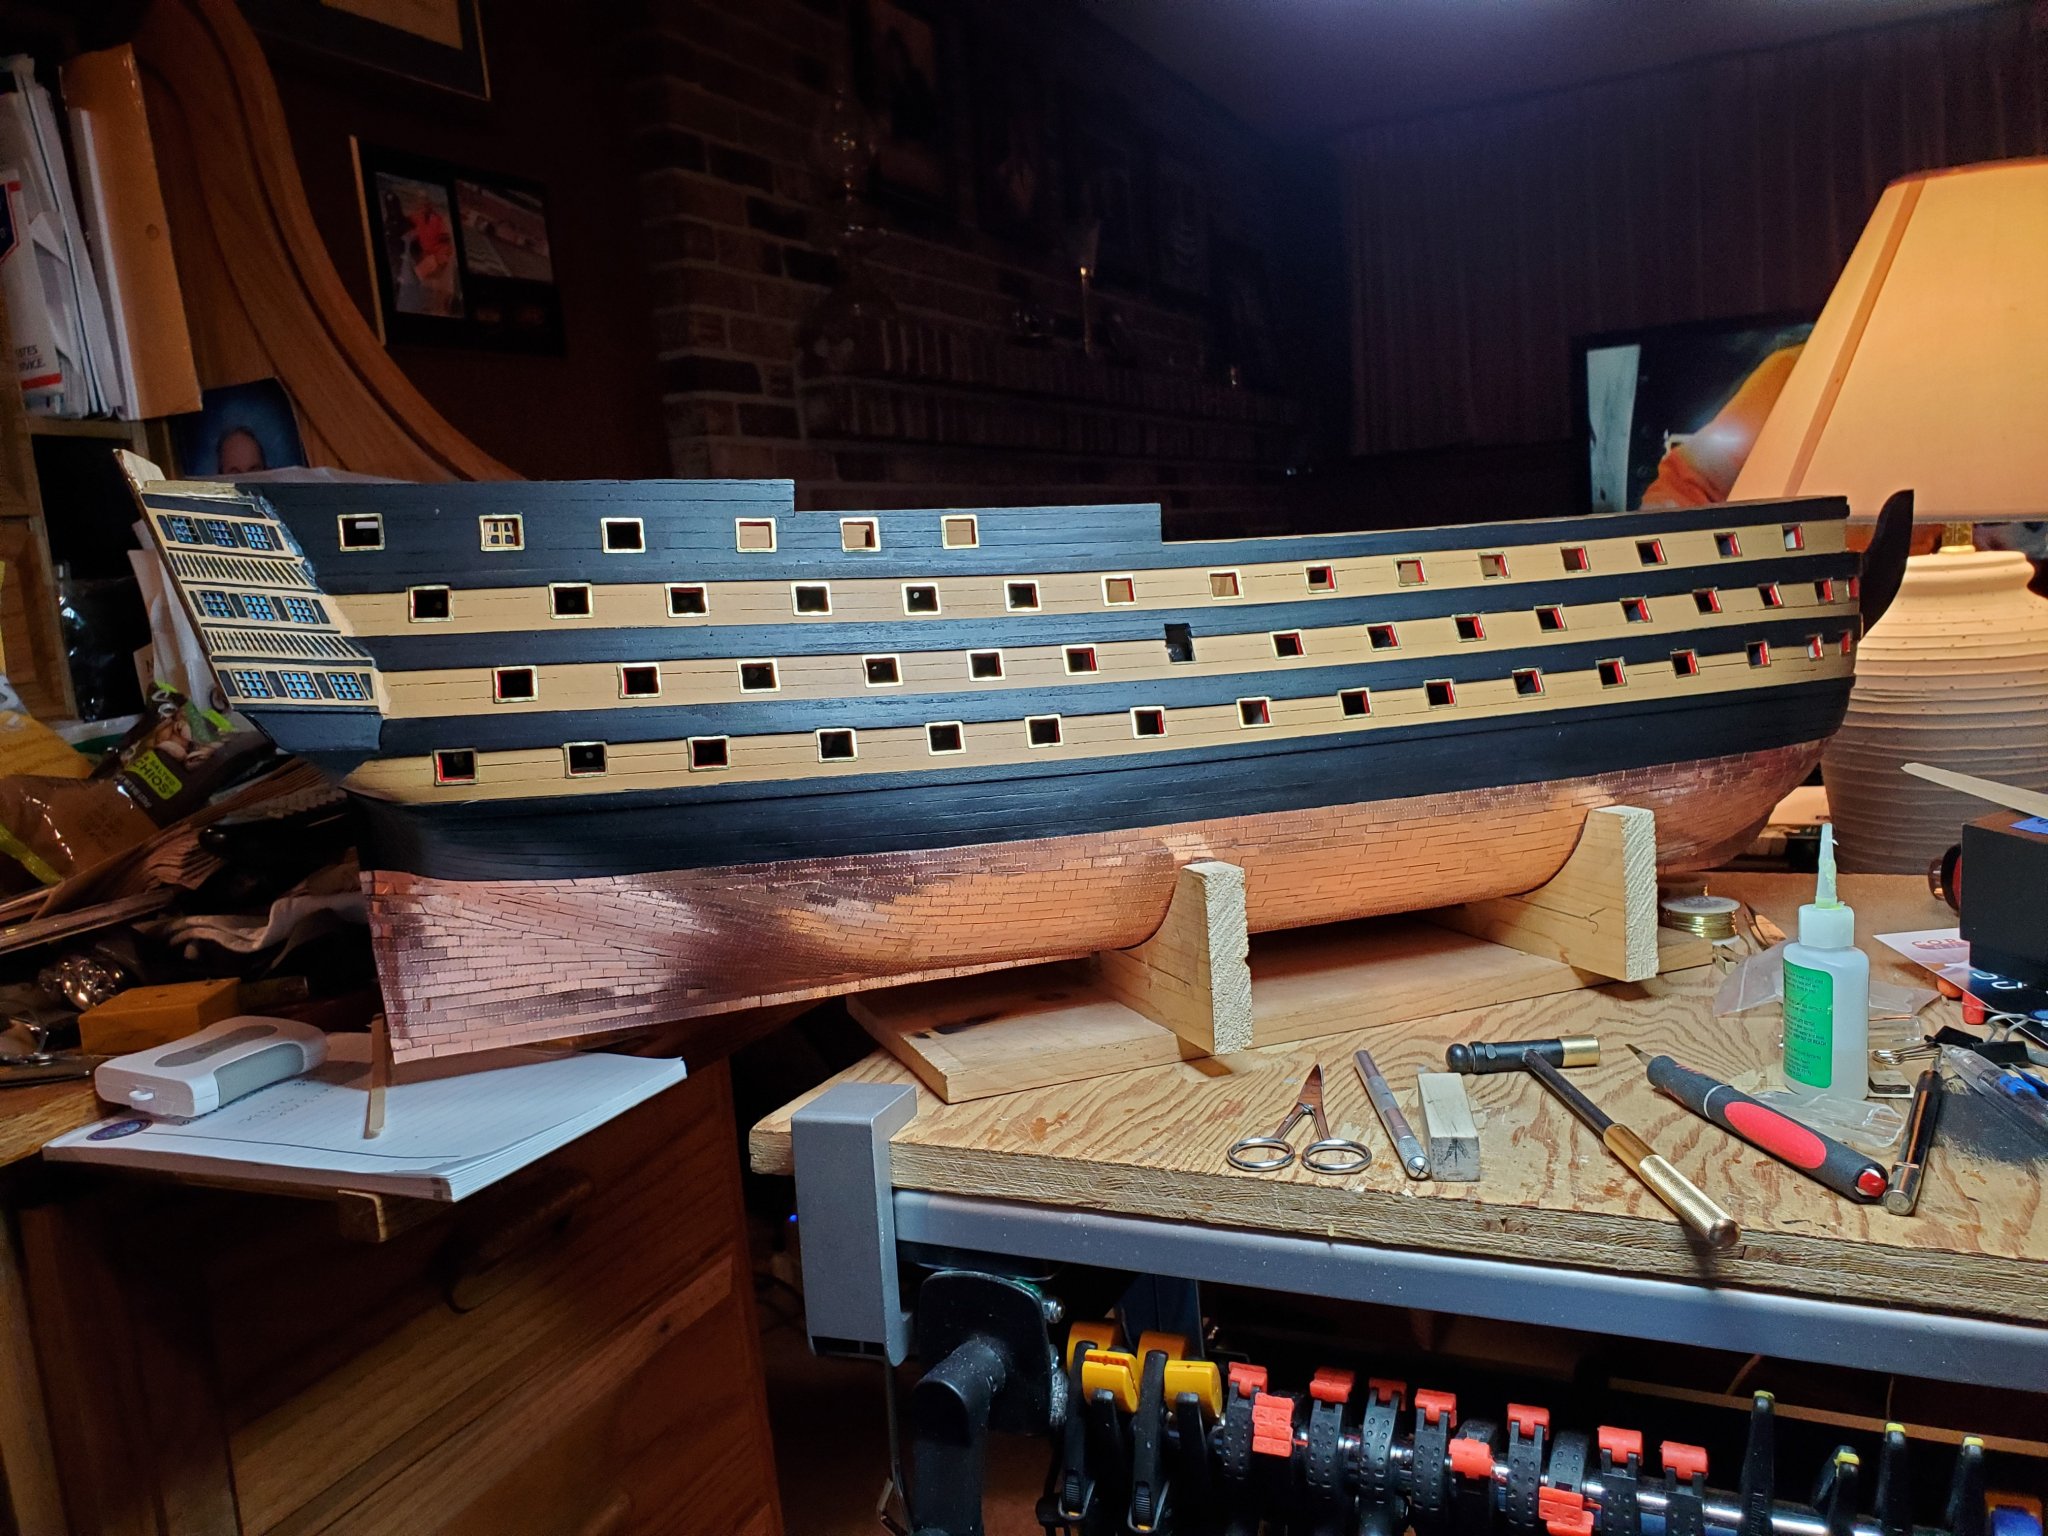
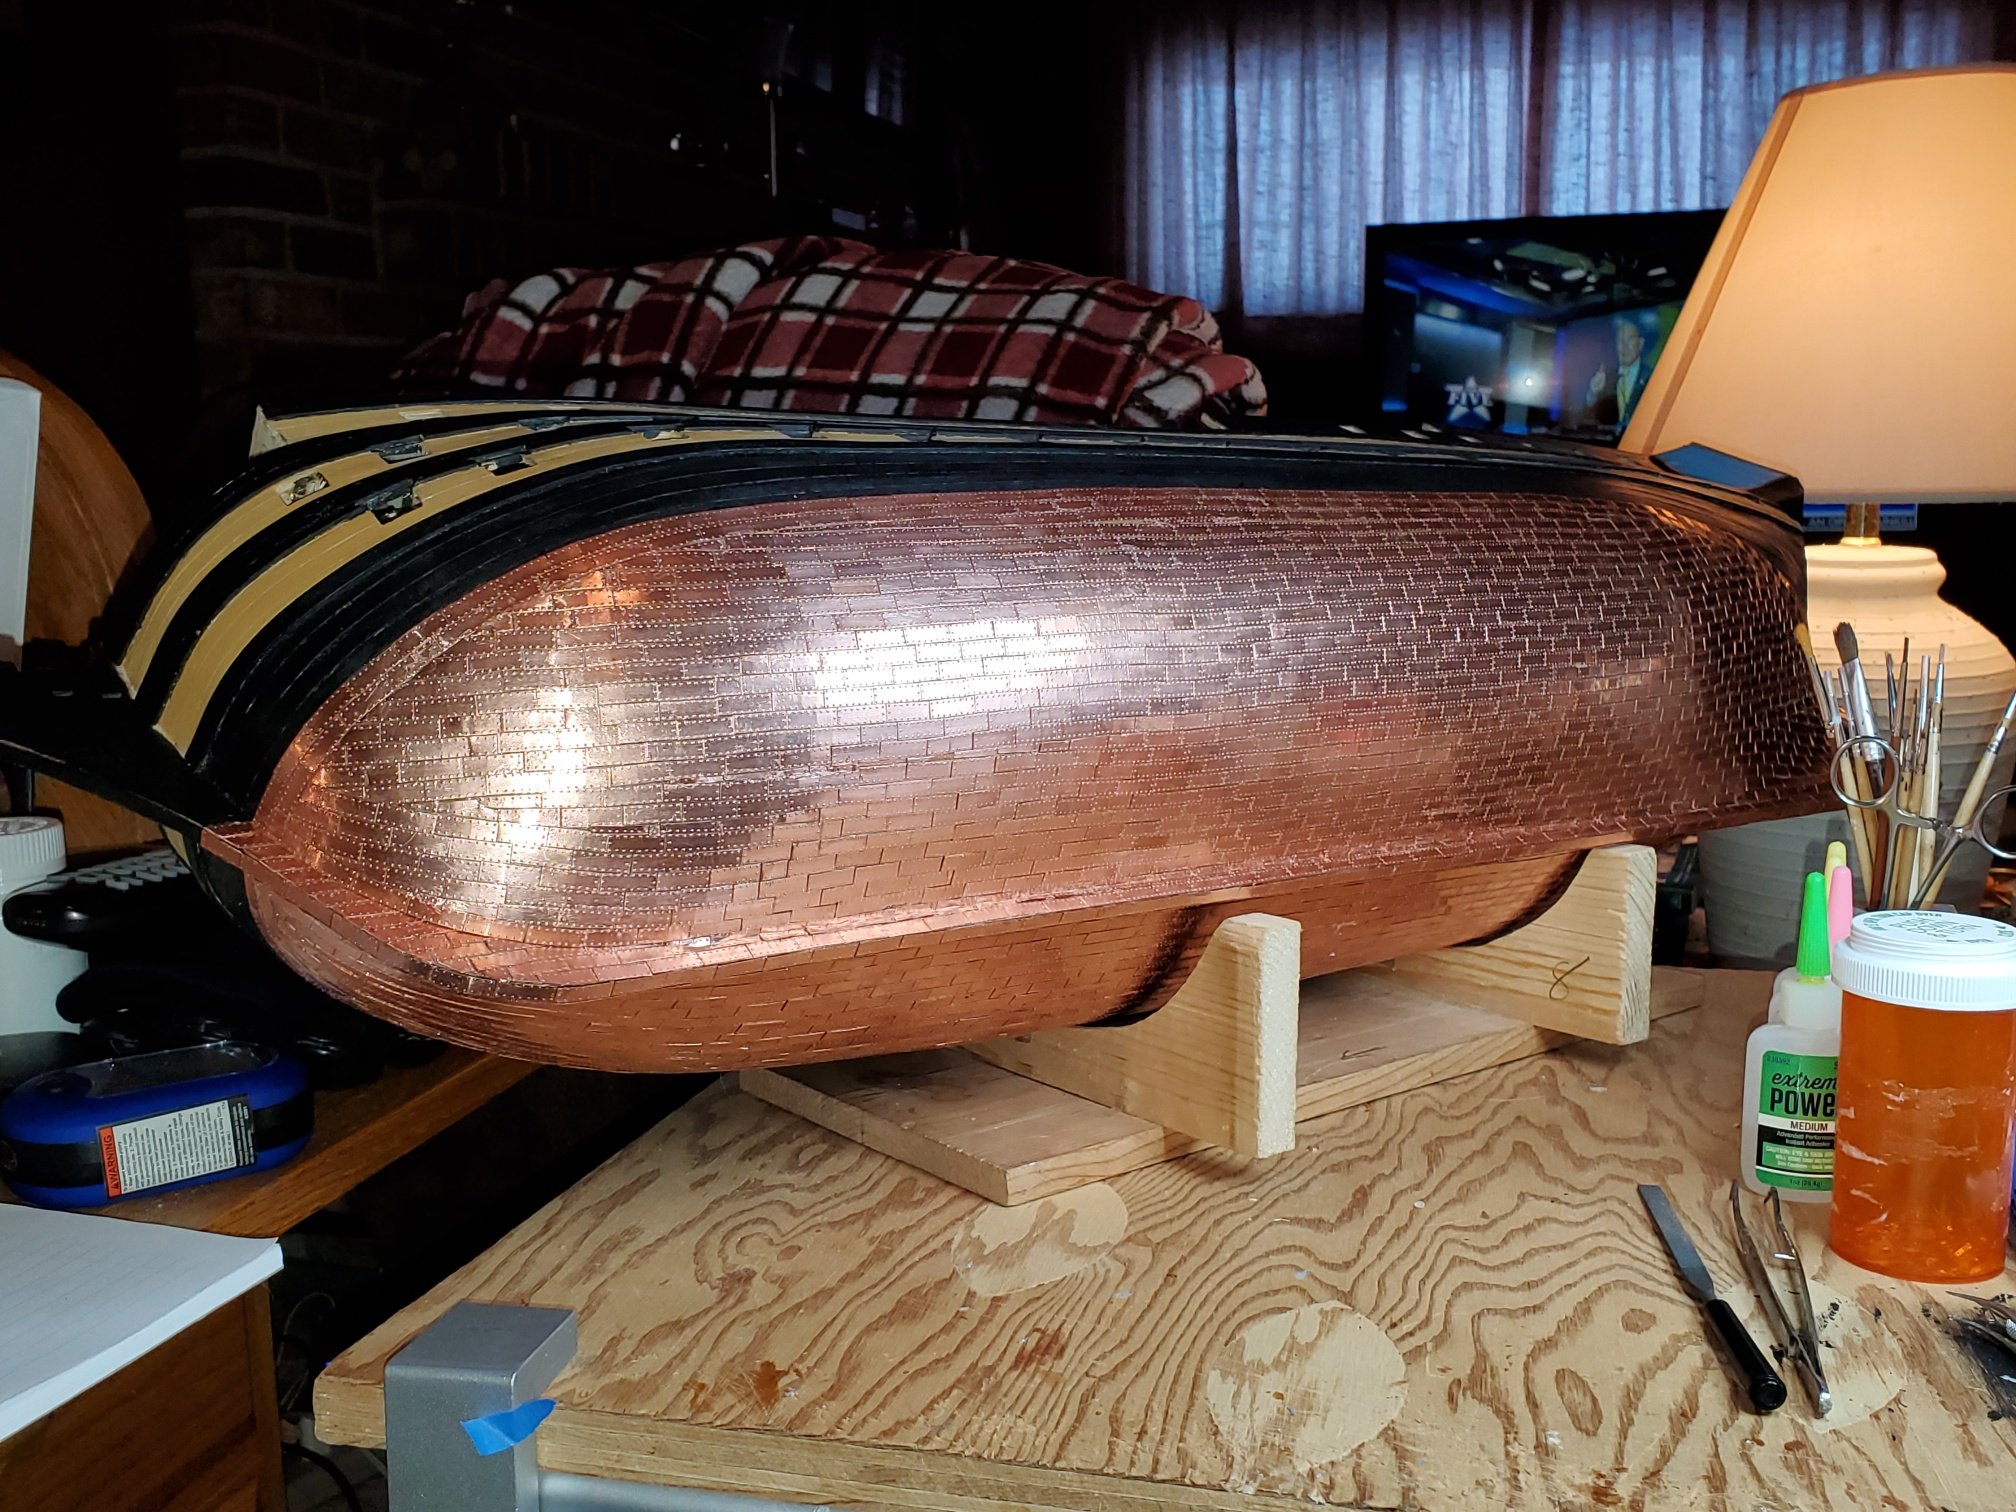
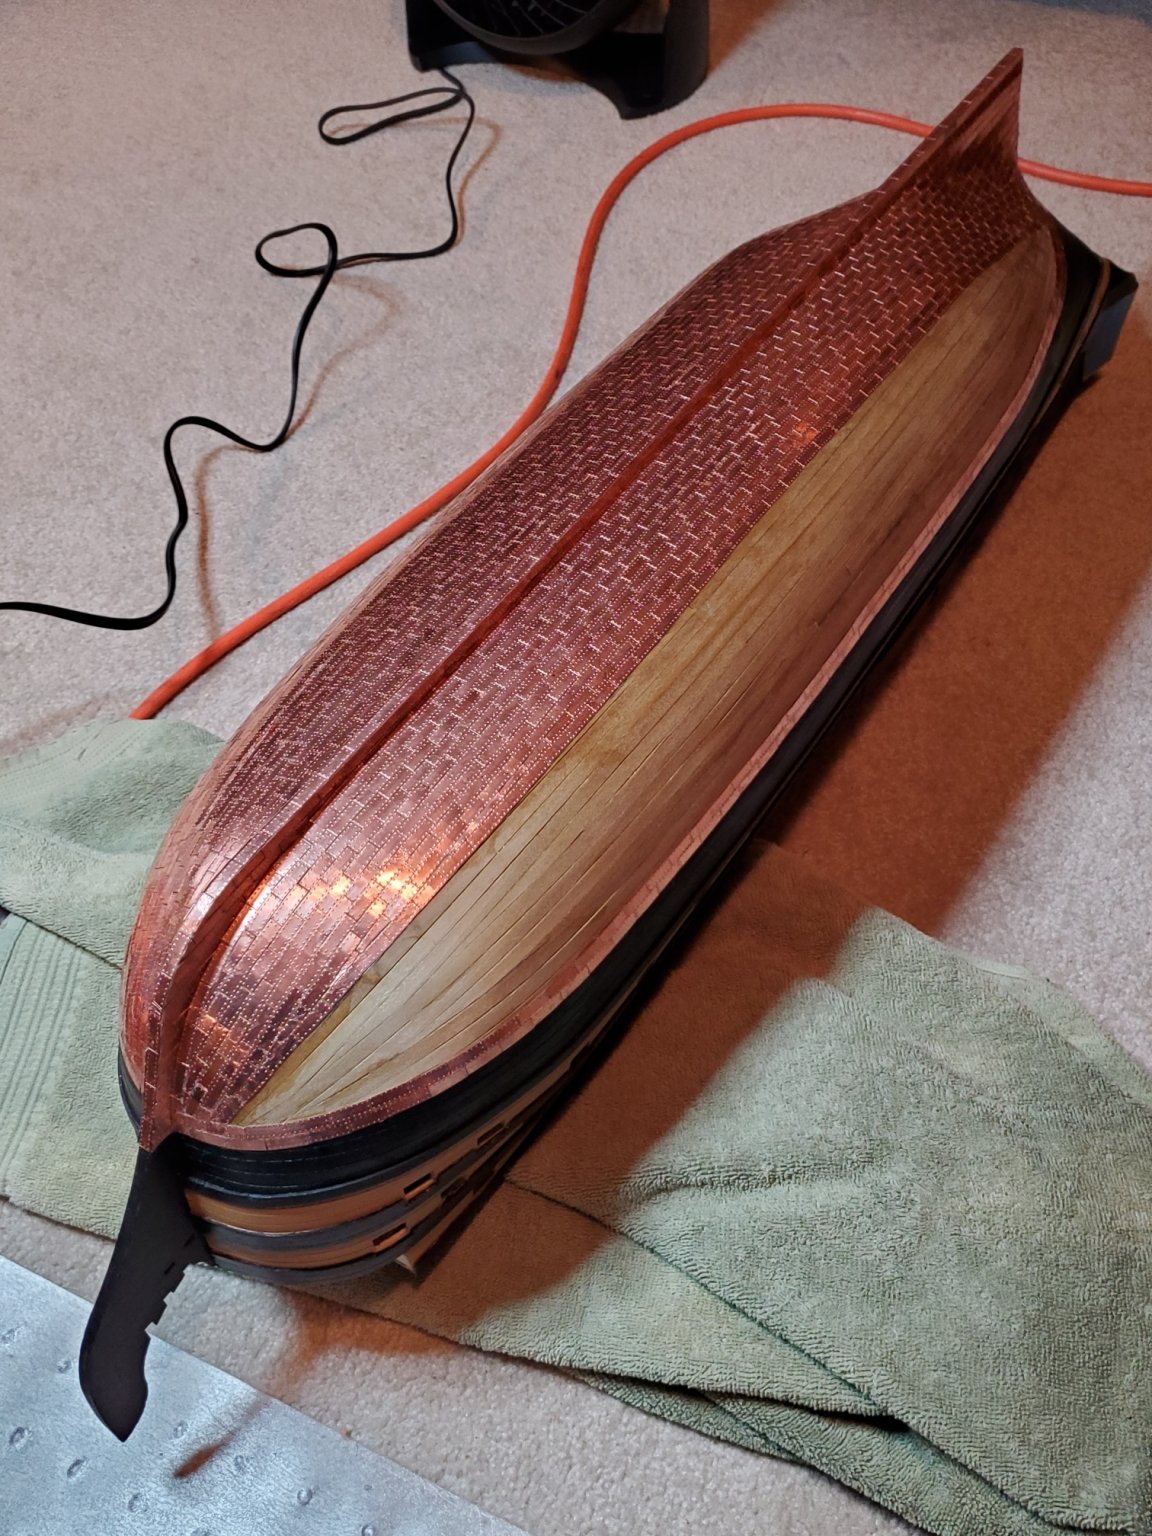
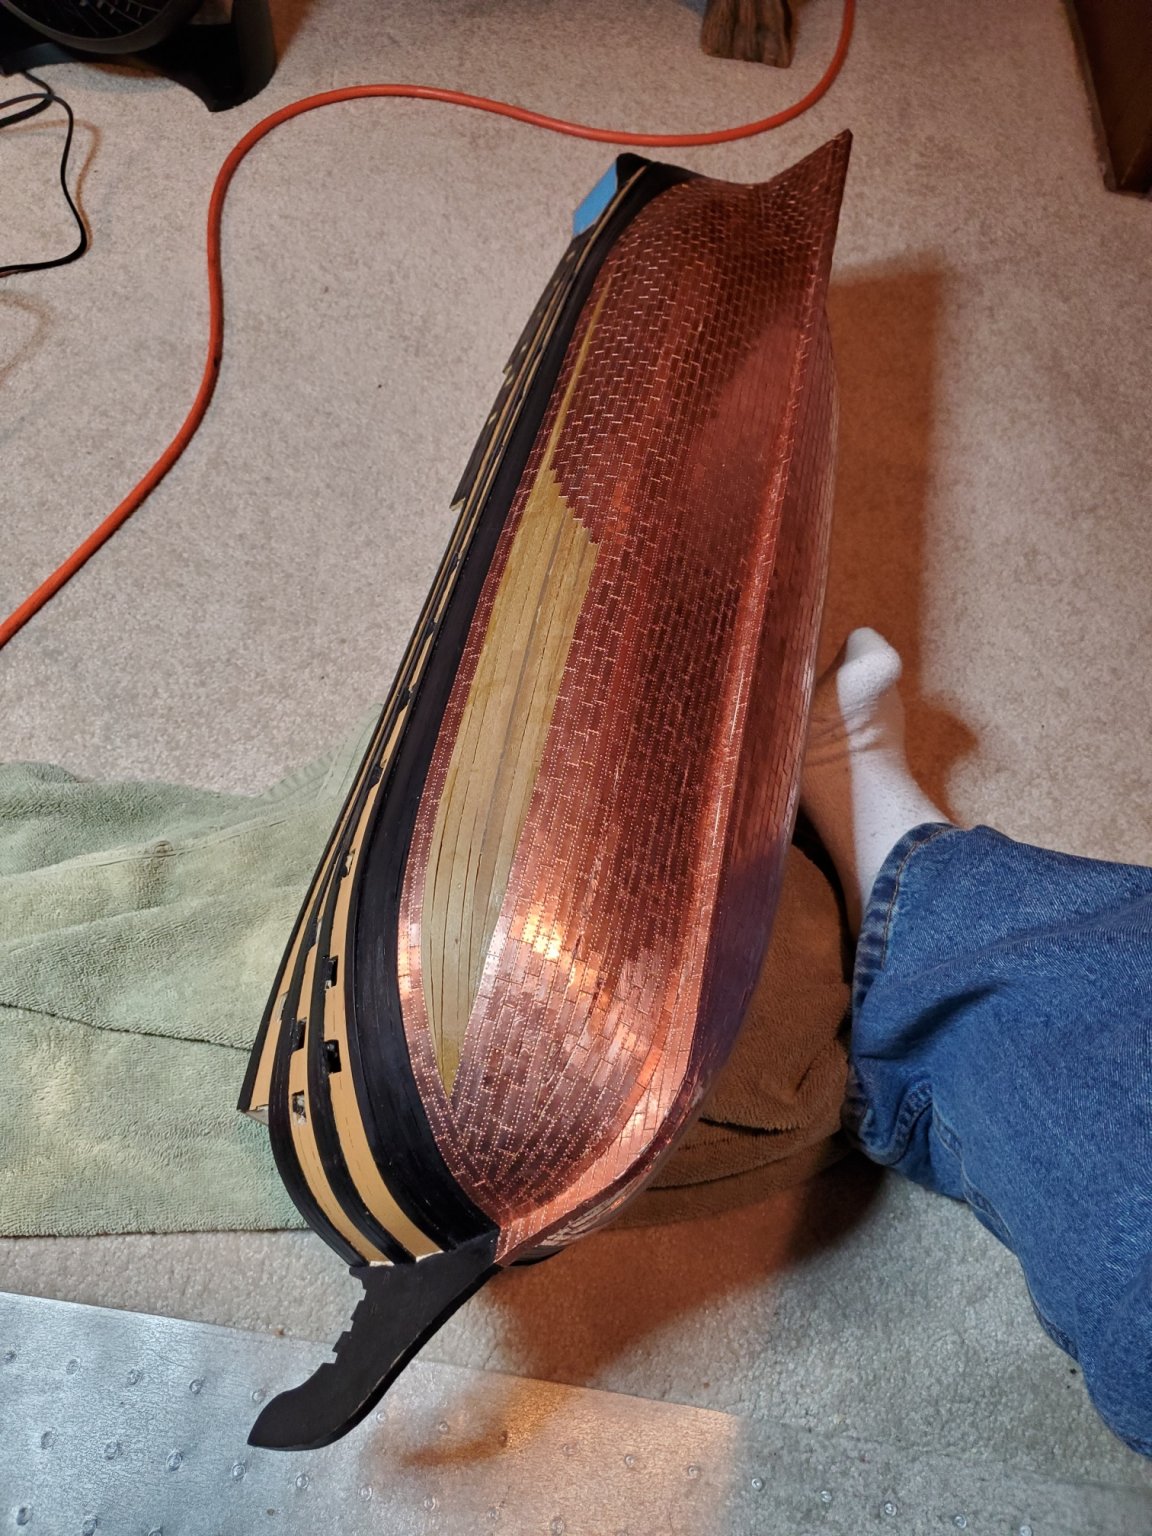
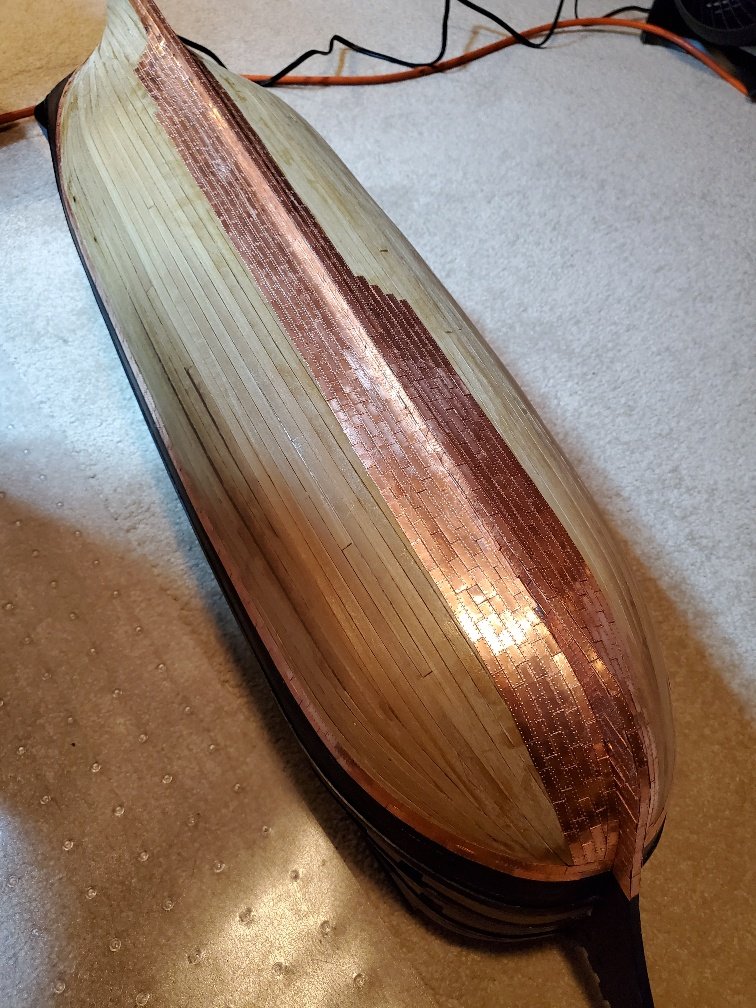
It has taken almost 2 weeks to complete but.... I"m happy to report that I have finished adding copper tiles to the haul of the Victory. I still have to do the rudder but my fingers can use the break since I'm not at that part of the build yet.


- Jeff-E, gieb8688, Duanelaker and 3 others
-
6
-
Recently read through you entire build. Enjoyed the trip. What caught my eye was your reference to a book entitled Historic Ship Models by Wolfram Zu Mondfeld.... so much so I ordered it off the internet for $8. For $8 who could go wrong. Thanks for following my Victory build and all your positive comments. Should have the copper tiles completed today!
-
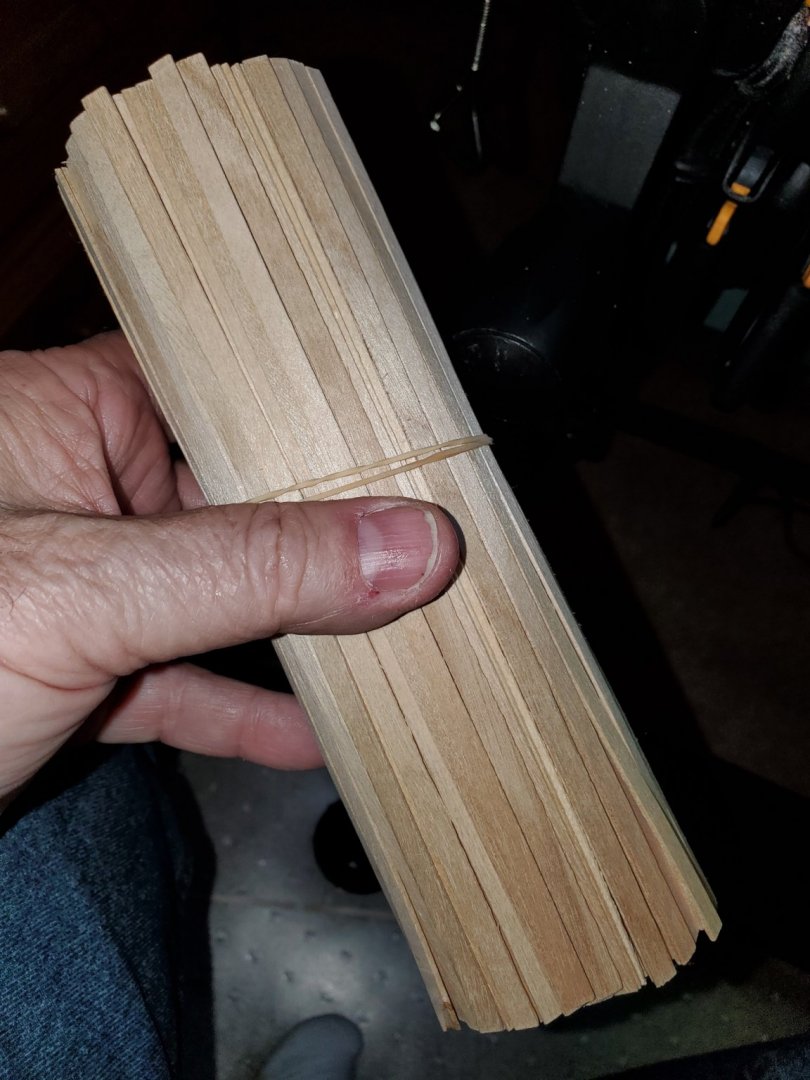
Great build! I have plans for the Mayflower II that I picked up at the Pilgrim Plantation in Massachusetts and will try and scratch build it using coffee stirring sticks.
Your build goes into much more detail that I will try duplicate.
Again great build.
- popeye the sailor, mtbediz and CDW
-
3
-
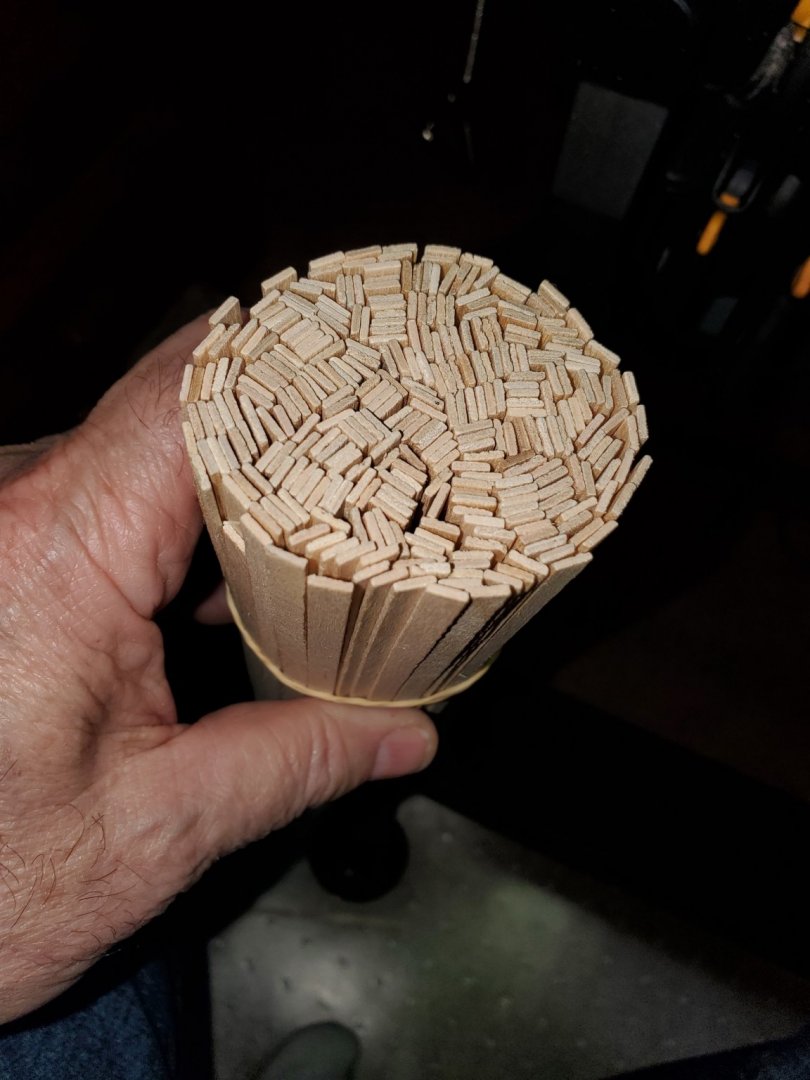
Has anyone used these?
On the last cruise we went on I saw these stirring sticks for your coffee. Look them up on the internet and found they were made of birch. Grabbed a bunch and will see if I can use them on the future build of the Mayflower II I plan on building after the HMS Victory build. I used similar sticks but much thinner for the decking on the Victory build. They look pretty good quality. To buy, they are less then $8 per thousand.
- BobG, GrandpaPhil, mtaylor and 1 other
-
4
-
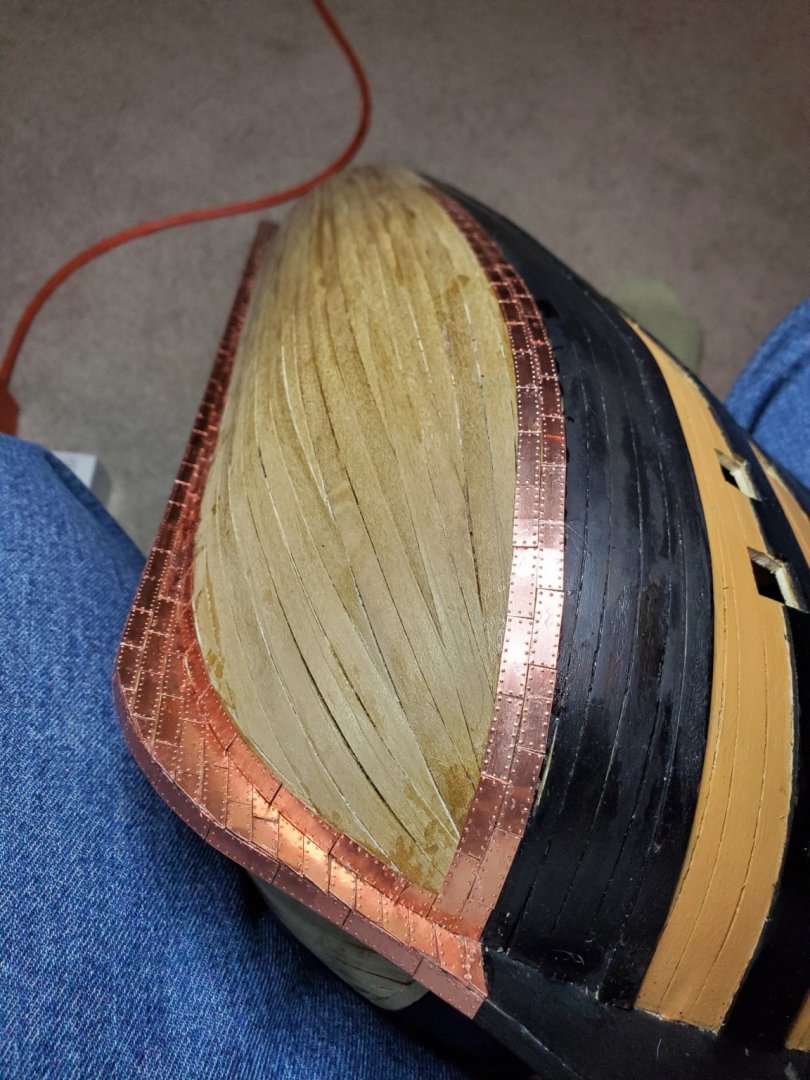
Whahoo! Port side copper plating complete. Now to finish the starboard side.
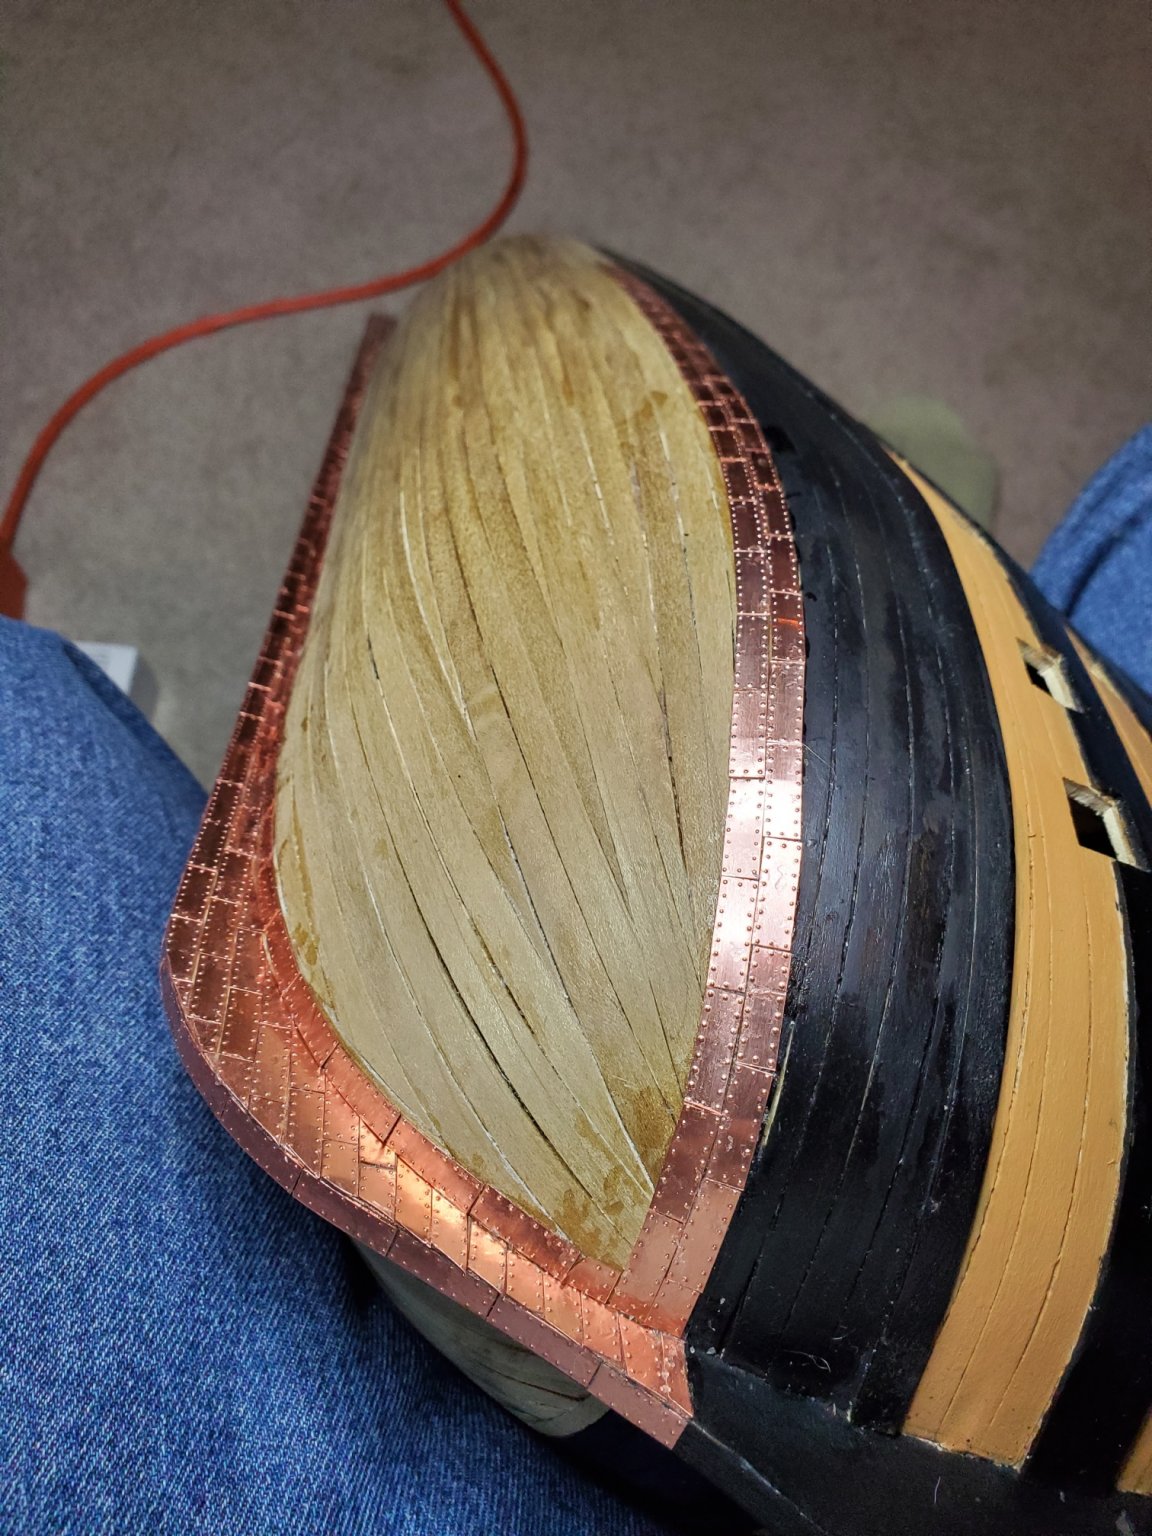
Tip: Testors has a copper paint that touches up some of the small , not so tight fit between tiles that may show some of the wood between the tiles. Although 99.9 % of all of the tiles fit nicely together, there were some areas (bow, stern, and keel) that had some small showing of wood between the tiles. Using a small brush with the copper paint filled those imperfections nicely. You really have to look to find those areas. The other thing I had to be careful about were the tiles themselves. You had to be careful that you were gluing a single tile to the model. They frequently stuck together one on top of the other and constantly had to be sure you only had a single tile. The other thing that made it difficult were the tiles themselves. They were of different thicknesses. Most were standard but some were much thinner but really didn't show on the model.
- GrandpaPhil, JayCub and Jeff-E
-
3
-
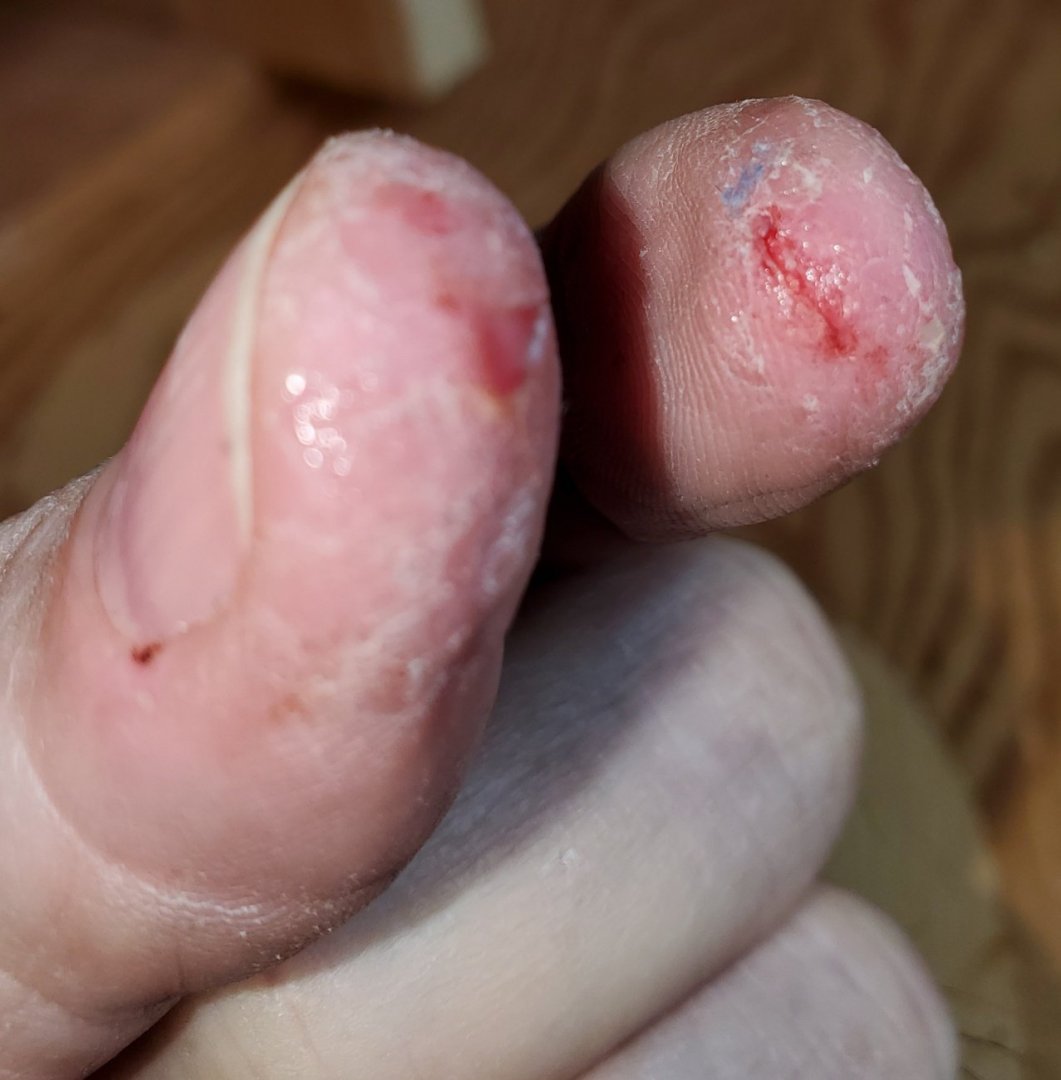
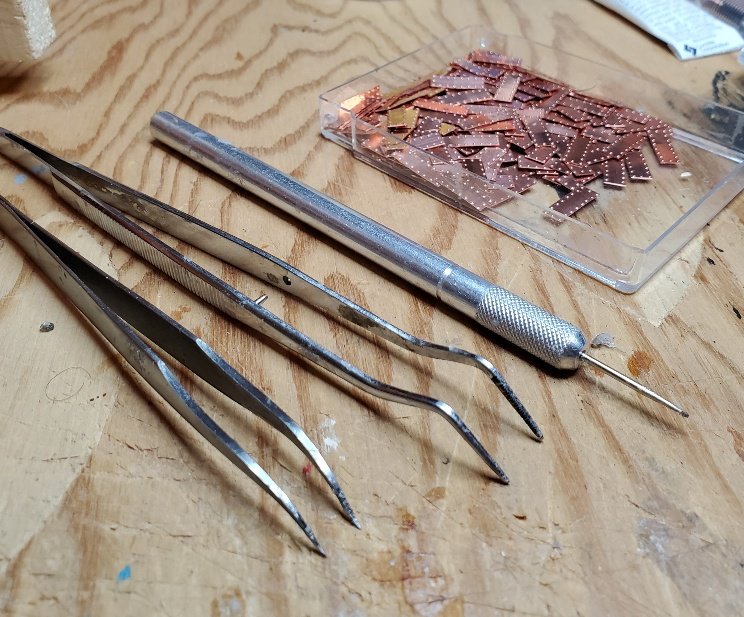
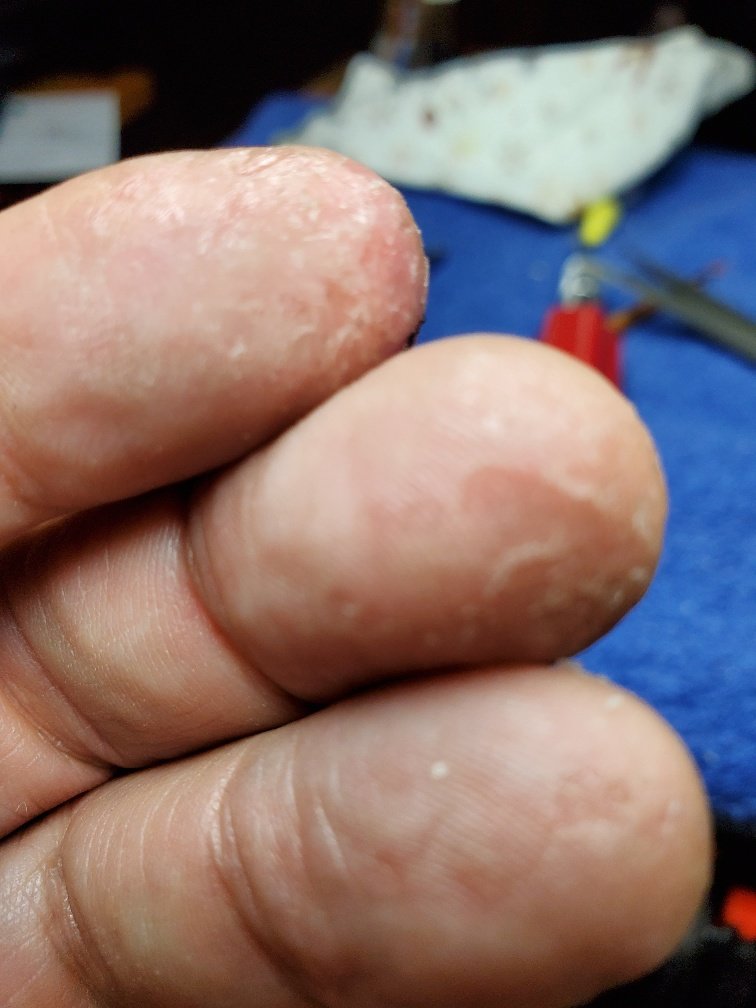
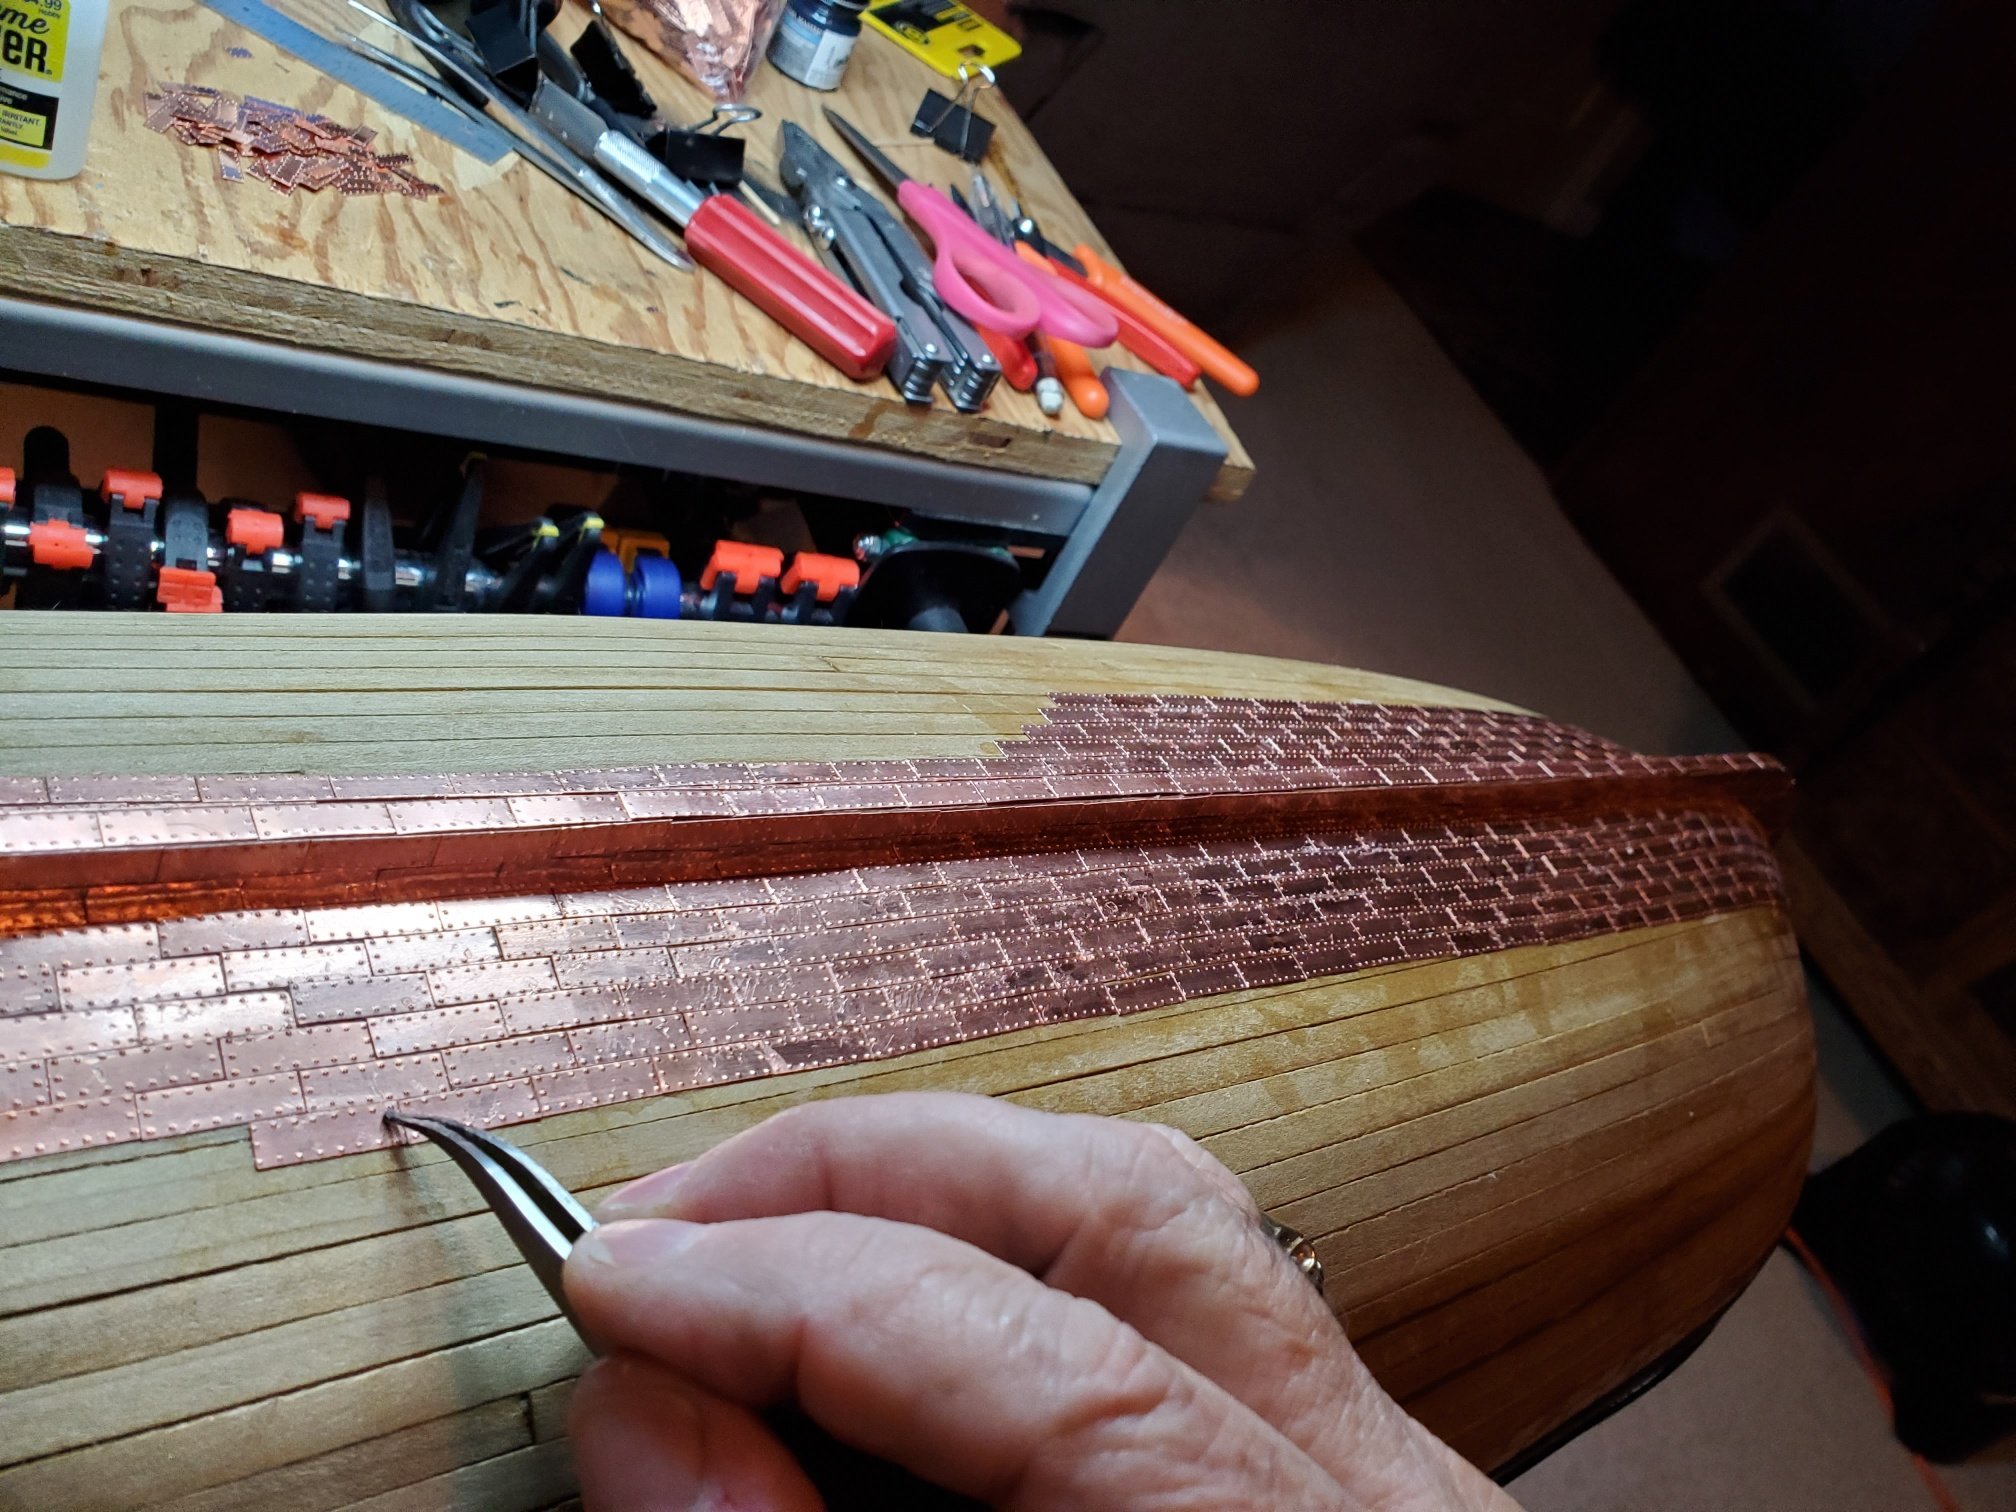
Duanelaker.... Thank you for your encouraging words. They help keep me motivated to keep moving forward on the build. I read somewhere not to use latex gloves but haven't seen anything about rubber ones. My problem is the copper tiles are so small that it difficult grasping those little devils and placing them in the correct position. I would think rubber gloves (unless really thin) would make it difficult to pickup and place the tiles. David56 recommended using curved tweezers (which I have found to work better then straight ones) and a pointed nail like device in an xacto holder. Don't know what they call it but it came with my Xacto set. I have found this to best control the pickup, placement, hold down until set, so far. Having a small piece of cloth near by to wipe some of the CA that oozes out from under the tile also eliminates much of the CA build up on my fingers and on the tiles themselves.
On a separate note, I have looked at your builds. Very good. The one that caught my eye was the Bounty Jolly Boat. May have to keep my eye out for it and put it in my line up of things to build. Although I have lots to do in the Victory, one is always looking at things to build next. I have some plans for a Mayflower II, and keep getting drawn back to the Le Soleil Royal 1669 by Sergal BUT.... It is very expensive, really don't need another 50+ inch ship in the house (wife would shoot me) but looks very impressive when finished. Hope you continue to follow the build.
- GrandpaPhil and Duanelaker
-
2
-
Four more days of tiling complete. Tomorrow I should have the port side completed and will continue on the starboard side. Still looking at 4-5 more days of tiling to go, then I think it will take about a week to remove the dried on CA on my fingers.


- JayCub, GrandpaPhil, BenD and 1 other
-
4
-
-
Thanks for the tips David56. After using a number of different tools for placing the copper tiles, I have to agree with you.... my tool of choice has been curved tweezers.
-
Day 2 of copper planking started. This is going to take some time. I think I'm getting more CA on my fingers than on the hull/tiles as I keep peeling dried CA off my fingers. Even with tweezers to place the tiles, most of the time you need to hold down the tile for the CA to cure enough to hold the tile in place.
- GrandpaPhil, ccoyle and mispeltyoof
-
3


HMS Victory by Daliab - FINISHED - Mantua/Panart
in - Kit build logs for subjects built from 1751 - 1800
Posted
Cutting, building, and painting the inside gun port lids. This is going to take a little bit of time.