
HOLIDAY DONATION DRIVE - SUPPORT MSW - DO YOUR PART TO KEEP THIS GREAT FORUM GOING! (89 donations so far out of 49,000 members - C'mon guys!)
×


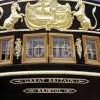
Beef Wellington
-
Posts
2,249 -
Joined
-
Last visited
Reputation Activity
-

 Beef Wellington reacted to Mirabell61 in Eagle of Algier 1753 by Mirabell61 - FINISHED - 1:48 - Chebec - Nils Langemann
little update :
some of the 1:48 scale crew members will be of "multy culty" mix of mediteranian nations and "stranded" individuals.....
I had been gathering these cast figures long time already and managed to give them a paint touch now...
The chimney-tube of the stove (under the quarter deck) has been installed now, may be a bit unusual, but why not
Nils
-
Beef Wellington reacted to Mirabell61 in Eagle of Algier 1753 by Mirabell61 - FINISHED - 1:48 - Chebec - Nils Langemann
Hi Carl,
yes, I`m glad I went for scale 1:48 its a very nice scale for details adding details, and its fun on top of it....
I`m trying on the first sample of the swivel gun and its mounting post this morning
Nils
this is one of the smallest RB barrels with predrilled pivot- and center hole. The soldering hole for the handle must still be brought in to the barrel
the semi round support is made from a brass tube...
I`ll probably blacken the guns with dull black gun color paint
-
 Beef Wellington got a reaction from DaveBaxt in HMS Jason by Beef Wellington - Caldercraft - 1:64 - Artois-class frigate modified from HMS Diana 1794
OC, Thomas, Eamonn, thanks for kind words.
@ BE - jury is out on a rudder coat, I've seen the great result you achieved, what I'm wrestling with the aesthetic and the quality of the result I might achieve. In the event I don't, I did simulate the end of the tiller
@ Carl - You reiterated my dilemma 1:64 is a scale where it seems sometimes that details are a question of compromise. The downside of using raise pins is that to my eye, they appear more obvious and overscale - and also runs the risk that it would be hard to get these positioned accurately Staying with the indentations, from typical viewing distance it is not obvious to the eye that the indents are in fact indentations rather than raised (think of the classic 'hollow face' optical illusion). The rudder straps were unaltered and show how these parts came.
Anyway...I was very excited to finally receive my copy of the Diana plans from NMM. WOW! I've never had a chance to see these types of plans before and I'm very impressed, not only will it hopefully become a nice decorative piece, but its very informative. Even though the plan indicates it's 'Diana' (non-contemporaneous pencil annotation), it appears to me that these should be considered to be more generic to the Artois class as a whole - there contemporary are annotations indicating that the foremast on 'Jason' and 'Diamond' were moved forward 6 1/4" - but, I'm not going to make any changes at this point as its quite subtle.
There are so many details that are much clearer than in the AOTS or kit plans, but few items just for starters...(the poor quality of my photos do not do justice to the print and colours didn't come out well.)
Given I'm building roughly 'as designed', I will need to reconsider a few things:
The position of the mizzen channels, these are placed lower than the kit plans and AOTS which reflect the 'as built' higher position. Looking at the classic Diana models, I now see this is indeed where they are positioned. The structure of the chains is also very different to what is provided in the kit. This view also shows evolutionary changes to the positions of the cannon and carronade ports.
To hopefully resolve a discussion/dilemma experience by Diana builders...my opinion estimating from these plans (and assuming plans to be correct scale) is that the kit stern frame are too wide at the top of the rearmost bulkhead by about 5mm. Not too significant, but enough to cause the misalignment with the stern fascia and light positions experienced by all builders it seems. Correction of this and other bulkheads would not be hard when starting out on the kit, but would need to be done prior to planking.
The main channels are shown positioned below the sheer rail 'as designed'. Unfortunately I've been working to have these in line with the sheer rail (as built it appears), but am not going to make changes as the difference is quite subtle. The built up bulwarks are also clearly shown, the kit provides for, and reference made in AOTS to Diana having a more decorative style consistent with the open bulkhead profile - the plans show these as the more standard, utilitarian square profile that later became standard.
The bow sections shows a number of interesting aspects:
Changes to positions of timberheads to accommodate evolving cannon/carronade compliment Inclusion of a forward port (as built) which I suspect would have been for access to the cathead/anchor rather than including a cannon. This would have been a nice feature to add, but would require significant rework earlier in the build (more than I did) to allow this as it aligns with the foremost bulkhead Also seems that there was some variations on the profile of the stem, and position of the cathead
-
-
Beef Wellington reacted to Blue Ensign in HMS Jason by Beef Wellington - Caldercraft - 1:64 - Artois-class frigate modified from HMS Diana 1794
A fine job Jason, and nice and close to the stern post.
Will you be fitting a Rudder coat?
B.E.
-
Beef Wellington reacted to cog in HMS Jason by Beef Wellington - Caldercraft - 1:64 - Artois-class frigate modified from HMS Diana 1794
Looks very smart, but I would have expected the bolts to be exposed, not create a hollow in the straps ... that's my ignorance writing
-
Beef Wellington reacted to egkb in HMS Jason by Beef Wellington - Caldercraft - 1:64 - Artois-class frigate modified from HMS Diana 1794
Super stuff J .. Looks Amazing !!
Eamonn
-
Beef Wellington reacted to Gahm in HMS Jason by Beef Wellington - Caldercraft - 1:64 - Artois-class frigate modified from HMS Diana 1794
This looks REALLY good, Jason!
Thomas
-
 Beef Wellington got a reaction from DaveRow in HMCSS Victoria 1855 by BANYAN - 1:72
Catching up Pat, great progress. I'm similarly pondering the rudder chains so will be interested to see what you uncover. I wonder how much history there is of rudders becoming unshipped, intuitively it just seems very improbable considering the length of pintles and the fact that the motion would need to be perfectly in line with the hinge line. The photo of the chains with multiple attachments is very interesting, way more than I've seen on most ships. Is it to minimise drag caused by the chain being in the water?
-
 Beef Wellington got a reaction from CiscoH in HMS Jason by Beef Wellington - Caldercraft - 1:64 - Artois-class frigate modified from HMS Diana 1794
Thanks all for the nice words, likes and continued interest. Know its been a while, seems as if I hit some sort of 'modelers wall'. Before I can really continue with the topsides, I needed to turn my attention to mounting the rudder. This is something I've been putting off for quite a while, and proved to be a very frustrating experience. I had initially delayed doing this to allow the copper to oxidize as much as possible just in case of any errant CA glue and prevent shiny spots.
The kit provides PE rudder and pintle straps, but for some reason I couldn't get comfortable with them. On Snake, the staps come with holes and pins were inserted, but this was something that in retrospect look a little too clunky and out of scale. Looking at pictures of period ships, the bolts/nails are quite a subtle feature similar to treenails in visibility. I experimented with card and styrene strip to make these from scratch, but in the end decided to go with the supplied PE parts. I forgot to take a picture, but instead of premade holes, these have rather large circular indentations in them, I'm guessing to simulate the bolts. To my eye they looked to far apart, and the holes too big. I made a slight alteration to increase the number of bolts/nail heads by drilling additional indentations to simulate what was already there. The rudder straps also needed to be shortened quite considerably to eliminate overhang at the rear of the rudder. These were painted with "Admiralty copper" paint after experimenting with other similar Tamiya colours.
The main challenge I found was to attach these without marring the copper plates, and this proved to be quite the challenge as at first the CA glue wouldn't provide a good bond and needed to be reapplied. Scratching the hull plates and inside surface of the PE seemed to get things strong enough. The rudder proved quite the challenge to mount as this had been made with a low (for me) level of tolerance following the AOTS plans which is documented earlier in the log.
Interestingly, the box artwork shows a spectacle plate, but there is nothing in the kit nor instructions. This was simulated using painted card and eyebolts, but interestingly there is very little room for this, however this seems consistent with AOTS diagrams. The ironwork on the lower counter ports used some PE parts from the "Badger" set which I had bought a number of years ago. These looked a little more in keeping scale wise than what is provide in this kit. I may add ring bolts and rings to these, but will likely not rig with line as I'm concerned this may be a visual distraction - personal preference of course. Next up will be to attach the rudder chains which, nicely, are provided in the kit.
-
Beef Wellington reacted to BANYAN in HMCSS Victoria 1855 by BANYAN - 1:72
As part of the final push for finishing, I need to drill for the ends of the rudder chains. These were used only as preventers and not for emergency steering; an emergency tiller was provided for this. This raises two questions I hope someone may be able to steer <pun intended> me in the right direction.
Q1. The Contract specified: "Rudder to be fitted with Rapson's patent slide tiller, pintles, and Lang's tiller abaft the rudder, in case of the rudder head being carried away,also to have one spare tiller."
This implies an iron tiller arm that is fitted above the waterline but outside the hull when required. My initial thoughts are this might be a iron T bar fitted into a mortice, or yolked around the rudder upper parts, with steering pendants then shackled to eyes on the ends of the T? Please note c1855.
I have not been able to unearth any info so any info or suggestions most welcomed.
Q2. The photo of the ship (not clear) and the lithographs show the rudder chains terminating at, or passing through the hull just under the counter/transom timber junction. The enhanced photo suggests some sort of collar BUT, I think this may only be some background 'clutter' which the person enhancing the photo has assumed to be the ship. i base this on all lithographs not showing this. See images below.
As these were only to prevent losing the rudder I believe these would have terminated on the hull as shown in all images. Another contemporary frigate, the Danish 'Jylland' shows the chains extending forward in loops but in this instance I believe it may be to provide sufficient length to use them for emergency steering also as shown by Harland in his book "Seamanship in the the of Sail".
In the absence of better information, I am going to terminate the chains under the counter on eyebolts. The alternate solution was that the chains went into the hull, hence the perception of collars, and would then be fitted as required to the Lang's Emergency Tiller which was fitted inside rather than outside the ship?
Supporting images - enhanced photo of Victoria counter, Danish frigate Jylland rudder chains (from Jylland Museum website) and illustration from Harland "Seamanship in the the of Sail". See earlier posts for lithographs etc.
Any comments, suggestions or corrections most welcomed.
cheers
Pat
-
 Beef Wellington got a reaction from zappto in HMS Jason by Beef Wellington - Caldercraft - 1:64 - Artois-class frigate modified from HMS Diana 1794
Thanks all for the nice words, likes and continued interest. Know its been a while, seems as if I hit some sort of 'modelers wall'. Before I can really continue with the topsides, I needed to turn my attention to mounting the rudder. This is something I've been putting off for quite a while, and proved to be a very frustrating experience. I had initially delayed doing this to allow the copper to oxidize as much as possible just in case of any errant CA glue and prevent shiny spots.
The kit provides PE rudder and pintle straps, but for some reason I couldn't get comfortable with them. On Snake, the staps come with holes and pins were inserted, but this was something that in retrospect look a little too clunky and out of scale. Looking at pictures of period ships, the bolts/nails are quite a subtle feature similar to treenails in visibility. I experimented with card and styrene strip to make these from scratch, but in the end decided to go with the supplied PE parts. I forgot to take a picture, but instead of premade holes, these have rather large circular indentations in them, I'm guessing to simulate the bolts. To my eye they looked to far apart, and the holes too big. I made a slight alteration to increase the number of bolts/nail heads by drilling additional indentations to simulate what was already there. The rudder straps also needed to be shortened quite considerably to eliminate overhang at the rear of the rudder. These were painted with "Admiralty copper" paint after experimenting with other similar Tamiya colours.
The main challenge I found was to attach these without marring the copper plates, and this proved to be quite the challenge as at first the CA glue wouldn't provide a good bond and needed to be reapplied. Scratching the hull plates and inside surface of the PE seemed to get things strong enough. The rudder proved quite the challenge to mount as this had been made with a low (for me) level of tolerance following the AOTS plans which is documented earlier in the log.
Interestingly, the box artwork shows a spectacle plate, but there is nothing in the kit nor instructions. This was simulated using painted card and eyebolts, but interestingly there is very little room for this, however this seems consistent with AOTS diagrams. The ironwork on the lower counter ports used some PE parts from the "Badger" set which I had bought a number of years ago. These looked a little more in keeping scale wise than what is provide in this kit. I may add ring bolts and rings to these, but will likely not rig with line as I'm concerned this may be a visual distraction - personal preference of course. Next up will be to attach the rudder chains which, nicely, are provided in the kit.
-
 Beef Wellington got a reaction from albert in HMS Jason by Beef Wellington - Caldercraft - 1:64 - Artois-class frigate modified from HMS Diana 1794
Thanks all for the nice words, likes and continued interest. Know its been a while, seems as if I hit some sort of 'modelers wall'. Before I can really continue with the topsides, I needed to turn my attention to mounting the rudder. This is something I've been putting off for quite a while, and proved to be a very frustrating experience. I had initially delayed doing this to allow the copper to oxidize as much as possible just in case of any errant CA glue and prevent shiny spots.
The kit provides PE rudder and pintle straps, but for some reason I couldn't get comfortable with them. On Snake, the staps come with holes and pins were inserted, but this was something that in retrospect look a little too clunky and out of scale. Looking at pictures of period ships, the bolts/nails are quite a subtle feature similar to treenails in visibility. I experimented with card and styrene strip to make these from scratch, but in the end decided to go with the supplied PE parts. I forgot to take a picture, but instead of premade holes, these have rather large circular indentations in them, I'm guessing to simulate the bolts. To my eye they looked to far apart, and the holes too big. I made a slight alteration to increase the number of bolts/nail heads by drilling additional indentations to simulate what was already there. The rudder straps also needed to be shortened quite considerably to eliminate overhang at the rear of the rudder. These were painted with "Admiralty copper" paint after experimenting with other similar Tamiya colours.
The main challenge I found was to attach these without marring the copper plates, and this proved to be quite the challenge as at first the CA glue wouldn't provide a good bond and needed to be reapplied. Scratching the hull plates and inside surface of the PE seemed to get things strong enough. The rudder proved quite the challenge to mount as this had been made with a low (for me) level of tolerance following the AOTS plans which is documented earlier in the log.
Interestingly, the box artwork shows a spectacle plate, but there is nothing in the kit nor instructions. This was simulated using painted card and eyebolts, but interestingly there is very little room for this, however this seems consistent with AOTS diagrams. The ironwork on the lower counter ports used some PE parts from the "Badger" set which I had bought a number of years ago. These looked a little more in keeping scale wise than what is provide in this kit. I may add ring bolts and rings to these, but will likely not rig with line as I'm concerned this may be a visual distraction - personal preference of course. Next up will be to attach the rudder chains which, nicely, are provided in the kit.
-
 Beef Wellington got a reaction from Ferit in HMS Jason by Beef Wellington - Caldercraft - 1:64 - Artois-class frigate modified from HMS Diana 1794
Thanks all for the nice words, likes and continued interest. Know its been a while, seems as if I hit some sort of 'modelers wall'. Before I can really continue with the topsides, I needed to turn my attention to mounting the rudder. This is something I've been putting off for quite a while, and proved to be a very frustrating experience. I had initially delayed doing this to allow the copper to oxidize as much as possible just in case of any errant CA glue and prevent shiny spots.
The kit provides PE rudder and pintle straps, but for some reason I couldn't get comfortable with them. On Snake, the staps come with holes and pins were inserted, but this was something that in retrospect look a little too clunky and out of scale. Looking at pictures of period ships, the bolts/nails are quite a subtle feature similar to treenails in visibility. I experimented with card and styrene strip to make these from scratch, but in the end decided to go with the supplied PE parts. I forgot to take a picture, but instead of premade holes, these have rather large circular indentations in them, I'm guessing to simulate the bolts. To my eye they looked to far apart, and the holes too big. I made a slight alteration to increase the number of bolts/nail heads by drilling additional indentations to simulate what was already there. The rudder straps also needed to be shortened quite considerably to eliminate overhang at the rear of the rudder. These were painted with "Admiralty copper" paint after experimenting with other similar Tamiya colours.
The main challenge I found was to attach these without marring the copper plates, and this proved to be quite the challenge as at first the CA glue wouldn't provide a good bond and needed to be reapplied. Scratching the hull plates and inside surface of the PE seemed to get things strong enough. The rudder proved quite the challenge to mount as this had been made with a low (for me) level of tolerance following the AOTS plans which is documented earlier in the log.
Interestingly, the box artwork shows a spectacle plate, but there is nothing in the kit nor instructions. This was simulated using painted card and eyebolts, but interestingly there is very little room for this, however this seems consistent with AOTS diagrams. The ironwork on the lower counter ports used some PE parts from the "Badger" set which I had bought a number of years ago. These looked a little more in keeping scale wise than what is provide in this kit. I may add ring bolts and rings to these, but will likely not rig with line as I'm concerned this may be a visual distraction - personal preference of course. Next up will be to attach the rudder chains which, nicely, are provided in the kit.
-
 Beef Wellington got a reaction from rusty b in HMS Jason by Beef Wellington - Caldercraft - 1:64 - Artois-class frigate modified from HMS Diana 1794
Thanks all for the nice words, likes and continued interest. Know its been a while, seems as if I hit some sort of 'modelers wall'. Before I can really continue with the topsides, I needed to turn my attention to mounting the rudder. This is something I've been putting off for quite a while, and proved to be a very frustrating experience. I had initially delayed doing this to allow the copper to oxidize as much as possible just in case of any errant CA glue and prevent shiny spots.
The kit provides PE rudder and pintle straps, but for some reason I couldn't get comfortable with them. On Snake, the staps come with holes and pins were inserted, but this was something that in retrospect look a little too clunky and out of scale. Looking at pictures of period ships, the bolts/nails are quite a subtle feature similar to treenails in visibility. I experimented with card and styrene strip to make these from scratch, but in the end decided to go with the supplied PE parts. I forgot to take a picture, but instead of premade holes, these have rather large circular indentations in them, I'm guessing to simulate the bolts. To my eye they looked to far apart, and the holes too big. I made a slight alteration to increase the number of bolts/nail heads by drilling additional indentations to simulate what was already there. The rudder straps also needed to be shortened quite considerably to eliminate overhang at the rear of the rudder. These were painted with "Admiralty copper" paint after experimenting with other similar Tamiya colours.
The main challenge I found was to attach these without marring the copper plates, and this proved to be quite the challenge as at first the CA glue wouldn't provide a good bond and needed to be reapplied. Scratching the hull plates and inside surface of the PE seemed to get things strong enough. The rudder proved quite the challenge to mount as this had been made with a low (for me) level of tolerance following the AOTS plans which is documented earlier in the log.
Interestingly, the box artwork shows a spectacle plate, but there is nothing in the kit nor instructions. This was simulated using painted card and eyebolts, but interestingly there is very little room for this, however this seems consistent with AOTS diagrams. The ironwork on the lower counter ports used some PE parts from the "Badger" set which I had bought a number of years ago. These looked a little more in keeping scale wise than what is provide in this kit. I may add ring bolts and rings to these, but will likely not rig with line as I'm concerned this may be a visual distraction - personal preference of course. Next up will be to attach the rudder chains which, nicely, are provided in the kit.
-
 Beef Wellington got a reaction from robdurant in HMS Jason by Beef Wellington - Caldercraft - 1:64 - Artois-class frigate modified from HMS Diana 1794
Thanks all for the nice words, likes and continued interest. Know its been a while, seems as if I hit some sort of 'modelers wall'. Before I can really continue with the topsides, I needed to turn my attention to mounting the rudder. This is something I've been putting off for quite a while, and proved to be a very frustrating experience. I had initially delayed doing this to allow the copper to oxidize as much as possible just in case of any errant CA glue and prevent shiny spots.
The kit provides PE rudder and pintle straps, but for some reason I couldn't get comfortable with them. On Snake, the staps come with holes and pins were inserted, but this was something that in retrospect look a little too clunky and out of scale. Looking at pictures of period ships, the bolts/nails are quite a subtle feature similar to treenails in visibility. I experimented with card and styrene strip to make these from scratch, but in the end decided to go with the supplied PE parts. I forgot to take a picture, but instead of premade holes, these have rather large circular indentations in them, I'm guessing to simulate the bolts. To my eye they looked to far apart, and the holes too big. I made a slight alteration to increase the number of bolts/nail heads by drilling additional indentations to simulate what was already there. The rudder straps also needed to be shortened quite considerably to eliminate overhang at the rear of the rudder. These were painted with "Admiralty copper" paint after experimenting with other similar Tamiya colours.
The main challenge I found was to attach these without marring the copper plates, and this proved to be quite the challenge as at first the CA glue wouldn't provide a good bond and needed to be reapplied. Scratching the hull plates and inside surface of the PE seemed to get things strong enough. The rudder proved quite the challenge to mount as this had been made with a low (for me) level of tolerance following the AOTS plans which is documented earlier in the log.
Interestingly, the box artwork shows a spectacle plate, but there is nothing in the kit nor instructions. This was simulated using painted card and eyebolts, but interestingly there is very little room for this, however this seems consistent with AOTS diagrams. The ironwork on the lower counter ports used some PE parts from the "Badger" set which I had bought a number of years ago. These looked a little more in keeping scale wise than what is provide in this kit. I may add ring bolts and rings to these, but will likely not rig with line as I'm concerned this may be a visual distraction - personal preference of course. Next up will be to attach the rudder chains which, nicely, are provided in the kit.
-
 Beef Wellington got a reaction from FatFingers in HMS Jason by Beef Wellington - Caldercraft - 1:64 - Artois-class frigate modified from HMS Diana 1794
Thanks all for the nice words, likes and continued interest. Know its been a while, seems as if I hit some sort of 'modelers wall'. Before I can really continue with the topsides, I needed to turn my attention to mounting the rudder. This is something I've been putting off for quite a while, and proved to be a very frustrating experience. I had initially delayed doing this to allow the copper to oxidize as much as possible just in case of any errant CA glue and prevent shiny spots.
The kit provides PE rudder and pintle straps, but for some reason I couldn't get comfortable with them. On Snake, the staps come with holes and pins were inserted, but this was something that in retrospect look a little too clunky and out of scale. Looking at pictures of period ships, the bolts/nails are quite a subtle feature similar to treenails in visibility. I experimented with card and styrene strip to make these from scratch, but in the end decided to go with the supplied PE parts. I forgot to take a picture, but instead of premade holes, these have rather large circular indentations in them, I'm guessing to simulate the bolts. To my eye they looked to far apart, and the holes too big. I made a slight alteration to increase the number of bolts/nail heads by drilling additional indentations to simulate what was already there. The rudder straps also needed to be shortened quite considerably to eliminate overhang at the rear of the rudder. These were painted with "Admiralty copper" paint after experimenting with other similar Tamiya colours.
The main challenge I found was to attach these without marring the copper plates, and this proved to be quite the challenge as at first the CA glue wouldn't provide a good bond and needed to be reapplied. Scratching the hull plates and inside surface of the PE seemed to get things strong enough. The rudder proved quite the challenge to mount as this had been made with a low (for me) level of tolerance following the AOTS plans which is documented earlier in the log.
Interestingly, the box artwork shows a spectacle plate, but there is nothing in the kit nor instructions. This was simulated using painted card and eyebolts, but interestingly there is very little room for this, however this seems consistent with AOTS diagrams. The ironwork on the lower counter ports used some PE parts from the "Badger" set which I had bought a number of years ago. These looked a little more in keeping scale wise than what is provide in this kit. I may add ring bolts and rings to these, but will likely not rig with line as I'm concerned this may be a visual distraction - personal preference of course. Next up will be to attach the rudder chains which, nicely, are provided in the kit.
-
 Beef Wellington got a reaction from BenD in HMS Jason by Beef Wellington - Caldercraft - 1:64 - Artois-class frigate modified from HMS Diana 1794
Thanks all for the nice words, likes and continued interest. Know its been a while, seems as if I hit some sort of 'modelers wall'. Before I can really continue with the topsides, I needed to turn my attention to mounting the rudder. This is something I've been putting off for quite a while, and proved to be a very frustrating experience. I had initially delayed doing this to allow the copper to oxidize as much as possible just in case of any errant CA glue and prevent shiny spots.
The kit provides PE rudder and pintle straps, but for some reason I couldn't get comfortable with them. On Snake, the staps come with holes and pins were inserted, but this was something that in retrospect look a little too clunky and out of scale. Looking at pictures of period ships, the bolts/nails are quite a subtle feature similar to treenails in visibility. I experimented with card and styrene strip to make these from scratch, but in the end decided to go with the supplied PE parts. I forgot to take a picture, but instead of premade holes, these have rather large circular indentations in them, I'm guessing to simulate the bolts. To my eye they looked to far apart, and the holes too big. I made a slight alteration to increase the number of bolts/nail heads by drilling additional indentations to simulate what was already there. The rudder straps also needed to be shortened quite considerably to eliminate overhang at the rear of the rudder. These were painted with "Admiralty copper" paint after experimenting with other similar Tamiya colours.
The main challenge I found was to attach these without marring the copper plates, and this proved to be quite the challenge as at first the CA glue wouldn't provide a good bond and needed to be reapplied. Scratching the hull plates and inside surface of the PE seemed to get things strong enough. The rudder proved quite the challenge to mount as this had been made with a low (for me) level of tolerance following the AOTS plans which is documented earlier in the log.
Interestingly, the box artwork shows a spectacle plate, but there is nothing in the kit nor instructions. This was simulated using painted card and eyebolts, but interestingly there is very little room for this, however this seems consistent with AOTS diagrams. The ironwork on the lower counter ports used some PE parts from the "Badger" set which I had bought a number of years ago. These looked a little more in keeping scale wise than what is provide in this kit. I may add ring bolts and rings to these, but will likely not rig with line as I'm concerned this may be a visual distraction - personal preference of course. Next up will be to attach the rudder chains which, nicely, are provided in the kit.
-
 Beef Wellington got a reaction from Timmo in HMS Jason by Beef Wellington - Caldercraft - 1:64 - Artois-class frigate modified from HMS Diana 1794
Thanks all for the nice words, likes and continued interest. Know its been a while, seems as if I hit some sort of 'modelers wall'. Before I can really continue with the topsides, I needed to turn my attention to mounting the rudder. This is something I've been putting off for quite a while, and proved to be a very frustrating experience. I had initially delayed doing this to allow the copper to oxidize as much as possible just in case of any errant CA glue and prevent shiny spots.
The kit provides PE rudder and pintle straps, but for some reason I couldn't get comfortable with them. On Snake, the staps come with holes and pins were inserted, but this was something that in retrospect look a little too clunky and out of scale. Looking at pictures of period ships, the bolts/nails are quite a subtle feature similar to treenails in visibility. I experimented with card and styrene strip to make these from scratch, but in the end decided to go with the supplied PE parts. I forgot to take a picture, but instead of premade holes, these have rather large circular indentations in them, I'm guessing to simulate the bolts. To my eye they looked to far apart, and the holes too big. I made a slight alteration to increase the number of bolts/nail heads by drilling additional indentations to simulate what was already there. The rudder straps also needed to be shortened quite considerably to eliminate overhang at the rear of the rudder. These were painted with "Admiralty copper" paint after experimenting with other similar Tamiya colours.
The main challenge I found was to attach these without marring the copper plates, and this proved to be quite the challenge as at first the CA glue wouldn't provide a good bond and needed to be reapplied. Scratching the hull plates and inside surface of the PE seemed to get things strong enough. The rudder proved quite the challenge to mount as this had been made with a low (for me) level of tolerance following the AOTS plans which is documented earlier in the log.
Interestingly, the box artwork shows a spectacle plate, but there is nothing in the kit nor instructions. This was simulated using painted card and eyebolts, but interestingly there is very little room for this, however this seems consistent with AOTS diagrams. The ironwork on the lower counter ports used some PE parts from the "Badger" set which I had bought a number of years ago. These looked a little more in keeping scale wise than what is provide in this kit. I may add ring bolts and rings to these, but will likely not rig with line as I'm concerned this may be a visual distraction - personal preference of course. Next up will be to attach the rudder chains which, nicely, are provided in the kit.
-
 Beef Wellington got a reaction from toms10 in HMS Jason by Beef Wellington - Caldercraft - 1:64 - Artois-class frigate modified from HMS Diana 1794
Thanks all for the nice words, likes and continued interest. Know its been a while, seems as if I hit some sort of 'modelers wall'. Before I can really continue with the topsides, I needed to turn my attention to mounting the rudder. This is something I've been putting off for quite a while, and proved to be a very frustrating experience. I had initially delayed doing this to allow the copper to oxidize as much as possible just in case of any errant CA glue and prevent shiny spots.
The kit provides PE rudder and pintle straps, but for some reason I couldn't get comfortable with them. On Snake, the staps come with holes and pins were inserted, but this was something that in retrospect look a little too clunky and out of scale. Looking at pictures of period ships, the bolts/nails are quite a subtle feature similar to treenails in visibility. I experimented with card and styrene strip to make these from scratch, but in the end decided to go with the supplied PE parts. I forgot to take a picture, but instead of premade holes, these have rather large circular indentations in them, I'm guessing to simulate the bolts. To my eye they looked to far apart, and the holes too big. I made a slight alteration to increase the number of bolts/nail heads by drilling additional indentations to simulate what was already there. The rudder straps also needed to be shortened quite considerably to eliminate overhang at the rear of the rudder. These were painted with "Admiralty copper" paint after experimenting with other similar Tamiya colours.
The main challenge I found was to attach these without marring the copper plates, and this proved to be quite the challenge as at first the CA glue wouldn't provide a good bond and needed to be reapplied. Scratching the hull plates and inside surface of the PE seemed to get things strong enough. The rudder proved quite the challenge to mount as this had been made with a low (for me) level of tolerance following the AOTS plans which is documented earlier in the log.
Interestingly, the box artwork shows a spectacle plate, but there is nothing in the kit nor instructions. This was simulated using painted card and eyebolts, but interestingly there is very little room for this, however this seems consistent with AOTS diagrams. The ironwork on the lower counter ports used some PE parts from the "Badger" set which I had bought a number of years ago. These looked a little more in keeping scale wise than what is provide in this kit. I may add ring bolts and rings to these, but will likely not rig with line as I'm concerned this may be a visual distraction - personal preference of course. Next up will be to attach the rudder chains which, nicely, are provided in the kit.
-
 Beef Wellington got a reaction from Landlubber Mike in HMS Jason by Beef Wellington - Caldercraft - 1:64 - Artois-class frigate modified from HMS Diana 1794
Thanks all for the nice words, likes and continued interest. Know its been a while, seems as if I hit some sort of 'modelers wall'. Before I can really continue with the topsides, I needed to turn my attention to mounting the rudder. This is something I've been putting off for quite a while, and proved to be a very frustrating experience. I had initially delayed doing this to allow the copper to oxidize as much as possible just in case of any errant CA glue and prevent shiny spots.
The kit provides PE rudder and pintle straps, but for some reason I couldn't get comfortable with them. On Snake, the staps come with holes and pins were inserted, but this was something that in retrospect look a little too clunky and out of scale. Looking at pictures of period ships, the bolts/nails are quite a subtle feature similar to treenails in visibility. I experimented with card and styrene strip to make these from scratch, but in the end decided to go with the supplied PE parts. I forgot to take a picture, but instead of premade holes, these have rather large circular indentations in them, I'm guessing to simulate the bolts. To my eye they looked to far apart, and the holes too big. I made a slight alteration to increase the number of bolts/nail heads by drilling additional indentations to simulate what was already there. The rudder straps also needed to be shortened quite considerably to eliminate overhang at the rear of the rudder. These were painted with "Admiralty copper" paint after experimenting with other similar Tamiya colours.
The main challenge I found was to attach these without marring the copper plates, and this proved to be quite the challenge as at first the CA glue wouldn't provide a good bond and needed to be reapplied. Scratching the hull plates and inside surface of the PE seemed to get things strong enough. The rudder proved quite the challenge to mount as this had been made with a low (for me) level of tolerance following the AOTS plans which is documented earlier in the log.
Interestingly, the box artwork shows a spectacle plate, but there is nothing in the kit nor instructions. This was simulated using painted card and eyebolts, but interestingly there is very little room for this, however this seems consistent with AOTS diagrams. The ironwork on the lower counter ports used some PE parts from the "Badger" set which I had bought a number of years ago. These looked a little more in keeping scale wise than what is provide in this kit. I may add ring bolts and rings to these, but will likely not rig with line as I'm concerned this may be a visual distraction - personal preference of course. Next up will be to attach the rudder chains which, nicely, are provided in the kit.
-
 Beef Wellington got a reaction from jwvolz in HMS Jason by Beef Wellington - Caldercraft - 1:64 - Artois-class frigate modified from HMS Diana 1794
Thanks all for the nice words, likes and continued interest. Know its been a while, seems as if I hit some sort of 'modelers wall'. Before I can really continue with the topsides, I needed to turn my attention to mounting the rudder. This is something I've been putting off for quite a while, and proved to be a very frustrating experience. I had initially delayed doing this to allow the copper to oxidize as much as possible just in case of any errant CA glue and prevent shiny spots.
The kit provides PE rudder and pintle straps, but for some reason I couldn't get comfortable with them. On Snake, the staps come with holes and pins were inserted, but this was something that in retrospect look a little too clunky and out of scale. Looking at pictures of period ships, the bolts/nails are quite a subtle feature similar to treenails in visibility. I experimented with card and styrene strip to make these from scratch, but in the end decided to go with the supplied PE parts. I forgot to take a picture, but instead of premade holes, these have rather large circular indentations in them, I'm guessing to simulate the bolts. To my eye they looked to far apart, and the holes too big. I made a slight alteration to increase the number of bolts/nail heads by drilling additional indentations to simulate what was already there. The rudder straps also needed to be shortened quite considerably to eliminate overhang at the rear of the rudder. These were painted with "Admiralty copper" paint after experimenting with other similar Tamiya colours.
The main challenge I found was to attach these without marring the copper plates, and this proved to be quite the challenge as at first the CA glue wouldn't provide a good bond and needed to be reapplied. Scratching the hull plates and inside surface of the PE seemed to get things strong enough. The rudder proved quite the challenge to mount as this had been made with a low (for me) level of tolerance following the AOTS plans which is documented earlier in the log.
Interestingly, the box artwork shows a spectacle plate, but there is nothing in the kit nor instructions. This was simulated using painted card and eyebolts, but interestingly there is very little room for this, however this seems consistent with AOTS diagrams. The ironwork on the lower counter ports used some PE parts from the "Badger" set which I had bought a number of years ago. These looked a little more in keeping scale wise than what is provide in this kit. I may add ring bolts and rings to these, but will likely not rig with line as I'm concerned this may be a visual distraction - personal preference of course. Next up will be to attach the rudder chains which, nicely, are provided in the kit.
-
 Beef Wellington got a reaction from Barbossa in HMS Jason by Beef Wellington - Caldercraft - 1:64 - Artois-class frigate modified from HMS Diana 1794
Thanks all for the nice words, likes and continued interest. Know its been a while, seems as if I hit some sort of 'modelers wall'. Before I can really continue with the topsides, I needed to turn my attention to mounting the rudder. This is something I've been putting off for quite a while, and proved to be a very frustrating experience. I had initially delayed doing this to allow the copper to oxidize as much as possible just in case of any errant CA glue and prevent shiny spots.
The kit provides PE rudder and pintle straps, but for some reason I couldn't get comfortable with them. On Snake, the staps come with holes and pins were inserted, but this was something that in retrospect look a little too clunky and out of scale. Looking at pictures of period ships, the bolts/nails are quite a subtle feature similar to treenails in visibility. I experimented with card and styrene strip to make these from scratch, but in the end decided to go with the supplied PE parts. I forgot to take a picture, but instead of premade holes, these have rather large circular indentations in them, I'm guessing to simulate the bolts. To my eye they looked to far apart, and the holes too big. I made a slight alteration to increase the number of bolts/nail heads by drilling additional indentations to simulate what was already there. The rudder straps also needed to be shortened quite considerably to eliminate overhang at the rear of the rudder. These were painted with "Admiralty copper" paint after experimenting with other similar Tamiya colours.
The main challenge I found was to attach these without marring the copper plates, and this proved to be quite the challenge as at first the CA glue wouldn't provide a good bond and needed to be reapplied. Scratching the hull plates and inside surface of the PE seemed to get things strong enough. The rudder proved quite the challenge to mount as this had been made with a low (for me) level of tolerance following the AOTS plans which is documented earlier in the log.
Interestingly, the box artwork shows a spectacle plate, but there is nothing in the kit nor instructions. This was simulated using painted card and eyebolts, but interestingly there is very little room for this, however this seems consistent with AOTS diagrams. The ironwork on the lower counter ports used some PE parts from the "Badger" set which I had bought a number of years ago. These looked a little more in keeping scale wise than what is provide in this kit. I may add ring bolts and rings to these, but will likely not rig with line as I'm concerned this may be a visual distraction - personal preference of course. Next up will be to attach the rudder chains which, nicely, are provided in the kit.
-
 Beef Wellington got a reaction from mort stoll in HMS Jason by Beef Wellington - Caldercraft - 1:64 - Artois-class frigate modified from HMS Diana 1794
Thanks all for the nice words, likes and continued interest. Know its been a while, seems as if I hit some sort of 'modelers wall'. Before I can really continue with the topsides, I needed to turn my attention to mounting the rudder. This is something I've been putting off for quite a while, and proved to be a very frustrating experience. I had initially delayed doing this to allow the copper to oxidize as much as possible just in case of any errant CA glue and prevent shiny spots.
The kit provides PE rudder and pintle straps, but for some reason I couldn't get comfortable with them. On Snake, the staps come with holes and pins were inserted, but this was something that in retrospect look a little too clunky and out of scale. Looking at pictures of period ships, the bolts/nails are quite a subtle feature similar to treenails in visibility. I experimented with card and styrene strip to make these from scratch, but in the end decided to go with the supplied PE parts. I forgot to take a picture, but instead of premade holes, these have rather large circular indentations in them, I'm guessing to simulate the bolts. To my eye they looked to far apart, and the holes too big. I made a slight alteration to increase the number of bolts/nail heads by drilling additional indentations to simulate what was already there. The rudder straps also needed to be shortened quite considerably to eliminate overhang at the rear of the rudder. These were painted with "Admiralty copper" paint after experimenting with other similar Tamiya colours.
The main challenge I found was to attach these without marring the copper plates, and this proved to be quite the challenge as at first the CA glue wouldn't provide a good bond and needed to be reapplied. Scratching the hull plates and inside surface of the PE seemed to get things strong enough. The rudder proved quite the challenge to mount as this had been made with a low (for me) level of tolerance following the AOTS plans which is documented earlier in the log.
Interestingly, the box artwork shows a spectacle plate, but there is nothing in the kit nor instructions. This was simulated using painted card and eyebolts, but interestingly there is very little room for this, however this seems consistent with AOTS diagrams. The ironwork on the lower counter ports used some PE parts from the "Badger" set which I had bought a number of years ago. These looked a little more in keeping scale wise than what is provide in this kit. I may add ring bolts and rings to these, but will likely not rig with line as I'm concerned this may be a visual distraction - personal preference of course. Next up will be to attach the rudder chains which, nicely, are provided in the kit.
-
 Beef Wellington got a reaction from Gahm in HMS Jason by Beef Wellington - Caldercraft - 1:64 - Artois-class frigate modified from HMS Diana 1794
Thanks all for the nice words, likes and continued interest. Know its been a while, seems as if I hit some sort of 'modelers wall'. Before I can really continue with the topsides, I needed to turn my attention to mounting the rudder. This is something I've been putting off for quite a while, and proved to be a very frustrating experience. I had initially delayed doing this to allow the copper to oxidize as much as possible just in case of any errant CA glue and prevent shiny spots.
The kit provides PE rudder and pintle straps, but for some reason I couldn't get comfortable with them. On Snake, the staps come with holes and pins were inserted, but this was something that in retrospect look a little too clunky and out of scale. Looking at pictures of period ships, the bolts/nails are quite a subtle feature similar to treenails in visibility. I experimented with card and styrene strip to make these from scratch, but in the end decided to go with the supplied PE parts. I forgot to take a picture, but instead of premade holes, these have rather large circular indentations in them, I'm guessing to simulate the bolts. To my eye they looked to far apart, and the holes too big. I made a slight alteration to increase the number of bolts/nail heads by drilling additional indentations to simulate what was already there. The rudder straps also needed to be shortened quite considerably to eliminate overhang at the rear of the rudder. These were painted with "Admiralty copper" paint after experimenting with other similar Tamiya colours.
The main challenge I found was to attach these without marring the copper plates, and this proved to be quite the challenge as at first the CA glue wouldn't provide a good bond and needed to be reapplied. Scratching the hull plates and inside surface of the PE seemed to get things strong enough. The rudder proved quite the challenge to mount as this had been made with a low (for me) level of tolerance following the AOTS plans which is documented earlier in the log.
Interestingly, the box artwork shows a spectacle plate, but there is nothing in the kit nor instructions. This was simulated using painted card and eyebolts, but interestingly there is very little room for this, however this seems consistent with AOTS diagrams. The ironwork on the lower counter ports used some PE parts from the "Badger" set which I had bought a number of years ago. These looked a little more in keeping scale wise than what is provide in this kit. I may add ring bolts and rings to these, but will likely not rig with line as I'm concerned this may be a visual distraction - personal preference of course. Next up will be to attach the rudder chains which, nicely, are provided in the kit.