HOLIDAY DONATION DRIVE - SUPPORT MSW - DO YOUR PART TO KEEP THIS GREAT FORUM GOING!
×


KenW
-
Posts
1,231 -
Joined
-
Last visited
Content Type
Profiles
Forums
Gallery
Events
Everything posted by KenW
-
 Thanks Bob, Mark and E.J. for your kind comments. I enjoyed working on the ship, and it's not done yet. Cheers.
- 122 replies
-
- 2
-

-
- independence
- privateer
- (and 1 more)
-
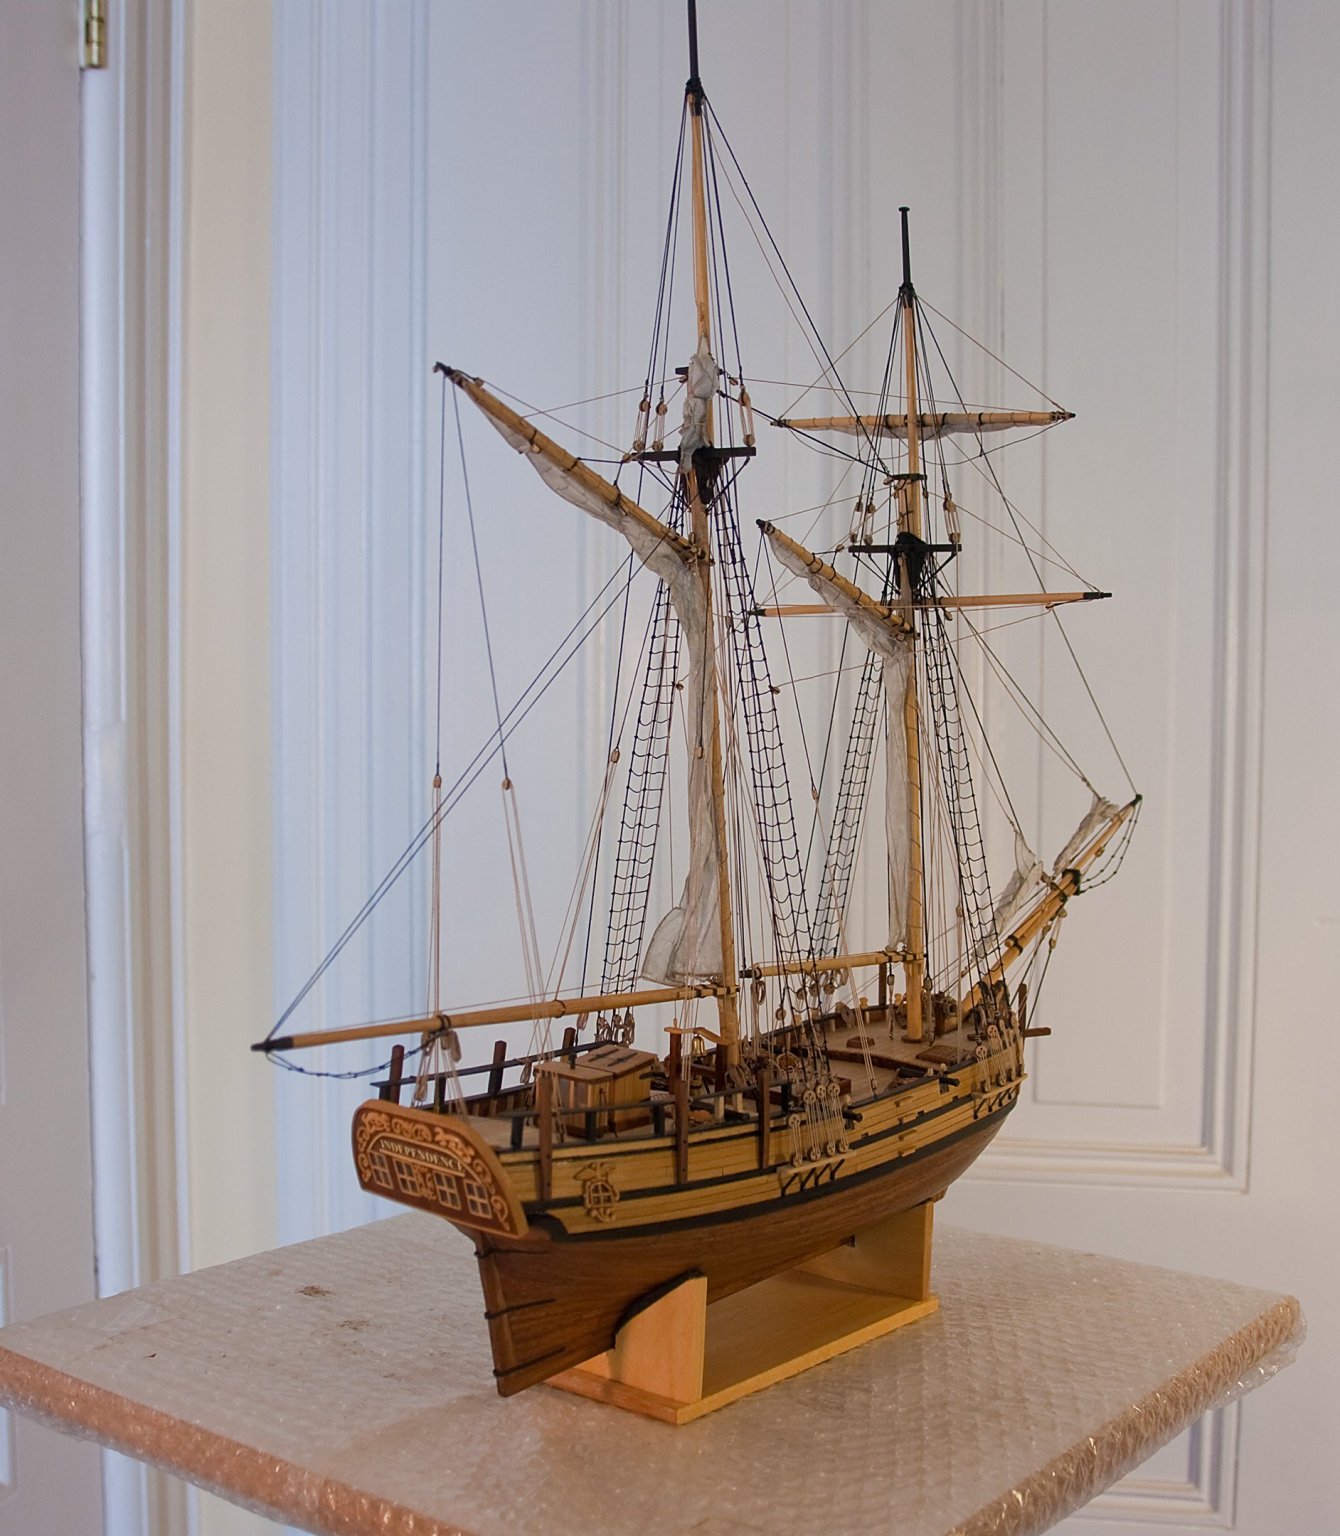
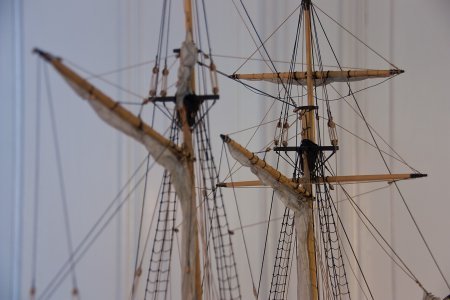
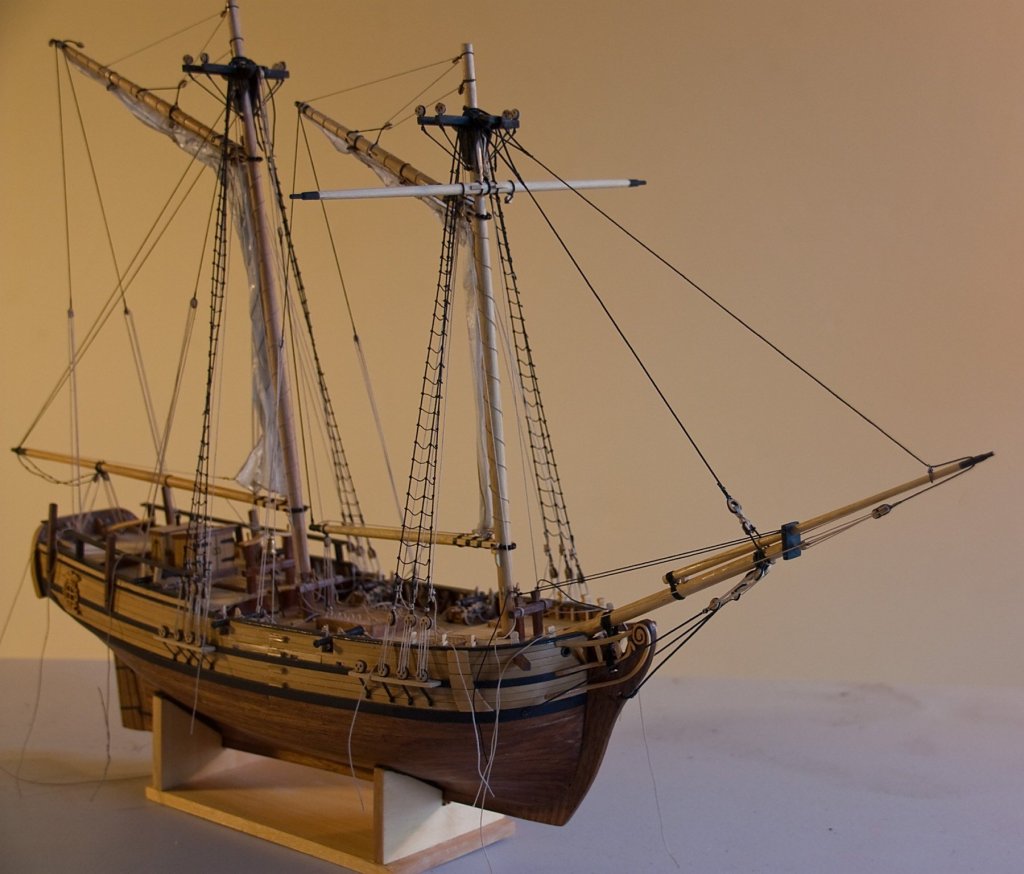
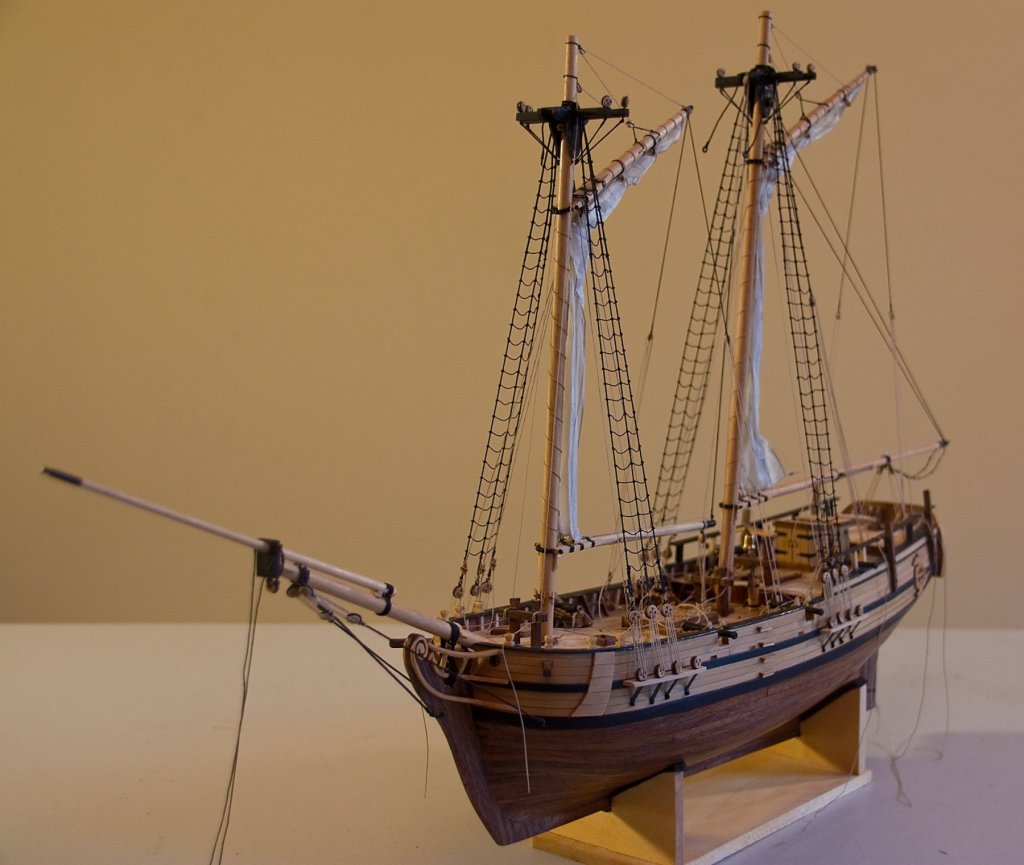
I’ve finished the rigging of the model. I’m not totally pleased with the way it came out because the shrouds and back stays are so loose. I only hope that when the weather turns dryer the lines tighten up a bit. Included are many rope coils to give that finished look. The fore and main bits are especially crowded. The remaining posts for the swivel guns were also glued in place. That means all that is left to do is install the rudder pendants, anchor, swivel guns and ensign. So the end is in sight. Some more photos -

- 122 replies
-
- 11
-
-
- independence
- privateer
- (and 1 more)
-
Both both models look great. Please bring them both to our next meeting. BTW - There is an editing feature on an iPhone. You can adjust the color if need be. Cheers.
- 1,784 replies
-
- 2
-
-
- winchelsea
- Syren Ship Model Company
- (and 1 more)
-
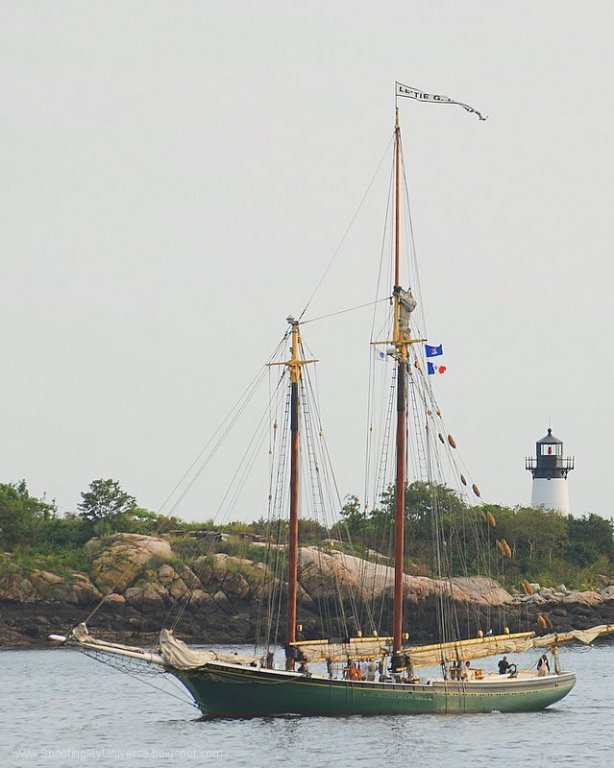
Big Thanks to JerseyCity Frankie for this photo of a furled gaff topsail. I guess my efforts aren't too far off base. I still think I can make my furl neater. Thanks again Frankie.
- 122 replies
-
- 2
-
-
- independence
- privateer
- (and 1 more)
-
I’ve been working on the two remaining sails: the gaff topsail and the main topmast staysail. I made both sails and started by attaching the staysail to the main topmast stay and then attempting to furl it. I couldn’t get a furled sail that looked reasonable. However, I read in Darcy Lever’s , “The Young Sea Officer’s Sheet Anchor”, that the staysail was either brought down to the foremast and made into a bundle that was stored on the top. Or, it is taken down and stored below. My boat doesn’t have a top and my bundle looked horrible so I decided to store the sail below deck. I left the halyard hooked to the stay block and considered the problem solved. I wanted the gaff topsail, however, to be furled and seen. The furled bundle is nowhere as bad as the staysail, but … I do know that I need to replace the gaskets; and I may consider adding a silkspan covering, if I can, to make the bundle look more appealing. Any suggestions would be welcome.
- 122 replies
-
- 6
-
-
- independence
- privateer
- (and 1 more)
-
The fore topmast yard and sail were installed without too much trouble. The shrouds were also added as well as the fore topmast stay and back stay. One thing I noticed is that the way I’m tying off the rigging is very similar to the rigging plan that came with the kit. The differences are that I’ve given all the stays and fore topmast yard lifts the ability to be adjusted. I believe this was done on all ships. One thing the rigging plan, and my rigging, have in common is that the fore bit is becoming very crowded. I’m going to have a major task when I glue and trim all those lines and then add rope coils to that bit. The deck looks very messy now, but I hope to change that soon.
- 122 replies
-
- 9
-
-
- independence
- privateer
- (and 1 more)
-
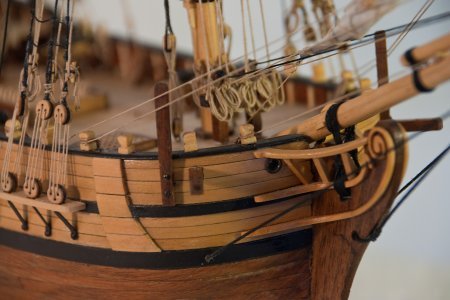
Since the last entry I’ve added the furled fore staysail and the jib. Both were made from silkspan as described earlier and the furling was based on previous research. I think the ‘look’ is good. The mainstay was added but not finished or tied off. Also, I decided to use footlopes or ‘horses’ rather than the netting that came with the original kit. Somehow the net didn’t look right to me. I made netting, so if I’m challenged, I can always change my mind. I’m constantly changing the rigging plans from the kit to be more in line with my limited experience and research. As a result, the boat looks less and less like the kit’s instructions and photos. I hope I haven’t created a boat that is completely different from what existed at the time. Next up is the fore topmast yard and sail. I feel I'm getting closer to the end.

- 122 replies
-
- 8
-
-
- independence
- privateer
- (and 1 more)
-
Looks excellent. I like the color scheme.
-
Good photos. I feel like I’m walking below decks. Of course that means the model-making is excellent as well.
-
Why are all of you posting your conversations in my blog that was completed 4-5 years ago? Abelson please start your own blog. Thanks.
- 455 replies
-
- 2
-
-
- fair american
- model shipways
- (and 1 more)
-
Abelson: Do you have a question? I haven't looked at this blog in 3-4 years. I'll try to remember, or I tell you more answers based on my current research. Thanks.
-
Glad to see you started a log. Looks like you got off to. A great start. Cheers.
-
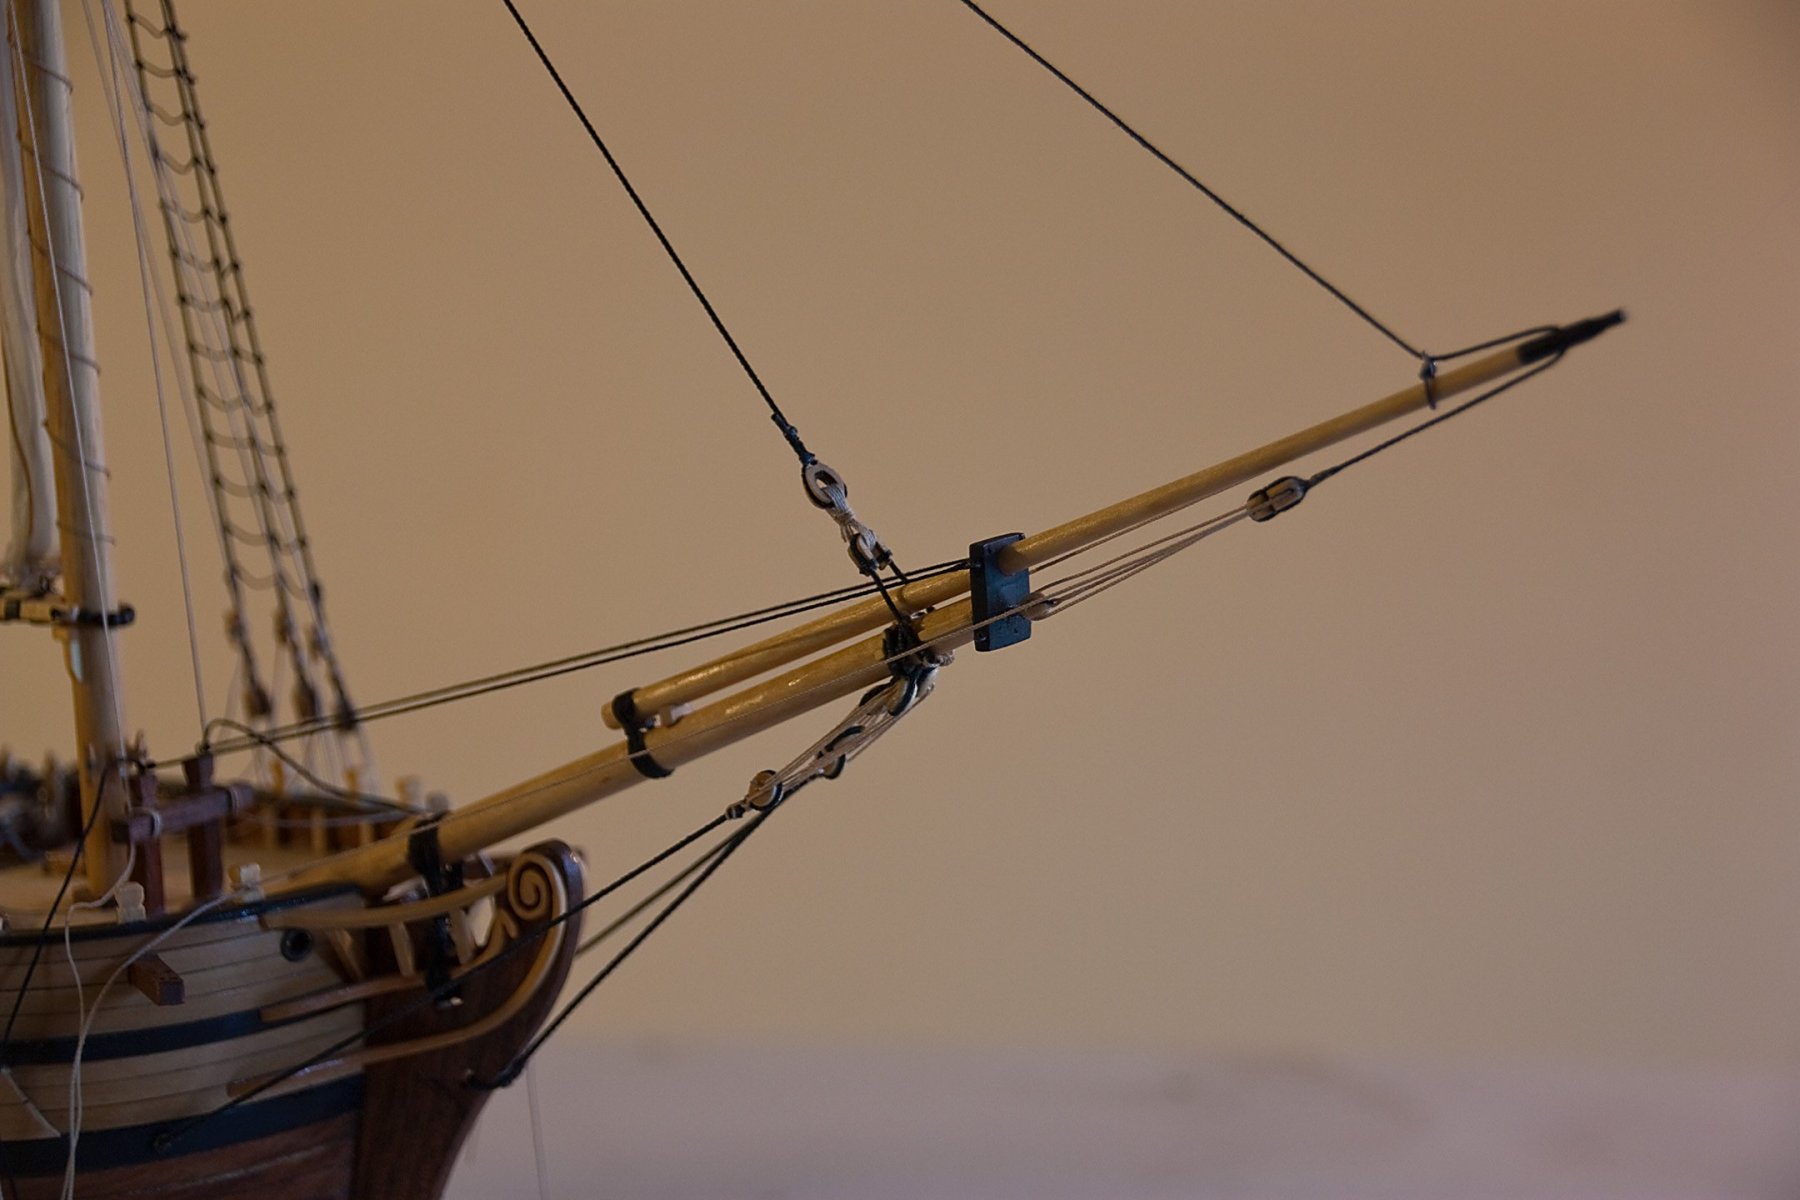
I added the standing rigging in the bow section; specifically the forestay and jib stay. I’m exploring ways to rig all the lines and not use too many timberheads or space on the bitts. I always worry about not having enough room to tie off all the lines. I did use two timberheads, but I think everything is going well and I’ll find the space somewhere.

- 122 replies
-
- 10
-
-
- independence
- privateer
- (and 1 more)
-
Thanks MtZigg. Hope your model comes out great. Cheers.
- 122 replies
-
- 2
-
-
- independence
- privateer
- (and 1 more)
-
WOW! Just checked out this build. I think the work is unbelievable. Really first-rate. Glad to follow along. Cheers.
-
Next up is to step the main mast and its rigging. The shrouds, vangs and halyards are the same as on the fore mast; while the boom topping lift is different. I also changed the way the brails are tied off. The new method frees up space and is similar to most of my research. I also added the jib boom in preparation for rigging the fore stays and sails, as well as the fore topsail. Edit to enlarge the photos.

- 122 replies
-
- 10
-
-
- independence
- privateer
- (and 1 more)
-
Thanks for the comments Dave, and yacht1255. Thanks also to MtZigg. In answer to your questions: As I remember the sequence of events, I first planked the deck and then the first layer of the hull. Next, I planked the inner bulwarks, followed by the final layer of hull planking. I've been using silk span from this site: https://brodak.com/silkspan-lite-white-only-2-sheets.html I use the thinest silk span, which Brodak calls "Lite Silkspan BH-916". As described in my entry I laminate three sheets together using white glue diluted with water at a ration of 1 part glue to 7-10 parts water. When it comes to furling the sail, I wet the sail with water and form the furl. Once the sail dries, it's stiff but looks good. You can always re-wet and re-form the furl it you think it's necessary. Hope this answers your questions; and, good luck with your model.
- 122 replies
-
- 5
-
-
- independence
- privateer
- (and 1 more)
-
Excellent looking planking. It's going to be a beautiful model.
-
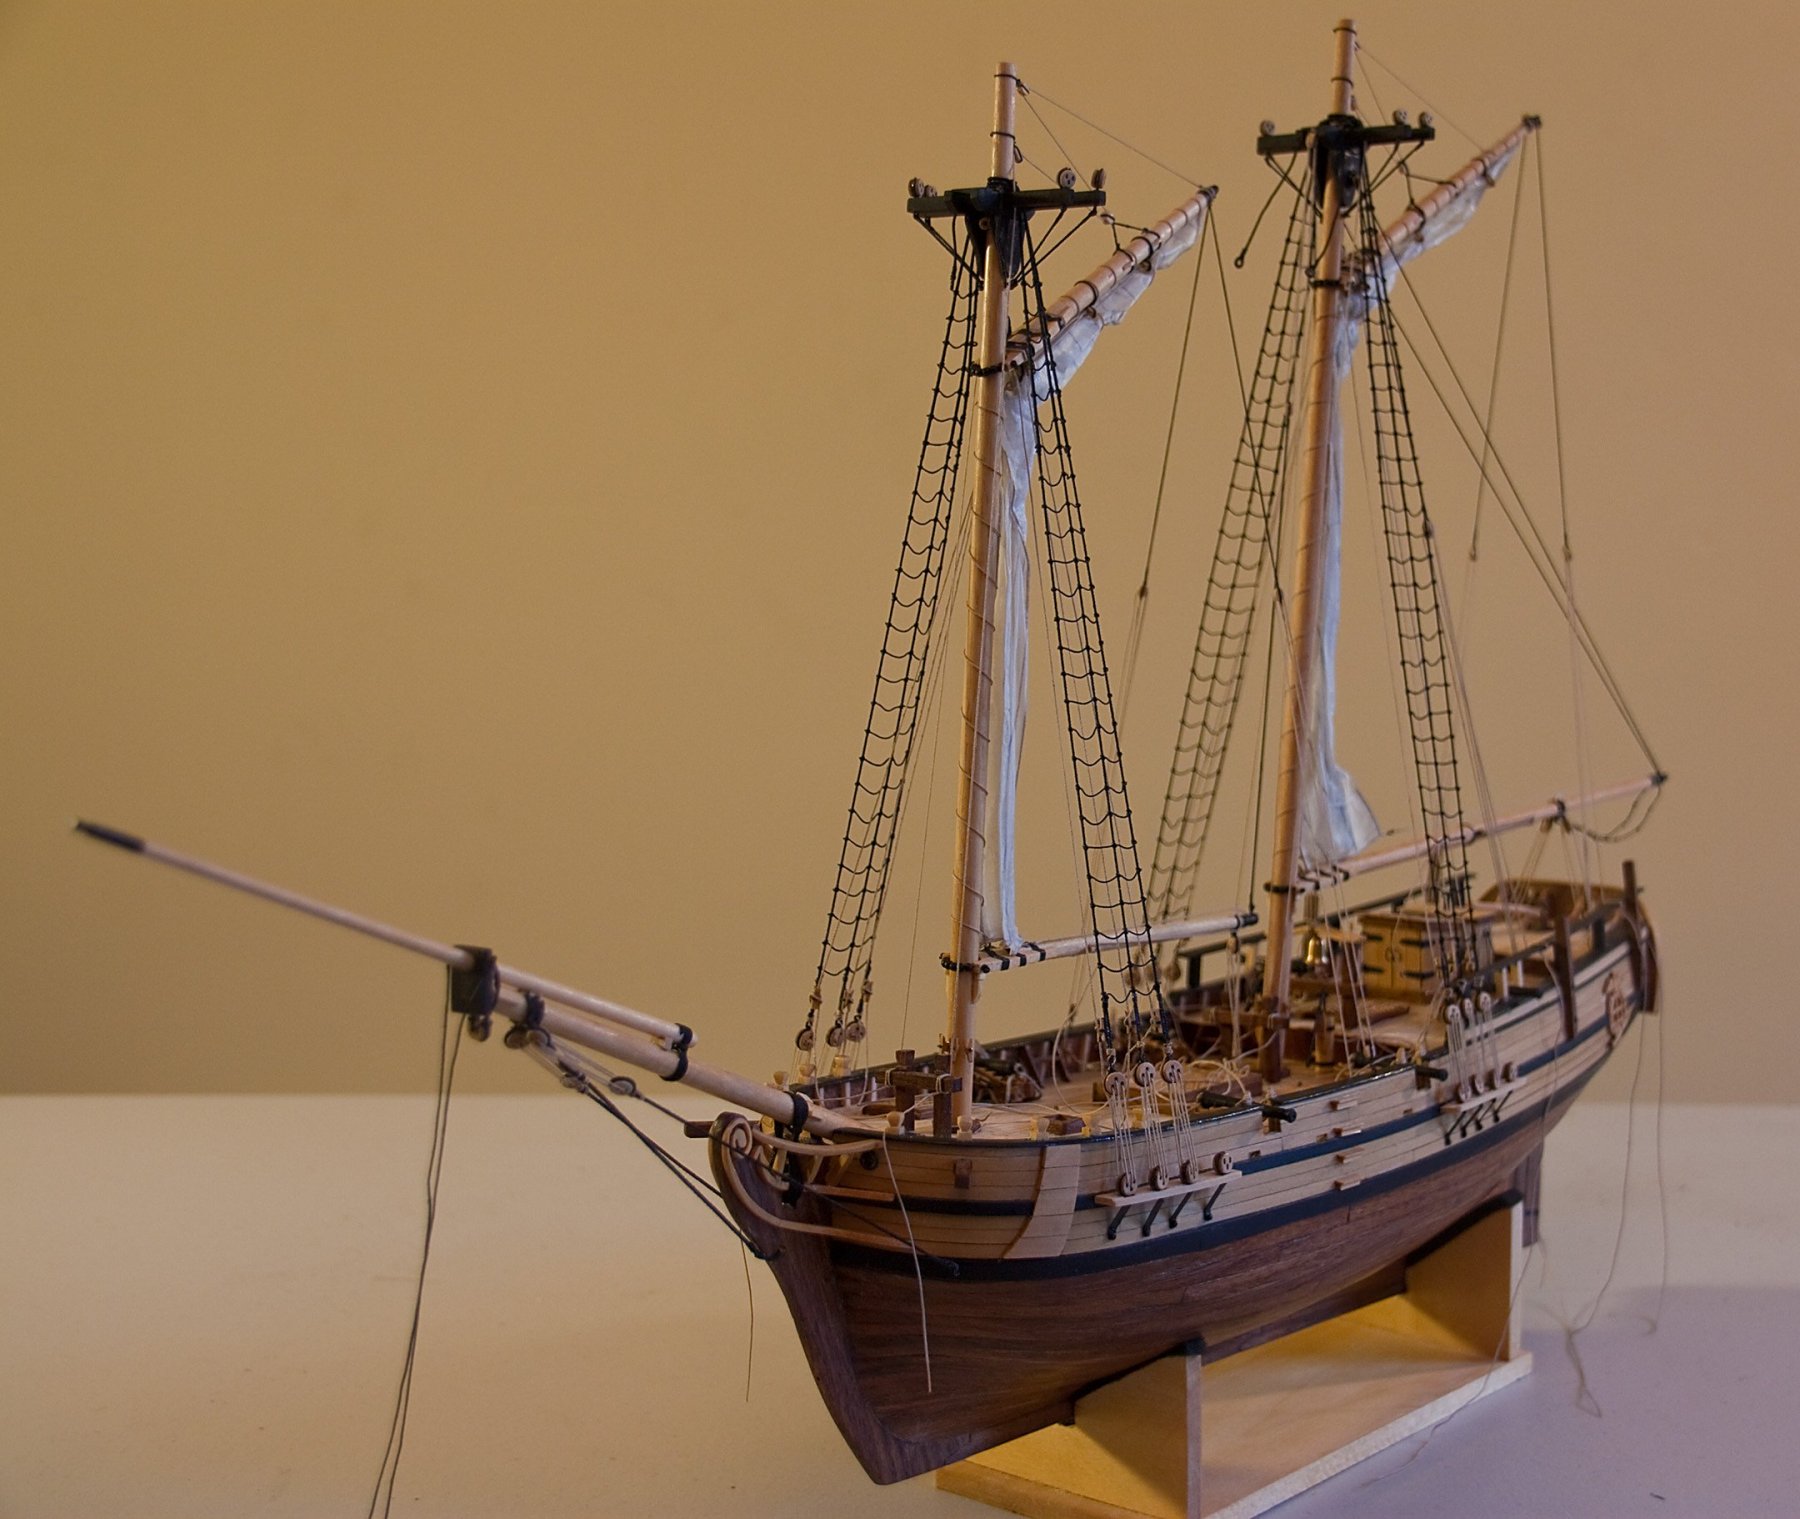
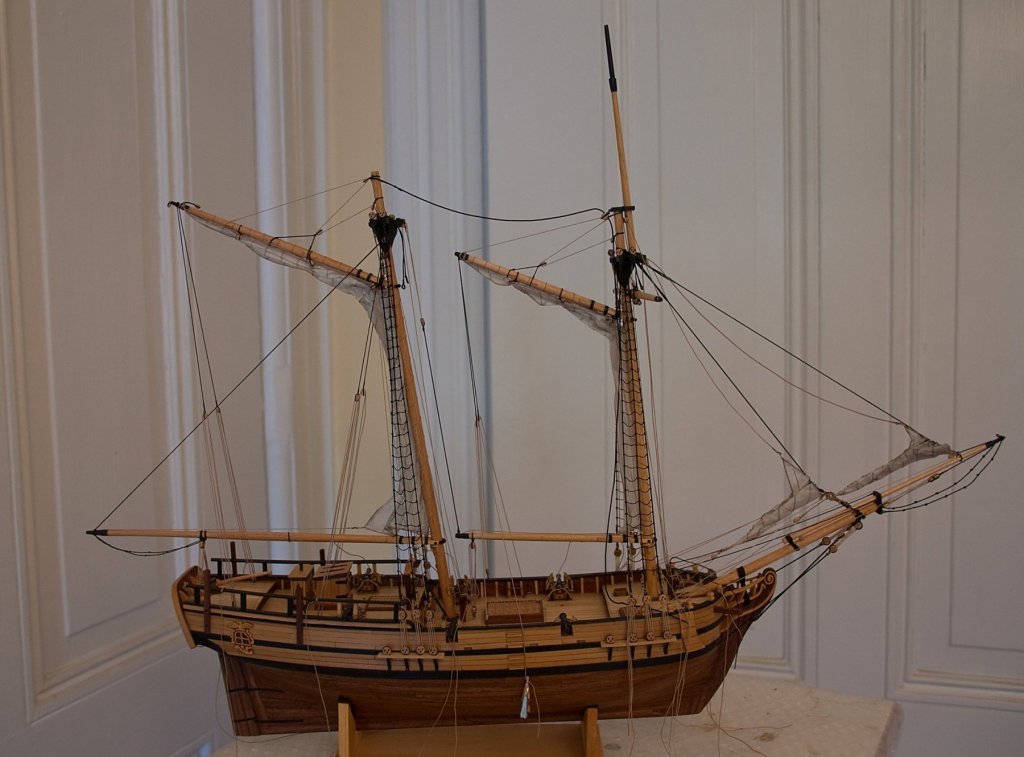
After some family visits, I ‘finished up’ the model for a presentation at the May club meeting. None of the rigging has been tied off and the shrouds have been ratted up.
- 122 replies
-
- 12
-
-
- independence
- privateer
- (and 1 more)
-
Thanks Mark for the ideas. I still have the main spanker to do. Also thanks to Dave for the encouragement. Cheers.
- 122 replies
-
- 2
-
-
- independence
- privateer
- (and 1 more)
-
After a long period of attention to my group build, I’ve returned to the Independence. Since the last post I’ve tenuously added, without glueing, the lower fore shrouds. But my main focus has been on the fore lower sail which is a gaff sail. I want the sail to be brailed and look proper. When I attended the meeting of the Northeast Clubs at New London, Connecticut, I acquired a collection of designs of ships published in 1882 in Paris. One of the plates shows a ship very much like the Independence with brailed sails. I want my model to look like that ship. But I couldn’t get either cloth or silkspan to behave. I came up with the idea to make the sail in two parts. The first part is what is furled up to the gaff; and the second part is what is furled to the mast. Some photos: The piece that is furled to the mast I done first. Then the diagonal part is furled to the gaff, with some effort to merge to two pieces together. (Not a good explanation, but it’s the best I can do.) The last photo shows the sail brailed exactly as shown in the 1882 plate. (I’m not able to get a decent copy of the plate to include here.)
- 122 replies
-
- 9
-
-
- independence
- privateer
- (and 1 more)
-
So far looking good. Excellent work.
-
Thanks Rusty and come on down. And I always listen to Chuck.