lambsbk
-
Posts
910 -
Joined
-
Last visited
Content Type
Profiles
Forums
Gallery
Events
Everything posted by lambsbk
-
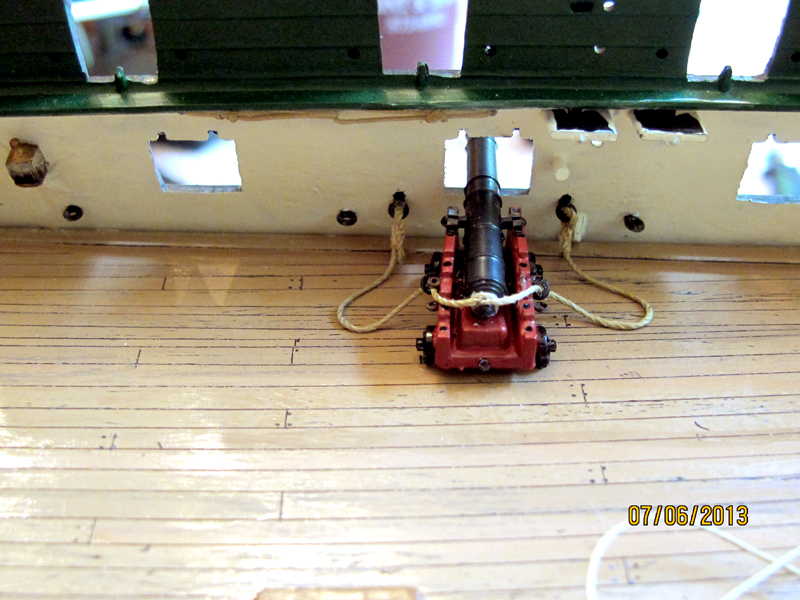
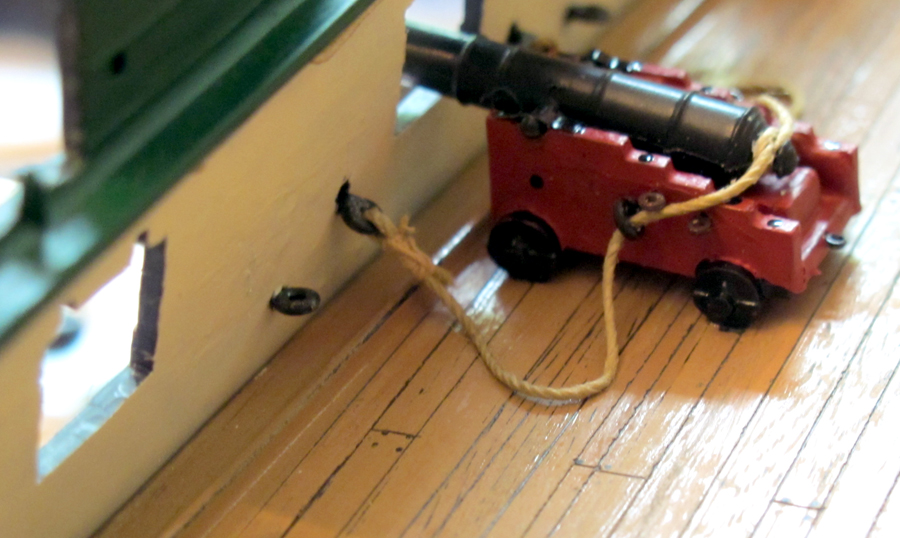
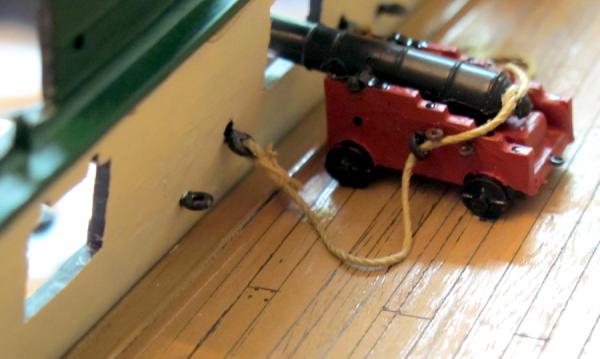
The prototype breeching gun is complete. I think I will modify the seizing on the remaining guns. Although it is tied correctly I don't like the look. I think I will simplify the next one and double seize the line (it will be more correct by doubling).
- 601 replies
-
- 2
-

-
- constitution
- revell
- (and 1 more)
-
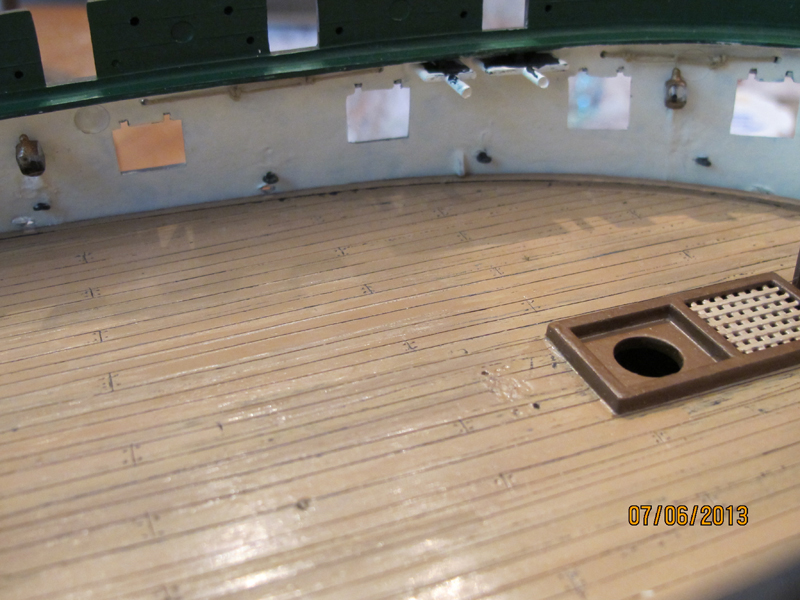
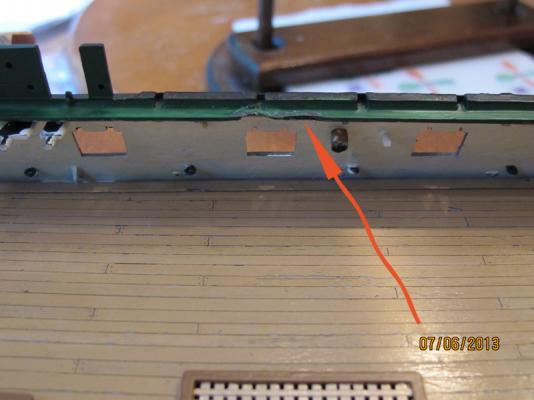
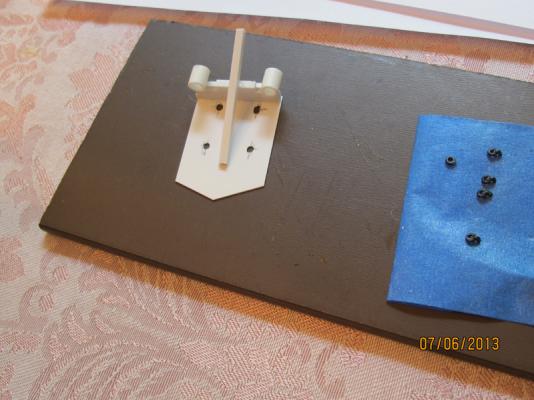
A couple of pics below. I am experimenting with the bulwark ringbolts. Those of you who have thickened the bulwark will have no problem with this...but drilling out the inner bulwark without the thickened effect is tricky. Not much room for error and I am sure I will some external repair to do after the drilling and placement of the bolts. The Spar Deck damage. After the nibs were removed I really liked the clean look of the bulwark. Up close it may not look so great but overall I like it. I made a jig to align the cannons, scrape down to plastic on the Gun Deck for gluing the carriages, and for ring bolt positioning.

- 601 replies
-
- 1
-
-
- constitution
- revell
- (and 1 more)
-
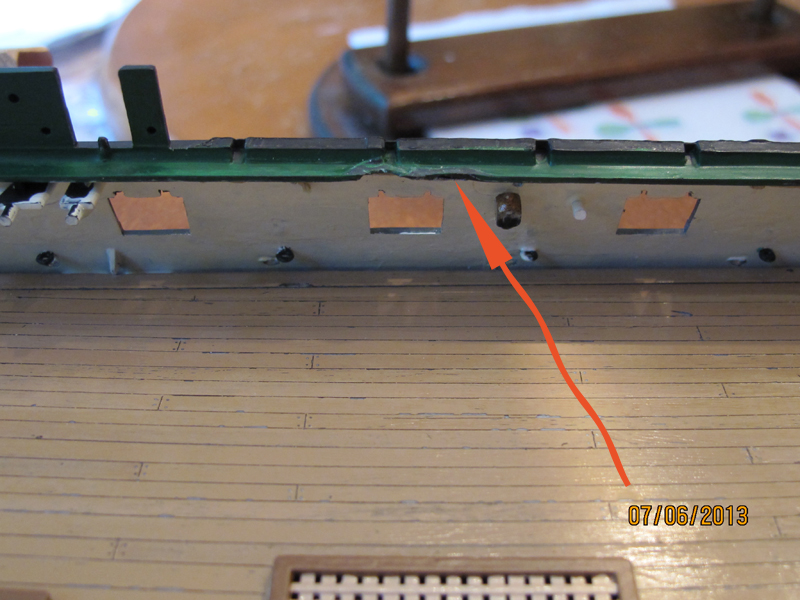
Thanks all. Fortunately the spar deck only took a small hit amid ship. I have already cleaned the melted plastic off and now need to put a little plastic putty to work. I think the final reshape will be ok. I'll test fit the spar deck until it is right again. I'll get some pics up this weekend. Kim: thanks for the sail idea. I have not gotten that far ahead in my build thinking yet but I'll reference this page when I do.
-
Just an update. I started to modify the bulwarks by removing the pathetic nibs supplied for the breeching by Revell. I had a 'great' idea of using a hot knife to cut through them and then Dremel with a small sanding wheel to finish the cut. I was VERY careful with the knife because I knew I could not get it close to the other parts. But careful wasn't good enough and it touched a bit of the spar deck attachment area. ARGHHH...! So now I have to repair that. Thankfully it is not beyond repair. After that frustration on the port side I decided to just use tree snips to trim the nibs...why do the best ideas only come after disaster? They worked so much better and the rest of the build did not have to suffer. Now on to the clean up and repair...
-
Looks great John.
-
I like the way you are thickening the bulwarks. Very nice. I am also working my way aft of the deck. Like you I have a capstan, shot racks, and pumps to build yet...then onto the spar deck where additional detail will really be seen the most. I am looking forward to following your additions to this build. Right now, like you, I am re-thinking the side tackles for the guns and their attachments.
-
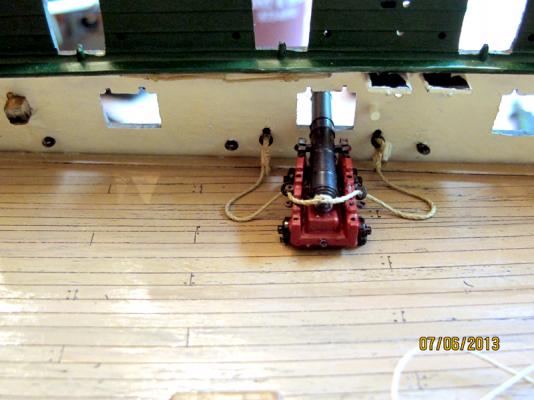
The Connie in 1812 had only carronades on the bulwark of the spar deck. These are different from cannonades which have trunions. The chase guns were a later addition. Unfortunately the refit ship has BOTH (incorrectly). The 24 pounders were of english manufacture and the knowledge of their make and size pretty much comes from the sister ship America. Nice anchor and barrels. I used thin pieces of wiring shrink wrap to mimic the bands on mine. It worked well. Jasseji: I was wondering where you plan to put them?
-
Russ - you are right. Ringbolts are used for the gun tackle attachment to the bulwark. I have started to think about the 'how' to do it.
-
Kim: Sorry to hear about your dad. I hope you get to come 'home' soon. John: You will have a great time. Bring some cannolis (per Evan's advice) from Mikes across the bridge.
-
Sjors: I have to pipe in here...what about those eels? I have not been to Amsterdam (yet). Is this a slang reference (like 'Rocky Mountain Oysters') or are you serious? Sorry to have to ask. (naive) Dave
- 2,250 replies
-
- 1
-
-
- model shipways
- Charles W Morgan
- (and 1 more)
-
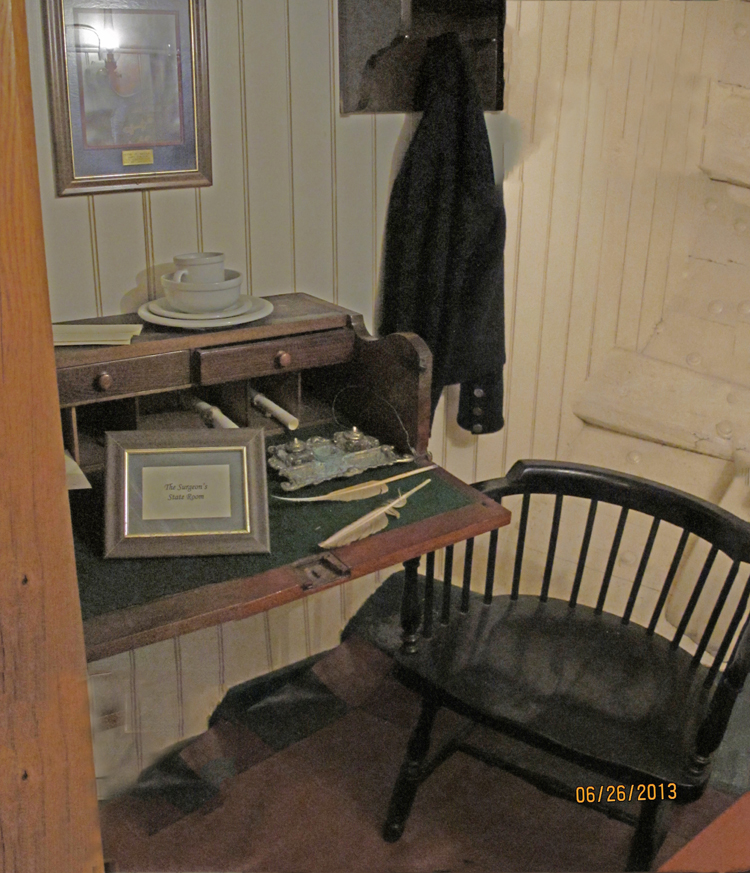
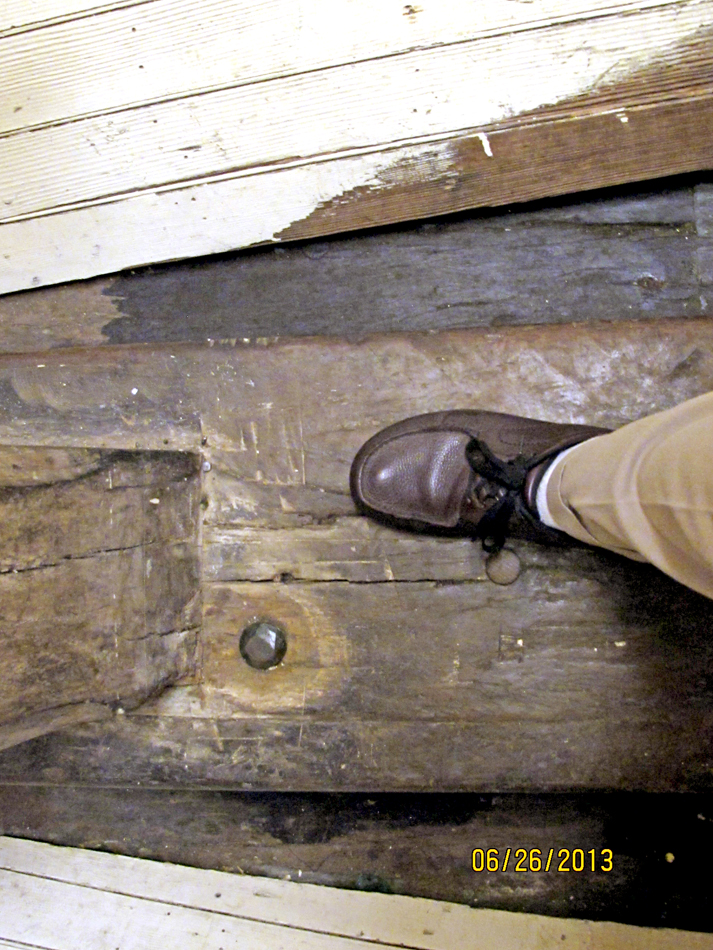
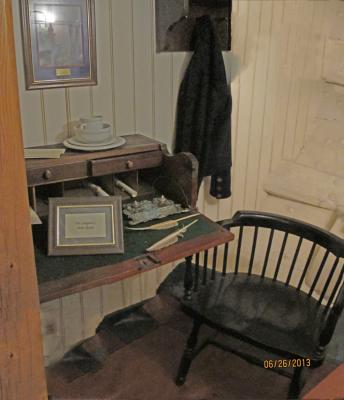
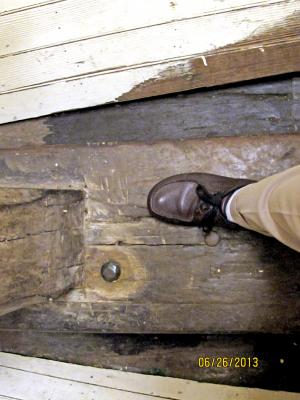
Like Evan I got to step on some of the 10% of what is left of original timber. The doctors office. A lot smaller than mine. Main mast. Awesome.
- 601 replies
-
- 3
-
-
- constitution
- revell
- (and 1 more)
-
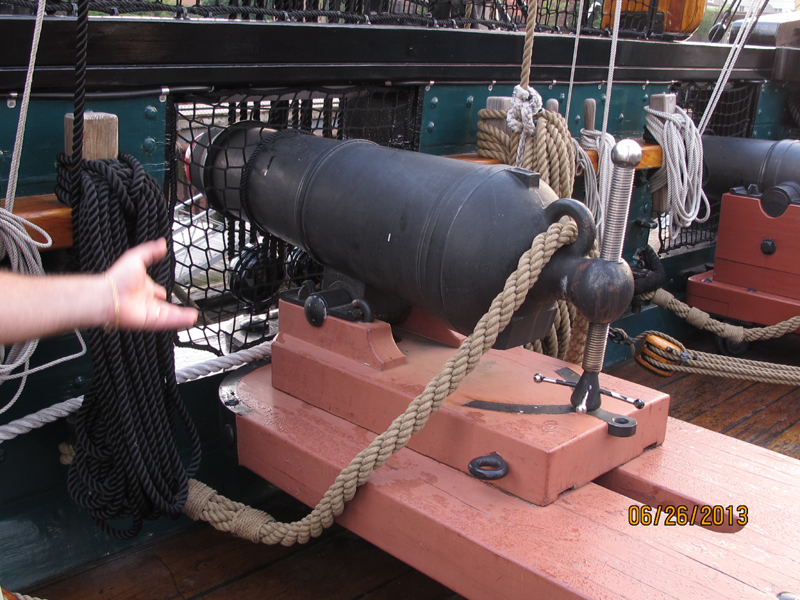
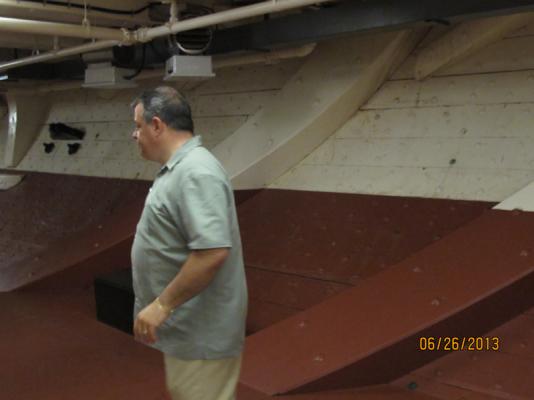
Henry pointing out the re-addition of the diagonal riders (originally designed and built into the ship) improving the hog from over a foot back to the original of about an inch. Carronades vs. cannonades.

- 601 replies
-
- 1
-
-
- constitution
- revell
- (and 1 more)
-
Henry does some re-enacting and is a marine for those events. Thanks for the pics Henry. Of course he wears 'civies' most of the time.
-
I just got back from my tour on the Connie. You guys have to try this - Henry is a GREAT tour guide. The tour was way above my expectations. Thanks Henry for your time, your knowledge, and your friendship. I learned so much. It is going to take me days to digest it all. I'll get some pics up soon. Dave
-
Thanks Kim and Dan. John it does not look like I will be getting that far south although that would be nice. I know you are looking forward to that visit given your current build. I'm getting ready now to head to the wharf and for the Connie visit...
-
John: It is looking good. Starting to take shape. I am glad to see the transition from plastic to wood isn't so...challenging. Hmmm...is it too early to say that yet?
-
Well, concerning the extended tour of the Constitution a member of this forum has come to my rescue. I was not going to be able to do the tour due to my anniversary falling on Tuesday (the only day for extended tours). But Henry (popeye2sea) has offered to get me on an extended tour after hours. That is just too cool: extended tour AND a MSW member's knowledge...how can you beat that? Dave... in Boston
-
Henry: I just caught up to your build site. Beautiful workmanship. Nice detail. I look forward to following along. Dave
-
Good luck Neal and have fun with it! I will watch for your posts.
-
Looks good (yes, the lake too). I used Model Master acrylic paint for the gun carriages. At first I was not as happy with this type of paint versus enamel but found myself liking it more as I use it more. The hull is looking nice. The paint makes a nice difference doesn't it. You may want to ask yourself at this point how you are going to mount the completed build. In some kits there is a place for keel mounts but they are not drilled out. The insert is for a square nut and the keelson and keel can be CAREFULLY drilled out to accommodate a bolt for pedestal mounting. The square nut has to be placed before gluing the hull halves together (well, it can be placed after but then requires some repair). You then drill top down with a small diameter bit for a pilot hole (through the eye of the square nut) and then flip the ship keel up, change the bit size, and drill the exact diameter hole to accommodate the bolt, stopping short of the nut.

-
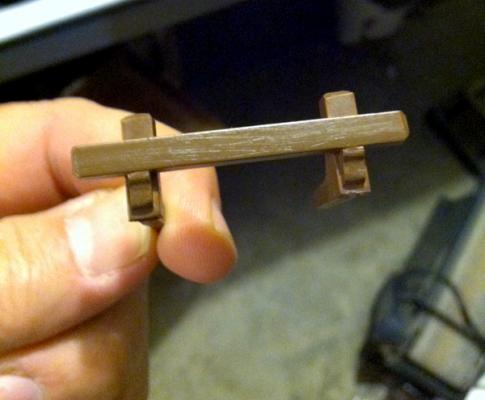
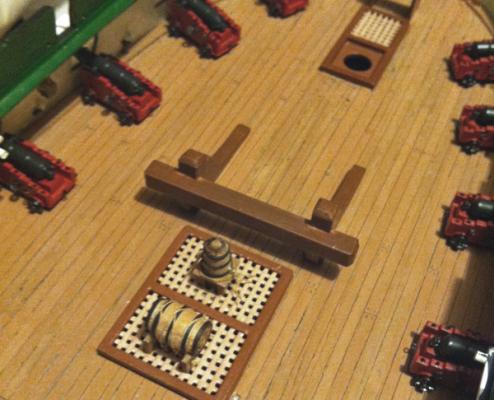
This will be my last post for a few weeks. I am busy packing for my trip to Boston. I will get lots of pics. Thanks again Evan for the visit/tourist suggestions. I, unfortunately, may not get to do the extended experience tour. I have not given up hope on that yet though. I finished the aft rider bitt and placed it (dry) in relative position. It IS starting to look like a deck. Exciting. Shape detail, Paint and wood grain, and in relative position, dry.
- 601 replies
-
- 2
-
-
- constitution
- revell
- (and 1 more)
-
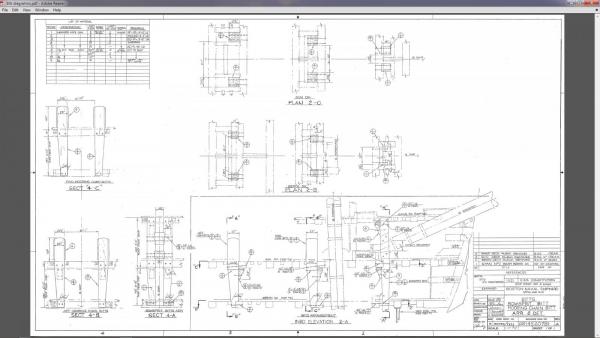
Dan: I believe the plans came from a link on Force9's reference list although I can not locate the reference now. They are Naval plans of the more modern restoration of the ship 1973(after many refits) and I only used them as a general reference for the size of the timbers and their general spacing. For instance the Bitt pins are wider in 1973 due to the addition of iron to accommodate the chain cable.The Marquardt AOTS (p.49, 71, and 78) was used for comparison and in general it agreed with the other reference concerning placement. The timber size was referenced to the 1973 specs. since the dimensions were listed. It is a PDF file so I could not upload to the site but I did a screen shot below. It is not great magnified but maybe you can see some details. I am sorry I did not log the source reference well. I downloaded it before really getting into doing this log and I have since learned from other members to document a bit better - or, more correctly - I have observed their more careful approach to documentation and now at this latter stage am trying to mimic that documentation where I can.
- 601 replies
-
- 1
-
-
- constitution
- revell
- (and 1 more)
-
Those eye bolts are not as clean as you think. The flash is on the inner diameter as well. When they are clean they are VERY fragile. I will be making stronger ones for supporting rigging down the line. Several members have suggested it. I am glad to see you getting started and I look forward to following your progress. Dave
-
Dan- it is a good point. I have added lanterns on the gun deck and I am not certain at this point what will actually be seen - plus I am just having fun with the details. Like you I it seems progress is a bit slow on my build too. I don't remember the last time I referenced the actual Revell directions! Your ship is looking good. I like the brick detail. The plans are internet based on the Connie (Naval Museum I think - BUT they are more modern on the refit. The bitts position was the only thing I trusted on them since the rider bitts have changed to cable bitts.
-
Looking good Russ.