HOLIDAY DONATION DRIVE - SUPPORT MSW - DO YOUR PART TO KEEP THIS GREAT FORUM GOING! (Only 24 donations so far out of 49,000 members - C'mon guys!)
×


Maury S
-
Posts
1,490 -
Joined
-
Last visited
Content Type
Profiles
Forums
Gallery
Events
Everything posted by Maury S
-

How to maintenance Byrnes table saw
Maury S replied to michael101's topic in Modeling tools and Workshop Equipment
To change the blade: UNPLUG the saw. unscrew and remove the insert. Tip the saw to the left. Use a wrench to loosen the nut on the blade. Hand twist off the nut. remove the large ring. If necessary, remove the arbor ring (depends on the hole in the blade). Remove blade. reverse process to install the new blade. Maury -
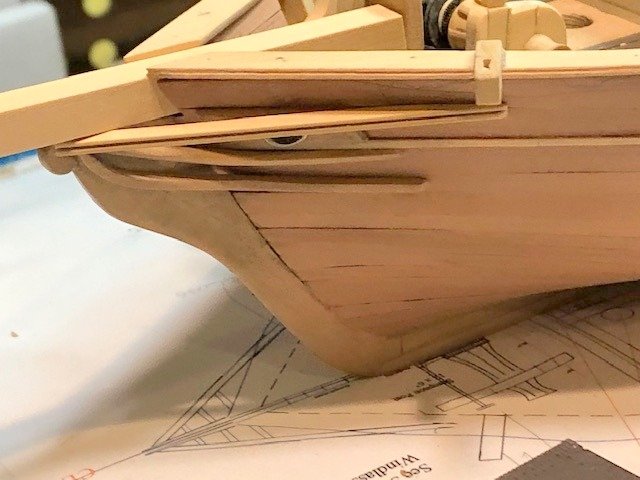
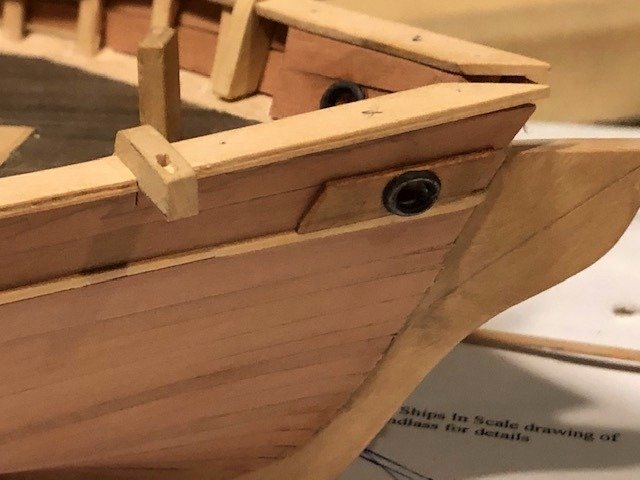
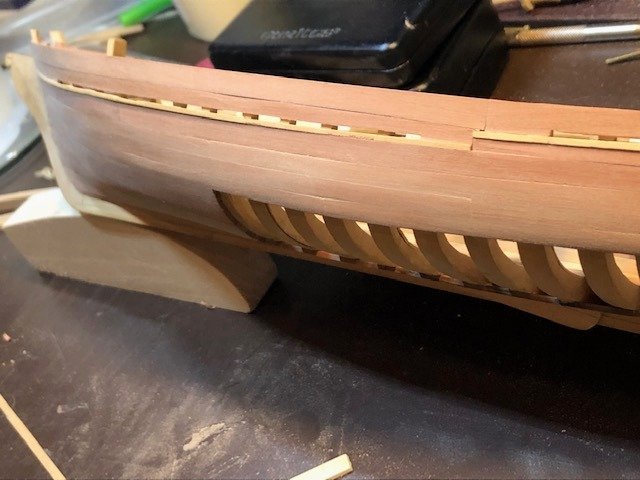
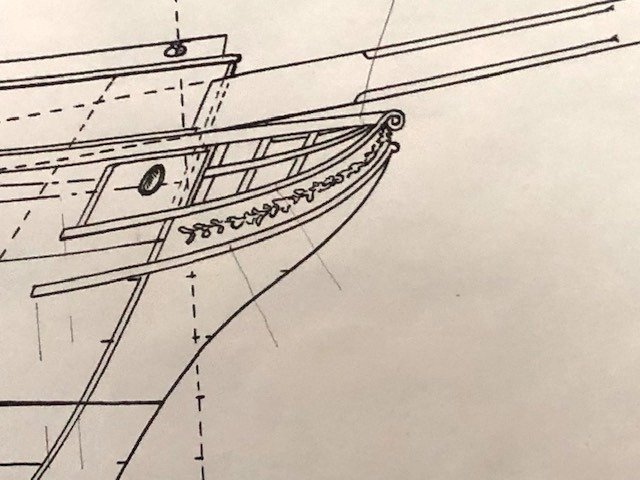
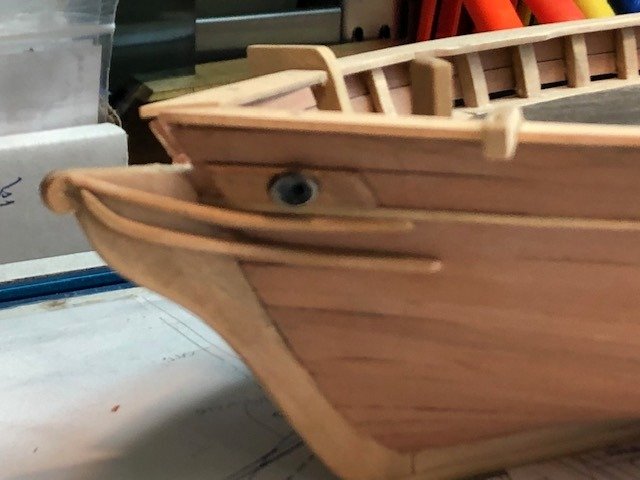
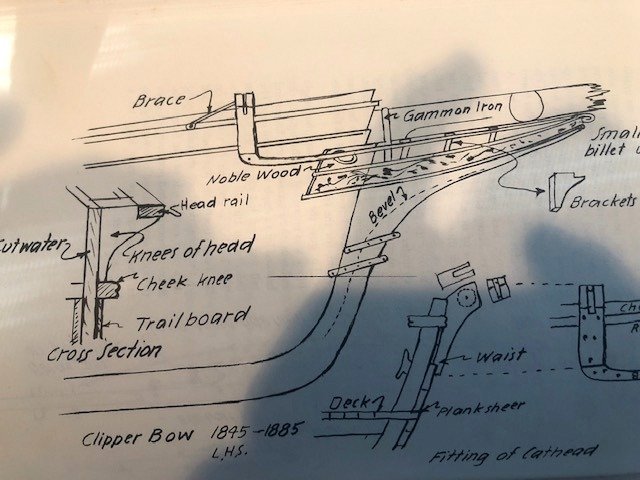
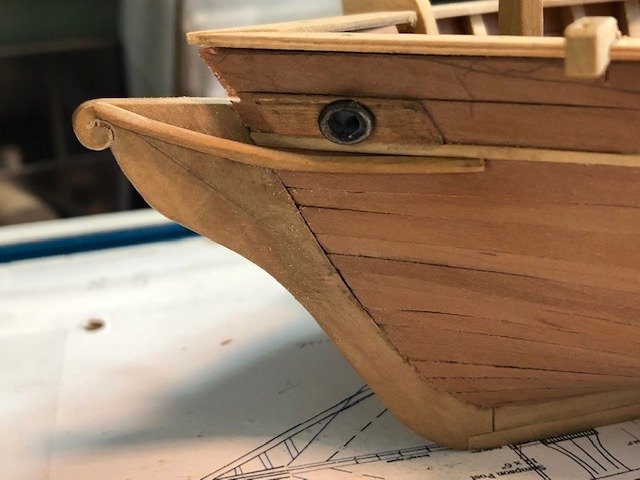
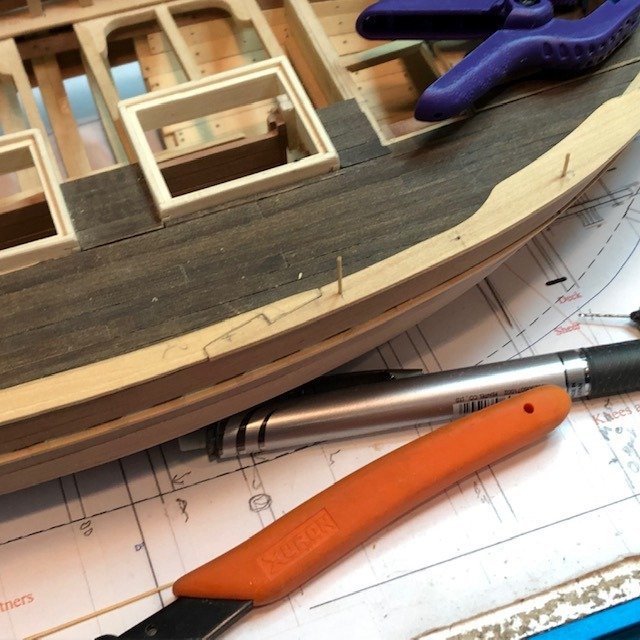
From the plans there is decorative scroll on the stem piece but no trail board. Two cheeks curving up to the billet at the end of the stem, and a rail above the noble wood going out to the top of the stem with a light intermediate rail below that. Between the plan and the illustrations of other boats in American Fishing Schooners... by Chapelle, I've got it pretty close. Back to the cheeks. These are the most complex pieces I've ever cut/sanded/carved/sanded. Multiple angles and curves. I started with an over-sized block with the angle between the hull planking and stem cut. Next came beveling the after portion to align with the slope of the hull vis a vis the vertical line of the stem. Everything past that was trial and error on the fit. The notch on the left one is for the gammon iron holding the bowsprit to the stem post. The varying thickness of the lower cheek must be an issue with the lens. Doesn't look that way to the eye. Maury
-
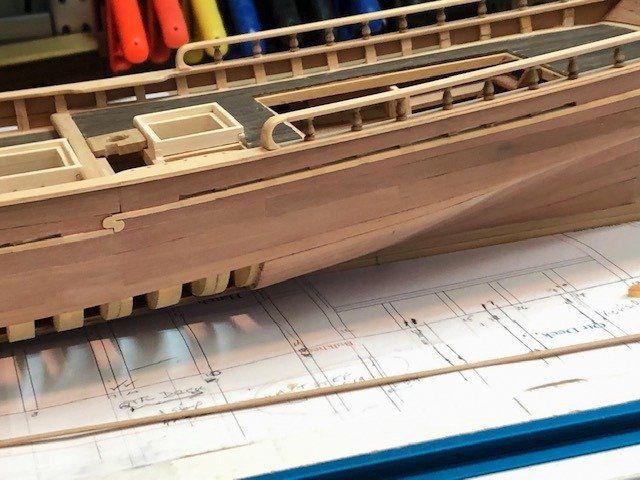
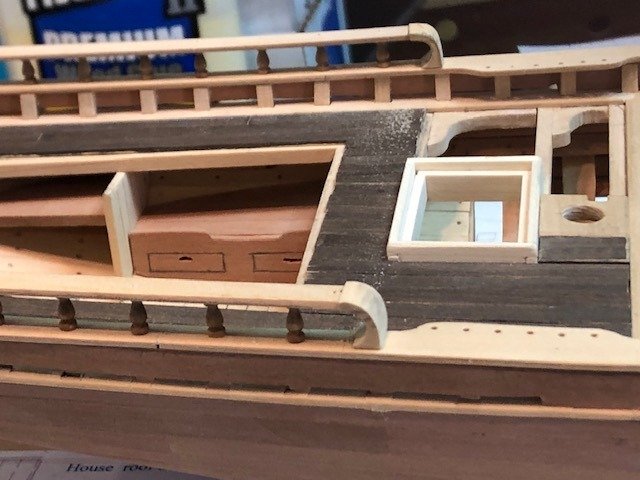
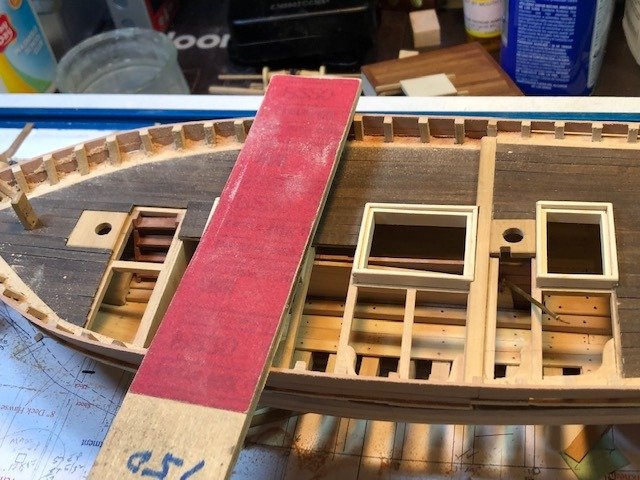
The covering boards need something between the main and quarter deck. A simple hanse will solve the problem. Maury
-
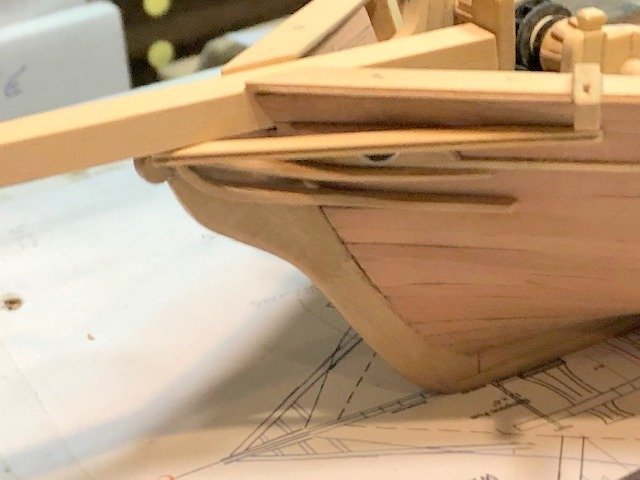
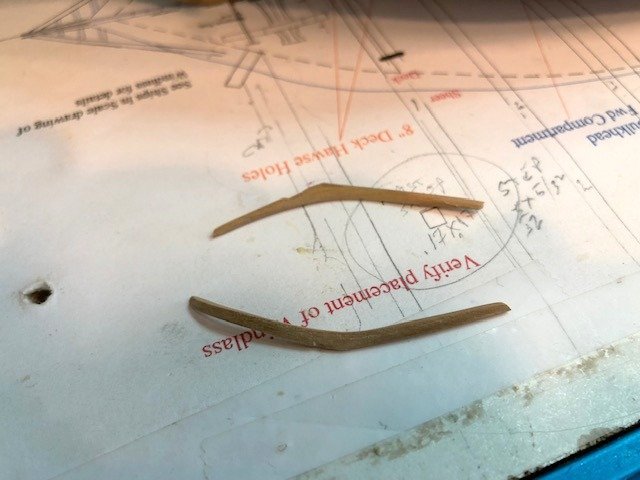
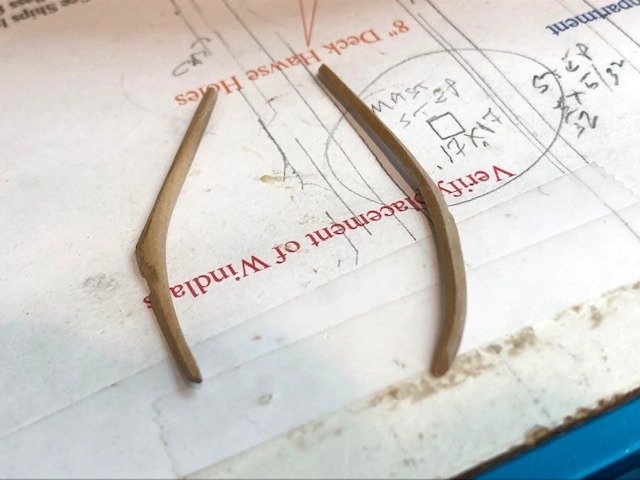
Just below the noble wood is the upper cheek (temporarily tacked in place). There are two and no apparent trail board between the two. It is a complicated piece because of the multiple angles. Looking at the photo, I think the forward part needs some more thinning. Very hard to hold and sand. Maury
-
Poly over acrylic paint????
Maury S replied to CPDDET's topic in Painting, finishing and weathering products and techniques
If the model has value to you, spend the money on "museum glass" for the case. Not cheap, but a significant amount of UV protection. Maury -
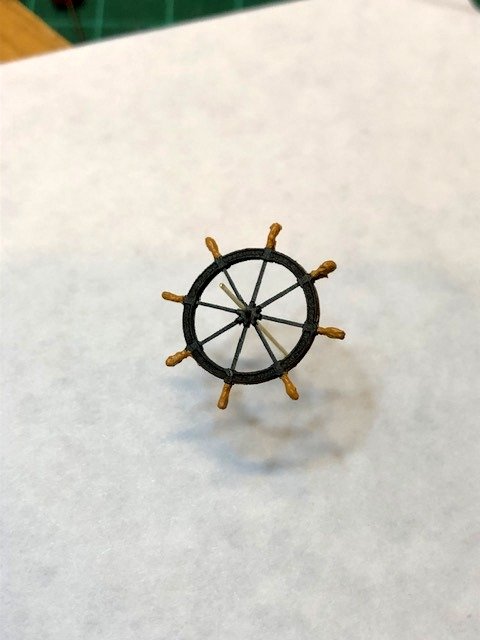
The ships wheel is built and painted. Minor touchup still needed. I've thinnned the monkey rail a bit and added the anchor catheads. Maury
-
Maybe this is for an Administrator...Why is Crown Timberyard still on the advertiser list on the side panel? They've been out of business for some time. Even if they paid for a year in advance, it is awkward to send someone there only to find out there is no there there. Maury
-
- 5
-

-
Mike, Do your self a big favor and start with something fairly simple. You'll pick up lots of skills pretty quickly and then you can move up. Look at Syren's longboat or barges. MANY years ago, I started with a Clipper ship kit from Model Shipways and it's still only partially completed.
-
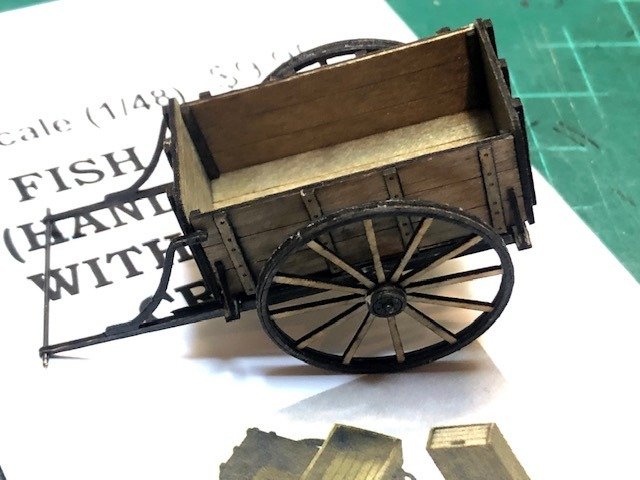
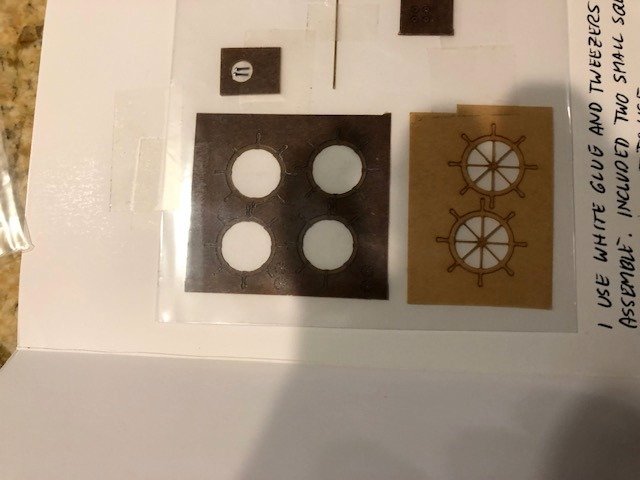
While at the NRG Conference, I met Andy Small, one of the two vendors present. He makes wonderful laser-cut accessories, mostly for the model train crowd. One being a "Fish Cart or Hand Cart" and some boxes that I can display next to the boat. Since he makes great wheels, I asked him if he could cut a "ship's wheel" and he agreed to try. Below is the resulting kit (two wheels shown). The pieces are sandwiched; dark outer rims and handles with the light colored spokes in the middle to make a really good scale wheel. I've assembled one as a test. Since the ship had a metal wheel with wooden handles, I need to wait for some good paint to arrive. In the meantime, he is happy to sell these kits (one wheel) for $5 plus $5 shipping and handling. Contact him at: sales@traintroll.com www.traintroll.com 1-401-480-5381 Maury
-
The rails are installed and nailed. The alignment of the pins in the monkey rail went more smoothly than expected. The fancy end of the rail (someone will tell me the term for that piece, I'm sure) is carved from a piece of 1/4" x 3/8" box. Inside of curve cut while part of the longer piece, then cut off and finished. Still some more adjustments to be made, thinning them down a bit. Maury
-
Got it. I mistakenly thought it was being made with Alaskan Yellow Cedar (AYC). Same issue I imagine because it's soft like Bass. Maur
-
Nice result Toni. Back to the question about 1500 grit sandpaper. Why do you think it necessary to go beyond 320? Maury
-
Toni, I've never seen anyone sand unfinished wood finer than 320. Do you think the AYC needs such treatment? Maury
-
Test fit of stanchions between main rail and monkey rail. The main rail is marked, then monkey rail is taped to it and both are drilled out simultaneously. To use Druxey's term; a bit fiddy getting them all in place. (not sure it's the proper usage of the term). Maury
-
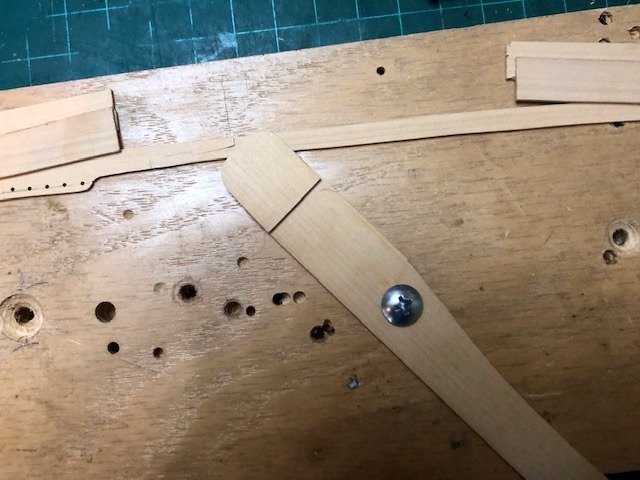
The rail is pinned and is marked for the next two pins moving aft, drilled and repeated. As I move aft, slight deviations in the arc of the rail show up, so the rail is removed, slightly edge-bent and put back on. Jig for bending is simple: Two resistance boards (upper left and right) are the thickness of the plank (rail) to be bent, and have a covering board to prevent the rail from rising up and twisting. The lever-arm has a similar covering board. Slightly move the lever with a heat source applied until the small adjustment is done. Maury

-
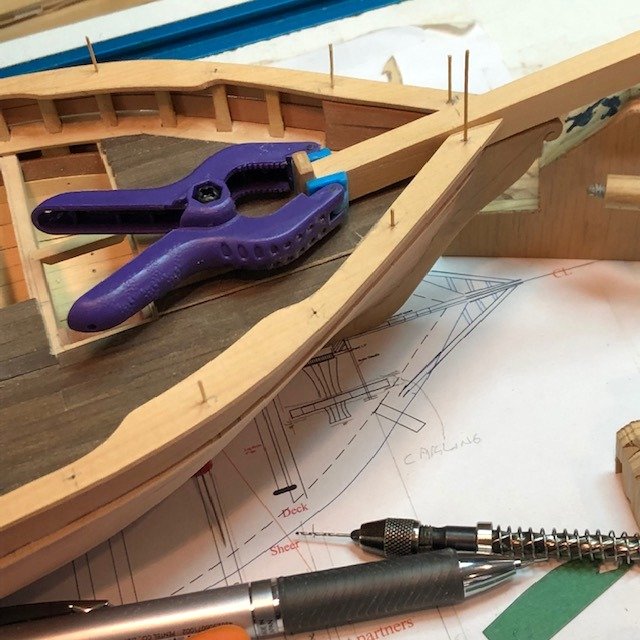
Starting to work on the main rail. They are just pinned for now to get things lined up. Scarph joint in the rail. Lots more work to be done. Maury
-
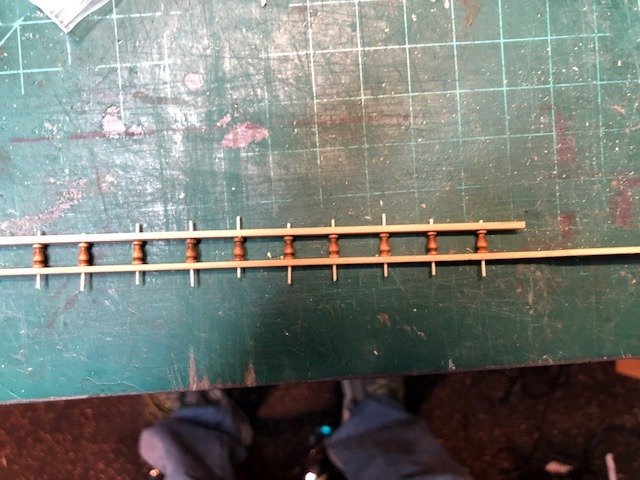
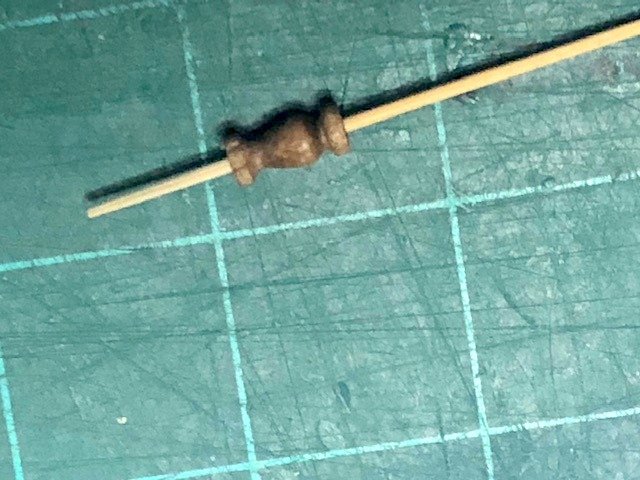
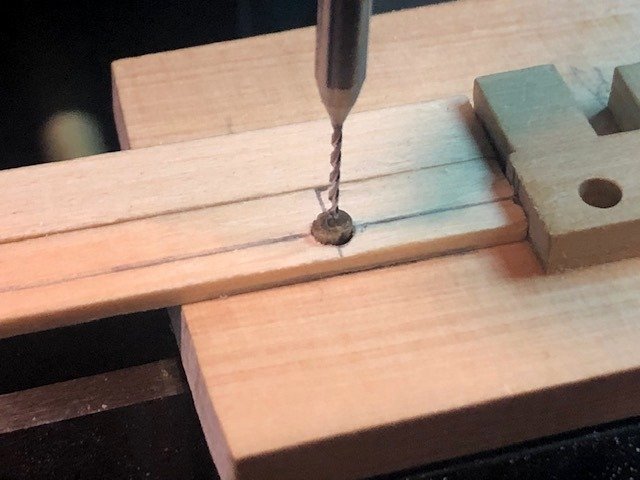
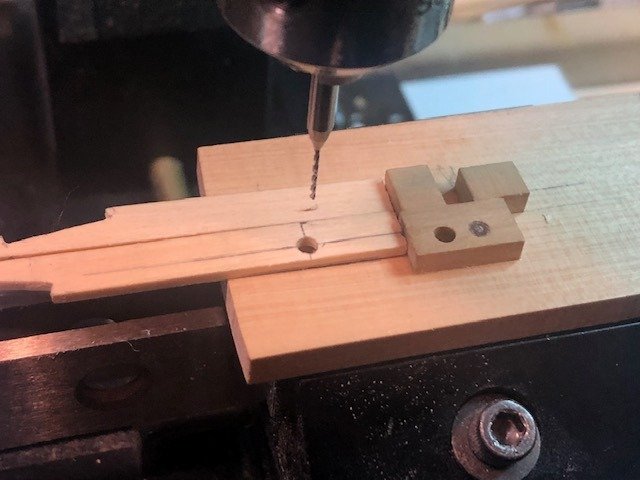
The monkey rail (at the qtr. deck) is supported by stanchions...34 of them, 1 foot above the main rail. I do not have a duplicator, so I bought a pack of 6 mm stanchions from Model Expo-online. They need a center pin so I have to drill a hole drilled through to accept a .027" pin. Final product below: There were complications to accomplish this. I need to drill a hole for the pin, top to bottom. I need some way of holding the piece so the hole is centered. The base of the stanchion is about .011+", the cap is about .010+" and the narrowest part is about .05". I'm far from expert with a mill. If all the boring was done without moving the x or y-axis, everything should be centered. To drill from the base toward the top, using the mill I made a jig with a .010" hole a little shorter than 6 mm deep so the inverted stanchion would slide into the hole (top to bottom), but the wider base would be a bit proud of the jig and held centered. See inverted stanchion inserted in jig. A #71 drill bit was used to bore a little more than 3 mm deep. (boring all the way through never came out centered on the other end). All the pieces were drilled this way. Next, how to bore from the center of the narrower top down to complete the hole? In the jig, I bored another hole .011", wide enough to hold the (bottom of the) stanchion, but the top was loose, so never plumb. How to hold the top so it was centered on the drill bit axis? I bored a 2.35 MM hole . in a piece of scrap lined up on the jig and reamed it out so the cap of the stanchion would just fit in. The stanchion was inserted (upright) in the larger hole and the "scrap" piece was then placed over the cap, held in place so the drilling from the top down was centered on the drill axis. After drilling a little more than 3 mm deep, it was removed from the jig and checked to see of the pin would be centered. All were. Back to the rails. Maury

-
Just received an email alert. https://contenti.com/sale-specials They are having a sale. (I have no connection to the company) Maury
-
- 5
-
-
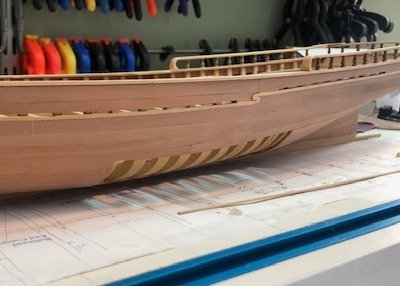
There is a small gap between the top of the wale and the bottom of the covering board. Only way to solve the problem is to replace the wale. New piece installed at the fore. Maury

-
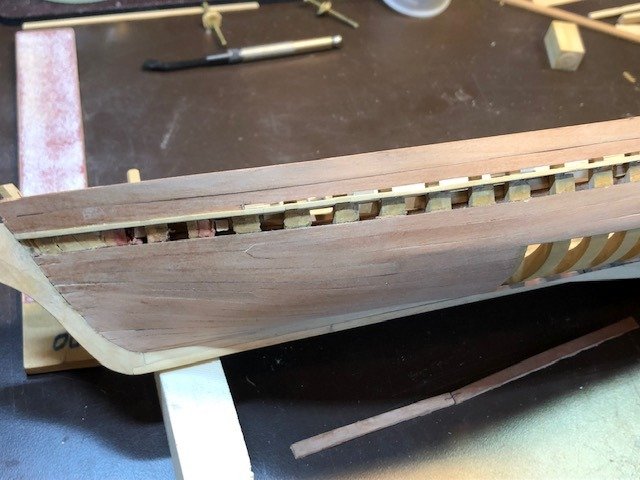
Bulwarks are in and being evened and faired. Note the strake above the covering board is a scupper strake (2.5" open to the next strake above). Maury
-
Thanks Dave, What about the acid content of wrapping paper? M
-
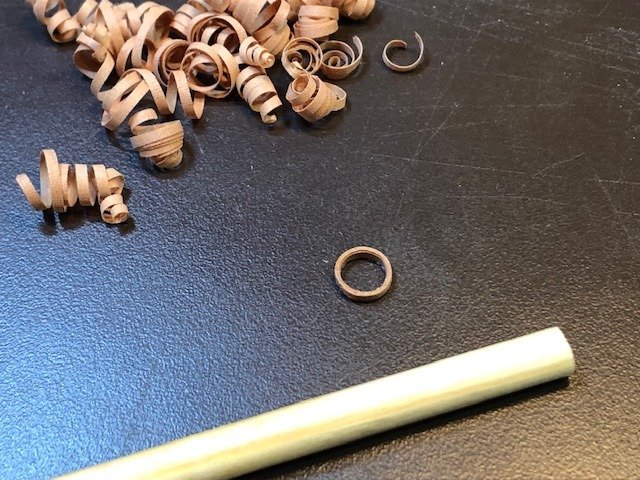
Chapelle, in The American Fishing Schooners 1825 - 1935 devotes a full page to the sizes of mast hoops. I recall some recent discussion, but can't find it in a search. I've been saving planed shavings from the edge of 1/16" Swiss Pear for this purpose. I waxed a piece of dowel that is about 25% larger than the maximum diameter of the main and foremasts. I then carefully loaded a coil onto the dowel, dampened the shaving and built up about 3 - 4 layers using dilute white glue to hold the shaving in place on itself. Pretty good result. A light sanding on the edges will bring them to the specified width. 28 more to go. Maury
- 11 replies
-
- 10
-