
HOLIDAY DONATION DRIVE - SUPPORT MSW - DO YOUR PART TO KEEP THIS GREAT FORUM GOING! (Only 24 donations so far out of 49,000 members - C'mon guys!)
×


Maury S
-
Posts
1,490 -
Joined
-
Last visited
Content Type
Profiles
Forums
Gallery
Events
Everything posted by Maury S
-
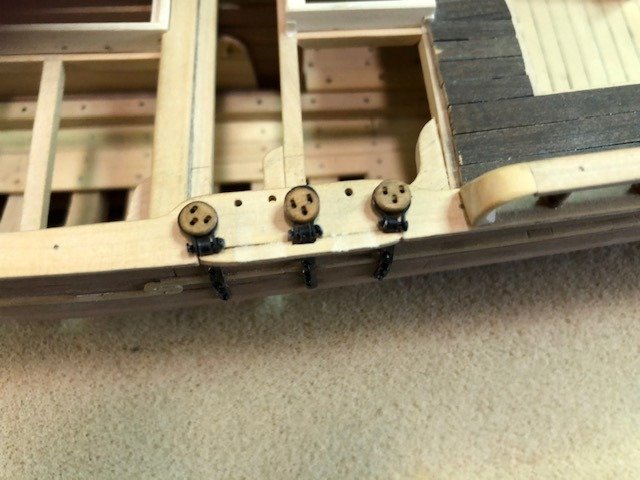
 Lots of "fiddy" work. Making shaclkes, eye bolts, thimbles, etc. I installed the port-side chainplates and the covering boards over the chainplates. The chainplates need some touching-up with LOS solution and the bolt heads need flattening. Maury
-
1:48 Seaman
Maury S replied to cafmodel's topic in CAD and 3D Modelling/Drafting Plans with Software
Even one figure on or near a model sets the scale in the viewer's mind. Very nice pieces. Maury -
Byrnes Sliding Table -Input Requested
Maury S replied to glbarlow's topic in Modeling tools and Workshop Equipment
The first thing I did after buying the Byrnes saw (years ago) was to build a sled (not nearly as precise as Jim's). I can't imagine using any table saw to cross-cut without one. I will probably buy Jim's before my next project. Maury -
Converting a Backyard Shed into a Model Workshop
Maury S replied to Hank's topic in Modeling tools and Workshop Equipment
Next step is to build a veranda on 3 or 4 sides, cover it and then screen it in for insect protection. 😉 -
I ordered in mid-Dec. and received the book in late Jan. Good luck I guess. M
-
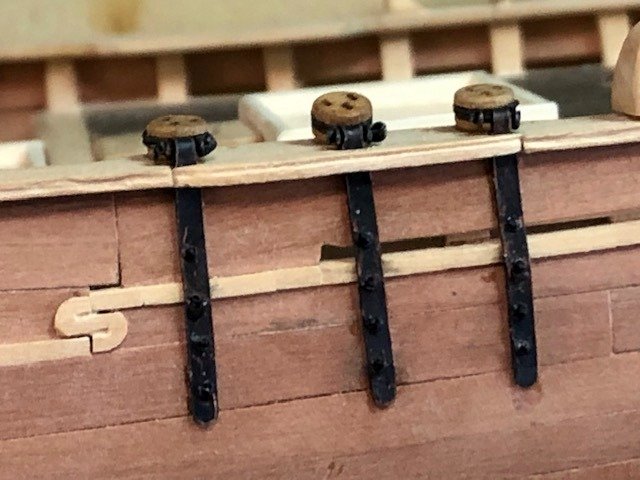
I didn't notice the config. of the deadeyes. They are upside down. Not arranged yet. Maury
-
The deadeyes are temporarily attached to the chain plates. I'm waiting on some 30 Lb test monofilament line to replace the pins and then blackening. Deadeyes are from Syren. Maury
-
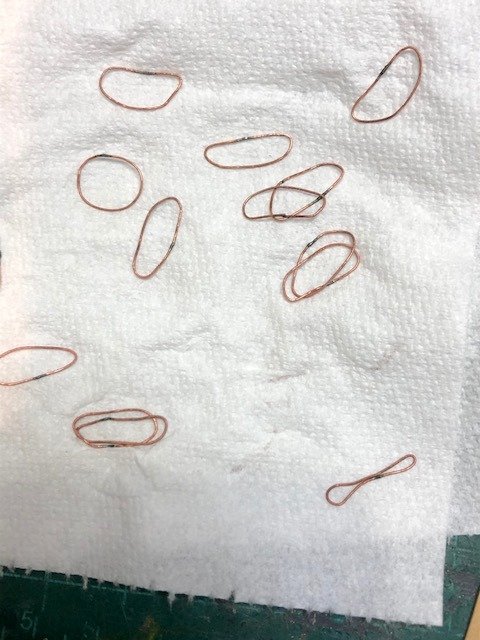
I found some solid copper 26 ga. wire at Michaels. I took the solder well. The pieces were cut to the same size, ends squares up with a file, bent to a ring and soldered. After pickling they look good. They will be pinched and shaped for the deadeyes. The chain plates have been drilled and cleaned up. I'll round the bottoms a bit before I go any further. Maury
-
The 26 ga. copper wire I have turns out to be copper coated (probably steel under). Anyone think this will be a problem for the dead eye bands? The copper is so I can blacken it in situ without staining the surrounding wood (per Ed Tosti). Maury
-
Homemade Styrene rack
Maury S replied to Rcboater Bill's topic in Modeling tools and Workshop Equipment
Let me remind you that wood strips stored in a vertical manner will eventually take on a bend (been there, done that). They should be stored flat. Maury -
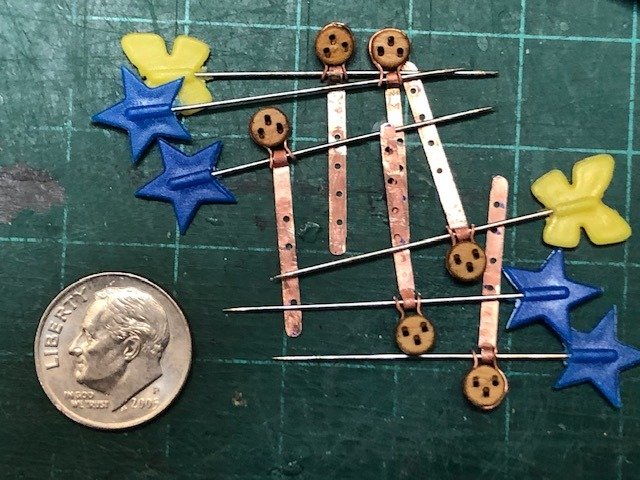
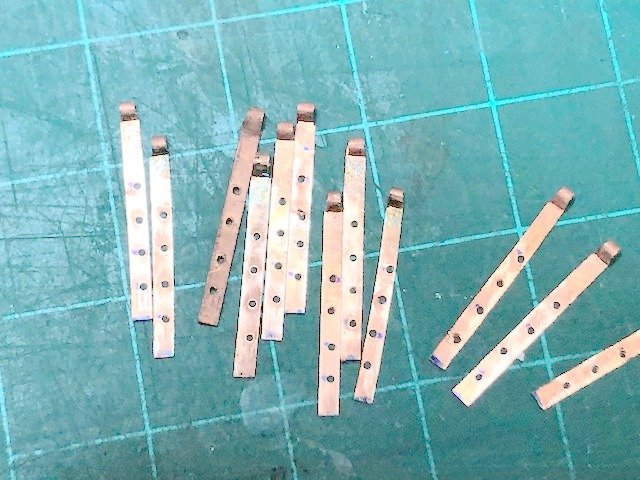
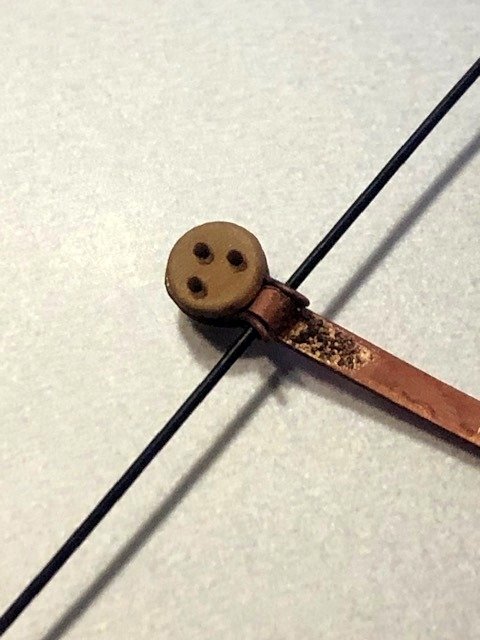
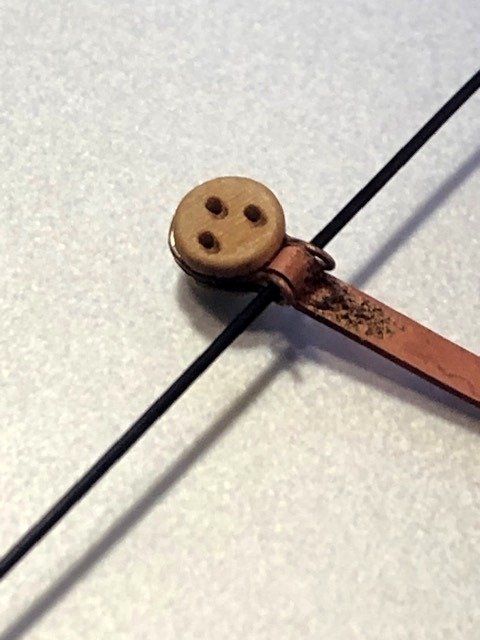
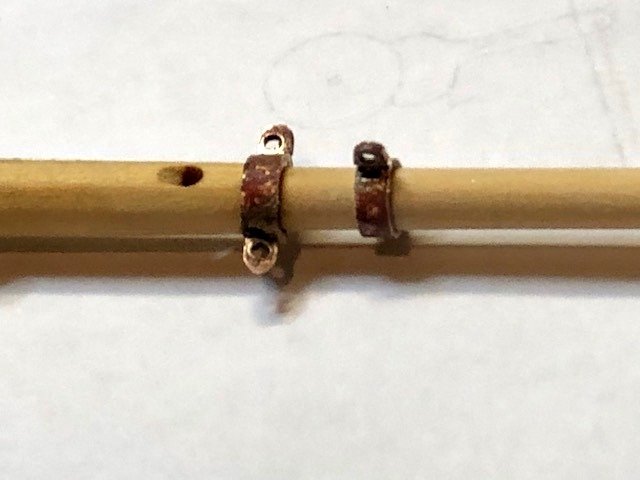
Working on the chainplates. I slit off pieces of ,016" thick copper (3/4" at scale) into .073" (3.5") strips and cut off in 1- 1/4 lengths . The ends were bent into a loop, pickled and silver soldered. Next I doubled-over a piece of 26 Ga. copper wire and cut it to 3x + the circumference of the deadeyes (Chuck's 4mm). I soldered the ends to form a ring, flattened it out so there was a small loop at each end, bent the ends and wrapped the piece to become the deadeye band. A piece of 25 lb. test monofilament line was inserted as the pin holding the band to the chainplate. For a prototype it's good. I have to make the rings (a total of 12) just a hair smaller so the loops are a better fit (see right hand loop in the above photo extending a little further down) to the deadeye and chainplate. I'm going to heat-flatten the ends of the monofilament line to see if they will hold well. The flux still needs to be removed from the chainplate. Maury
- 308 replies
-
- 10
-

-
Season it by heating oil (i.e. Peanut oil) and wiping it with a bunch of table salt after each usage. We never wash one in soap and water. Maury
-
Might the technique also work with black monofilament line that many of us use as a result of Ed's comments? (I don't have a car snow brush). Maury
- 3,618 replies
-
- 2
-
-
- young america
- clipper
- (and 1 more)
-
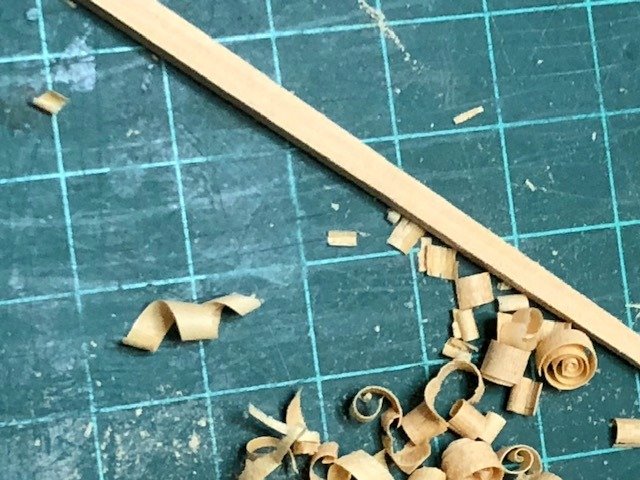
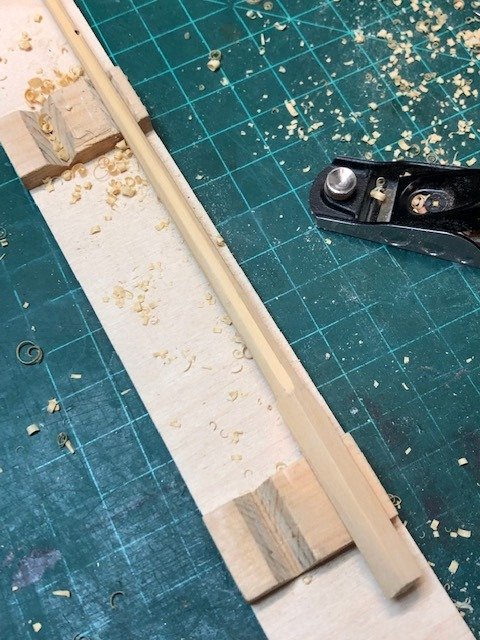
Spars: I'm building up a punch list of items that need attention on the hull, and in the mean time, working on the spars. The for and main masts have been tapered, shaped and cut to height. The main boom is shown tapered. Maximum diameter is about 1/3 from the heel. Taper is about 20% at both ends. It was planed to eight-sided and then rounded except at the heel where the jaws attach and near the end where a couple of cheek blocks go. So far, each spar takes about 1 hour to complete the tapering and shaping. Another boom, the 2 gaffs and top mast to go. Maury
-
Very nice metal work, especially at that scale1 Maury
-
Bow sprit irons: The two bands at the end of the bowsprit are made from .016" (3/4" @ scale) soft copper sheet. I cemented the sheet to a scrap of 1/16" ? scrap plywood and parted off a strip 1/16" (3") for the bands. I drilled holes in the strip 1/2 the circumference of the BS apart and cut it a hair longer than the circumference (trial and error dictated this). I also drilled a hole near the end of the copper strip and cut it off for the ring on the iron. I then filed one edge of the little tab to fit into the holes on the strip. The "iron hoop" has not yet been shaped to round yet. After shaping the hoop to roughly round, making sure the ends mate well, I applied silver solder paste in the holes, inserted the tabs, applied solder to the butted ends of the hoop, applied heat with the butane torch and hoped the pieces stayed put with the gust from the torch. Once I was satisfied the technique worked, I repeated the process for the second iron. The one on the left (horizontal) is for the BS shrouds and the right (vertical) is for the stay and bobstay. A little stretching / rounding over a home-made mandrel and inserted over the end of the bowsprit. The BS has not been cut to length yet but it ends close to the hoop on the right. I'll pickle and blacken them next time I do blackening. Maury

-
...Searcher, In the Chesapeake Bay, they had both off-center and through-keel centerboards well into the mid 1800's. The Chapelle plans show a centerboard 16' long and 5.' high. I doubt it was lowered more than the full width (5' + / -) or as you say That would have given plenty of leeway resistance, and would keep the top edge of the centerboard contained within the trunk. for maximum strength. From the pivot point, that would mean an angle of rotation of about 15 degrees. When measured from the chain connection at the top of the CB to the slot at the deck, the variation in the angle of the chain is only about 6 degrees. A shorter and wider CB would alter these angles. There is no winch arrangement shown on the profile, so for C. Chase, the alternative is a Burton Pendant attached to the main mast. Thanks for your interest and your comments. Maury
-
I really like the tool rack shown in the video. My only suggestion is the entire rack could be tilted (forward) maybe 15 - 20 degrees. It would make it easier to lift-out and replace the tools. 😀Maury
-
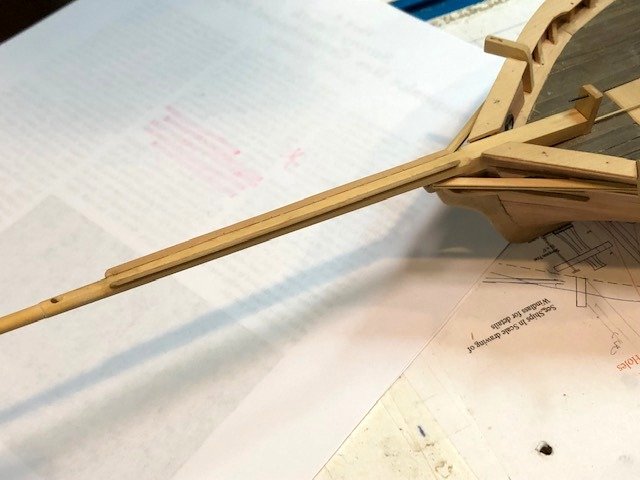
Bowsprit: The bowsprit is 31' - 10" long and 20' is outboard of the knightheads. Bowsprits of the era were tapered 50% from the gammon iron out to the the end of the pole. The bottom of the pole was not tapered. Tapering is pretty straight forward marking a line of taper from full size (12") to 6" on three sides (all of the vertical taper occurs on the top). The circular sander was use to achieve an even taper. The spar is square out to near the billet, then 8-sided for about 4', then 16-sided and eventually round. Following is a picture on the jig used to cut the square to 8-sides. The top is kept flat. the jack stays? were put in place and need some cleaning up. Really tough to hold them in place while glue dries. Maury
-
Mast tackles/Burton pendants in 1763 Cutter
Maury S replied to tkay11's topic in Masting, rigging and sails
Frank, Is it true fiddle blocks are stronger than a double block since the strain is placed on two pins rather than one? Maury- 8 replies
-
- 1
-
-
- mast tackle
- burton pendant
- (and 2 more)
-
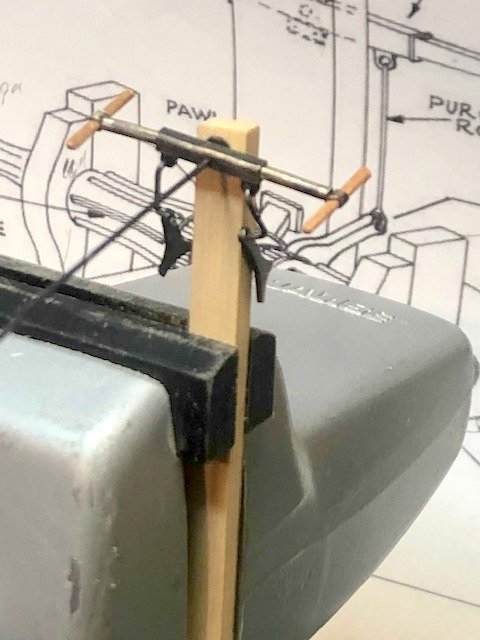
Not much work done with the holidays coming up. I worked on the rocker arm / brakes / purchase rod and purchase for the windlass. Soldering some of the smallest pieces was a challenge...particularly the little tubes at the end of the brakes. Getting all the pieces lined up with the gears on the windlass will be a challenge. It is set on a piece of scrap about the size of the pawl bitt. Maury
-
ENVY!!!😂
-
I use cardboard tubes or 1 1/4" PVC pipe of assorted heights, glued to a flat base. Vertical storage takes up much less space on my limited work bench. Cost = $0. Maury
-
Toni, I think the clinker planked boat is a great idea. Few of us have done one and this will be a tremendous opportunity for us to learn some different techniques. You've got a great set of plans, even if some modifications might be necessary. No pressure to match your project to the model since there are questions of provence. She's a lovely boat. Looking forward to the saga. Maury