Maury S
-
Posts
1,490 -
Joined
-
Last visited
Content Type
Profiles
Forums
Gallery
Events
Everything posted by Maury S
-
 Since the weather was so nice yesterday, I spent some time in the garage (shop) making the building board and gantry (mostly per Ed Tosti's plans in his Naiad book). The paper plan shown on the board is preliminary, just to see how things lined up. I'm a long way from getting the frame layout finalized in CAD. With the supports on the underside raising the board about 2 1/2", the working height on my work table seem awkward (too high). I may have to build another table to hold the building board...oh well. Maury
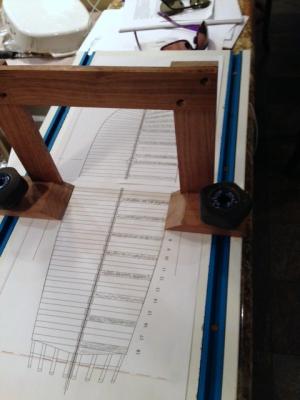
- 525 replies
-
- 19
-

-
- anchor hoy
- hoy
- (and 1 more)
-
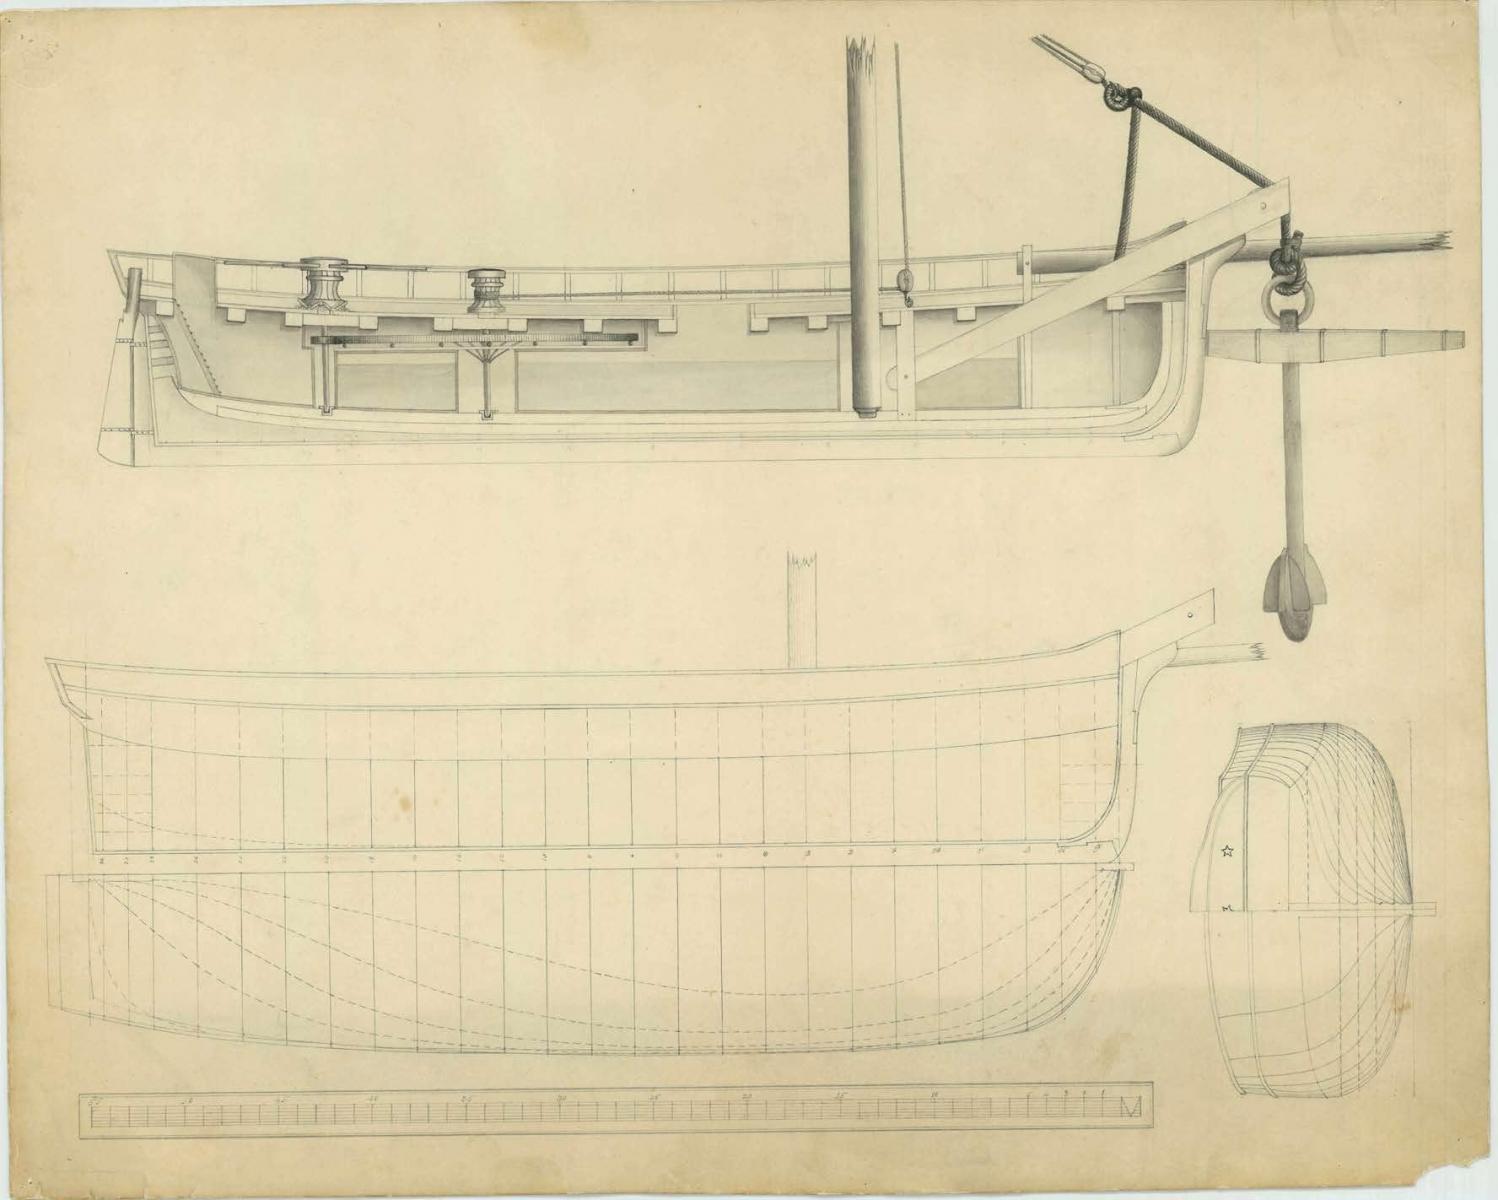
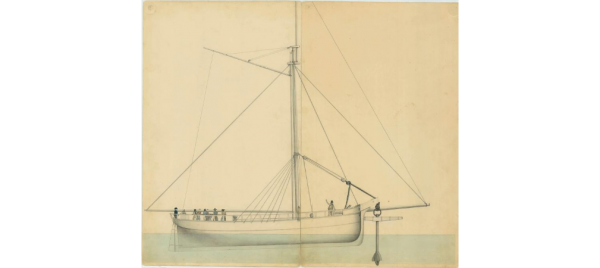
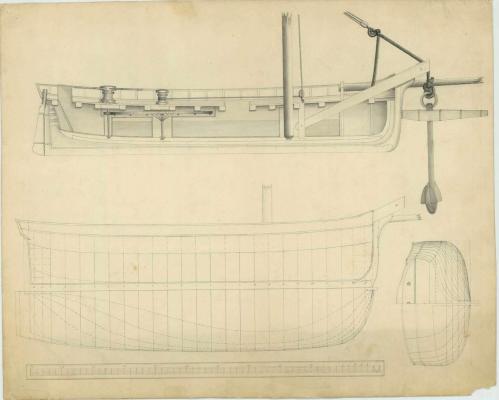
Anchor Hoy / Water Tanker c. 1814 -1825 Designed and built by Francis Grice in the Norfolk Navy Yard. Grice designed and built many ships for the US Navy and was appointed Chief Naval Constructor in 1847. He headed the Naval Construction Department until his death in 1859. Grice is among the few who have left tracings and papers describing work boats. They were preserved by the national government in the Office of Naval Records and Library and were subsequently transferred to the National Archives. They were reproduced in part in Grimwood's American Ship Models. Grant Walker at the Naval Academy Museum referred me to a source for the plans. Anchor hoys were designed to carry and recover huge anchors and many had large water tanks to service ships in the harbors. This boat has a length between PP of 56' 9” and a breadth of 20'. At a scale of 1:48, overall length of a model (with spars) will be less than 24”. Some of the reasons for choosing this vessel were the sloop rig, double capstan and gearing system used to hoist the anchors, the running rigging of the shrouds and the shroud supports for the main mast supporting the weight of the anchors. There is little known about the actual construction of these boats, so the frame and spacing is conjectural. After reviewing the series Shipyard and Service Craft: A Portfolio of Plans by Robert Cairo in the Nautical Research Journal from June, 1976 through September. 1979 (eight installments), one can extrapolate many dimensions of various parts and Scantlings of Royal Navy Ships 1719 – 1805 by Allan Yedlinsky provided many particulars even though it does not directly address work boats such as this anchor hoy. While the water tank can be seen in the profile drawing, there is nothing that indicates its width. The plans I acquired were conjectural so I used them along with copies of the original Grice drawings to start to loft a more complete set for the 1:48 scale I have chosen to use. This will be a plank on frame model with partial planking to expose the details of the framing and the gears attached to the capstans. That process involves using a CAD program. While I have drawn house and furniture plans, I have never tackled ship plans before. There is an article on this site by Wayne Kempson titled Drafting Ship Plans in CAD. http://modelshipworldforum.com/ship-model-plans-and-research.php While I am only partially into the lofting process, that report has been invaluable. The skills I've acquired on several POF models I've build over the years and particularly the recently completed Echo Section from Admiralty Models have emboldened me to take on this new challenge. Pictures of the Grice drawings from the National Archives follow:
- 525 replies
-
- 28
-
-
- anchor hoy
- hoy
- (and 1 more)
-
What a beautiful model. The :Like: button is not enough. Maury
- 641 replies
-
- 3
-
-
- greenwich hospital
- barge
- (and 1 more)
-
I had an interesting conversation with the TurboCAD sales dept. today. I have the choice of using a 32 bit PC (Windows10) or a 64 bit Mac (10.10 Yosemite) so I inquired as to the capabilities, ease of use, support, service, etc. between the two. The reviews are mostly good for the PC version and horrible for the Mac version. He confirmed that the PC version is much better. Maury
-
White Paint Issues
Maury S replied to rynmss's topic in Painting, finishing and weathering products and techniques
Any of those paints will perform better if you thin them (yes, I know, even more like skim milk), and apply 5 or 6 coats. Amazing difference in the finished product. BTW, what are you painting white on ECB? Just the spars? Maury -
Danny, Great work. It took me a year to get this far on my Echo Section, and it's not as tidy as yours! Maury
-
Echo by Maury S - FINISHED - Cross-Section
Maury S replied to Maury S's topic in - Build logs for subjects built 1751 - 1800
Thanks for the comments and all the "likes". I received a lot of help from people on the site. I've learned a lot by doing this project. Skills have improved and patience has grown. Maury -
Echo by Maury S - FINISHED - Cross-Section
Maury S replied to Maury S's topic in - Build logs for subjects built 1751 - 1800
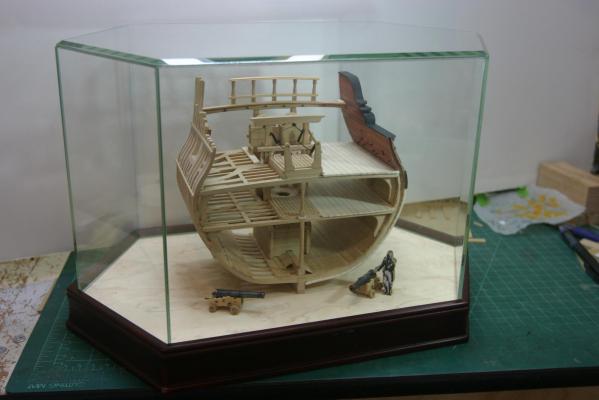
I'm re-painting the cannons per Greg's suggestion. Here's how it looks in the case. It's a "Football Display case" from Hobby Lobby. A piece of birds eye maple veneer held in place with Contact Cement (no warping this time). Just the right size. The officer in the foreground is cut from Chuck's Cheerful plans and glued to a piece if 1/4" wood...shaped a bit. No way am I going to try to carve one yet. It's a good prop to show the scale. Maury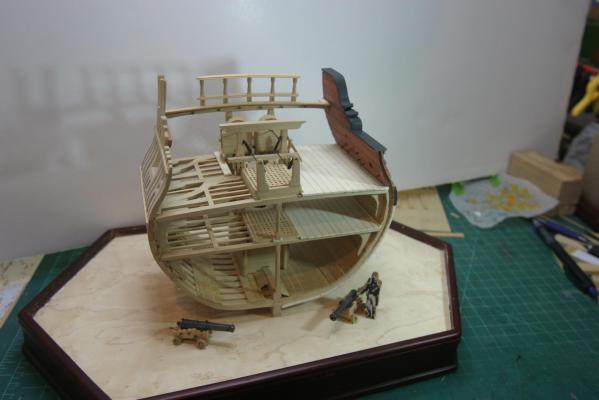
- 324 replies
-
- 24
-
-

-
Echo by Maury S - FINISHED - Cross-Section
Maury S replied to Maury S's topic in - Build logs for subjects built 1751 - 1800
Thanks Greg. I'll try that. Maury -
Echo by Maury S - FINISHED - Cross-Section
Maury S replied to Maury S's topic in - Build logs for subjects built 1751 - 1800
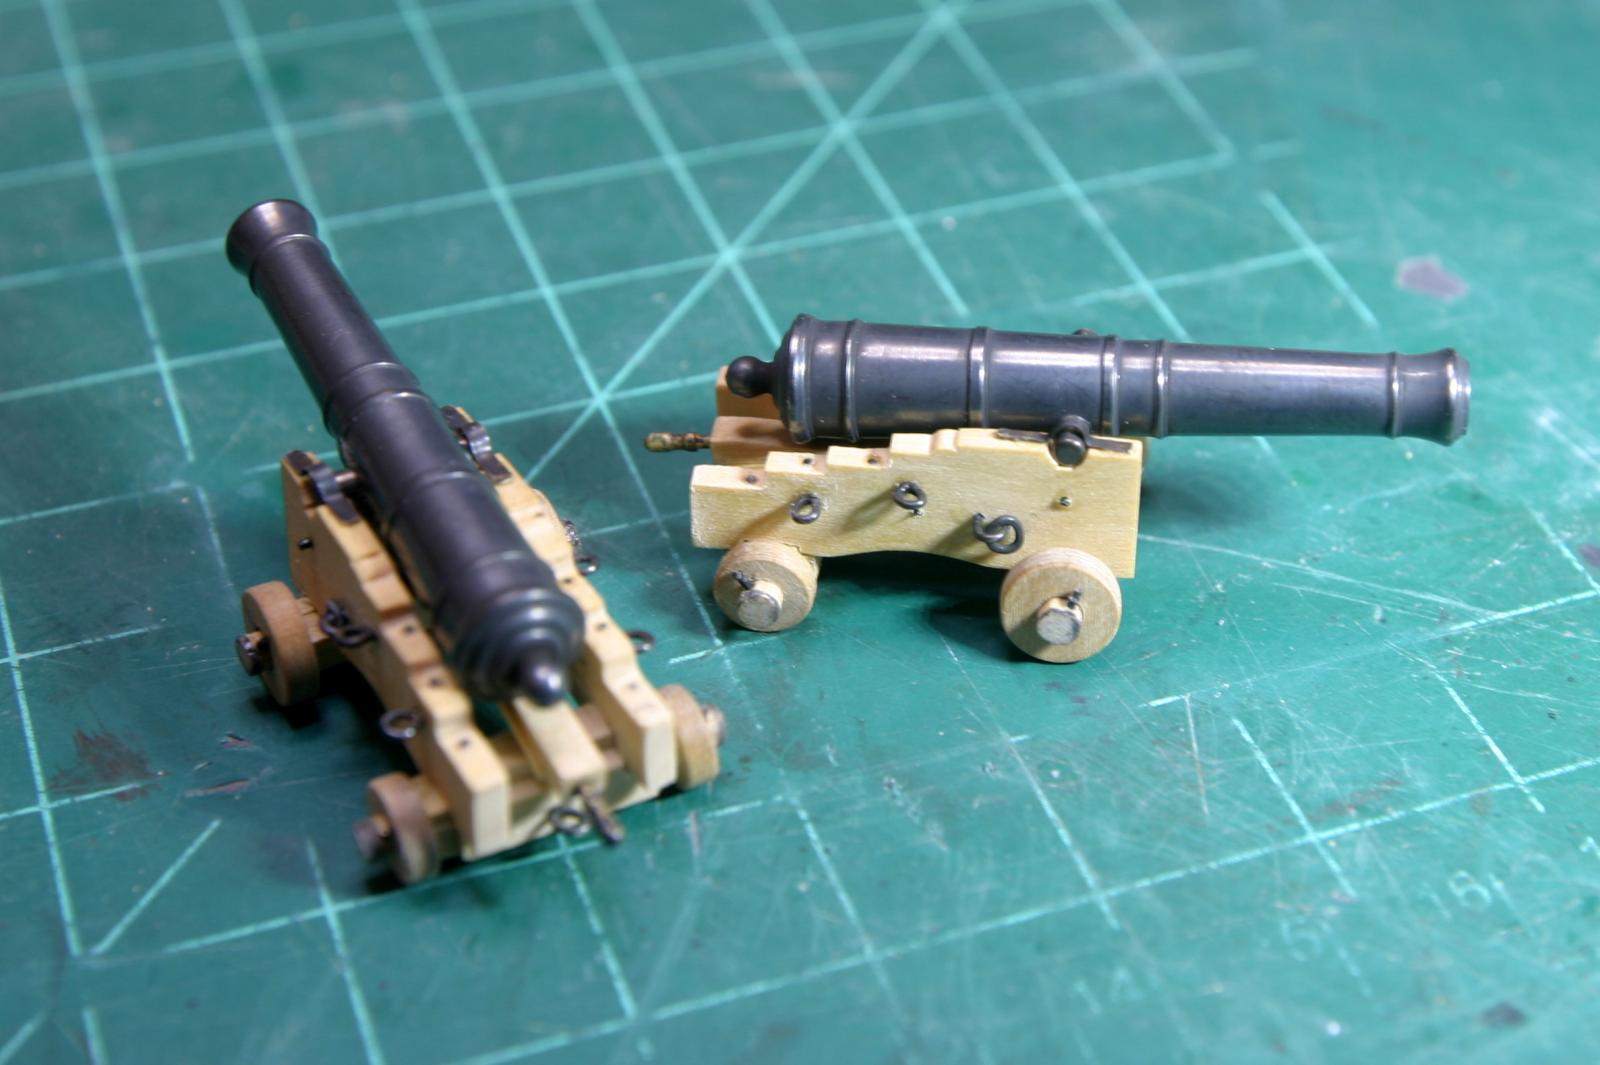
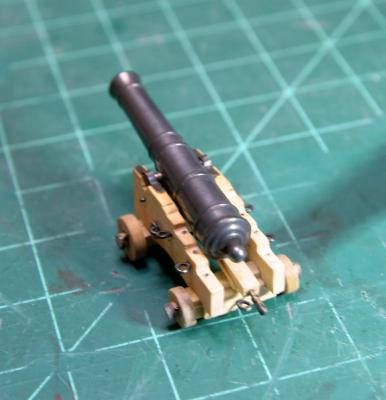
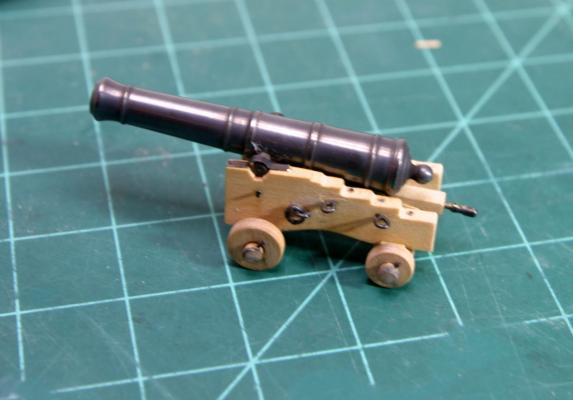
Carriages done. The cannon were blackened twice with diluted Caseys Brass Black after a long bath in Acetone, rinsed and bathed in vinegar, rinsed again. Pretty color, but not the black I was hoping for. Having read Ed Tosti's frustrations with blackening I can understand, but any suggestions on getting them "Iron Black" would be appreciated. Maury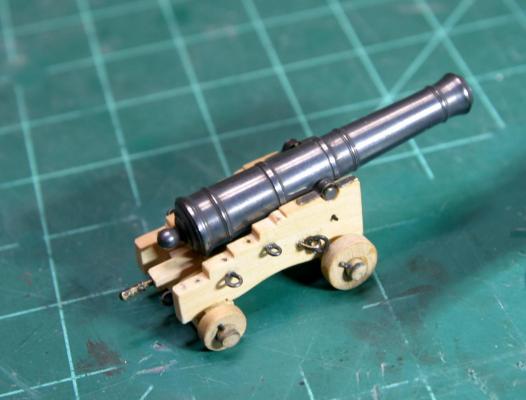


-
Echo by Maury S - FINISHED - Cross-Section
Maury S replied to Maury S's topic in - Build logs for subjects built 1751 - 1800
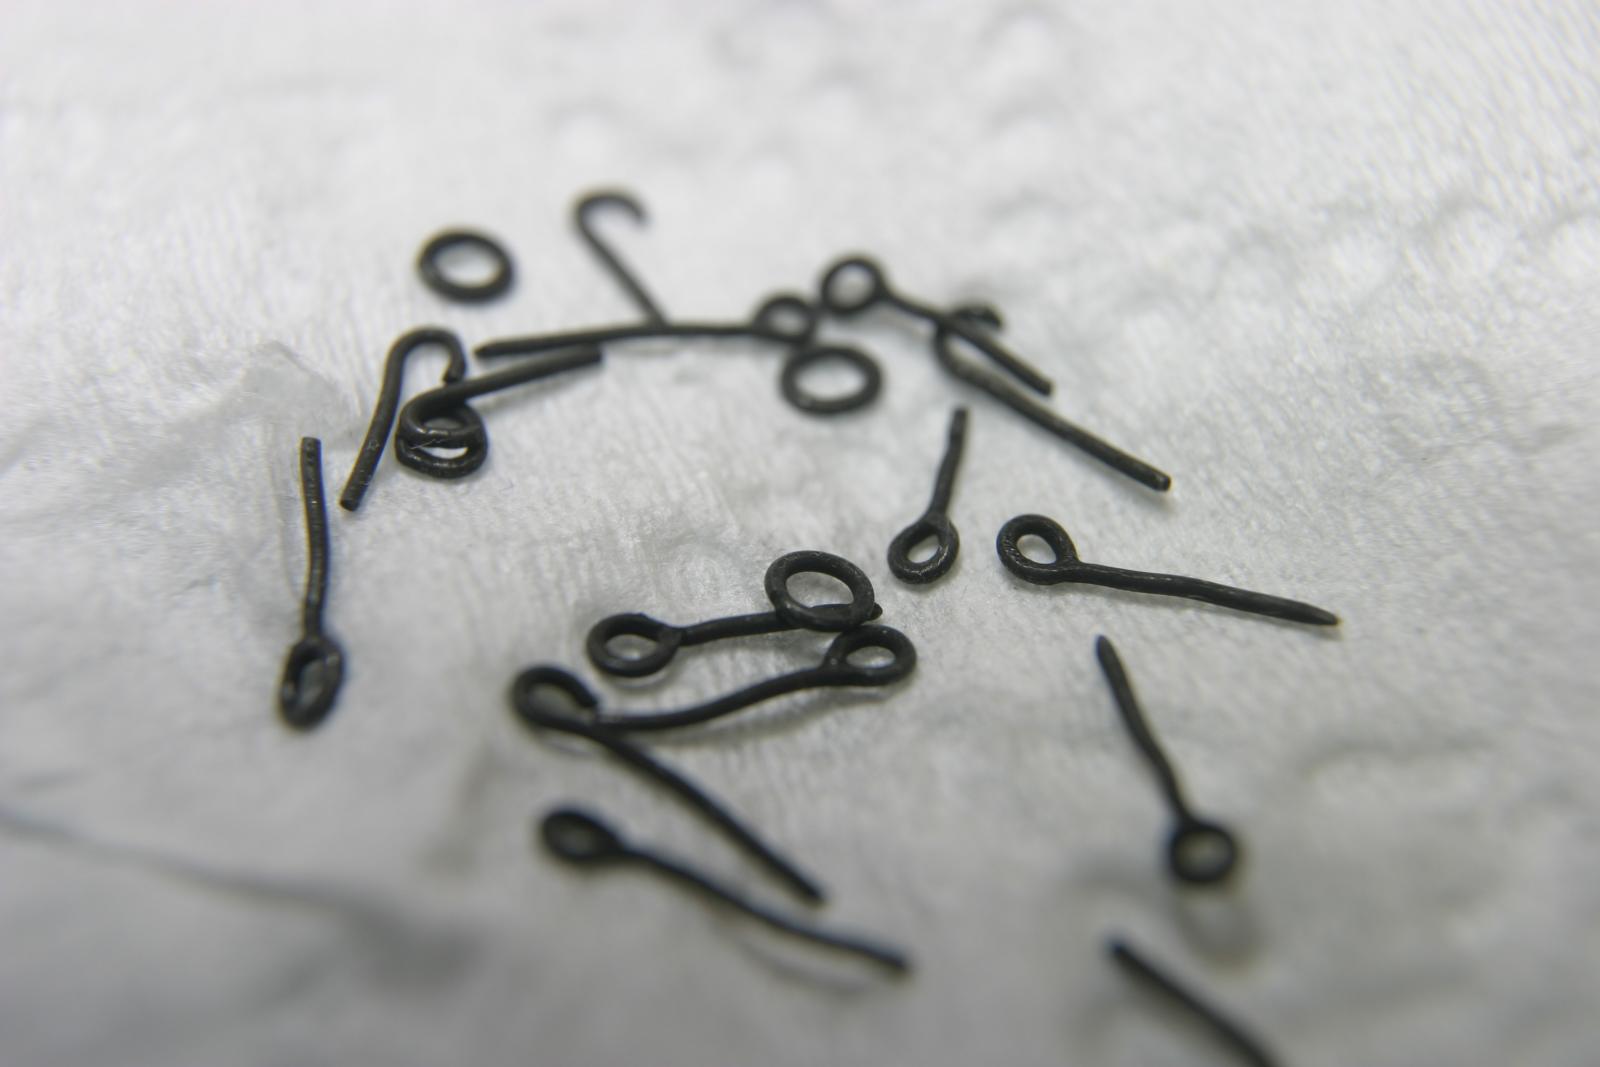
Boy, am I glad I don't have 74 of these things to make! Assorted eye bolts, half eyes (for where the rings get installed) and rings. More iron work and the cannons to blacken. Maury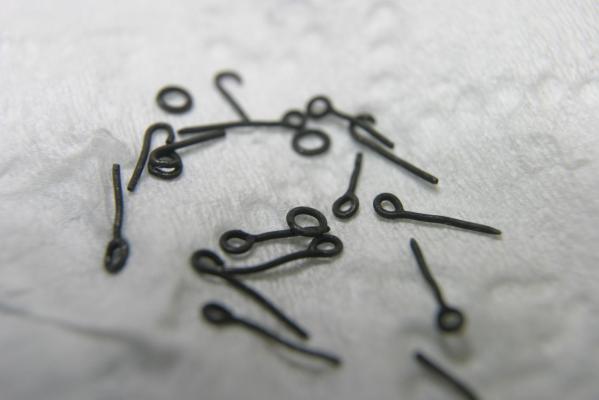


- 324 replies
-
- 10
-
-
Druxey, I'm thrilled to see a log from you. So much to learn from a master. Maury
- 641 replies
-
- 4
-
-
- greenwich hospital
- barge
- (and 1 more)
-
Ed, Thanks for doing this log. We all appreciate your fine work and the time you take to help the rest of us improve our skills. Maury
- 191 replies
-
- 8
-
-
- young america
- clipper
- (and 1 more)
-
Echo by Maury S - FINISHED - Cross-Section
Maury S replied to Maury S's topic in - Build logs for subjects built 1751 - 1800
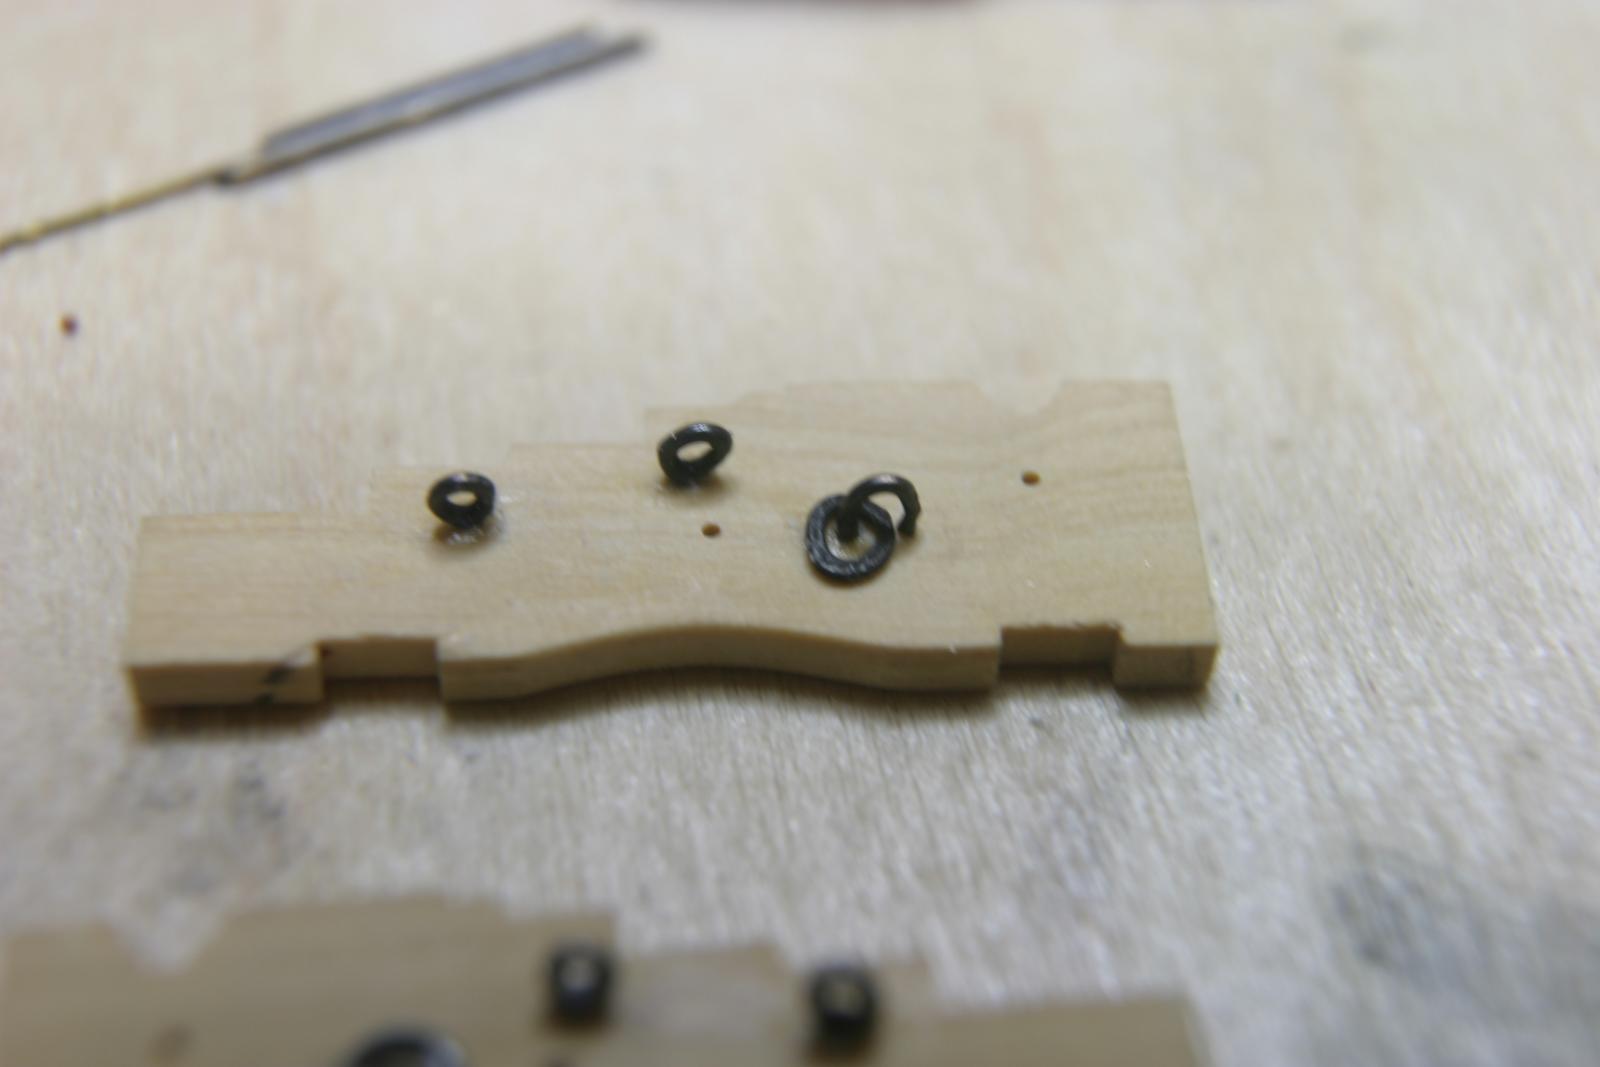
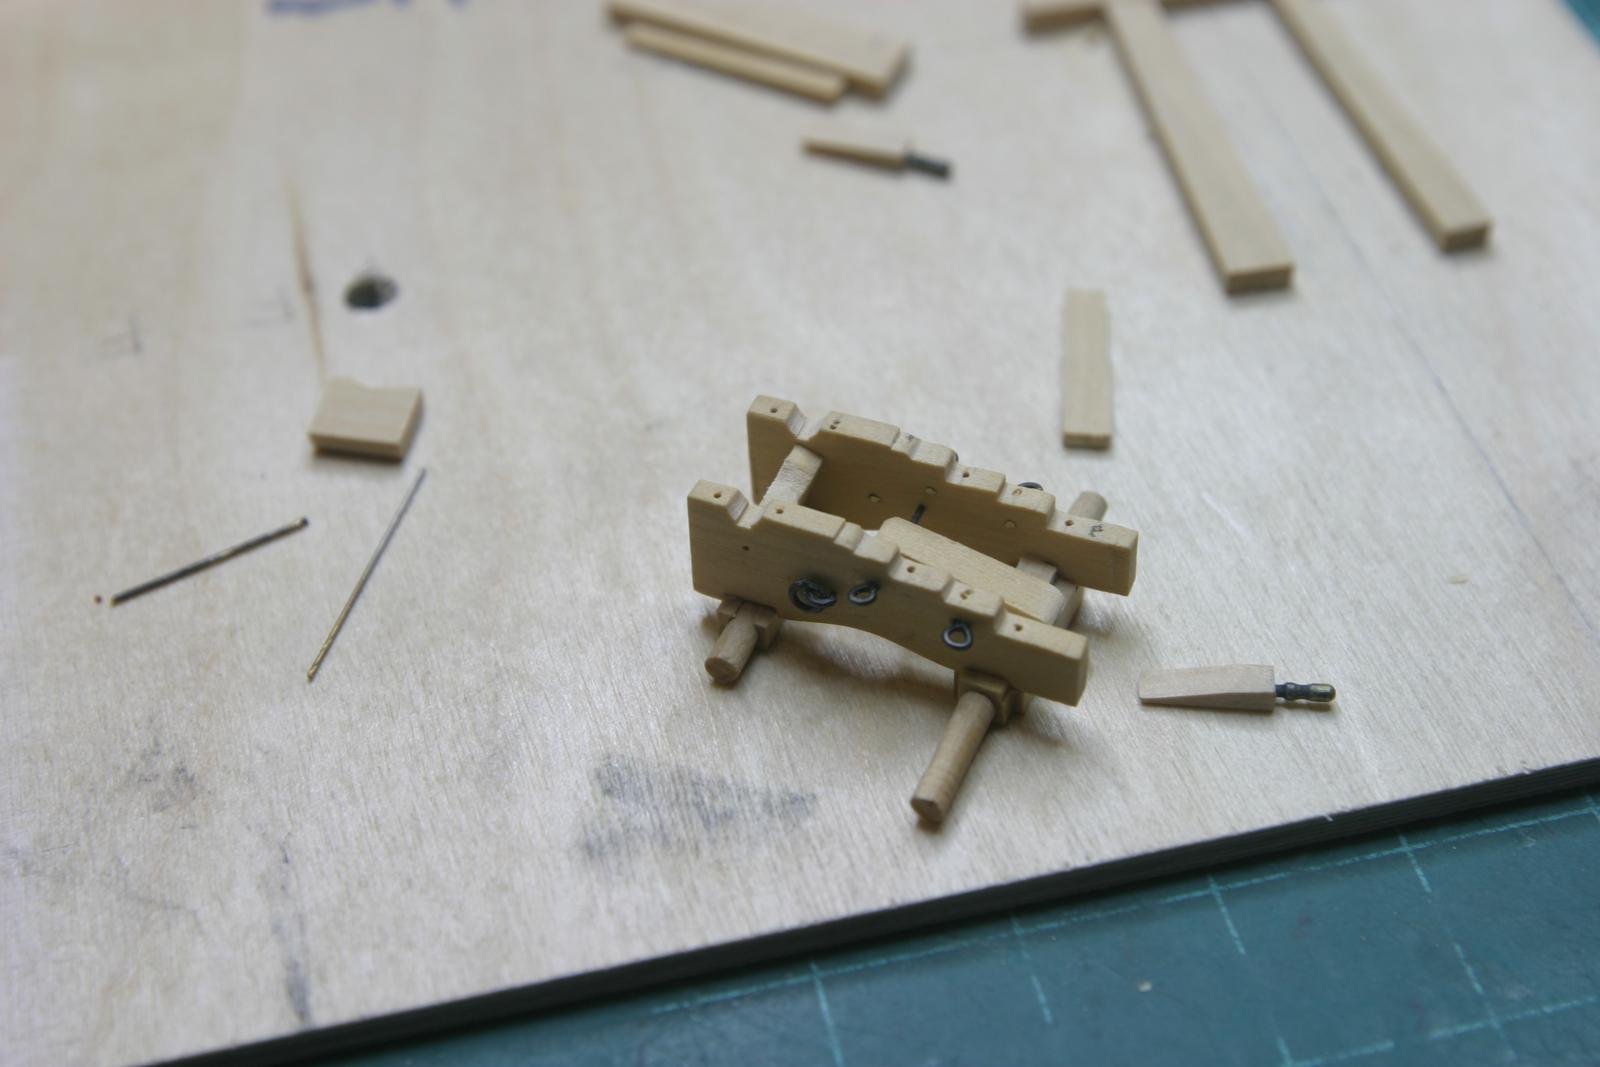
Thanks for the input. I took off the veneer and will start over. Misc. pieces for the carriages in the picture. The quoin handles are belaying pins from an old 1:96 model. The jig holds the brackets at the correct angle (2 degrees) for when the axle trees go on. A simple wedge in the middle holds them tight against the sides of the the jig. Flip it over for the transom, etc. I think the iron work needs to be done before I start any assembly. Maury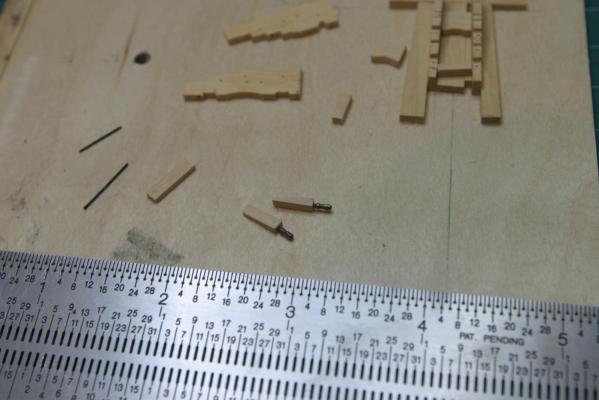
- 324 replies
-
- 11
-
-
Echo by Maury S - FINISHED - Cross-Section
Maury S replied to Maury S's topic in - Build logs for subjects built 1751 - 1800
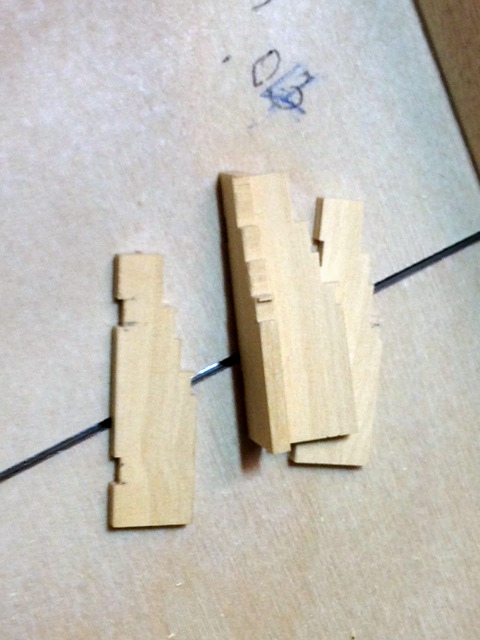
Very little work done over the weekend. The brackets were glued together so the drilling of the various holes would line up. (pic. attached) All the holes drilled, soaked in iso. and split the pieces apart. Other parts (transoms, bolsters, quoins, etc made (no pics.) I bought a glass (football) display box (Hobby Lobby) and cracked the mirrored bottom trying to drill the mounting holes. I pulled the mirror (pieces) and put in a VERY NICE piece of birdseye maple veneer. Warning: do not use water-based glue on veneer! (The guy at Woodcraft has no clue on installation...telling me to use Tite Bond). It created 1/4" high waves every inch or so even with a heavy weight on it. Next attempt will be to put down some more veneer using either CA or rubber cement. Maury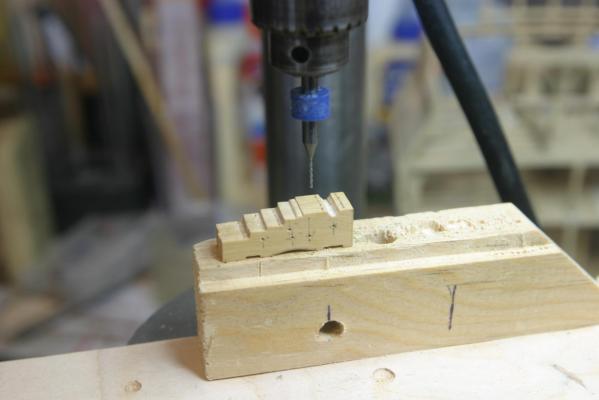
-
Echo by Maury S - FINISHED - Cross-Section
Maury S replied to Maury S's topic in - Build logs for subjects built 1751 - 1800
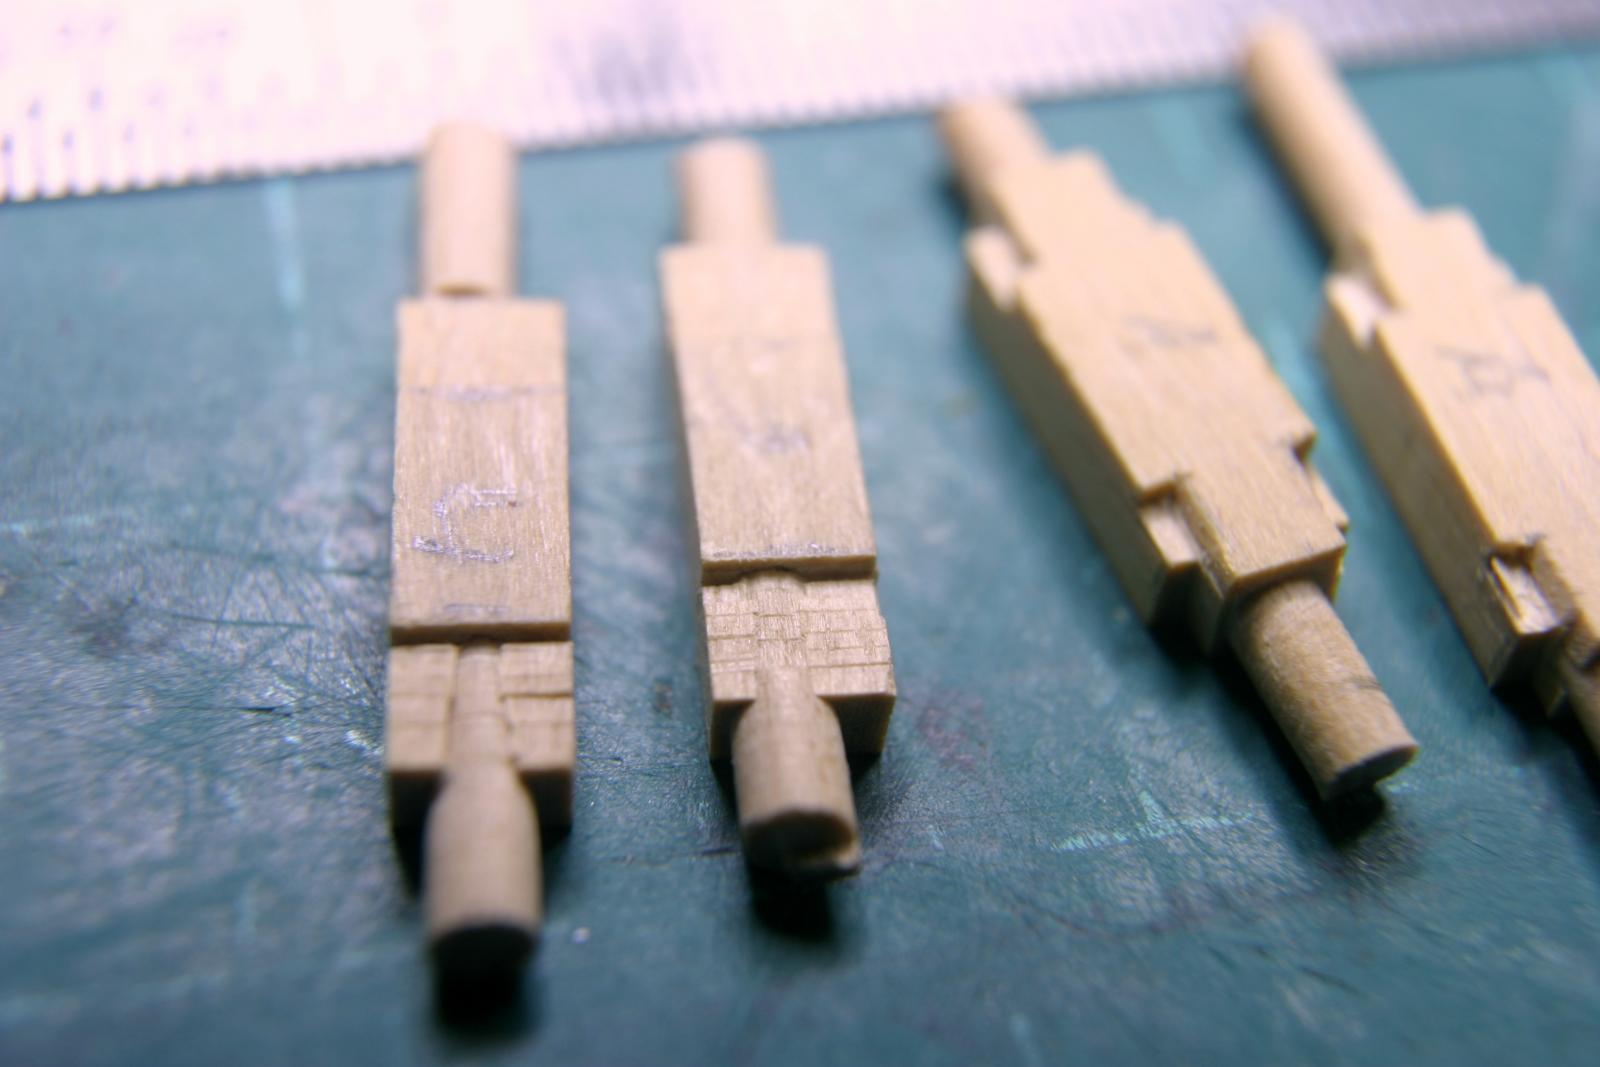
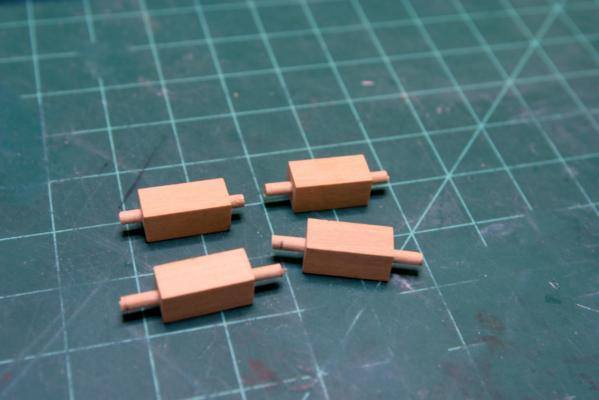
More work on the axletrees. The axles are not supposed to be centered in the blocks. Pretty small, but everything was done on the thickness sander, table saw and the little notches for the brackets with a knife (needs cleaning up). Looks pretty good 'til you take a picture with the marco lens. Maury
- 324 replies
-
- 11
-
-
Echo by Maury S - FINISHED - Cross-Section
Maury S replied to Maury S's topic in - Build logs for subjects built 1751 - 1800
I started on the gun carriages. The brackets (sides) were taken from TFFM (Vol. I??). David has them shown in 1:24 as well as 1:48. Sure makes measuring easier using the 1:24 and dividing by 2. I used the table saw to rough-cut the brackets...could have been done on the mill, but I'm not as good with that. Shown on the crosscut sled. I drilled out the axle holes on the Axle tree blanks using the mill. Axles were done on the mini-lathe. I'll cut / sand them to shape and get some more metal work done. Maury
- 324 replies
-
- 11
-
-
Echo by Maury S - FINISHED - Cross-Section
Maury S replied to Maury S's topic in - Build logs for subjects built 1751 - 1800
Toni, I still have Chuck's Cheerful to finish...probably a year or so. I've started collecting some info. on a work boat. http://modelshipworld.com/index.php/topic/12450-work-boat-research-for-pof-project/ Current thinking is either an Anchor Hoy (fascinating stuff on one of those) or a Stone (or Granite) Sloop. Pretty lines, centerboard sloops, something different than warships. We'll see if I can get actual plans. Maury -
Echo by Maury S - FINISHED - Cross-Section
Maury S replied to Maury S's topic in - Build logs for subjects built 1751 - 1800
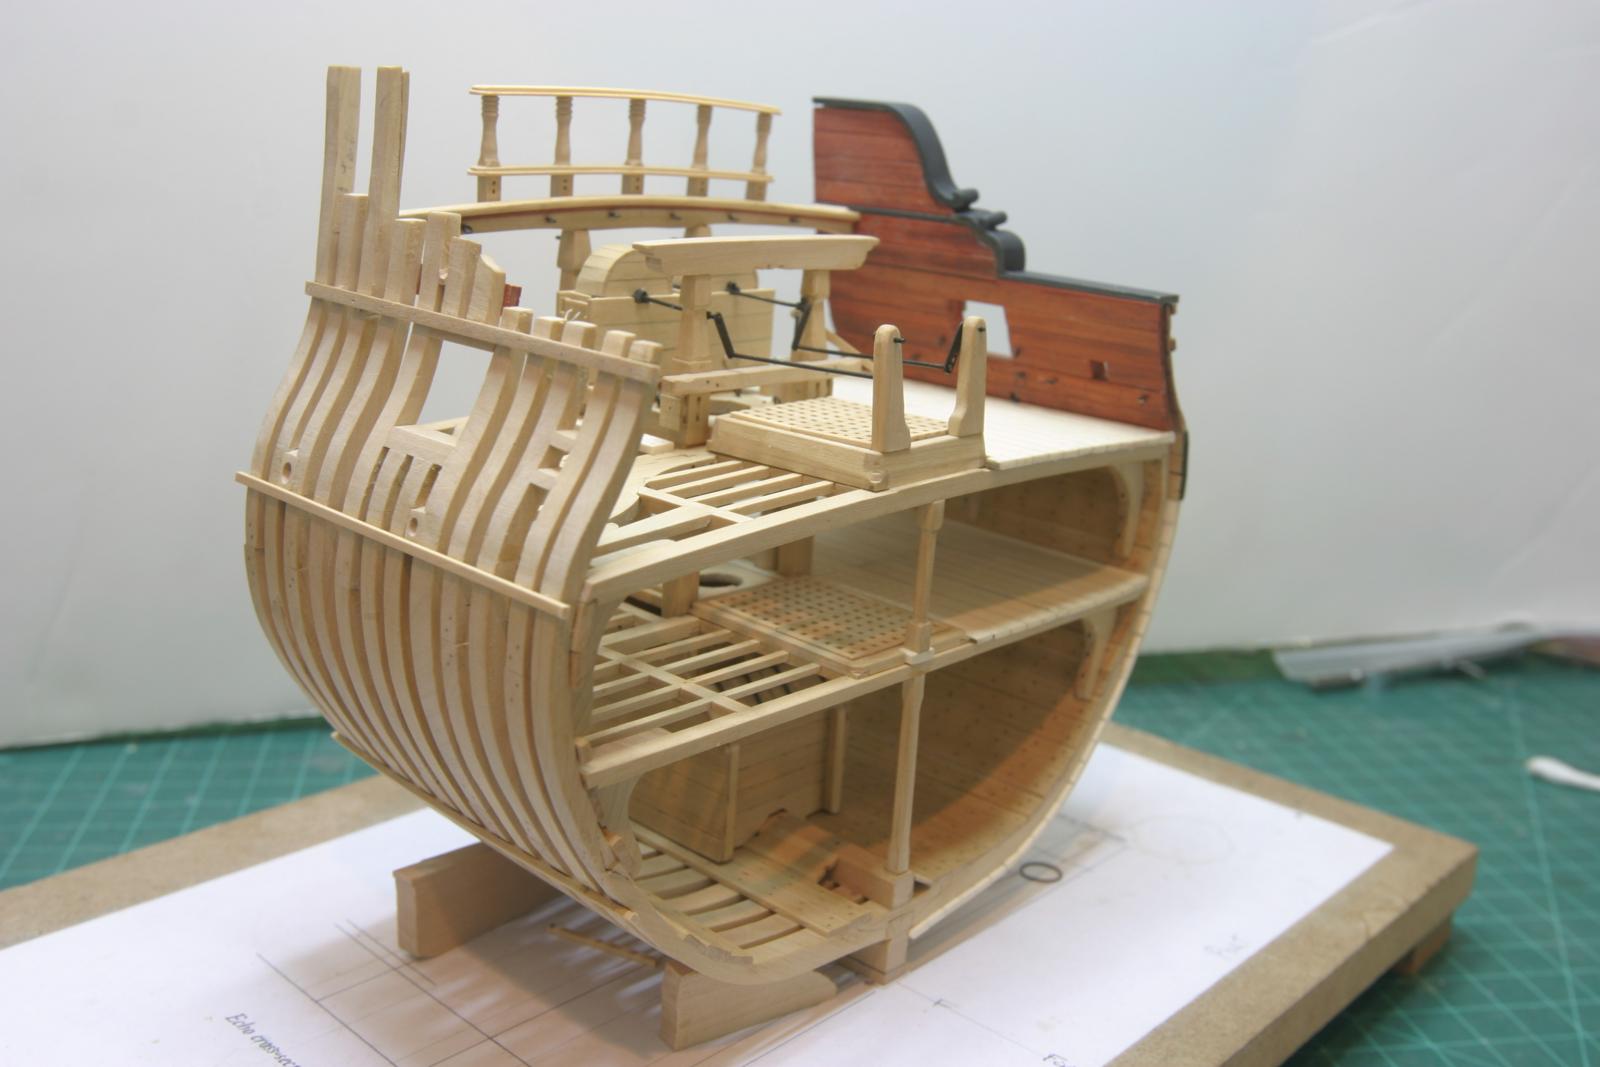
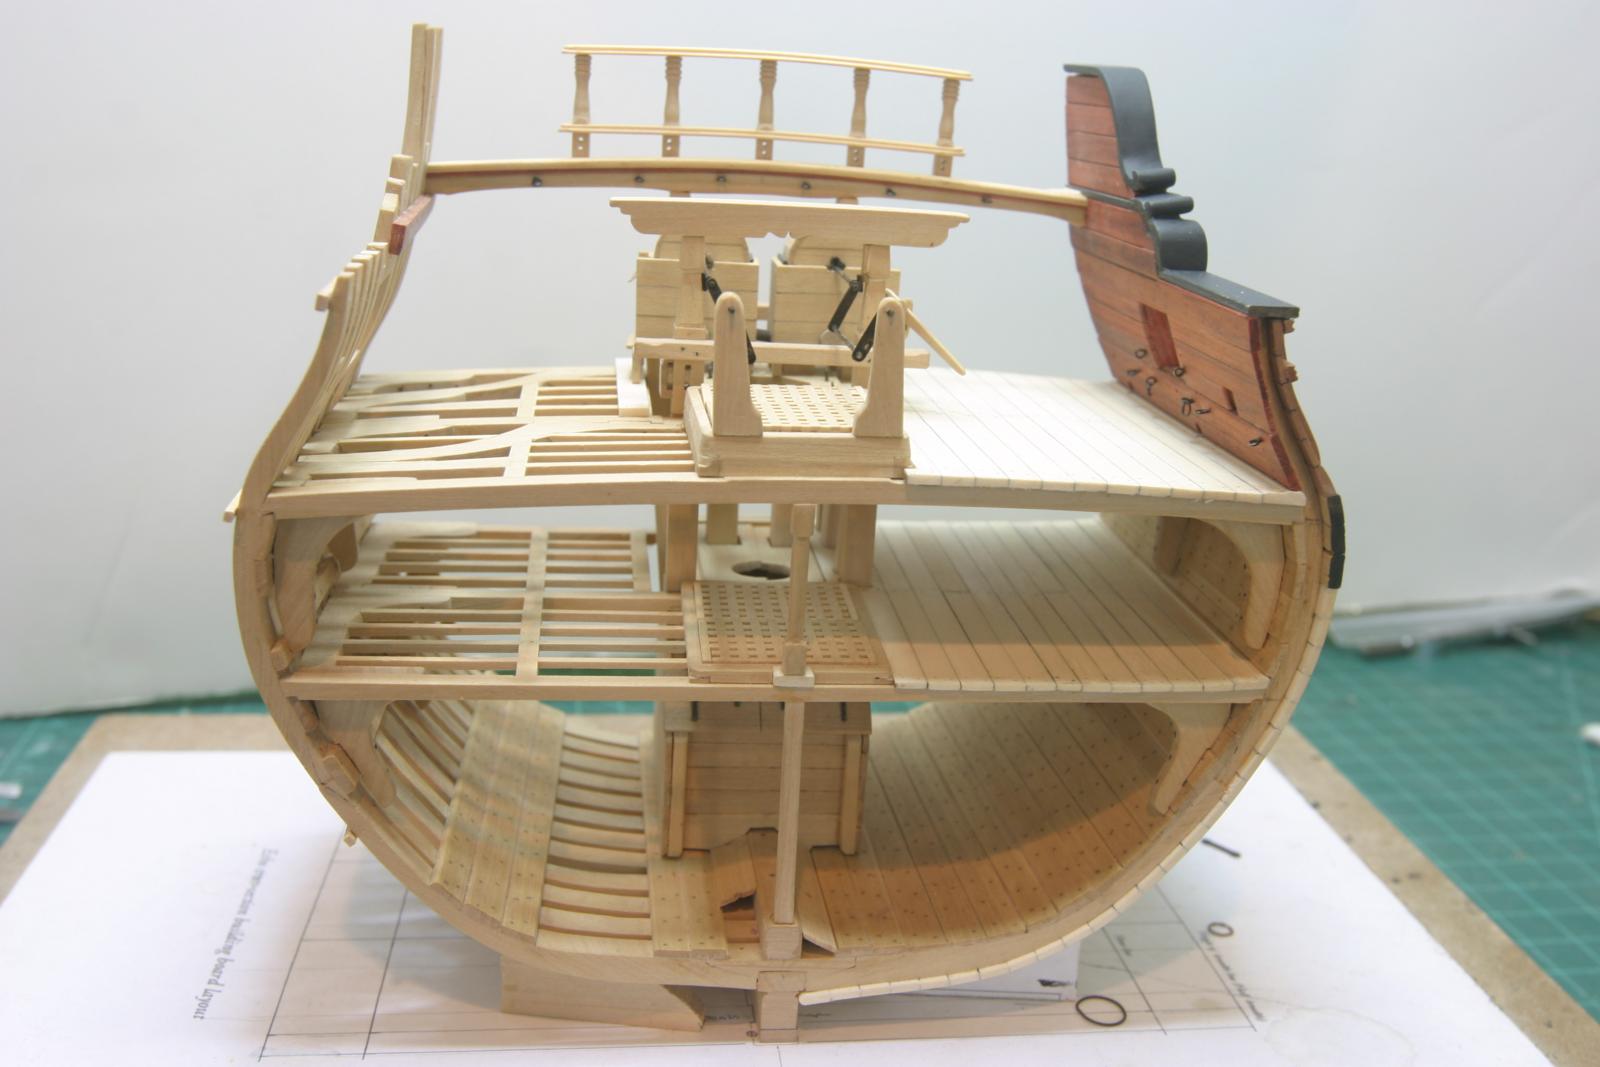
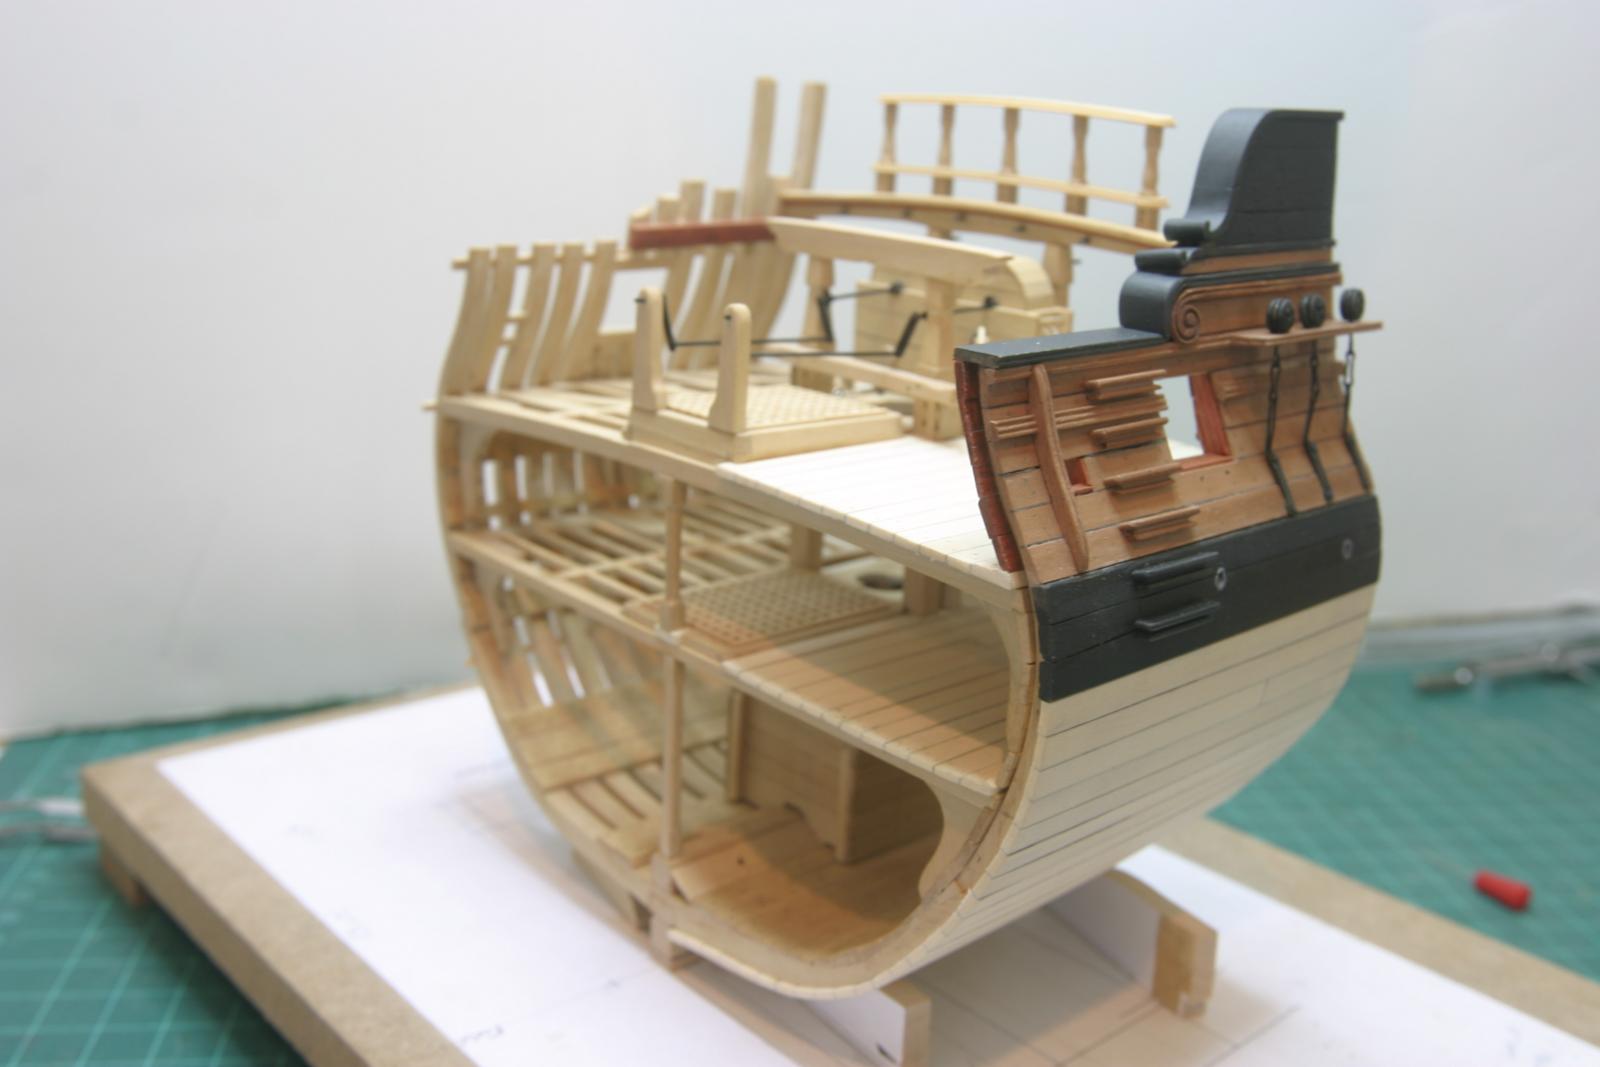
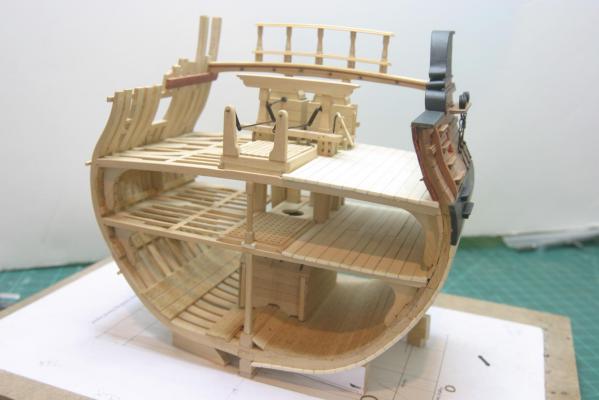
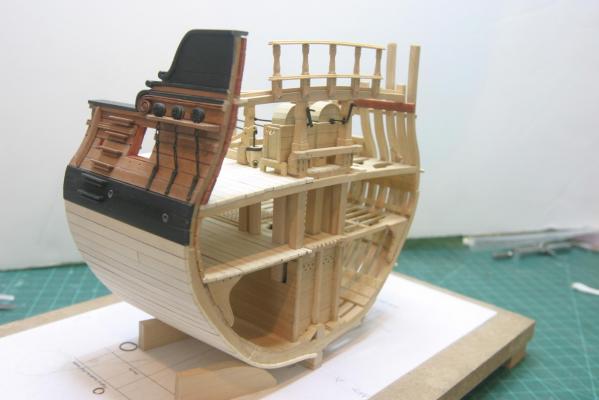
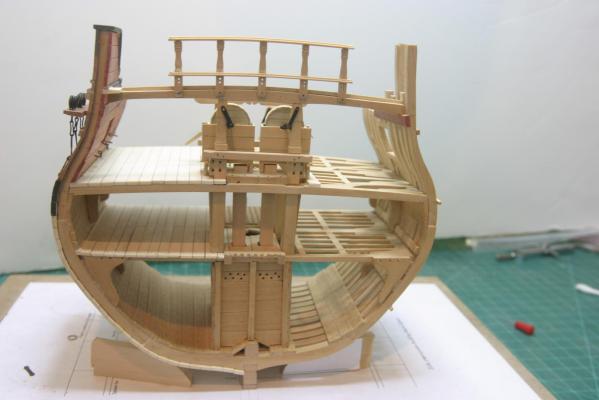
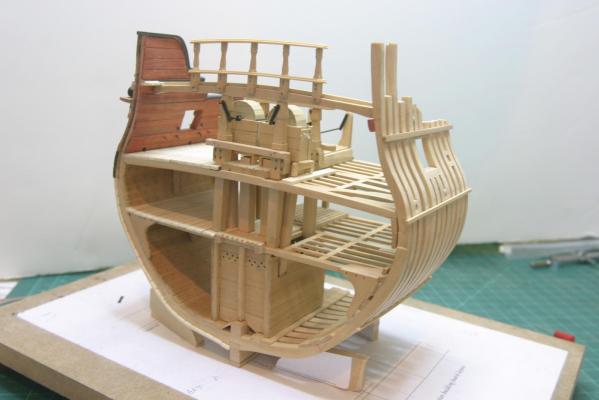
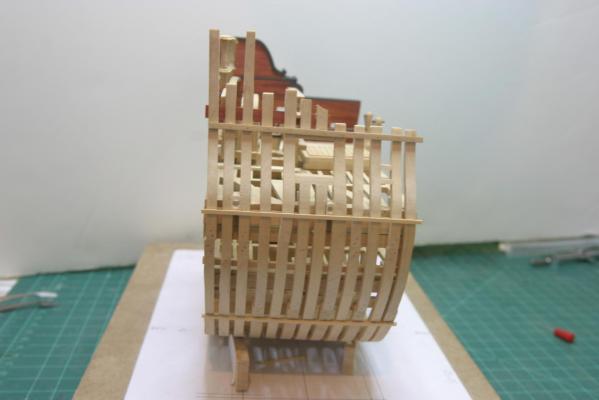
A few touch ups, a final coat of finish on the stb. side frames and she's done. I'm going to make the cannon carriages just for practice. If anyone notices any things that need attention, please chime in. Thanks for all the likes and comments; especially the ones that pointed out items that could be improved. My skill level has advanced significantly by doing this project. Special thanks to David an Greg. Maury


- 324 replies
-
- 22
-
-
-
Echo by Maury S - FINISHED - Cross-Section
Maury S replied to Maury S's topic in - Build logs for subjects built 1751 - 1800
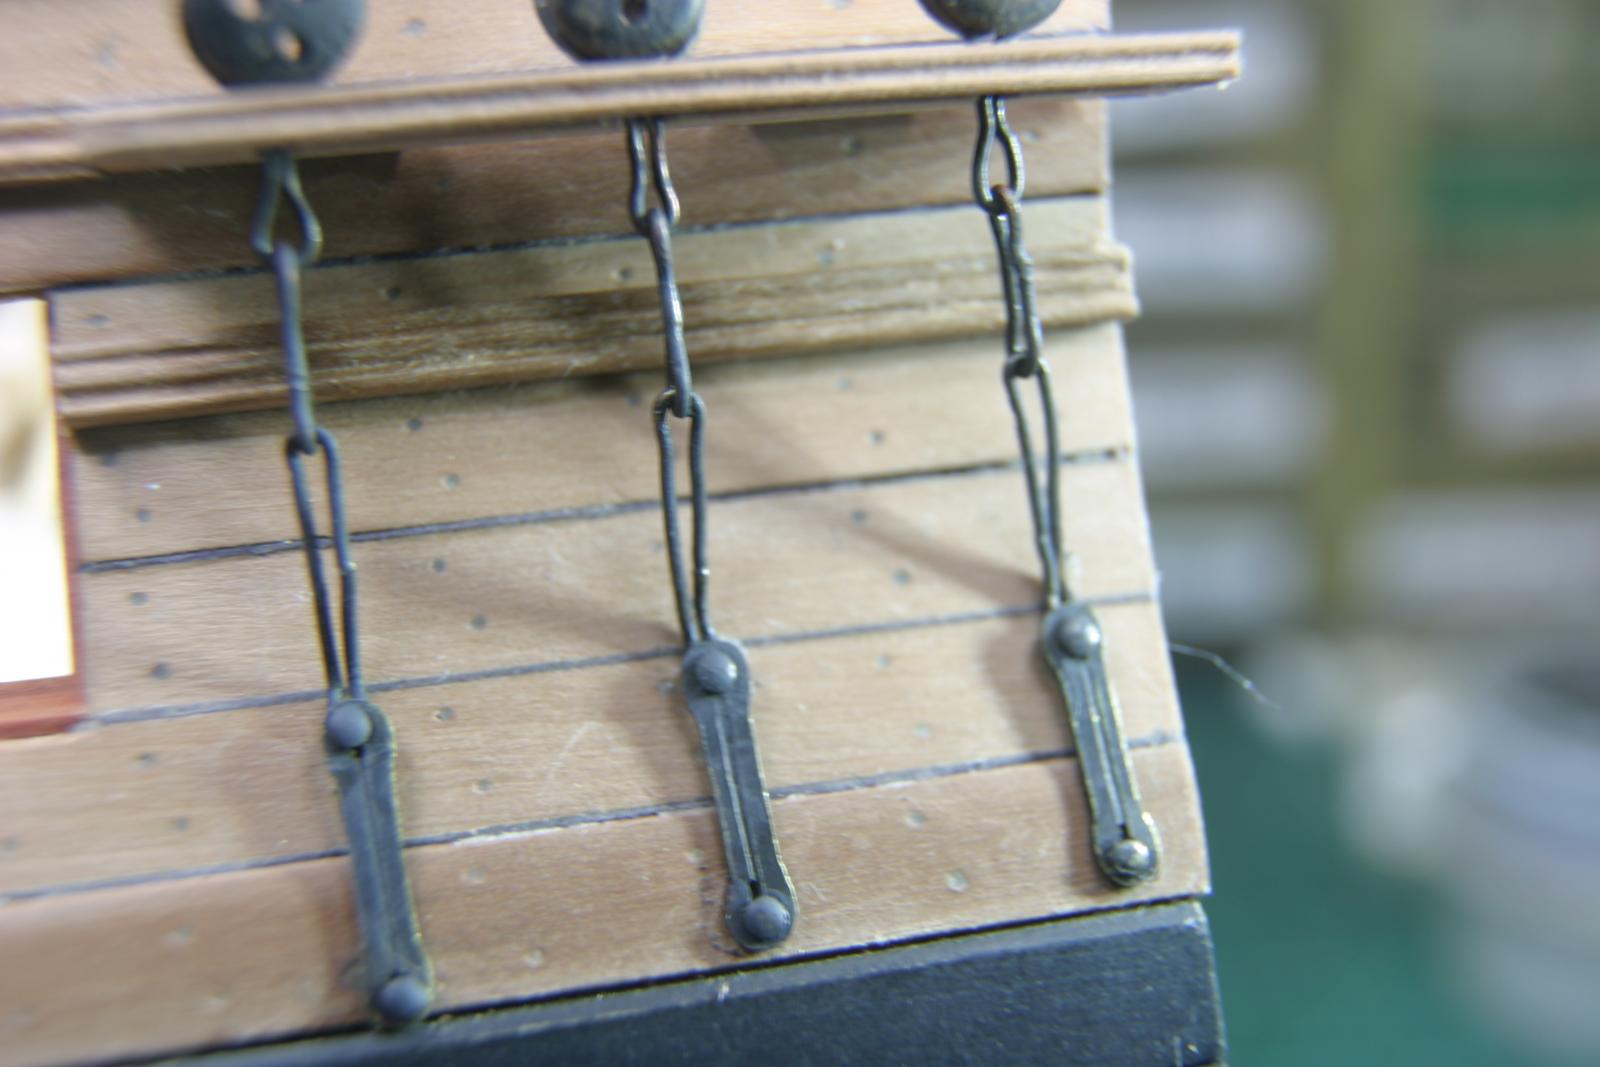
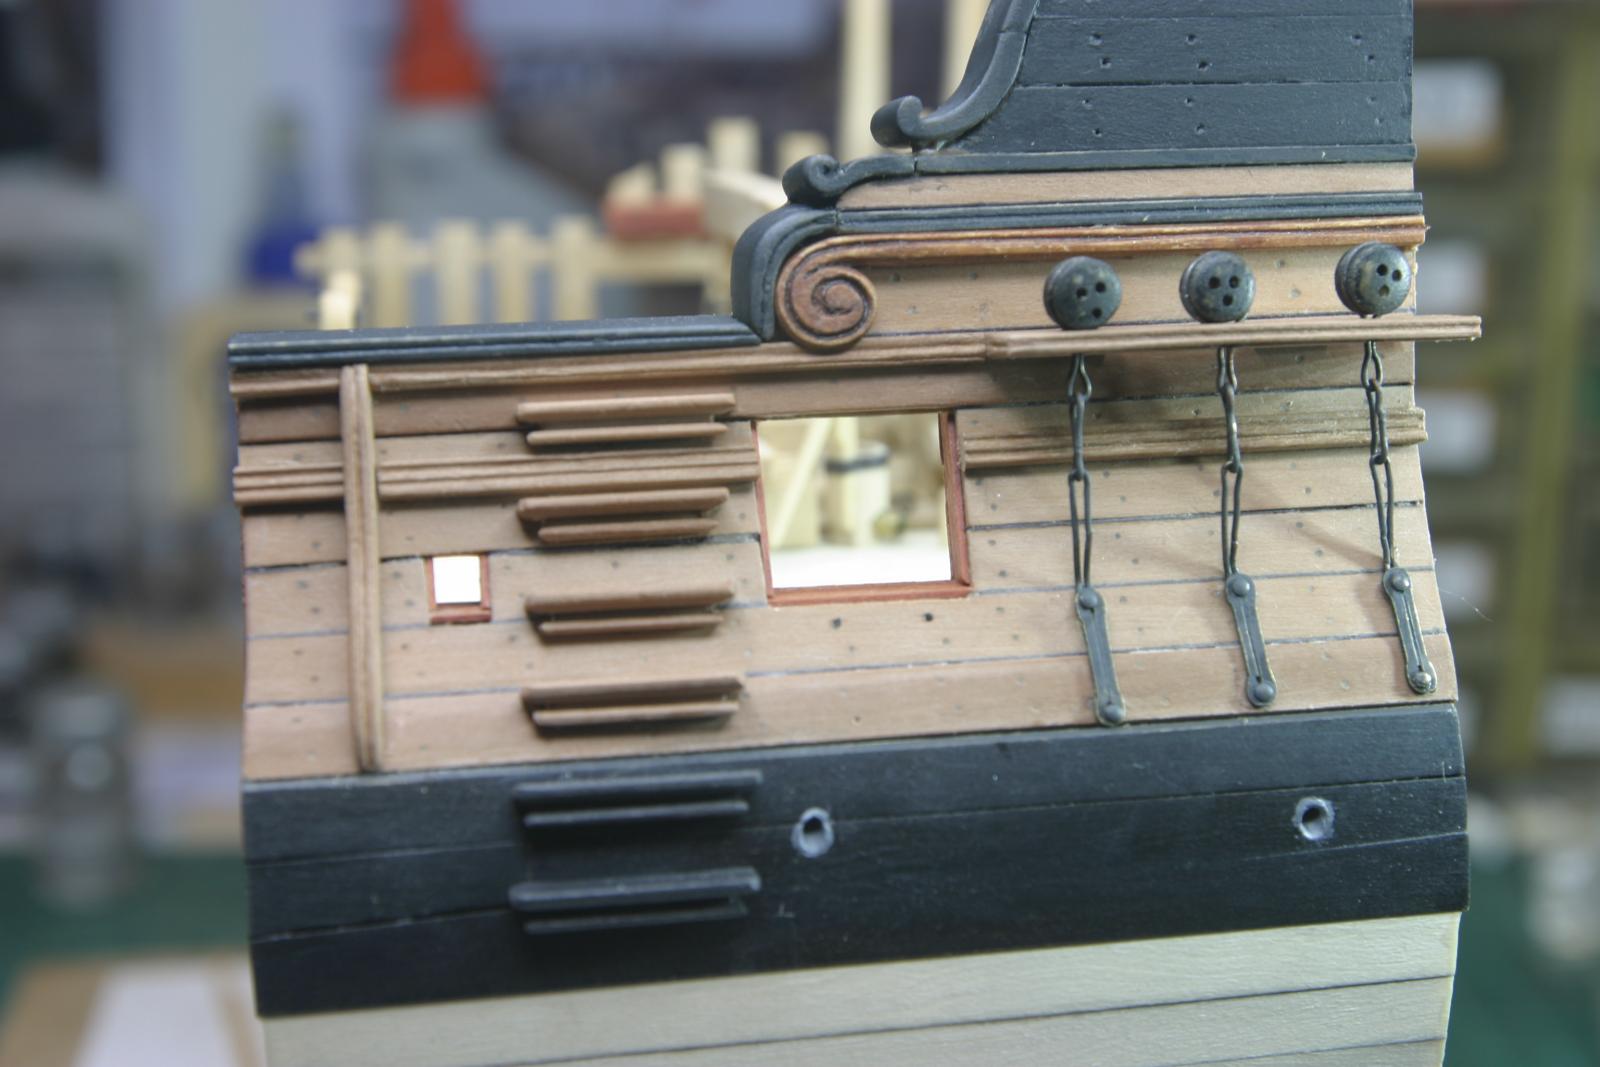
I cleaned up and re-shaped the toe links and put smaller bolts in place. I squeezed the tops of the toe links with a shim of brass stock to make the tops more square (doesn't look very square in the closeup) and evened up the sides. Not as clean as David's drawing, but much better. Maury

- 324 replies
-
- 14
-