Maury S
-
Posts
1,490 -
Joined
-
Last visited
Content Type
Profiles
Forums
Gallery
Events
Everything posted by Maury S
-
Does anyone know where to get Preac Thickness Sander sleeves. A friend has been searching and no luck. Maury
-

Echo by Maury S - FINISHED - Cross-Section
Maury S replied to Maury S's topic in - Build logs for subjects built 1751 - 1800
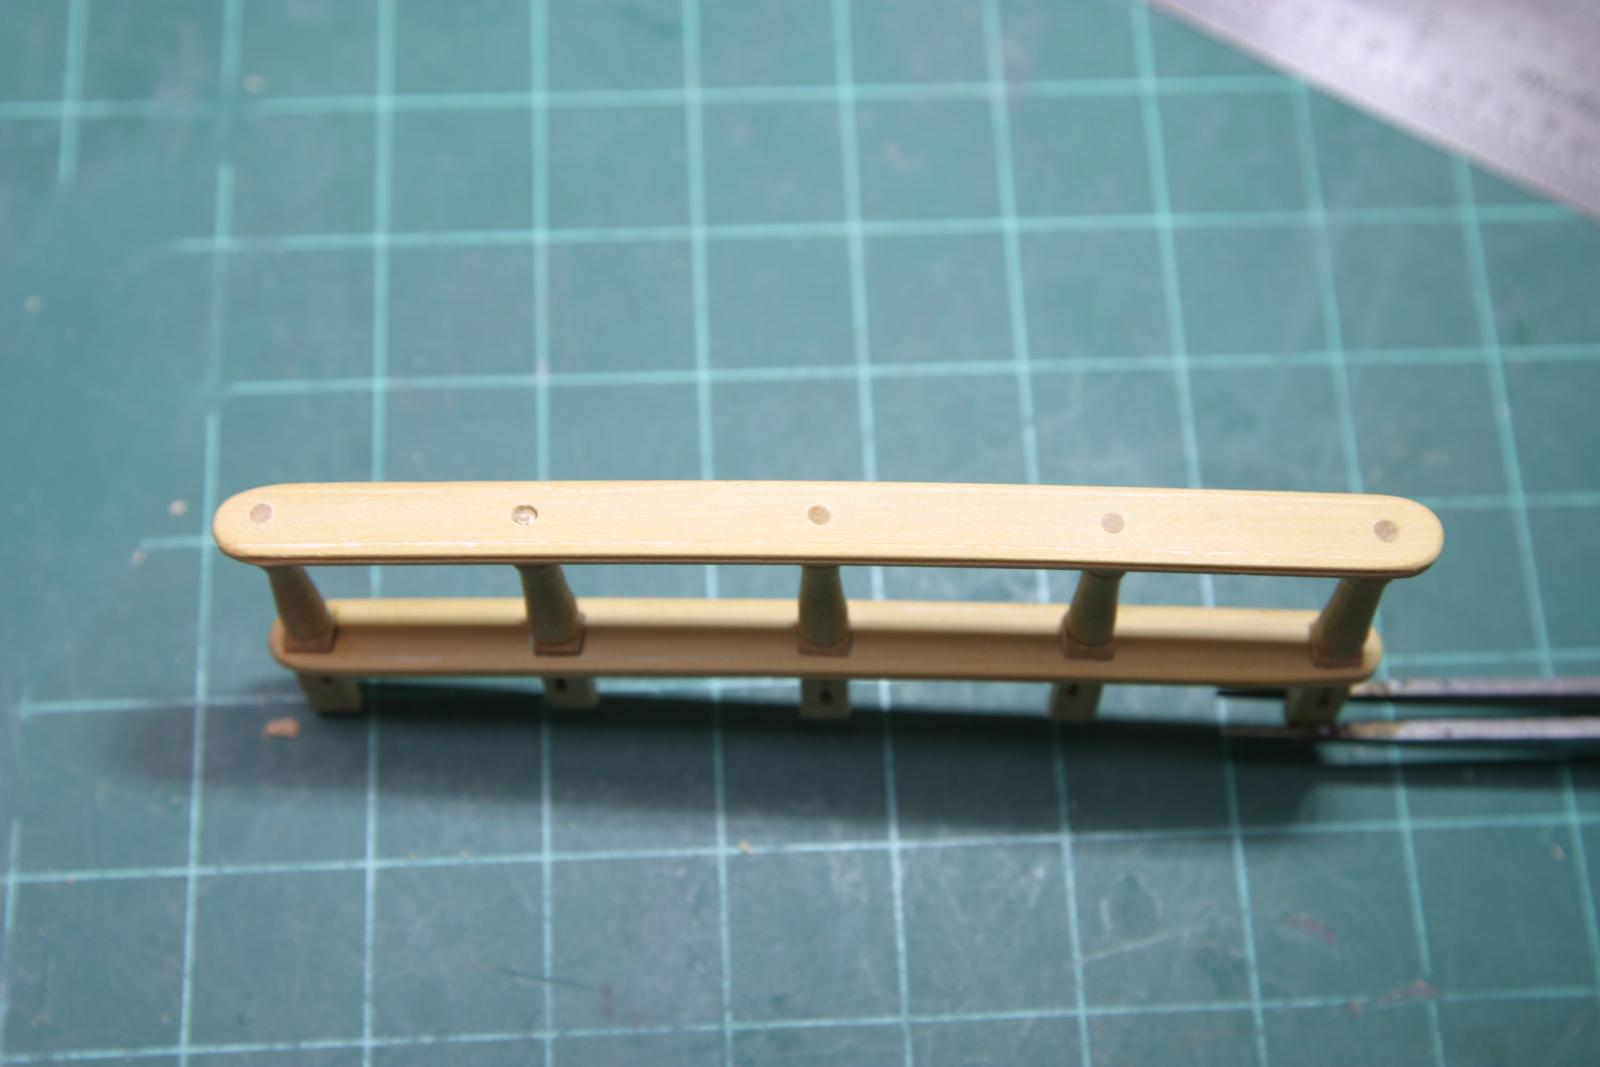
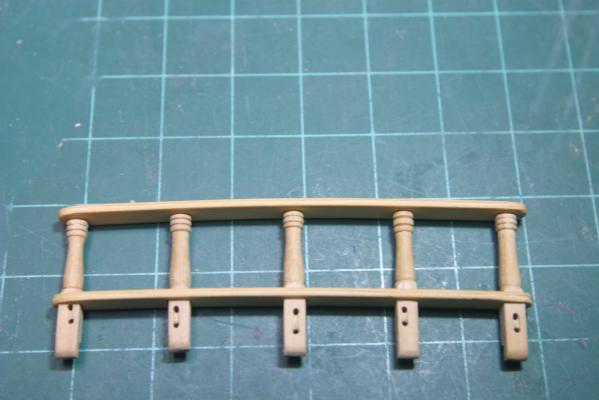
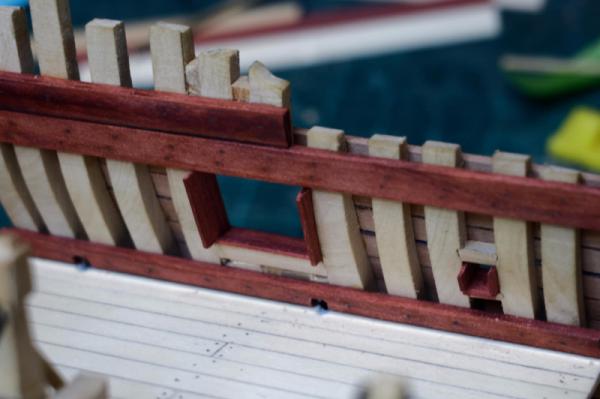
Thanks for the likes and all the tips for the lathe. The entire breastwork is a project unto itself. I made about 10 turnings from 7" square stock and picked the five most alike. The top and intermediate rails are 3" x 11" with a decorative groove scraped into the edge (not visible in the pictures). I need a lot more practice cutting and using scrapers. I clamped the rails in a makeshift jig and heated them with a blow dryer to match the bend of the deck. Undersized holes were drilled through the rails and reamed to size with files. Drilling them out with a larger bit risks tear-out. The posts are square where they pass through the lower rail and it needs careful filing to fit. The turnings are not perfectly matched given my inexperience with the lathe. Half-lap joints cut in the lower ends of the posts to attach to the deck beam. Holes for simulated sheaves were drilled. I don't want to mount it just yet for fear of breaking it while working on the bulwarks. Maury


- 324 replies
-
- 15
-

-

-
Echo by Maury S - FINISHED - Cross-Section
Maury S replied to Maury S's topic in - Build logs for subjects built 1751 - 1800
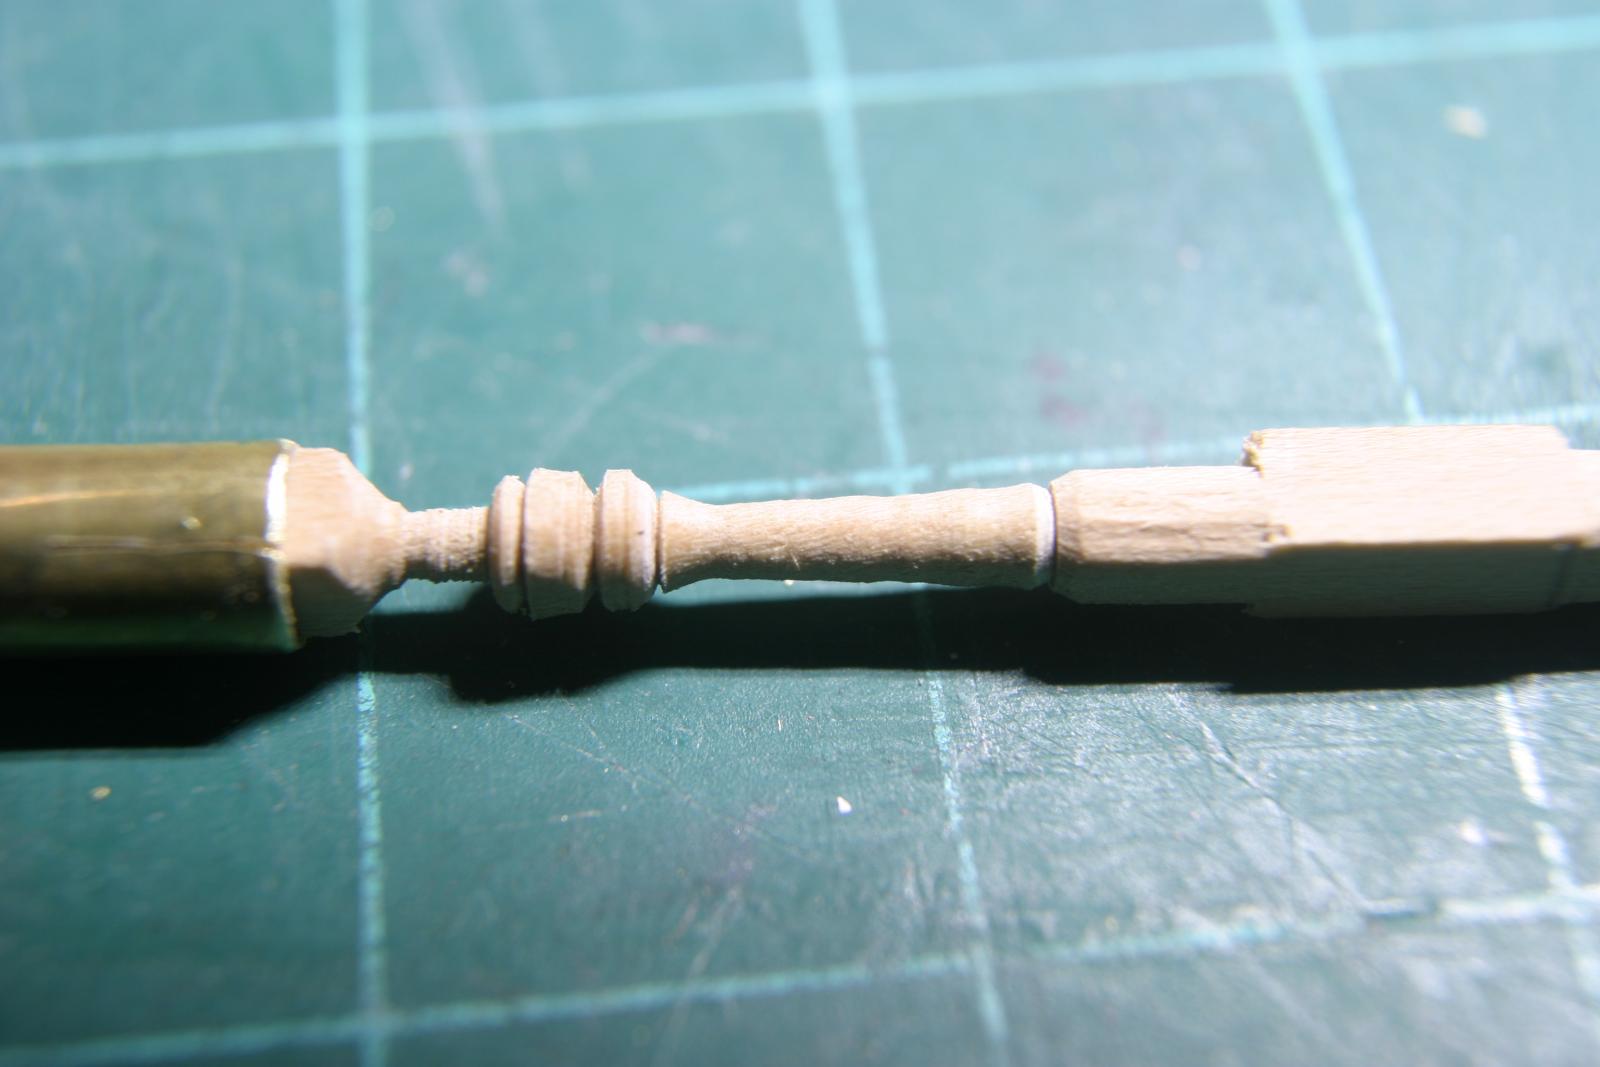
I put a macro lens on to get this pic. It is still a test without any sanding. The turned portion is about 5/8" long. The challenge will be to make five identical posts. I taped the scale drawing of the post to the lathe tool rest so I can try for a similar profile, and after a few more tries, I'll probably settle on the final shape. I found it's better to work close to the collett end...not the middle of the piece where there is some flex with such a small square stock. Maury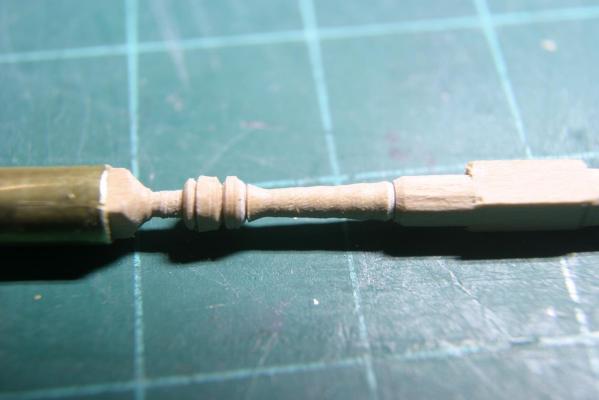
-
Echo by Maury S - FINISHED - Cross-Section
Maury S replied to Maury S's topic in - Build logs for subjects built 1751 - 1800
Thanks for all the comments on the lathe chuck. Danny's reference to Gaetan Bordeleau's Le Fleuron posting was very helpful...just use a brass tube to hold the square piece. Sort of like a collett in a collett. I cut three nesting tube pieces so I have various sizes. I had to nest two tubes to get a firm grip by the closest sized collett and it worked perfectly. First practice turning came out fine (sorry about the focus...I'll switch cameras to get a better shot next time). I suspect that using slightly over-sized square stock to begin is better. This was 1/8 " to start. Maury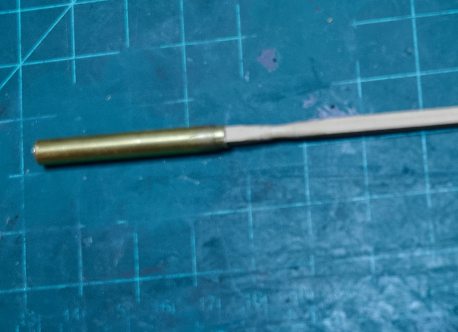
-
Thanks for the centering tips. Just what I was looking for... Maury
- 728 replies
-
- 1
-
-
- le fleuron
- 64 gun
- (and 1 more)
-
Echo by Maury S - FINISHED - Cross-Section
Maury S replied to Maury S's topic in - Build logs for subjects built 1751 - 1800
Danny, The self-centering chuck shown goes on their big lathe. I did not bite that bullet. M -
Echo by Maury S - FINISHED - Cross-Section
Maury S replied to Maury S's topic in - Build logs for subjects built 1751 - 1800
Thanks for the comments. Proxxon does not offer a self-centering 4-jaw chuck as far as I can see. I do masts the old fashioned way, going from 8 sided to 16 sided to round. It's the small newel posts on the rail at the quarter-deck I'm doing now. Six-inch square stock turned in the center. Five matching ones needed. Final length (full sized) about 1.5". I'll play with some of the suggestions. I need the experience anyway. Maury -
Echo by Maury S - FINISHED - Cross-Section
Maury S replied to Maury S's topic in - Build logs for subjects built 1751 - 1800
Thanks Danny, I'll try that. Maury -
Echo by Maury S - FINISHED - Cross-Section
Maury S replied to Maury S's topic in - Build logs for subjects built 1751 - 1800
I need to turn some posts, so I bought a Proxxon 250 mini lathe after reading a bunch of reviews. I haven't used a lathe since high school wood shop. I practiced on some dowels and actually gained a little proficiency. Since the posts have a square upper and lower section, I naturally bought the 4 jaw chuck. So far, I've not been able to get the square piece in the chuck to line up with the center axis of the piece. Does anyone have a reasonably simple way to center a square piece in the chuck? I tried adjusting the set screws visually to no avail once the lathe is turned on. Perhaps using a snug-fitting dowel and tightening the set screws to just touching the dowel as a starting point, then carefully tightening the set screws equally on the square piece? Any help appreciated! Maury -
Cutter Cheerful 1806 by rafine - FINISHED
Maury S replied to rafine's topic in - Build logs for subjects built 1801 - 1850
Very nice Maury- 525 replies
-
- 3
-
-
- cheerful
- Syren Ship Model Company
- (and 1 more)
-
My apologies. Maury
-
Vandalay? Wasn't the the company George Costanza created? Maury
- 19 replies
-
- 5
-
-
- VandaLay
- Industries
- (and 6 more)
-
Echo by Maury S - FINISHED - Cross-Section
Maury S replied to Maury S's topic in - Build logs for subjects built 1751 - 1800
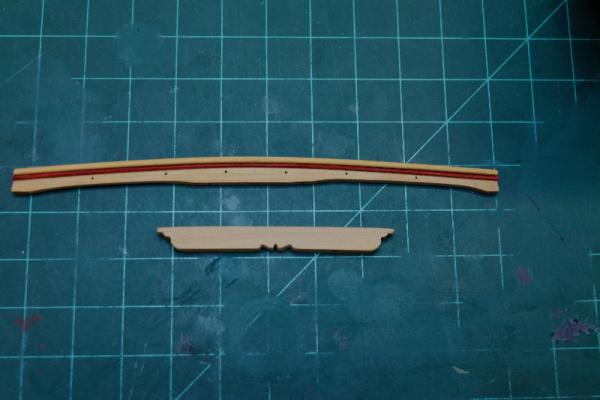
I marked, drilled and filled (Minwax Walnut putty) nails for the outer bulwarks. There are two thru bolts under the gun port that are black mono-filament line used to simulate bolts elsewhere. The gallows cross piece was cut to length (10') and sanded to 7" thick by 12" + high. I used the Byrnes table saw to rough cut the deco ends and center and the bow in the piece was sanded using the same top and bottom jig I used for the main deck beams. I finished it off with files and 320 paper. The Quarter deck beam now has the lip installed, the molding under (I used a scrap of 1/32 x 1/32 redheart) and has the six holes for the eye bolts. Maury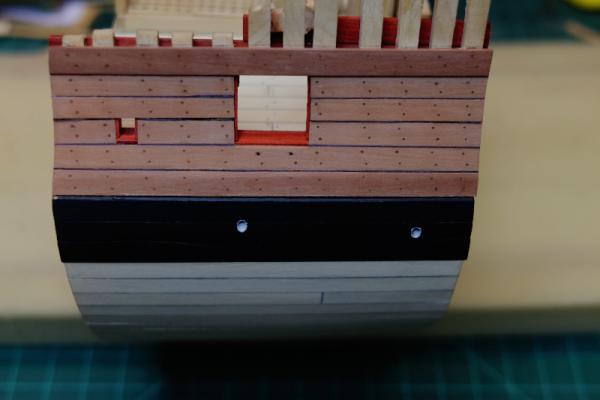
- 324 replies
-
- 15
-
-
Echo by Maury S - FINISHED - Cross-Section
Maury S replied to Maury S's topic in - Build logs for subjects built 1751 - 1800
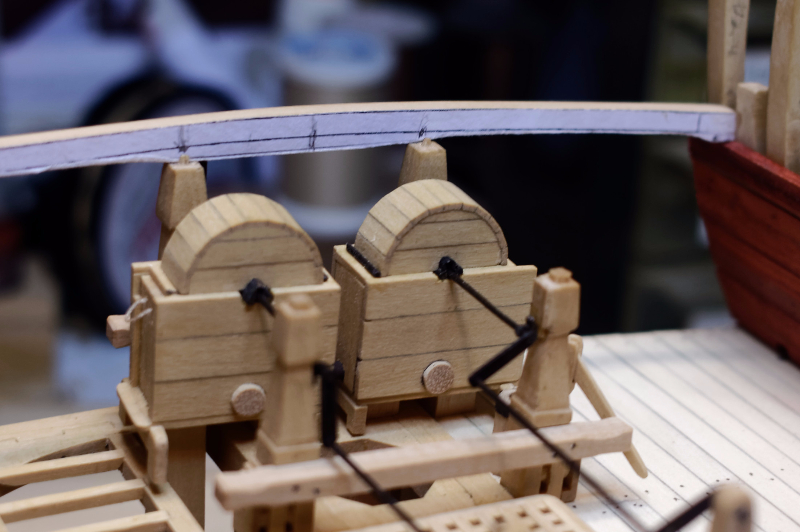
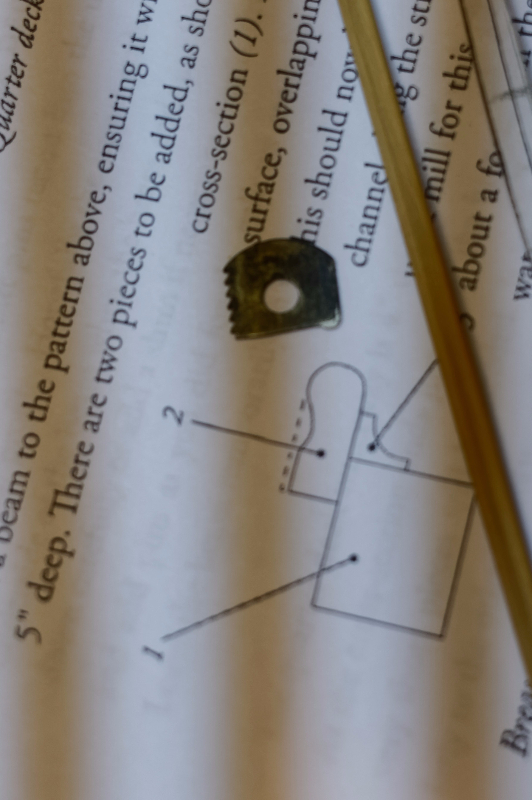
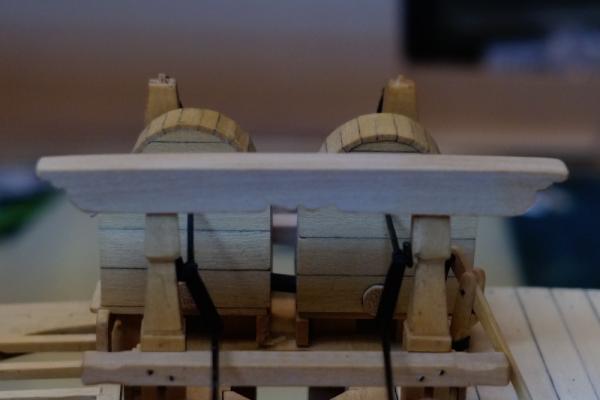
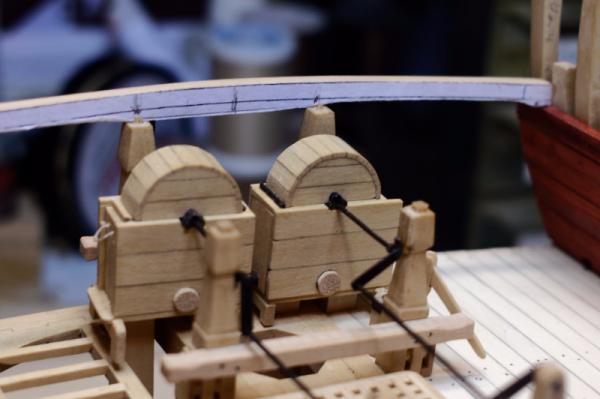
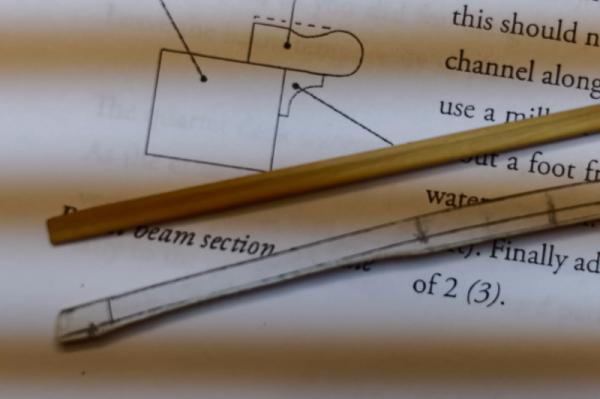
Bulwarks (inner) finished on this deck. Next up is the Quarter Deck beam and lip. A little tweaking on the thickness of the beam so it would rest snug on the tops of the bitts and on the clamps. You can see in the picture I left the thickness deep enough so it would fit to the bitts. Some cleanup left to do here. The underside of the beam was drilled out to accept the tenons on top of the bitts. The lip on the Quarter Deck beam has a channel in it for water runoff. This means scraping the concave channel so I had to make a scraper to fit. This is the first time I've cut a scraper to shape, so here goes. I heated up the end of an old hacksaw blade and let it cool, cut off a bit of the end and filed a little convex shape on one side. You can see it (shiny tip) on the lower right side of the of the blade segment. You can also just make out the channel scraped in to the 3" x 6" beam. One edge of the lip was bullnosed and the top of the aft edge thinned down to 2 1/2". The lip was wrapped in a paper towel, drenched in water and cooked in the microwave for 3 minutes, clamped to the top of the beam to dry in the proper shape. Maury

- 324 replies
-
- 12
-
-
I use the Panavise, mounted to a piece of 3/4" MDF large enough to clamp it to my bench / table. Portable and sturdy. Maury
-
Echo by Maury S - FINISHED - Cross-Section
Maury S replied to Maury S's topic in - Build logs for subjects built 1751 - 1800
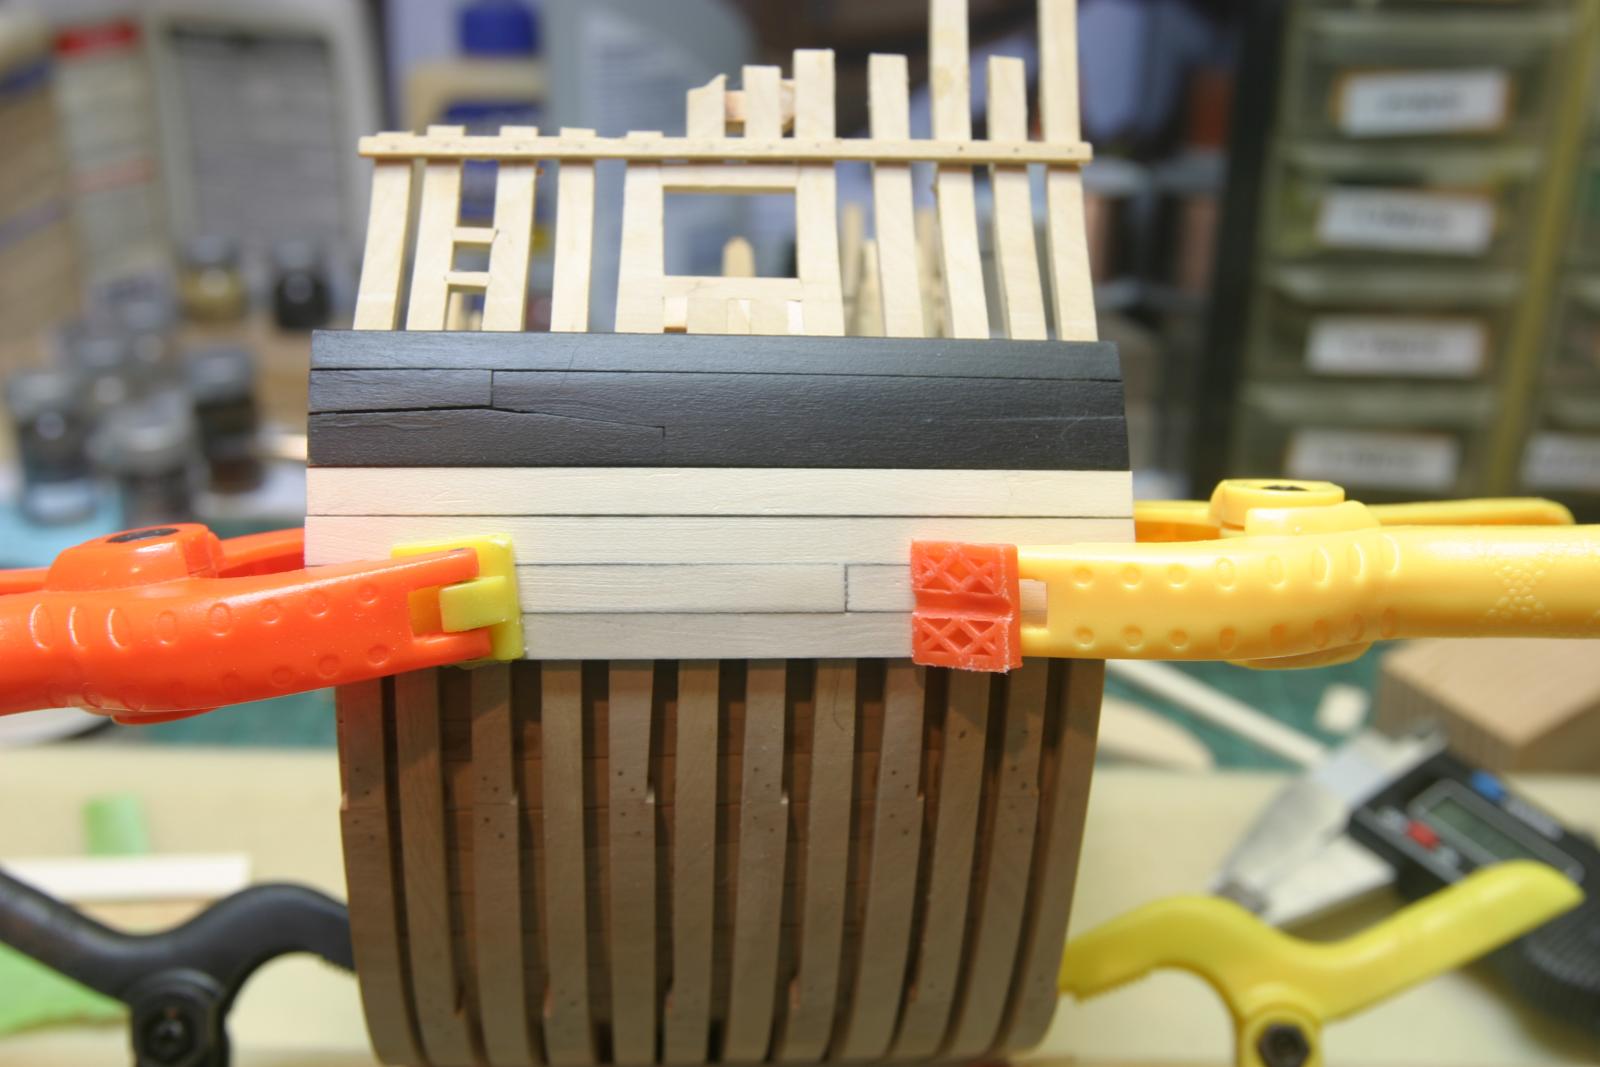
The first shot shows the port linings...redheart thinned to 1". It took several attempts to get the angle of the side pieces correct. They are still rough on the inner side and will be trimmed and faired once the glue is firm. The second shows the first plank of spirketing (above the waterway) and the quarter deck clamp (two strakes, the lower one continues forward as the "string in the waist"). All the inner bulwarks on this deck will be redheart. The bolts are simulated with "Walnut" putty (MinWax). That's the darkest I could find so they will be subtle. The holes were marked, drilled and filled before the planks were installed. The remaining planks of the bulwark go in later. Maury
- 324 replies
-
- 14
-
-
From Chuck P. Take your time. Work slowly. And if it isn't right, do it again until it is. The learning curve will kick in. Maury
-
Echo by Maury S - FINISHED - Cross-Section
Maury S replied to Maury S's topic in - Build logs for subjects built 1751 - 1800
I just got back to the cave after a month of business commitments. I am using redheart for the interior bulwarks and porthole linings (basically most of what would have been painted red). I did that on my Fair American and really like the result. Pictures in the next day or two. Maury -
I bought the same bench and left the lower drawers and the shelf off the assembly so my knees can fit under when I work. Maury
-
Echo by Maury S - FINISHED - Cross-Section
Maury S replied to Maury S's topic in - Build logs for subjects built 1751 - 1800
Thank you Druxey. I knew better and ignored prior warnings. M -
Echo by Maury S - FINISHED - Cross-Section
Maury S replied to Maury S's topic in - Build logs for subjects built 1751 - 1800
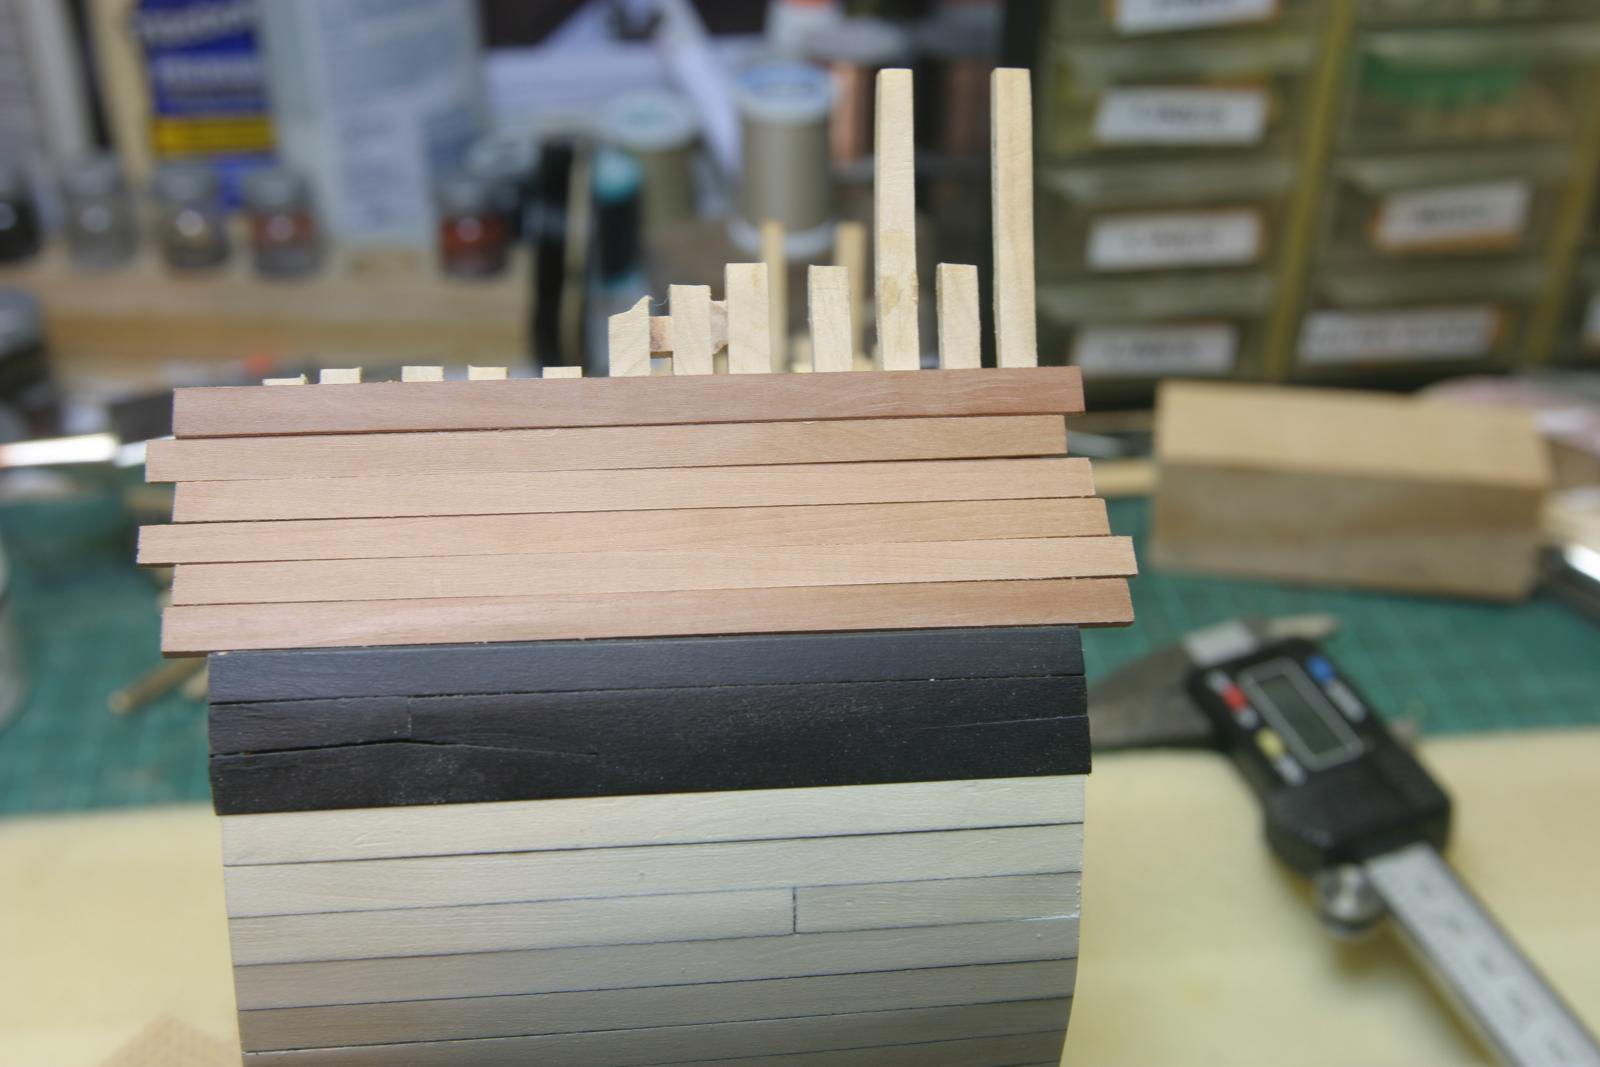
Pear blanking installed. I scuffed up the wales while sanding the edged of the planks. I may re-do some of the wale planks...not thrilled with the top and butt joint. It must have moved while clamping, because the joint was hardly visible before I glued it. Maury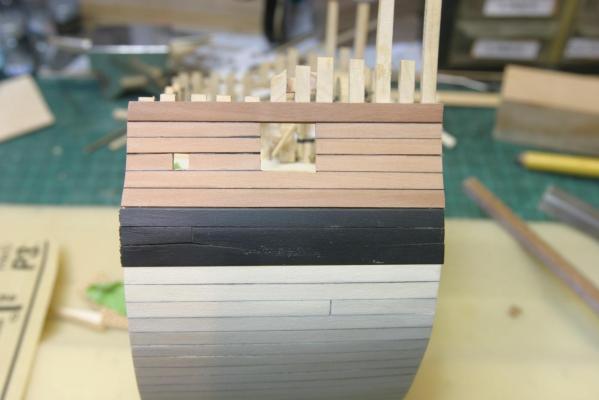
-
Echo by Maury S - FINISHED - Cross-Section
Maury S replied to Maury S's topic in - Build logs for subjects built 1751 - 1800
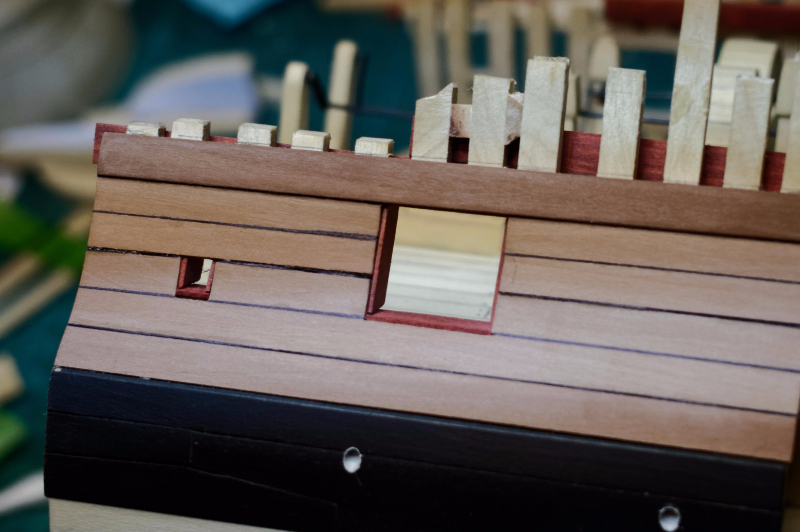
Lower planks are done. Above the wales I'm using Pear for some color variation. For the "Black strake"... First plank above the wales...(not painted black) it's 10" x 3" (tapering to 2"). The shear is 10.5" x 3.5". All the intermediate planks are about 9" x 2". I'm going to put a black paper edge on these (not shown yet). I think it will show the caulking better. Once the intermediates are sized, I'll lay them in around the port openings. Maury
- 324 replies
-
- 11
-
-
Cutter Cheerful 1806 by rafine - FINISHED
Maury S replied to rafine's topic in - Build logs for subjects built 1801 - 1850
Very nicely done. Maury- 525 replies
-
- 3
-
-
- cheerful
- Syren Ship Model Company
- (and 1 more)
-
Echo by Maury S - FINISHED - Cross-Section
Maury S replied to Maury S's topic in - Build logs for subjects built 1751 - 1800
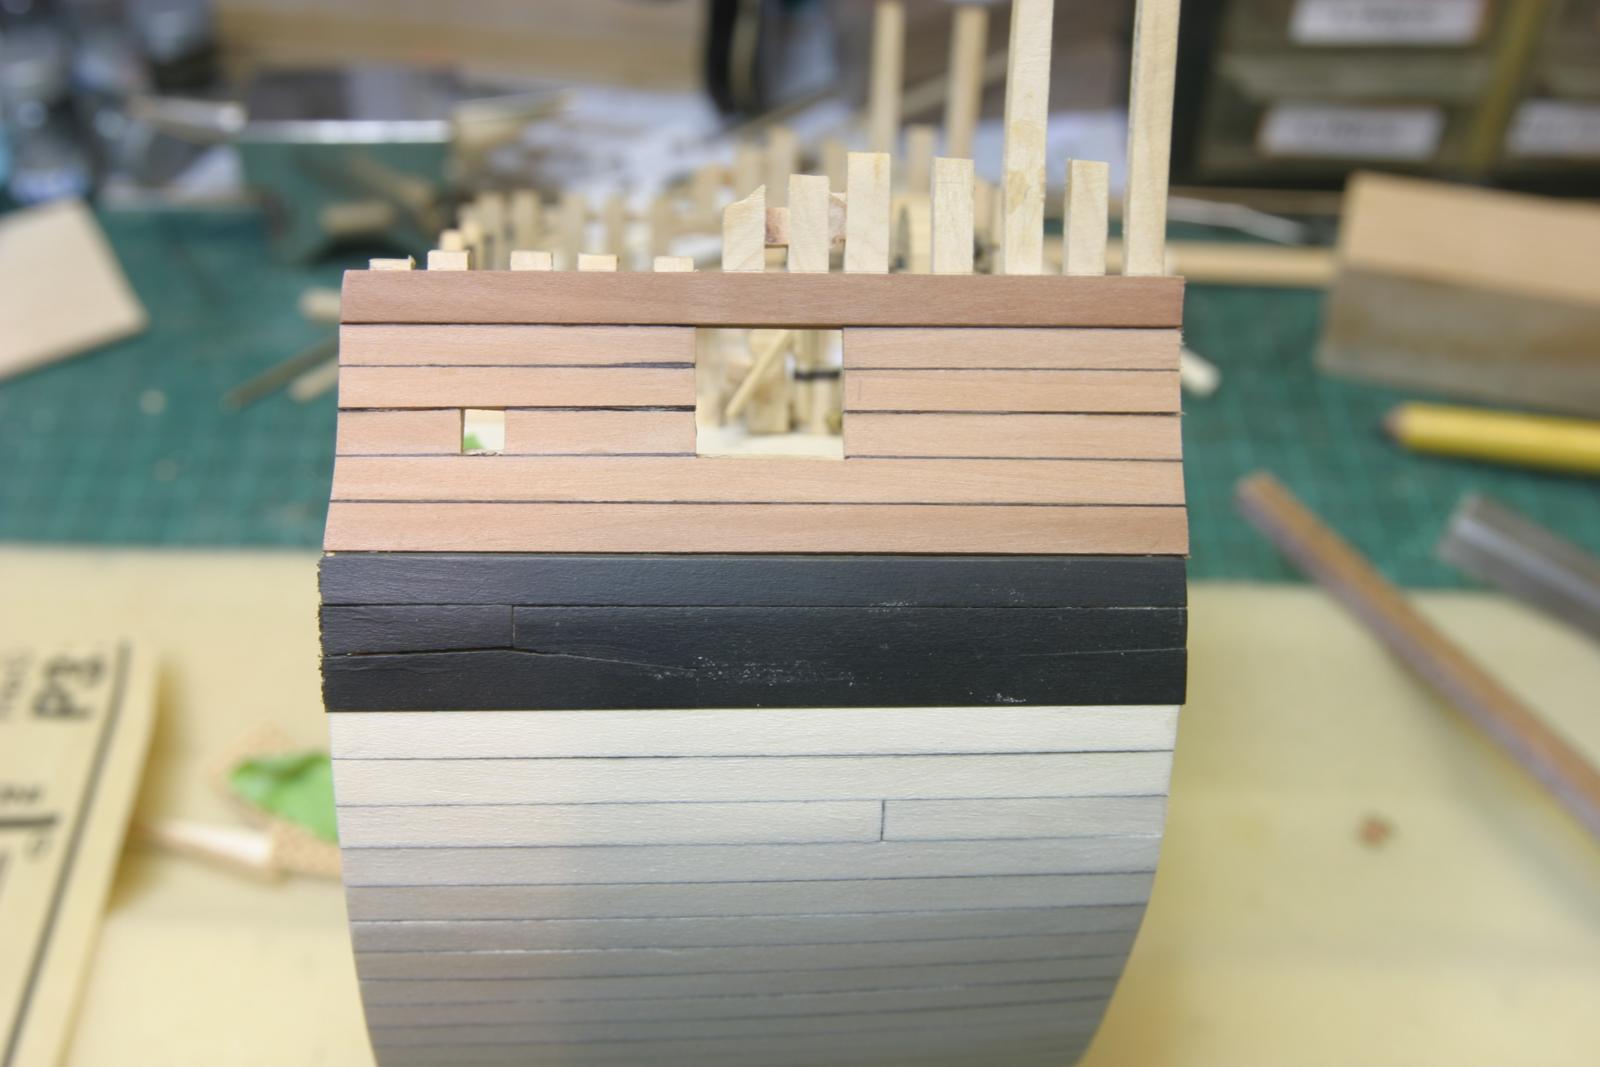
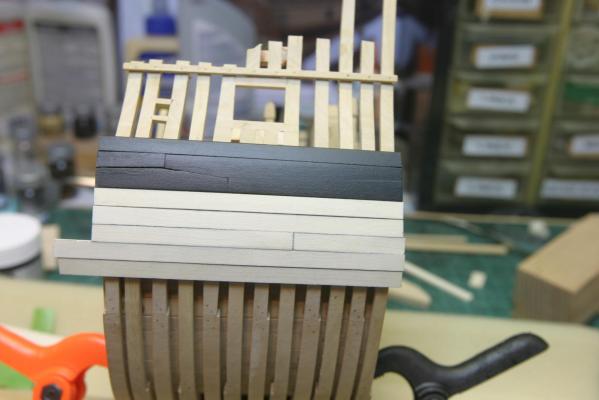
Wales are finished...8 coats of MS-Hull&Spar Black. Lower planks are holly. 24 planks from wales to keel, about 10" wide. The plank below the wale and the garboard plank are 3 1/2 ", the rest are 3". This part is going quickly. Maury
- 324 replies
-
- 15
-