Maury S
-
Posts
1,490 -
Joined
-
Last visited
Content Type
Profiles
Forums
Gallery
Events
Everything posted by Maury S
-

Echo by Maury S - FINISHED - Cross-Section
Maury S replied to Maury S's topic in - Build logs for subjects built 1751 - 1800
Thanks! I will work on those items. Maury -
Echo by Maury S - FINISHED - Cross-Section
Maury S replied to Maury S's topic in - Build logs for subjects built 1751 - 1800
Druxey, Thanks for the comment. Pointing out the little things makes me a better modeler! I looked at David's drawings and they show more of a very long triangle shape... is this what you mean? Maury -
Echo by Maury S - FINISHED - Cross-Section
Maury S replied to Maury S's topic in - Build logs for subjects built 1751 - 1800
All the chains and plates are temporarily installed to test for fit. A few minor tweaks need to be made. Maury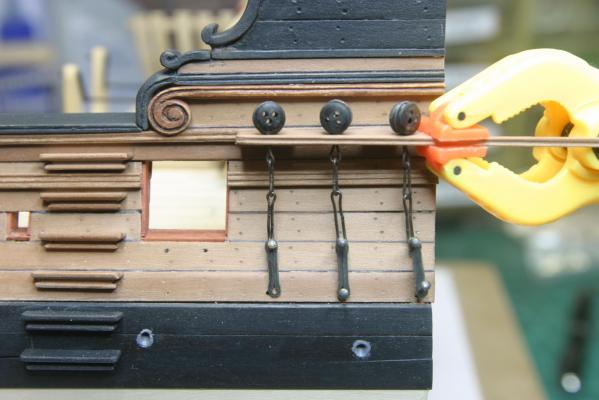
- 324 replies
-
- 10
-

-
Echo by Maury S - FINISHED - Cross-Section
Maury S replied to Maury S's topic in - Build logs for subjects built 1751 - 1800
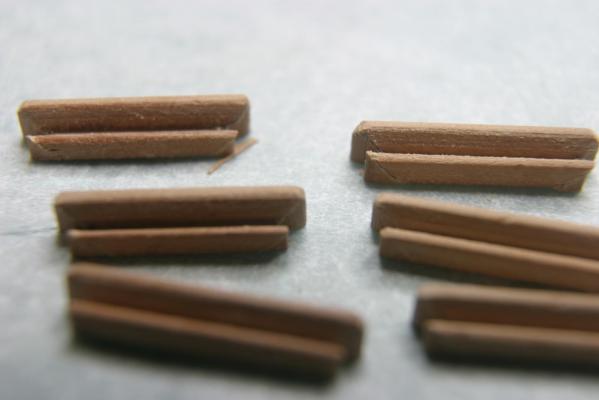
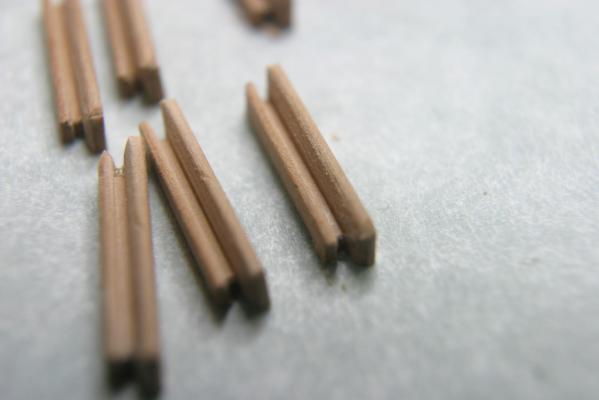
Chain Plates are made from 3/32" brass strip; cut to size, drilled and filed to shape. Blackened as above and test-fitted. They are scored down the middle since the plates were made of 1 1/4" square stock, shaped to fit. The scores are barely visible without the macro lens. Toe and mid-links go next. Maury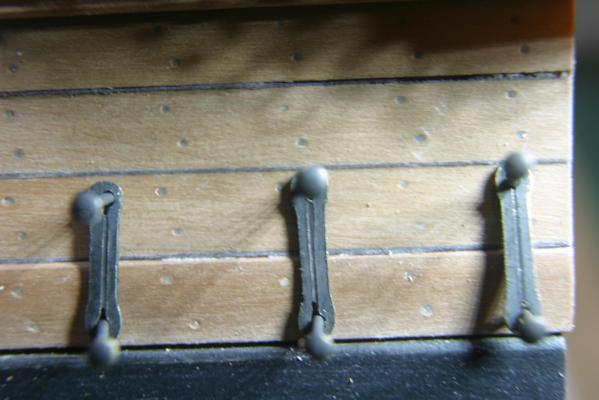
- 324 replies
-
- 13
-
-
Echo by Maury S - FINISHED - Cross-Section
Maury S replied to Maury S's topic in - Build logs for subjects built 1751 - 1800
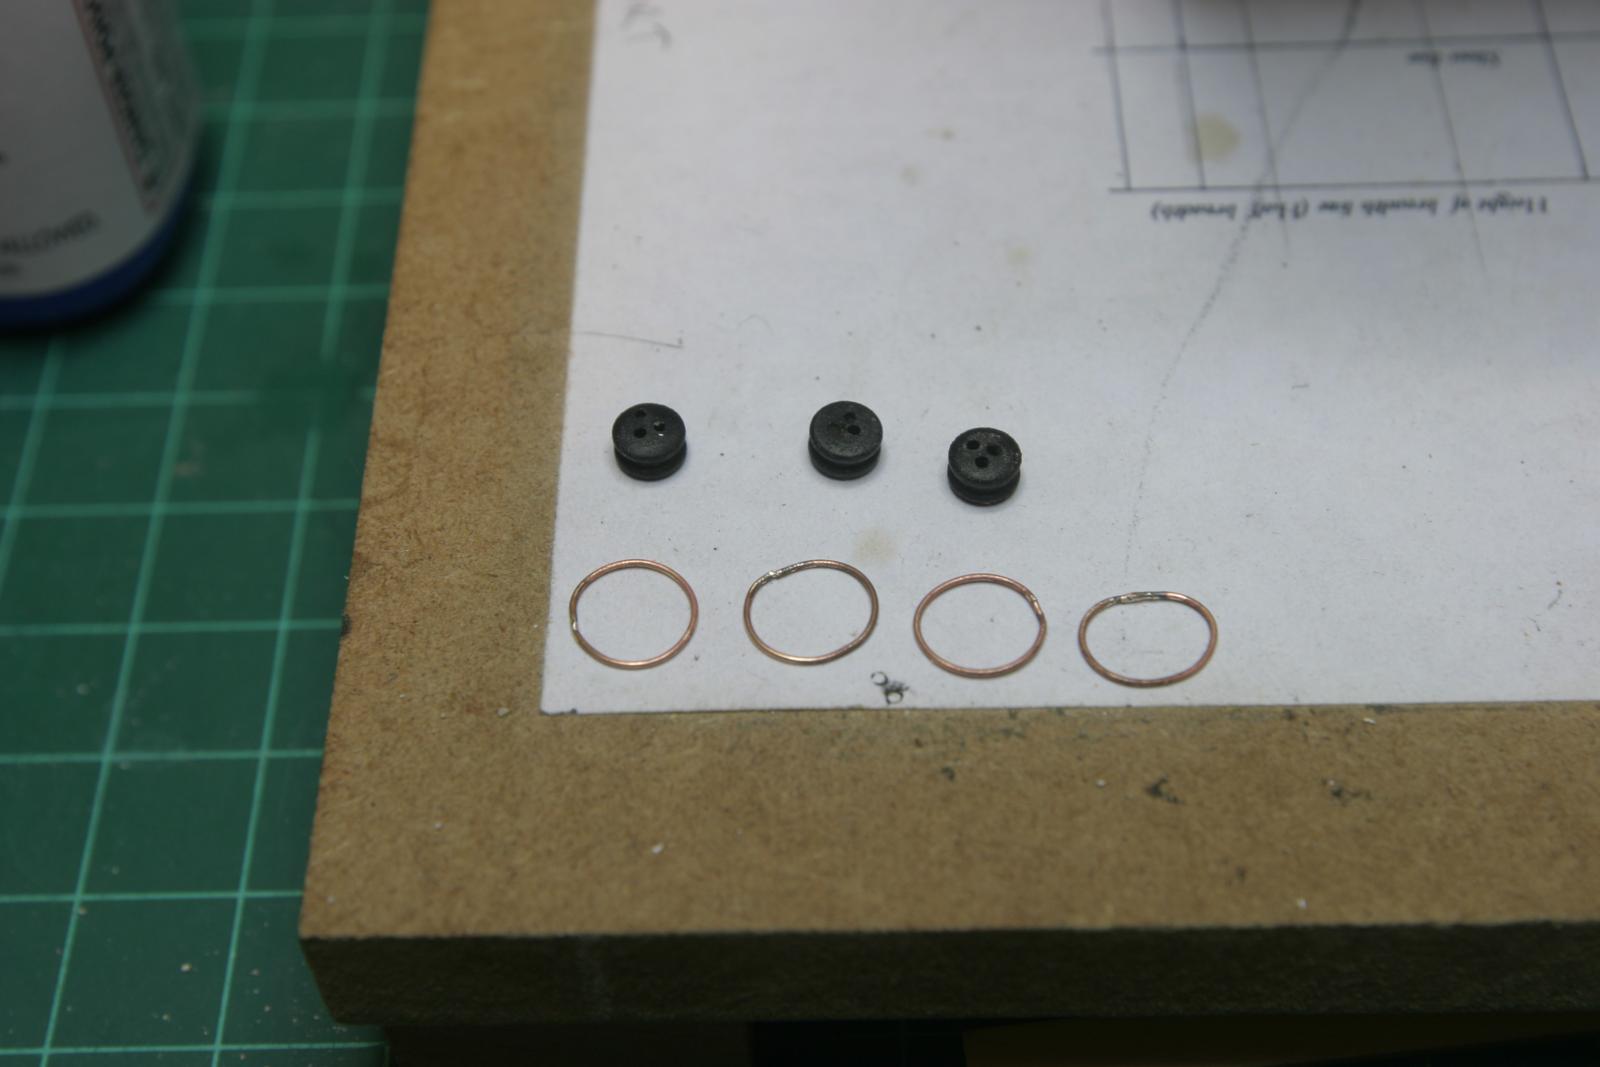
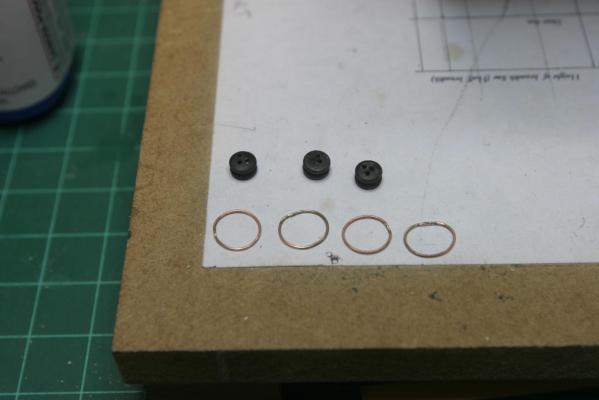
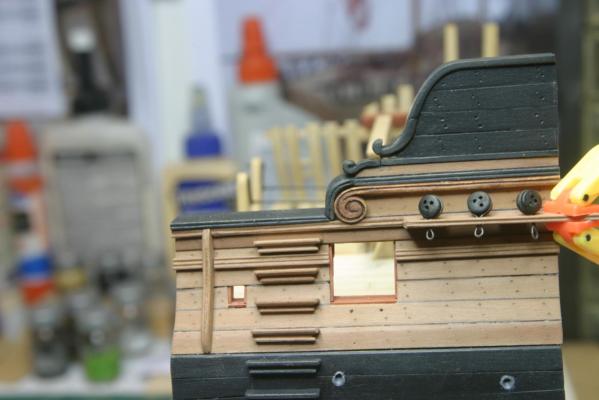
The channel was pinned and glued to the planking and the covering board is temporarily held in place. The deadeye bindings were made with .02 brass wire, annealed and measured to length for all three. Ends of the wire were filed flat to get a good solder joint. They were bent around a pencil to get an approximate circle with the ends touching. A bath in acetone removed any oils, etc. and they were silver soldered, dropped back into the acetone, rinsed and then into vinegar and they came out bright (see picture). I used a dilute (1:8) Brass Black solution, treated twice so there was no flakey buildup and rinsed again in vinegar to halt any further chemical reaction. I put the deadeyes (5mm is approximately 10" at scale) into the bindings and temporarily set them on the channel. Next are three more pieces (preventer plate, toe link and middle link). Happy New Years to all. Maury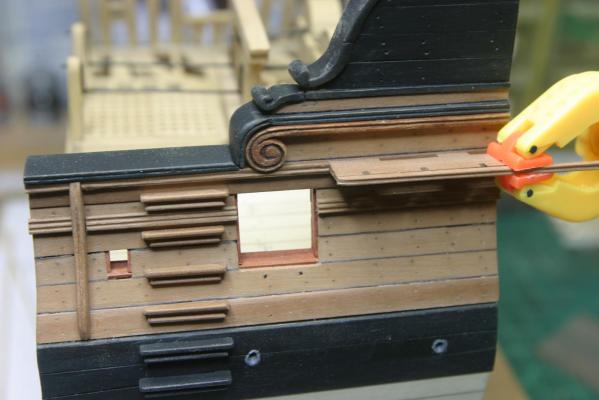
- 324 replies
-
- 16
-
-
Echo by Maury S - FINISHED - Cross-Section
Maury S replied to Maury S's topic in - Build logs for subjects built 1751 - 1800
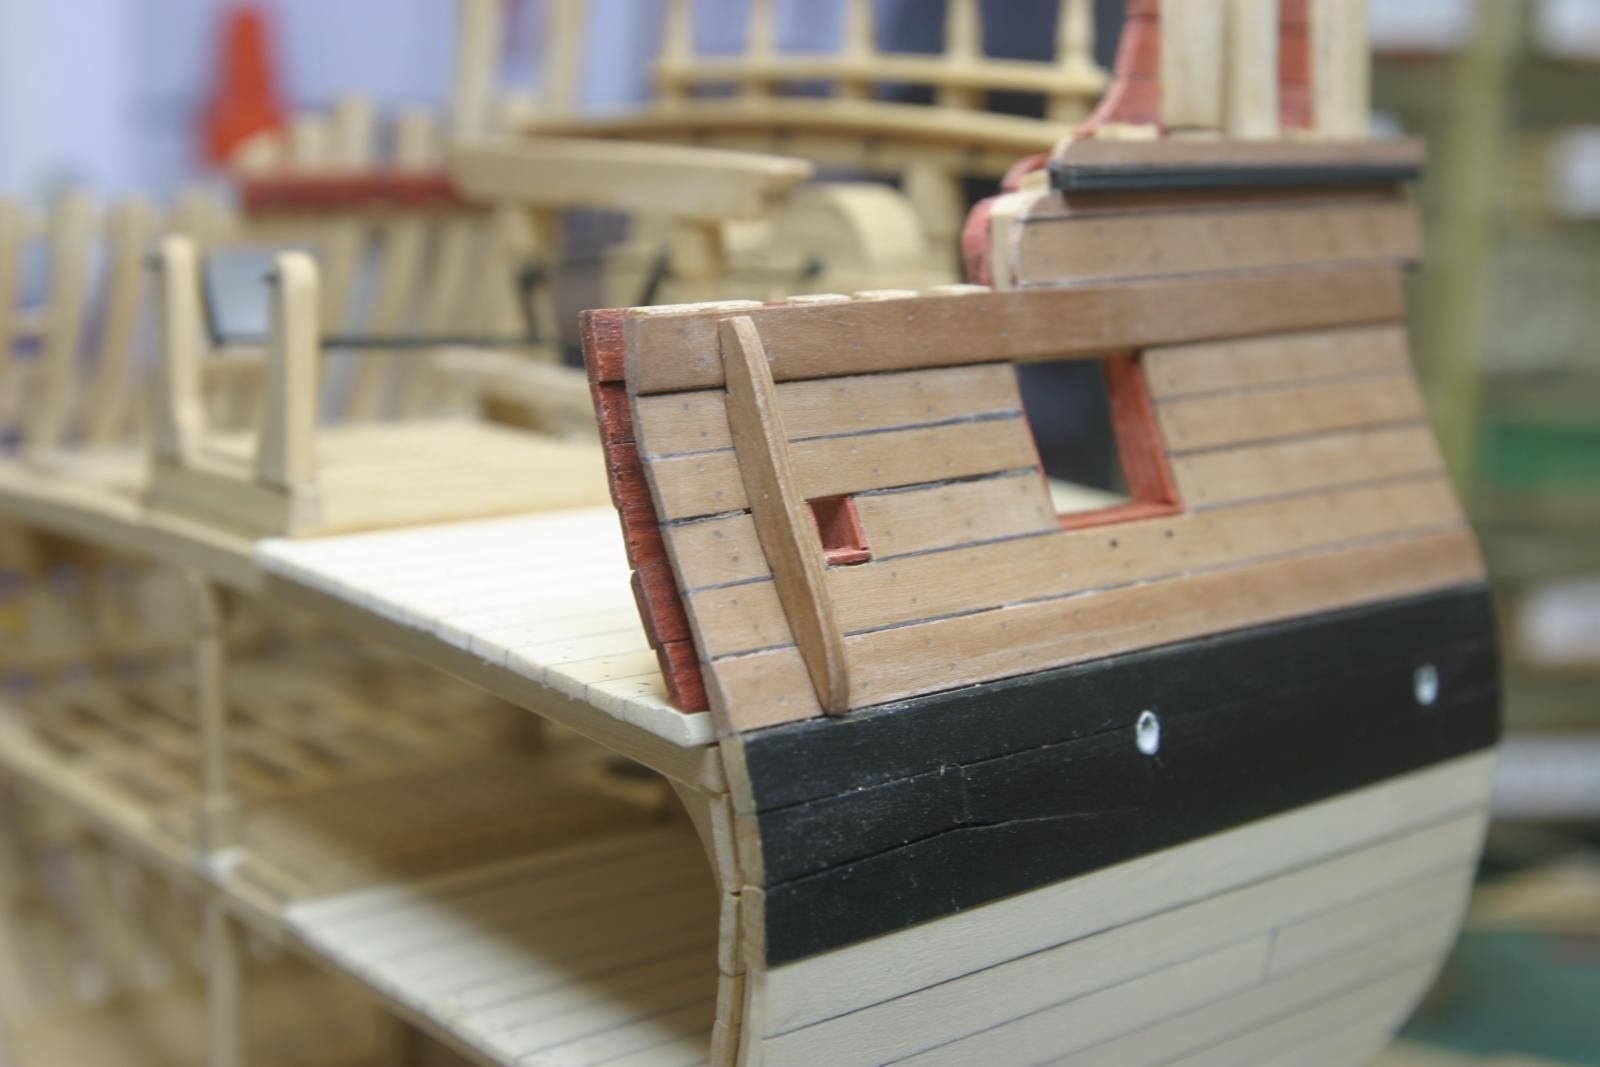
Next is the main channel. A bit out of order from David's practum, but I didn't want it to get broken off as I worked on the rails above. Wide piece with notches cut for the air gap where the channel connects with the planking and the covering board for the outer edge once the deadeyes are installed. It starts out at 4" thick and tapers to 2 1/2" at the outer edge. I have to drill and insert two pins to connect thru the planking and give it some strength before starting on the deadeyes and chain plates.. Maury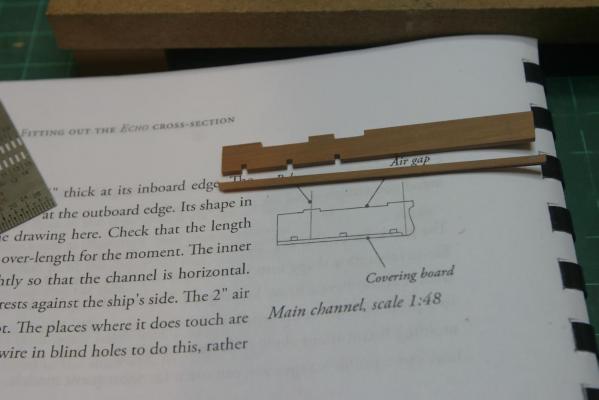
-
Yves, I don't know if it's at my end or not, but none of the pictures are showing up on your post...I see pics on all others. Maury
-
Echo by Maury S - FINISHED - Cross-Section
Maury S replied to Maury S's topic in - Build logs for subjects built 1751 - 1800
Still more work to be done. Next model??? I'm working on Chucks Cheerful and I'm researching a new project...Working boat...not sure yet. Maybe an anchor Hoy or a stone sloop. Availability of plans and info will be a factor. Maury -
Echo by Maury S - FINISHED - Cross-Section
Maury S replied to Maury S's topic in - Build logs for subjects built 1751 - 1800
Final rail in place. Maury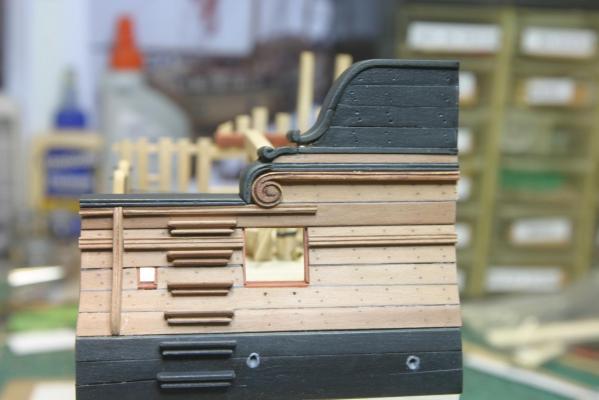
- 324 replies
-
- 19
-
-
Echo by Maury S - FINISHED - Cross-Section
Maury S replied to Maury S's topic in - Build logs for subjects built 1751 - 1800
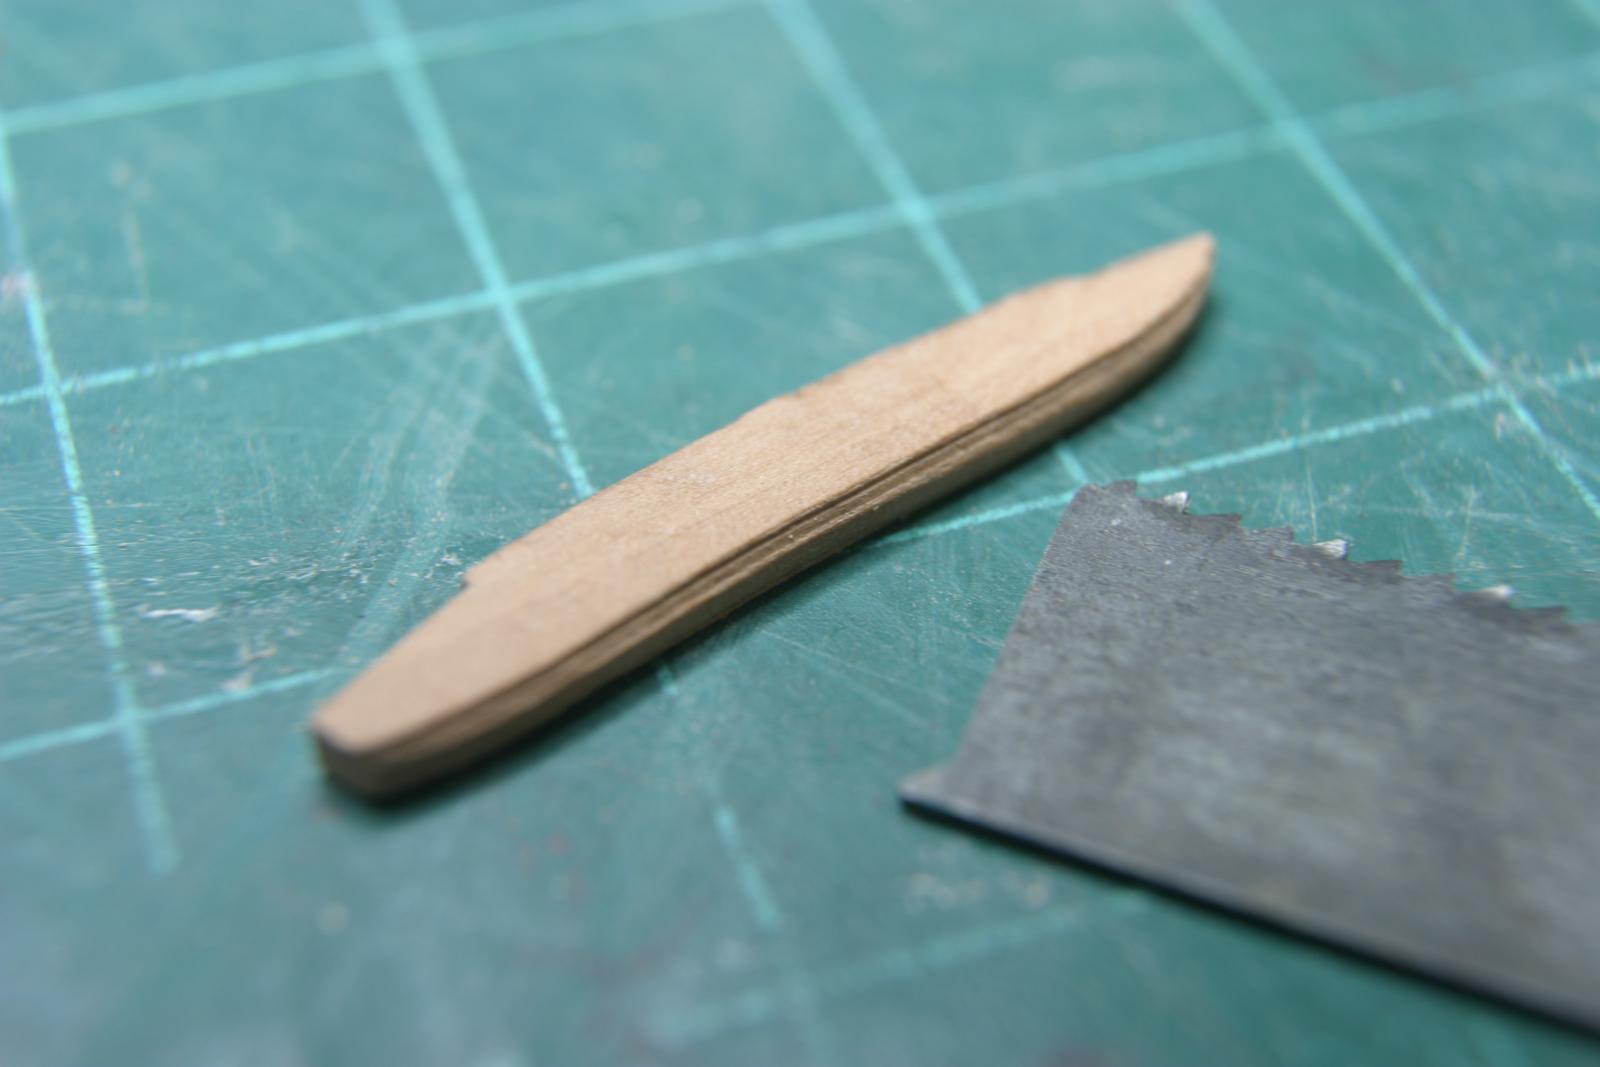
Thanks for all the "likes". It's a long way from Greg's section, but my skill level is improving, and that's what this project is all about. The roughtree rails are next. A big "S" shaped piece running from the top of the bulwarks down to the planksheer rail. I copied the pattern on a piece of card and transferred it in two parts to a 1/2" square piece of boxwood. Rough cut on the scroll saw and then sanded the lower sides to fit the profile. The next step will be to thin them down to 2 1/2 - 3" (.05 - .0625") and work on the fancy curl at the bottom. Maury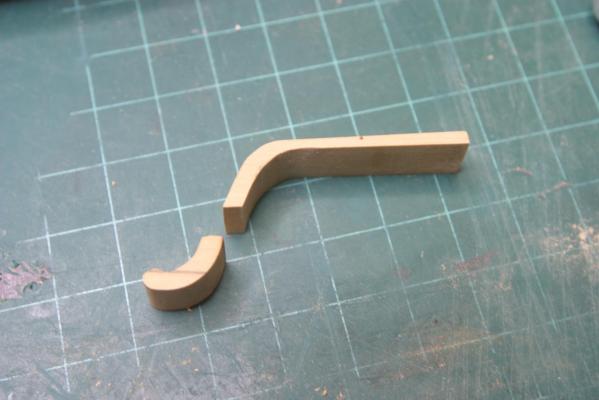
-
Echo by Maury S - FINISHED - Cross-Section
Maury S replied to Maury S's topic in - Build logs for subjects built 1751 - 1800
I thinned the volute from the back (used double-sided tape to hold the piece to the sander sled) to about half the thickness of the last picture. I also put some dark walnut stain to tone-down the color a bit. Looks better. I also thinned the fancy end of the plank-sheer molding and filed the drift end to match up better. Maury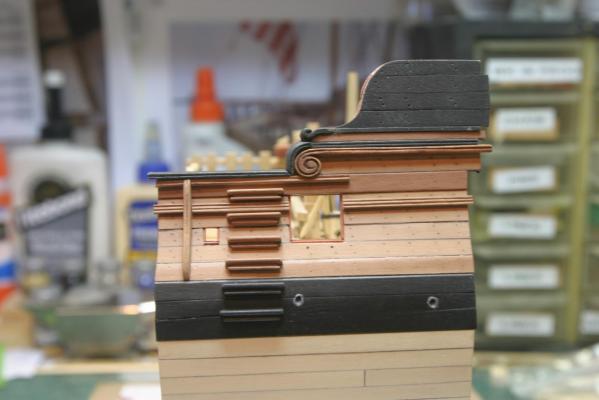
- 324 replies
-
- 11
-
-
Echo by Maury S - FINISHED - Cross-Section
Maury S replied to Maury S's topic in - Build logs for subjects built 1751 - 1800
More carving. The decorative curl on the end of the planksheer rail was made several times...Dropped and lost one of them, the final one is OK. While it seems so small while carving, it looks a bit large in place. The volute has a simple gouge pattern. I do not have the skills to carve the pattern as David laid out. The pear was too soft to carve, so I went back to the Box wood and stained it. Not an attempt to match the pear, just decorative. I may thin it down (from the back). It looks a bit heavy as is. The upper bulwarks are just set in place. More work there and then the Roughtree rail. Maury
- 324 replies
-
- 13
-
-

-
Echo by Maury S - FINISHED - Cross-Section
Maury S replied to Maury S's topic in - Build logs for subjects built 1751 - 1800
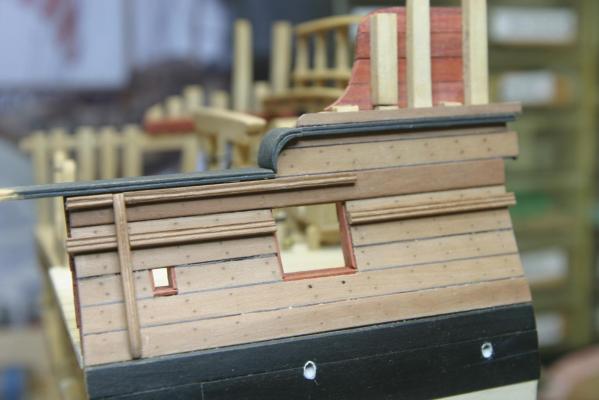
Ben, The scuppers ended up at different levels because of the angle of the holes. They are slightly different sizes as well since one drains the chain pumps. Notice also, there is no cover on the sweep port. The linings were too close to the edge of the planking. Maury -
Echo by Maury S - FINISHED - Cross-Section
Maury S replied to Maury S's topic in - Build logs for subjects built 1751 - 1800
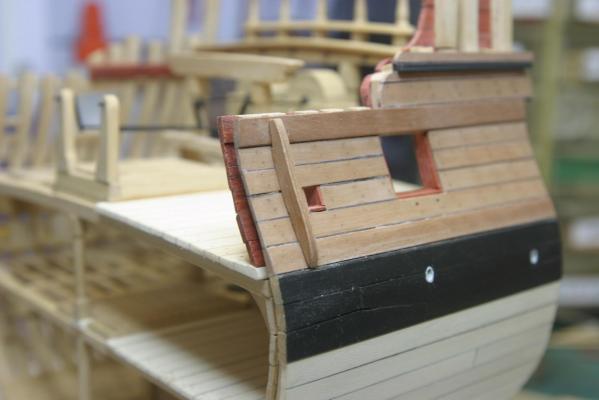
Stairs finished and installed. I sanded the backs to bring the treads level. The step below the waist rail was installed first, then the others using a spacer (.16"). The planking was scratched behind where the stairs were installed so the CA would hold. A little black touch-up paint needs to be applied on / around the lower two steps. The drift was re-made to match the compound angles and width. Still not permanently installed. Maury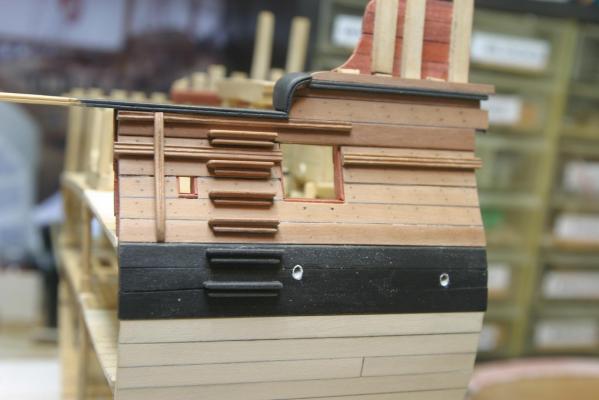
- 324 replies
-
- 11
-
-
Echo by Maury S - FINISHED - Cross-Section
Maury S replied to Maury S's topic in - Build logs for subjects built 1751 - 1800
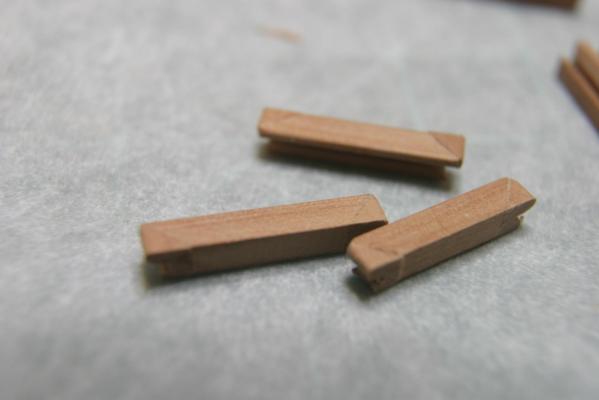
Stairs: Rather than scrape the pattern, I cut a slot with my (Byrnes) table saw, then another cut on the edge at a shallower level. Lots of sanding to get a delicate profile. I then cut miters and put the pieces together. That way, the pattern on the ends exactly matches the face. The tails were sanded off and finished with 320 grit paper. They look real rough under the macro lens so a once over with the scotch pad and they should be good. The backs have to be sanded on an angle so the treads are level as they get placed up the side. Maury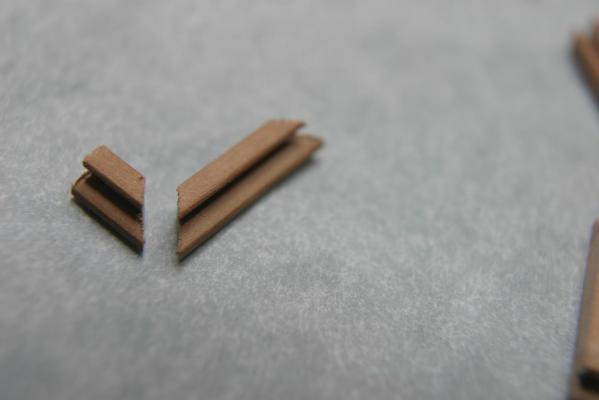
- 324 replies
-
- 11
-
-
-
Echo by Maury S - FINISHED - Cross-Section
Maury S replied to Maury S's topic in - Build logs for subjects built 1751 - 1800
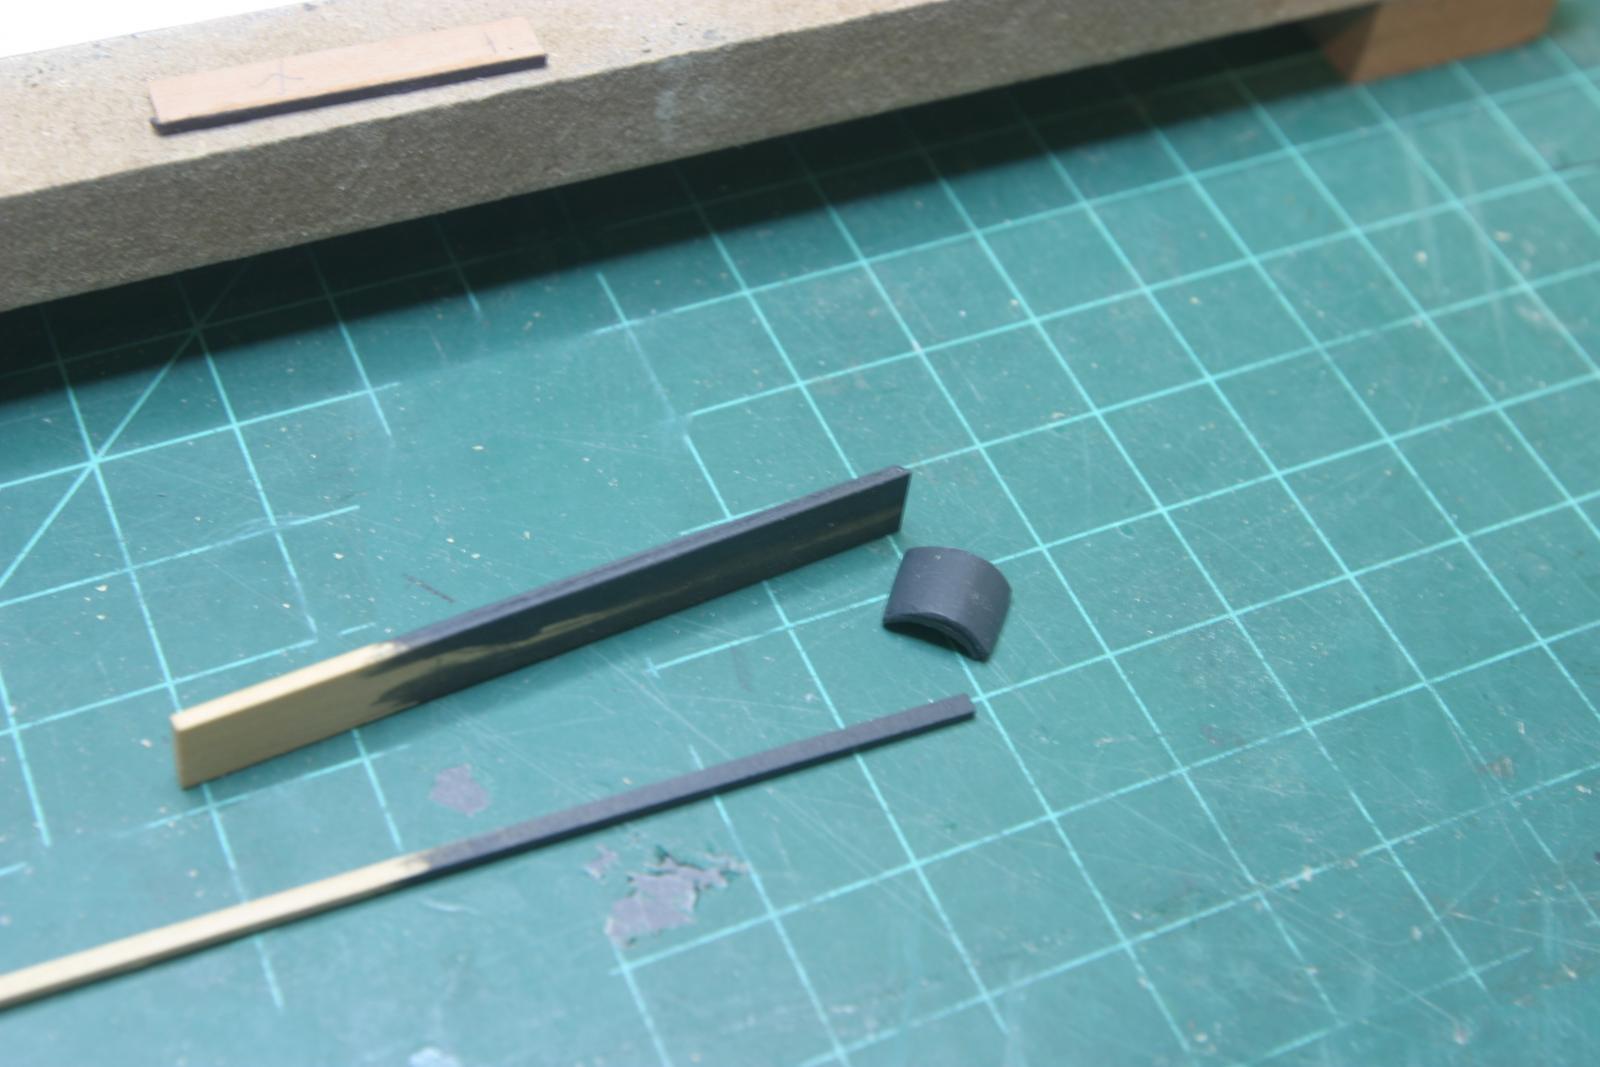
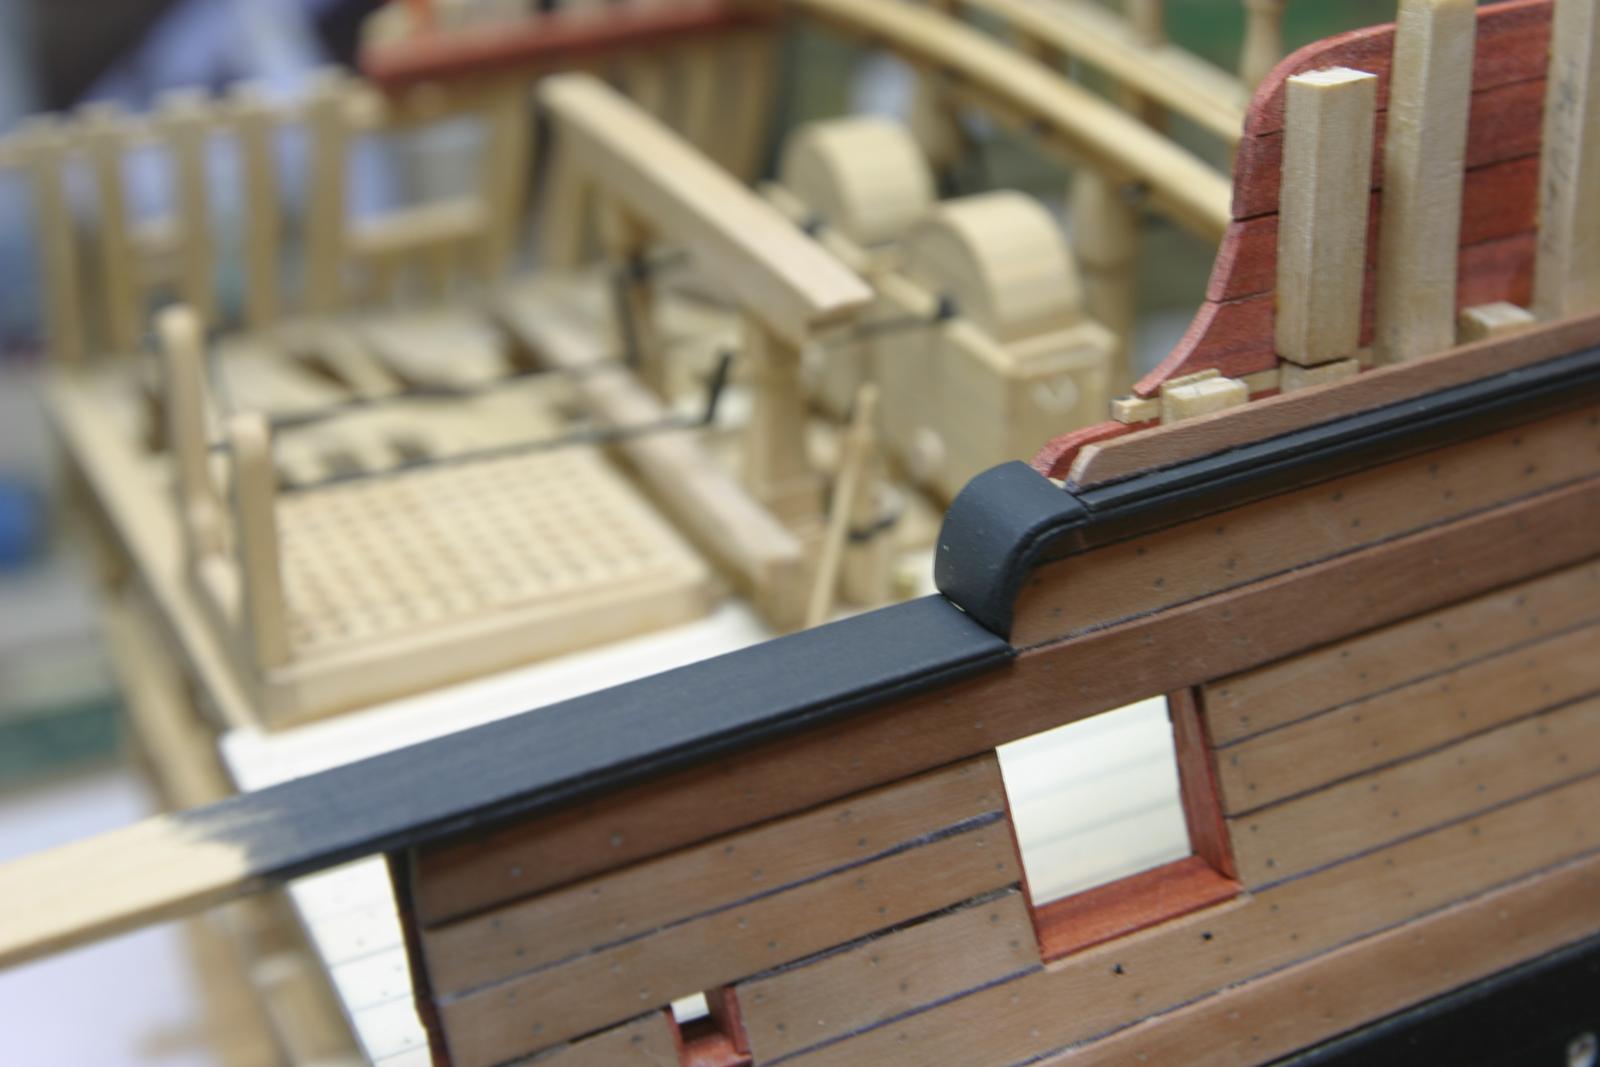
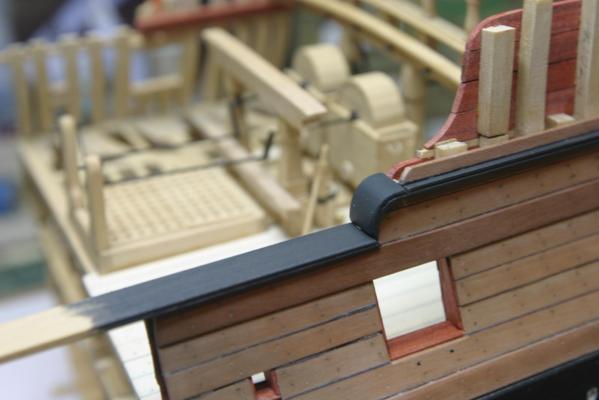
Capping the timbers is satisfying, if only temporarily! Thanks for the likes and comments. I finished the fender (only room for one) and the waist rail. This entailed a lot of scraping, filing and sanding. I have not yet mastered cutting a complex scraping tool, so I made two different simple ones from pieces of an old hacksaw and scraped two patterns. The first picture of the fender showed it to be too thick, so I shaved it in half and re-scraped the molded edge. Stairs are next. Maury
- 324 replies
-
- 14
-
-
Echo by Maury S - FINISHED - Cross-Section
Maury S replied to Maury S's topic in - Build logs for subjects built 1751 - 1800
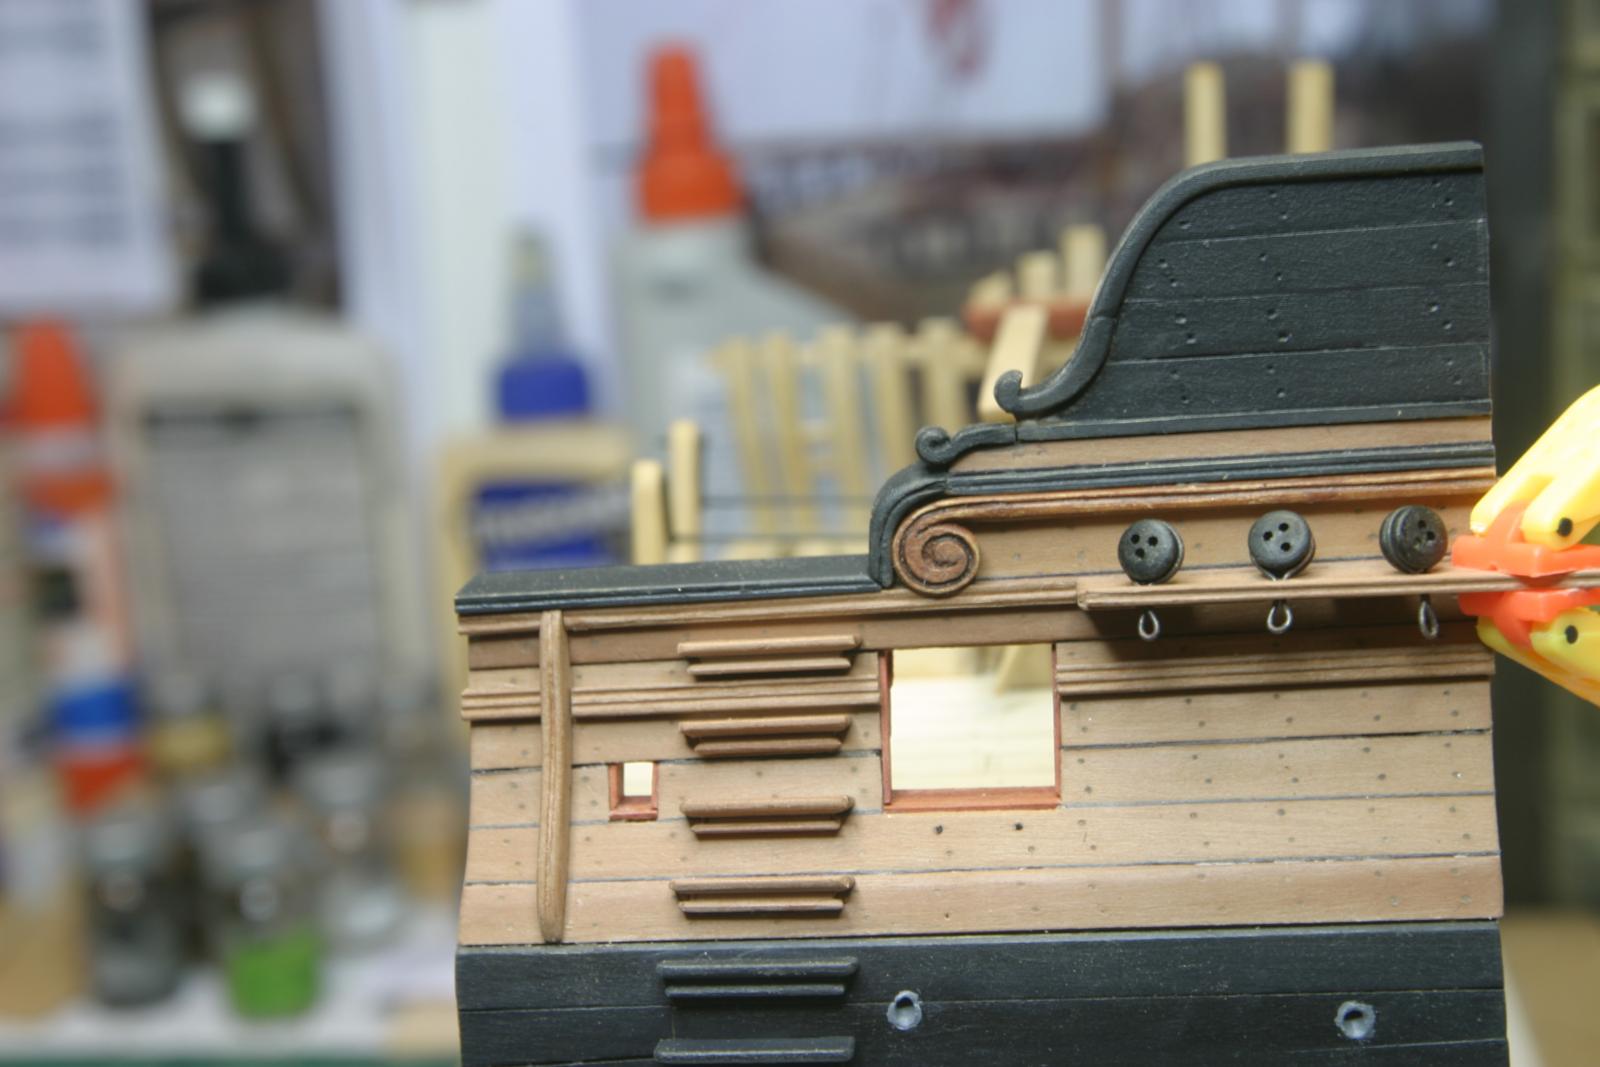
A little more progress on misc. parts for one of the rails. They are finished and just set in place for now. Six - seven thinned coats of hull-spar black. Maury
- 324 replies
-
- 15
-
-
Simply amazing! Now repeat at 1/96th scale. Maury
- 3,618 replies
-
- 5
-
-
- young america
- clipper
- (and 1 more)
-
There are a lot of possibilities with this. I'm doing volutes on my Echo section and the spiral template makes great patterns, both clockwise and counter clockwise. Maury
-
Echo by Maury S - FINISHED - Cross-Section
Maury S replied to Maury S's topic in - Build logs for subjects built 1751 - 1800
Breastwork mounted. The bolts thru the aft half-laps are Black monofilament line as with other bolts throughout. they are held in with medium CA and might even provide some structural strength? I finished the inner bulwarks on the quarter deck. The thin black piece will join with one of the rails. Rails will eventually go on top. Some carving (Drifts and Volutes) coming up pretty soon. I suspect the scrap box will get some more rejected pieces. Maury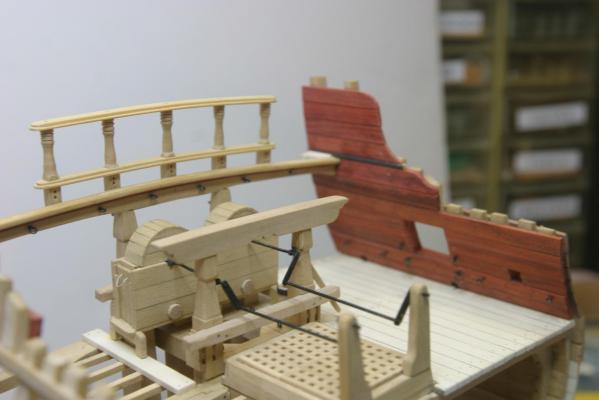
- 324 replies
-
- 16
-
-

-
Echo by Maury S - FINISHED - Cross-Section
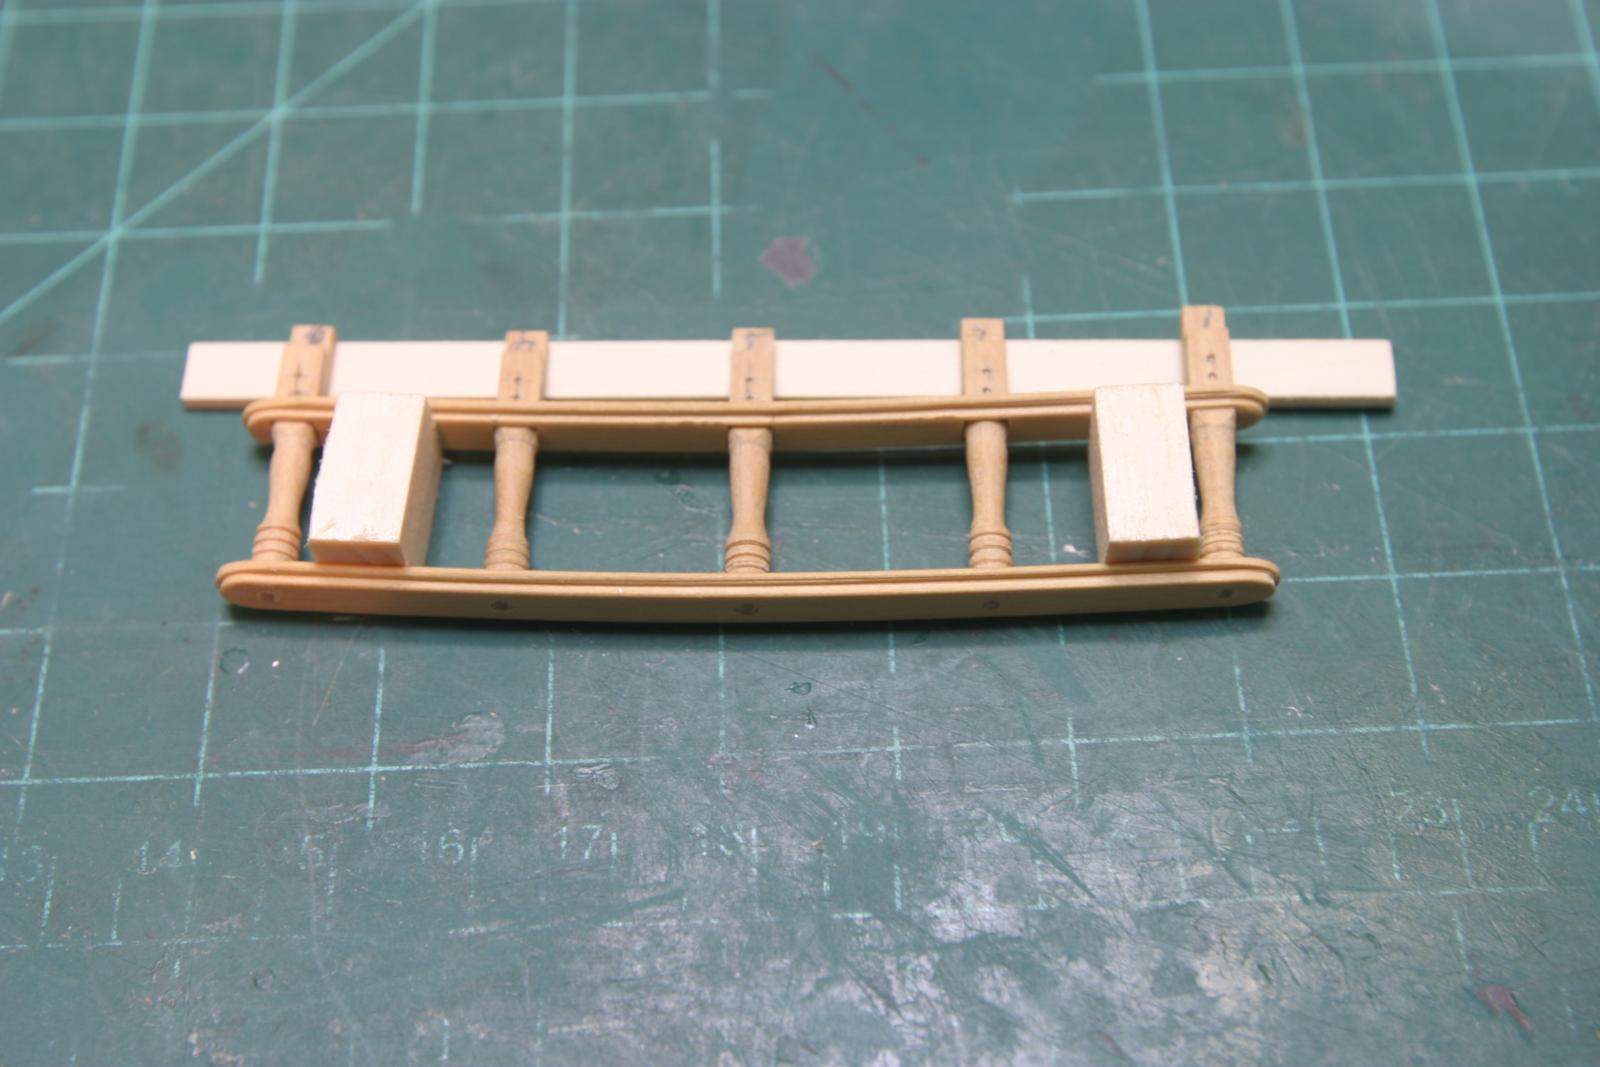
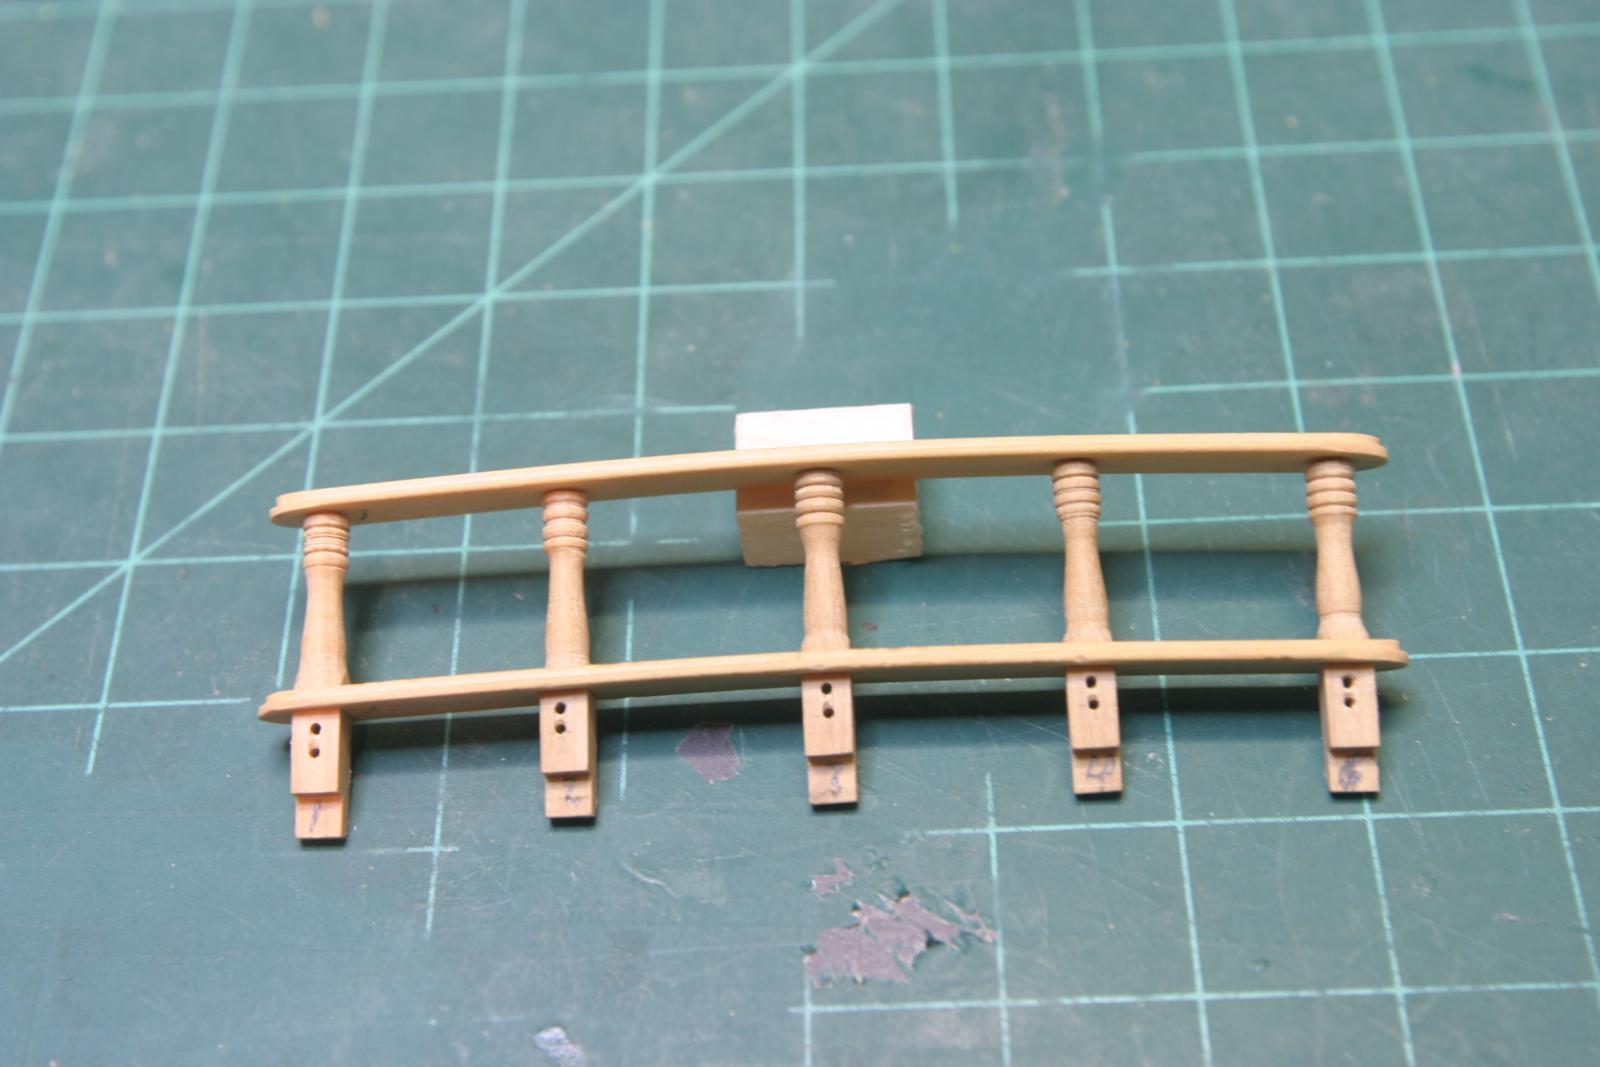
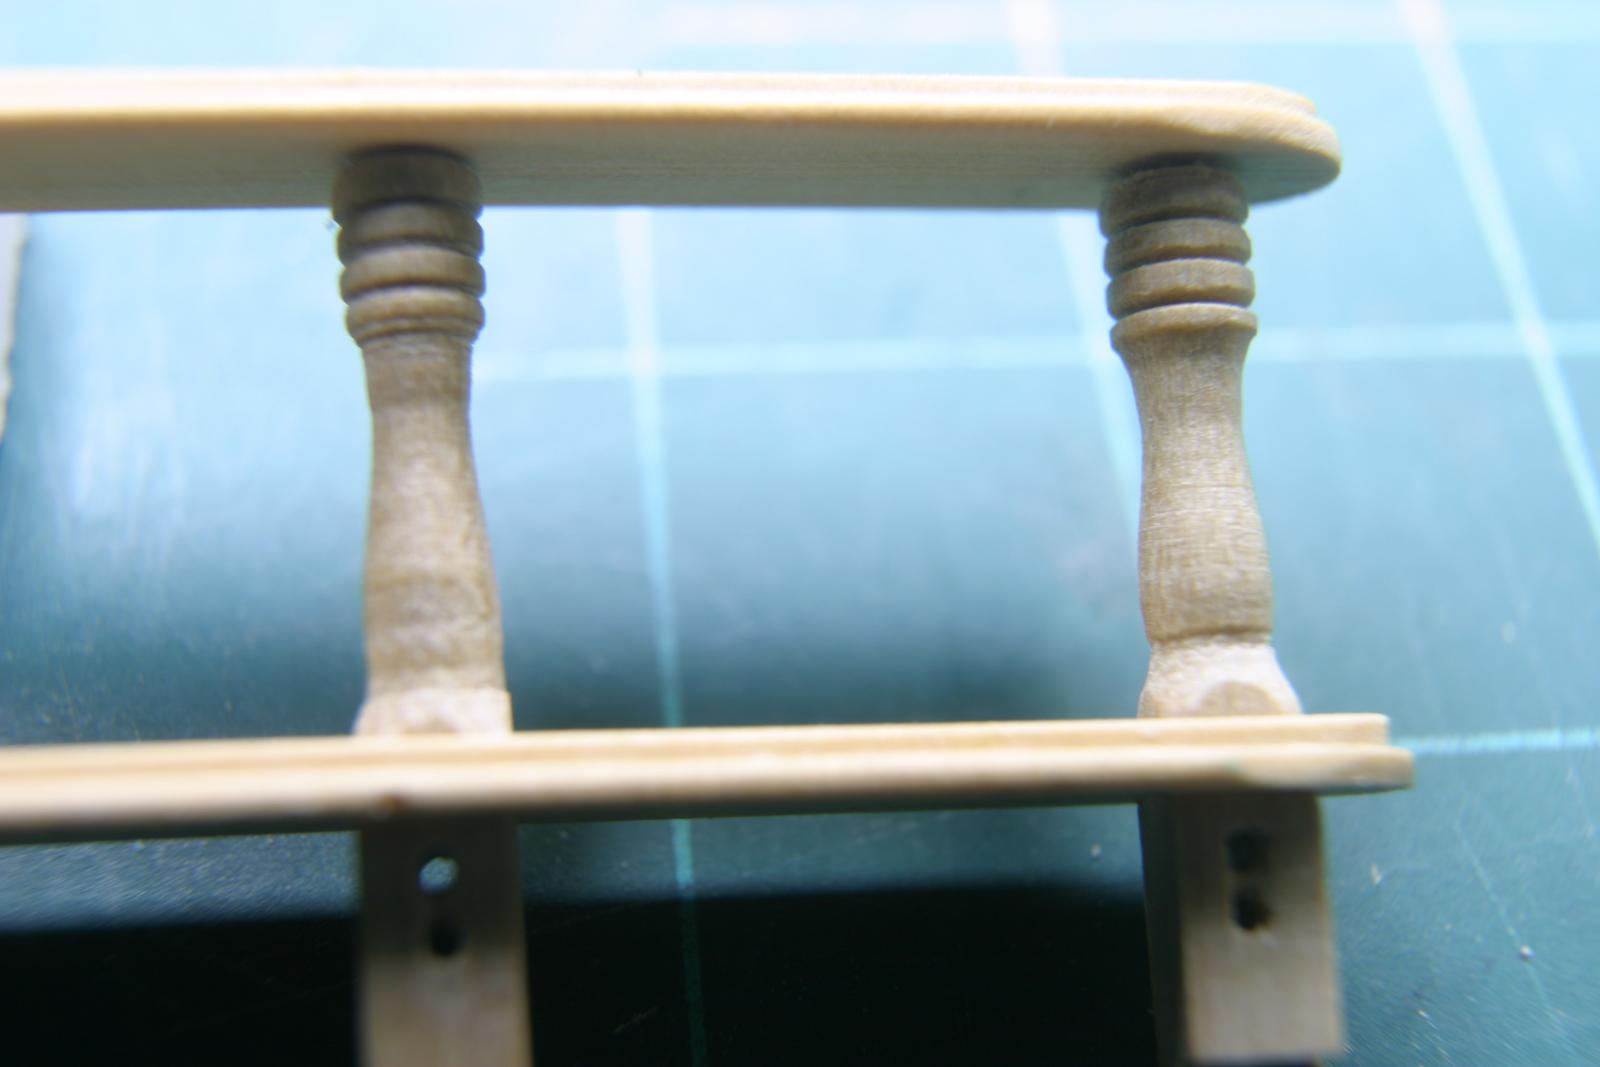
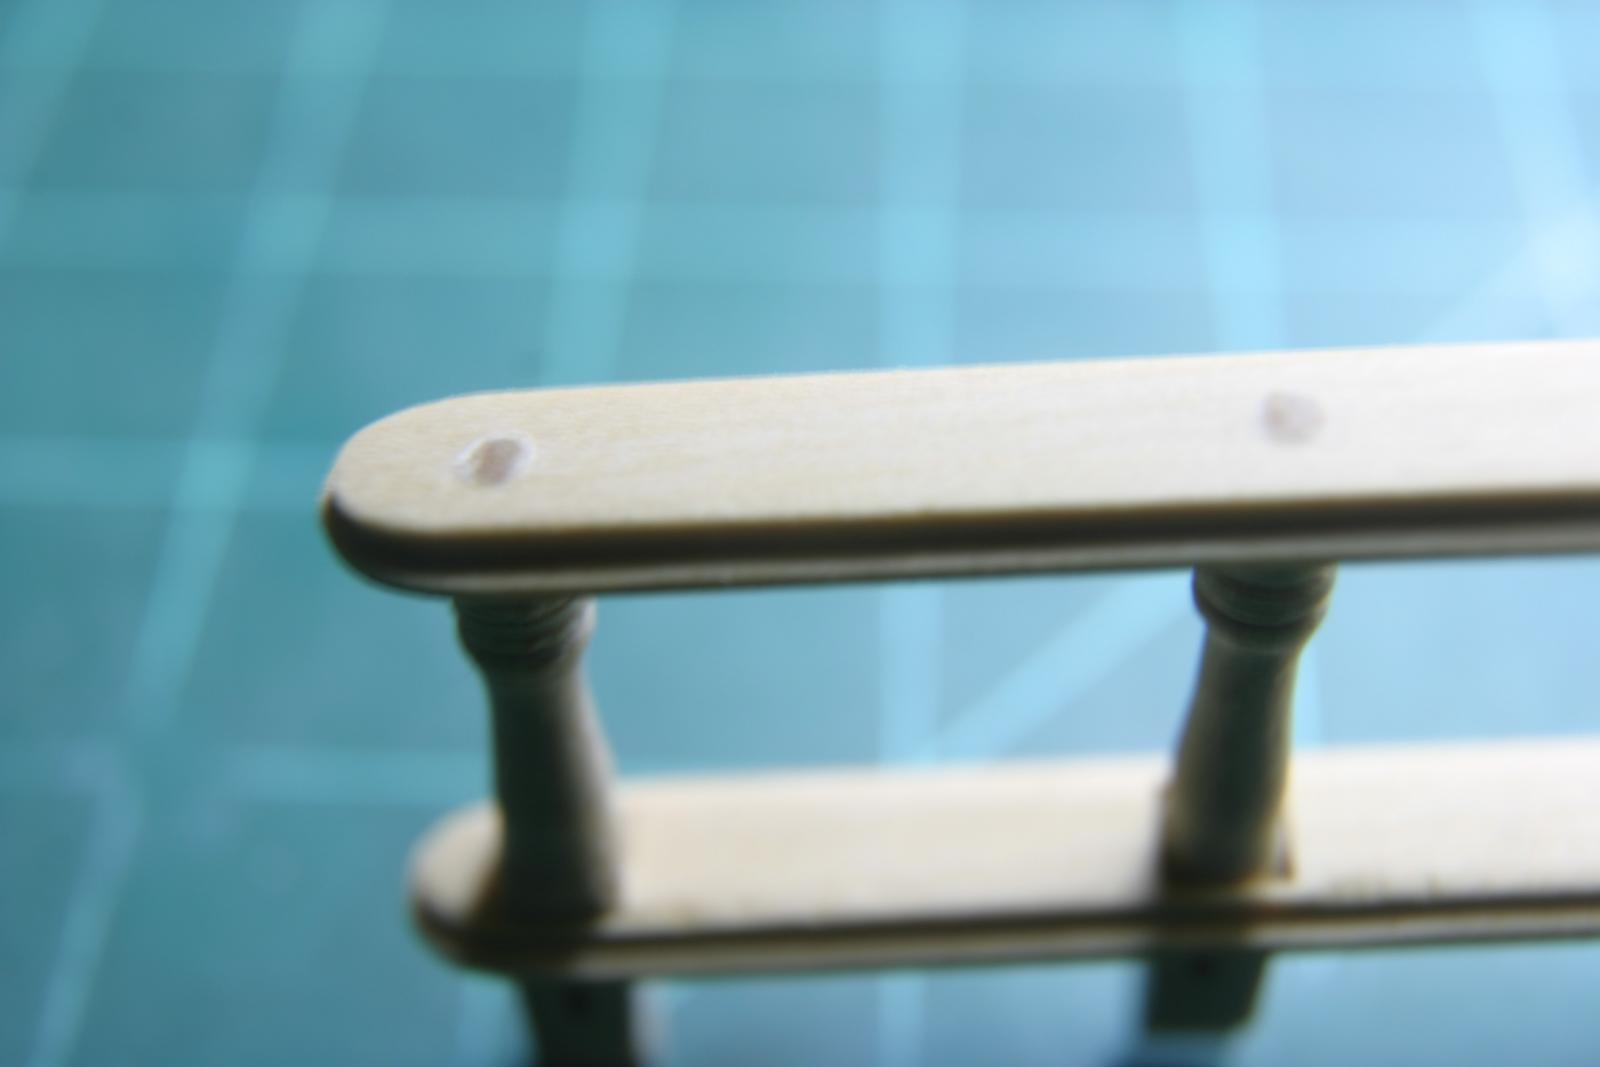
Maury S replied to Maury S's topic in - Build logs for subjects built 1751 - 1800
More details of rails and posts. I cut some blocks to make sure the spacing between the rails was consistent, then everything glued up. Once together, the sheaves were marked and drilled. The macro lens sure shows some things I don't see with the naked eye. Maury


- 324 replies
-
- 11
-
-
-
Echo by Maury S - FINISHED - Cross-Section
Maury S replied to Maury S's topic in - Build logs for subjects built 1751 - 1800
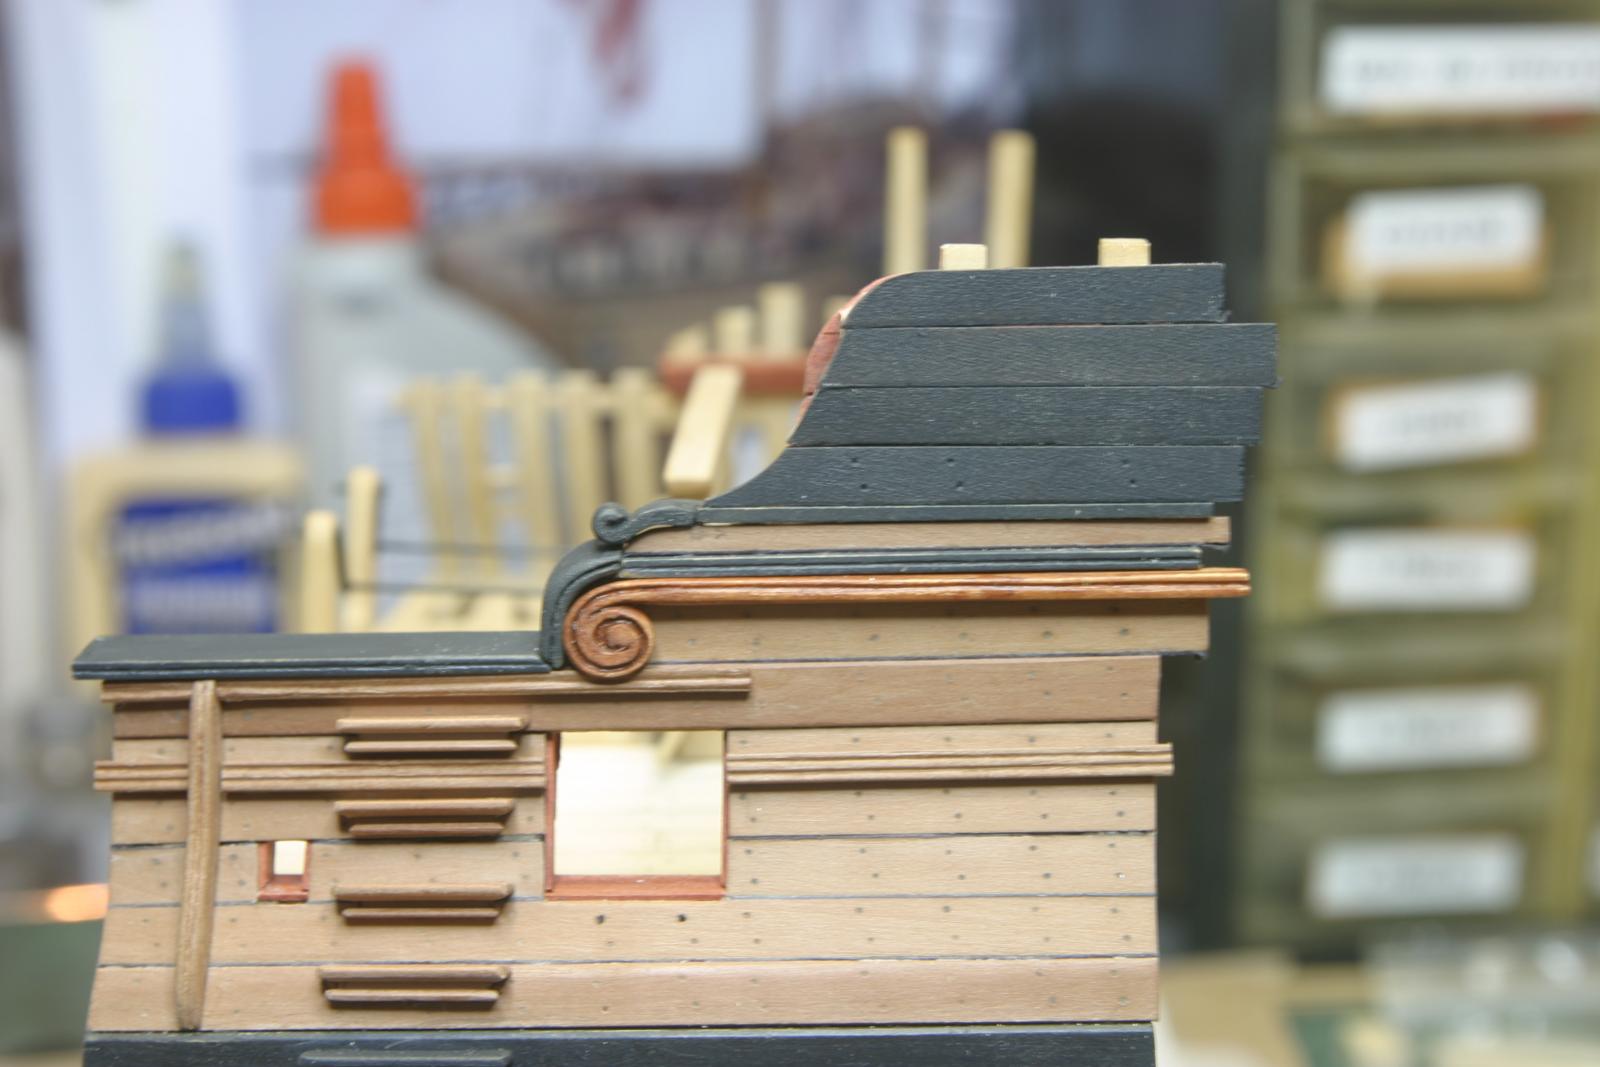
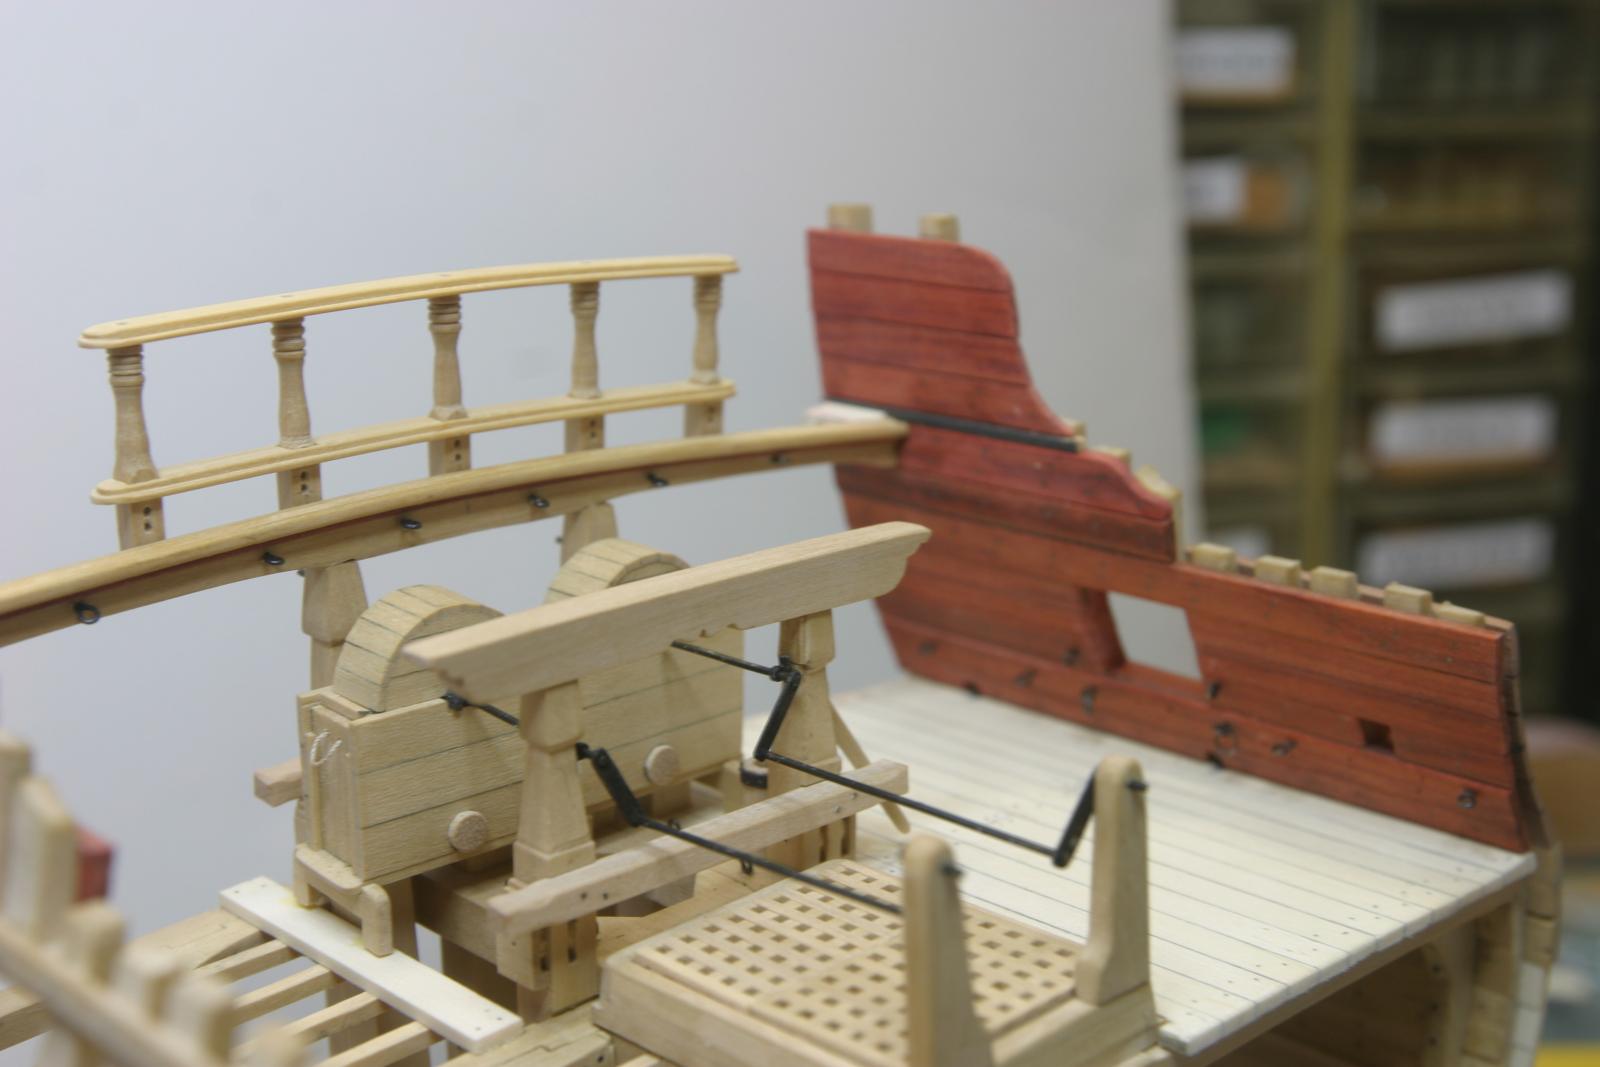
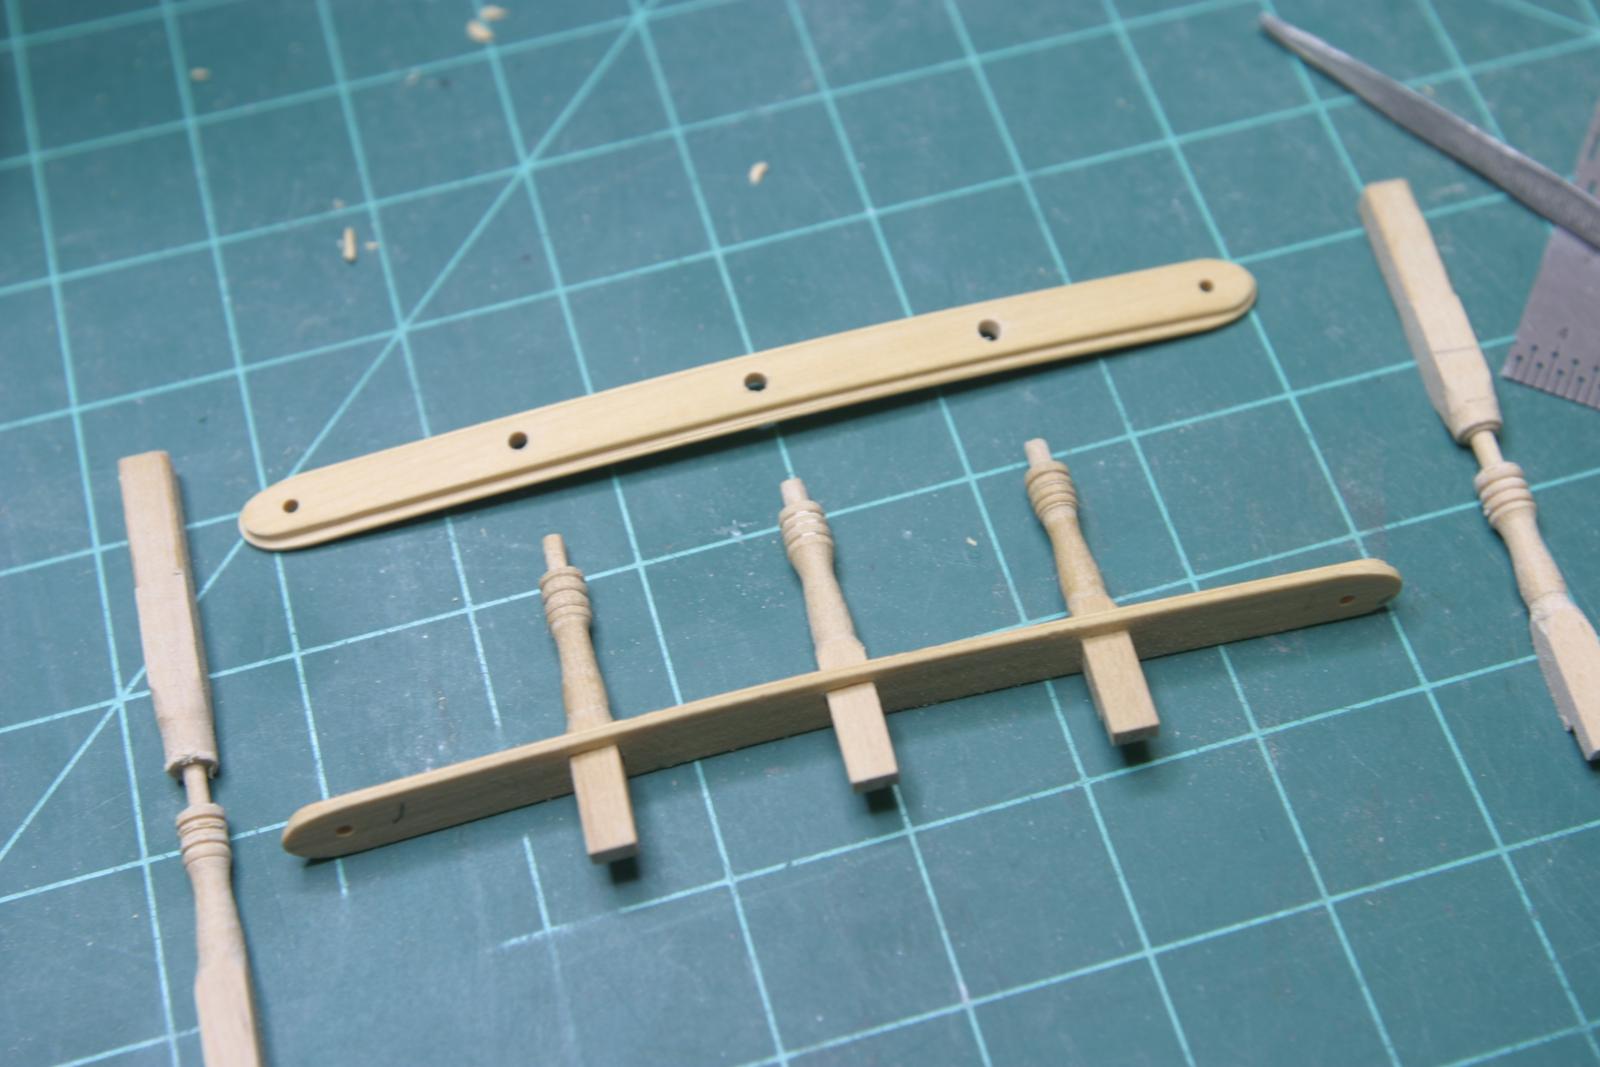
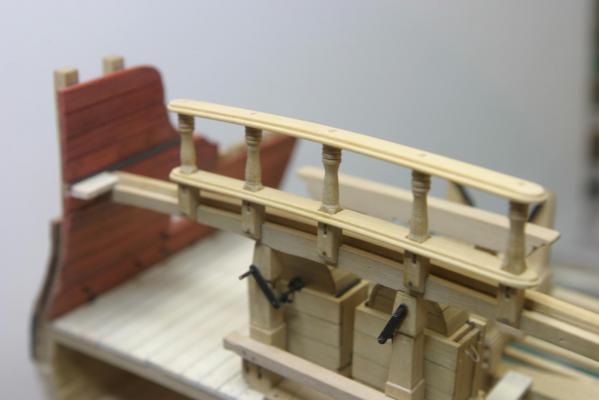
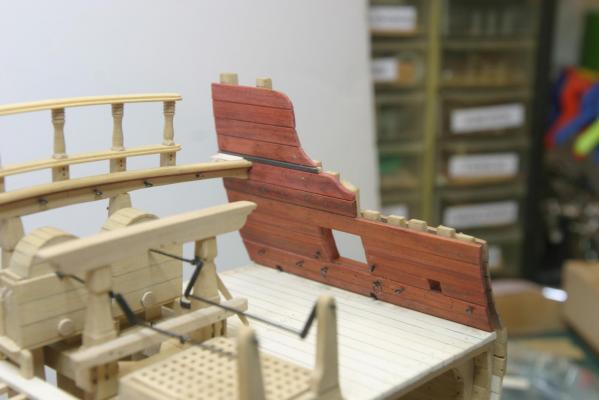
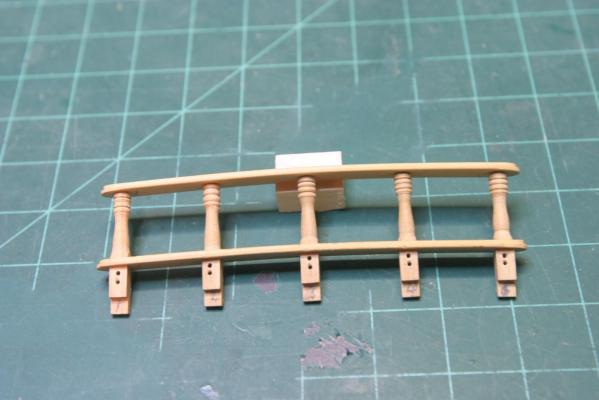
I was not happy with the molding and I need more practice on the lathe so I re-did the breastwork rail and posts. The posts are more consistent and the railing molding is more visible on this version. Finished version soon. Maury
-
Preac Thickness Sander Sleeves
Maury S replied to Maury S's topic in Modeling tools and Workshop Equipment
Thanks for the references. Found what was needed. Maury -
Ed, the part about "Its best to thickness sand the beams before slicing them off" makes a lot of sense! I tried it with individual frames and it did not work out well. Maury
- 191 replies
-
- 4
-
-
- young america
- clipper
- (and 1 more)