


Maury S
-
Posts
1,490 -
Joined
-
Last visited
Content Type
Profiles
Forums
Gallery
Events
Posts posted by Maury S
-
-
The garboard is an issue. First one was too short (by 1/64th") and would show badly. Lining up the plank into the stem rabbet after bending was another problem. Now I know why I should be making it in pieces. I've decided on two planks per strake all the way up to the sheer strake. I think making a butt joint will be easier than making each strke in one piece. Thanks for everyone's comments.
Maury
- Elmer Cornish and EdT
-
 2
2
-
Ed, The view ports look great. I bet you're pleased with the way they are coming out.
Maury
-
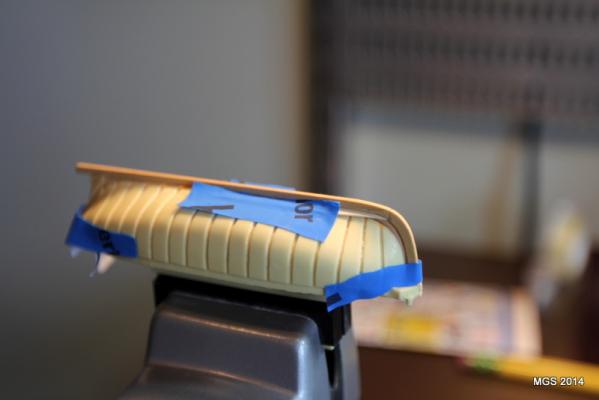
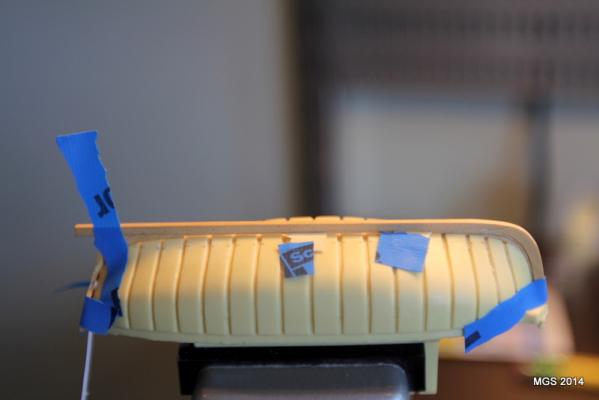
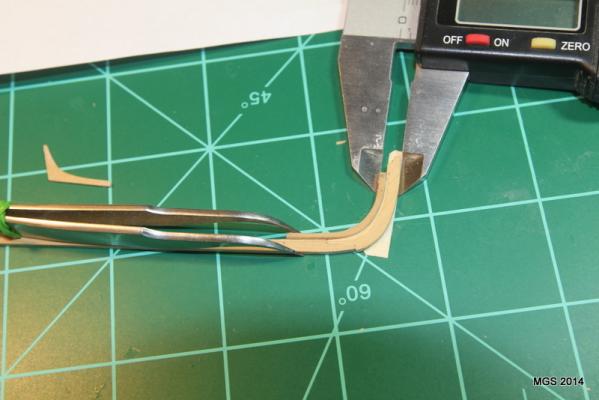
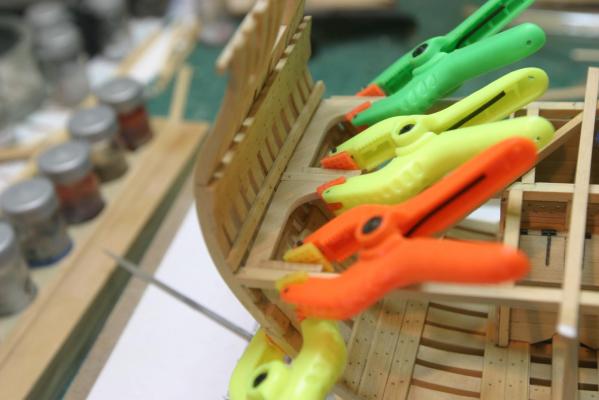
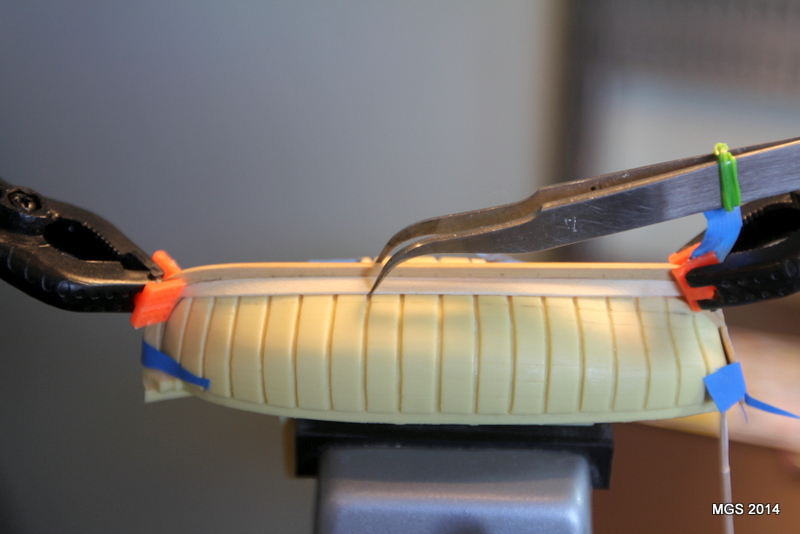
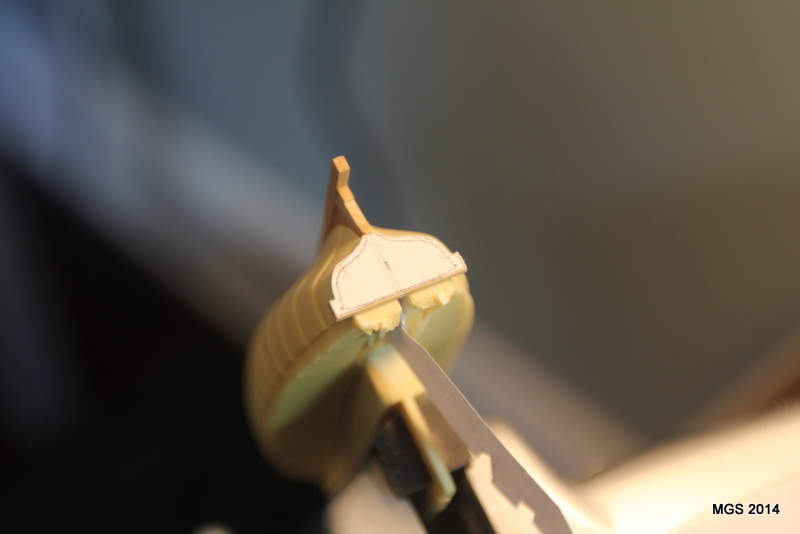
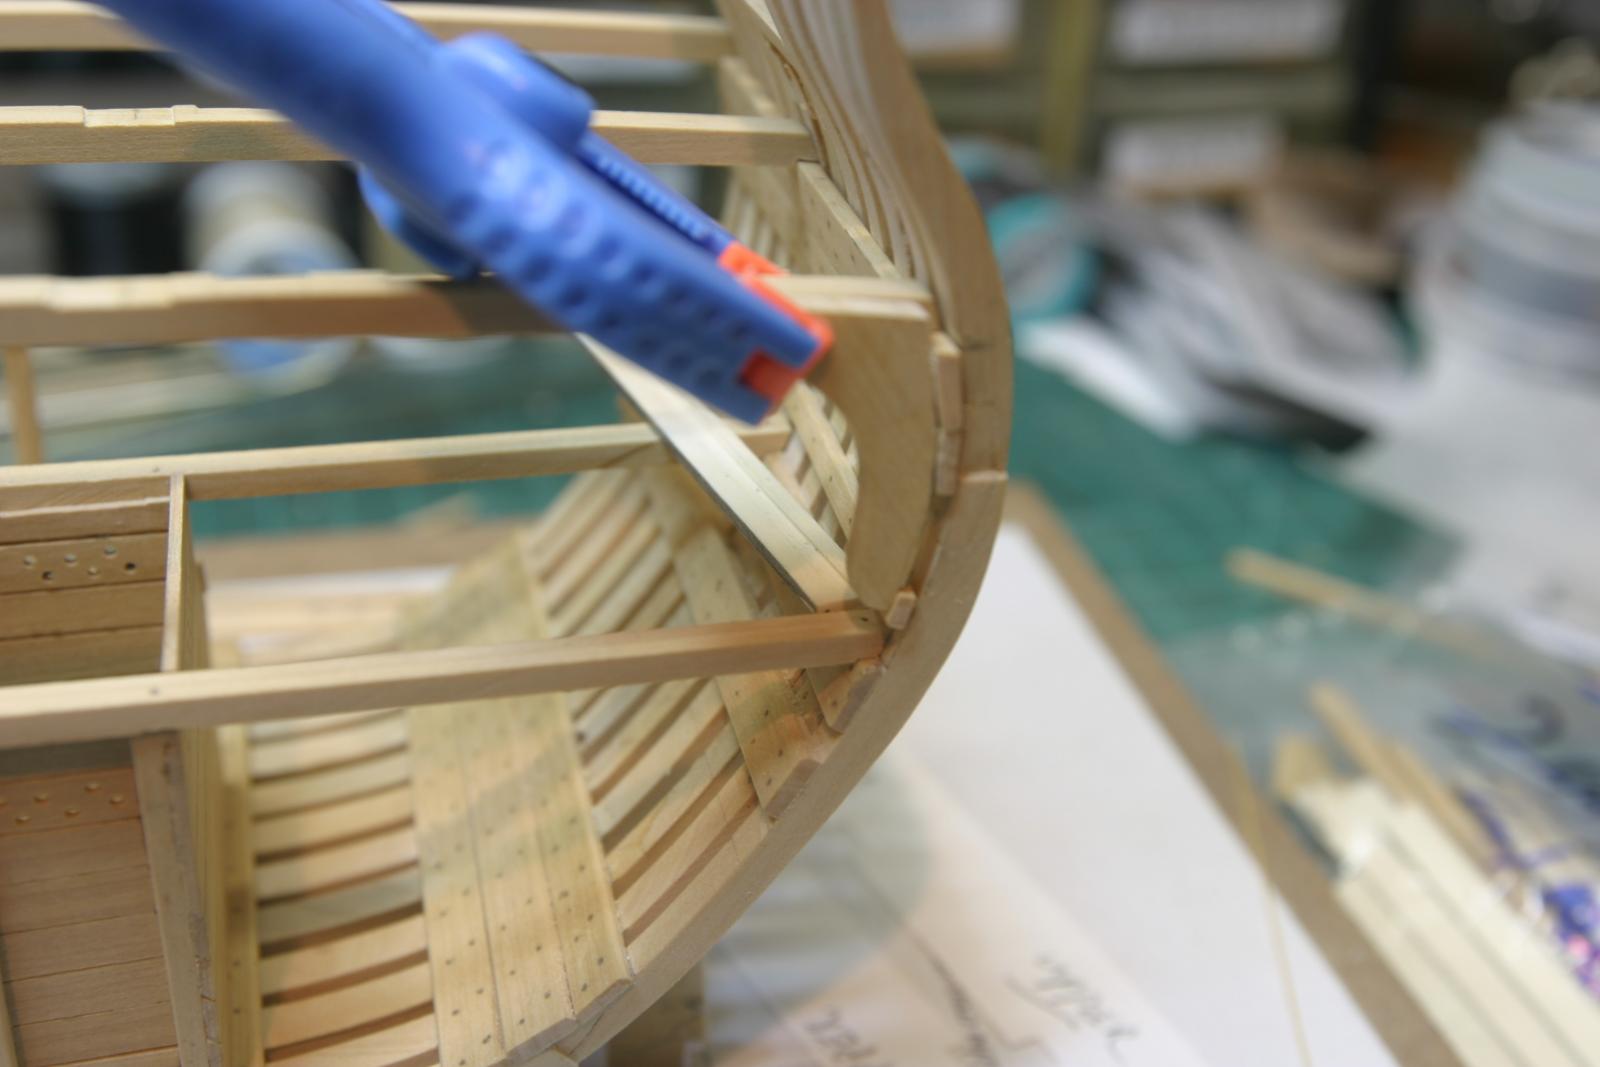
Three patterns for the first garboard (in card), followed by a plank in holly that was too short by 1/16". Once more... I wedged a couple of pieces of 1/64 scrap between the plug and into the rabbet to hold the keel assembly in place on the opposite side I'm working on. I steamed the plank (wrapped in a wet paper towel and microwaved for 30 seconds) then put it in place and clamped it for drying. After the piece is dry, I'll sand a little on the upper edge to get it to the plank line on the plug. By the way, one side of the plug has the planks laid out with a very fine score. That's a big help and I don't know why the score was not put on the other side.
Maury

- Elmer Cornish, gjdale, hexnut and 2 others
-
5
-
Hang on to your seats. Toni, the ribs and planking are to be of holly. Probably finish the interior details with box. The garboard plank is always a challenge. I'm starting with a card template, but I'm not able to make fine adjustments to the card stock. Card's cheap. I'l just do another one.
Thanks for tuning in. Feel free to add suggestions as we move along. This is my first attempt at clinker built planking!
Maury
-
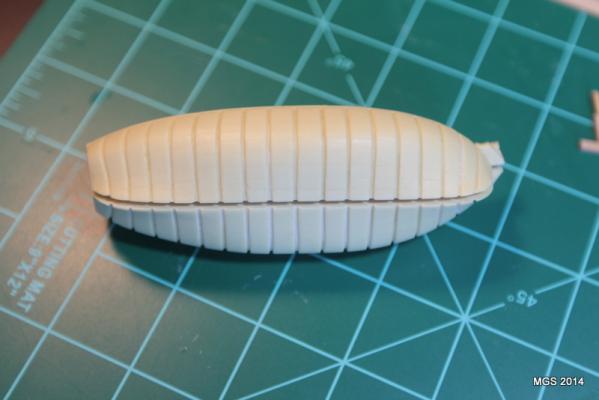
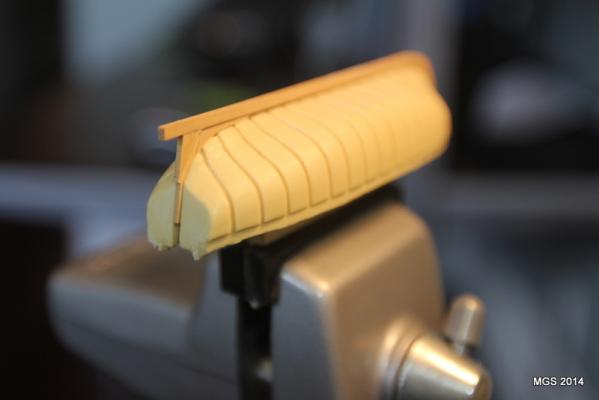
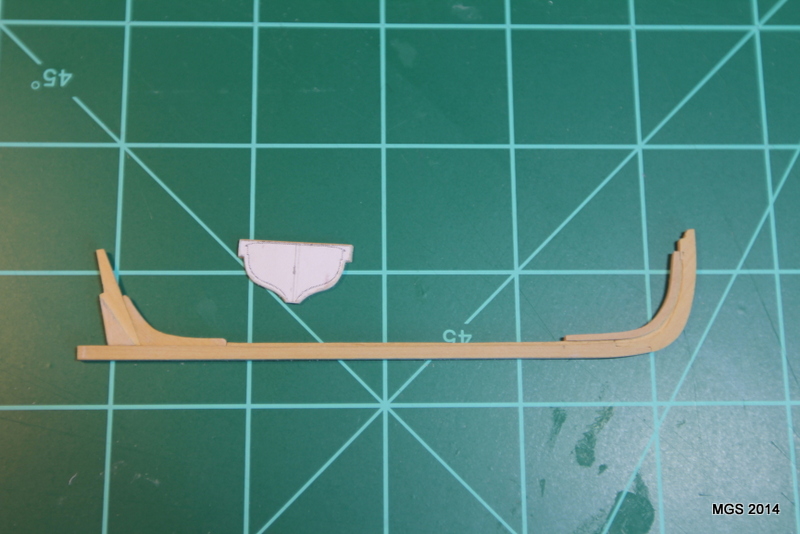
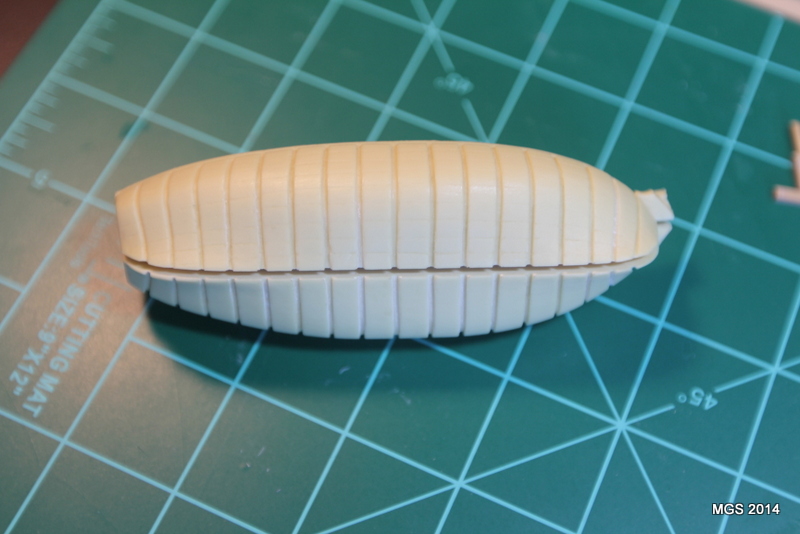
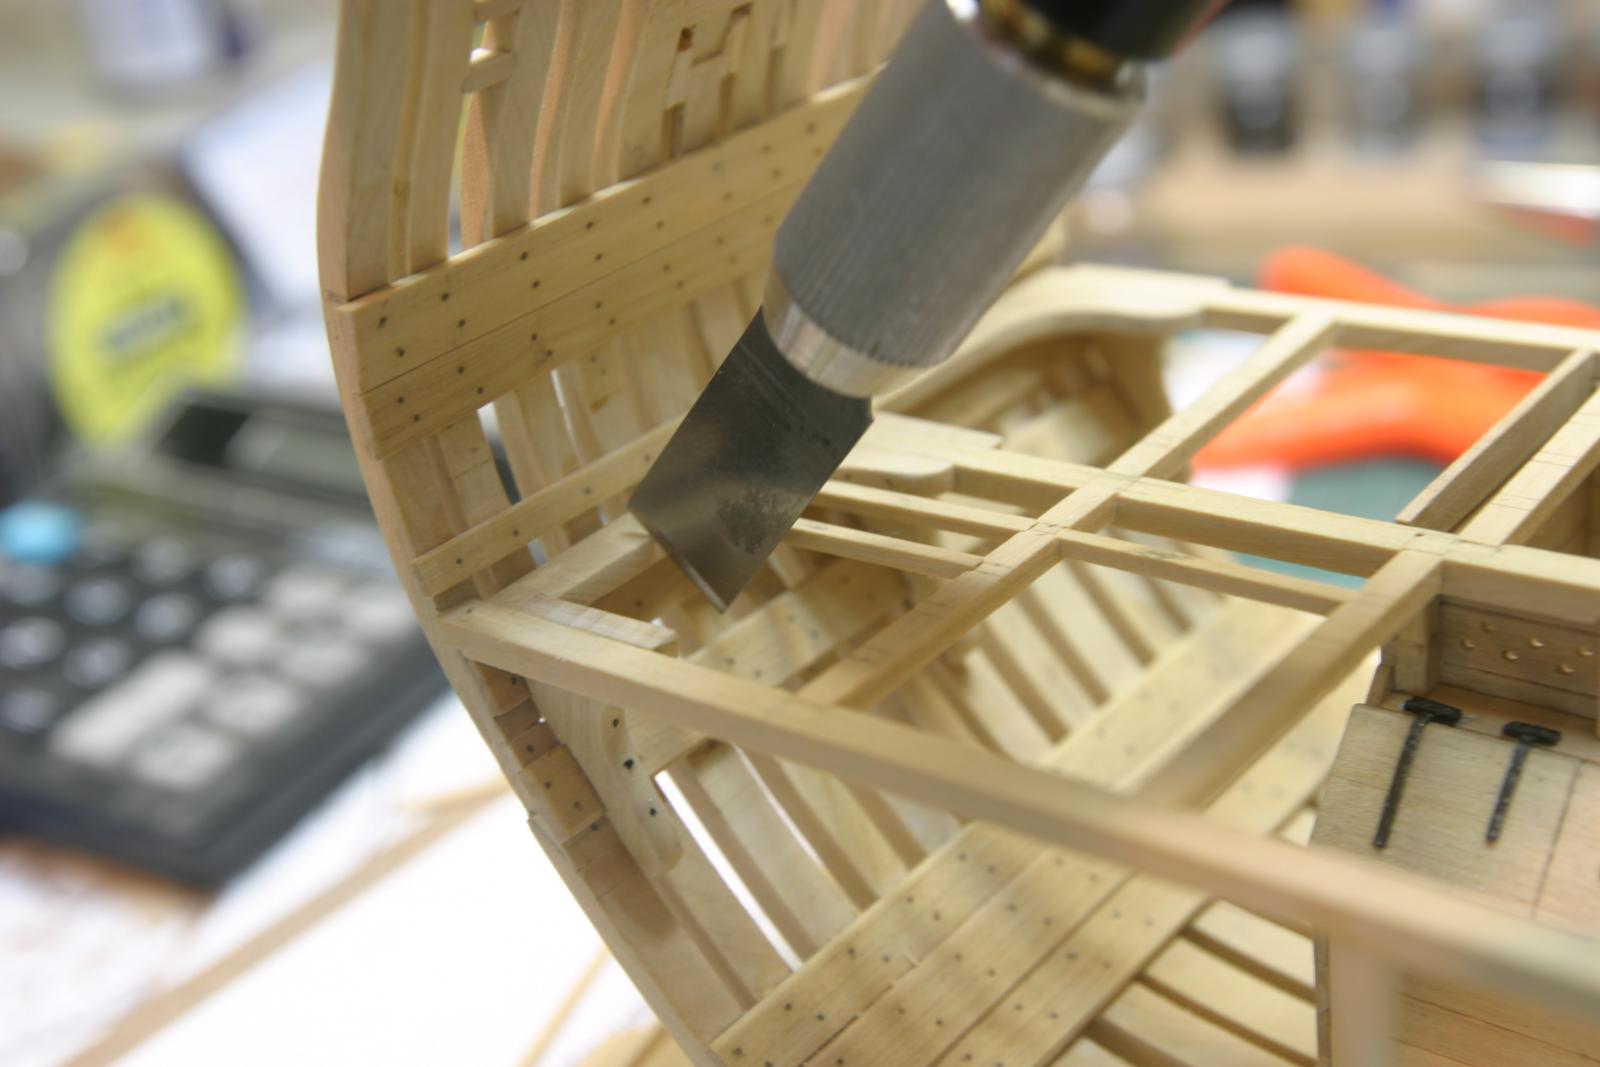
As a diversion, I've started an 18' cutter with a plug and instructions from Admiralty Models. I don't think they offer the plug any more, but the instructions can be found via a Google search. The various parts of the keel assembly are each a different thickness, so I used my Byrnes thickness sander to get the right dimensions.
The keel is 3 1/2" sided, the stem 3" the stem apron 4 1/2", sternpost 3" and the sternson knee and transom are 1 1/2".
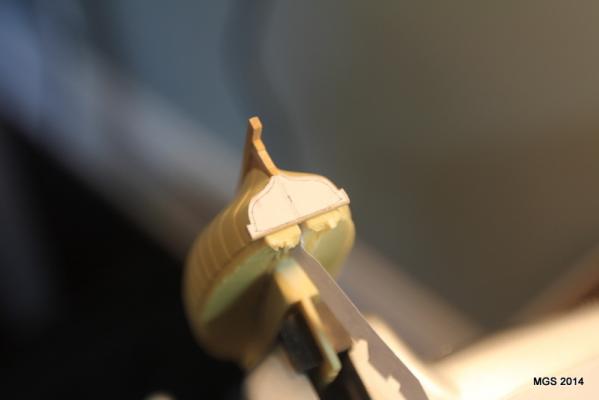
I chose to make the apron separate from the stem and getting it to match the after side of the stem takes some care. I thought it easier than cutting it in one piece as David Antscherl did in his practum. Lining the pieces up for gluing was a matter of sanding several shims to get the pieces centered on the keel with a proper fit. No rush job here. Prepping the plug is easy, with adjustments where the apron fits...just a series of sanding the inner slot equally on both sides (count the strokes) until the apron fit snugly. Once that was done, I used the keel assembly in the plug to align and glue on the transom.
Maury

- DORIS, Elmer Cornish, dgbot and 7 others
-
10
-
Thanks, The top of the vise isn't too good on the saw teeth. So the scarfs are cut separately, unlike the system you used on the Naiad deck beams where the sides mated?
Maury
-
-
I just received a package of dead eyes from Syren Ship Models http://www.syrenshipmodelcompany.com/. Beautifully done and consistent throughout. Good work Chuck.
Maury
-
You guys are such an incredible source of info.!!!
Maury
-
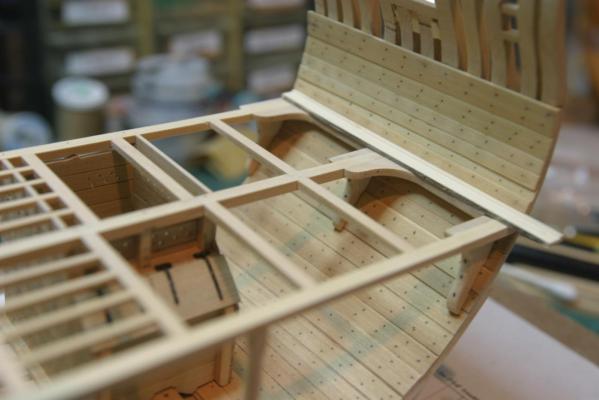
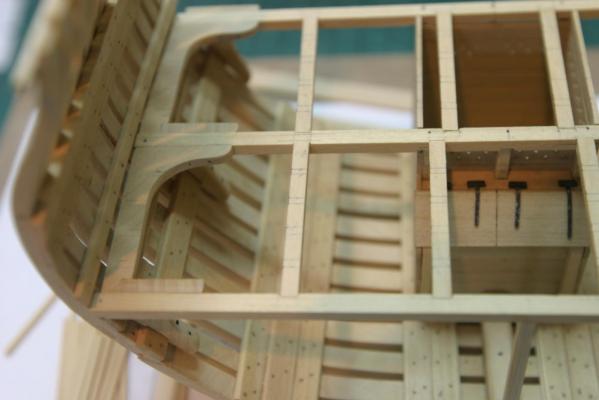
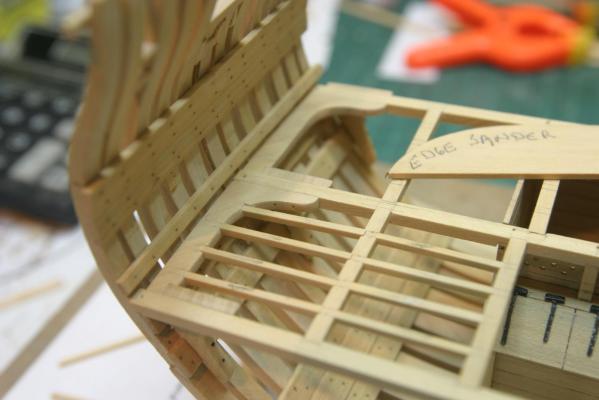
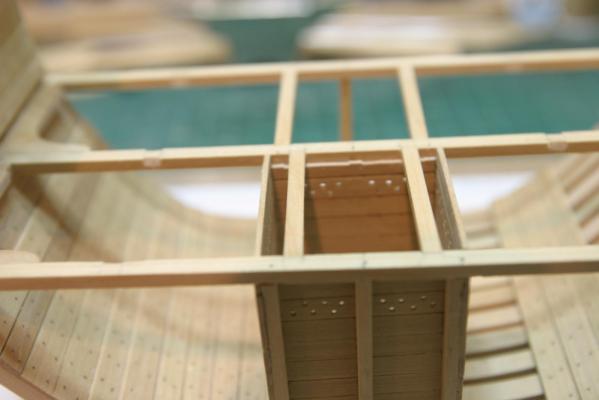
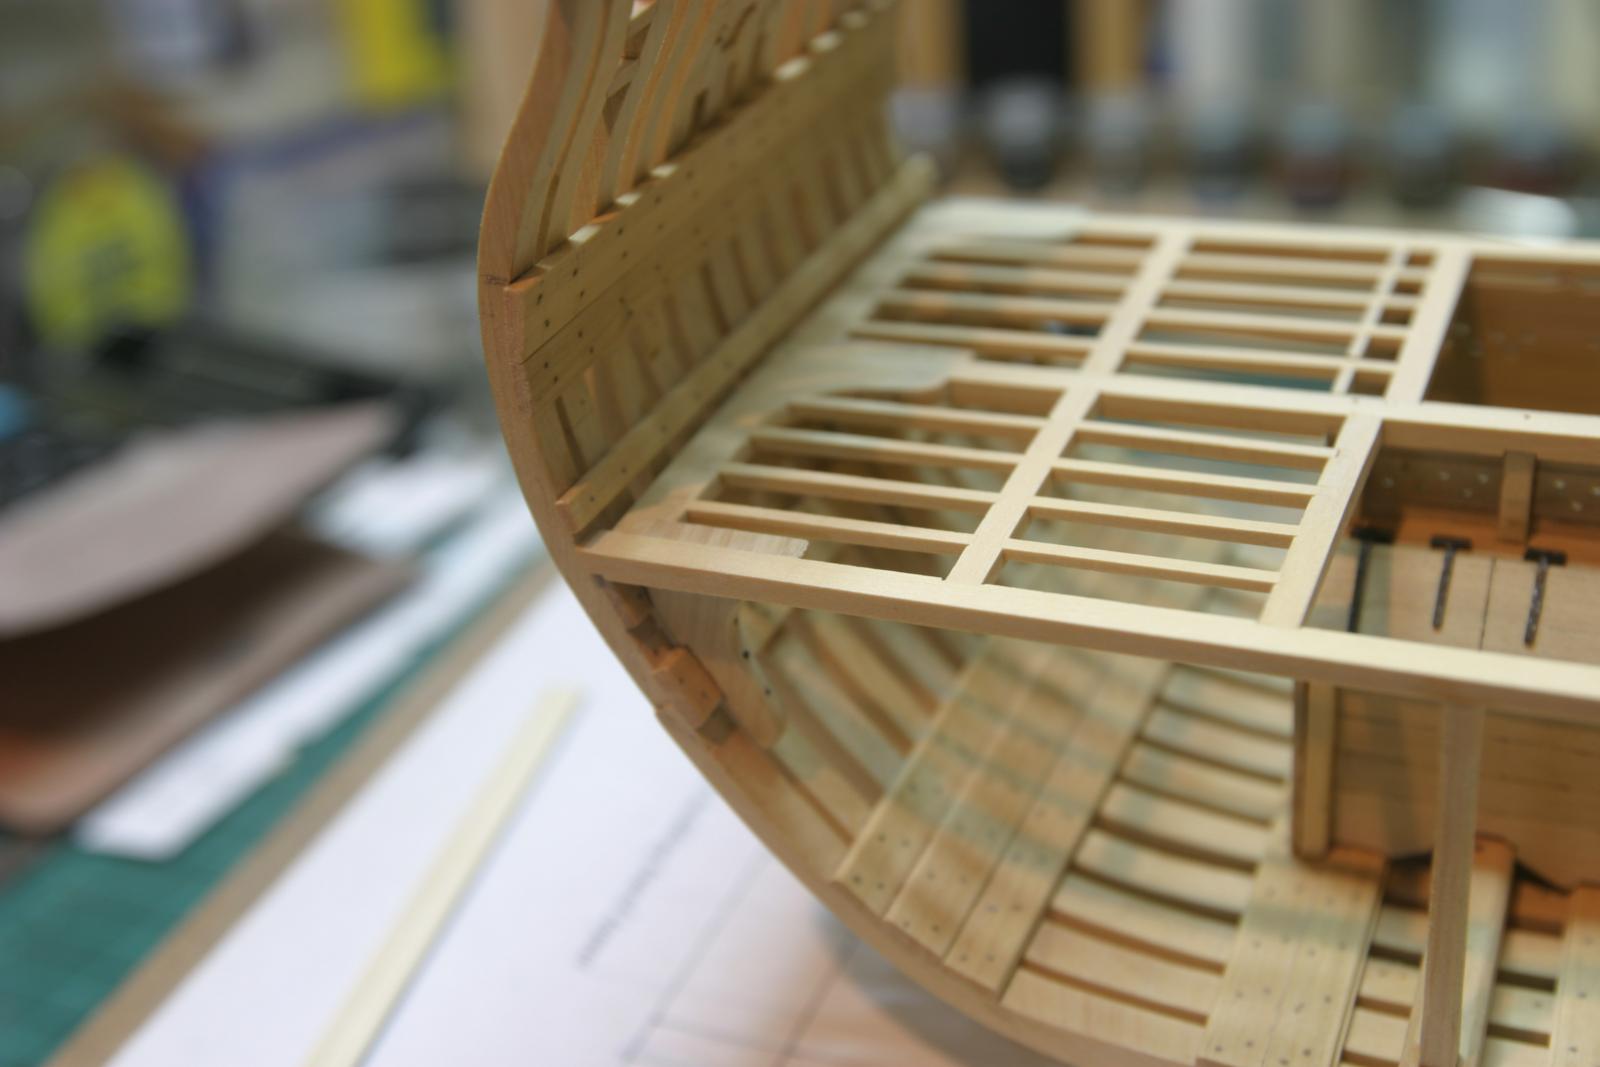
(second time I posted this) The ledges are finished. Going back over the installation, the carlings and lodging knees were marked from the plans, showing where the ledges connect. The carlings were scored with a knife and cut enough to create a shoulder. The notches were then cleaned up with a fine swiss file per Greg's suggestion. The ledges connecting with the lodging knees were covered in a previous post. After all were individaully cut and fit, they were glued in place. A sanding board was run across the beams, carlings & ledges to smooth and even the entire area. I milled and cut the holly deck planks to rough size. They will be installed at a later time. Now for the next installment.
Maury

-
I just bought one. They said the #3 is finer than the #5. (I think normal file grades go finer as the number increases, but I asked before I bought)
Maury
-
Ed, I have one of those saws and now I know where to use it. Now, about that long thin file...please describe what it's called and where to get one.
Maury
-
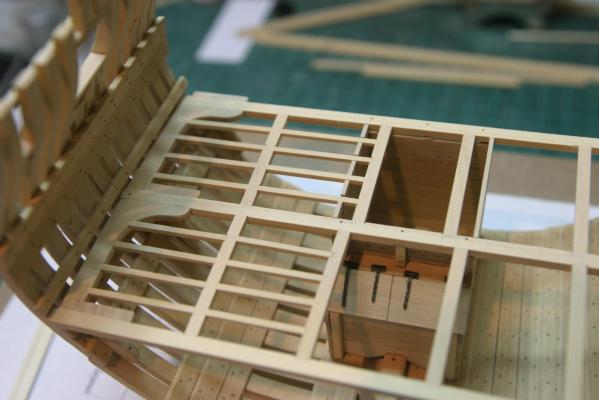
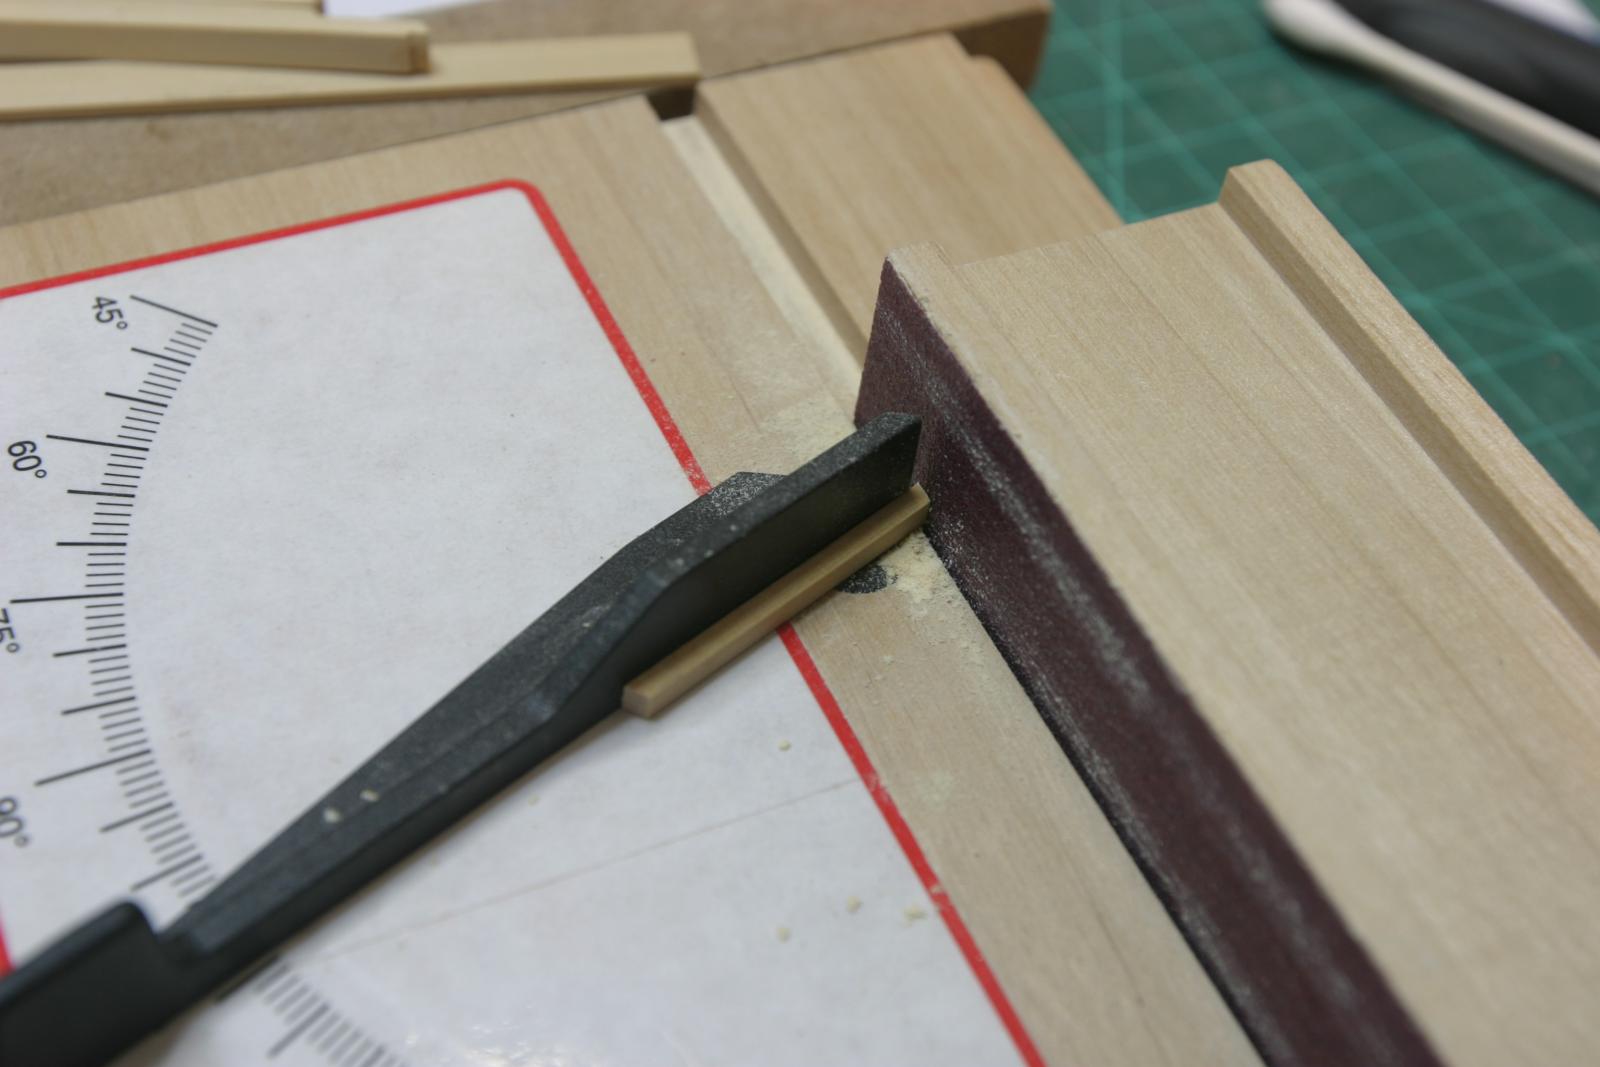
Ledges: Pics # 1 & 3 are out of order. I laid out the pattern from the plans, marking where the ledges intersect the carlings and lodging knees. I got ahead of the instructions and permanently installed the lodging knees when I put in the hanging knees. Cutting the notches in the knees became a problem. I used a chisel blade to start the notch, gouged out as best I could and used a home-made rounded sanding piece (See fourth picture...thin strip of 220 grit paper glued to the rounded edge) to clean out the notch. One side of the ledges were cut to a 67.5 degree angle in the miter box, trimmed to 70 degrees on the sander and then marked for the proper length. I then cut the other side, and gently sanded at 70 degrees to the proper length, checking for fit every few passes. Each ledge cut to fit separately. I marked the top side of each ledge with a pencil mark to 1] make sure I cut the correct side and 2] provide a sanding guide for after all are installed.
Maury


-
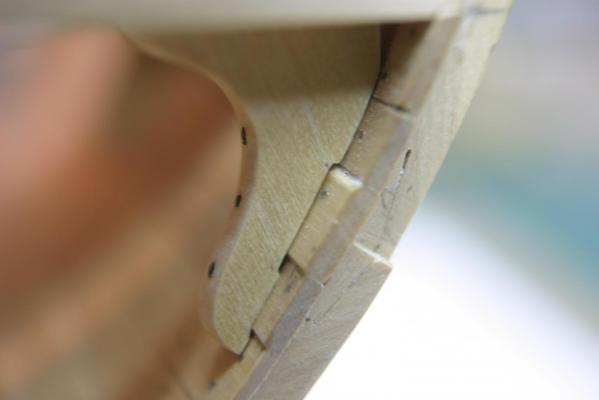
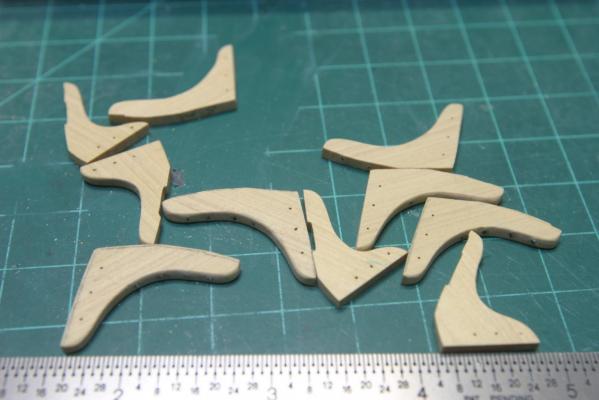
Alan, The collection of knees includes the upper-deck knees. All cut as single pieces. The "Iron bolts" were drilled all the way thru for most holes. The ones deepest in the bend of the knees were drilled about 1/4". The monofilament line (Amnesia brand) was dipped into some CA glue and inserted into the hole, cut flush and the end immediately wiped with acetone to remove any trace of the glue on the edge of the wood. That technique is directly from Ed Tosti's Naiad log.
Maury
-
Thanks for the likes. I appreciate the critical comments as well. This is a learning experience and I've got a lot to learn. Pics. follow: Testing the fit of the aft-hanging knee. The space available behind the beam is short, so I made the aft knees a bit thinner. Installing and clamping the hanging knees. The closeup of the installed knee shows it's not as perfectly fit as Greg's, but I'm getting better. The "iron bolts" visible on this pic. Ledges coming up next and a few challenges.
Maury

-
Now that the next installment is available, I've added a bit more. Carlings are measured out from the center-line and installed, and I've cut the hanging knees (both lower and upper deck knees) to form before final fitting. Holes in knees will be filled with black monofilament line to simulate iron bolts. The lodging knees are already put in place in the second photo.
Maury
-
Ben,
Did you build or buy the cabinet with wheels? Same ht. as the HF bench? I'm going to buy another of the Harbor Frt. tables but modify it a bit (reduce lower shelf so I can get my legs under the table and extend the drawers down one side only).
Maury
-
I stumbled on this from the Gutenberg Project... by E. Keble Chatterton
"This eBook is for the use of anyone anywhere at no cost and withalmost no restrictions whatsoever. You may copy it, give it away orre-use it under the terms of the Project Gutenberg License includedwith this eBook or online at www.gutenberg.org"
http://www.gutenberg.org/files/17563/17563-h/17563-h.htm#imagep178
Maury
-
Remco, Is the brass sheet soft enough to shape the straps in situ, or do you have to bend them off the model and keep test-fitting?
Maury
-
-
Get a needle threader from a sewing (notions) shop. http://www.amazon.com/Prym-Dritz-249-Needle-Threaders/dp/B001HZSK5Y/ref=sr_1_7?ie=UTF8&qid=1397489594&sr=8-7&keywords=needle+threader
Maury
-
I love your interior shots!
Maury
-
Remco,
I love the pantry. Great detail. Question...the lower hinge on the door appears to be on the sill, not the door. Or is there no sill?
Maury
-


18' Cutter by Maury S - Scale 1:48 - SMALL
in - Build logs for subjects built 1751 - 1800
Posted
Druxey, Thanks. I followed your suggestion and it is much easier.
Maury