Shipyard sid
-
Posts
1,106 -
Joined
-
Last visited
Content Type
Profiles
Forums
Gallery
Events
Everything posted by Shipyard sid
-
 Greetings Jerry Well done on sorting your waterline out. You said you were now going to do some wood filling and sanding of the hull before you added the plates. It is a good idea as I said earlier to use a primer on the hull first and it will highlight any defects in the hull, which you are looking for, and to have a smooth surface for laying your tiles. It's up to you, but it is only a five minute job to prime it. I just used a cheap water based white primer. Any way on with mask and away you go!!!! Keep showing us all your progress as you proceed . DAVID
 -
Hello derek Well done on all that work, splendid stuff. Hope the ladies treatment is coming on well. I did the buckets but they were a mess, the handles are all over the place, so I put them away for later on. I am as you know awaiting eye pins from CMB ( out of stock) for my lower gun port lids, so I have made the boomkins but not fitted them, they will get knocked off, no doubt about that, and I have made the bowsprit and the jiboom , and now on with the flying jiboom. I will mail you later. Again well done derek it's coming on a ton. DAVID
-
Well done Kevin it's come along fine, and as Arthur said adding the shuttering will really enhance things. Keep up the good work. DAVID
-
Greetings Jerry Yes, only joking about things..... No glue, styrene out of stock. I started the tiling from the water line. I think most builders are doing that way. I bought .. The period ship hand book .. By Keith julier. And followed he's method. I do believe Kevin did the same. Good luck with your coppering. DAVID
-
Greetings Jerry Well there's a surprise , the water line marker was a darn failure. You said the point of the marker got caught in the planks. It's a bit late now that you have got it sorted, but I used white primer on all the hull area to be planked, and sanded out all the small defects in the planking which the primer highlights, and it closes the gaps between the planks if you understand, and creates a smooth surface for the maker to draw the line around. Go on then, tell me you used primer and it didn't work!! Ok if you haven't its an idea to prime the whole area and sand out the defects that as i said will be highlighted. Jerry it no good finding little problems all the time, you will be telling us the styrene is out of stock next or you've ran out of glue. ..The dreaded tiles are still waiting and have got to be done !!!!!!!!! DAVID
-
Good!! At last you have got that sorted out. Come on then start building your ship. We are all waiting for some photos. DAVID
-
Cheers yon. I set the lids by eye, they are not perfect, but not bad. You will find the fitting and rigging of them is pretty easy, the awkward bit is the small eyelets and the use of CA with the ammount to be fitted, I think it will be do a few then walk away for a while. Thanks again yon. DAVID
-
Cheers Kevin DAVID
-
Hello Muggebigge . Lost your log for a while. Did you find your brass strips?? DAVID
-
Thanks for your reply yon.. Has muggebigge got a log I cannot find it ?
-
Greetings Thanks to you all for your comments and encouragement. I have all but finished the gunport lids. I have only the bottom 15 to fit and that it. I need a few eyelets for them, and they arrive tomorrow so all will be finished tomorrow night. So after tidying up the paintwork and any other bits and bobs I will turn my attention to the bows and see what is going on down there. Anyway once again I am happy with things, and here's a few photos chaps. The first one shows all the gunport lids for one side that you fellow builders will soon be enjoying!!!!! Hello there Yon!! ...thanks for viewing DAVID
- 439 replies
-
- 2
-

-
- victory
- caldercraft
- (and 1 more)
-
Muggebigge The brass profile comes with the kit,there should be 6 lengths. Look at manual 3. Part numbers 692, 693, and 694. They are all 1 mtre long. If you have not got them in your kit, Email or phone caldercraft / jotika and tell them. They will send you them. DAVID
-
MUGGEBIGGE Thanks a lot, I was just admiring your work. It is excellent. Keep it up DAVID
-
Greeting Second planking look excellent, your are really doing well. Keep up the good work and keep posting plenty of photos. DAVID
-
Greetings derek Well done young man !! I am in exactly the same position as you, ready to attach the bottom 15 lids, after fitting the string, hemp cotton stuff into the hull. Yes I was going to use styrene like Yon for the bendy bit, but got away with using beech strip as you know. I have sent you a few ideas on how you could get it sorted. Well done again derek. DAVID
-
Hello Colin I just read through your log, the quality of your build is excellent, with every thing so crisp and clean, just keep enjoying it.DAVID
-
Hello yon Yes the lockers are really good. An excellent idea, well done yon. Things are looking really good. Keep up The good work, and enjoy the stairways. DAVID
-
Hello Patrick You mean page 20 lining the gunports not 16. So this is how i see it. Firstly the inner bulwarks pattern is fitted, then 3 - 10 are lined flush with pattern on the inside and flush with the hull outside. Then the inner bulwark pattern is planked and the lining edges are planked over hiding the lining edges. On the outside the second planking continues and the gunport number 1 and 2 plus 11 - 15 are cut out as normal ready to be lined later, but on numbers 3 - 10 the gun port lining edges are flushed over with the second planking, that's how I see it. Are you seeing it different to me? DAVID
-
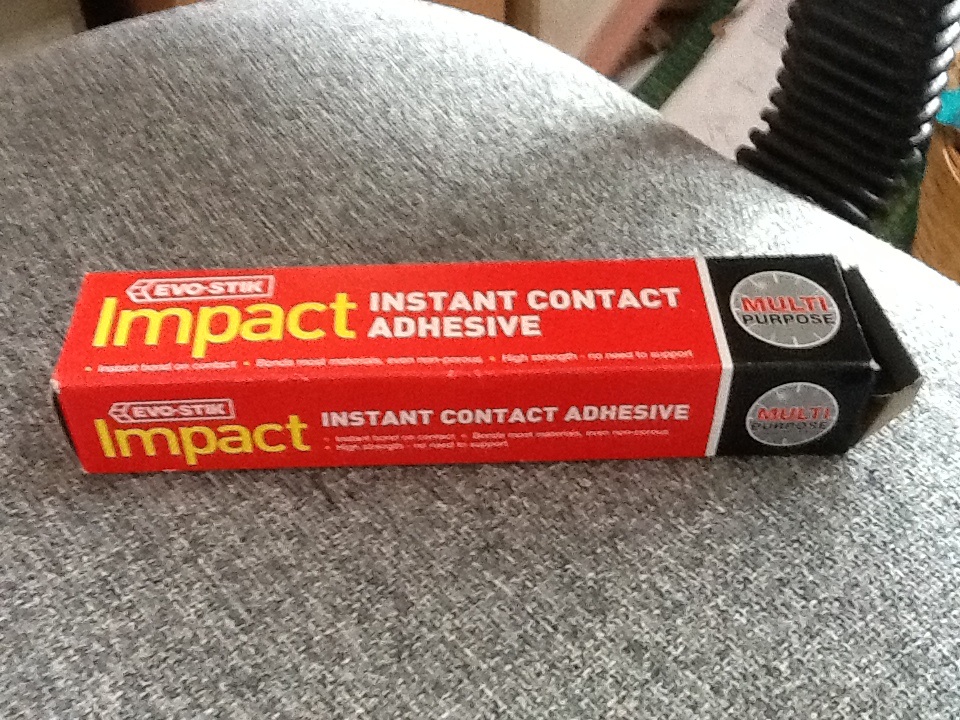
Greetings Jerry Which adhesive ??? It's everyone to their own. I used impact adhesive and laid the tiles about six to eight at a time. You have plenty of time to adjust them, and any excess that you get on the face of the tile can be simply rolled off, were as CA on the face of them can sometimes be a bit of a problem. Derek used a cleaning solution and cleaned the tiles when ever he needed to. What is a must!!! is an open window and a fan running constantly. So that's me. Impact adhesive , clean them as you go, don't get complacent, and fit all the small gaps when you come to them. Don't leave them until last, or you will have lots of small awkward bits and triangles to fit, and I think it makes sense to fit them as you come to them. Keep enjoying it DAVID

-
Greetings Jerry Yes your linings are looking good, and you will have the port linings finished tomorrow !!! ?. How much time are you spending daily on the build? What are you going to do when the linings are finished?? I surmise you will be looking at the copper plates. Anyway well done, keep up the good work. DAVID
-
Yon Well done it looks excellent. It was me who had the prob with the lockers. I phoned caldercraft/ jotika, and he knew exactly what I was going to say when I mentioned the lockers. There was a fault on production, and the sheets were getting cut in half. Just ring them, no prob. Mine was sent out, and I received it a day later. Yes it's looking really smart now. I bet you are looking forward to the gunport lids!!!! Not!!! I have my last 38 ready to fit, starting tonight. Well done you , keep up the good work DAVID
-
Lawrence The trim is brass profile which Comes with the kit. There are three different profiles for various areas on the ship. It can be obtained in 1mtre lengths. DAVID
-
Welcome back derek glad your wife is improving and as you said her progress has been excellent . You are doing really well, and buzzing along. I have got 8 lids left to fit hinges and eyelets on, then when they are fitted that's it. So that will be me for a few days. Keep up the good work, but don't neglect the garden, those plant pots and plastic flowers need dusting. Well done Derek ..Catch you later DAVID
-
Greetings jan Wonderful , it's a dream build with everything crisp and clean. Love the carving. Sculpey??? That's new to me. Keep enjoying it, DAVID
-
Greeting all Firstly thanks to you all for your comments and for viewing . Well here's a quick update. What I have done over the past few days is add all the starboard channels and chainplates, plus the brass profile on the hull and main entrance and the chess trees. I fitted the handles on all the buckets but they looked rubbish so they need redoing later. I am at the moment fitting the hinges eyelets and scuttles to all the starboard gunport lids which is pretty easy but boring. I used my little jiggy thing which makes life easy, it looks rubbish but does the job. I have posted a couple of photos of it to show how simple it is. There is a 1mm recess on the backstop to enable the hinge to be set forward. The paint work is once again tidied up and I have fitted the chain to the rudder, and added thread to the two rear gunports. I fitted the chain in the same fashion as Gil Middleton, with a double loop. It looks ok but if I want to change my mind it will be simple to remove, and I have some spare chain. That's it for now. I have posted a few photos, but as I said earlier its all becoming much of a muchness. I shall return with all my hinges fitted and guns in position in about a weeks time, then it's boomkins and the final work in that area. Here's some photos for you. Thanks again DAVID
- 439 replies
-
- 2
-
-
- victory
- caldercraft
- (and 1 more)