Nirvana
-
Posts
5,453 -
Joined
-
Last visited
Content Type
Profiles
Forums
Gallery
Events
Everything posted by Nirvana
-
 Sorry for the non-editing, hope you can figure the relationship out.
 -
and finally, SWISS PEAR SYCAMORE TAMBOUTI TULIPWOOD WALNUT WILLOW YEW
-
PADAUK PAU MARFIN PERNAMBUCO PEROBA POPLAR PURPLEHEART REDGUM SITKA SPRUCE SNAKEWOOD
-
HORNBEAM INDONESIAN ROSEWOOD JATOBA KINGWOOD KOA MACASSAR EBONY MADRONE MANSONIA MAPLE MOPANE OSAGE ORANGE
-
CANARY WOOD CHAKTE KOK CHECHIN CHERRY COCOBOLO CYPRESS DOGWOOD EBONY GONCALO ALVES GRANADILO HOLLY
-
BLACK CHERRY BLOODWOOD BOCOTE BOX ELDER BOXWOOD BRAZILIAN ROSEWOOD BRAZILIAN SATINWOOD BUBINGA
-
From the site mentioned by Mark SWISS PEAR AFORMOSIA AFRICAN BLACKWOOD ALASKAN CEDAR ALDER APPLE AVODIRE BASSWOOD BEECH BIRCH
-
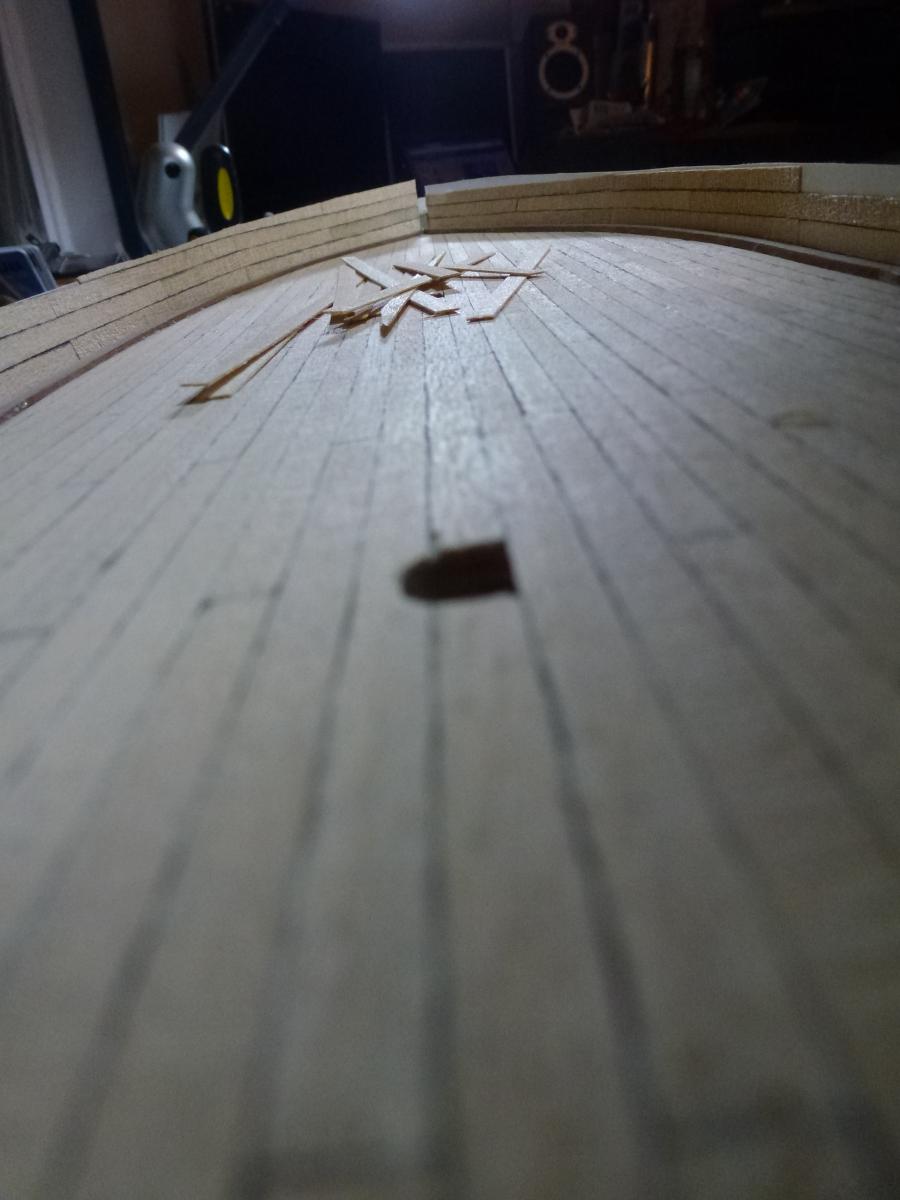
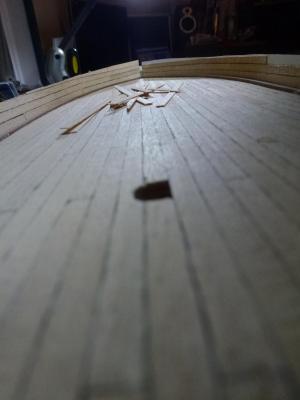
The "Harley" has been neglected for some time, but when I went into my log I realized it hadn't been updated either. The picture is old and the camera angle can be discussed, but the inner bulwalks planking is commencing.
-
I don't want to put another log into the fire but I think Michael is right, just attaching this little site of an artist using cedar. I was amazed!
-
I have been trying to find some sort of a chart with several manufacturer of paint for matching. Then I stumbled over this website, where you can enter one manufacturer and get a comparison of another brand. Hopefully this would make it easier when finding paint for our kits. Vallejo color chart Any comparison is possible. Upload a picture and use it for reference is also possible. Enjoy!
-
Micro Combo Saw, from Unique Master Models
Nirvana replied to Mahuna's topic in Modeling tools and Workshop Equipment
This micro saw is an amazing little tool, bought it about 10 month ago. Have used it when cutting the keel for the longboat. At 16 dollars for the big set from UMM (when I got it) you can't go wrong. Buy extra blade when you get it! This pictures is from my building of the longboat and the new keel, material from Jeff at HobbyMill. The first one, showing the extreme fine cut it makes, second the scarf.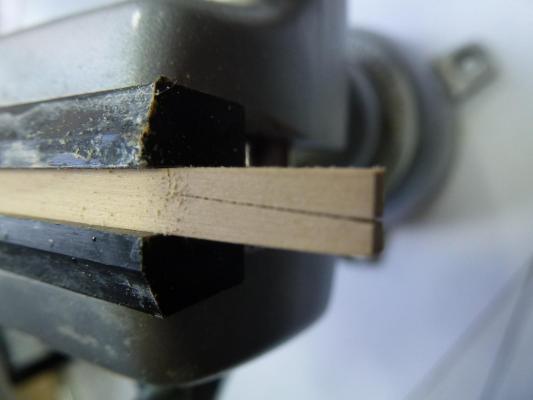

-
Matti, Happy Birthday or we say in Sweden, Grattis på födelsedagen. Don't let a birthday stop you from continuing to work on Vasa unless you have a big party.
-
Matti, Vasa is coming together amazingly, your eye and skill for the products makes her justice. I am surprised you haven't been approached by Billings at this time for creating better instructions. I think their representative for the US/Canadian market is viewing and scanning NRG's MSW, as I were approached regarding my upcoming build of Danmark. This is when BB also is Beautiful Built
-
Augie, Another admirer to that decking. That's amazing shine. Enjoy your vacation and your Confederacy will be waiting.
- 2,191 replies
-
- 1
-

-
- confederacy
- Model Shipways
- (and 1 more)
-
General Scroll Saw use
Nirvana replied to jdbradford's topic in Modeling tools and Workshop Equipment
kurtvd19, Thanks for the plexi info. -
Just Beautiful! What a wonderful job you have done so far.
- 2,191 replies
-
- 1
-
-
- confederacy
- Model Shipways
- (and 1 more)
-
Pete, Very impressive! Both the build log and pictures from the races.
- 220 replies
-
- 1
-
-
- finished
- volvo open 70
- (and 1 more)
-
Sorry to change the subject for a short time, I had a Red Maple 4 shell 8-piece 1976 Ludwig Classic while living in Sweden. Miss it tremendously... Hailing from your starboard (Cheney, WA) Enjoy the gig tonight. My son lives in Seattle and also have a friend there. Visiting Seattle from time to time.
- 308 replies
-
- 1
-
-
- finished
- model shipways
- (and 1 more)
-
Steve, That's an interesting ship I have an eye on as well, however I am in a non-buy situation. The admiral has stipulated no more kits until I have some done. And yes there are some waiting in the yard. Btw, from the other side of the Cascades, A warm welcome to NRG's MSW. Is that a DW set?
- 308 replies
-
- 1
-
-
- finished
- model shipways
- (and 1 more)
-
Pete, I wonder if it may be a spring-loaded feature as it goes in very quick. I don't see the purpose of using servo in this matter. Would be too slow. But that's just my two cents.....
- 220 replies
-
- 1
-
-
- finished
- volvo open 70
- (and 1 more)
-
Pete, I also checked the stockmaritime and their boats, however the price tag was on the higher end, starting at 2000 Euros.
- 220 replies
-
- 1
-
-
- finished
- volvo open 70
- (and 1 more)
-
Michael, 1.5m! I like that idea. Just imaging a race with ten of them! Powerful!
- 220 replies
-
- 1
-
-
- finished
- volvo open 70
- (and 1 more)
-
Pete, WOW! The real pictures along with your build log. Like it, Like it and Like it! Now I wonder how to convince you to share the plans as I like to build one, for RC purpose. There is one boat available from Kyosho or ThunderTiger but I prefer to make to one meter length.
- 220 replies
-
- 1
-
-
- finished
- volvo open 70
- (and 1 more)
-
Remco, I think you got us all with this one...... Improving!?? What and where, think none of us has found any area that needs improvement. Stunning!
- 1,215 replies
-
- 1
-
-
- sloop
- kingfisher
- (and 1 more)
-
Pete, We have to meet some day, since we are only 1 hour away from one another. Would like to see your collection.