Nirvana
-
Posts
5,453 -
Joined
-
Last visited
Content Type
Profiles
Forums
Gallery
Events
Everything posted by Nirvana
-
 Pete, That paint job is exquisite! For my T37 I relied to a local body paint shop for cars. ..... But it sure came out nice. Lot's of high-grade sanding was involved. The micro-groves didn't seem to have the efficiency and gain, otherwise all ships in trade and super/racer cars would have it. The micro-groves will improve stability, just like the small dimples in a golf ball. That's my 2 cents, and I guess someone else will have a better explanation.
 -
Richard, your J-class comes nicely together. They are sure nice and true yachts. I have to many waiting in the shipyard but hopefully I will have a mid-1970 model of the Sverige yacht waiting as well. Have to track down the plans.
-
Floyd, there is a bedroom available over here. Regarding the storage, we will figure that one out during the time. My workshop isn't big but probably good enough......
-
You made a soft bed too, just for the cat!lol These details are fantastic! I have a real calico kitten in our house. She is 10 weeks old.
- 1,215 replies
-
- 1
-

-
- sloop
- kingfisher
- (and 1 more)
-
Pete, Hmm, no wonder I had a similar haircut. Think the "barbers" at that time didn't know any other type of haircut. It was either this or "longhair"....
-
Chuck, thank you I have been using wood glue Titebond II that's why the clips.
-
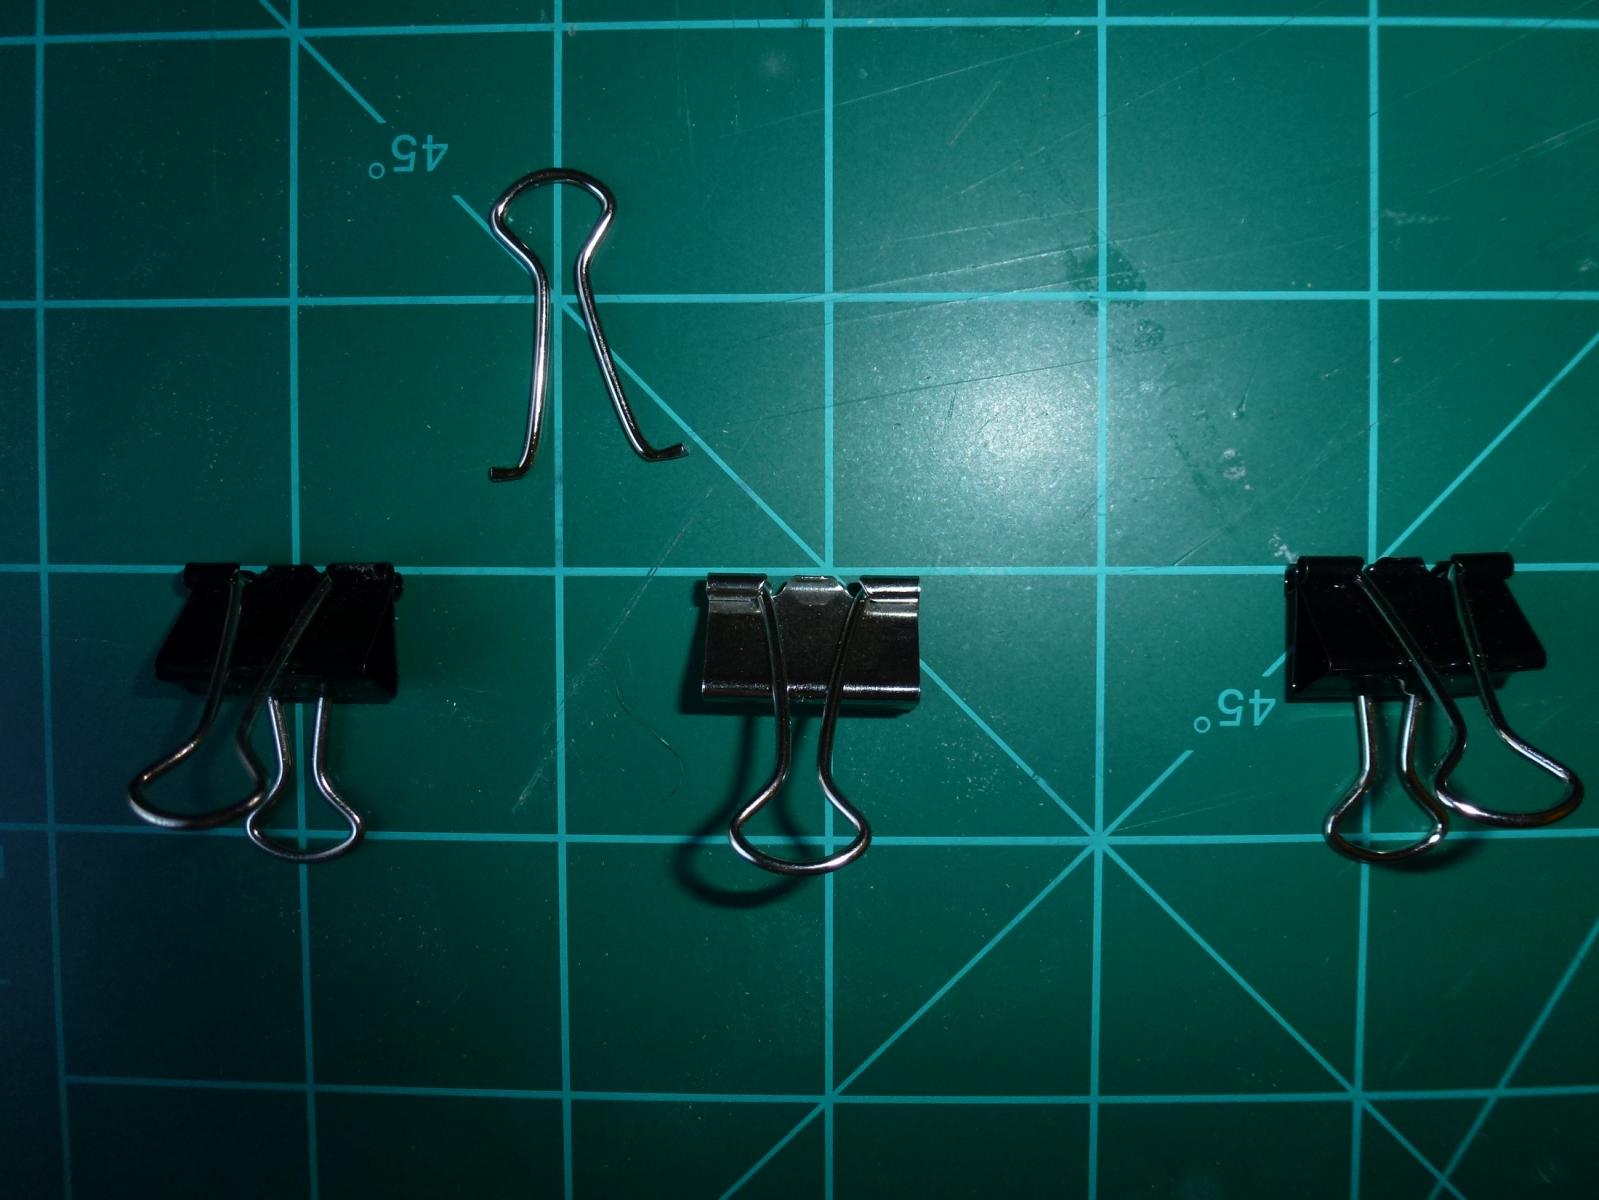
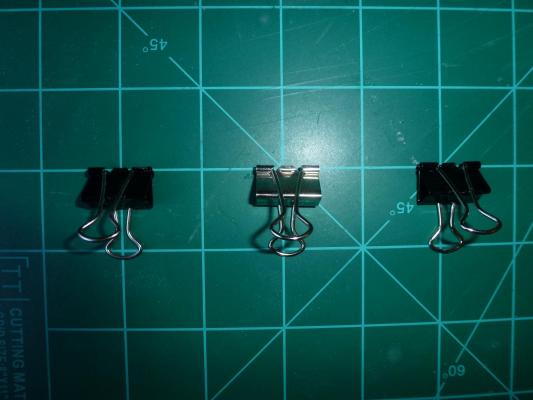
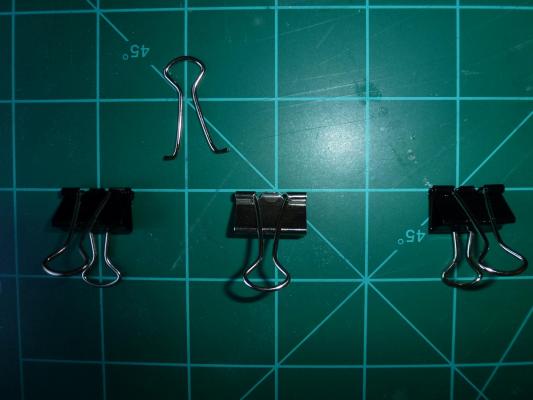
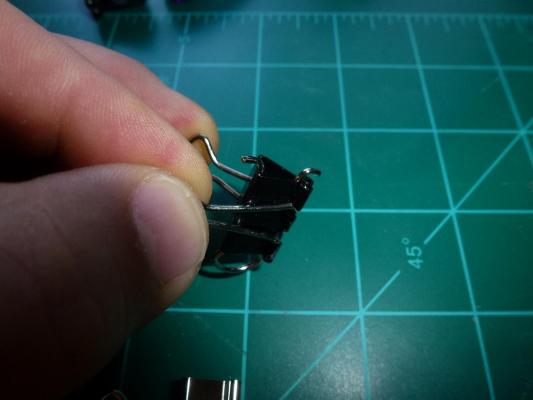
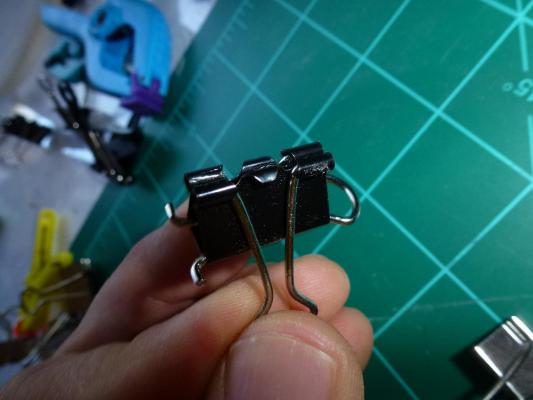
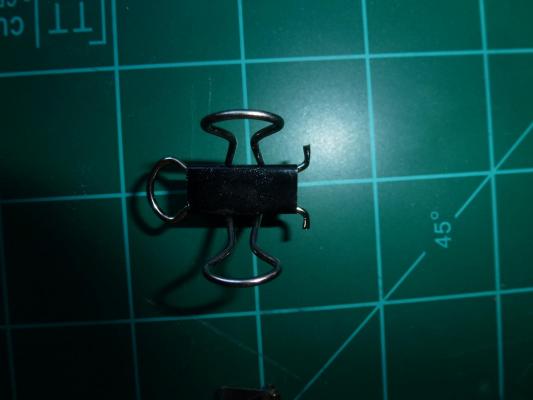
David, It's regular paperclips you can find in any store. There are several different sizes of them. This is one of the smaller. Take three clips Remove the "ears" Slide the single "ear" into the next clip Twist 90 degree And done, you will have two clips from three
- 335 replies
-
- 2
-
-
- 18th century longboat
- Finished
- (and 1 more)
-
AC -converter/adapter is all you need, has worked for me before moving to the US What I understand, Sherline is the machines! If I only had the money...
-
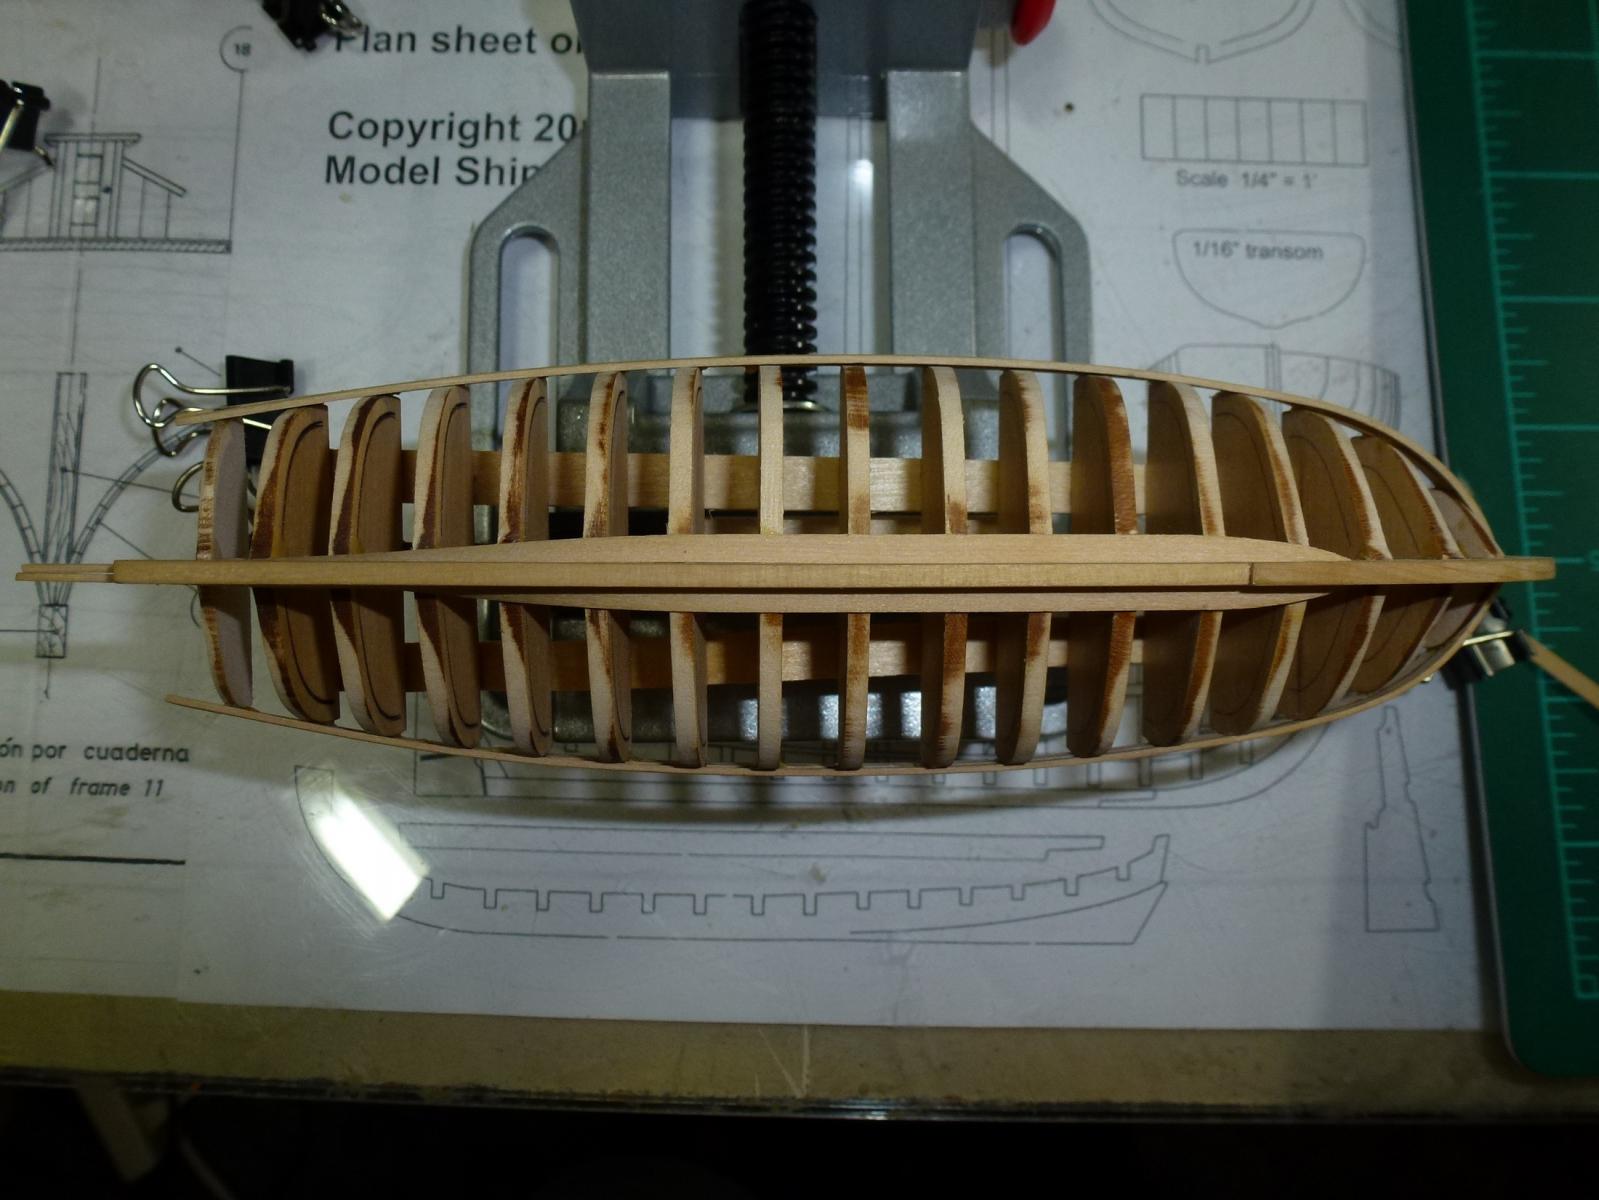
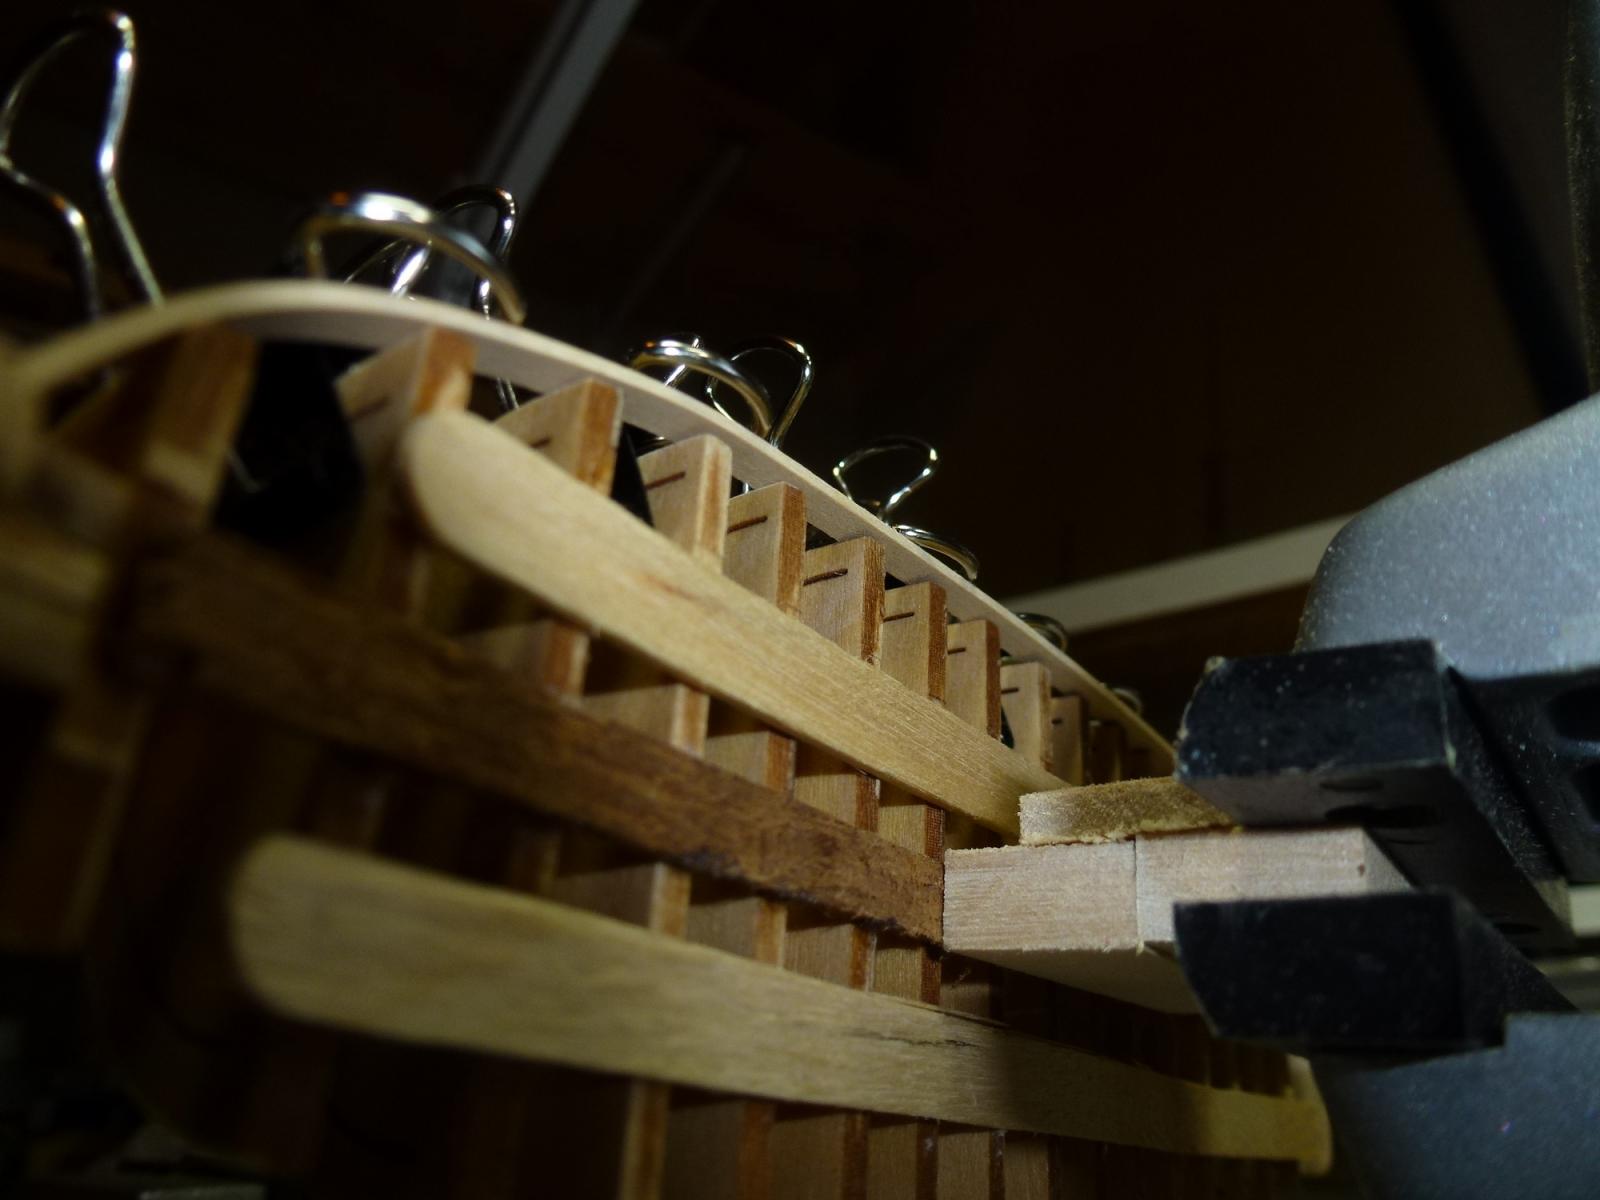
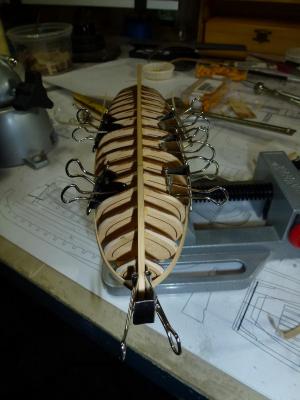
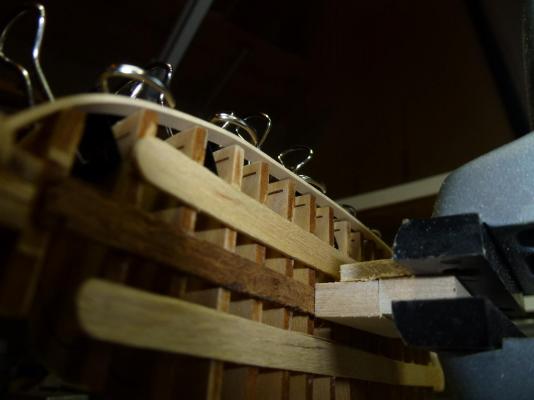
So, I released one clamp, and this is the result: Some trimming and it will probably be fine. Still wondering how Chuck got the nice bends.....? Chuck, do you have any good answer? After this I will measure the mid-bulkhead and start tapering remaining strakes.
- 335 replies
-
- 2
-
-
- 18th century longboat
- Finished
- (and 1 more)
-
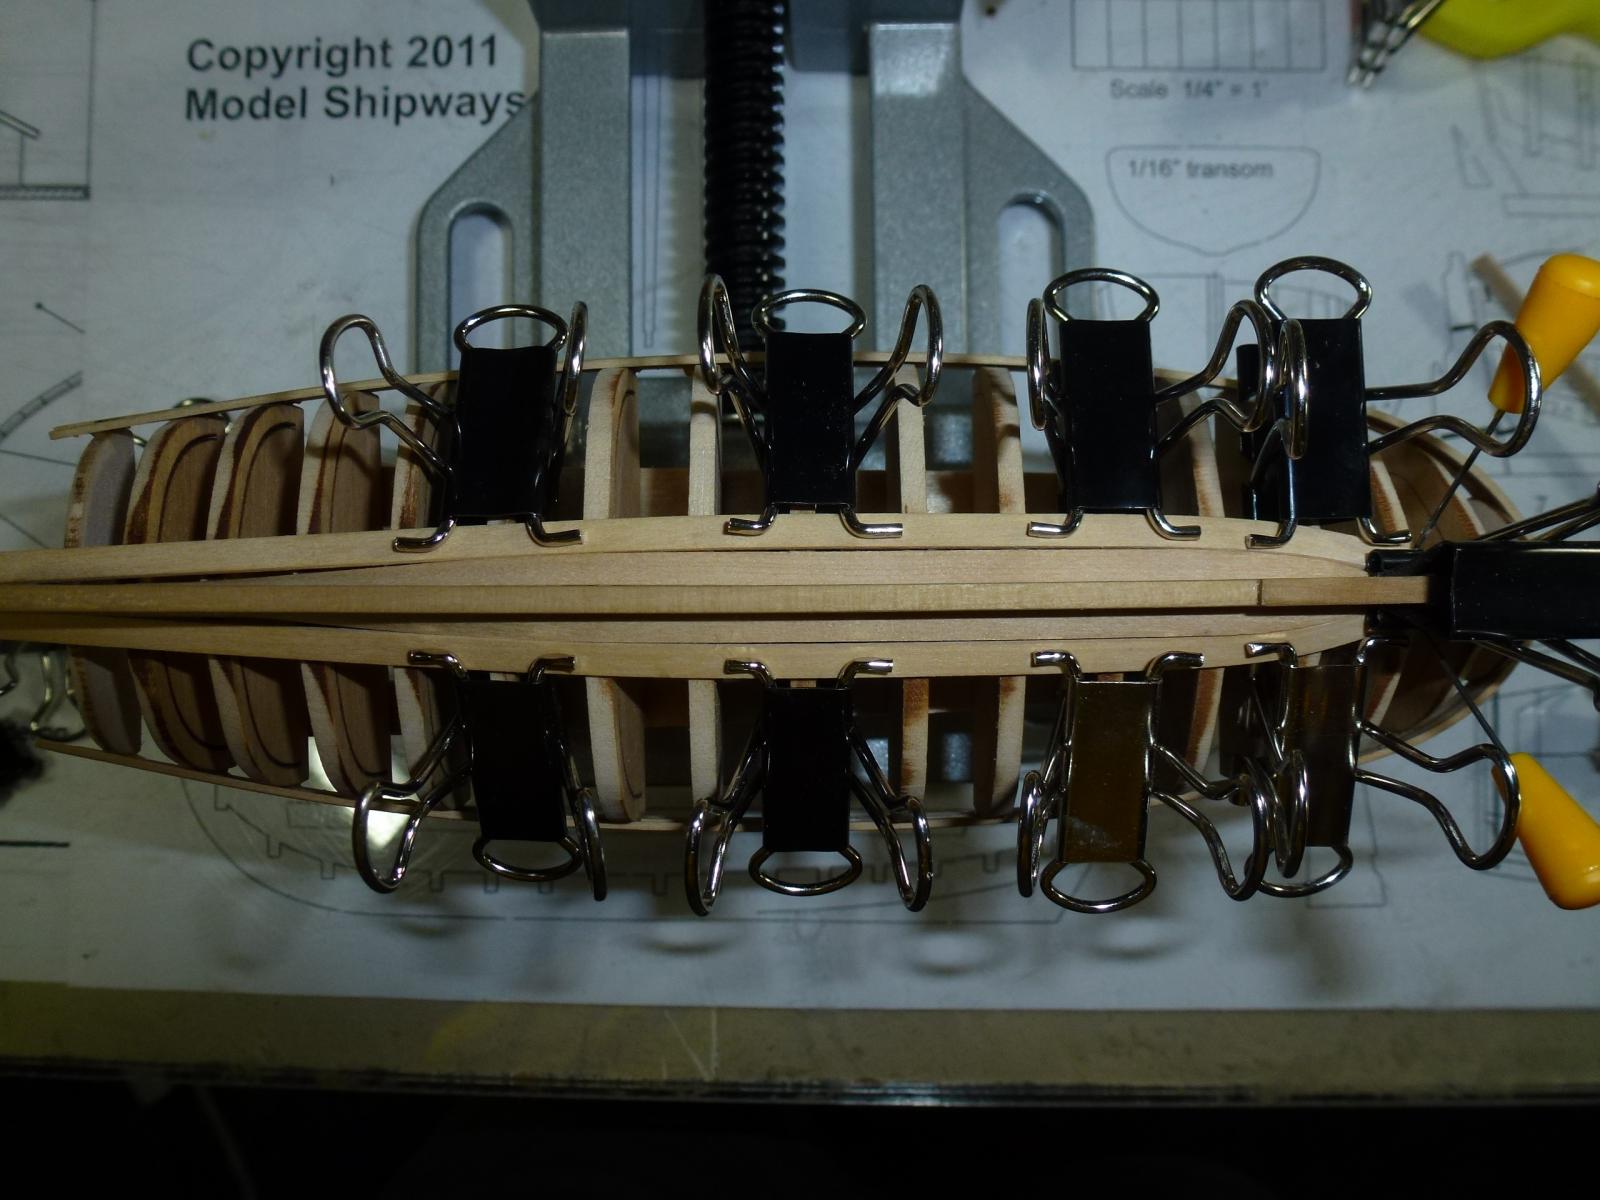
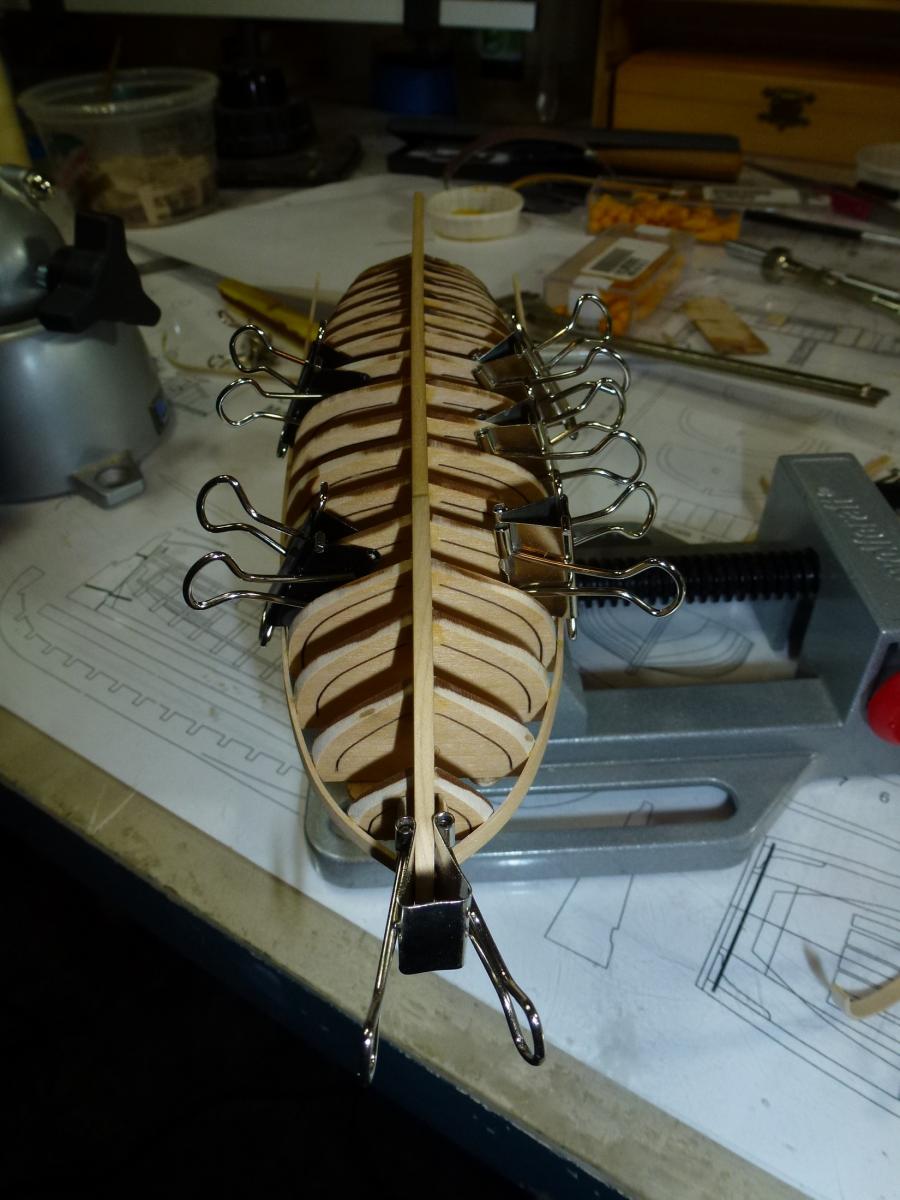
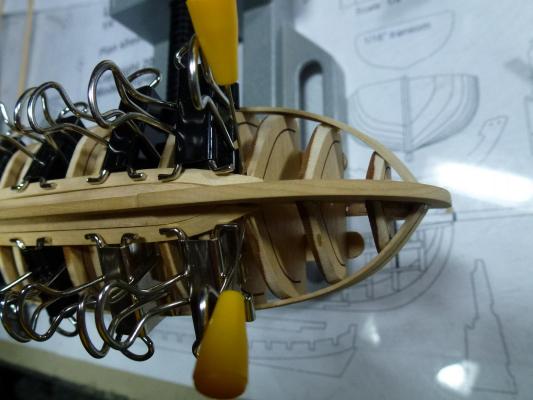
So round two of planks from the keel, it turned out that the material I had pre-bent wasn't long enough. I had to do a second batch. These are now in place, first softened by using water then clamped down as before giving a little more bent. Then dry-fitted in place with angular cut towards the keel, clamped and "hair-blower dried". This picture is what I see right now while typing this. Don't know how exact it will be.

- 335 replies
-
- 3
-
-
- 18th century longboat
- Finished
- (and 1 more)
-
Pete, I am trying hard to find the similar plans like yours but for S3 Sverige that sailed in 1977. Still remembering that sunny but windy Saturday when me and a friend were out sailing his Scampi when we just heard the sound from breaking waters of a bow cutting. Then suddenly she appeared, big and beautiful, and overtook us in a heartbeat. I also learned to sail solo when being six years old. My dad converted a deserted wood rowing boat to a sailboat. During the following winter she got an fiberglass shell on top of the wood. She had beautiful inner-hull of wood. Got plywood centerboard and a mast made out of pine found at my grandfathers summer-place. She was clinker build. Today 40 years plus moss and moisture claimed her life. I remember being towed after my dads boat sleeping in the sun. We were One.
-
Remco, I certainly hope you make double items of some of the interior furniture's and display them separately. I really like the key on the fingertip of yours. Very delicate and beautiful.
-
For all interested in the material Pete is using, here is the link to the manufacturer. http://www.westsystem.com/ss/ When building the T37's the Epoxy is coming from West System.
-
And the outcome of the garboard planks. Sorry for the shaded areas. Came out much better than I expected.
- 335 replies
-
- 6
-
-
- 18th century longboat
- Finished
- (and 1 more)
-
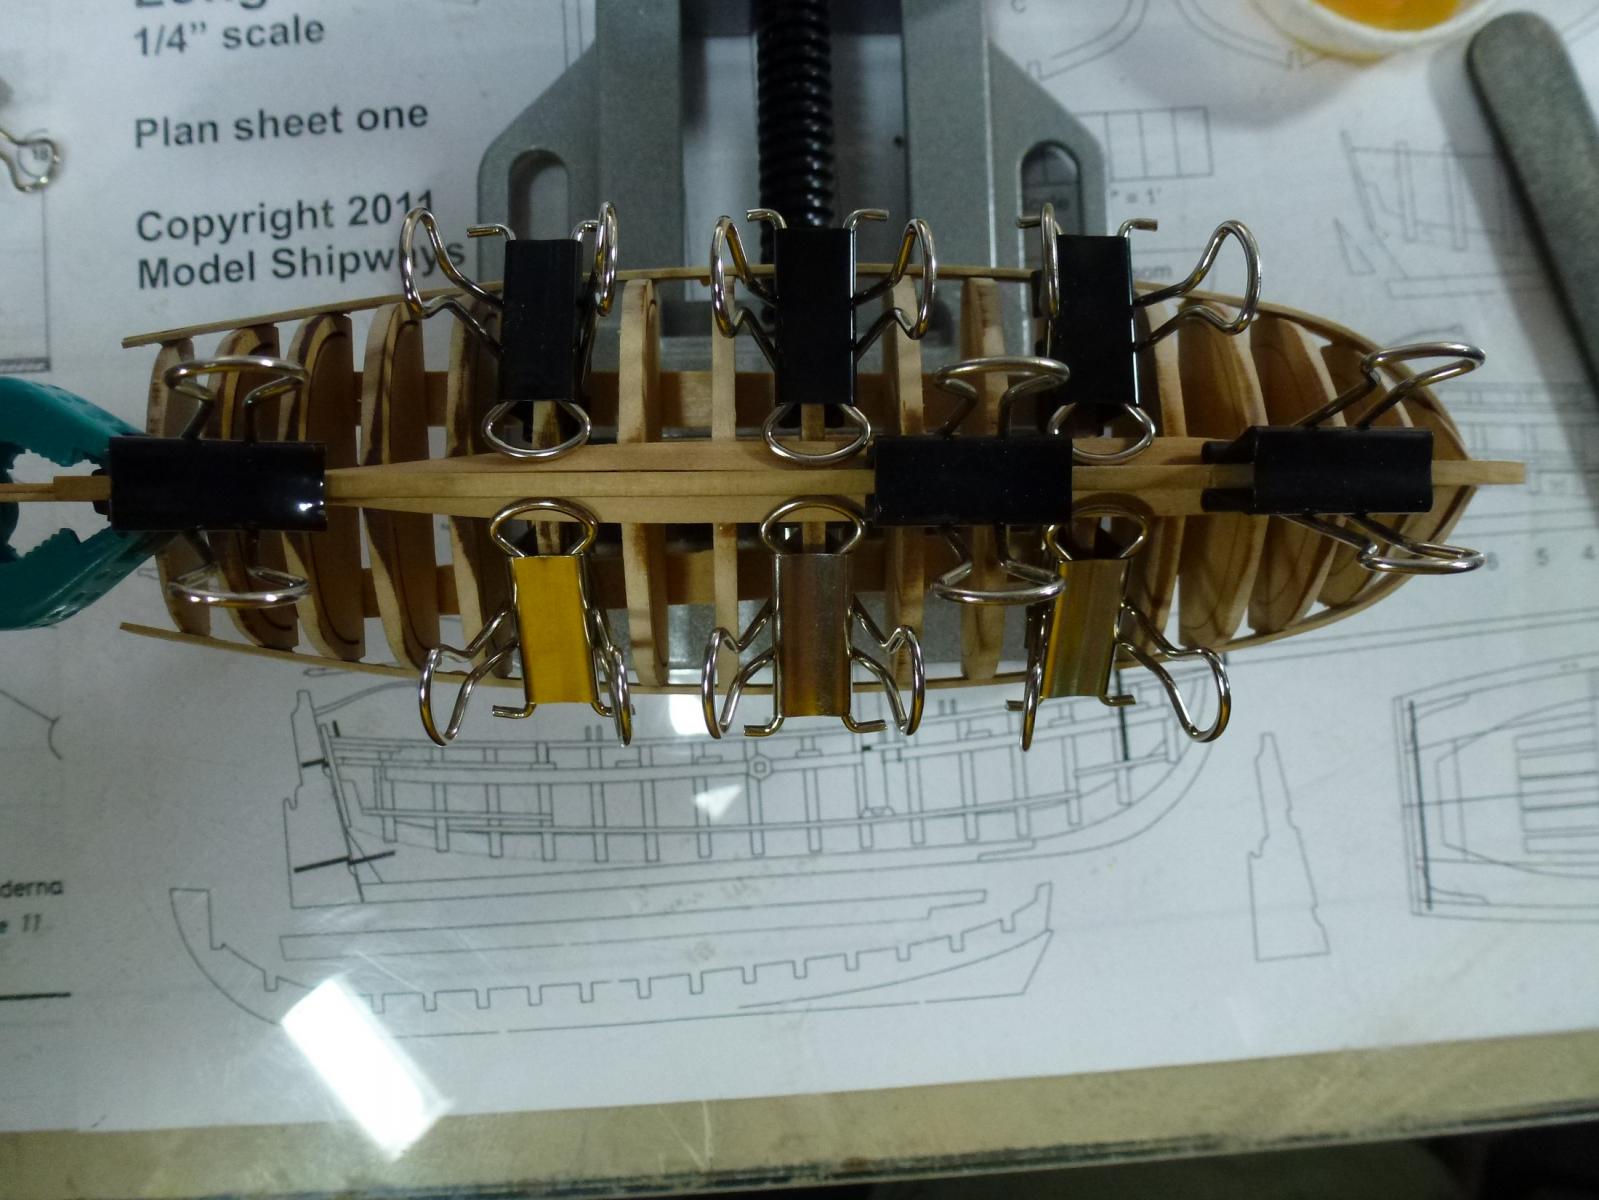
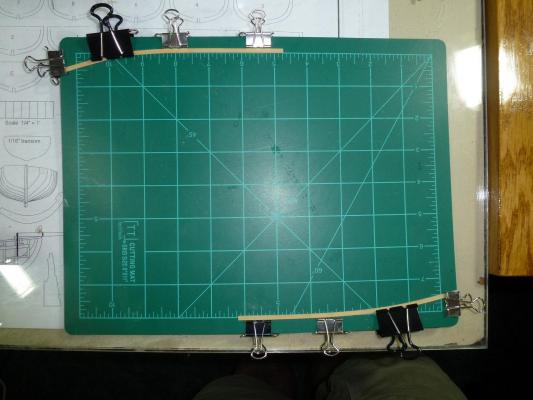
The planks next to the garboard are being bent. I used my cutting mat for this purpose, so I get somewhat similar bents. They boxwood (all planks) are easy to work with after being soaked.
-
Mike, And you haven't seen how it's looking without the clamps Thank you for the kind words.
-
While I had the port garboard plank drying in place I saw what I didn't like with the starboard side. After some delicate knife work I had been able to remove the plank and made a new one and got much better fit.

- 335 replies
-
- 3
-
-
- 18th century longboat
- Finished
- (and 1 more)
-
Well, so far so good. The first garboard plank is layed. I gave the connecting edge towards the keel a slight chamfer. Got a neat and tucked connection.

- 335 replies
-
- 7
-
-
- 18th century longboat
- Finished
- (and 1 more)
-
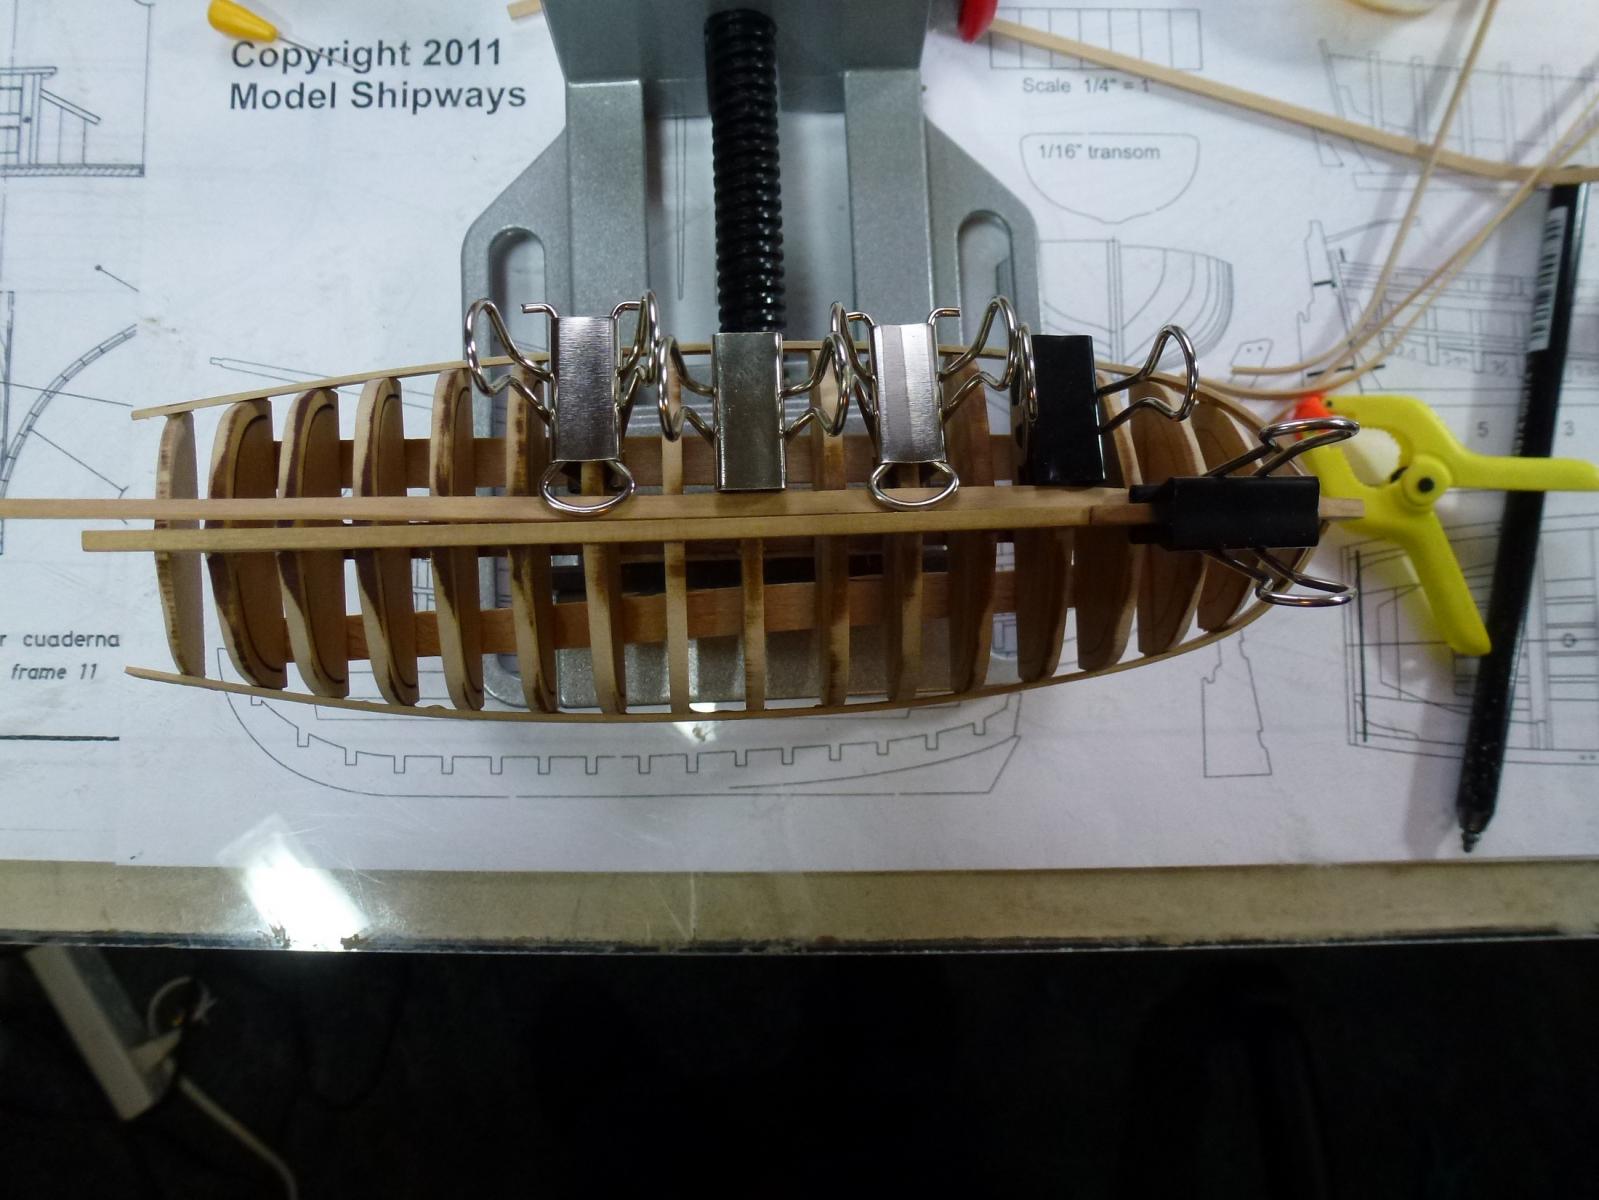
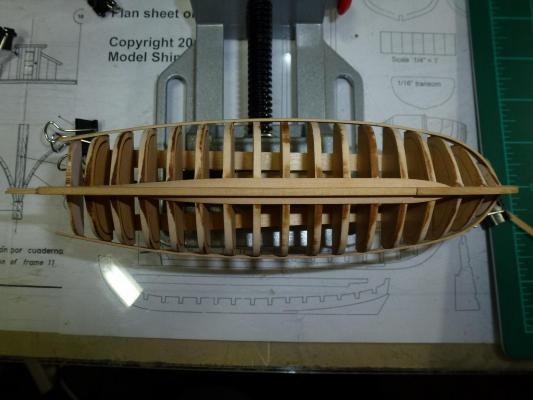
Have lined up and glued the first planks at sheer line, this at port and starboard side. Had to re-do it after seeing line errors. Seeing each plank as a separate project. I am gluing the plank in segments not the whole at once. One way for me to correct any errors along the way. So far the two planks are linear with each other. Bulkheads E through 7 (8) aren't glued at this time. The keel is straight it's a visual error from the camera.
- 335 replies
-
- 3
-
-
- 18th century longboat
- Finished
- (and 1 more)
-
Ryland, thanks for the sharp eyes, I will fair them further. The technique of plank bending of Chucks works great. but I didn't use the hair dryer
- 335 replies
-
- 1
-
-
- 18th century longboat
- Finished
- (and 1 more)
-
So I dry fitted the sheer plank and it follows the top of each bulkhead perfectly! The instructions reads " This is about 1/16" below the top of the bulkheads mid ship" Guess I have to force the dip in order to get the curve.
- 335 replies
-
- 1
-
-
- 18th century longboat
- Finished
- (and 1 more)
-
Jim Byrnes Model Machines
Nirvana replied to Mahuna's topic in Modeling tools and Workshop Equipment
Jim, Thanks for that update, I thought we had to use two of the same grit but had to deal with the center that doesn't have any coverage. -
Jim Byrnes Model Machines
Nirvana replied to Mahuna's topic in Modeling tools and Workshop Equipment
Richard, It works both for sheets and strips, don't think it will work with sheets wider than 2 3/4". -
Jim Byrnes Model Machines
Nirvana replied to Mahuna's topic in Modeling tools and Workshop Equipment
So, I had a chance to get hand on a thickness sander type Model Byrnes, I have never had such a machine before. As I don't have a shop vac or a proper work shop I have done the little sanding outside when it's been nice weather. This machine, is amazing! It's quiet, the adjustment tolerance in the 10th of millimeter. Even on an unstable table the machine didn't "walk" due to the small vibrations. It's a very well balanced. I just hope to get the table saw some day. Jim and Donna, I thank you both for a true quality machine which is going to last me many years to come!