Nirvana
-
Posts
5,458 -
Joined
-
Last visited
Content Type
Profiles
Forums
Gallery
Events
Everything posted by Nirvana
-

Can i live without a BYRNES TABLE SAW
Nirvana replied to shihawk's topic in Modeling tools and Workshop Equipment
I think I stay with the modern world tools to a certain degree....... thank goodness -
Can i live without a BYRNES TABLE SAW
Nirvana replied to shihawk's topic in Modeling tools and Workshop Equipment
Roman, Scratch building by using our teeth? That would be something new..... -
Chisels or Carving Tools
Nirvana replied to sfotinos's topic in Modeling tools and Workshop Equipment
David, Being a Swedish-American I have my set of Mora knifes, but I haven't used them for modeling carving. Love those knifes, and yes they stay sharp for long time even with excessive usage. Perfect to have around when working in the yard. -
Jack, I understand your issue, but I think if I would measure it out on my plans I would get a different size. Hope you understand what I try to say, the tolerances are so fine, work it the way you feel best and looks best for your longboat. Cheers
-
Can i live without a BYRNES TABLE SAW
Nirvana replied to shihawk's topic in Modeling tools and Workshop Equipment
An anti-cut glove for USD 20-50 is certainly a very cheap insurance, versus all the other issues that otherwise can happen. -
Cap rails with "extra meat" according to instructions. The basswood is easier to work with than boxwood. As you see I have a lot of wood to reduce, but better to much and re-doing it. The opening for the stem will be reduced to have a flush connection.
-
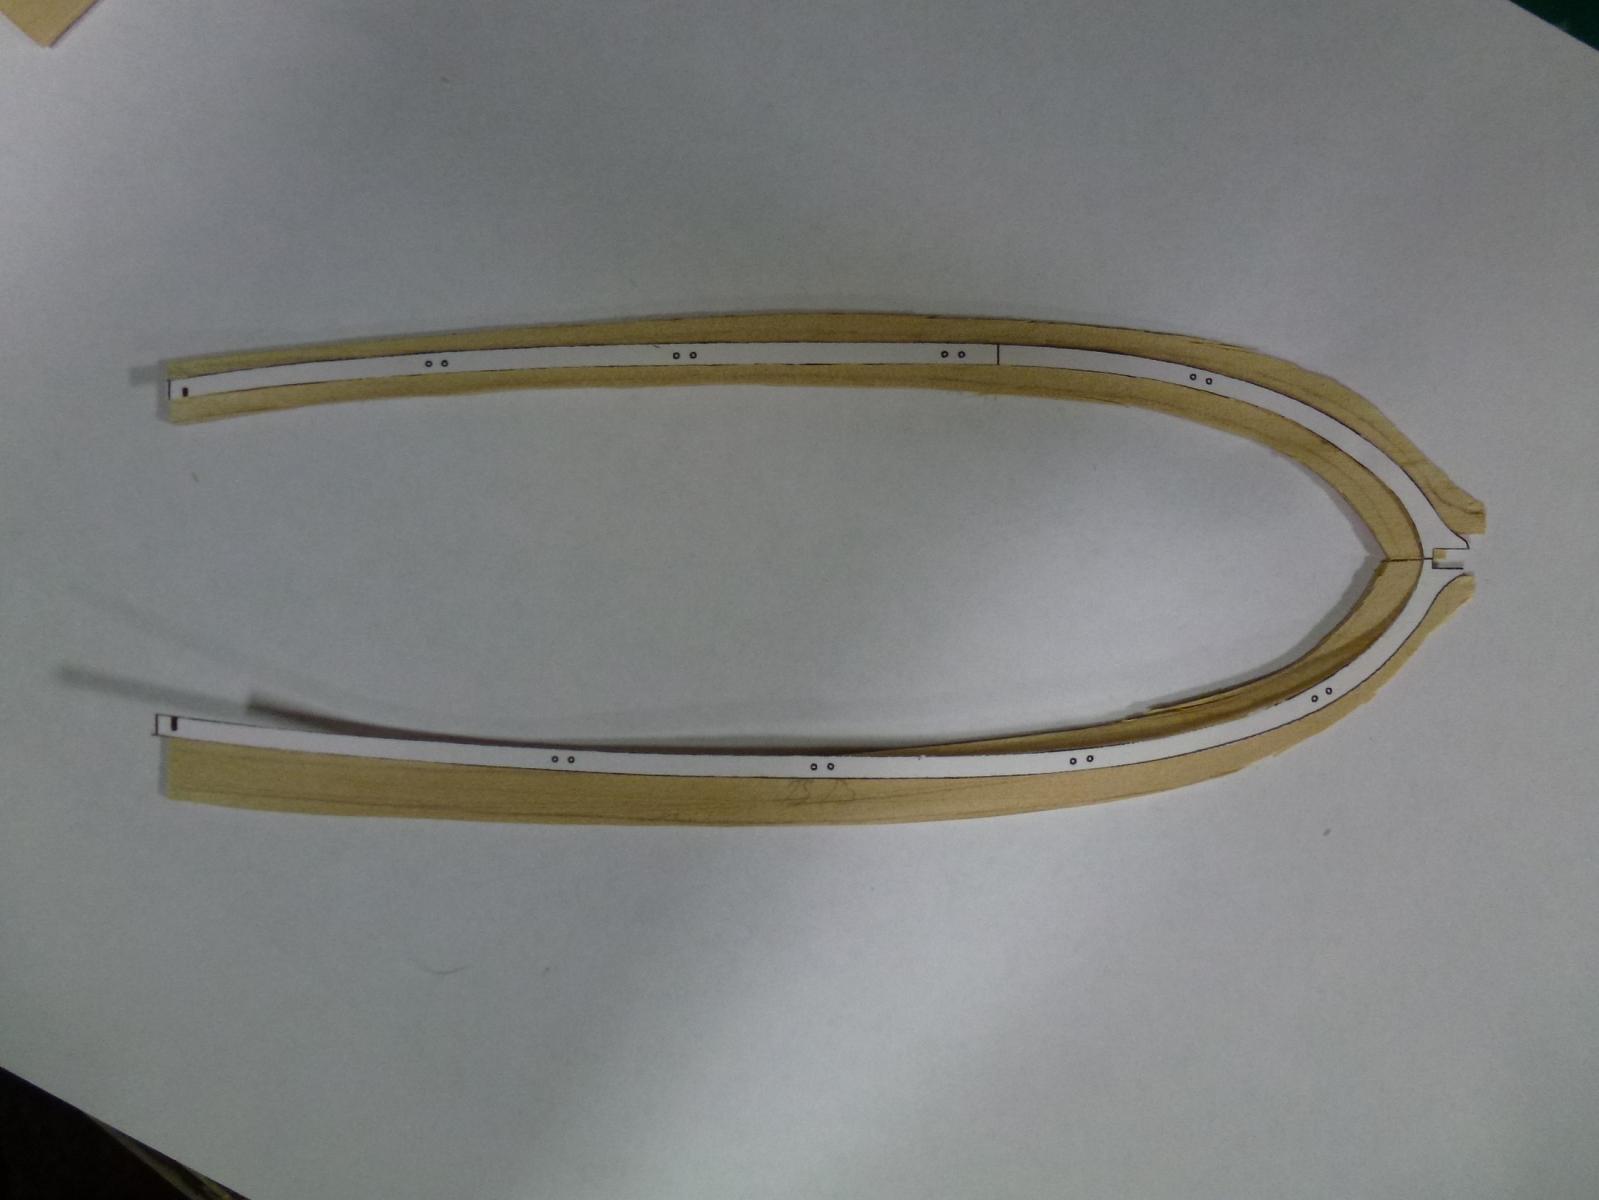
David, It is a curved shaped.......
-
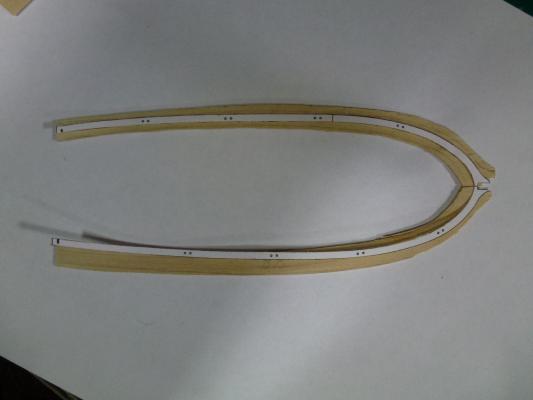
While I have been sanding the frames, I took on the delicate thing..... cap rail. I did three trial with the boxwood and each resulted with broken pieces. Due to the curves it was easier to do the cap rail with the bass wood. When "cutting" the cap rail out from the sheet, use blade #22. Cap rail done!! :D
-
Can i live without a BYRNES TABLE SAW
Nirvana replied to shihawk's topic in Modeling tools and Workshop Equipment
Take a look at my topic of Japanese saw. I wrote this one back in 2013. http://modelshipworld.com/index.php/topic/4171-japanese-saw/ -
I like this little boat. It's a fun and great project. Thank you Chuck for creating this model!
- 335 replies
-
- 1
-

-
- 18th century longboat
- Finished
- (and 1 more)
-
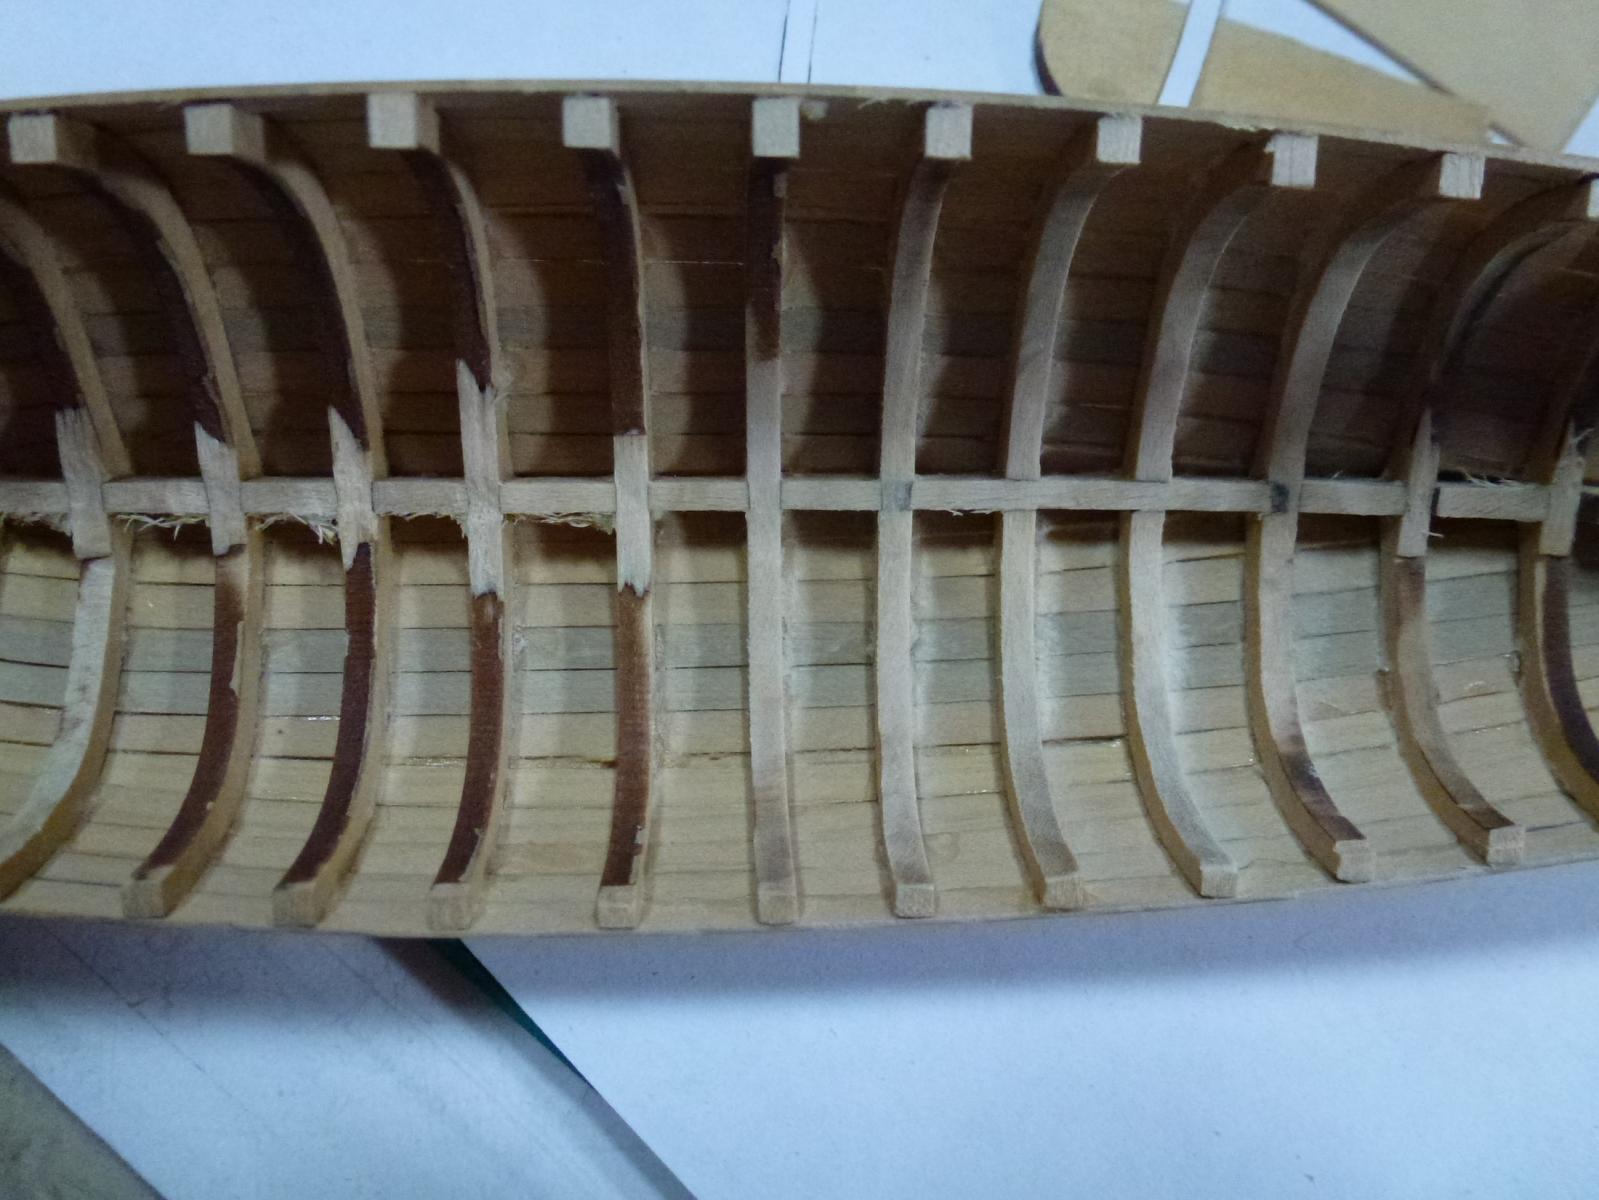
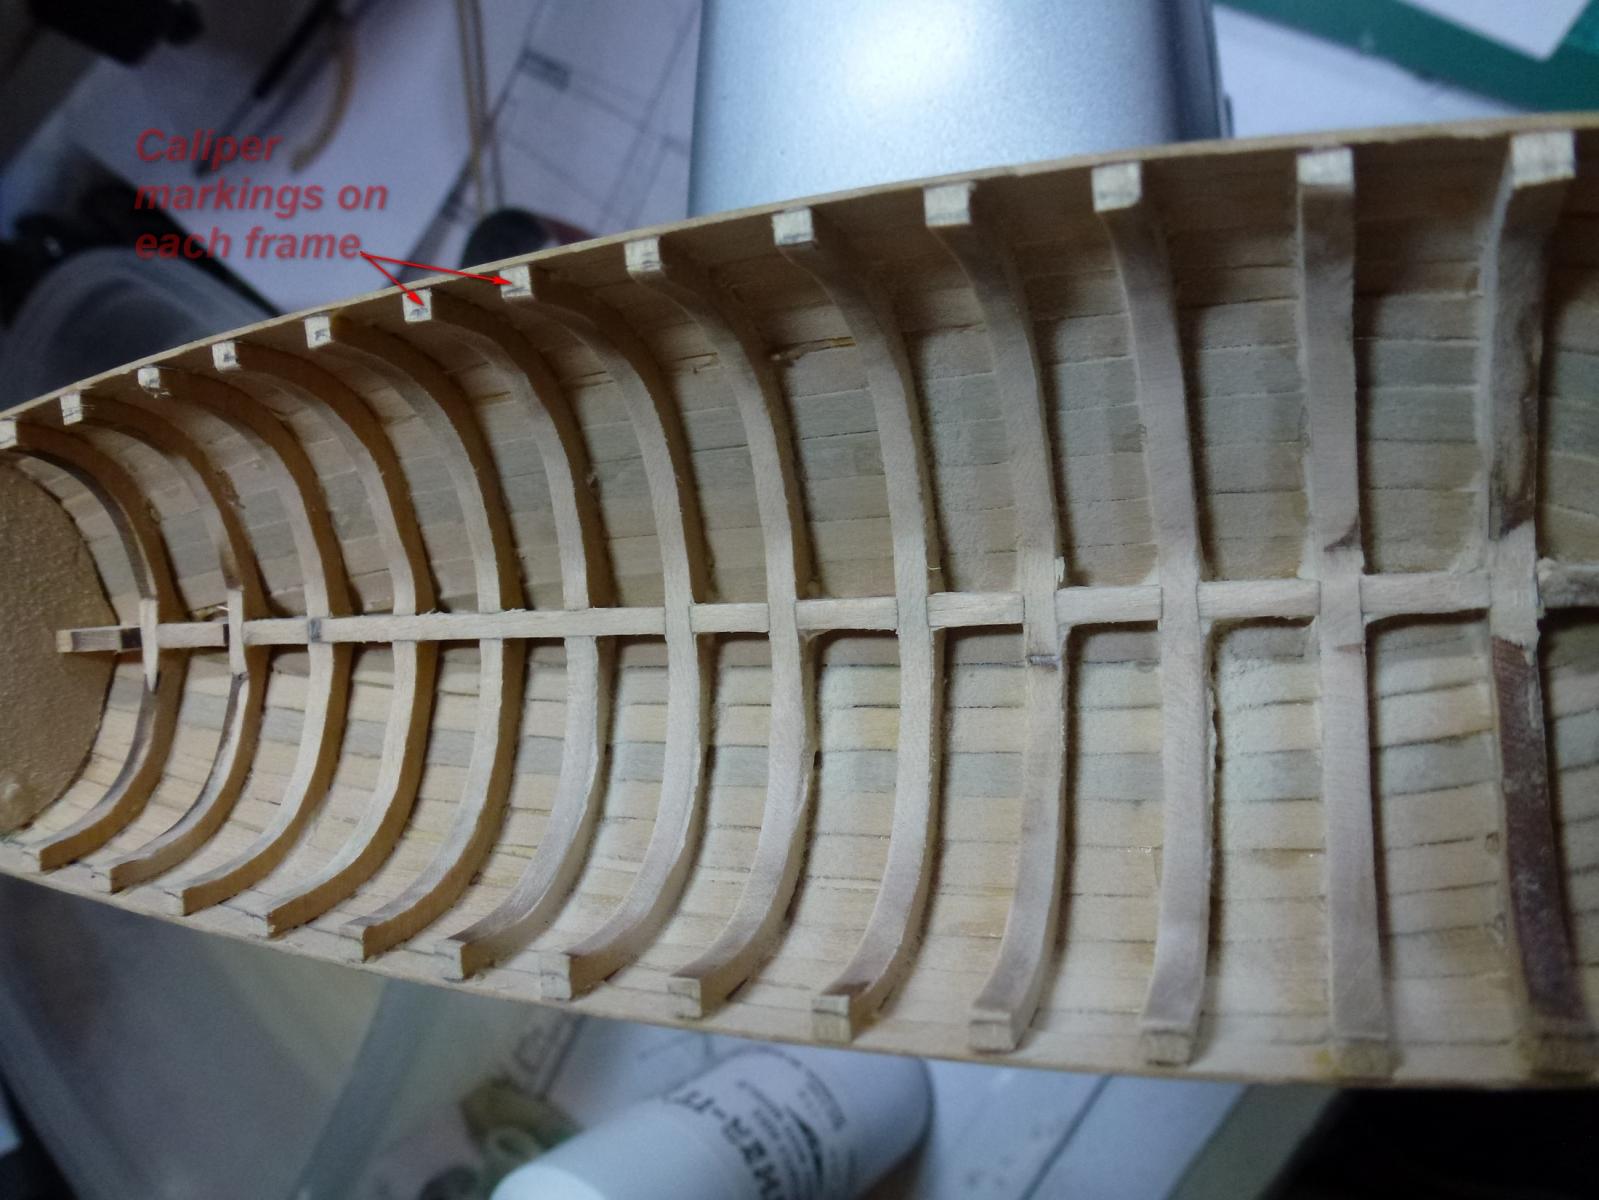
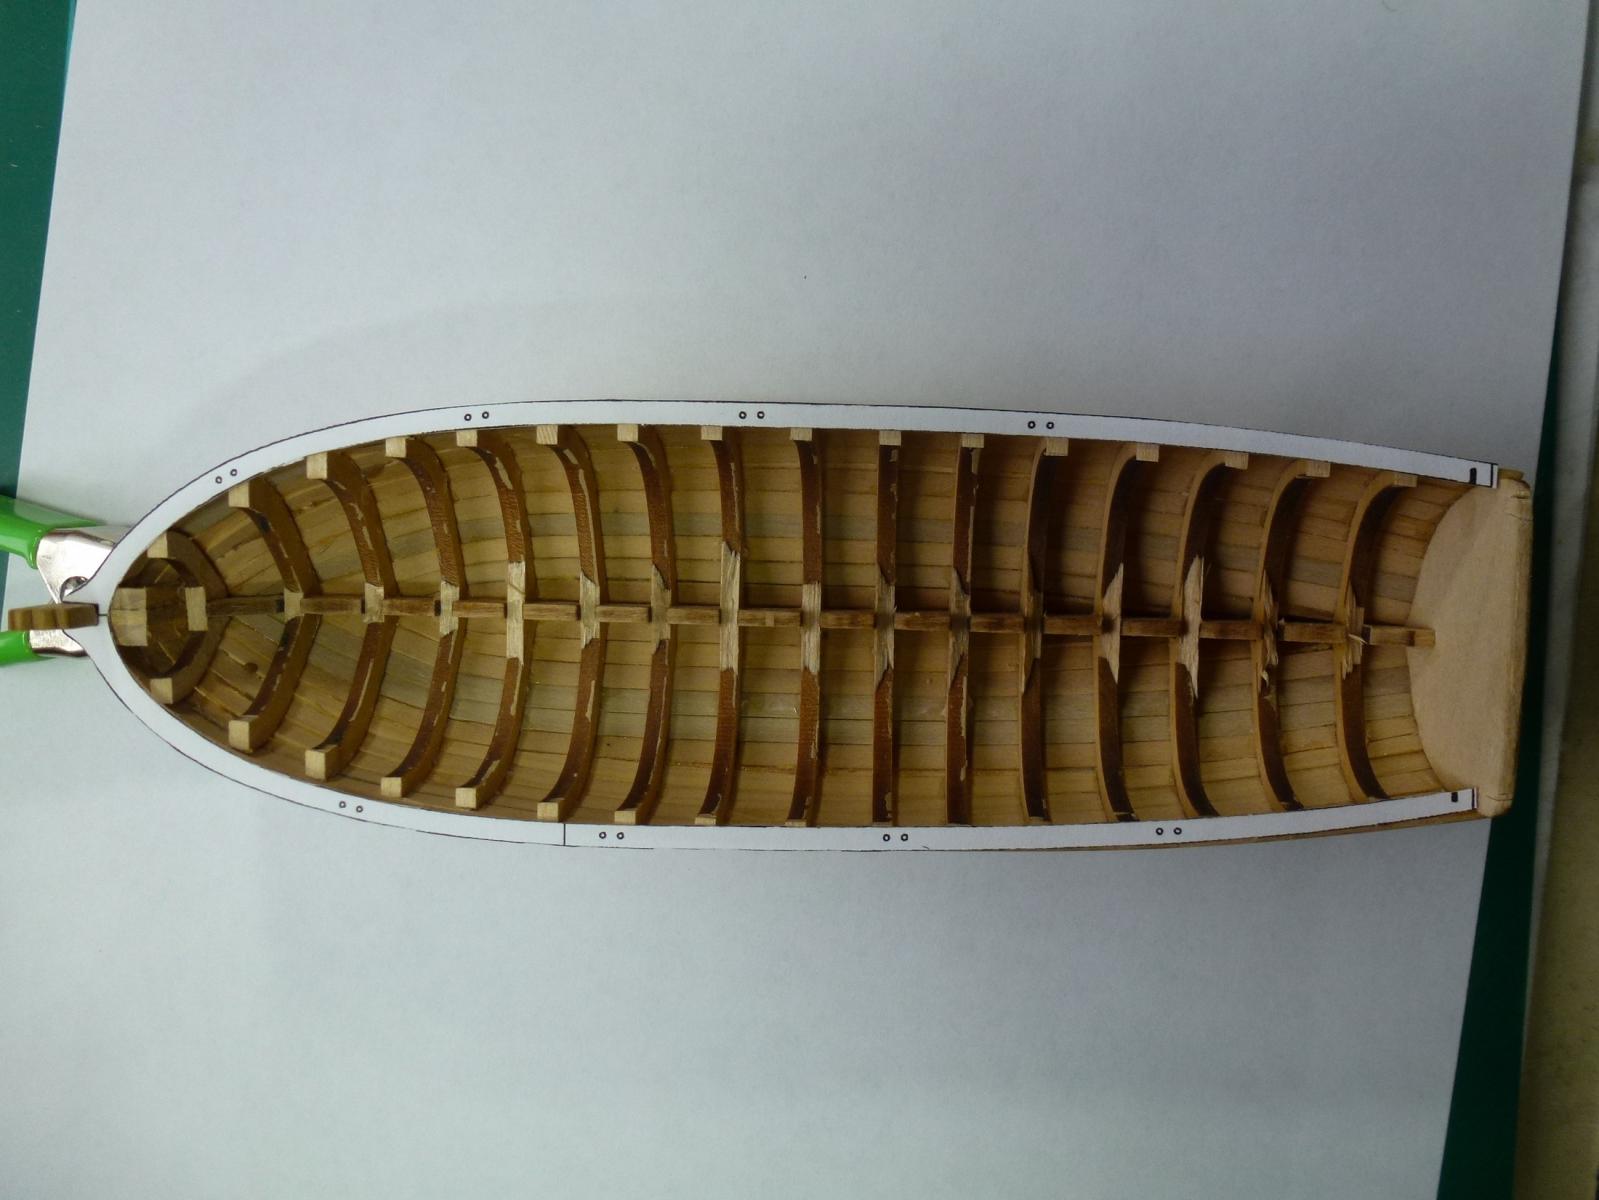
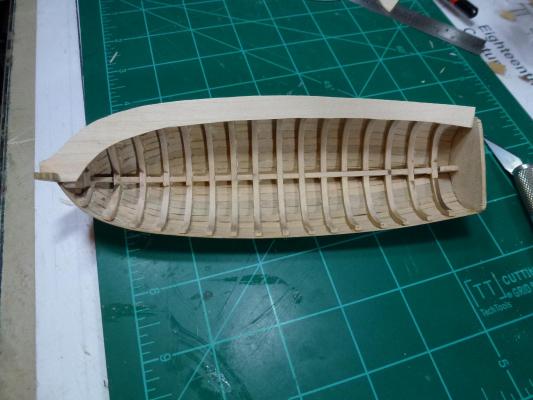
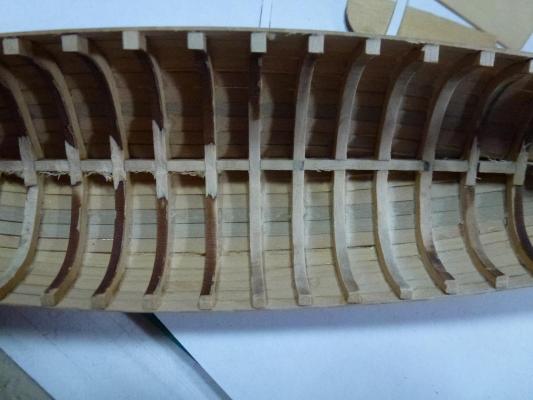
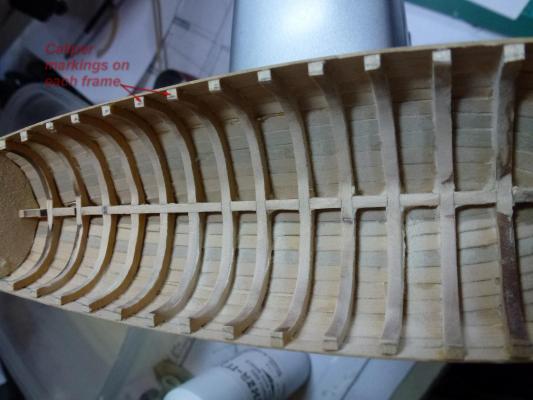
Using the Dremel idea from other builders of reducing the frames I cautiously started the project. Here I noticed the frames are very thick. There is a lot of wood to reduce. Then I thought why not use the soft head from Dremel, I cut out a slightly larger piece from regular sandpaper ( I used 320grit ), having the soft head. It became easier to sand the curves of frames. I wondered how much "meat" from the frames on the inside needed to be sanded out, here I used the caliper and set it to 3/32" which is according to the instructions and marked each frame. There is a lot to sand down.

- 335 replies
-
- 2
-
-
- 18th century longboat
- Finished
- (and 1 more)
-
I haven't sanded down the frames nor the keel, meanwhile I did make a copy of the plans and cut out the cap rail as for a dummy. This just to get an idea how it will look like. The rap rail in the plans are correct and I can use the cut-out as a template for making the rail.

- 335 replies
-
- 4
-
-
- 18th century longboat
- Finished
- (and 1 more)
-
Oldpaperone, glad to see you back at the building table. I also lile the usage of wooden cloth pins and wooden screws. Very genious!
-
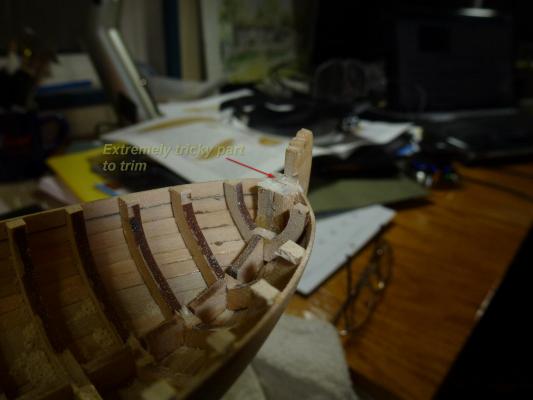
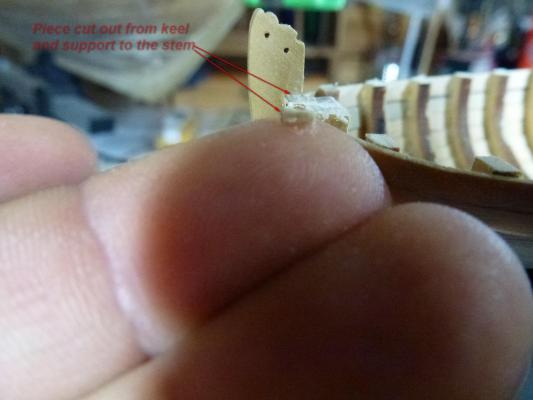
The solids towards the stem I found to be tricky to get leveled. First I used the Dremel (again!), then I used the fine tooth razor blade sized saw to do the rest. 10 minutes later I had it in my hand (ok, rather on my finger) This without damaging the stem piece. Btw, this is a funny little boat to build. It has it's challenges but at the same time, once beyond one point lot of things happens. I am leveling all the ribs to the plank and thinking what to do with the inner hull..... colorwise
- 335 replies
-
- 5
-
-
- 18th century longboat
- Finished
- (and 1 more)
-
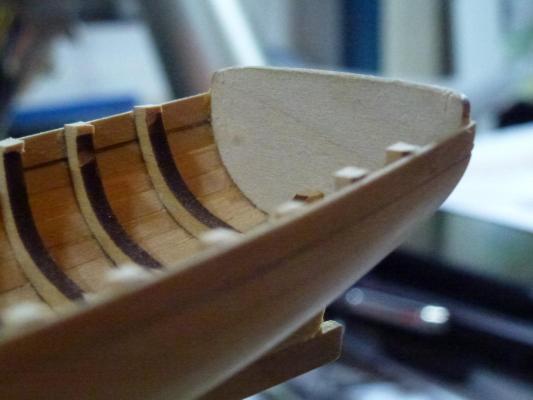
Ribs and keel will be trimmed internally once the top heads are leveled with the plank.
-
Using the new light-weight Dremel 8050 the reducing of the head was a breeze without touching the planks. Now fine filing to get them to level for the cap rail.
- 335 replies
-
- 4
-
-
- 18th century longboat
- Finished
- (and 1 more)
-
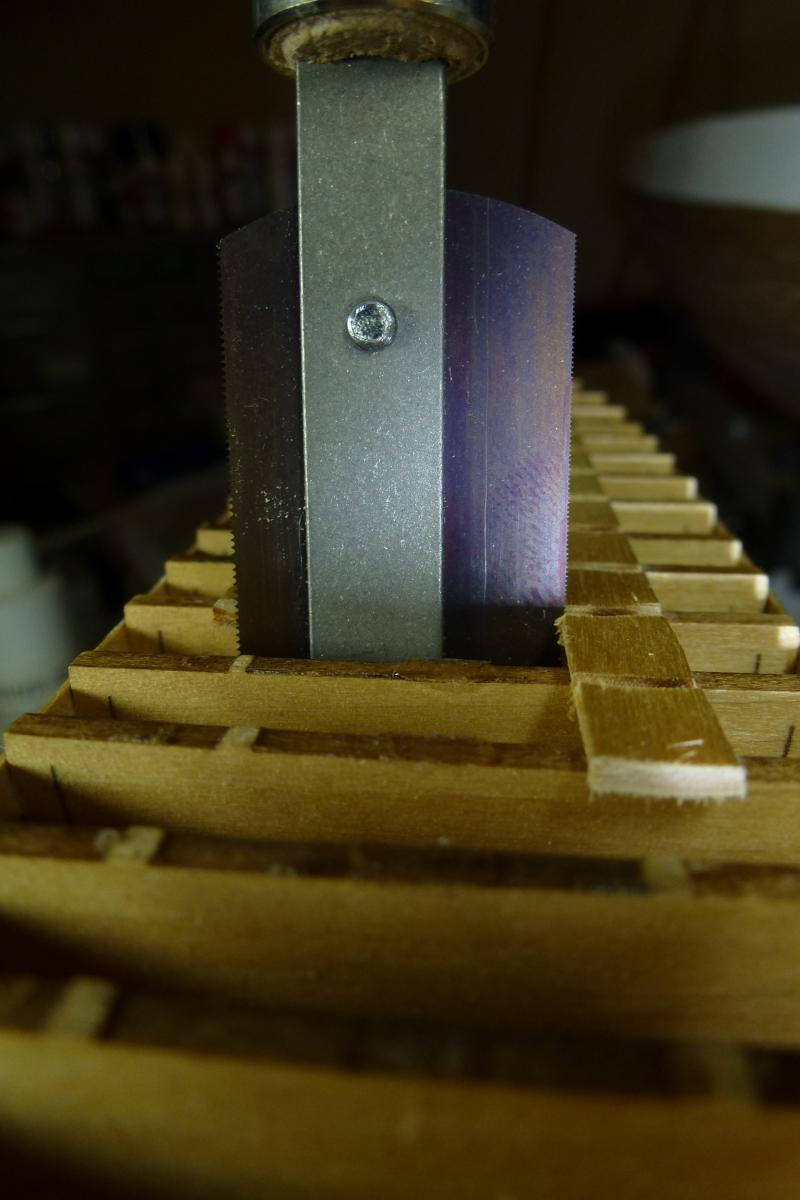
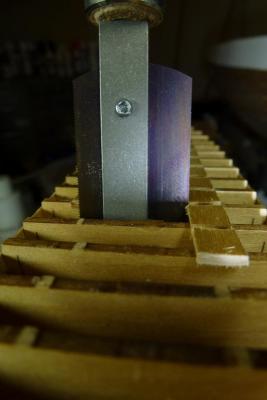
Cutting away the bulkhead notches was something I didn't look forward to. But using the new "type" of razor blade saw the cut is almost like laser cut. The blade itself is 1 1/2" long. In this picture it look huge.
- 335 replies
-
- 4
-
-
- 18th century longboat
- Finished
- (and 1 more)
-
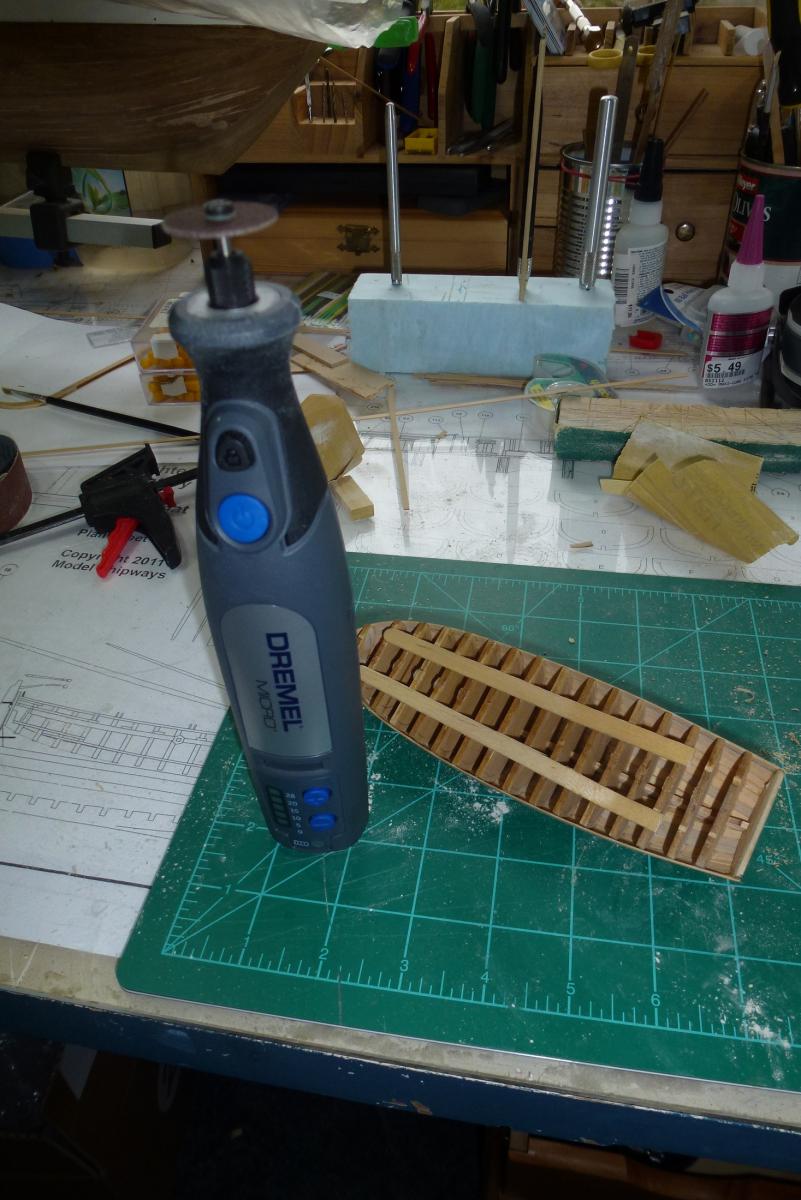
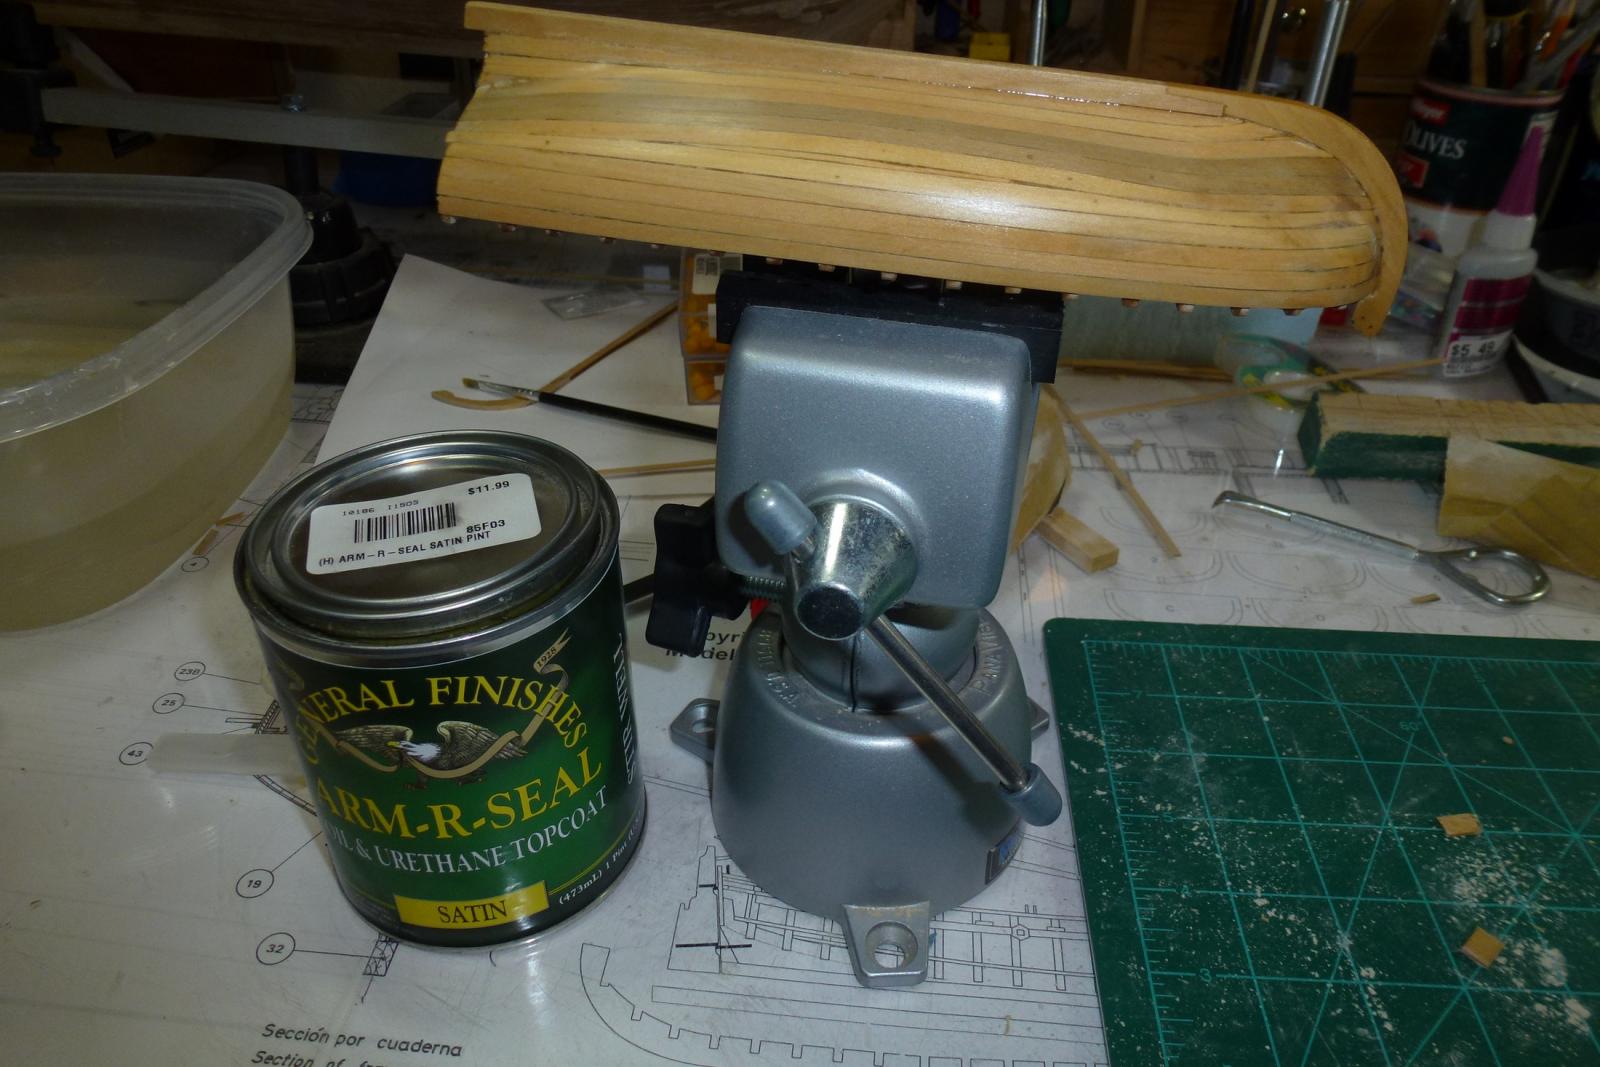
A long time has elapsed since I started the log, however today I am uploading the very latest pics, work has been done during the day. The hull was fully planked earlier this week. I had to do some mod's as I noticed some of the planks didn't attach fully to the bulkheads. All is CA glued. The bulkhead support (coffee stirrer from a famous coffee chain) was cut into parts by the new Dremel Micro 8050 The machine itself is really nice to work with, it's re-chargeable Li-On batteries charges fast and it's easy to hold (low weight) General Finishes Arm-R-Seal is the poly wipe on I am using. I didn't even bother to let it dry the slow way, I used the hair dryer. Some extra light sanding I and I should be ready for painting.


- 335 replies
-
- 6
-
-
- 18th century longboat
- Finished
- (and 1 more)
-
Jack, that is looking so much better. I am glad you didn't give up. Enjoy your Thanksgiving, don't eat to much bird. We are having Alaskan fresh water salmon instead of the bird.
- 41 replies
-
- 1
-
-
- 18th century longboat
- model shipways
- (and 1 more)
-
Jack, It seems like you have the same issue as I did with the third plank from top, as it like to curle outwards (not sticking to the bulkhead completely), either you redo the whole plank or just do partial at the bow. Since I used CA, it was easier to cut out and replace part of it. Just take it slowly and think "each plank as a separate project".
- 41 replies
-
- 1
-
-
- 18th century longboat
- model shipways
- (and 1 more)
-
I was searching for more info regarding the longboat especially how they were painted, and came across this website containing lot of useful info. I thought this book could be very useful for many of us to get in-depth about the artillery. Enjoy, http://www.privateermedia.com/Publishing/book1.htm
-
Can i live without a BYRNES TABLE SAW
Nirvana replied to shihawk's topic in Modeling tools and Workshop Equipment
Sorry for intruding, but I felt I like to be part of this conversation. No, I don't have a Byrnes table saw, but it's on the "wishing list". Because not having such I have been buying strips from Jeff at HobbyMill. Since he is to close down his business there won't be any more of the high quality strips available. See where I am heading? And yes, buying ready made strips are more expensive than buying a plank and ripping it yourself. Price difference may vary depending on the material, but I did a short comparison and found the strips being about three times more costly than a plank and ripping it. Sure you will have a higher initial cost buying the Byrnes table saw, but it won't take much before it has paid itself versus buying strips. I do have the thickness sander and am very happy with it. But this is only my two cents. Ps. The Byrnes table saw can be used in other applications besides ship modelling. -
Augie, as mentioned before I have the Confederacy waiting, and I enjoying every little bit of your build log. Question: Do you think it would be possible to plank the deck with thicker strips and no false deck; type Bluenose? Just curious.
-
Just Wishing ...work benches (edited)
Nirvana replied to BubbleHead's topic in Modeling tools and Workshop Equipment
The Sjöberg work benches are so good they are being used in the wood classes in Sweden. Remember my wood classes in the 70's, the quality is outstanding. Definitely worth the money. Plus there are many accessories available as well. Here is the link to the company. I made it sure you have it in English.