Nirvana
-
Posts
5,453 -
Joined
-
Last visited
Content Type
Profiles
Forums
Gallery
Events
Everything posted by Nirvana
-
www.pssm.club
-
Welcome to MSW StebbinsTim, there are quite a few people from PNW joining in the past. Yes, there is PSSM (Puget Sound Ship Modelers) meeting up every month. Again, Welcome to MSW
-
 Alan, use hardened steel nozzle they are better and long lasting.
- 460 replies
-
- 4
-

-
- Finished
- Flower-class
- (and 1 more)
-
Alan, this is looking very nice. How did you create the davits?
- 460 replies
-
- 4
-
-
- Finished
- Flower-class
- (and 1 more)
-
HSwMS Äran by Nirvana
Nirvana replied to Nirvana's topic in - Build logs for subjects built 1901 - Present Day
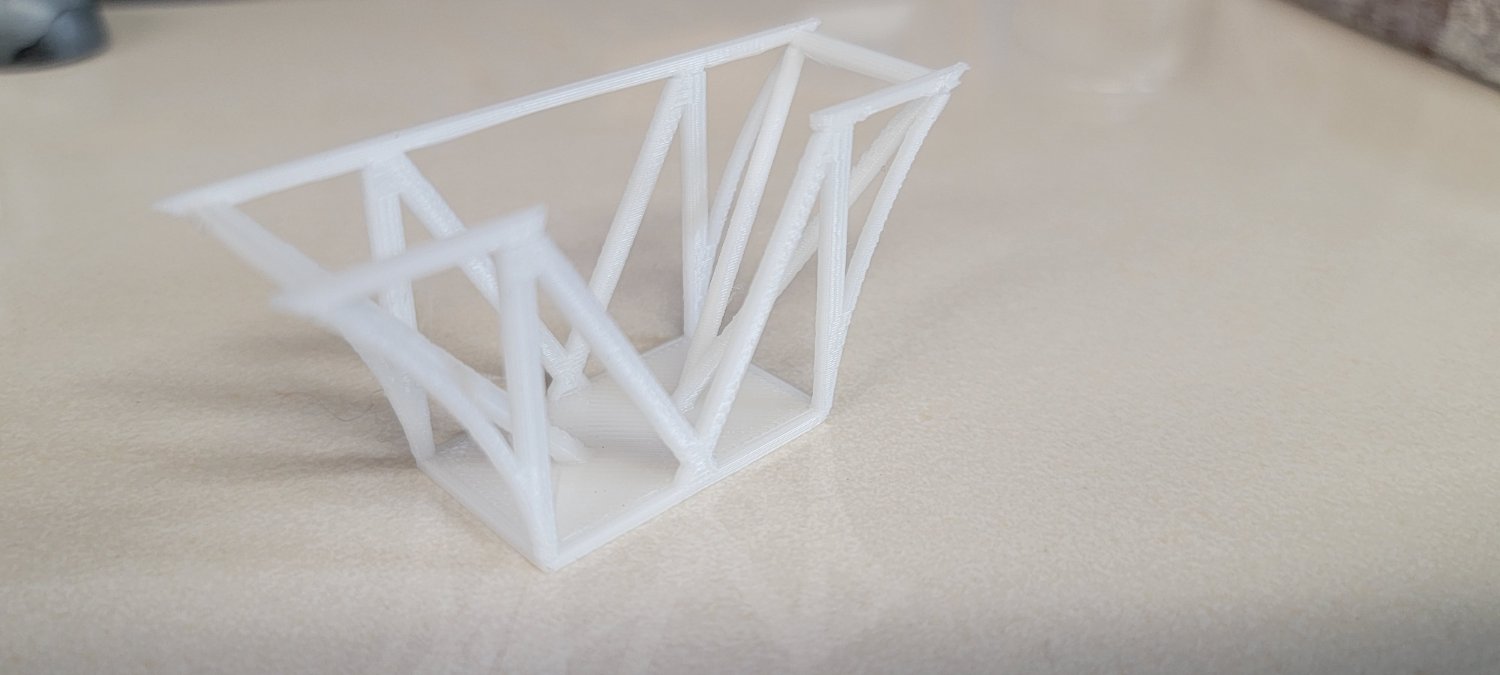
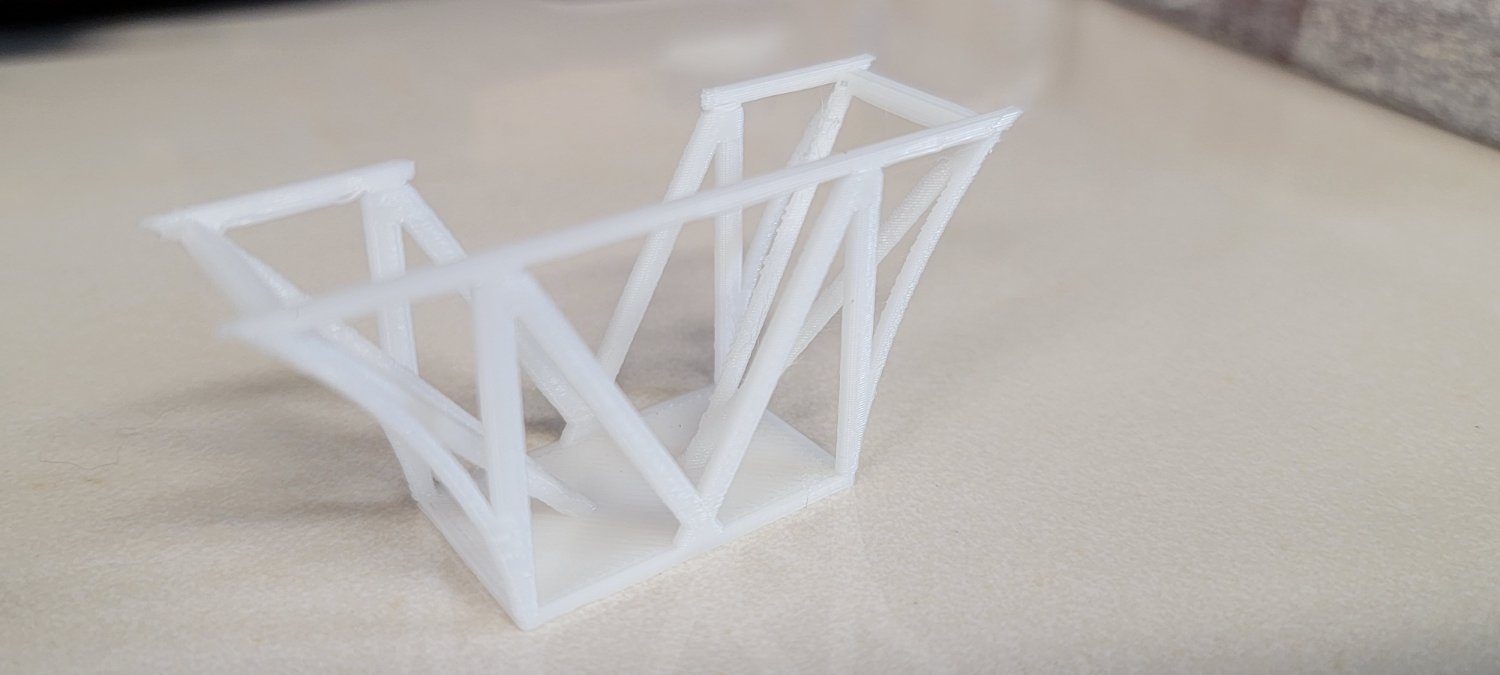
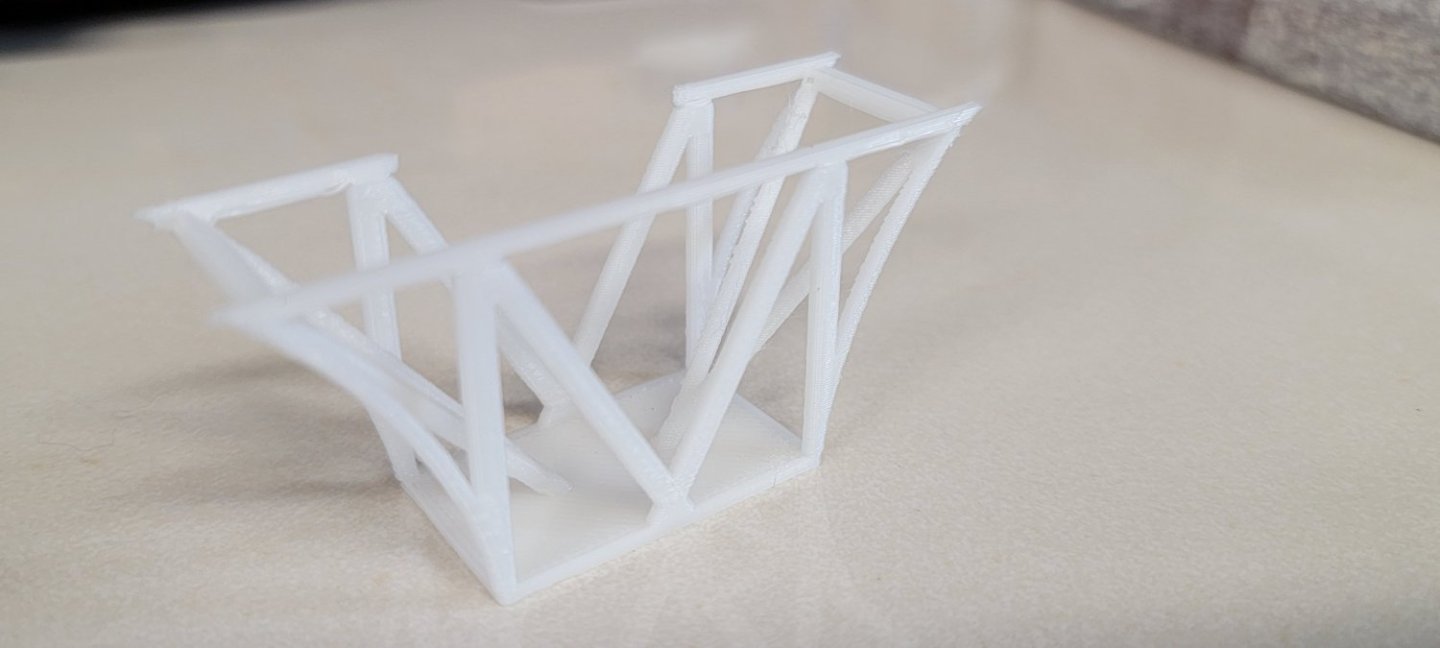
So I got the 3d printer built and tuned. Did my first serious print of the searchlight superstructure. No support needed!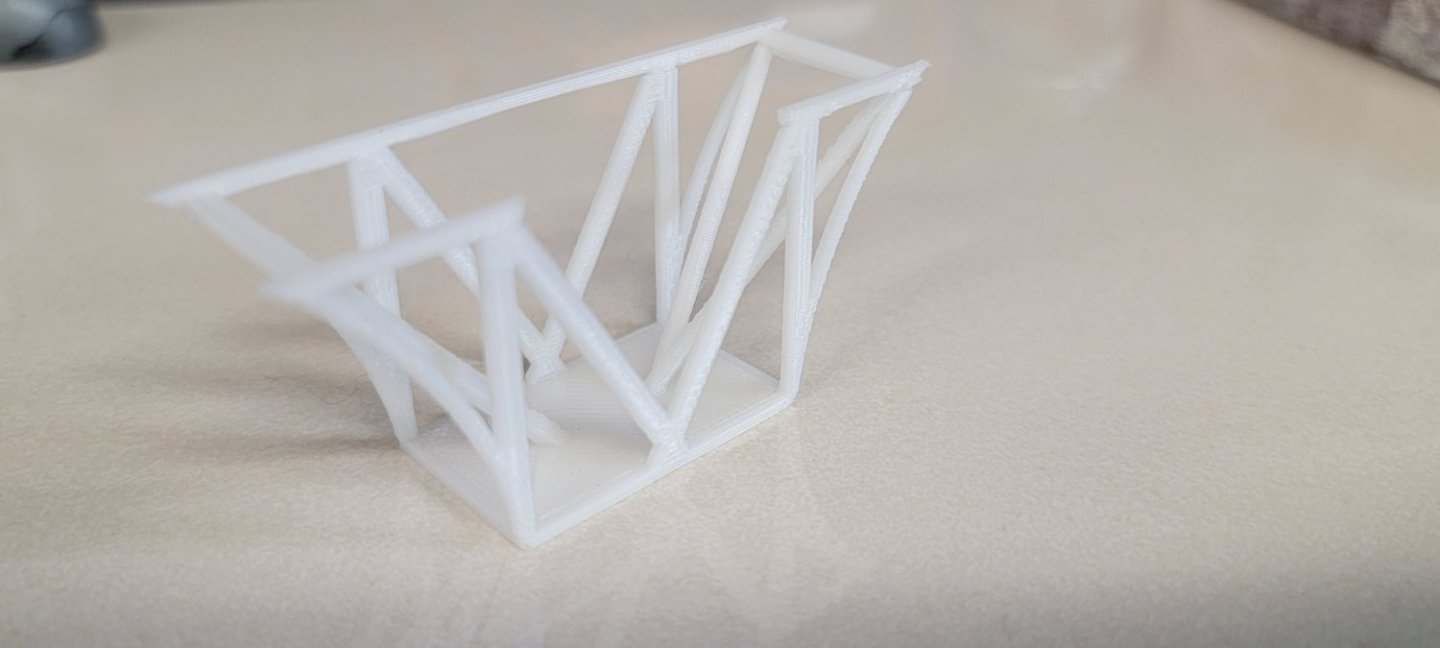
- 24 replies
-
- 10
-
-
I am done with power tools; I have what I need as my arsenal was completed last weekend when my Admiral picked up a Craftsman 9 bandsaw for 50 dollars at a nearby estate sale. Bandsaw Byrnes Table saw Byrnes Thickness sander Byrnes Disc sander Generic scroll saw Dremel corded and re-chargable drill Dremel Lathe Ender 3 V2 3d printer Airbrush And yes, I do use all of them.
-
Rich, I hope you have a window, because I didn't have any cooling in garage until lately. The two windows I have in the garage is facing south and west, in my building corner. And made it unbearable to be in during summer time. There are various brands out there, so do your research. Then I got this and it works wonder.
-
I will definitely try this as well. Good for cramped spaces.
-
So you are working on USS Baltimore! Please, send me a couple of screen shots for the newsletter
-
Air Compresser
Nirvana replied to Guyuti's topic in Painting, finishing and weathering products and techniques
Guy, I would recommend a small hobby compressor with tank, like this There are so many various brand names of these units, most important is the airbrushes themselves. The more you pay - the higher quality. Good luck. -
Chris, warm Welcome to MSW and yes I like to second what steamschooner wrote. Contact us at Puget Sound Ship Modelers, PSSM. You can also contact me as I am the editor for the news letter. Twice a year we are meeting at Foss Waterway Museum.
-
Ange, I truly like the build log of yours, very nice done and having Atlantic as a comparison model for size. I have Constructos America on hold, hoping to give her the same love and attention you have done to yours.
- 37 replies
-
- 3
-
-
- BlueJacket Shipcrafters
- America
- (and 1 more)
-
Radek at HiSModel.com and the decks seems to be superior to the deck I got. Besides he also offer so much more of aftermarket items for the ship.
- 446 replies
-
- 2
-
-
- Revell
- Constitution
- (and 1 more)
-
Bill, here is the link from AL with the plans for download. There are four of them. You need to download the jpg's and save to a thumb drive, then take it to a print shop. They will be able to print them at 100% as the pre-view are at approx. 30% Good luck with the build.
-
Greeting from Pennsylvania
Nirvana replied to New England Captain's topic in New member Introductions
Andrew, my best welcome greeting to you.... trying to outshine the other greetings....😆 Don't know if I did so, but now you are one of us. Hope to see your build log soon. -
Coming into ship modelling from a unusual angle
Nirvana replied to von_bednar's topic in New member Introductions
Witam, warm welcome to Model Ship World. The 3d printed steam ship SS Venture seems like a fun project. Did you have to scale it up? And yes, even I have ordered Paper card models from Poland. Mine are from JSC, got the Swedish fleet. -
Hello from Canton Ticino, the Italian Land of Switzerland
Nirvana replied to Piero52's topic in New member Introductions
Piero, is that a version of Peter? Anyway, a warm . I am glad you have your ship (or part of a ship) narrowed down. And it's never too late to fall in love again. Since I didn't know exactly where you are located, I looked it up...... and I have to give to you. It's just stunning beautiful! I am in awe. (For all other members look up this location, I could spend a lot of time there) -
Ed, just stunning! So, I take you will get going with Rattlesnake soon.
-
Very well done! Congrats to the final! Now what is remaining is a case!
-
New to modeling - wish I found this site earlier
Nirvana replied to flutlo6180's topic in New member Introductions
Ken, a warm -
HSwMS Äran by Nirvana
Nirvana replied to Nirvana's topic in - Build logs for subjects built 1901 - Present Day
Paint job is much of a guess work with little history of ships of the time era. Thank you, Andrew, for the encouraging words. -
HSwMS Äran by Nirvana
Nirvana replied to Nirvana's topic in - Build logs for subjects built 1901 - Present Day
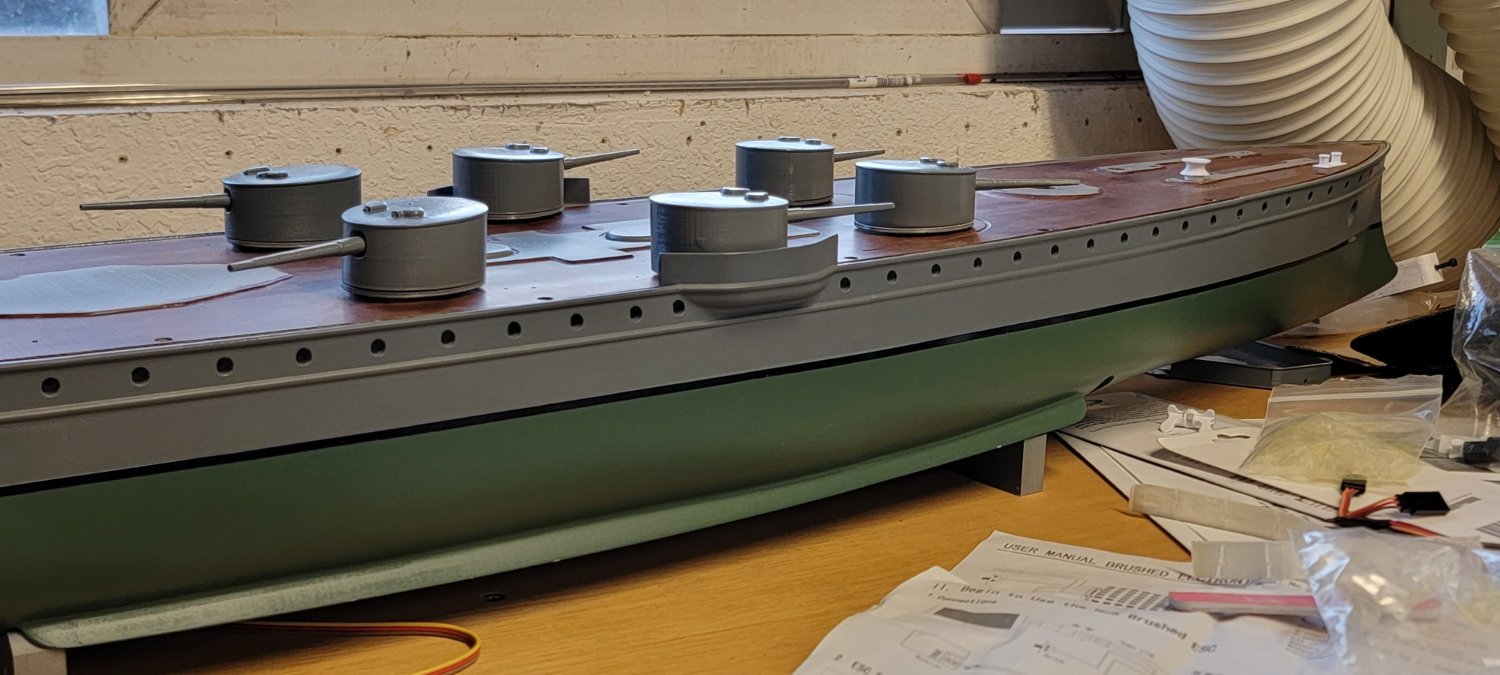
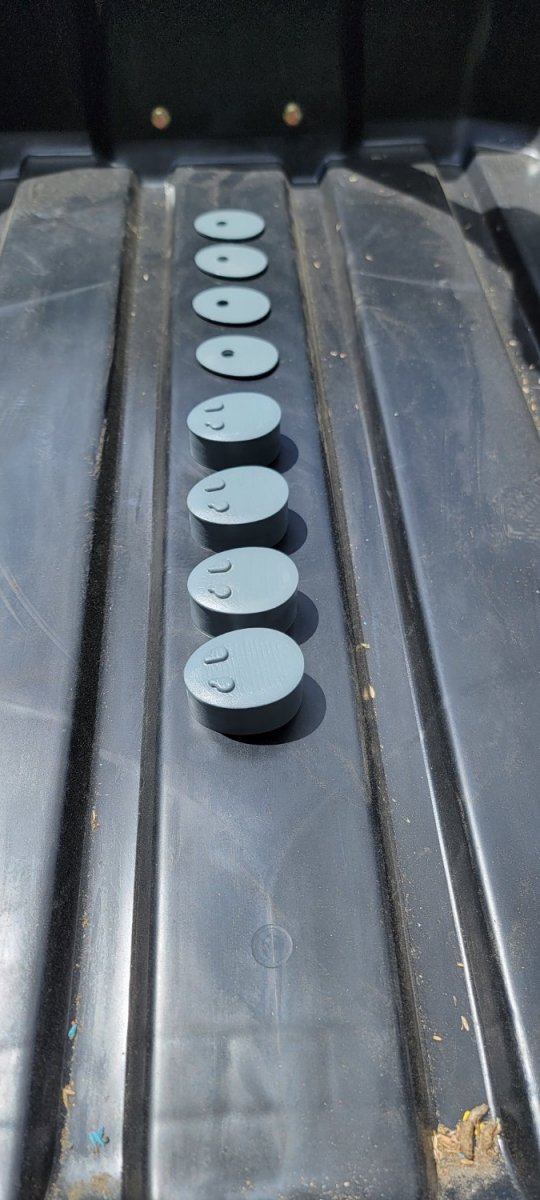
Side turrets almost put together but all painted.
- 24 replies
-
- 10
-
-
HSwMS Äran by Nirvana
Nirvana replied to Nirvana's topic in - Build logs for subjects built 1901 - Present Day
New ESC's was ordered yesterday. New computer TX to be ordered today. Sadly, I have had such a great experience with the Spektrum brand (yes, it's expensive) but that's what I am going again. -
HSwMS Äran by Nirvana
Nirvana replied to Nirvana's topic in - Build logs for subjects built 1901 - Present Day
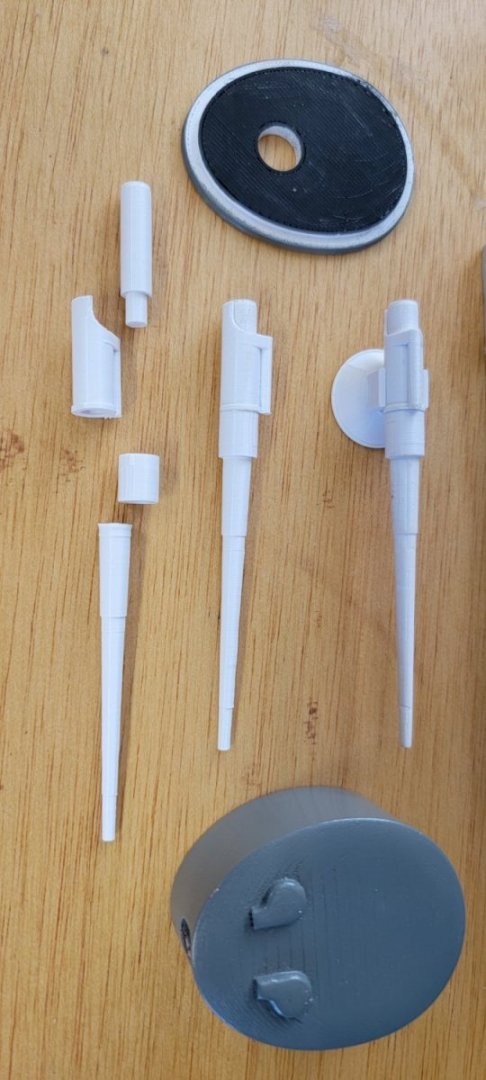
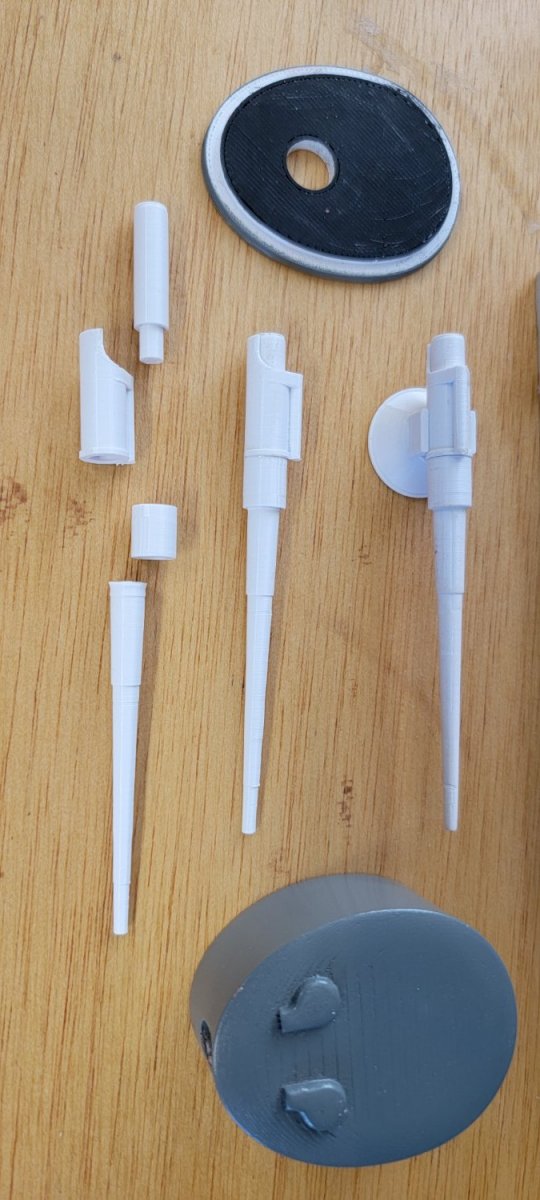
Working with ESC and not checking polarity can be hazardous, as I experienced. Burned out one of them. And I also learned the motors has a tremendous torque. Today I am working more on the details, painting and assembling of turrets. Outdoor temperature makes the curing time very short. Each turret and cannon consist of 8 parts.