Nirvana
-
Posts
5,457 -
Joined
-
Last visited
Content Type
Profiles
Forums
Gallery
Events
Everything posted by Nirvana
-

A Lorch Micro-Mill that never was ...
Nirvana replied to wefalck's topic in Modeling tools and Workshop Equipment
Now, that makes the mill even more impressive! -
A Lorch Micro-Mill that never was ...
Nirvana replied to wefalck's topic in Modeling tools and Workshop Equipment
Weflack, Are you creating this little mill from plans or is this just all from plans in your head? I am so impressed! -
Hi Sarah and welcome back along with your Longboat build. That frame support you added will keep the longboat strong while fairing the frames. It is well needed. I beveled the planks lengthwise for a tighter fit to avoid light coming through. I went along with Chuck's additional separate instruction using a hair-dryer or light heat-gun for bending and CA when it came to planking. Worked out really nice. However, your longboat is coming together very nicely and quick as well. We missed you at the annual PSSM BBQ in August. And that applies to you Harvey as well.
-
Herr Pucko, I am very pleased that the instructions are in Swedish as well. The detailing is amazing! Thank you for sharing.
- 305 replies
-
- 3
-

-
- deagostini
- vasa
- (and 1 more)
-
Gråsäl (grey seal), I just found your restoration of Bluenose (jag såg din restauration av Bluenose) And as to me it seems to be an old AL version (för mig ser det ut som en gammal version of AL) However, the ship doesn't seem to be to damaged so it should be a fairly simply fix (däremot verkar det som att modellen är i ganska gott skick, så det borde inte vara så svårt att ordna henne) There are so many build logs of Bluenose, so you shouldn't have to many problems (Det finns så många olika byggnationer av Bluenose (både orginal och version II) så det borde inte vara några problem för dig. If you have any sort of question in with Bluenose, this is the site! (Om du skulle hava någon fråga beträffande Bluenose, så har du hittat rätt!) Good luck to you work - looking forward seeing more!
-
Mr. Pucko, I hope you didn't choke on the chocolate drink when you realized it. I wonder if there is an error in the laser cutting?
- 305 replies
-
- 2
-
-
- deagostini
- vasa
- (and 1 more)
-
Beautiful pictures, thank you for sharing. I miss visiting the area. It was easy when living in Europe, but now traveling from the West Coast of America there is so much more planning.
-
Bill, There are ship parts in the pictures. Guess you got caught by the "surprise"
- 305 replies
-
- 2
-
-
- deagostini
- vasa
- (and 1 more)
-
Very nice! Looking forward to seeing what is next in the building line.
- 305 replies
-
- 2
-
-
- deagostini
- vasa
- (and 1 more)
-
Adam, This looks both interesting and very good. Guess I will be one of the first to pull up a chair, to watch this build.
-
Thank you Chuck, I appreciate your fast answer. I was suspected the 24 but wanted to be sure.
- 335 replies
-
- 2
-
-
- 18th century longboat
- Finished
- (and 1 more)
-
Can anyone shed some light regarding the oar locks as these are supposed to be made out of 26 gauge black wire. The material list only shows 24 and 28 gauge. Which size has been used on others longboat?
- 335 replies
-
- 2
-
-
- 18th century longboat
- Finished
- (and 1 more)
-
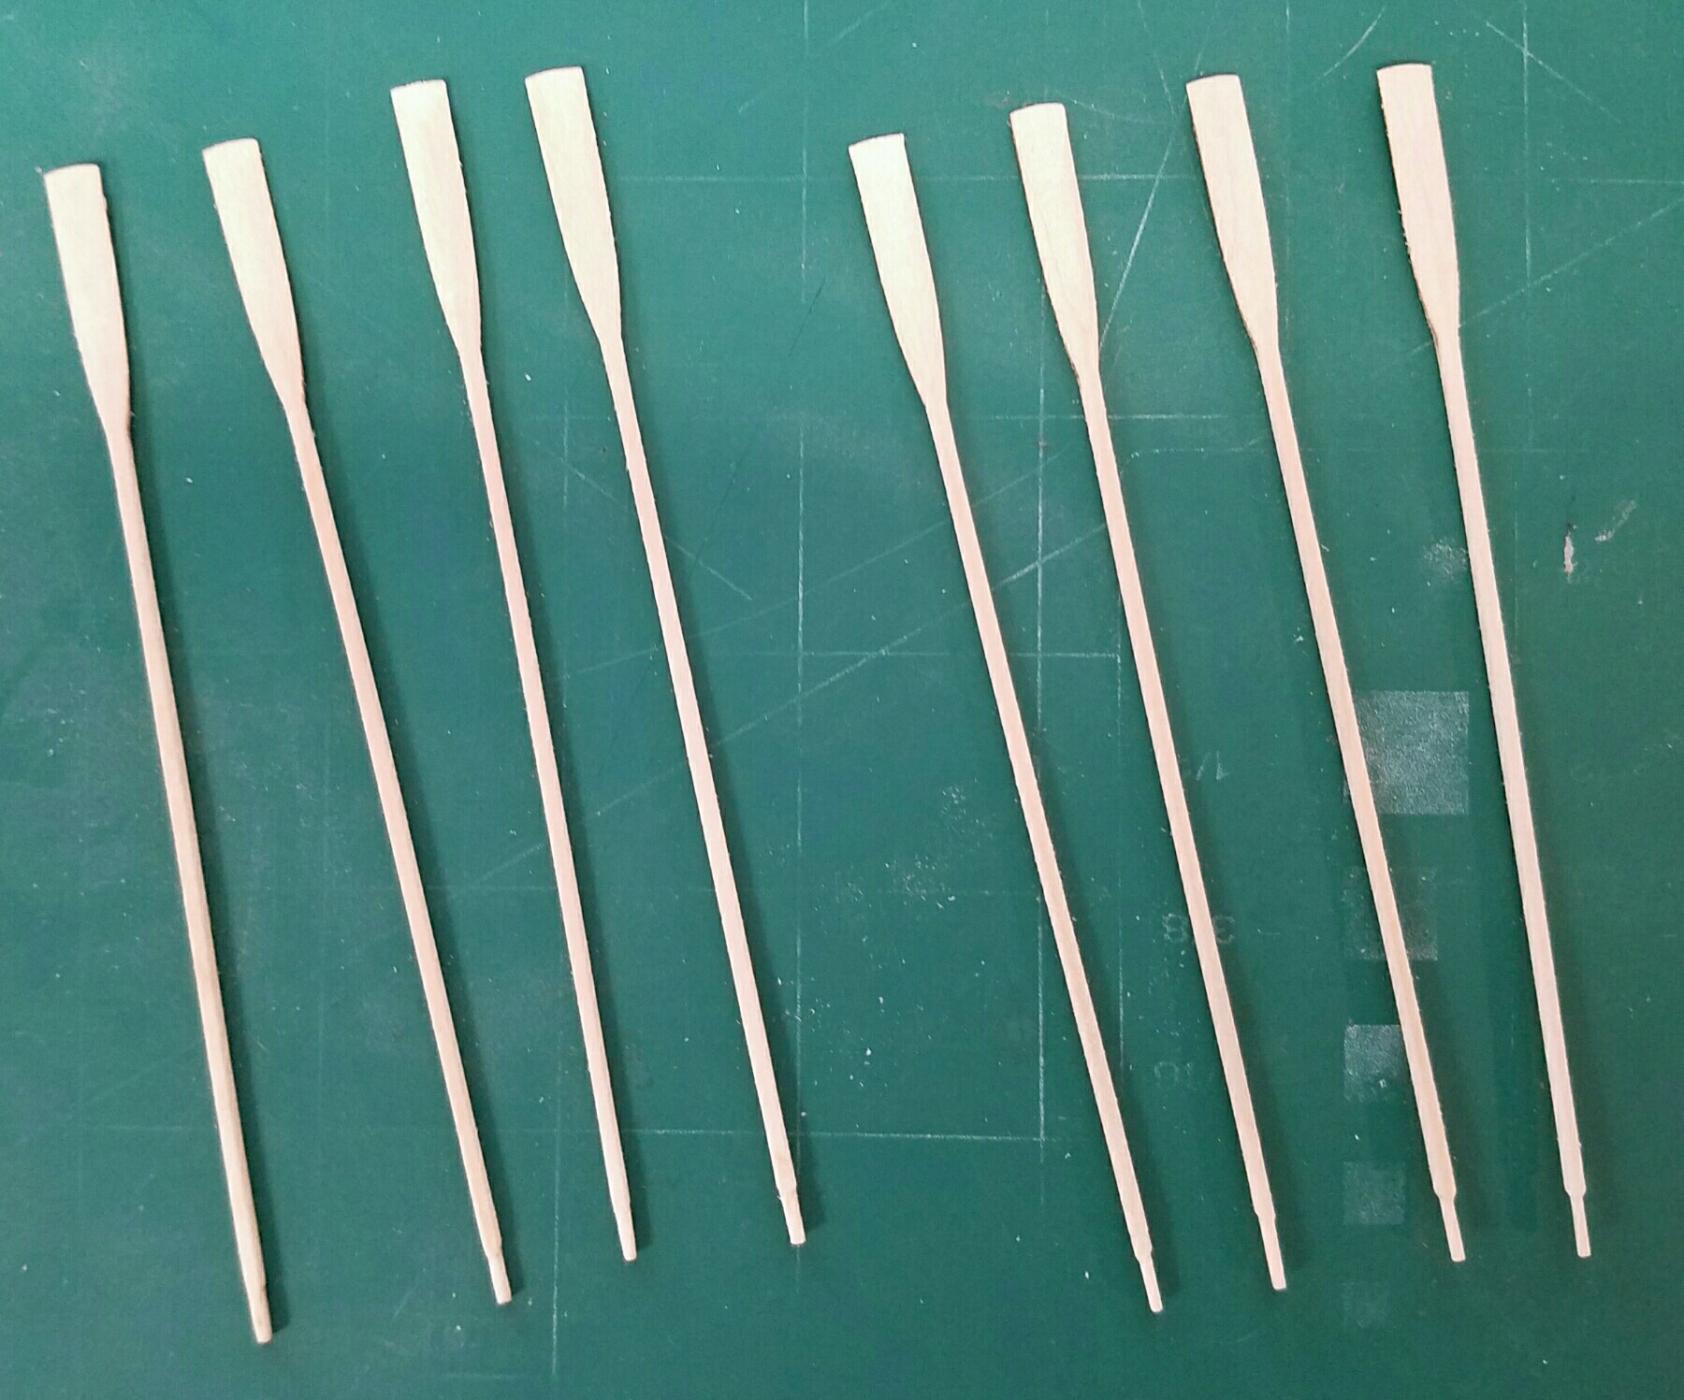
As I stayed Sunday with intention of heading home Monday morning, this allowed me and Floyd to work on our longboats. So, yes I made the oars for both of us. A set of for each.

- 335 replies
-
- 11
-
-
- 18th century longboat
- Finished
- (and 1 more)
-
Tools and Supplies for My "Shipyard"
Nirvana replied to daveward's topic in Modeling tools and Workshop Equipment
Toni, Somewhere in our forum there is a topic regarding "Bondo" with the recommendation to stay away from it. Elmer's Wood putty do work. -
Tools and Supplies for My "Shipyard"
Nirvana replied to daveward's topic in Modeling tools and Workshop Equipment
Kurt and Dave, Many times when it comes using the optical visor of some kind we will experience a light issue. This to illuminate the work we are doing using the visors. For the mentioned visor there is something to consider and that is the led attachment. I have another type of visor that I am not happy with so, I thank you for this lead. -
Jerry, Great job! I am just waiting to get started with my Bluenose.
-
Aydin, That decking is looking fantastic, I hope you used epoxy for laying the strips. Or are you to cover the deck with fiber-glass as well? I am concerned you will have issues with the water otherwise. It would be such a shame if you get problems. Have you done any interior water protection at all? I hope you have as you have put down the deck already. Everything needs to be protected, sadly to say but necessary since you are to RC her.
- 414 replies
-
- 4
-
-
- riva aquarama
- amati
- (and 2 more)
-
As Cathead mentioned and I also learned, more fairing is needed. But otherwise looking good.
-
Aydin, Applauses for a wonderful build. Looking so good.
- 414 replies
-
- 3
-
-
- riva aquarama
- amati
- (and 2 more)
-
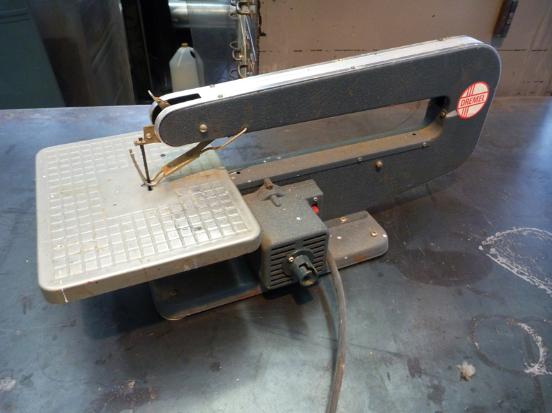
Question not related to the Bluenose but the dremel scroll saw. One local second hand store has the old one at 80 dollars plus tax. Should I pick it up? For the Bluenose build, I like it it very much. One step plus one and then it will be more than two.....
-
Model Machines Disc Sander for sale
Nirvana replied to Byrnes Model Machines's topic in Modeling tools and Workshop Equipment
Wow that was fast, Less than two hours - too bad I was engaged with vacuuming the house otherwise I would have had it! Congrats Pete! -
Looking Good Jerry!
-
Mark, that model is not that small as I thought from the beginning.......