HOLIDAY DONATION DRIVE - SUPPORT MSW - DO YOUR PART TO KEEP THIS GREAT FORUM GOING! (Only 20 donations so far - C'mon guys!)
×


Ulises Victoria
-
Posts
1,790 -
Joined
-
Last visited
Content Type
Profiles
Forums
Gallery
Events
Everything posted by Ulises Victoria
-
 Magnificent!!! I love your ratlines... so even!!! Can we expect it to be finished this March??? Ulises
- 1,616 replies
-
- 7
-

-
- caldercraft
- agamemnon
- (and 1 more)
-
Karl... this bowsprit looks very well done. The detail is amazing. I've never attempted any welding!!! Good job!!! Ulises
- 164 replies
-
- 3
-
-
- Model Shipways
- Finished
- (and 1 more)
-
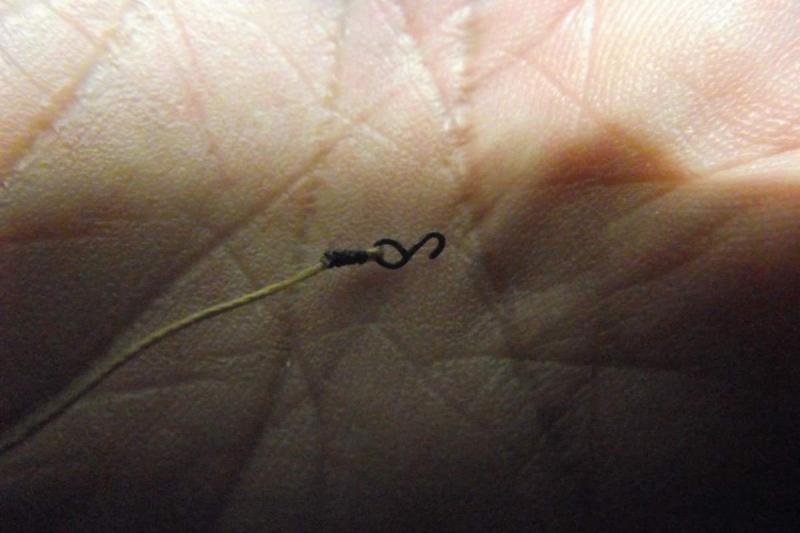
Hey Karl. Yes, there are eyebolts in the kit.... too big.... too gold colored. The advantage is that the twisted portion in my own provides additional mechanical and glue grip. Yes... the wheels were included in kit.
.thumb.JPG.5325972b2e1d62835b8b69c74e1f0459.JPG)
- 786 replies
-
- 5
-
-
- Royal Louis
- Finished
- (and 1 more)
-
Here we go.. New modeler; new member.
Ulises Victoria replied to Achu's topic in New member Introductions
from Monterrey, Mexico The most important thing I see in your setup, is that mug of coffee. Best wishes on your project. Ulises -
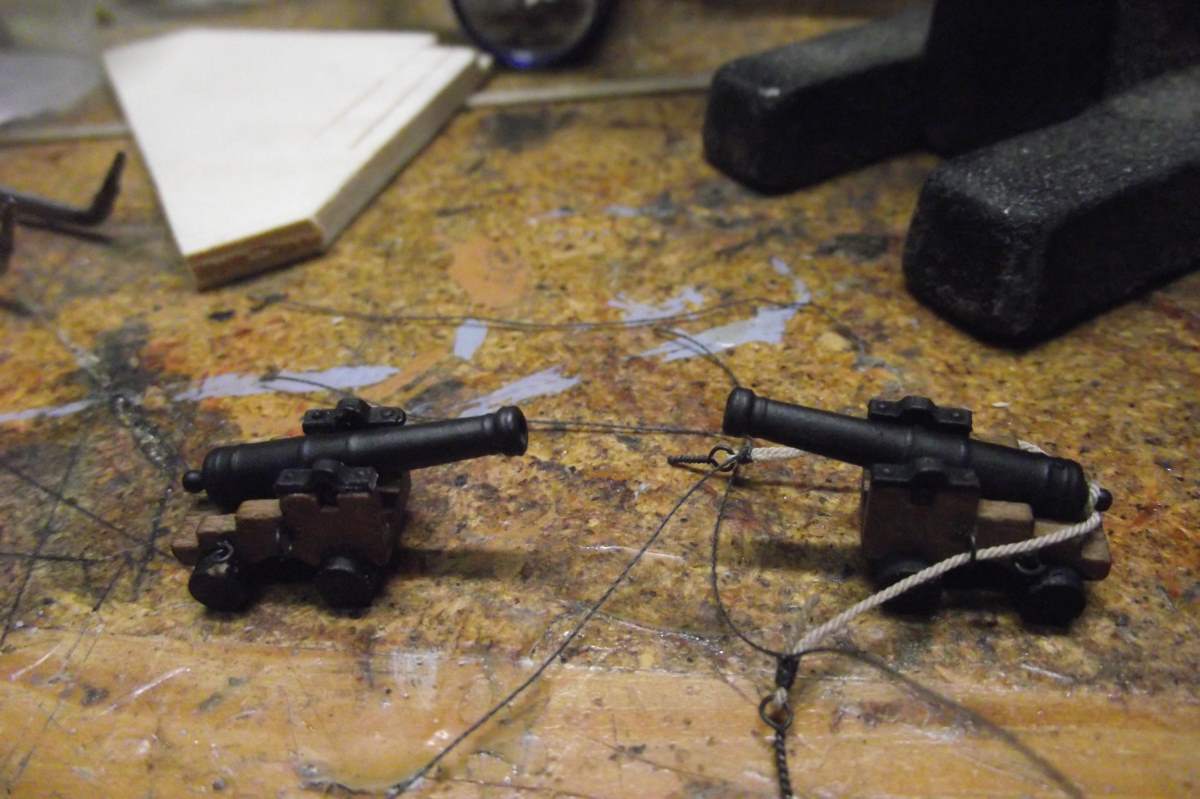
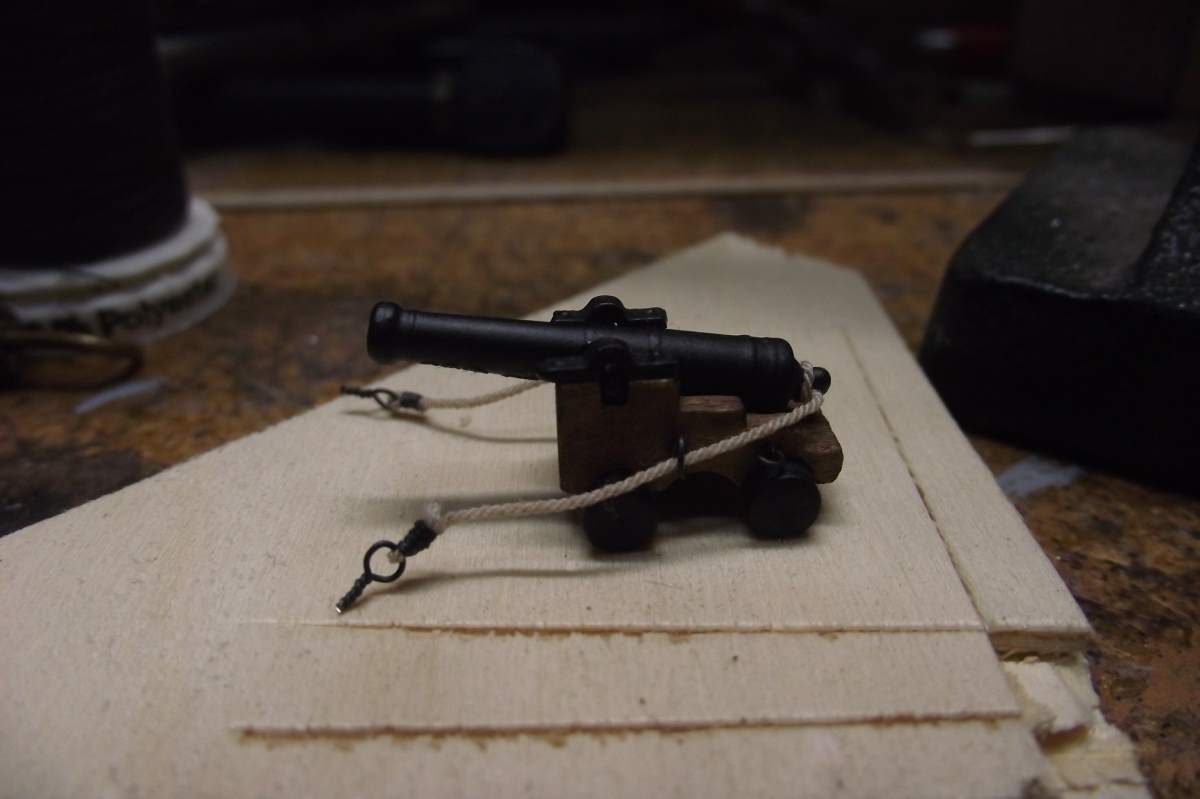
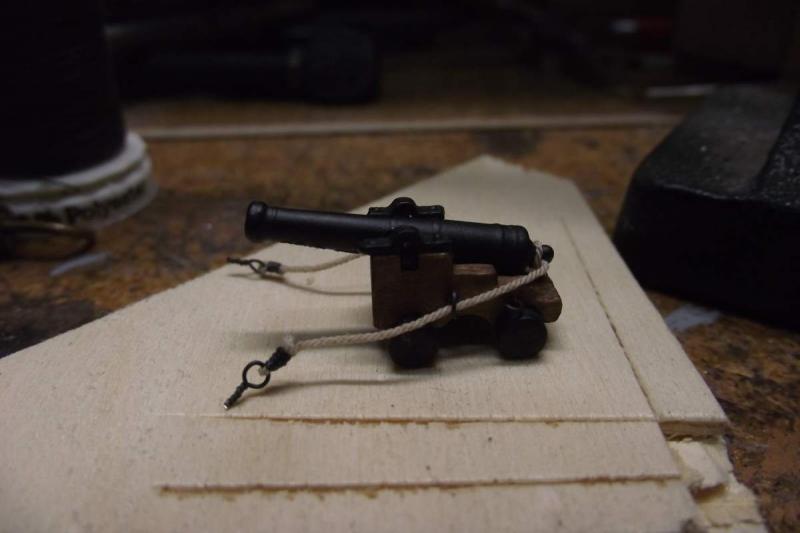
Cannon assembly line update. (With special mention to Sjors and Anja ) First, a bunch of eyebolts in two different sizes had to be made. I am starting with these 12 cannons that go on the upper deck. Here, holes for eyebolts have been drilled Here eyebolts are glued and attached and coat of BLO applied Cannons in place. This is one of the rare occasions in which I use cyanoacrilate (Super glue) Here hinges have been placed A piece of rope tied to the cannon bell Process of tying the eyebolt Two cannons rigged These 12 cannons are now ready to be mounted. To be continued... I don't know how to remove a photo. This next one wasn't intended to be here Ahhh- The delete button is well hidden!
.JPG.39bb796d540bfeb6cec736d6bbc094b4.JPG)
.JPG.3f0c32f9bc5c6cc017f205010ba4319d.JPG)
.JPG.fe51e5f4f82671e5e53fdbe267cd61e2.JPG)
.JPG.b916cb6b6dcaf79111dffaa04debfd35.JPG)
.JPG.ee6755a7deb73e27459c64e8a3a07519.JPG)
.JPG.8d51fddd1f55593a7fc0518c279552b8.JPG)
.JPG.05003ab333bec417dc8cb9e1475cf50f.JPG)
.JPG.32cdc58c0aeddaeac28c3998cd1da272.JPG)
.JPG.6761c89d1675cfdf644e6495d0adc78f.JPG)
.JPG.ebbac2f679656f394552e7fff2fd2ab4.JPG)
- 786 replies
-
- 17
-
-
- Royal Louis
- Finished
- (and 1 more)
-
Are Woody Joe kits any good?
Ulises Victoria replied to Lucius Molchany's topic in Wood ship model kits
A Gretsch White Falcon... my dream guitar -
Actually I miscounted: There are 33.5 rigged cannons. Those last two in this update were rigged one side only
- 786 replies
-
- 2
-
-
- Royal Louis
- Finished
- (and 1 more)
-
Sjors: I will post photos for you Arthur: Yup! The other ship I built with that many cannons was (Plastic) Heller's Victory in 1/100. So long time ago (1993) I don't remember many details. Luckily in R.L. only 30 that go on open decks have to be rigged. Thank you, mates!
- 786 replies
-
- 2
-
-
- Royal Louis
- Finished
- (and 1 more)
-
Thank you Pat. Patience and perseverance are key. This is something I've learned from my past builds And yes, the remaining 28 cannons will be assembled in an assembly line, so to speak. Thank you for your kind words and visit!
- 786 replies
-
- 1
-
-
- Royal Louis
- Finished
- (and 1 more)
-
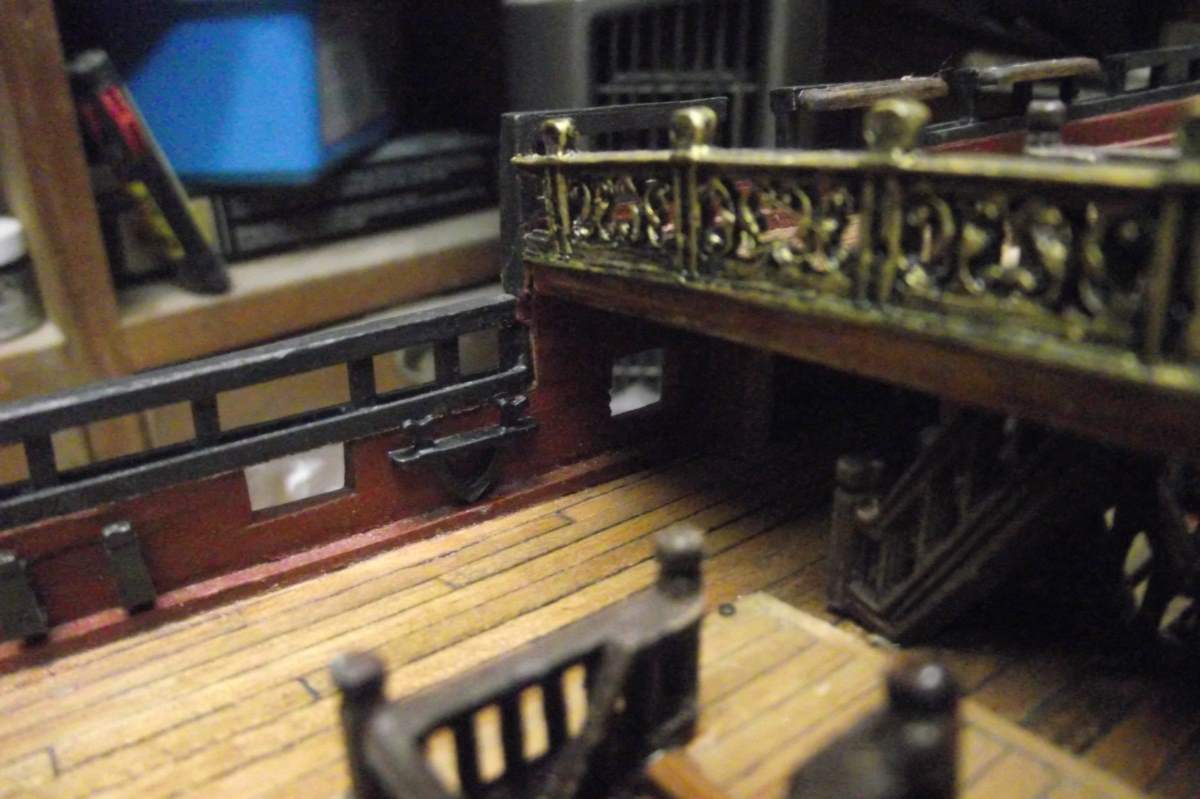
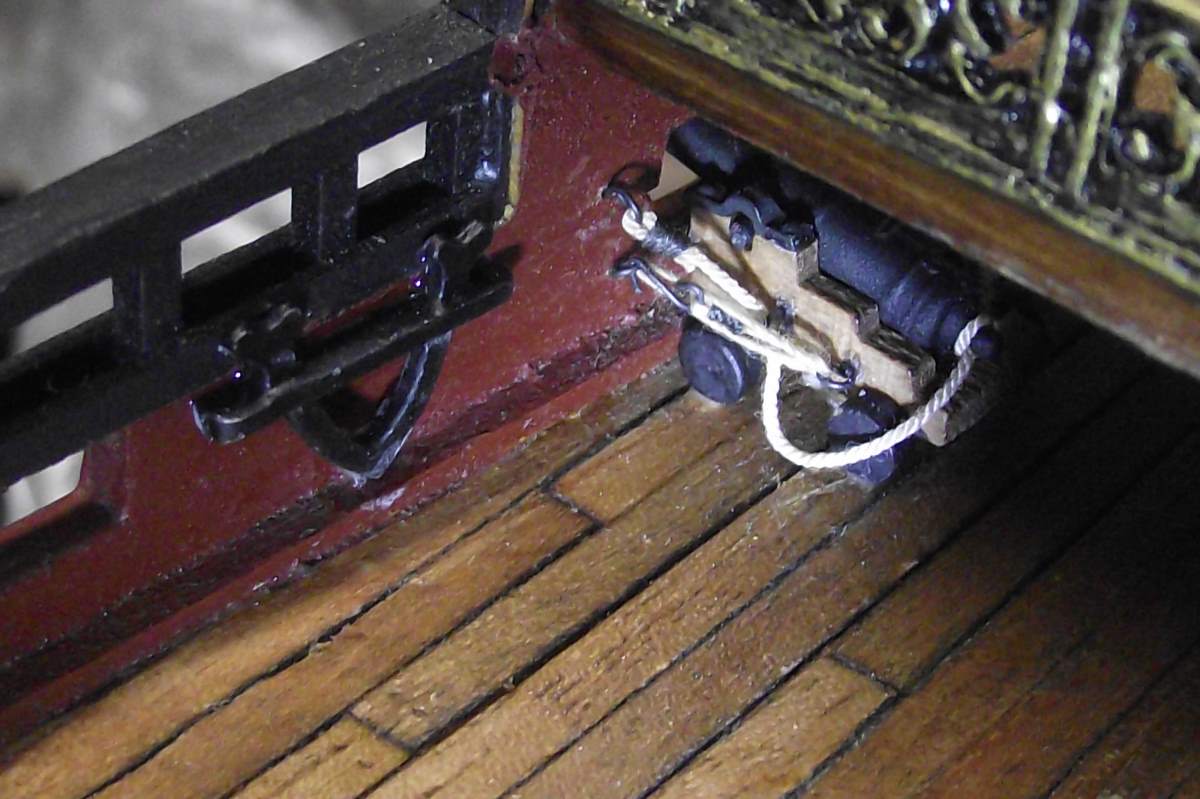
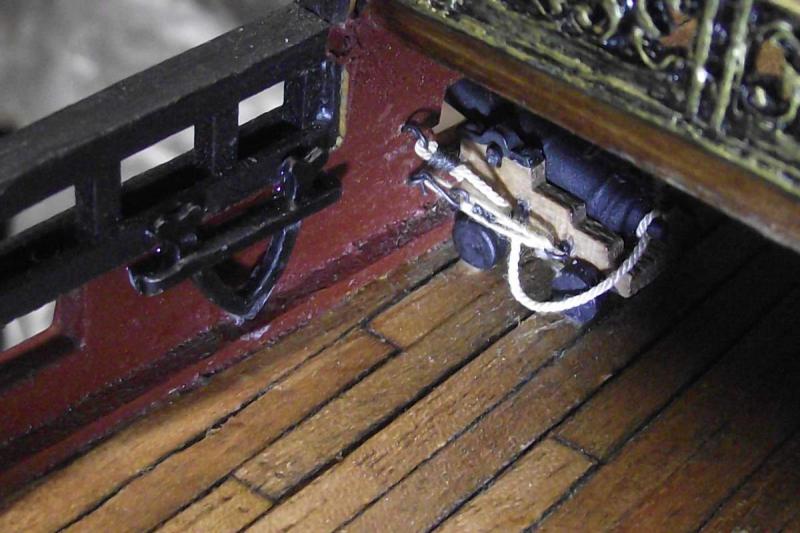
Hello all. Small update but a big relief for me. These two little guys were causing me some nightmares, just thinking where they had to be placed AND rigged... ... right here, under the deck. Just thinking about drilling holes and placing eyebolts here... As you can see, I thought that adding the eyebolts to the rope before placing the cannons would make things a lot easier, and indeed it did. Finally, both of them were placed, glued and rigged. These two were first since they obviously wold be the more difficult to accomplish. 28 more to go, but they will be easier as they are not hiding under a deck or anything. Thanks for visiting!!!


- 786 replies
-
- 7
-
-
- Royal Louis
- Finished
- (and 1 more)
-
Hello Dan. We all started with the first kit. There are several horror stories about starting with an advanced kit as a first project. ( I have my own) so your change in direction from the Connie to the Phantom is a wise move. It will tell you if you have what it takes to tackle the Constitution or Victory in the future. My best wishes in your project. Don't be afraid or shy to ask questions.
-
What is the most EPIC kit available???
Ulises Victoria replied to Rossi46's topic in Wood ship model kits
I concur with the above posters dkuehn and Rossi46. When I started reading this thread my mind was thinking: "When it comes out, Amati 1/64 Victory could be labeled as epic" Size, details, ornaments and a myriad of other things we had the opportunity to see while Chris was building the prototype make it a strong candidate. -
Hello Gunther. There are several issues, among them: cost. In some instances shipping costs skyrocket when shipping to Mexico. Other is the Postal Service in Mexico is totally unreliable. It takes forever for things to be delivered, IF actually ever they are. Stuff goes missing too often. Customs regulation and taxes are impossible to deal with. Services like UPS or DHL are the best options, but very expensive. Now I have to say that this may have changed. I wouldn't know since it has been years that I have a mail address in Texas, and they bring my things across the border for a very reasonable fee.
- 164 replies
-
- 1
-
-
- Model Shipways
- Finished
- (and 1 more)
-
Hey Karl. Great job here my friend. I buy from USA and overseas stores all the time. Try to find in your city a company that manages your import things. There is one here in Monterrey I have been using for years without problems. I would think Guaymas has to have something similar. Hope you find one. It is a life saver when buying stuff from USA or other markets. Hope this helps. Un abrazo!!!
-
Excellent. It has always be my feeling that the easiest and quickest way to ruin this kind of ships, is paint it with shiny colors!!!
- 86 replies
-
- 12
-
-
Hola Django. It is the Royal Louis, my present build. Please follow link in my signature for a full build log and more photos!
-
Hello Anja: What a beautiful ship. I have put my eyes over her several times, specially because her history is somewhat related to México. I will keep an eye on your build and my hands on Sjors' popcorn machine Oh, and welcome back!!!
-
I have placed two orders directly to them. Takes very long to arrive but other than that not problems whatsoever. My second order was a (rather expensive ) book in Spanish which I had purchased years before in French It was delivered in an unacceptable condition. I emailed them photos and a complaint. They never answered, but a few days later a brand new, plastic sealed book arrived. No questions asked, no returning of the damaged book asked. Very reliable company.
-
Guitar lessons. One more thing we have in common!!!
- 1,616 replies
-
- 6
-
-
- caldercraft
- agamemnon
- (and 1 more)
-
Hello my friend. Glad to see you back although I have to admit I have not visit for a long time . What i see however, looks fantastic. You are doing a terrific job here. My congratulations!!! Ulises
- 1,616 replies
-
- 6
-
-
- caldercraft
- agamemnon
- (and 1 more)
-
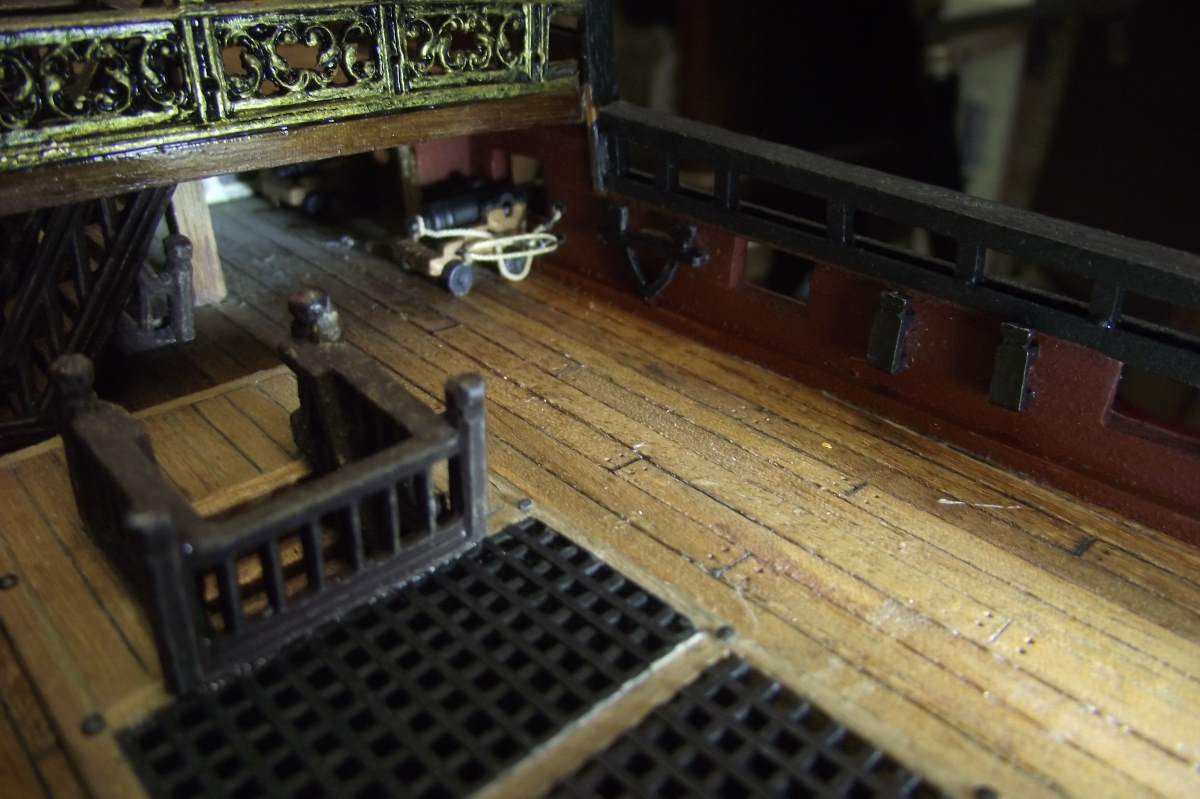
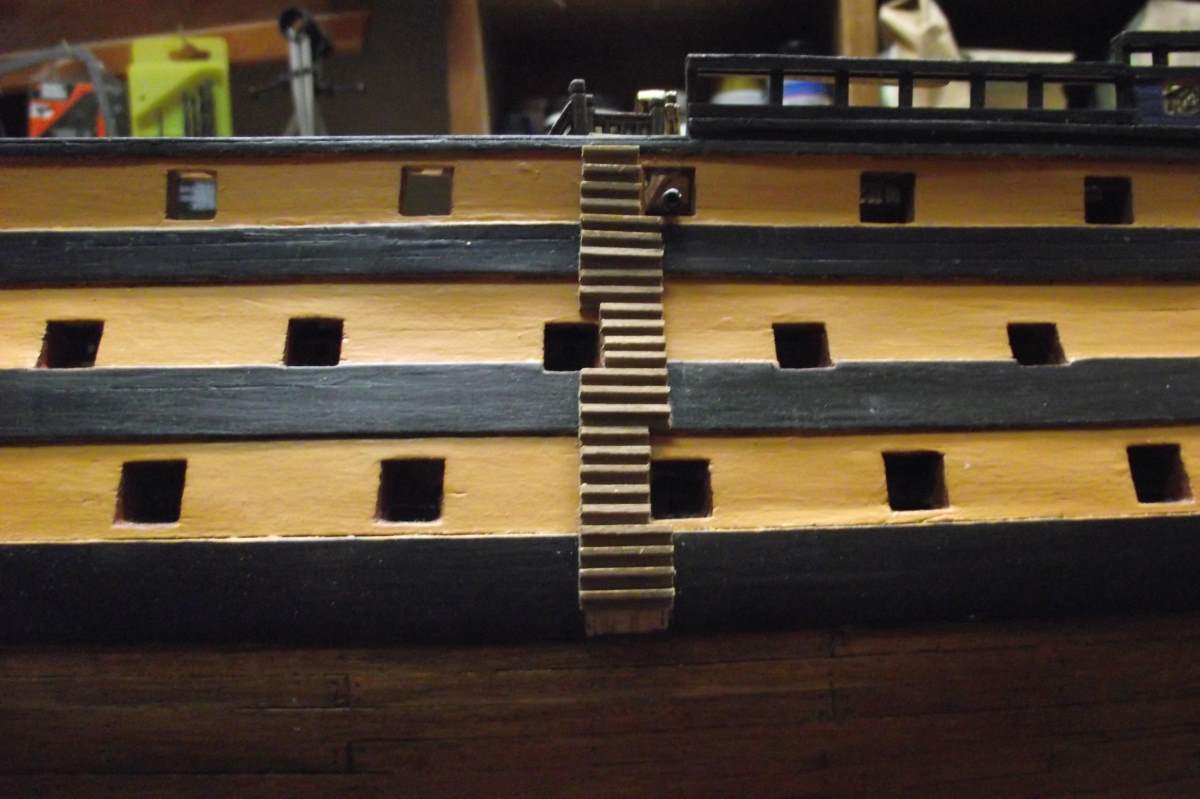
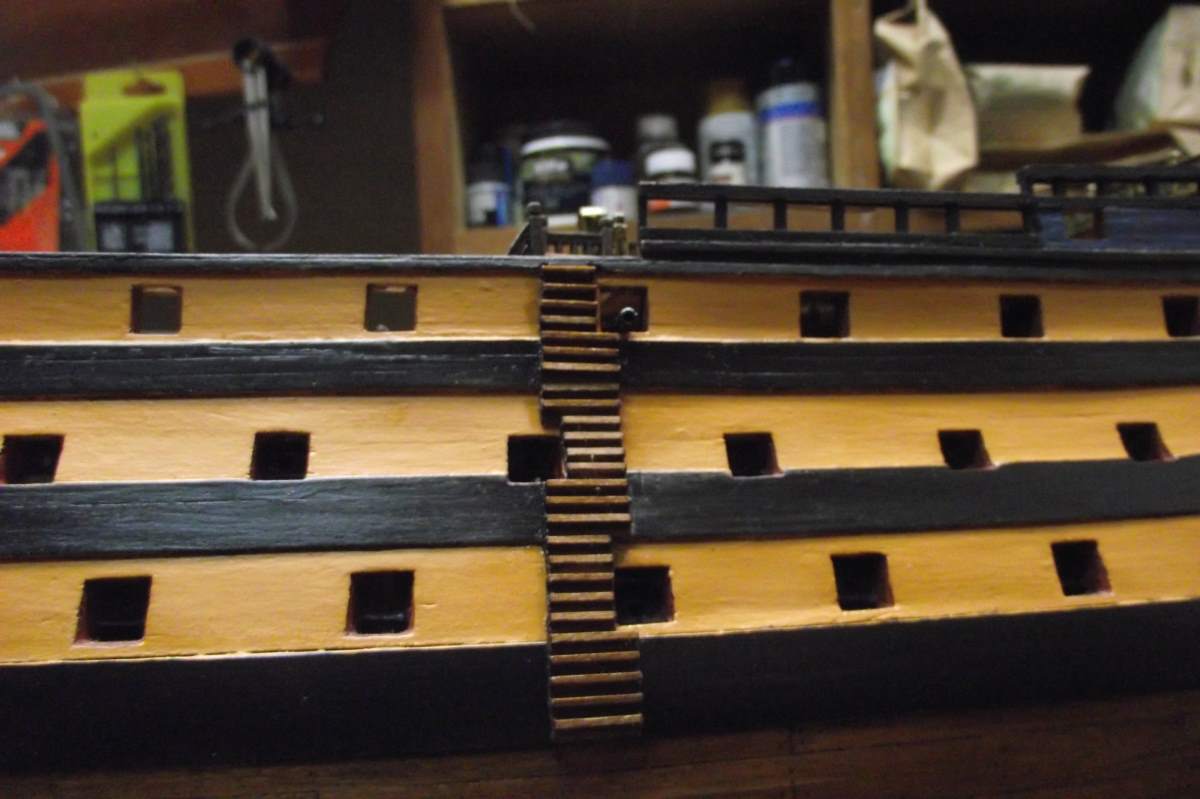
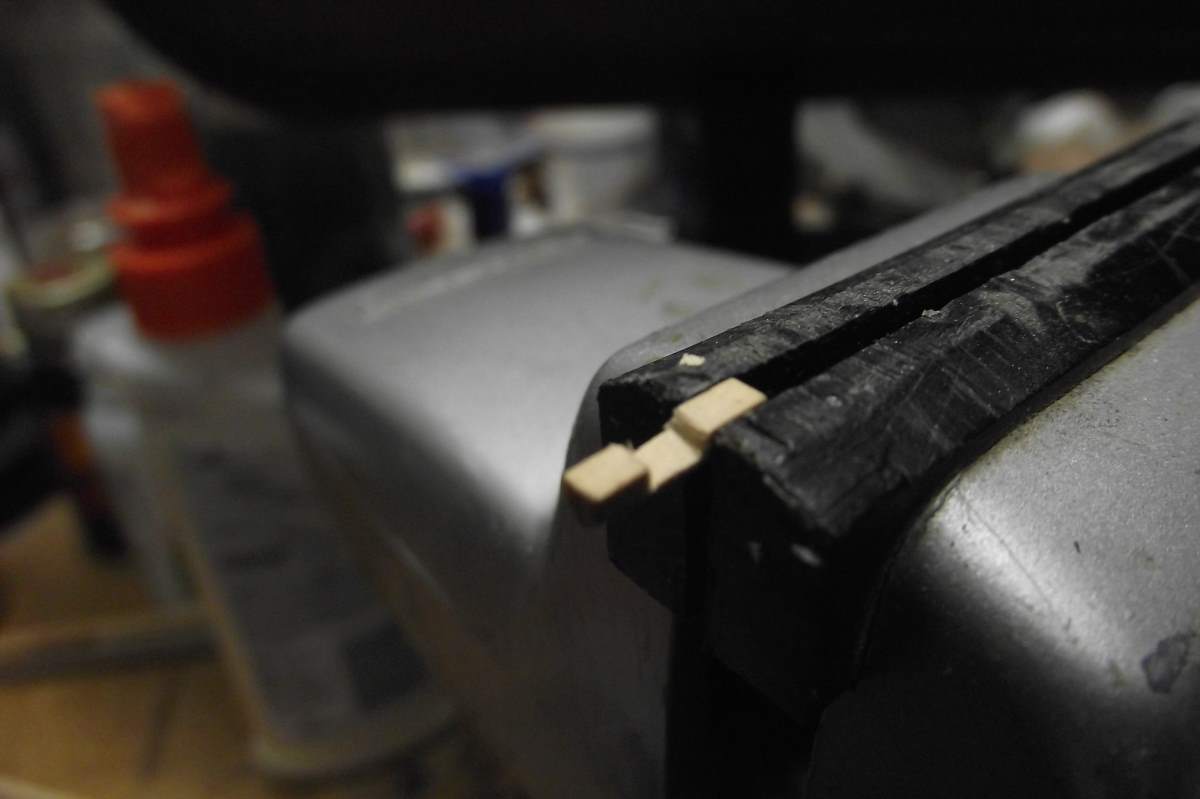
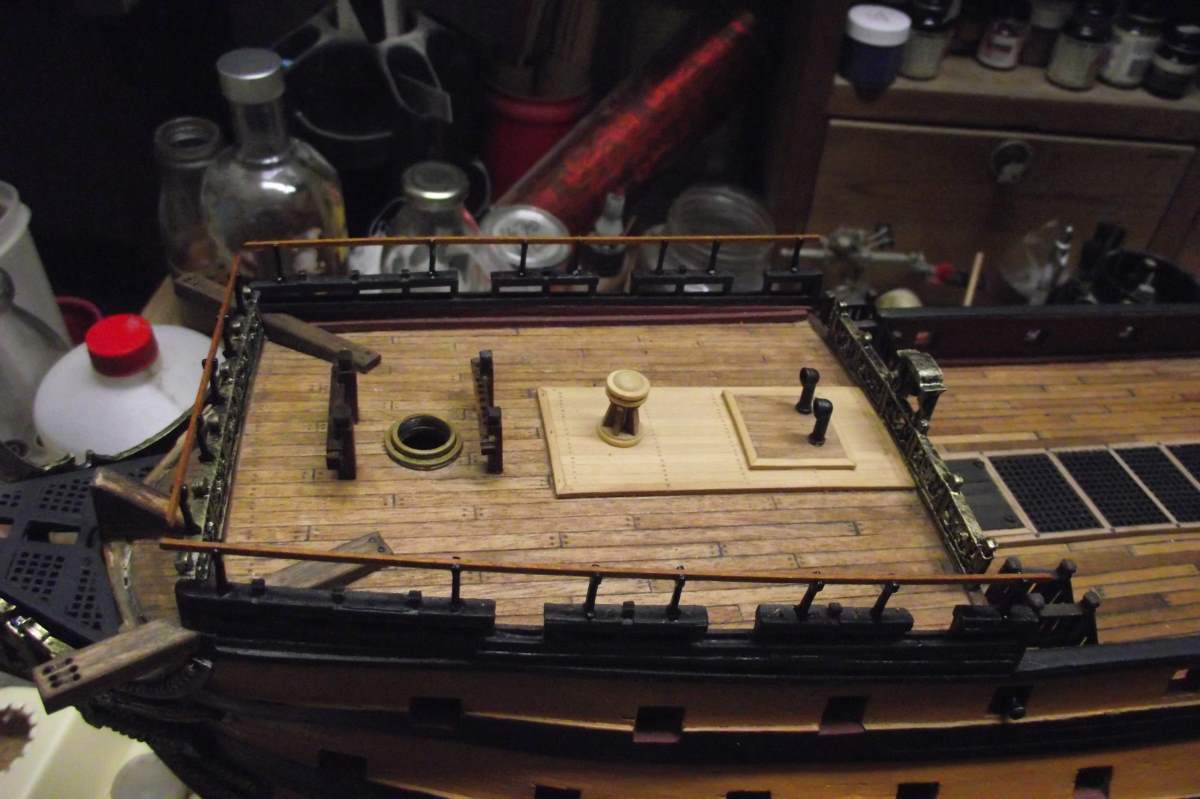
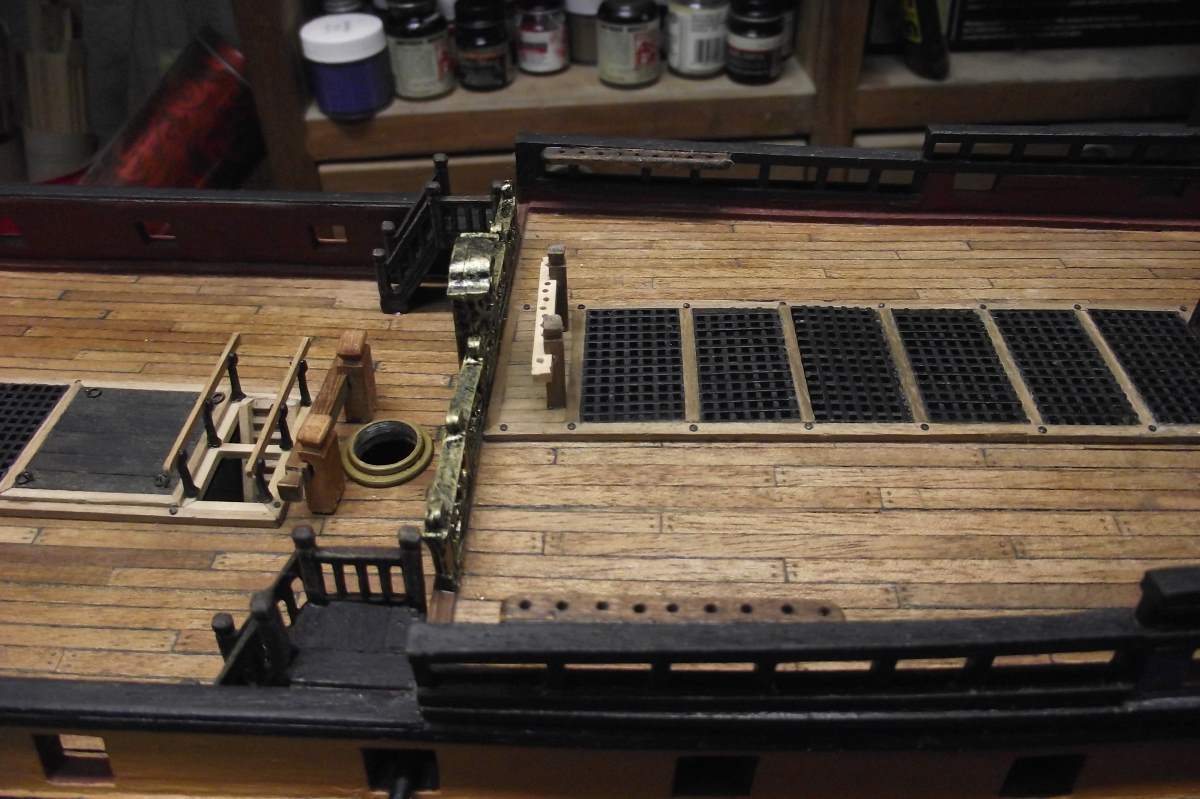
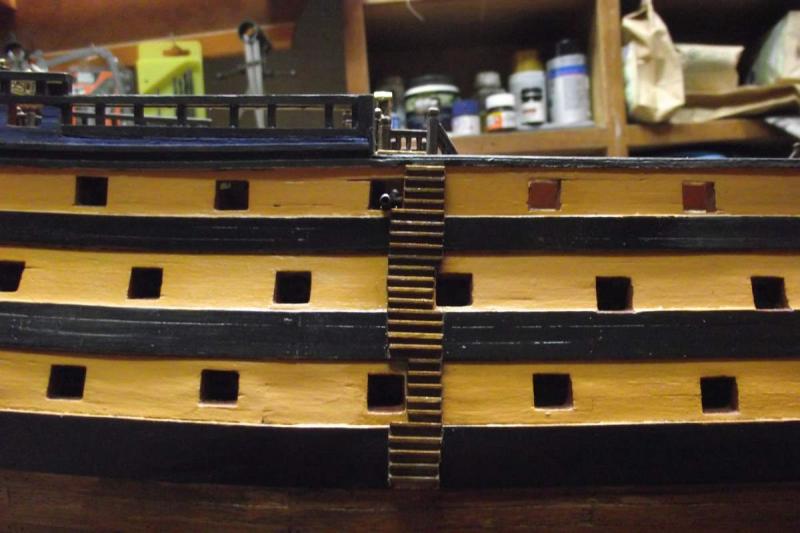
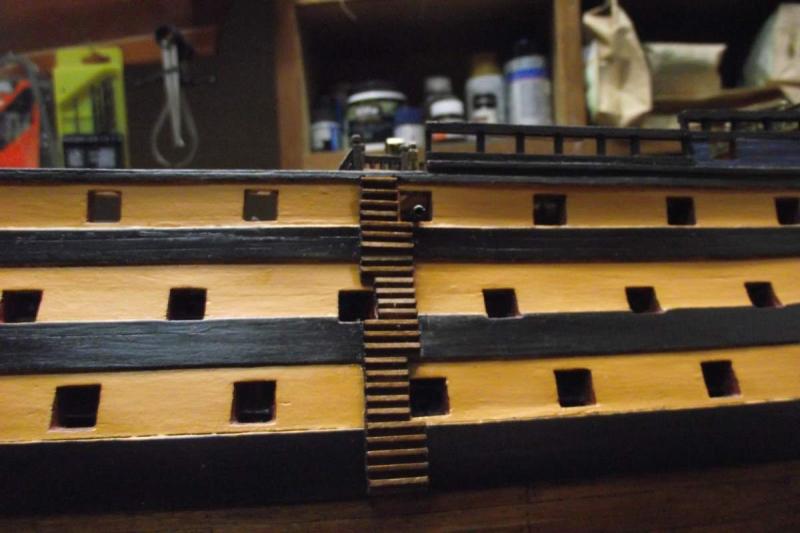
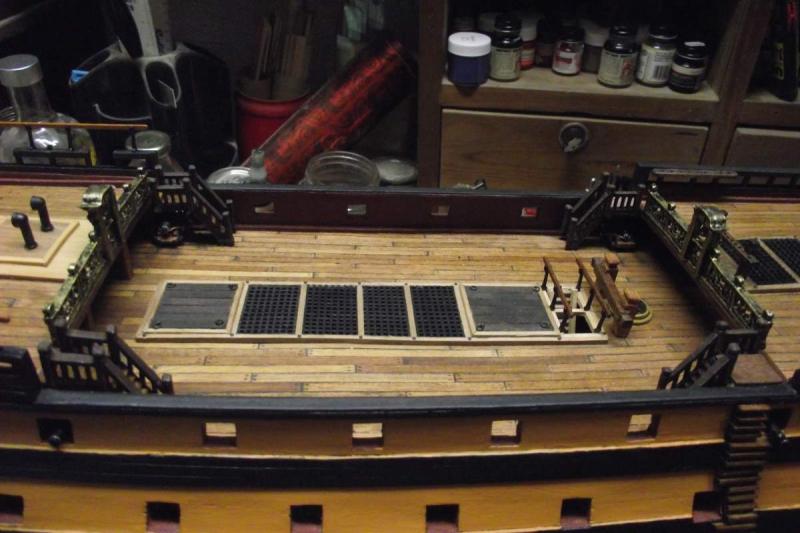
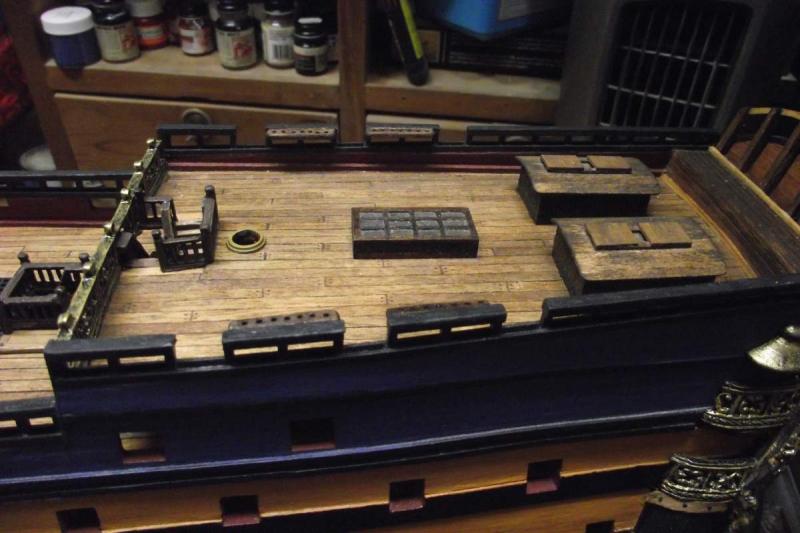
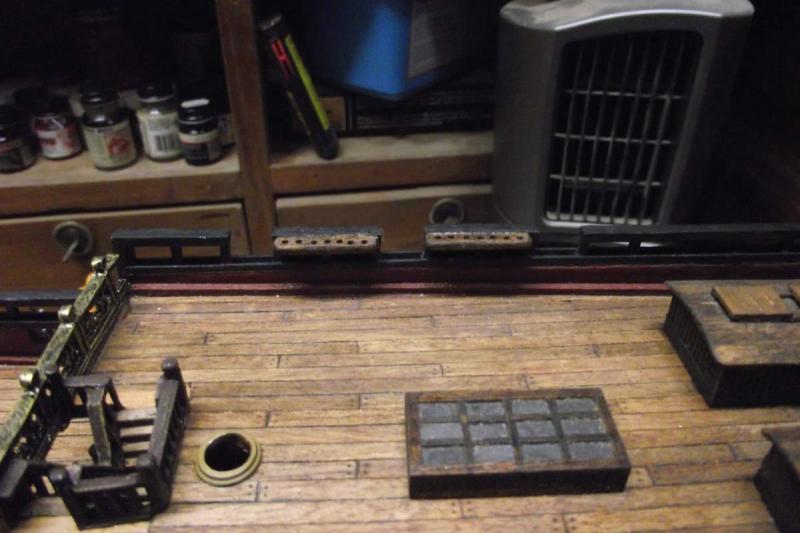
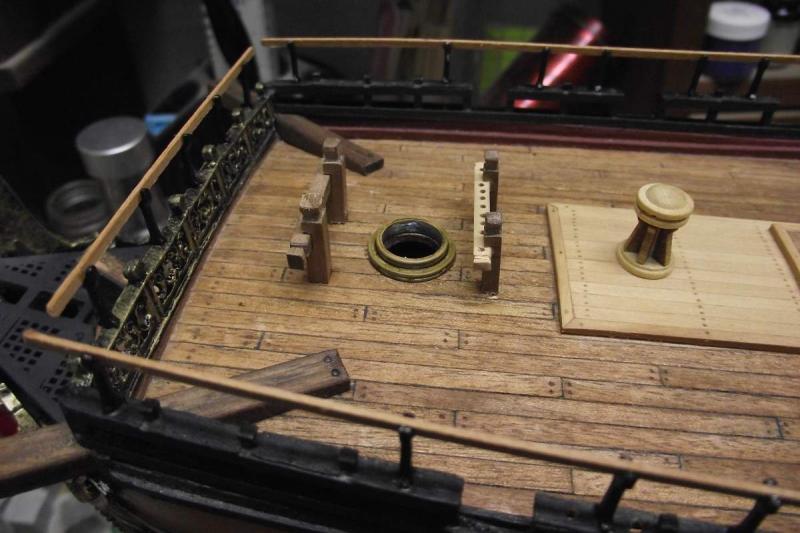
Small update and question. I finished placing these steps. Here you see them without and with a coat of boiled linseed oil as finish. My question is: I would like the guys climbing these steps to have something to hold onto while climbing. Any suggestions or ideas? I tried to place a wire handrail at the sides, but it was very flimsy and vulnerable. I think I've seen drawings showing a knotted rope just hanging there. Instructions say nothing on the matter. Thanks for any advise. Here they are being placed. You can see where I "shaved" the paint to get better adhesion. 2 of these little pieces go at the sides of the anchor davits. They will be stained before placement. Since this is a very small update, I will fill with photos of the general look of the 4 decks as they are at this moment. (Hey Arthur... look at the pin racks ) Thanks for visiting


- 786 replies
-
- 10
-
-
- Royal Louis
- Finished
- (and 1 more)
-
Hi Arthur. Glad you like my glue trick I thought about staining the fore and mid rails after I saw how the other look, but I'm not too sure about doing it after they are installed. This usually gets more things stained that weren't meant to...
- 786 replies
-
- 1
-
-
- Royal Louis
- Finished
- (and 1 more)
-
Hello from Monterrey Mexico. Finally another Royal Louis build!!! I am having problems with the large scale one... can't imagine at your scale... hats off! I wish you the best of lucks and will keep an eye on your build Saludos
-
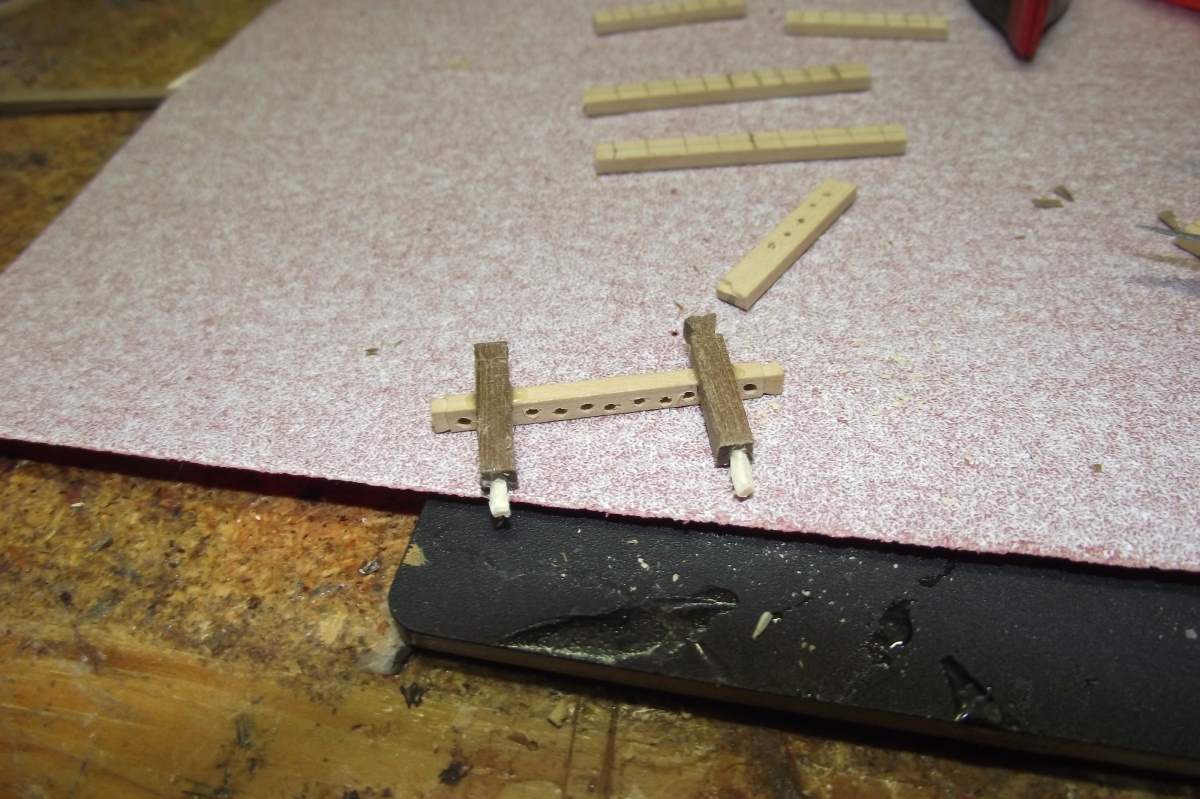
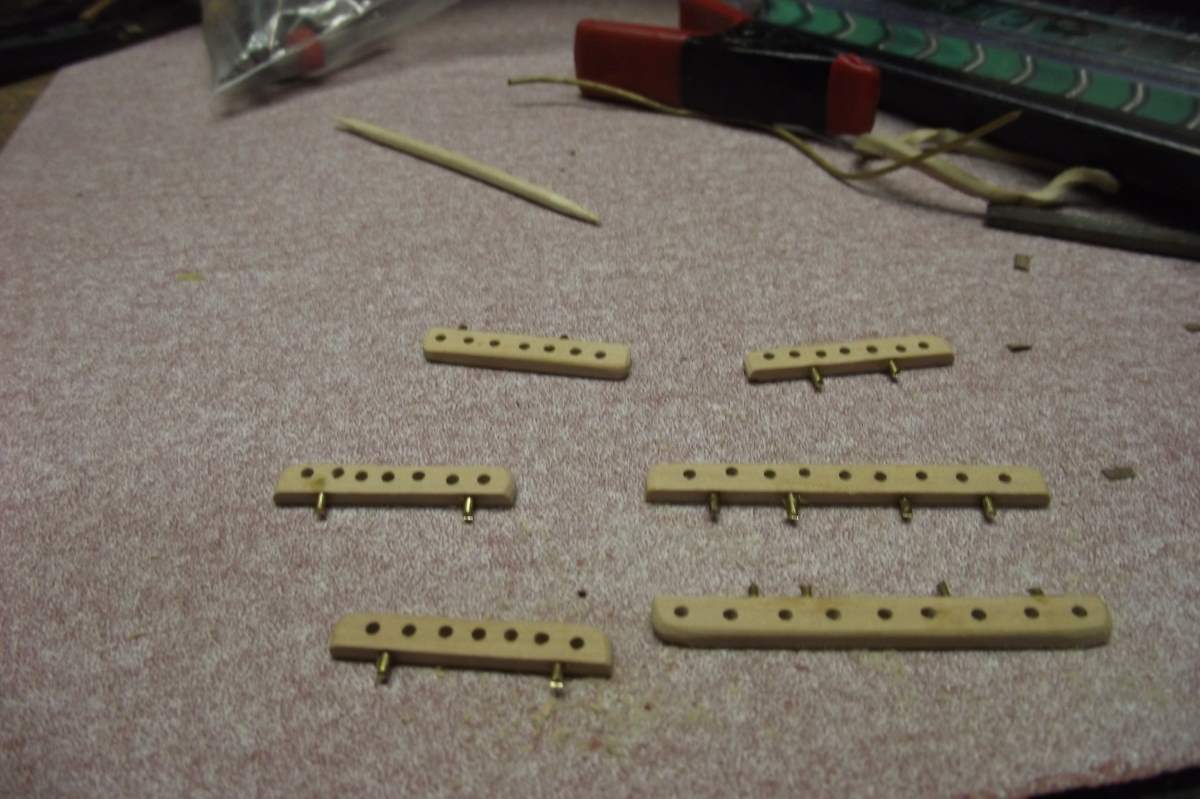
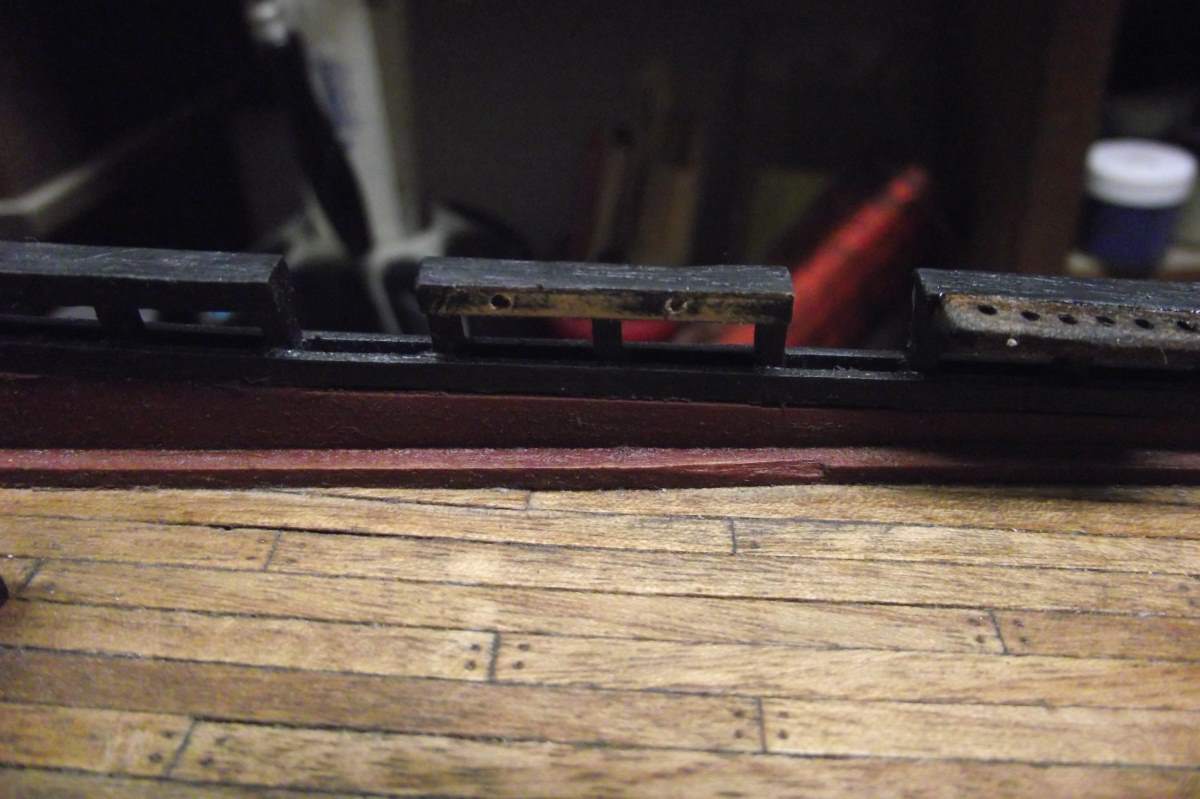
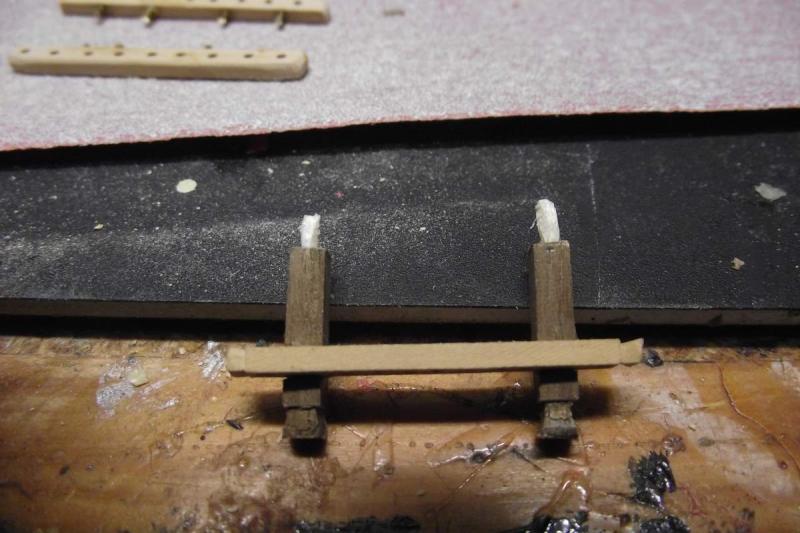
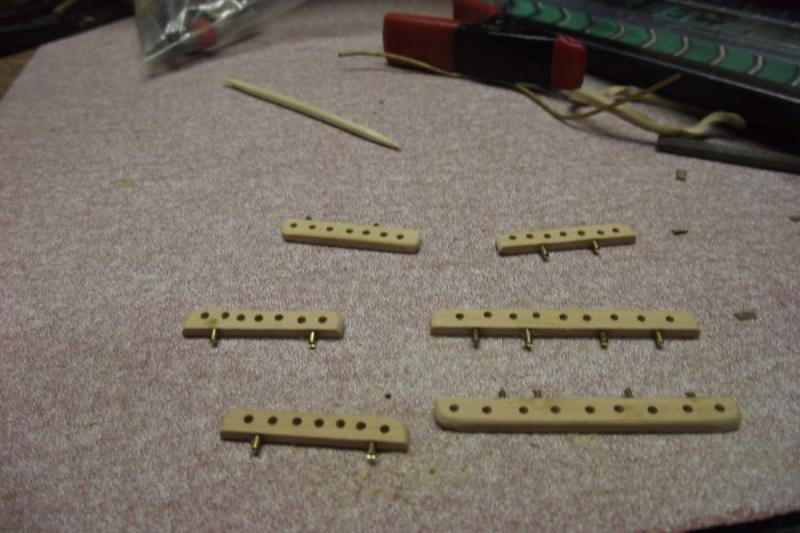
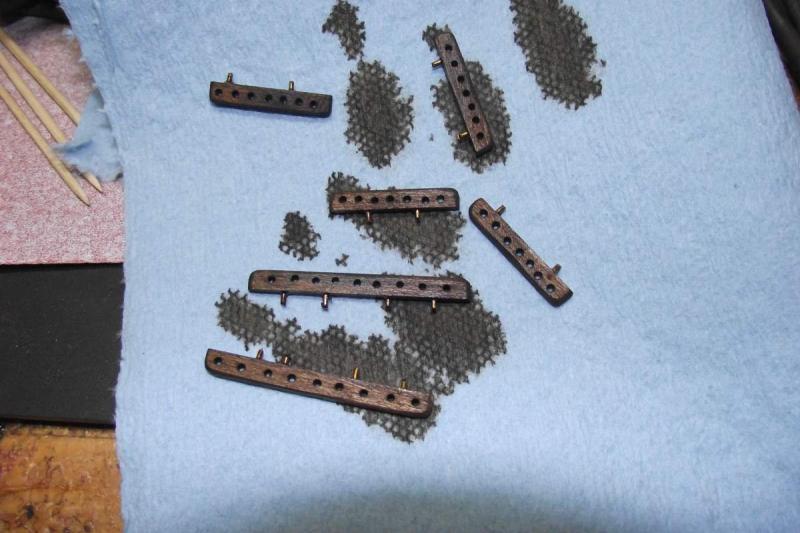
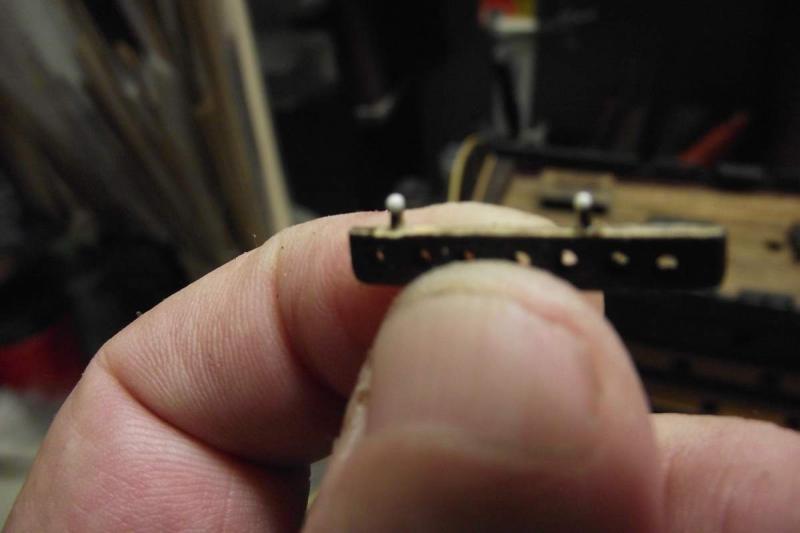
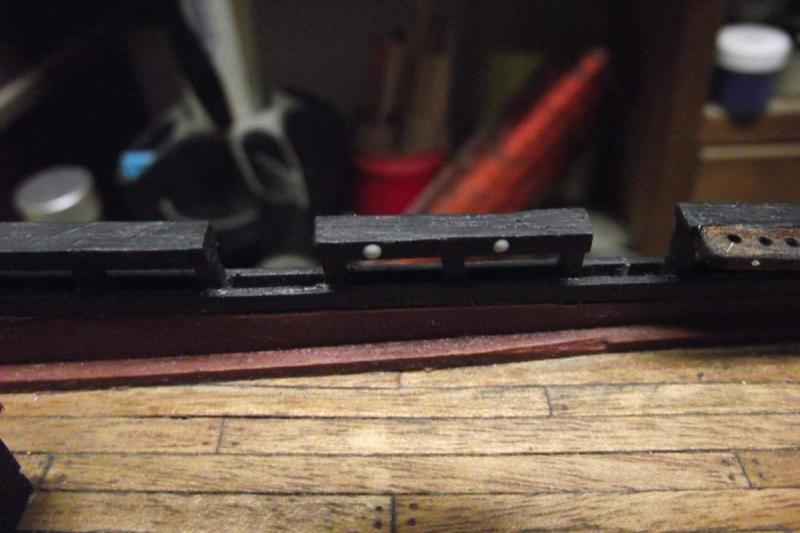
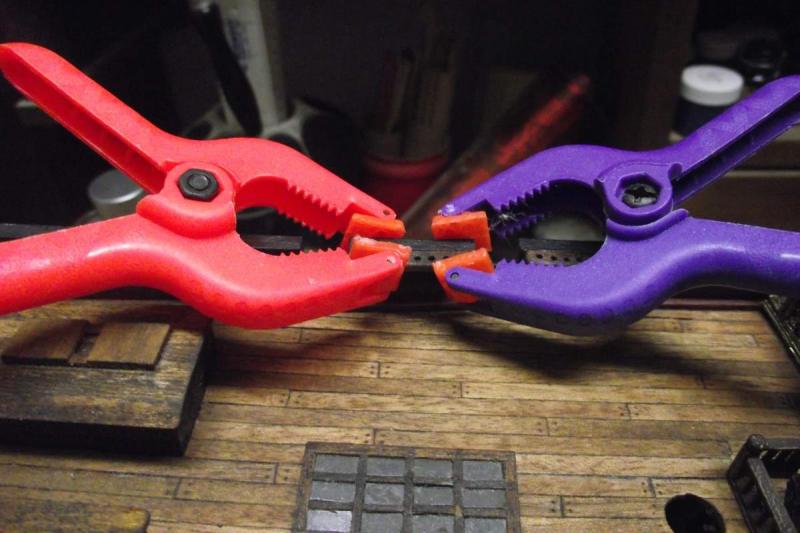
Hello mates. Happy New Year to all my friends here. A small update: Started work on the belaying pin racks. (Those holes are more straight on the upper side ) I placed two small dowels to serve as anchors, using toothpicks and carving them to the desired diameter. For the belaying pin racks that go on the bulwarks, I placed two small brass wires on them. ...and stained them with walnut stain... Here is a little trick. I put a small drop of glue on the brass and touch the bulwark with it... The glue spot tells me exactly where to drill... These racks will never come off... I placed also the rings that go on theck to support the masts. Thats all for today. More work on the decks still to do, and oh yes... the cannons... gunport lids, open deck cannons rigging... still a long way to masting and rigging! Thanks for visiting!!! Best regards.


- 786 replies
-
- 9
-
-
- Royal Louis
- Finished
- (and 1 more)
.JPG.3fd568801f5e042d6354ecbdc782bc02.JPG)