Senior ole salt
-
Posts
393 -
Joined
-
Last visited
Content Type
Profiles
Forums
Gallery
Events
Everything posted by Senior ole salt
-

Whale boat eye splice
Senior ole salt replied to Senior ole salt's topic in Masting, rigging and sails
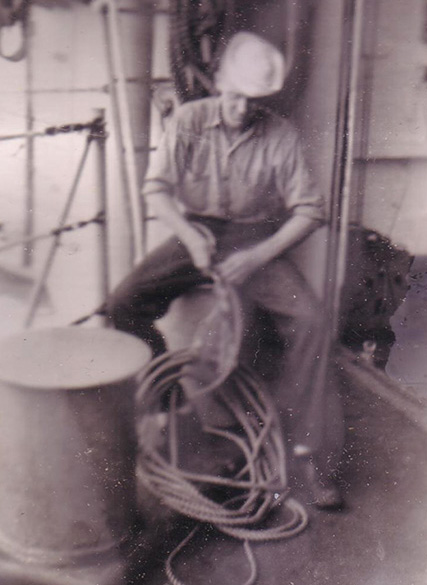
Ron & Andrew. I've had lots of practice. Been doing eyes splices for a long time. Thats me doing an eye splice aboard the USS Coral Sea 1950. S.os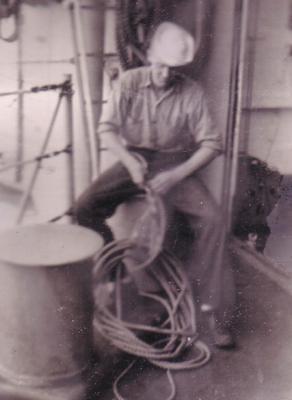
-
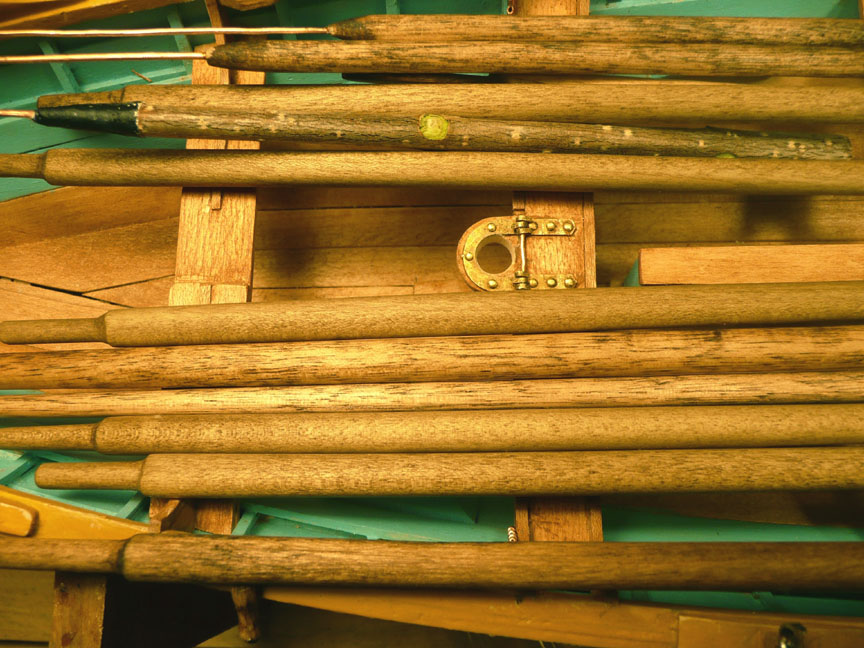
The plans or rather the book for the New Bedford whale boat ( see this thread http://modelshipworld.com/index.php?/topic/5000-new-bedford-whaleboat-a-kit-by-model-shipways/ calls for an eye splice for the end of the whale line. It seemed a bit daunting but what the heck I'll give it a try. It took a while but i think it came out oK. I waxed the strands so they were quite stiff. But the hardest part was to hold open the strand long enough to let the strands of the splice go through. I didn't attempt to taper the splice. S.os
-
You're making good progress. Will you be tempted to make a real one?? S.os
-
Thanks for the encouraging words and tips. Next to attend to some of the cordage involved with this model, like the harpoon lines, painter and various bucket handles. Maybe even an eye splice for the painter. I'm stretching the harpoon line just like they did in the old days. Notice the fastening stains in the hull. I deepened the stain in the ceiling. I thinks it looks better. I might do the same for the thwarts but can't figure if the stain would be less where the rowers sat of lighter. Any thoughts ? S.os

- 39 replies
-
- 3
-

-
- new bedford whaleboat
- model shipways
- (and 1 more)
-
I'd like to blacken my copper harpoons and copper fittings furnished with my Model Shipways whaleboat kit. http://modelshipworld.com/index.php?/topic/5000-new-bedford-whaleboat-a-kit-by-model-shipways/ Are there any common kitchen or household liquids or powders etc.that can do that ? Thanks S.os
-
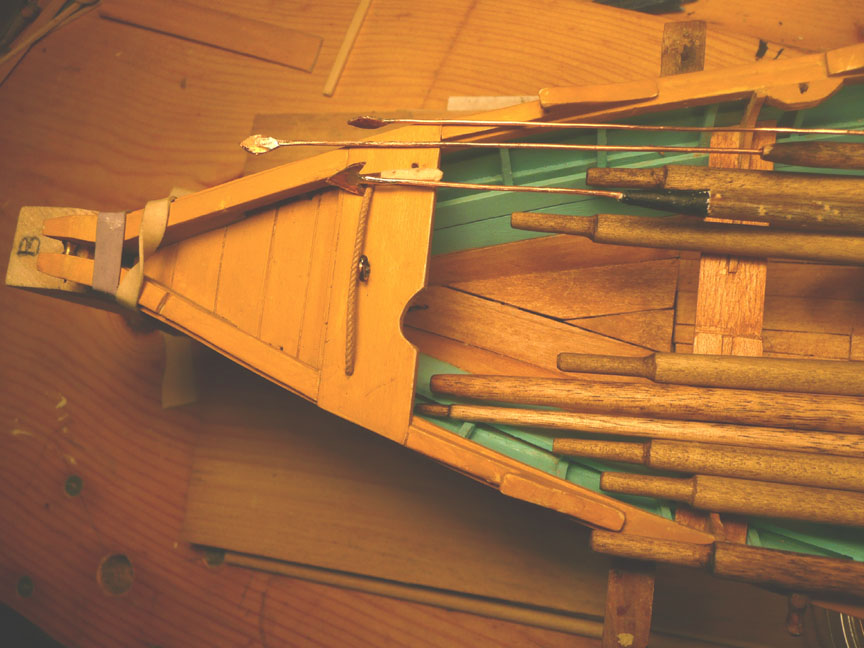
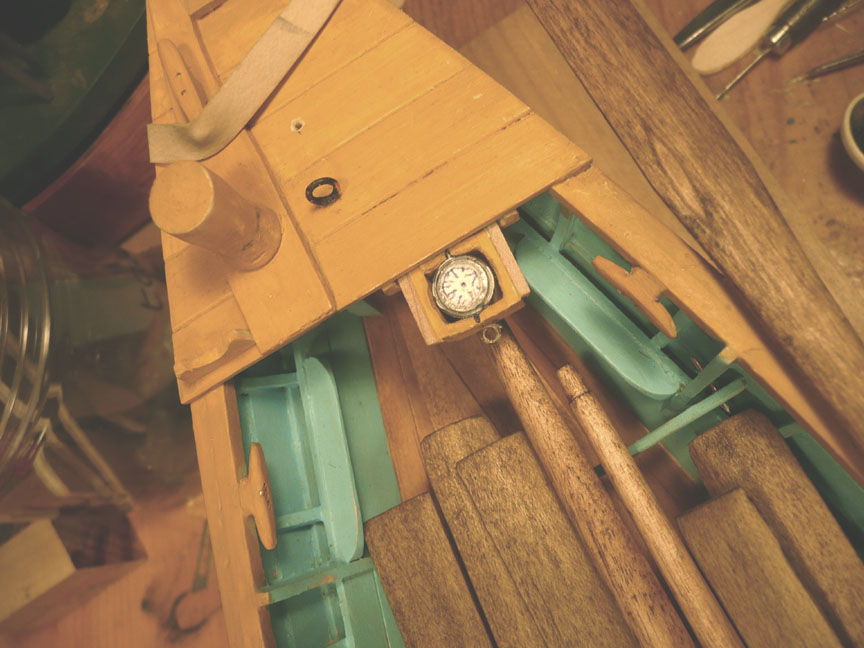
Been making some of the fittings. The kit supplies photo etched harpoons & lances. Also copper wire to solder them to. Does anyone here know any household liquids to blacken em with ? The oars are simpler to make. I used poplar from H. Depot. Now the compass was furnished with the kit but not the C. rose. I hope my home made rose doesn't get the boat steerer lost. Still a way to go. S.os


- 39 replies
-
- 6
-
-
- new bedford whaleboat
- model shipways
- (and 1 more)
-
Keith, very nice and ship shape. Ole Captain Bligh would be proud. Hand made oars are not that daunting. After cutting the initial shape, It's easy to whittle em out . One can feel if they are round. Try it on a piece of poplar. H.Depot has this wood cheap. S.os
-
I continue to be astounded by the quality of the works displayed here on this forum. it's a shame it's not recognized by the public and the "art " world. Auction housed continuously pedal art that don't come near what's shown here and for huge sums of money. S.os
-
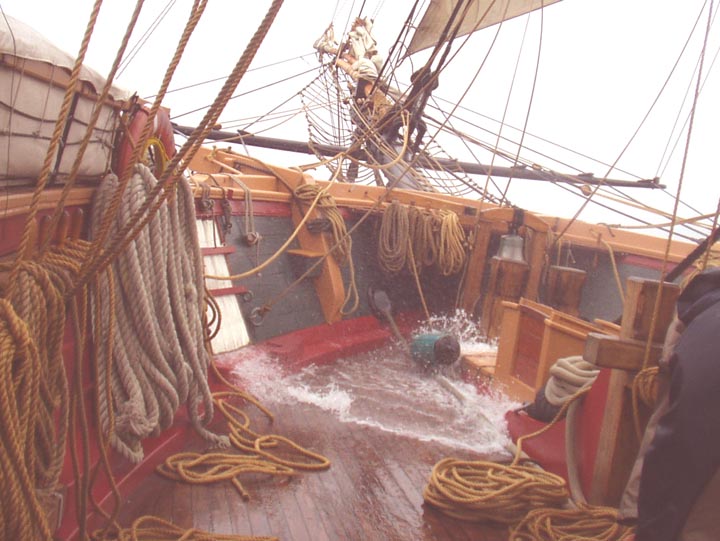
In conditions where a vessel would come into a deep trough, the lowers courses would have no wind in the sails . When the vessel rose on the next wave crest the sails would explosively fill with wind. A very shaking experience. S.os
-
Superb craftsmanship. I like the way you rigged the guns. Have you ever visited the ship in Erie and seen the museum ? Here's a short video I took last year.: S.os
- 304 replies
-
- 1
-
-
- niagra
- model shipways
- (and 1 more)
-
Beautiful job. How did you get that rusty barrel hoop look ? I made a video taken at Mystic seaport of how the dory's were used. Thanks S.os
-
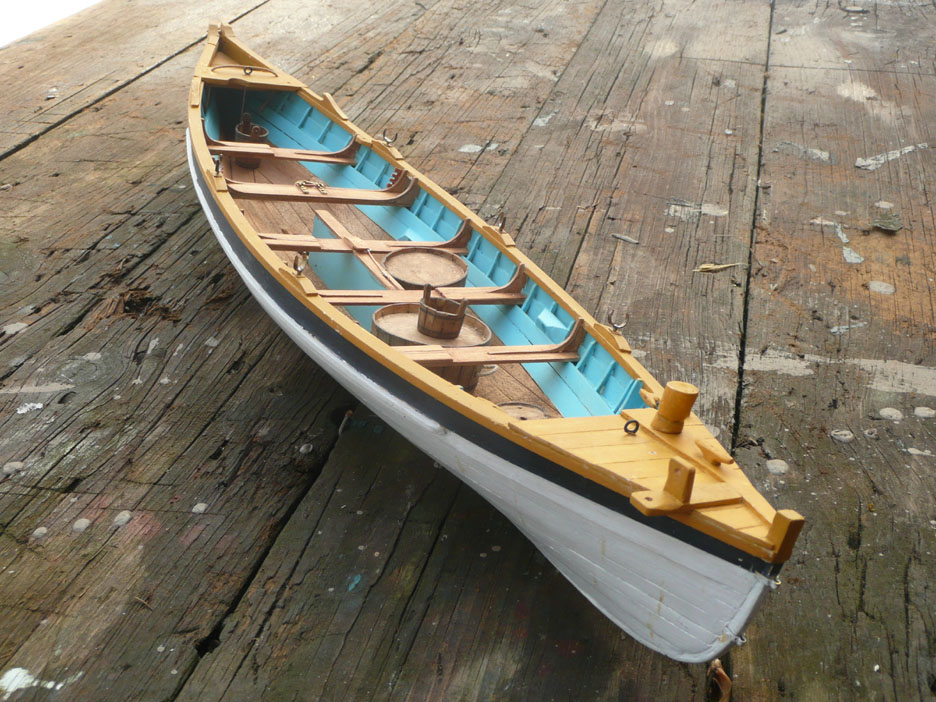
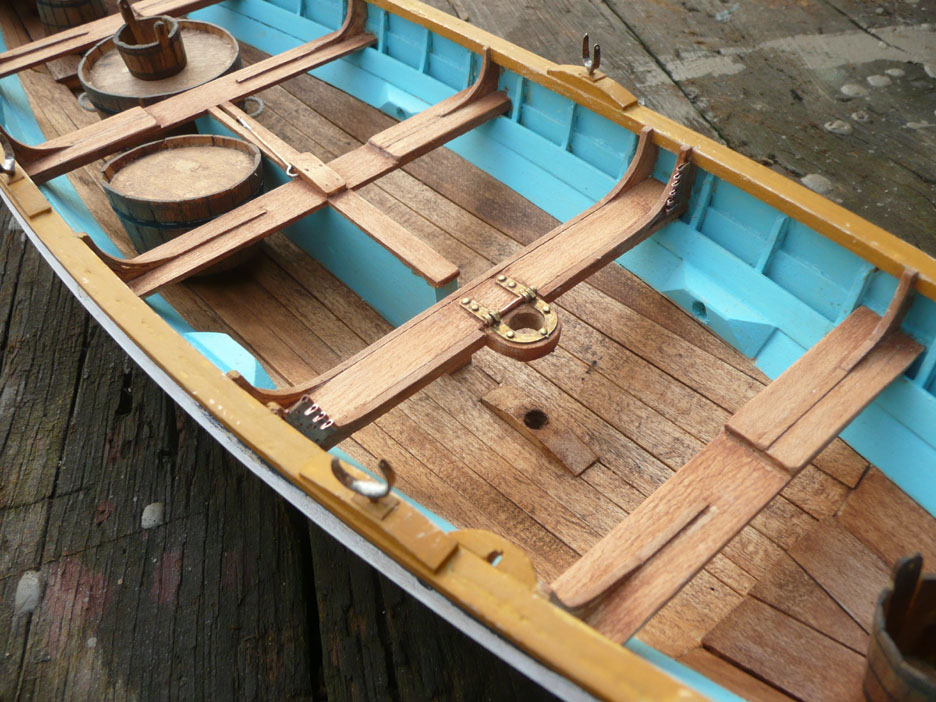
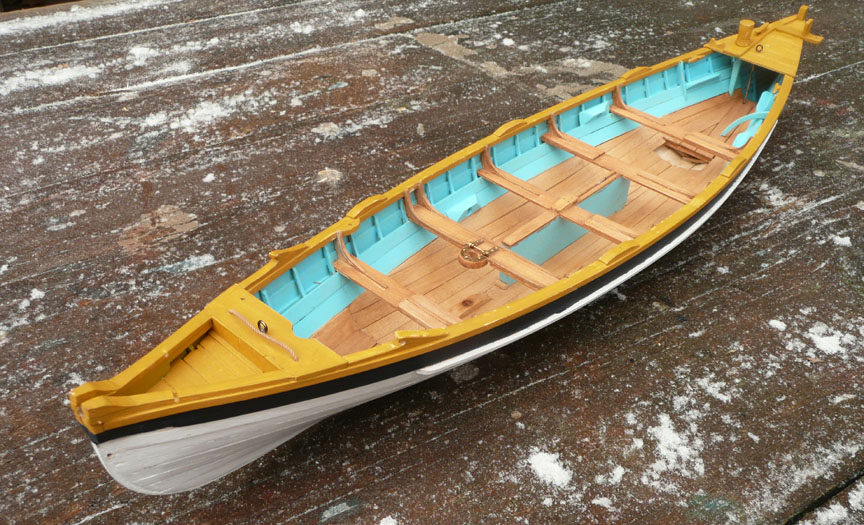
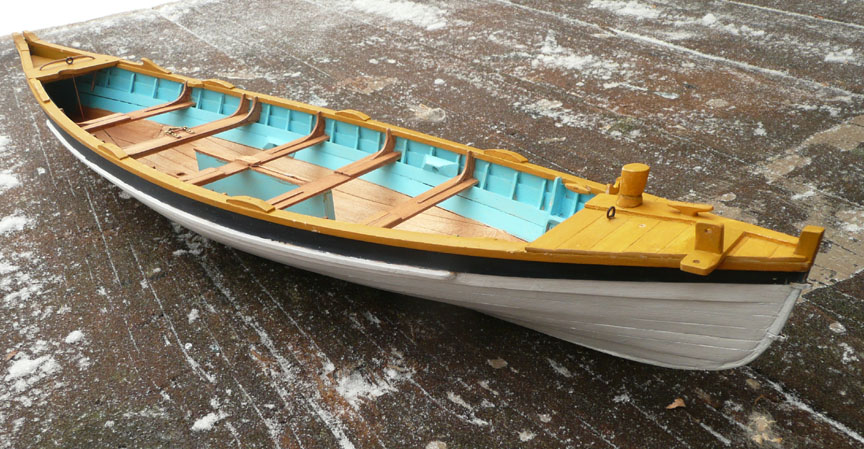
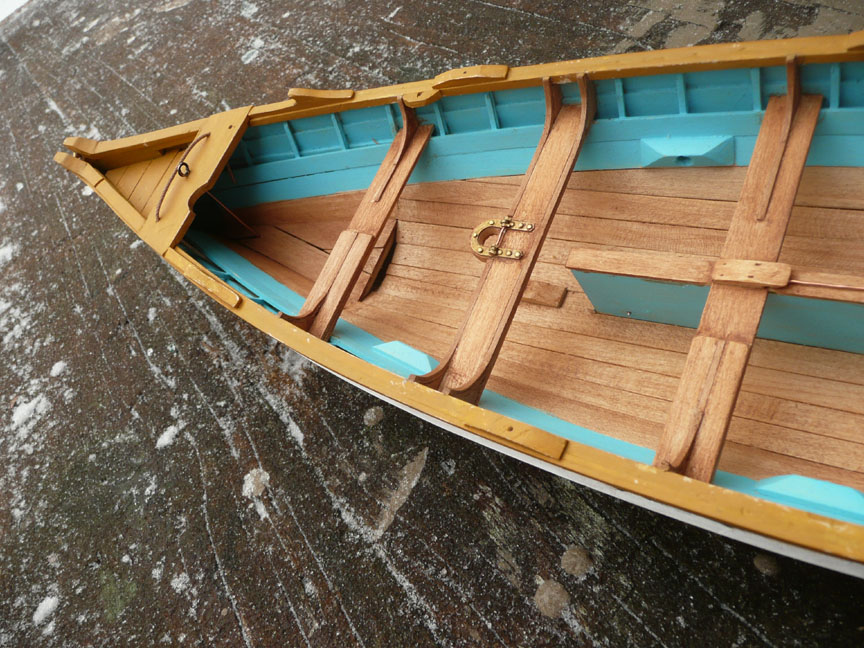
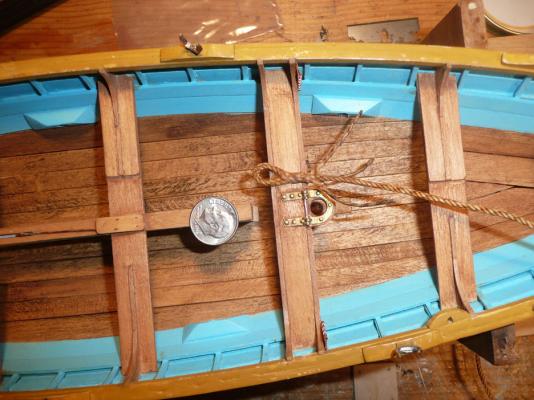
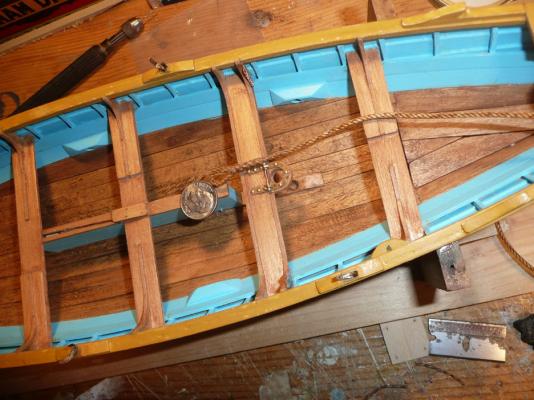
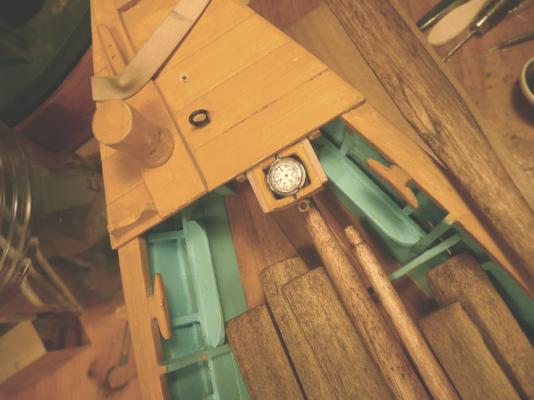
I got all the thwarts installed. I also took the liberty to depart from the plans furnished in the kit. With the C.W. Morgan undergoing major repairs there are many independent boat builders furnishing new whale boats for the bark. Like many boats the whale boat isn't a "cookie cutter" craft. With this in mind and using one of the whale boat sites ( Beetle)a building on the internet I decided to use a different version of the steering oar brace. It looked more substantial then the one shown on the Erik Ronnberg pattern. One problem I had was the size to make it. After making two of different sizes I settled on the one shown in the images. Also in the kit is no provision for a mast and spar rest after the sail gear is lowered. This U shaped chock is located on the stern just to the stb. side of the loggerhead. Most of the boat itself is finished. Now all I have to do is construct , improvise and install all the various whale hunting craft. A kit in it self. S.os


- 39 replies
-
- 6
-
-
- new bedford whaleboat
- model shipways
- (and 1 more)
-
I admire your resolve to repair, especially your attitude. S.os
-
Niagara jibboom outhaul tackle question.
Senior ole salt replied to BLarock's topic in Masting, rigging and sails

-
Niagara jibboom outhaul tackle question.
Senior ole salt replied to BLarock's topic in Masting, rigging and sails
Perhaps these images could help: S.os

-
Thanks a lot Jay. You're an inspiration. It got me thinking to improve my set up S.os
-
What a wonderful project. The research alone is outstanding. I bet your dad is viewing it all, giving you quiet direction and encouragement. S.os
-
It sure is fun to see a true craftsman at work. Reminds me of the old watchmakers one would see in the windows of NYC shops a half century ago. I remember all they had was a loop in one eye. S.os
-
Holding tool for holding small parts
Senior ole salt replied to Tarjack's topic in Modeling tools and Workshop Equipment
Thanks ! a great tip.. Now maybe I won't have to look in the vacuum cleaner after I sneeze several Items away. S.OS -
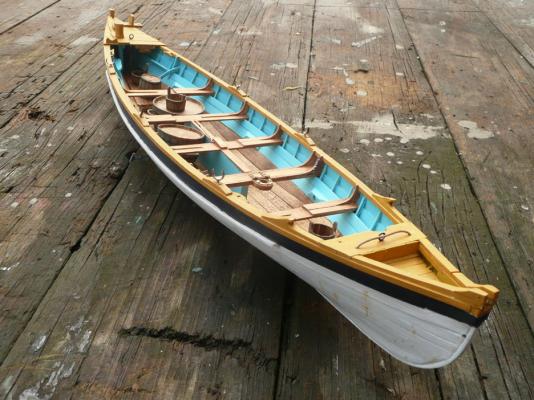
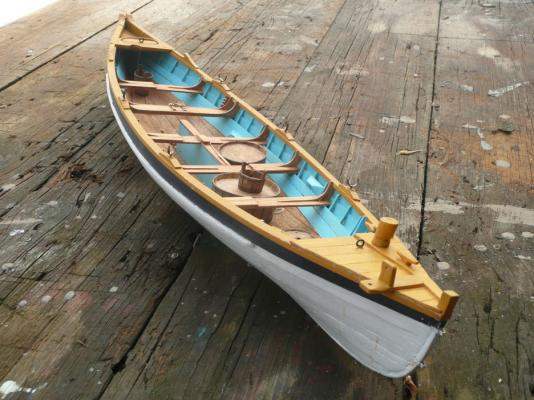
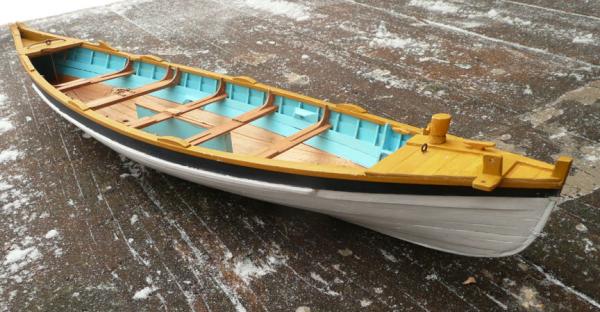
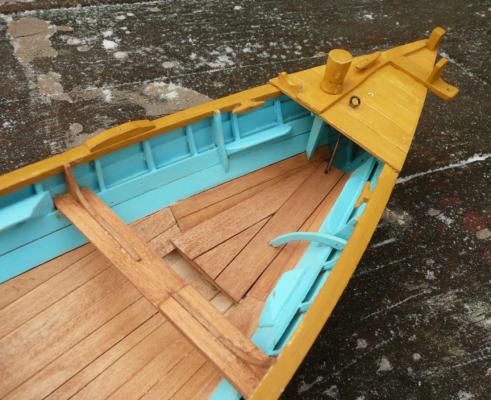
This weekend, I hit the model with some paint. I was very hesitant as I wasn't sure just what scheme course to take. The thwarts are just temporary as before . I still have to make the thwart knees and rudder hardware as well as the brackets that hold on the steering oar and numerous other details just to the hull alone not mention all the gear carried aboard these unique craft. I intend to weather the model some and an attempt is made with some rust stains on the fwd.Stb. bow. Any weathering tips would be appreciated. Thanks S.os


- 39 replies
-
- 7
-
-
- new bedford whaleboat
- model shipways
- (and 1 more)
-
Anja, The model looks great. Thanks for posting. S.os
-
Ahoy Buck. I like the woody look to the model and the nipper idea to crimp the rudder gudgeon. S.os
- 515 replies
-
- 1
-
-
- artesania latina
- whaleboat
- (and 1 more)
-
Thanks Great Galleons. The crane plan would be a nice alternative. How do we exchange mailing info ? S.os
-
Perhaps this painting hanging in the Fram museum Oslo Norway might help. BTW the ship is there too. S.os

-
Scoot, If you google Models of the New Bedford whale boats, a lot of pix come up. My kit just had 4 pages of plans for the boat.I wonder just what boat plan present day kits omit ? My kit was scant on oar locks, so I have to make my own. I also found the wood and moulds for the line tubs are over sized and will not fit in place. So thats another item to make from scratch. Good luck with your kit and if you get puzzled at times I'll be glad to chime up. S.os PS this site is also helpful : http://www.whalingmuseum.org/programs/beetle-whaleboat-project as it shows many pix of the real thing . It's close to the plans furnished in the kit.In fact I modified some the items in the Beetle site to the model build.