

jhearl
-
Posts
355 -
Joined
-
Last visited
Reputation Activity
-

 jhearl got a reaction from flying_dutchman2 in Where to buy thread for ropewalk machines?
I have been using DMC Cordonnet thread for years now. It comes in ecru, which works well for un-tarred rope and it can be easily dyed after the rope is made if you want a dark brown. It is a cotton thread but has no fuzz and is considerably less expensive than linen. It comes in sizes 20-100 (100 is smallest). Here's one online US source that appears to carry all sizes:
https://www.tattingcorner.com/threads-12/dmc-cordonnet-67/
(I've never ordered from them and have no affiliation with them in any way - just one source I found on the web.)
Sometimes, even the 100 is too large, so I use Gutermann cotton sewing thread for the smallest lines. Sometimes, you have to just use thread itself without twisting it into rope for really tiny lines. I'm not sure what kind of rope machine you have, but on mine, I can use multiple threads (such as 6 or 9) to get even thicker rope if three 20s aren't big enough, for example. When I got started making rope, I made up a sample length with each thread size so I would know what I needed in the future for a particular size finished rope.
Cheers -
John
-

 jhearl got a reaction from FrankWouts in HMS Winchelsea - FINISHED - 1764 - by Chuck (1/4" scale)
OK - I have two questions:
1) How long do you need to keep the iron on the wood?
2) How long does the wood need to cool before you unclamp it?
OK - just thought of a 3rd question - if you're using a hair dryer, how long do you need to heat the wood?
Thanks -
John
-
 jhearl got a reaction from Ed Gibbons in Gluing Toe Rail
I use pieces of 1/32" brass rod to position the toe rail. Here's how I do it:
I place the forward end of the toe rail up against the stem (or wherever its final position is supposed to be). While holding it in place with one hand, I drill down through the toe rail into the deck beneath. (Be careful not to drill out the side of the hull but you want the brass rod to be in the deck deep enough that it won't easily fall out.) I then stick a piece of 1/32" brass rod into the hole, through the toe rail and down into the deck, then snip the excess rod off leaving about a half-inch above the toe rail. No glue at this point.
Now, move aft along the hull and toe rail until you reach a point where the toe rail needs to curve inward. Hold the toe rail in place, drill a hole there through the toe rail and deck, and insert another piece of brass rod. Keep working your way aft inserting more rods as necessary to keep the toe rail conformed to the desired curvature.
At this point, the toe rail should be lying nicely in place without you having to hold it at all. Carefully lift the toe rail off the deck a quarter inch or so, being sure that the brass rods don't come out of the holes in the deck. That will allow you to put your glue of choice on the deck or underside of the toe rail. Press the toe rail back down into place and wait for the glue to dry. I typically prefer small dots of medium CA for this purpose. I always put a dot on each of the pieces of brass rod where they go into the deck. If you prefer yellow glue, you may need to hold the toe rail tight to the deck with tape until the glue dries.
Once the glue has dried, snip off the remaining ends of the brass rod and file them down level with the top of the toe rail.
In the picture below, you can see a few of the brass rods I used for this particular boat after they had been filed down. No two boats are alike, so placement of the rods will vary. If your toe rail has scupper holes, be careful not to put a piece of brass rod through the hole.
It is helpful if the hole you drill is just slightly smaller than the 1/32" brass rod. You want a snug fit but not so tight that you can't move the toe rail off the deck. Make a hole in a test piece before you start drilling into the model itself. This technique can work for rub rails as well. Figuring out just where to bend the rub rail can take a little practice, so you might want to do a test run on some scrap to get a feel for how it works before you move to the model.
Hope this helps -
John
-
 jhearl got a reaction from Bob Cleek in Gluing Toe Rail
I use pieces of 1/32" brass rod to position the toe rail. Here's how I do it:
I place the forward end of the toe rail up against the stem (or wherever its final position is supposed to be). While holding it in place with one hand, I drill down through the toe rail into the deck beneath. (Be careful not to drill out the side of the hull but you want the brass rod to be in the deck deep enough that it won't easily fall out.) I then stick a piece of 1/32" brass rod into the hole, through the toe rail and down into the deck, then snip the excess rod off leaving about a half-inch above the toe rail. No glue at this point.
Now, move aft along the hull and toe rail until you reach a point where the toe rail needs to curve inward. Hold the toe rail in place, drill a hole there through the toe rail and deck, and insert another piece of brass rod. Keep working your way aft inserting more rods as necessary to keep the toe rail conformed to the desired curvature.
At this point, the toe rail should be lying nicely in place without you having to hold it at all. Carefully lift the toe rail off the deck a quarter inch or so, being sure that the brass rods don't come out of the holes in the deck. That will allow you to put your glue of choice on the deck or underside of the toe rail. Press the toe rail back down into place and wait for the glue to dry. I typically prefer small dots of medium CA for this purpose. I always put a dot on each of the pieces of brass rod where they go into the deck. If you prefer yellow glue, you may need to hold the toe rail tight to the deck with tape until the glue dries.
Once the glue has dried, snip off the remaining ends of the brass rod and file them down level with the top of the toe rail.
In the picture below, you can see a few of the brass rods I used for this particular boat after they had been filed down. No two boats are alike, so placement of the rods will vary. If your toe rail has scupper holes, be careful not to put a piece of brass rod through the hole.
It is helpful if the hole you drill is just slightly smaller than the 1/32" brass rod. You want a snug fit but not so tight that you can't move the toe rail off the deck. Make a hole in a test piece before you start drilling into the model itself. This technique can work for rub rails as well. Figuring out just where to bend the rub rail can take a little practice, so you might want to do a test run on some scrap to get a feel for how it works before you move to the model.
Hope this helps -
John
-
 jhearl got a reaction from thibaultron in Gluing Toe Rail
I use pieces of 1/32" brass rod to position the toe rail. Here's how I do it:
I place the forward end of the toe rail up against the stem (or wherever its final position is supposed to be). While holding it in place with one hand, I drill down through the toe rail into the deck beneath. (Be careful not to drill out the side of the hull but you want the brass rod to be in the deck deep enough that it won't easily fall out.) I then stick a piece of 1/32" brass rod into the hole, through the toe rail and down into the deck, then snip the excess rod off leaving about a half-inch above the toe rail. No glue at this point.
Now, move aft along the hull and toe rail until you reach a point where the toe rail needs to curve inward. Hold the toe rail in place, drill a hole there through the toe rail and deck, and insert another piece of brass rod. Keep working your way aft inserting more rods as necessary to keep the toe rail conformed to the desired curvature.
At this point, the toe rail should be lying nicely in place without you having to hold it at all. Carefully lift the toe rail off the deck a quarter inch or so, being sure that the brass rods don't come out of the holes in the deck. That will allow you to put your glue of choice on the deck or underside of the toe rail. Press the toe rail back down into place and wait for the glue to dry. I typically prefer small dots of medium CA for this purpose. I always put a dot on each of the pieces of brass rod where they go into the deck. If you prefer yellow glue, you may need to hold the toe rail tight to the deck with tape until the glue dries.
Once the glue has dried, snip off the remaining ends of the brass rod and file them down level with the top of the toe rail.
In the picture below, you can see a few of the brass rods I used for this particular boat after they had been filed down. No two boats are alike, so placement of the rods will vary. If your toe rail has scupper holes, be careful not to put a piece of brass rod through the hole.
It is helpful if the hole you drill is just slightly smaller than the 1/32" brass rod. You want a snug fit but not so tight that you can't move the toe rail off the deck. Make a hole in a test piece before you start drilling into the model itself. This technique can work for rub rails as well. Figuring out just where to bend the rub rail can take a little practice, so you might want to do a test run on some scrap to get a feel for how it works before you move to the model.
Hope this helps -
John
-
 jhearl got a reaction from RichardG in Gluing Toe Rail
I use pieces of 1/32" brass rod to position the toe rail. Here's how I do it:
I place the forward end of the toe rail up against the stem (or wherever its final position is supposed to be). While holding it in place with one hand, I drill down through the toe rail into the deck beneath. (Be careful not to drill out the side of the hull but you want the brass rod to be in the deck deep enough that it won't easily fall out.) I then stick a piece of 1/32" brass rod into the hole, through the toe rail and down into the deck, then snip the excess rod off leaving about a half-inch above the toe rail. No glue at this point.
Now, move aft along the hull and toe rail until you reach a point where the toe rail needs to curve inward. Hold the toe rail in place, drill a hole there through the toe rail and deck, and insert another piece of brass rod. Keep working your way aft inserting more rods as necessary to keep the toe rail conformed to the desired curvature.
At this point, the toe rail should be lying nicely in place without you having to hold it at all. Carefully lift the toe rail off the deck a quarter inch or so, being sure that the brass rods don't come out of the holes in the deck. That will allow you to put your glue of choice on the deck or underside of the toe rail. Press the toe rail back down into place and wait for the glue to dry. I typically prefer small dots of medium CA for this purpose. I always put a dot on each of the pieces of brass rod where they go into the deck. If you prefer yellow glue, you may need to hold the toe rail tight to the deck with tape until the glue dries.
Once the glue has dried, snip off the remaining ends of the brass rod and file them down level with the top of the toe rail.
In the picture below, you can see a few of the brass rods I used for this particular boat after they had been filed down. No two boats are alike, so placement of the rods will vary. If your toe rail has scupper holes, be careful not to put a piece of brass rod through the hole.
It is helpful if the hole you drill is just slightly smaller than the 1/32" brass rod. You want a snug fit but not so tight that you can't move the toe rail off the deck. Make a hole in a test piece before you start drilling into the model itself. This technique can work for rub rails as well. Figuring out just where to bend the rub rail can take a little practice, so you might want to do a test run on some scrap to get a feel for how it works before you move to the model.
Hope this helps -
John
-
 jhearl got a reaction from allanyed in Gluing Toe Rail
I use pieces of 1/32" brass rod to position the toe rail. Here's how I do it:
I place the forward end of the toe rail up against the stem (or wherever its final position is supposed to be). While holding it in place with one hand, I drill down through the toe rail into the deck beneath. (Be careful not to drill out the side of the hull but you want the brass rod to be in the deck deep enough that it won't easily fall out.) I then stick a piece of 1/32" brass rod into the hole, through the toe rail and down into the deck, then snip the excess rod off leaving about a half-inch above the toe rail. No glue at this point.
Now, move aft along the hull and toe rail until you reach a point where the toe rail needs to curve inward. Hold the toe rail in place, drill a hole there through the toe rail and deck, and insert another piece of brass rod. Keep working your way aft inserting more rods as necessary to keep the toe rail conformed to the desired curvature.
At this point, the toe rail should be lying nicely in place without you having to hold it at all. Carefully lift the toe rail off the deck a quarter inch or so, being sure that the brass rods don't come out of the holes in the deck. That will allow you to put your glue of choice on the deck or underside of the toe rail. Press the toe rail back down into place and wait for the glue to dry. I typically prefer small dots of medium CA for this purpose. I always put a dot on each of the pieces of brass rod where they go into the deck. If you prefer yellow glue, you may need to hold the toe rail tight to the deck with tape until the glue dries.
Once the glue has dried, snip off the remaining ends of the brass rod and file them down level with the top of the toe rail.
In the picture below, you can see a few of the brass rods I used for this particular boat after they had been filed down. No two boats are alike, so placement of the rods will vary. If your toe rail has scupper holes, be careful not to put a piece of brass rod through the hole.
It is helpful if the hole you drill is just slightly smaller than the 1/32" brass rod. You want a snug fit but not so tight that you can't move the toe rail off the deck. Make a hole in a test piece before you start drilling into the model itself. This technique can work for rub rails as well. Figuring out just where to bend the rub rail can take a little practice, so you might want to do a test run on some scrap to get a feel for how it works before you move to the model.
Hope this helps -
John
-
 jhearl got a reaction from mtaylor in Gluing Toe Rail
I use pieces of 1/32" brass rod to position the toe rail. Here's how I do it:
I place the forward end of the toe rail up against the stem (or wherever its final position is supposed to be). While holding it in place with one hand, I drill down through the toe rail into the deck beneath. (Be careful not to drill out the side of the hull but you want the brass rod to be in the deck deep enough that it won't easily fall out.) I then stick a piece of 1/32" brass rod into the hole, through the toe rail and down into the deck, then snip the excess rod off leaving about a half-inch above the toe rail. No glue at this point.
Now, move aft along the hull and toe rail until you reach a point where the toe rail needs to curve inward. Hold the toe rail in place, drill a hole there through the toe rail and deck, and insert another piece of brass rod. Keep working your way aft inserting more rods as necessary to keep the toe rail conformed to the desired curvature.
At this point, the toe rail should be lying nicely in place without you having to hold it at all. Carefully lift the toe rail off the deck a quarter inch or so, being sure that the brass rods don't come out of the holes in the deck. That will allow you to put your glue of choice on the deck or underside of the toe rail. Press the toe rail back down into place and wait for the glue to dry. I typically prefer small dots of medium CA for this purpose. I always put a dot on each of the pieces of brass rod where they go into the deck. If you prefer yellow glue, you may need to hold the toe rail tight to the deck with tape until the glue dries.
Once the glue has dried, snip off the remaining ends of the brass rod and file them down level with the top of the toe rail.
In the picture below, you can see a few of the brass rods I used for this particular boat after they had been filed down. No two boats are alike, so placement of the rods will vary. If your toe rail has scupper holes, be careful not to put a piece of brass rod through the hole.
It is helpful if the hole you drill is just slightly smaller than the 1/32" brass rod. You want a snug fit but not so tight that you can't move the toe rail off the deck. Make a hole in a test piece before you start drilling into the model itself. This technique can work for rub rails as well. Figuring out just where to bend the rub rail can take a little practice, so you might want to do a test run on some scrap to get a feel for how it works before you move to the model.
Hope this helps -
John
-
jhearl got a reaction from thibaultron in Modifying a saw blade
You can cut these saws with a cut-off wheel in a Dremel. Just be sure to wear eye protection. Here's a Japanese-style pull saw I recently made for a diorama from an old Exacto saw blade.
-
 jhearl got a reaction from Canute in Modifying a saw blade
You can cut these saws with a cut-off wheel in a Dremel. Just be sure to wear eye protection. Here's a Japanese-style pull saw I recently made for a diorama from an old Exacto saw blade.
-
jhearl got a reaction from mtaylor in Modifying a saw blade
You can cut these saws with a cut-off wheel in a Dremel. Just be sure to wear eye protection. Here's a Japanese-style pull saw I recently made for a diorama from an old Exacto saw blade.
-
 jhearl got a reaction from GrandpaPhil in Breezin Thru by Shore thing - FINISHED - Wye River Models - 1/2" scale
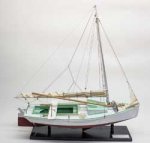
You will notice that Breezin' Thru has a half-round metal strip on the rub rail, which is a very common feature. Do a Google search on "half round brass wire" and you'll find it in several different sizes. It can be blackened, then glued and/or pinned to the edge of the rub rail.
Here's an example of one of my models where I used it:
-
jhearl got a reaction from GrandpaPhil in Breezin Thru by Shore thing - FINISHED - Wye River Models - 1/2" scale
Last time I was up your way in 2019, I visited Kentmoor Marina on Kent Island where Breezin' Thru was docked at that time. No idea if she is still there.
Cheers -
John
-
jhearl got a reaction from thibaultron in Question for Jim Bryne's Saw Owners and Preac Saw Owners
I'll offer a somewhat contrarian view. I bought my Preac in 2001 and it has served me well all these years. I have only had my Byrnes saw for a few weeks now. I don't have a lot of room on my tool bench, so I can't have both saws on there at the same time without removing another tool. But since having the Byrnes saw, I have yet to have any need to pull out the Preac.
One of the first things I did was make a sliding crosscut table and for the base, I used 3/16" hardboard. (It's sold as marker board and is smooth brown on one side and smooth white on the other). The reason for using 3/16" was so that any long stock placed on the crosscut table would go over the rip fence so that I would not have to be constantly removing/replacing it. I find myself changing between the two modes very frequently and I knew going in that dealing with the rip fence would be a big issue for me. Using such thick material for the base meant using 4" slitting saw blades, but they are working just fine for me. In fact, just the other day I ripped some 3/4" poplar with the 100-tooth blade that Jim sells and it cut through it with no problems at all. Only once have I used the carbide blade so far, and that was to cut some 3/4" boxwood. The slitting saw blade just wouldn't cut it. This was some true, European Box that I had harvested from some old-growth bushes and is hard as a rock.
One great advantage of the Byrnes saw over the Preac is the ability to cut thicker material. My Preac would barely cut 3/16" and to cut 1/2" stock meant cutting one side, turning the stock over and cutting the other. And because of the small motor, it would often bind up on something like that. That problem has been entirely solved with the Byrnes saw. The other real nuisance with the Preac was setting the blade to a particular height. The adjustment mechanism on that saw is quite primitive and I found that when I tightened the blade down, the height would change, so there was often a lot of trial and error to get it right. Not so with the Byrnes saw. The height adjustment is quick and precise and stays where you put it when you lock it down. If you need to cut lap joints or notches at a precise depth, this is something you will appreciate immediately. Unless I'm doing something precise like lap joints, I don't even lock down the blade height on the Byrnes saw. On the Preac, you had to lock down the height and it was always awkward (not to mention the hole in the cap screw always being full of sawdust).
On my current model, I've lately been making some planks that are about 1/2mm thick and 3mm wide. Pretty tiny stuff. I've had no problems cutting it using my crosscut table (I'm using a 220-tooth 4" blade for this). One issue I've had, however, is that when ripping wider material to get these planks, it is so thin, it slides under the rip fence. So I have to clamp a piece of wood to the fence so that the wood sits right down on the table. The rip fence on the Preac is designed differently and sits tight to the table, so it would be better for that kind of work, but then, I'd have to take one of my other tools off the bench, pull out the Preac, set it up to make the cut, then put everything back in place. If I had room for both saws, I'd probably use both, but as it is, I have not really missed the Preac at all so far.
Cheers -
John
-
jhearl got a reaction from mtaylor in Davits for whaleboats on Kate Cory scratch model
This photo may help. It's a part of Ronnberg's model of Kate Cory in the New Bedford Whaling Museum
Not the best photo but they appear to all be the same height above the waterline.
You could also try sending an email to the Cape Ann Museum where Mr. Ronnberg is a curator - curatorial@capeannmuseum.org
Cheers -
John
-
 jhearl got a reaction from Keith Black in Davits for whaleboats on Kate Cory scratch model
This photo may help. It's a part of Ronnberg's model of Kate Cory in the New Bedford Whaling Museum
Not the best photo but they appear to all be the same height above the waterline.
You could also try sending an email to the Cape Ann Museum where Mr. Ronnberg is a curator - curatorial@capeannmuseum.org
Cheers -
John
-
 jhearl got a reaction from Justin P. in Finding sheaves for small functional blocks?
This is not such a difficult thing to do.
First, buy some 2mm diameter brass rod. One good source is Scale Hardware https://model-motorcars.myshopify.com/collections/the-metal-shop/products/9863-2mm-diameter-round-brass-rod
Cut off a short piece and chuck it in your Dremel. Mount the Dremel in a vise or some sort of holder so you can use both hands to hold a small file.
Use a triangular file to score the groove. (The groove really doesn't have to be semi-circular.)
Slice off a 1mm wide piece with a jeweler's saw. You will probably need to run the cut side over a file or some sandpaper to make it flat.
Center-punch the slice, clamp it in a vise (use some scrap wood to protect the edges of the groove) and drill the required size hole using your drill press.
Sheave number one, done. Well, your attempt at sheave number one will be done. It may take making several to get two that are good enough. But seriously, this just isn't that hard to do.
My two cents, anyway.
John
-
 jhearl got a reaction from Ryland Craze in Breezin Thru by Shore thing - FINISHED - Wye River Models - 1/2" scale
You will notice that Breezin' Thru has a half-round metal strip on the rub rail, which is a very common feature. Do a Google search on "half round brass wire" and you'll find it in several different sizes. It can be blackened, then glued and/or pinned to the edge of the rub rail.
Here's an example of one of my models where I used it:
-
jhearl got a reaction from thibaultron in Breezin Thru by Shore thing - FINISHED - Wye River Models - 1/2" scale
Last time I was up your way in 2019, I visited Kentmoor Marina on Kent Island where Breezin' Thru was docked at that time. No idea if she is still there.
Cheers -
John
-
 jhearl got a reaction from Shore thing in Breezin Thru by Shore thing - FINISHED - Wye River Models - 1/2" scale
Last time I was up your way in 2019, I visited Kentmoor Marina on Kent Island where Breezin' Thru was docked at that time. No idea if she is still there.
Cheers -
John
-
jhearl got a reaction from Shore thing in Breezin Thru by Shore thing - FINISHED - Wye River Models - 1/2" scale
You will notice that Breezin' Thru has a half-round metal strip on the rub rail, which is a very common feature. Do a Google search on "half round brass wire" and you'll find it in several different sizes. It can be blackened, then glued and/or pinned to the edge of the rub rail.
Here's an example of one of my models where I used it:
-
 jhearl got a reaction from ccoyle in Breezin Thru by Shore thing - FINISHED - Wye River Models - 1/2" scale
Last time I was up your way in 2019, I visited Kentmoor Marina on Kent Island where Breezin' Thru was docked at that time. No idea if she is still there.
Cheers -
John
-
 jhearl got a reaction from Rik Thistle in Macro photography on the cheap.
I would offer a somewhat contrarian view and say that macro gear may not be the best solution for close-up model photography. I own a Nikon D800 and three different macro lenses plus a bellows and tripod - altogether some quite expensive equipment. I use none of it for model photography. Instead, I use what would be considered a high-end point-and-shoot (Fuji X100F). That camera has a fixed focal-length 23mm lens and a 16 megapixel sensor. The camera cost around $1K new but now sells for around $500 used. It has a lot of controls that someone used to a digital SLR would want, which is one of the reasons for it's high cost. But, I can use that camera hand-held, in relatively poor light (it has an f2 lens), and get very good results. It is able to close-focus to just under 4 inches (so-called macro mode) but because of its 23mm lens, it's also useful for taking a shot of a whole boat. I almost never use a tripod - just hand held. The advantage of the 16mpx sensor is that it's easy to crop in on something to get the impression that it was shot with a macro lens but generally has better depth of field. Newer cameras have even larger sensors, which means even tighter crops.
Here, for example is a quickie shot (uncropped) of a ruler about as close as I could focus:
Here's a crop from the same image (slightly out of focus but I wasn't being very careful with it). It was shot at f/8 at 1/110sec.
Here's an actual photo from one of my builds. You can see there's a much greater depth of field than would be typical with a macro lens:
And another:
There's nothing wrong with macro, but it does require a lot more work and a lot more care in using it than just picking up a little point-and-shoot and hand-holding it. Not to mention it can require much more expensive gear and, if you get into focus stacking, much more time. So I'm just offering this as an alternative. If you already own a digital SLR, before you buy a macro lens, try a wide-angle lens if you have one. I have a 16mm lens for one of mine and I can achieve similar results with it although it doesn't focus as closely as the P&S camera.
Cheers -
John
-
jhearl got a reaction from thibaultron in which table saw to get??
The advantage of the wider table is that you can use the Byrne's sliding table without having to remove the rip fence. You just slide the fence over to the right. I go back and forth between cross-cutting and ripping frequently so the wider table was worth it for me. It would drive me nuts to have to keep removing and re-installing the fence. I also bought the micrometer but after trying it a couple times, it has been sitting in the drawer ever since. I work at larger scales (typically 1:16), so that degree of accuracy is unnecessary for me.
Cheers -
John