HOLIDAY DONATION DRIVE - SUPPORT MSW - DO YOUR PART TO KEEP THIS GREAT FORUM GOING! (Only 68 donations so far out of 49,000 members - Can we at least get 100? C'mon guys!)
×
DBorgens
-
Posts
327 -
Joined
-
Last visited
Content Type
Profiles
Forums
Gallery
Events
Everything posted by DBorgens
-
When I wax the lines, I pass them over one the work lamps (the one with an incandescent bulb) several times with a little hand tension. Works best on the smaller lines. Dave B
-
 Don, I too forgot to add bolt ropes while hemming the sails. I cheated and sewed them in at the corners later. Works for me. Dave B
 -
Jack, Excellent work on the sails. Nice catch with the fit check. She is truning out very nicely. Thanks also for posting your friends advice with preparing linen. That's a gem to keep for reference. Dave B
-
Floyd, Glad to see the progress, I confess I haven't checked in a while. Planks look good and I expect to see a well done hull next club meeting. Dave B
-
Daniel, thank you. I've learned to make each piece a model. Besides, it passed the time watching (listening) to football on Thanksgiving. Floyd, I forgot your mention of bra hooks. I find the repetitive tasks relaxing. It feels good to make visible progress. Dave B
- 43 replies
-
- 1
-

-
- bluenose
- model shipways
- (and 2 more)
-
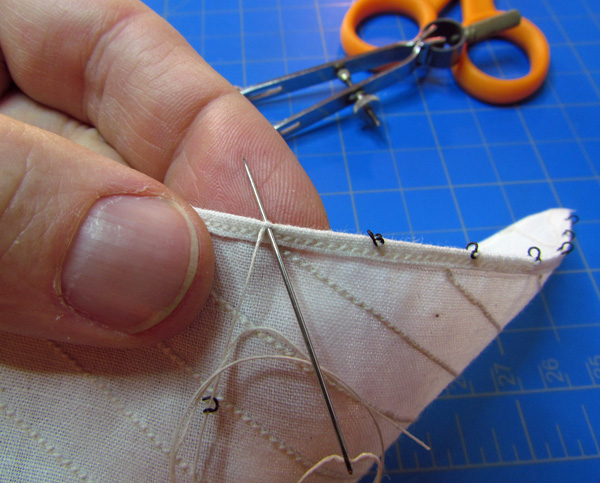
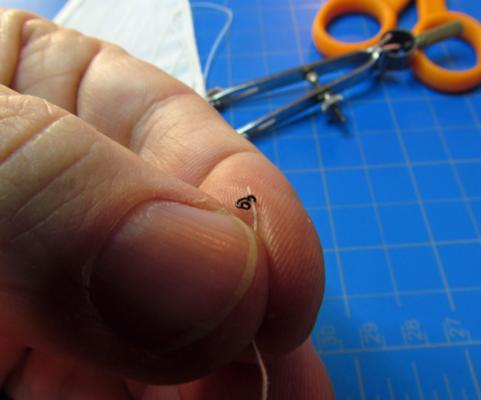
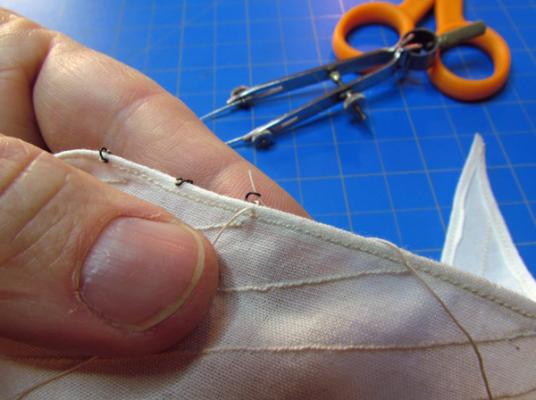
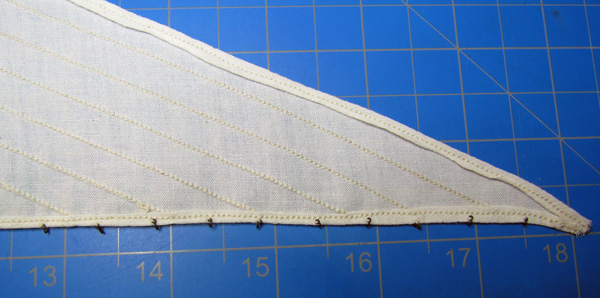
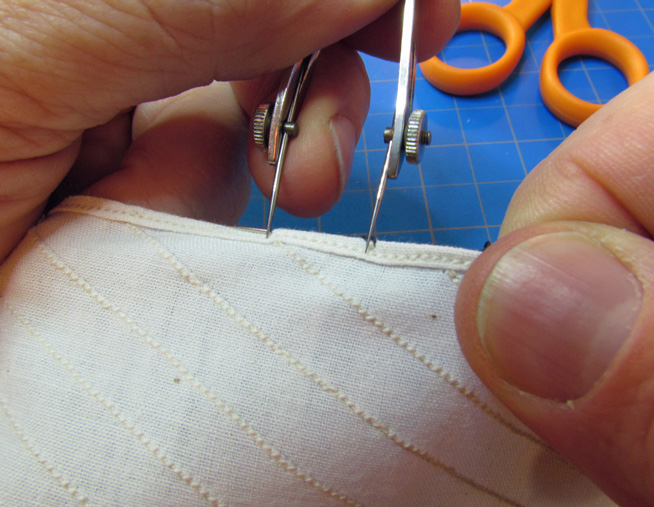
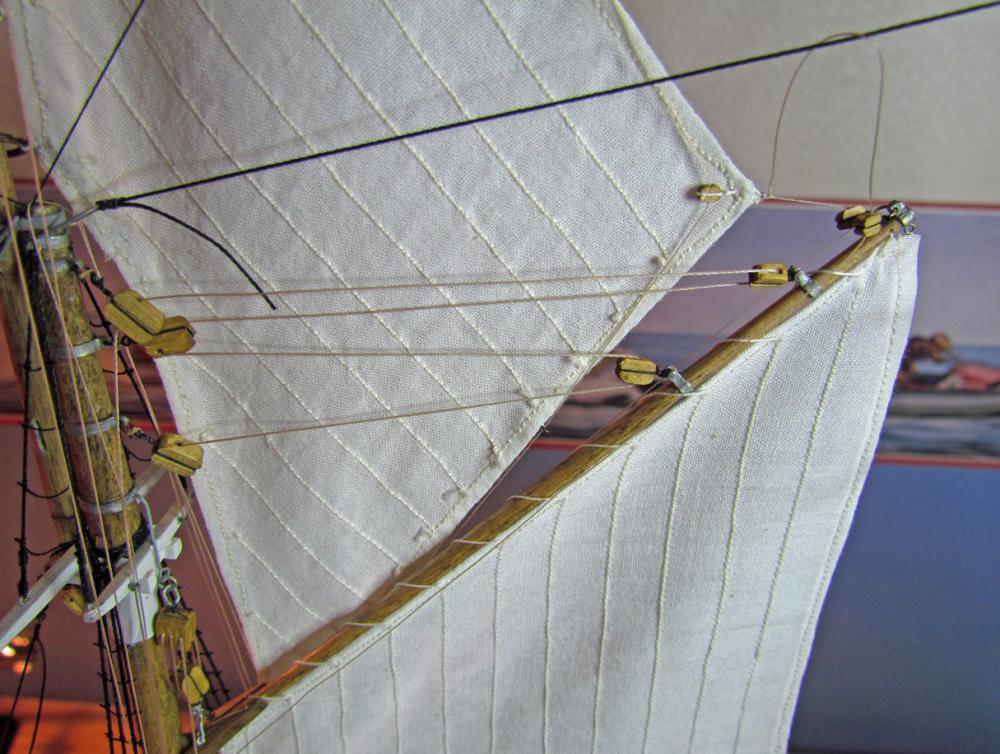
Jib hanks My hanks are approximately 6” high by 4” wide or half the size shown on the plans, which appear too large to me. Specifically, they are .094” (2.4 mm) high by .068” (1.7 mm) wide. I used 30 gage copper wire (.010”, .25 mm) and formed the hook ends around two #77 (.018”, .46 mm) drills spaced .130” (3.3 mm) apart. After trimming the hooks I bent the hank around the smallest end of round nose pliers (.048”, 1.22 mm). I shaped these as shackles rather than planar as shown on the plans. Perhaps proving I am no sailor, but right wrong or indifferent, they look better. Stitching hanks to jibs. Lacking any guidance, I use a running stitch to sew the hanks to the jib. This works well for me and will work if the hanks are planar. I cut a thread twice the length of the hem and harden the free end with thin CA. This makes it easy to thread through the hank hooks and needle. I have to remove the needle twice for each hank since the hooks are smaller than my needles. Start by locking the stitch and running the needle inside the sail hem to the point of the first (or next) hank. In this photo you can see the needle exiting the hem at the left divider point. Remove the needle and thread the hank from the inside out to make the hank lie properly at the stitch. Rethread the needle and stitch through the hem from immediately below the hank, (I learned later that stitching below the hank helps keep it normal to the hem) so the hank will lie upright. Thread the other hook, again from the inside out. Pull the thread tight and check the position of the hank. Now is the time to make corrections. Thread the needle and start a stitch (again below the hank)to proceed to the next hank. Completed jib hanks. Dave B


- 43 replies
-
- 8
-
-
- bluenose
- model shipways
- (and 2 more)
-
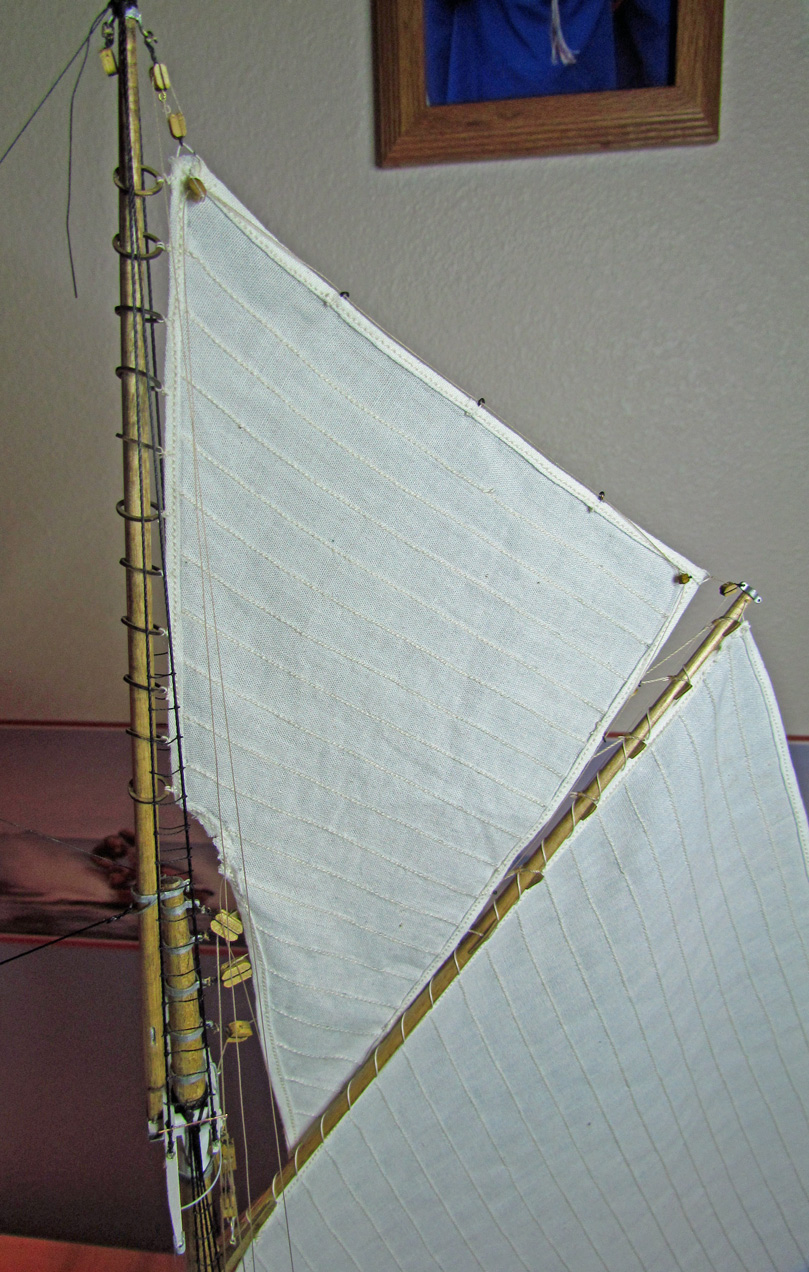
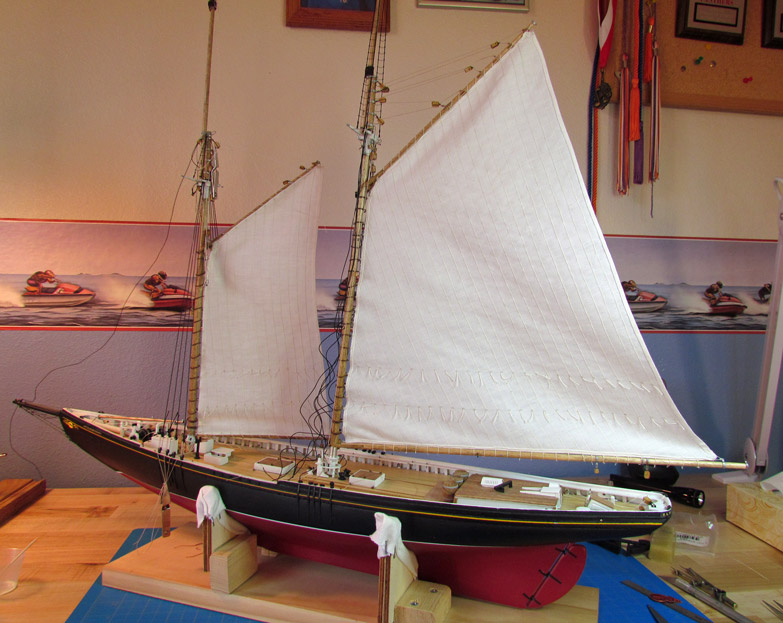
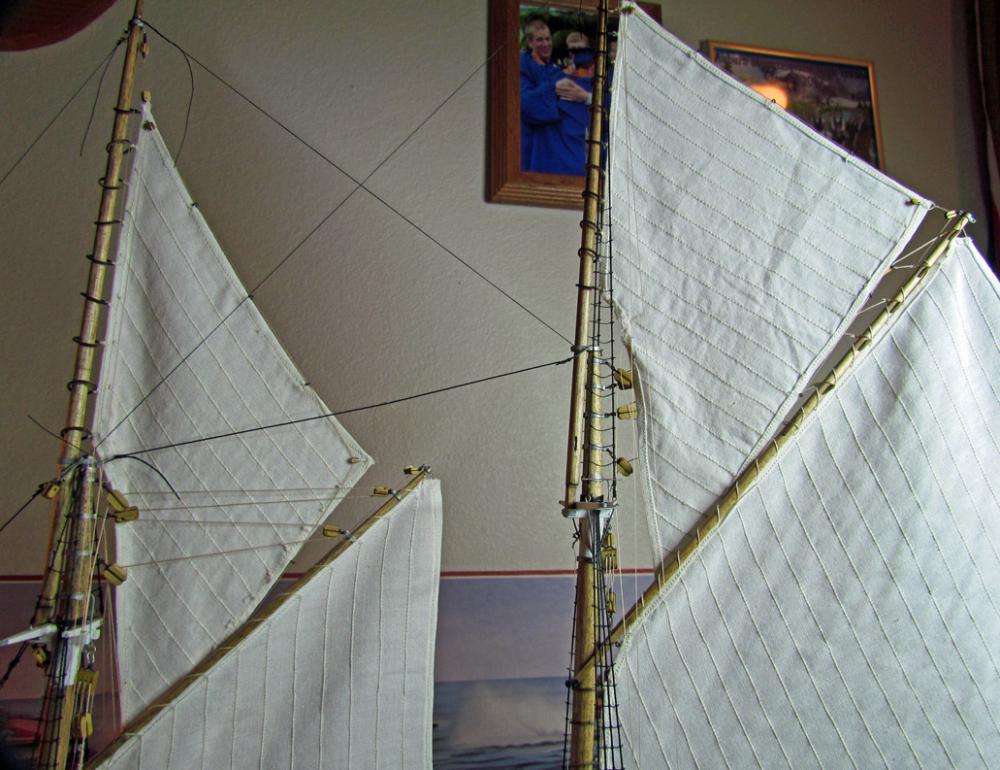
After finishing ratlines (a few have come loose, trimmed too close) and have set the topsails. It was a bit tricky to seize the sails to the mast hoops in amongst the rigging but not too difficult. I keep bumping some of the stays and knocking them loose. Fortunately, I read a hint to leave the seizings untrimmed and set them later. It’s certainly easier to retighten stays than to cut them off and seize new ones. Now I am on to the jibs and plan to sew the hanks onto the sails off the ship. This will mean replacing the stays but it seems easier then trying to sew them on the ship. So, when is the best time to set the sails? In hindsight, I would have set the jibs earlier and avoided some rework. The ship are always a learning experience. Topsails set. Fore top Main top Dave B

- 43 replies
-
- 3
-
-
- bluenose
- model shipways
- (and 2 more)
-
Don, I just discovered your log. Completing the model is a great honor for your friend's family. She looks lovely with a nice clean deck. If you do manage to get down to Woodinville, I would love to see her. I am a member of PSSM along with Floyd and am finishing my own Bluenose. Regards, Dave B
-
Beautiful work! Something to aspire to. Dave B
-
Popjack. I skipped cutting or scraping the cove and simply painted the stripe. I used electrical tape to mask a 1/32 wide stripe, which took some work. The tape is good since it has some stretch and seals well. After a few coats of yellow acrylic I removed the tape and had only a little touch up. At least this worked for me and is acceptable for a first build. I tried a paint pen to make the scroll work around hawse ports. The pen did not cover very well over the black hull and ended up too wide for the scroll work. Play with it but you might have difficulty keeping a straight line (or it is just my shakey hands). Dave B
-
Gill, Thanks for the tutorial, defintely on my long term to do list. I like the simplicity of your method and wonderful results it gives. Your lines are impressive and the photos do not do justice. Keep writing and we'll keep learning. Dave B
-
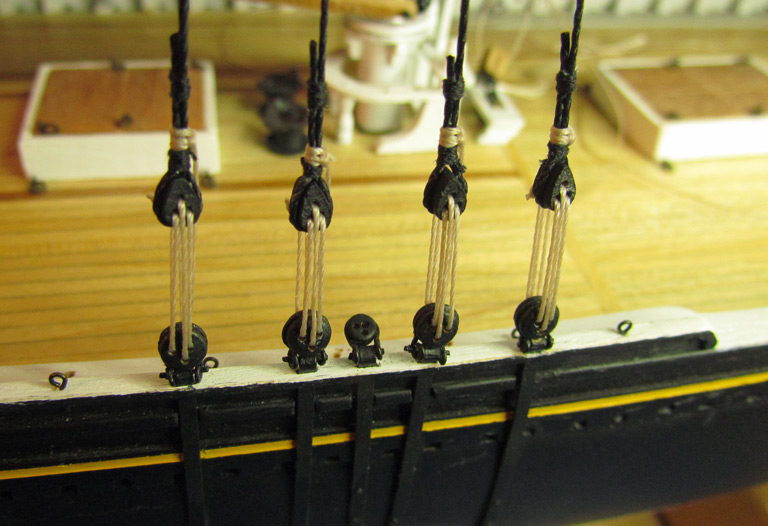
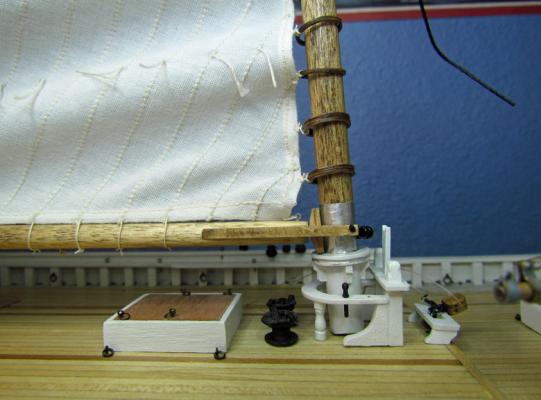
I used a piece of medium weight rigging thread and glued it around the sprockets (actually two pieces). You could also try fine wire or very fine chain (I couldn't find any small enough). The thread is better than nothing but does give the appearance of the drive system. Dave B
-
Gil, Your Victory continues to amaze me. Shows how much I have to learn. Your log is another practicum for us mortals, thank you for the photos and posts. Dave B
- 755 replies
-
- 4
-
-
- finished
- caldercraft
- (and 1 more)
-
Dave, Your Bluenose looks great. I like the attention you gave to deck "clutter" since she was a working schooner after all. She dresses up well when all the bits are done. Well done. Dave B
-
Jack, Thank you for posting your friend's advice on washing and drying linen. Wish I had known that, it would have saved a couple cycles of ironing. Your sails look good so far and I am convinced they will turn out great. Dave B
-
Jack, Excellent work on the sails. I too love your grommets, nice detail. Dave B
-
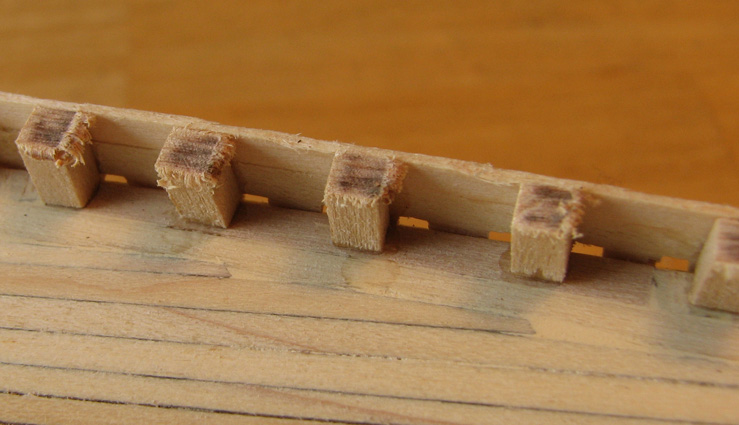
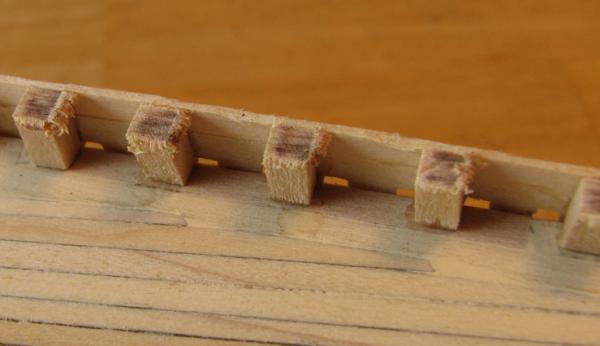
I filed the scuppers in a 3/16 x 1/16 plank. If you have the step correct you should file the quarterdeck scuppers into the "upper" edge of the plank and the foredeck on the lower edge. I believe I learned this method from Bob Hermann's post on Bob Hunt's forum and it made sense. Check the deck "step" height before you start. Mine is only 1/16 high, probably from earlier mistake. Measure the spacing carefully as little errors become apparent later, at least to the builder. Mine turned out pretty close to the stanchion spacing and I was pleased with the outcome for a first build. Check the depth of the scuppers against the deck as you start so you get that correct. I did scrap one or two planks in the process but did not run out of planks. Don't worry about the overall height since you will sand down the hull to the correct rail height (again from Bob Hunt's practicum). The picture shows foredeck scuppers after I sanded the rail height. Scorch marks from the Dremmel drum, which went quick but plunged a little in a few spots (minor repair opportunity). I placed the false stanchions using a short stick for spacer gage so rather than align with the scuppers. Uneven stanchions would be more evident on the model. Whichever method you choose, give it a try and experiment on some short lengths of planking. At worst you might have to buy a few more sticks. Dave B
-
Bob, I'm glad to see you making progress. Beware of CAD programs, they suck up vast amounts of time. The sails are going to look great, can't wait to see them set. Dave B
-
Floyd, brunging her tomorrow. Thanks for the tip, I'll file it for future use (far future at my pace). Jan, thank you. I enjoyed making the fittings, it is good to see things come together. For metal work, check out Bob Hermann's Bluenose. He is a wizard and happy to help. I would love to see a picture of your ship. Dave B
- 43 replies
-
- 1
-
-
- bluenose
- model shipways
- (and 2 more)
-
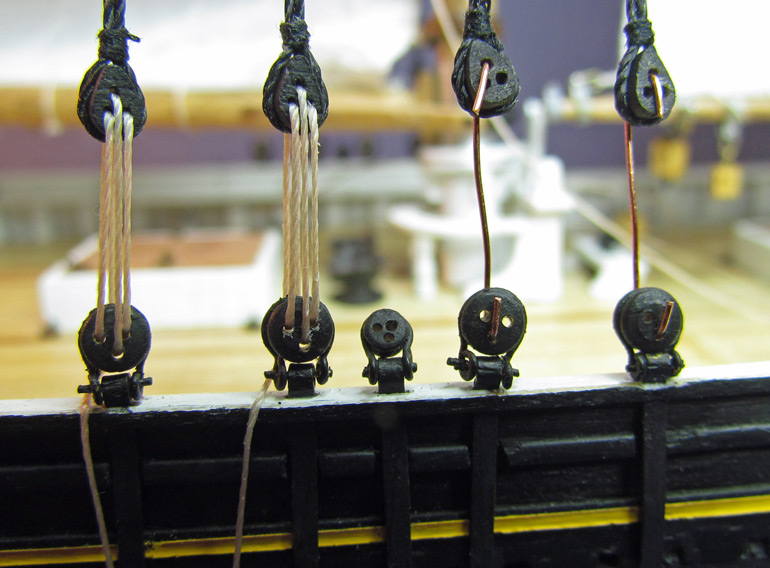
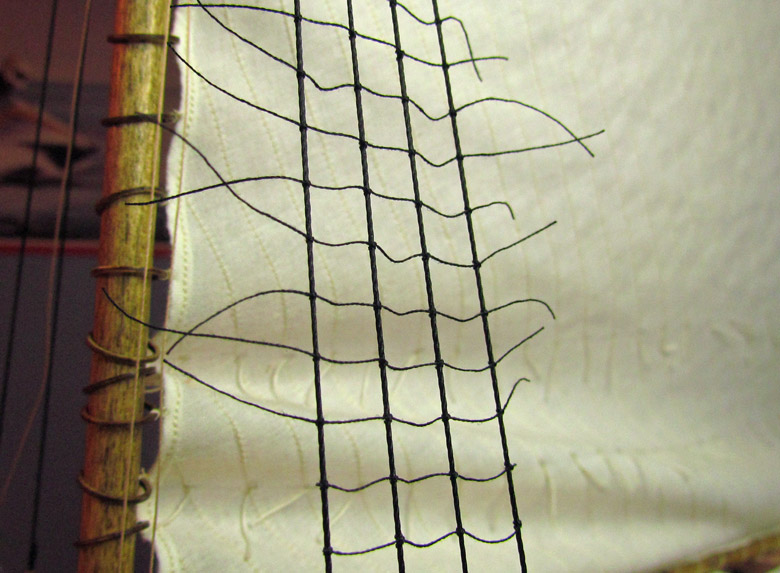
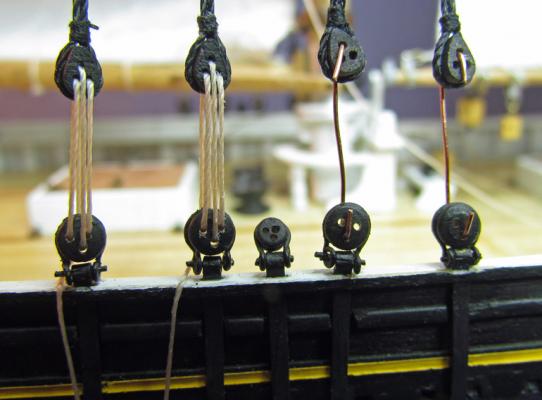
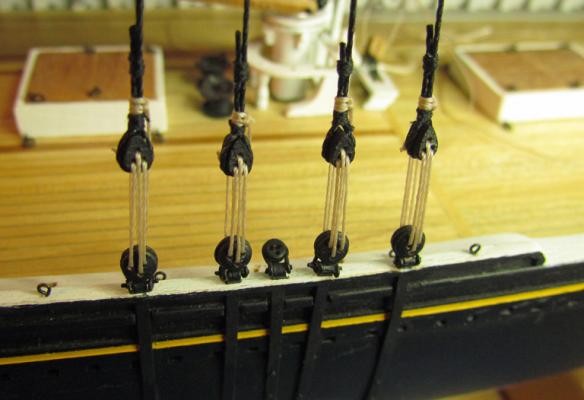
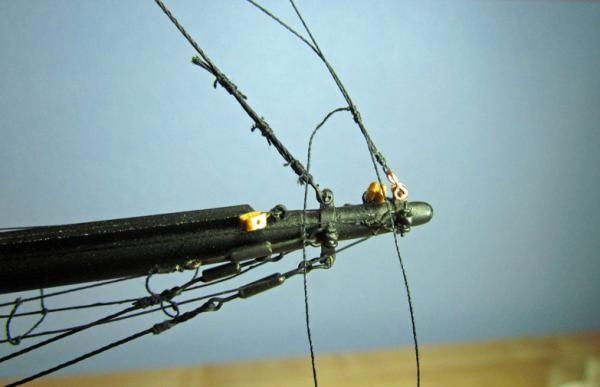
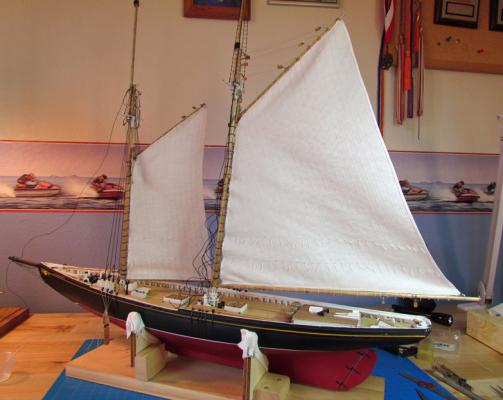
Haven’t posted in quite some time, bad me. To catch up, I have stepped the masts and complete much of the standing rigging. I am currently tying ratlines and have competed the port side of the main mast. Some photos to catch up. Main sail lacing. Main and fore masts and sails set in place. The gaffs are temporarily rigged. Used single wires to set constant deadeye heights while seizing the shrouds. The single wires worked okay for height but allow the deadeye to rotate while tightening the shroud. Next time I’ll try something more stable and may make a single tool for all deadeyes. Lanyards complete. Bowsprit details. Ratlines in progress. Dave B

- 43 replies
-
- 9
-
-
- bluenose
- model shipways
- (and 2 more)
-
Jack, I made my sails early and set the main and fore sails to the masts and booms before starting rigging. I figured the easiest way to rig the mast hoops would be off the ship. It was easy and so far the sails have not interfered with rigging. I'm currently tying ratlines. I haven't posted any photos in my log for some time (shame!). I did post a method of seizing mast hoops in the mantling, rigging and sails forum, here. http://modelshipworld.com/index.php?/topic/3288-seizing-mast-hoops/ Hope this helps. Dave B
-
Fred, Though I, haven't researched this aspect yet (still tied up in rat lines), the plans do show an open chain box. No further details are given. If you search for "Bluenose" find the Nova Scotia archives for photos by W.R. MacAskill. You should find photos from around 1940 showing deck details the chain box is clearly seen behind the engine box. Here is the link http://www.gov.ns.ca/nsarm/virtual/bluenose/archives.asp?ID=193 Dave B
-
Jack, Great looking stand and it fits very well with your Bluenose. I need a stand or mine and you have provided an excellent option that doesn't look difficult to build. Dave B
-
Tex, Thank you for stopping by. I looked through your Morgan log. Beautiful! I also loved your pictures from Mystic Seaport. Another thing to add to the bucket list. Alas, on the wrong side of the country. Dave B
- 43 replies
-
- 1
-
-
- bluenose
- model shipways
- (and 2 more)
-
Bob, What cloth did you decide to use? If it frays, I recommend using Fraycheck. A small bottle will do Nelson's entire navy. I applied it before I cut the sails. It dries clear but it stiffens the cloth which makes the hem harder to fold. I ironed mine and it was a bit of work to keep the hem small. If you use Fraycheck, test it with your fabric cement to be sure all turns out well. Wouldn't want it self combusting. Dave B