HOLIDAY DONATION DRIVE - SUPPORT MSW - DO YOUR PART TO KEEP THIS GREAT FORUM GOING! (Only 68 donations so far out of 49,000 members - Can we at least get 100? C'mon guys!)
×
DBorgens
-
Posts
327 -
Joined
-
Last visited
Content Type
Profiles
Forums
Gallery
Events
Everything posted by DBorgens
-
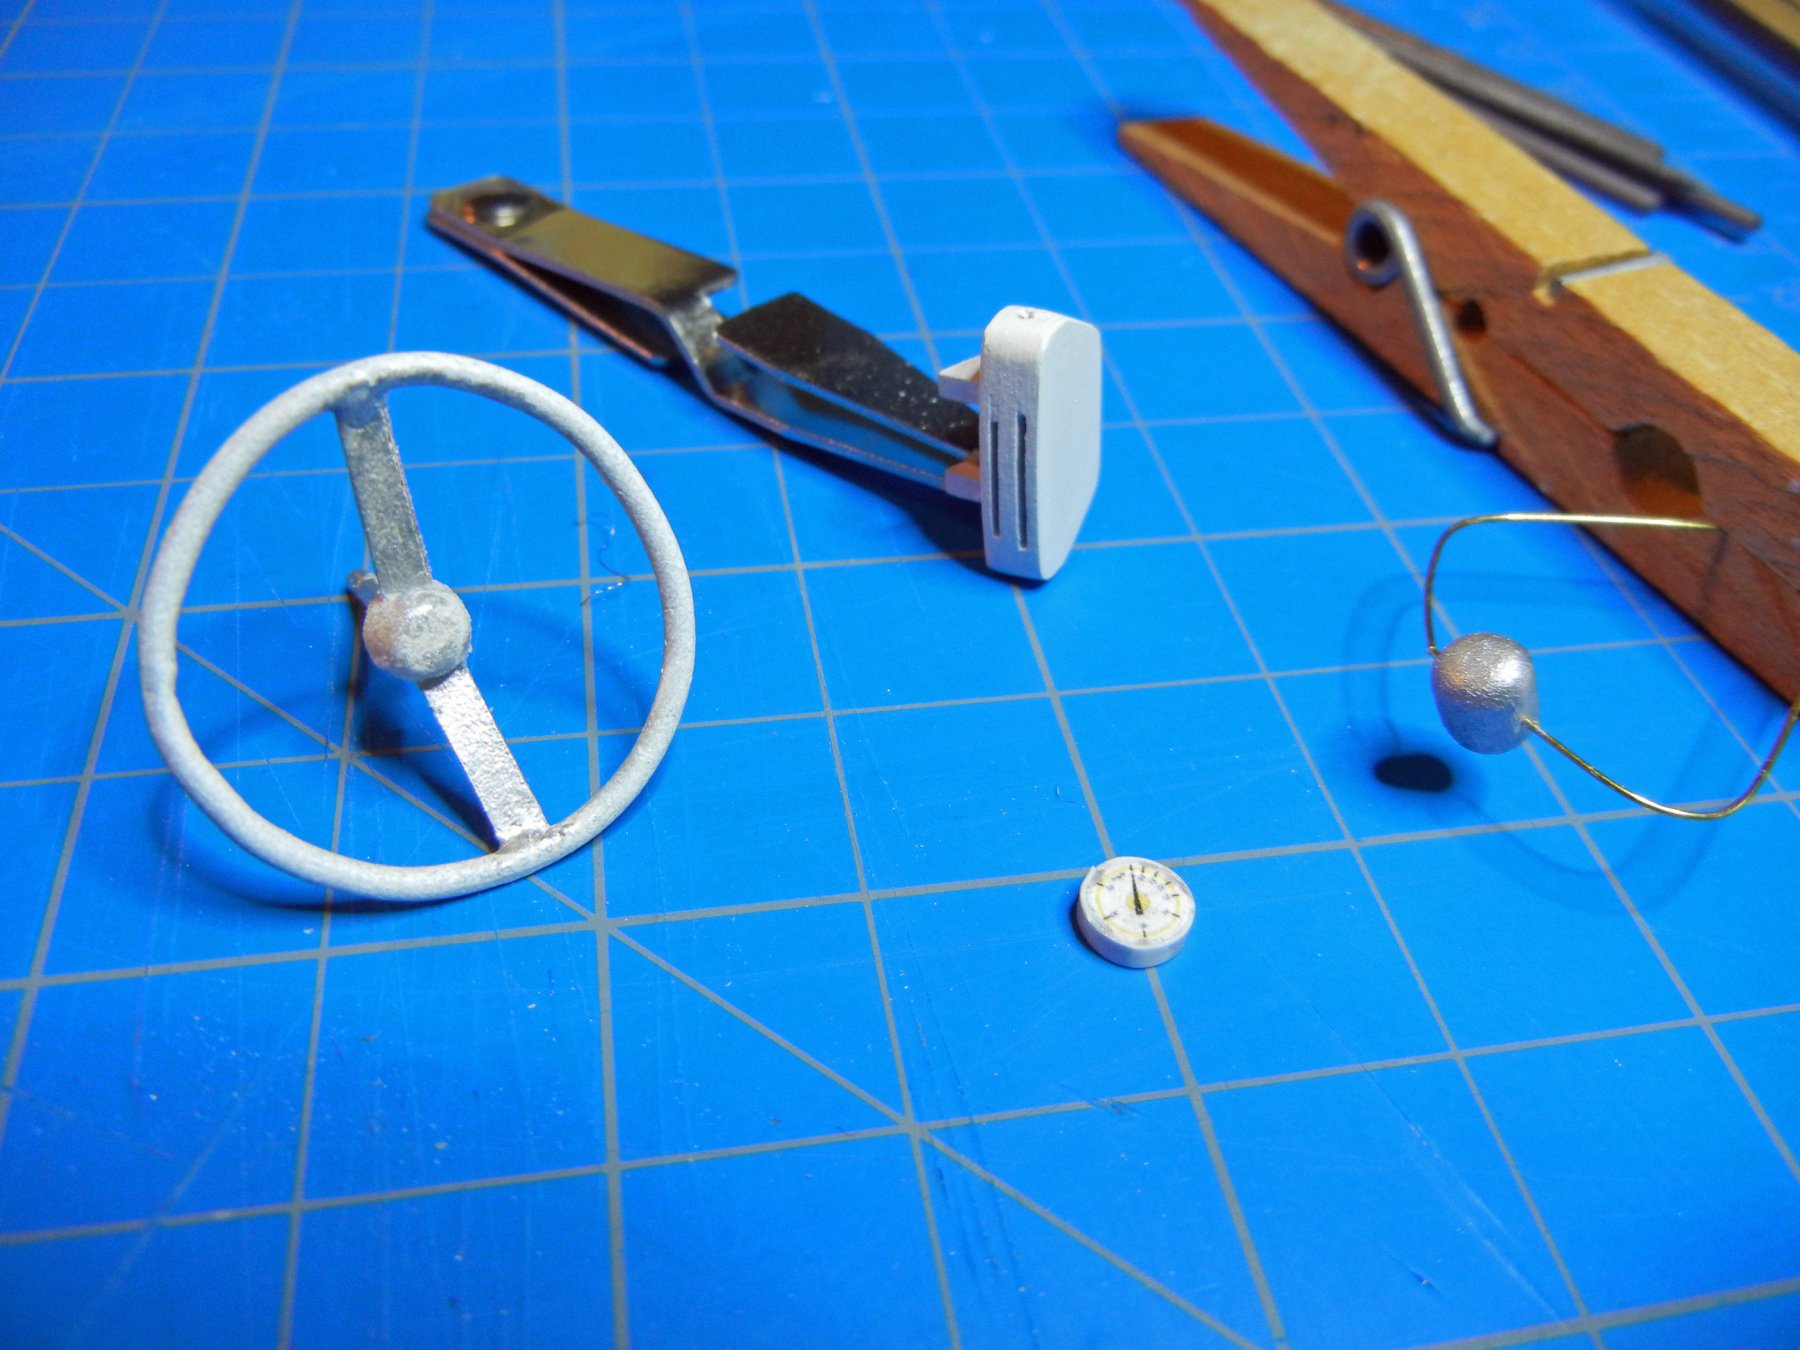
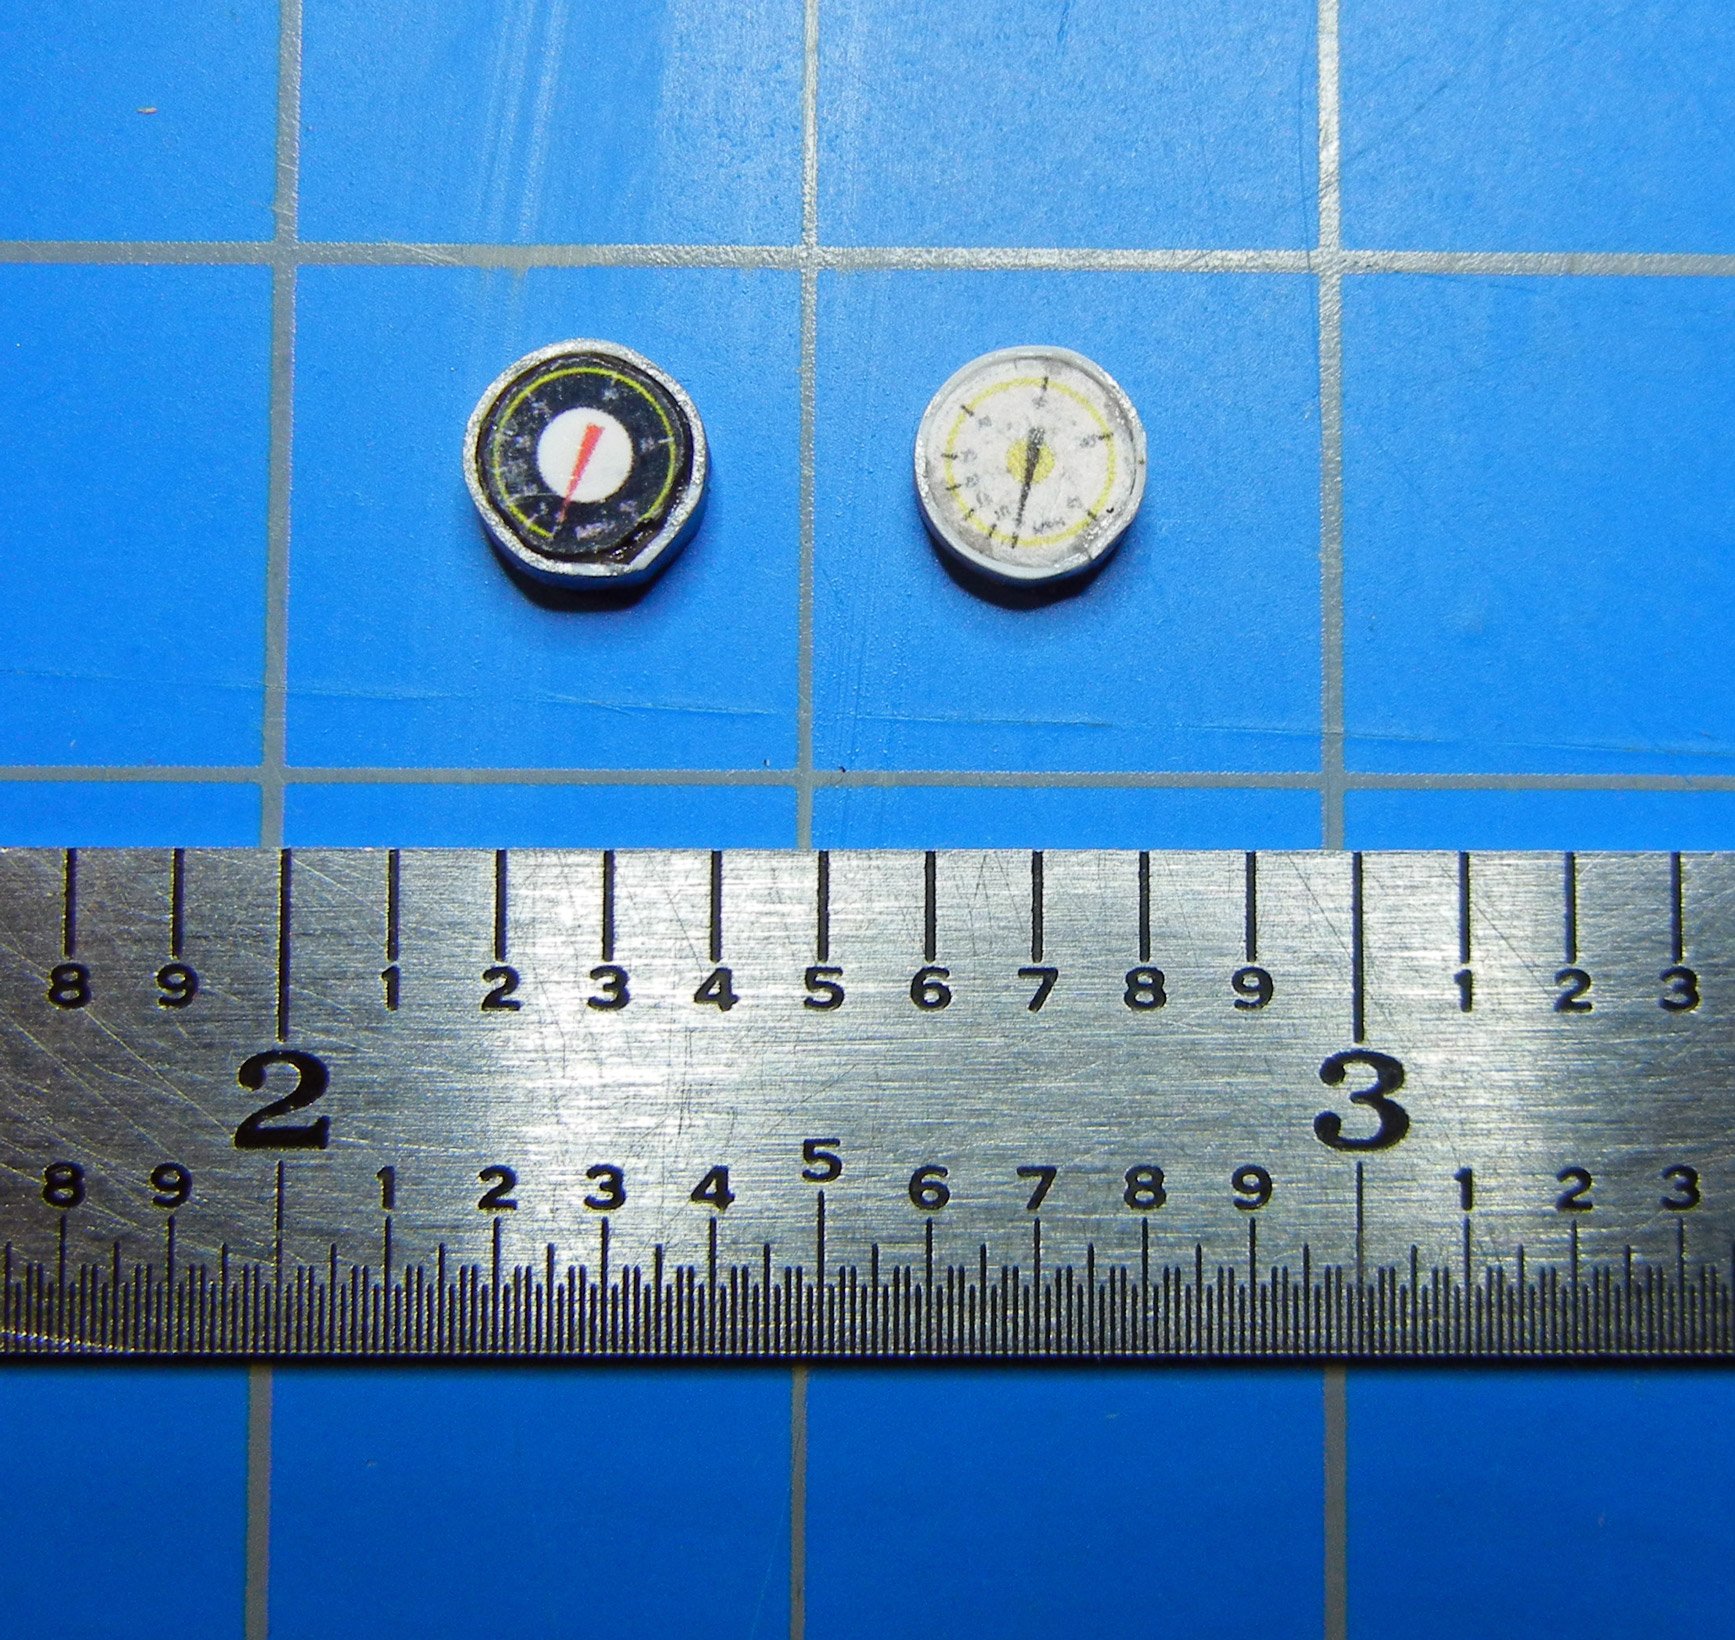
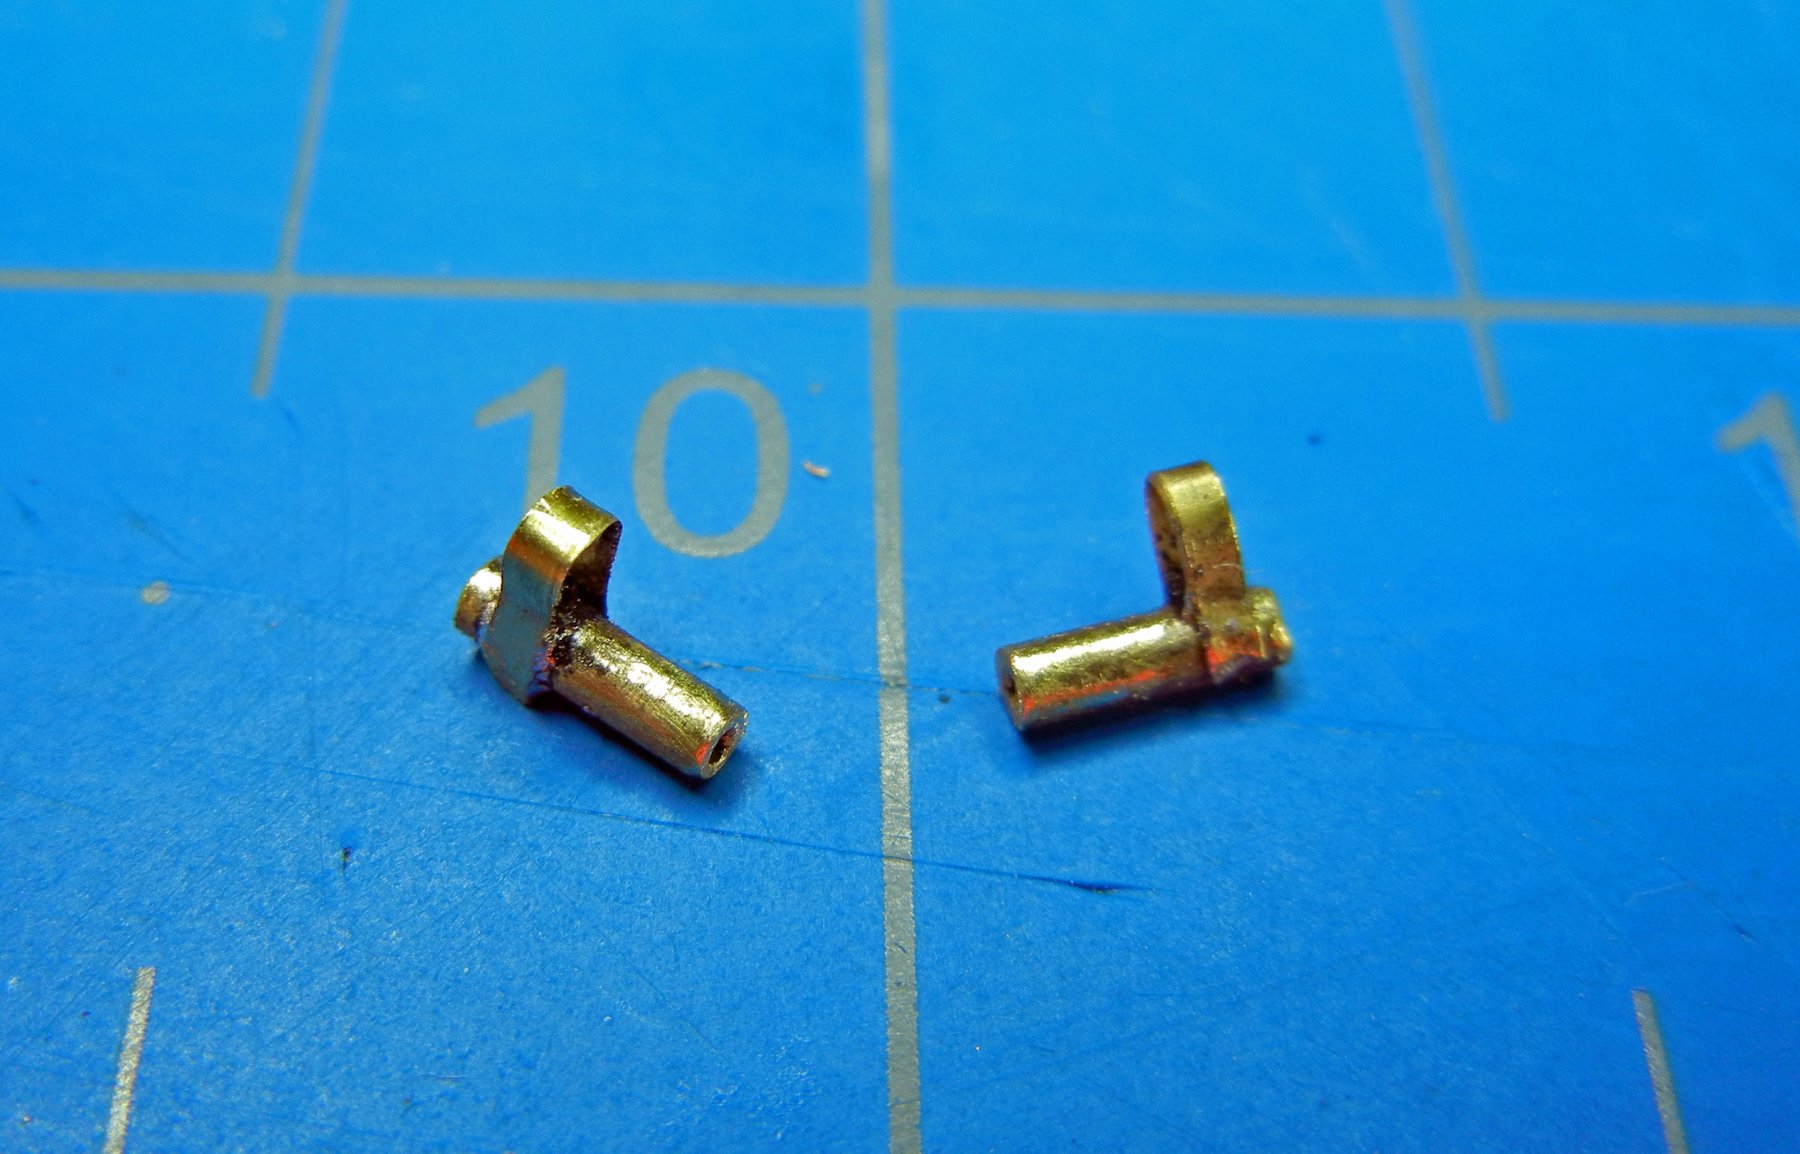
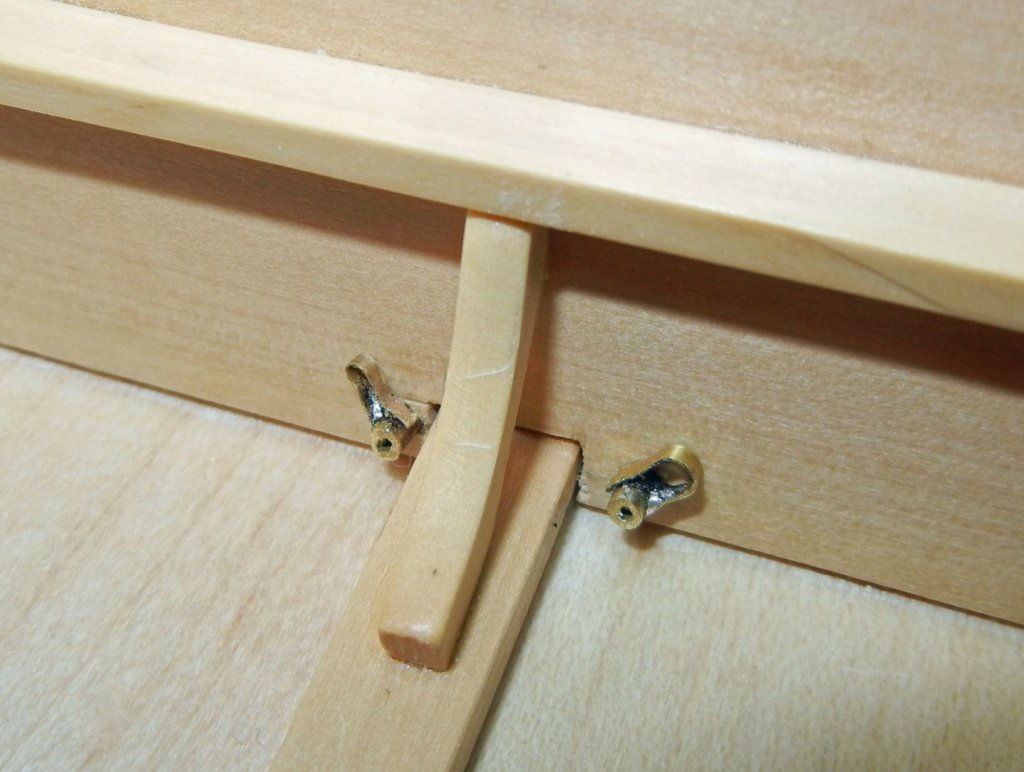
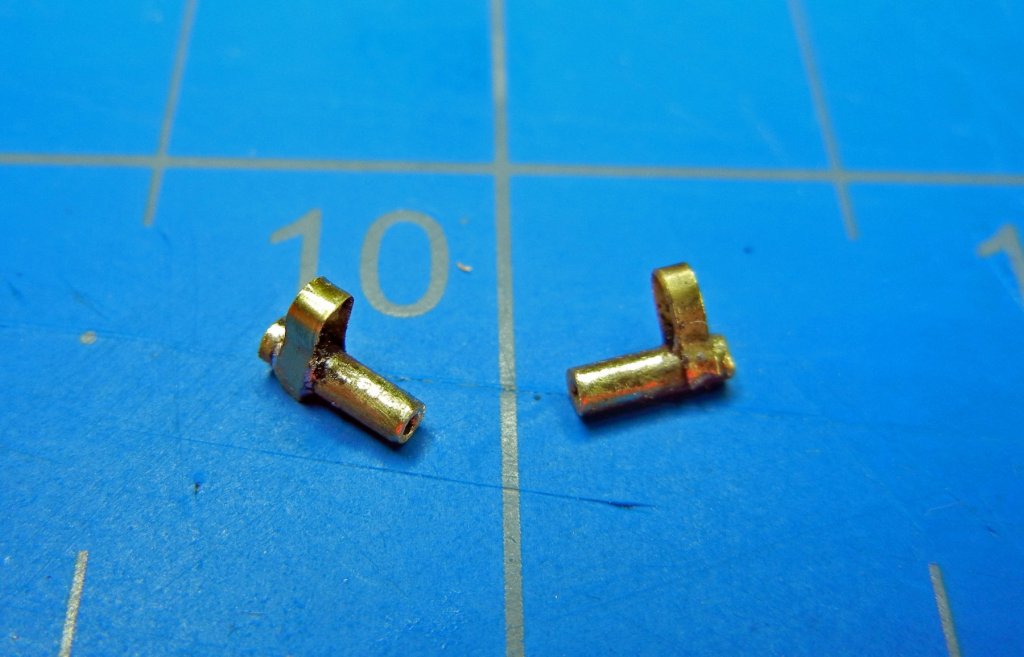
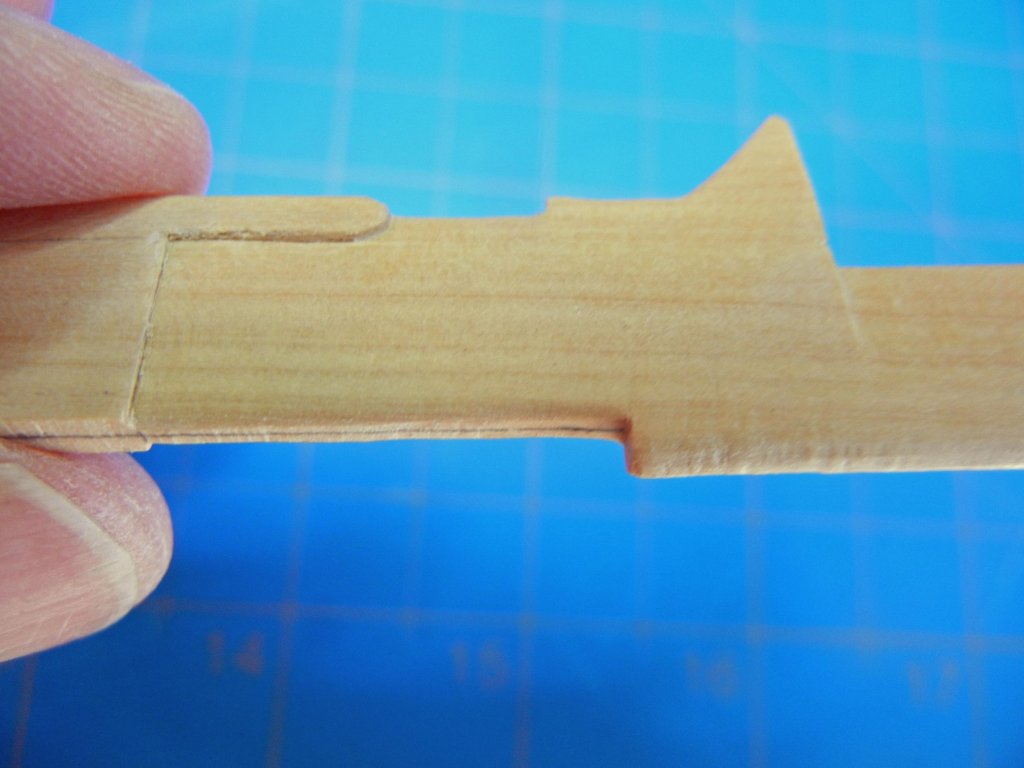
 Bits and Pieces I made the throttle control by laminating 1/32 sheet and 1/64 plywood. This was the best way to support the levers in position. The first photo shows the slots to hold the throttle at the idle position and the shift lever in neutral. The levers are brass strips with small beads for handles and will be installed later. The speedometer face was drawn large and printed at a very small scale. I chose the darker one. The photo shows all of the tiny imperfections. Patrick, how do you build in such small scale? My fingers are not that skilled. Unable to find a commercial steering wheel the right size, I soldered one from brass tubing and sheet. The result is acceptable though not as round as I would like. My ambitions exceed my skills (don’t we all?). The gray part with wires in the photo is the compass body. I will paint the top black to resemble the dial and will make a small base. I will not even attempt to print the dial, it would be invisible.


-
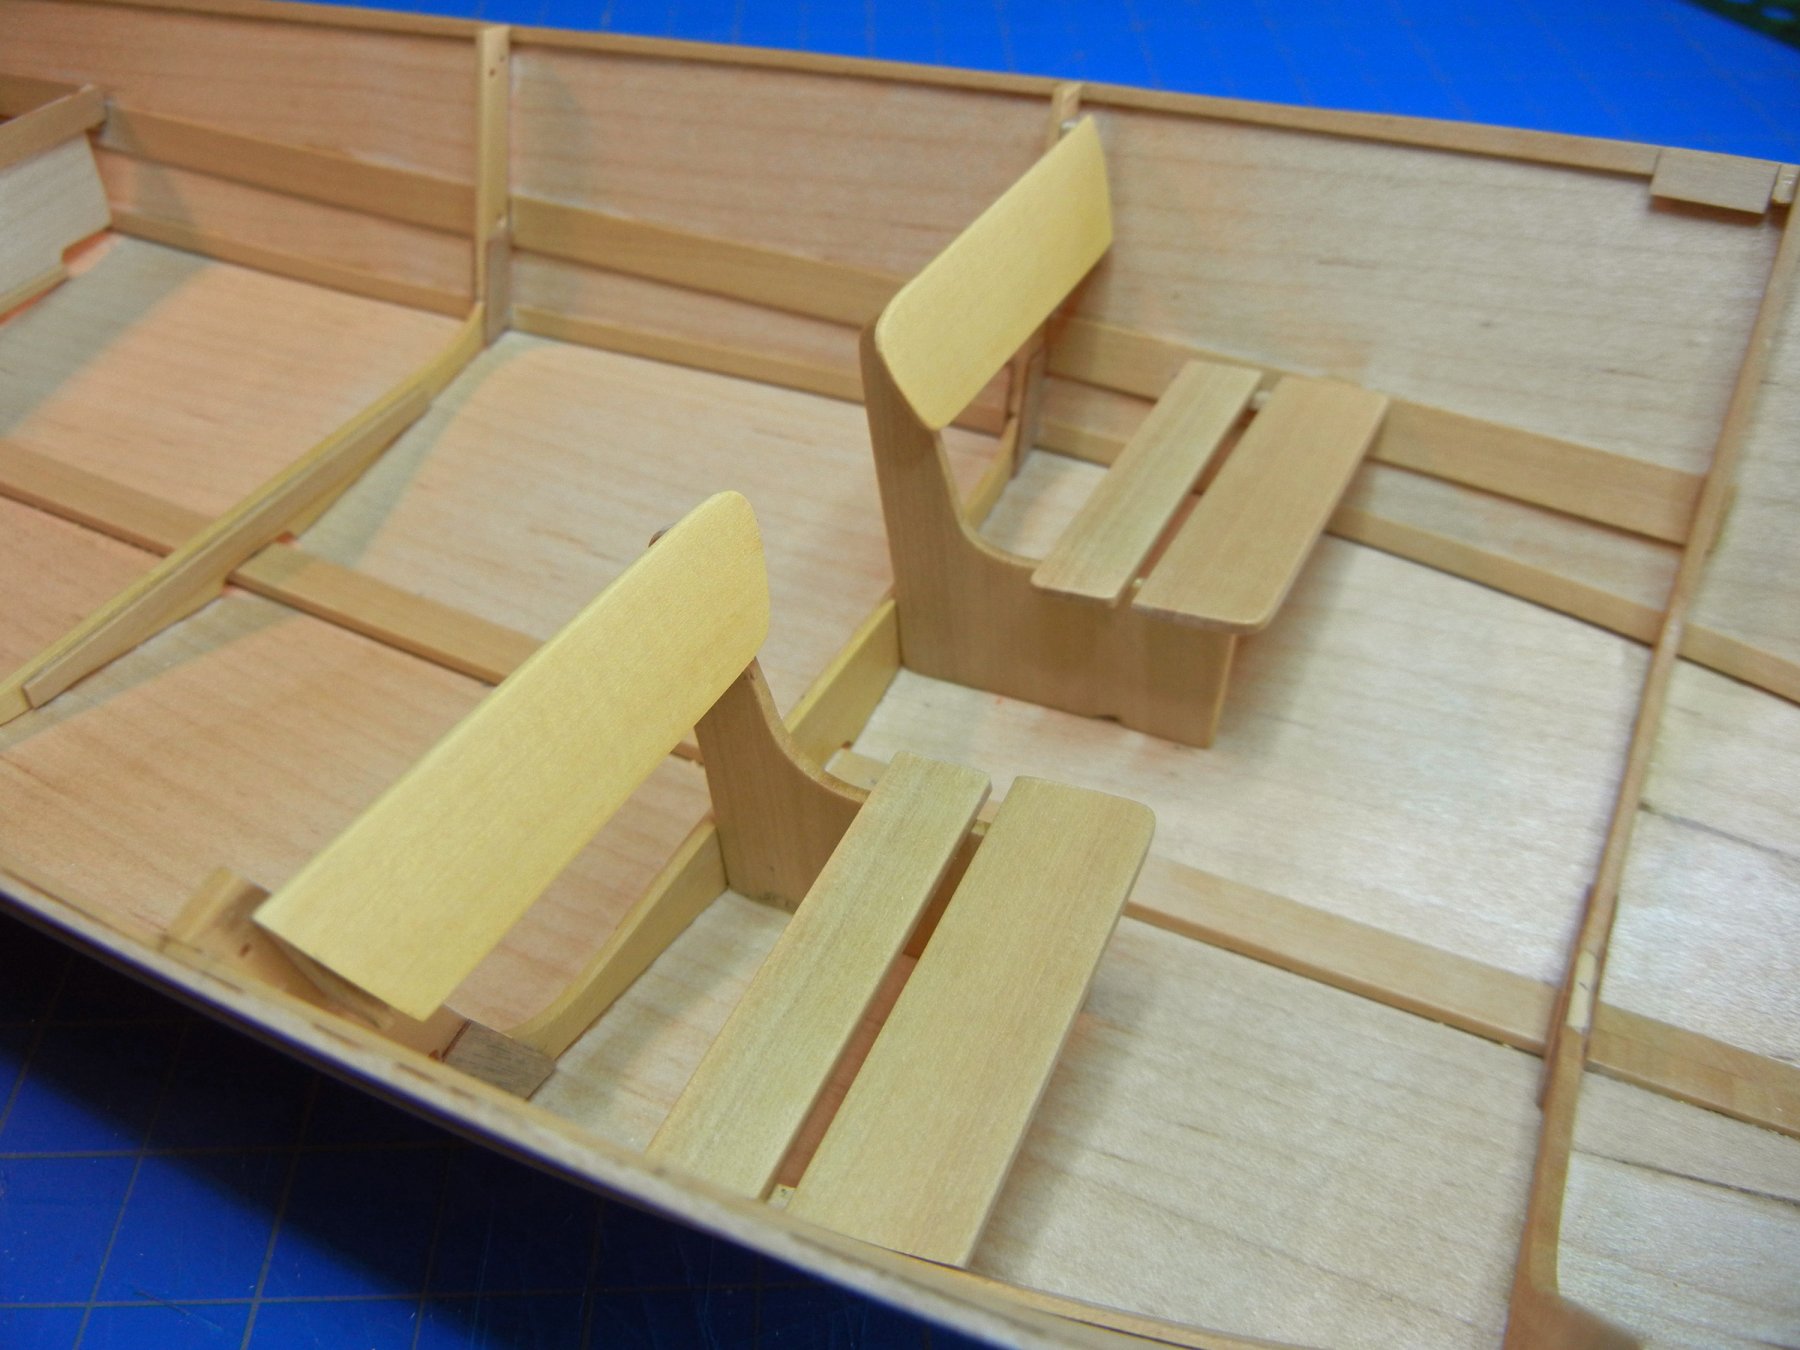
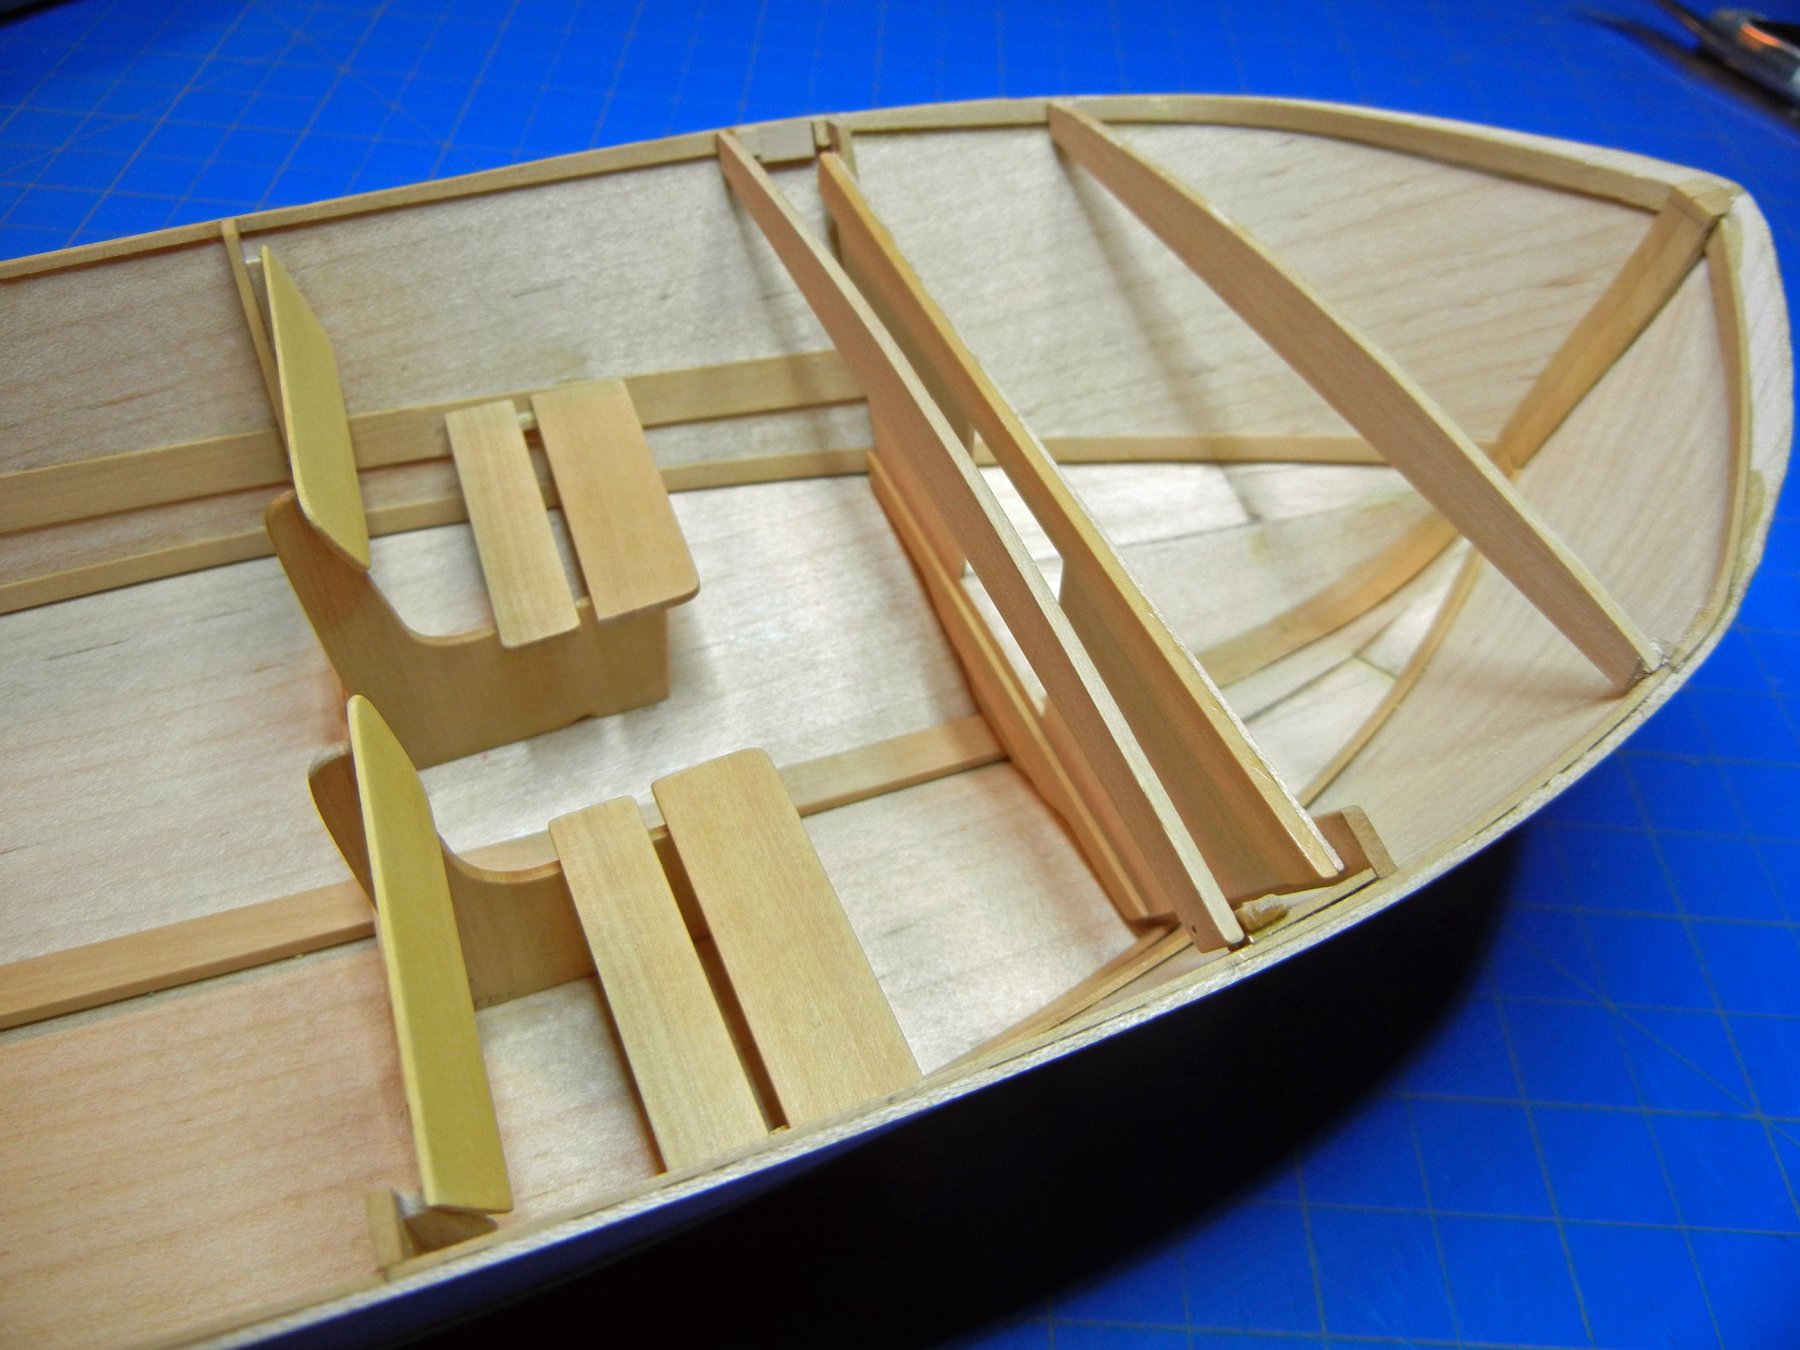
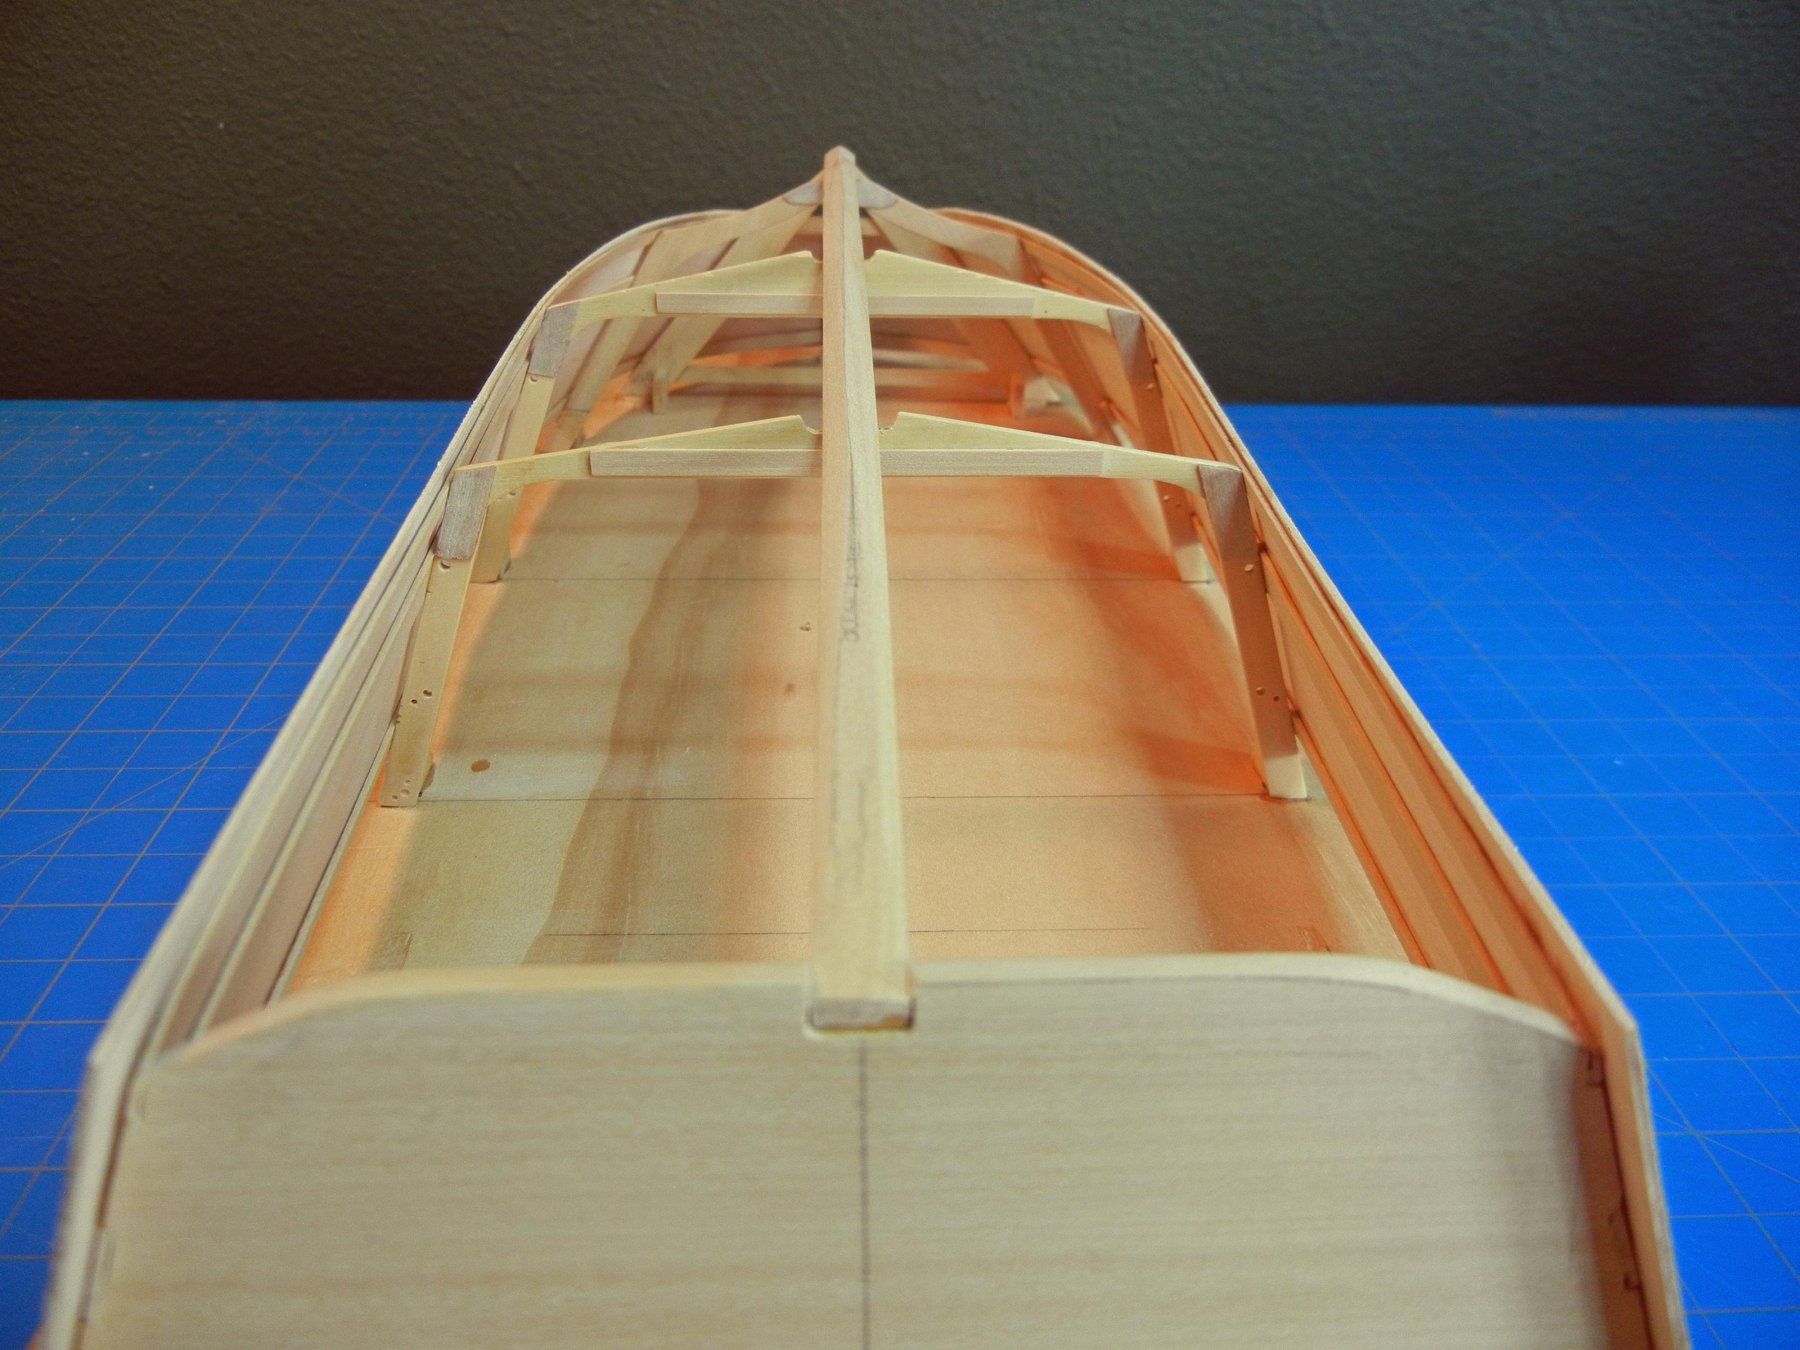
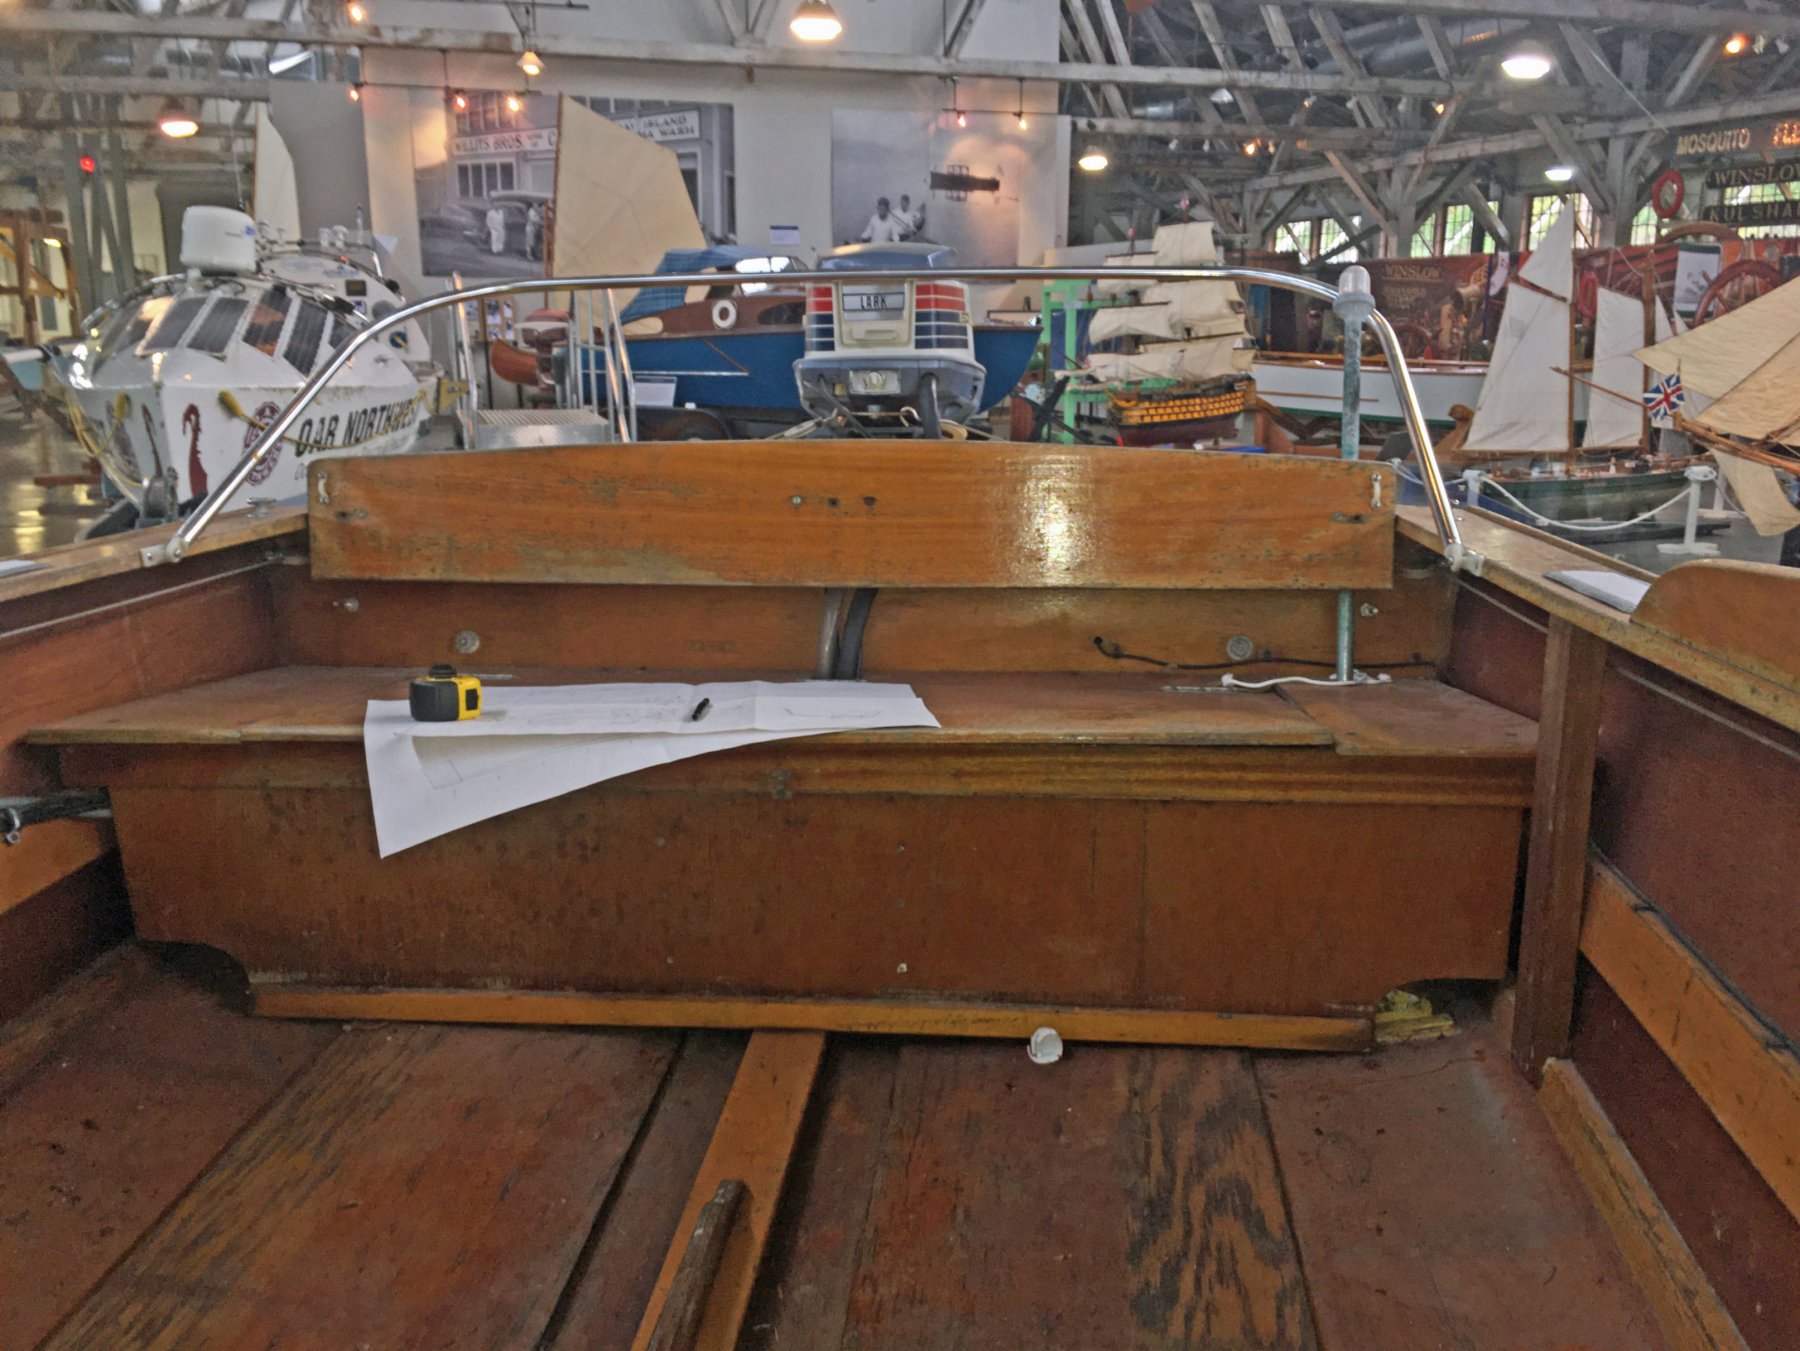
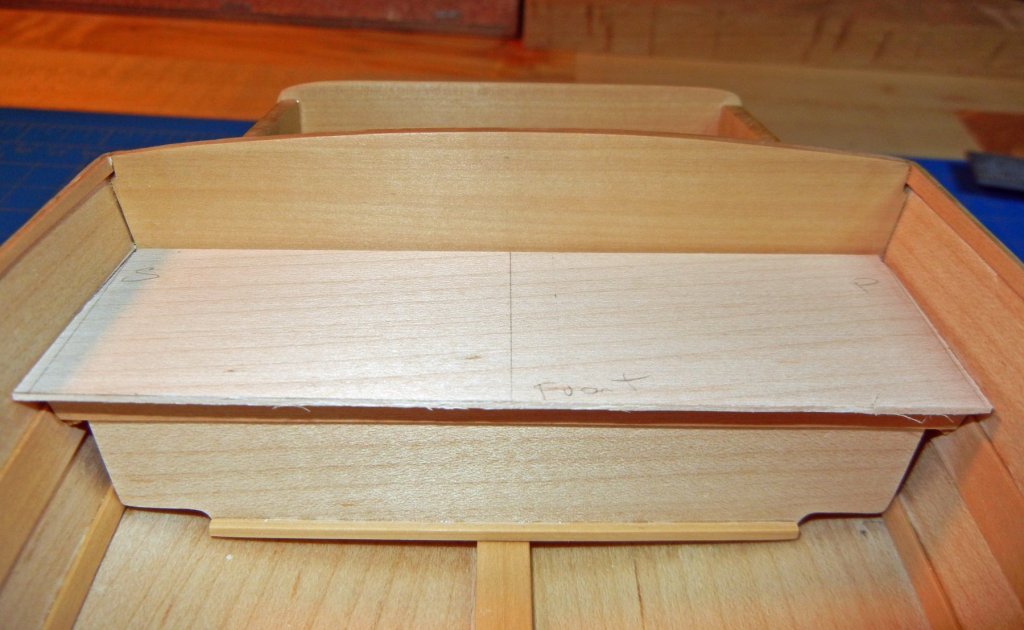
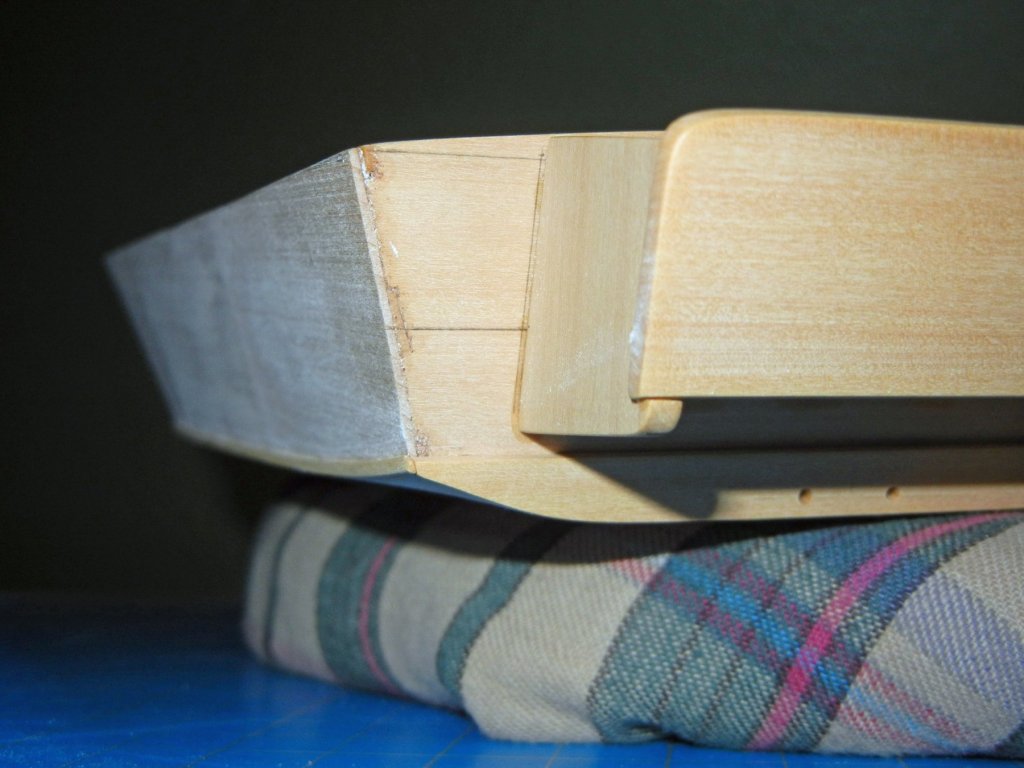
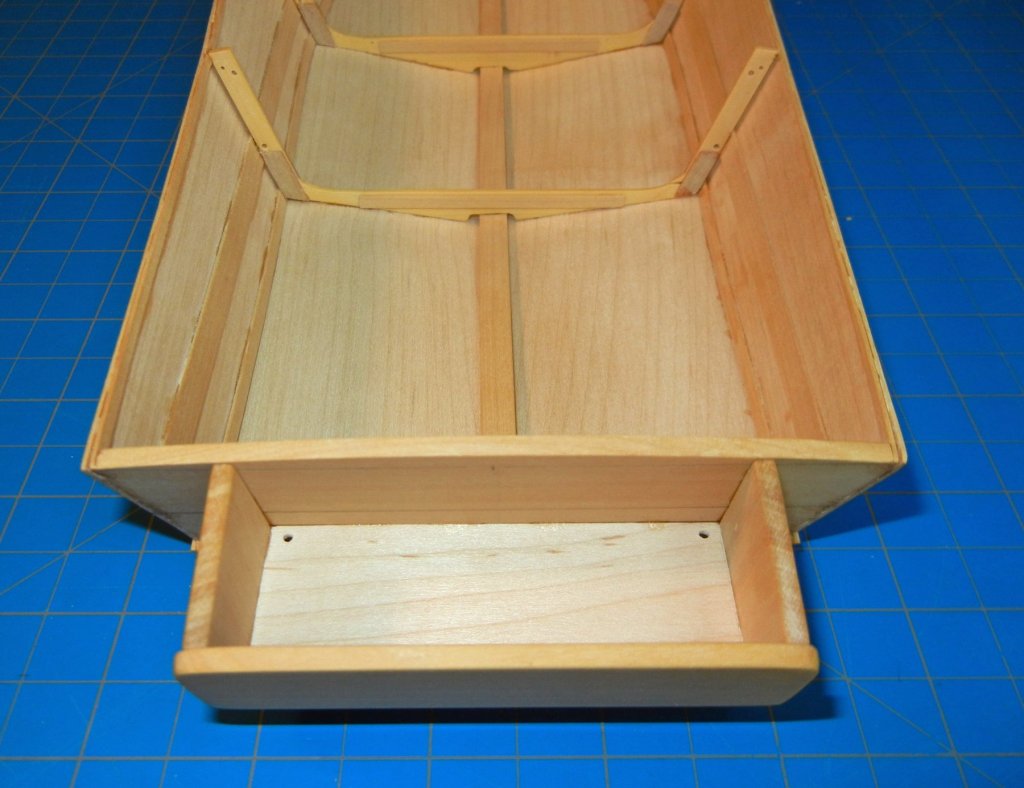
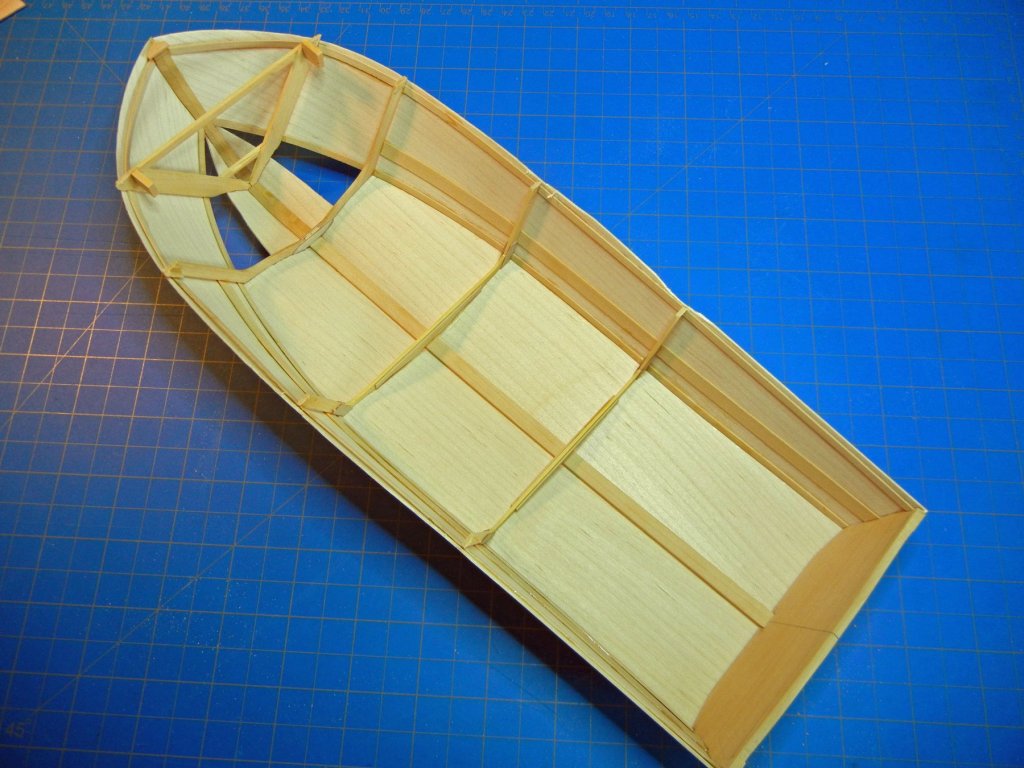
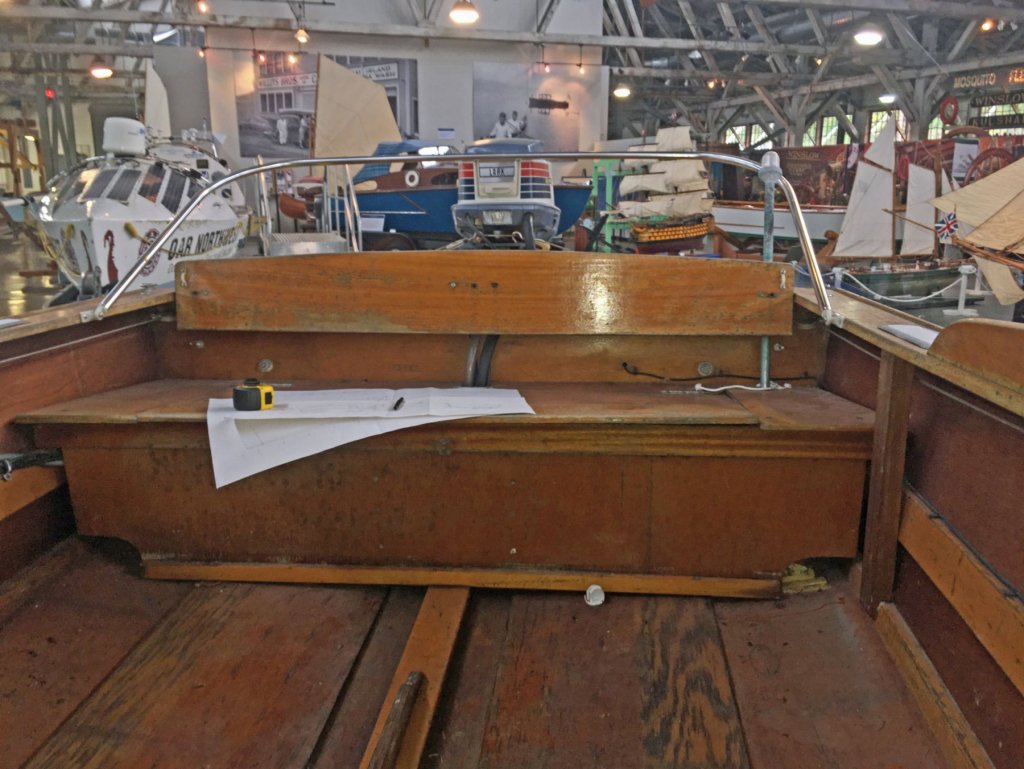
Wow, it has been a long time since my last update. I have been slow but but not idle. The forward seat parts were simple to make but tricky to install. I’m learning slowly how to build mostly square seats in a boat with no right angles and few flat surfaces. Aligning the seat parts was fiddly, requiring a few attempts. Some Lego blocks helped provide some support for gluing. I am satisfied with the result. One difference between our boat and the one at Foss Waterway, ours had a partition enclosing the bow storage area. The partition is attached to the first frame and has a small sliding hatch. As a child it was my job to retrieve items from here (small boys are useful for something!).


-
Swan class 3D model in progress
DBorgens replied to dvm27's topic in CAD and 3D Modelling/Drafting Plans with Software
A masters work indeed!- 141 replies
-
- 4
-

-
- pof swan series
- swan
- (and 1 more)
-
Per, Looking good. That is how I did mine. Either Bob Hunt recommended this in his practicum or I found it on MSW 😀 Mine are nowhere as neat or scaled as well as yours.
-
Hello BE, I too just happened to find your new build. Your logs are instructive and very entertaining. If you don’t mind, I will pull up a chair and follow your build. Have a wonderful new year.
- 574 replies
-
- 3
-
-
- cheerful
- Syren Ship Model Company
- (and 1 more)
-
storage/staging for a build
DBorgens replied to zamboknee's topic in Modeling tools and Workshop Equipment
Before I had a room to take over, I built on the kitchen table. I stored the model in a safe place (high shelf in den or one in our bedroom. My wood was in the box and tools in a tackle box. This worked well and served for most of my Bluenose build. -
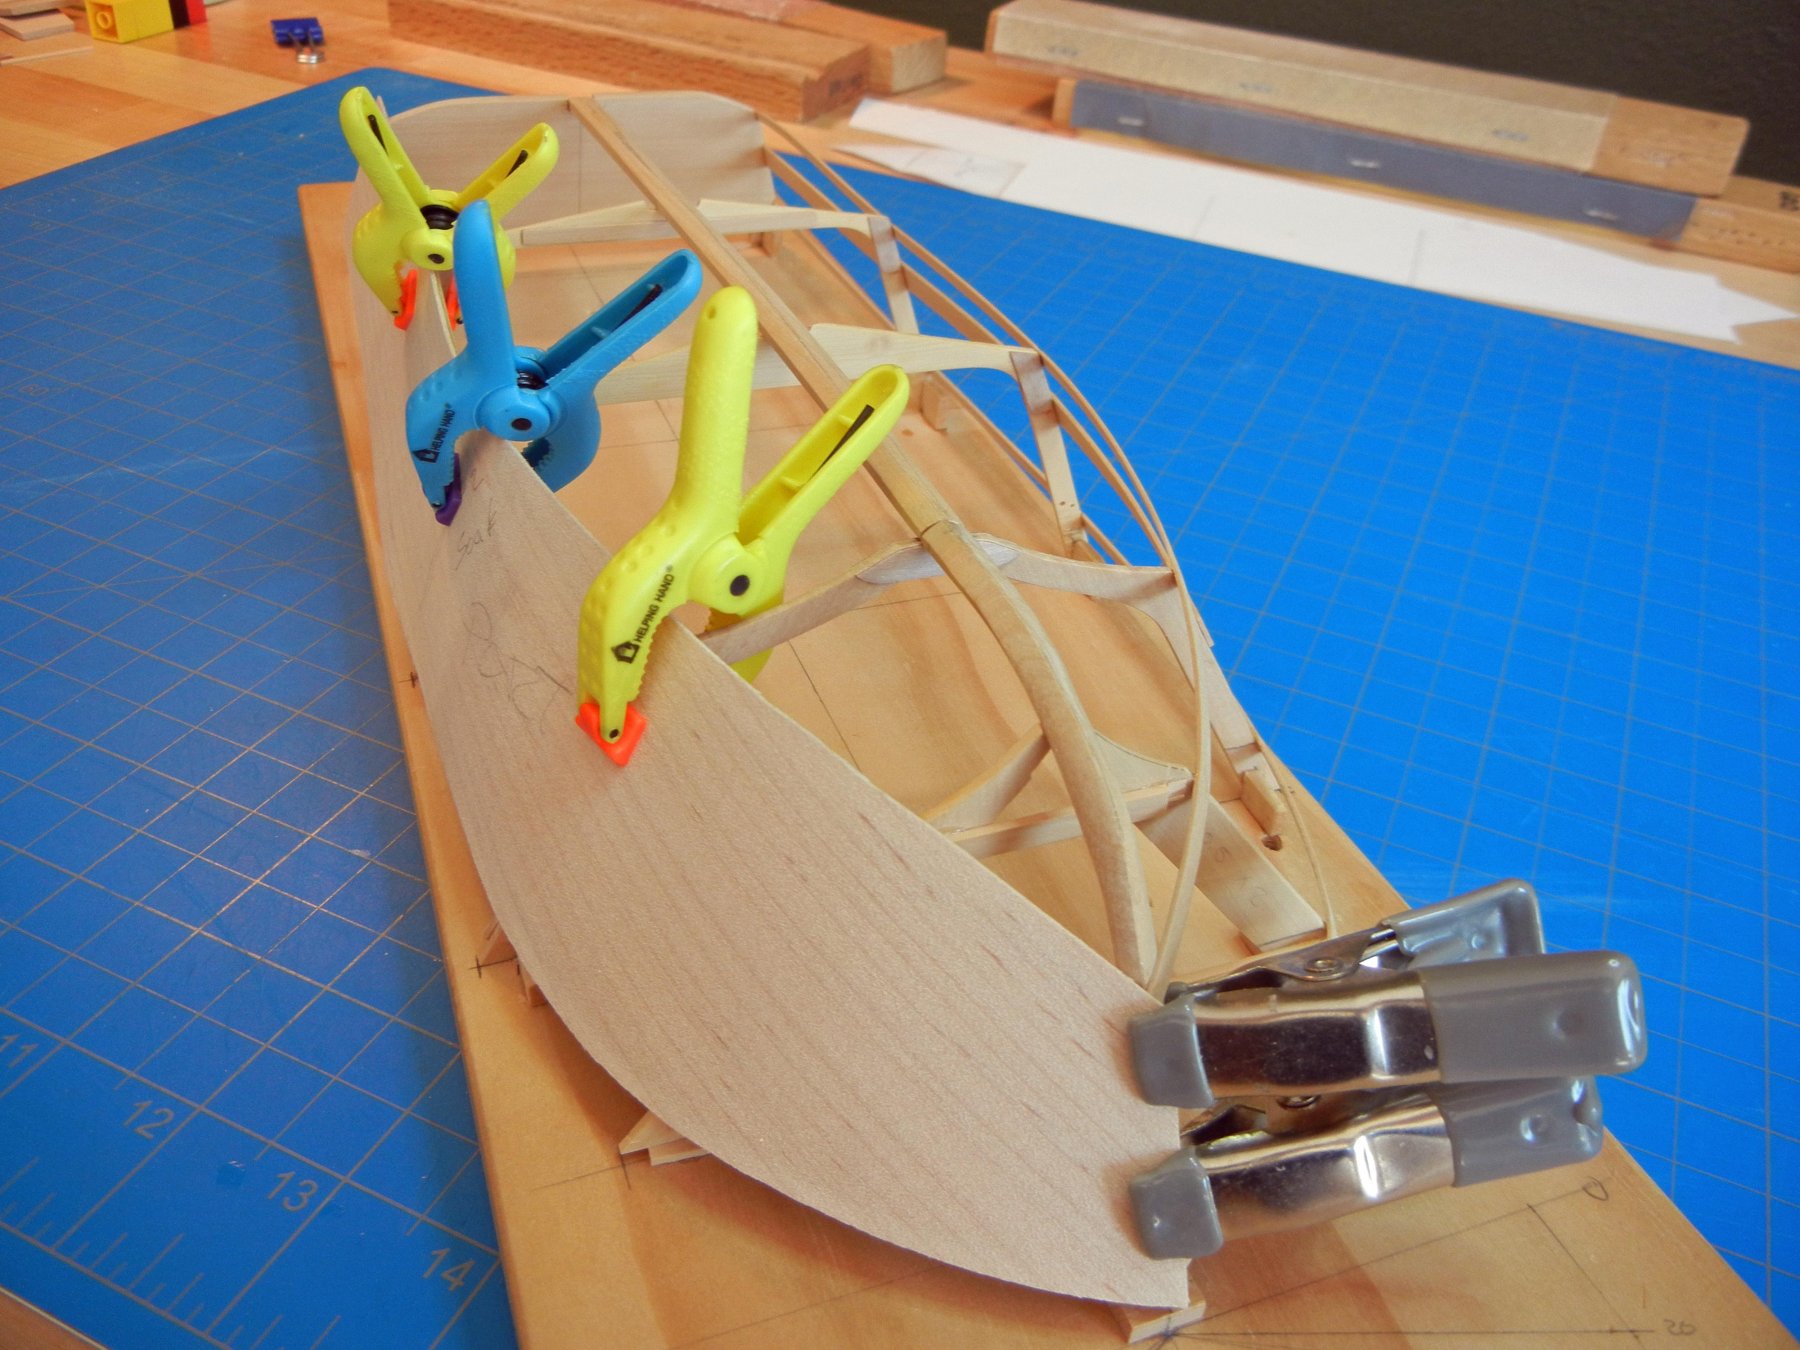
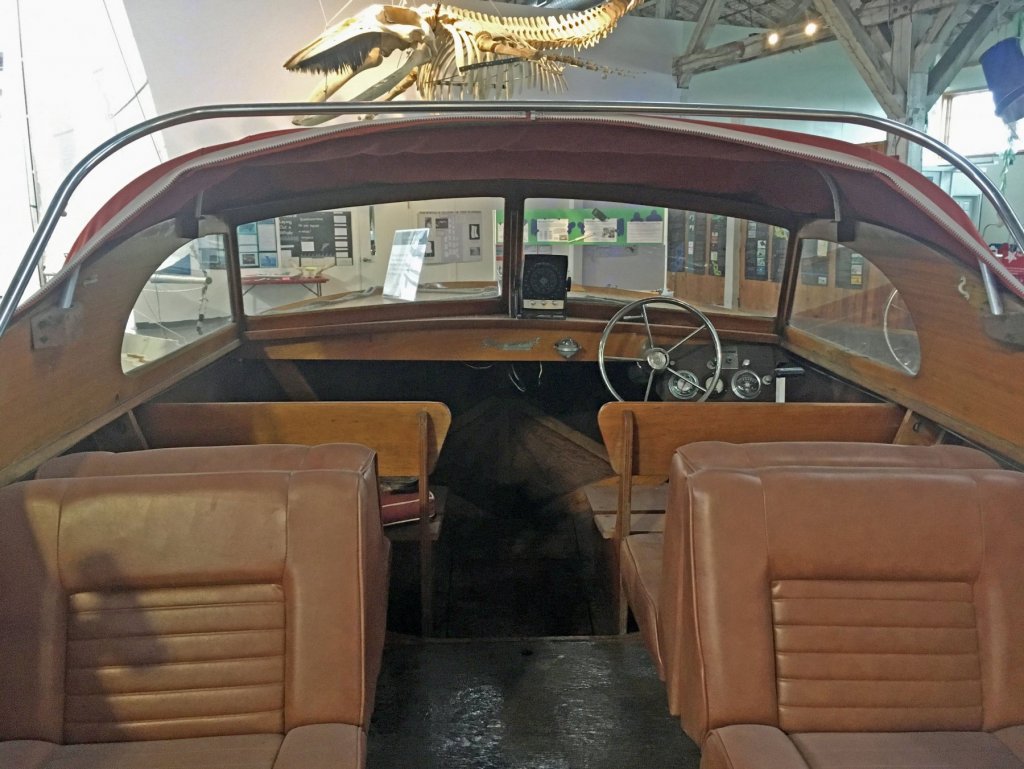
I have been working on cabin details since these will be installed before the deck. I build and installed the bench structure but have not cut out the swing portion of the seat (sitting loose in the photo). The space beneath the bench stores the battery and other gear that doesn't mind getting dirty or wet. Since this is effectively bilge space items will get wet so the battery was contained in a fiberglass enclosure. I also made some plugs to see how they would look. I damages one on (temporary) installation and will have to make a new one. I am continuing with the front seats and forward details. Will have pictures as I install them. We returned to the Foss Waterway museum today so I got a picture of the boat with "daddy". A rice bag protects the hull and makes a fair working support. Bench seat Plugs With daddy
-
Per, I look forward to seeing you af Foss Waterway. Hopefully I will have some furniture installed. I'm working on the aft bench.
-
Thank you Patrick. Yes, it is for the motor, in order to provide adequate cabin space.
-
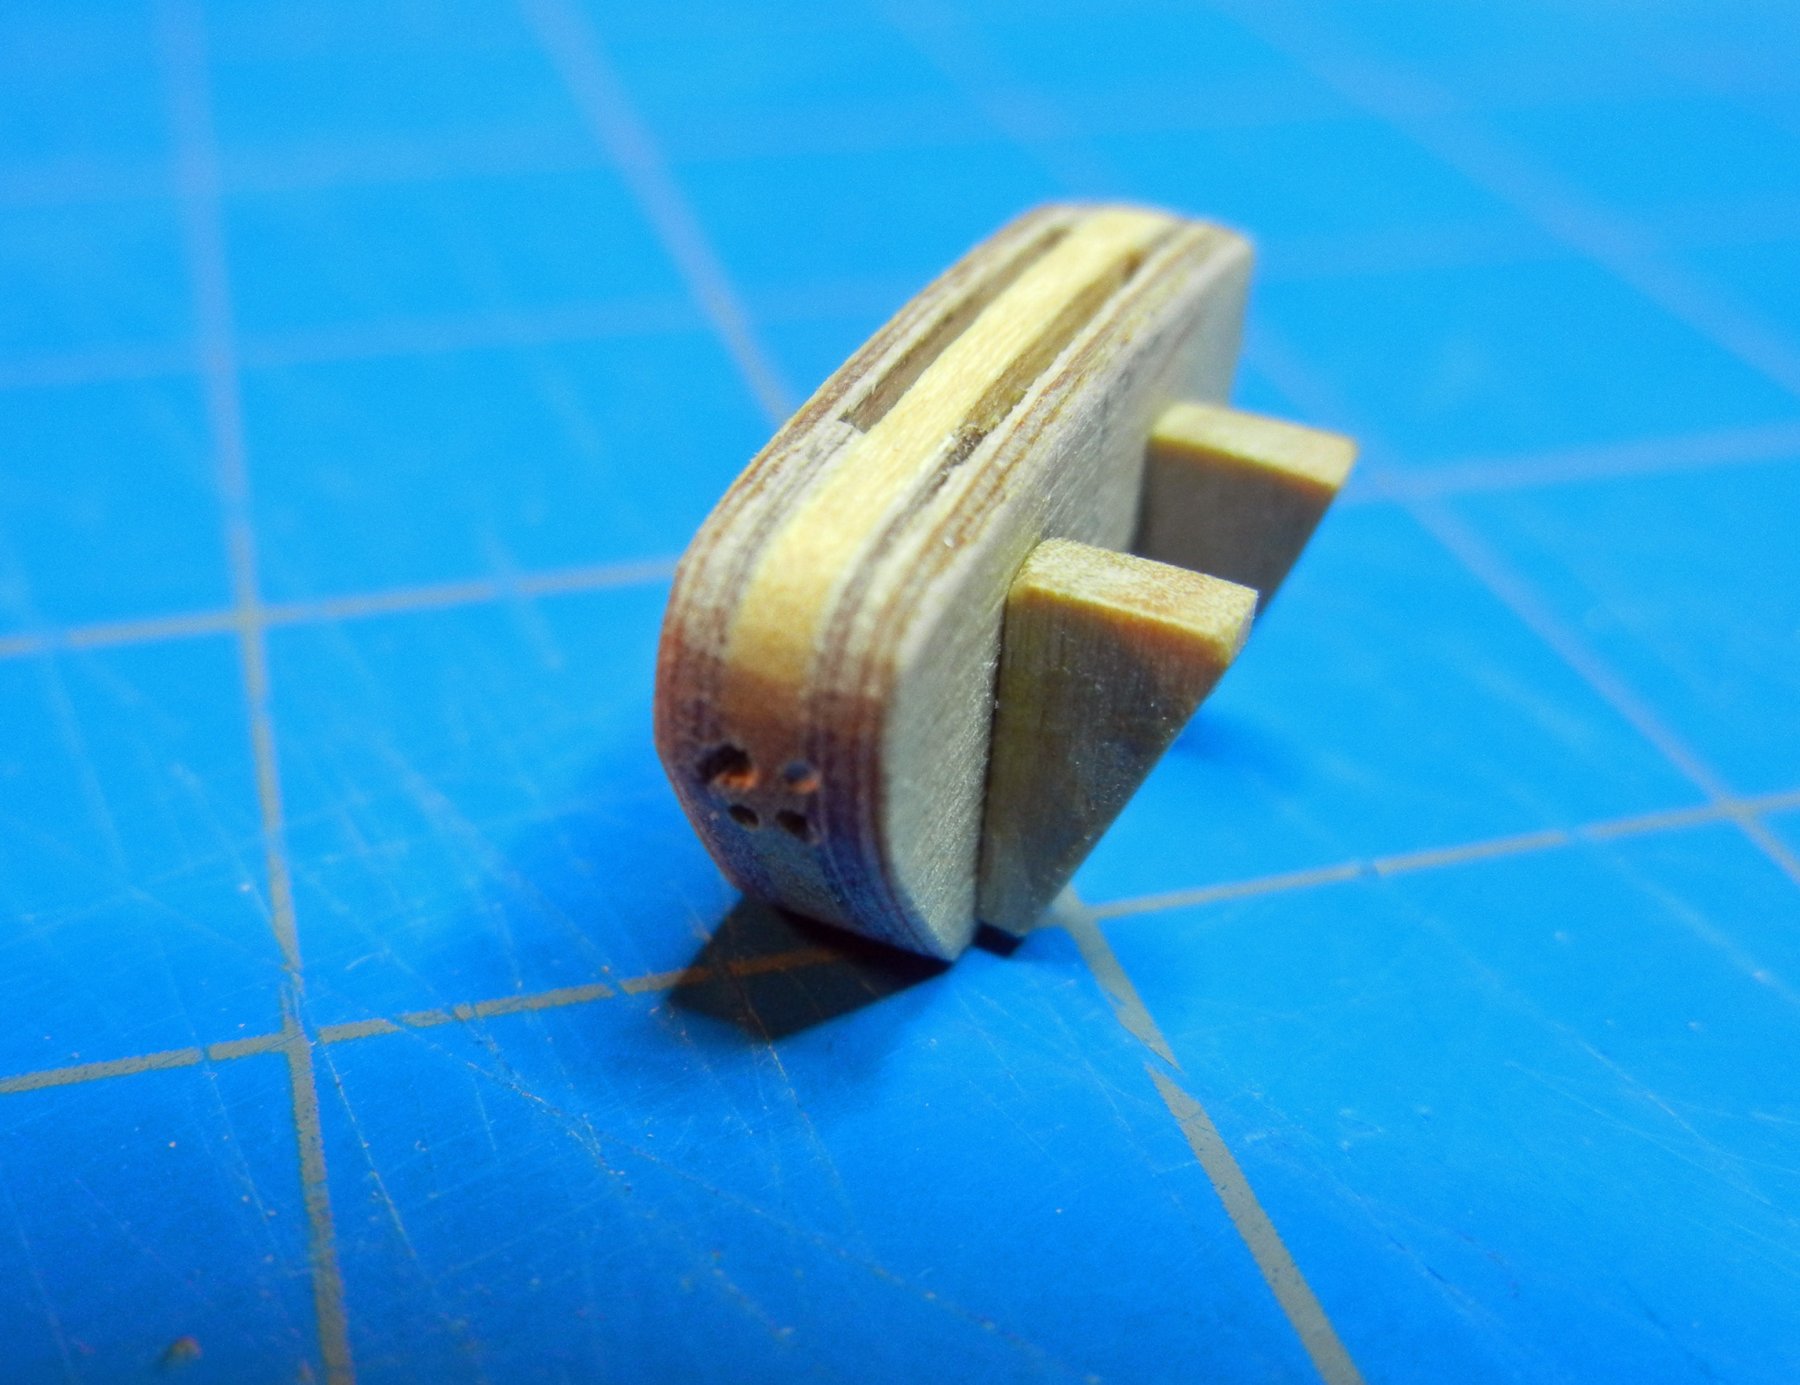
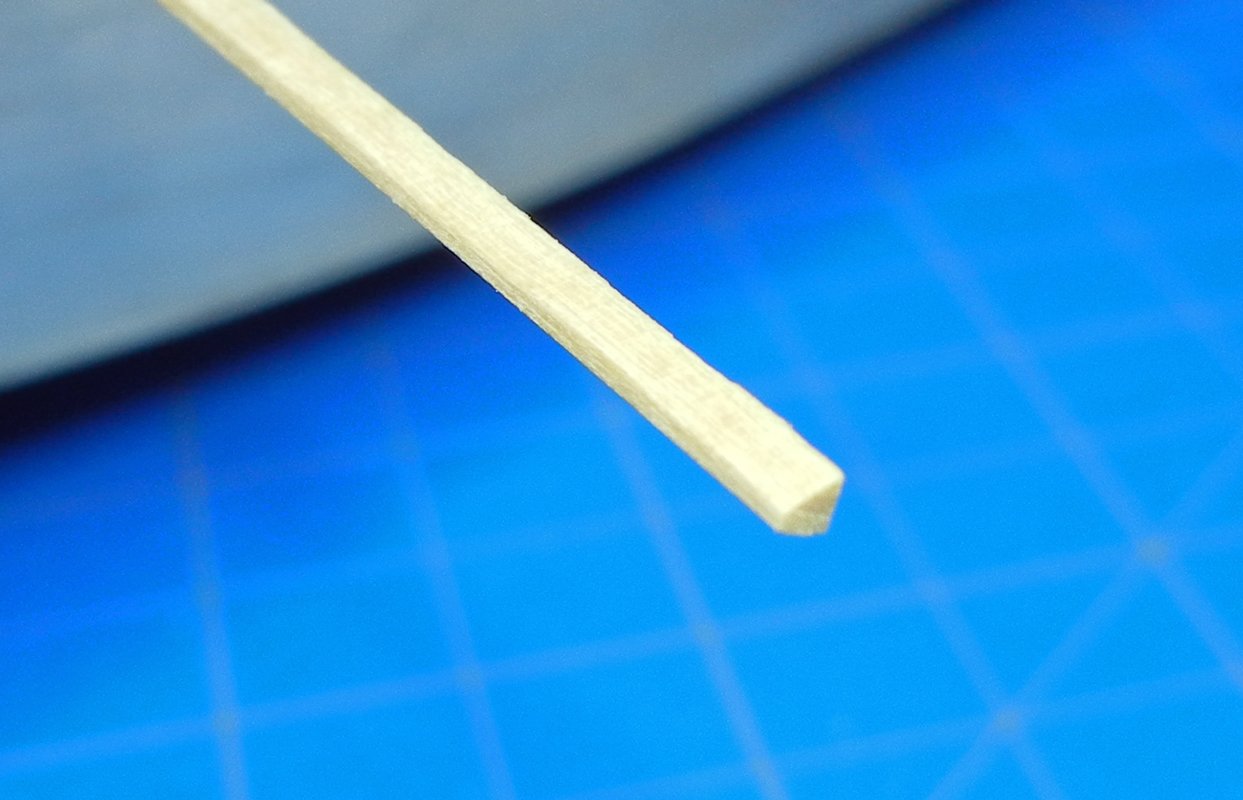
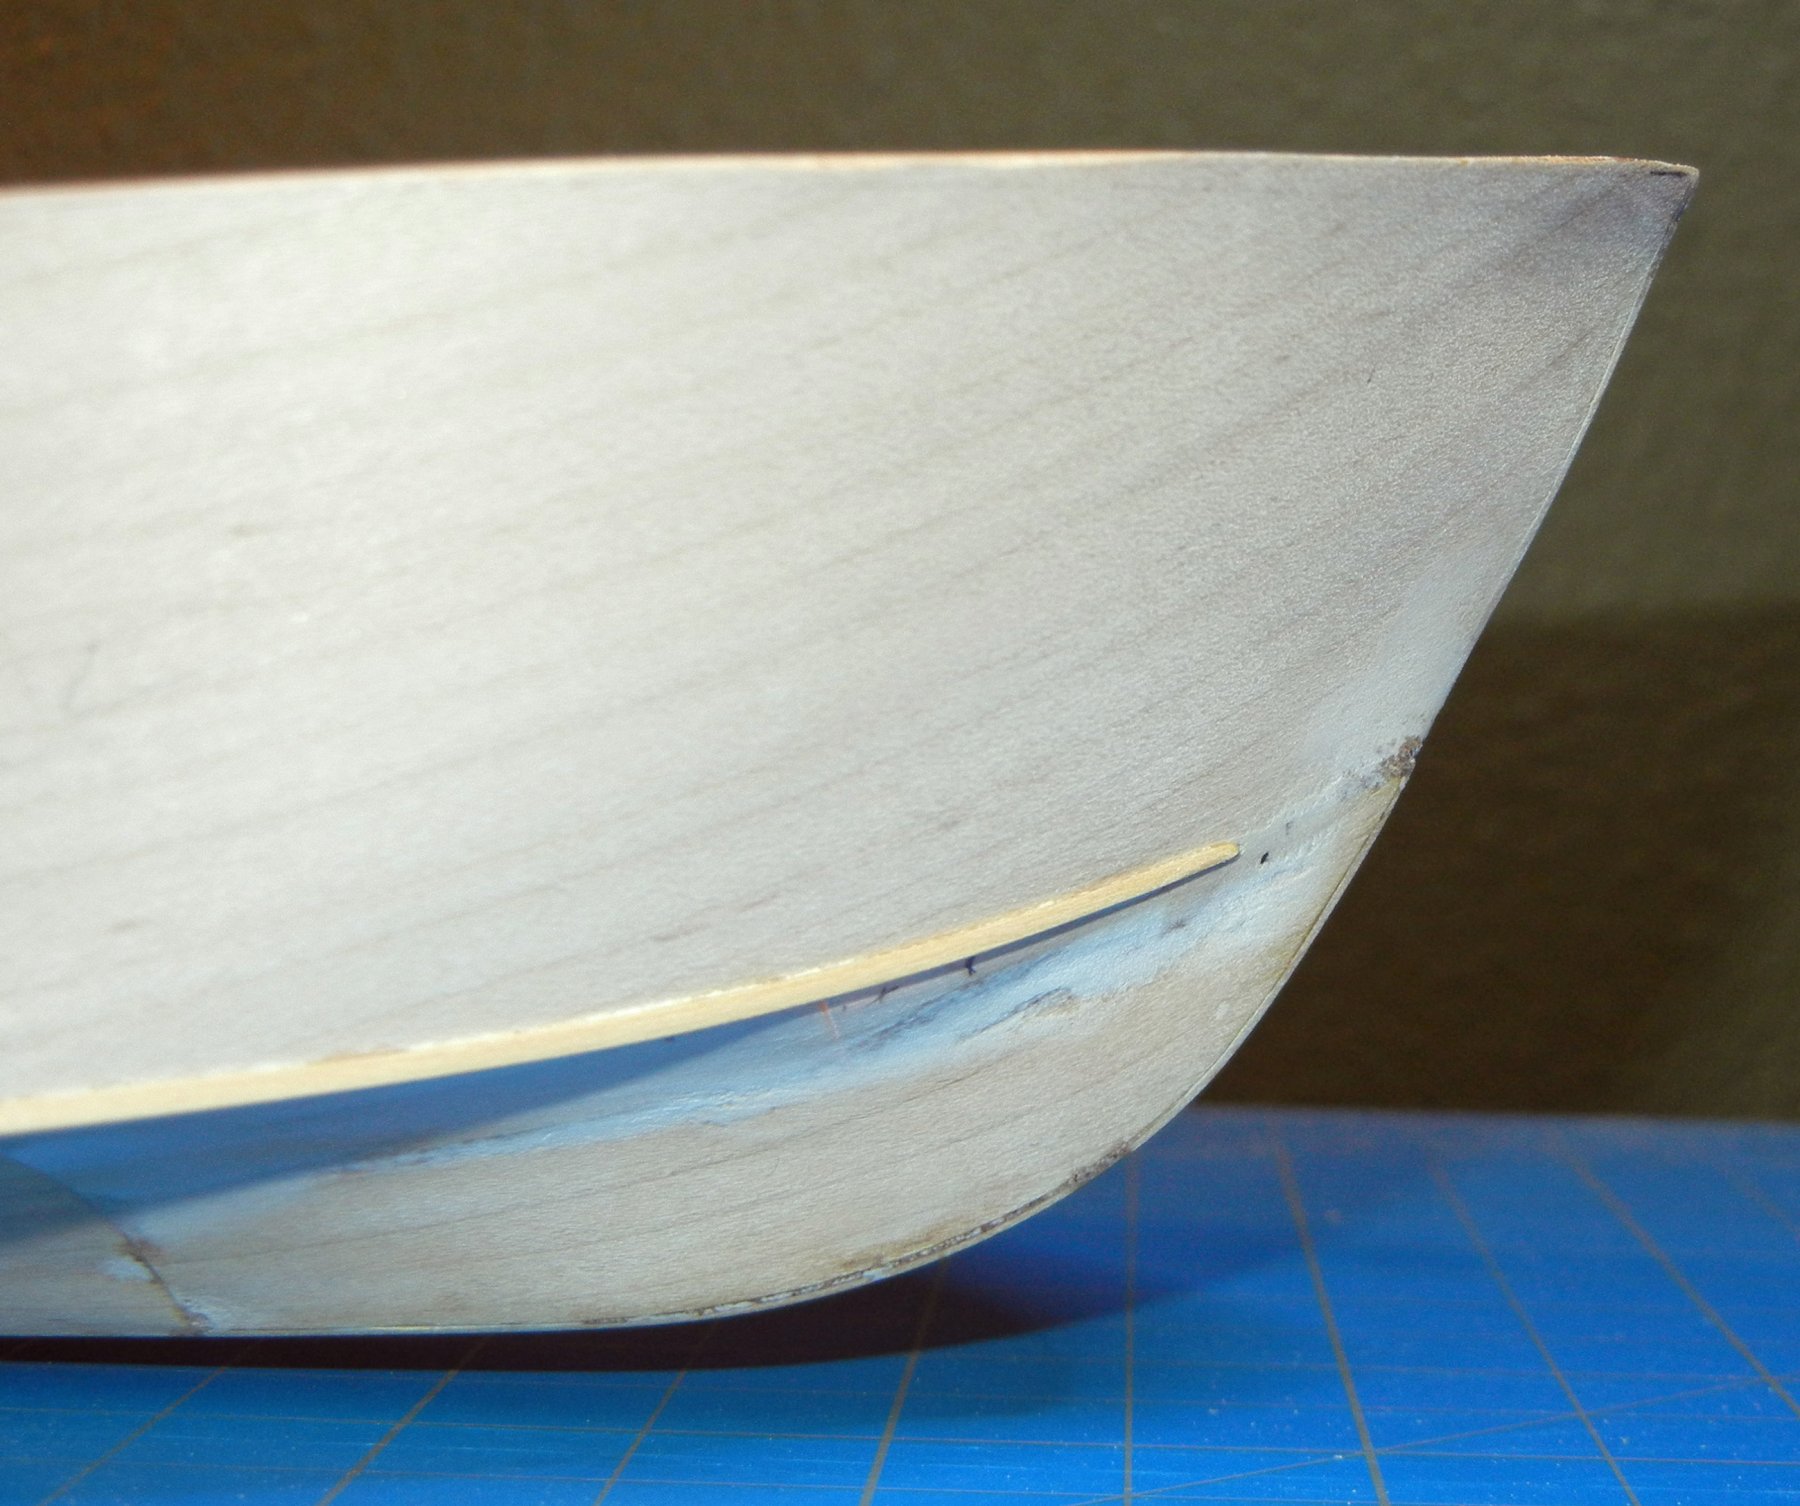
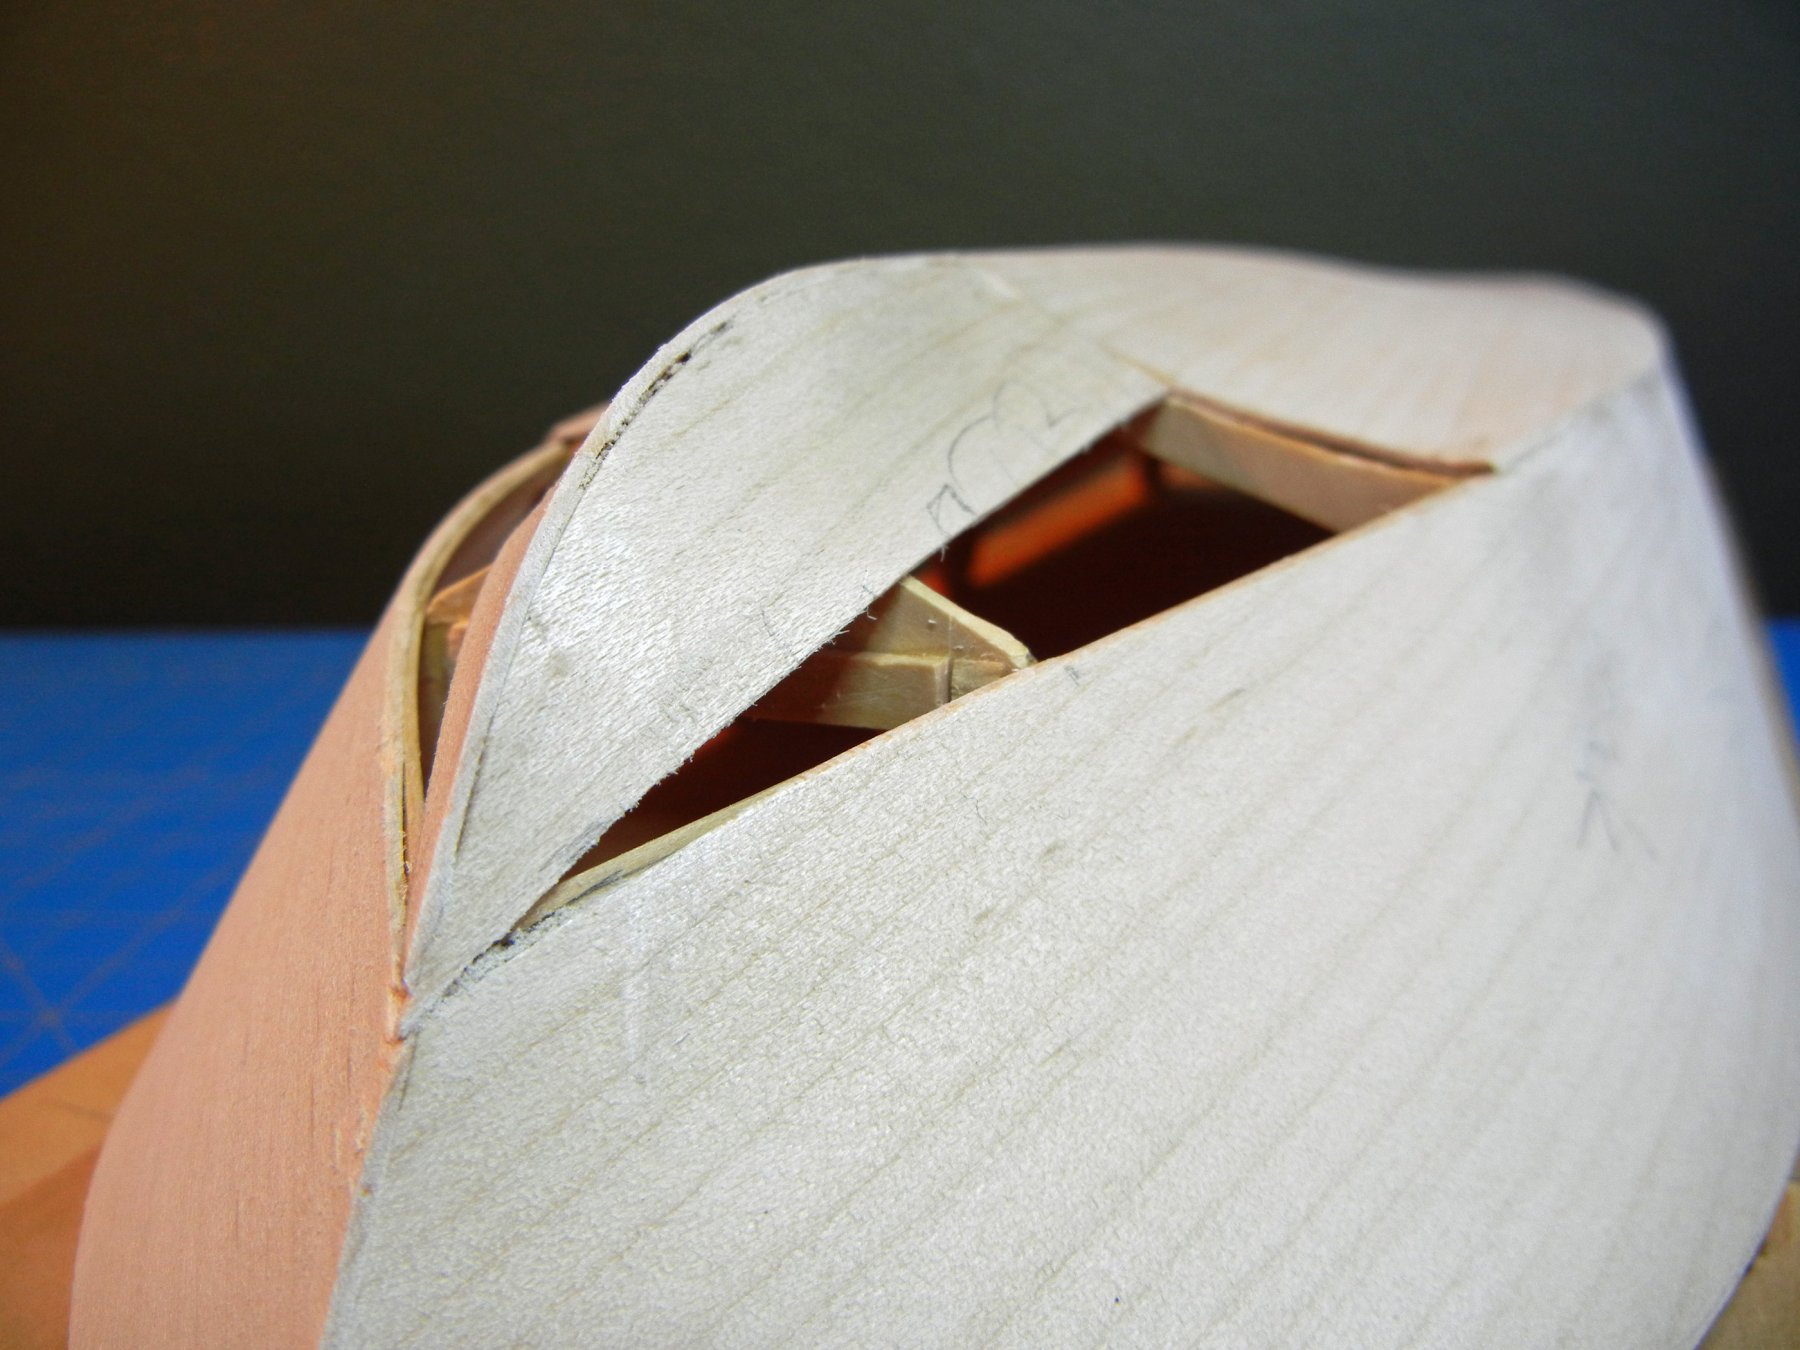
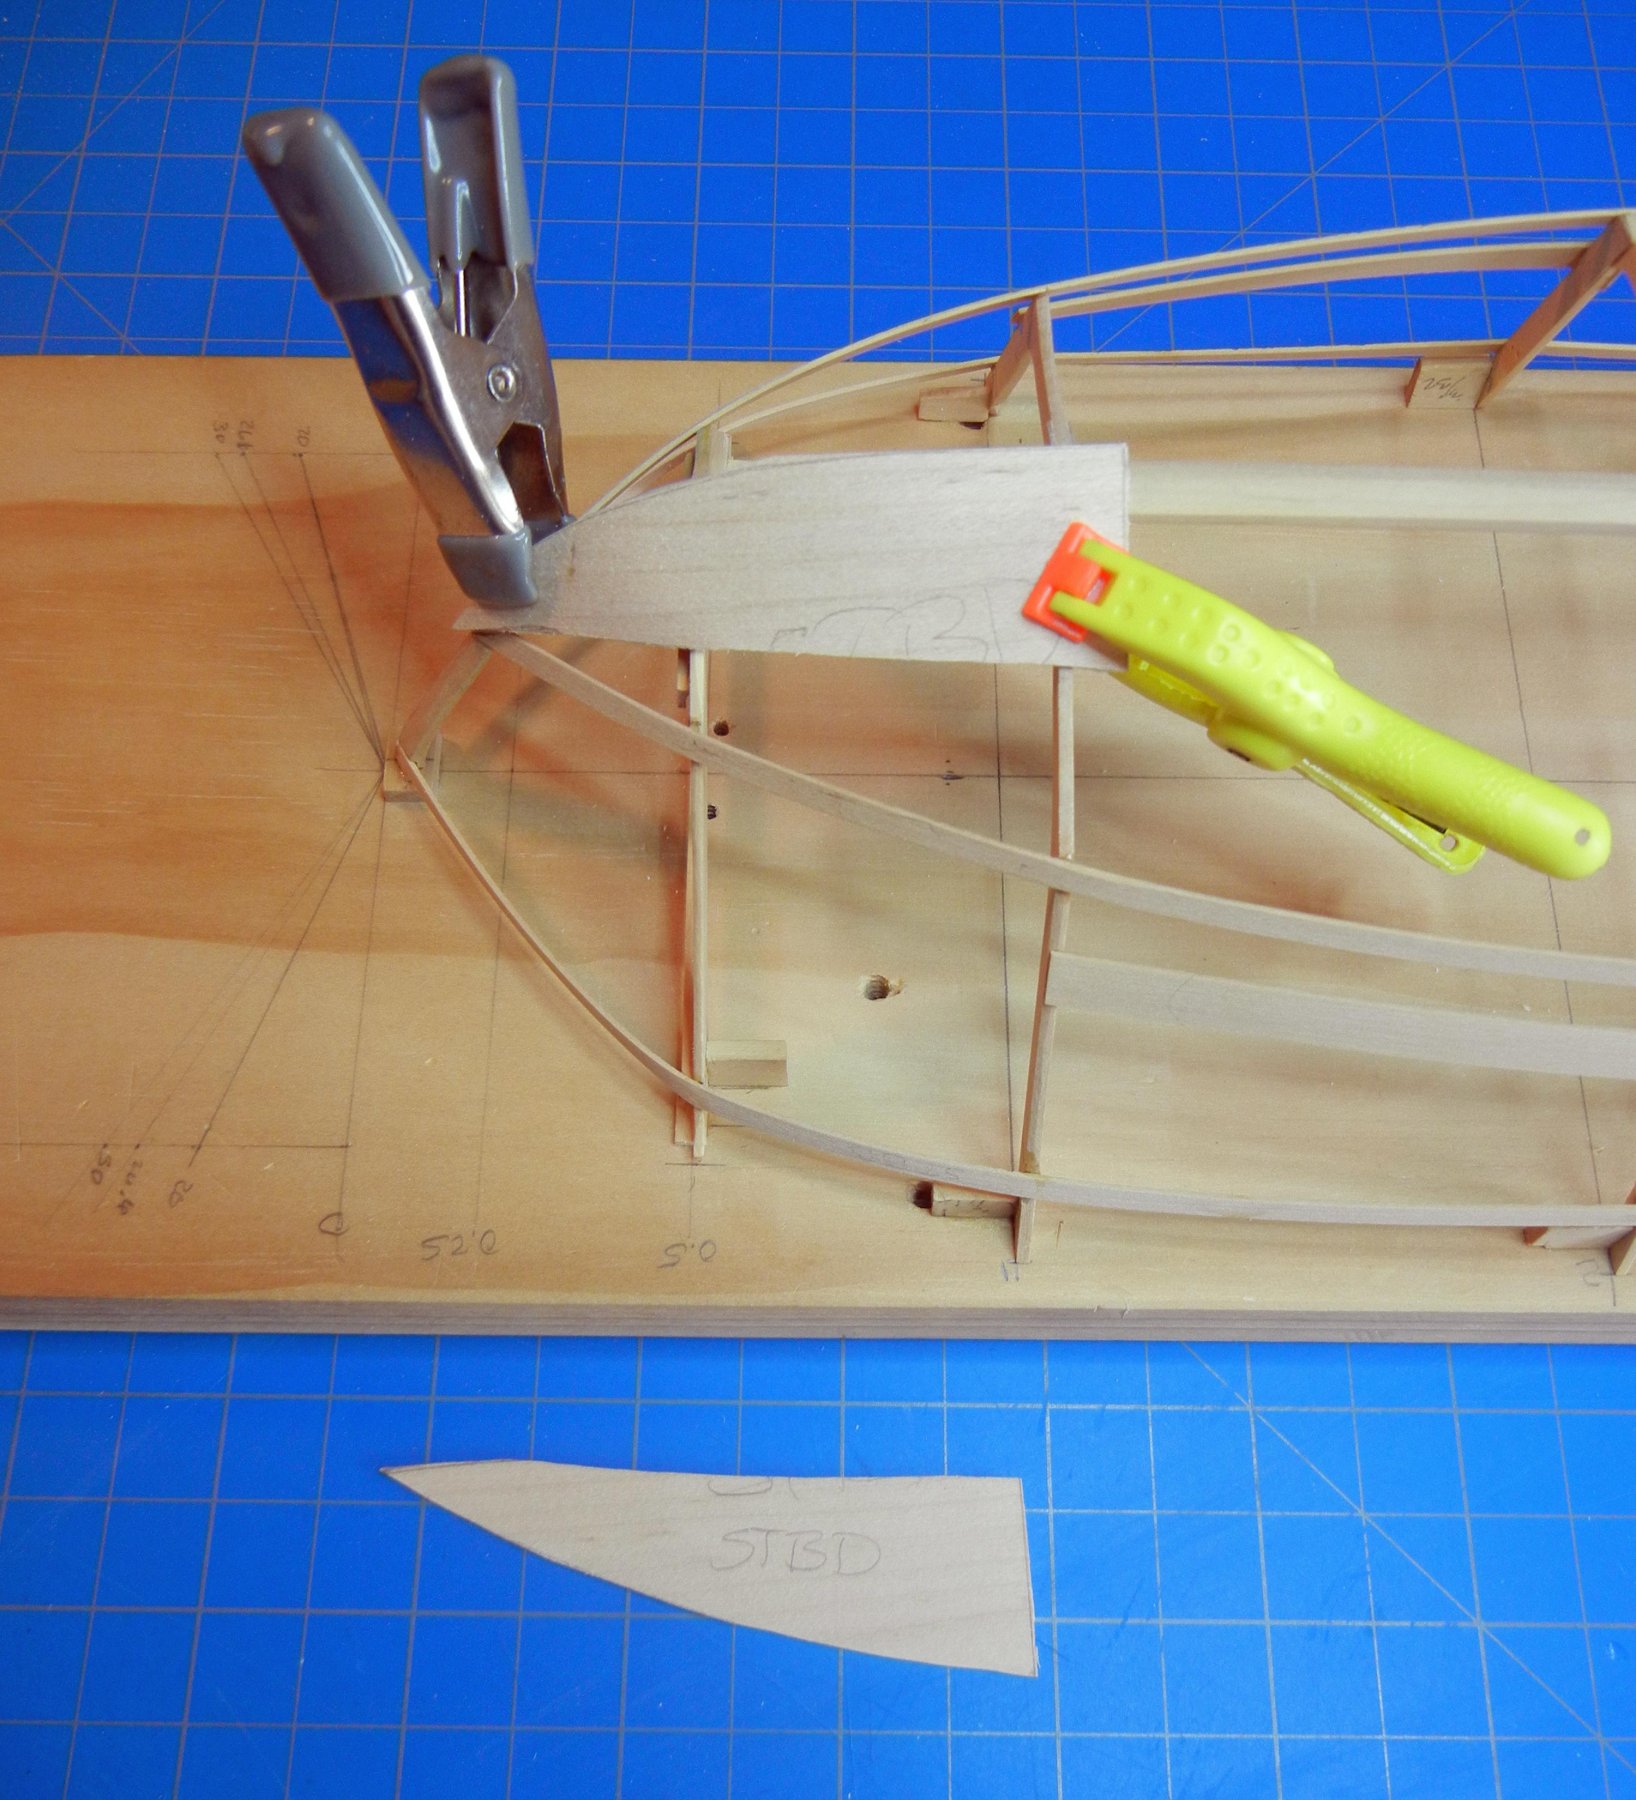
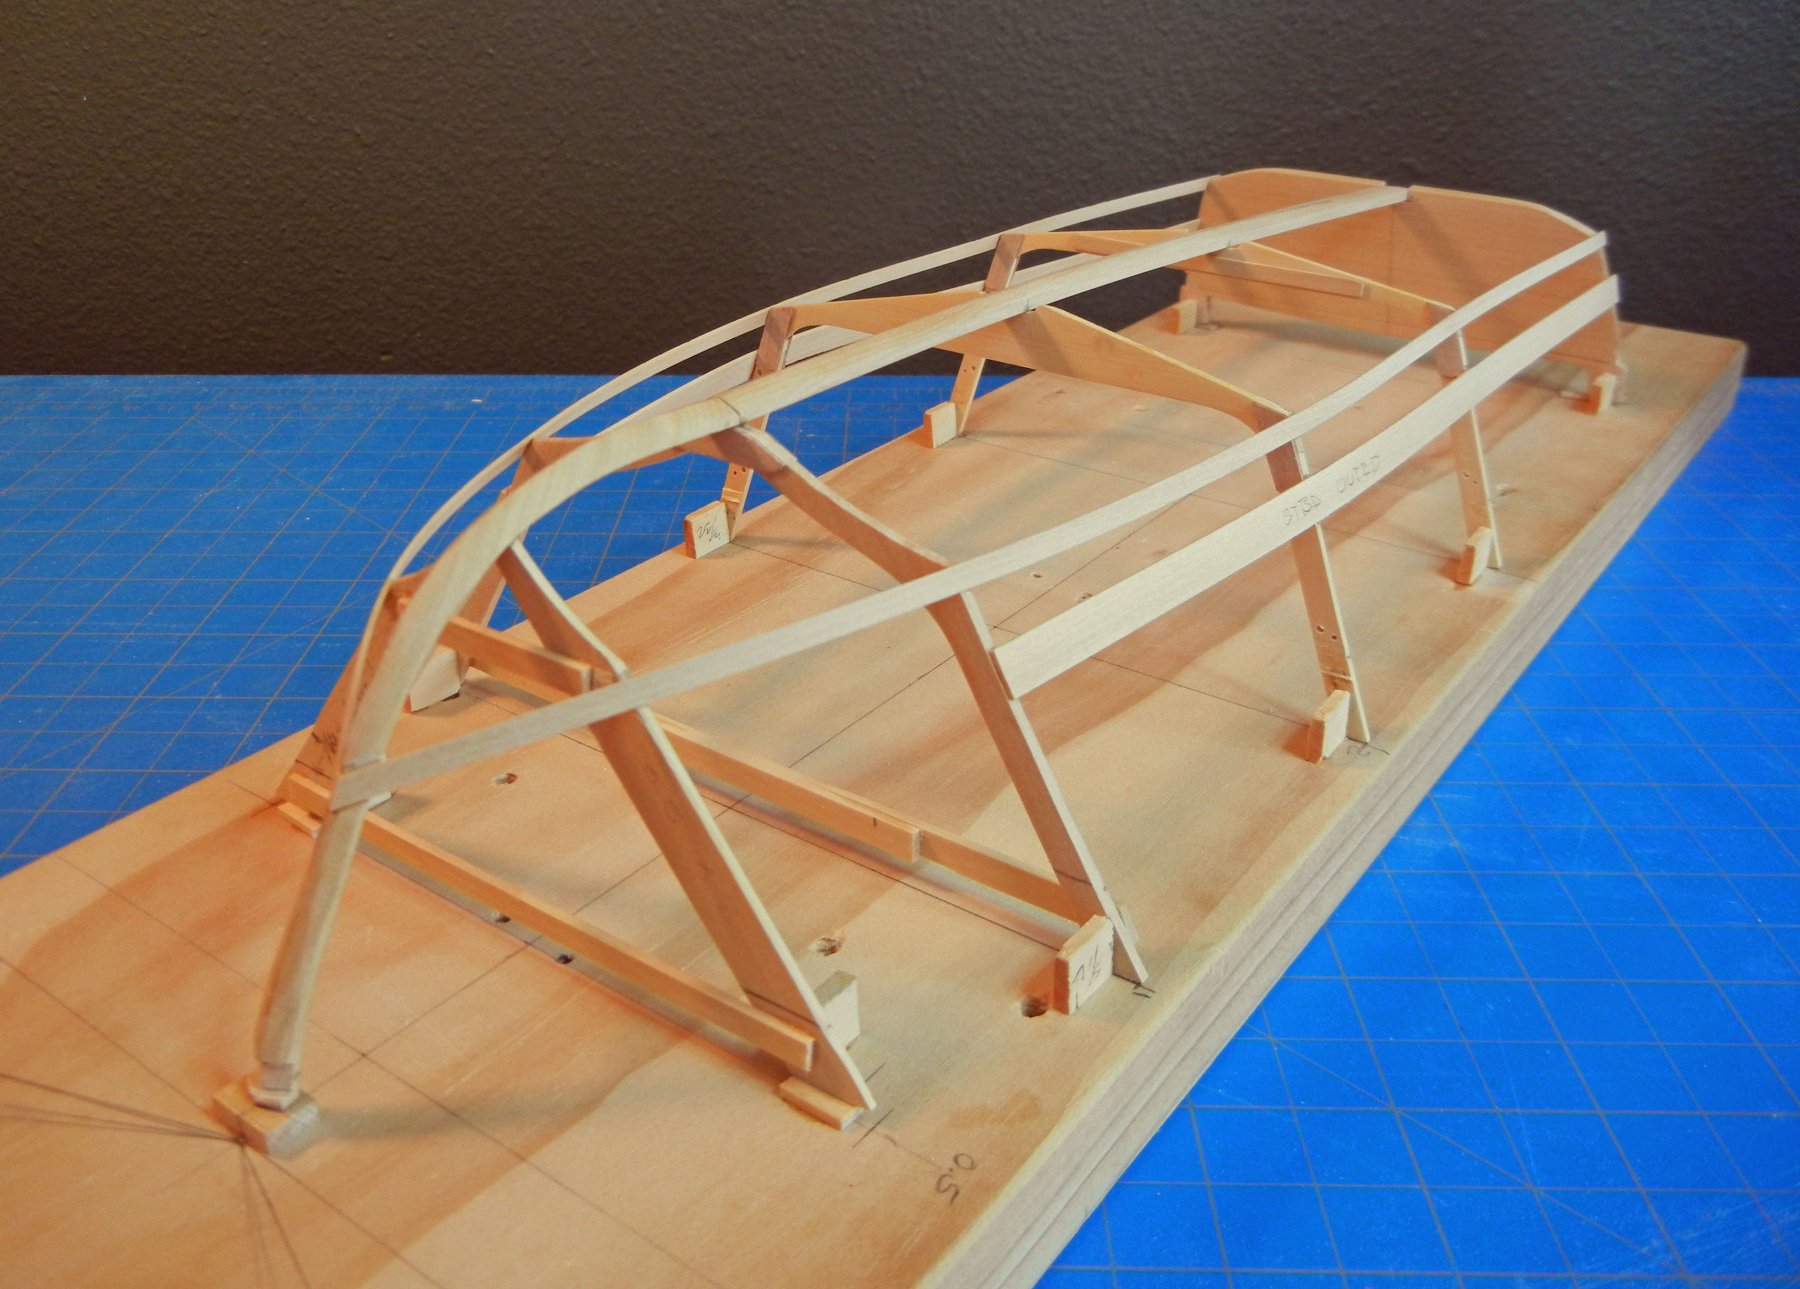
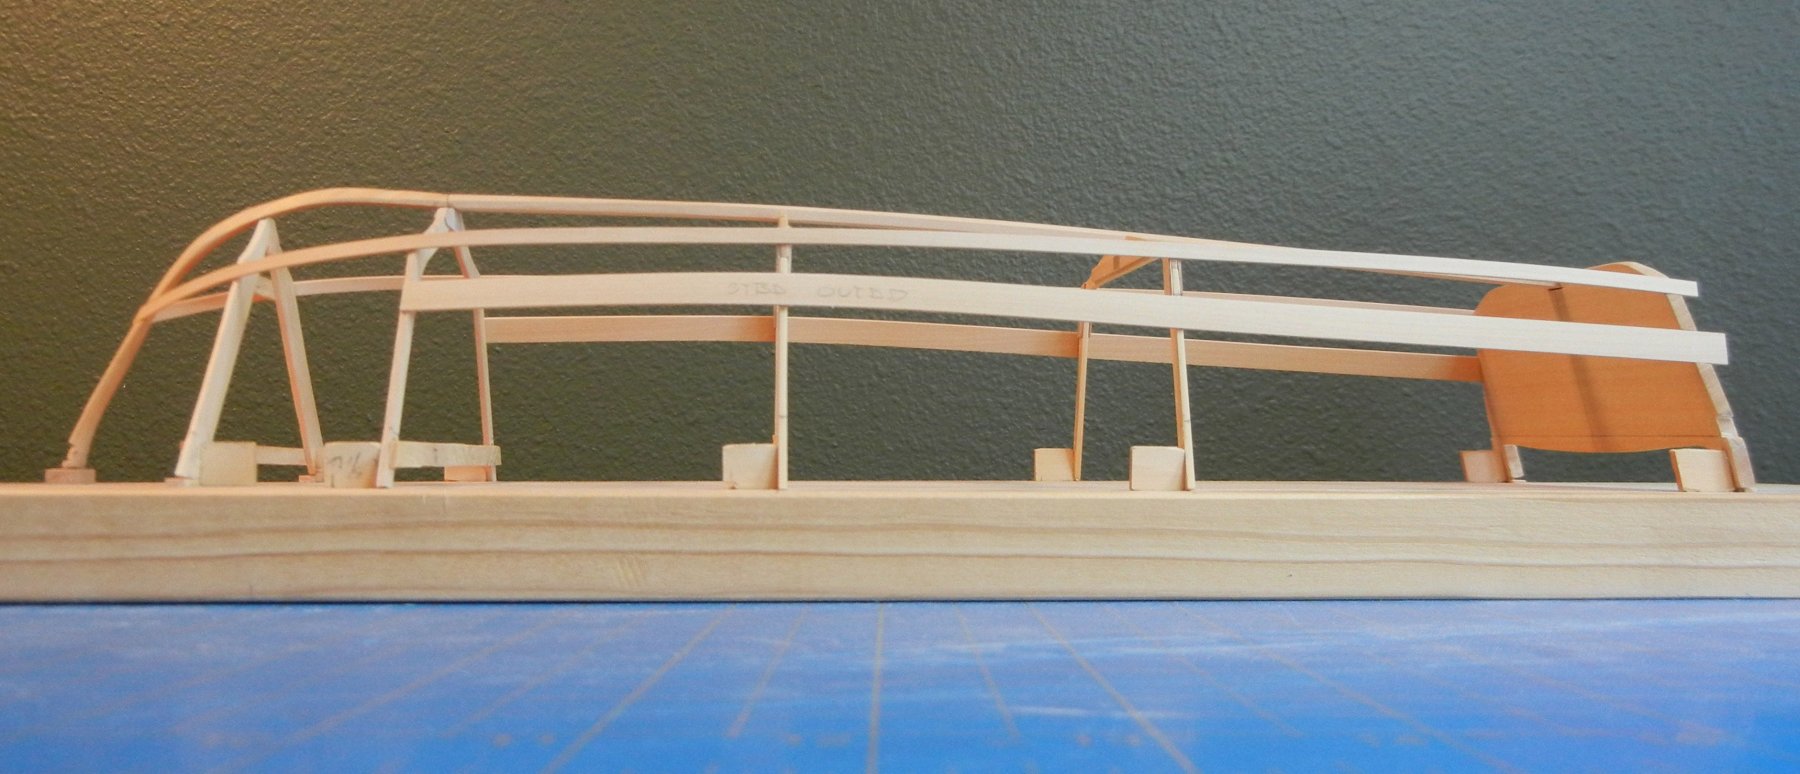
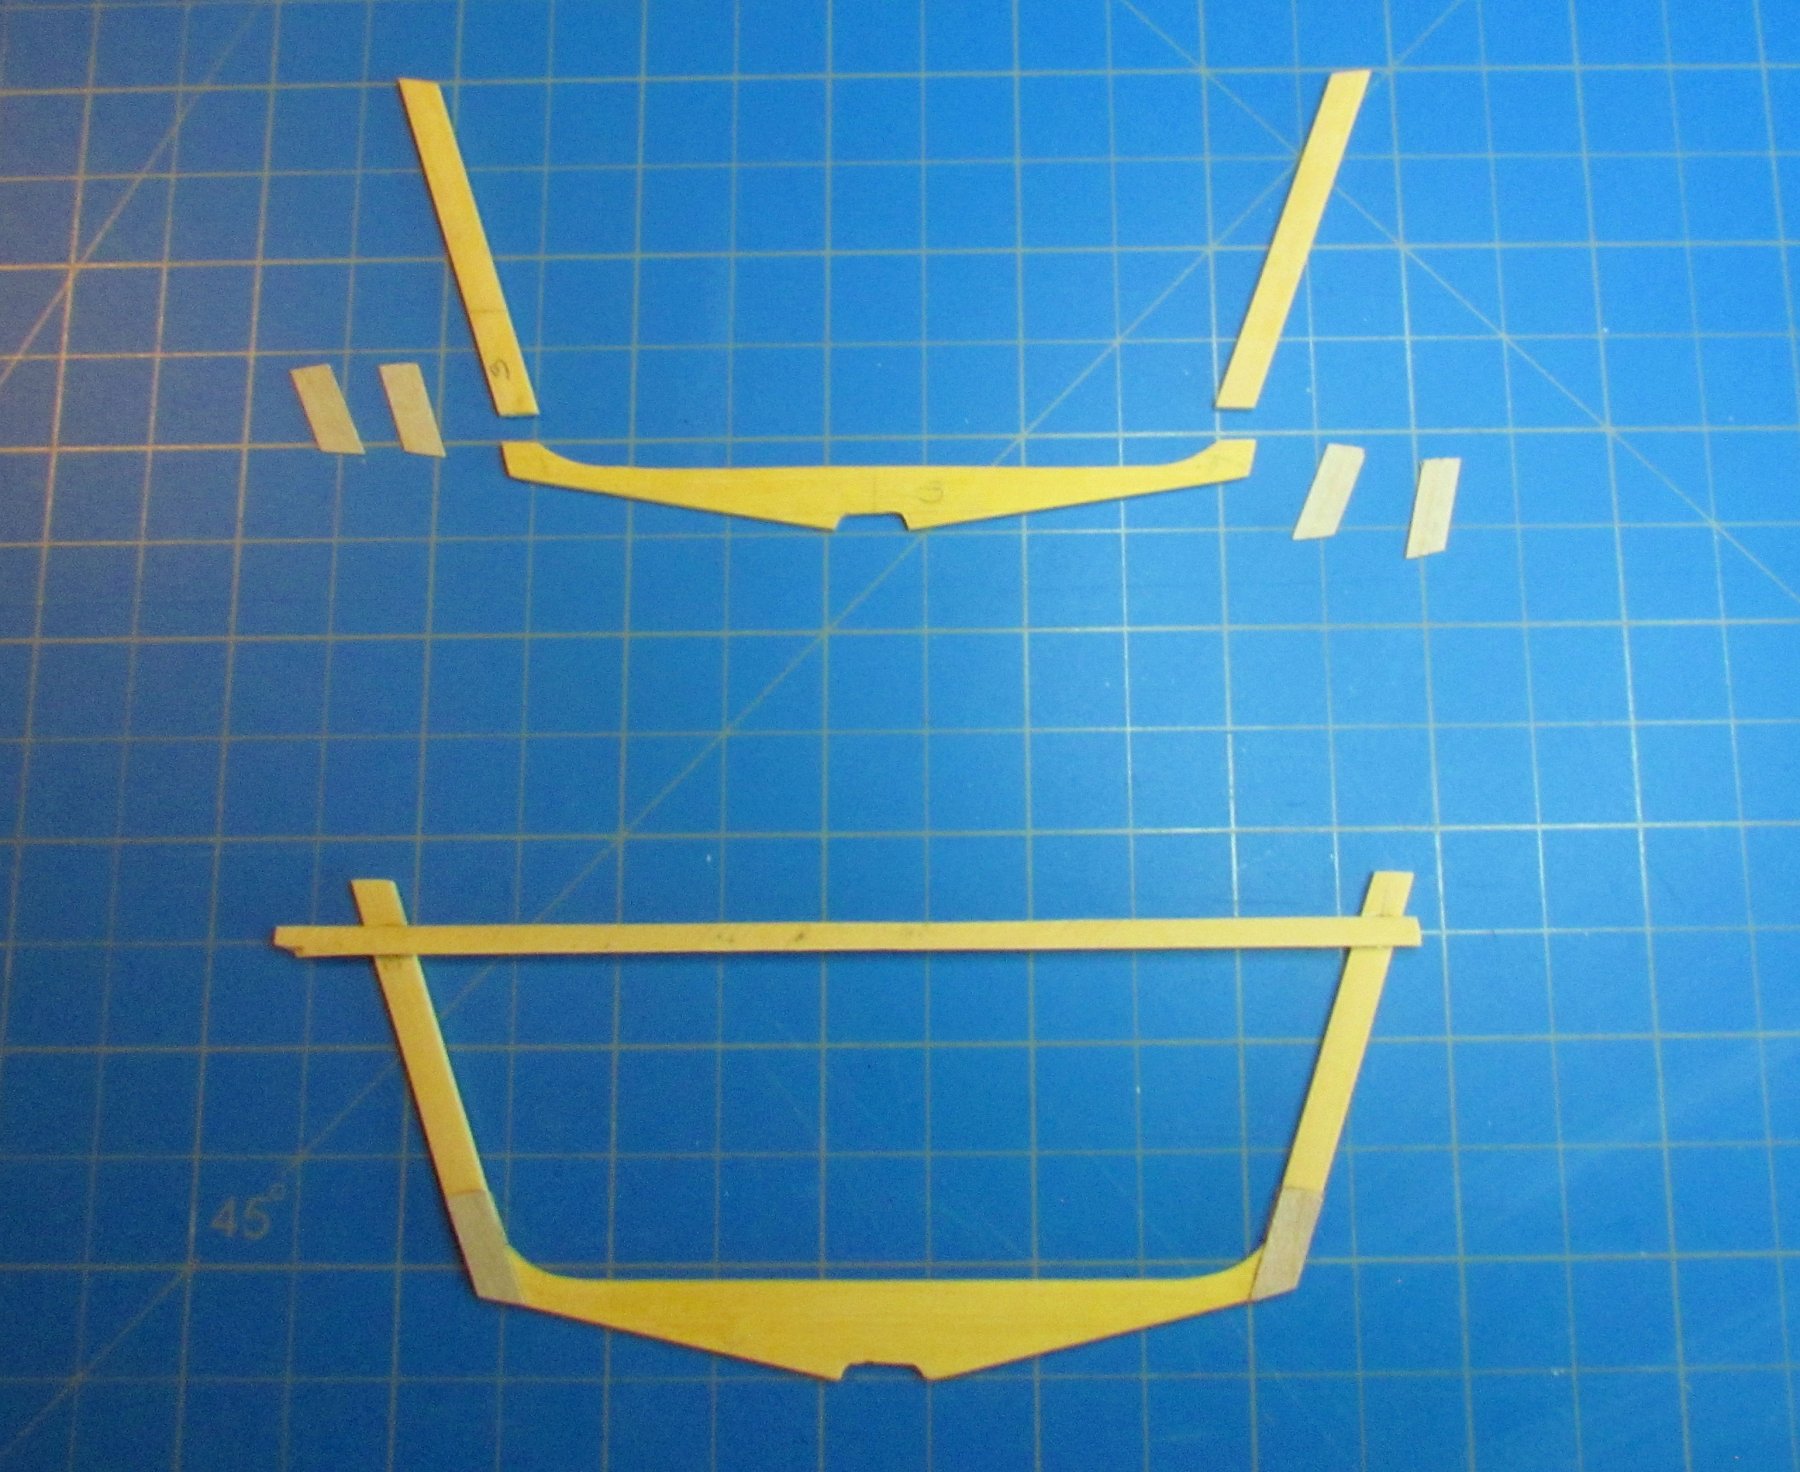
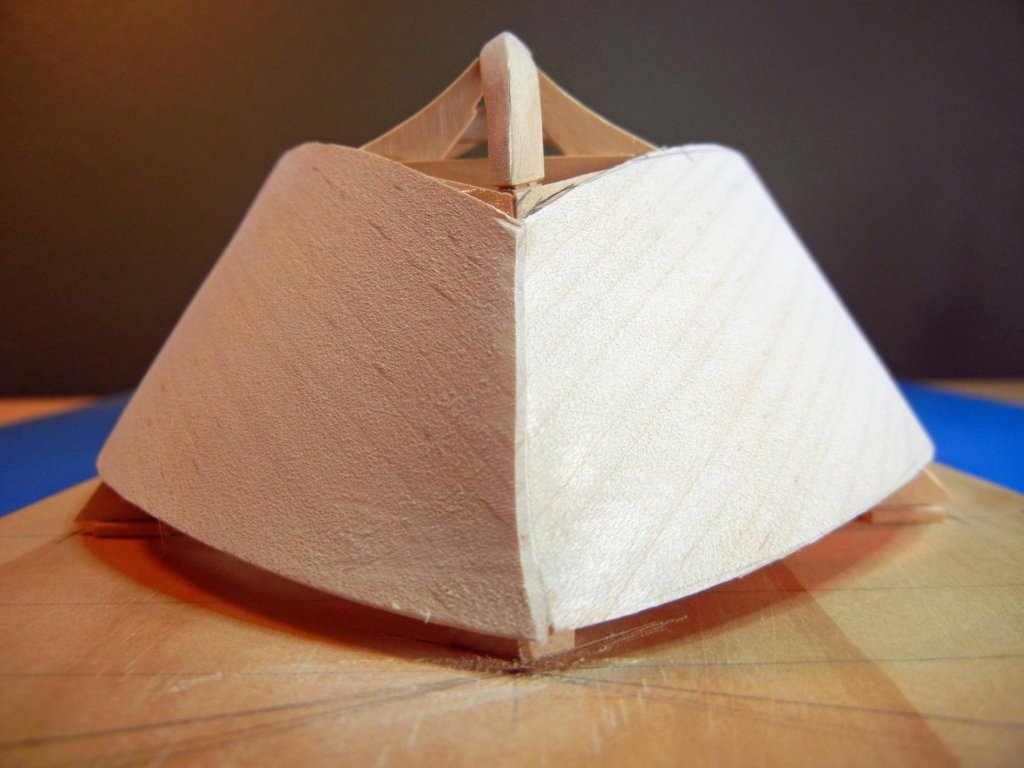
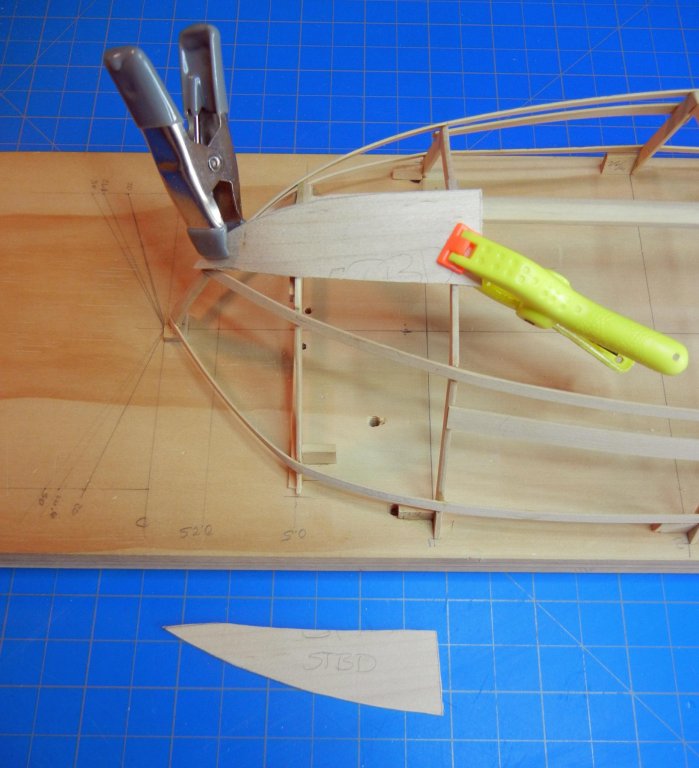
Chine strakelets One unique feature of this boat is the small strakelet along the chine. I formed the strakelets from 1/16 square boxwood by sanding down one side with a simple jig (1/16 square brass tubing glued to an aluminum sheet). Strakelet section Strakelet comparison to full size boat. It still looks large in the pictures but is less pronounced to the eye. Transom comparison also showing the transom box. Transom box The 17 foot Skippercraft has a transom box for the outboard motor. Like much on this boat, the box is dead simple, just have to mind the angles. On to the interior details.


-
Gil, Thank you for the explanation, I was curious about thr rigging colors. Two of my sons are color blind and the colors wouldn't help unless you're careful with selection (take them shopping!). Beautiful finish on the deck and cabin.
- 60 replies
-
- 3
-
-
- dragon class
- billing boats
- (and 2 more)
-
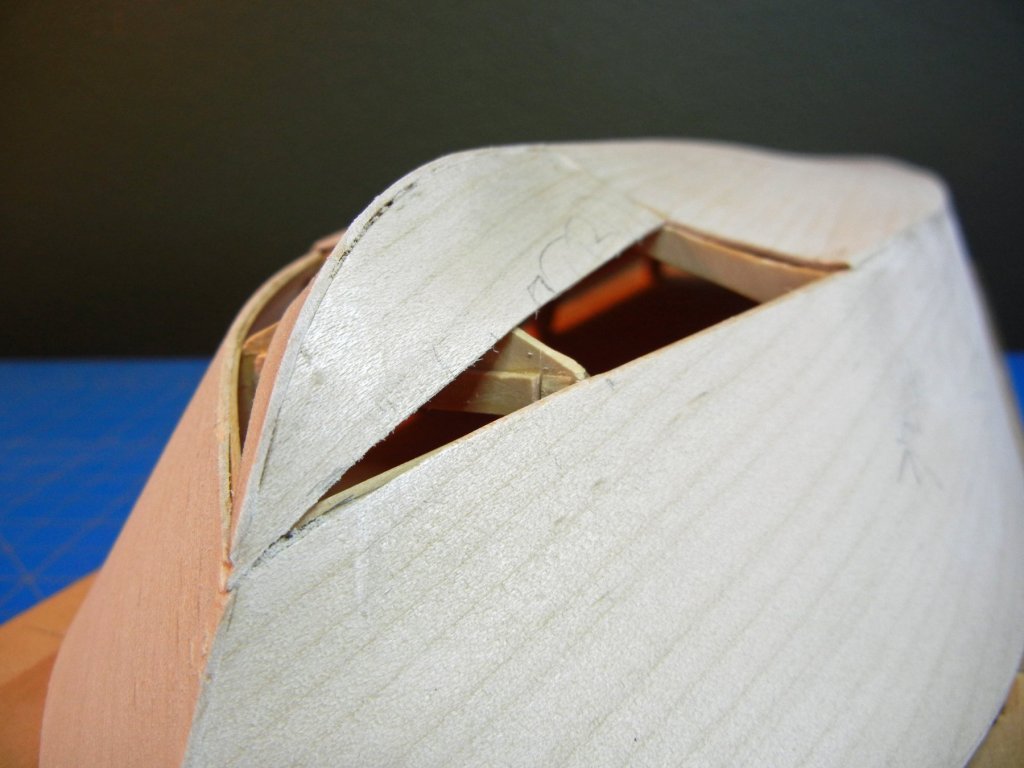
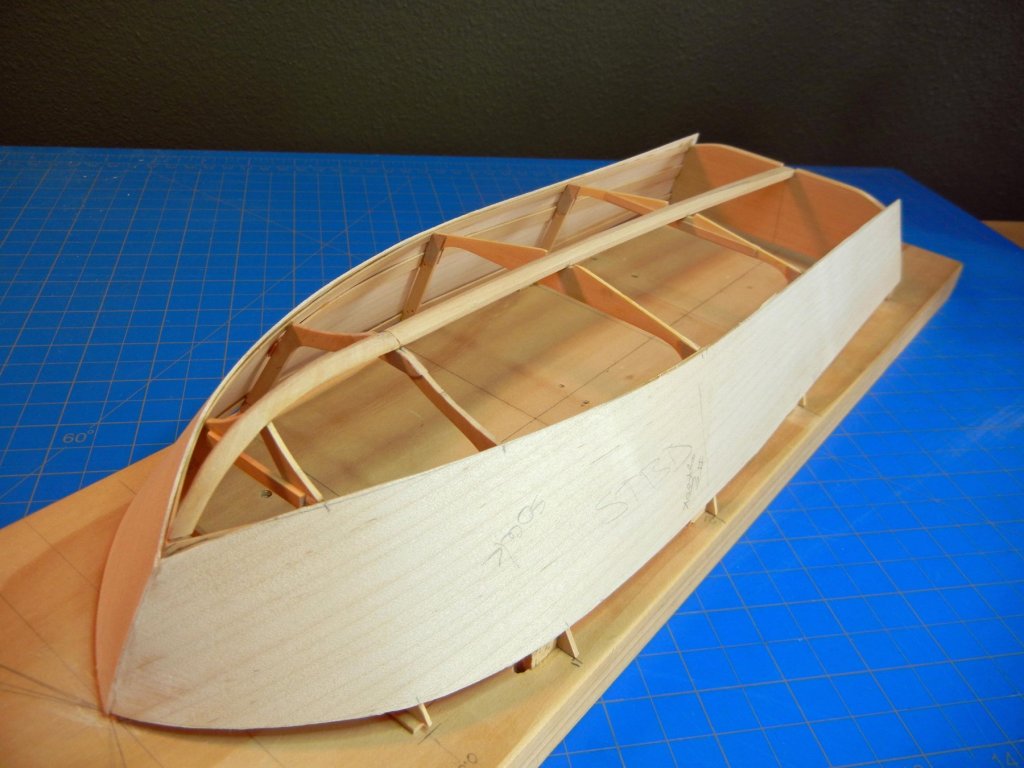
An update of hull sheeting. I removed the hull before completing the sheeting to help shape and install the last parts. I also found I needed to cut the last sheets into smaller pieces due to the compound curvature of the sheet. It was just too much for a single piece, even when well soaked in hot water. Removal allowed me to make the parts more accurate though they are not nearly as close as I wished. I have since trimmed the parts and started filling the gaps. I am using sanding dust and white glue as the interior will be clear coated. The gaps are not as large as they appear in the rough. They are also in the bow under the fore deck which will not easily be seen. First bow sheets. Off the board (the forward frame is temporary and has since been removed). Last sheet. Oh the gaps!

-
Grant, just caught up after not checking in for a long time. I love the detail work and such a beautiful finish. Stunning craftsmanship!
- 339 replies
-
- 3
-
-
- dumas
- Chris-Craft
- (and 3 more)
-
Floyd, I do like the look of the sweeps. What's a little time spent sanding? Ha! (I hate it too, especially when I sand a bit too far.) I look forward to seeing your progress next month.
-
Longboat 1680-1780 by jose_b - FINISHED
DBorgens replied to jose_b's topic in - Build logs for subjects built 1501 - 1750
Jose, Impressive! Your relative is blessed to receive such a beautiful boat. Looking at the detail pictures I keep thinking this is a much larger model. Great work. -
Thank you for the likes. The time spent forming has paid off. I installed the side sheets relatively quickly today. These are fitting nicely so far. I’ll find out when I try to close the last sheets near the bow. The admiral mentioned that she is finally starting to look like a boat. The grain in appears to be planks, pure luck. The odd curvature near the prow is a slight warping in the overlap of the sheet. A little trimming will straighten this out. That's it for now.

-
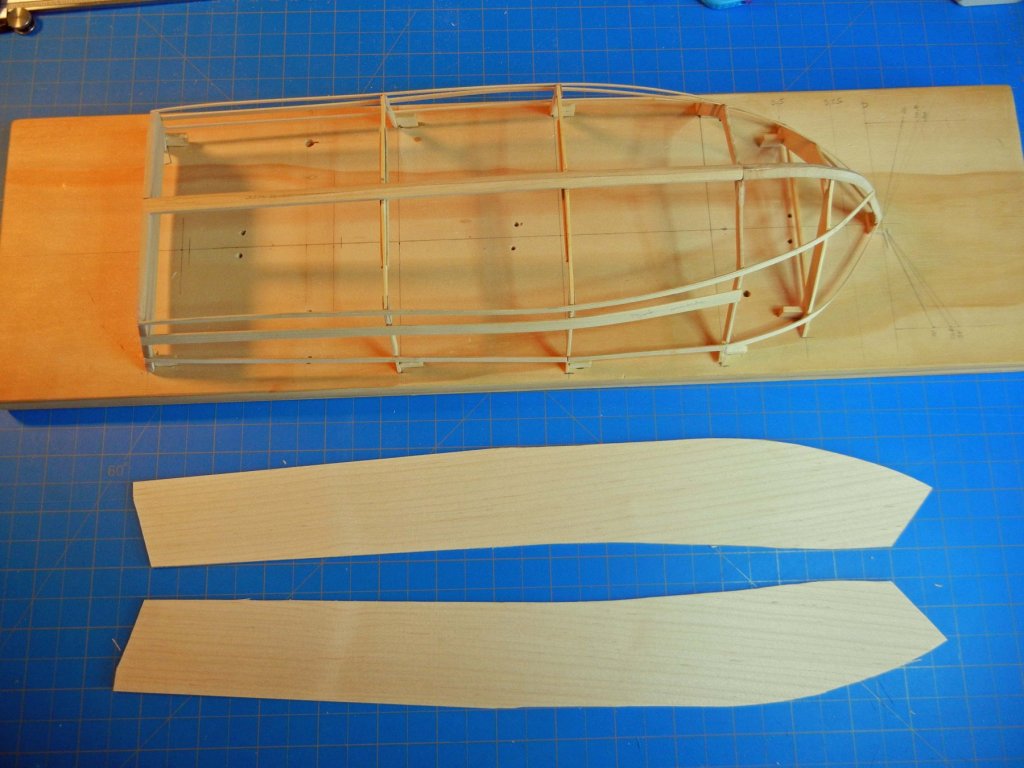
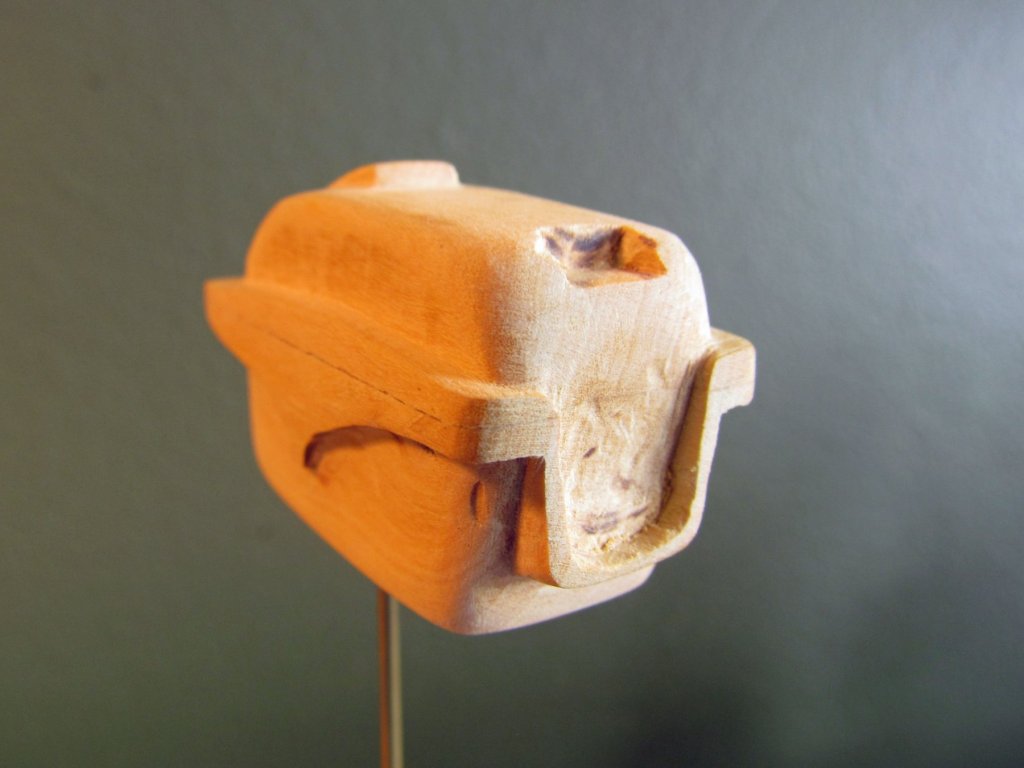
Patrick, thank you and I really love the mountains around here. I do apologize for the slow updates, summer keeps getting in the way. More hiking, yeah! I have started on the hull sheeting by making patterns from card stock and transferring them to 1/32 in. (0.8 mm) maple sheet. The sides formed up well after a hot soak and overnight drying while clamped. I’ve made each bottom sheet of three pieces due to the curvature of the bow as it is in the full size boat. I’m about ready to assemble these to the hull frame. While hull pieces were drying, I made some progress on the motor lower unit. I will cut this in three pieces to add fins and the propeller shaft and skeg. I cut the outline on a jig saw and am shaping with miniature files and scraping with a #10 X-acto blade. Unfortunately, I just discovered I made a design error and will have to make a new one. Makes for good carving practice anyway. The motor is not needed for quite a while so no hurry. That's about it for now.

-
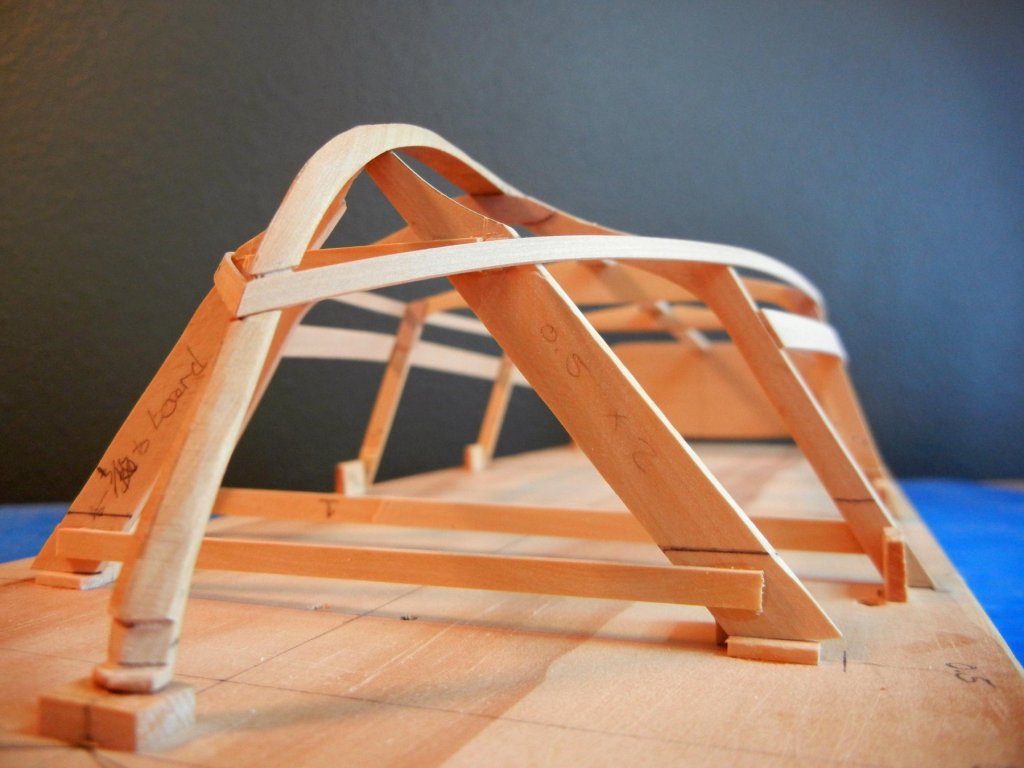
I’ve made progress framing the boat. Slow going, but we have taken some wonderful hikes recently and my fence and gate repair is coming along. Mt Rainier from Freemont lookout. After installing the keel, I cut and shaped the stem. This was a fiddly part with much fitting and checking hull fairing. Shaping became an exercise of much scraping (using a #10 blade) and sanding. When I think I need a little more, I have to remind myself there is no perfect. I notched the stem for the stringers for strength as the stringers are butted against the stem in the prototype. There is a bump between the first two frames that I need to take down a bit. The forward frame is temporary and will be removed once the boat is off the board. I added chine stringers and the wider mid hull stringers this afternoon. These were more troublesome than anticipated, requiring constant measuring and viewing the hull for shape and symmetry. I measure, sand, realign and re-measure time and again. Nothing like a kit where if it looks good it is good. I have a final stringer to add at the deck level which is not in the full size boat. It appears the Larsen built the hull using the deck to set the hull shape, especially at e the bow. Since I am building on inverted frames this would be very difficult. The added stringer will be hidden by the deck.


-
[Oops, I just realized I had this ready to go at the end if June and did not post.] I received the wood (thank you Jason!) and started frame construction. There are only three frames plus the transom. I am following the production pattern in piecing the frames. The photo shows frame 2 nearly finished and frame 3 pieces. The prototype picture shows how the boat was assembled. You can see the bolts attaching the sheeting and deck to the frame. Note, the vinyl seat is not part of the prototype, these were loose in the boat.

-
Mark, Thank you, pull up a seat.
-
Patrick, Welcome, you certainly did. I am amazed at the details you manage to get into such small models. Love your work.
-
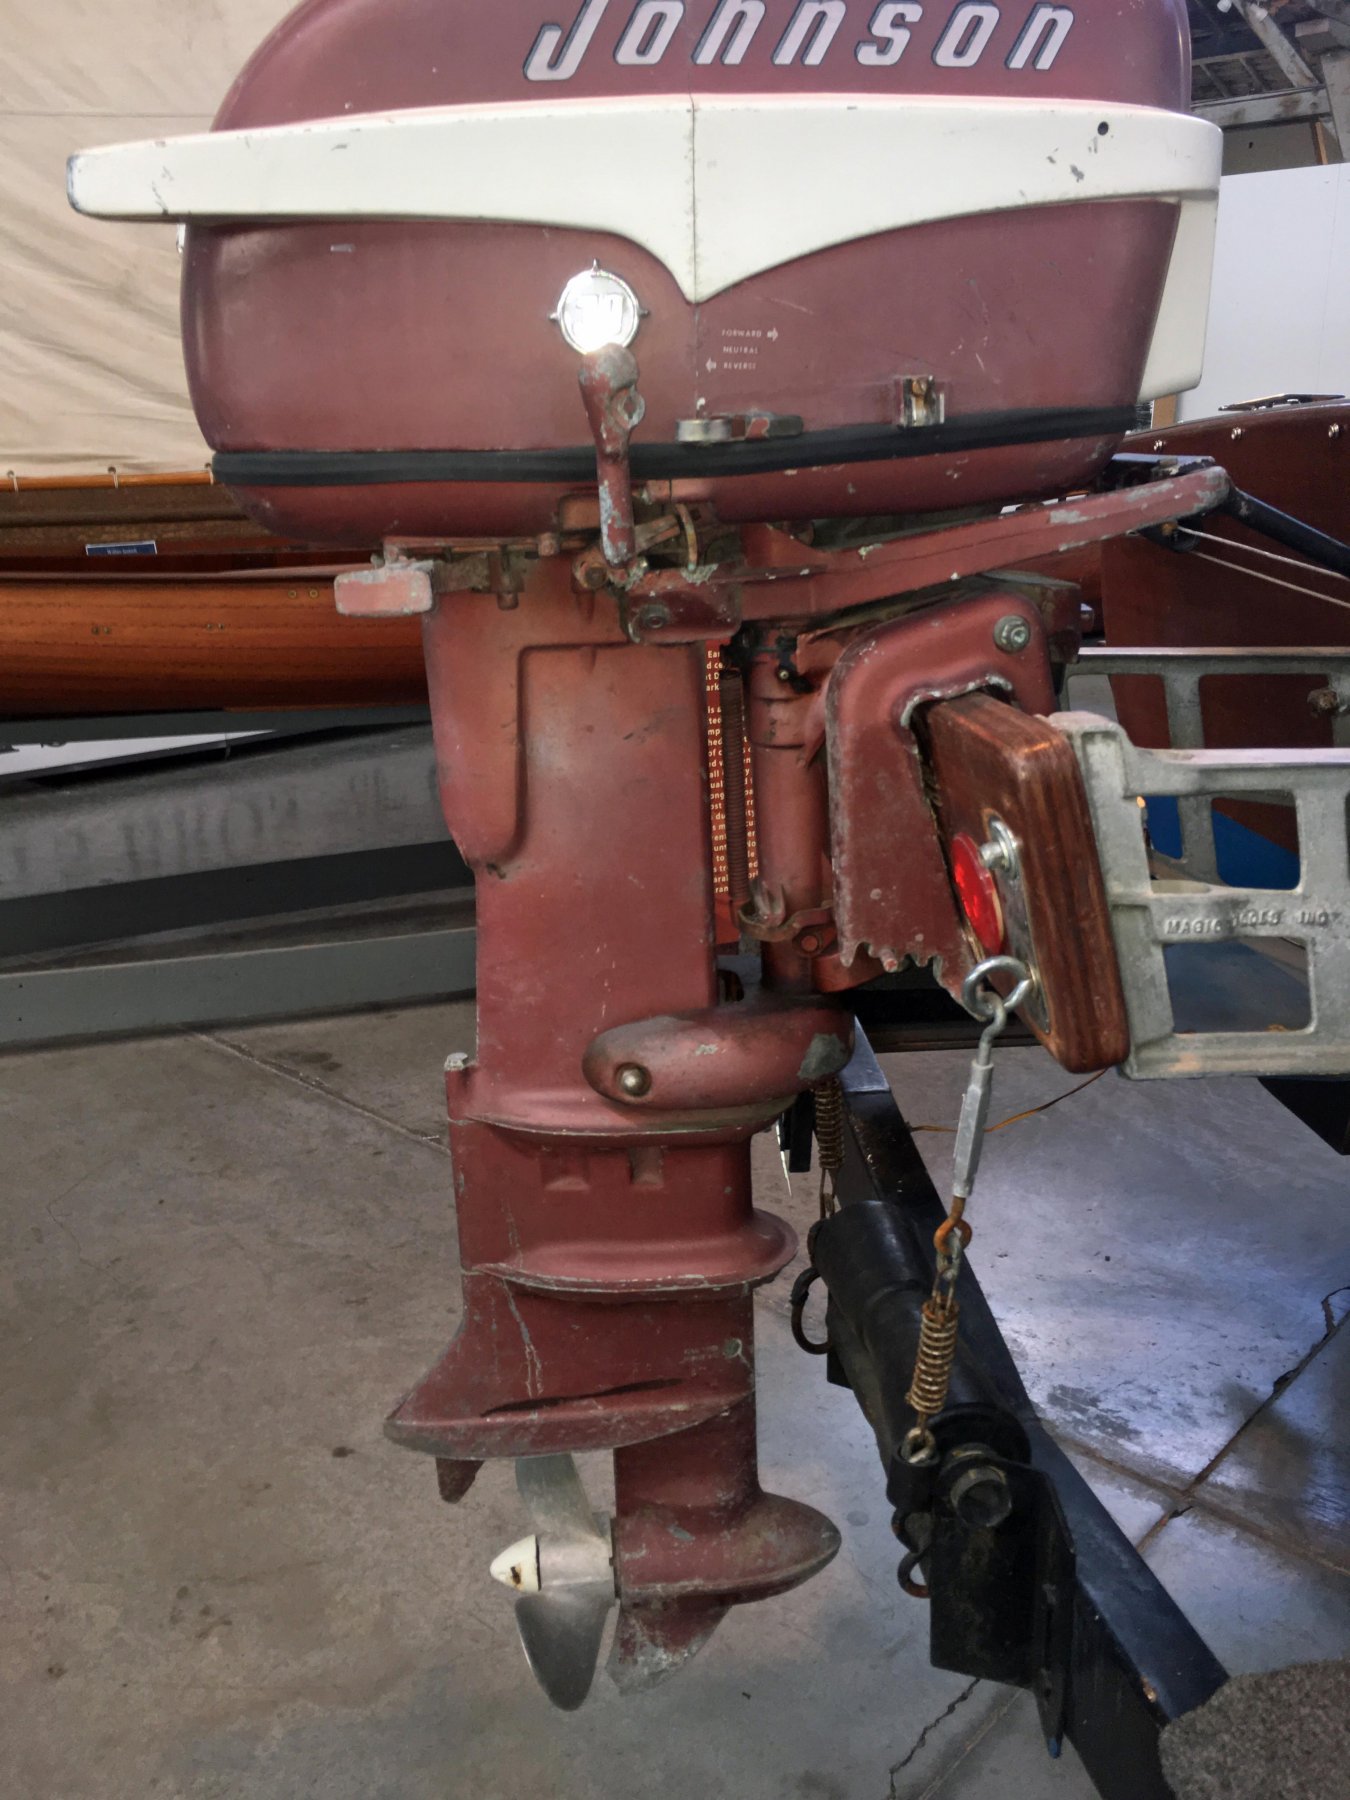
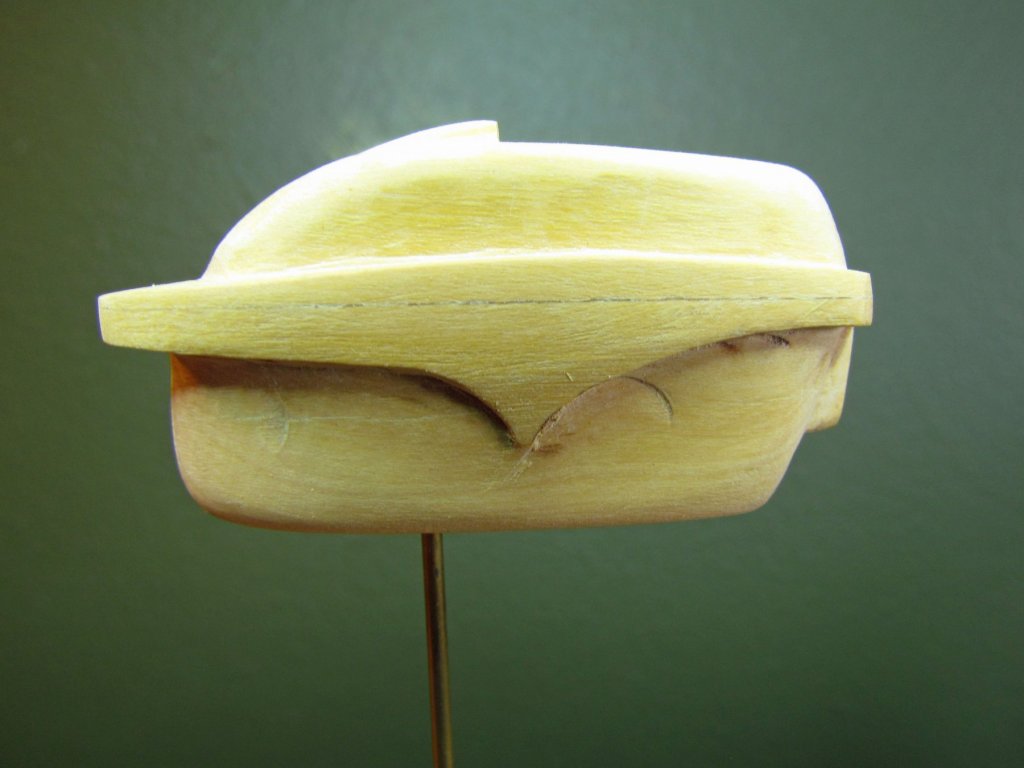
The frames are boxwood and the hull sheeting will be maple. While waiting for the wood, I started carving the motor power head. Working from photos and measurements of a similar motor I’ve made a fair start with some spots to fill. Wow, boxwood is certainly nice for carving. Motor at Foss Waterway Powerhead carving. The color differences are due to shifting the lights on my workbench.
-
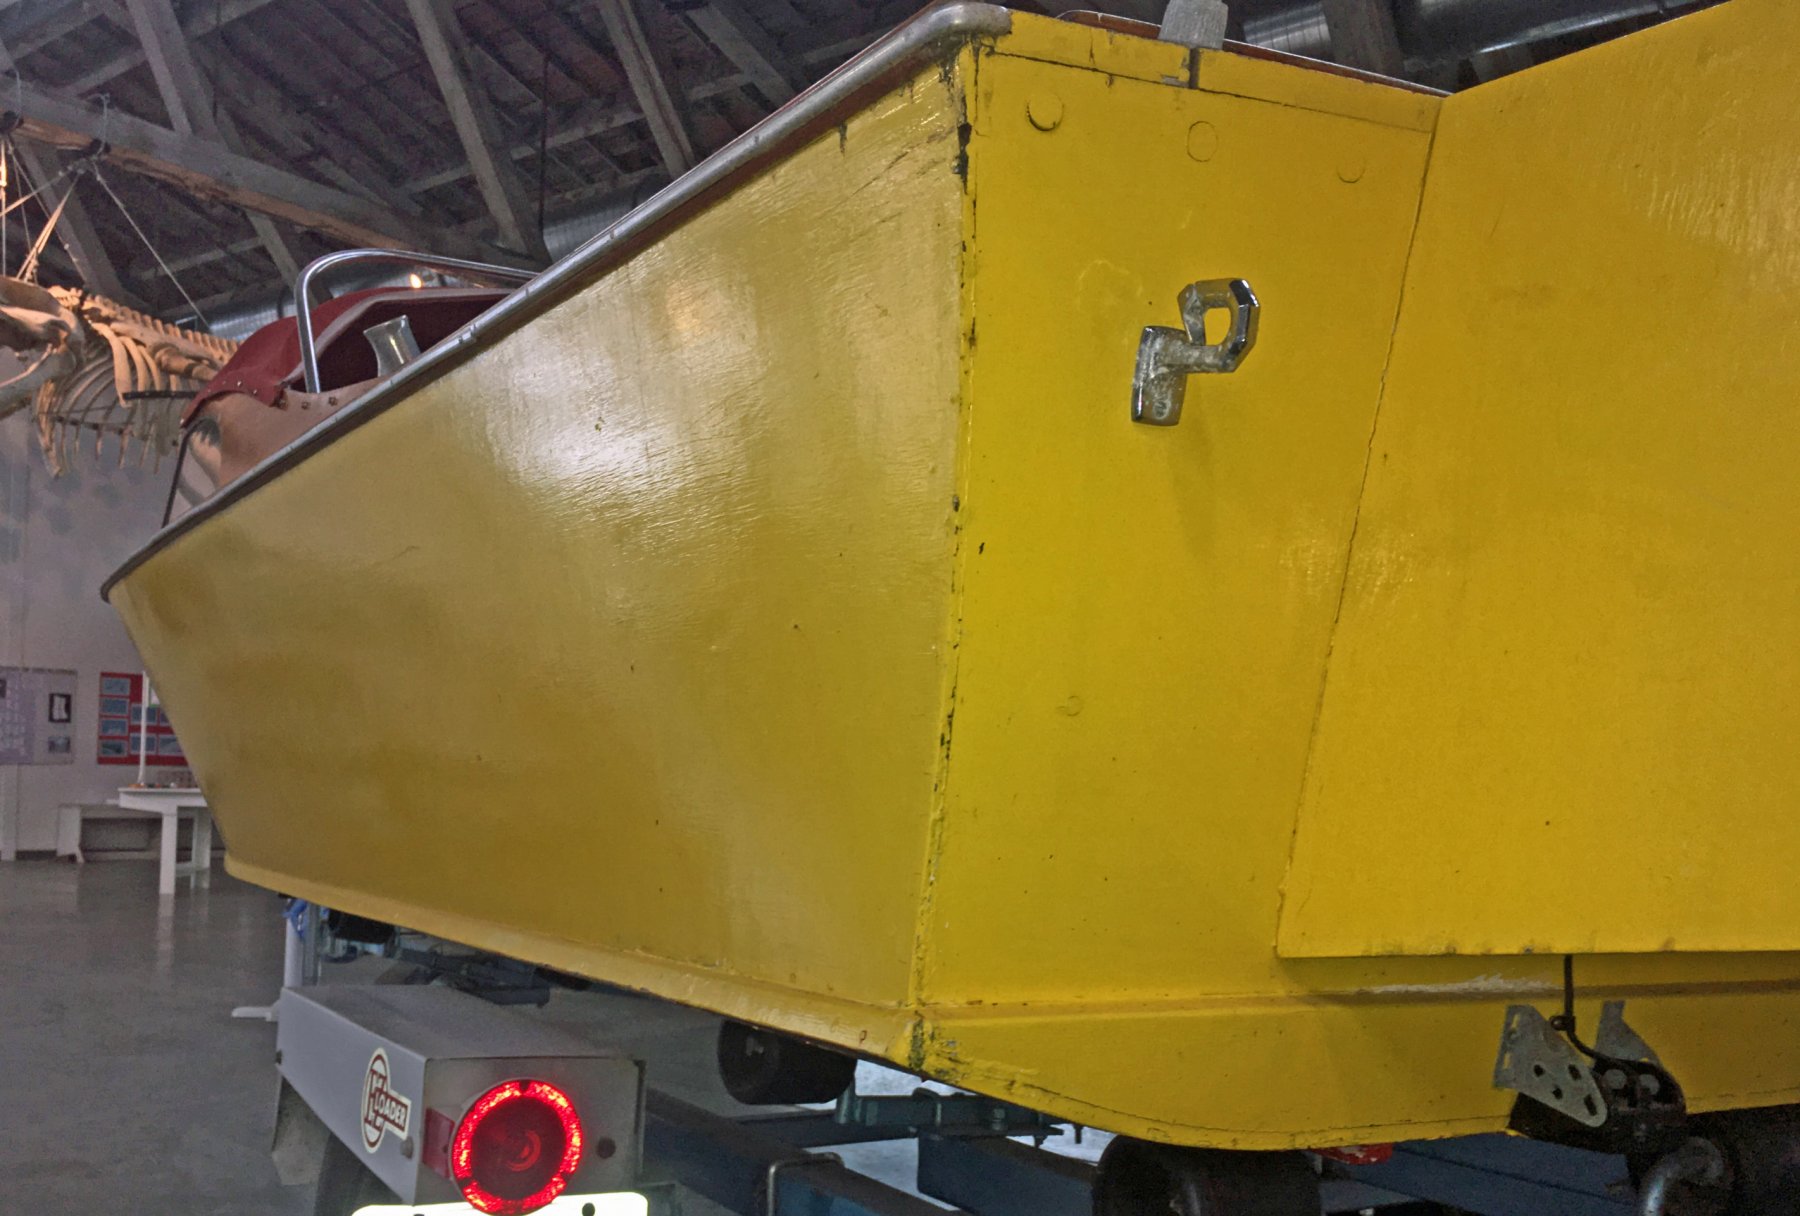
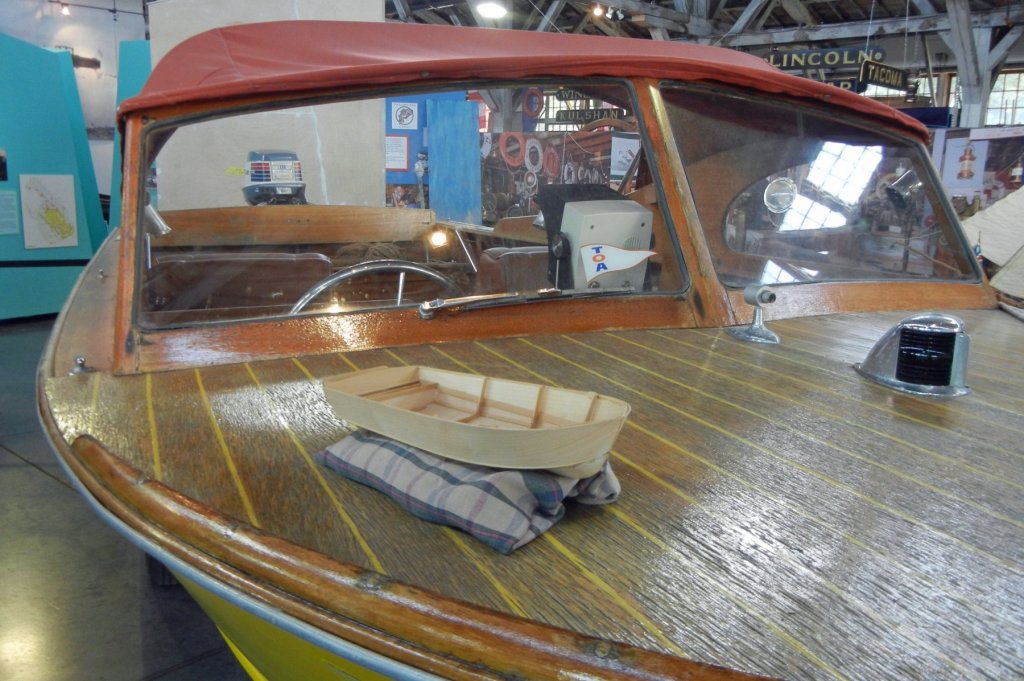
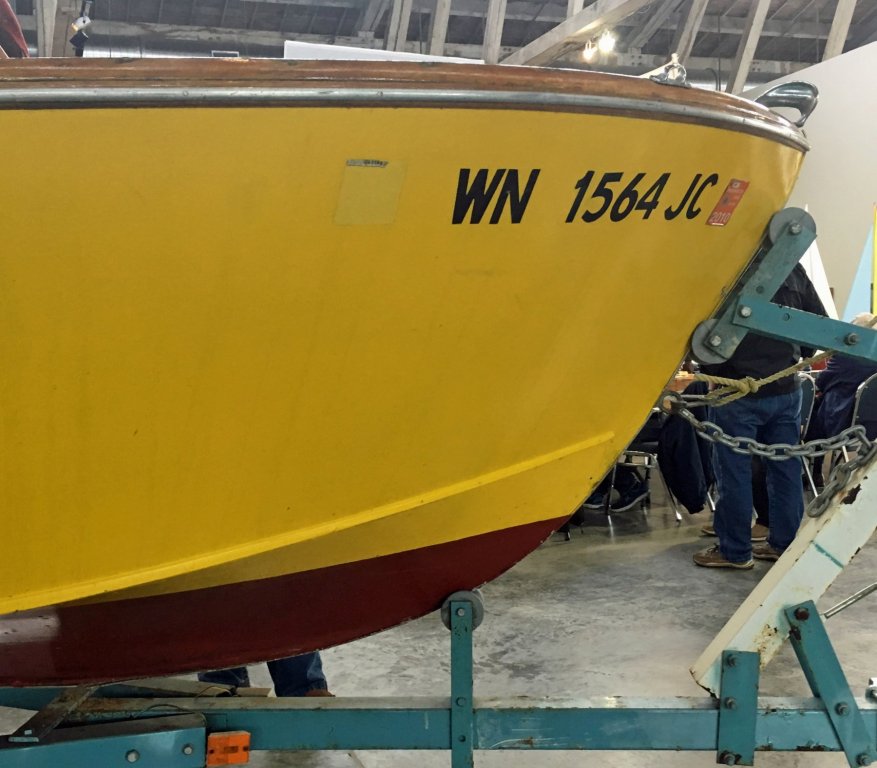
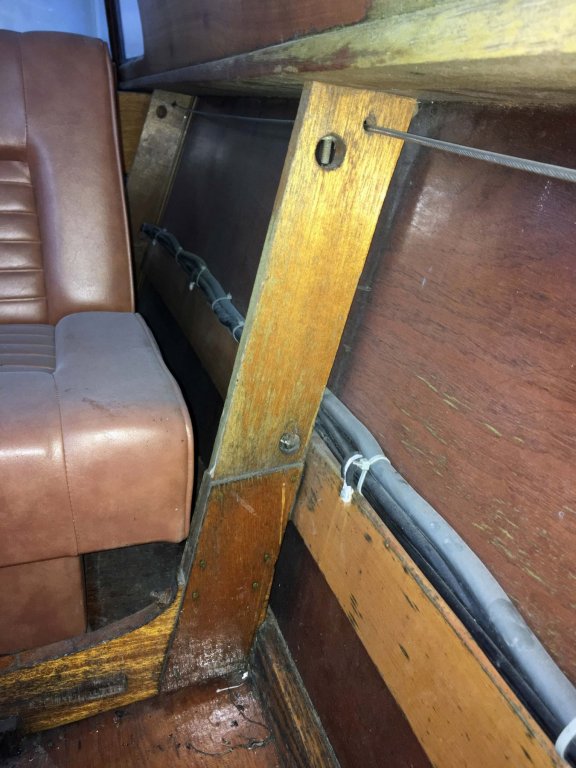
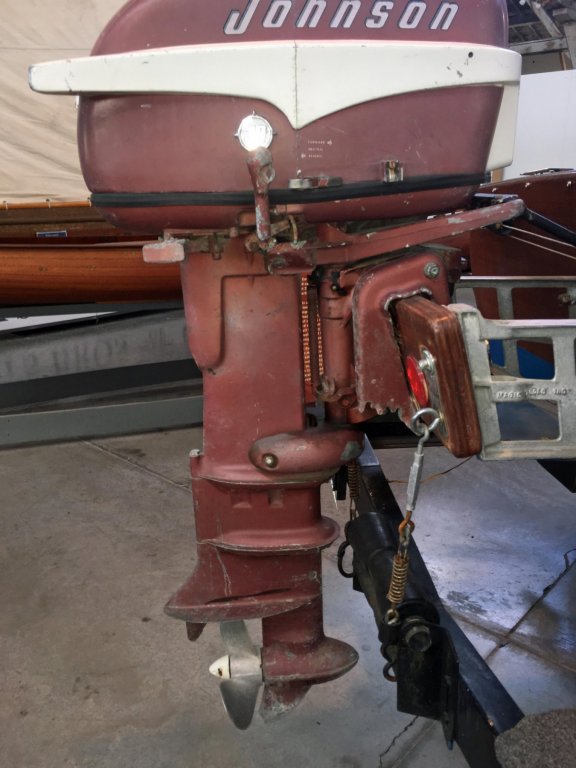
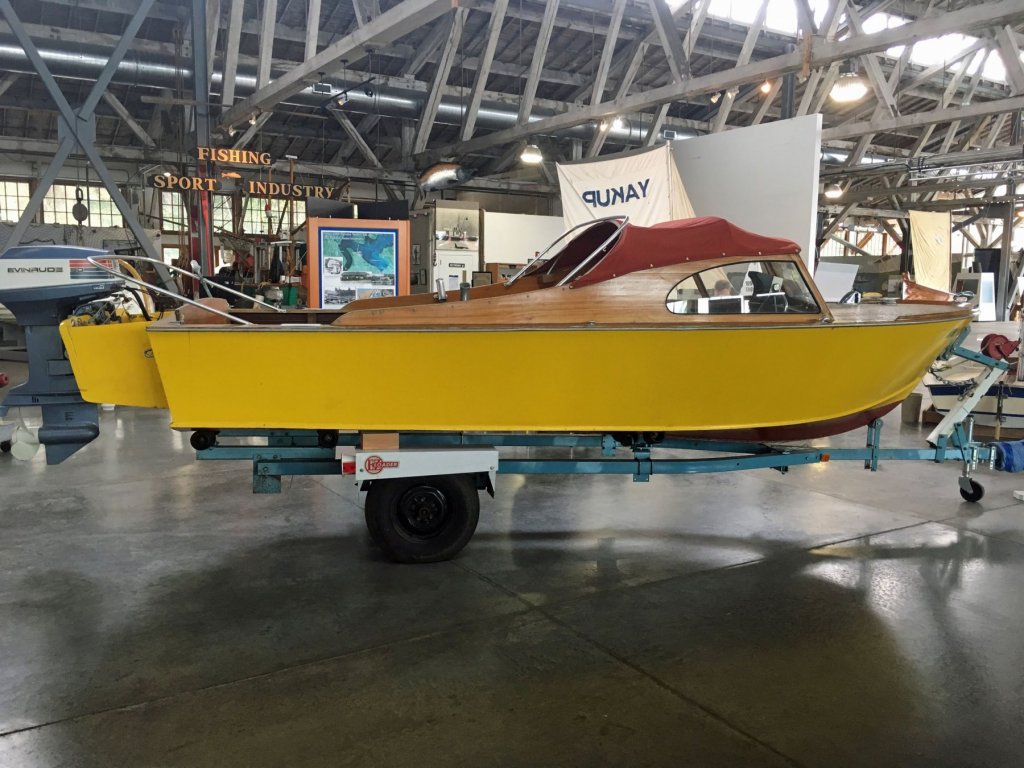
When I was a boy, we owned a Skippercraft runabout in which I enjoyed fishing and cruising in Puget Sound. I’ve been building ship models now for several years and finally decided to model this runabout for my father. My goal is to complete this for his 91st birthday in October, ambitious but doable. We’ll see how this goes. Our boat was a 17-foot model, so I chose to use 1/16 (3/4 inch) scale which will provide a nicely sized model. This is my first scratch build. The Skippercraft was a simple plywood runabout built in the late 1950’s by Larsen Marine on Vashon Island. I looked for plans but could not find any, nor could I find any photos of this boat. Ours had a 35 horsepower Johnson outboard motor, of which I was able to find photos. This spring, the Foss Waterway Seaport in Tacoma invited our club to demonstrate modeling. Surprise! There sat a Skippercraft runabout right in front of our tables. Needless to say, I spent a few hours pouring over the boat making measurements and taking photos. A museum associate explained that these boats were often built without plans. The builder would construct a prototype from which he would make forms for production once he was happy with the design. Skippercraft in Foss Waterway Seaport
-
Derek, Sometimes life interferes with modeling, which is the way it ought to be. This is not our profession. Nibbing is certainly a learning experience and your aft deck planking looks good (better than mine did). Skills learned. Enjoy building.