Search the Community
Showing results for tags 'Plastic'.
-
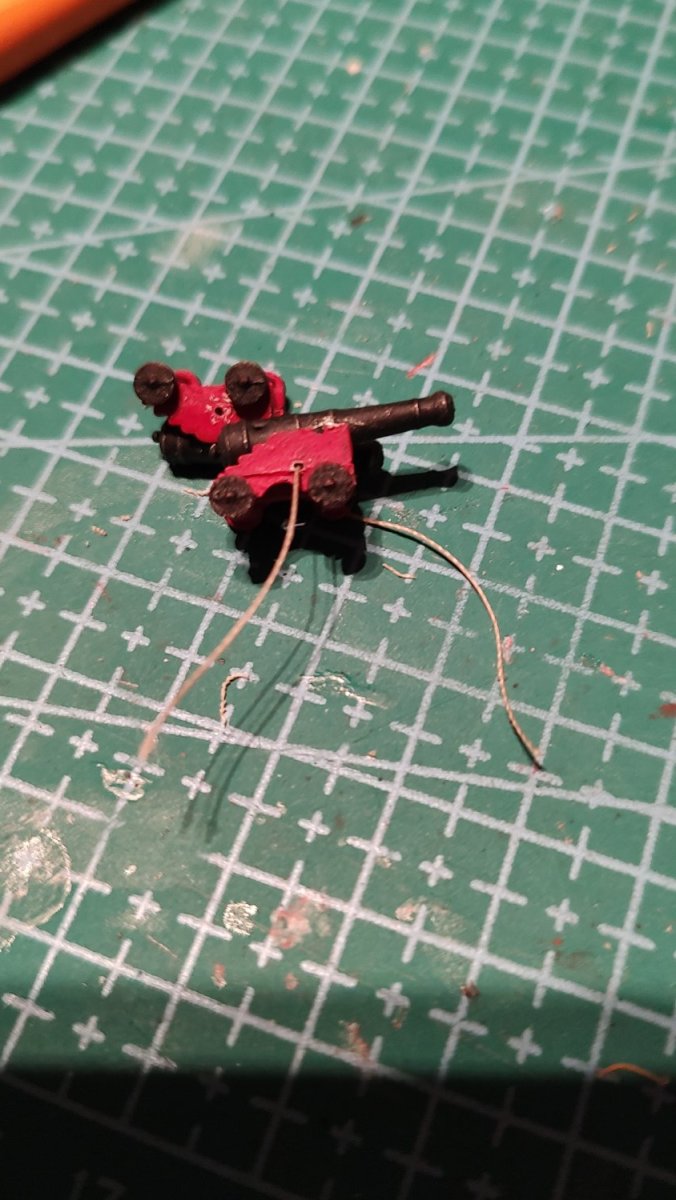
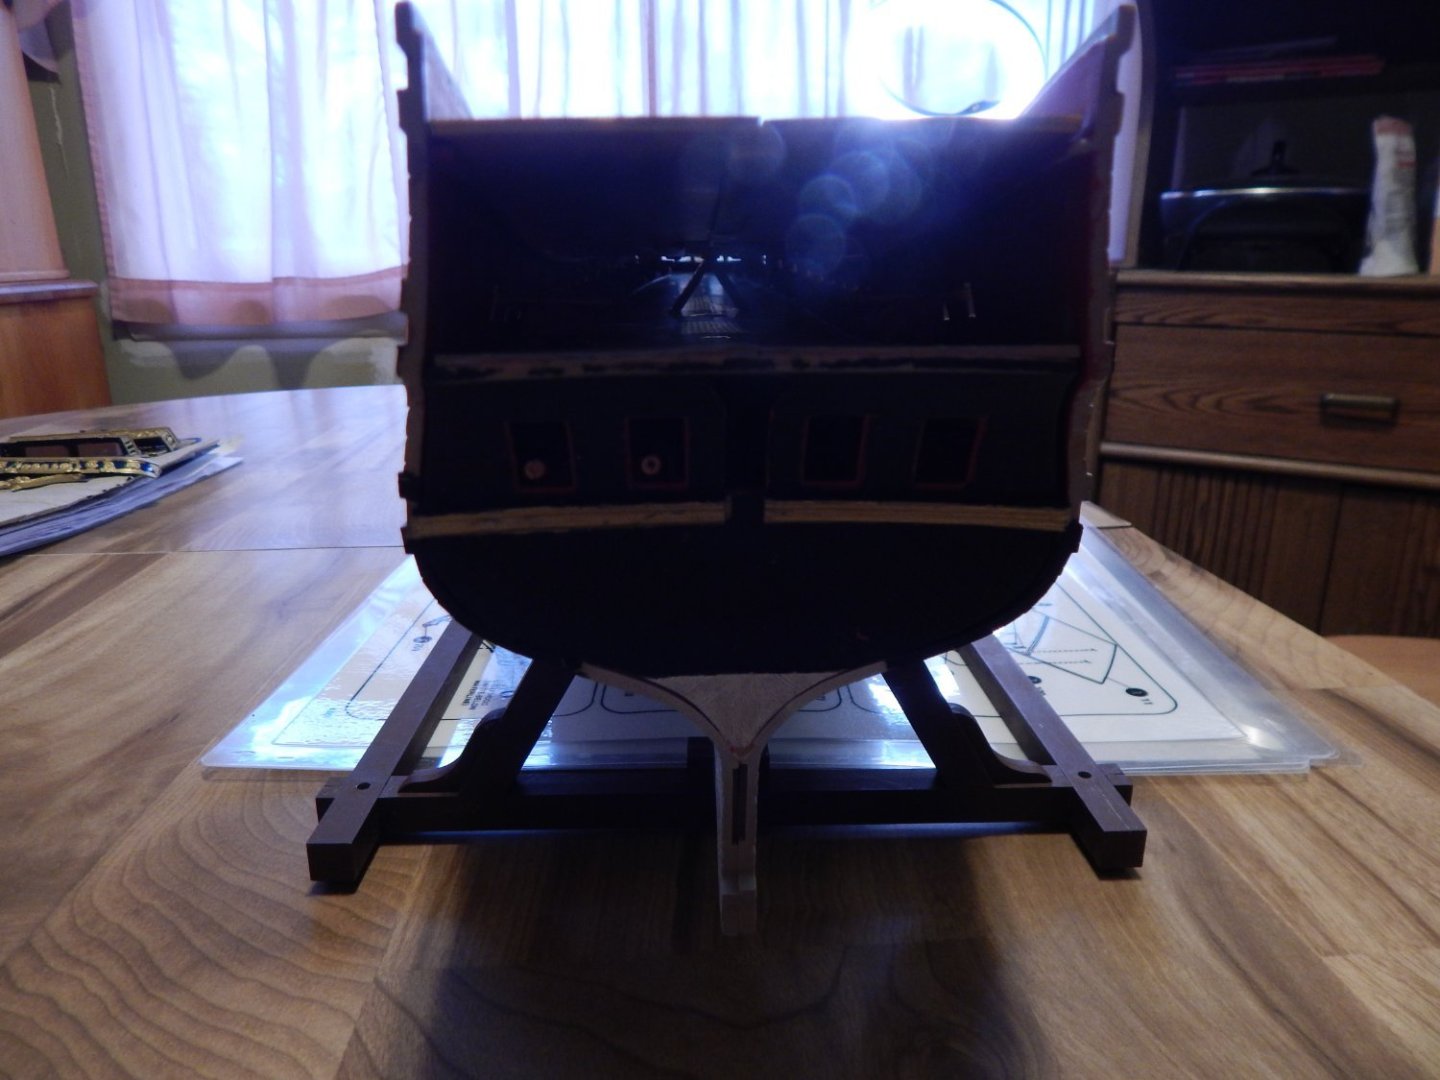
 This 1961 plastic kit is preowned. It cost $115 plus shipping. This was quite the deal. The first run of a model injection mold is the best. From there on each casting is sloppier. This model is a first run with few missing parts. The History The Confederate Navy needed ships to run blockades and raid enemy merchantmen. A British shipyard began building Hull 290 to be a merchantman. The ruse lasted just long enough to beat the authorities. It slipped down the river to sea a day before the raid. A ship was waiting to arm Hull 290 at sea. “ CSS Alabama was a screw sloop-of-war built in 1862 for the Confederate States Navy. It was built in Birkenhead on the River Mersey opposite Liverpool, England by John Laird Sons and Company. Alabama served as a successful commerce raider, attacking Union merchant and naval ships over the course of her two-year career. She was sunk in June 1864 by USS Kearsarge at the Battle of Cherbourg outside the port of Cherbourg, France. “ Wikipedia The ship was primed with auto primmer. Tamiya acrylic paint is being used on this model. The next model will use Citadel acrylic paint. It is more expensive than what is used now. However, it is made for hand painting. I will probably never invest in airbrushing.
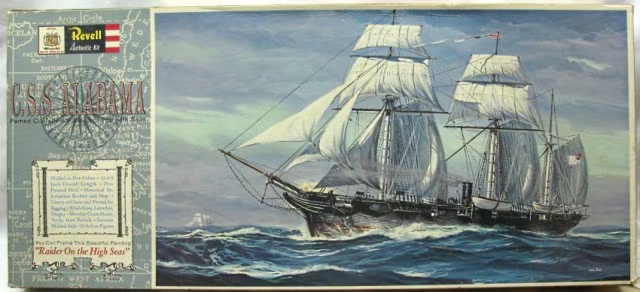
-
 Hi all, I'm new here. First build log. Got back into modeling of late and finally joined the forum. I tinkered around a bit with some other kits to build some skills and I feel like this one is where the practice and patience is starting to pay off. I actually kind of feel guilty about how well this kit has gone, almost too easy. Anyone else have experience with this kit? Zero flash. All parts have fit perfectly so far. I know this is not how it usually is. I have been bumbling my way back into the hobby and have made lots of mistakes and am probably still doing things incorrectly, so constructive criticism is welcome from all of you, masters. Obviously I need to do a lot of touch up painting. One question I have is how to paint the masts? The instructions say to paint everything brown, but I think that looks kind of dumb and probably isn't accurate. Any suggestions or good sources to go to for ideas? Starting this build log part way into the project already, so apologies for no earlier pictures. But here is where it lies today.

- 6 replies
-
- 4
-

-
- Cutty Sark
- clipper
- (and 2 more)
-
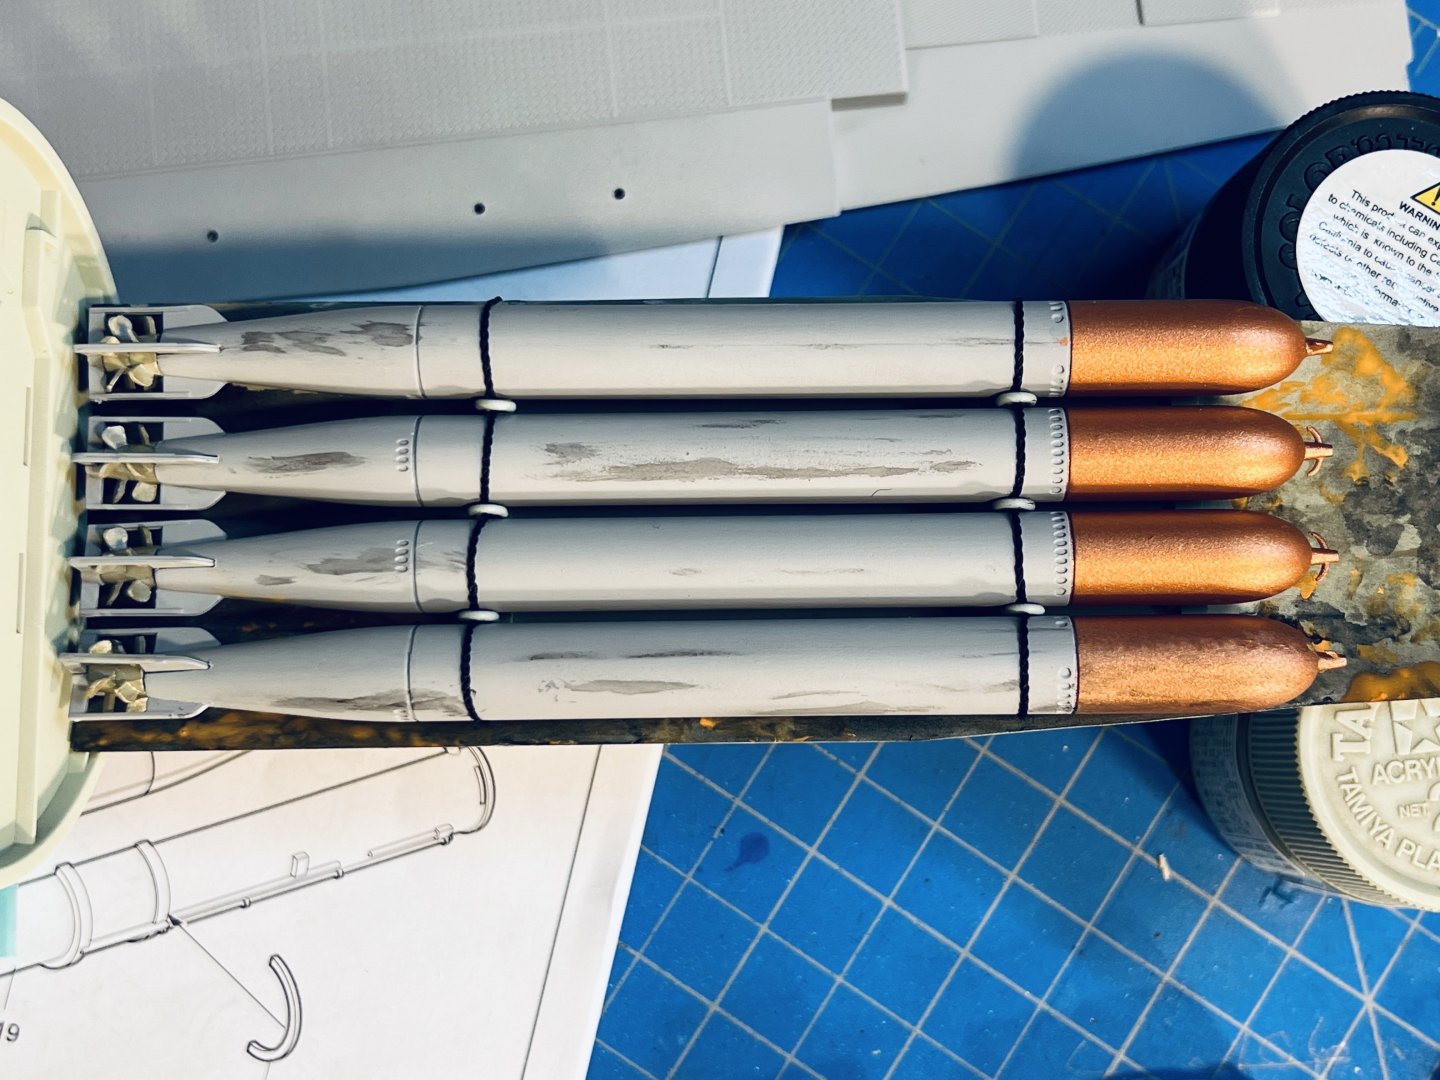
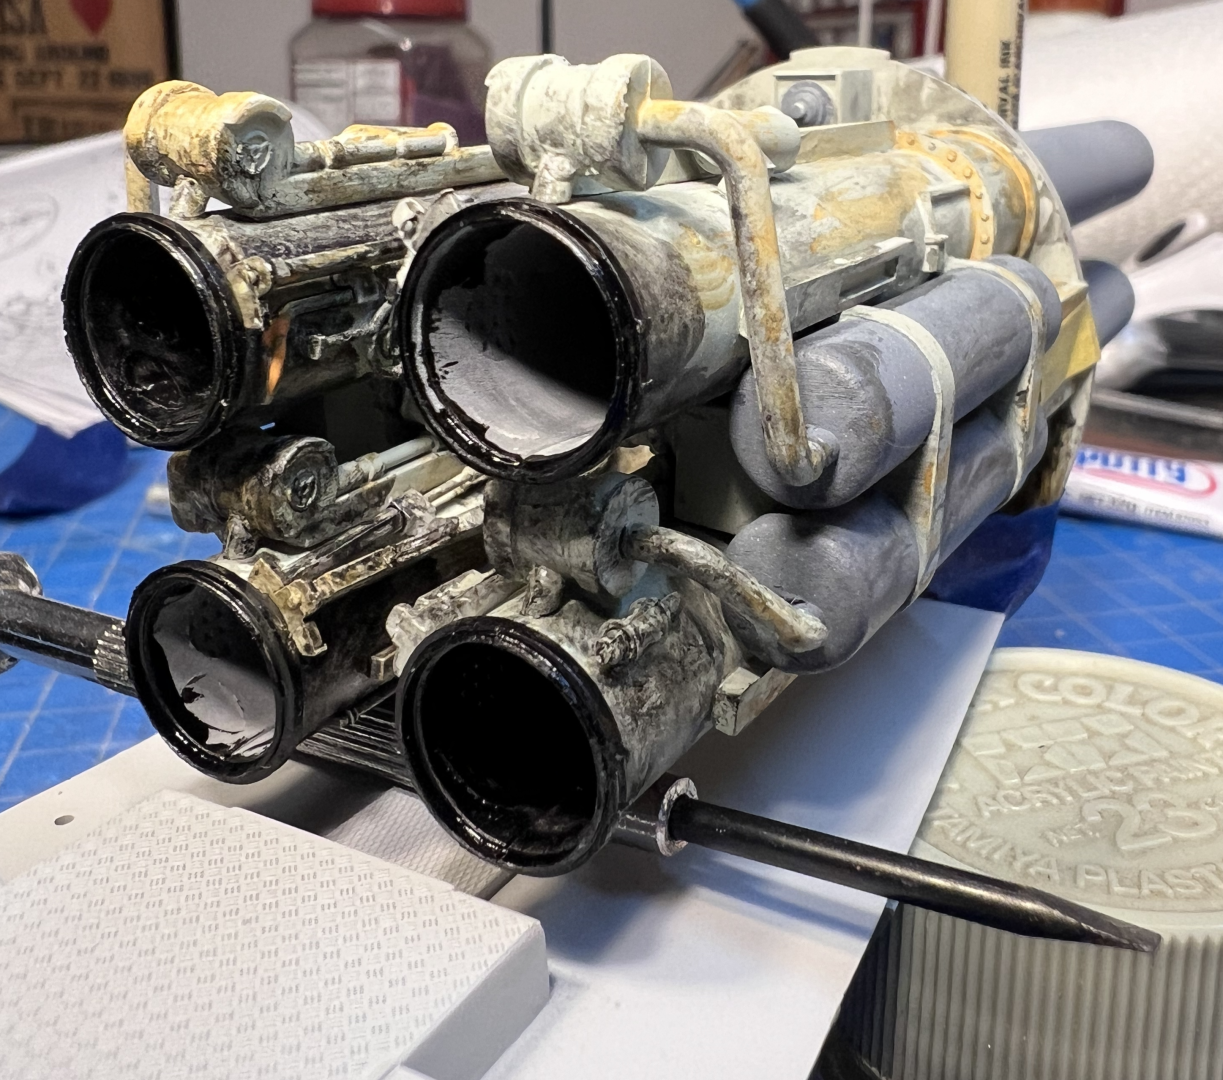
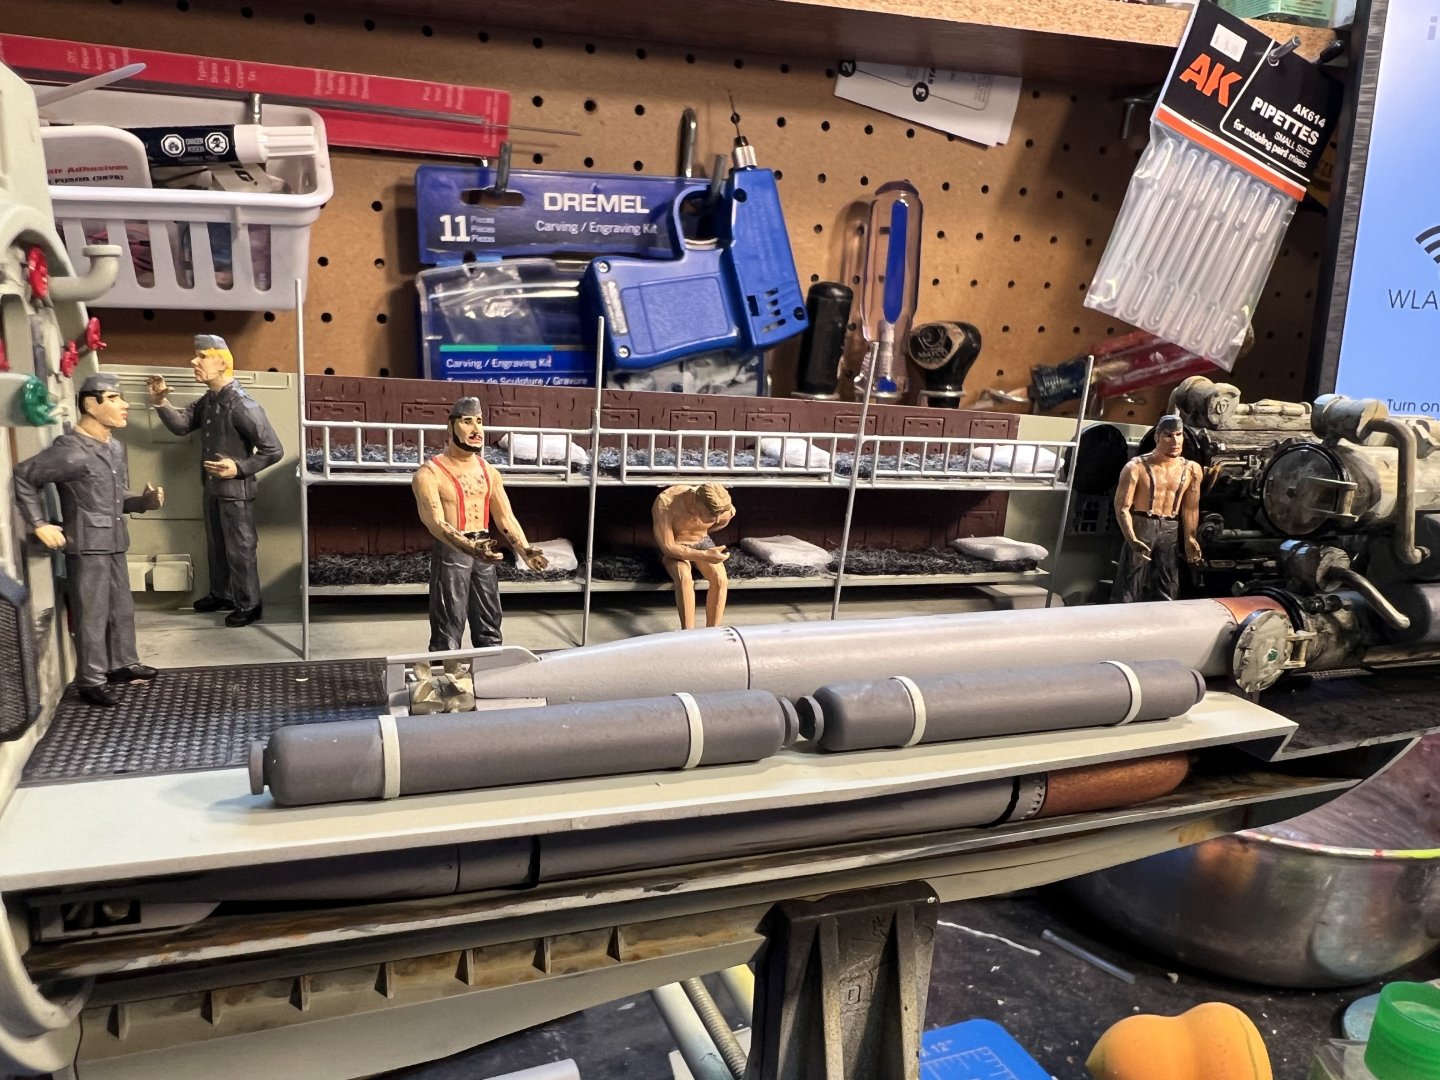
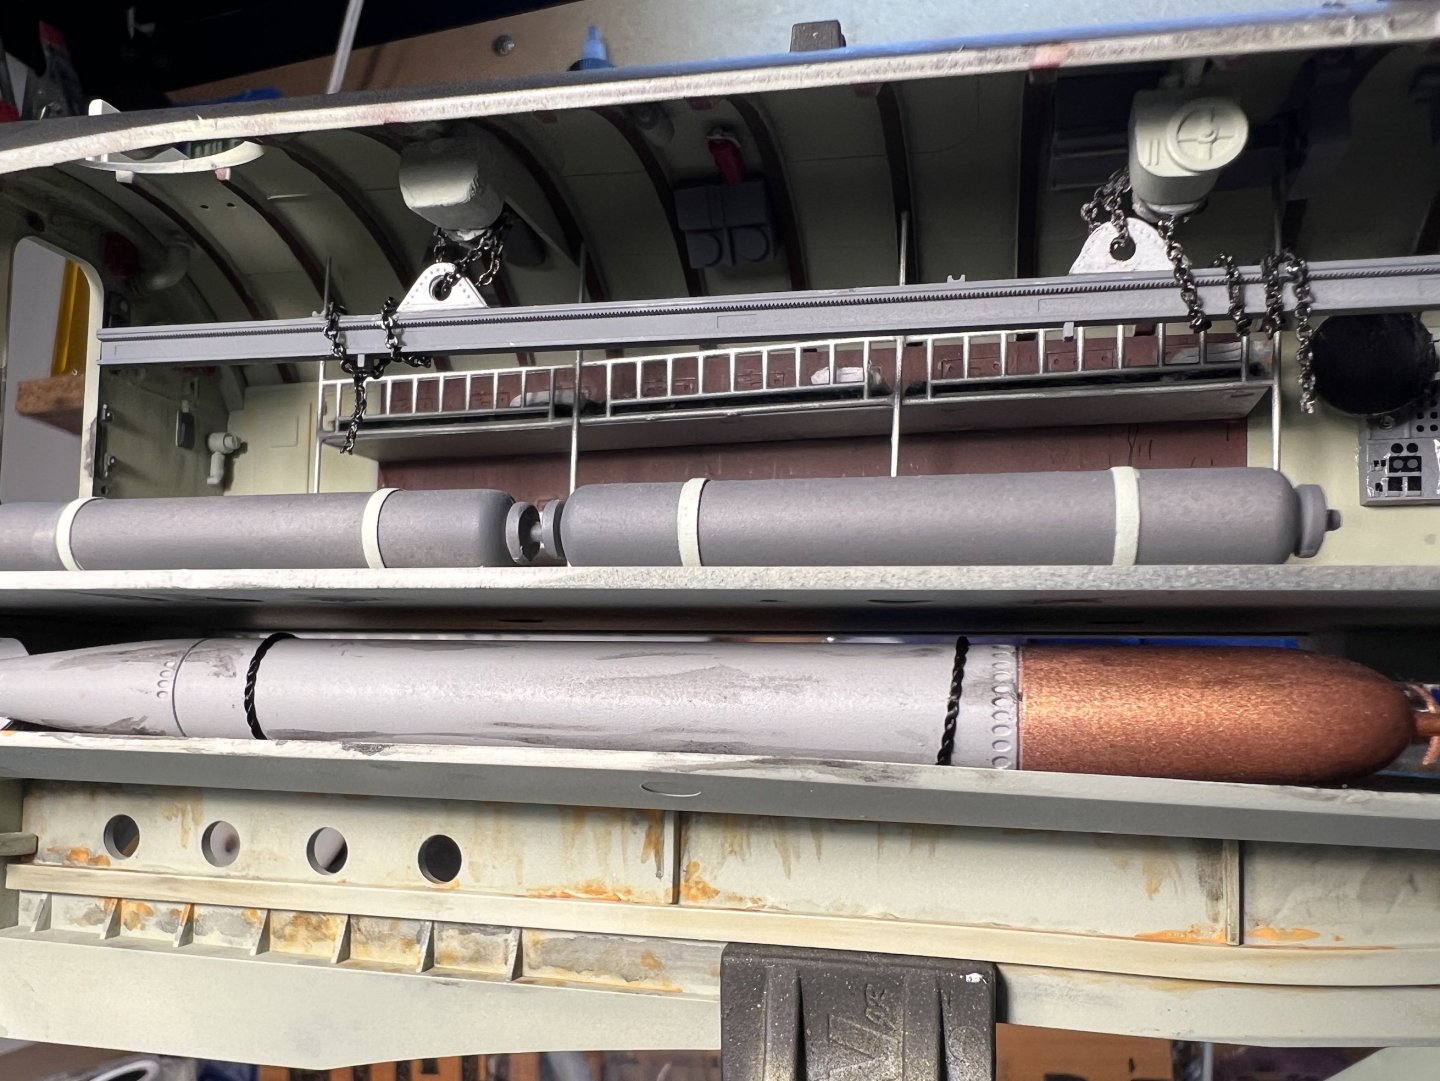
 FORWARD TORPEDO ROOM I received this monster kit for Christmas 2023 and I'm heavily involved in its construction. I'll start off with the Forward Torpedo Room. Tamiya paints and AK weathering used exclusively. If you have any questions on anything, please ask and I will try to help you out the best I can. 12 "Eels" 4 spares arranged on lower tray below floor boards Forward tubes with their grease and other assorted yuck. Crew bunks with great felt and pillows made from folded white polyester. Floorboards weathered with AK bearing grease, panel liner, and ground up pastel chalks (brown & black). Crew members added You will need to scratch build a second winch unit to be used for the I-Beam on the overhead. Here, I used an ankle bracelet chain (courtesy of my wife) to use for the chains on the I-Beam torpedo lift. You can actually find these chains (ankle braclets) fairly cheap at WalMart - $3.00. I had her get another pack of them since I will be using them in the other modules. Adds a real nice touch to the module. Here we have some of the crew added.
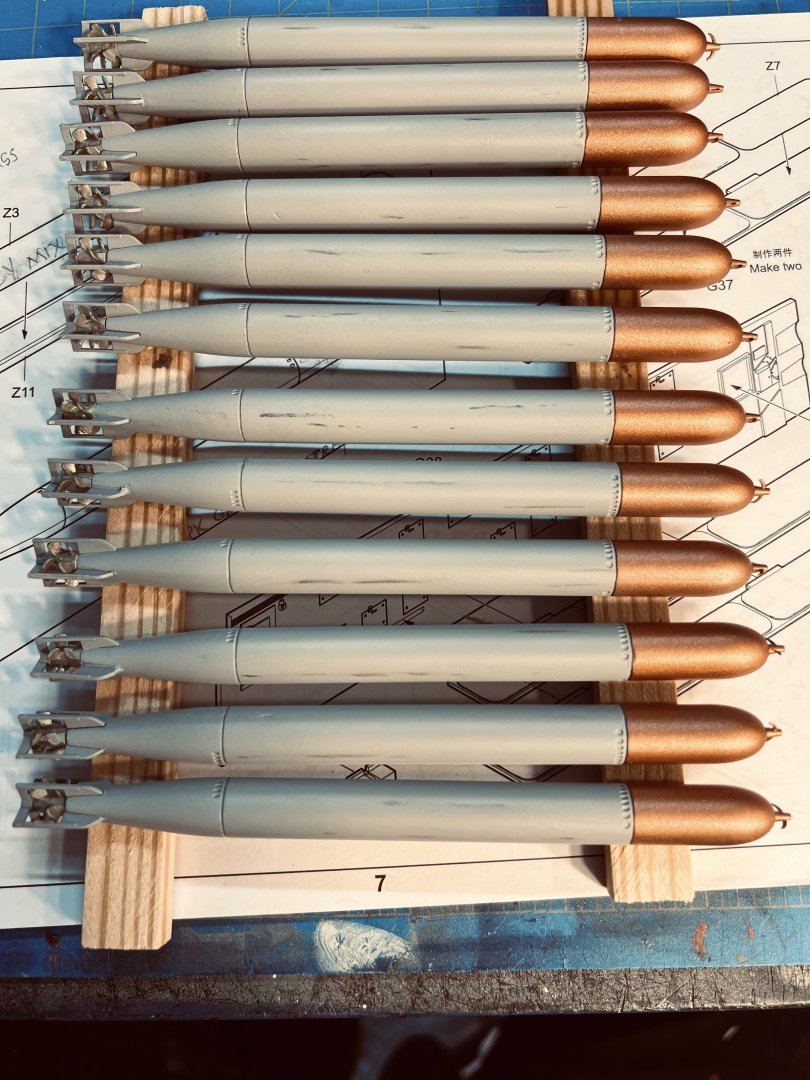


-
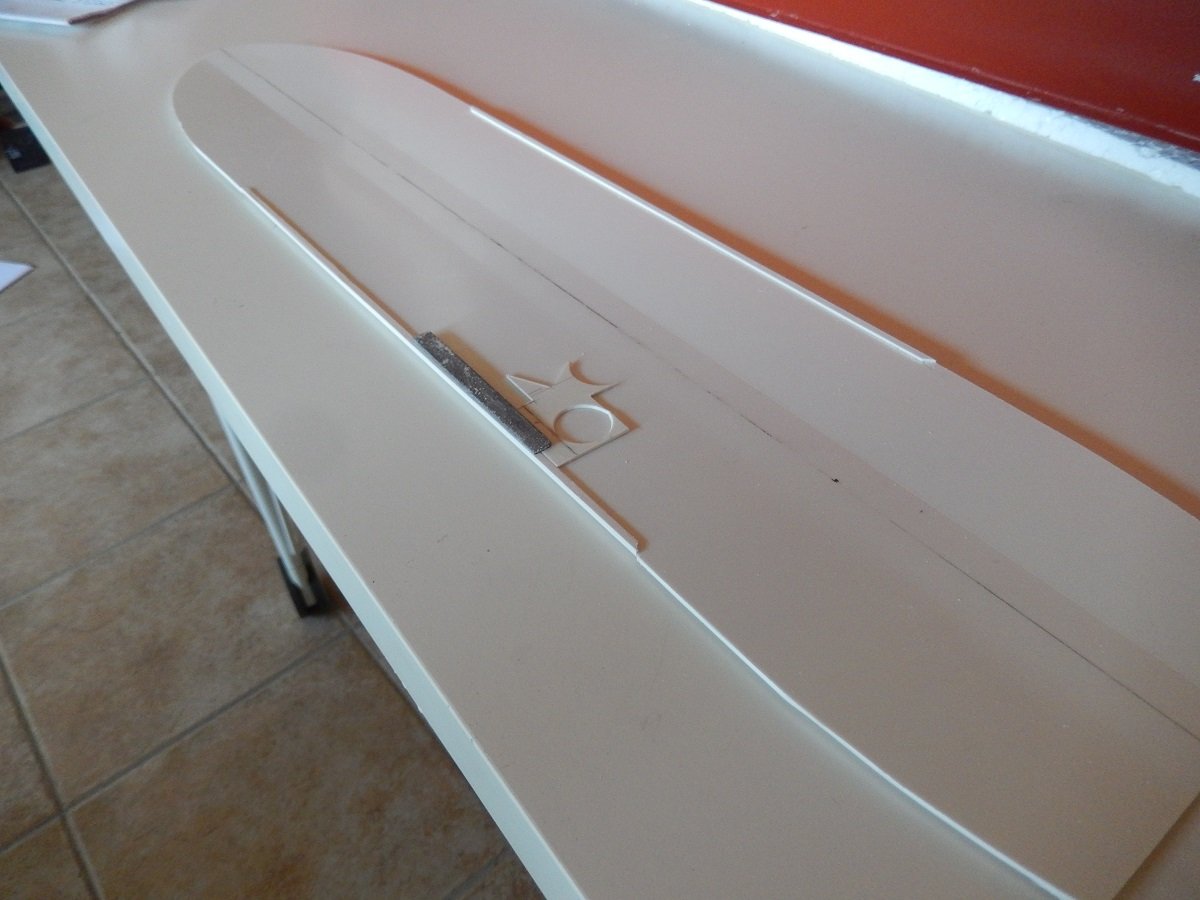
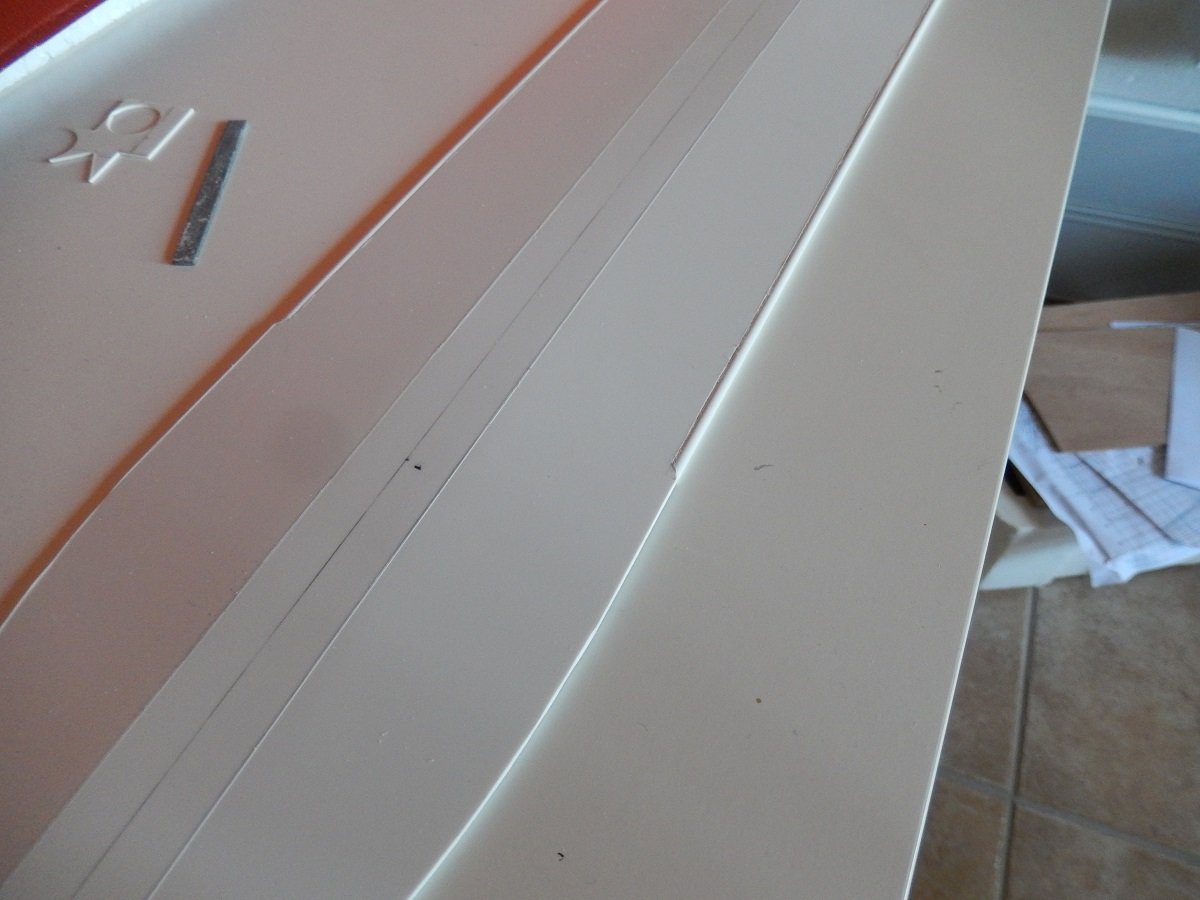
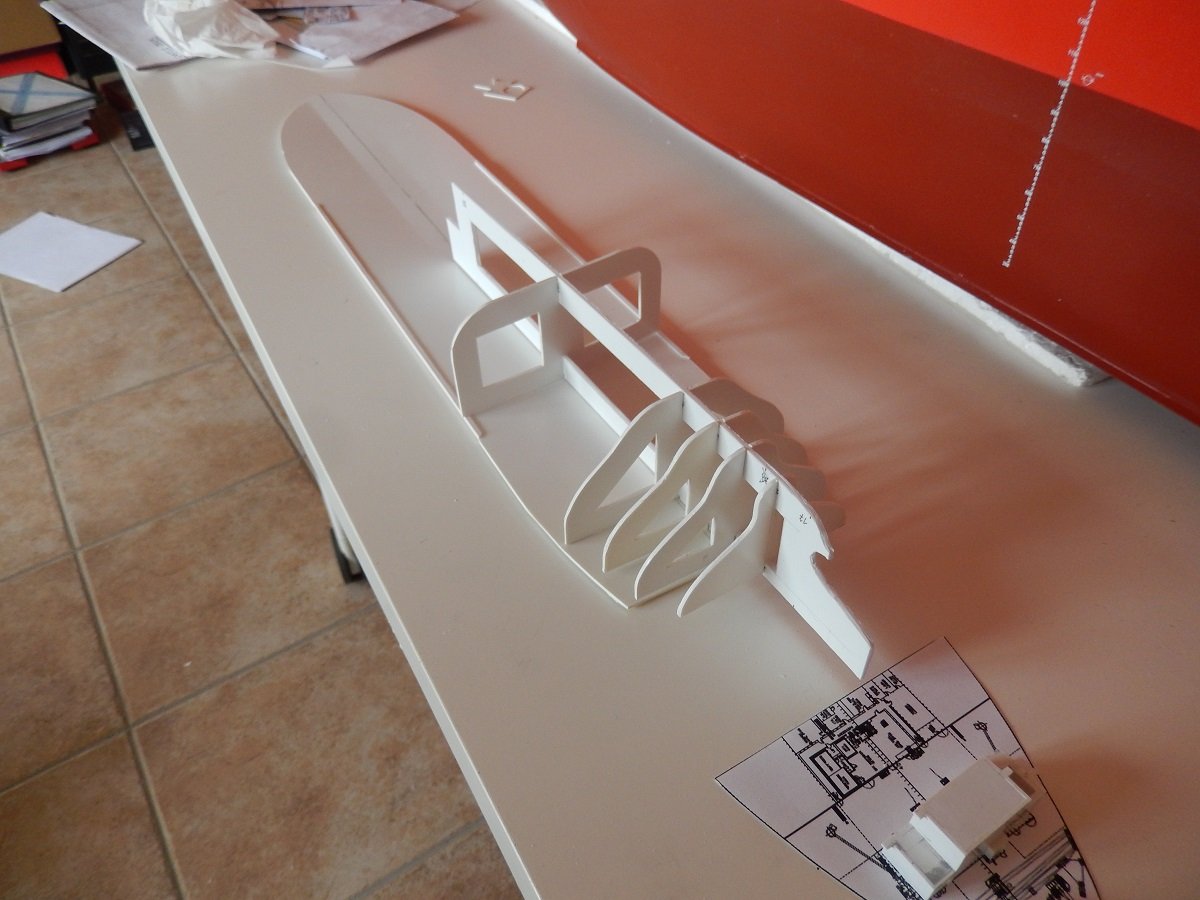
 Well since I'm longer onboard, without the possibility to show new progress. I'd thought I'd fuel @KeithAug newfound love for complex piping a bit further. I consider this build, for an unknown reason, still as one of my best builds. It's an eye catcher in my display closet, probably by its color and size. As the title says, I'm talking about the TI Europe (TI standing for Tankers International, an oil tanker company pool). The TI Europe is an Ultra Large Crude Carrier, one of 4 sister ships built by the Korean Daewoo yard. They were built for the Greek company called Hellespont, but were sold after a few years to the larger company called Euronav and renamed as TI Africa, TI Asia, TI Europe and TI Oceania. TI America was deliberately left out for fears of terrorist attacks since this all happened in the beginning 2000's. When built they were the largest double hulled ULCC's in the world and still are some of the heaviest ships around. Their size, 380m (1247ft) long on 68m (223ft) wide, was huge for those days (nowadays however this is not such an exception with many container ships measuring around 400m long x 56m wide), however their full load draft of around 24.5-25.5m (80-85ft) made them huge. With that full load draft they were unable to pass Singapore Strait, the English Channel etc. in a safe way. Due to that size, they were also restricted in amount of ports that they could enter. These vessels weigh about the same as 5 US Carriers together when fully loaded. When I went onboard, we were doing Ship-to-ship transfers off the coast of Los Angeles to smaller vessels. The voyage then went to Saudi Arabia, where loading happened on buoys connected to the actual terminal by submerged pipelines. Other voyages she often did, took her to Europe, discharging part of her cargo in France before transiting the English Channel to go to Rotterdam with the remainder of the cargo. The model. I built her, using the experience I built up with frame on keel methods from plastic. Size and rigidity was the real challenge here. Since that's also an issue in the real design of such vessels, some solutions were given by the original. The main deck of the beast, can easily fit a US CVN on top of that deck. I've made the main deck of 1.5mm styrene, this was still not very rigid over such a length. However, on the real ships, the corners are rounded, this help divide the forces over a larger surface instead of a single angle. A square angle would simply break loose under such forces. To simulate this rounded corner, I cut a piece of styrene rod and glued it flush with the deck. This added to the rigidity of the deck where it was most needed (the central part). Additionally you see the deck is divided in 3 parts, creating a camber like the real ship. On the real thing, that camber is truly large as well. Then I started building up the skeleton structure bellow, using the table surface and deck to keep everything flat. At the same time I started building the (small-ish) superstructures for this vessel. That's it for today. Since I can't get home for a while, I'll continue soon.
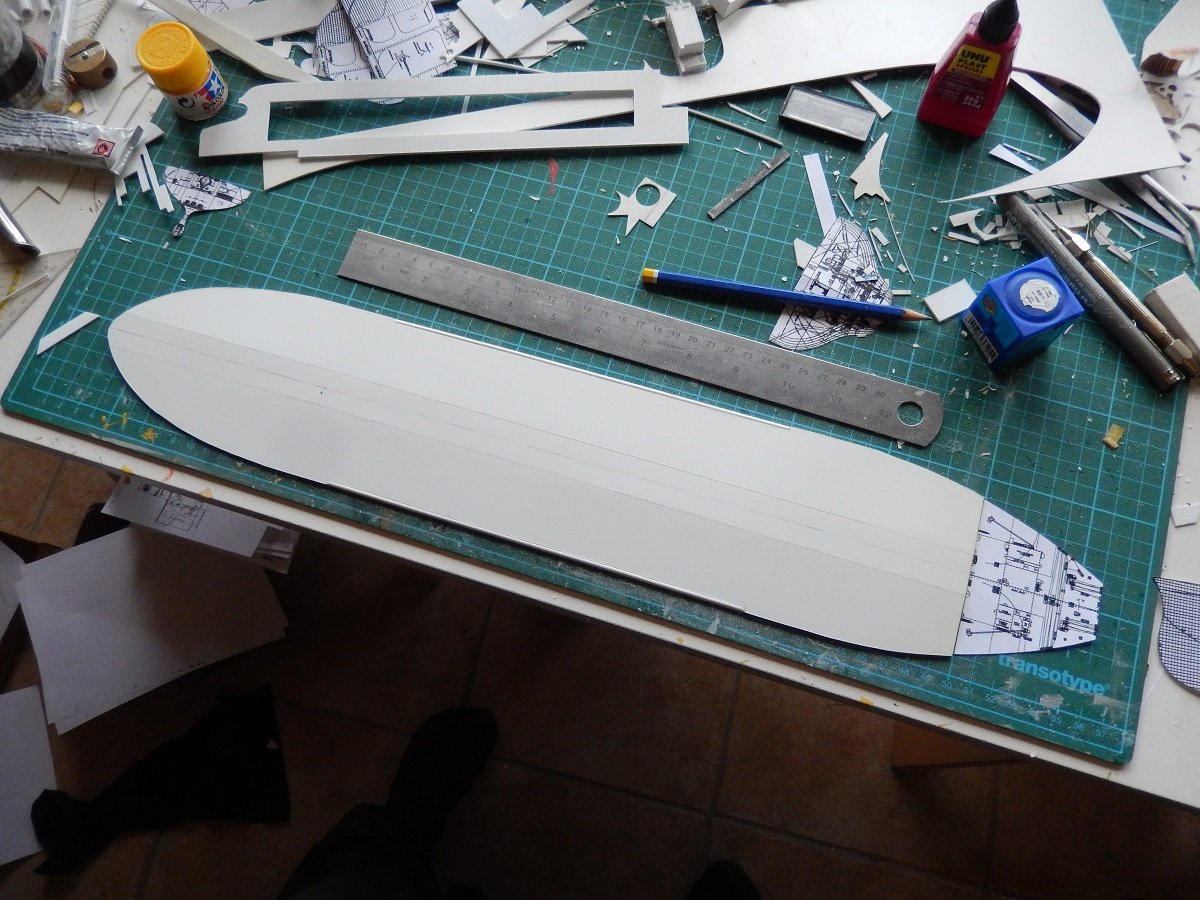
-
 I've bought the kit. Have the gear. Hope to share with others when I start in a few weeks. It should be a great change to the boats and planes I have made to date. I plan to weather this model as it had quite a distinguised history.
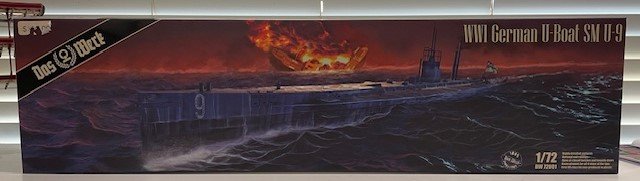
- 15 replies
-
- 10
-
-
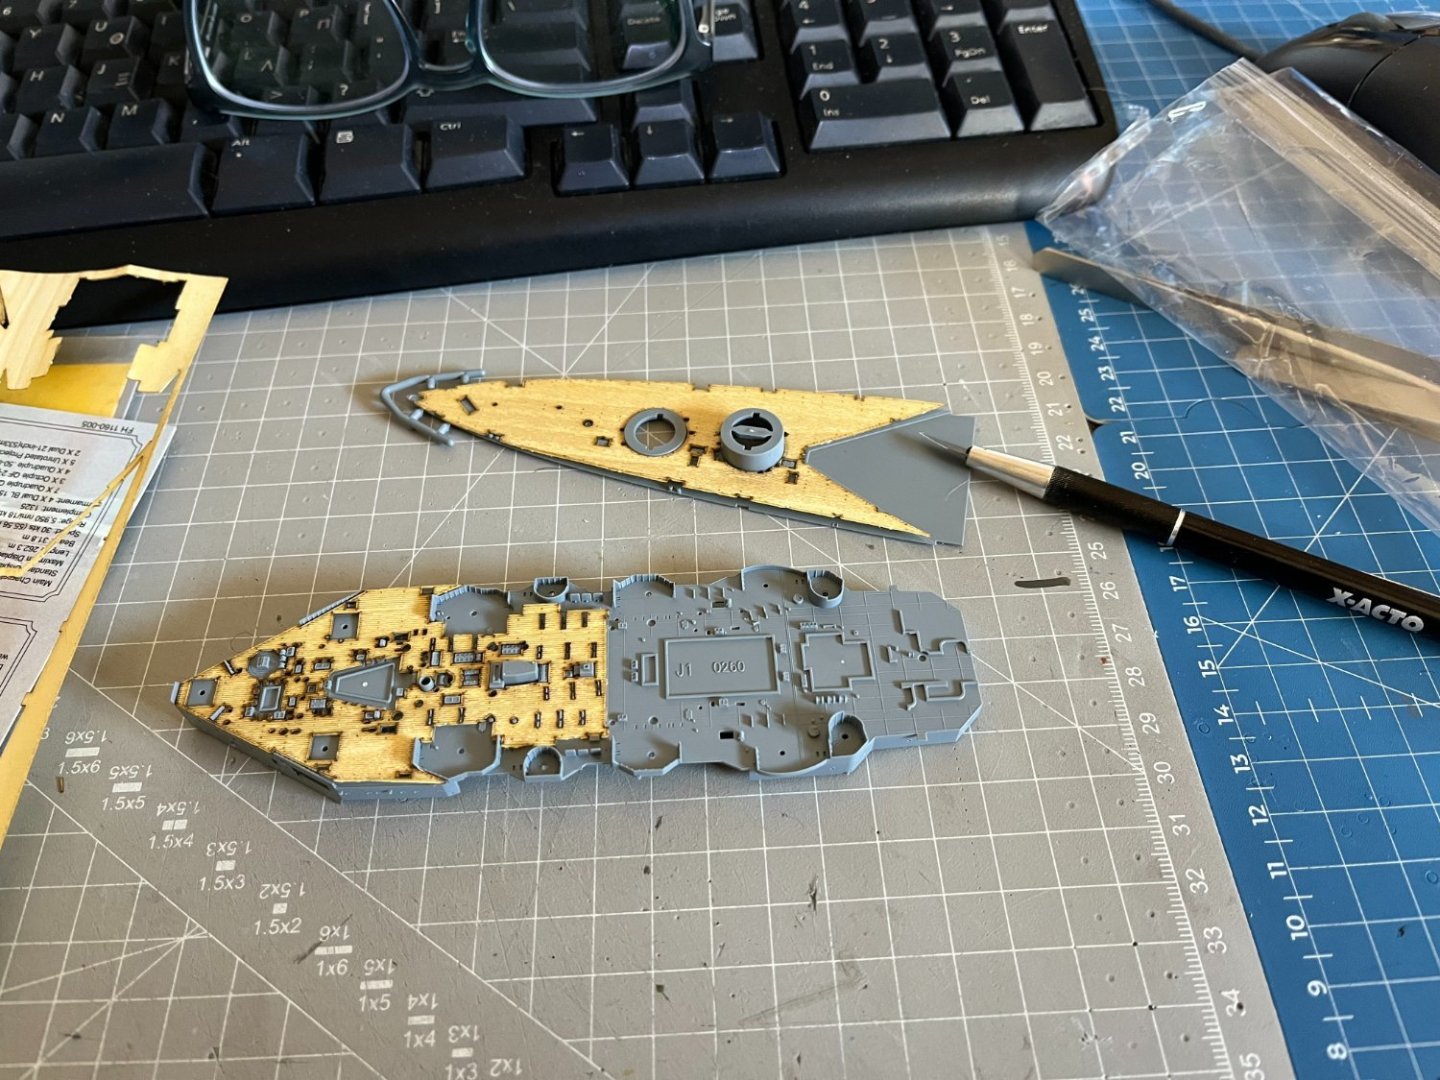
 HMS Hood 1941 - FlyHawk - 1:700 After two paper models and since the weather was more suitable for painting, I started the HMS Hood. I also added a wooden Deck and masking Sheet kit at a very good price for more realism. The kit has a lot of small parts and seems to be very well detailed. First I tried the application of the wooden deck and it seems to be excellent.
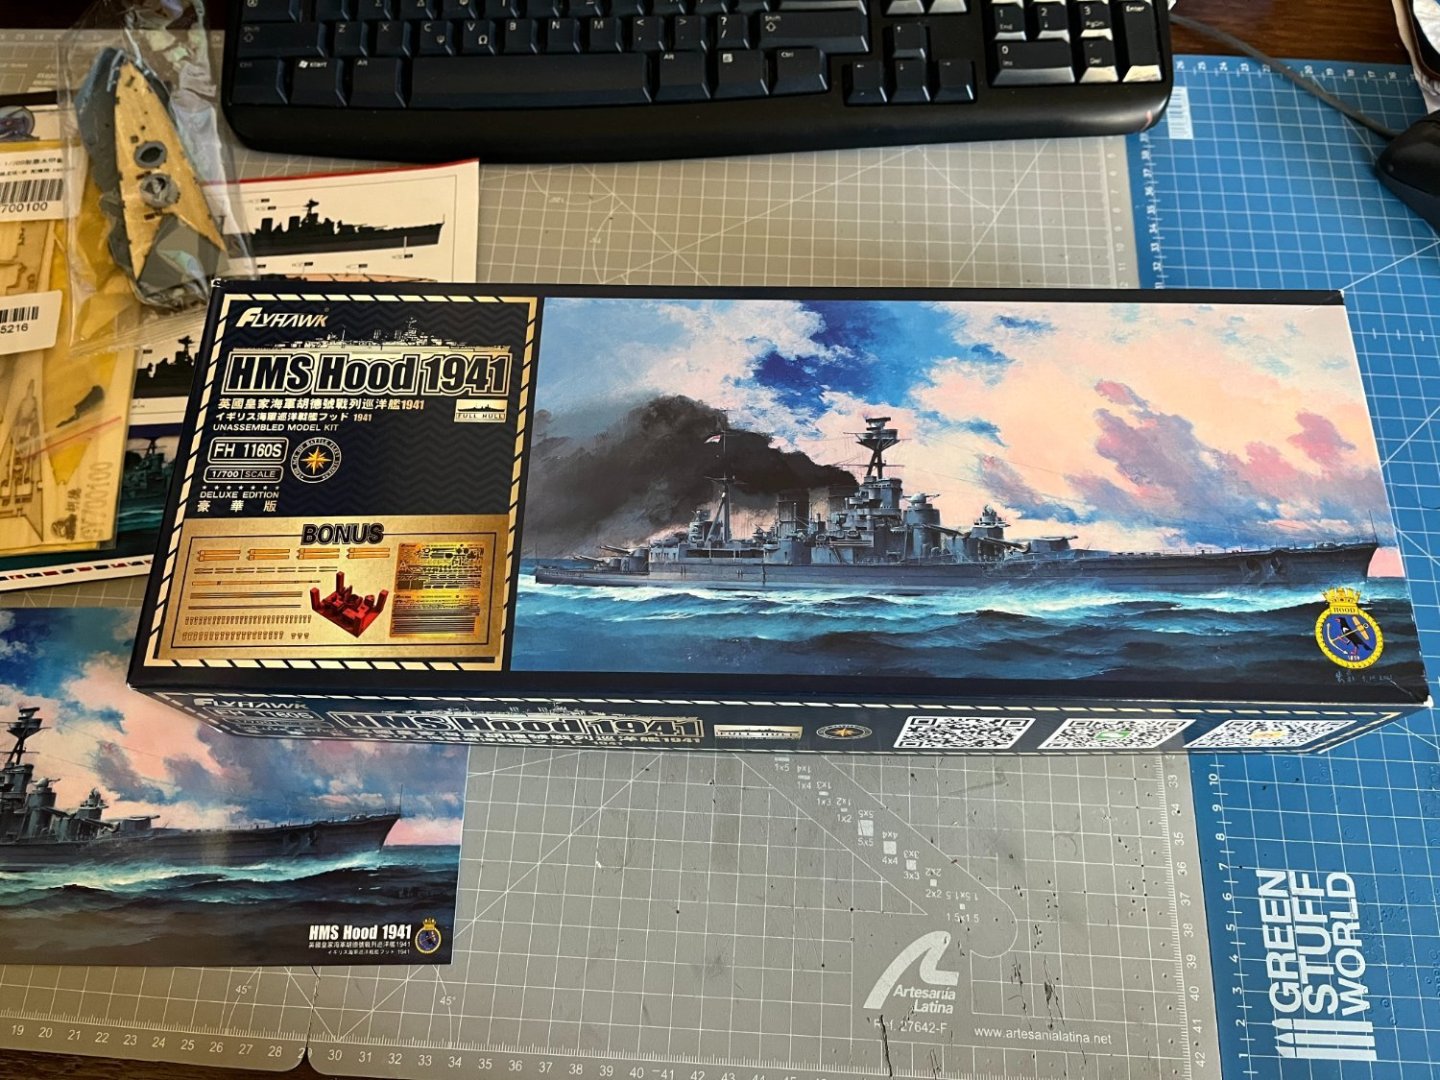

-
 Not my first kit, but first in 40 years! I started building this model that long ago, but 2 kids, and life interfered. I always told myself, "Tomorrow, tomorrow". Well. tomorrow has arrived. Now, if I can live long enough, I WILL finish her. These pictures are a start. Funny, I was having trouble taking good pics with my old camera(a Sony dslr), but picked up an older Nikon Coolpix, and man, what a difference! This is one beautiful camera. Only one problem. It shows warts and all. Looking at the pictures, I see every little flaw. Lots of paint touch-ups to do. I know I am not up to the standards of some (read any) of you, but I will give it my best!


- 1 reply
-
- 6
-
-
- Soleil Royal
- Heller
- (and 1 more)
-
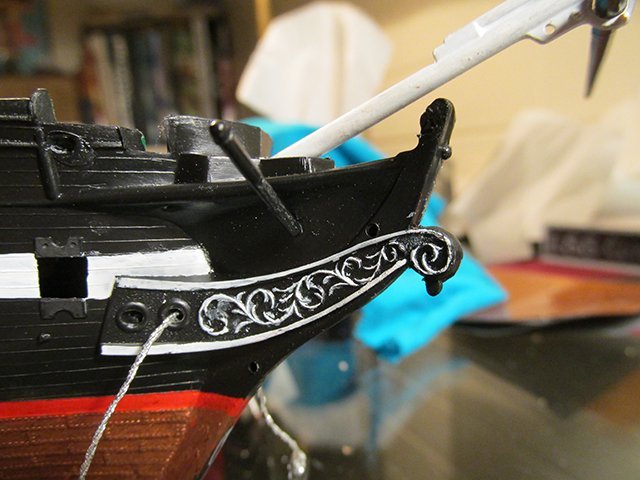
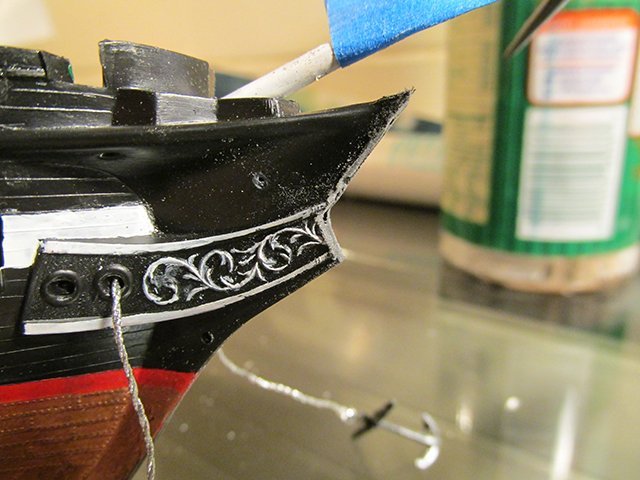
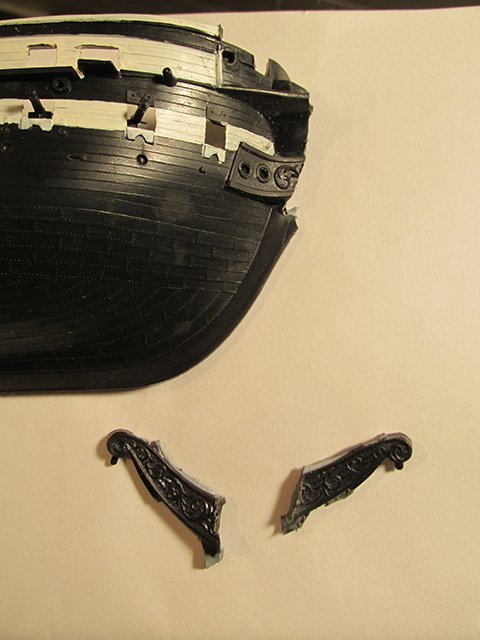
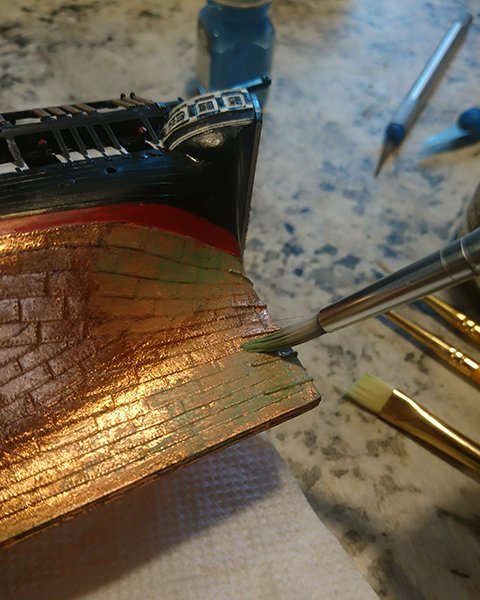
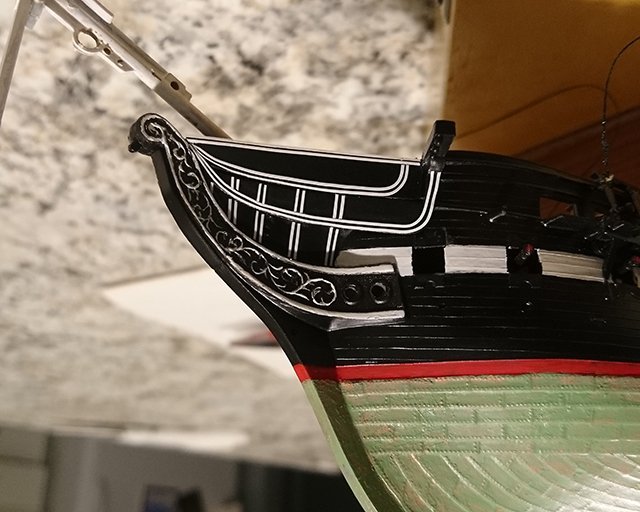
 Hello, everyone! I've been quietly reading these forums for some time and finally decided to chime in with my own build. Others' build logs have been a huge source of information and encouragement for me during the build process, so I hope this log can be of some benefit to others. I worked on this kit for a week or so about nine years ago, and only picked it up again this year. It's my first model kit I've built as an adult and first ship of any kind (Although as a teenager, I painted the hull of the larger 1:96 kit from Revell, then immediately gave up). I also started with zero knowledge of ships, so this whole thing is a learning experience. Much of the work I've done recently has aimed to undo or improve mistakes I made when I first started. One of my biggest mistakes was choosing to modify anything at all, as this slowed the process and made me feel daunted at various points. As a beginner, I regret spending so much time tweaking this kit instead of progressing through multiple kits over the years. Still, I'll mostly focus on modifications here because that's what I've most closely documented. These first photos are from 2015, so some of this is more retrospective. My earliest record is of hastily assembling the hull and deck and painting various details. I tried replicating the paint of the real ship, which lead me to notice differences in the bow and other details. I couldn't figure out why the model had a figurehead, which lead me to research that interesting history. At this point, I should mention that I had two of these kits to work with. Both were purchased at Goodwill totaling less than $5, so I recklessly decided to sacrifice one in an effort to make the bow section more closely resemble the real ship in its current state. Even though I had already installed the boomkins and metallic anchor thread, I ripped everything apart and temporarily ruined both kits. I cut off part of the stem from the donor ship far enough down so that it would extend to roughly the correct height when reshaped and attached to the working model. A bit of jump, but here's the result. I tried filling the gaps with Tamiya putty but you can still see the seam where the two pieces meet and the decorative relief doesn't match up. The other white details were made using thin strips of masking tape for curves and covered with acrylic sealant. The whole endeavor still misses the mark for accuracy, but it makes the bow more recognizable in profile, which I count as a success. At some point, I also lined the hull with real copper leaf but didn't like the look of it and painted over it with green. I think this was because most of my reference photos showed the ship in dry dock.
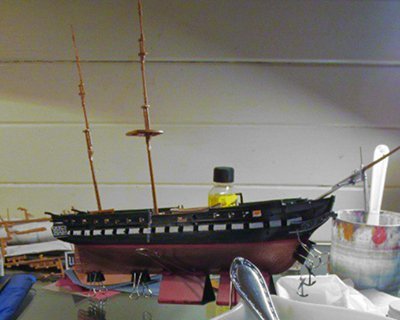
- 2 replies
-
- 1
-
-
- revell
- constitution
- (and 1 more)
-
 Hello everyone: This log will go back in time a bit, like a lot of my projects this one started roughly twenty years ago. During the early 2000's this tug, the Malaspina Straits, was listed for sale on a used vessel website. With the posting were a few photos of the tug out of the water along with a few drawings. At the time I was quite into 3D modelling and thought that this would be a fun project to make a few renderings of. One thing led to another and the project never did get off of the ground and the files were tucked away. Fast forward to sometime around 2017 and it was suggested that we build a pond at the local museum; the model ship bug bit, at this same time I was realizing that HO scale model trains, while neat, just won't fit my current living arrangements. The ship bug really bit when the missus and I purchased a property with a small pond, and a pond needs a boat so the search was on for a prototype. While organizing some files I stumbled upon the old drawings and photos saved some twenty years prior. A little looking online showed that she was again for sale and a few queries put me onto the naval architect. After making a call to see about getting a set of drawings the architect noted that this was a common request and asked that I mail a cheque to them, but make it out to another independent society that is rebuilding a steam tug, the SS Master. The Master is British Columbia's last surviving wooden hulled steam tug, once I learned that the "fee" for the drawings was going to help with this restoration I couldn't get the cheque book fast enough. Check out the SS Master here: SS Master The Malaspina Straits was launched in 1964 and was one of a group of three ships, the Rasario Straits and the third escapes me at the moment, all built for Straits Towing Ltd. of Vancouver, BC. Considered a hot rod of a tug it was primarily designed for moving chip barges up and down the West Coast of British Columbia. The tug moved around to various owners over the years and was refit a few times, the model that I am building will be per the original drawings. I've never seen the tug myself so can't post any photos of it but here is a link to a page with a bit more detail: Malaspina Straits - Nauticapedia.ca As far as model ships go, I've never built one, at least from scratch however I have turned heaps of styrene into other buildings, trucks and various model railway related things. As I was more familiar with modelling in styrene and as this model will be used in the water styrene felt like a better fit than wood, it may be, it may not be, time will tell. Just after the ugliness of Covid descended upon the world the model got under way, a few 4' by 8' sheets of styrene were purchased from a local supplier and bits started to be cut out...
- 7 replies
-
- 4
-
-
- Malaspina Straits
- plastic
- (and 1 more)
-
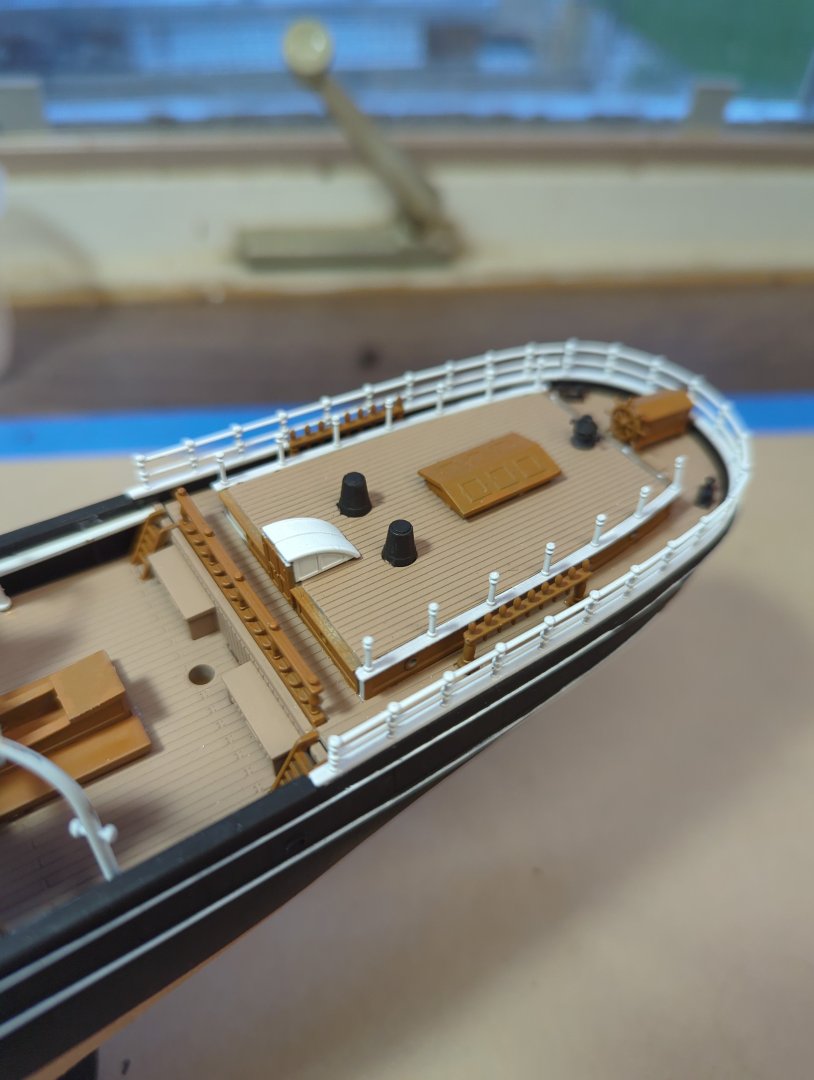
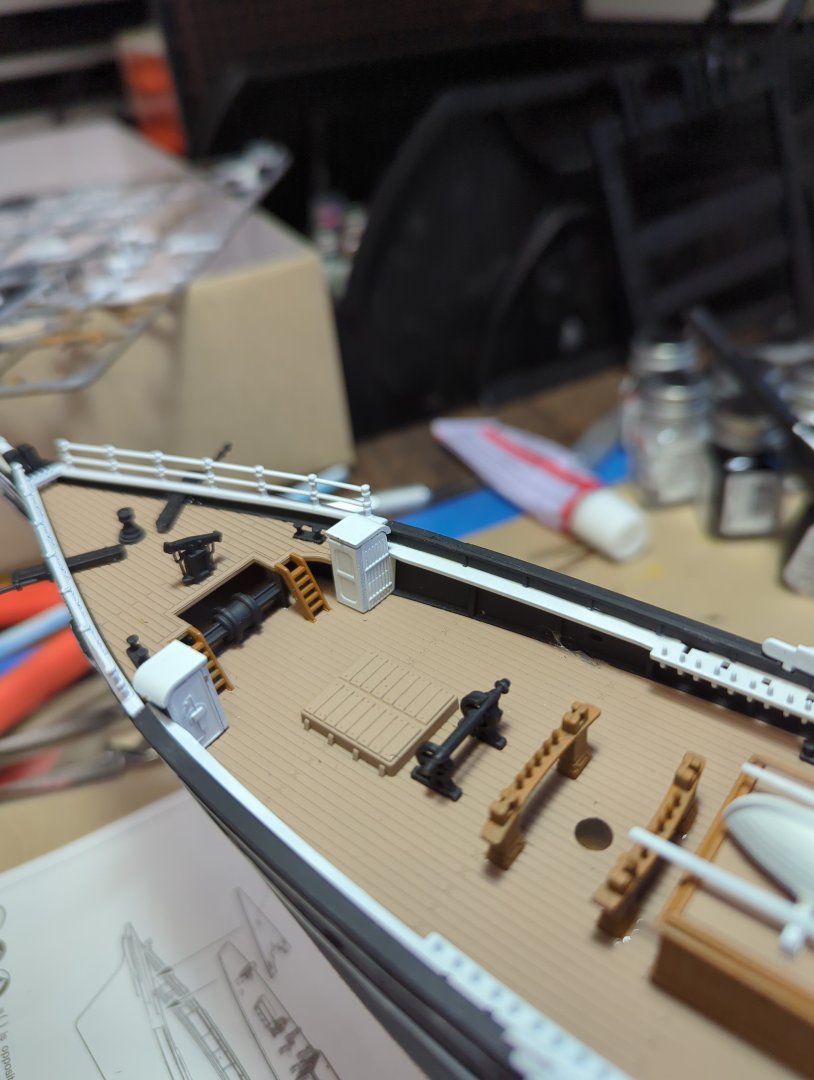
 Question, In the instructions it shows gluing the ship to the stand early in the build. I worry that might restrict flexibility in painting. Can/should I wait until closer to installing masts etc? David
- 97 replies
-
- 2
-
-
- Cutty Sark
- plastic
- (and 3 more)
-
 Part 2: Digging In This is a photo of my completed Golden Hinde. You should remember this if you've been a long-time viewer of my build logs. As I was building this model, I ended up noticing multiple historical inaccuracies. For one thing, the Golden Hinde might not have even looked like this. In Wikipedia's records, it was armed with 22 guns of different types. This ship is armed with 12 guns. In fact, the Golden Hinde was probably not even a race-built ship as is depicted here. For a 1965 kit, it holds up to scrutiny however. That being said, calling it the Golden Hinde might be a fallacy. There is also the issue of the belaying pins. Baker told me as I was well underway with the running rigging that English ships didn't start incorporating belaying pins until over a century after the Golden Hinde sailed. Plus, let's face it- with the skill and knowledge I have today, I could do a lot better on this kit. For one thing, the entirety of the shroud assemblies could be scratch-built. Secondly, the majority of the rigging and sails do not hold up to my current skillset, and the anchors and flags are the same way. I would like to significantly improve the paintwork as well. While the paint job is relatively good looking even now, I have better paints and brushes than I had then. I also have better tools and fittings. That leads me to my plan, and this build log. I will not touch the original Golden Hinde. However, I will order the Heller version of this kit and do that. I am planning on doing all my normal work on the ship, while paying special attention to the paint, sails, and rigging. I plan on making silkspan sails, putting decals on the sails, staining the rigging (something Kirill told me I should do) as well as making general improvements. This is still just a plan, and I haven't even ordered the kit yet. However, it would be nice to have some company while I work on what is hopefully going to be my best model yet. I plan on portraying this ship as a small galleon of the English fleet that went up against the Spanish Armada in 1588, and yes it is named after someone I know, but for official records, the name Queen Elizabeth comes from the English tradition of naming ships after the reigning monarch at the time. There were two ships in the Elizabethan Navy bearing her name (The Elizabeth Jonas and the Elizabeth Bonaventure) so this name is historically plausible. For now, this is a research log.
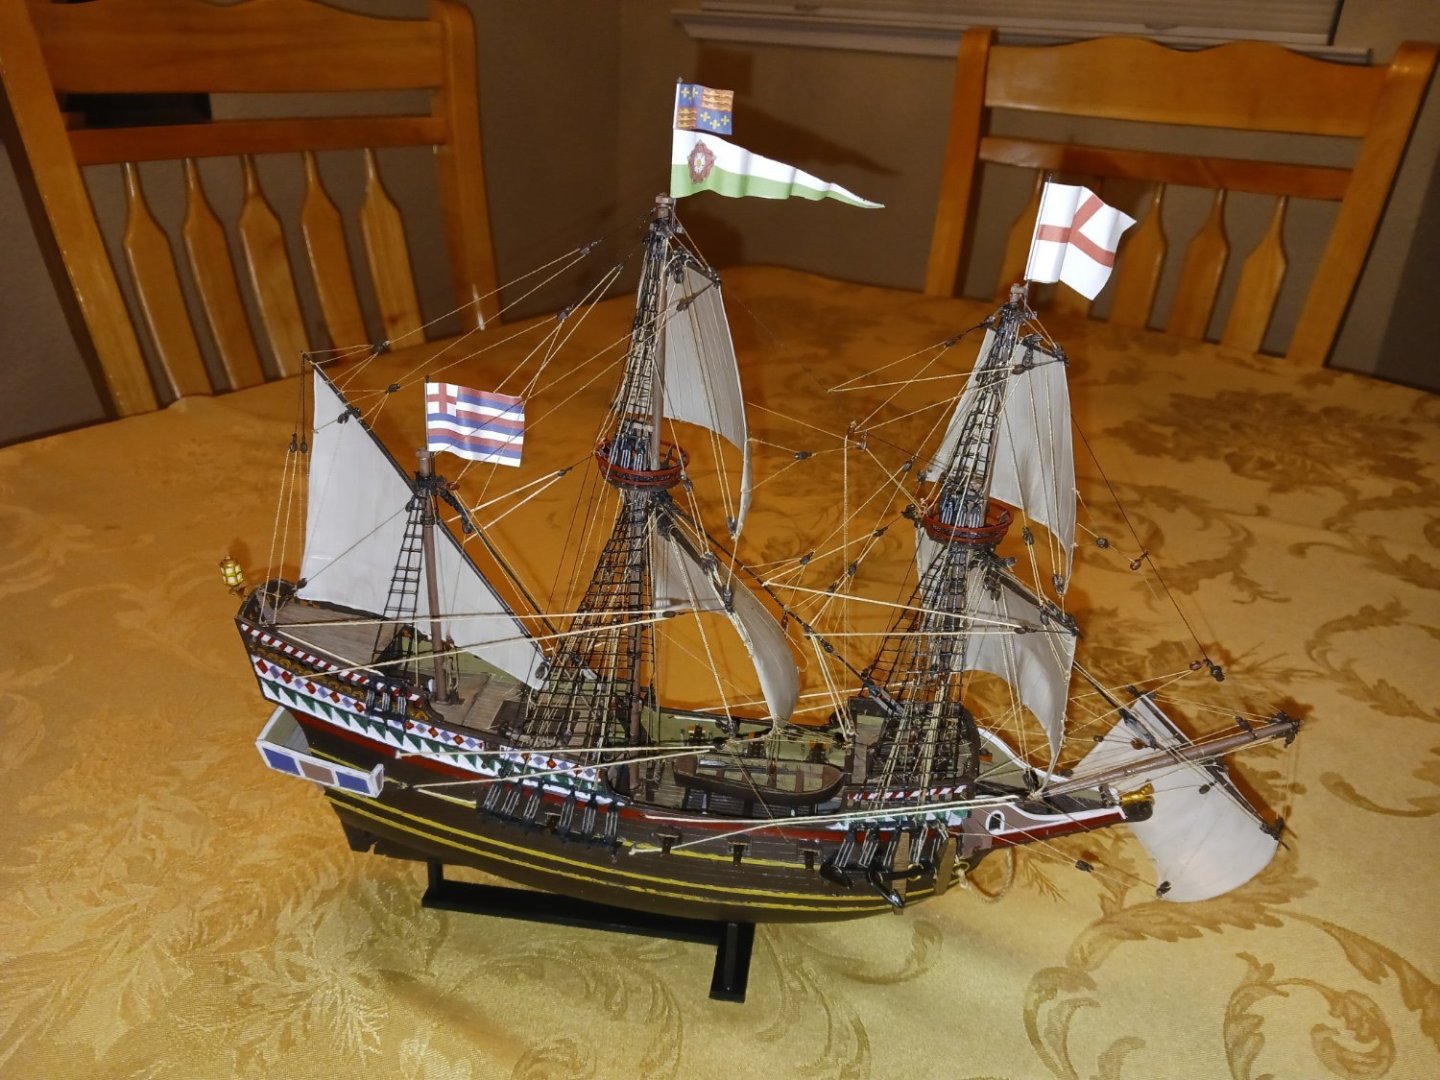
-
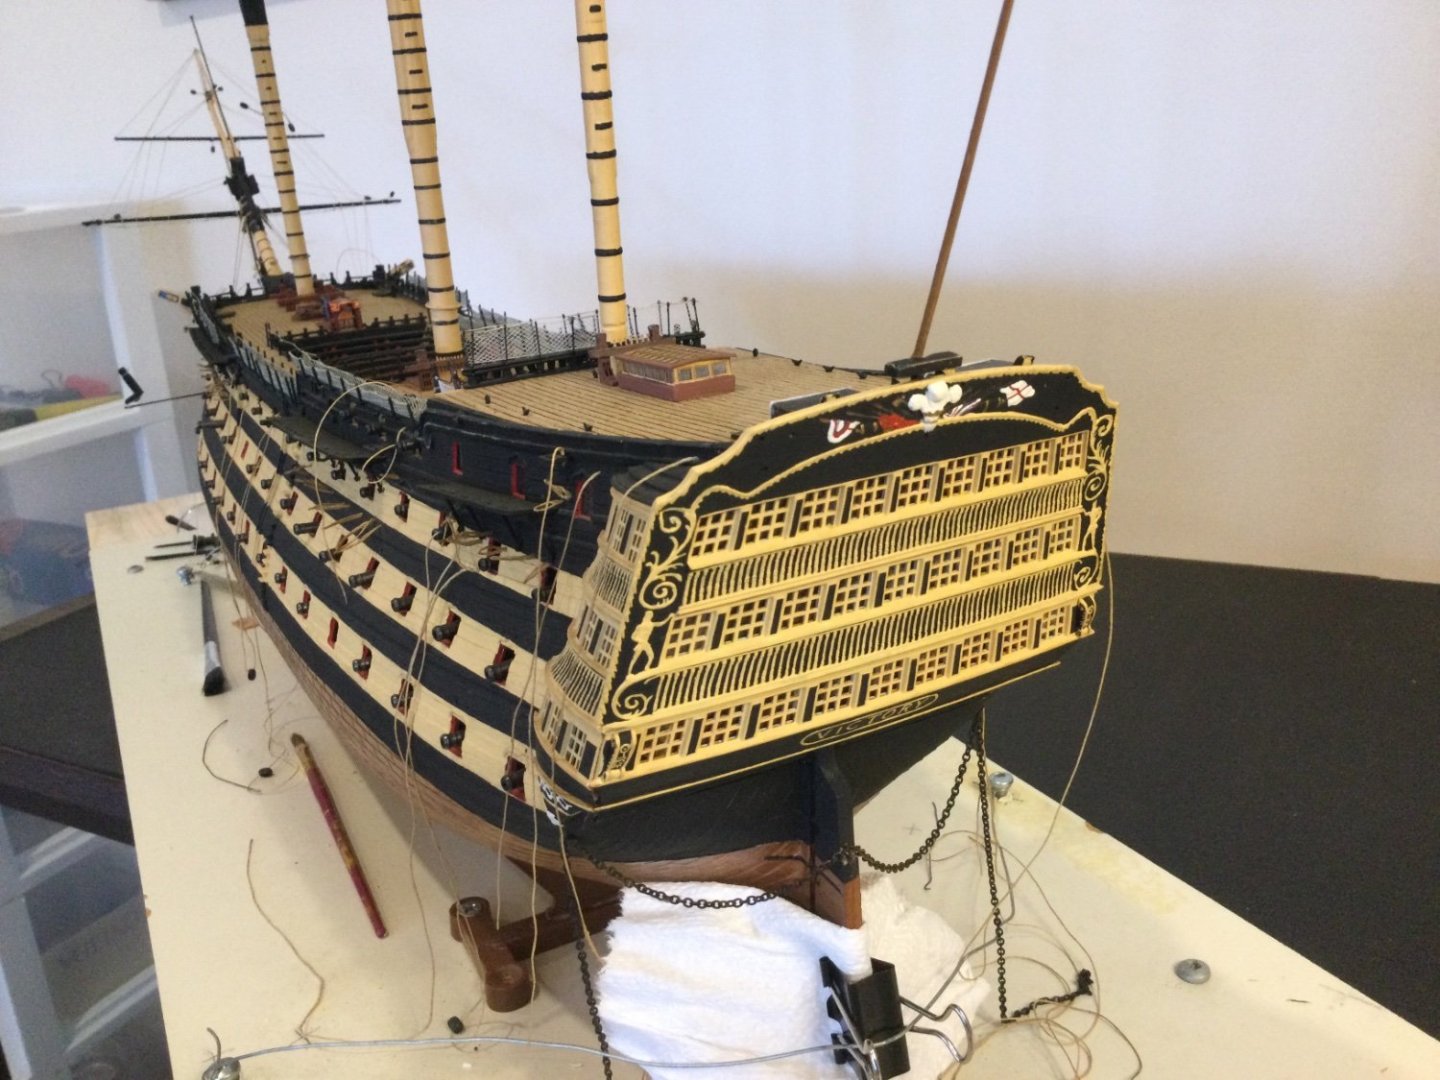
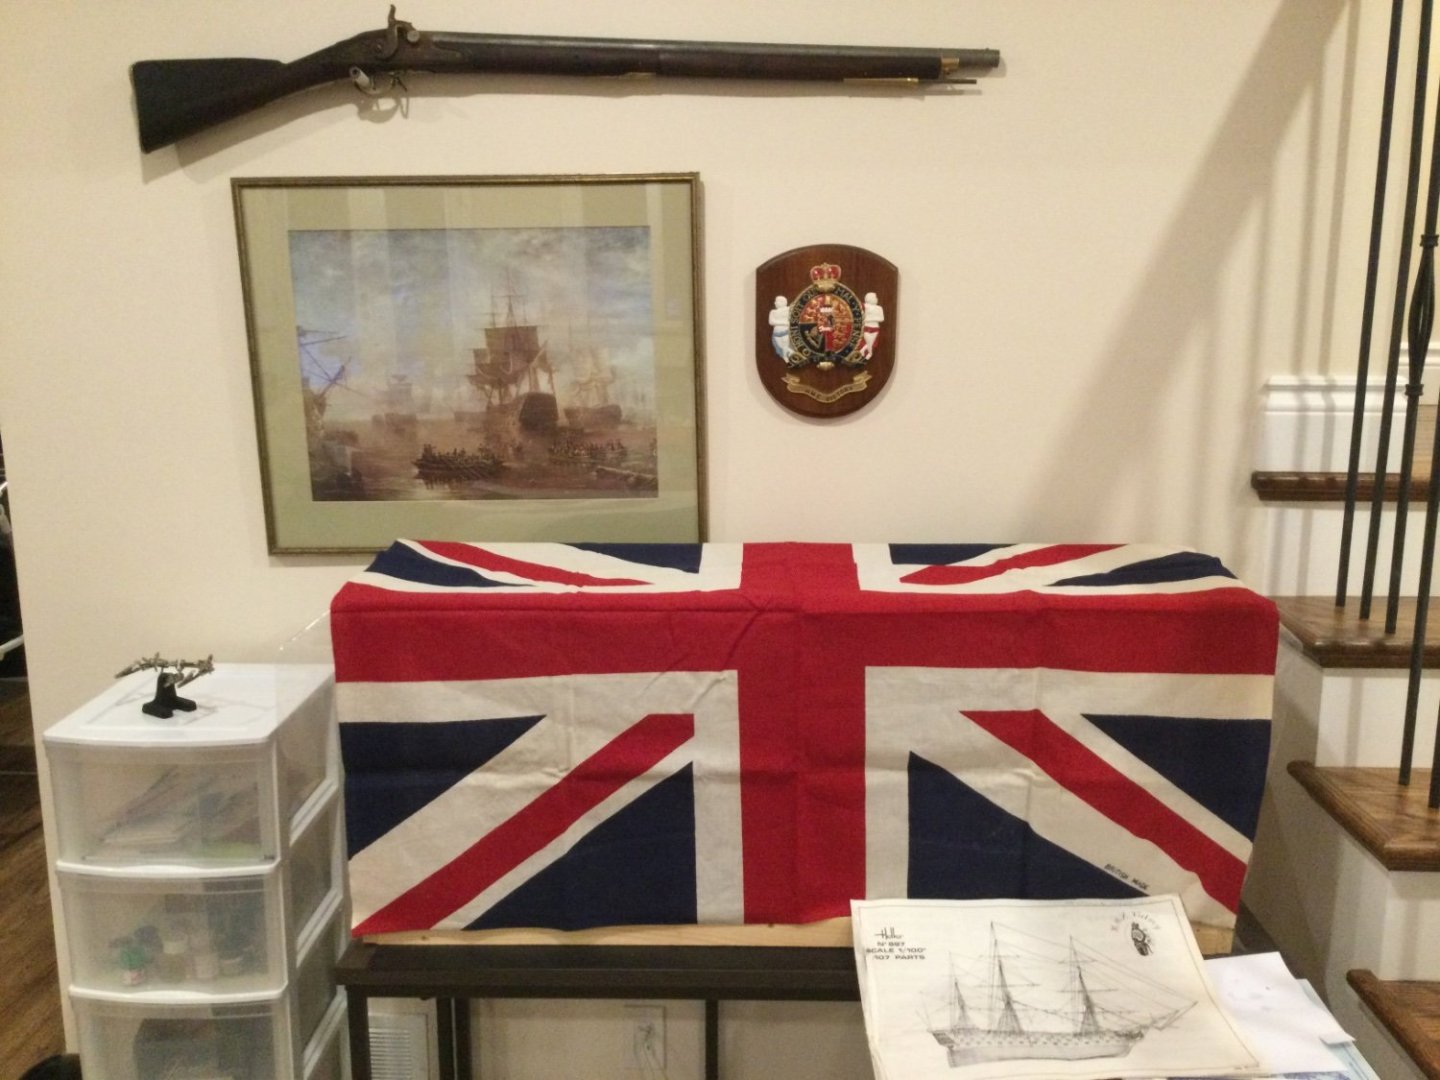
 While I’m new to MSW I am not new to model ship building. In my earlier life, I built two period sailing ships: Heller 1/200 L'indomptable and the Revell 1/96 Elizabethan Man ‘O War. Sadly, these did not survive the decades since I built them. My current project is the Heller 1/100 HMS Victory. While I say ‘current’ my story is similar to that of others in this forum. I bought my kit around about 1984 but a busy career and family life meant the project became an on-again off-again proposition. Clearly, more off than on. I am now retired and motivated to push this project to completion. The hull of my model is mostly complete but the rigging is a whole other challenge and I will need help. And lots of it. Ian Grant, who completed a fabulous rendition of this model has already been immensely helpful to me. A few pictures follow: . I’m told this is a 1st generation kit, C1979. I believe Heller is now into its 3rd iteration. Hard to believe but in 1984 this kit was $CDN180! I am re-doing the bowsprit standing and running rigging since I originally rigged it per the kit instructions. That is simply no longer acceptable 😊 I’m glad I completed most of the finicky painting - aft gingerbreads, balusters, coats of arms, etc. (quoting Billy Joel) “when I wore a younger man’s clothes” 😉 Good news is, while my eyesight isn’t as sharp as it once was, my hand is still pretty steady. I built this temporary enclosure to protect the model while also helping to keep it dust free. It still managed to collect dust! My main work area (I have another for sub-assemblies) looks quite ‘proper’ with the Brown Bess musket on the wall (I fashioned a whole new forestock for it), the contemporary picture of Victory in Portsmouth Harbour and the Victory crest. My wife says it looks like a shrine…and I’m ok with that too 😁 You can tell by this picture of my bar area that I’m all things ‘Nelson’ - the Britannia Triumphant poster, the rum ration cup with Nelson’s image, Nelson’s portrait (I also have a same sized portrait of Lady Hamilton) and the battle line serving tray. Since I was a very young lad, Horatio Nelson has always been my #1 hero. In my adult life I can honestly say I have never missed recognising Trafalgar Day (Oct 21st). Whether in quiet contemplation or a raised glass. Or both 😁


-
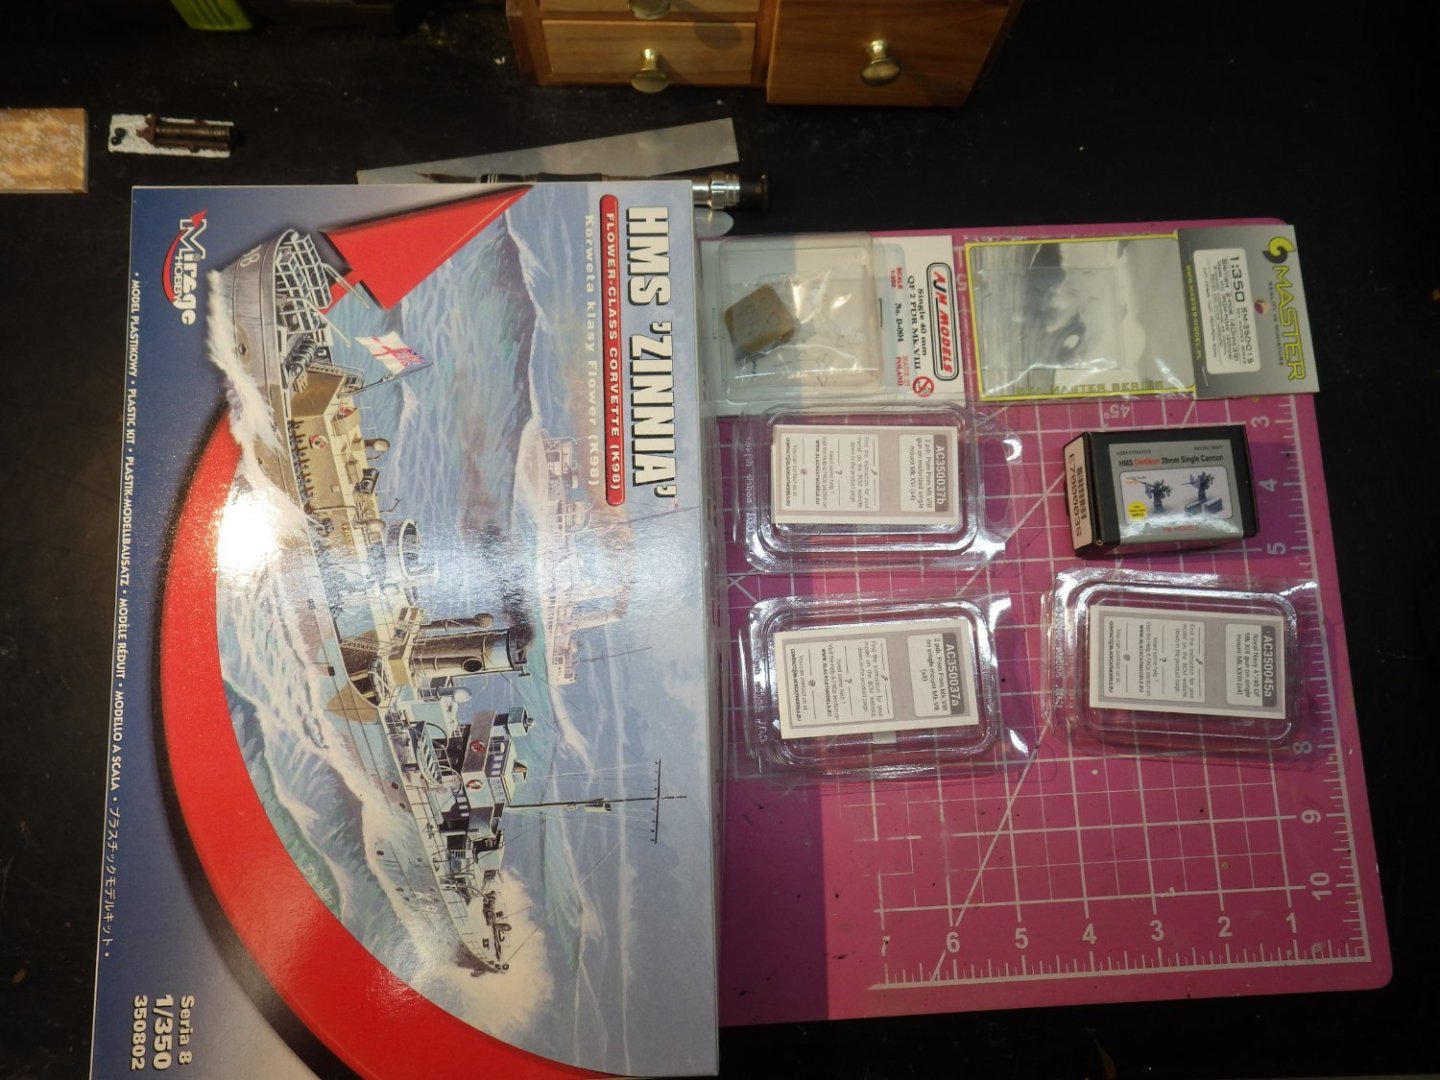
 Well, its been a slow start after completing the Loarre castle. Cleaning a years worth of sanding dust off the work bench and pretty much everything else in the garage took some time. Then its been difficult deciding where to start again. I had lots of ideas and several boxes were opened and put away again. I wanted to build a ship but also wanted something relatively short but interesting with some PE to rehabilitate myself. The final choice was the Mirage Flower Class corvettes The initial choice was HMS Zinnia and I got as far as assembling the hull before realising this was a relatively early Flower and didn't have the later style bridge so down came HMS Spirea and I started again. Mirage make four Flower kits and it looks like they all share the same hull but have different decks, superstructure and details. Zinnia was an early Flower but I can't determine whether she should have had a short forecastle or not. I think its just about possible she could have been built to the long forecastle standard. She was commissioned in April 1941 and sunk in August 1941 so she certainly was never refitted The kits look quite good although there are some annoying placements of the sprue gates on the hull halves requiring some clean up before the deck can be fitted. Curiously Zinnias hull was horrible to fit together and adding the aft deck was even worse. Spirea was much better and only a tiny mount of putty was needed to smooth it out. Otherwise there are some lovely delicate details like the galley stove pipe and some clunky parts too. I am planning to use the White Ensign PE set as appropriate and some PE or resin substitutes for the armament. I've been pondering the build order, trying to decide what to assemble before the basic painting (its been a while). I think the replacement PE bridge, radar and gun tub / bandstand will be too delicate to stand a lot of handling so I decided to add the basic plastic superstructure to the deck and paint the hull first and then the deck and then follow with the superstructure and details. I may paint myself into a corner! So, the two hulls ready for primer. Spirea in front. This is my first attempt at 1/350 scale so some new techniques for me. I drilled out the portholes and the engine room ports and opened out the anchor fairleads Then some Mig One Shot black primer From here on I plan to concentrate on Spirea and work Zinnia if there is a pause. Its going to be too hard to get the wrong stuff on the wrong hull otherwise I masked the hull and added the red bilge and then sprayed the decks Next up some serious masking of the deck, paint the wooden deck sections and dip into the PE My ambition for one of the models is a diorama (I can't seem to break the habit - but it will only be a small one - honest) Here is the tease This video has motivated me and I have had the photo in mind since building the 1/48 scale Campanula Thanks for looking in. Alan
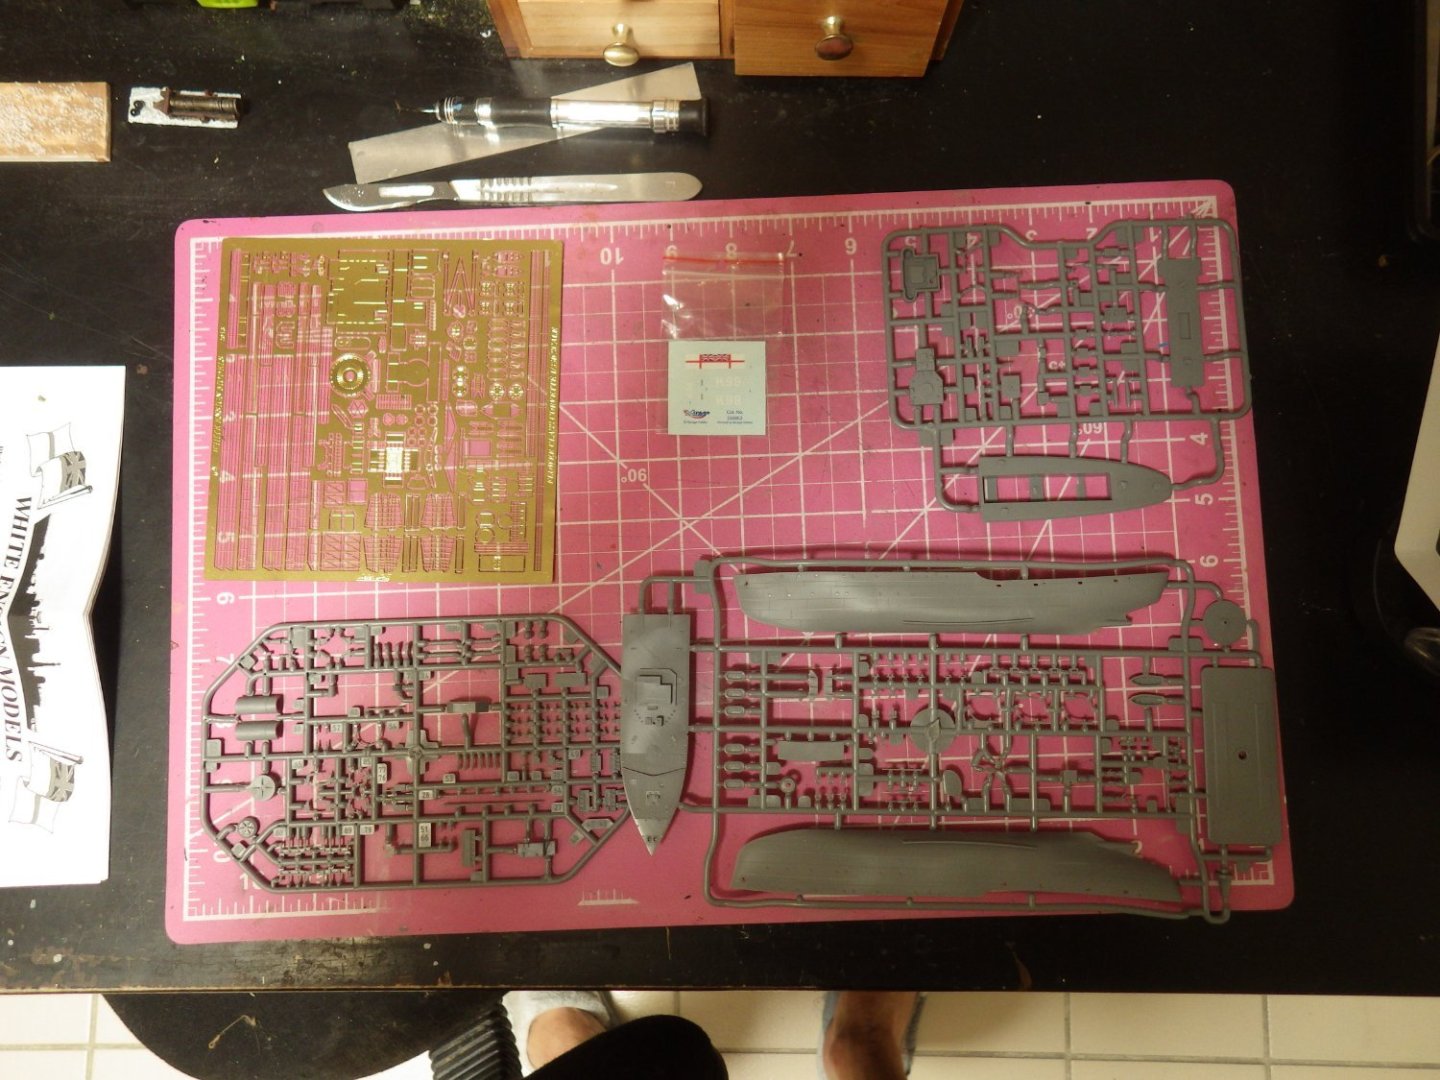
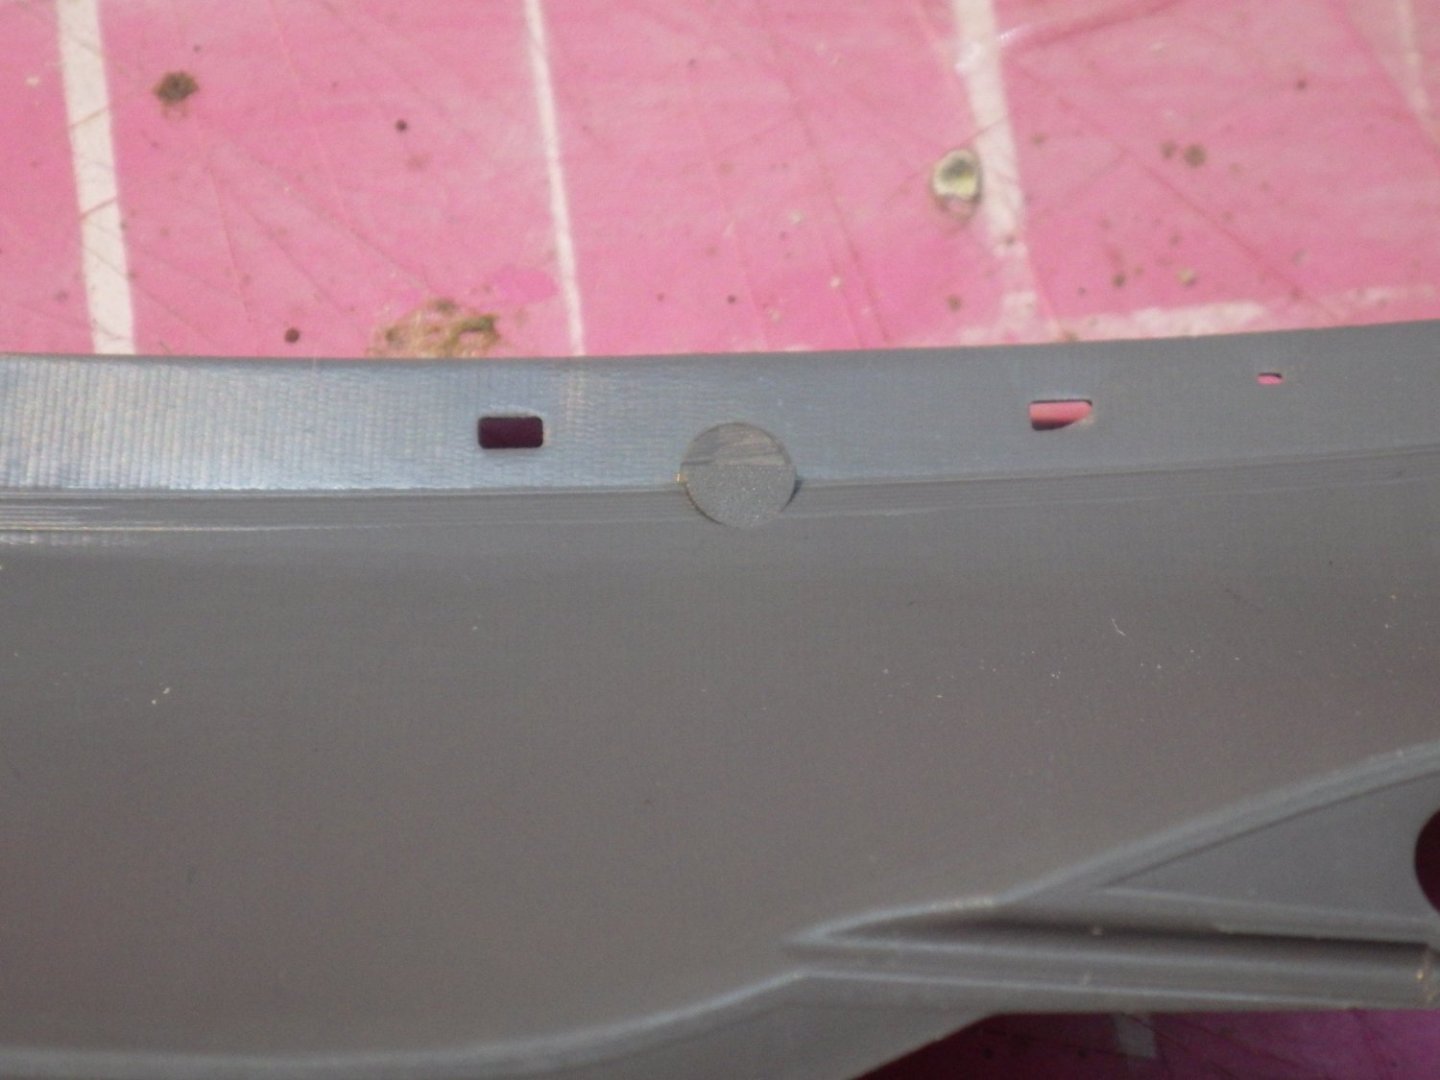
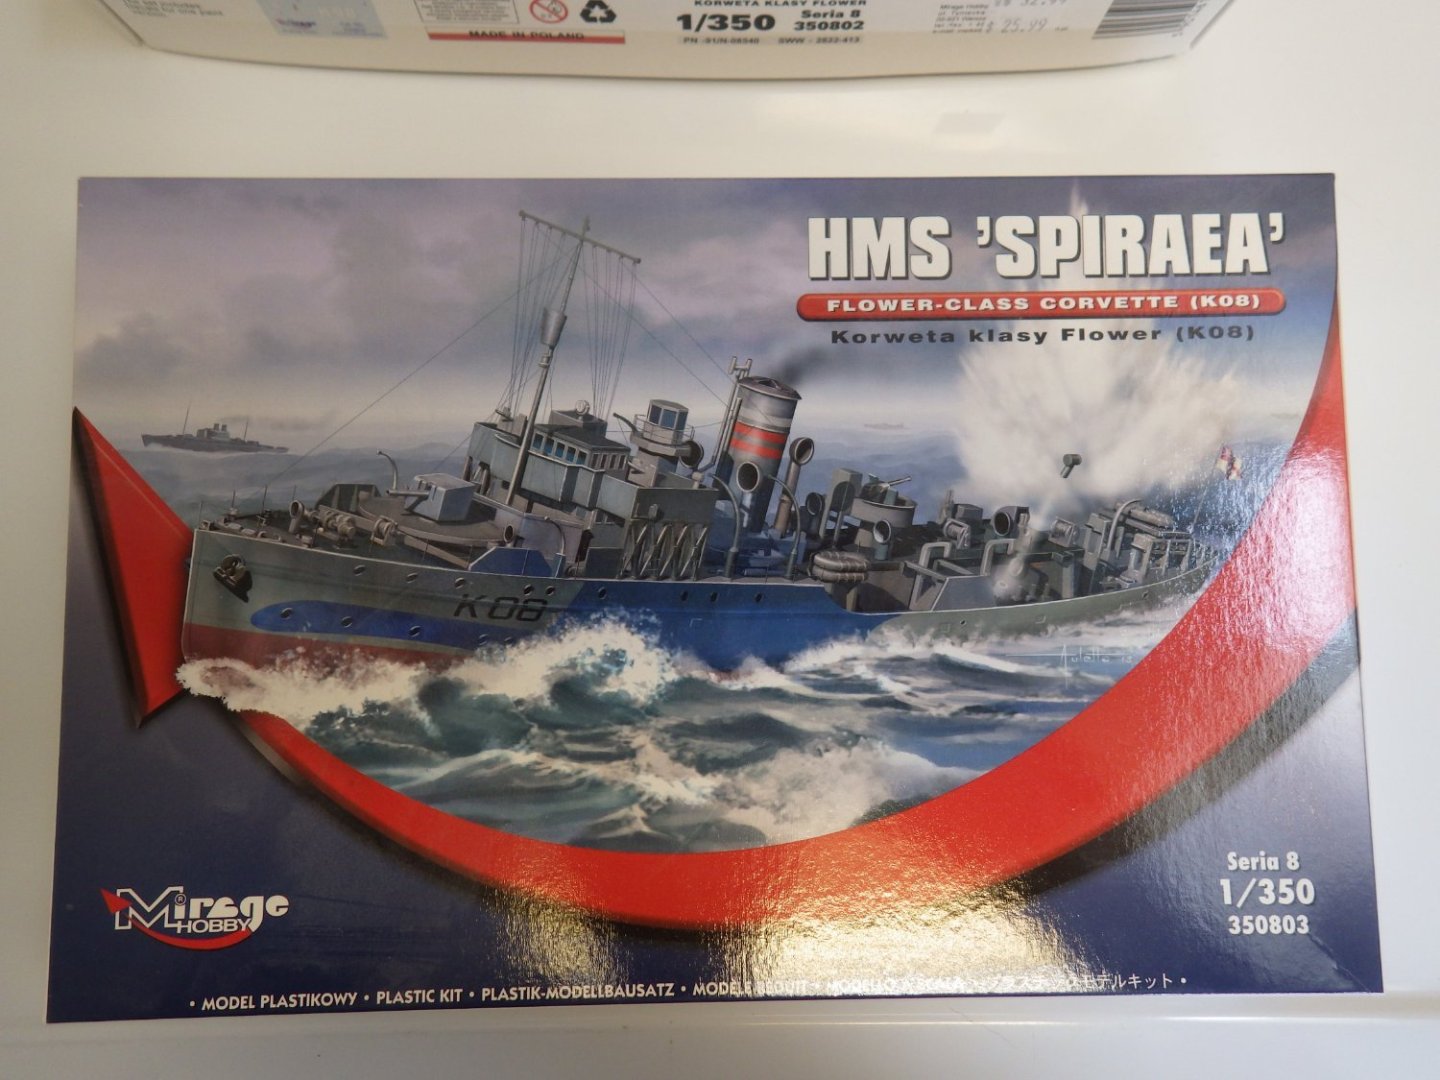
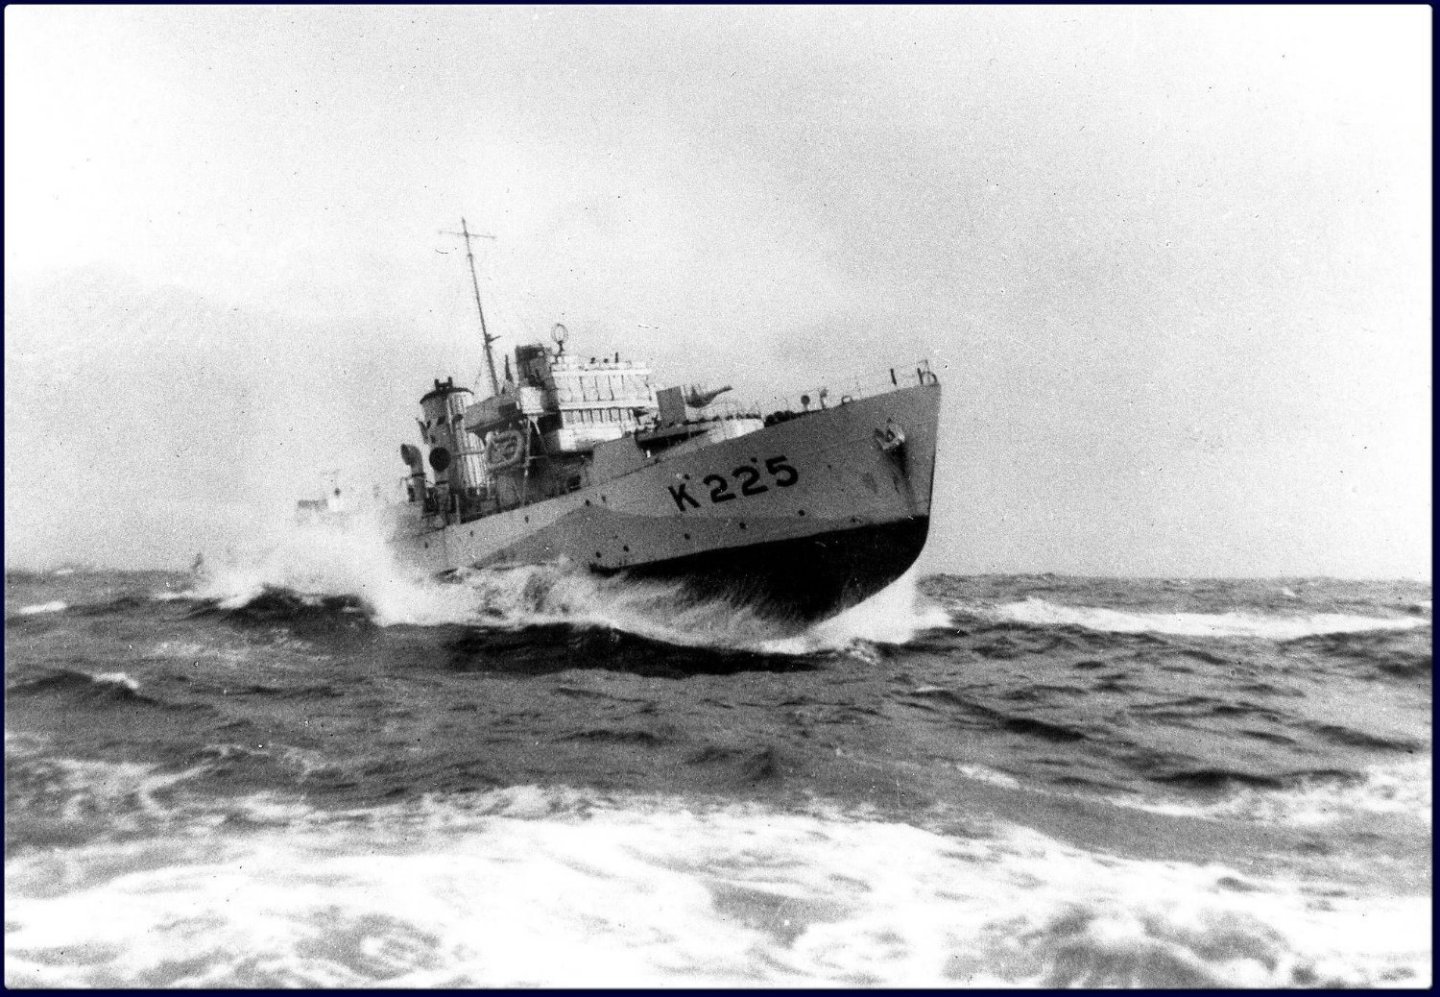


-
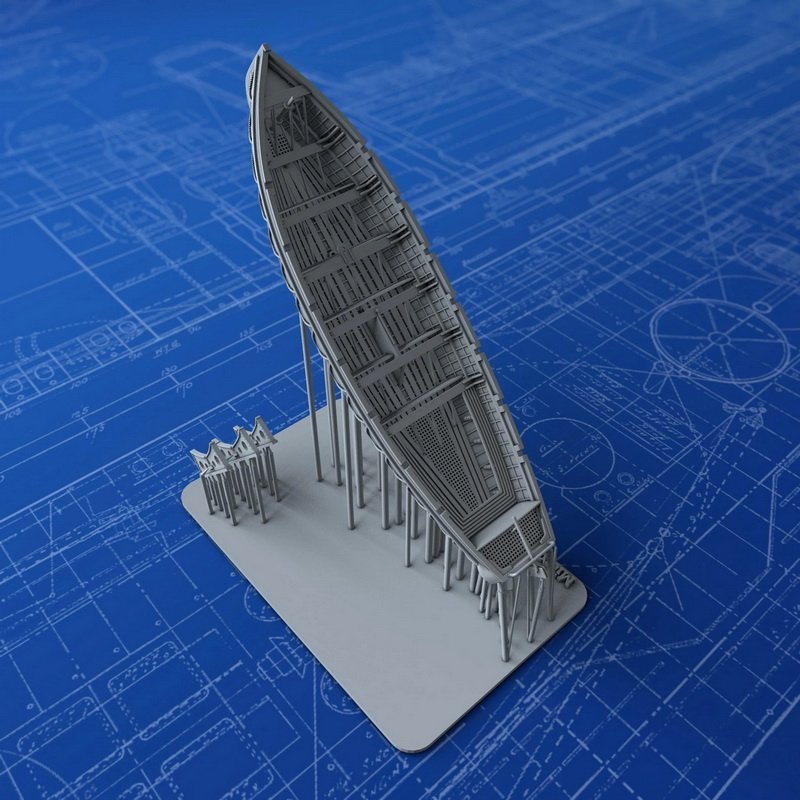
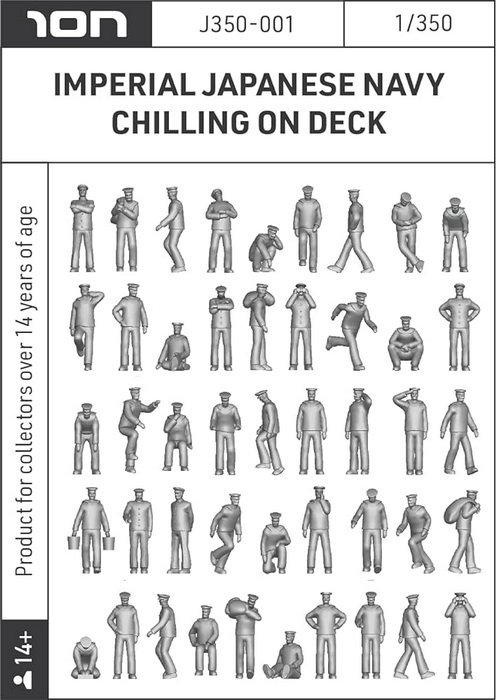
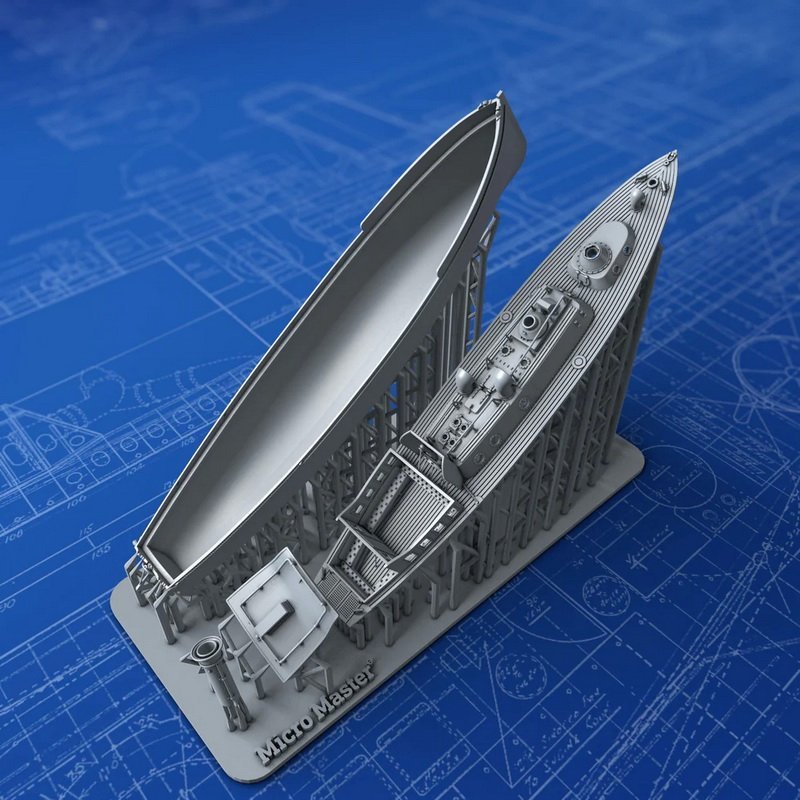
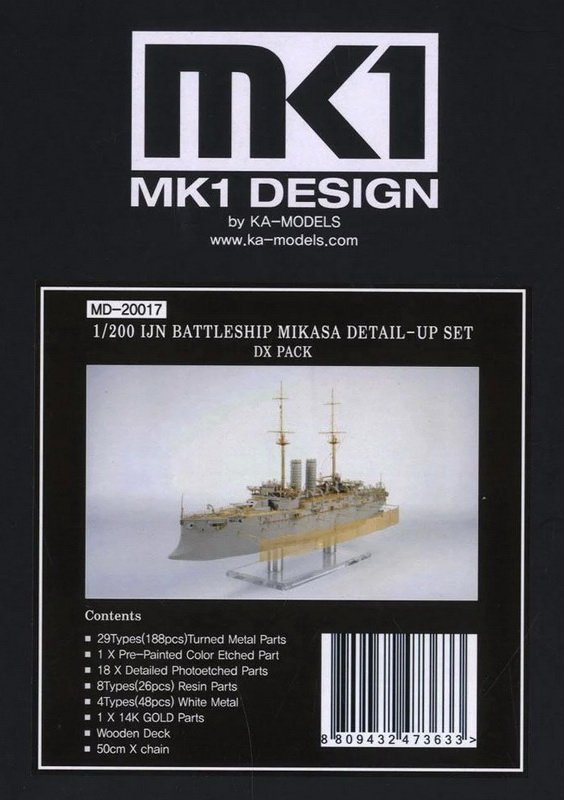
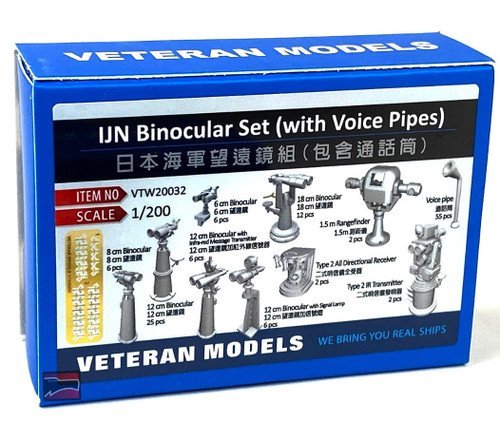
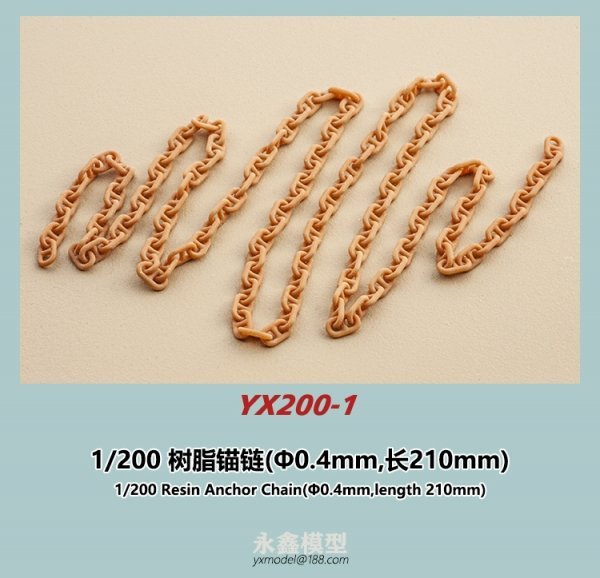
 Ahoy, friends of the adhesive guild. Back to my roots, building model ships. It was a nice excursion into the Star Wars universe and I had a lot of fun. But now I’m looking forward to a real ship that I’ve had in the pipeline for a long time. The pre dreadnought battleship Mikasa of the Imperial Japanese Navy (IJN). I know, nothing new for most. There are so many construction reports about this boat and yet it remains a must for me. And that for two reasons. First there is the shape of the hull. Really archaic. Reminds me of a Greek trireme because of the suggested ram. I like it incredibly much. And on deck everything on this ship is so different than on my Bismarck, for example. Secondly, I don’t just have a Pontos Detail Up Set for this model. No, as a bonus there is also the MK1 Deluxe package from KA Models. There are a few details that are missing from Pontos. Probably not researched thoroughly enough, or what?!. But more on that later. Well, it’s going to be an etching orgy in the very first cabin. What fun. Then I would like to introduce you to the available material for this project. First of all, the model. This is available from a number of manufacturers such as I Love Kit, Wave Corporation or HobbyBoss. But everything is definitely Trumpeter, which you can see immediately when you open the box. After all, my Mikasa comes from Merit International. It’s amazing how many names this model is sold under. The picture shows the box from the company I Love Kit, as I no longer have mine. Of course there is also my favorite etched part set from Pontos. And now I’m exaggerating, I know, but this model also comes with the MK1 Deluxe package from Ka Models. I’ll explain what motivated me to do this later in my construction report. Unfortunately there isn’t much from Veteran Models for this model, but at least this: This time the figures come from the company ION, which I appropriately won as a prize for my Bismarck. It is still incomprehensible to me that the manufacturers, regardless of whether it is the model or the expensive aftermarket products, that anchor chains have double bar links. So they became worried. Let's come to another exquisite accessory that I only discovered through Jeff59´s first-class construction report. These fantastic dinghies from Micro Master from New Zealand. A little dream. So, this is the first list of ingredients for my new project. Although I can’t or don’t want to rule out the possibility that one or two particles could come along. On to the next two years of fun.
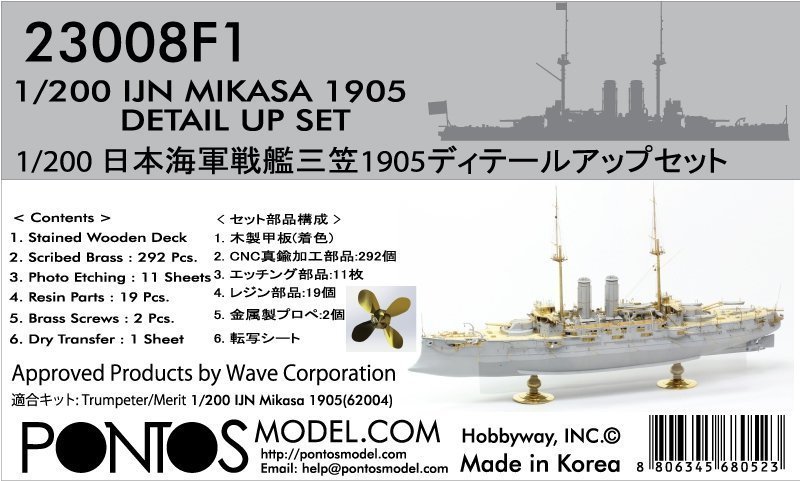
.jpg.99a5b8e8c089e65f8bf377eed0fa4238.jpg)
- 27 replies
-
- 7
-
-
- Russo-Japanese War
- Mikasa
- (and 2 more)
-
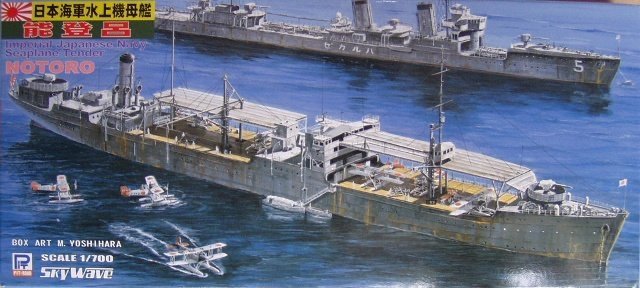
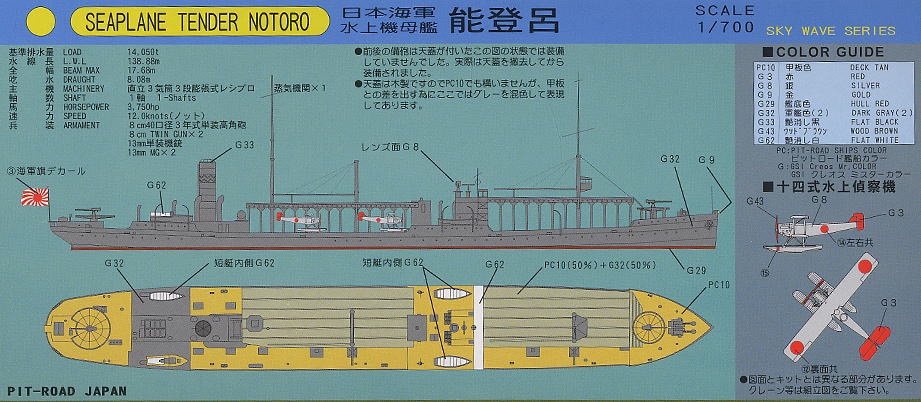
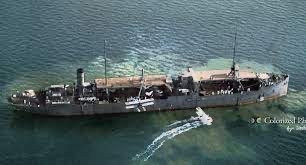
 A month ago, I started conversing with someone who was building this kit on one of the FB groups, which led me to talking to someone who was researching the Notoro for an upcoming build. So I decided to start it while some of the discussions were fresh in my mind since there seem to be some minor inconsistencies in the kit and the Five Star set. This ship launched as an oiler in 1920, was converted into a seaplane tender in 1924, and then reconverted back into an oiler in 1941. This ship, though damaged on multiple occasions, ended up surviving the war and was scrapped in 1947. I will build the Notoro using the Pit Road kit and Five Star detail set as a seaplane tender from 1929 and I'll probably try to recreate the colorized picture in the picture below. During that time, the Notoro carried up to eight Yokosuka E1Y (Type 14) reconnaissance aircraft. I just need to come up with a few more aircraft as the kit only provides two of them. Thanks for looking in!
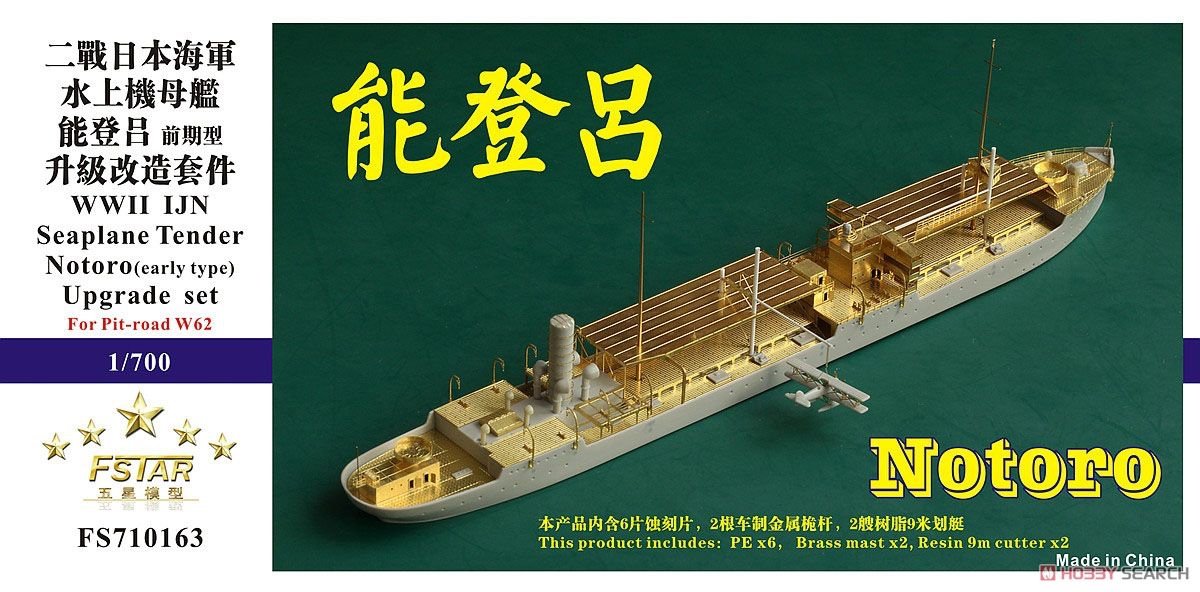
-
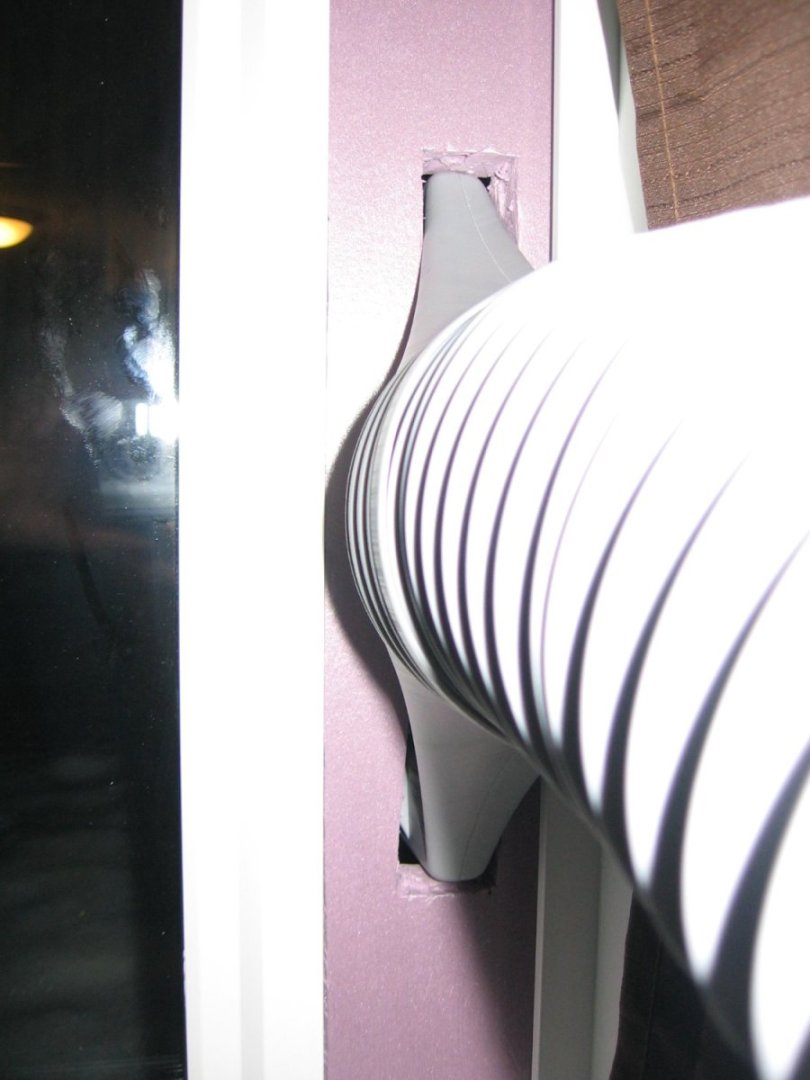
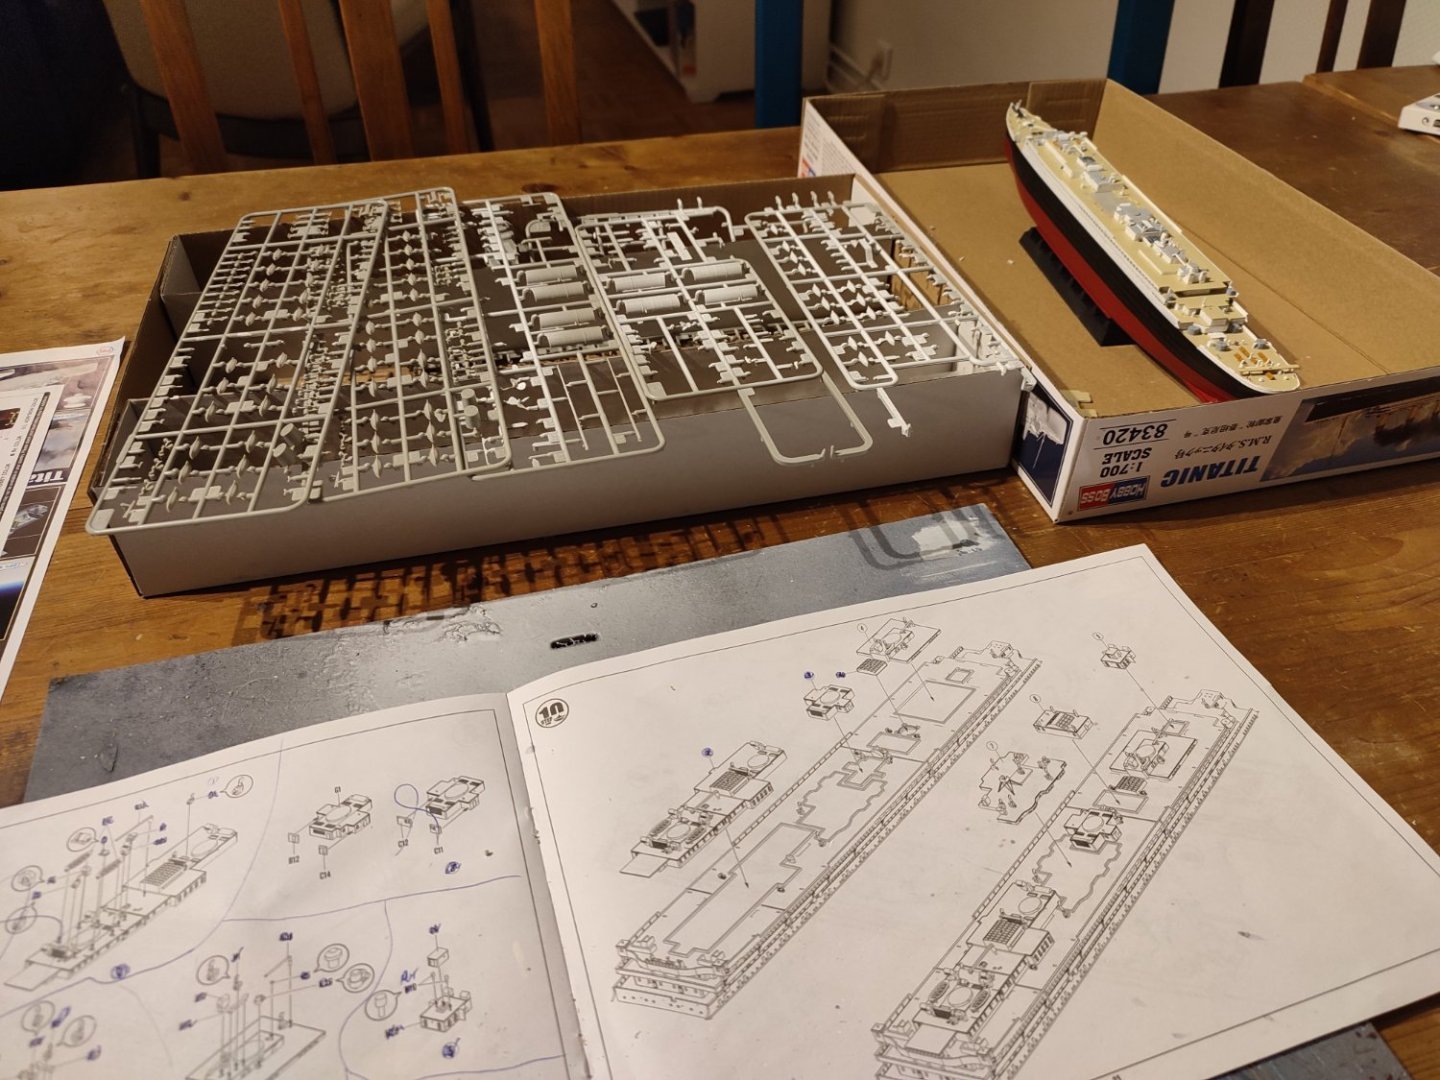
 I thought it's time to get my build log started, even though I haven't actually started the build yet. Soon. I've been quite busy with research, planning and start up. Essentially 50 years since I built scale models, so lots to do in preparing for this build. Start up is still in progress. Before anything else, I first off just want to put out a big thanks to Evan, aka Force9, for his very detailed and resources rich Titanic 1/200 build log. I’ve learned so much from his thread, before I even begin my Titanic, and I would have missed so much without this information. Thanks Evan. Okay. Some preliminary stuff.... This was my work station for my Academy 1/400 Titanic. All building, and the limited painting I did, was here. Not exactly conducive to the Trumpeter 1/200 version. My new workstation for the Trumpeter 1/200 Titanic. The pool table is being sequestered for a few years. That's fine. We didn't play much anyway. The son-in-law helped me carry the 4x8 plywood in yesterday. Originally purchased for the electrician to install the pool table light fixture. Stowed in the garage since. Spidey senses must have known there'd be a use for it again. The task lamp is the same one as with the small table. I just drilled a 1/2" hole in the plywood for it. Now it's interchangeable, as I will still be using the small work station. On the left, I put the binder together just yesterday and today. Some inspiration from Evan, again, on that, but I give myself credit as well for recognizing this need. Throughout my entire working career, I have always been about organization. It's half of it. Even as a Deckhand, organization was key. An organized and clean deck is a good working deck. Same goes for building models, I figure. The book on the right was recently purchased online and just arrived today. I'm optimistic this will be a valuable resource toward my build. A closer view of the "build binder". Not sure what else to call it. I'm an older salt, and thus somewhat old school. Digital pictures and screenshots are fine to a point. But, for the most part, I like the physical copy in my hand. Much (probably most) of what is in this binder are digital screenshots. Anyhow, lots going on with startup. My new Airbrush Station. The new airbrush kit just arrived today! And one more pic for now. One problem with the Spray Booth venting is insulating the gaps at the window. Been pondering this for days now (the Spray Booth arrived last week). Stuffing bubble wrap in the gaps proved to be a Mickey Mouse solution. Got the idea of foam in my head as a solution. Placed an order for some poly foam yesterday. It's coming from the US, however, so a solid resolution here might be awhile. Suggestions are welcome. Anyhoo, that's it for now. Lots more to come. I've ordered five after market kits for the model, none of which have arrived as yet. My first approach to the model itself will be addressing the hull. No brainer there, I suppose, but in particular, how to approach the hull inaccuracies and porthole inaccuracies. Regarding the portholes, I came across a tip on Gene Davis' FB page (the title of which is too lengthy to repeat) that I most likely will go with. I like it. I don't plan on using the LED lighting kit for my model and this tip appears to me to be a great option for the portholes for those modelers not doing the LEDs. Stay tuned. In the meantime....suggestions are welcome. Thanks for looking and cheers, Mark
.thumb.JPG.bc94c53db6455e9a0c1aa0d39f5a00a8.JPG)
.thumb.JPG.89e288773890c337e9b16572634fd3aa.JPG)
.thumb.JPG.428320860531c05abbcdeaa06b11acbe.JPG)
.thumb.JPG.69a953faf018a16eb59cdd2b01ae6a55.JPG)
-
 Started this before I joined, so no early pics. It's new tooling from 2023, good fit, nice and crisp details. Instructions aren't very good I believe, but maybe I am spoiled with Tamiya instruction quality. Scale is too small for me ( at my age 😬 ) but I did somehow manage to do the pe parts

-
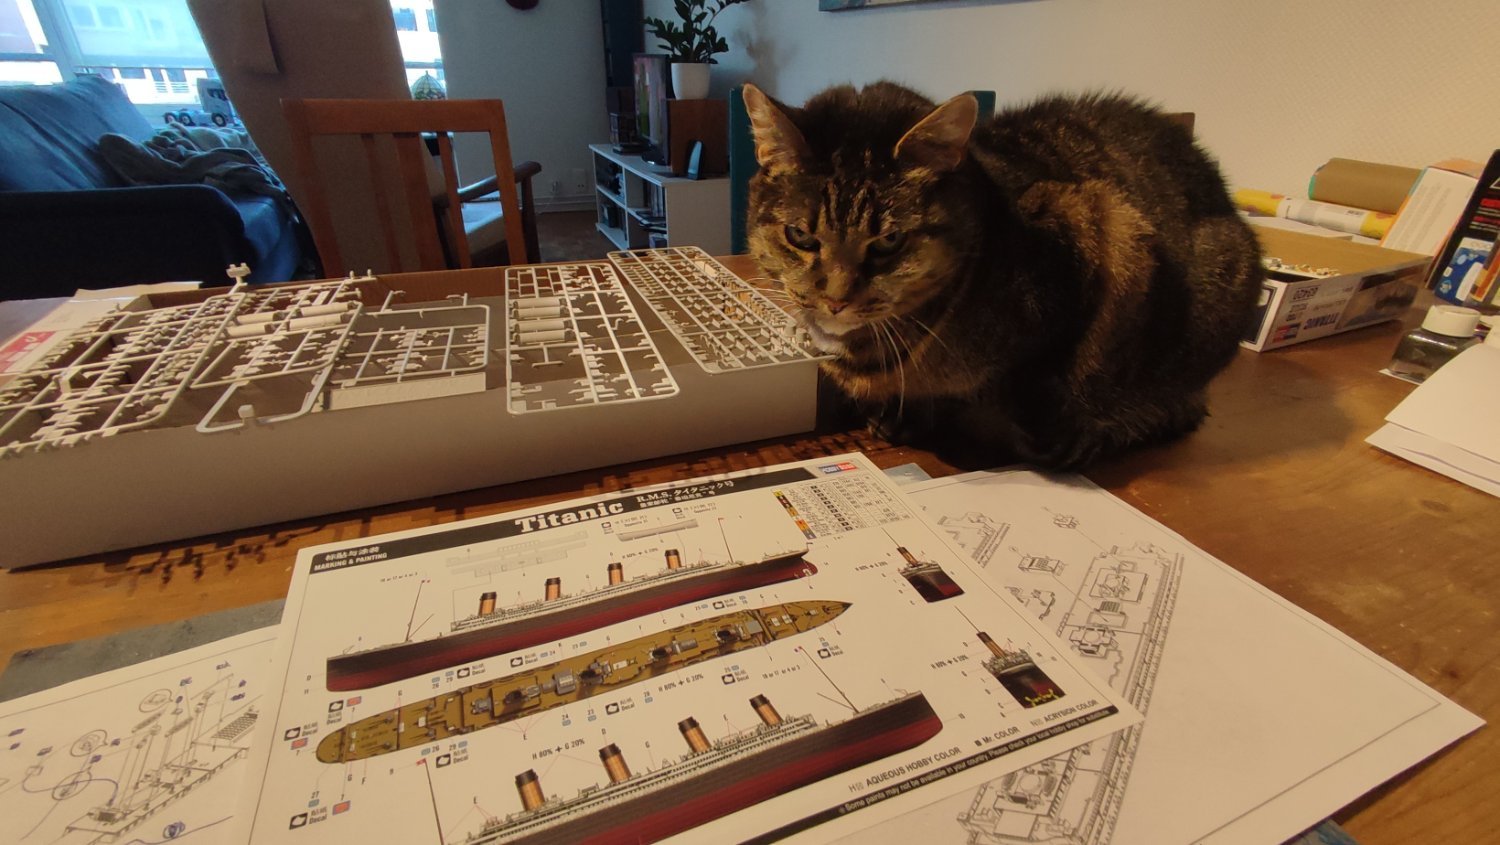
 So , here goes, I've decided to have a go at modelling and having always being fascinated with the Titanic I thought I would start there. I've completed about half of it so far and thought I would build a log, as much for me to look back on as also to gain some expert tips from members here. I have also bought an Occre Polaris, which will be next project, I thought I would try plastic and wood and see which I like best, although I think in the end I will continue with both for variety. I've been looking at the amazing build logs on here for this model and I'm already learning, which is why I started in the first place. Anyway, here goes....
 -
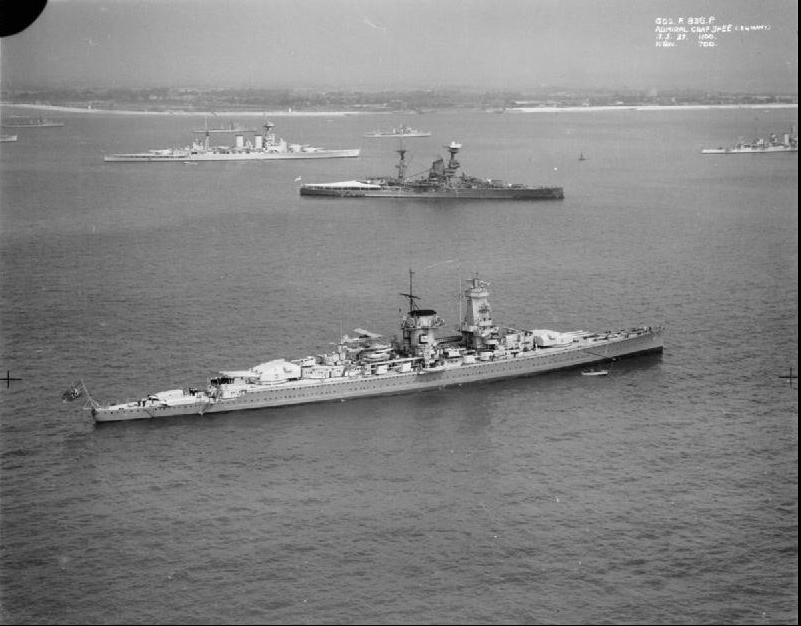
 After my failed attempt at the 1:700 scale Dragon Z-39 I poked around the interwebs and found a site that presented skill levels in their reviews. ‘CyberModeler Online’ is a very nice review source. <sarcasm>Surprisingly</sarcasm>, the Dragon kits are ‘Expert’. But, the Academy Graf Spee kit I bought concurrently was a ‘Beginner’ kit. I've been lurking this site for about a year. It has kept my interest in the hobby going. So, here I go again!!! I’m going to model her as she was while ‘showing the flag’ just before WWII. She, and her captain, were caught out by the start of WWII. It is not likely a good thing to be in the wrong hemispheres (both of them) as an unescorted cruiser against the world’s best and largest navy. Her crew applied many hasty, at sea, camouflages – some of which are cool. I really like the brush painted bow wave she sported on her final sorties, but I don’t know if she also sported the fake second funnel at the same time. Regardless, she did not take fire till the Exeter, Ajax, and Achilles plinked her at the Battle of River Plate. Thus, she probably should not be heavily weathered, and she had been well cared for. That means just two main paint colors and no camo pattern. I’m going to whale this one a little bit. I mean, I paid for her a year ago so any mullah spent now just seems like a justifiable new kit purchase. I’ve never used 3D printed parts but I think working those in will be easy and effective. I could not imagine bending PE for all those secondary guns. The Eduard PE will be used for railings and for some easy PE stuff – I did OK with the Z-39, but it was difficult. The plastic rails provided in the kit provide a nice and easy template for the PE. Regretfully, the Eduard PE doesn’t have the ‘CORONEL’ plaque that was placed on the superstructure while the WEM PE does – but the Eduard instructions are derived from the Academy kit instructions and I’m thinking that will make things much easier for a noob like me. I have never tried a wood deck, but there is no time like the present and the Artwox deck seems to fit no fuss, no muss based on build threads I have read. And, I’m going to ‘nope’ on porthole covers and whatever – I want to have a win here. Another thought for the more skilled and ambitious. There is a really cool photo out there where the Graf Spee is anchored near the HMS Hood and Resolution for the coronation of King George VI in 1937. I think that will require back dating her secondaries since she was refit to include the below aftermarket secondaries in 1938. Look at this beautiful photo: If any of you see anything amiss, please comment. I have yet to click the ‘Buy’ button and will probably not do so for a couple of days. I am planning on using Squadron.com for the purchases. If anyone has better sources please inform me. They seem ok though. Aftermarket: Item Cnt Manufacturer Part No Main Guns/Turrets 1 Micro Master MM1743P 8x1, 150mm SK C/28 Kit Provided 3x2, SK C/33 Twin 105mm Dopp.LC/31 2 Black Cat Models AC350071A 4x2, 37mm FLAK SK 30 Twin, Dopp Mount 1 Black Cat Models AC350068A 10x1, 20mm FLAK C 30 2 Black Cat Models AC350064A Artwox Wood Deck 1 Artwox AW10049 Eduard 1 Eduard 53050 Paint: Color Hellgrau 50 (light gray) Vallejo Model Color 990 (light gray) Hellgrau 51 (dark gray) Vallejo Model Color 905 (blue gray pale) Happy Hunting and Pray for Me...
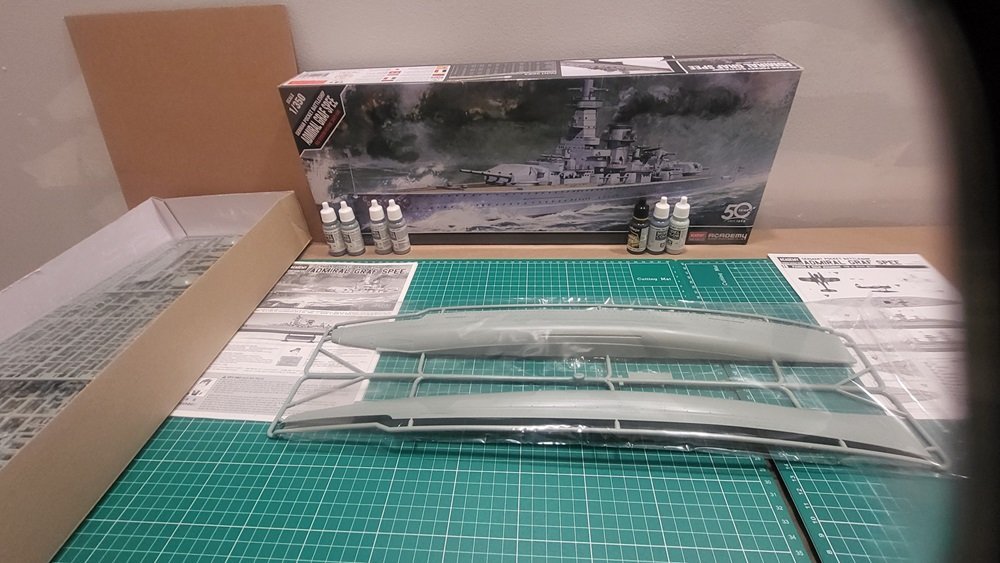
- 27 replies
-
- 7
-
-
- academy
- Admiral Graf Spee
- (and 5 more)
-
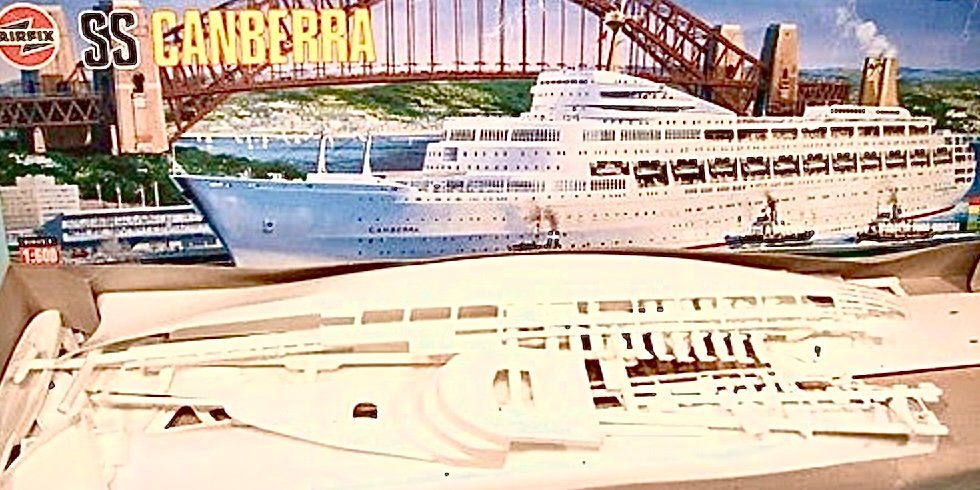
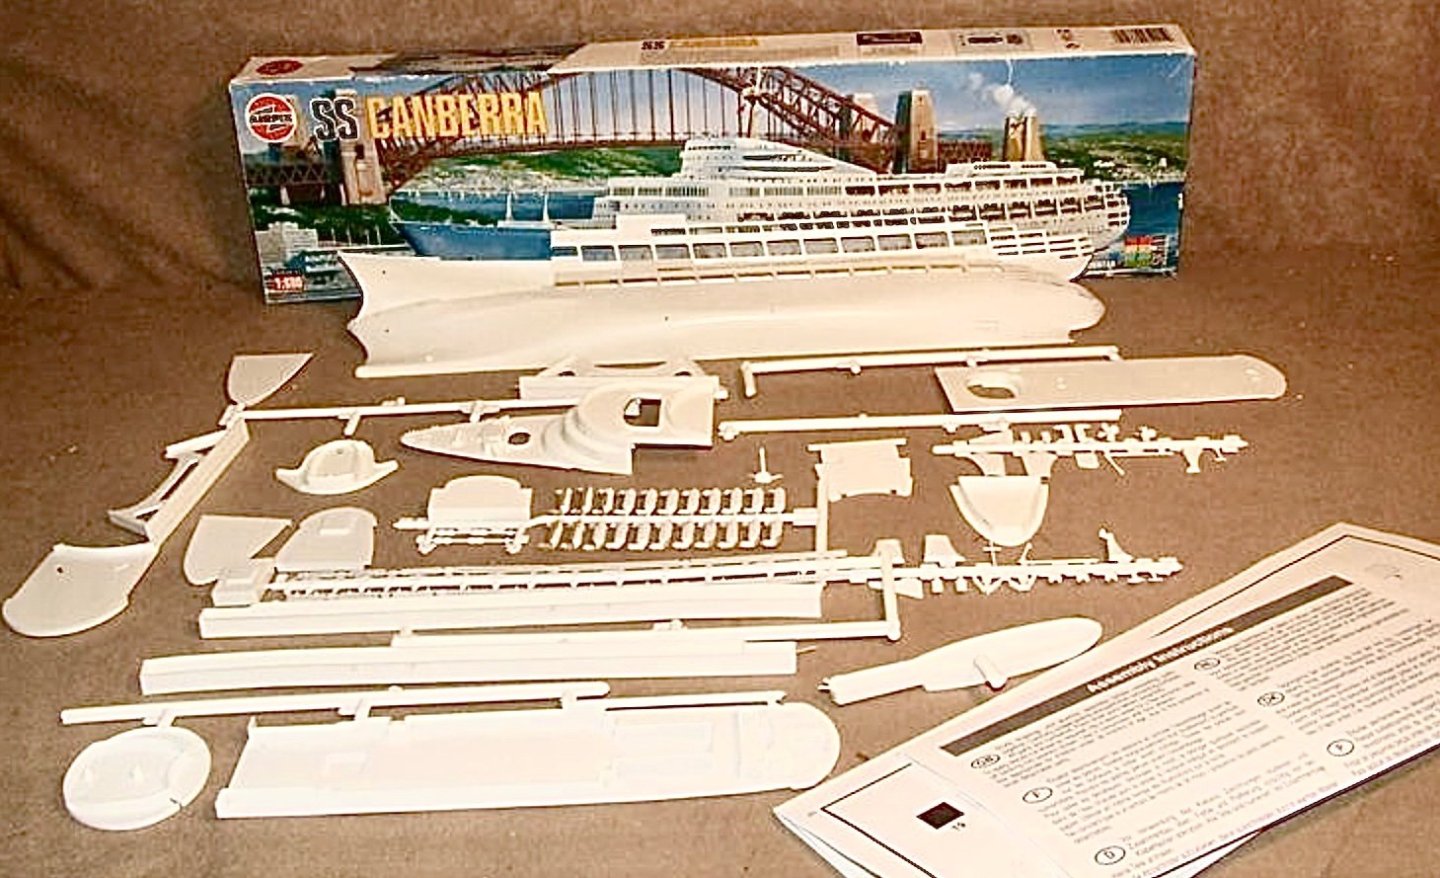
 Here I go again! Having finished the ‘Mayflower’ with some difficulty I needed some more occupational therapy! In January of 1972 we found ourselves on the SS Canberra. My family and I were sailing from Southampton to Sydney. Our eldest son was eight years old at the time and to remind him of the boat we bought an Airfix model kit of the Canberra which we thought that he might build at a later date. Time went by and the Canberra kit joined the ‘Mayflower’ and went into ‘storage’ with the ‘Mayflower’ for the next 50 years. They travelled from Brisbane to Wellington to Germany with us and now, with my grown up son’s permission, I’m starting to try to build the SS Canberra! This build log will describe my problems and solutions (if any) with the build. As others have already commented, the kit was not very well made so features in the polystyrene are not often clear and pieces do not seem to fit too well sometimes. This time the first step that I took was, after washing the parts, to spray everything with a white undercoat! I soon found that the major difficulties with the build were going to be with the painting of the individual parts and applying the transfers (decals). As I found with the ‘Mayflower’ my hands were not too steady and I did have some problems masking and painting some small parts. The windows were a nightmare (see later).
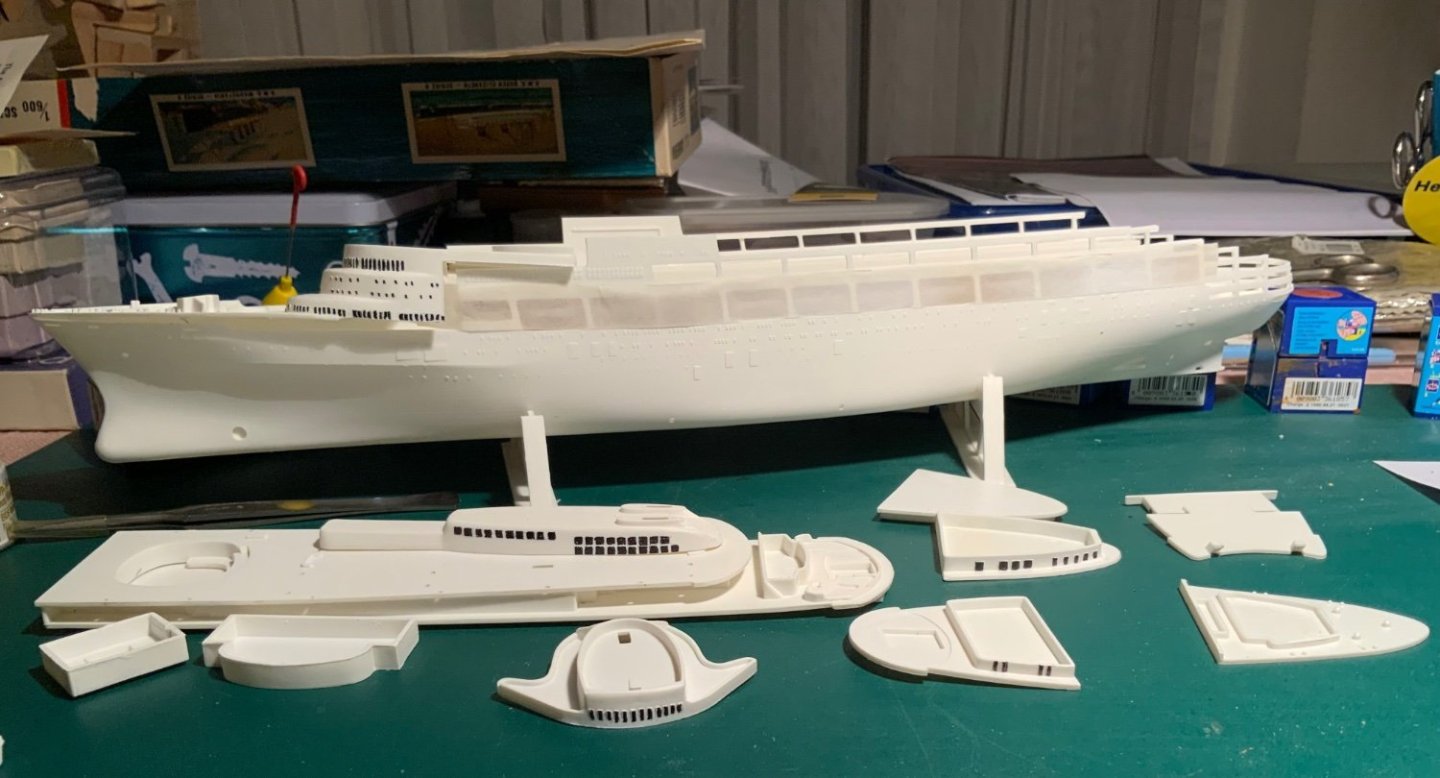
-
 As I move into retirement (and the peasants rejoiced) I had wanted to spend some time focusing on rigging. Well, I was given this Heller Victory with the hull pretty much done. The backstory was the gentleman had passed away and this was picked up in an estate sale for next to nothing. His work was superior and once I saw the hull I decided this was a good subject for my goal. There was the inevitable broken components but that was largely confined to the royal masts and (of course) the jibboom. The accompanying box of parts was incomplete but I have another 1.5 of these in the stash (bit of a story there). I would have done some things differently (like the deck isn't painted) but for what I was going to use if for and for actual looks that was fine. I have a friend that already has asked to have it upon completion for his library at home, which is perfect. I have dissected the plans and have defined each and every line so am over that hump. I did notice some differences to actual practice. I have a set of the plans that Longridge uses in his book (thank you Uncle Leo) and have defaulted to that presentation where practical. For example the foremast stays did not include the Breast Backstay so I am adding that. Not going crazy or over the top but where it makes sense will make those changes (for example, will use the supplied plastic blocks). I looked through my stash of 'rigging' line and have chosen to use 6 types. The Heller supplied line is white and didn't want to dye. So this morning after getting the remnants of the broken pieces removed and things prepped, went ahead and primed the necessary replacements. I am using Vallejo acrylics. It will be interesting to see how close I can get to the existing yellow shade. I should be working on this at least 2 days a week at a minimum. My first task is to scratch some open and closed hearts for the fore and main mast stays. These seem pretty iconic and need to be there but aren't included in the kit. Stay Building My Friends, Mark
.JPG.79990ac9a03ccb5863611932cf047da2.JPG)
.JPG.d202681a6ef3aee1ec9fa793cfe4a452.JPG)
.JPG.082ebe4de74ac127de97aca00a15e0c5.JPG)
.JPG.1935c3259708a5afe50dd95635322ff2.JPG)
.JPG.569333ad8409a308ff435f633ba2b67a.JPG)
.JPG.5c6fb467d3cc582a9de7ef92c1c78d54.JPG)
-
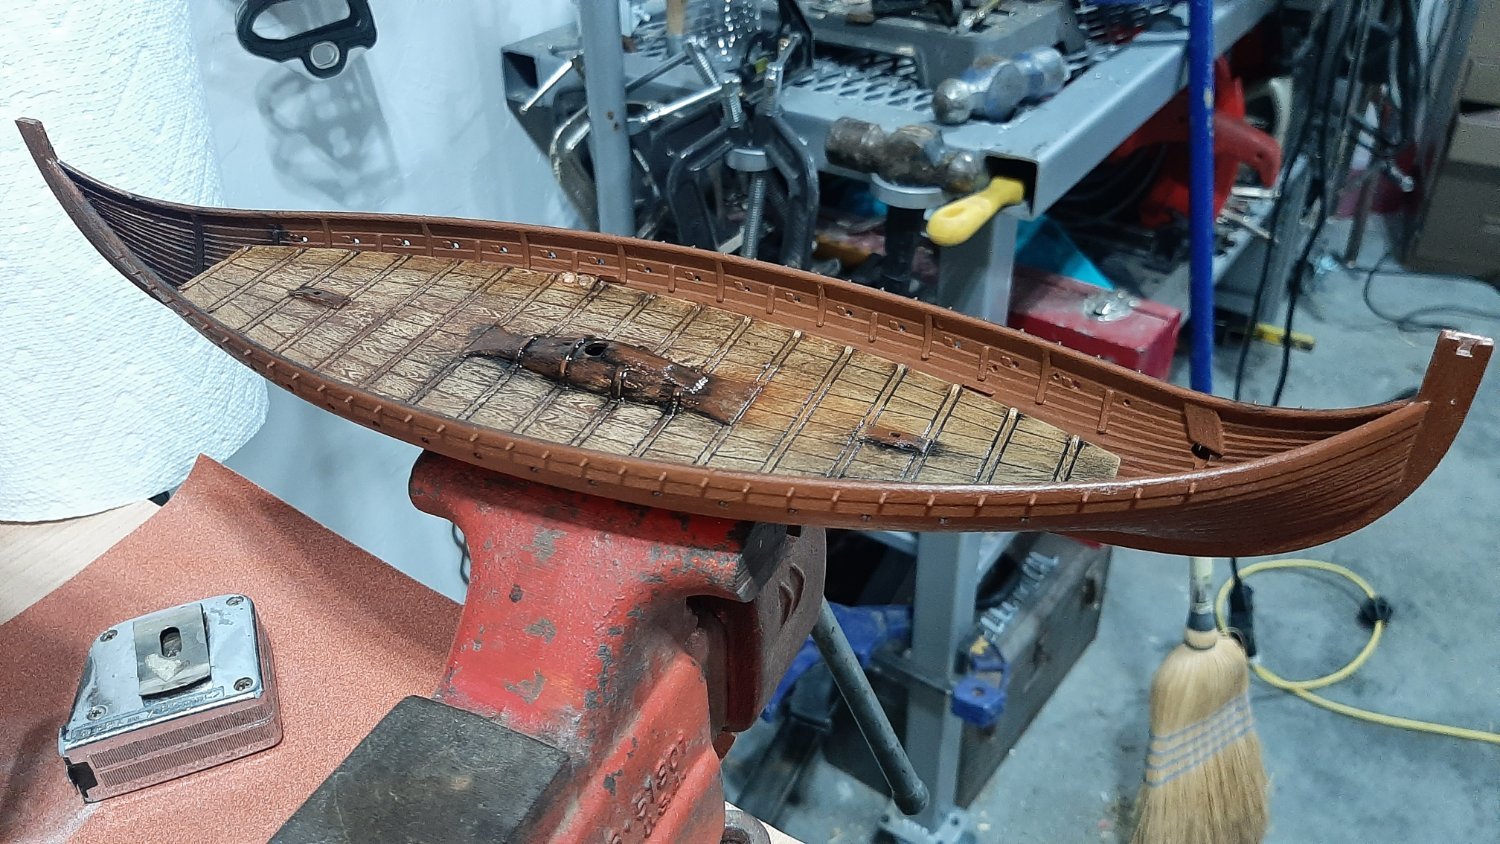
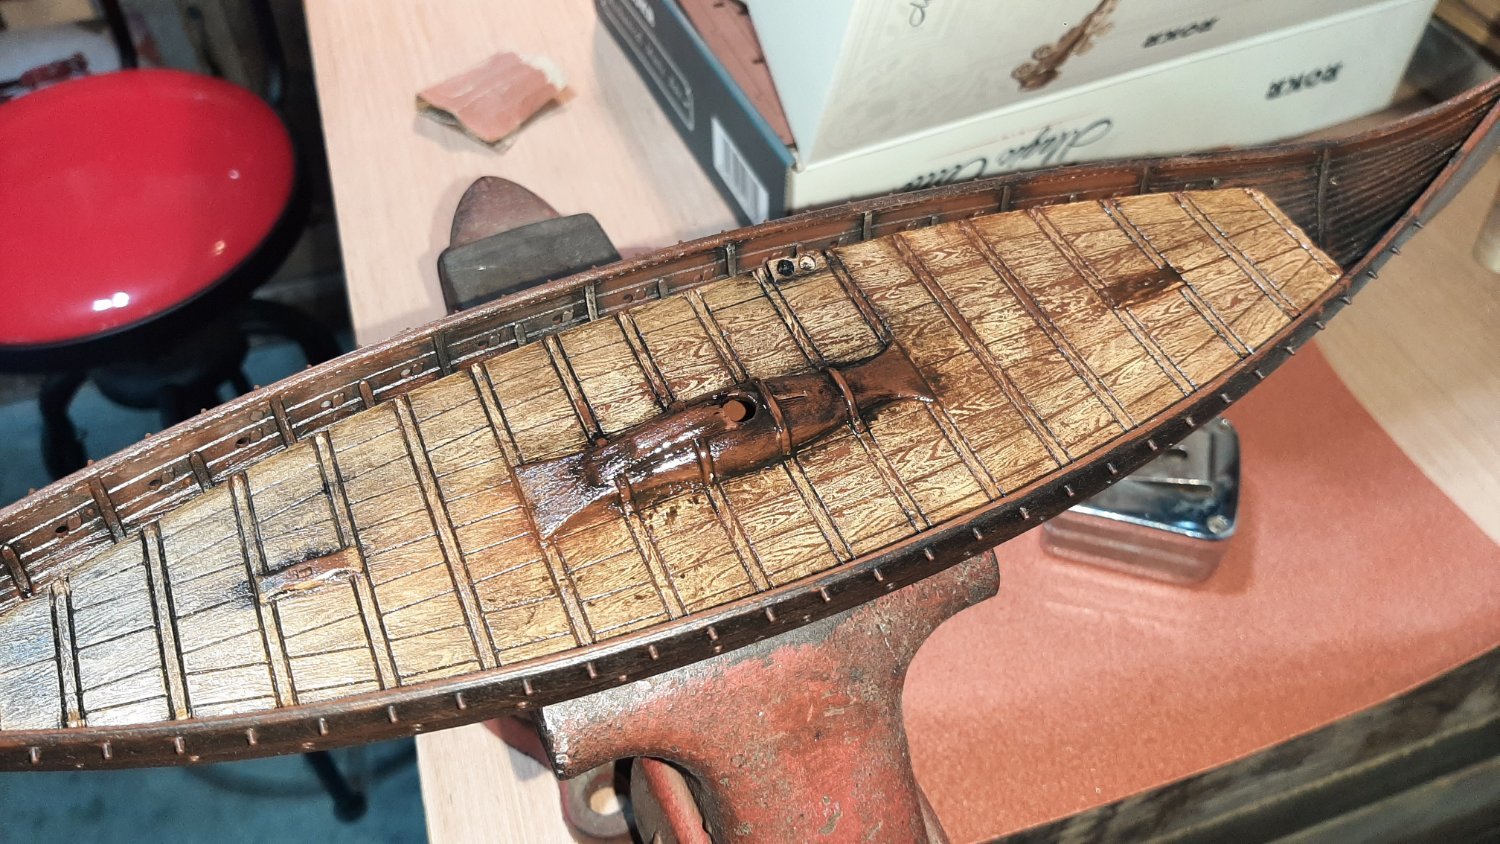
 Hello All, Yes I have another viking ship build going on here too, a vintage wooden kit. I also have this plastic kit in progress. I'm really a plastic guy...nearly all my modeling experience has been in styrene. This one presents a unique challenge because it's a material I'm most familiar with but I'm tasked with making it look like an entirely different material! This has been difficult so far, but I think I'm getting the hang of some techniques that might work. I can't claim to have thought up the methods, only that this is my own attempt. The Revell Germany kit has good...if a tad heavy...wood grain and texture molded into this kit. The base brown color is useful in some circumstances but I do wish they had mixed up the molding color a bit. I started experimenting on the main (only) deck with some Vallejo acrylics several years ago when I started the kit. It got boxed up for a couple moves until I played around with some artists oil paints on it today. I sanded the acrylic base (the color was a buff or tan of some sort) to reveal some of the darker wood grain below. Using dabs of Ivory Black, Burnt Sienna, and Titanium White, along with some linseed oil, I was able to work some color and variation into the existing acrylic base. I then just wiped it off to lighten and reveal some of the lighter graining below. I was careful to get some good darks deep into the recesses molded into the deck as well. Overall I'm pleased with the outcome thus far. Thanks for looking.

- 10 replies
-
- 5
-
-
- Viking Ship
- Revell
- (and 1 more)
-
 Hi All! Been awhile since I've shared any modeling on this forum. Figured I'd change that with the new tool kit from I Love Kit (Trumpeter). It's the USS Curtis Wilbur in 1/200 scale. It's an Arleigh Burke class guided missile destroyer. The kit is based apparently on the destroyer during the mid to late nineties. There is no aftermarket available (that I could find) for the kit yet, so I most likely will be modeling her as I Love Kit (Trumpeter) intended. This is a placeholder until I can get some shots of the kit sprues once I unbox it. At first glance though, this looks like a very solid attempt by I Love Kit (Trumpeter). I hope you like what you see in upcoming posts in this topic! Patrick
- 52 replies
-
- 8
-
-
- Curtis Wilbur
- I Love Kit
- (and 1 more)
-
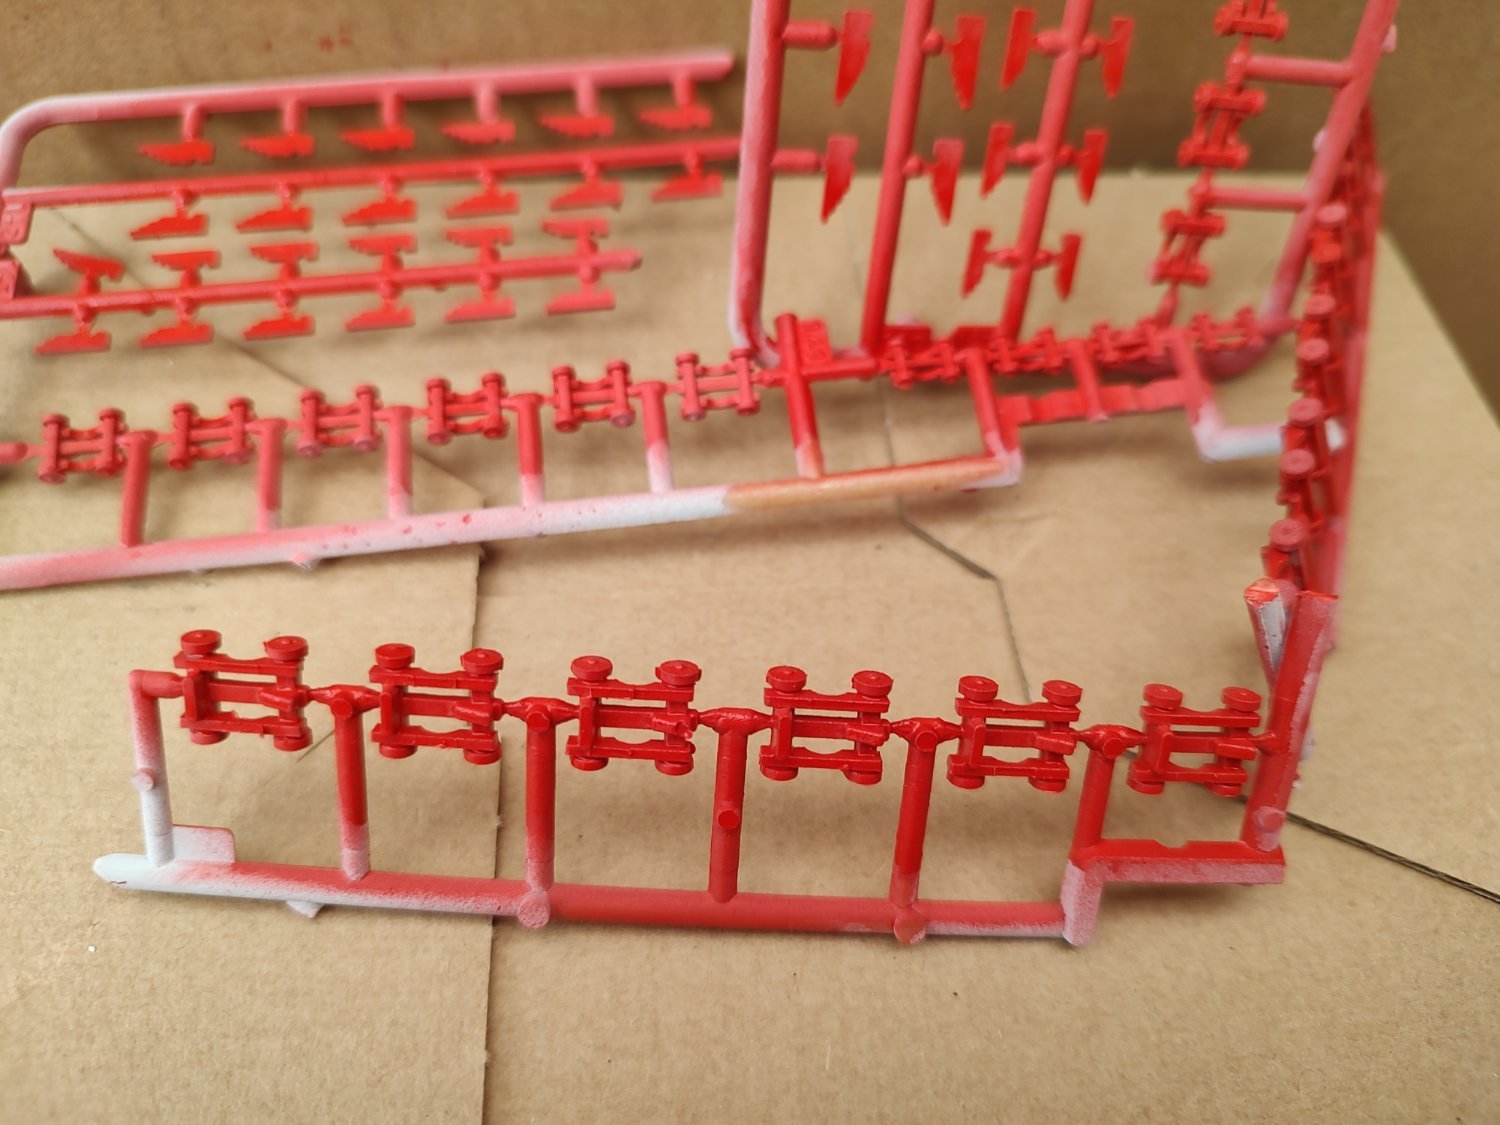
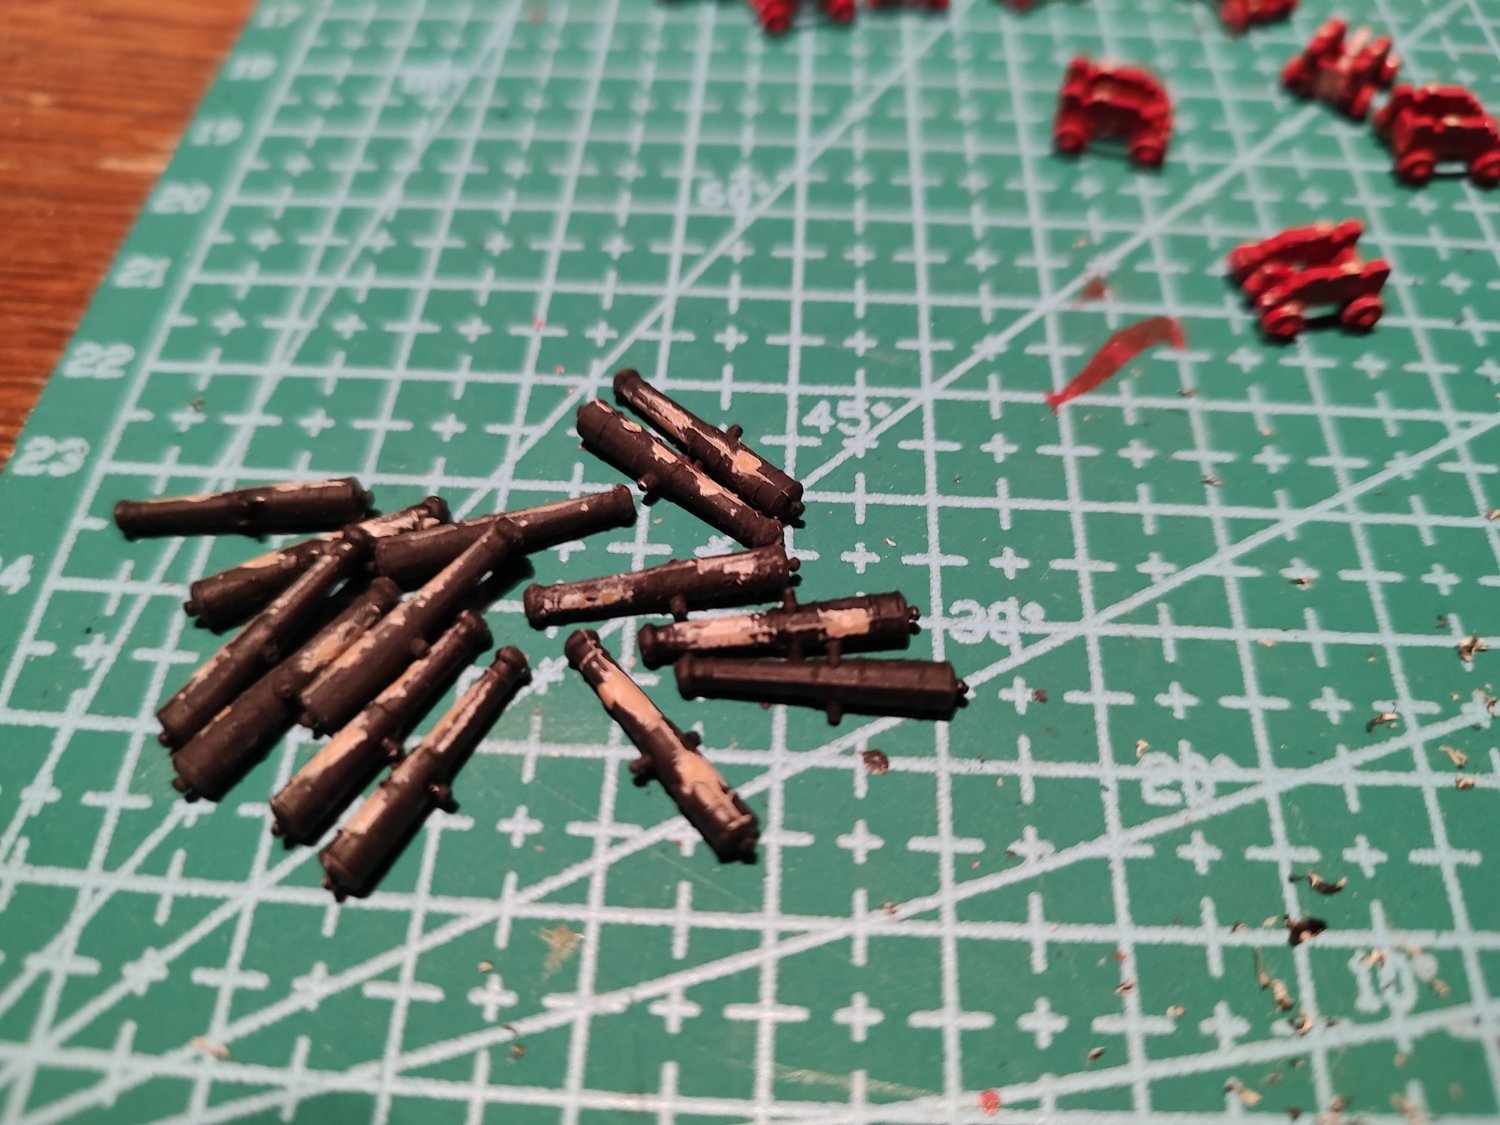
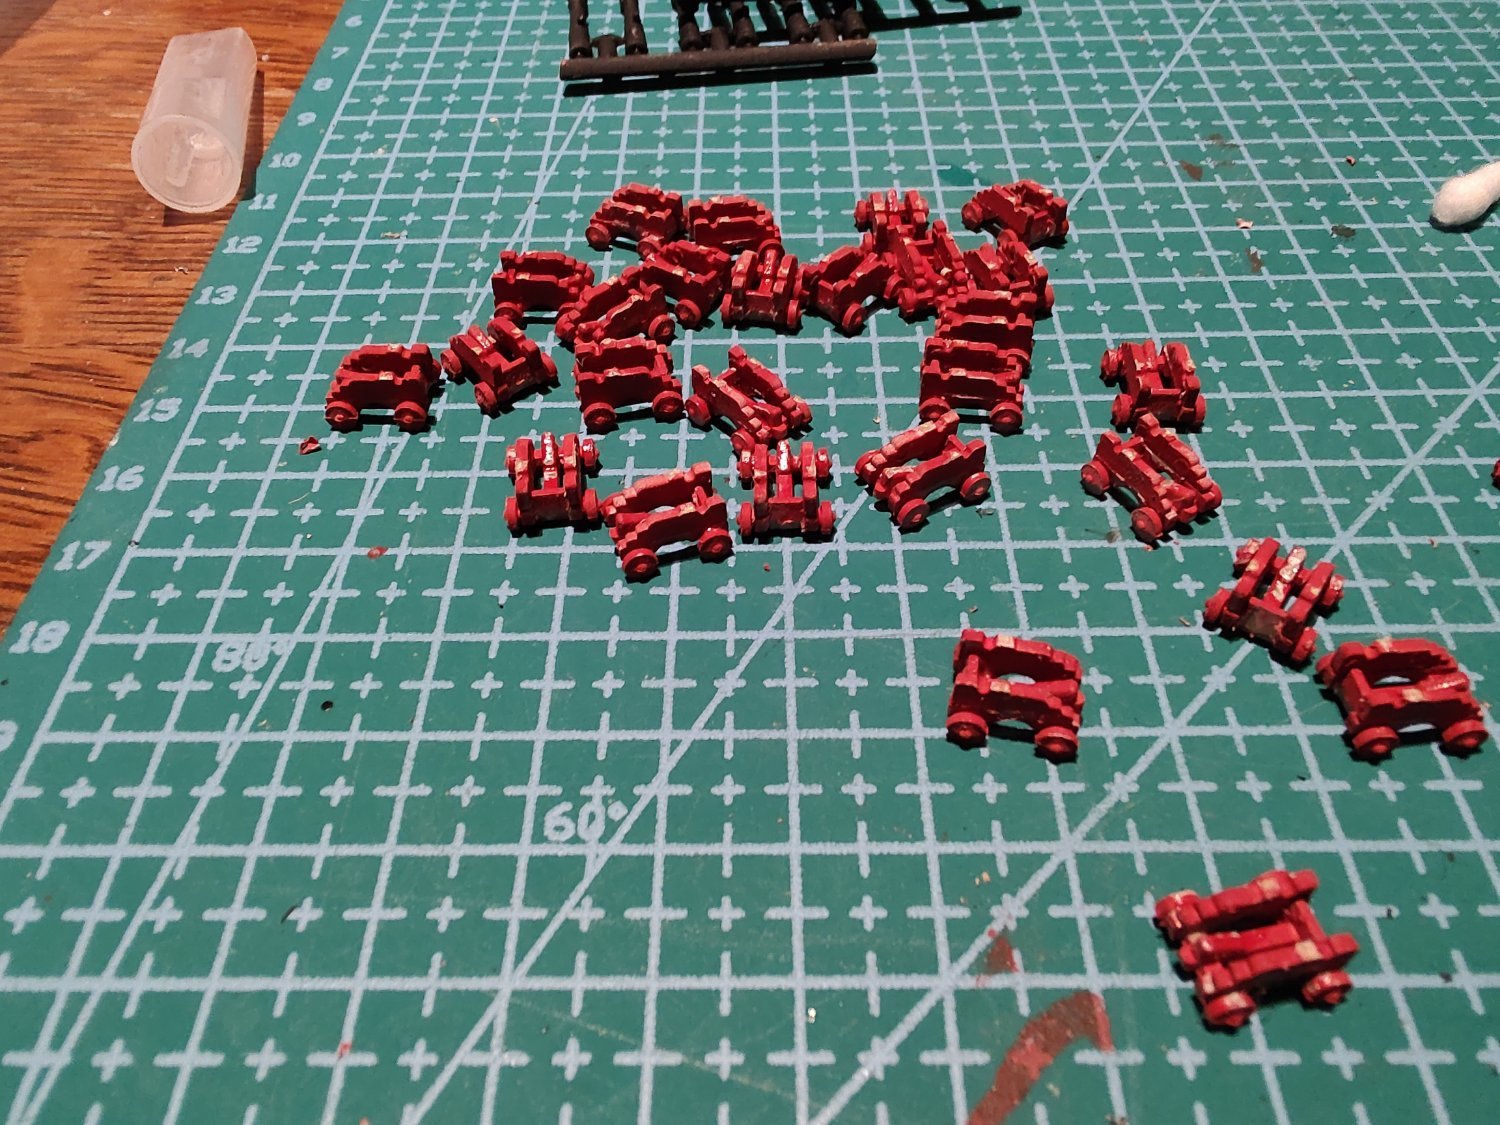
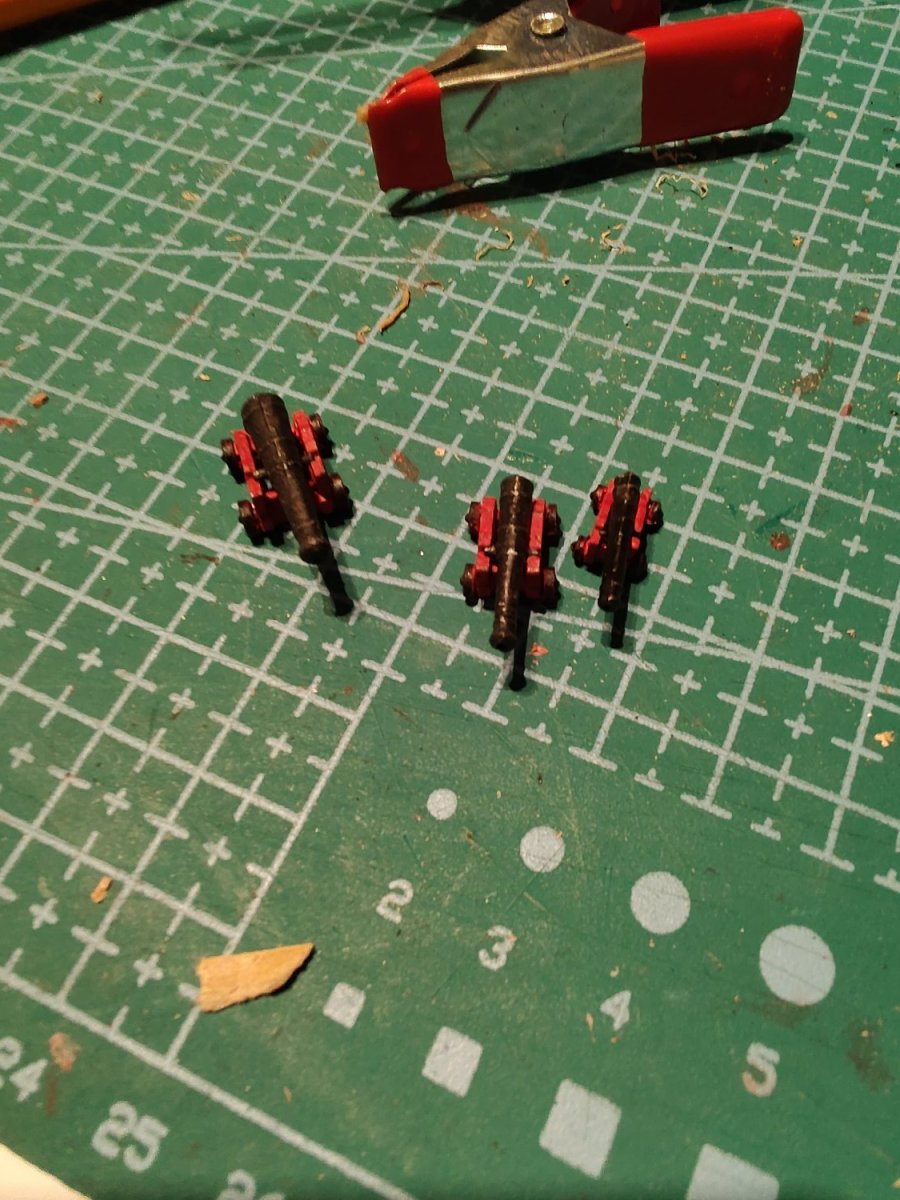
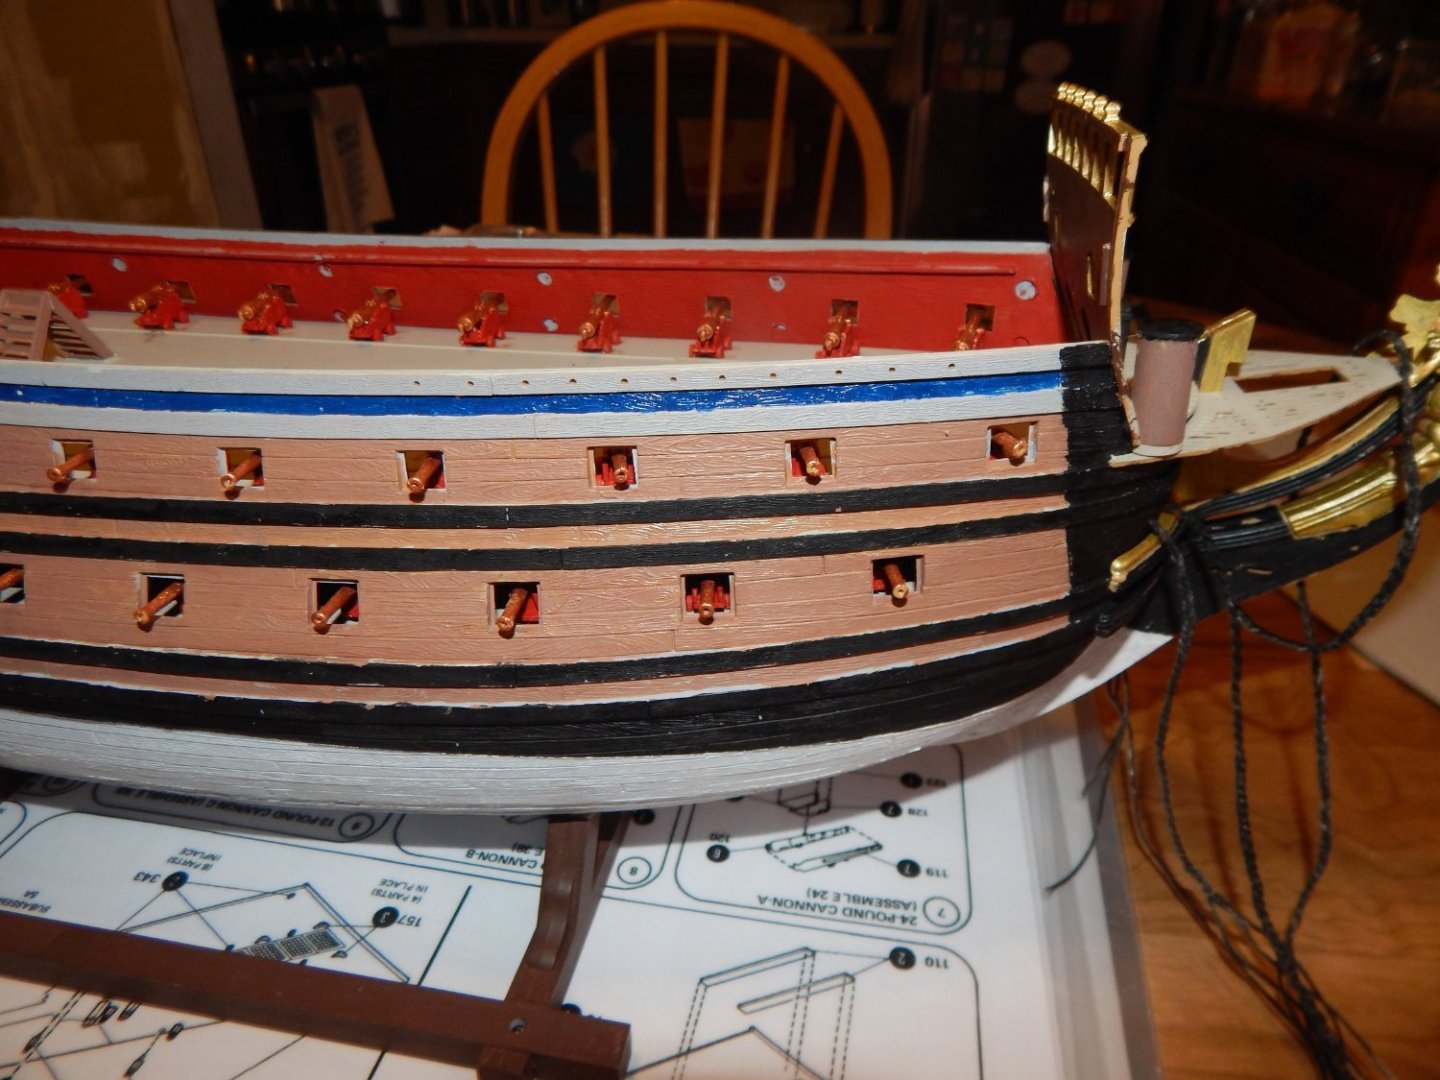
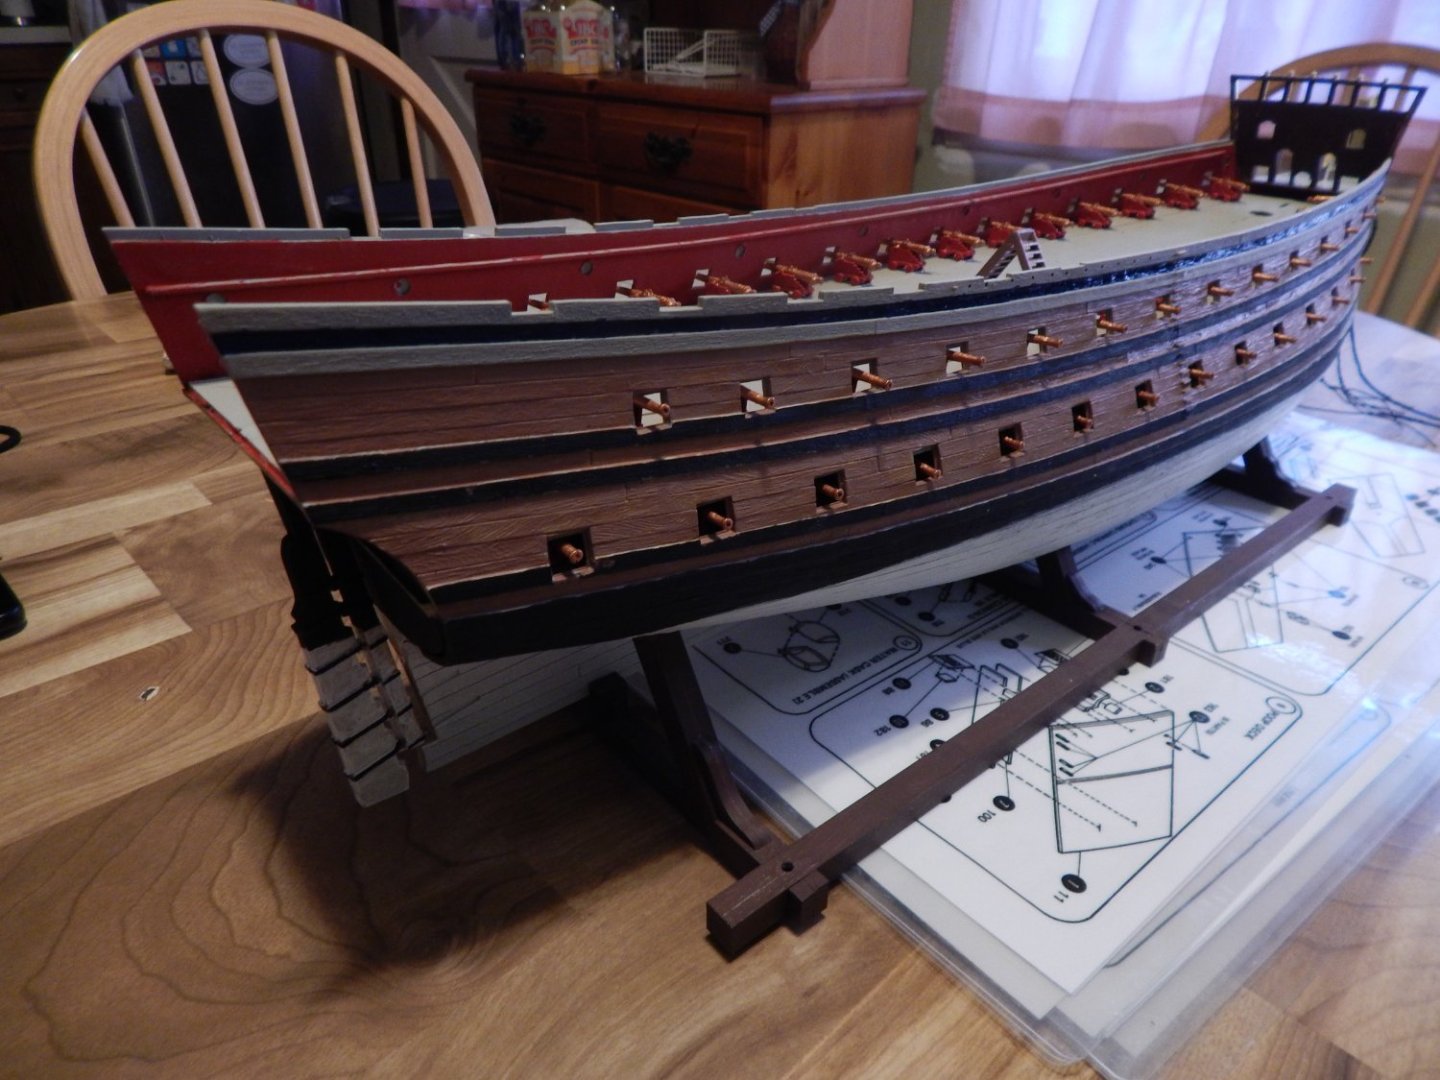
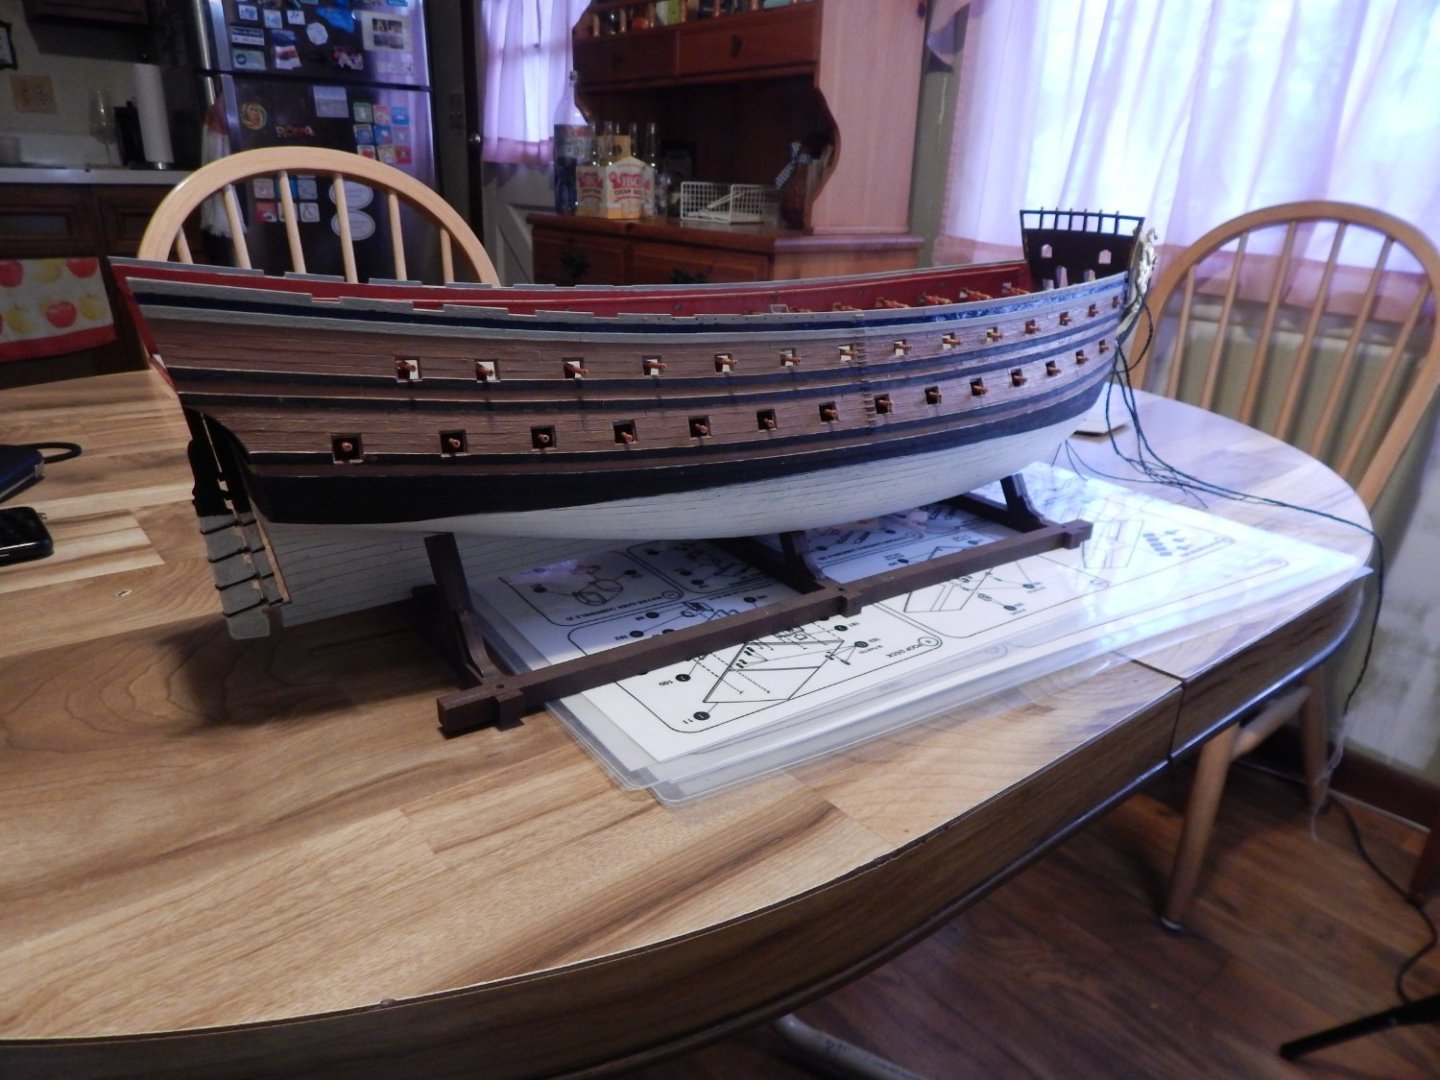
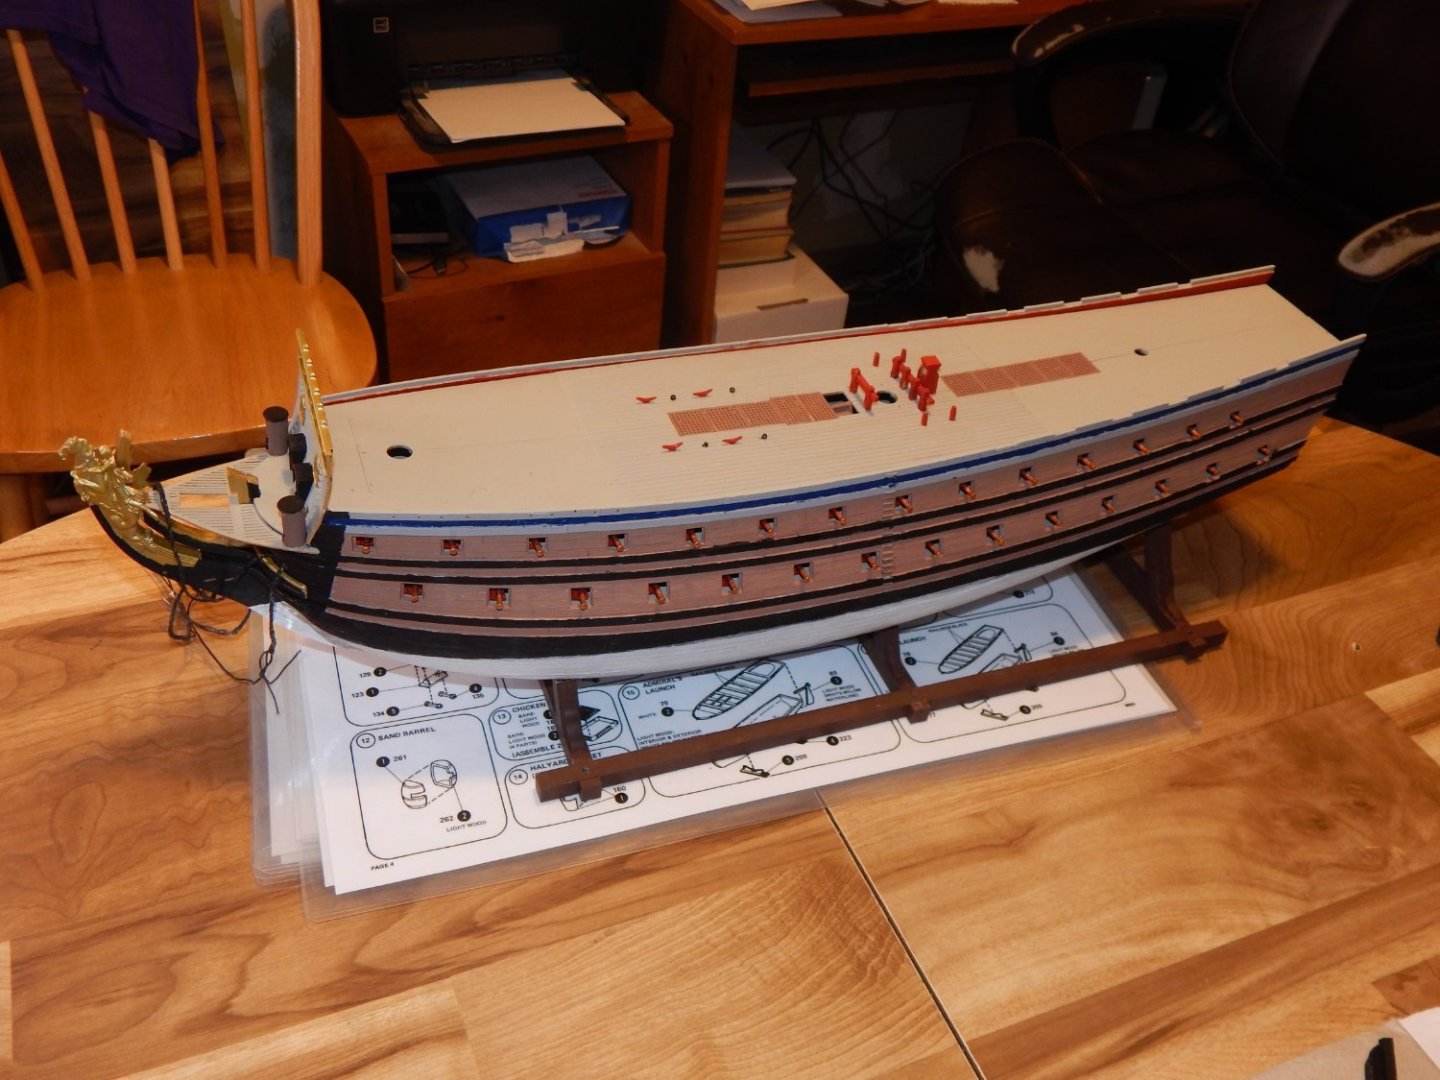
 I'm going to try and do a build log as I go, I set up this post vs. piggyback off Bill97's excellent Build. I just placed an order from True North Paints (enamel like Model Masters) , once I get those in I'll be able to pick up the pace a bit. Since I'm doing this for a client, I'll need to work as directed, one side will have the cannons extended and one side will have the ports closed (they can turn it when they like). I'm going to strip the paint off the stern and probably remove the fish and redo the wood grain detail (client is undecided as of now and understands there is no information either way on the matter). I'll also need to figure out if I'm going to use the stern gun ports. I've ordered the Parrell rollers needed for the yards, I'm researching the correct blocks needed, the small ones in the kit are strange. My reference is the "Rigging and Masting of 16th. century ships. The deck detail technic I used came from "How to Build Plastic Ship Models" by Kalmbach. Base coat flat black, let dry 24 hrs. then topcoat in your choice of tan/browns, I perfect Testors Armor Sand due to being light enough to detail the caulking on the planks and still give a dark water wash. I've also pre-prepped the deadeyes and other various parts in a basecoat of flat black.

-
 Hello fellow builders and lurkers, Though not quite new in modelbuilding, this is my first ever 18th century sailing ship. I am using Boudriot's 74 gunship as reference but I mainly try to get a feeling for the technics used for the scale and what I can and can't do. The build will be slow because I will try to not burn myself out on it. First of all, I used to colours that Heller suggested, but I am open to suggestions! The carriages are in the red that Heller sugests I cleaned the gunbarrels after I painted them, Maybe next time I'll do it before. I decided to divert from Heller's sugestion and painted the guns black and add a bit of gunmetal with drybrushing, still not sure if it looks okay Guns, Guns, Guns And Carriages The guns completed, only the small caliber has no drybrush In Boudriot's work I found the way the cannons are rigged. I think that on this scale the small blocks, tacks and cables are maybe not realy necessary but I did try to do some fitting for the heavy ropes. Not sure if this is the way to go. Again I am open to suggestion Cannon with rigging Next, I tried my hand on etching some planks in the lower deck. I am thinking of adding some interior instead of only the heavy guns. It is absolutly not my best work, but it was my first try on a place that is not clearly visible in my final work. I also braided the cables for the anchors, just to do something different. Etched deck and dryfit So, this is all I did last month, just to give you an idea about how slowly I am going . Tips and sugestions are more than welcome! Kind regards


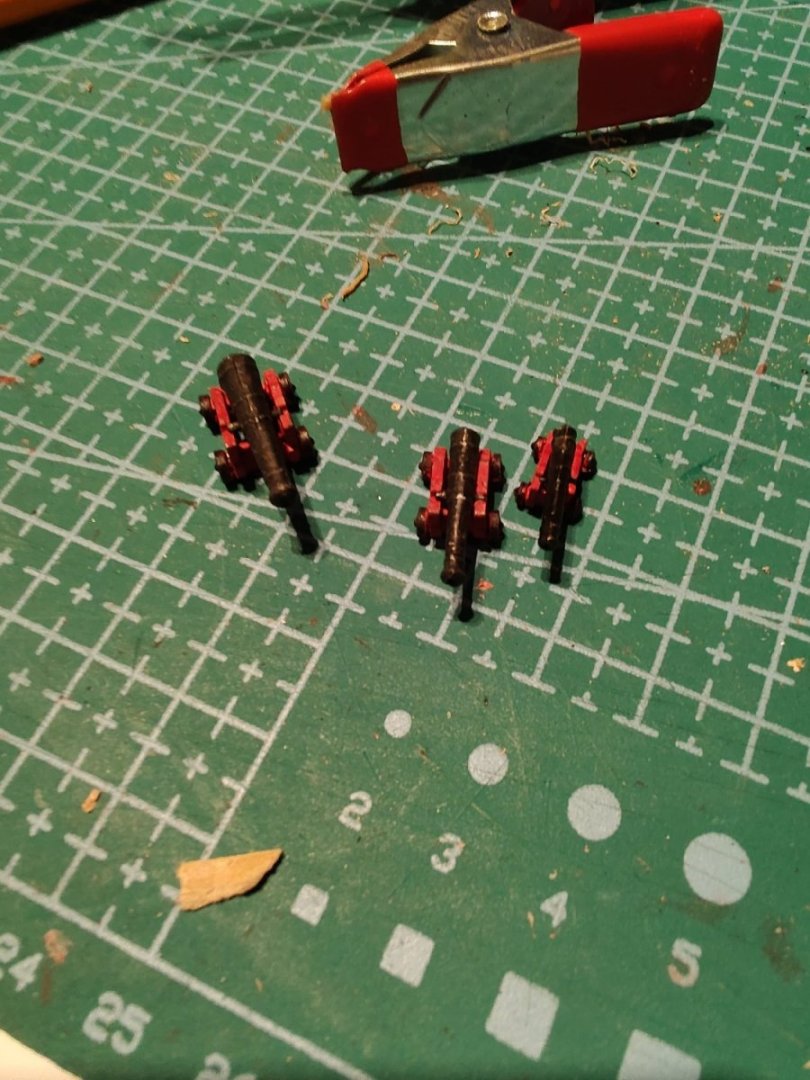

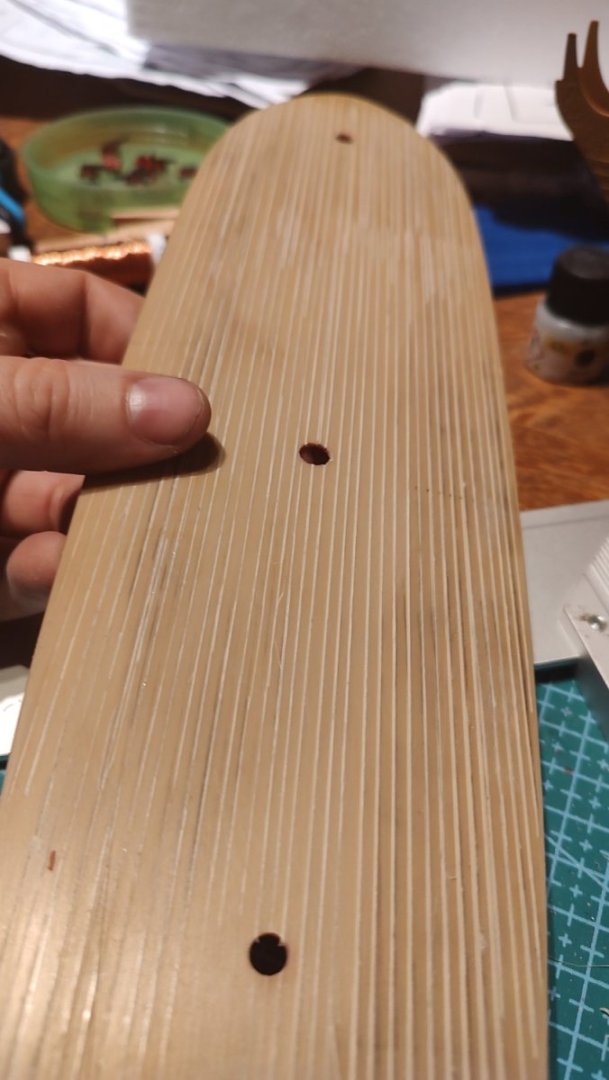
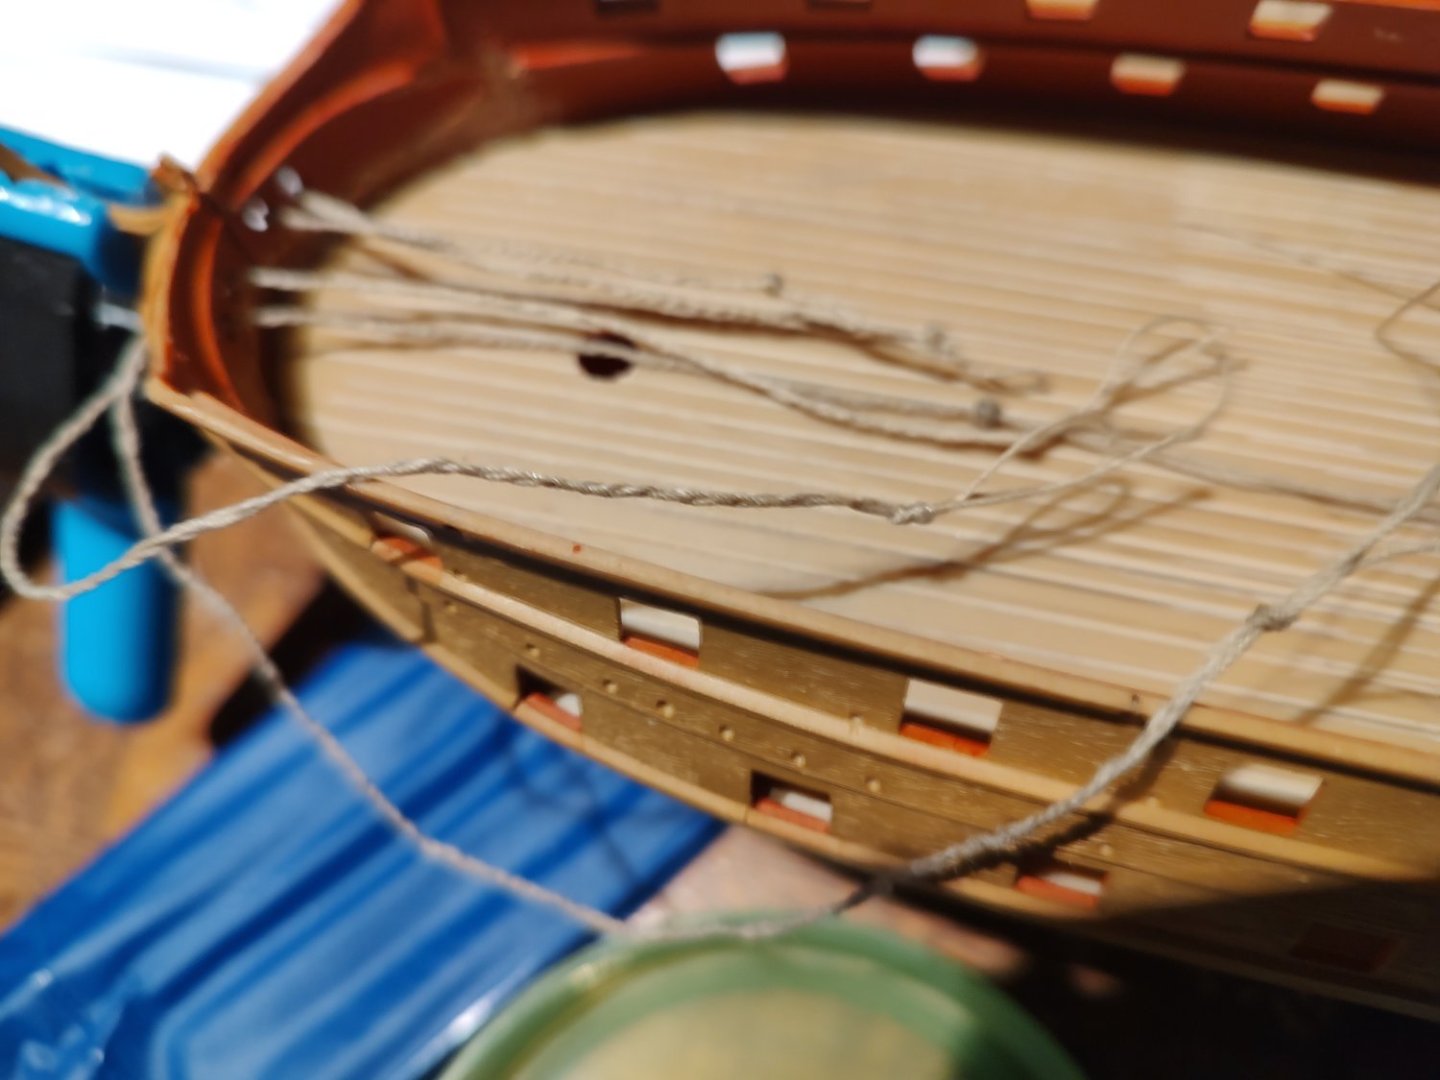
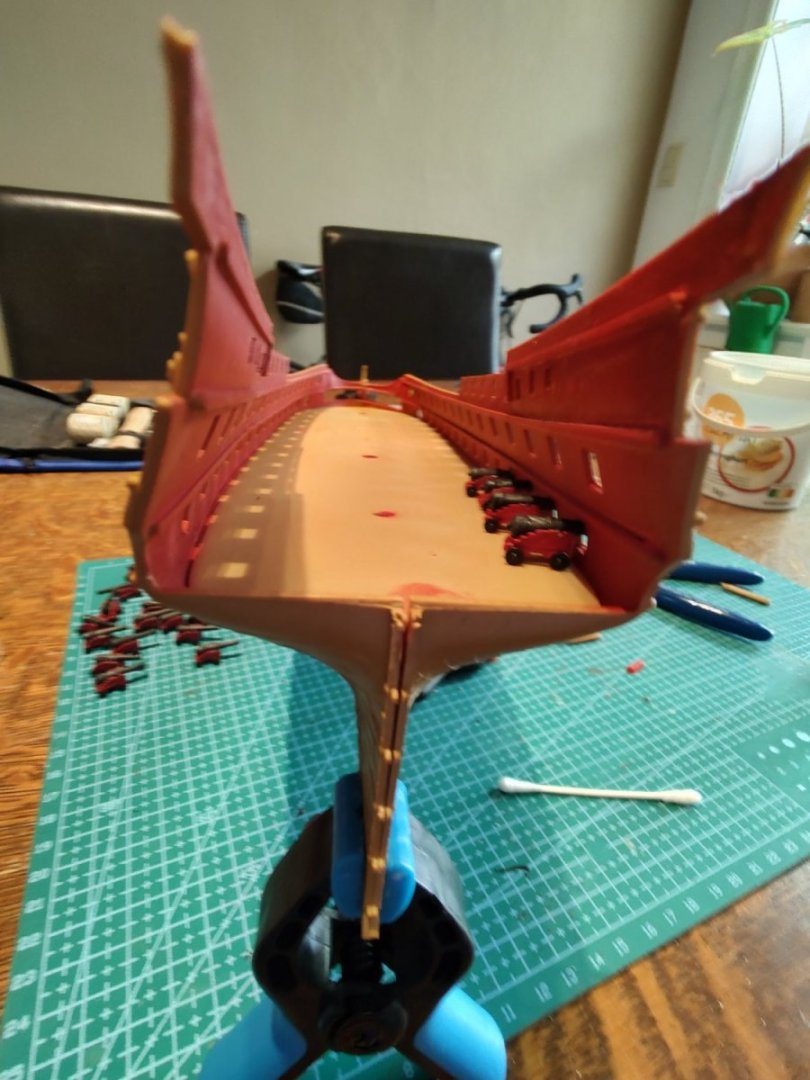
- 3 replies
-
- 4
-
-
- Le Superbe
- Heller
- (and 1 more)


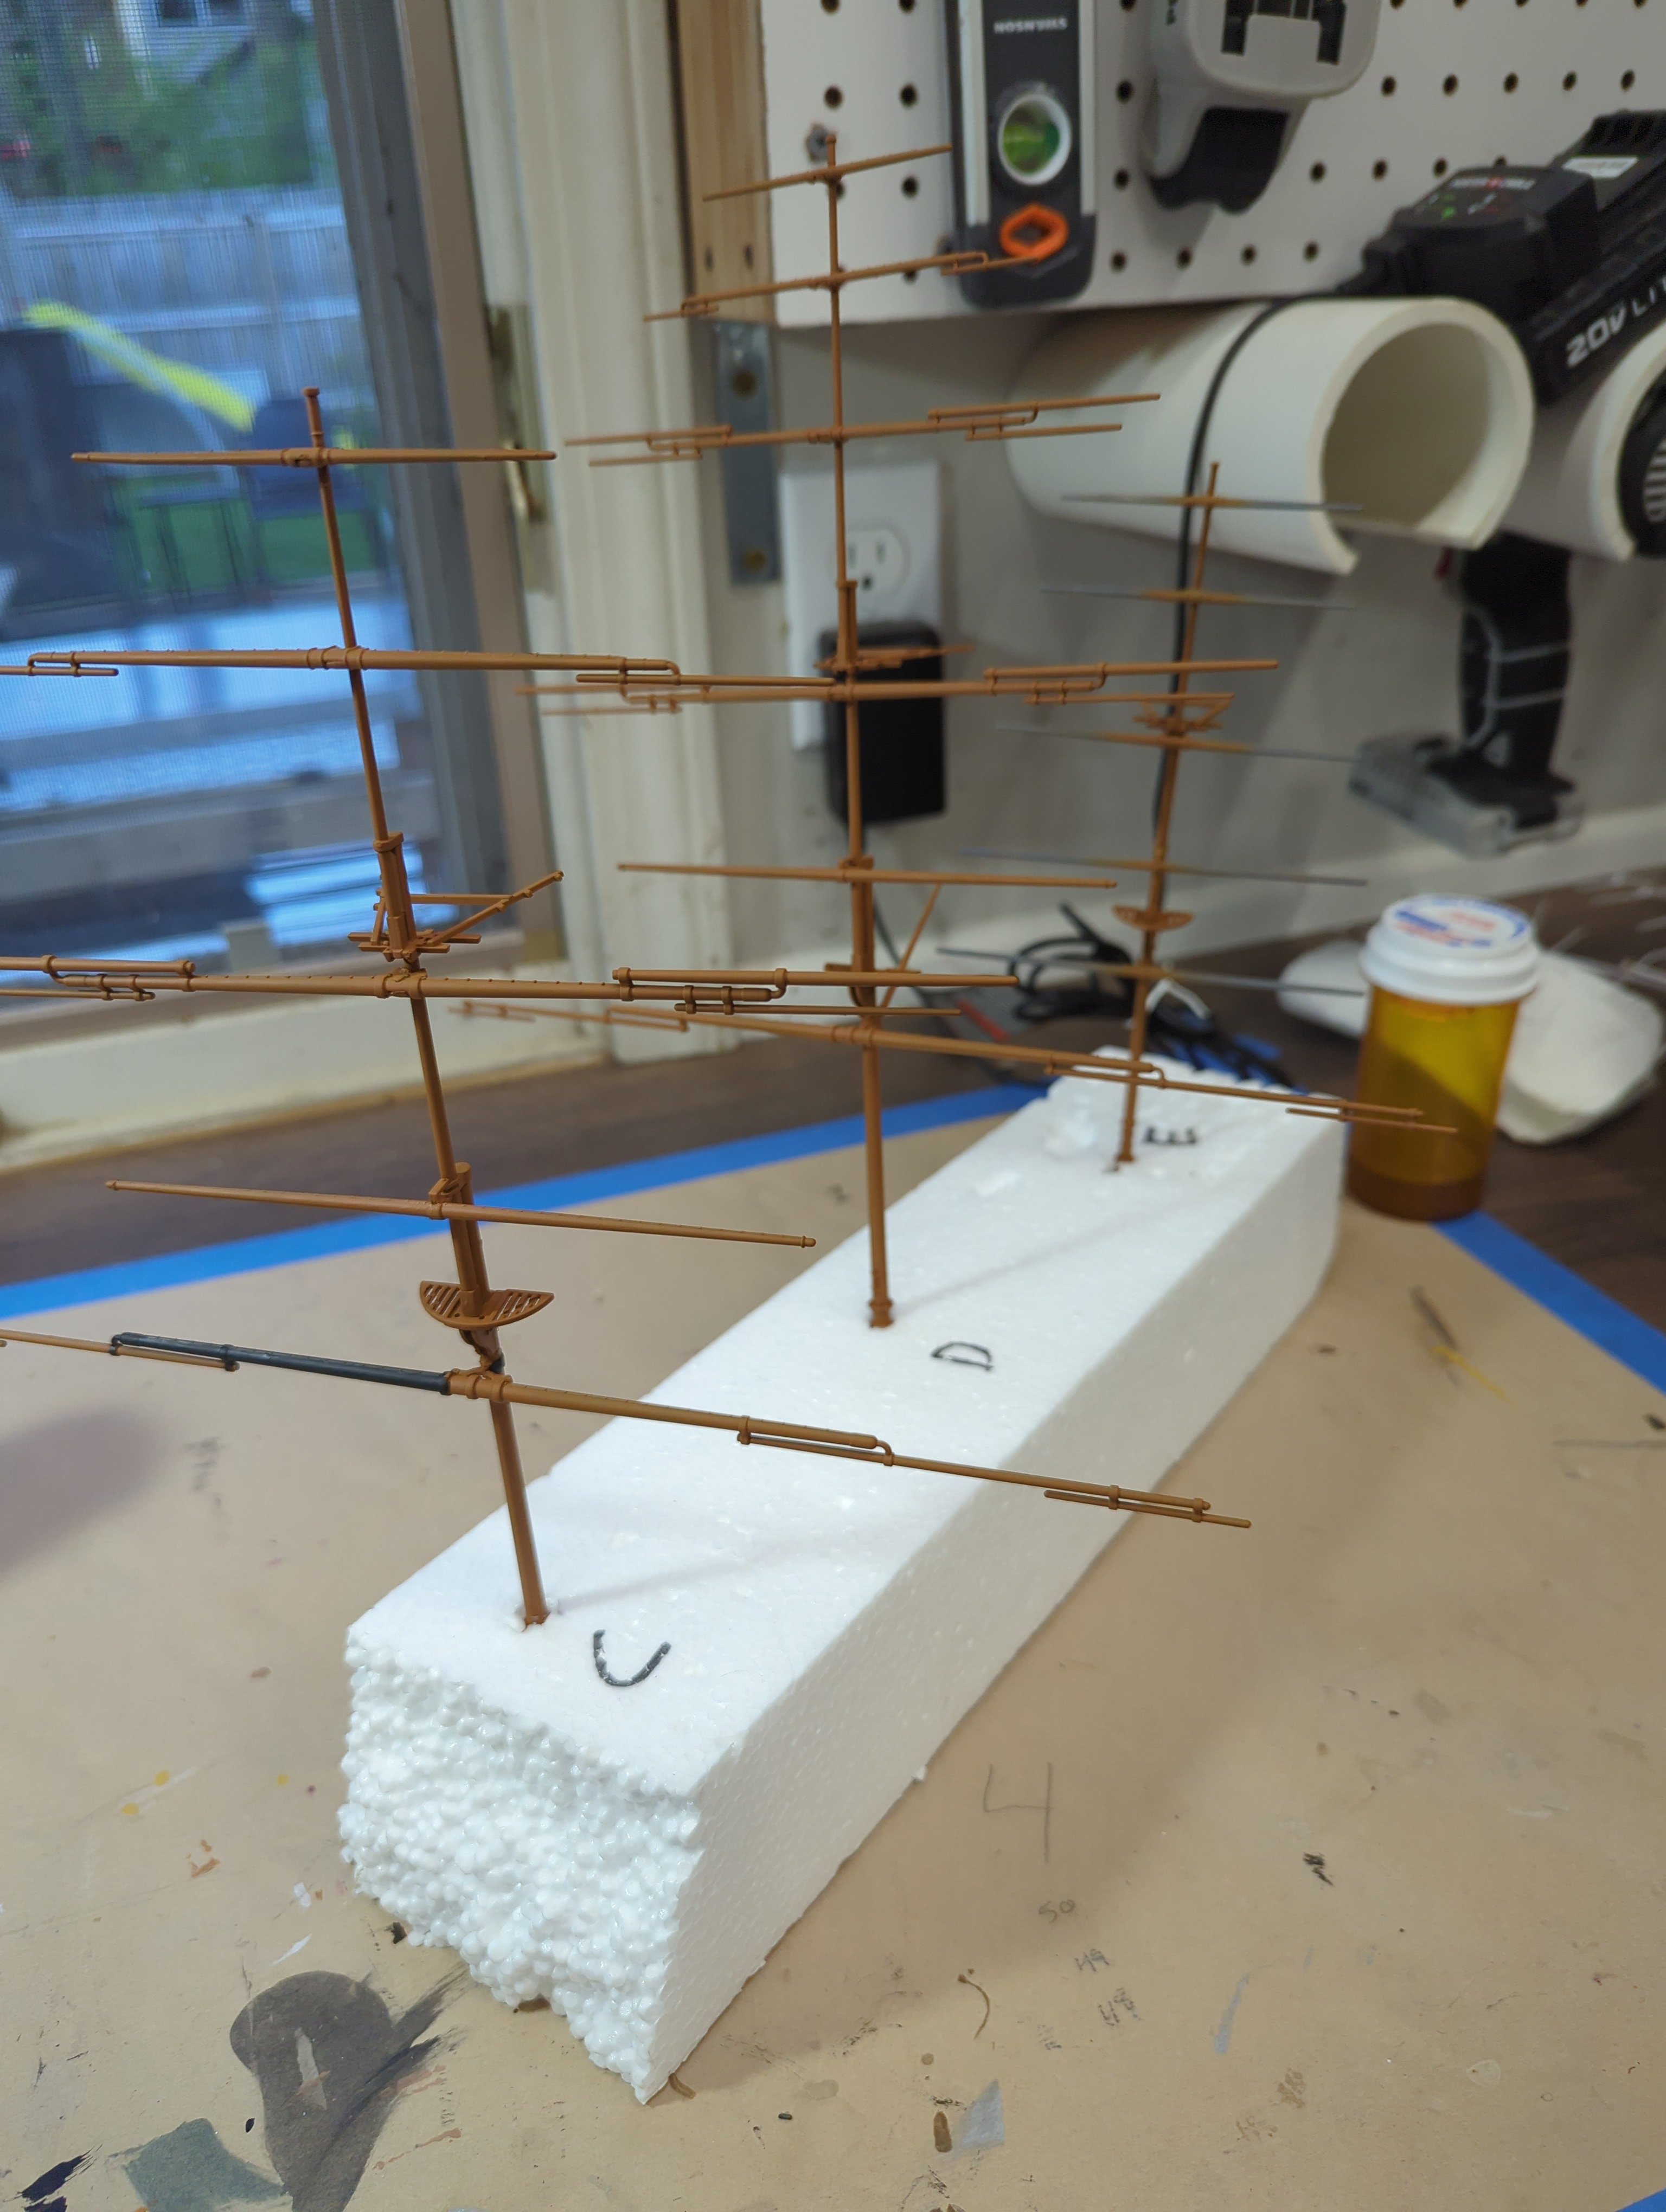


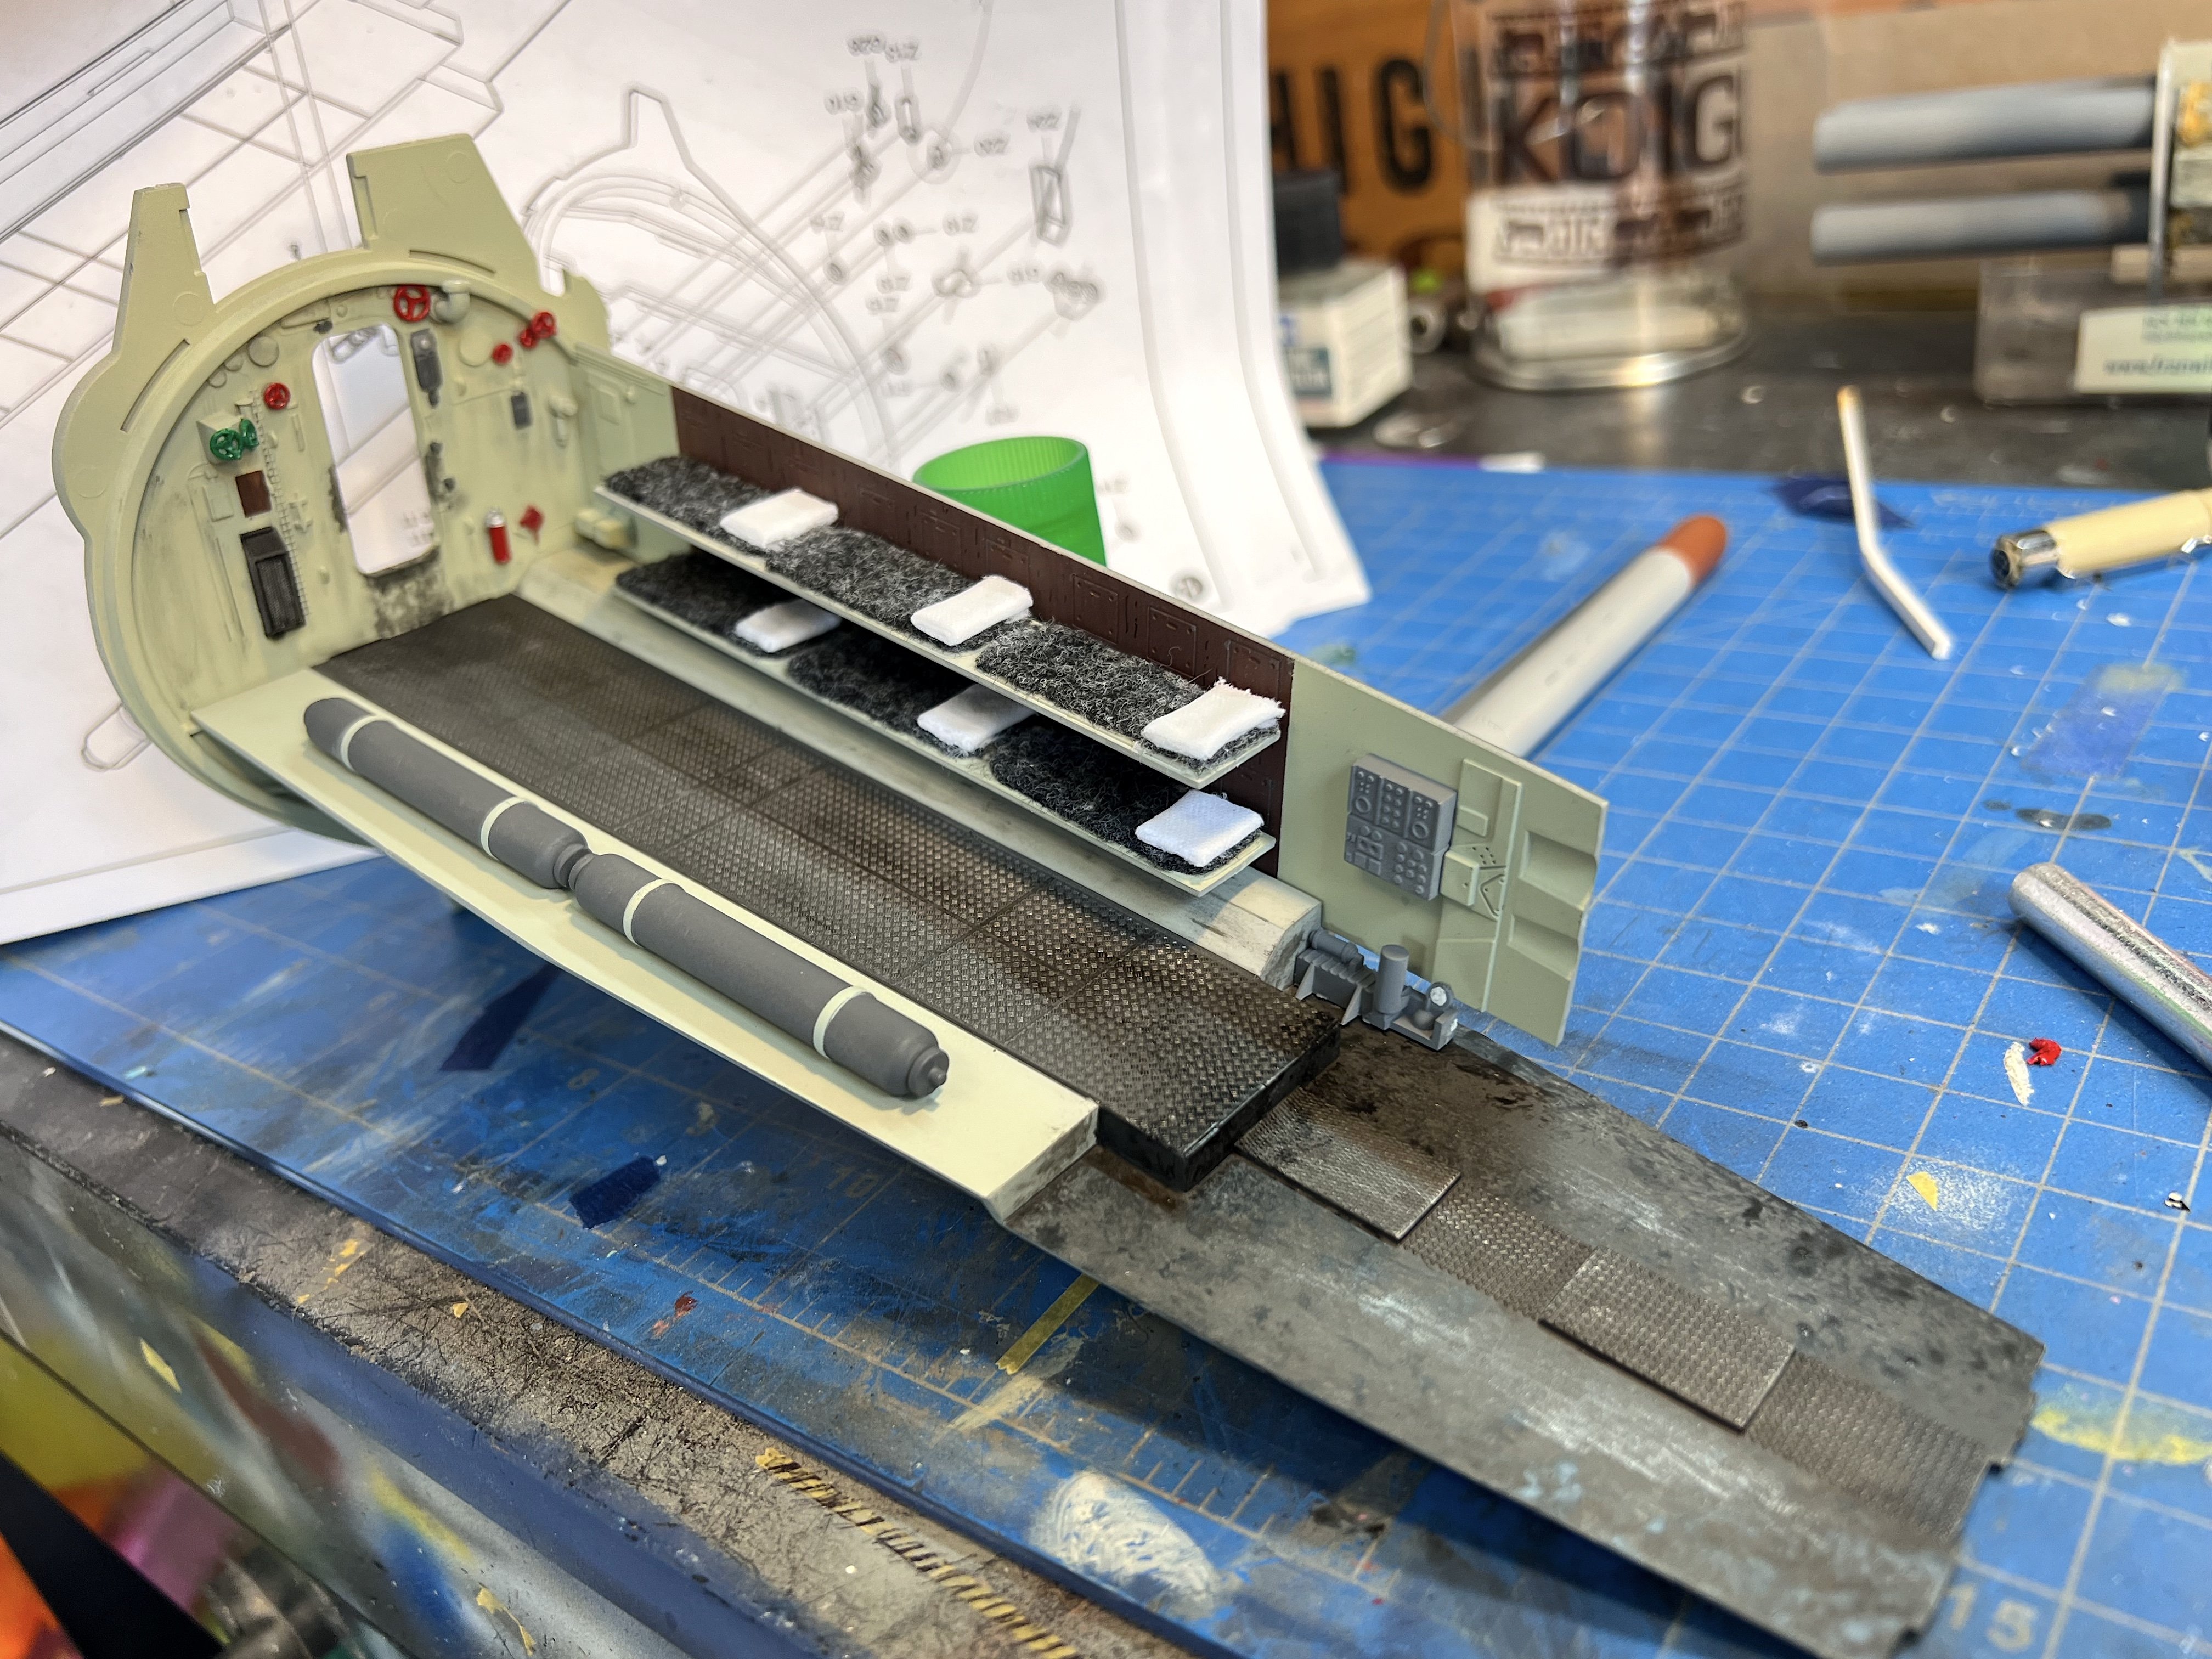

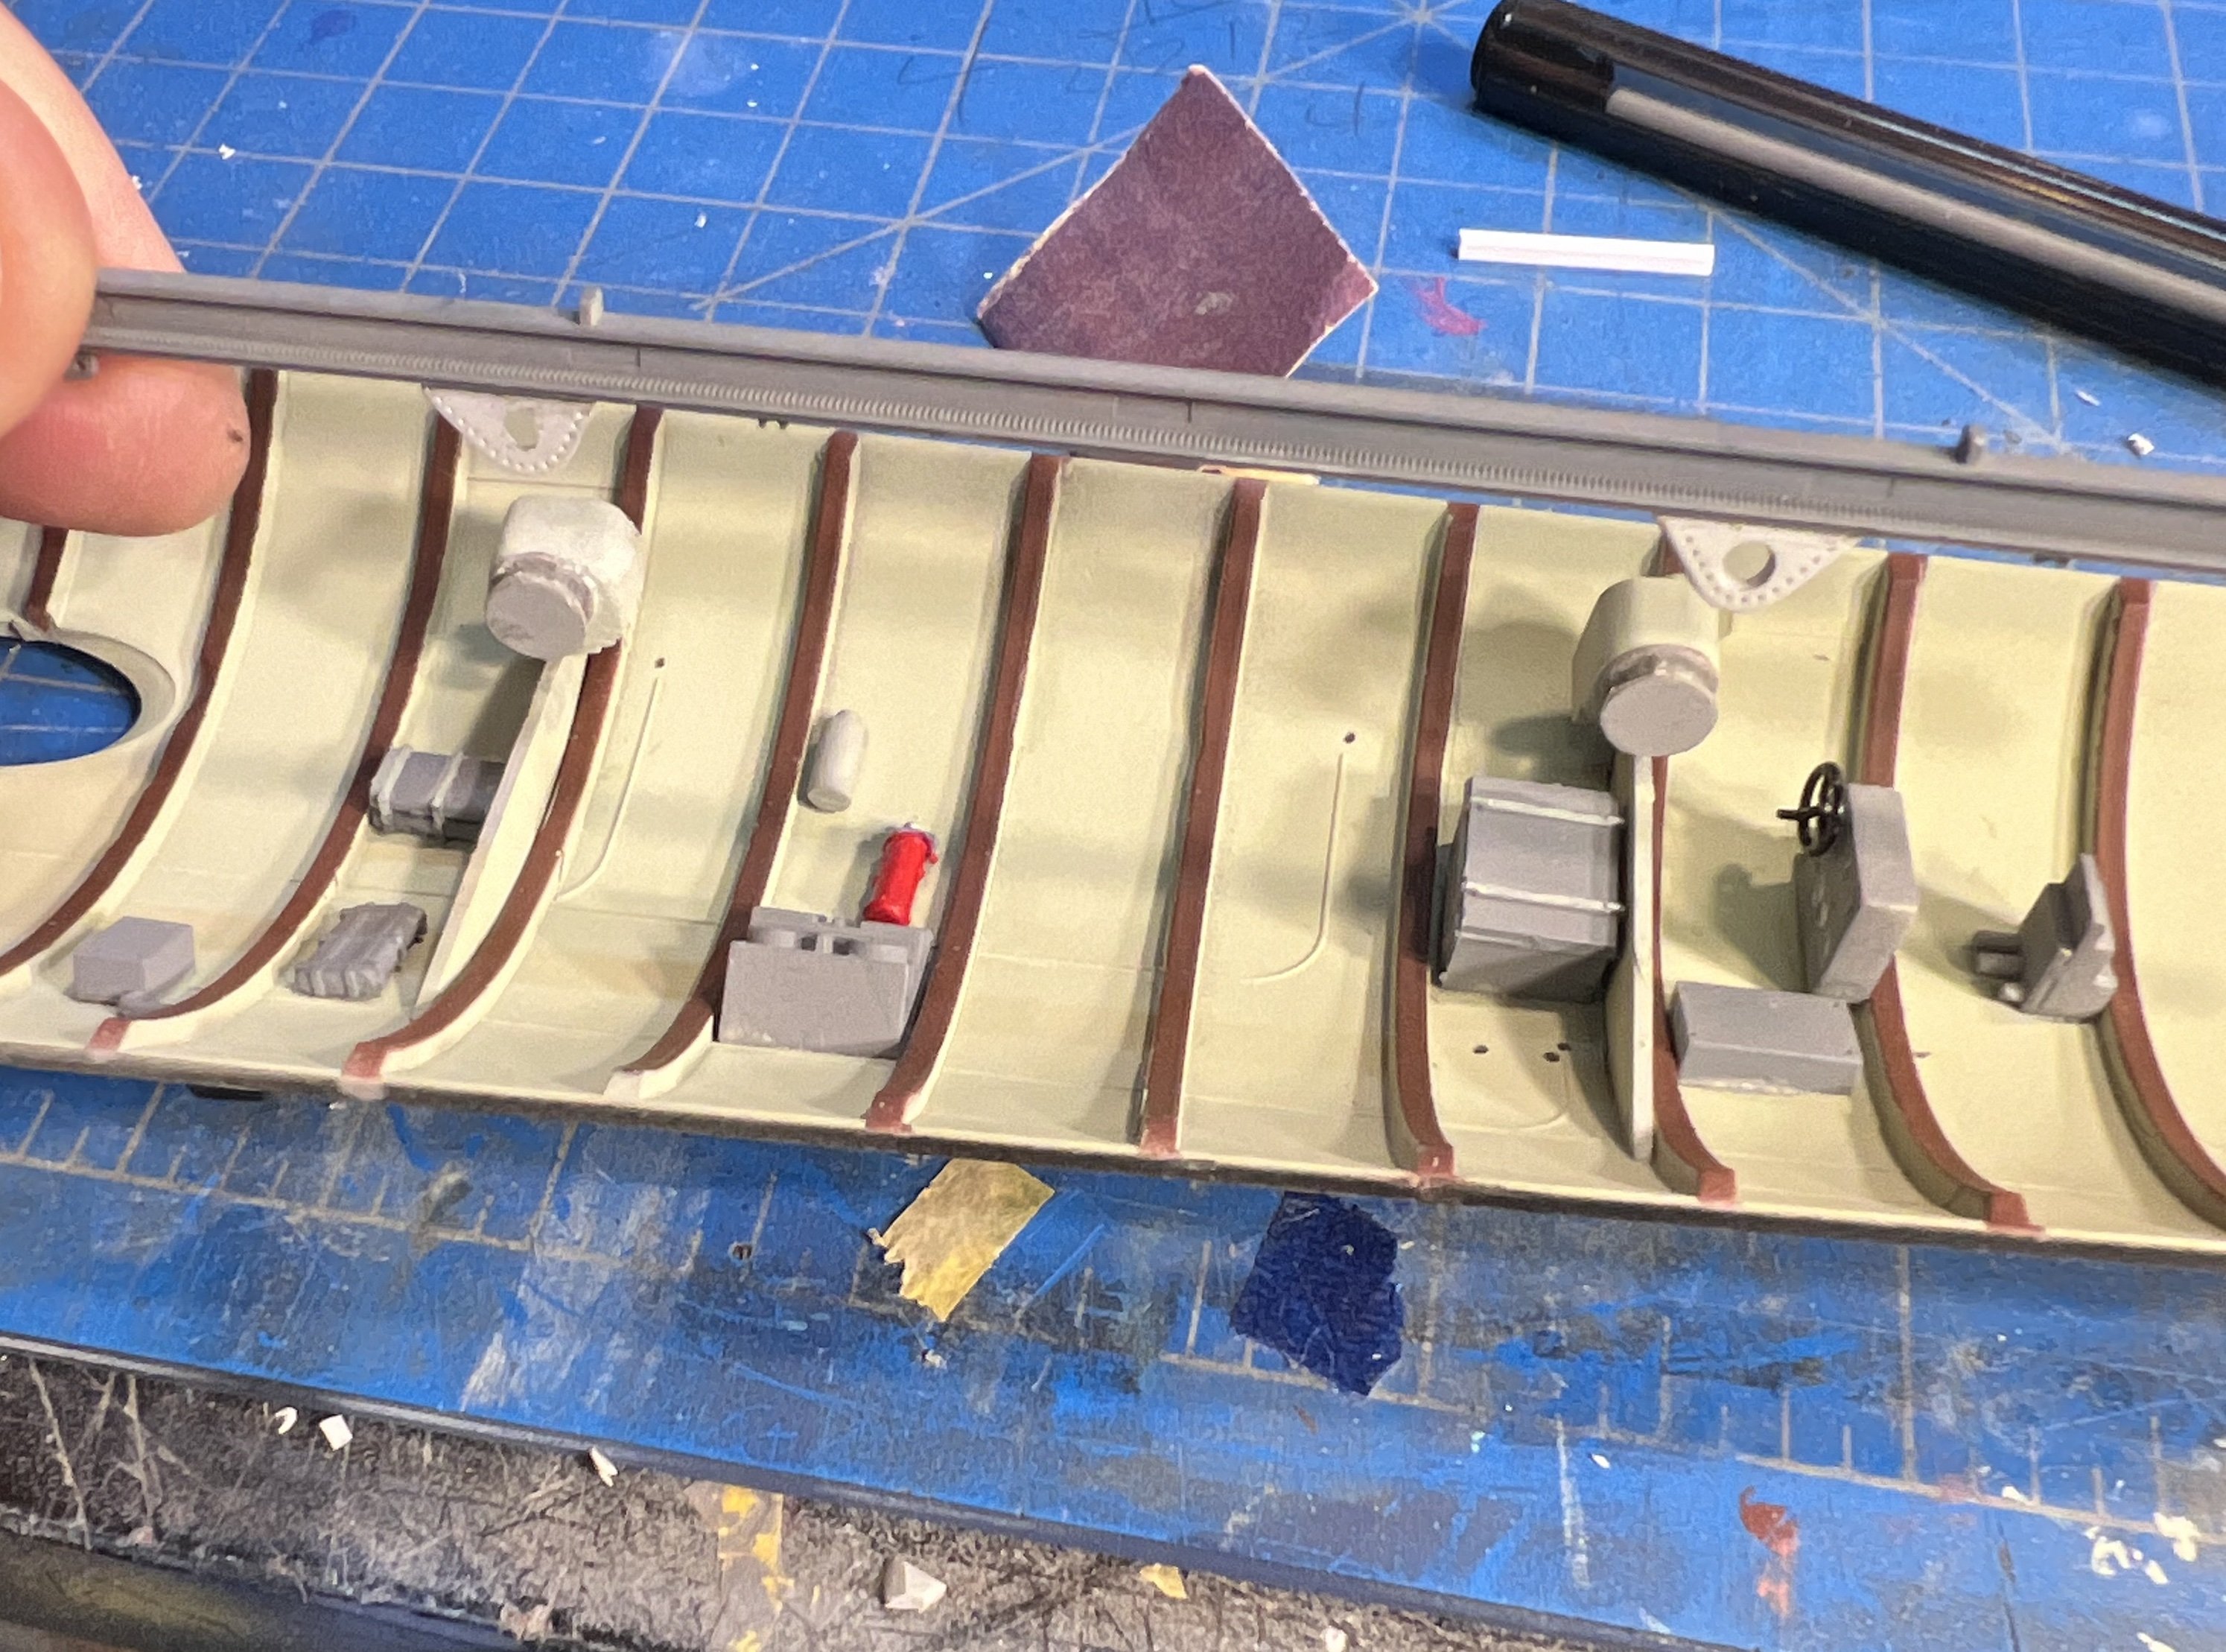


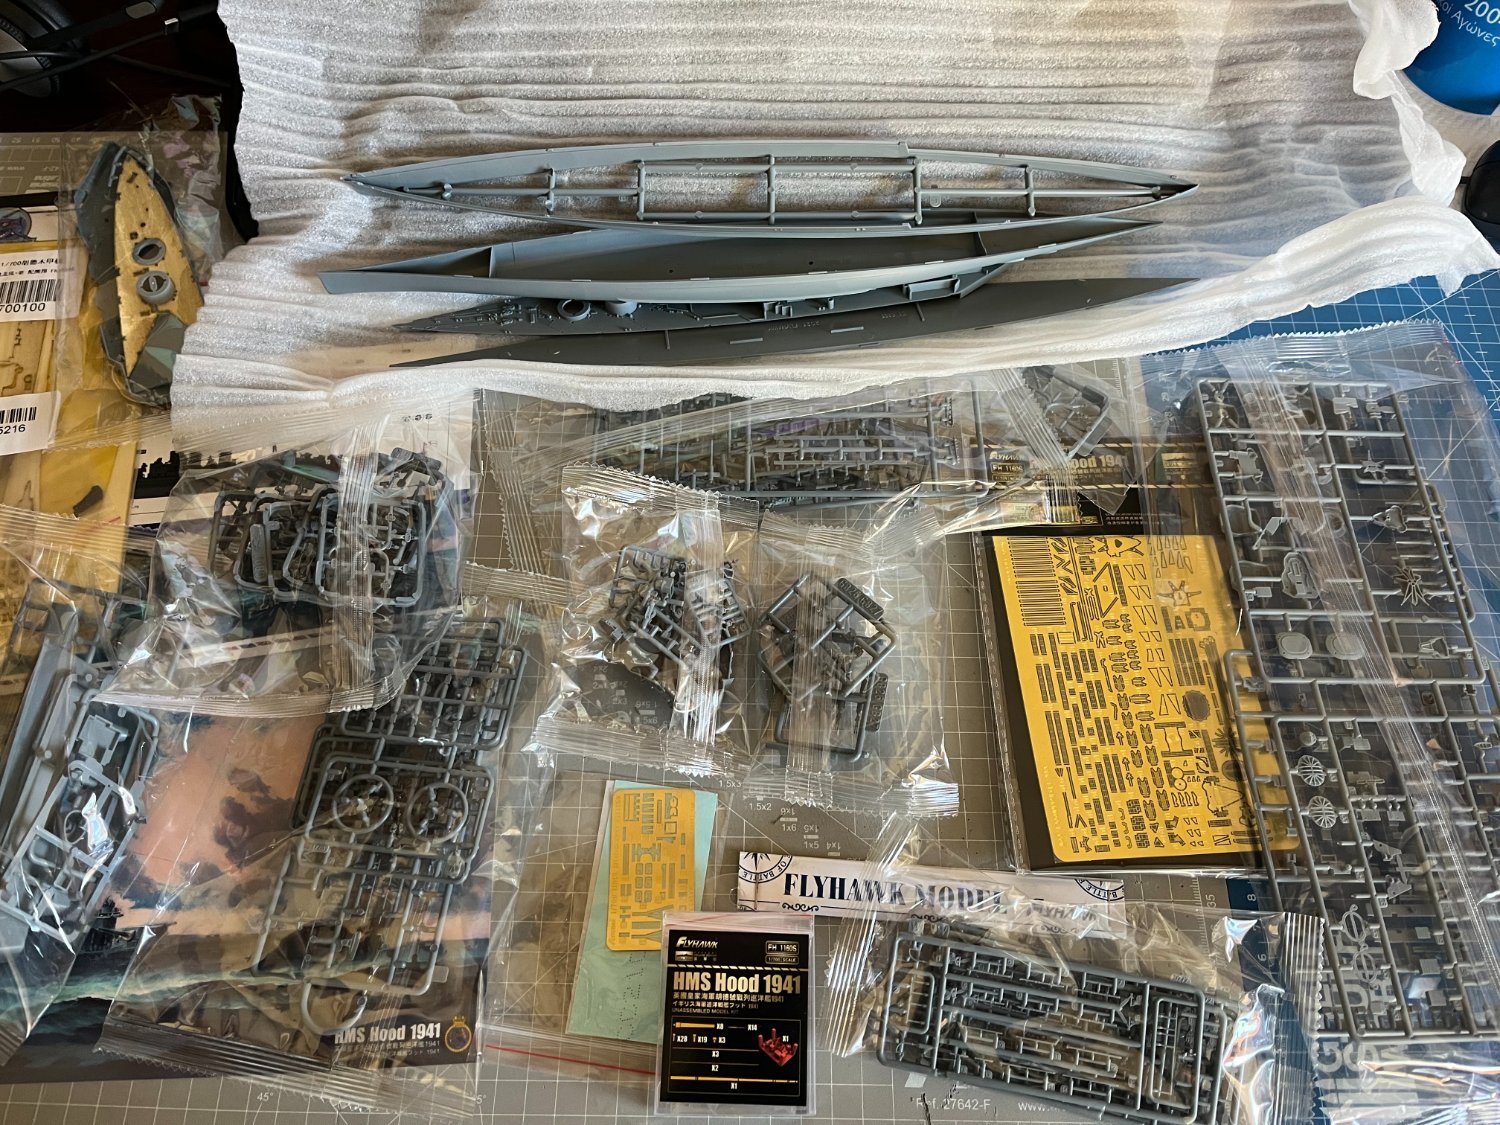

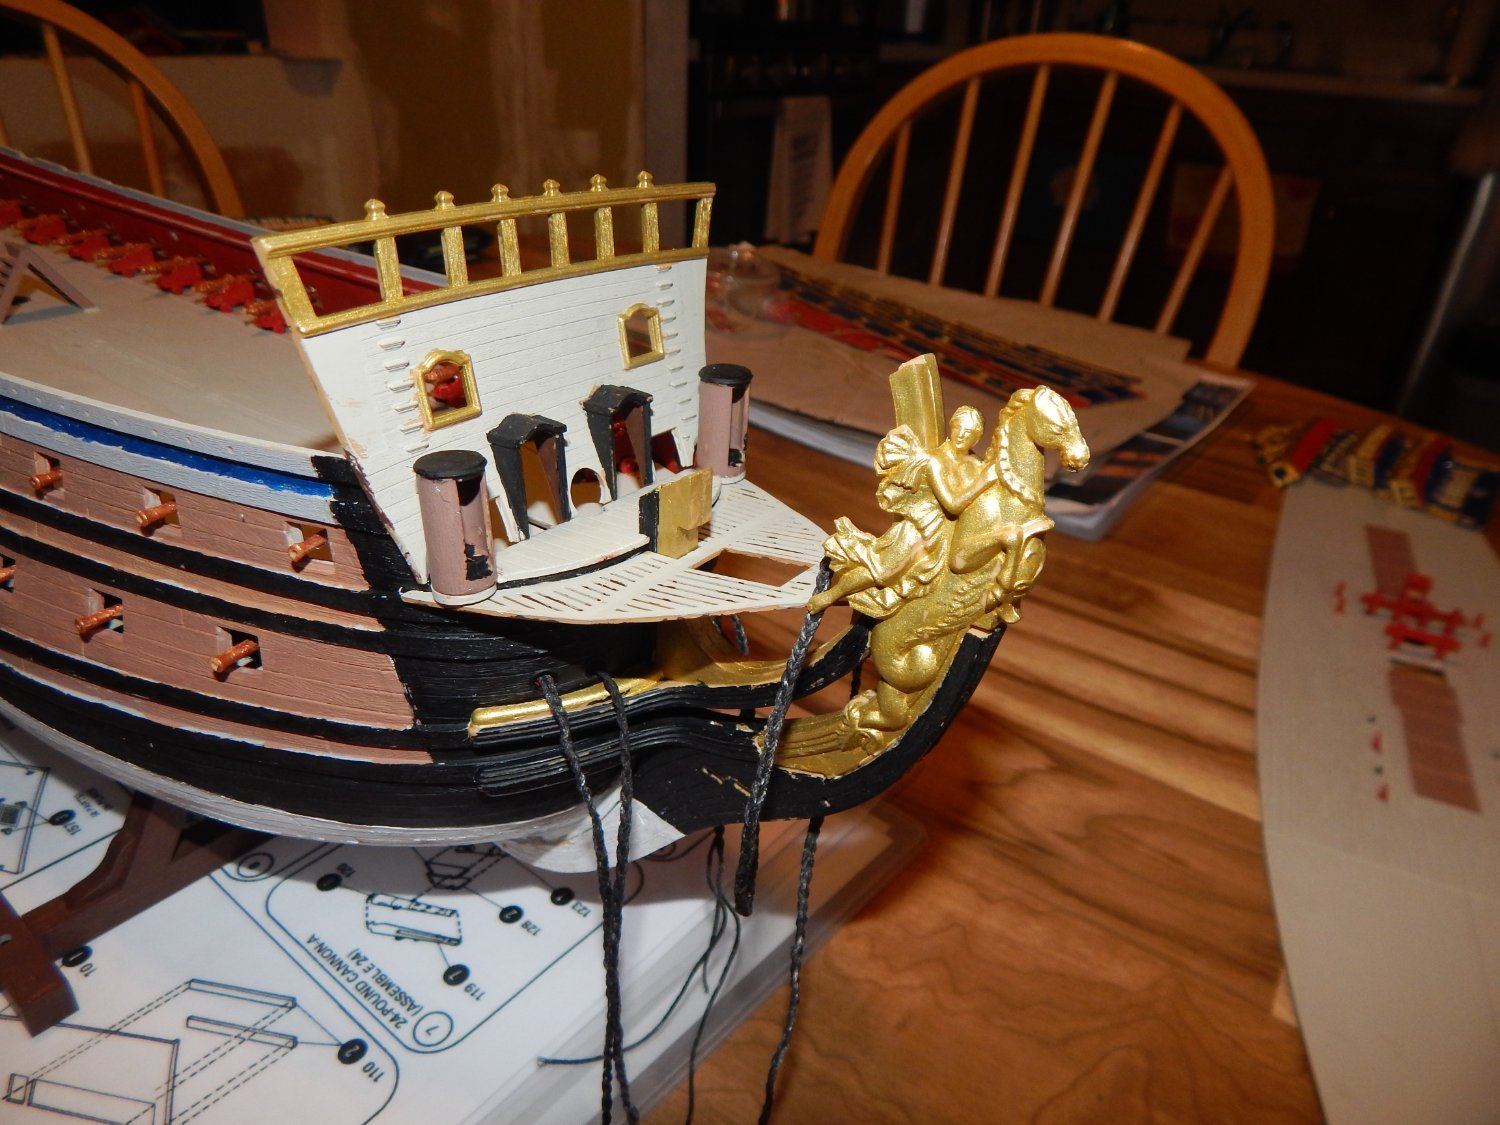


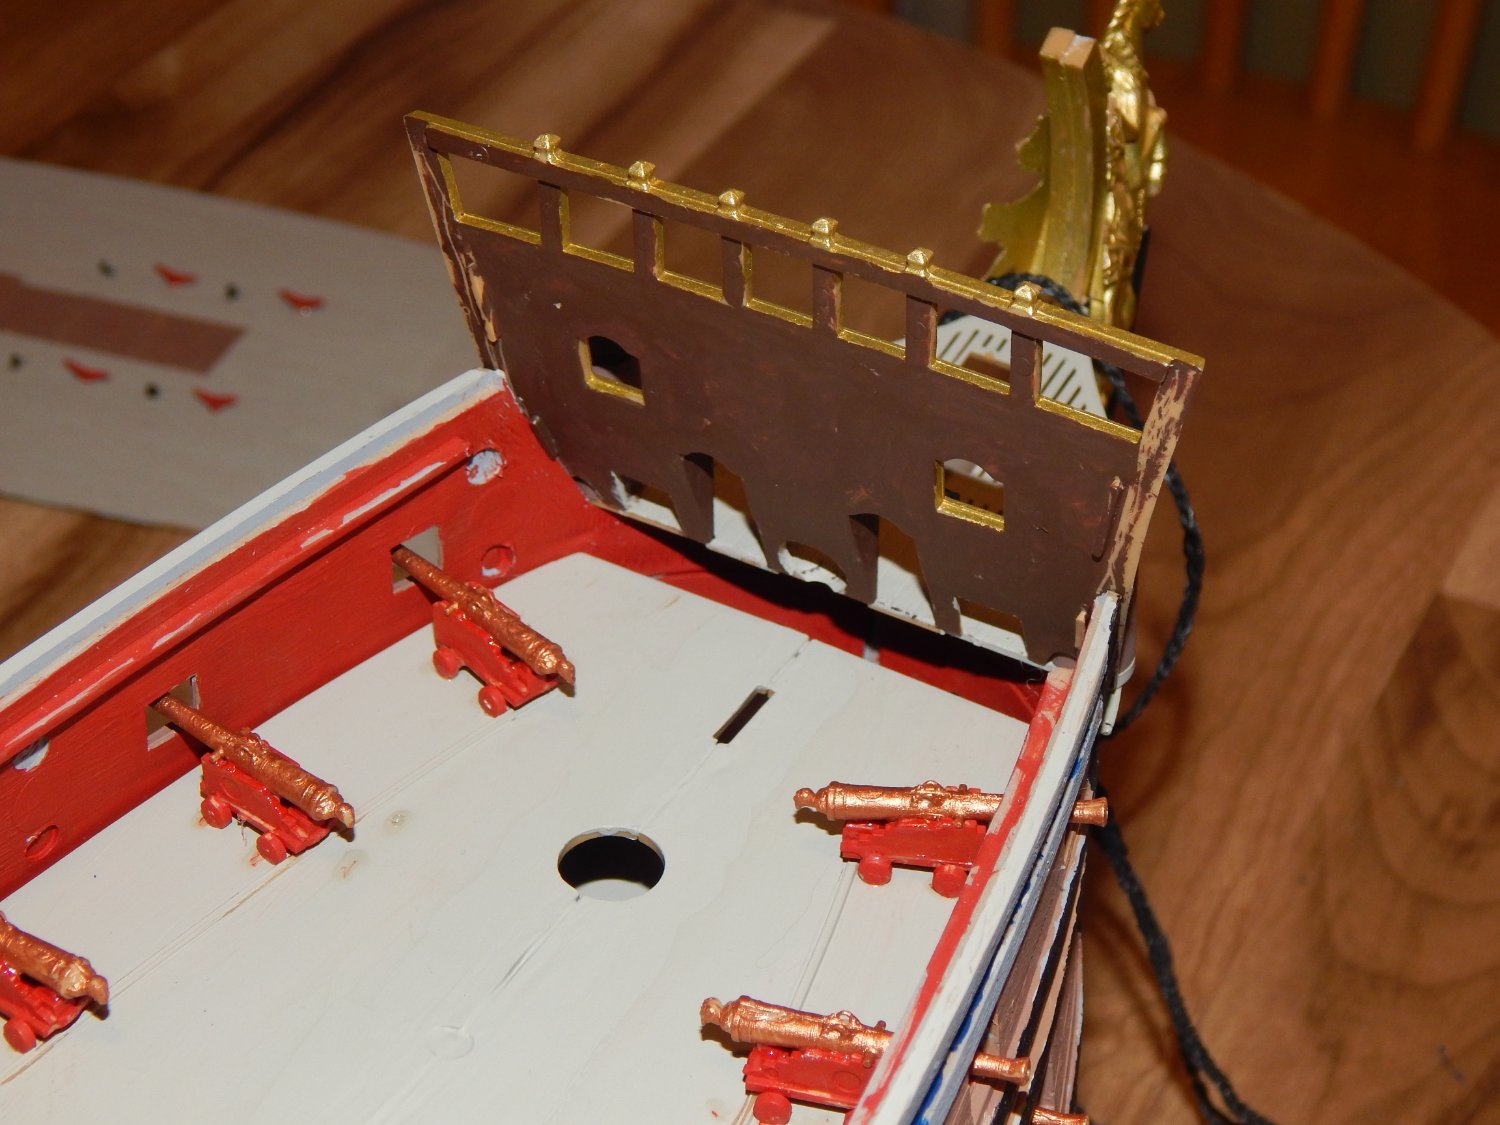
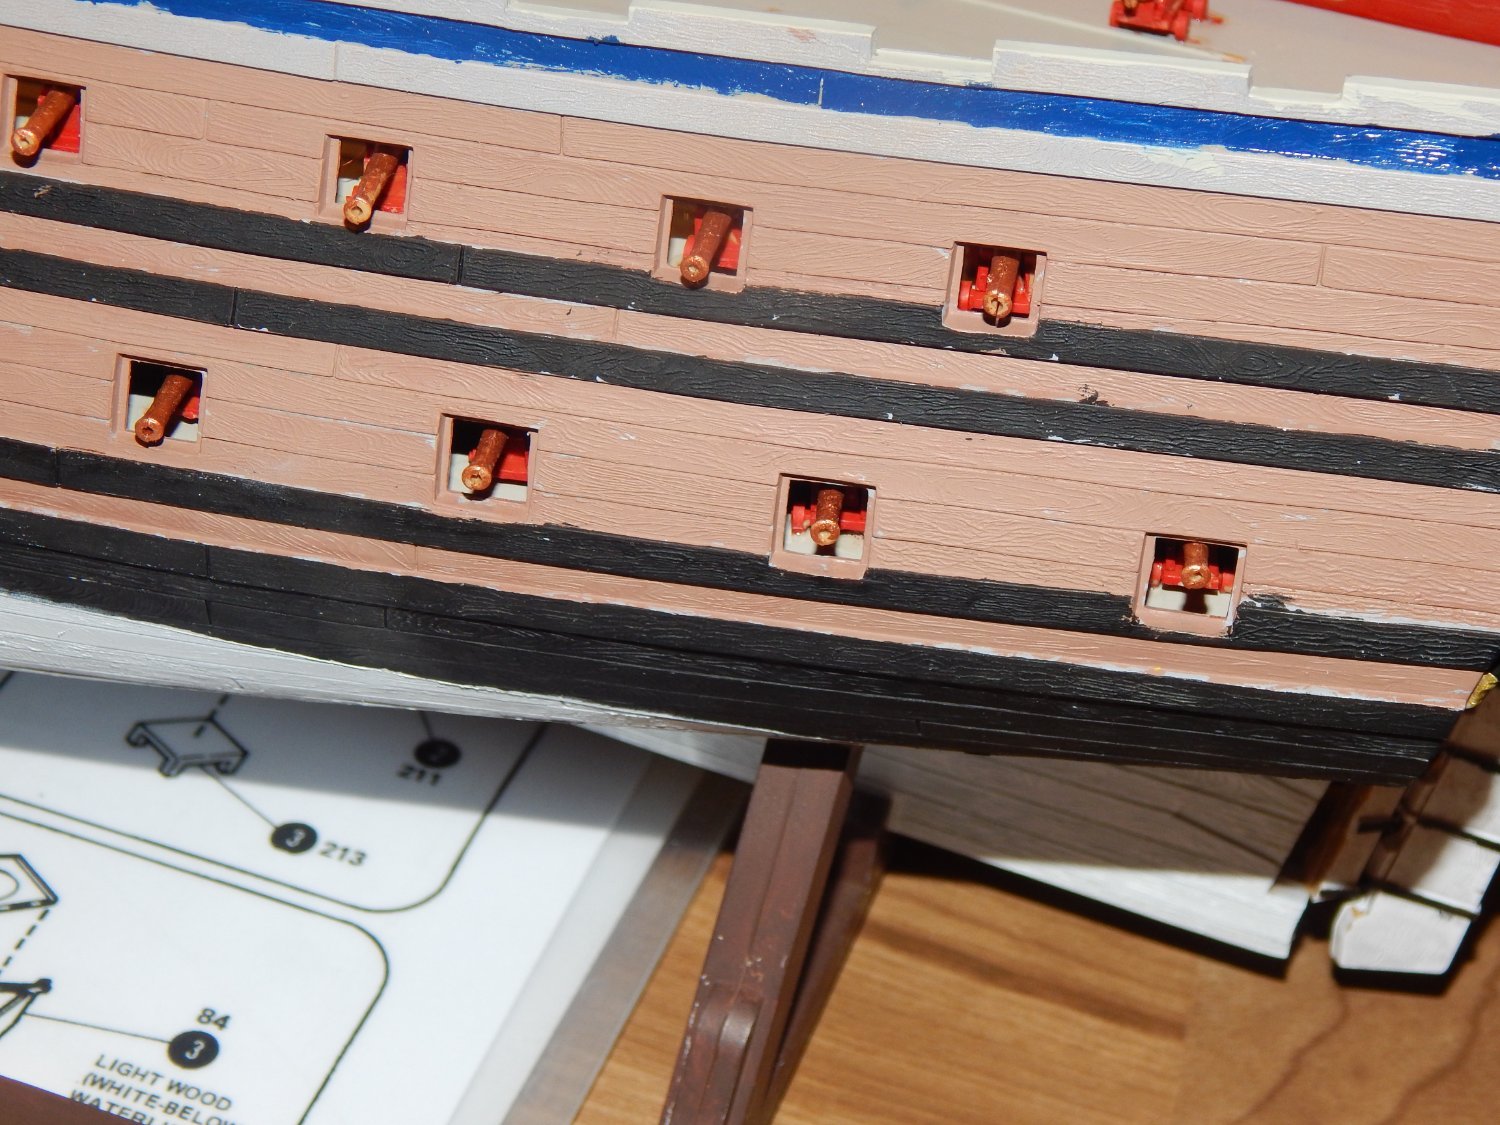


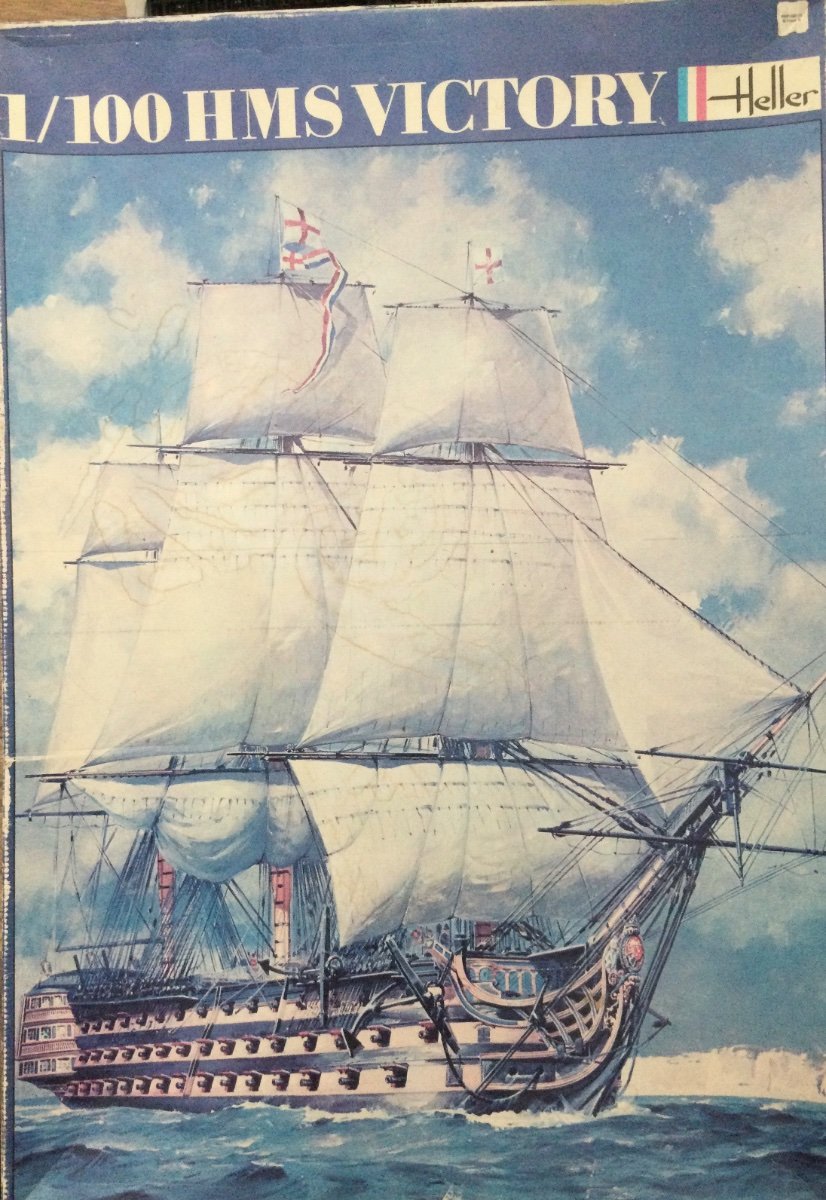


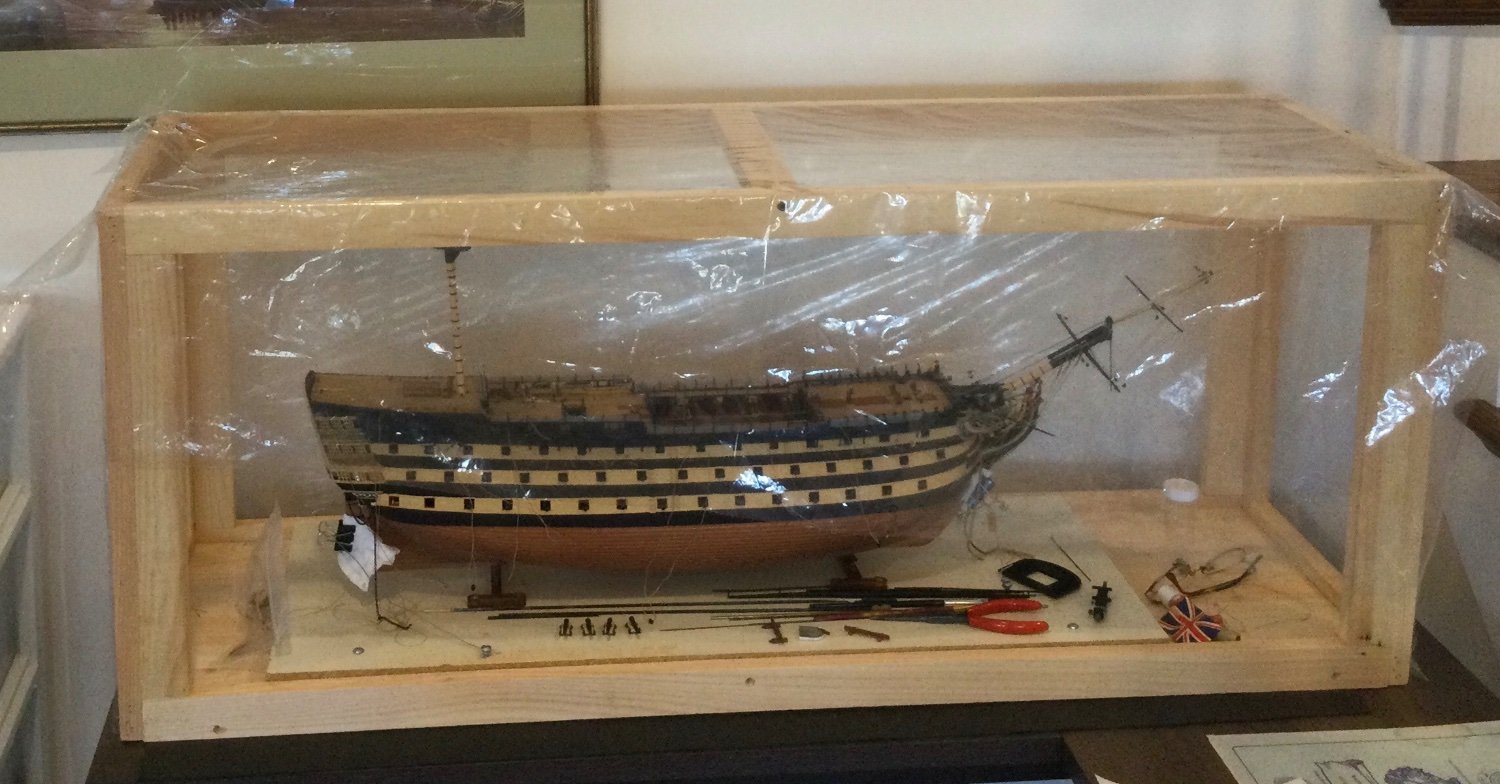

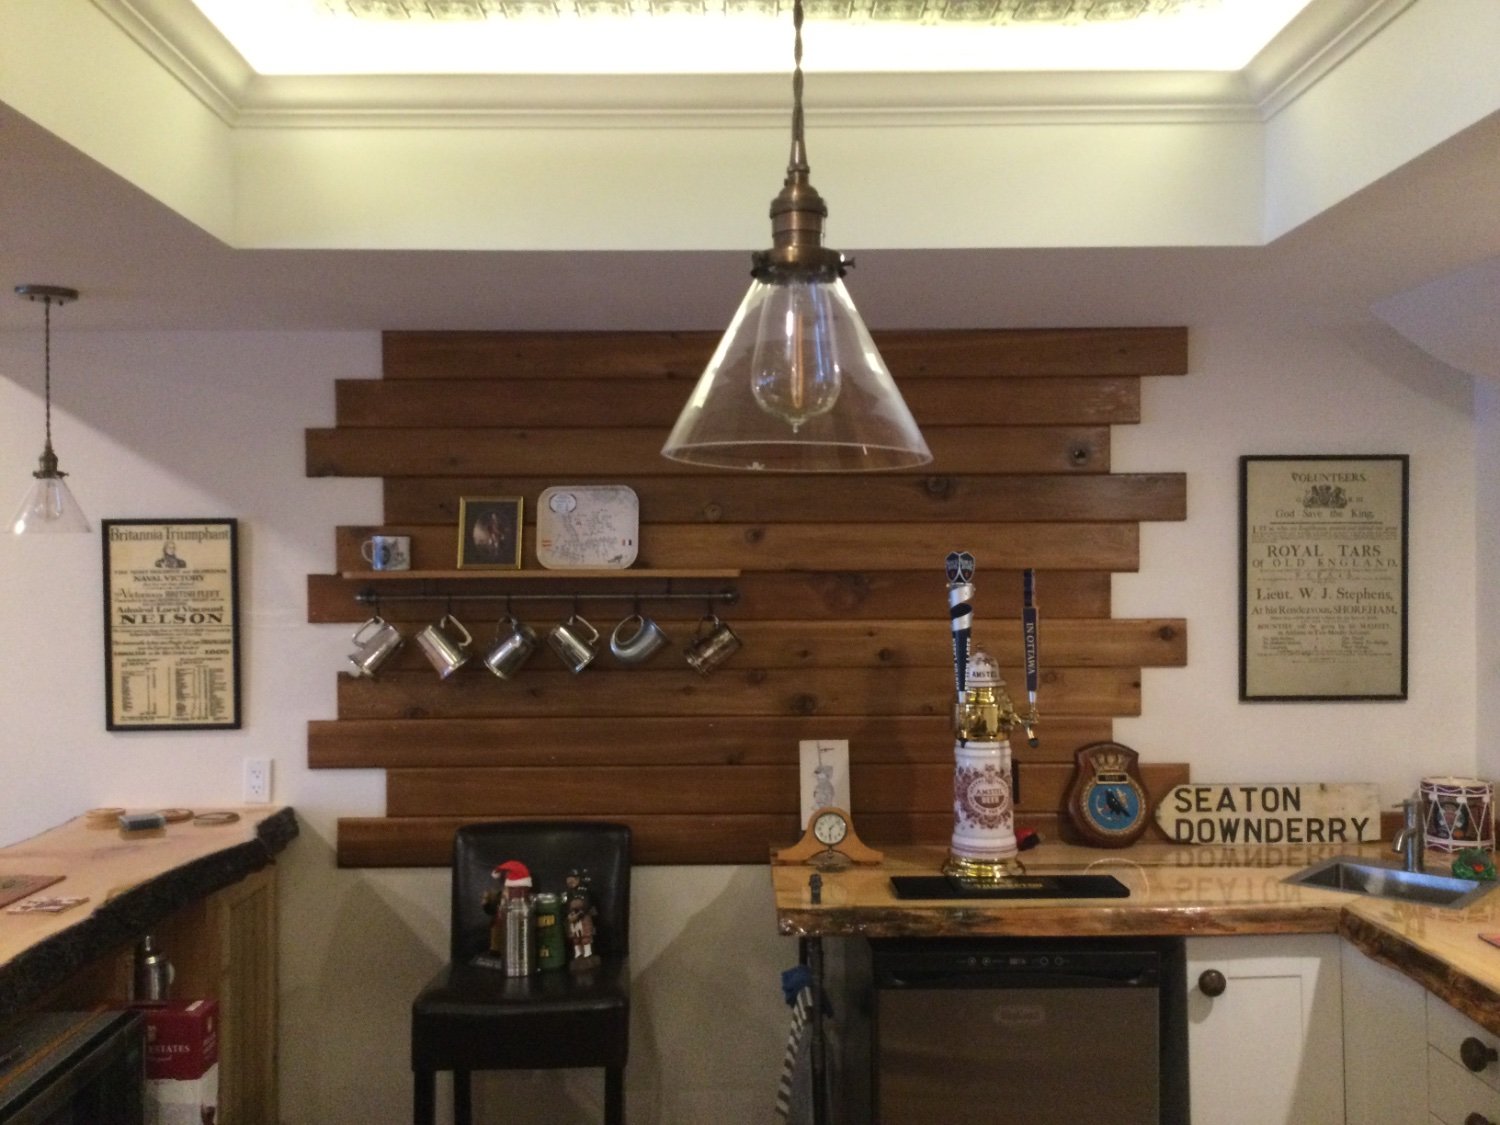
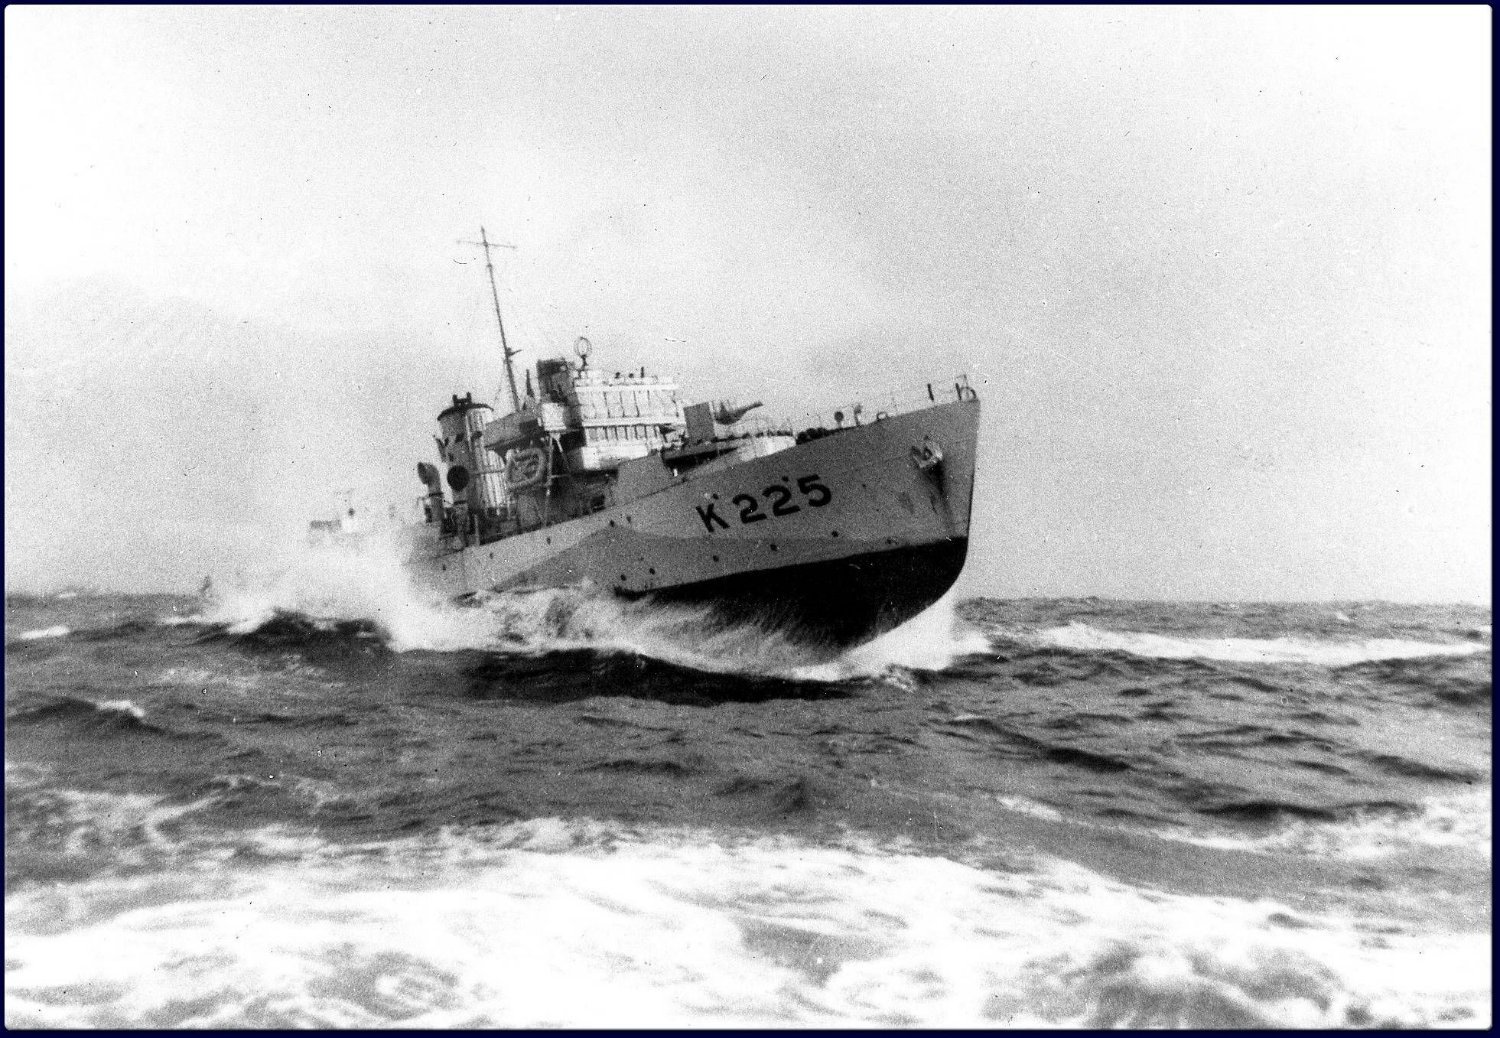


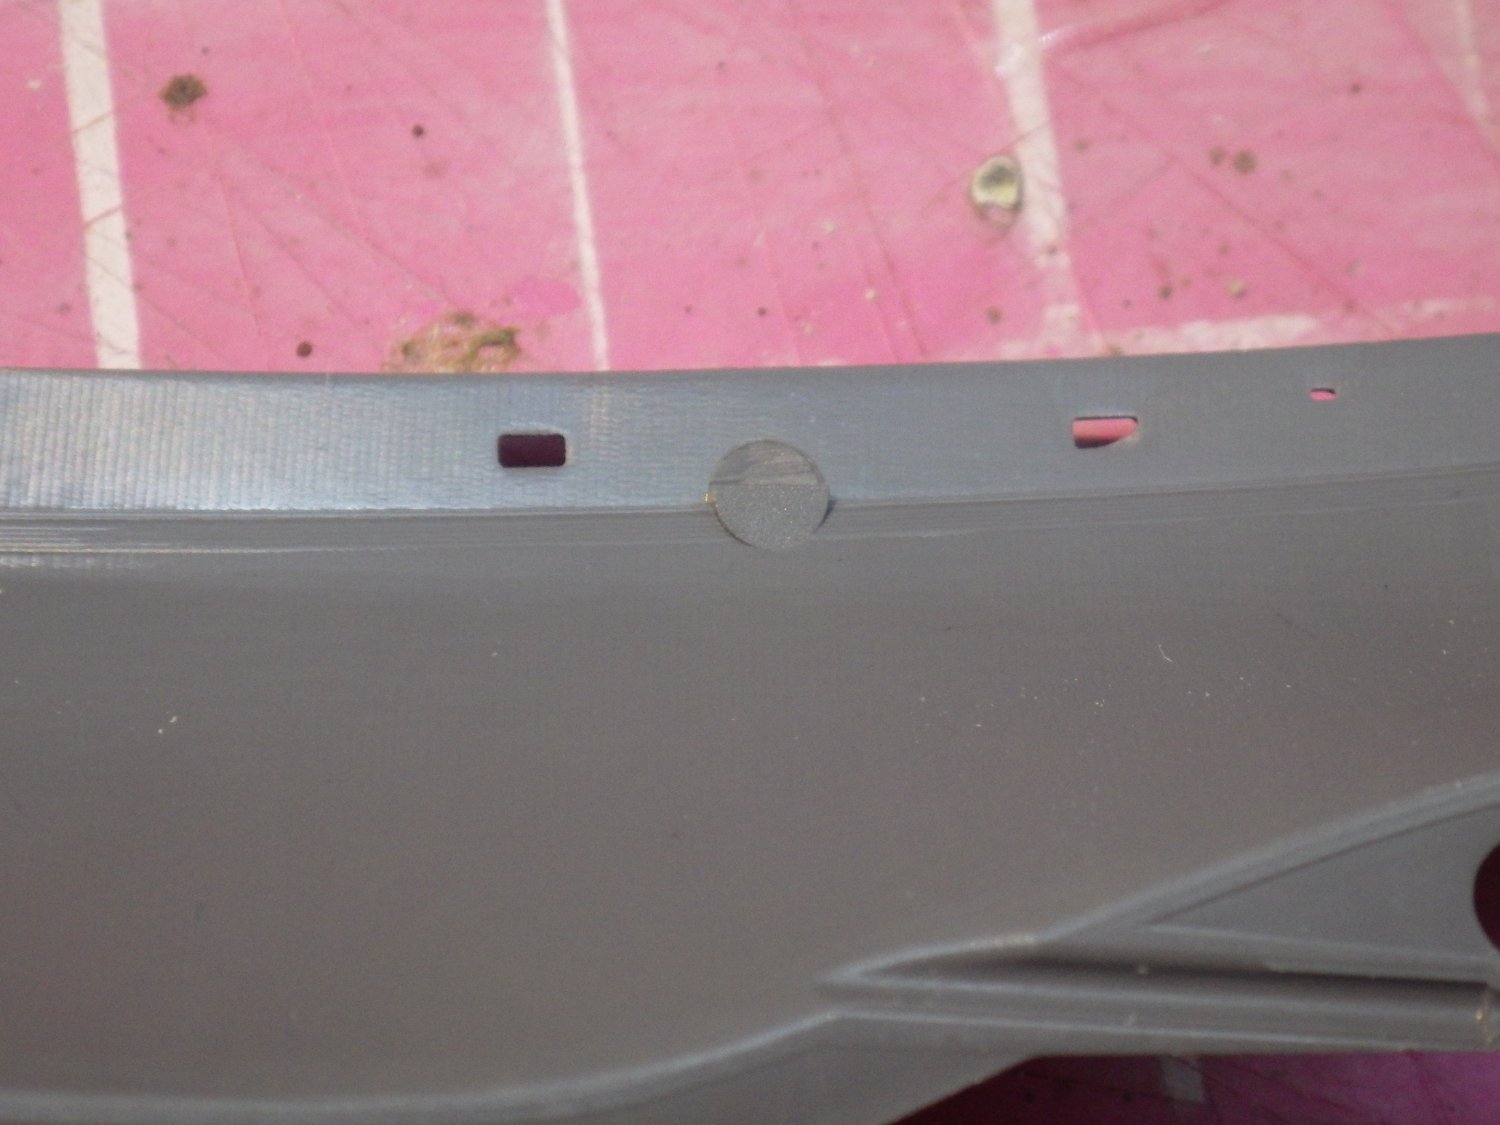


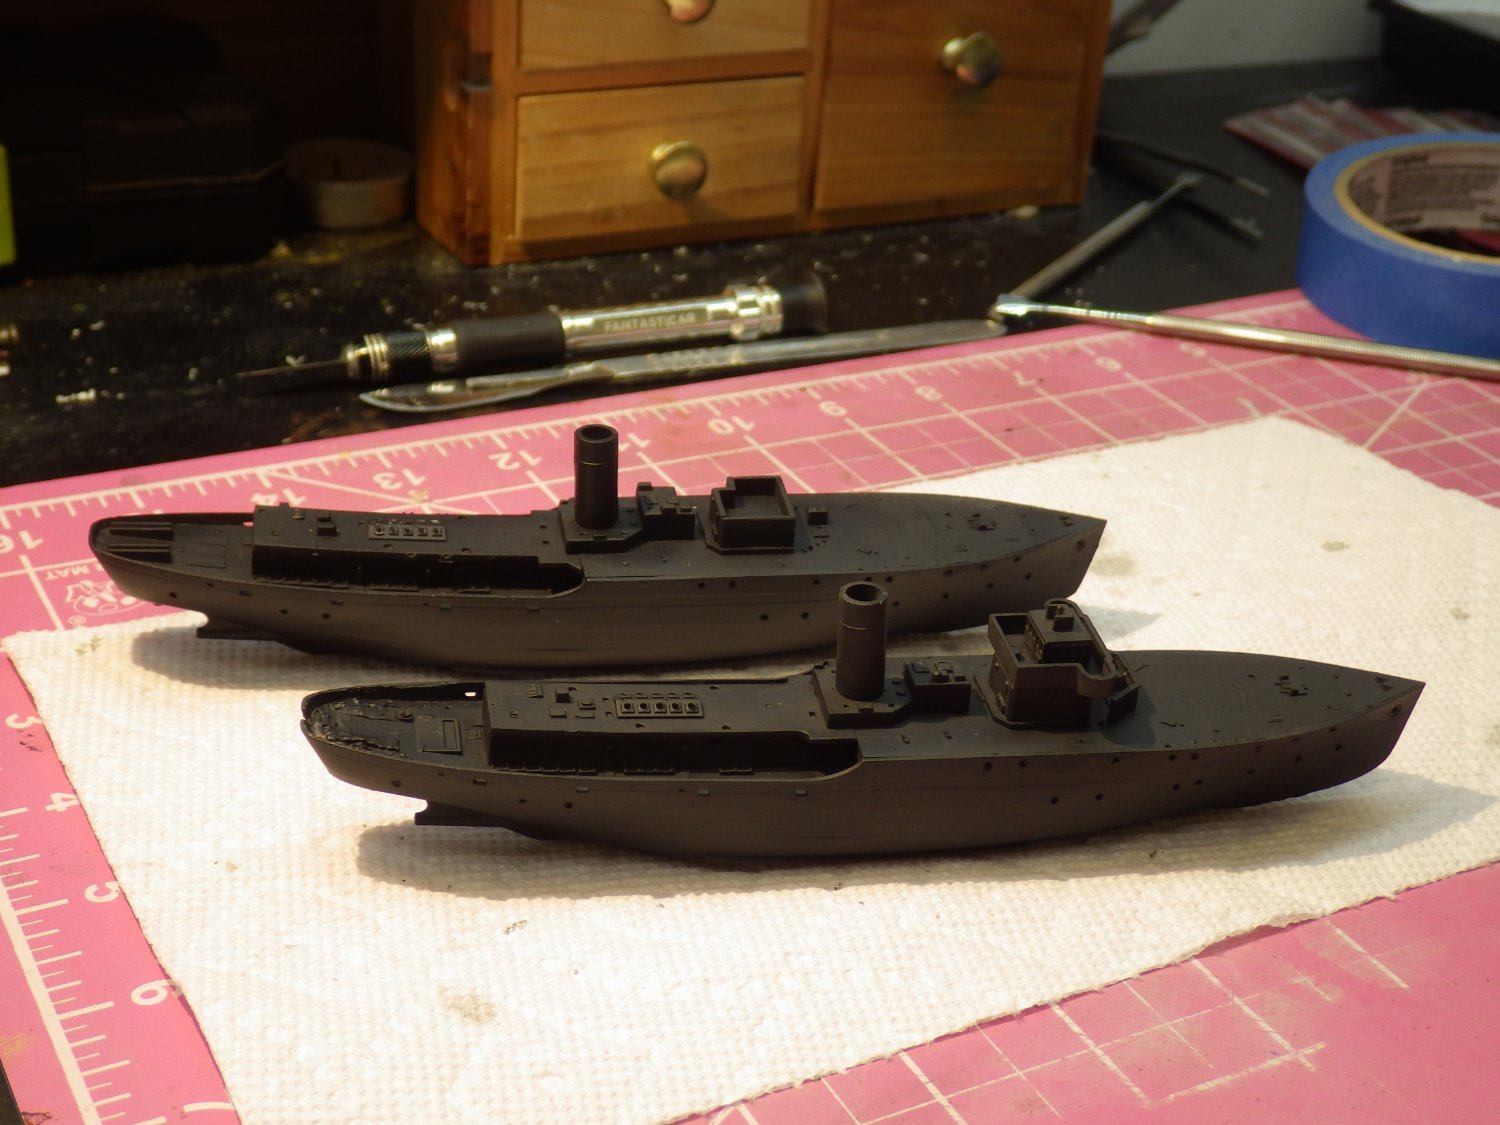
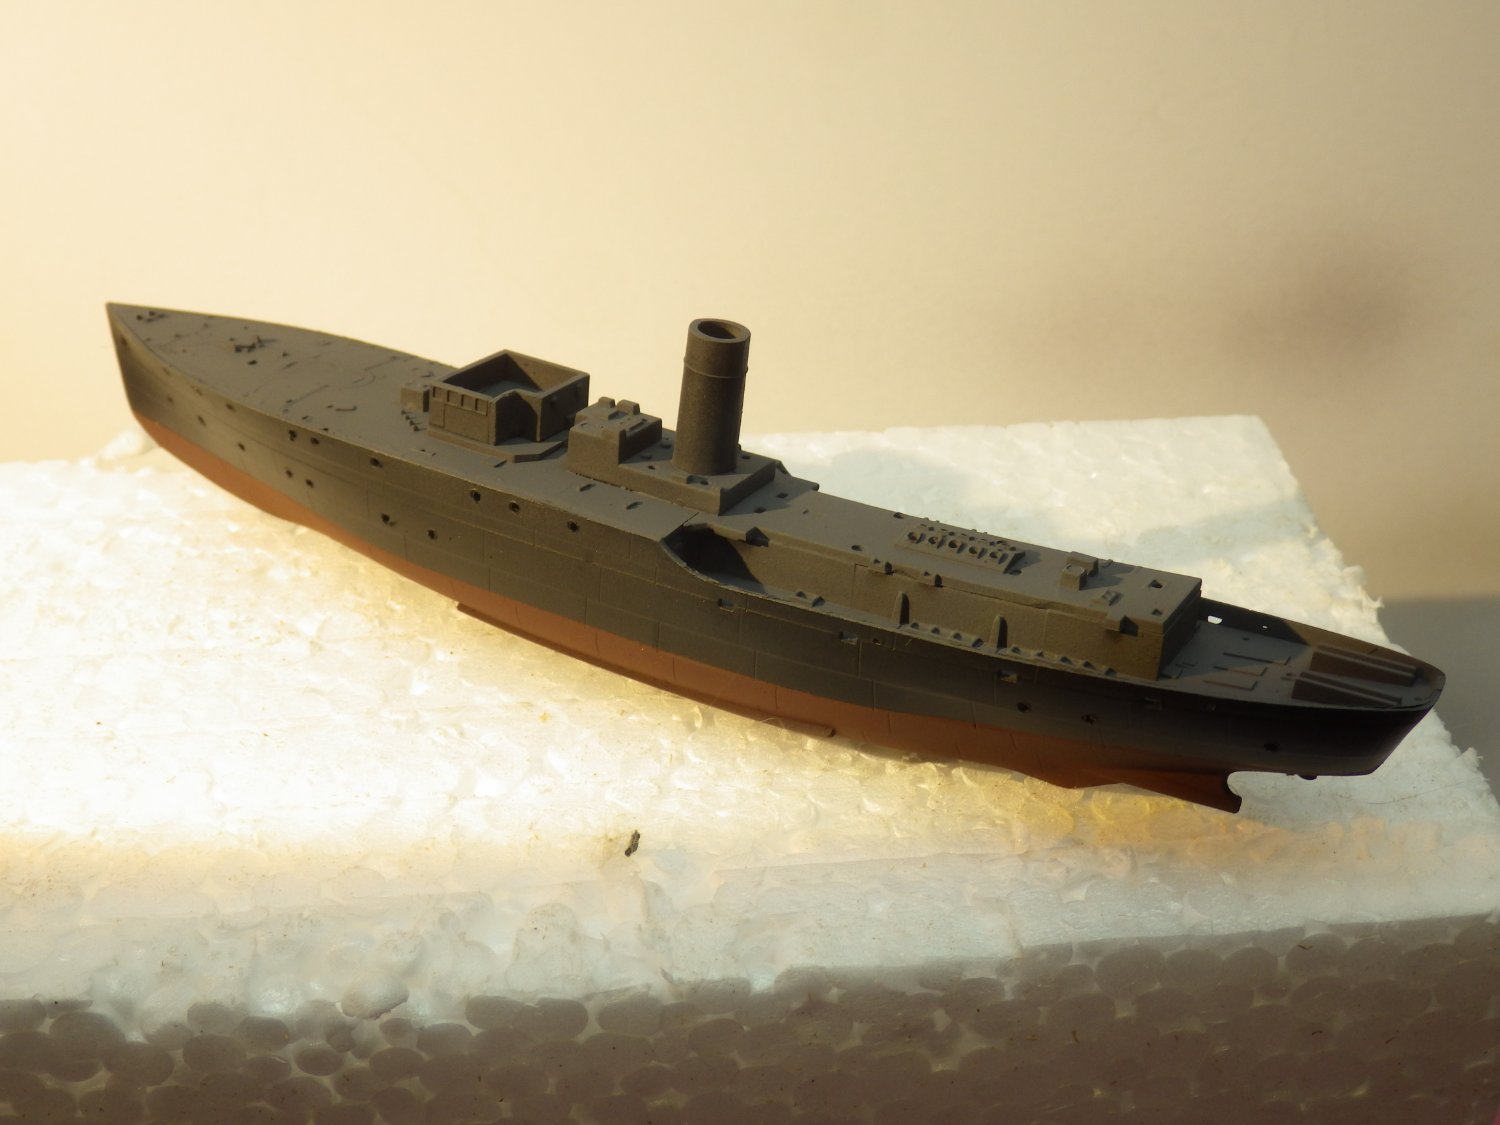
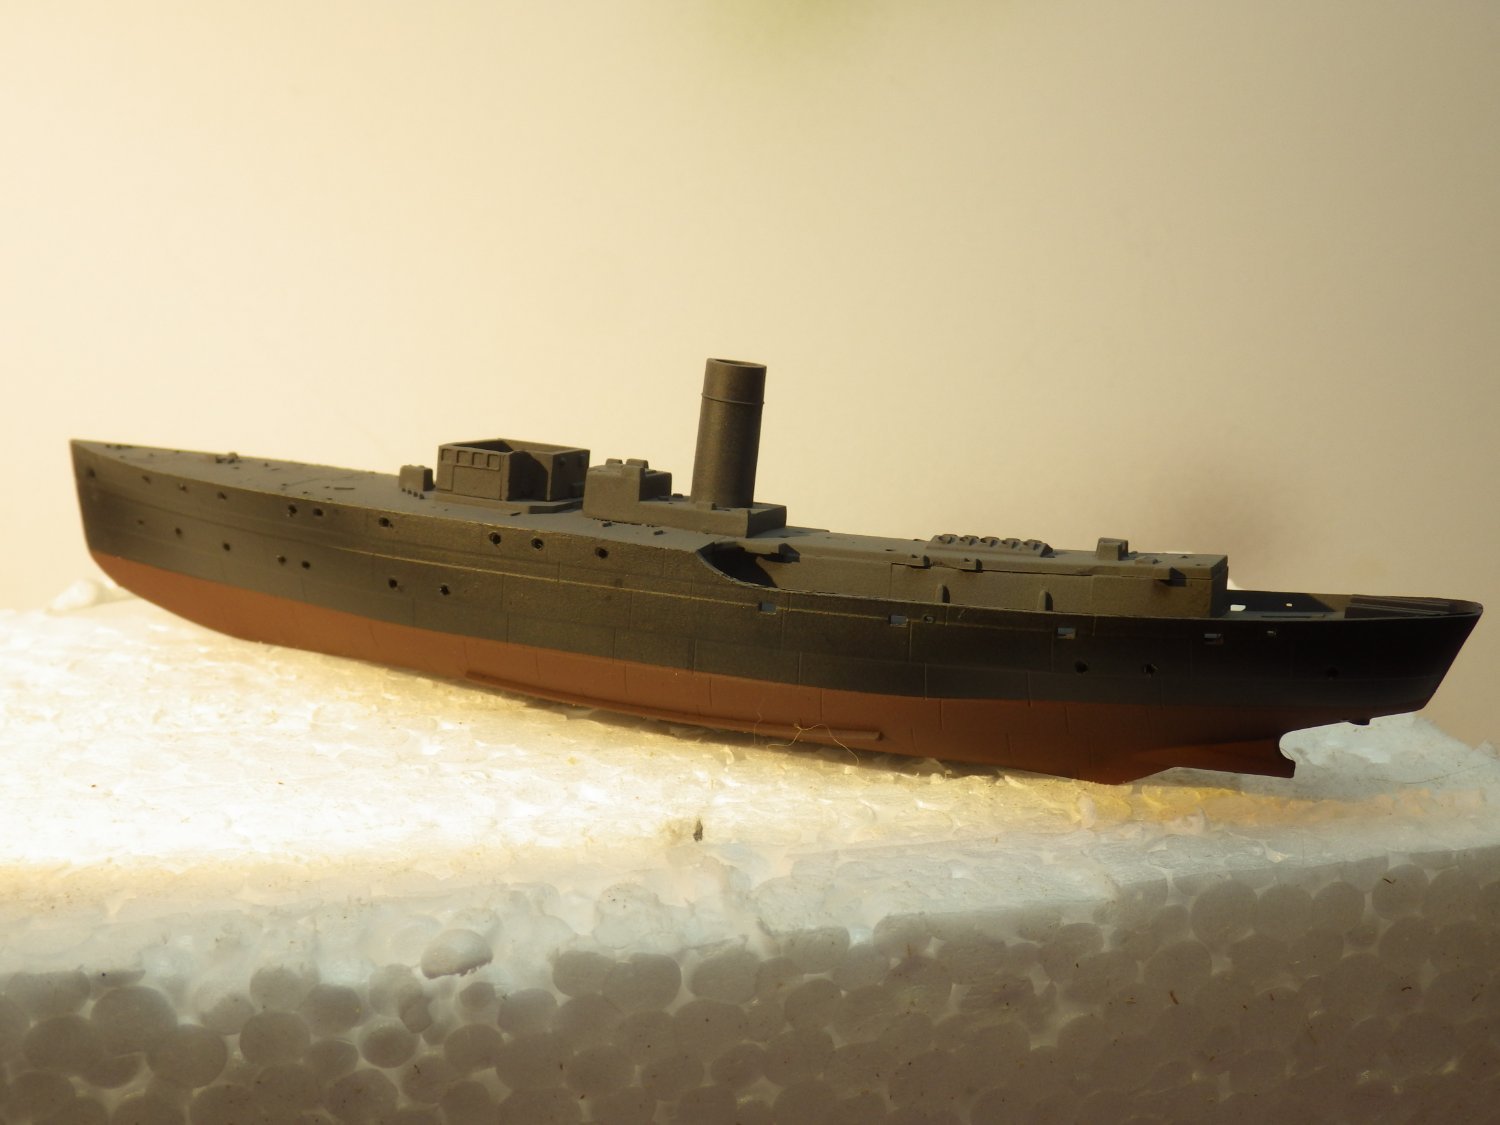
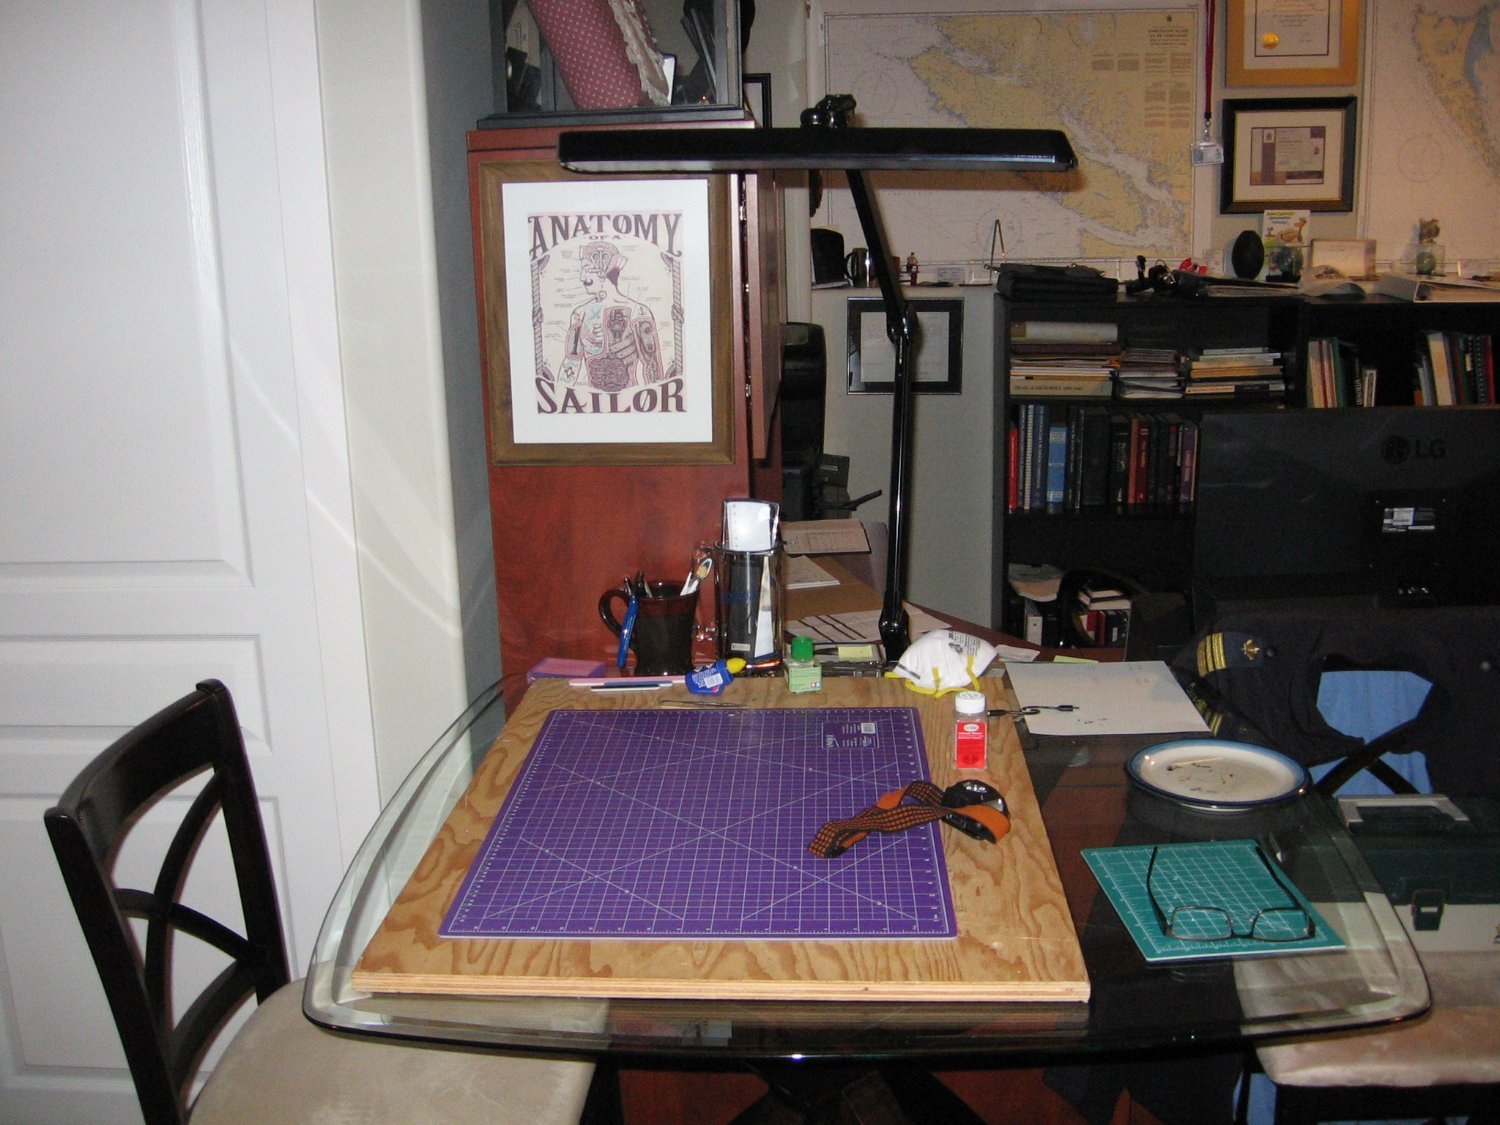
.JPG.4e481a45bb47baab8be2fc545dad20d2.JPG)
.JPG.feb2fe22fe8148ef78a1b35c5d511311.JPG)
.JPG.2397e06fa167802fb177db4050fa11d9.JPG)
.JPG.0126de223e58ba632ab80a6741081779.JPG)