Search the Community
Showing results for tags 'caldercraft'.
-
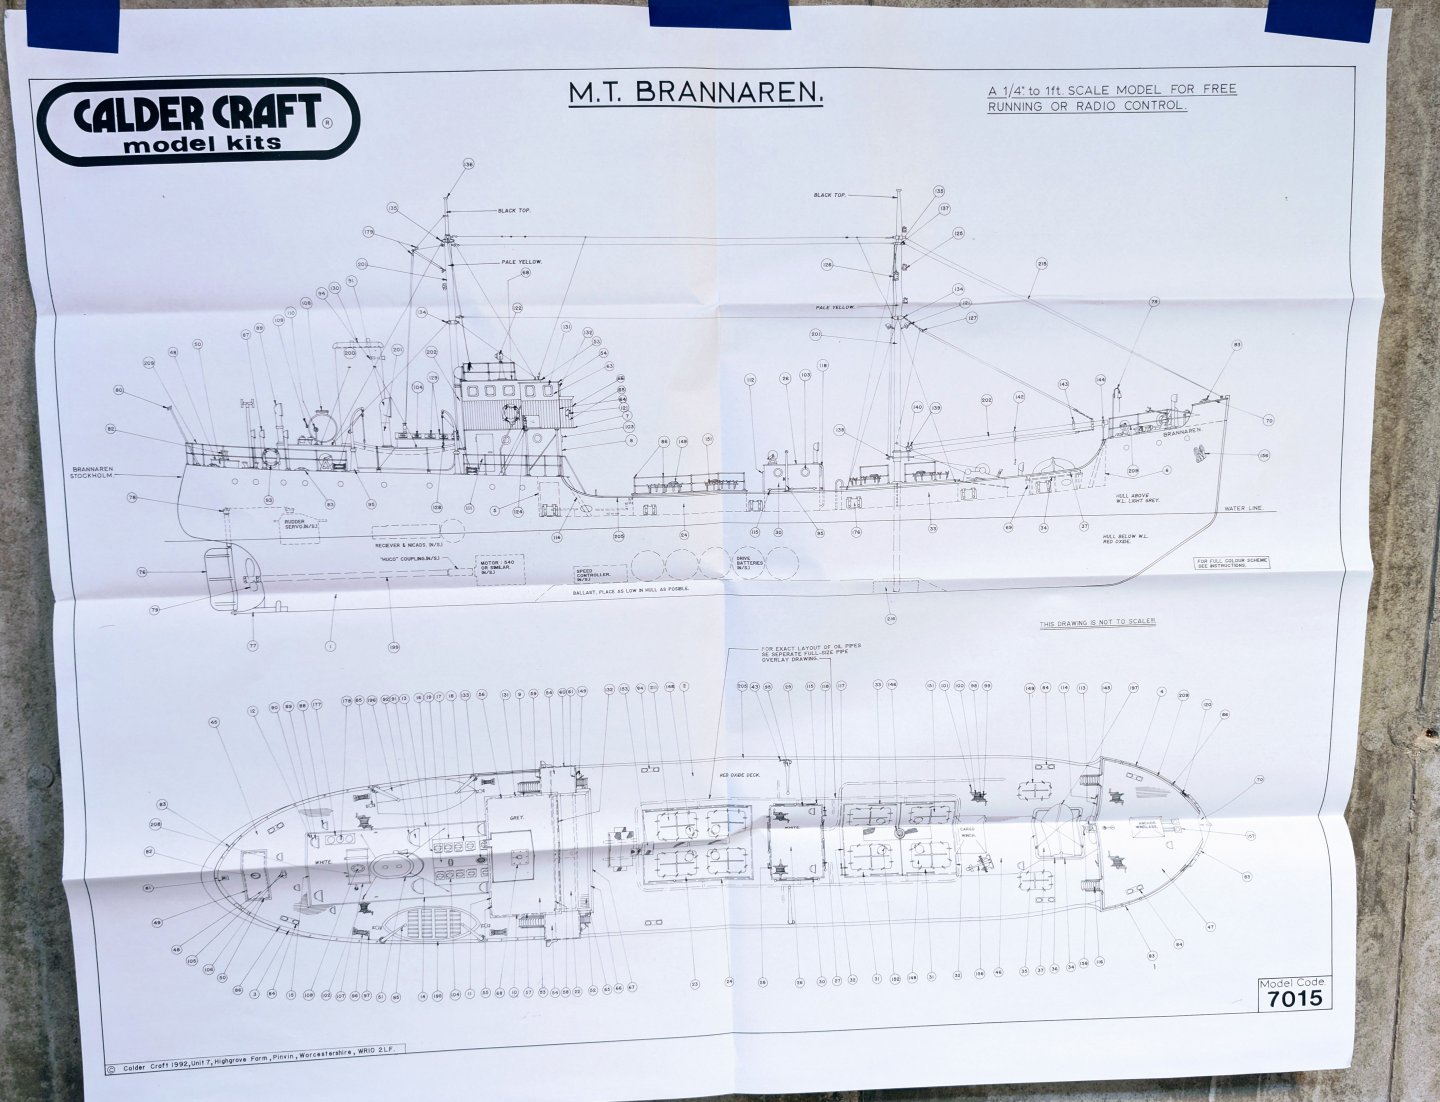
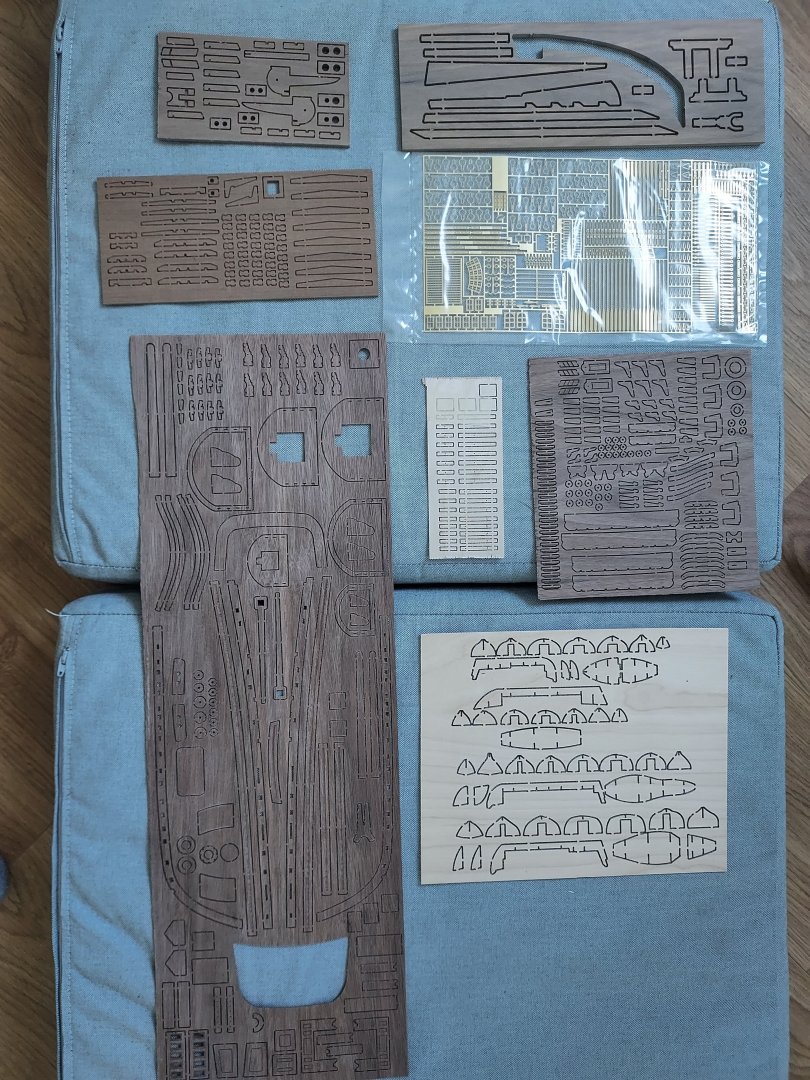
 After a break from ship building with the Jupiter locomotive, I've returned to ships. But the HMS Victory really maxed me out on ratlines, so I was looking for something different, and wanted to build a cargo ship. The Caldercraft Brannaren looked like a good bet. Included here are the tranditional "what's in the box" pictures. The hull is pre-formed since Caldercraft intends this to be a RC model if desired -- but I'm going to build it as a static model for display. I pulled the manual and quickly realized that sparse is perhaps an inflated description of the written instructions. So I went looking in the box for a bunch of how to build diagrams -- but no dice. There are a few charts -- I've included an example of a master chart -- but for me at least there was a real gap in figuring things out from the instructions. I think Caldercraft's philosophy on this model is best summed up by the following excerpt from the manual: "Piece by piece descriptions of placement of the remainder of the fittings have been deliberately omitted, as it is thought that the drawings and photo pack adequately describe and show all placements of them." I read this and thought: great, where is the "photo pack". Not in the box. Did some preliminary web searching for pictures, but didn't find much beyond the single stock picture on the kit page at Caldercraft or Ages of Sail or others. Wrote Caldercraft about the "photo pack" but no reply. So I bore down on Google and searched really hard, and finally found a set of pics from several sources that will provide adequate guidance for construction, painting, etc.. I don't mean my tone above to indicate to any of you that this is one to steer clear of. Far from it: with the pictures I've found I'm now feeling confident and looking forward to the build. With that in mind, if anyone following this log decides to take on the Brannaren, I'd be more than happy to forward the pictures I found, as I think they are essential. I'm not going to post them here as I don't want to clutter up the log or confuse followers as to what I built and what others built. Regards, David
-
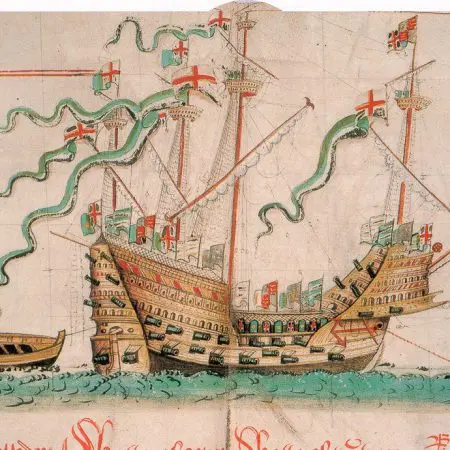
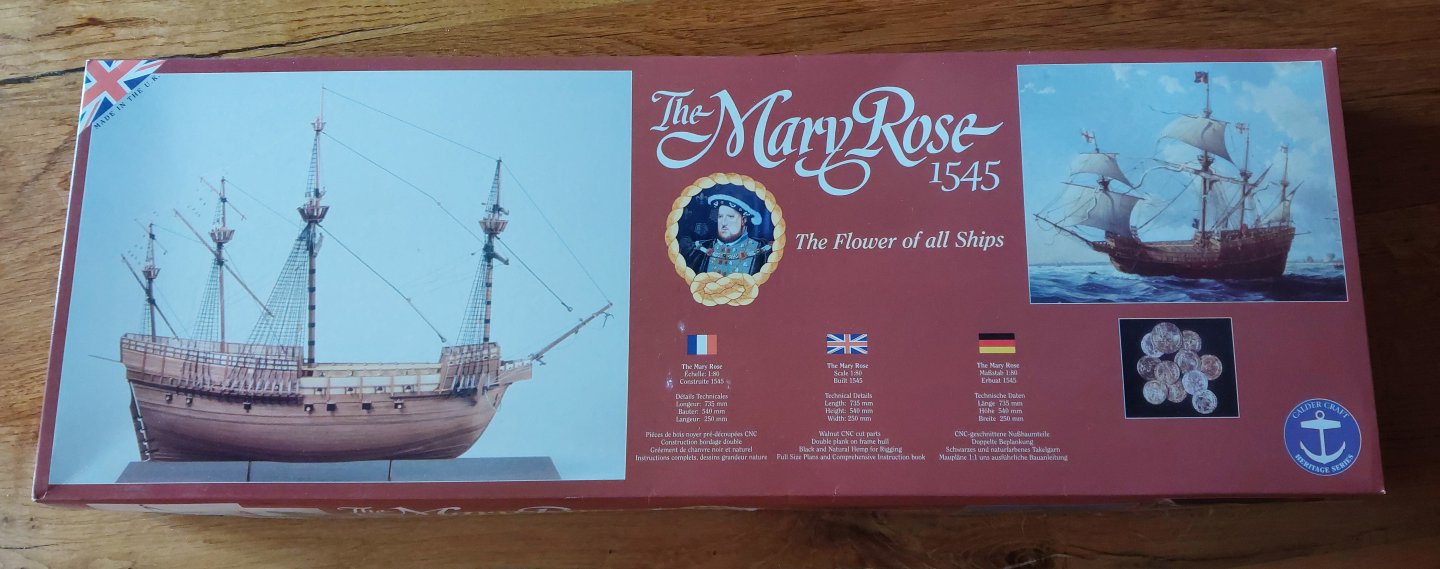
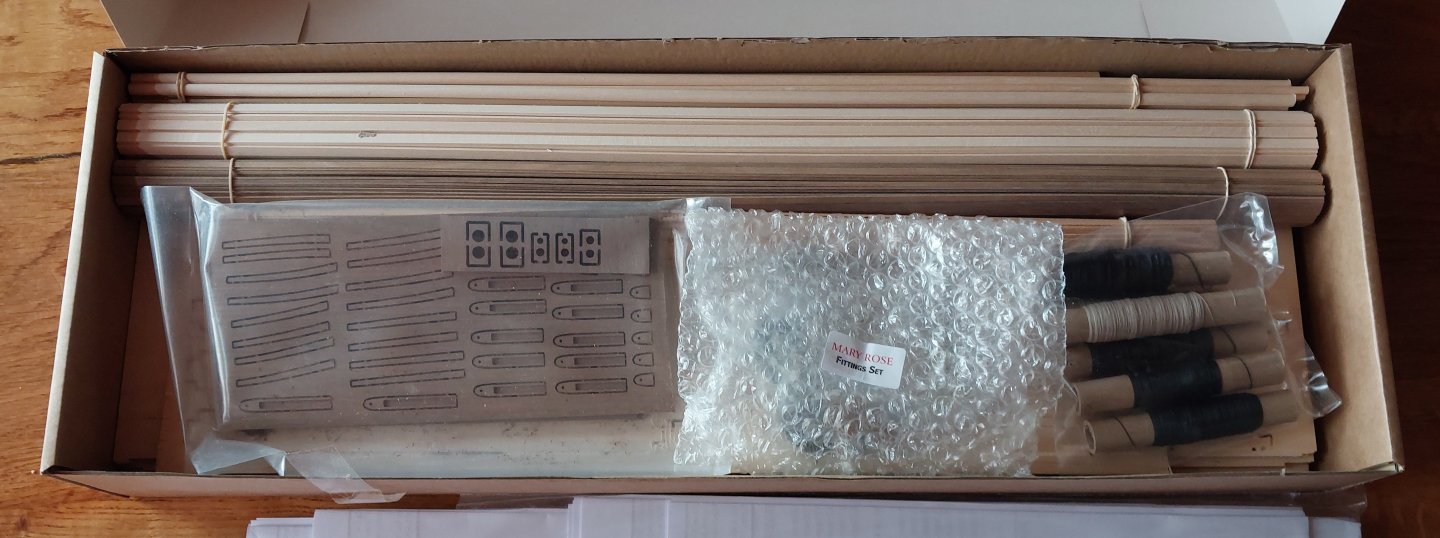
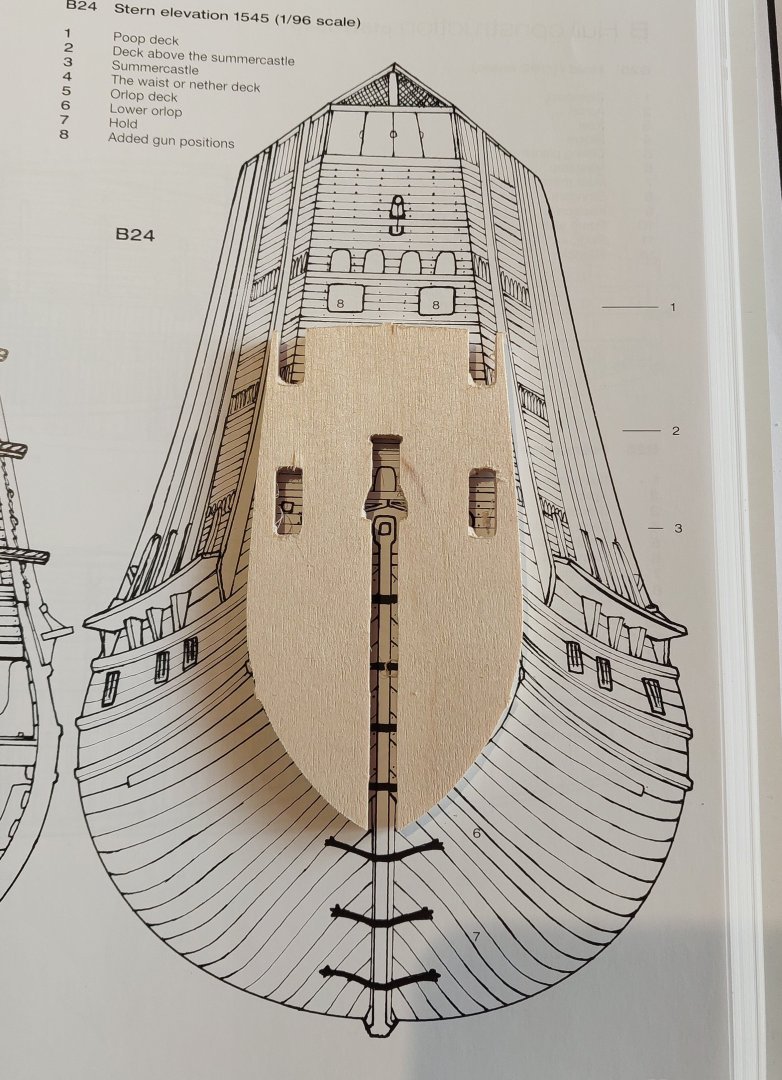
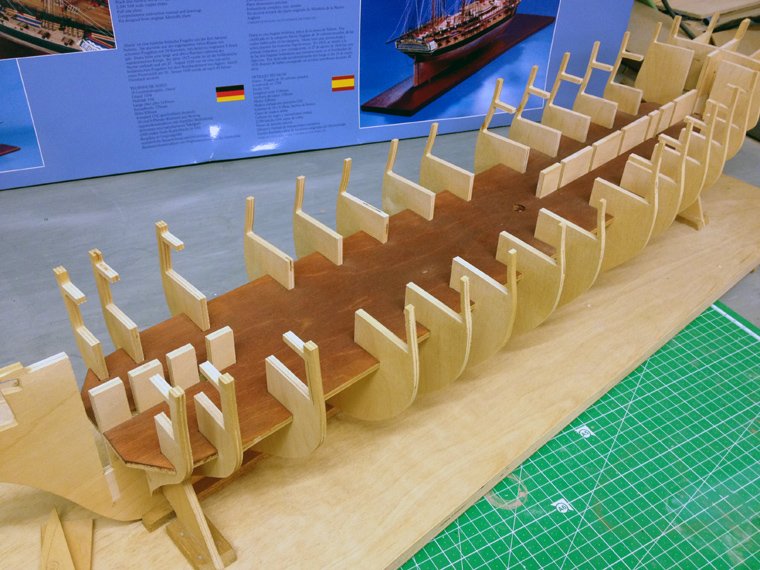
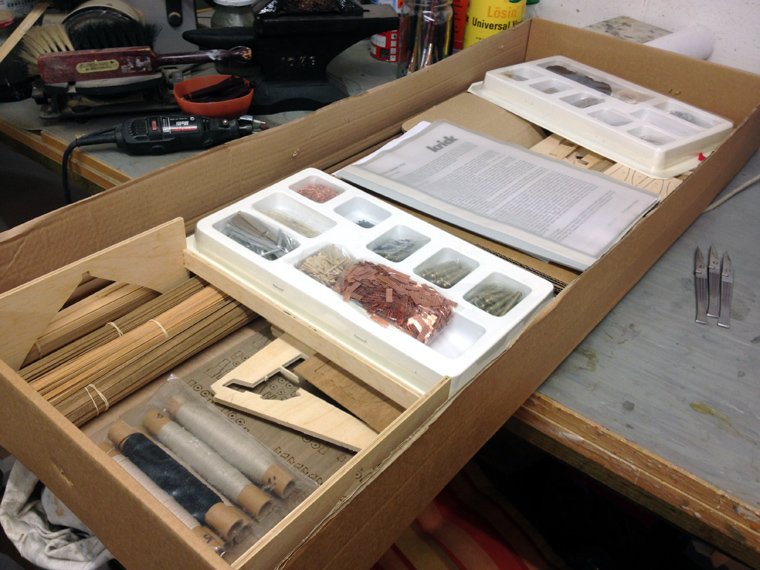
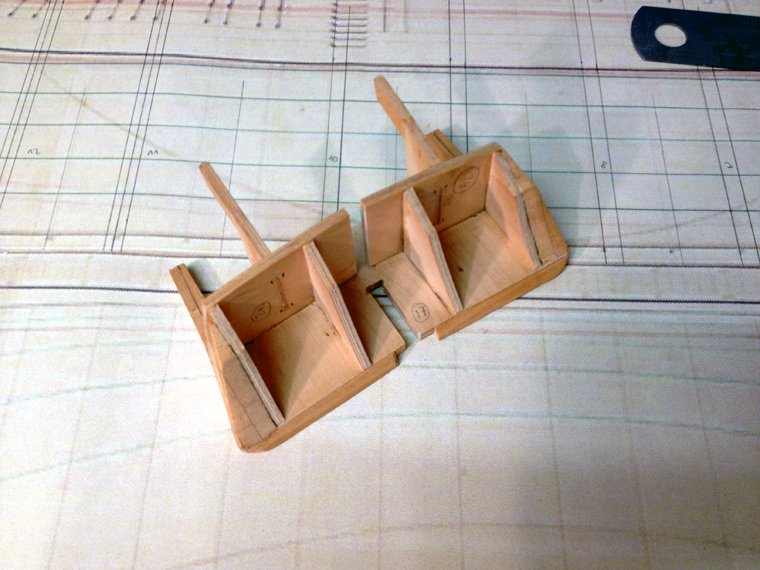
 Hello! And welcome to my third build log. Today I'll be sharing some of my initial progress on the Mary Rose kit by Caldercraft. Introduction I lived in Portsmouth for a few years, and was very keen to build one of the historic dockyard ships - HMS Victory of course being the most famous. Caldercraft also produce a kit for the Victory, but it is prohibitively expensive for a relatively novice builder. The Mary Rose was the next obvious choice. Mostly made famous for her tragic sinking in the Solent in 1545, the Mary Rose saw active service for over 30 years of Henry VIII's reign. In the early 1970s, she was rediscovered, and many will remember the live broadcast of her being brought back to the surface in 1982; you can watch this on YouTube here, alongside a very young King Charles. I visited the Mary Rose museum as a child, during which time the remains of the hull were being sprayed with preservative chemicals. I've since visited now that she's dry and on proper display, and I'd wholeheartedly recommend it if you're ever down in the city. I can recommend some good bars too. Caldercraft's model was designed in conjunction with the Mary Rose trust. This, you would think, guarantees historical accuracy. You would think. Here's a stock image of the completed kit: If you're reading this, you might already be aware of the problem, but for the uninitiated here is the only contemporary picture of the Mary Rose, from the Anthony Roll, an inventory of the Tudor fleet: Compare the two photos and the issues will be very clear; Caldercraft's kit is based on a 17th century galleon, and the Mary Rose was a carrack, with high castles fore and aft. Caldercraft also has far less cannon than the Anthony Roll depicts, and as we know, the more cannons the better. Incidentally, this was one of the factors that lead to the original ship's sinking, as her open gunports sank beneath the water of the Solent. I digress. I would really rather make a kit that resembles the original ship, and though there is very little of her remaining above the gunwales, the historical evidence for the high castles appears to be very convincing. As such, my intention is to build the kit - but to add a number of decks to each castle and make a few other amendments to bring the finished product more in line with the historic original. References Other than the above image, there are a number of references I'll be using for this build alongside the instructions for the base kit. If you're a regular broswer of ModelShipWorld, you may have come across @Baker's fantastic (ongoing at time of writing) scratch build of the Mary Rose, which was a huge inspiration behind my thinking about editing the kit. I'm certainly not ready to scratch build my own version, but his build is a masterclass in both building and research. I'll certainly be referring to parts of this throughout. I also had a brief chat with @Louie da fly, who was extremely helpful with both advice and some recommendations. Thanks Steven! I'm still not sure how to make those deadeyes There are two key books I'll be using: Douglas McElvogue's Anatomy of the Ship: Tudor Warship Mary Rose, and Peter Marsden's 1545: Who Sank the Mary Rose? McElvogue's book is a fabulous resource, full of his own fully scaled drawings of his interpretation of the ship. It's likely a lot of it is made up, but it does follow the majority of the archaological evidence, and I'll be using his measurements throughout. After all, we'll never know exactly what she looked like - this is my interpretation. Marsden's previous book Mary Rose, Your Noblest Shippe was my original port of call, but unfortunately it appears to be nearly unobtainable in the UK. I emailed the author, and he recommended 1545 instead, as this is a more recent version of his research - one which corroborates the extra decks in both fore and sterncastle. As a note, Peter Marsden is a well-established maritime archaeologist, and alongside his work on the Mary Rose he's also partly responsible for the UK's protection of wrecks act. Fascinating! On to the build. First Steps Caldercraft's kit packaging is first class. The instructions are pretty detailed, and printed on massive sheets of paper in full scale - really useful. Here's my first look at my expensive purchase: A look inside: And beneath the instructions: That's a lot of dowel! You'll have all seen the basics of kit building before, so I won't go into much detail, but here's a nice little indication I'm on the right path with my alteration ideas: This illustration is from McElvogue's book, and is in 1:96 scale. The 1:80 transom piece is obviously missized, but the general shape matches up - all I'll need to do is add a few decks. Simple. The bulkheads from Caldercraft's kit match up pretty well to those in both McElvogue and Marsden's books. I expected this - the hull is the best preserved part of the ship, after all, and it'll remain mostly the same in my build. Here it is dry-fit. I've only worked with laser-cut bulkheads before, and Caldercraft's are CNC'd 5mm ply. It cuts nicely with just a Stanley blade, but the sawdust was something else. Probably not one to do on the kitchen table again. Glueing the keel on: And the lower main gun deck in place, with false backs for the main guns: N.b. I may move these false blocks around later, or just add some more blanks for the missing cannon. I figured I'd slot them in place for now as they provide some structure to the next deck. I've emailed Caldercraft's parent company Jokita and am in discussion with them about getting some extra cannons shipped over - if that falls through I'm going to have to learn some new skills! Here are the two top decks provided with the kit dry fit on the bulkheads. I'll be using the sterncastle piece, but the forecastle is completely the wrong shape. And here's the upper deck glued in place: You can see that this has a big crack in it in the photo. To get it into place below the forecastle supports you have to bend this piece nearly in half - I don't think it would have ever survived the process even if I were more careful. It's going to be planked over anyway, so no huge issue, but a weird design choice. Laying in some first deck planks: McElvogue's book has these all at the same length on this deck, which works out to 45mm in 1:80 scale. The wood is also excellent, with a lovely grain that I think will come up nicely. I did the classic trick of edging each plank with a soft pencil to simulate caulking. And here's the sterncastle planked: I've only planked up to this point as the front of the sterncastle is going to divide the deck at this point. I also realised midway through that with my additional decks above, this is going to be near-invisible, but I carried on for completion's sake. There will be an open doorway and a number of gunports allowing a view inside, so I don't think it's wasted time. And on the subject of extra decks, here they are: Excuse the various paraphernalia I've used to space these out! Except for the first sterncastle deck, which is Caldercraft's original, these are all 0.8mm ply cut to the shapes laid out in McElvogue's book. Both McElvogue and Marsden agree that there were likely three decks on both castles, with another small half deck atop the forecastle, just behind the foremast. The forecastle here will be slightly further forward - I need to cut some slots in so that it can fit within the bulkheads. I'm glad I took the time to cut these to shape now - I wasn't entirely confident in my plans, but seeing this rough mockup has filled me with a possibly unearned feeling that this is actually achievable with my skills. Obviously there's a long way to go, but I can actually visualise this looking 'correct' - and that's a start. Thanks for checking this out, and please do follow along! Any input is more than welcome.
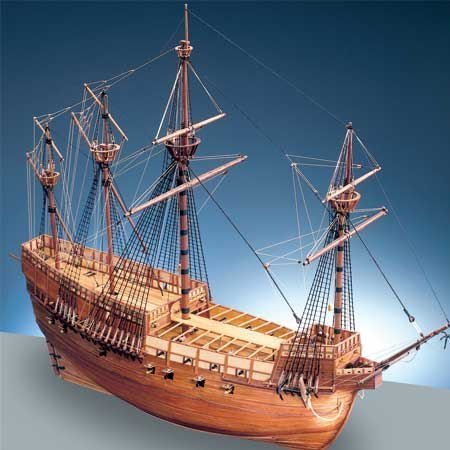


-
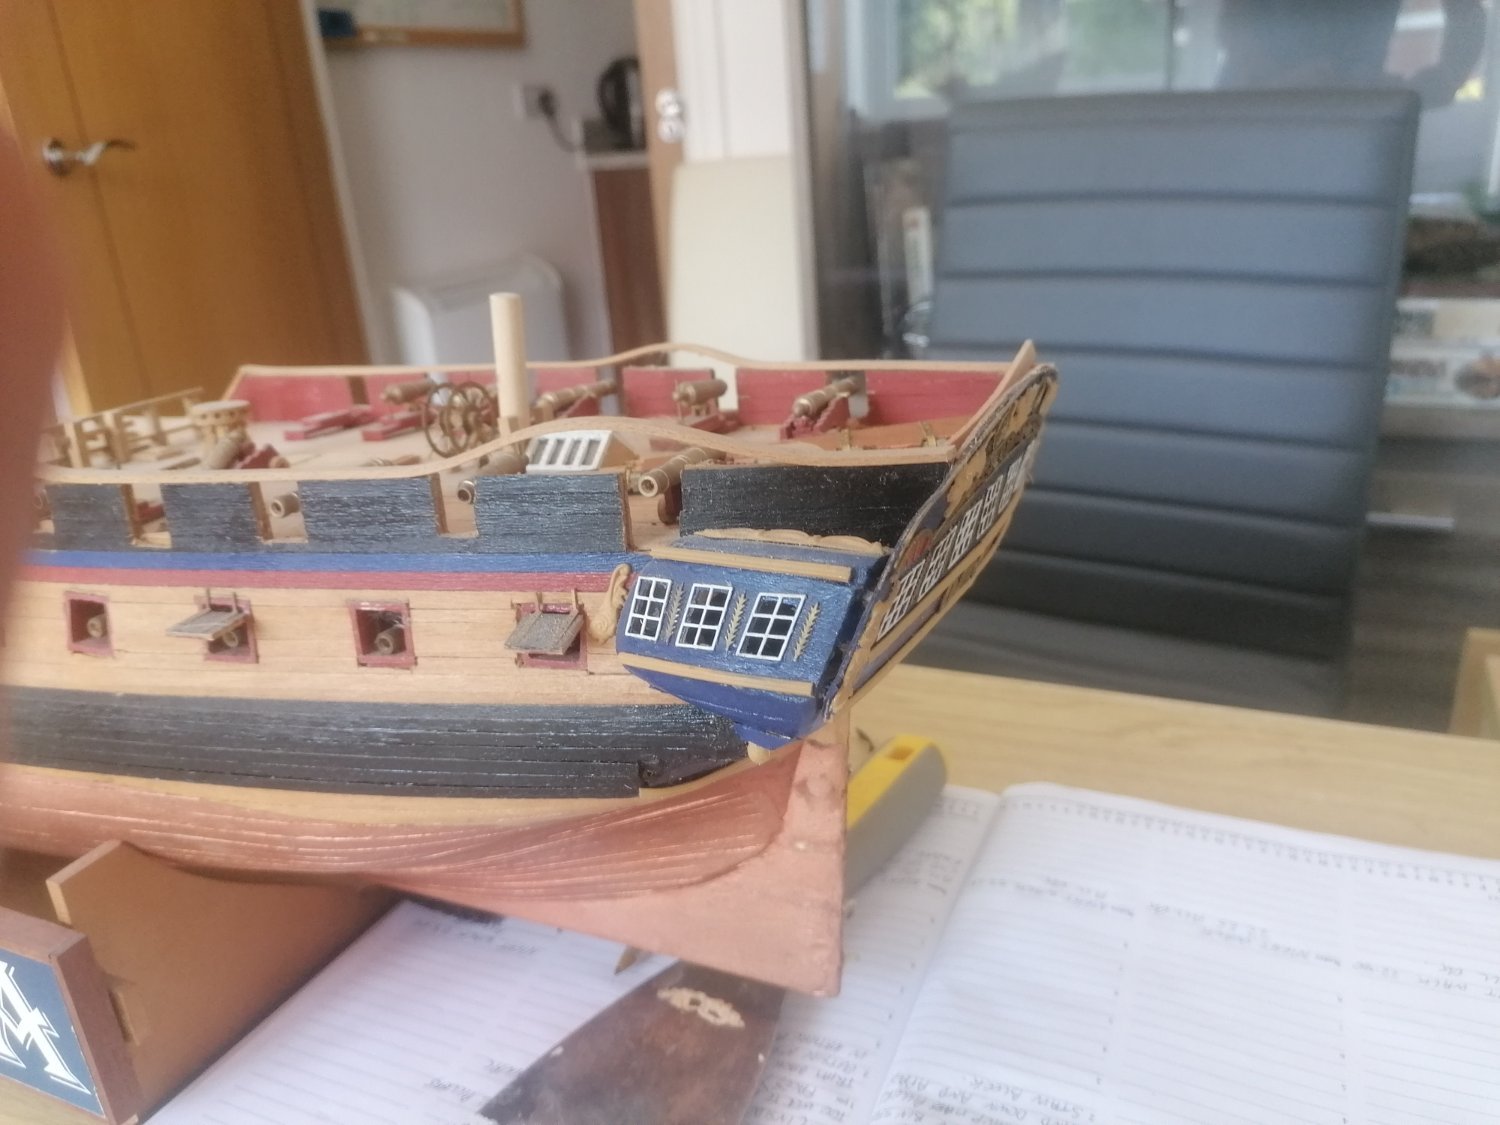
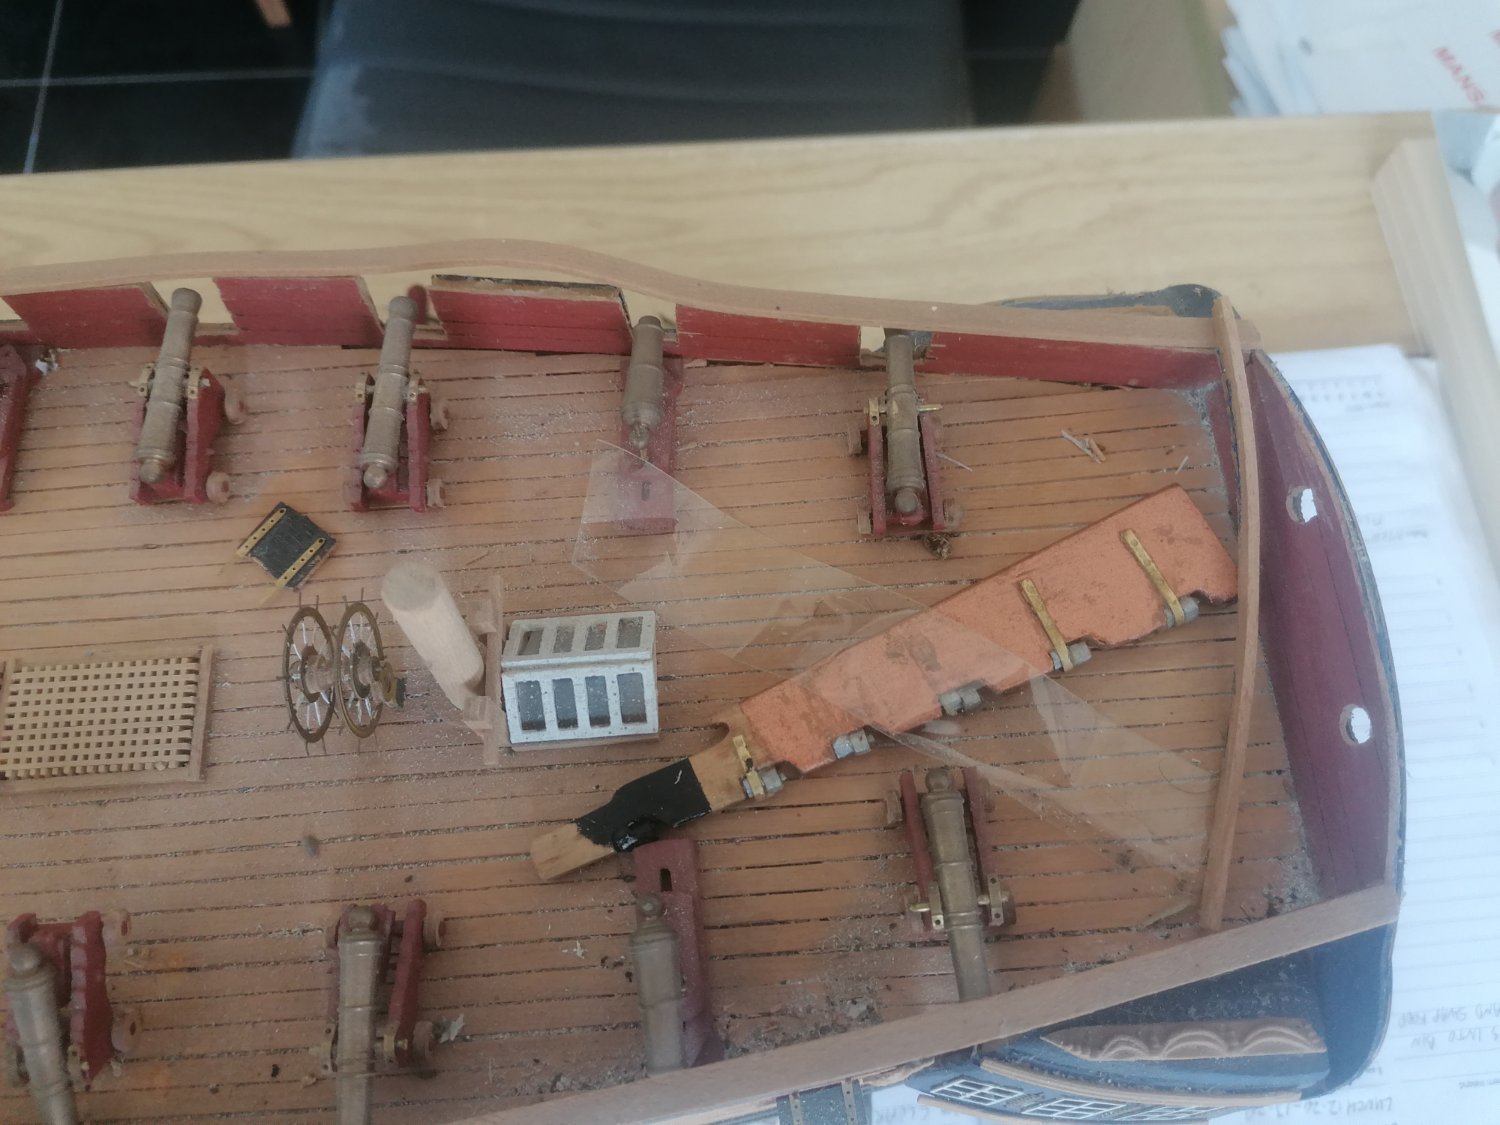
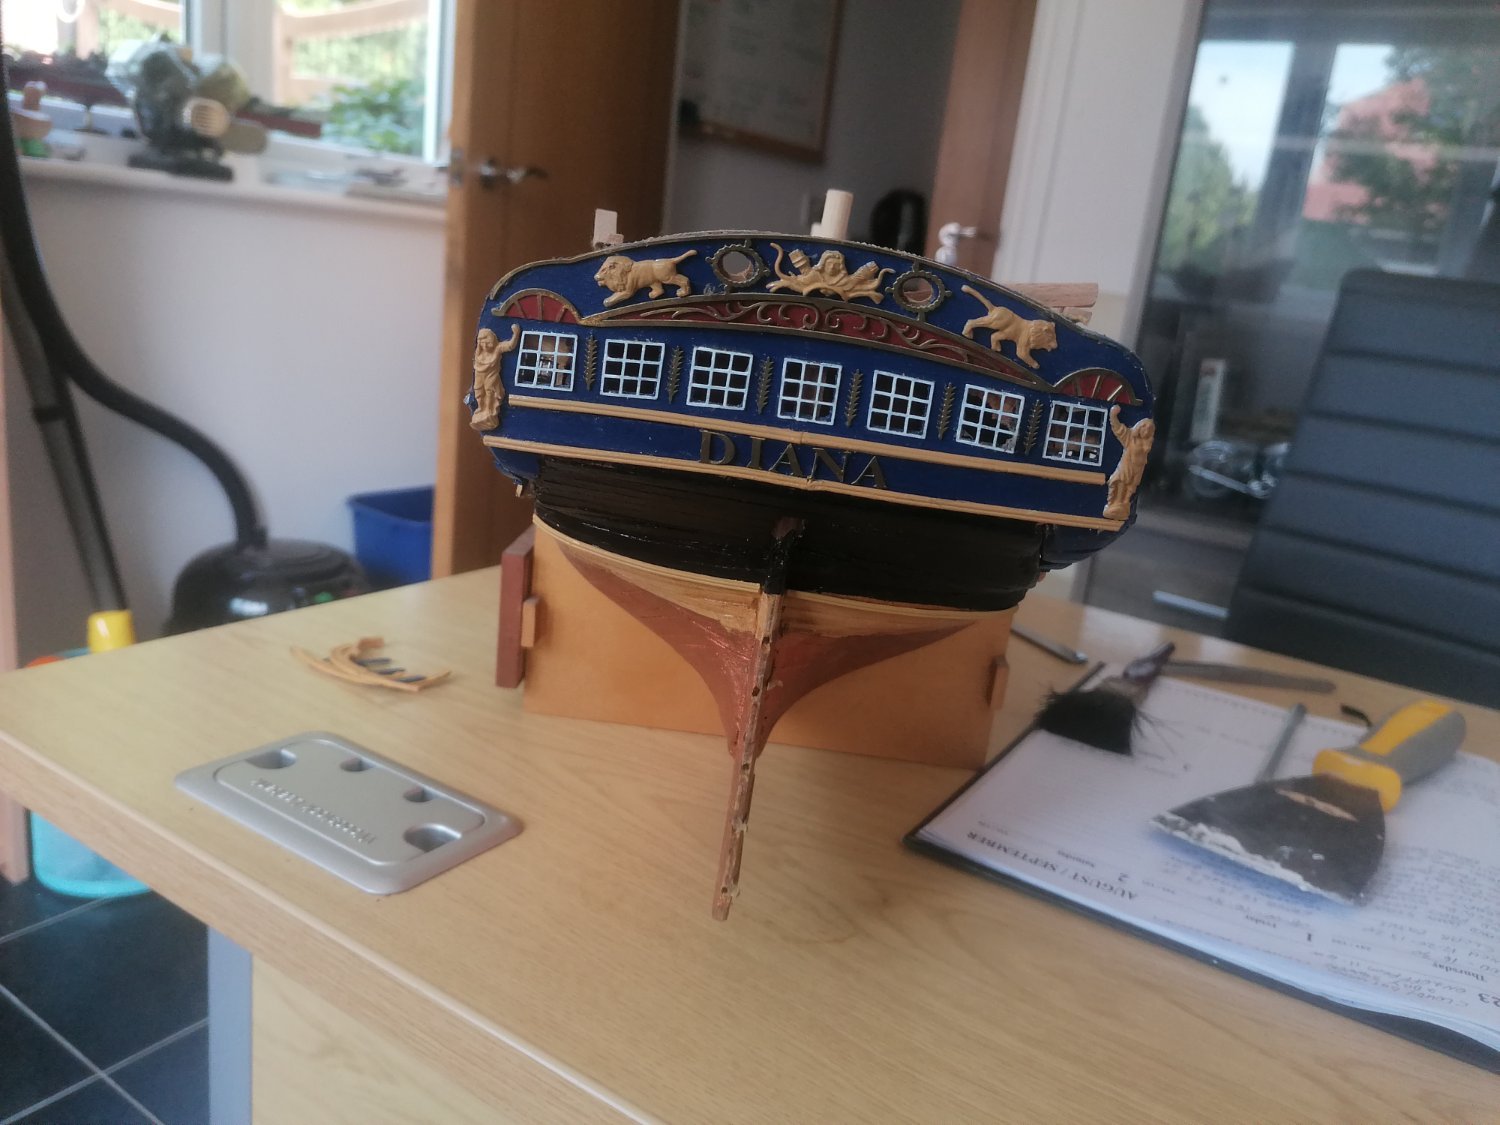
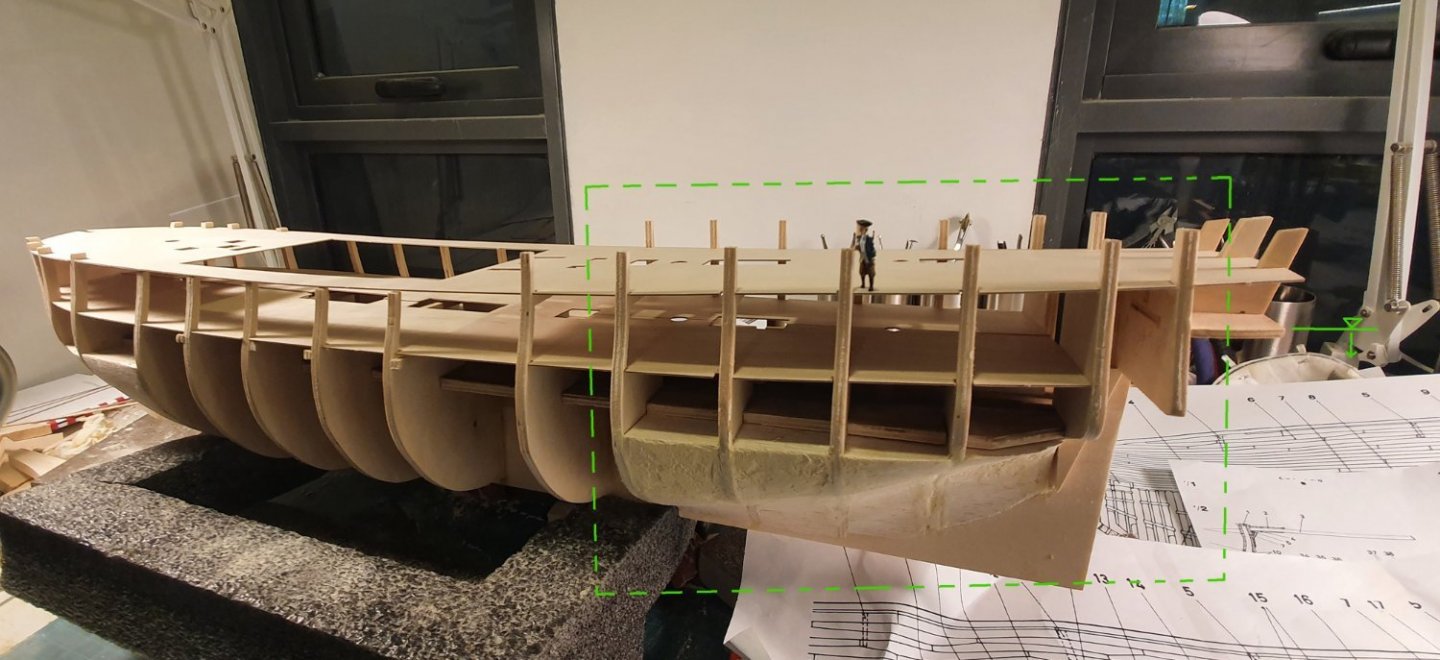
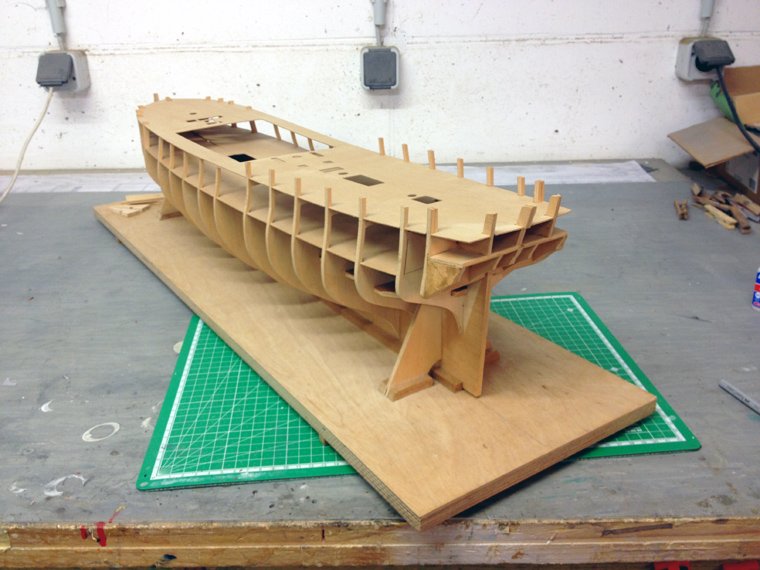
 I December 2023 I bought a partially built model of the HMS Diana at an auction of the New Jersey Ship Model Society. As you can see the guy deck was planked, the hull double planked, the quarter deck beams, the stern gallery taffrail and facia were also in place. This is my second Caldercraft Diana build. My first was completed in 2017 before my Victory. While doing research for thet build I learned Diana had a sister named Jason. My younger son who I was building Diana for is named Jason so HMS Diana became HMS Jason.


-
 As stated in my Pinnace post, I started a HMS Cutter Sherbourne. I have made some good progress on it after a couple months or so. I have slowed way down now that I am working the very fine details and getting ideas. I really wished I got the Vanguard of this model. The materials would have been better for some of the parts that I want to do more fine details. But overall, this one is not bad either. So, as always started putting together the frame using lego and 1,2,3 block. Thanks to the person that answered me on that they were. Love using them. While working on that, I was working on shaping the two gun-port Balkwarks. Placed the gun-port balkwarks into place and clamp overnight. Also, I shaped the hull getting it ready for first planking. Ok, time not to be a chicken and start the 1st planking taking my time and remembering to let the plank naturally lay this way you get a better fit. I did some shaping using water and clamping into position. Time for second planking. Took even more time on this one. I believe it took over 1.5 weeks about 2 - 3 hours. Was really taken time shaping and let glue dry before moving on. Now, I started working on the inside. I even added an extra piece in there to help transition the inside of the bulkwarks and the decking. a baseboard if you will. Well, that about catches this build up. I do have some more progress, but I did not take pictures yet. Such as the Main wale and the posts on top of the upper cap. Anyway, time to get back to the shipyard.


-
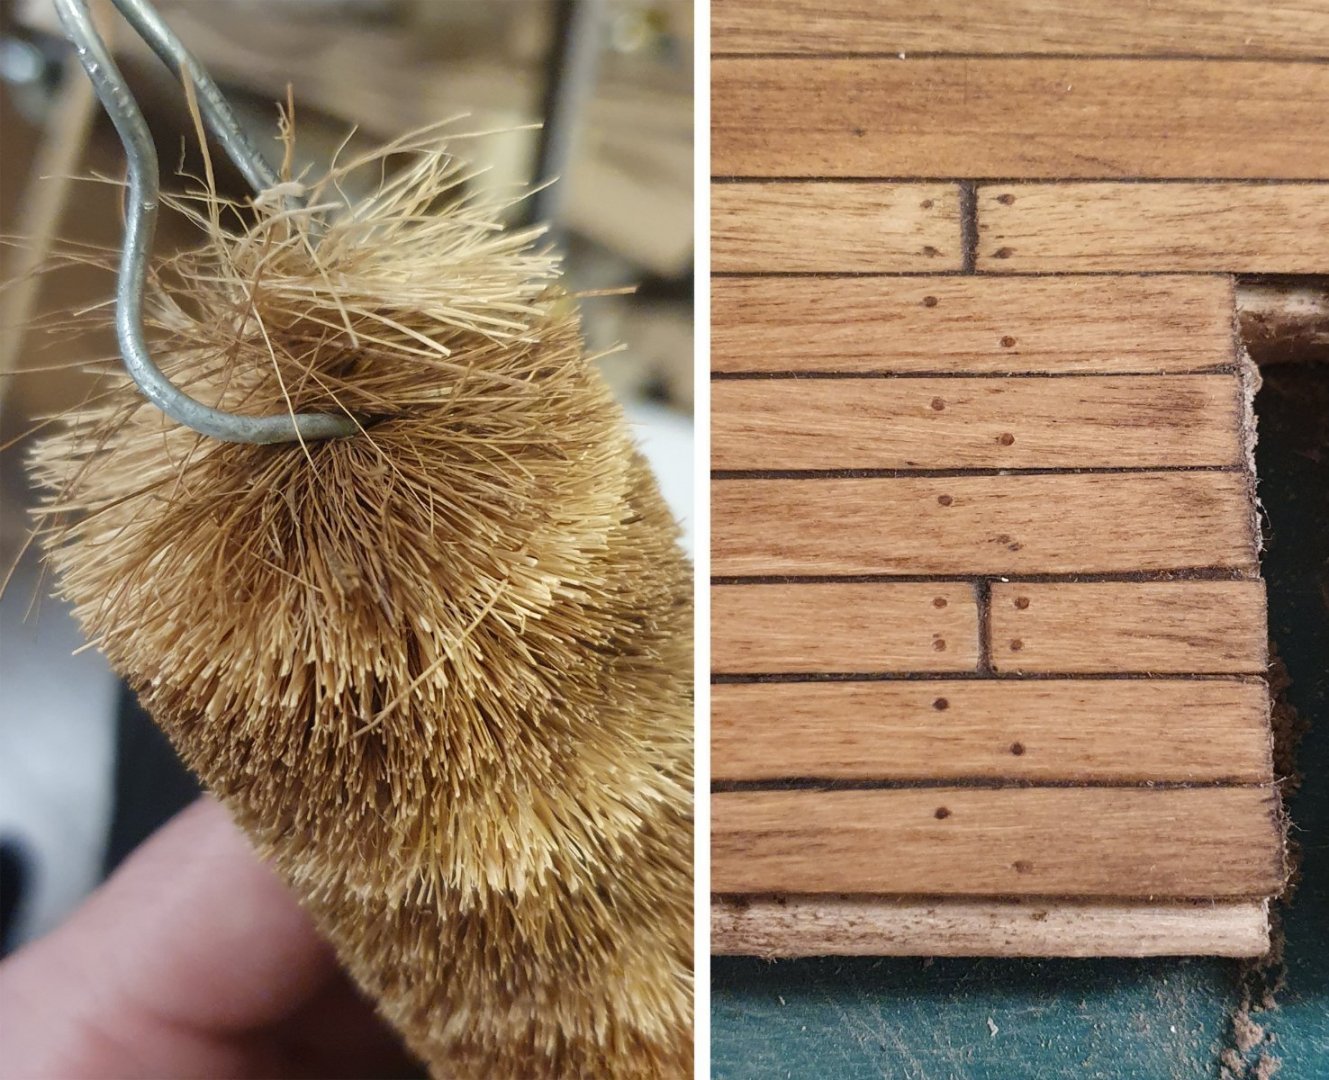
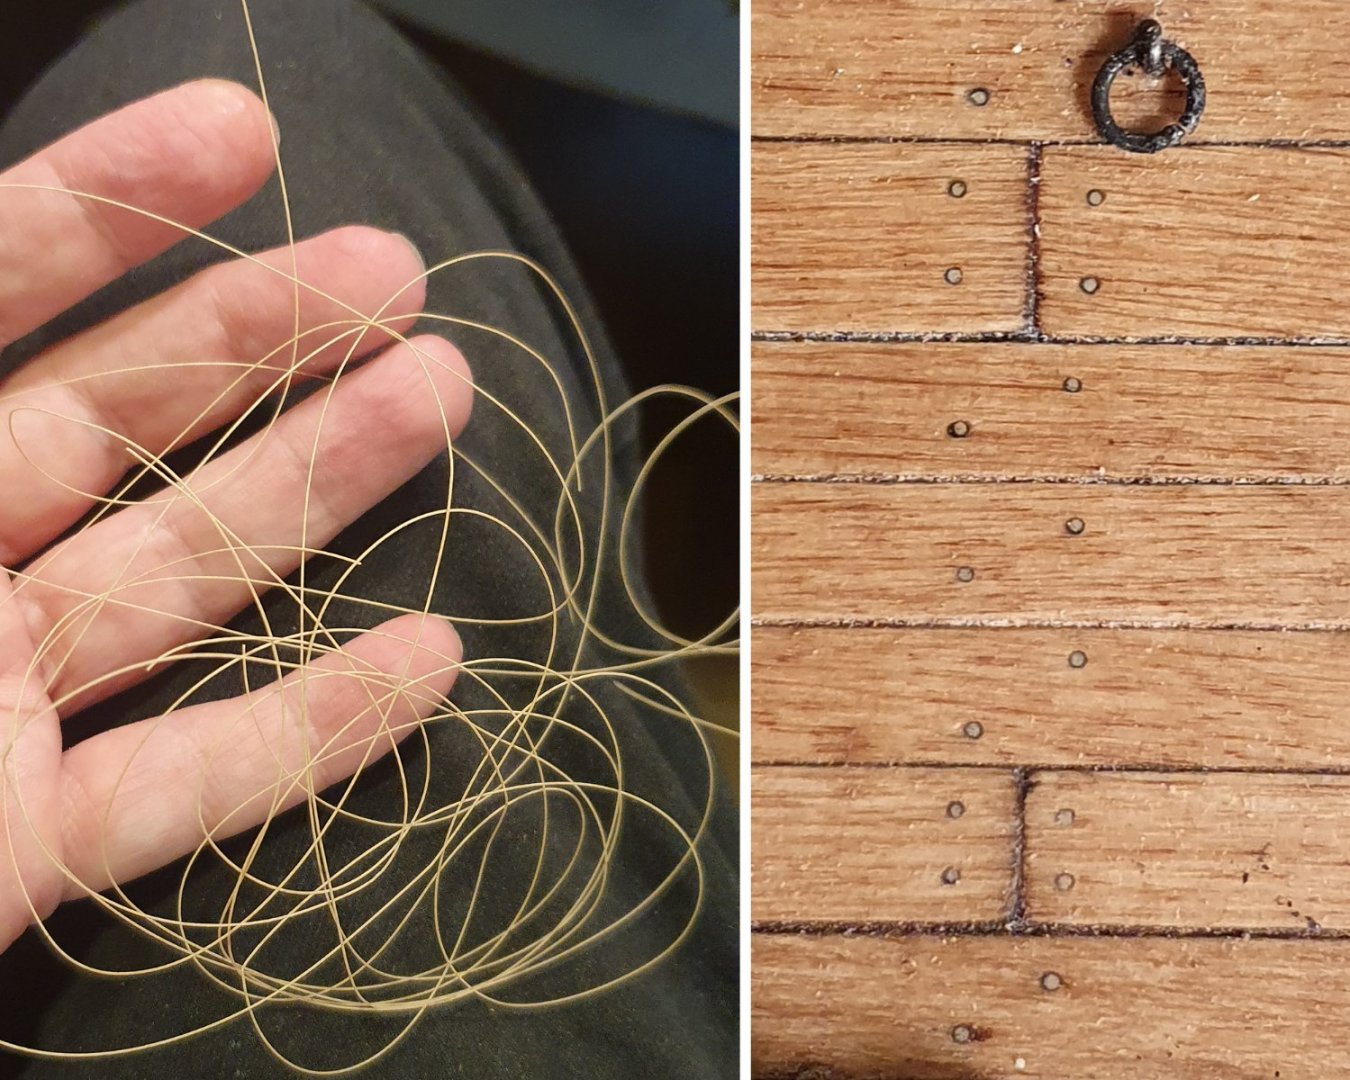
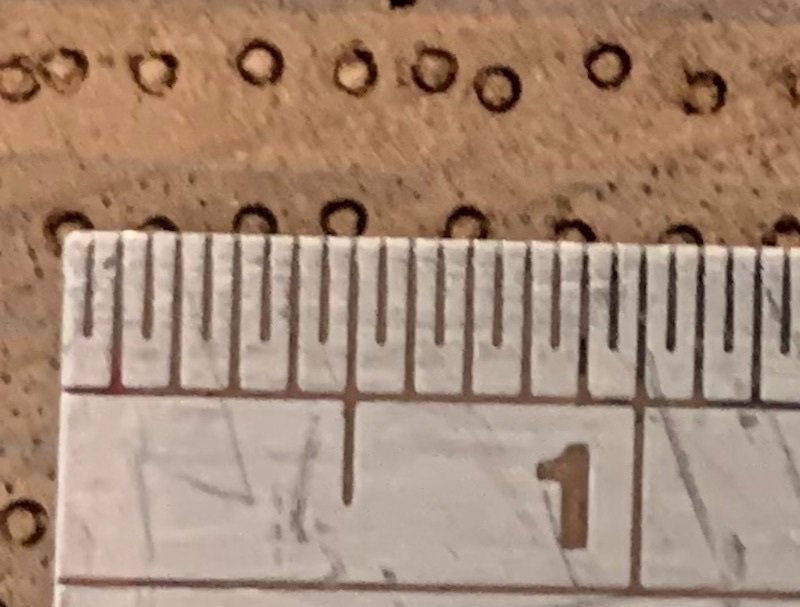
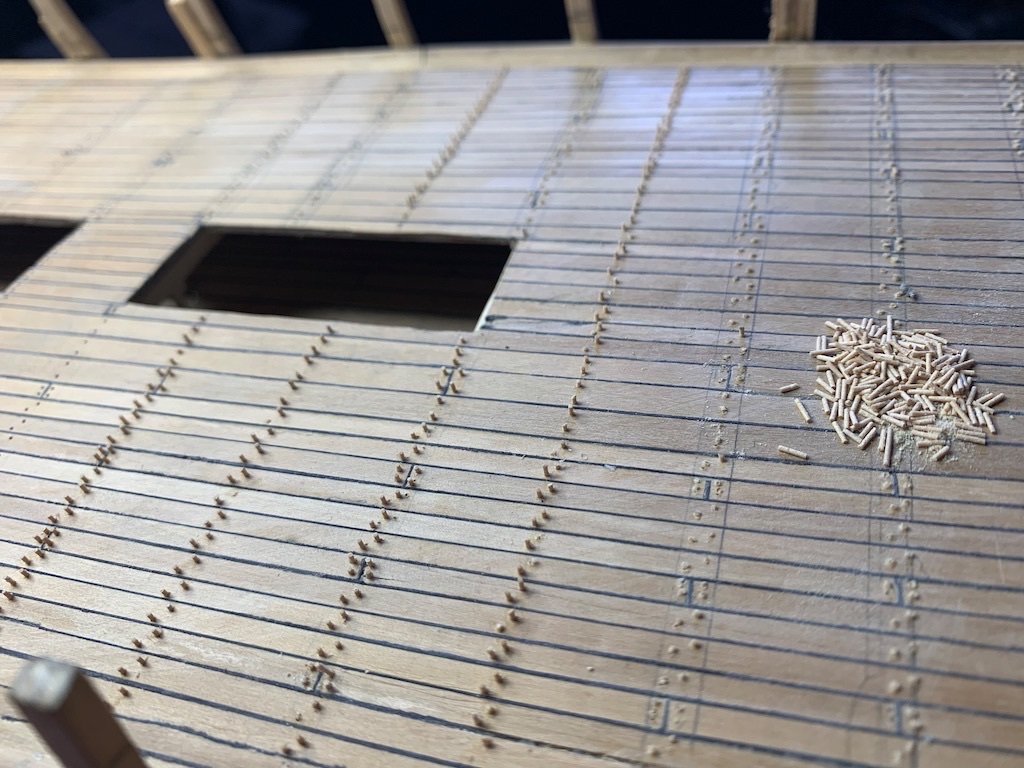
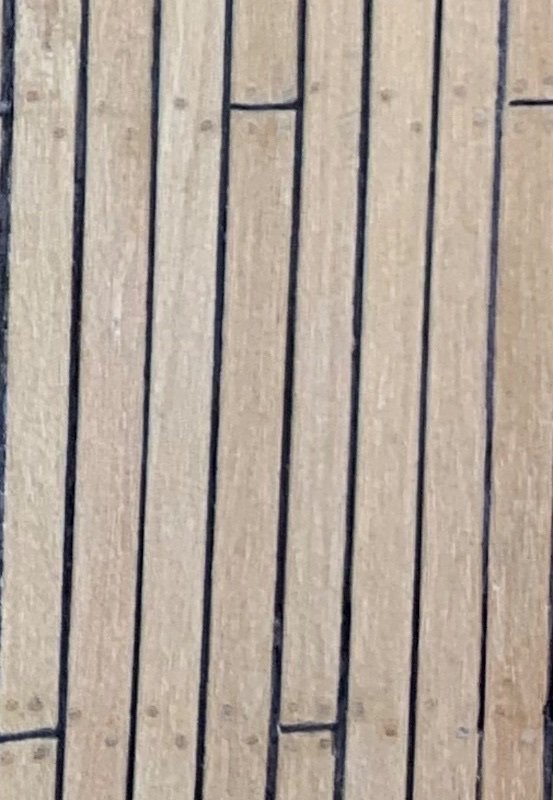
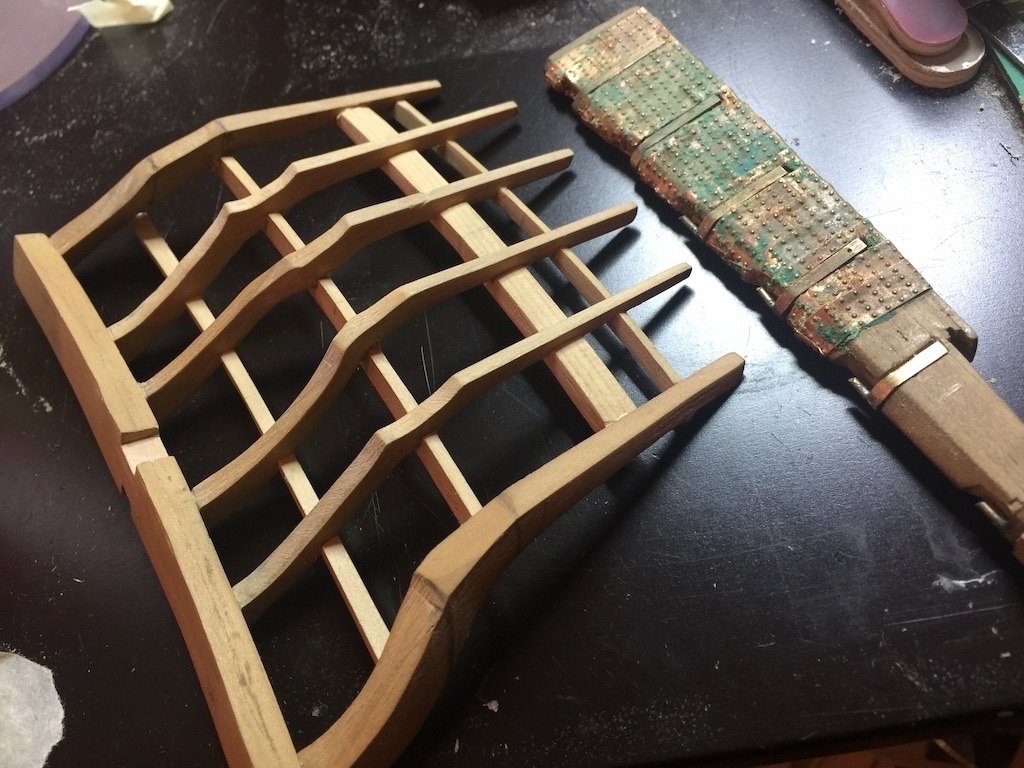
 I have decided to attempt a build log. I learn so much from the build logs of other members that I felt that I should venture something in return so, after a gentle prod from Dunnock, here we go. I am fairly new to the hobby having taken it up two years ago. I had just completed the Charles W. Morgan which was very enjoyable and selected the HMS Diana for my next build as it is a very pretty ship. I did hear that the kit itself has issues but thus far it has gone together without too much trauma. I started this build in January 2021 so the first few posts will be a catch up to where I am now. The book The Frigate Diana from the Anatomy of the Ship Series by David White (AOTSD) is a very valuable resource for anyone attempting this build and is my first call for reference having more or less shelved the drawings and instructions. I also reference the drawings of the Artois class ships housed in the National Maritime Museum (NMM) along with photos of their collection of contemporary models and of course the wealth of information contained in the build logs of other members. The basic frame went together fairly easily but I did have to use the heavy file to get the pieces to fit together. I introduced some balsa blocks to fill the bow and stern section as my hull planking skills are a bit shaky and I need as much help as I can get when tackling the complicated curves in these areas. I also sawed off the section at the bow and replaced it with a new piece made out of 5mm thick lime wood as I was not happy with the exposed edge of the ply. I wish I had done the same at the stern post. I suspect that there may be something not quite right in the positioning of the rear deck that forms the lower edge of the counter. Having now completed the build in this area I found that the quarter deck galleries ended up sitting too high. There is a good possibility that this may be a result of my bungling but I have noticed this phenomenon in other builds. If I was starting again I would do a lot more checking of the profiles of the aft bulkheads against the drawings in the AOTSD and the drawings from the NMM. It is only around 4 or 5mm difference but it is quite a difference to what is shown in the NMM drawings. It should be noted that these sit a bit higher in the drawings for the Jason and the Seahorse but these are still lower than where mine ended up. I will just have to live with whatever I have as it is too late to go back and do any modifications. The lowest deck can only be glimpsed through the gun deck hatches so I used this an opportunity to test out some planking mockups. I settled on a maple plank and I tried to give it a more distressed look using various stains and pastels but feel that the end result was a bit dark. I went a touch lighter for the gun deck itself. I am aiming for a more weathered look as I do not possess the mad skills required to produce one if those immaculate looking models and I can always pass off any wonkyness as an intentional depiction of wear and tear. I wanted to add trenails but ran into a bit of bother. I have heard that bamboo skewers can be lathed down to an appropriate trenail size but that proved very time consuming and frustrating and didn't provide a very good result. I think that the skewers are best left for the Kebabs. I then tried some 0.5mm diameter styrene which was good in terms of a consistent shape and size but they were too white and I needed something closer to a 0.3mm diameter. While wandering about the supermarket I found a scrubbing brush that had bristles that were 0.35mm diameter which was an improvement on the styrene but still too white. I then went back to the supermarket and found a brush, which I assume is for cleaning bottles, that had natural bristles that were a better colour and the correct diameter if you could be bothered sifting through them. Despite the fact that they are too dark and painful to work with I ploughed ahead and completed half the gun deck before I discovered that I could get excellent trenail material if I ran the faux wood filament through the 0.3mm diameter nozzle on my 3d printer without printing anything. It is the correct size and dimension and they almost become invisible depending of the angle of viewing much like the real thing. They are a little light but it is as good as I can do. As this is my first post I will stop here and submit as I am not that confident of success.
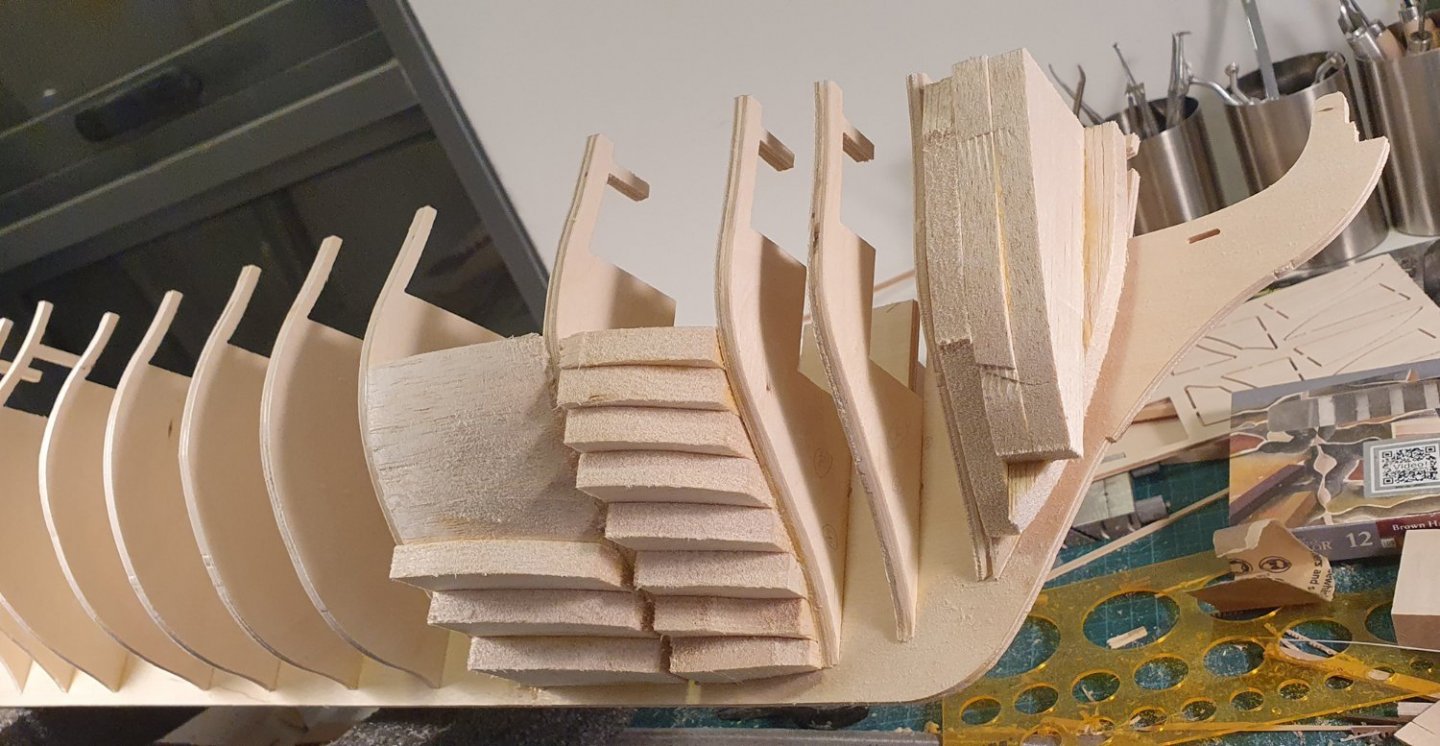


-
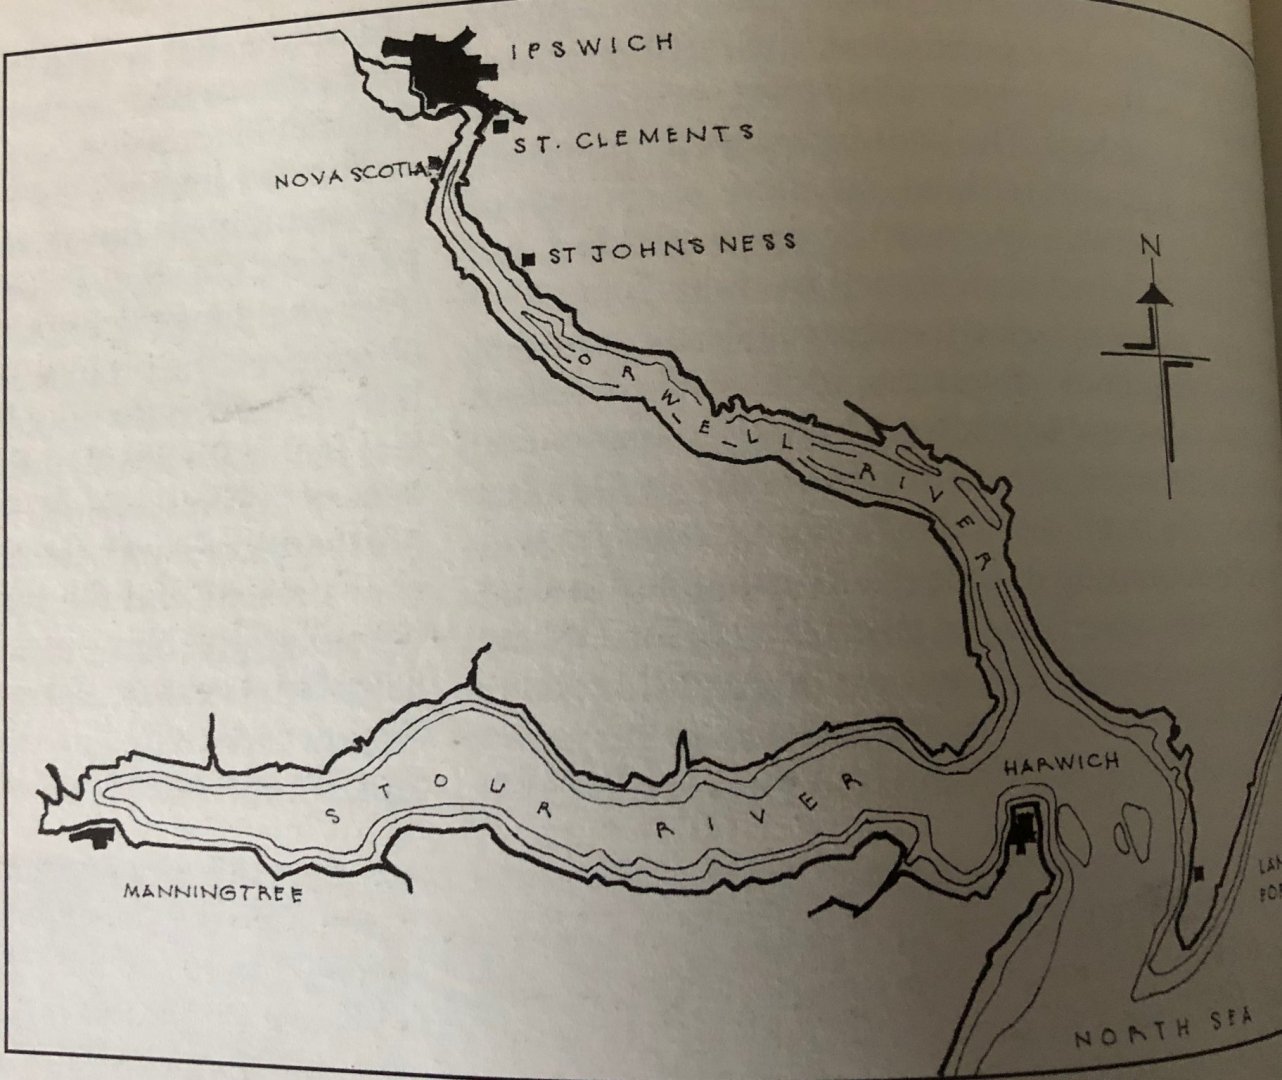
 Well, with the continued encouragement of Vane, I have decided to break the ice and start a build log for my efforts on the HMS Granado. I have ordered the AOTS reference and my wife was super kind and found a nice reference book on the builder.... Granado was ordered to be constructed on September 14th, 1741 and the keel was laid on November 18th, 1741. The construction of the ship occurred at St Clements on the River Orwell near Ipswich. The Granado's design was unusual in that she was to be used as either a sloop or a bomb vessel, being constructed with a conventional square stern. Launched on June 22nd, 1742, Granado was initially taken to Harwich, and fitted out and put in commission as a sloop. It was not until 1756 that Granado was fitted for the first time as a bomb vessel from an Admiralty Order on July 26th 1756. However, between the launch of Granado and her fitting as a bomb vessel, a number of changes had been made as compared to the original Admiralty plans, the most noticeable of these were as follows: 1. Two extra 4pdr carriage guns were added (Admiralty order of June 20th 1745) bringing the total 4pdr carriage guns to 10. 2. Two bow chaser gun ports were added allowing accommodation of the extra guns either under the forecastle as bow chasers or at the fifth gunports. 3. The mortars as shown in the Admiralty plans are two 13 inch mortars however when fitted as a bomb vessel this was actually changed to 1 x 13inch and 1 x 10inch mortar. This is confirmed by the provisions list on March 30th 1757 which details 50 large and 50 small shells. It was during its period as a bomb vessel that Granado was involved in her most active role. On January 22nd, 1759, Granado and the squadron under command of Commodore John Moore anchored off Basse Terre. By January 24th troops had occupied the forts of Basse Terre and Fort Royal, and the town had been devastated by fire caused by the carcasses discharged from the bomb vessels. On February 7th, the fleet moved to attack Fort Louis at the entrance to Cul de Sac Bay. The attack began the following day and by February 15 the bombardment ceased with the capture of the Fort. Granado remained as a bomb vessel until the Admiralty Order to fit her as a sloop on March 20th 1760. Granado was again converted to a bomb vessel in August 1761 and she remained as such until she was sold on August 30th 1763 for £575. During this period Granado was involved in the action of capturing Morro Castle and El Morro in the West Indies and the capitulation of Havana on August 13th 1762. .


-
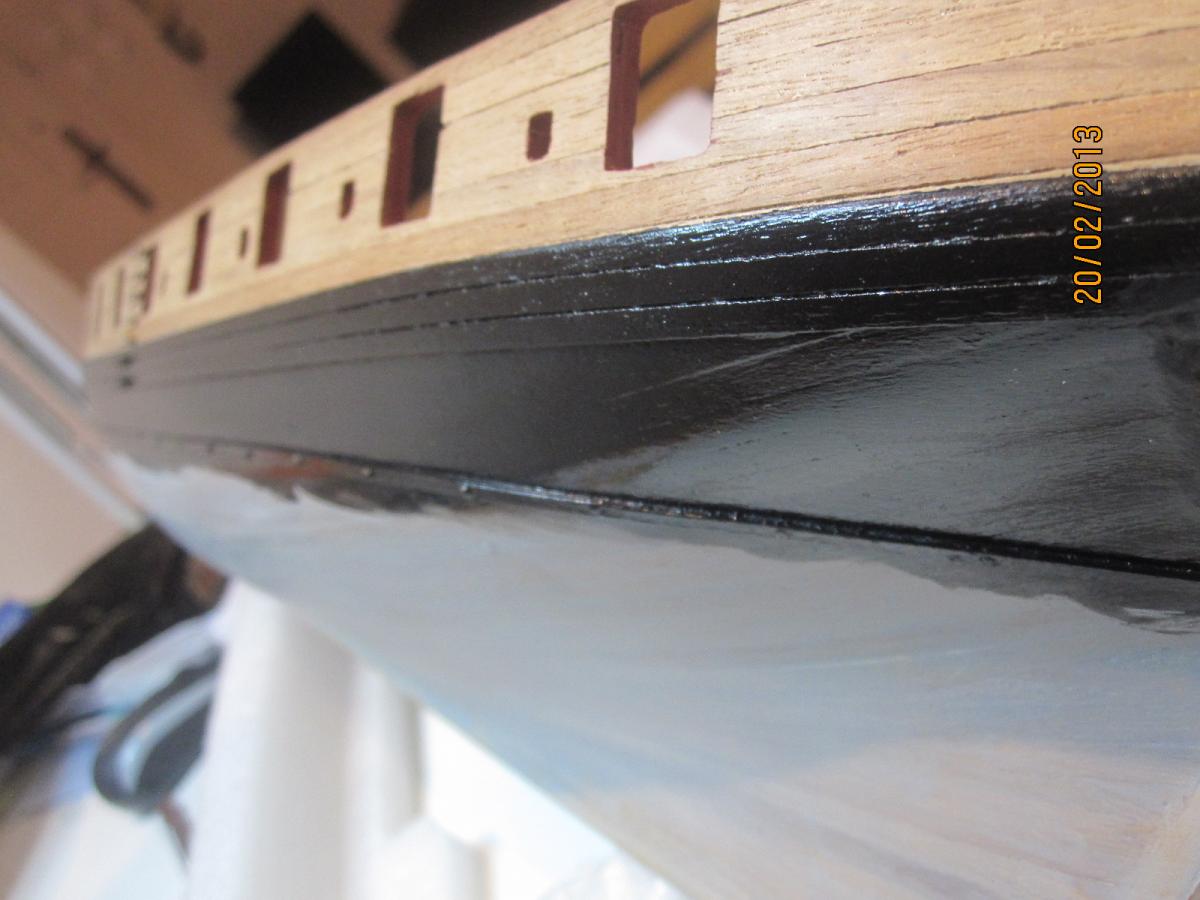
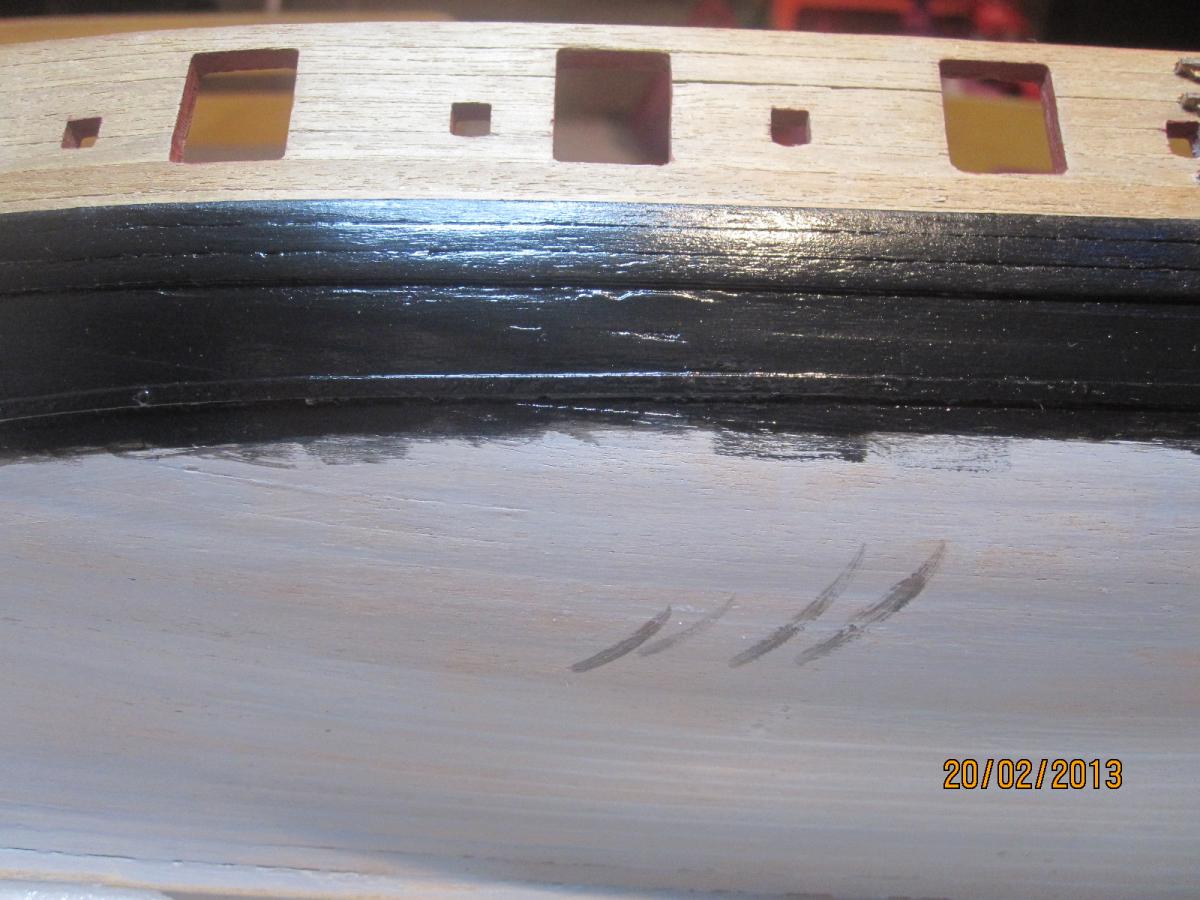
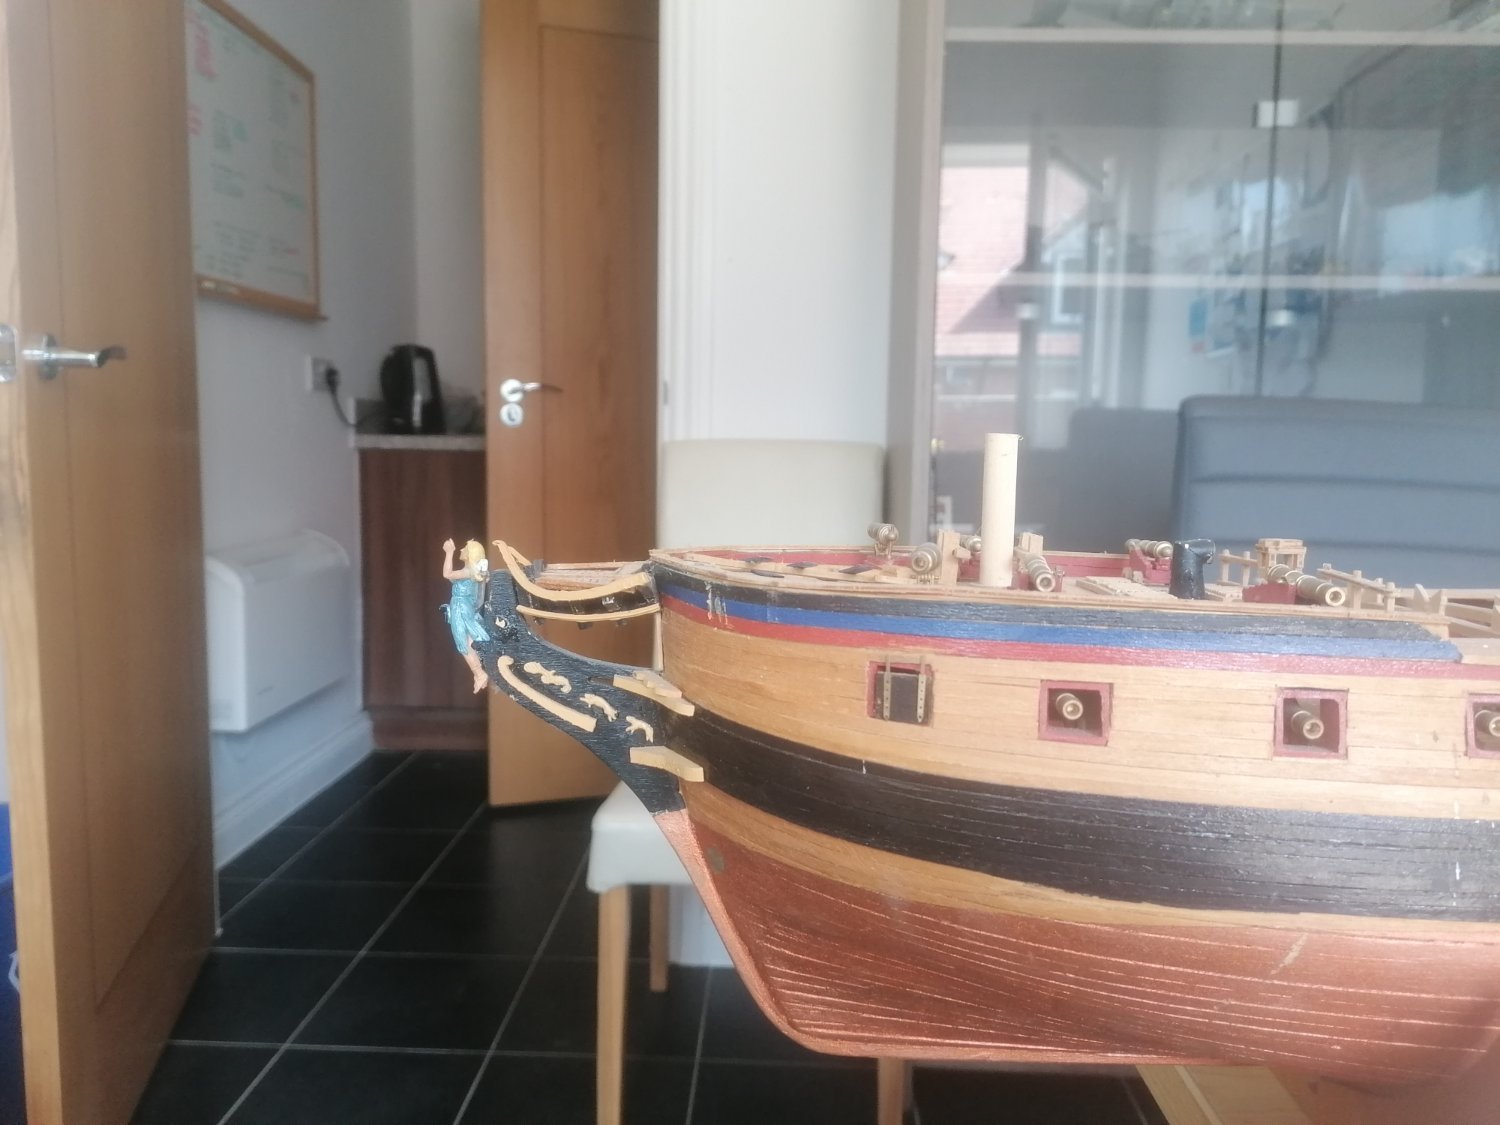
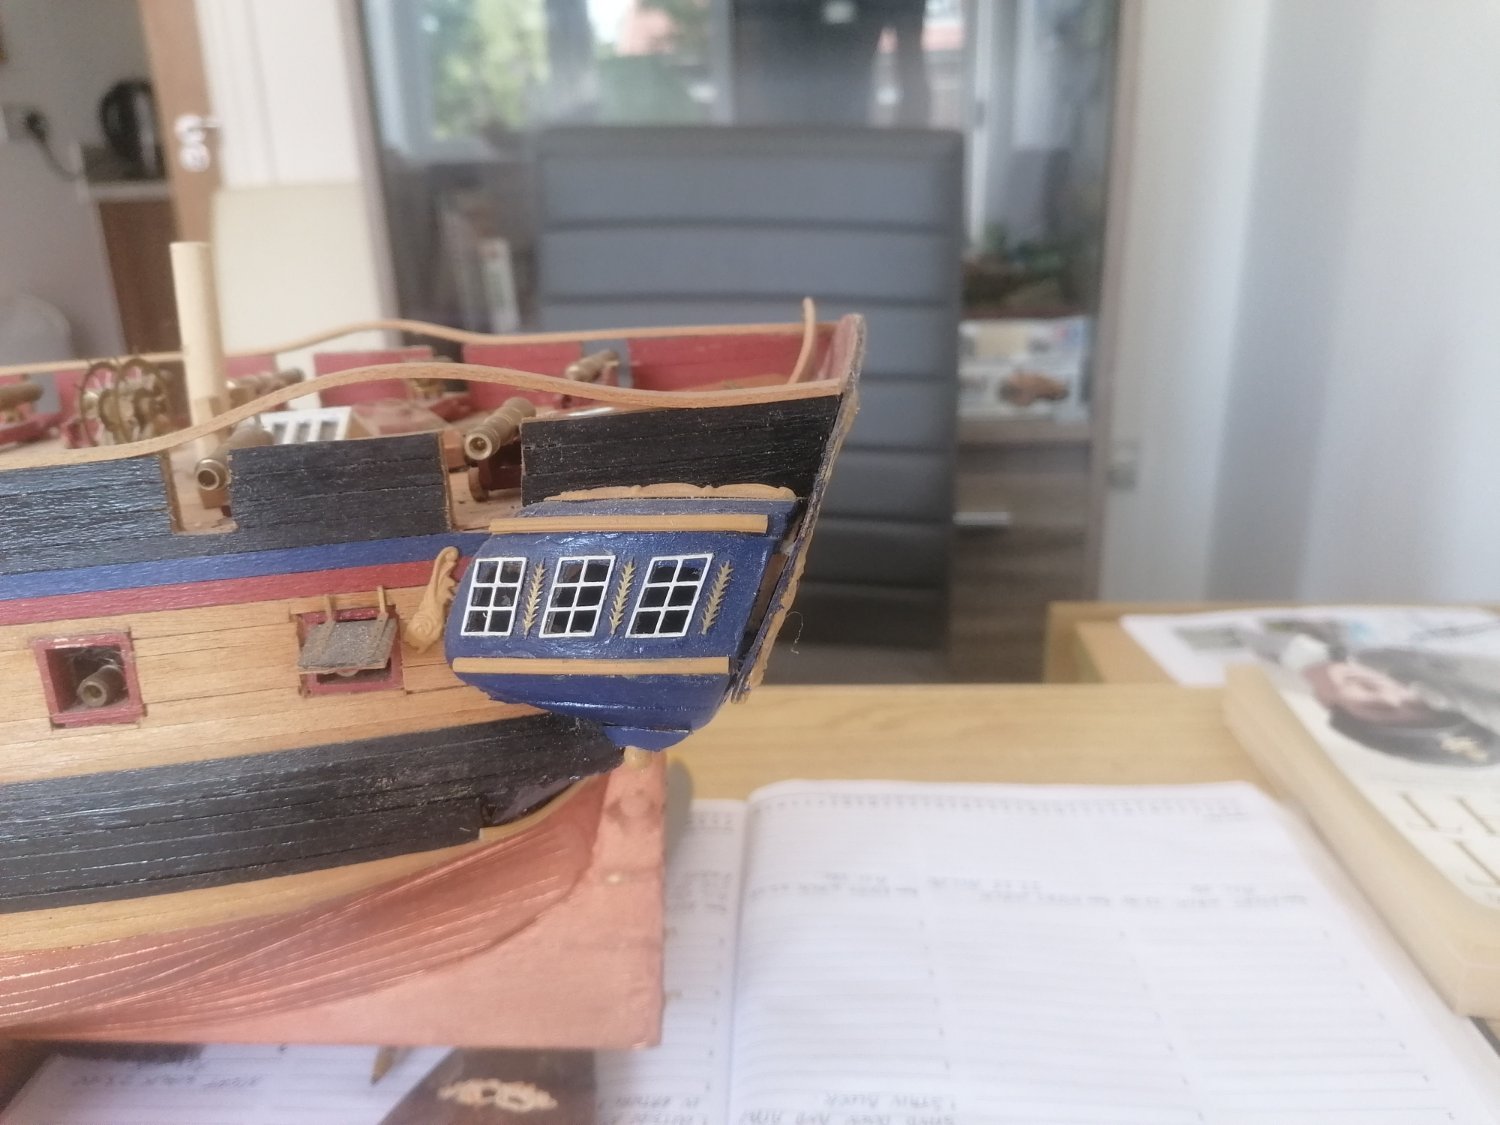
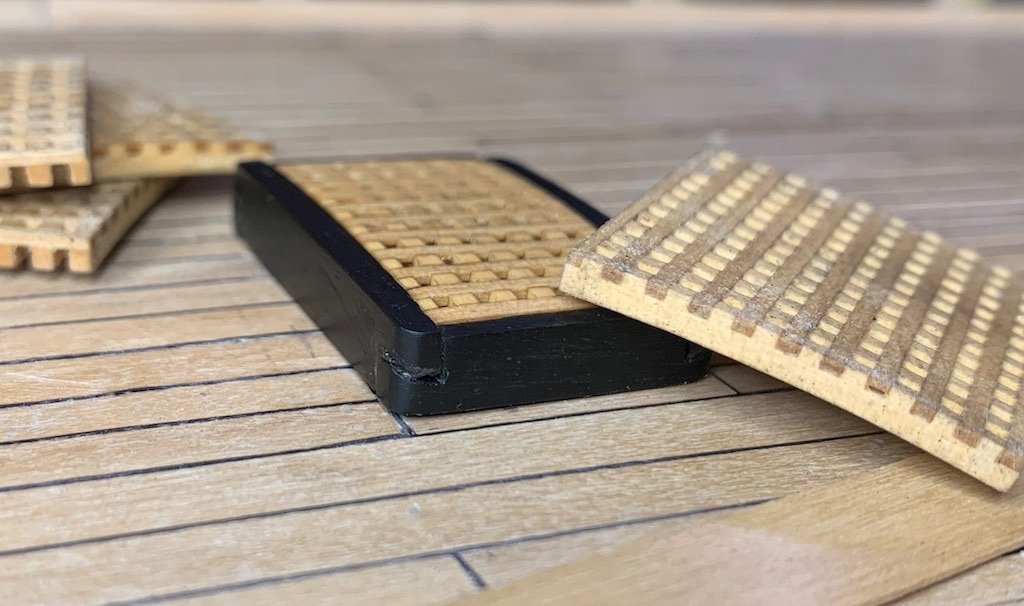
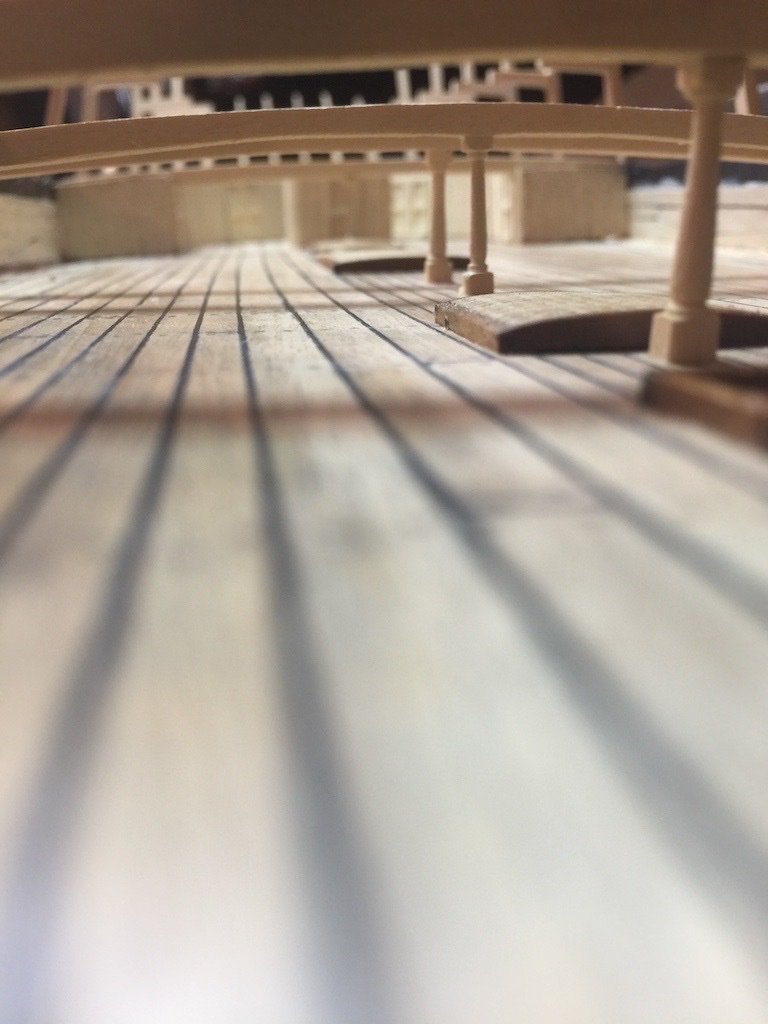
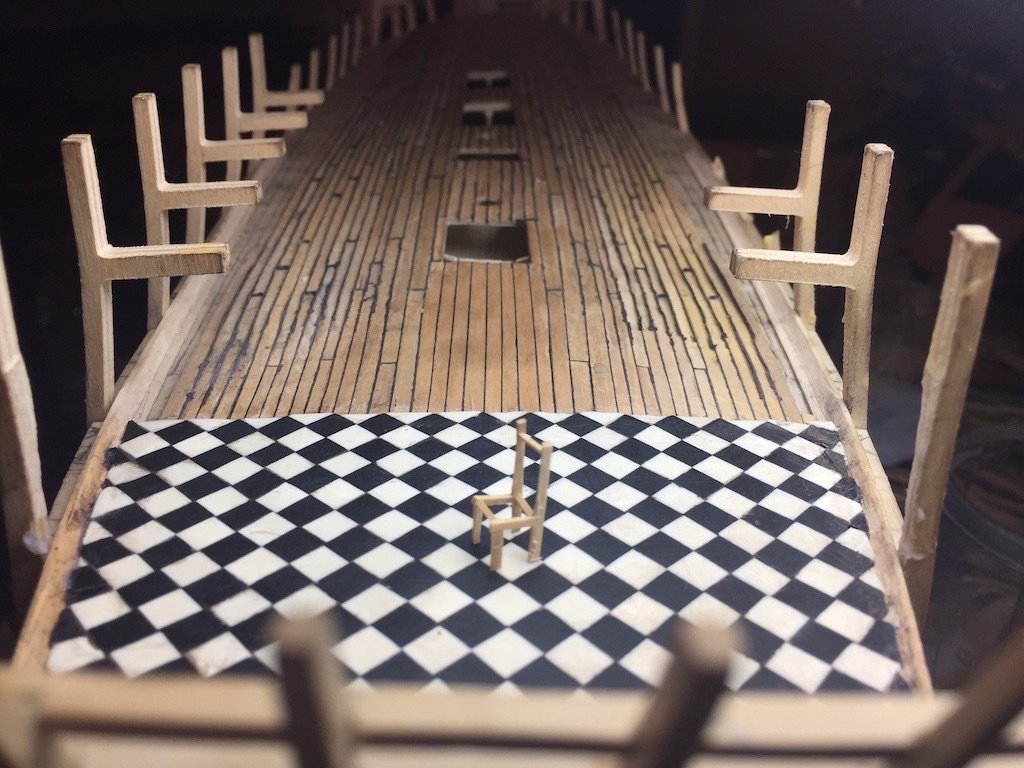
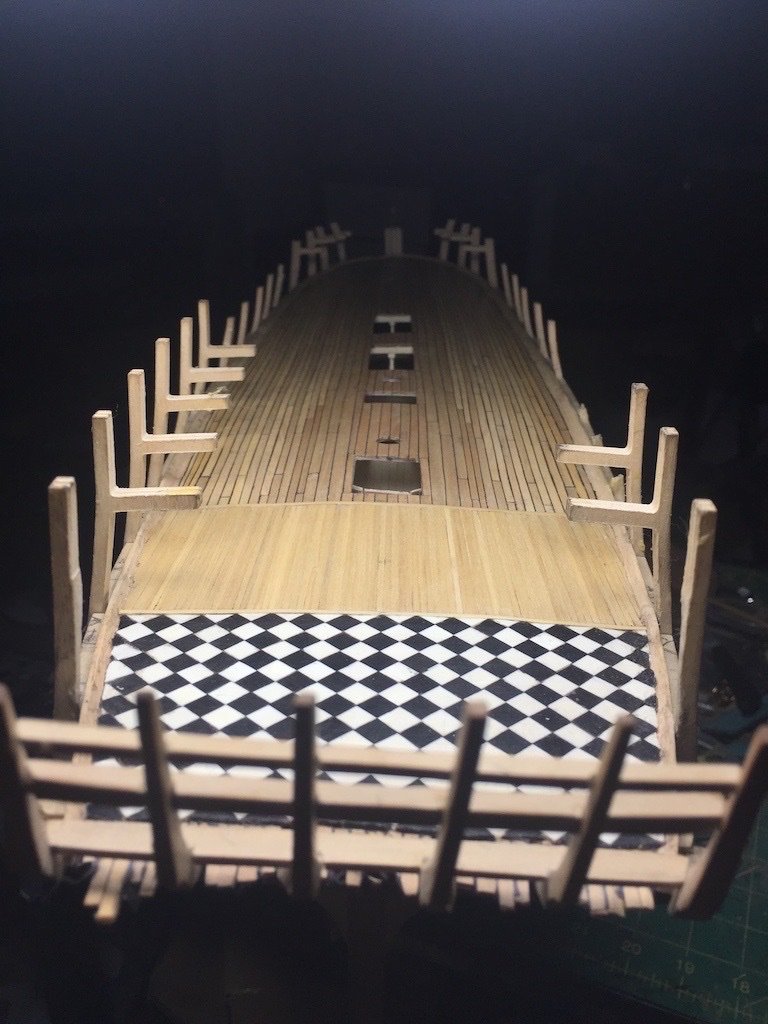
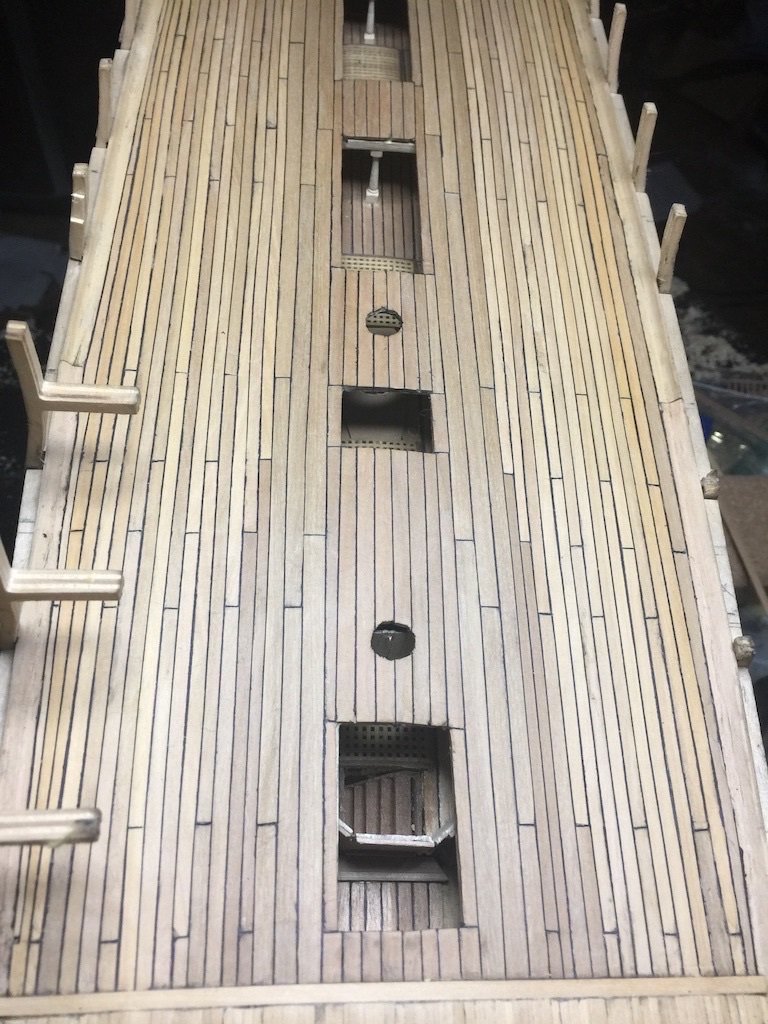
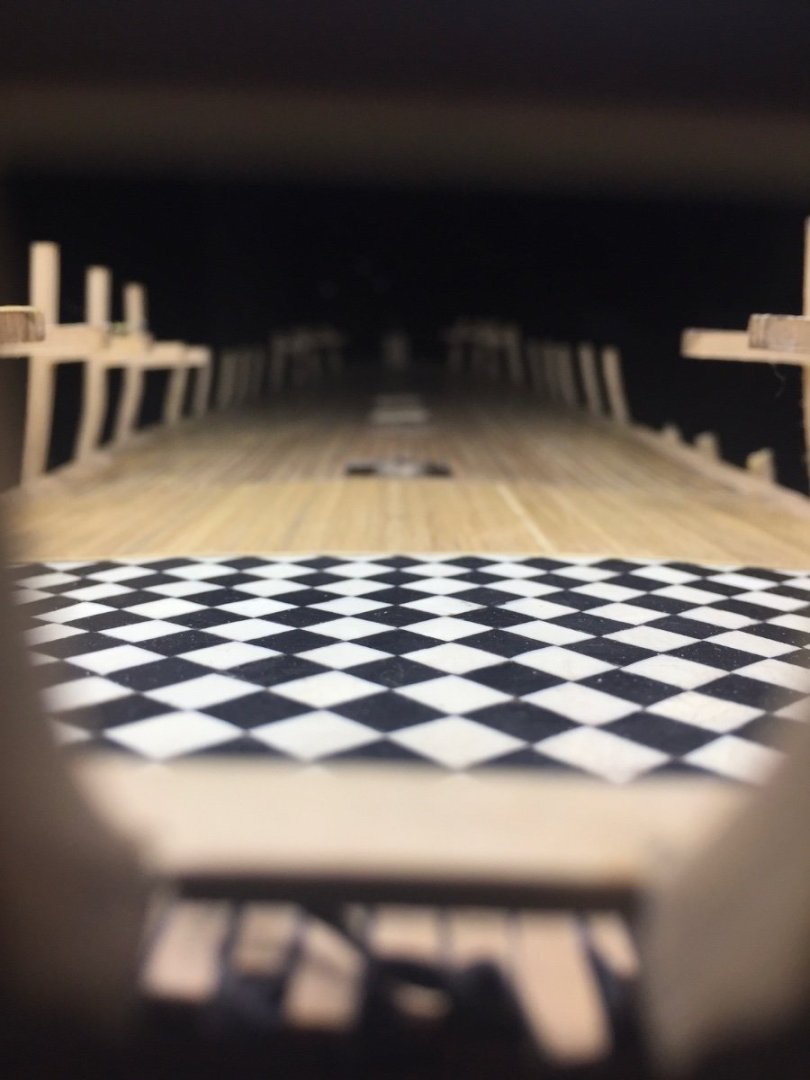
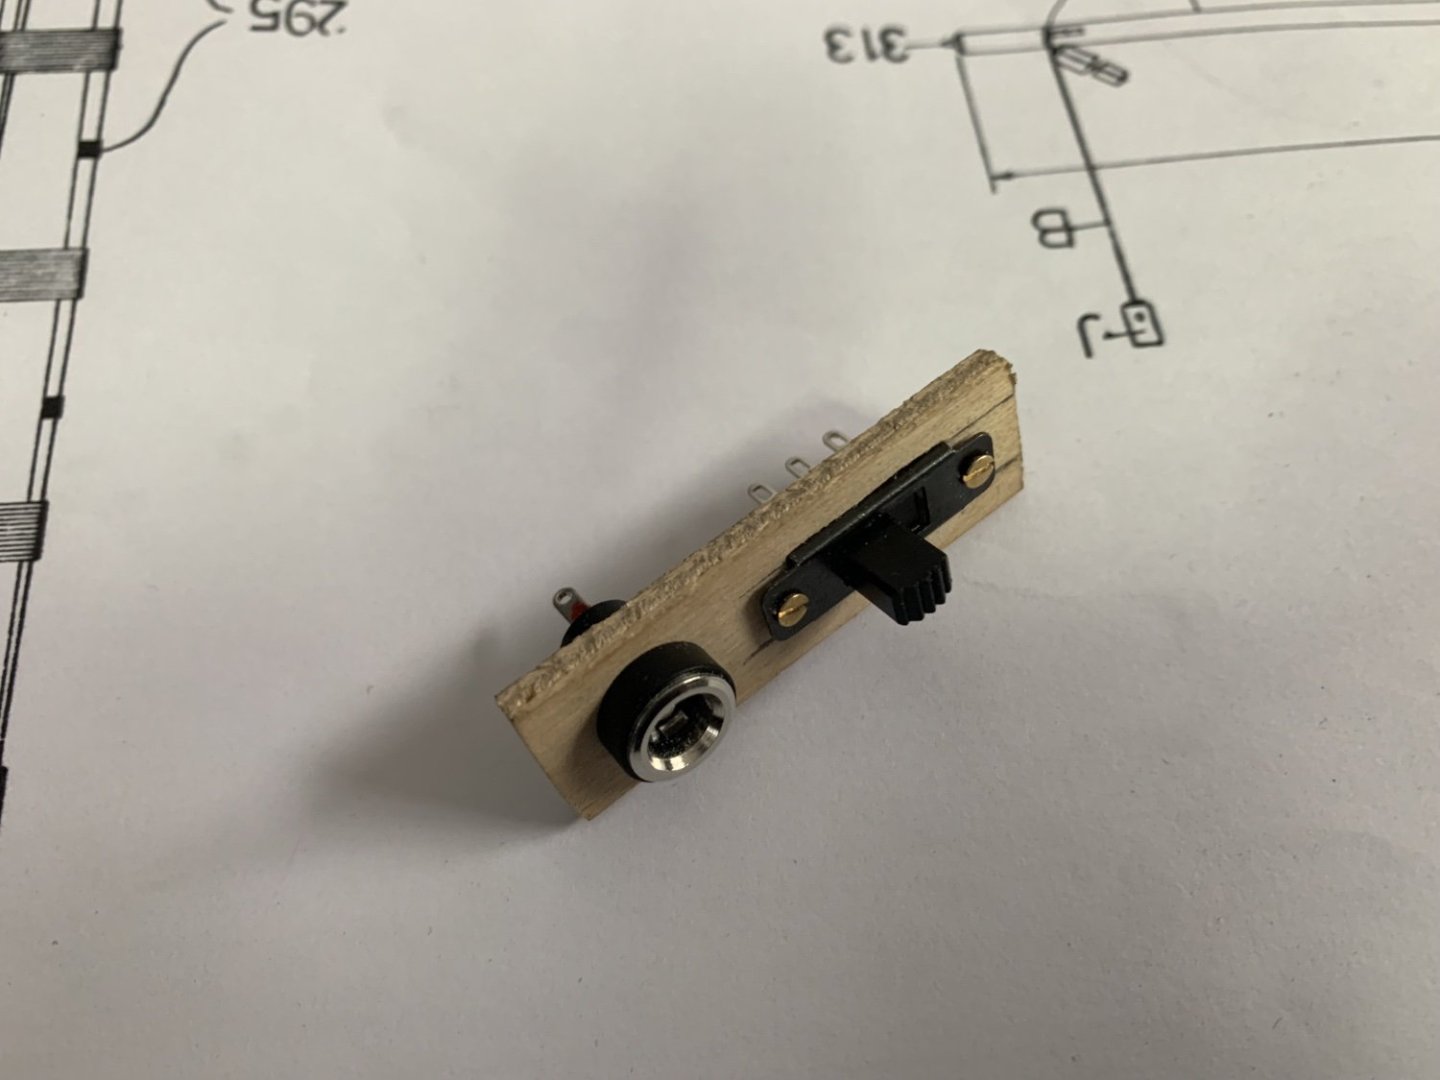
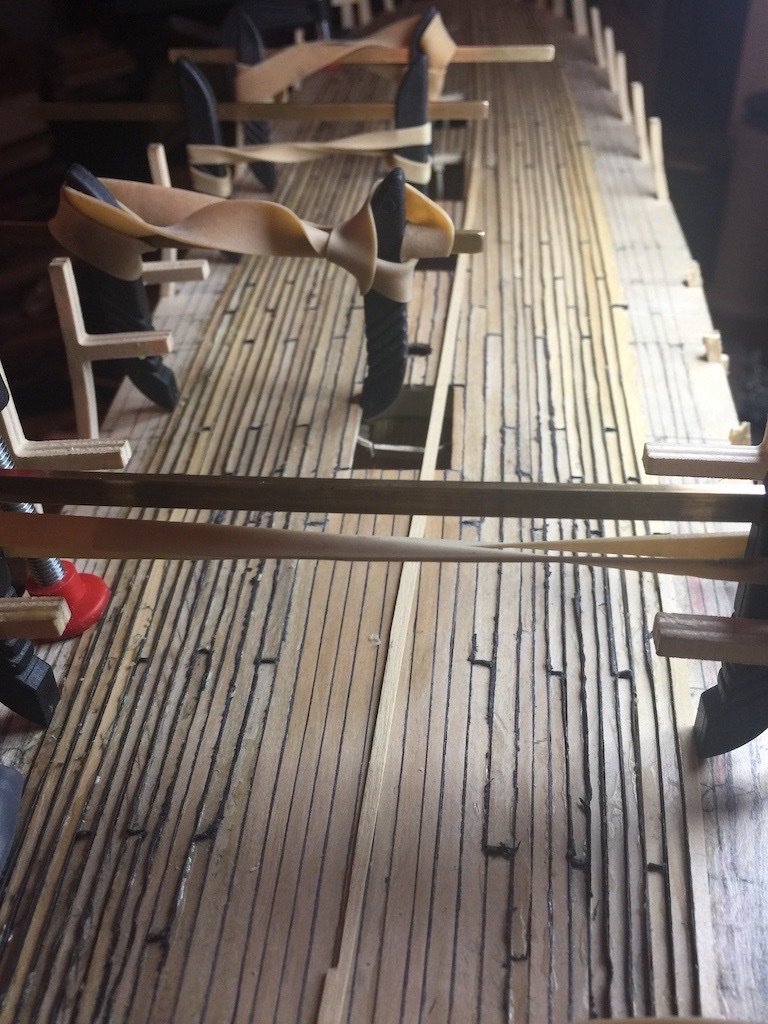
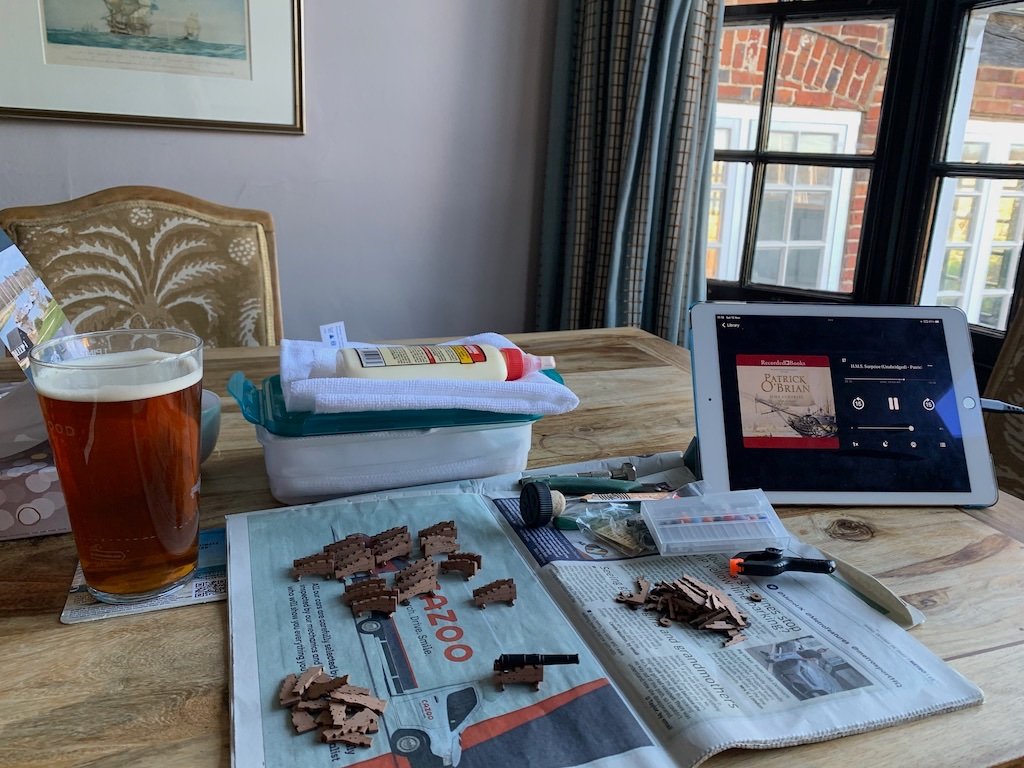
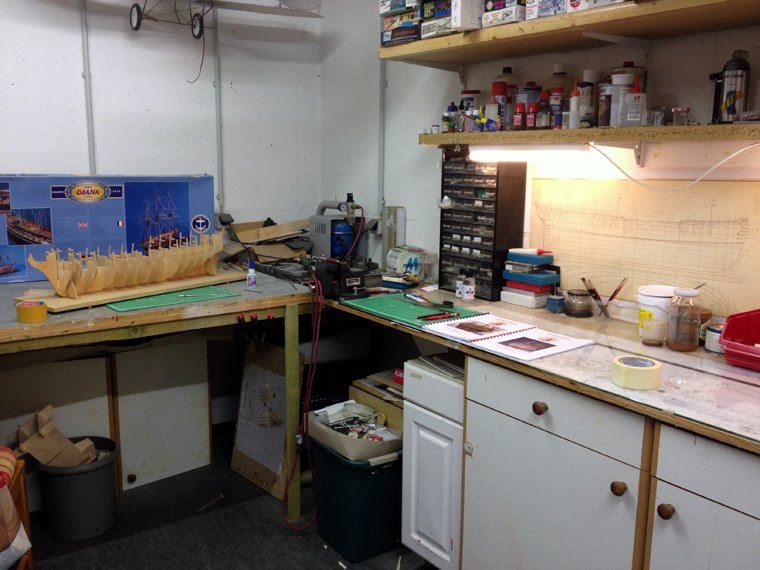
 I've been wanting to start a log here for some time on this build as it's been an on-and-off project for years (purchased in 2006, started in 2009, currently at the stage of planking outer hull). I've taken some pictures over the years which you can see below. These show progress to-date and I'll update this build-log as I make significant progress going forward. Summary: As a project I intend to use the caldercraft kit as the base but will replace and enhance much of it where I can, because I love adding details, even if they're not going to be seen. I also really enjoy working with hardwoods and have a good set of Byrnes model machines which are a joy to use (disk sander, circular saw, thickness sander and rope walk). My first completed kit was HMS Sherebourne which I also heavily modified and my high level plan is to start with smaller ships, then the large frigate, a 74 then, if there's time (!) a 100+ gun ship, all from the same period and same scale of 1:64. I plan to represent her after her 1801 refit, with full sails and replicating the same planking patterns shown in the admiralty plans and the Anatomy of the Ship book. The captains quarters will be fully fitted and lit, as well as additional details on the lower deck. Stern and rudder, made from boxwood. Rudder shows some original testing of coppering which I've since removed and plan a different technique. Lower deck planking (boxwood). After testing a few different techniques of representing the caulking between deck planks I settled on using strips of cartridge paper which I felt resulted in the most pleasant finished product. However, it's a lot of work! You have to cut long strips of the paper, stick it down one long edge of the plank with wood glue before adding the next plank. At the end you shave it back and sand. The bands you can see on the pic below were used to squeeze the planks together as they had a tendency to spread. This results in the occasional exploding plank but, well, the end results are nice! (you can see shaved planks in the lower centre of the pic) Rear lower deck and some details of roughly built cabins which are unlikely to be seen. You can see how the planking has progressed however including those tricky odd-shaped planks near the waterway. Also visible is my earlier version of trenails, and earlier version of gratings. Details of the central pillars on lower deck and you can see how nicely the caulking worked out. Gundeck started: Same method of caulking. Captains quarters floor is decorated with ebony and artificial ivory tiles. The chair is just there to help remind me of scale. One of the cannon; a slightly modified Vanguard Models 18lb carriage gun - lovely kit. I've spent some lovely days in the Master Builders hotel at Bucklers hard; on this occasion you can see my 'workbench' as I build all the gun carriages. Gundeck planking finished but no trenails yet... (smaller planks for the officers quarters - an idea I pulled from the plans of the '74 gun ship by Boudroit And now... the tedious bit! Trenails! I chose the 'syringe' method which is where you take 19 guage syringes, insert them into a pile drill, press into boxwood block and slice the top off the block. I went through quite a few syringes, and it took days to get enough made. The end result, hysterically, is very accurate trenails. So accurate however that you can't really see them. It would have been easier to see if I used pearwood instead of boxwood planks. However, I decided at this stage to go for accuracy instead of aesthetics. I needed a healthy break from the build after completing all the trenails! Instead of starting on the outer planking I decided to build some of the fun bits on the gun deck. I built these from scratch (boxwood gratings and ebony coamings built with the correct corner fitting). Finally, here's the switch built into the base which is for the lighting. This is fitted near the keel and the planking surrounds it. The lights are yellow flickering leds (I'm yet to figure out a way to upload a short movie showing the lights in action). ...more to follow.
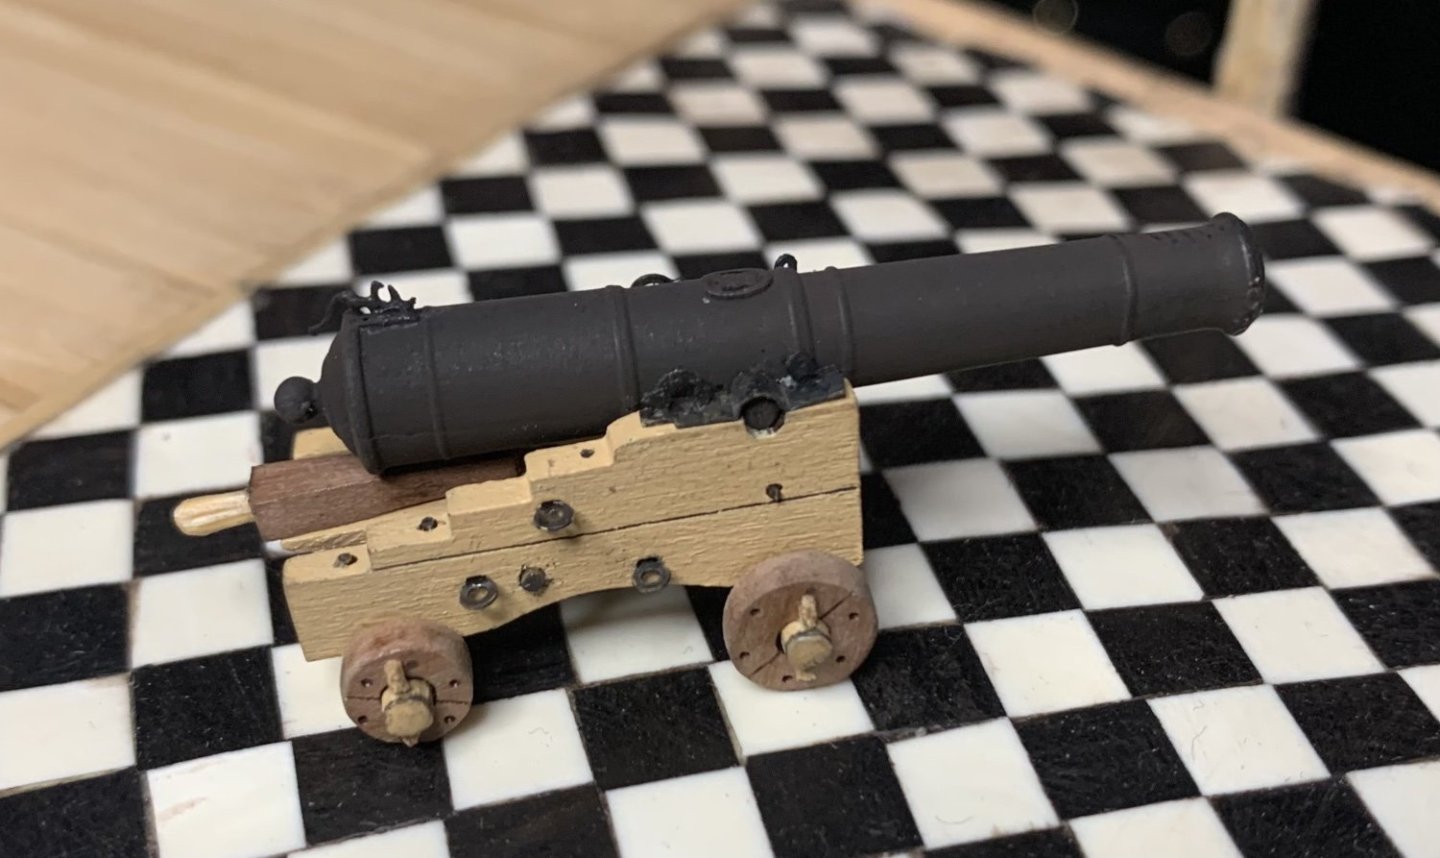

-
 Hello All, after looking around for a while for a nice model ship project, I was able to buy a started Calder Craft HMS Diana in good condition at a reasonable price. I have been thinking of building a ship model for a little while now, and even started designing a few projects for a scratch build, but in the end I decided I needed to get a good quality kit as a first build. The Diana was on the top of my list because a) it's Royal Navy (British ships interest me most) and it's a late frigate, a type I find very attractive. So it was pure luck that one popped up on Ebay which turned out to be within driving distance so on a nice Saturday morning I made the trip and bought it on the spot. Here she is. The building board was already built by the PO (previous owner). Nothing has been glued yet. The box top is different than the ones being built here on the forum. Maybe this is an early version kit or one specifically for the european market? The lower deck had already been painted by the PO. I won't worry about this as I want to plank the deck anyway and maybe add some details This is what's in the box The stern section was also already built. All to a good standard. And here another view. I have already ordered the AOAS on the diana and hope it arrives soon as I intend to dress out the lower deck a bit, even if it's hardly noticable later. This is my hobby cellar, all cleaned up (happens very rarely!) for the new build So, this is my first wooden ship build, so please be patient with me. I have always been a slow builder so this might take a few years - haha. Feel free to tune in, next I'll show you the beginnings of part one: Hull construction. --Chris
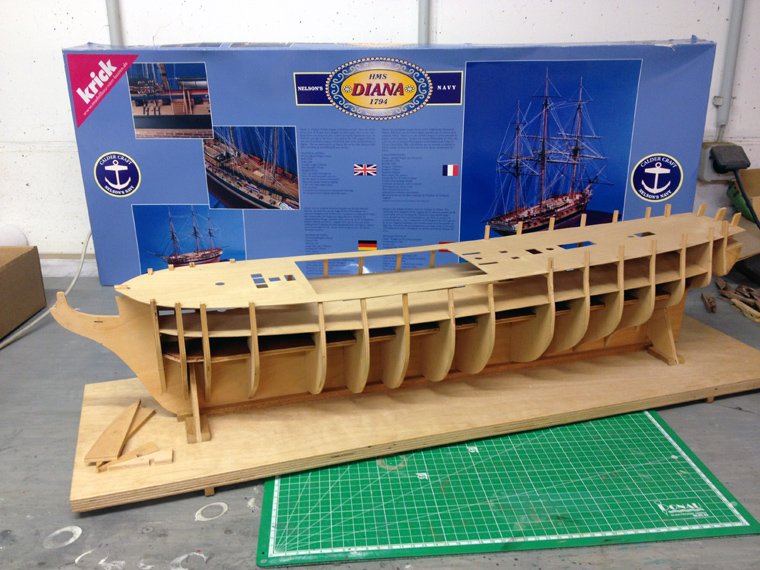
-
 Hi everyone! Last week I celebrated my birthday (53rd). From my wife I received HMS Agamemnon by Caldercraft. What a wife I have! To push me a little bit further I have decided to start a build log on my project in order to push myself and encourage others. I know there are so many skilled builders out there. I am perhaps not one of them but maybe I can help others avoiding the mistakes I eventually will do. I am a slow builder. I can be expected to put in 4-5 h a week into the project. The building instructions warns you to expect 1000-1200 h of building joy. With my tempo I will struggle for at least the next five years so be patient and enjoy my quest for the holy ship. So far I have dry fitted all the bulkheads on the false keel as well as lower gun deck and bevelled edges. The garage where I do the building is white with dust which slowly spreads in the house. I have to vacuum clean the garage before the wife retakes the birthday present… Whilst dry fitting I discovered that the upper side of the false keel is slightly banana shaped (not parallel to the bottom of the keel). It has its lowest height in the middle (around main mast) and the height by bulkhead 3 is different from that by bulkhead 14. I first thought this very strange. The height difference from the highest to the lowest point is slightly less than 10 mm. That is 64 cm in reality. Imagine dropping a cannon ball on a sloping floor like that. Sailors will lose their legs! Checking drawing 1 I realized the lower gun deck is bent into the banana shape of the upper side of the false keel. I cannot remember anyone commenting this on Caldercraft’s Aggy. I will now follow the drawings in hope that lower gun ports will be correctly located. Anyone who wants to comment on this? I suppose Caldercraft’s lower gun deck is not an exact depiction of the reality. Kind regards Henrik
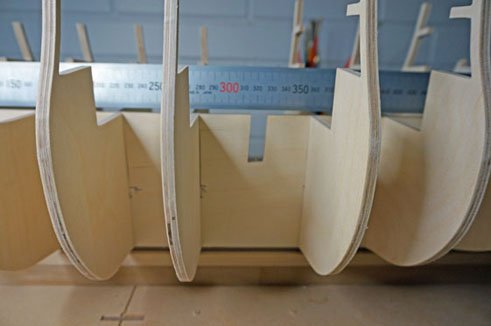
-
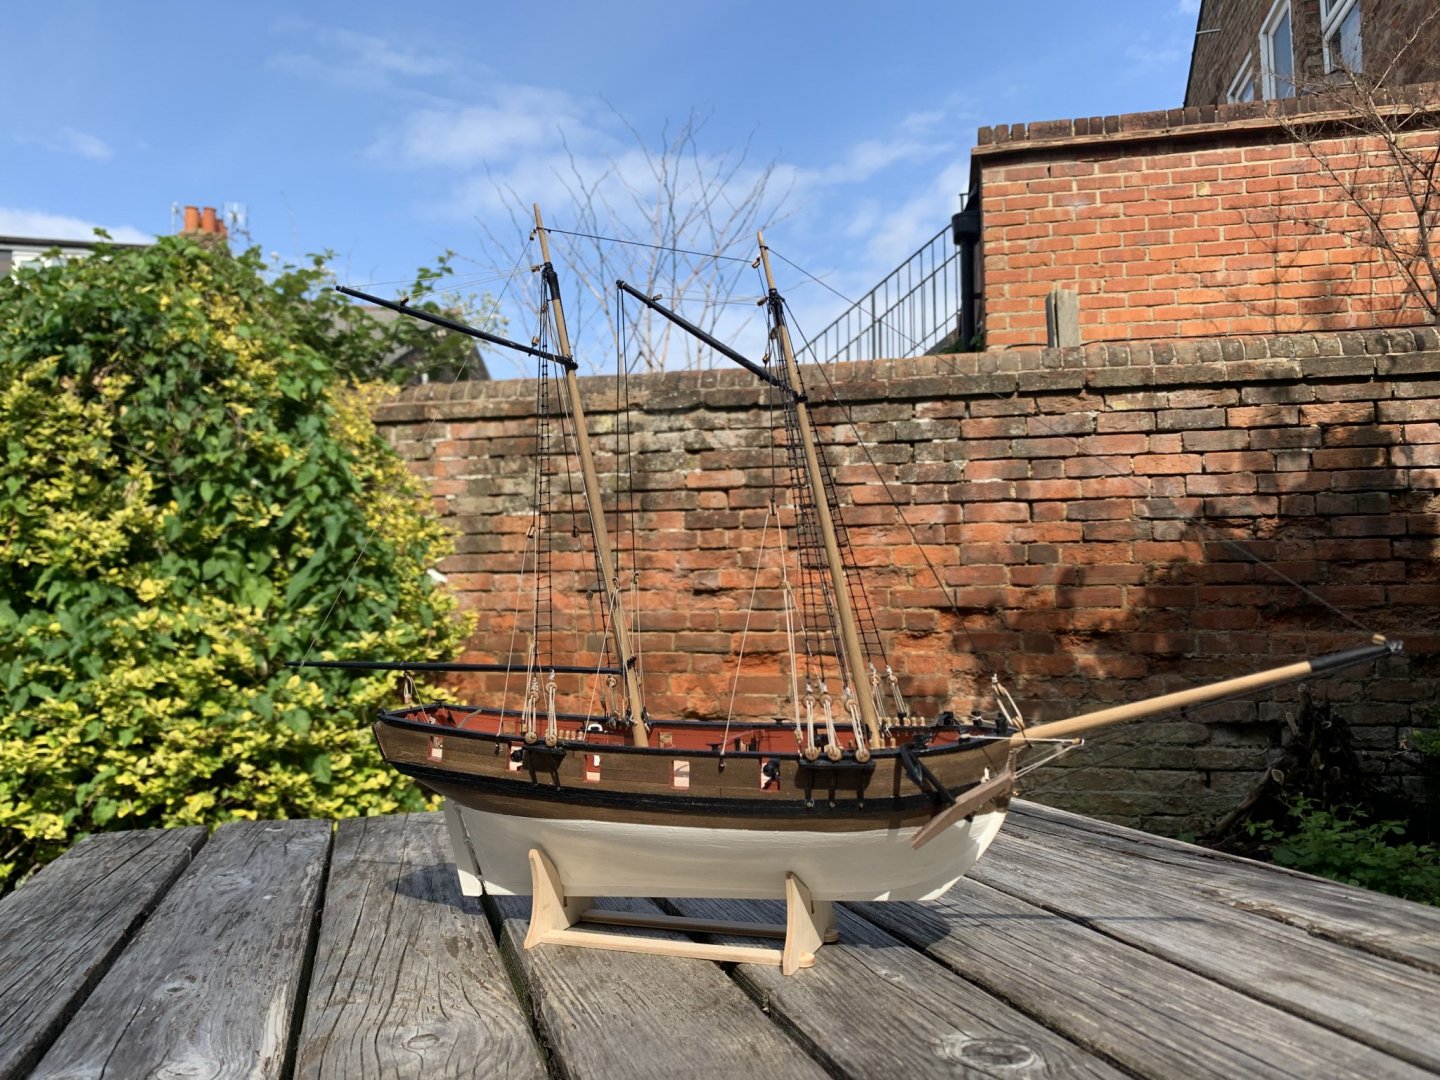
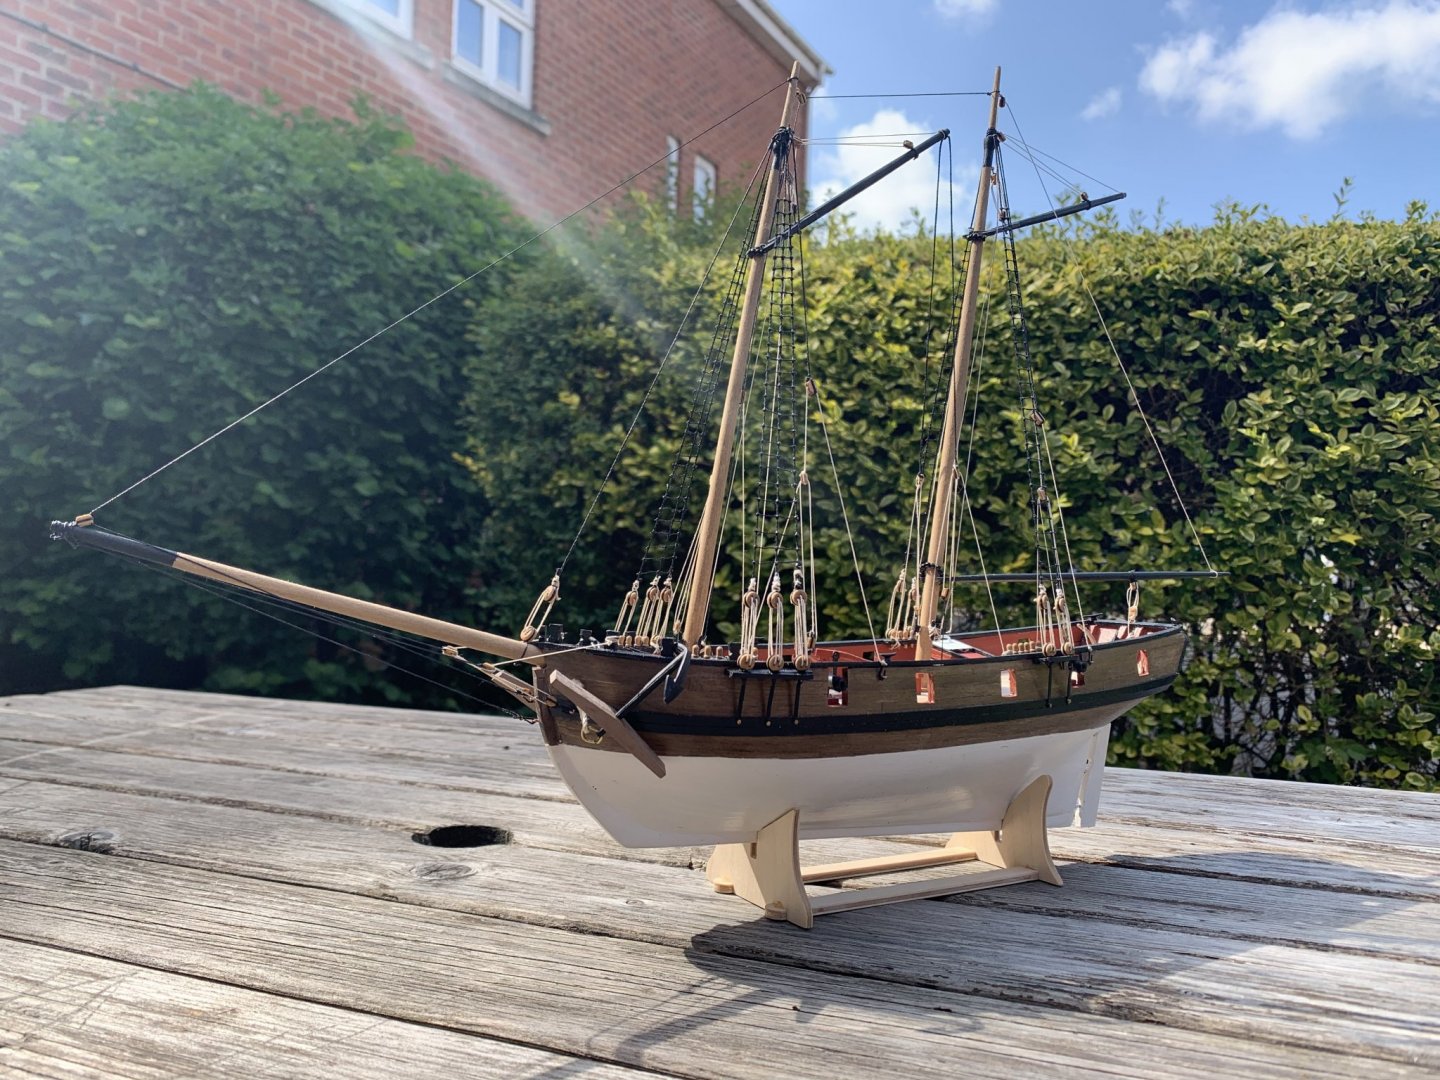
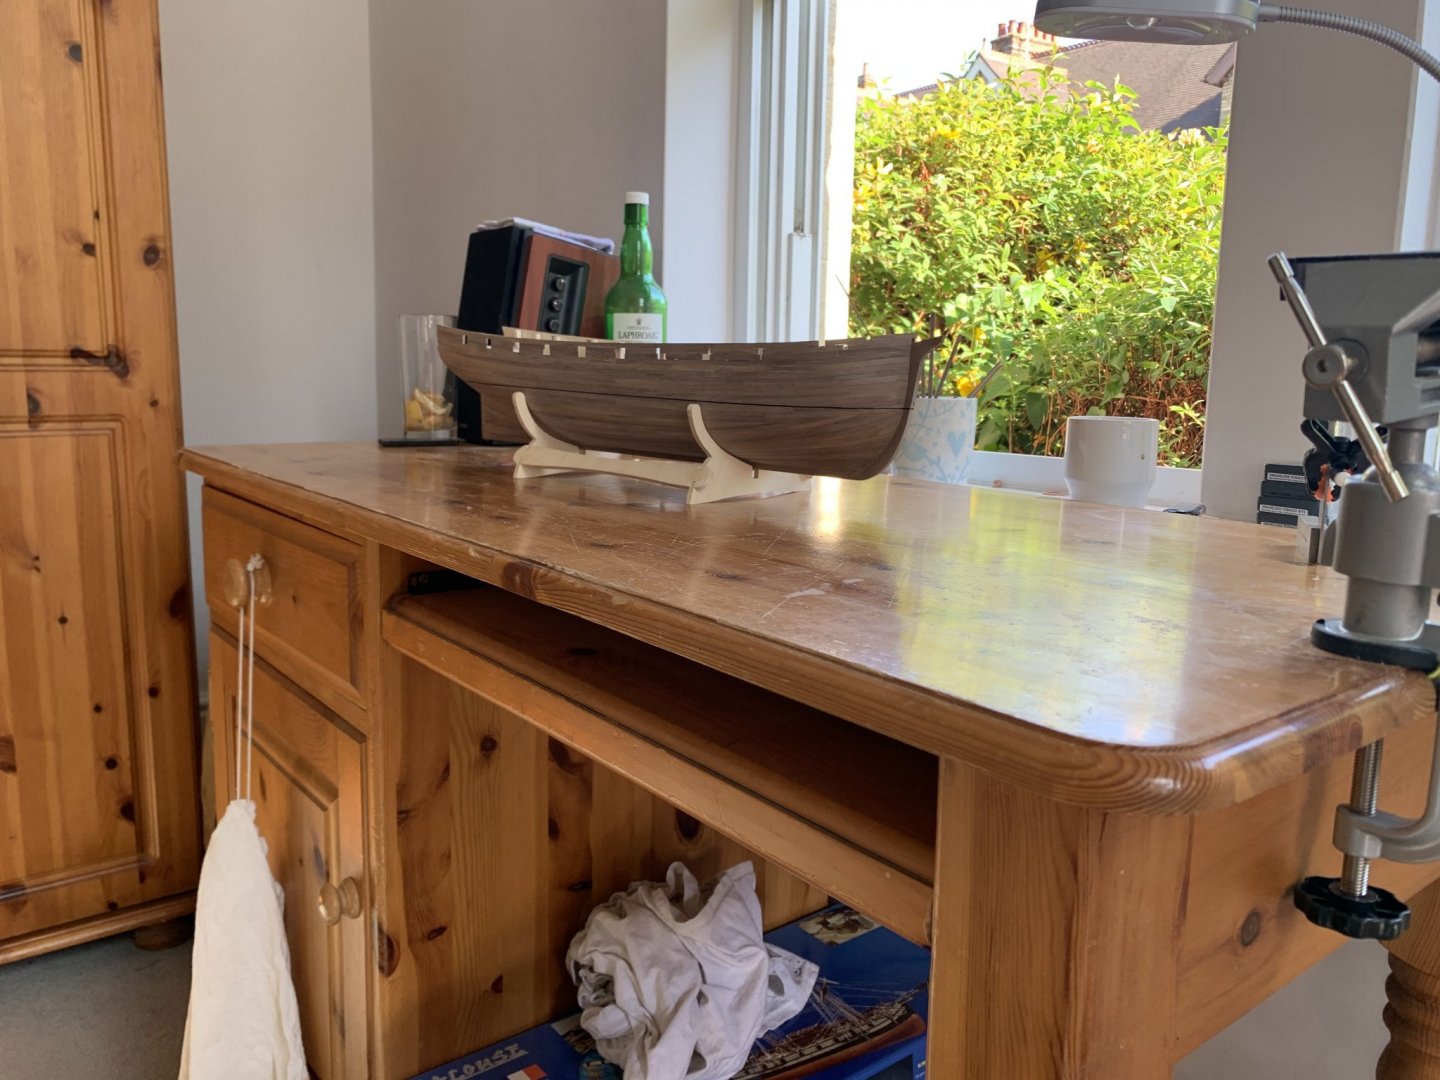
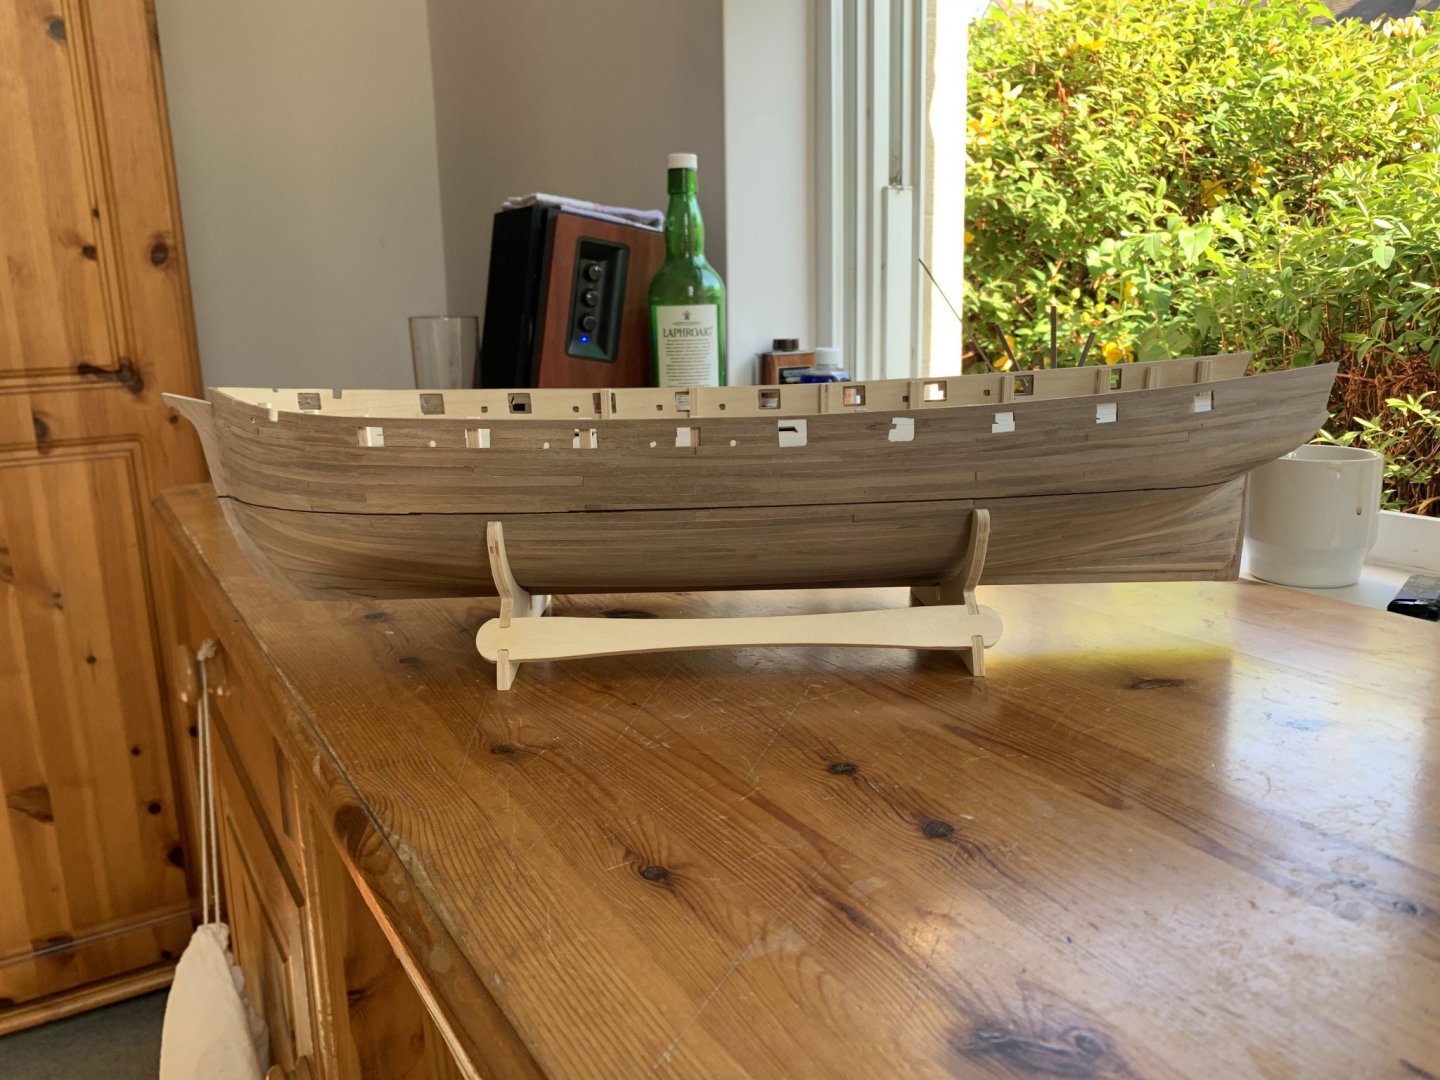
 (Sorry for the mix up, I put it in the wrong category by mistake!) As the lockdown continues here in the UK, I have been steadily working on my Jalouse. Just finished the Ballahoo a few weeks back. Here are some pictures of both. I do hope this log can help future builders of the Jalouse as there seems to be no logs at all on this beautiful ship. Cheers, Tom Here is Ballahoo and the beginning of Jalouse:
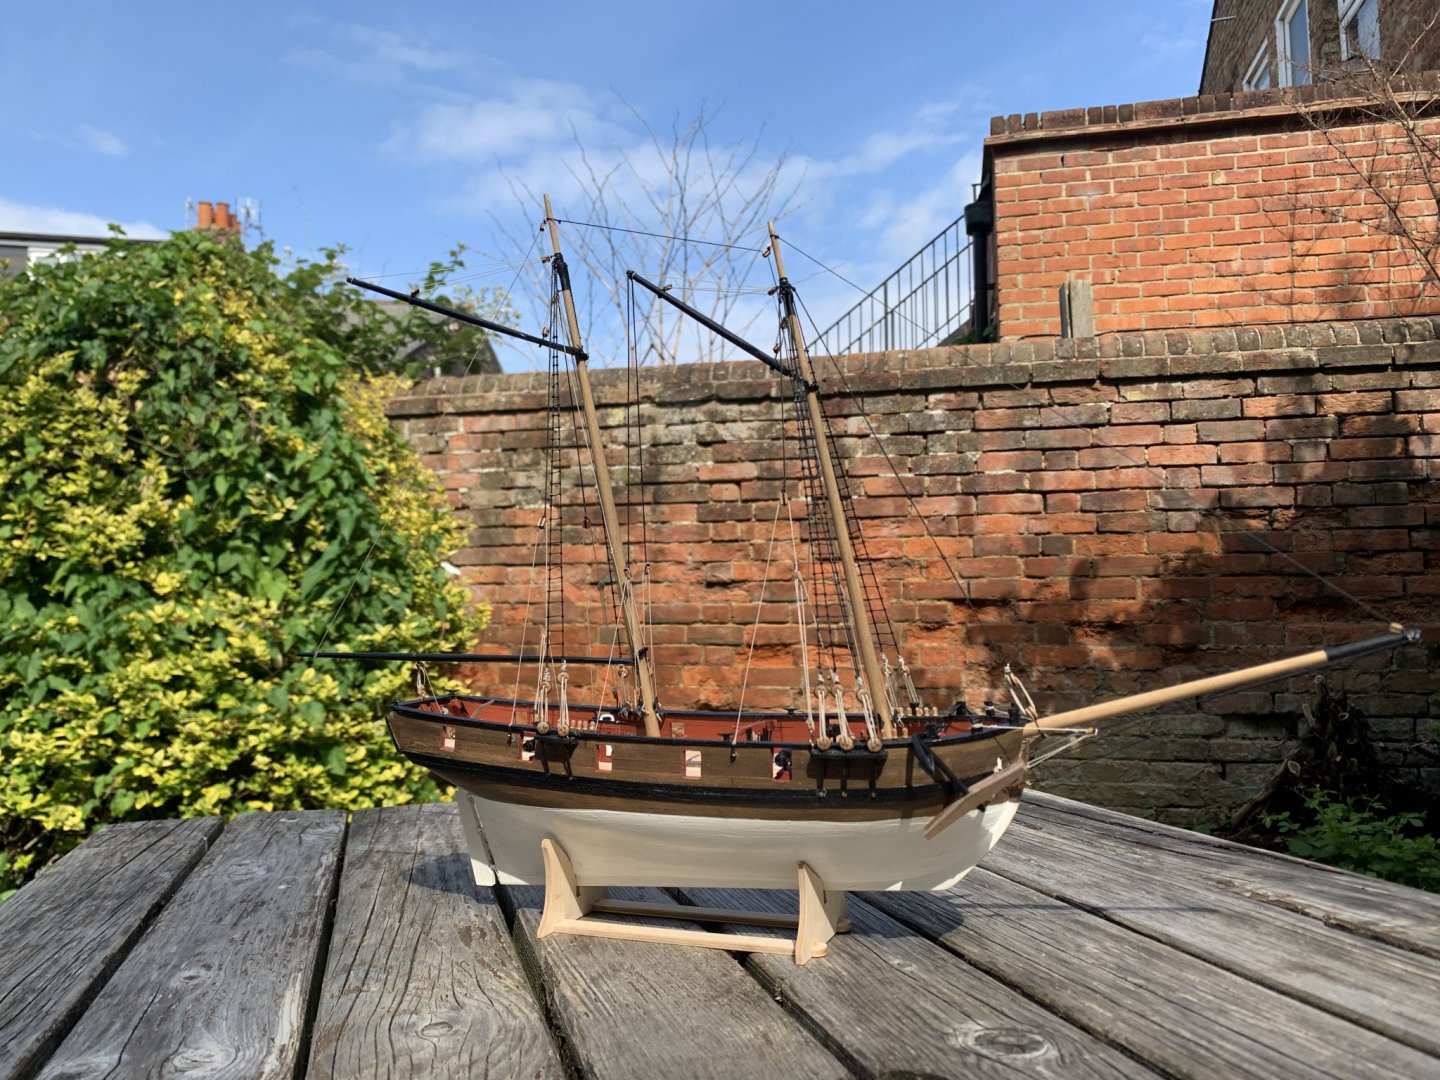


-
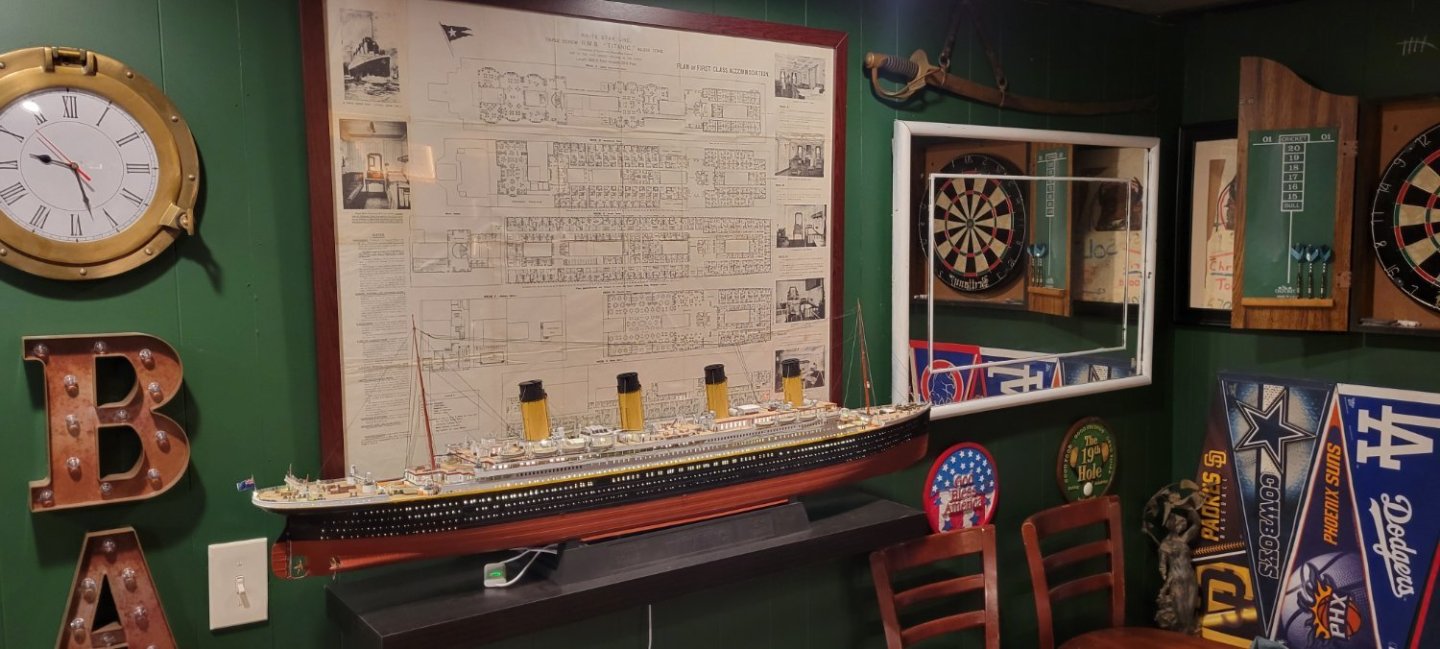
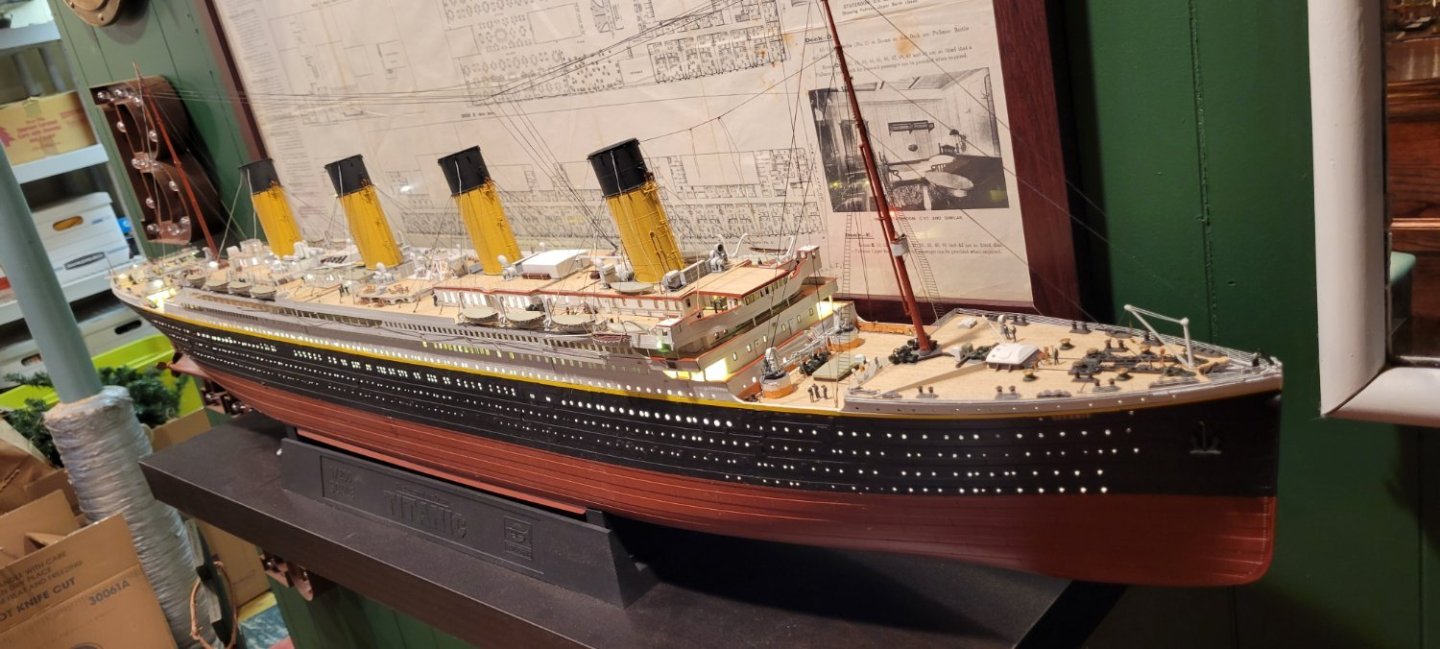
 Hello everyone! Well....after 40 years of work, I retired 2 years ago and have been trying to find things to do. As a teenager, I certainly worked on plastic models, with all their glue stings and poorly fitting parts and horrific paint jobs. I remember getting a small Cutty Sark wooden model, with poor instructions and parts that were only printed to wood sheets. Everything had to be cut out and even the hull was a solid block of wood that had to be shaped and sanded....never came close to finishing. Last year I took on a plastic model, Trumpeter's Titanic. It was a massive undertaking and took just about a year to finish. I had to learn how to handle photo etch, a paint gun, the use of CA glue and manipulating teeny, tiny parts. I took most of last summer off in the build as I own a sailboat in upstate NY, USA and that took priority, but I finished her last November or so. Is she a show room piece? Lol, no, but I am very proud of how she looks. I have fairly good wood working skills and can problem solve a lot of things with wood. I love sailing and have always wanted to buy one of those pre-made wooden ships for my office. The ones that cost about $500-$700 USD. Instead, I decided, why not try to build one!!!! I know this kit is VERY hard and having never even tried to build a wooden model or the subsequent issues and tasks concerning rigging, I just wanted to take a stab at it. So I found a kit in stock in the UK through Arrow Models. I ordered her and within about 2 or 3 weeks it arrived in the USA. Arrow did a great job and while I was a bit nervous working with an overseas company where I could find little feedback, they were tops! Great communication and great customer service. There are a few Caldercraft 1:72 build logs on MSW (I see more now as I've learned the search process here) and a few YouTube video logs that I am using. Perhaps (upon my initial search) not as many as some of the other models and kits. I thought I would add a log that is from a person with absolutely NO experience with this type of kit and certainly a kit that requires a high degree of skill or expertise or as is my hope....just the patience and perseverance to gut it through! I've posted a few Titanic pics in this post, I promise going forward it will be all Victory all the time. I just want to see how the posting process works and I will start adding right away. As of Feb 21, 2024 I am on the first planking task, about 5 planks up. So.....I'll see you at the finish line and thank you! Chris I use 3 books and they are a tremendous help. I looked for used versions. Longridge's took some time. The book has many pull out plans that help with any model's build and I wanted to be sure the book I bought had them intact. I included Google links. Used Books Anatomy of Nelson’s Ships – Longridge, Nepean HMS Victory – McGowan The 100 Gun Ship Victory – McKay I use many videos, and many listed below have dedicated playlists that help keep their HMS Victory builds separate from their other work. YouTube Video Blogs Wooden Ships – Greg Wislon Just A Good Place This is a Spanish blog for Artesania Latina model Johns Wooden Ships - John Aliprantis Many blogs of wooden ship models including HMS Victory (NOT Caldercraft) John Builds Iconic Military Models – John Mansell Huge playlists for 2 different HMS Victory models Olha Batchvarov – Olha HUGE database of builds, how to’s and more including DeAgostini version Paul Vickers – Paul Vickers There are only 8-9 videos before he stopped posting. So good for a new starter only I am a member of two model ship builder sites. Both are great and offer so many tips, hints, links, etc. Ship of Scale The site has an advanced search enabling you to input exact issues you want to research and the ability to 'watch' build logs and get notifications when the builder adds new content. Paulv1958 – Paul Vickers Hasn’t done much and incorporates the use of his YouTube blog Traumadoc – As of 11/8/24 he is finishing up stern and hammock rails. I believe he is a novice builder just like me, but has done remarkable work while juggling a full-time job and taking the time to log his work. Peterg – Major blog with high quality build, including lighting and custom features. As of 11/8/24 on quarterdeck w/ cannons Serikoff – Sergey Custom built HMS Victory using Mantua plans. Just started builders log in October, 2024 but has brought it up to date with what he has done. He provides EXTENSIVE information concerning his build, how to’s and more. Julian – Occre model, but has similar build issues that will help Y.T. – Mamoli scale 1:90 Model Ship World A great site, a lot of interaction between builders, a great search engine and the ability to monitor other builders as they add content. Kiwiron – Ron As of 7/24 completed quarterdeck, stern, bow and more Robert29 Finished Caldercraft HMS Victory – one of the best builds I have seen and use extensively while doing mine. Charter33 As of 5/24 he has finished quarterdeck and is working on outerhull trim and deadeye platforms. Very good build, meticulous Heinz6672 Wood only (no paint) museum quality work, but stopped posting while doing rigging around 2020 Paulb – Paul Last posts around 2023 with work on standing rigging. Very detailed work There are many other blogs on both sites and searching will also pull many recommendations for help on various tasks needed during the build. I didn't include links to topics such as laying hull planking, deck planking, rigging tips, making rope, etc. These are things each builder will have to do to get to know the process. I am a NOVICE builder with just one model under my belt. A plastic large scale model of the Titanic. It took me a year to build and that was pretty quick given that I have a lot of time as I'm retired. In addition to the above, I spend a lot of time searching specific issues when needed. When working on cannons, I would search keywords: cannons 1700 era ships, hms victory cannons, cannon rigging, cannon tackle. Once Google provided me with their search, I would save pictures for future reference. Hope this helps and good luck! Chris
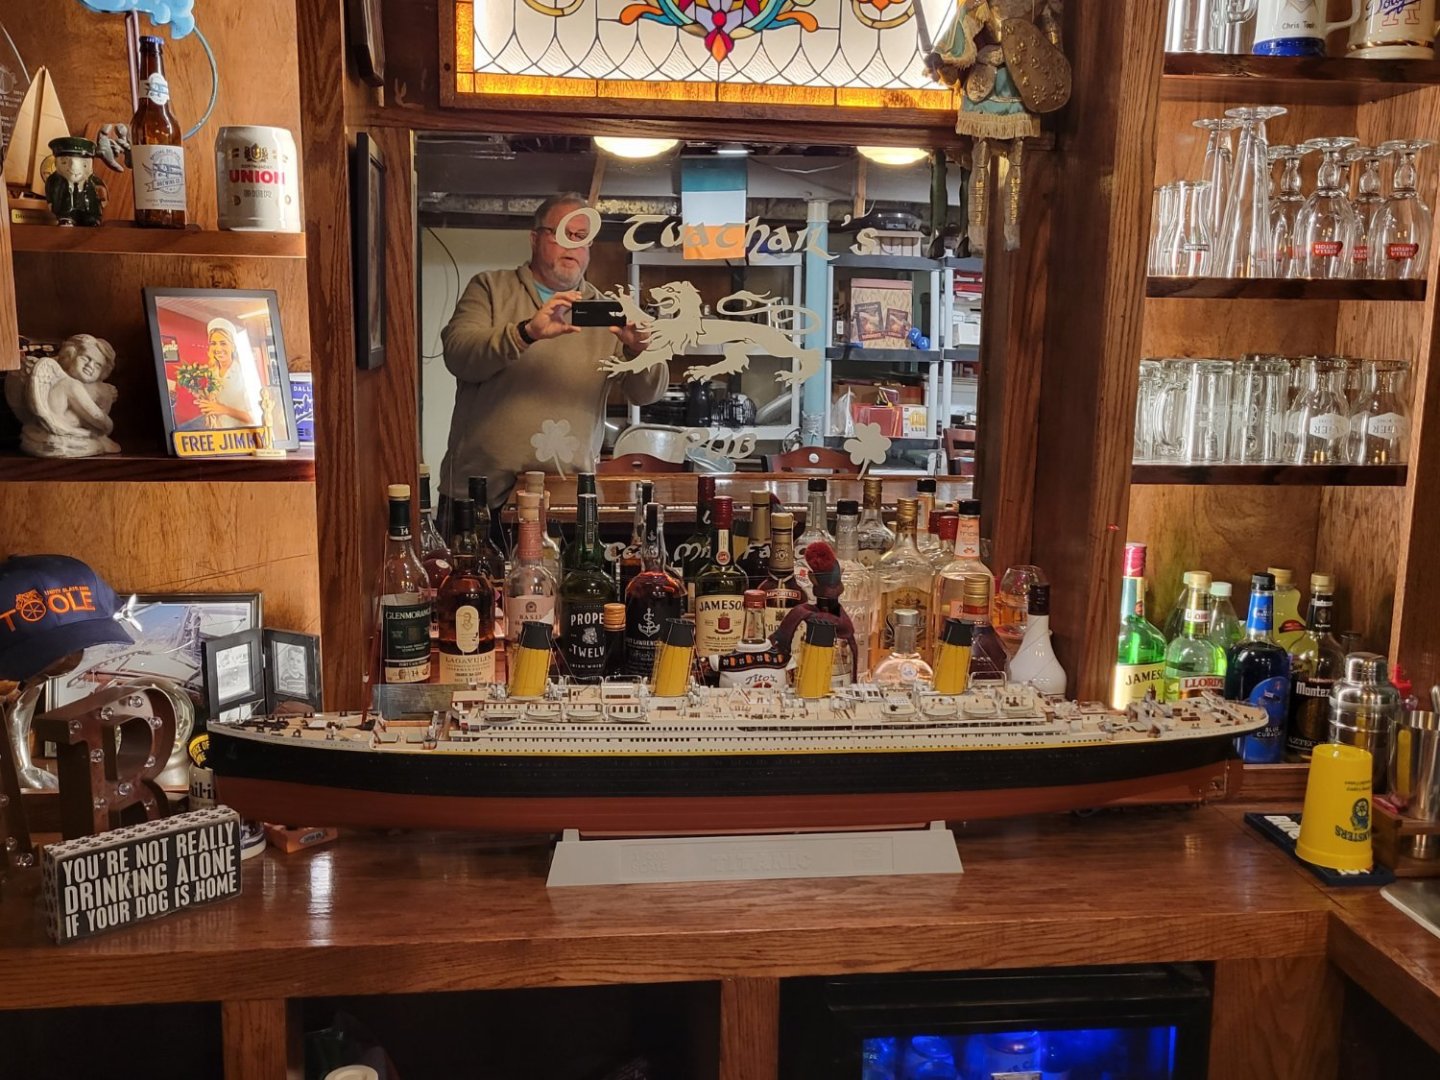
-
 Hello time to start build log of the HMB Endeavour by Caldercraft. I am planning to make her as detailed as I can, using all source of information i can find. For now I have only Anatomy of the Ship that should be good start. Quality of parts is very good, but blocks i will change for aftermarket one fit is tight but everything fit perfectly now time to start planking Best, Maciek

-
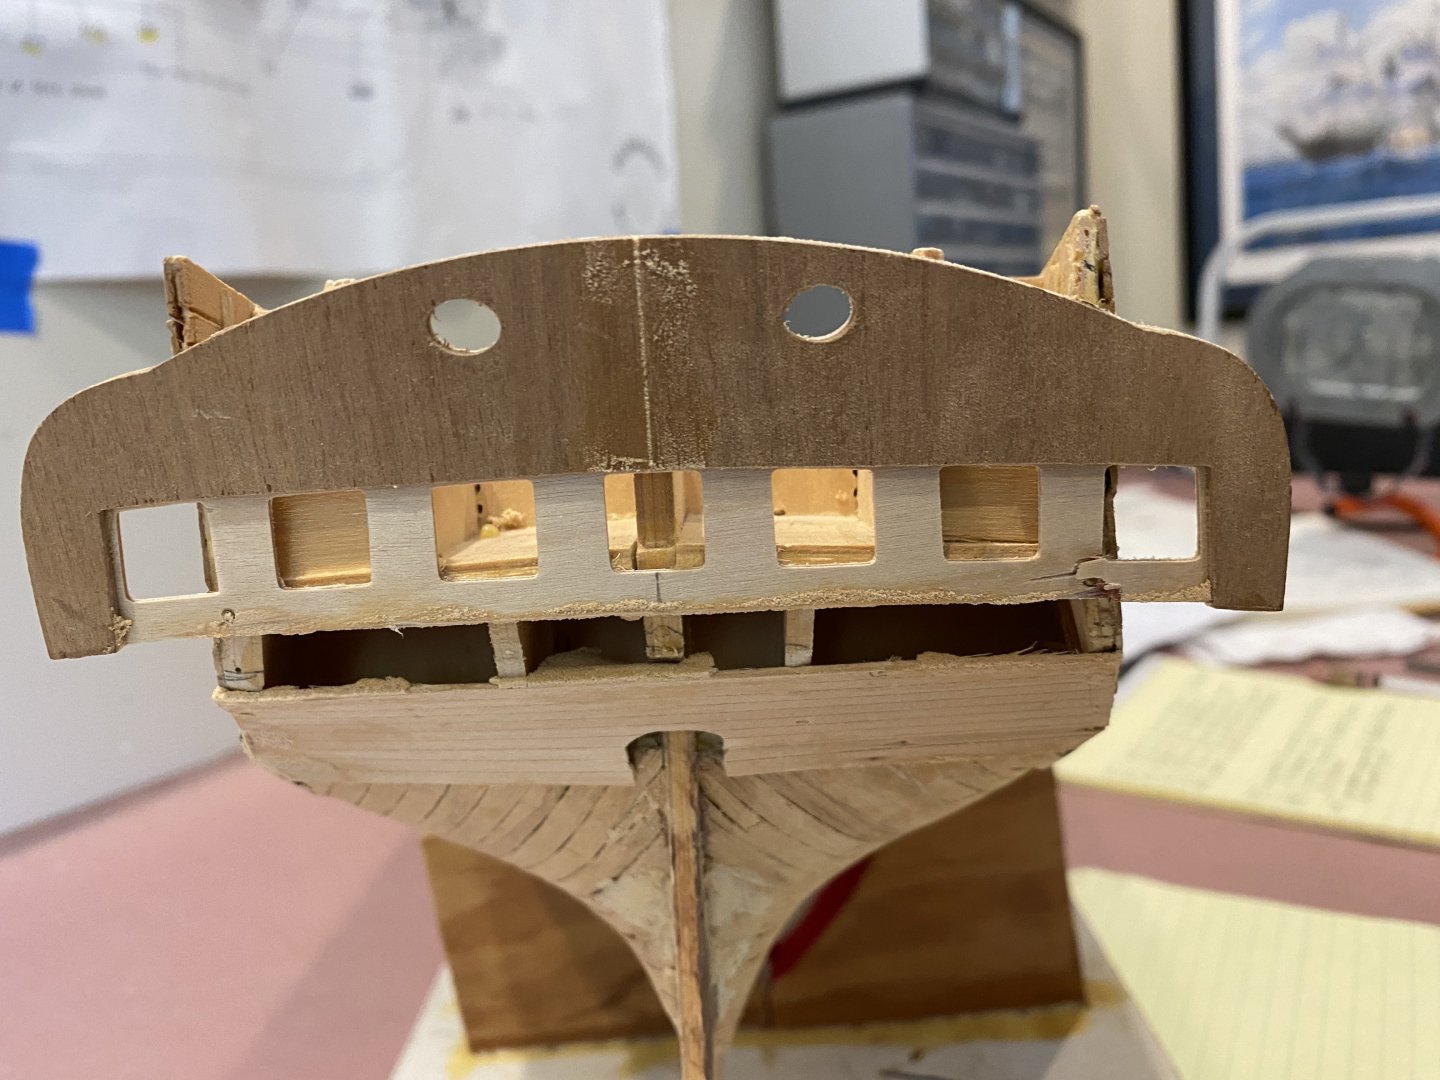
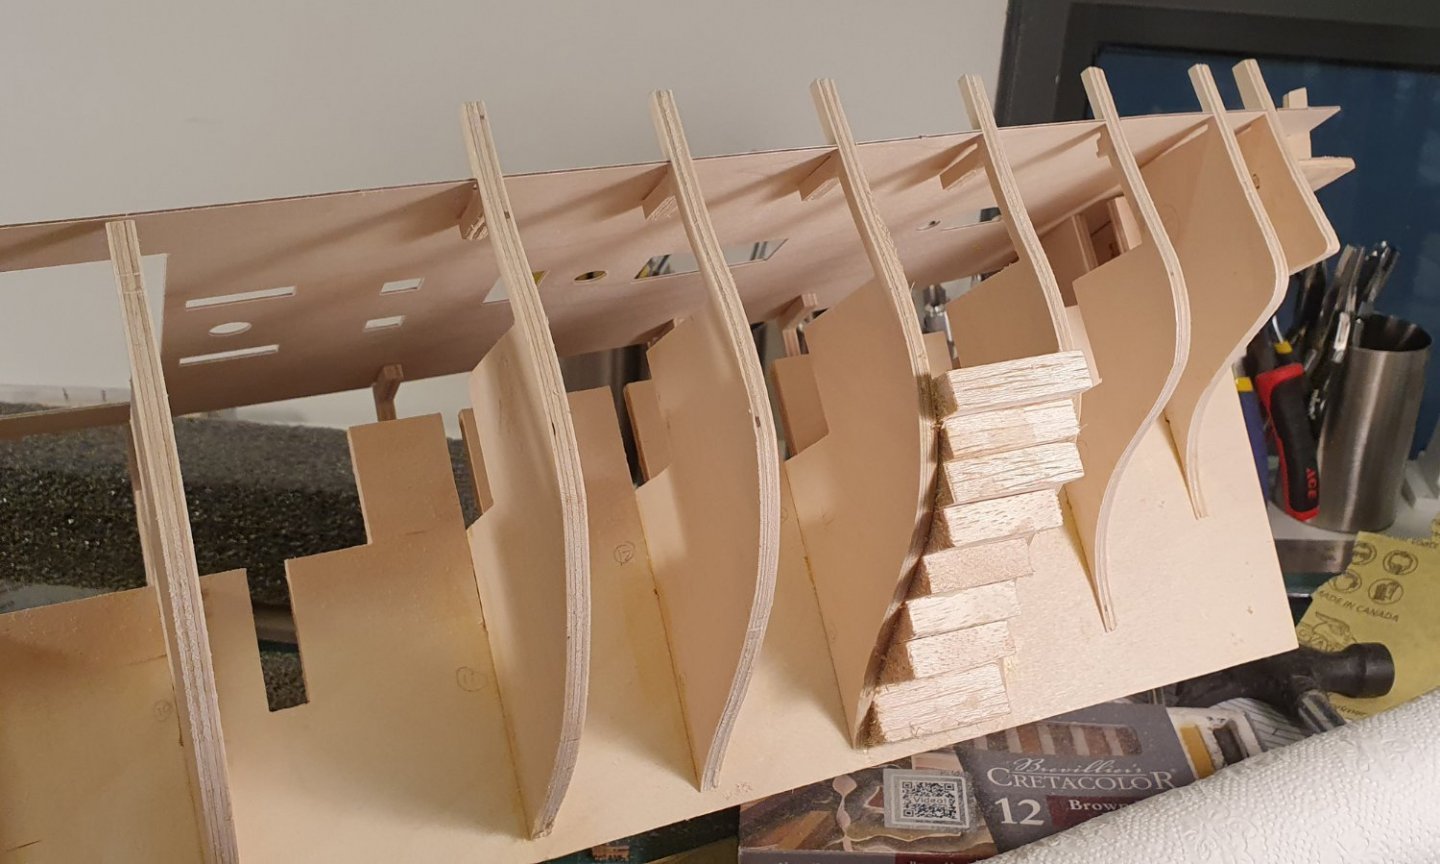
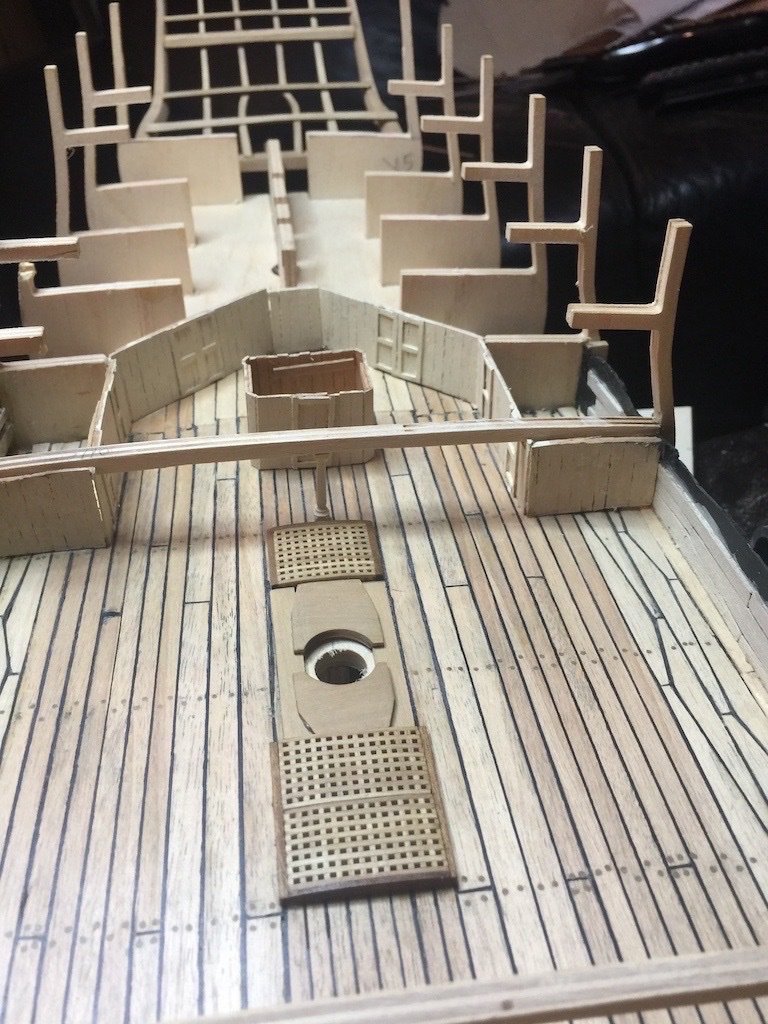
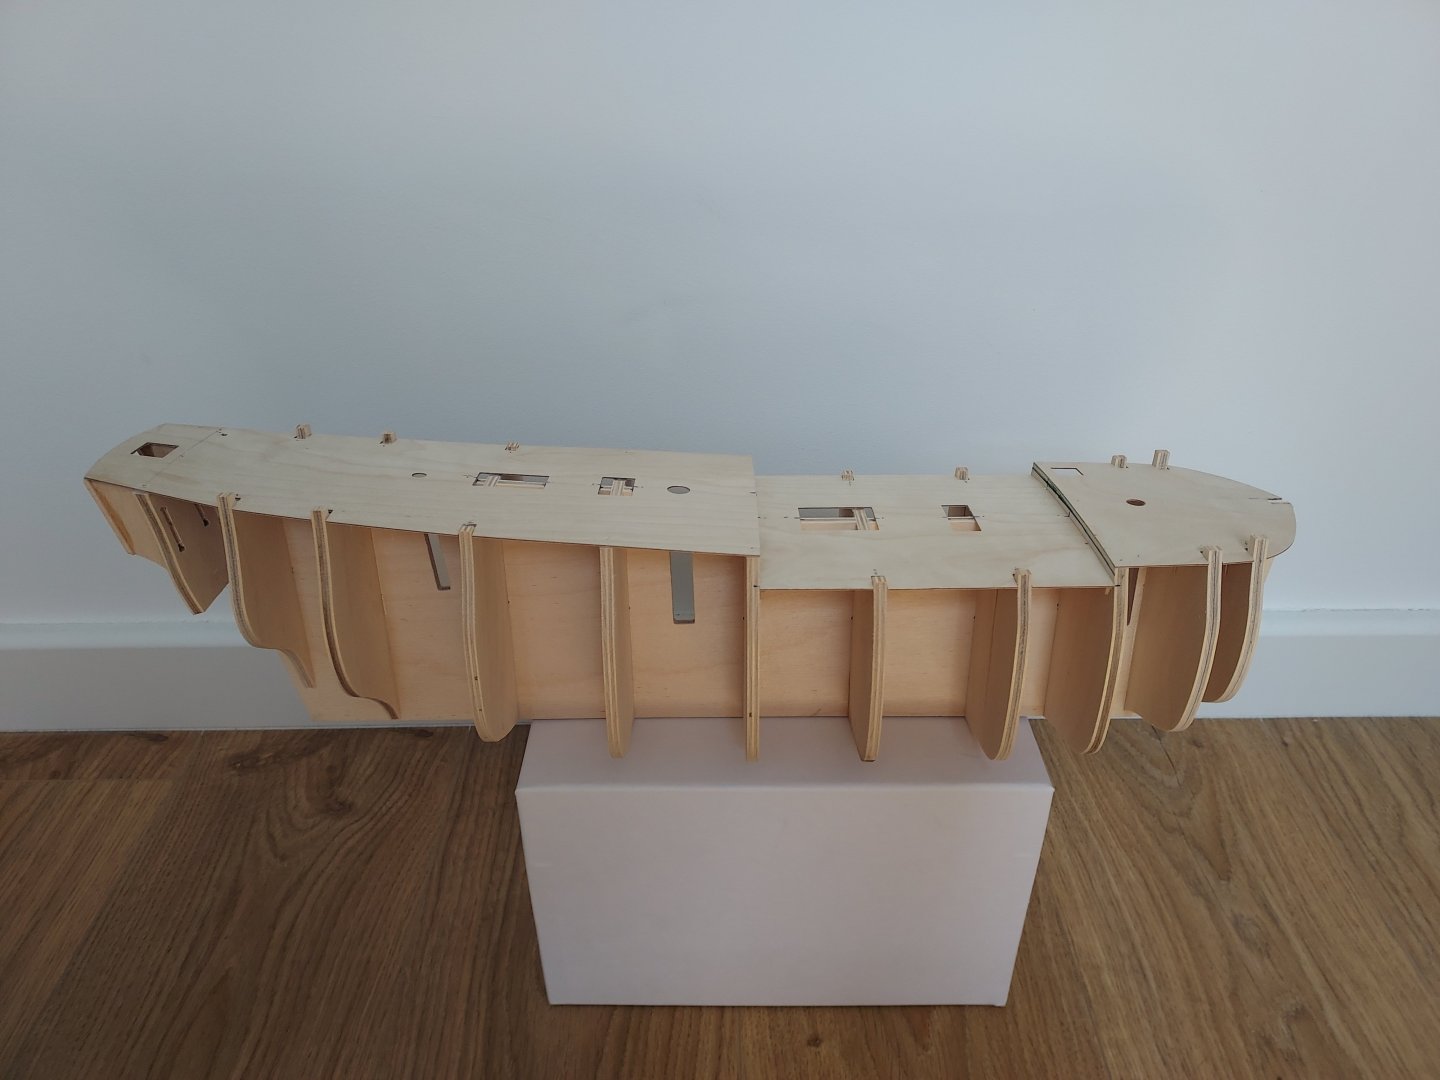
 I will be using the Caldercraft/Jotika kit of the Ballahoo schooner (Fish class) to build a model of her sister schooner Whiting. Why Whiting? Because she has an interesting history that I have researched in depth and I continue to study log books and other records. We are blessed with several drawings of the Fish class and their fore-runners at the National Maritime Museum and the drawings of Haddock in particular are excellent (ZAZ6116 and ZAZ6117 are the best two). I am now trying to interpret some features on the drawings and already have several questions about aspects that confuse me. I hope that some of the experienced shipwrights here can help. Height of the deck This is a big issue where the Caldercraft kit seems to make a major simplification. The kit has a level deck from stem to stern, but the drawings show that the deck is higher over the commander's cabin and the 'entrance lobby'. The side profile is a bit fuzzy but the deck planking and the sections through the deck beams show where the deck is higher. The plan view shows where there are pairs of deck beams at the steps, one at the low level and one at the high level. Is this something that Caldercraft and other builders have missed, or am I misinterpreting the drawings? (There are a couple of photos below that show extracts from the drawings.) Windlass and catheads The drawings do not show a windlass which is plausible for the size of anchor that this vessel would have carried. I have read that a couple of blocks would be set up in place of a windlass to raise the anchor, and then more blocks for the final lift because there are no catheads either. It all seems reasonable, if hard work for the crew, but an alternative explanation is that the drawing does not show the windlass or catheads but they would be fitted anyway. The builders might be expected to know to add these items, in the same way that they know about masts and yards even though the drawings do not show them. (There is an old saying that 'absence of evidence is not evidence of absence.) Any thoughts? Holes in the deck for anchor cables There are various names for these holes (Navel pipes?) which were used to route the cables from above deck down to the cable tier. The Haddock drawings do not show any and I guess that this is correct, the alternative being to cut away the fore corners on the grating over the main hatch. I suspect that the holes in the deck are later practice but have no real evidence to support this assertion. Does anyone have information from contemporary models or paintings? More to come later... George Bandurek (Previous model is Sherbourne, completed 5 years ago)
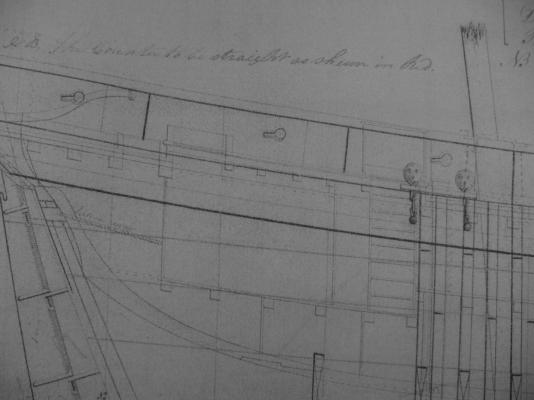

-
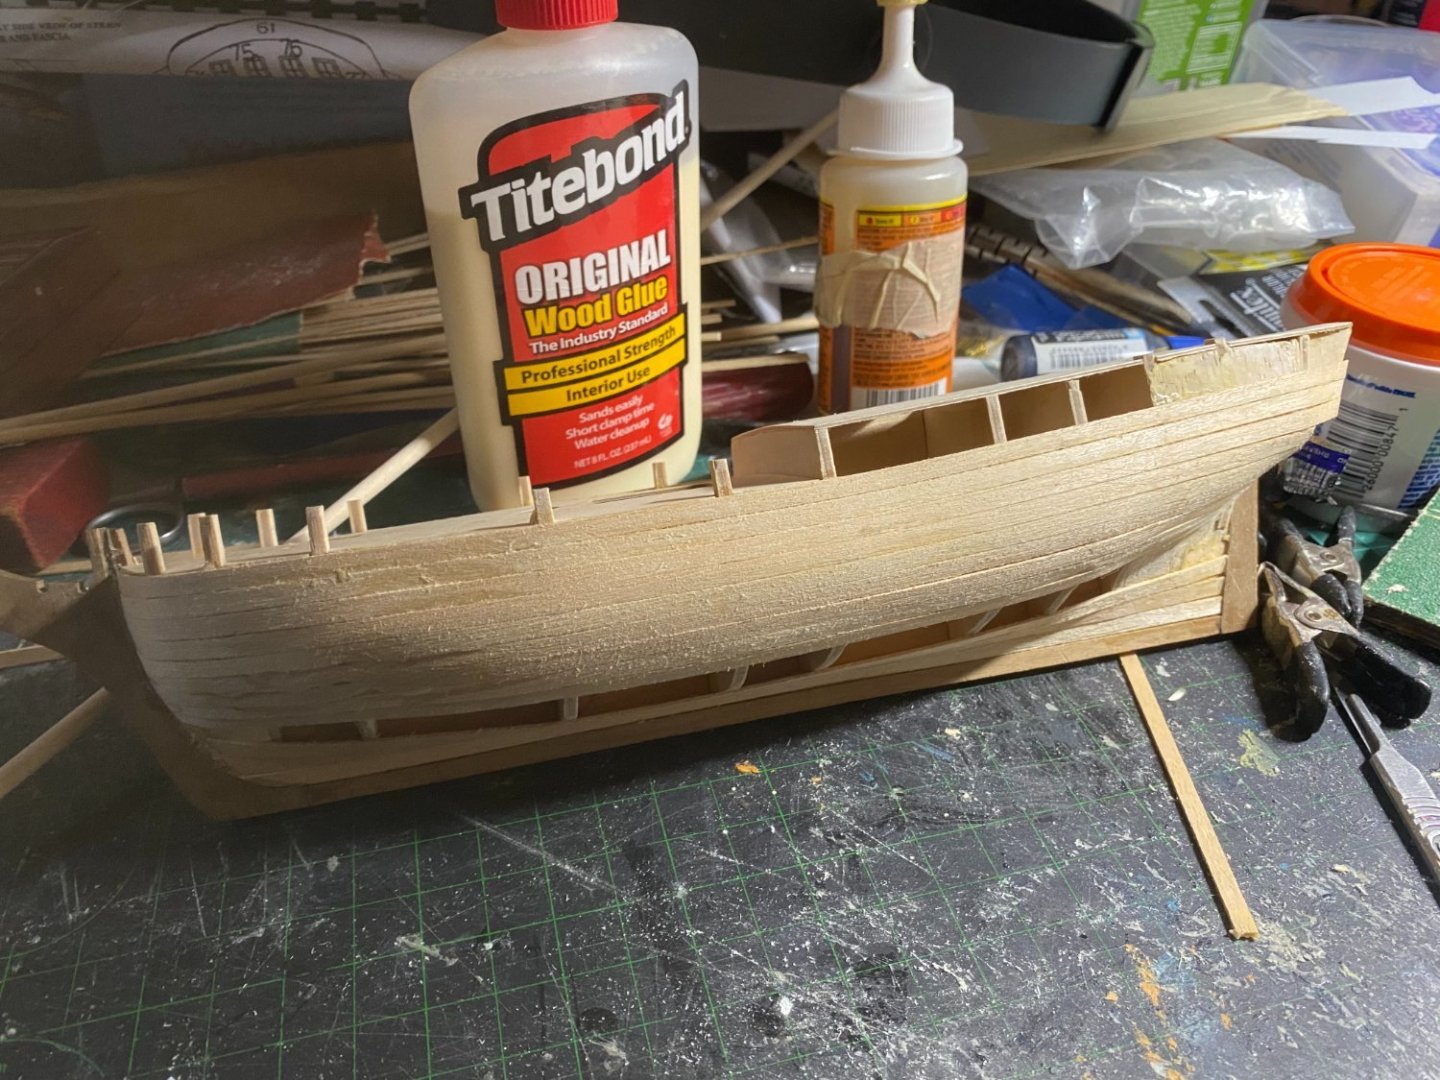
 Hello I've been lurking on this website for a couple of years and building ship models to various levels of completion but thought it was actually time to build something to completion and post it on this website. The frame and bulkheads went together nicely and I am putting on my first layer of planking. I did some rabbet work and a bearding line down by the keel, stem, and post rather than following the kit instructions to the letter.
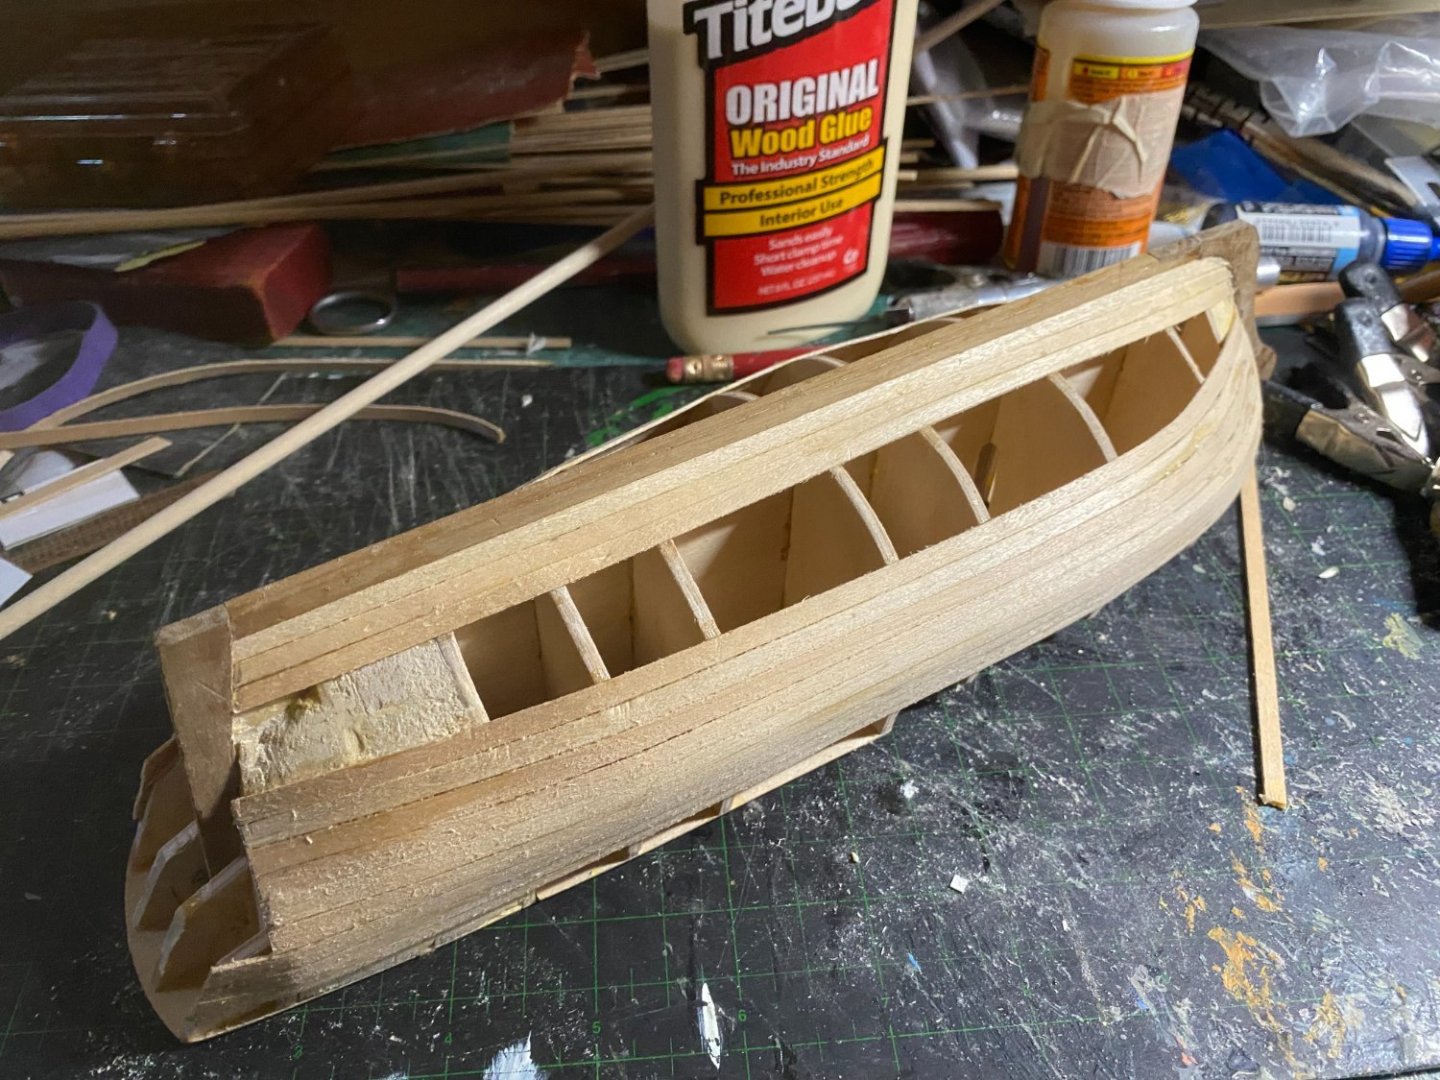
.thumb.jpg.55ac79dffeb13acd497f61ce627ceaa3.jpg)
-
 Haven't posted in here since the forum's previous incarnation, but starting a large new build, so here goes.... I've previously completed a static display HMAV Bounty in 1:64, and have the completed hull of a (huge!!) 1:64 Agamemnon on the shelf Unexpected windfall and a hankering to have a go at R/C sidetracked me (again!) in the direction of this kit. I wanted something Naval (ish) and at a decent scale, as I like lots of detail. After a bit of research and "umming and ahhing", plumped for Caldercraft's "Resolve", which fits the above bill, and both my static builds are Jotika/Caldercraft jobs, so I know and trust them. Excellent service from Cornwall MB, as ever on delivery of the box. Size was no surprise, as it has to have a single piece hull in there somewhere, which "aint going to be small" at this scale. Well packed, as ever - quantity of contents not too scary, as Agamemnon is considerably more complex. Spent a good week (of available time) checking the contents, especially the enormous number of castings - only found two small problems (one missing porthole, and a couple of brake drums that clearly are a different part), which I shall need to get onto CMB about - not bad really - I think packing that lot would drive me nuts ! Also invested in the "Tugboat Book", which has a review of a build of this kit by Brian Peach - I think I'm going to need all the help/clues I can get on this one ! Next spent a day or two researching and head scratching over power plant, R/C etc. - never done any R/C so all new to me (which is partly the point). Steam would be nice, but *way* too pricey (the windfall wasn't that big !), so electrickery it is. There is virtually *no* guidance in the manual on powerplant, coupling, props beyond "its designed for twin Decaperms and you can buy a complete add-on kit", however these motors seem to be outrageously expensive. My one-and-only-reference (Brian Peach) used 65mm props on his build - looks a bit big to me, so I opted for 50mm - learning in the process that the props on a twin screw rotate in opposite directions so have to be "handed" Looked into brushed vs brushless motors - brushless, though generally lower cost, seem to be for the powerboat fraternity and revving much too fast to direct drive props on a tug. Useful chart on Raboesch site giving max RPM against prop size suggested 7000 max for 50 mm props. Either gearing down brushless, or using a geared motor would be options. Not comfortable with trying to construct some sort of reduction gearing, so eventually plumped for MFA Torpedo 800's, which whilst still not cheap, do come with mountings. These are 12V nominal Batteries is a whole other issue - NiCd, NiMH,LiPO or good 'ol lead-acid ? Lead-acid for now as its low cost - will see how it goes Decided budget would stretch to Electronic Speed Controls - twin Viper 15's. Whilst my trade is electronics, I'm not keen to spend too much spare time on it (spare time is for modelling !), so off-the-shelf it is. Briefly looked into controlling both motors from a single ESC, but there are a few horror stories out there, so I've gone for two. Next problem - how to actually physically connect motors to propshafts (the shafts are the only bit of the drivetrain that actually come with the kit) - lots of things called "coupling inserts" available - took a while to realise these are meant to go into some kind of miniature universal joint (I told you I was new to this...) - apparently something as simple as a piece of suitable rubber tubing can also work, but I don't fancy it at 5000 RPM 😮 Finally a suitable RC system - a Futaba 3PRK with two proportional channels and a third on/off switch channel. I might want to upgrade to something with more channels if I get into controllable sound and lighting in the future, but this will do for now Phew! Unfortunately I commiited the cardinal sin at this point of ordering all the above running gear (about £250 worth all told) from a supplier I had not previously used - Westbourne Model Centre. Sadly they failed to so much as acknowledge the order, and when I checked on the web, there are some quite adverse comments about them. After several days, and multiple unanswered emails, I eventually telephoned them, cancelled the order (which they'd apparently been sitting on due to the RCS being out of stock), and re-ordered the whole lot from CMB (who acknowledged immediately, as I would expect, and the whole lot is currently in transit via tracked UPS for delivery tomorrow). Anyone else have trouble with Westbourne recently ? Wouldn't want to flame them based on one bad experience, but failing to even acknowledge an order is unique amongst suppliers in my experience, as is utterly ignoring emails. The moral is - if you haven't used a supplier before, place a *small* order first, and see what happens - guess I got blase about web ordering - never had this sort of problem before. Lesson learned.
 -
 Hello, I am a new member and started to build the HMS Victory. Visited this site very often in the last month for building info and found a lot of great building logs. I had problems finding the right location for the top gunport pattern (270).
-
 After reading several blogs on this beautiful ship I couldn't resist removing her from the box and taking a look at whats on offer. After the issues I had building the Endeavour ( I am still working on the rigging) the first thing I looked at was the plywood keel and to my pleasant surprise there was only a slight twist at the bow. Instead of using the brackets supplied by the kit for making the initial building board (these were not completely square) I built myself one out of MDF. Once the keel was placed into this and dry fitted the decks everything looks to have squared up nicely including the bow section. I would already like to thank a number of members including Dunock,DavidEN and BeefWellington for there considerable help in pointing out a number of issues with the initial build including the cutwater, the angle of the bowsprit, removal of the section of the false keel to allow some of the lower deck to be planked. The position of the mizzen mast and again it was necessary to remove another section of the keel. It was also mentioned that the first gun port from aft will fall foul of number 3 bulkhead These are all issues I will need to address before gluing takes place but intend to hold fire whilst rigging the Endeavour and given time hopefully will be able to figure out the best coarse of action moving. Here is some photos of major patys dry fitted. Notice already I have broken off a number of the upper deck supports. Not a great start. Another reason I chose to build this model is due to being the proud owner of The AOTS series and therefore will adhere to this as close as possible and perhaps consult bothe James lees and Lavery for anything which needs further clarity.One thing which I have notice with the this Caldercraft kit is the sizes of the masts, which are the same as the Endeavor. Although it is once again my intention of building the masts from sqaure boxwood stock, I notice that the according to AOTSD the main,fore, mizzen and bowsprit should be 11.1mm,9.7mm,7.3mm and 11.1mm consecutively . So I currently only have boxwood up 10mm thick. So I will need to order some 12mm thick for this job. I am still not sure whether or not I need to make a rabbet or not and to also replace the stem with boxwood. At present I am unsure of the drawing if I need to add a walnut keel and stern post too, or I actually need to cut into No 3 bulkehead to allow the line up of No 1 gunport or can I just move the gunport at a later date. Any advice in this area would be appreciated.
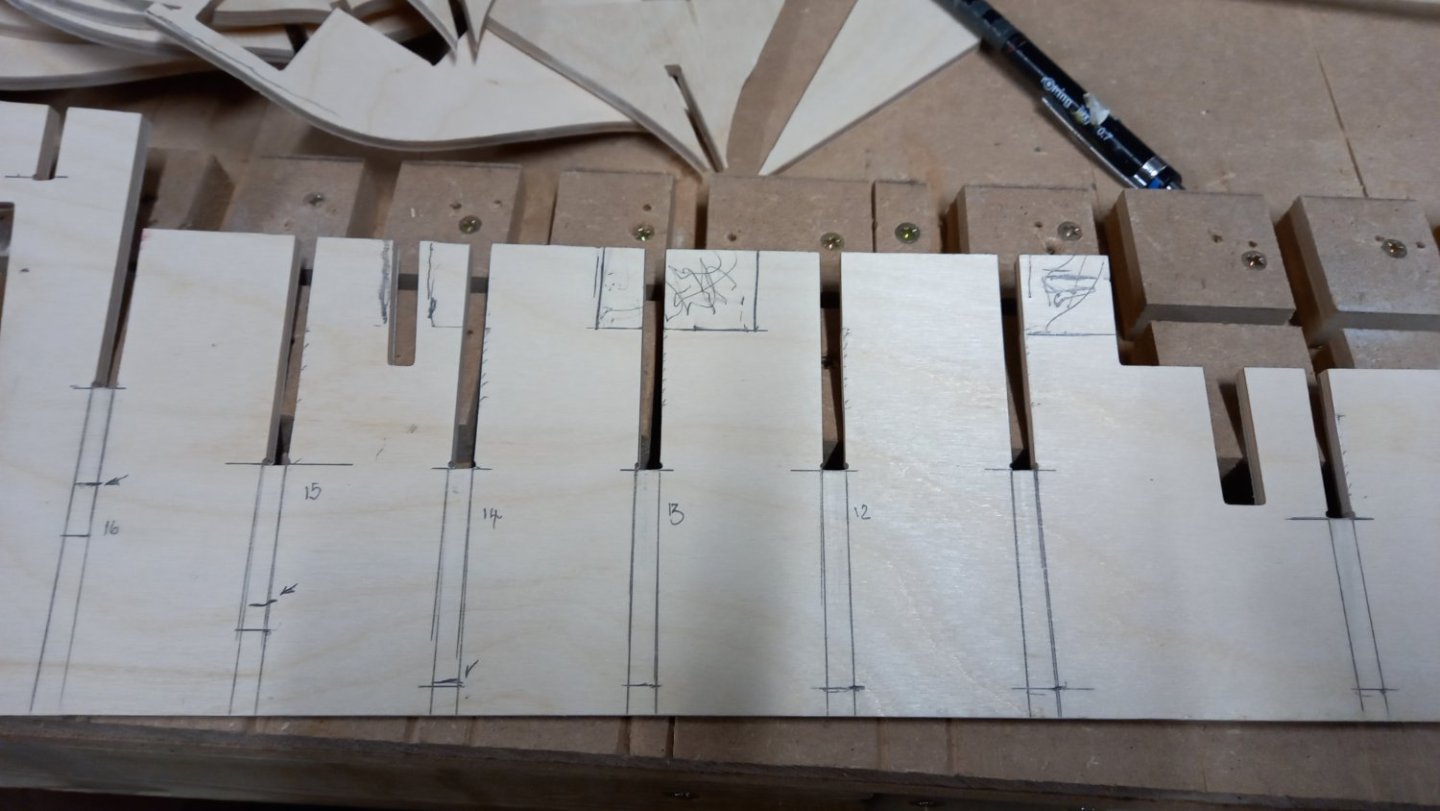

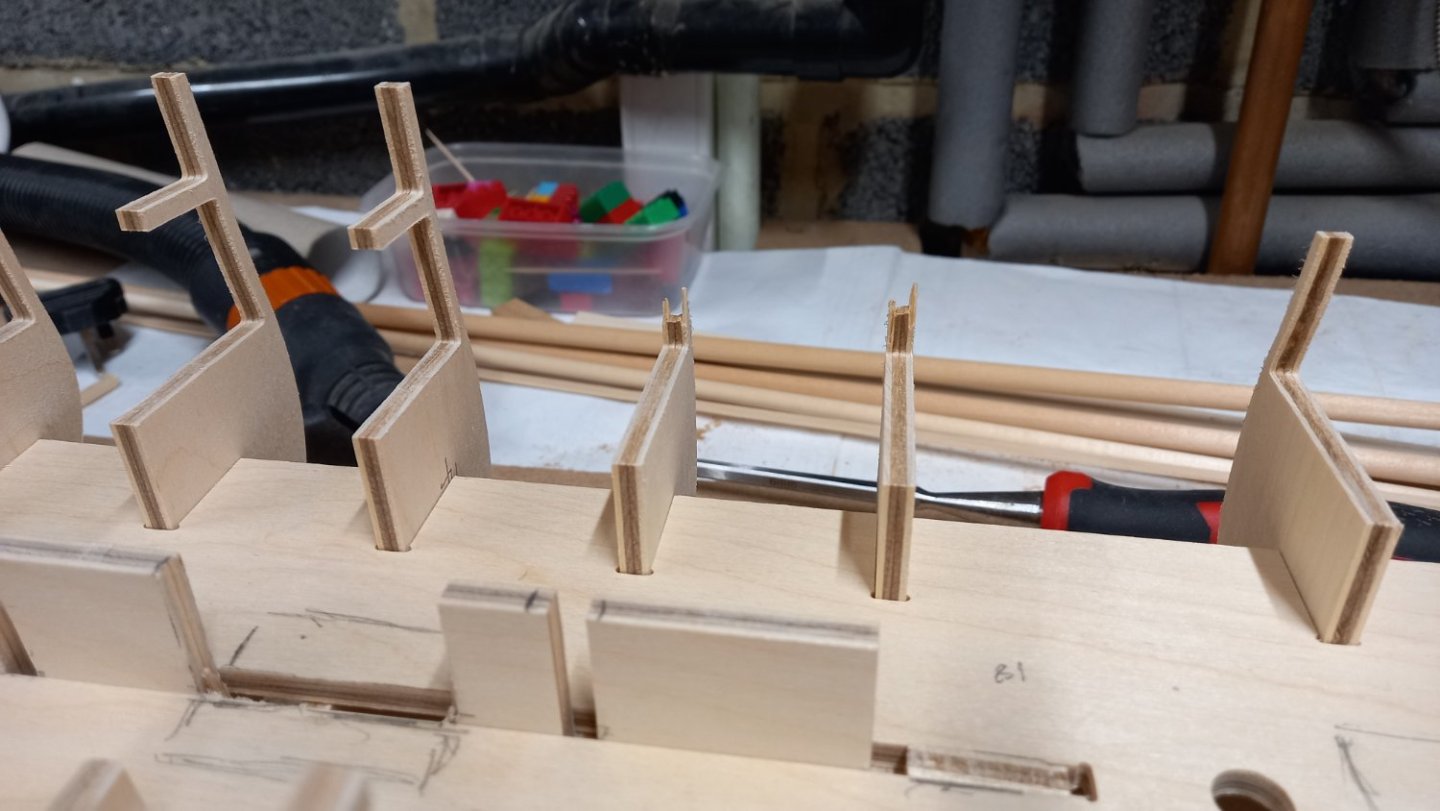
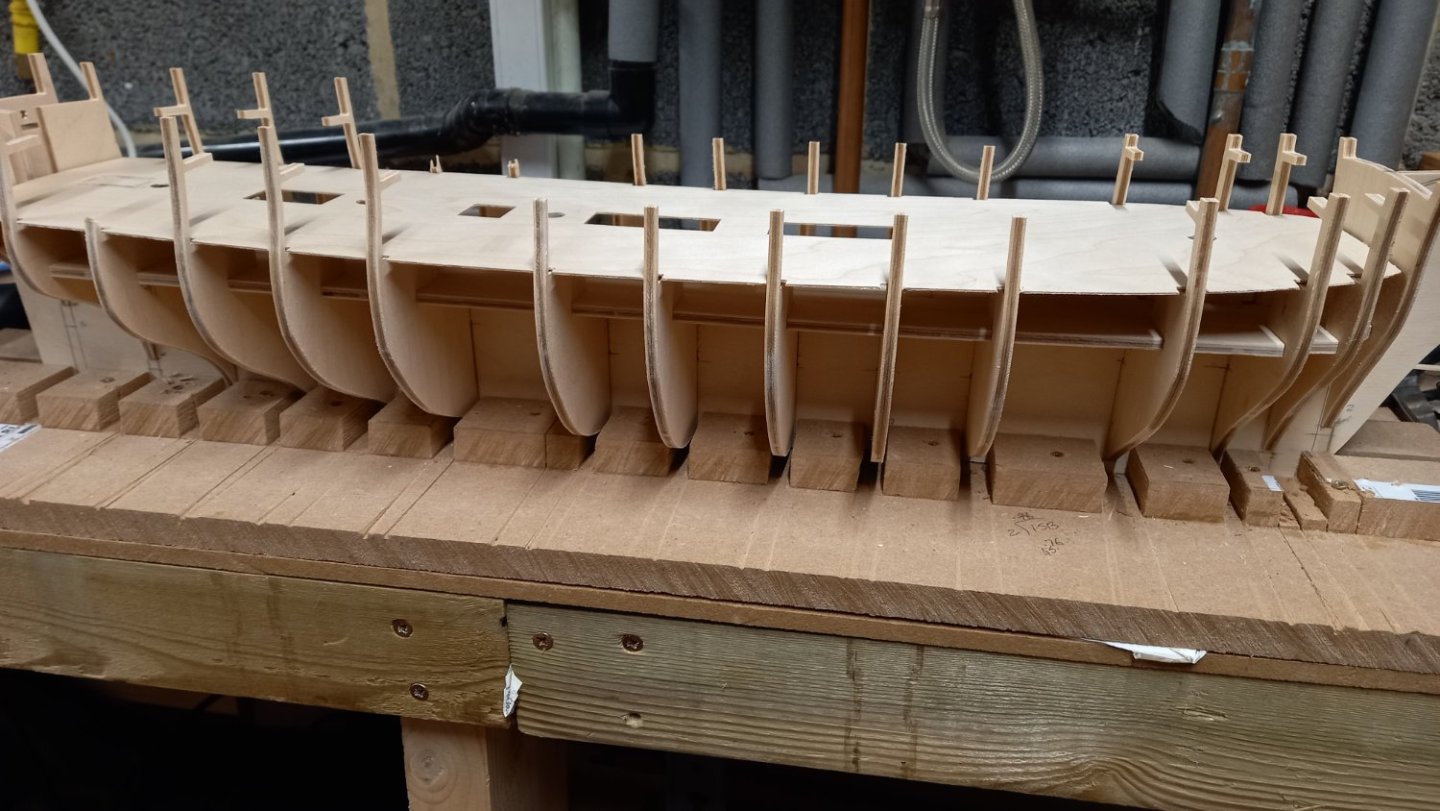
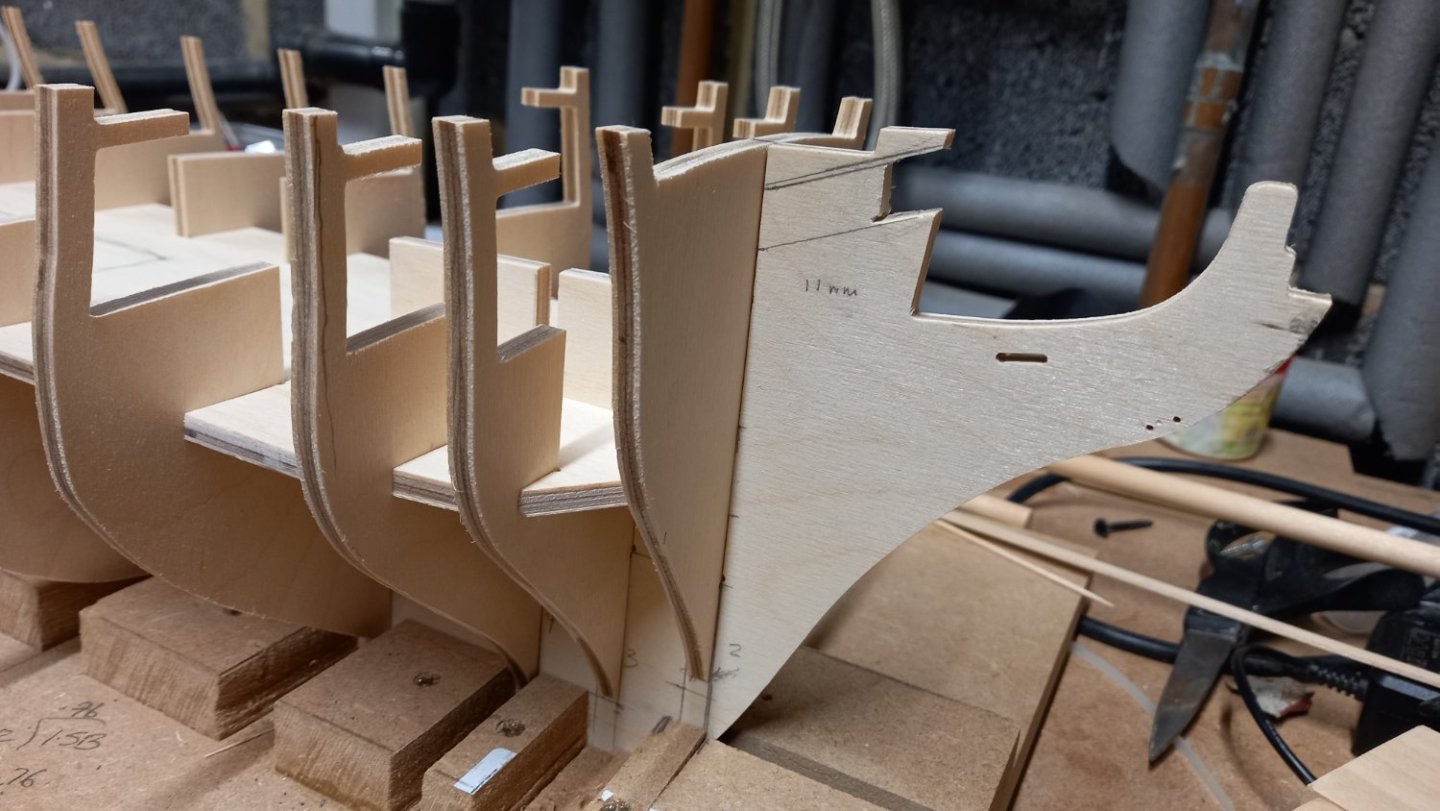
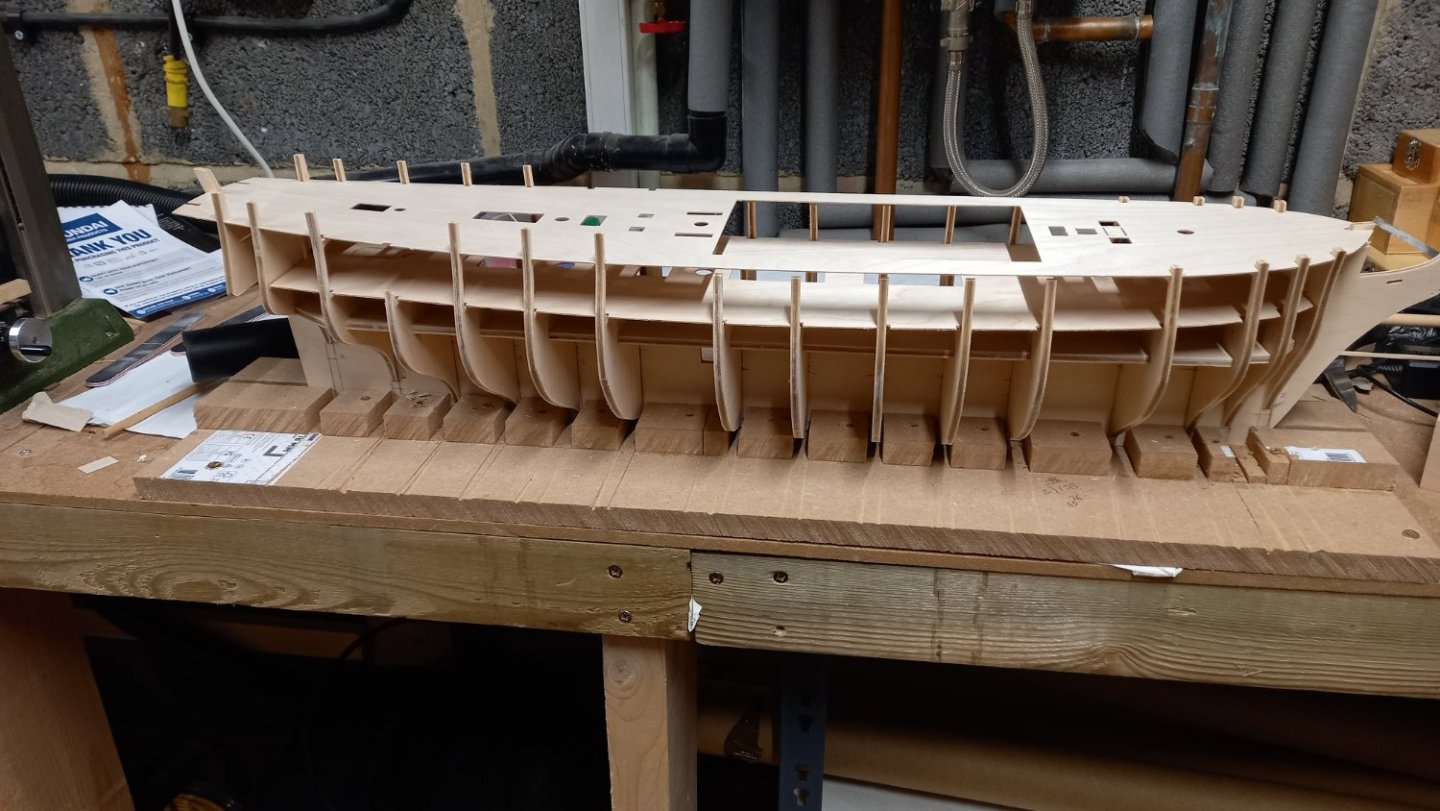
-
 Hello all, I have decided to build the HMS Cruiser 1:64 by Caldercraft as my first build. I have a feeling that I will be asking a lot of questions here.
-
 Next project, Started 6th July 2022.

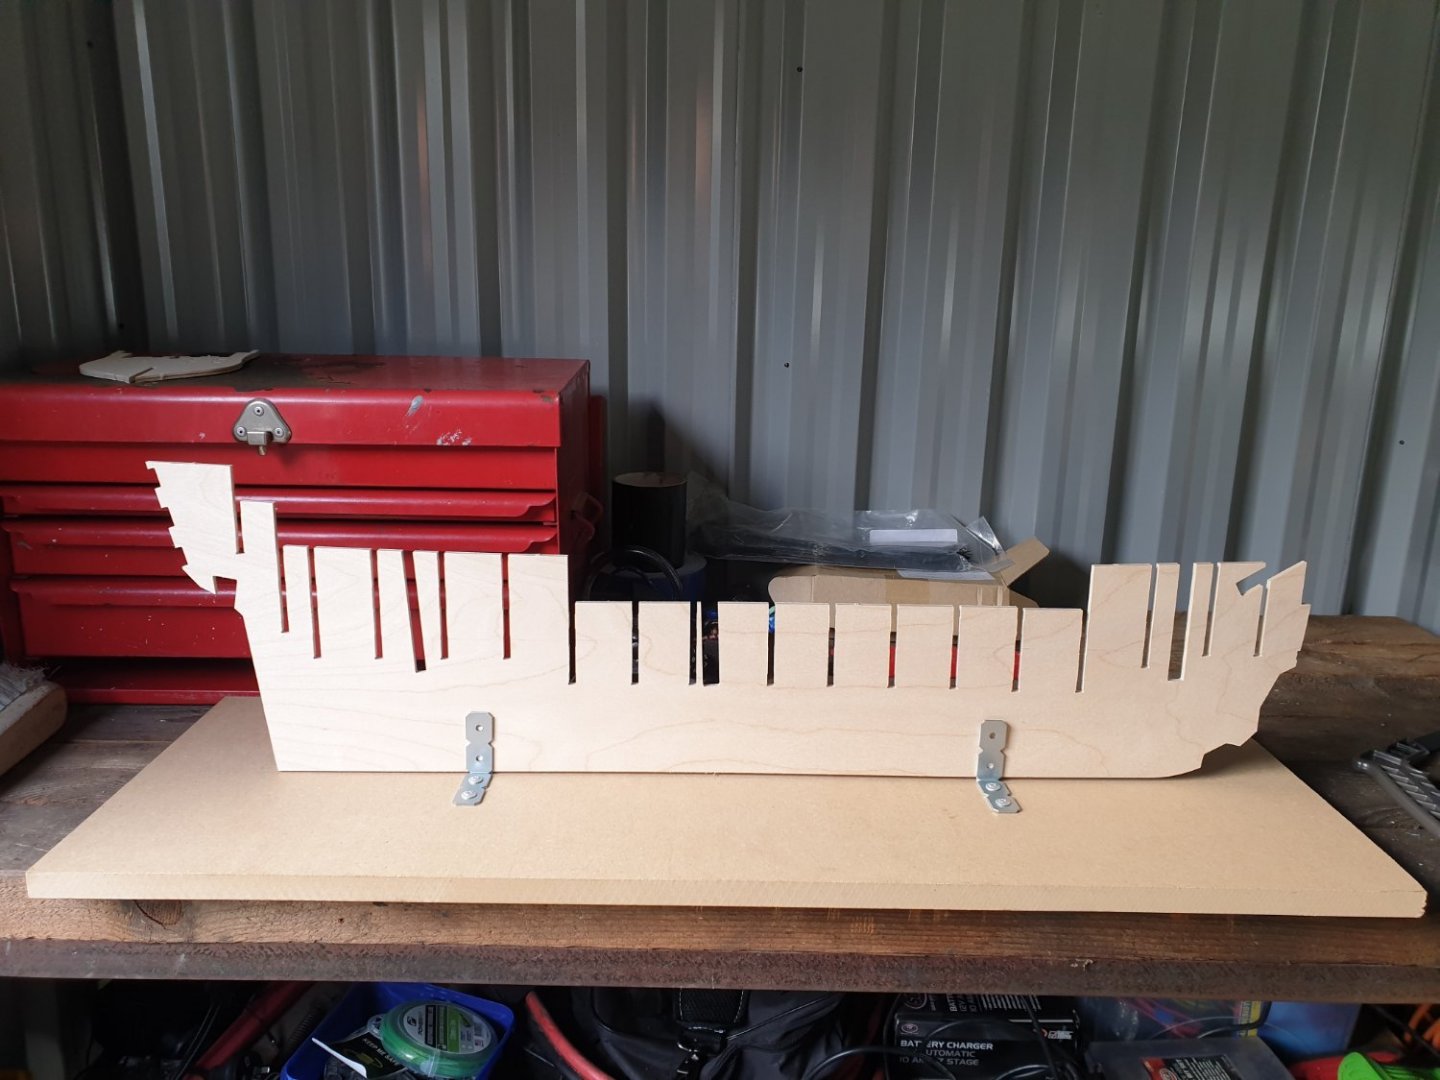

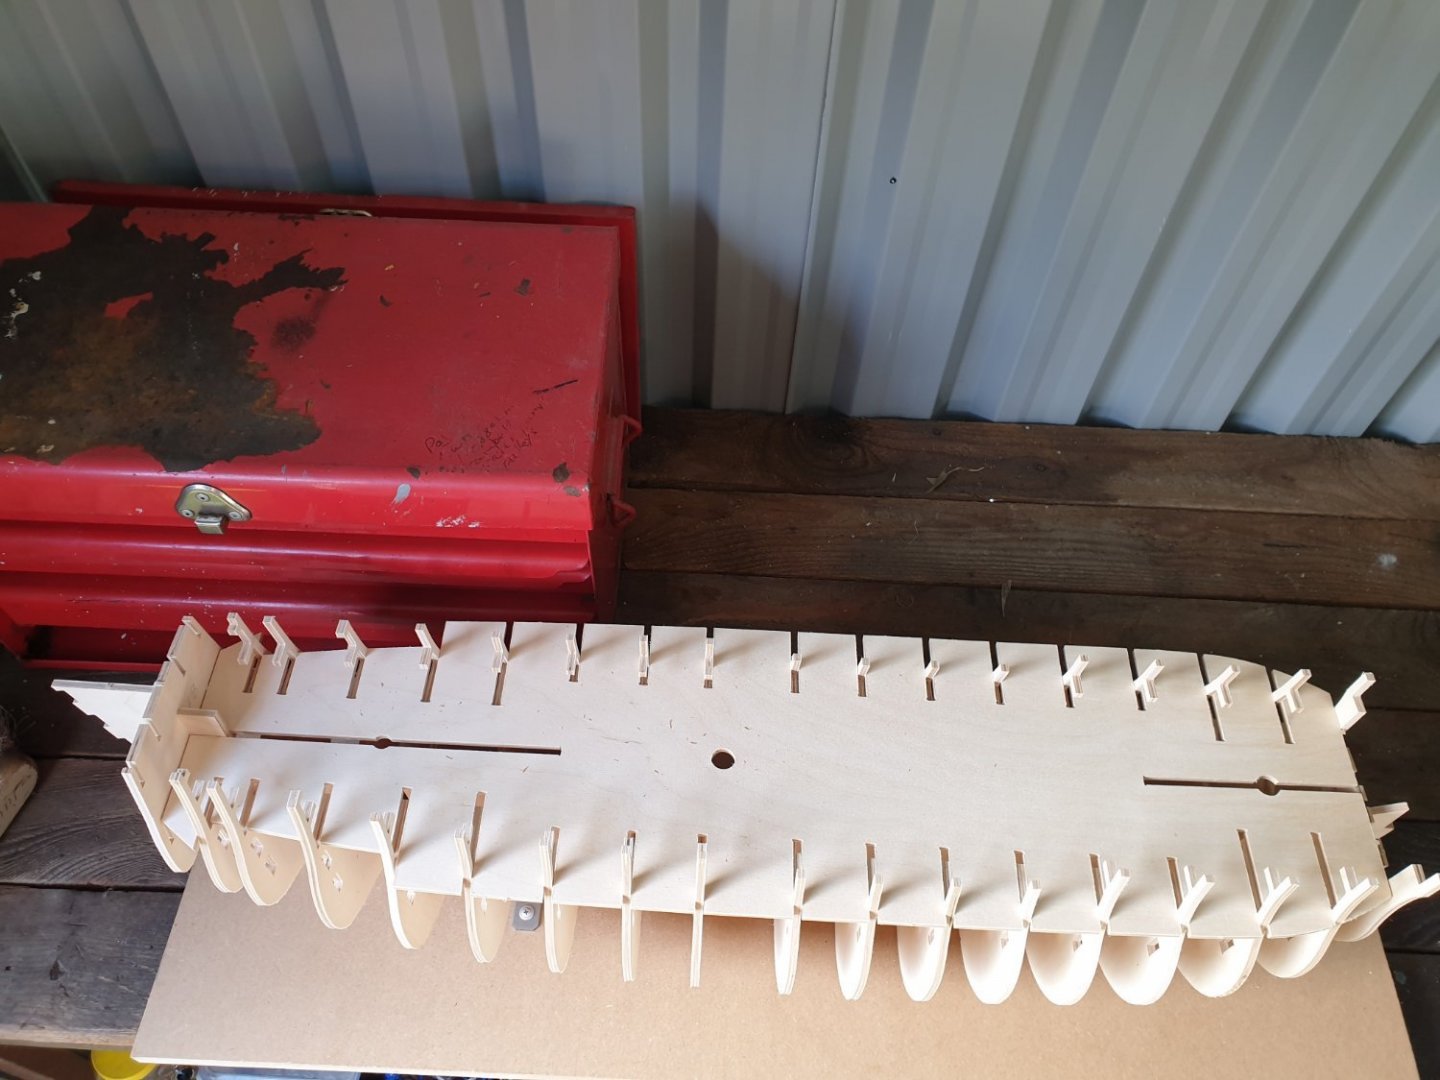
-
 Bonjour, The Granado is my second wooden ship build these year. This follows the ship Endurance which you can follow the link to in the MSW gallery. Before to start I learned many things with the forum. Thank You Timmo, Joe, Kevin, Brian, Vane... I was a little bit disappointed when I opened the box because 3 sheets missing. Thanks to Glenn (Cornwall) the problem was rapidly solve. Like everybody the fitted of the gunport pattern is not easy. At the end Ithe gunport cutouts of each pattern (port and starboard) were not fully aligned (1-2mm) !
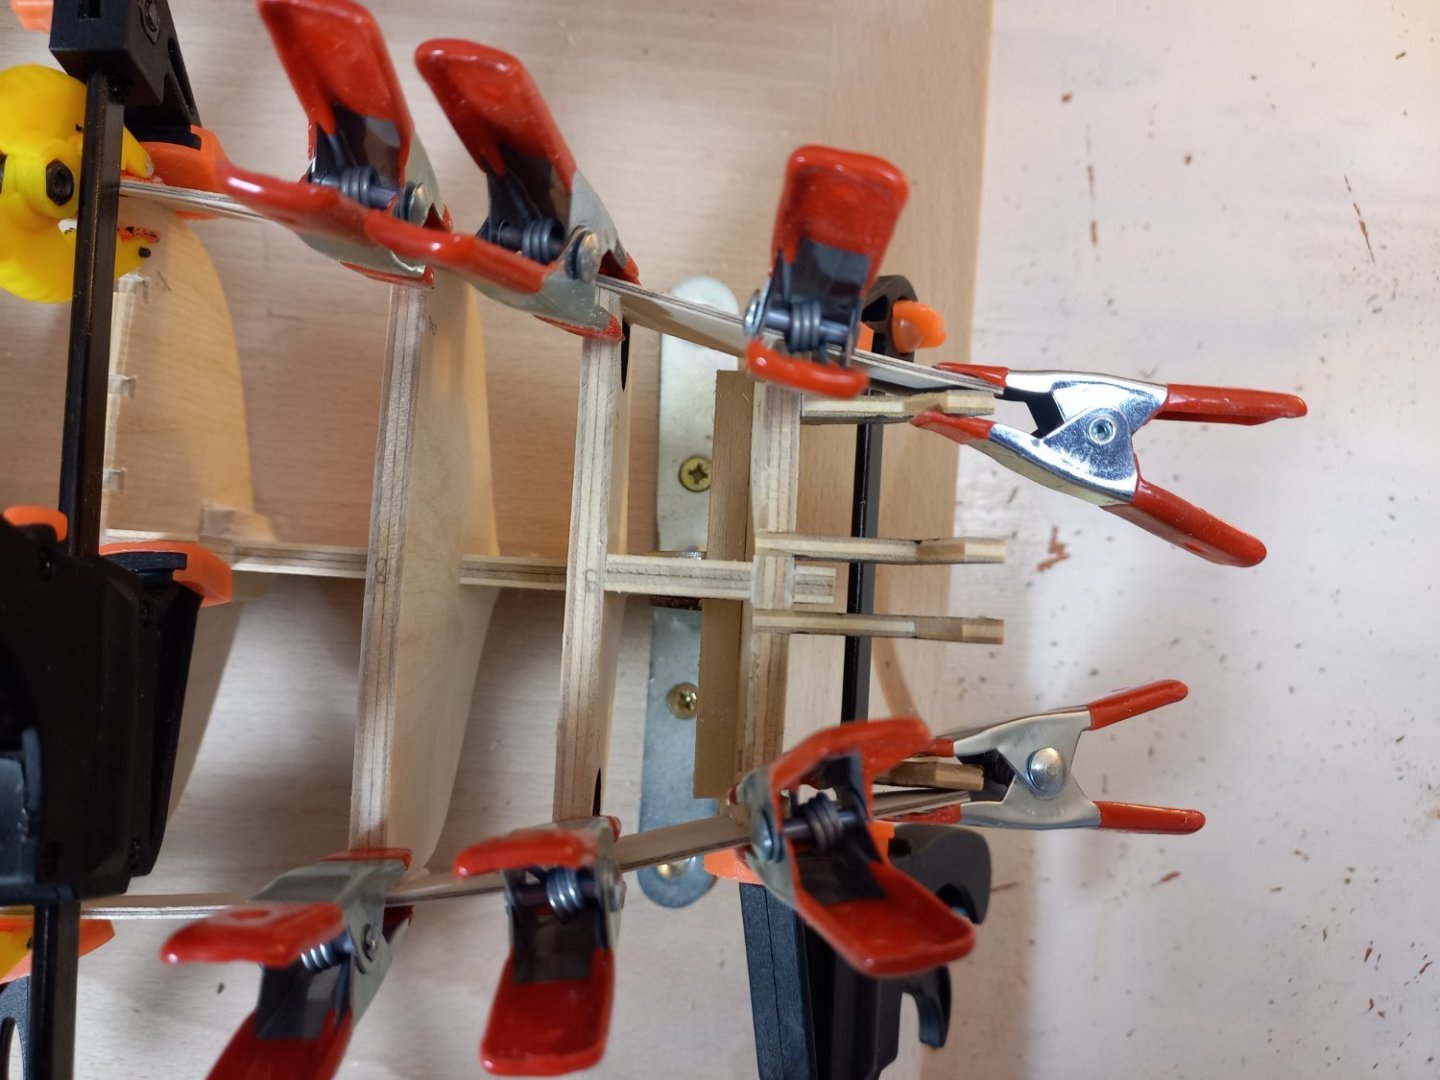
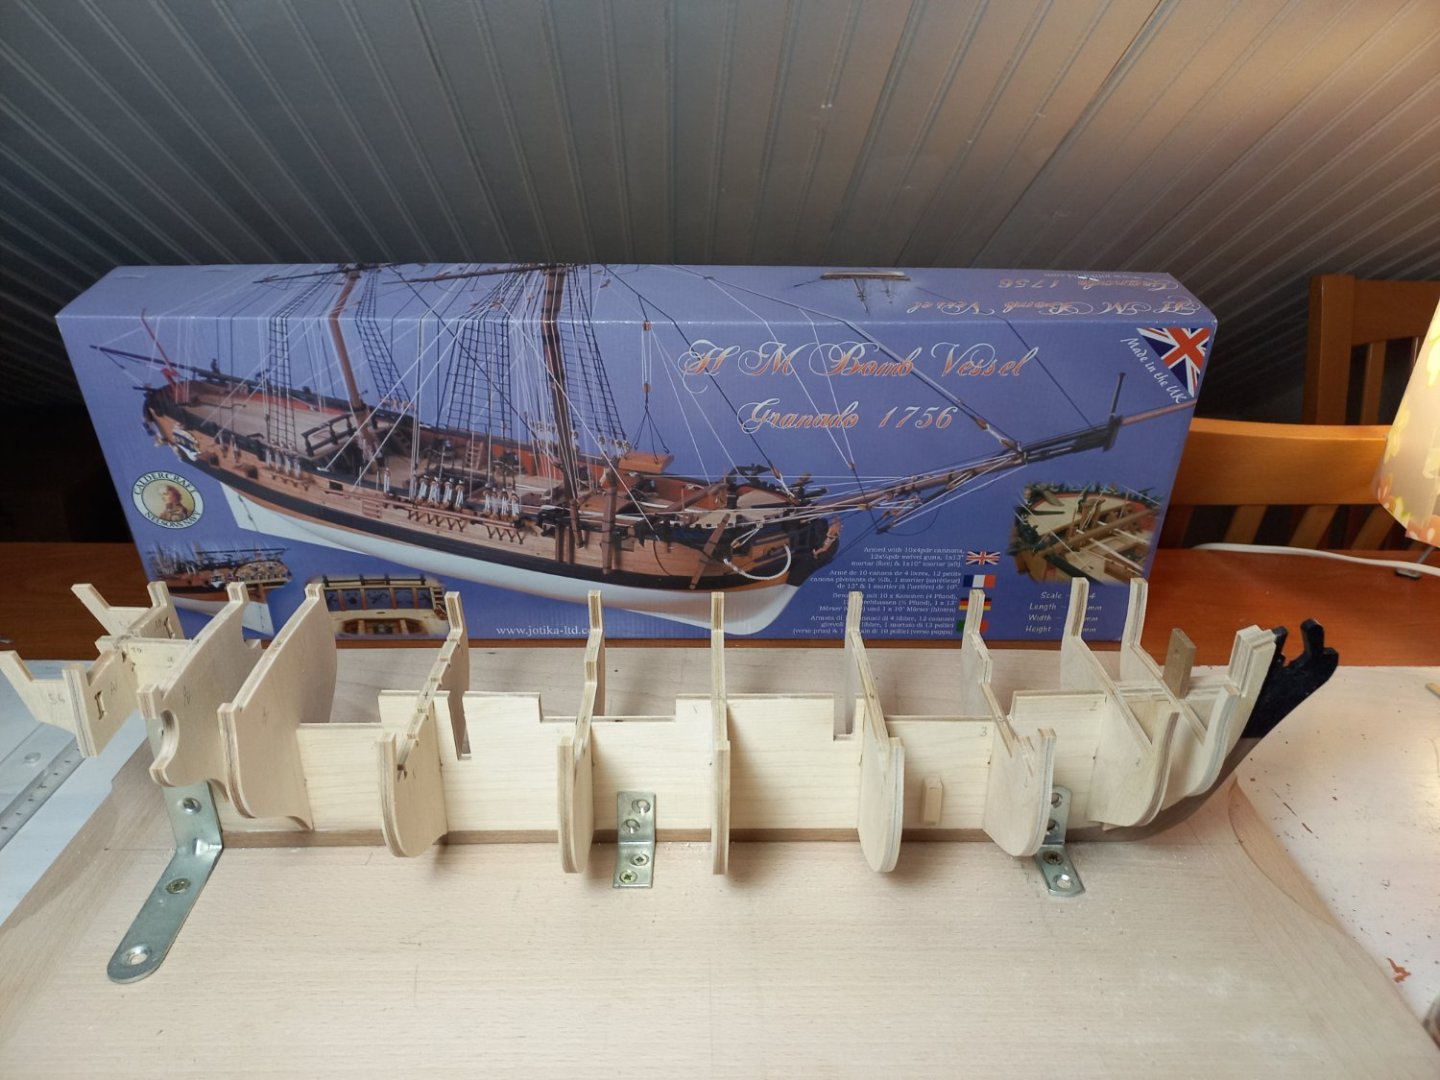
.thumb.jpg.bcf05ffc08f9a29b014466aa03f0ba62.jpg)
.thumb.jpg.5769dd69c685acc88474bd3b7b80453d.jpg)
- 61 replies
-
- 4
-

-
- Granado
- Caldercraft
- (and 1 more)
-
 Testing.....

-
 [This is a rebuild of my original posts] Here is the start of my build log. Have not done anything like this before so please bear with me. Sometimes I have too much verbiage – what do I mean sometimes! A short deviation: Back in ’83, no not 1883, I flew over the pond to visit the Victory as I had just finished a model of her. I brought a piece of the Victory back here to Canada (given to me) and decided that someday I would build another and put that real piece of the Victory into the next model. That time came last October/November 2009, (can it really be twenty-seven years). I started to look at my photos from ’83. Don’t know what possessed me to start but start I did. After looking at my photos and digging out the slides and prints, I ended up scanning about 45 images that I had taken that wet soggy rainy day in October. I know most of you remember we didn't have digital cameras back then. (Do you think the young ones these days could survive without their instant digital images and have to wait a week or two for the pictures to get back after we mailed them to Kodak for processing?) Those pictures I took just weren't enough. And I don’t feel like booking a flight to London these days. So, how could I build a much better Victory with more real reference pictures of her in Portsmouth? The first challenge was more images and books. The internet is here now, I remember when it wasn't! It took a while to figure out what kit to purchase but time and time again from MSW members and other forum sites this Caldercraft kit appears to be one of the best manufactured. I must admit the 1:64 model of Victory with complete details would have been my purchase if it was on the market from Chris Watton and Amati. I really wanted to do all the decks and will be fiddling the Jotika interior with some smoke and mirrors that I hope will work. My quest for new knowledge of course started with the internet. I am amazed at how much info is buried in those bits and bytes throughout the world. Why wasn't this around when I built my first Victory? My internet surfing shows me there is lots of data on the Jotika / Caldercraft Victory and there are many builds of the Jotika kit with extensive photos etc. What is packed in the box and the contents is well documented. I see no advantage to repeating those excellent reviews. As I haven’t built any models for almost thirty years it was like starting over. And where did I start this time-- I started with Google and typed in “HMS Victory”. After visiting many sites, the first one being the official site and clicking countless numbers of those crazy links I decided to buy some books . Ordered these books: 1. HMS Victory Her Construction, Career and Restoration by Alan McGowan 2. The Anatomy of Nelson’s Ships by C Nepean Longridge 3. The Ship Model Builder’s Assistant by Charles G. Davis 4. Anatomy of the Ship The 100- Gun Ship Victory by John McKay I dug out some books I had from way back: 1. Ship Models from Kits by Colin Riches 2. Trafalgar The Nelson Touch by David Howarth 3. Sailing Ships, A Rand McNally Color Illustrated Guide by Attilio Cucari 4. HMS Victory Souvenir Guide Book – bought in Portsmouth ‘83 And went to the library and found these books: (it would have been great to find more but I’m in a land locked city close to mountains. No oceans here so not much maritime information available at the library. Oh well, they got $12 out of me and I got my lifetime library card for these two books: 1. Ship Modelling from Stem to Stern by Milton Roth 2. Wooden Ship-Building by Charles Desmond I can’t believe how much I've read about the Victory, Nelson and the Royal Navy in these past few months. I’m tempted to suggest that building the model is only part of the process. I am stoked to have discovered so much more about the Victory this time around. The internet is a wealth of knowledge and it would have been cool to have it around on the first go-around. Figure I haven’t done so much reading etc. since university! My career path has taken me along the computer highway so I am no stranger to these machines and software. I decided early that I would use the computer to retain the data. I’m sure most of you do too. One very useful internet tool for me has been Yahoo babel fish. This translates an internet page. It proved very useful because one can choose “all languages” in the search engines. When I found a page in a language I could not understand I used this link on a new tab: http://ca.babelfish.yahoo.com and copied the web address onto the babel fish page. Try it, the translation is not perfect but one can get a better gist of the page if you don’t understand the language. This is turning into a book! Back to the pictures! I started to find pictures just with the Google search. By typing “HMS Victory” in the search box, letting it find the sites and then clicking up at the top on images… voila... Image after image. It is truly amazing how many photos are on the net. And what fun it is to go to every photo. There are videos as well. Clicking on the video option lists many videos. Strangely enough, not many individuals have posted a walking tour HD video of the Victory. I’ve only found one good one. Here are the search engines that I use for general items and photos: Google, Bing, Yahoo, and sometimes Alta Vista. I found Truveo.com is great for videos as is YouTube. Just going to their home page and typing HMS Victory brought many videos to view. One of the best places to find photos is Flickr from Yahoo.
- 295 replies
-
- 2
-
-
- victory
- caldercraft
- (and 1 more)
-
 Firstly I would like help with the title for this log as I have bought the model with the hull. at first glance looking almost finnished. How wrong I was. I have taken time out from my Golden Hind build so as to clear my head and look at starting again with a fresh mind and set of eyes. Then, at the Southern model show I saw this.
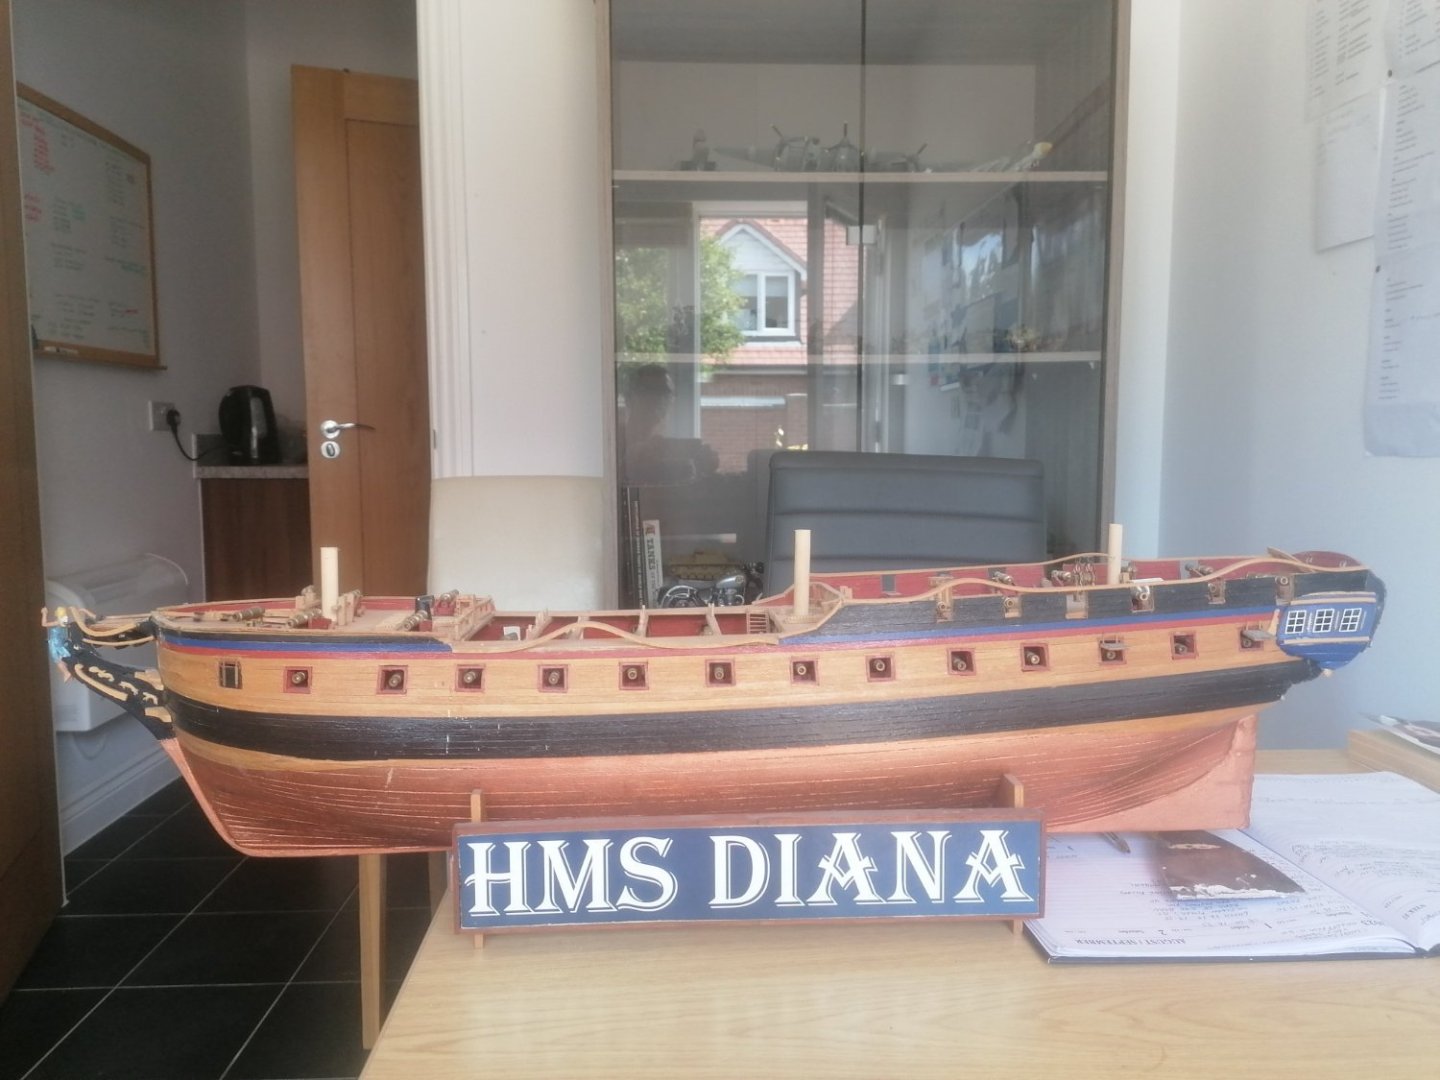

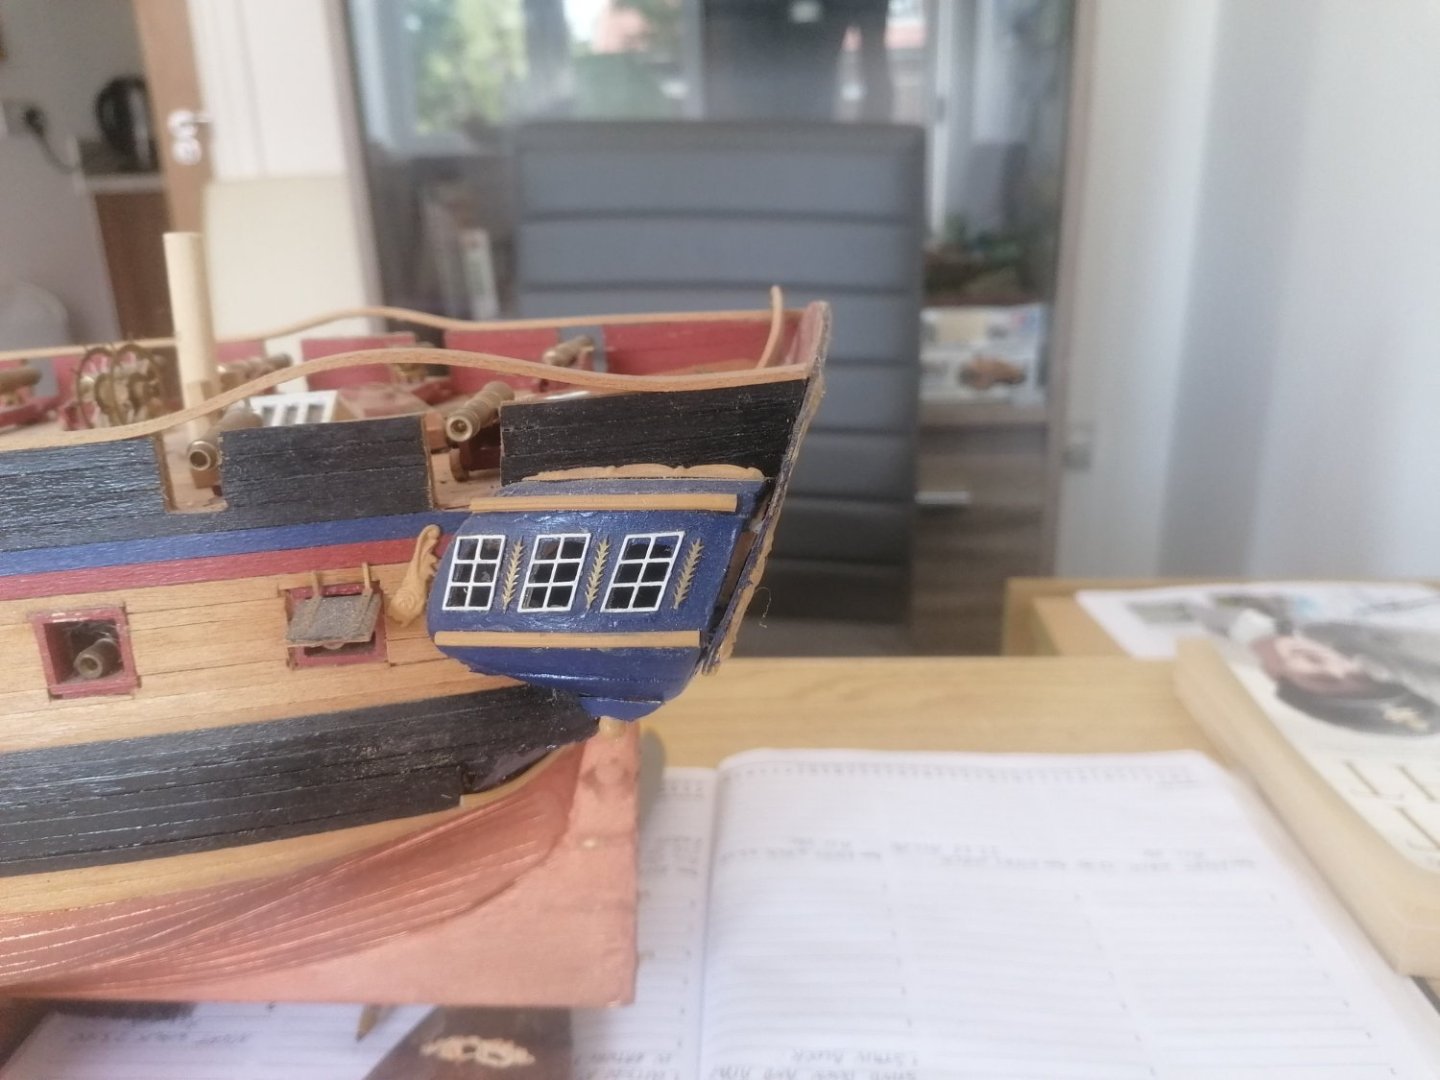
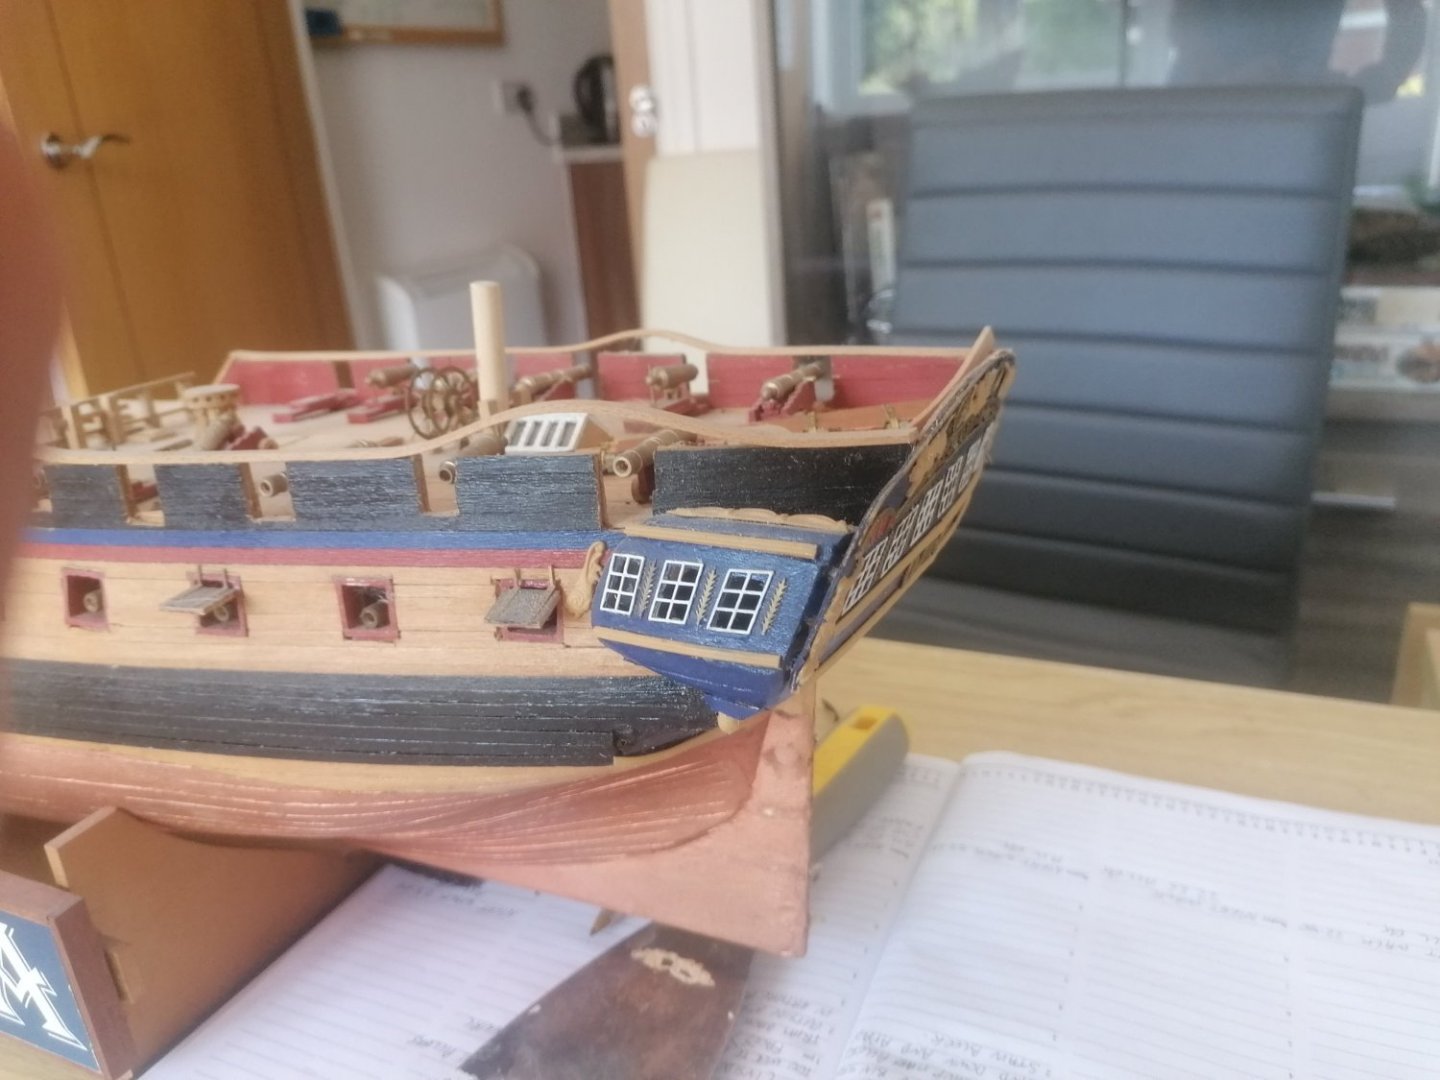
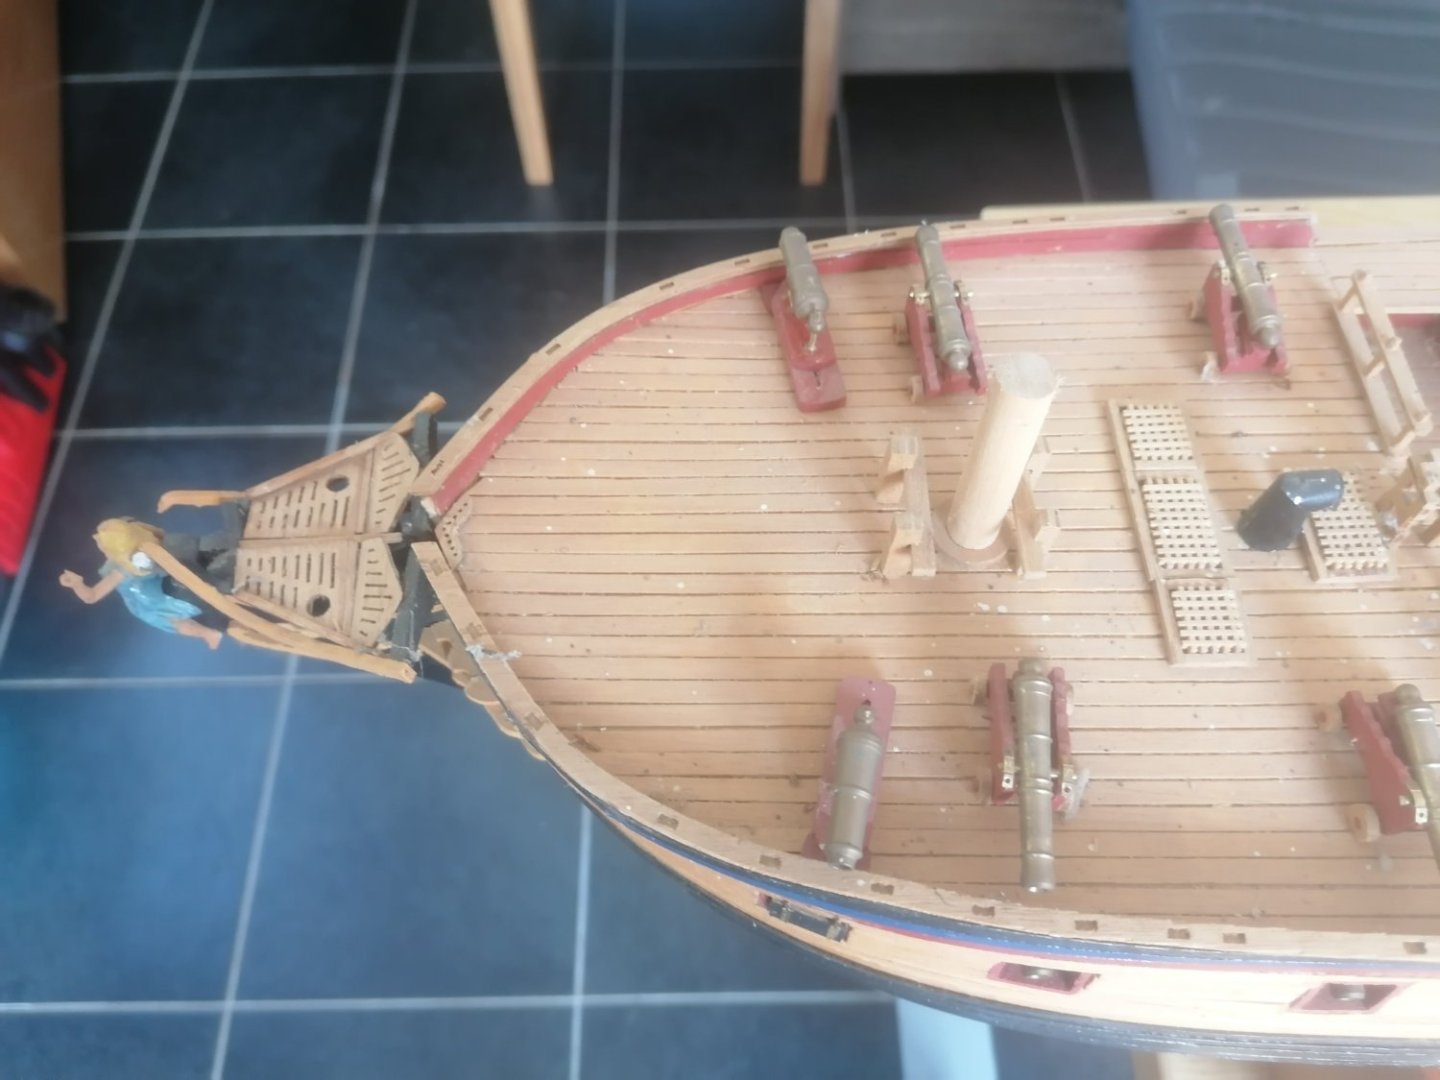
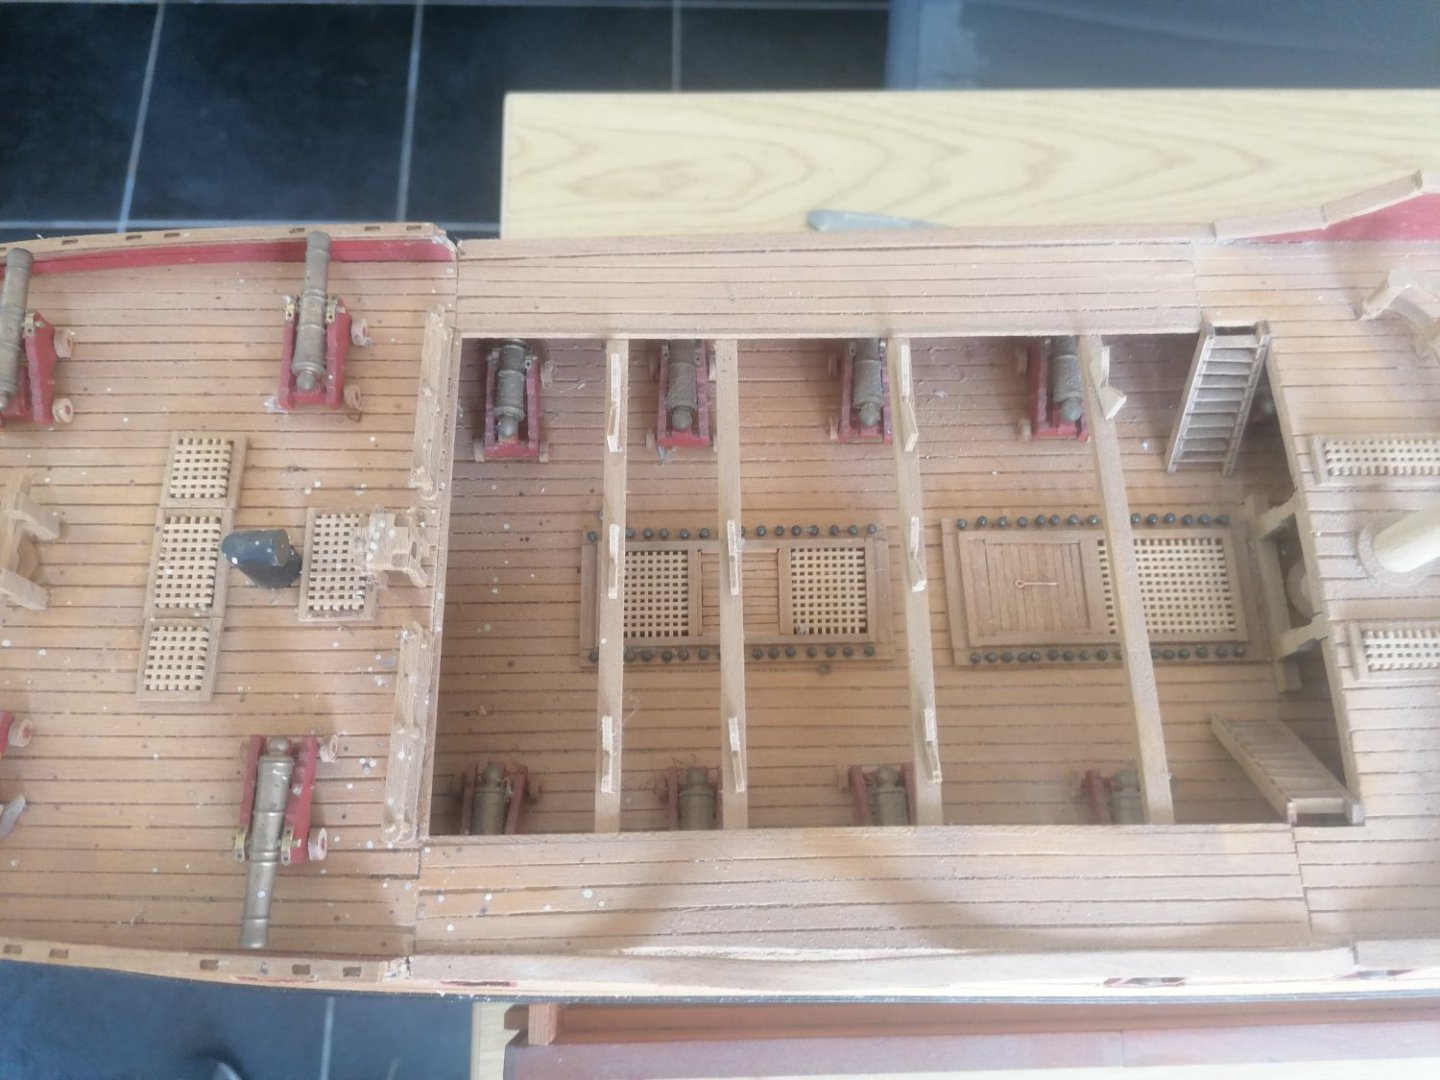
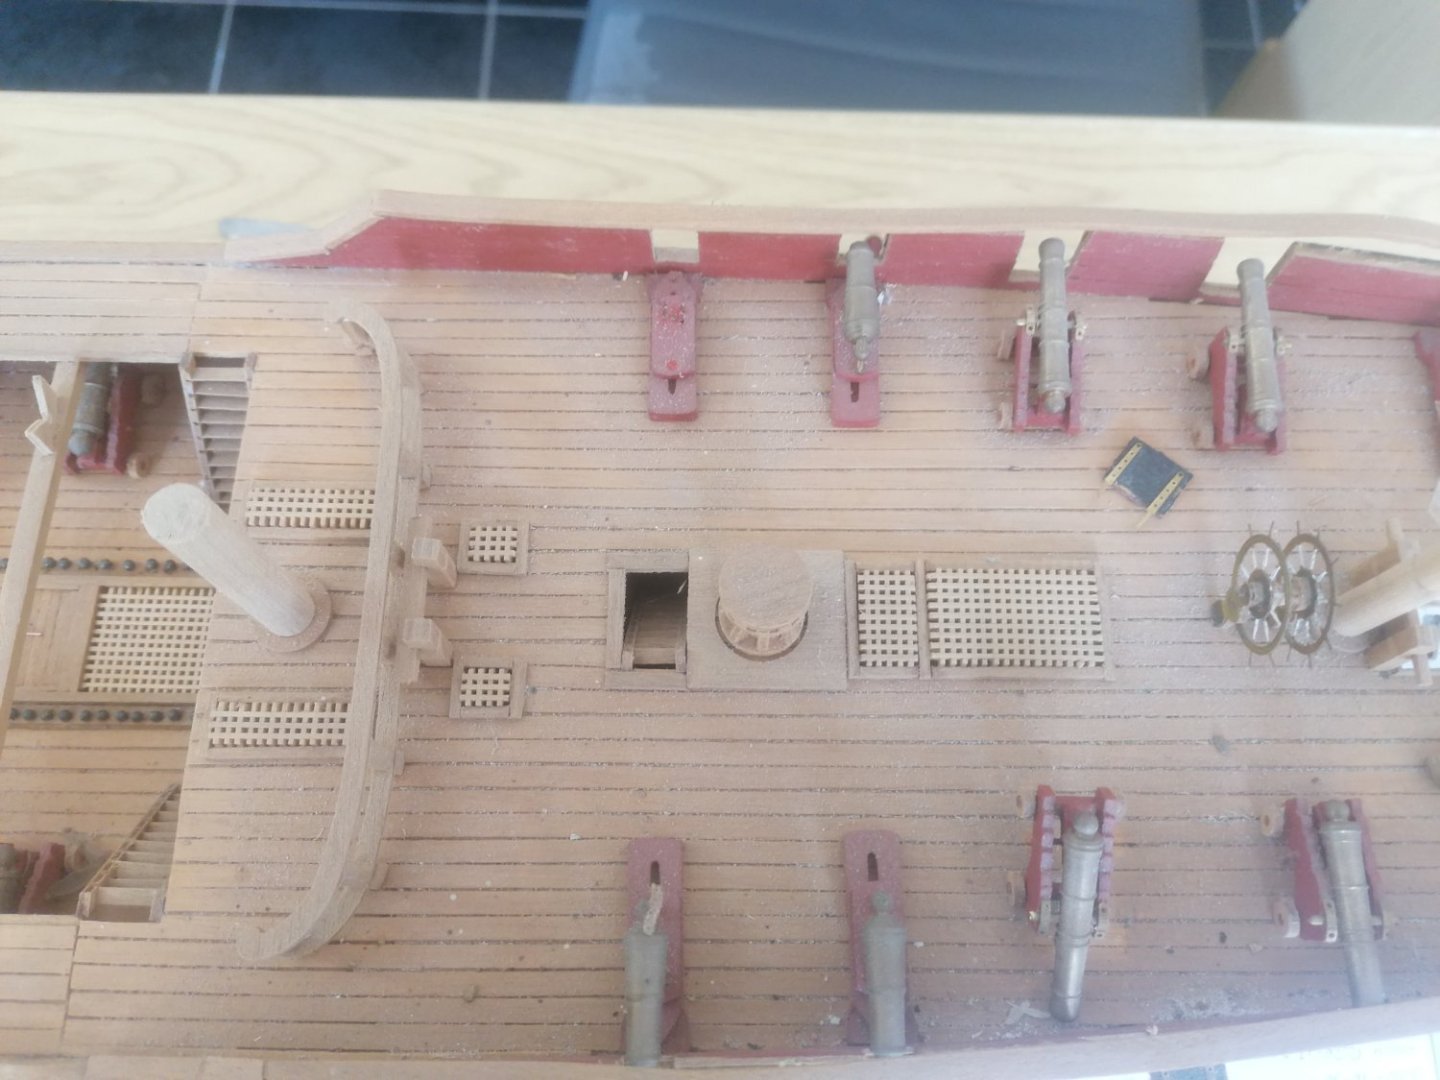

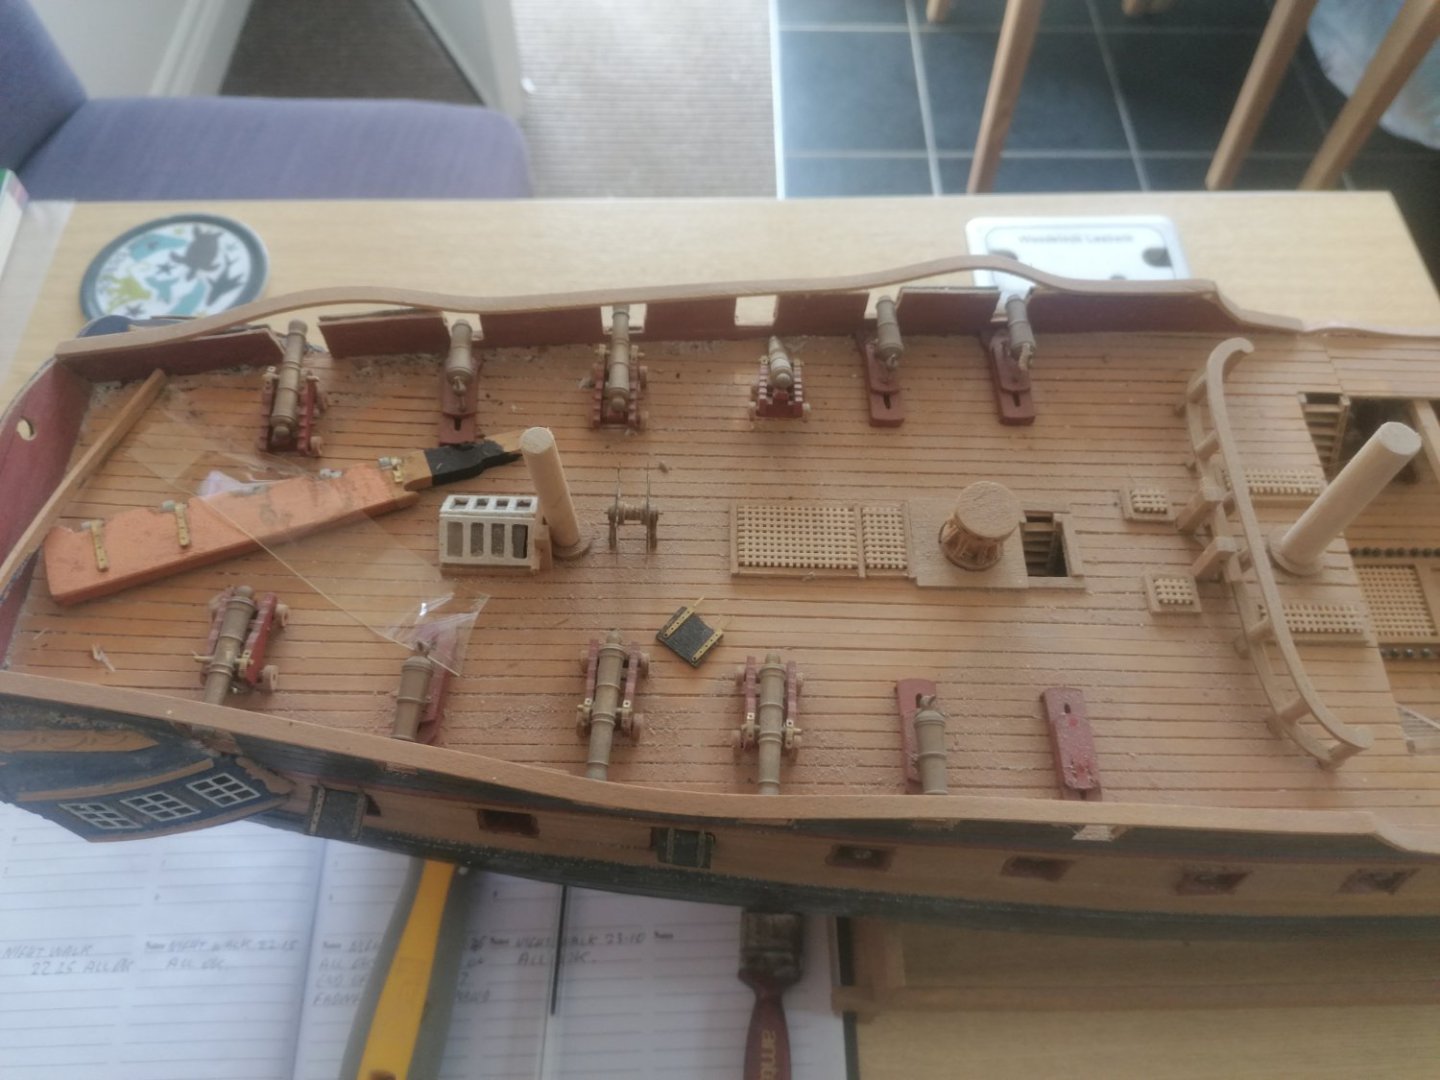

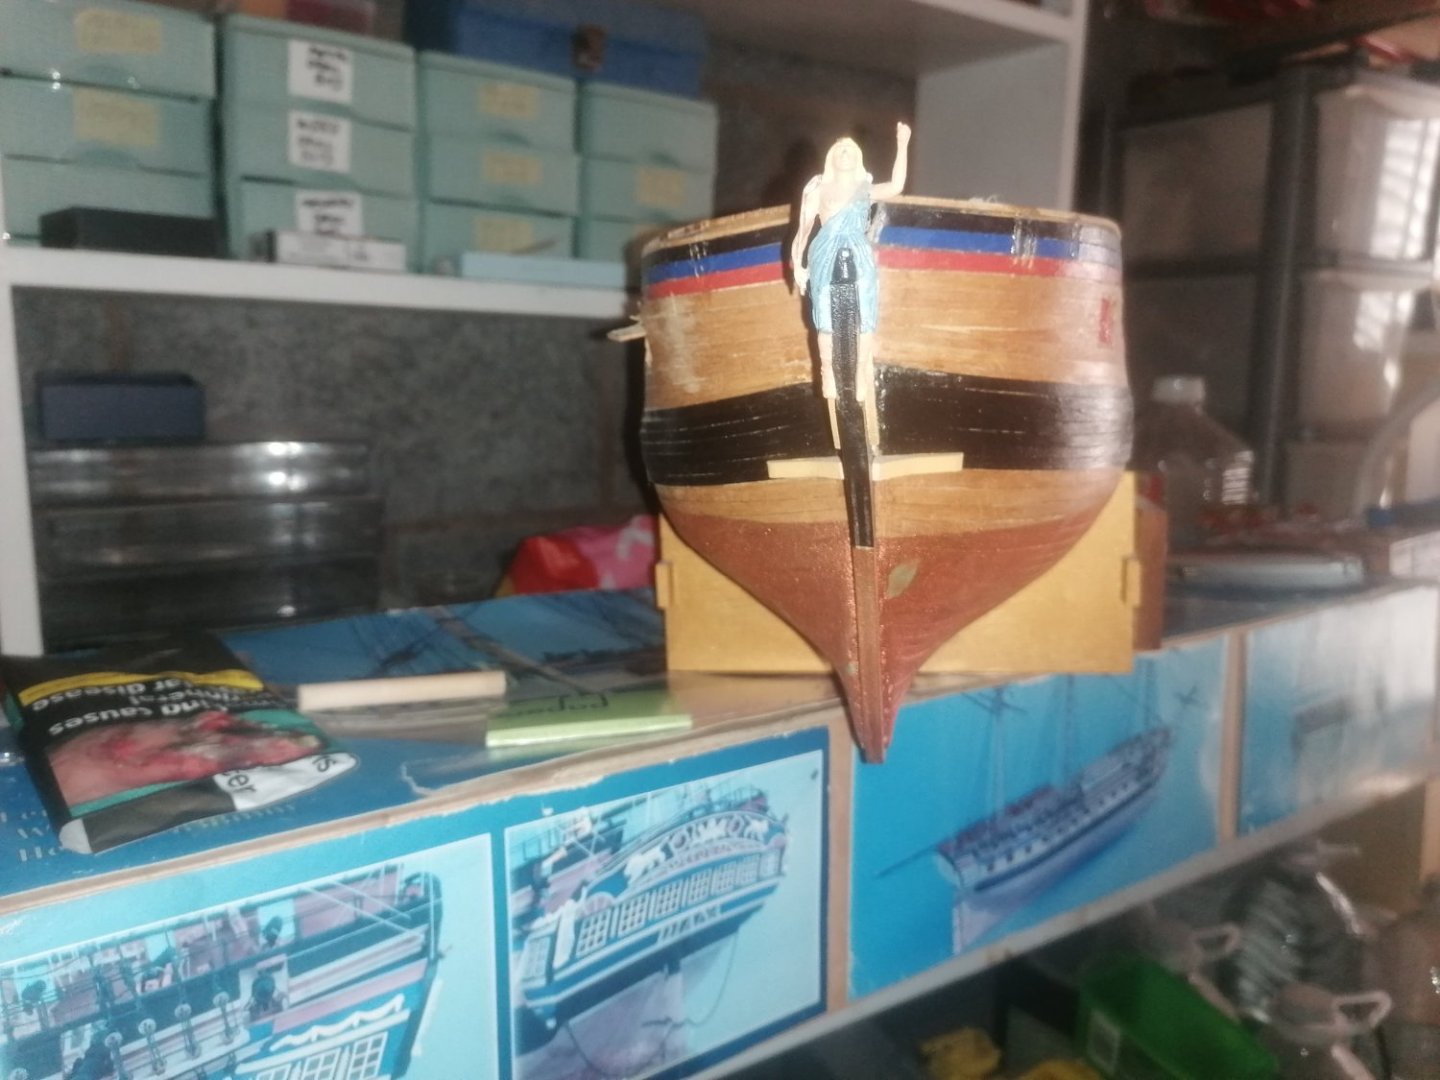
-
 Hi All Well this gets the first thing done, raising a new topic. This was already a topic before site problems so now i need to dig out the photos and repost. Having the subject there will hopefully pressurise me to get that done. The model has been some years in build, the hull is pretty much all done. Masts built and kitted out, most yards and spars turned at least. Next big job is shipping the masts and getting to grips with miles of ratlines. I will select a few appropriate photos of previous progress and take it from there. POMPEY
- 84 replies
-
- 3
-
-
- finished
- caldercraft
- (and 1 more)
-
 Hello everyone. Yes, I am starting my second project. First one is in rigging stage and i love working with wood, so.... I bought this kit a while ago and i couldn't wait to unpack it and start modeling. My first ship of the line. I wanted to build this one 5 years ago but i knew i didn't have enough knowledge or practice so i had to start with something smaller like endeavour. The wait is over, lets get to the work.
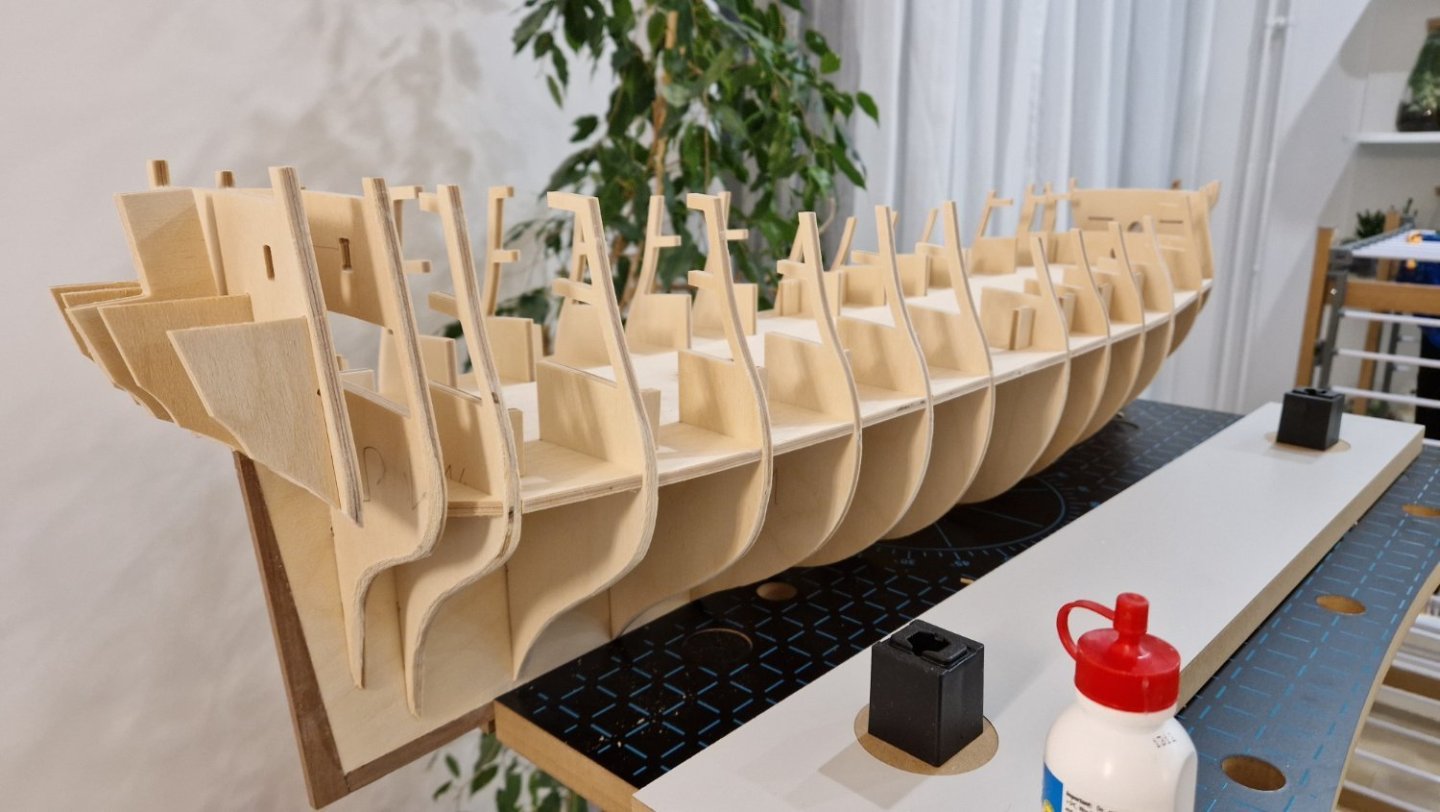
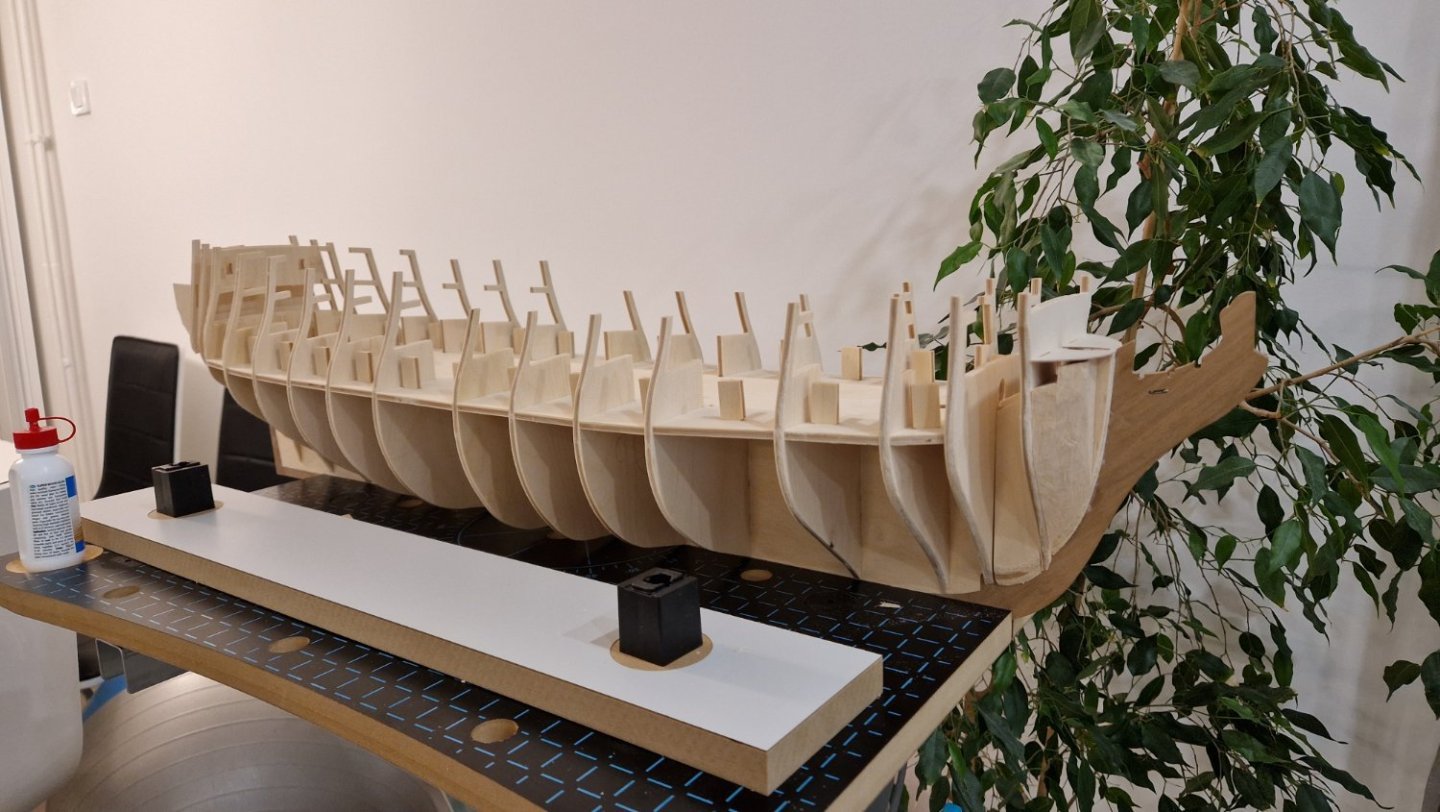
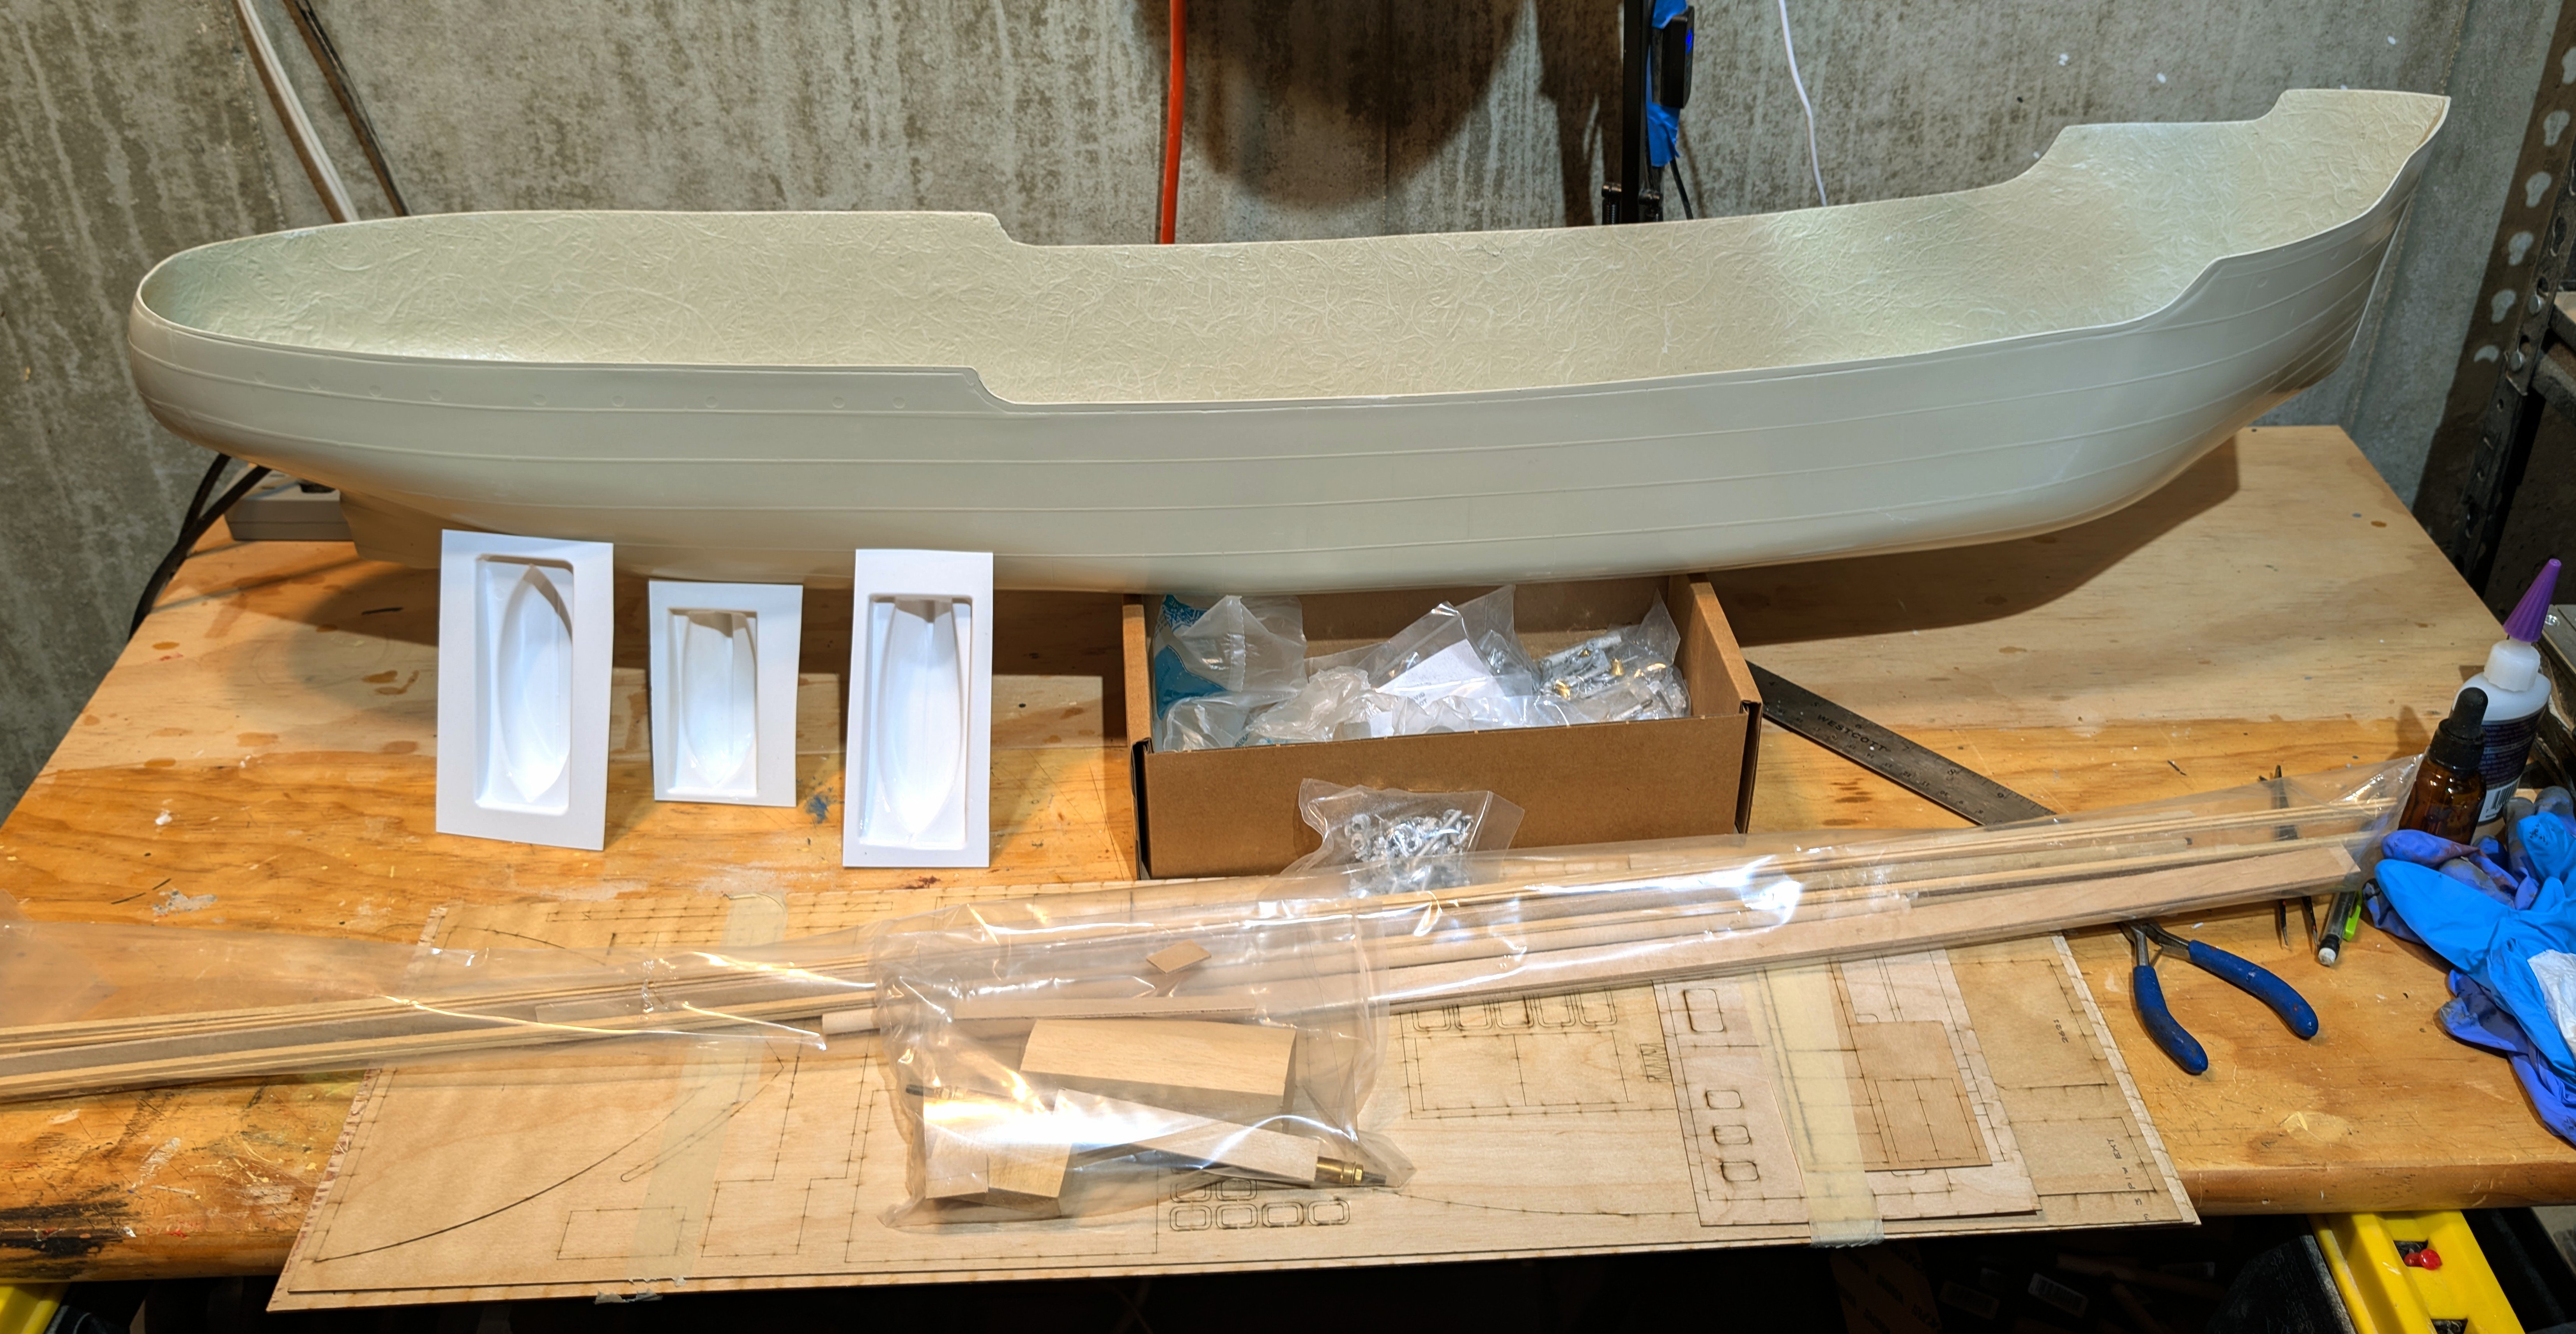
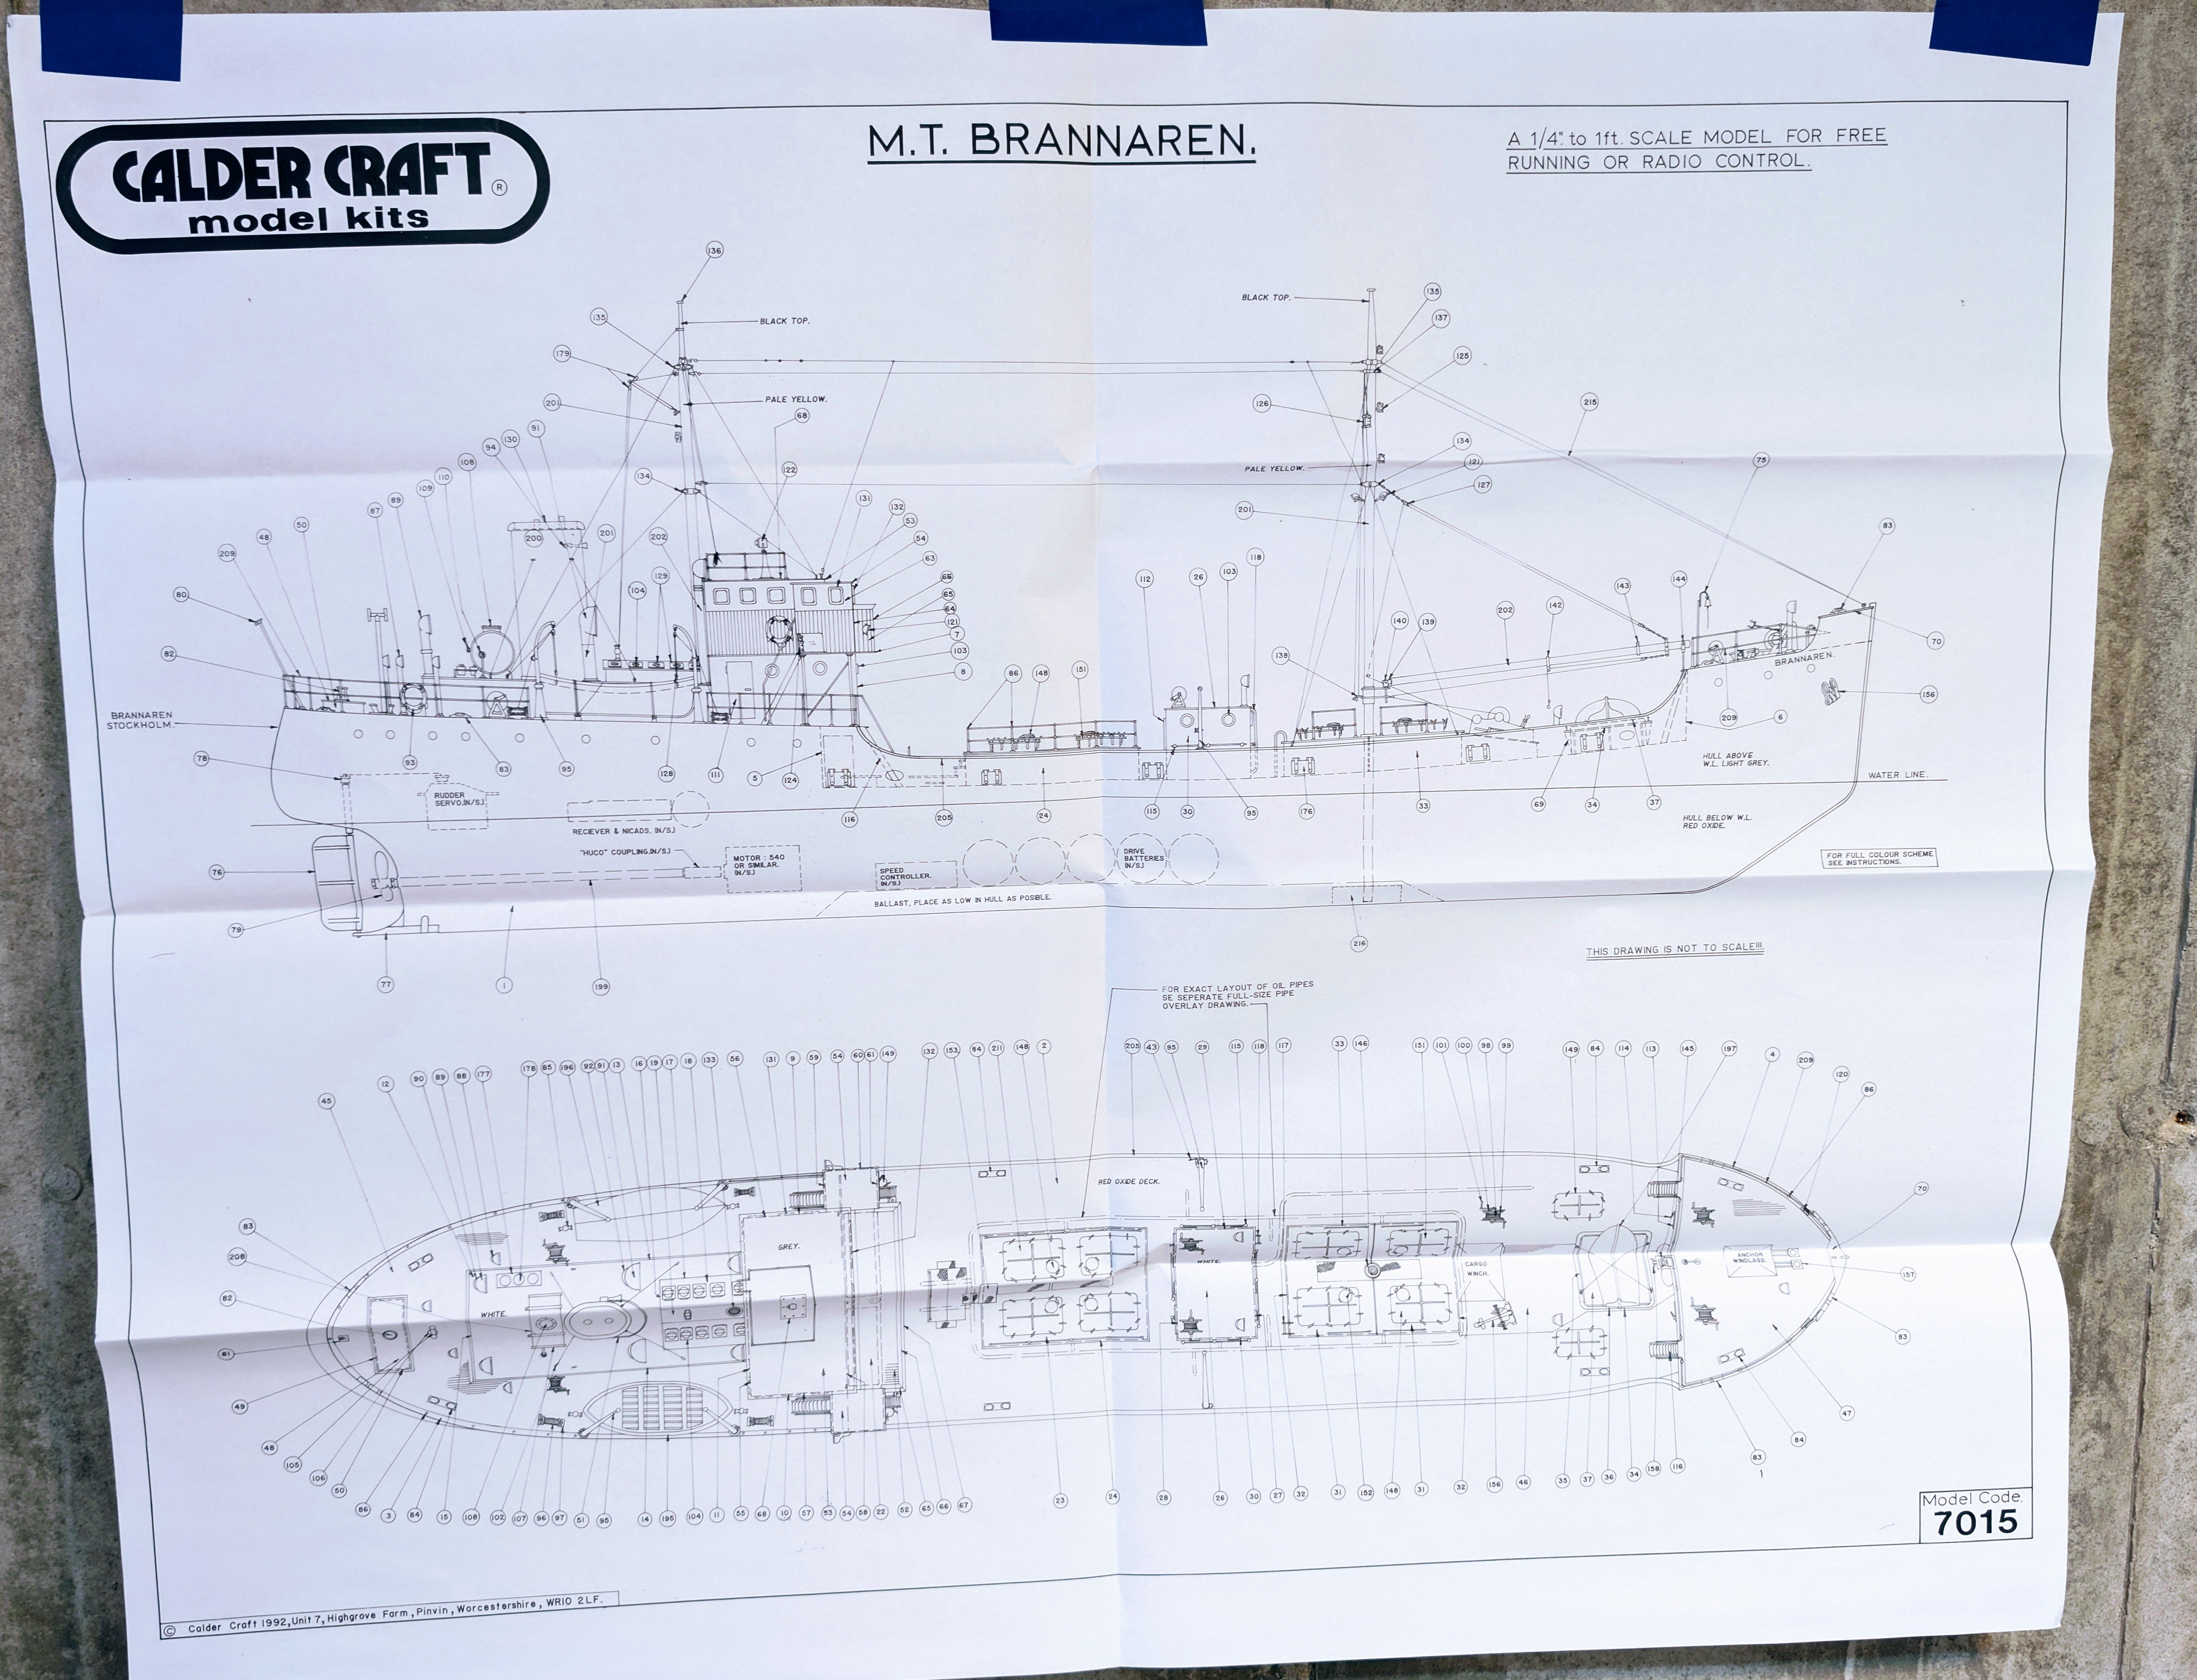
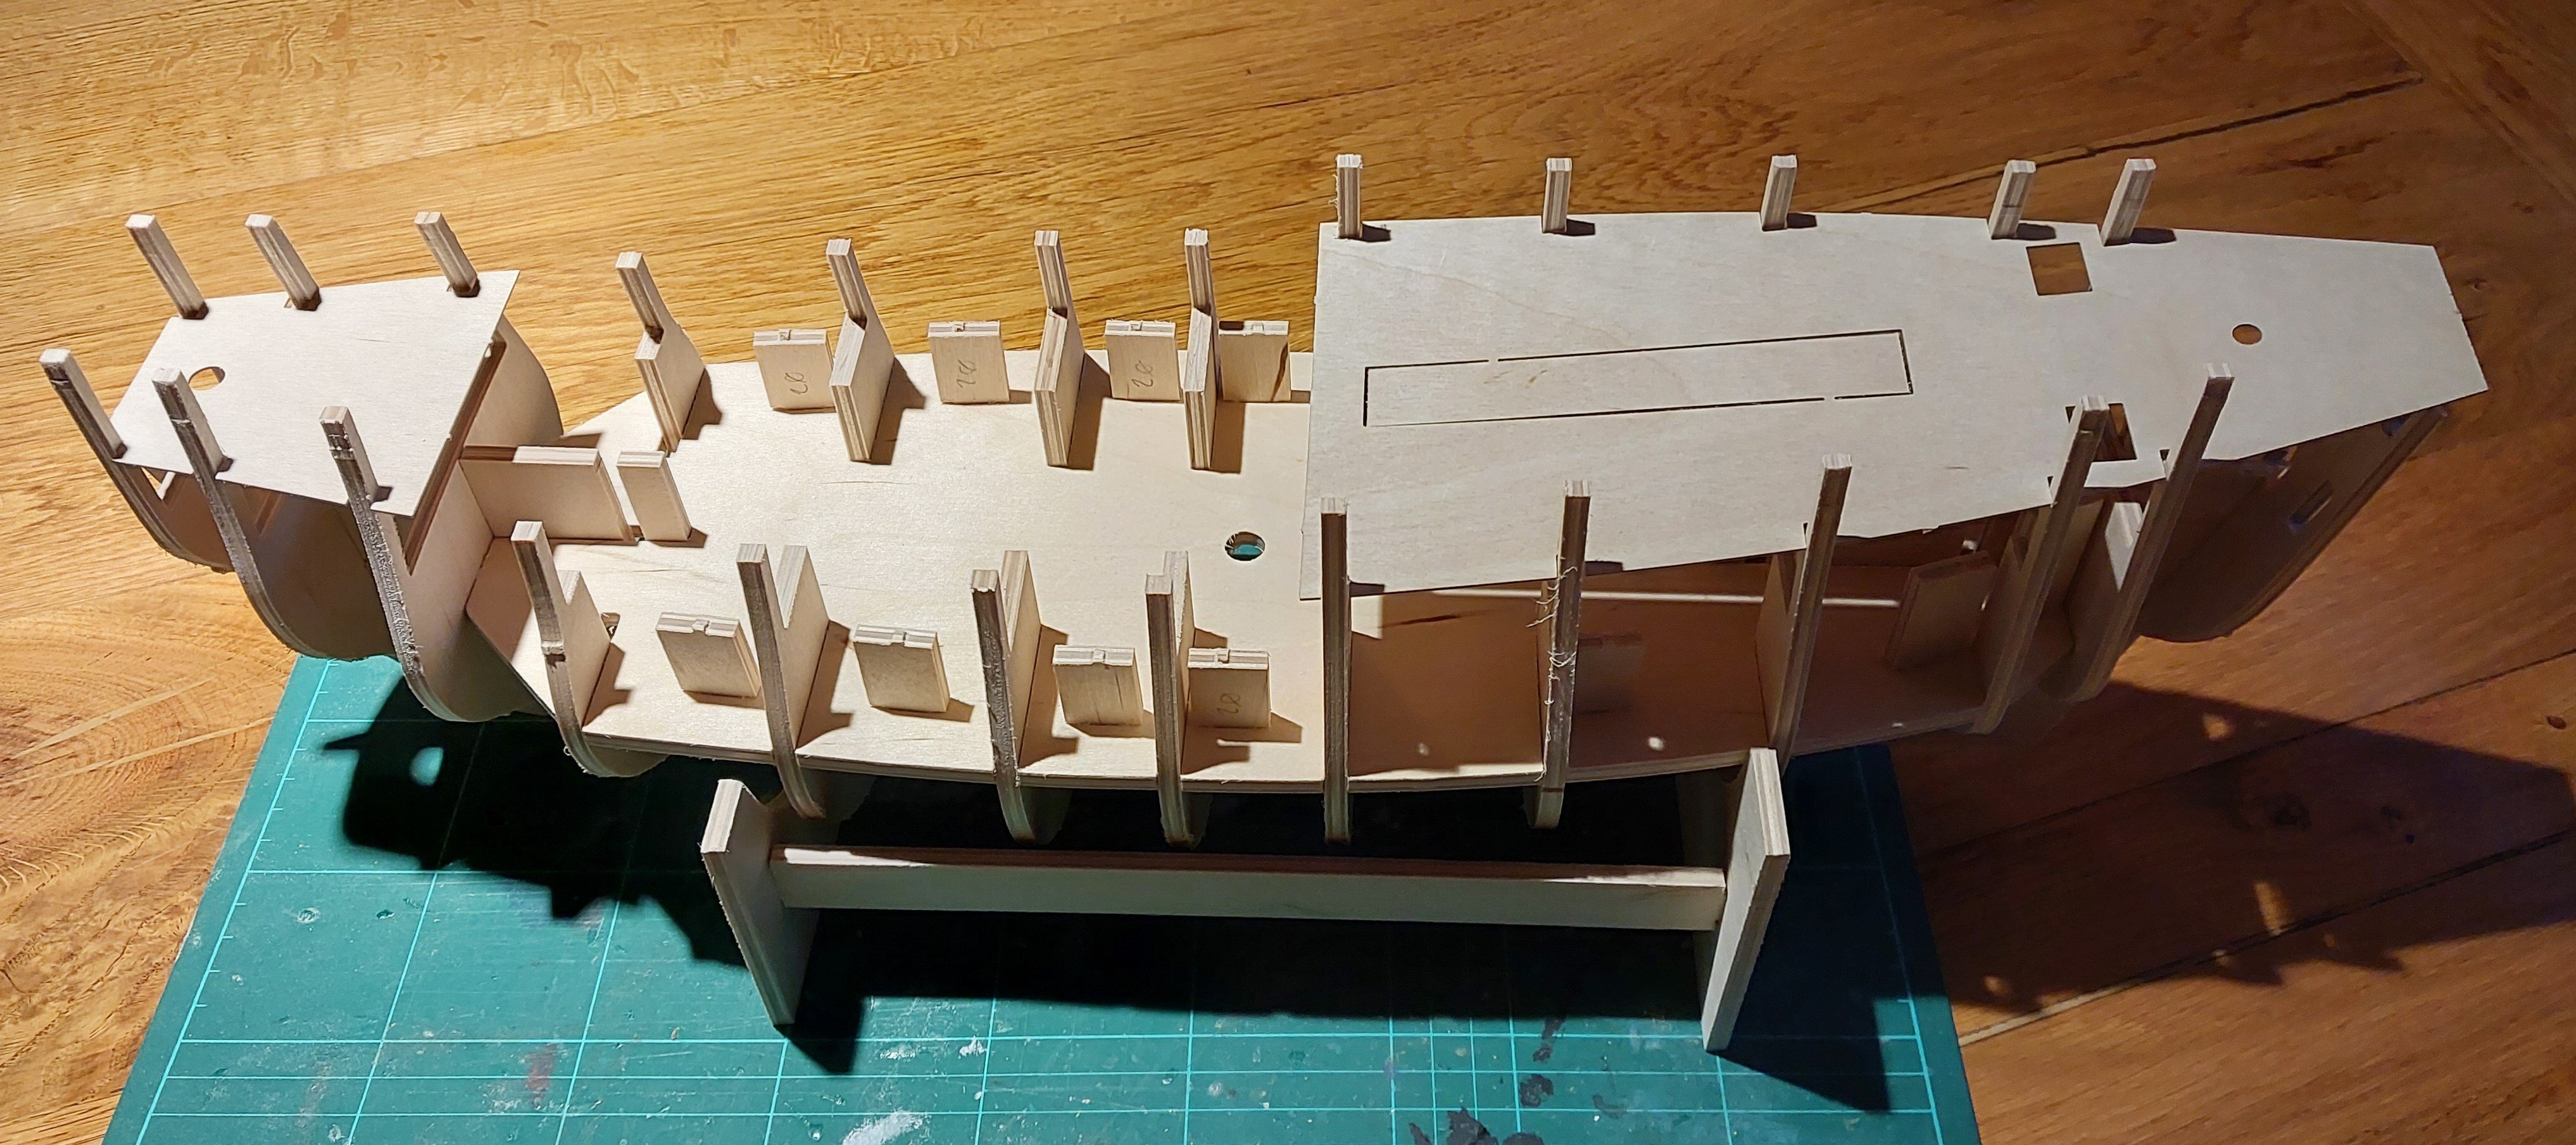
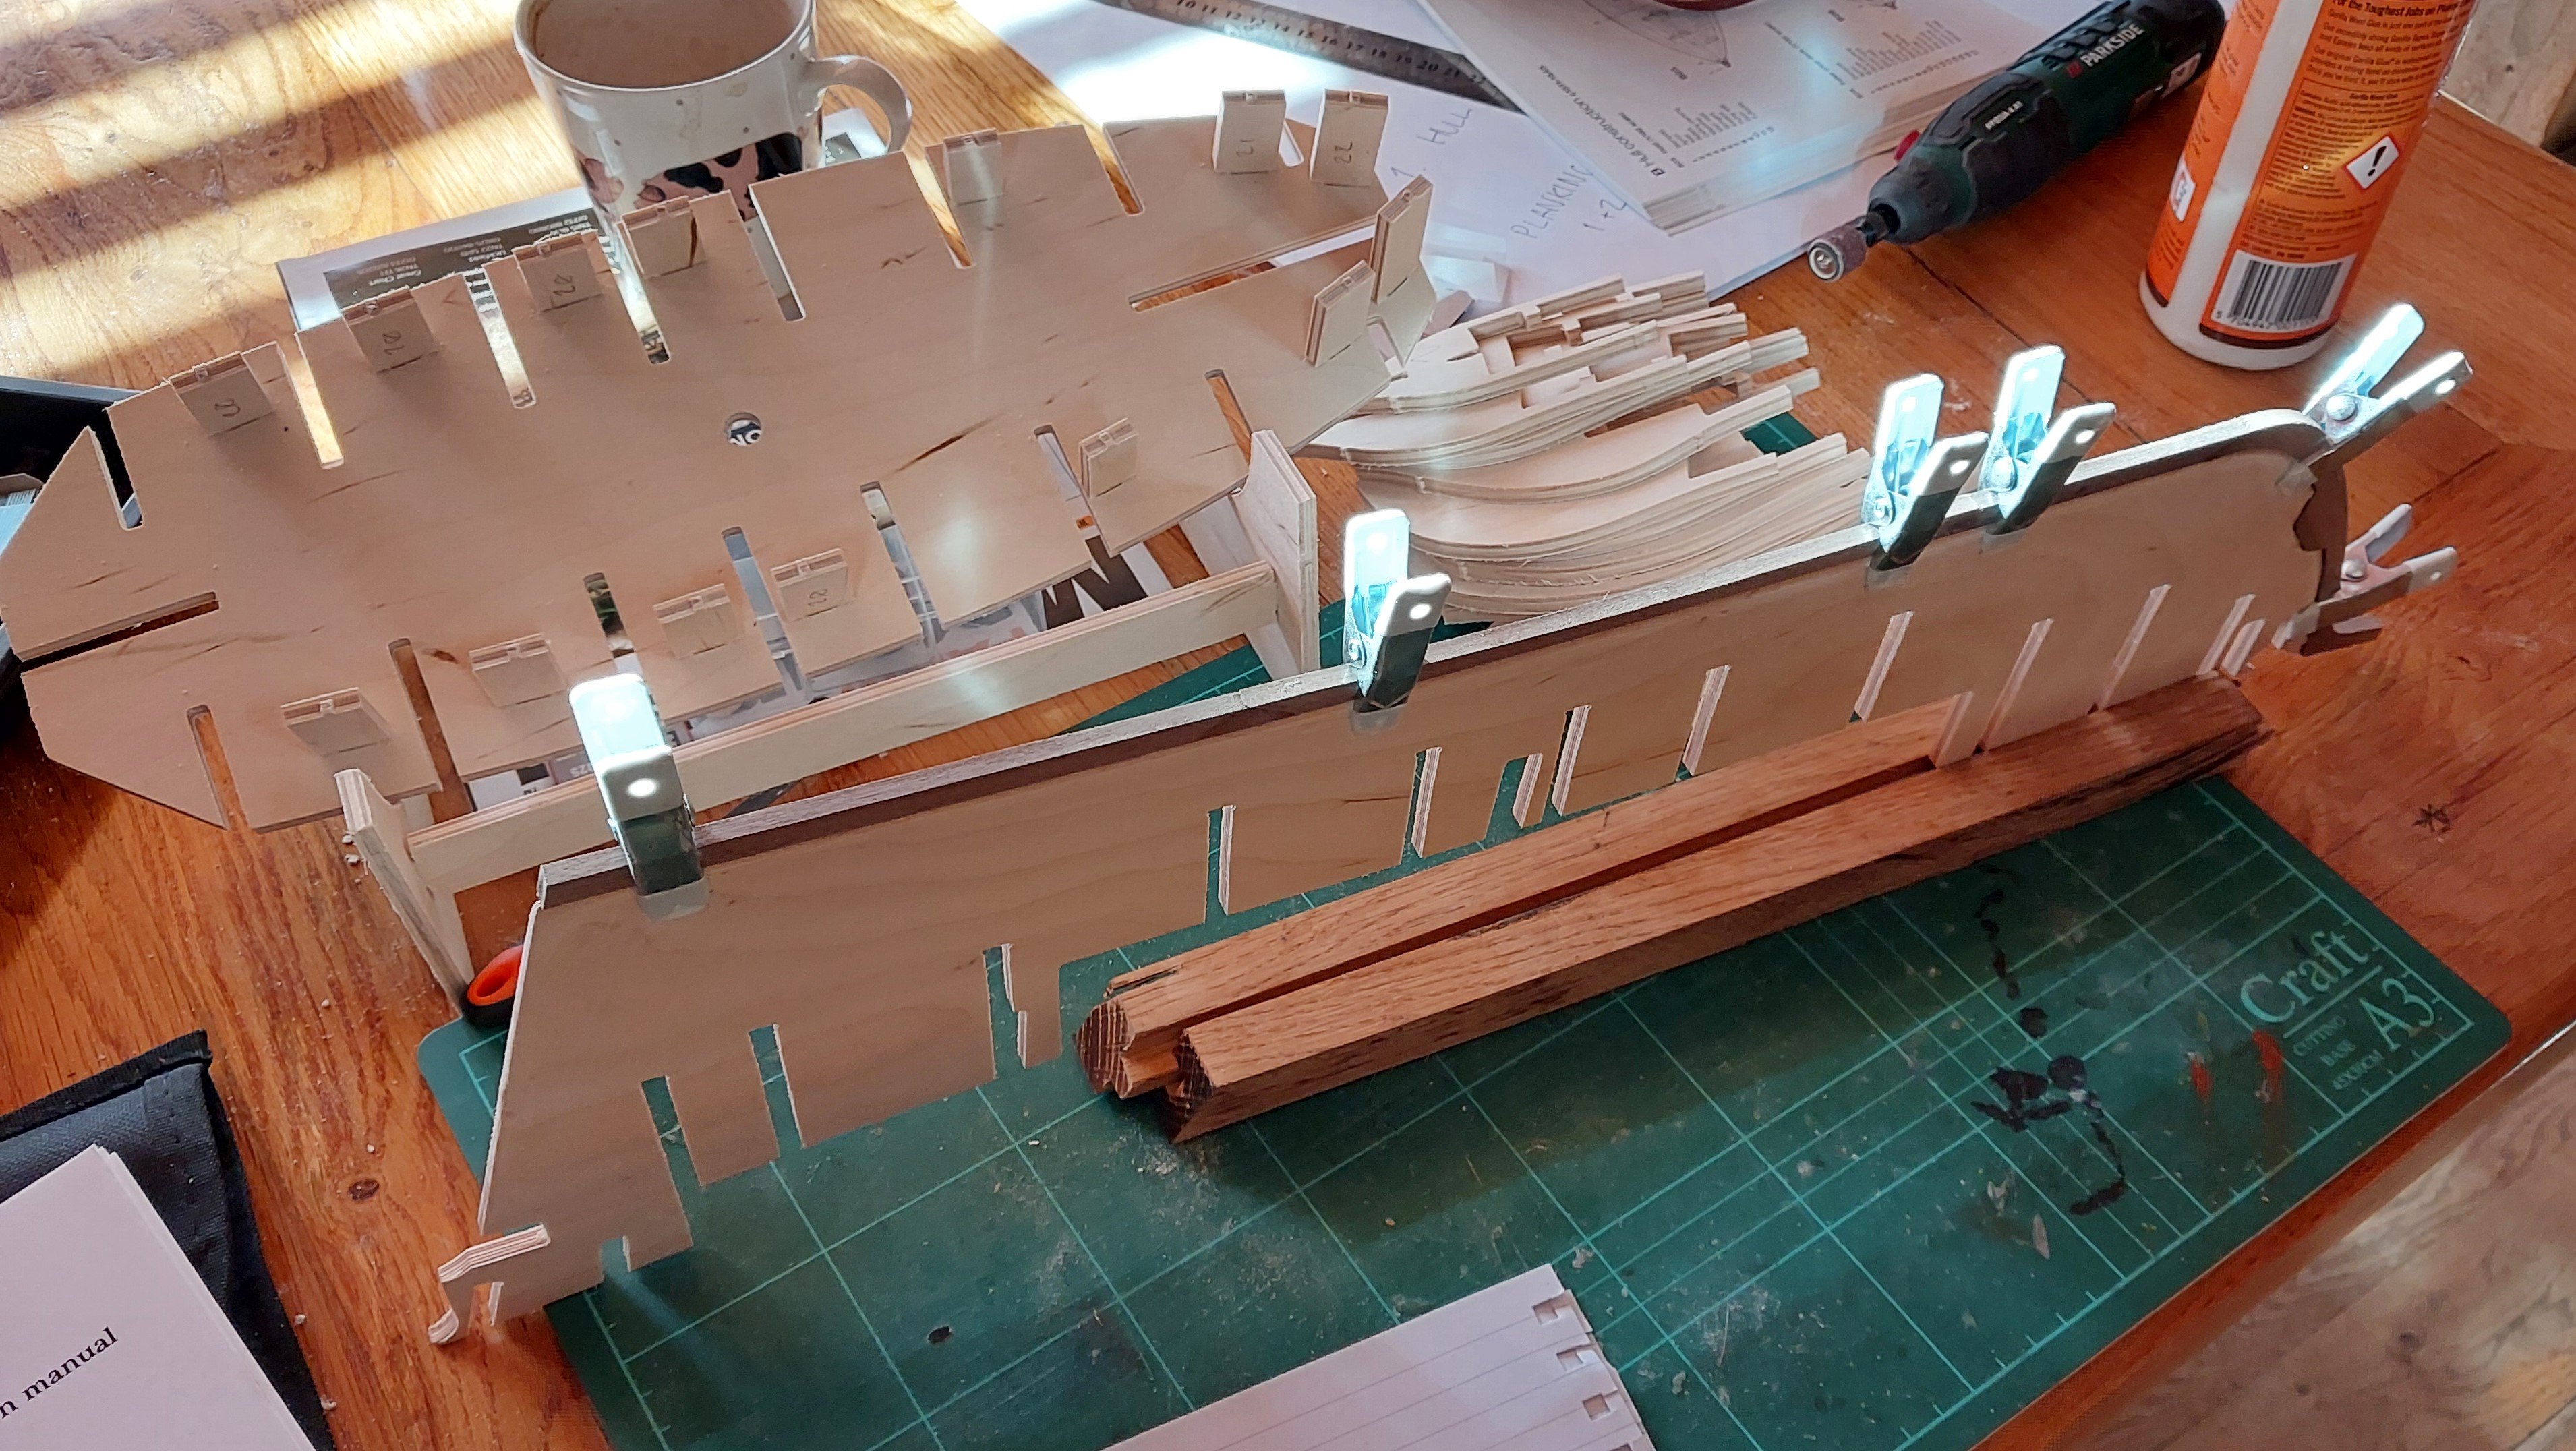
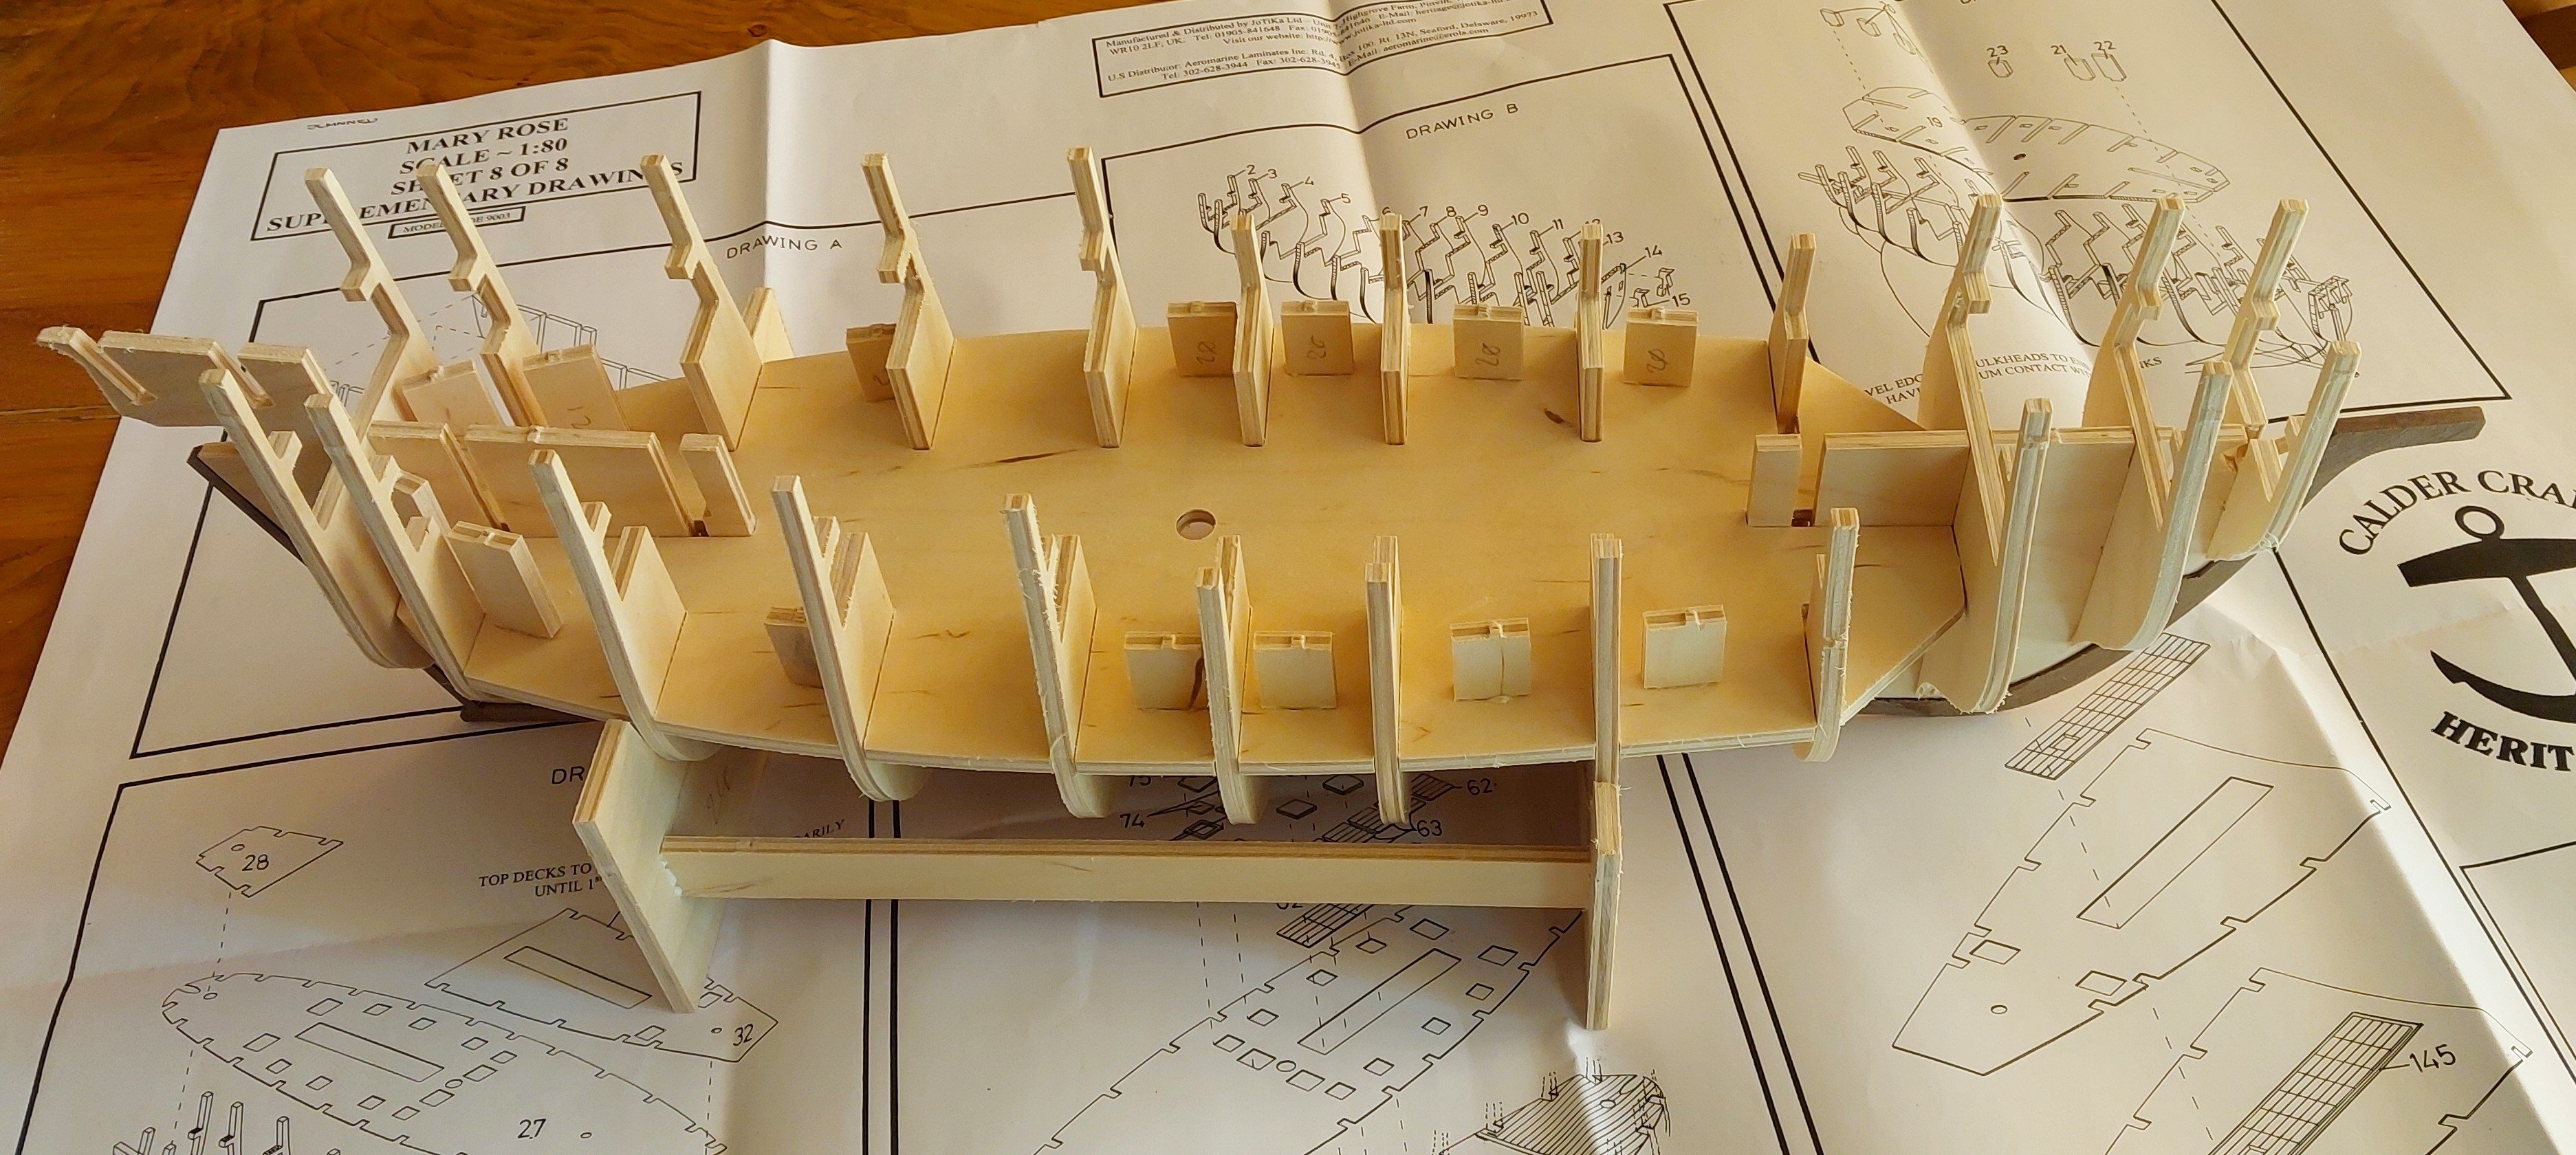
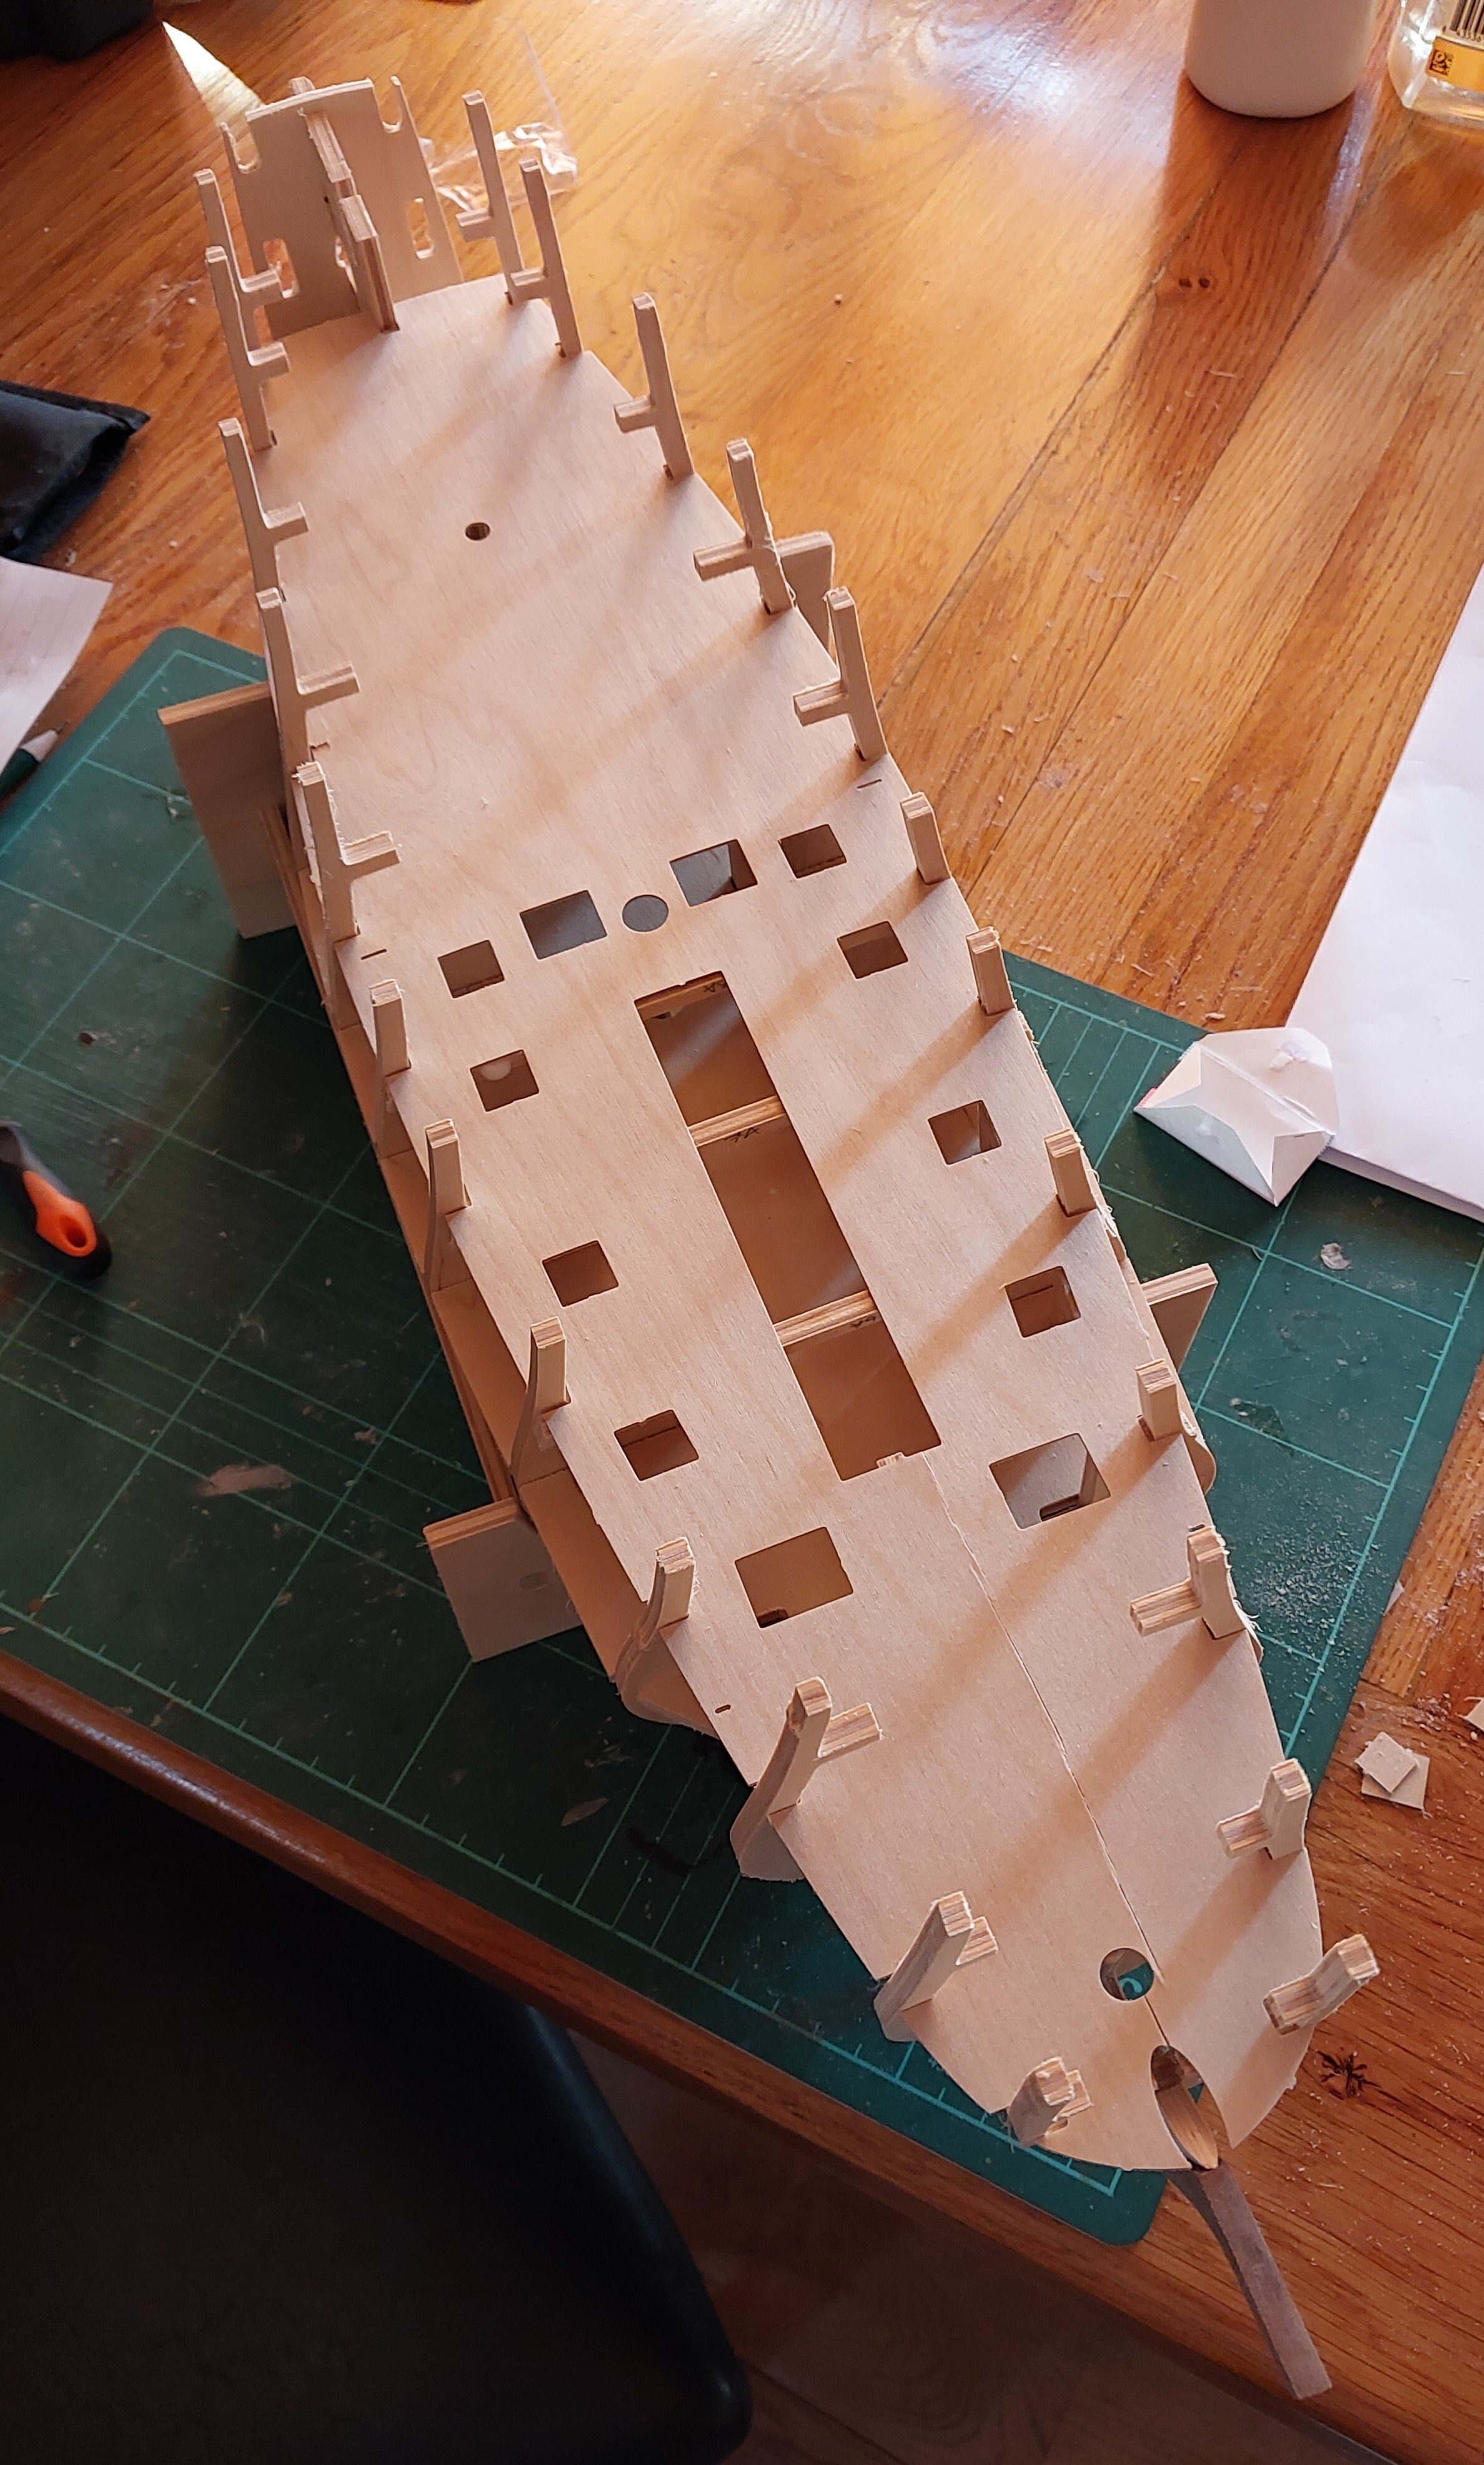
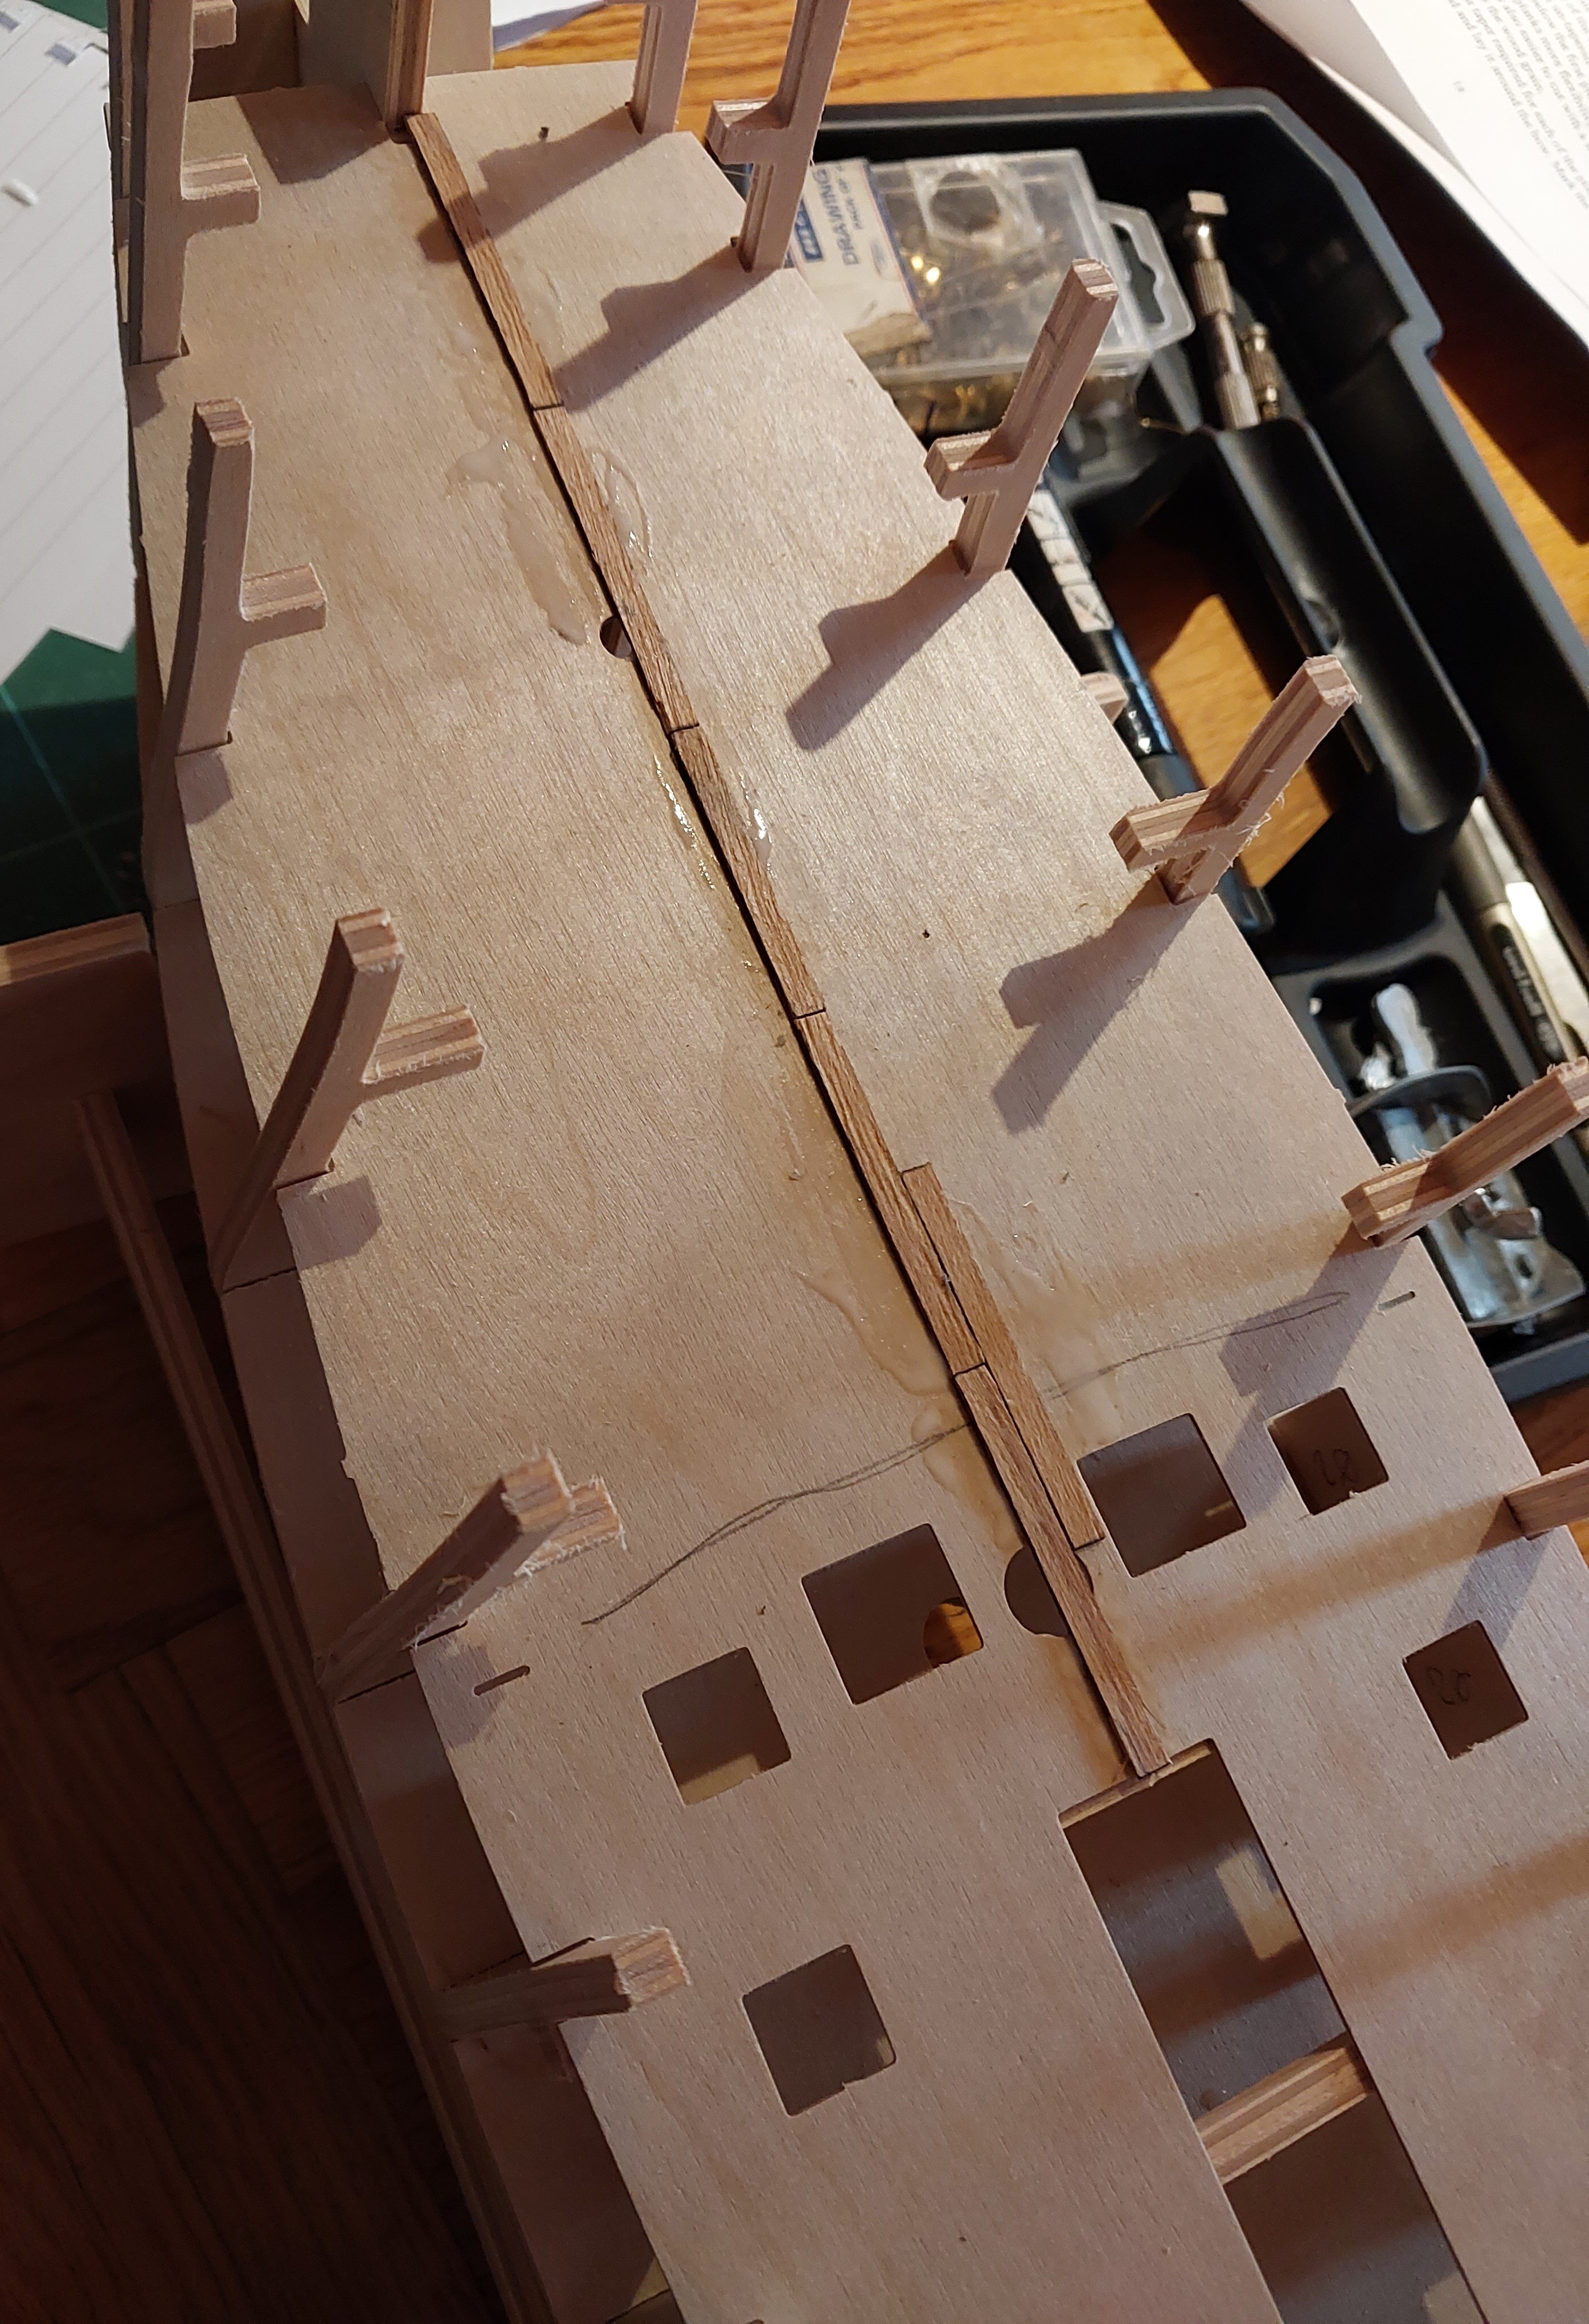
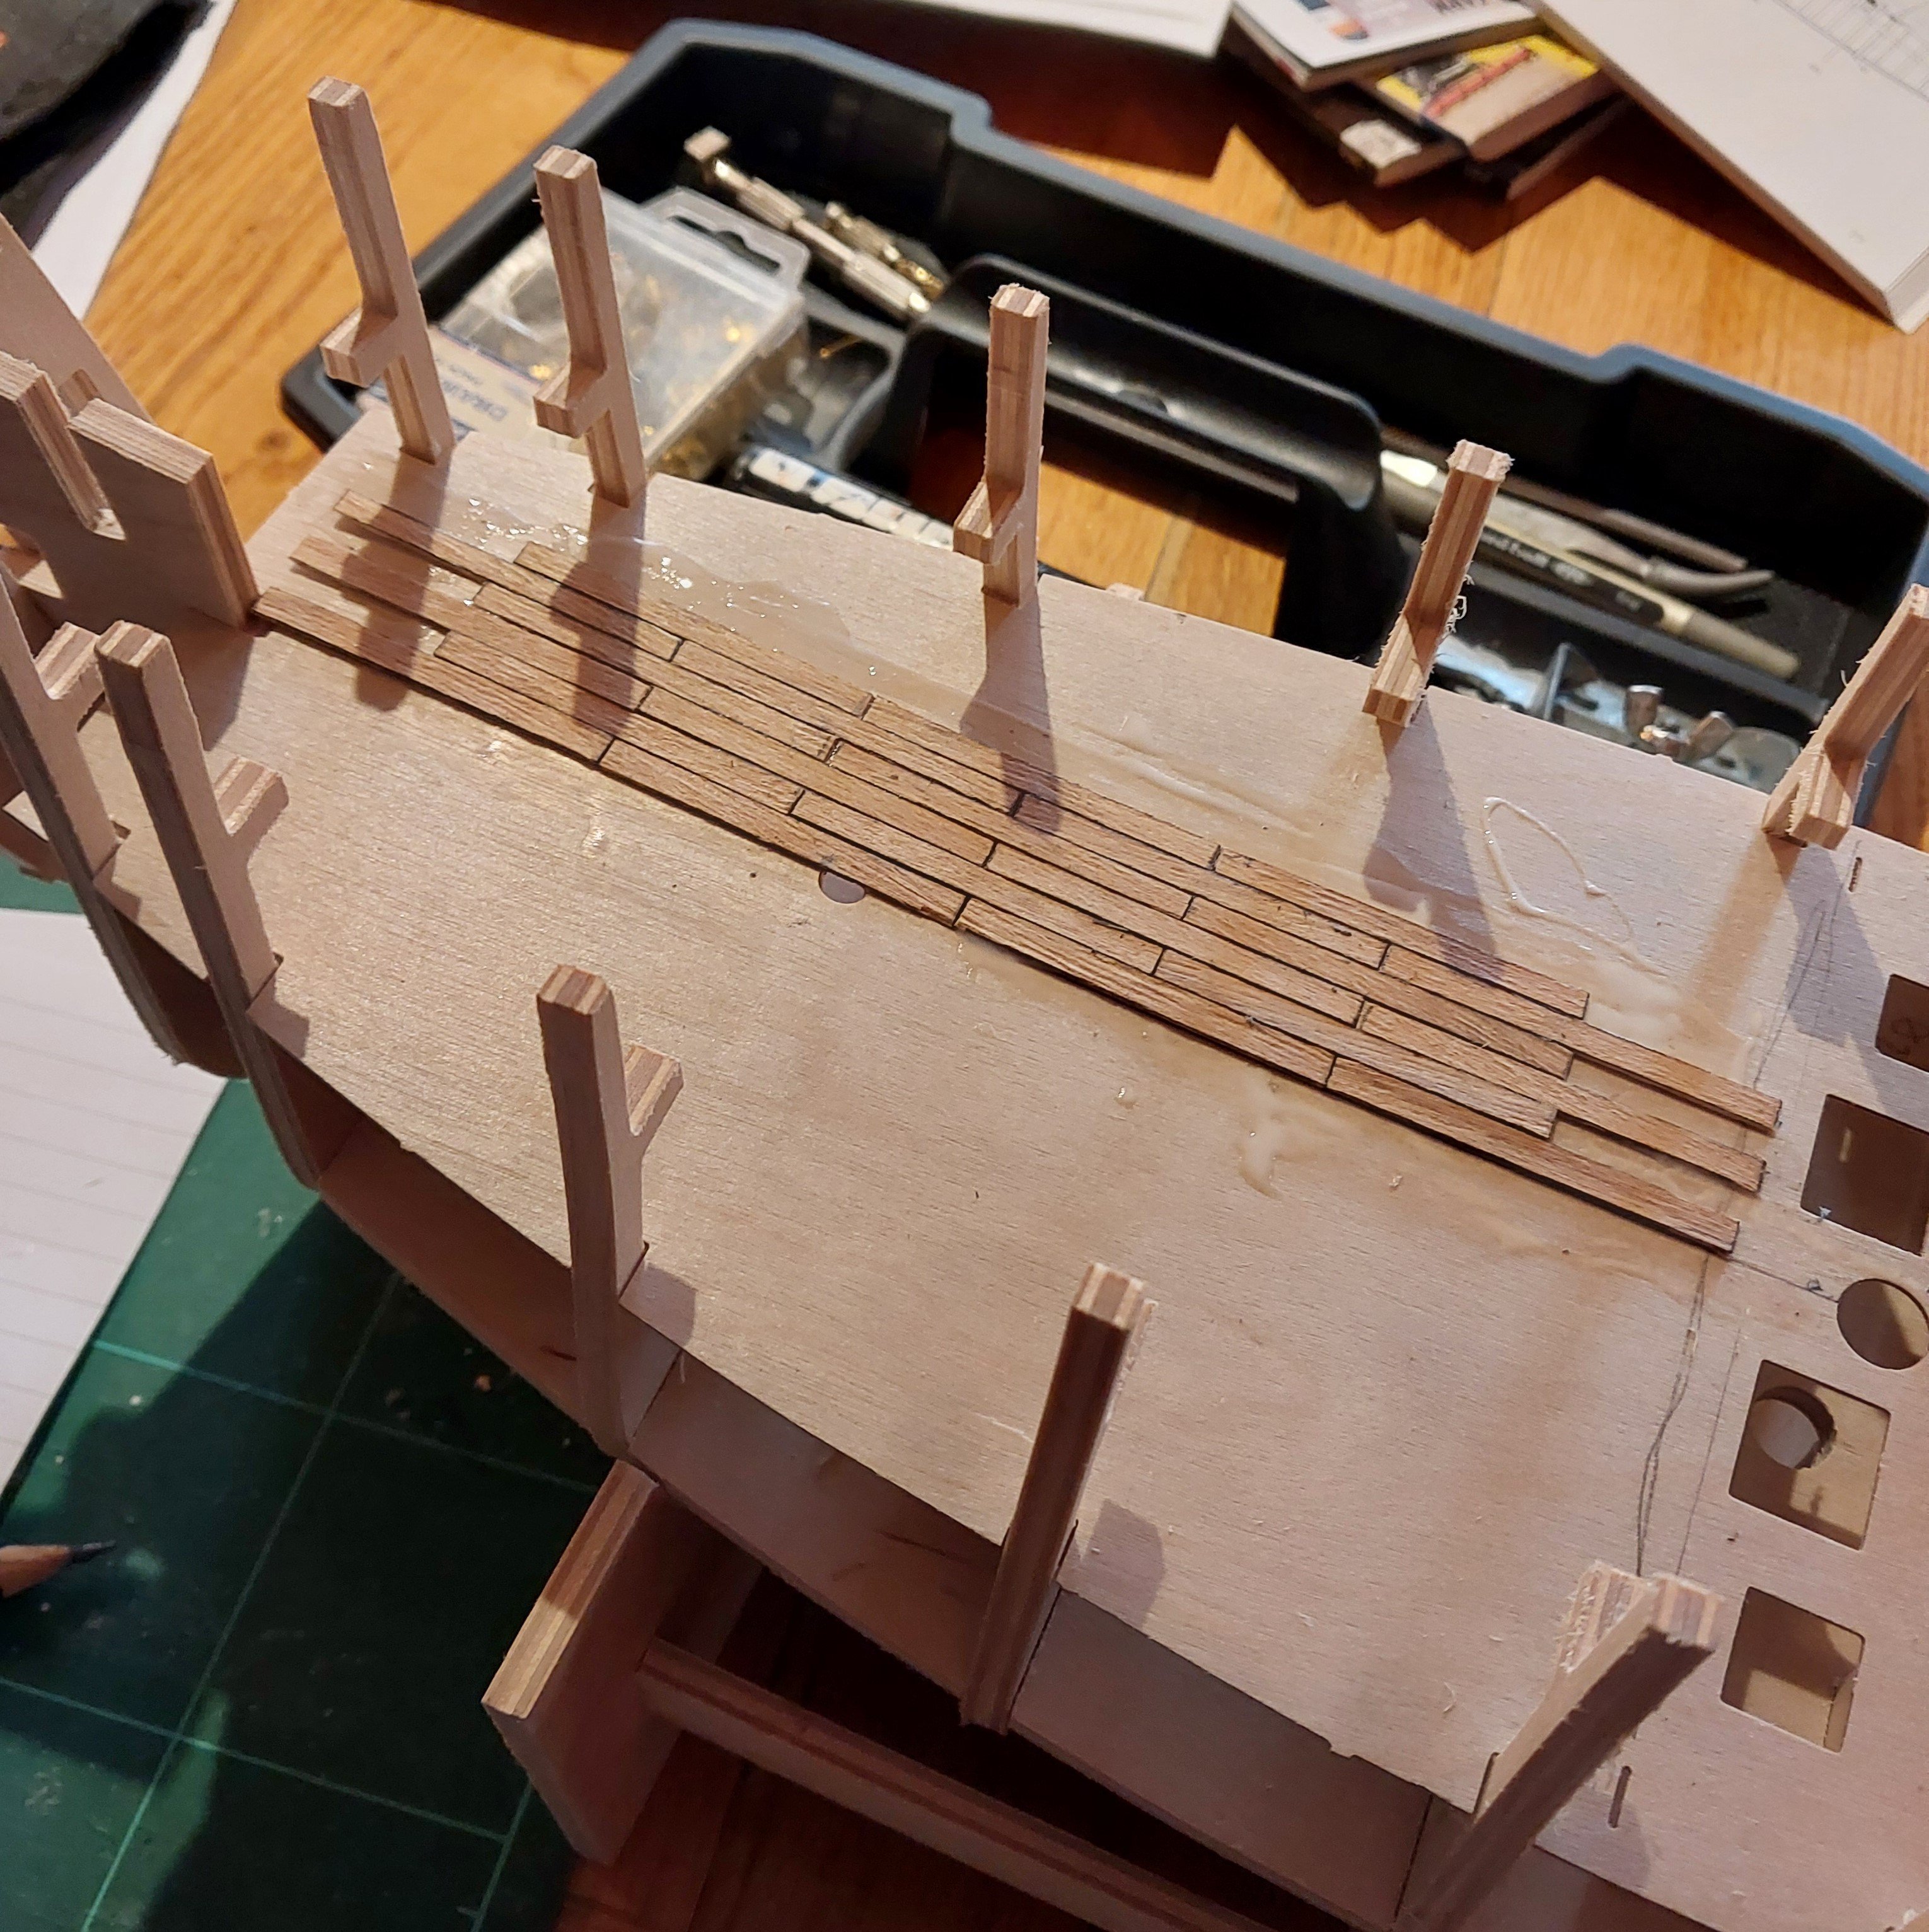
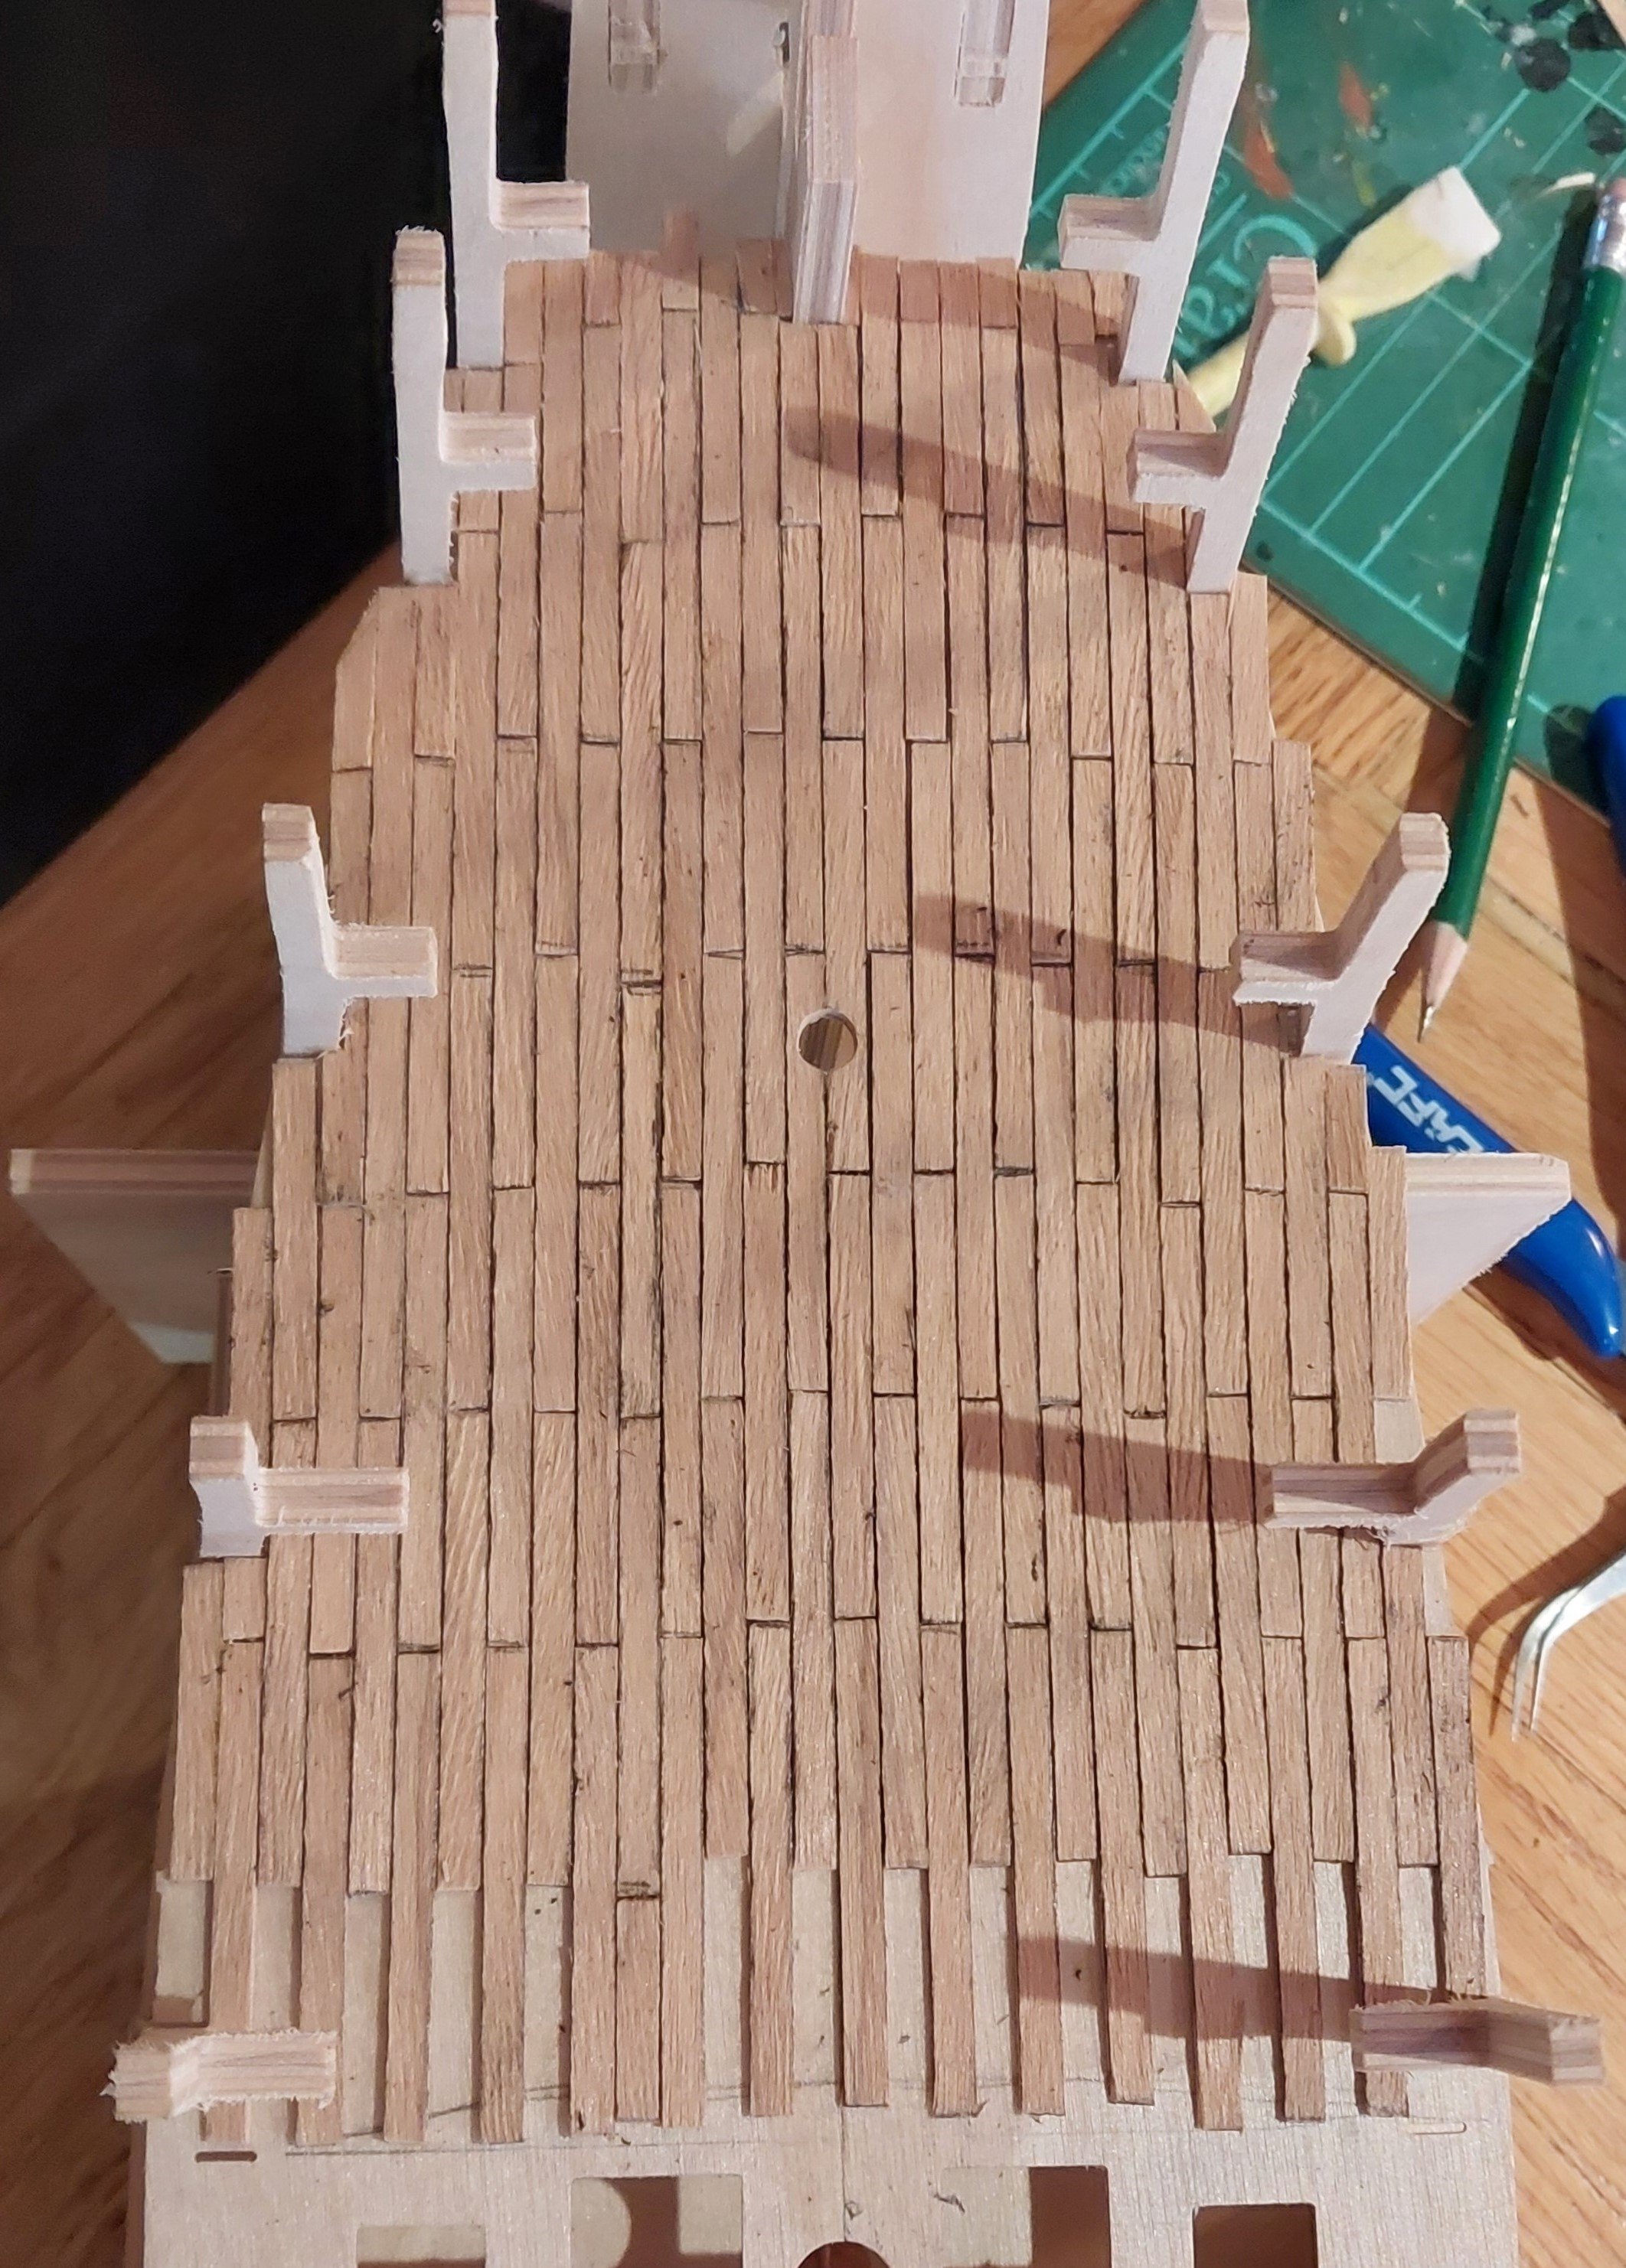
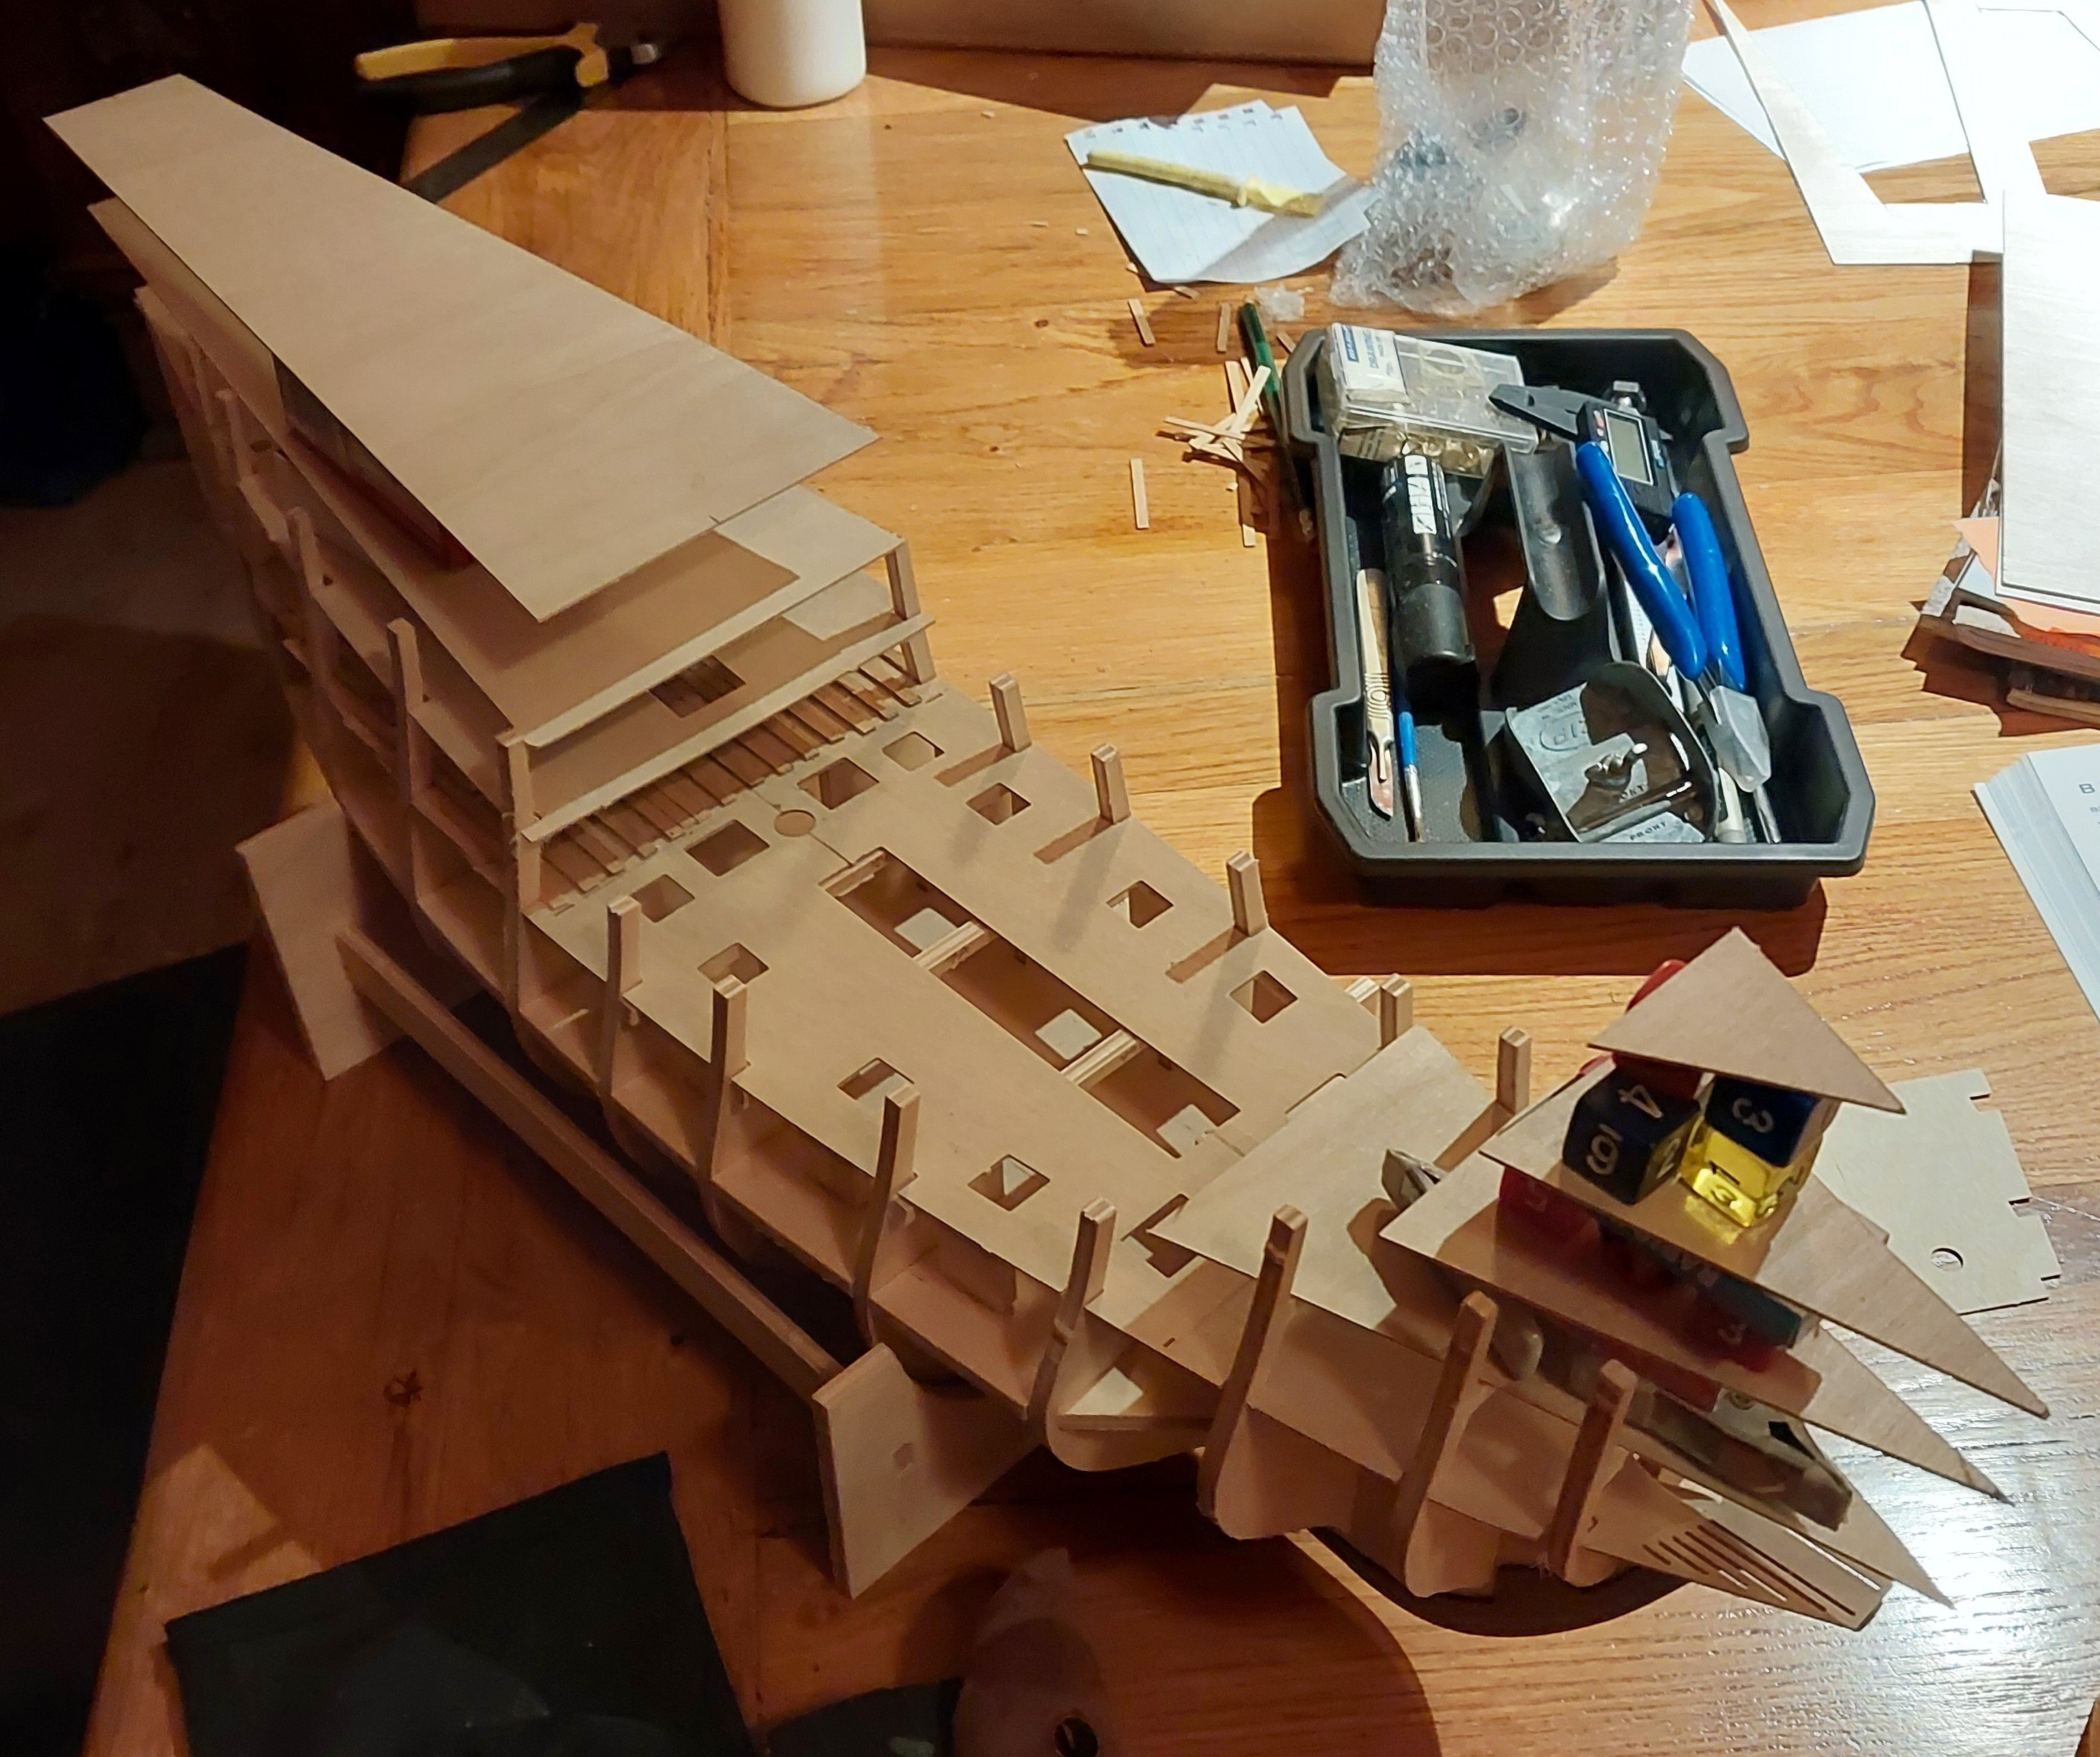
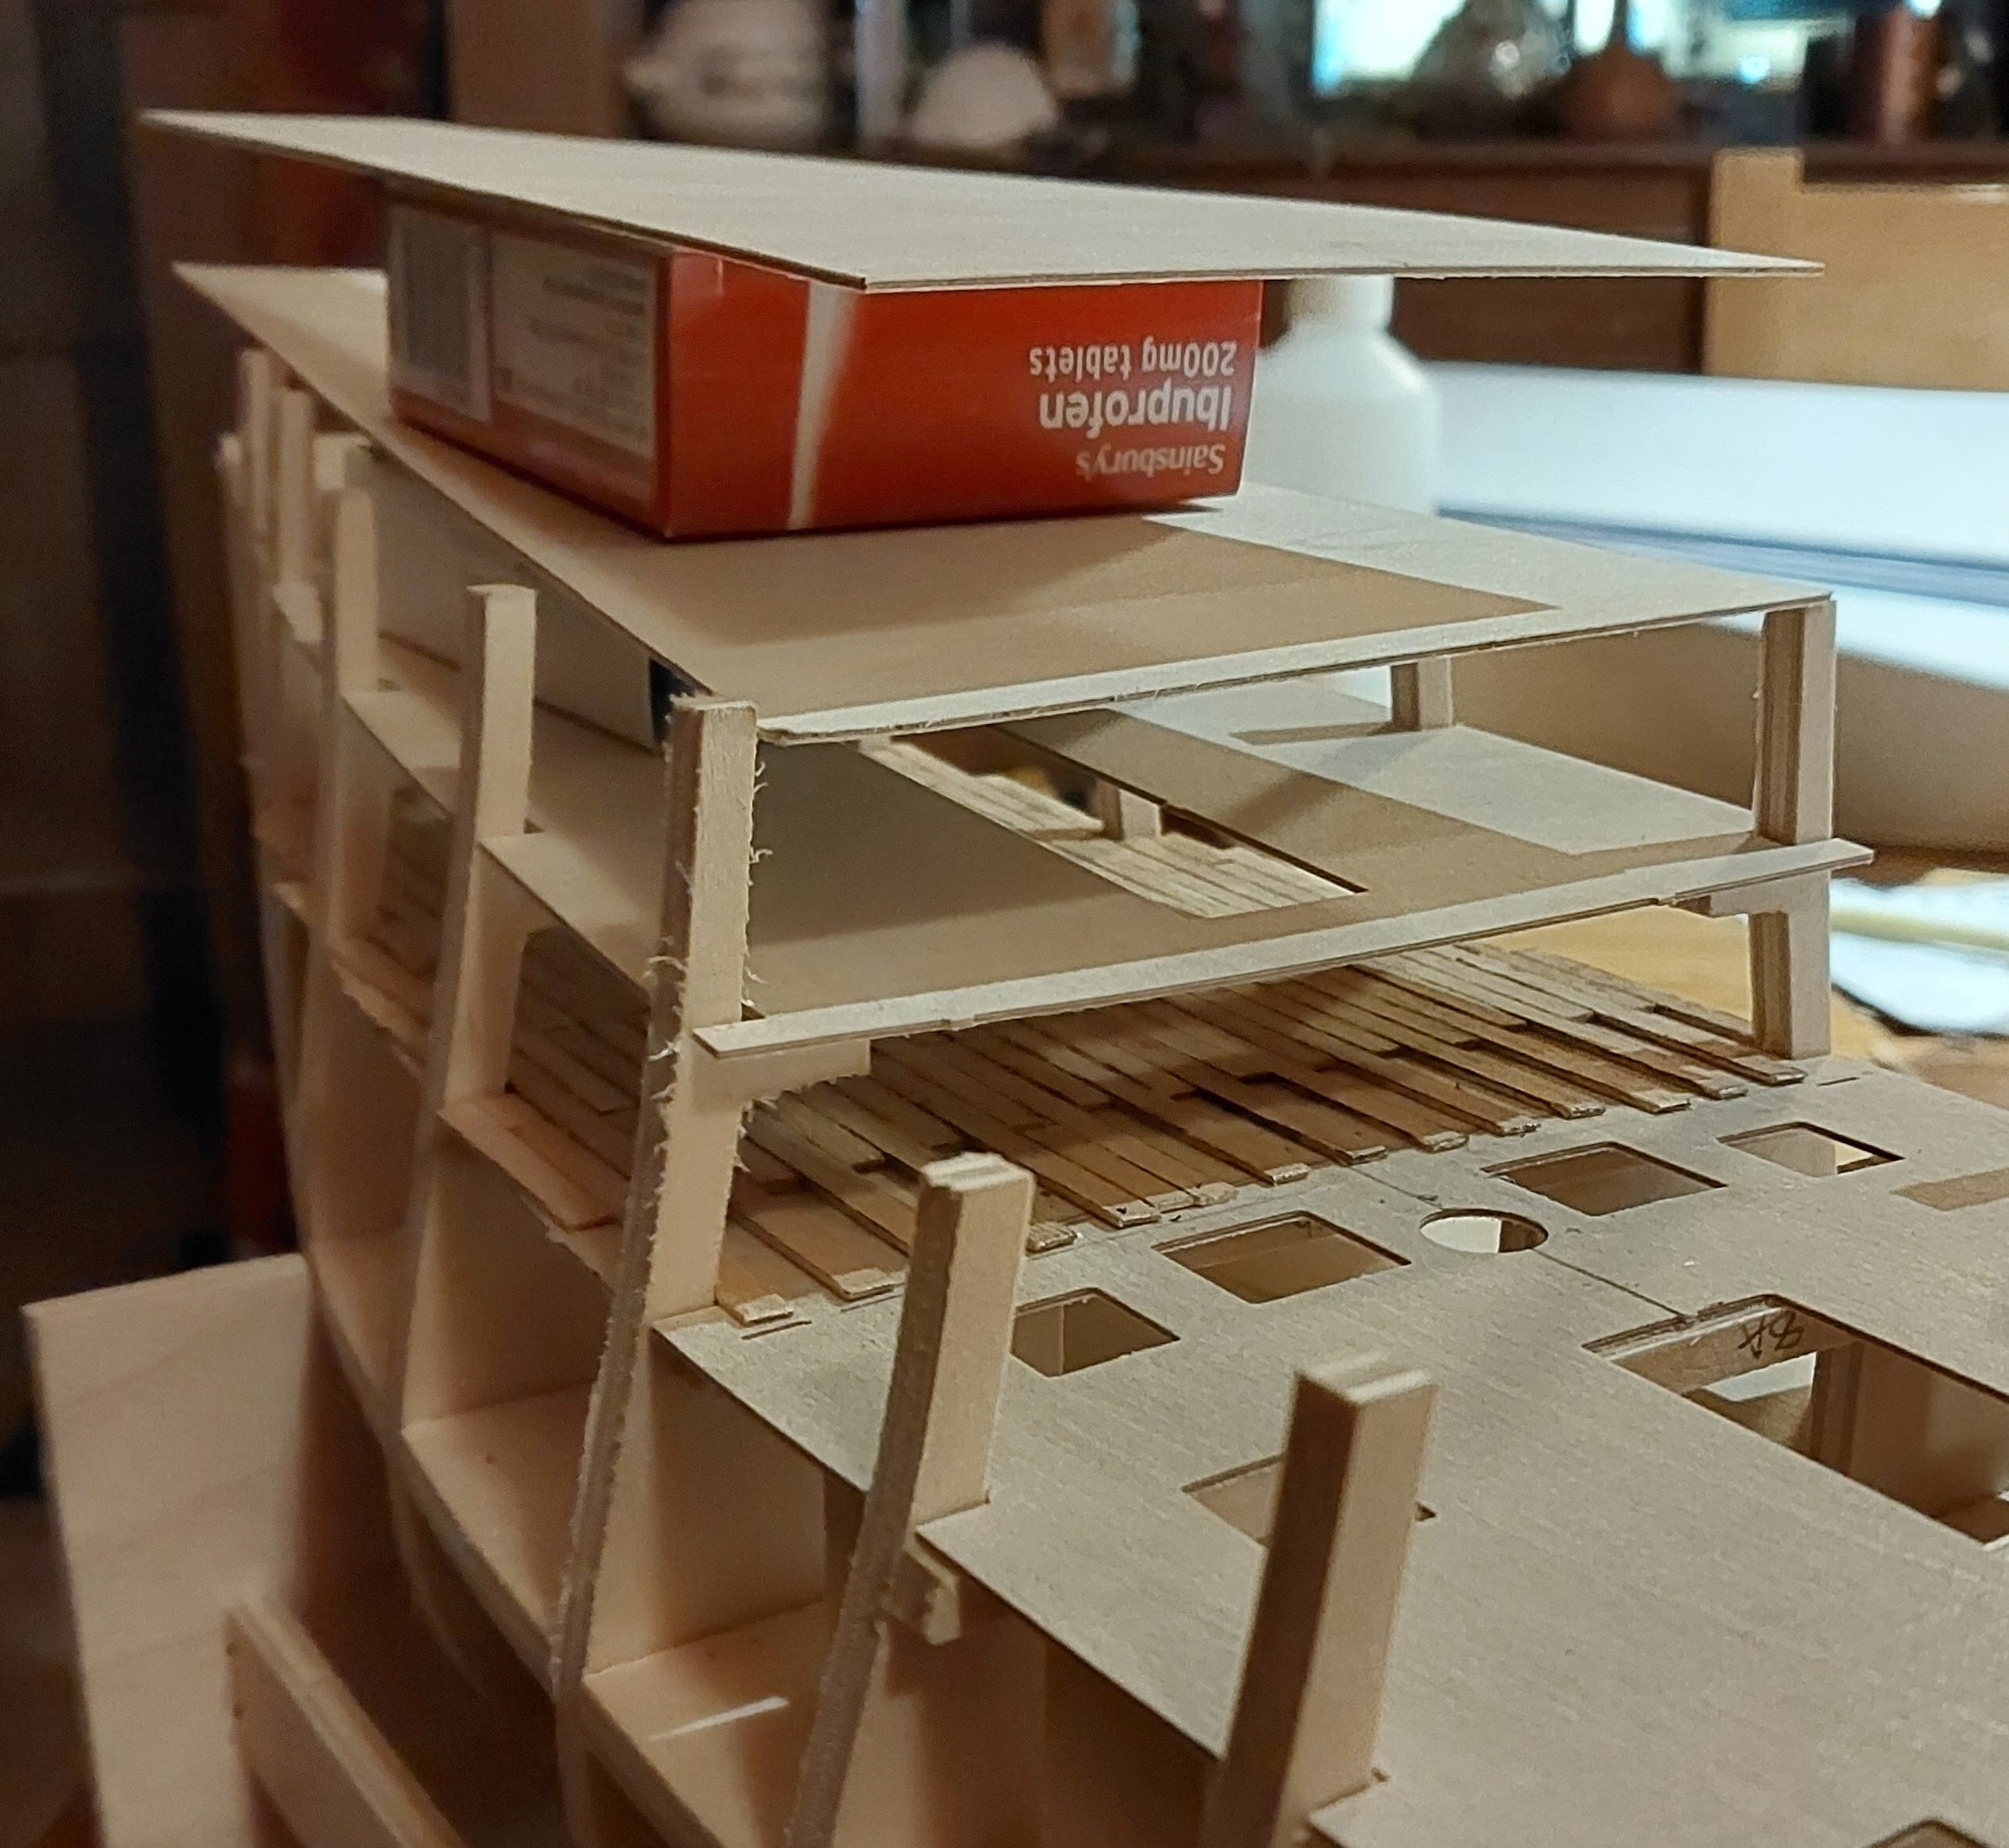


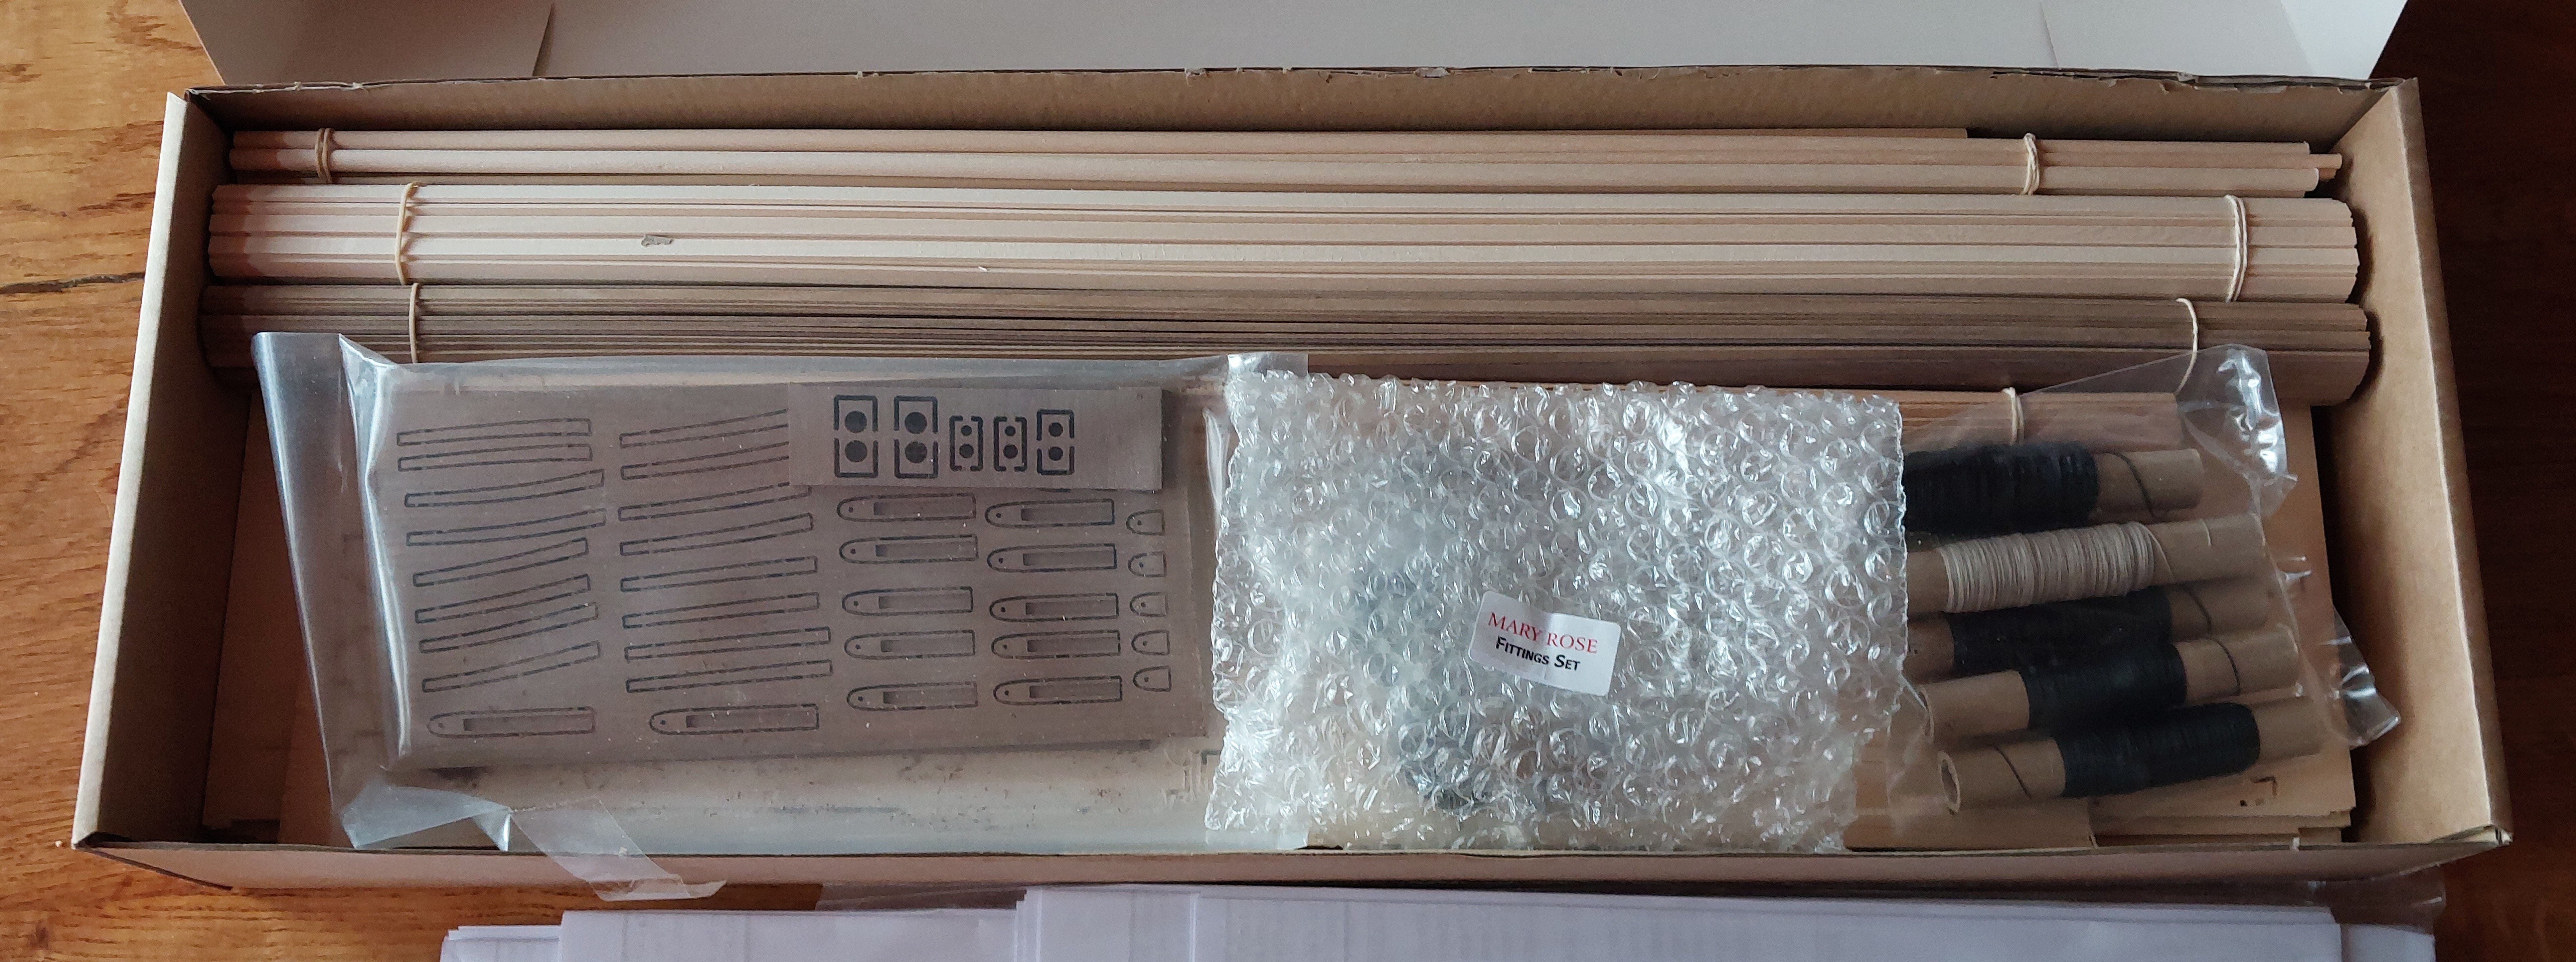
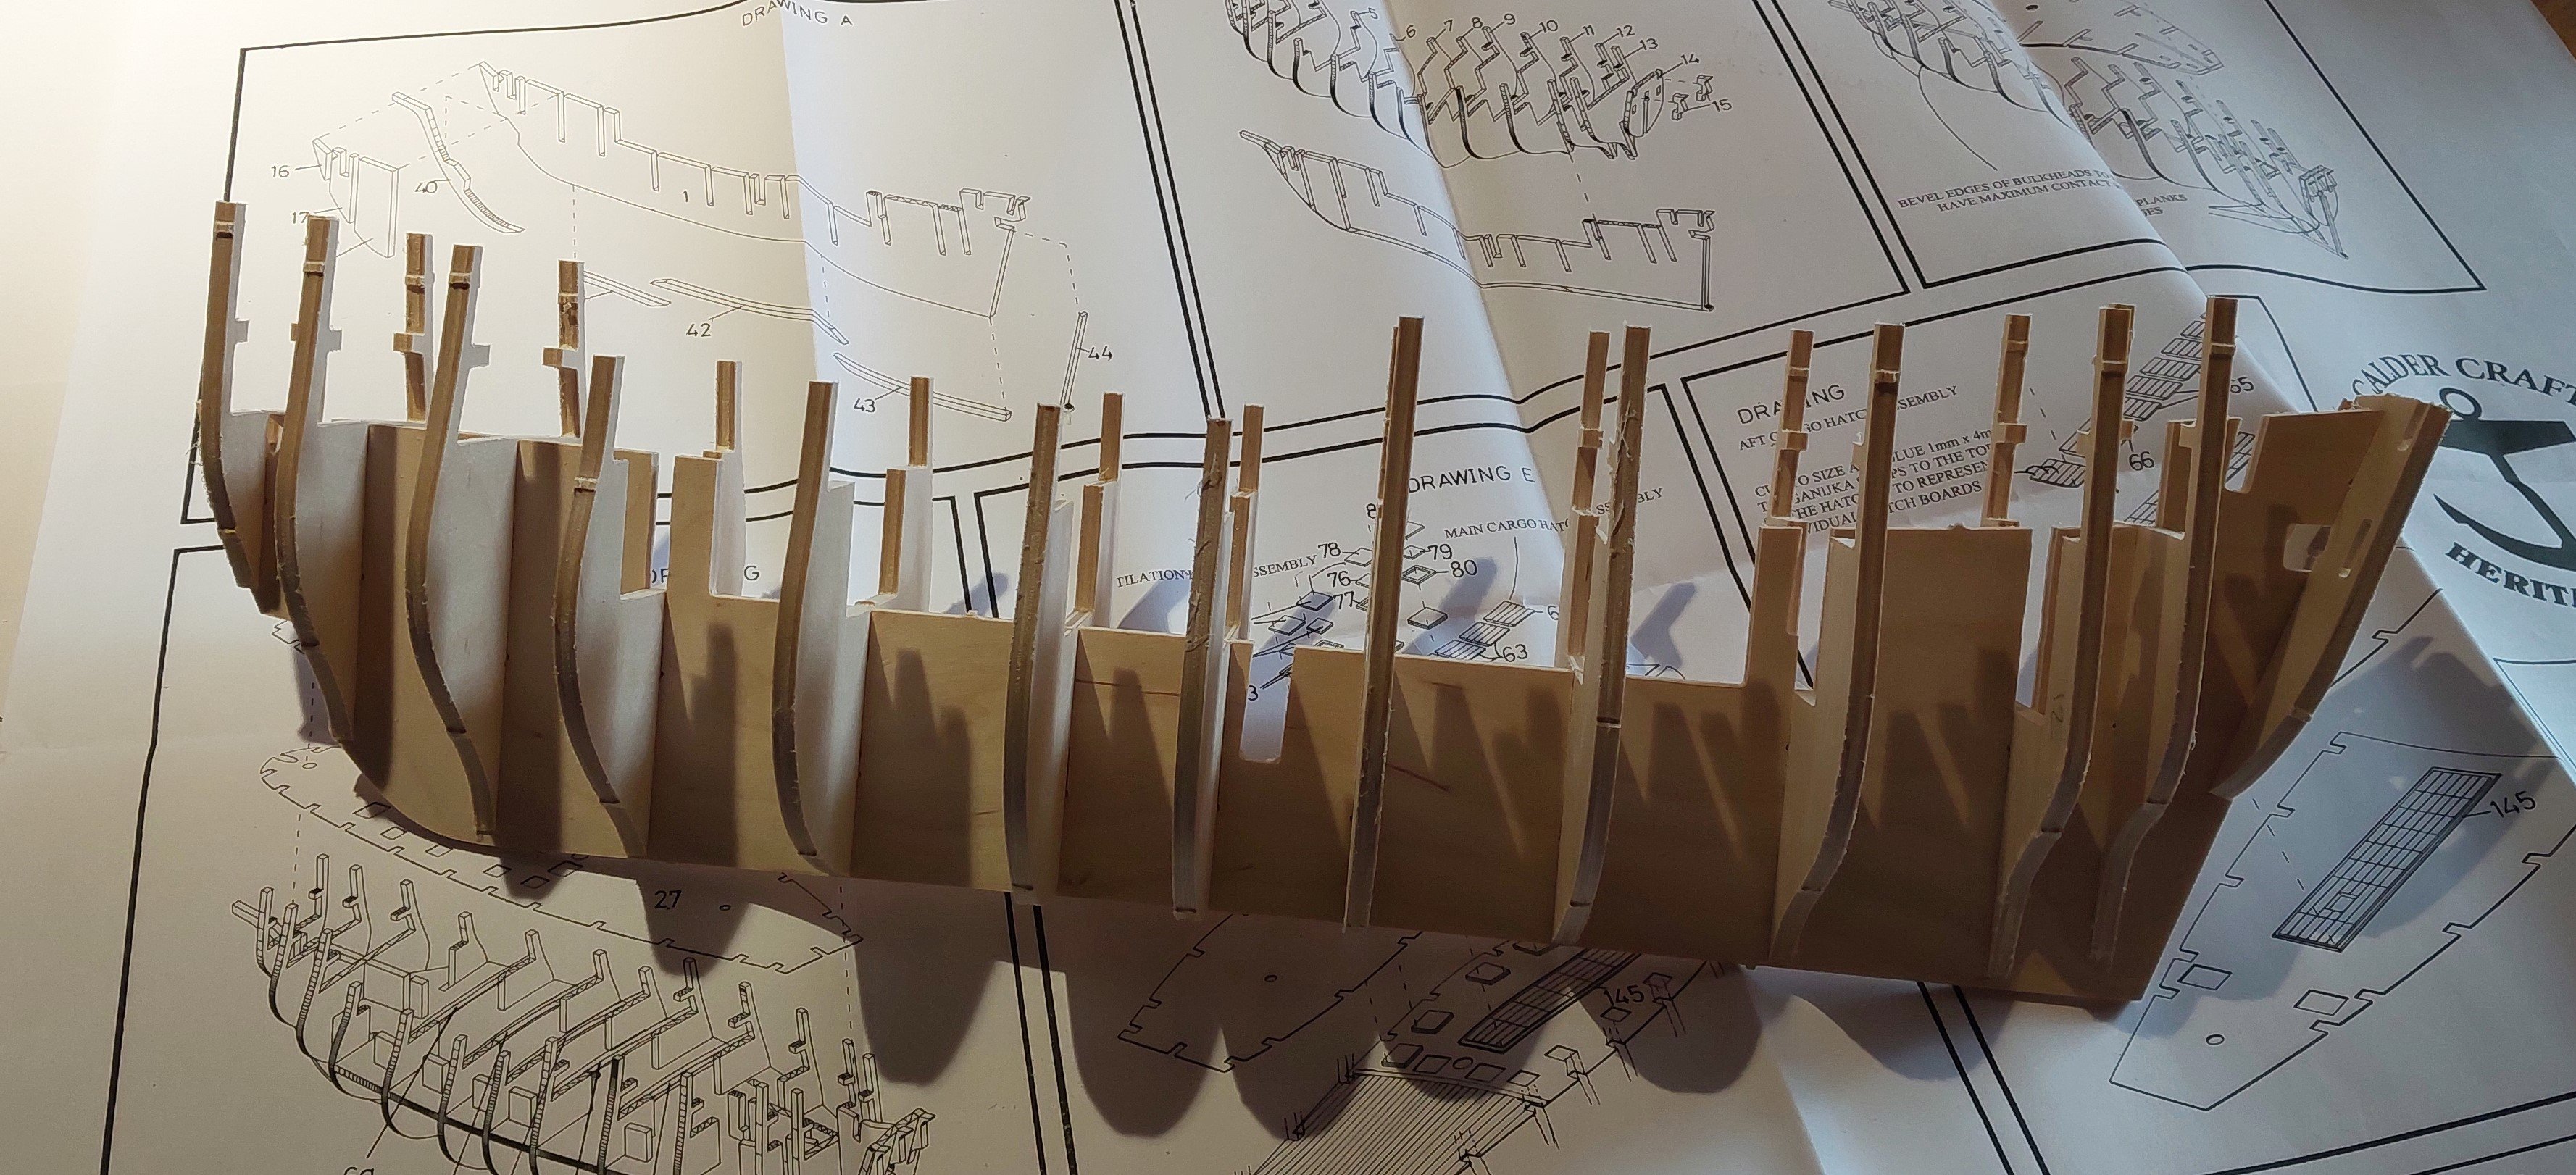

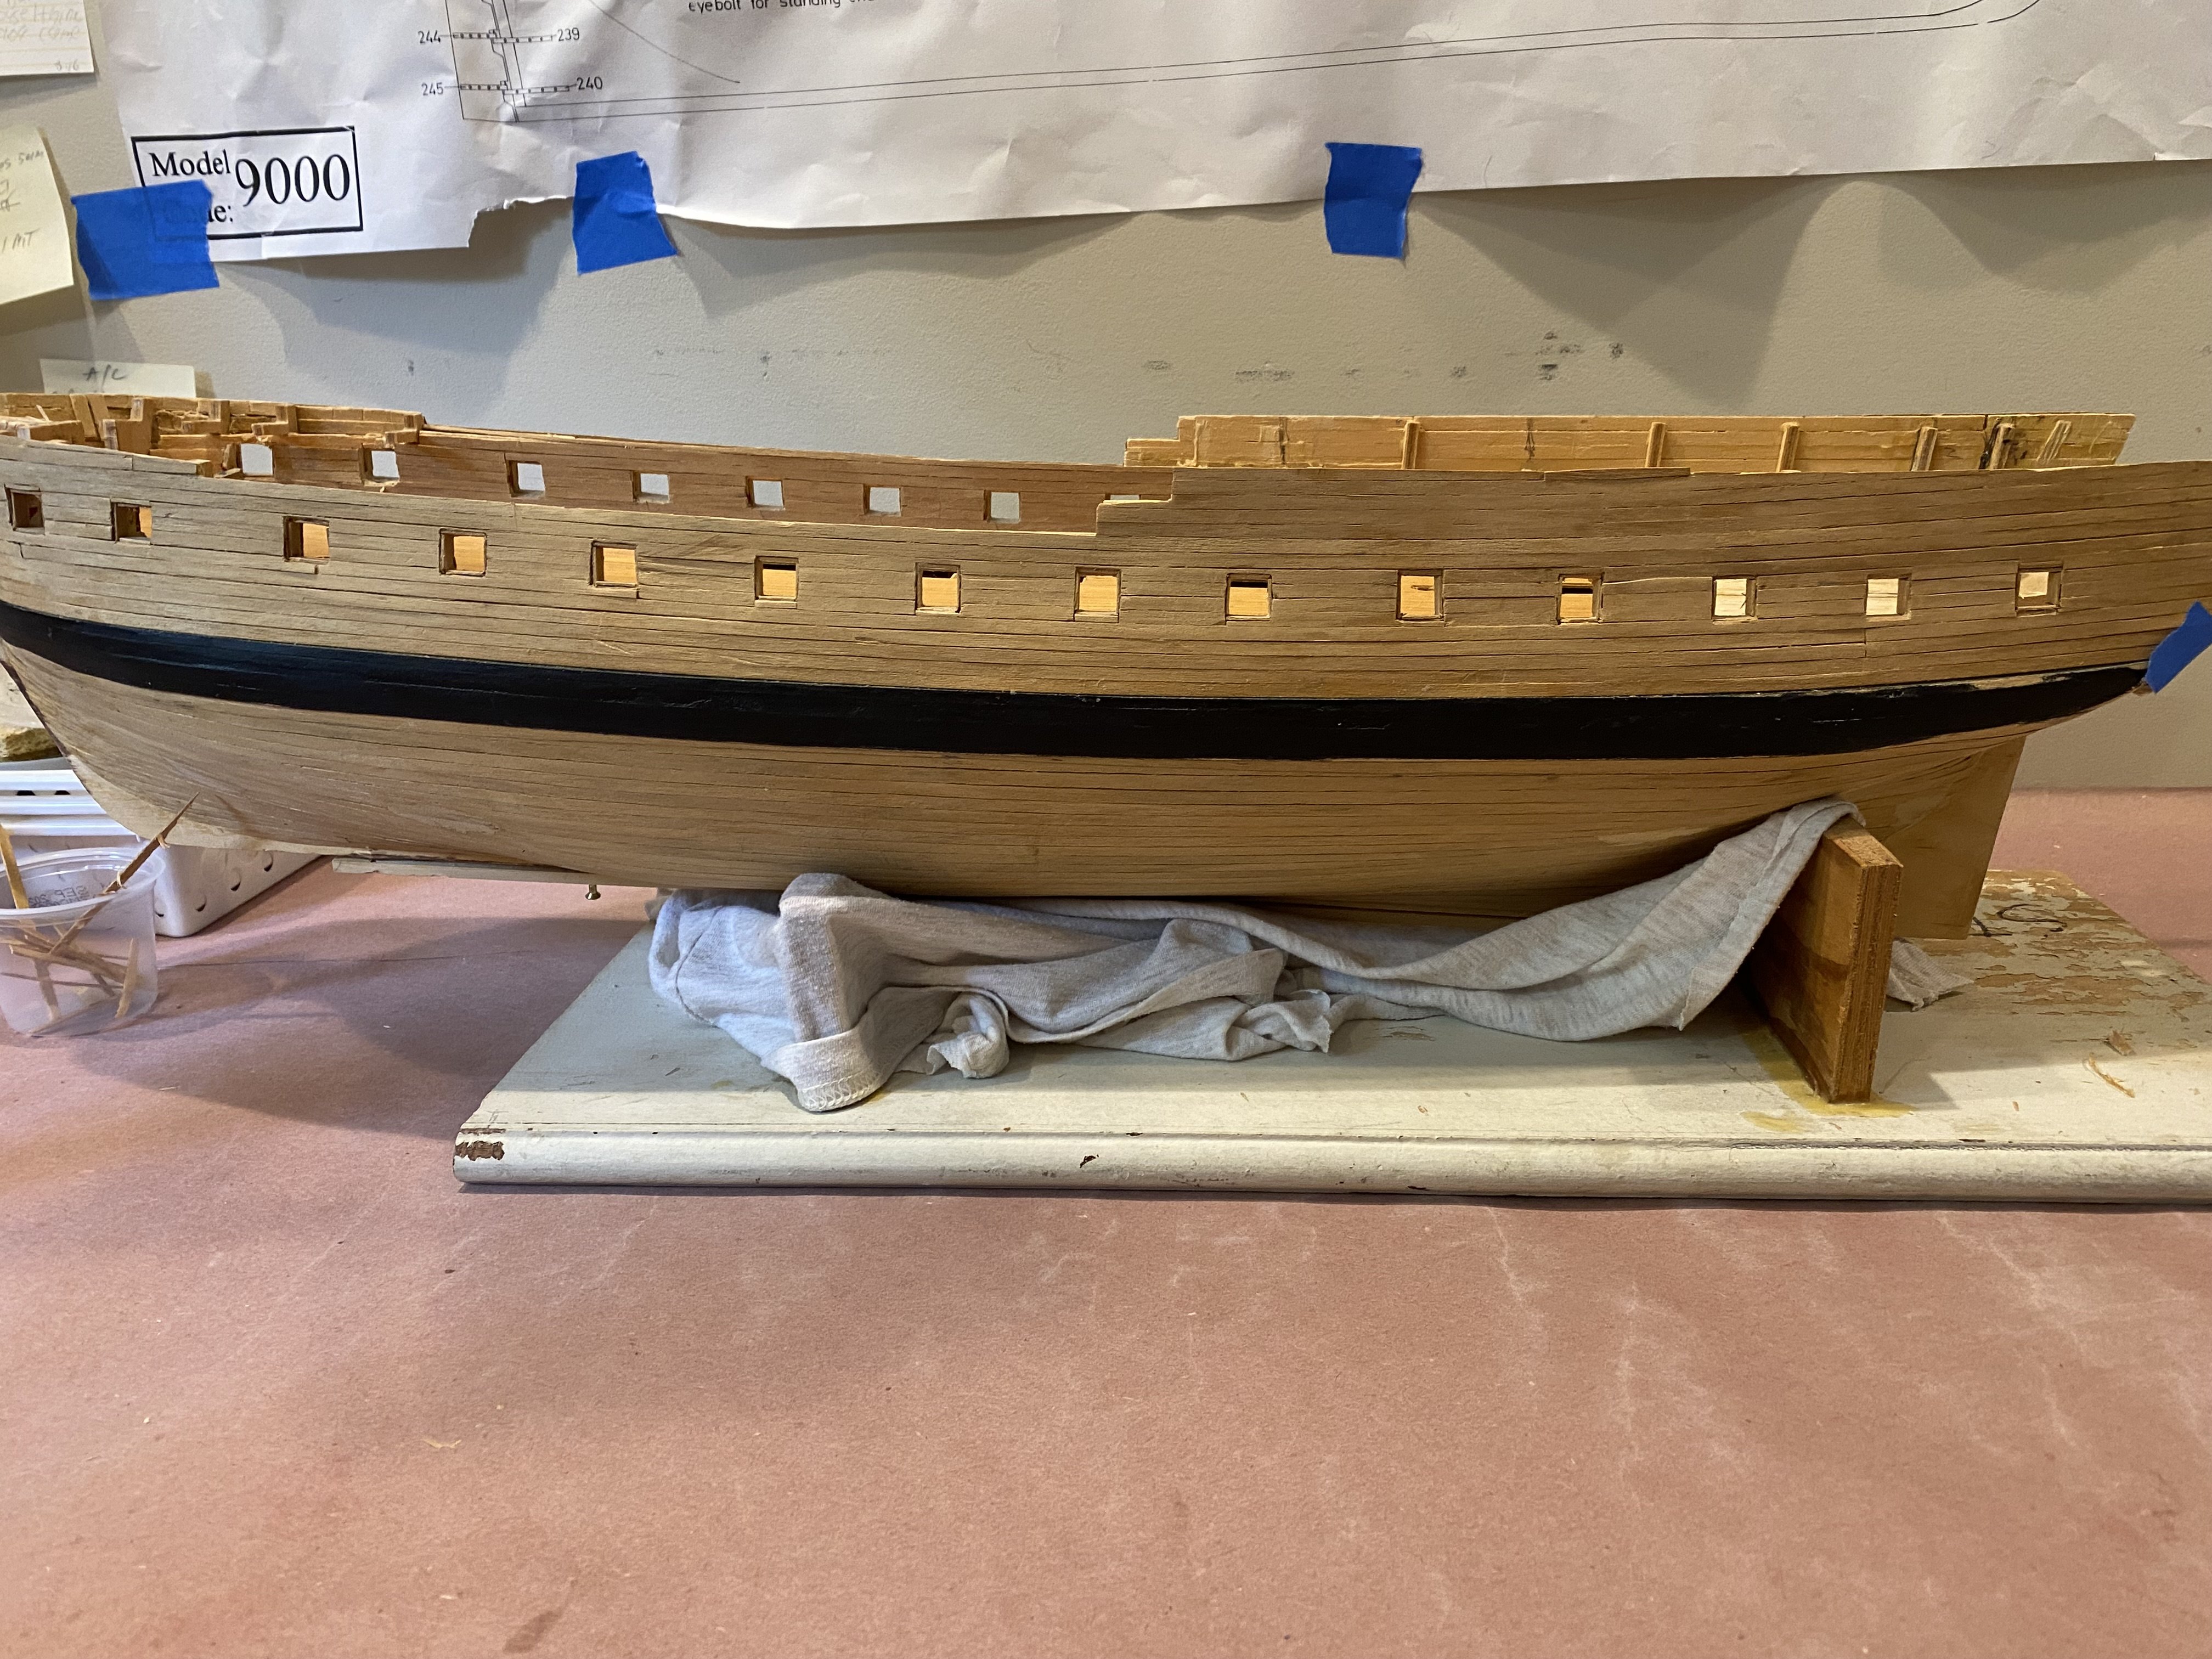
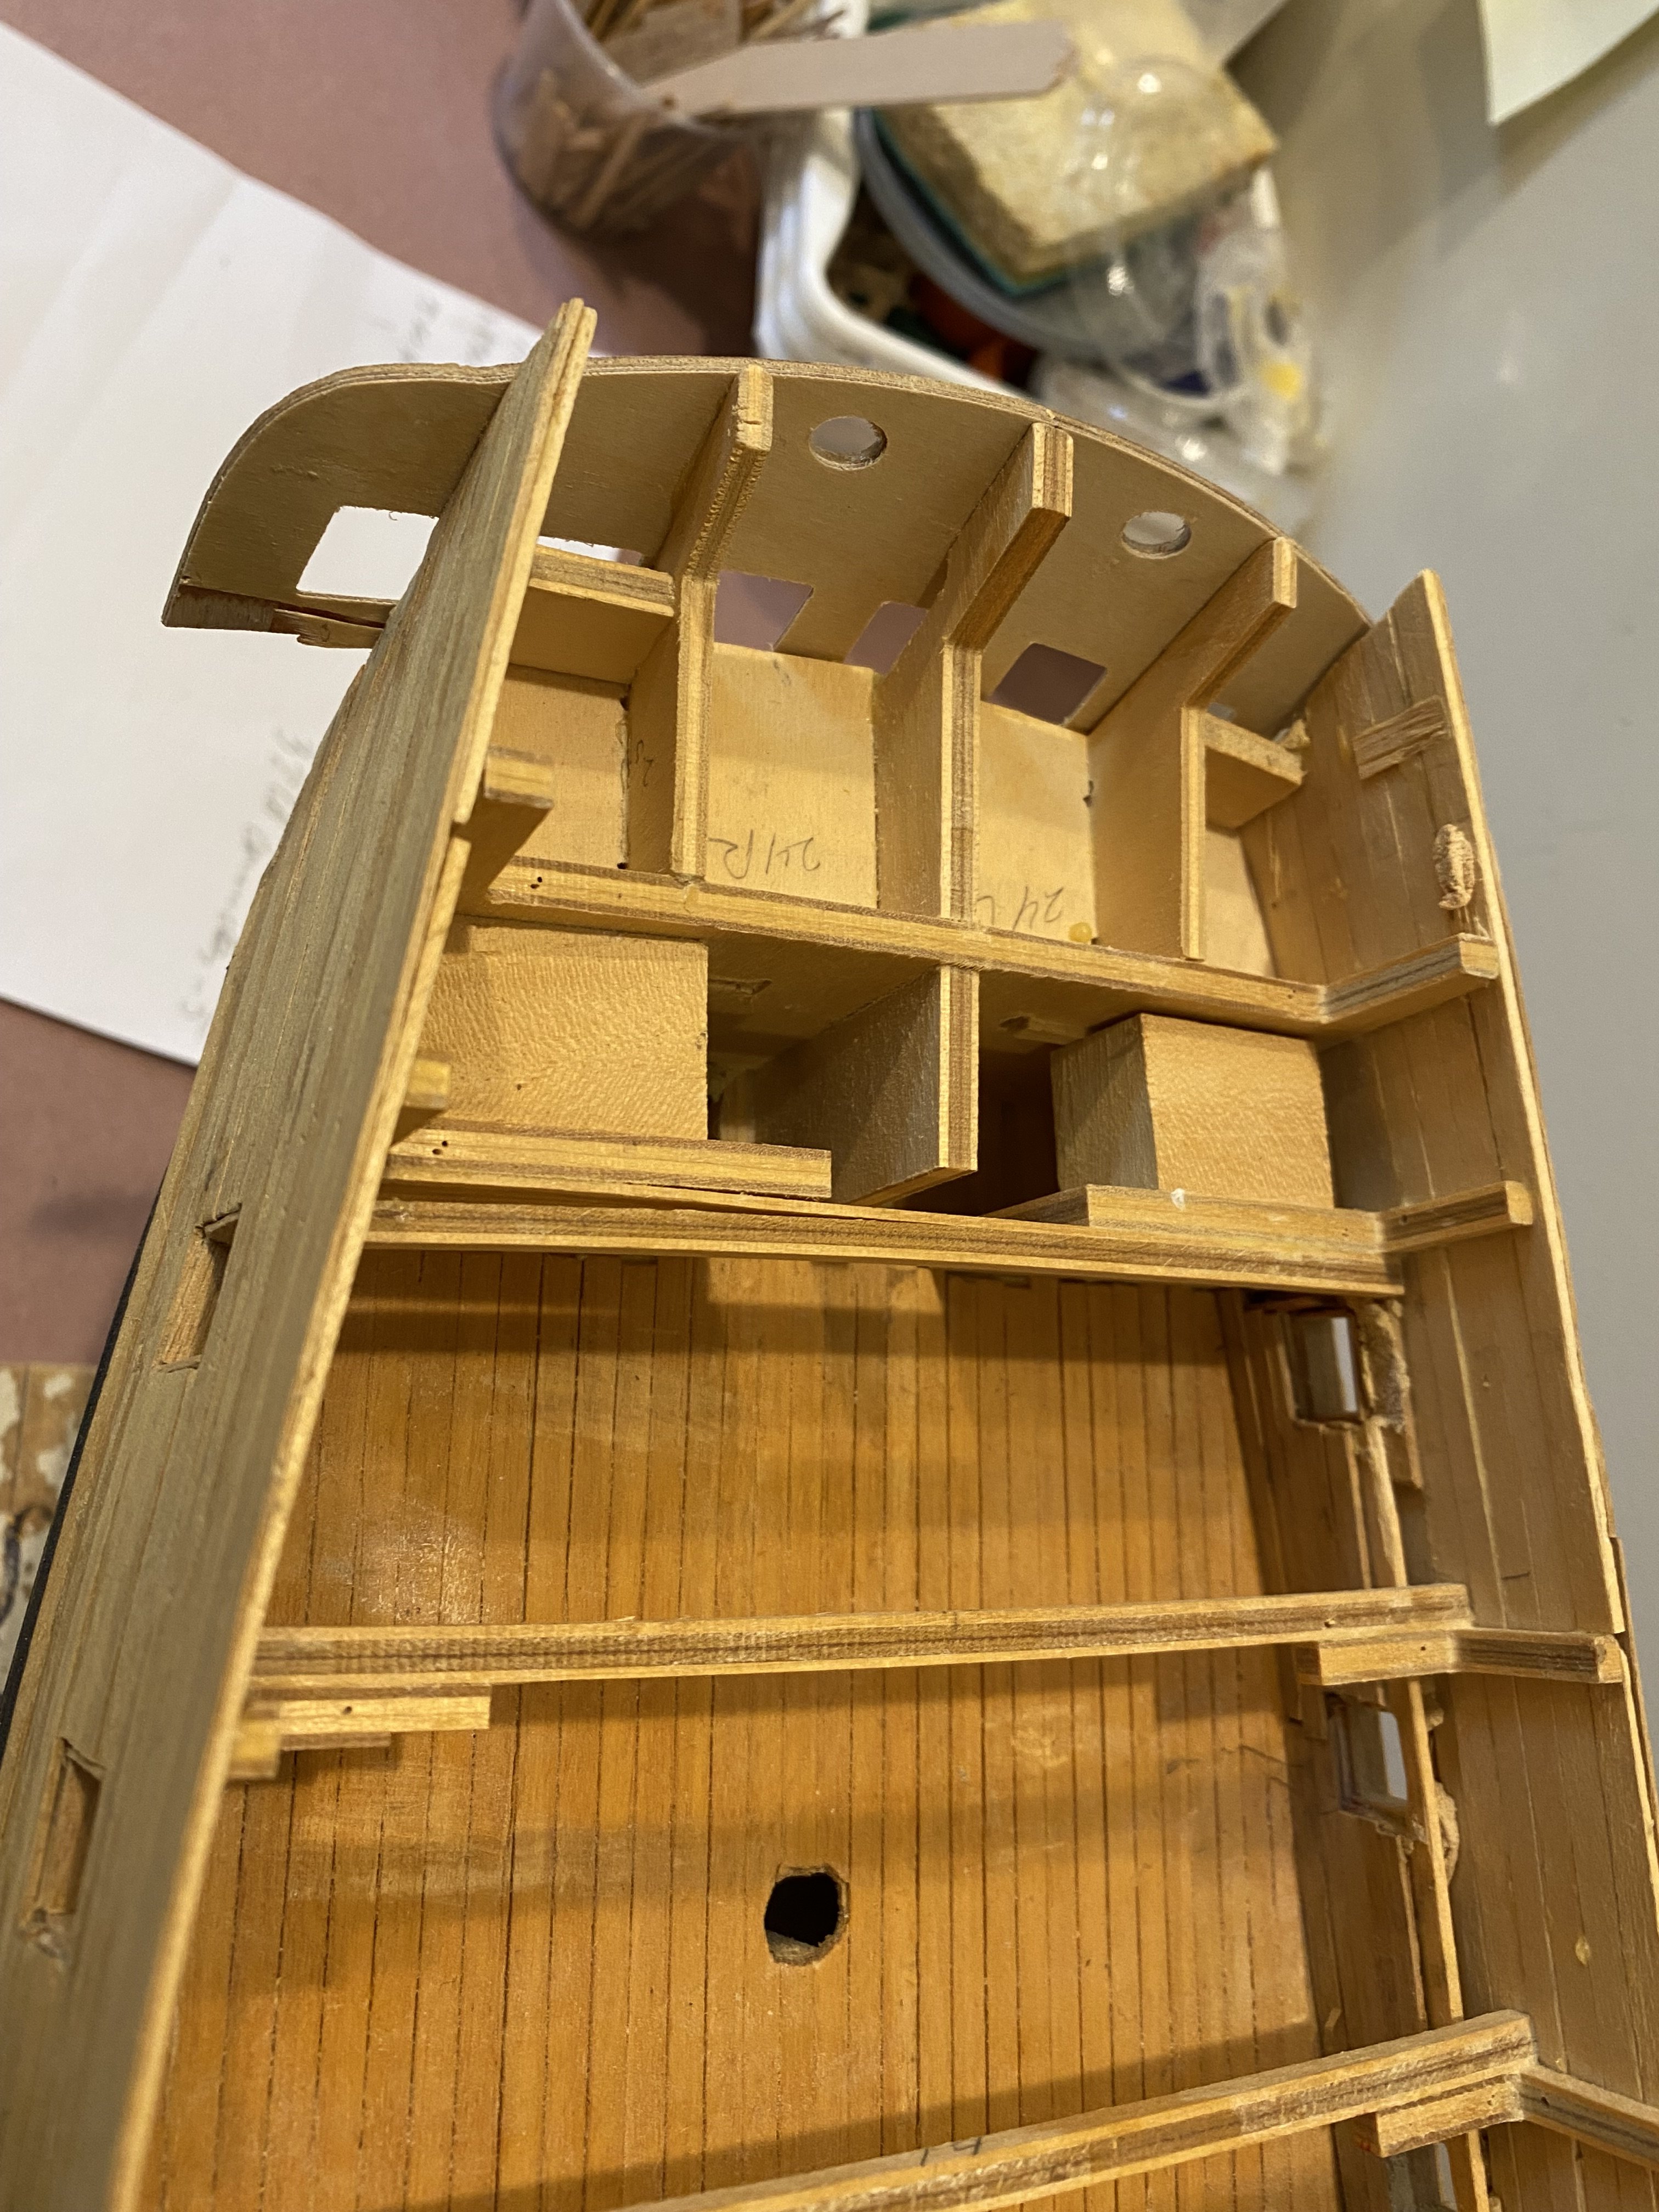

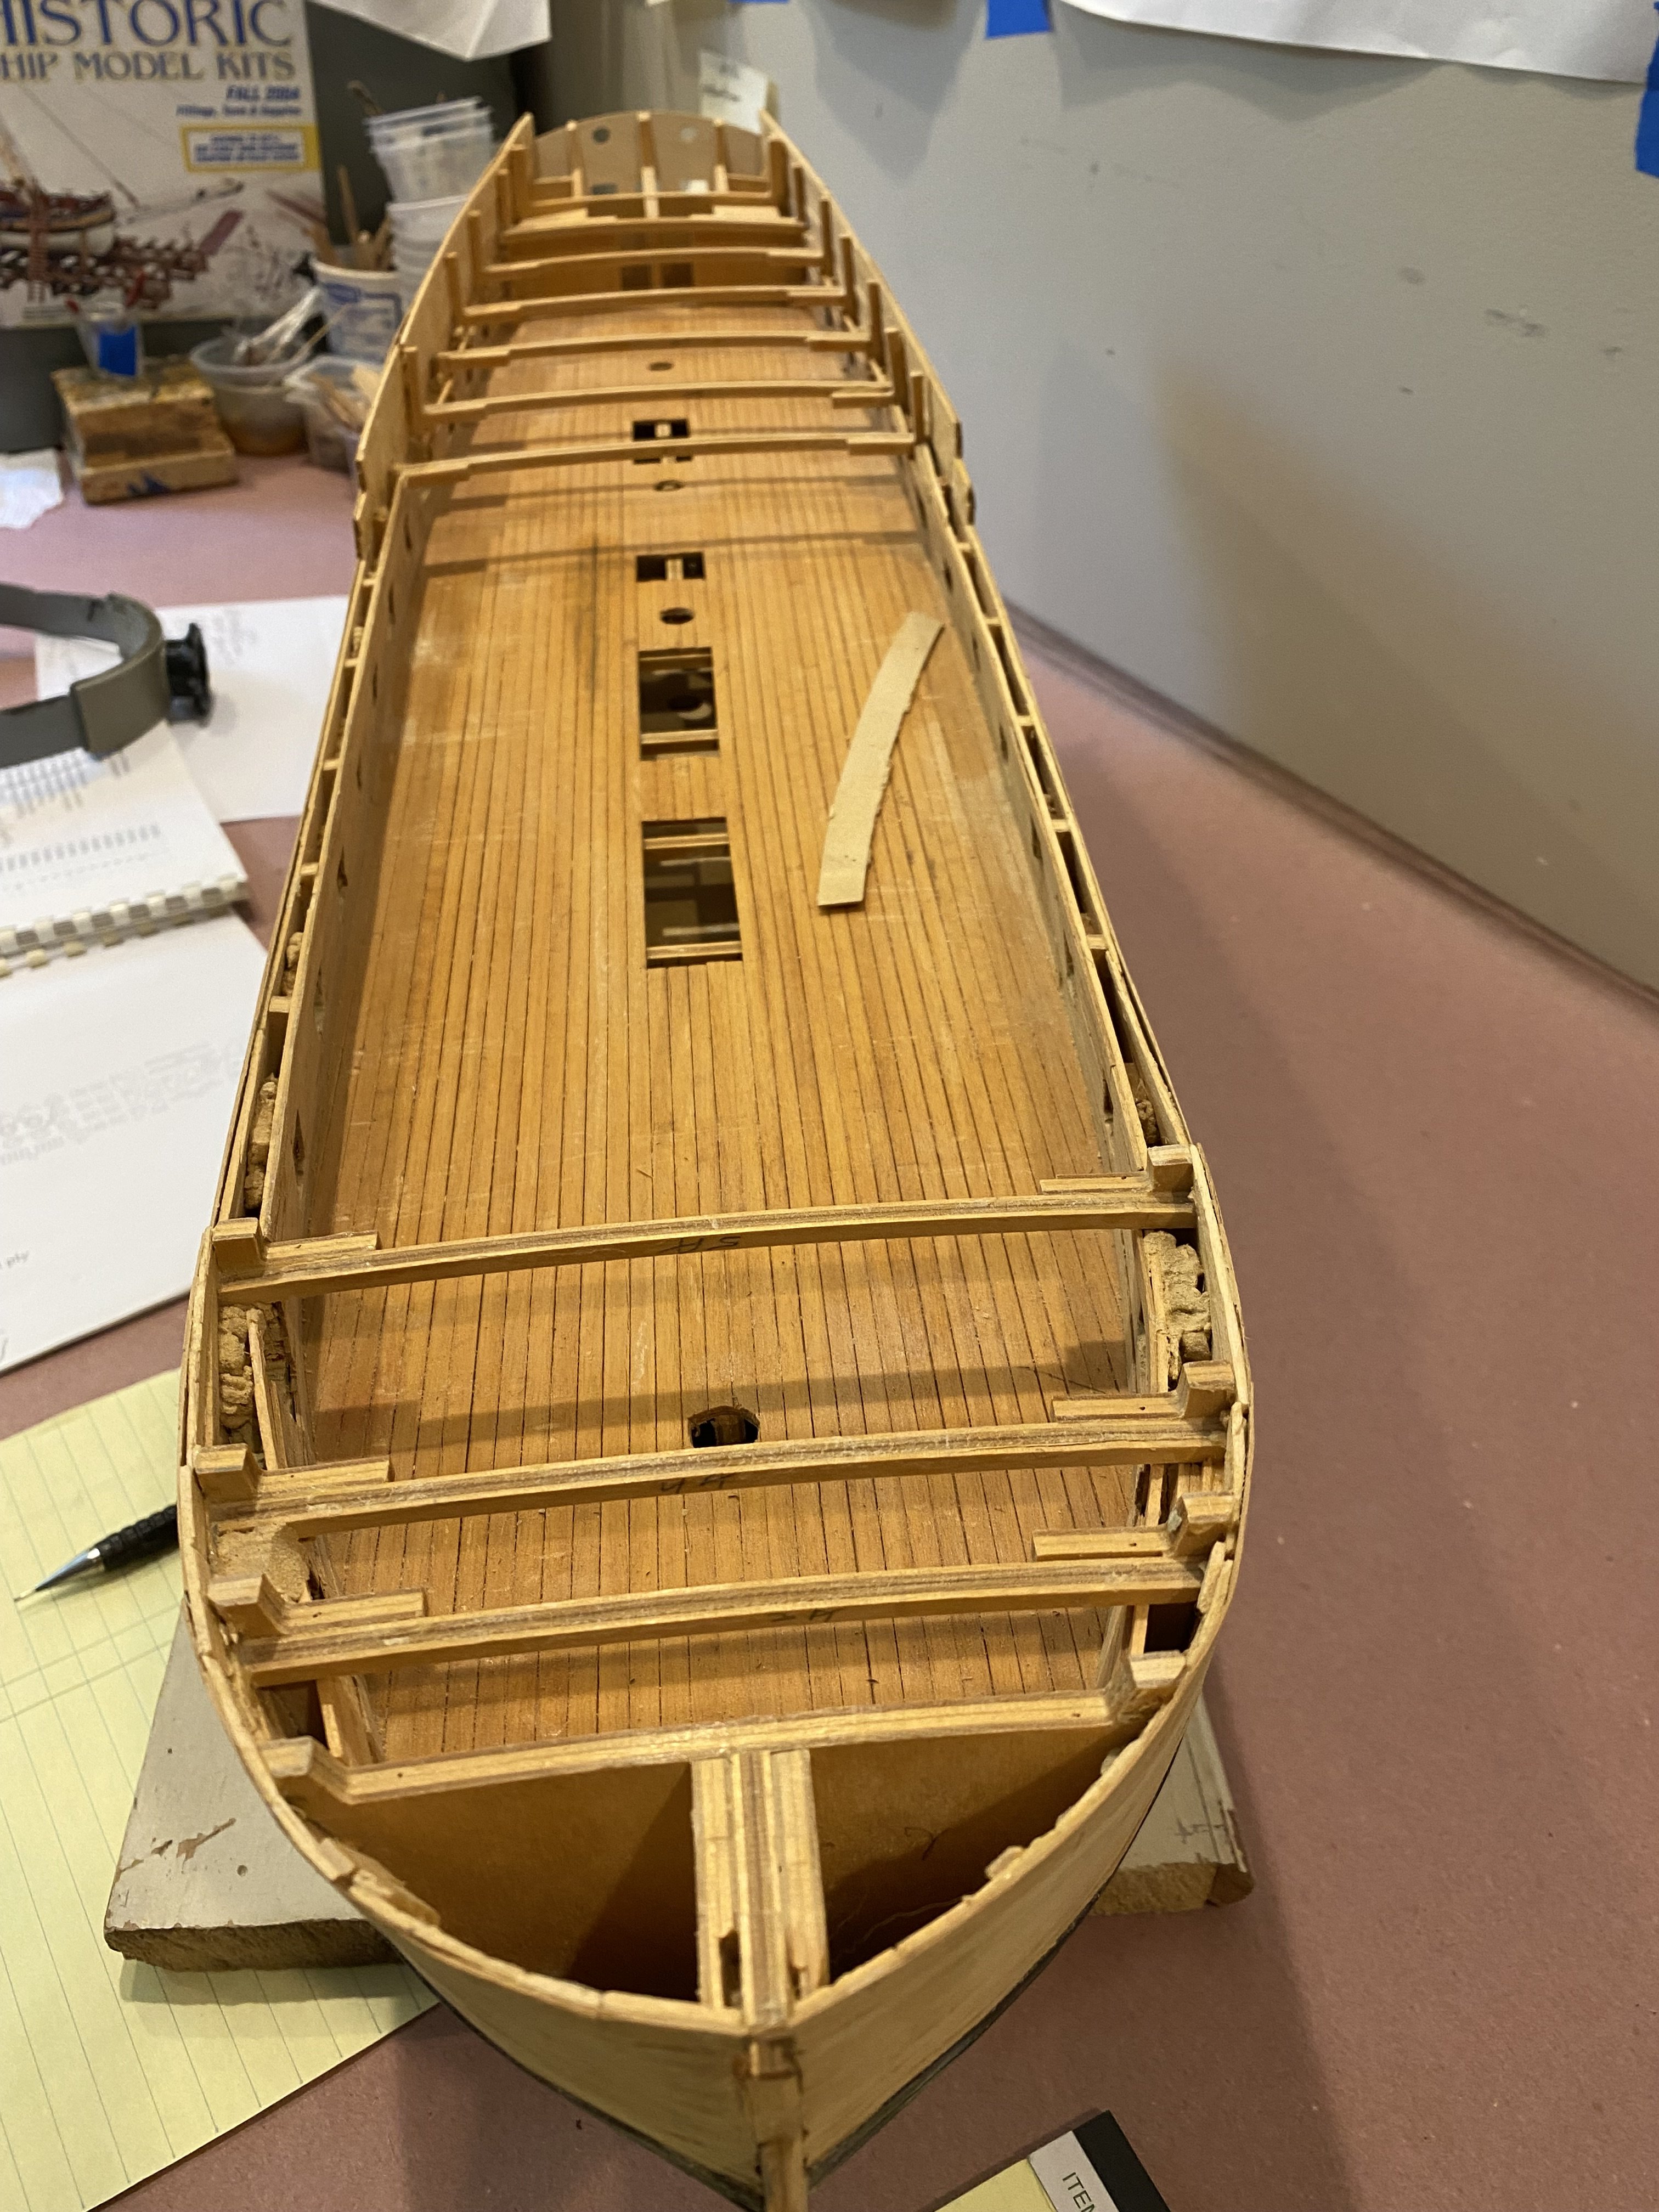


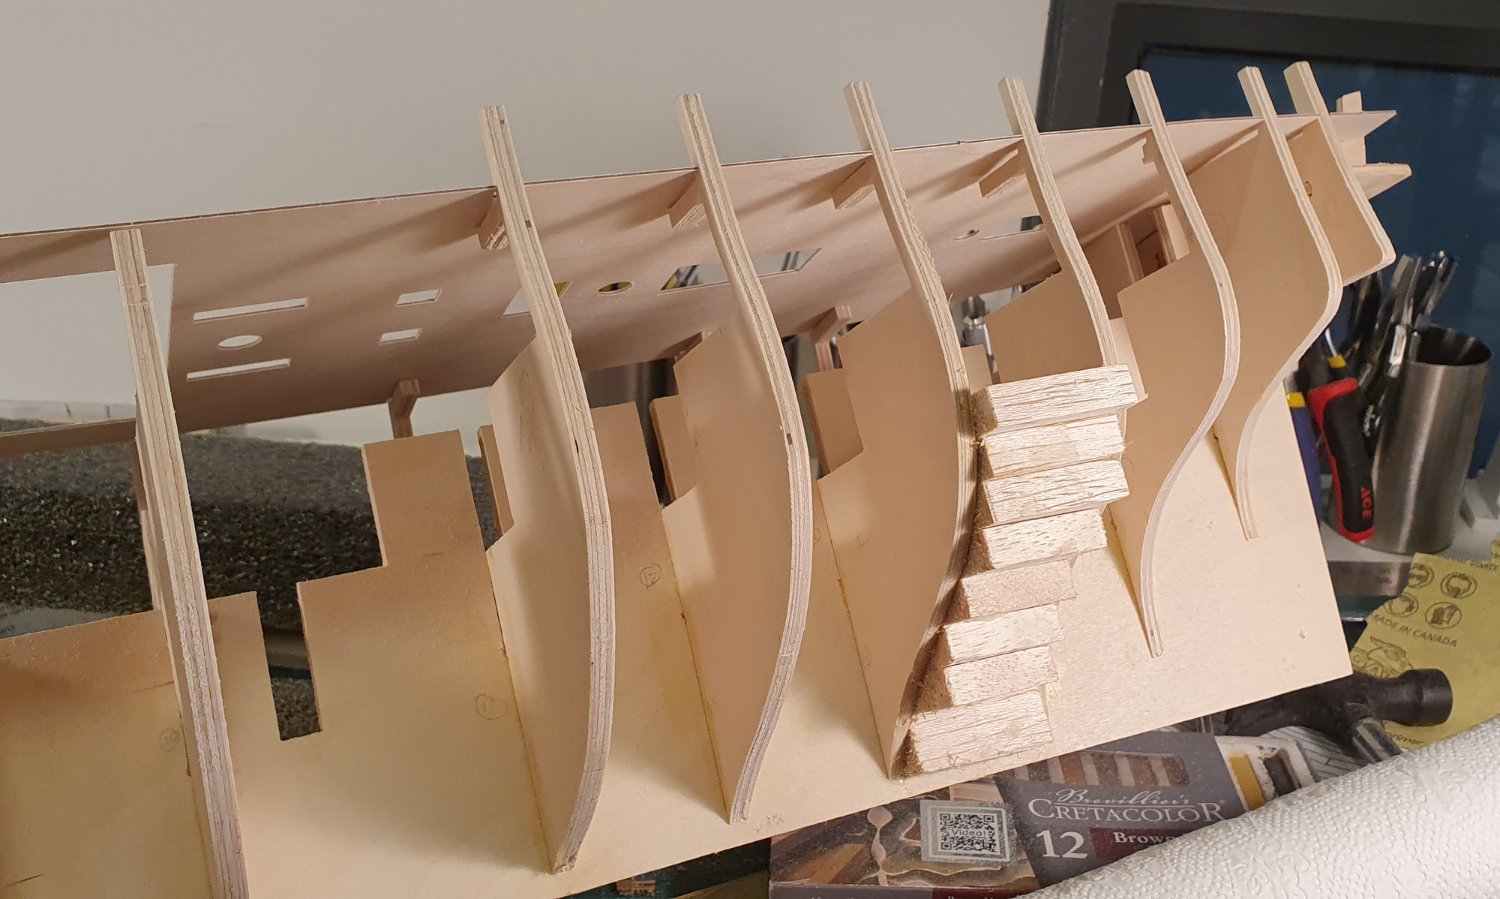

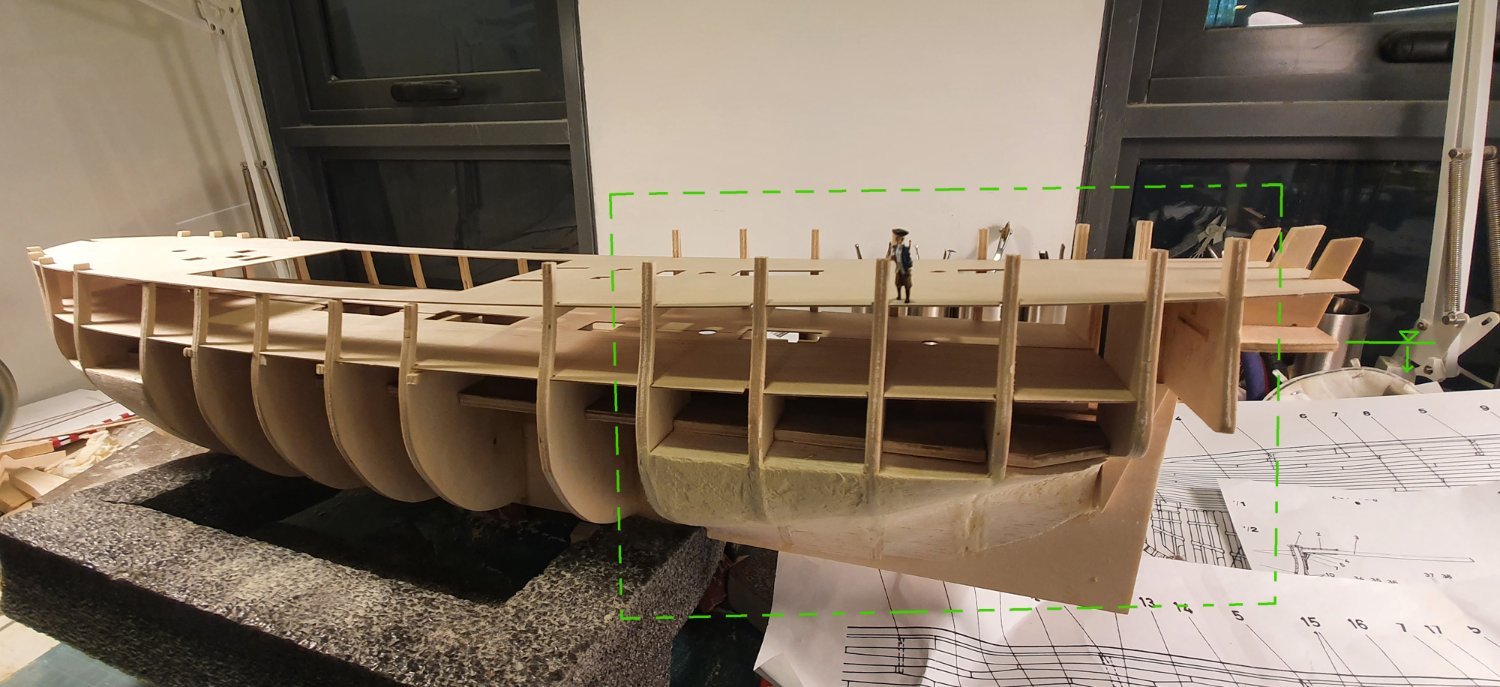
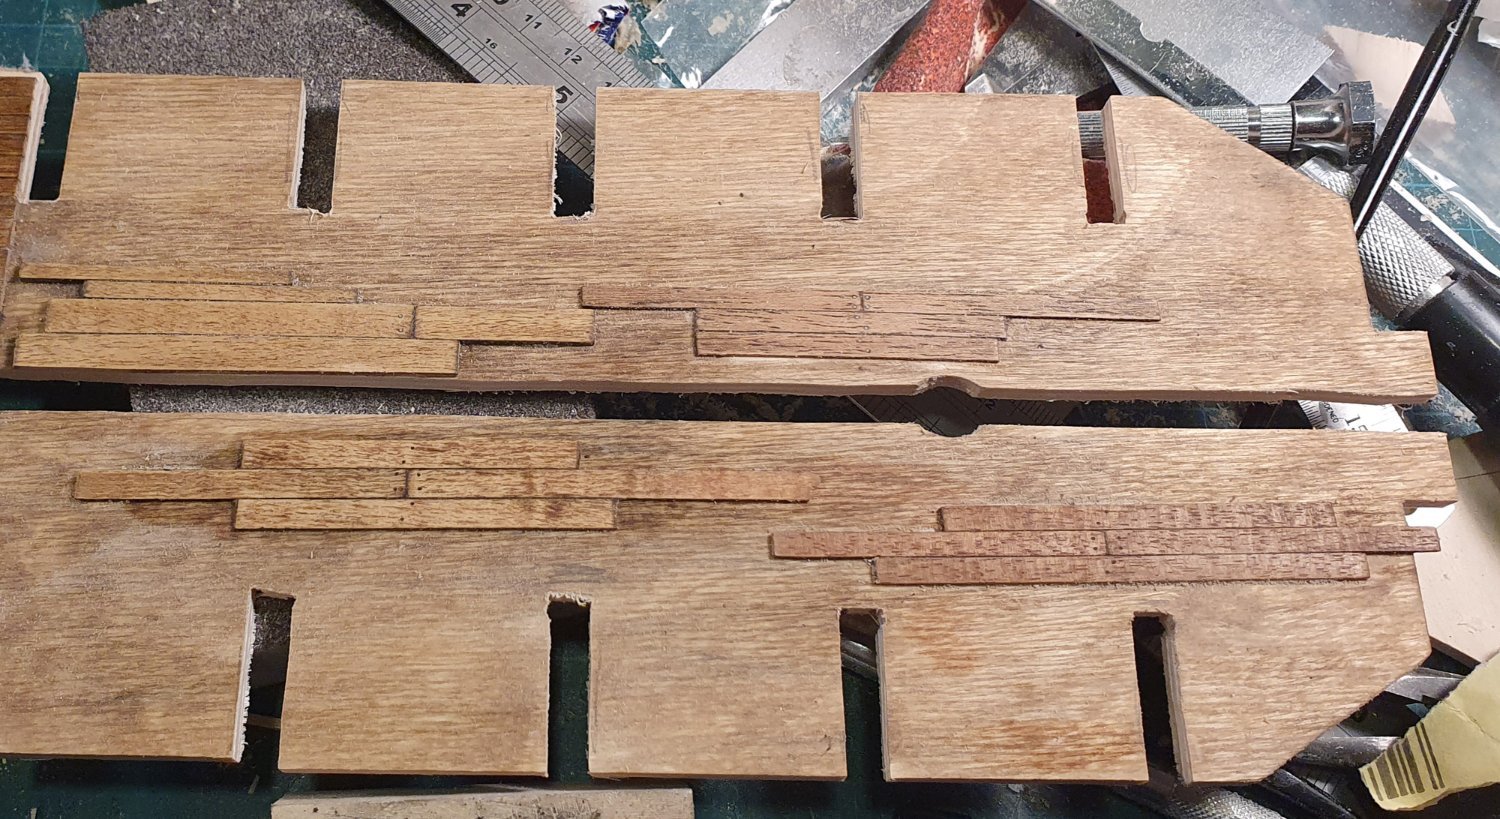

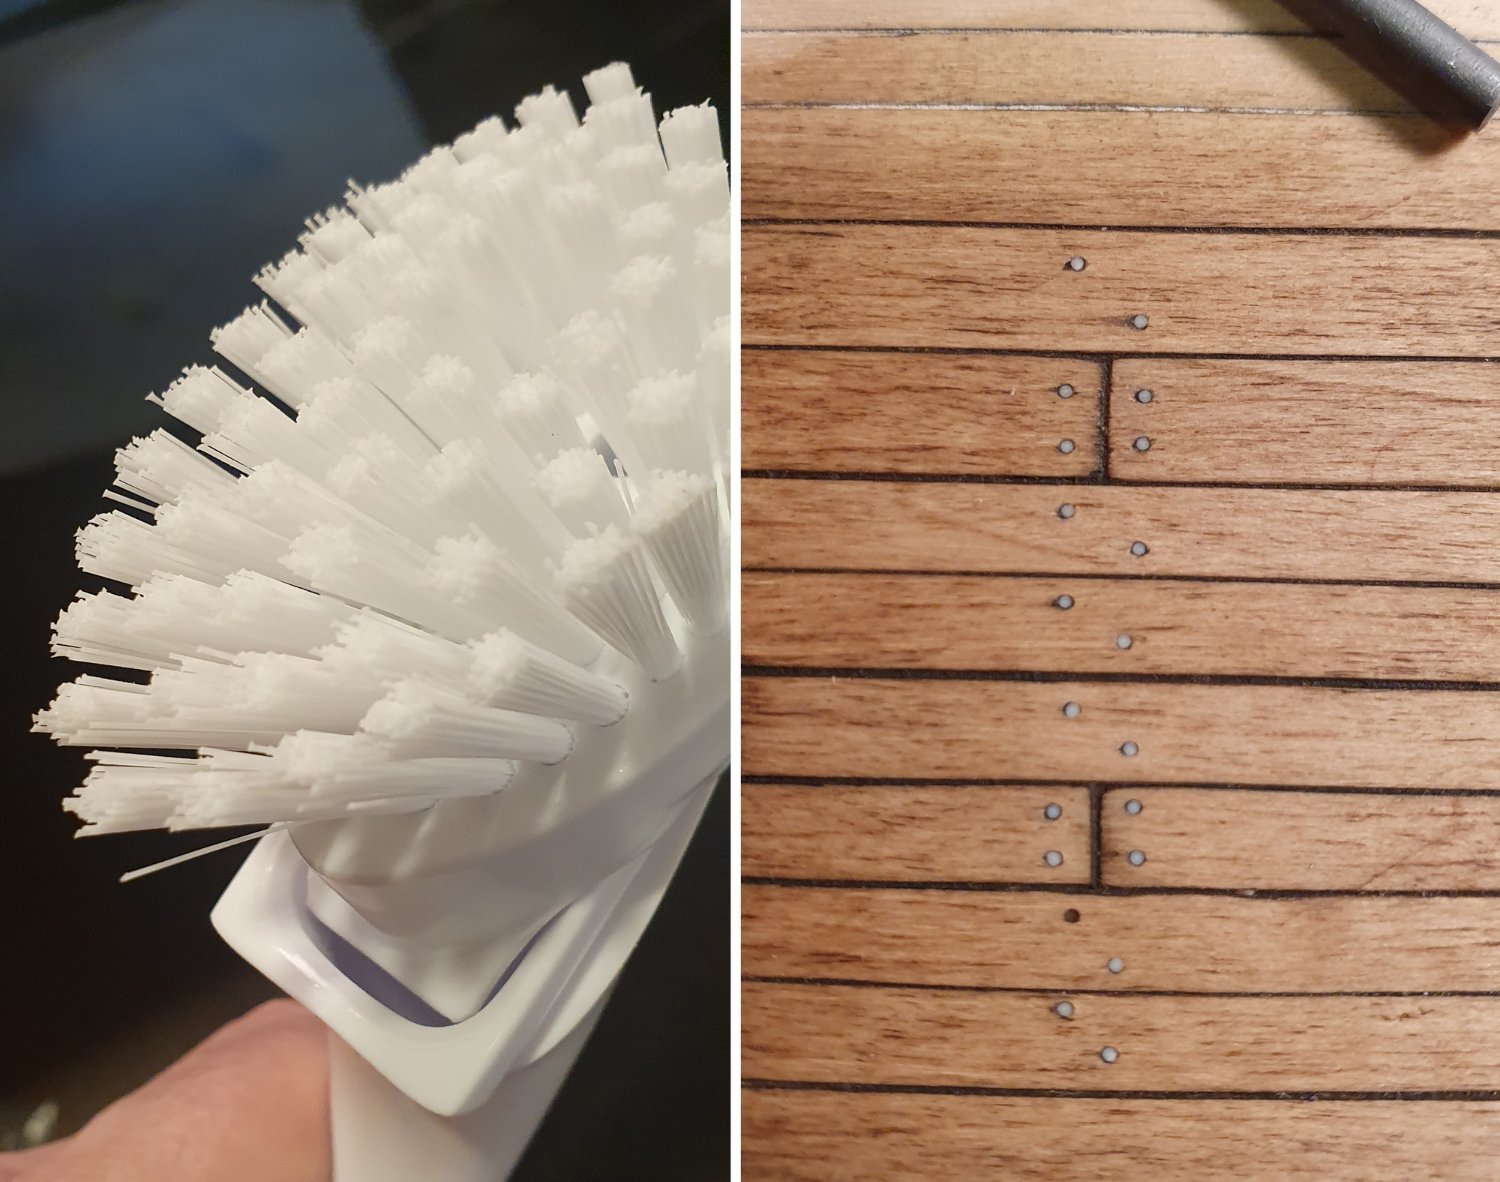

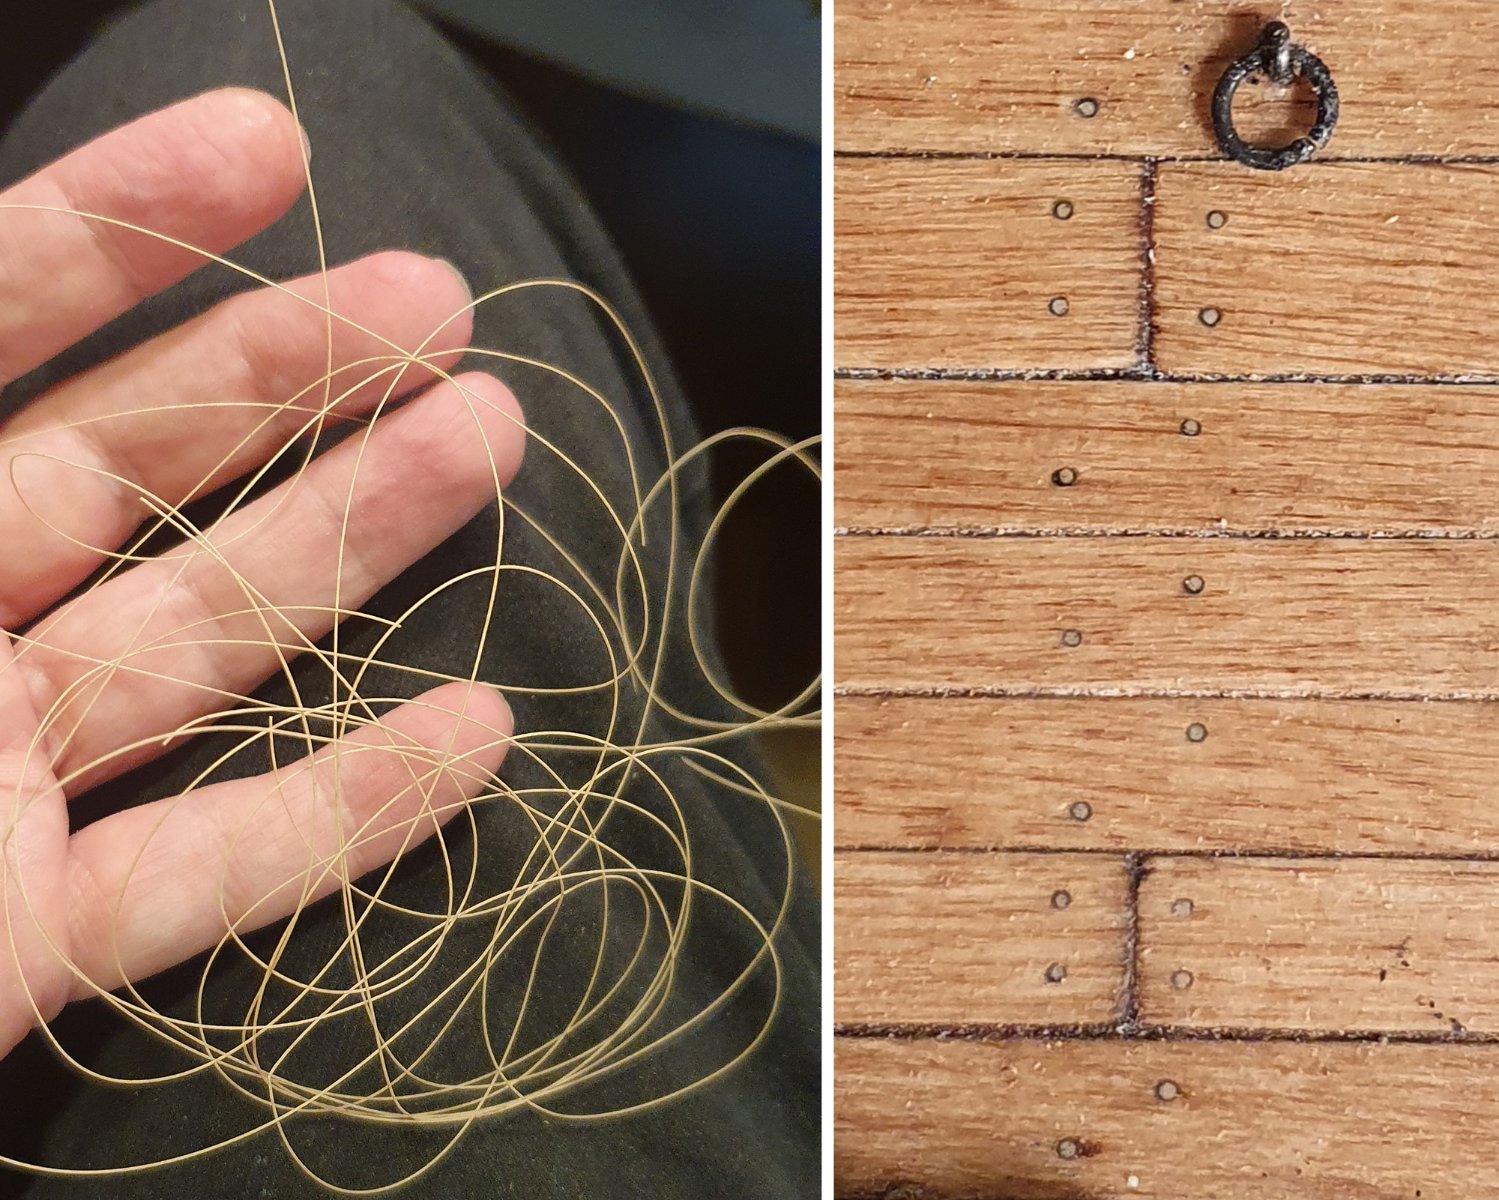
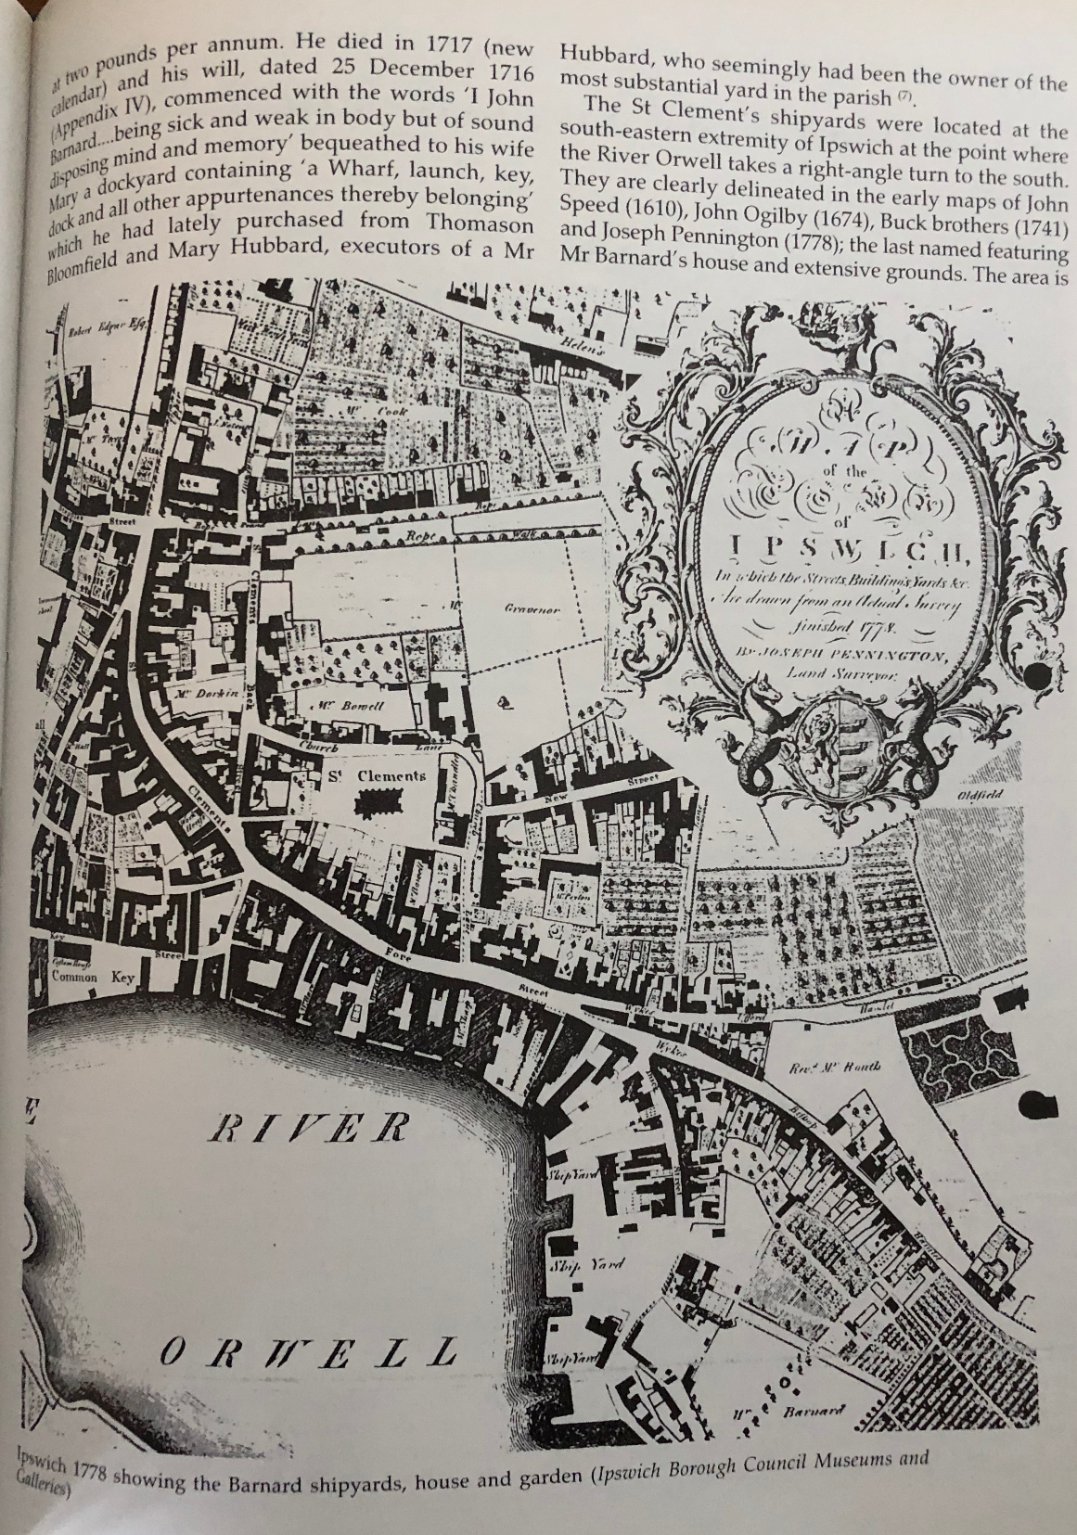

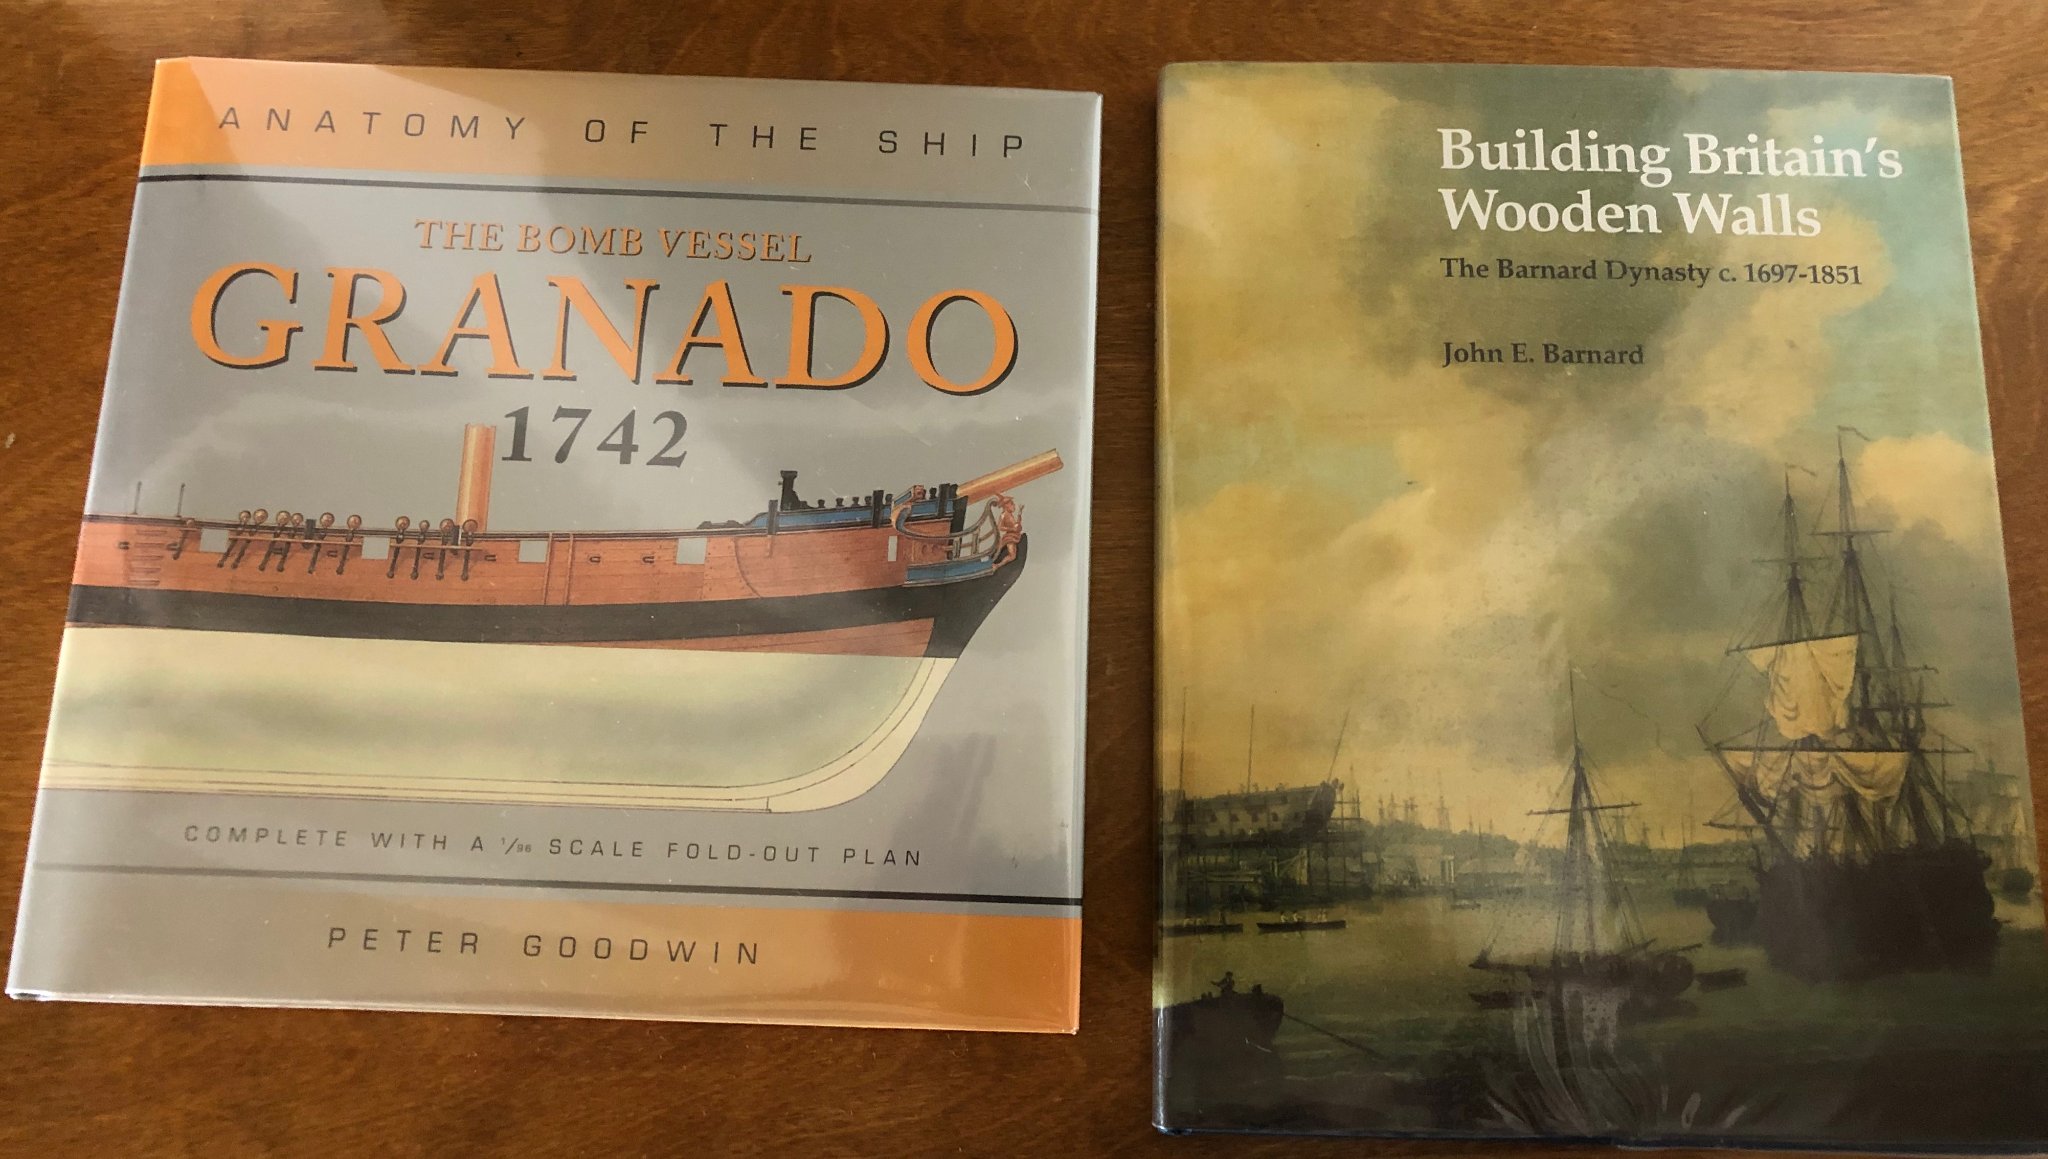
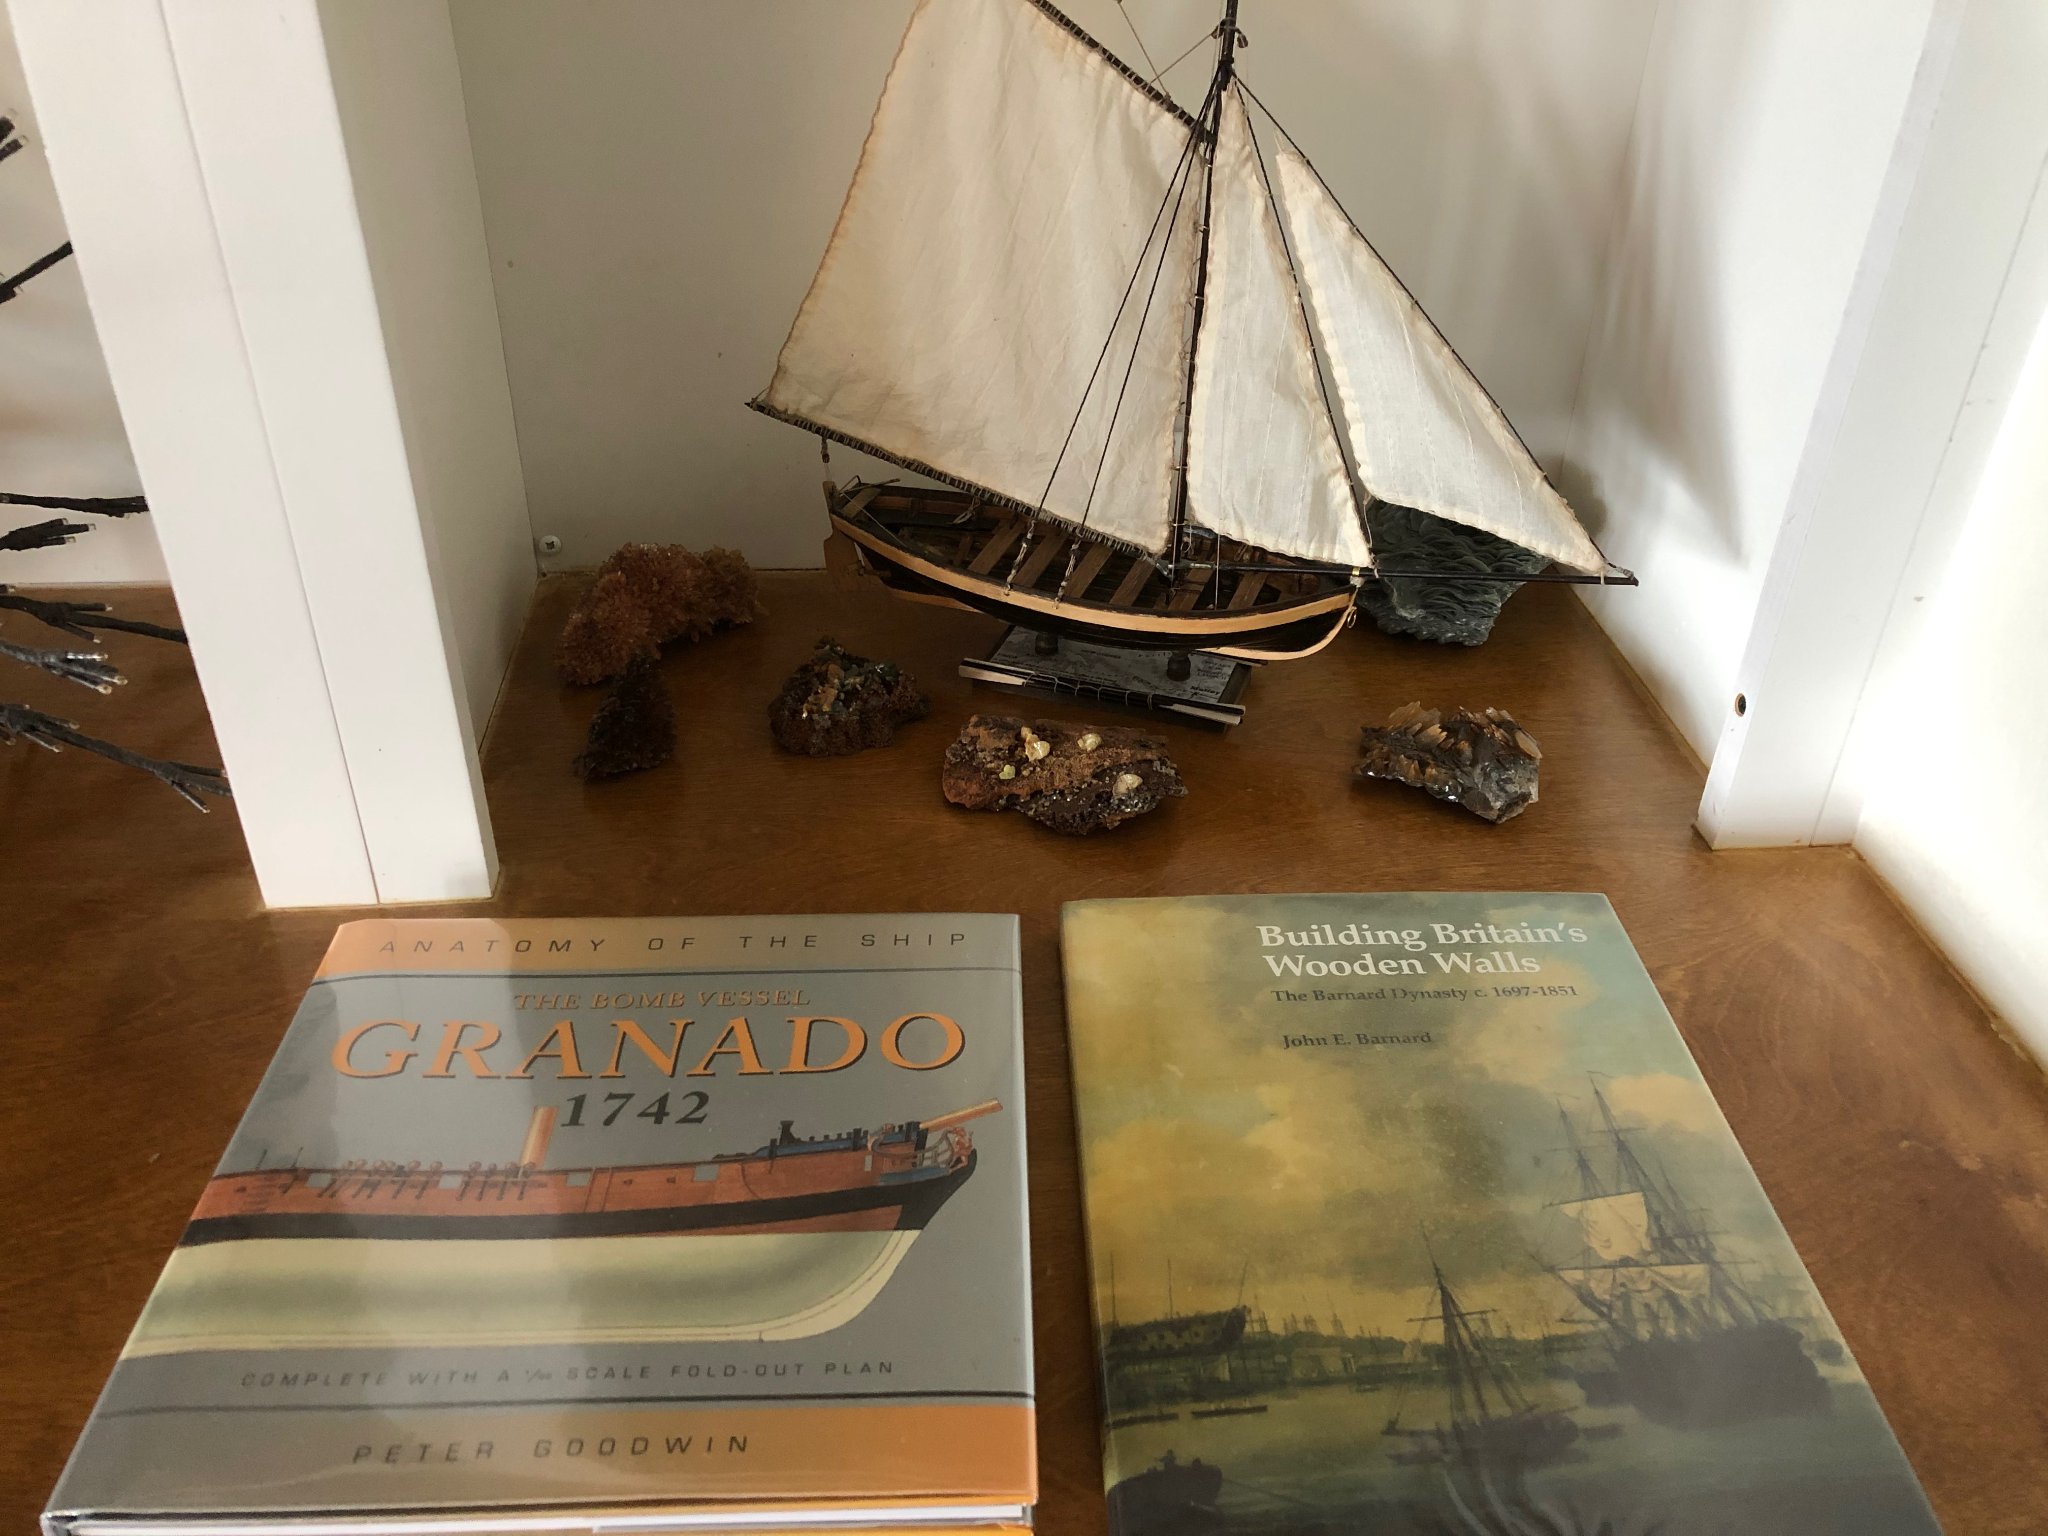


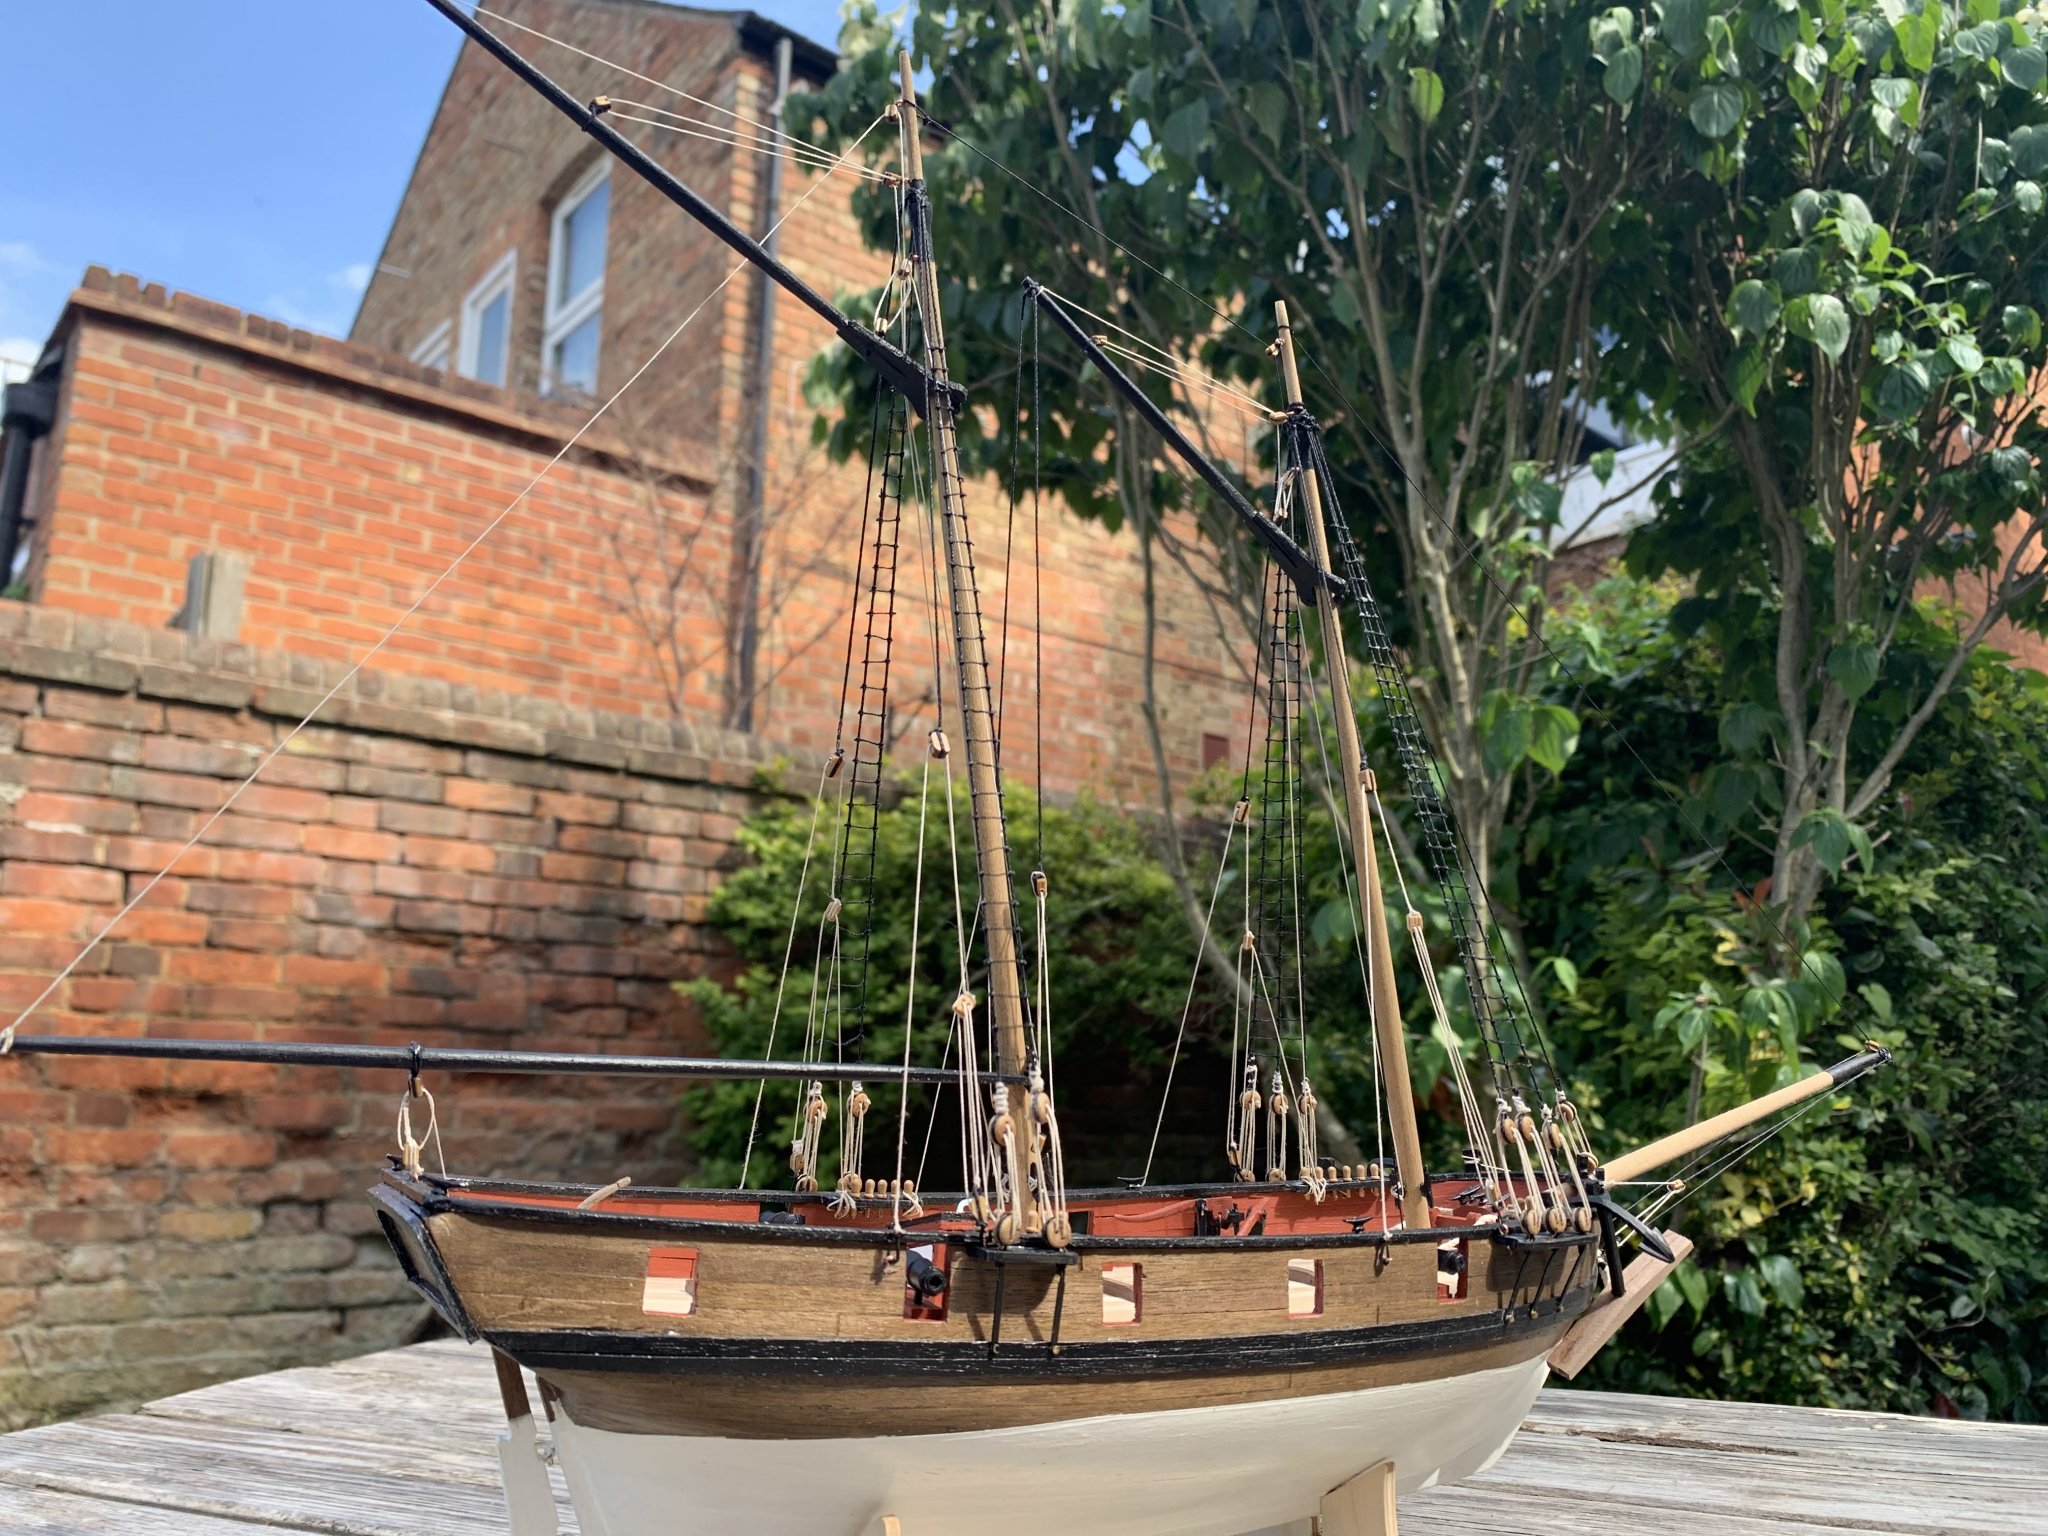
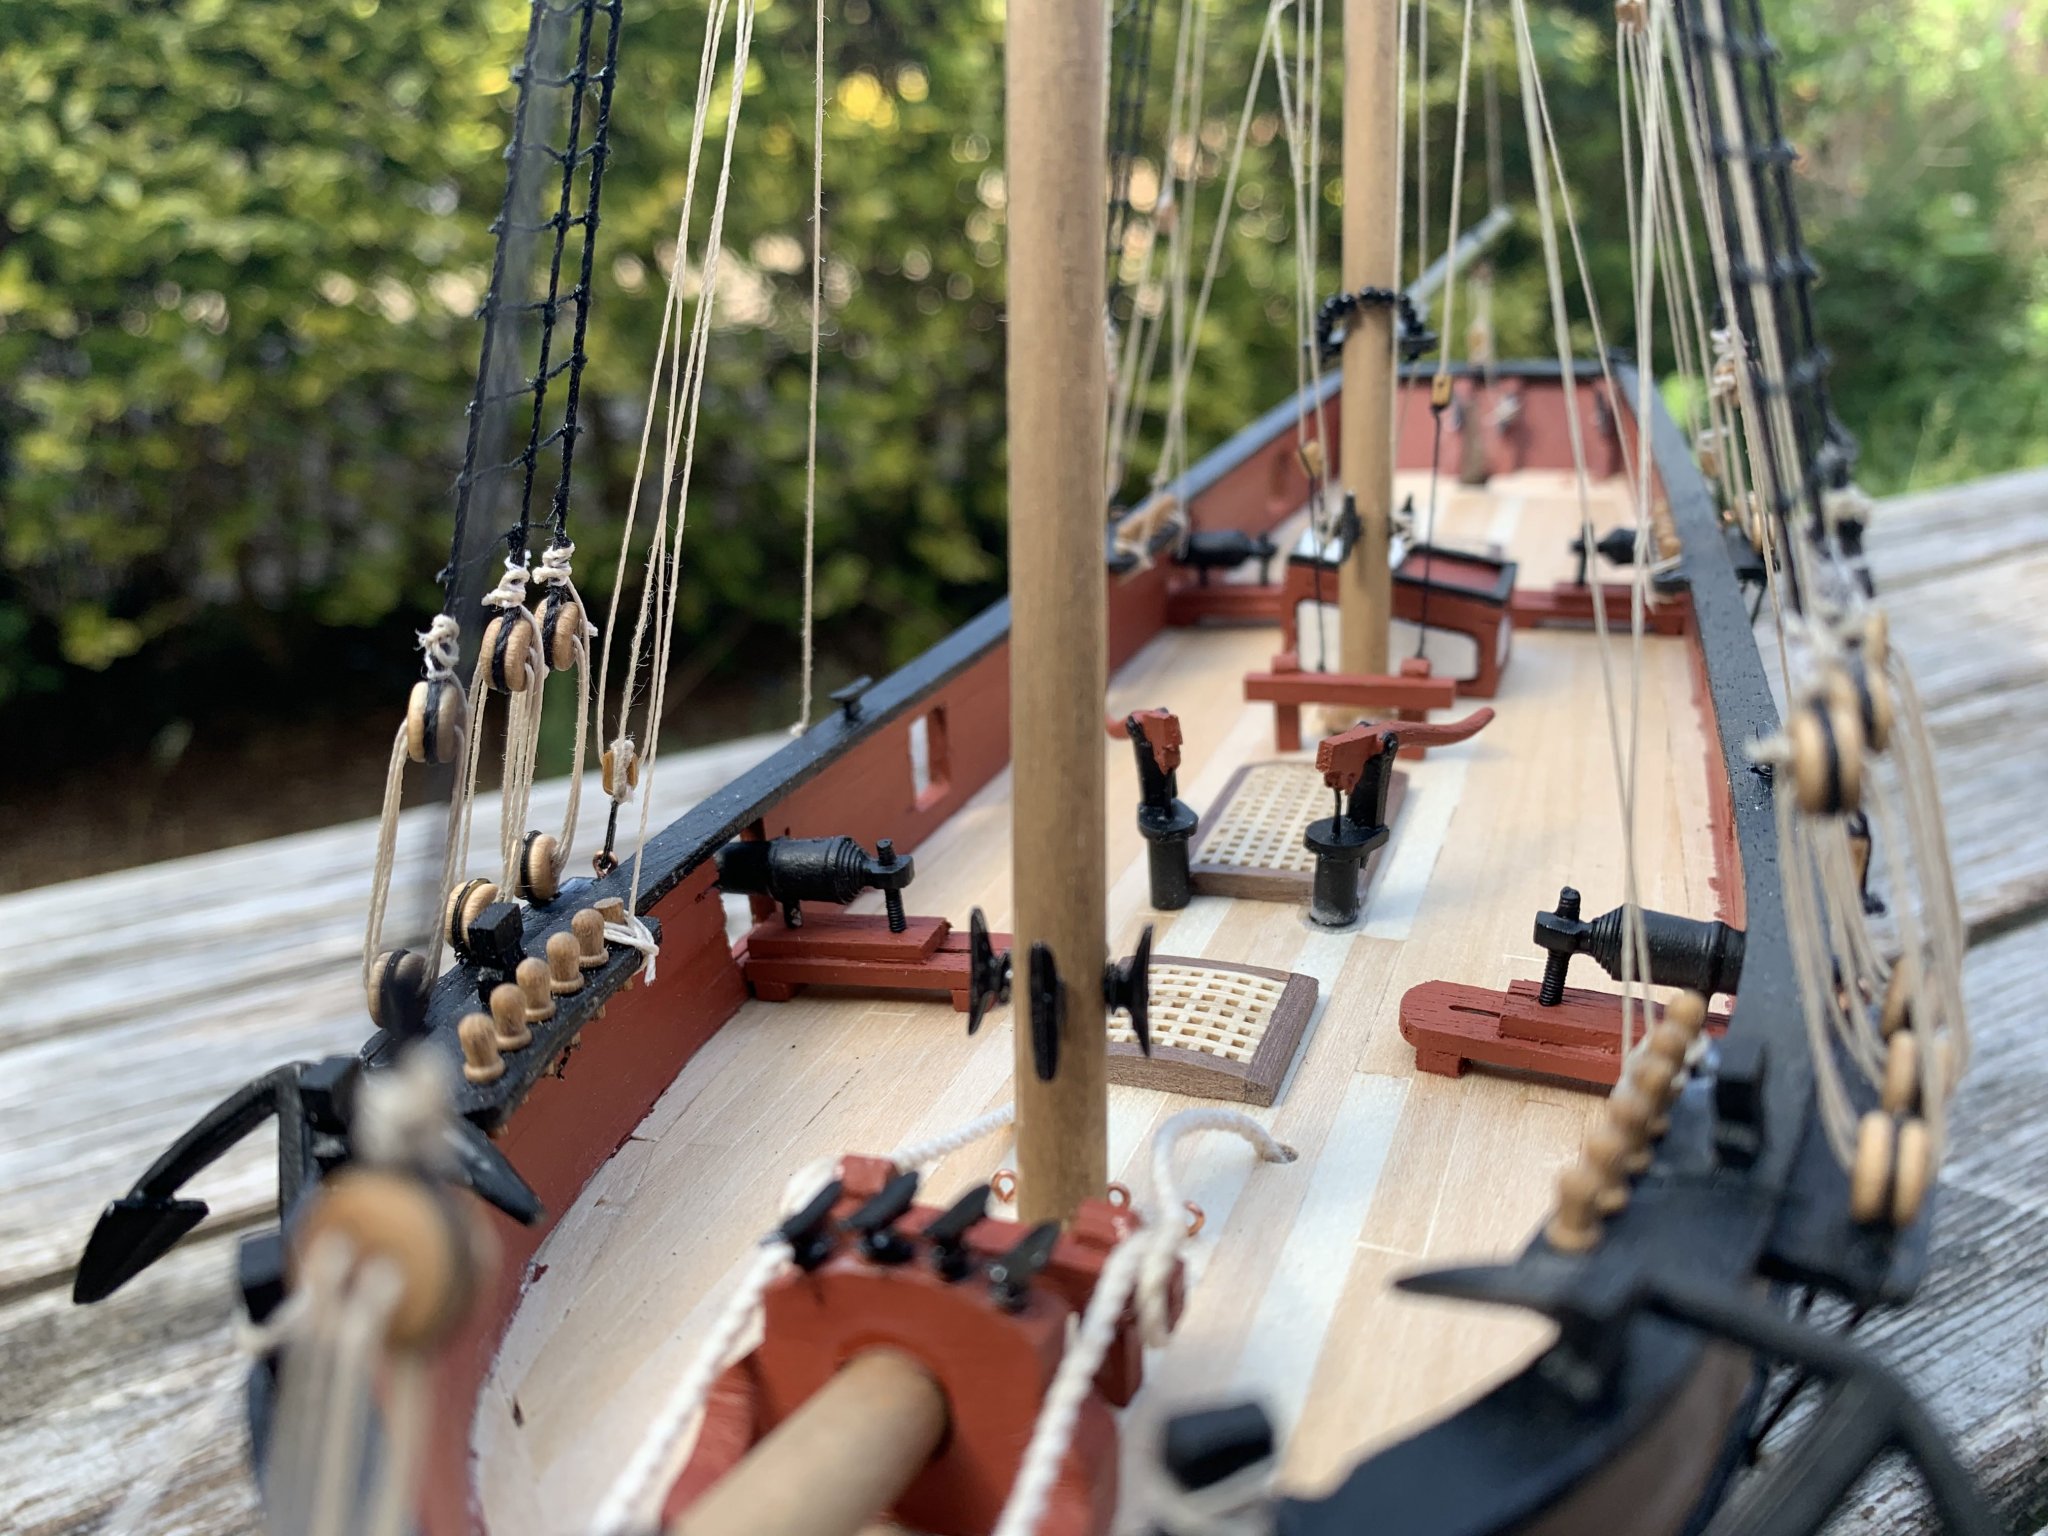


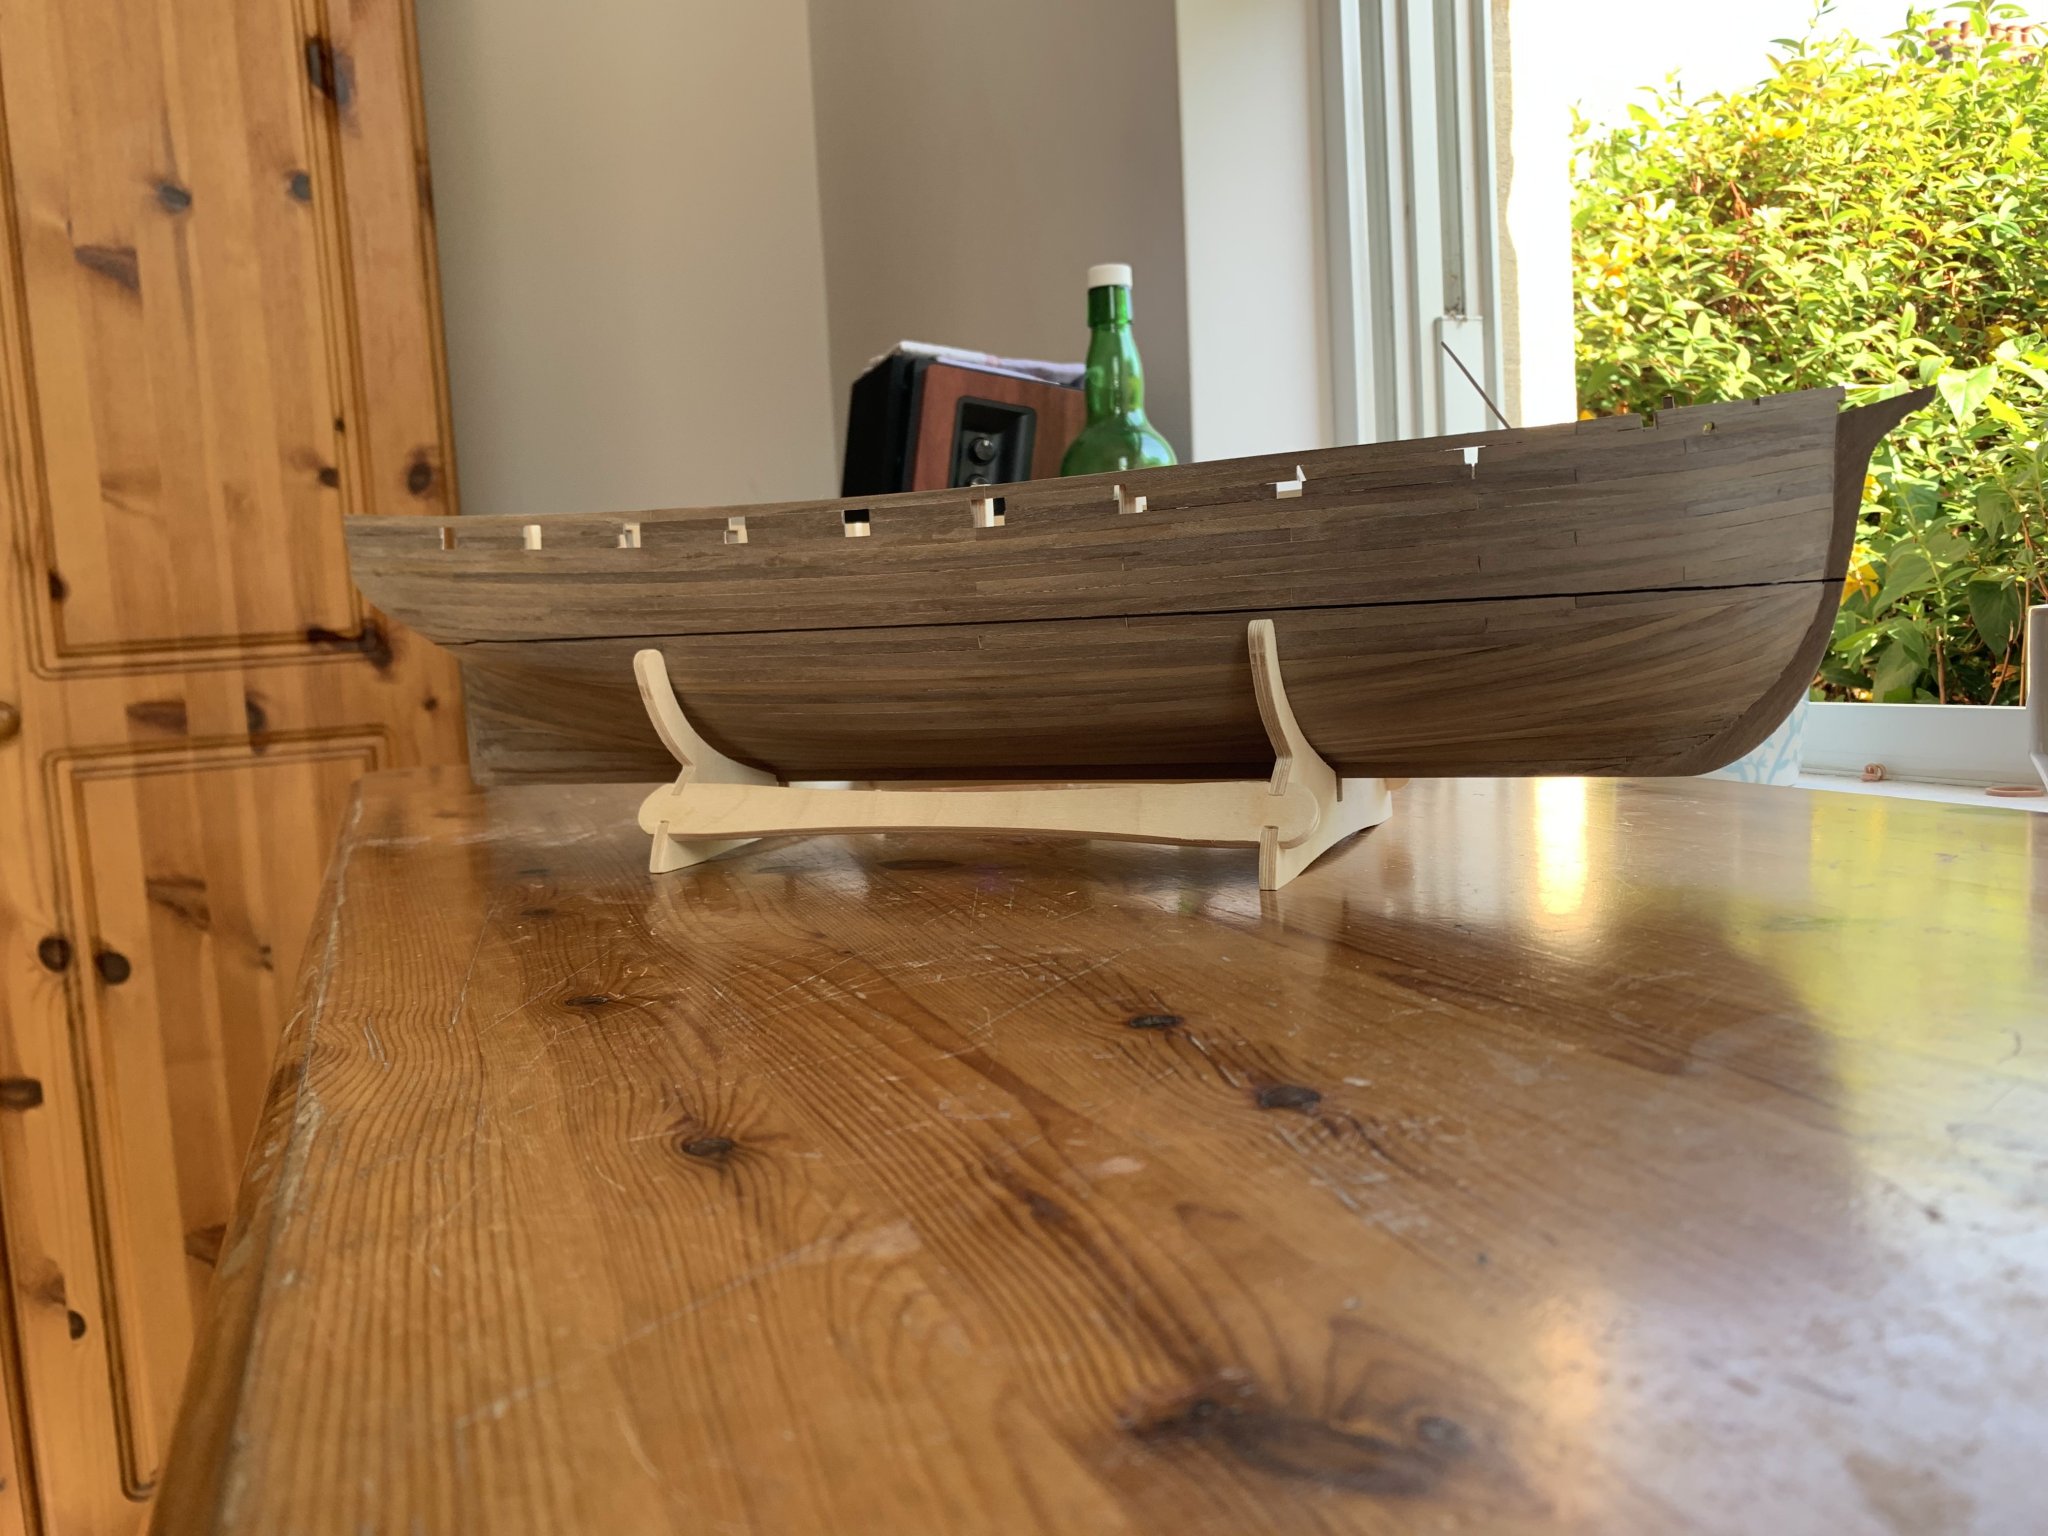
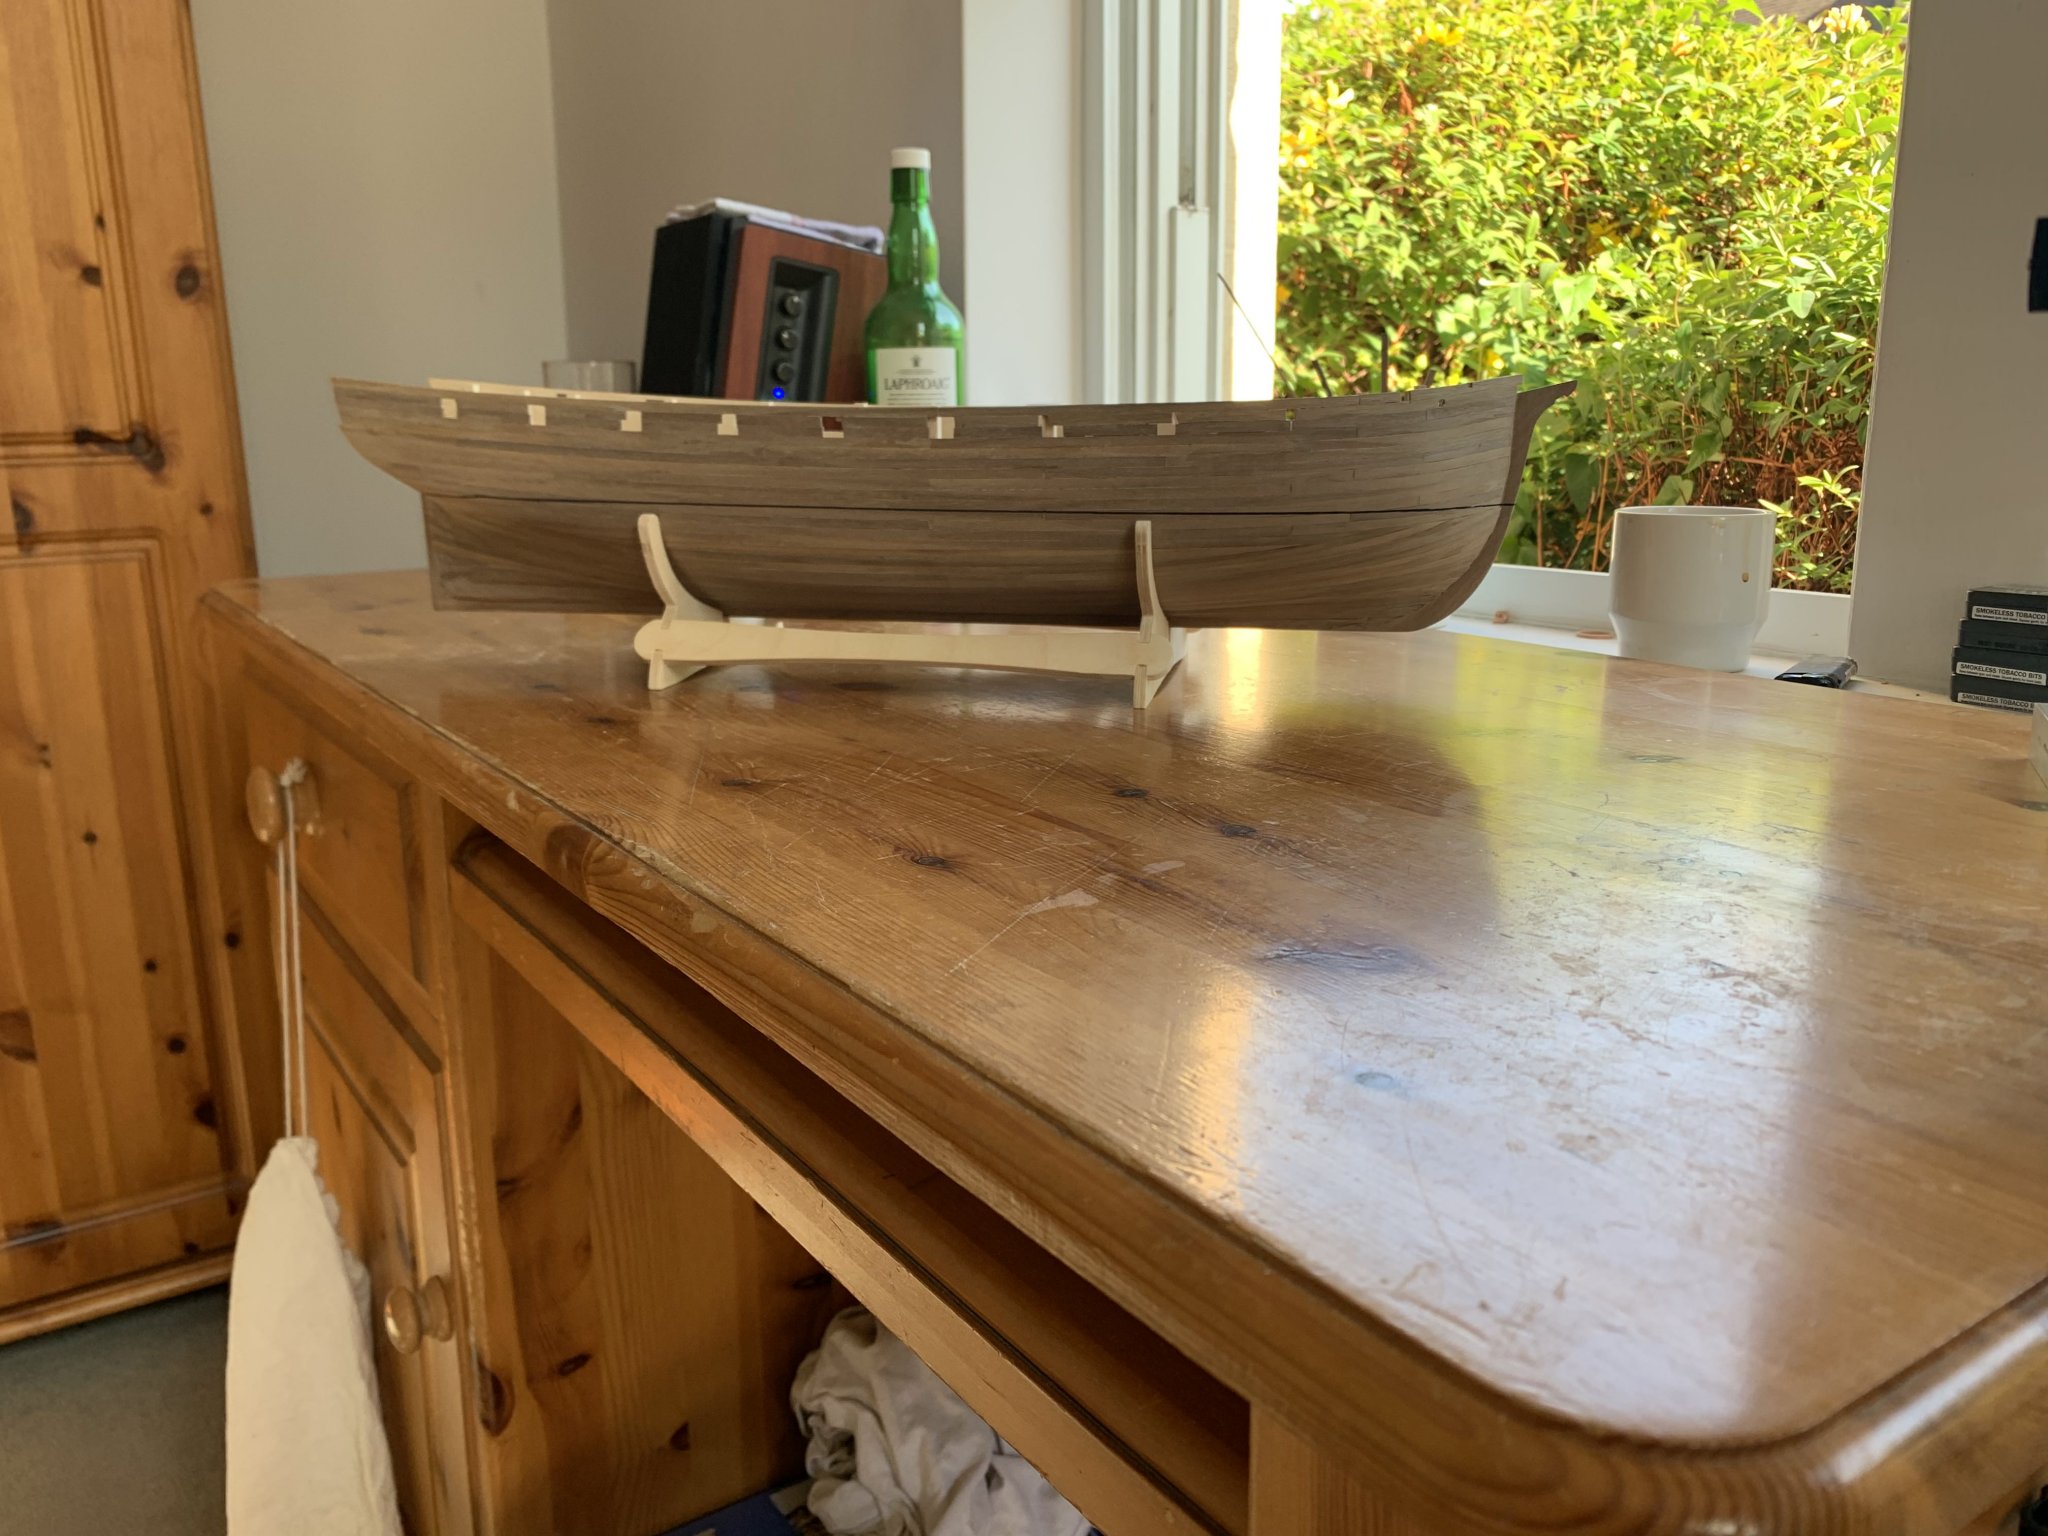


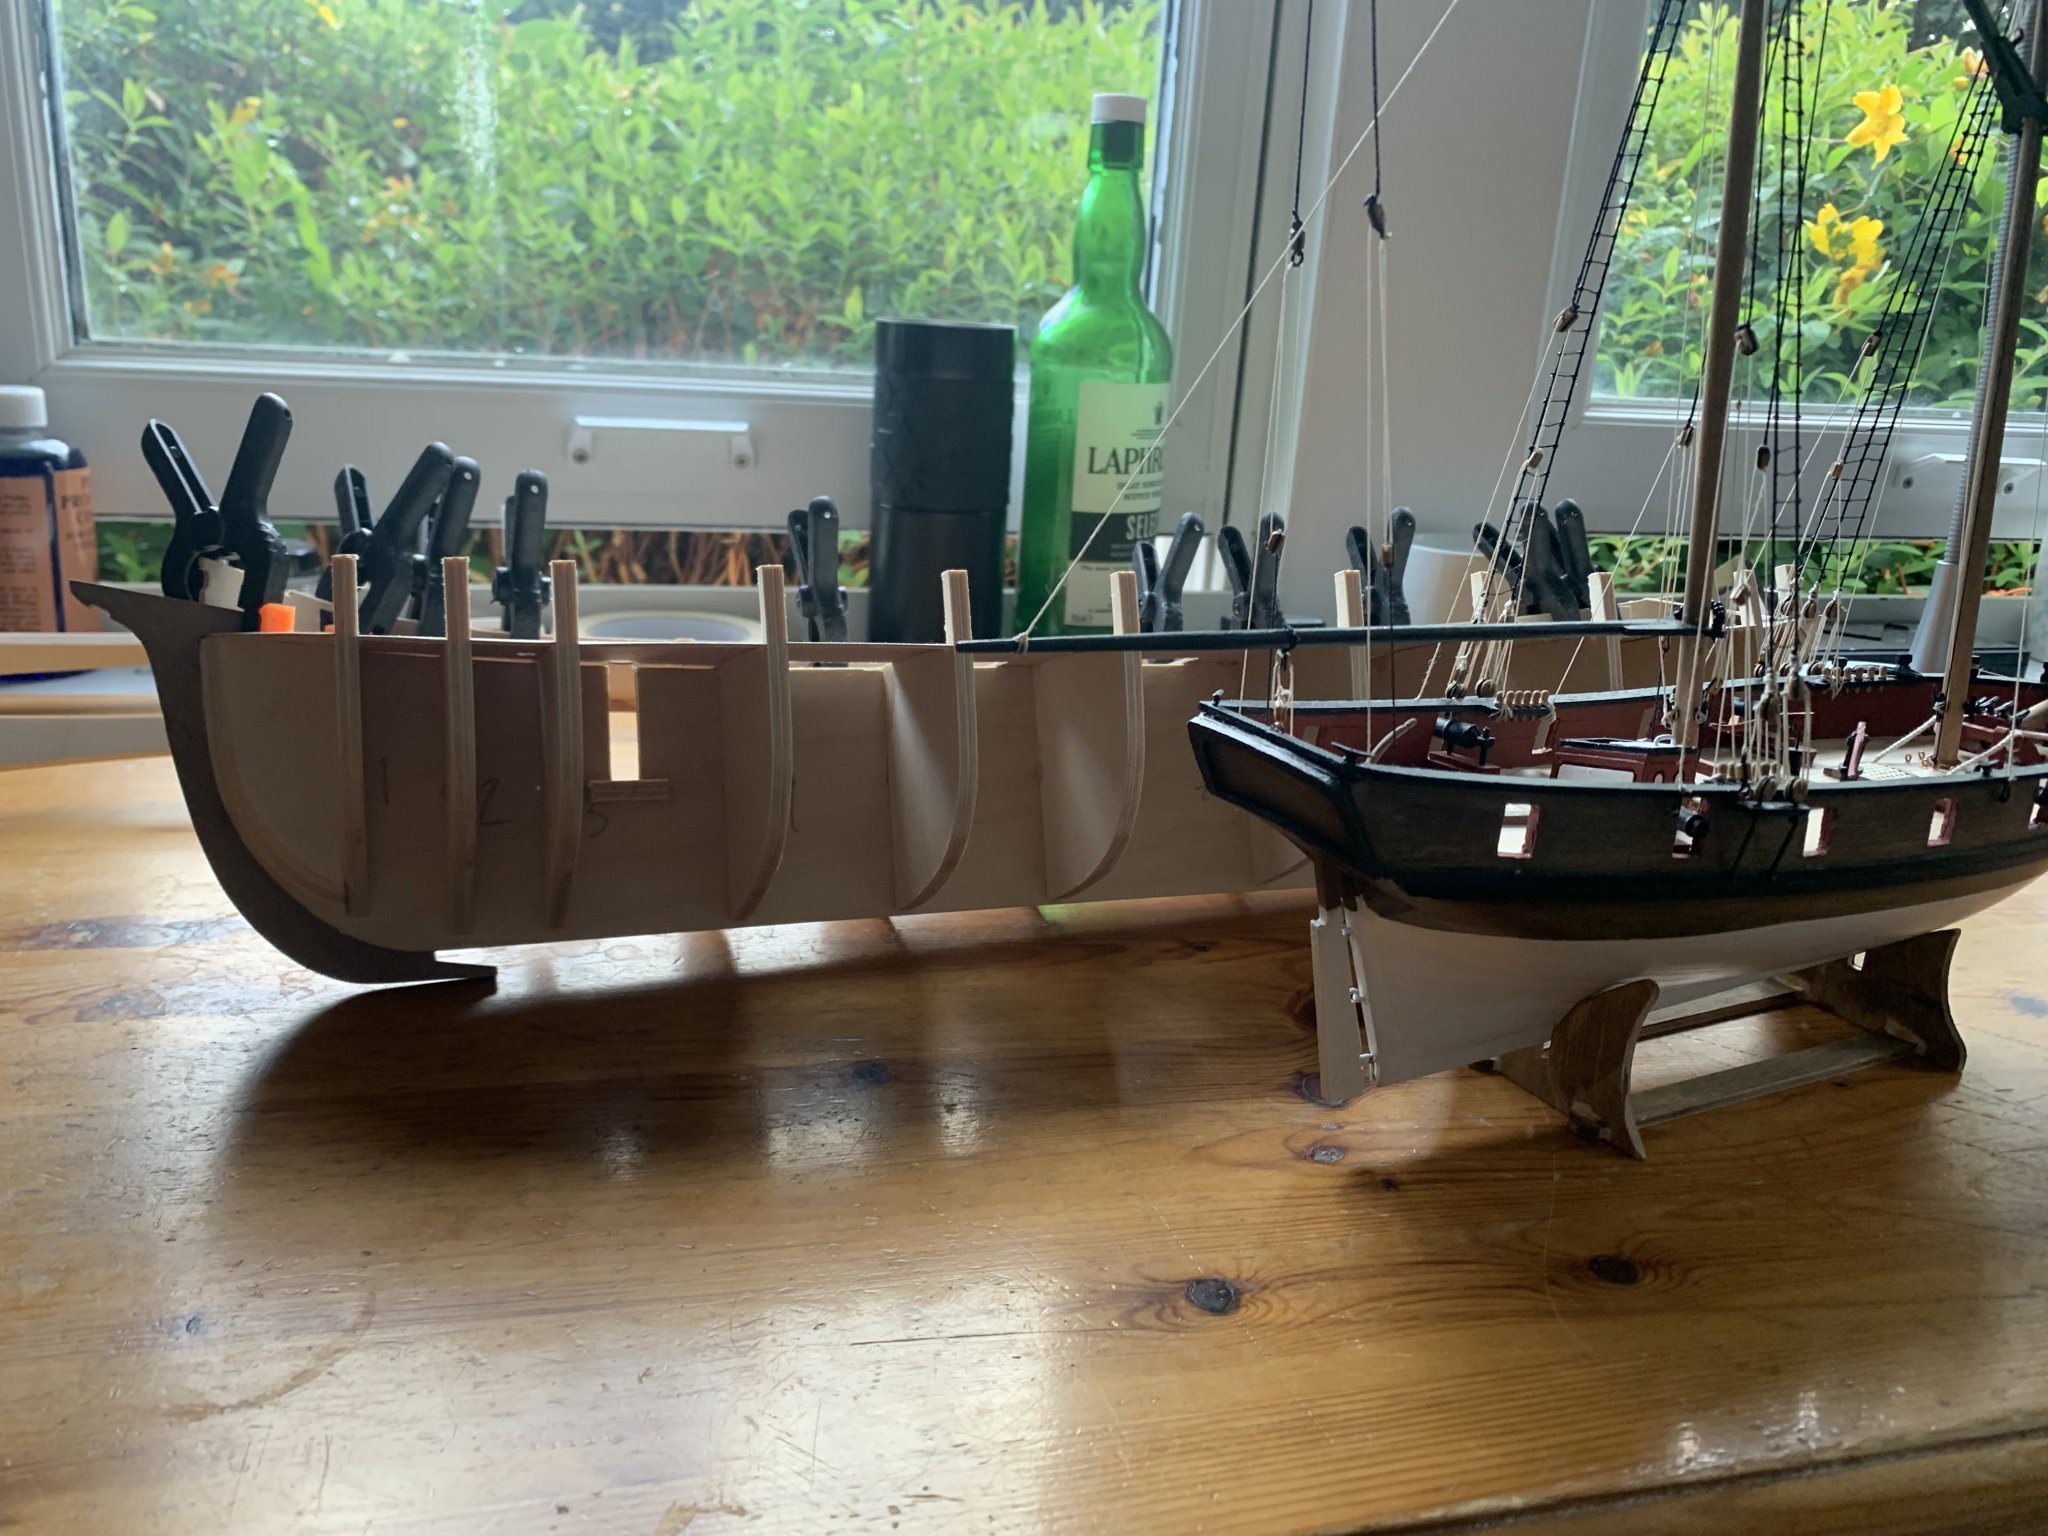

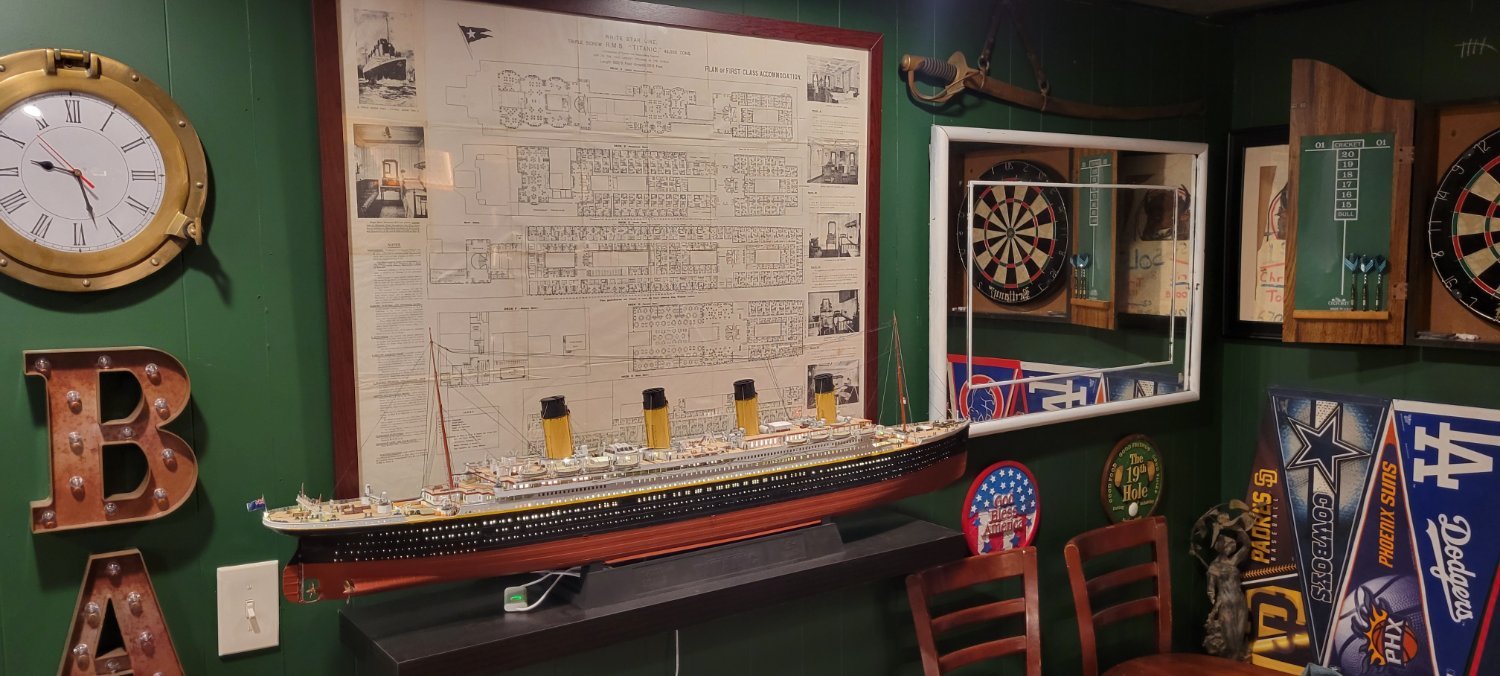


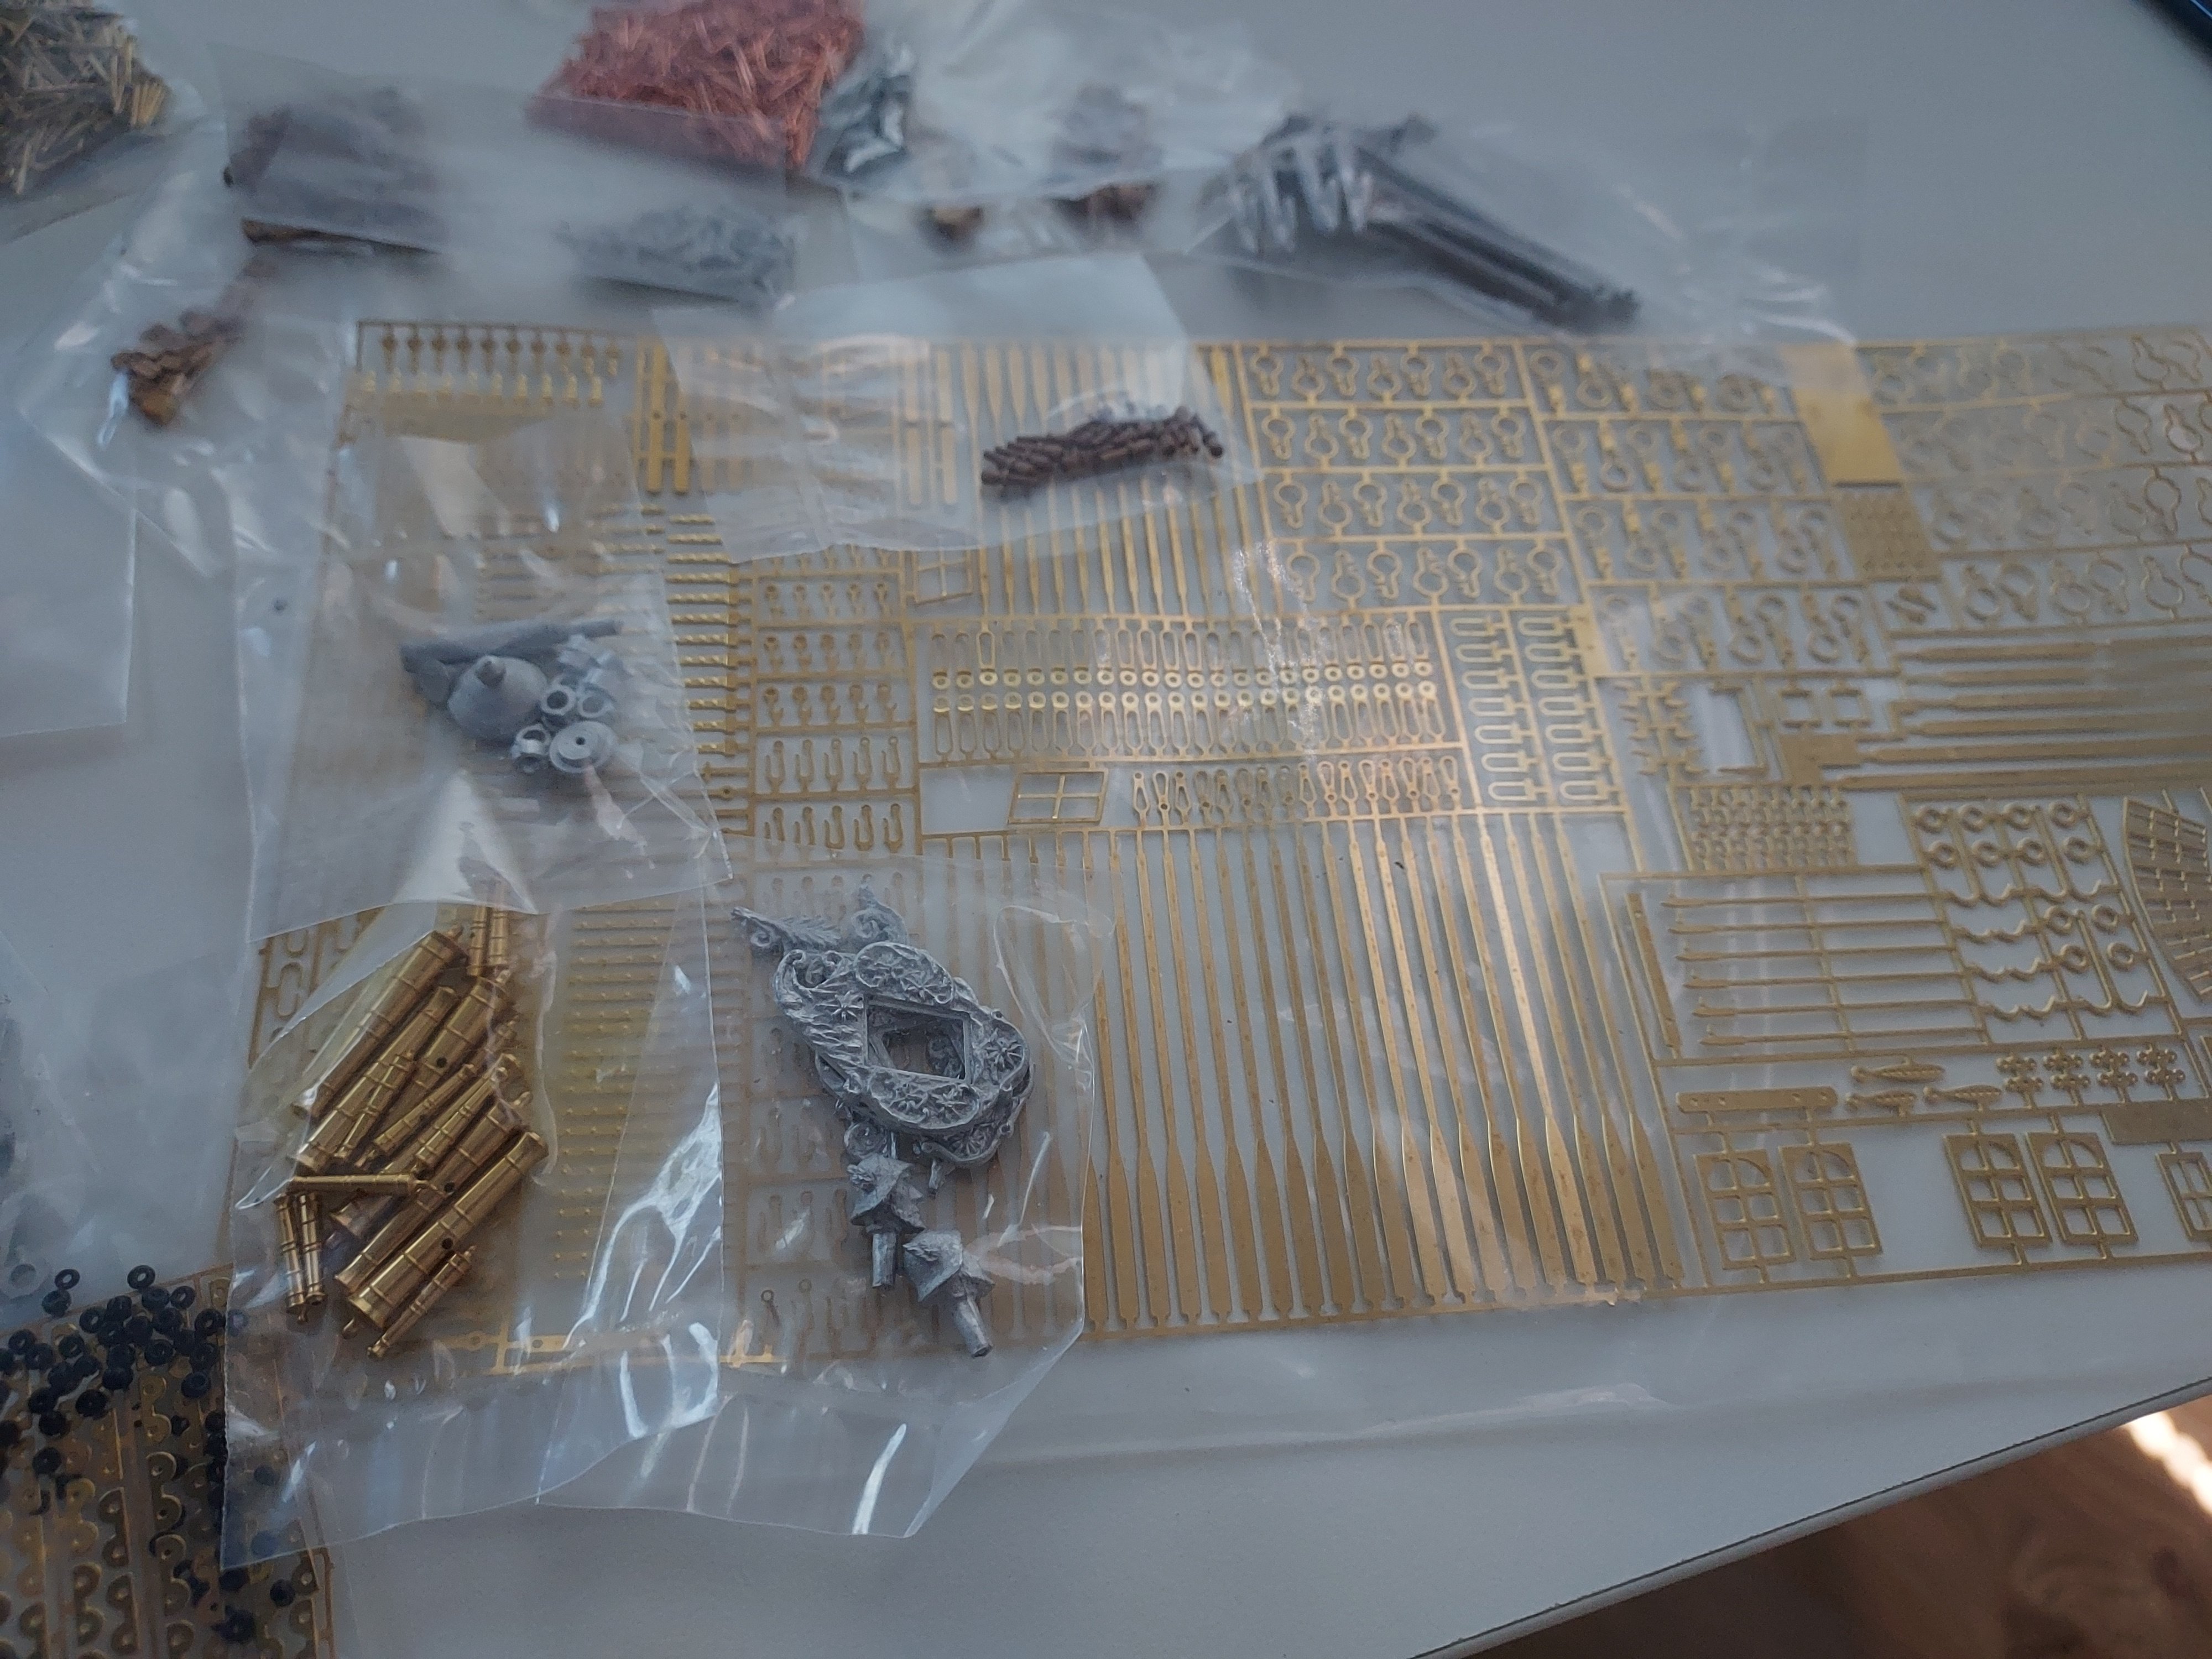

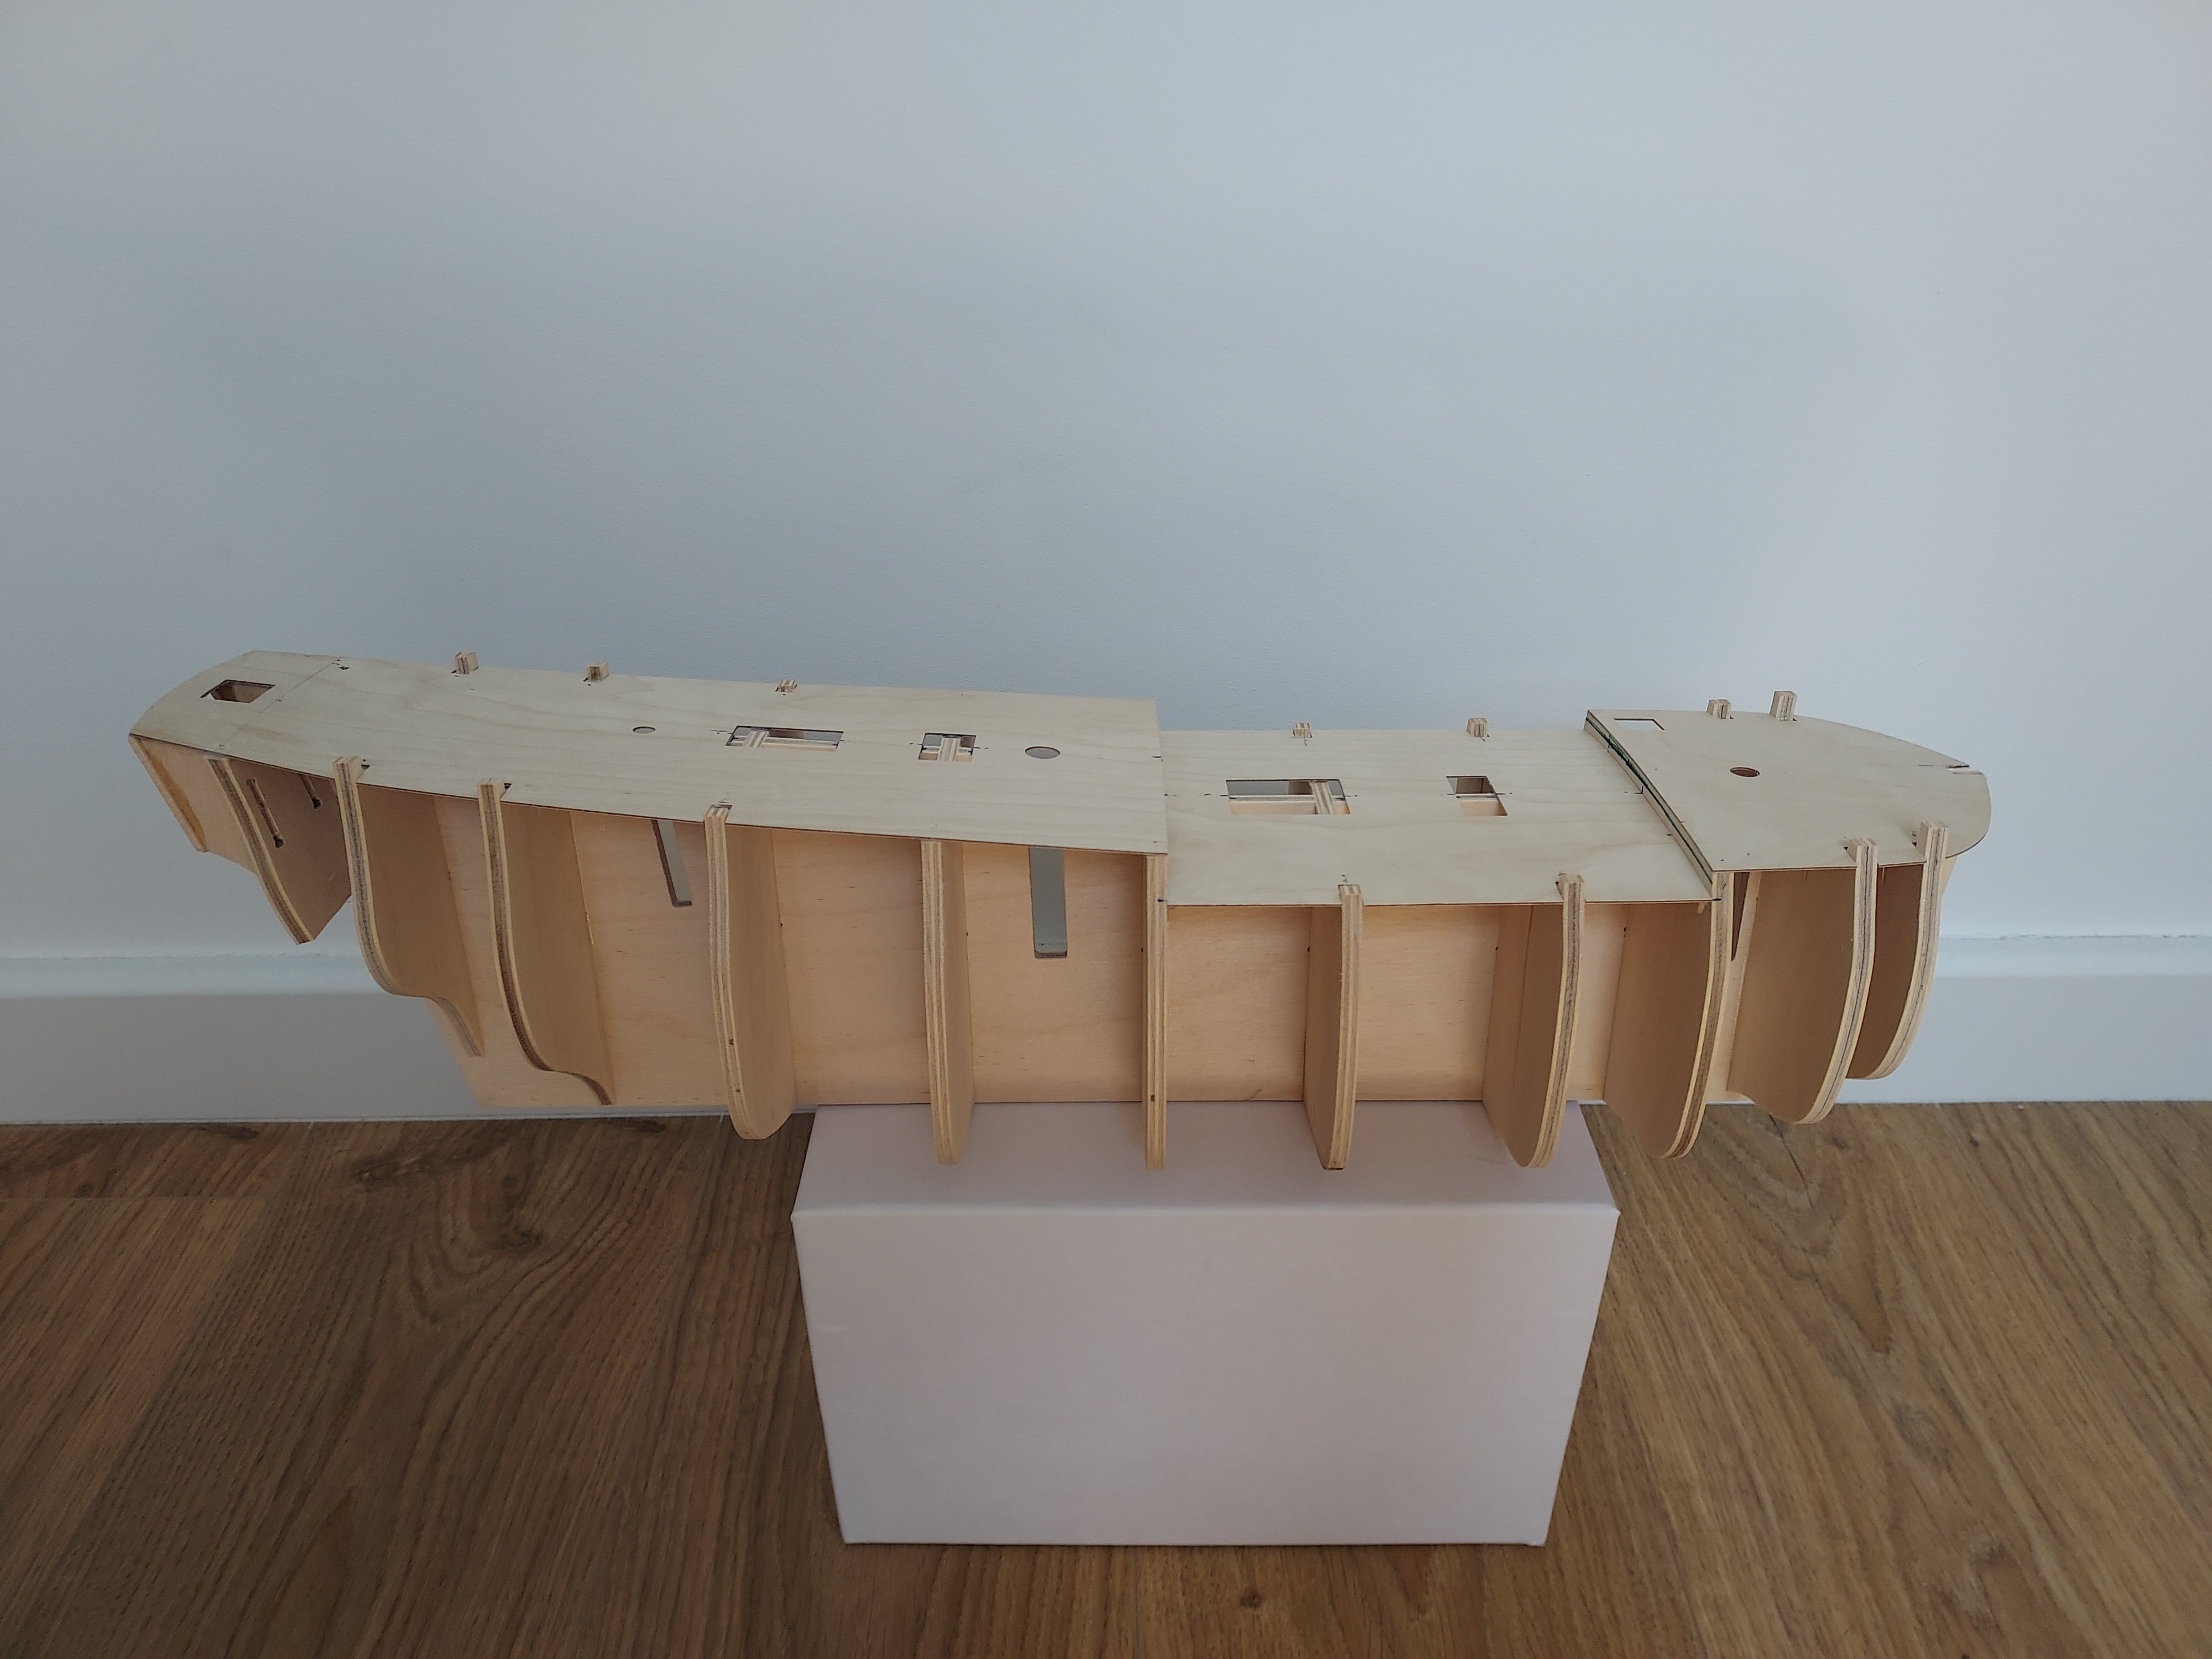

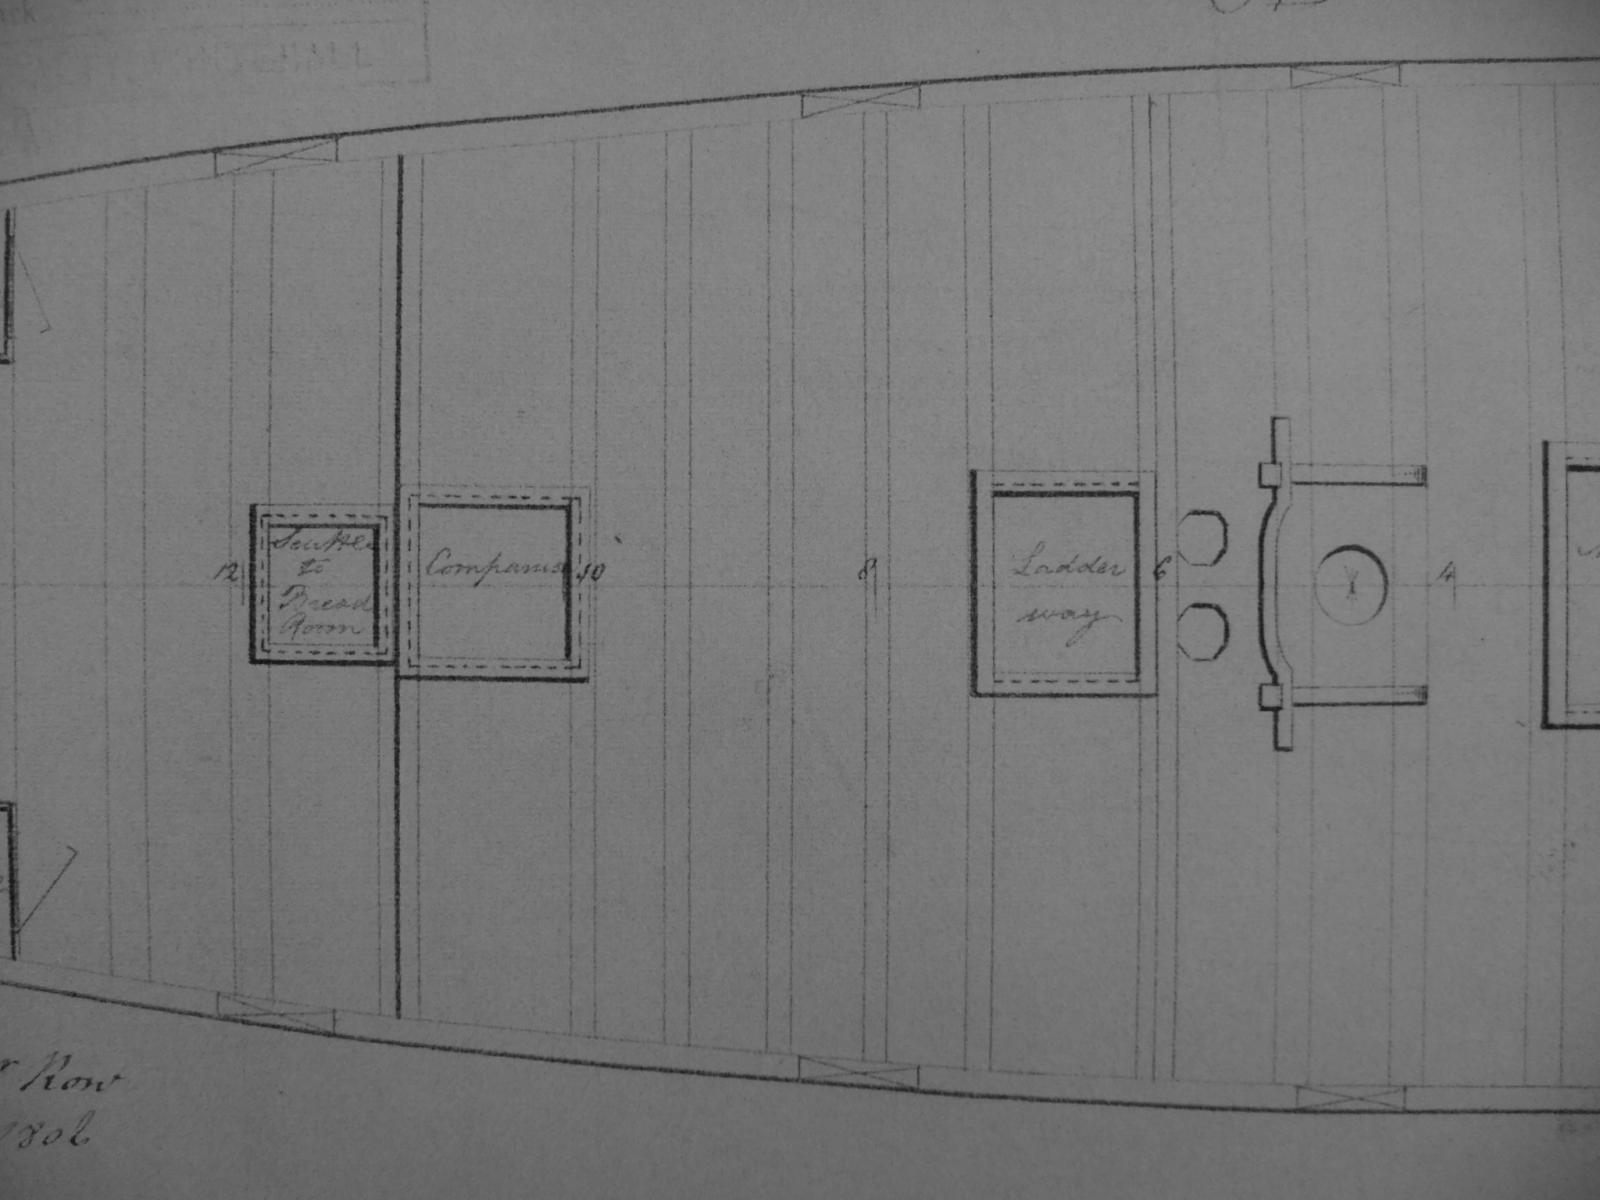


.jpg.123a6ec8182b77e9f1b75da52933f599.jpg)
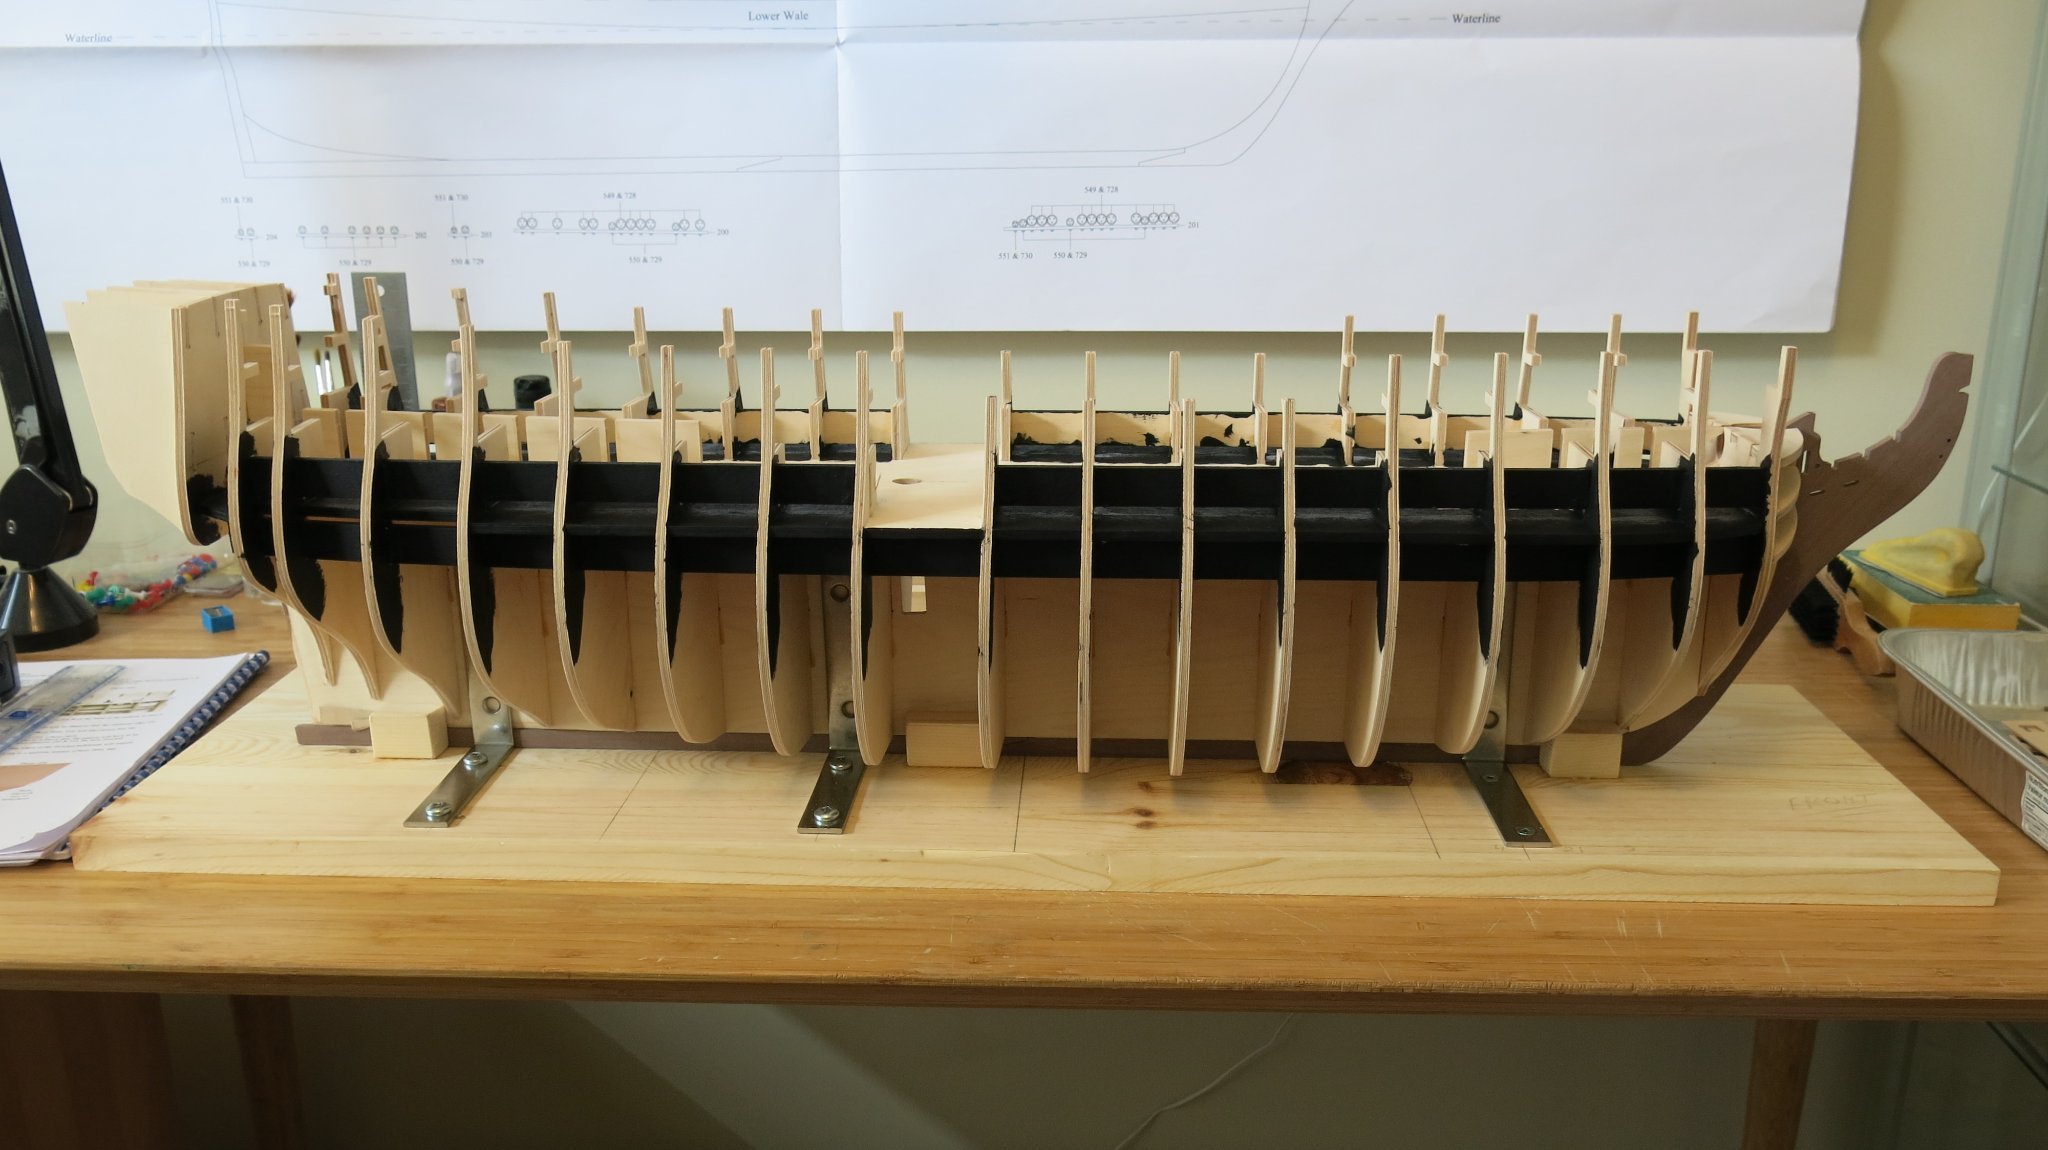

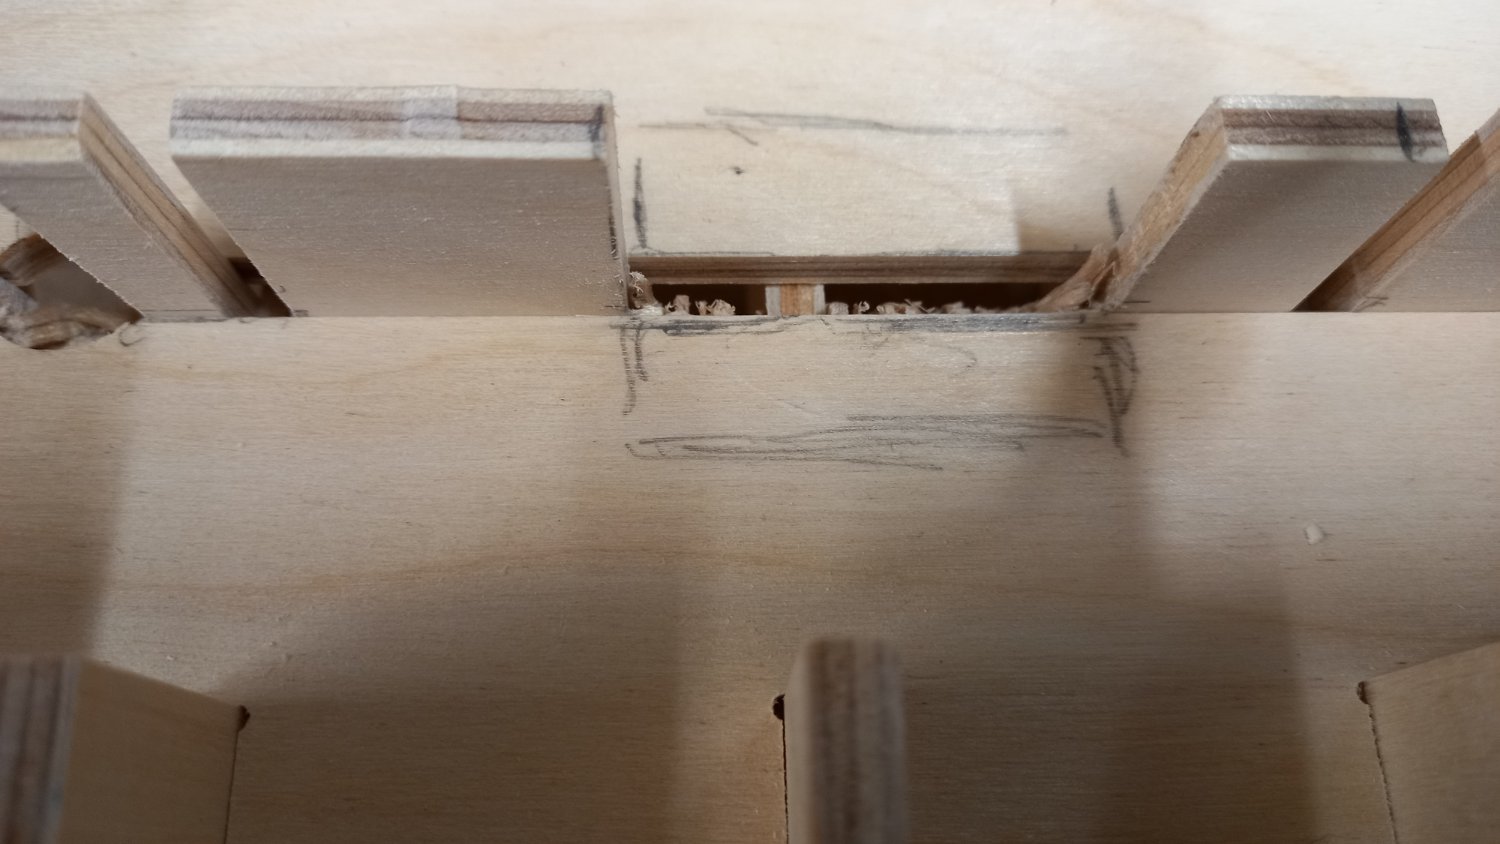


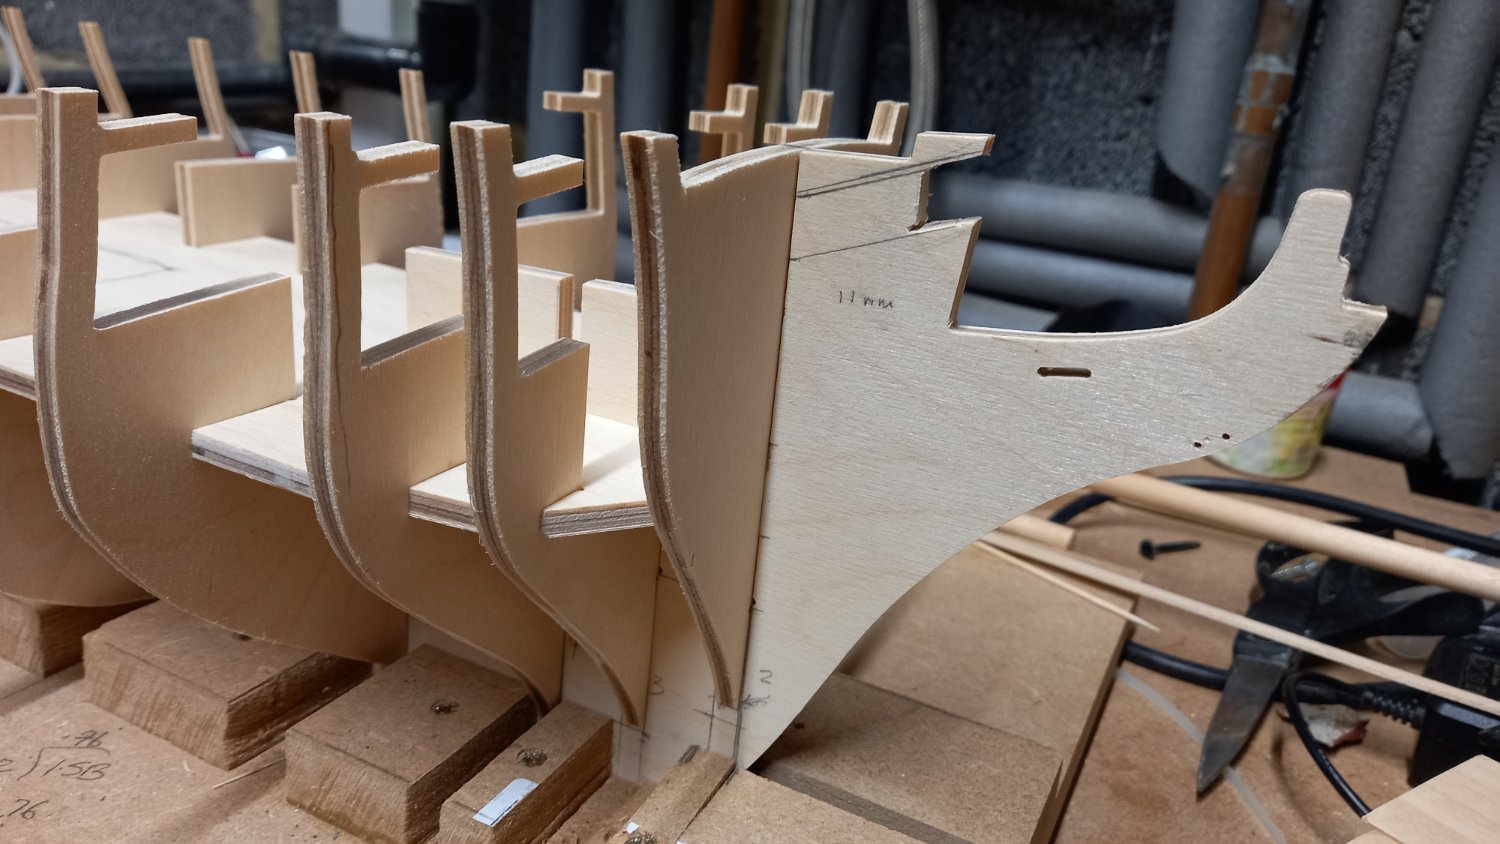

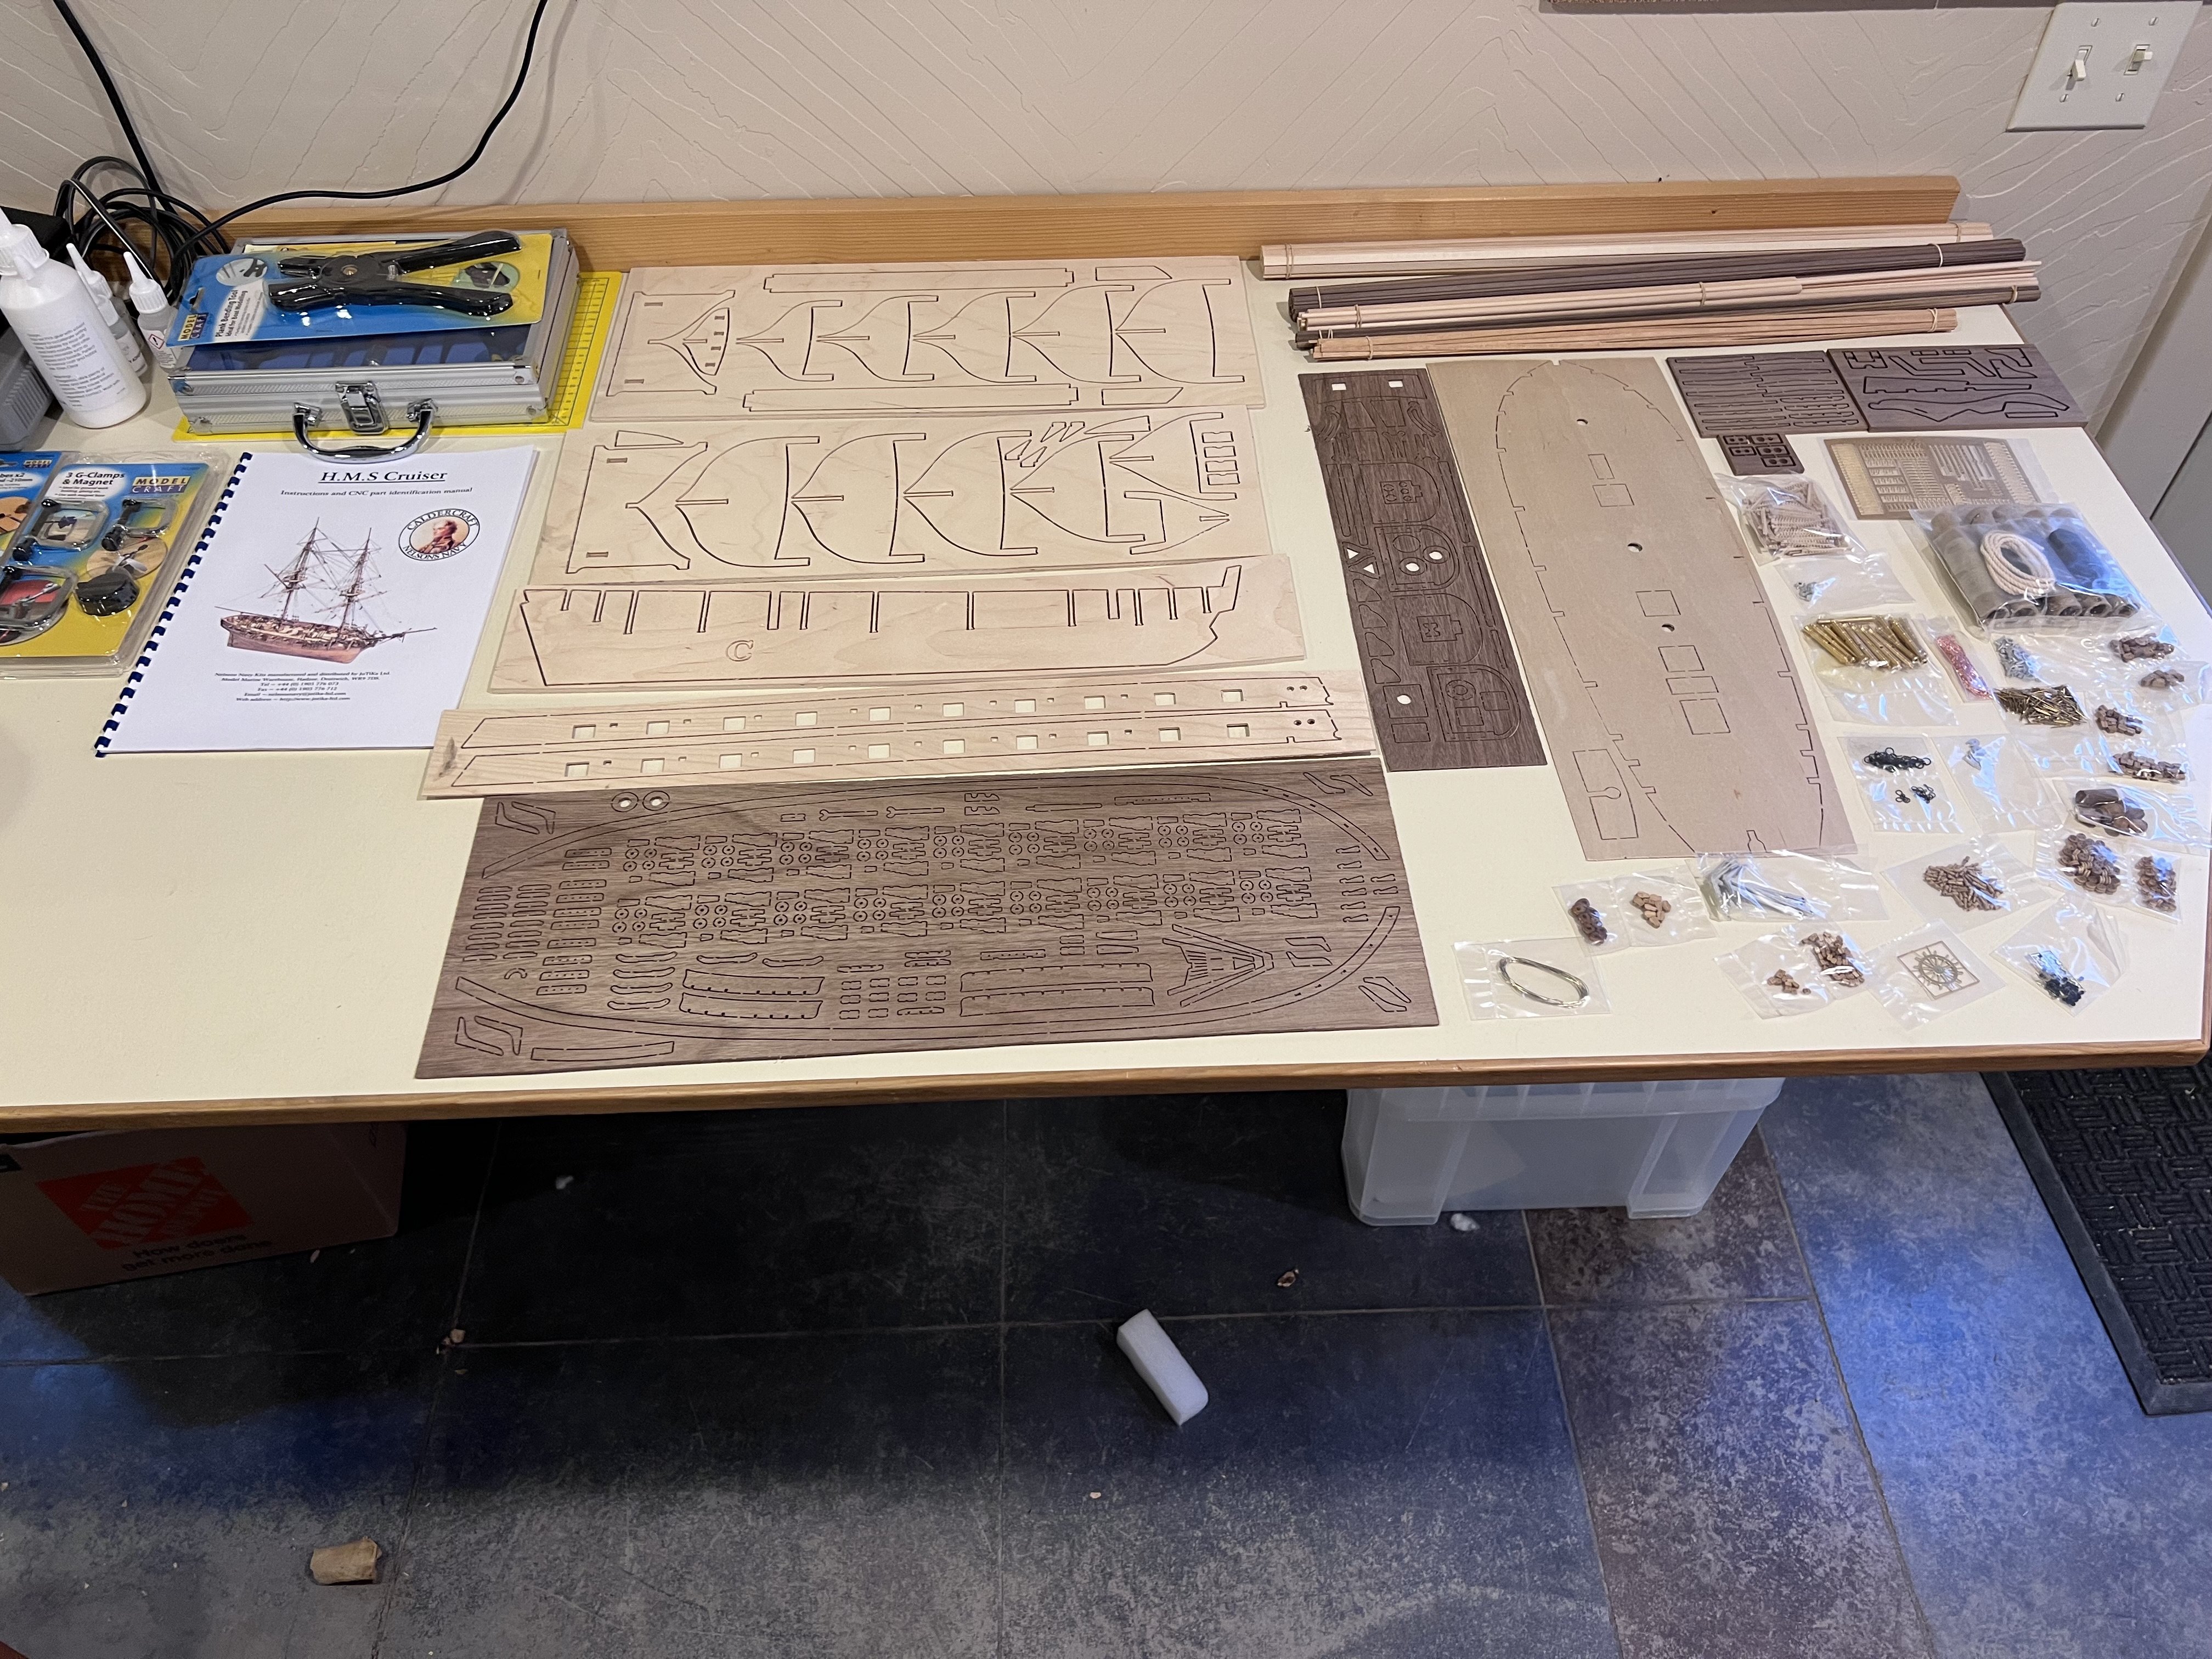
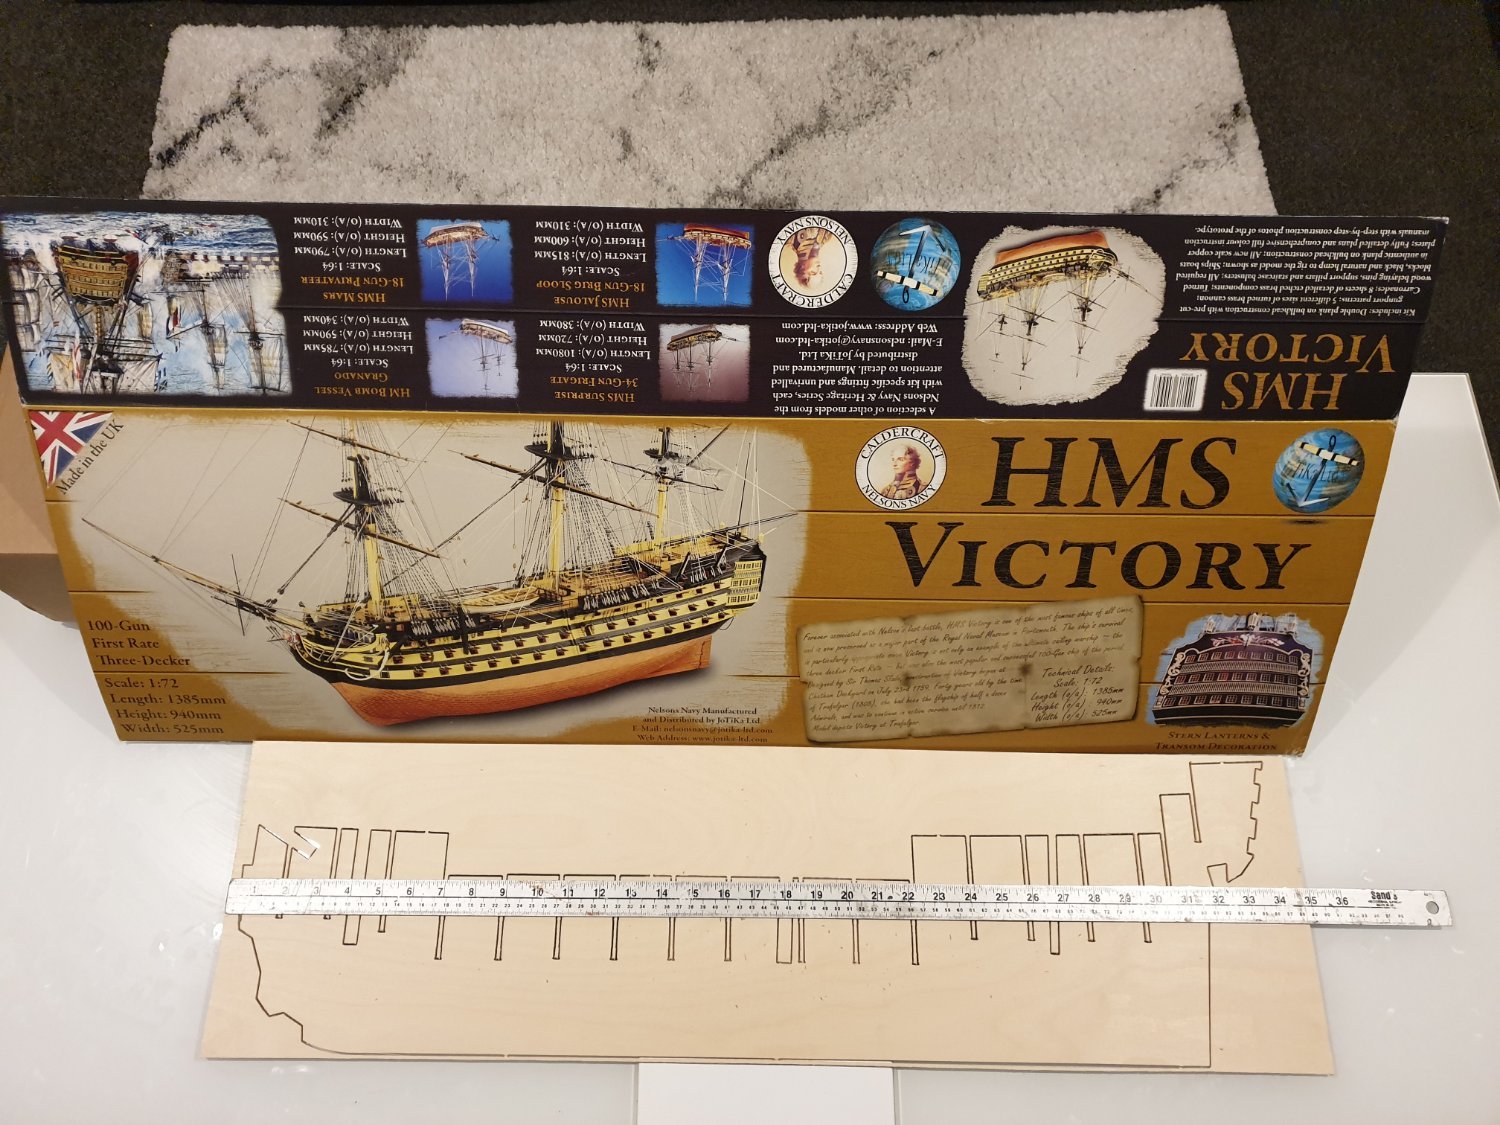
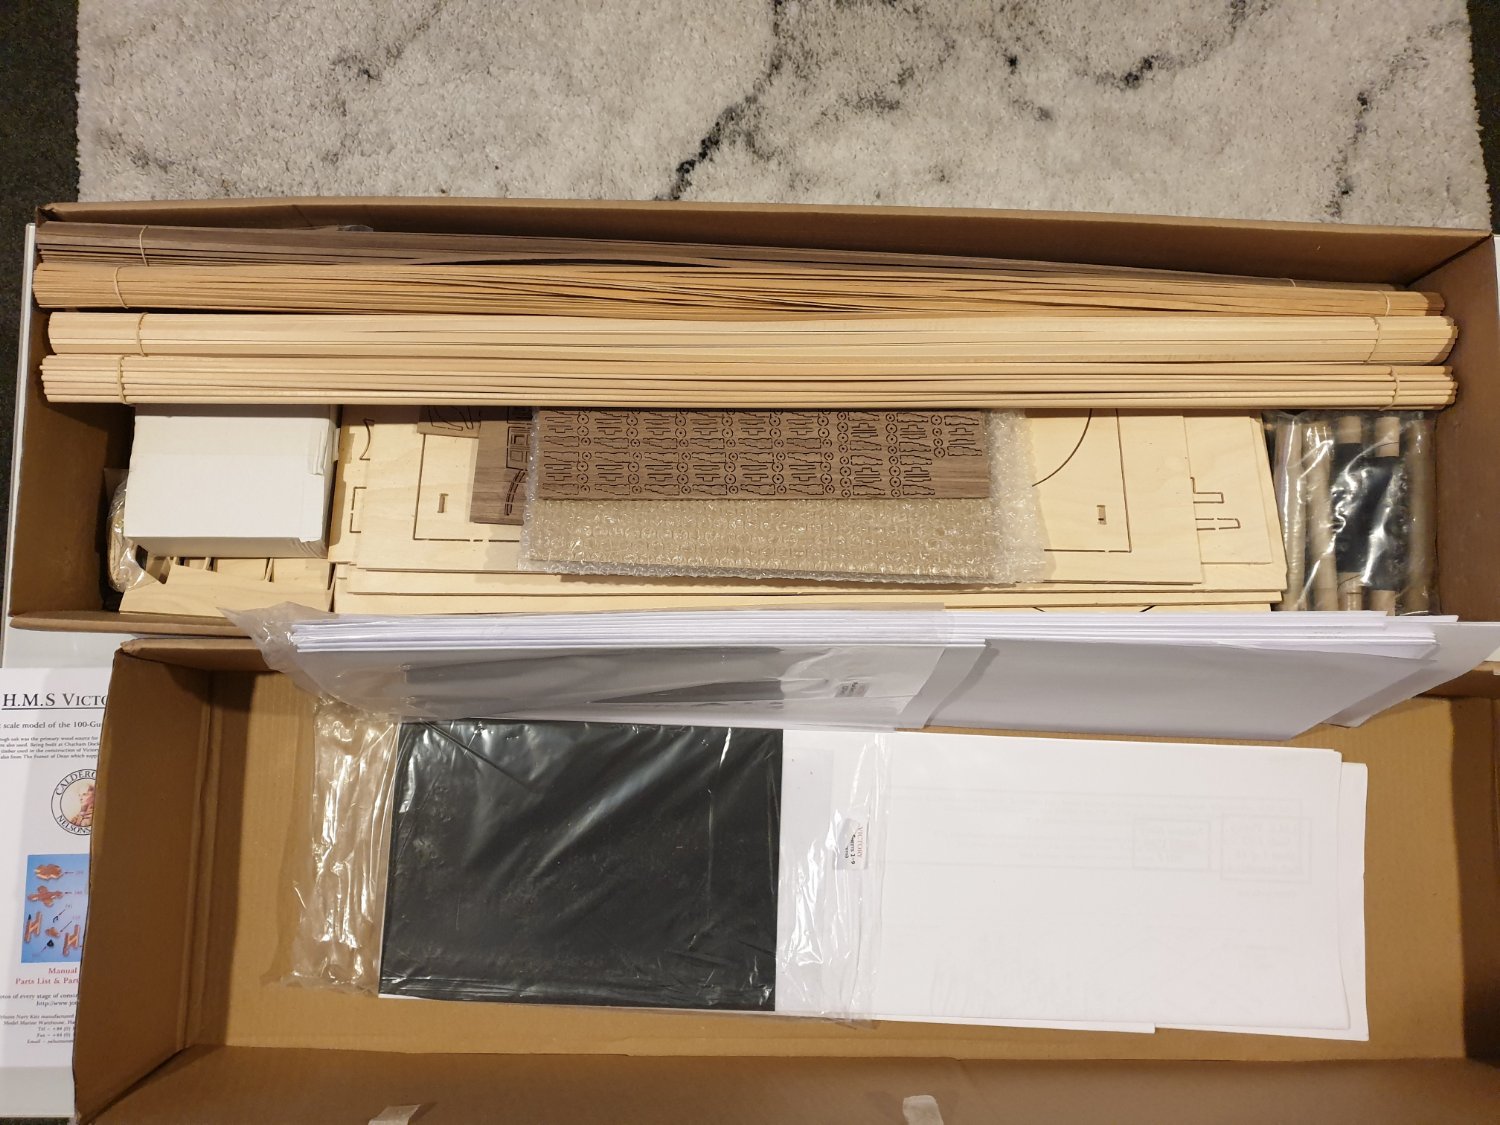

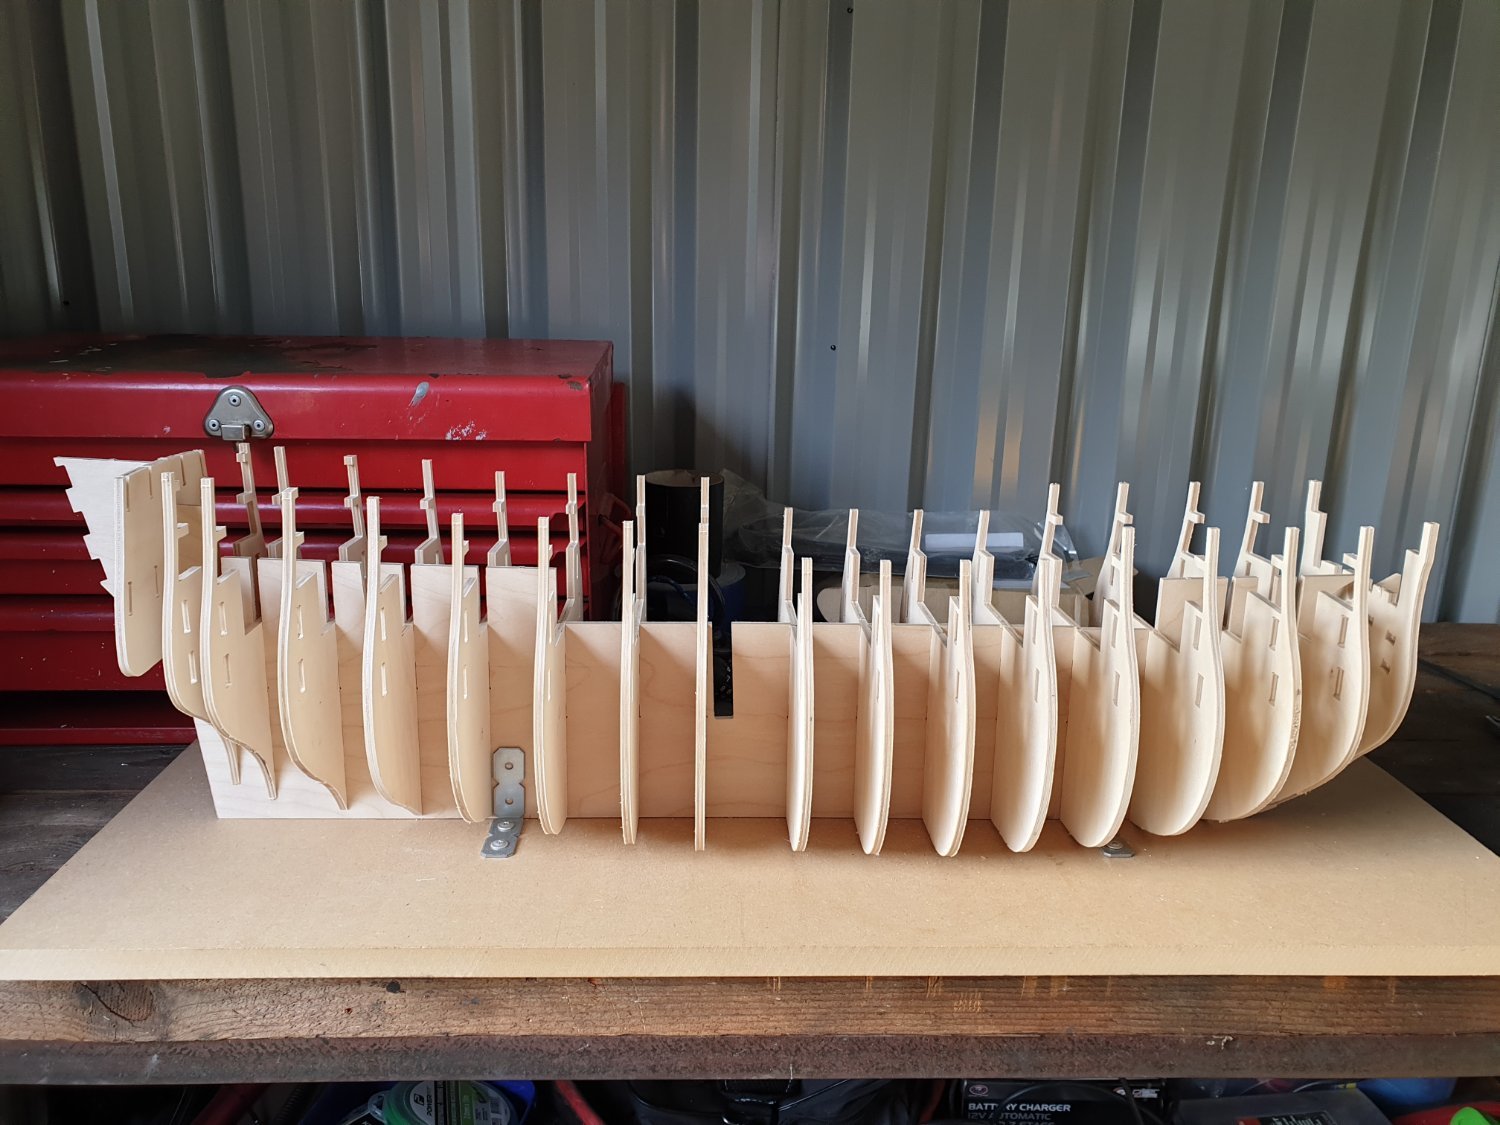
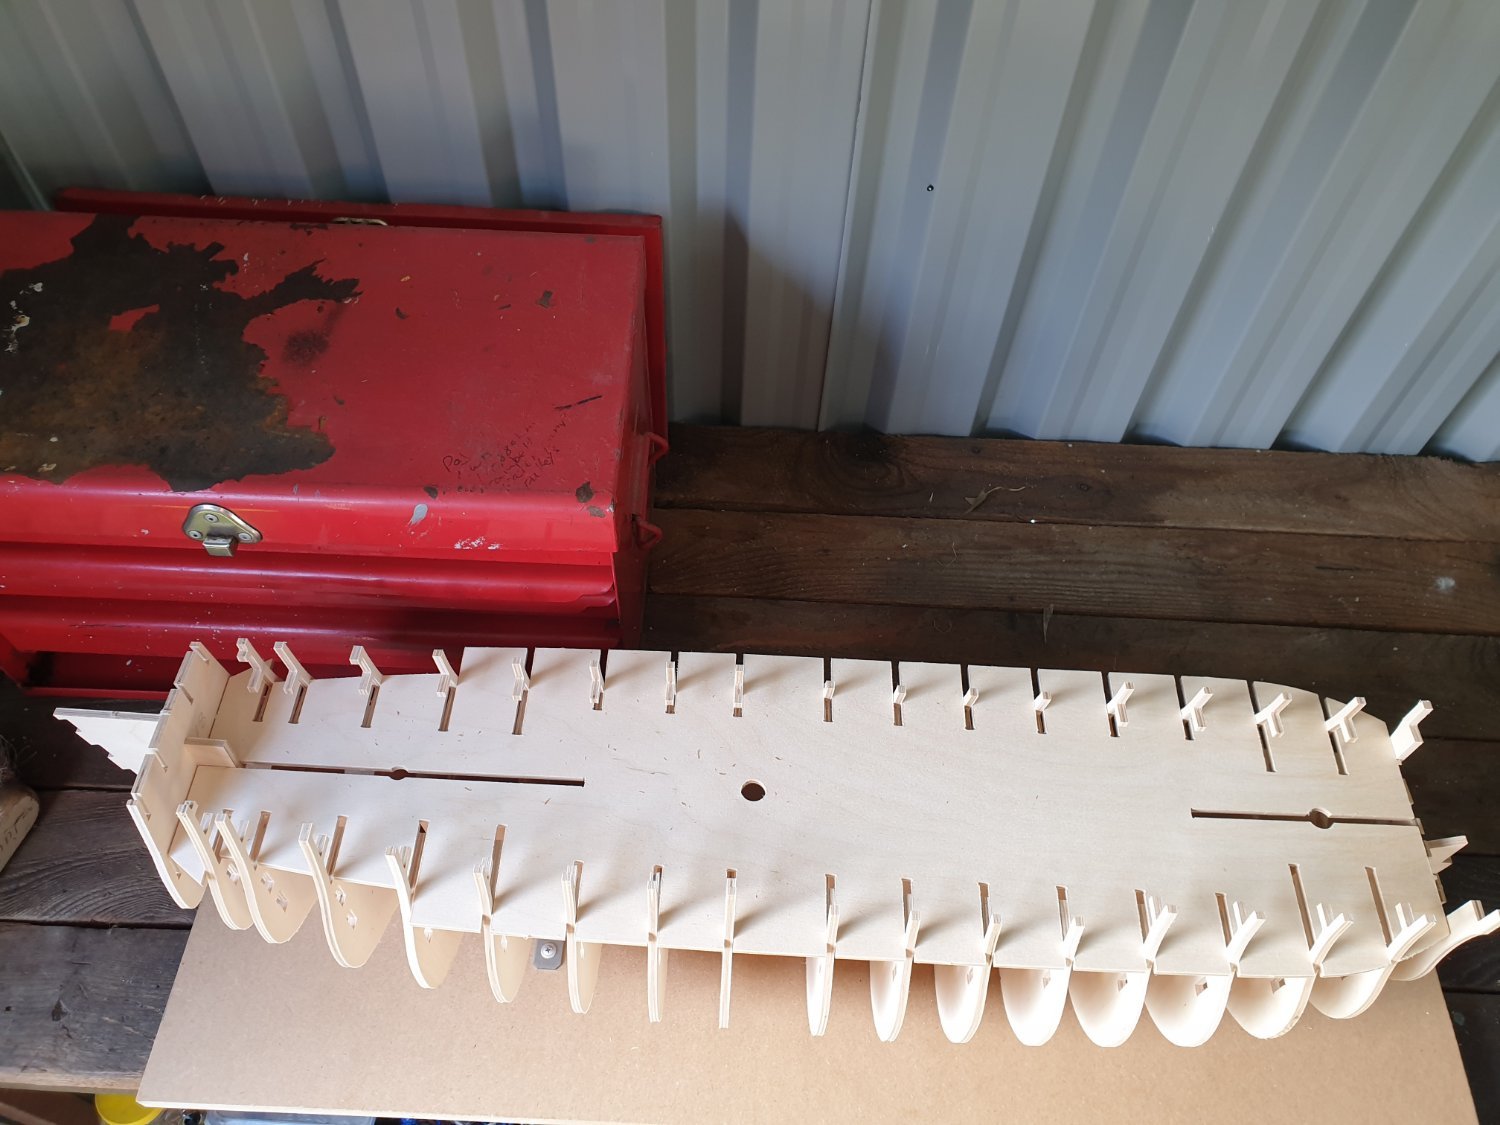


.jpg.668dea2f809628cc68f73f8e7d569bf8.jpg)
.jpg.2243b5d813accdae760a6174e0d196ec.jpg)