HOLIDAY DONATION DRIVE - SUPPORT MSW - DO YOUR PART TO KEEP THIS GREAT FORUM GOING! (Only 20 donations so far - C'mon guys!)
×


James H
-
Posts
6,067 -
Joined
-
Last visited
Content Type
Profiles
Forums
Gallery
Events
Everything posted by James H
-
 Ok, I have added a tool which will take you straight back to the top of the page which will help if you had to scroll a long way. When you start to roll down a page, you will now see a black 'Up Arrow' in the bottom right of the screen. Press that and you'll be taken to the top again.
- 14 replies
-
- 16
-

-

-
It certainly works faster and is more forgiving. If I get a plate slightly wrong, I can just reposition it or throw it away and add a new one. No more CA gel, but you also don't get the nail marks (if you wanted them). These can be added with a rivet tool from VM or a beading tool.
- 488 replies
-
- 8
-
-
- Indefatigable
- Vanguard Models
- (and 1 more)
-
Hey ho! You'll have to forgive me for not wanting to spend my hols tinkering with stuff in tech here

-
The original Indy clearly shows the chain pumps fitted, but the drawings made for the razed iteration shows that other changes were made too...one of them being the chain pump omission. The guys doing these plans surely knew what they were doing, and adding the smaller pumps would've been a very unusual move and not one that would've been done without them being specifically requested. That's what the drawings show, ergo, that's how the deck is fitted out.
- 488 replies
-
- 10
-
-
-
- Indefatigable
- Vanguard Models
- (and 1 more)
-
What a great start you made here on MSW. Off to BanLand you go.
-
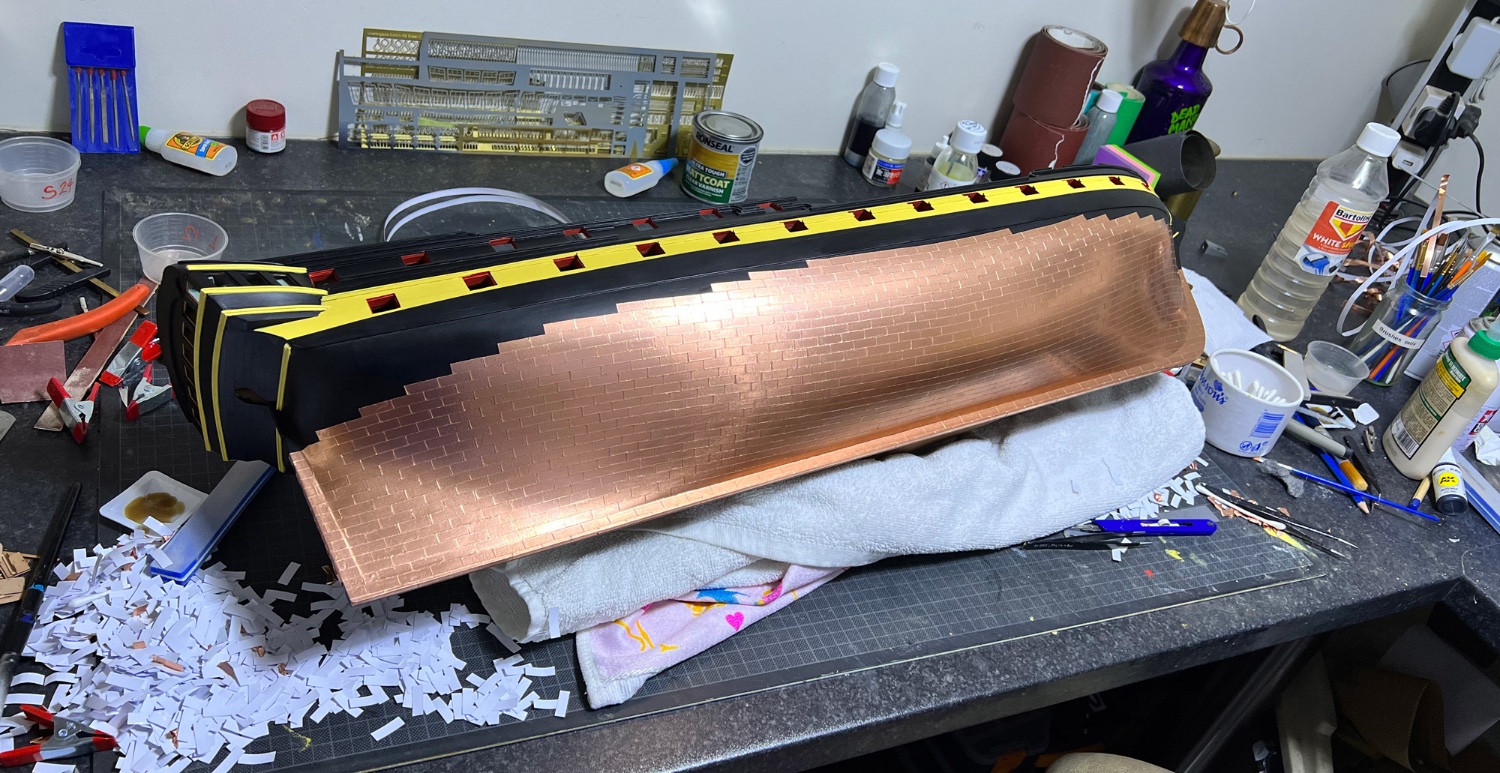
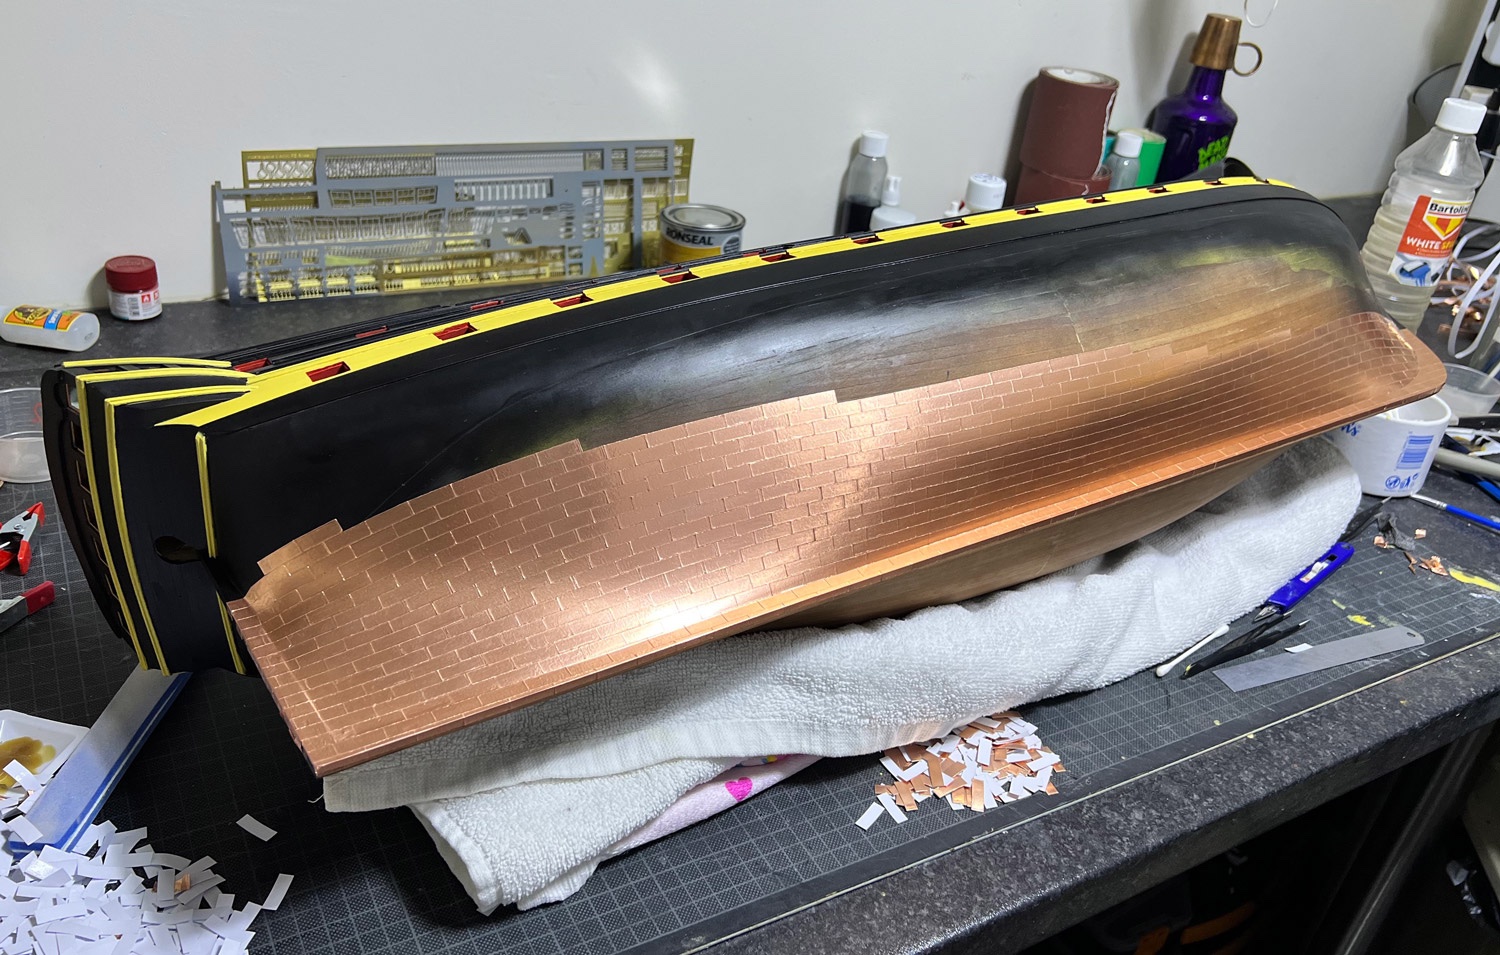
I've coppered the first side and will do an update once I've coppered the opposite side and trimmed it down to waterline level. Here she is so far.

- 488 replies
-
- 32
-
-

-
- Indefatigable
- Vanguard Models
- (and 1 more)
-
I'll do a proper update in a few days, showing coppering, but until then, here's a photo showing the work so far. Coppering is a fairly quick process, thankfully, and fairly therapeutic.

- 488 replies
-
- 39
-
-
- Indefatigable
- Vanguard Models
- (and 1 more)
-
Can I point you to the post I made earlier today about not turning this into a Wishlist? The problem is that a topic about new releases and products is becoming swamped with members asking for their own wishes. Cheers.
-
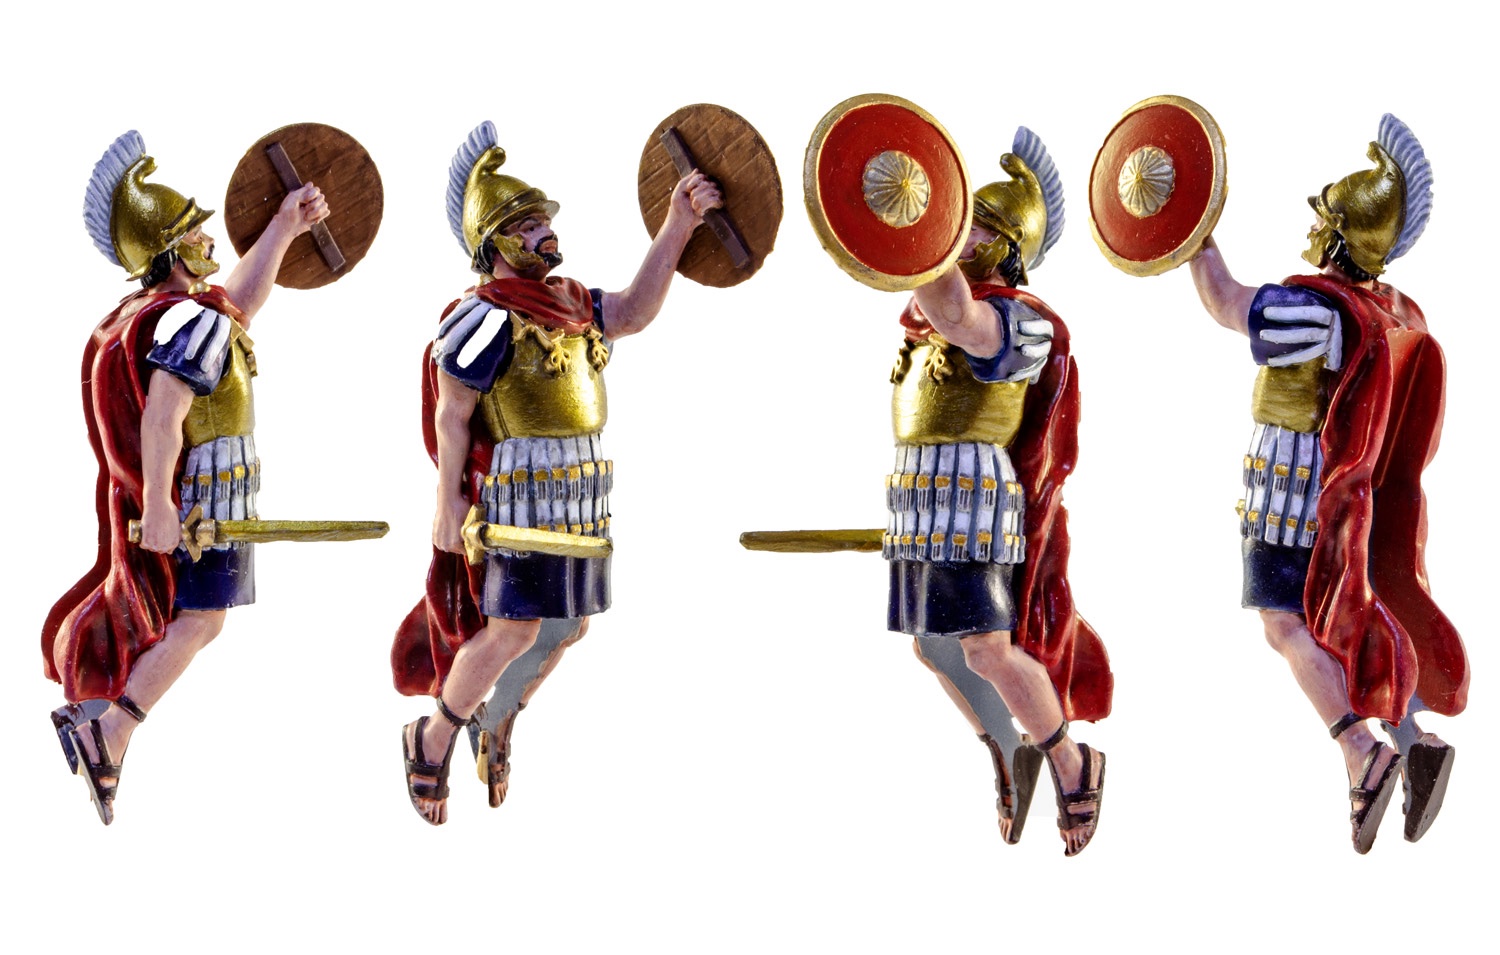
Ok, I have a reworked figurehead to reflect the bronze/gold armour, instead of the silver steel from the previous incarnation.

- 488 replies
-
- 35
-
-
-
-
- Indefatigable
- Vanguard Models
- (and 1 more)
-
One day, my wife will say that about my guitars!
- 488 replies
-
- 9
-
-

-
- Indefatigable
- Vanguard Models
- (and 1 more)
-
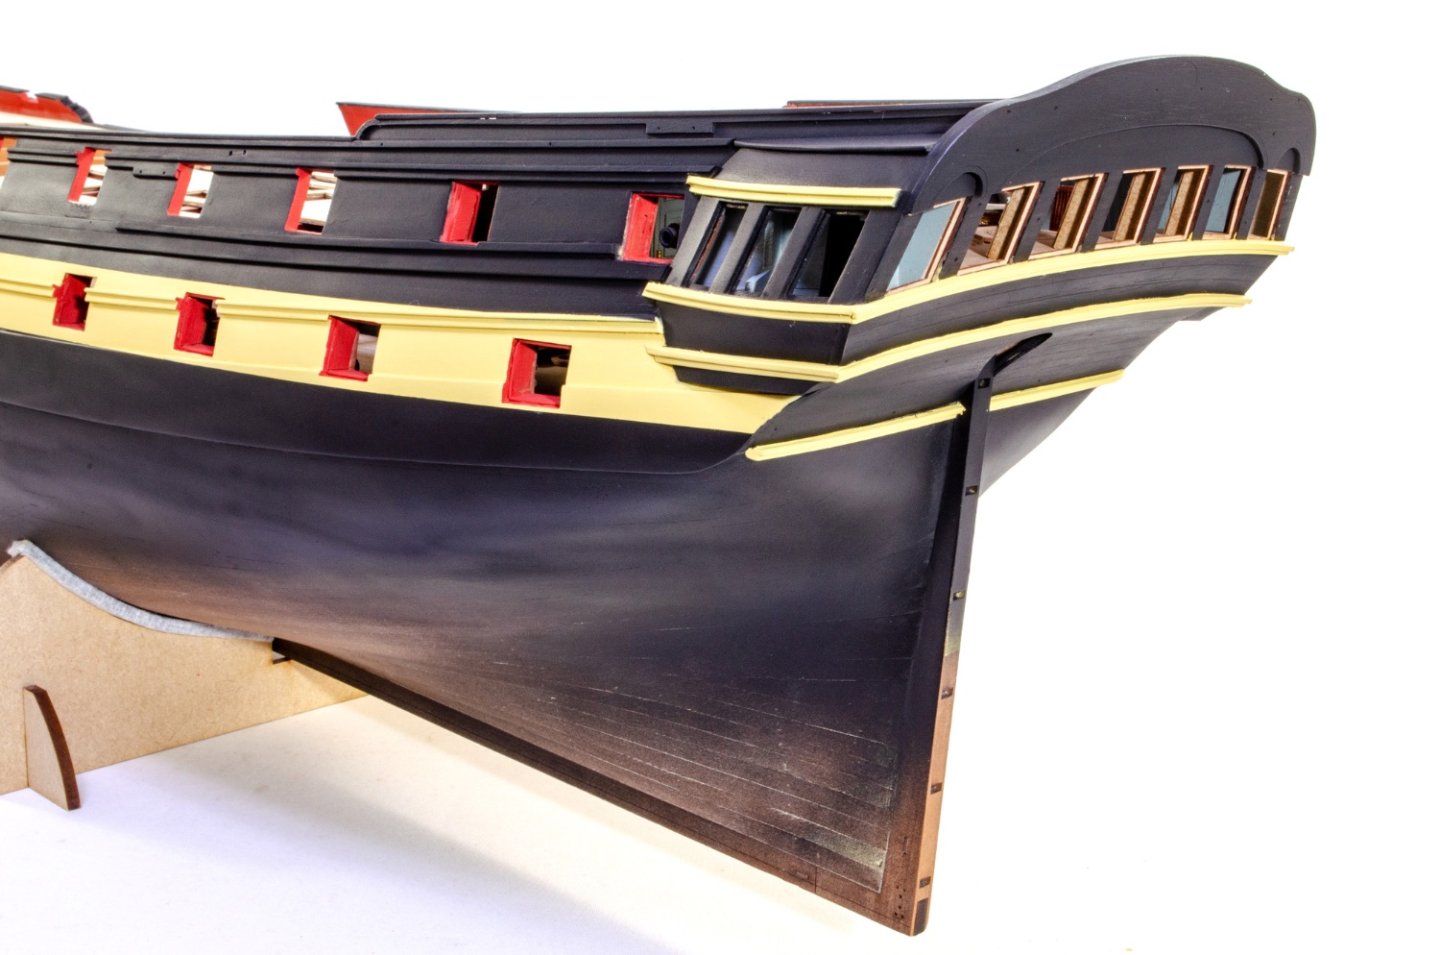
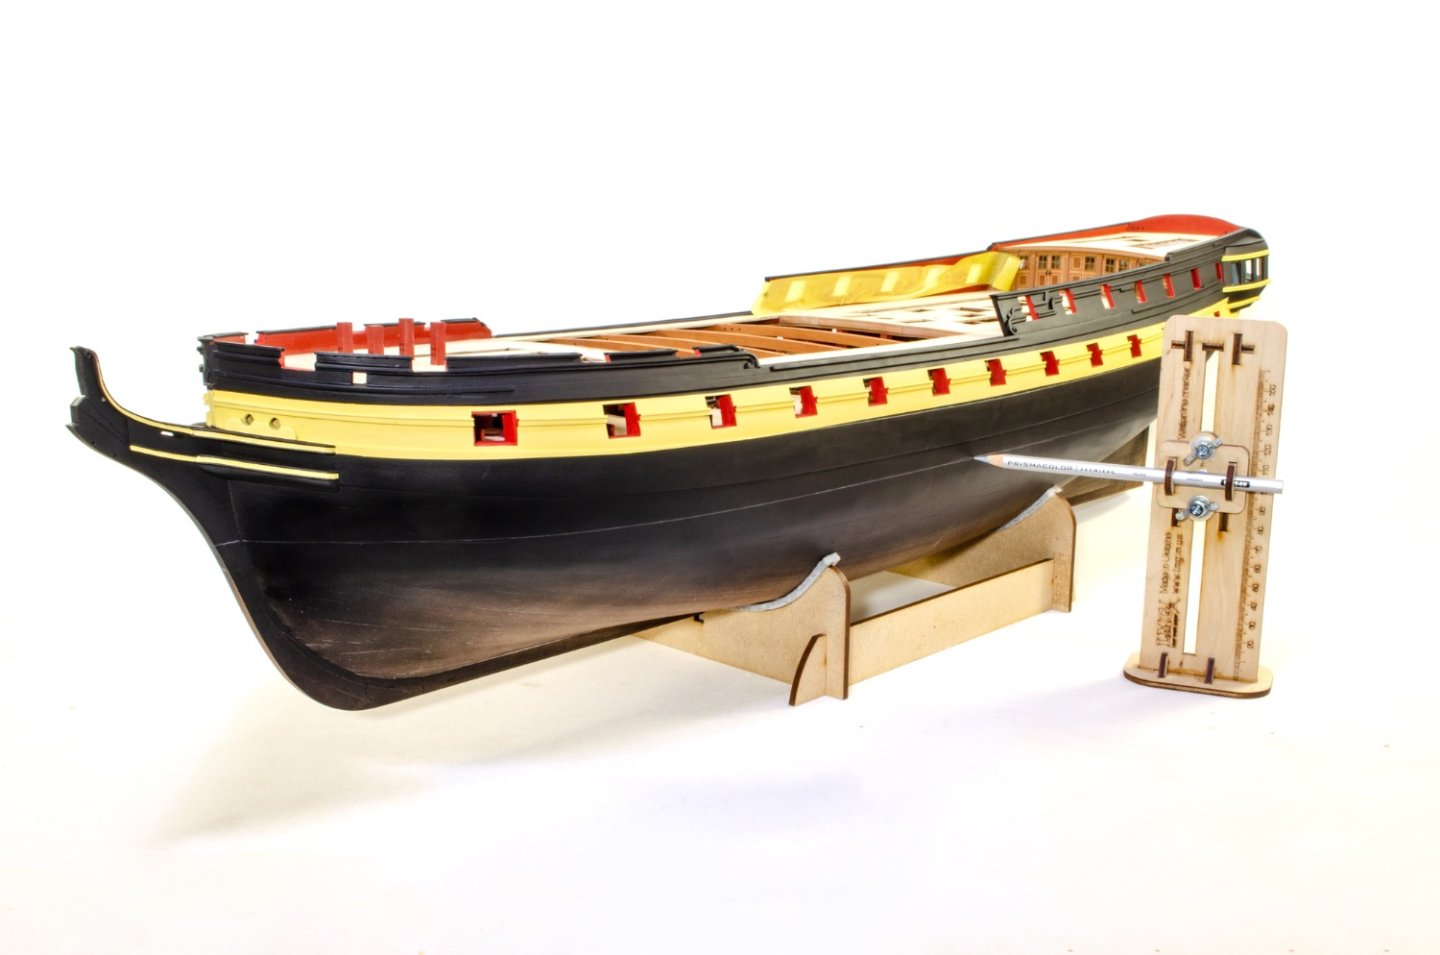
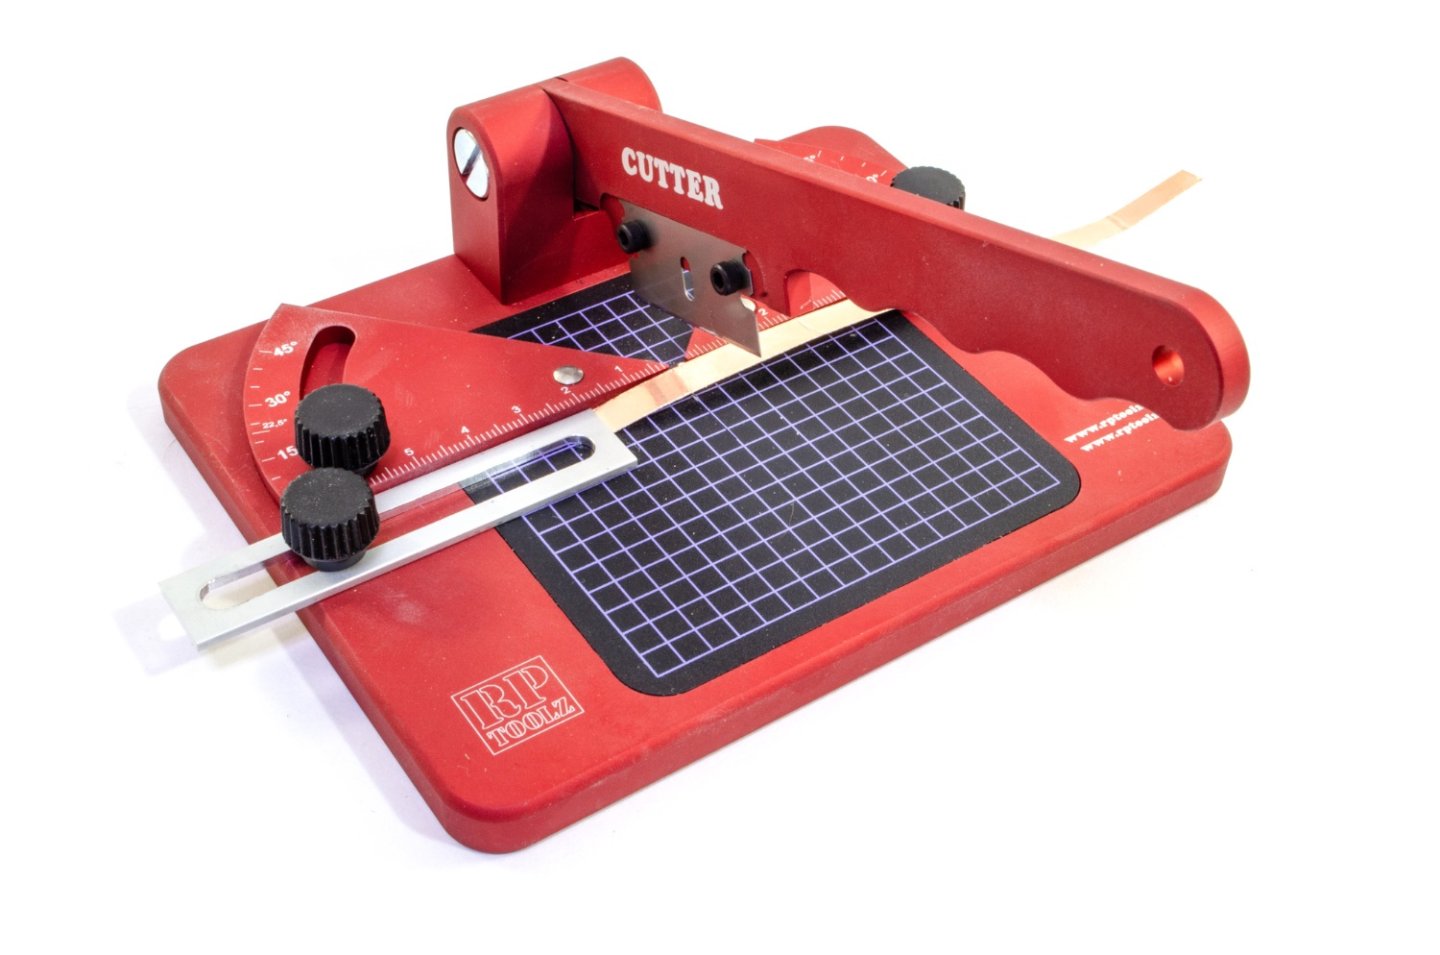
Time for an update here. The hull was varnished and sanded back a couple of times, helping to seal any open grain before applying paint. This was instead of using a primer, which you can of course use. Yellow ochre was then applied. I used Humbrol Linen as I wasn't in possession of the VM acrylic paint at the time. This paint was airbrushed over the hull and rubbed back successive times over a week or so, to make sure I'd got it right and it looked reasonably homogenous. The reason for painting all of this in ochre was that it's easier to see any fault areas that needed fixing up, before applying black paint. The hull was then painstakingly masked off before applying black. It's always tricky cutting a mask line across the longitudinal rail, and this took a few bits of touching up to get right. The effort is worth it though. The rails were also then painted in ochre and the gun ports touched up again after ochre overspray. I used a Prismacolor silver pencil to add a waterline on the hull, and made sure this was a few millimetres below the eventual one. The plan is to then use that as a guide and copper above it. Once coppered, I'll add another regular pencil line at the correct height and score a line along it before removing the copper tape above the waterline. A 50m roll of 6mm self-adhesive copper tape is included. This is reduced down into 18mm lengths. It sure does take some time, so I recommend a tool like this for making them. Each plate is exactly the same length and with perfectly square ends. Ok, it's about time to start coppering this hull...


- 488 replies
-
- 41
-
-
-
- Indefatigable
- Vanguard Models
- (and 1 more)
-
Ok, I don't think these paints can be brushed. I'm sure they are formulated for airbrush only, but could be wrong. V1 is the kit designed for these paints, but the V2 is made from timber varieties that supposedly don't need to use the paint, although I'm not convinced about that claim, if you want to recreate the antiqued look.
- 3 replies
-
- 4
-
-
- san bartolome
- stand
- (and 1 more)
-
I will have an update here by weekend. Prepping and painting the hull has taken an inordinate amount of time for me, and I want it under poly varnish before I post my WIP. Just a couple days or so now.
- 488 replies
-
- 26
-
-
-
- Indefatigable
- Vanguard Models
- (and 1 more)
-
Pavel Nikitin 1:32 Captain John Smith's Shallop - Ships of Pavel Nikitin
James H replied to James H's topic in REVIEWS: Model kits
And next week I shall be looking at their newly revamped Viking Drakkar, and the Santa Maria boat in two different scales. -
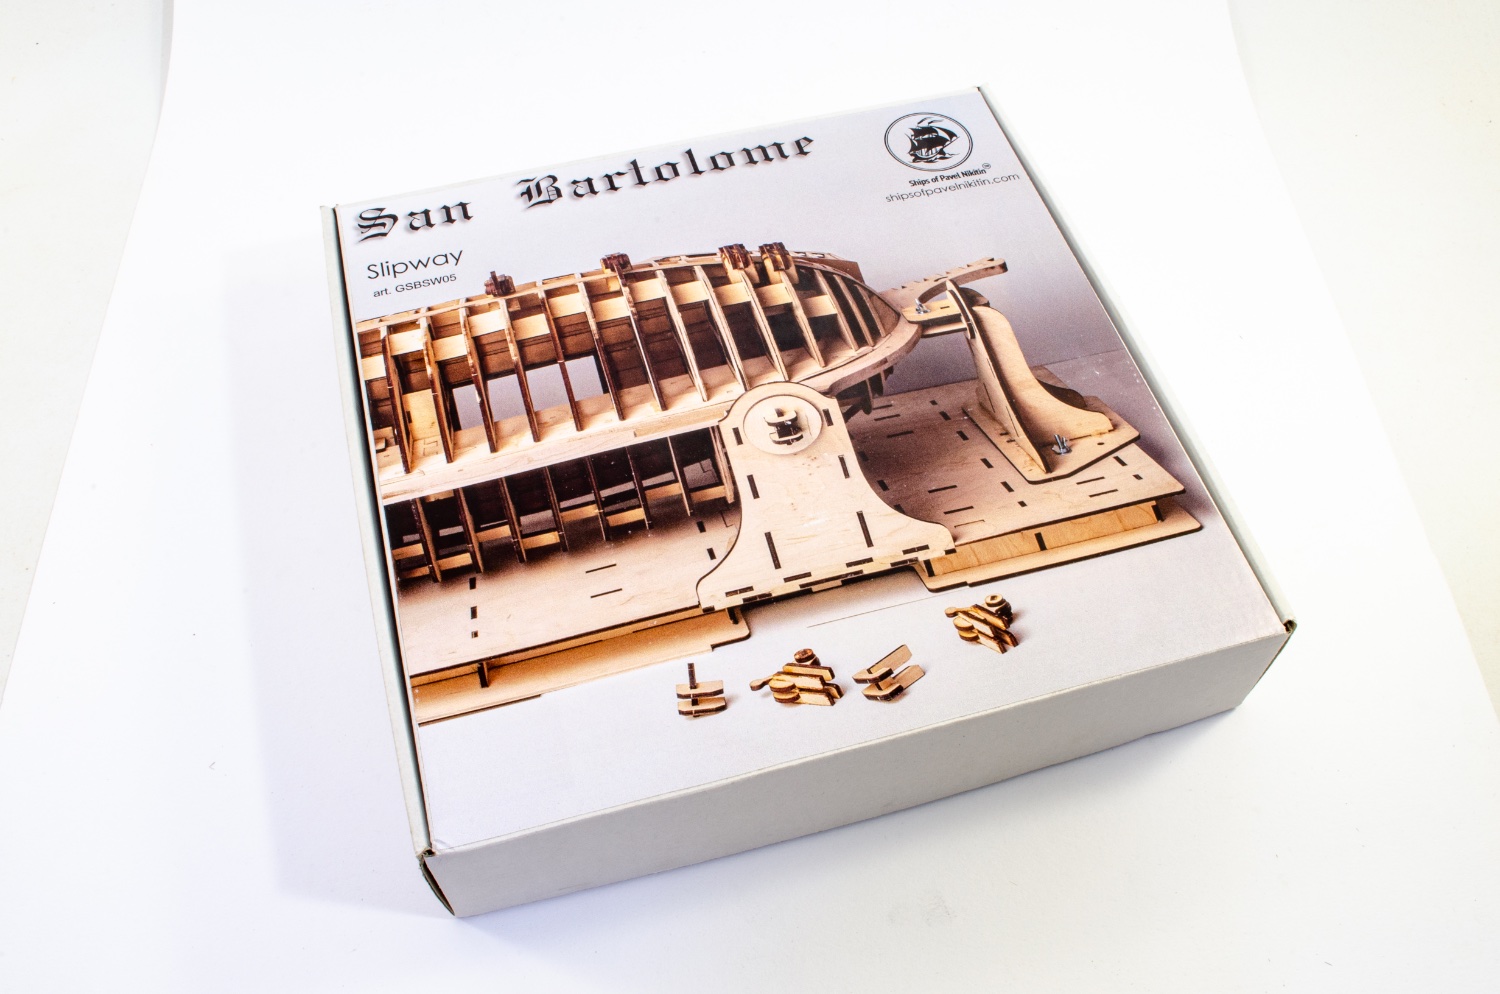
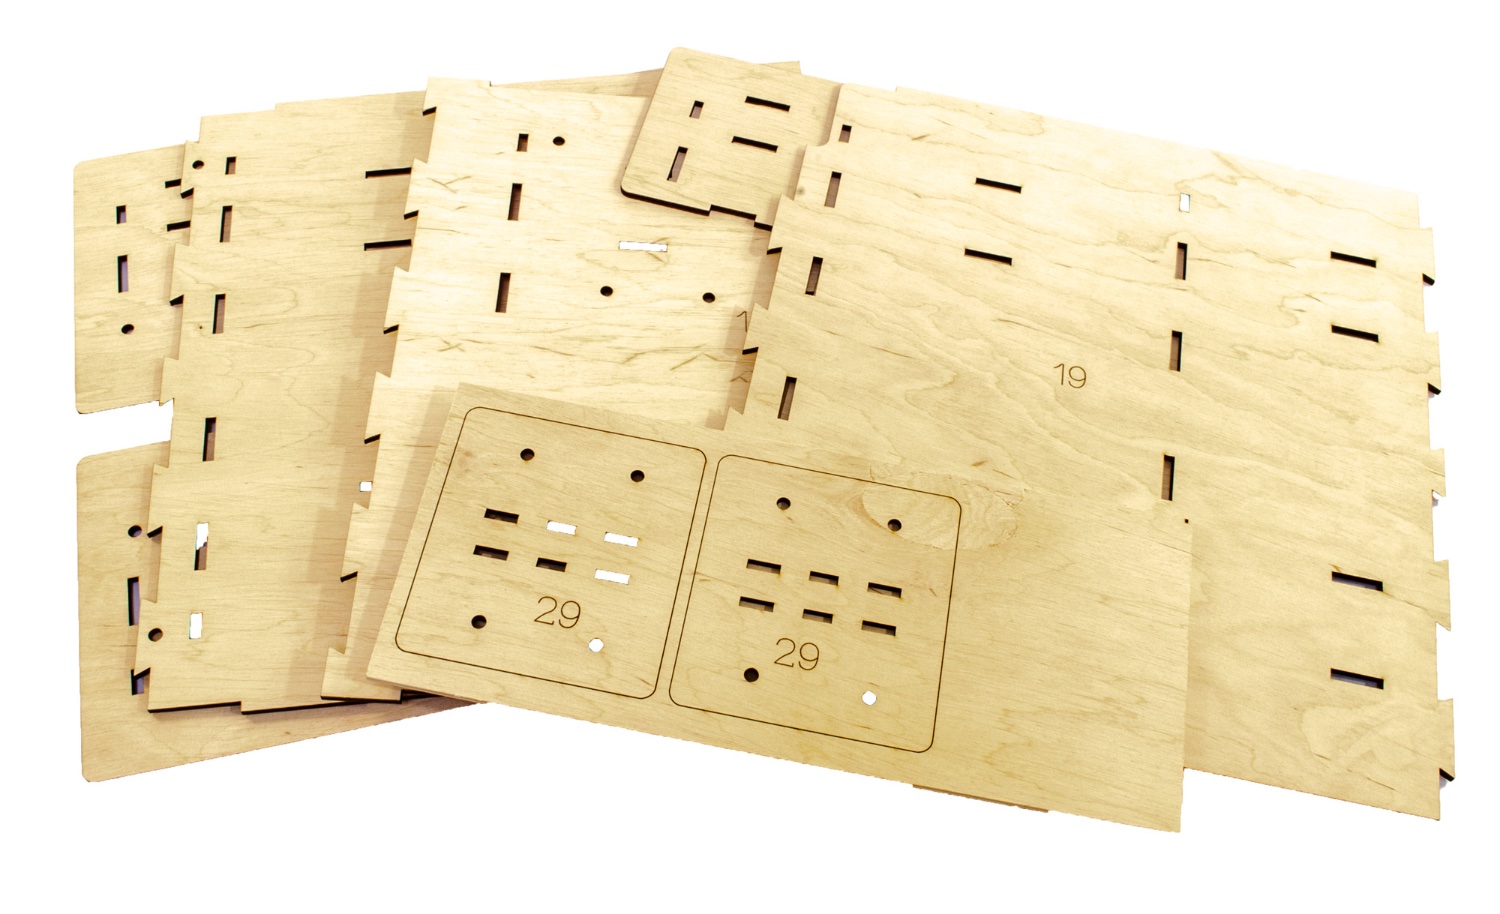
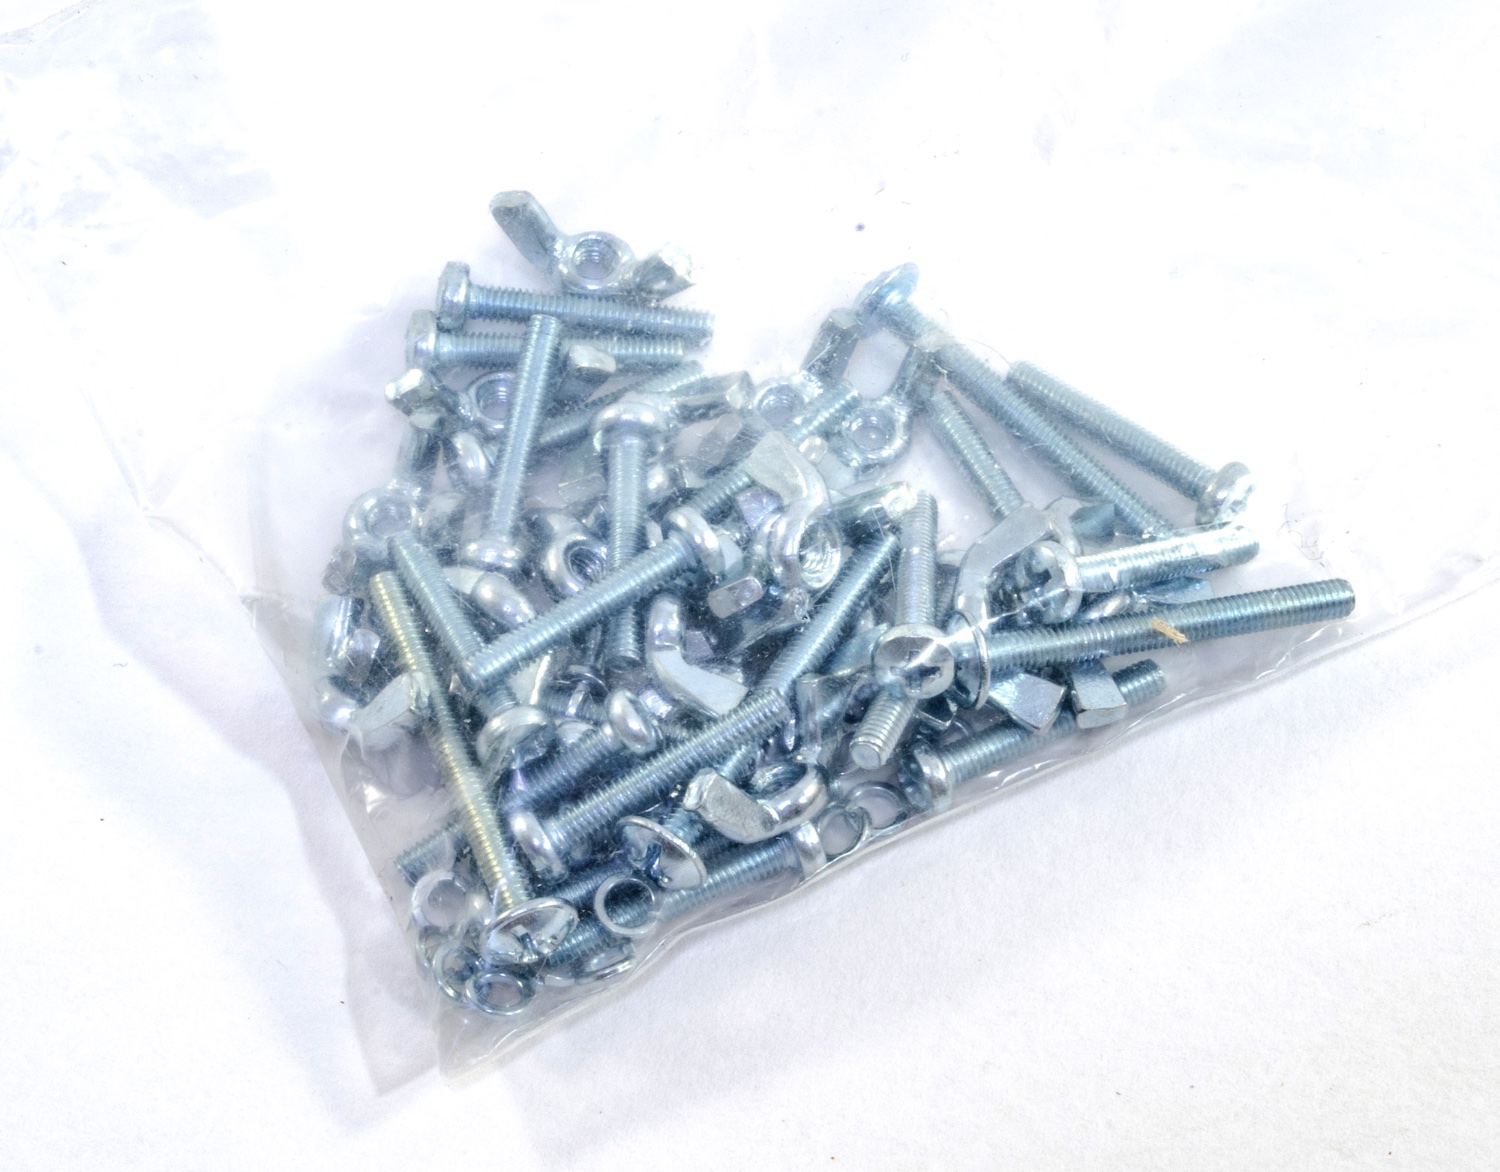
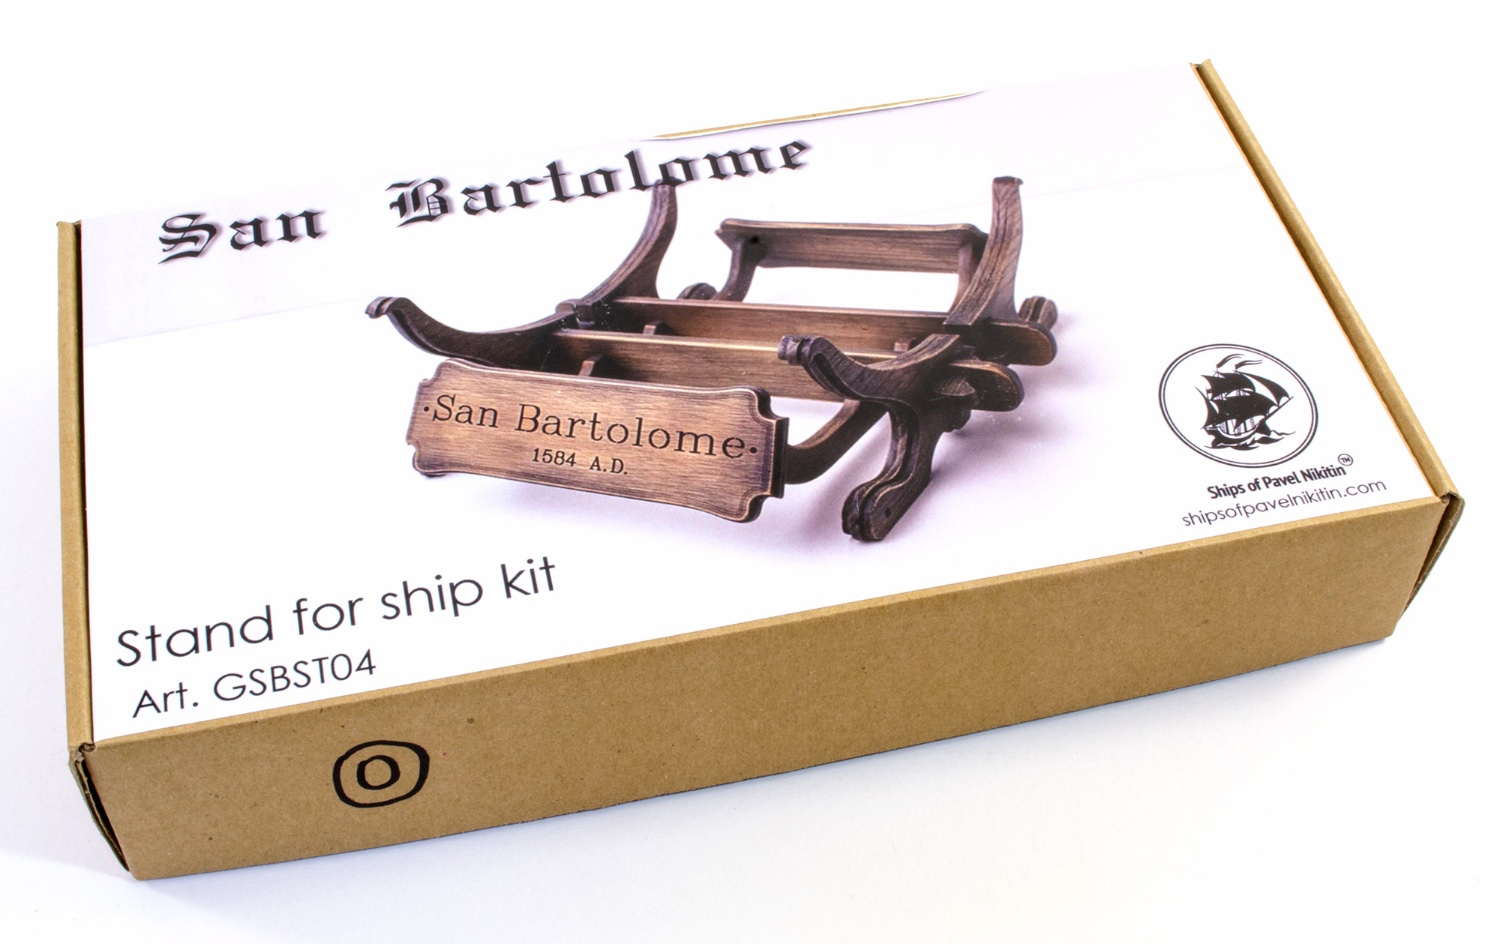
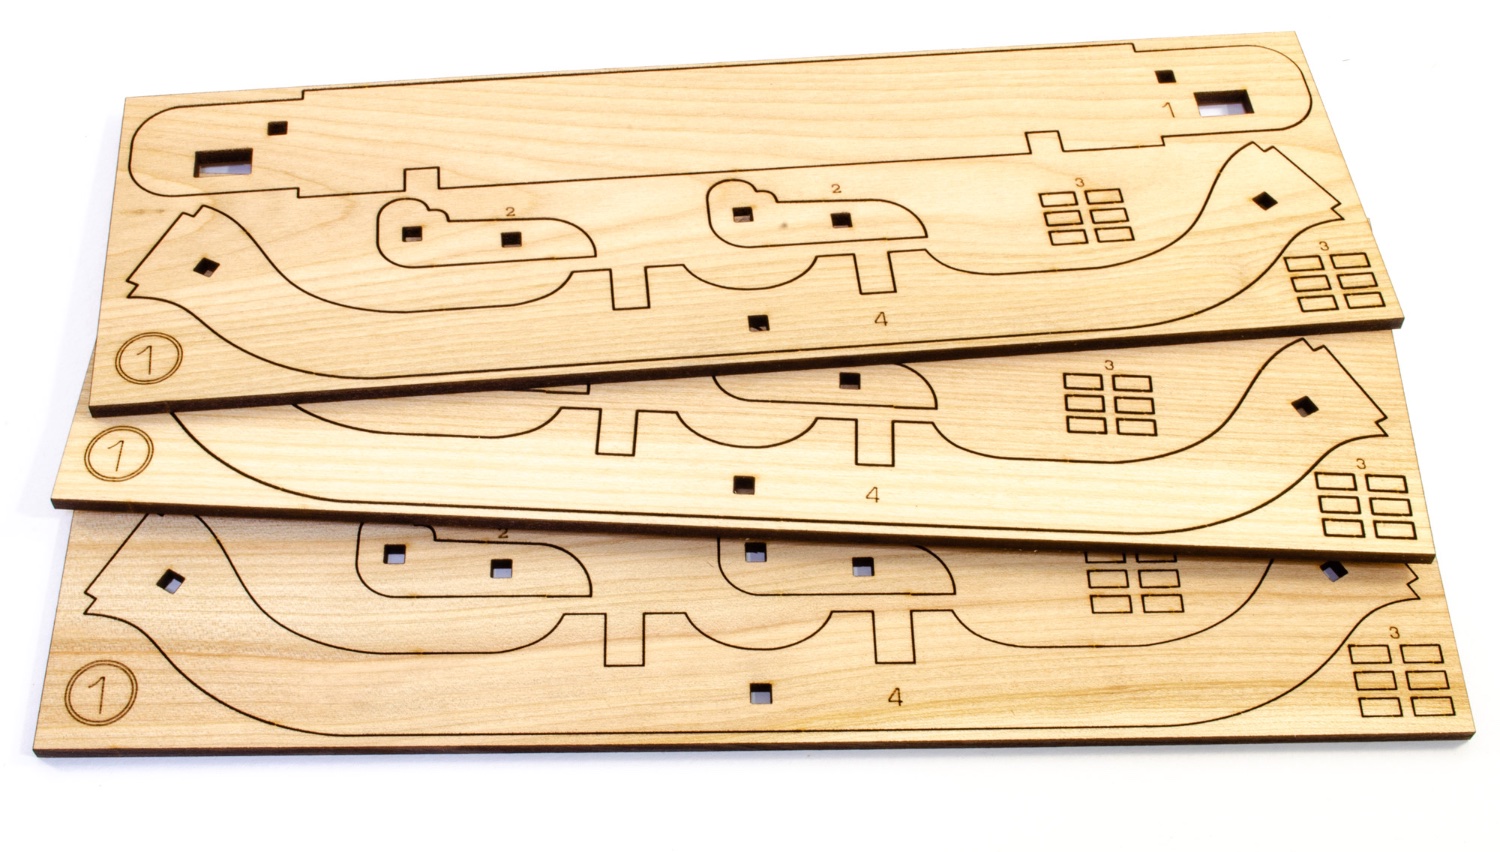
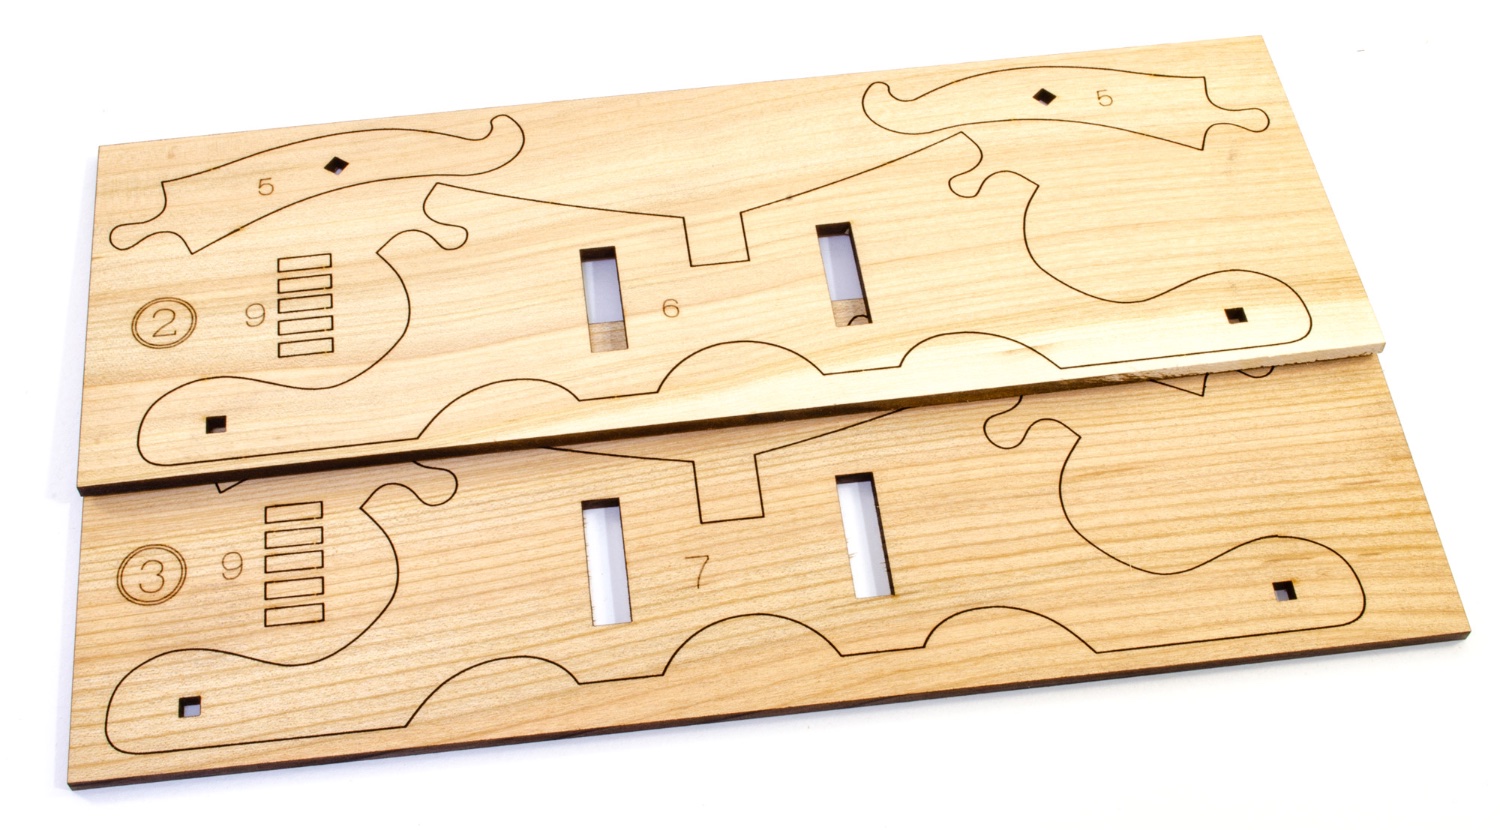
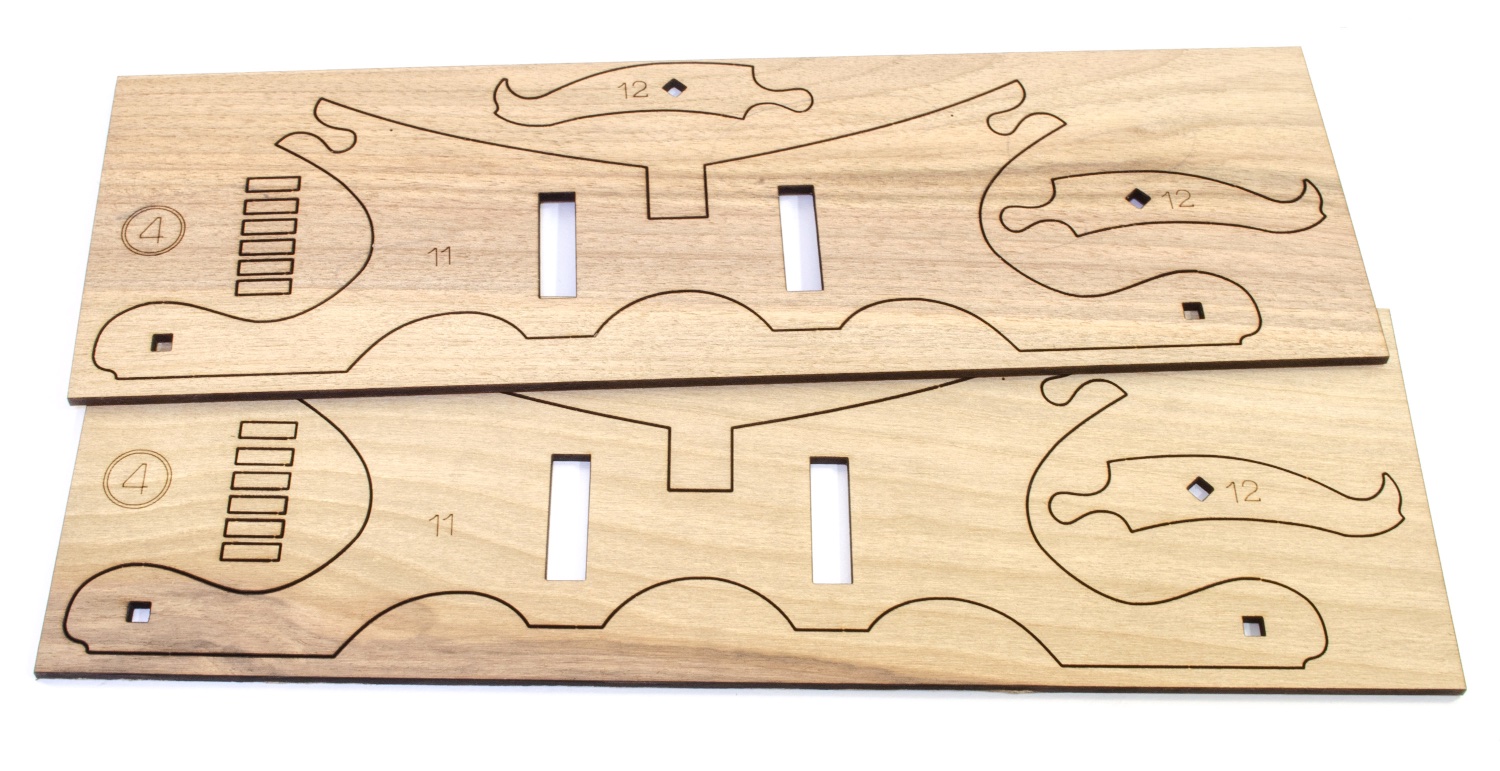
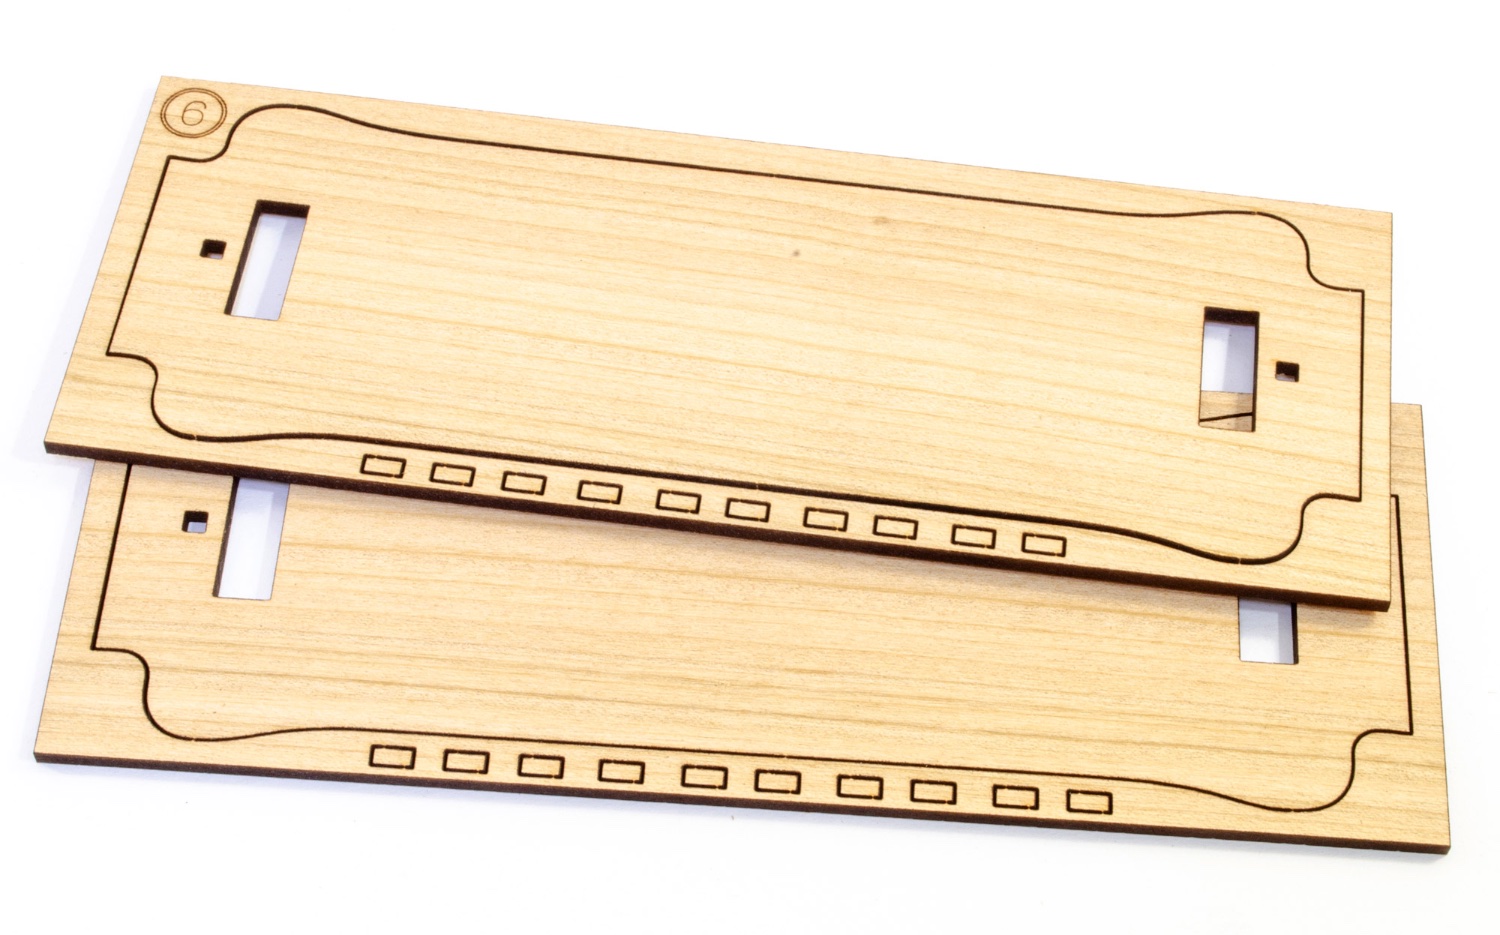
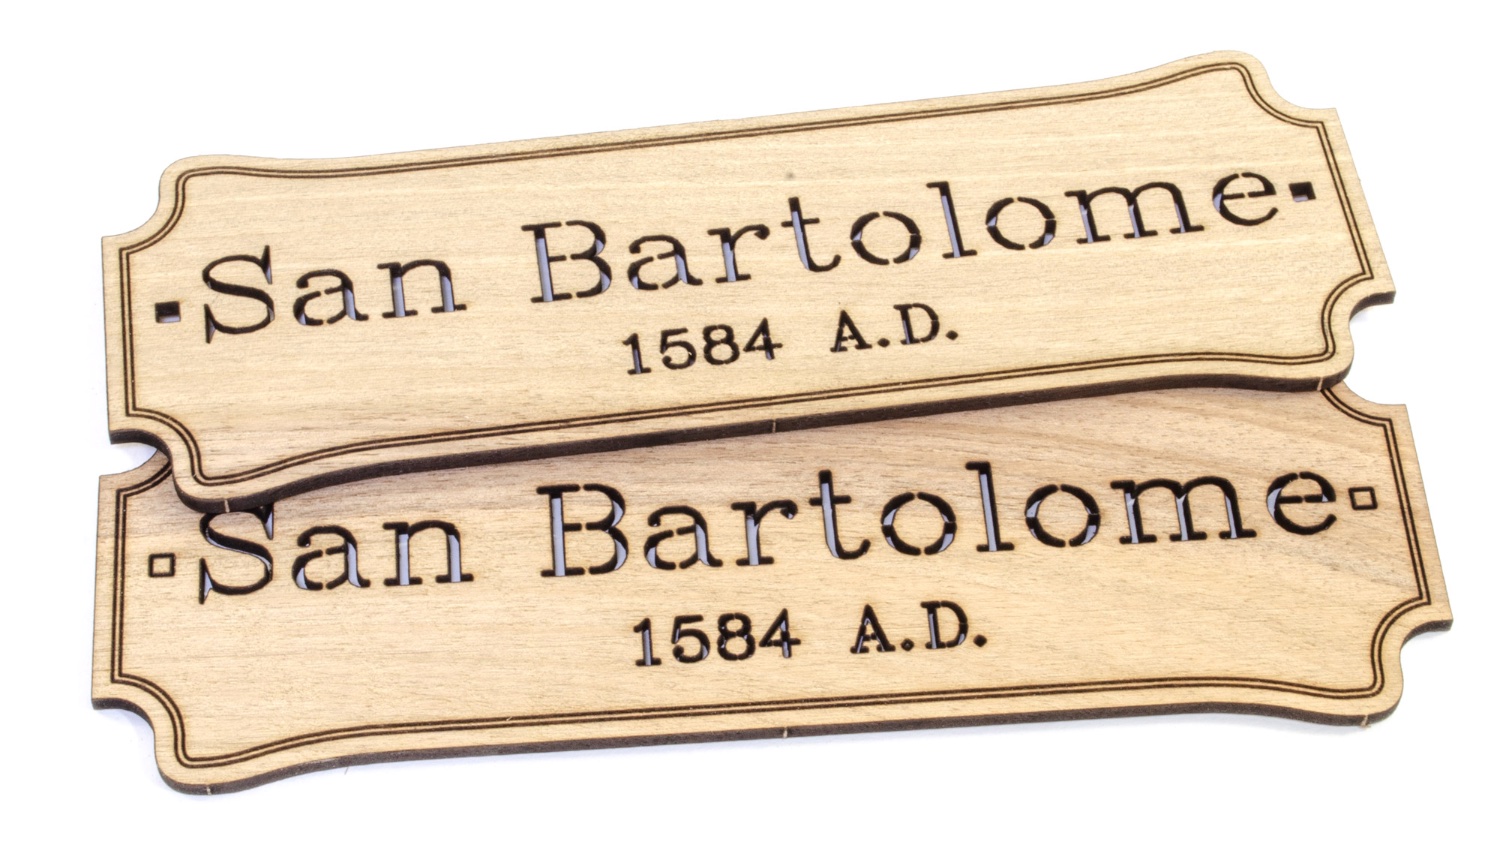
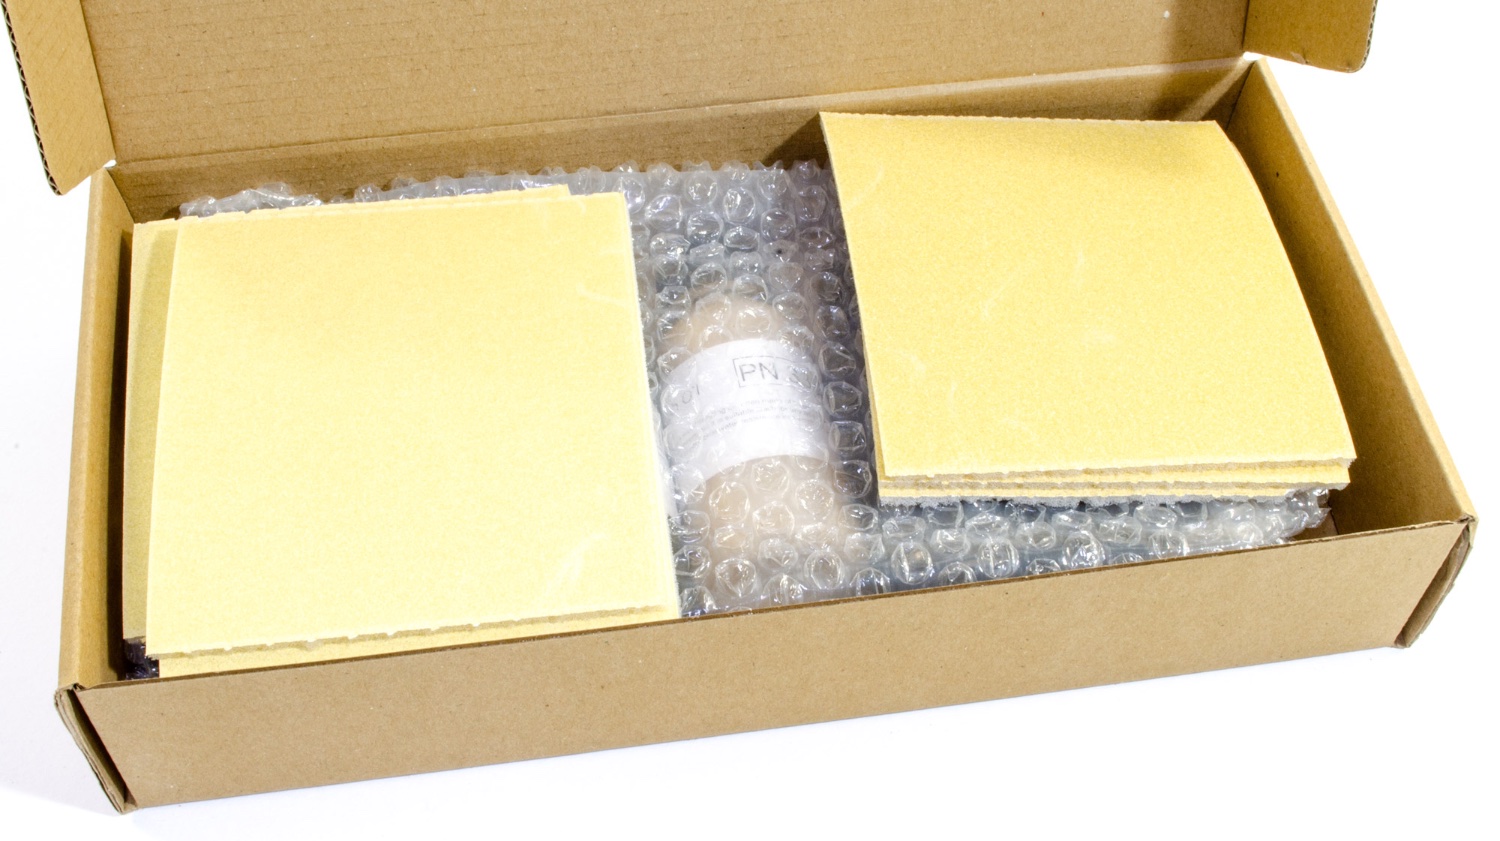
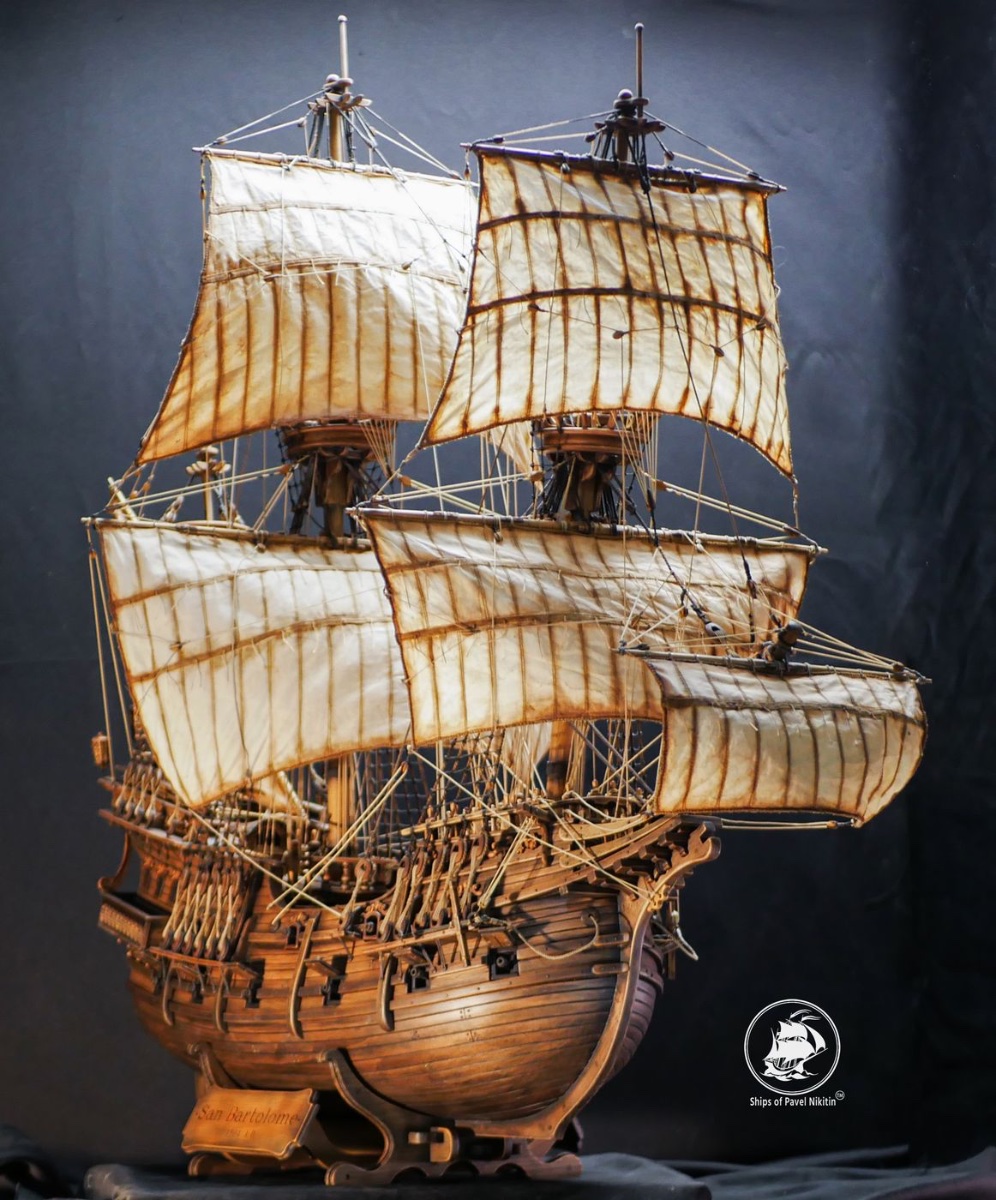
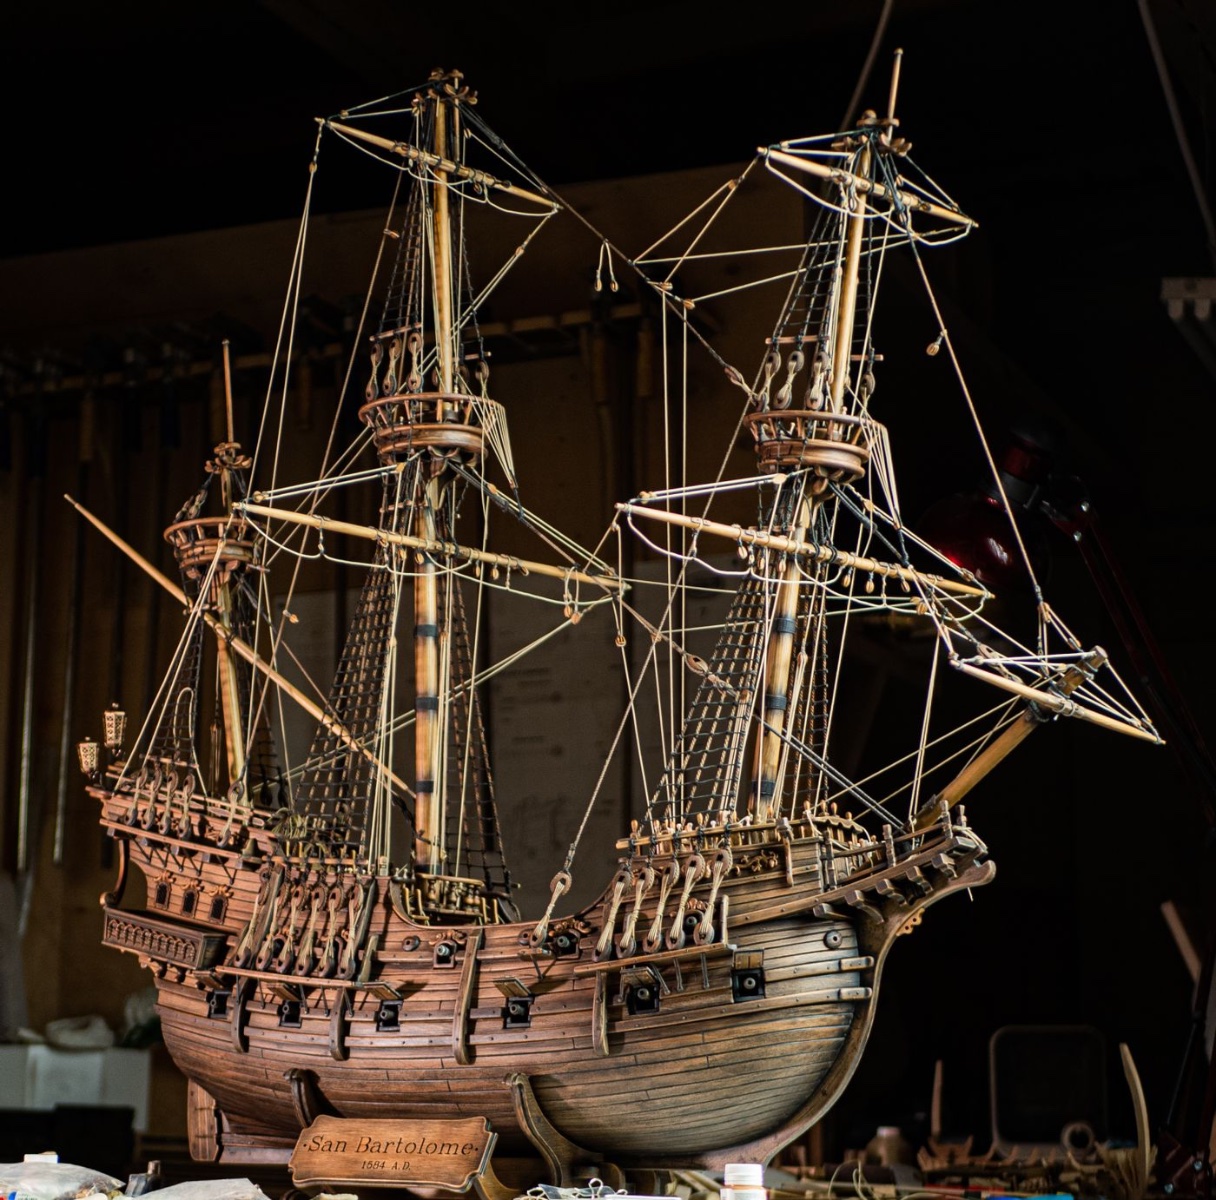
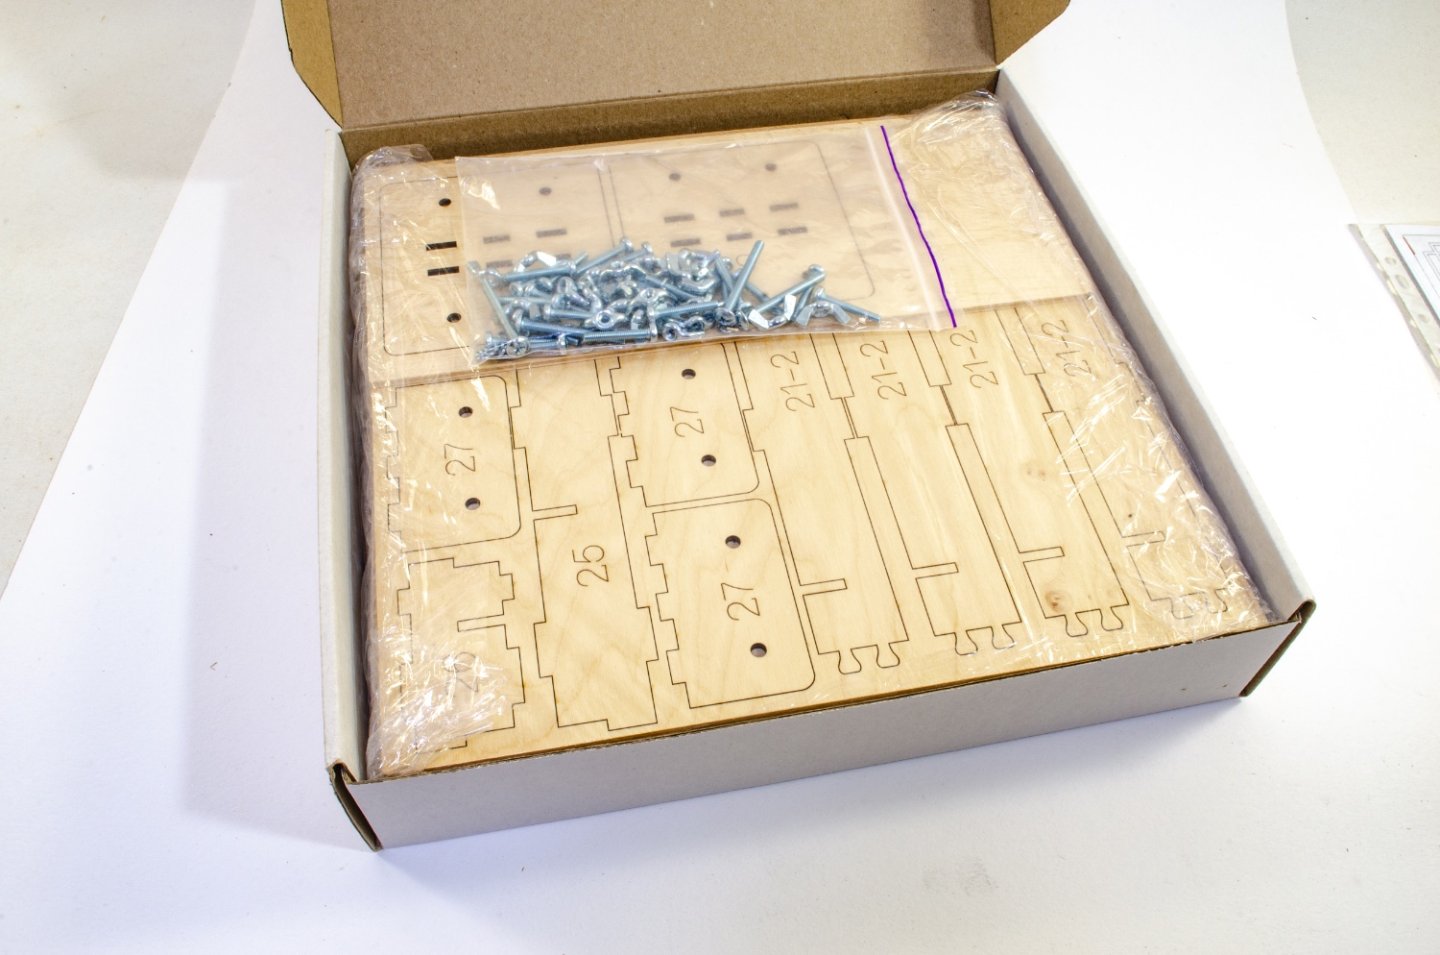
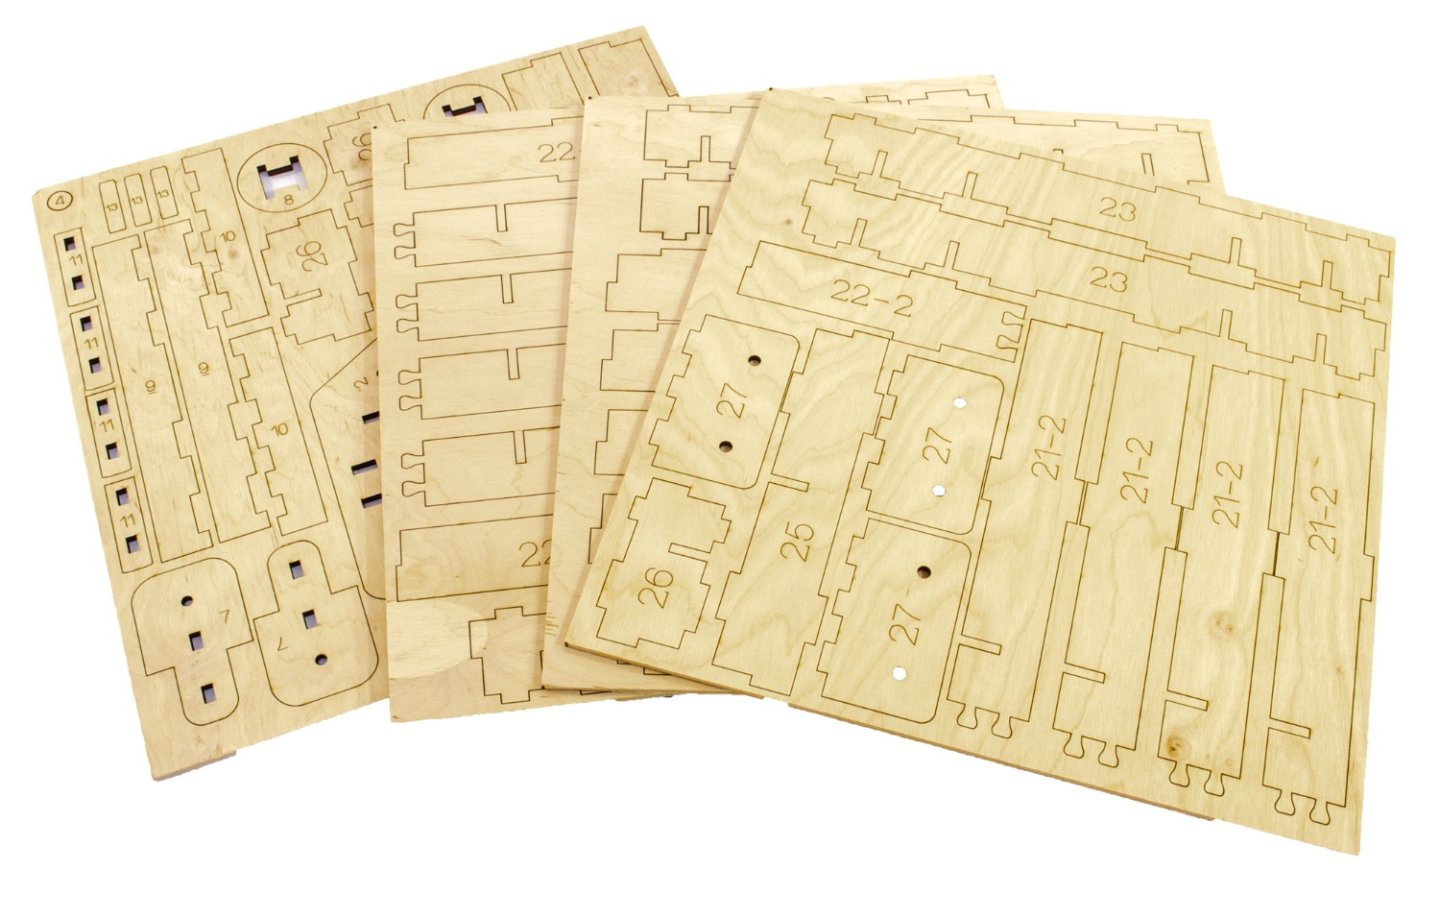
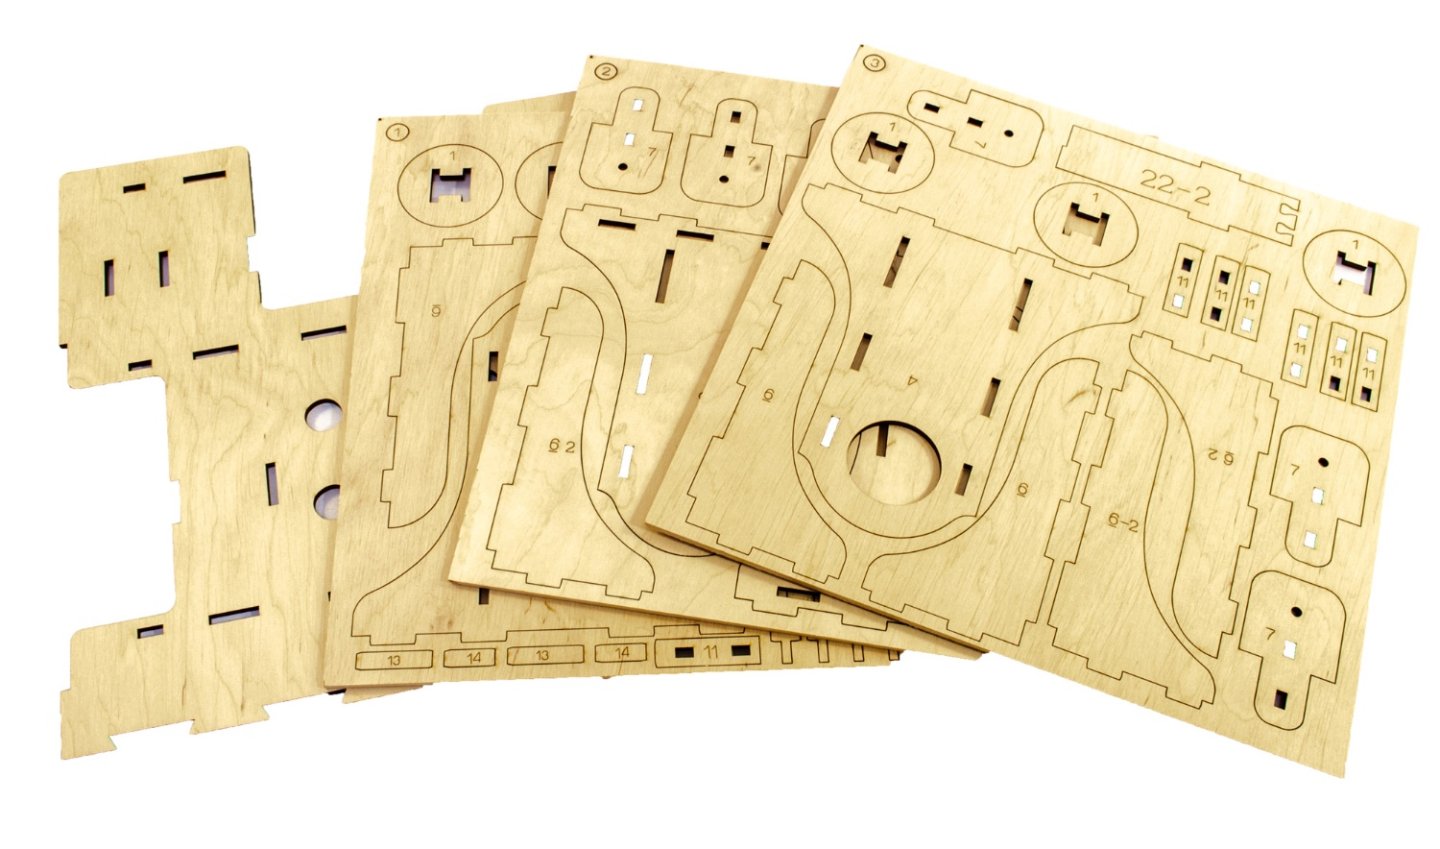
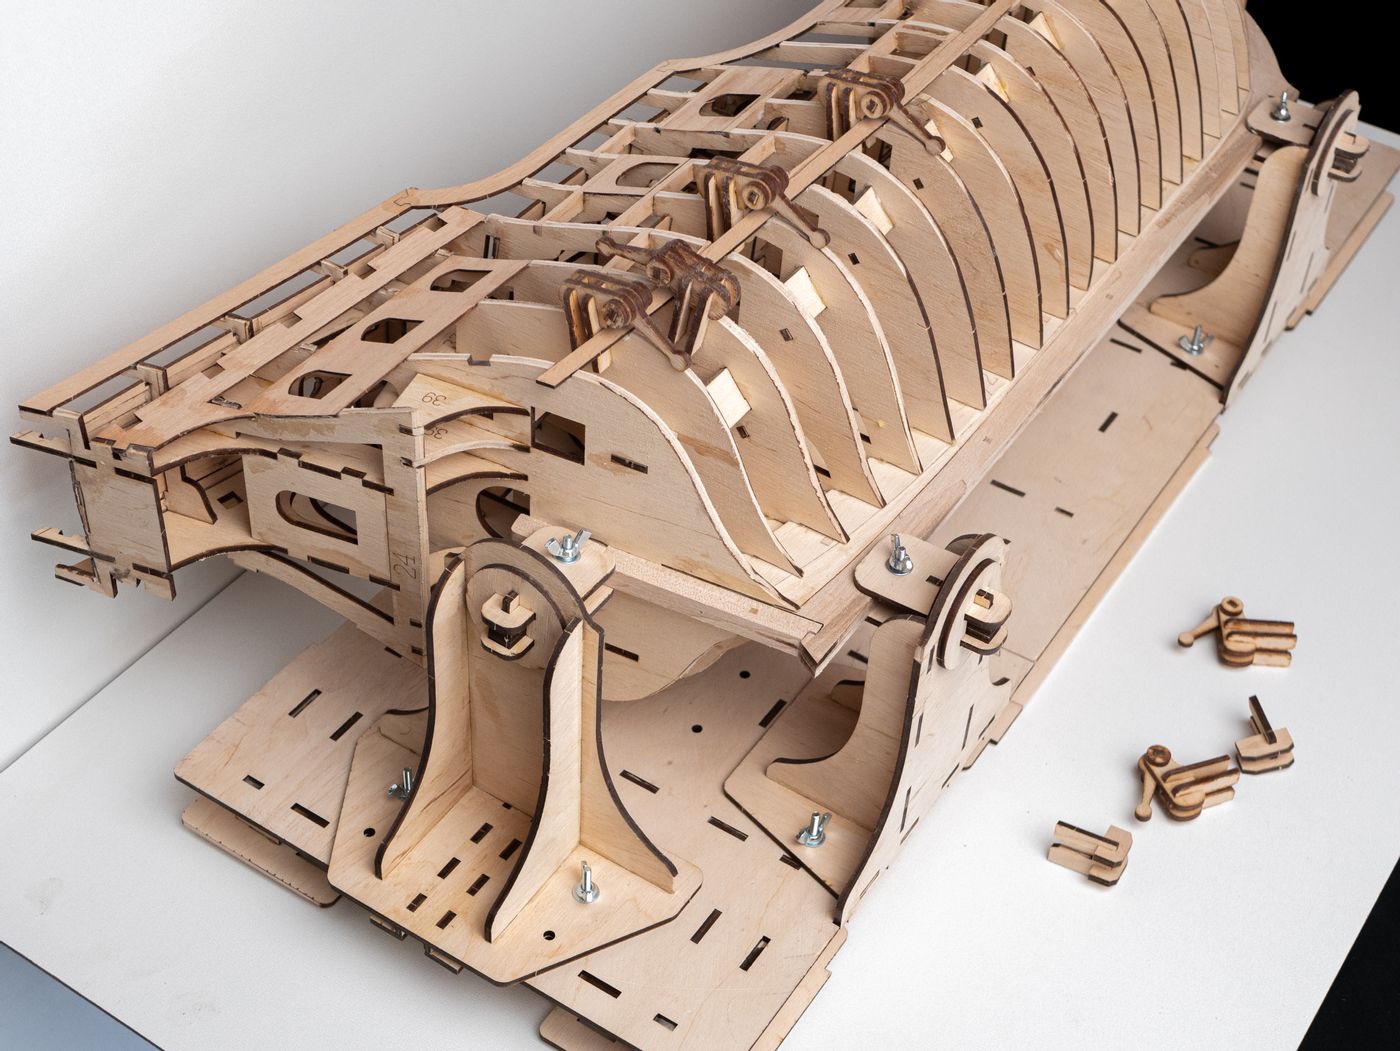
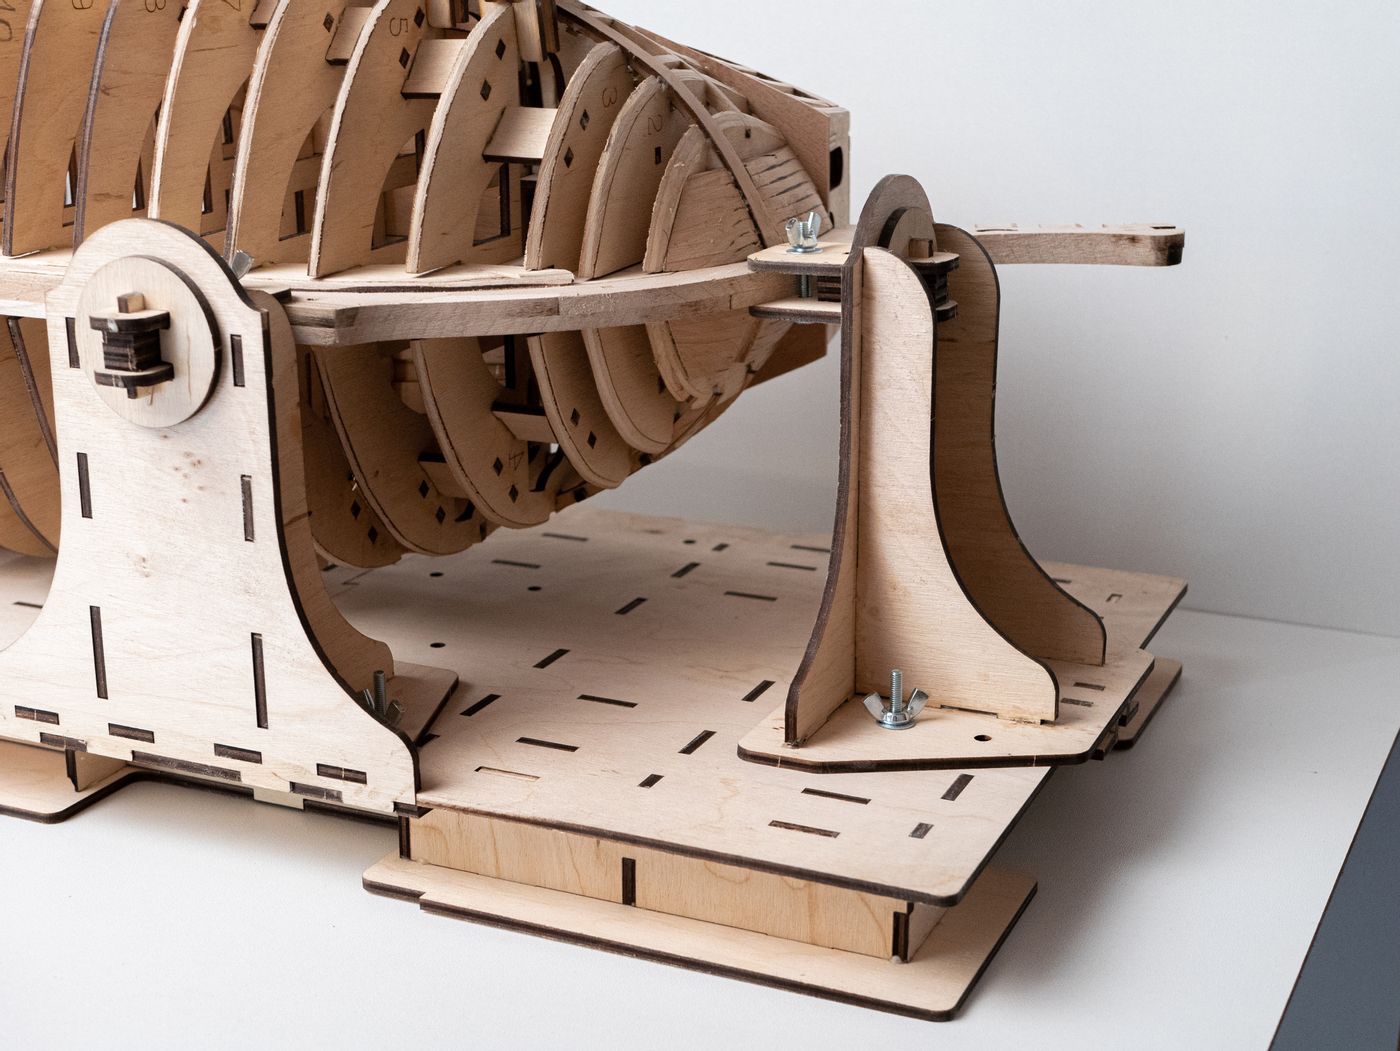
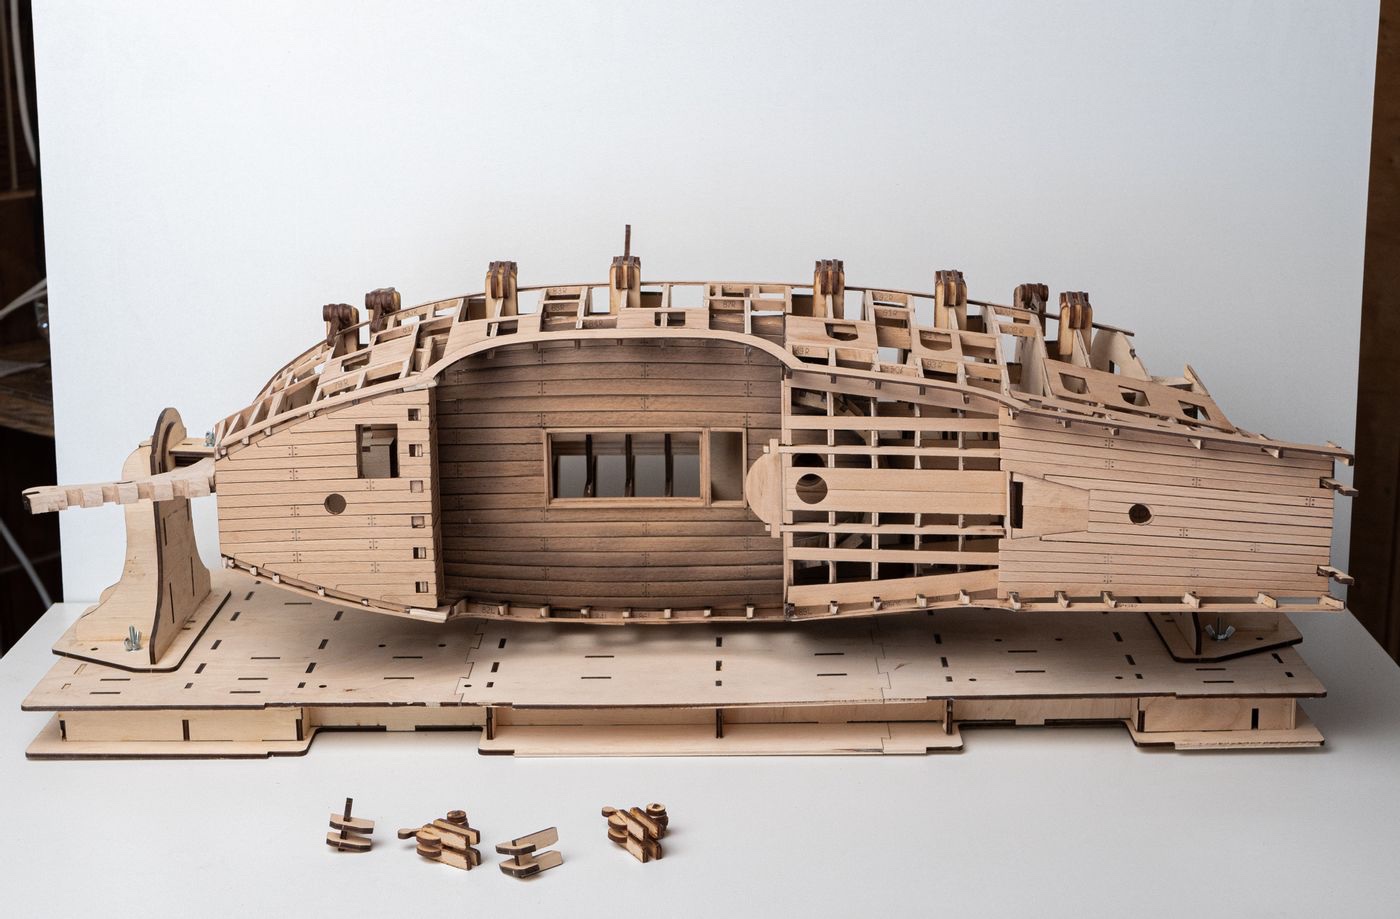
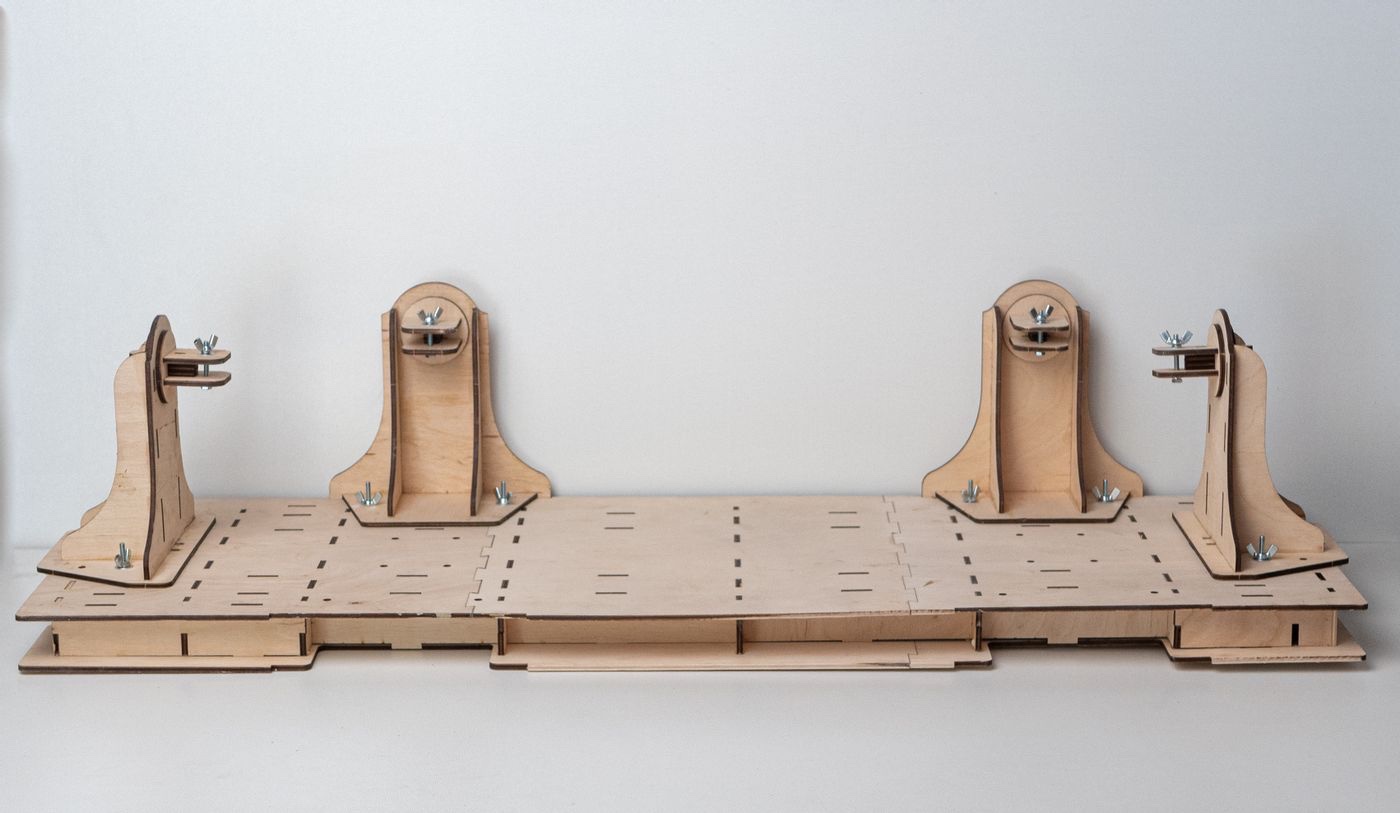
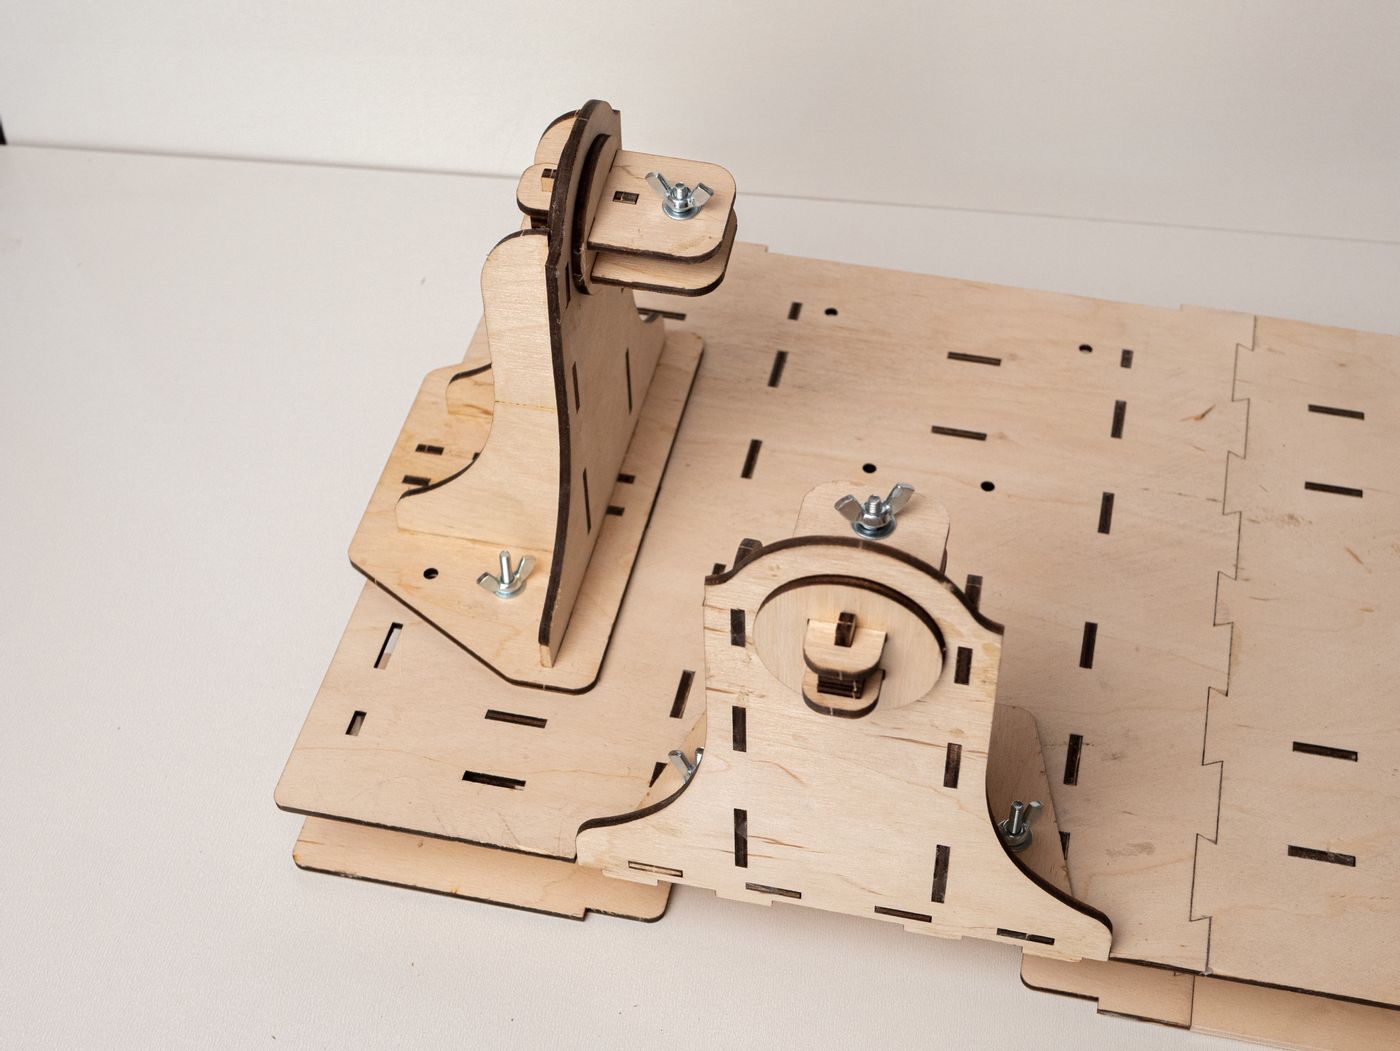
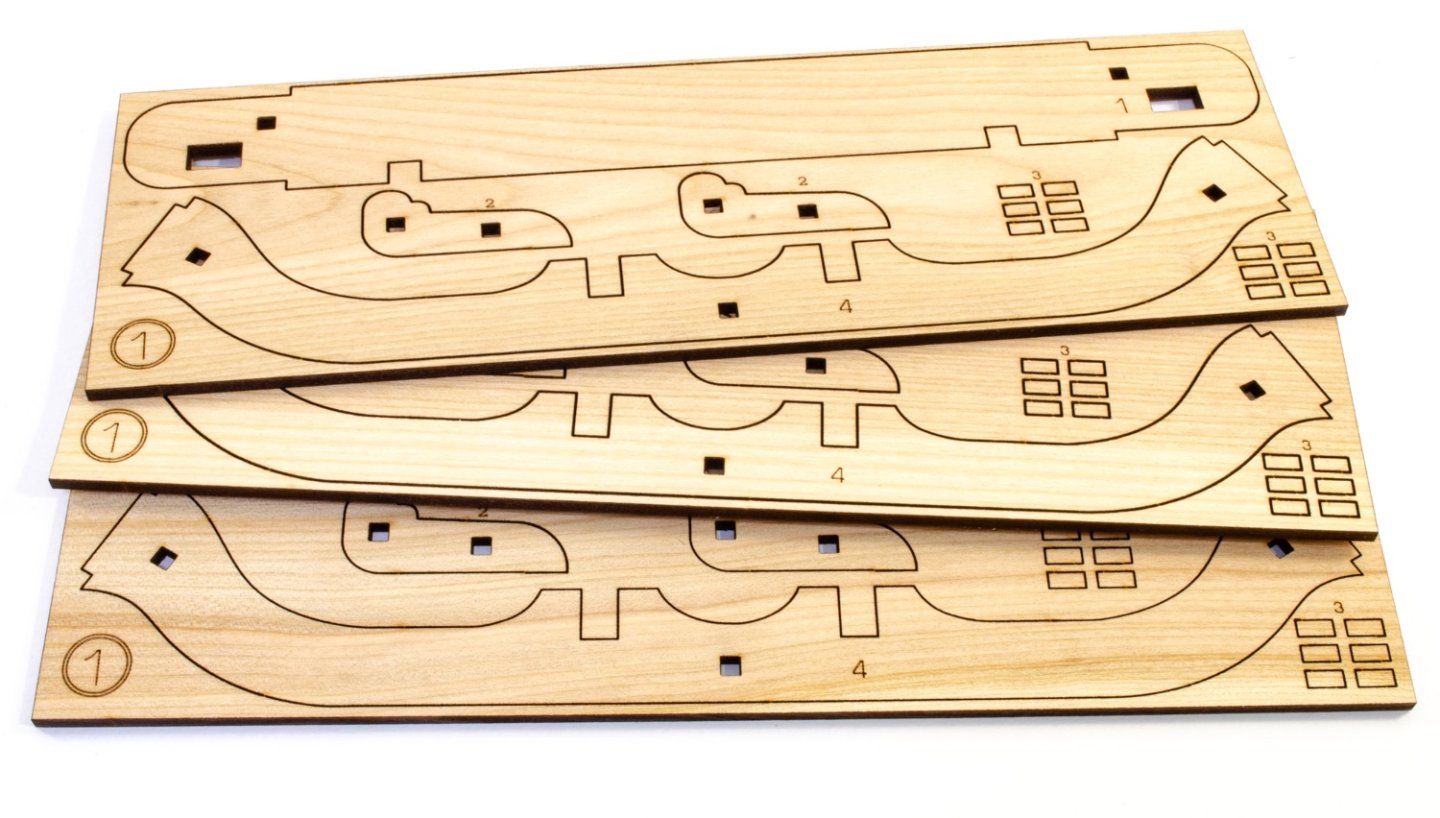
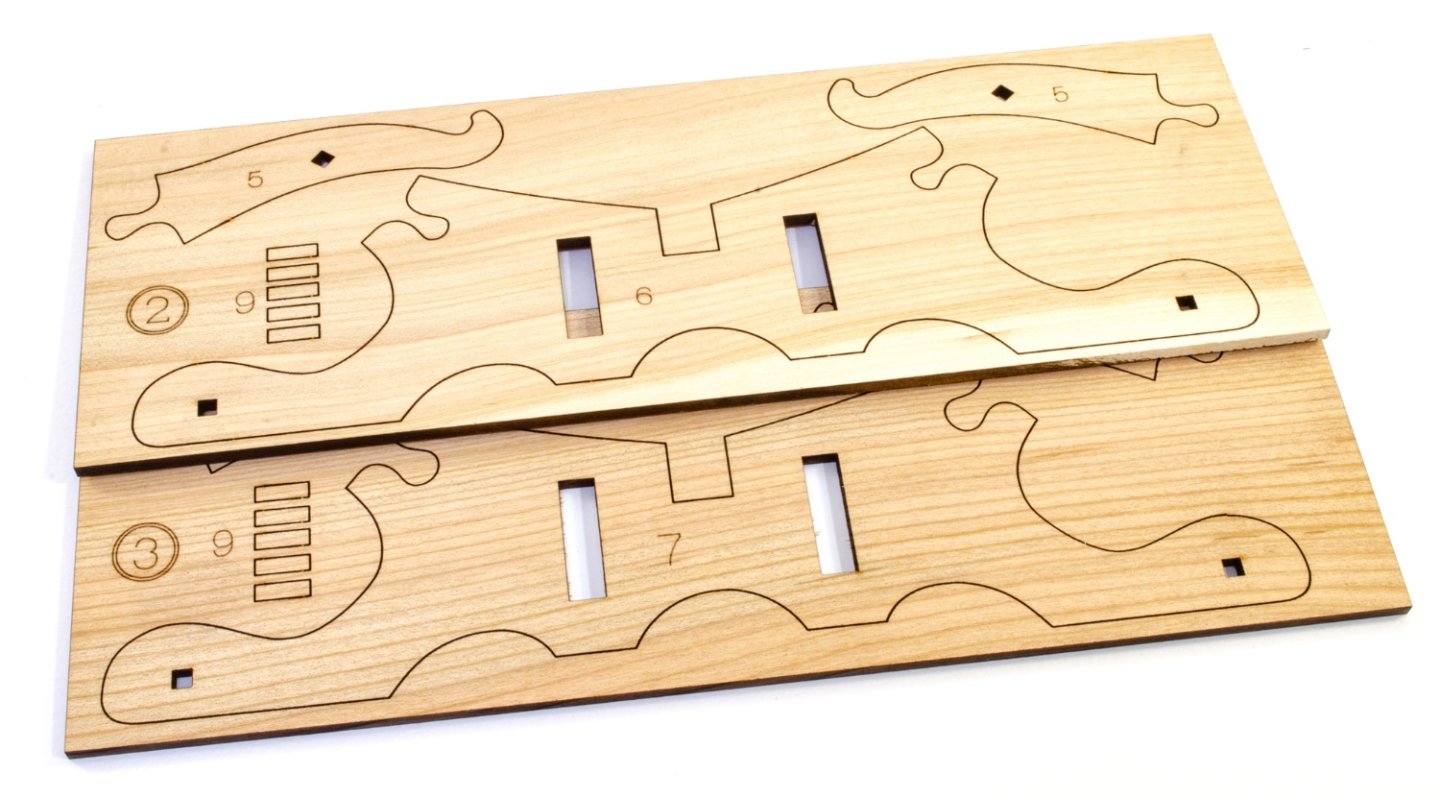
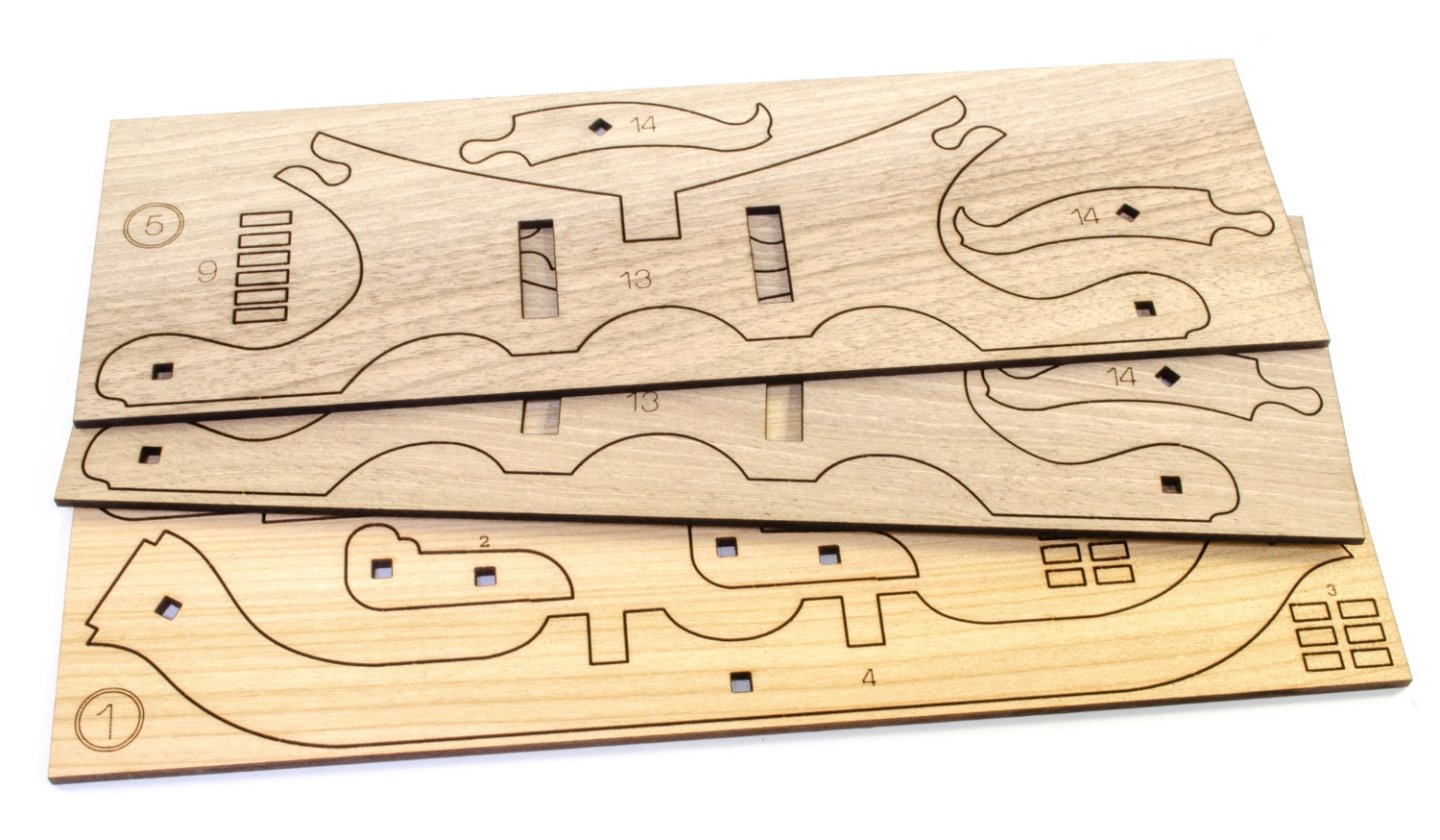
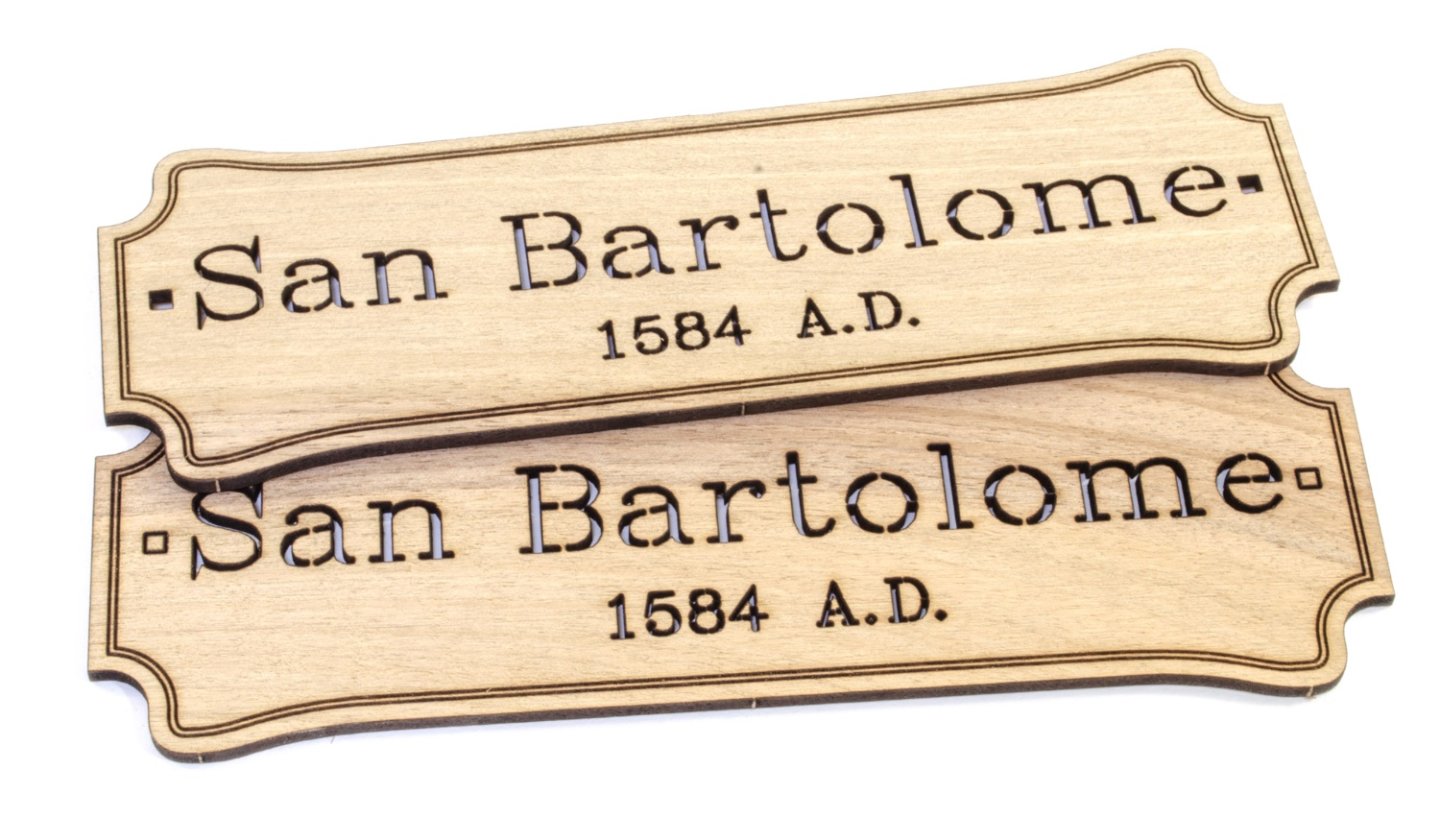
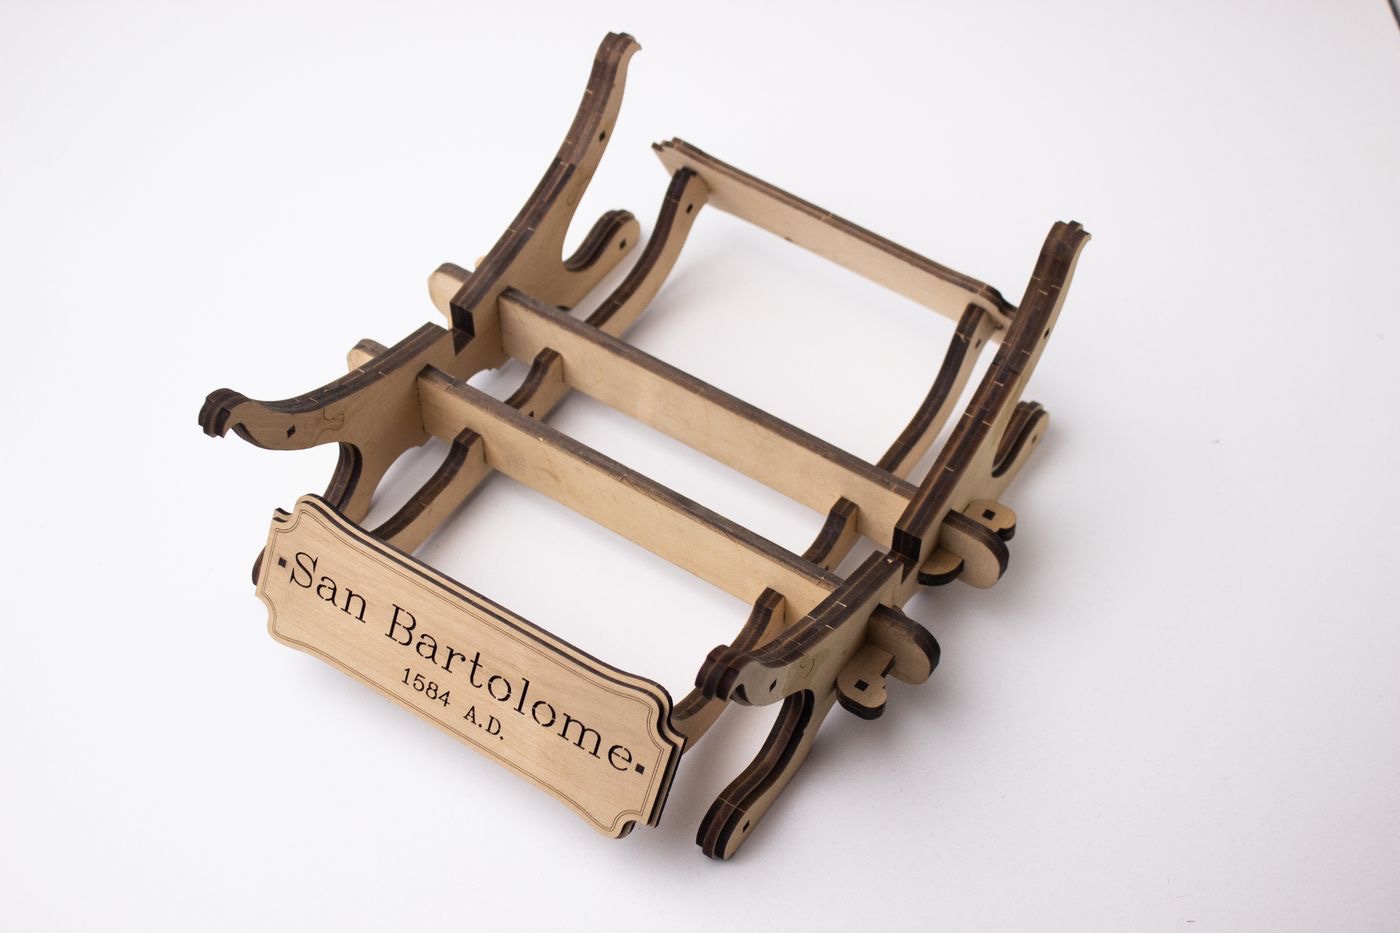
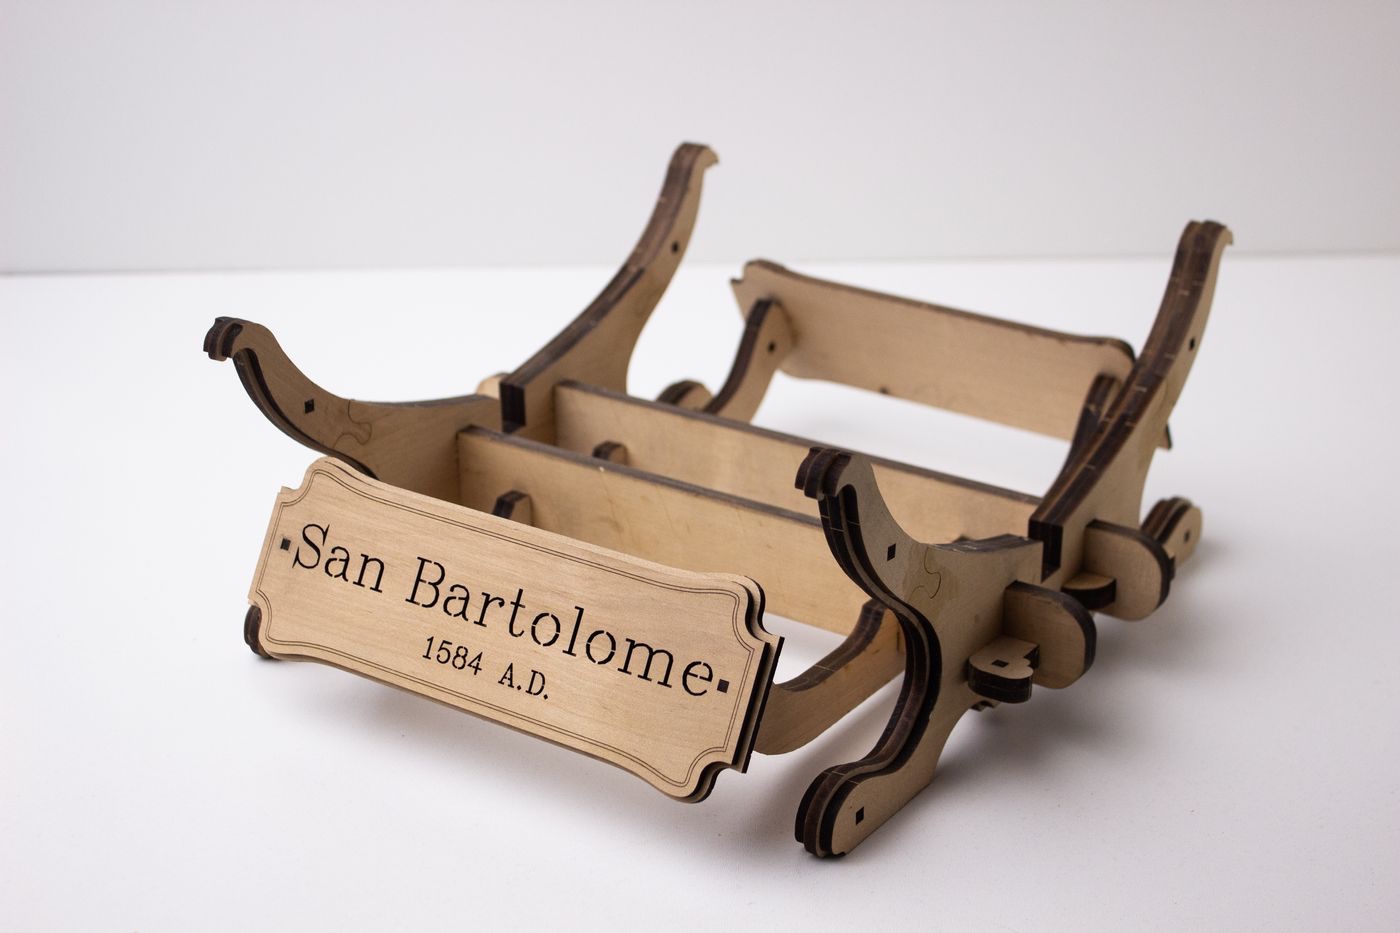
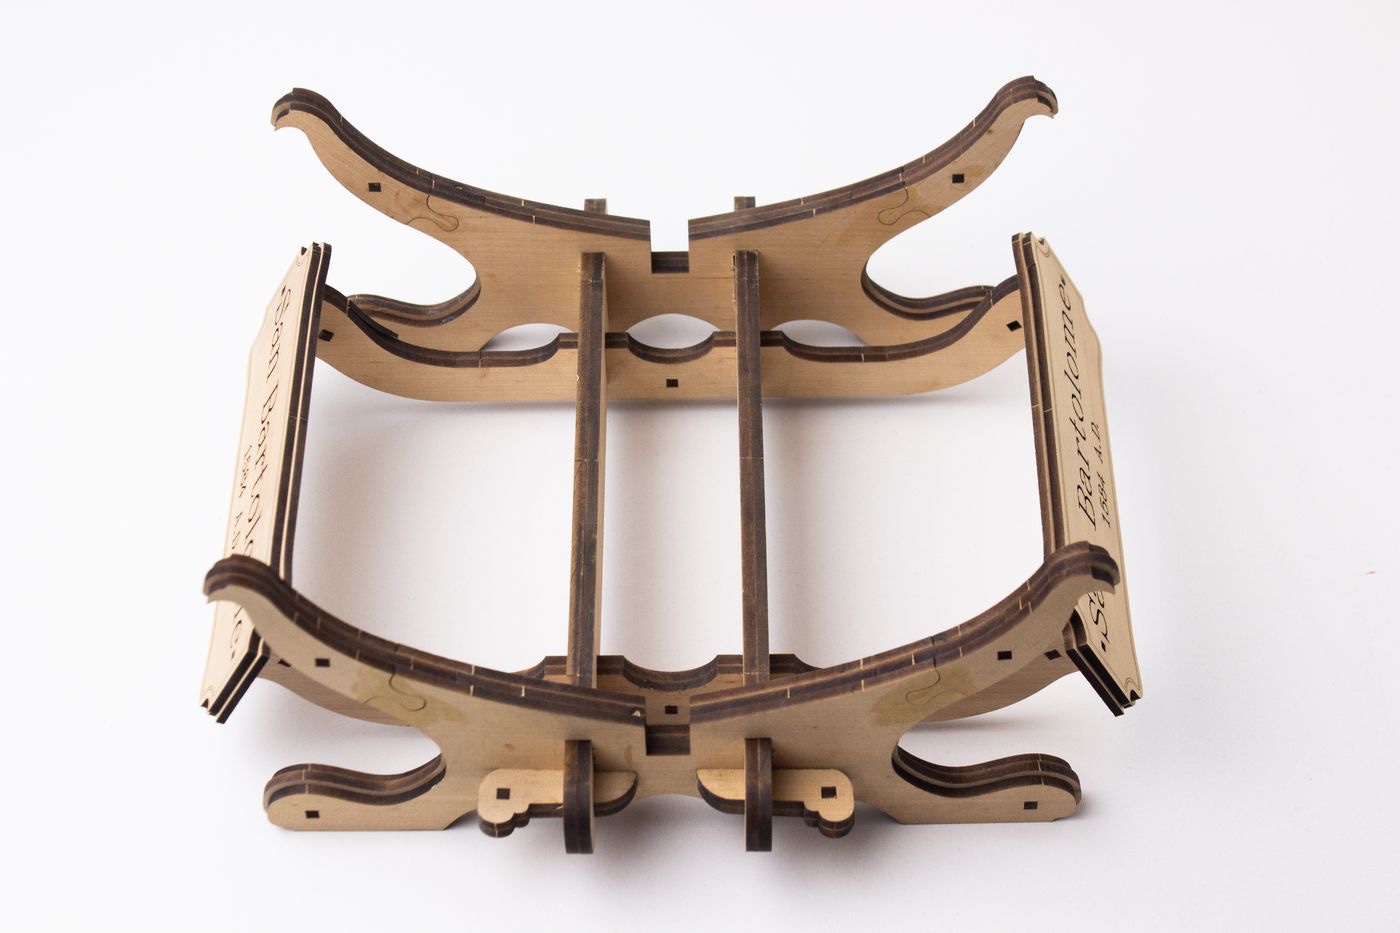
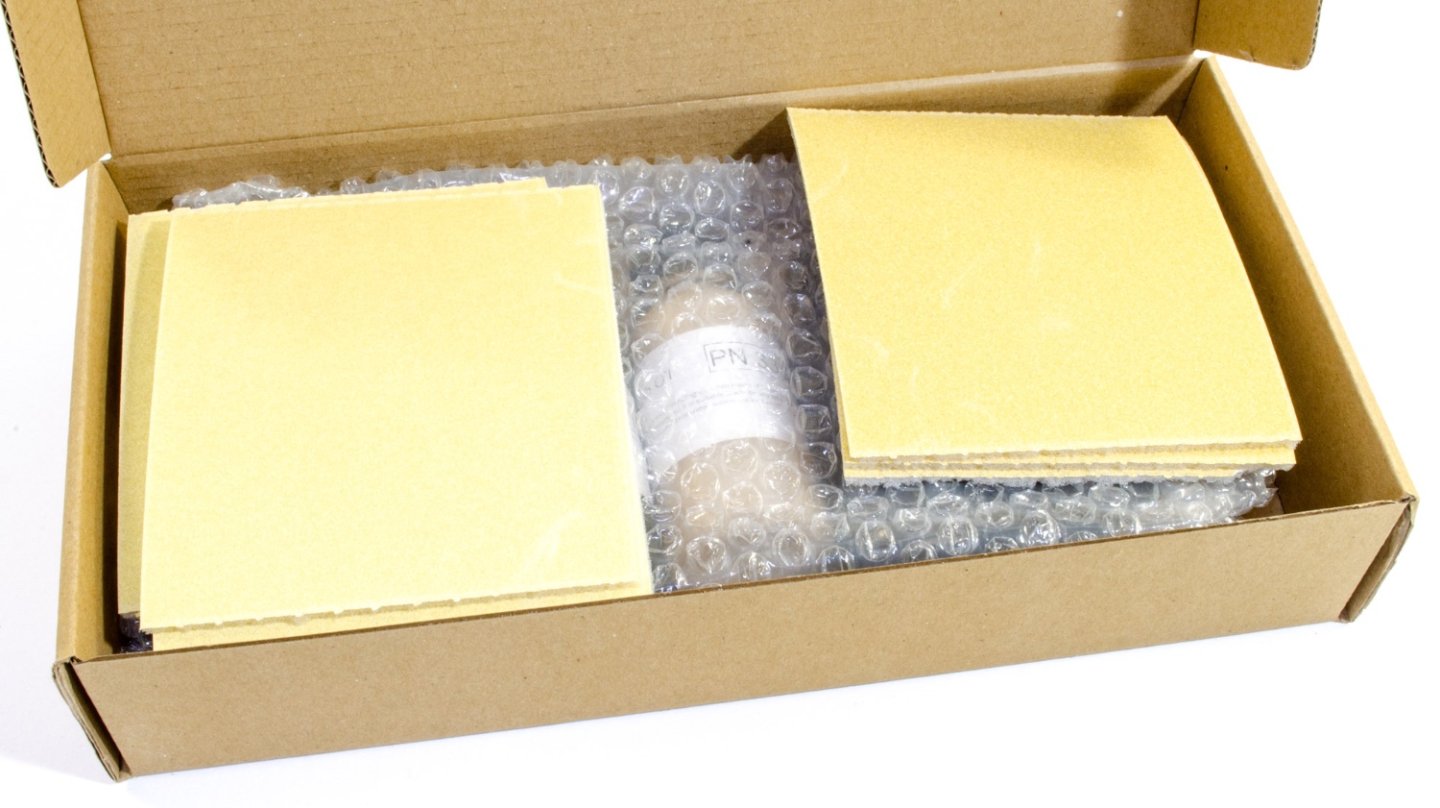
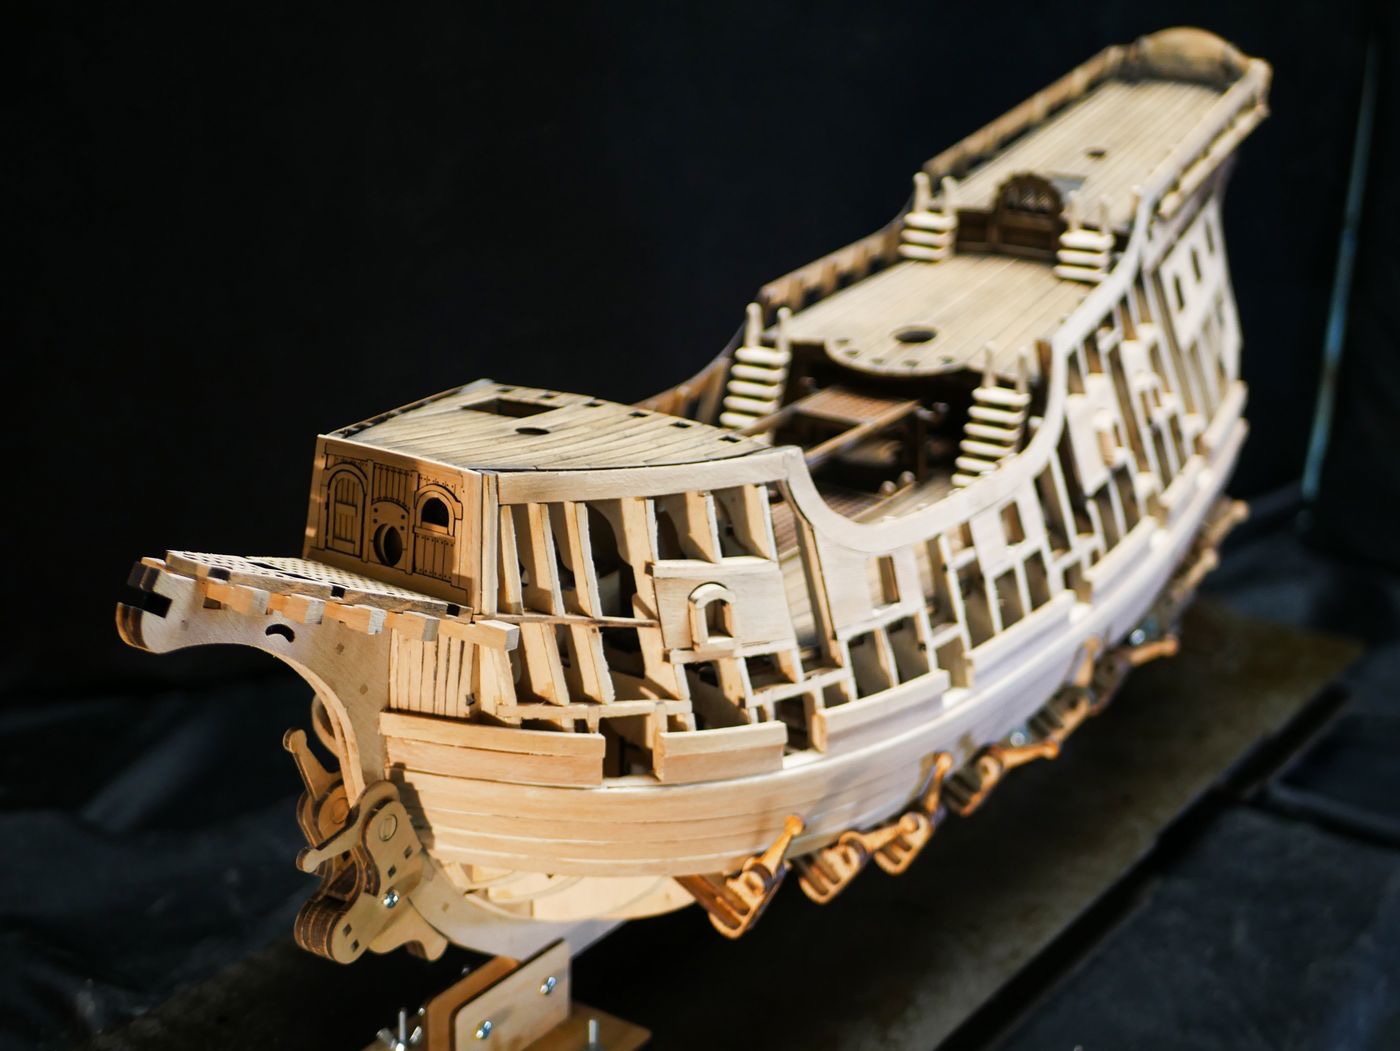
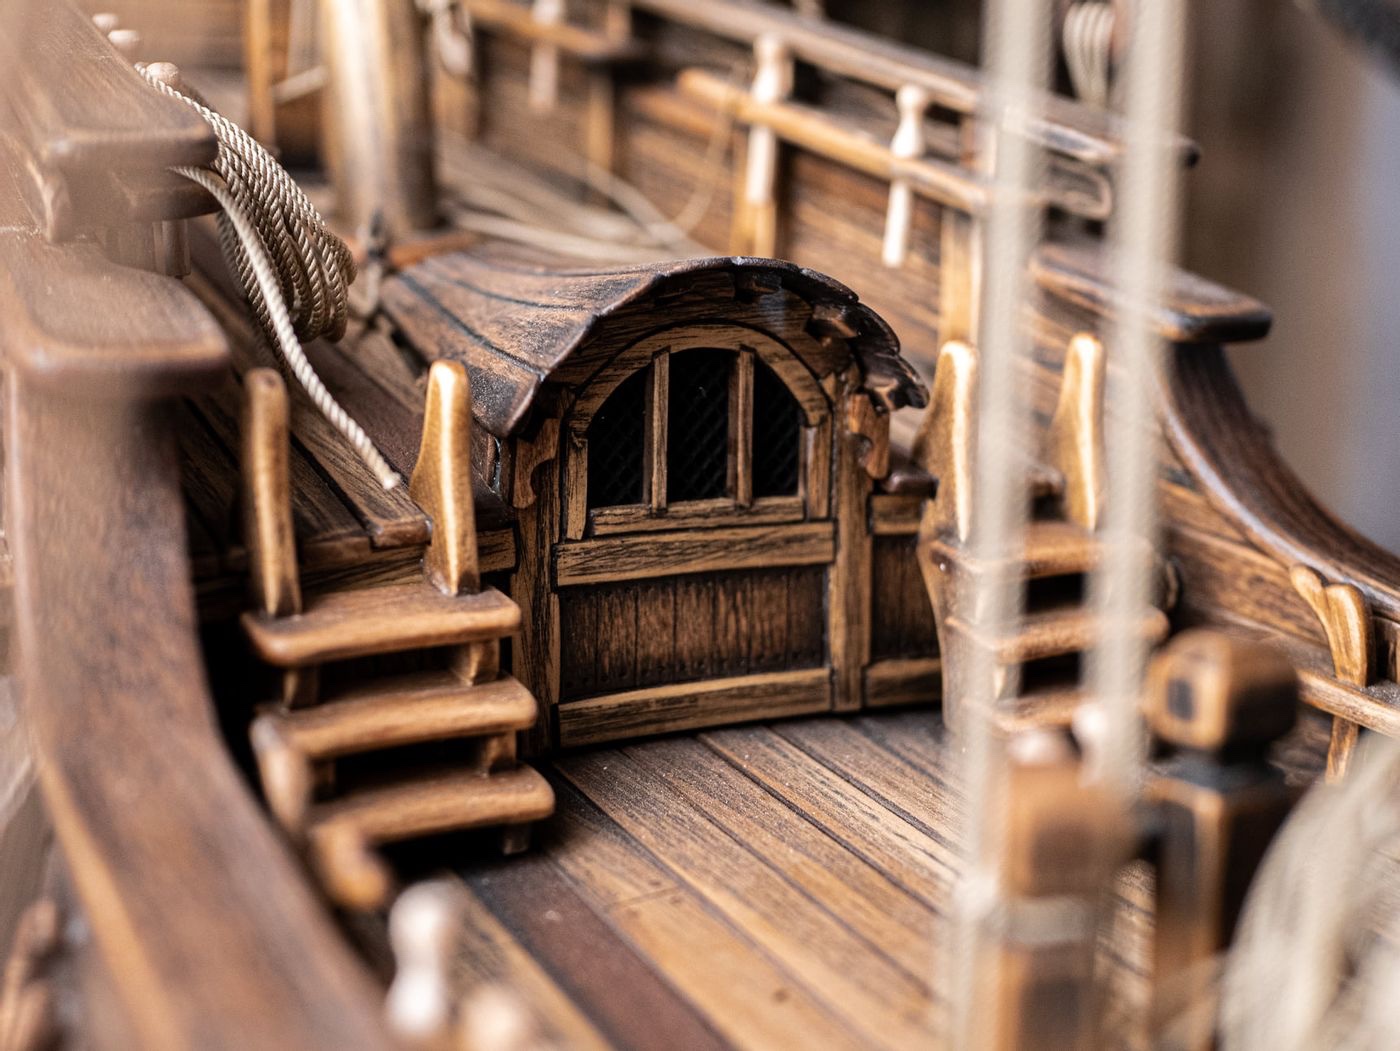
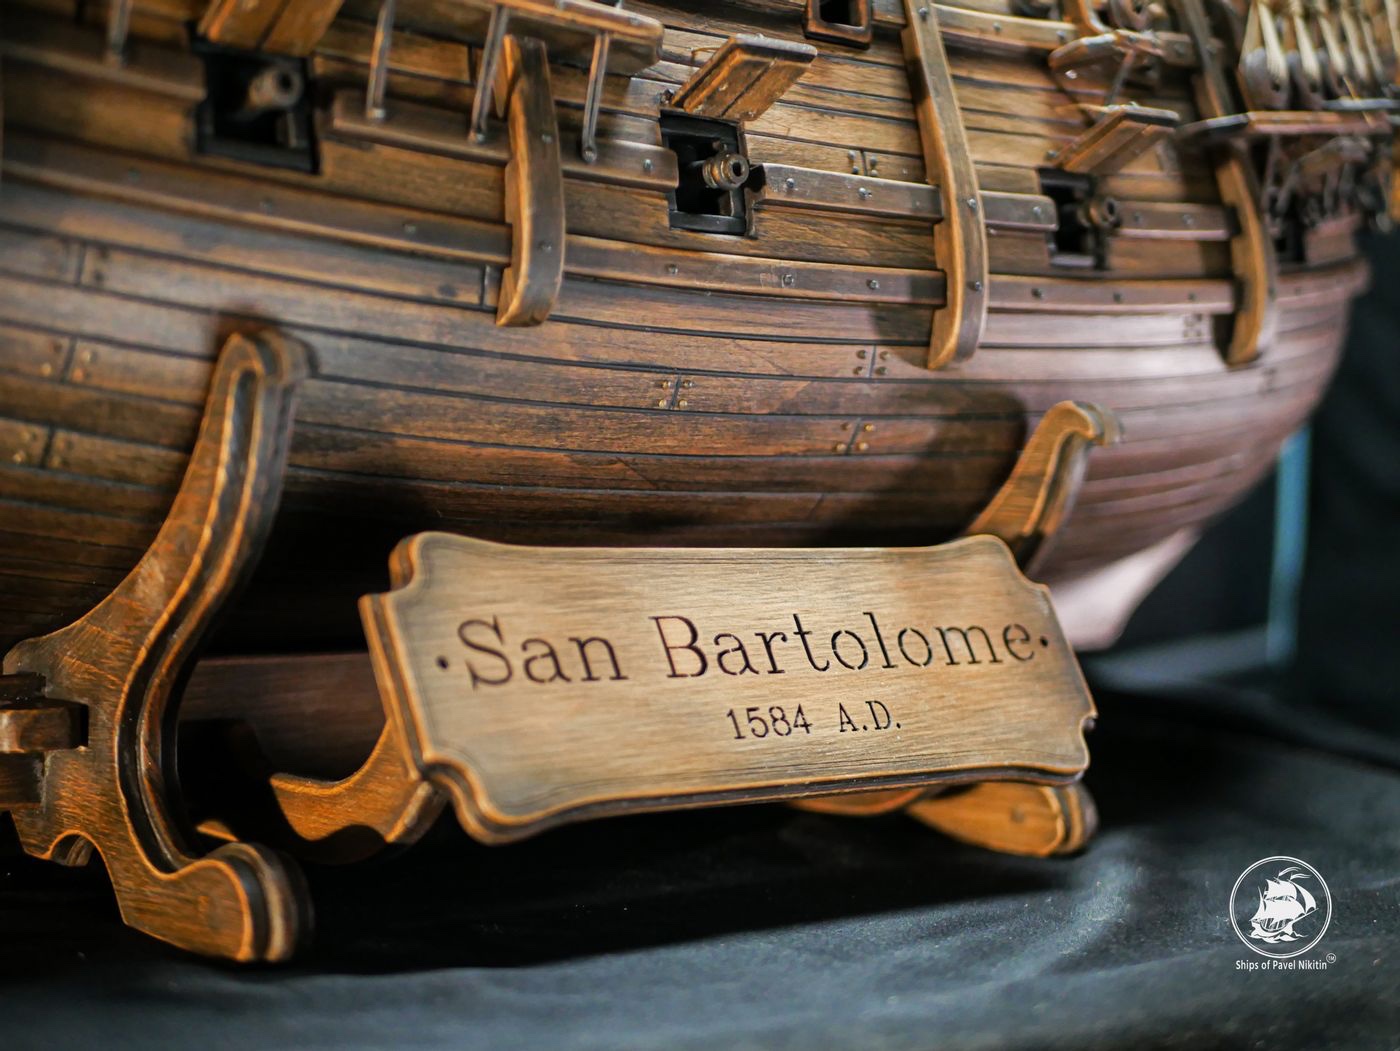
Various sets for 1:48 San Bartolome Ships of Pavel Nikitin Available directly. See article for links. Along with the 1:48 San Bartolome that we reviewed HERE, Pavel Nikitin also sent over a number of optional sets for this kit. Here we take a look at them. "San Bartolome - 2" slipway for building San Bartolome Whilst it’s not vital that you have a building slip for this kit, I know many folks do like to use one. As this model is 1:48, it may well be simpler to use one to rotate your model as you build up the intricate frames that she has. If you’re one who would use a slip, then you might be pleased to know that there is one specifically for the San Bartolome. This weighty box (2.4kg) contains a whole jig system for this model, based on a plywood box system. A series of small ply clamps are also included which are designed to hold planks to the outside of the hull, and doubtless other tasks during construction. The whole package is cleanly laser cut and includes the various metal fittings needed to hold everything in situ. The current price of this building slipway is 41.07 €, and it’s available HERE. "San Bartolome - 2" Stand for ship model The standard kit doesn’t come with a stand. I know some folks like to prepare their own or mount the model on brass columns, but if you want something that’s designed specifically for San Bartolome, then a stand is available for it as a separate item. This pack weighs in at just under 1kg and contains a laser cut ply stand that is as ornamental as it is functional. The stand is a series of interlocking parts with an attractive peg system to hold it all together. An attractive name plate adorns each side of the stand, so you can pose your model either way round and still have that on show. This stand would very much benefit from the paint set which we’ll look at next, due to the bare ply finish…..or you could paint the stand as you wish. The stand costs 45.17 € and is available directly from HERE. Painting Kit Firstly, I need to clarify that the San Bartolome 2 doesn’t require this set due to the different timbers that it’s made from in relation to the V1 of that kit. Both the V1 and V2 will shortly be available on their website, so you’ll have a choice of what to build and how you wish to finish it. This set consists of six bottles of alcohol-based paints. These all come in large bottles. These paints are designed to paint the model in a very specific way which is easier to show than to explain. Please check this video which illustrates how to apply this paint, which can be airbrushed without any extra thinning: This set also comes with three sheets of both 240 grit and 320 grit sanding sponge to create the distressed effect you can see in the video. This set is available for 35.89 € directly from HERE. My sincere thanks to Pavel Nikitin for sending the samples seen here on MSW.


- 3 replies
-
- 15
-
-
-
- san bartolome
- stand
- (and 1 more)
-
She' very pretty indeed. You did a real nice job with her.
-
She's looking real nice, Glenn. One thing to point out is that your fore sail is on in the wrong orientation.
- 106 replies
-
- 2
-
-
- Erycina
- Plymouth Trawler
- (and 3 more)
-
Ok, that's now fixed for you
-
Can you tell me what the 'error message' says? That would be useful
-
kit review 1:48 San Bartolome by Pavel Nikitin
James H replied to James H's topic in REVIEWS: Model kits


-
kit review 1:48 San Bartolome by Pavel Nikitin
James H replied to James H's topic in REVIEWS: Model kits
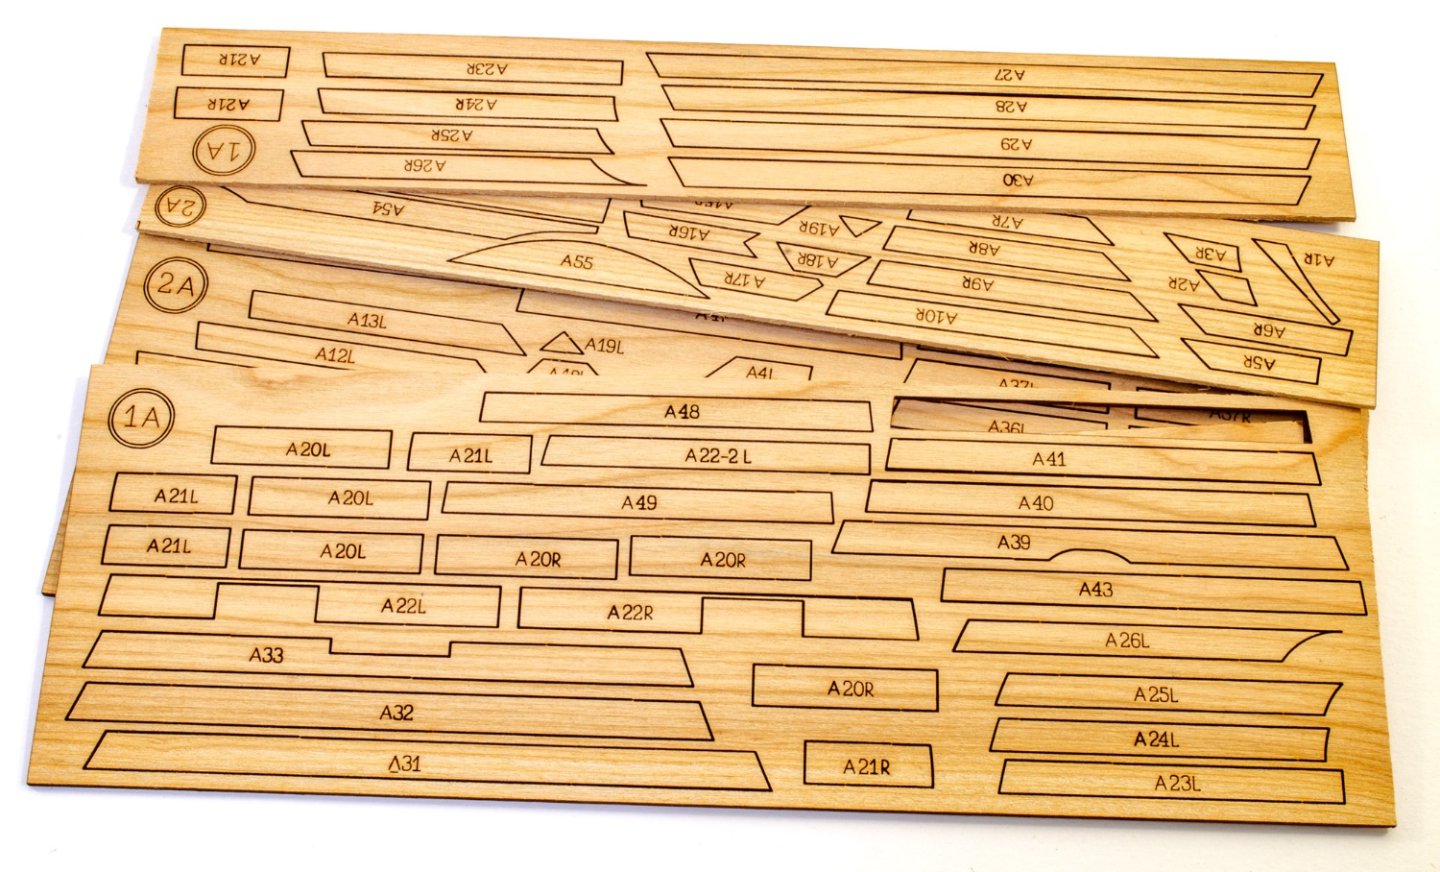
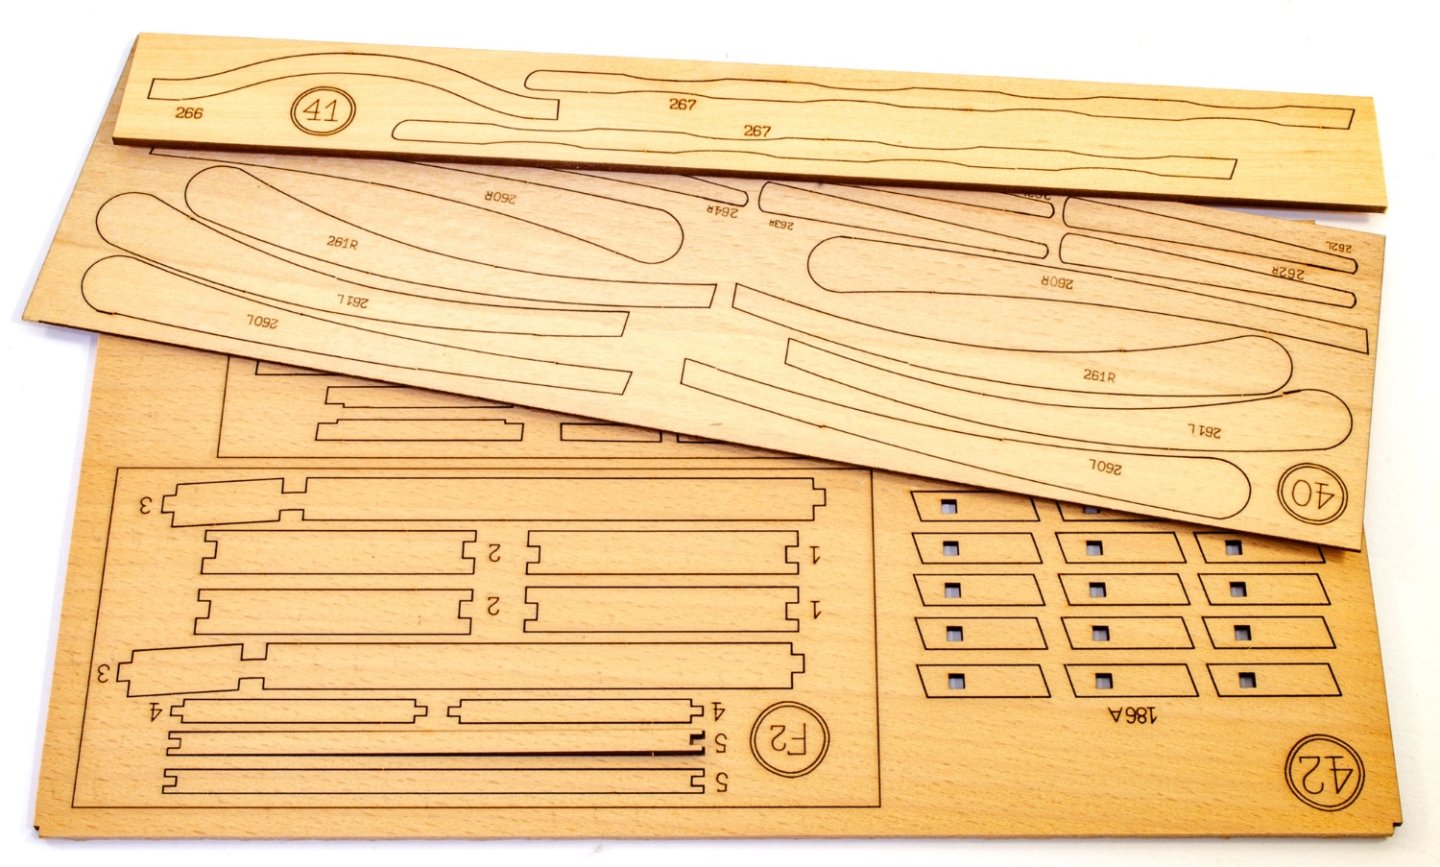
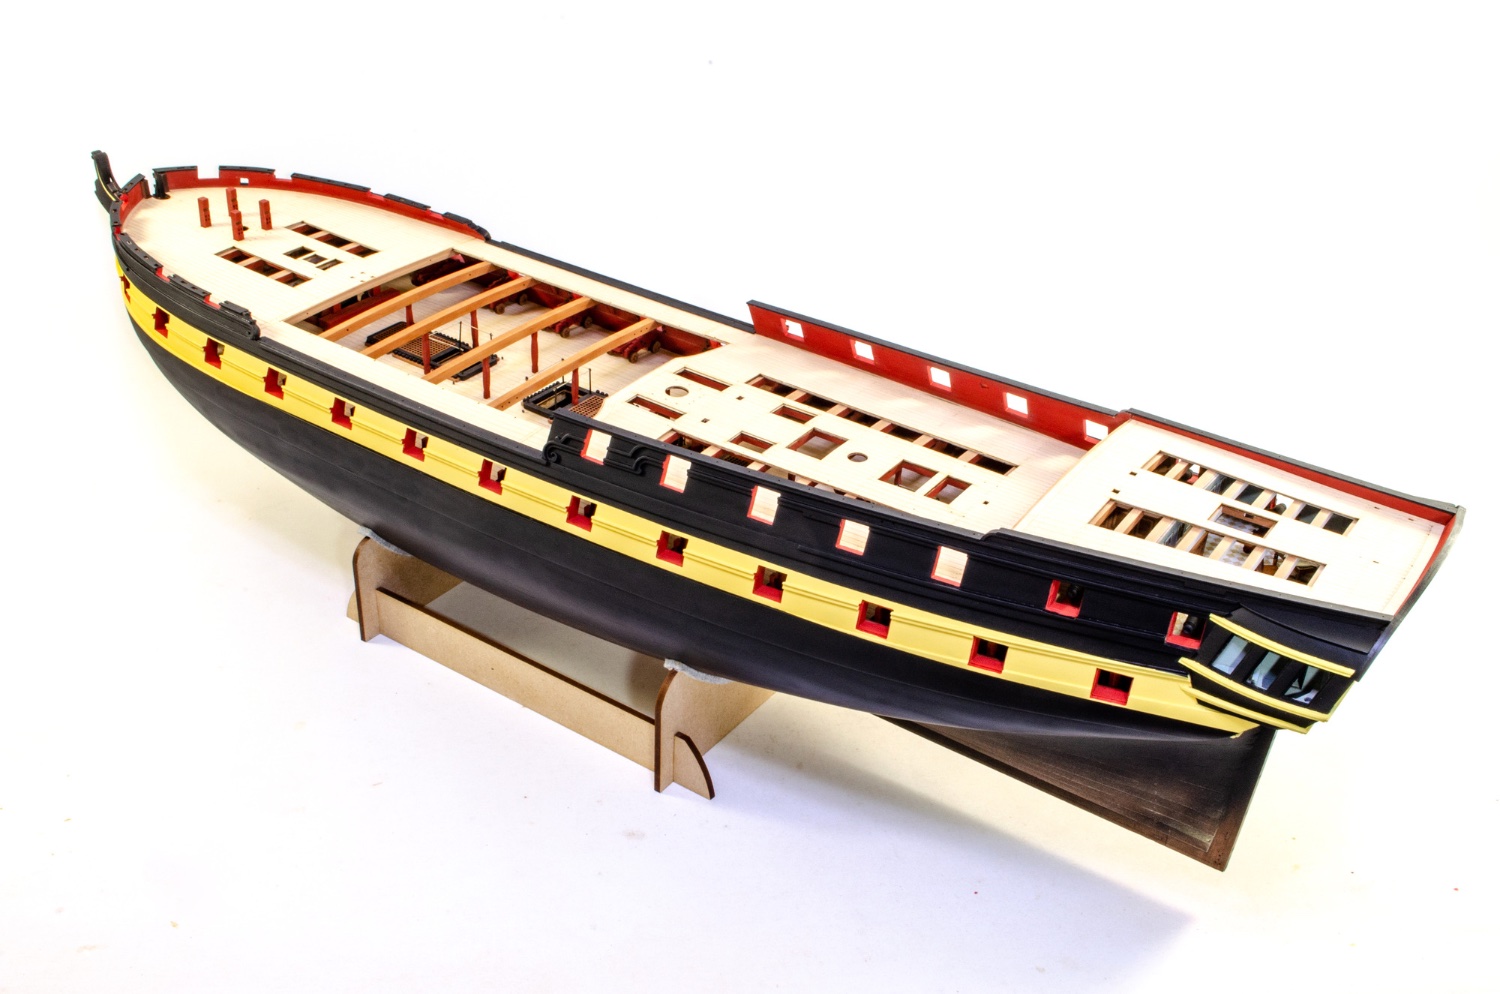
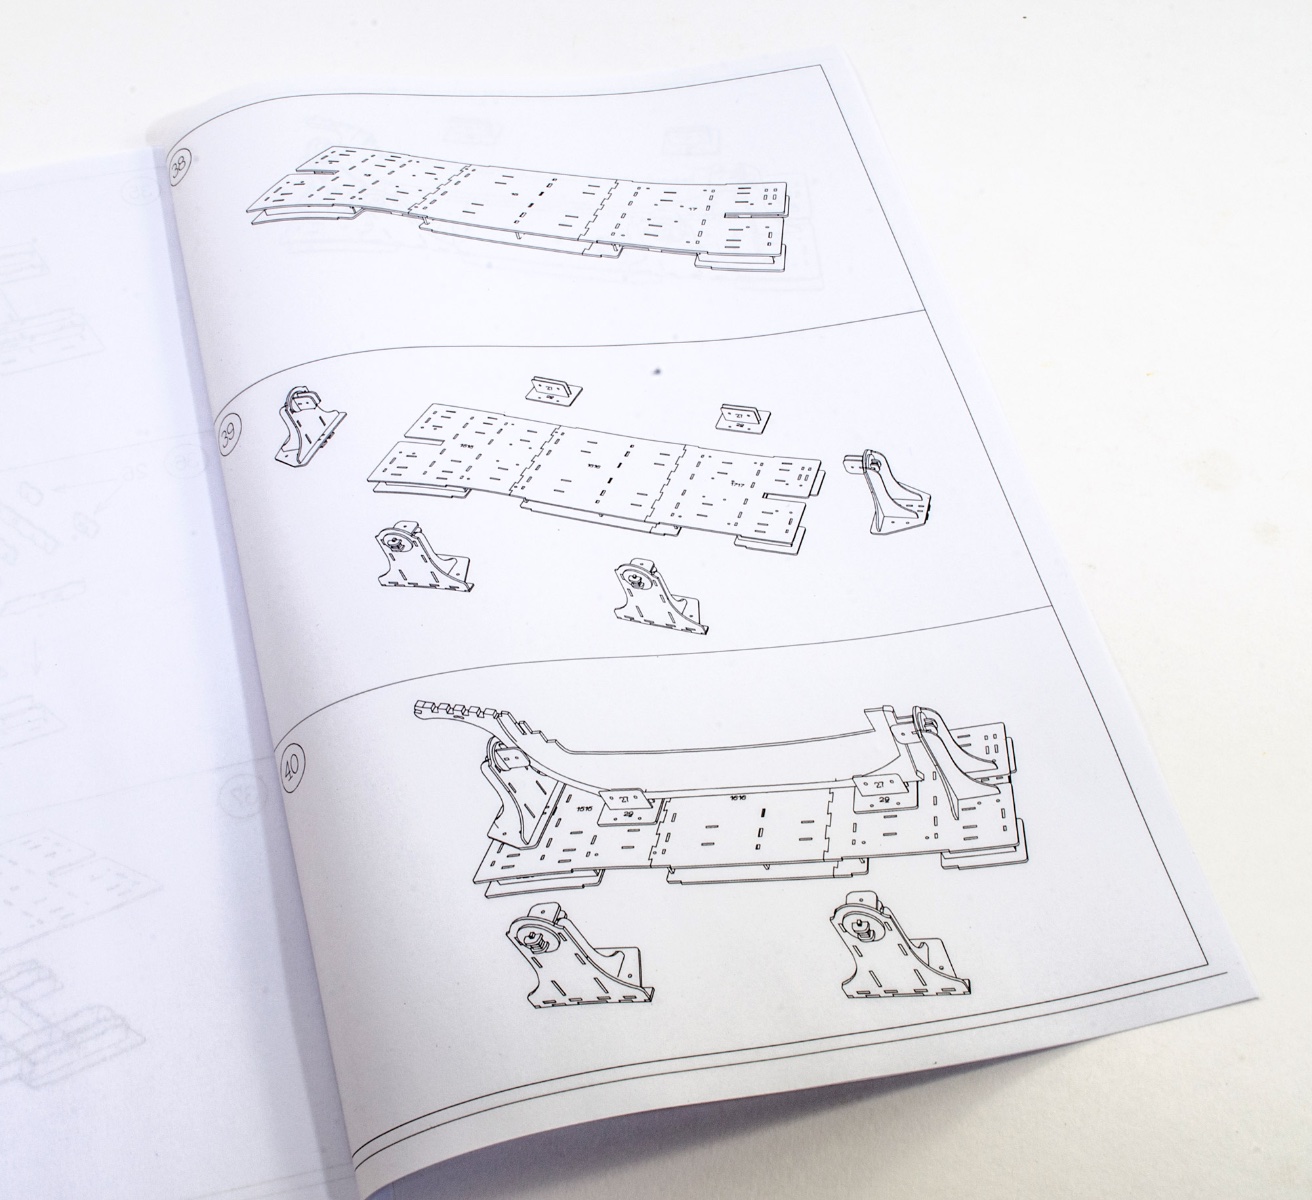
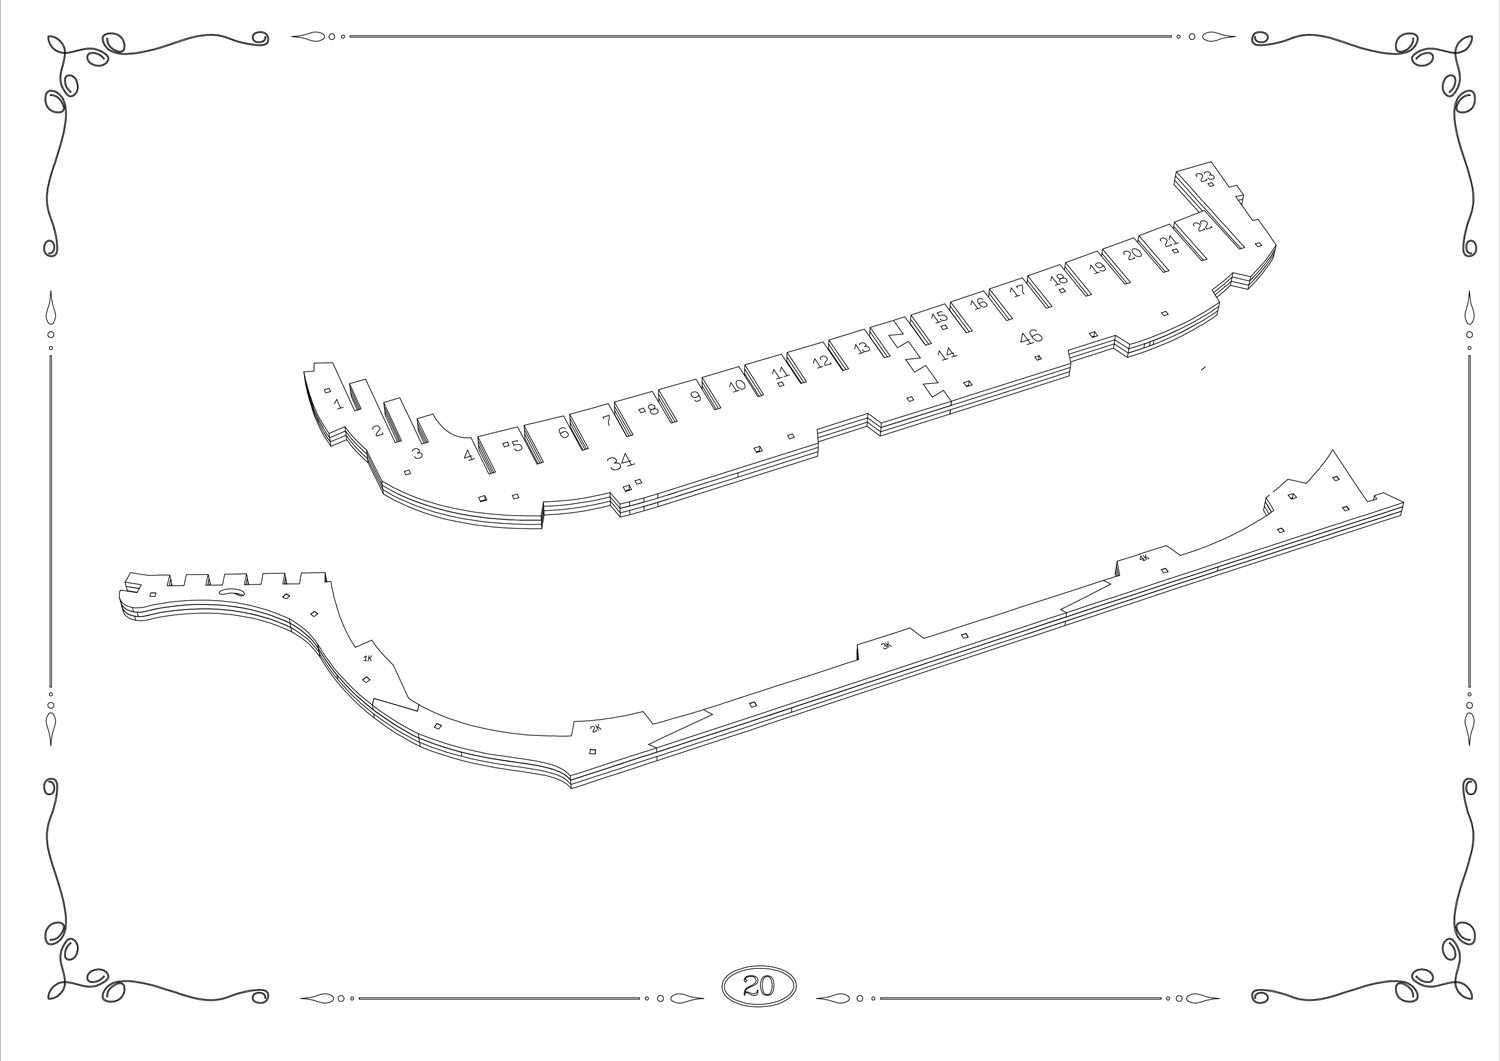
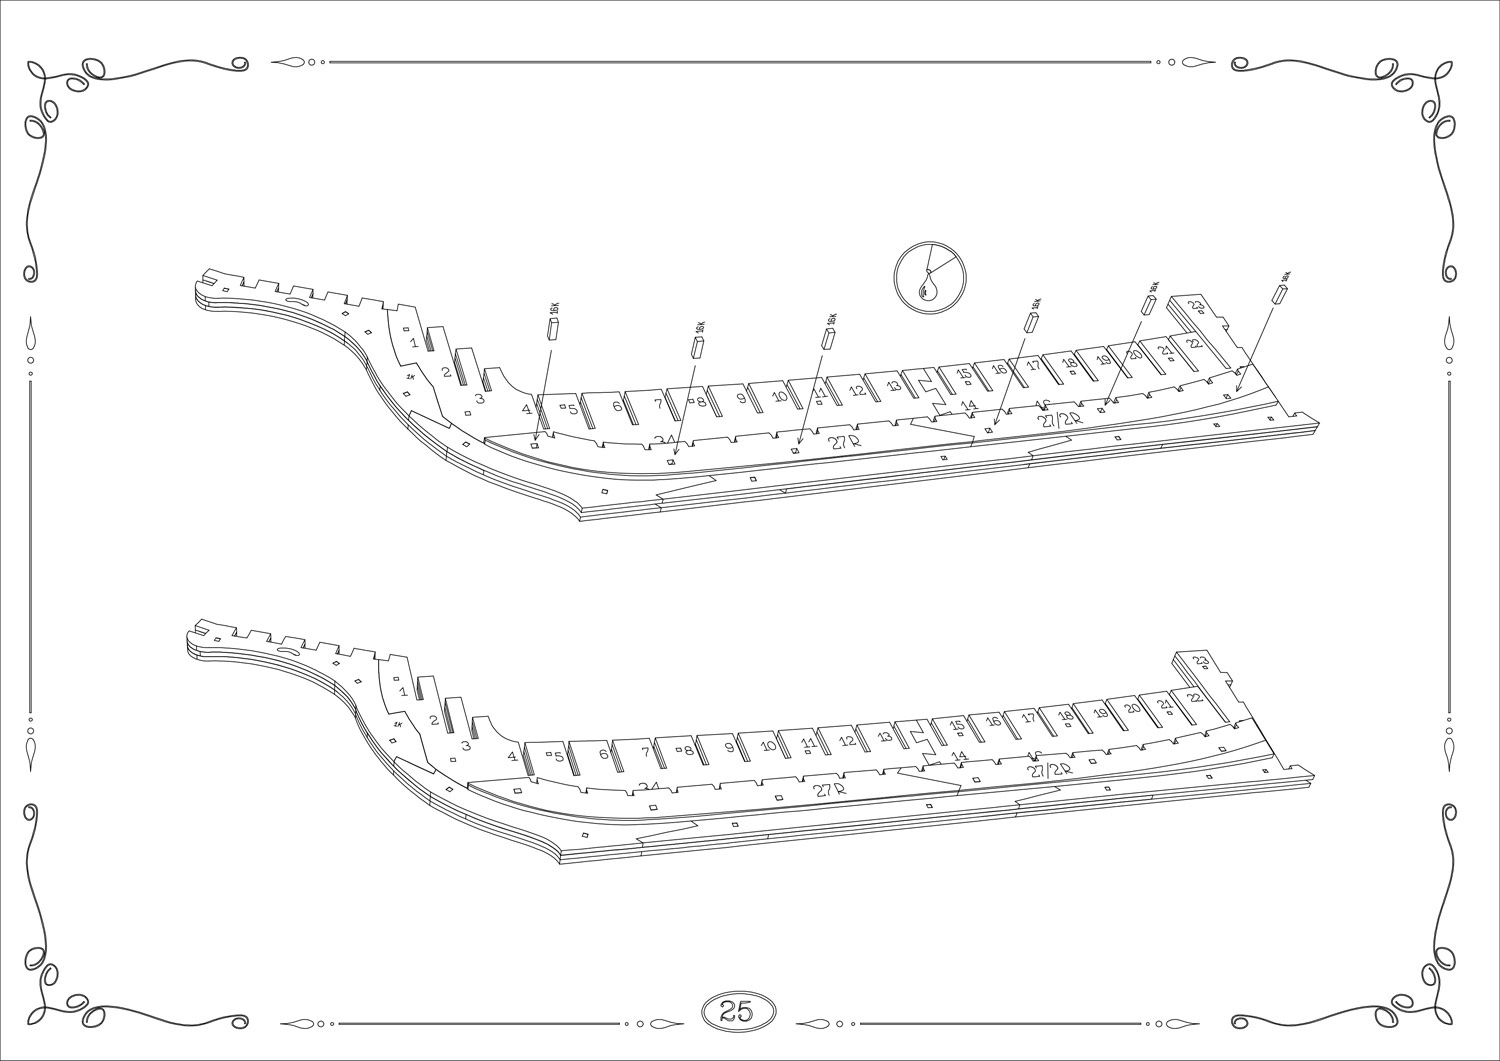
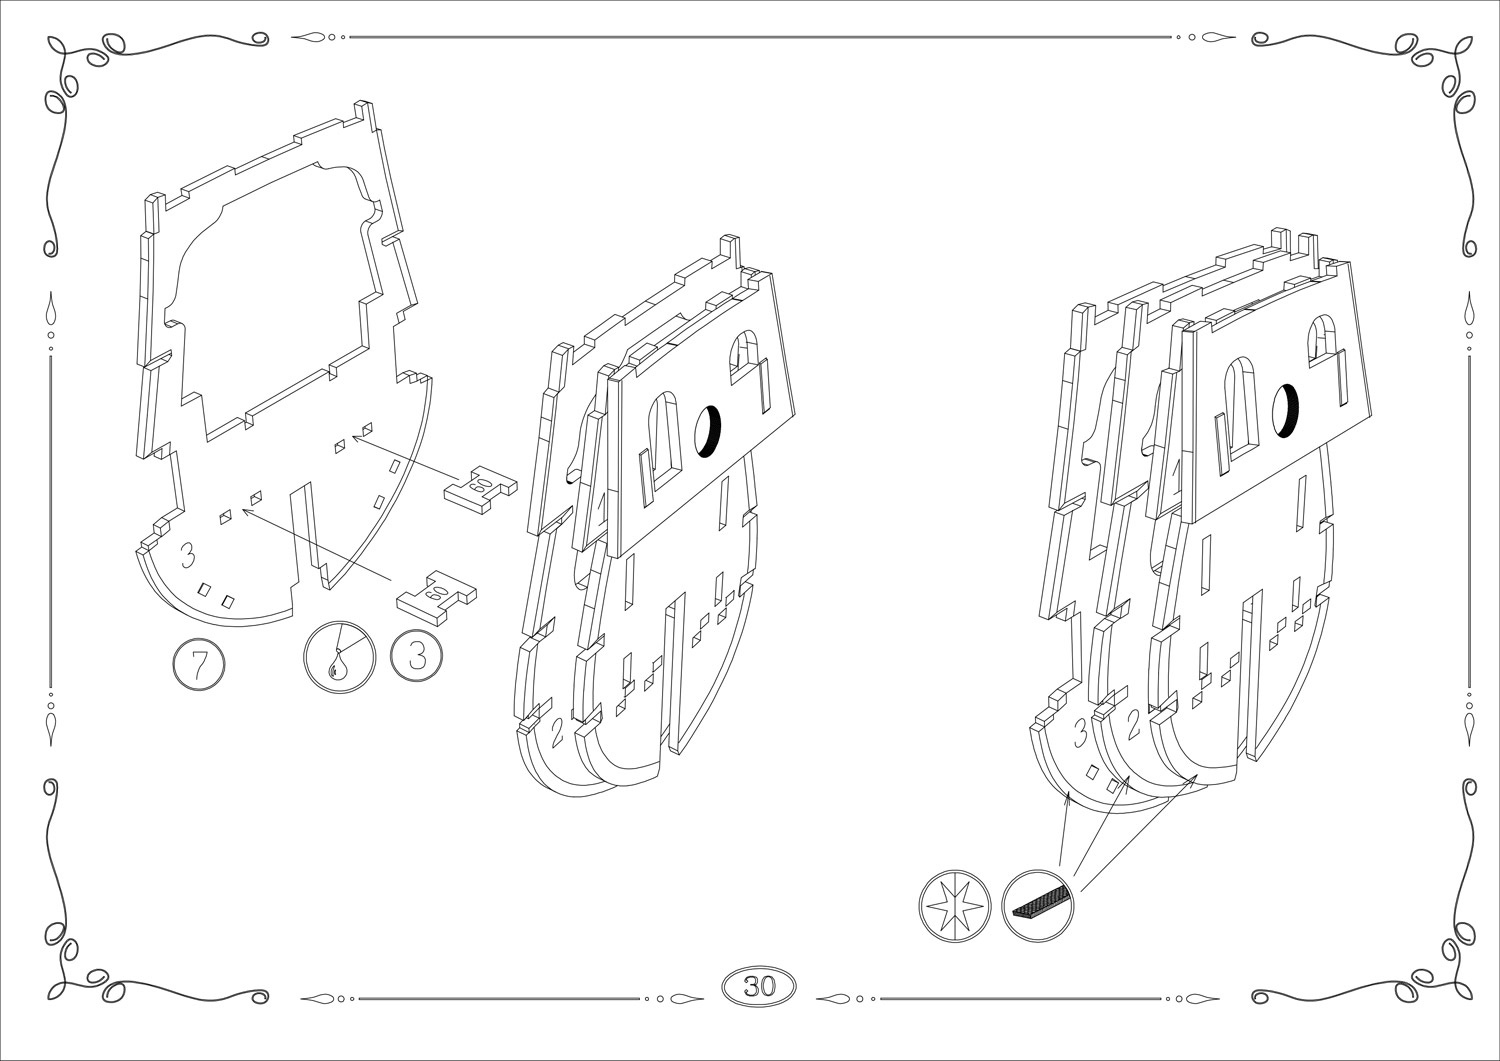
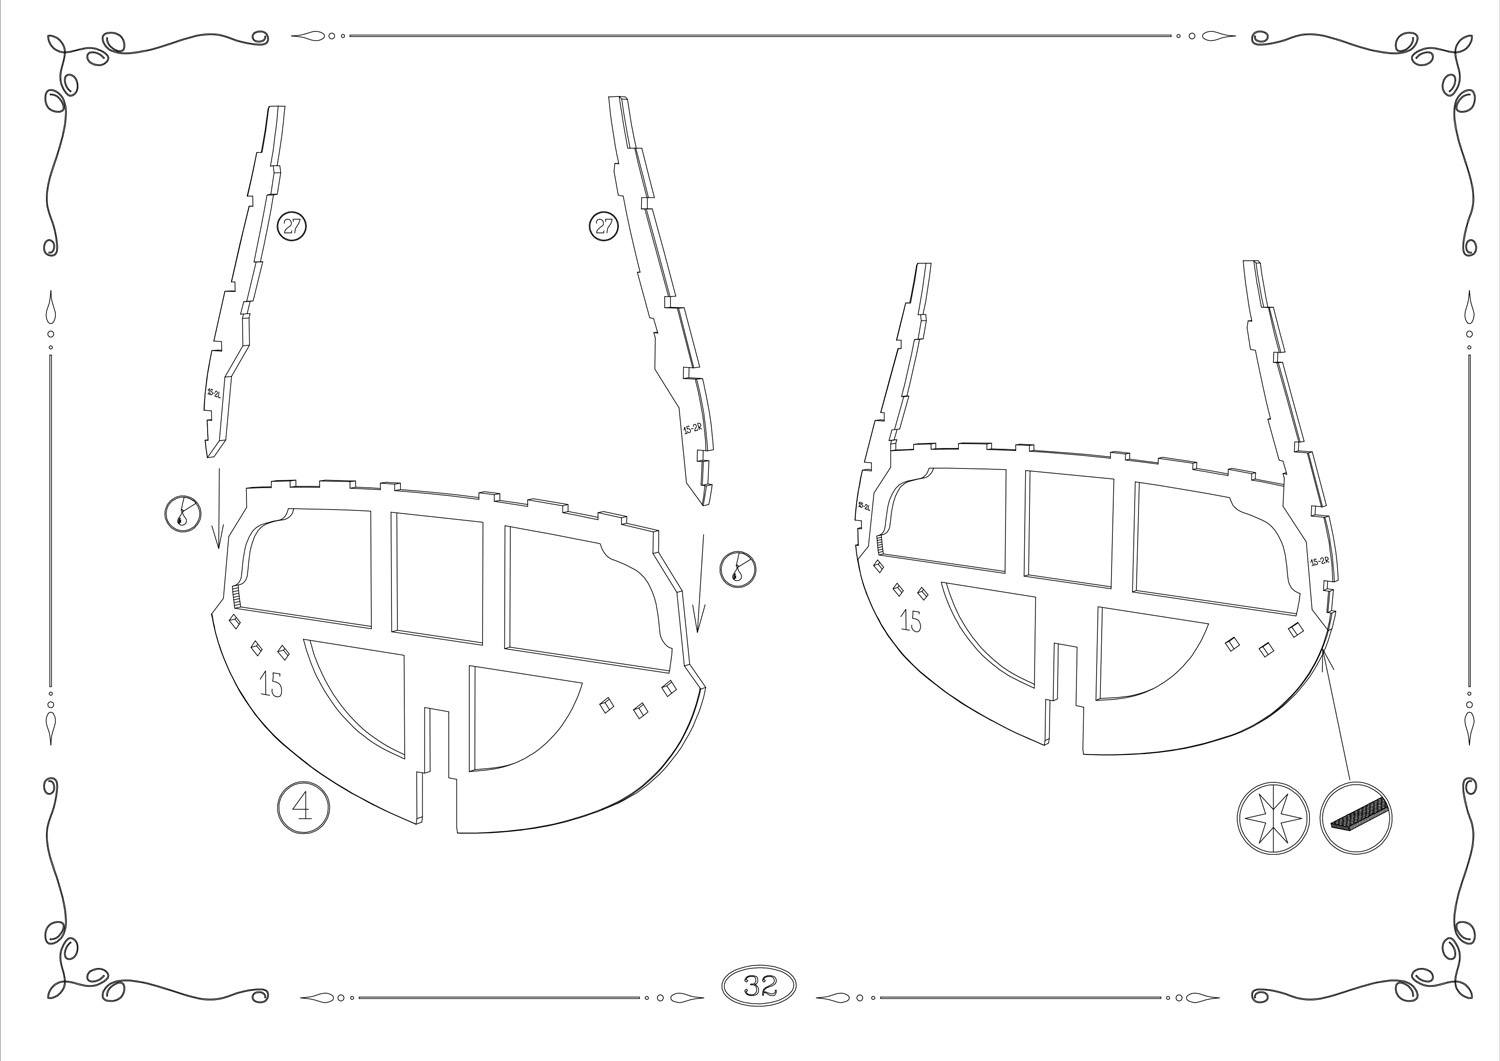
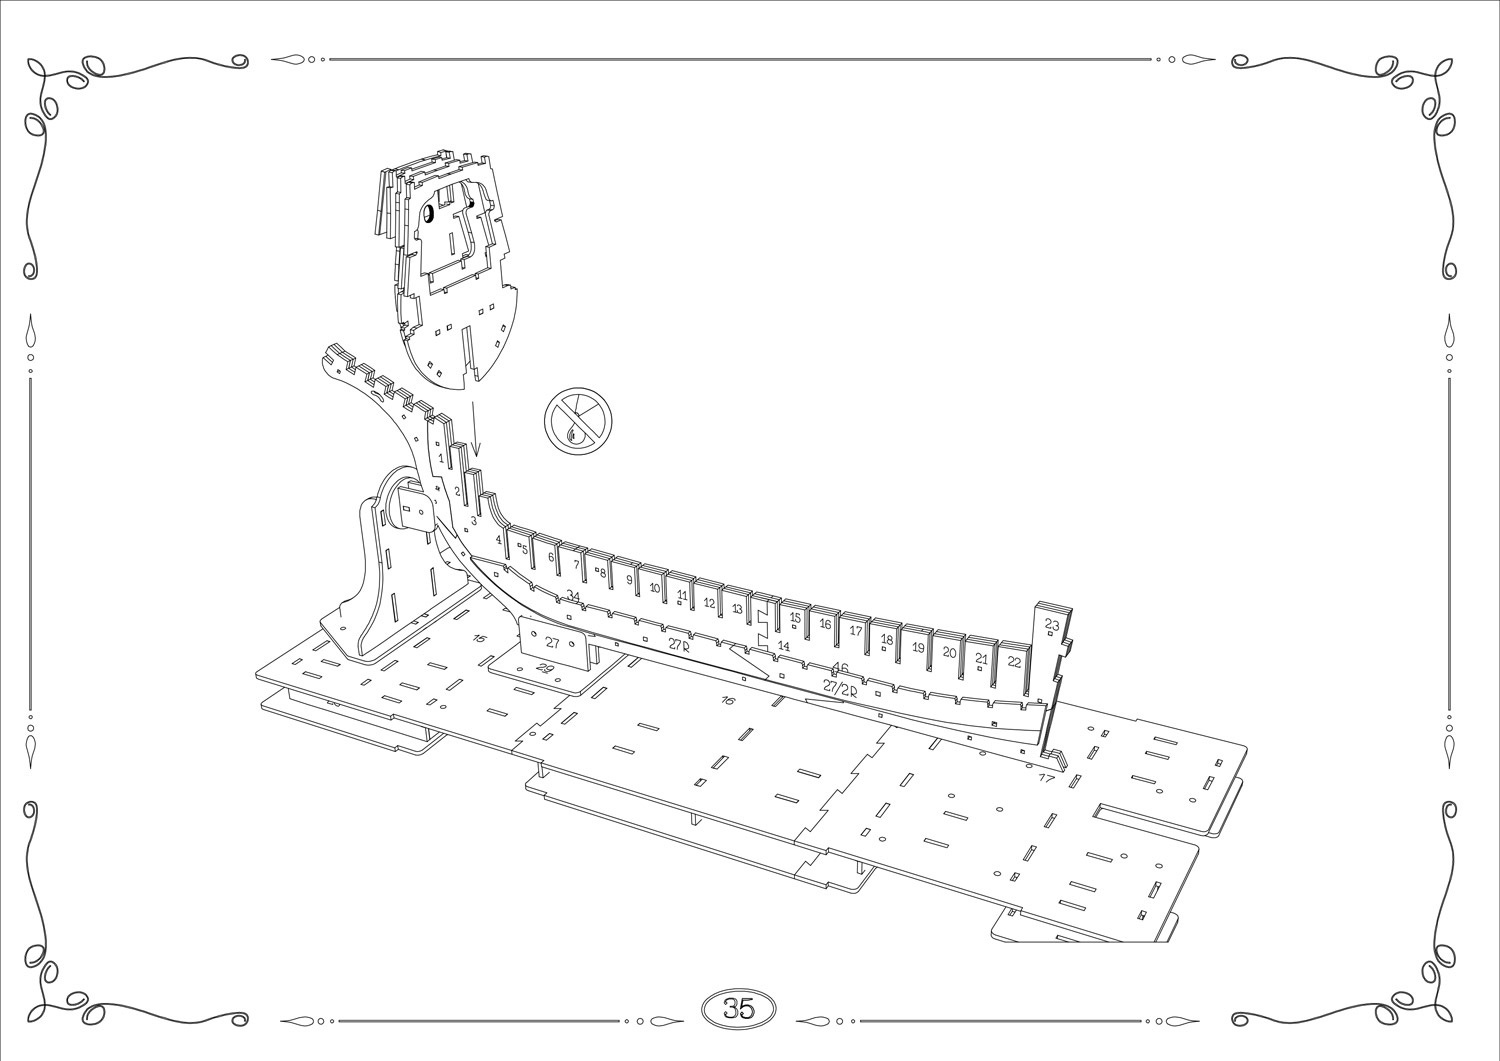
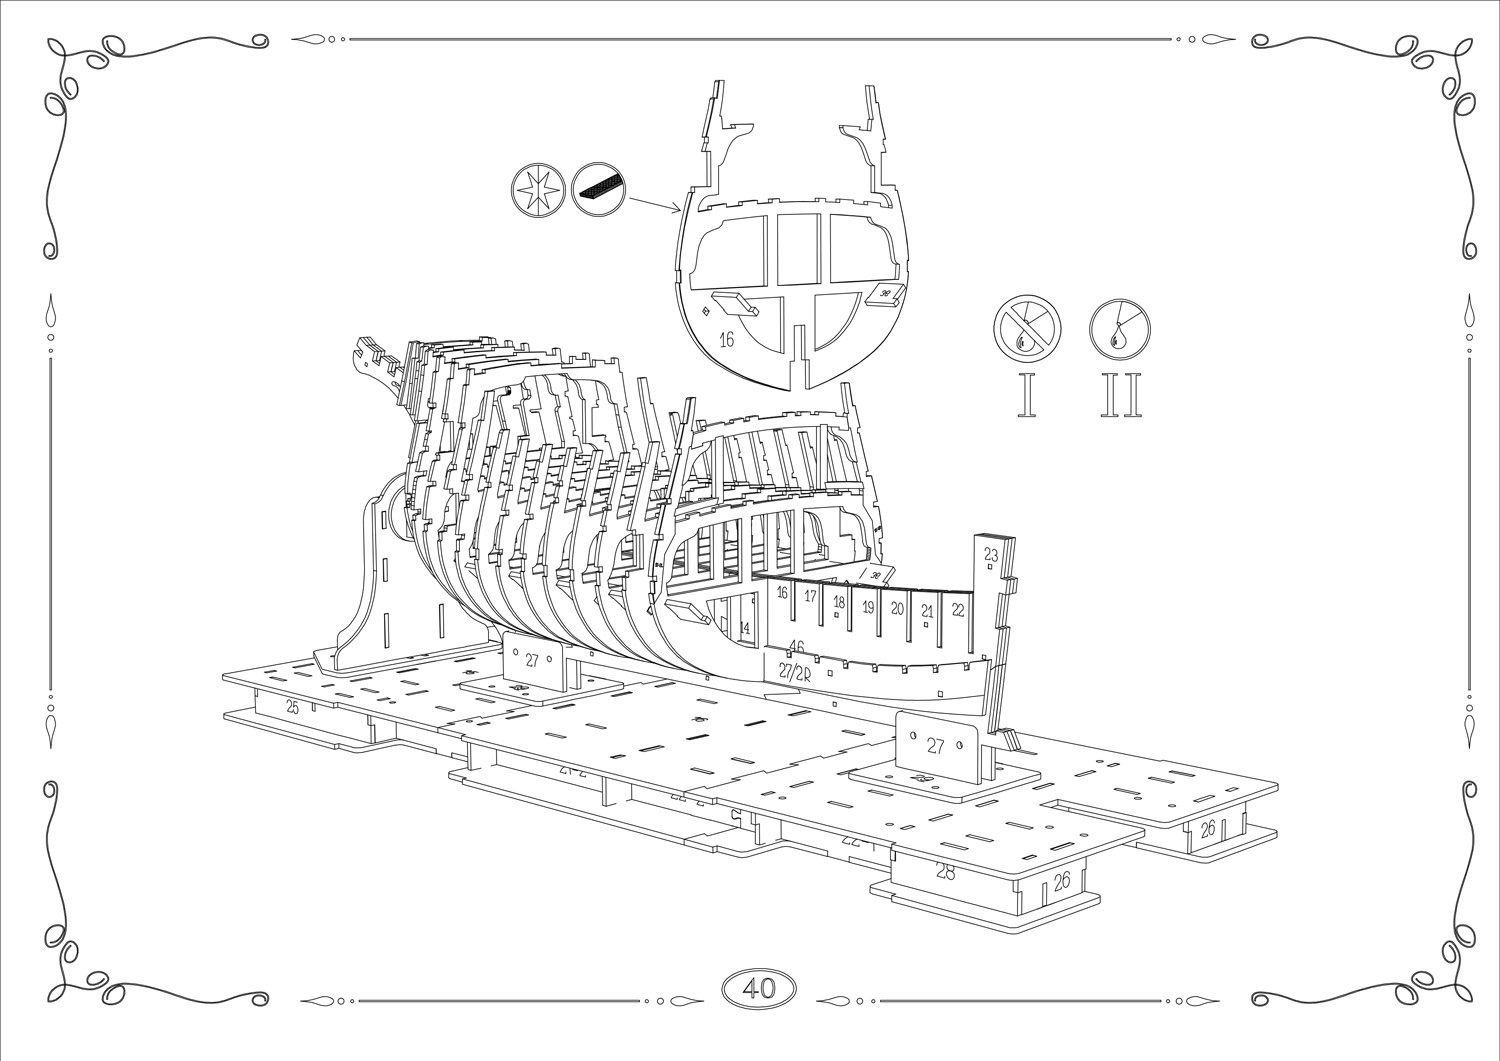
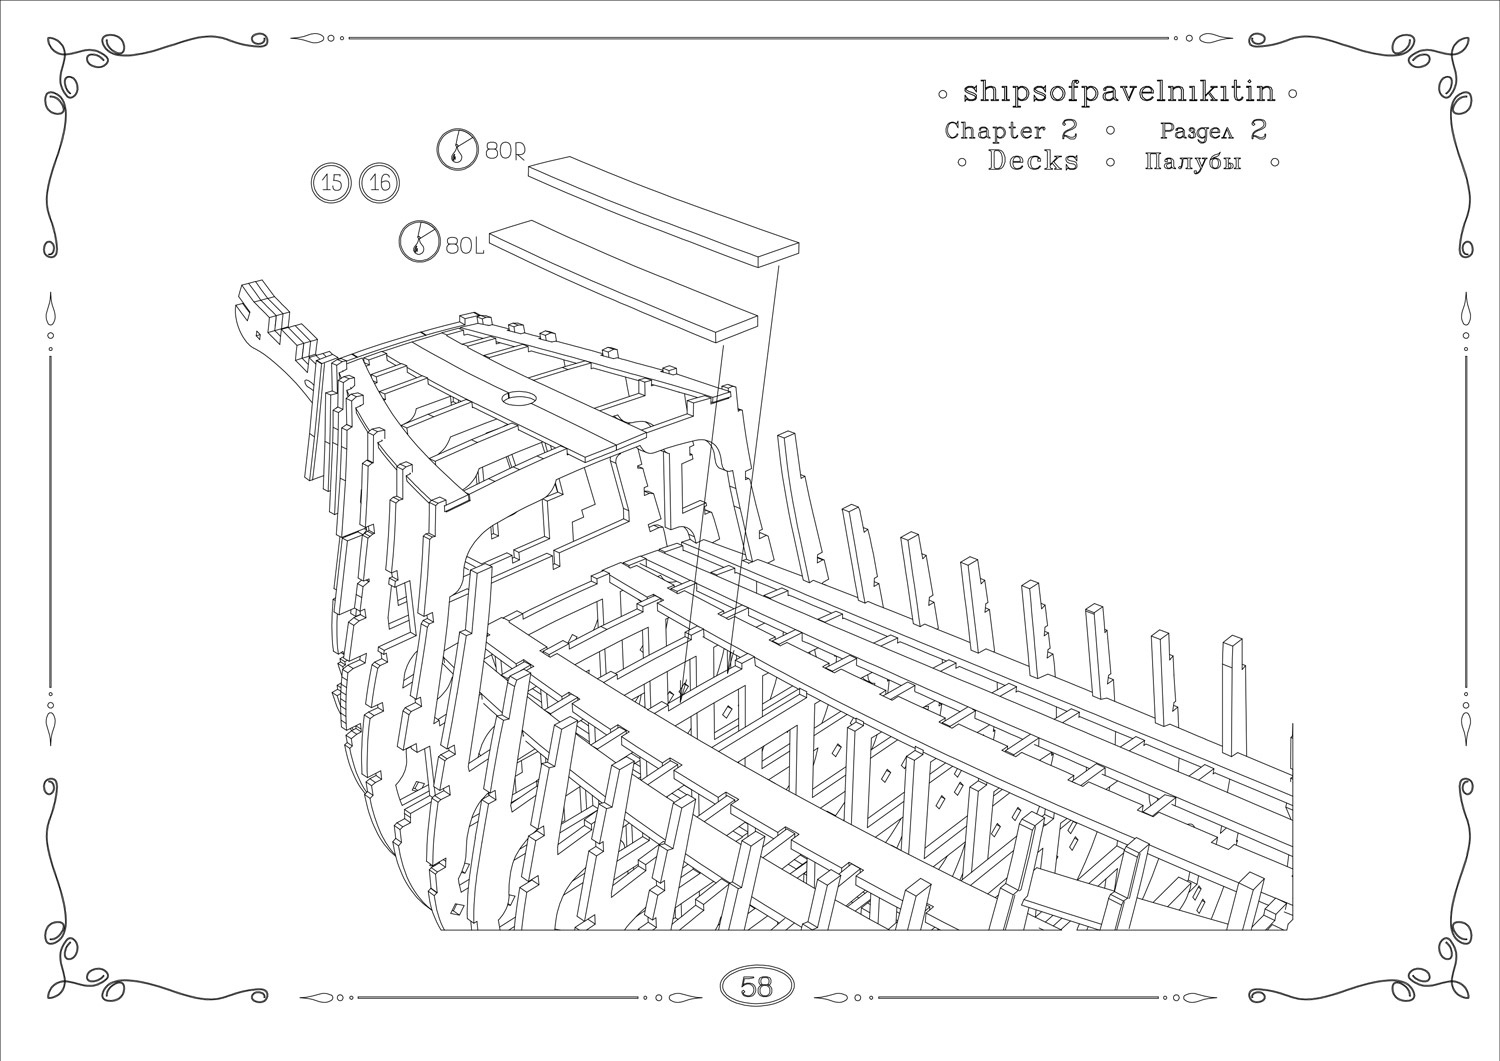
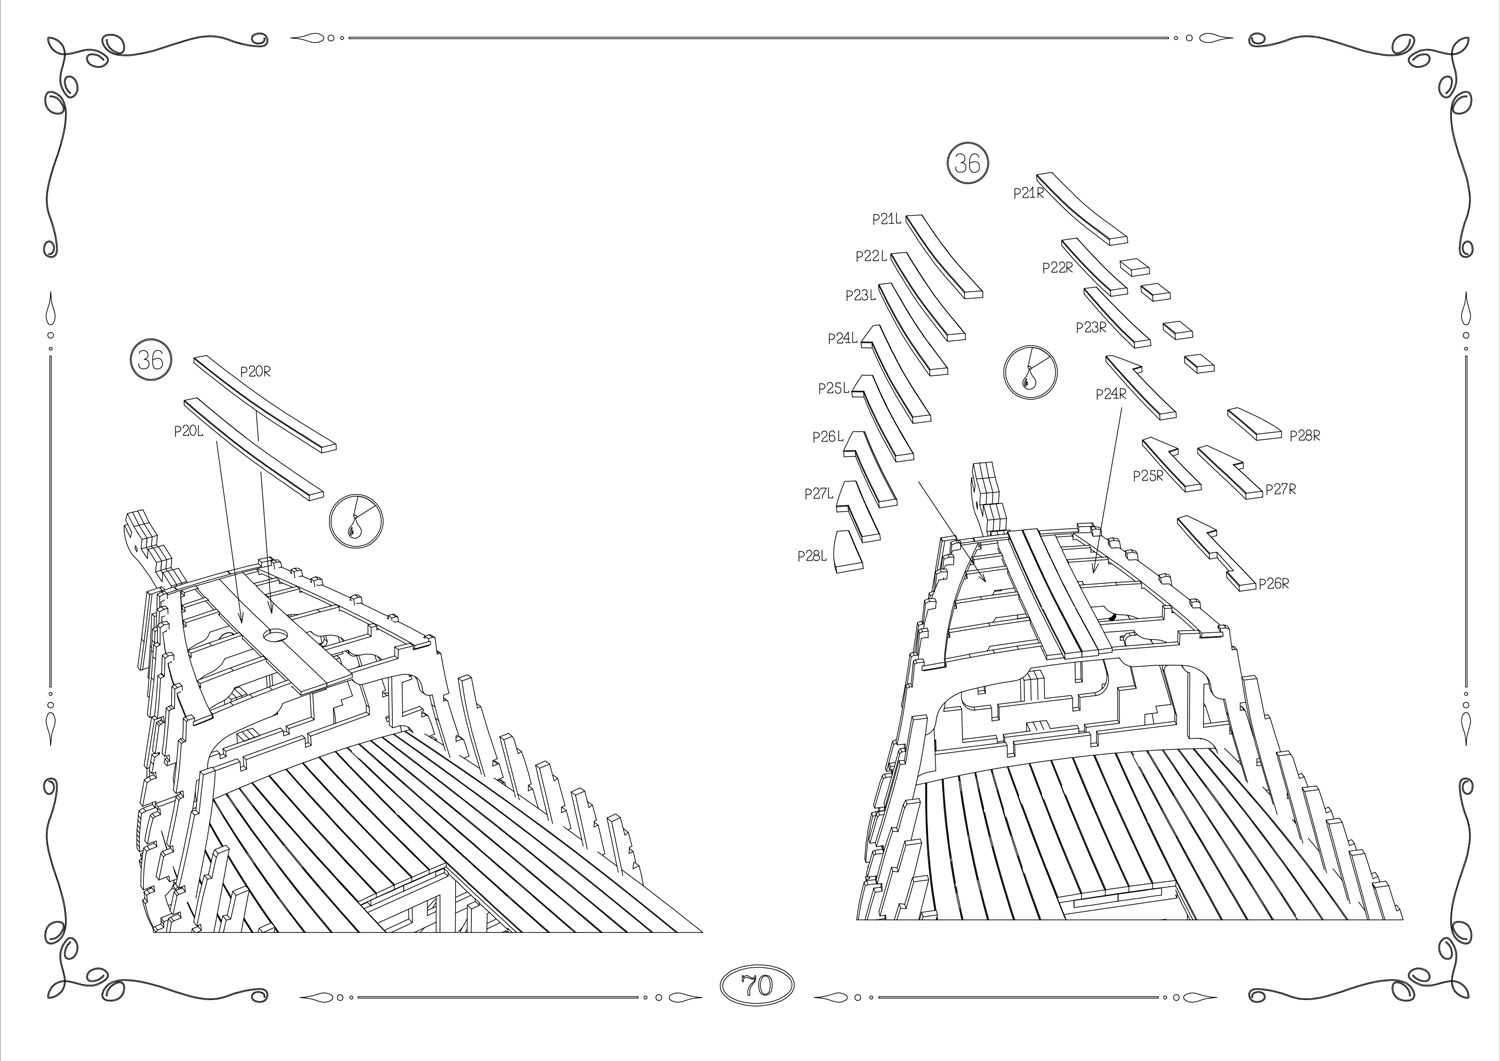
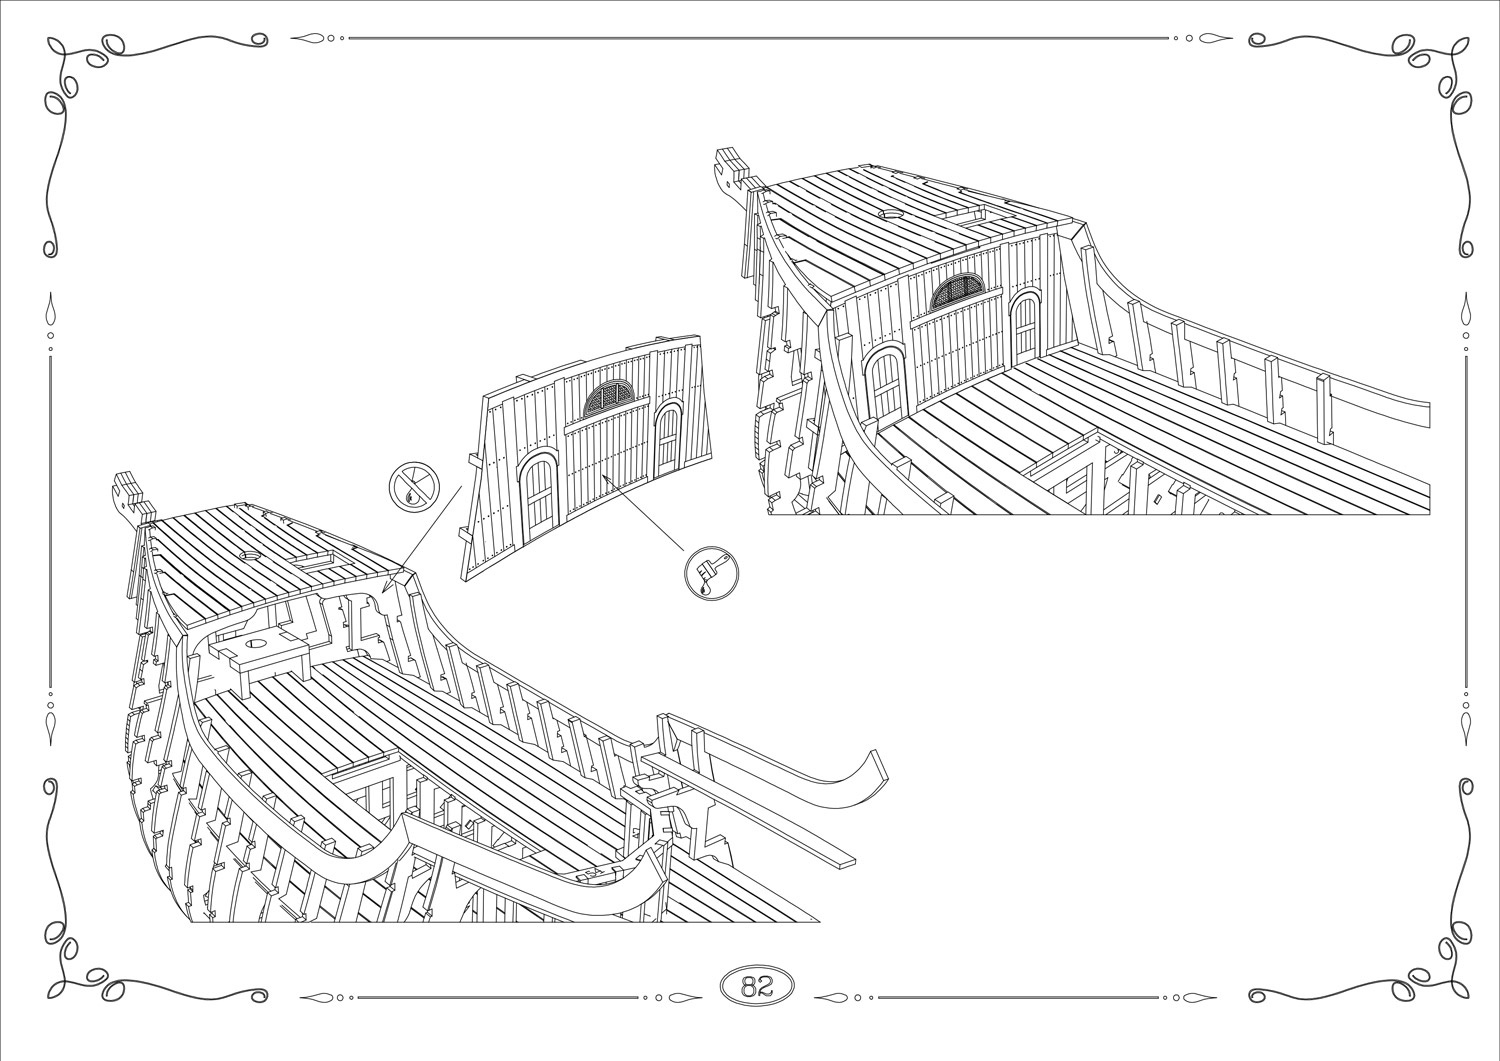
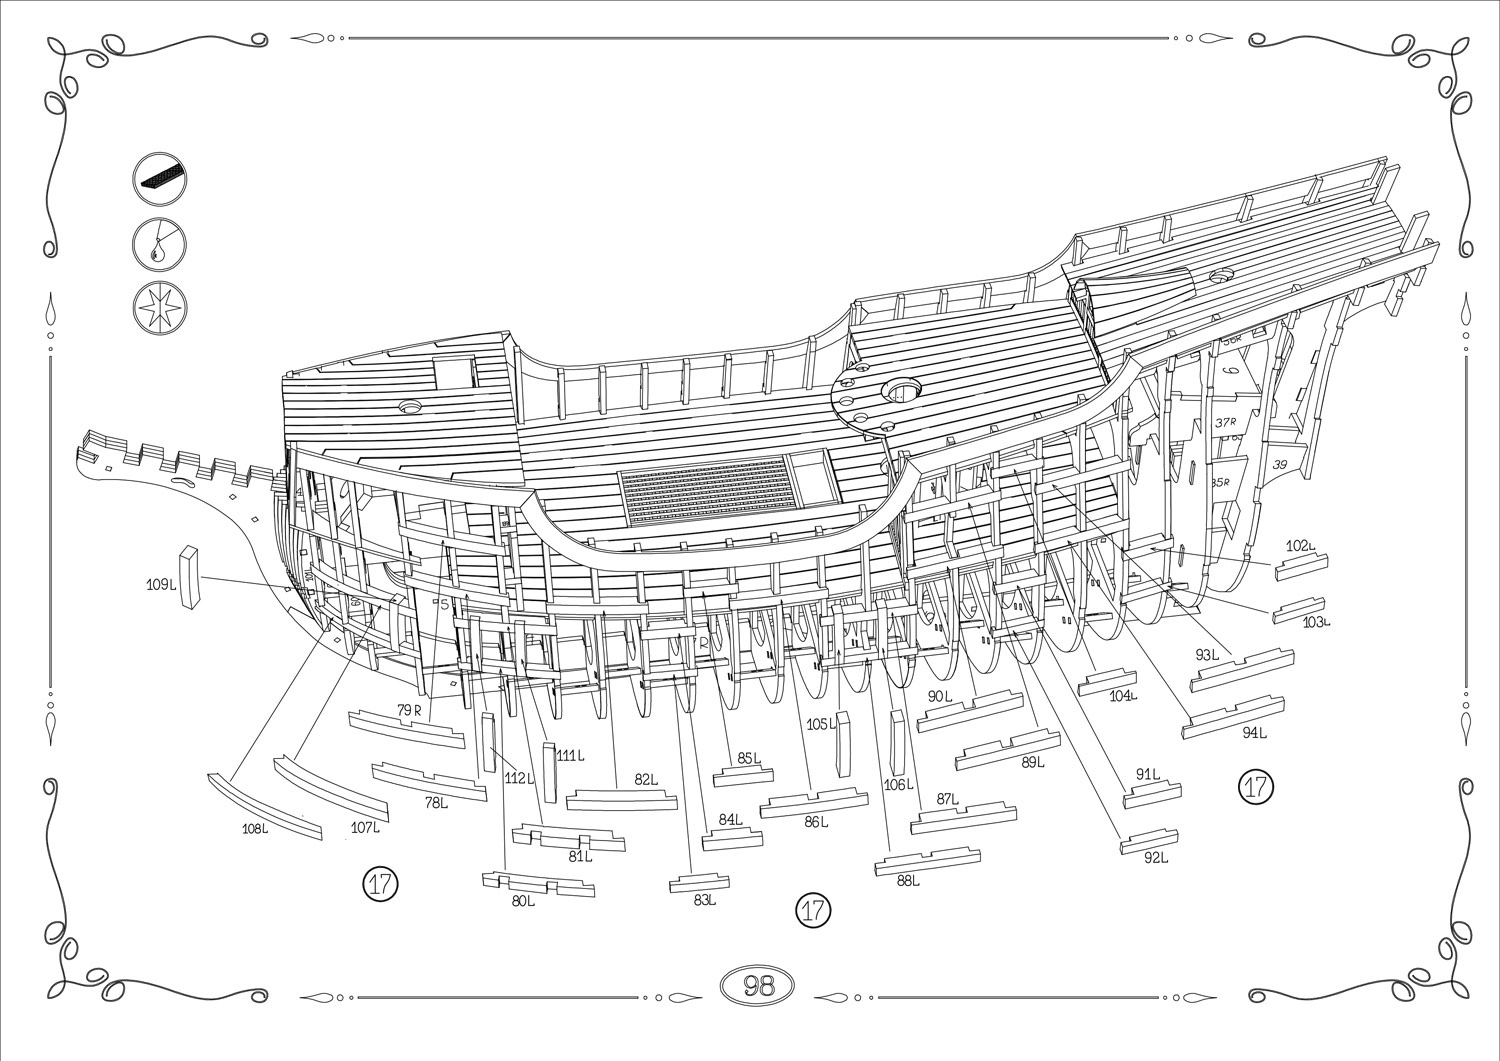
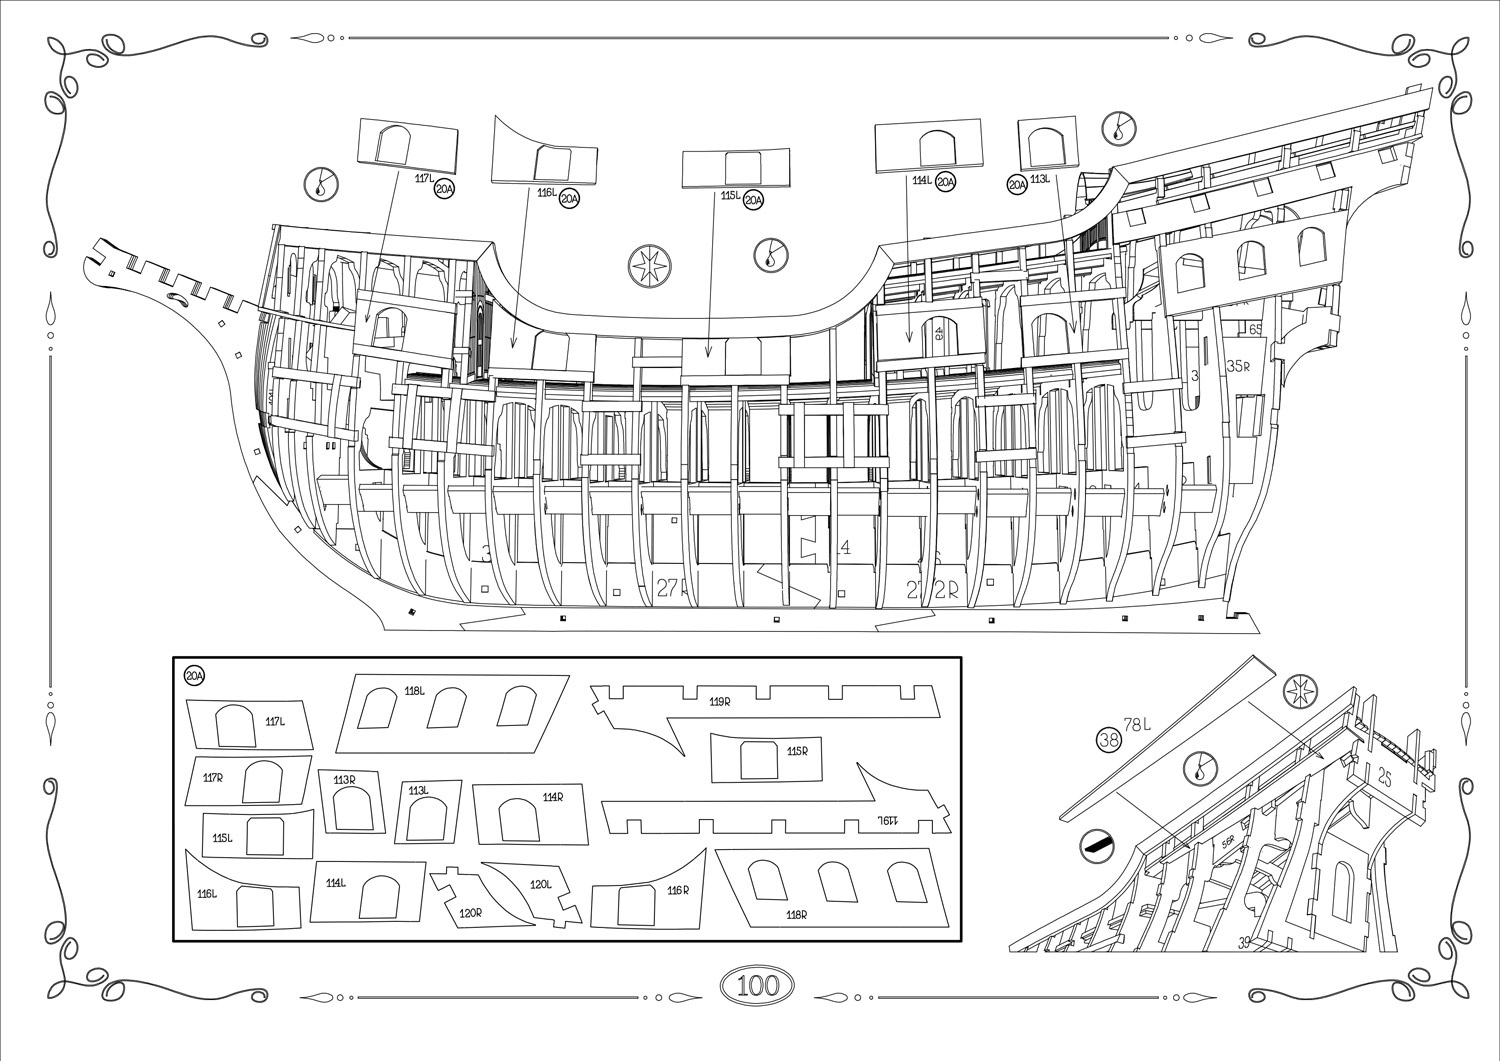
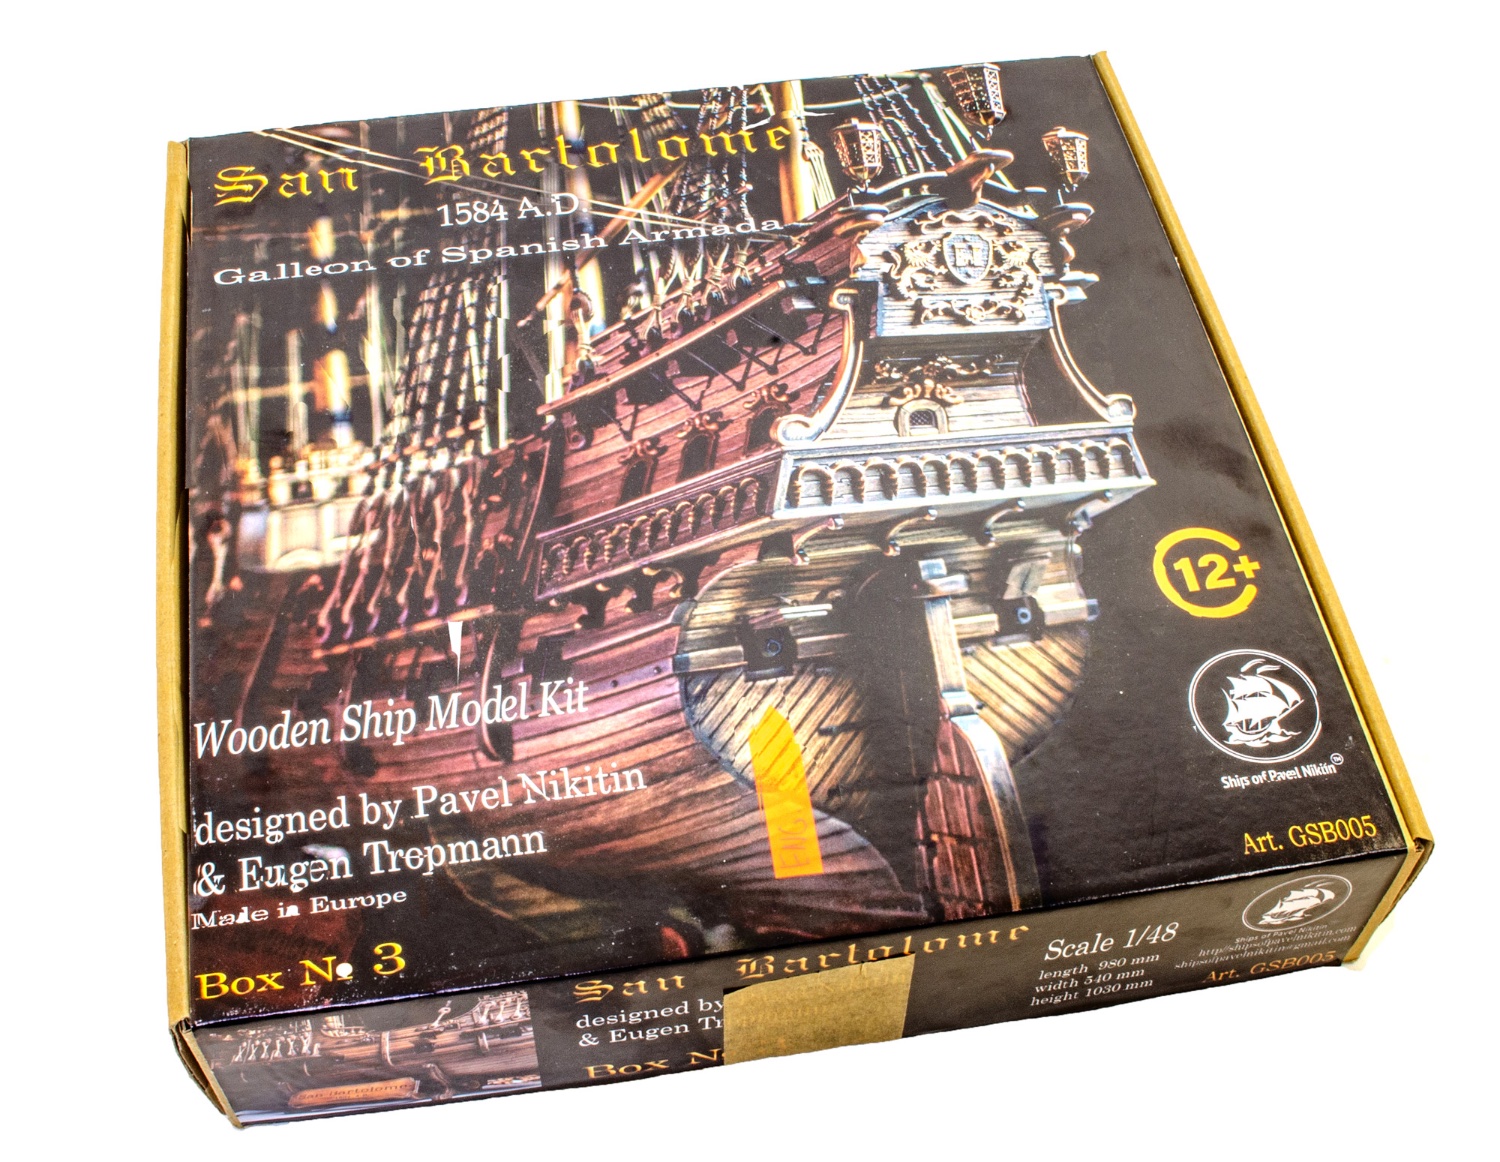
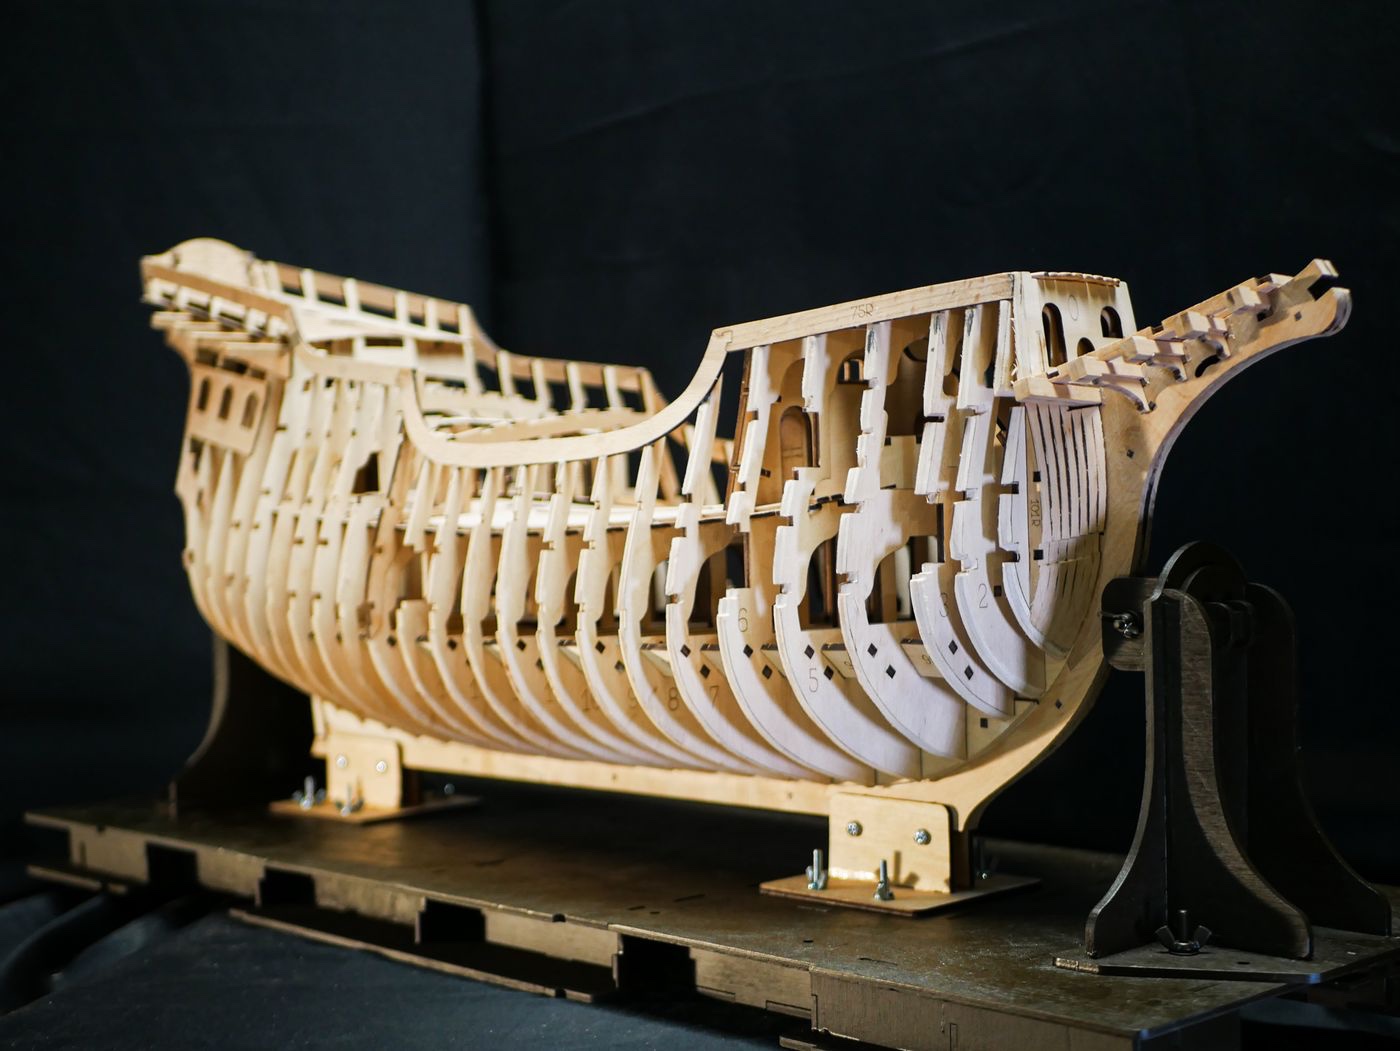
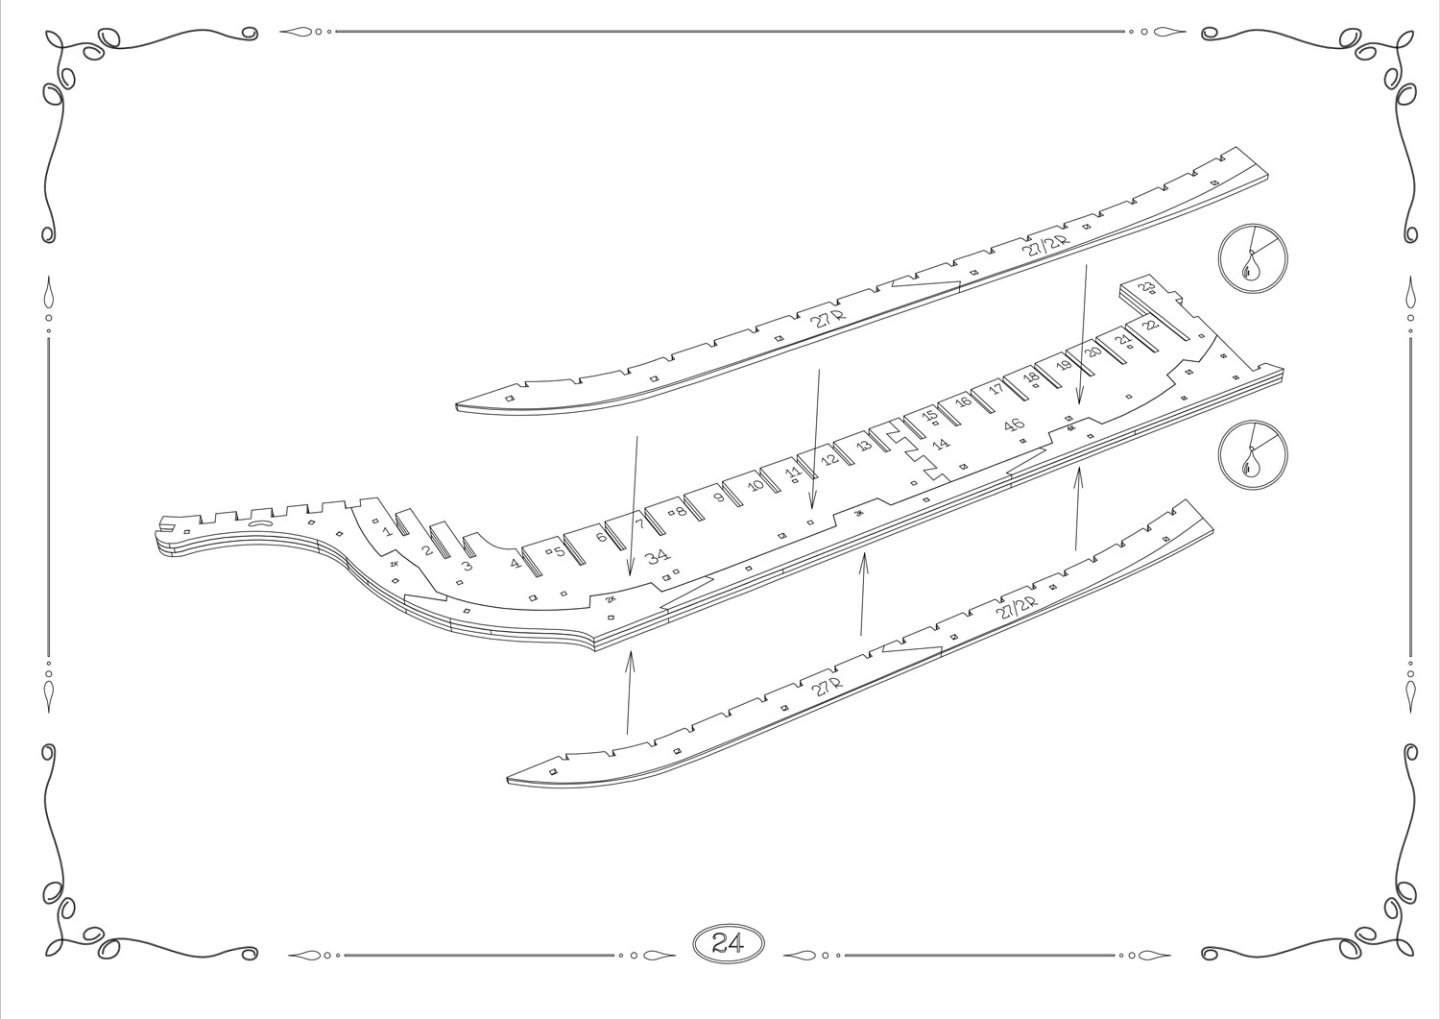
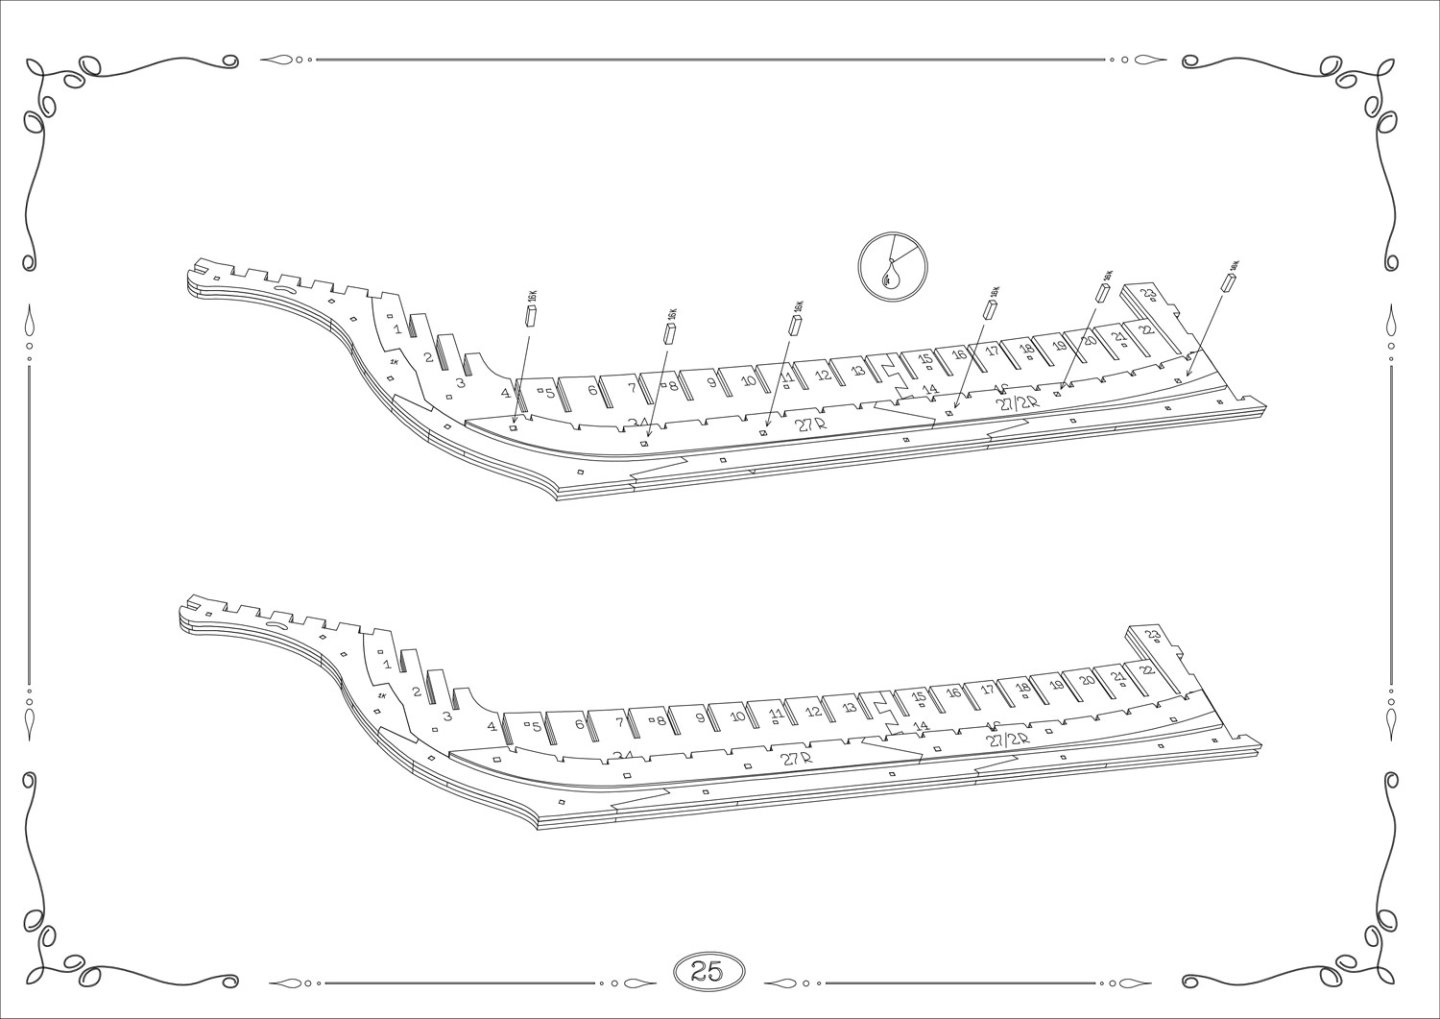
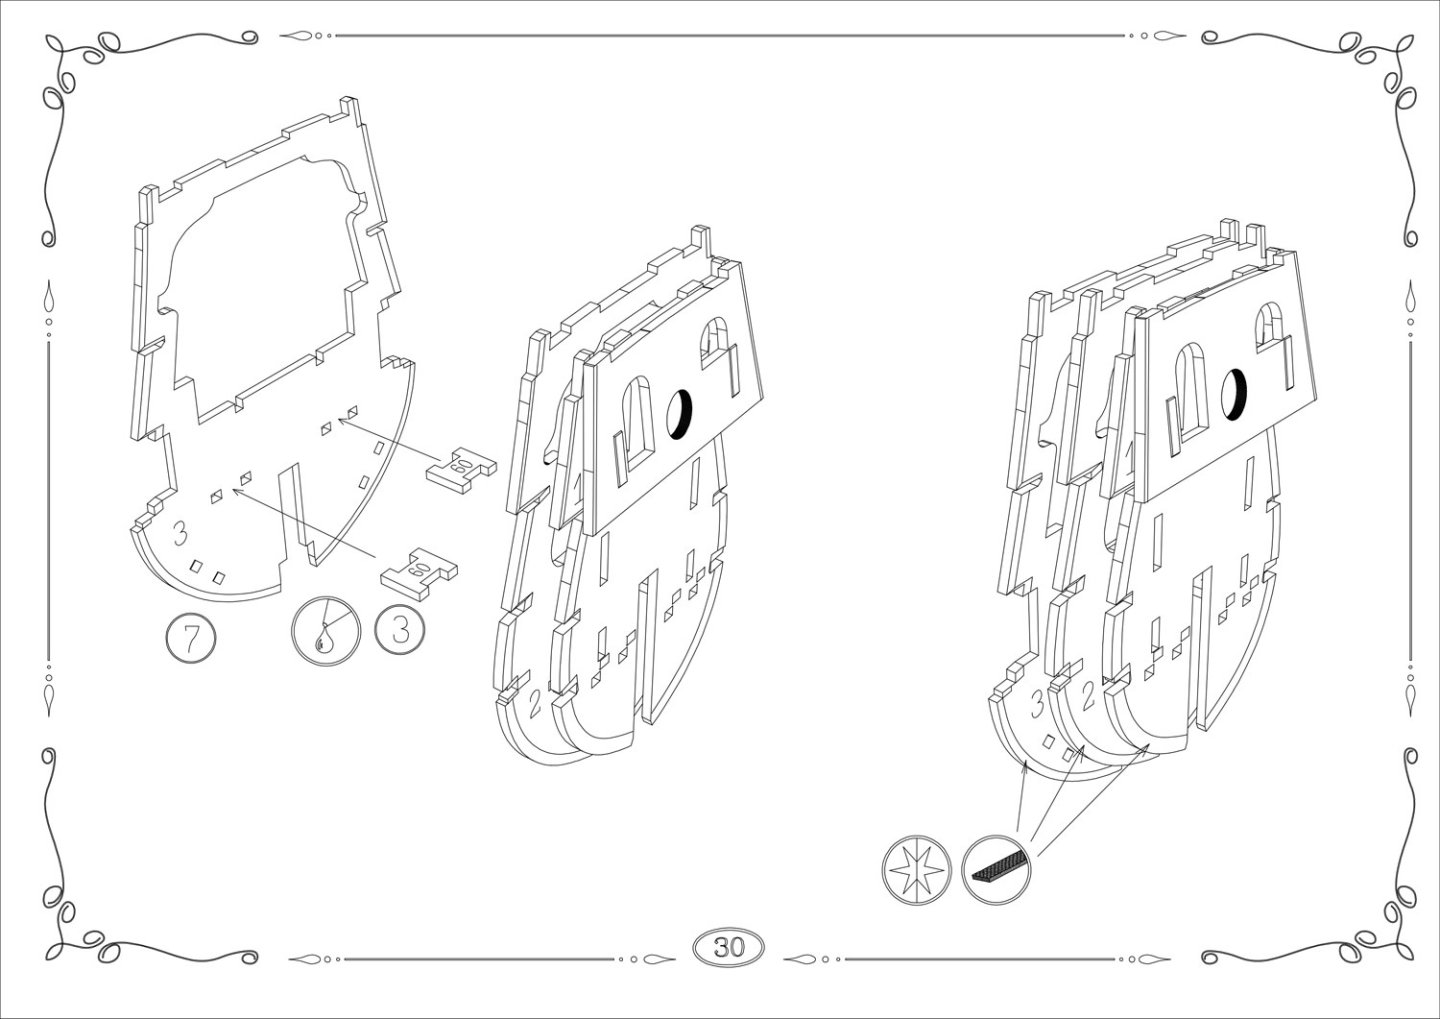
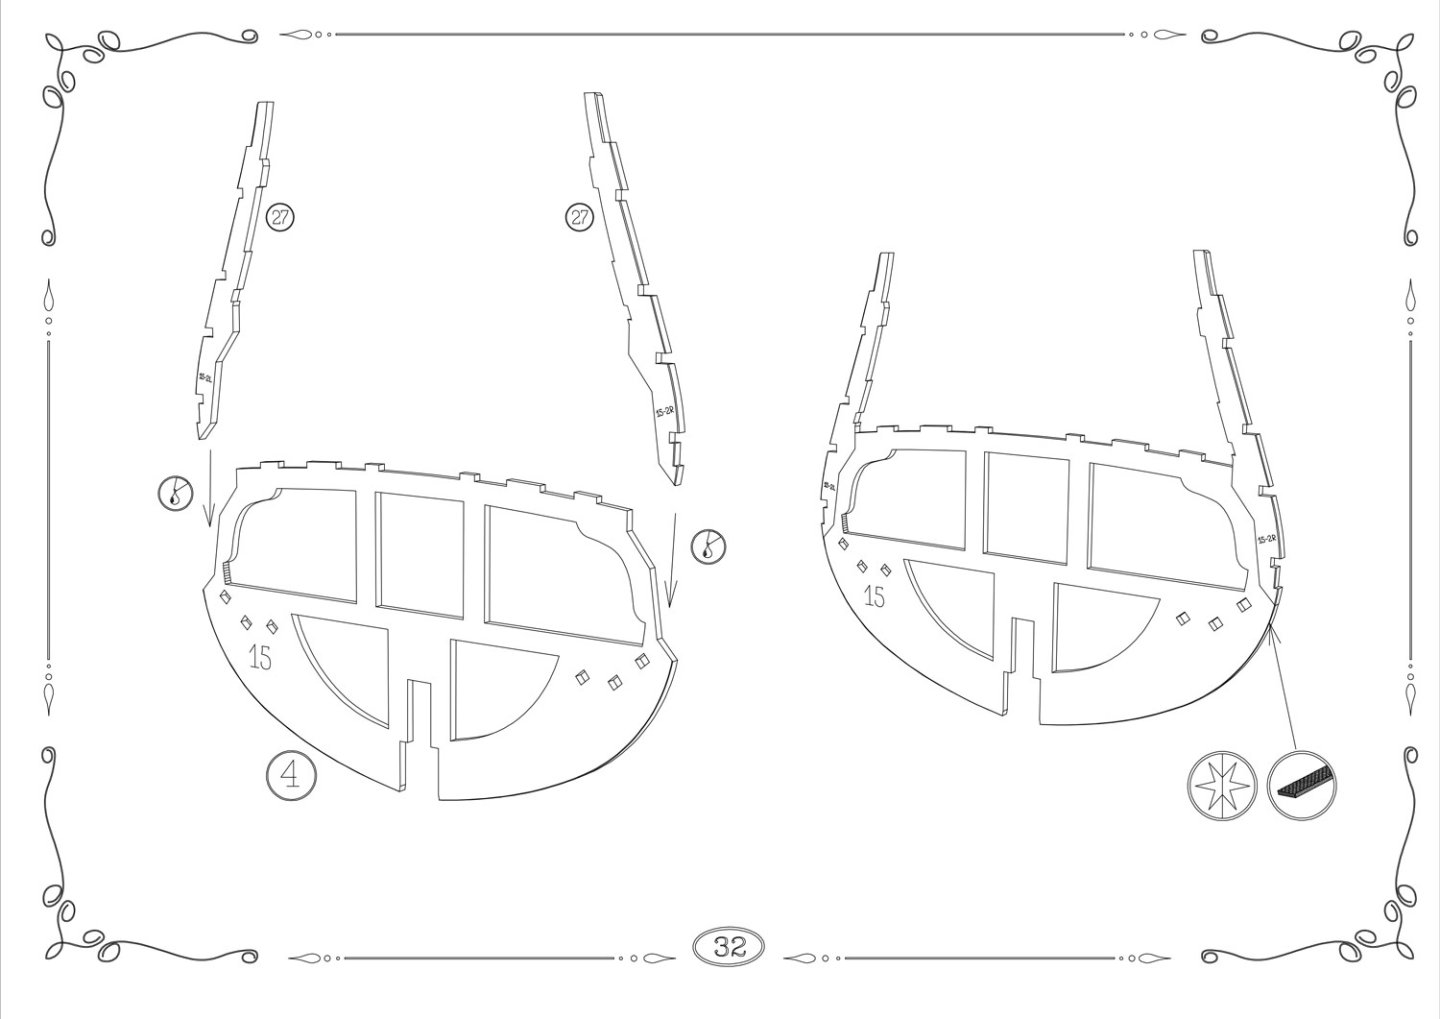
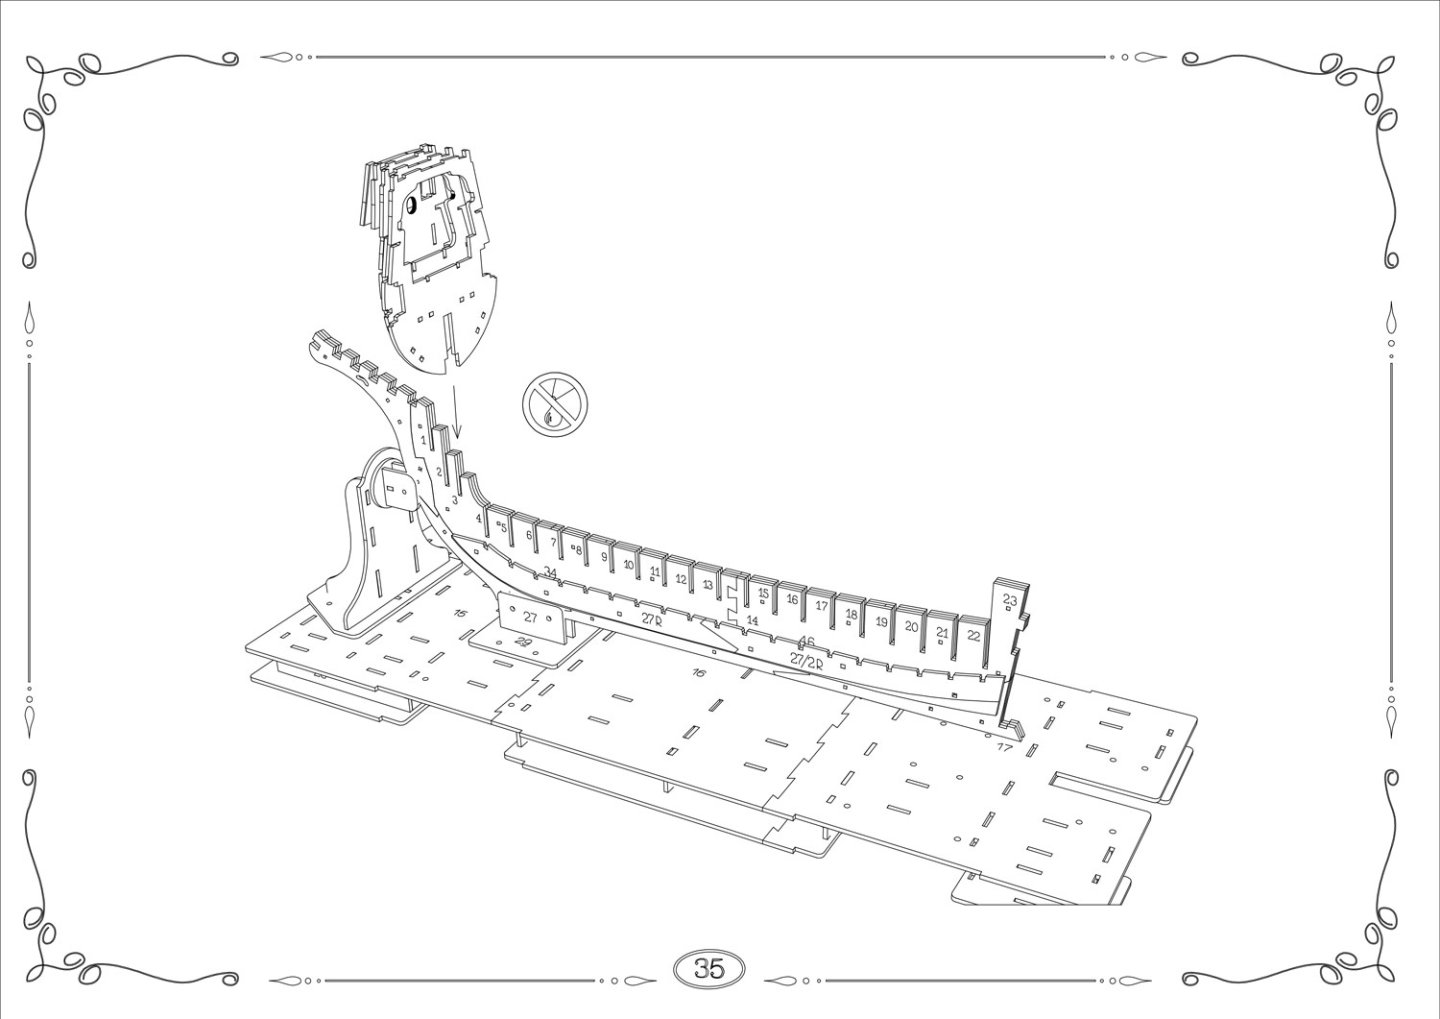
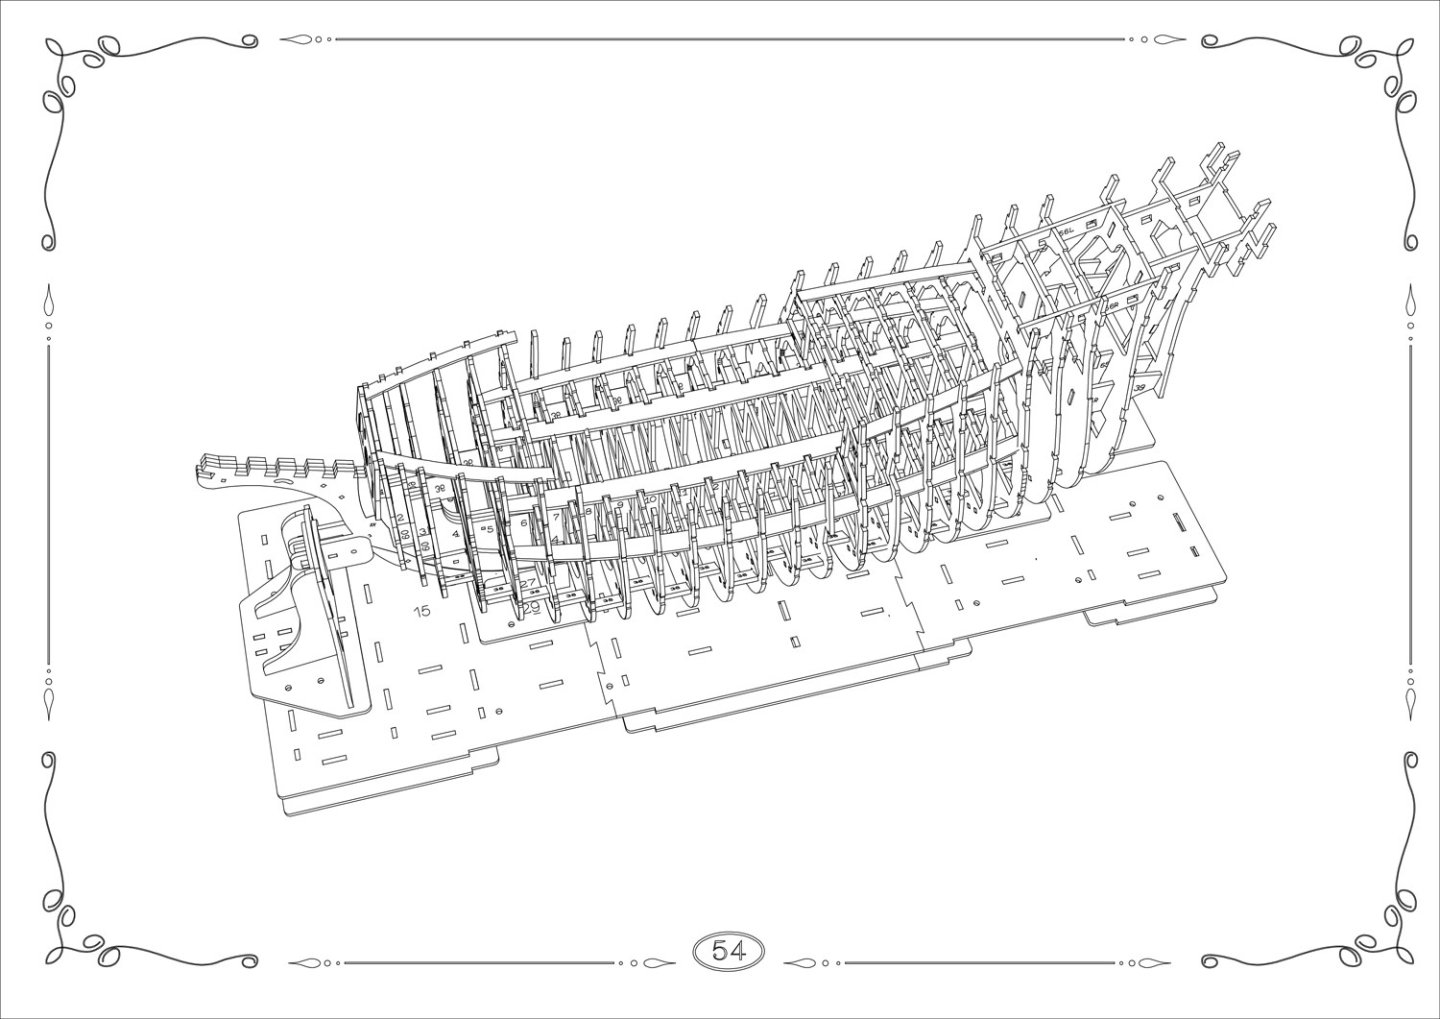
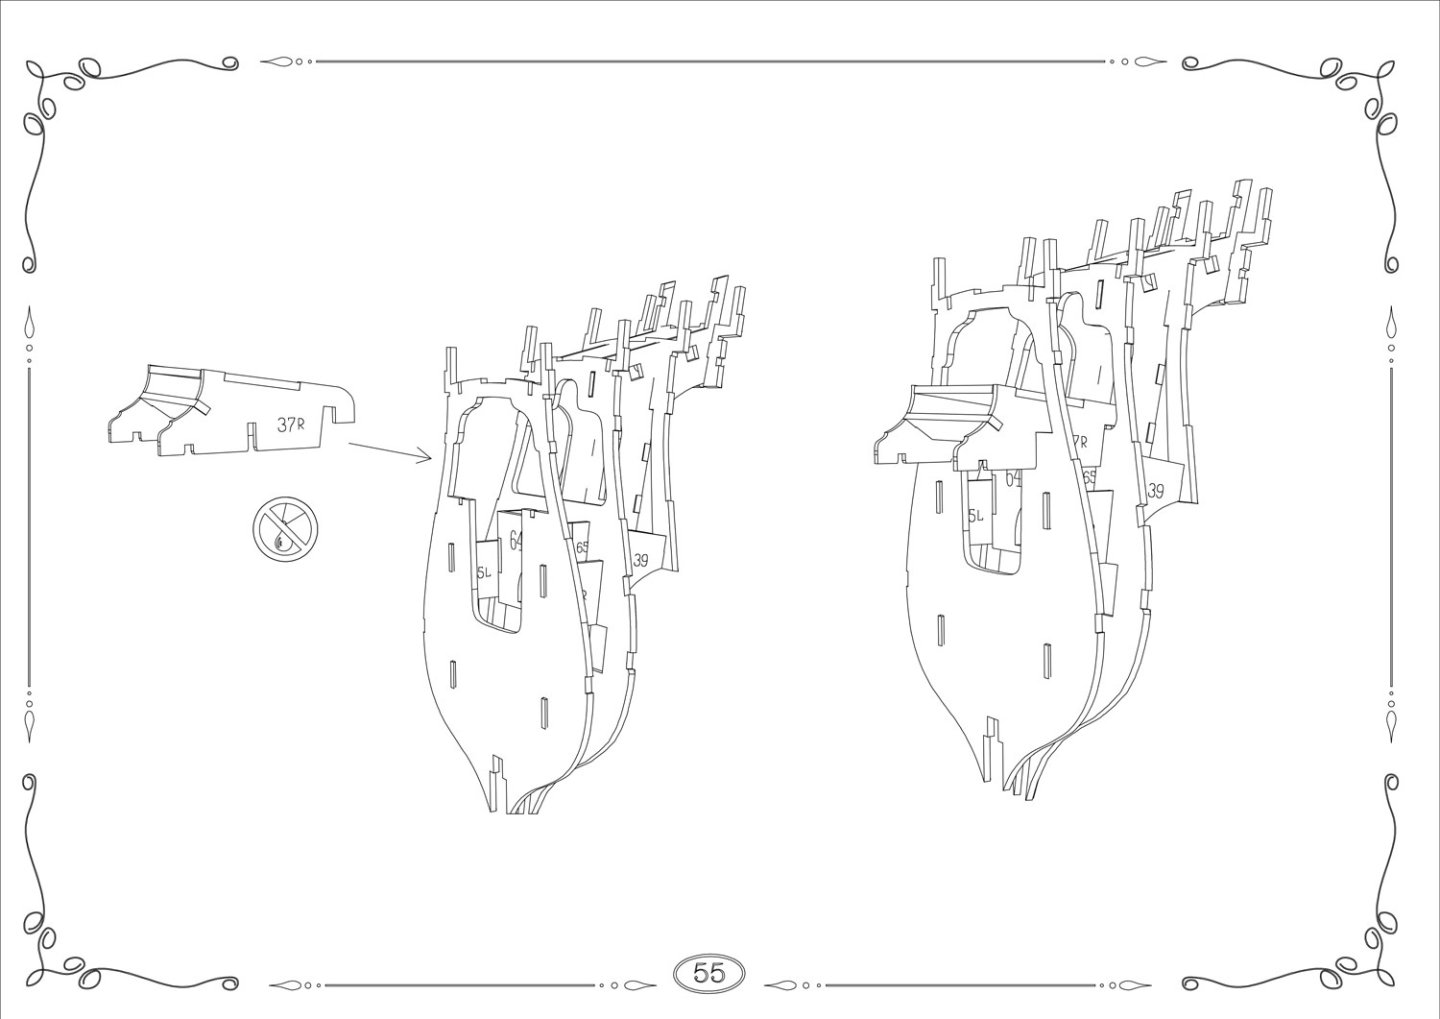
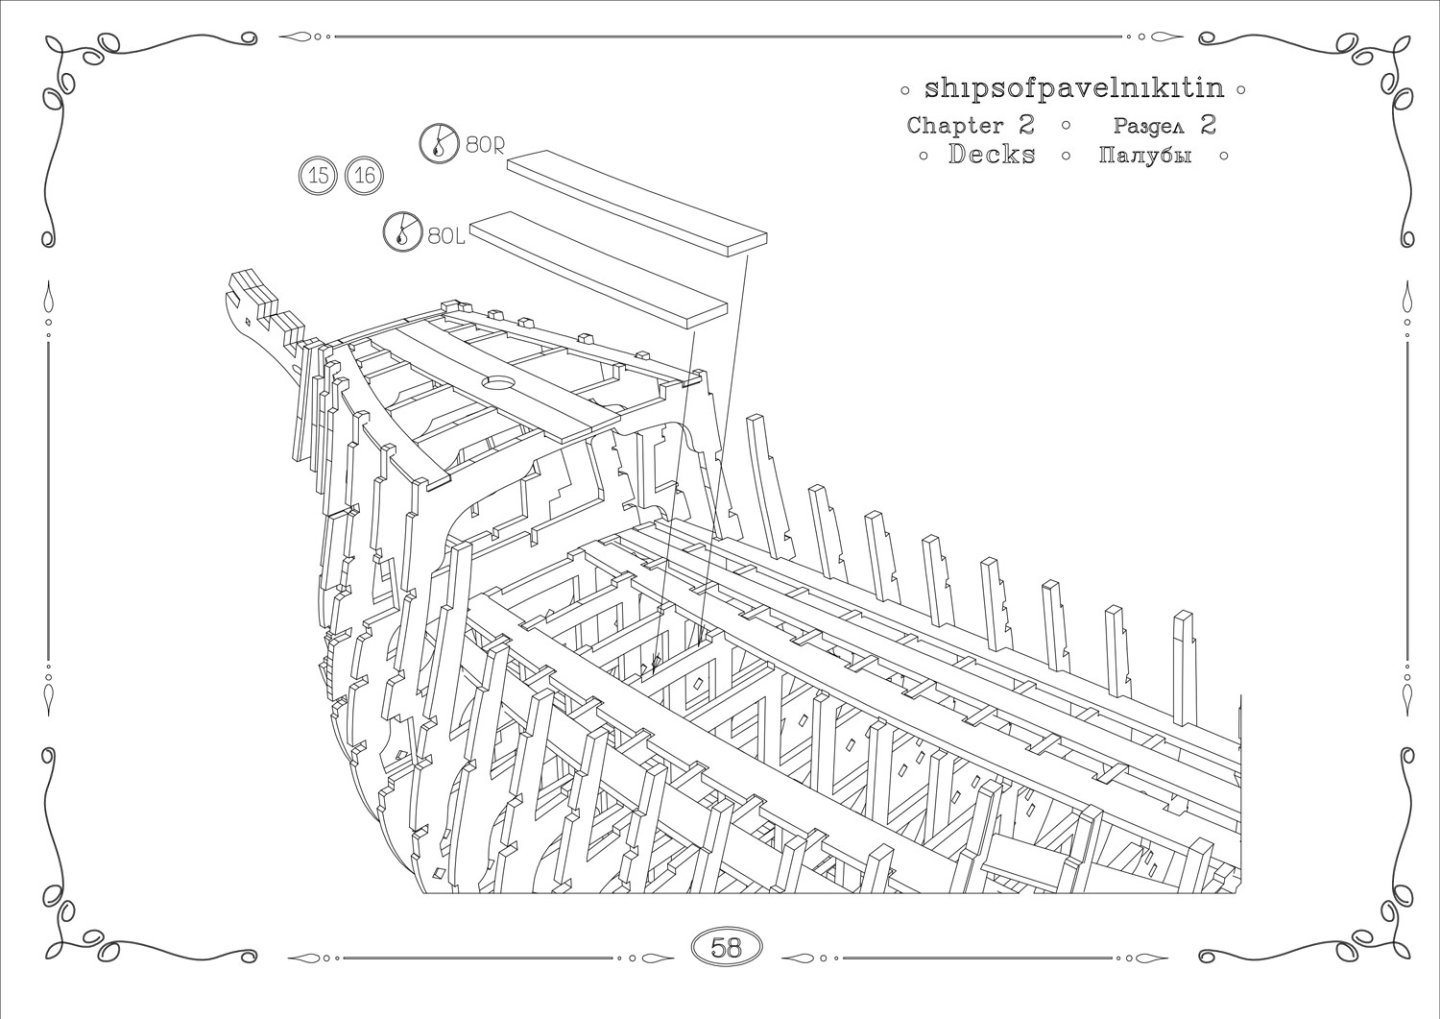
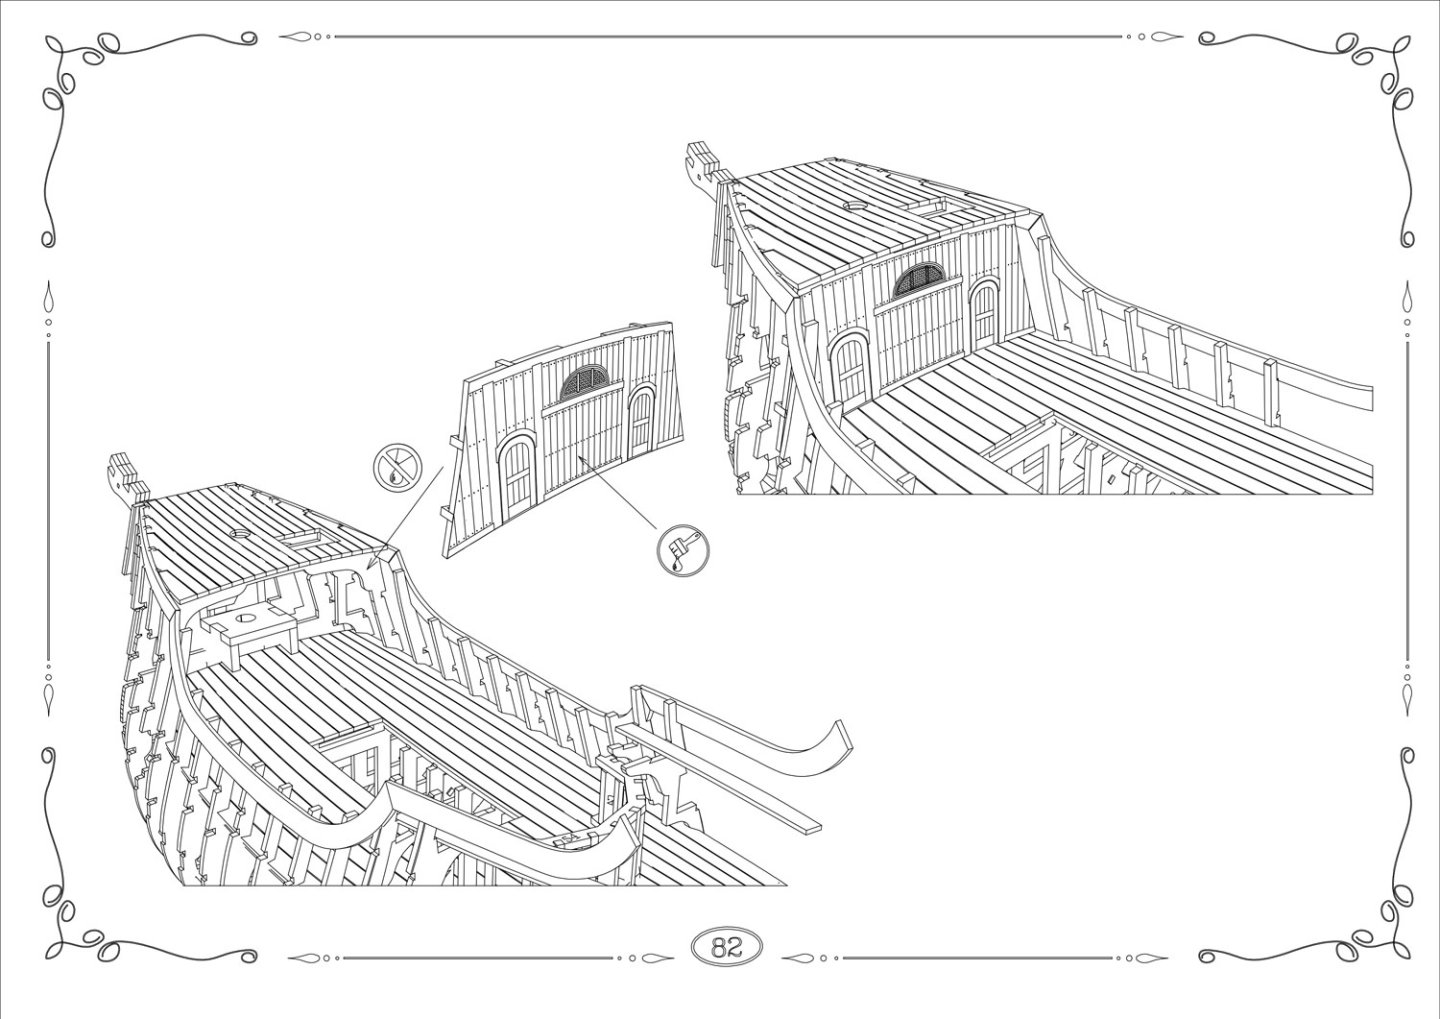
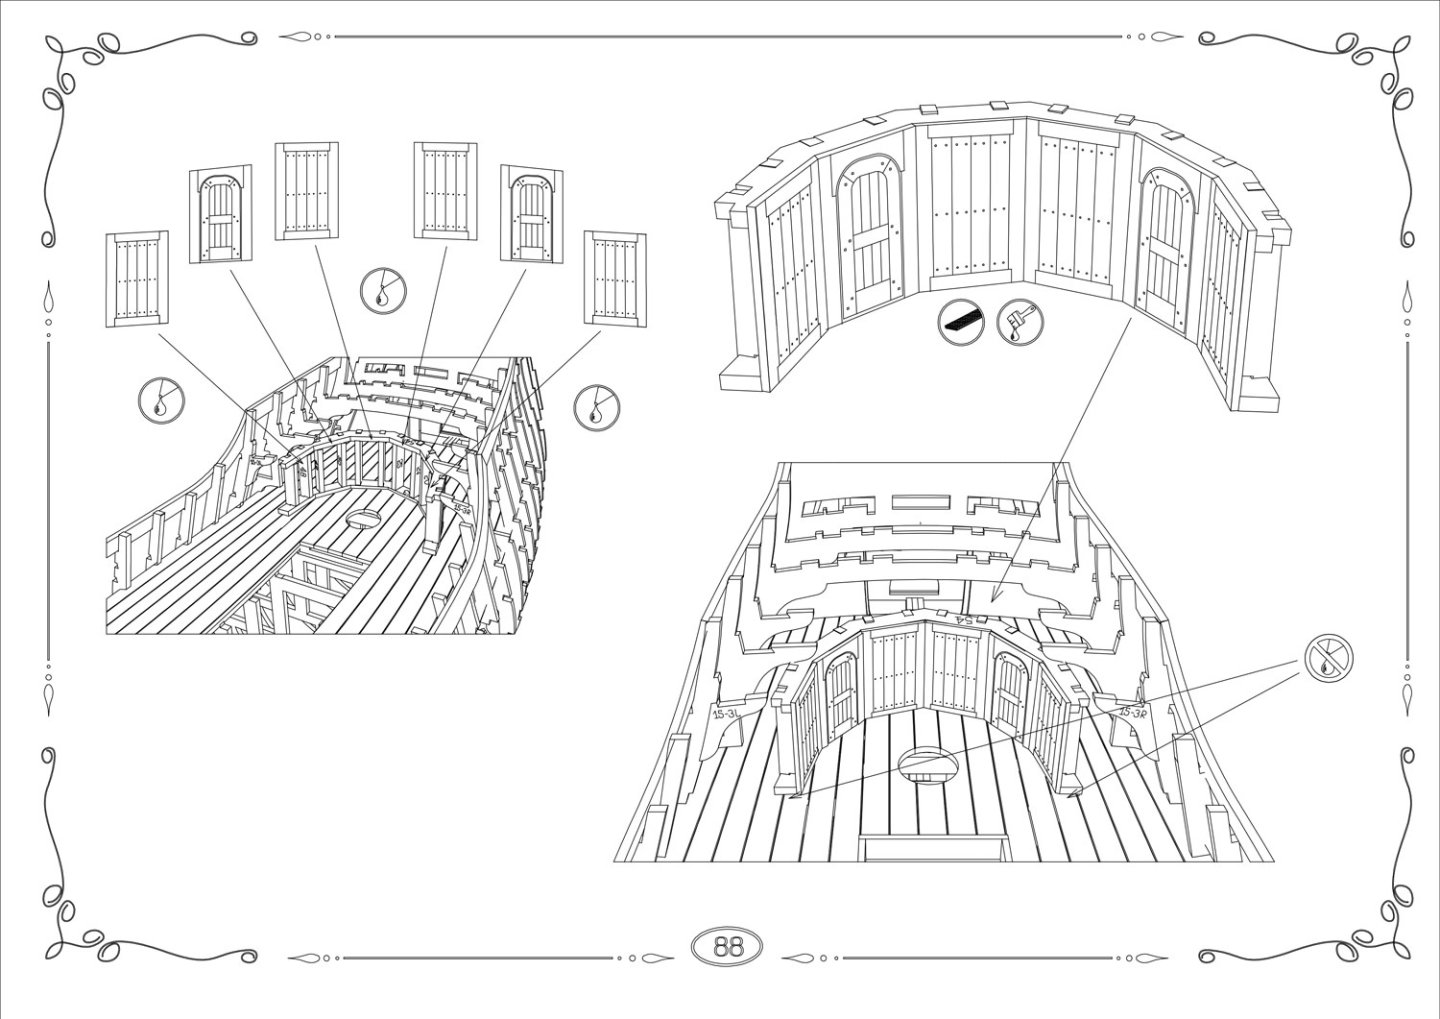
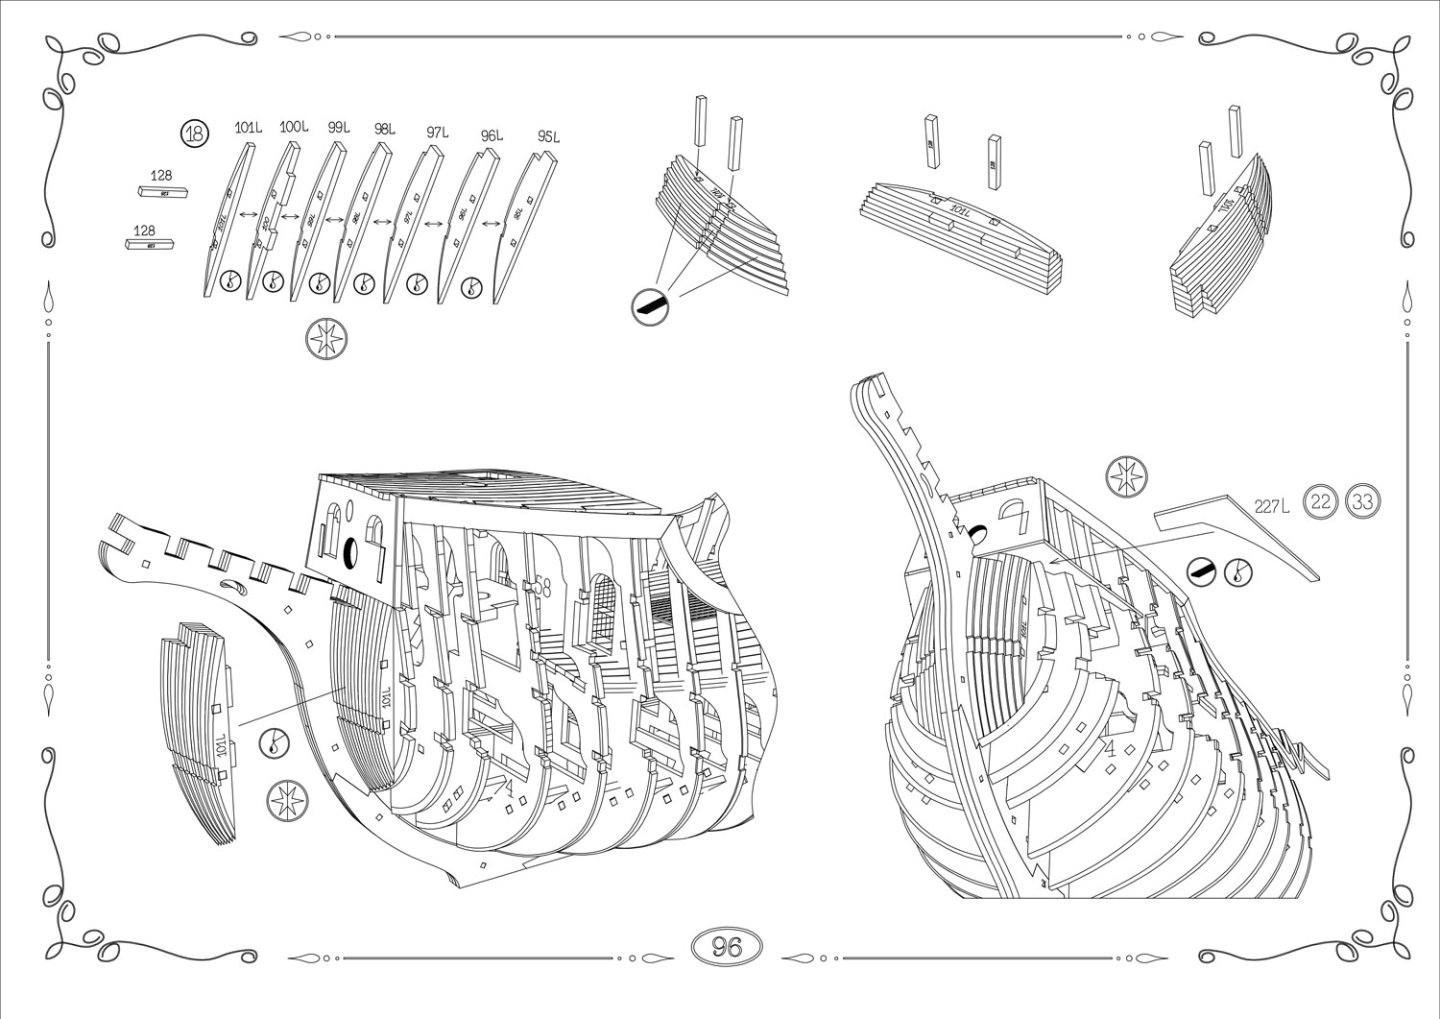
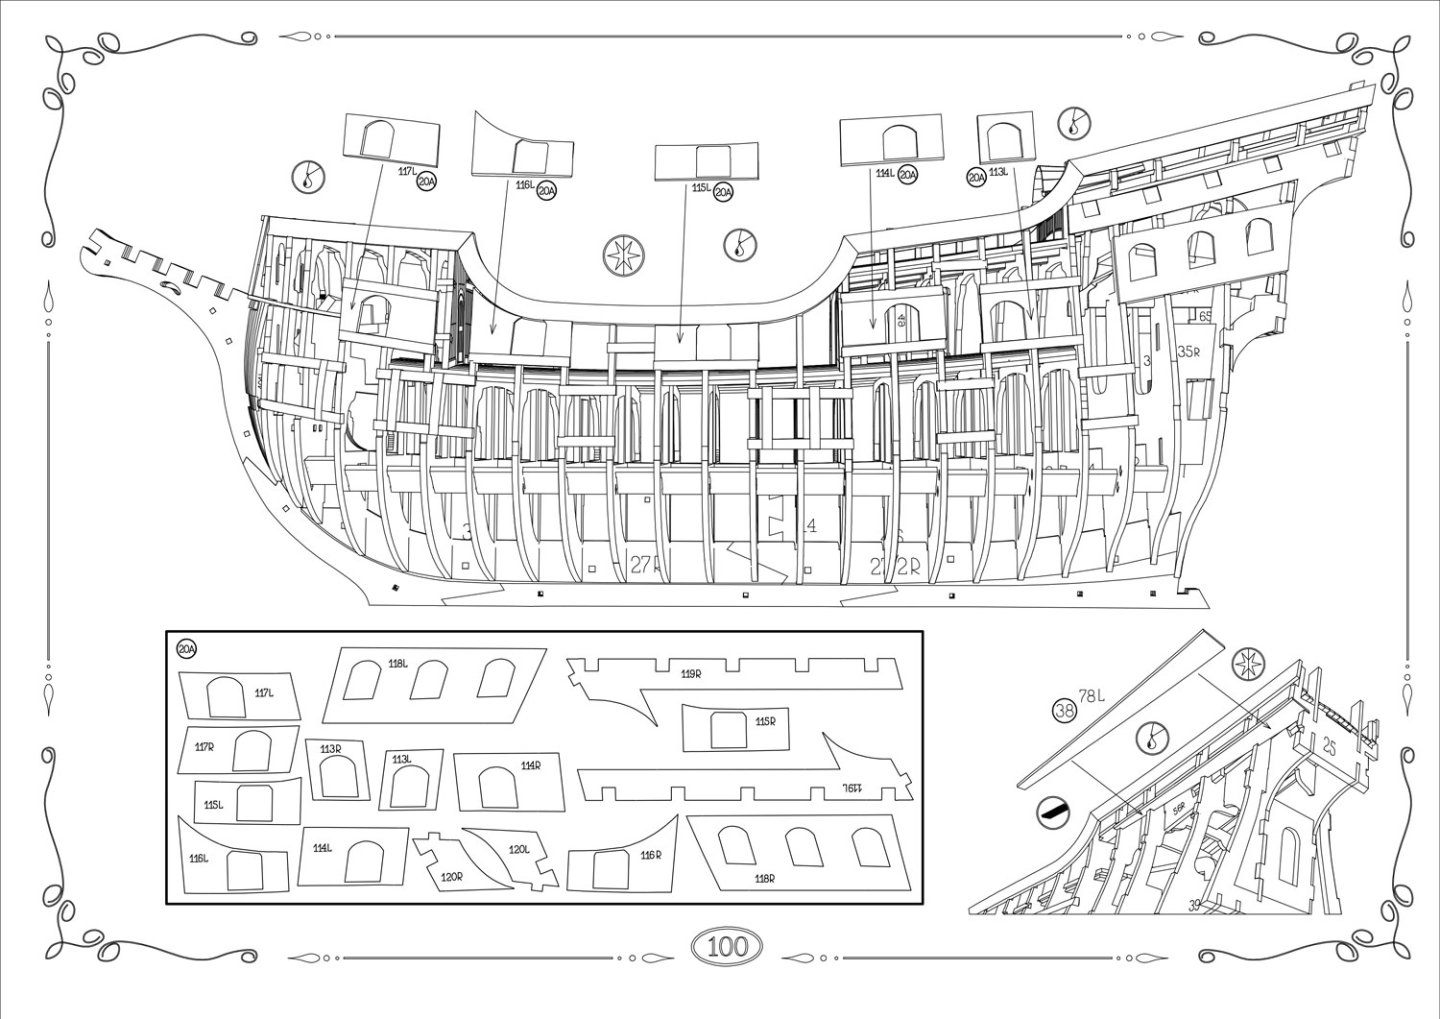
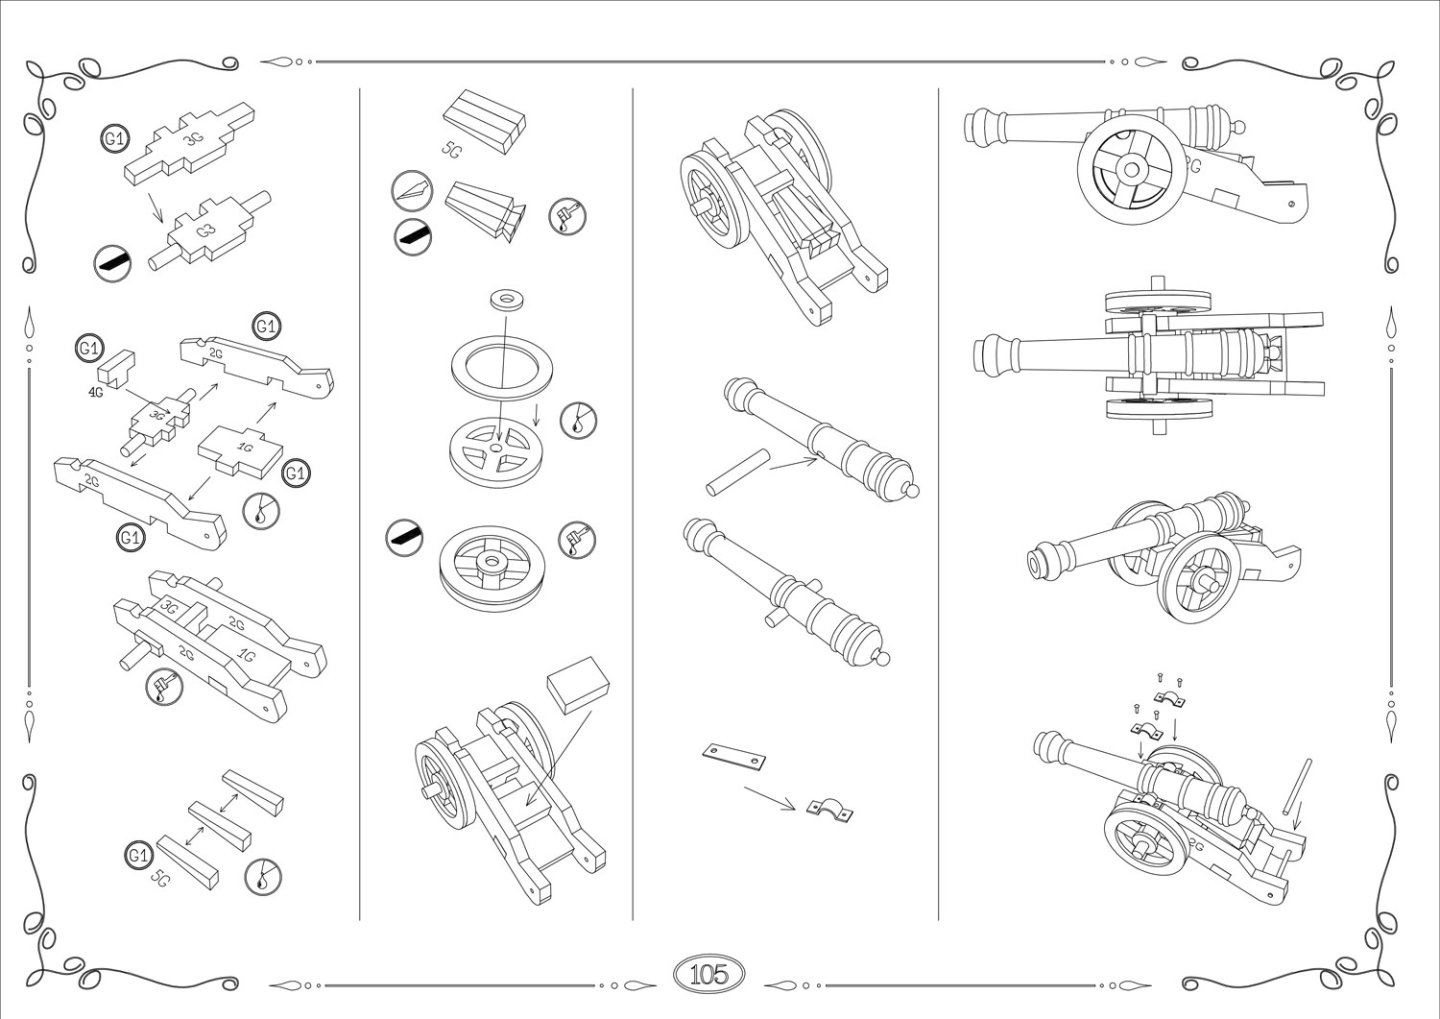
Instructions As previously indicated, this kit contains parts 1 & 2, bound as a single volume. We will receive the remaining two volumes as soon as they are available. As I want you to get a feel for the construction of this model, I’ve presented a good selection of images from the manual, to better acquaint you with the construction of this unique model kit. Conclusion In the right, competent hands, this kit will most certainly build up into a beautiful olde worlde Galleon representation. How you paint/finish the model will be more of an individual choice, but if you’re willing to have a go, then the set of paints specifically for this kit, would be a perfect choice. This model will require a keen eye and exacting nature, to be able to complete as per the box art, so you should take your time at every stage and carefully plan ahead to make sure you don’t mis-fit parts anywhere. You definitely get a lot of kit for your money here too. Make sure you have space enough to store those three boxes as well as build this very large model. What do I think of San Bartolome? Well, she’s a very impressive depiction of a 16th Century Spanish galleon, and her shape reminds me of the San Francisco kit from Artesania Latina, as that was the first wooden ship model I ever built. This is a wonderful kit and one that I’d love to see our members build here on MSW. I will post a review of the associated sets for this in a separate article. My sincere thanks to Pavel Nikitin for the review kit seen here on MSW. To order, click the link at the top of this article.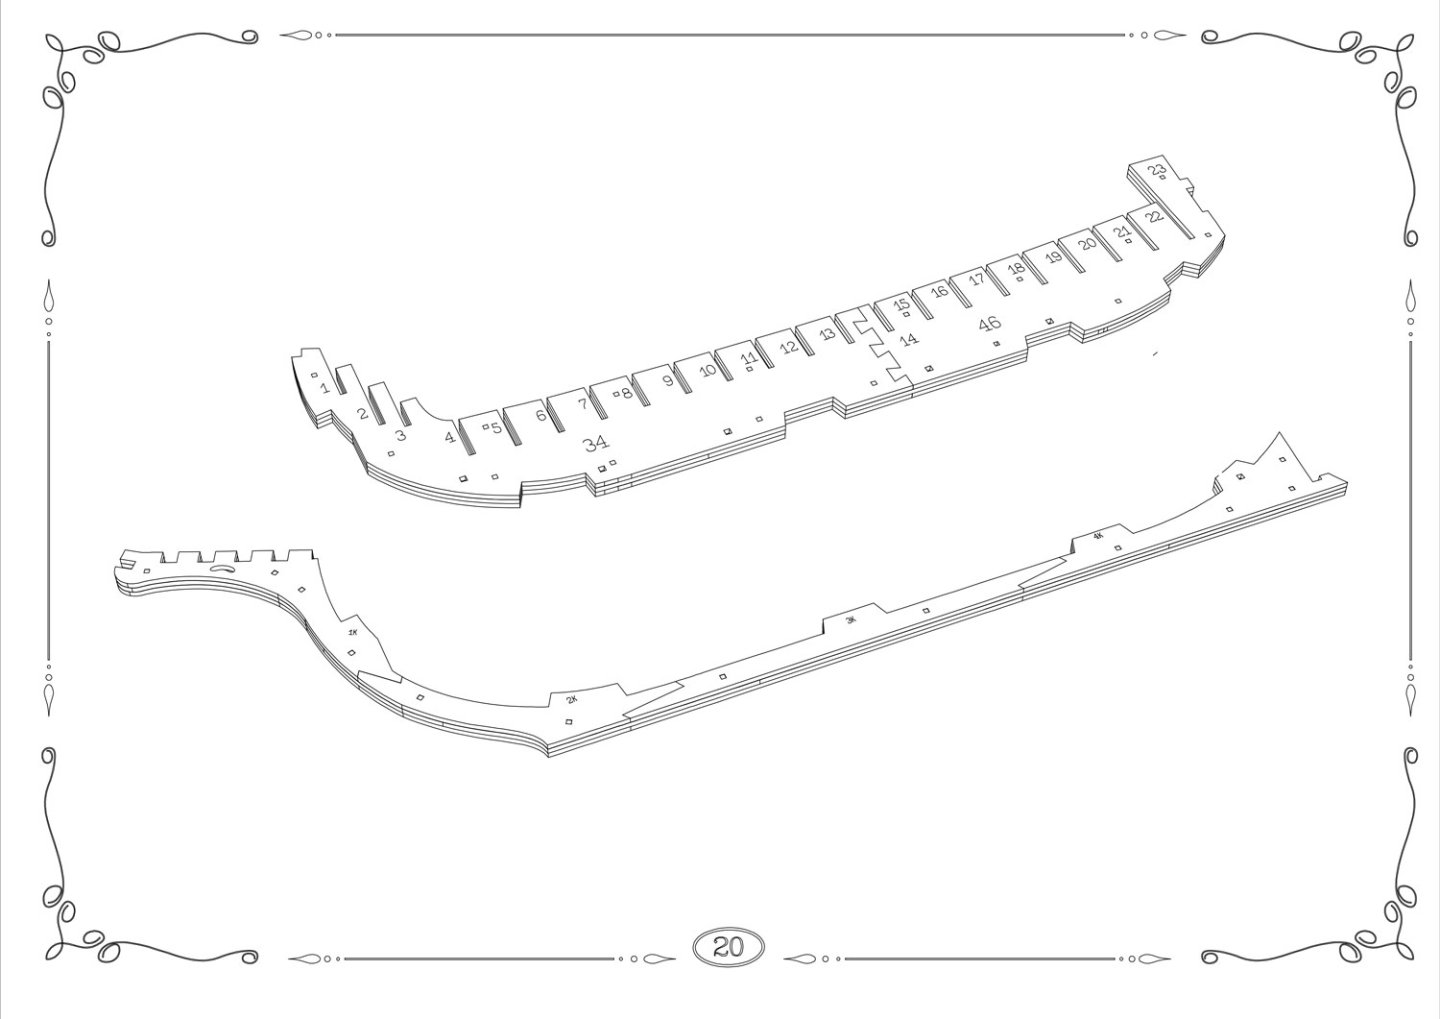


-
kit review 1:48 San Bartolome by Pavel Nikitin
James H replied to James H's topic in REVIEWS: Model kits
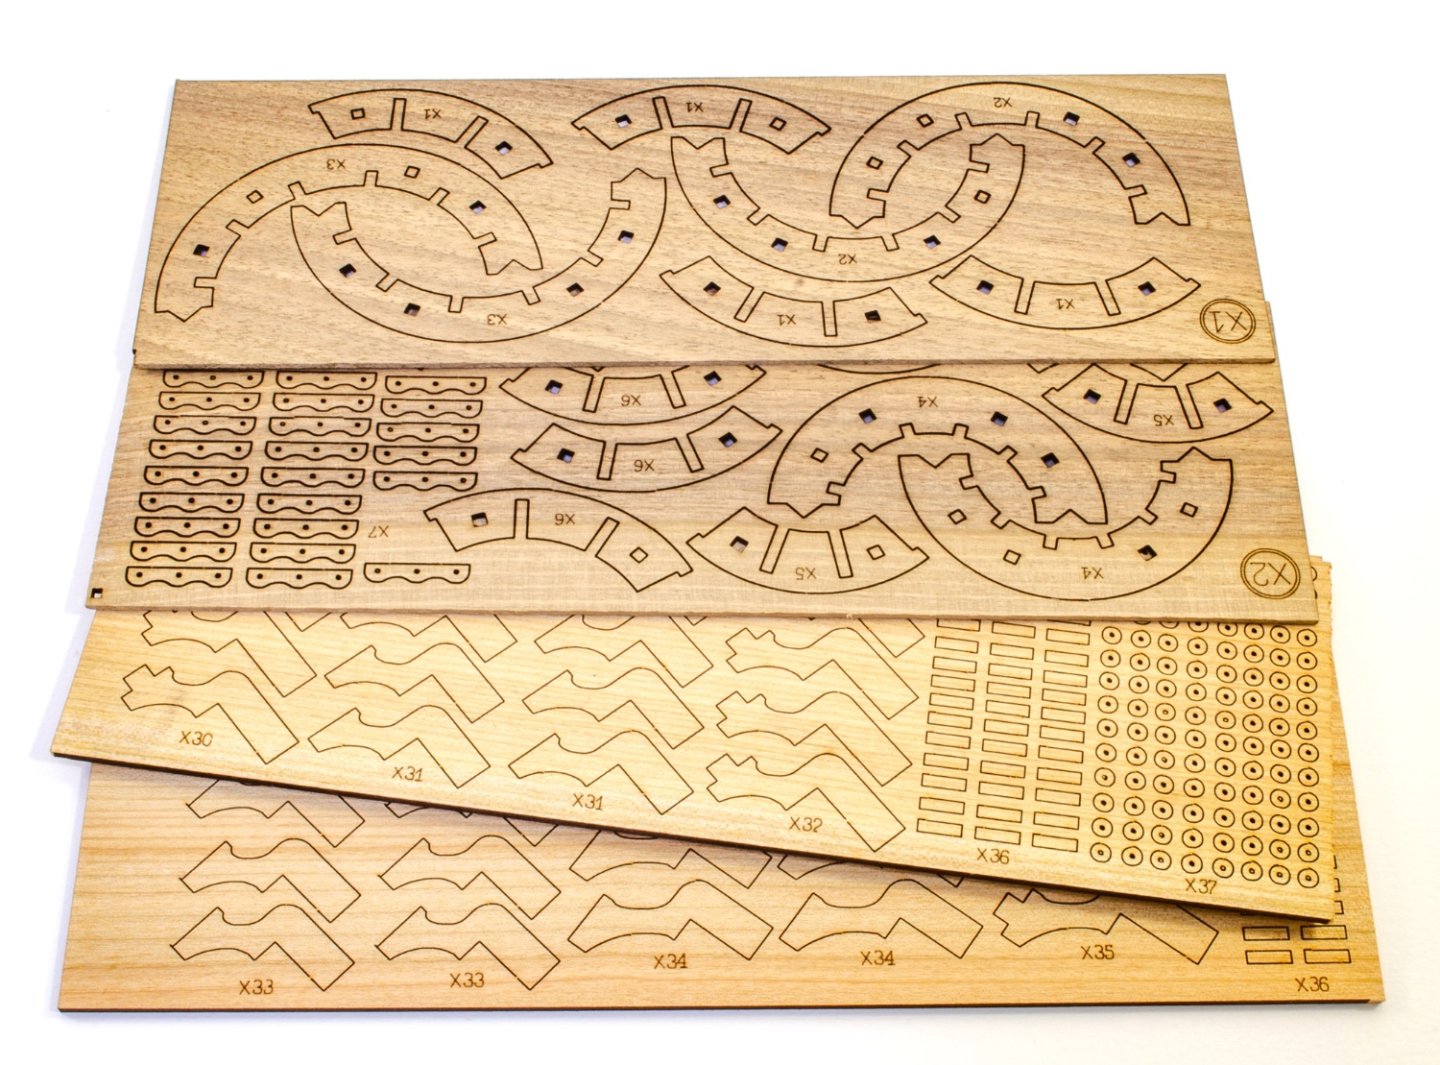
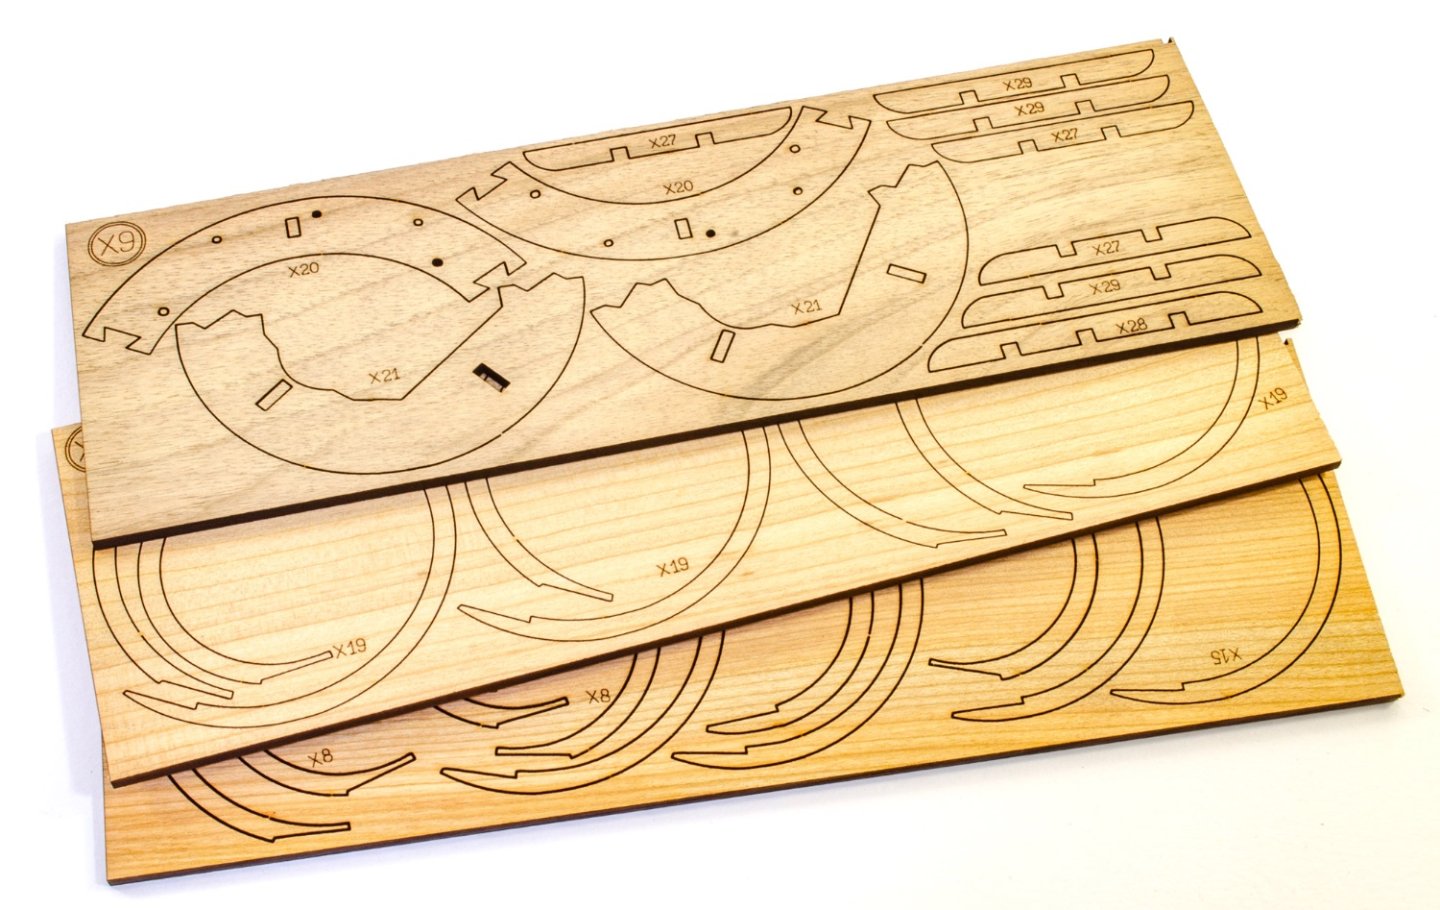
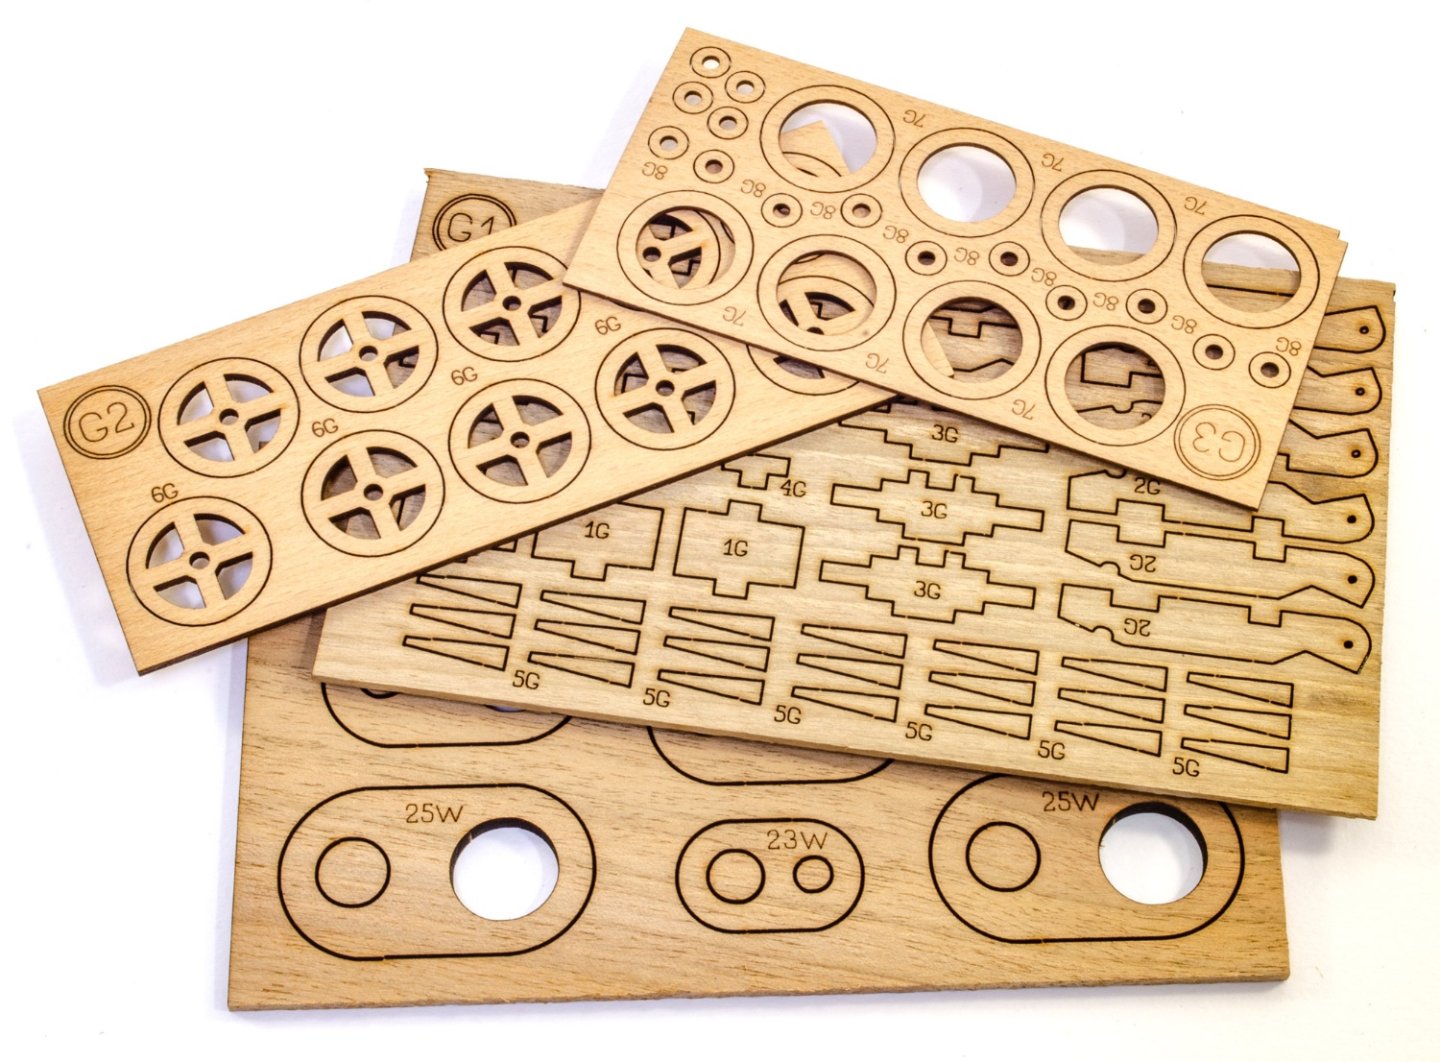
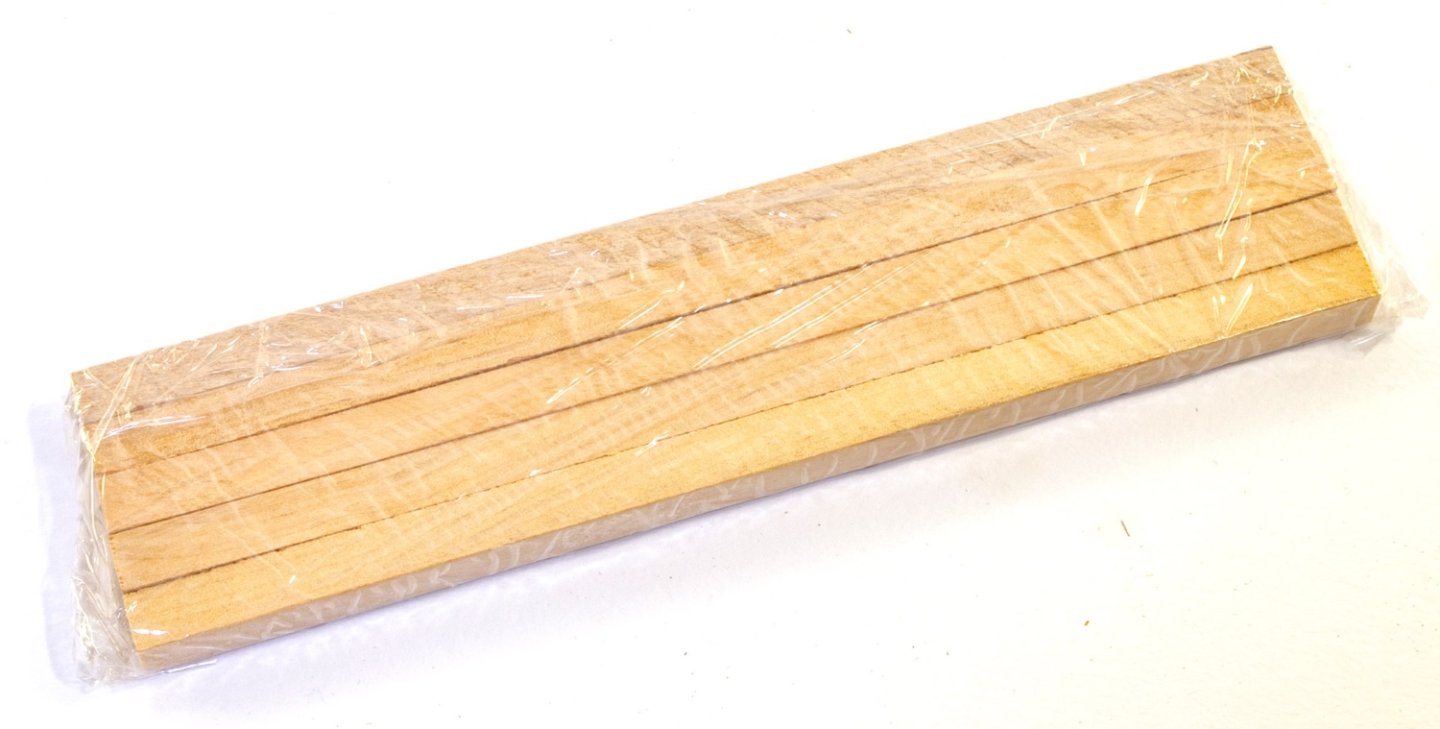
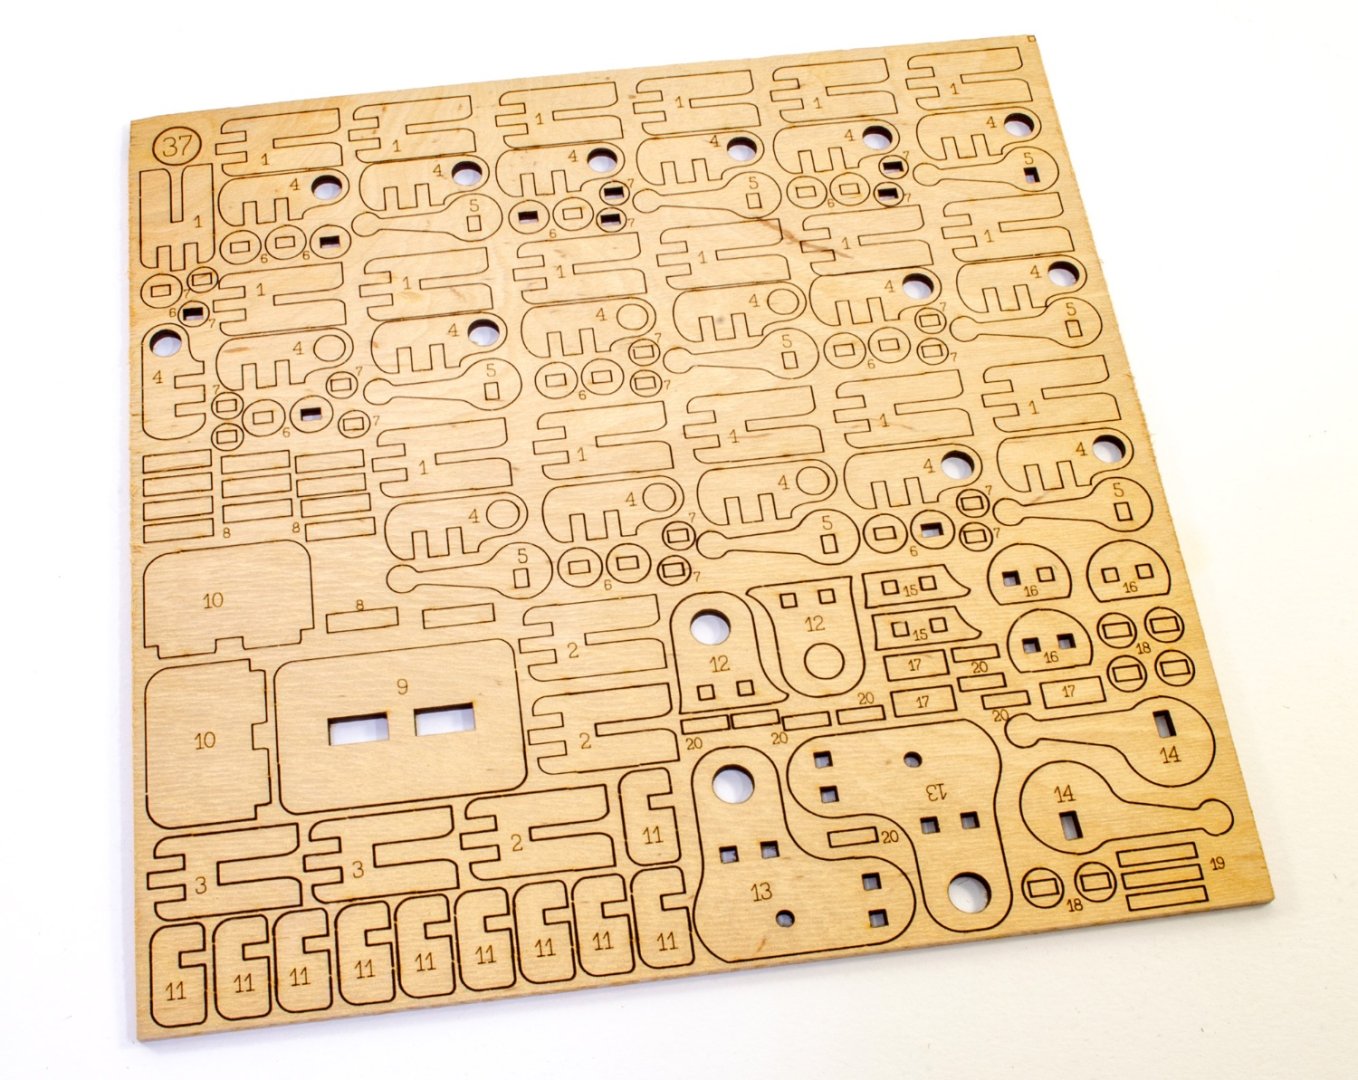
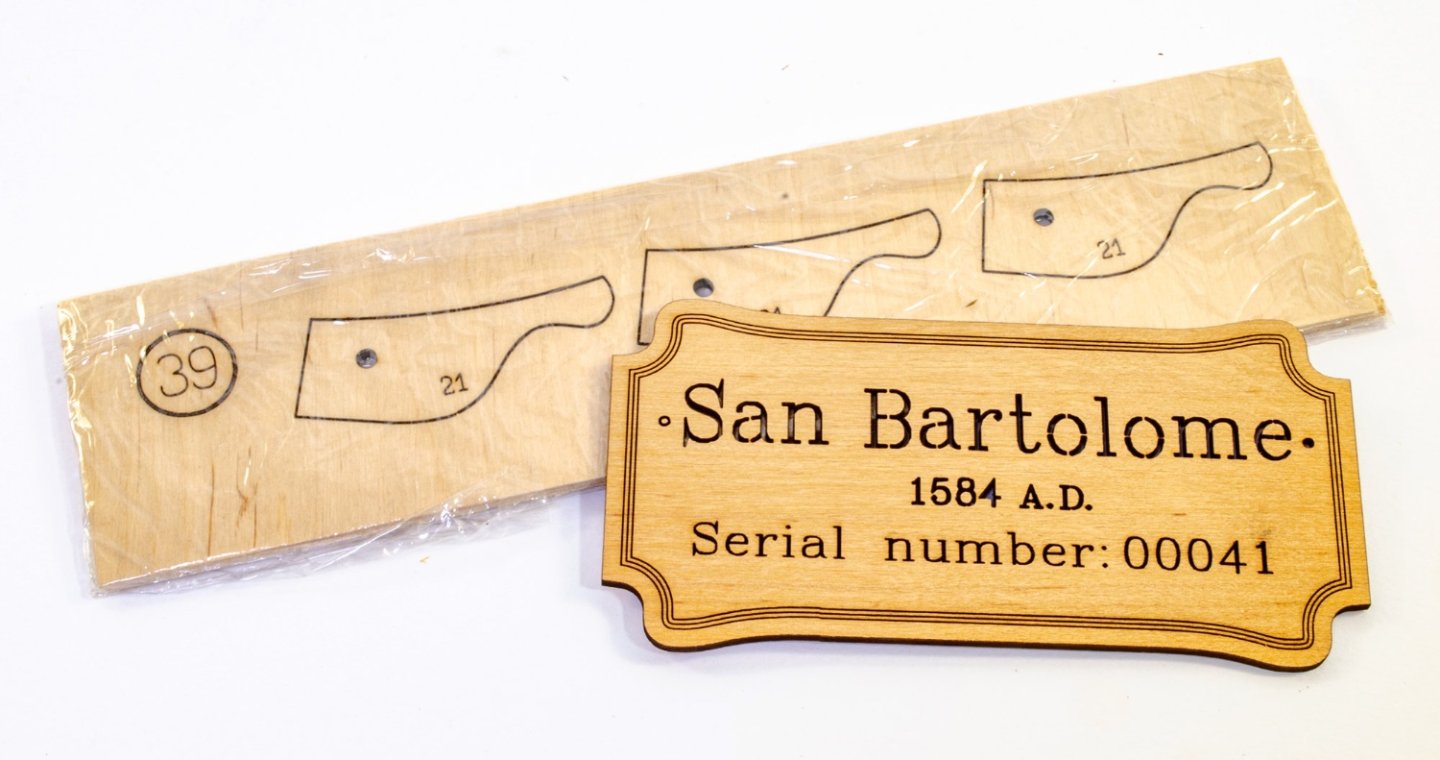
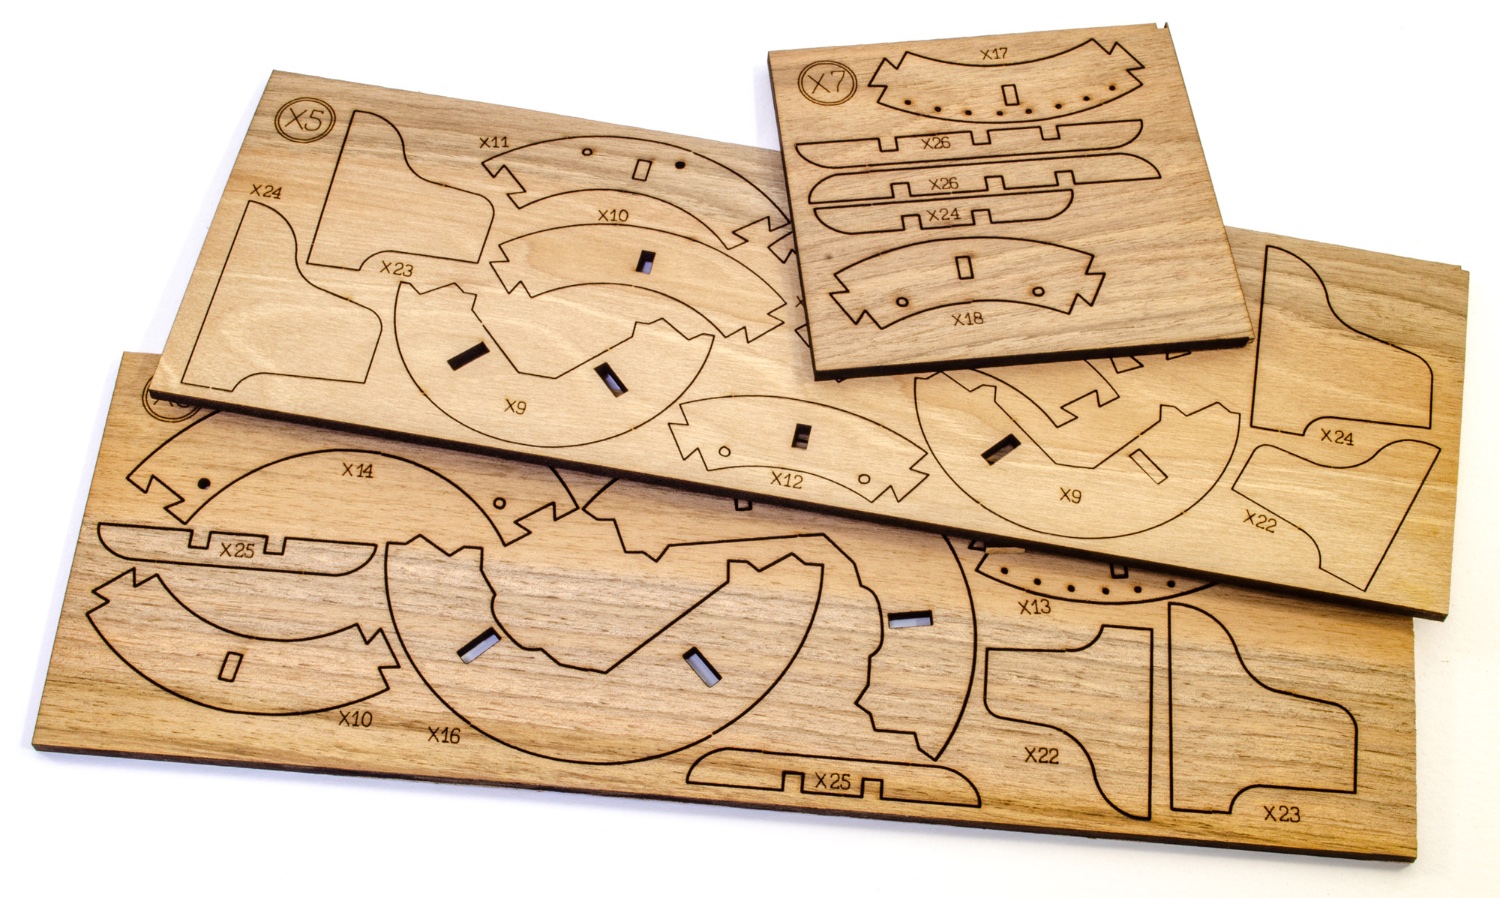
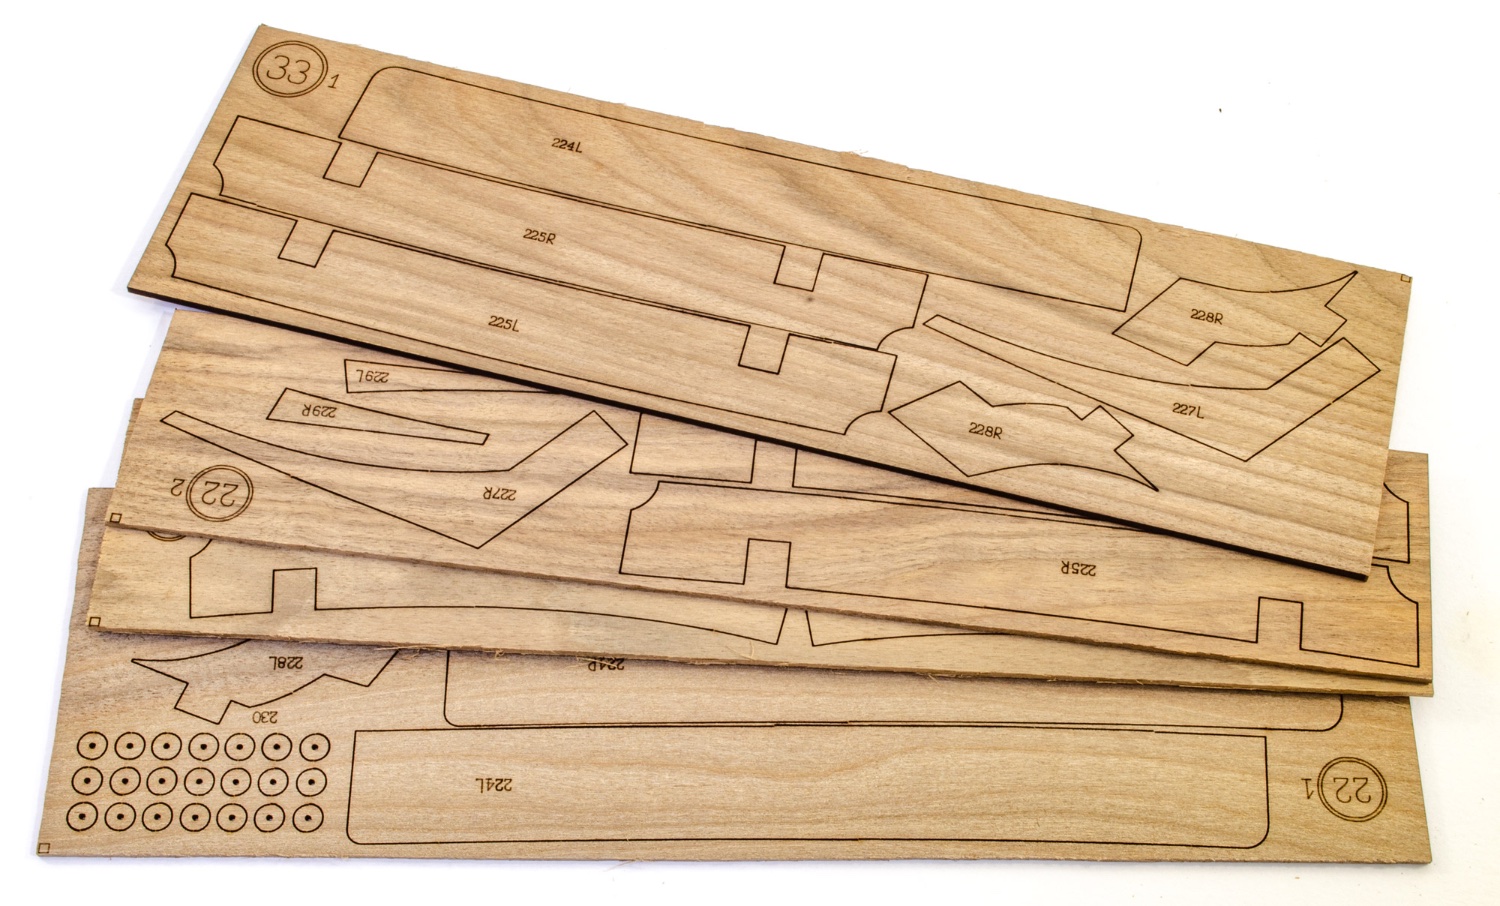
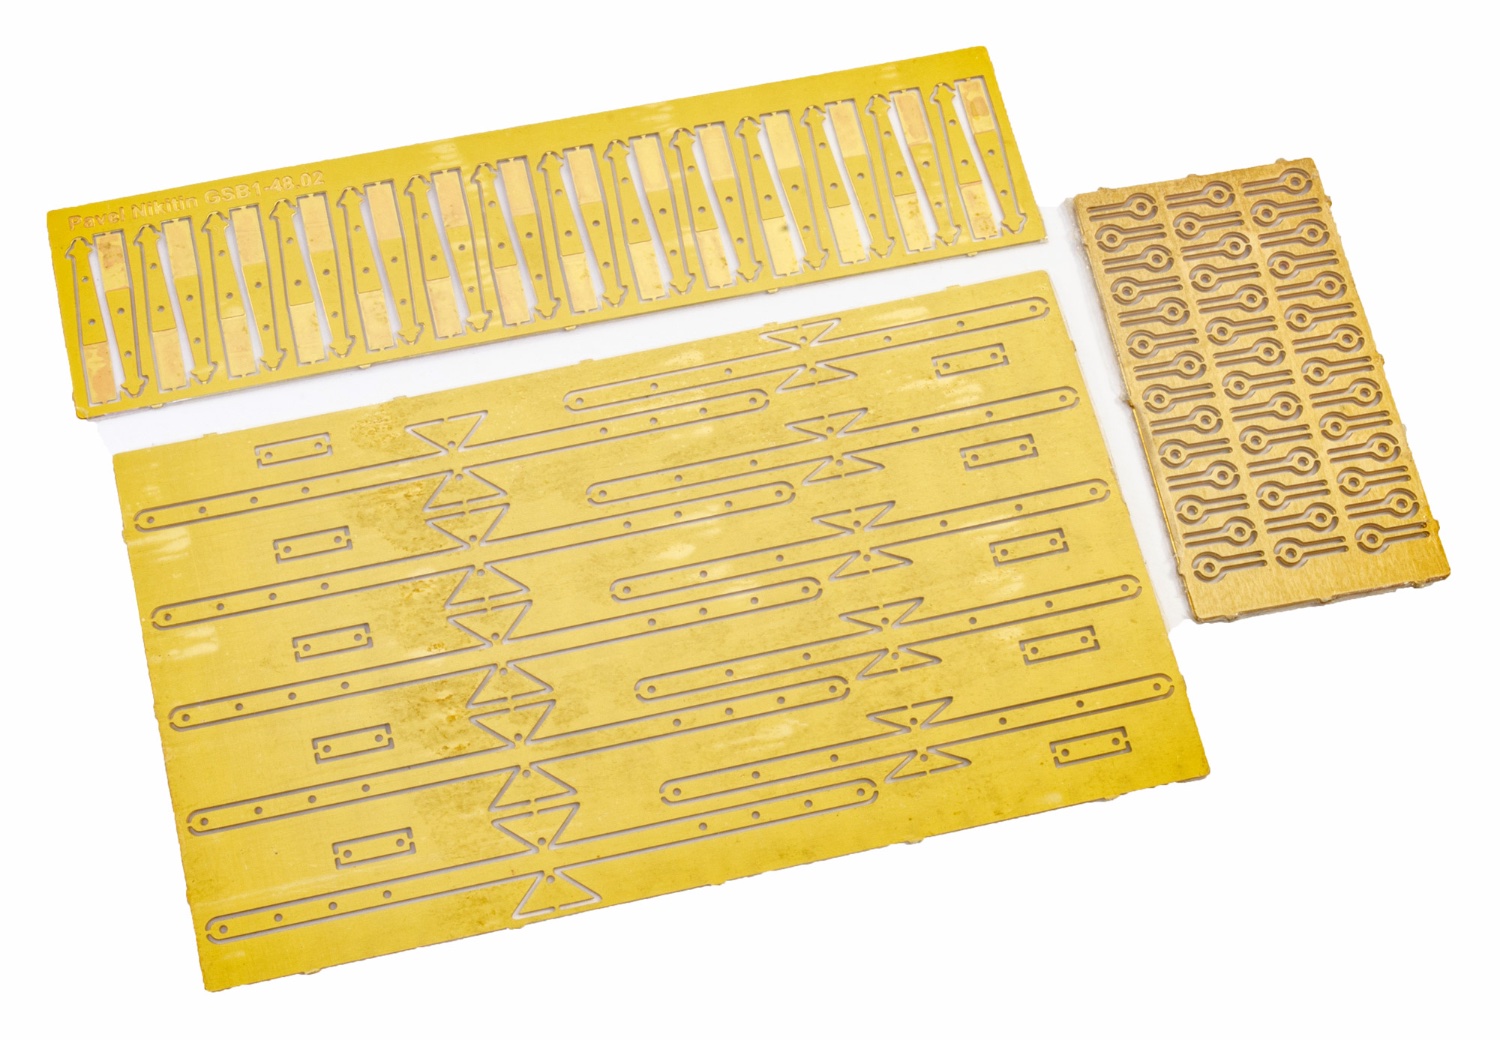
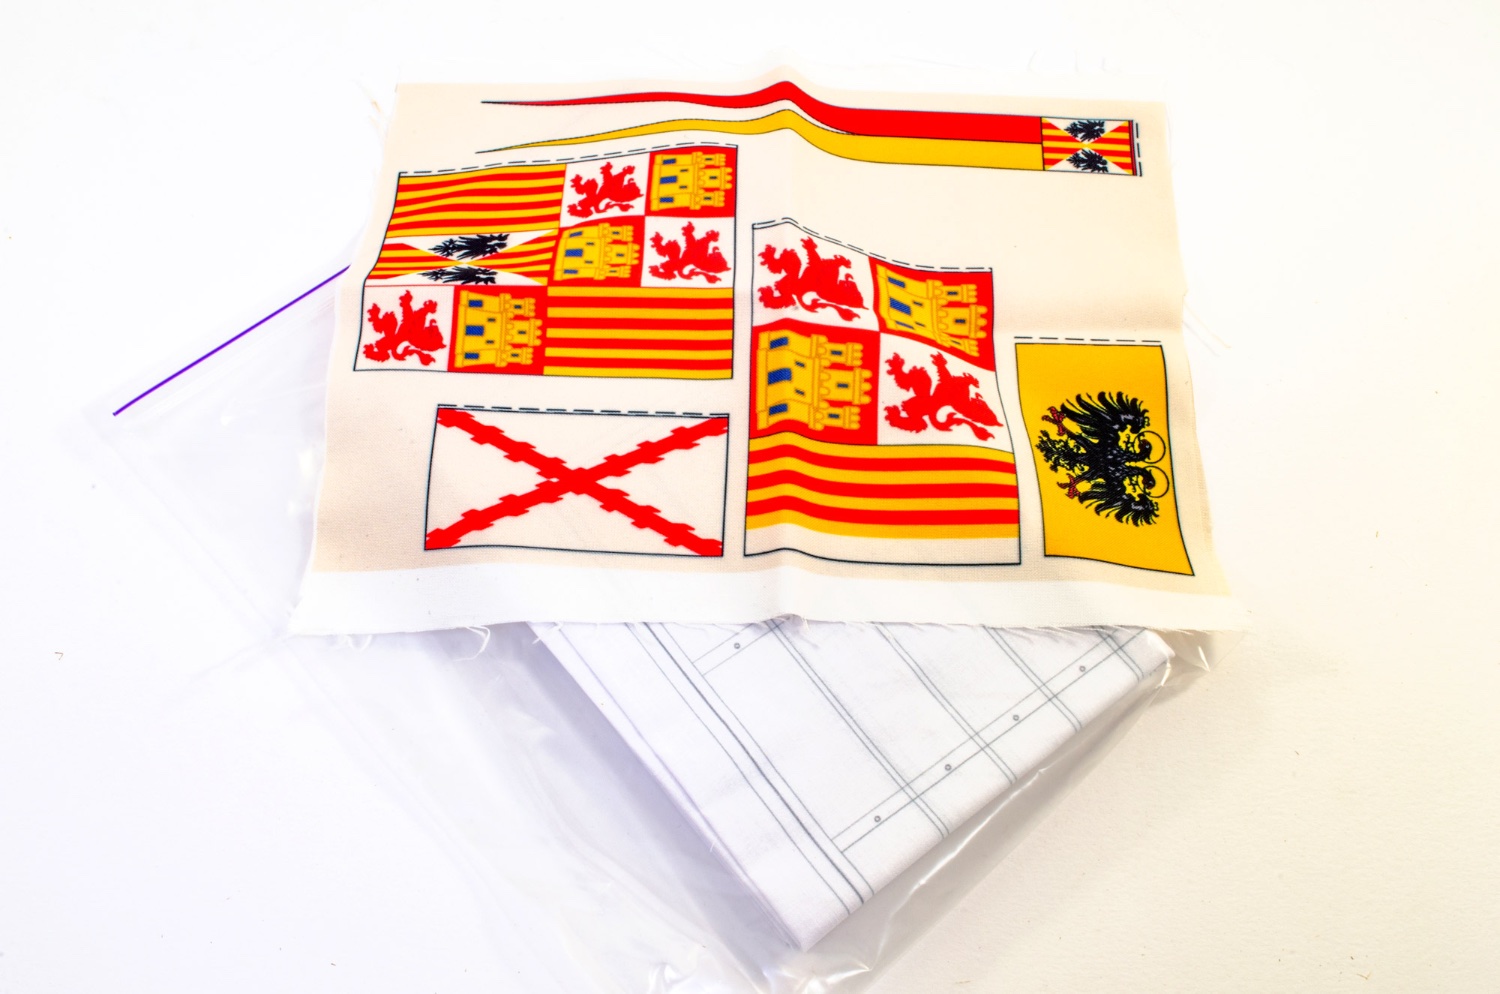
Box 3 This is a smaller box than the other two, but nonetheless full of many, many parts. The first sheets here show parts for the mast tops which are very indicative of that period of history. Here’s a preview of the remaining timber sheets in this kit, including some square section rod. As we currently have only half of the instructions, it’s quite difficult at the moment to be able to identify many parts, especially if they pertain to anything more than basic construction, minus masting. You’ll also see that we have been sent kit # 00041 too. Quite a low number, indicating the newness of this release. Like most kit releases these days, there are a number of photo-etch parts. This box contains three frets of PE brass for eyelets, hinges etc. Flags are supplied with this release, nicely printed onto an antiqued cloth material. Sails are also included, and the builder will need to cut thee out and add boltropes etc. If you don’t want to make the sails but still want to fit them, then you can buy pre-made ones from the website, and even ones that have been totally finished/antiqued too.