James H
-
Posts
6,136 -
Joined
-
Last visited
Content Type
Profiles
Forums
Gallery
Events
Everything posted by James H
-
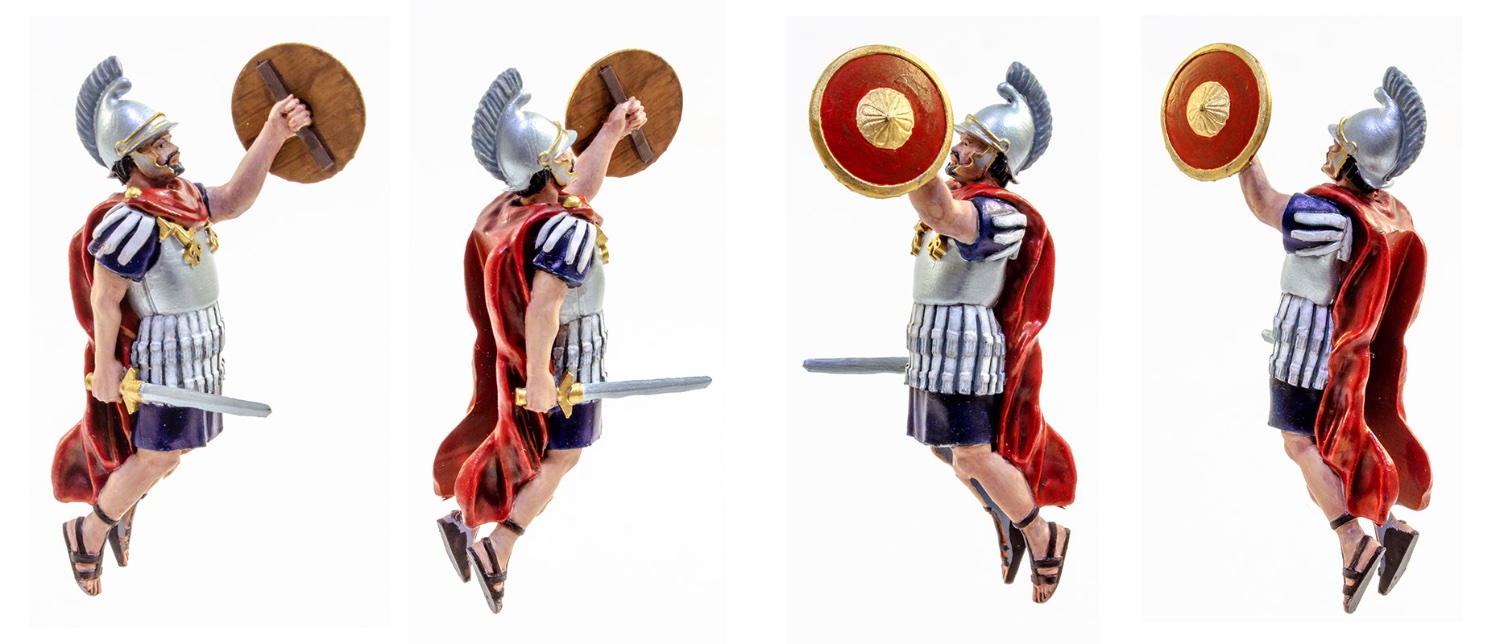
 Having a new figurehead painted with bronze coloured armour.
- 488 replies
-
- 3
-

-
- Indefatigable
- Vanguard Models
- (and 1 more)
-
Here's a small update...very small! This is Indy's figurehead, albeit still needs some touching up. Again, this was done by my friend, Mark. He's far more patience (and ability!) than I have.

- 488 replies
-
- 28
-

-
-
- Indefatigable
- Vanguard Models
- (and 1 more)
-
I'm very sure there will be many, many happy modellers.
-
They are indeed a delight to deal with. My questions always meet with quick responses.
-
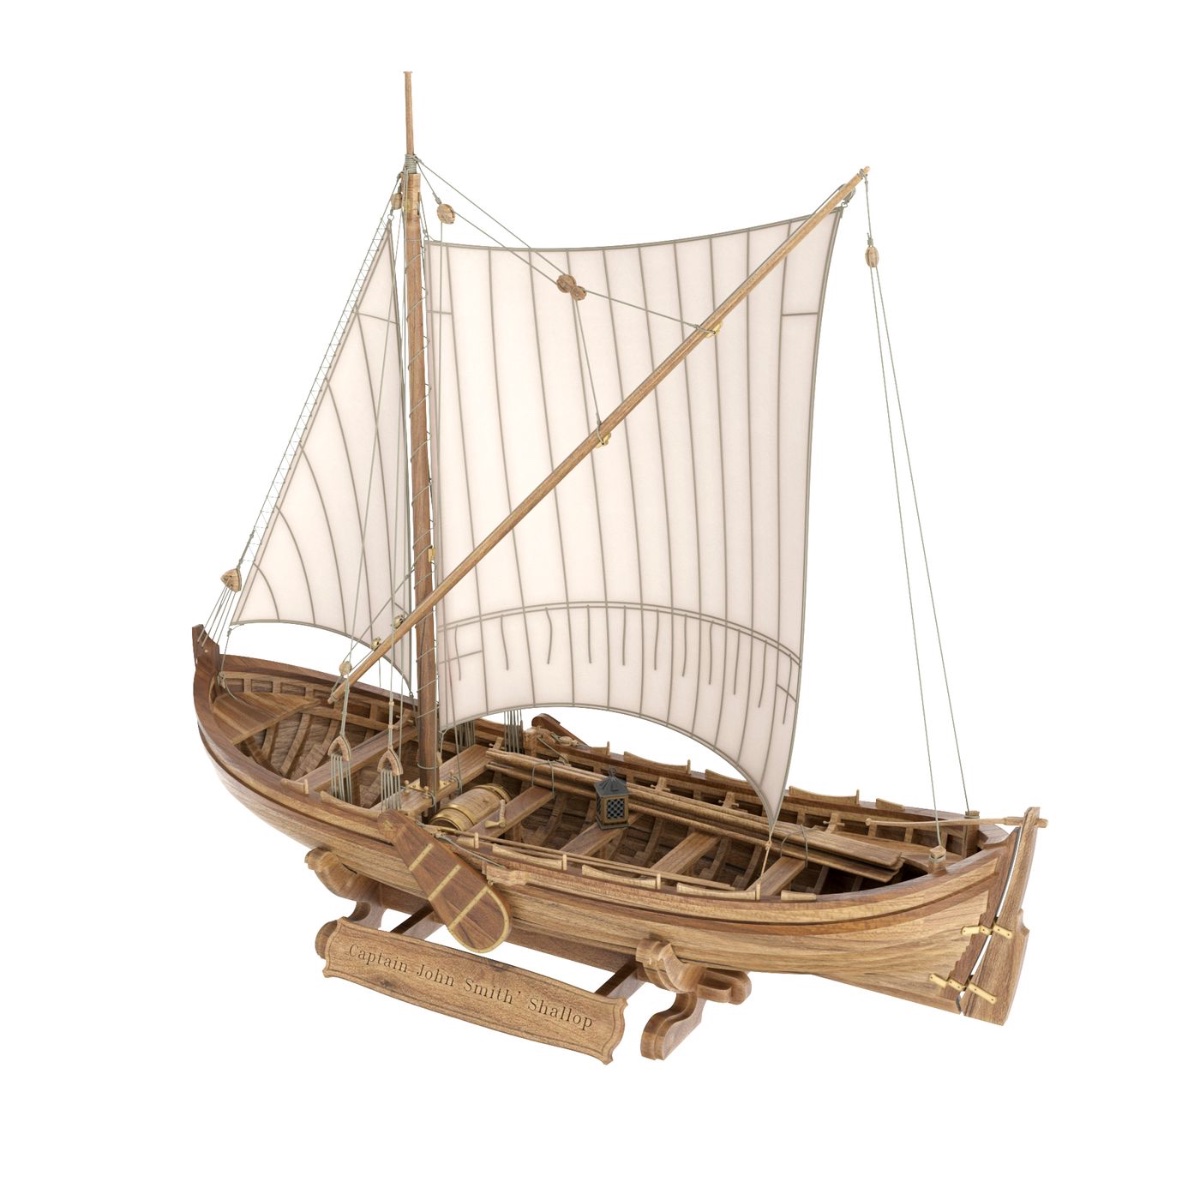
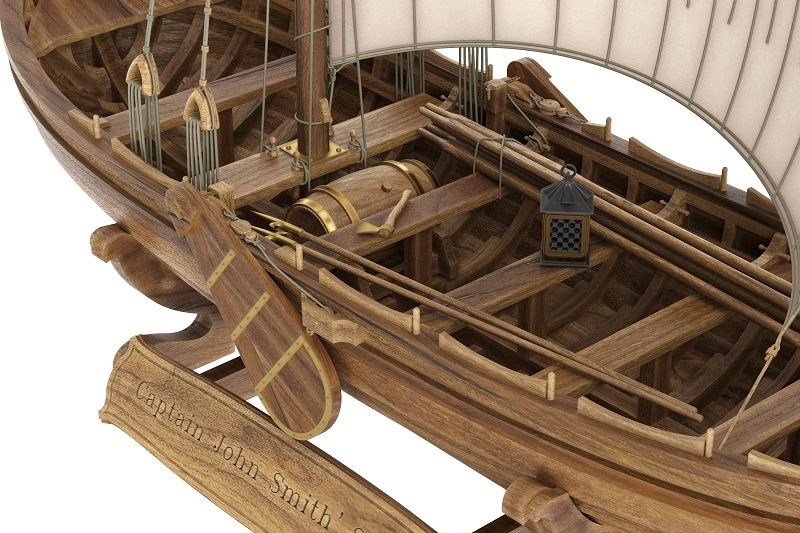
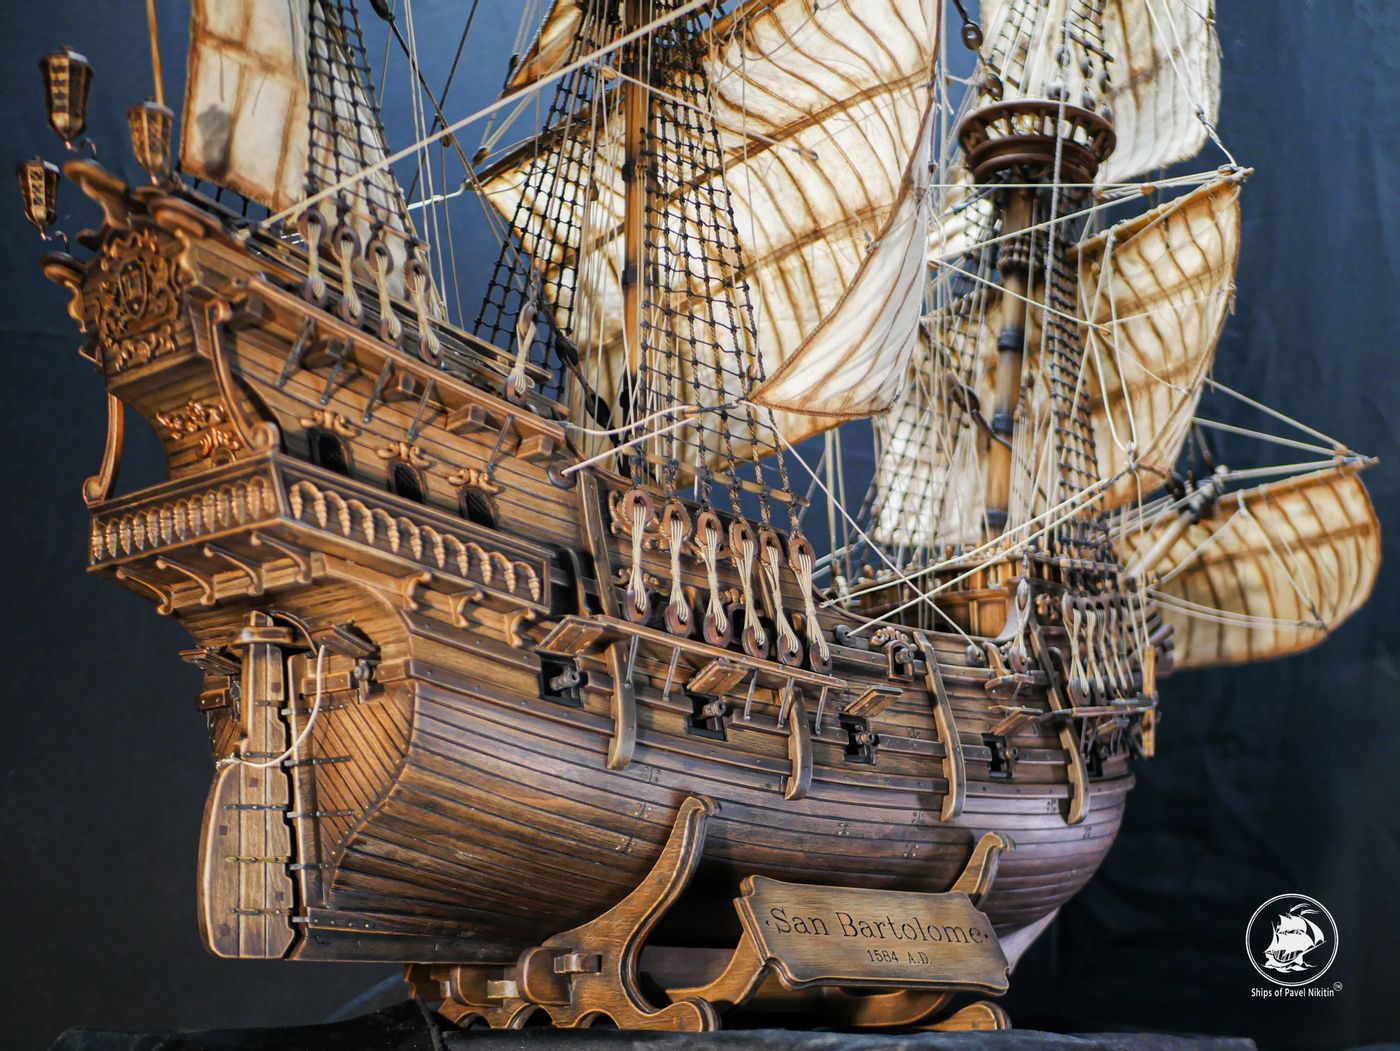
As the title says, we are pleased to announce that Ships of Pavel Nikitin are now a sponsor to MSW. https://shipsofpavelnikitin.com/shop This is a new Ukrainian company which have a small but growing number of original model kit designs with some nice building features which I'm sure you'll like. In the next week, I'll be bringing you reviews of: 1:48 San Bartolome 1584 Building cradle for San Bartolome Paint set for San Bartolome Display cradle for San Bartolome 1:32 Captain John Smith's Shallop. We are shortly being sent their new 1:25 Viking Drakkar too. These guys are operating in the most appalling of conditions in Kiev, with rocket attacks taking out their power and water etc. To continue to create thee kits in that climate is amazing. I hope you'll support them and welcome them to MSW. Their banner is now on our site too.

- 2 replies
-
- 31
-
-
-
That's what makes them lovely projects for the beginner and 'in-between' builds too. Easy to display. I have my Saucy Jack on my fireplace at the moment.
- 32 replies
-
- 3
-
-
- Saucy Jack
- Vanguard Models
- (and 2 more)
-
The deck shouldn't spring at all as it slots into the notches at the bottom of each bulkhead ear. That's important as you want the deck level to be even with the engraved lines on the inner bulwarks that you'll later fit. She's looking real nice!
- 32 replies
-
- 3
-
-
- Saucy Jack
- Vanguard Models
- (and 2 more)
-
Mary Rose – an English ship of the Mediterranean concept
James H replied to Waldemar's topic in Nautical/Naval History
Is this the monograph you have? I've got this one too.
-
I can tell you this kit will be with me in the next day or two, so I'll be able to give you an in-box appraisal of her. There will also be the Captain John Smith's Shallop too, plus in the near future, a reworked and new Viking Drakkar release. Pavel is managing to get his products out of Ukraine. It just takes a little extra time. The packages were sent on 13th Oct, and had a mismatch while at Kiev which delayed a few days. Still not too bad though.
-
Remember, those bevel lines are only approximated. They'll help you take off a chunk of material before assembly, but will later be faired in properly.
- 32 replies
-
- 3
-
-
- Saucy Jack
- Vanguard Models
- (and 2 more)
-
Looking real nice. No matter how perfect we think we have the hull, paint always shows it isn't! I've never, ever been that lucky.
- 106 replies
-
- 2
-
-

-
- Erycina
- Plymouth Trawler
- (and 3 more)
-
Looking forward to this. BTW, I removed the text formatting from your original post which covered the text in a brown covering.
- 32 replies
-
- 1
-
-
- Saucy Jack
- Vanguard Models
- (and 2 more)
-
Indy will be supplied with red alder as standard, so all will be good. The engraved decks were always going to be a (limited) option.
-
Correct Glue
James H replied to Blacklab's topic in Painting, finishing and weathering products and techniques
I use Gorilla CA gel all the time. It's all I'll ever now use (of all CA brands) for constructional stuff, when I'm not on Titebond. -
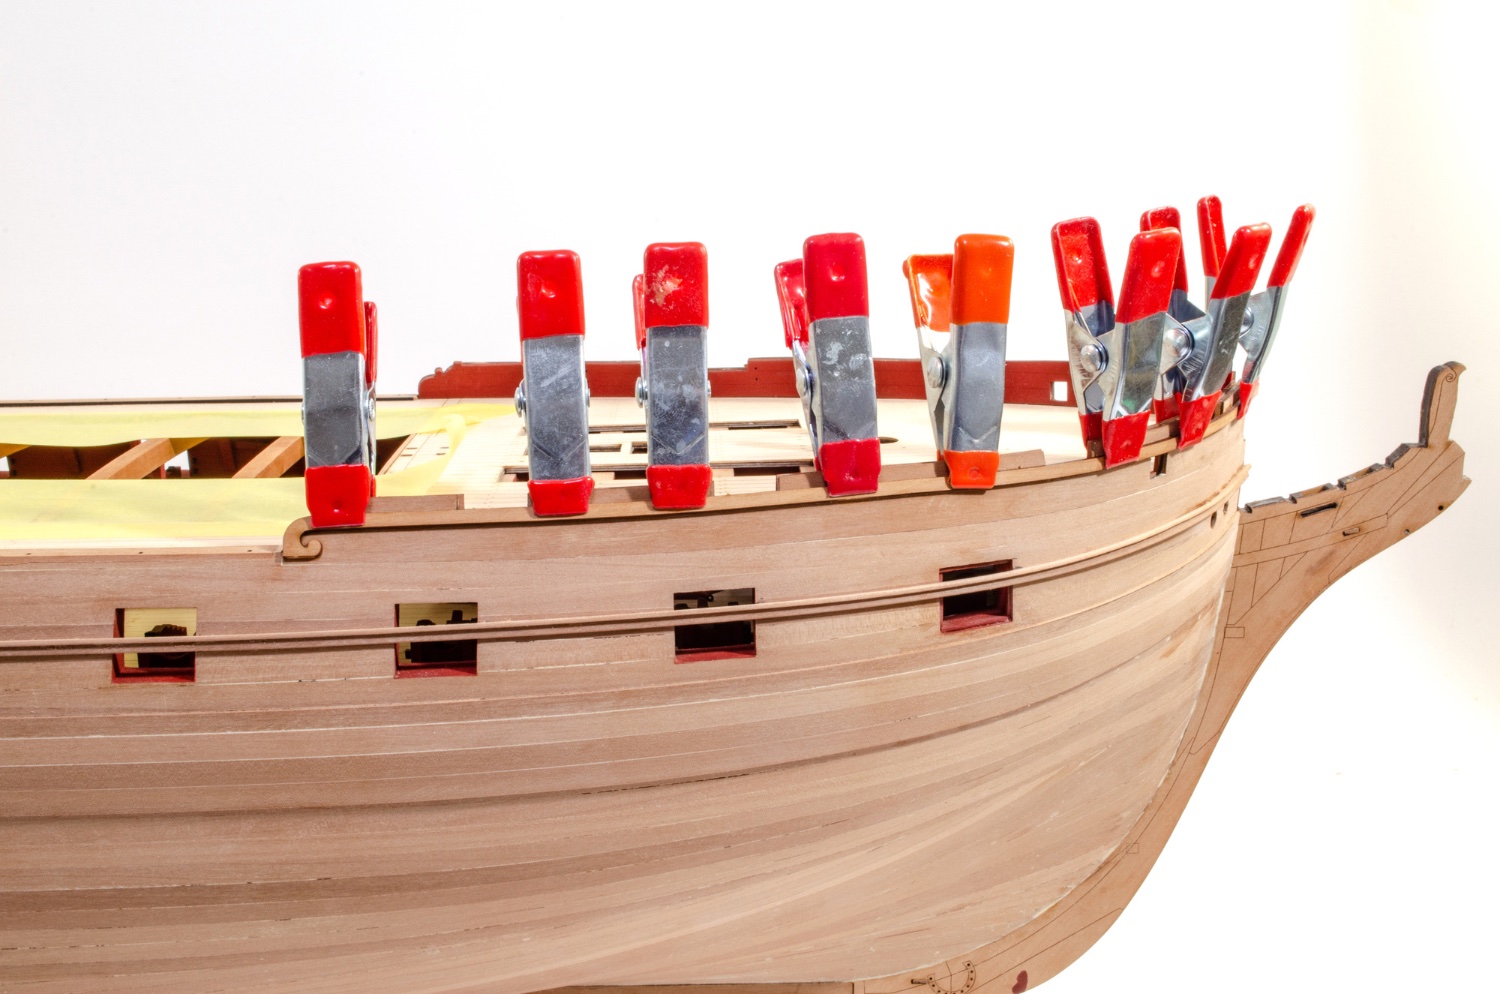
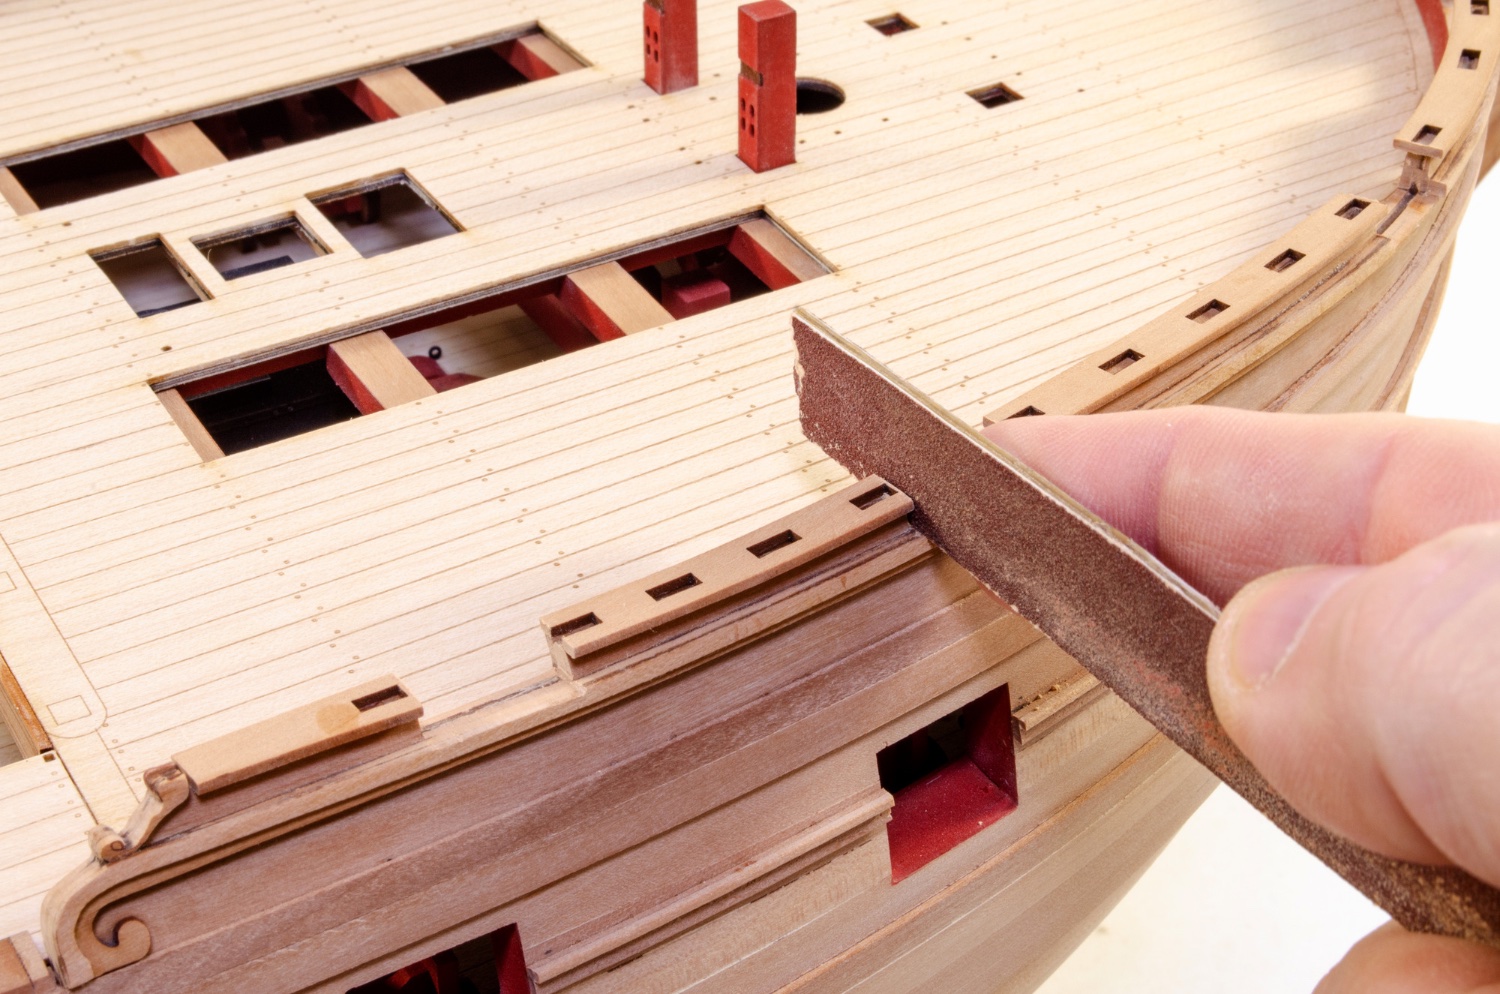
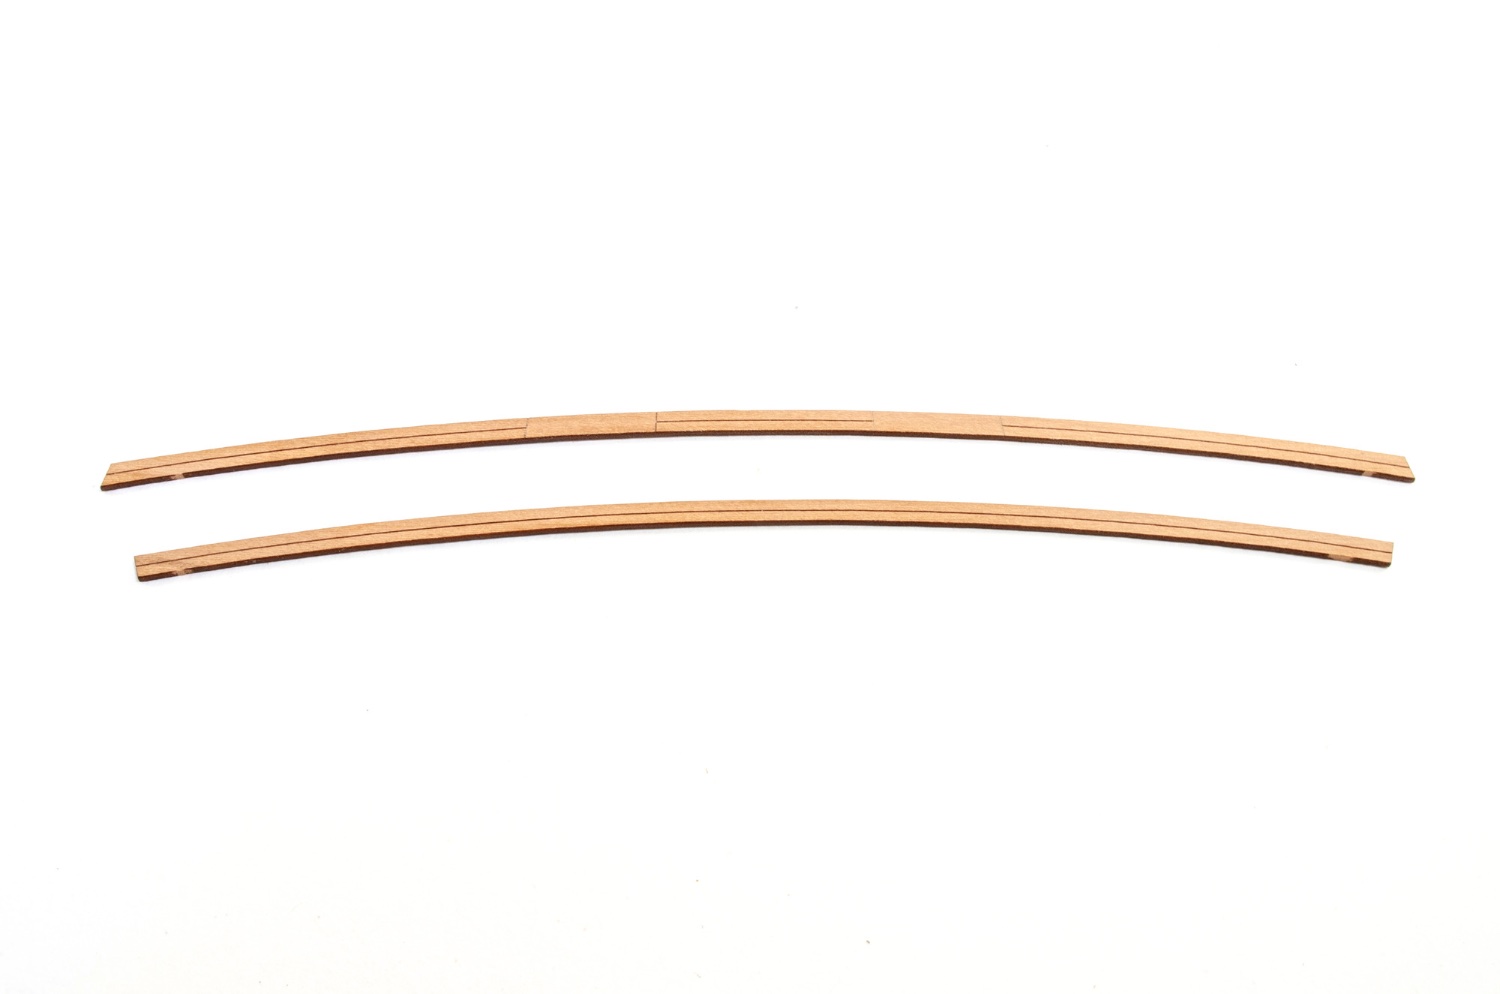
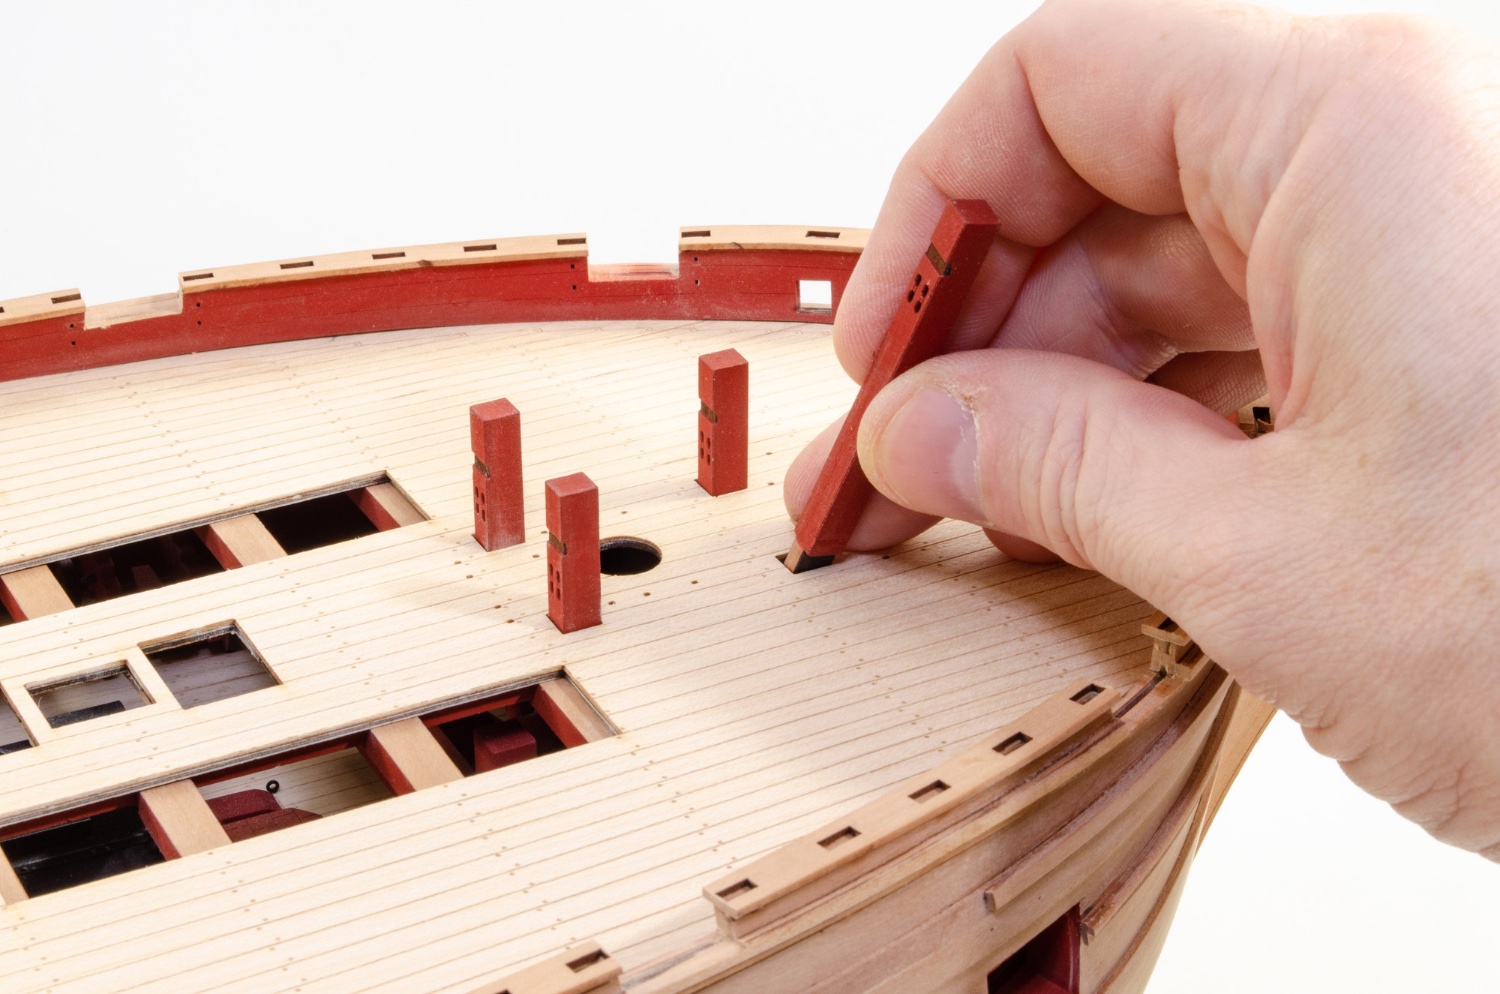
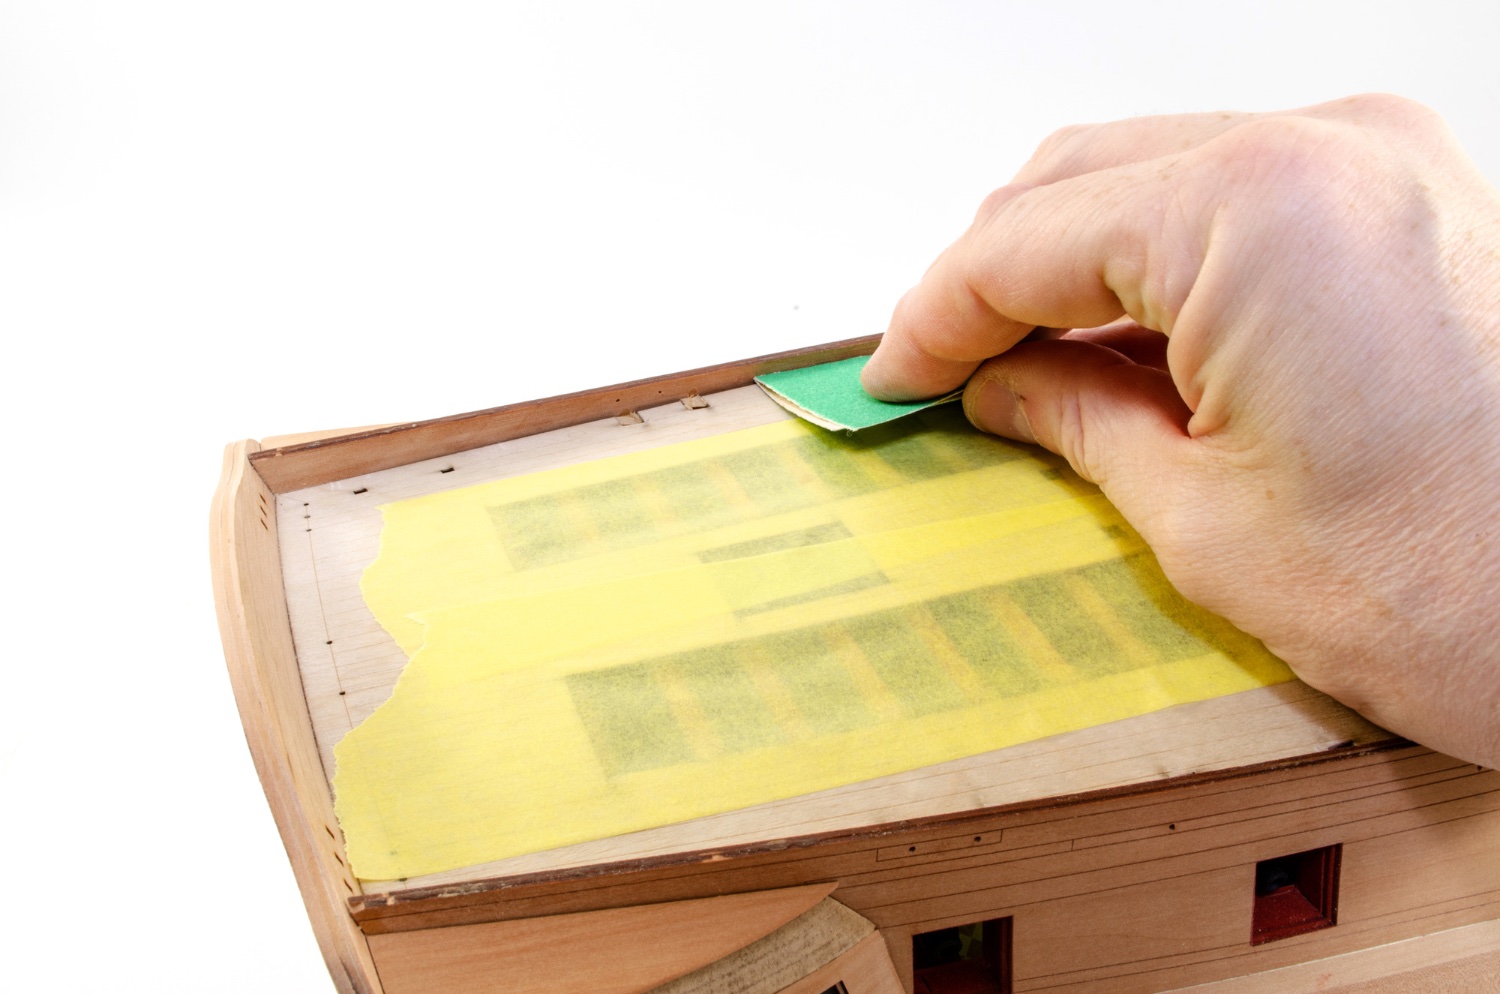
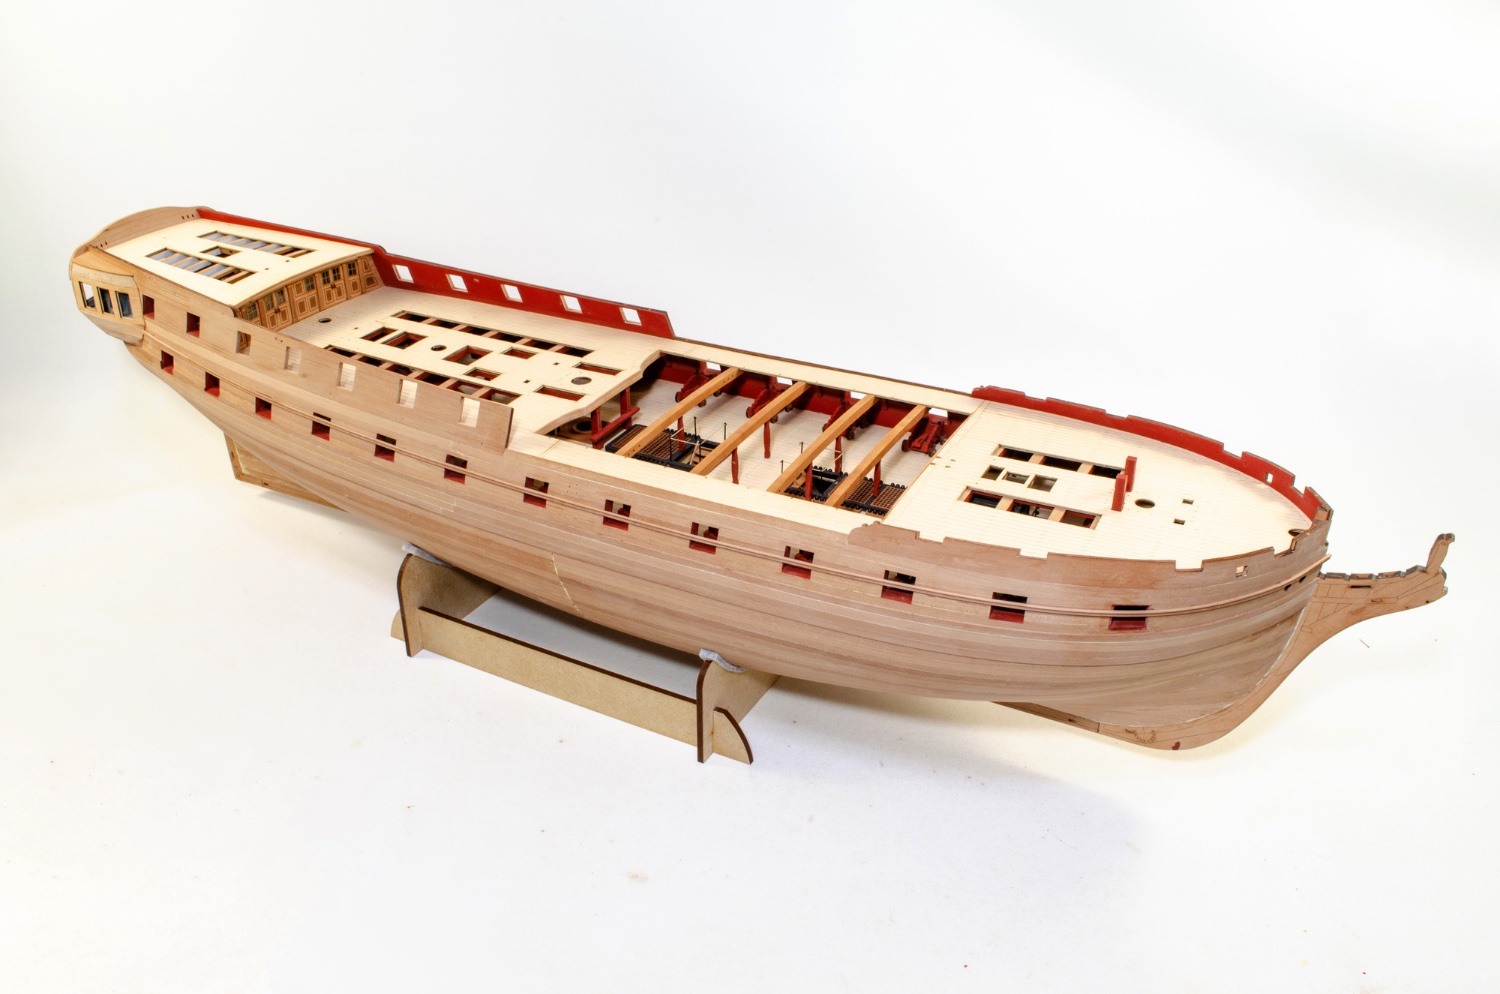
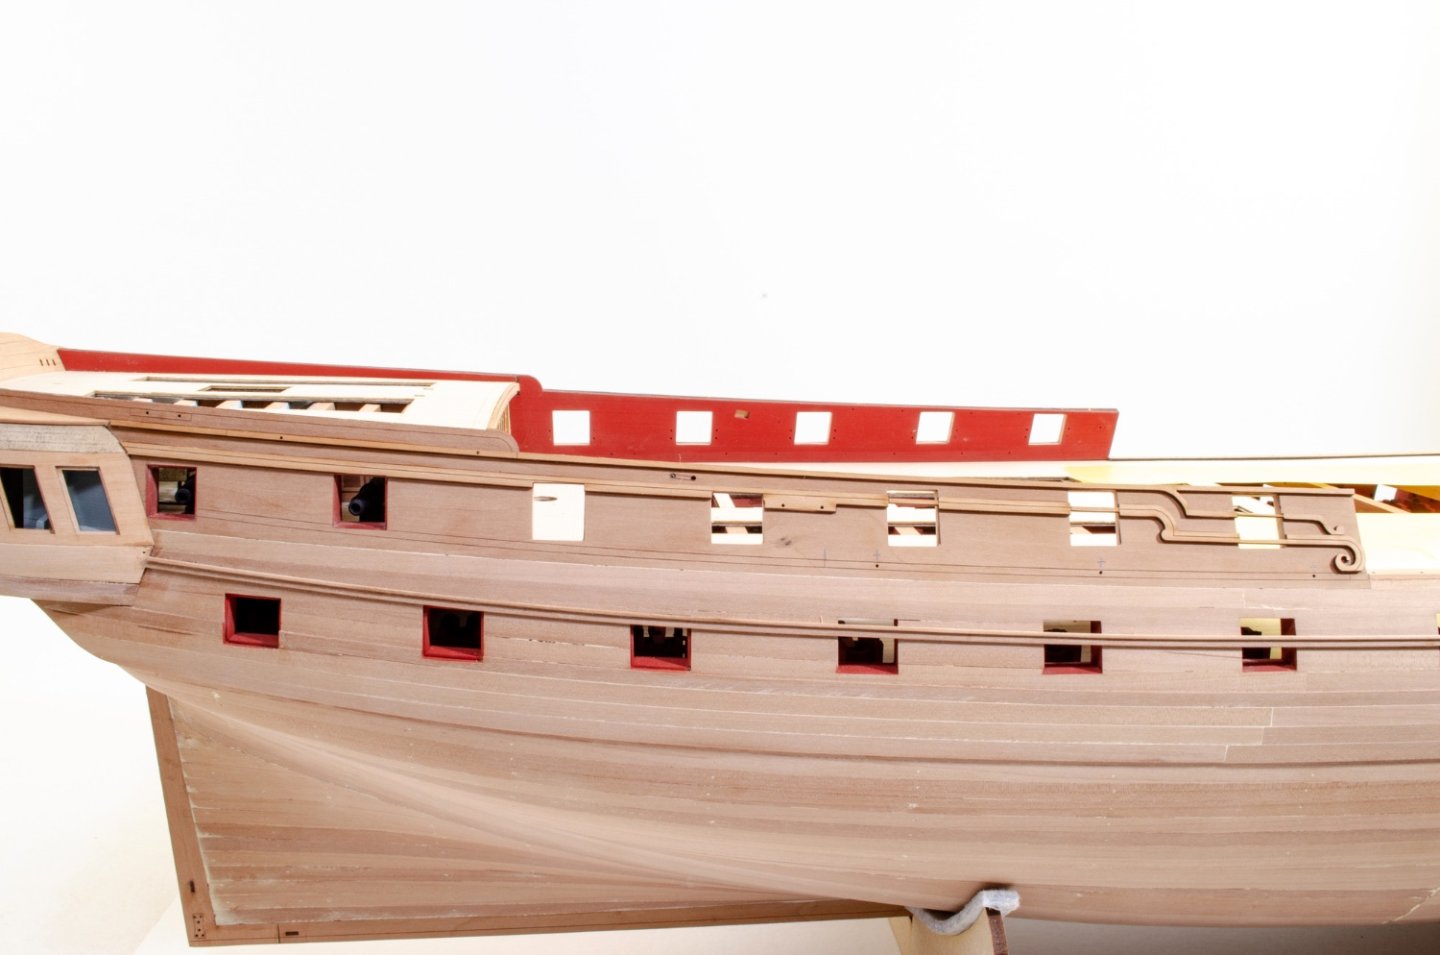
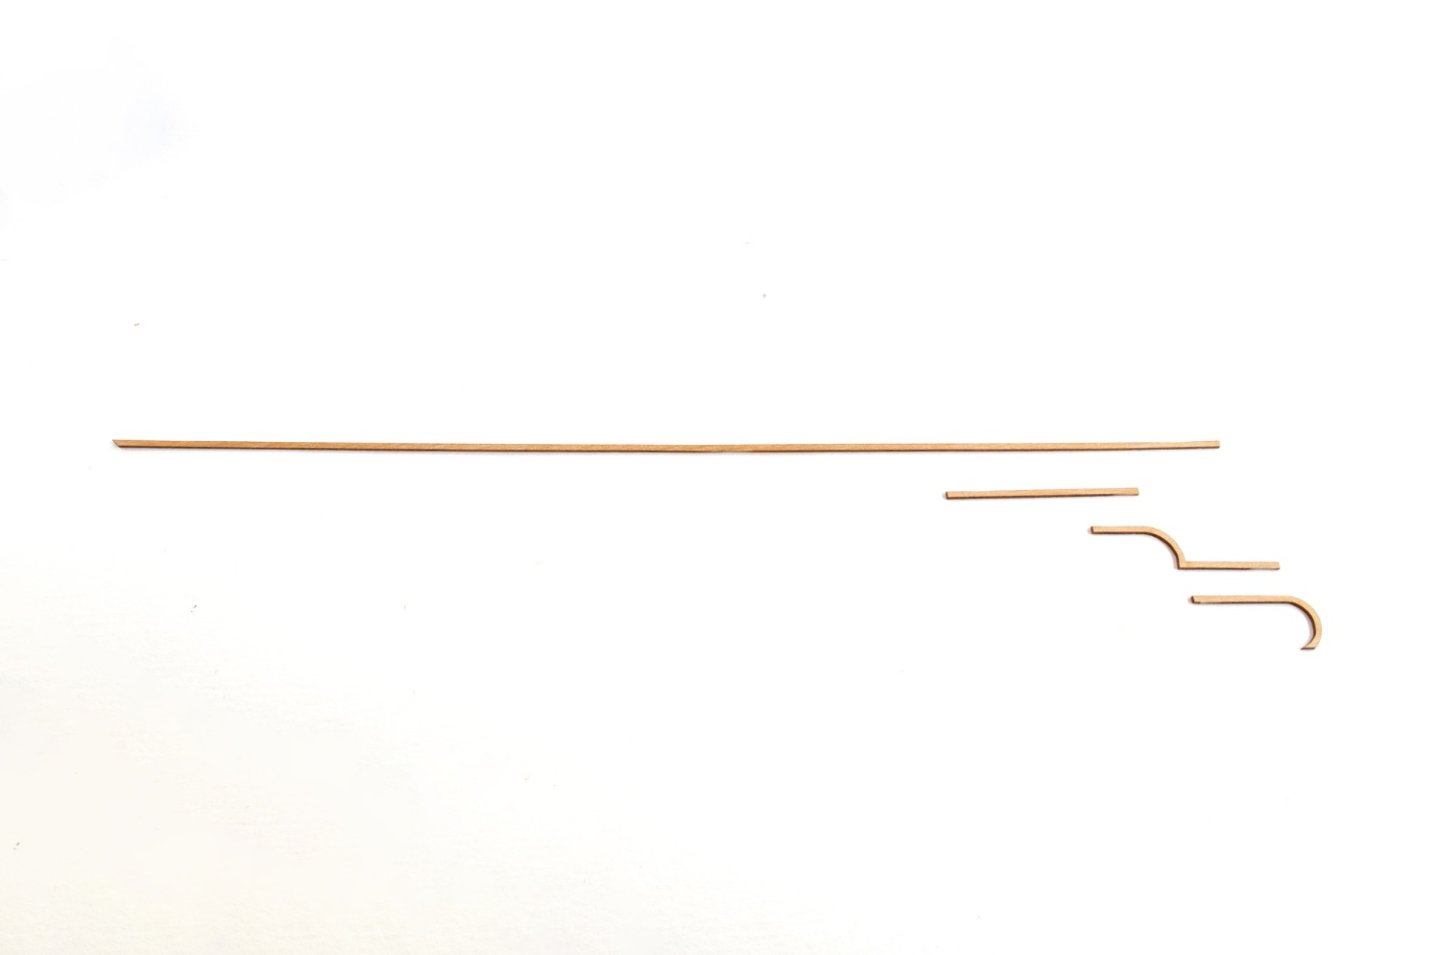
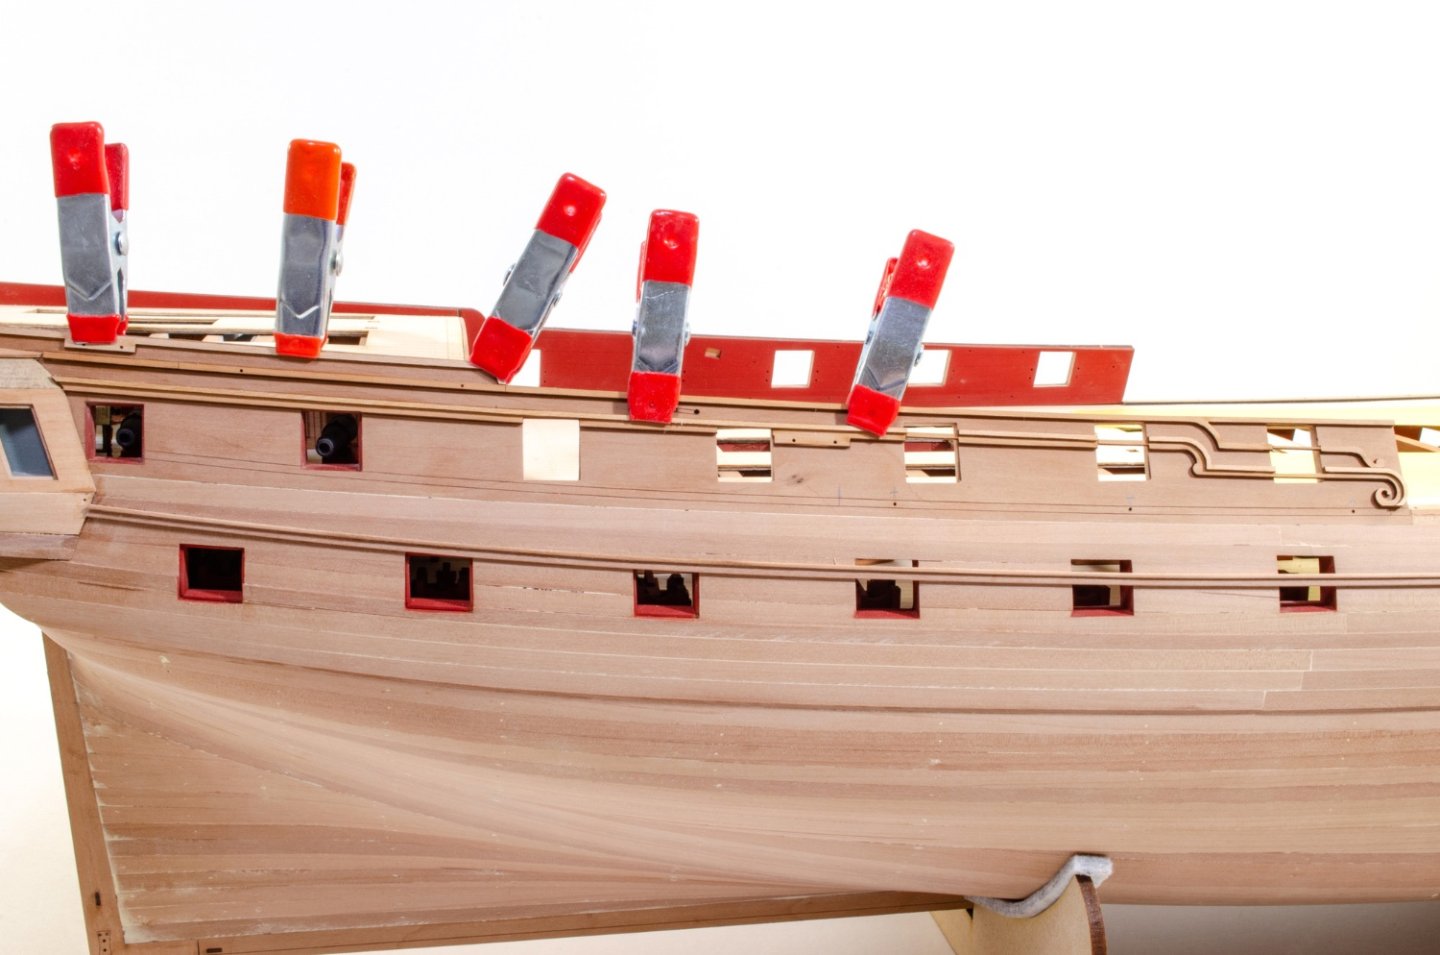
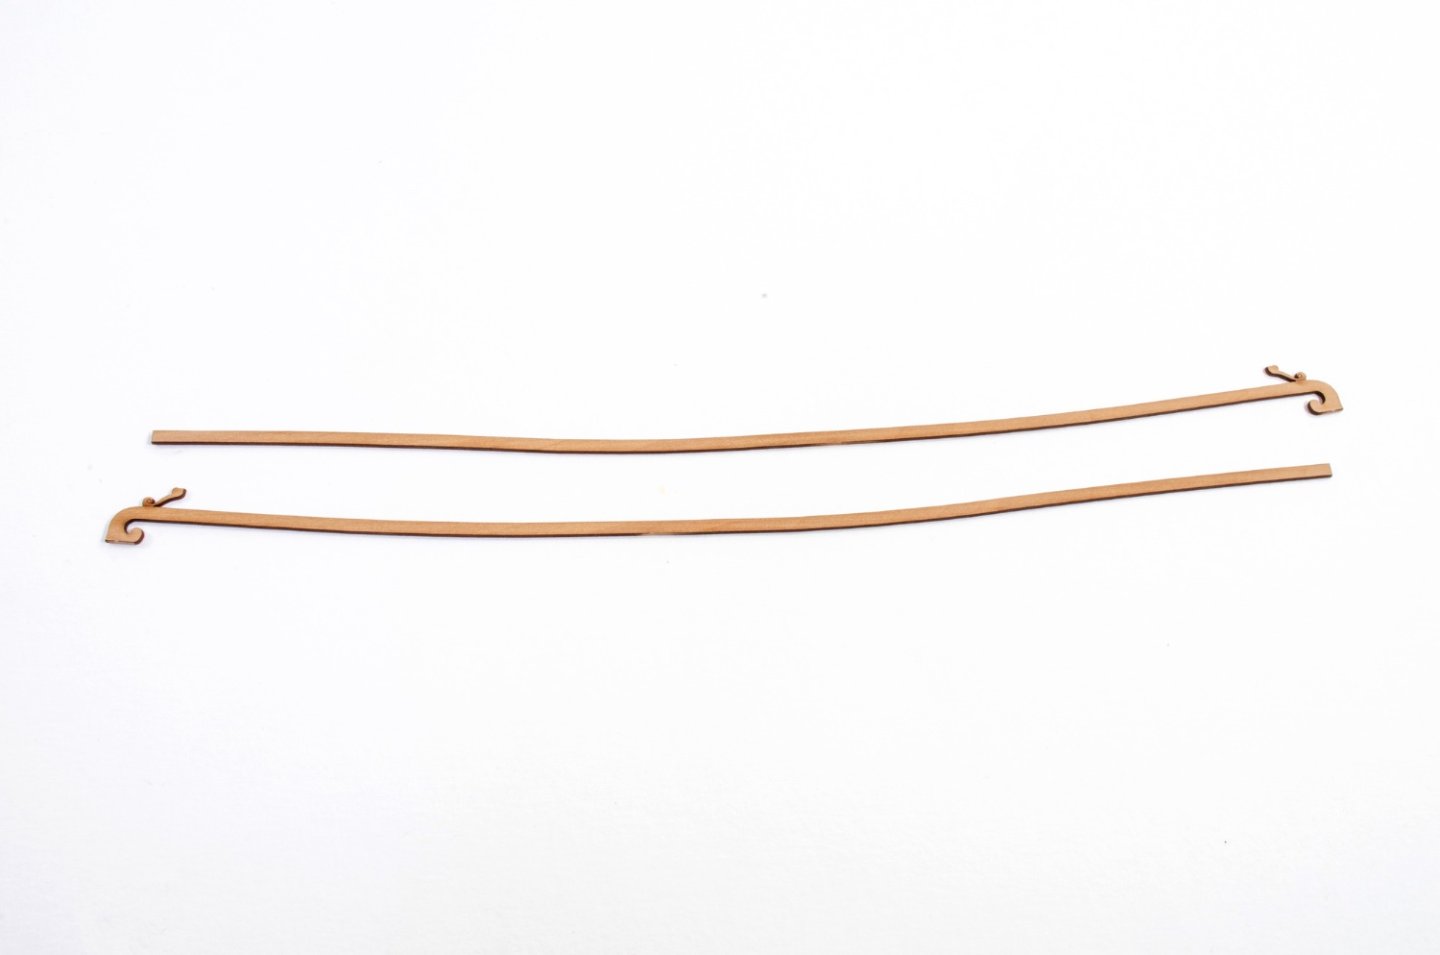
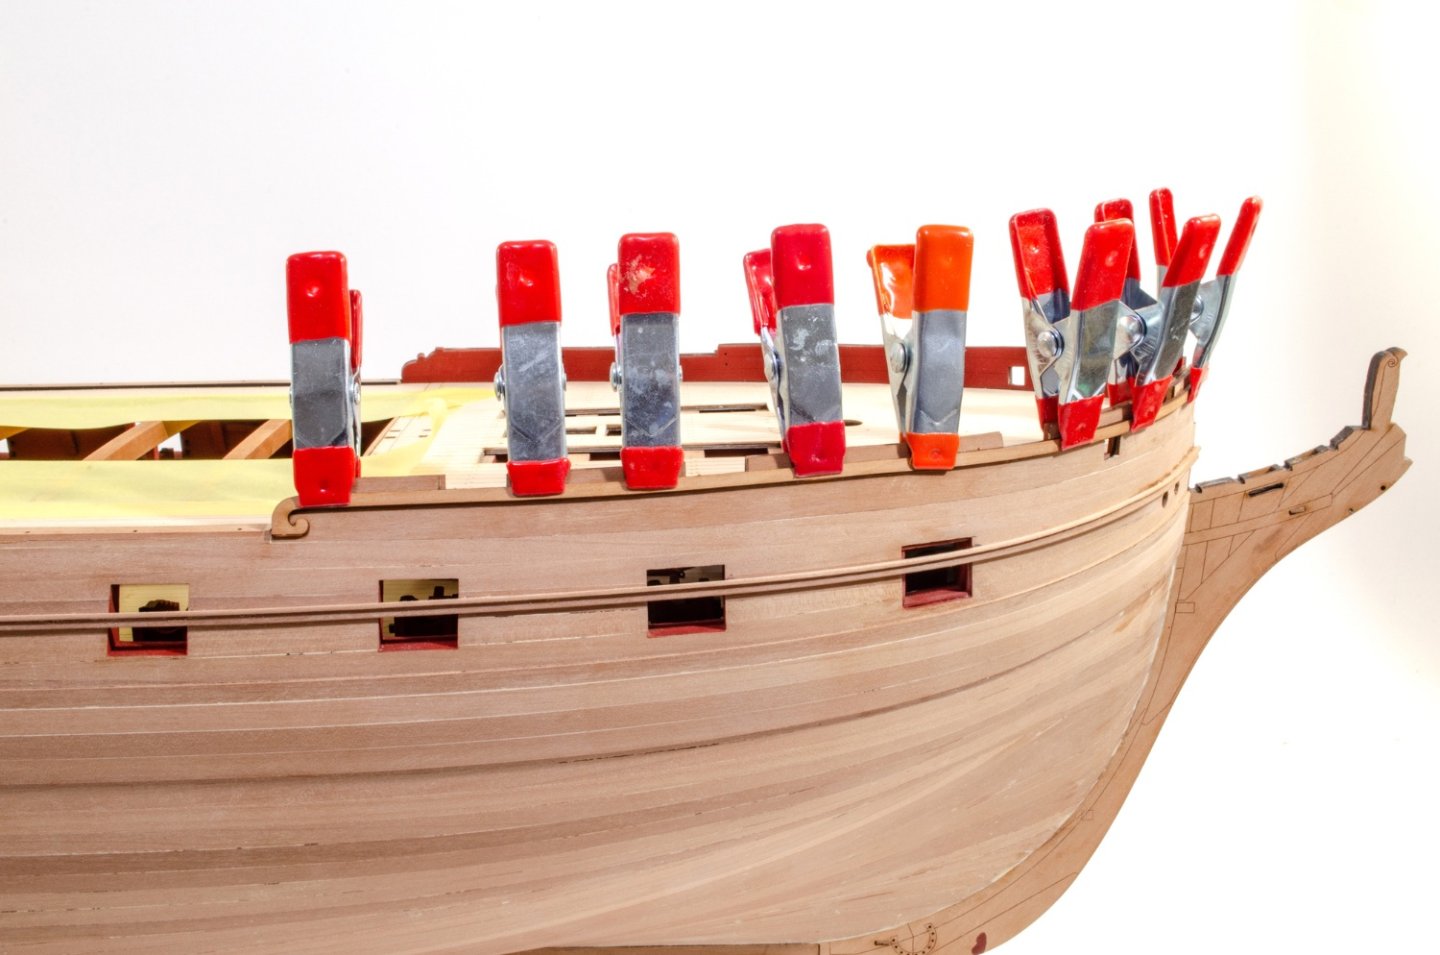
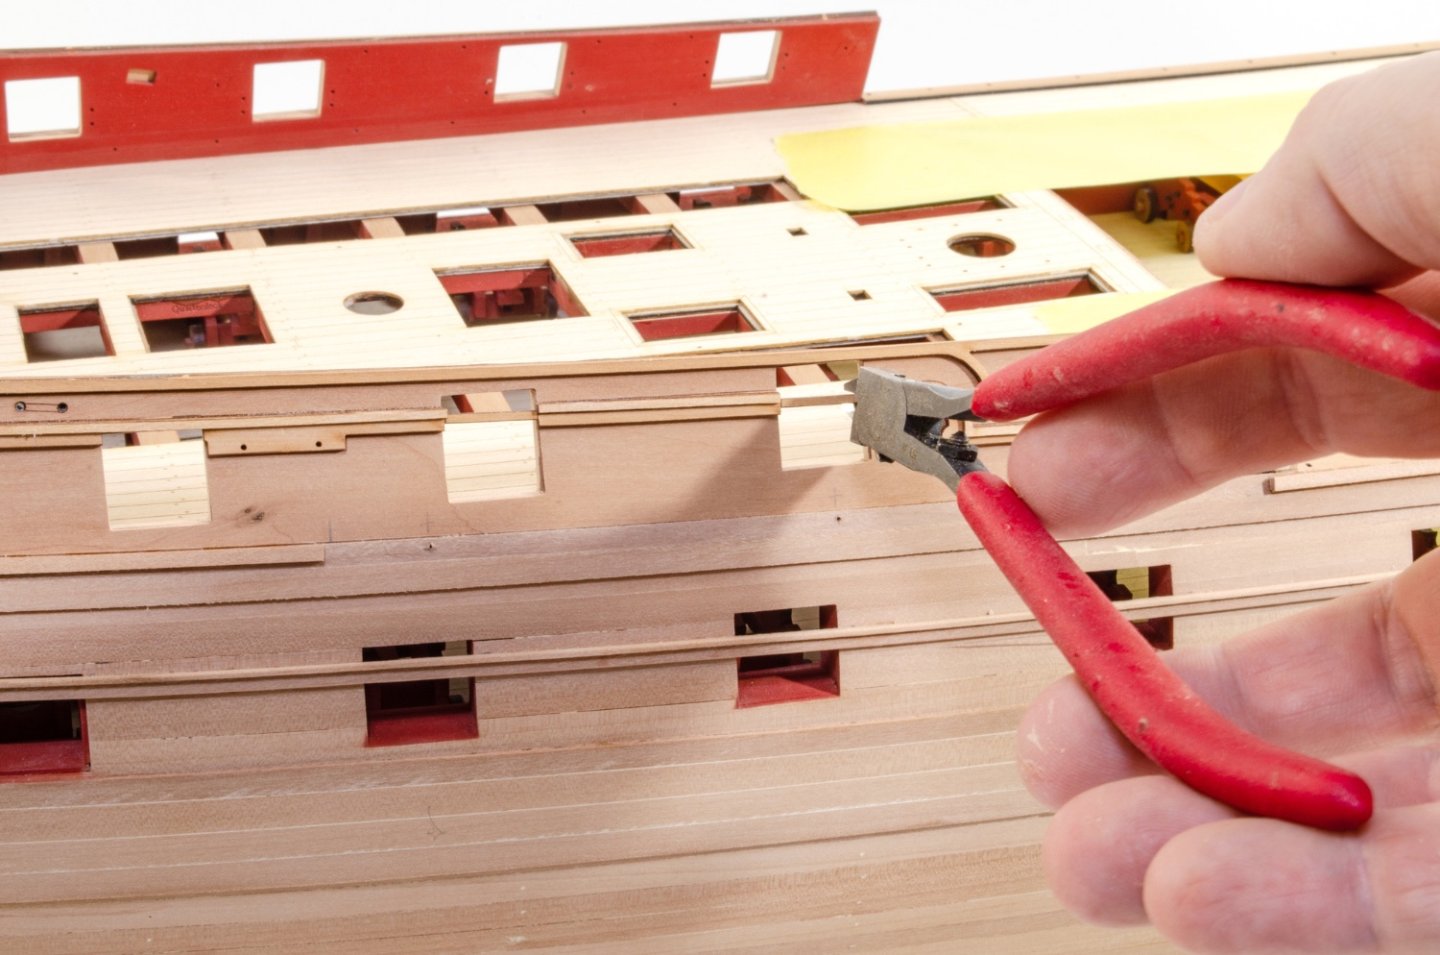
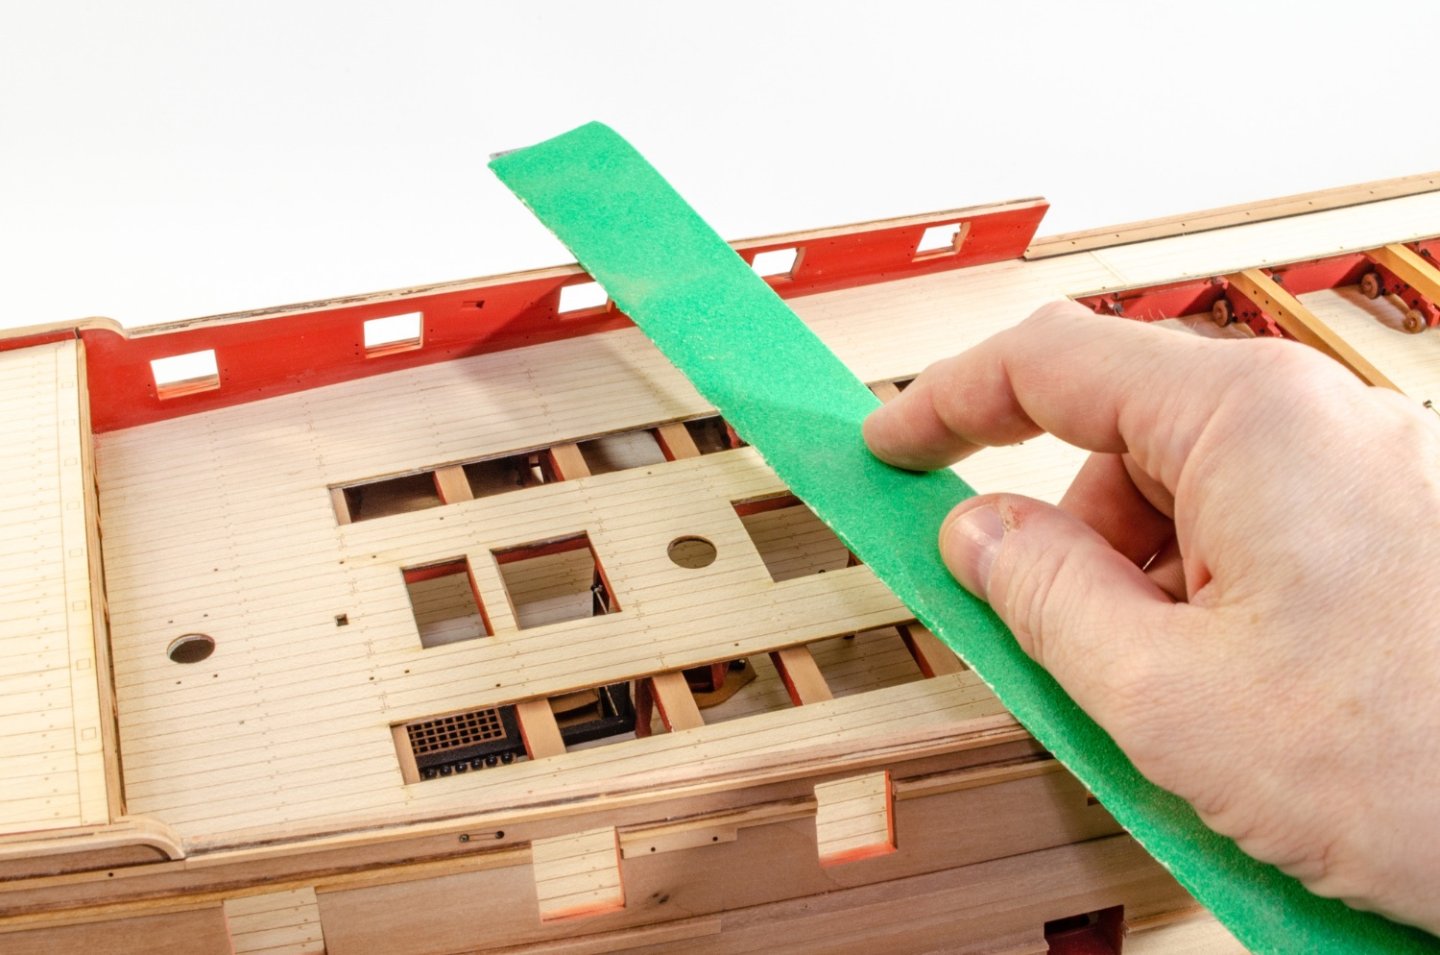
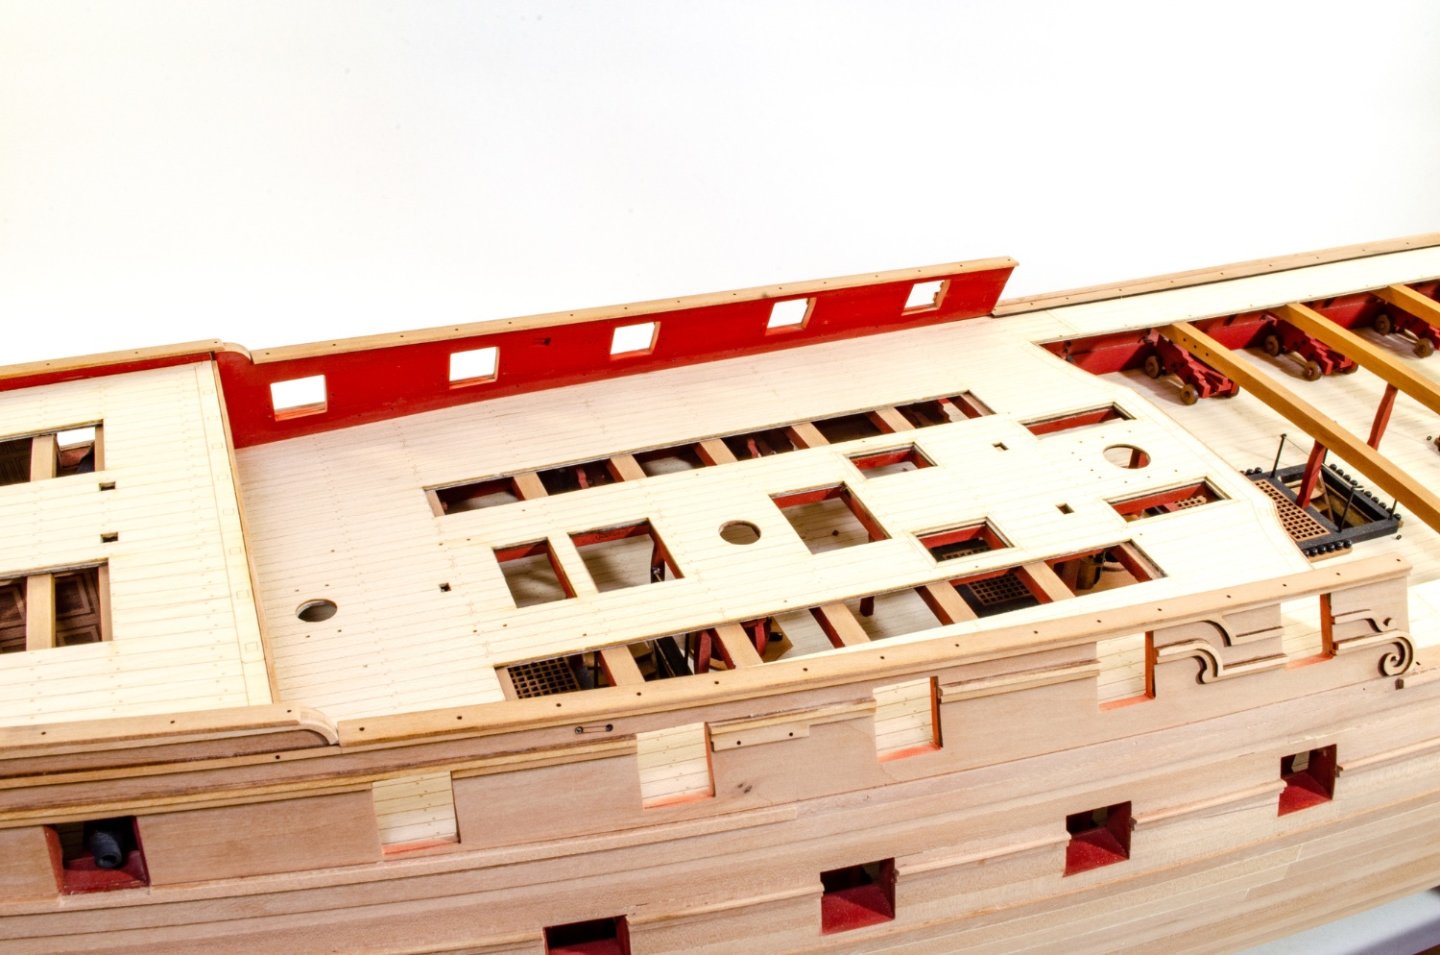
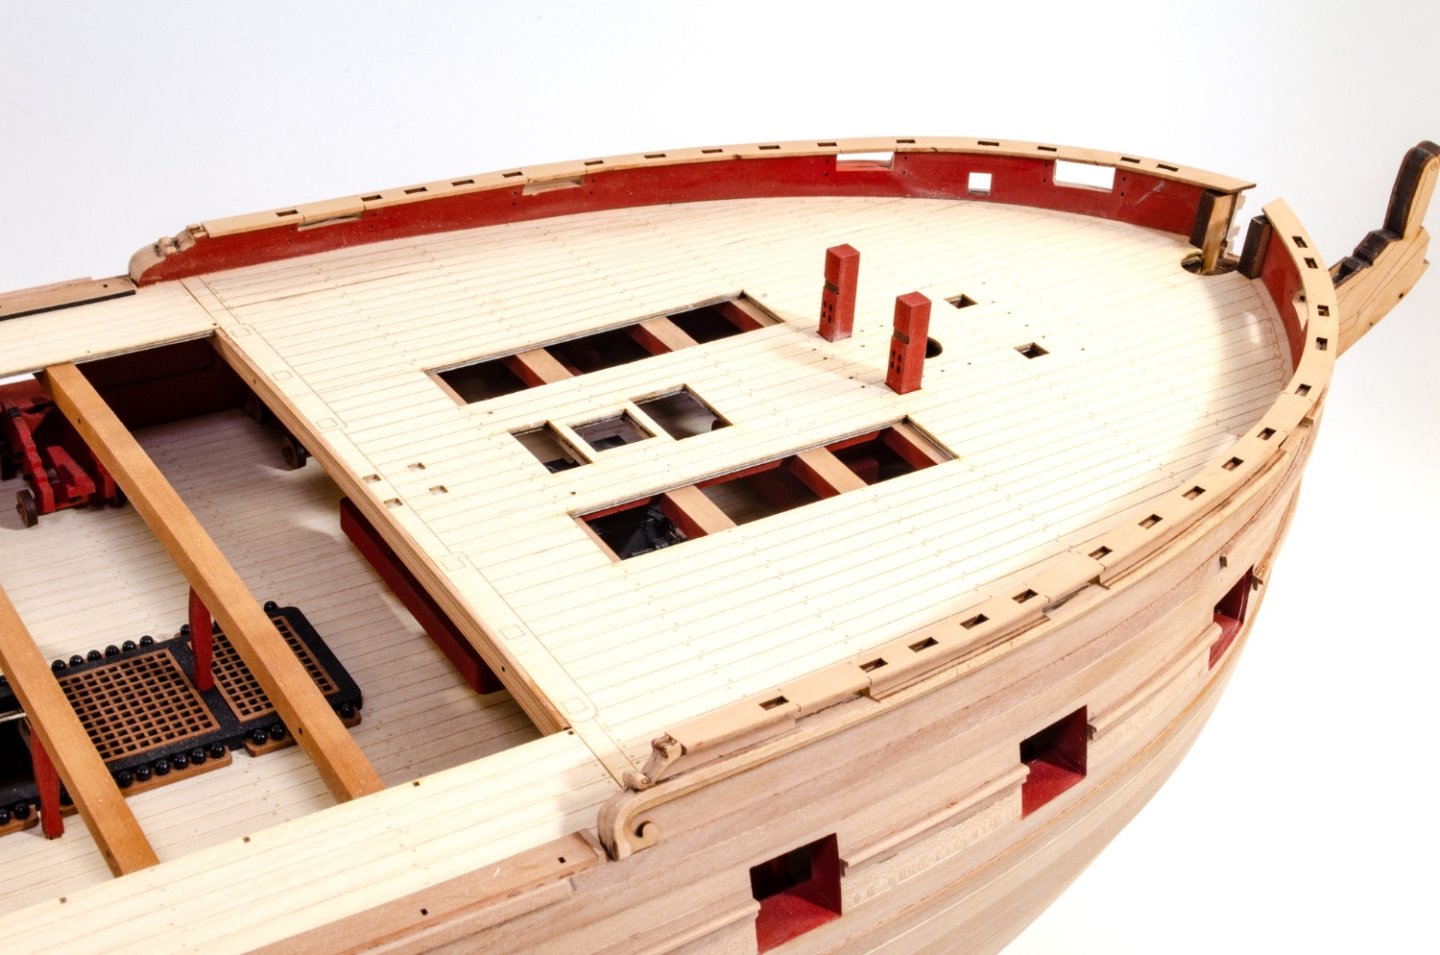
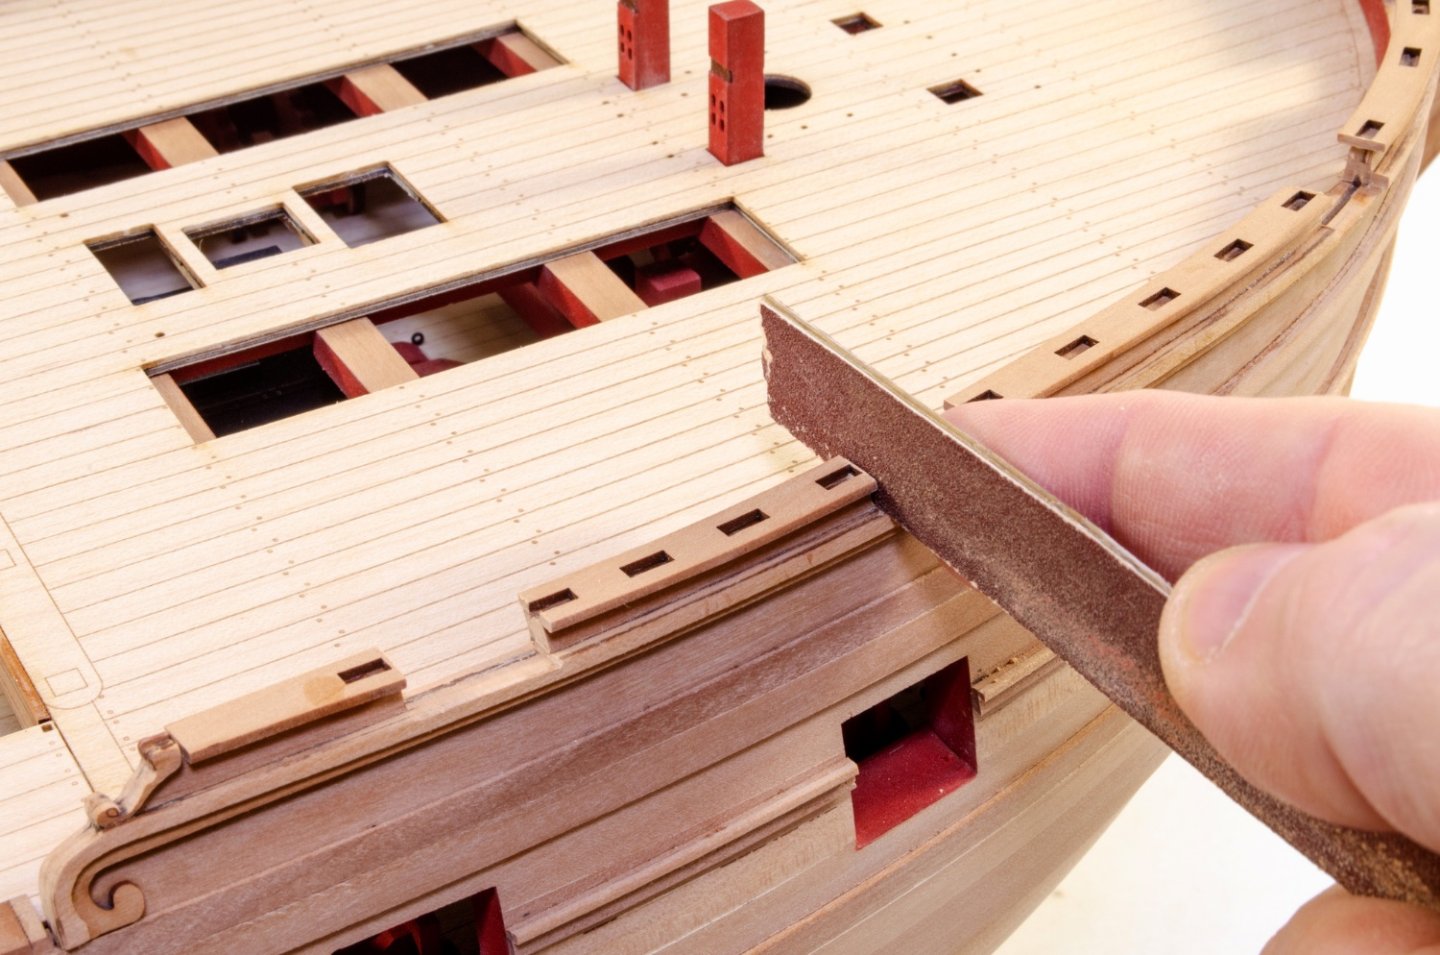
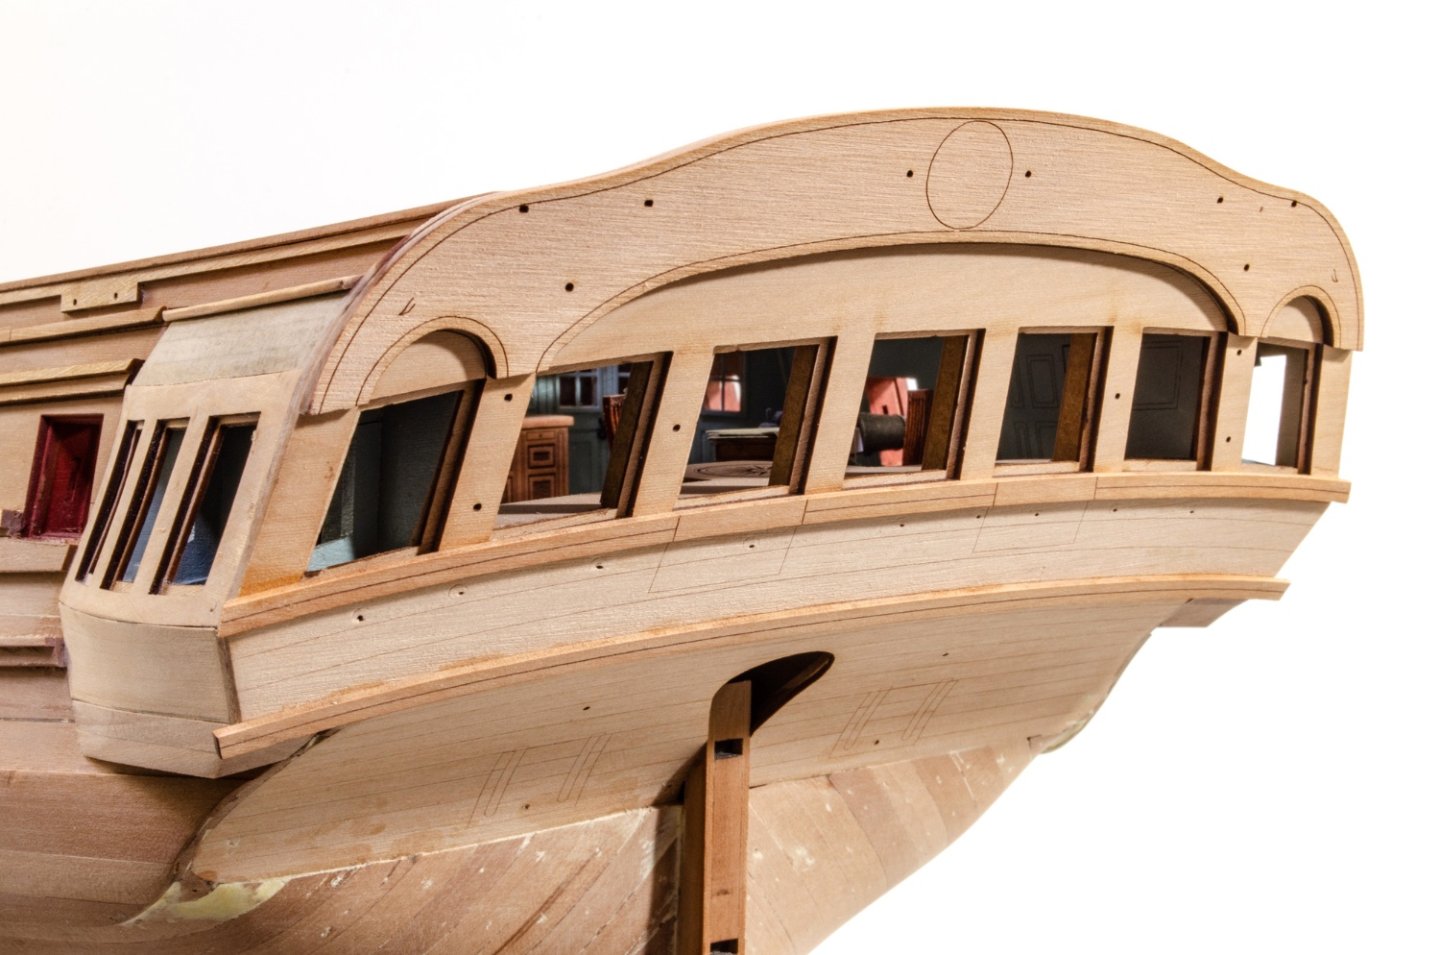
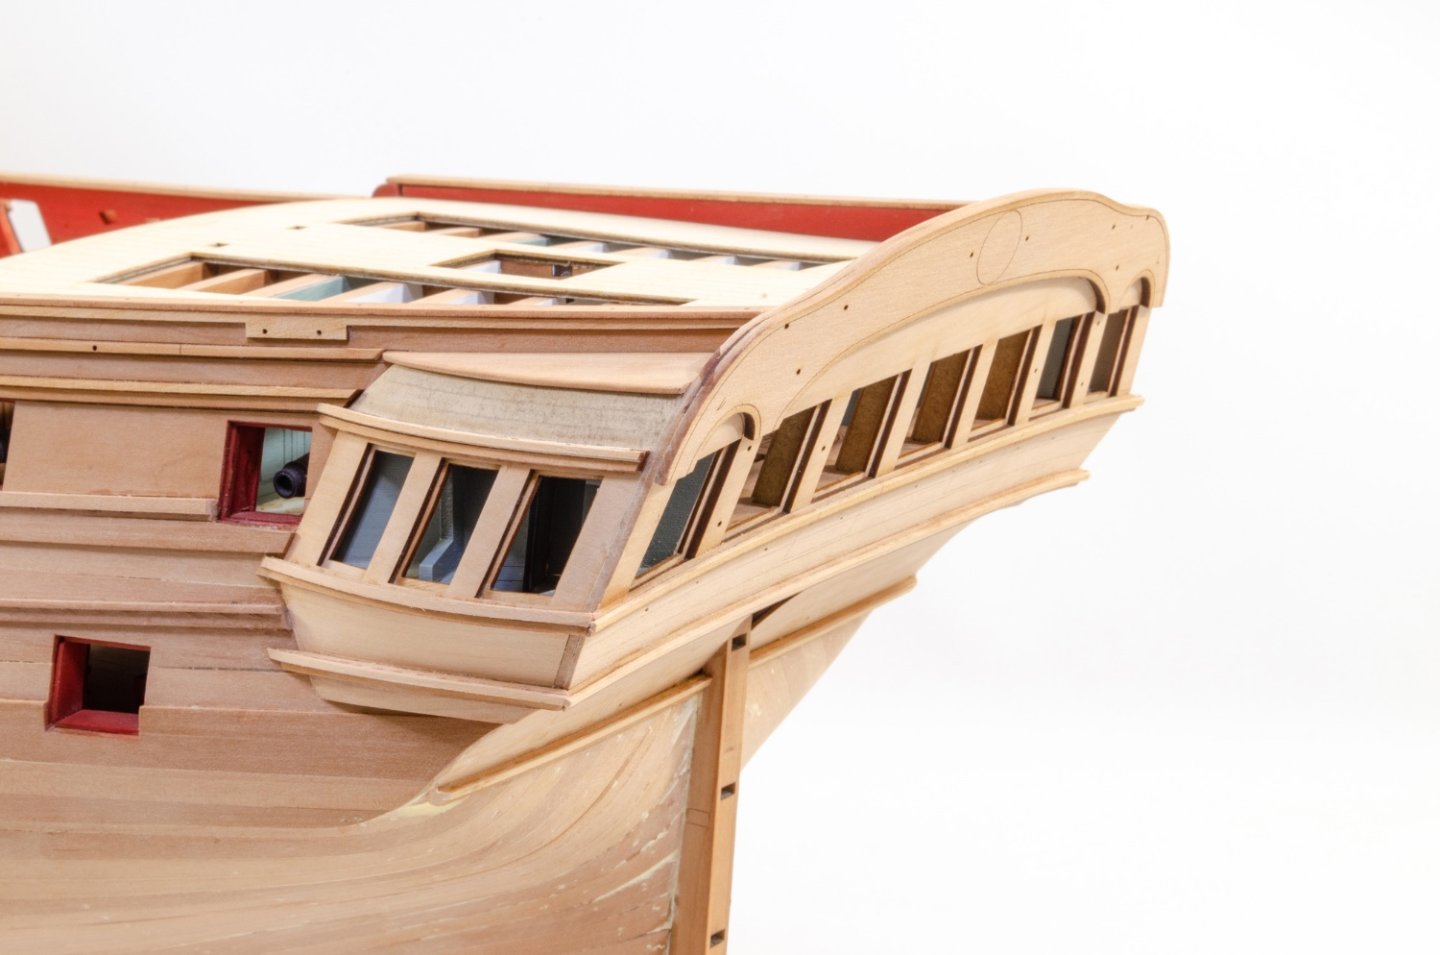
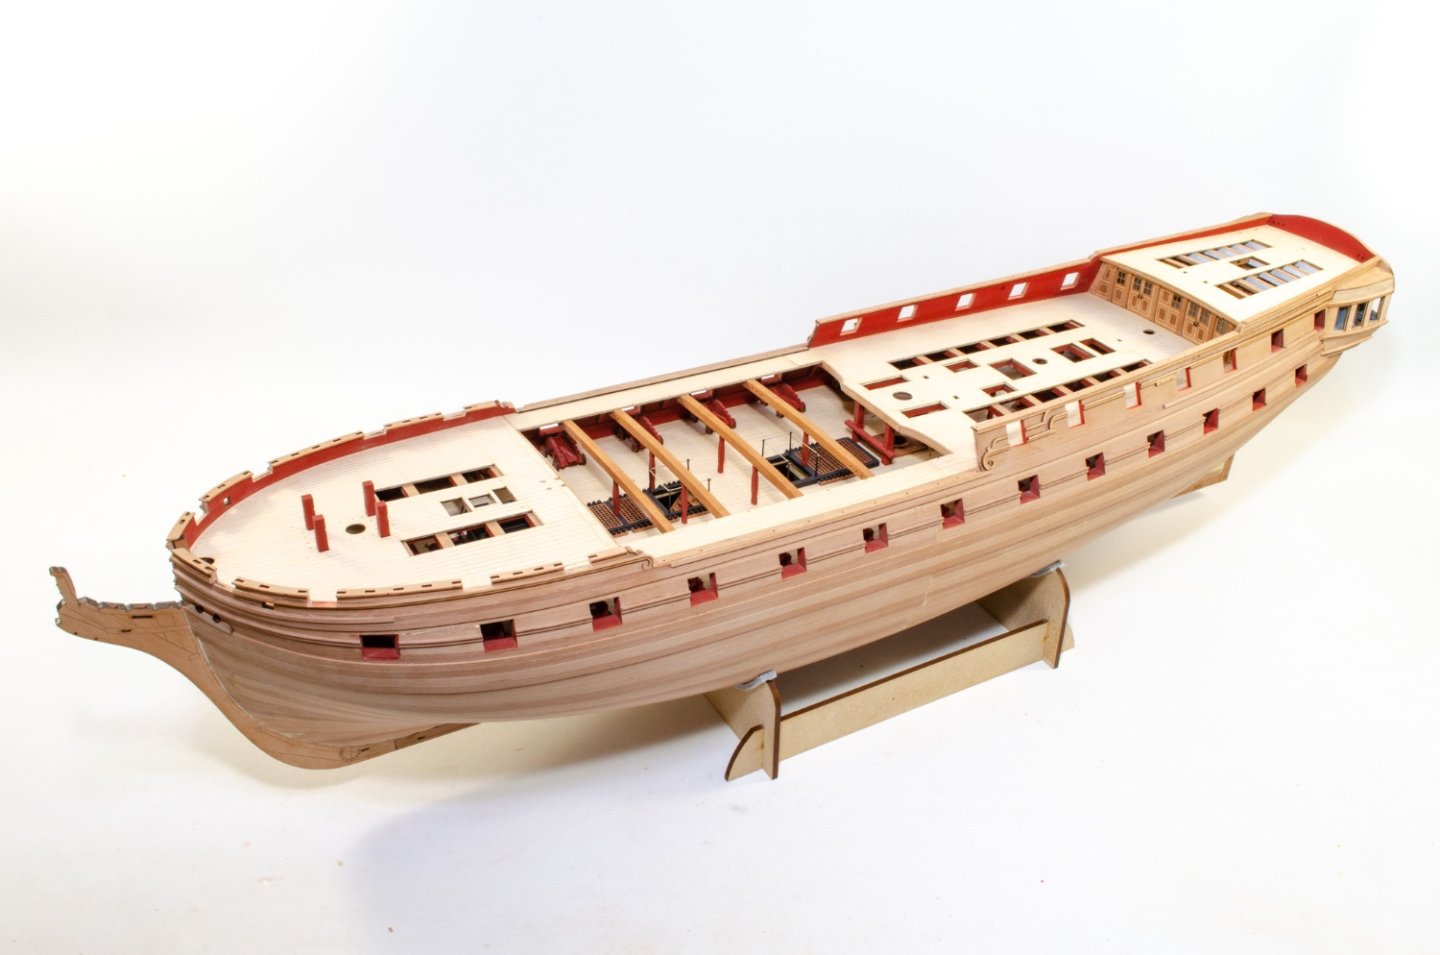
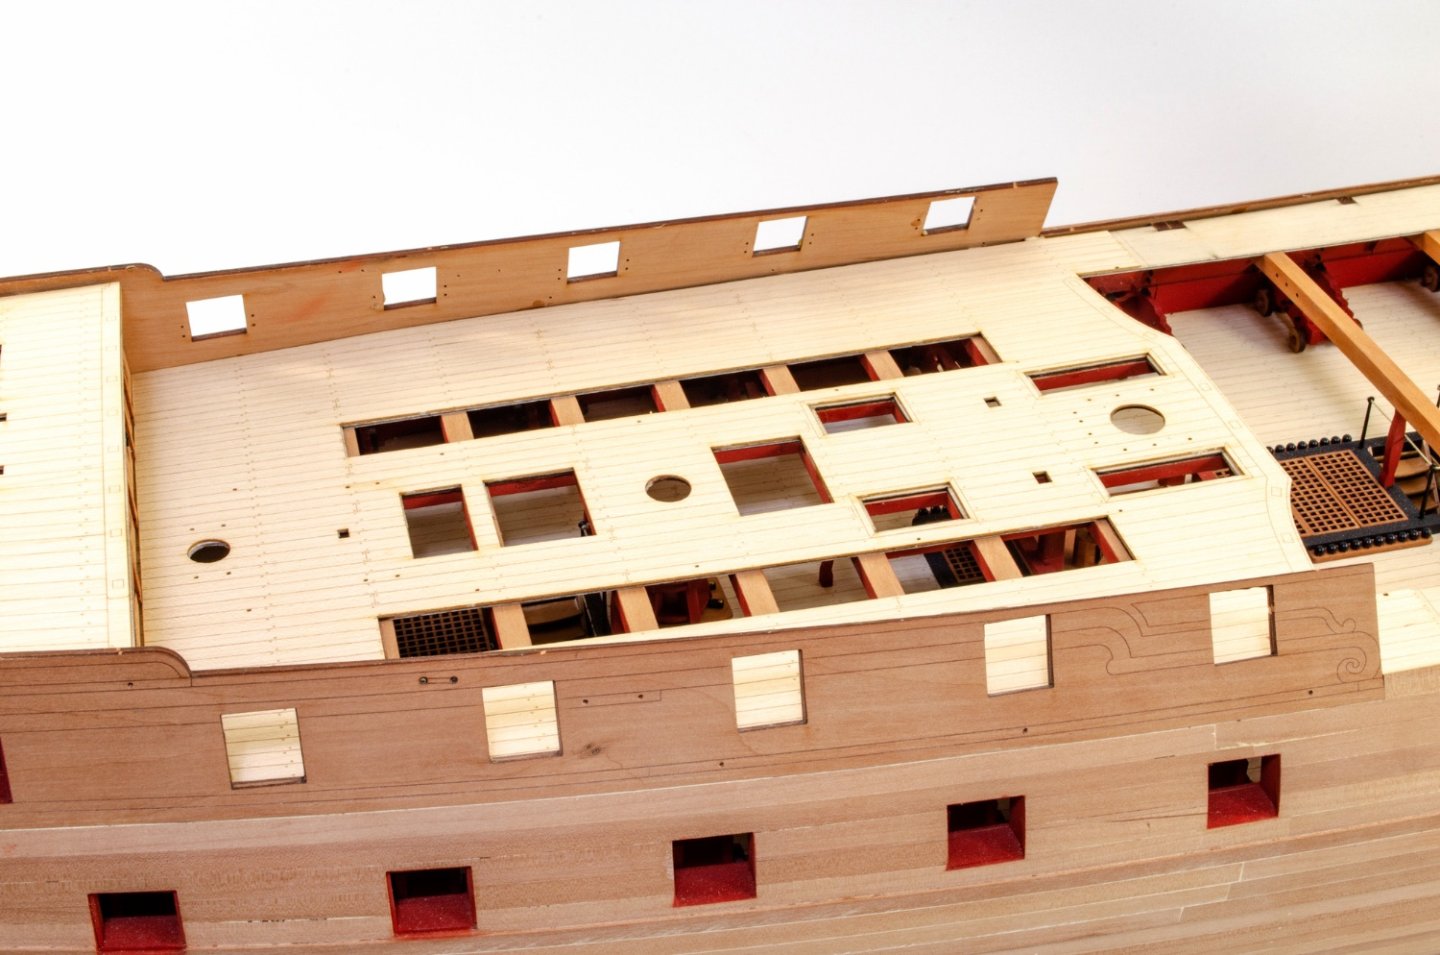
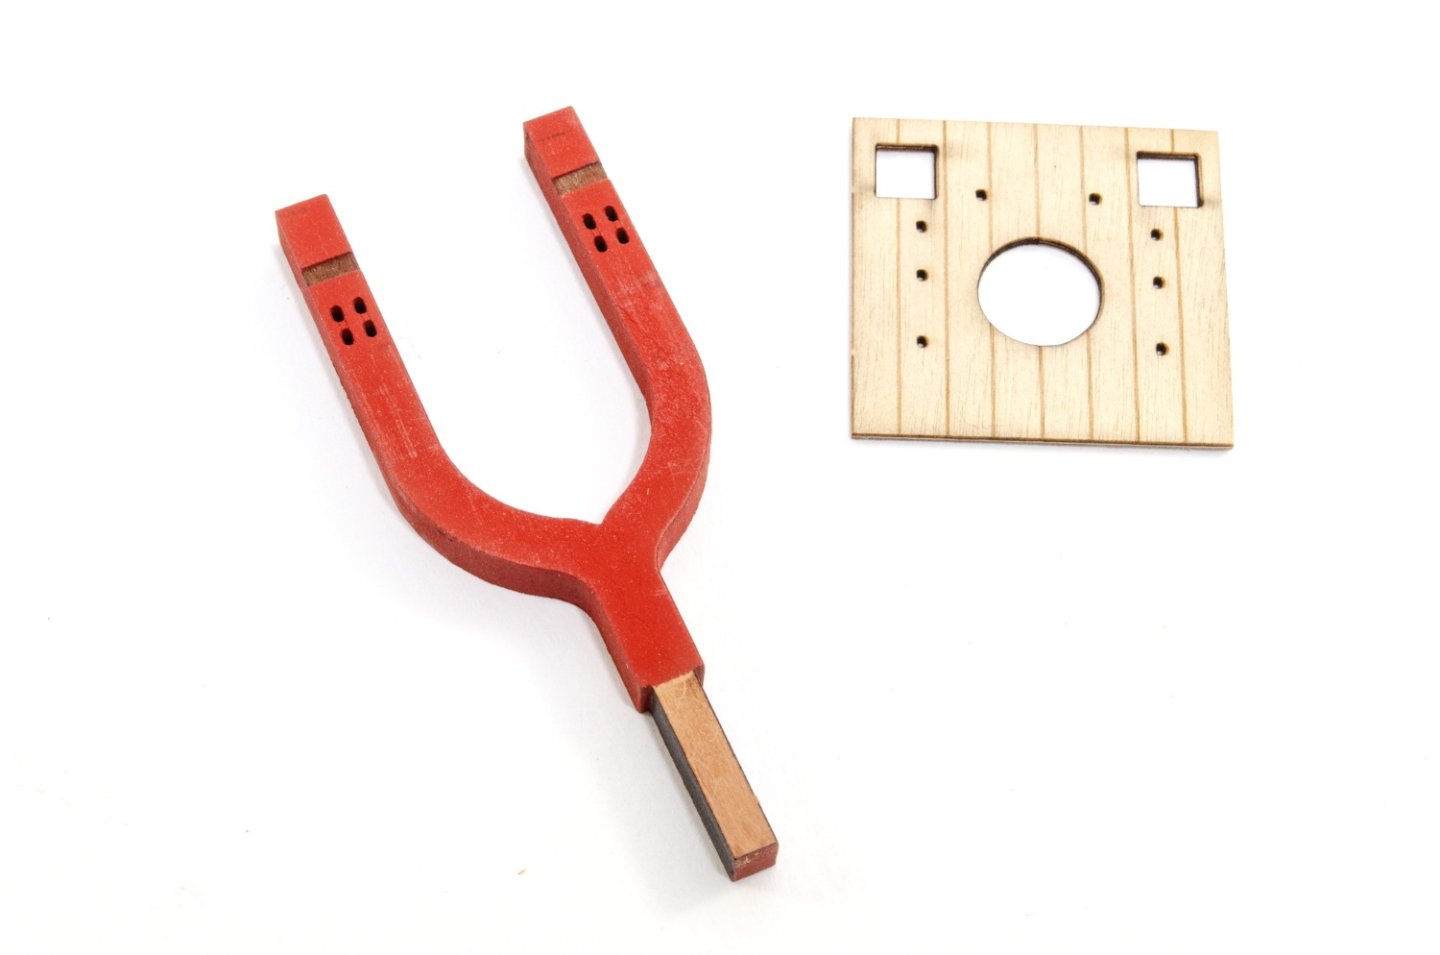
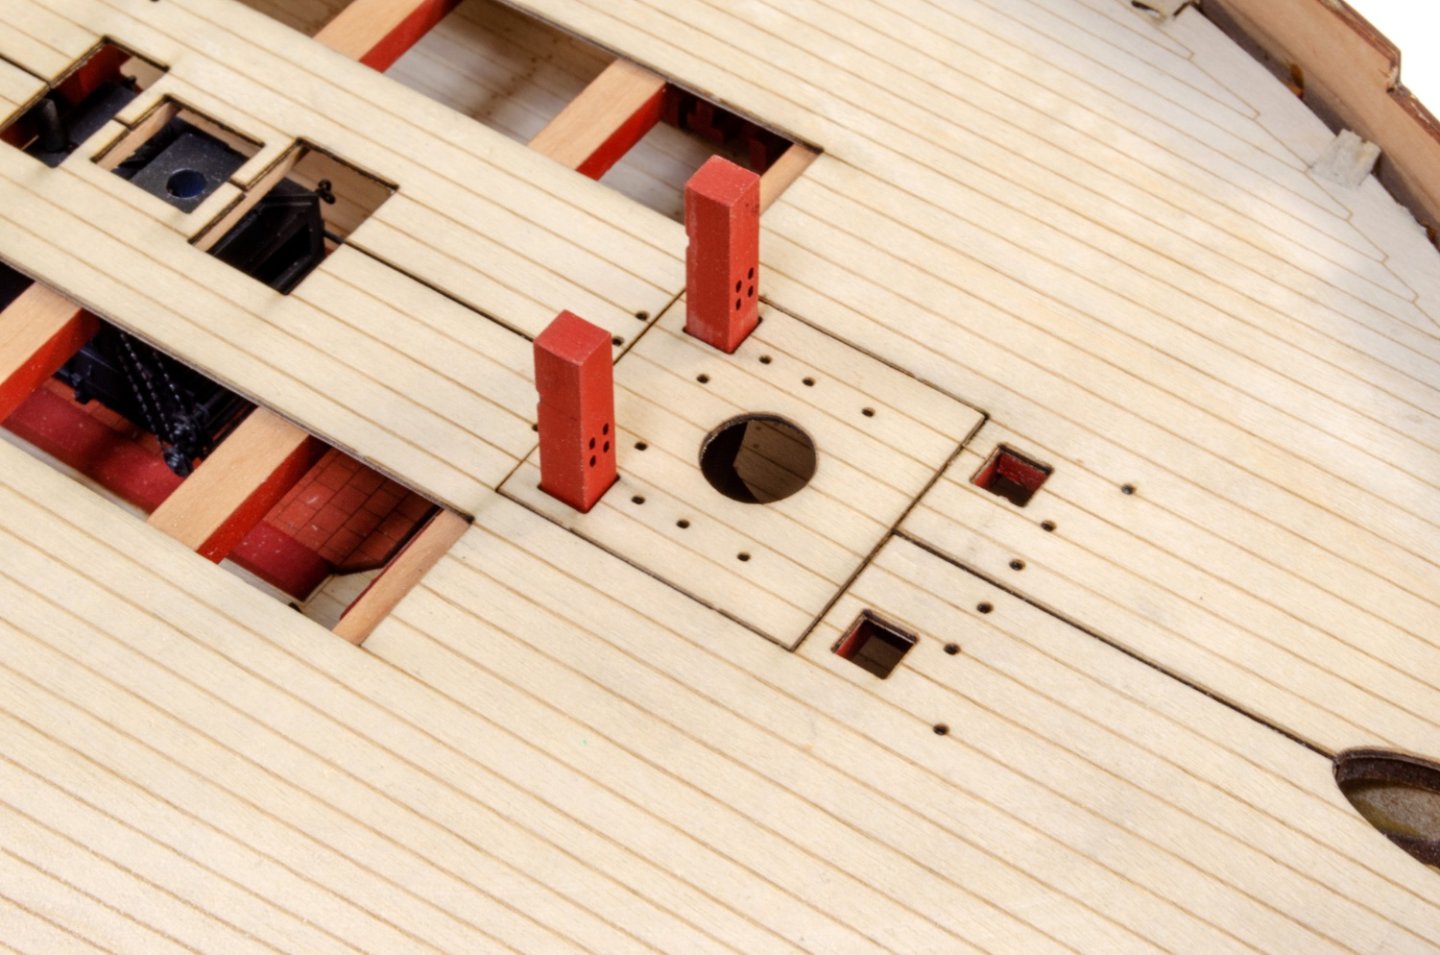
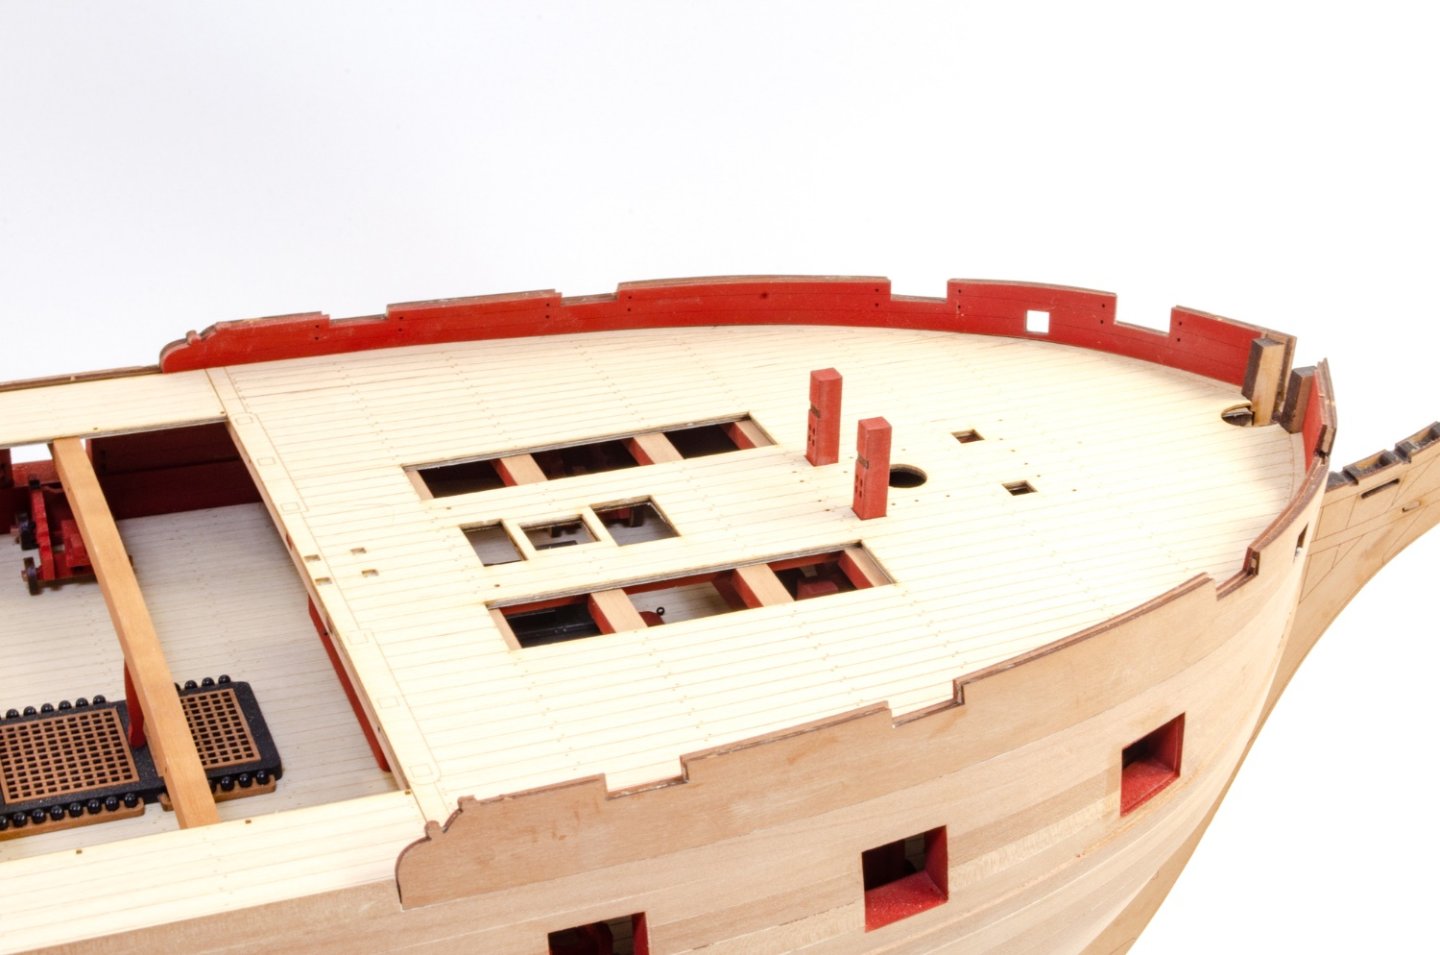
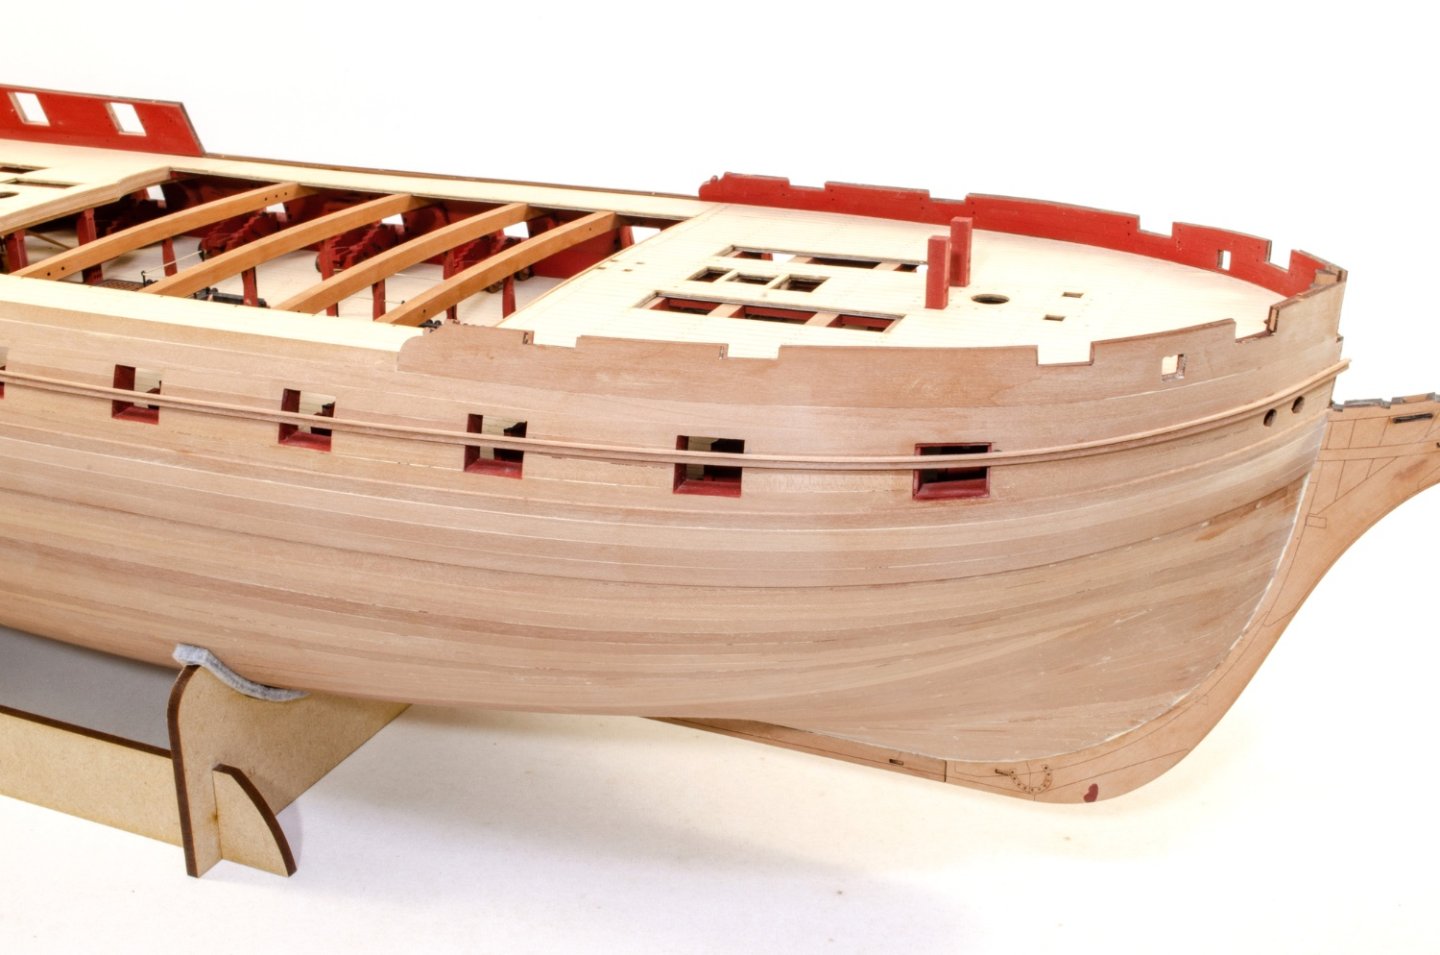
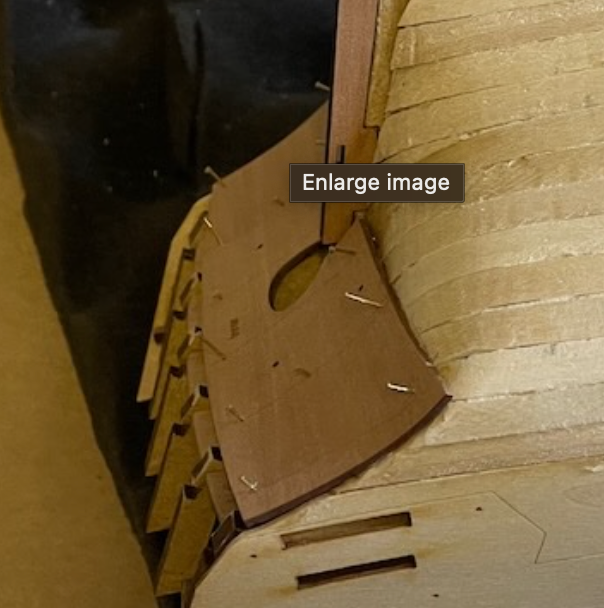
....continued. Now, those laser cut rails. These are now glued into the engraved positions on the outer bulwarks. Some extra parts are added to these to create a 3D relief. What we believe is the remainder of the original second wale from her 64-gun days, is now fitted. The position of this is crucial. Here you see the area around it masked off and the wale sanded. The timber which is obstructing the gun port is now carefully snipped away and sanded flush with the gun port edges. More gunwale position levelling, and the parts finally glued into place. The gun port positions on the forecastle gunwale are also prepared. Now it's the turn of adding rails to the stern of this beast. These are all laser cut and engraved. All you need to do is to make sure you fit them all in alignment. At this point, I glue in the second set of foremast bitts. And here is Indy so far. I have actually done more than this in preparing other assemblies, such as binnacle, ship's wheel, catheads etc. At this point, it's not long off adding some colour to this hull.


- 488 replies
-
- 47
-
-
-
- Indefatigable
- Vanguard Models
- (and 1 more)
-
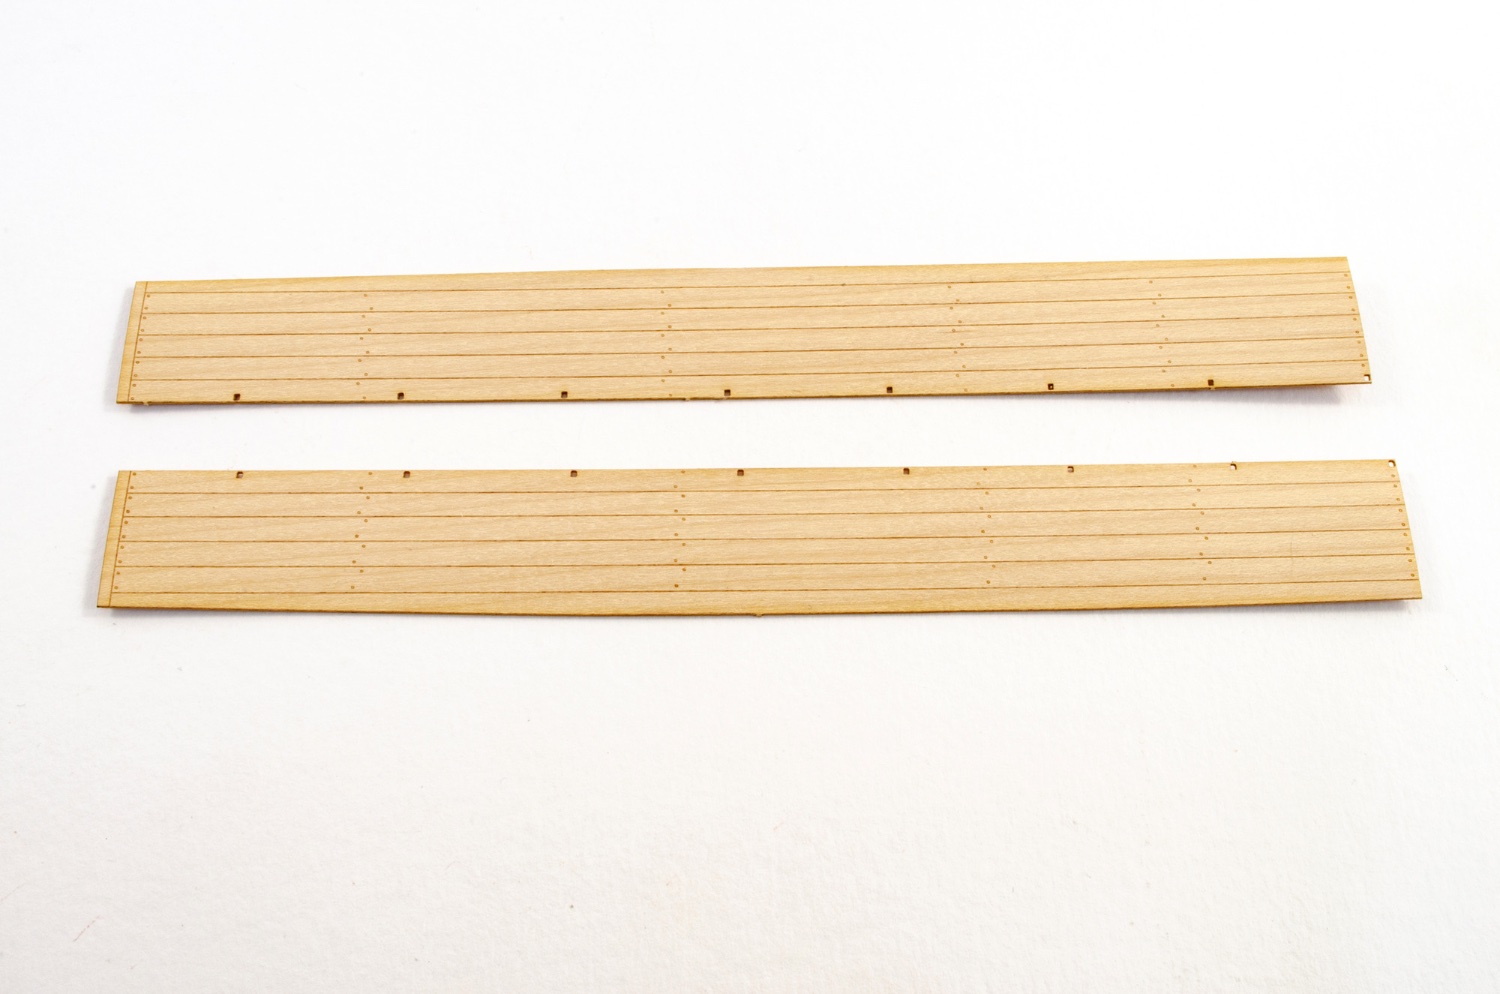
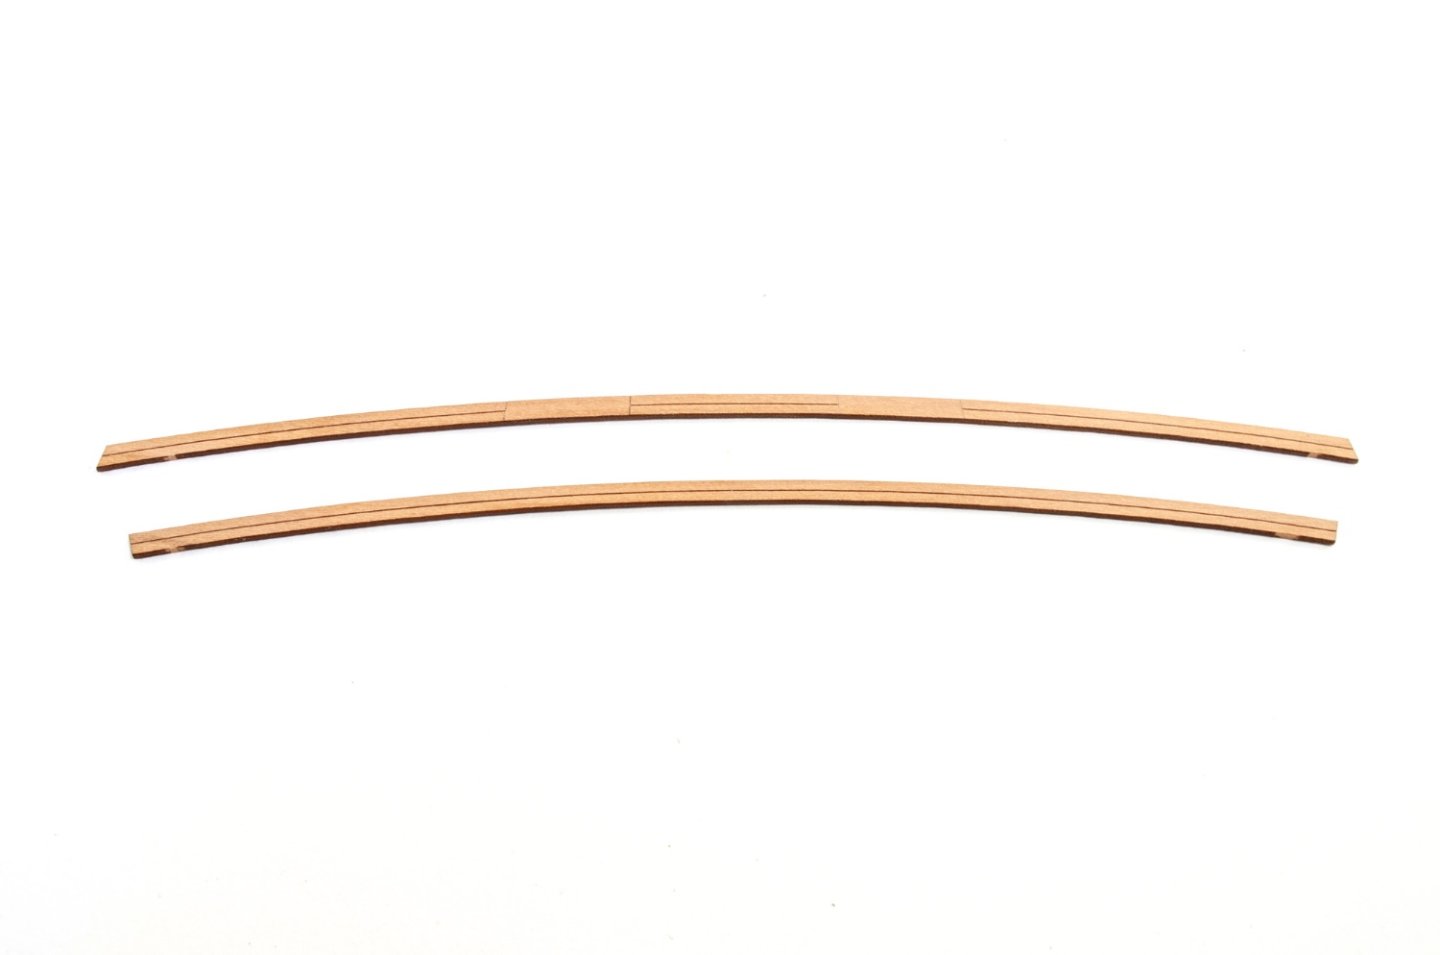
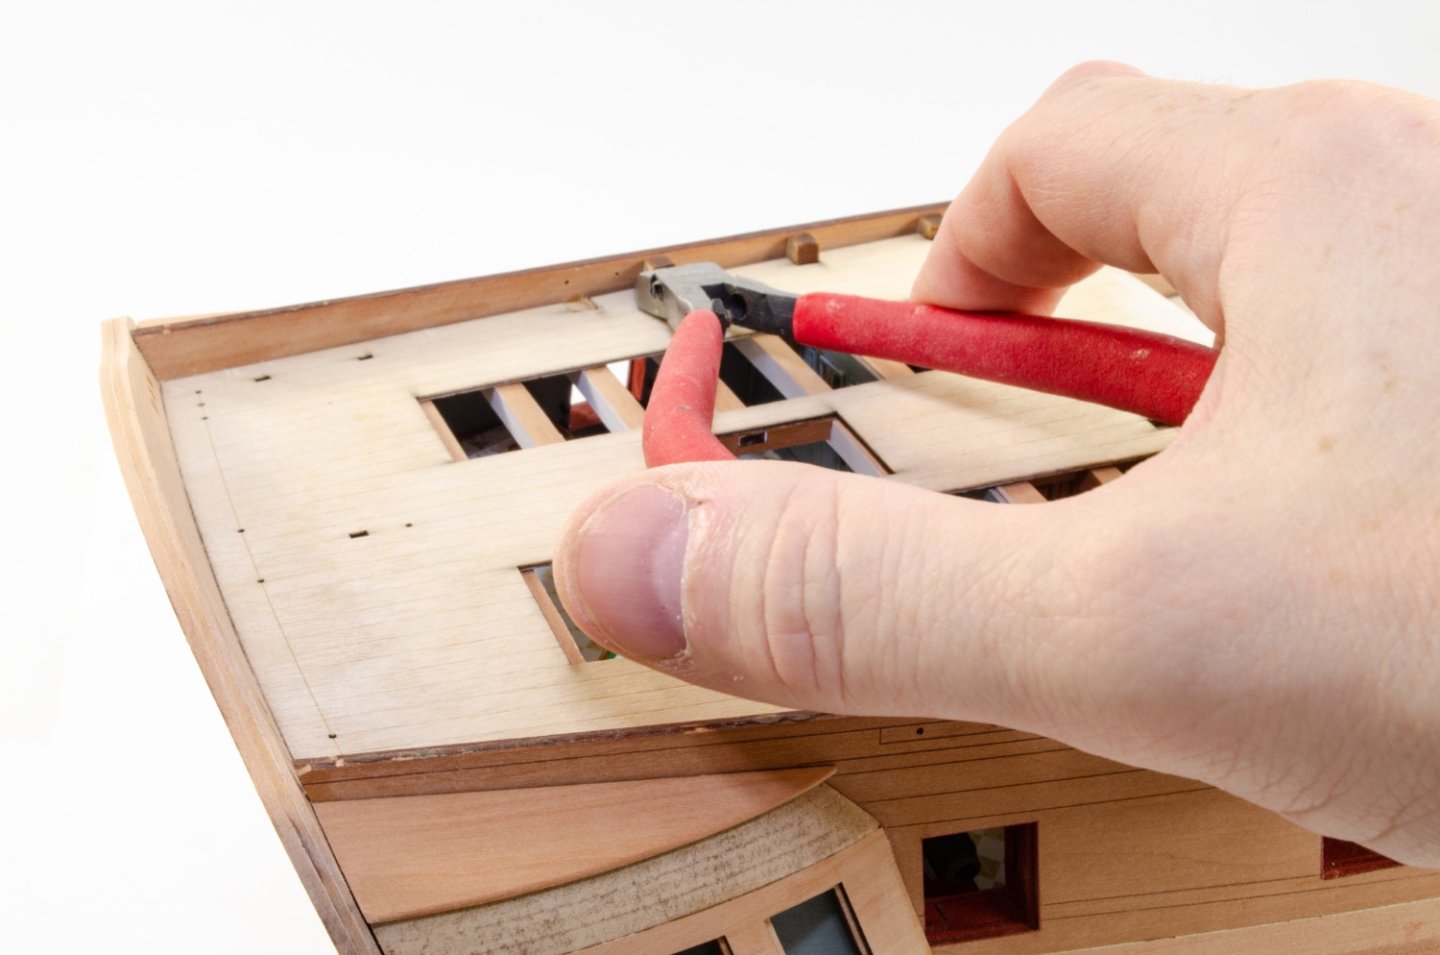
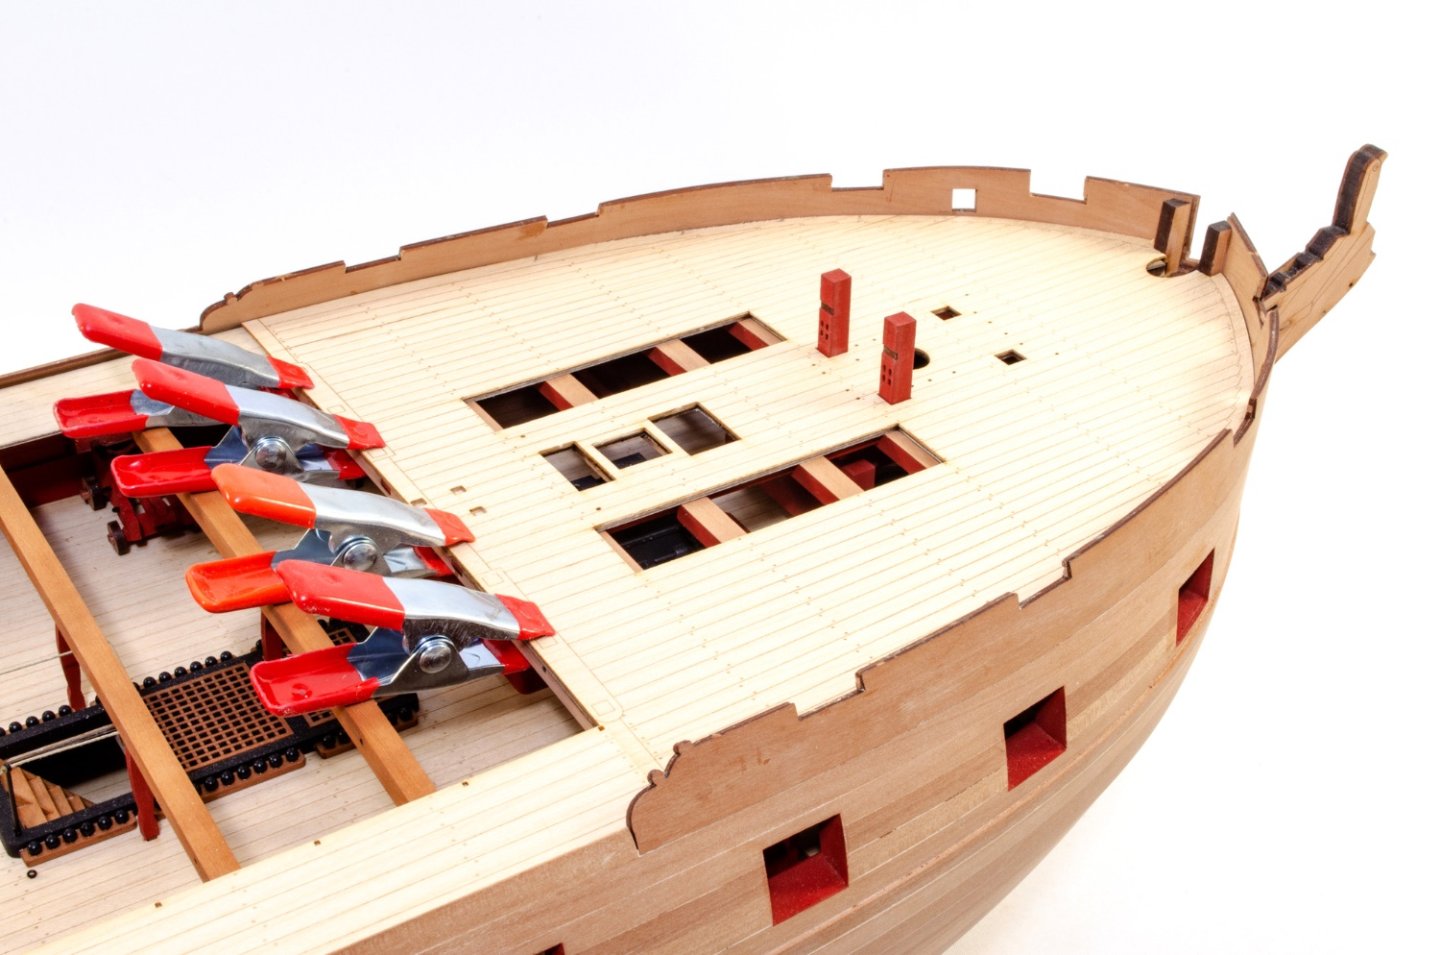
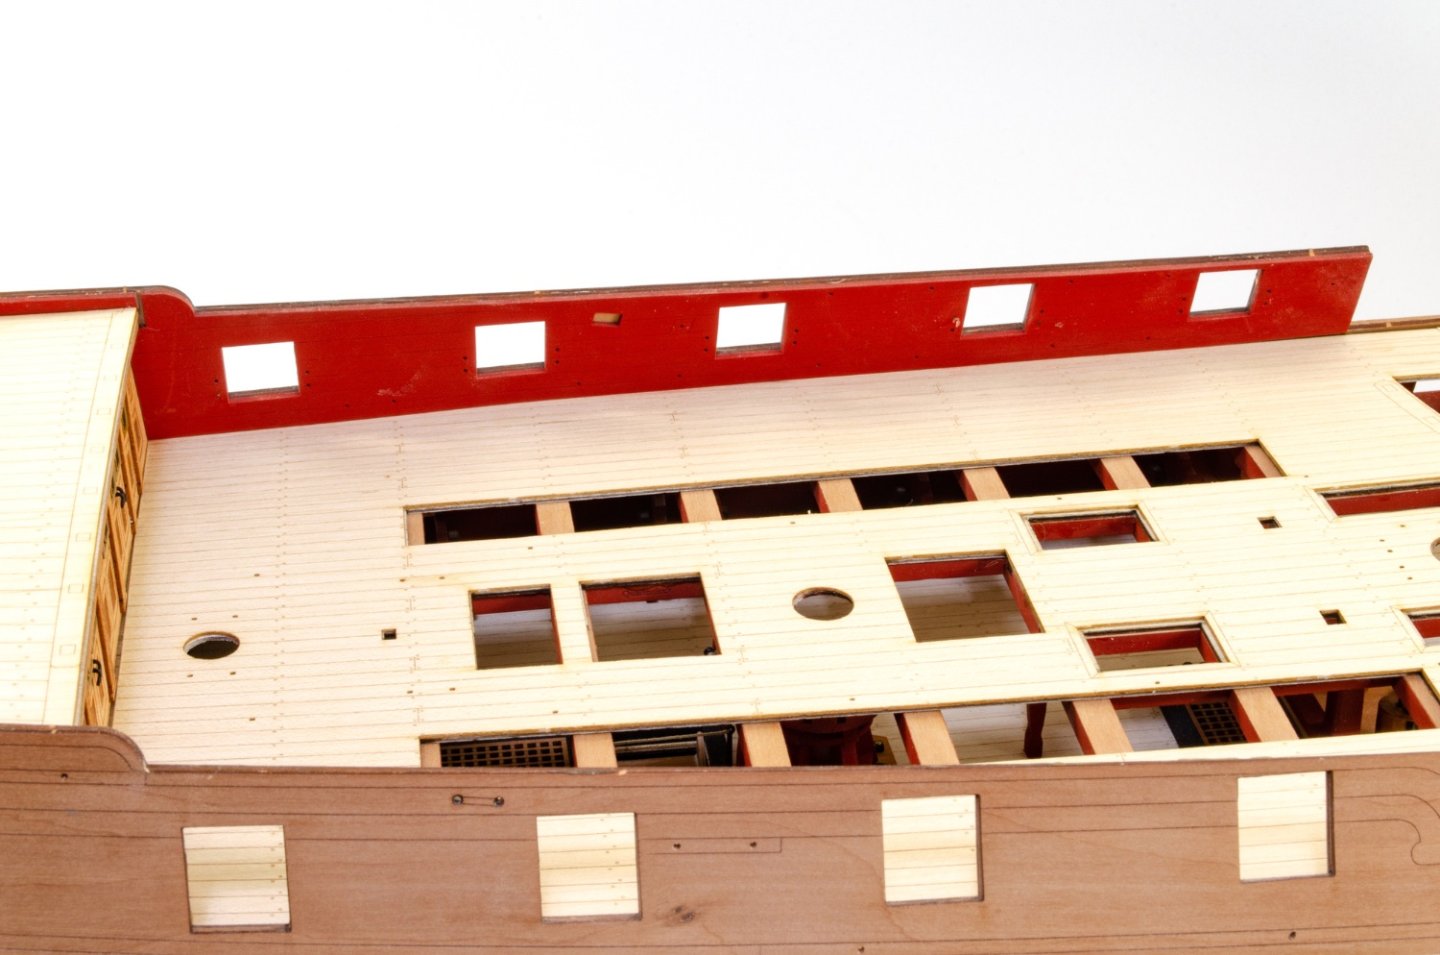
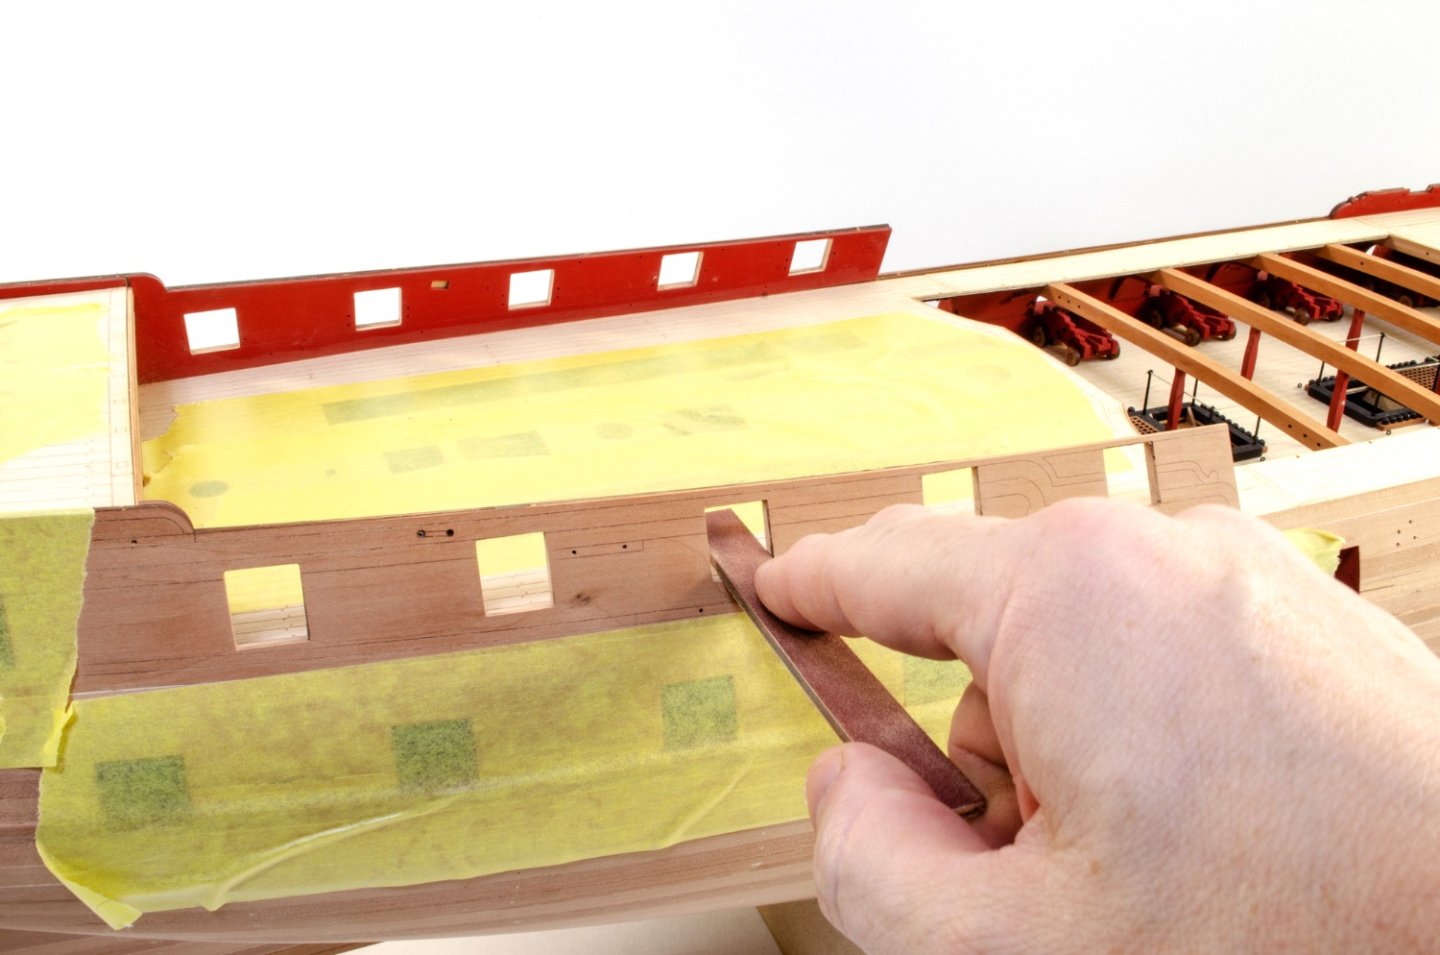
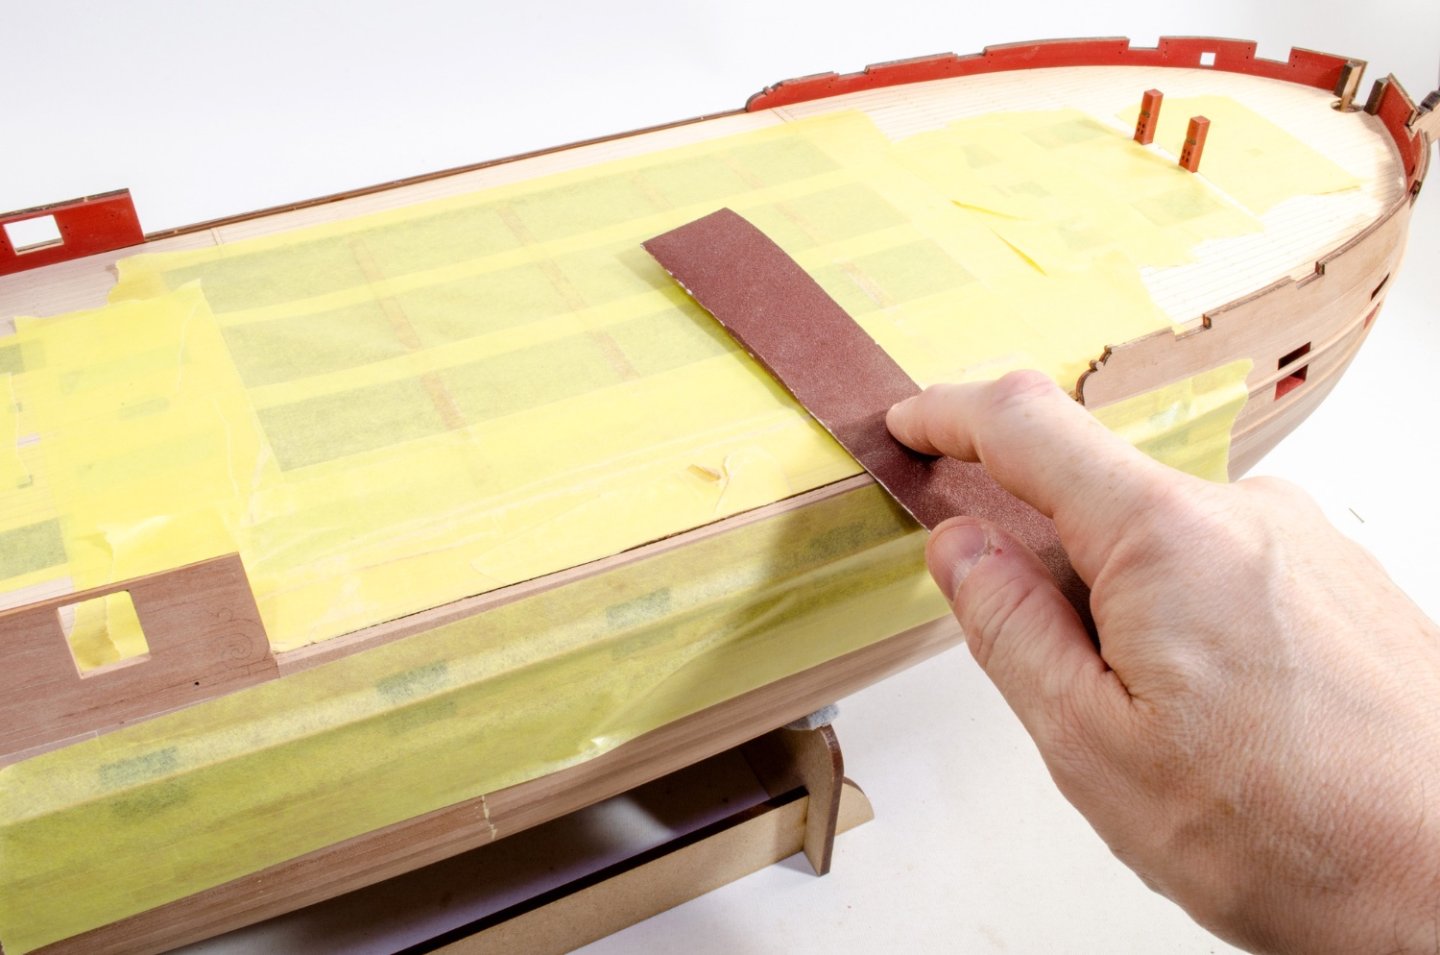
This update concerns fitting the inner bulwarks, finishing off the stern (for the moment) and fitting rails, gunwales etc. I alway find snipping and sanding away the last vestige of visible MDF from the model, to be very satisfying. This being the removal of the bulkhead ears above deck. Sandpaper is then used to properly level them. As this model is being fitted with the optional maple deck, test fitting and trimming that is the next task. Finally, this is carefully glued into place, checking alignment as I go. Plenty of 2-inch clamps are used to make sure the whole surface is in contact around the various openings. Before the forecastle maple deck can be added, I need to fit the foremast bitts. This is fitted at this stage to allow the lower ply sub deck to be fitted. This is now slotted through the deck beam frames and then the small deck section slotted and glues over it. With that in place, the maple deck can then be fitted. Deck test fitting is of course done before fitting the bitts. Lastly, the gangway maple deck section are glued into position. With the deck sections fitted, the inner bulwarks are painted in red and fitted. The forecastle ones were first soaked and clamped to shape before working with them. More gun port tidy up now, using the same homemade sanders I used for the main gun deck. At this point, I needed to fit some of the external details, such as rails etc. These are a combination of strip timber and pre-cut parts. Firstly, a 1mm² strip is glued to the edge of a 3mm² strip, left to dray and the edges subtly rounded. The rail is then fitted at a position equidistant from the wale below it. A 12-inch steel rule is now wrapped in sandpaper and used to level the gunwale positions for later.


- 488 replies
-
- 34
-
-
-
- Indefatigable
- Vanguard Models
- (and 1 more)
-
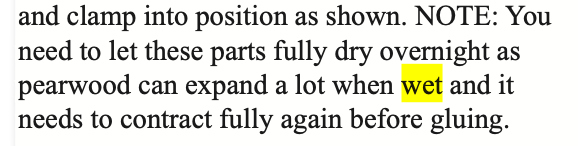
I think we recommend that the pear should be allowed 12-24hrs to throughly dry. I know I've still had the stuff swollen by a few mm even after almost a full day's bench session. It's like the final welling only goes back in last hours 🤪
- 426 replies
-
- 3
-
-
- Vanguard Models
- Sphinx
- (and 1 more)
-
Ah, and if that piece is still damp, it won't have shrunken back to its proper size. Pear swells a LOT, so you need to make sure it's bone dry.
- 426 replies
-
- 2
-
-
- Vanguard Models
- Sphinx
- (and 1 more)
-
If you temporarily sit the the upper counter and stern fascia in place, and the fascia sits about 2mm above the bulwark level, then you'll be perfectly ok.
- 426 replies
-
- 3
-
-
- Vanguard Models
- Sphinx
- (and 1 more)
-
Looking at the counter, I think you placed it lower, not higher, than mine. Higher is closer to top of stern, not higher when upside down. Take a look where mine falls in relation to the rudder post, and then elevate yours about 2.5mm closer to top of hull than that.

- 426 replies
-
- 2
-
-
- Vanguard Models
- Sphinx
- (and 1 more)
-
Just add a little piece to infill there. It won't be seen.
- 106 replies
-
- 1
-
-
- Erycina
- Plymouth Trawler
- (and 3 more)
-
I can confirm that my tests with these show they can be thinned with regular tap water and also brush-painted. I'm really picky about paints as I've trialled and used lots of garbage whilst working for magazines, but these are superb. Very nice indeed.
-
Ok, this topic has been pruned of around 30 posts that were asking status, and those trying to explain things. When I have news on this project, then here is where I'll post it. If there is no post, then I have no news, so please don't keep enquiring.
-
This has been such a wonderful project to follow and nice seeing the little things you've done throughout to change her too. As for lodging and hanging knees, I had real pleasure fitting those on Indy 🤪 I help we'll eventually see you try your hand at the new super frigate.
- 857 replies
-
- 5
-
-
-
- Sphinx
- Vanguard Models
- (and 1 more)