James H
-
Posts
6,139 -
Joined
-
Last visited
Content Type
Profiles
Forums
Gallery
Events
Everything posted by James H
-
 You sort of missed the words before the title you gave this topic: That means, if you have questions about how to use the forum, not how to rig. or plank a model etc.
- 1 reply
-
- 6
-

-
You're doing a nice job of your planking. Good to see her coming along so well.
- 426 replies
-
- 2
-
-
- Vanguard Models
- Sphinx
- (and 1 more)
-
I left the hammock cranes off the model as they would've fouled the shrouds. That won't be a problem with your build.
- 857 replies
-
- 4
-
-
- Sphinx
- Vanguard Models
- (and 1 more)
-
While it's an advanced level kit, if you've got some building experience under your built and can think logically, this won't be beyond many people.
- 488 replies
-
- 9
-
-
- Indefatigable
- Vanguard Models
- (and 1 more)
-
Hornblower isn't supplied with this kit. Just Pellew. It's up to the modeller if they want to include Hornblower and any uniform vagaries (bearing in mind most folk wouldn't know anyway...I certainly didn't).
- 488 replies
-
- 6
-
-
- Indefatigable
- Vanguard Models
- (and 1 more)
-
Sounds like this will be perfect for you 😉😜
- 488 replies
-
- 5
-
-
- Indefatigable
- Vanguard Models
- (and 1 more)
-
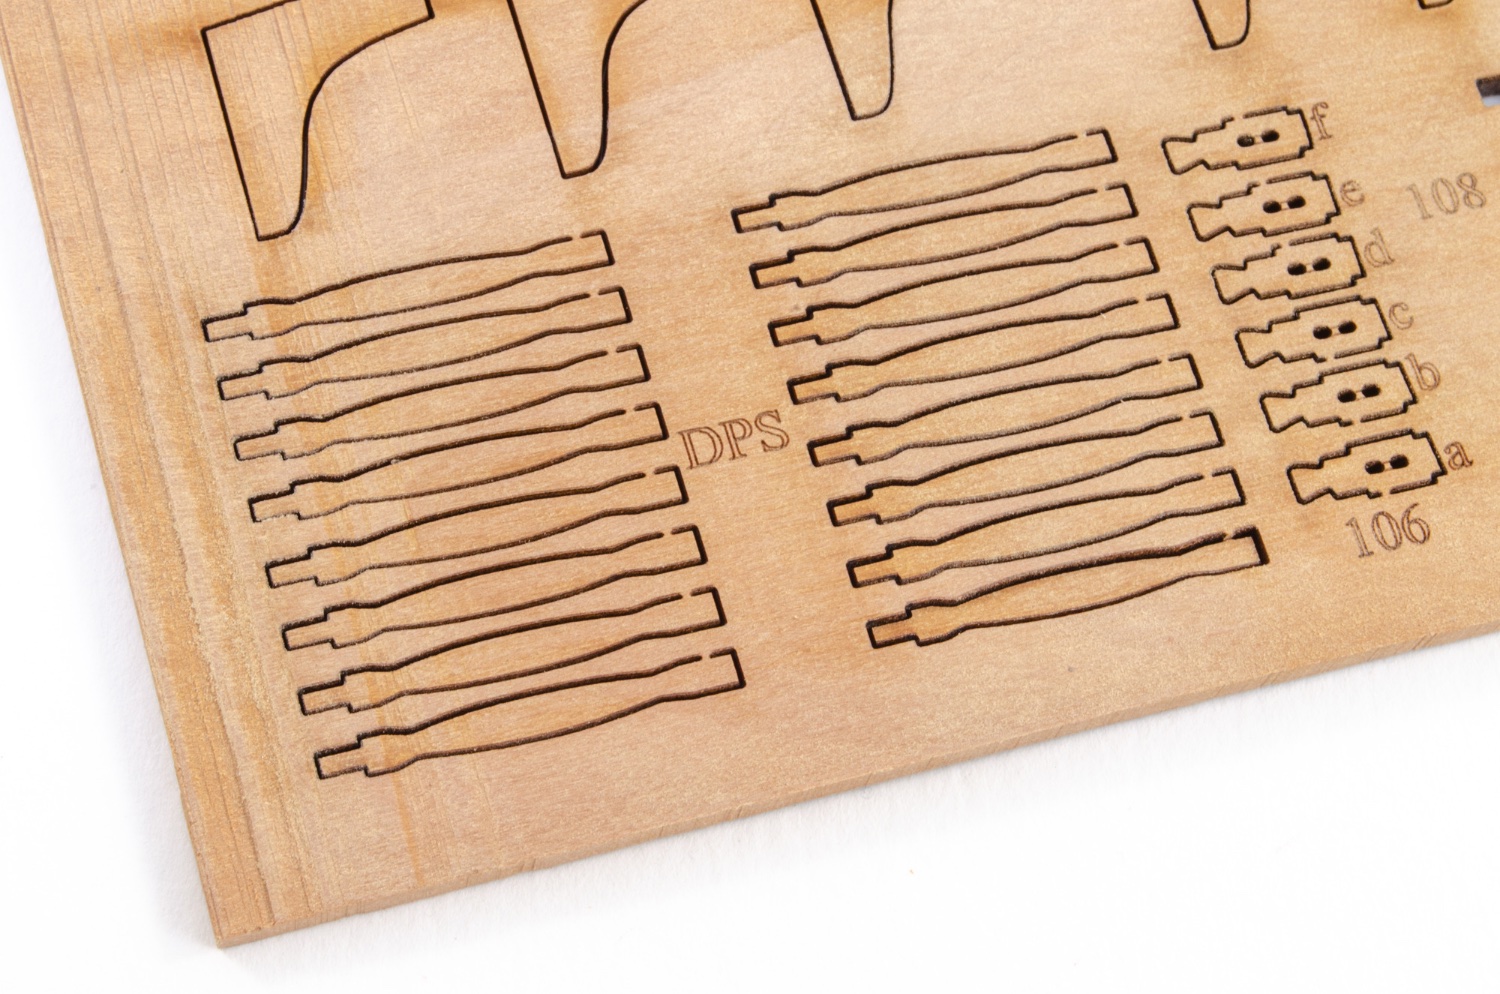
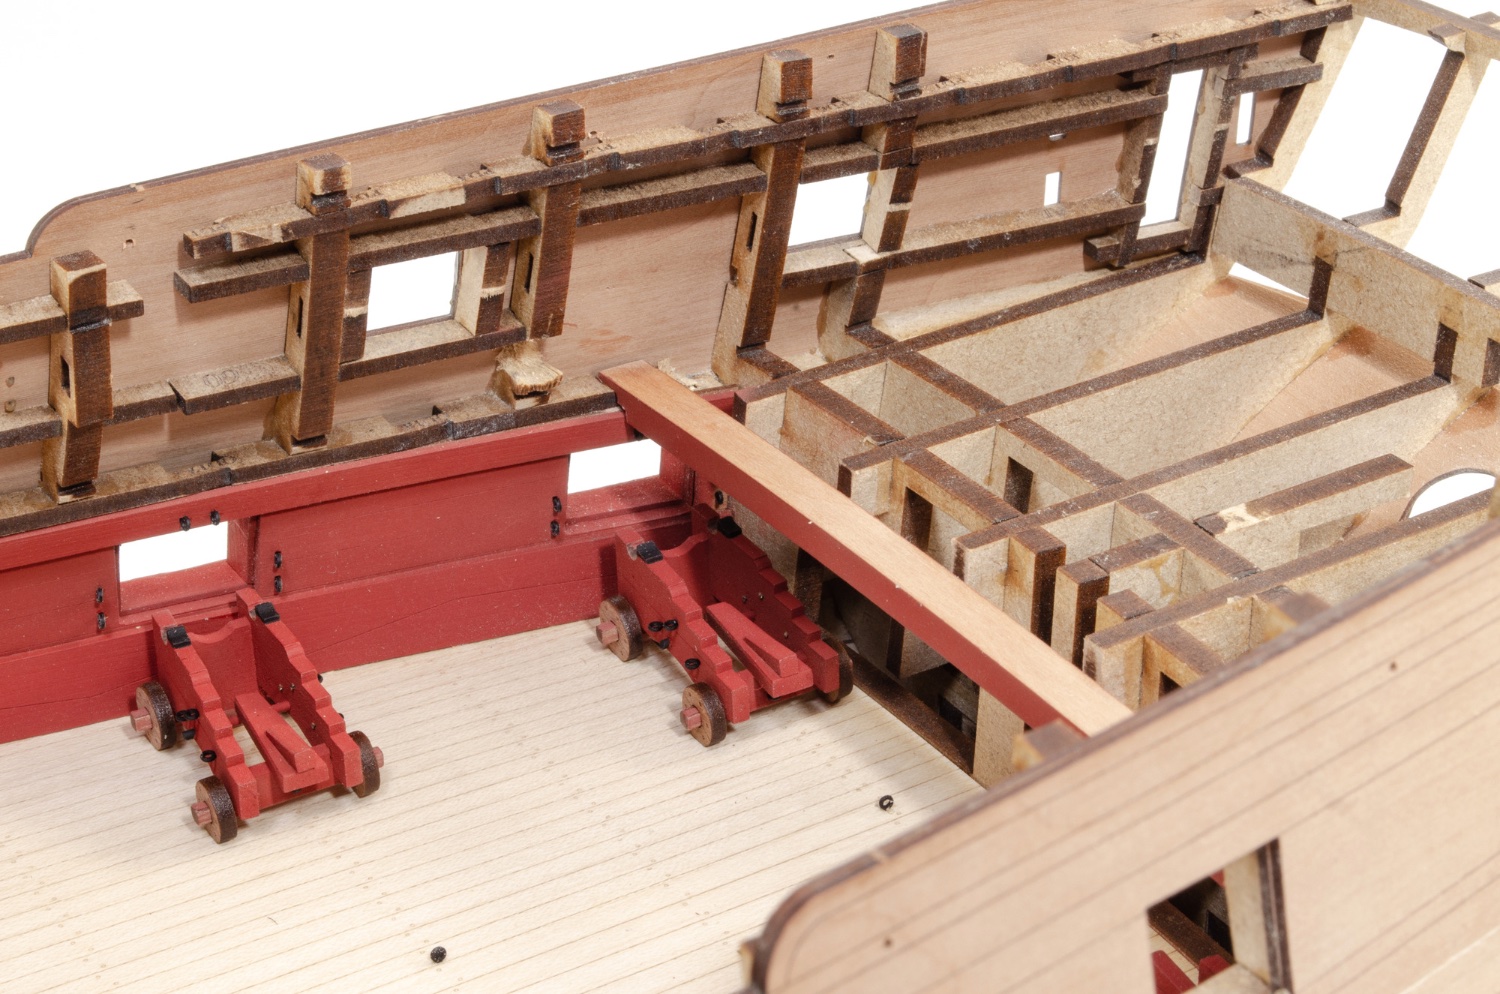
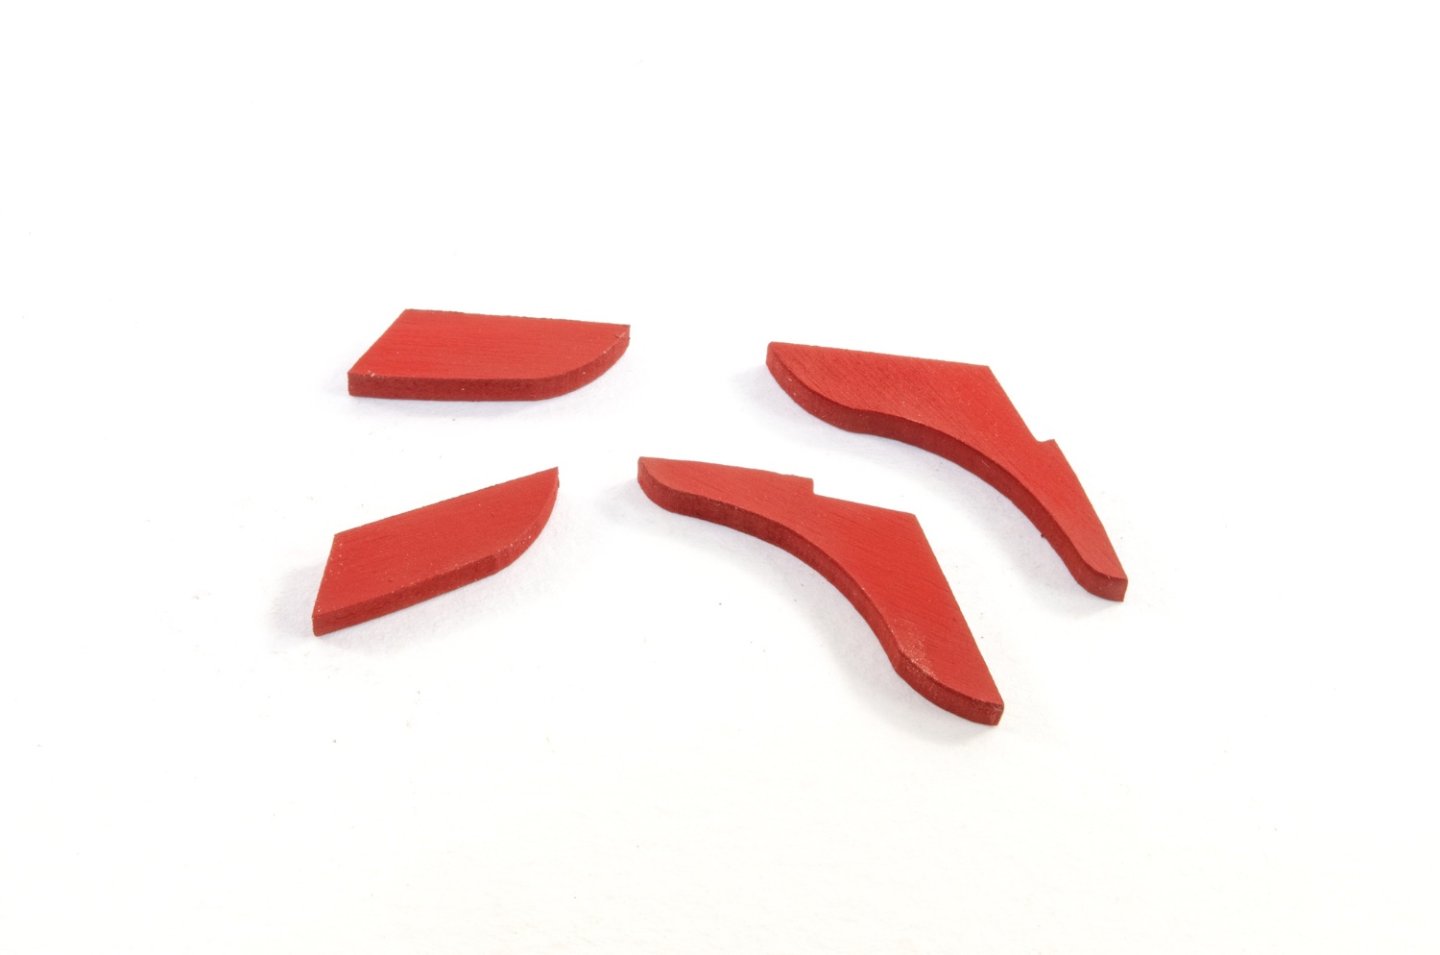
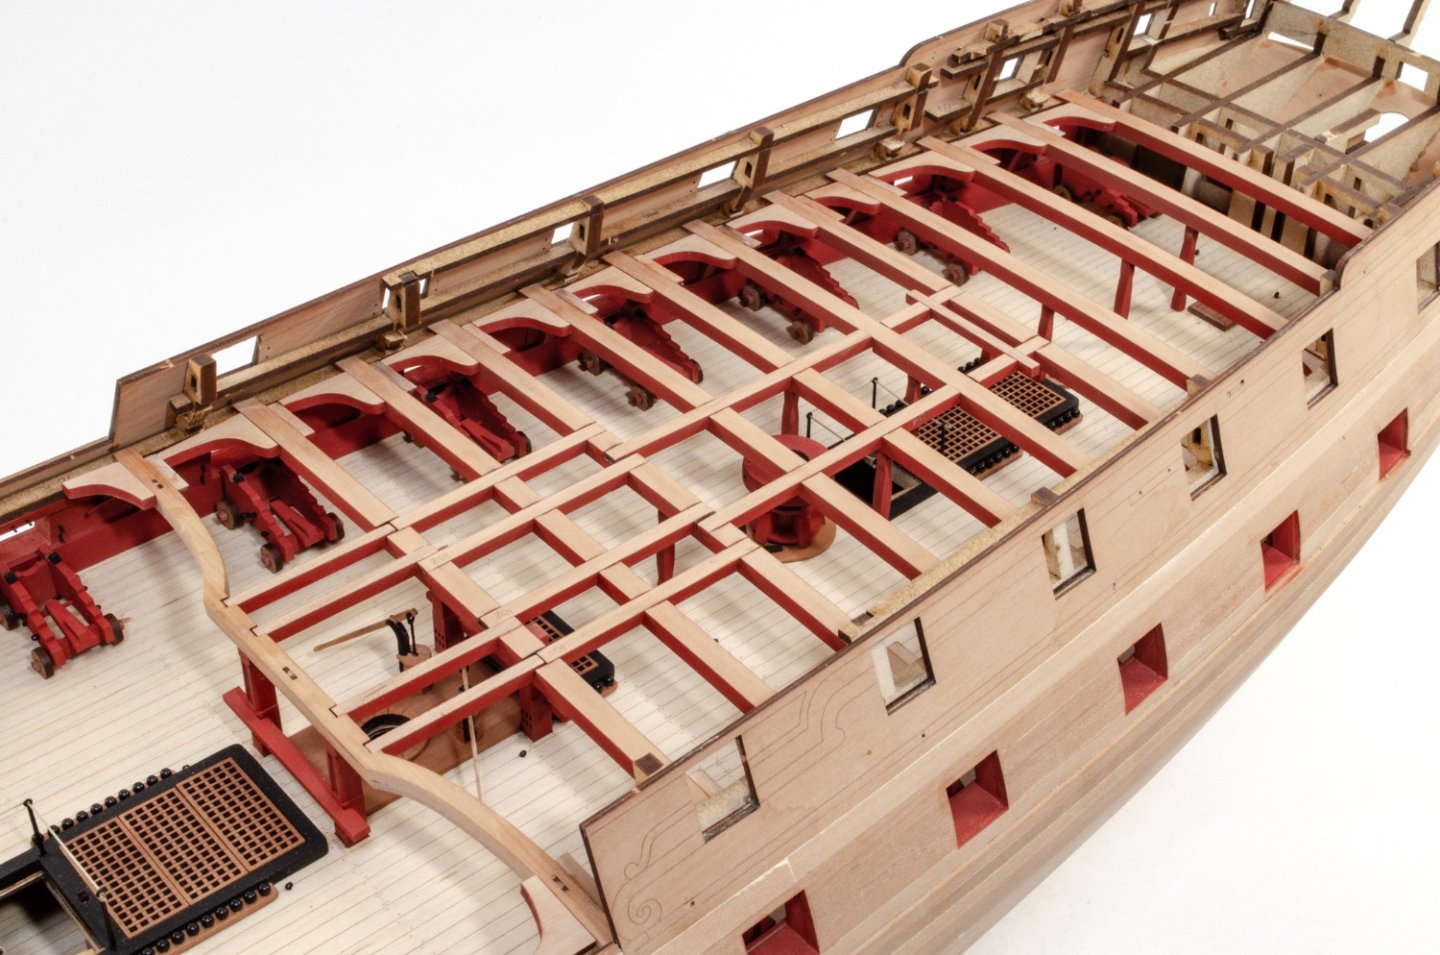
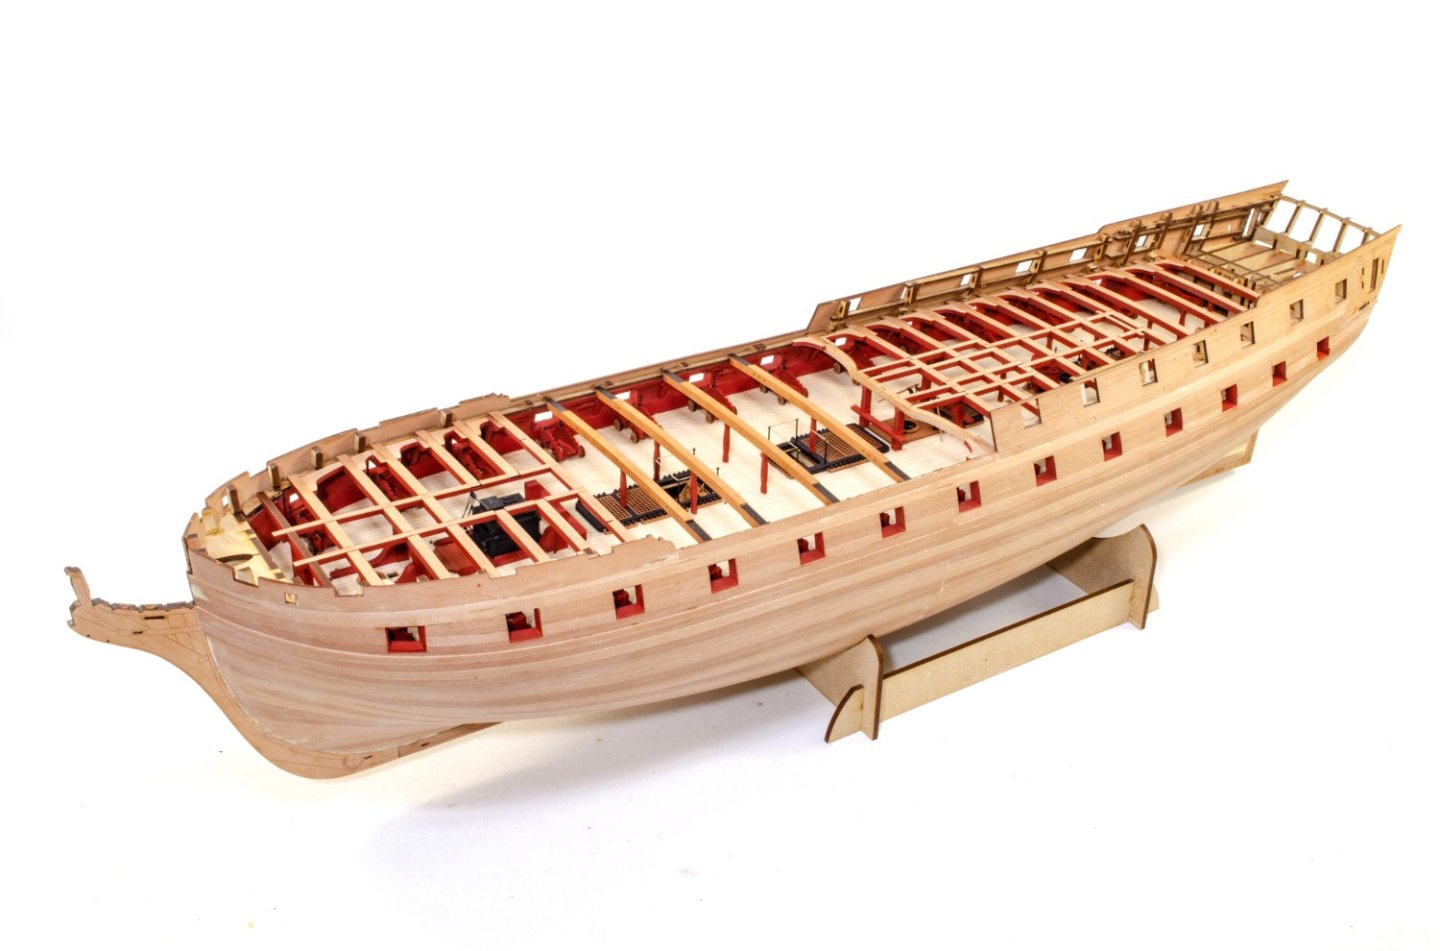
Included in the kit will be a set of optional lodging and hanging knees. It'll be up to you if you want the extra work, but for the manual, I have to take one for the team! These are the hanging knees. The truncated ones are the parts that will be fitted where the gun port would otherwise be obstructed by the longer part. Of course, each part also needs to be specifically shaped to its position. Plenty of spares are supplied. Here they are fitted, along with the lodging knees. And the fore deck beams are now added, with the optional knees also installed, followed by the boat beams. These also have optional knees. And here she is so far!!
- 488 replies
-
- 48
-
-

-
- Indefatigable
- Vanguard Models
- (and 1 more)
-
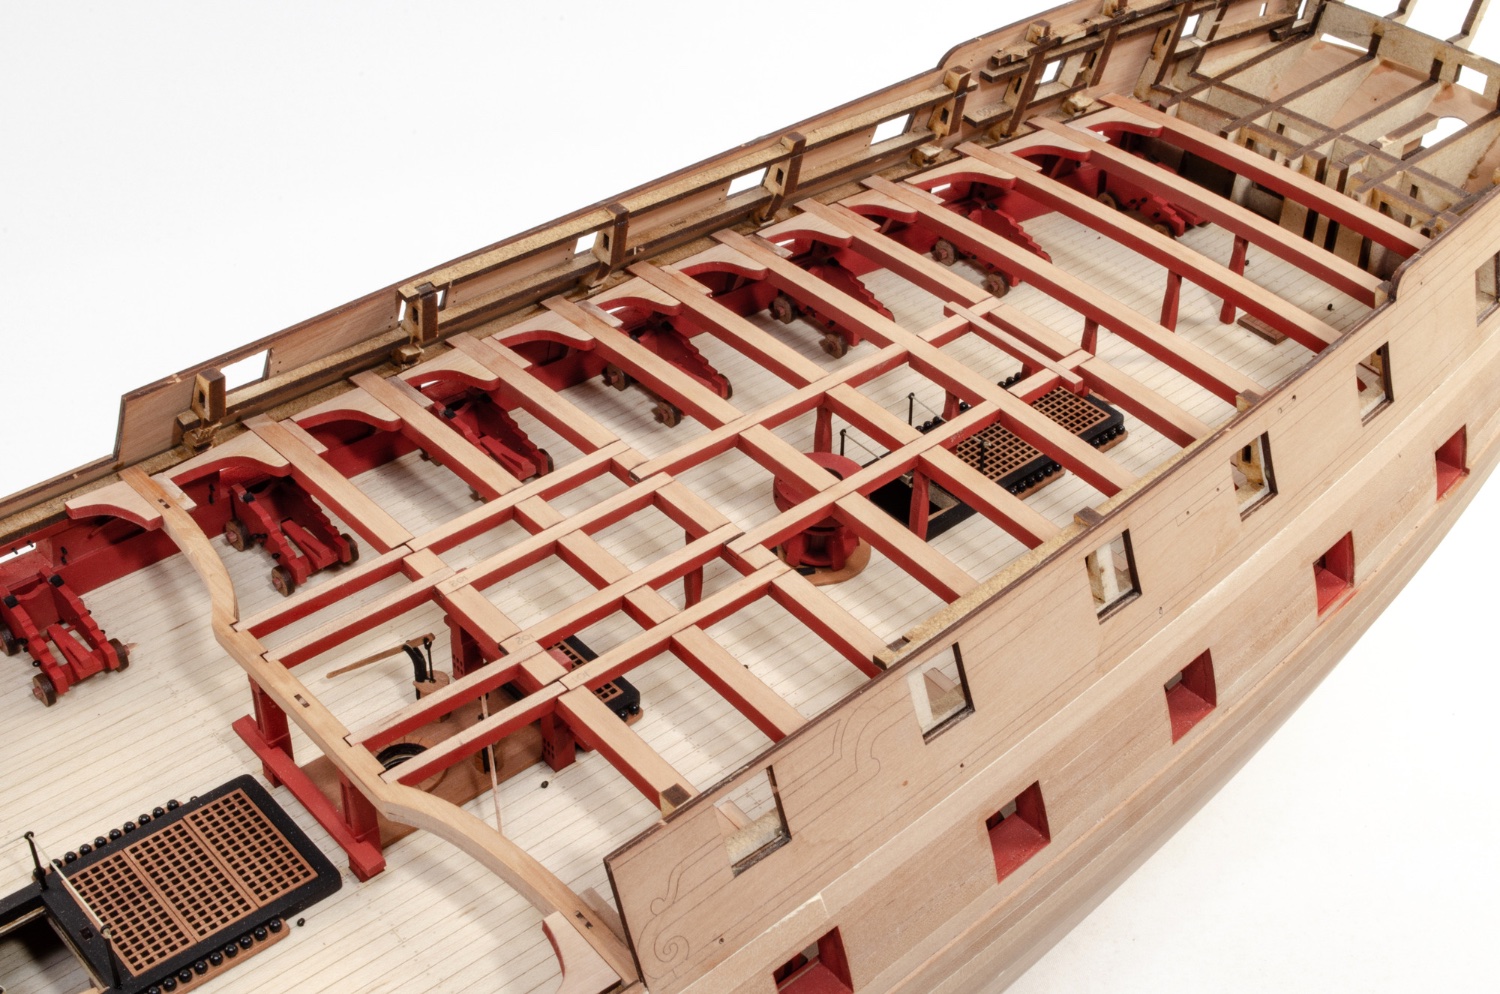
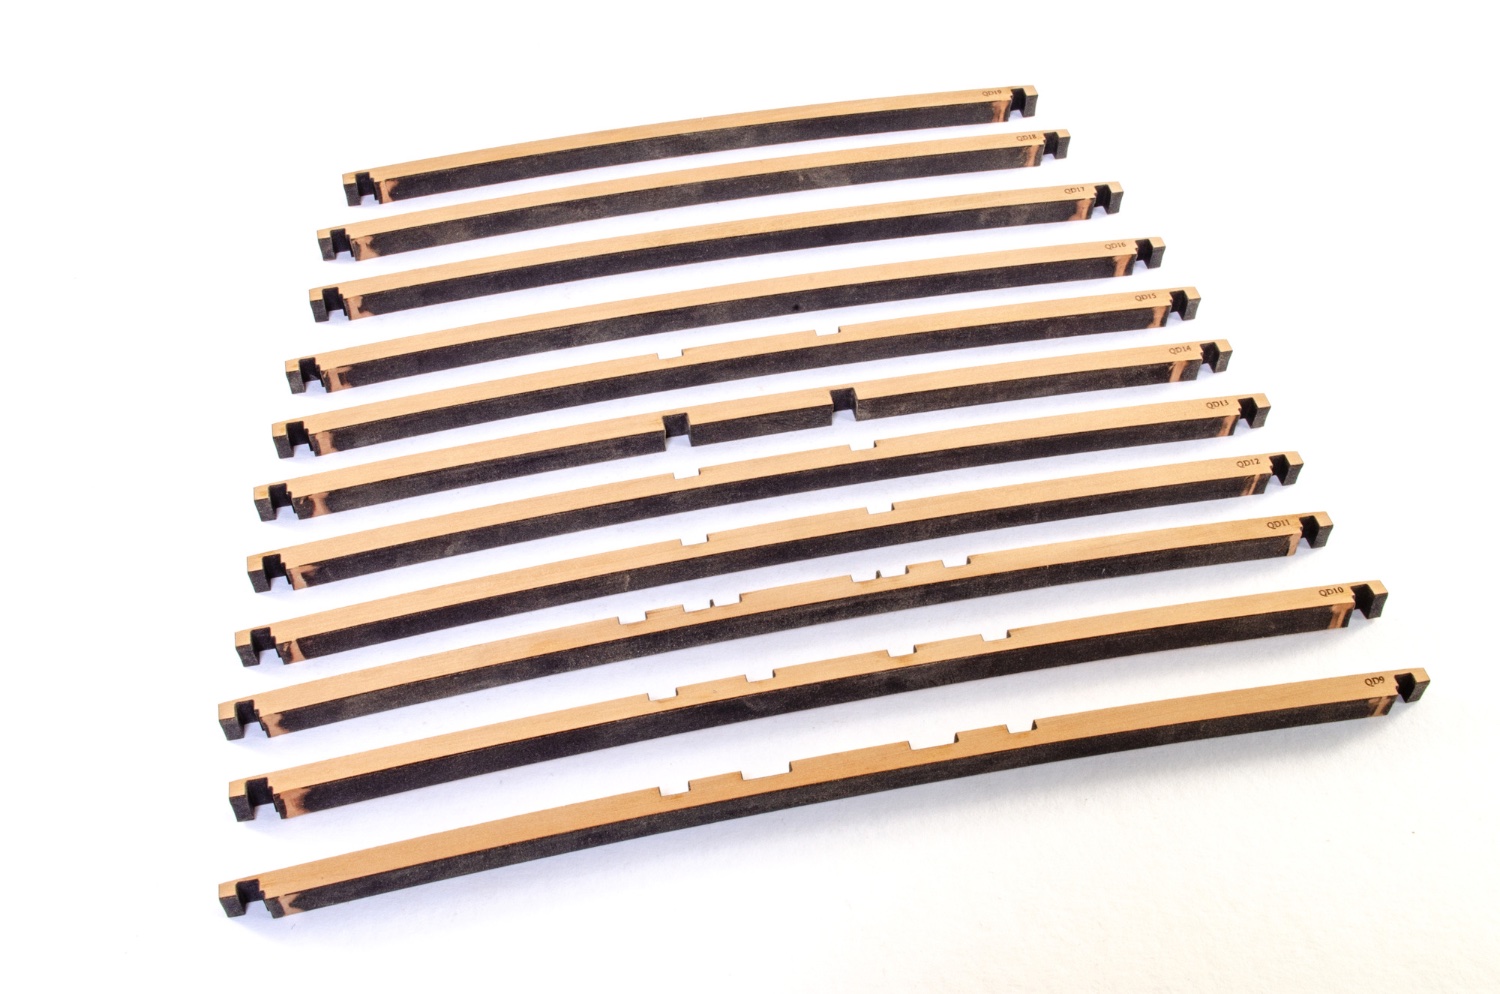
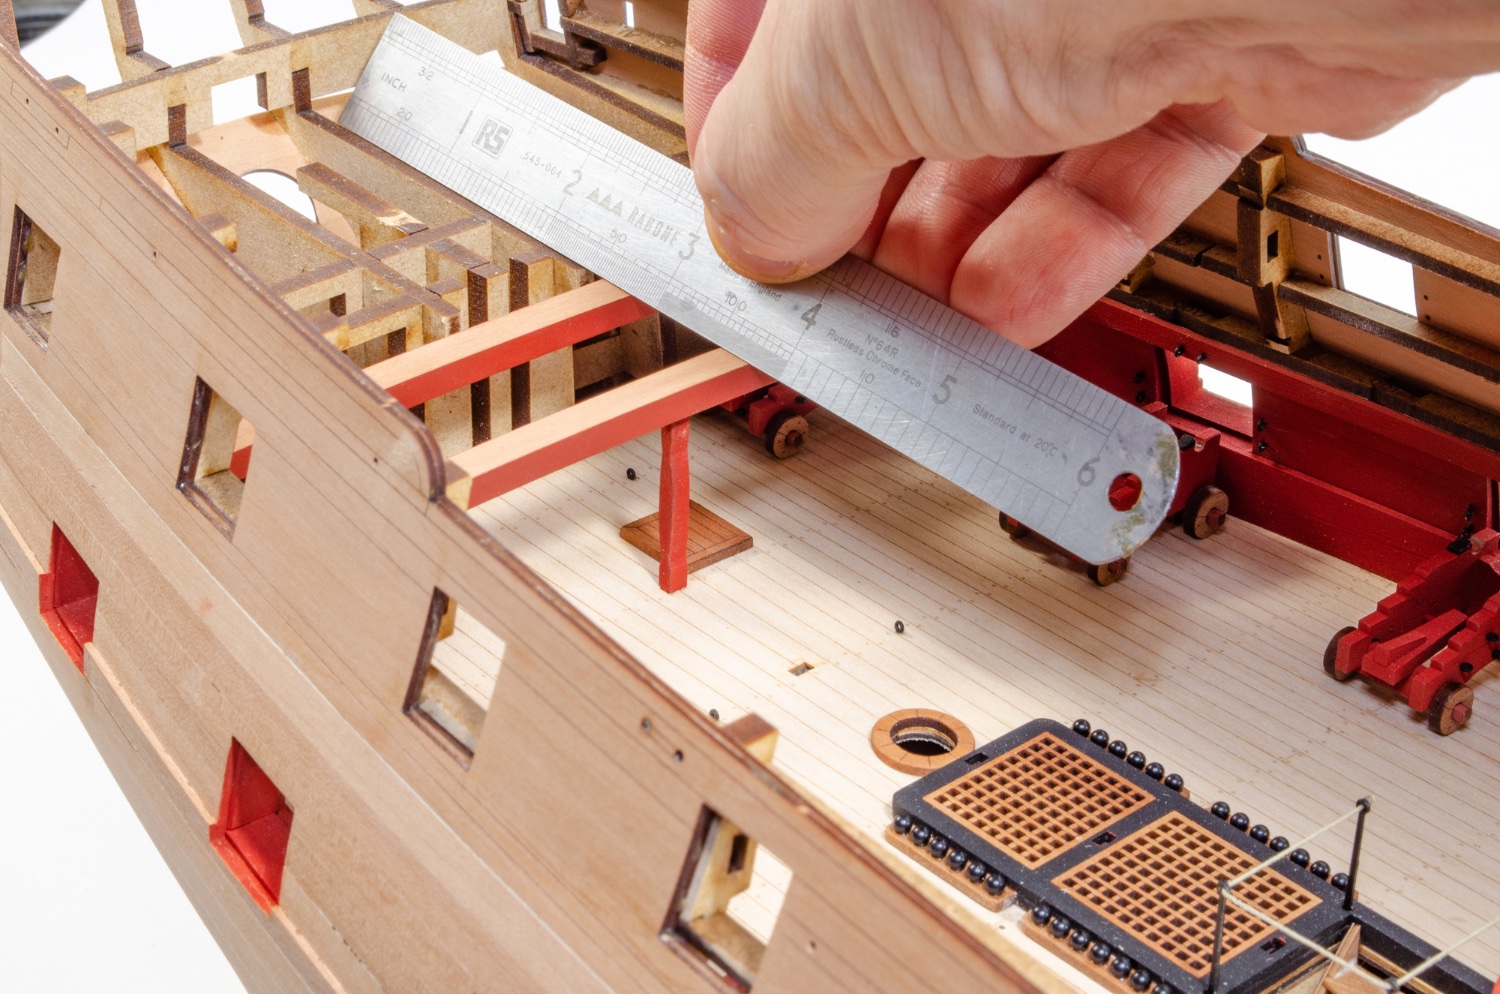
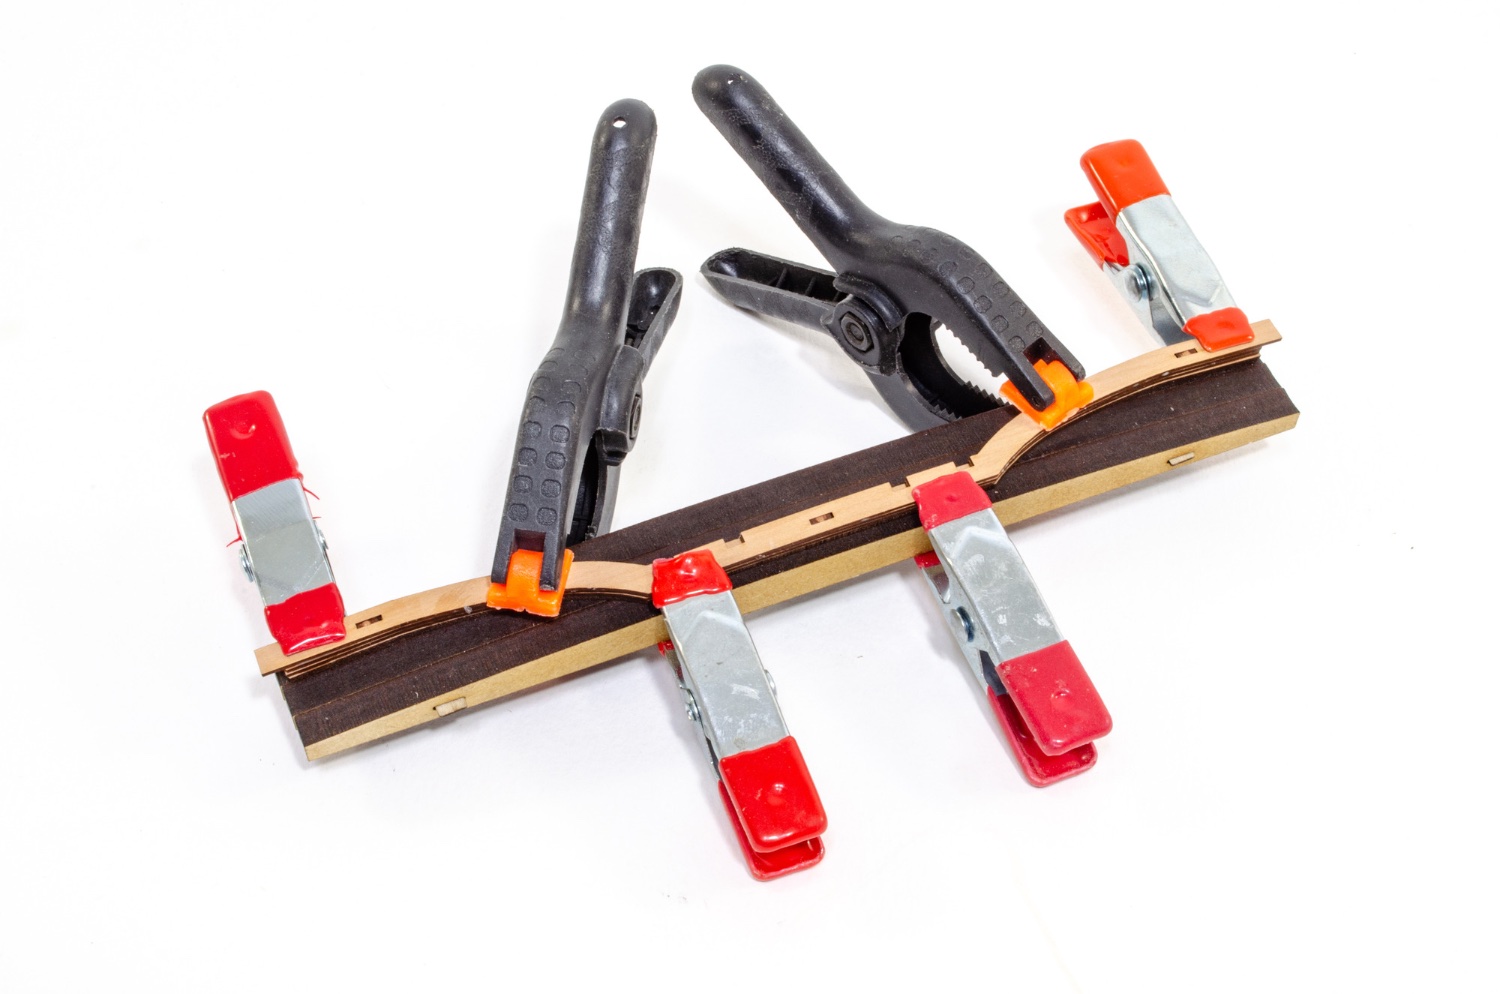
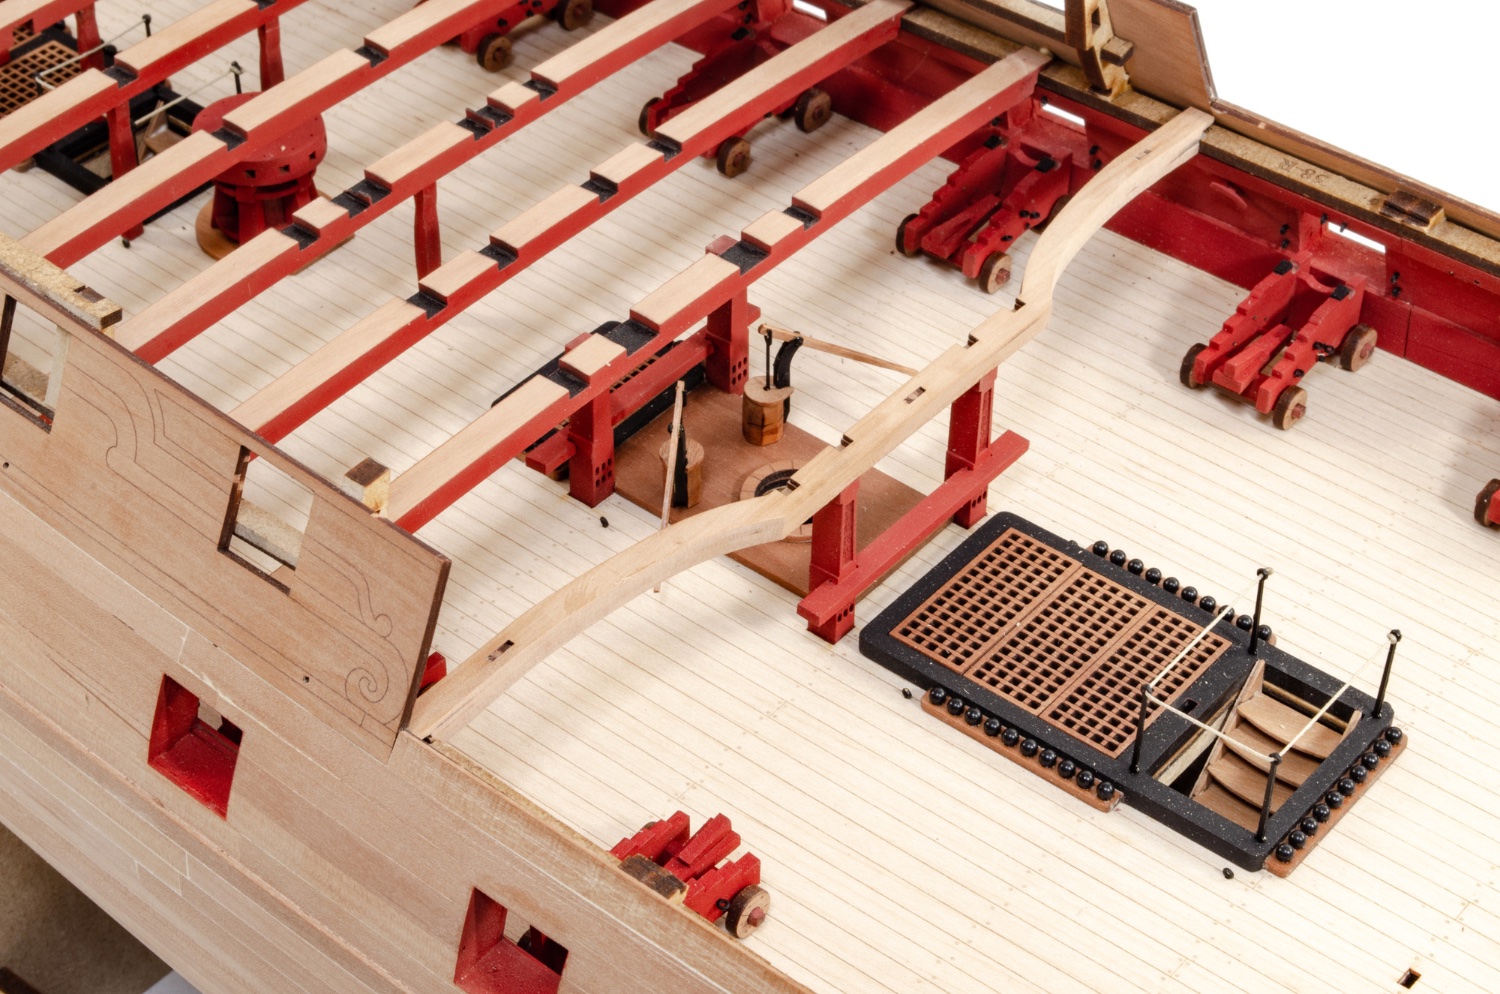
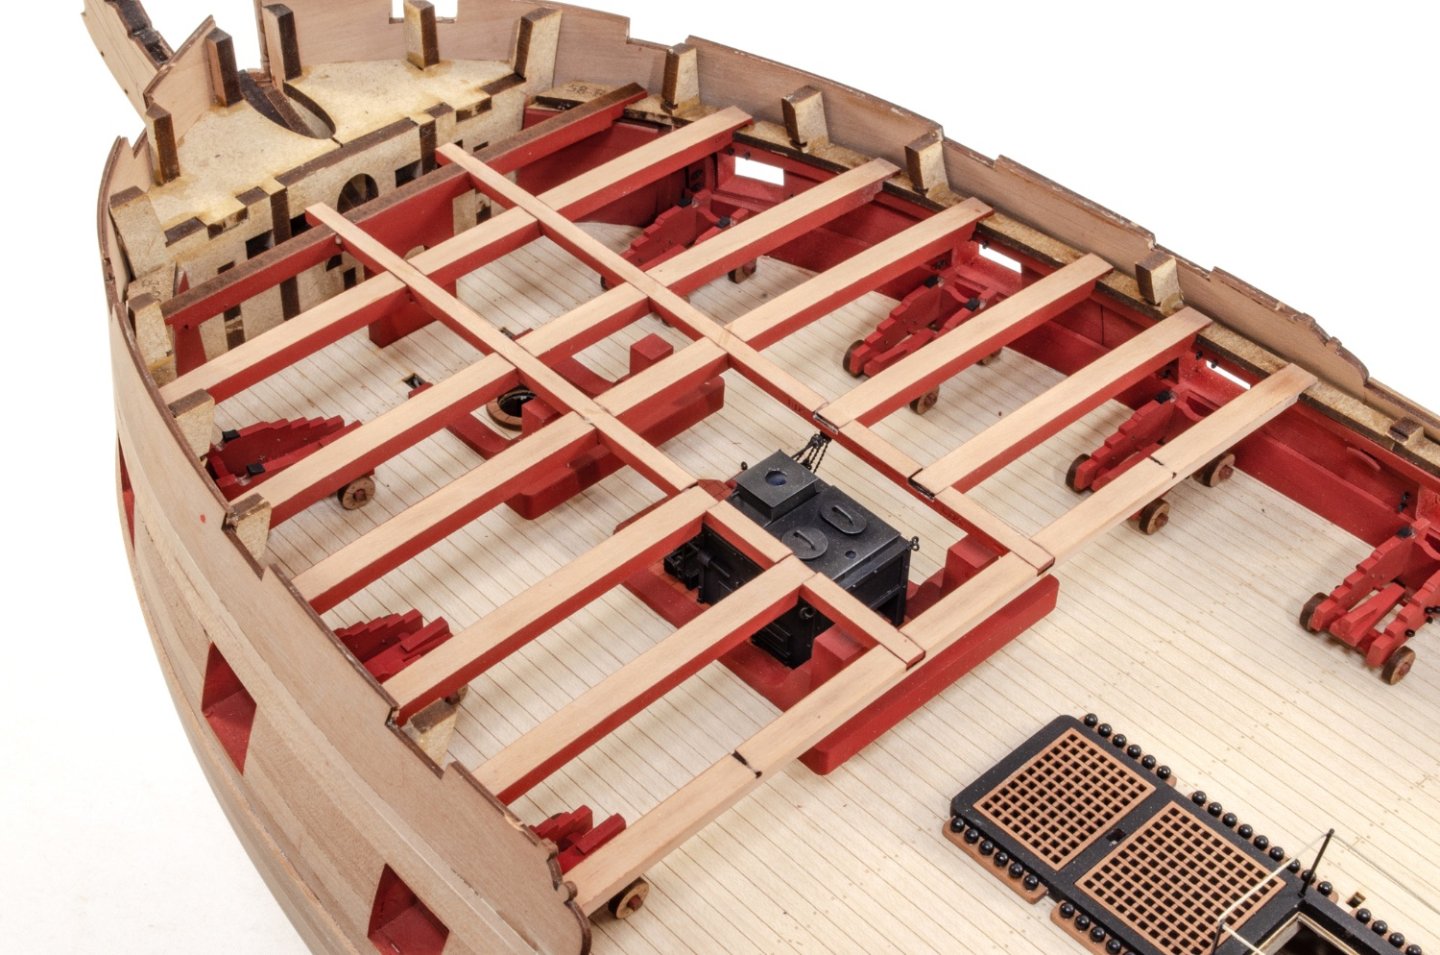
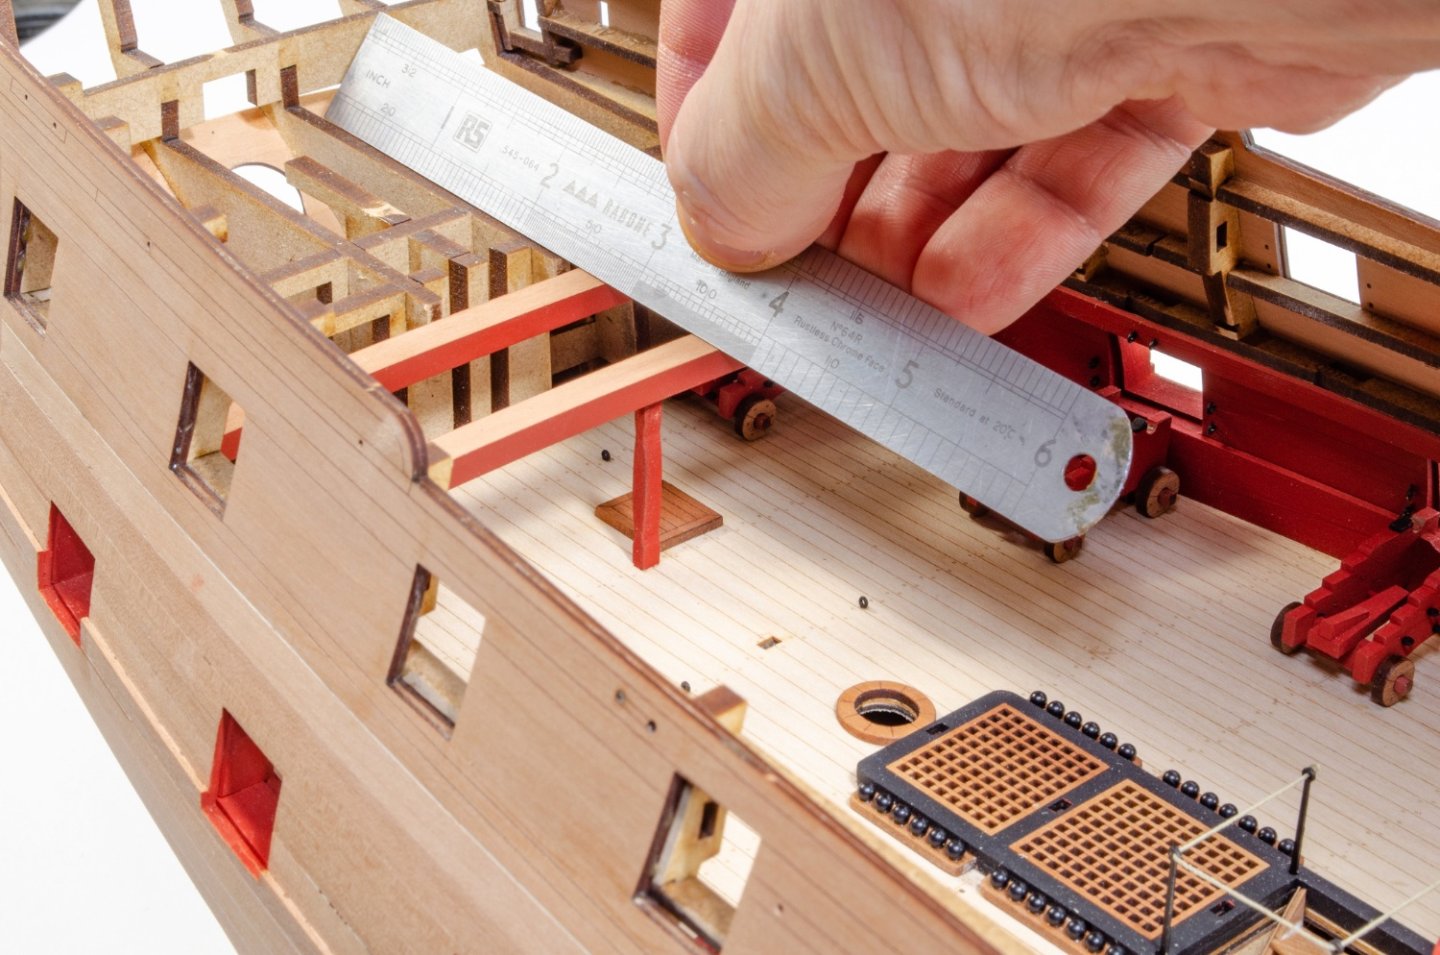
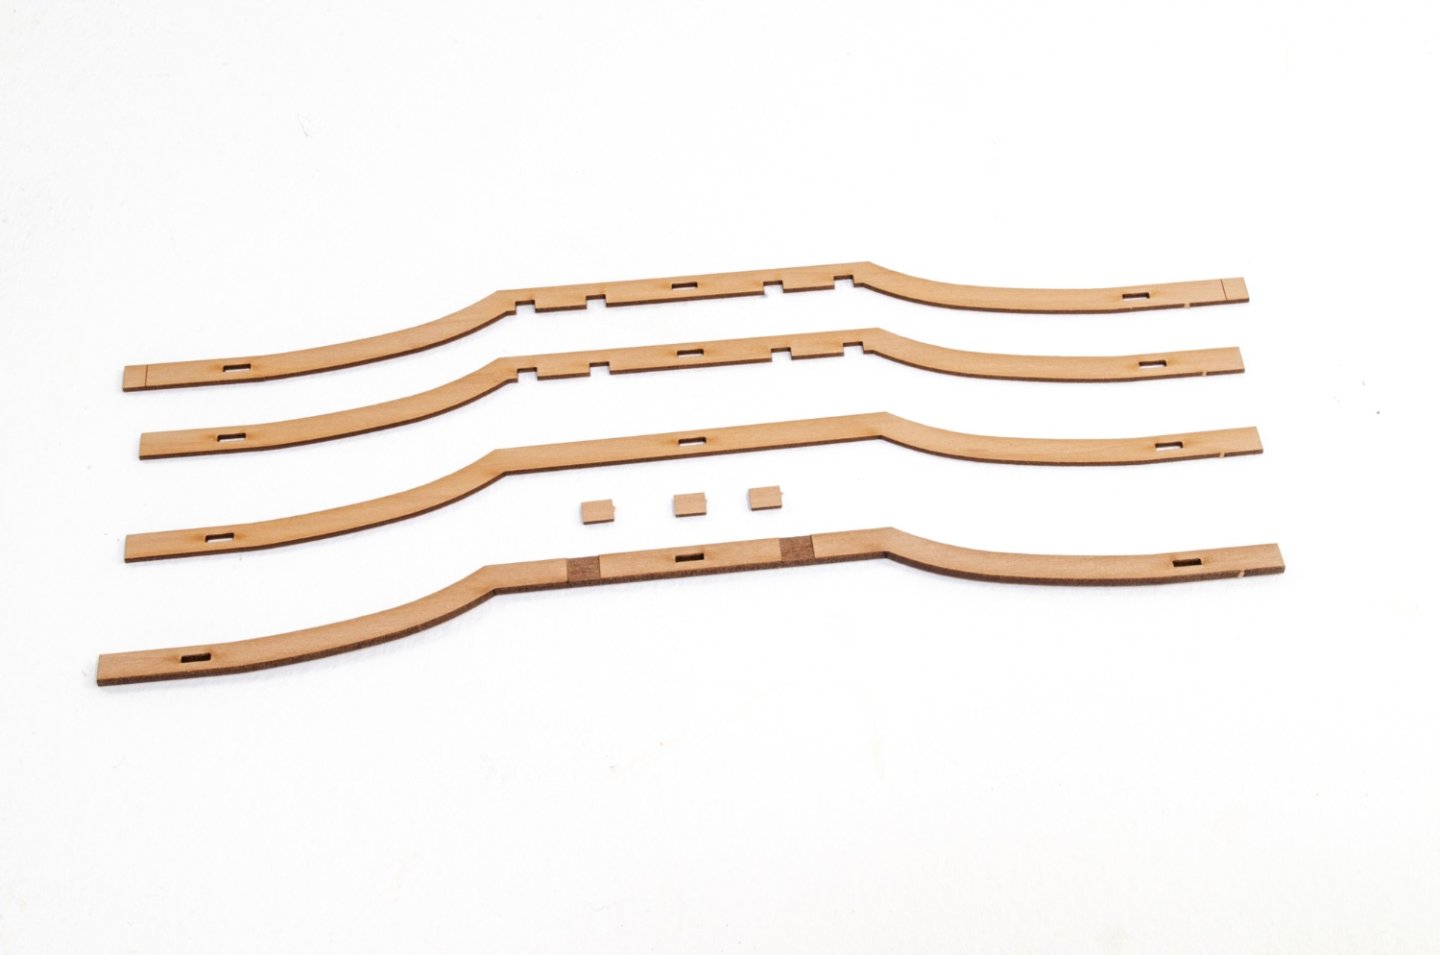
Time for another update. This was something I was looking forward to doing. Not covering up all that work I'd just done, but to turn a corner and be able to do it all again for the next layer in the Indy cake. Before I did that, I needed to add the scale-sized cannonballs to the shot garlands. These are done with liquid CA and some thin-ended paddle tweezers that won't knock the previous ball glued into place. And with that, it's onto the beams. As the upper side will have some timber showing through the deck cutouts, these were totally cleaned of char. The whole upper face was cleaned also because they look much better for the instruction photos. There are two lengths of pillar, depending on whether they sit on a deck or on a grate coaming. All deck beams were painted red, except for the upper side and all the slots. The beam ID is engraved on each beam and this ties in with the engraved number of the deck beam sill. The beams are now slotted and glued into position. Those beams that are supported are continually test fitted with a pillar before being finally glued. Also important to make sure the pillar doesn't push the beam higher than was intended. A steel rule checks this as I go. The forward beam for the quarterdeck is not only shaped in profile, but also curved across its length. To create this, the beam is made from laminated pear parts, glued together over a jig. When this is dry, the part is cleaned up and fitted into place, sitting atop two of the bitts.


- 488 replies
-
- 31
-
-
-
- Indefatigable
- Vanguard Models
- (and 1 more)
-
I've always wanted a really long wait of tweezers with precision tip, and reverse grip too. These would be for belaying, and I reckon about 8 inches long. I really do need to look for some.
- 476 replies
-
- 4
-
-
- sphinx
- vanguard models
- (and 1 more)
-
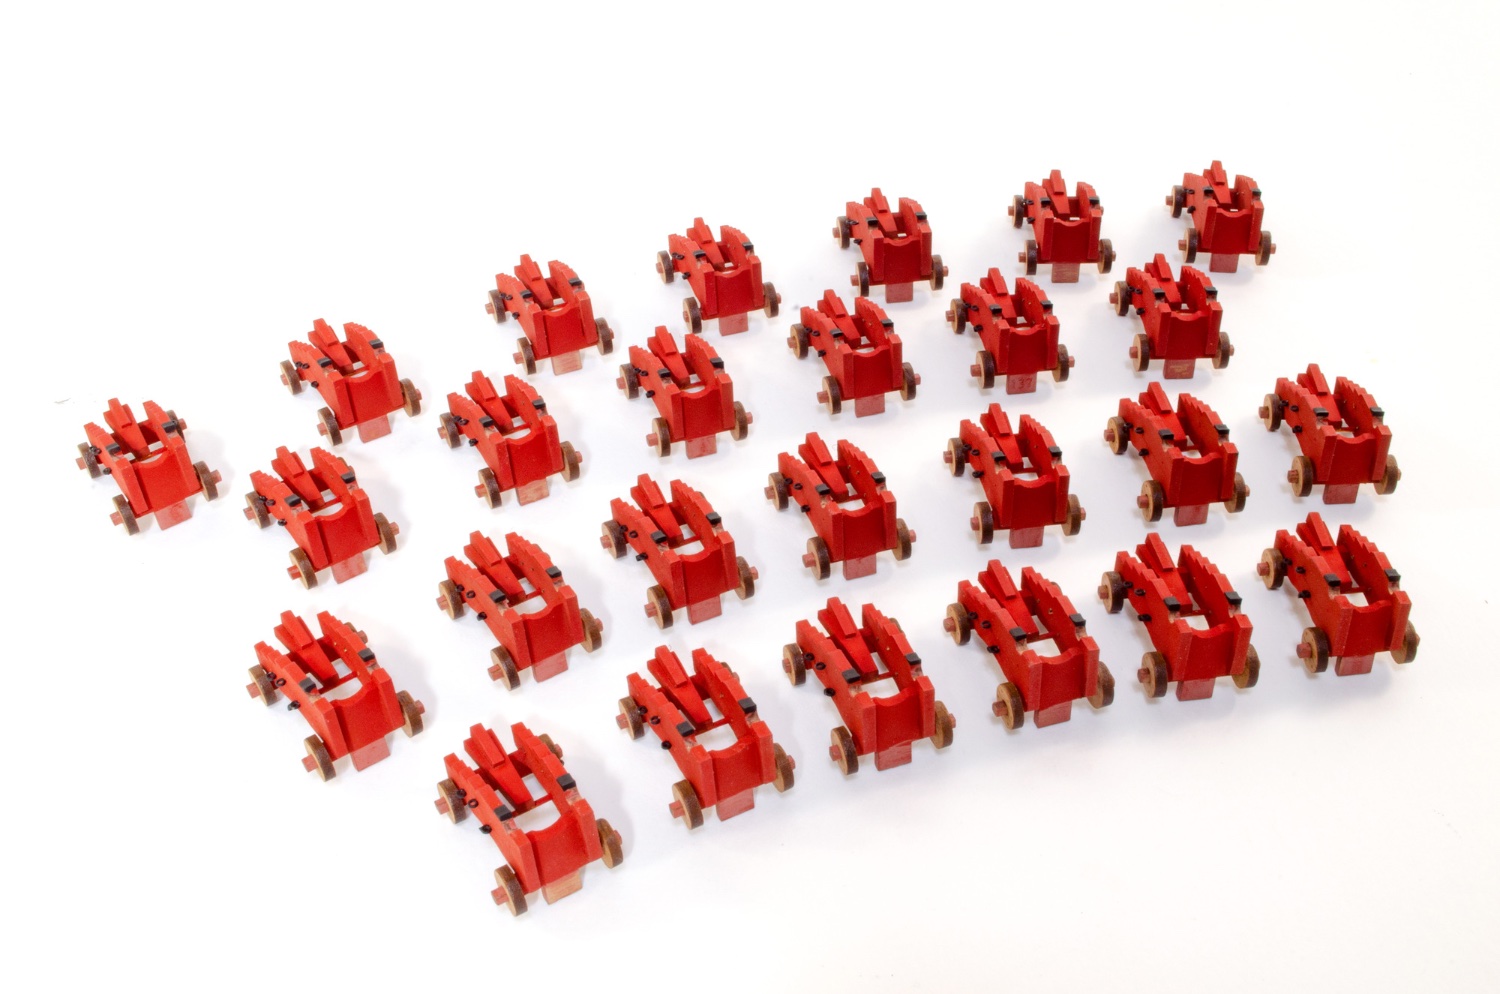
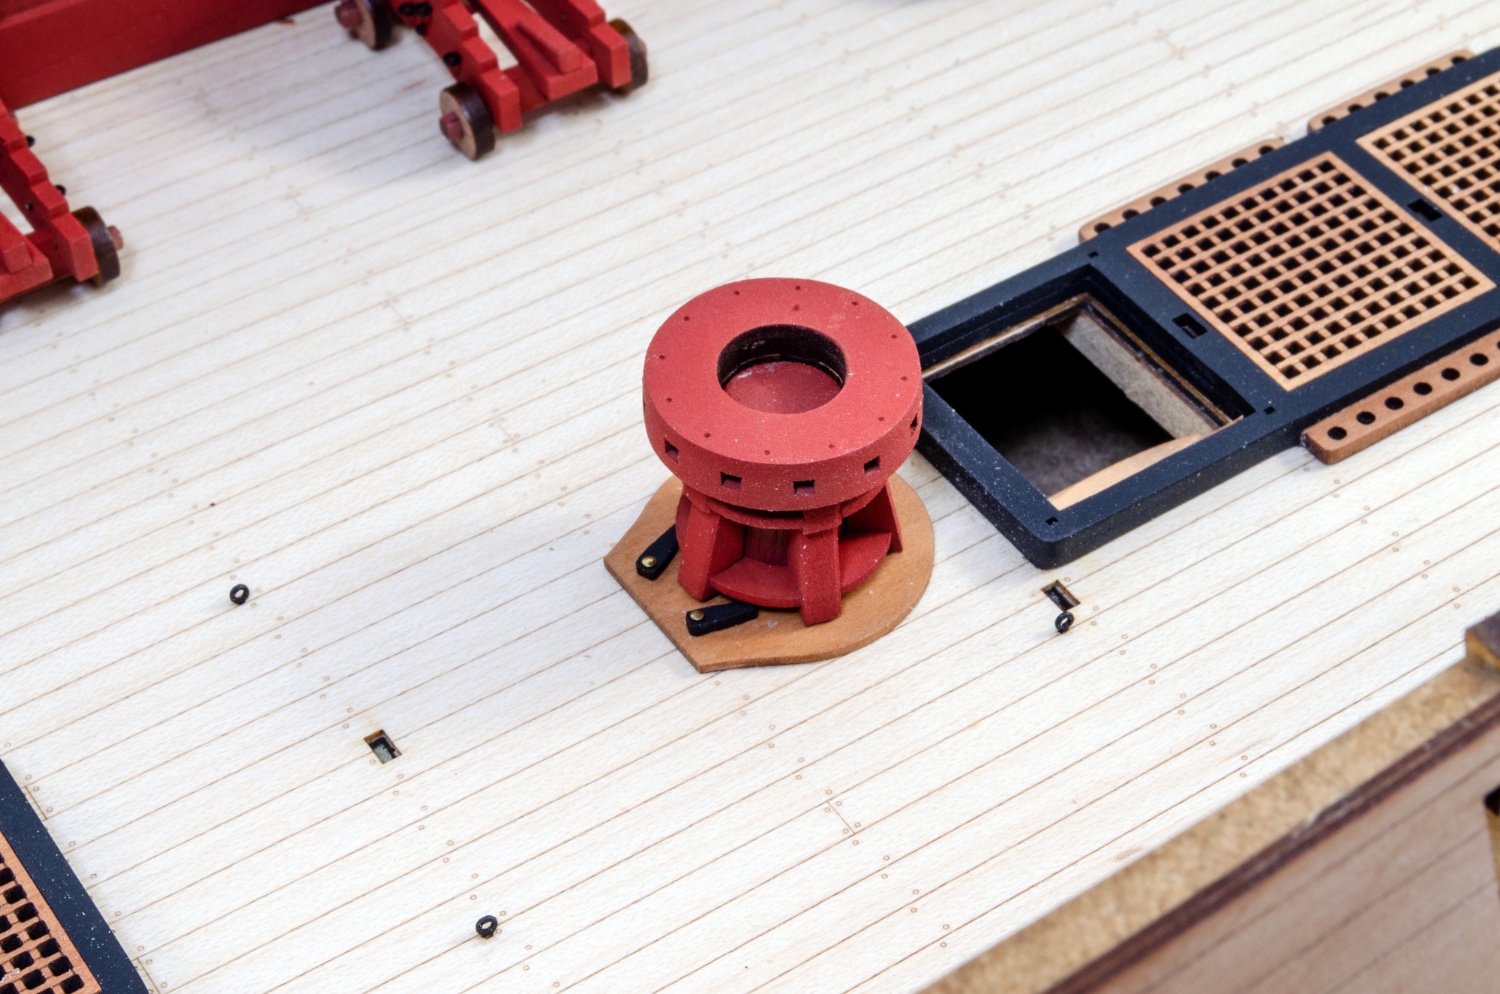
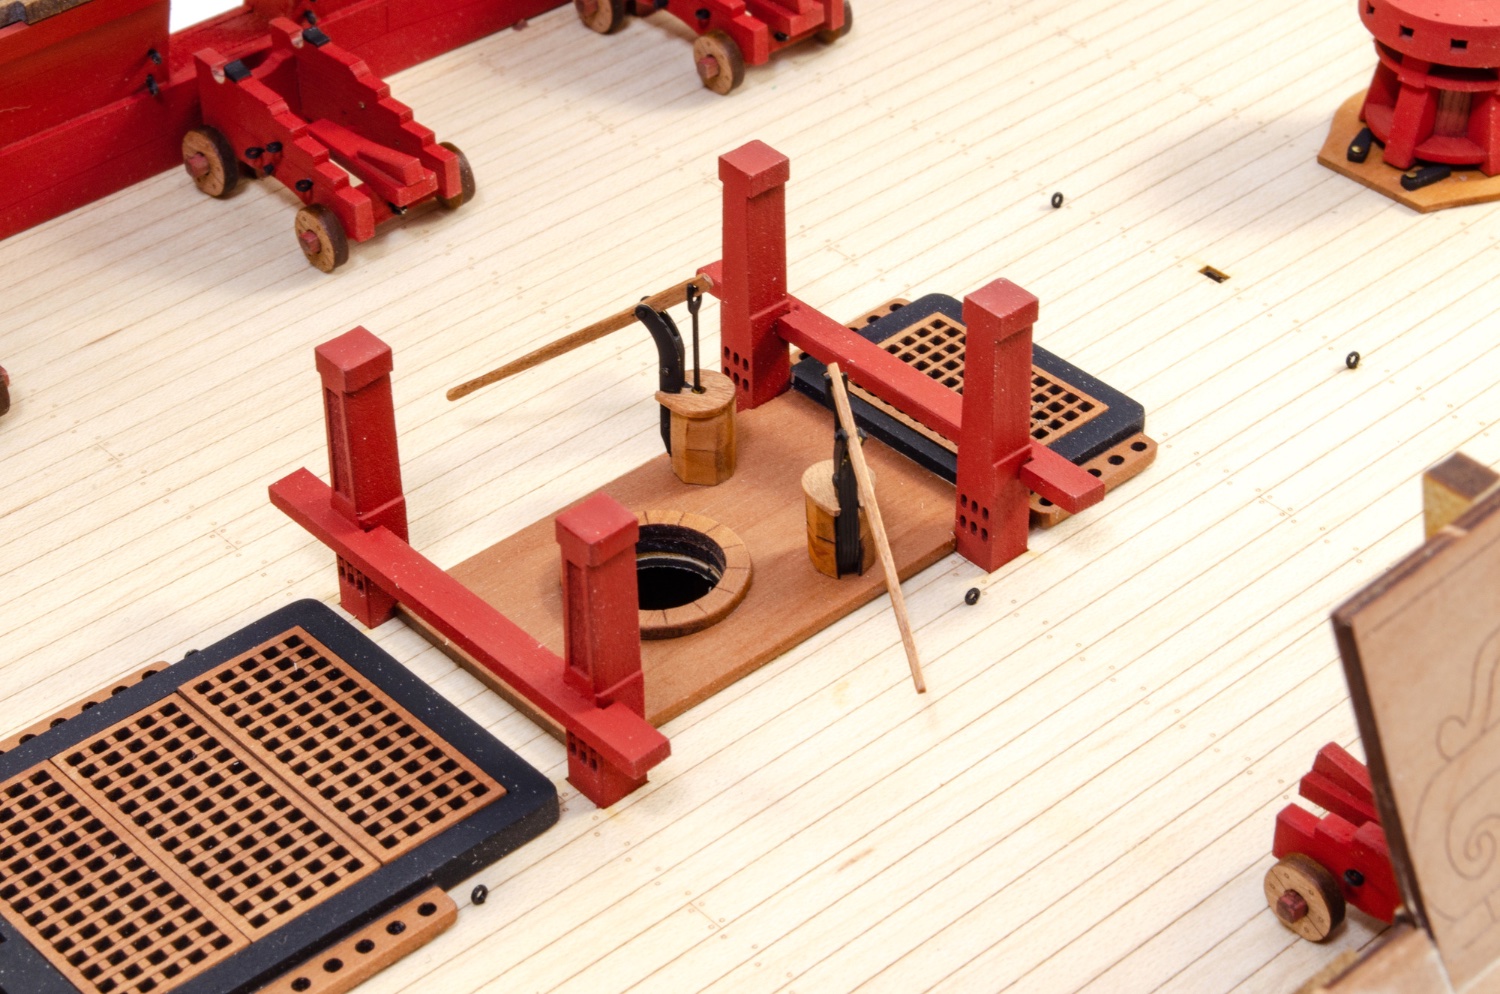
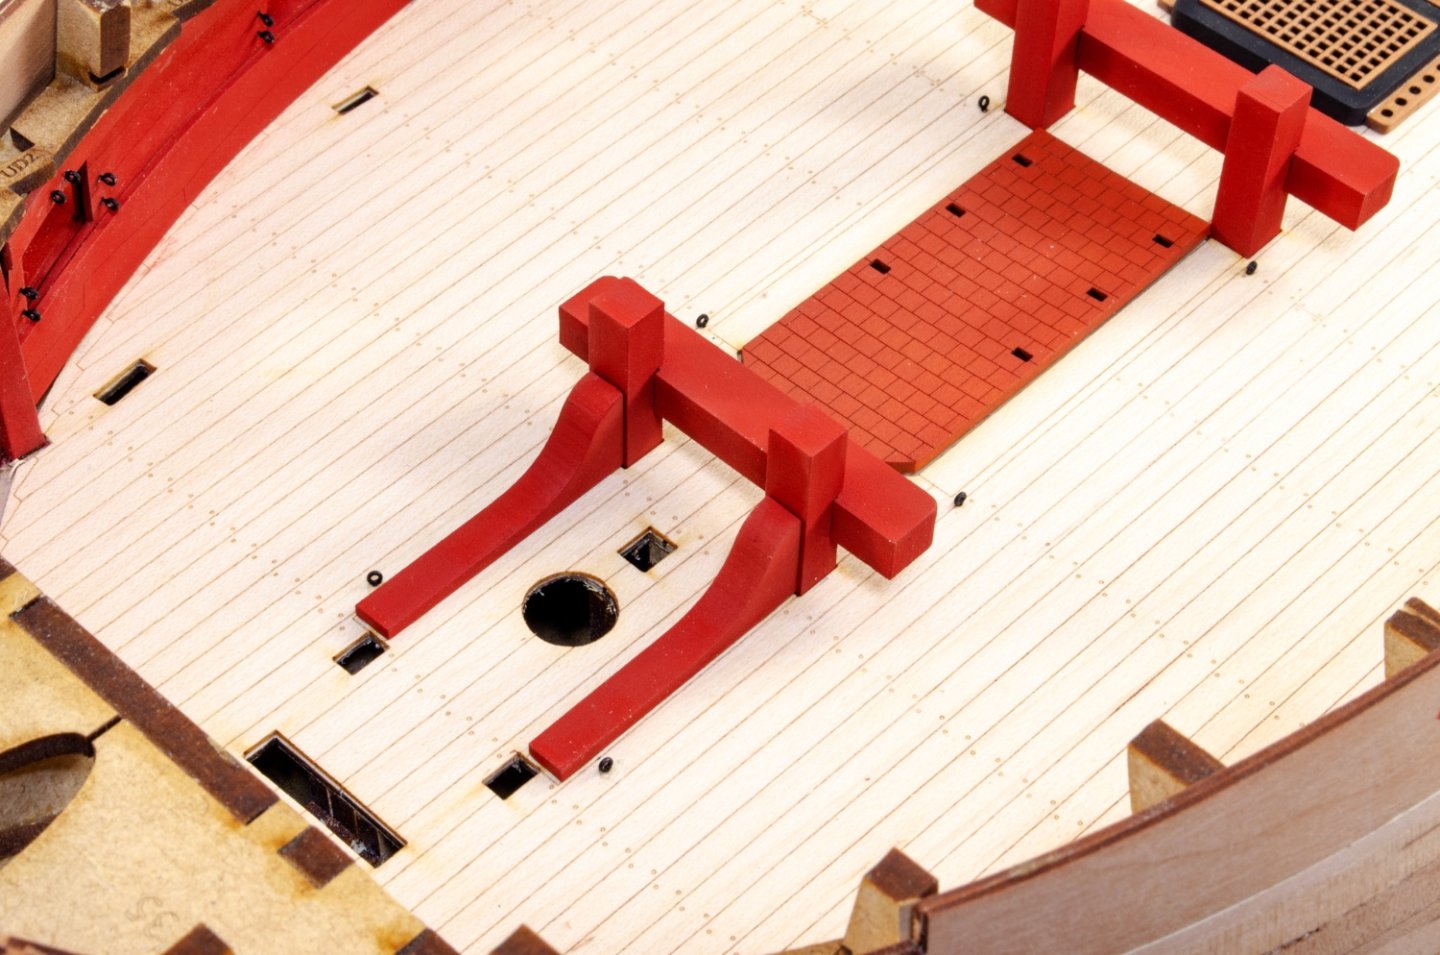
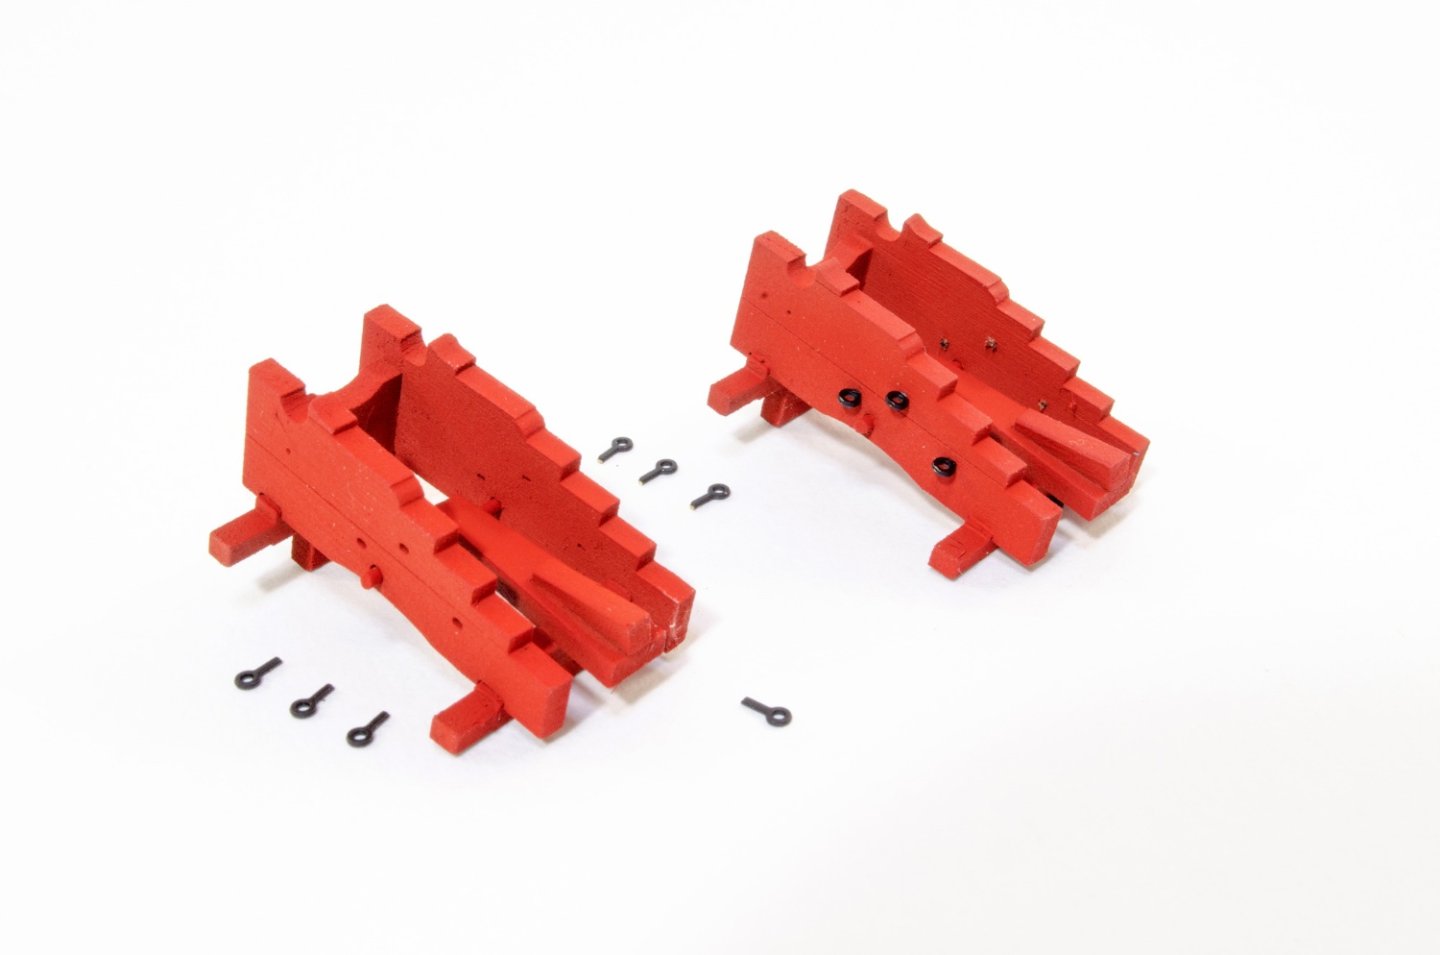
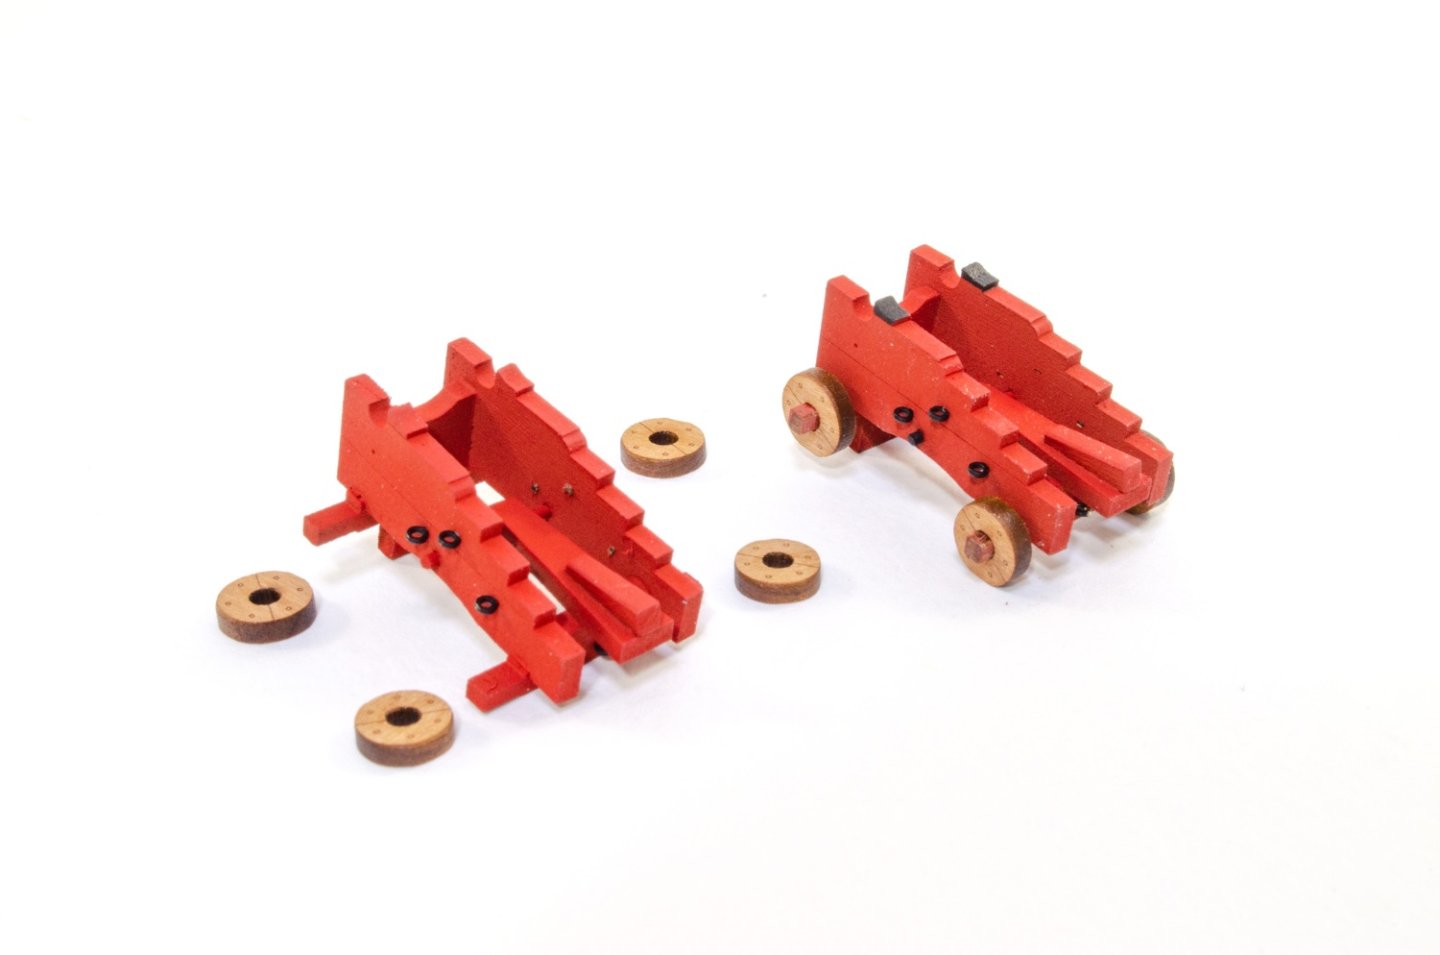
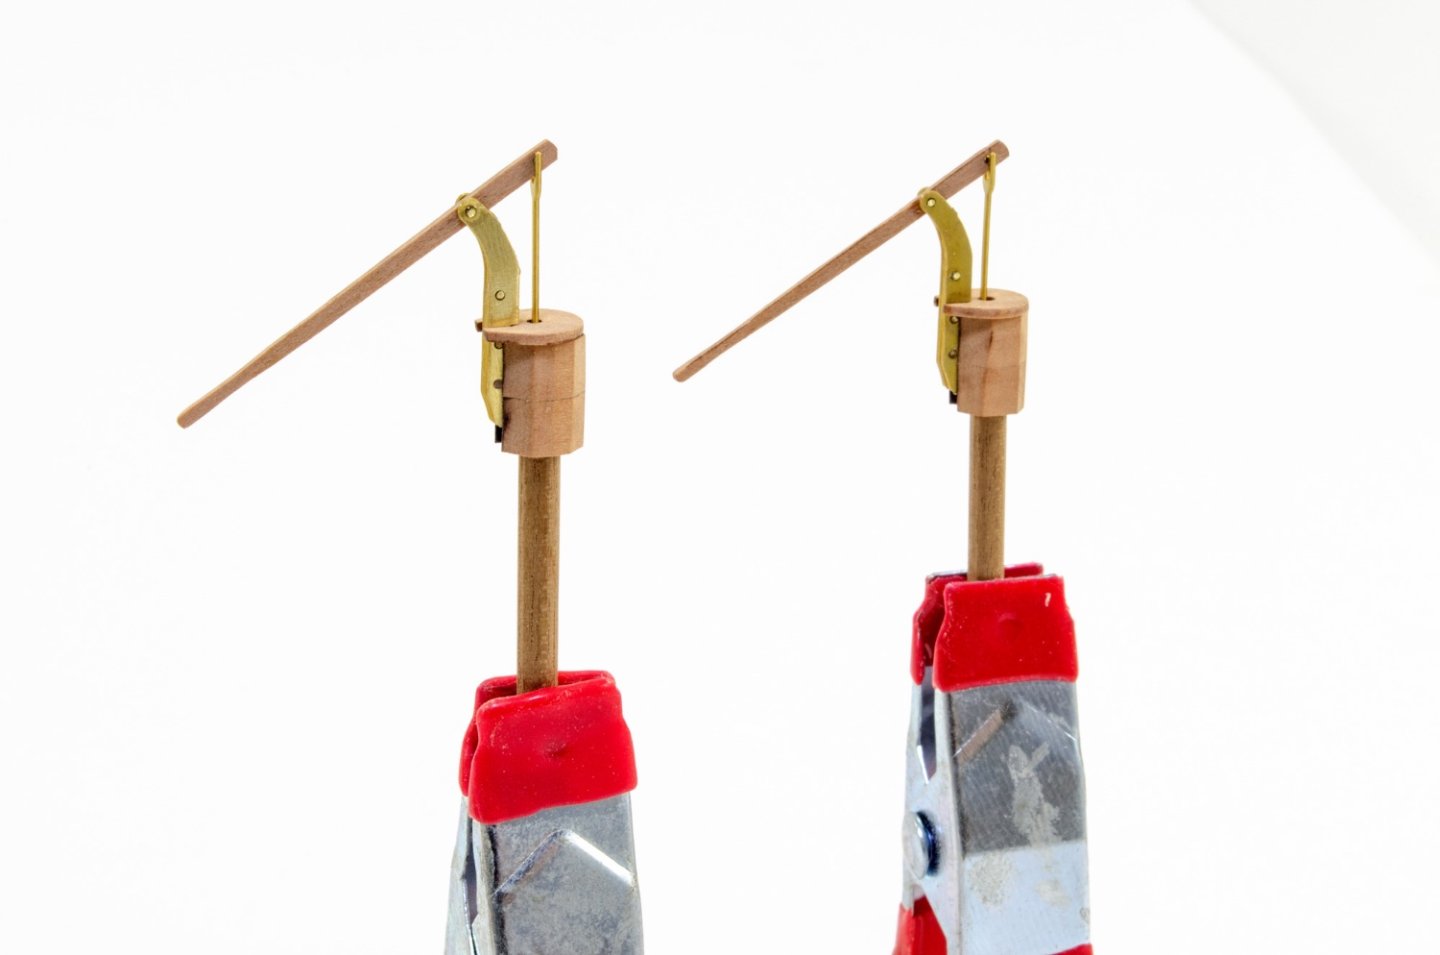
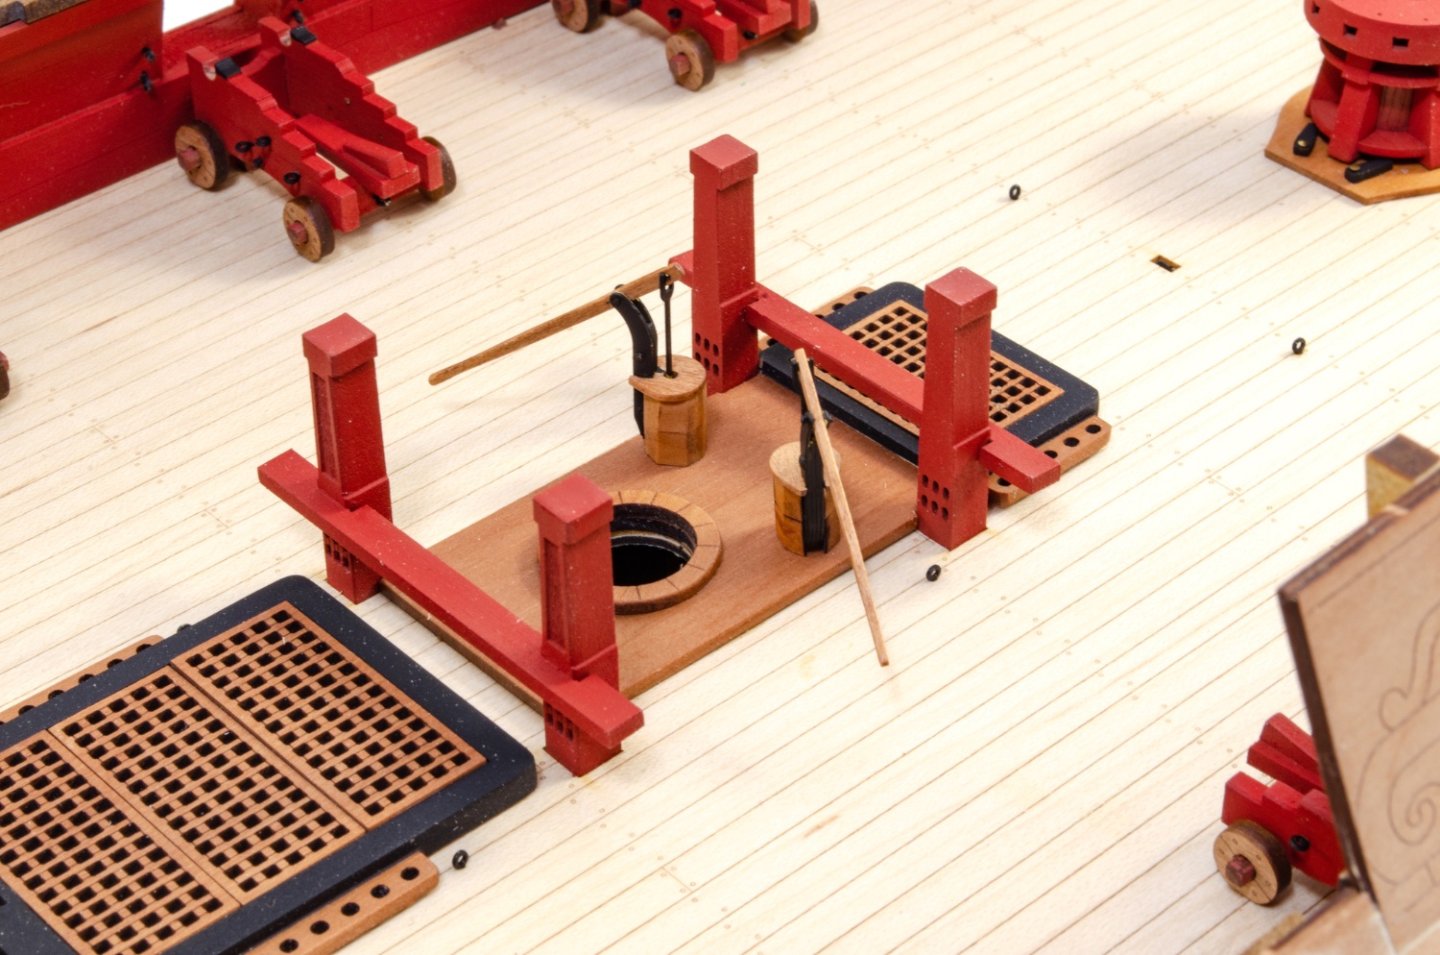
And more... Knees(?) now added, as well as a painted brick floor for the stove. And the gun carts now have some colour applied to them, as well as ironwork and wheels. Remember, these won't be fitted with barrels until the model is more or less complete. Capstan finally done. As are the hand pumps. No one wants to walk down stairs without a safety rope around them! And the stove makes an appearance. And this is Indy up to date. Back in the shipyard tomorrow


- 488 replies
-
- 48
-
-
-
- Indefatigable
- Vanguard Models
- (and 1 more)
-
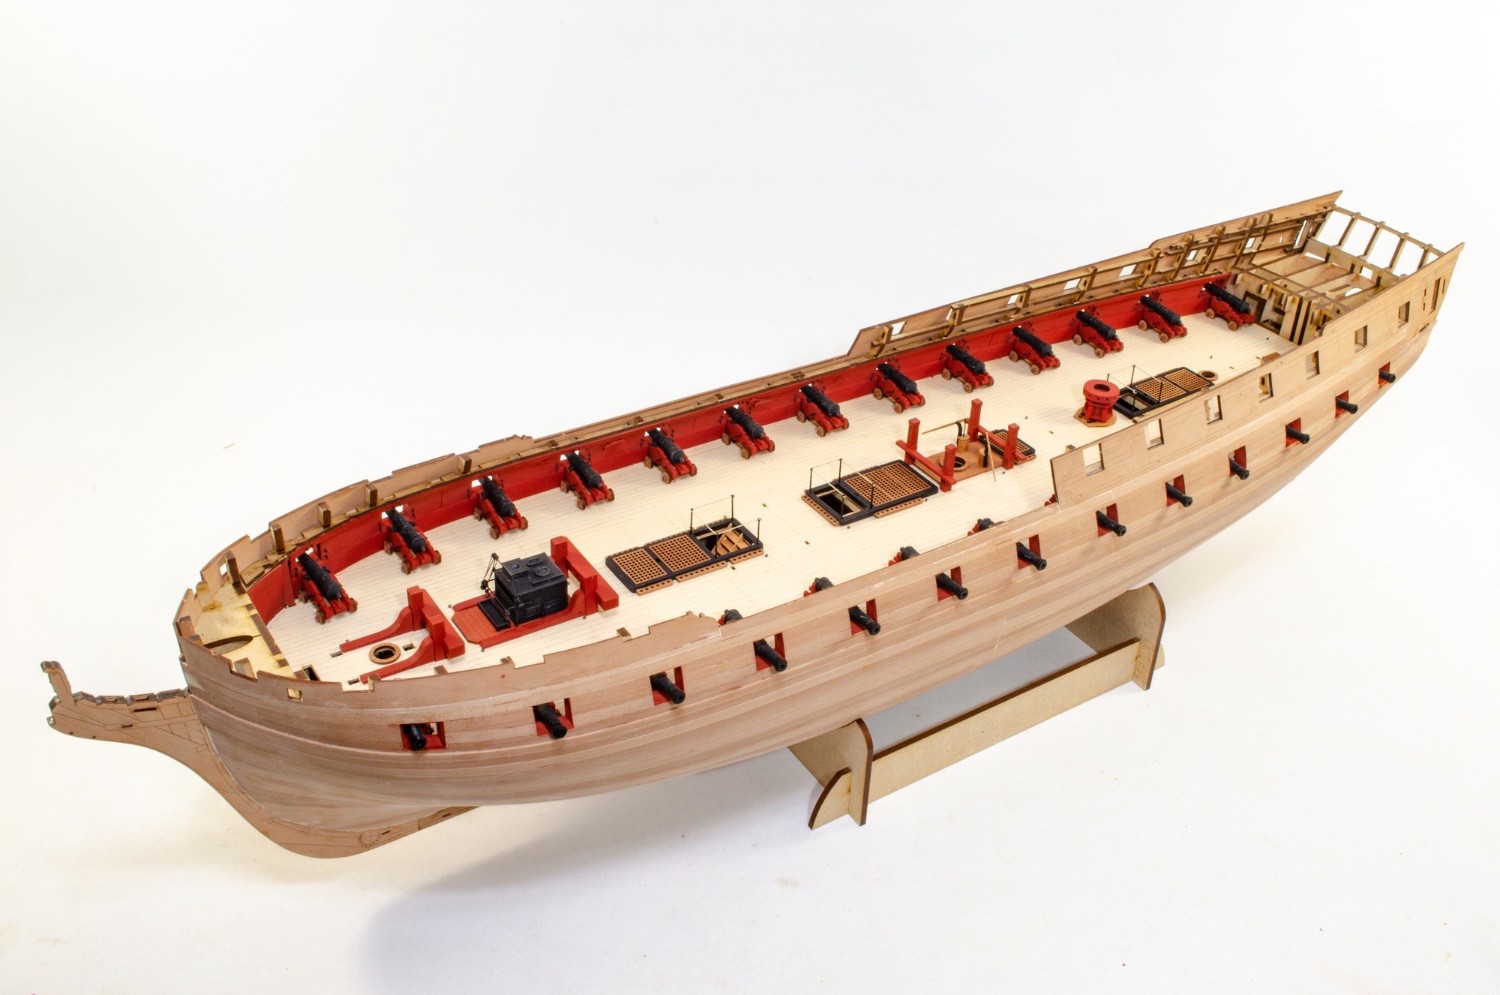
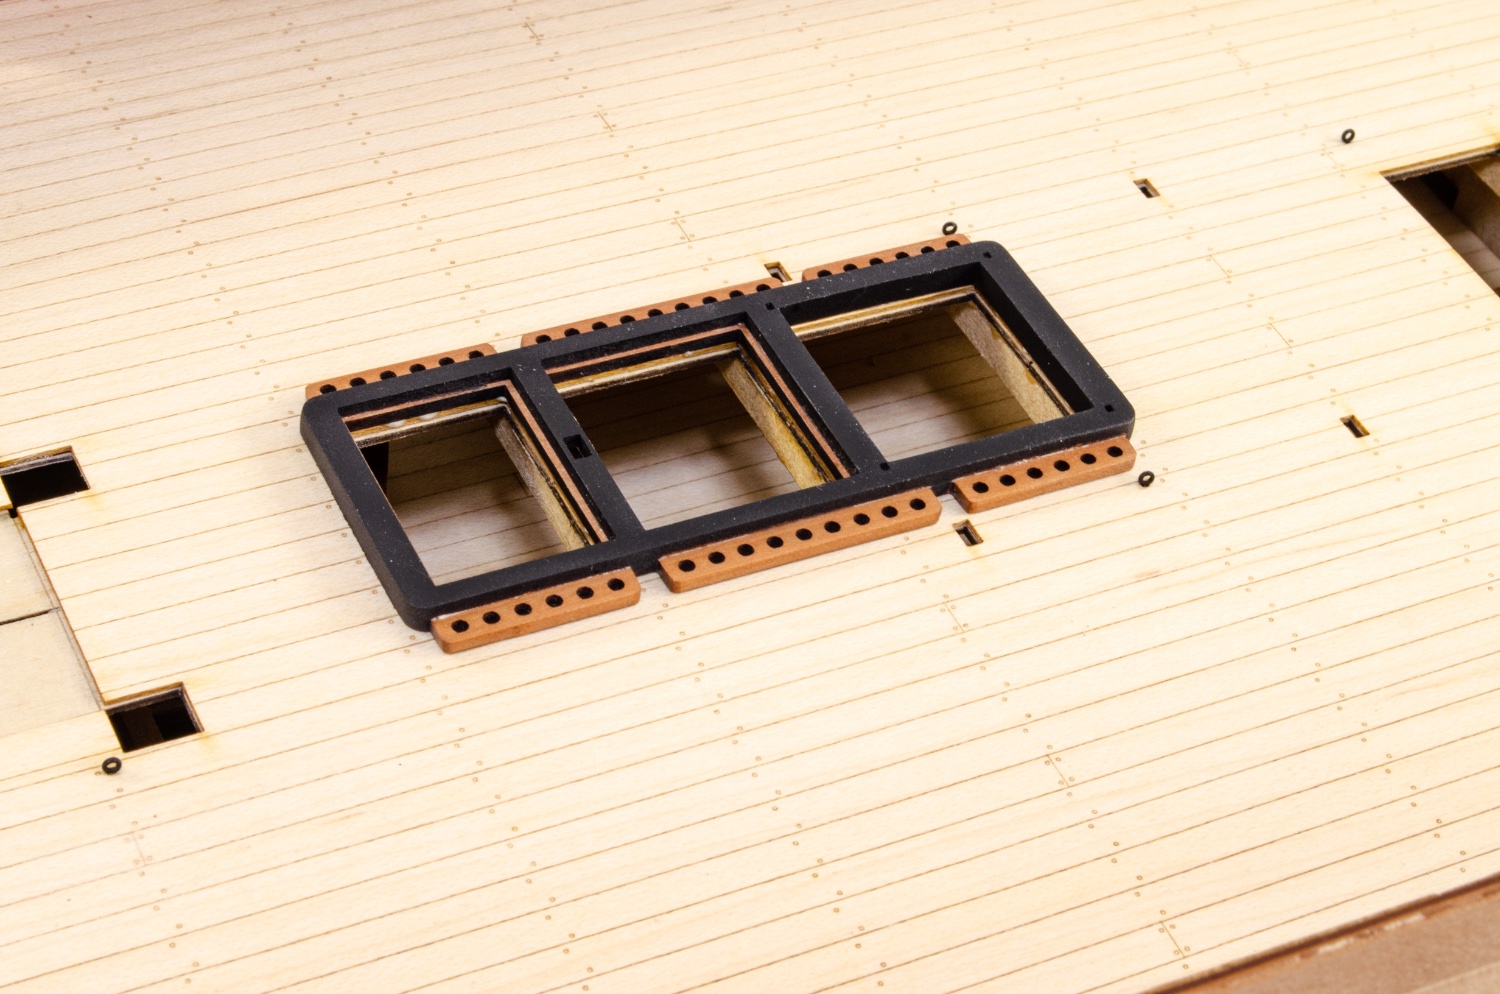
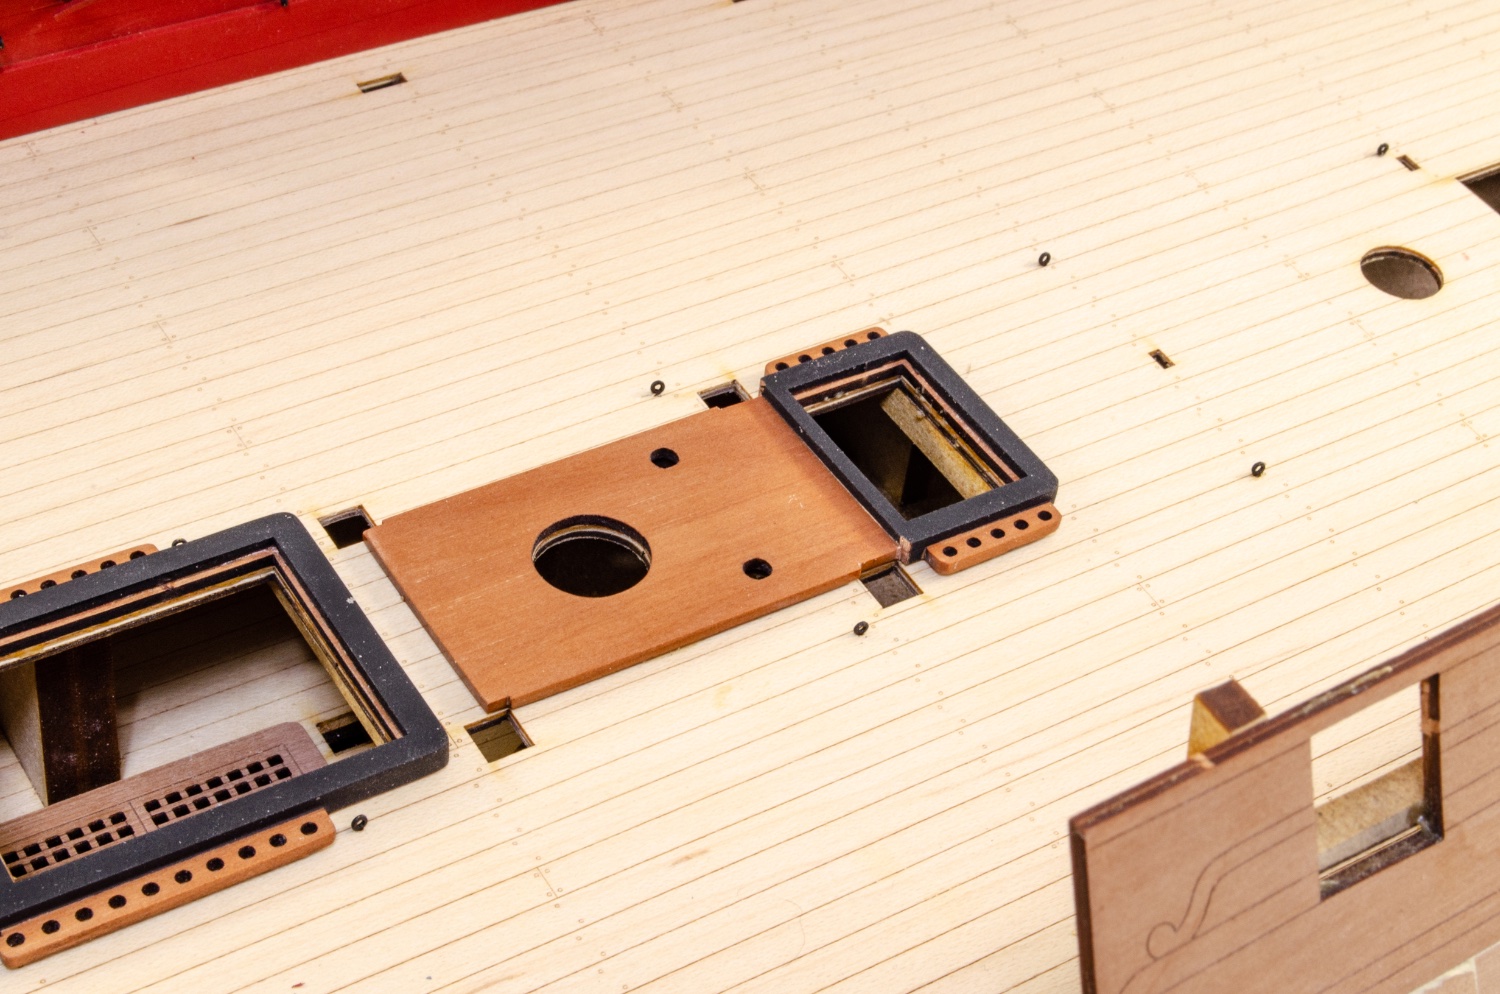
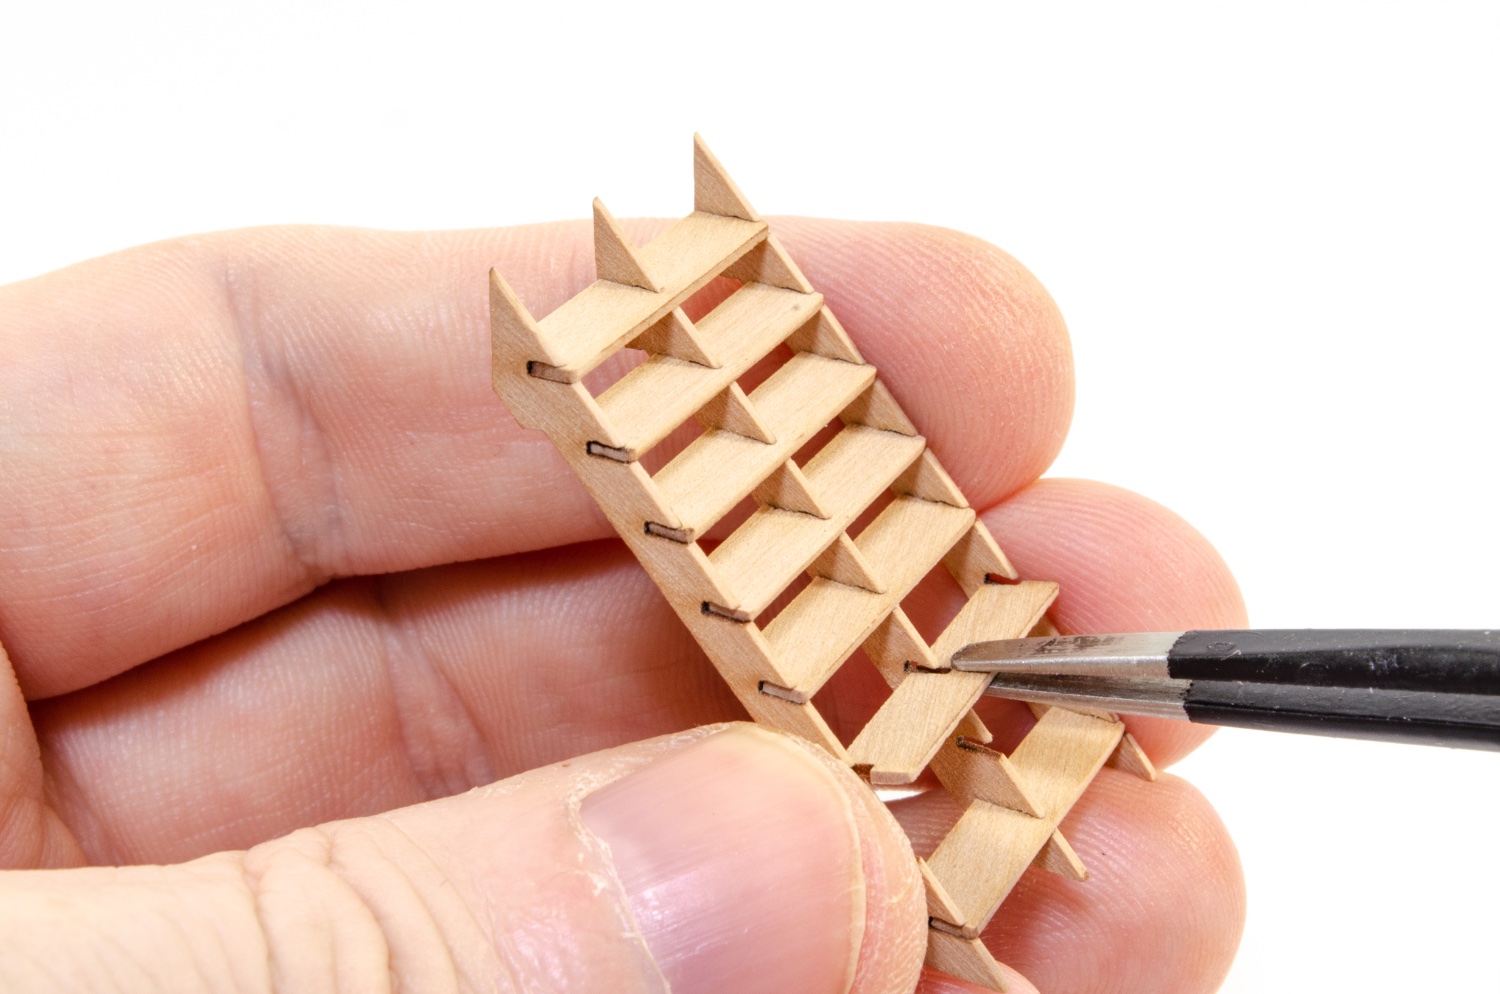
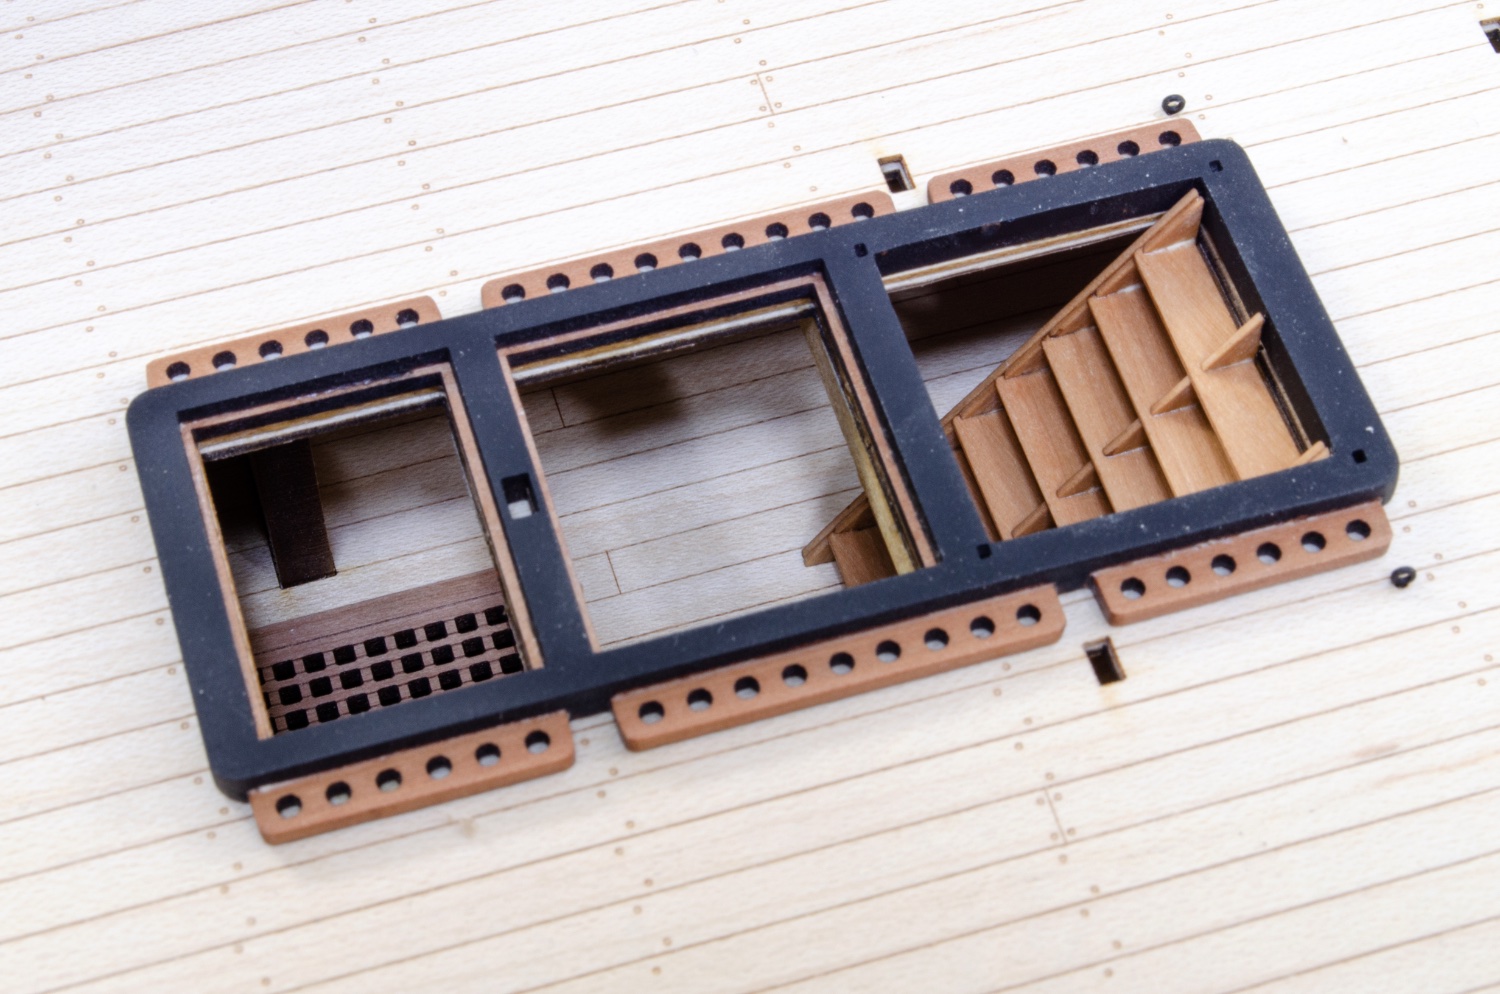
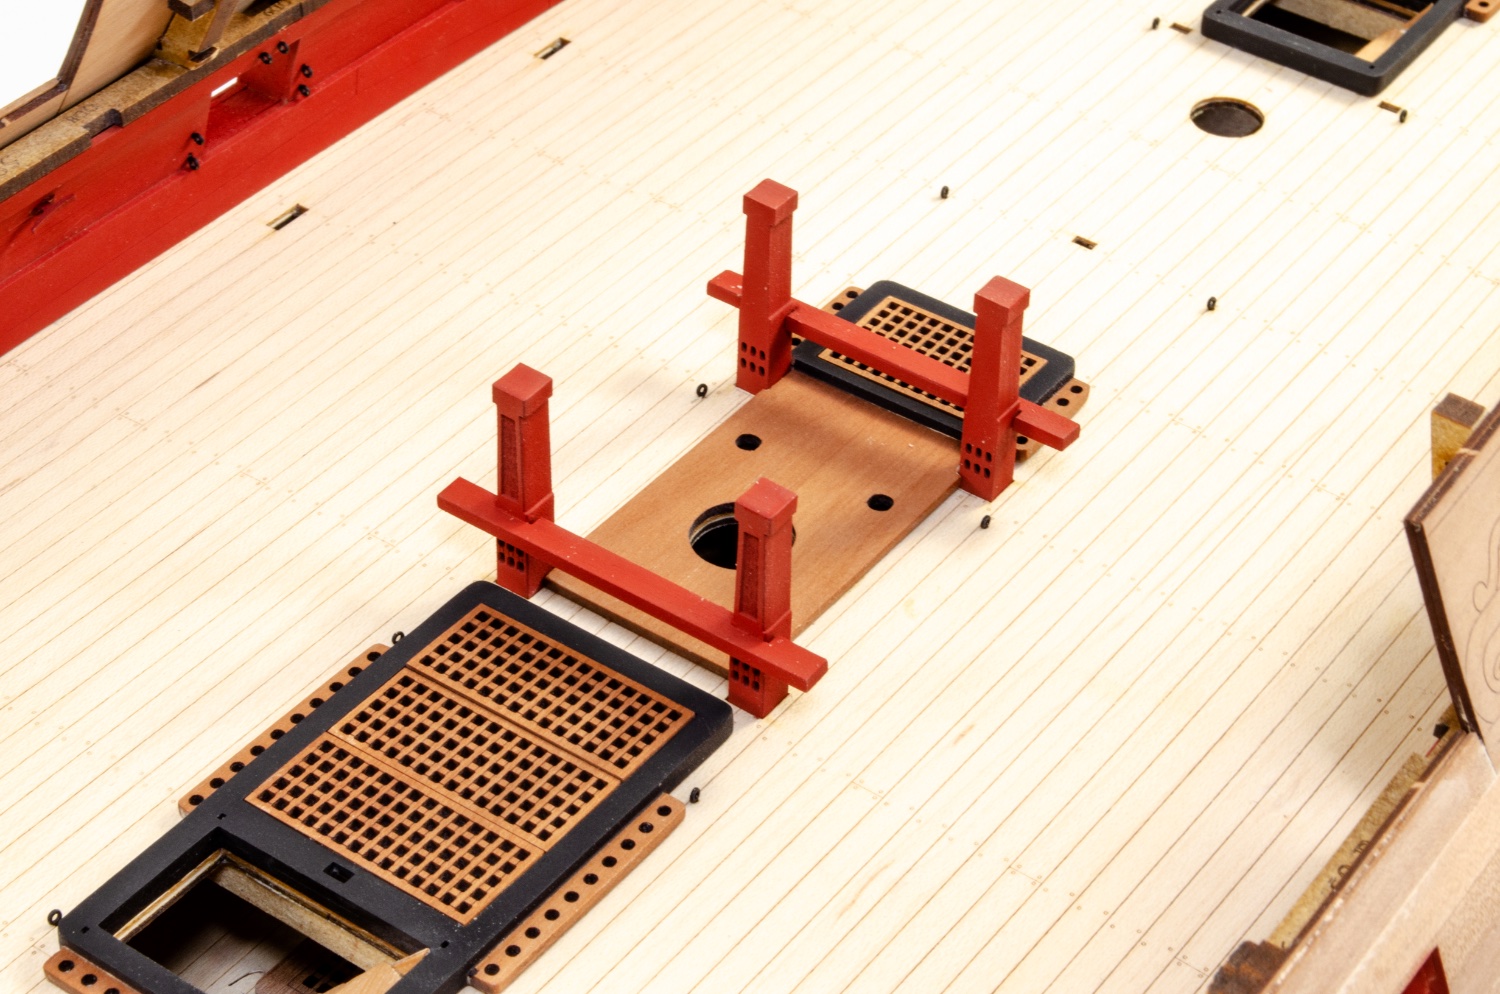
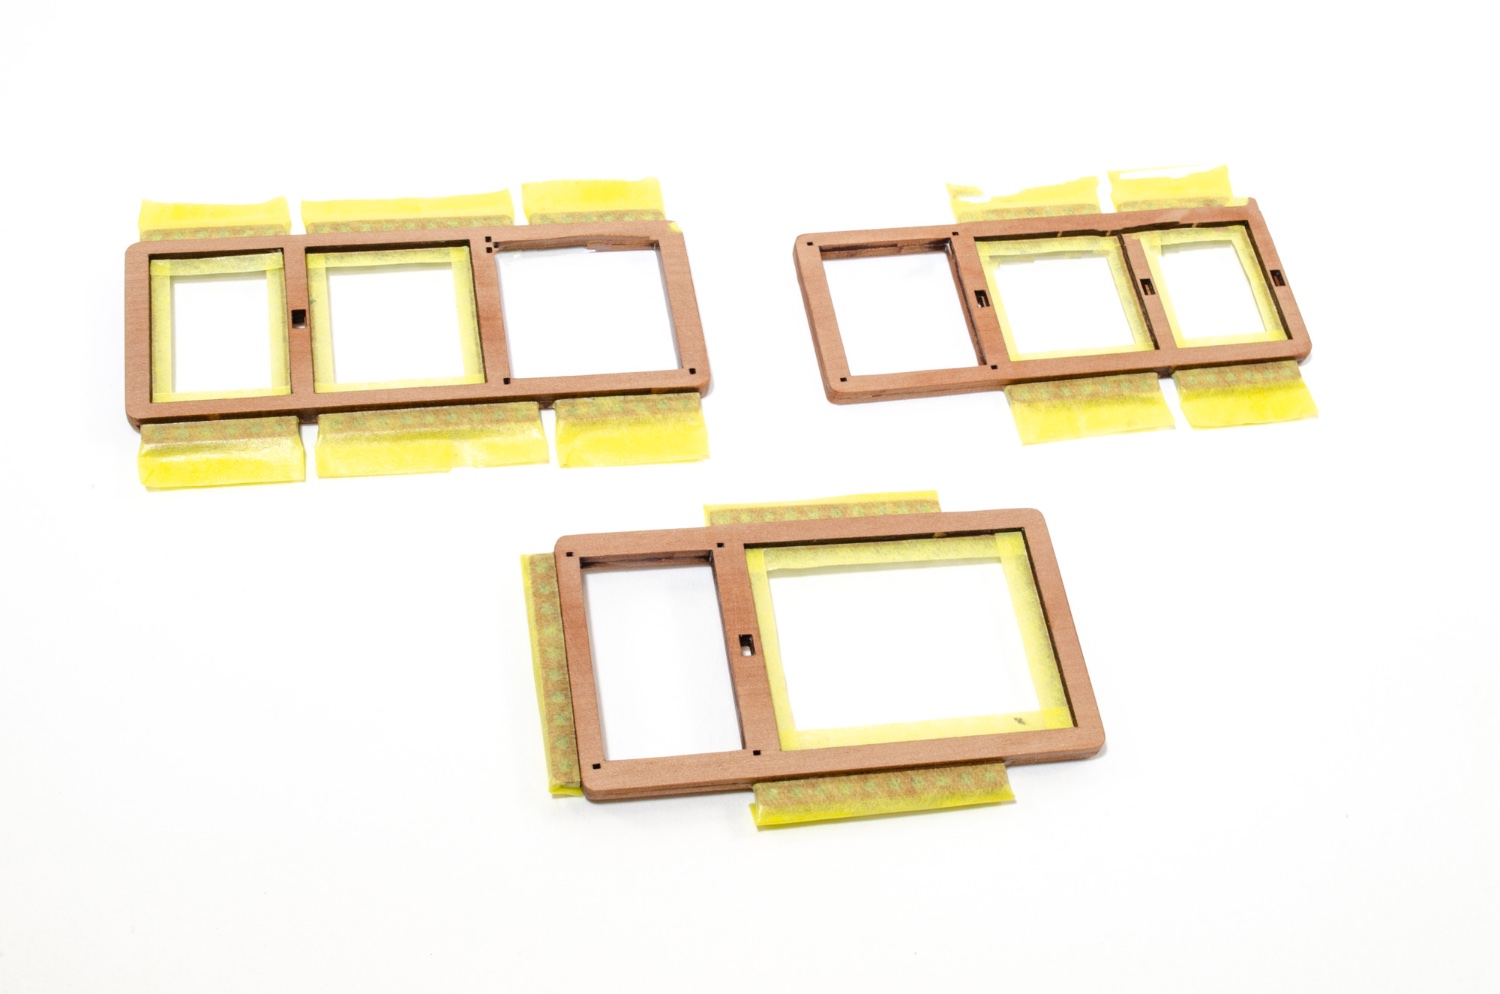
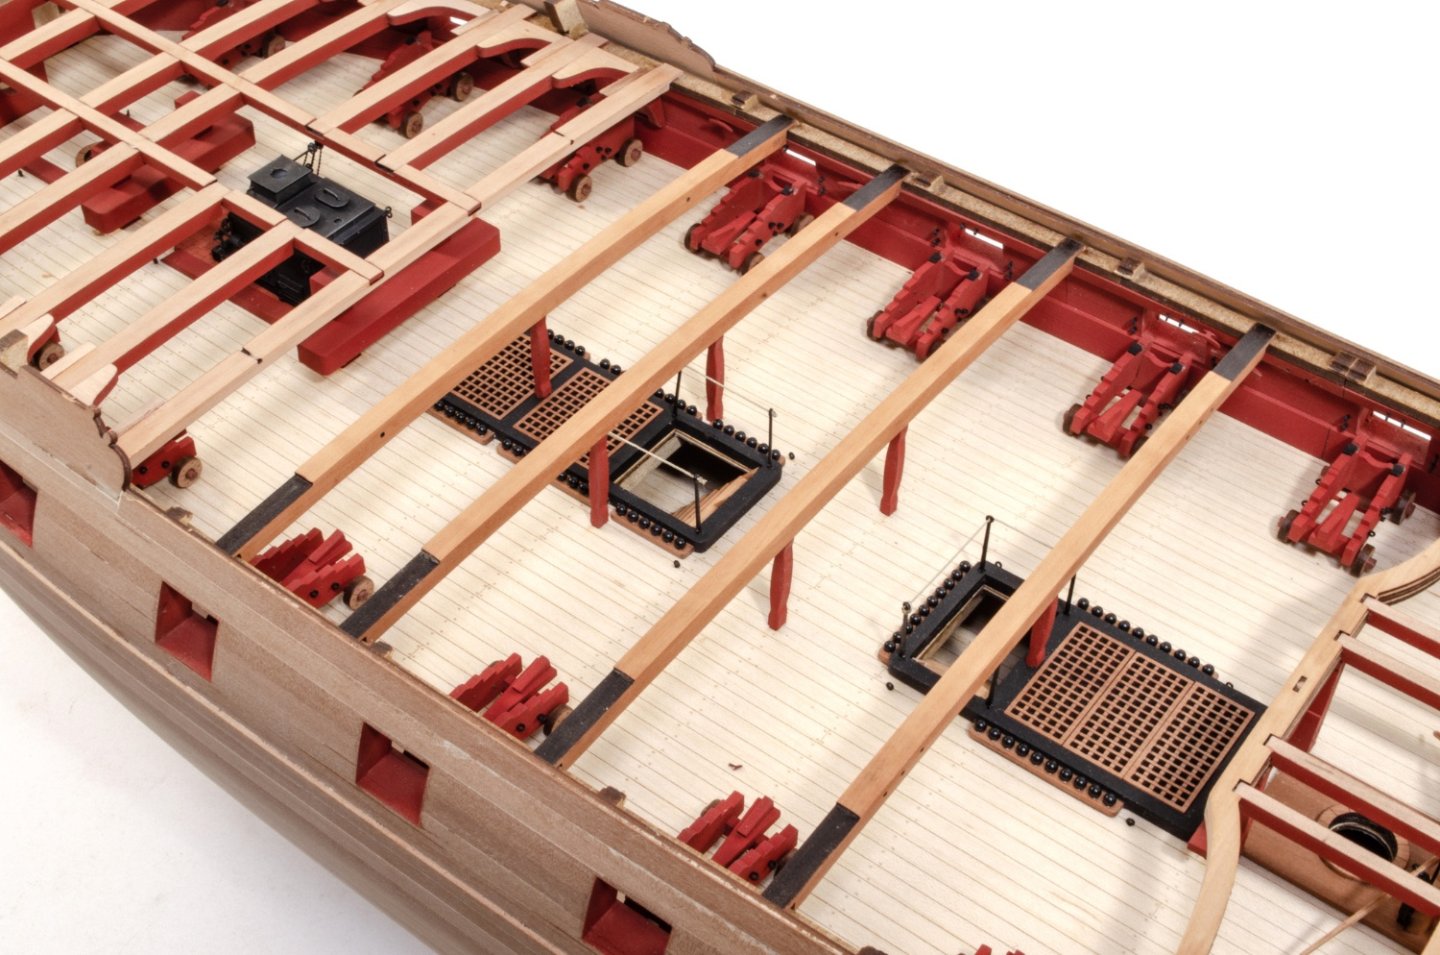
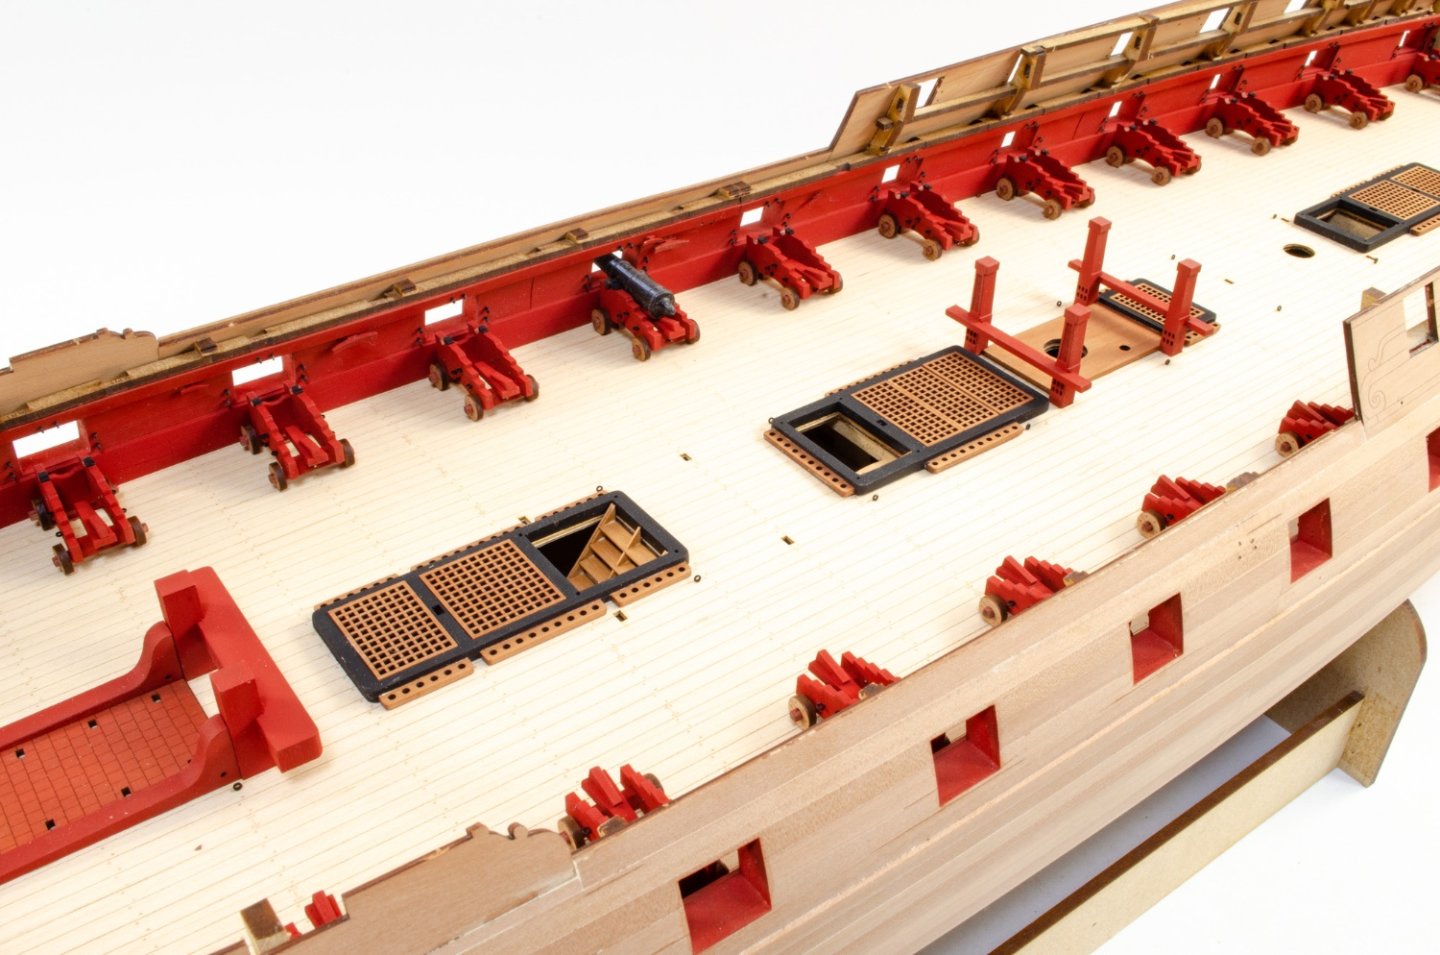
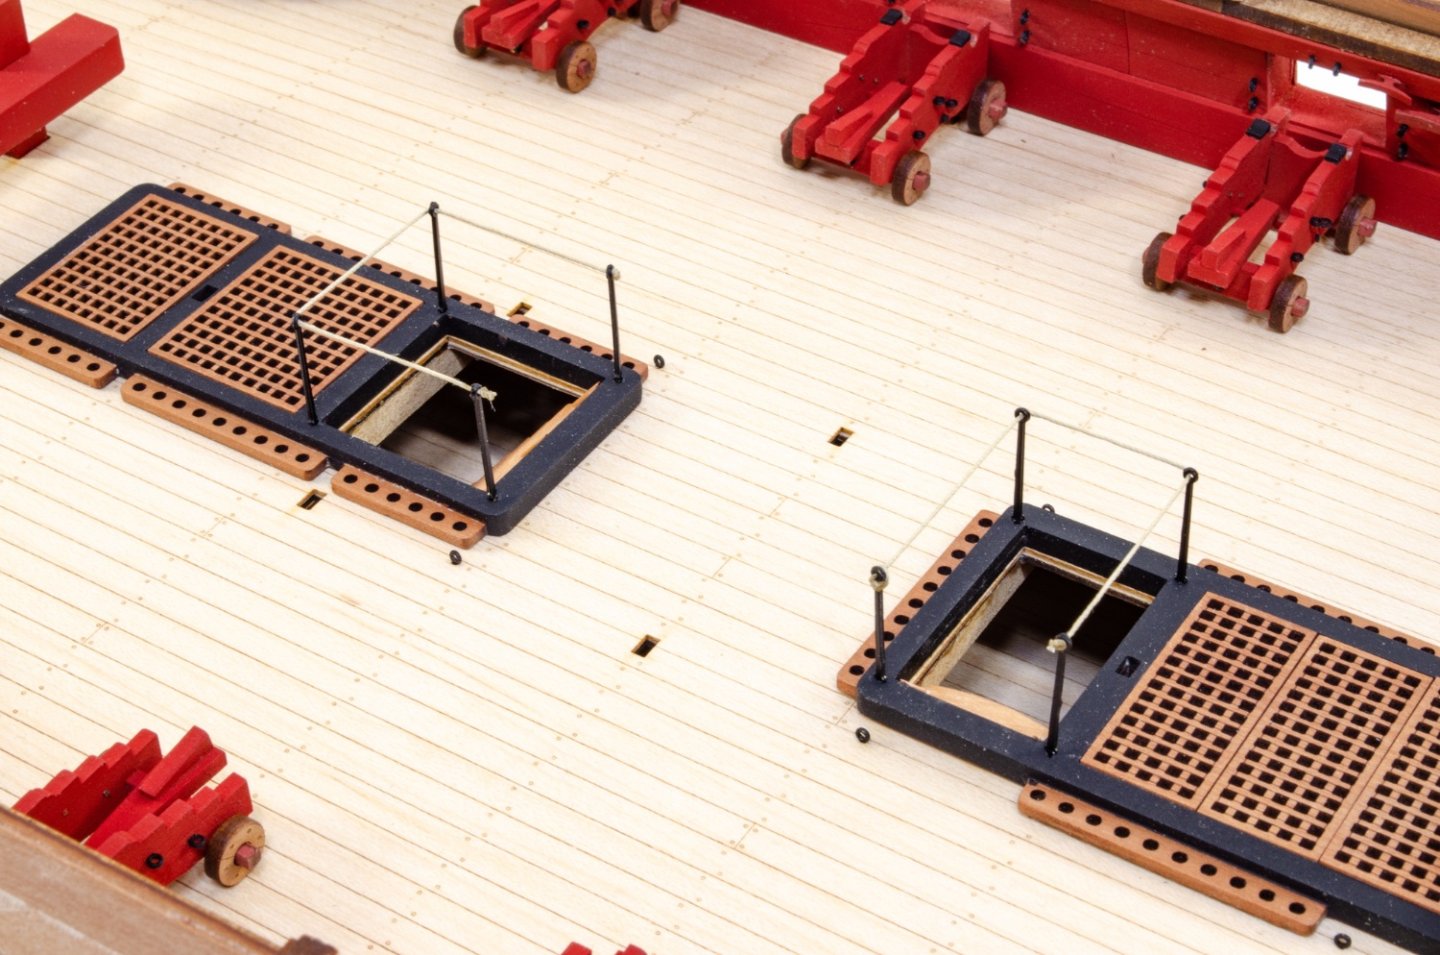
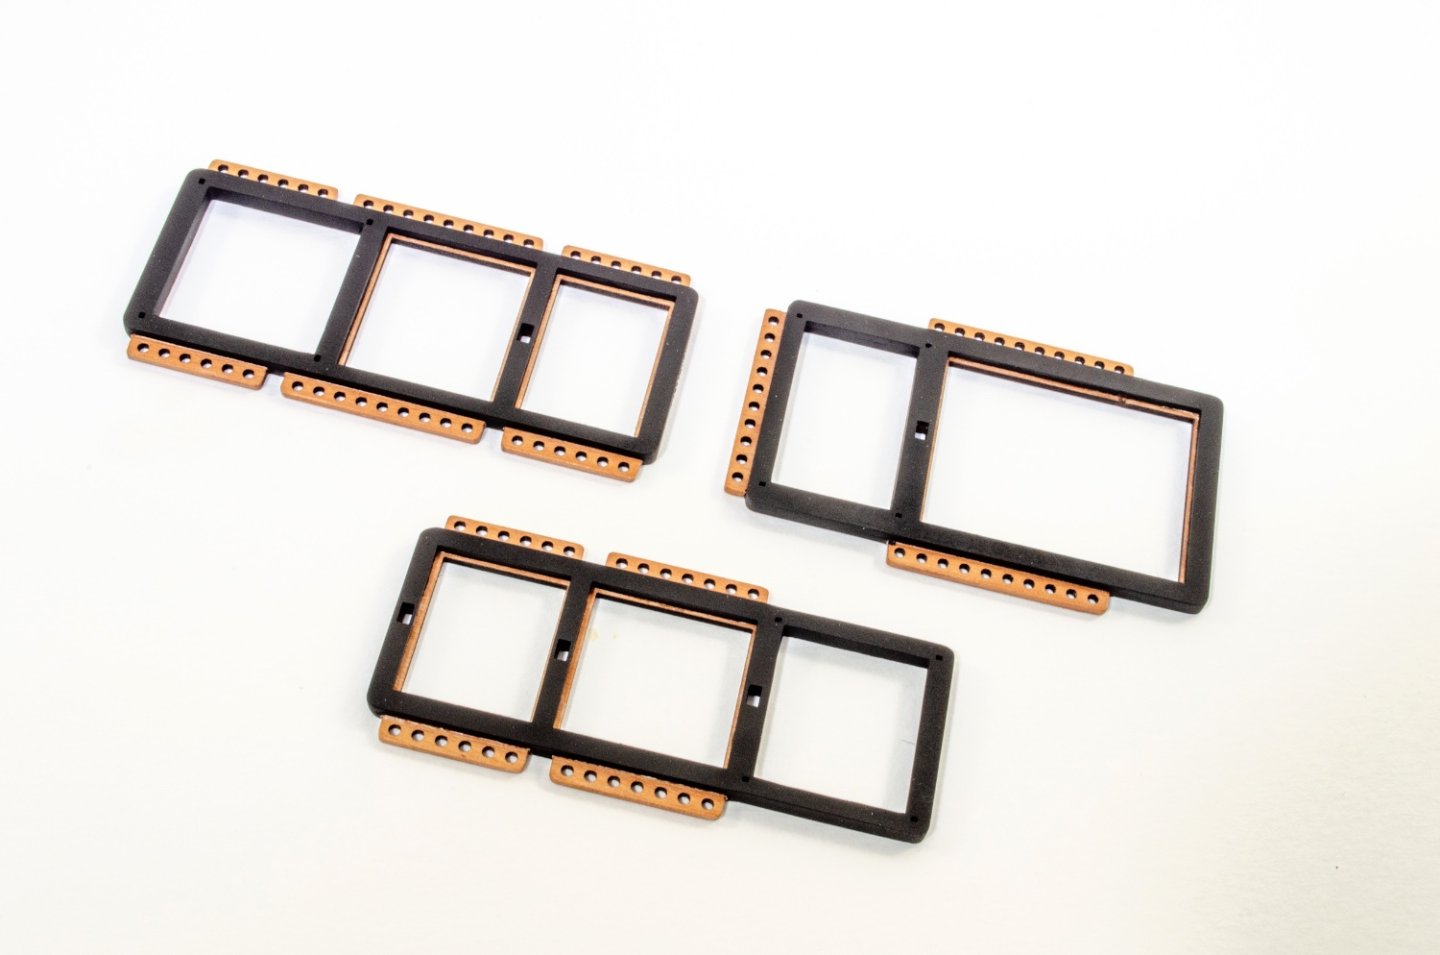
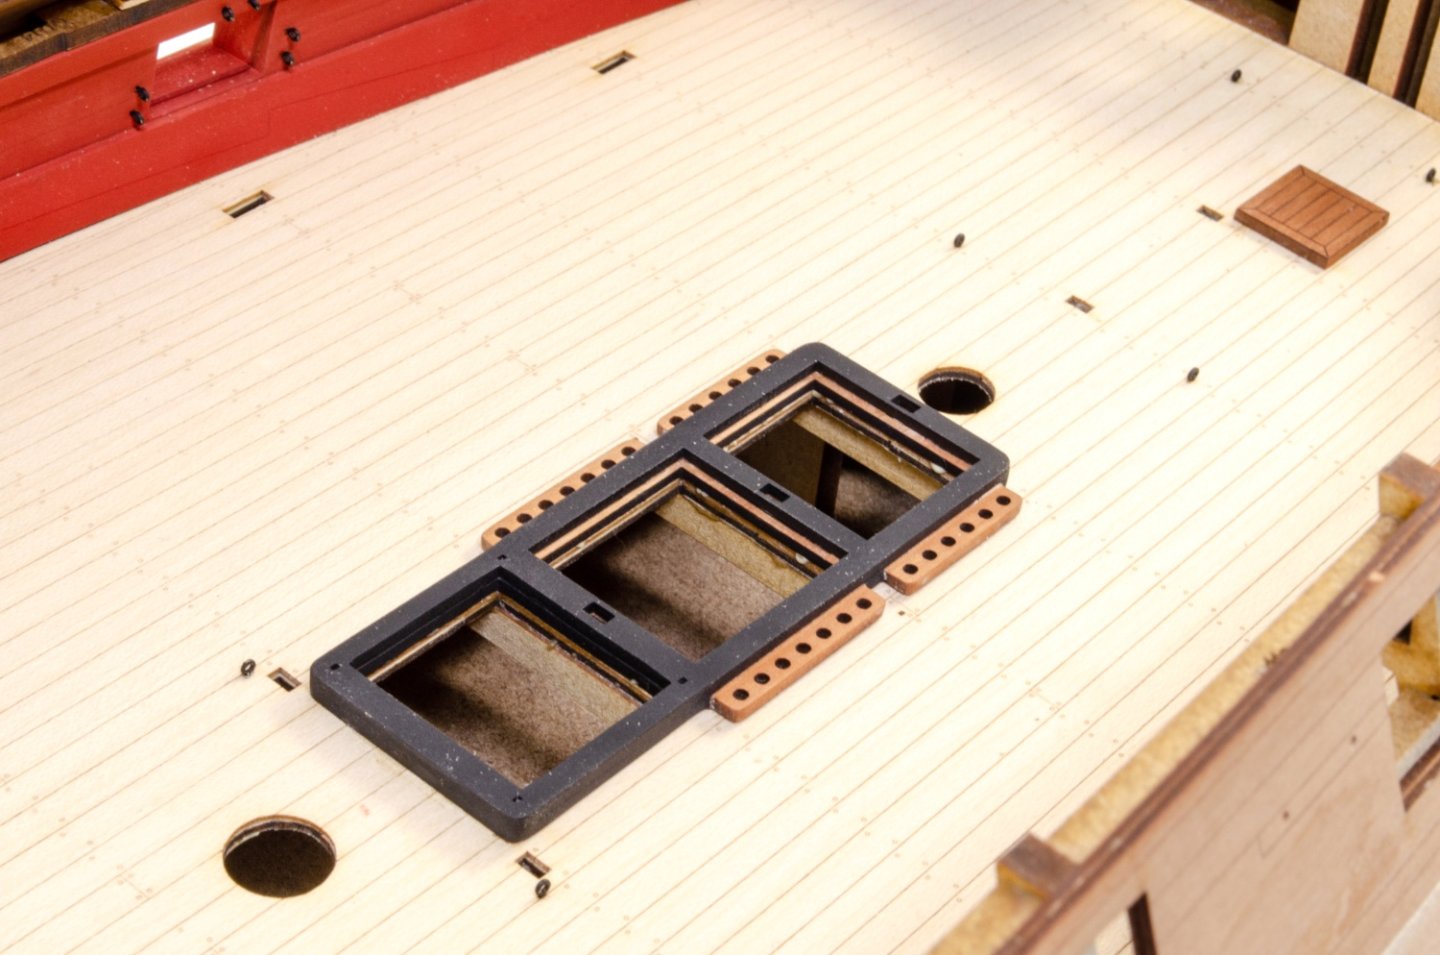
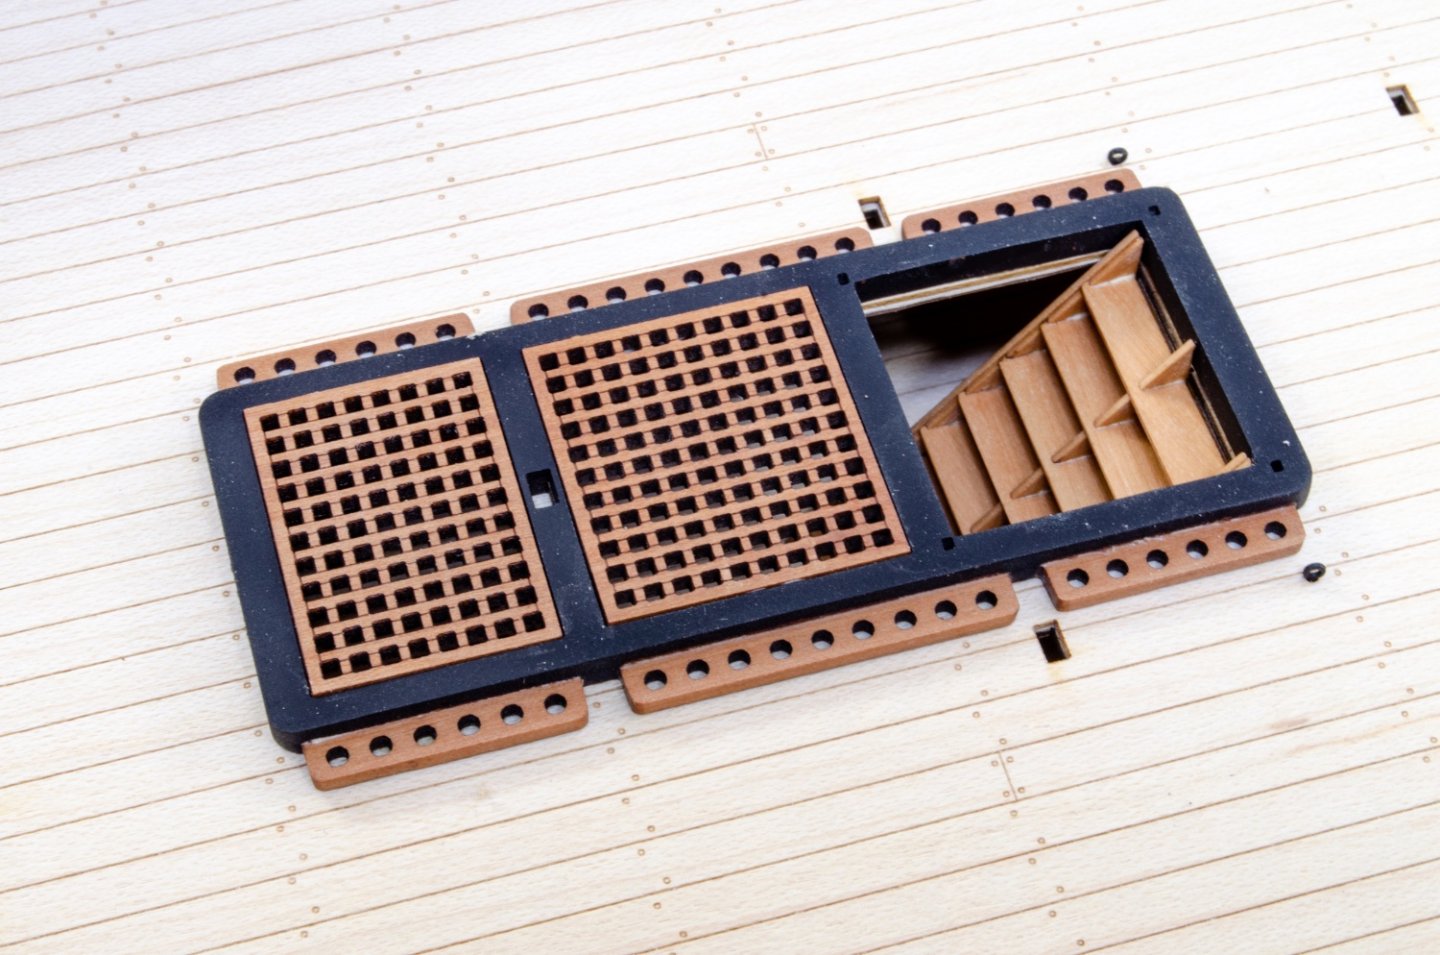
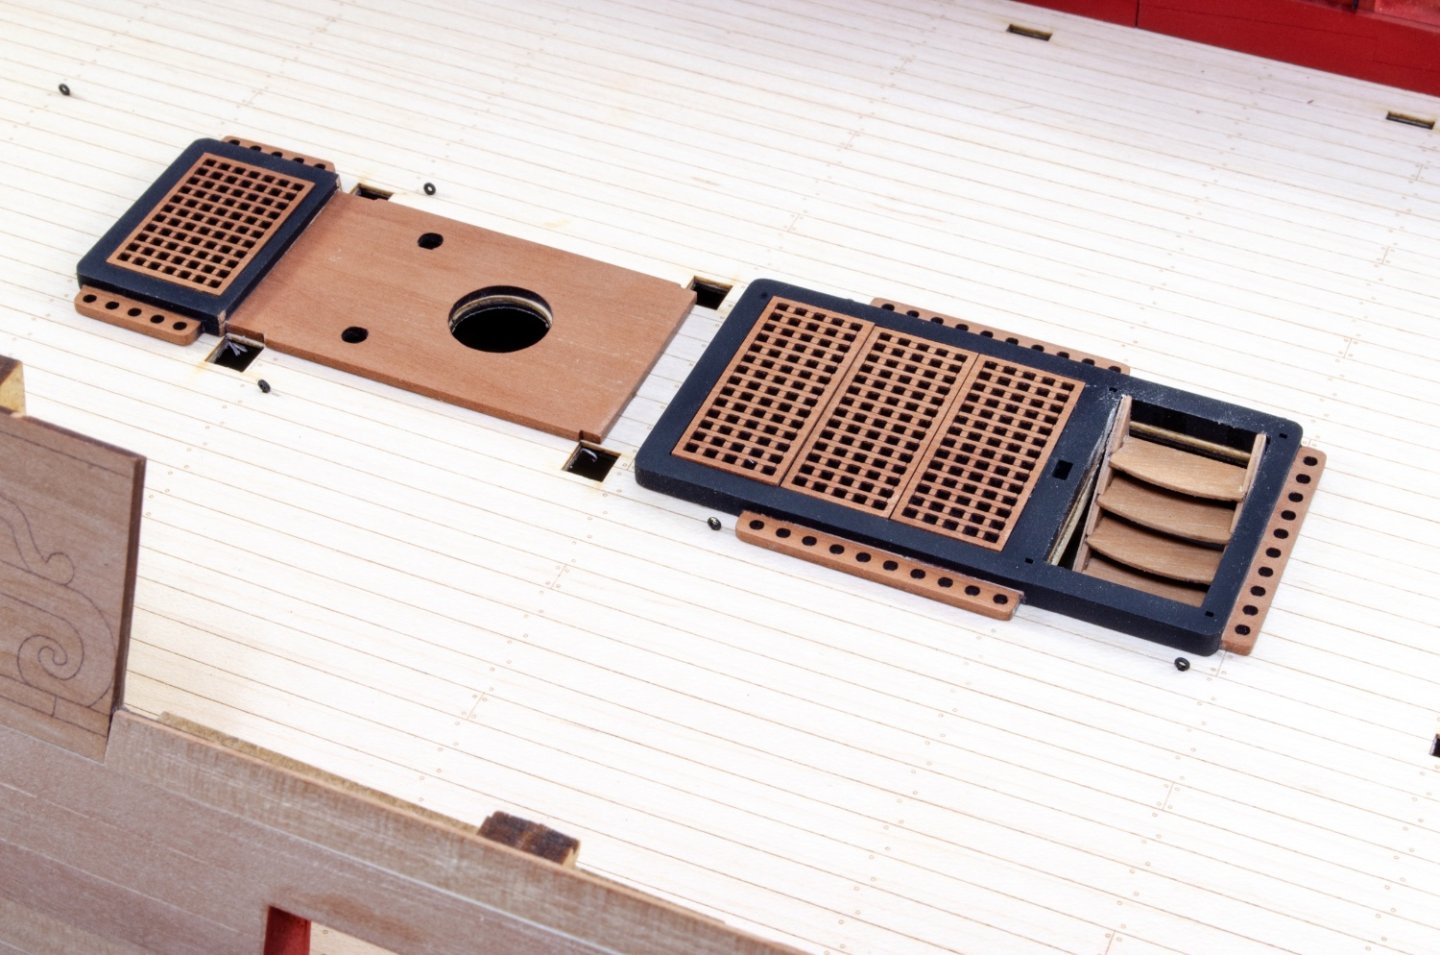
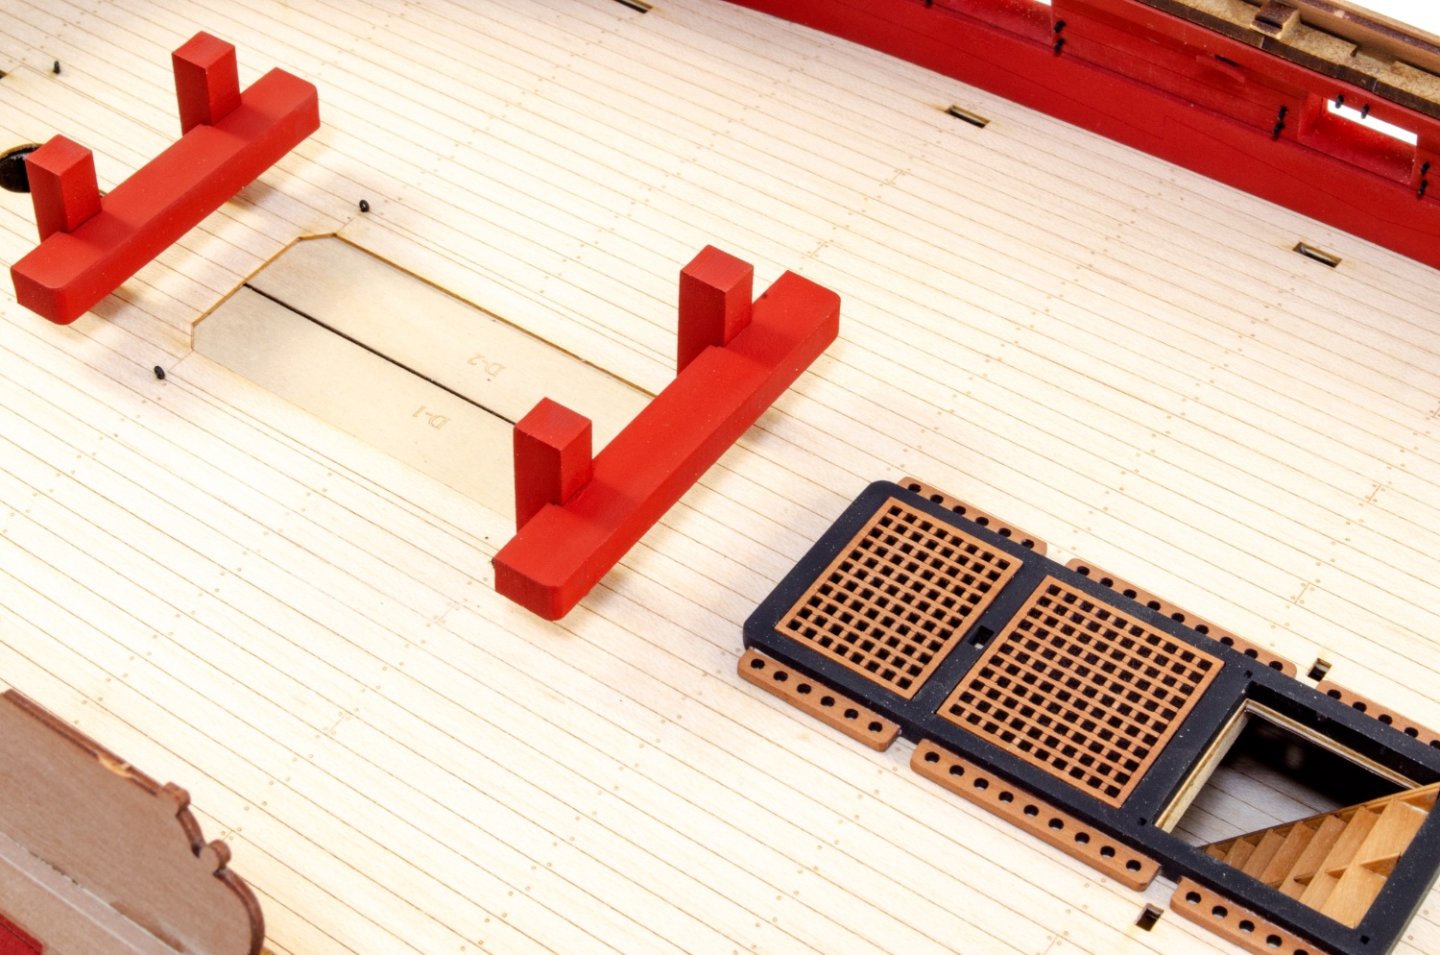
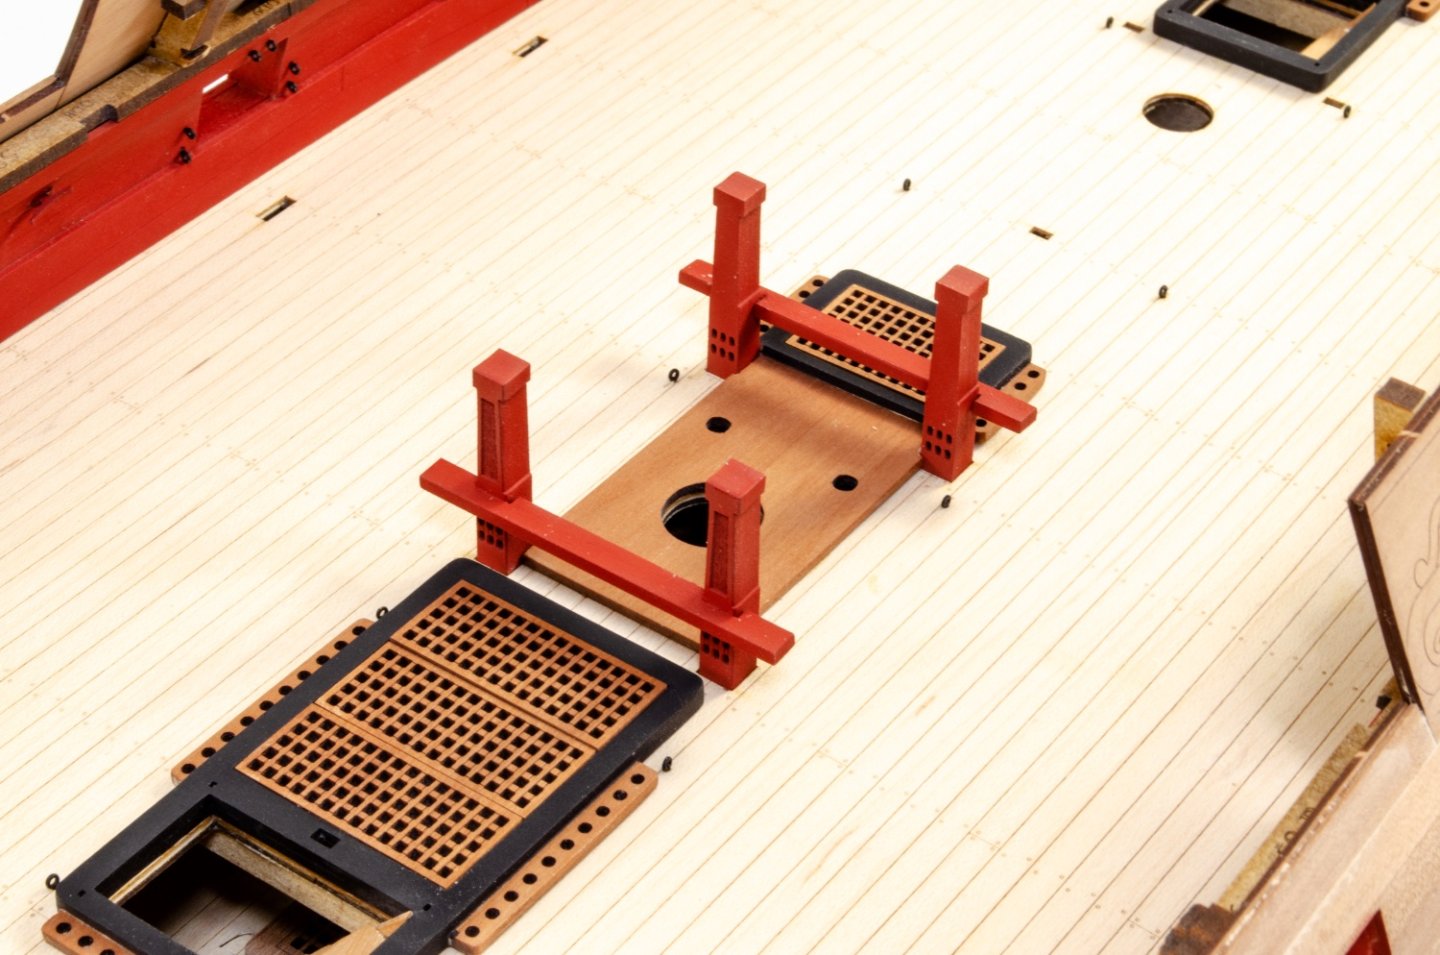
Ok, major update time! I've actually had a lot of subassemblies ready for a while, as this log shows, but now it's time for adding them in. What I haven't shown here is the spirketting that I added and fitting the eyelets to the inner bulwark gun positions. You'll have to wait until manual is finished for those! I've had to take about 100 photos these last days and sequence them, with the ones I took ages ago. Ok, first paint is for the coamings, after masking off the garlands and glue area for grates. Coamings now fitted without grates as they are more flexible for deck curve. I've probably posted this pic before, but this just shows that the ladders are now being fitted, along with the grates. I pre-assembled the bitts etc in situ, then removed them when dry before painting. These are now added into place for the last time.


- 488 replies
-
- 29
-
-
-
- Indefatigable
- Vanguard Models
- (and 1 more)
-
Maybe apart from the 'pink' bit (😆), you are absolutely right. In fact, including the pink! As long as the materials are there to build the model as intended, then any small extra effort is up to the modeller in how they depict a vessel.
-
I can almost guarantee that's the reason, and no other. Shipping prices for business are awful at the moment, and these folk need to recoup that.
-
It's not the lower gun deck, it's the main gun deck. Many contemporary models show the same for that deck. We have plenty in our gallery.
- 488 replies
-
- 4
-
-
- Indefatigable
- Vanguard Models
- (and 1 more)
-
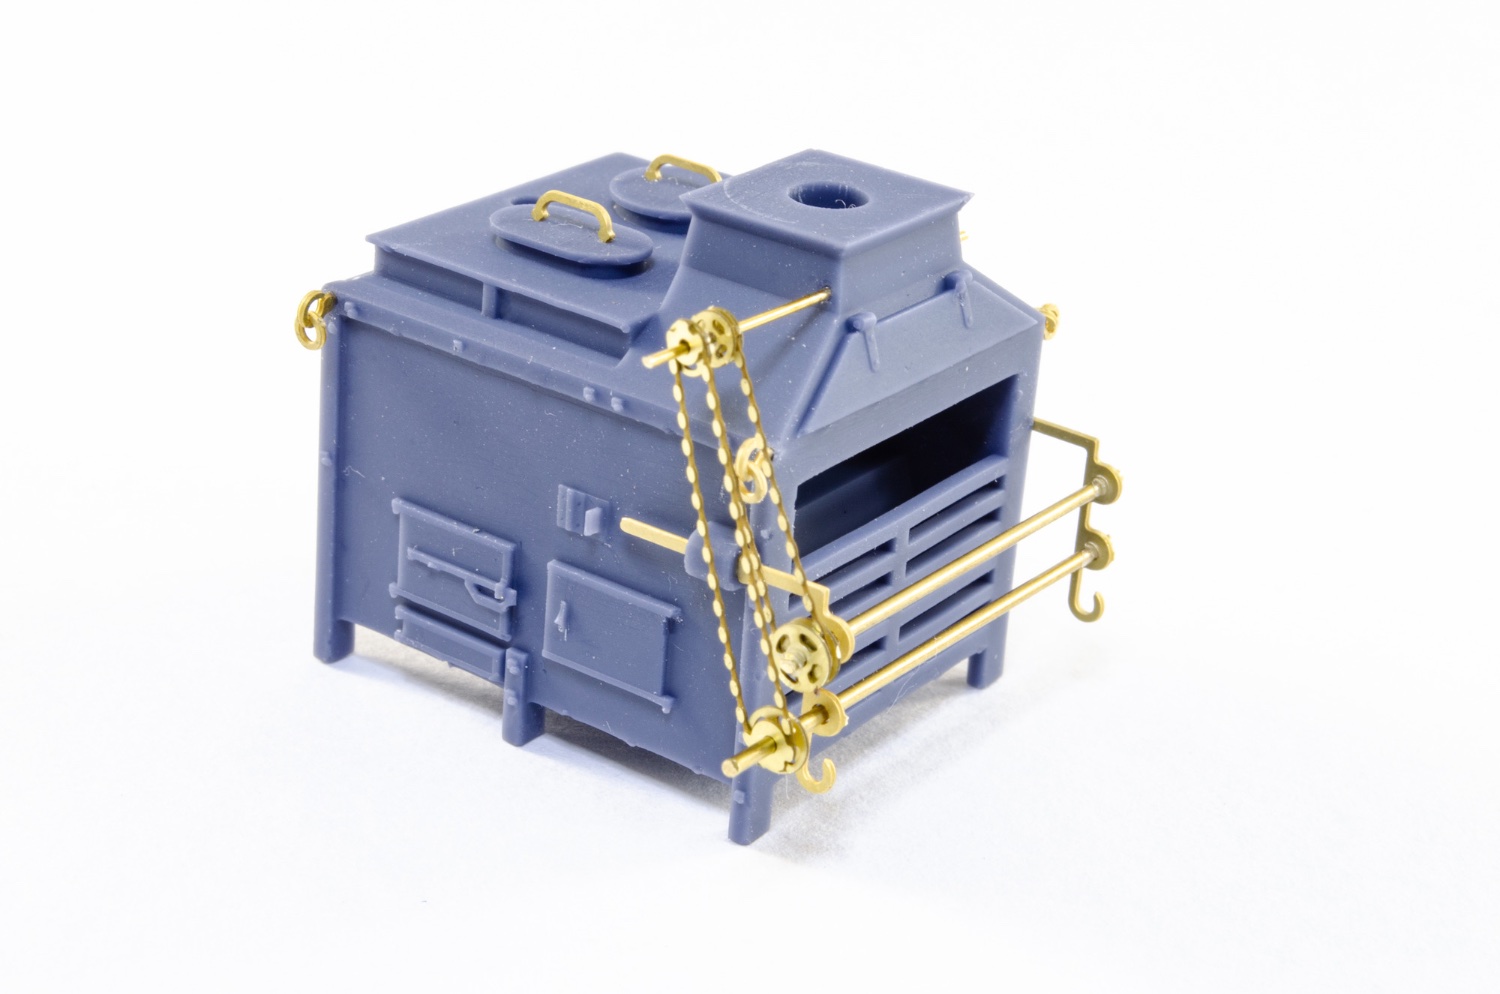
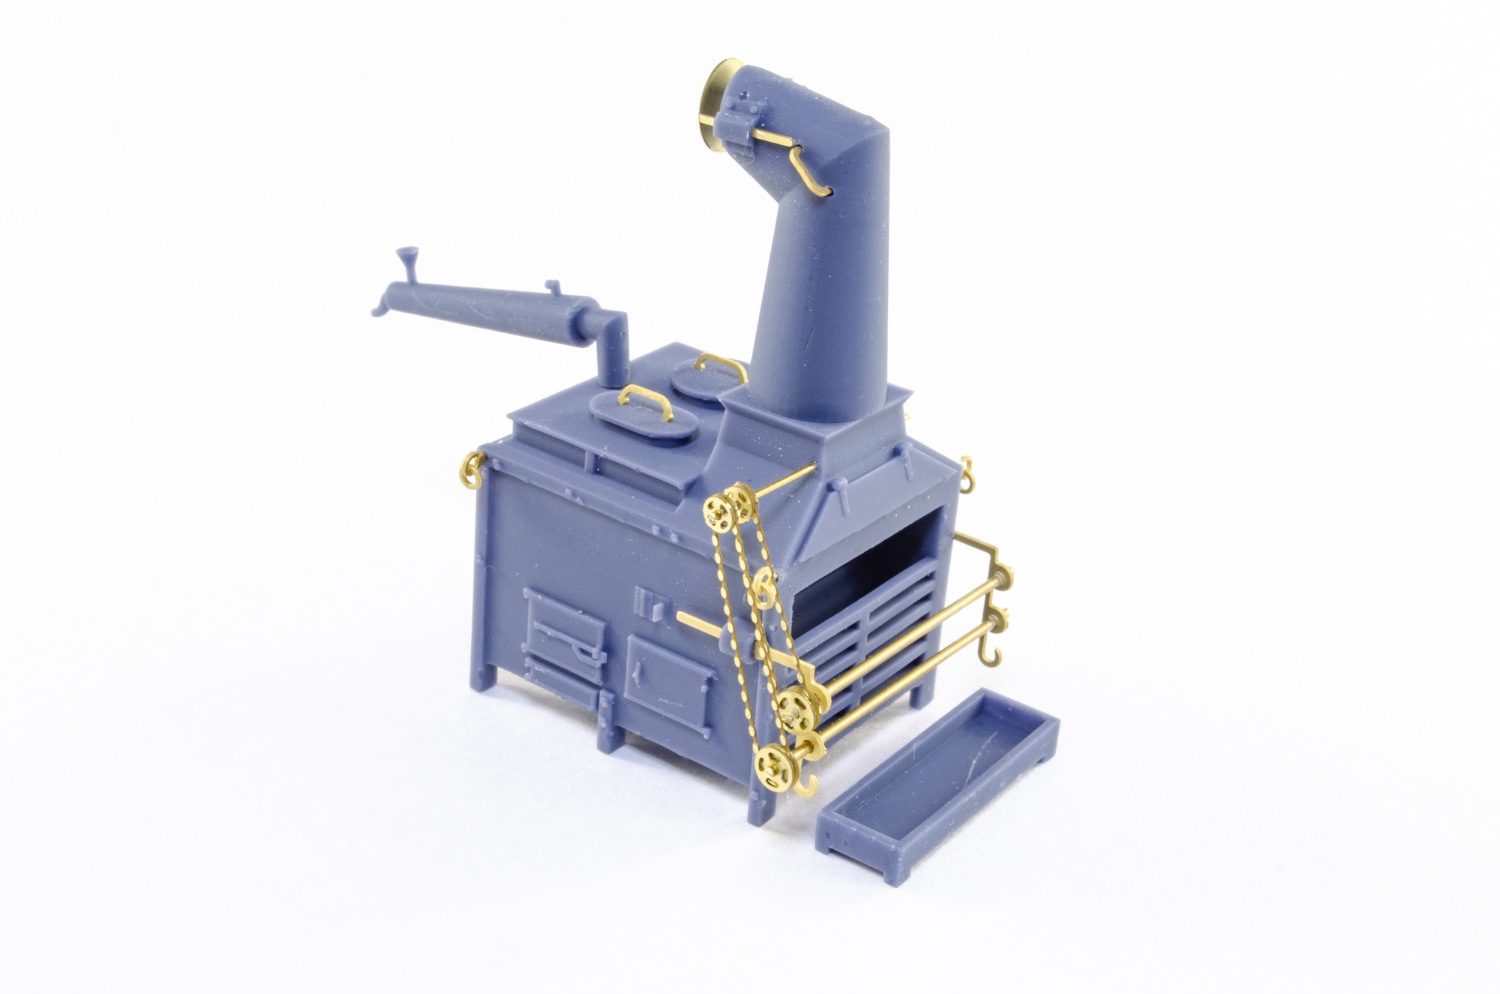
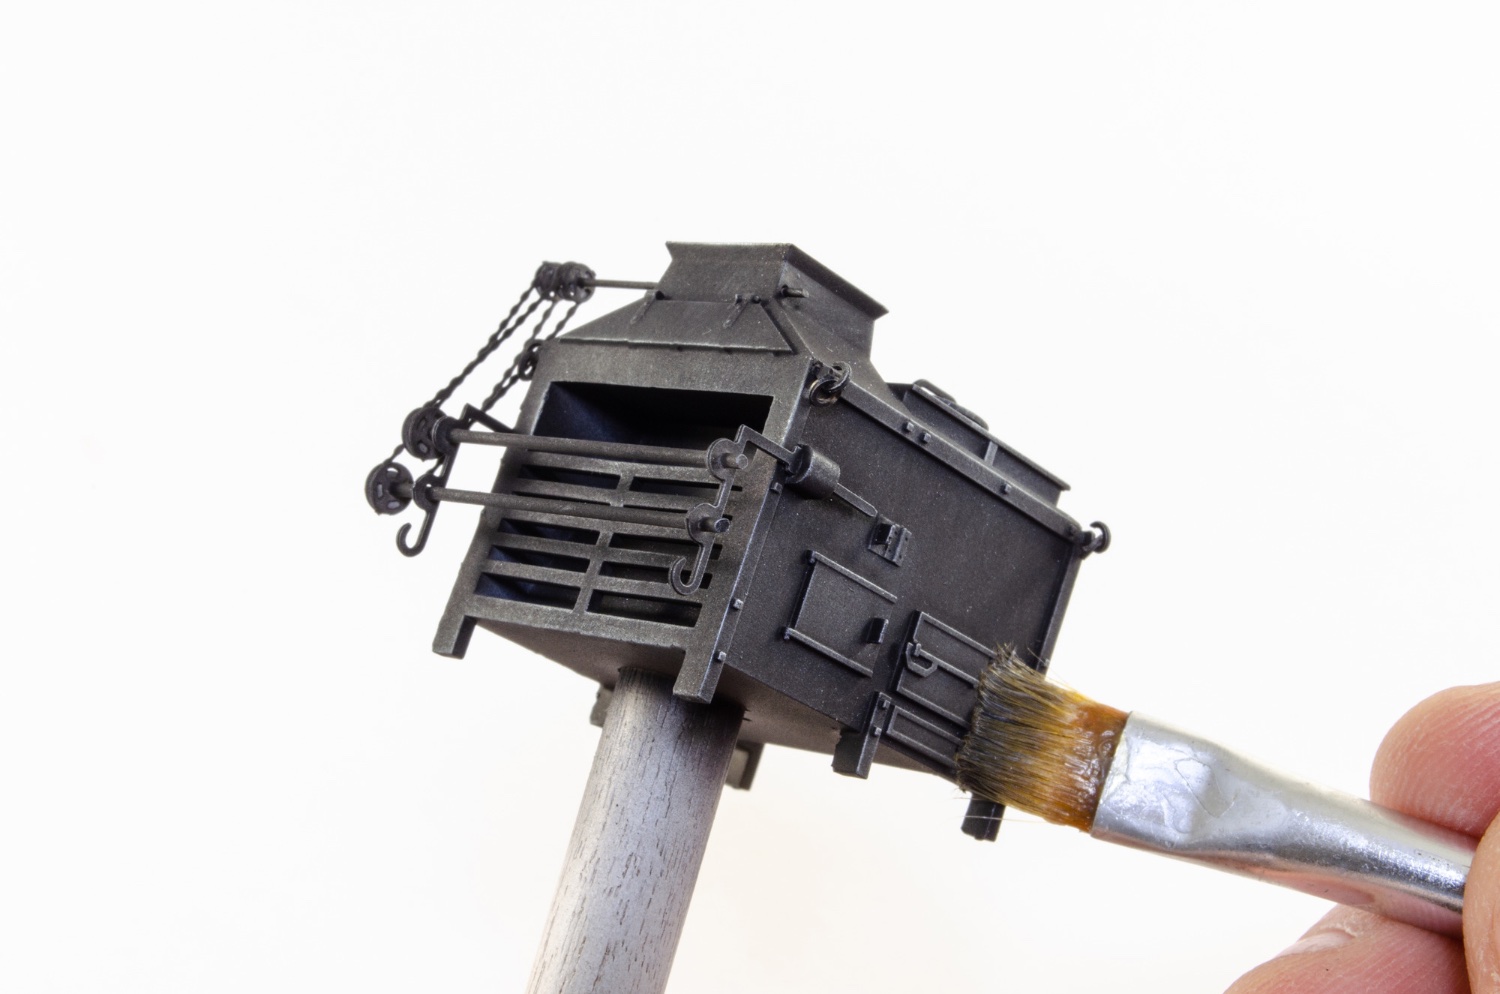
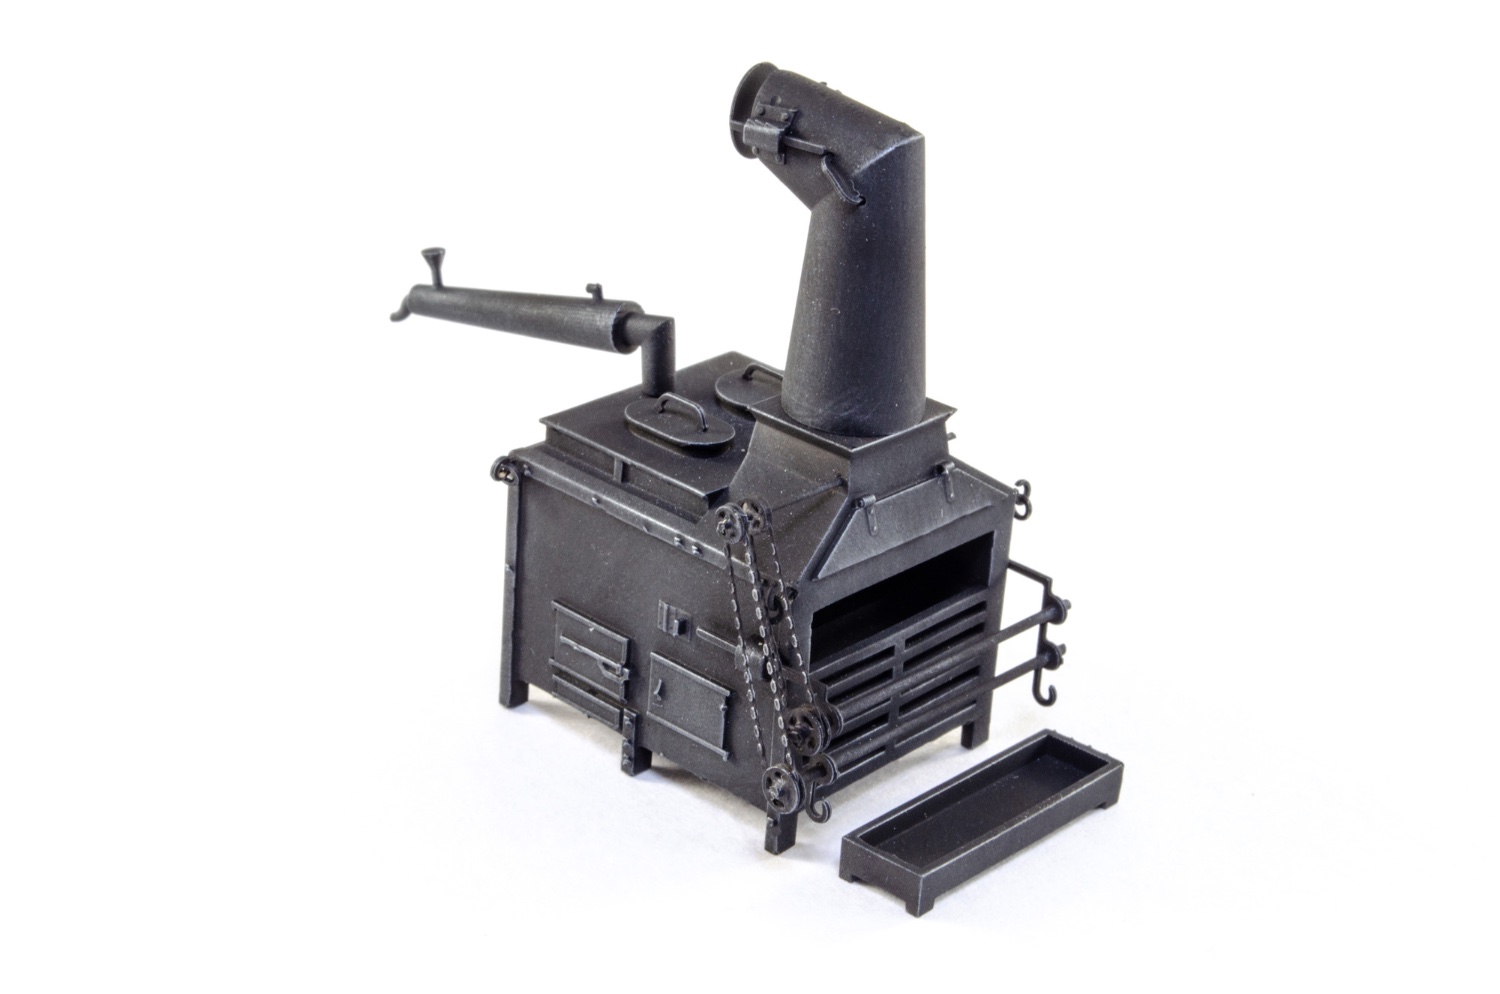
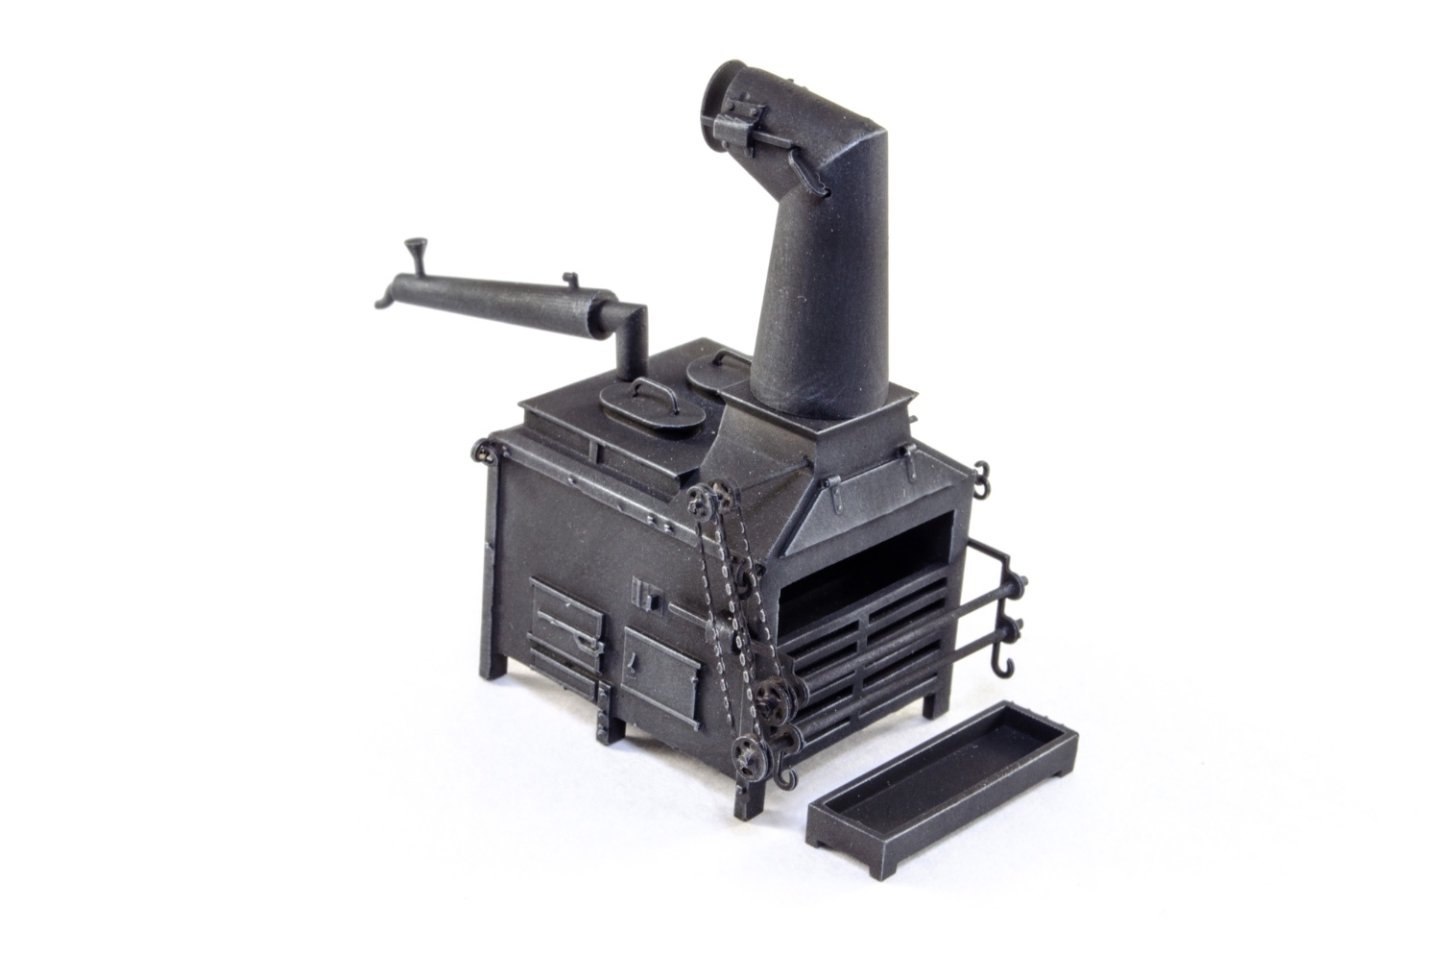
Ship's stove. I know I did the for the VM web-shop but this one is now printed in 8K resolution using a different resin which is tough. There are two PE frets with this stove, with a few spares for things like pulleys and eyelets etc. The stove assembly is the same as the one in the shop, but here are some pics of the work. Tamiya fine primer was used on the stove, followed by Tamiya Flat Black. The stove was then weathered with Uschi van der Rosten steel pigment. At this stage, the chimney and pipe are only sat in position. They'll be glued to the stove later in the build.


- 488 replies
-
- 41
-
-
-
- Indefatigable
- Vanguard Models
- (and 1 more)
-
You can have a look through my build logs for stuff that you might be wanting to use. I'm UK and everything I buy is either local, or Amazon.
-
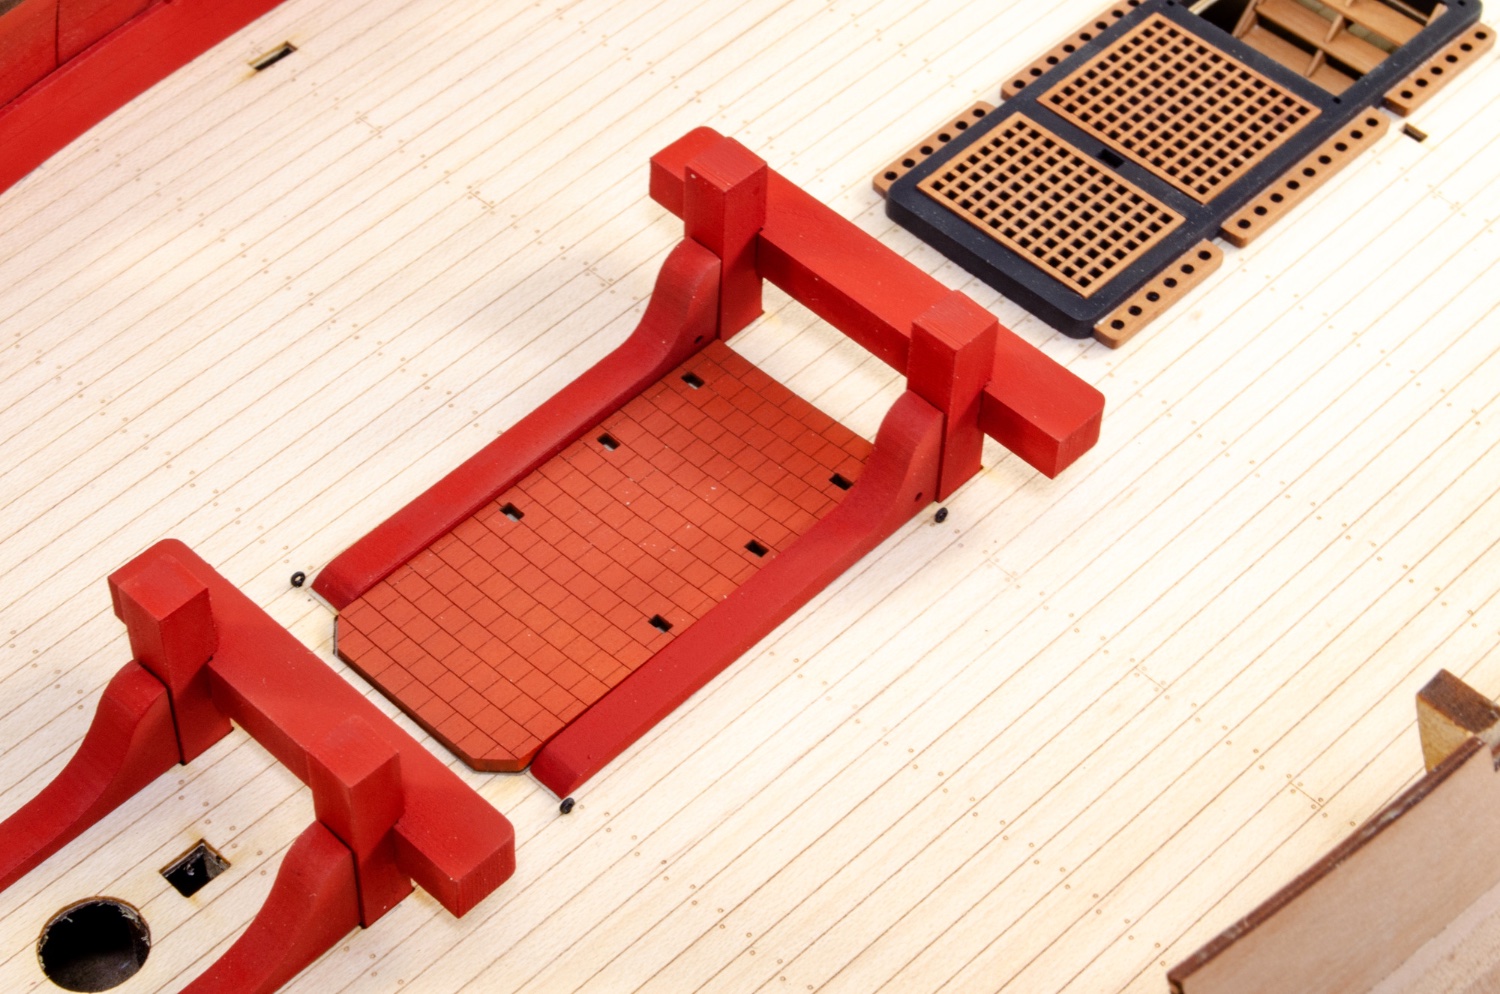
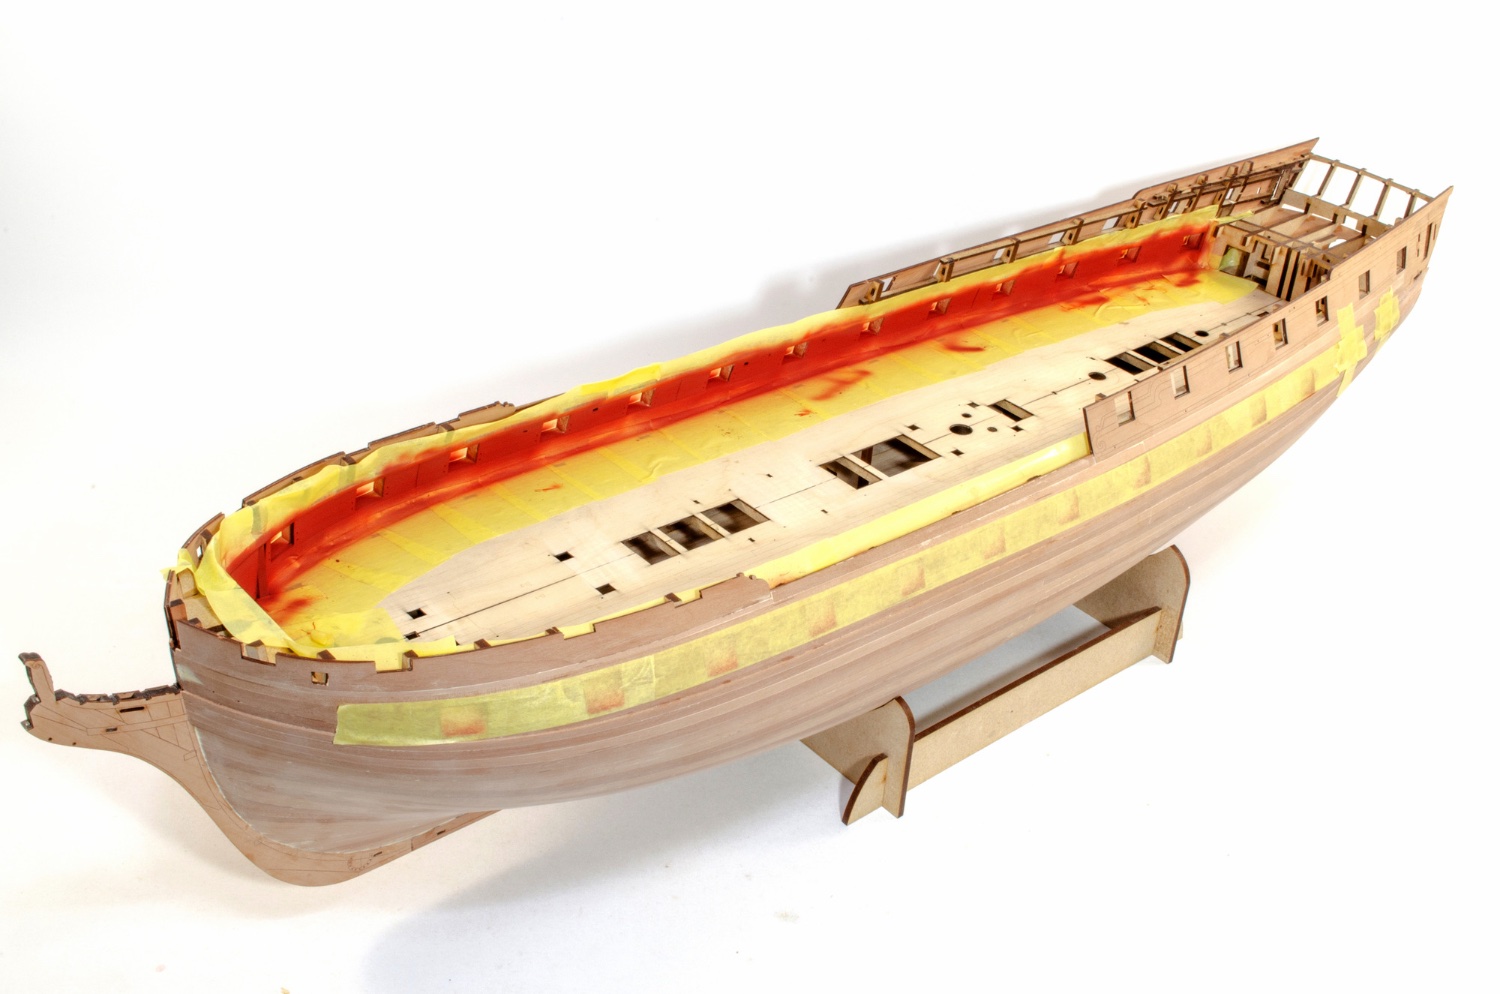
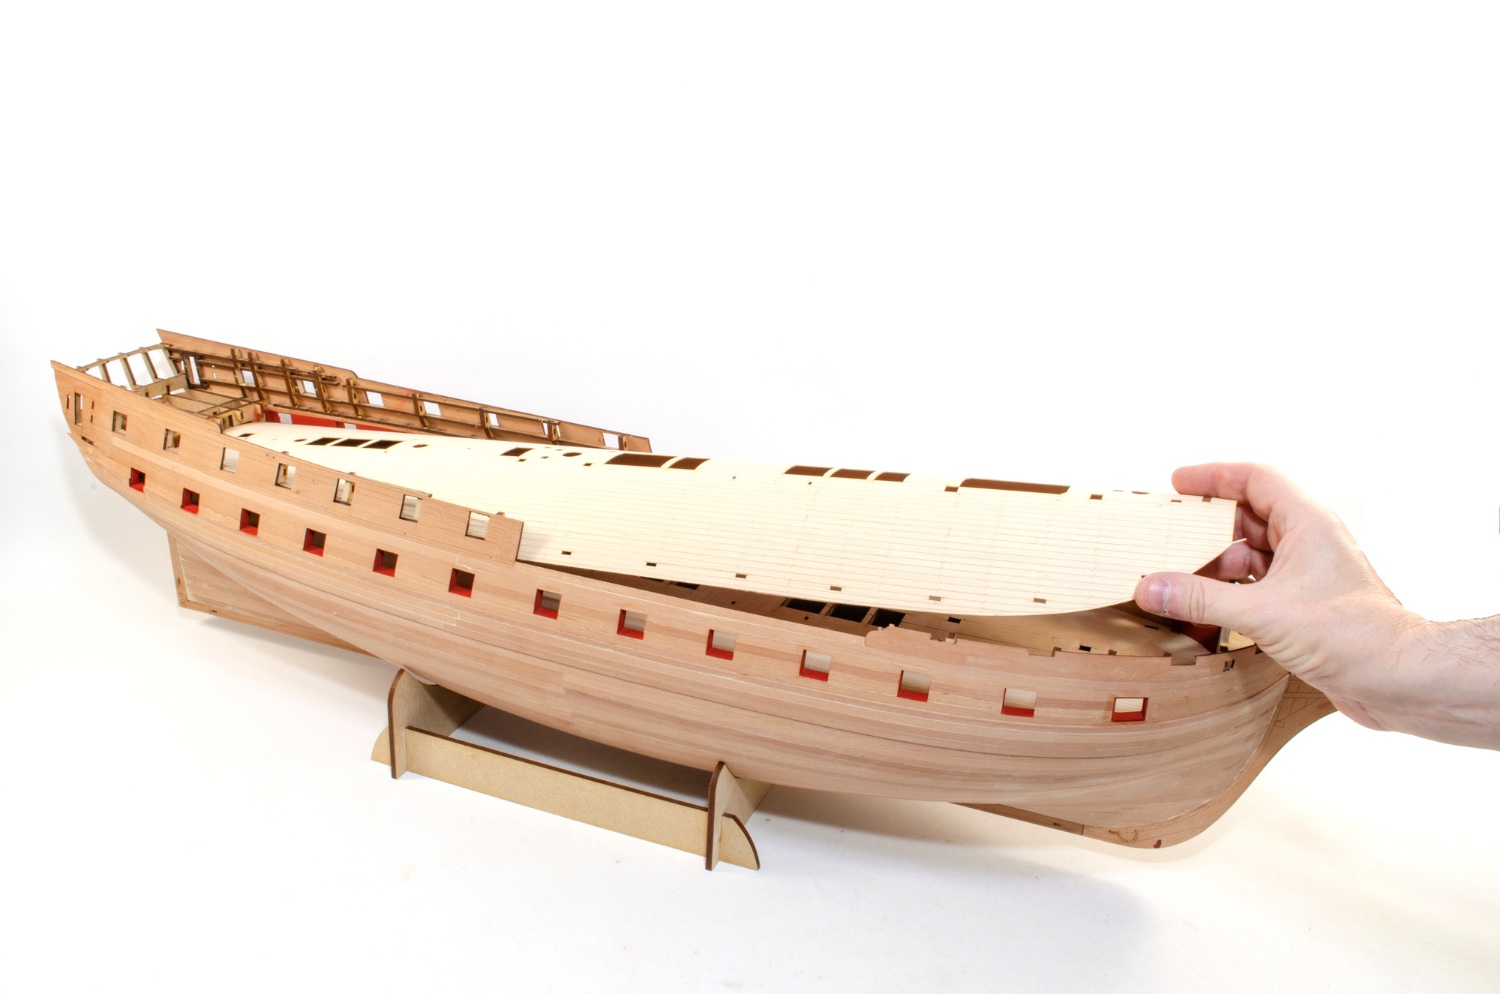
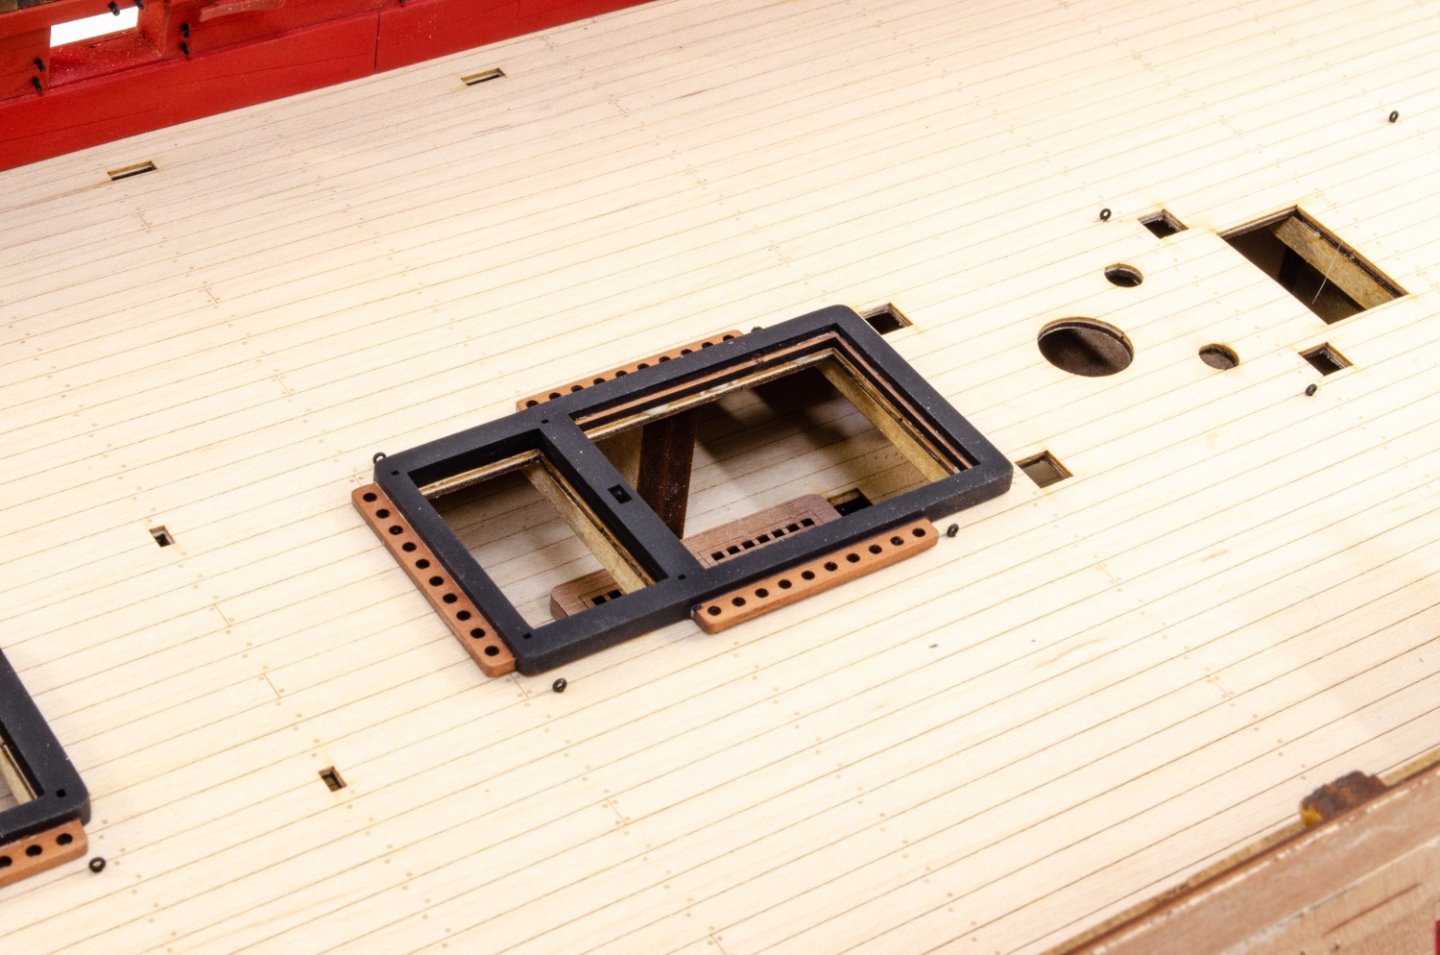
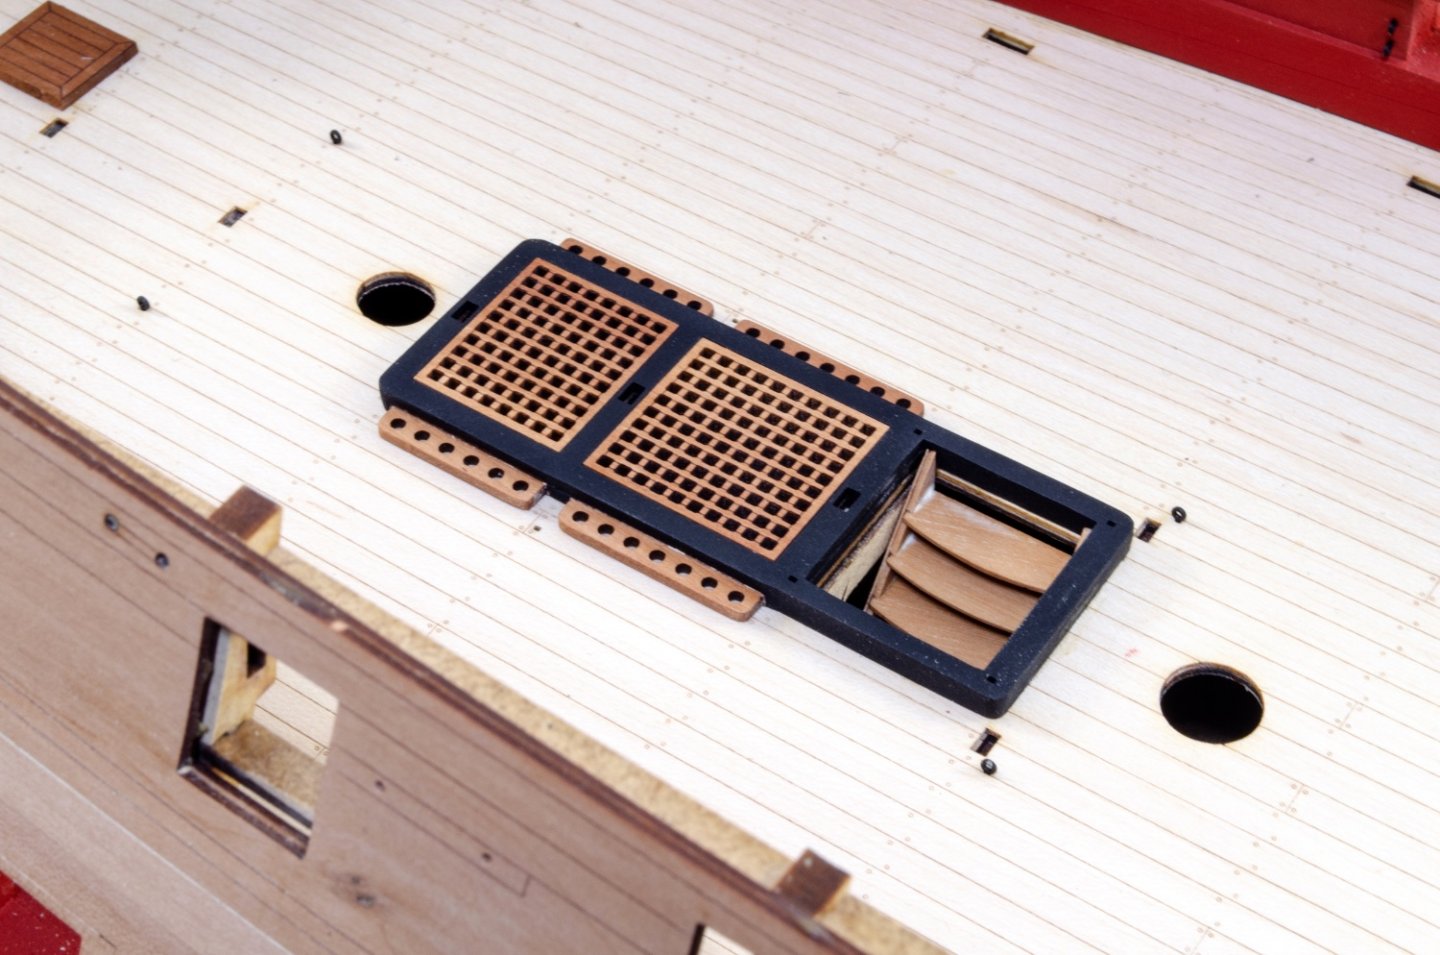
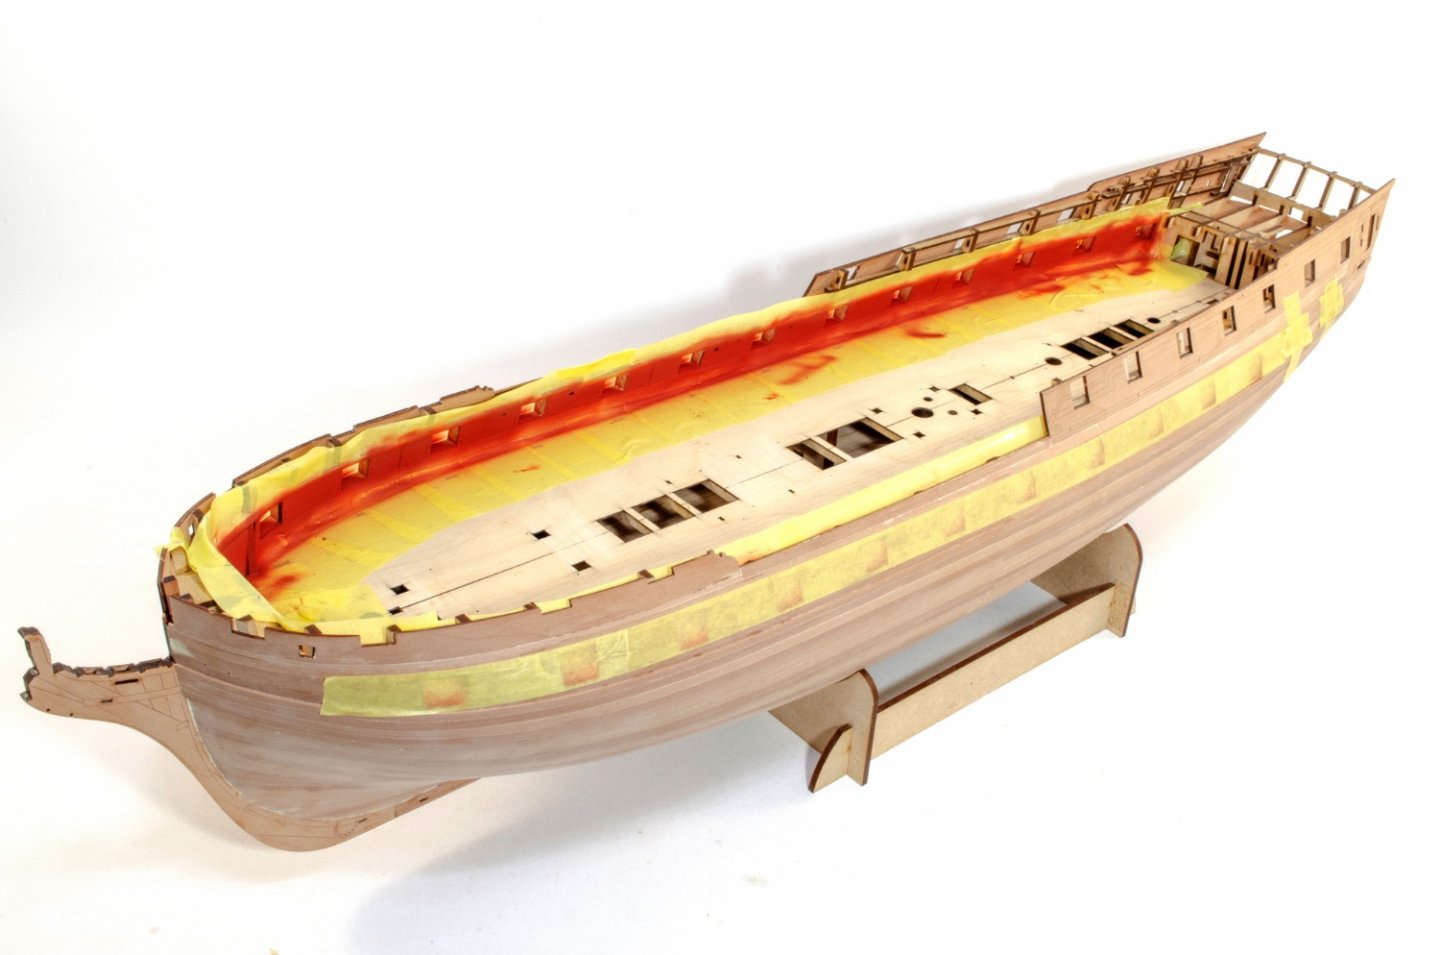
Tiny update as I am doing a few other things in other build areas of Indy too. I now have some colour on the model. I first varnished the exposed strip on the inner bulwarks and then used masking tape before I added paint. For this, I used some Plastikote Red Oxide (same as on the lower fisher hulls) and decanted it from the aerosol so I could airbrush it. The paint was left to de-gas for a few hours. That's important as it'll boil if you try to use or do anything with it when fresh from the rattle can. The paint was then thinned with mr Levelling Thinner, about 60:40 paint to thinner. When completely dry, I airbrushed Tamiya Flat Red over the red oxide. After more judicious masking (and masking the ports off from interior), I did the same paint regime for the gun ports. Once dry, everything was unmasked. The standard kit will be supplied with Red Alder for deck planking. This is a beautiful timber. However, for this, I am using an engraved maple veneer deck. There will be an option for a maple deck, but it's an actual maple deck, not veneer. Fitting the deck will be the same as for this, with a subtle flex and sliding into the rear first, underneath the stern timbers. First though, a test fit should be done and the edges sanded so it lies flat to the bulwark edges. The deck was then glued down and left to dry. In the meantime, the main gu deck coamings were masked and airbrushed in Tamiya Flat Black. The grates will be added after the coamings are fitted, so to reduce rigidity when fitting. More soon(ish)
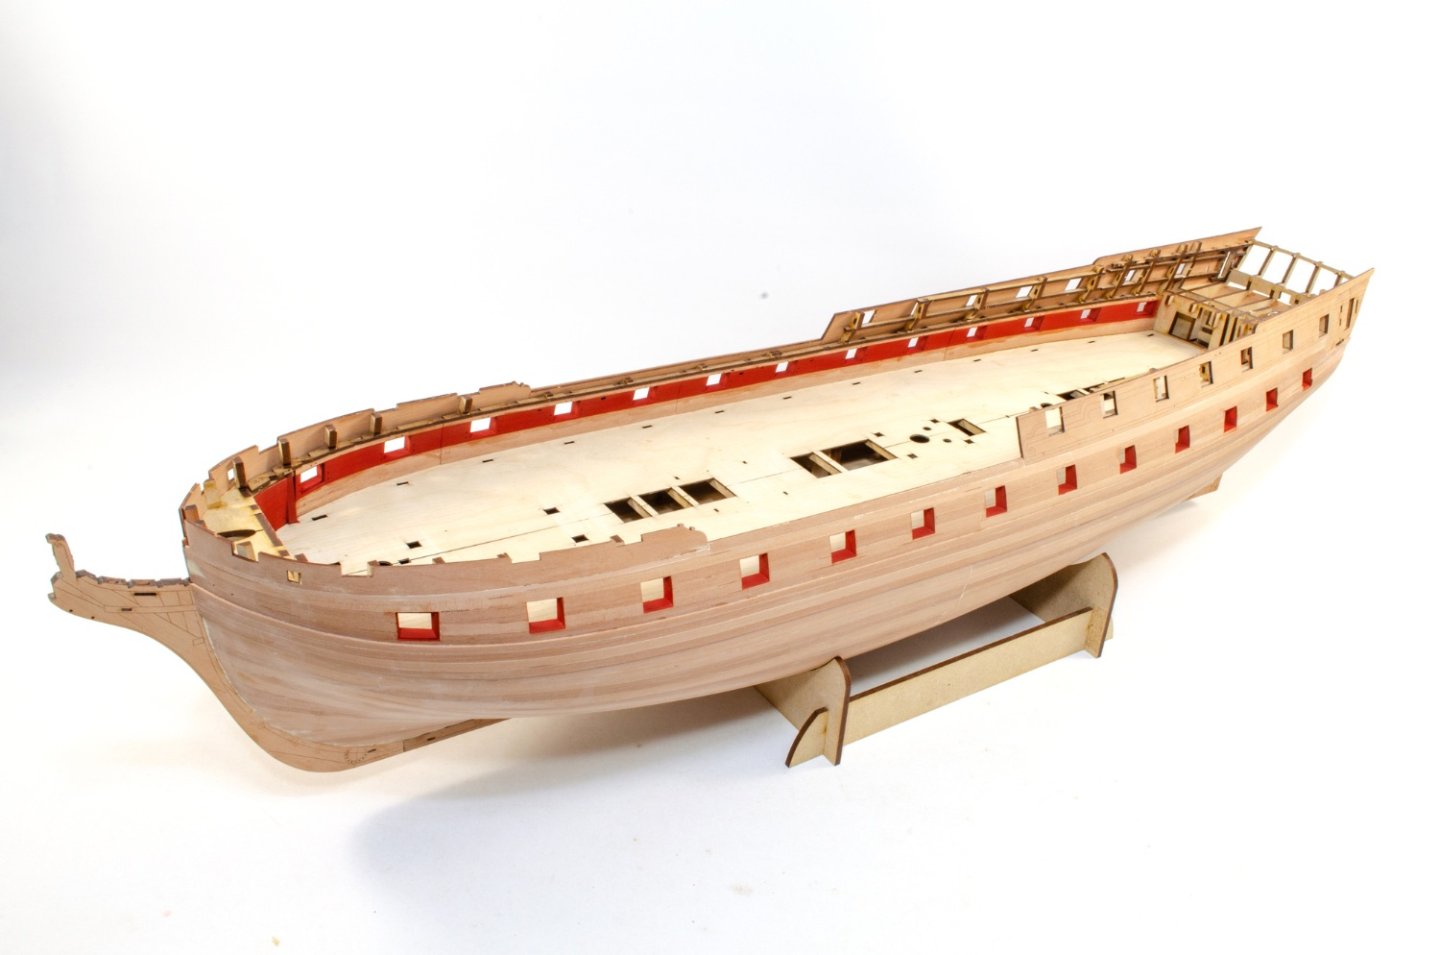


- 488 replies
-
- 45
-
-
- Indefatigable
- Vanguard Models
- (and 1 more)
-
I'm not sure what a drover is. Also the rig plan instructions are pretty much what I followed when I rigged Sphinx for the manual. I didn't replicate every single rig item as a photo as the drawings suffice and photos of such things aren't easy to take. It'd also bloated the manual out by another 20 pages! 😁
- 73 replies
-
- 1
-
-
- Sphinx
- Vanguard Models
- (and 1 more)
-
Ok, this is derailing an excellent build log with material which is totally pointless. Let's respect what Doug is setting out to do here. If you want a topic on prow tapering, which isn't included on any commercial kit, or ever been asked for to my knowledge, then please open a topic about it ad create discussion there. Same goes for application of a ship's name to the stern, period depending.
- 102 replies
-
- 5
-
-
- Flirt
- Vanguard Models
- (and 1 more)
-
No matter how much work is put into a kit, nothing can ever be absolutely represented in the minutest of detail when the kit needs to be released without the company going bust because it's spending too much time on stuff no one will ever notice. Well, almost no one.
- 102 replies
-
- 7
-
-
- Flirt
- Vanguard Models
- (and 1 more)
-
You're right. Everywhere I've looked, it's out of stock. As it's so widespread, perhaps the kit is now. (temporarily?) out of production?
-
That is spectacular!
-
Oh, I also gave the underside another rigorous sanding to really smooth it up.
- 488 replies
-
- 13
-
-

-
- Indefatigable
- Vanguard Models
- (and 1 more)