James H
-
Posts
6,139 -
Joined
-
Last visited
Content Type
Profiles
Forums
Gallery
Events
Everything posted by James H
-
 I work as a Senior Tech in local government.
- 488 replies
-
- 11
-

-
- Indefatigable
- Vanguard Models
- (and 1 more)
-
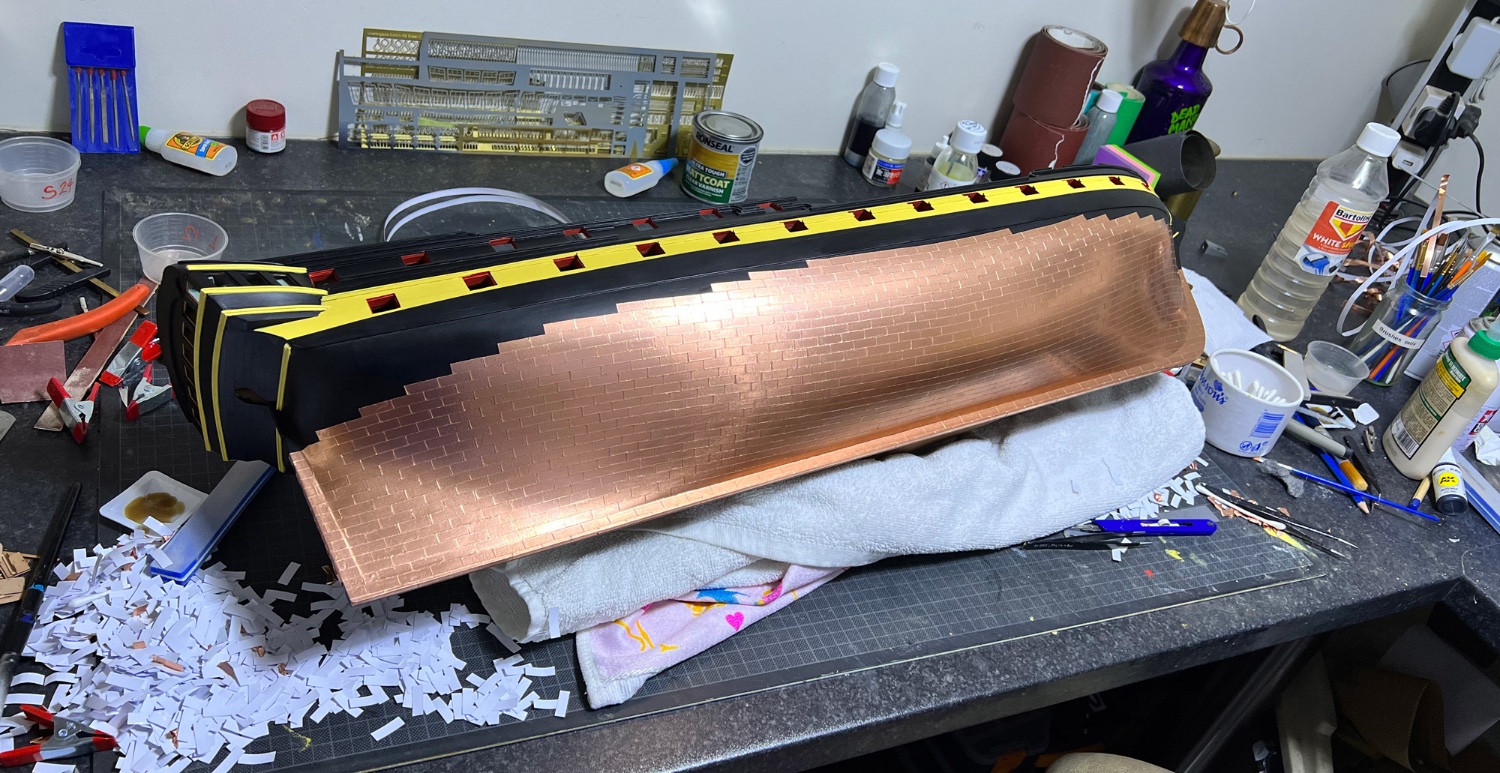
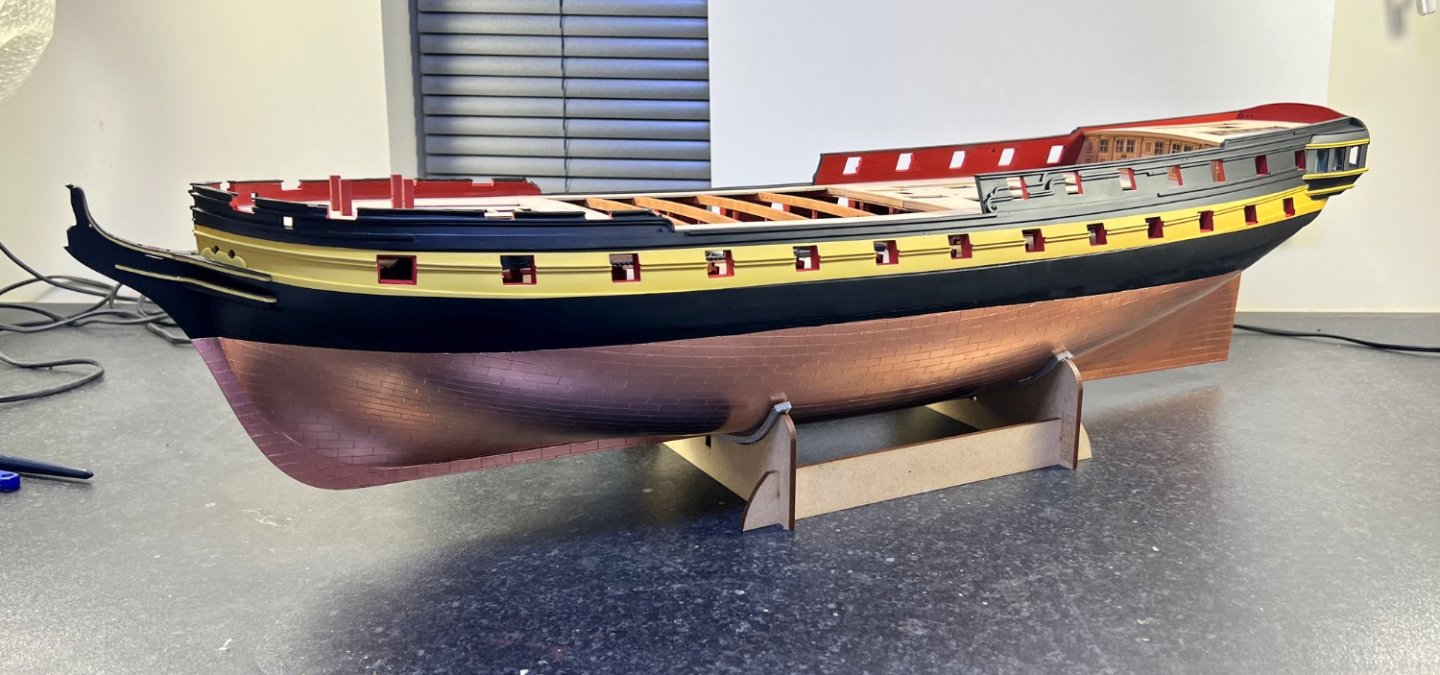
I'll do a proper update this weekend, but here's a quick phone photo of the coppered and trimmed hull. Other work I've been doing is finishing up the 24' cutter, painting the timberhead rails and building channels...as well as many other things. She will come together pretty quickly, but I do need to protect this copper from tarnishing.

- 488 replies
-
- 41
-
-

-
- Indefatigable
- Vanguard Models
- (and 1 more)
-
That is sort of ongoing as a possible plugin. Our forum uses proprietary software, and although we can make amendments etc. these things are best done by uploading as an app/module, and not by tinkering with pages of code that aren't ours.
- 542 replies
-
- 1
-
-
- Sphinx
- Vanguard Models
- (and 3 more)
-
backing up a log
James H replied to Knocklouder's topic in Using the MSW forum - **NO MODELING CONTENT IN THIS SUB-FORUM**
I think here is fine. Many people will have seen it here and can continue following. -
No, nothing has changed. It's as it's shown. I removed some char from top of parts, so things will look different.
- 426 replies
-
- 1
-
-
- Vanguard Models
- Sphinx
- (and 1 more)
-
The New Up Arrow Button!
James H replied to Matt D's topic in Using the MSW forum - **NO MODELING CONTENT IN THIS SUB-FORUM**
-
Grecial sure has nice lines!
-
backing up a log
James H replied to Knocklouder's topic in Using the MSW forum - **NO MODELING CONTENT IN THIS SUB-FORUM**
No, we have nothing that can do that, or access via third-party plugins. Browsers are generally equipped to export as either a web page or PDF, and also to print whole pages you are on. It make take time over a large build log, but there's nothing we can do about that. We keep several backups of MSW at all times, and backups are made 4 times per week, into several different locations. If you feel you need to back up your build log, for whatever reason, you'll have to do this manually. -
I think the point of this is that Chris has made it abundantly clear many times what his plans are with regard to his larger naval vessels (period etc), and that countless requests for ironclads and yachts, as well as the multitude of typically unknown vessels, simply won't fly. Discussion should revolve around announcements/releases etc. On this note, Chris has asked me to lock this topic so he can start a fresh one. This one is currently 78 pages!
-
backing up a log
James H replied to Knocklouder's topic in Using the MSW forum - **NO MODELING CONTENT IN THIS SUB-FORUM**
The forum software won't cater to that, but it's easy enough through your browser. Ok, I'm using Safari on Mac here, but this should be available on most, if not all browsers. Just export each page as a PDF and save to your computer.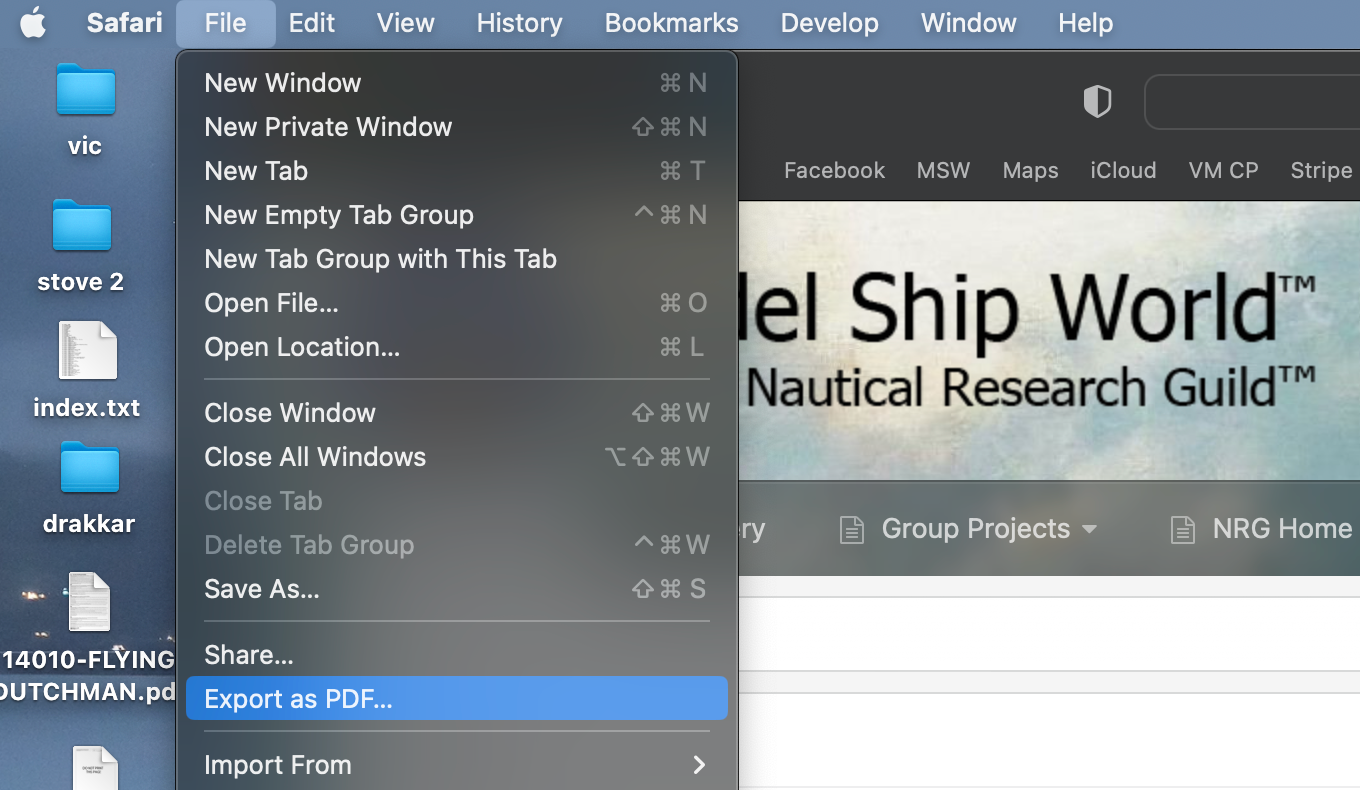
-
It's defo there. Try on an updated browser. Works for me on Chroma, Safari and Firefox.
-
I would paint the swastika first, using masks, then add the hardware over it and paint. BUT, Amati have supplied the kit with the last known iteration before it was sunk. At that time it had no swastikas. They were painted over.
-
It's great to see you back! You were one of the very first members of MSW 1.0!!
-
***Please note*** Any further posts regarding chain pumps will be deleted from hereon in. It's superfluous to the discussion and serves only to derail what I'm trying to achieve here. I've even received PMs demanding to know why I removed member's posts after me needing to cull my topic (for the third time!). It must stop. Now.
- 488 replies
-
- 28
-
-

-
-
- Indefatigable
- Vanguard Models
- (and 1 more)
-
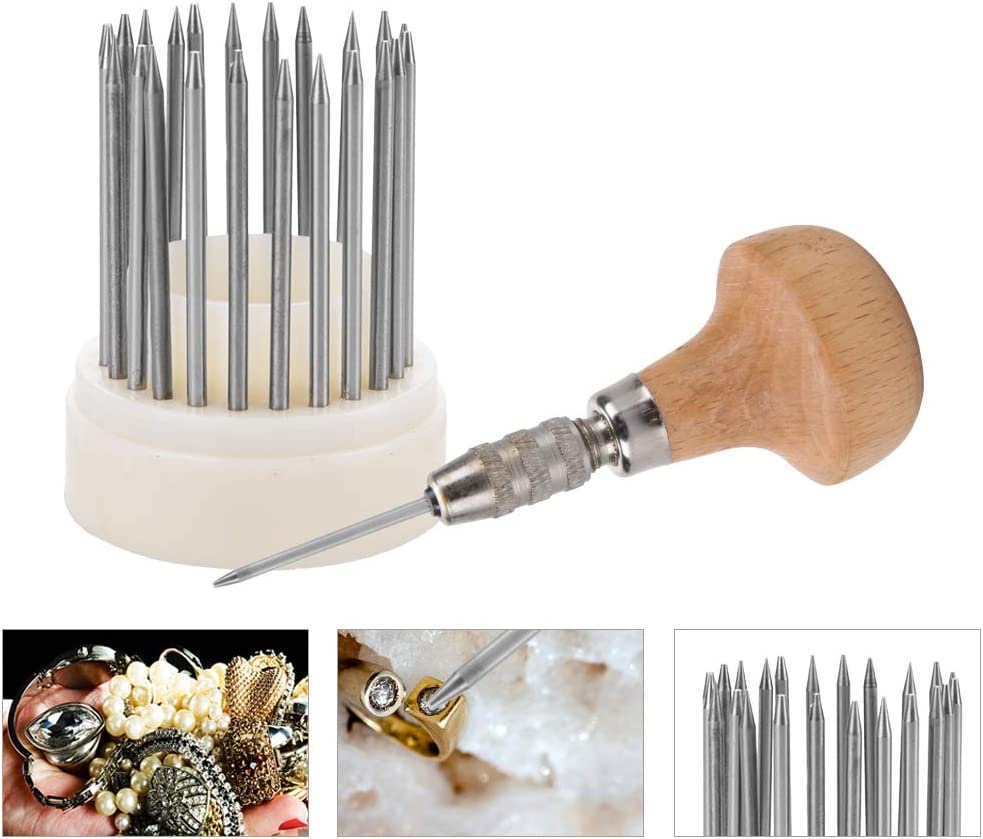
This is a beading tool. Used by jewellers for making indent patterns etc.
- 488 replies
-
- 7
-
-
- Indefatigable
- Vanguard Models
- (and 1 more)
-
You're welcome. We did used to have one a while ago but the software was never updated to fit the core forum software version we were running, and it simply stopped working, so we removed it.
-
I must admit that the thought of running a rivet tool, freehand over the hull, would fill me with dread. If I opt to rivet the hull, I think I'll do one plate at a time with a beading tool. I'm quite used to that method for adding rivet lines to large 1:32 airframes.
- 488 replies
-
- 5
-
-
- Indefatigable
- Vanguard Models
- (and 1 more)
-
Ok, I have added a tool which will take you straight back to the top of the page which will help if you had to scroll a long way. When you start to roll down a page, you will now see a black 'Up Arrow' in the bottom right of the screen. Press that and you'll be taken to the top again.

- 14 replies
-
- 16
-
-
-
It certainly works faster and is more forgiving. If I get a plate slightly wrong, I can just reposition it or throw it away and add a new one. No more CA gel, but you also don't get the nail marks (if you wanted them). These can be added with a rivet tool from VM or a beading tool.
- 488 replies
-
- 8
-
-
- Indefatigable
- Vanguard Models
- (and 1 more)
-
Hey ho! You'll have to forgive me for not wanting to spend my hols tinkering with stuff in tech here

-
The original Indy clearly shows the chain pumps fitted, but the drawings made for the razed iteration shows that other changes were made too...one of them being the chain pump omission. The guys doing these plans surely knew what they were doing, and adding the smaller pumps would've been a very unusual move and not one that would've been done without them being specifically requested. That's what the drawings show, ergo, that's how the deck is fitted out.
- 488 replies
-
- 10
-
-
-
- Indefatigable
- Vanguard Models
- (and 1 more)
-
What a great start you made here on MSW. Off to BanLand you go.
-
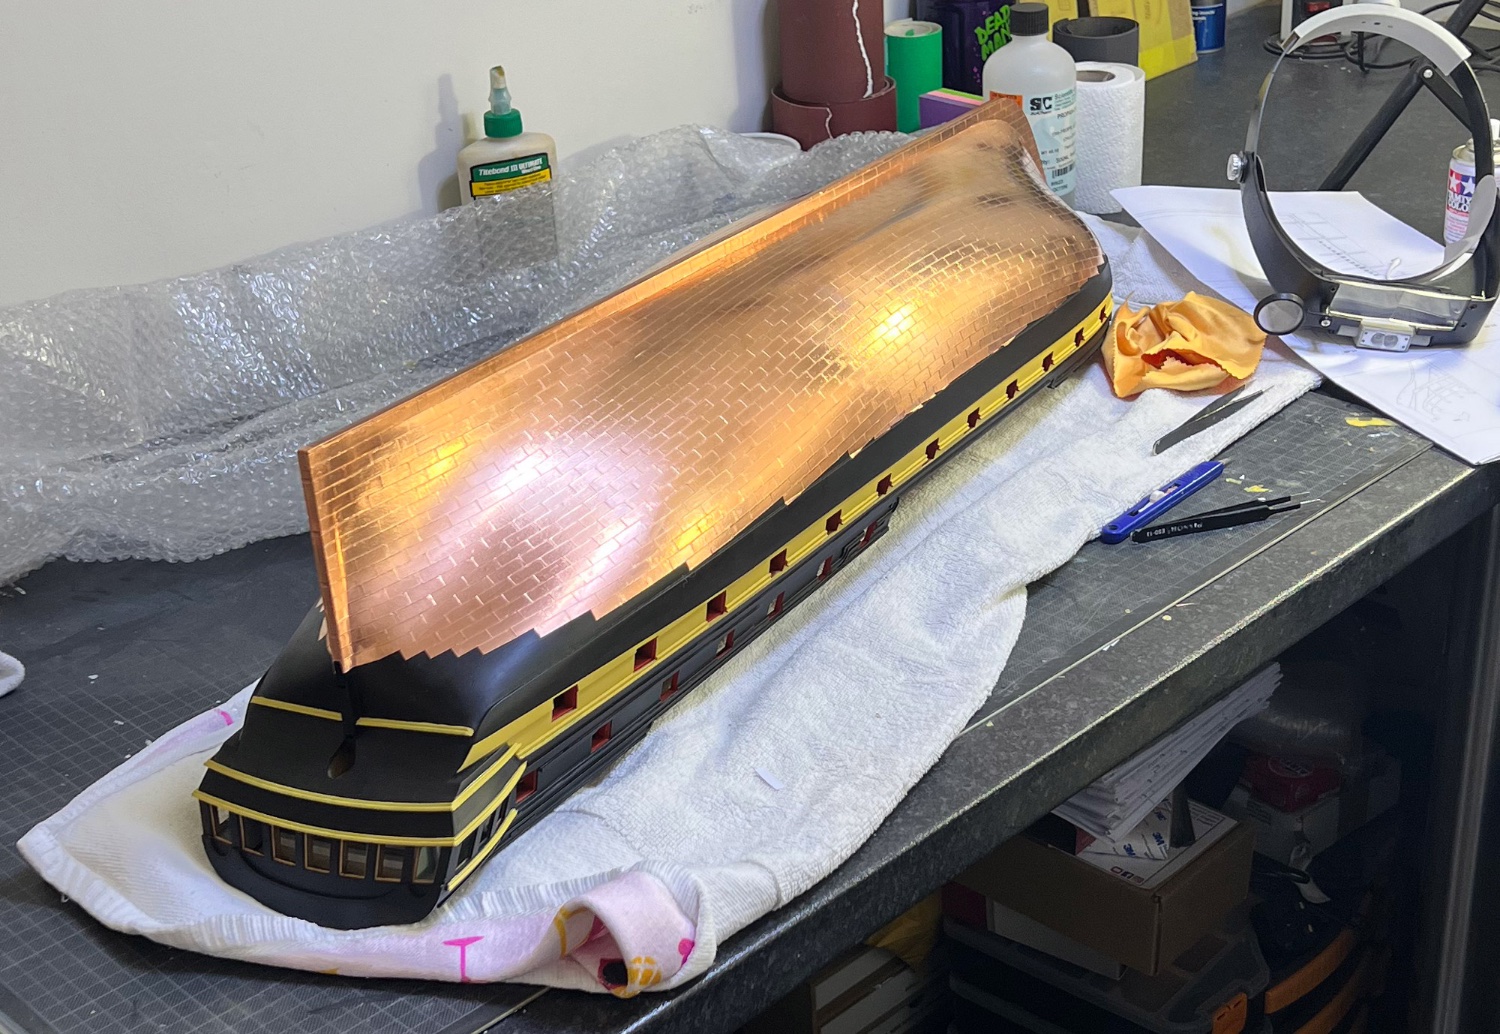
I've coppered the first side and will do an update once I've coppered the opposite side and trimmed it down to waterline level. Here she is so far.

- 488 replies
-
- 32
-
-
-
- Indefatigable
- Vanguard Models
- (and 1 more)
-
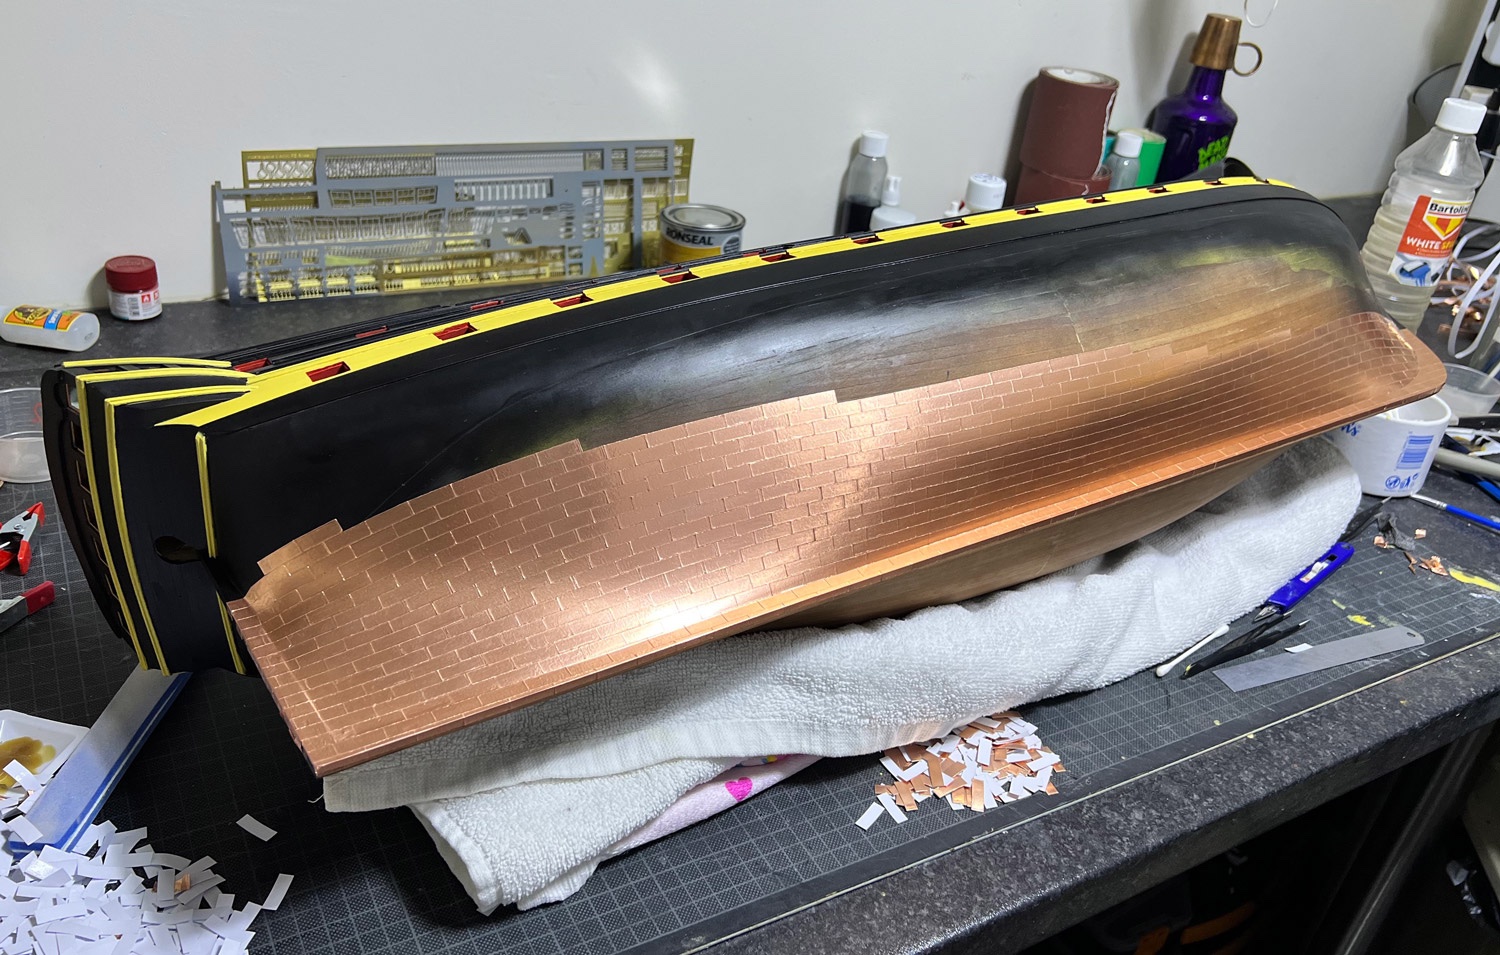
I'll do a proper update in a few days, showing coppering, but until then, here's a photo showing the work so far. Coppering is a fairly quick process, thankfully, and fairly therapeutic.

- 488 replies
-
- 39
-
-
- Indefatigable
- Vanguard Models
- (and 1 more)