James H
-
Posts
6,139 -
Joined
-
Last visited
Content Type
Profiles
Forums
Gallery
Events
Everything posted by James H
-
 As the flag needs trimming from its sheet, just trim that red line off.
 -
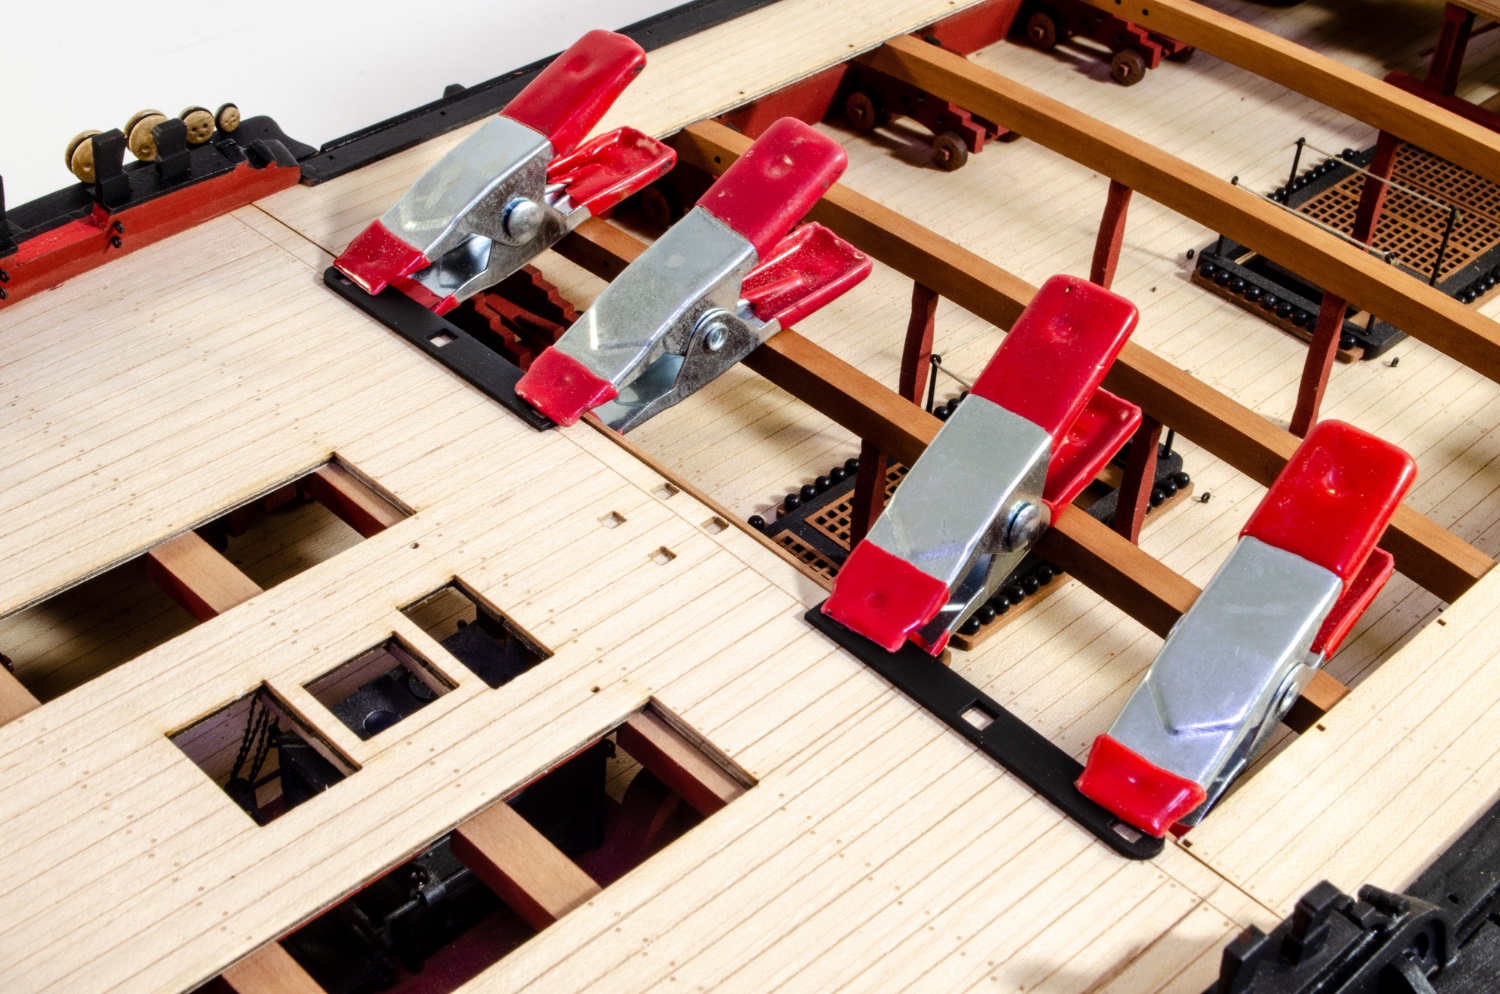
Just remember to taper those planks as you fit them. Take a few of them and soak them, then add a gentle curl into them also. That will help get those first ones installed a little easier if you're not used to working on them.
- 426 replies
-
- 3
-

-
- Vanguard Models
- Sphinx
- (and 1 more)
-
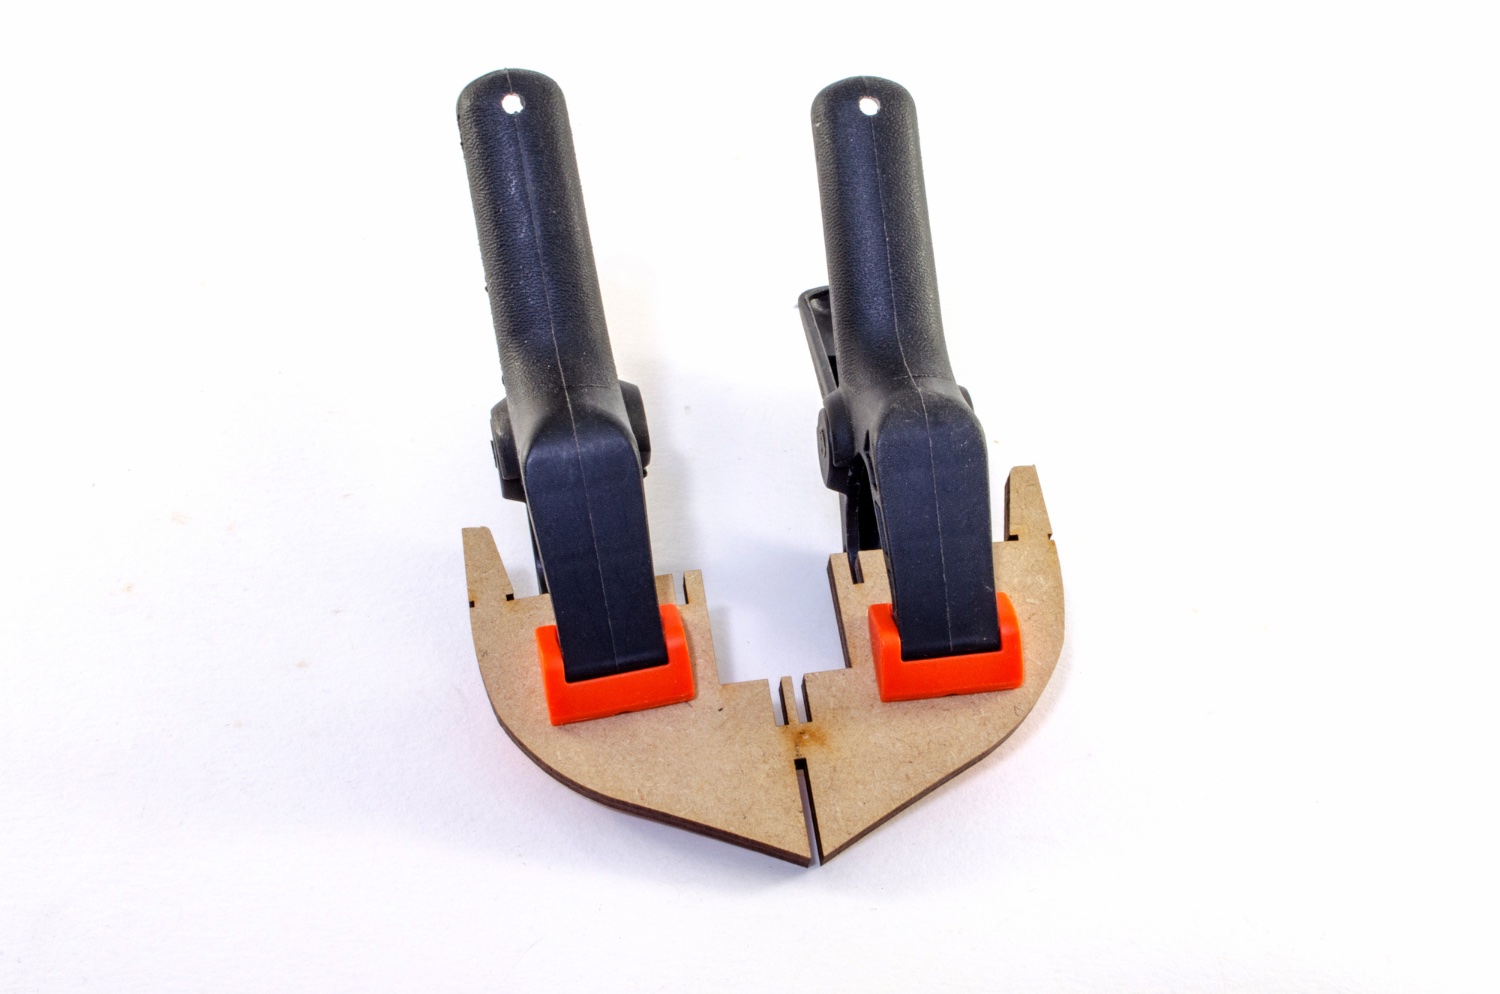
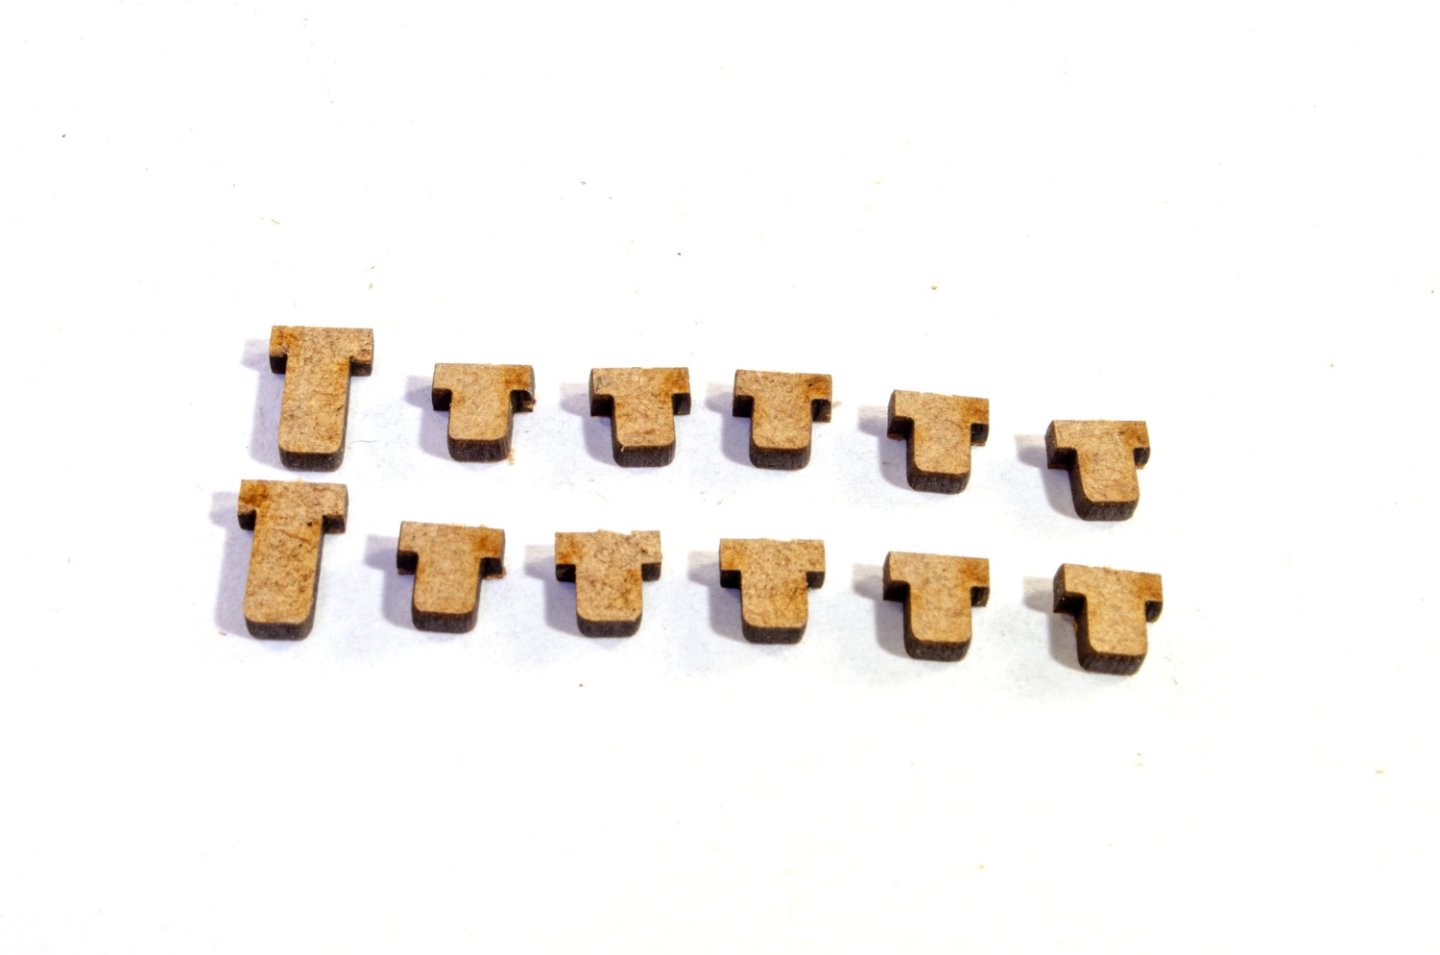
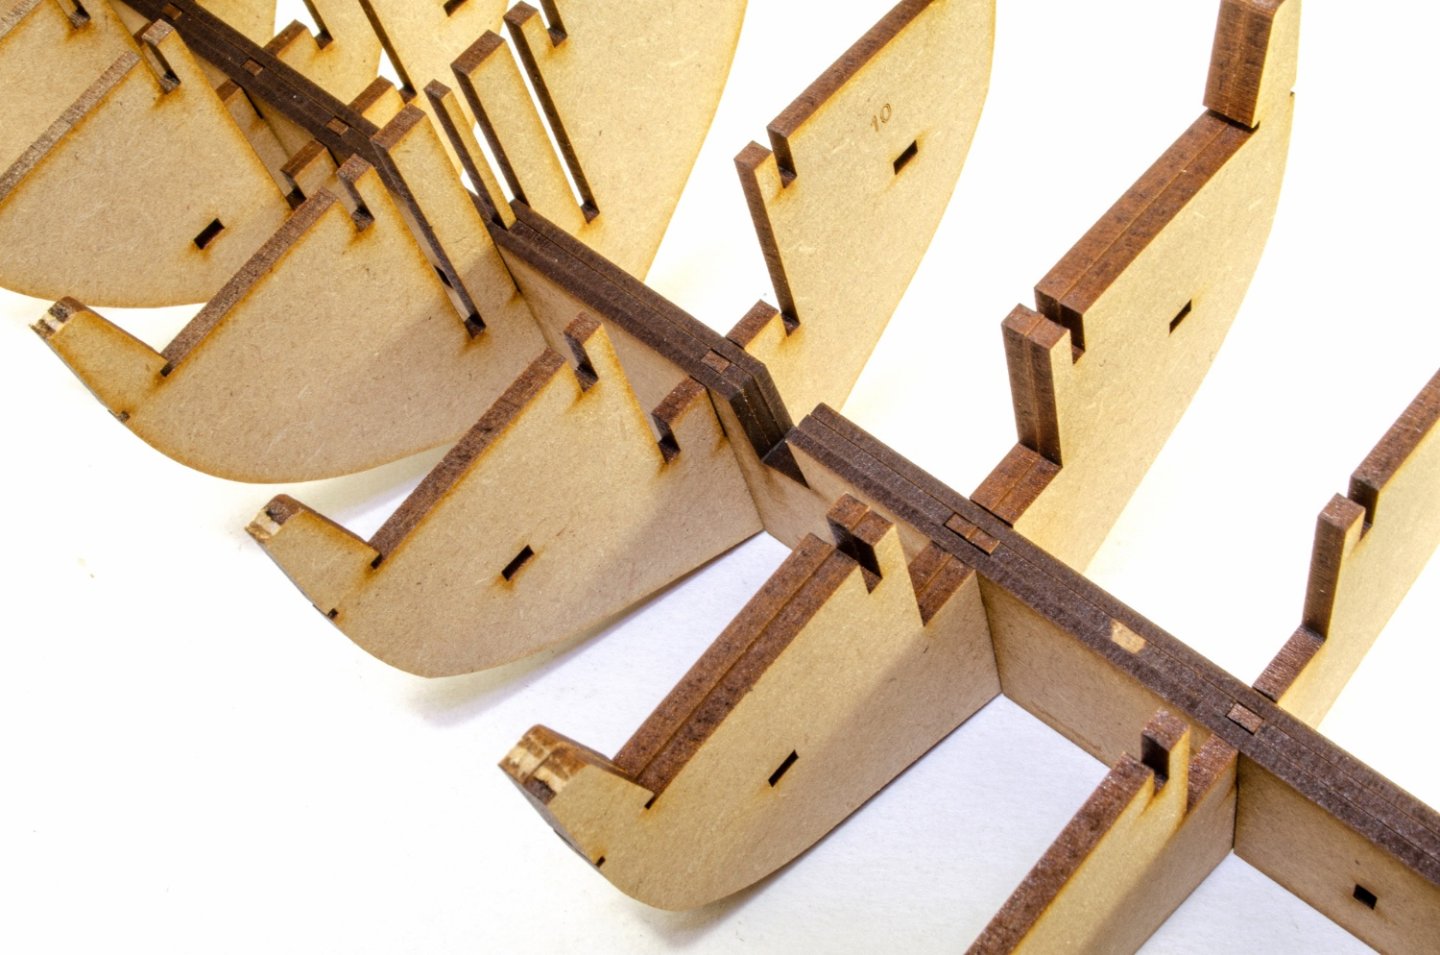
...continued Those doublers are now pinned into place with a series of plugs. These are glued into position. Before the sub decks can be fitted, the need bolstering a little from below towards the stern. These two parts are now fitted which create a firm base for the sub decks. Those sub decks are now DRY FITTED into place. Now, we have a lot of unglued joints that could come apart, so this is stopped by gluing a series of plugs through the holes in the bulkheads, holding the sub decks firmly in position, and all the other parts in a perfect position. And the last in this update shows the final bulkhead, with the various forms glued into place prior to being shaped and secured to hull. ....until next time.


- 80 replies
-
- 24
-
-

-
- Grecian
- Vanguard Models
- (and 3 more)
-
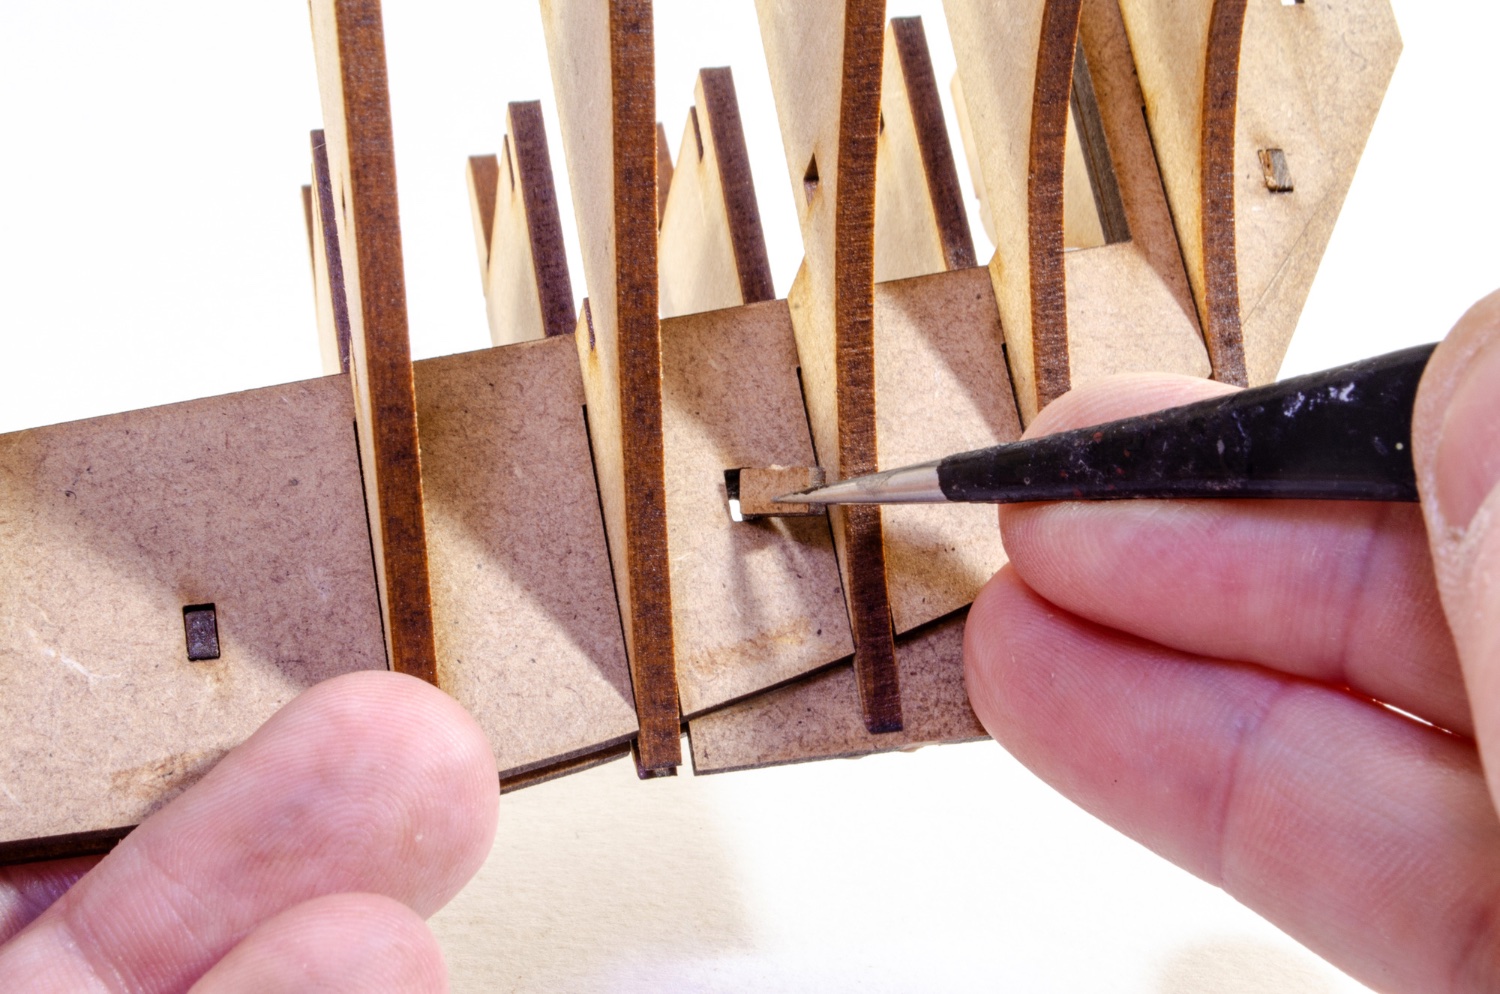
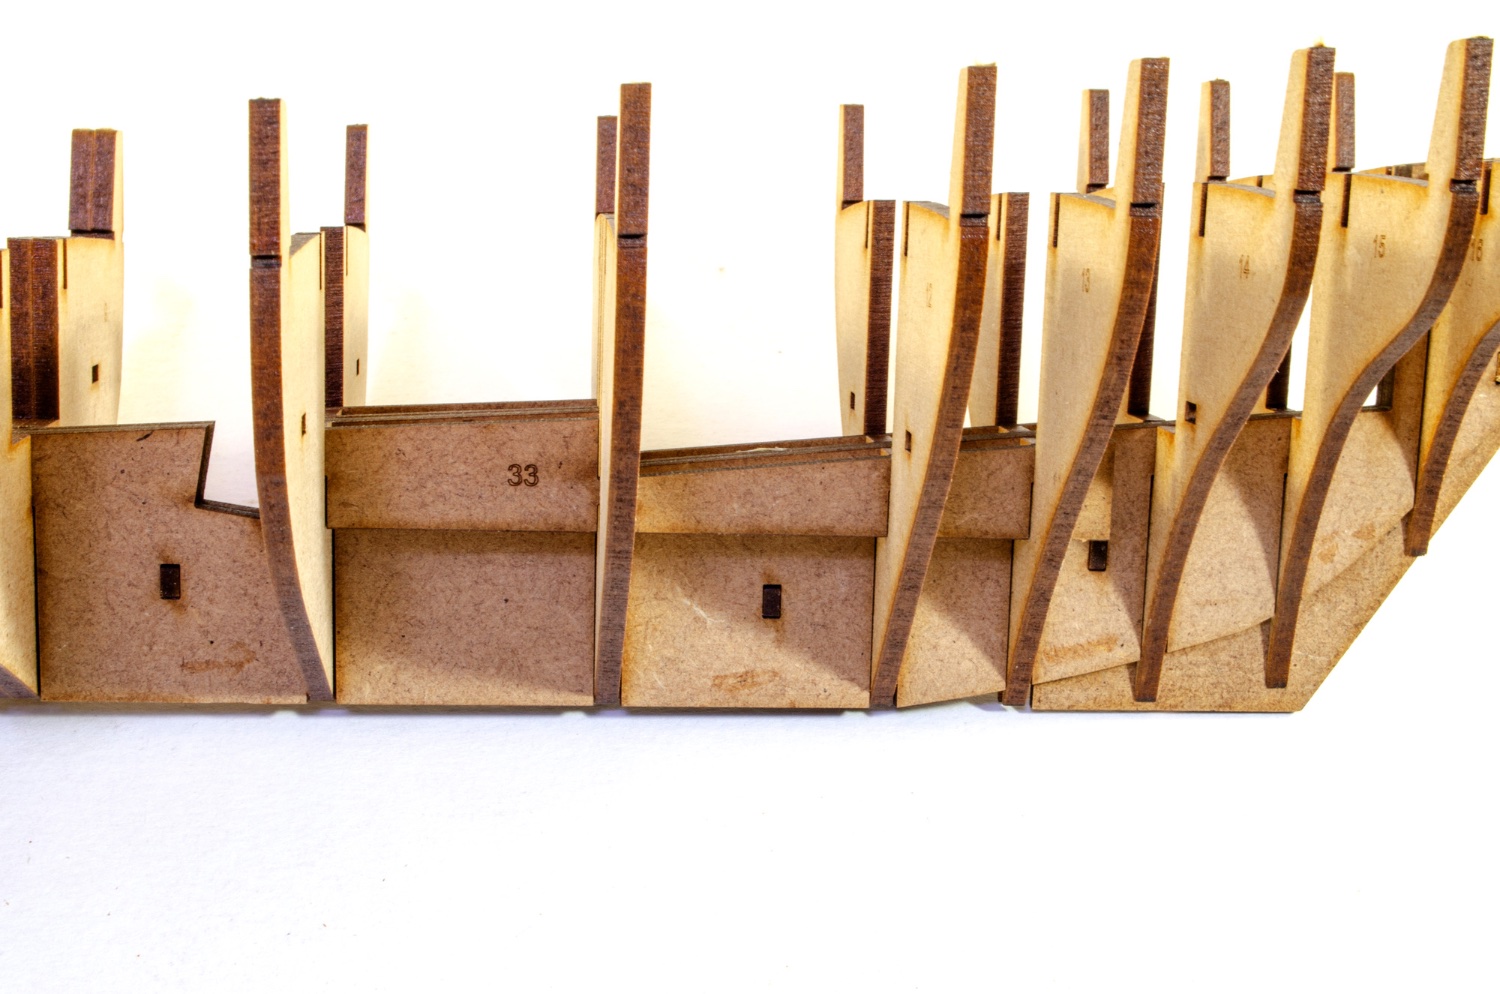
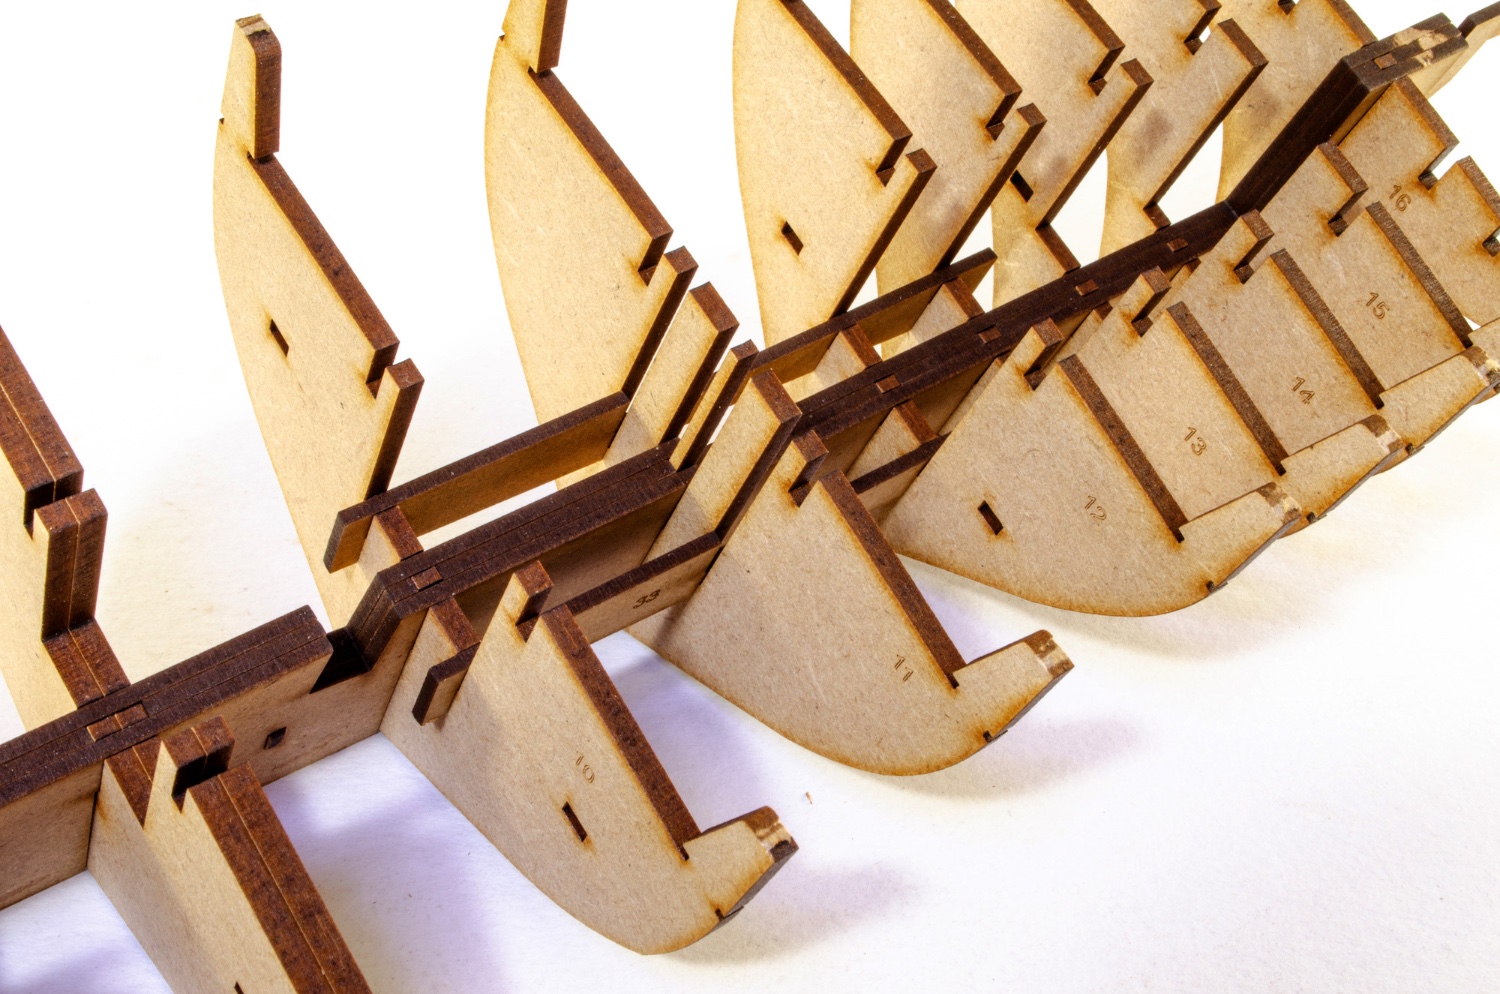
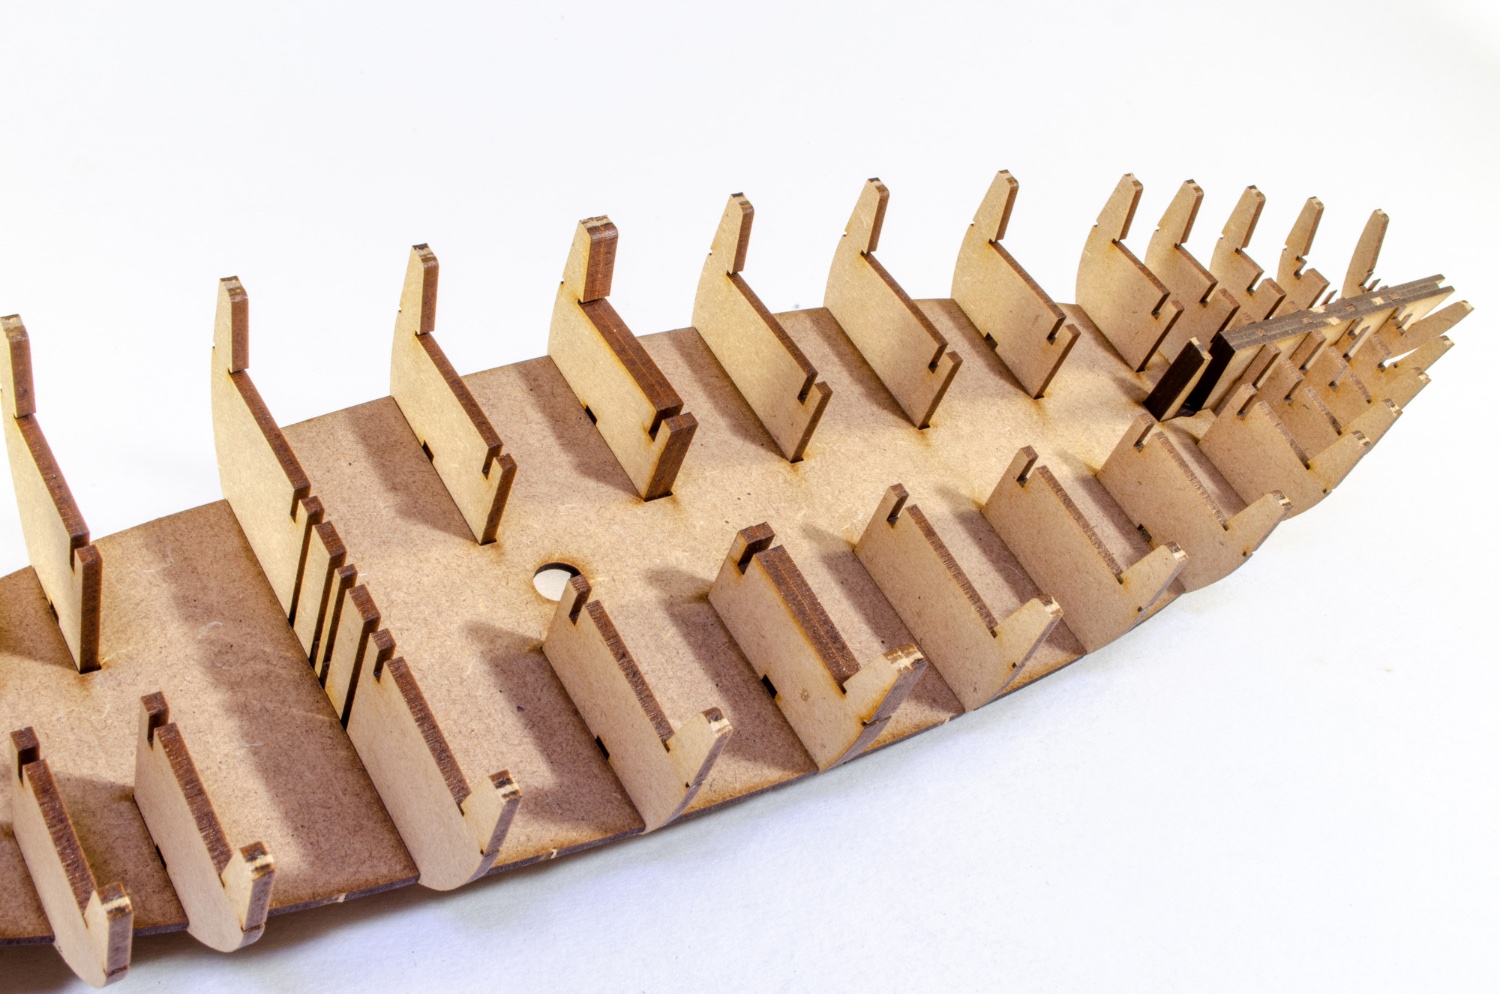
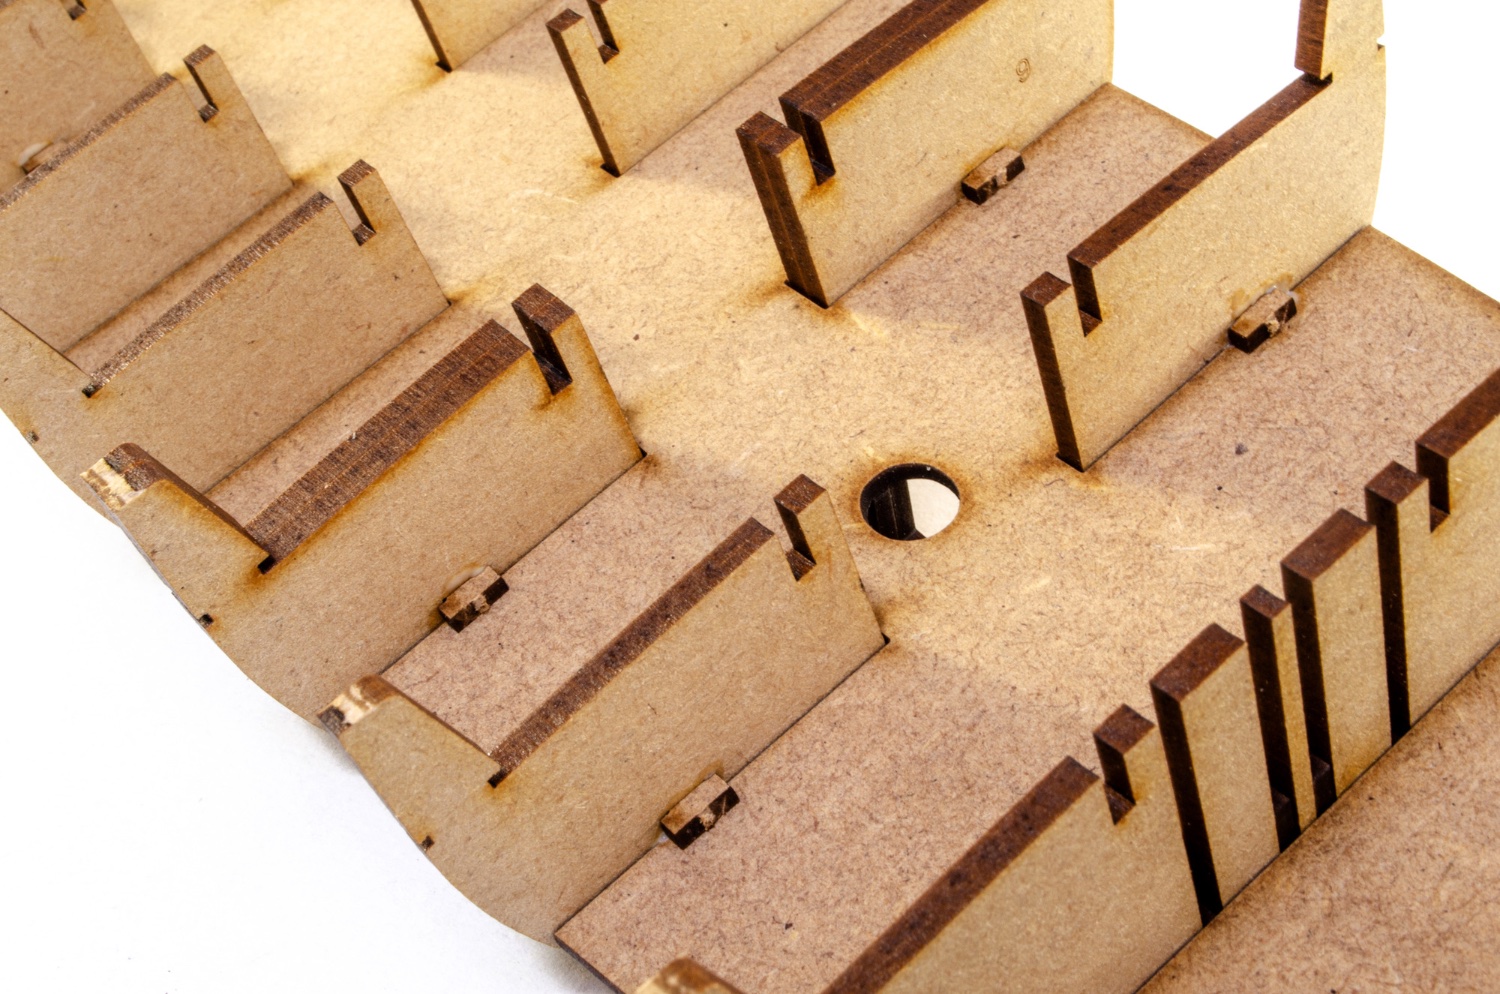
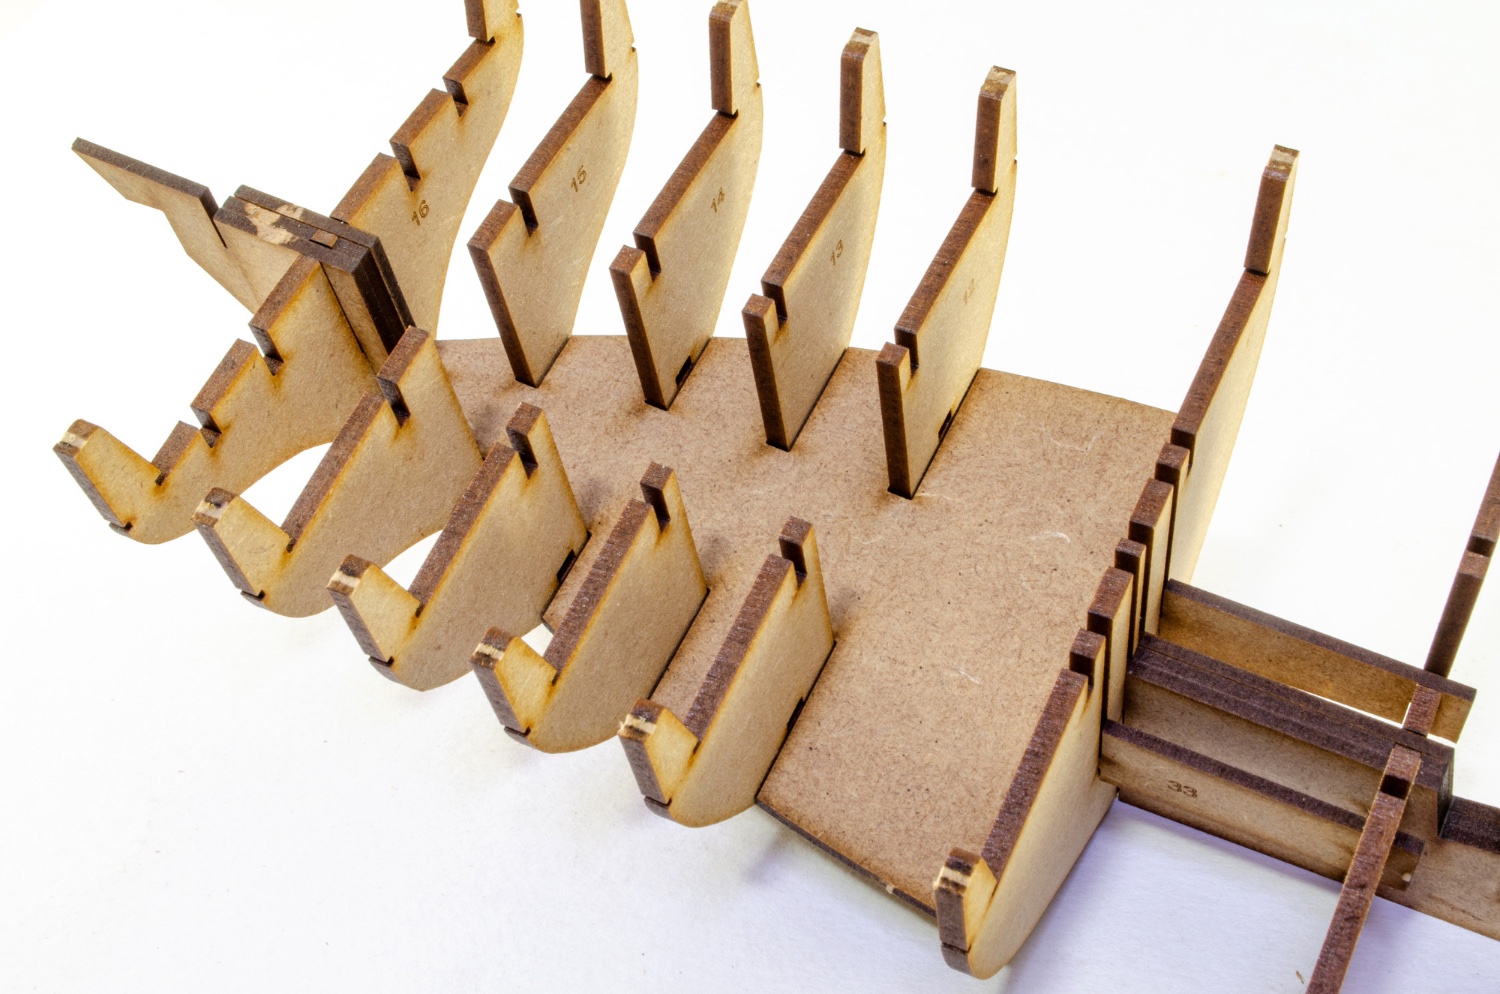
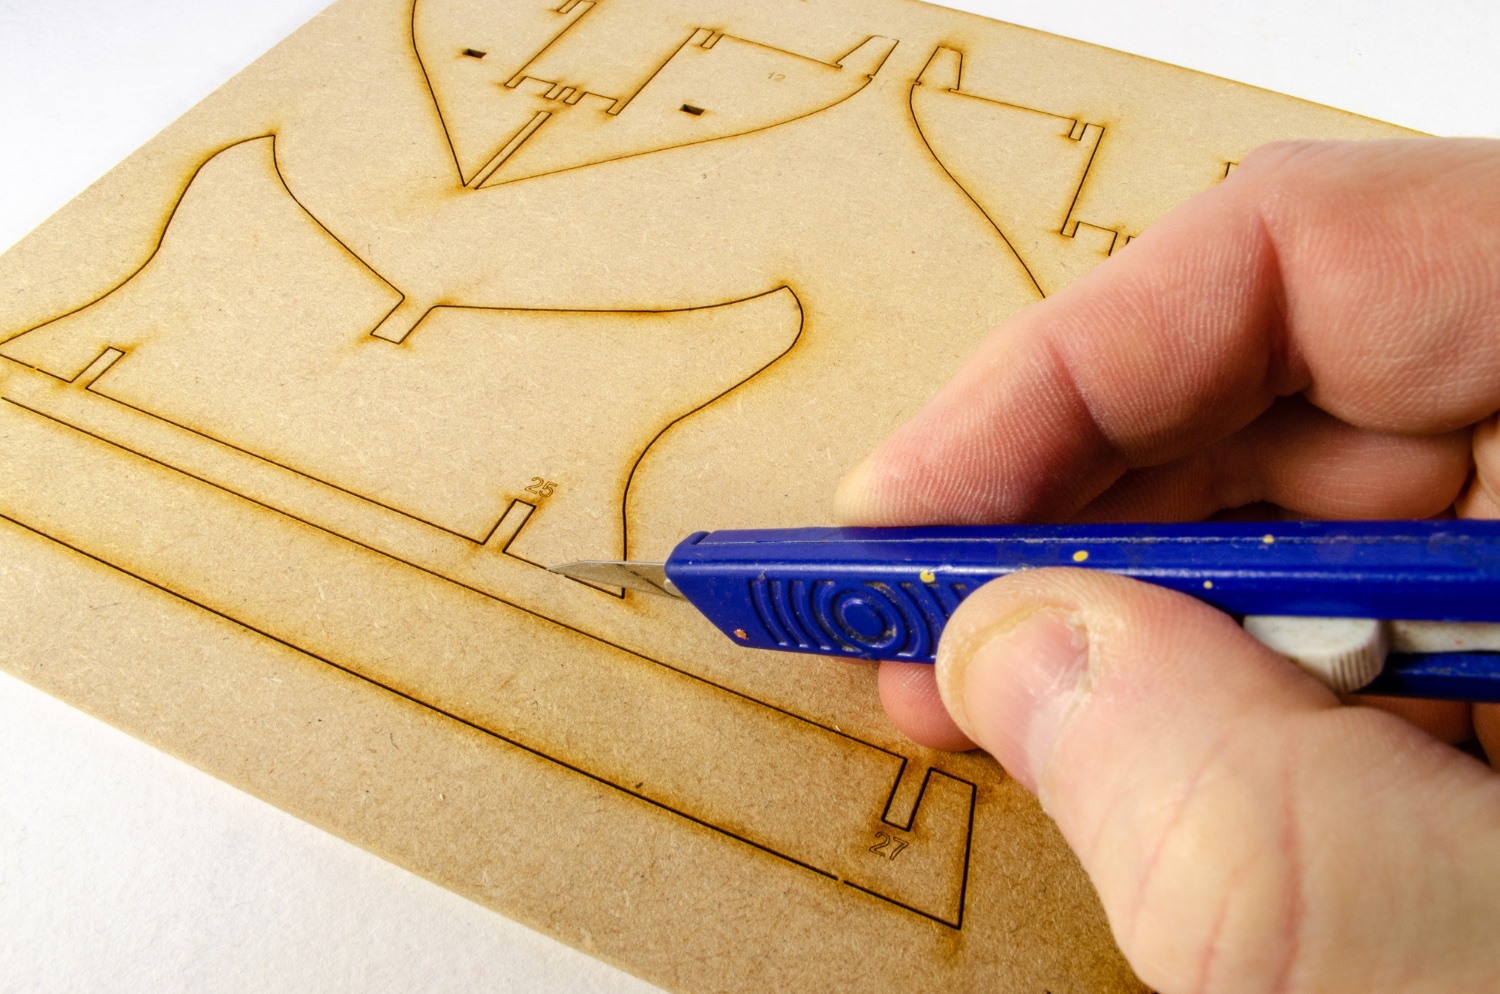
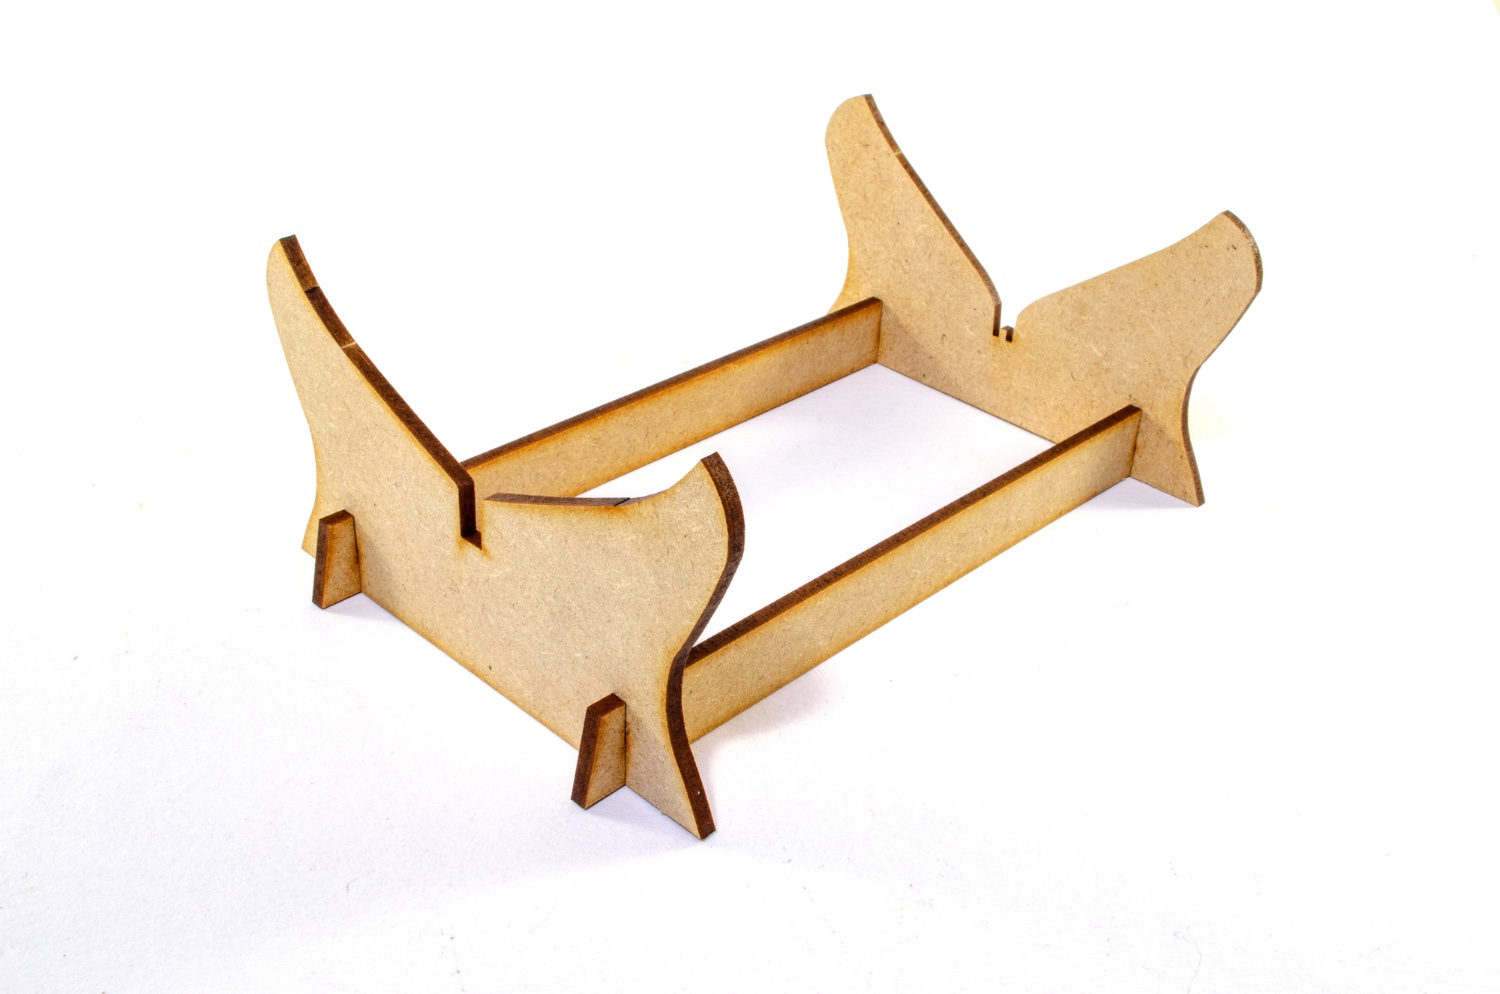
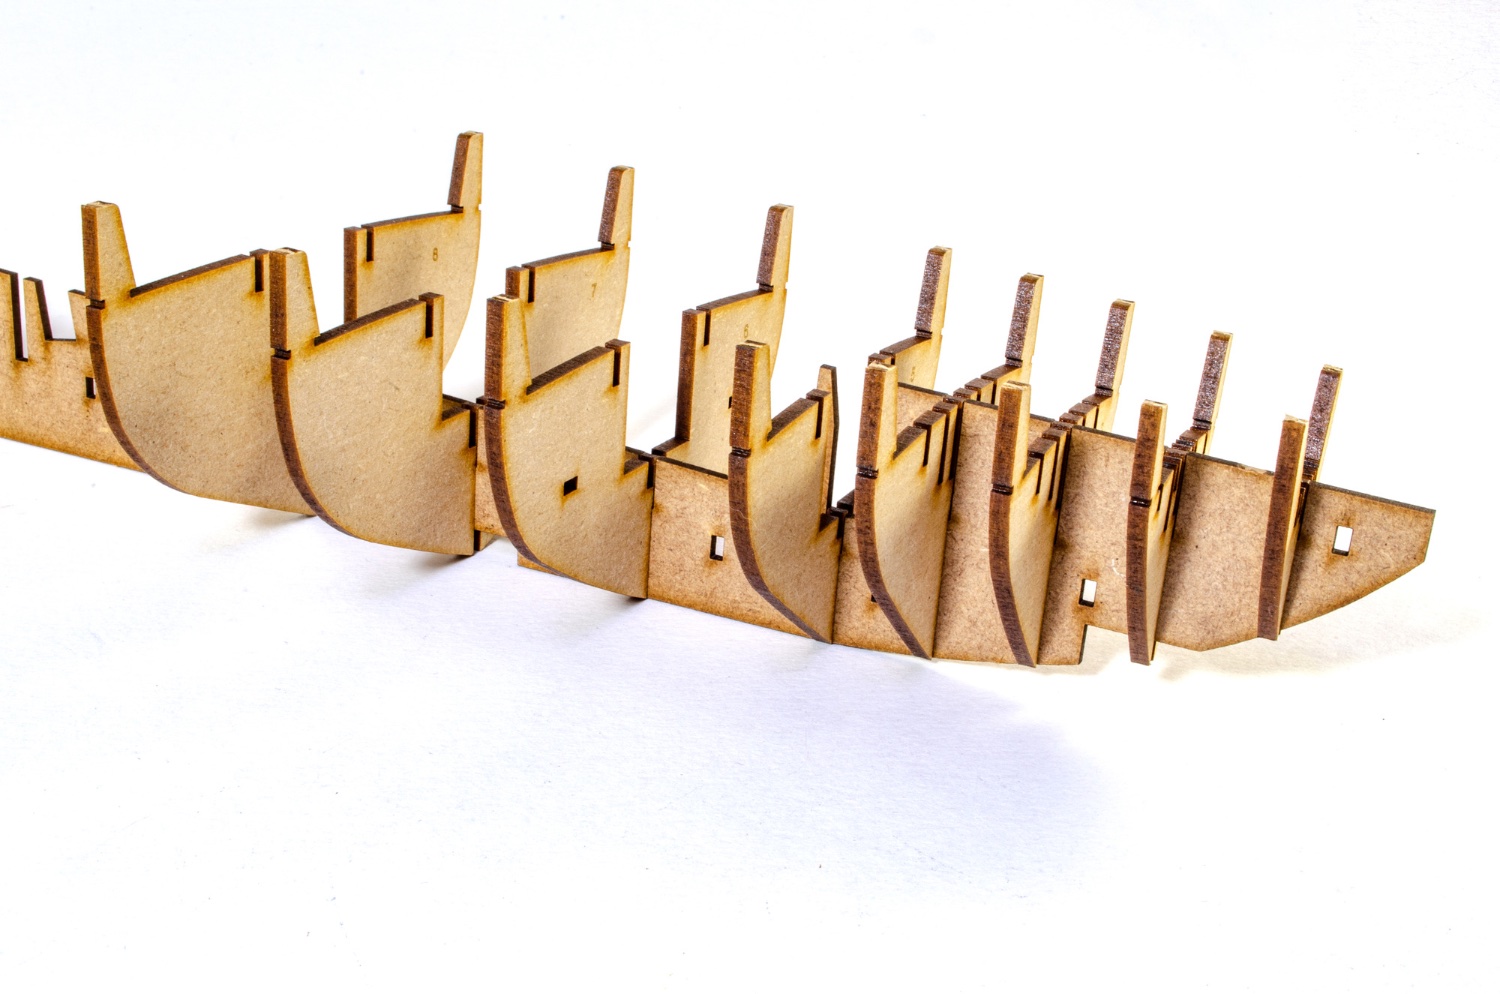
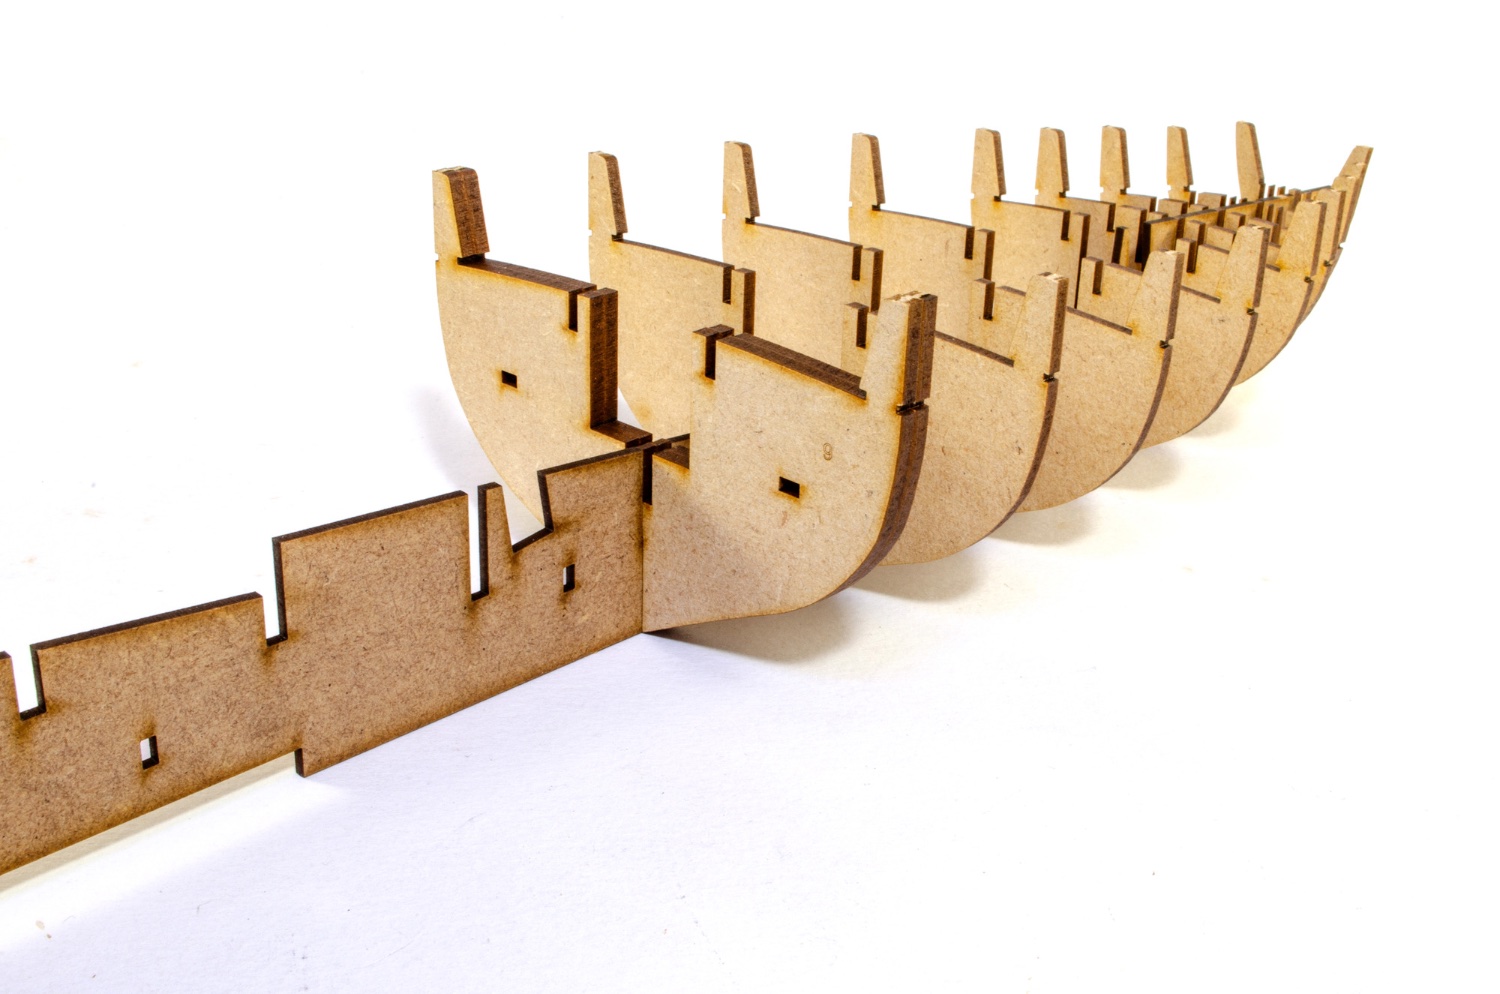
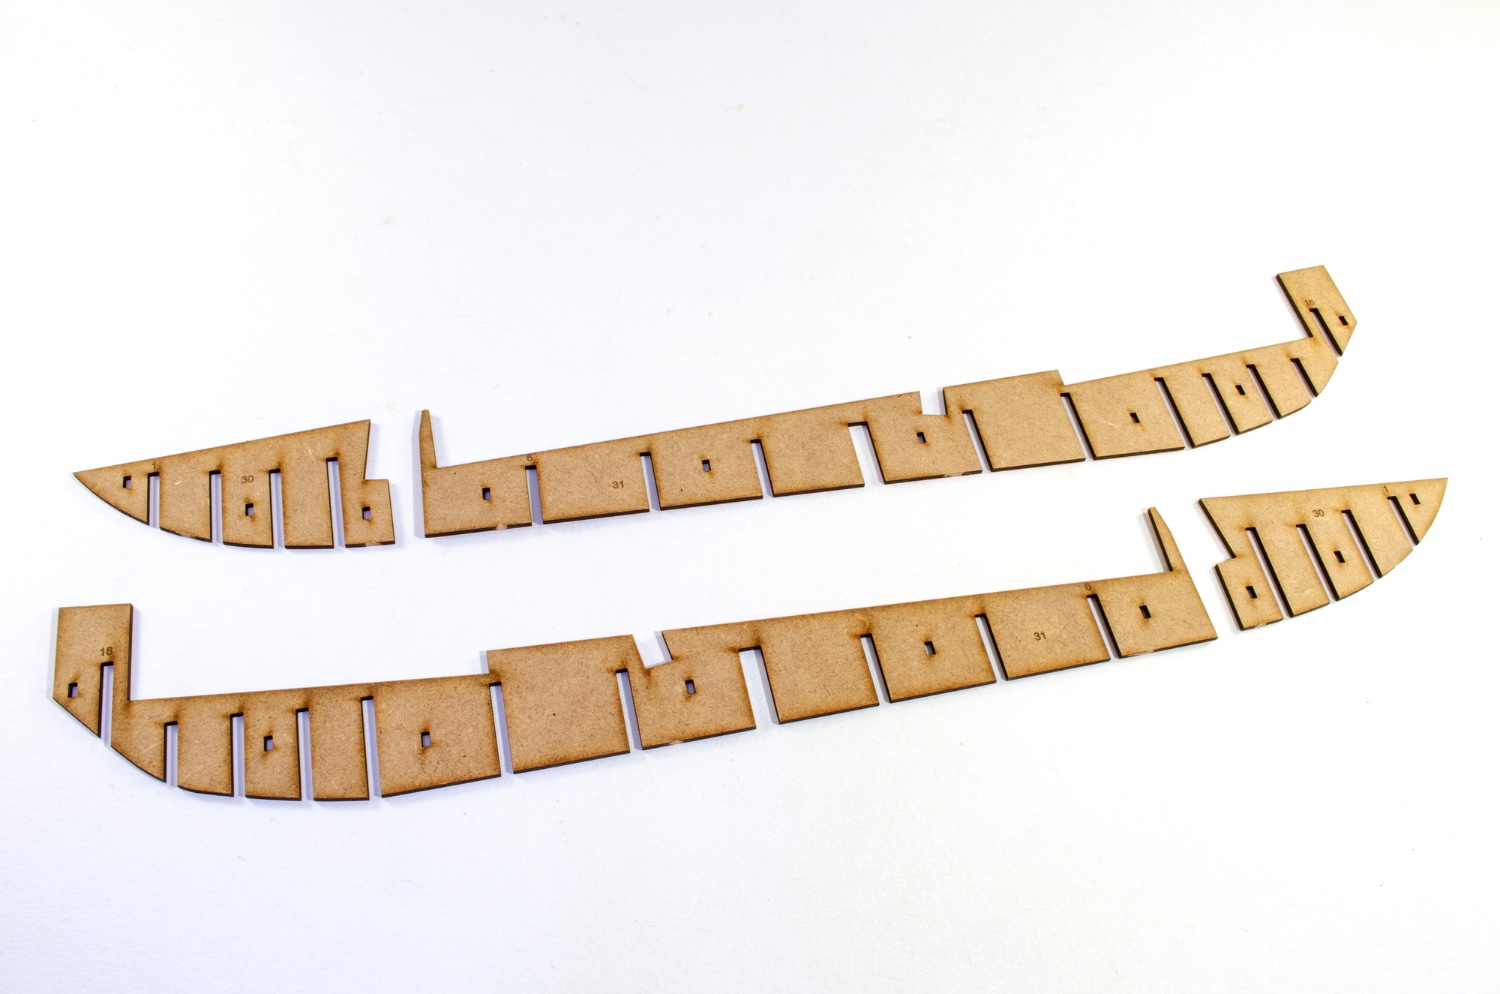
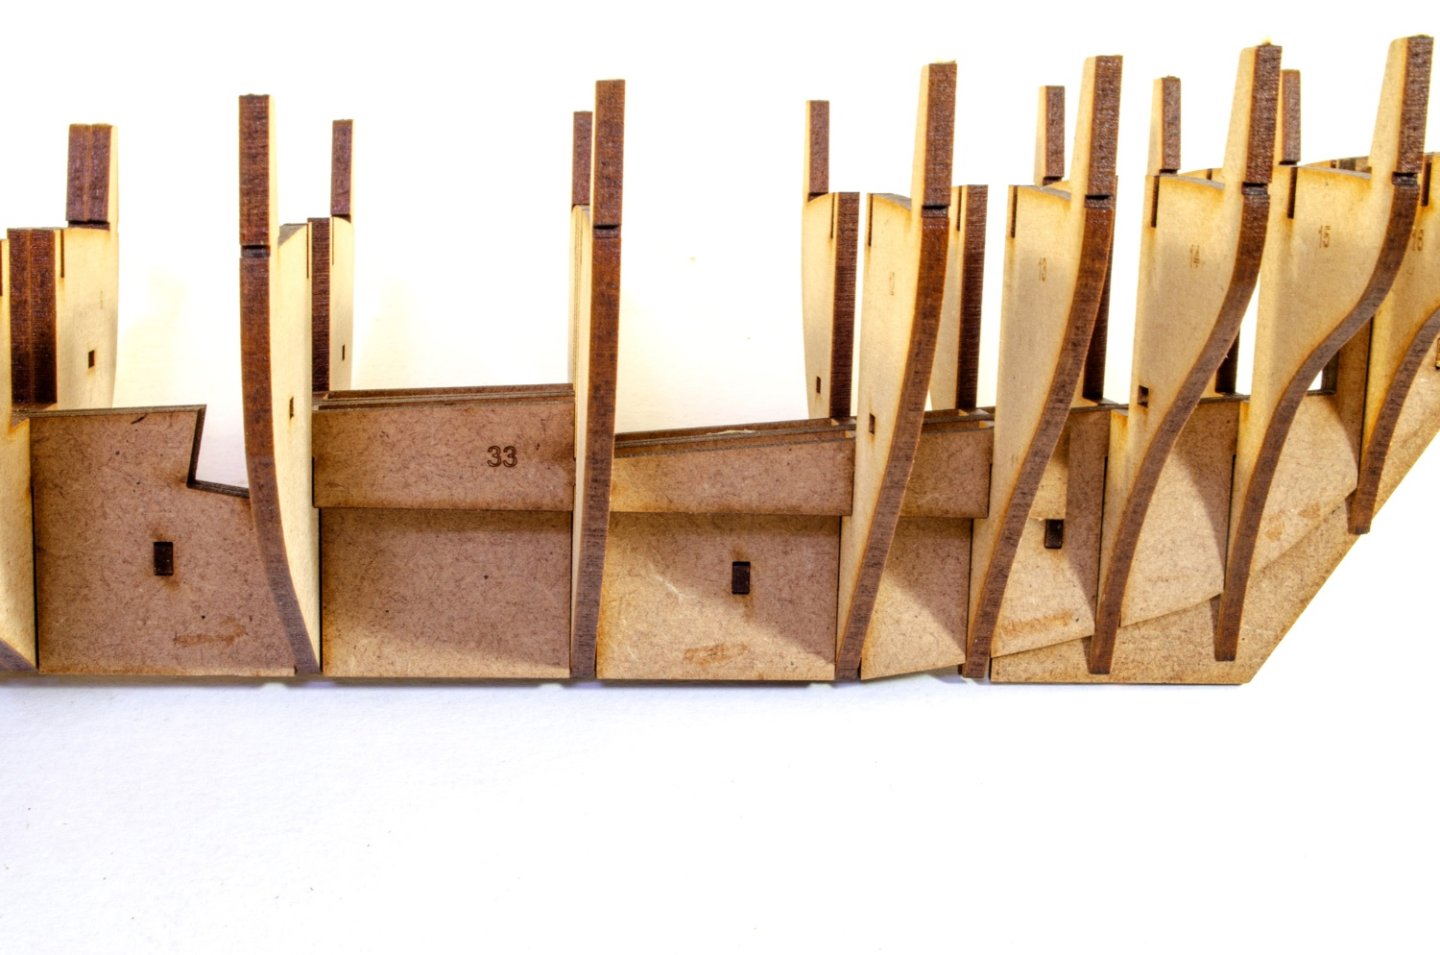
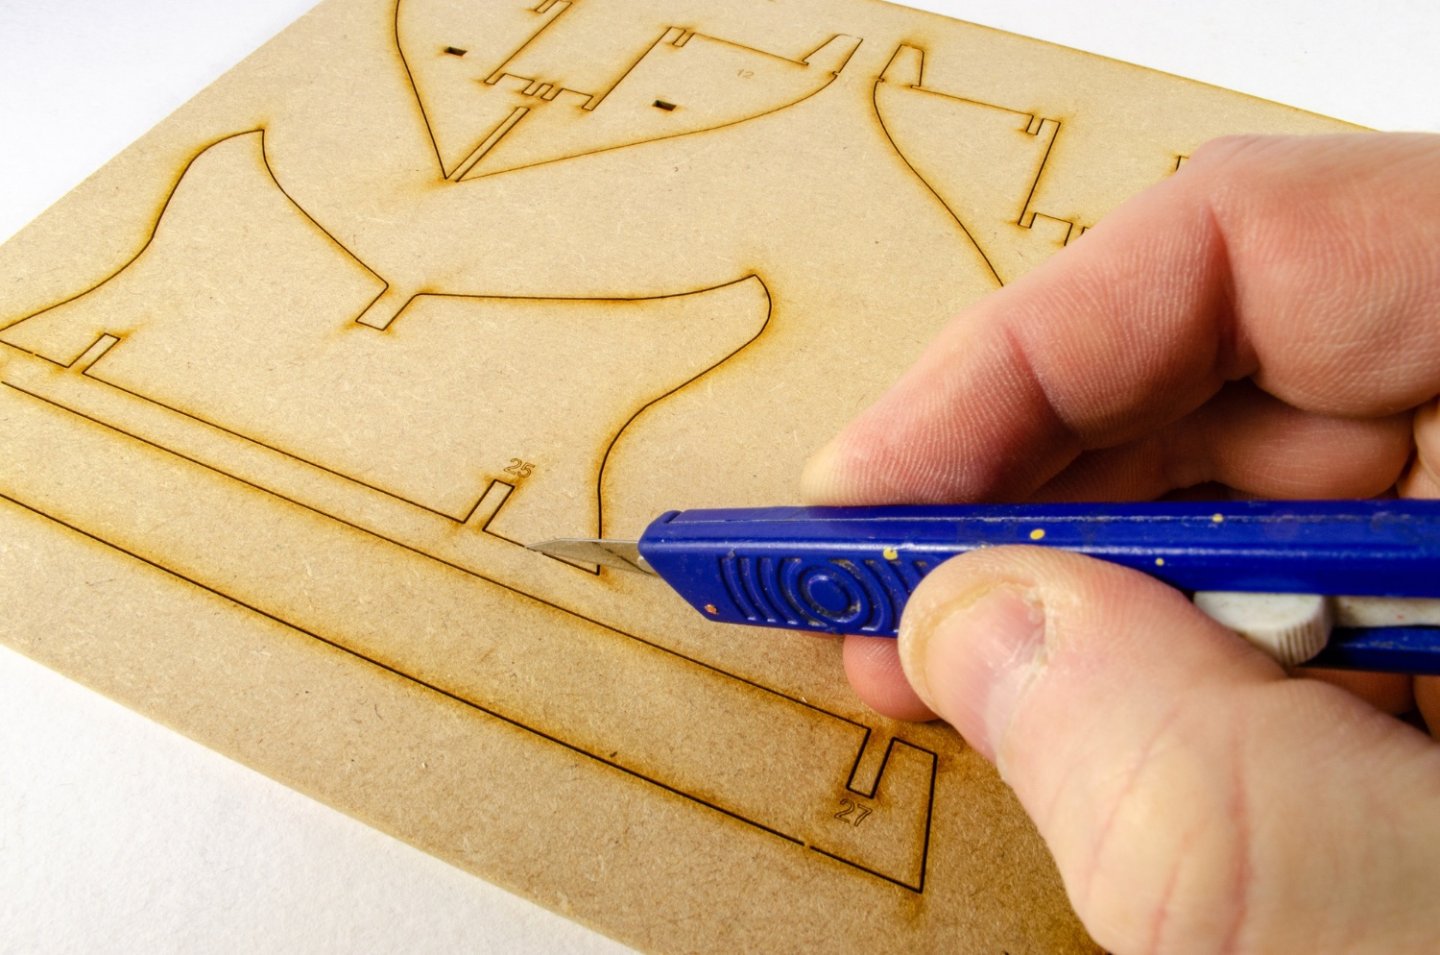
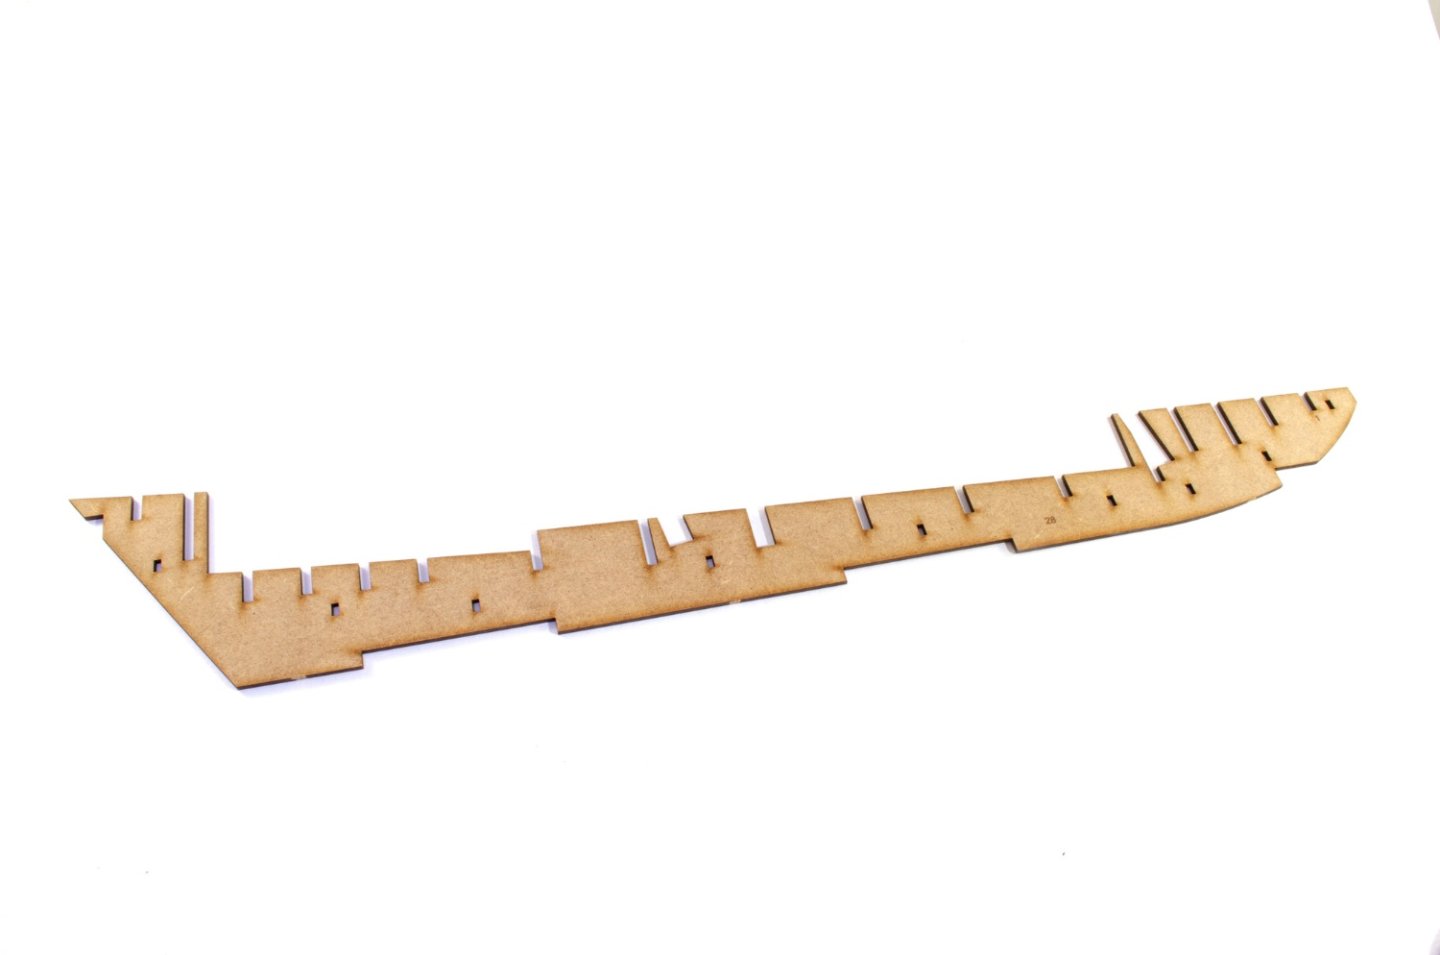
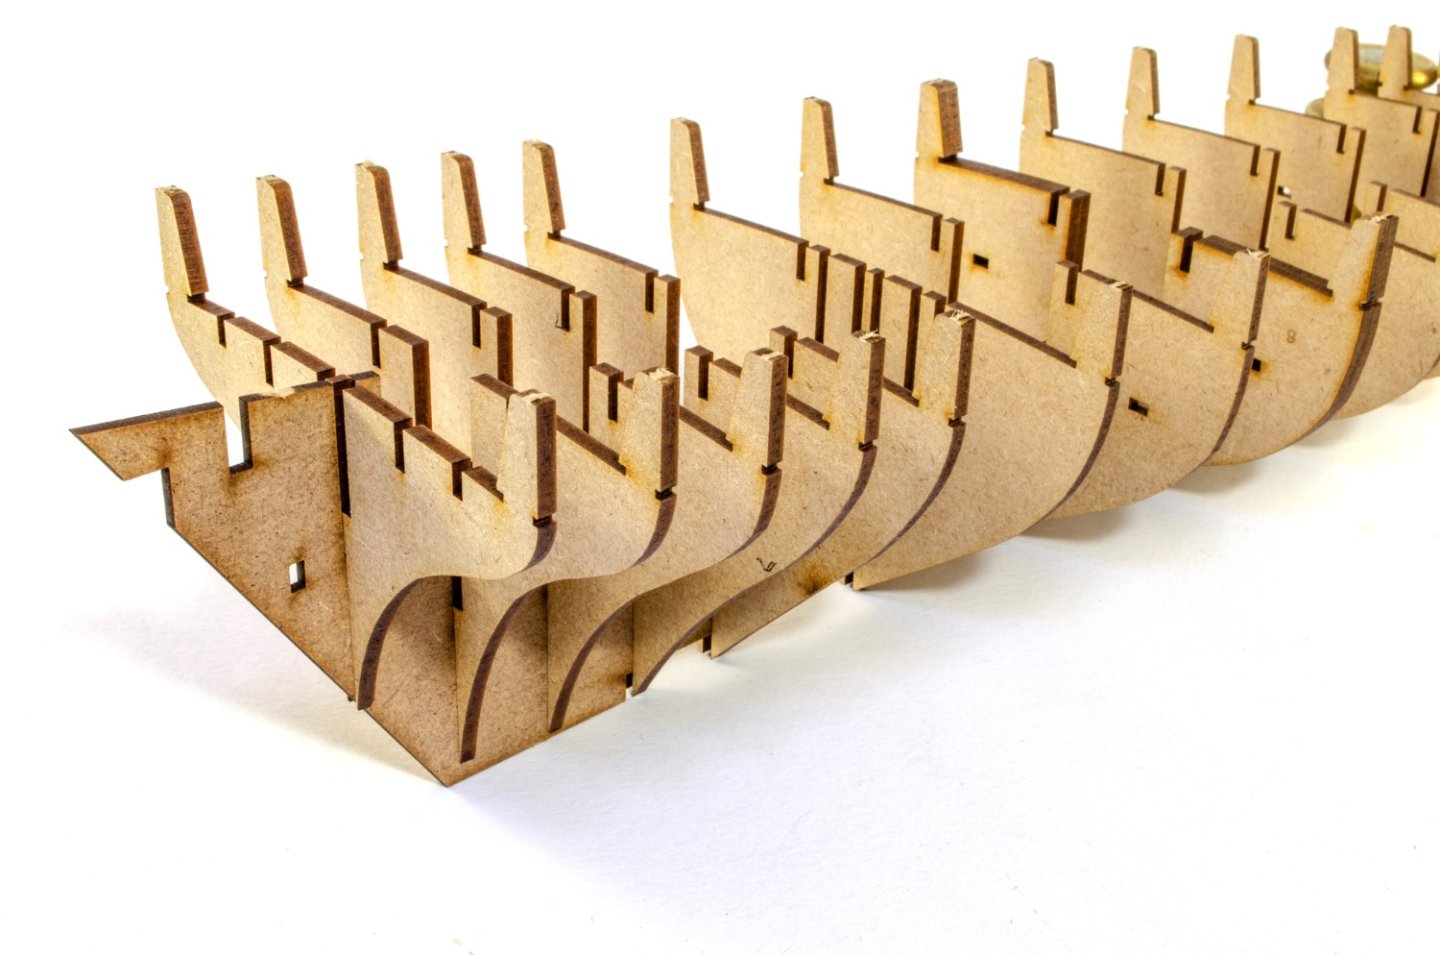
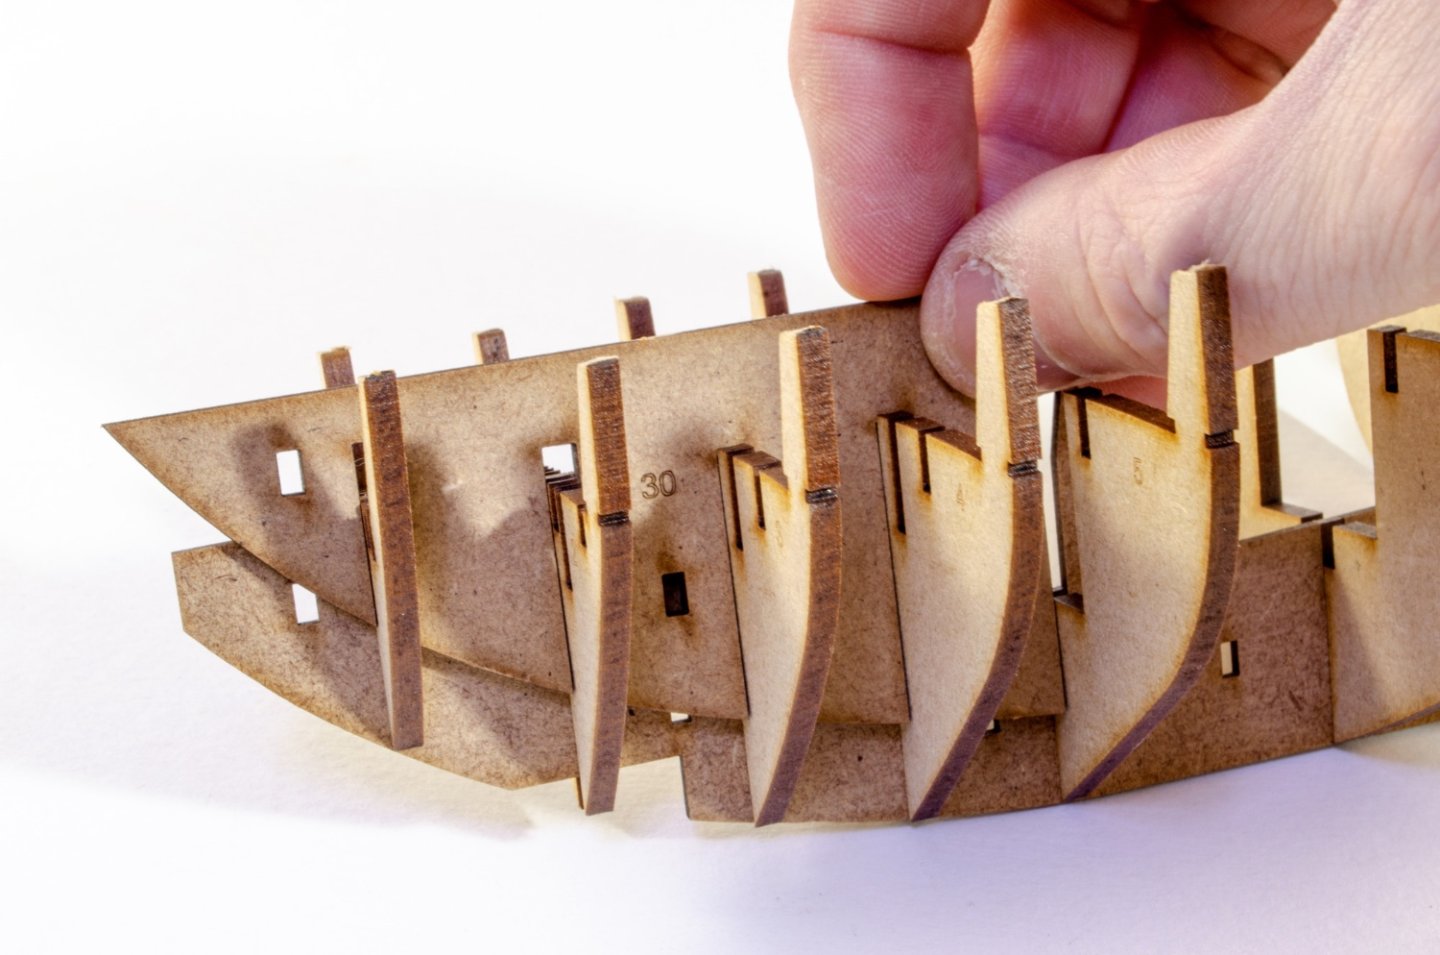
You've got to have hair to worry about that! Ok, an update. If you've followed other build logs or downloaded previous instructions, you'll see much that's familiar at this stage. There has been a developmental curve that can be traced through the various kits as they've been released, and you'll always find those advances in subsequent releases. I see a lot in this that have come from the Duchess kit, through Sphnx, Indy, and even the more humble fishers. Here, we start with the obligatory build cradle. The stern of Grecian sits far deeper in the water than the bow, so the cradle deals with that, and you'll see a little pip in one keel slot. The sits in an opening in the hull, angling the hull properly so the waterline can accurately be marked and the model displayed at the correct attitude. Here is the keel, designed to accommodate SEVENTEEN bulkheads! This will be a sturdy model. The first slot is ID'd with '1' to correspond with the first numbered bulkhead. From there, just work backwards. At this stage, NO glue is to be used. Bulkhead #9 is made from two identical parts, glued back to back. When made, the bulkhead is fitted to the keel, again with no glue. The last bulkheads are fitted, except for the rearmost one. No glue! All those bulkheads, for the moment, can move about a little. A lot of that is now removed by sliding full length doublers down each side of the keel, directly up against it. These are in two parts per side.


- 80 replies
-
- 18
-
-
- Grecian
- Vanguard Models
- (and 3 more)
-
Oh, and here's a nice video review of the Duchess. Enjoy!
- 117 replies
-
- 8
-
-
- vanguard models
- yacht
- (and 2 more)
-
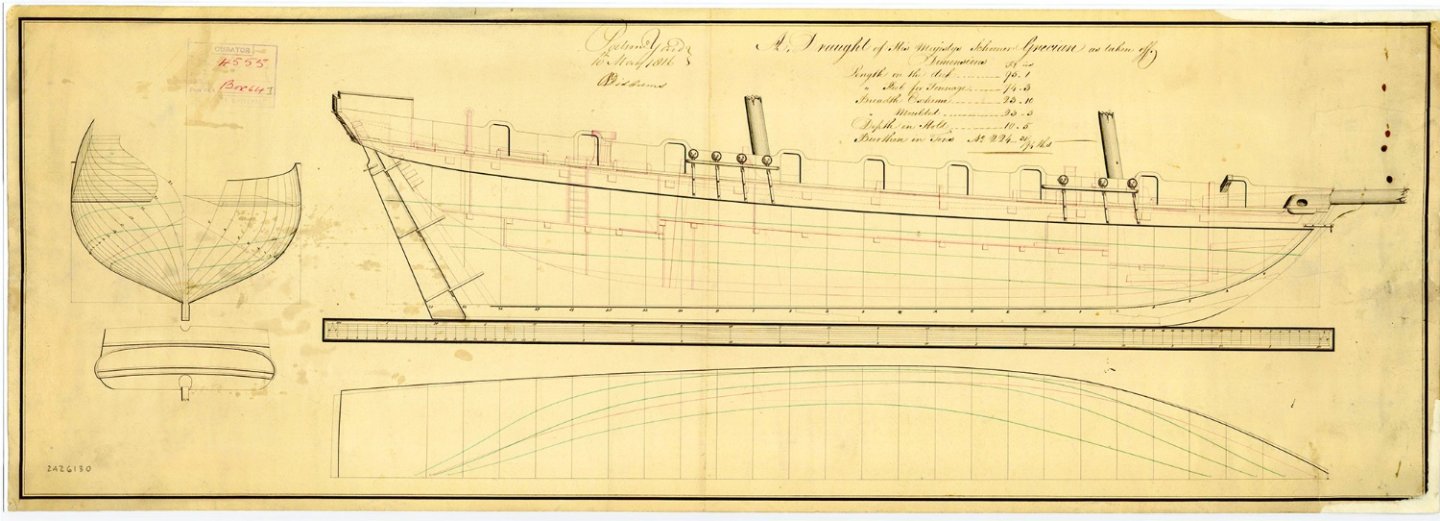
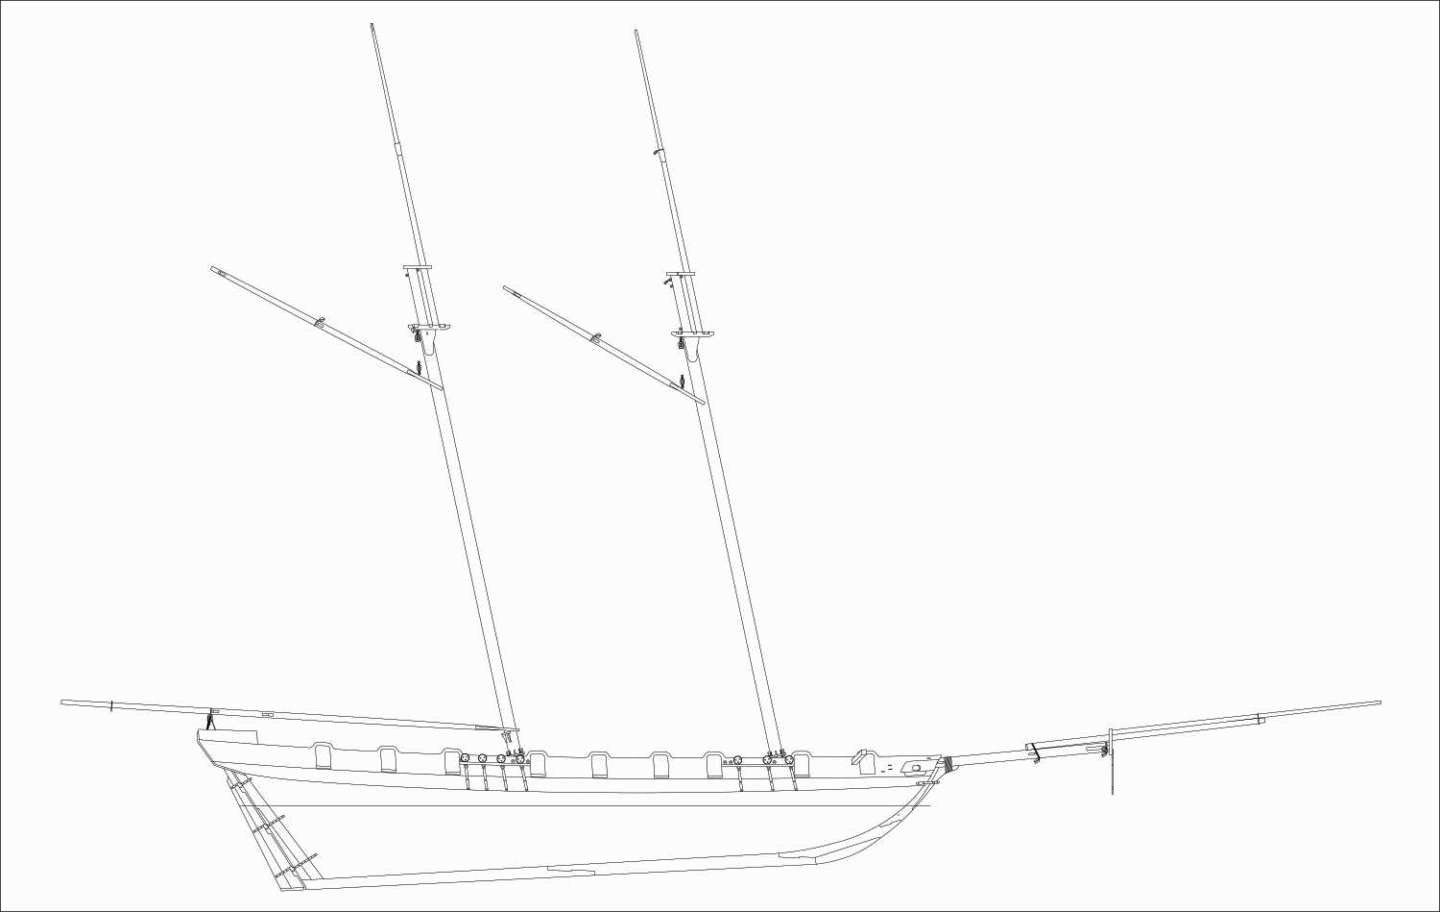
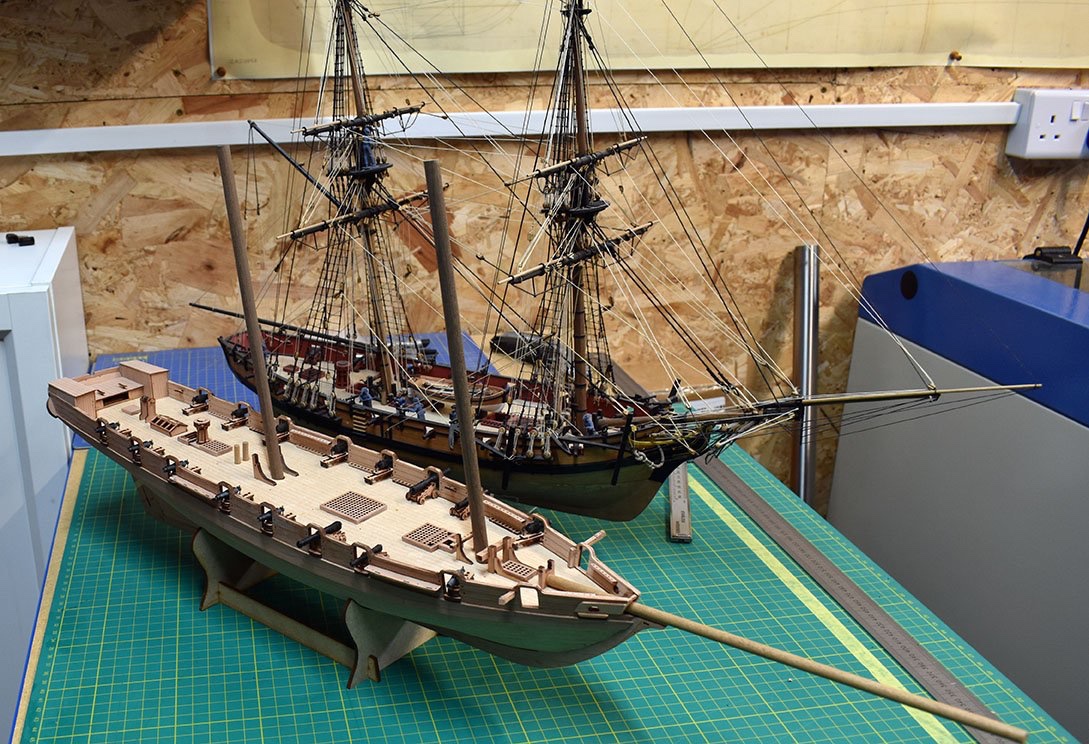
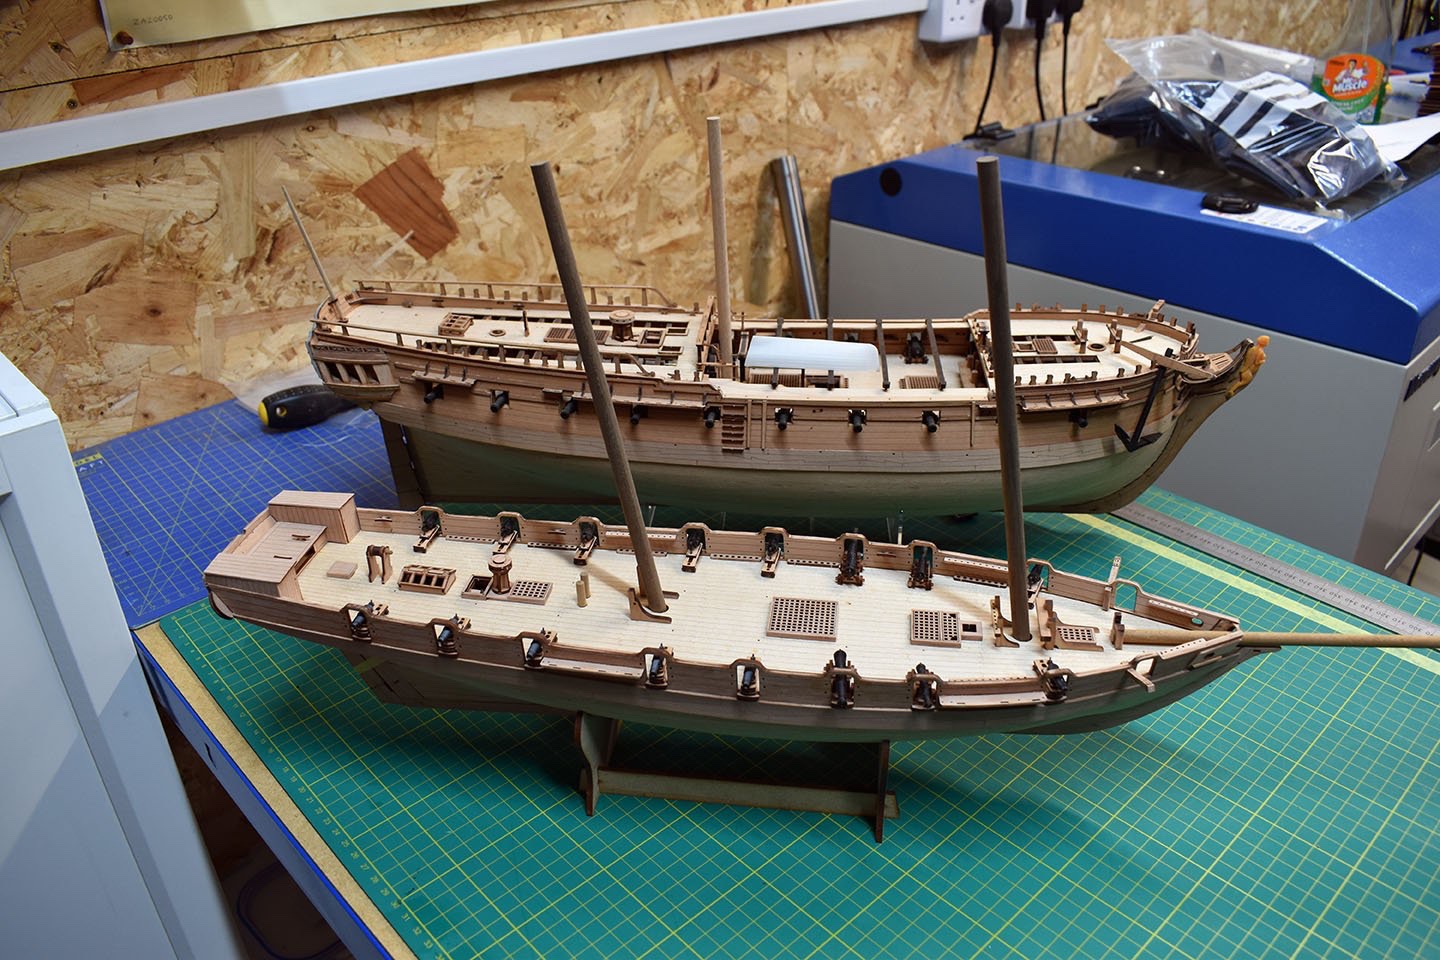
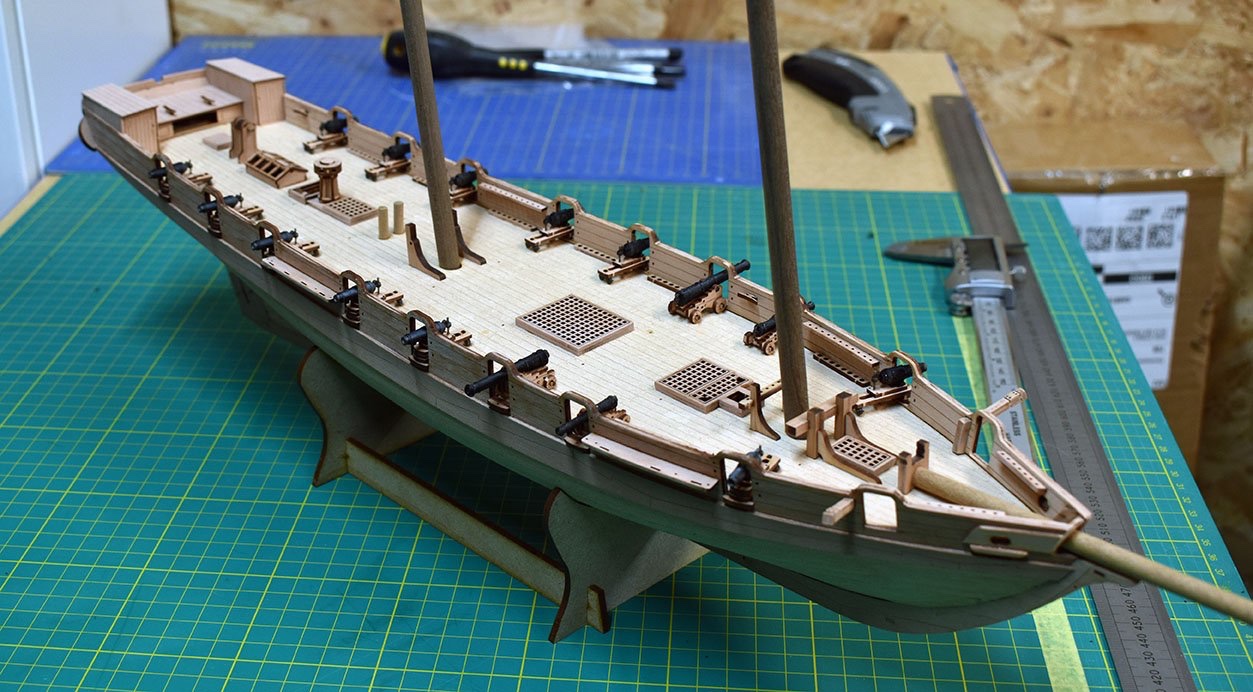
Ok folks, This kit will be hitting the doormat tomorrow so I'll be starting work tomorrow afternoon. Again, this is a prototype for the kit, and I'll be doing the kit manual pics and text as I go. Some history, abridged from Wiki Grecian was an American schooner launched in 1812. During the War of 1812 she received a letter of marque. The Royal Navy captured her on 5 February 1814 and took her into service as HMS Grecian. She was sold in 1822. In 1823 she became a merchantman. In 1824 the Chilean Navy captured her, but she escaped, and thereafter may have served for a time as a Spanish privateer. After the end of the Peruvian War of Independence she apparently returned to more conventional pursuits and was probably lost in 1829 though she was still listed in 1830 as sailing between London and Lima. She had a long, curving stem, and a shallow, less convex bow. Grecian's first captain was James Phillips, and under him she had made one voyage to France. She received letter of marque No. 944 in December 1813, under Captain Knapp. She had not captured anything before the boats of HMS Jaseur cut her out under the guns of a battery field pieces on East River, in Chesapeake Bay on 2 May 1814. The British cutting out party under Lieutenant West, first lieutenant of Jaseur, rowed up silently in the night, drove Knapp and the seven members of the crew on watch below deck, fastened the hatches, cut her cables, and sailed off. The British commissioned her as HMS Grecian under the command of Lieutenant Henry Jewry. After the end of the Napoleonic Wars, Grecian was deployed on anti-smuggling duties in the Channel, and captured a good number of vessels, including Betsey, Nancy, and Market Maid. On 18 August 1818 Lieutenant Nathaniel Martin was appointed captain of Grecian. Between 30 August 1819 and 20 January 1820, Grecian made several small captures. Grecian made further sundry small captures on 16 May 1820, 27 March 1821, 20 April, 6 May, and 2 August. She was paid off in 1821. The Admiralty put Grecian up for sale in April 1822 at Portsmouth. She was sold to Joshua Crystall for £510 on 18 April 1822. Initial prototype photos These are the builds Chris did to test the initial fit of parts prior. Here is where initial changes take place before sending out the materials to me. There may still be changes made as I build, and I will then pass those onto Chris, but the hull of this is quite different to other gunned vessels, so the usual trials and tribulations will be much less. More stuff when the parts land here...
- 80 replies
-
- 28
-
-
-
- Grecian
- Vanguard Models
- (and 3 more)
-
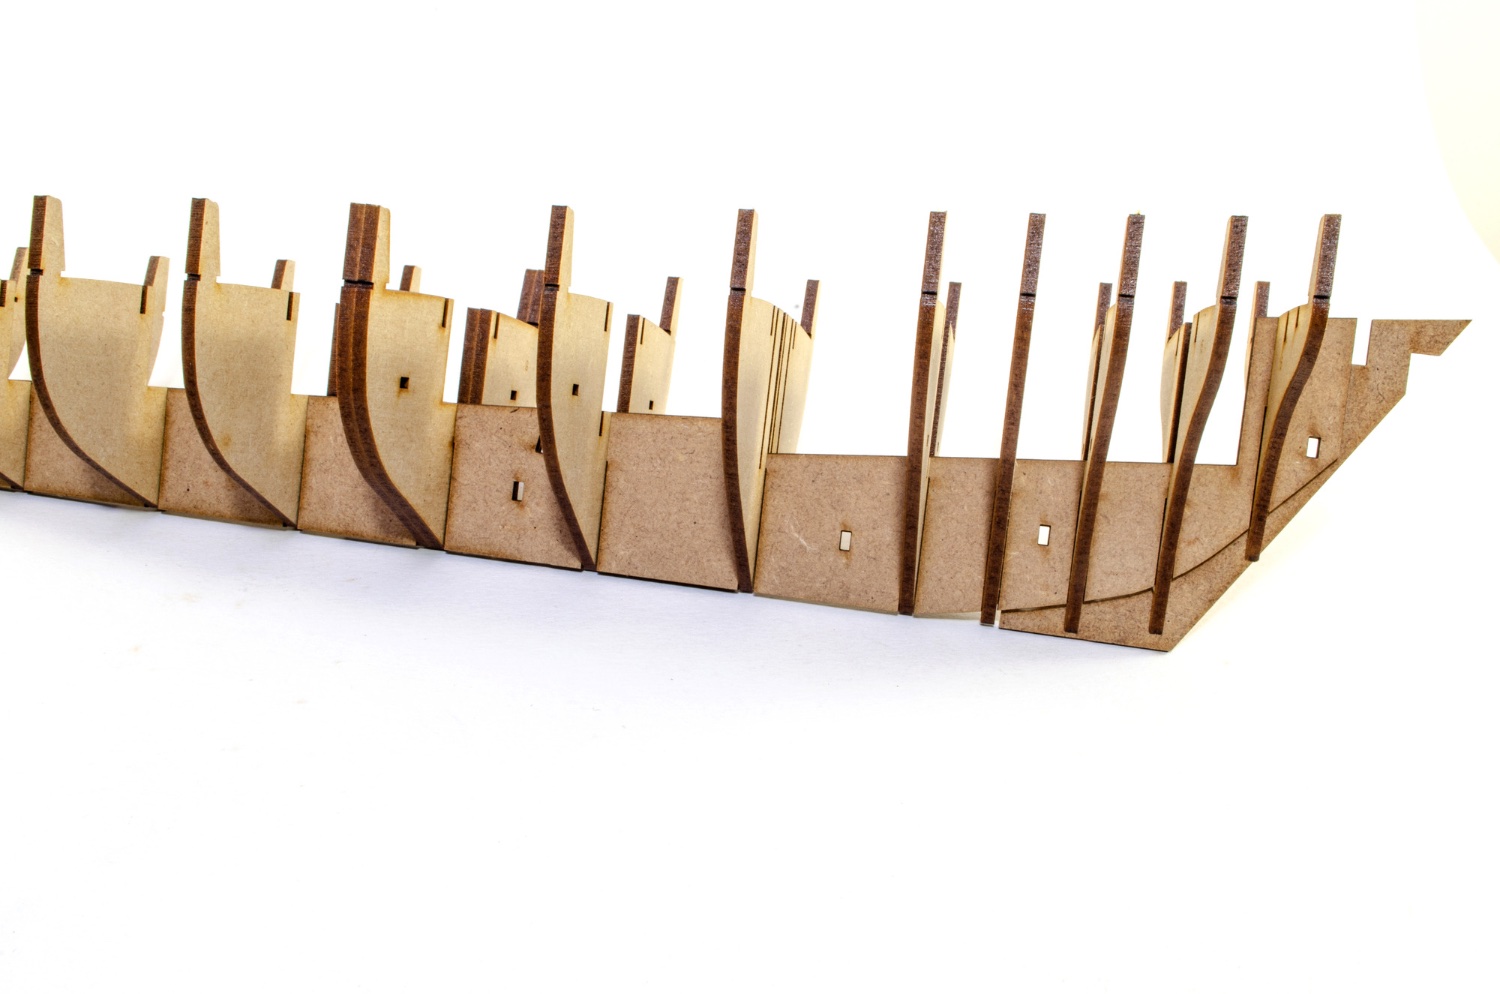
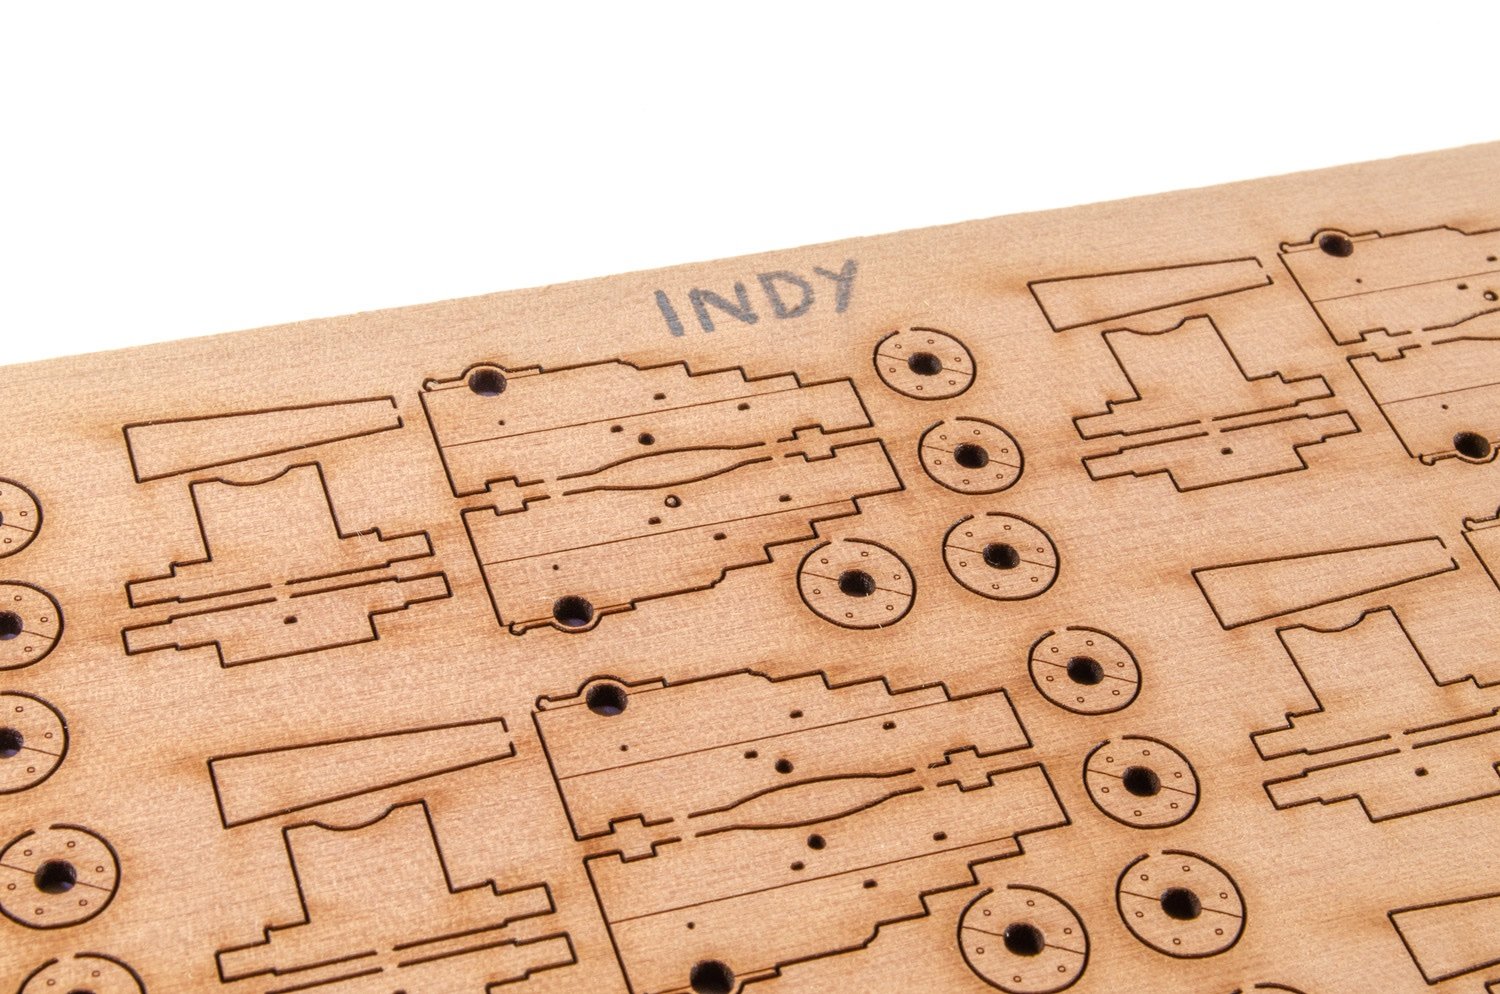
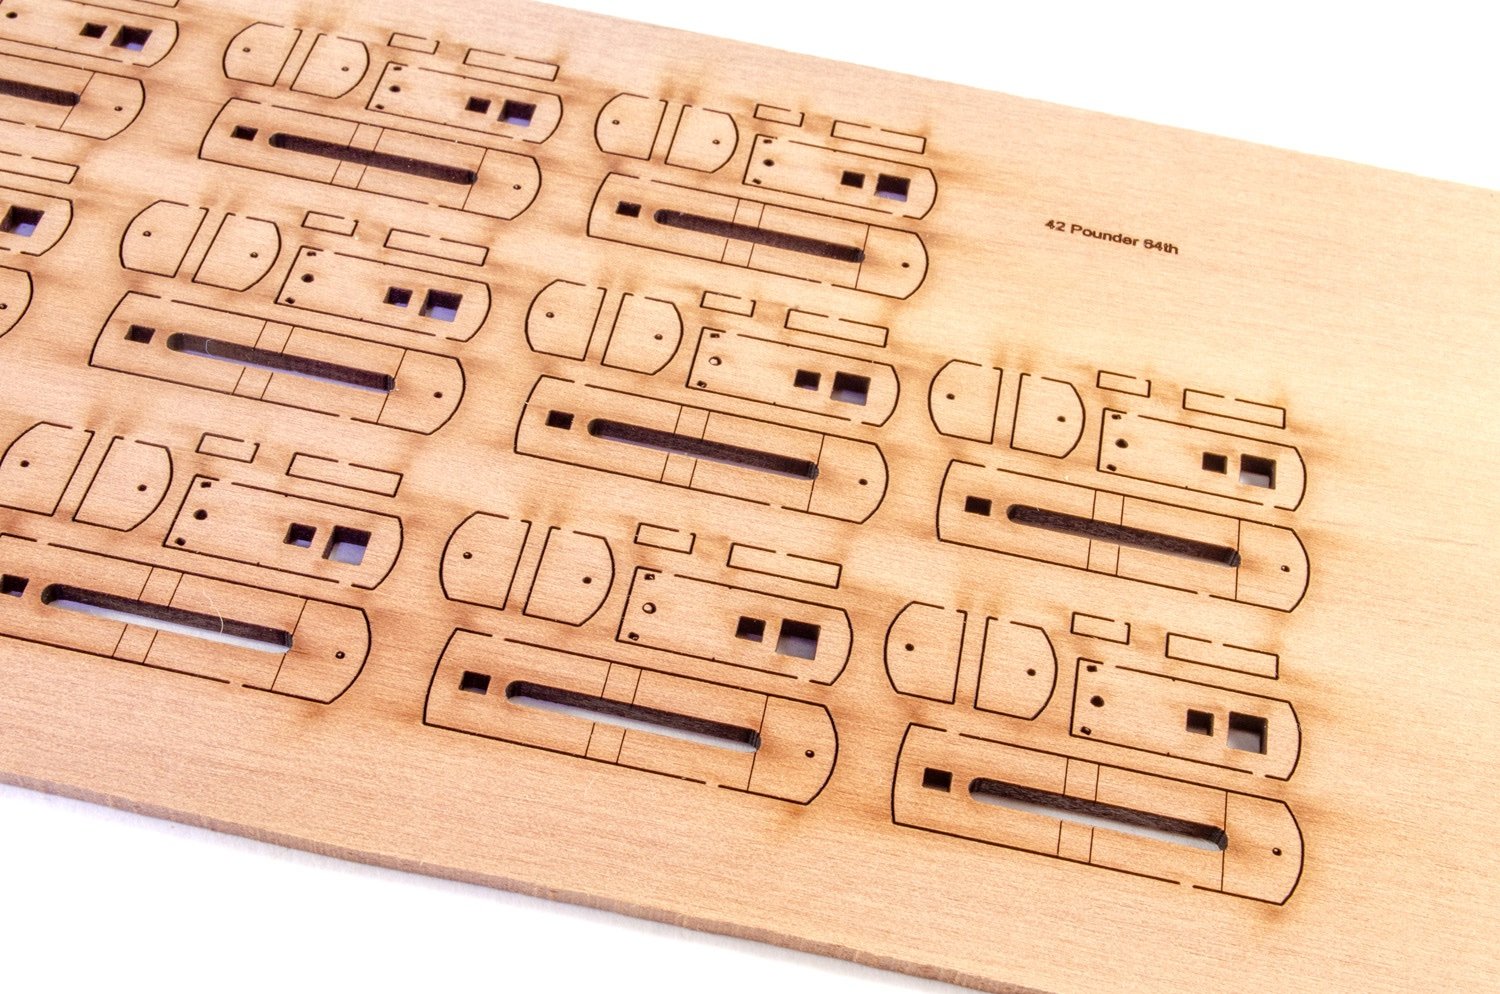
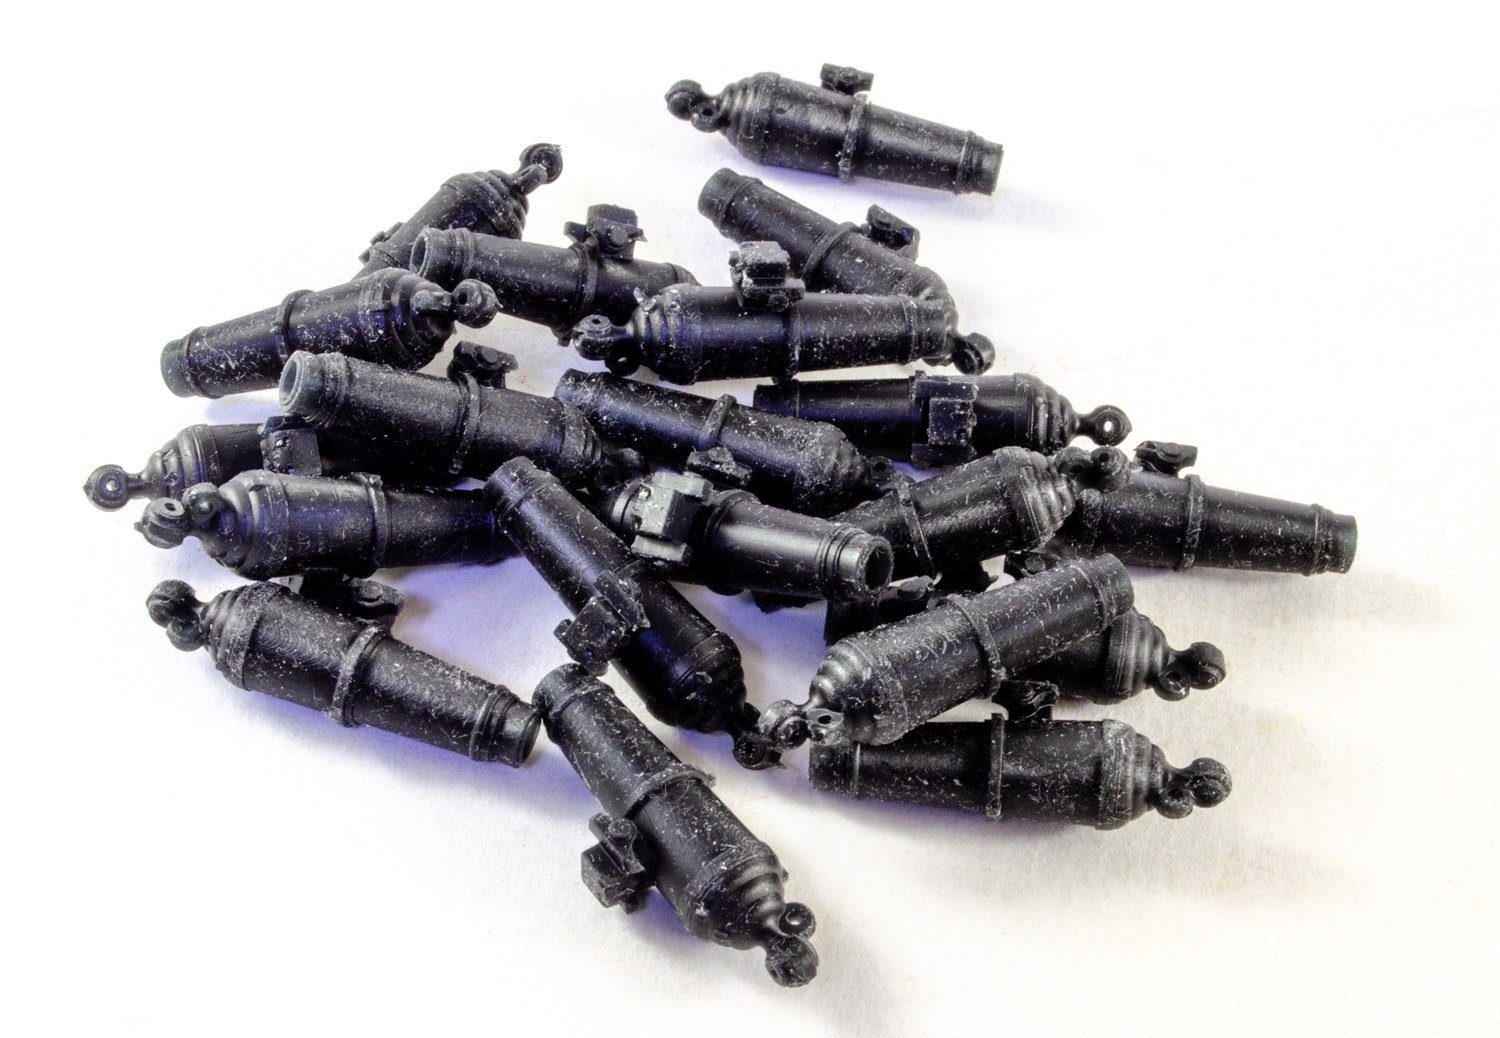
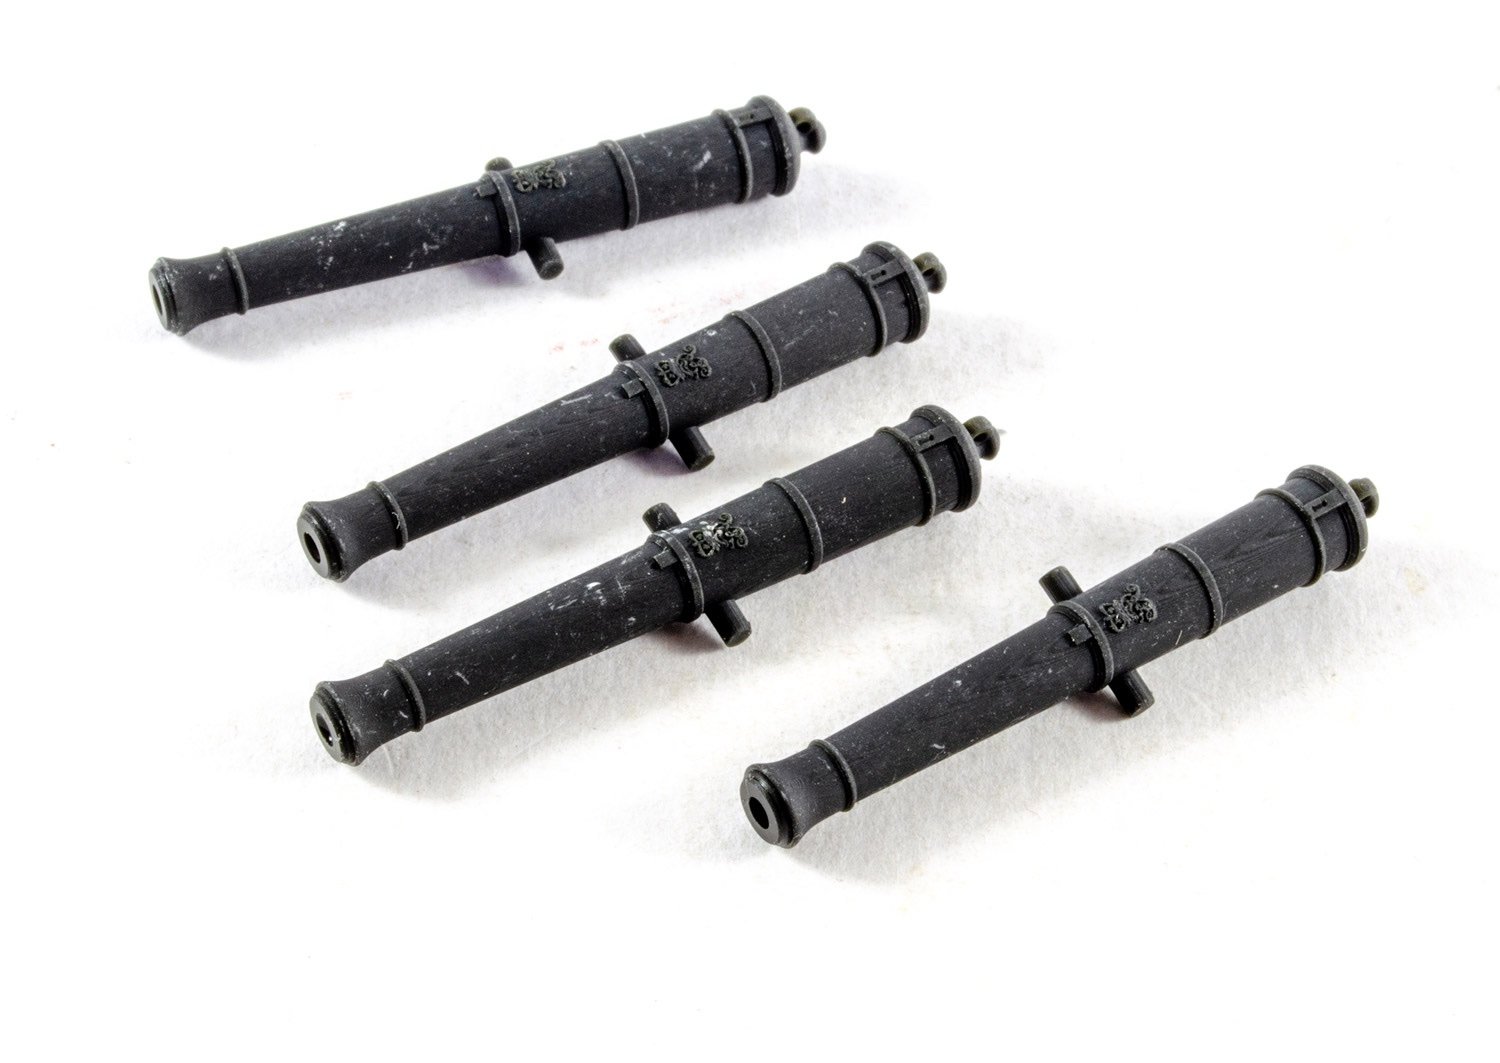
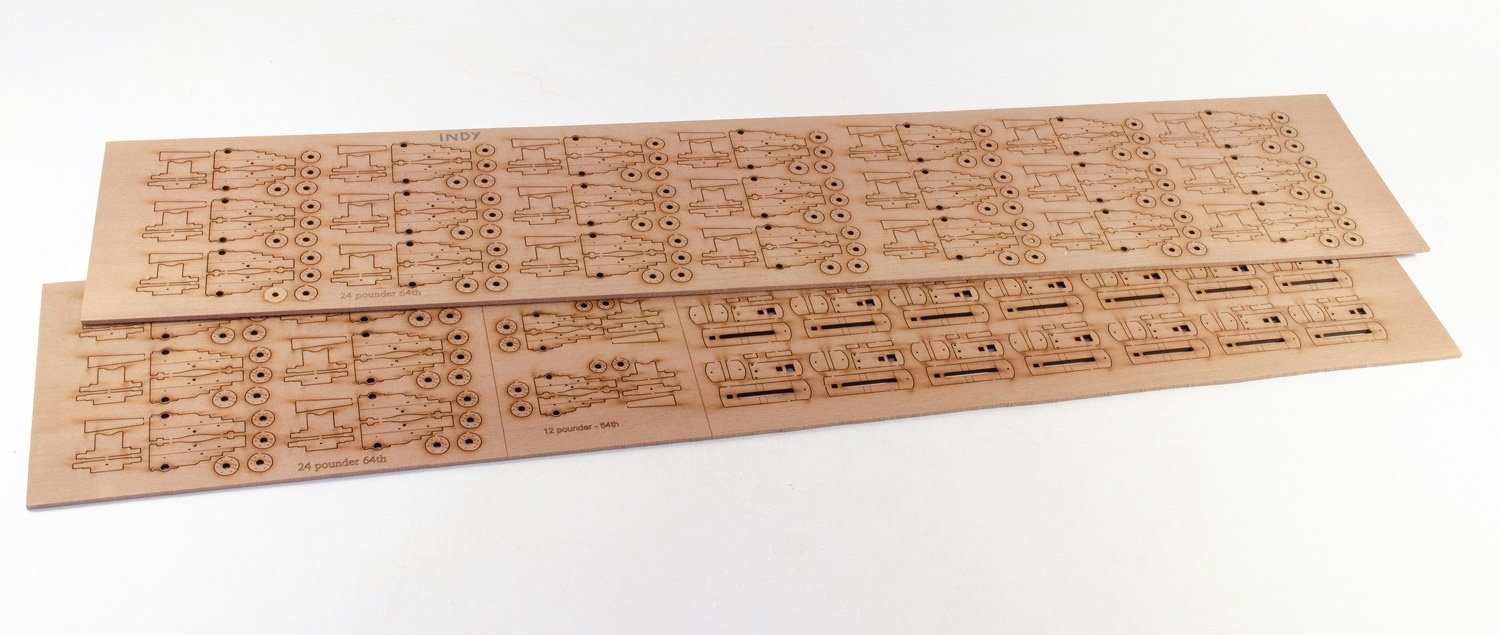
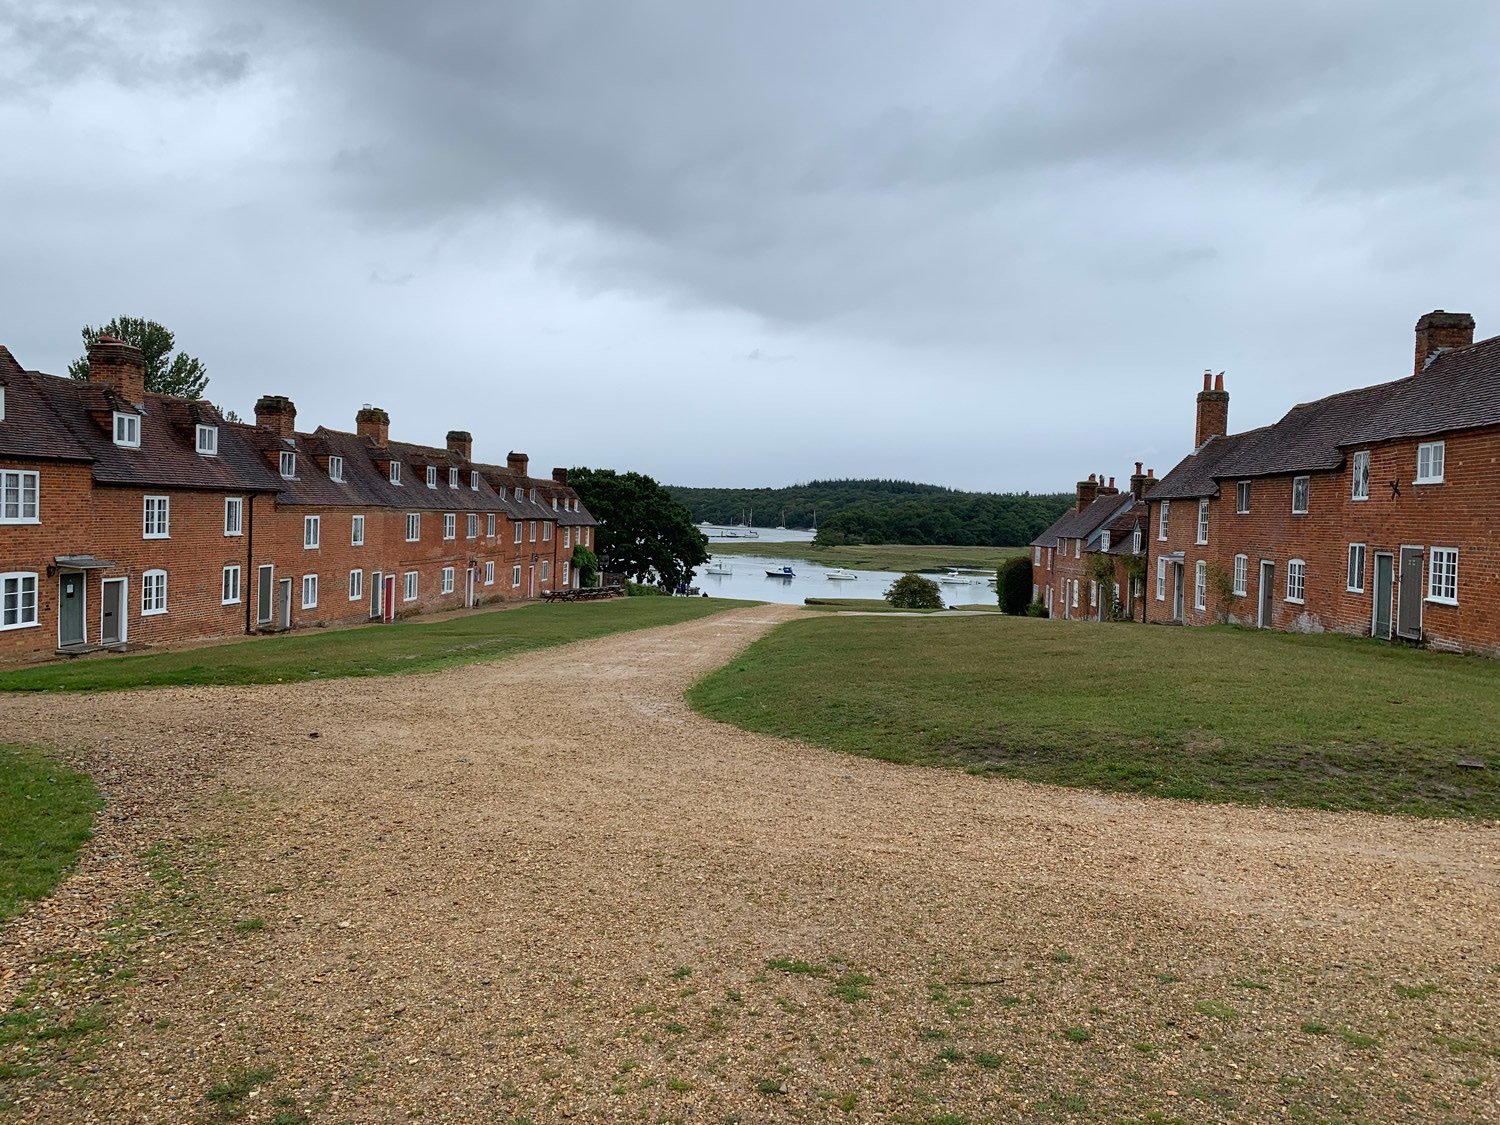
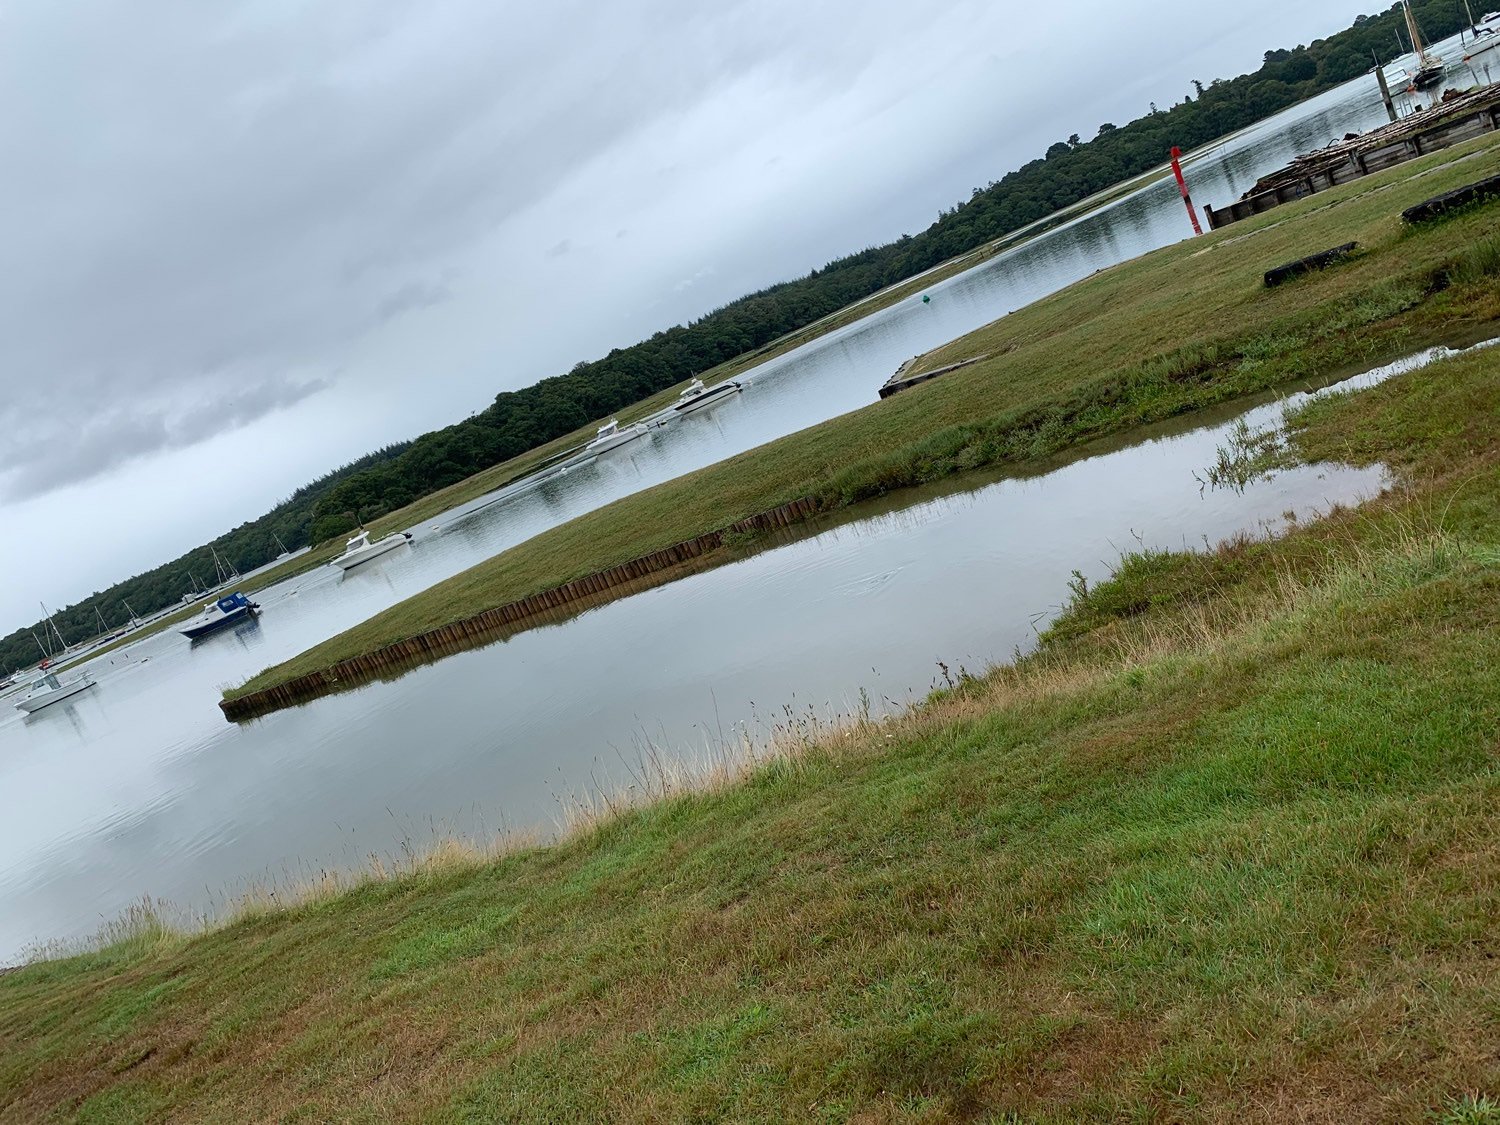
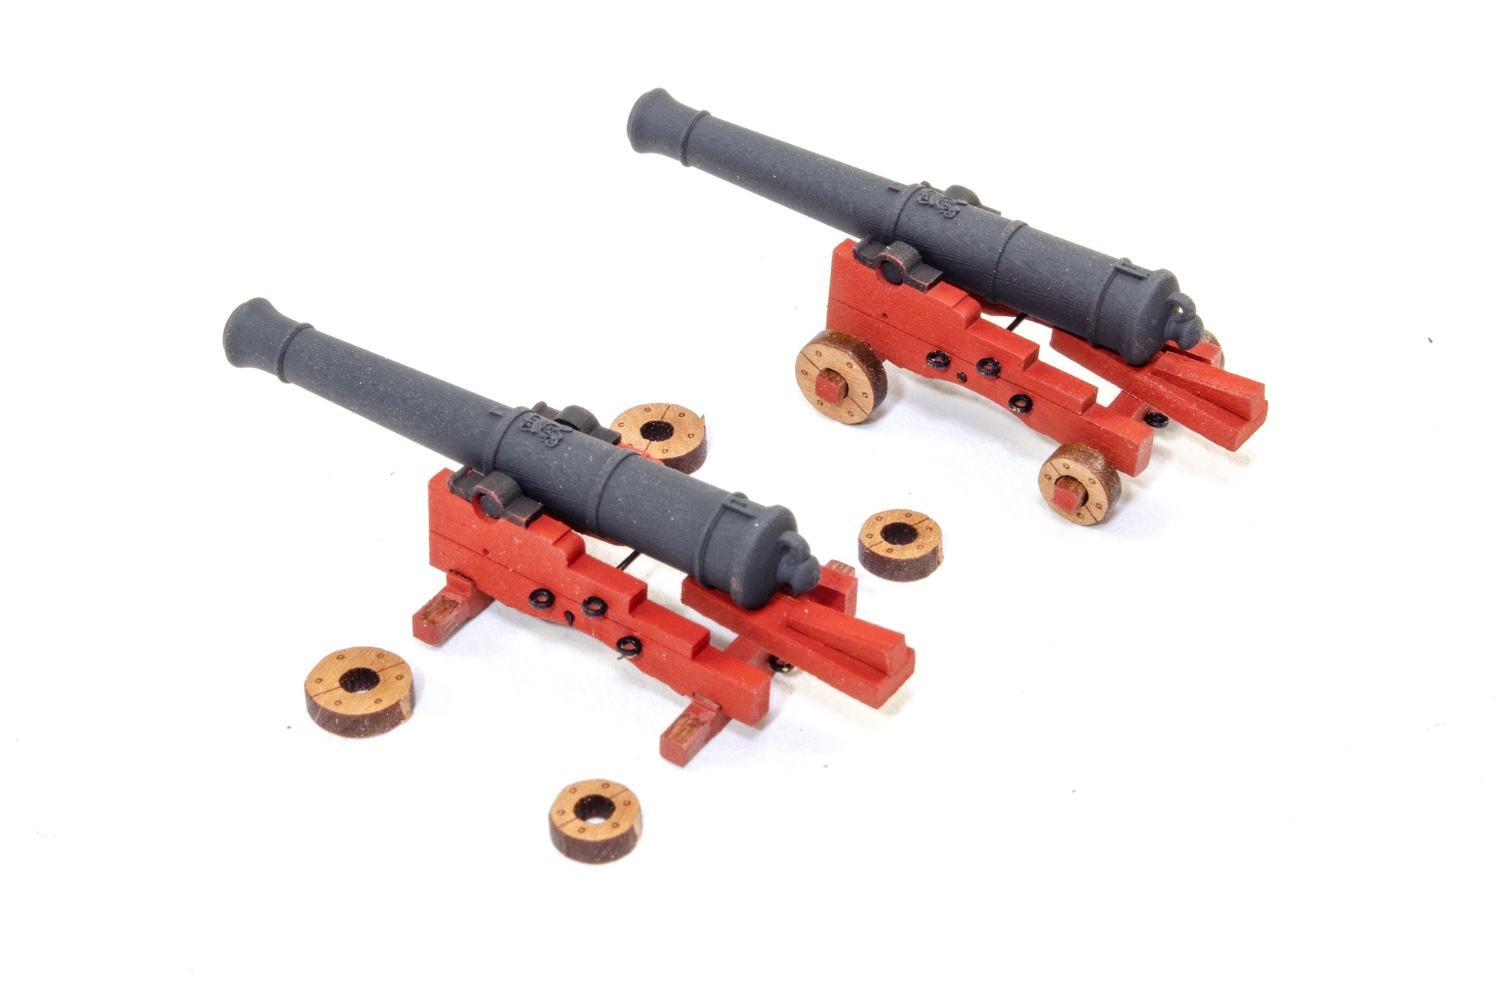
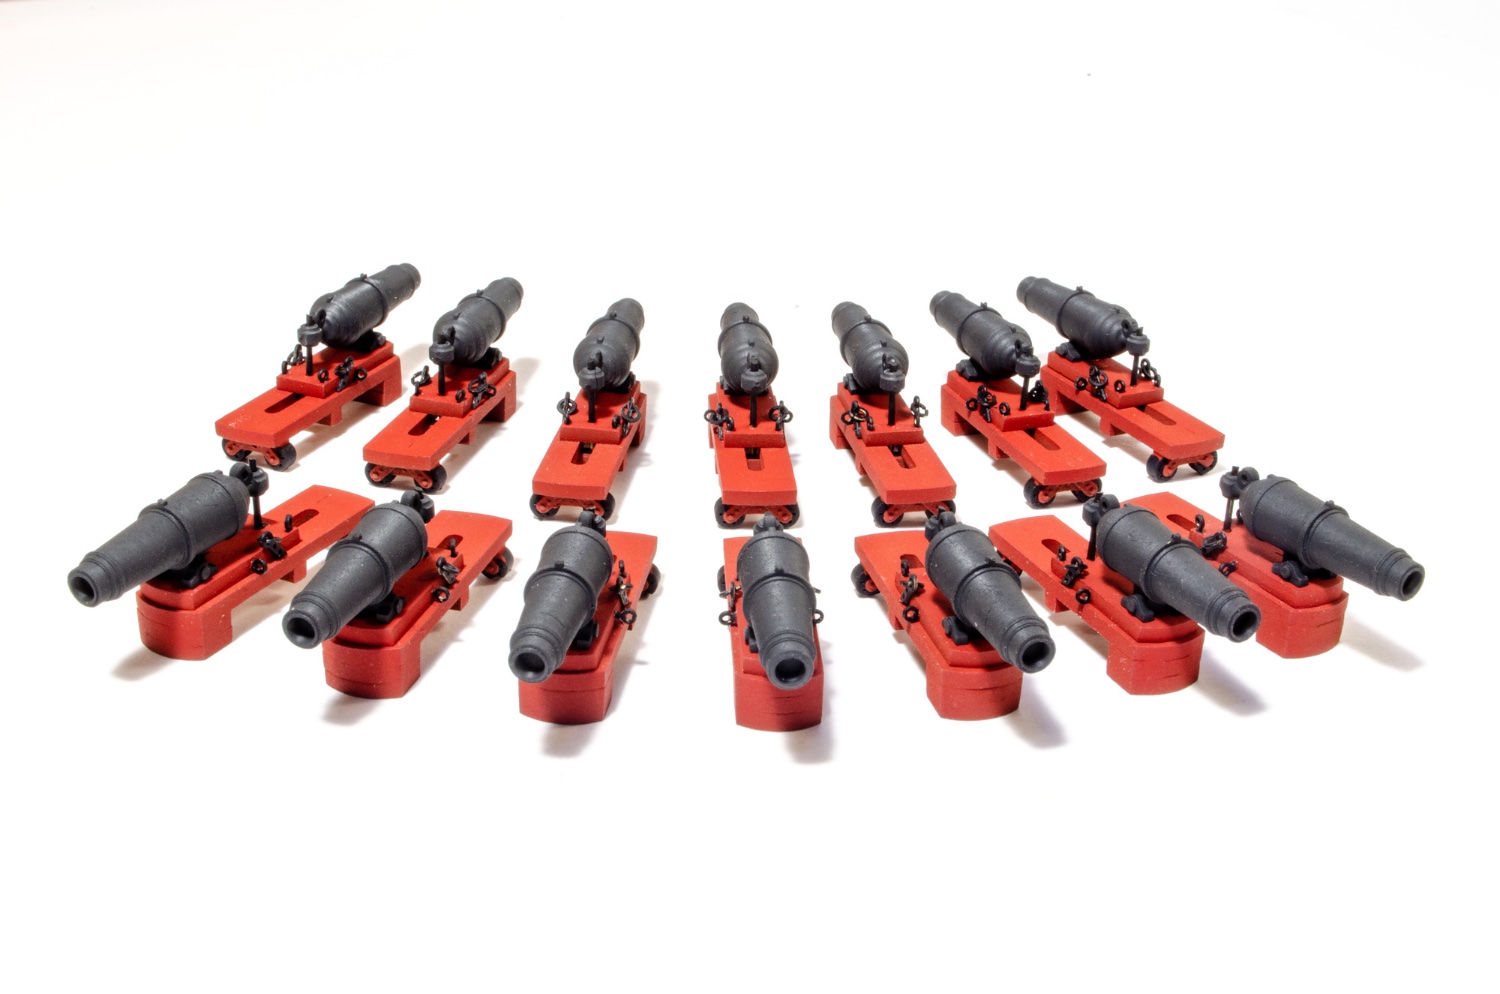
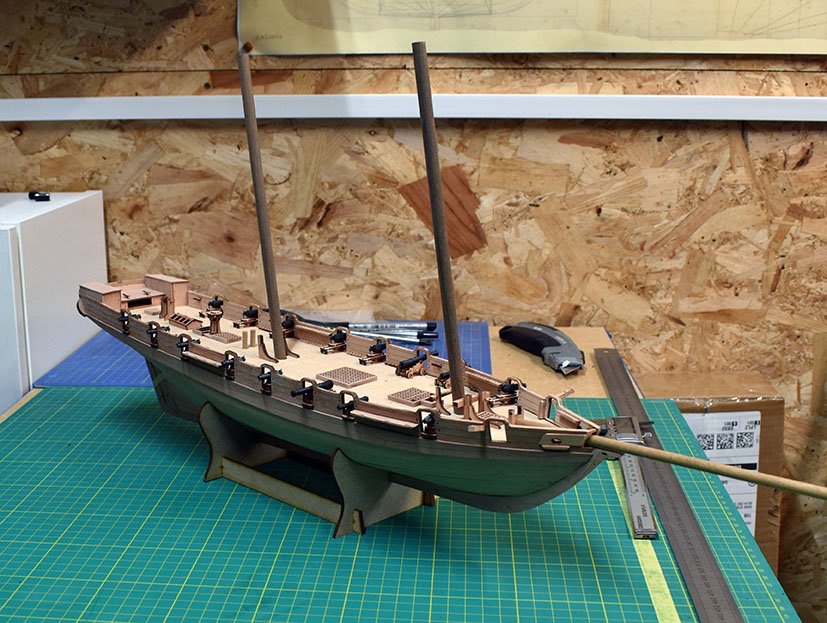
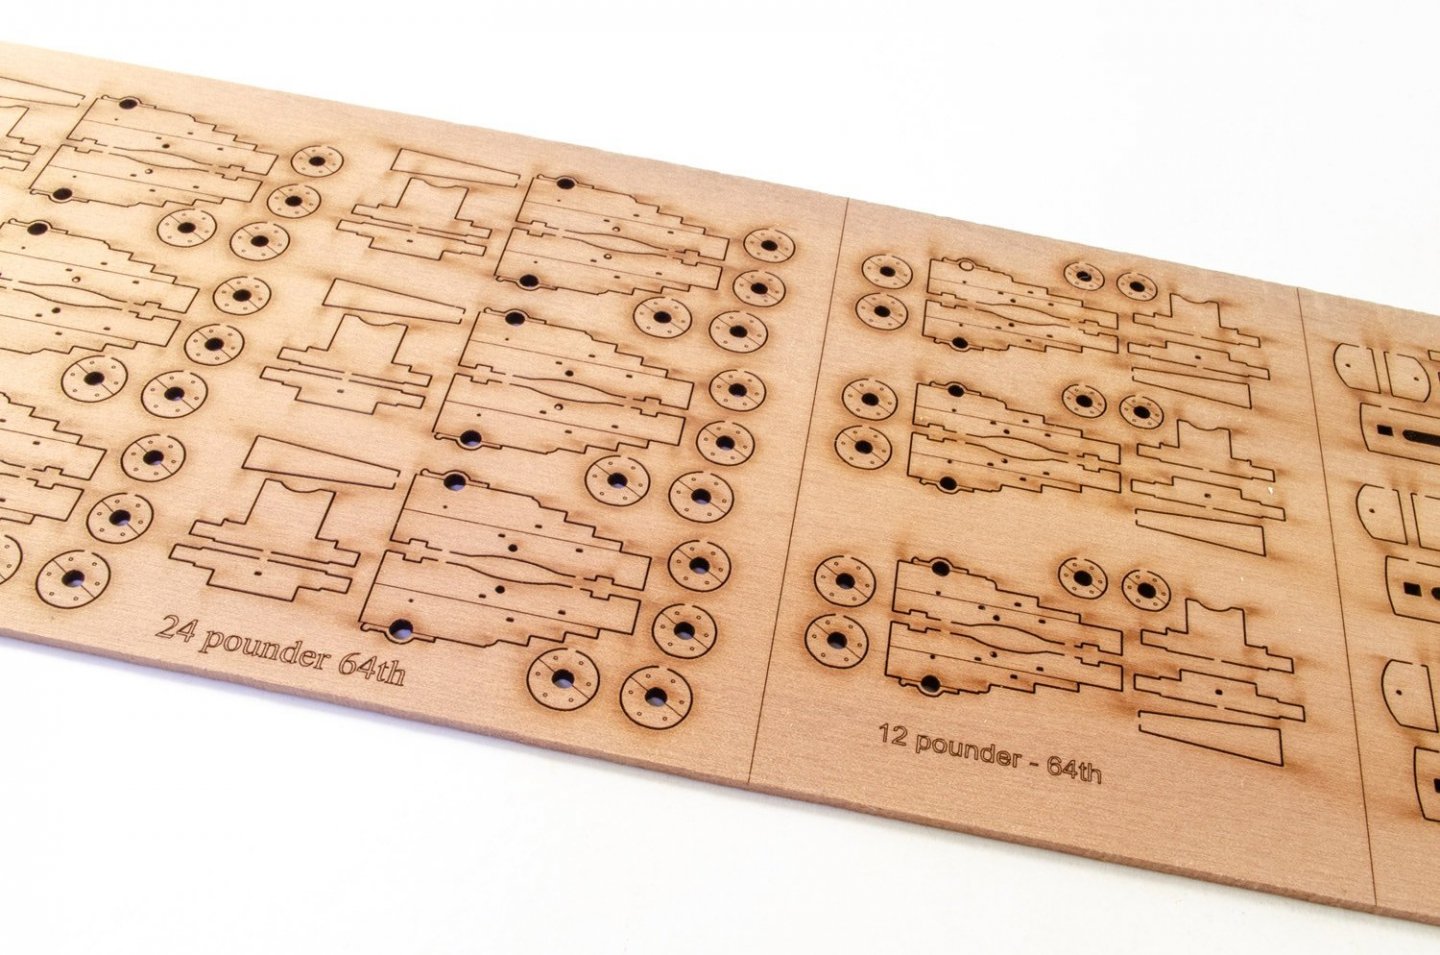
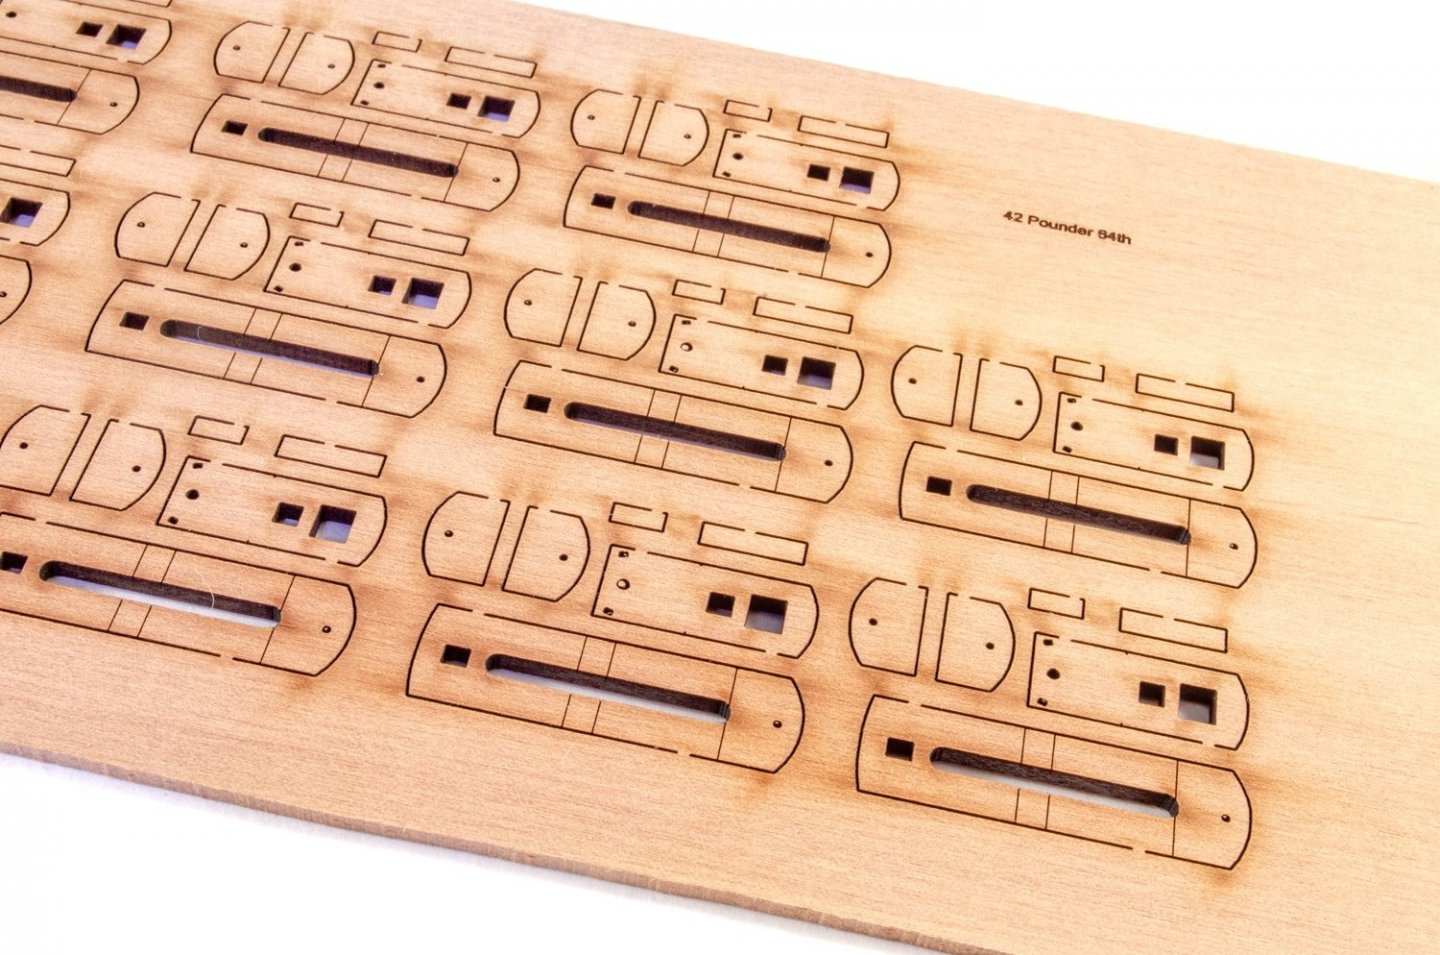
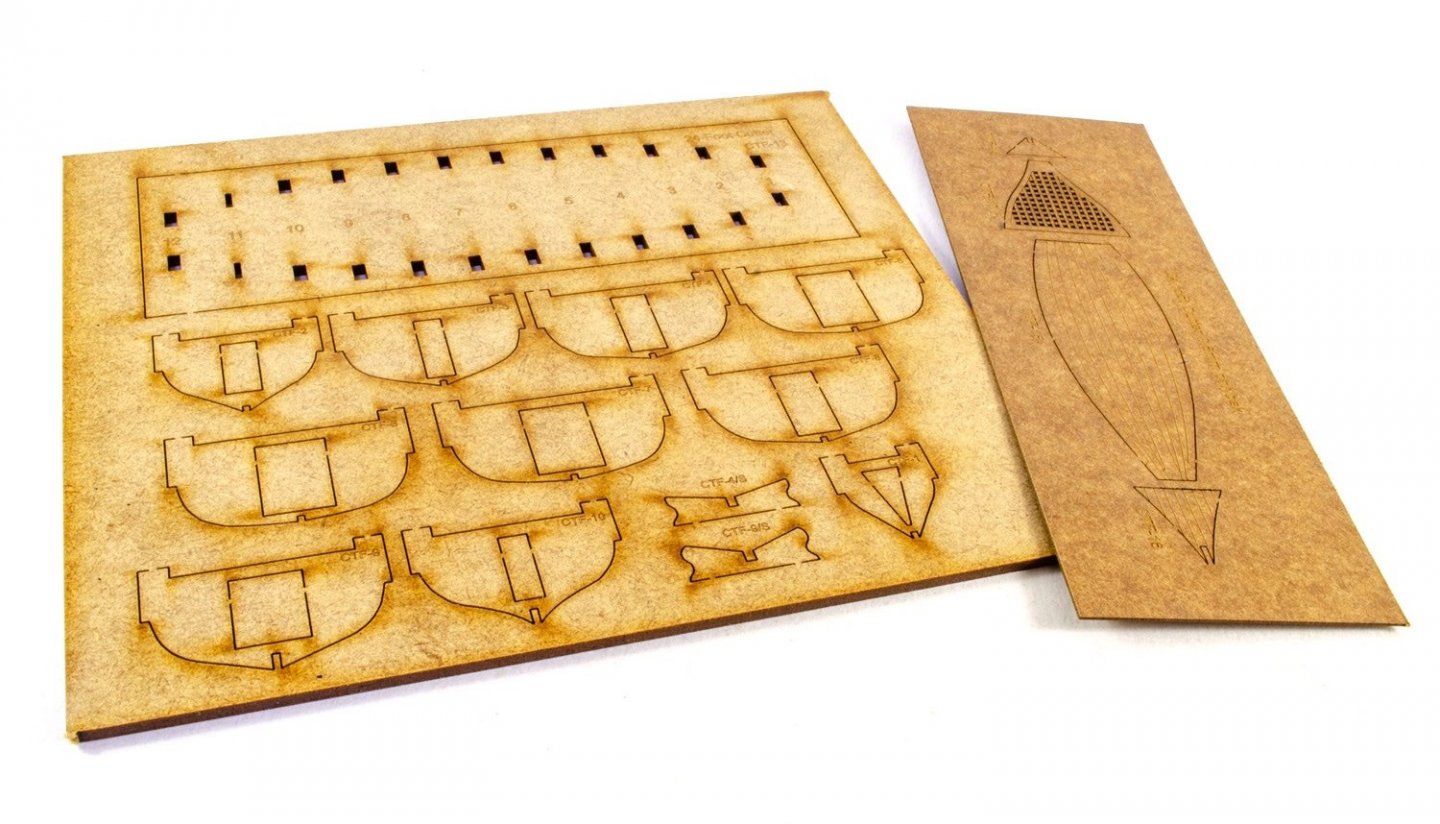
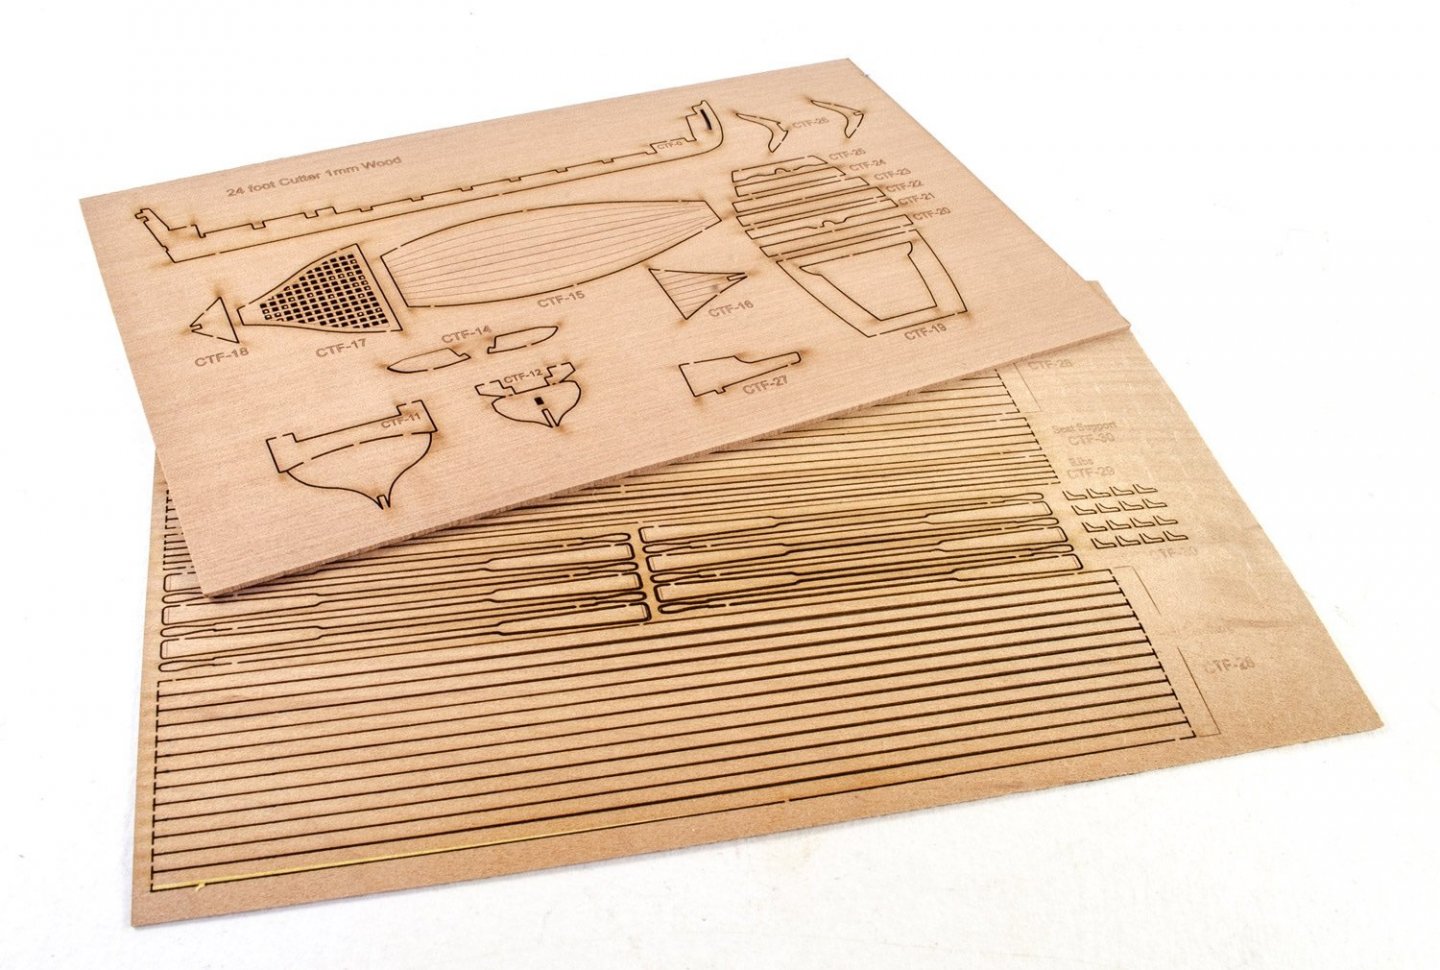
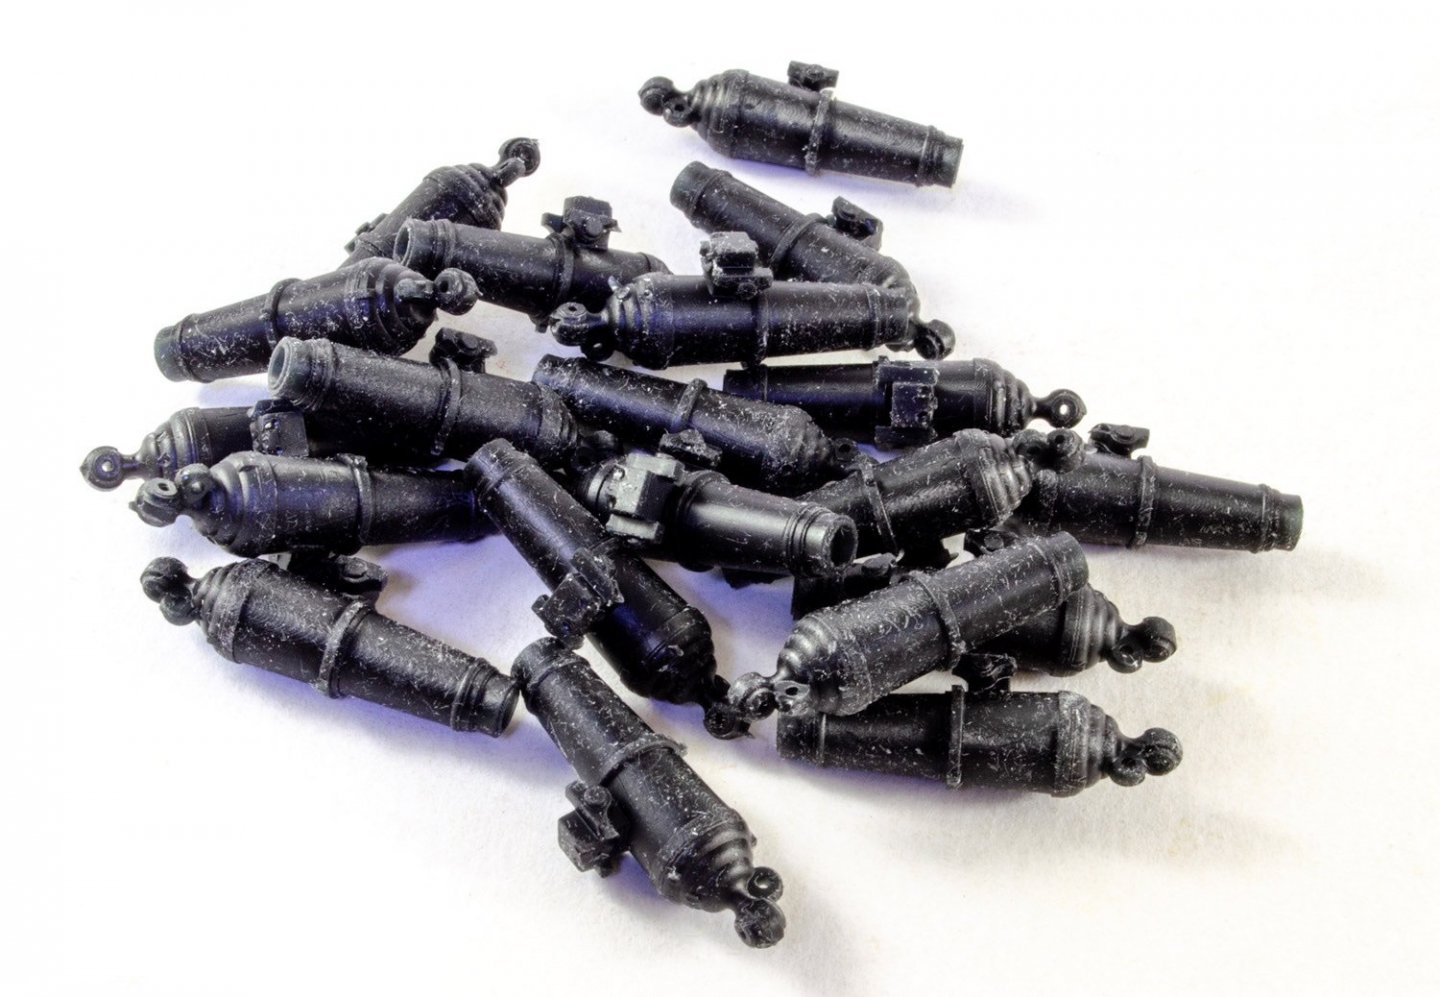
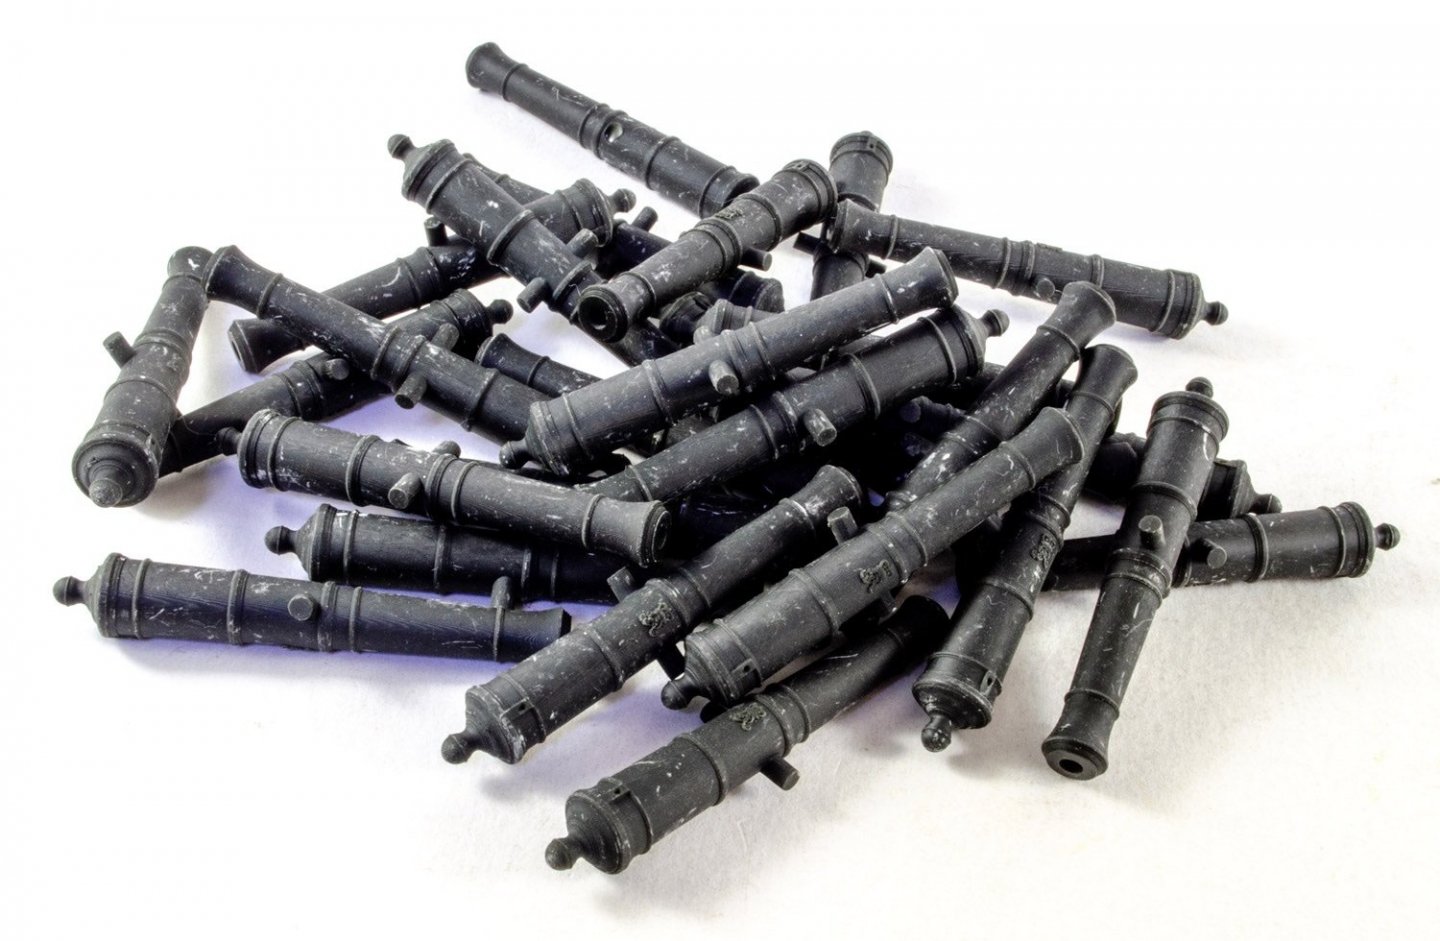
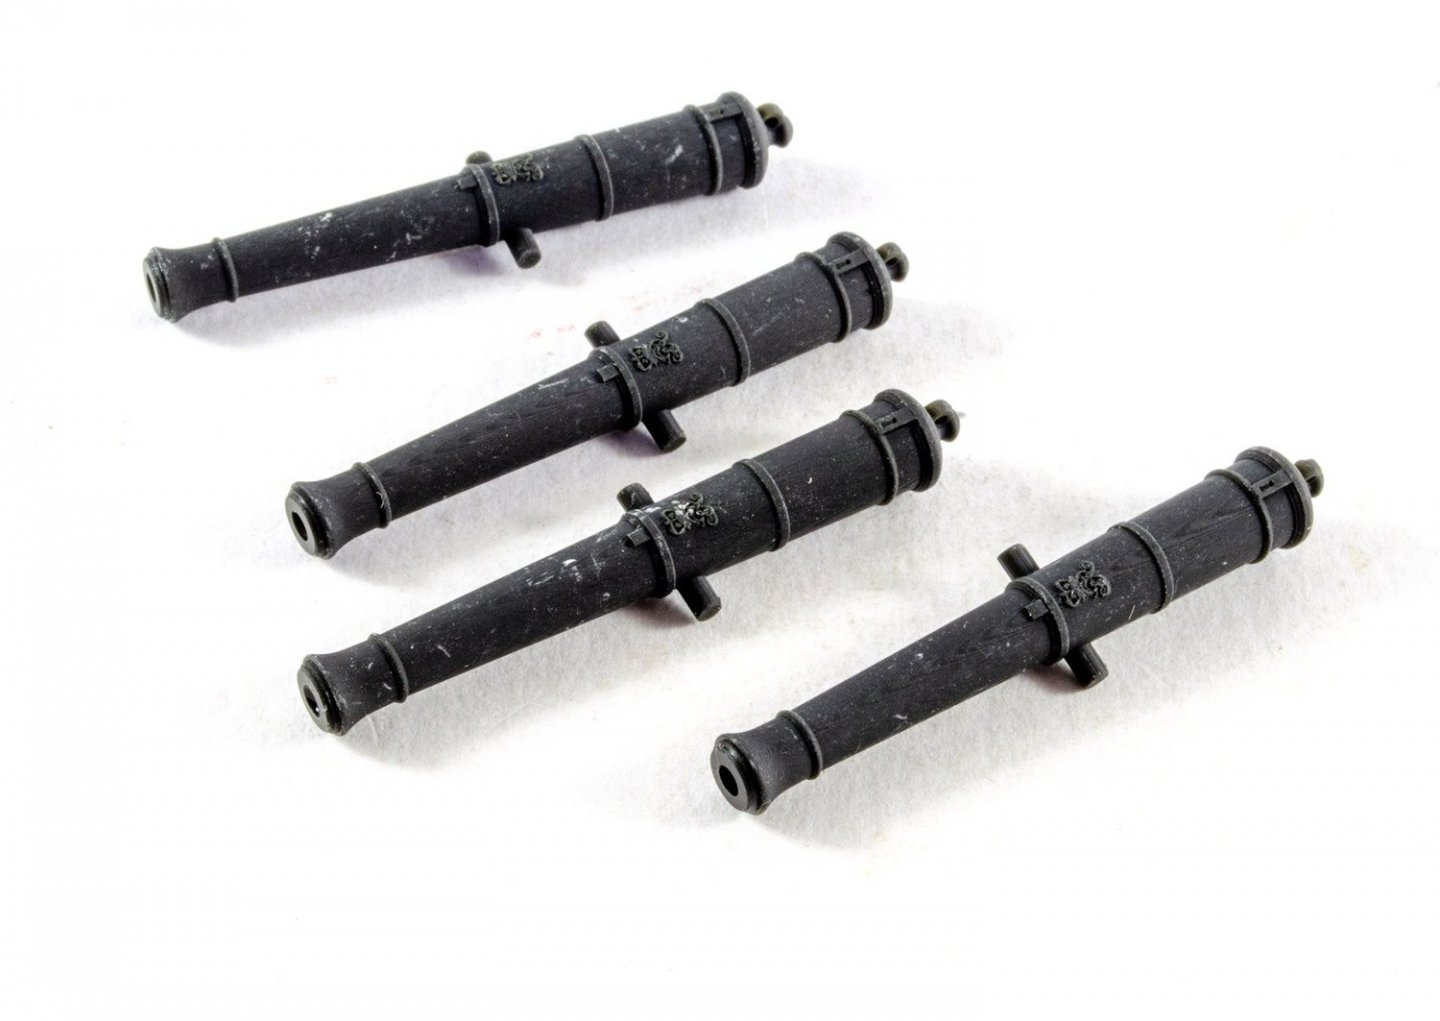
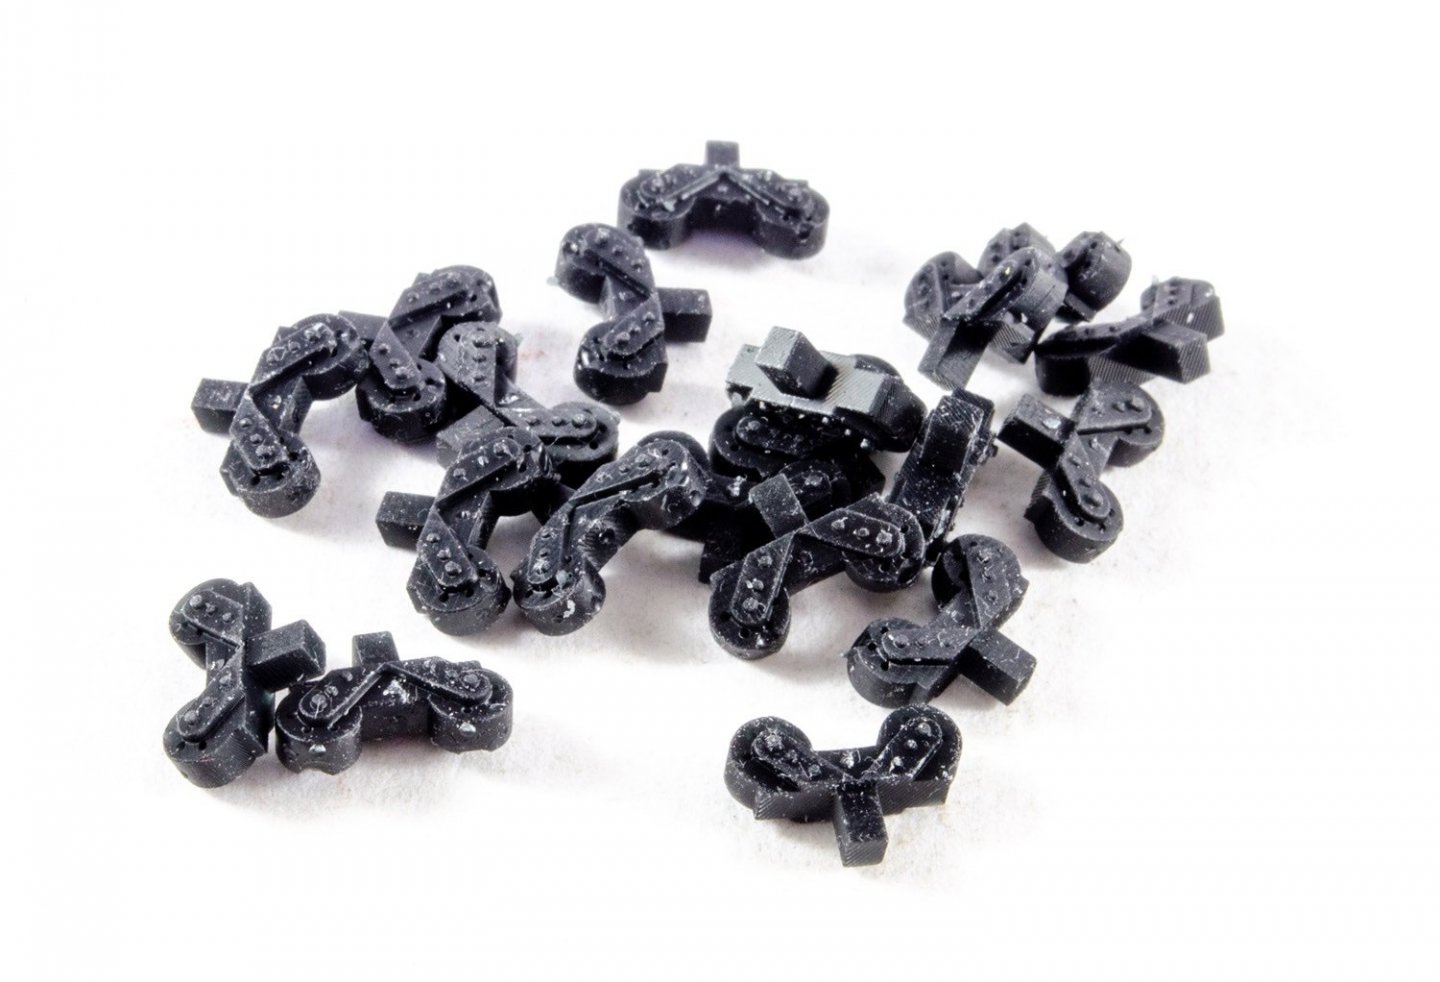
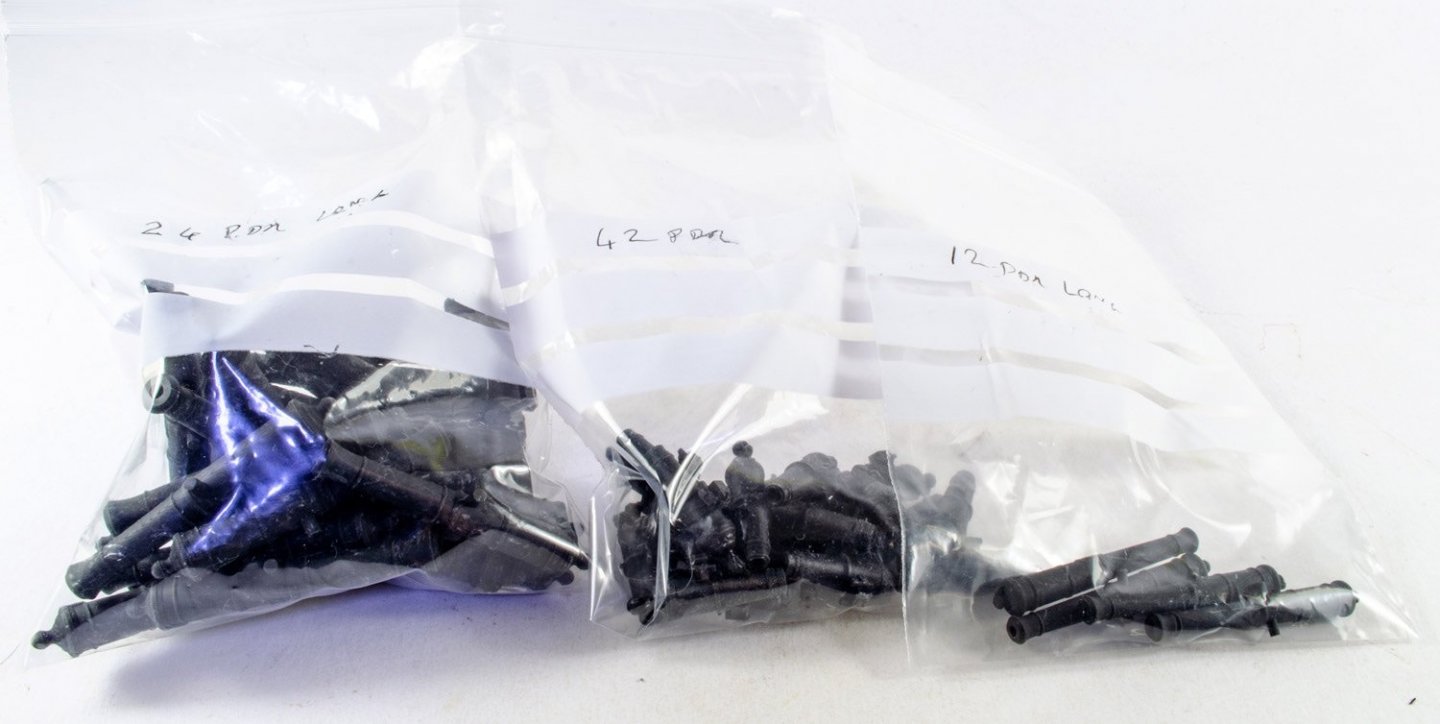
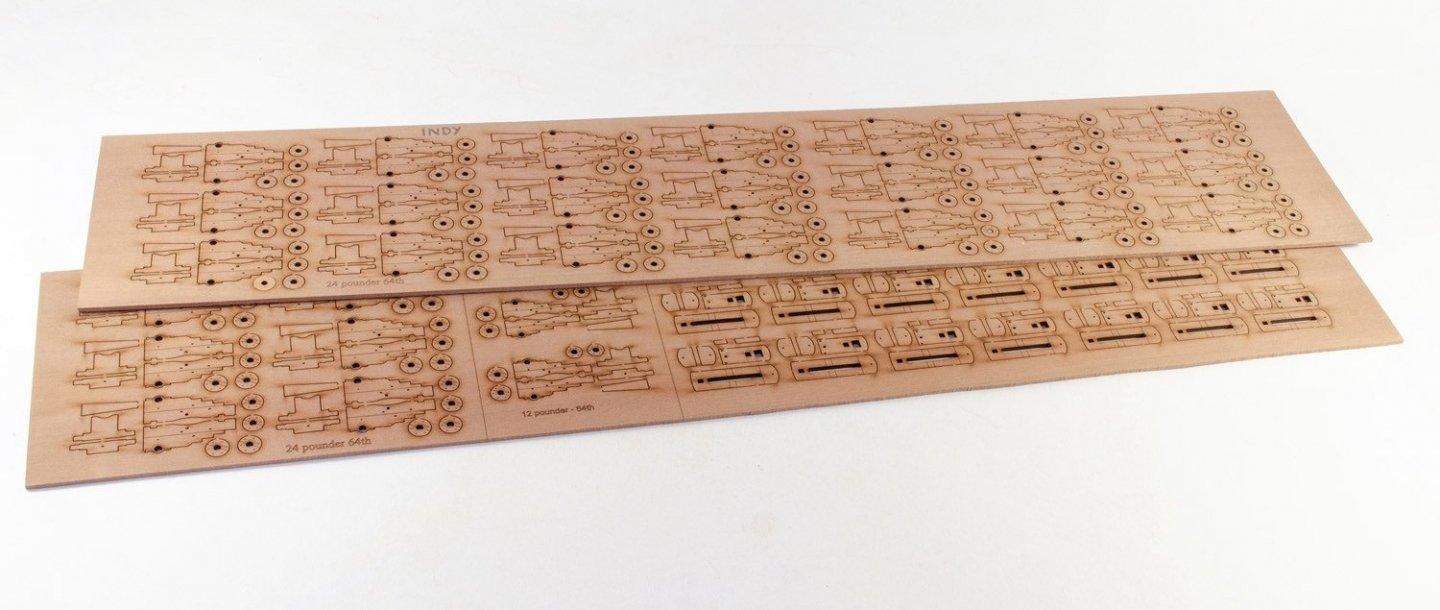
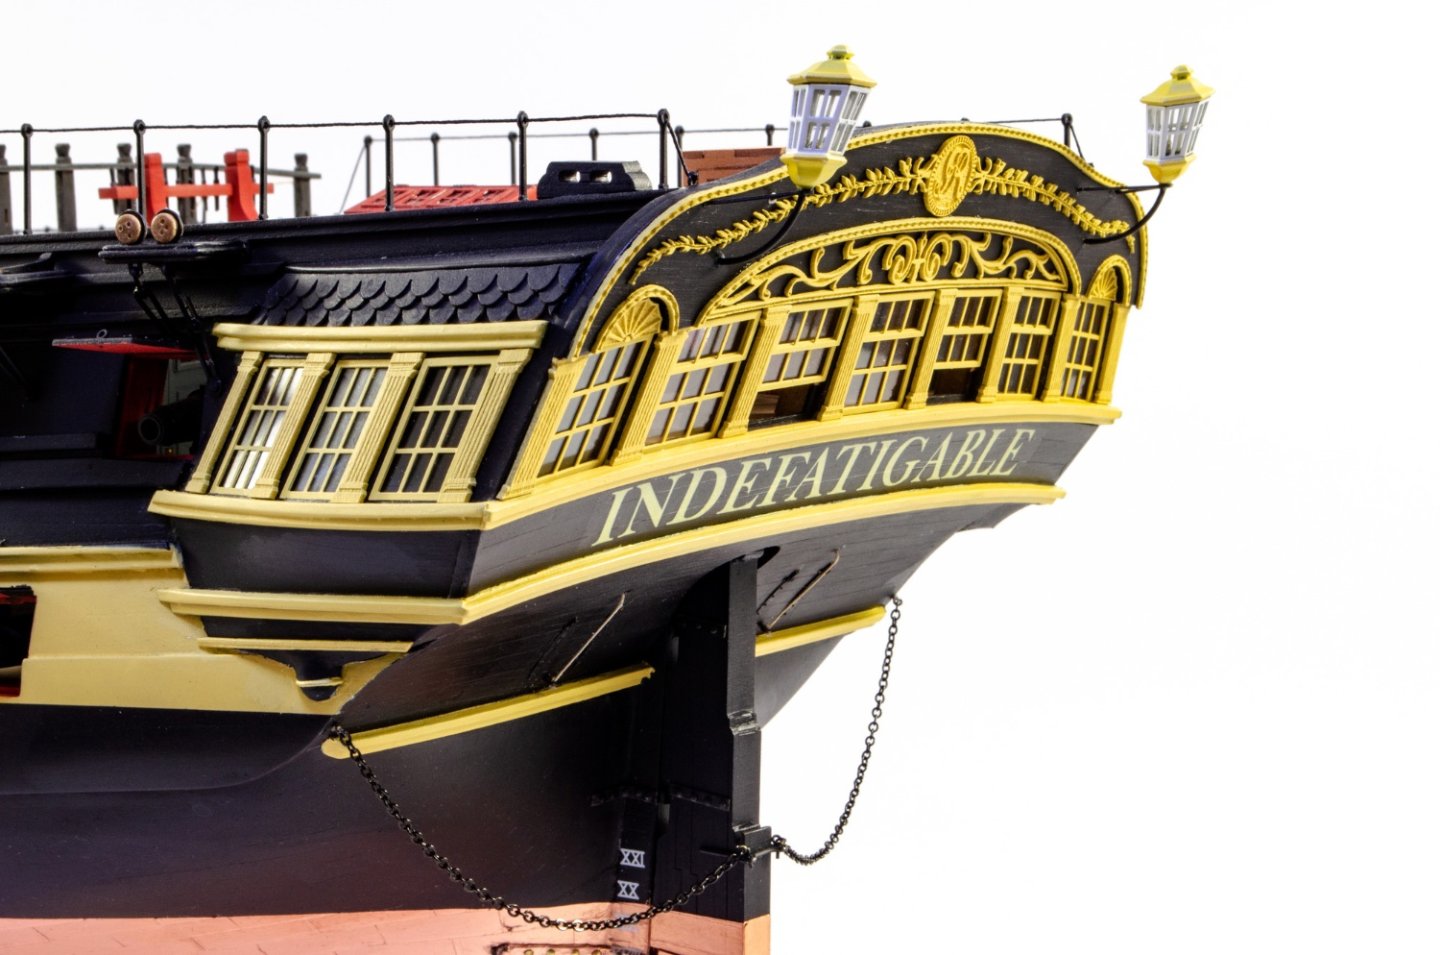
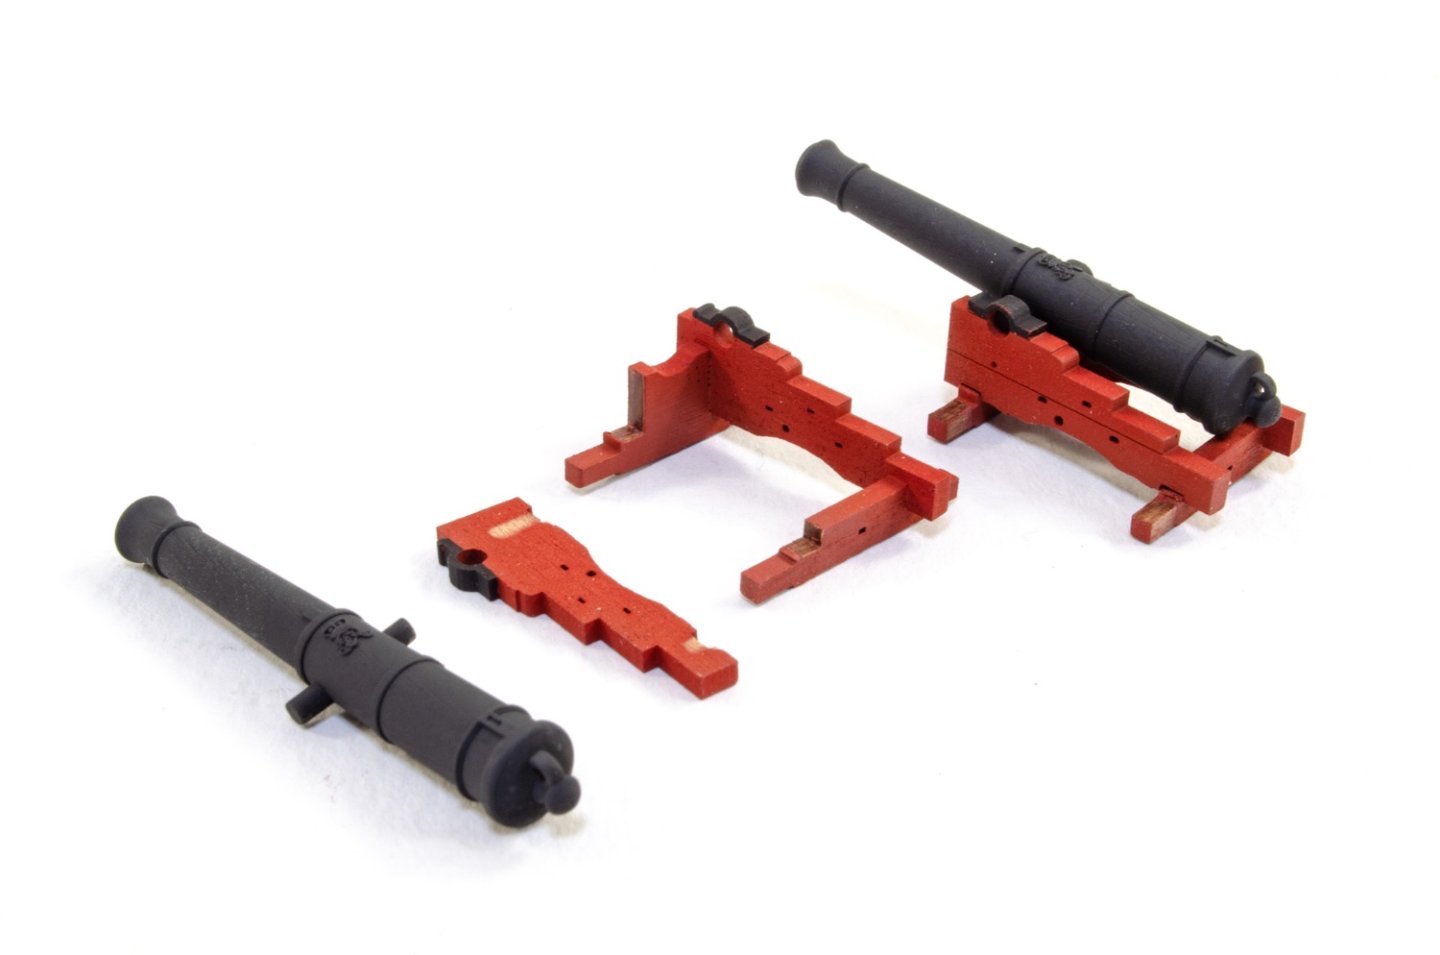
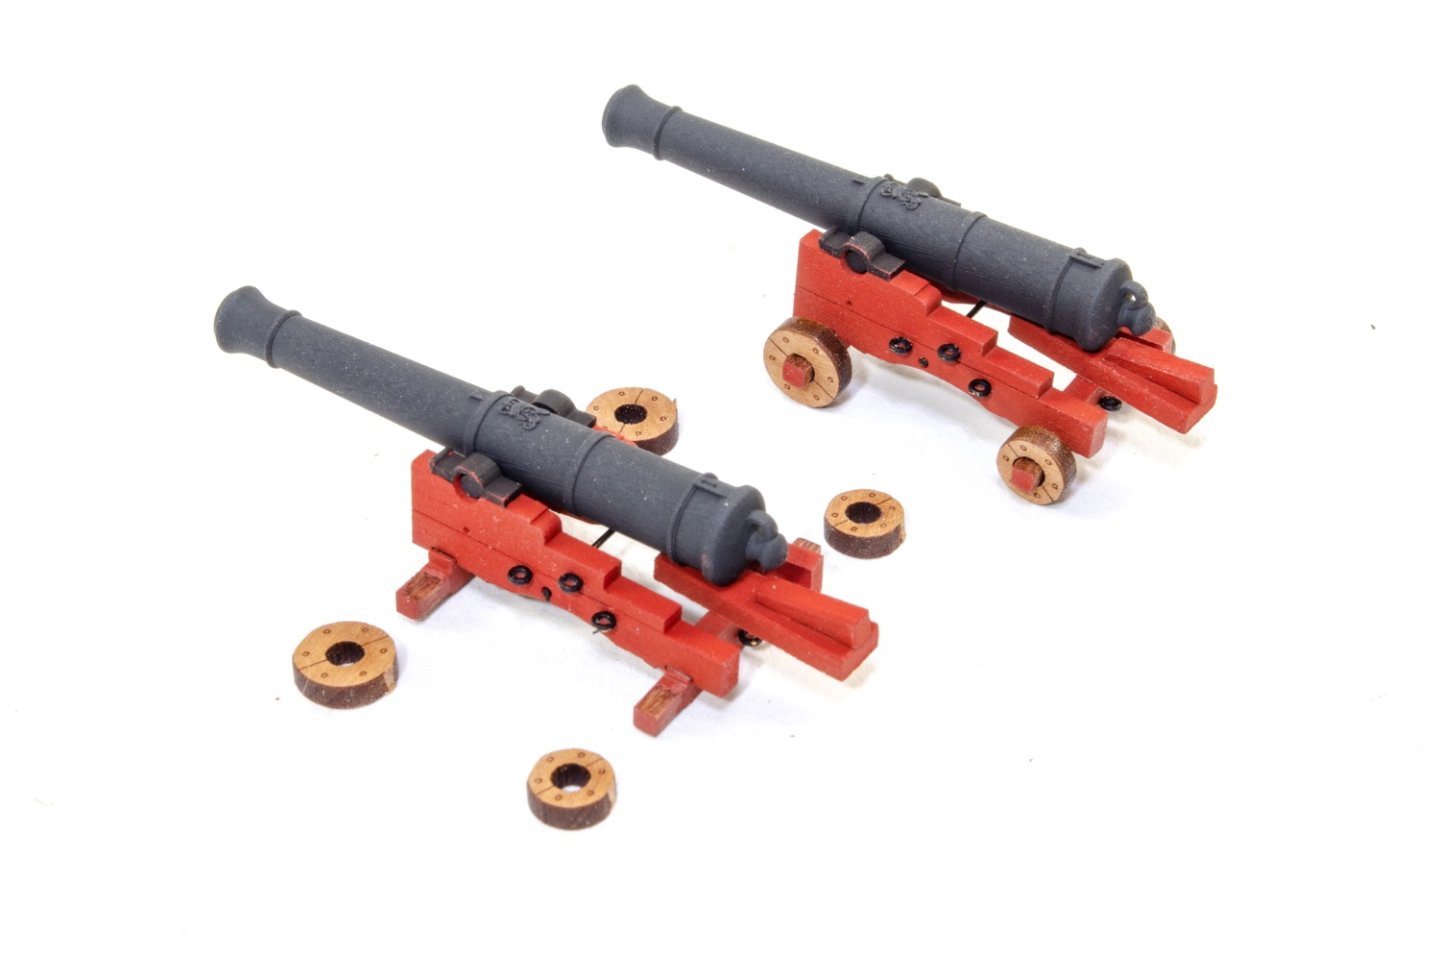
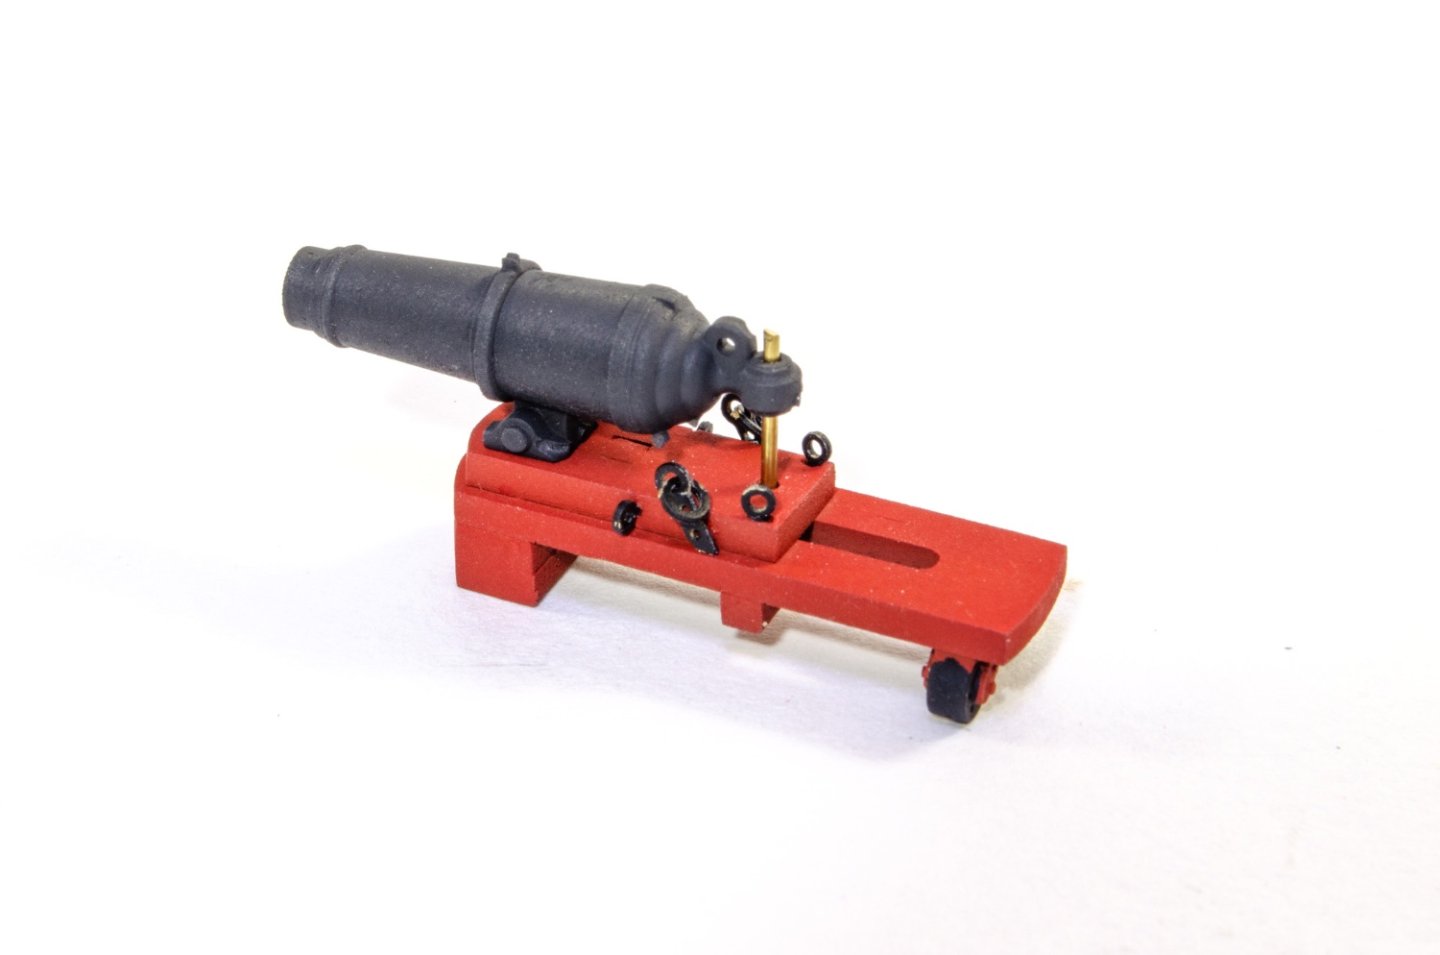
A little history (edited from wiki!) HMS Indefatigable was one of the Ardent-class 64-gun third-rate ships-of-the-line designed by Sir Thomas Slade in 1761 for the Royal Navy. She was built as a ship-of-the-line, but most of her active service took place after her conversion to a 44-gun razee frigate. She had a long career under several distinguished commanders, serving throughout the French Revolutionary Wars and the Napoleonic Wars. She took some 27 prizes, alone or in company, and the Admiralty authorised the issue of four clasps to the Naval General Service Medal in 1847 to any surviving members of her crews from the respective actions. Indefatigable was ordered on 3 August 1780 (long after Slade's death), and her keel was laid down in May 1781 at the Bucklers Hard shipyard in Hampshire owned by Henry Adams. She was launched in early July 178, and completed from 11 July to 13 September of that year at Portsmouth Dockyard as a 64-gun two-decked third rate for the Royal Navy. She had cost £25,210 4s 5d to build; her total initial cost including fitting out and coppering was £36,154 18s 7d (around £6.6m in today's money). By that time, she was already outmoded for the role of a ship of the line as the French only built the more powerful 74-gun ships, and she was never commissioned in that role. She was broken up in 1816. The kit This is quite literally hot off the press with regards to what you see here. Indefatigable is being represented in this new kit as the razée, and quite rightly so. I do have a lot of affection for the stuff built at Bucklers Hard, having visited there a couple of times myself. It's a beautifully tranquil place in England's New Forest, which really does betray the hive of activity it used to be. It even has the original shipwrights houses and the pub there, as part of the tour. Just to think, Indefatigable was definitely built in one of these two slips, as was Agamemnon etc. I took these photos a couple of years ago. This is very stuff for Indefatigable, as all I currently have are the cannon, carronades, and also the cutter. It will also become very obvious that when building these models, I never do anything in chronological order as seen in the manual. I work on whatever Chris has completed and sends over to me, with other work infilling between main tasks. I try to waste as little time as possible in order to keep to fairly tight release schedules. For the first time you'll see me work on stuff like this before the big hitters are sent to me. Even then, I will feed back with my findings and things will possibly be changed to reflect my own build. Not too much to see at the moment, and work won't start proper for a week or so, so keep checking in to see if things have progressed. Here's the two sheets of 2mm pear which contain the gun carts... I also have three bags of guns. These are: 12-pound long 24-pound long 42-pound carronades I do need to wash these guns in some isopropyl, especially the carronades as the initial washing left then with tissue debris on them. Also, the carronade carriages will also have 3d-printed wheels! Indefatigable will have many of the design traits of Sphinx, but this time incorporate more traditional planking around the upper bulwarks and gun ports etc. Indy will also feature a traditionally planked deck too. Here are the parts for the cutter: Chris might want to chime in here with other notes on the design too.


- 488 replies
-
- 44
-
-
-
- Indefatigable
- Vanguard Models
- (and 1 more)
-
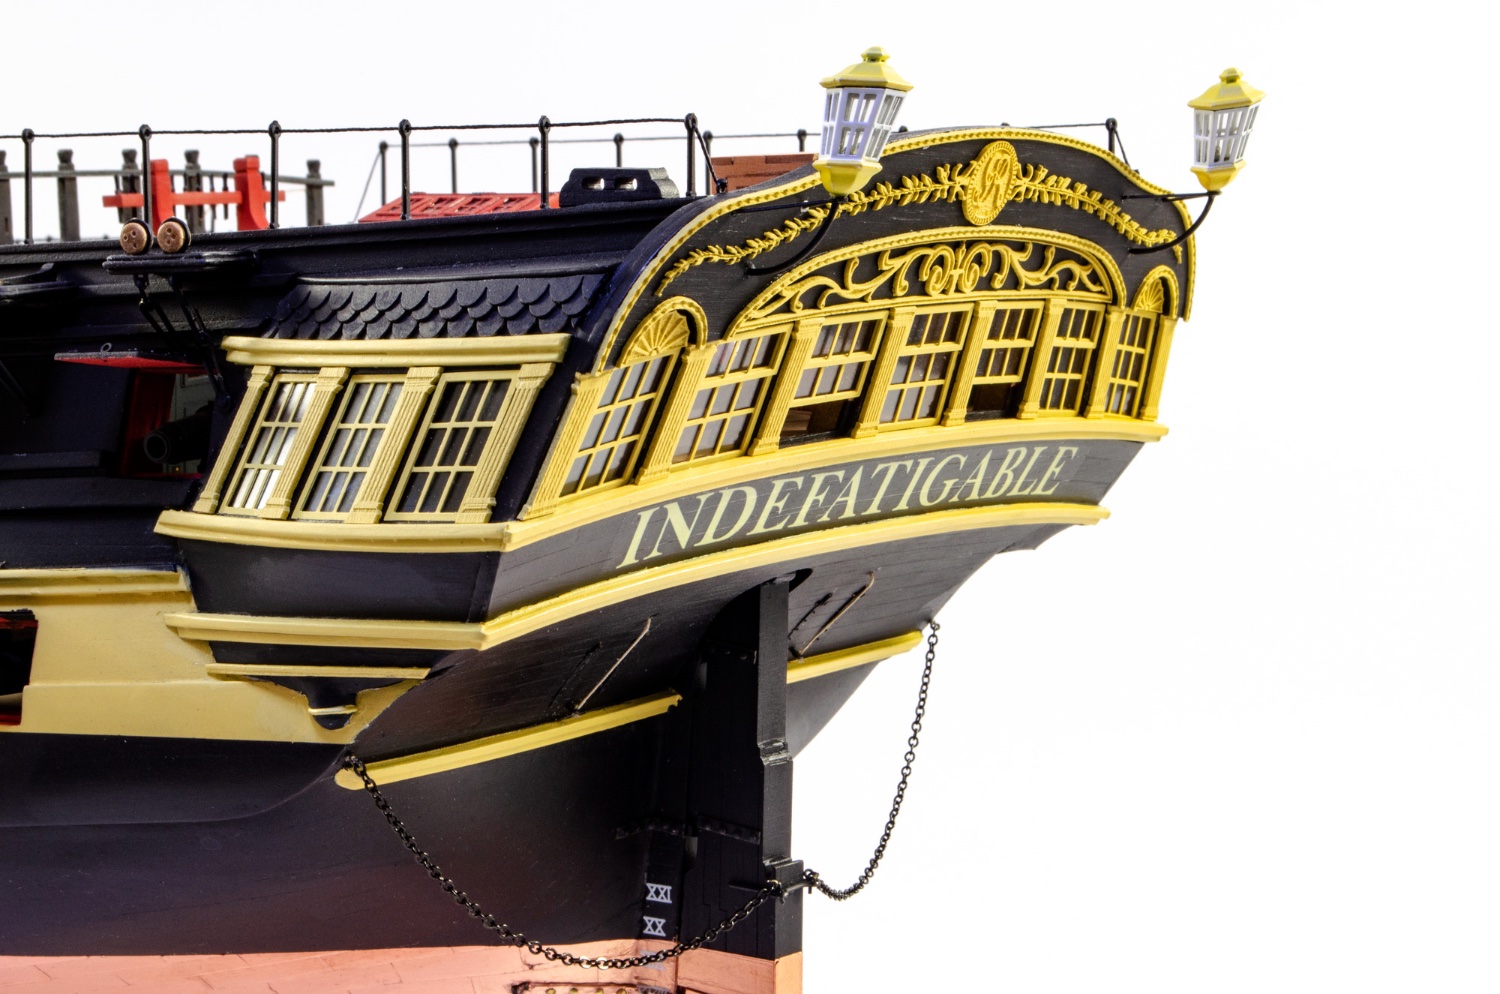
The yellow used on this model was Humbrol 74 Linen. My photoshop editing may have called for saturation to be turned down a little. Don't rely too much on any intensity that there seems to be. She's no different than any other scheme like this that I've seen modelled over the years.
- 488 replies
-
- 5
-
-
- Indefatigable
- Vanguard Models
- (and 1 more)
-
Decals last many, many years. Even the older ones I've seen used have lasted over 20yrs and still been ok. Some old decals used to yellow on the carrier film, but you've no need to worry with modern stuff.
- 488 replies
-
- 8
-
-
- Indefatigable
- Vanguard Models
- (and 1 more)
-
Value-for-Money Airbrush
James H replied to BANYAN's topic in Painting, finishing and weathering products and techniques
My main airbrushes are an Iwata HP-CH and an Iwata HP-C+. I run these on an Iwata Studio Series compressor. These are what I have tended to use for both my magazine work and also my Vanguard Models prototypes. However, with Indefatigable and her size, these airbrushes weren't as friendly, so I splashed out a 'small' fortune on a new airbrush. The larger needle allows me to give a good wetting to the hull with polyurethane varnish. Ta da!! As long as it does the job, all is good.

-
I fully intend to! There's never been a project on my bench, from recollection, as long as this. I was always a swift builder before VM stuff, but not one that ever rushed. Now I need to be in the zone between rushing and simply being swift. It takes a silly amount of forward planning, as a builder, in maximising my bench time in building as much of the small stuff as I can while doing the initial frame work...so deadlines can be met. I learned a lot of that from my magazine work, but this takes it to a whole new level.
-
Nope! 😆 Masting and rigging is well covered in the plans and making masts is mostly all about dimensions from dowel stock, I can't confer that any easier than a plan can. We also have to assume that at this skill level that the builder will have the prerequisite skillset to complete.
- 488 replies
-
- 10
-
-

-
- Indefatigable
- Vanguard Models
- (and 1 more)
-
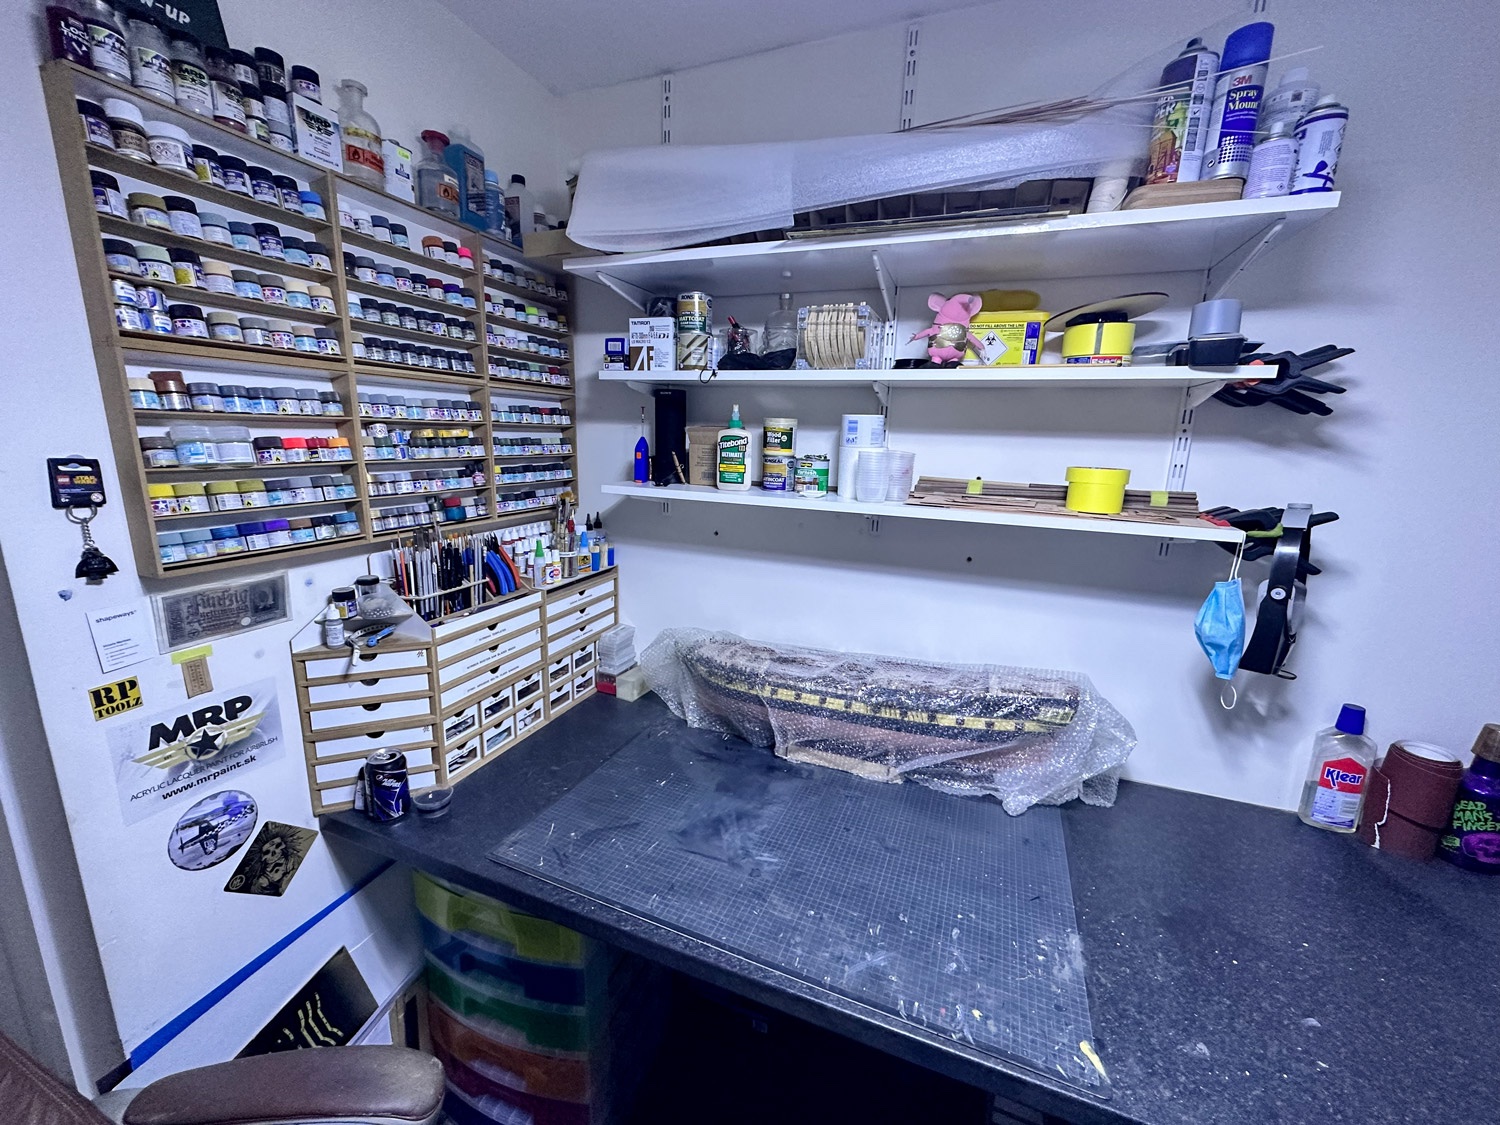
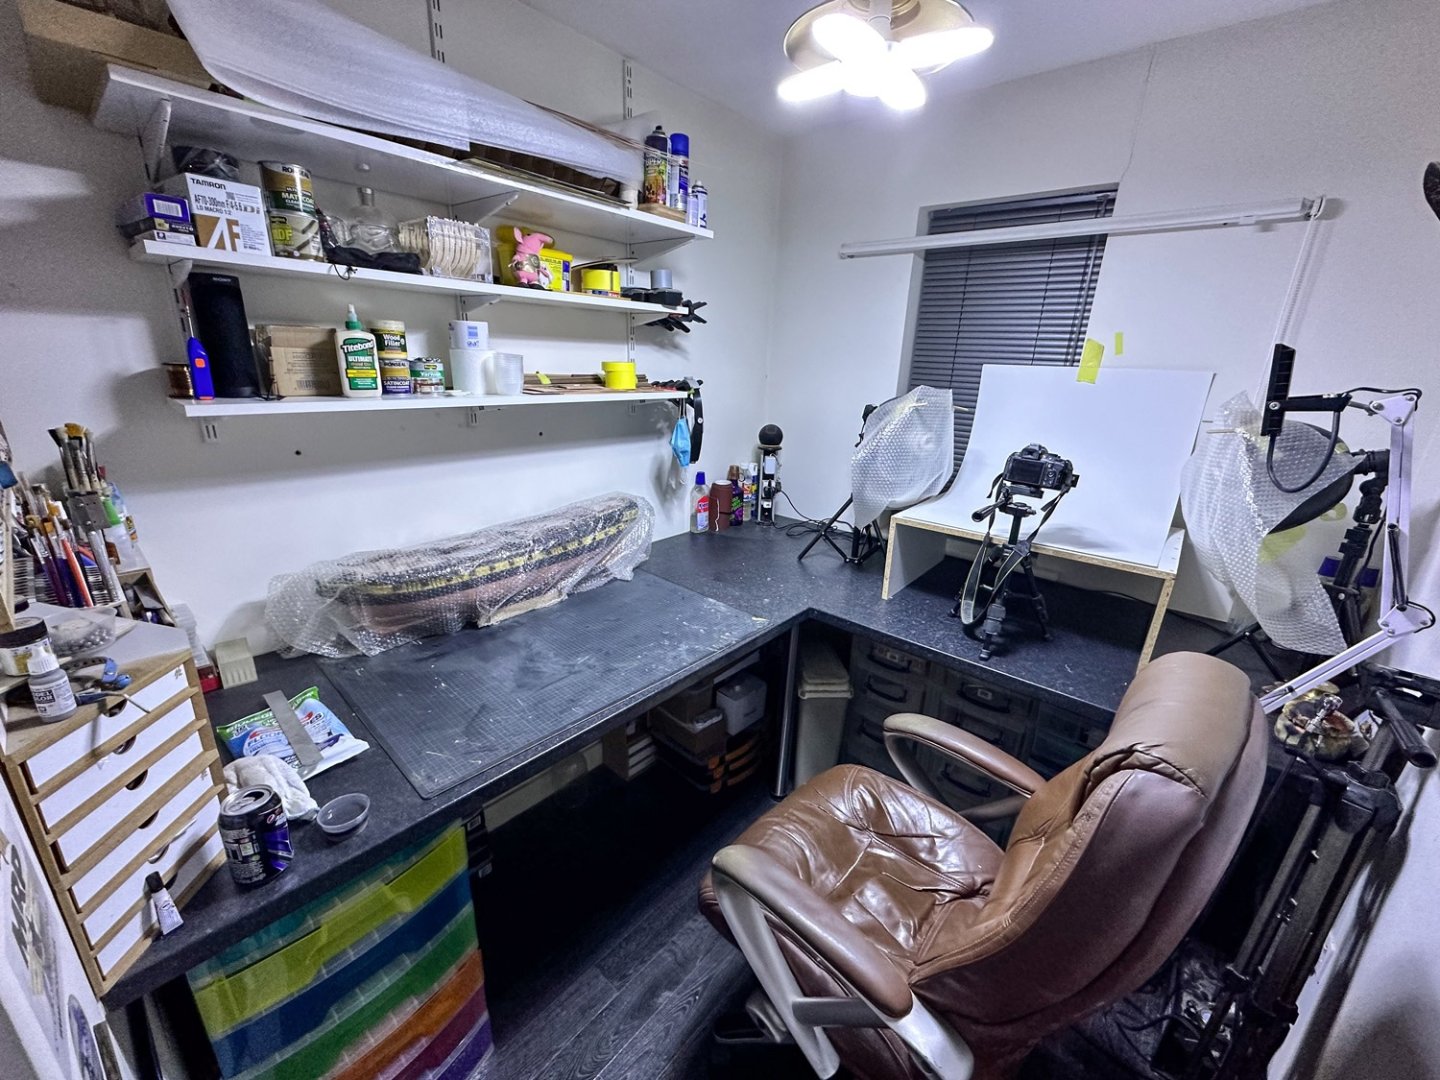
My room got gradually messier over the last 3 year with only interim cleans. For the first time since last April, there's no building activity. This time it's a deep clean to remove all vestiges of dust and detritus. Indy is now encapsulated so it won't get dusty during the next project. About halfway to making this workable again.

- 488 replies
-
- 27
-
-
- Indefatigable
- Vanguard Models
- (and 1 more)
-
The manual can now be downloaded from the product page: https://vanguardmodels.co.uk/product/hms-indefatigable-1794/
- 488 replies
-
- 7
-
-
- Indefatigable
- Vanguard Models
- (and 1 more)
-
The manual for this is A3, spiral-bound. There's about 25,000 words and over 1000 photos.
- 488 replies
-
- 14
-
-
-
- Indefatigable
- Vanguard Models
- (and 1 more)
-
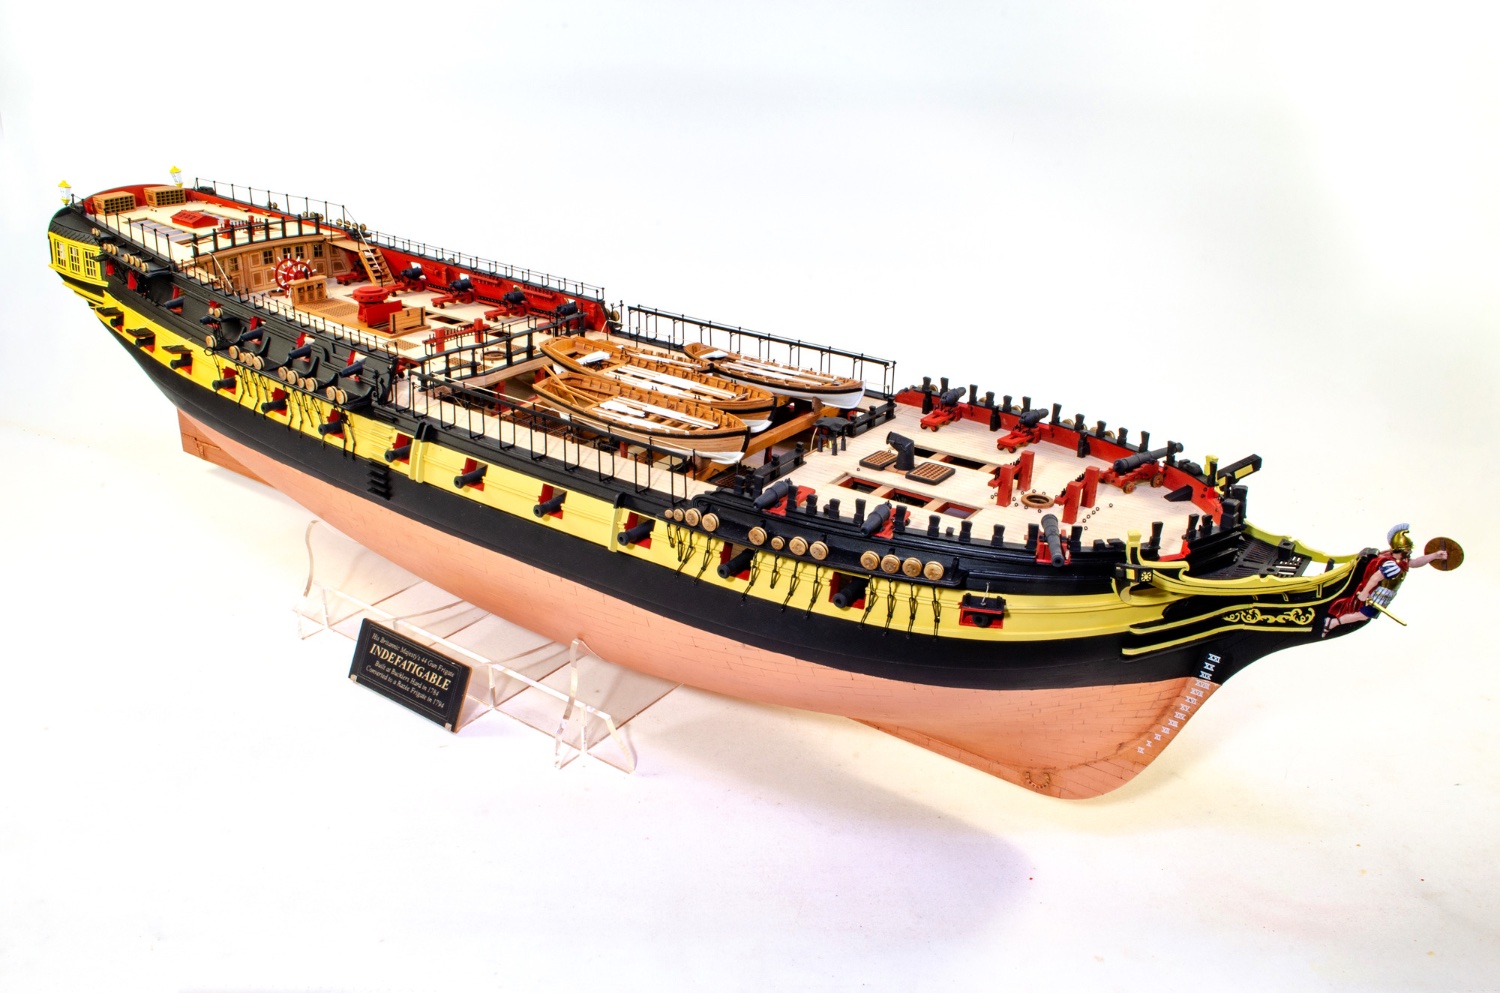
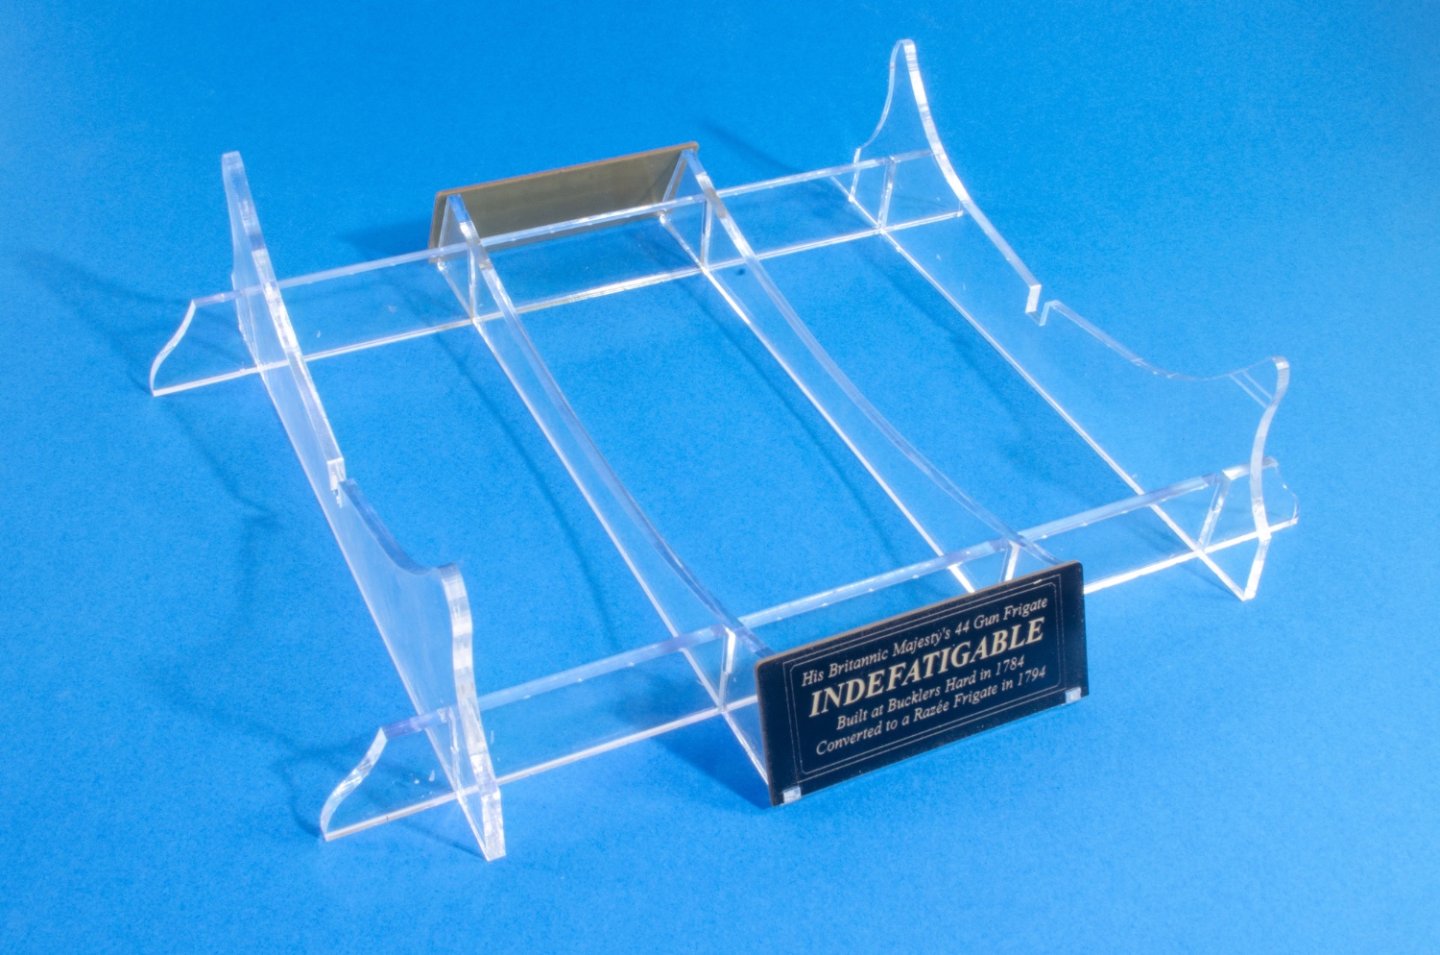
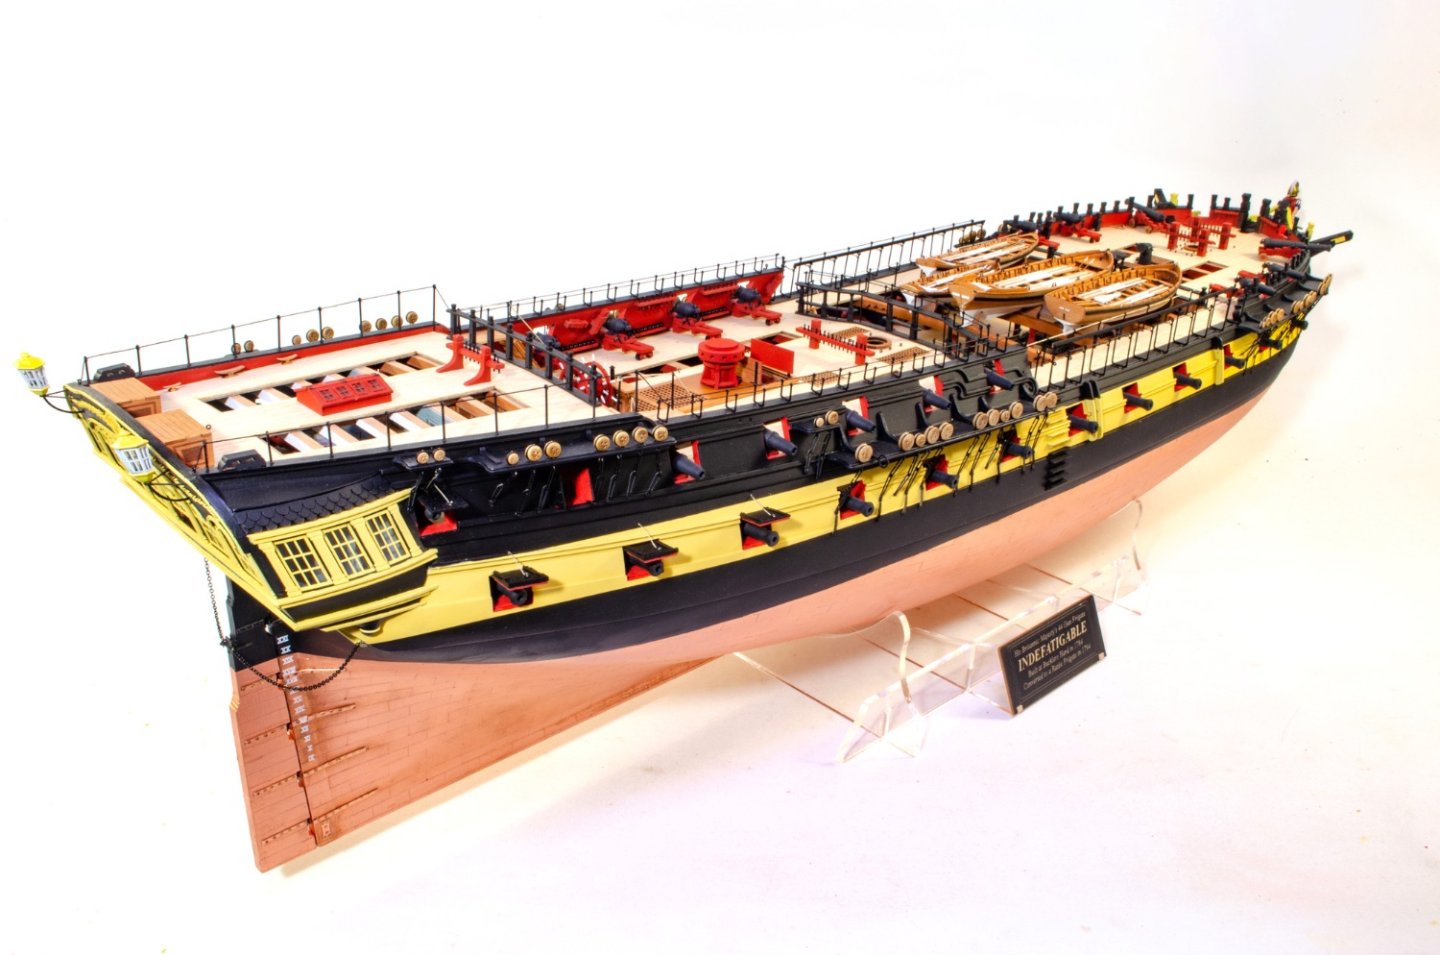
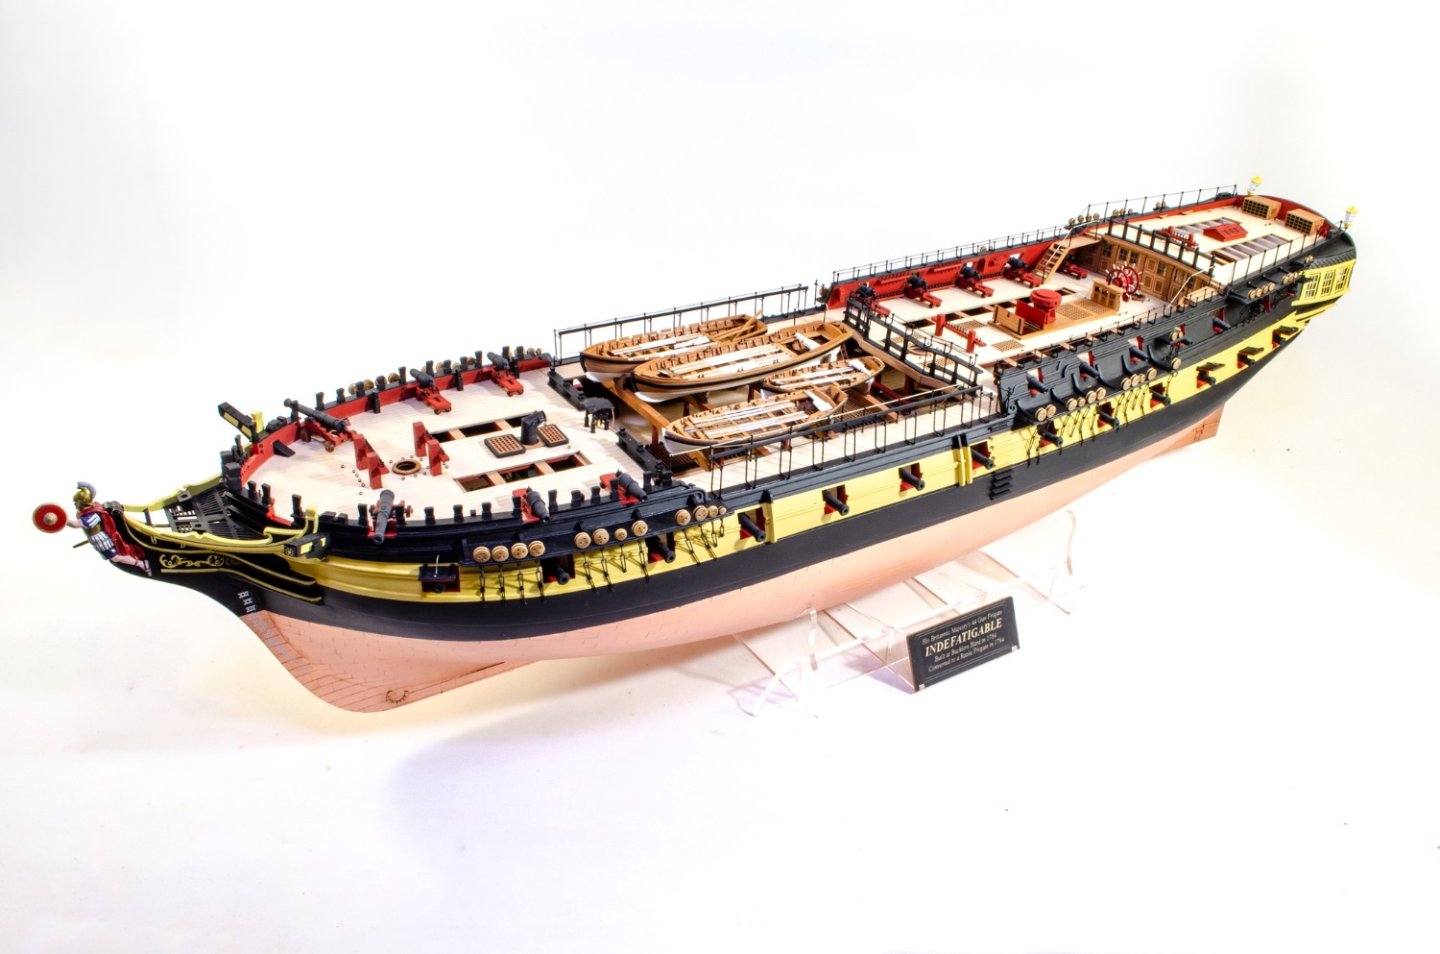
And lastly: As with other VM kits, this comes with an acrylic stand. This one is quite heavy too, with a gold/black nameplate. Final hull pics: And with that, I'm having a week or two abusing my PlayStation5 with Hogwarts Legacy and Call of Duty. Modern Warfare 2.


- 488 replies
-
- 62
-
-
-
-
- Indefatigable
- Vanguard Models
- (and 1 more)
-
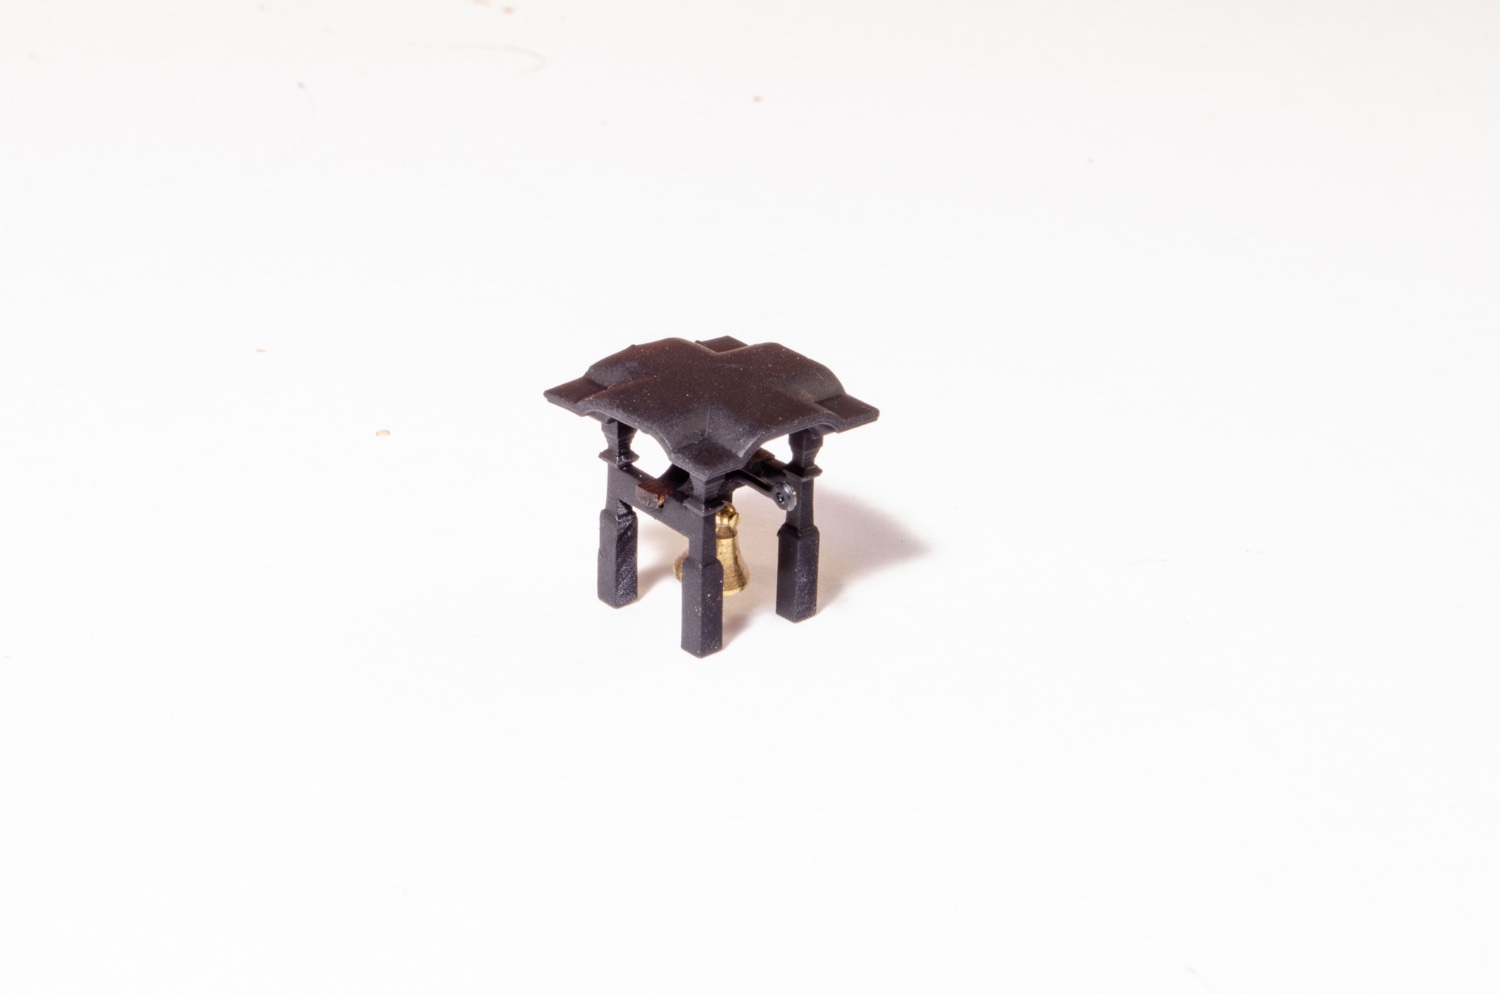
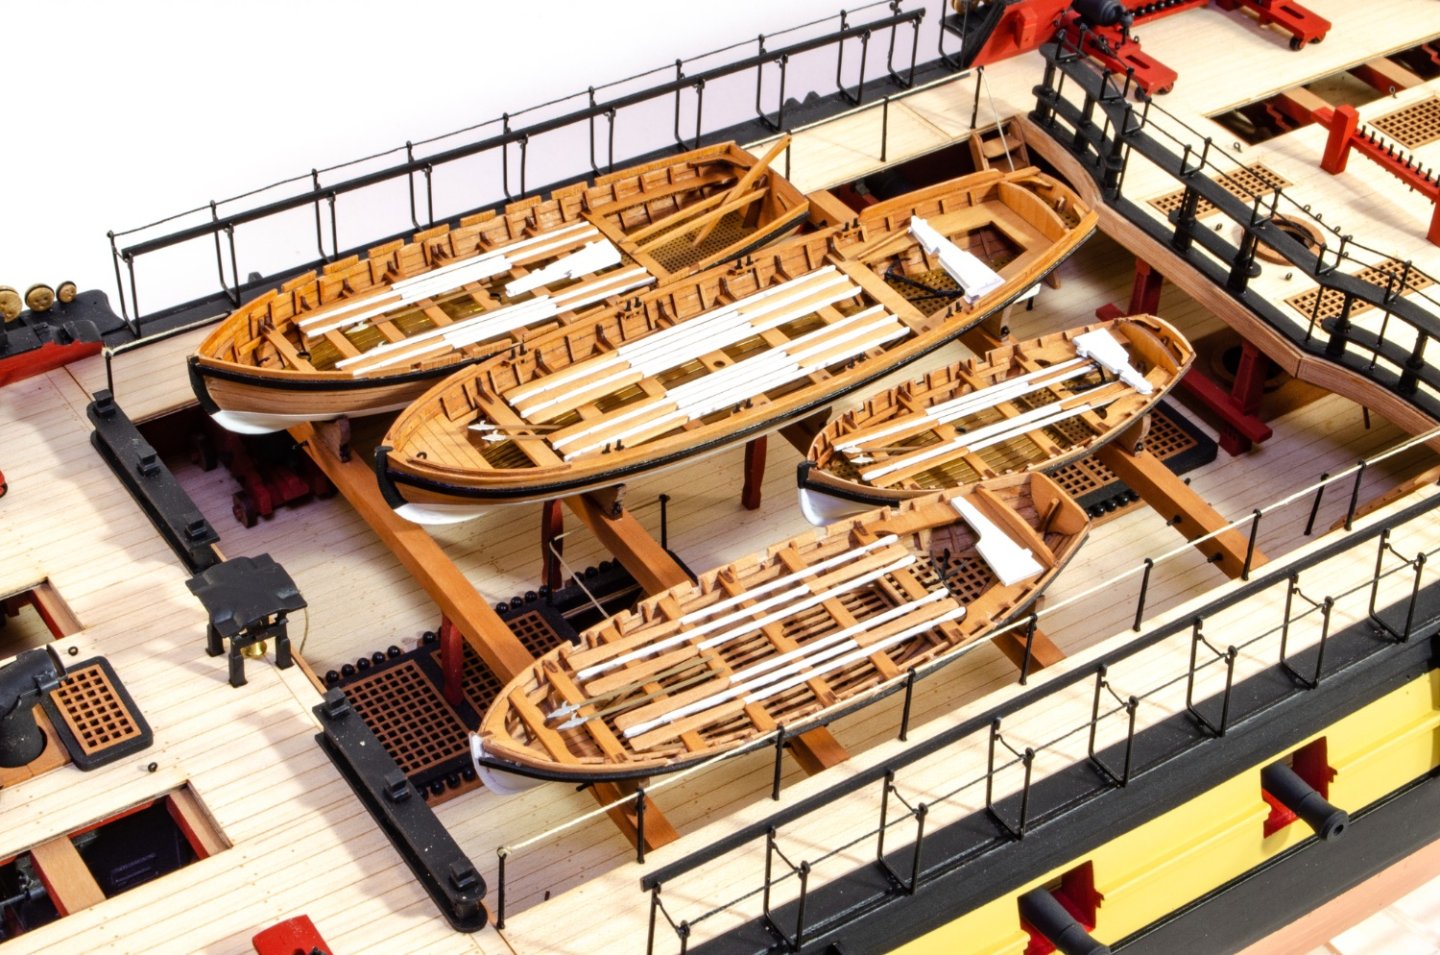
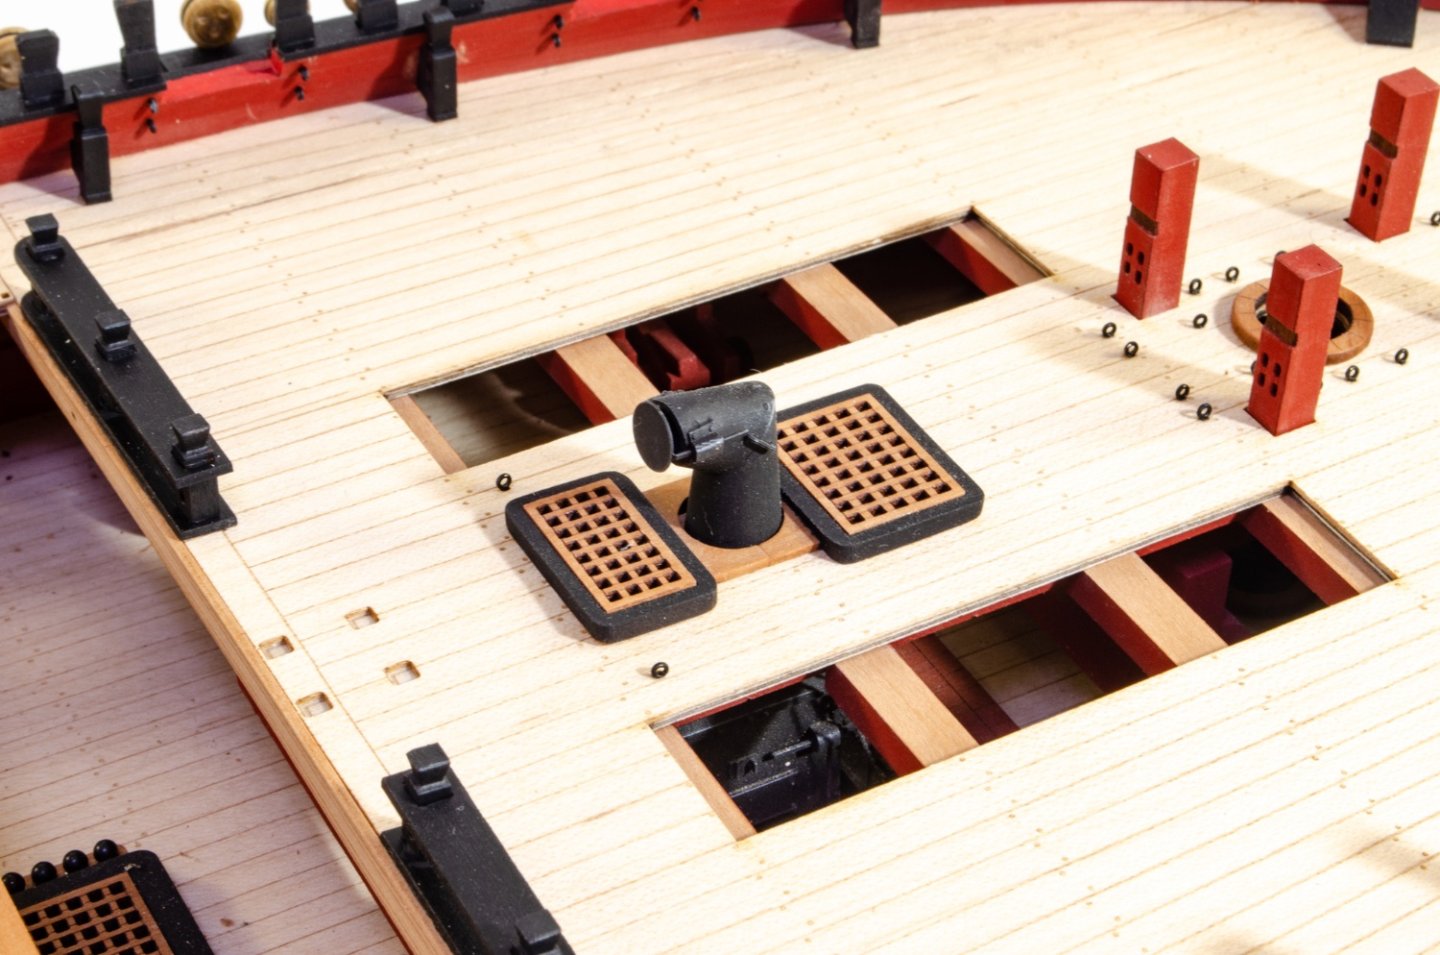
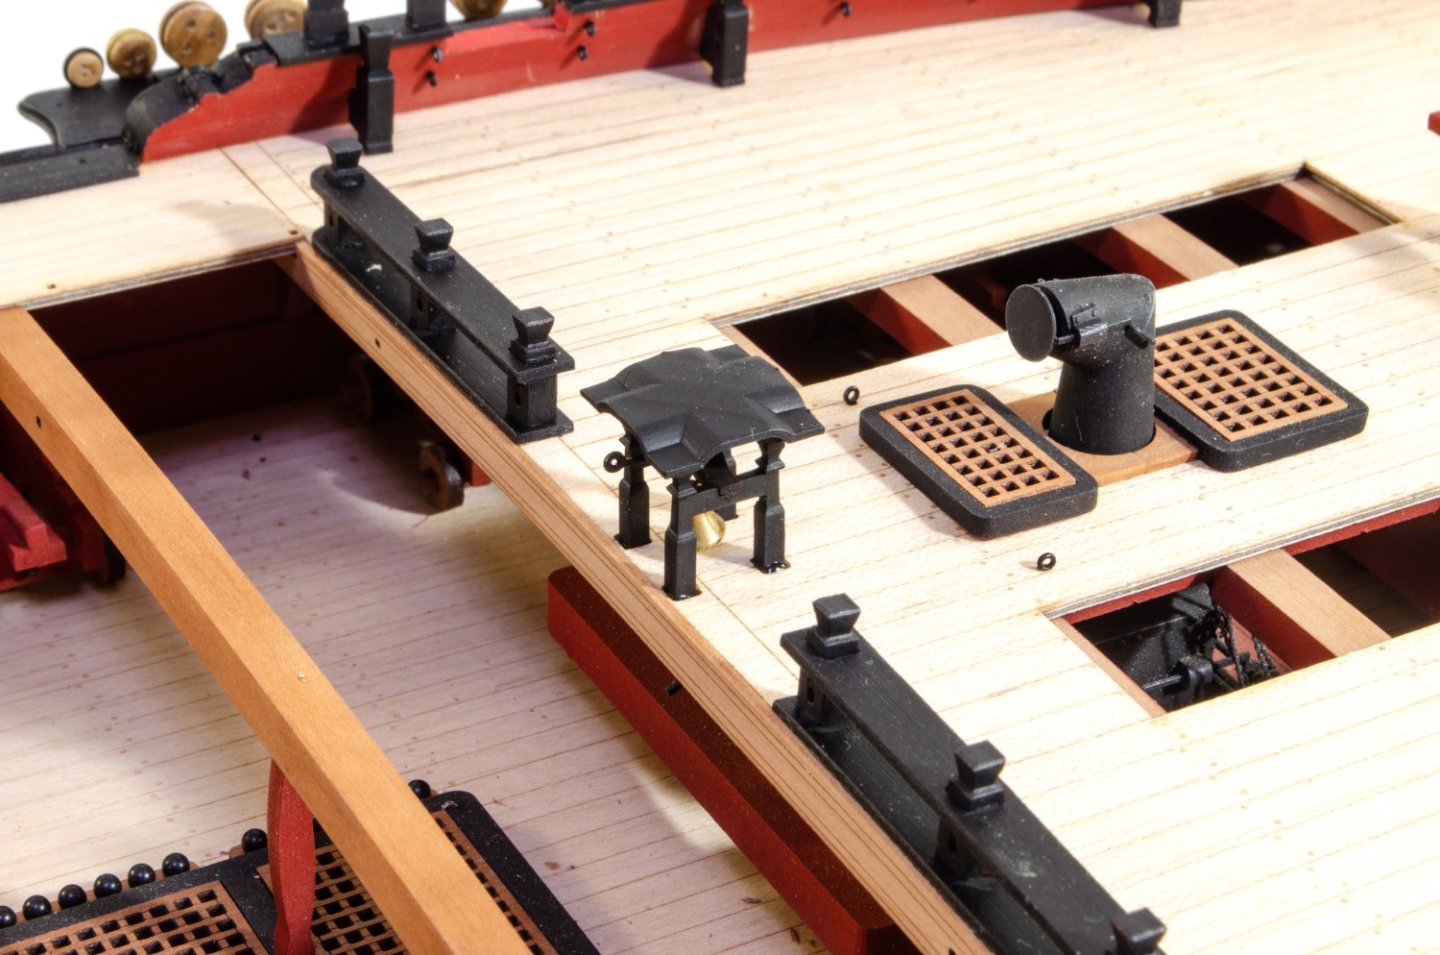
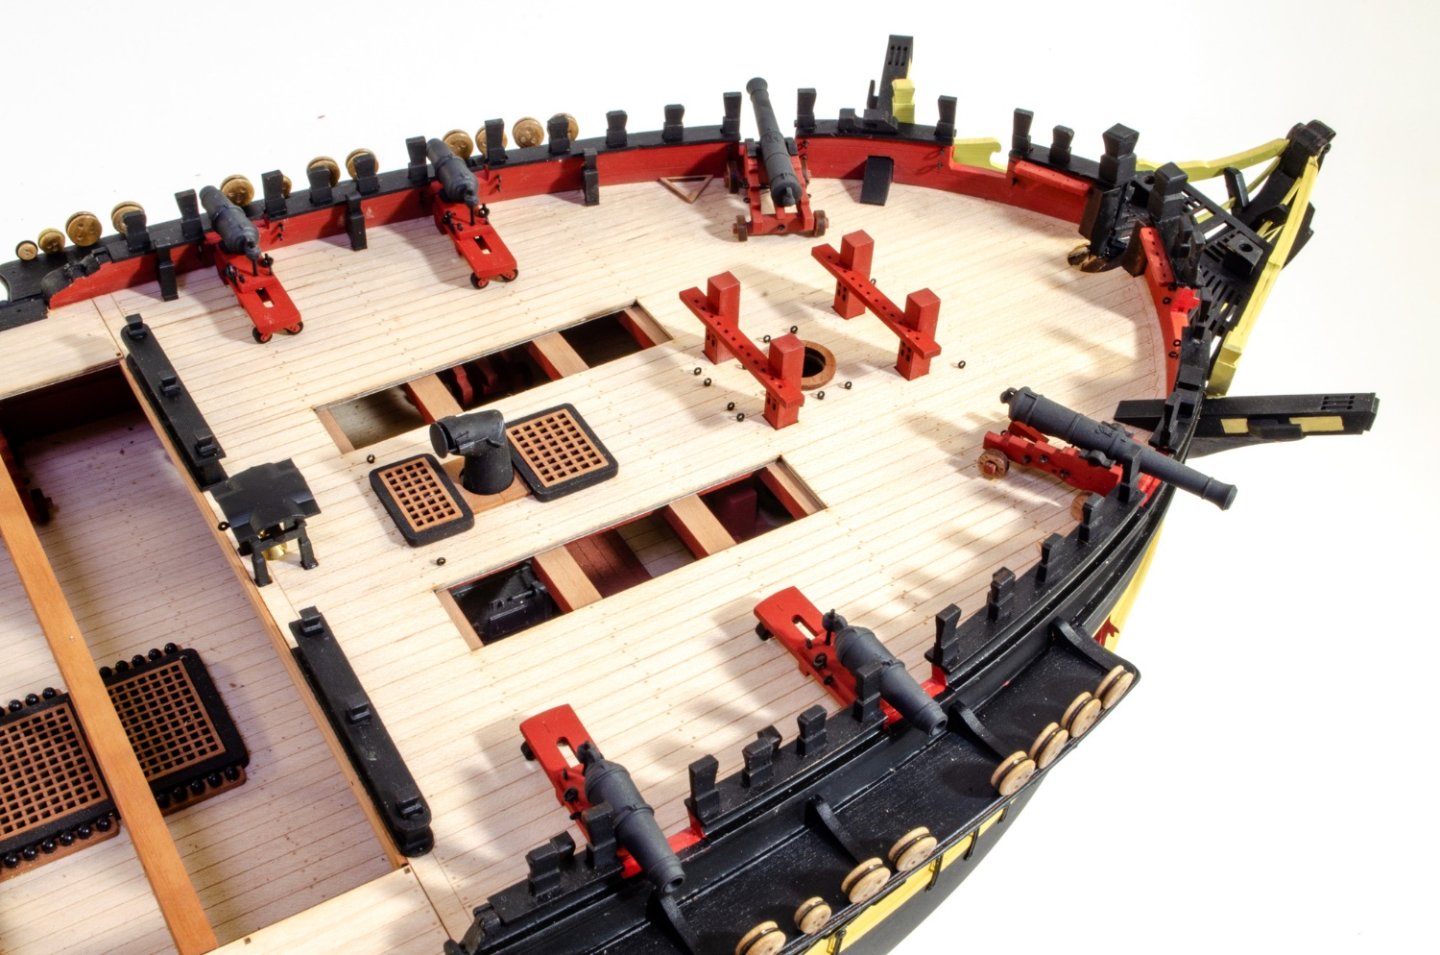
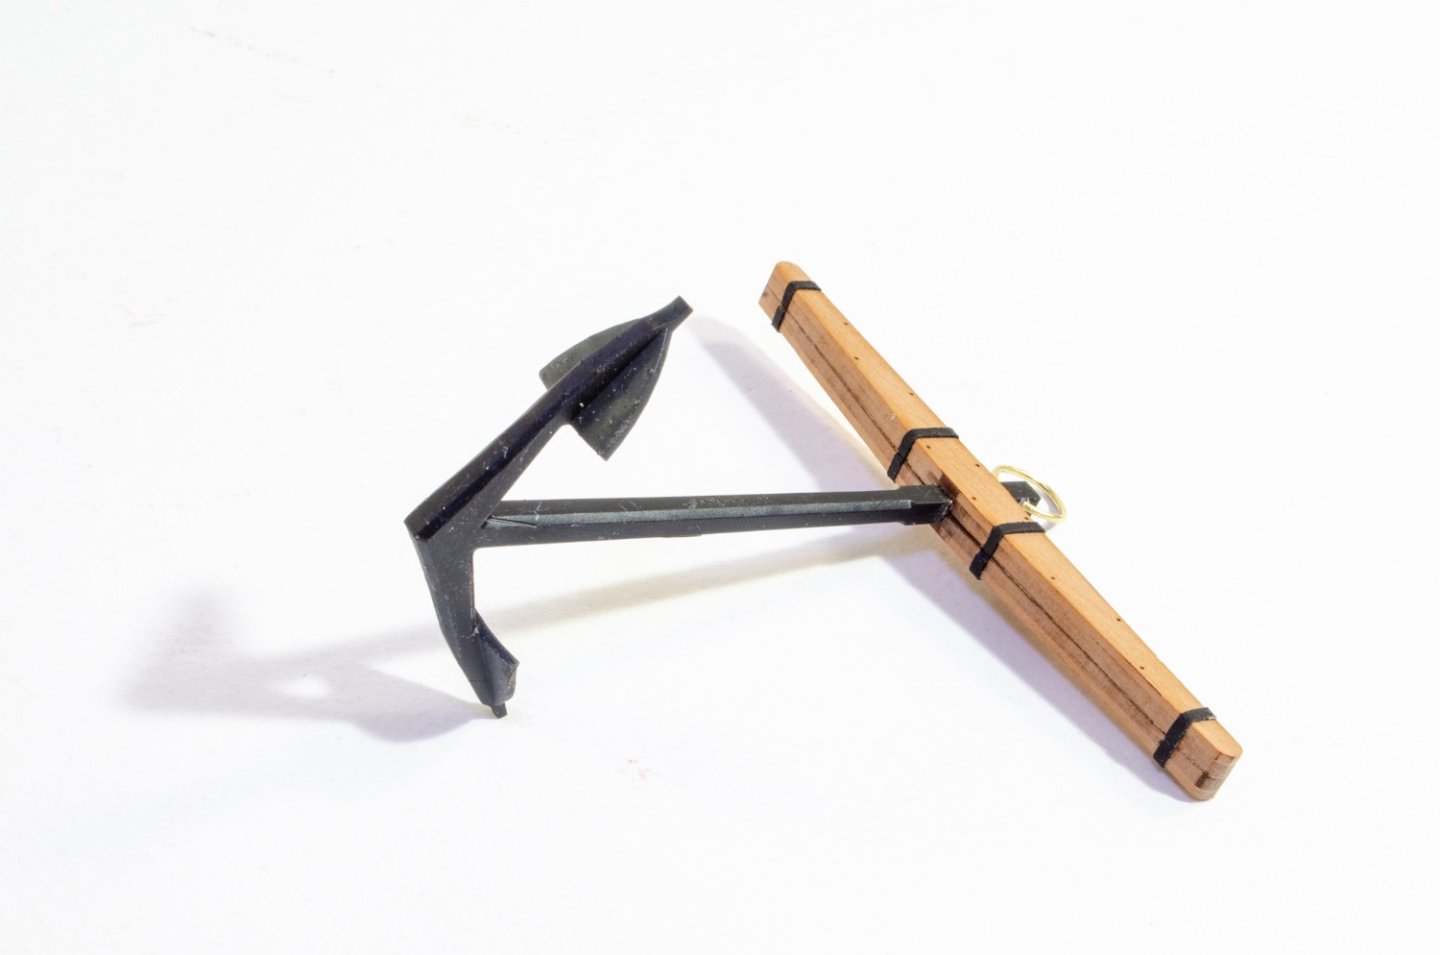
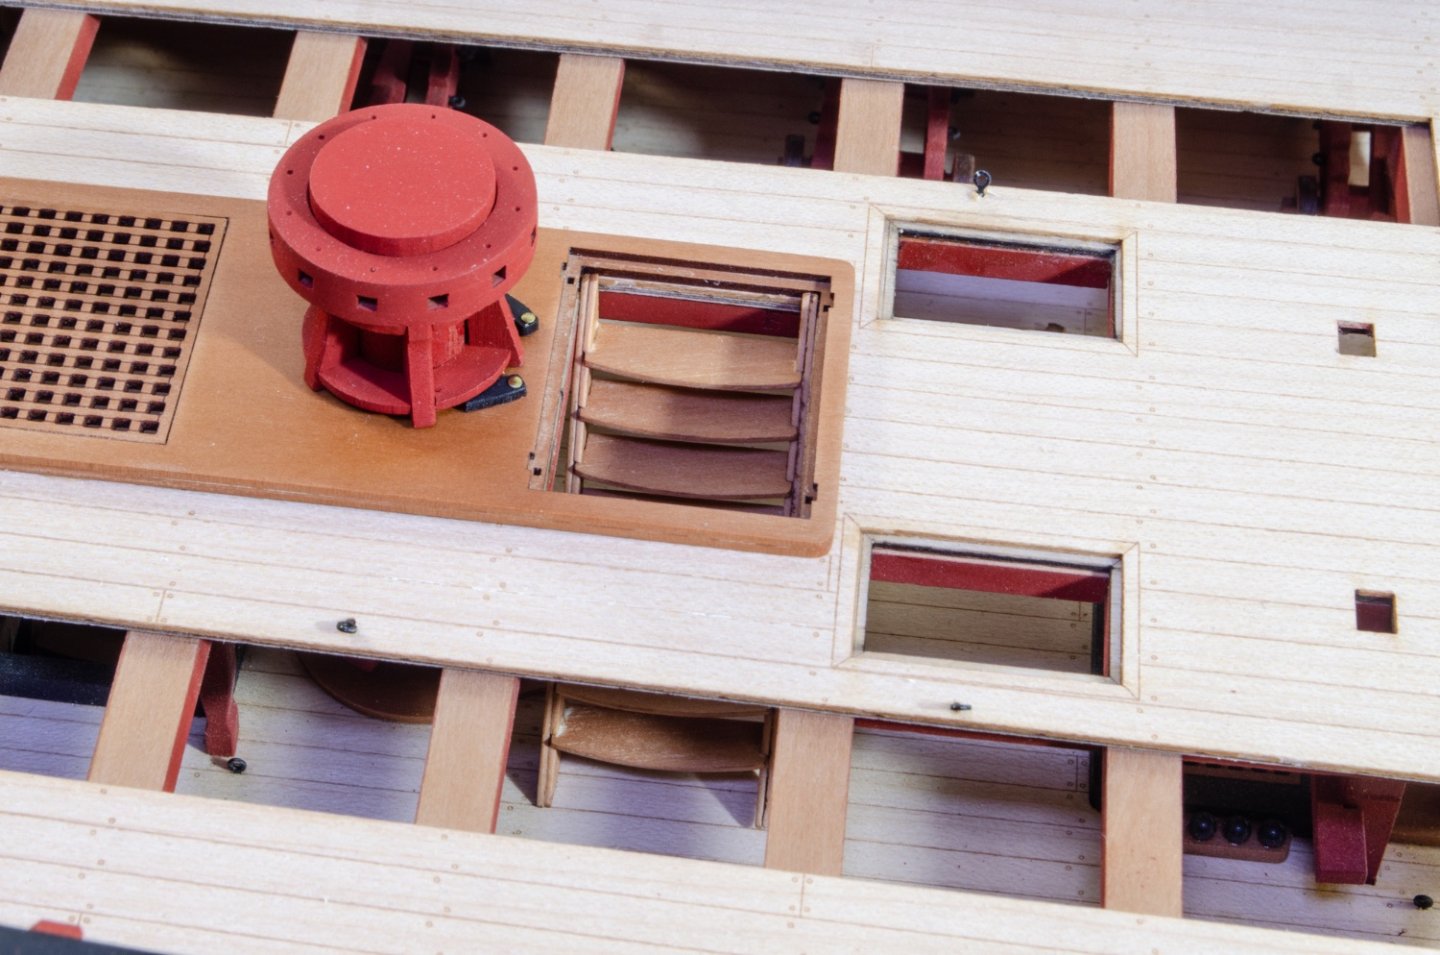
Moving onto the forecastle... The stove funnel is now fitted and the gratings installed either side of it. The belfry is supplied as a 3d part. This is fitted with a gallows and the bell/bellcrank. We have a couple of 12-pounders up front, and these are now built up and fitted, along with the rest of the carronades. The most forward ports are left unoccupied. Now onto the hammock cranes and other ironwork on the gunwales. Here you see the boat cradles in situ. And here is an anchor, as if you needed to be told!

- 488 replies
-
- 36
-
-
-
- Indefatigable
- Vanguard Models
- (and 1 more)
-
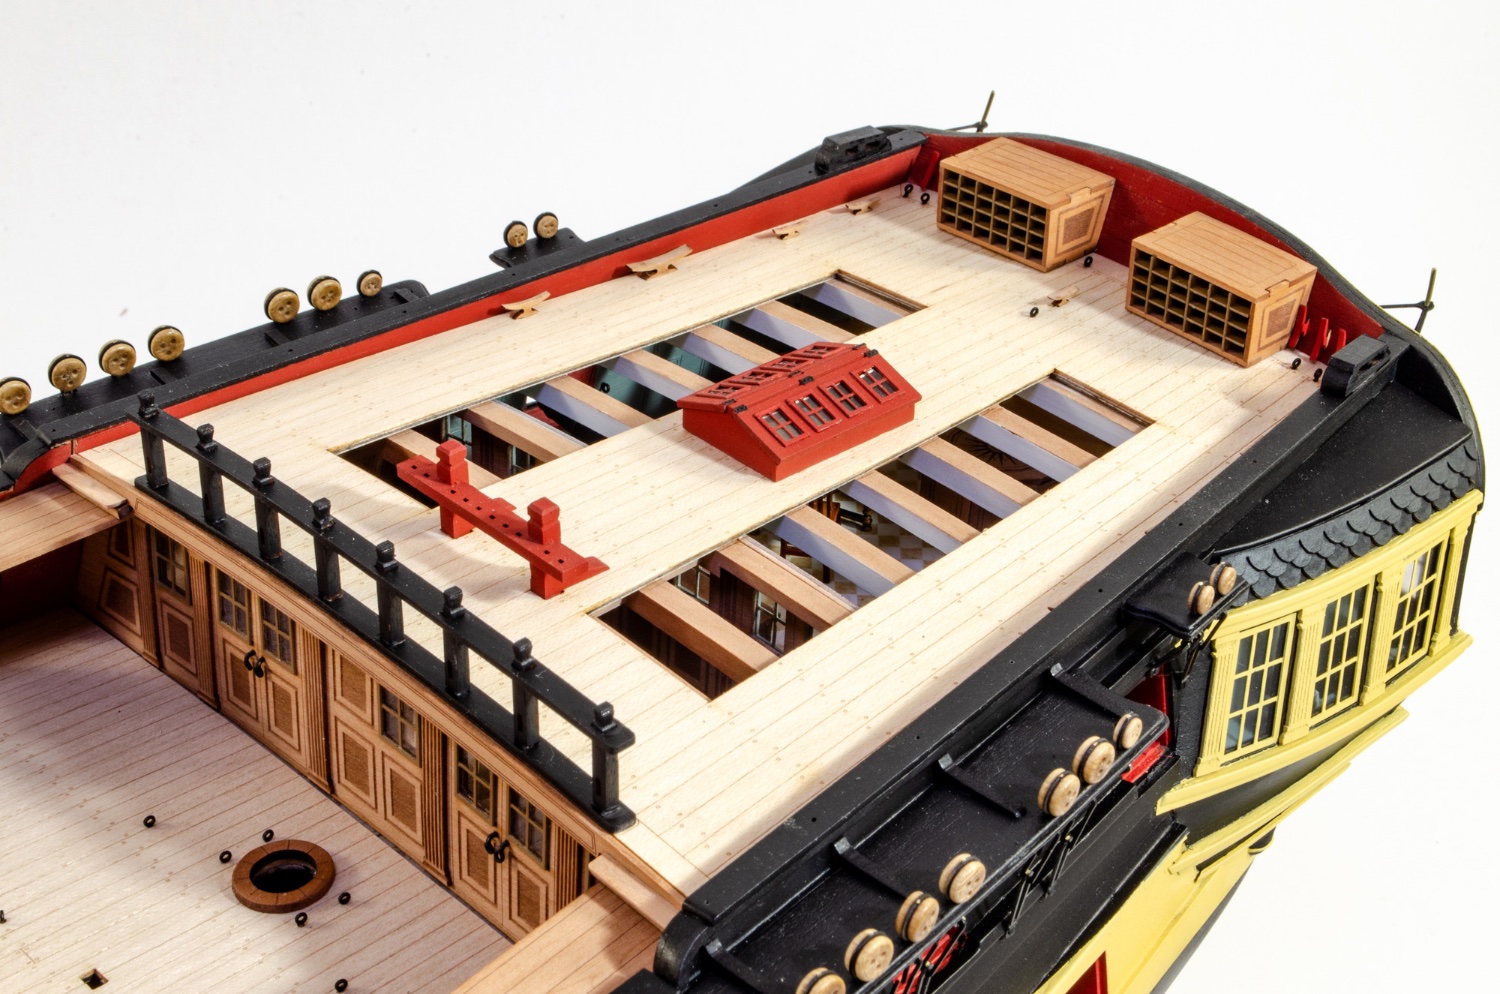
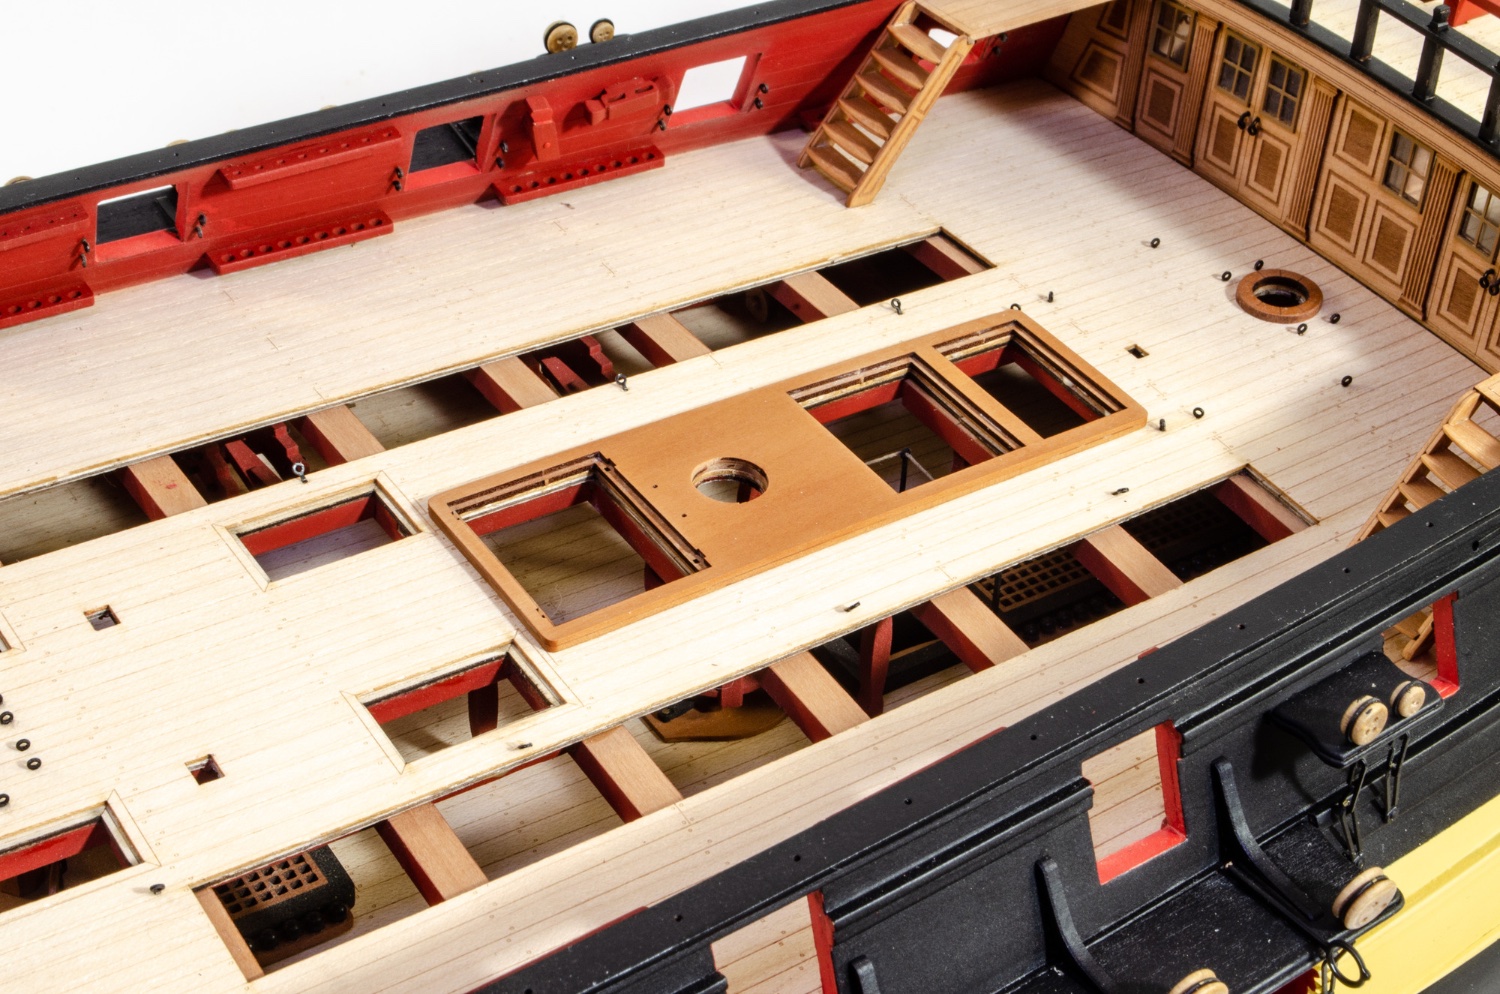
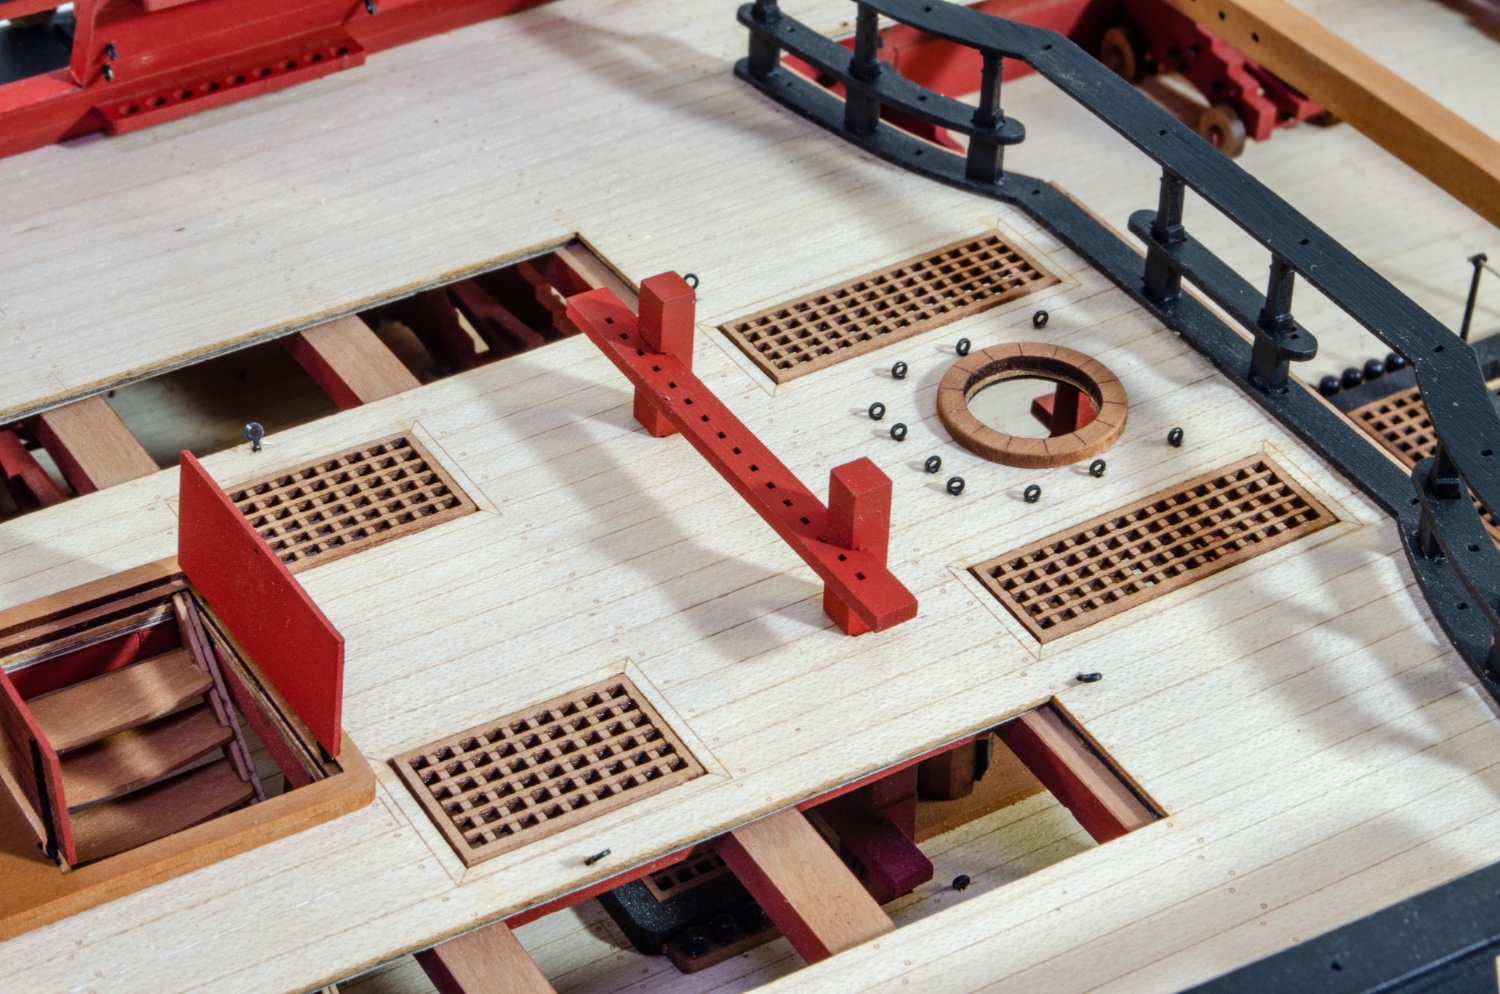
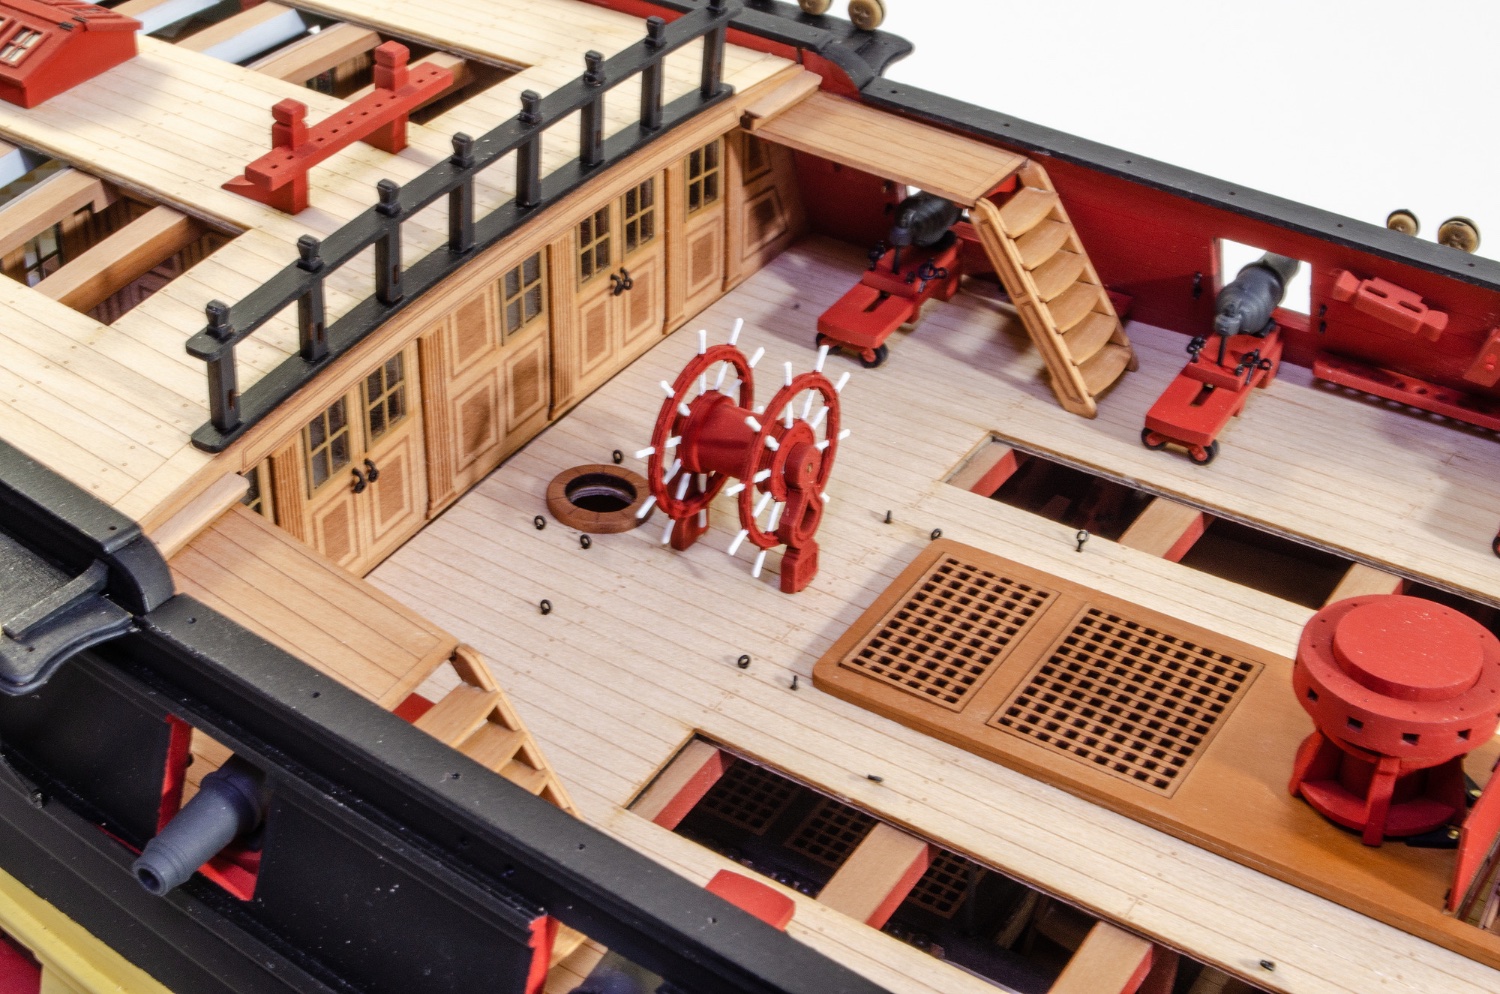
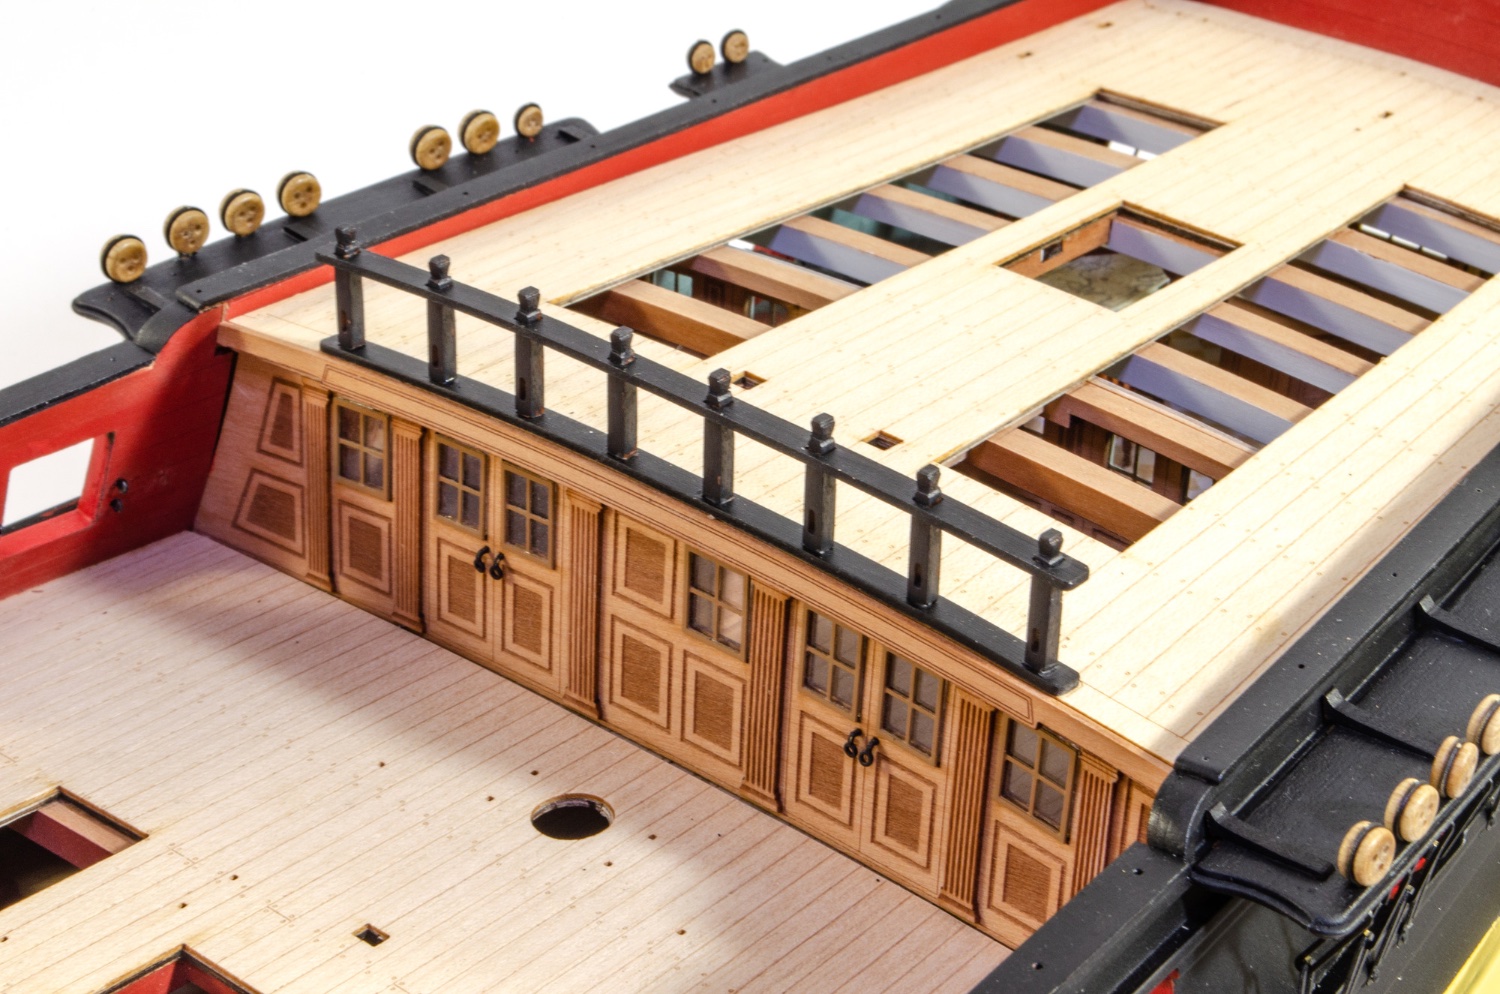
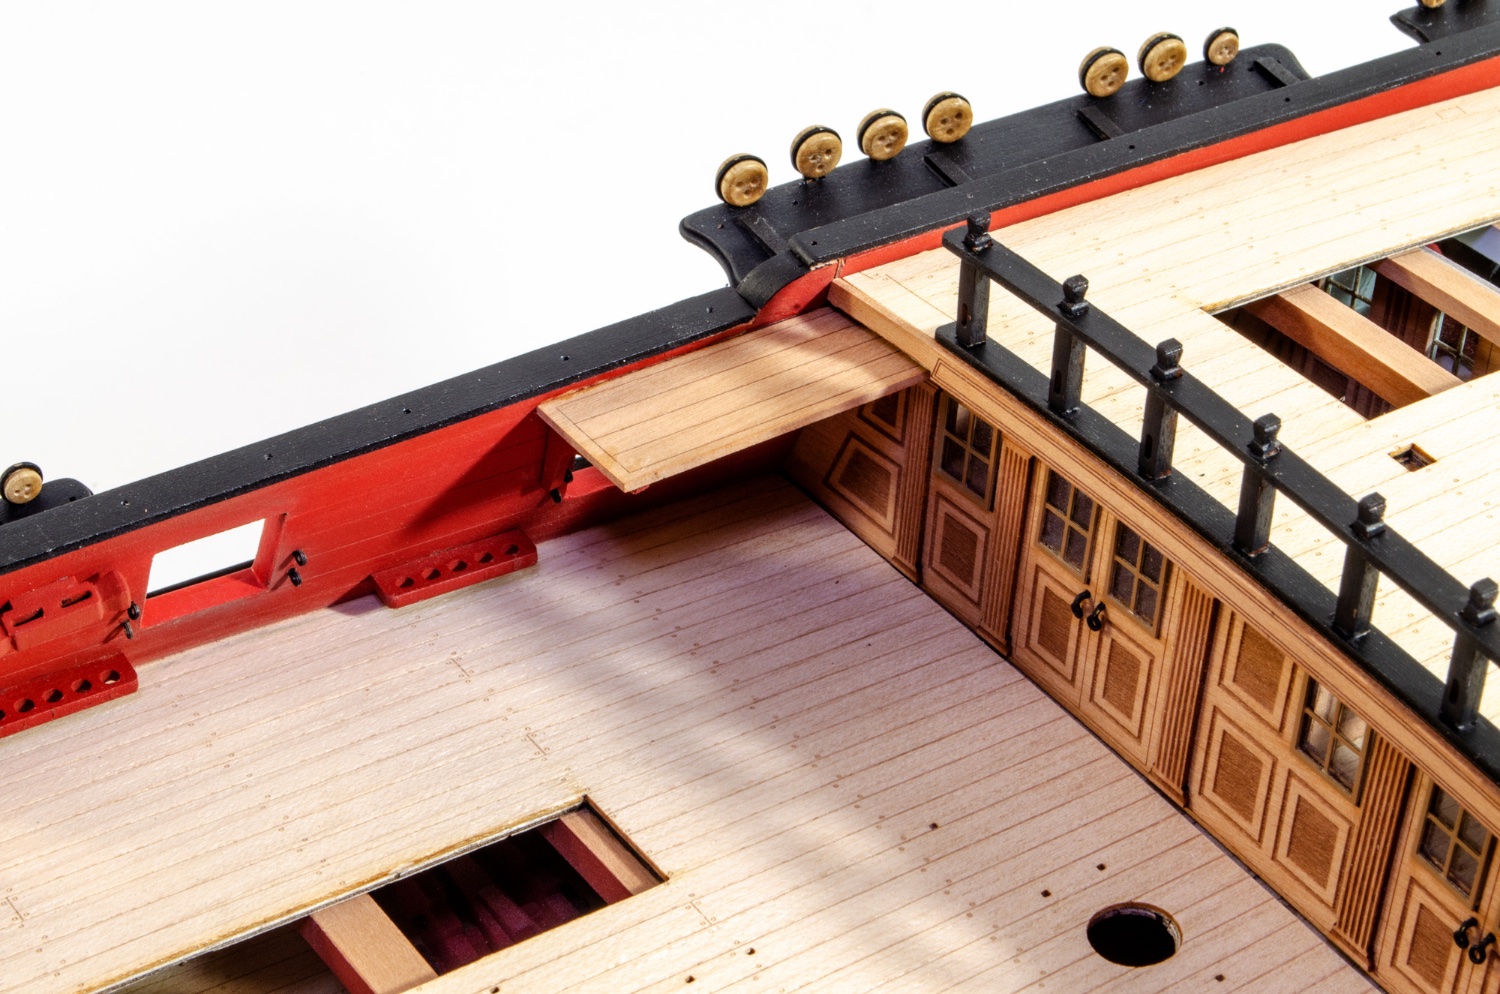
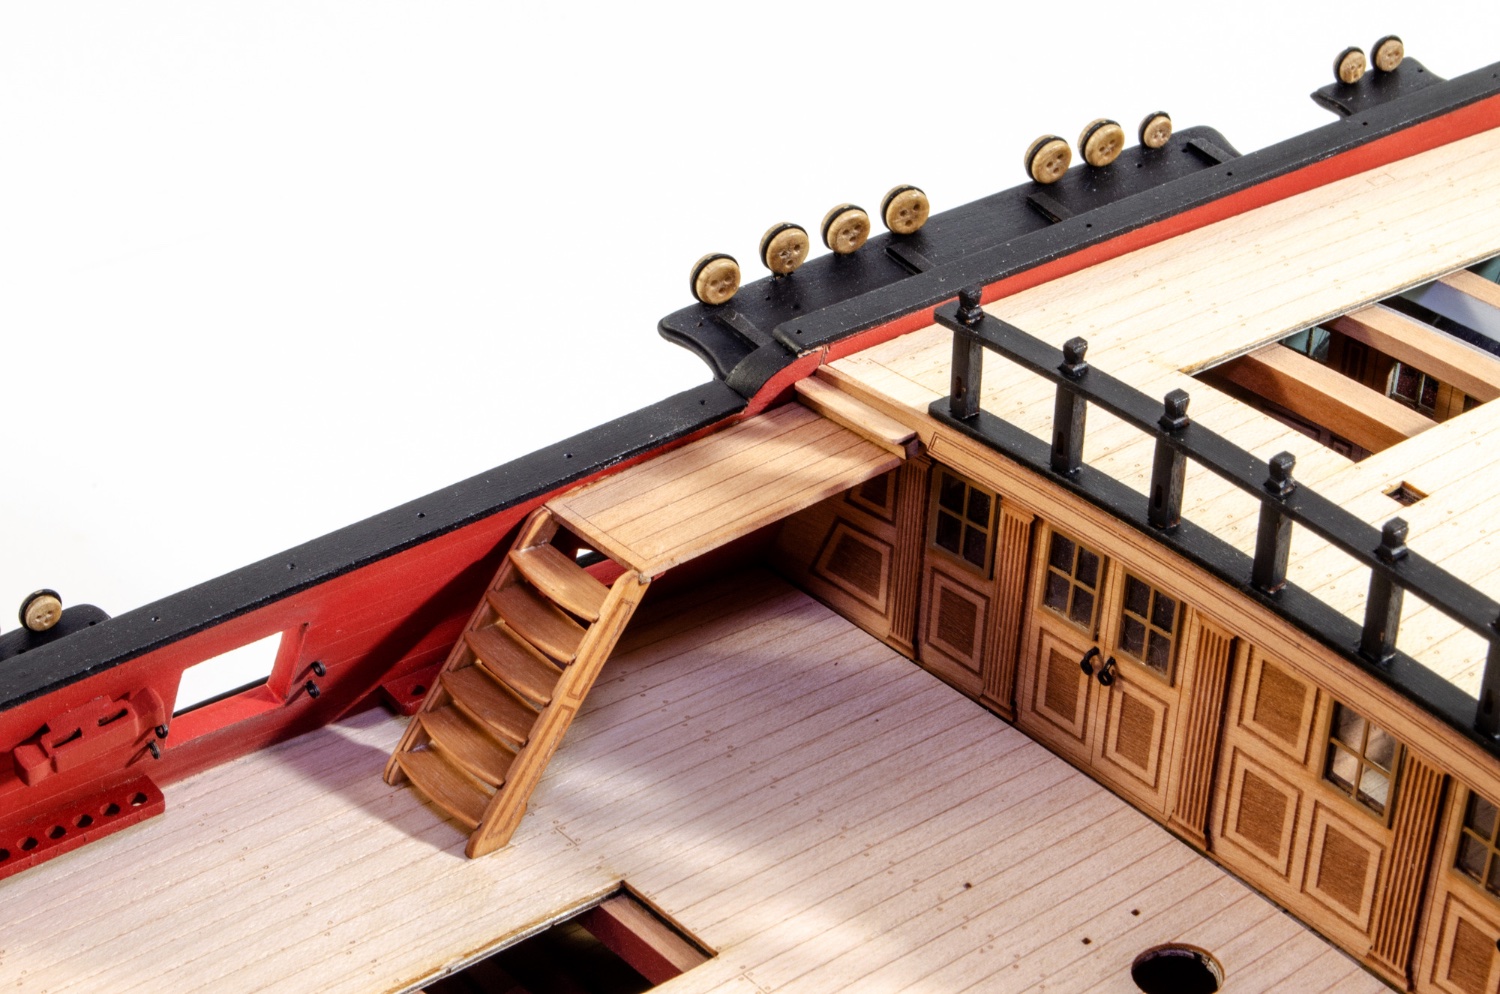
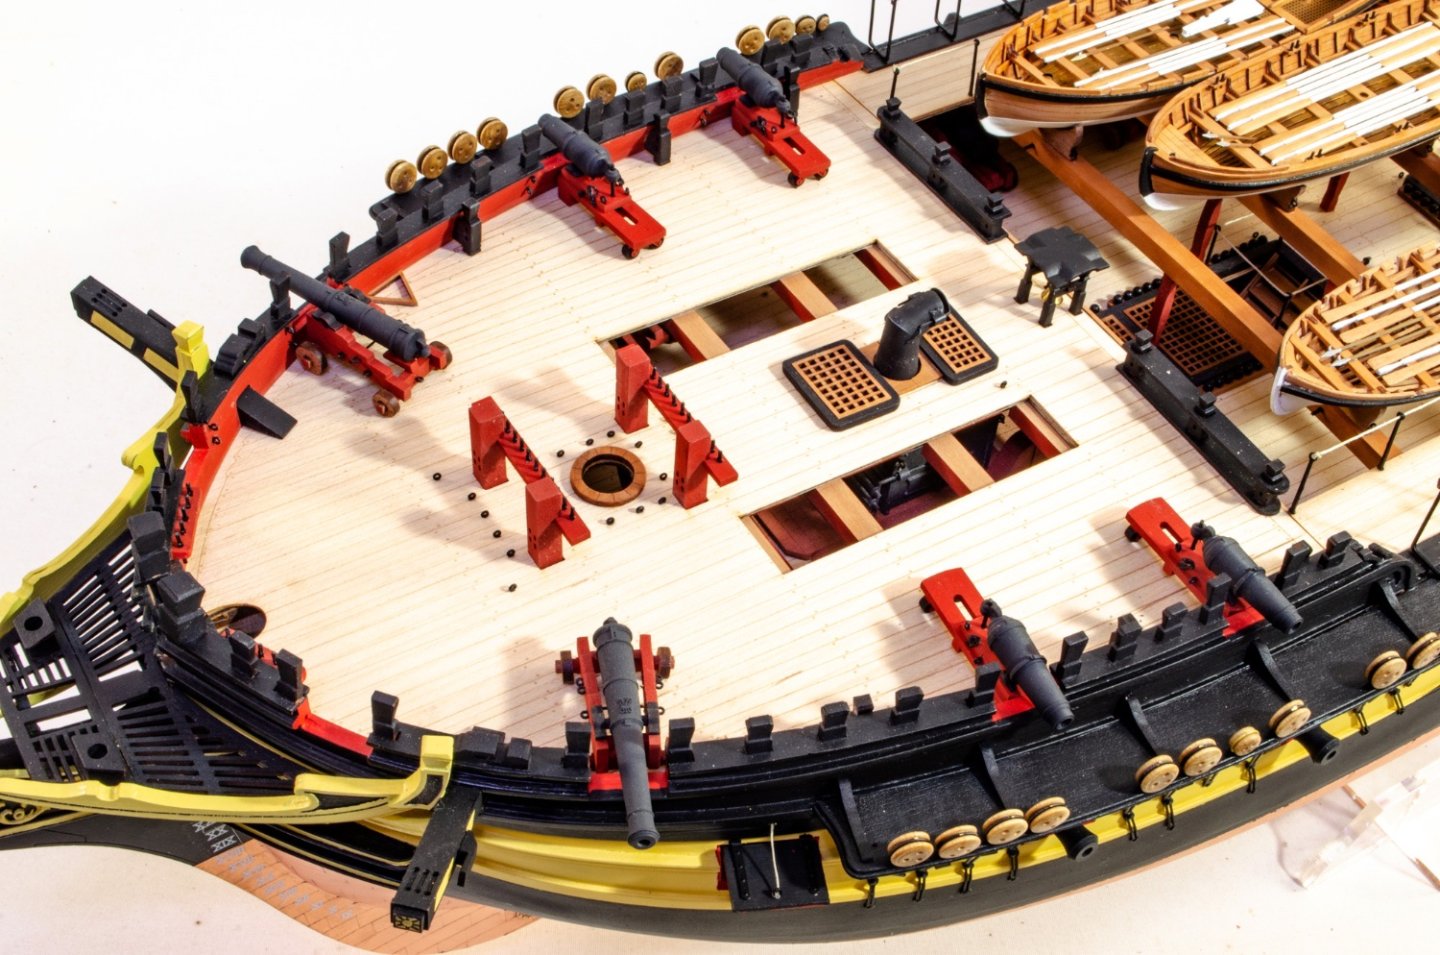
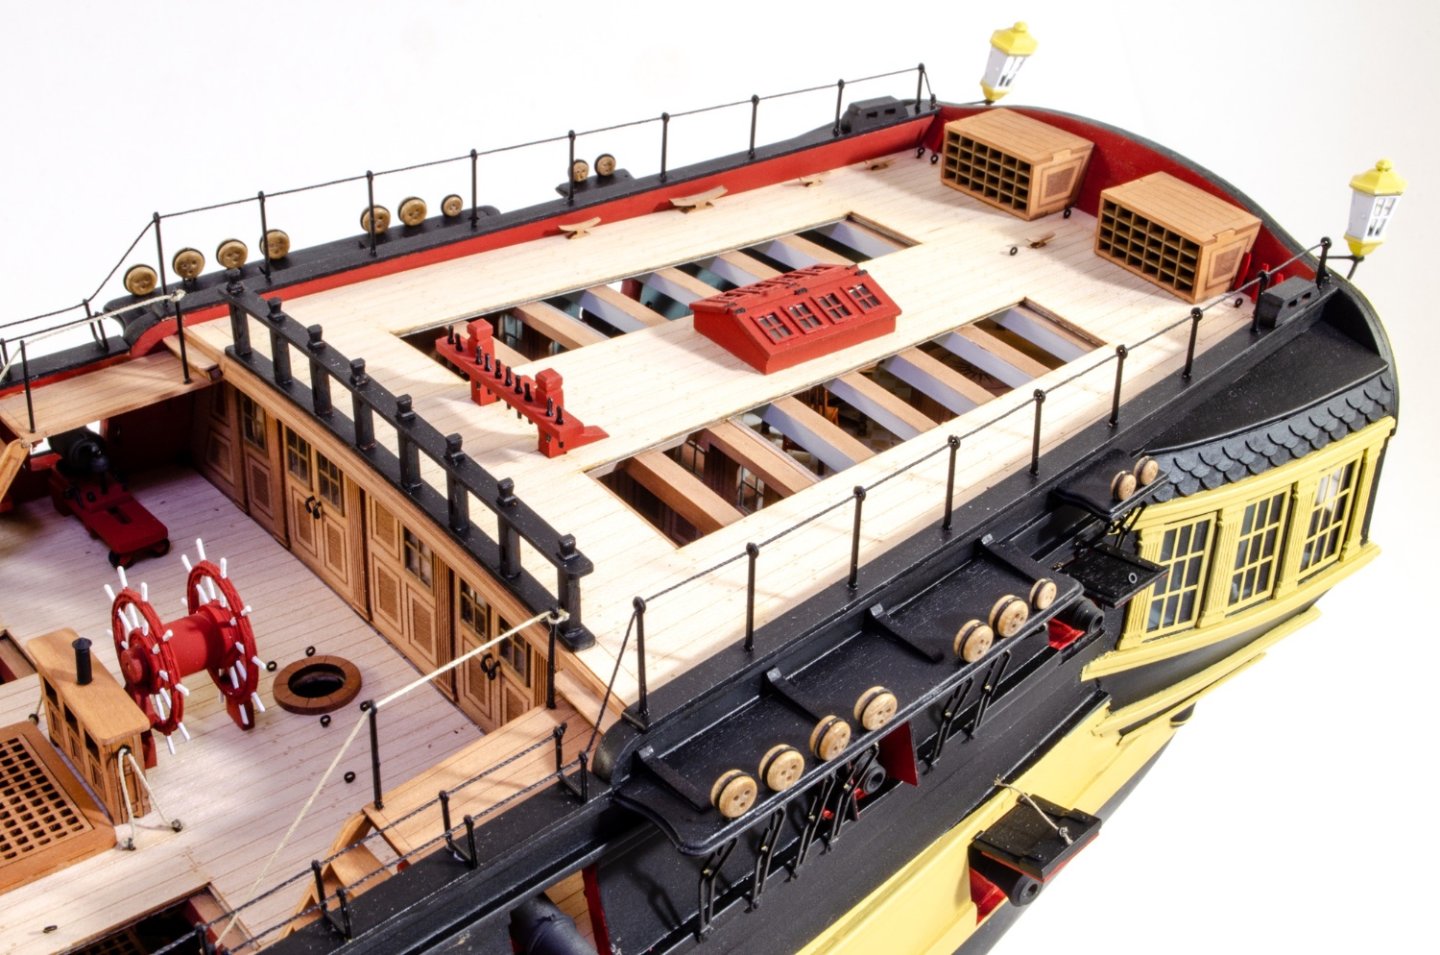
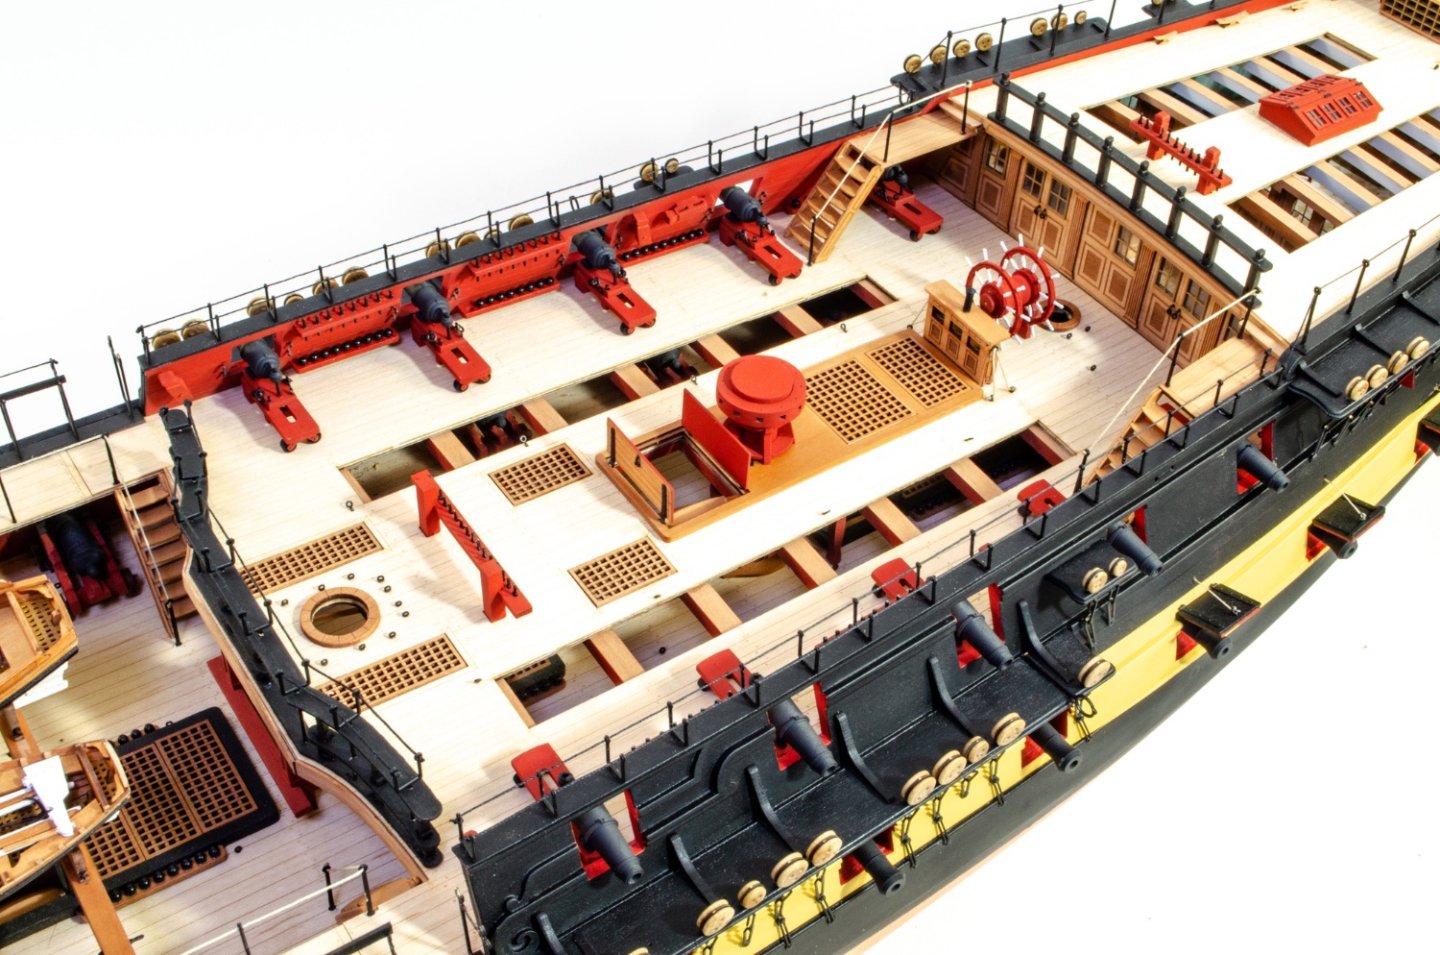
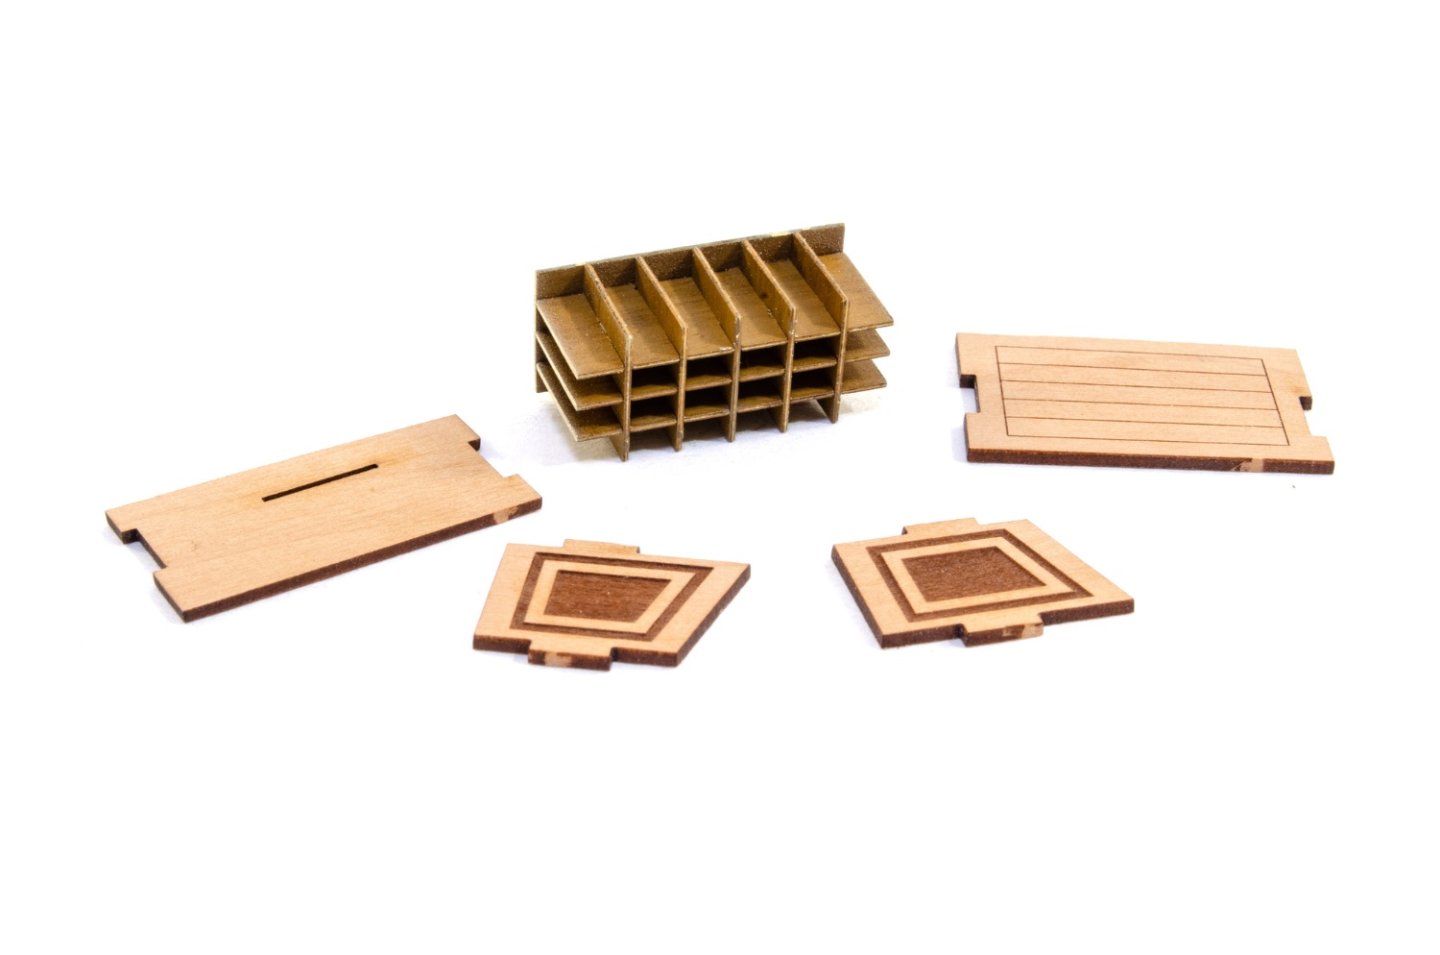
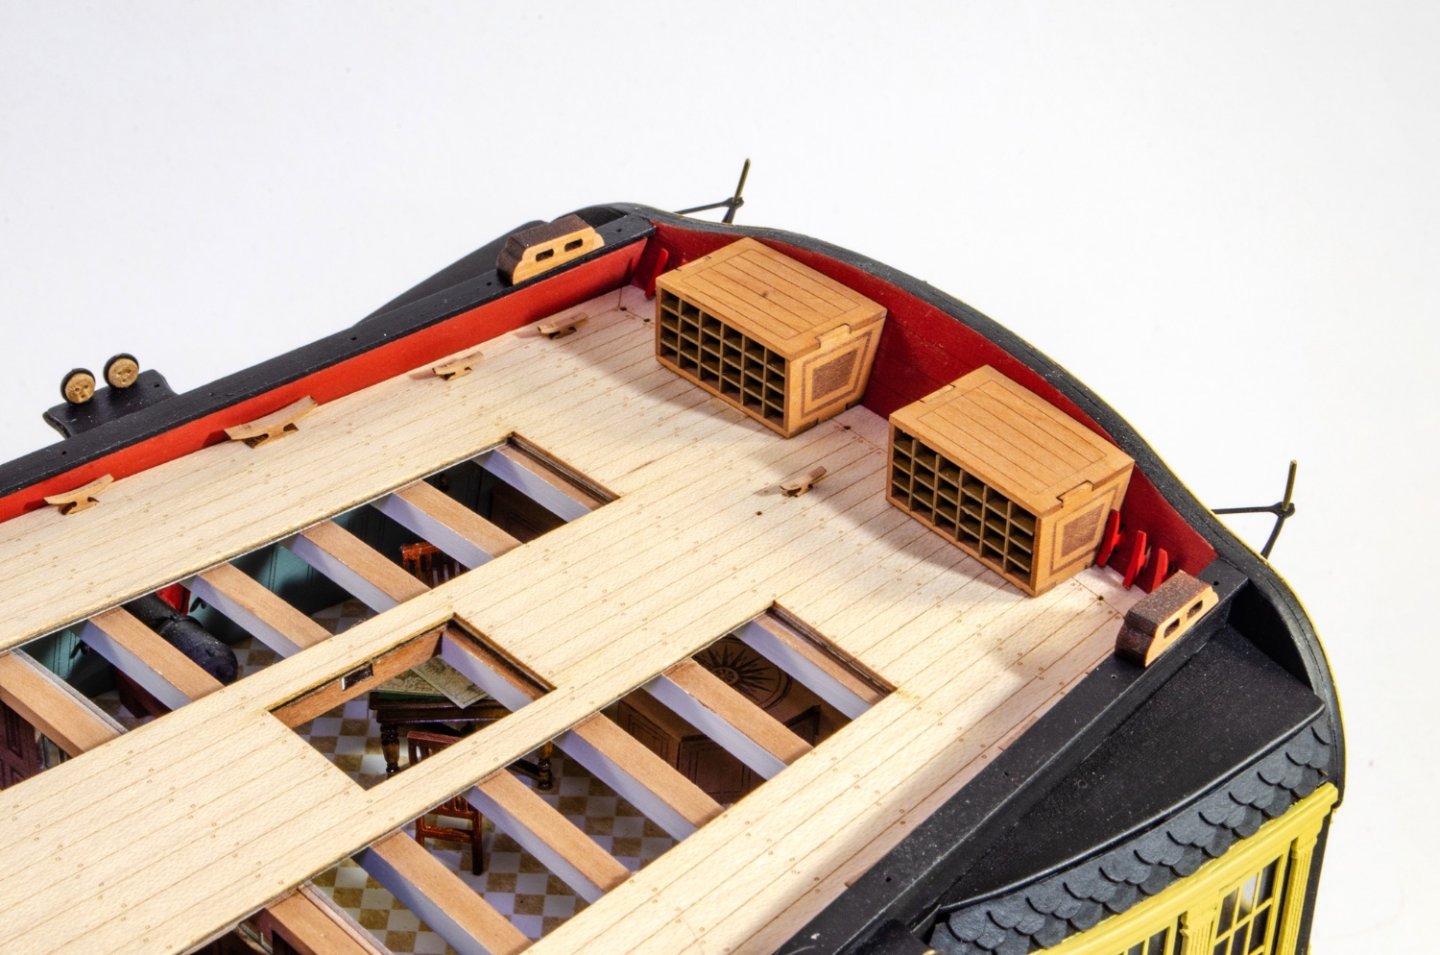
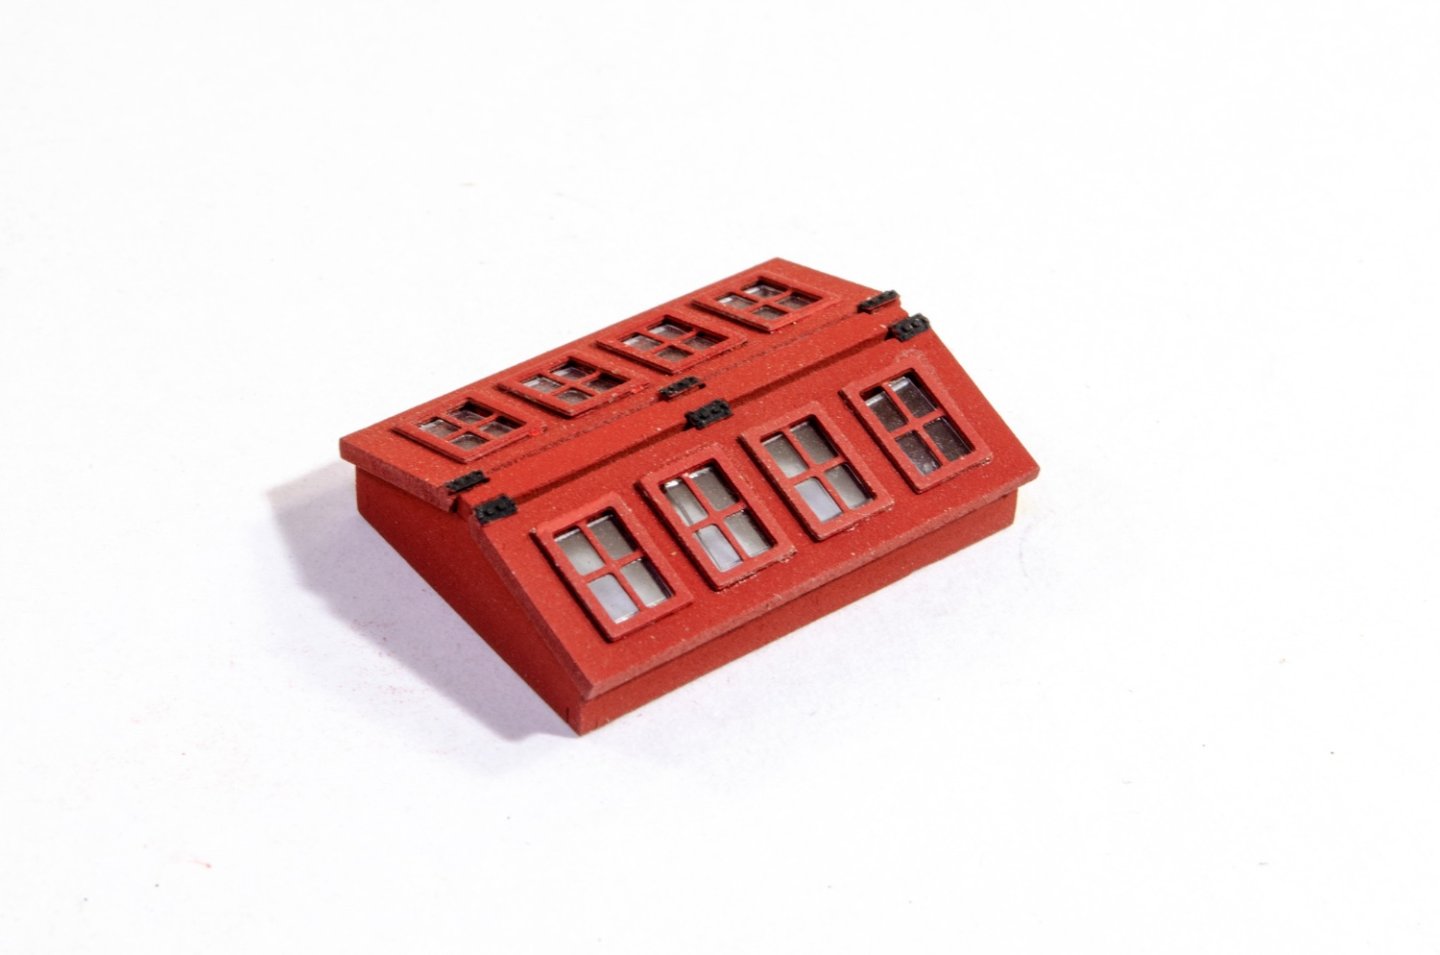
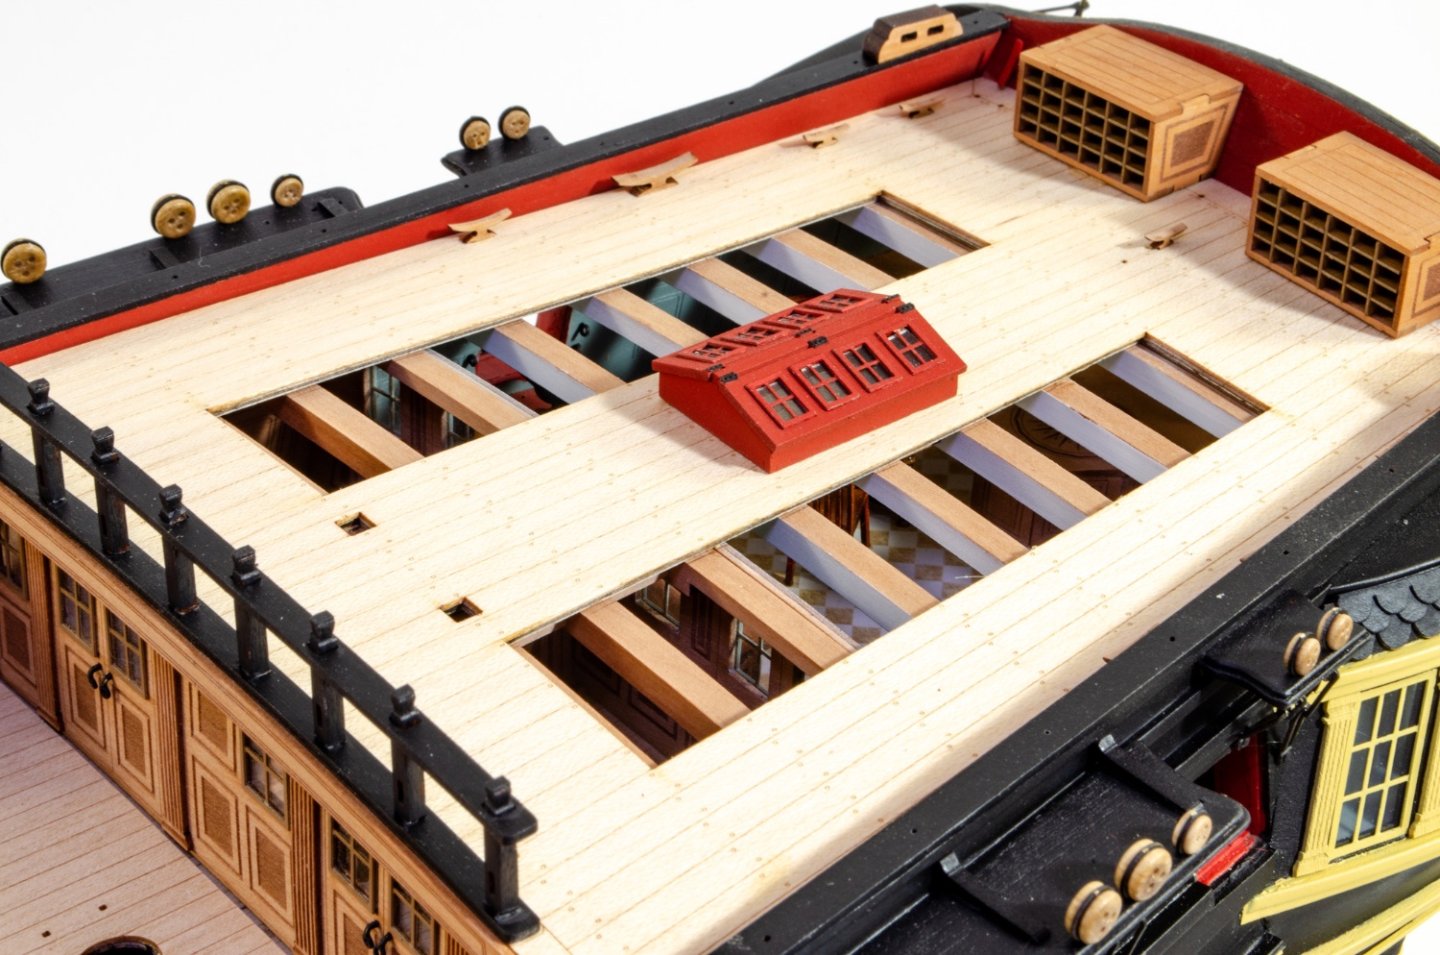
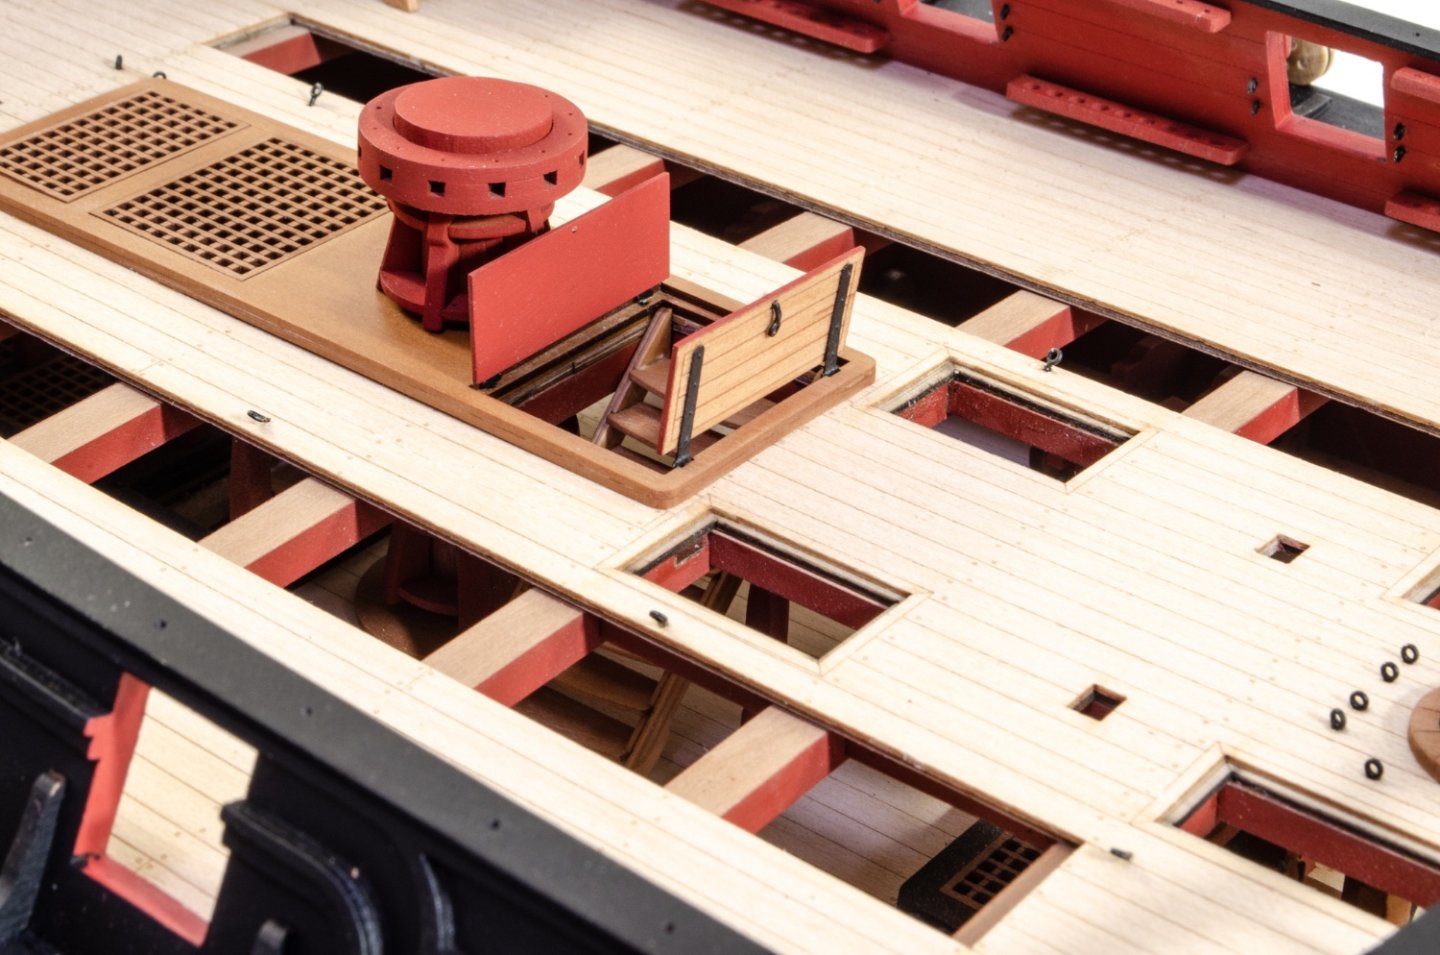
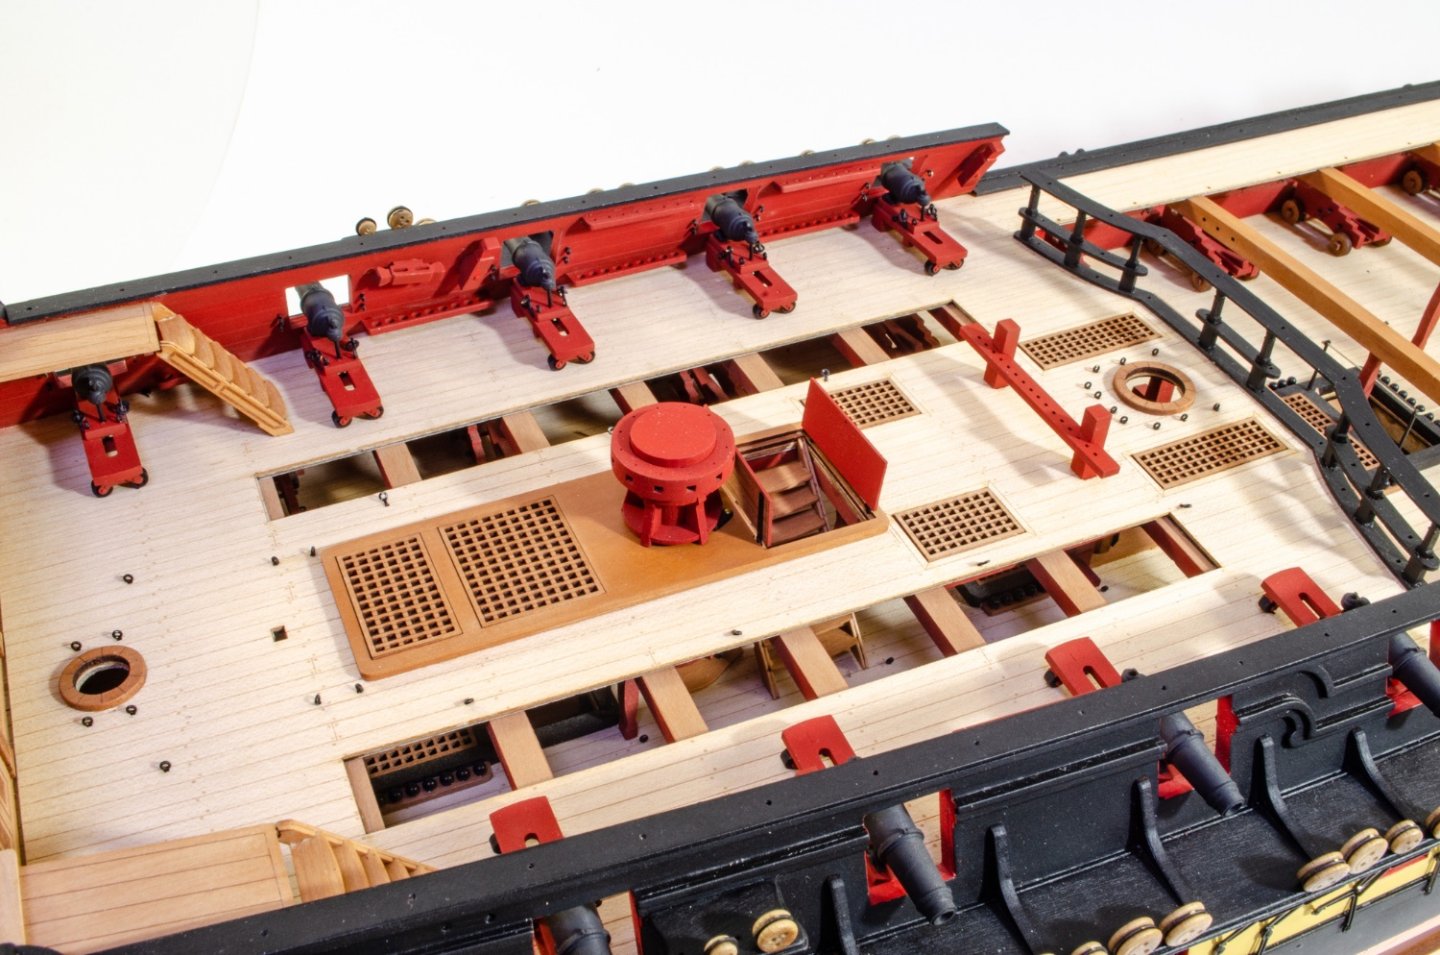
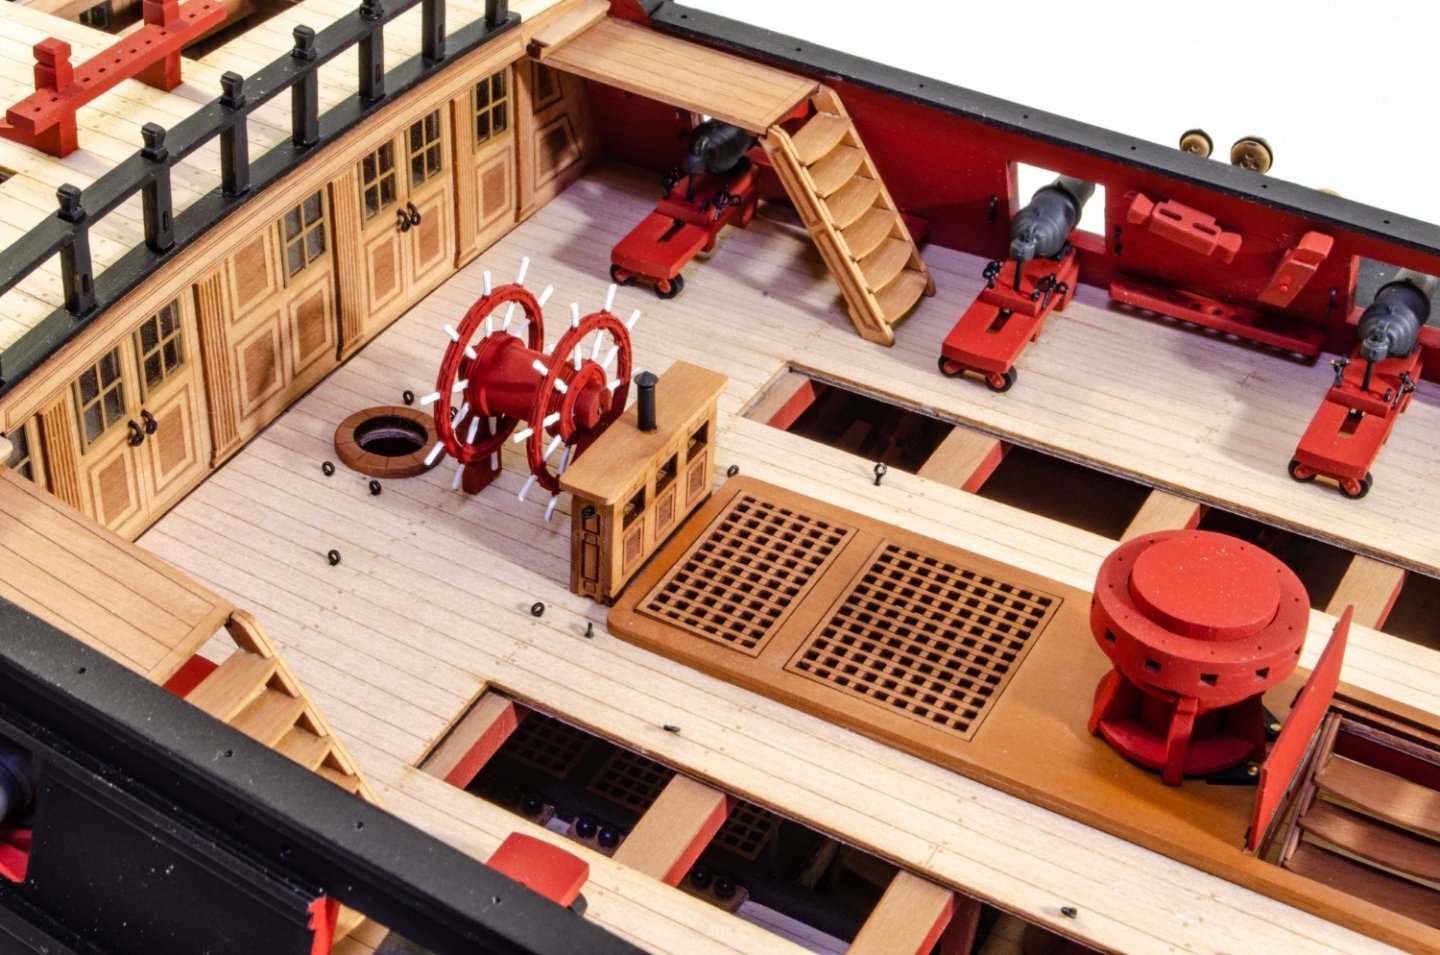
Poop and quarterdeck: First up are the flag lockers. The honeycomb core is made from photo etch, painted to resemble wood. This is enveloped in a pear case. Next is the skylight. And then the bitts. Moving onto the quarterdeck, I finally start to shed my shelf of all the parts I have, starting with this: The capstan and stairway are now installed, followed by the hatchway doors which are posed open. Bitts and gratings. The carronades on the open decks are different to the others as they don't need to slide. These are now built and installed to the quarterdeck. ...followed by the ship's wheel.... ...and the binnacle.


- 488 replies
-
- 36
-
-
-
- Indefatigable
- Vanguard Models
- (and 1 more)
-
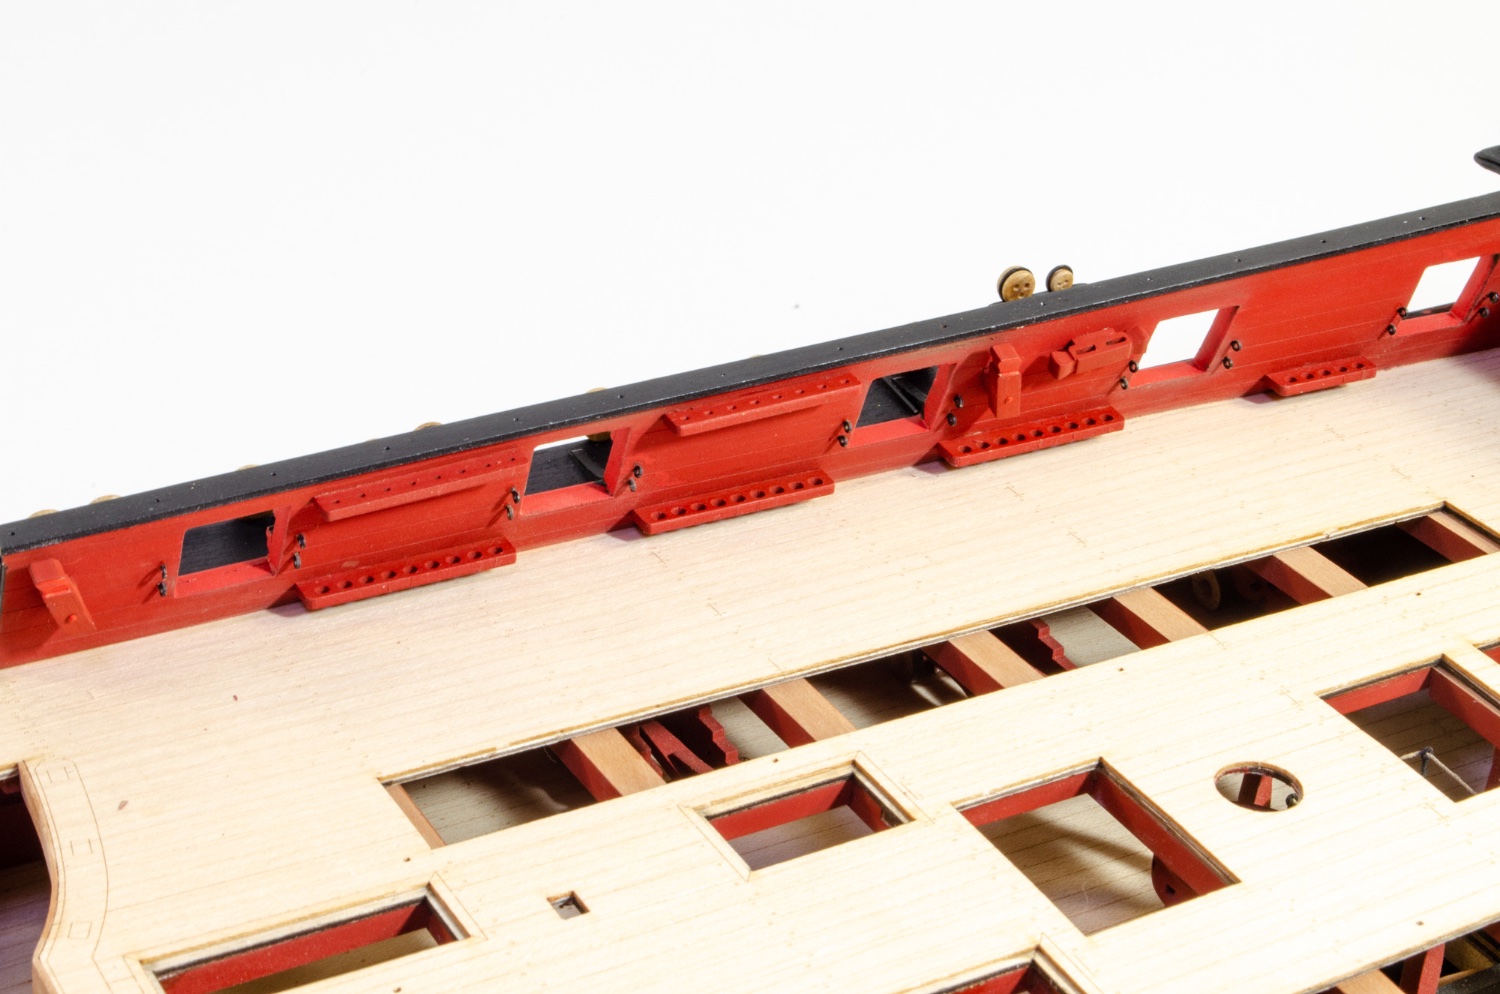
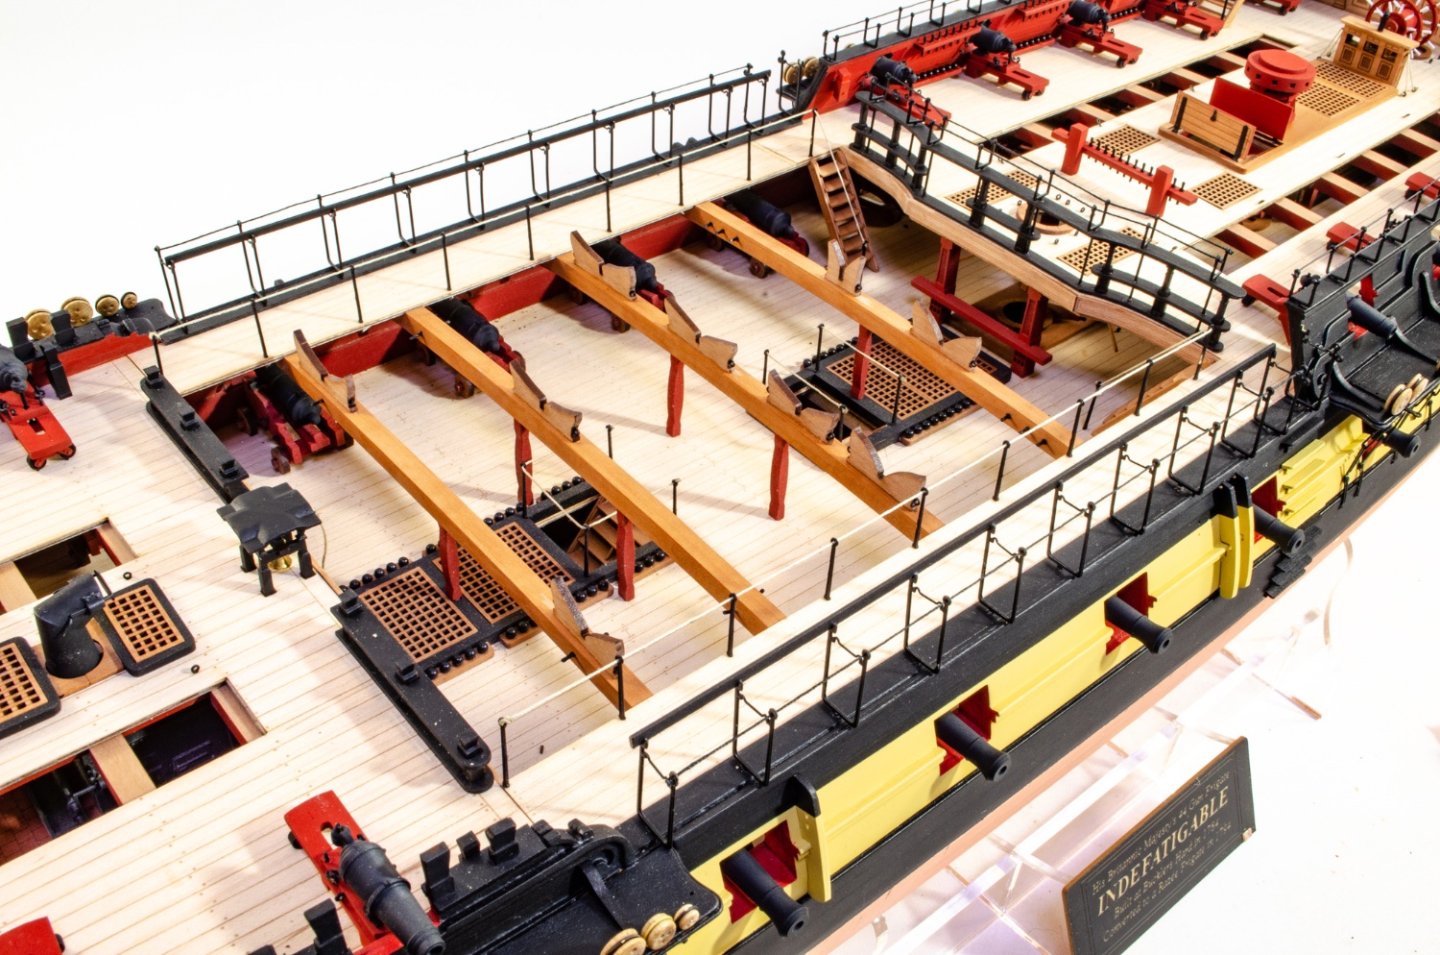
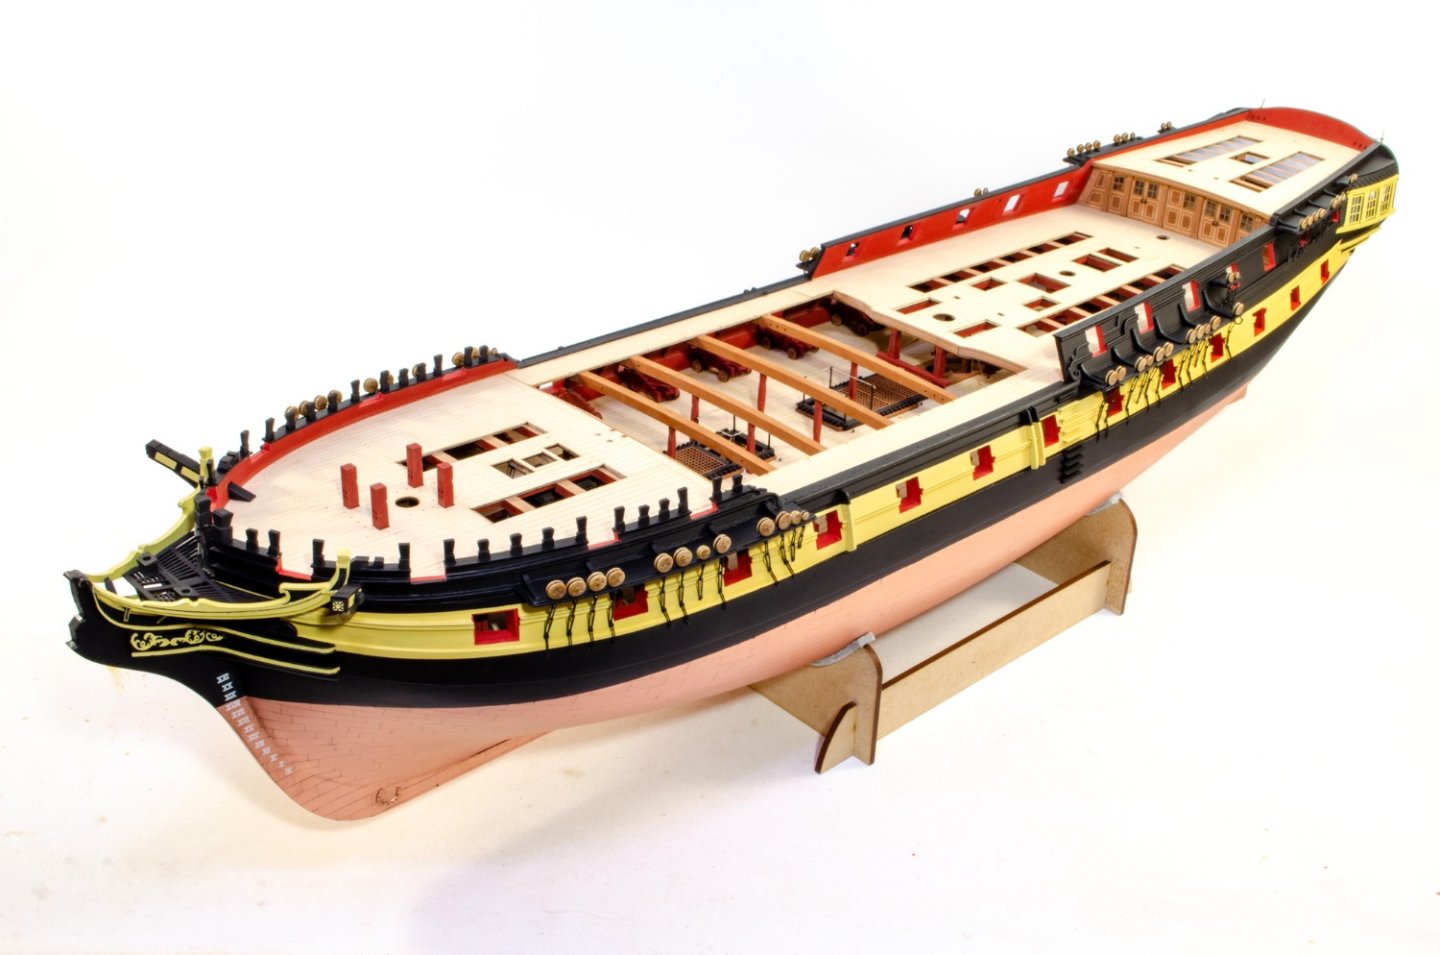
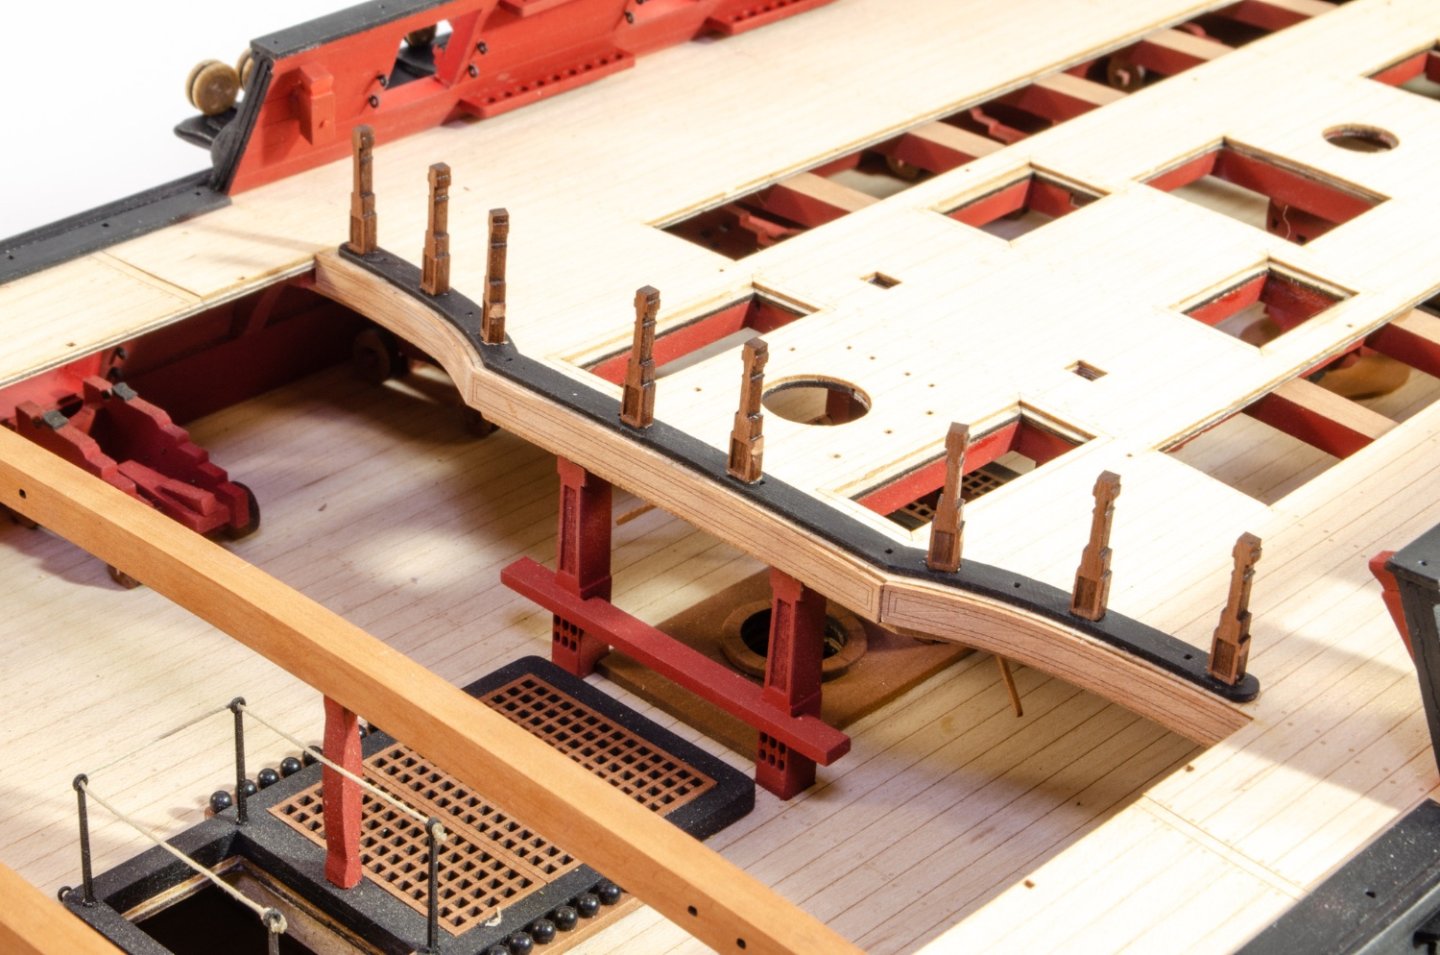
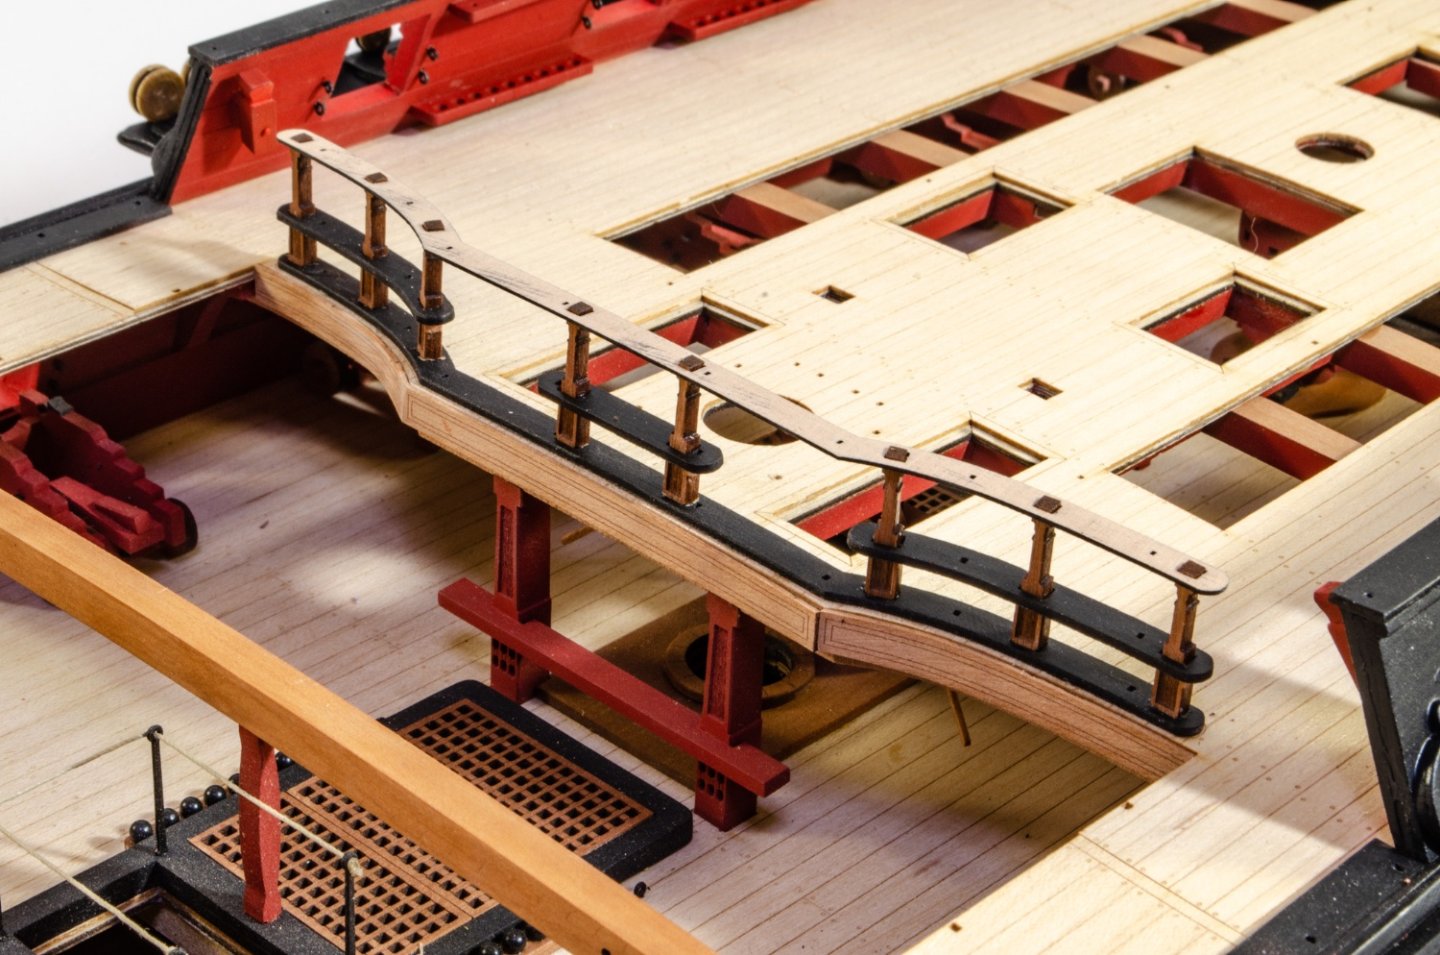
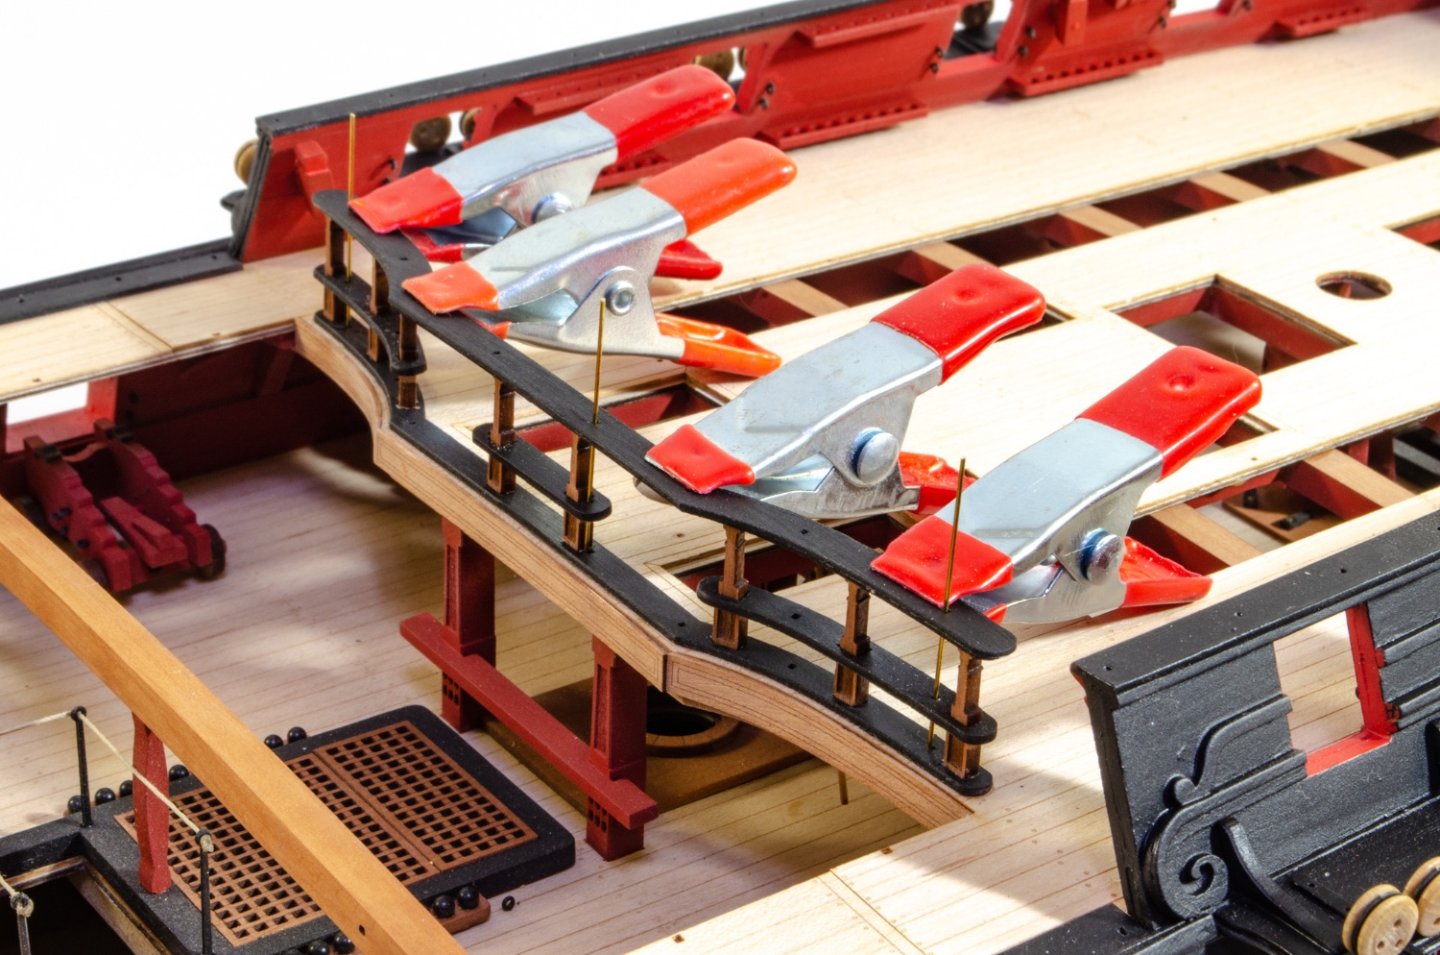
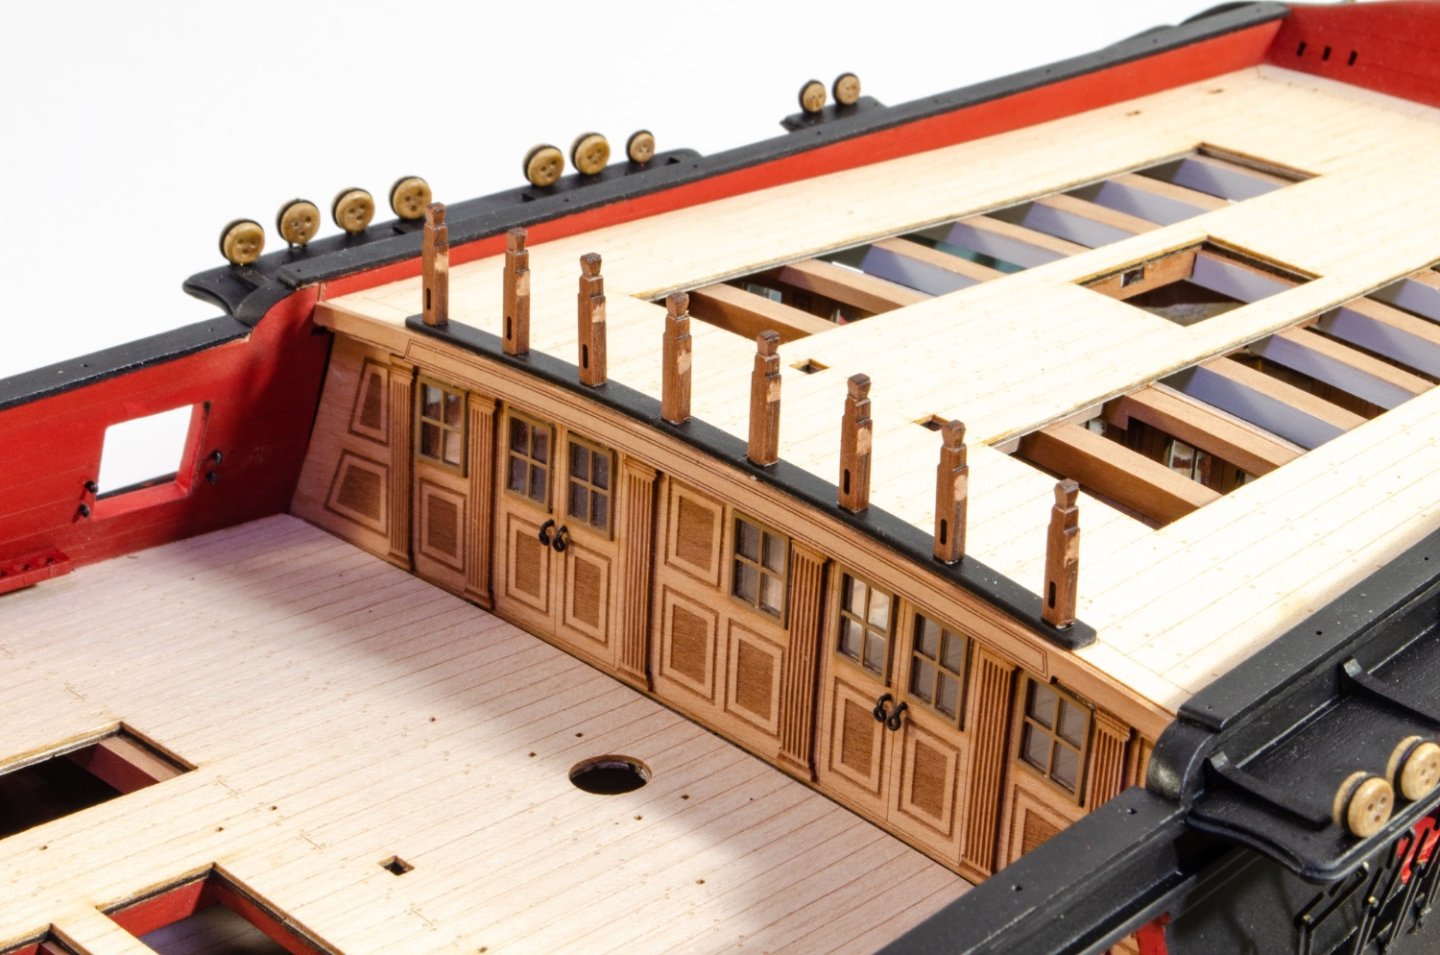
This is my penultimate update as the hull is now complete. After this, it will masting and riggings, but I will be building Grecian before that. The last couple of weeks has been very intense with getting everything done to deadline for a late Feb release. It I hadn't been ill for a lot of last year, this would've been done about 3 months ago. 🤨 The deadeyes/strops/chainplates are now fitted. These are straightforward enough. The shot garland and belaying pin racks are now fitted to the quarterdeck bulwarks, along with other paraphernalia. The racks are pinned for strength. Barricades are now fitted. All of the pillars are individual to their positions to cater to the change in camber of the deck. I now get to fit all of the stuff I've previously built during the deck fit-out. More in a few minutes...


- 488 replies
-
- 33
-
-
-
- Indefatigable
- Vanguard Models
- (and 1 more)
-
2nd rate London 1656 – the art of the shipwright
James H replied to Waldemar's topic in Nautical/Naval History
I agree. Topic locked. -
For a total novice, I’d go for Fifie or Zulu.
- 106 replies
-
- 2
-
-
- Admirals Barge
- Vanguard Models
- (and 1 more)
-
They aren’t insurmountable, but see we do class them as this on the website. It depends on your experience in and out of modelling.
- 106 replies
-
- 3
-
-
- Admirals Barge
- Vanguard Models
- (and 1 more)