James H
-
Posts
6,133 -
Joined
-
Last visited
Content Type
Profiles
Forums
Gallery
Events
Everything posted by James H
-
 One day, my wife will say that about my guitars!
- 488 replies
-
- 9
-

-

-
- Indefatigable
- Vanguard Models
- (and 1 more)
-
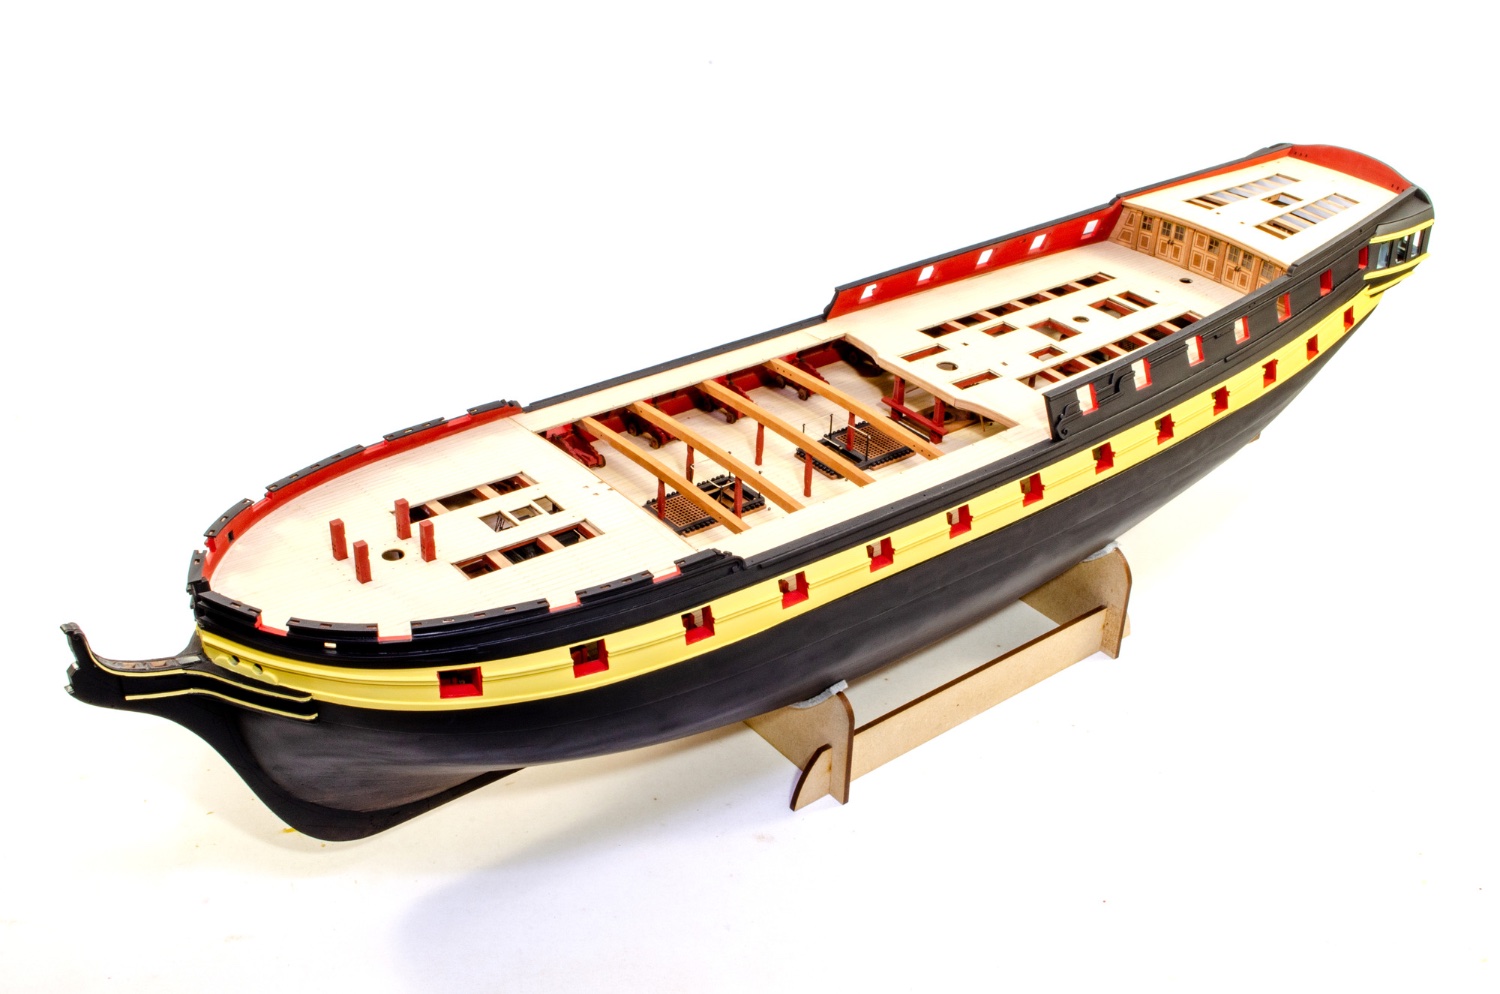
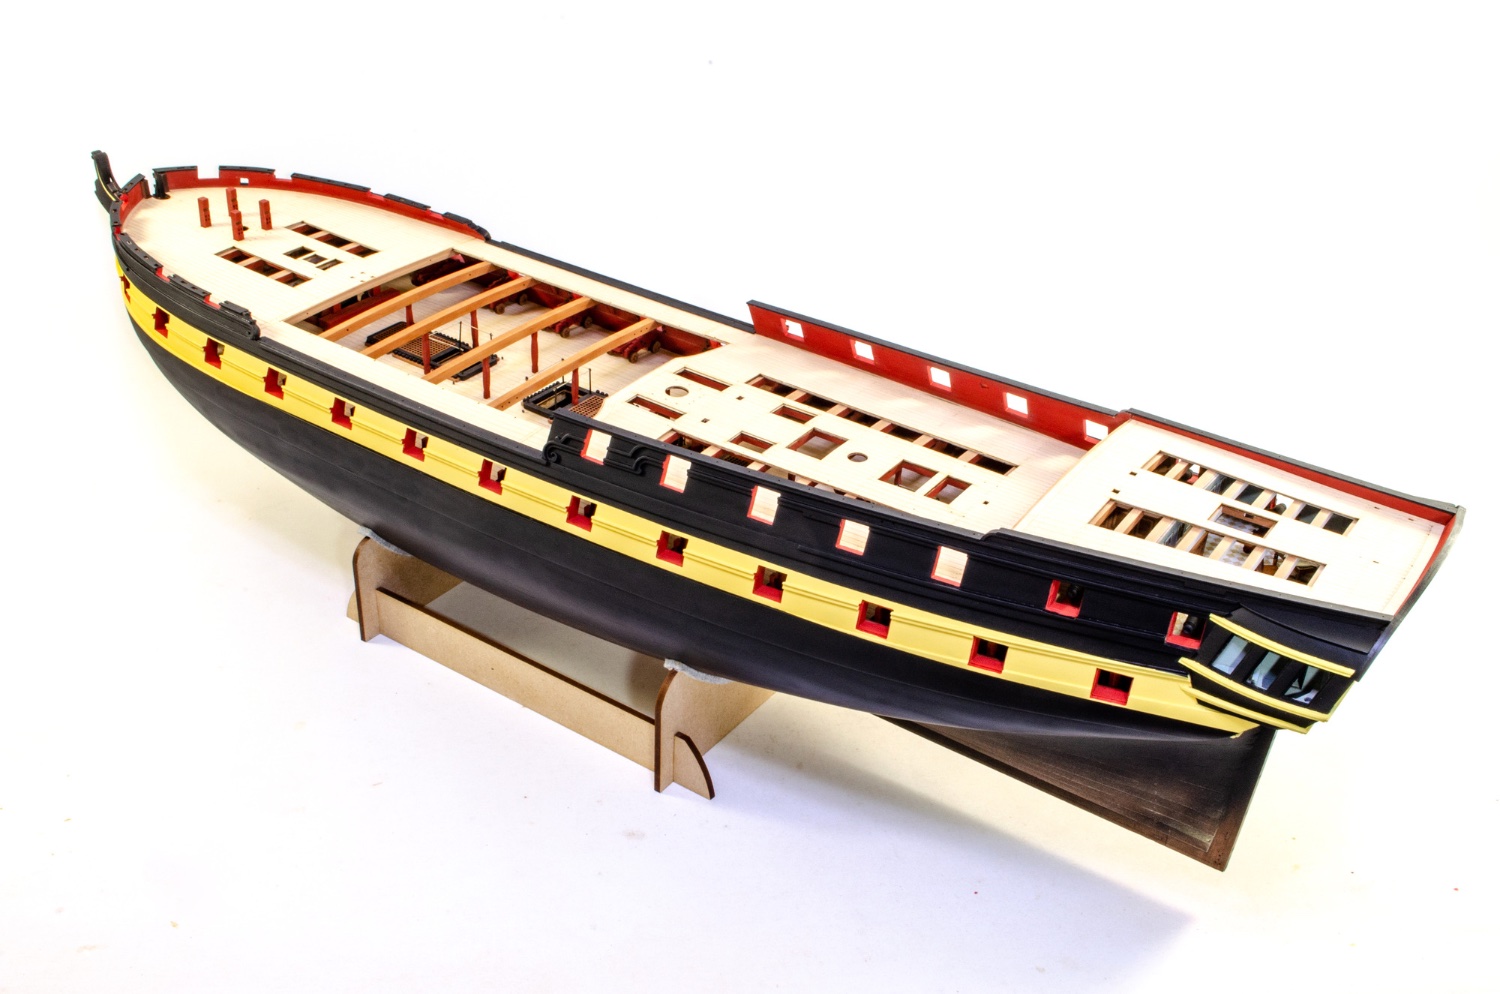
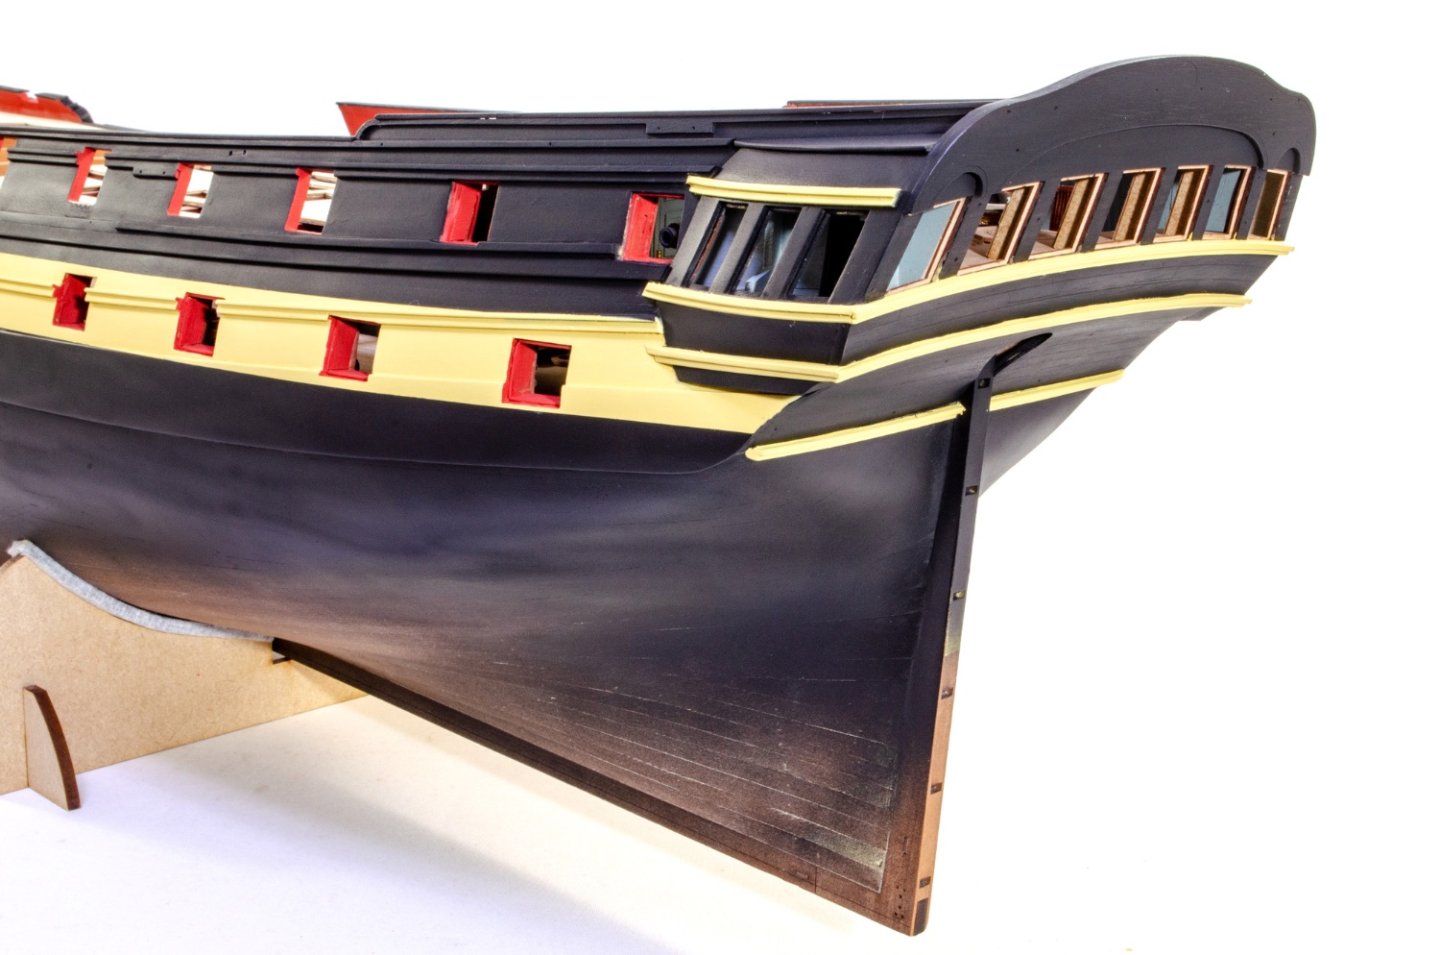
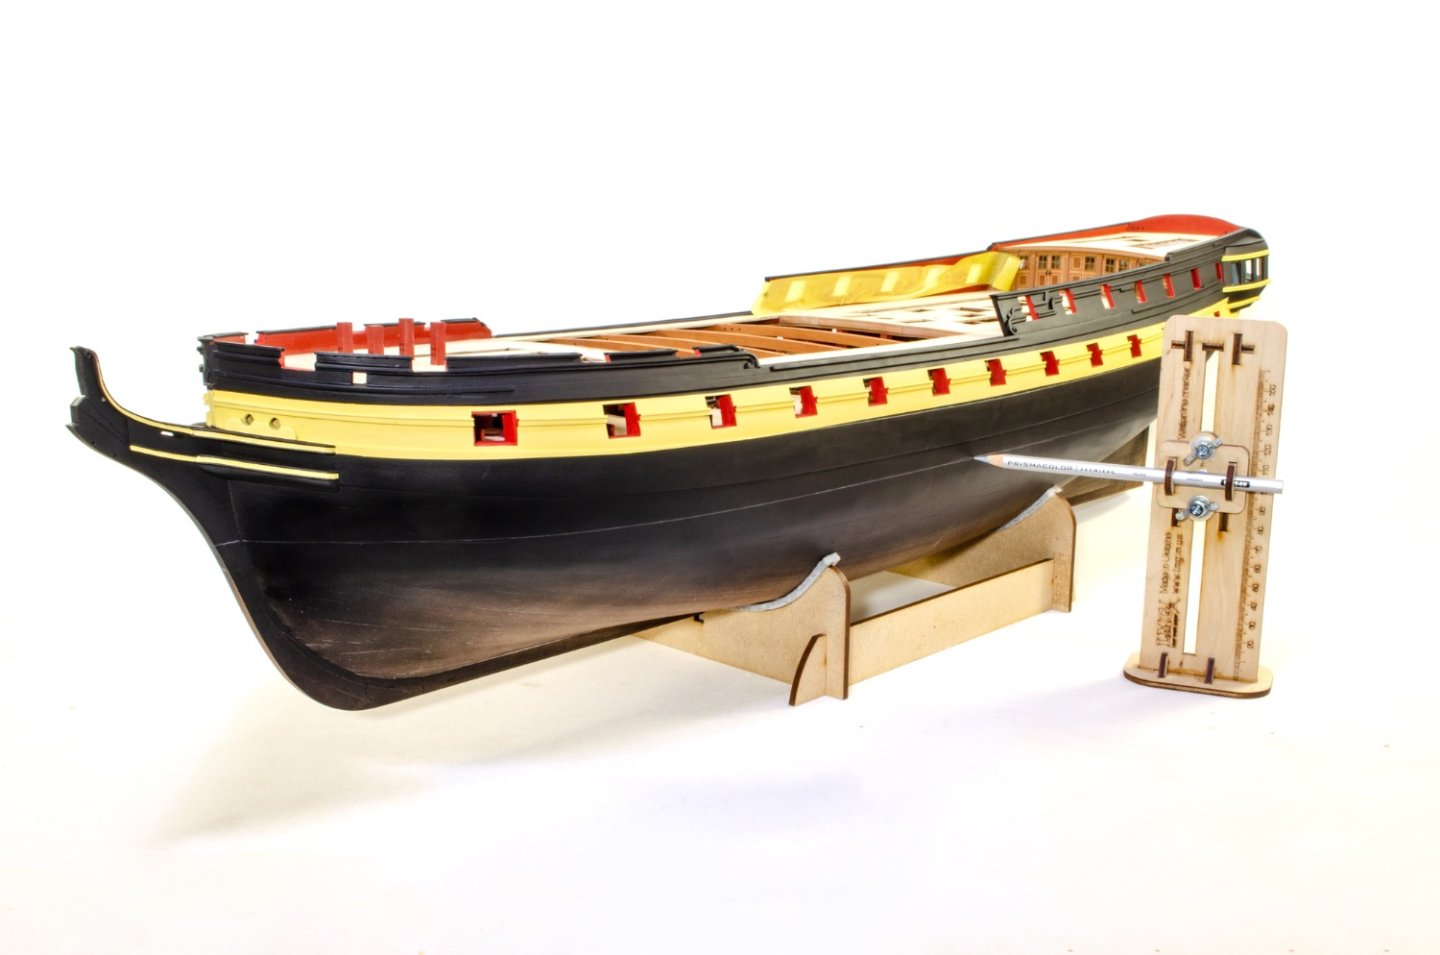
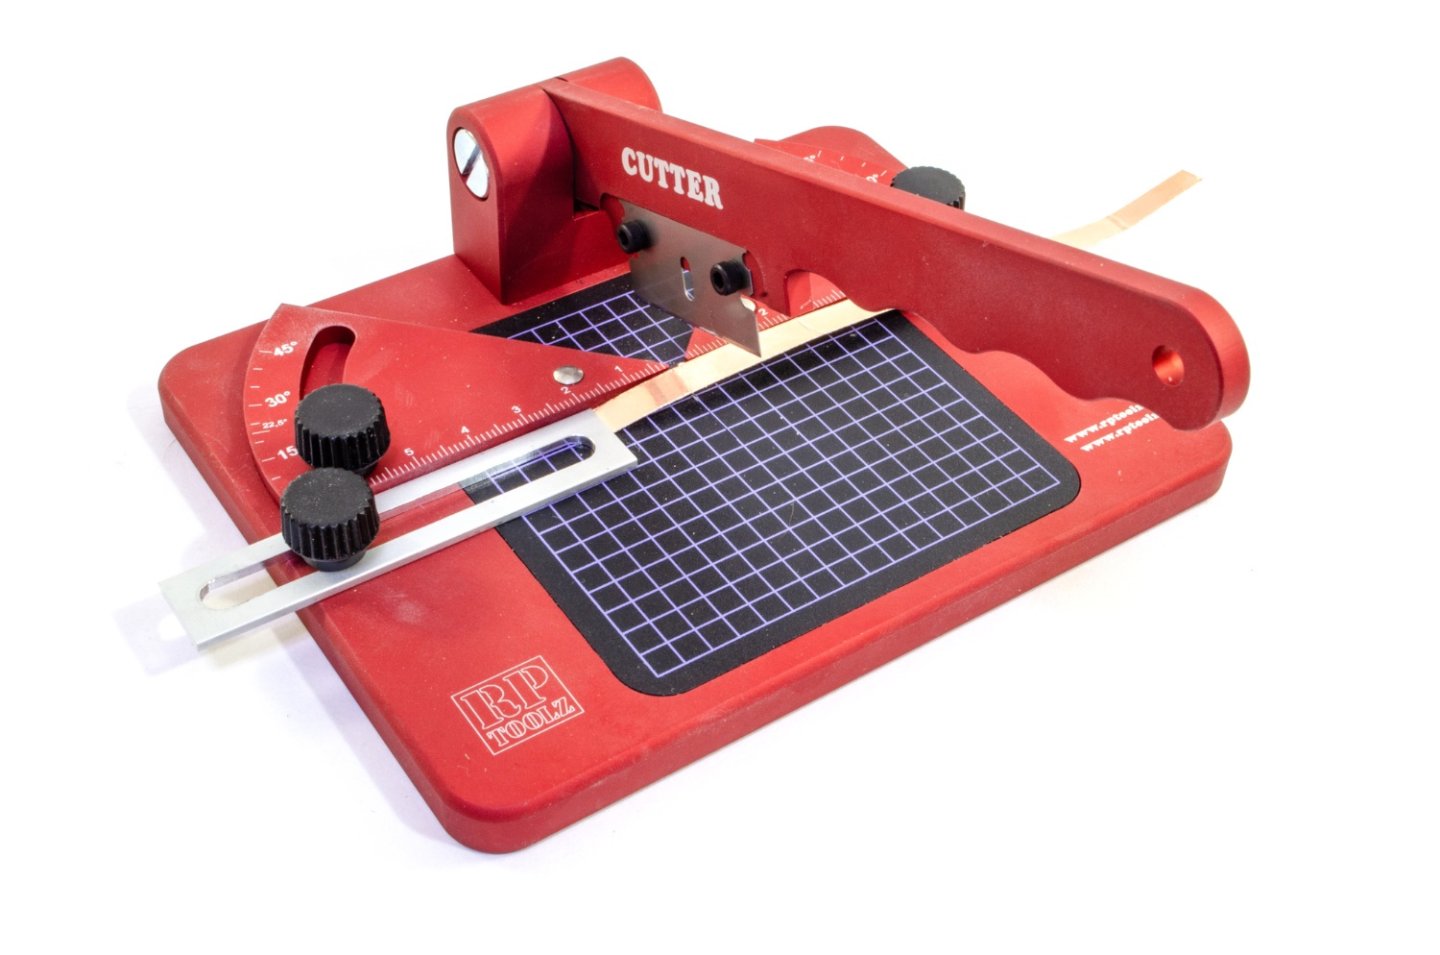
Time for an update here. The hull was varnished and sanded back a couple of times, helping to seal any open grain before applying paint. This was instead of using a primer, which you can of course use. Yellow ochre was then applied. I used Humbrol Linen as I wasn't in possession of the VM acrylic paint at the time. This paint was airbrushed over the hull and rubbed back successive times over a week or so, to make sure I'd got it right and it looked reasonably homogenous. The reason for painting all of this in ochre was that it's easier to see any fault areas that needed fixing up, before applying black paint. The hull was then painstakingly masked off before applying black. It's always tricky cutting a mask line across the longitudinal rail, and this took a few bits of touching up to get right. The effort is worth it though. The rails were also then painted in ochre and the gun ports touched up again after ochre overspray. I used a Prismacolor silver pencil to add a waterline on the hull, and made sure this was a few millimetres below the eventual one. The plan is to then use that as a guide and copper above it. Once coppered, I'll add another regular pencil line at the correct height and score a line along it before removing the copper tape above the waterline. A 50m roll of 6mm self-adhesive copper tape is included. This is reduced down into 18mm lengths. It sure does take some time, so I recommend a tool like this for making them. Each plate is exactly the same length and with perfectly square ends. Ok, it's about time to start coppering this hull...


- 488 replies
-
- 41
-
-

-
- Indefatigable
- Vanguard Models
- (and 1 more)
-
Ok, I don't think these paints can be brushed. I'm sure they are formulated for airbrush only, but could be wrong. V1 is the kit designed for these paints, but the V2 is made from timber varieties that supposedly don't need to use the paint, although I'm not convinced about that claim, if you want to recreate the antiqued look.
- 3 replies
-
- 4
-
-
- san bartolome
- stand
- (and 1 more)
-
I will have an update here by weekend. Prepping and painting the hull has taken an inordinate amount of time for me, and I want it under poly varnish before I post my WIP. Just a couple days or so now.
- 488 replies
-
- 26
-
-

-
- Indefatigable
- Vanguard Models
- (and 1 more)
-
Pavel Nikitin 1:32 Captain John Smith's Shallop - Ships of Pavel Nikitin
James H replied to James H's topic in REVIEWS: Model kits
And next week I shall be looking at their newly revamped Viking Drakkar, and the Santa Maria boat in two different scales. -
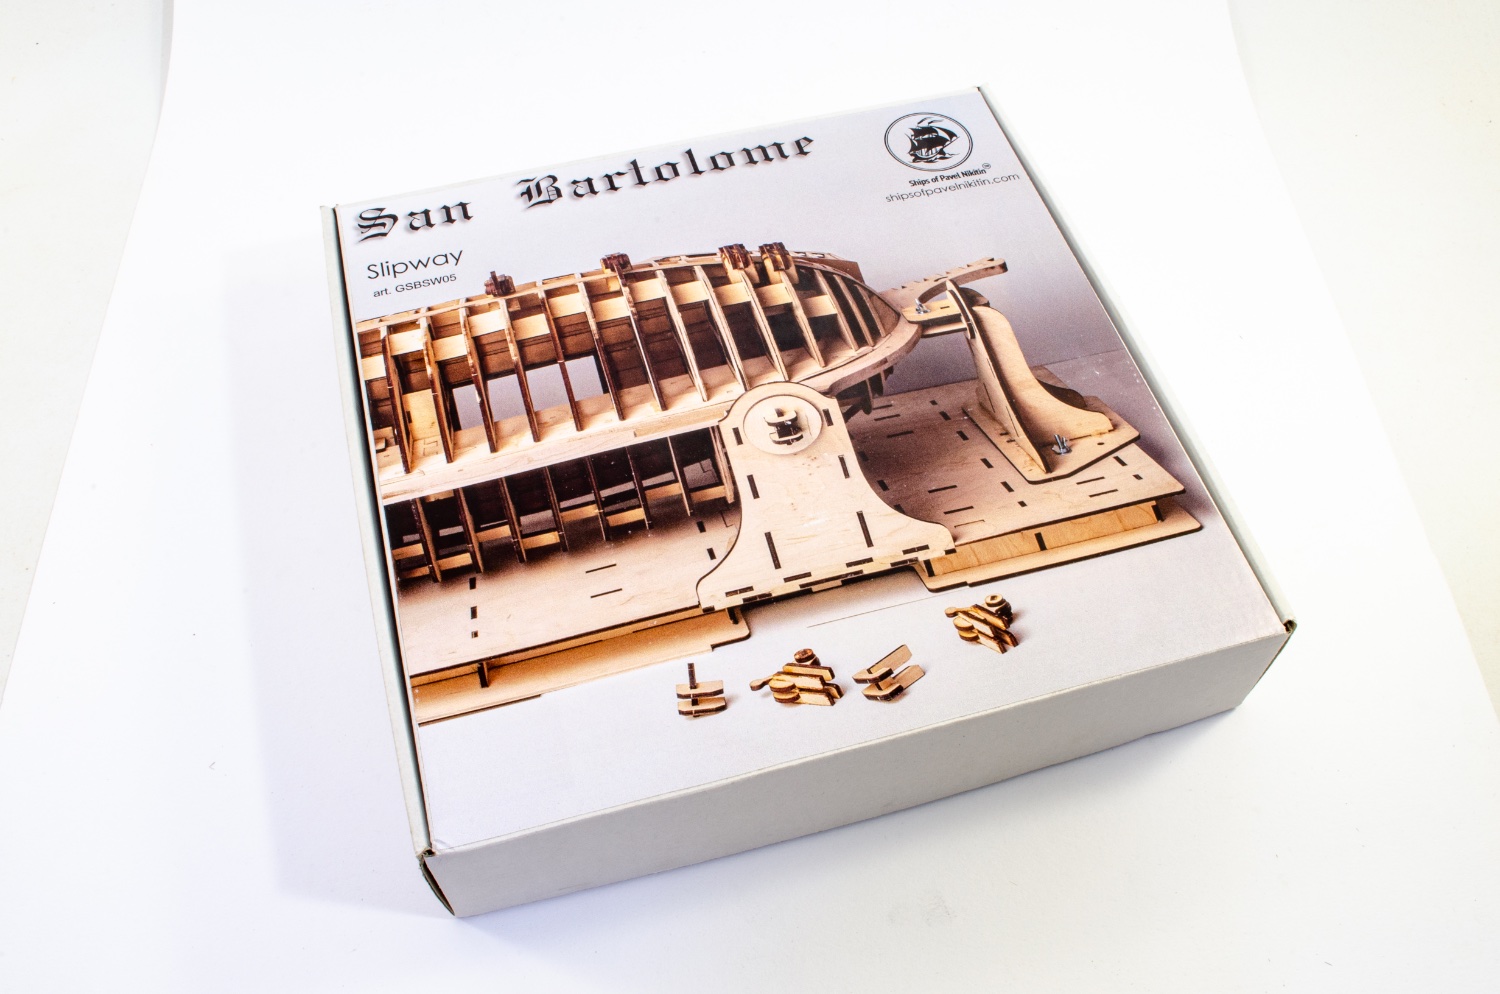
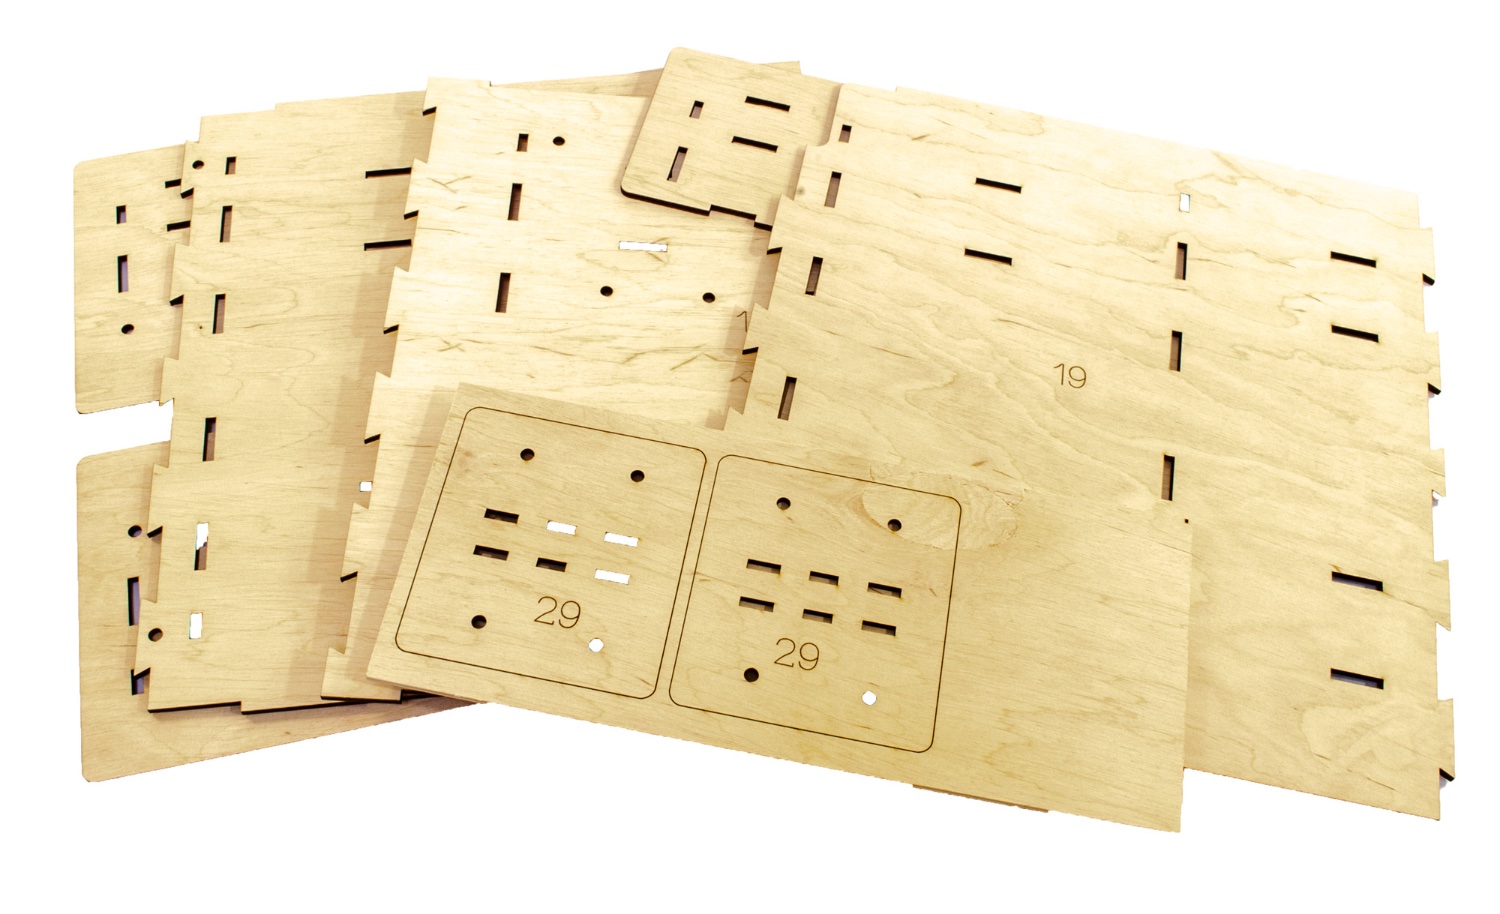
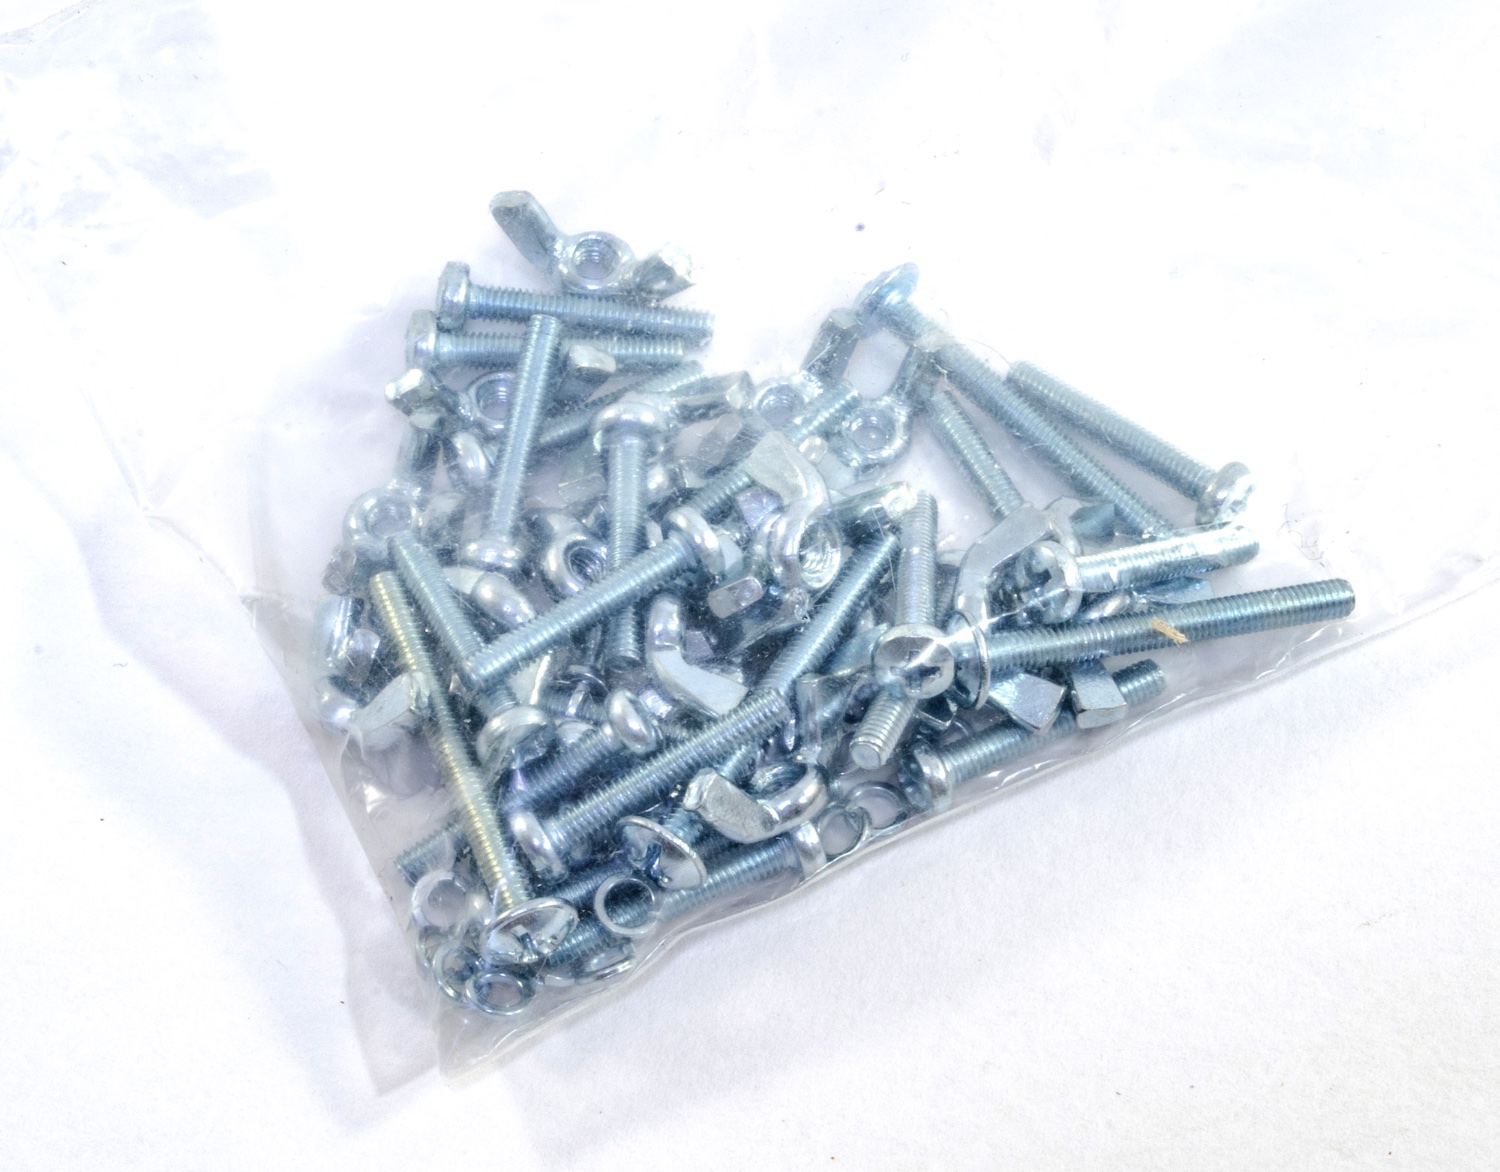
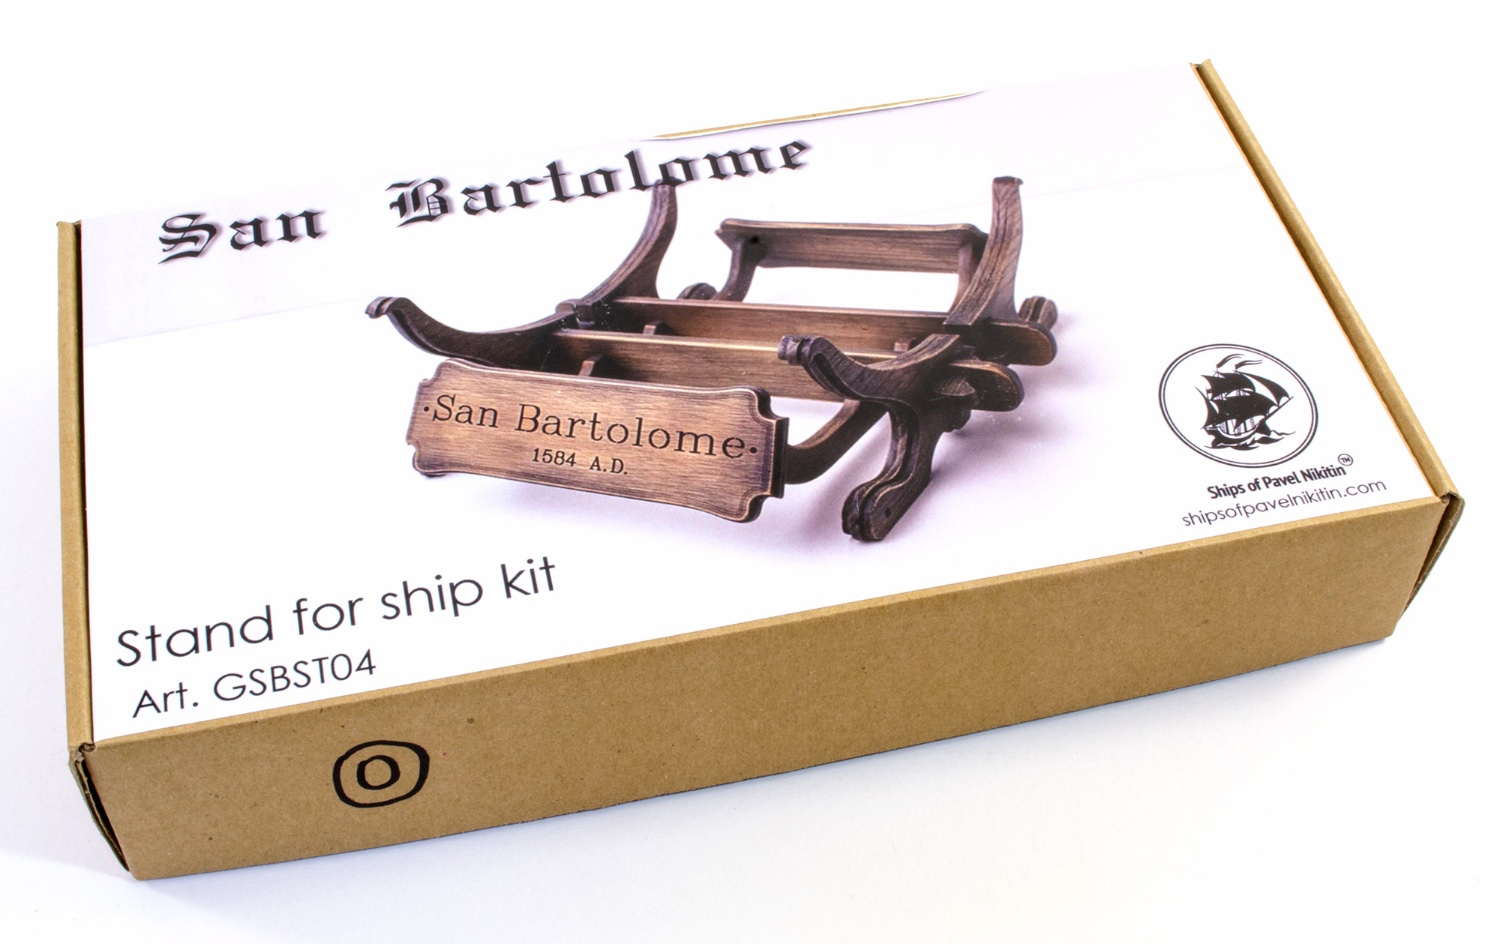
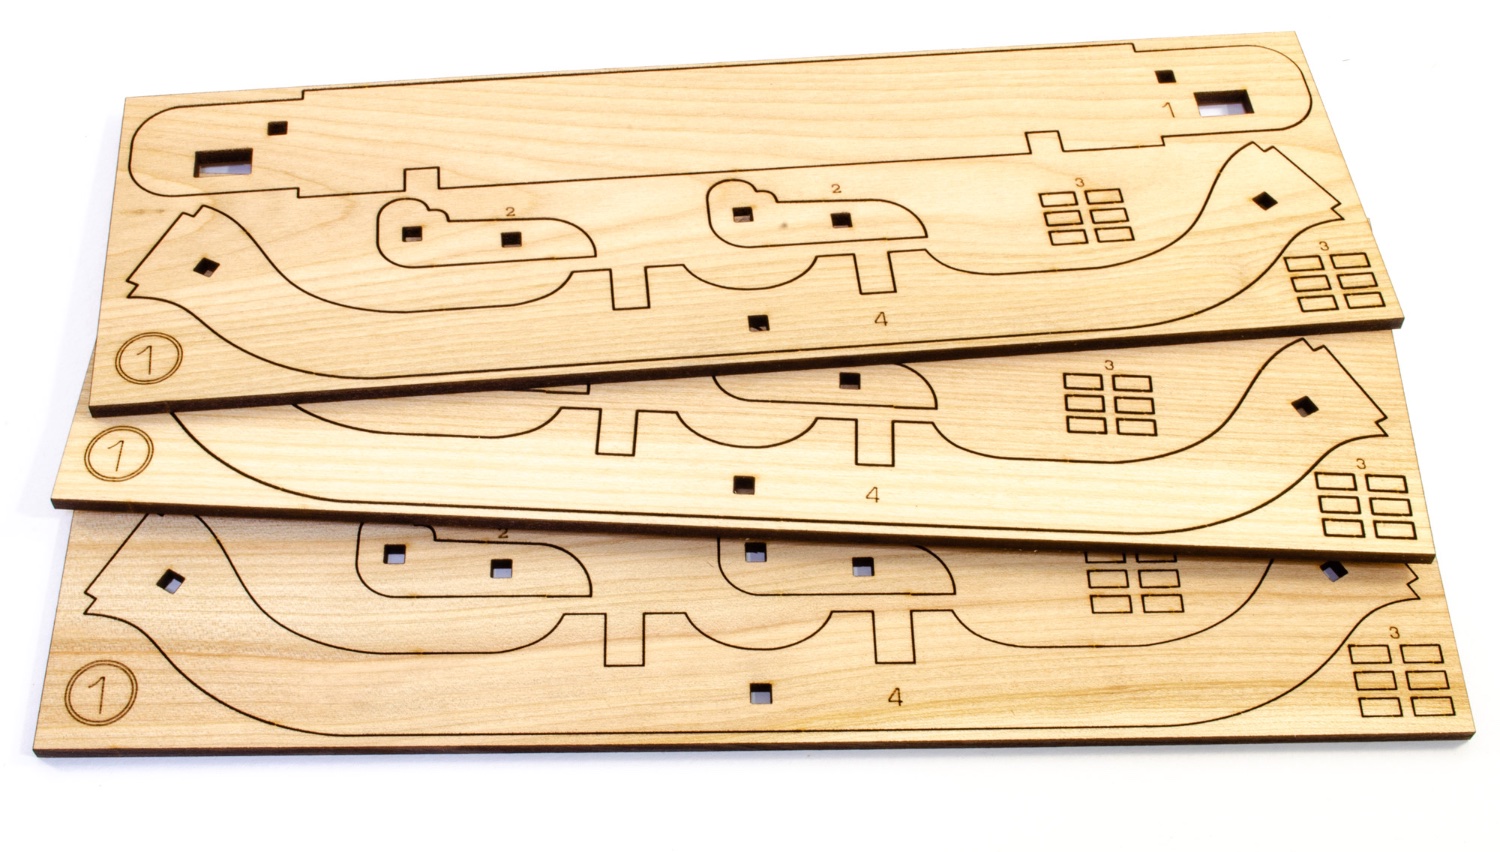
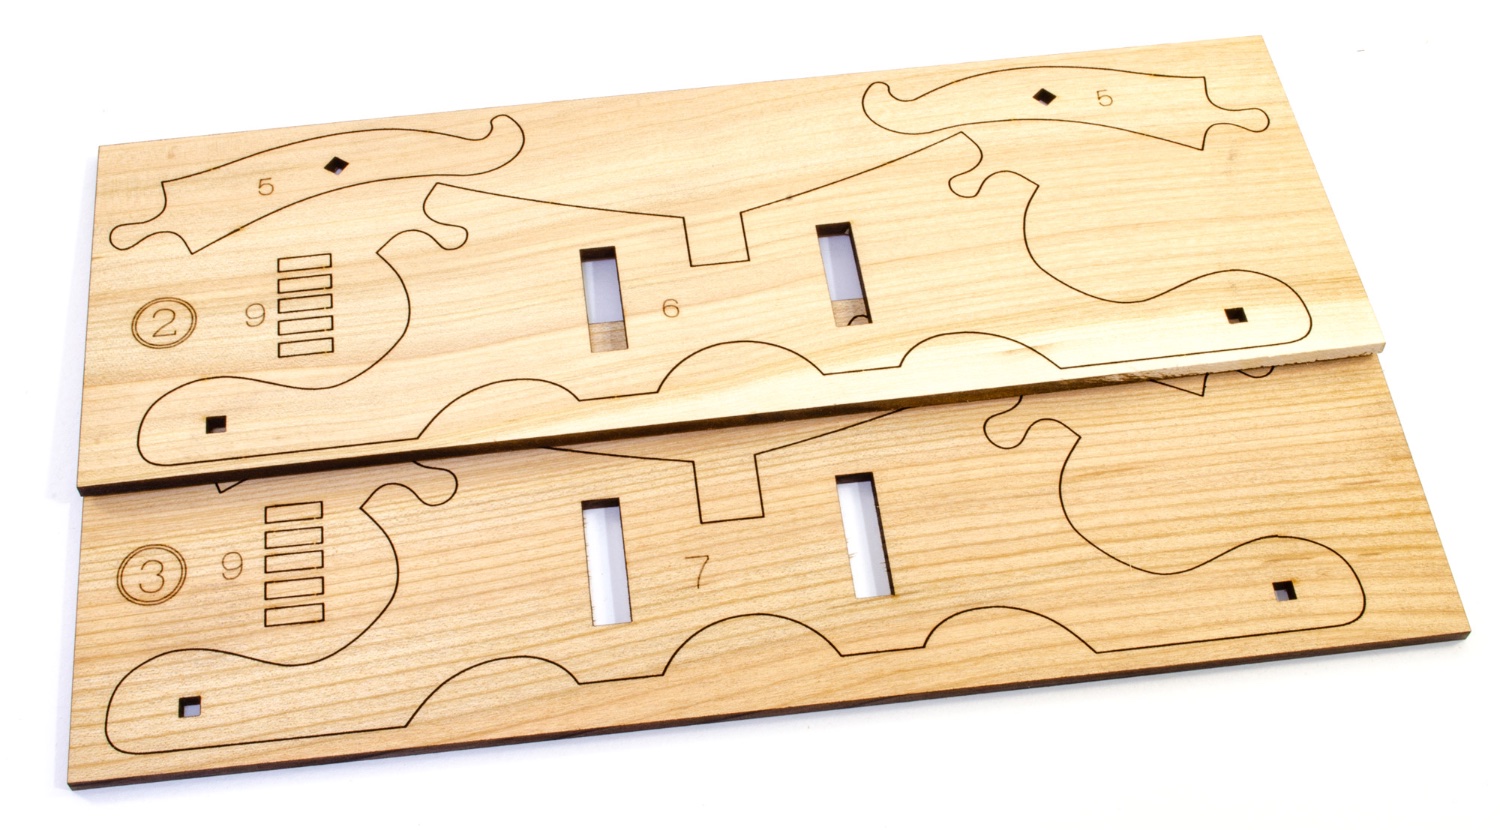
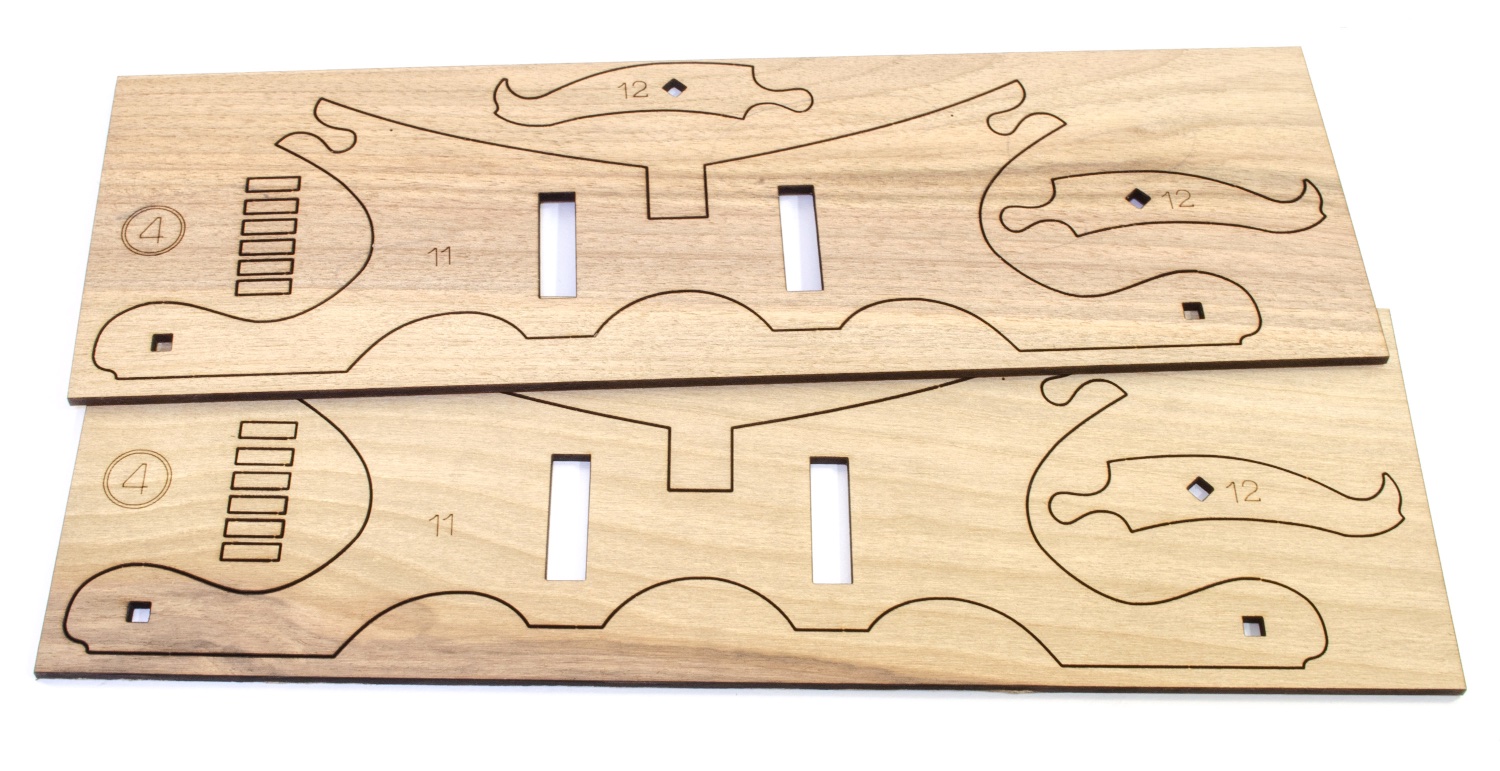
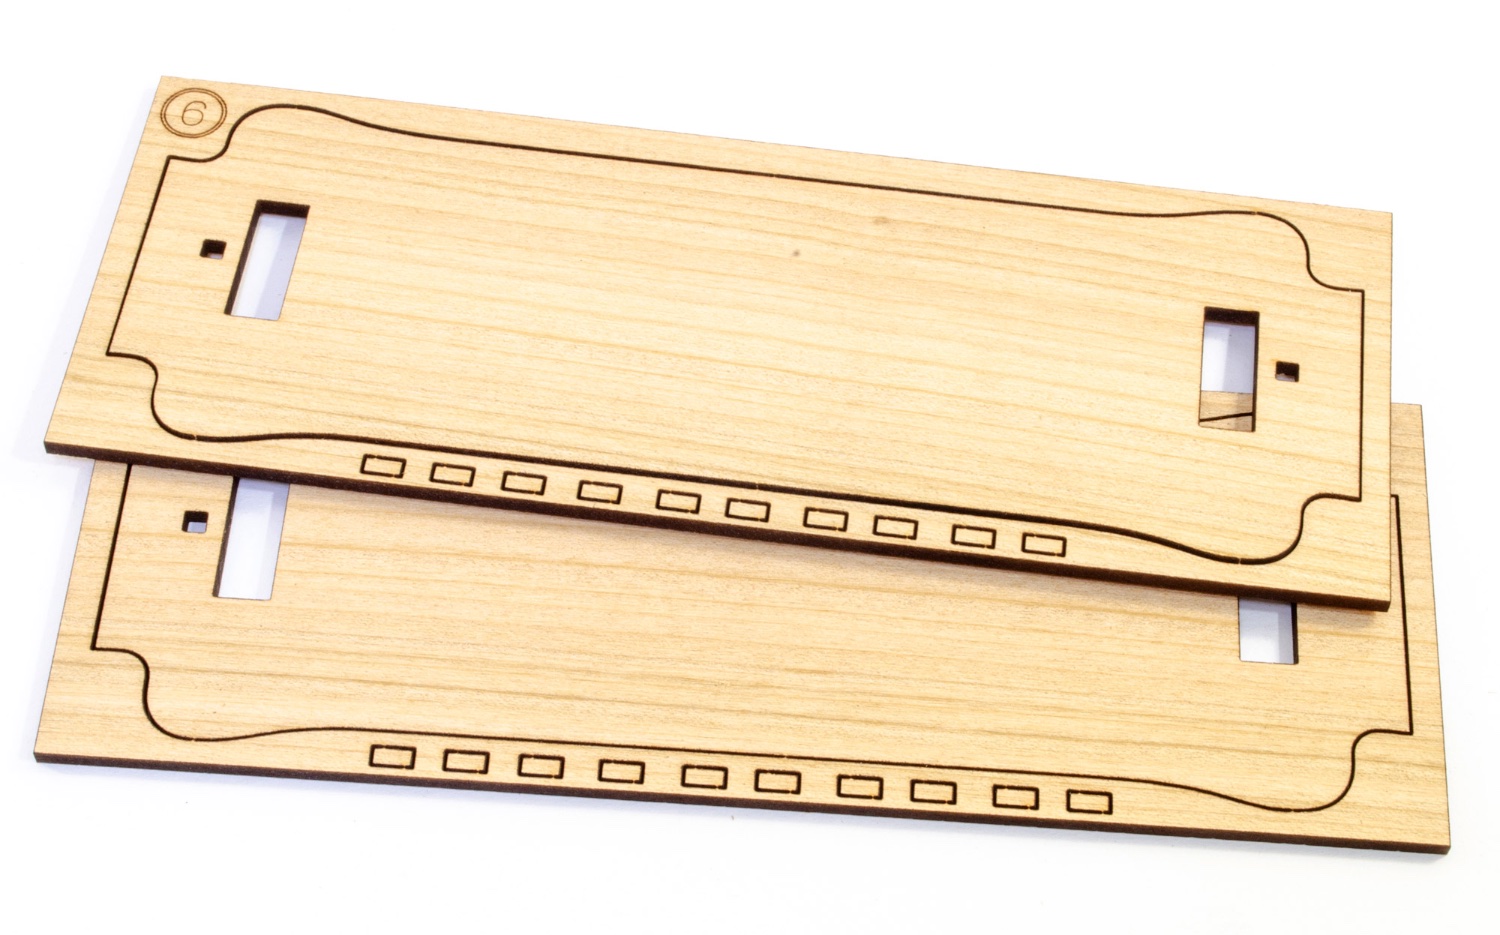
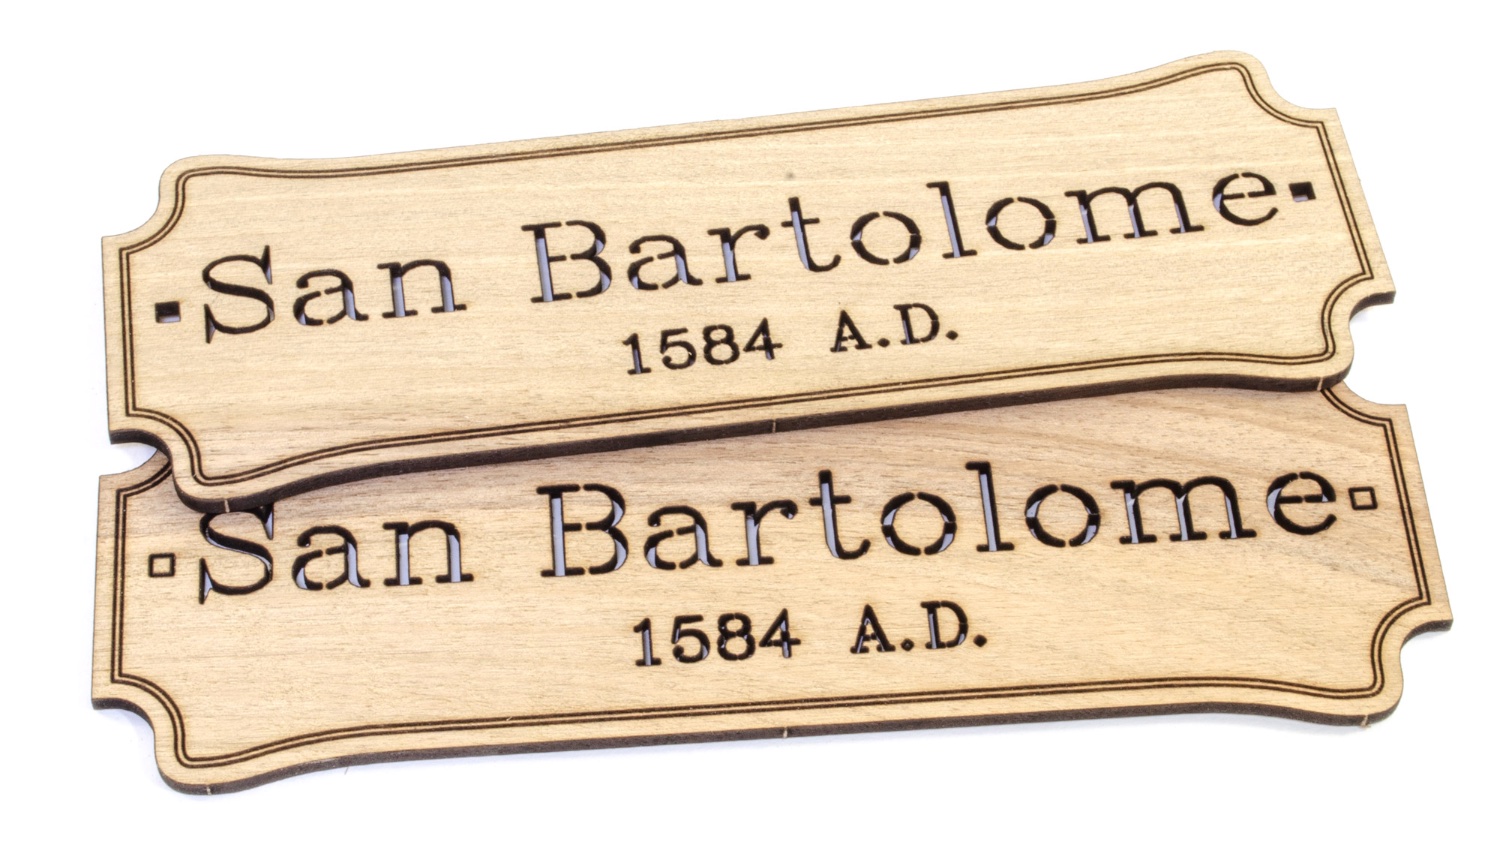
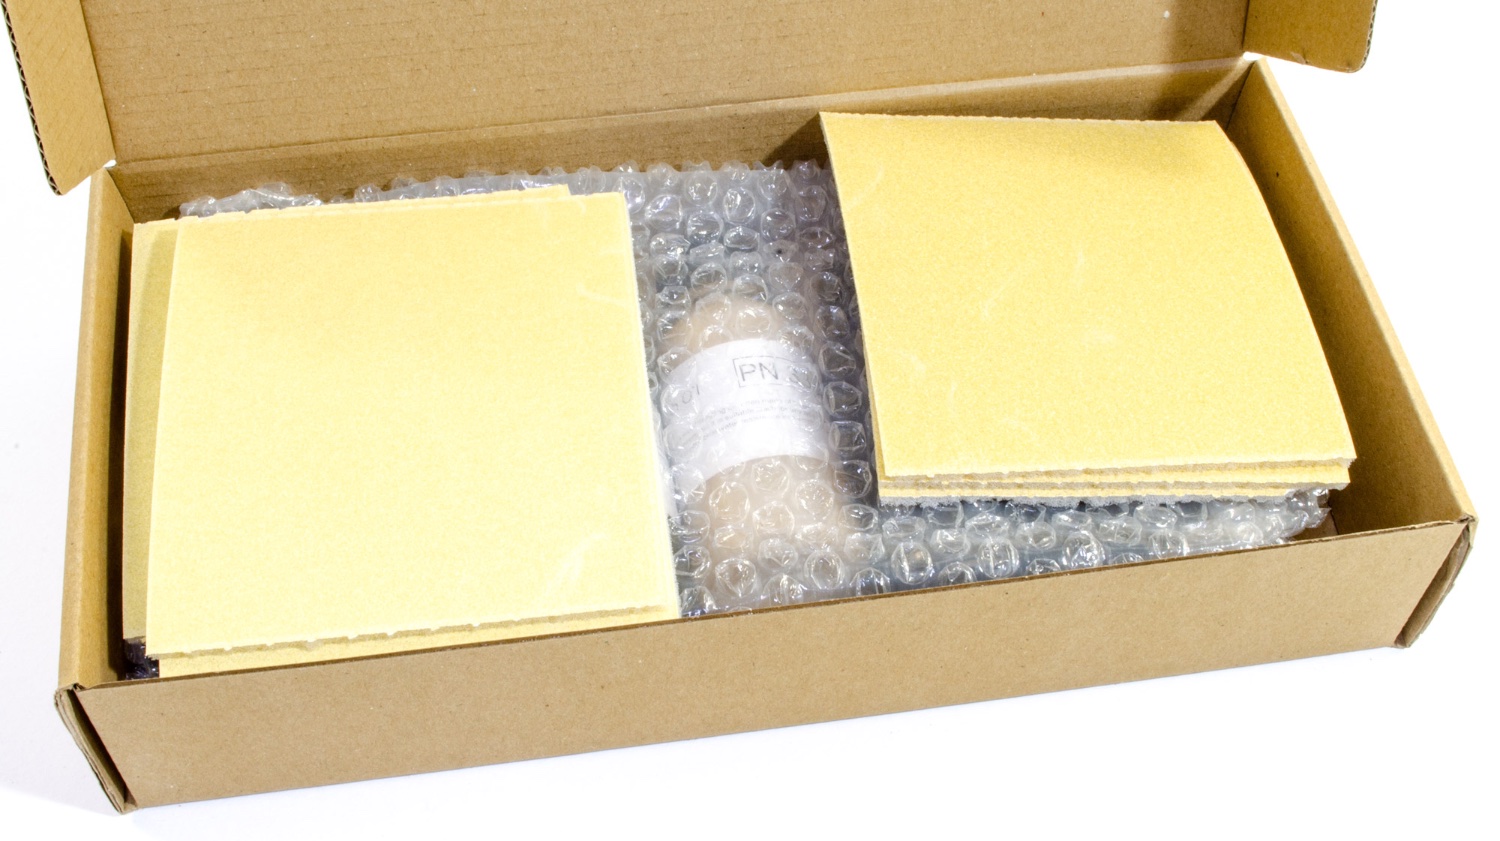
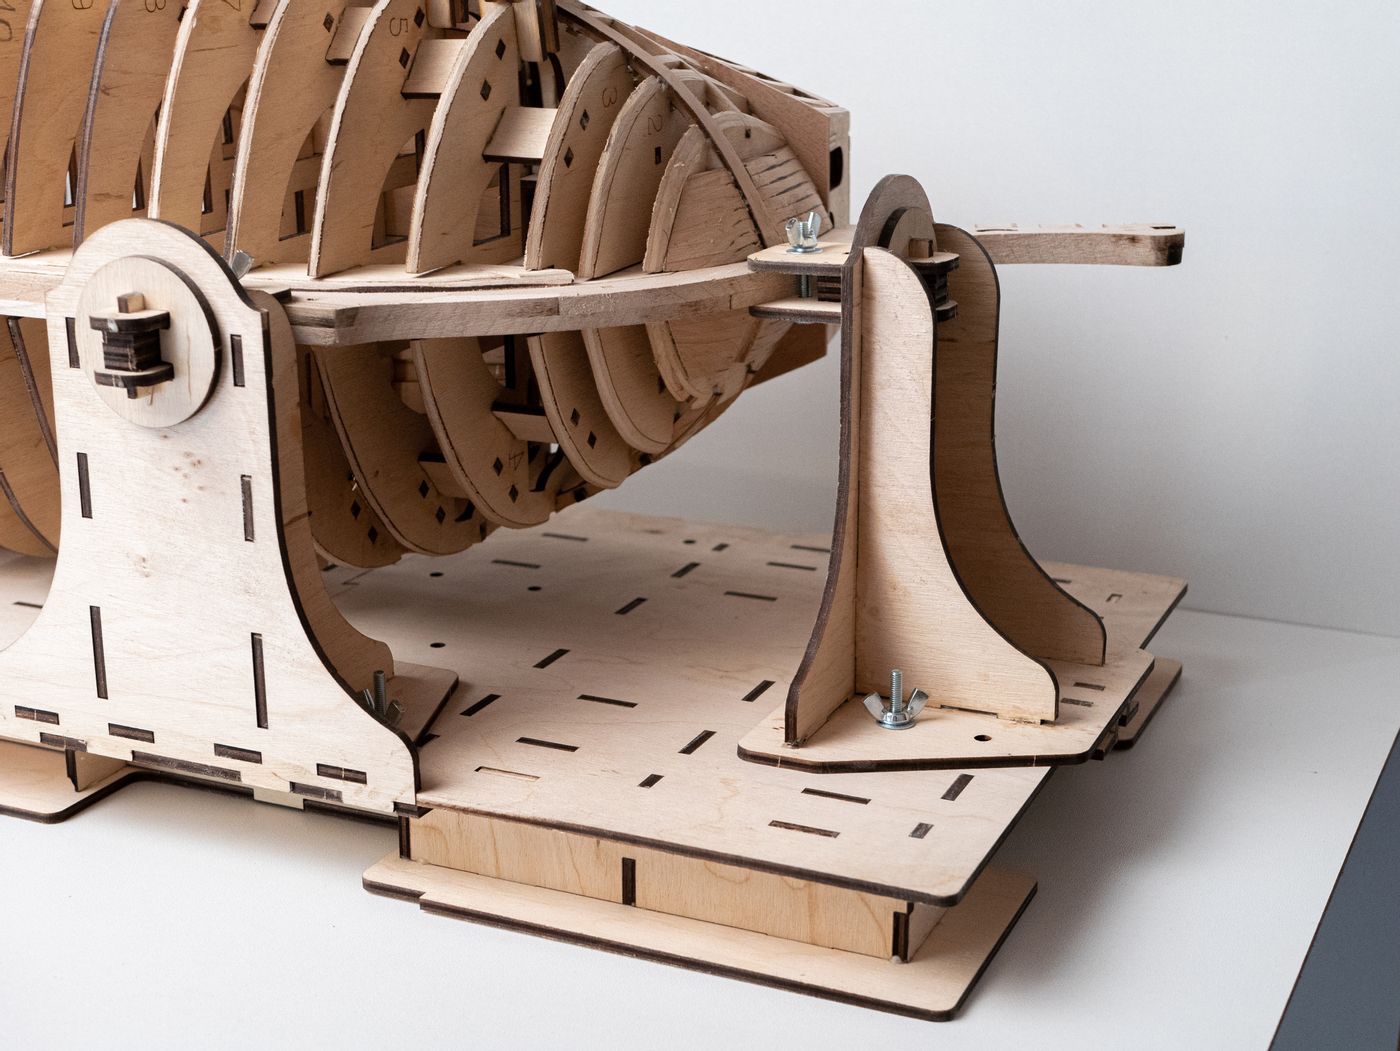
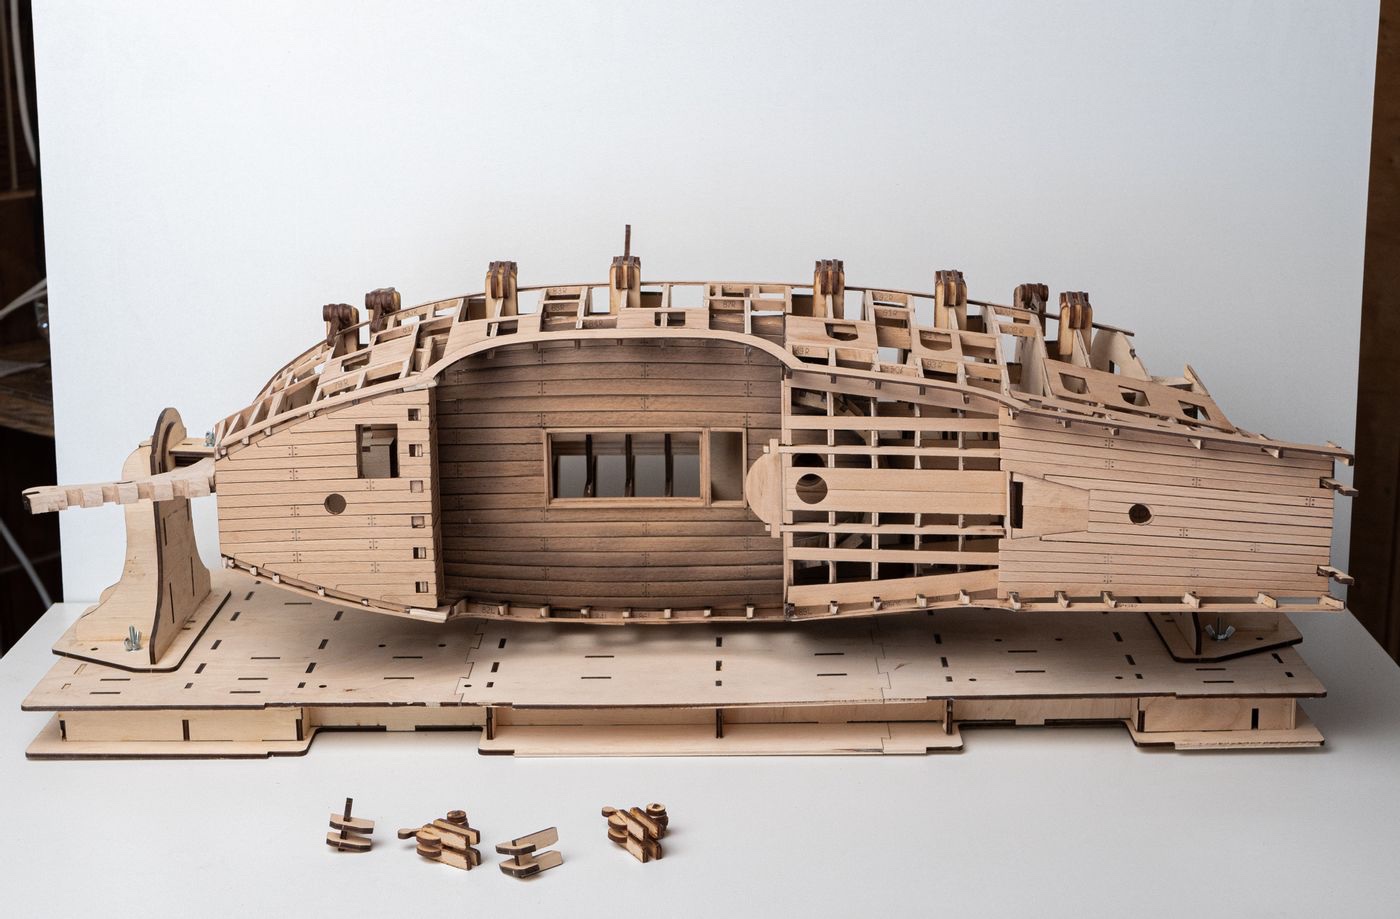
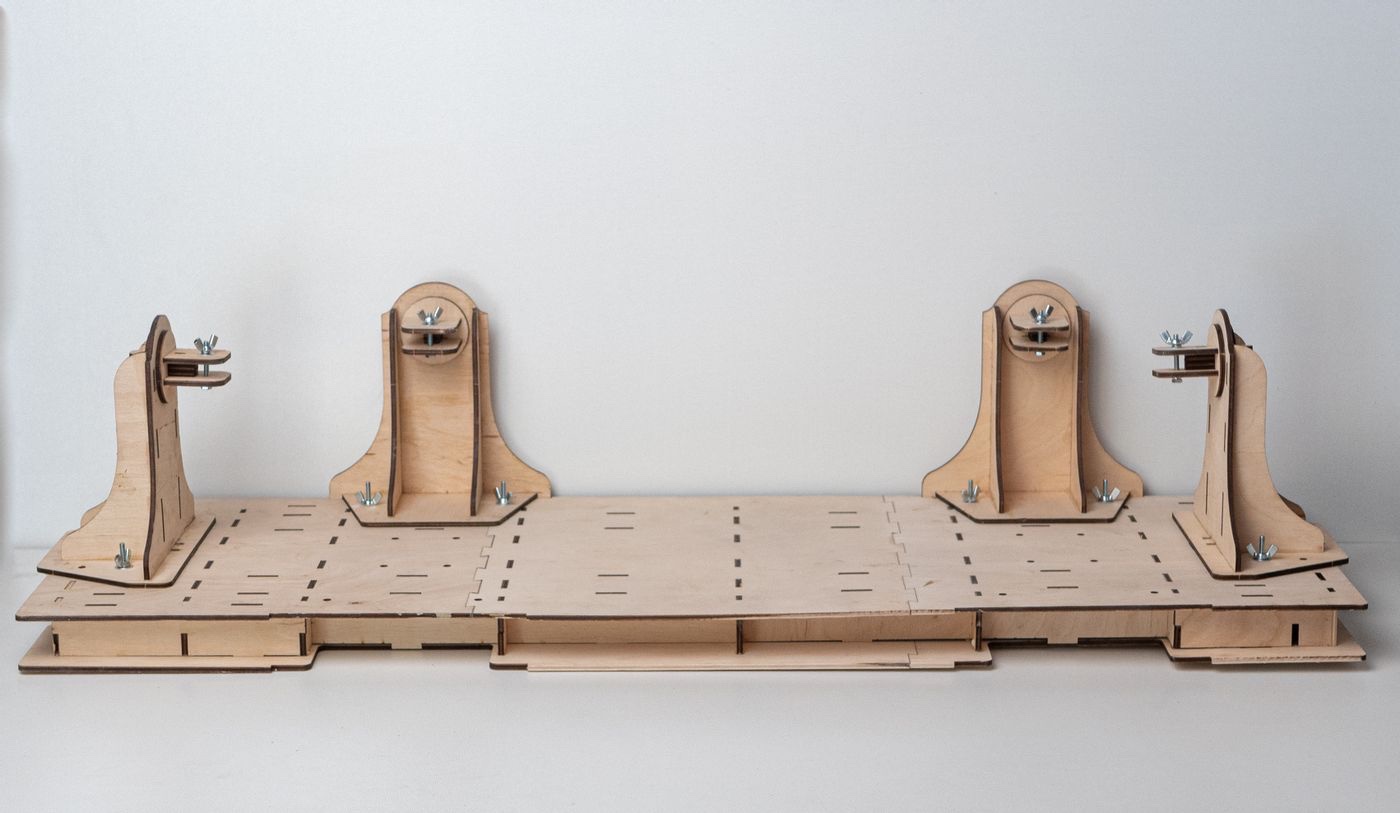
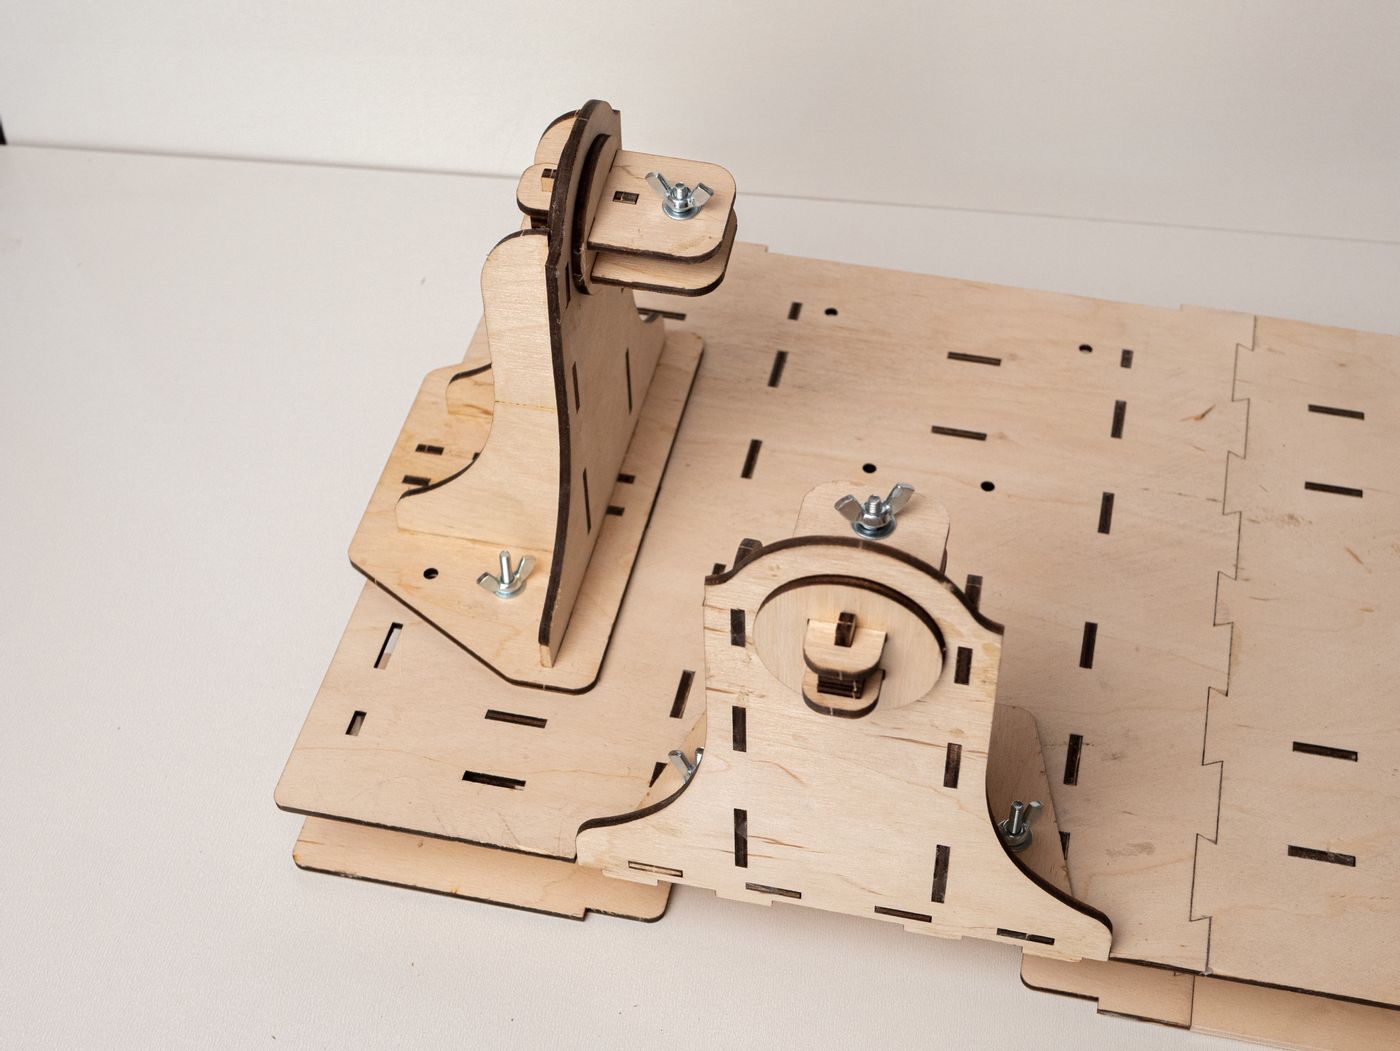
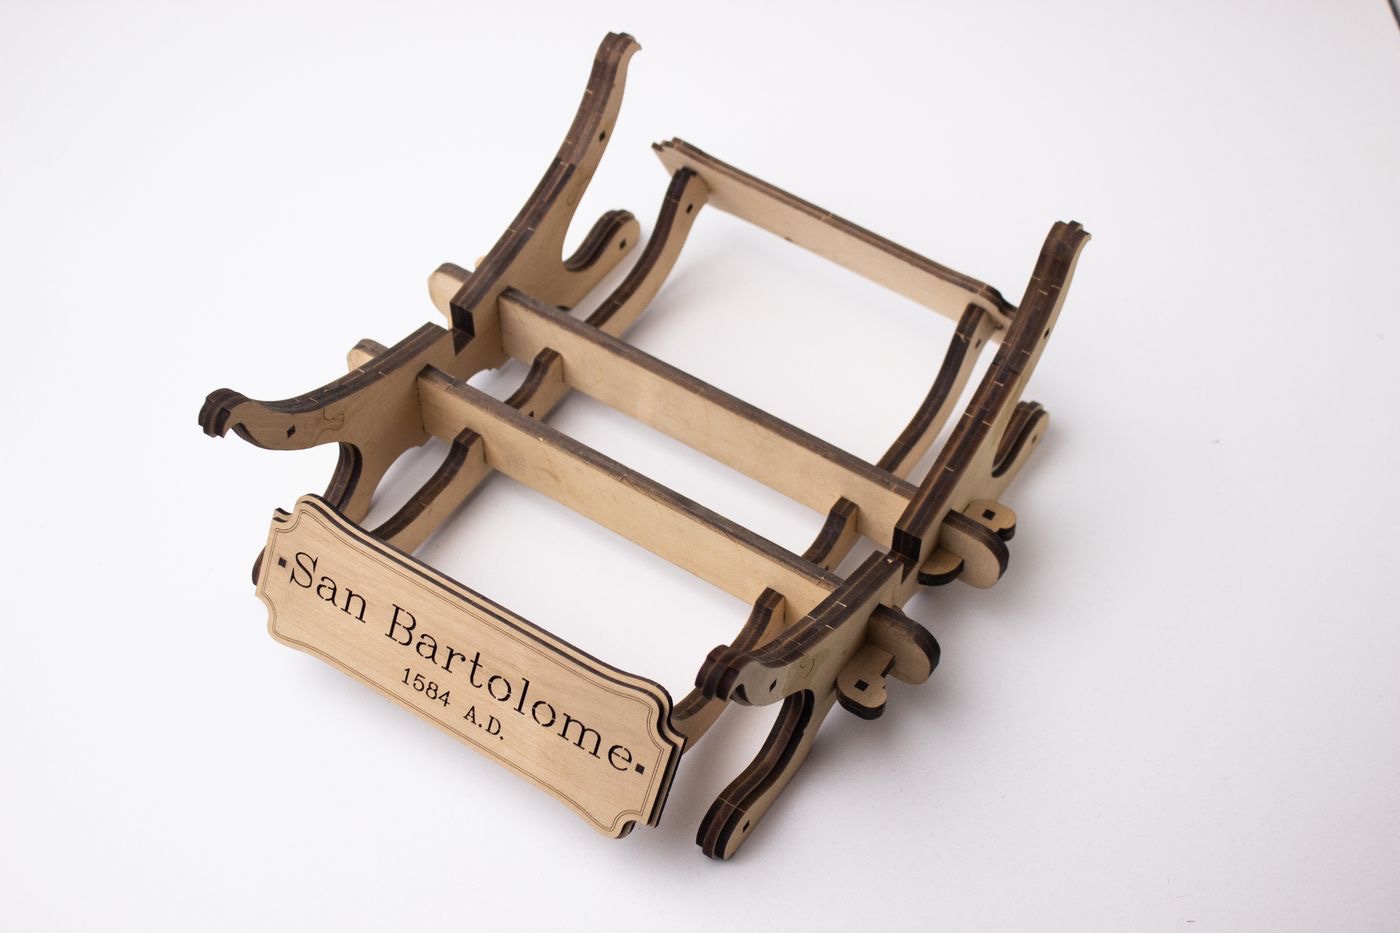
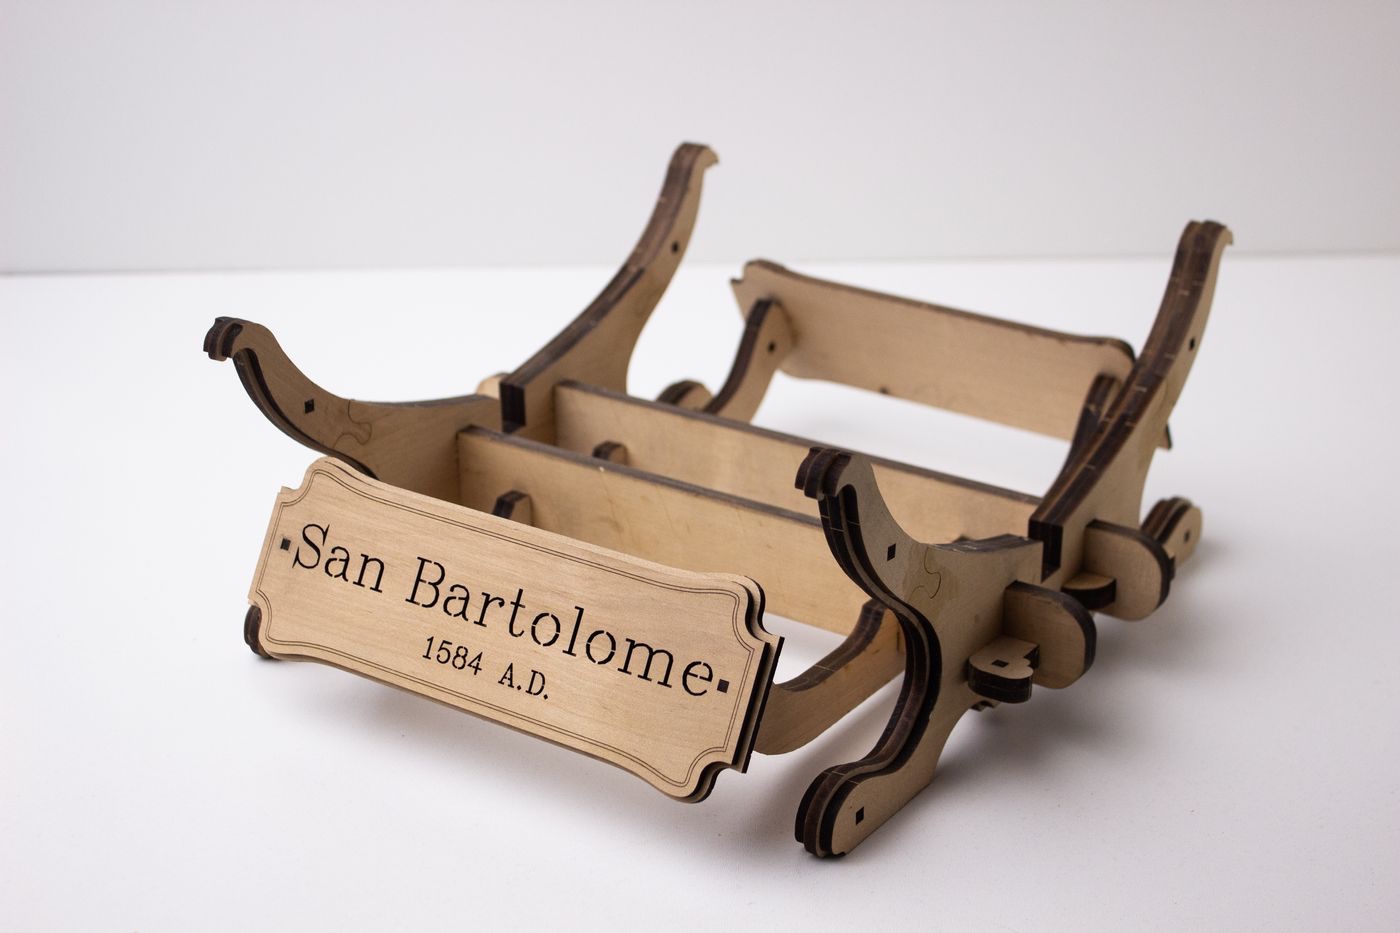
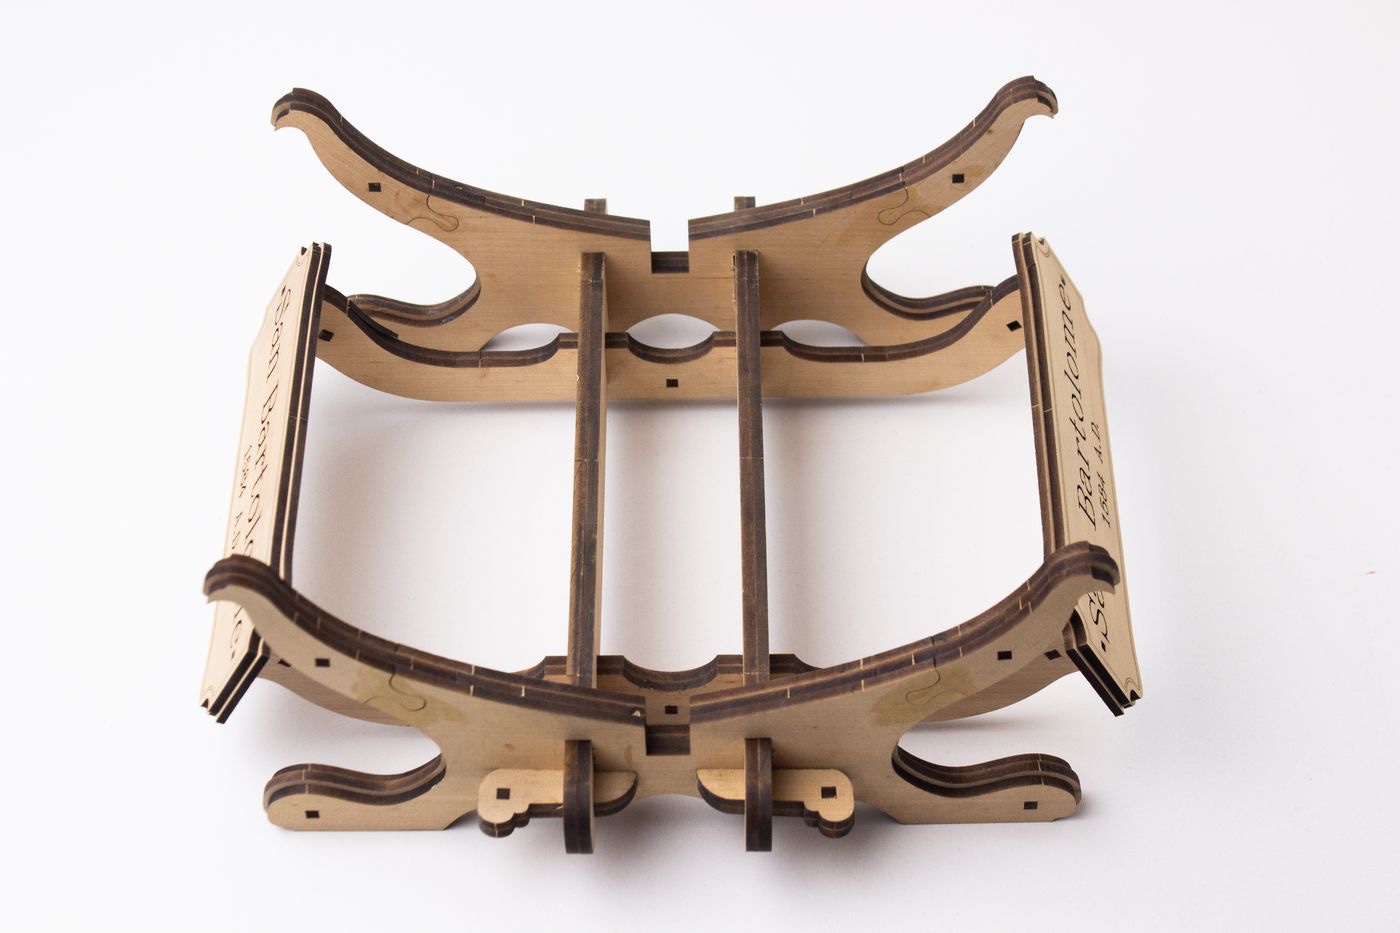
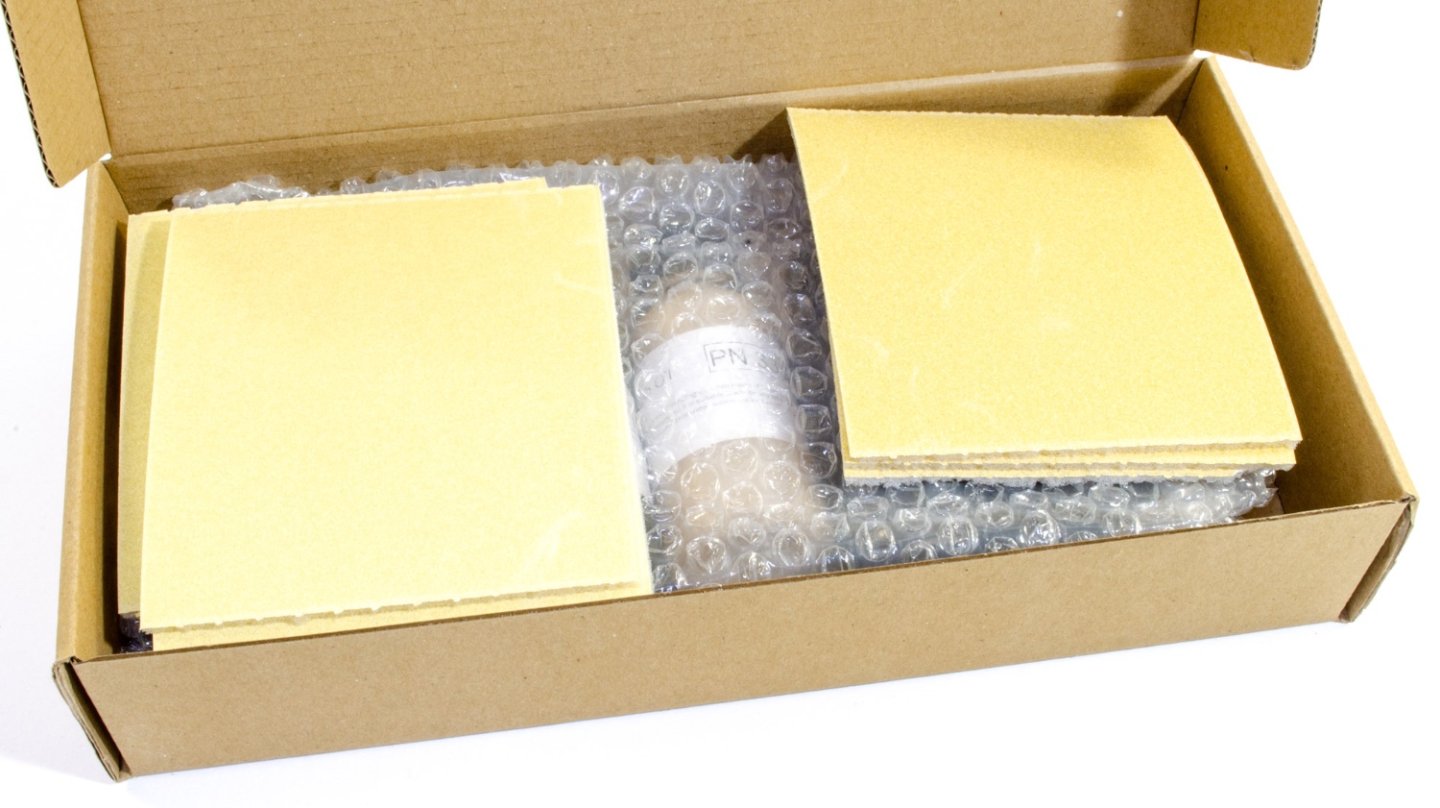
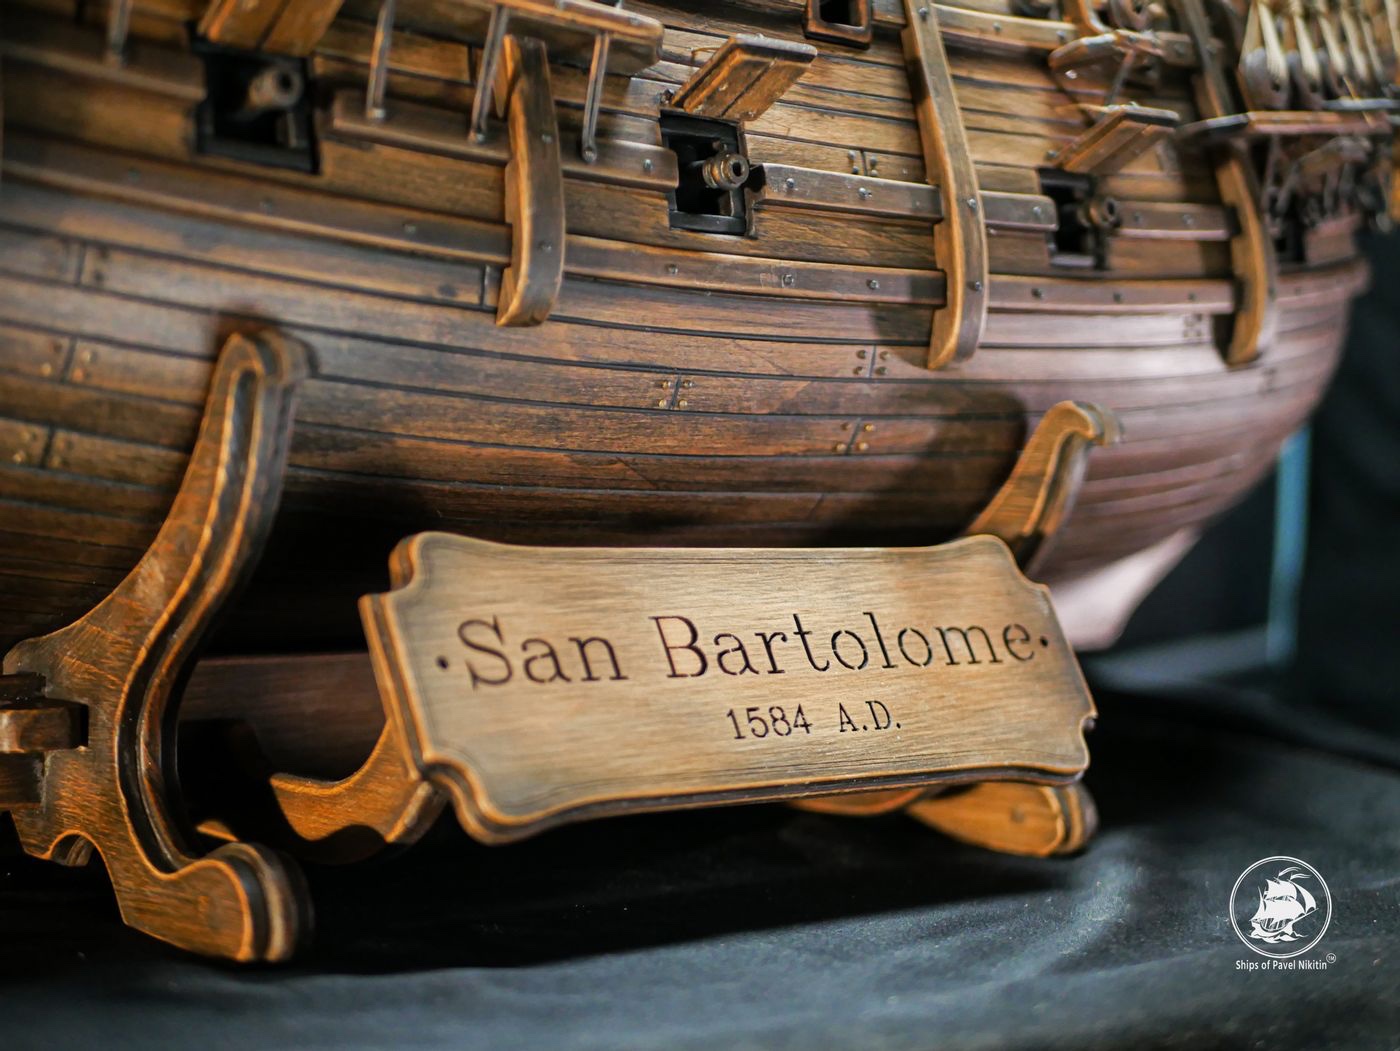
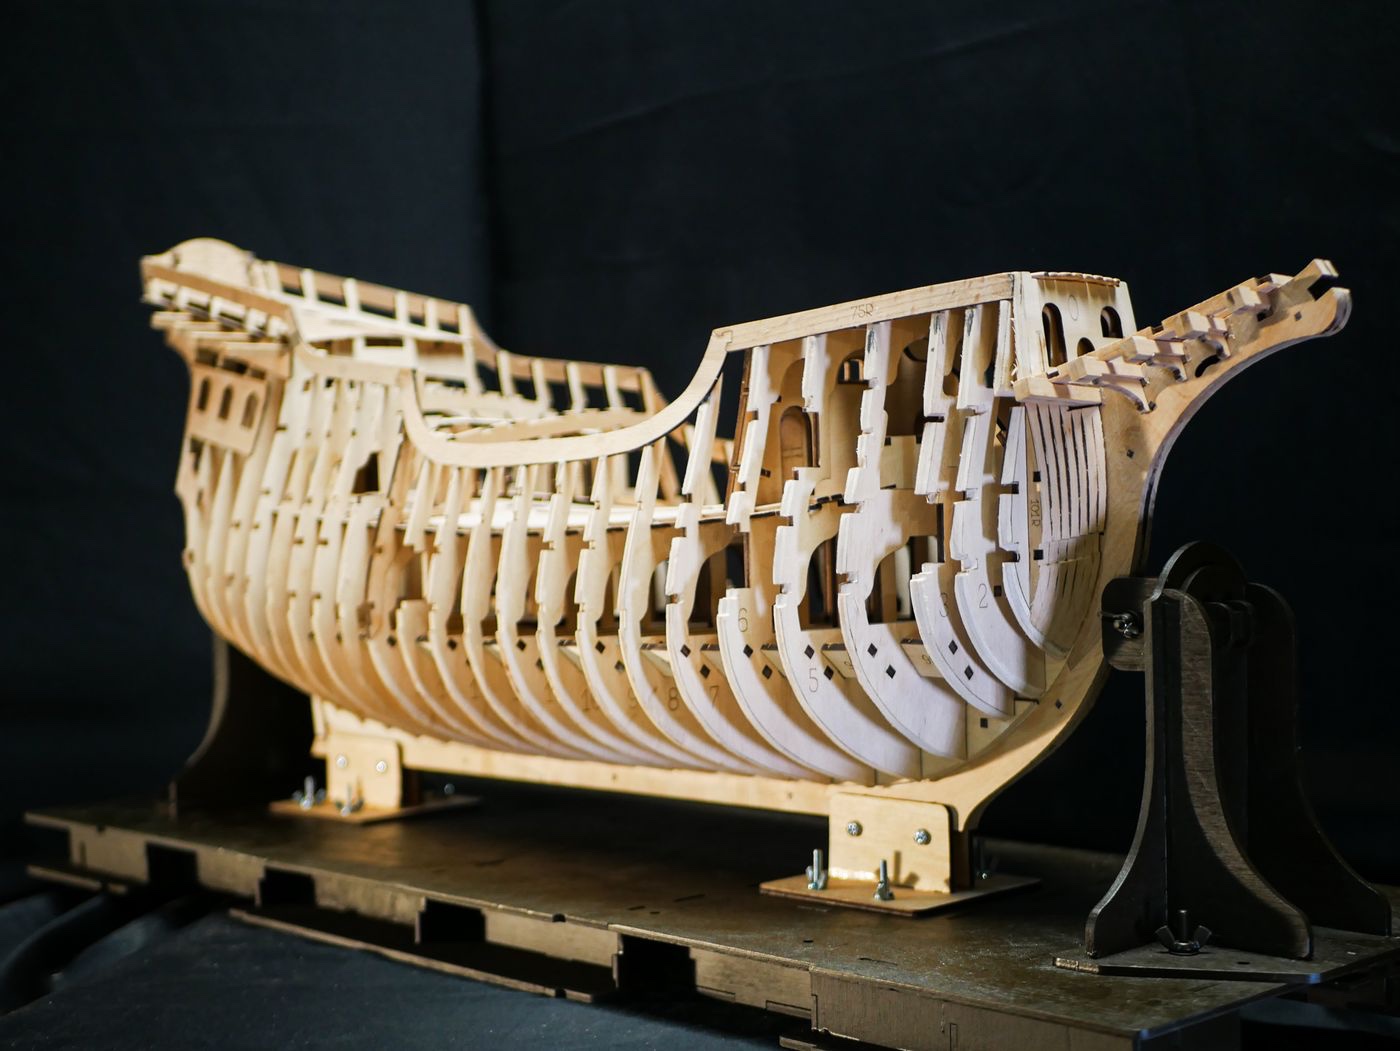
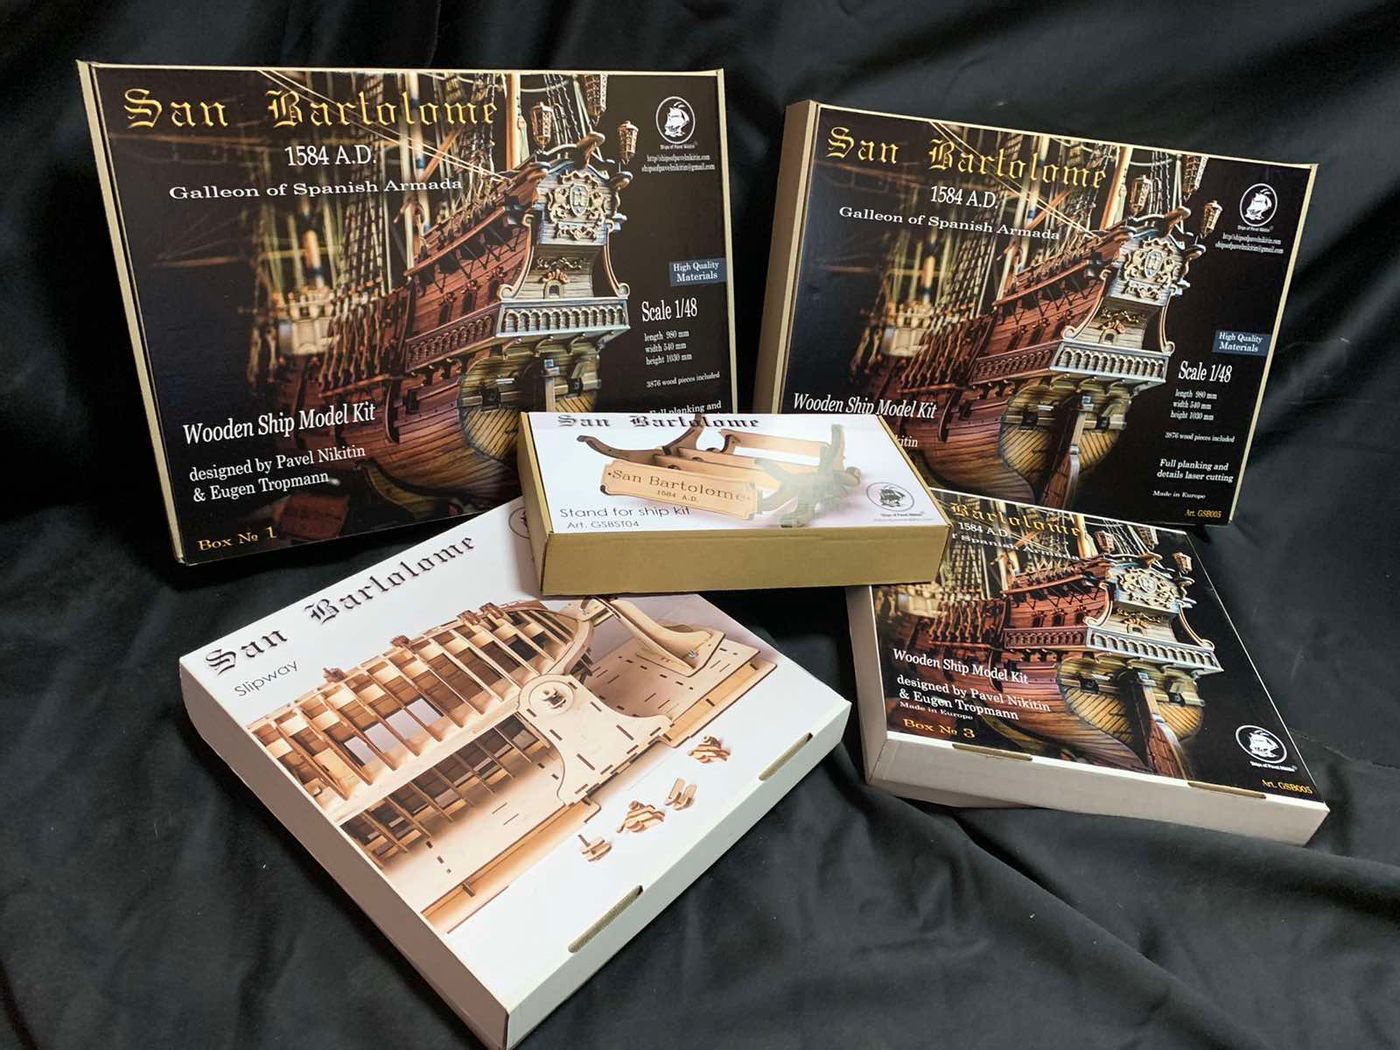
Various sets for 1:48 San Bartolome Ships of Pavel Nikitin Available directly. See article for links. Along with the 1:48 San Bartolome that we reviewed HERE, Pavel Nikitin also sent over a number of optional sets for this kit. Here we take a look at them. "San Bartolome - 2" slipway for building San Bartolome Whilst it’s not vital that you have a building slip for this kit, I know many folks do like to use one. As this model is 1:48, it may well be simpler to use one to rotate your model as you build up the intricate frames that she has. If you’re one who would use a slip, then you might be pleased to know that there is one specifically for the San Bartolome. This weighty box (2.4kg) contains a whole jig system for this model, based on a plywood box system. A series of small ply clamps are also included which are designed to hold planks to the outside of the hull, and doubtless other tasks during construction. The whole package is cleanly laser cut and includes the various metal fittings needed to hold everything in situ. The current price of this building slipway is 41.07 €, and it’s available HERE. "San Bartolome - 2" Stand for ship model The standard kit doesn’t come with a stand. I know some folks like to prepare their own or mount the model on brass columns, but if you want something that’s designed specifically for San Bartolome, then a stand is available for it as a separate item. This pack weighs in at just under 1kg and contains a laser cut ply stand that is as ornamental as it is functional. The stand is a series of interlocking parts with an attractive peg system to hold it all together. An attractive name plate adorns each side of the stand, so you can pose your model either way round and still have that on show. This stand would very much benefit from the paint set which we’ll look at next, due to the bare ply finish…..or you could paint the stand as you wish. The stand costs 45.17 € and is available directly from HERE. Painting Kit Firstly, I need to clarify that the San Bartolome 2 doesn’t require this set due to the different timbers that it’s made from in relation to the V1 of that kit. Both the V1 and V2 will shortly be available on their website, so you’ll have a choice of what to build and how you wish to finish it. This set consists of six bottles of alcohol-based paints. These all come in large bottles. These paints are designed to paint the model in a very specific way which is easier to show than to explain. Please check this video which illustrates how to apply this paint, which can be airbrushed without any extra thinning: This set also comes with three sheets of both 240 grit and 320 grit sanding sponge to create the distressed effect you can see in the video. This set is available for 35.89 € directly from HERE. My sincere thanks to Pavel Nikitin for sending the samples seen here on MSW.


- 3 replies
-
- 15
-
-
-
- san bartolome
- stand
- (and 1 more)
-
She' very pretty indeed. You did a real nice job with her.
-
She's looking real nice, Glenn. One thing to point out is that your fore sail is on in the wrong orientation.
- 106 replies
-
- 2
-
-
- Erycina
- Plymouth Trawler
- (and 3 more)
-
Ok, that's now fixed for you
-
Can you tell me what the 'error message' says? That would be useful
-
kit review 1:48 San Bartolome by Pavel Nikitin
James H replied to James H's topic in REVIEWS: Model kits


-
kit review 1:48 San Bartolome by Pavel Nikitin
James H replied to James H's topic in REVIEWS: Model kits
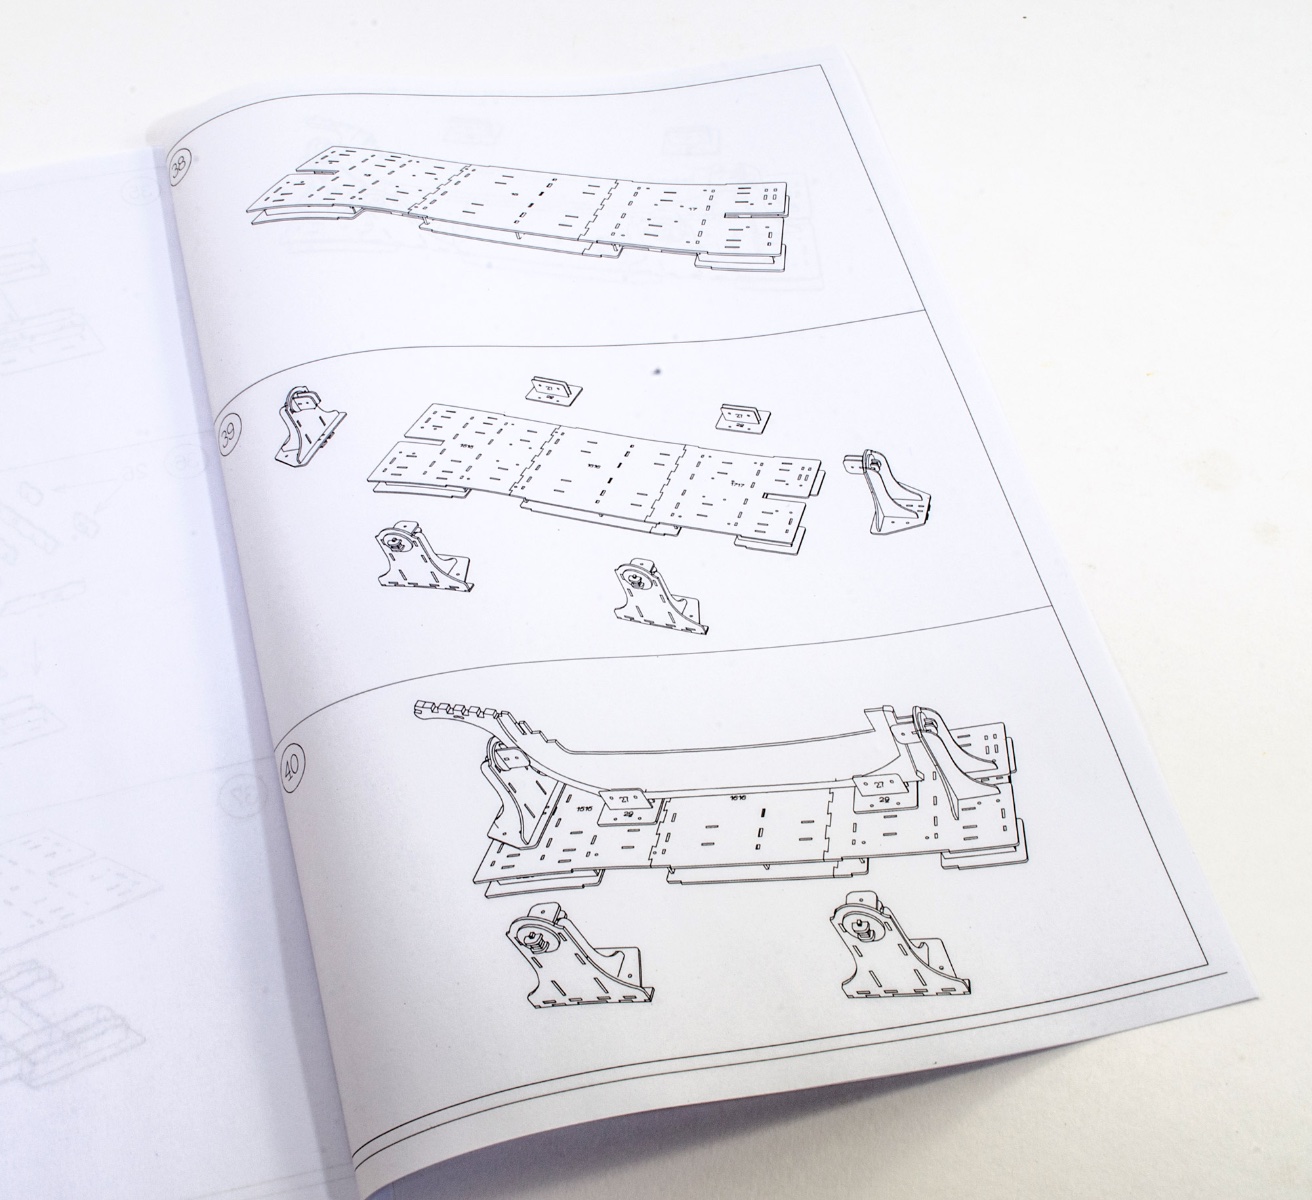
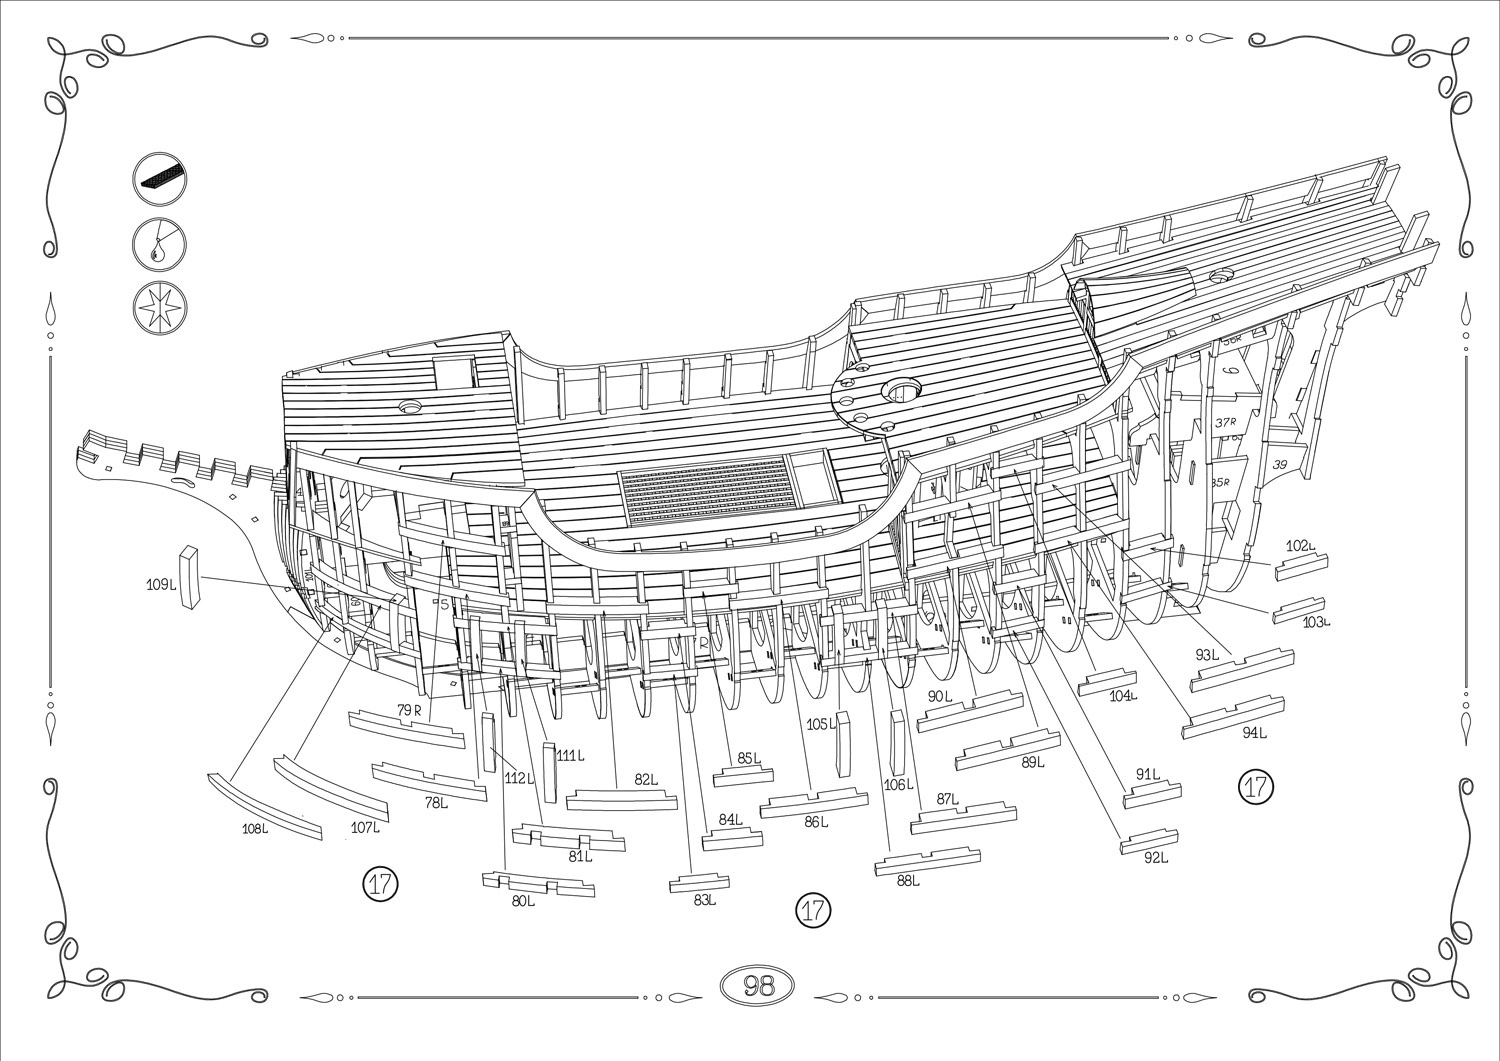
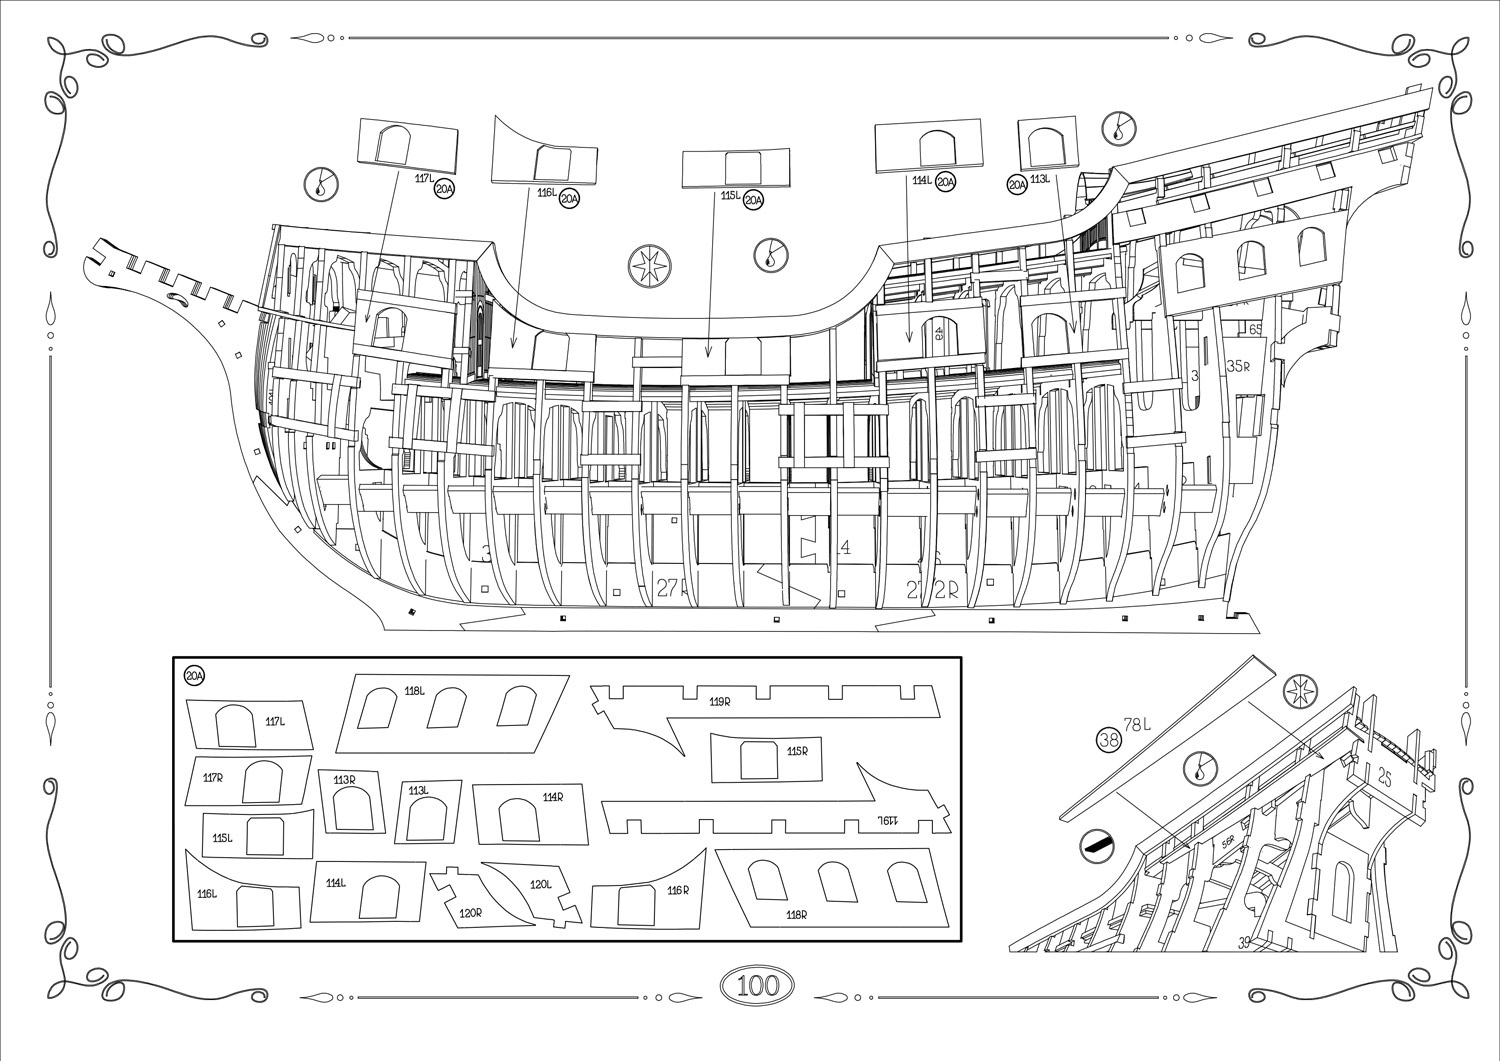
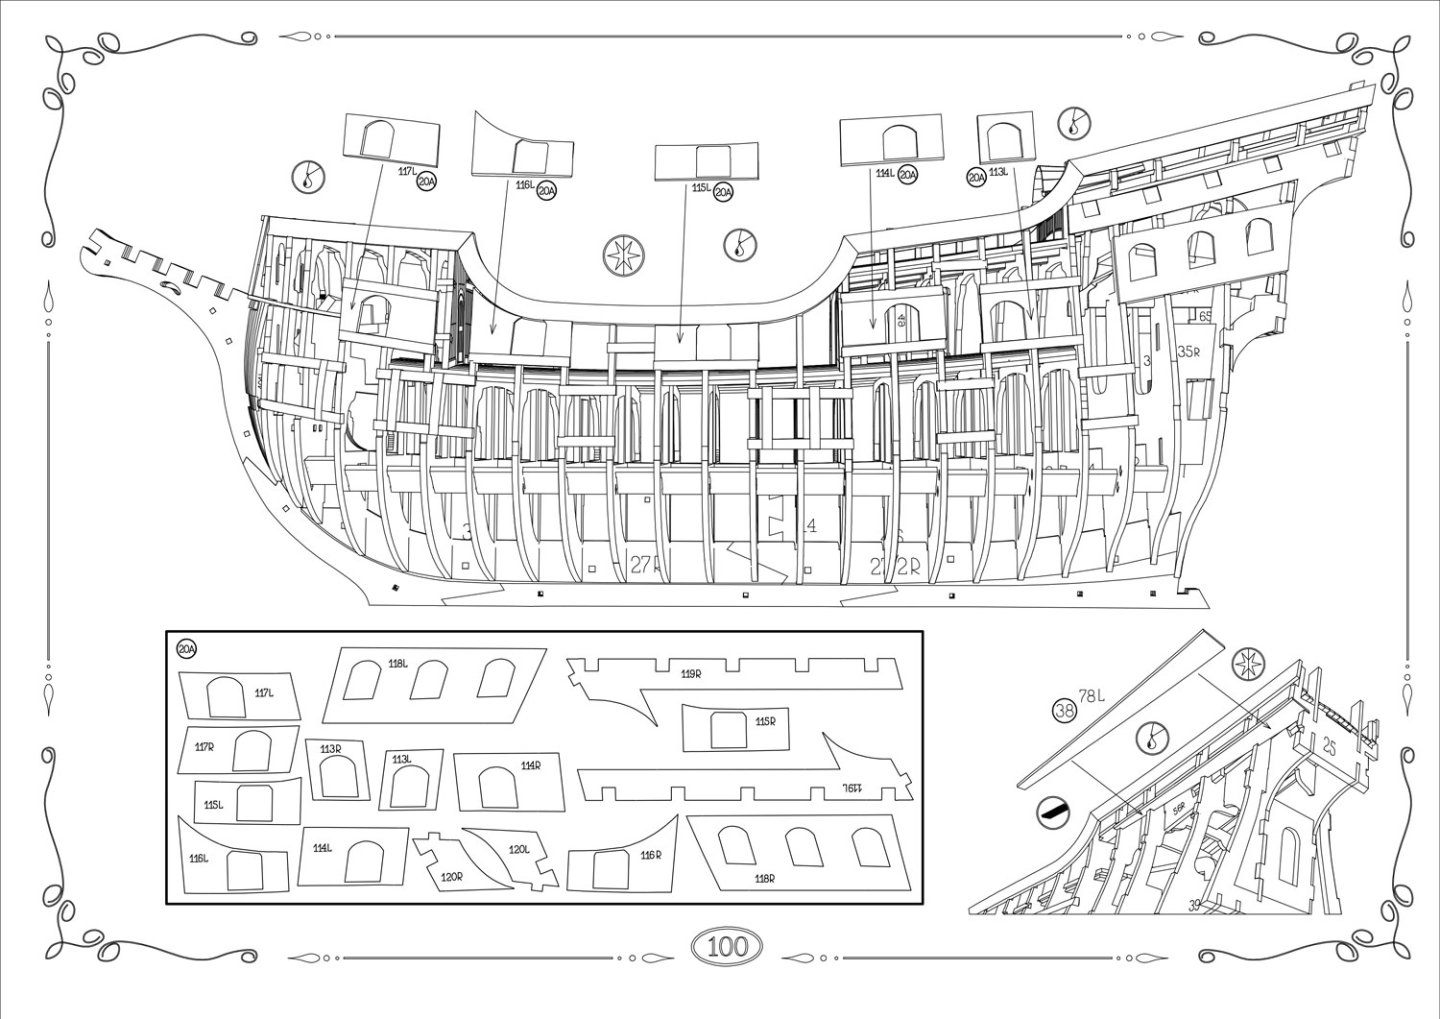
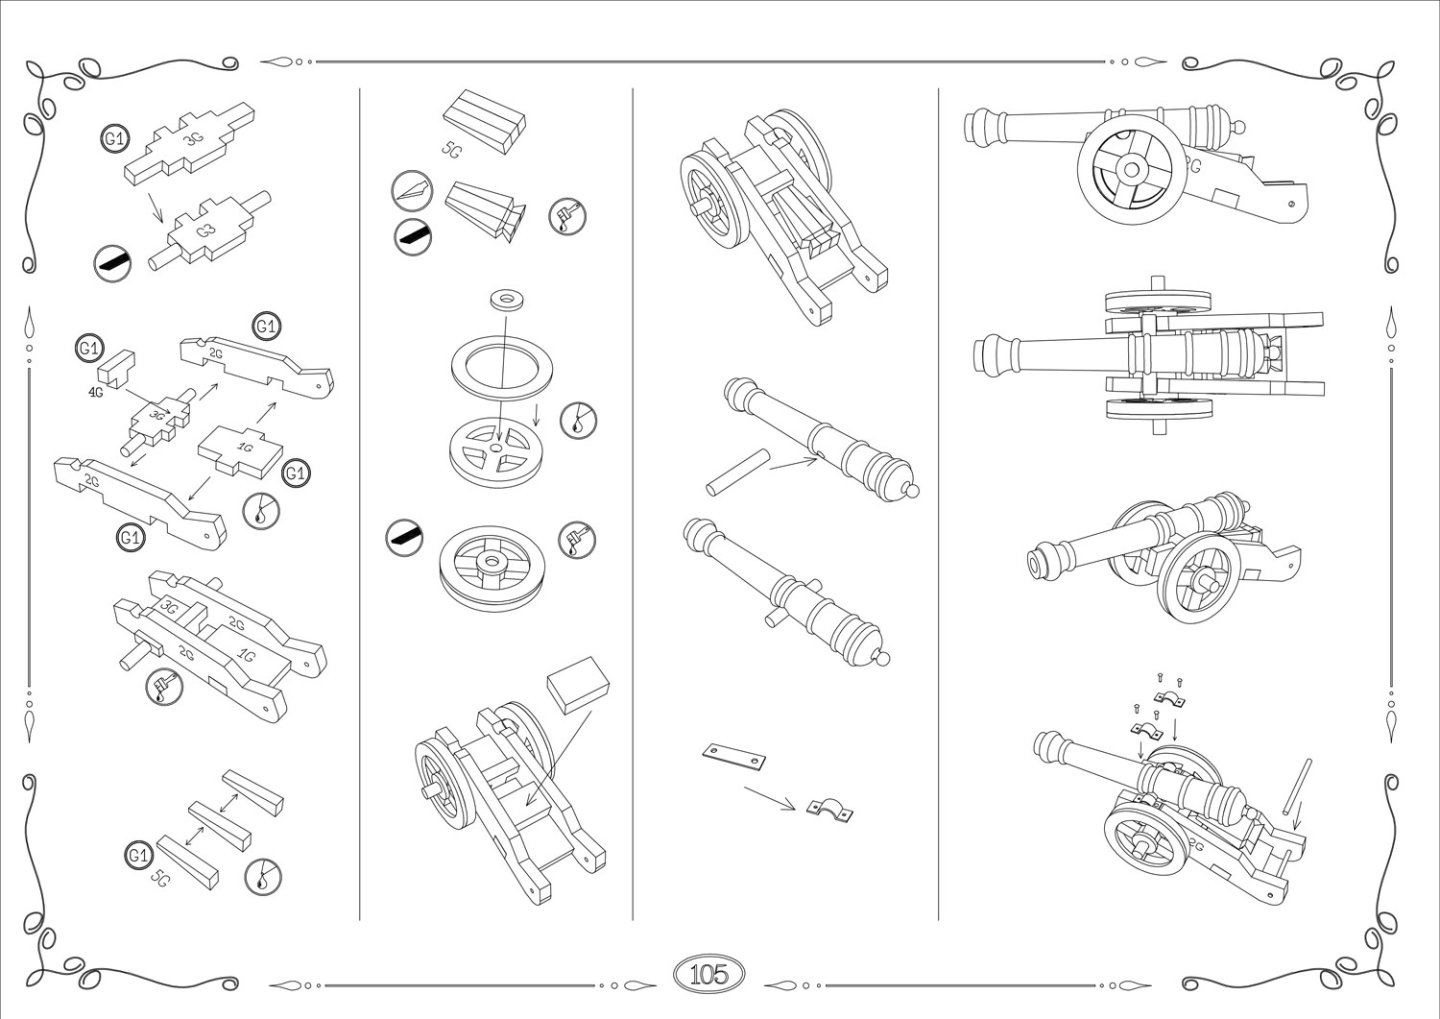
Instructions As previously indicated, this kit contains parts 1 & 2, bound as a single volume. We will receive the remaining two volumes as soon as they are available. As I want you to get a feel for the construction of this model, I’ve presented a good selection of images from the manual, to better acquaint you with the construction of this unique model kit. Conclusion In the right, competent hands, this kit will most certainly build up into a beautiful olde worlde Galleon representation. How you paint/finish the model will be more of an individual choice, but if you’re willing to have a go, then the set of paints specifically for this kit, would be a perfect choice. This model will require a keen eye and exacting nature, to be able to complete as per the box art, so you should take your time at every stage and carefully plan ahead to make sure you don’t mis-fit parts anywhere. You definitely get a lot of kit for your money here too. Make sure you have space enough to store those three boxes as well as build this very large model. What do I think of San Bartolome? Well, she’s a very impressive depiction of a 16th Century Spanish galleon, and her shape reminds me of the San Francisco kit from Artesania Latina, as that was the first wooden ship model I ever built. This is a wonderful kit and one that I’d love to see our members build here on MSW. I will post a review of the associated sets for this in a separate article. My sincere thanks to Pavel Nikitin for the review kit seen here on MSW. To order, click the link at the top of this article.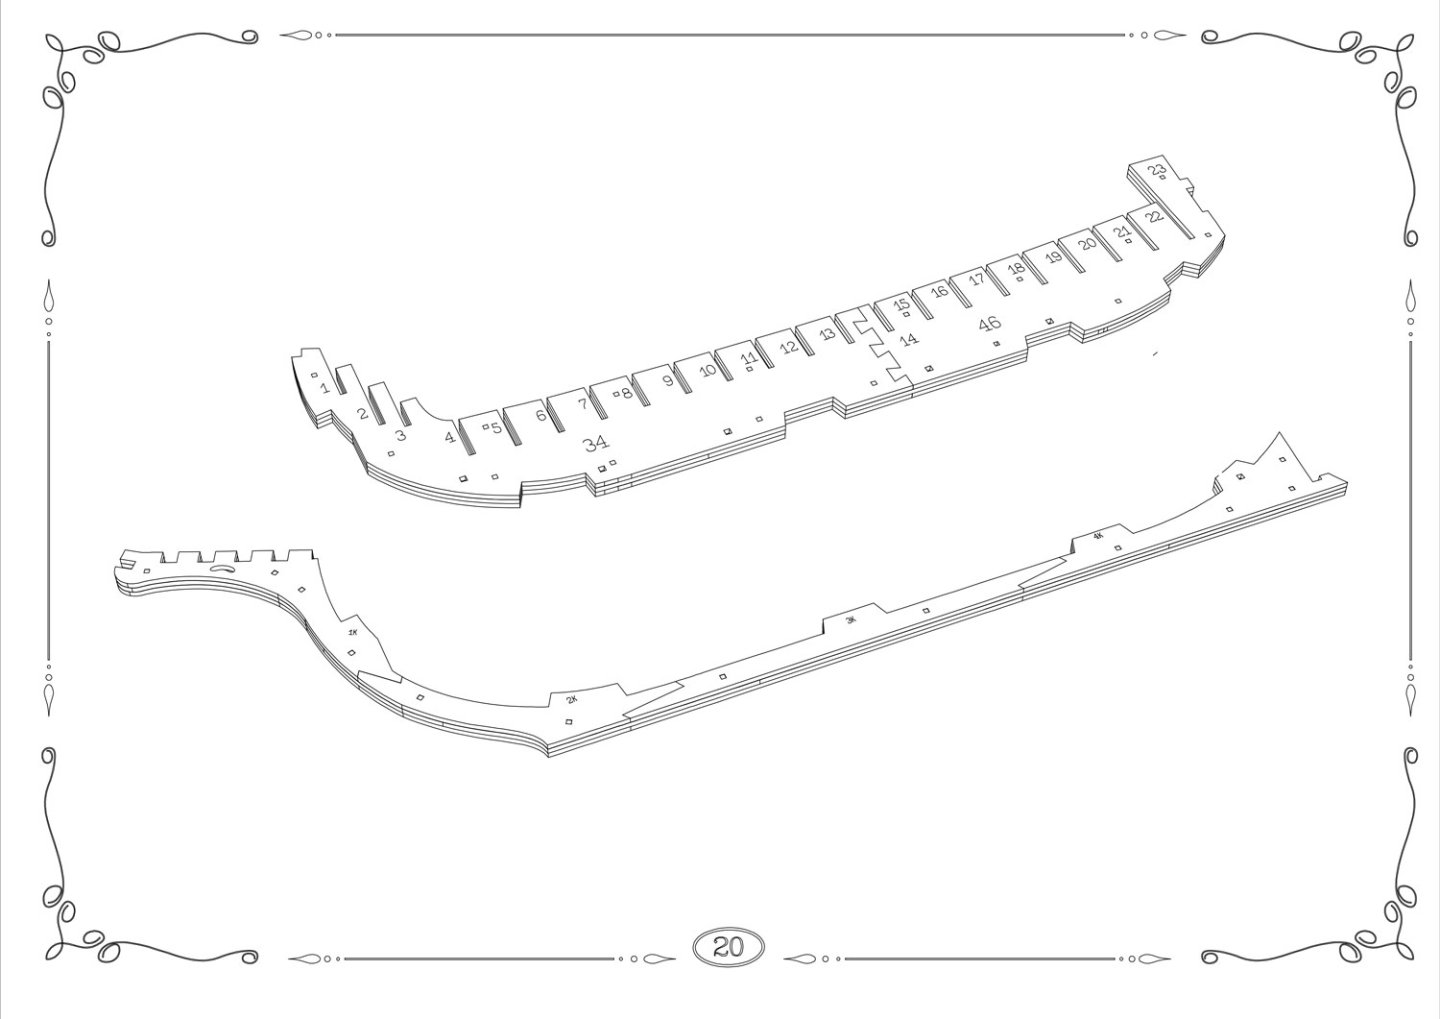


-
kit review 1:48 San Bartolome by Pavel Nikitin
James H replied to James H's topic in REVIEWS: Model kits
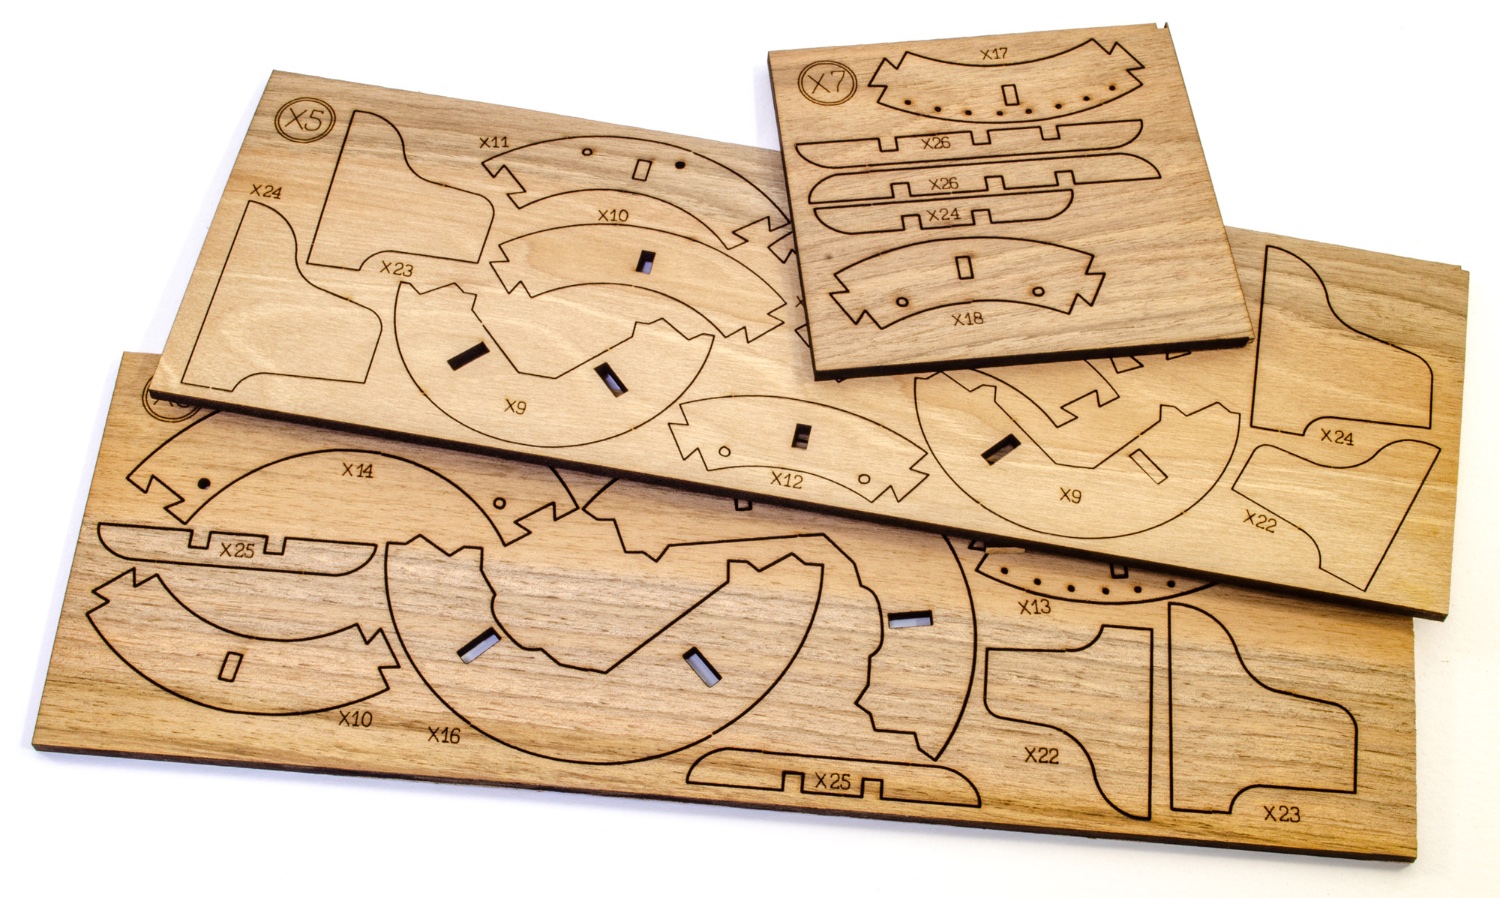
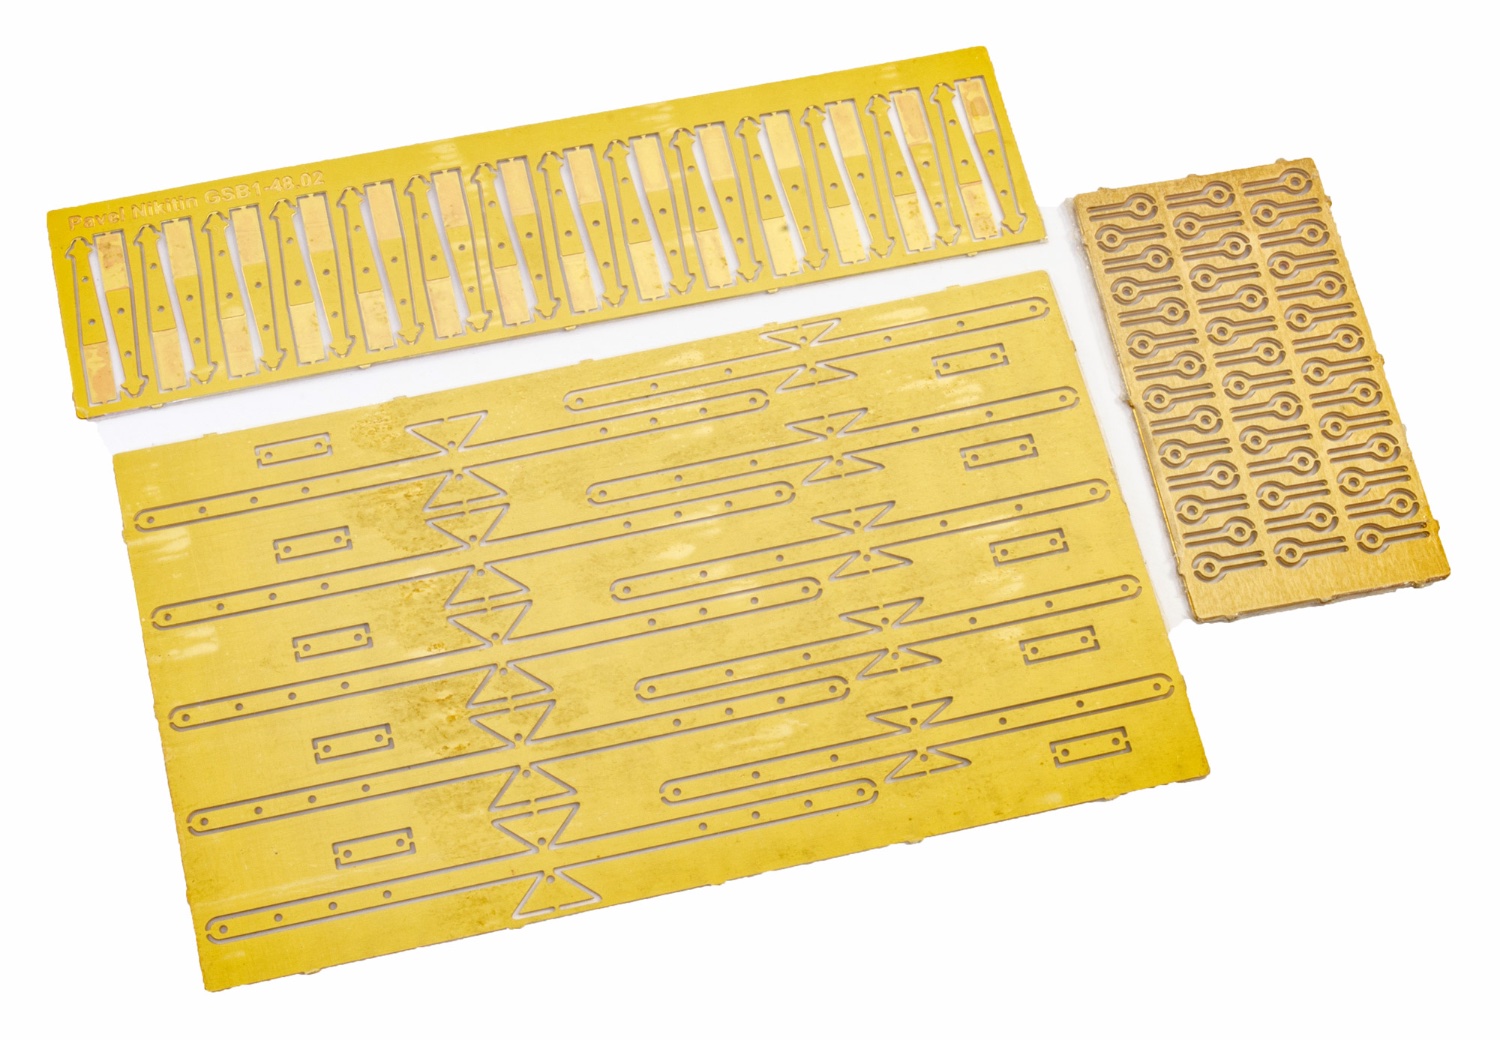
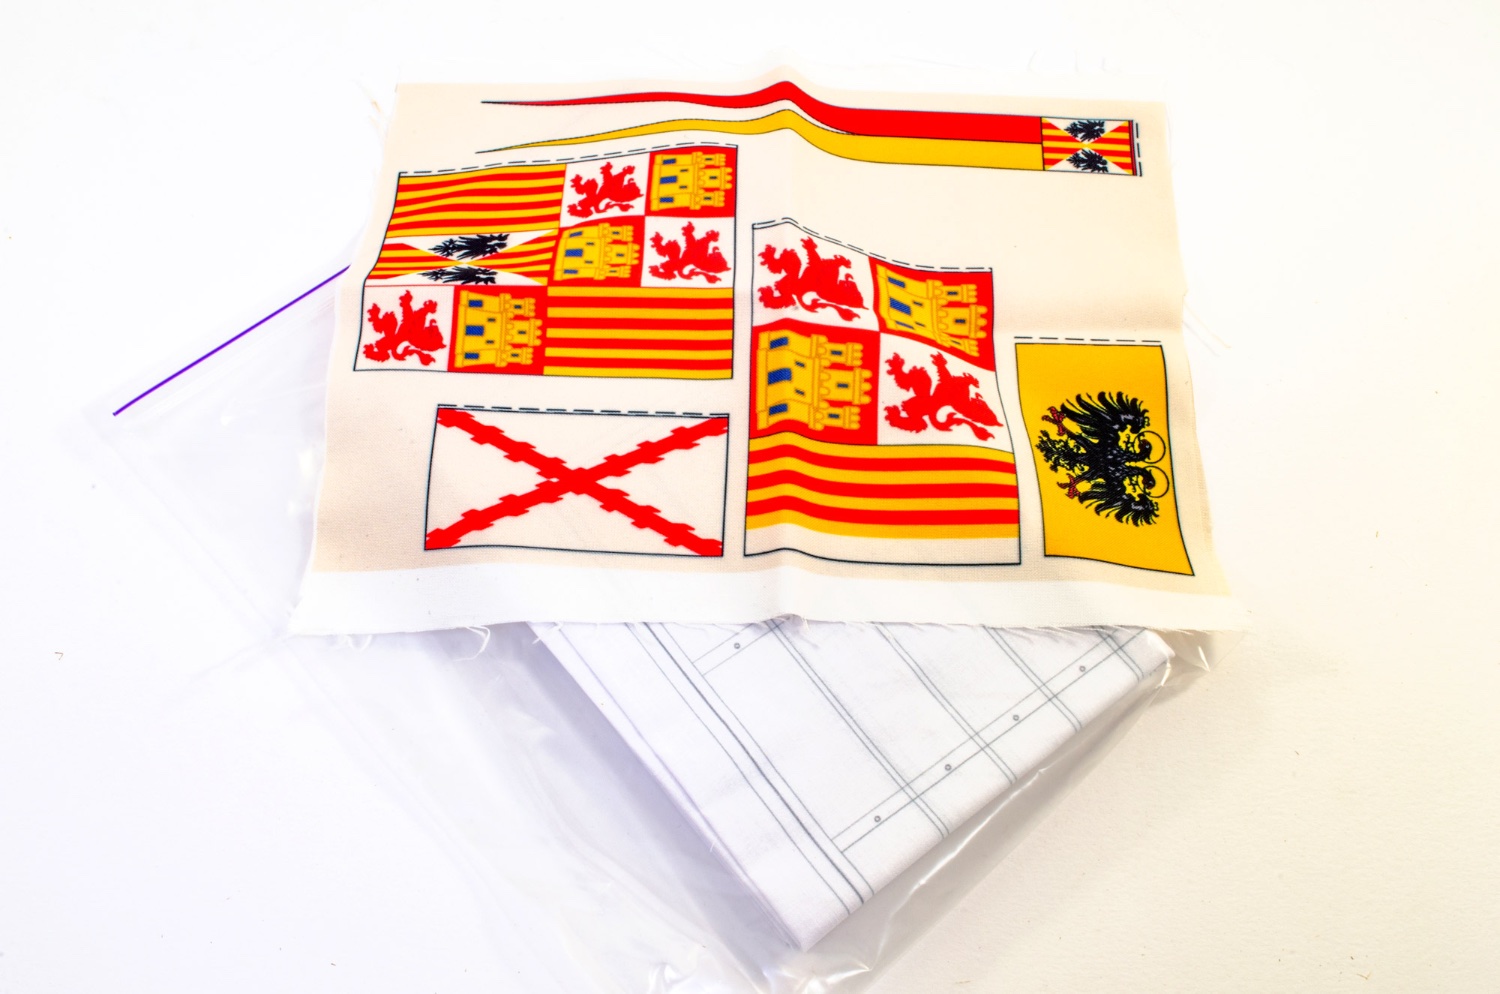
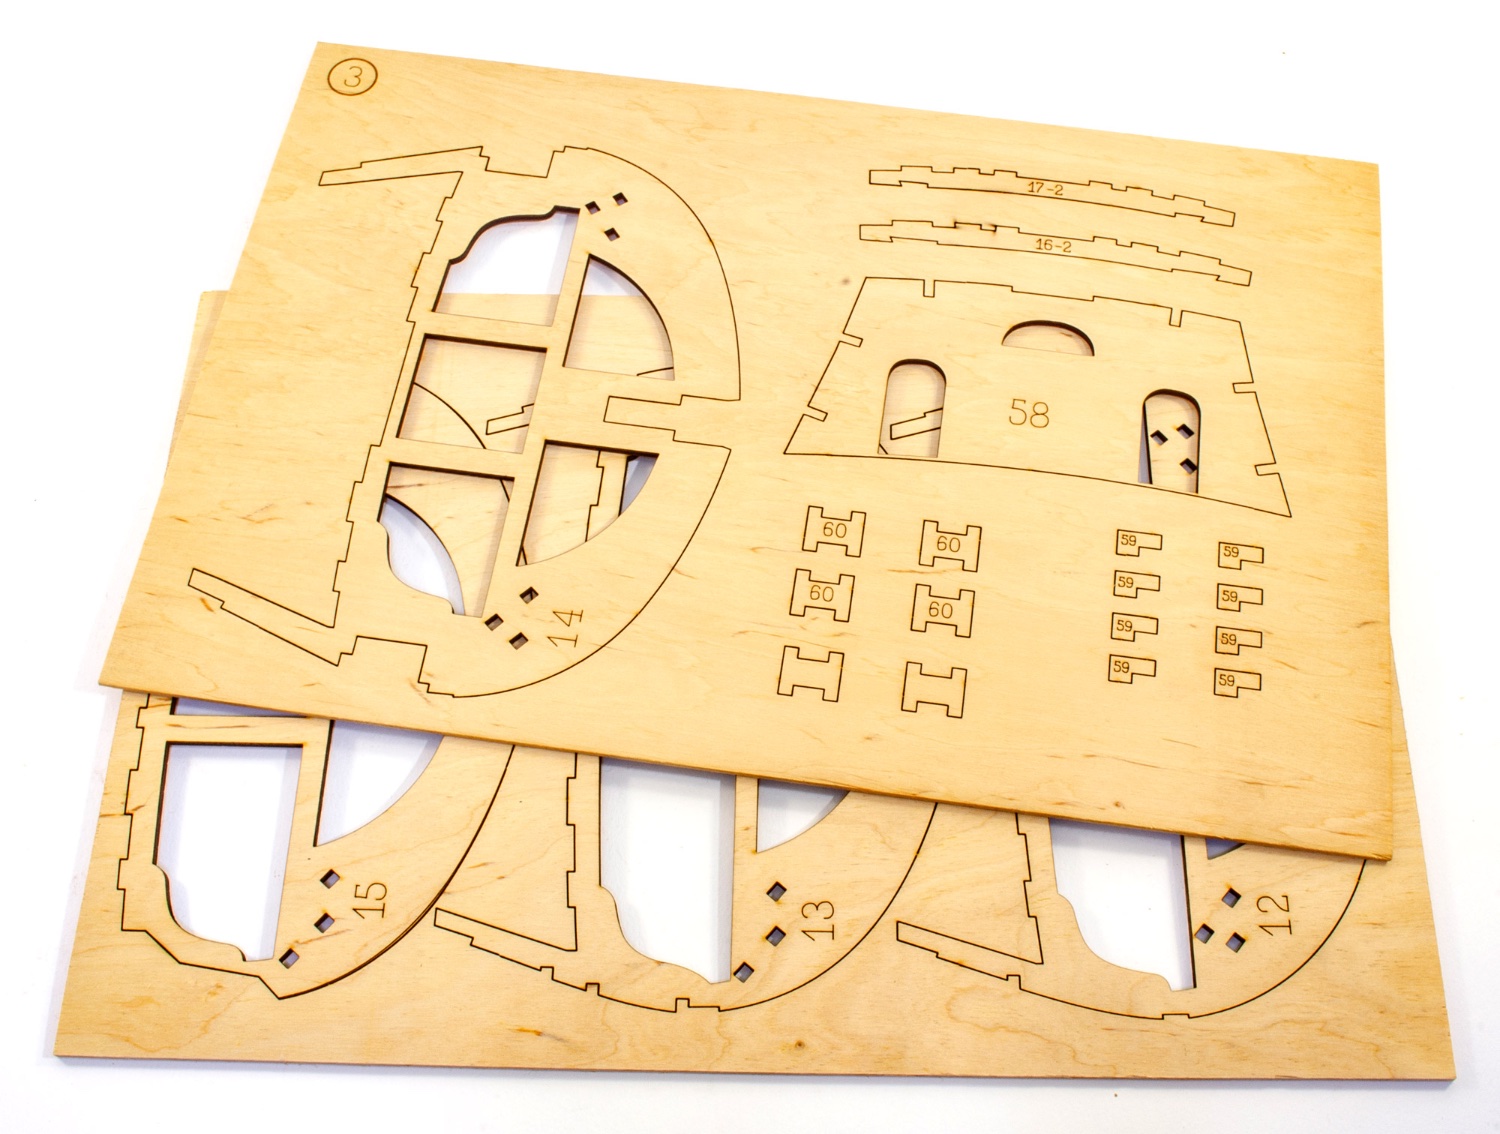
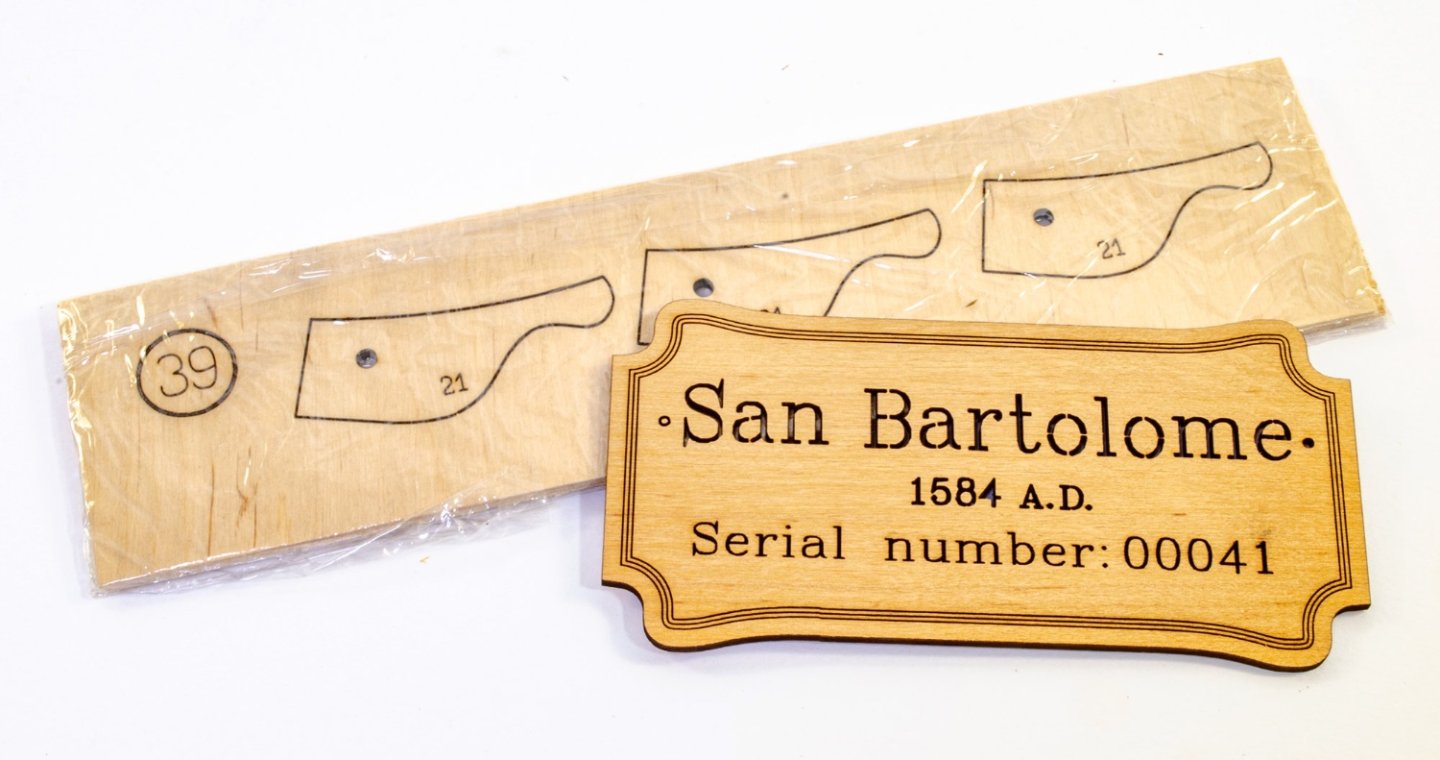
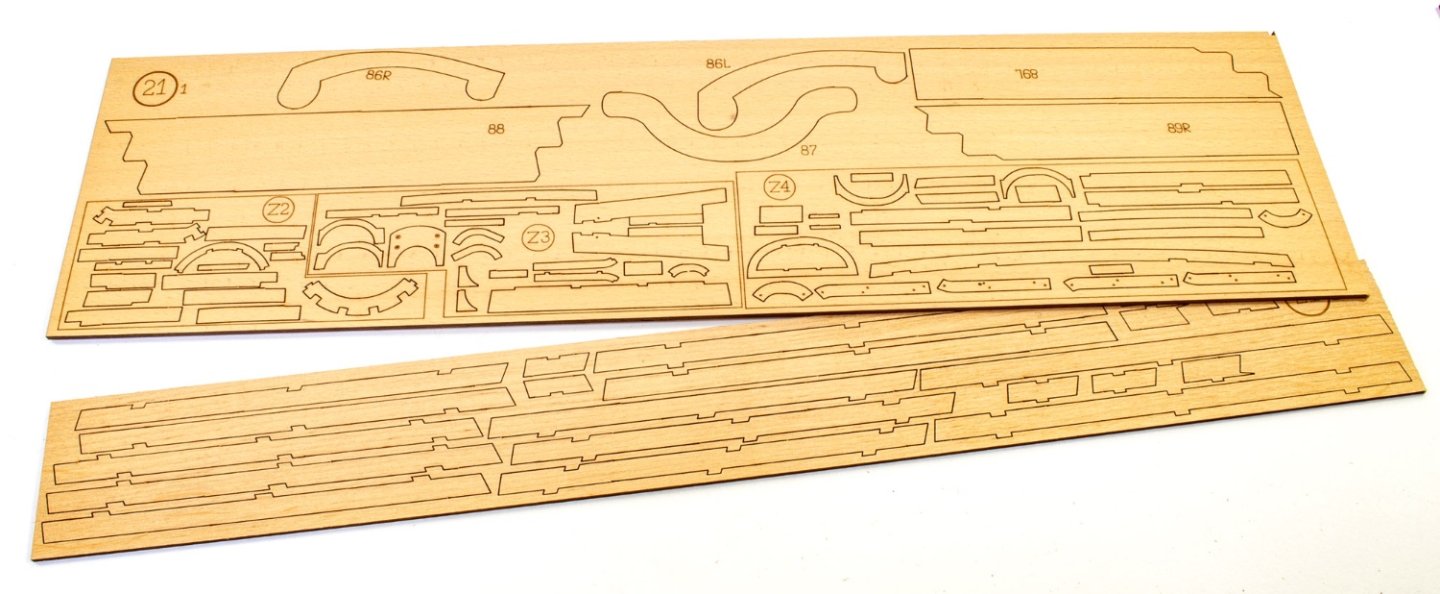
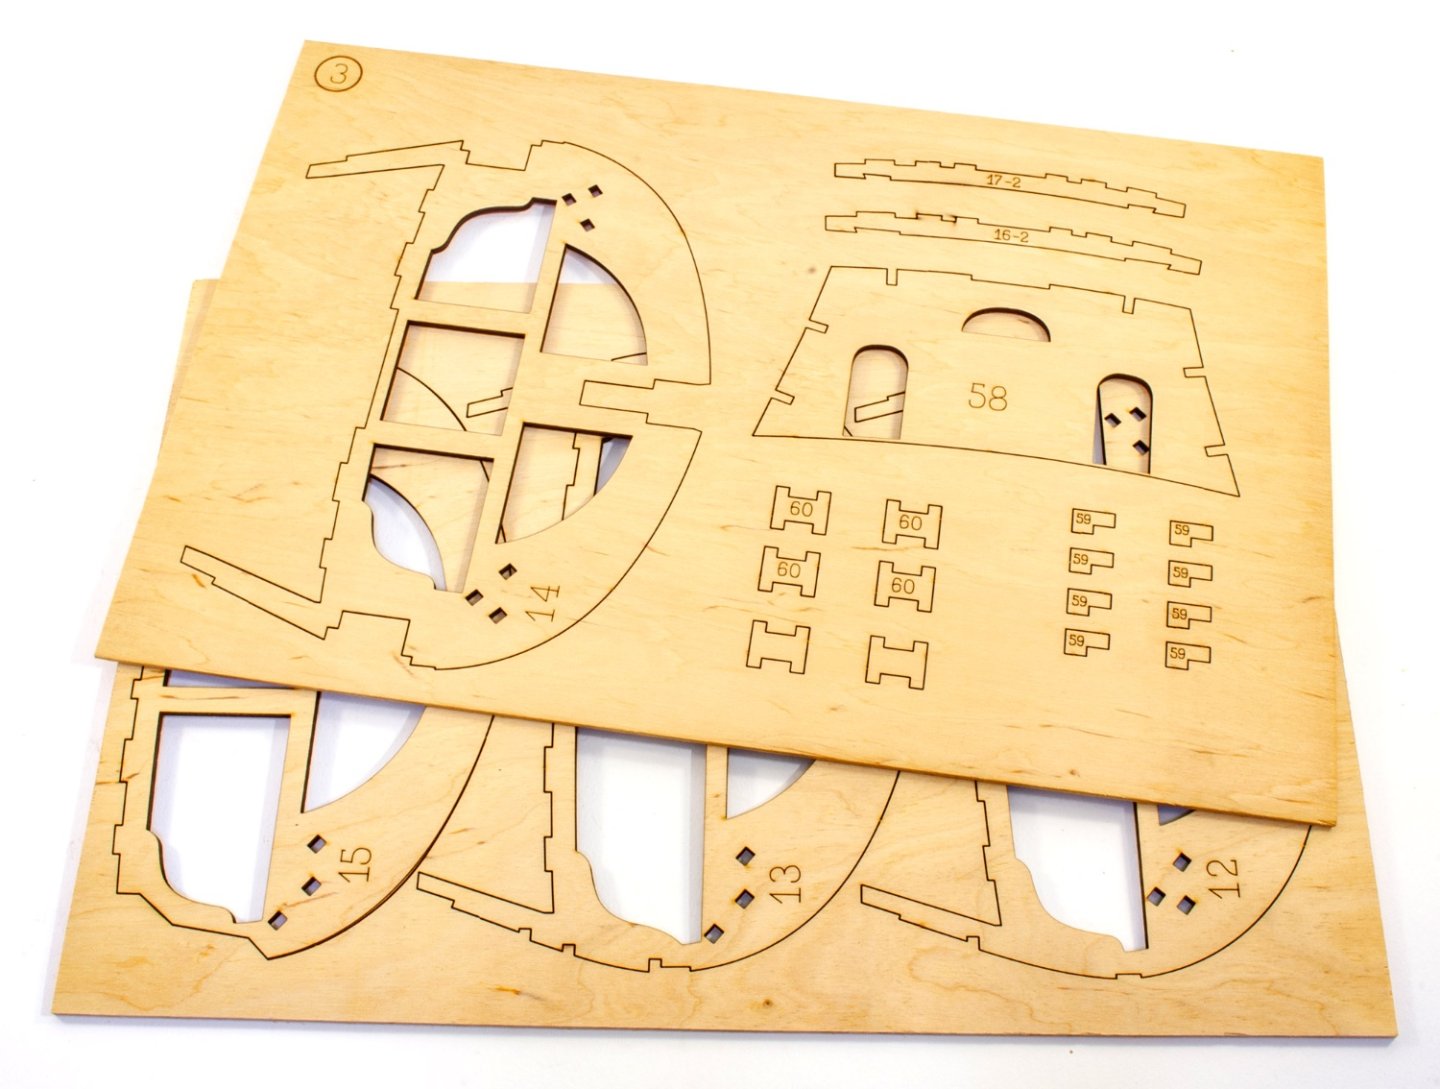
Box 3 This is a smaller box than the other two, but nonetheless full of many, many parts. The first sheets here show parts for the mast tops which are very indicative of that period of history. Here’s a preview of the remaining timber sheets in this kit, including some square section rod. As we currently have only half of the instructions, it’s quite difficult at the moment to be able to identify many parts, especially if they pertain to anything more than basic construction, minus masting. You’ll also see that we have been sent kit # 00041 too. Quite a low number, indicating the newness of this release. Like most kit releases these days, there are a number of photo-etch parts. This box contains three frets of PE brass for eyelets, hinges etc. Flags are supplied with this release, nicely printed onto an antiqued cloth material. Sails are also included, and the builder will need to cut thee out and add boltropes etc. If you don’t want to make the sails but still want to fit them, then you can buy pre-made ones from the website, and even ones that have been totally finished/antiqued too.


-
kit review 1:48 San Bartolome by Pavel Nikitin
James H replied to James H's topic in REVIEWS: Model kits
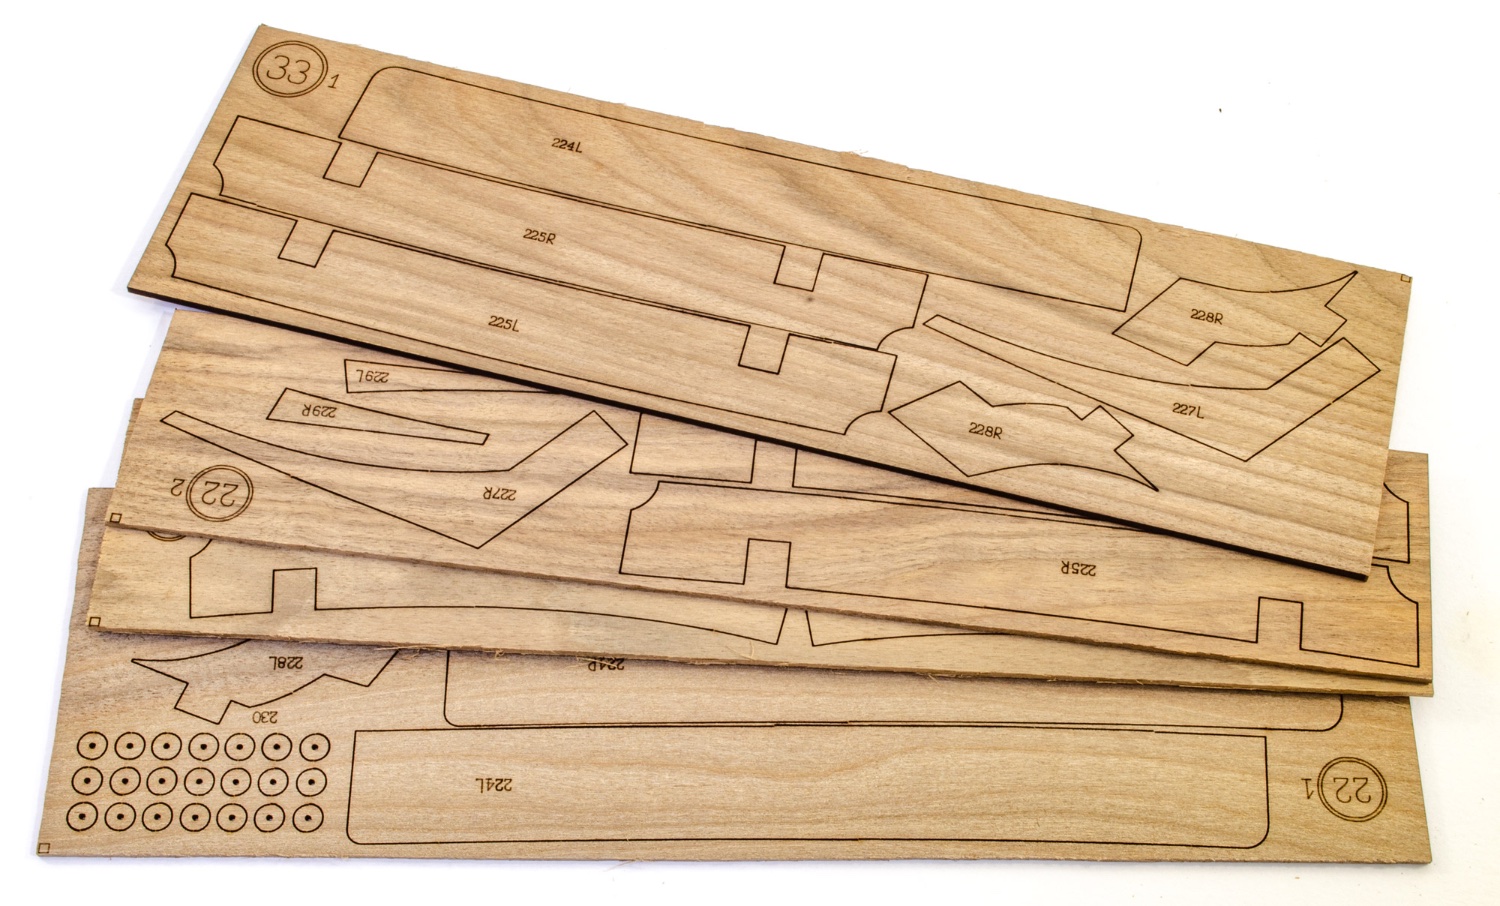
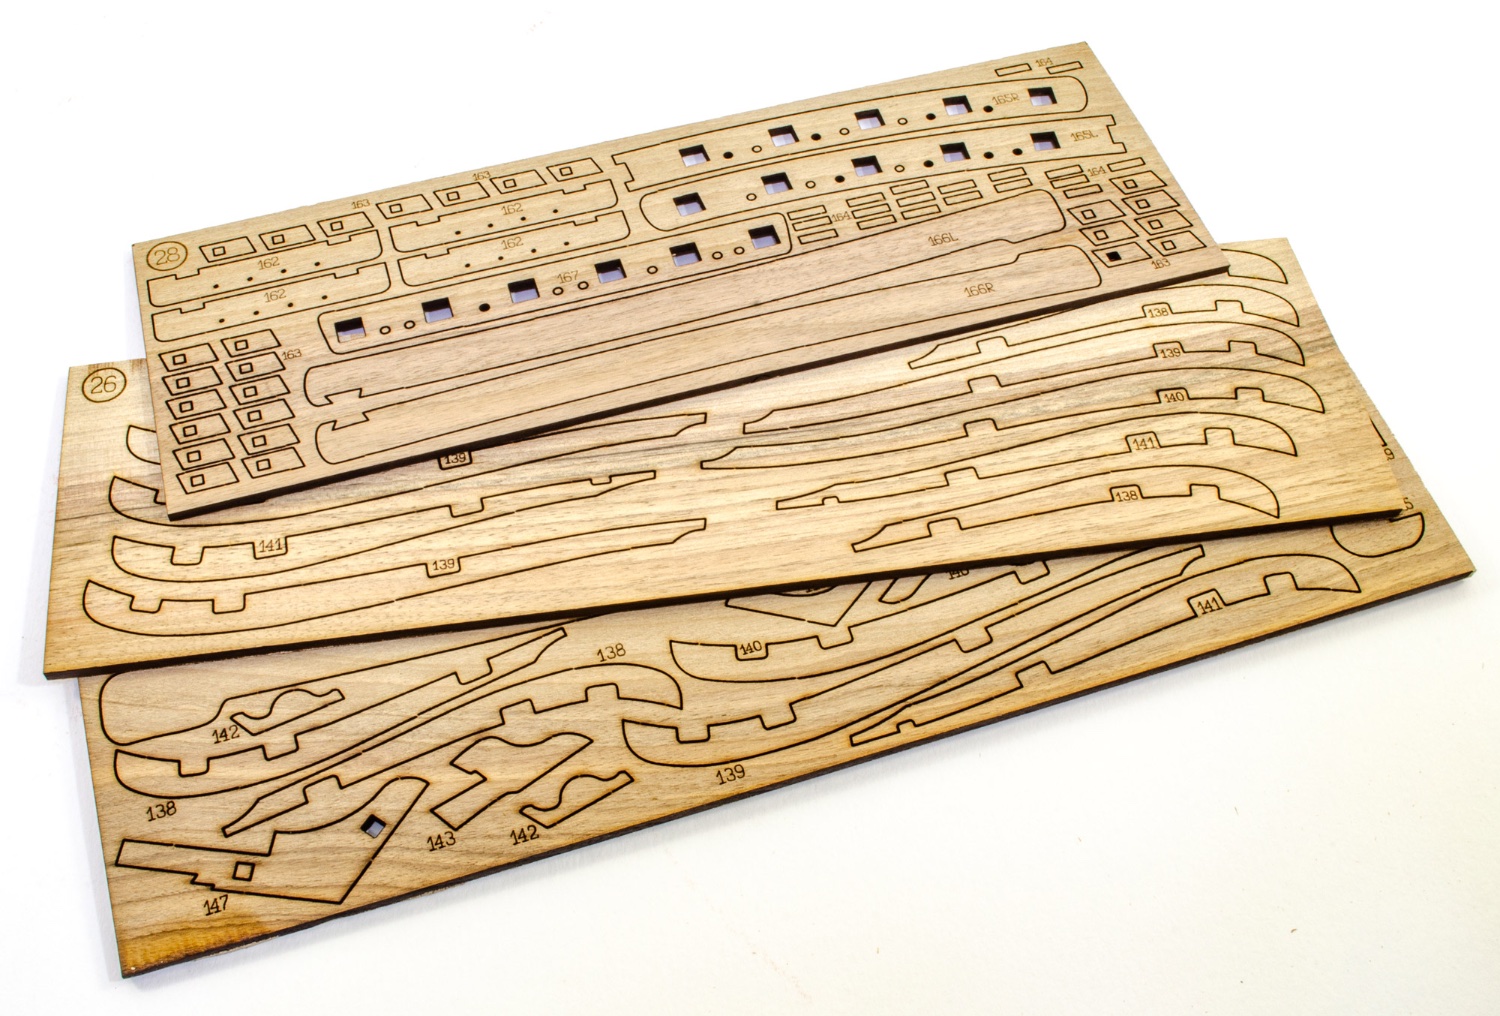
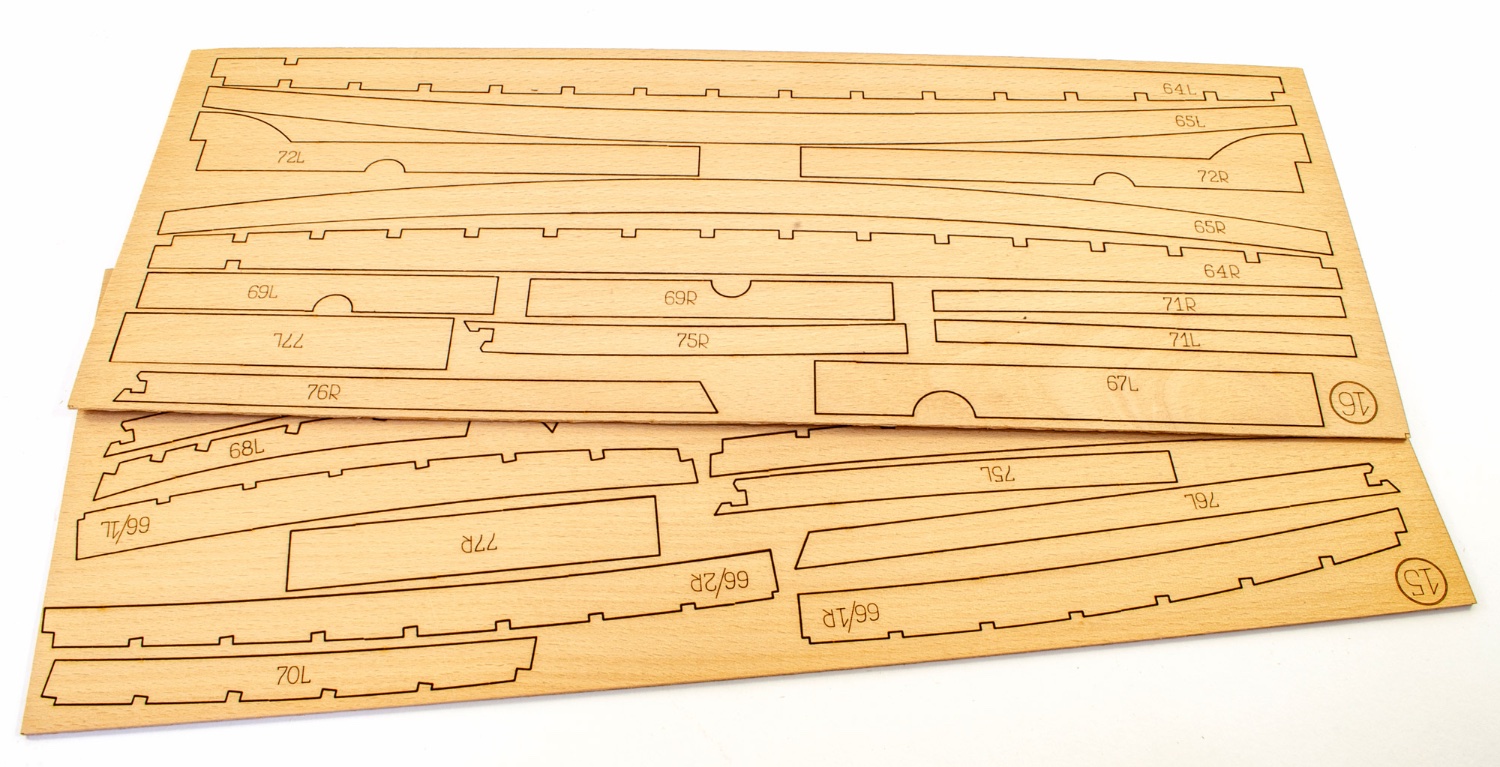
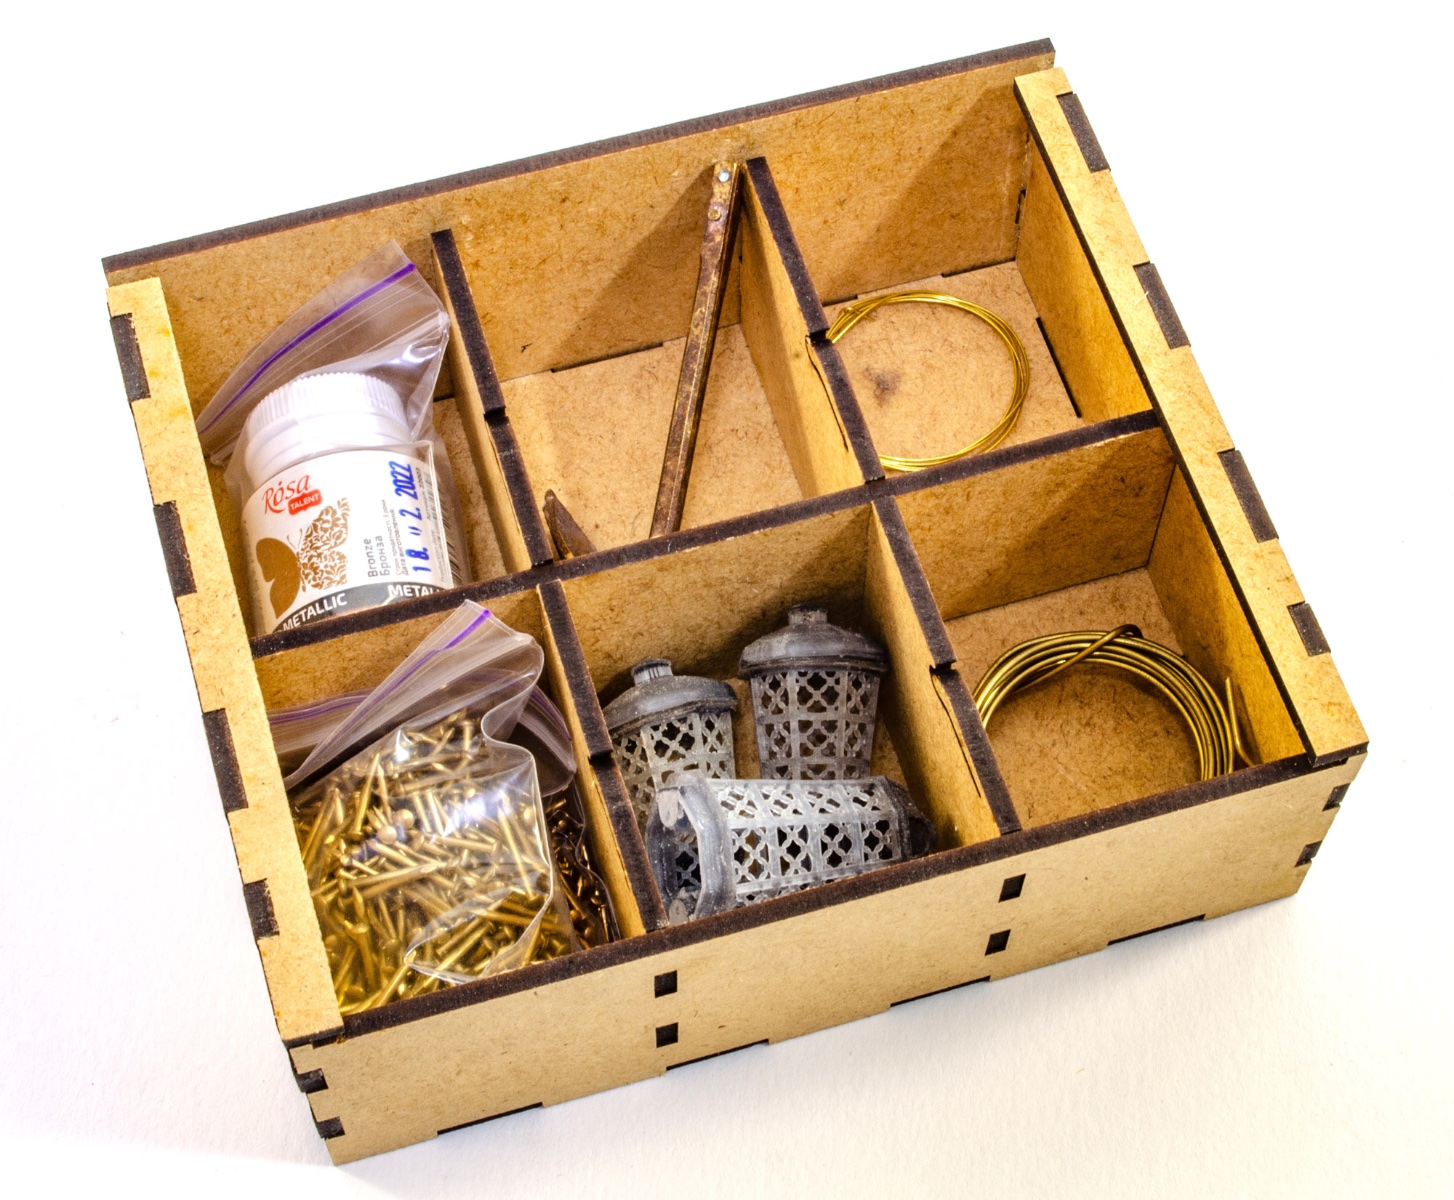
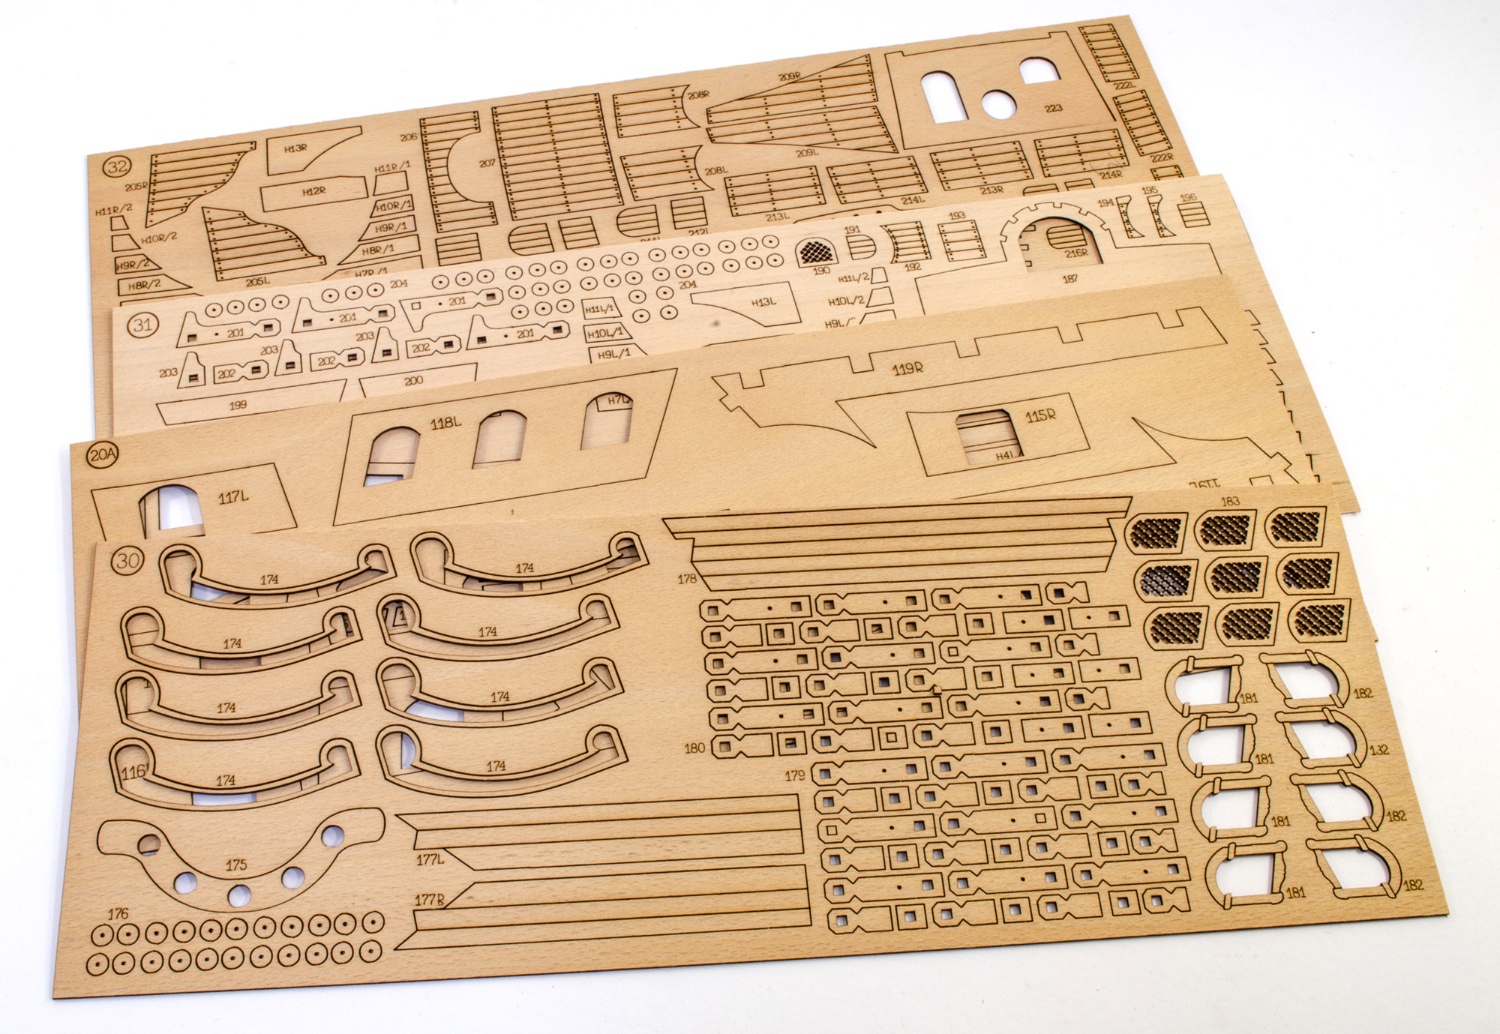
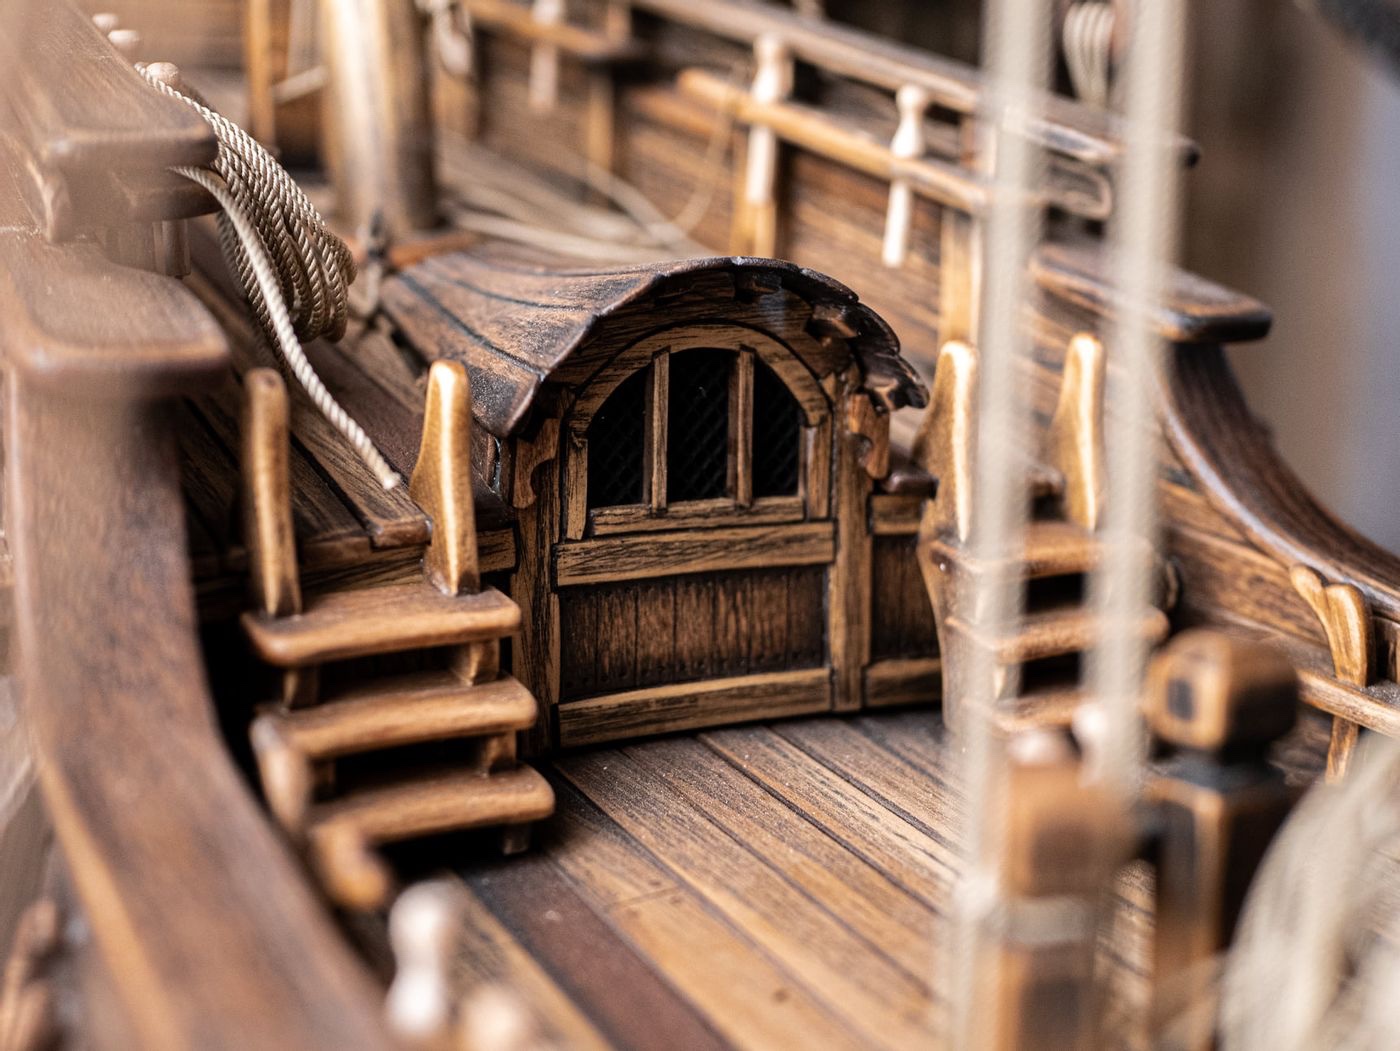
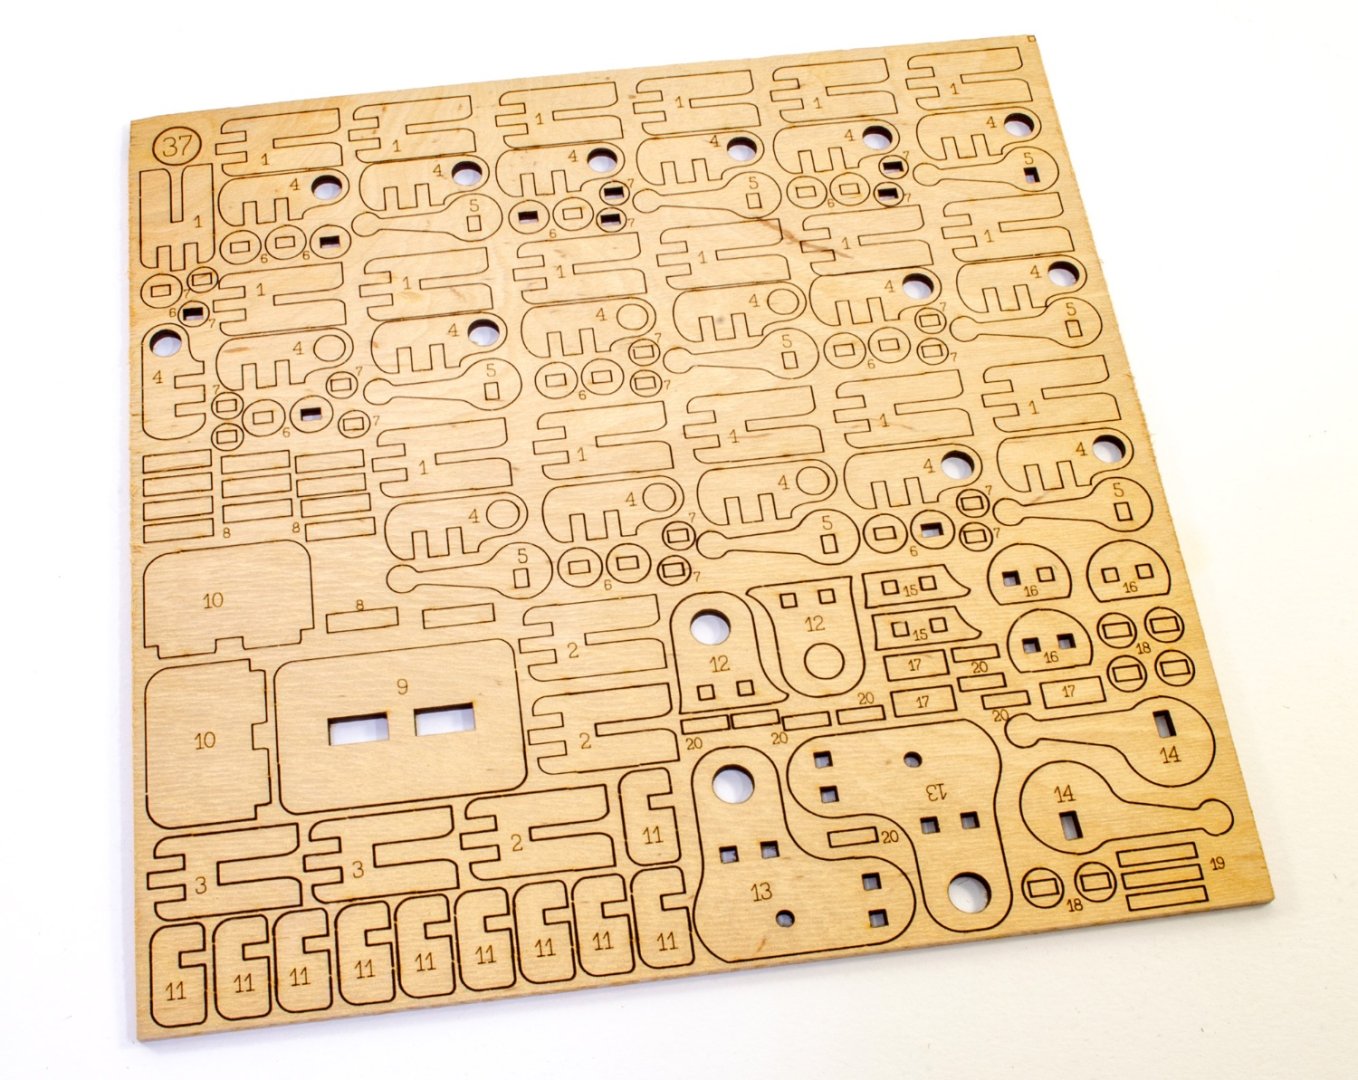
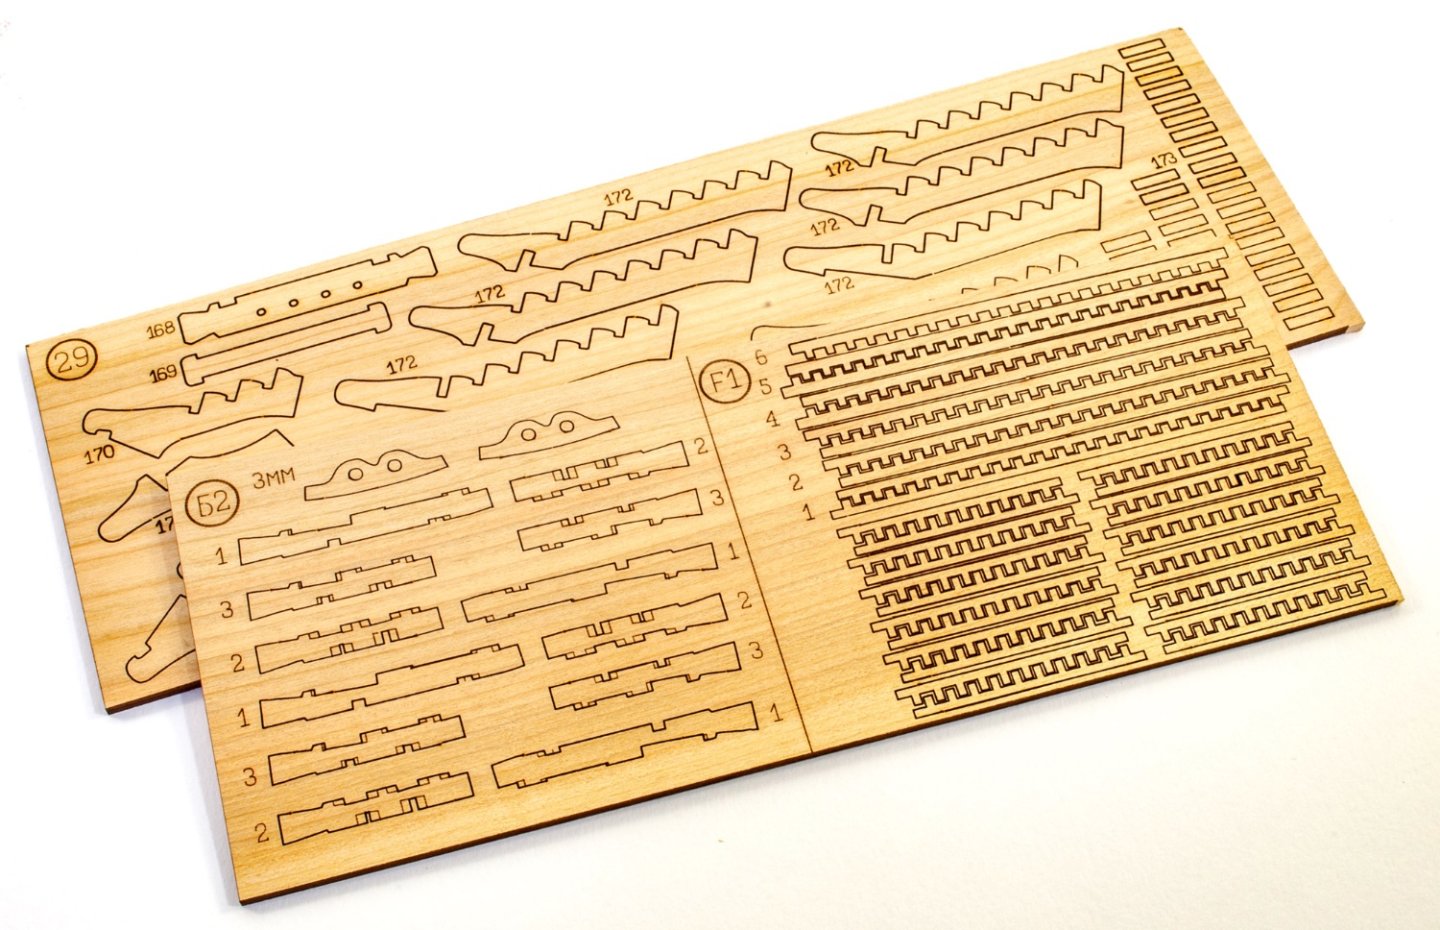
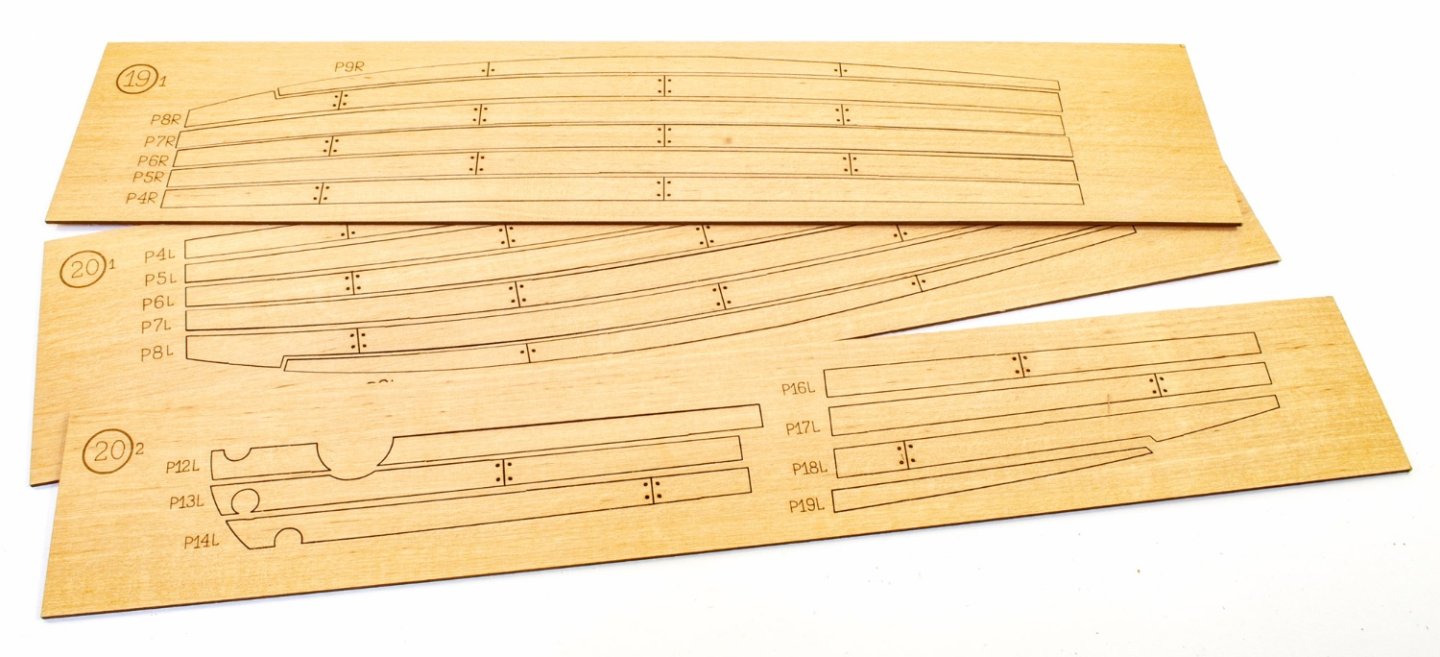
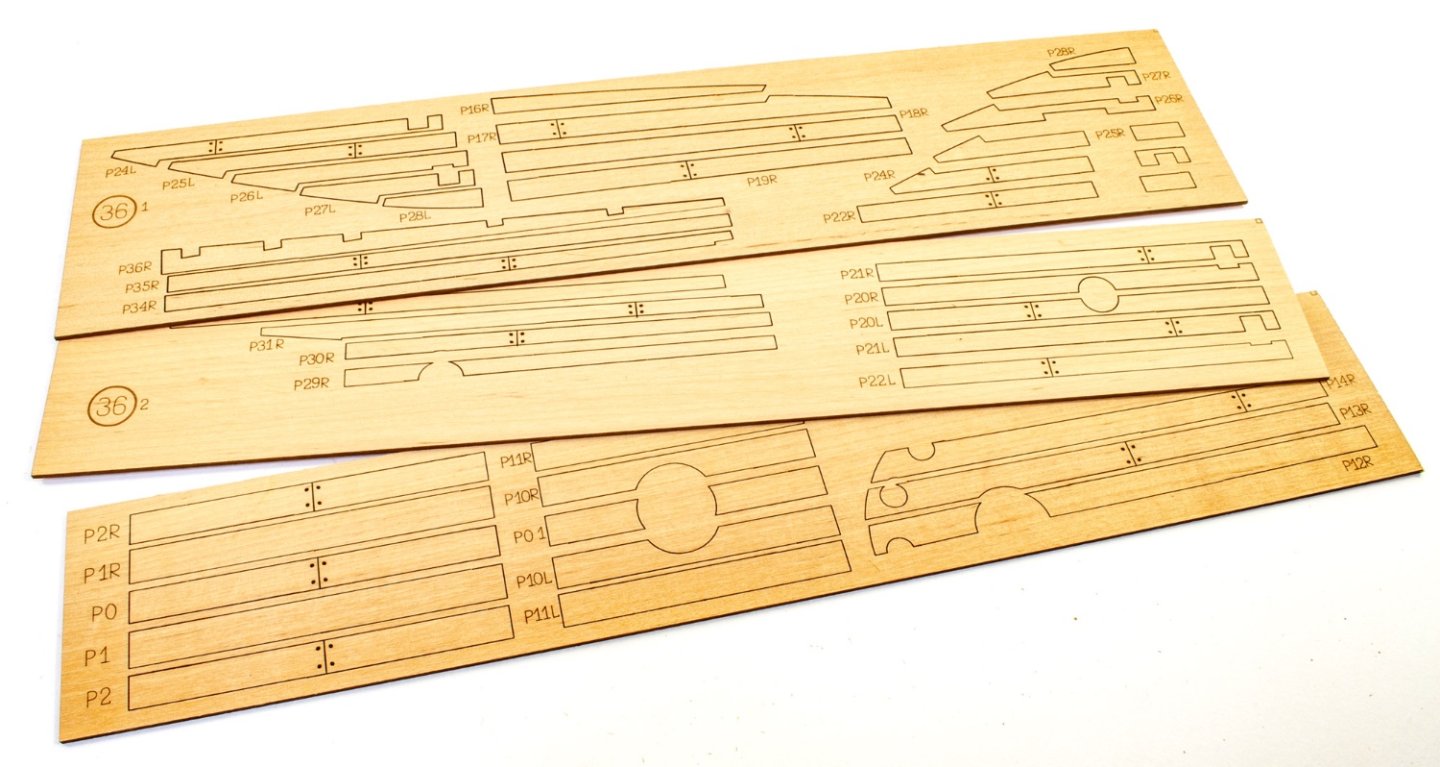
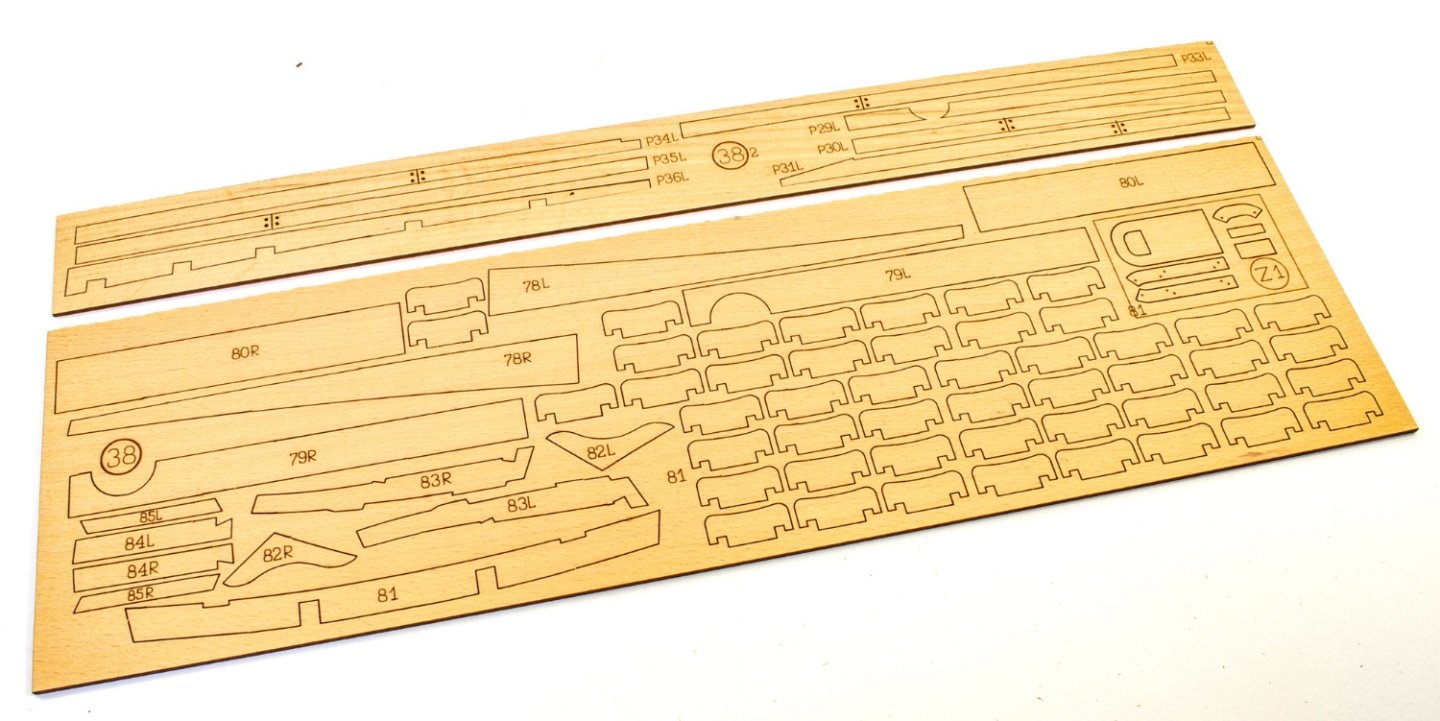
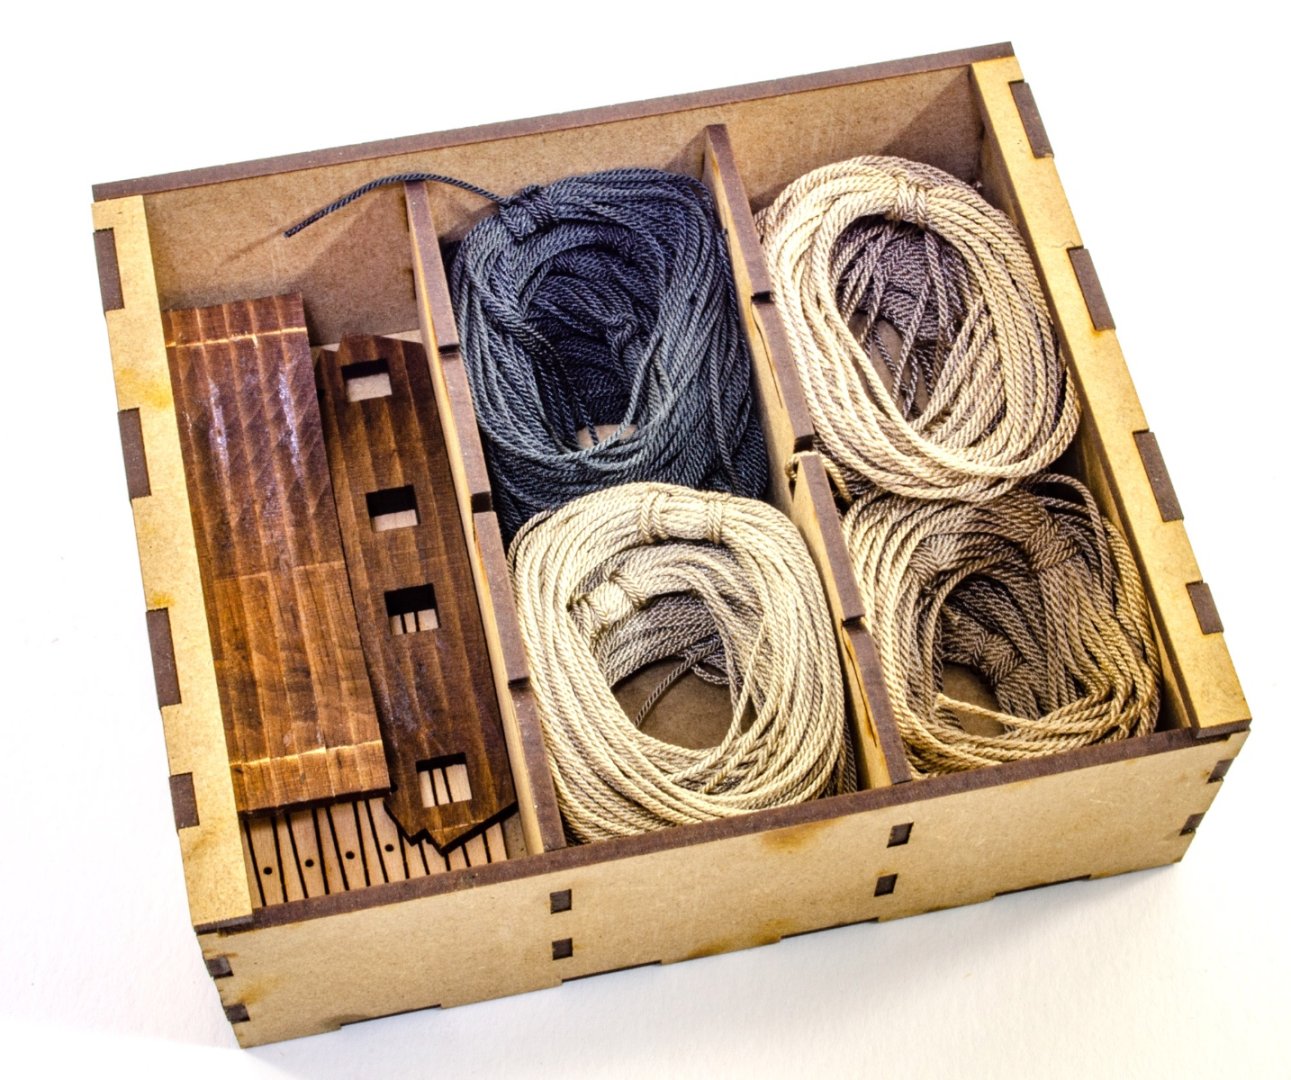
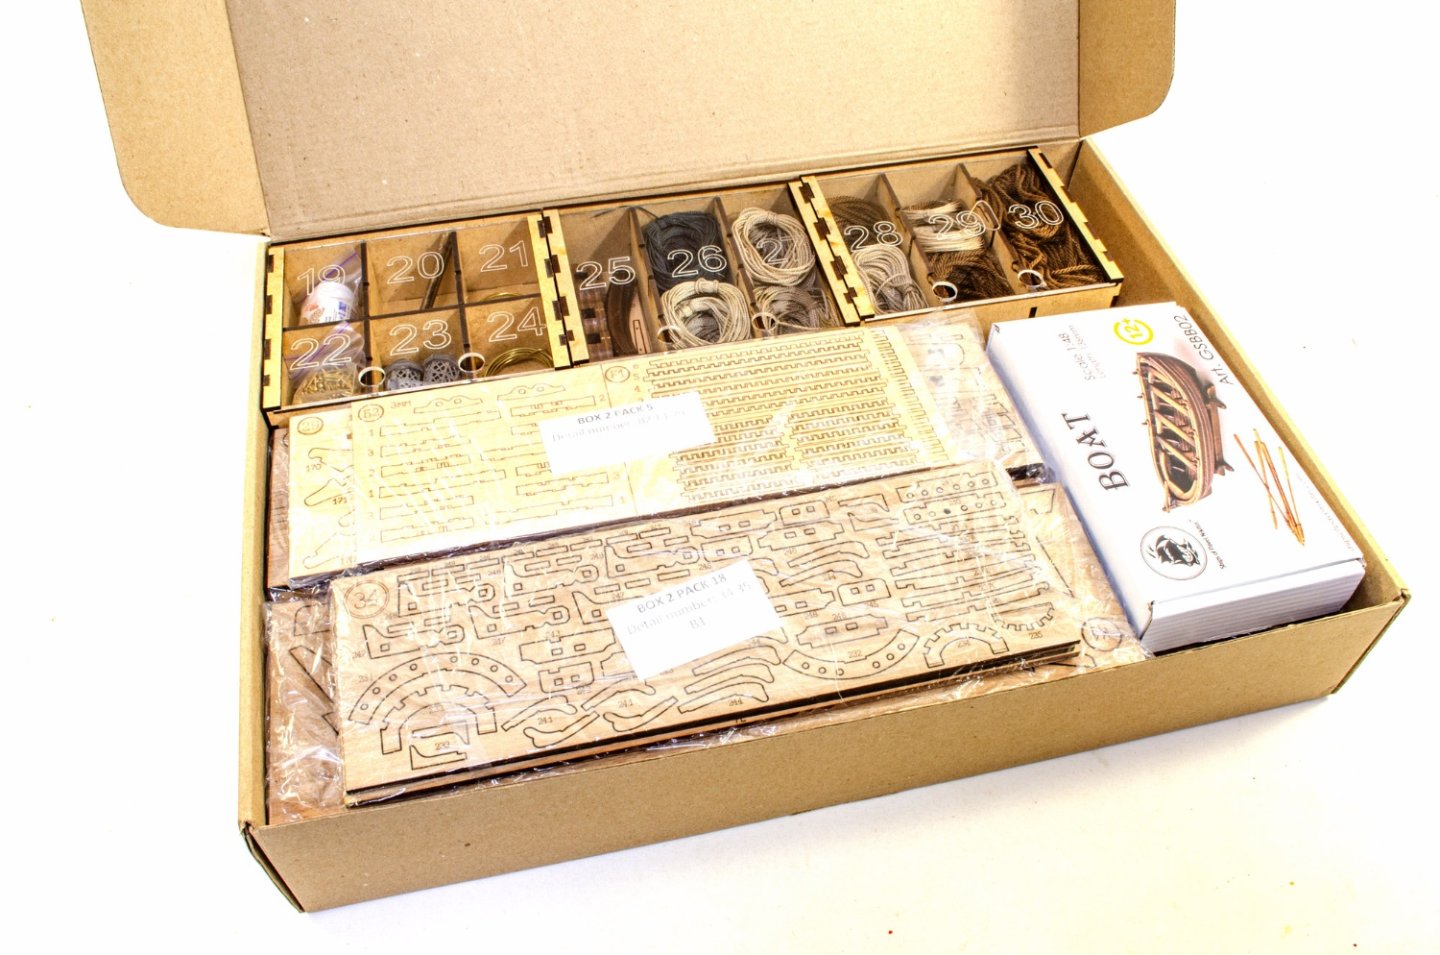
Box 2 The parts on these sheets tend be quite identifiable. Here you see the combs for the deck gratings, rigging bitts, stairway sides etc. At the current moment, these parts are generally unidentified, except for that I think may be spars that need to be rounded off. More bitts to be seen here and also. Not all gratings are self-assemble. Here you see ones for the bow area, complete with the frame into which they fit. Some of the thicker timber here, showing parts for the keel, rudder and prow etc. Yes, a kit within a kit! This little box contains the ship’s’ boat which is a project in itself and I believe is also now available separately on their website. The model looks quite simple to build, yet I a fully-formed (when built!) clinker hull vessel. Bevel lines are on the bulkheads and the gunwales are pre-cut too. All the planks on this model are also laser cut. Not too sure if I like the part numbers being on the actual parts. They’d look better adjacent to the part and won’t need to be hidden when being built. Here you see the display stand (for if you want to display the boat separately), deck boarding, oars, keel etc. An MDF jig is supplied for building this lovely little boat. The instructions are simple enough, and I think more than adequate for this little model. We are now back onto the main ship parts. As yet unidentified. The main deck areas on San Bartolome are supplied as individual laser-cut planks. The order and position of these must be precise to coincide with various hull structures. If you use the optional paint set, it’s important to figure in the painting and antique weathering as you proceed with your build. From here, we’ll take a more of the timber sheets in this kit release. This is a good photo of the keel sections in this kit. You can clearly see the section of the laminated keel, and that the laminated parts are staggered, to create strength in the hull. Each slot is also numbered for the correct bulkhead. There are another three boxes of fittings in this carton, again with a number-engraved acrylic lid to hold everything in. These boxes contain gold paint for ornamentation, 3D printed lanterns, nails for the finished hull plank, brass wire, and very nice quality rigging rope. A very unusual feature of this kit are some laser-cut and pre-assembled hull sections that just need sanding to shape. I really do like this sort of feature. ...continued.


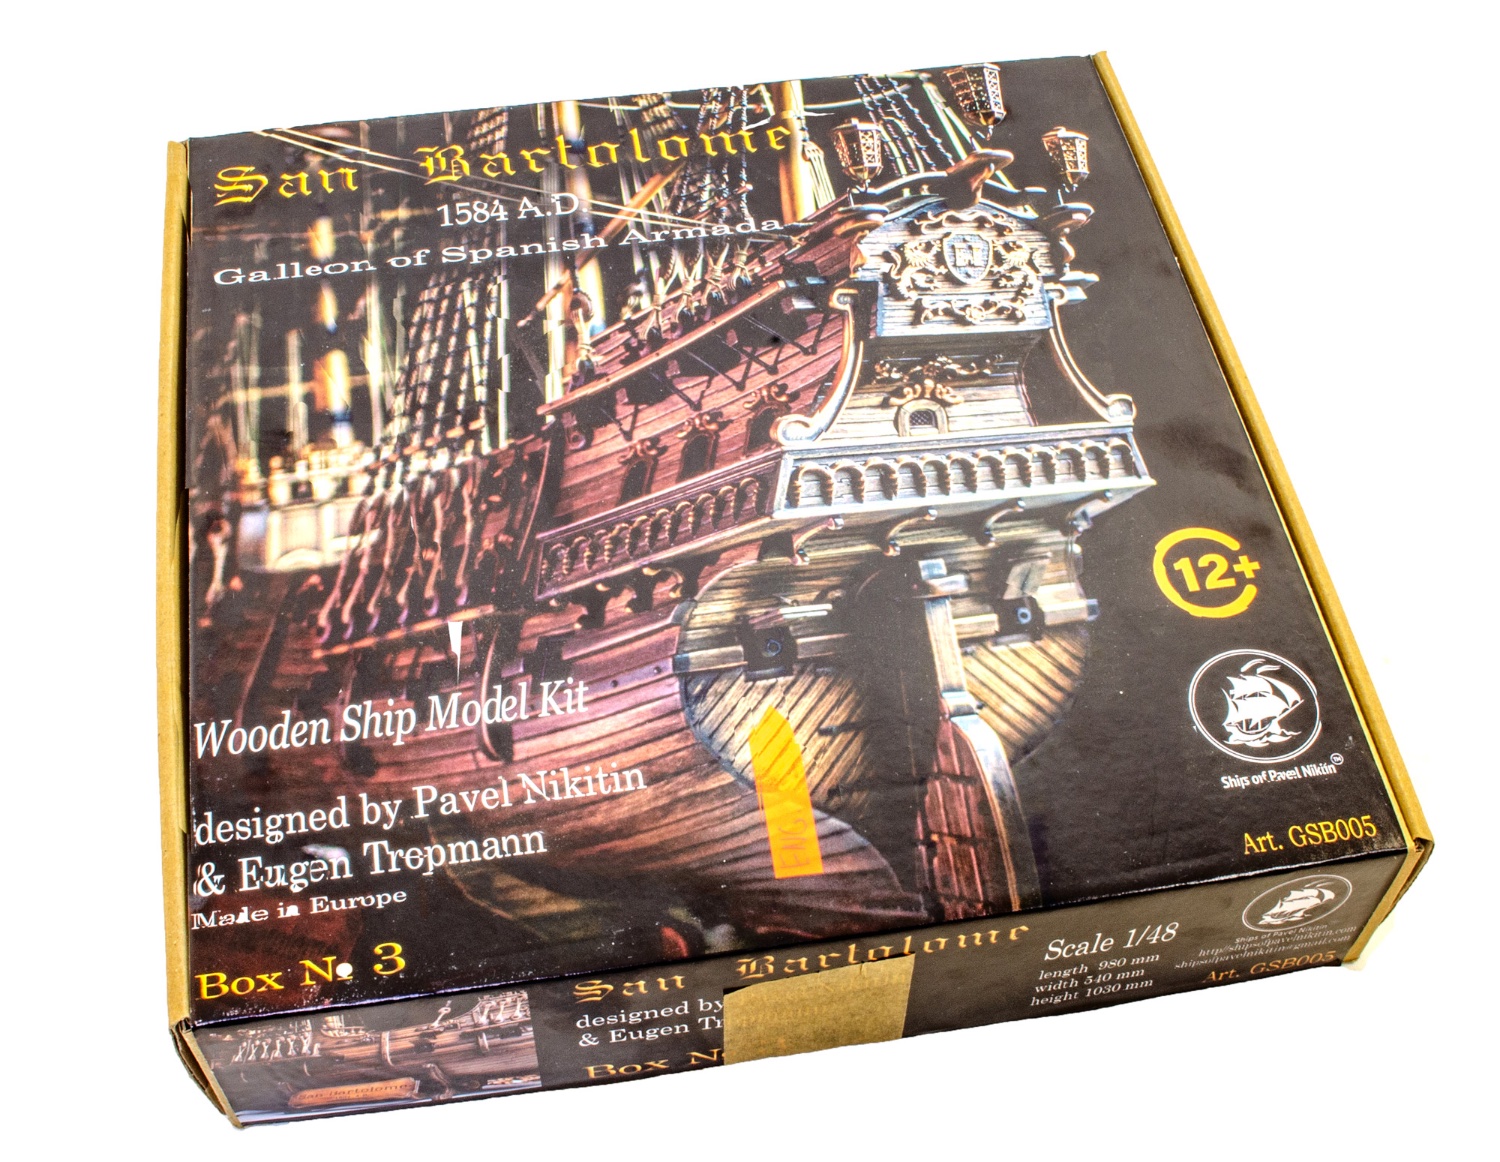
-
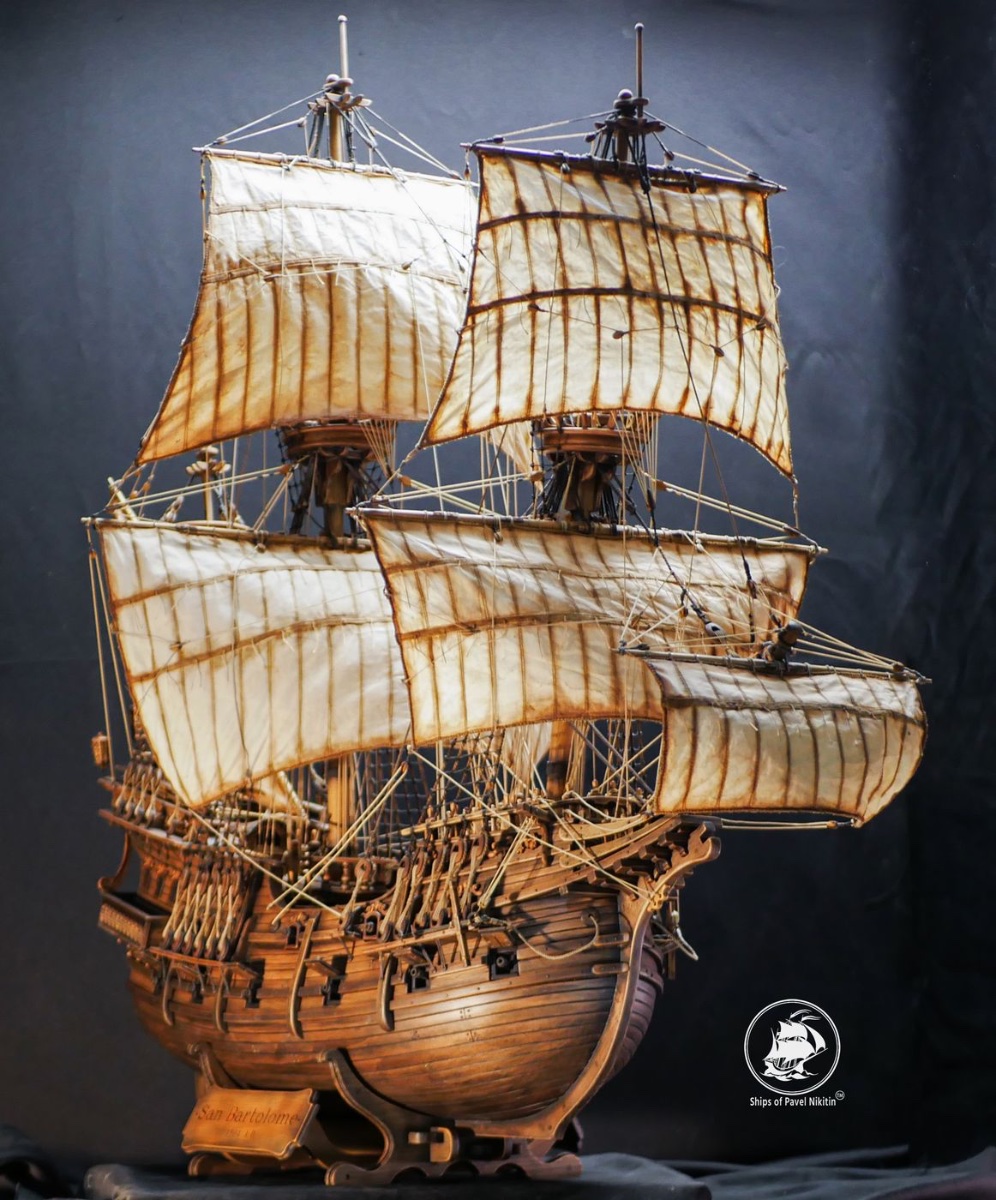
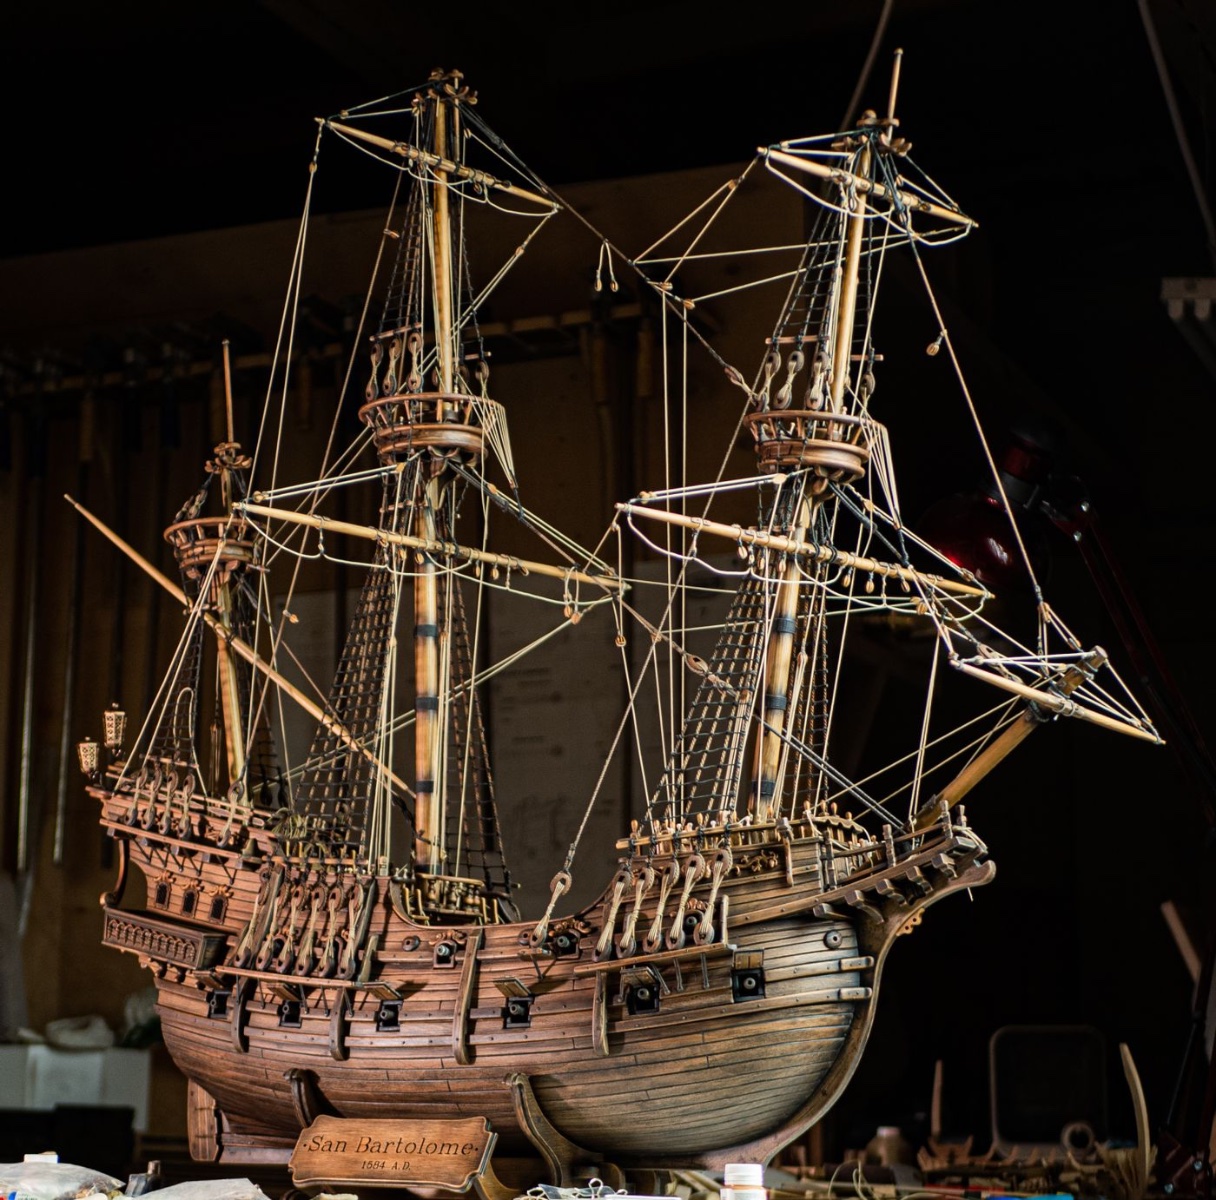
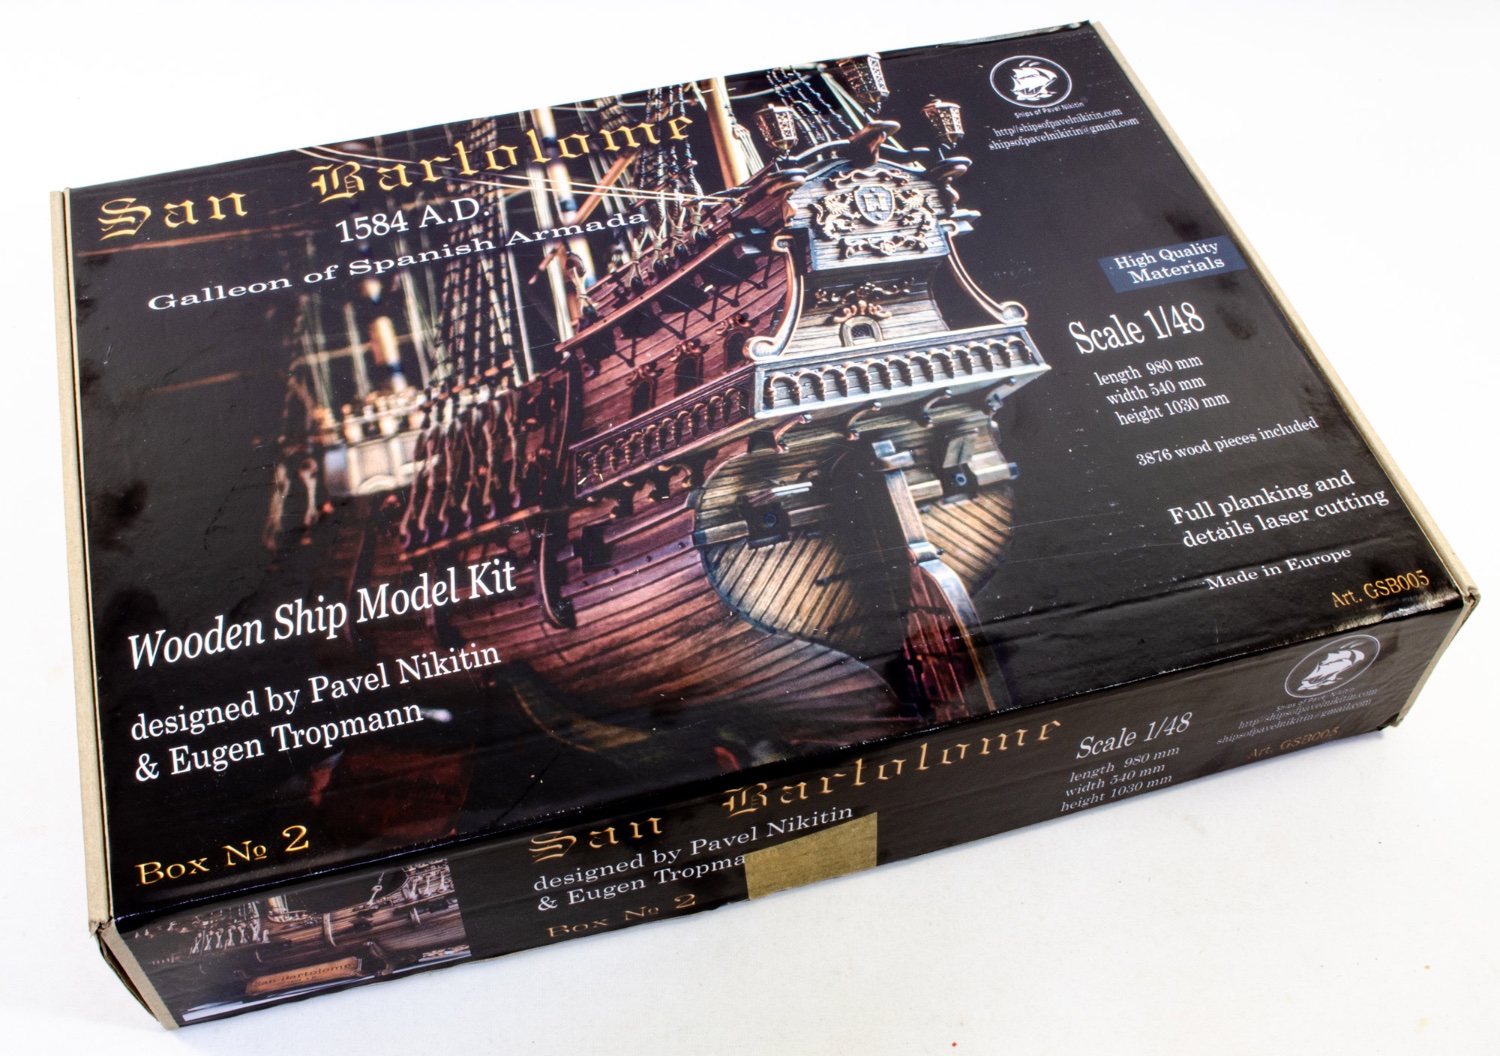
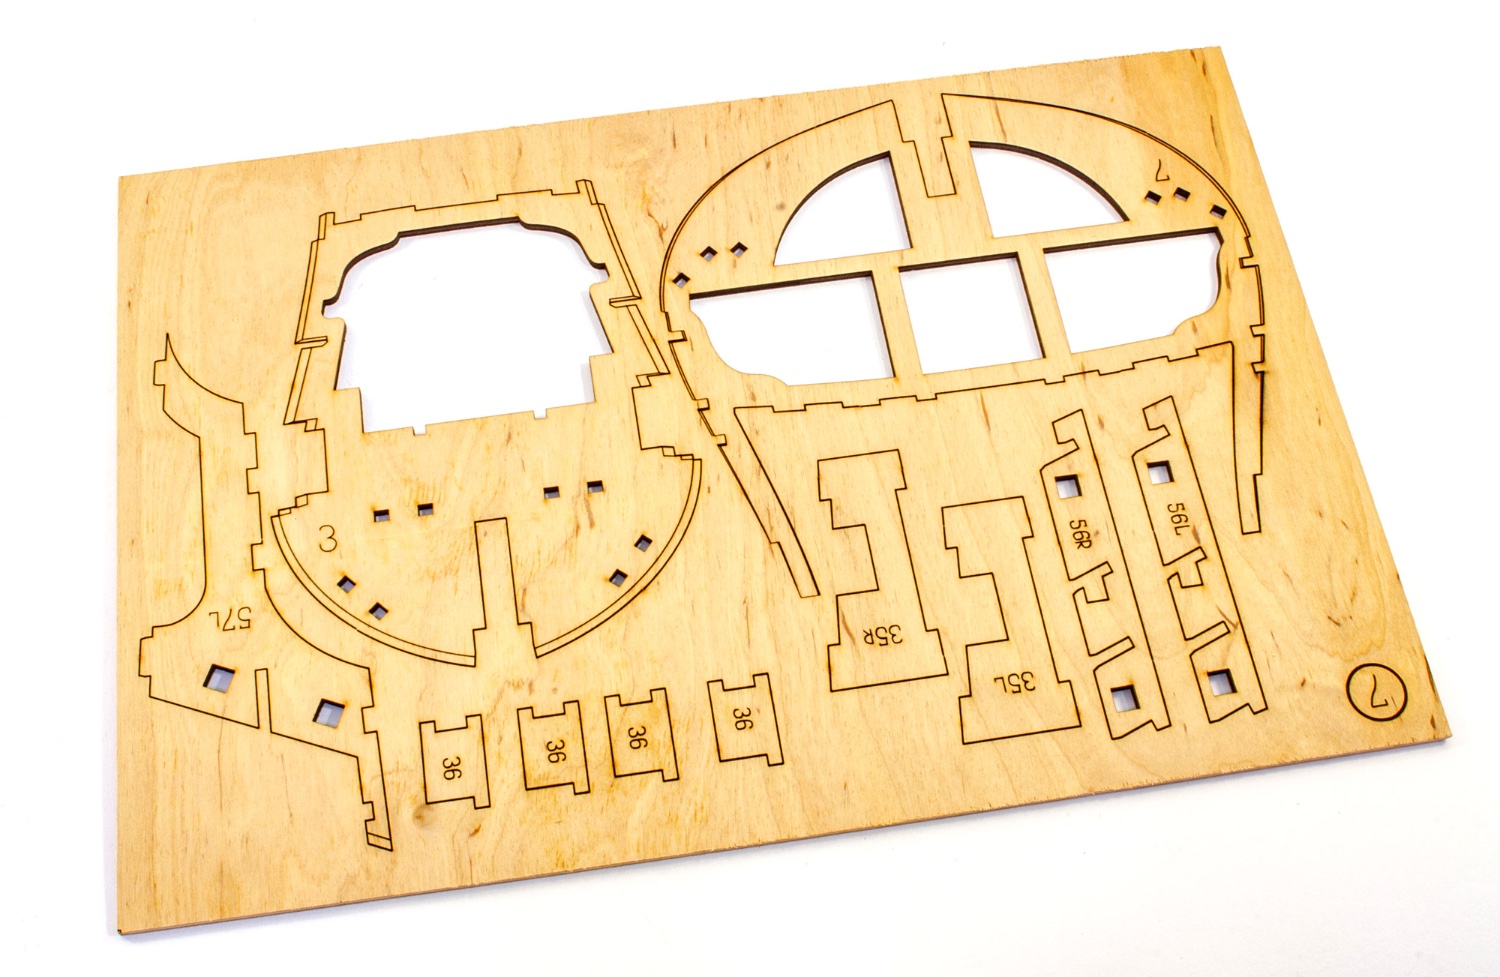
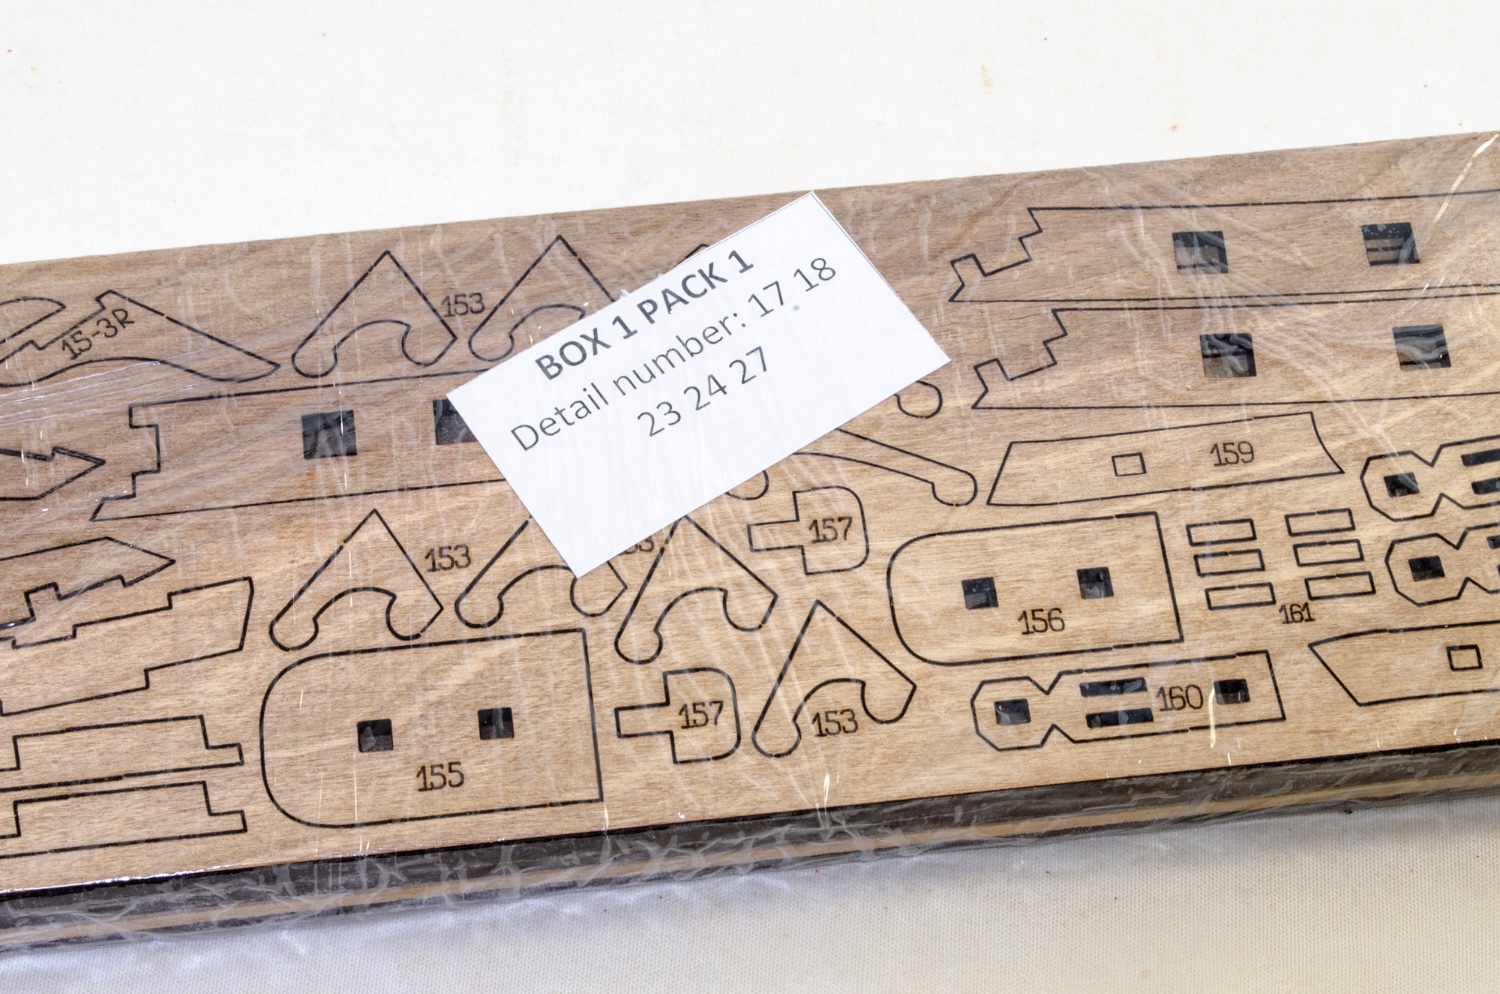
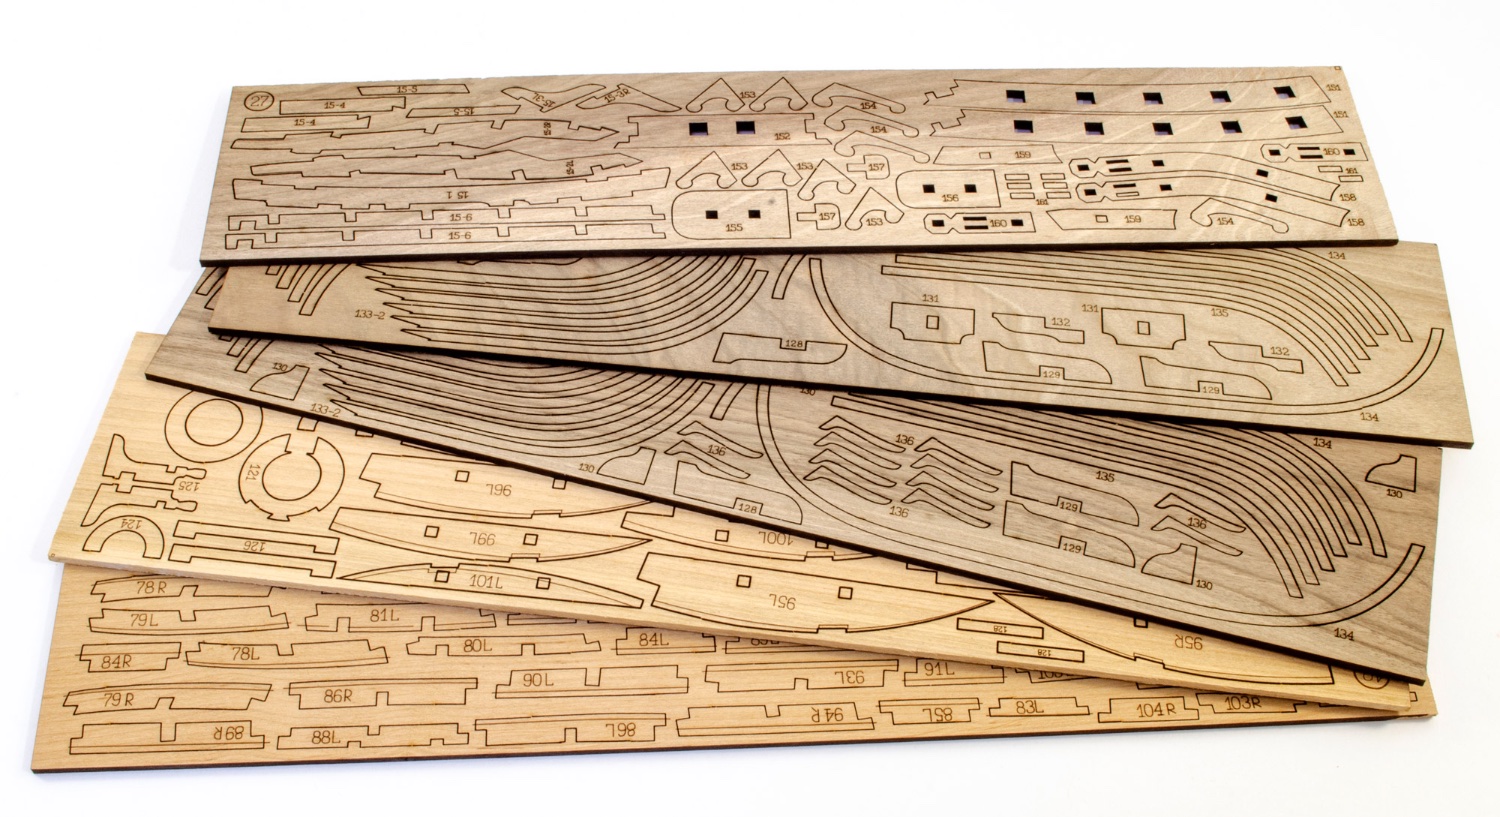
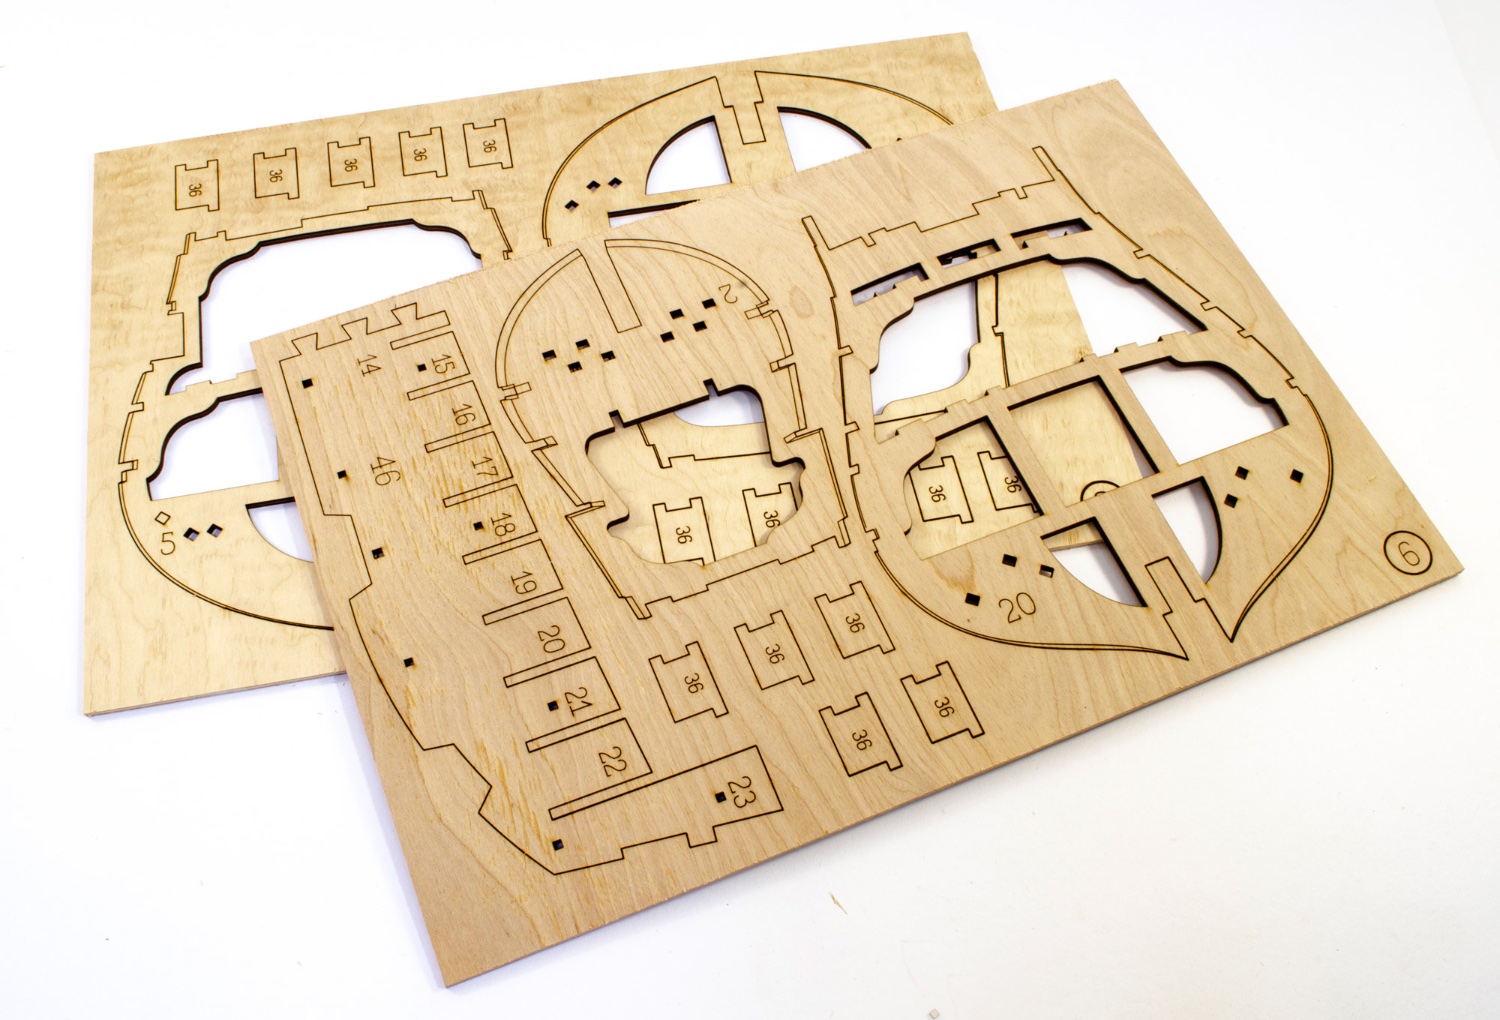
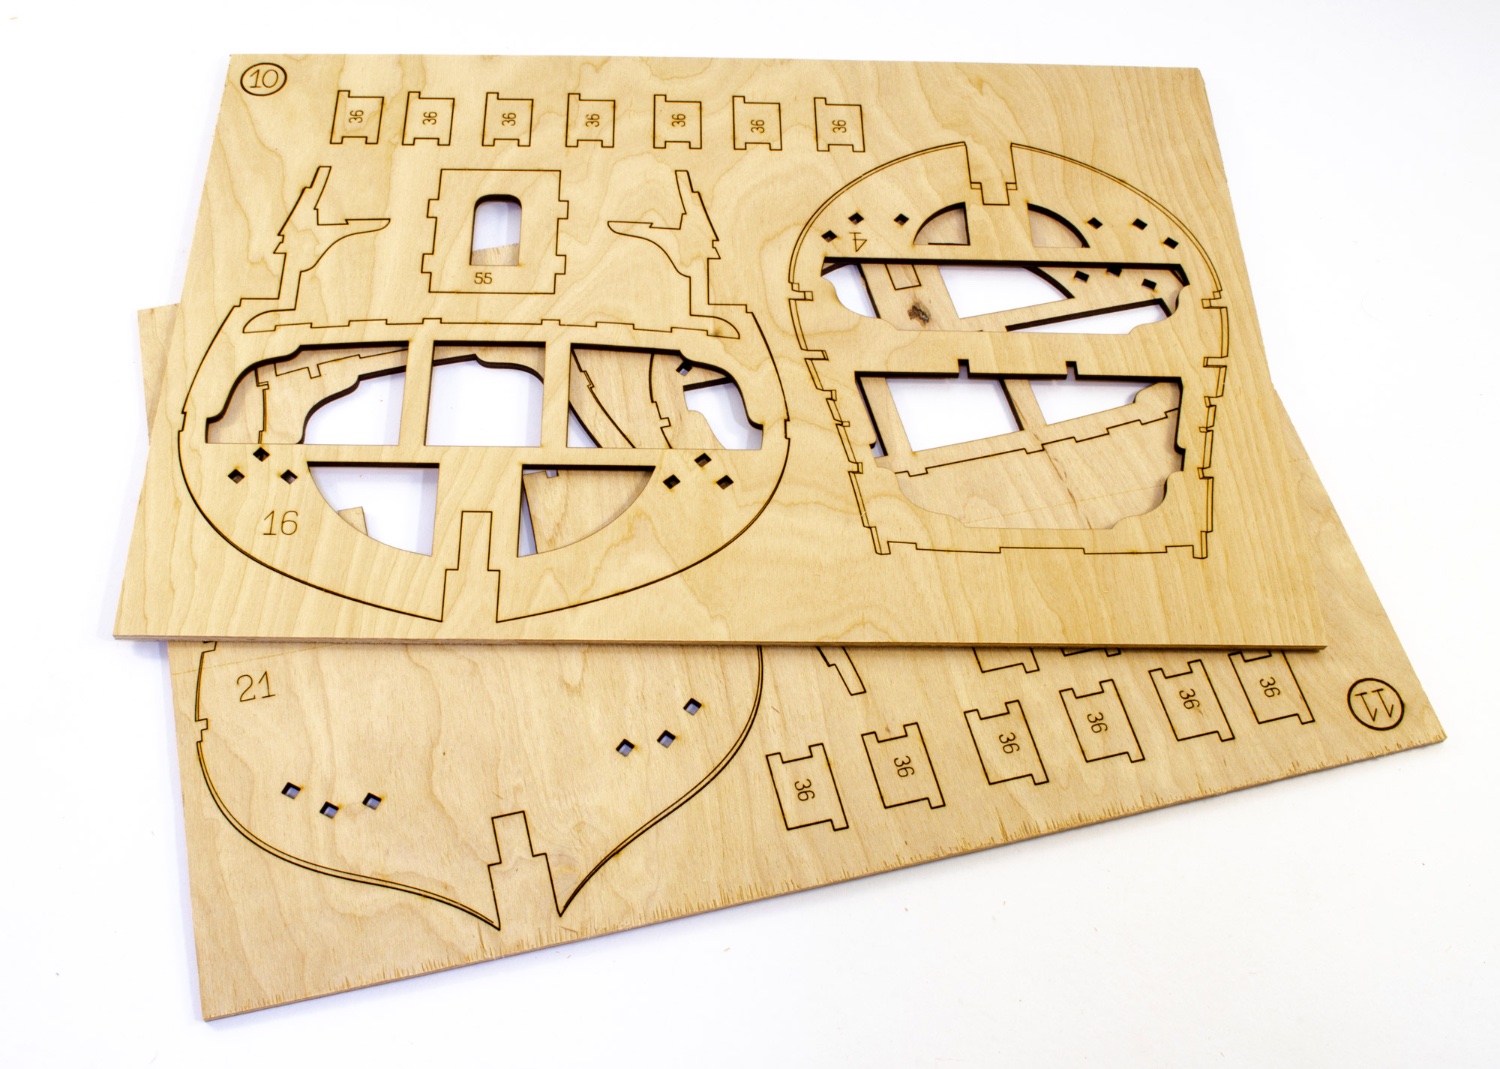
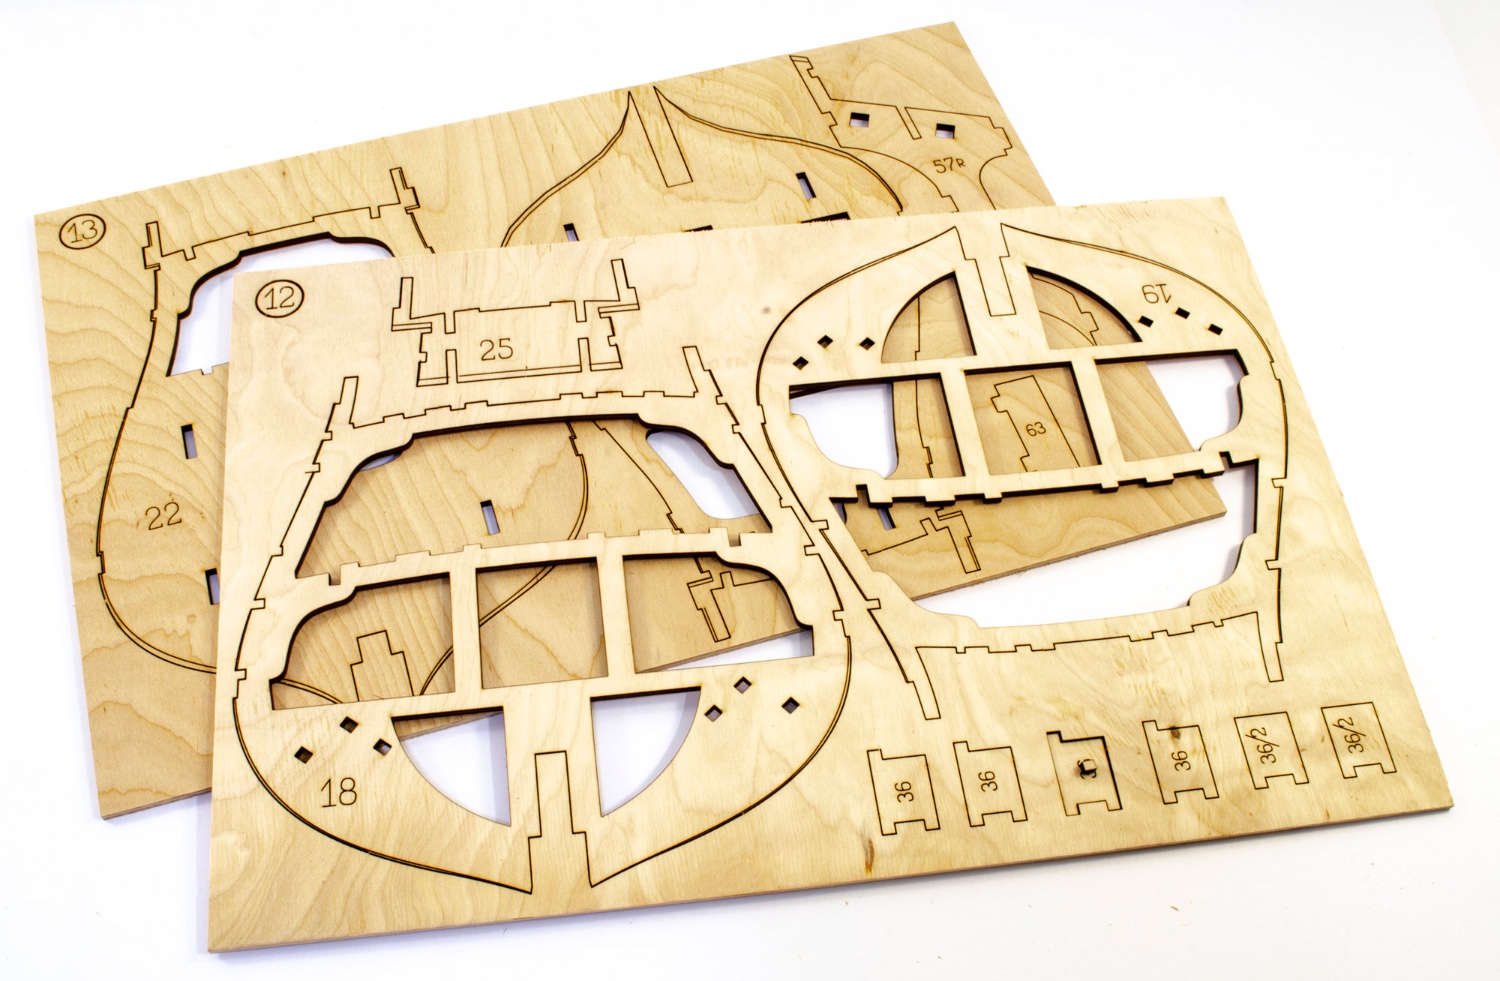
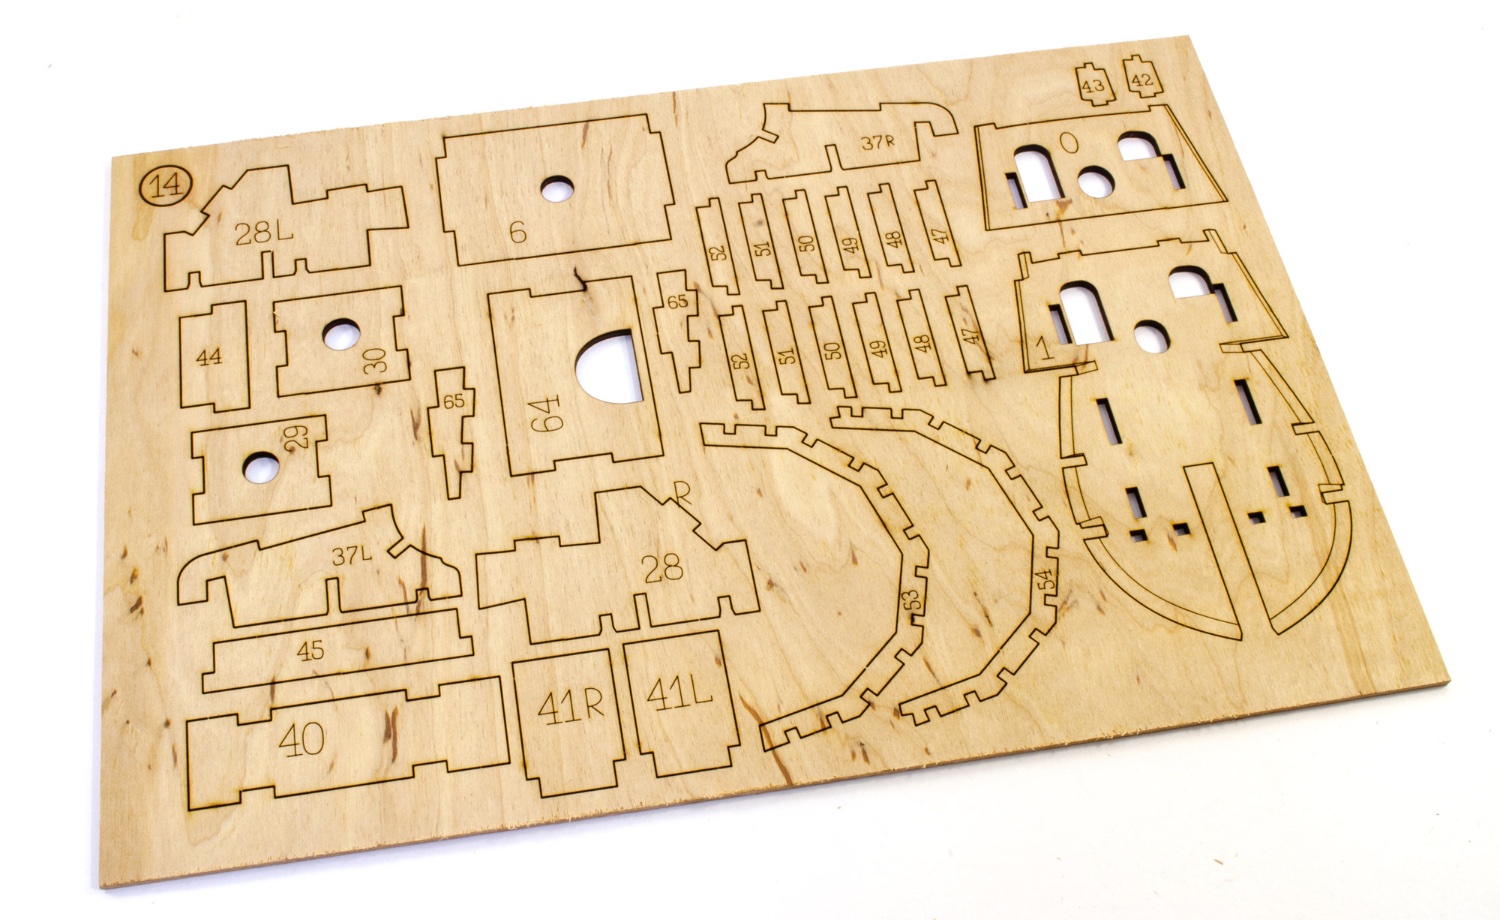
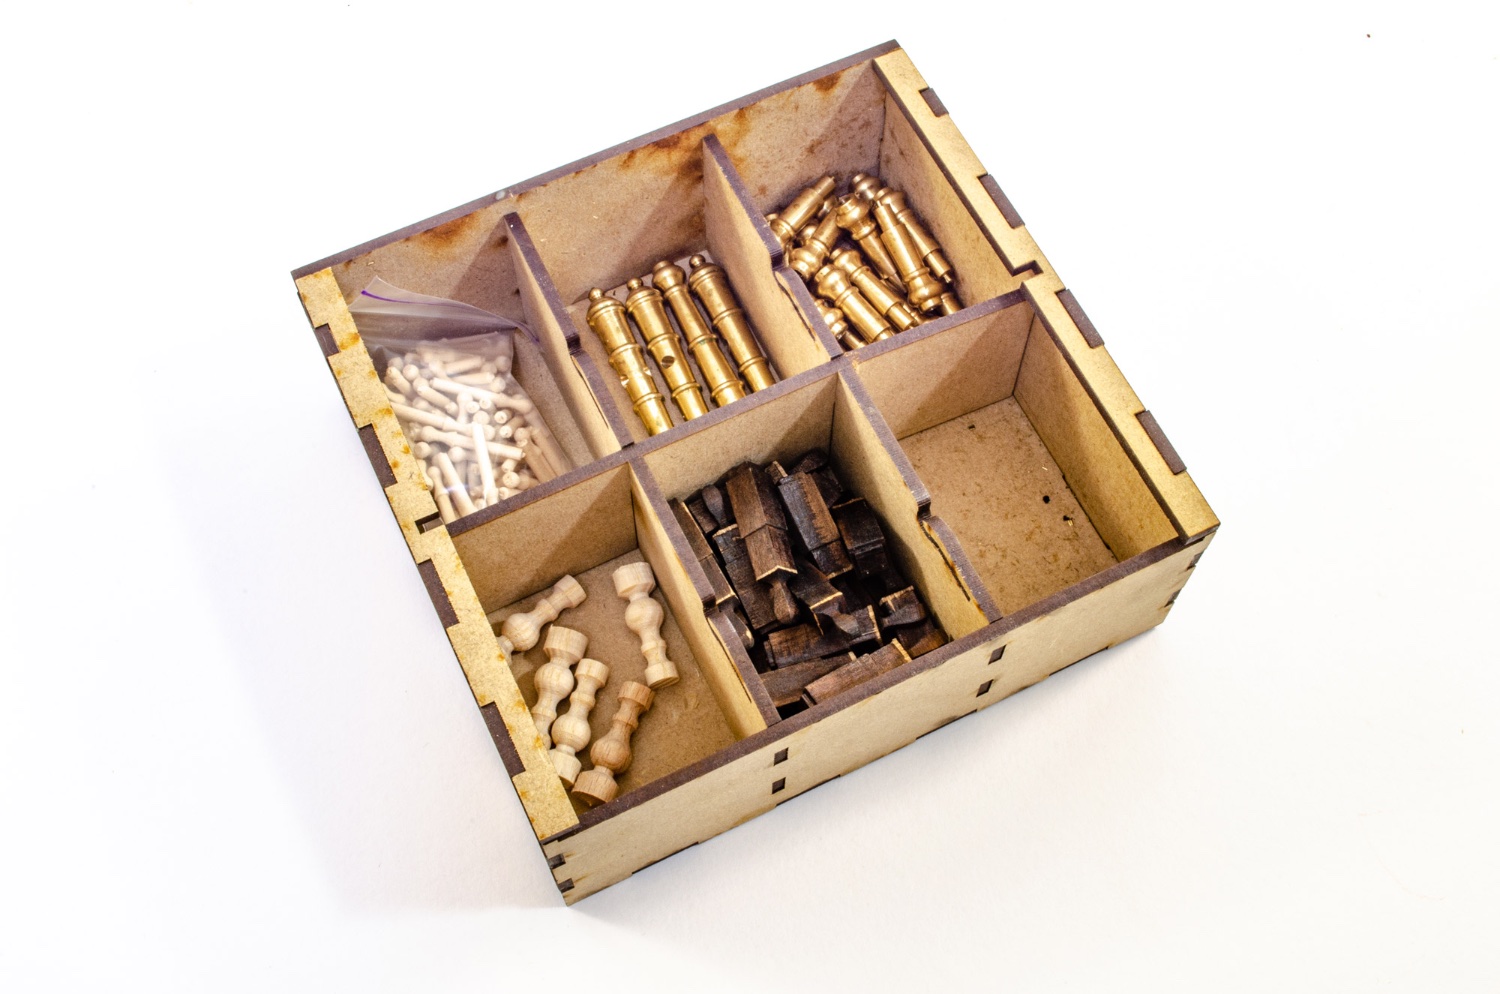
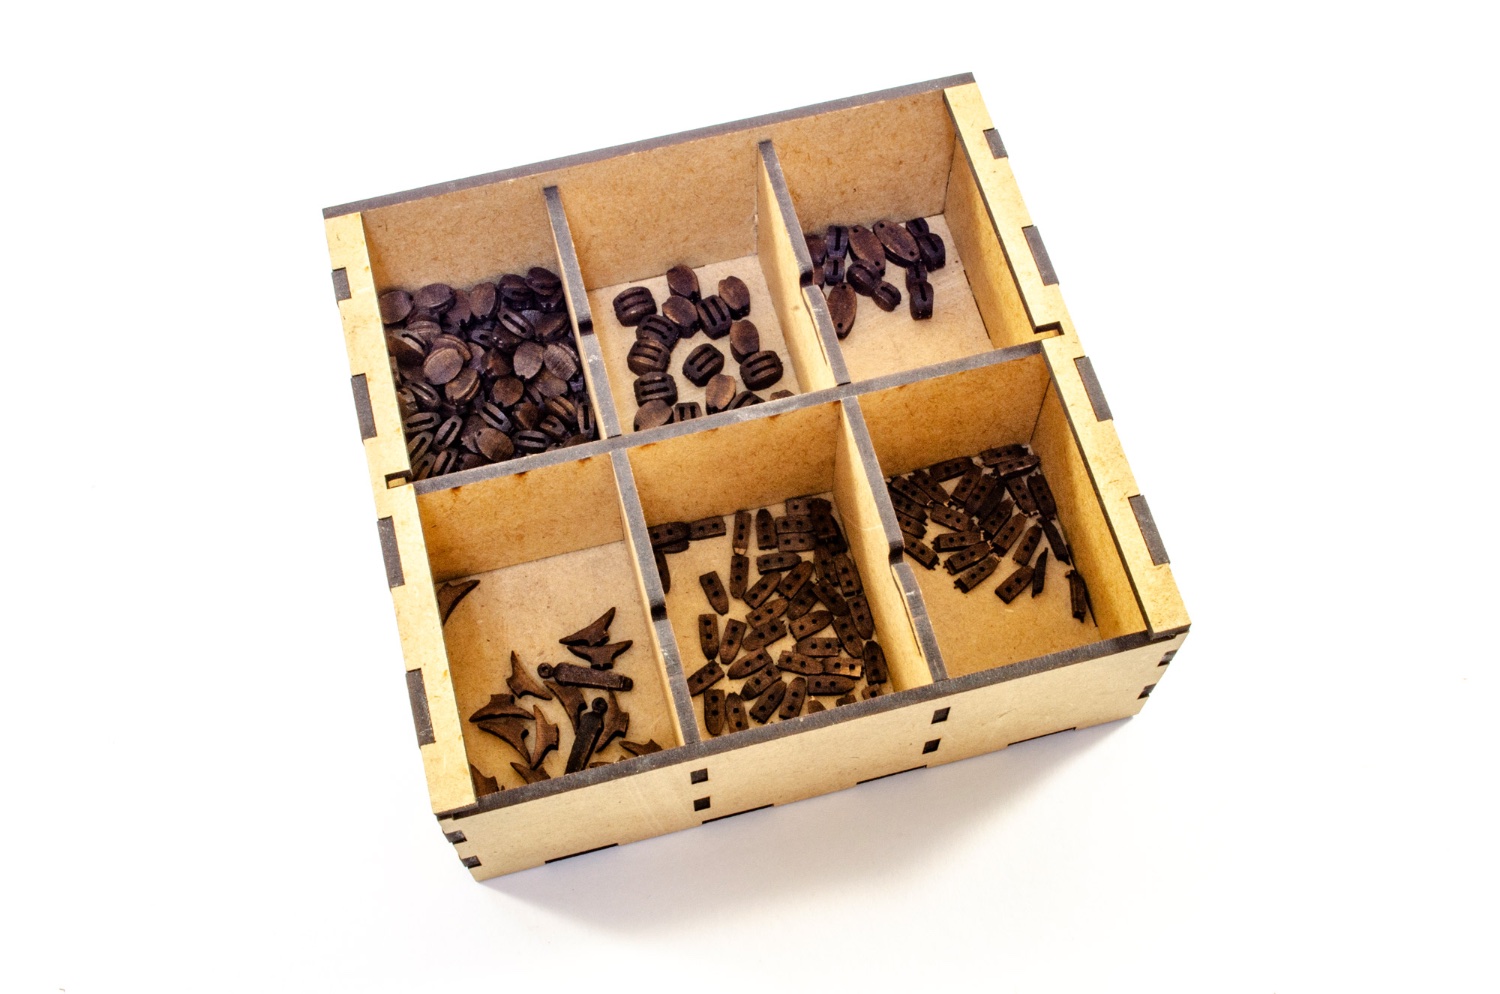
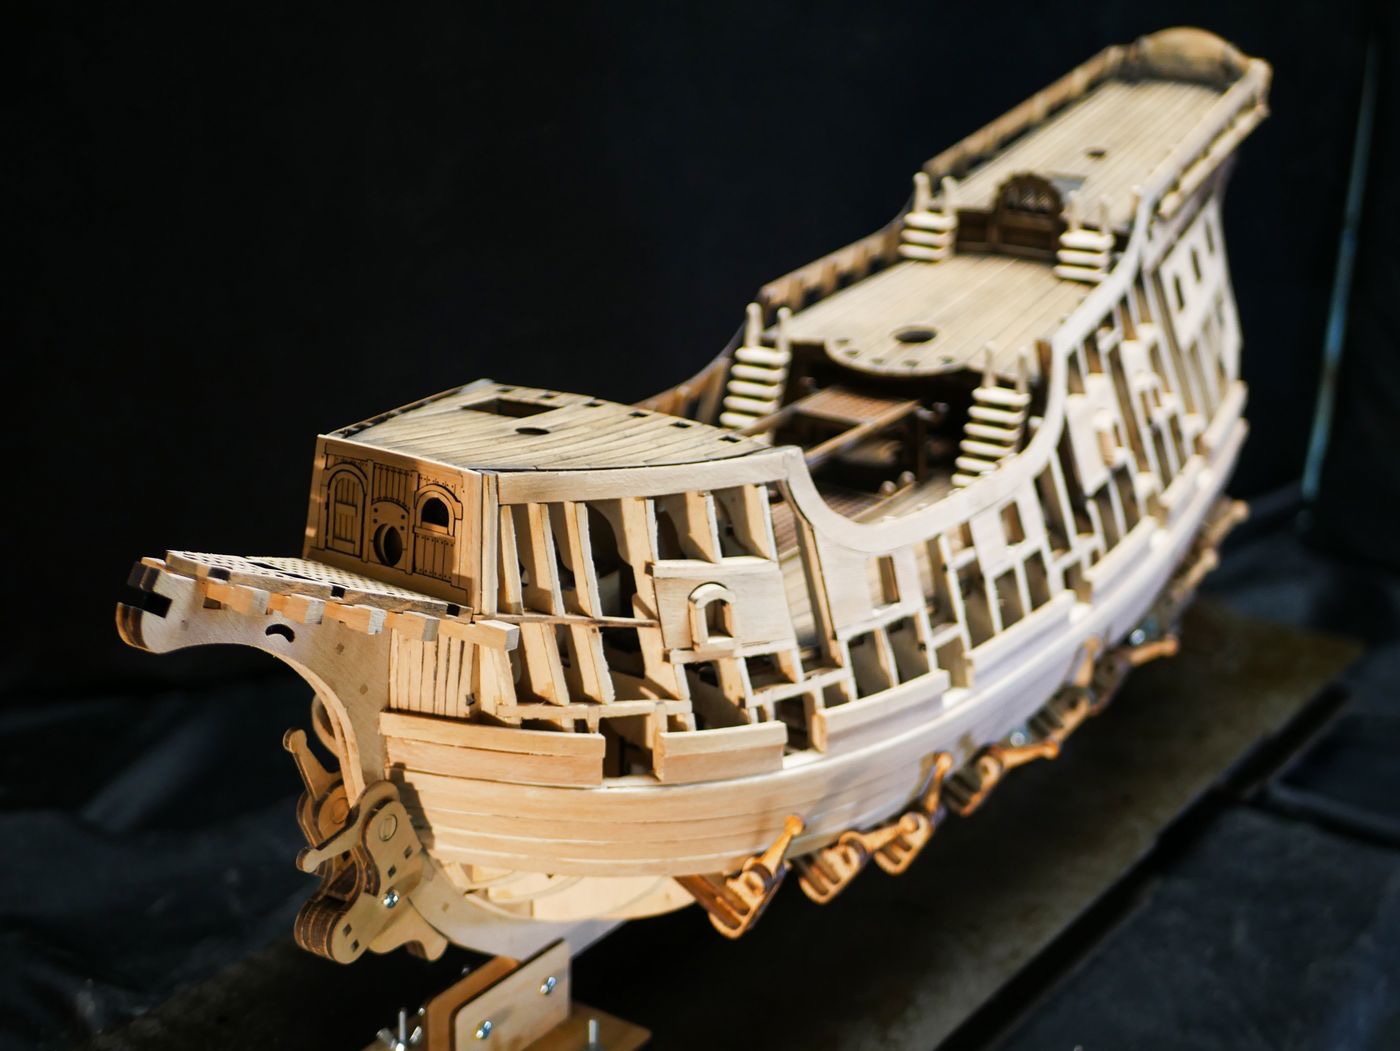
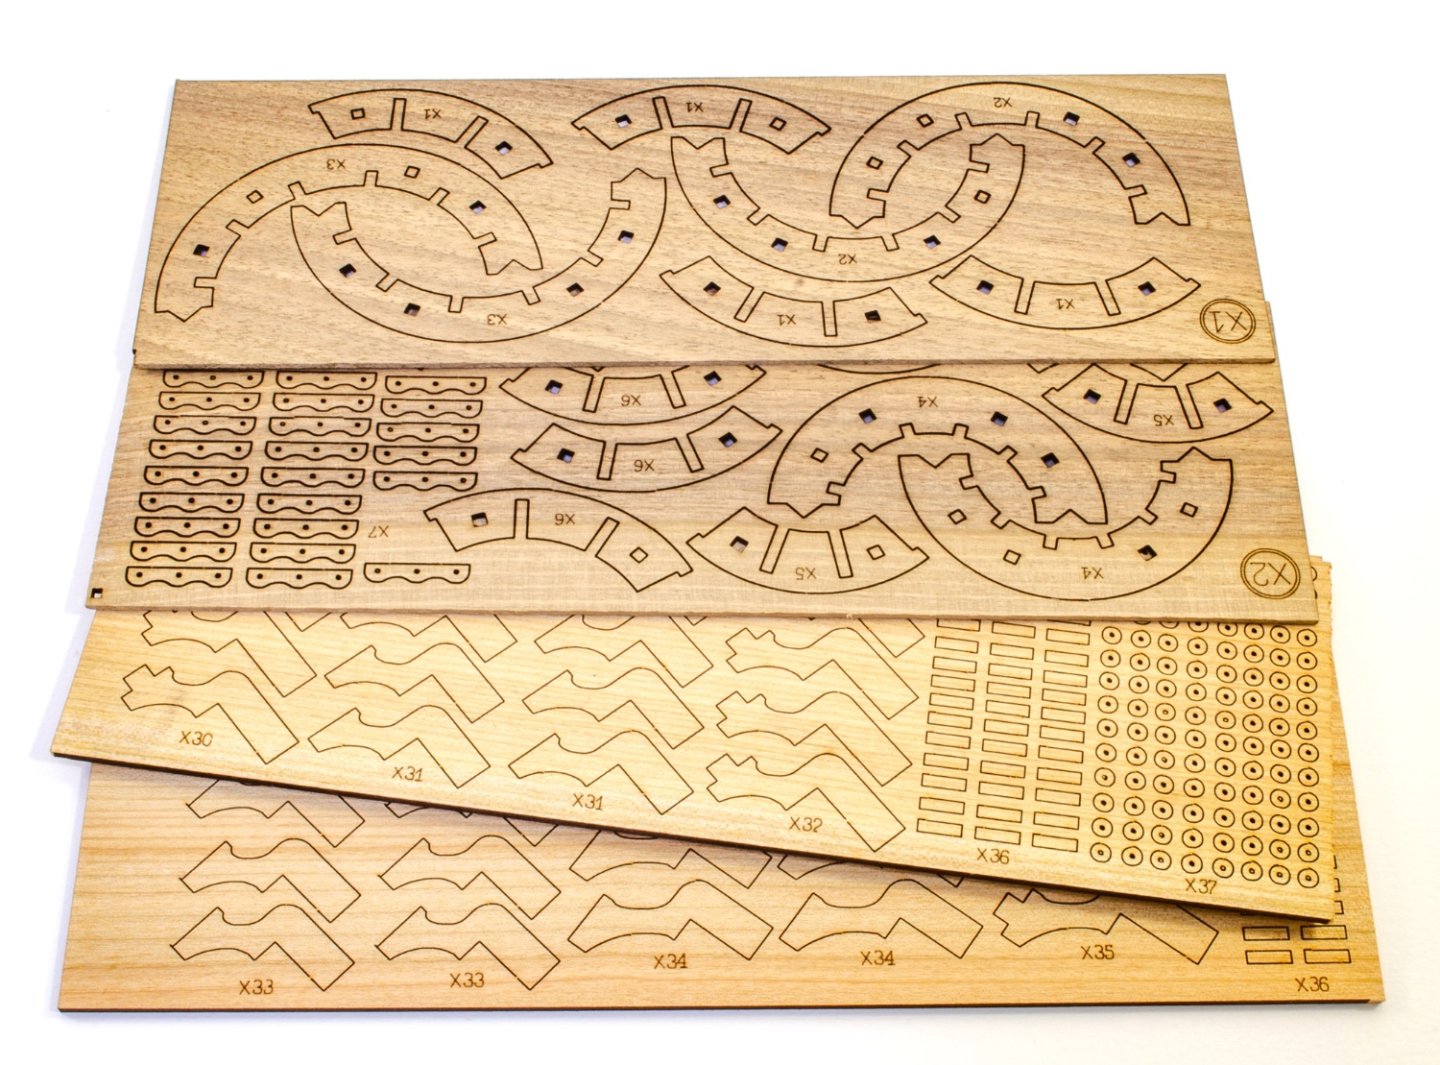
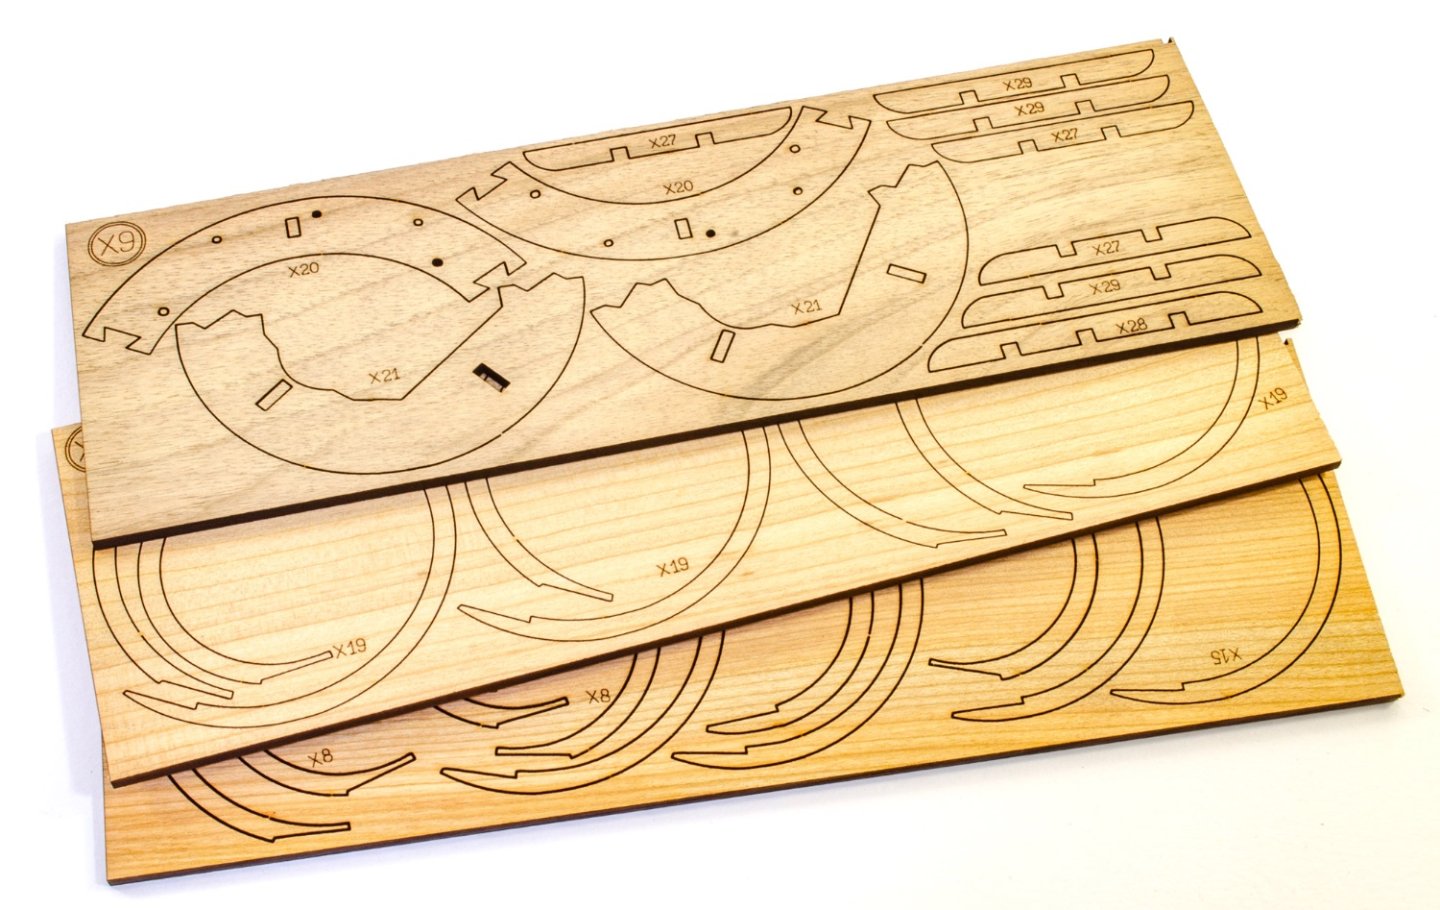
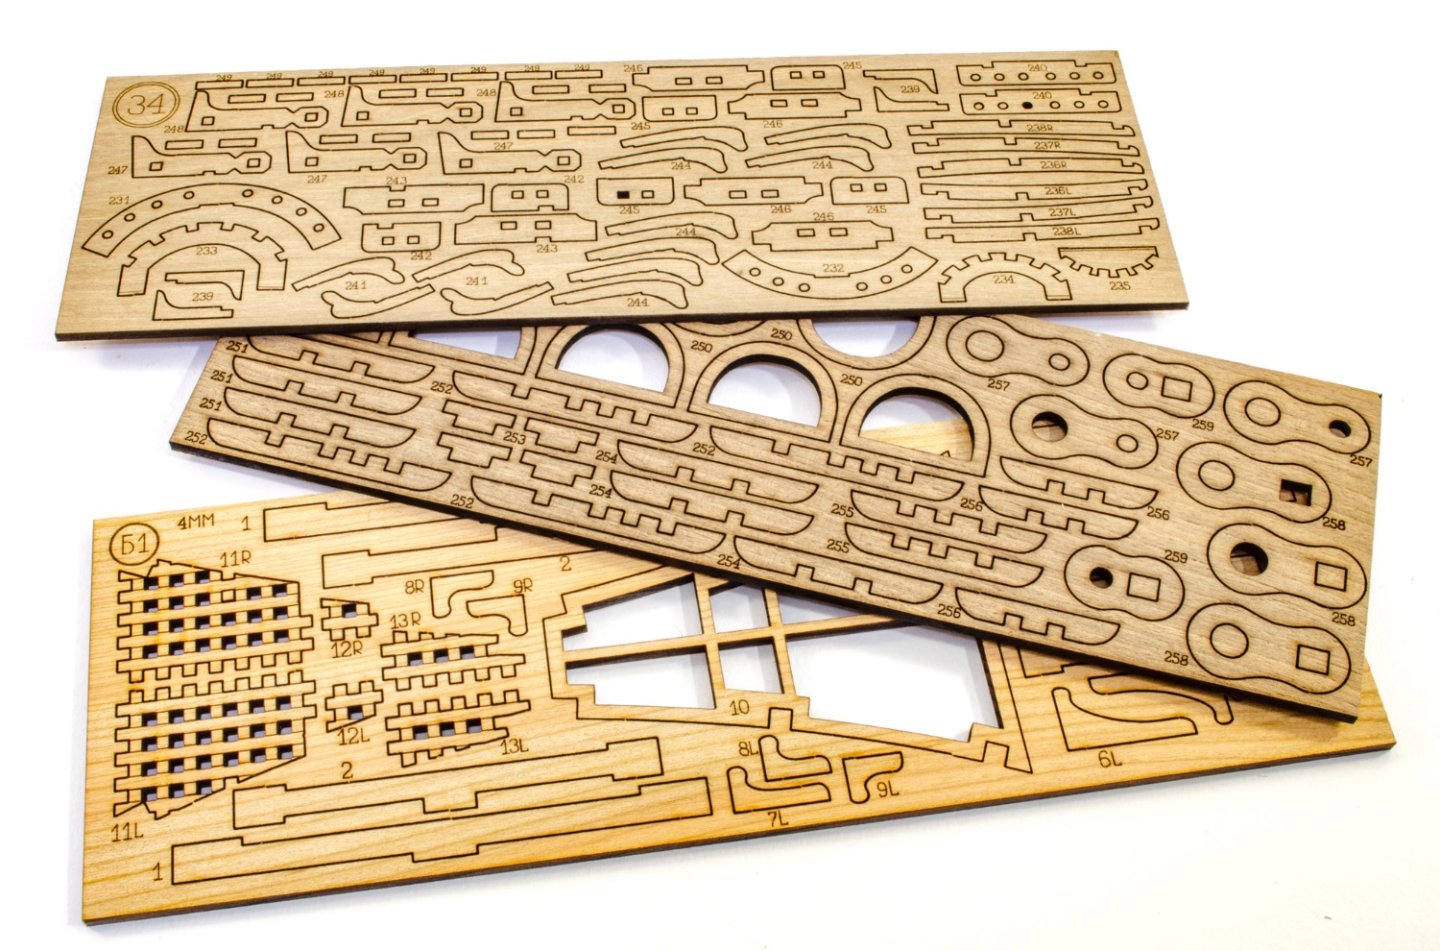
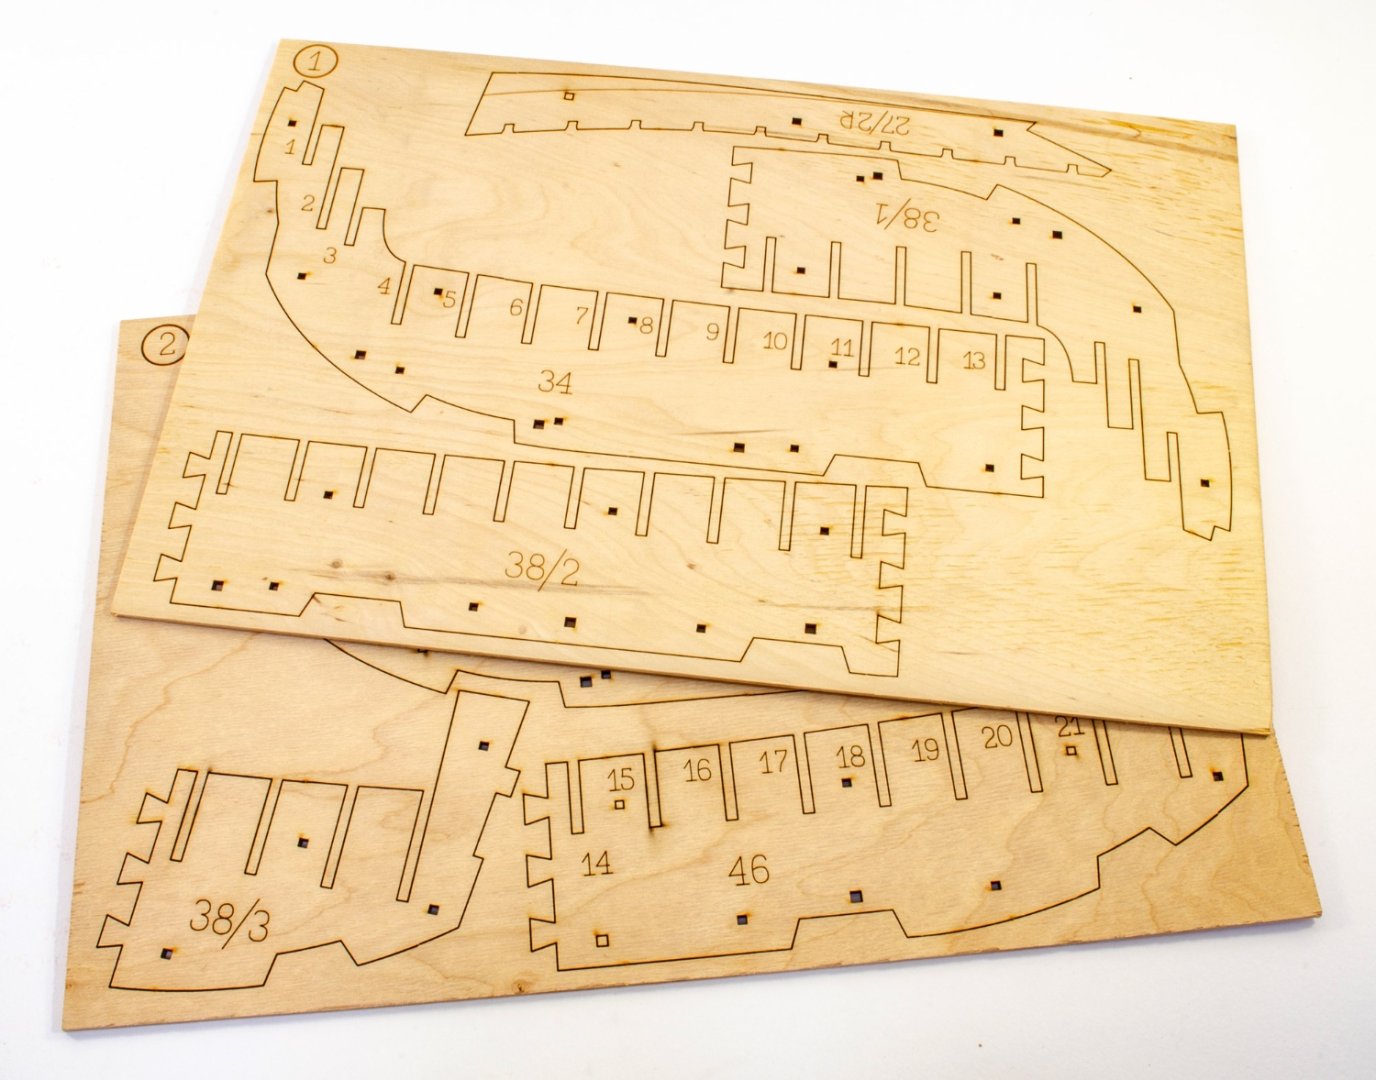
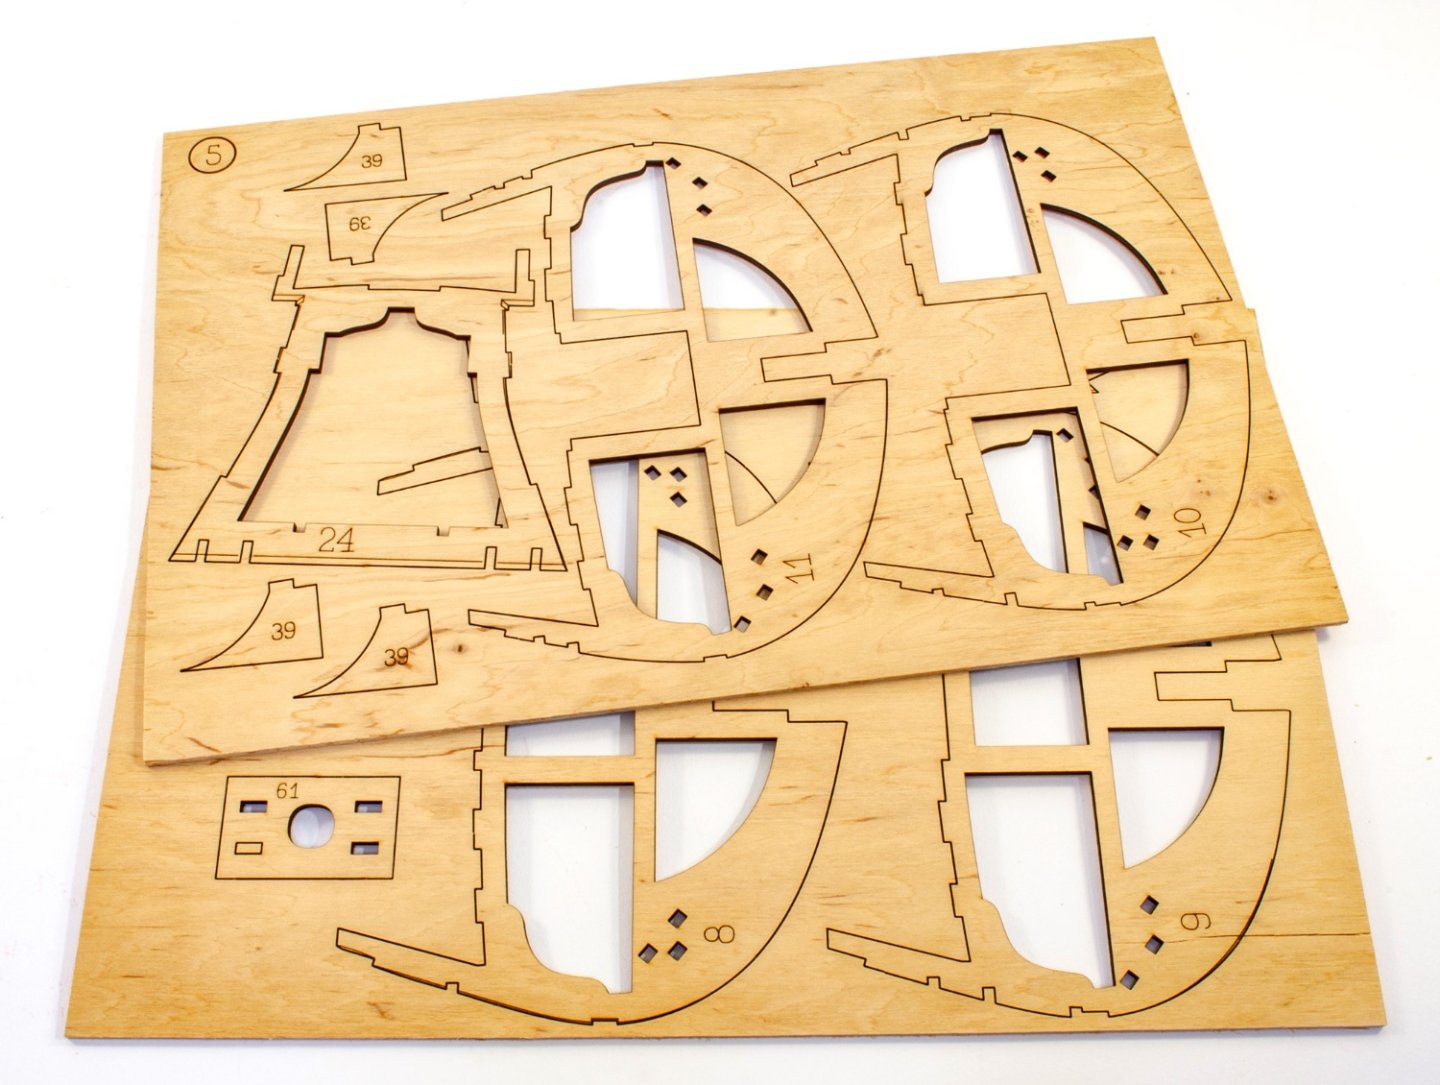
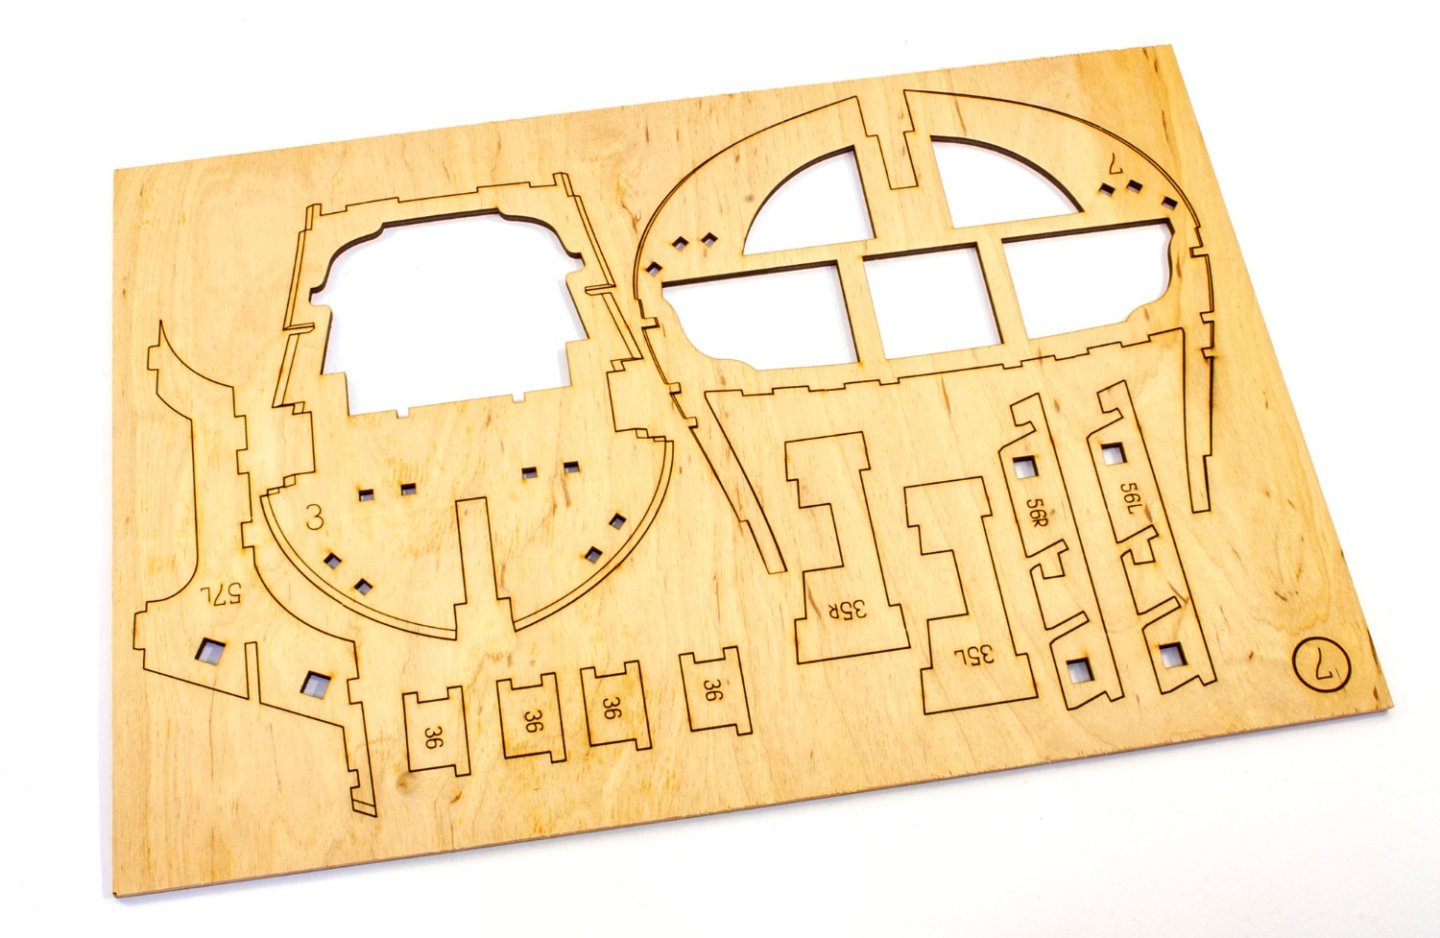
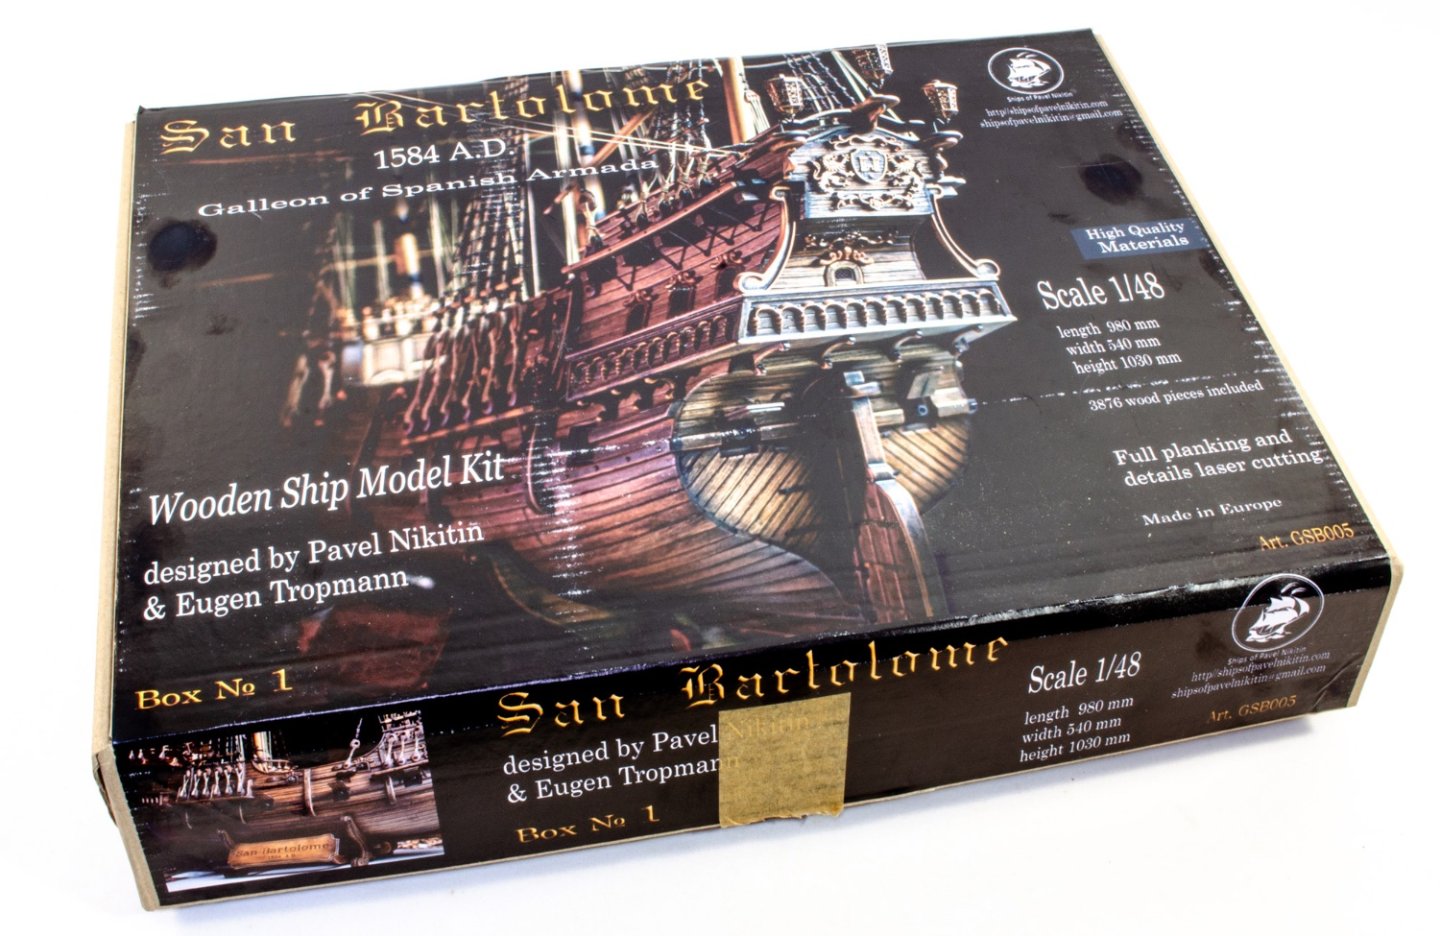
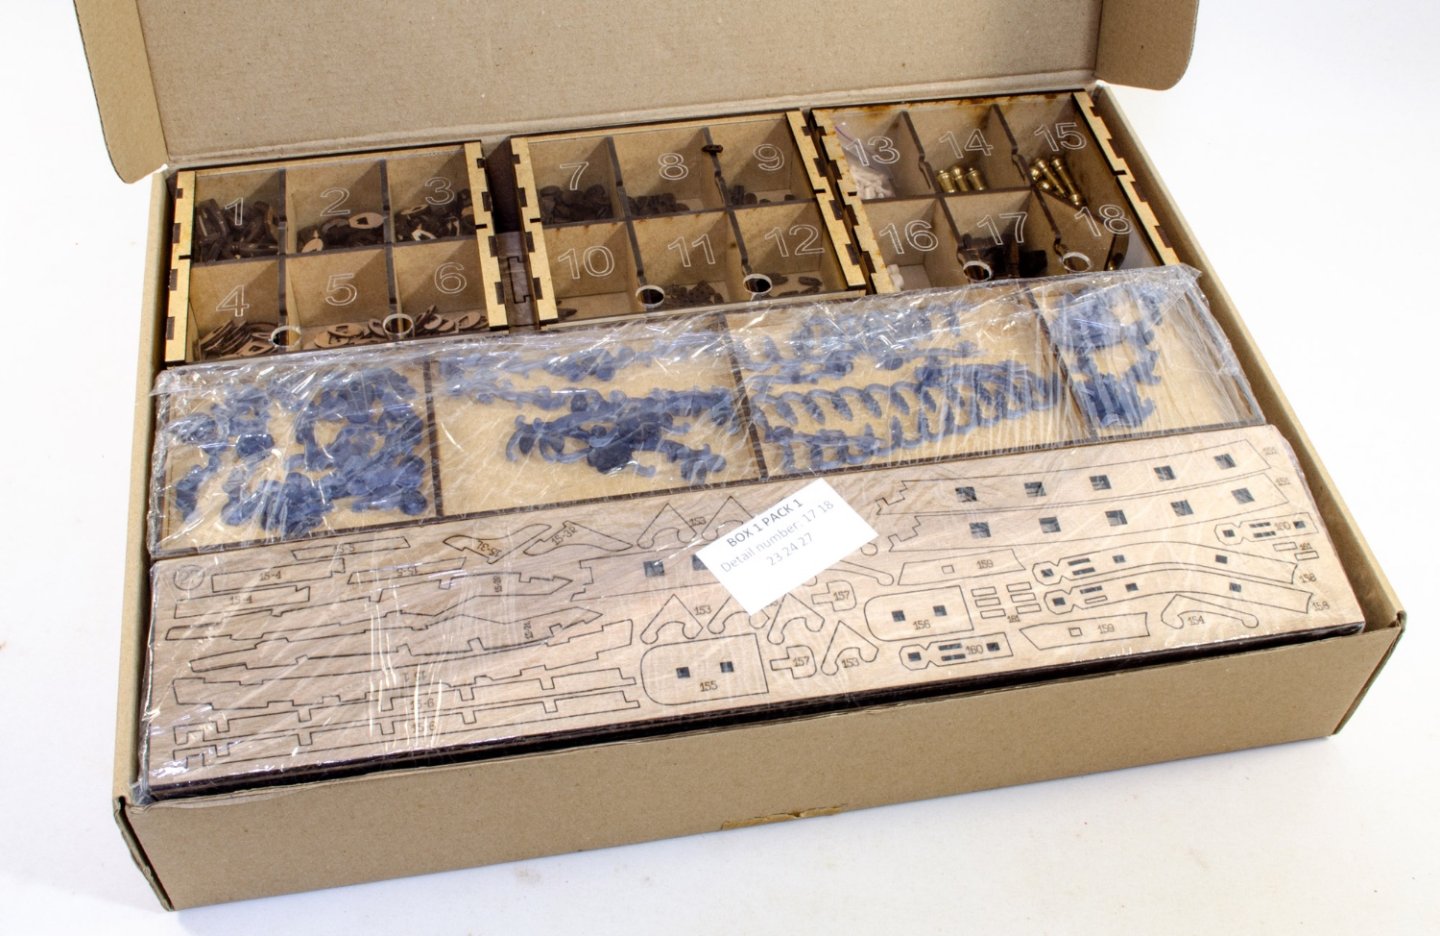
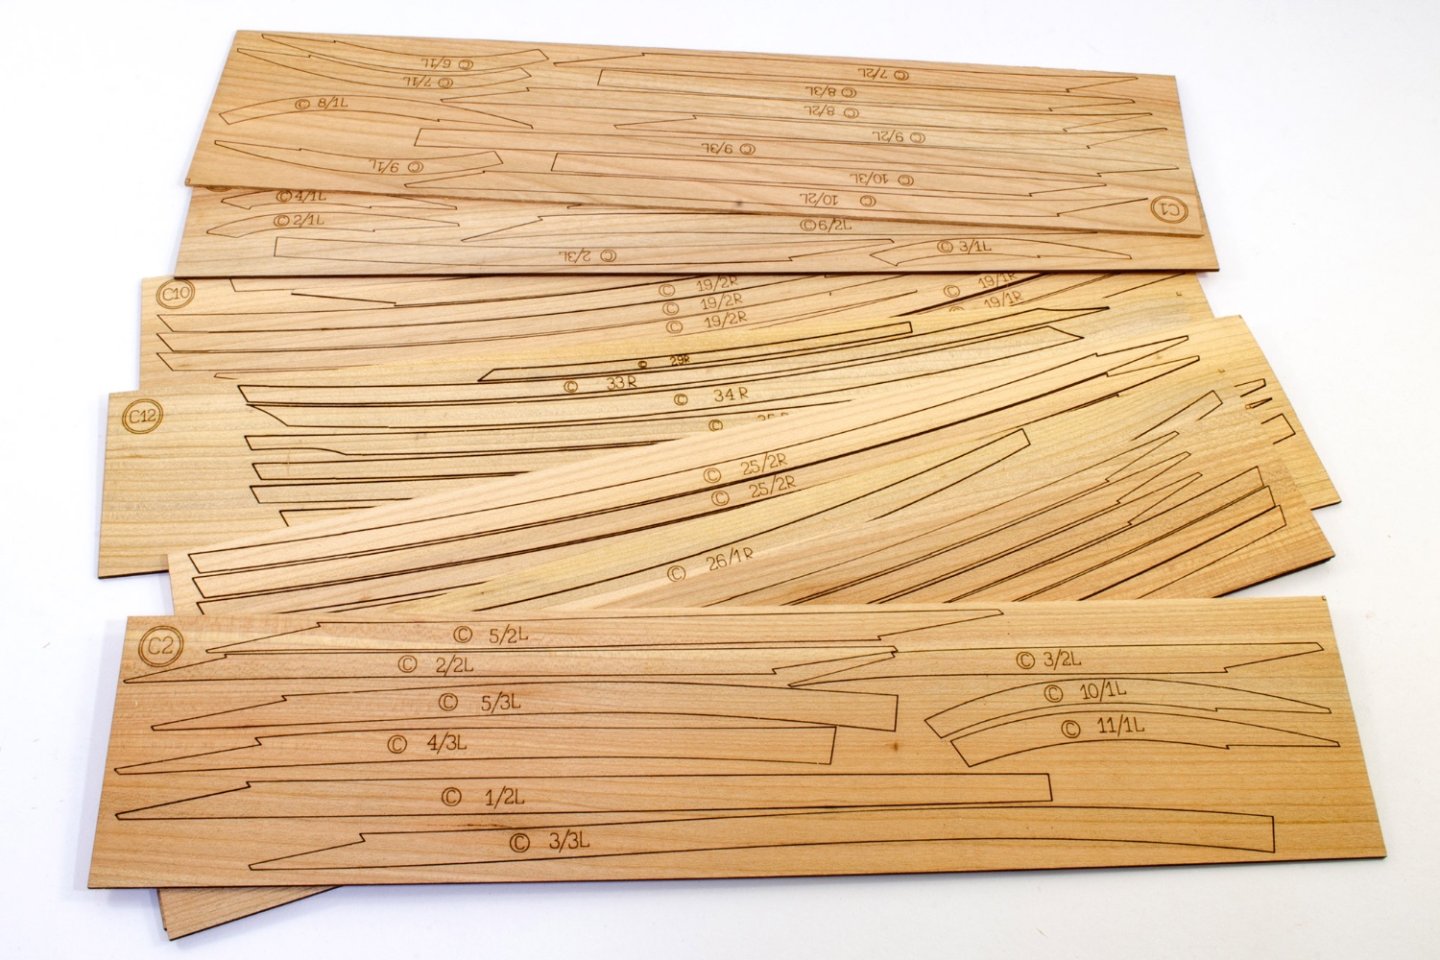
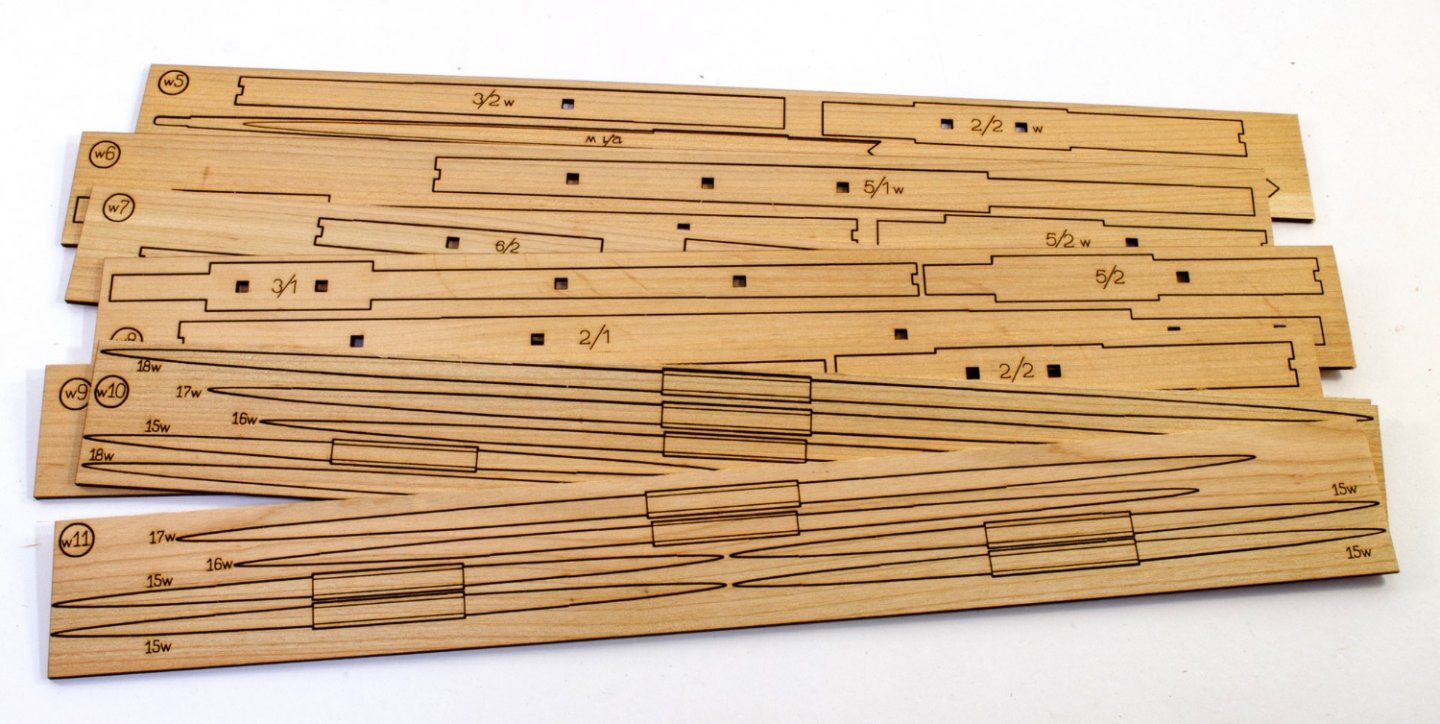
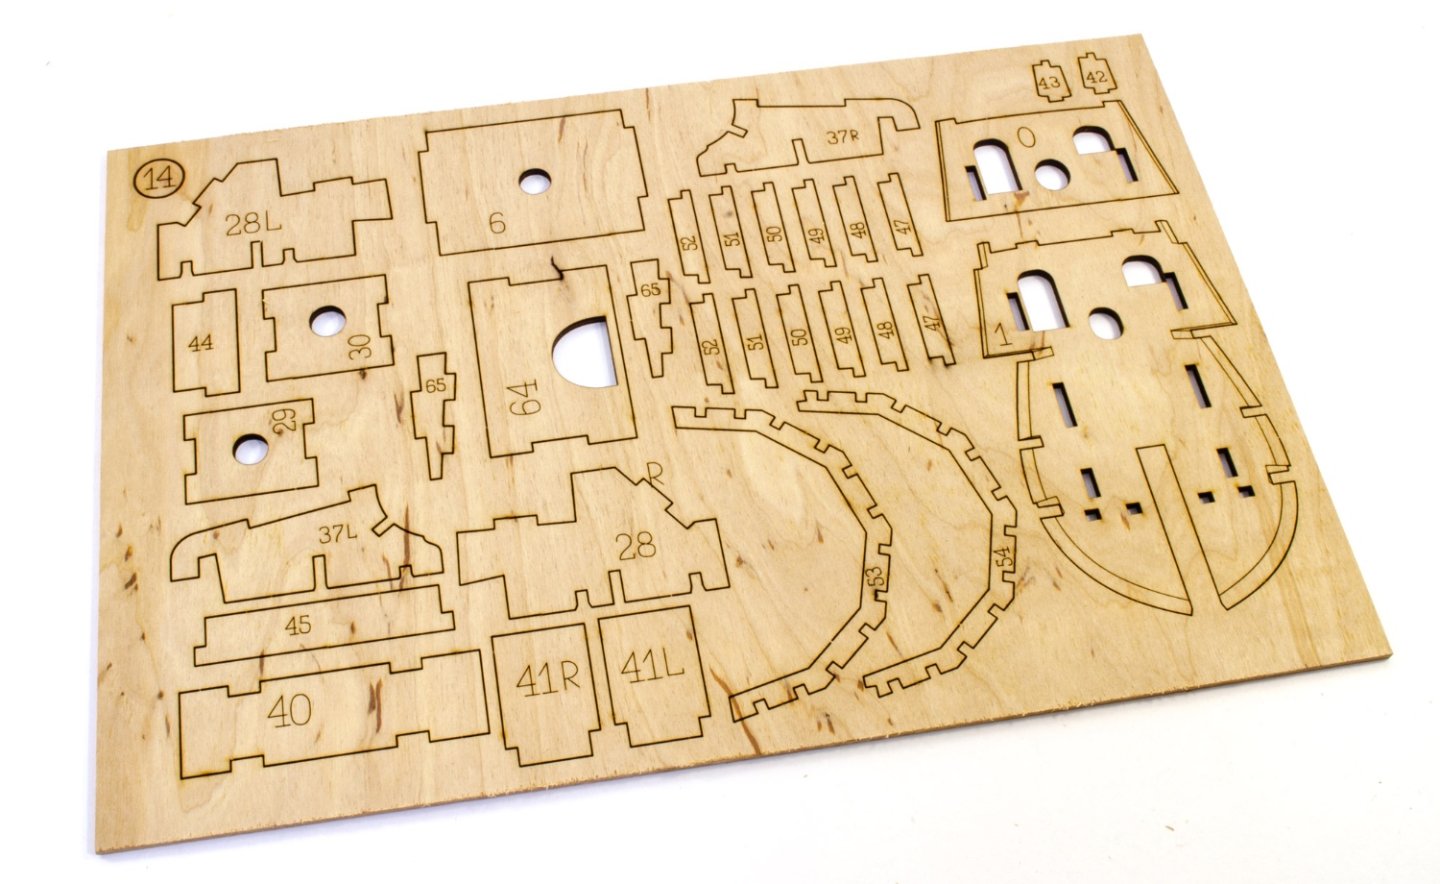
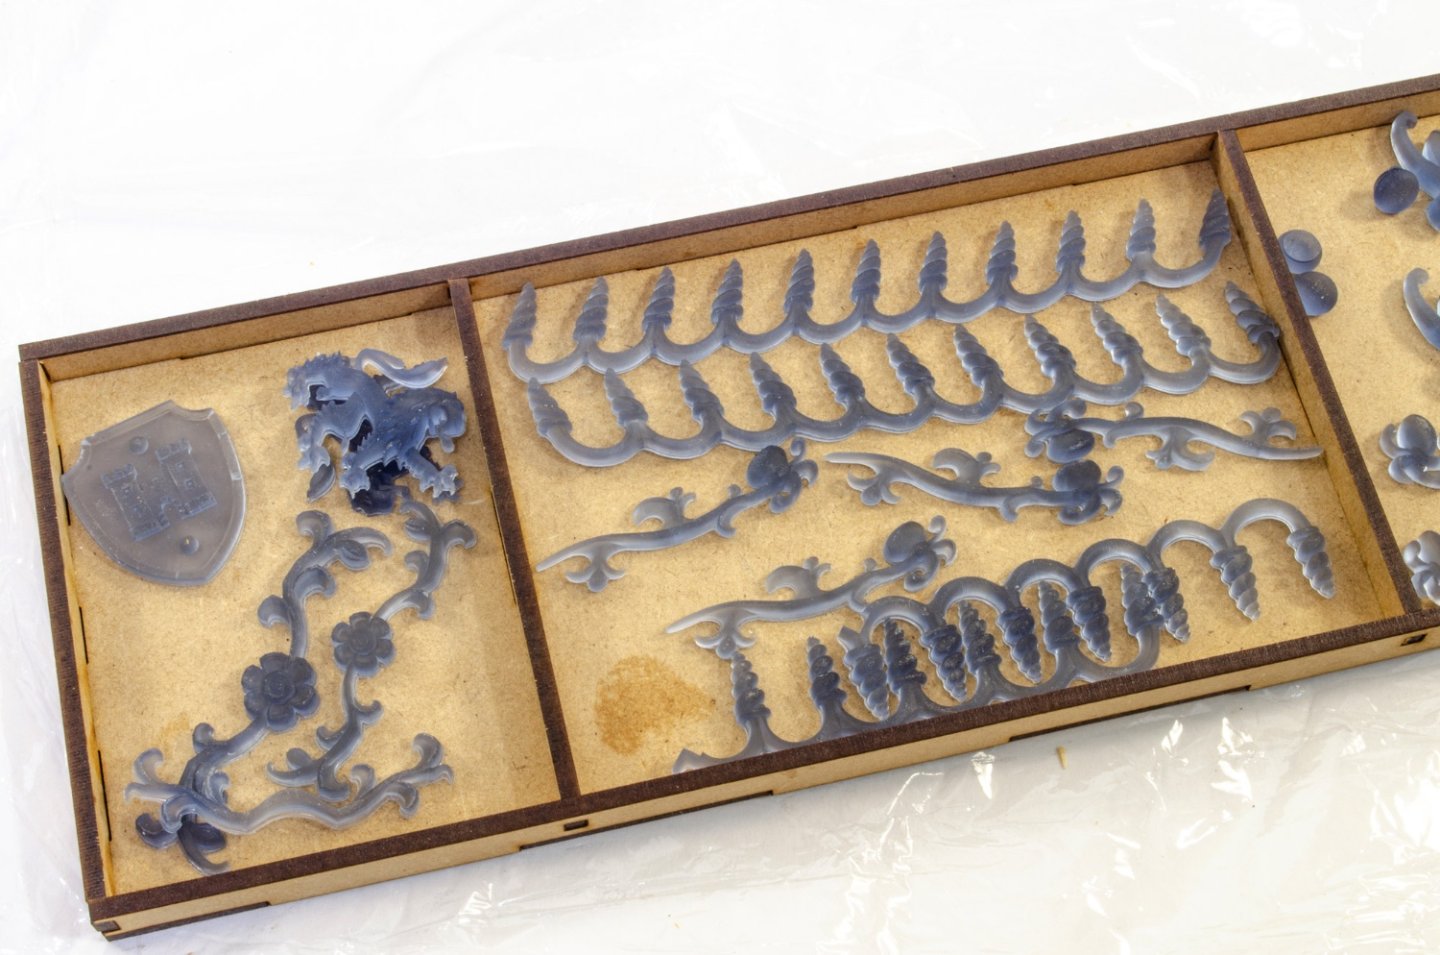
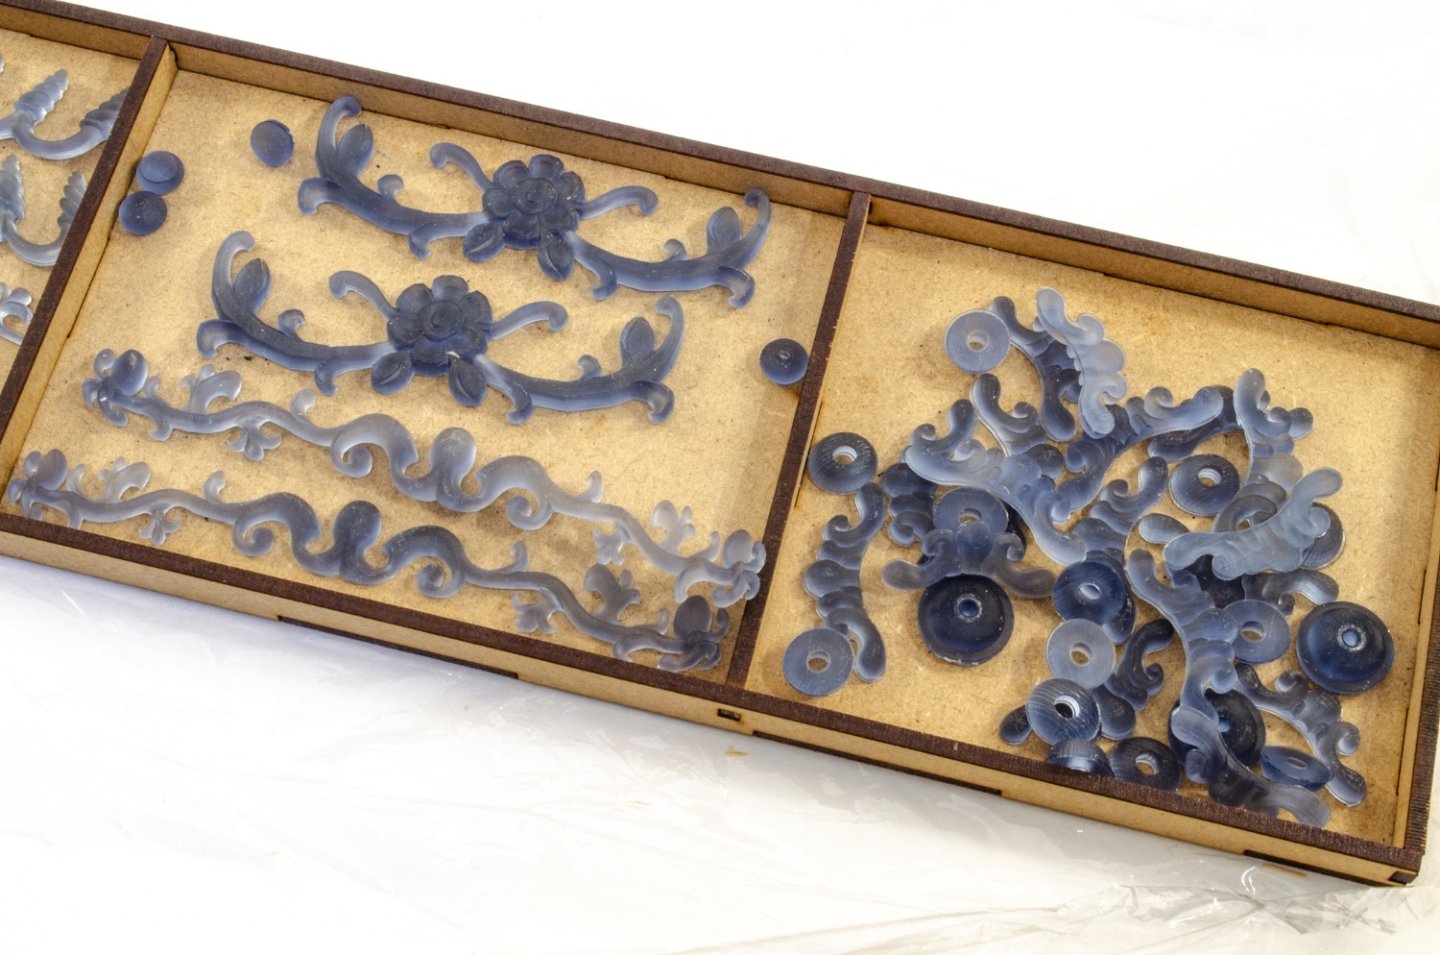
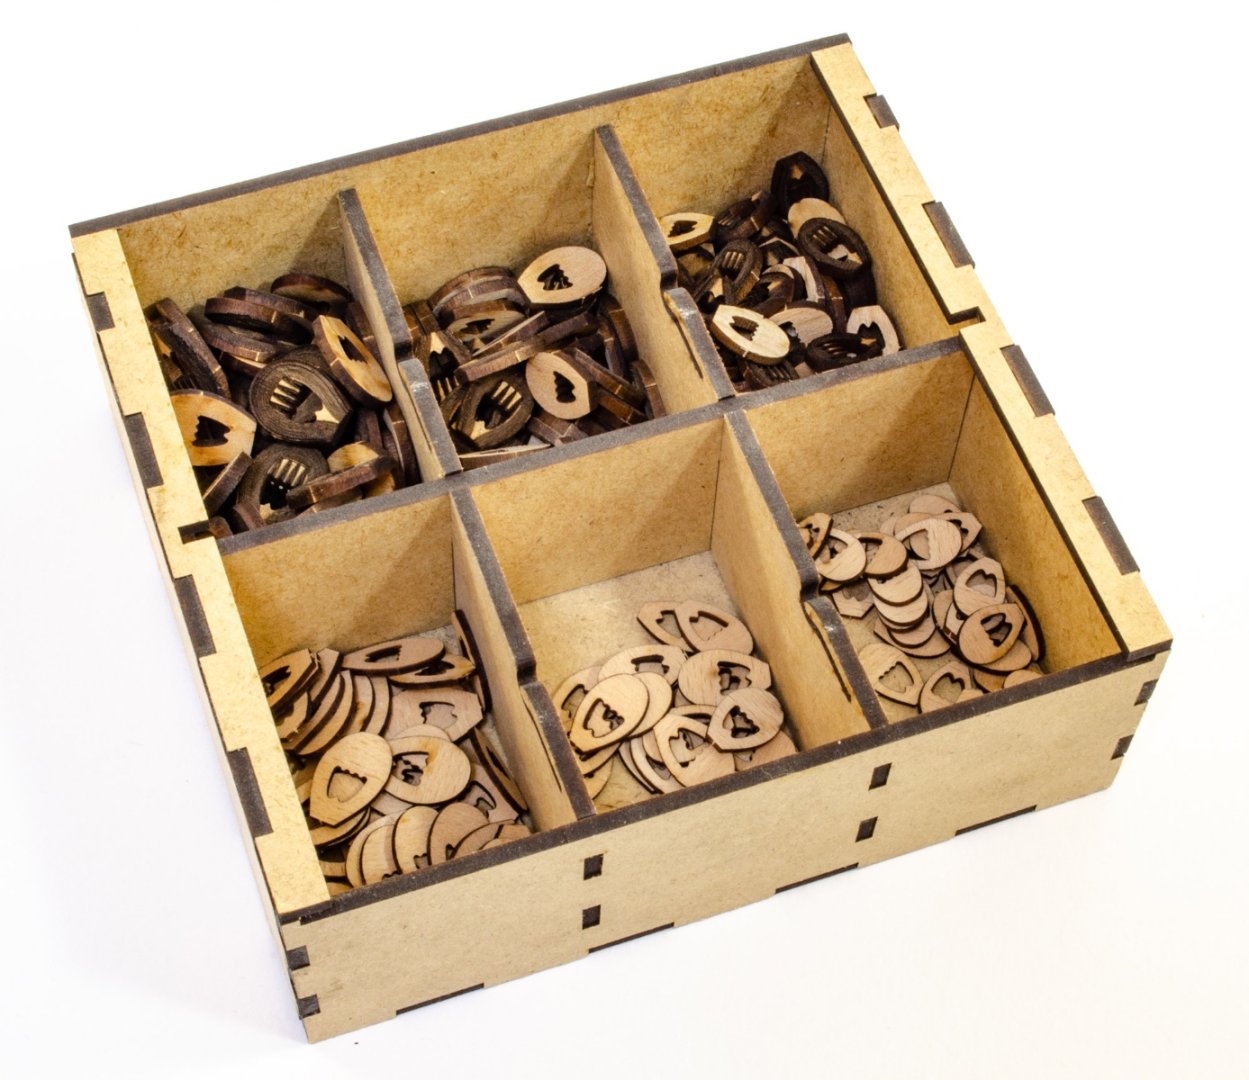
1:48 San Bartolome Catalogue # GSB005 Ships of Pavel Nikitin Available directly for €564.68 This San Bartolome was supposedly a part of the ‘invincible’ Spanish Armada led by Alonso Perez de Guzman, 7th Duke of Medina Sidonia, from May to September of 1588. The Armada was battered in multiple skirmishes with the Anglo-Dutch naval fleet, composed of light and manoeuvrable ships led by Charles Howard. This clash is known as the Battle of Gravelines. Elizabethan Pirates excelled in that battle, especially the notorious Francis Drake. The confrontation between Spanish and Anglo-Dutch fleets lasted for two weeks. The Armada could not regroup and, refusing to invade England, headed North. The English fleet followed the Armada along the East coast of the British Islands. The Armada’s return was very challenging, having to go through the north side of the Atlantic Ocean, along the West coast of Ireland. Due to strong storms, the Armada’s ships were taken to the far North and West shores of Ireland. During this expedition, the Armada lost more than 60 ships, of which only 7 of them were lost in battle. The kit When this one landed on my doorstep, I certainly wasn’t expecting the sheer weight of the package! San Bartolome is spread over not one, but THREE heavy boxes which weigh 14kg in total. What made this more immense were the extra associated sets that were also included, pushing the package to a back-breaking 19kg. The whole lot was encased in a shipping box built from sheets of MDF, then heavily wrapped in cellophane and black plastic sheet. The package arrived safely and intact from Ukraine in a little over 10 days, with a small hold up in Kiev due to the war. First of all, you need to understand something about the style of San Bartolome. Despite many modern design innovations, the finished model is designed to look like an old, antiqued ship, built in years gone by. Pavel Nikitin describes the finish as ‘retro’, Now, let’s take a look. To give you an idea about the finished size of this galleon, here are the dimensions: Length: 980mm Width: 540mm Height: 1030mm The box lids of all three San Bartolome packs, are adorned with a large, shiny label which depict the ship from the stern quarter, with the lighting highlighting the intentional retro style of the vessel. The label also states that the whole kit has a total of 3876 wooden parts. That should keep you occupied for a while. Box 1 Opening the lid shows that the first box, like the others, is crammed full of parts. In fact, it took me a long time to actually get everything back in the box after I’d done the photos. All sheets inside are grouped and wrapped, with a slip of paper to identify which group they belong to, making it easier to locate the said part. That’s quite handy when you consider that there are around SIXTY sheets of parts in this kit. Instead of shelf-standard plastic containers for fittings, a series of custom-made MDF boxes are included, with a Perspex lid that has engraved numbers to identify what’s in each compartment. The kit comprises of parts sheets that are cut from walnut, cherry, alder and beech. All of them are very neatly laser cut with parts that include bevel lines, where appropriate. The parts you see here with bevel lines, will form composite blocks which fill the bow area, creating almost solid area onto which to plank. You’ll also see that these sheets are in two different wood types, with the cheaper timber forming the parts what create the underlying structure that will be covered over. These unusual parts are actually to build up the various ports and openings for the side of the hull. Many sheets are as yet unidentified. The instruction booklet supplied with the kit is Part 1 & 2, and these may be from the forthcoming Parts 3 & 4. The cutting is very nice and lots of scarph joints to be seen. These sheets contain parts for various planked deck sections and panels which fit into the hull sides prior to hull planks. These define the positions for the gun ports etc. Various decorative elements are seen here, such as those for the bow. We are now onto some very large ply sheets. The bulkheads for this model are quite large and are also engraved with bevel lines. You can see cut outs for various stringers and the aforementioned built-up port that fit into the cut-out position parts you can see in a previous photo. Also here is a section of the false keel. The hull comprises a fore and aft half, and is actually make up from three laminates of ply. Pegs help to align the parts. Also present in the bulkheads are positions for bulkhead spacers to fit, keeping the bulkheads equally spaced from each other. More ply, this time to create various structures either within the hull design, or for building skeletons on deck structures. This kit is the ‘V2’ of San Bartolome, with the original having laser-engraved carvings. This version has 3D-printed parts for various external ornamentation. It’s quite difficult to see the quality in these pictures, but to my eye they look perfectly good and smooth. You may need to paint these to replicate the antiqued colour of the wood that the designers set out to be used. These parts are presented in another MDF box, covered in cellophane. These are the boxes of standalone components, with shaped timberheads, brass cannon, pillar, belaying pins, cleats, rigging blocks and multipart closed heart blocks etc. .....continued.


-
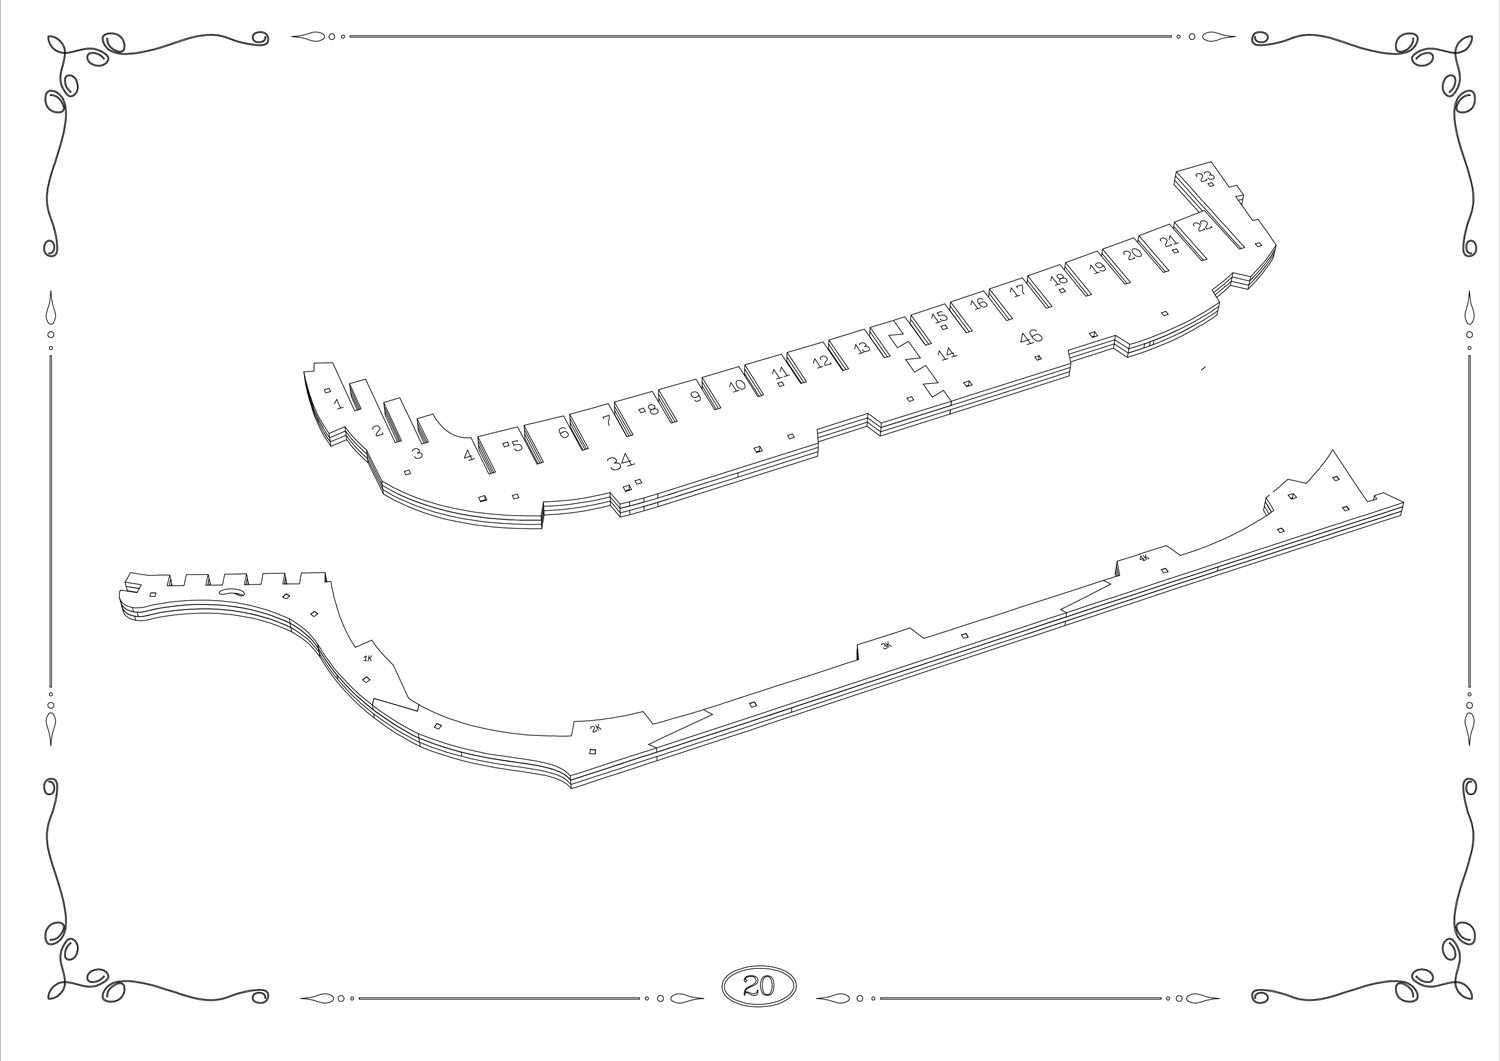
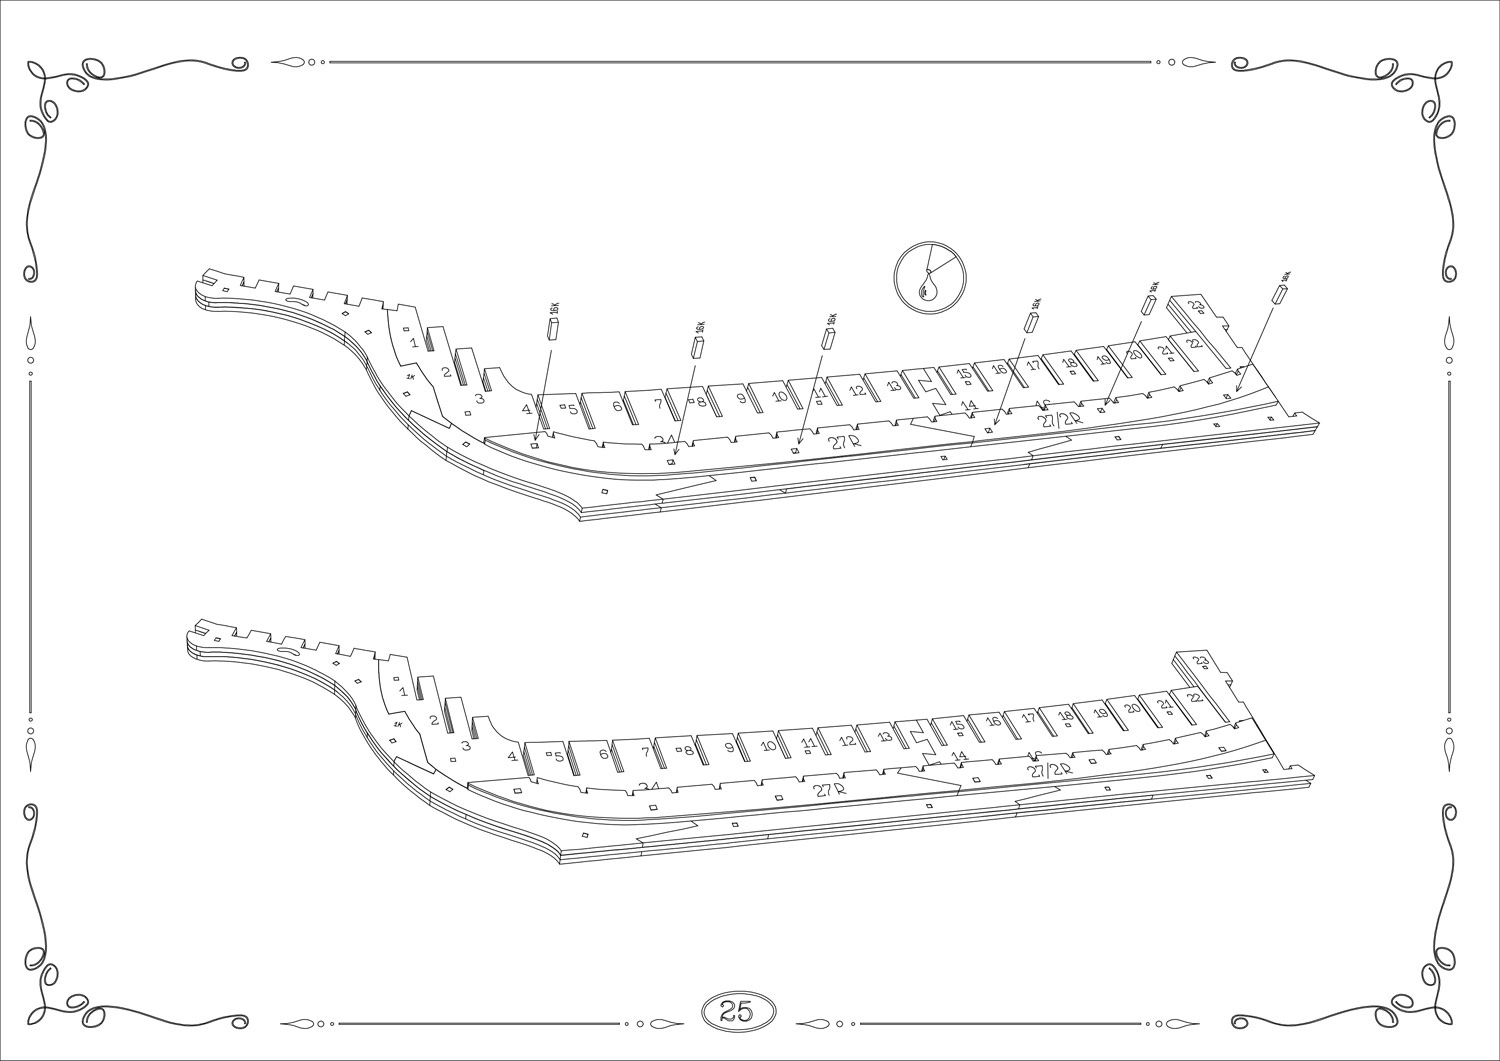
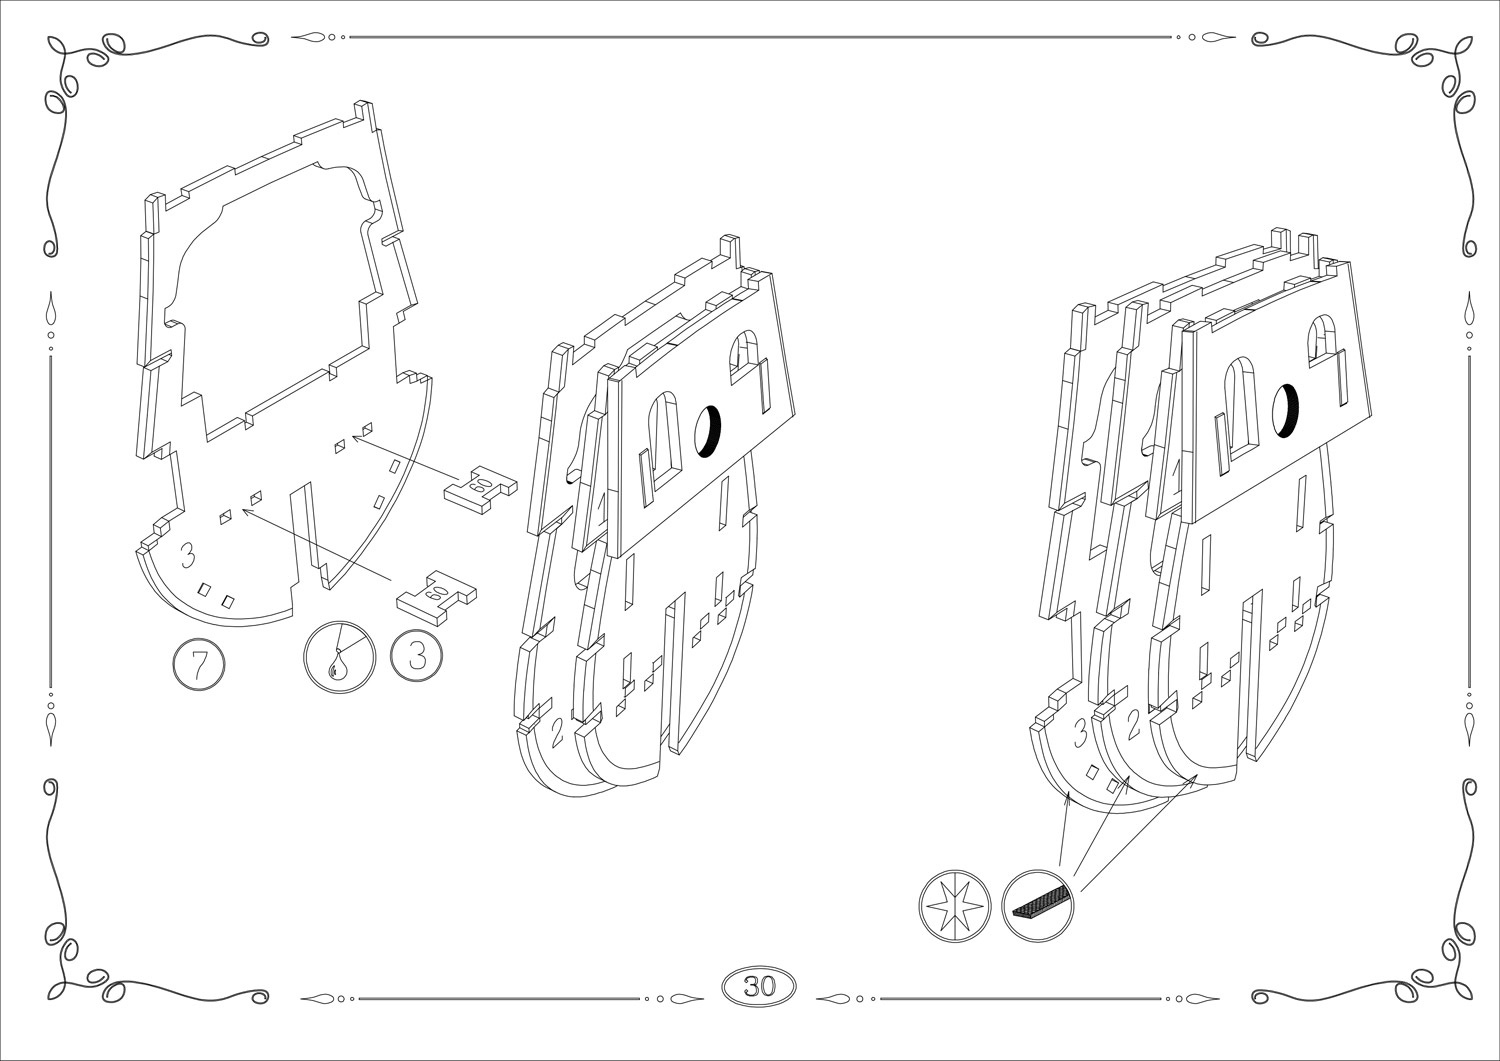
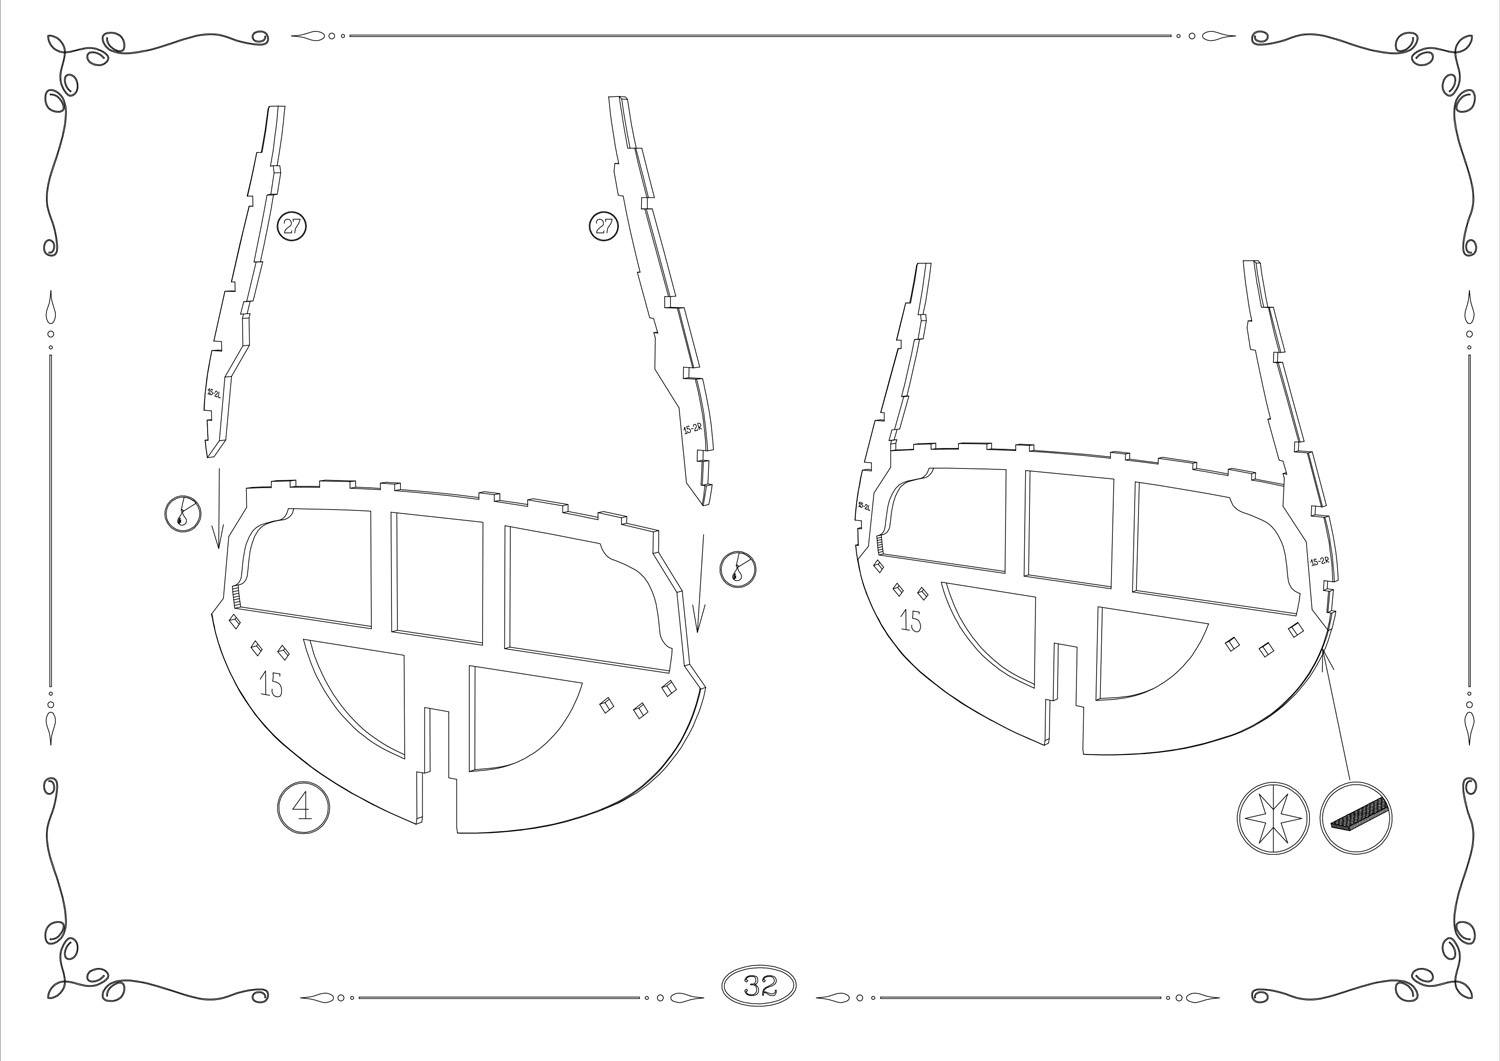
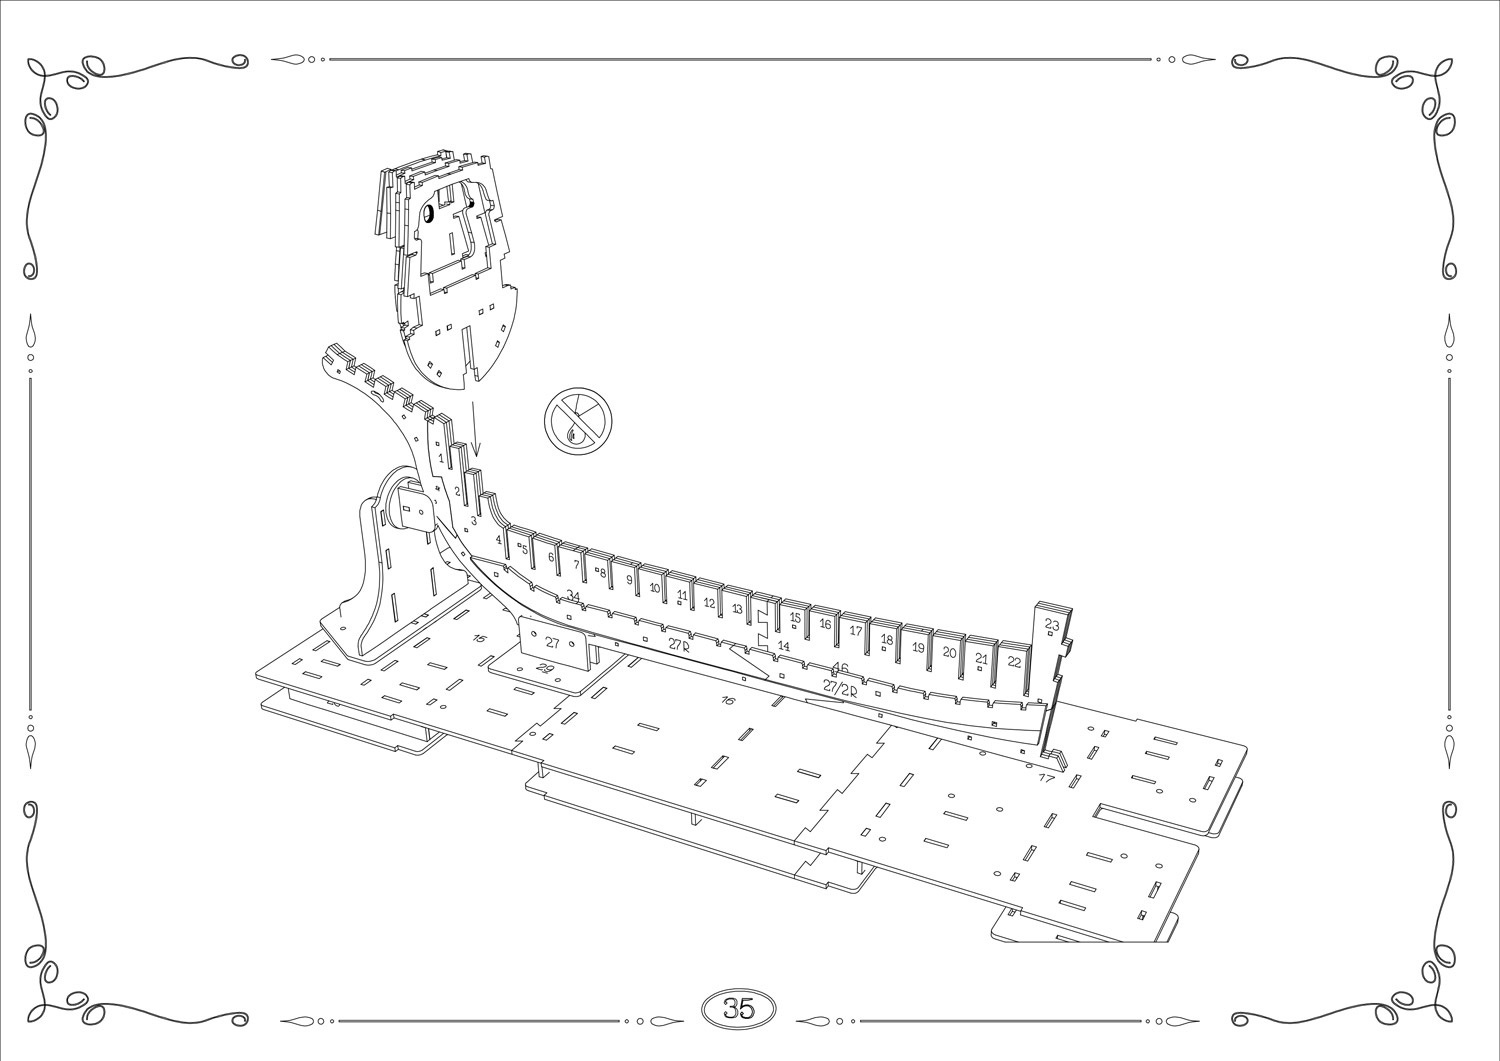
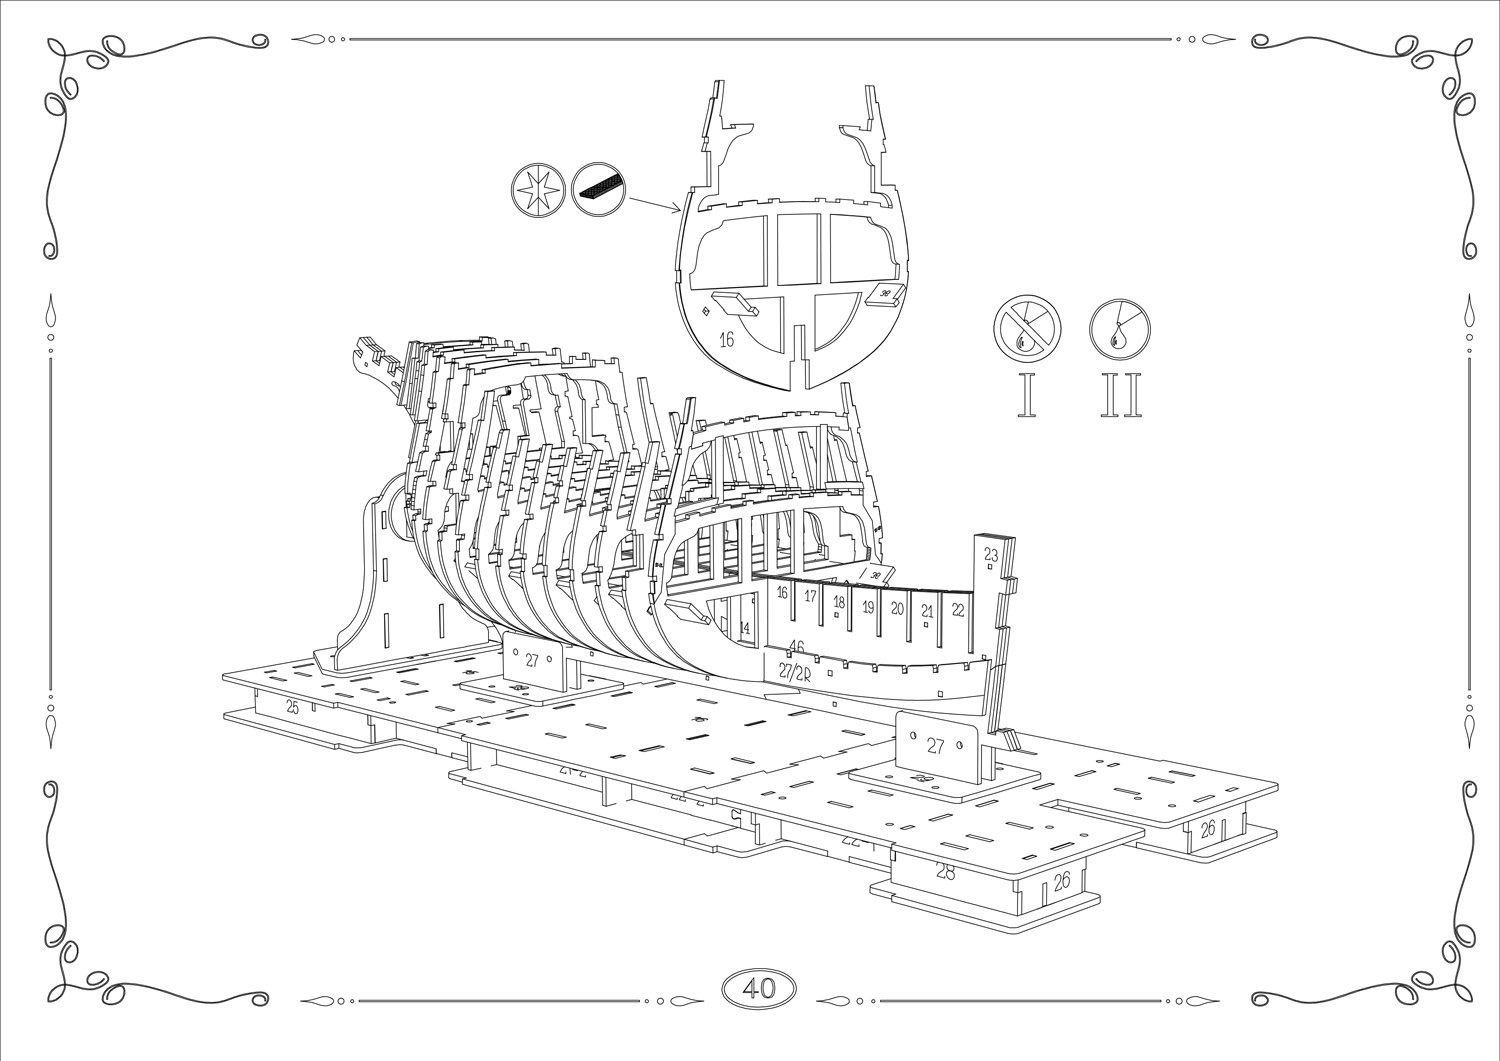
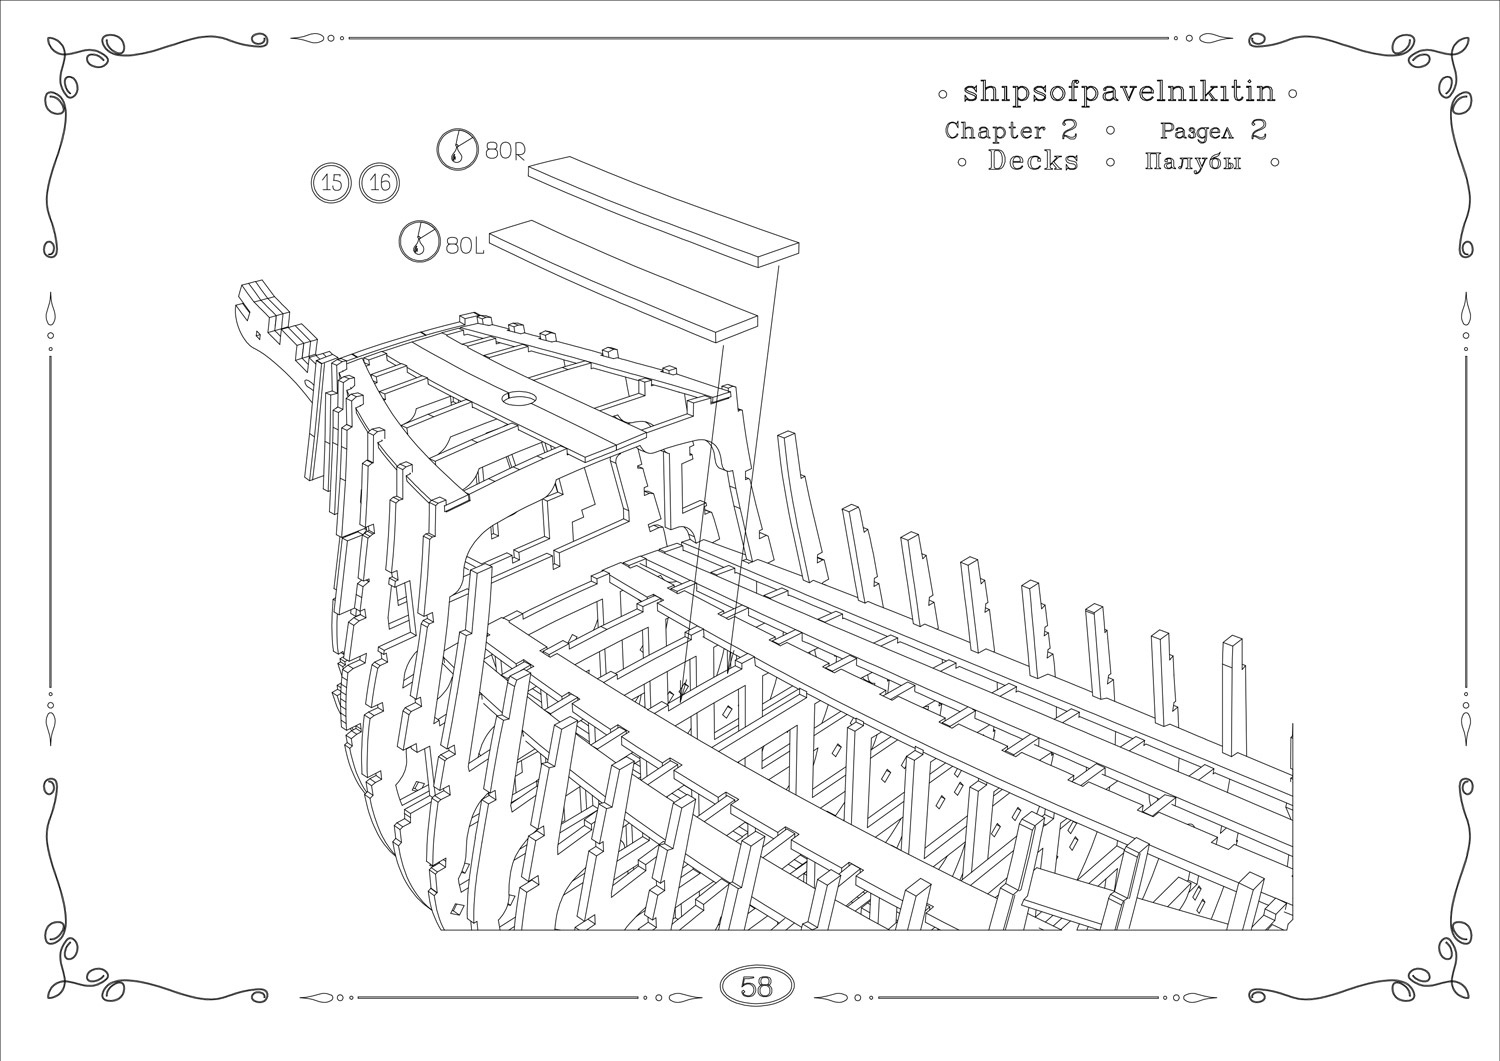
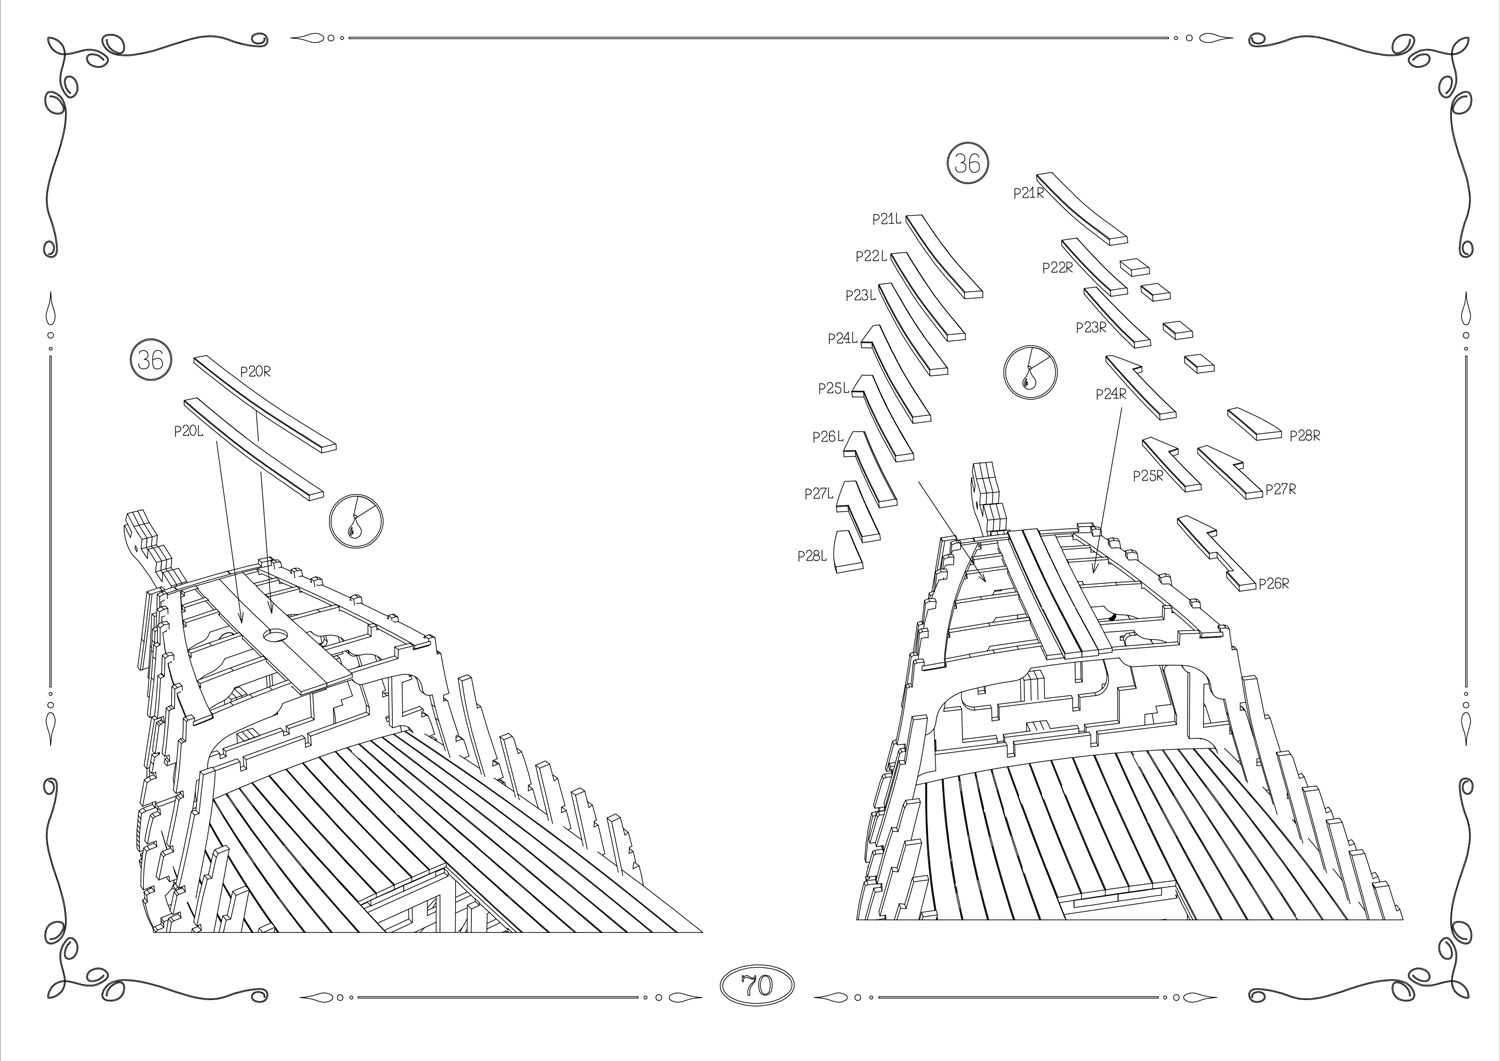
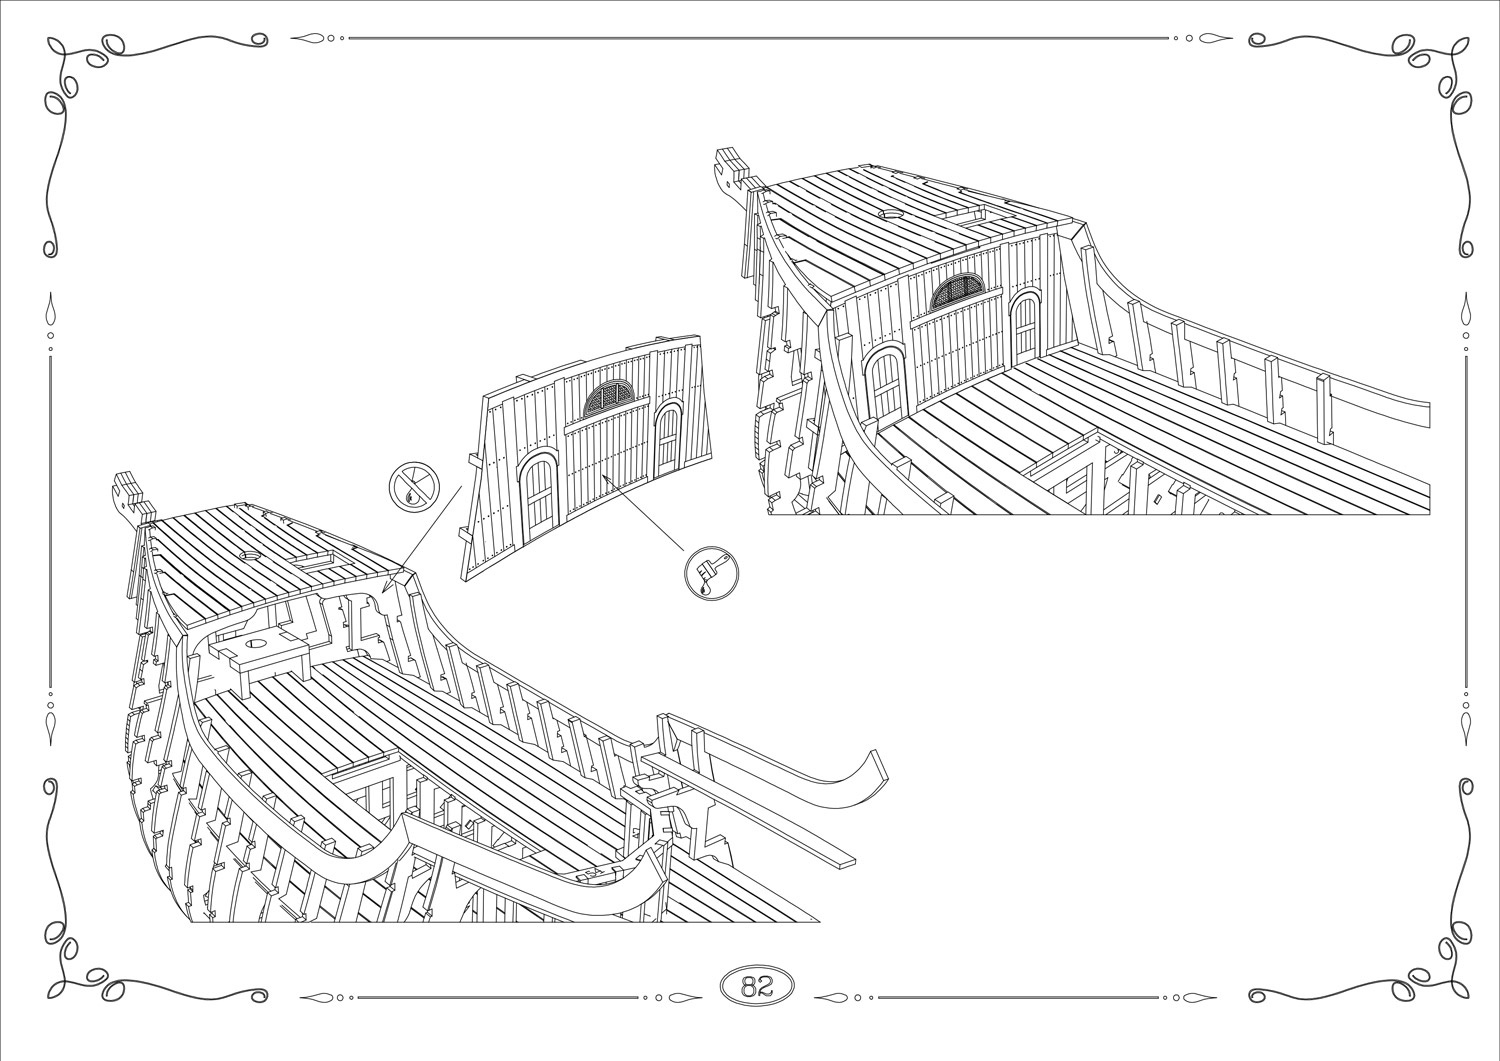
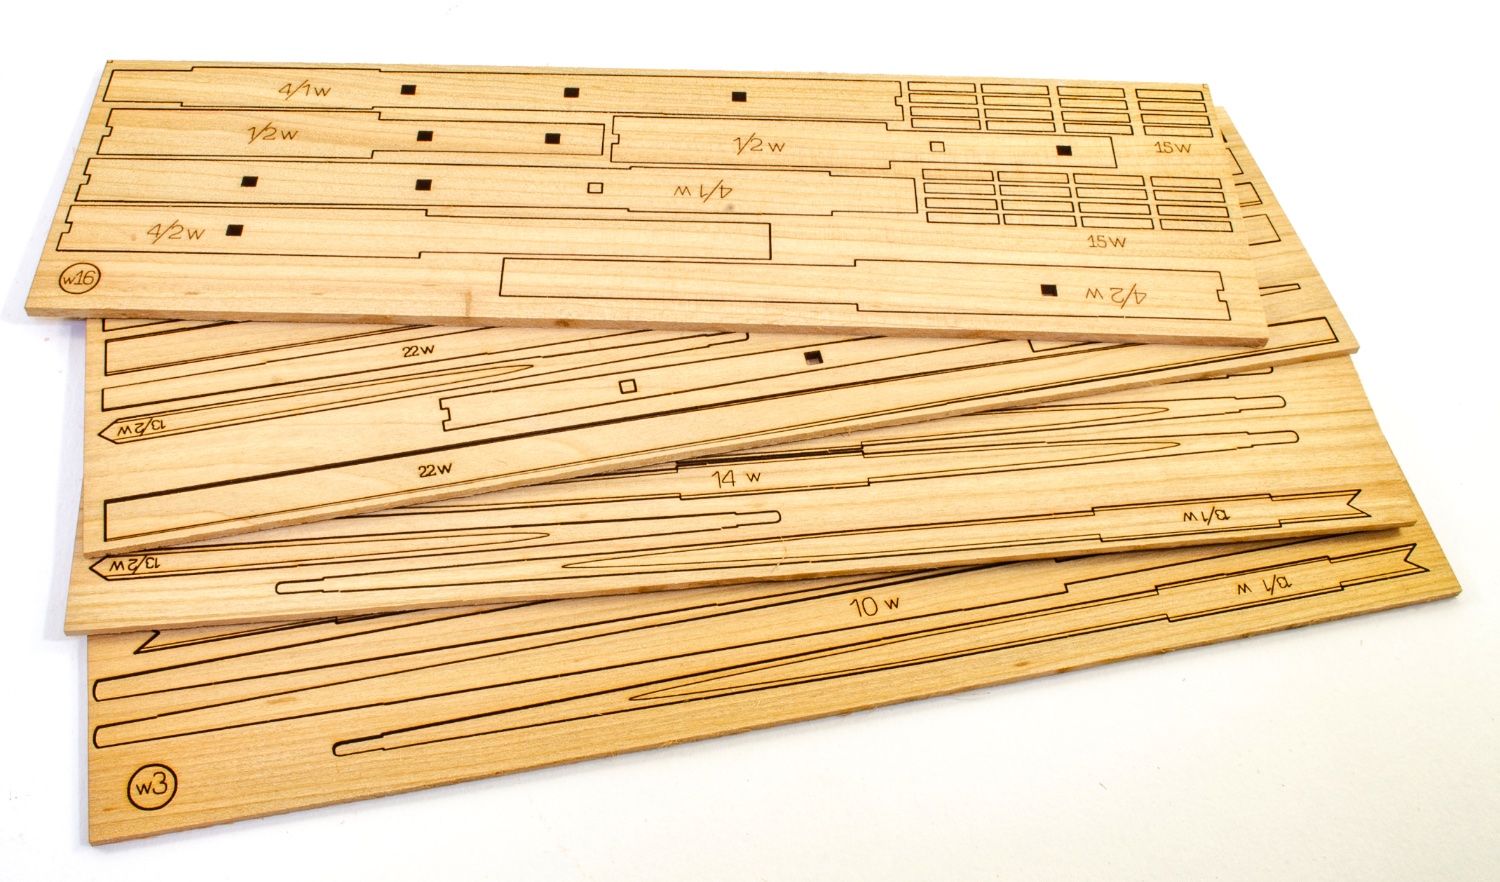
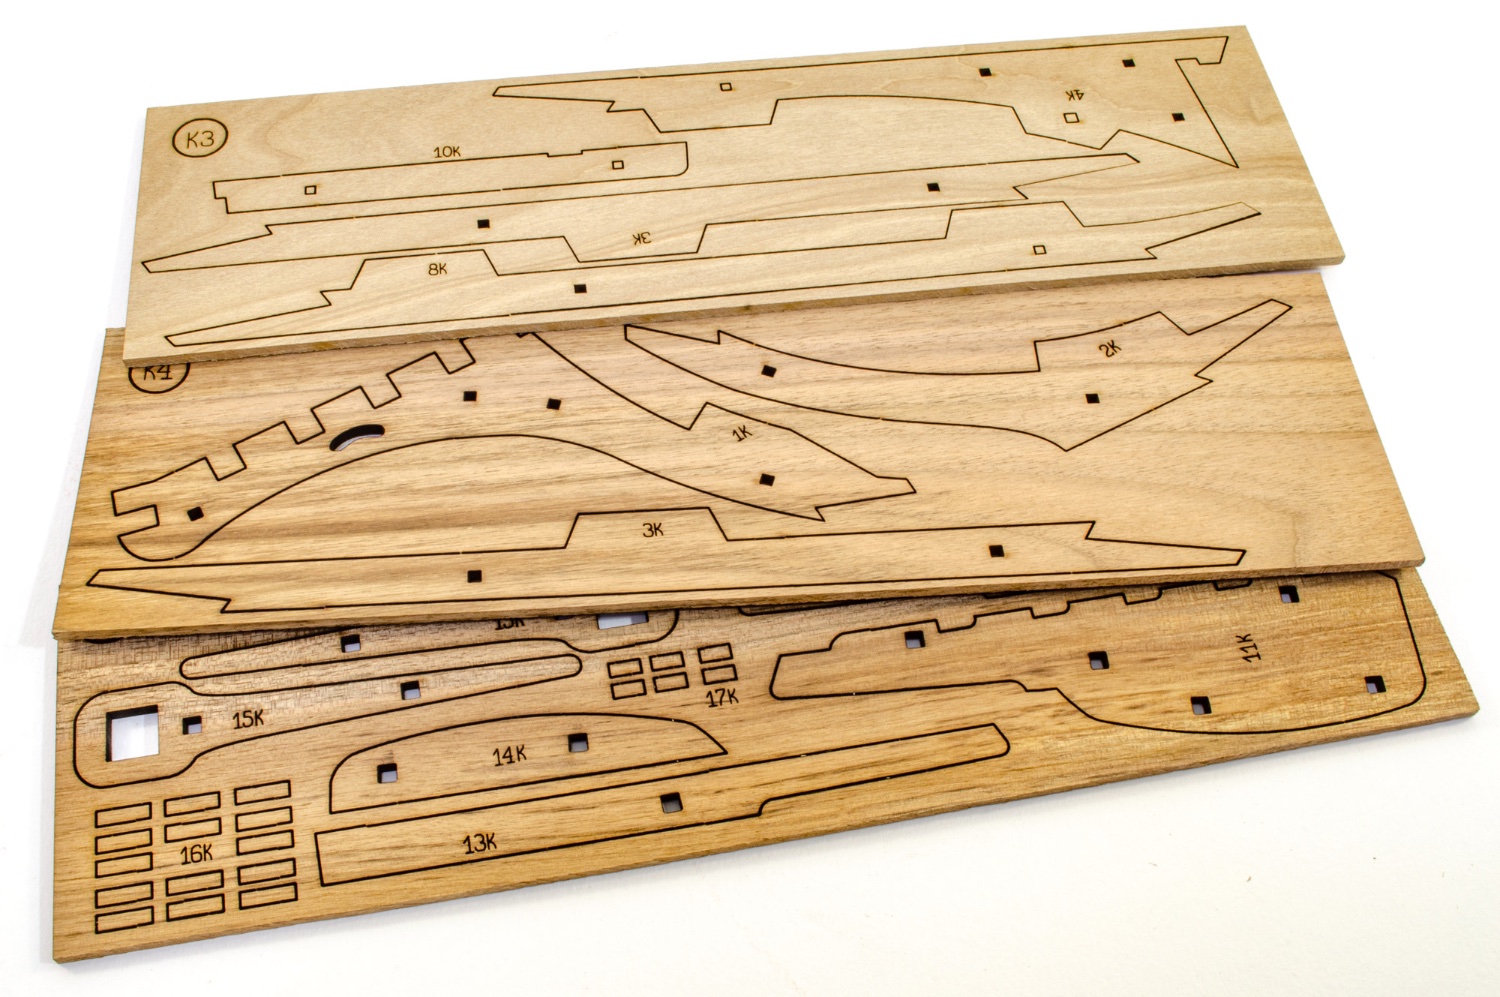
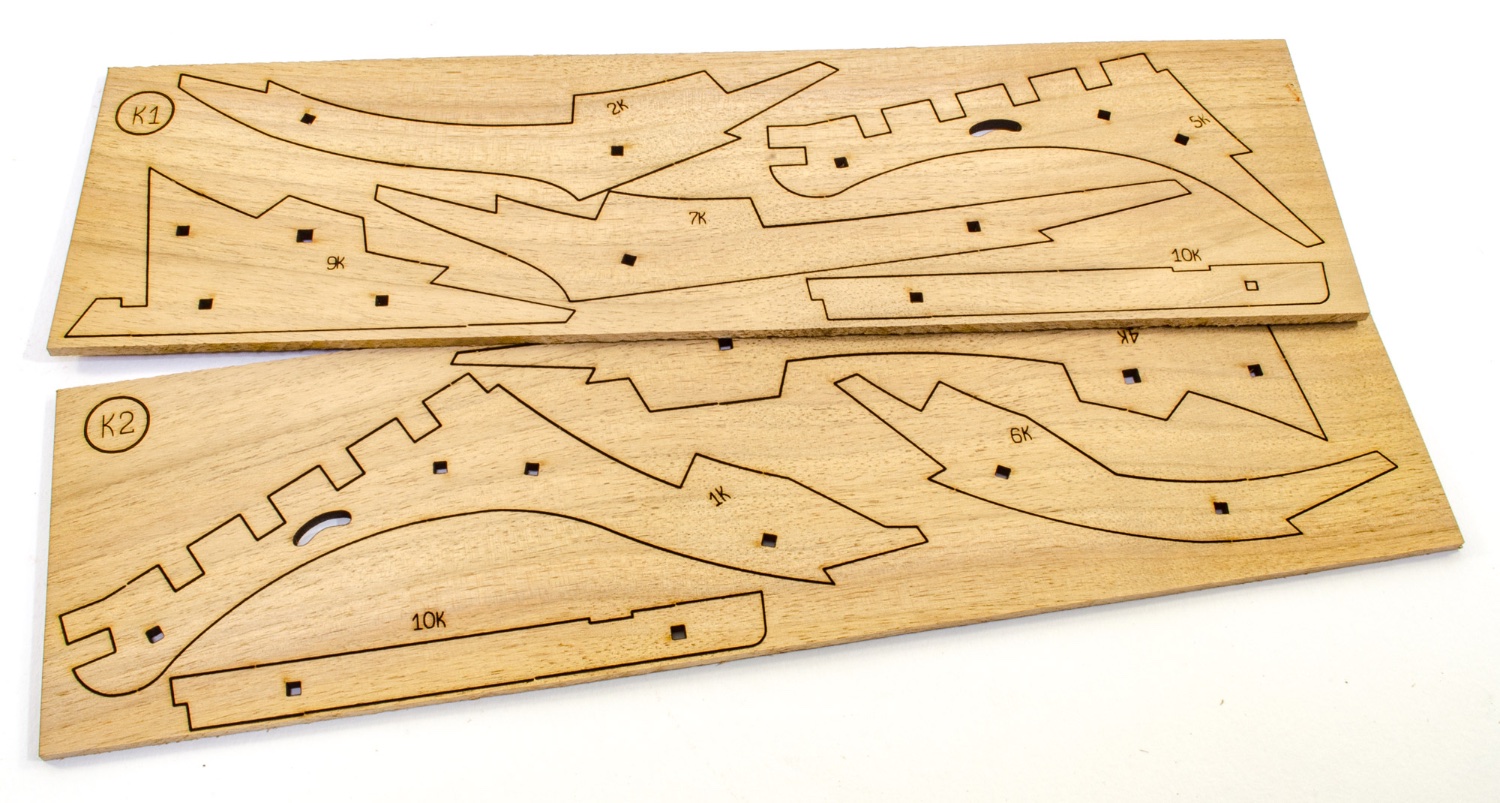
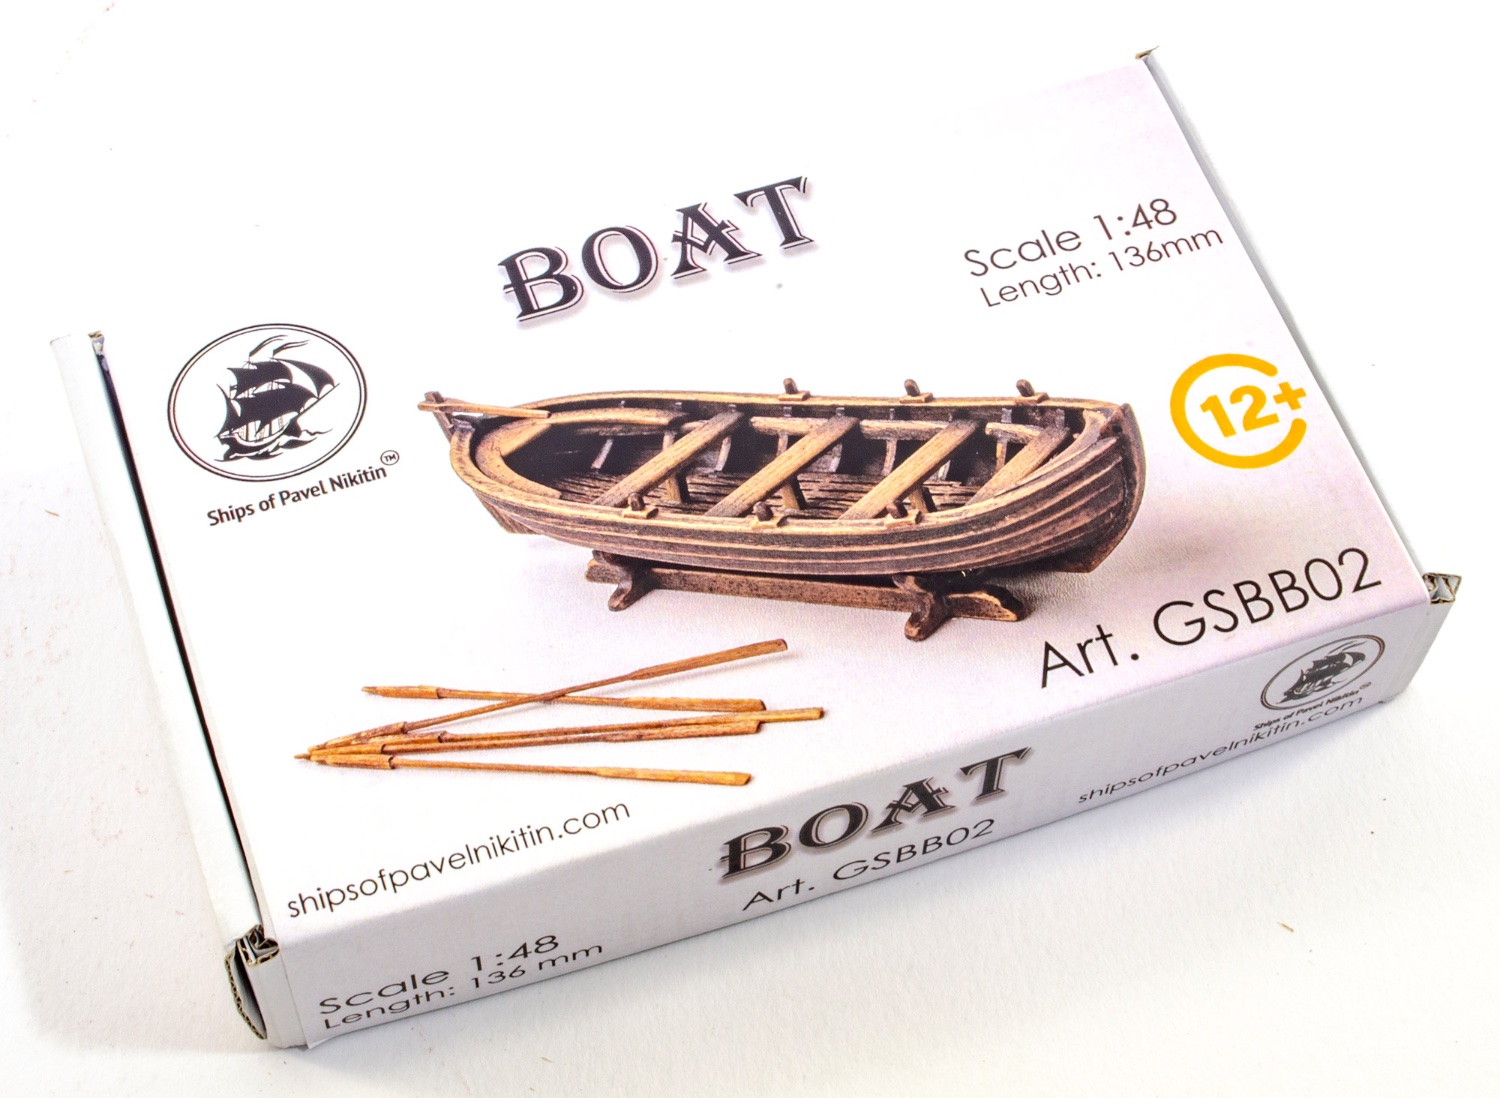
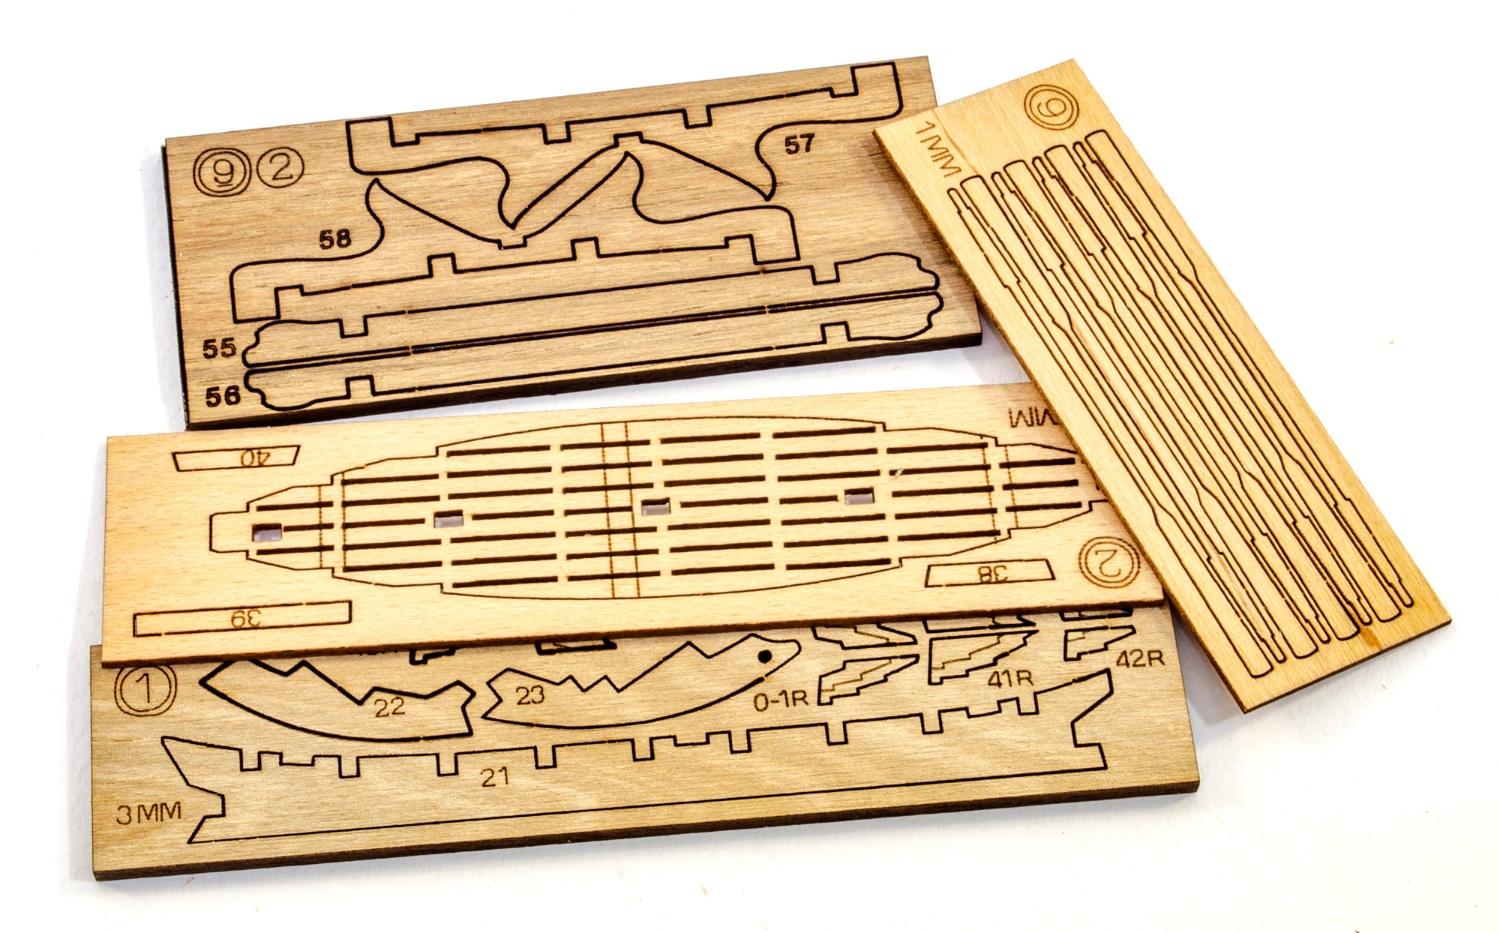
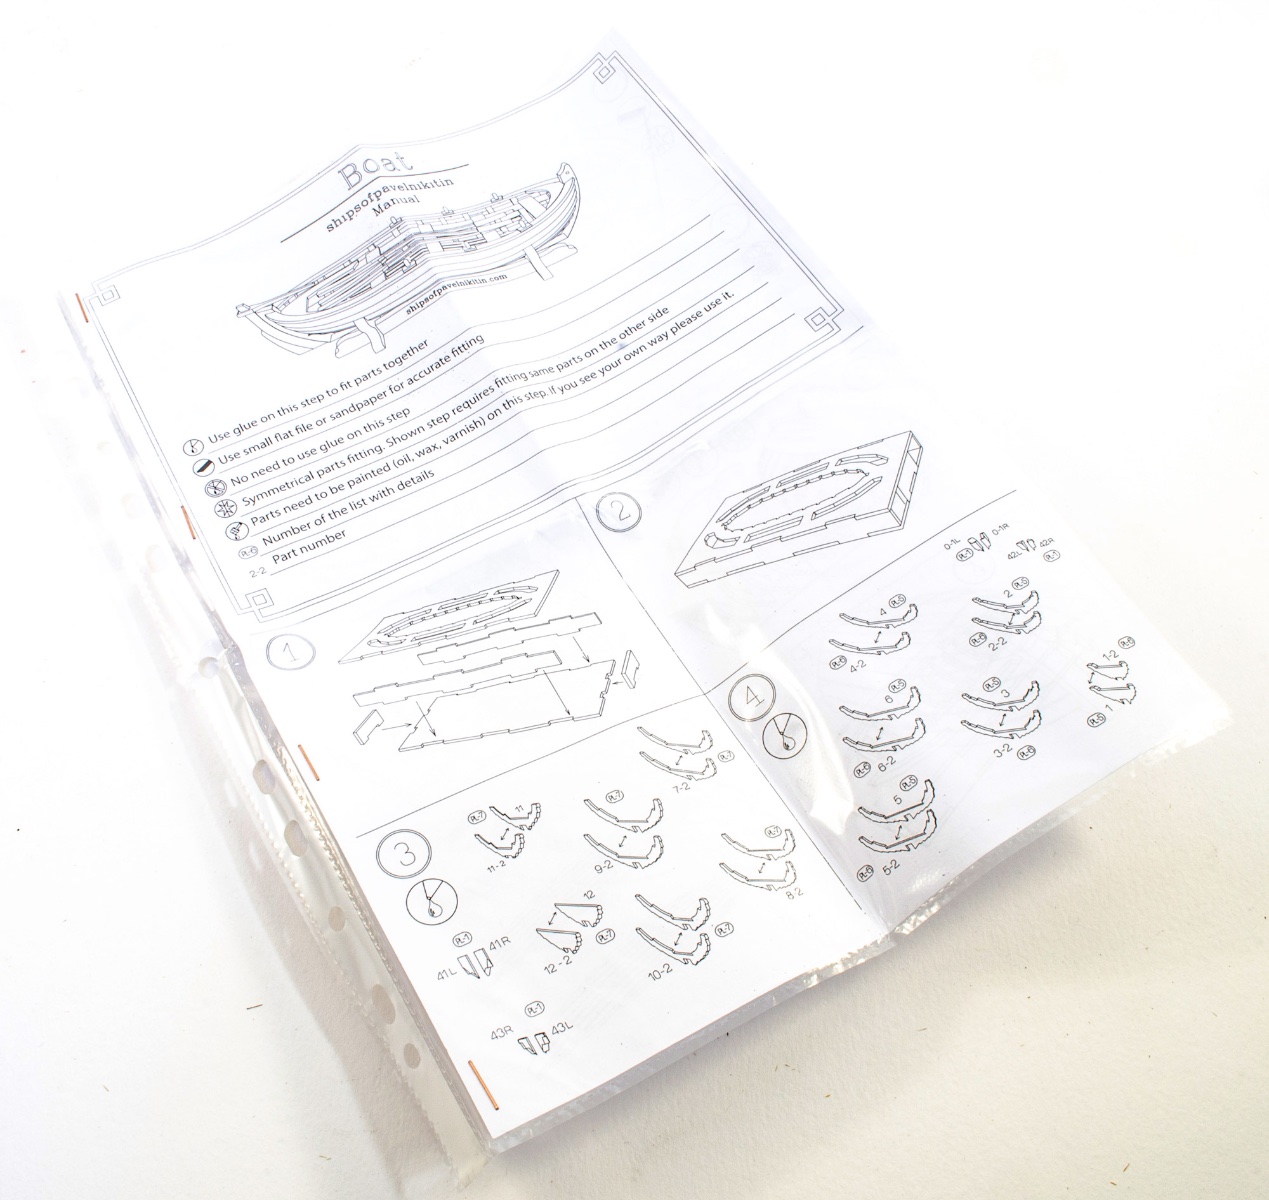
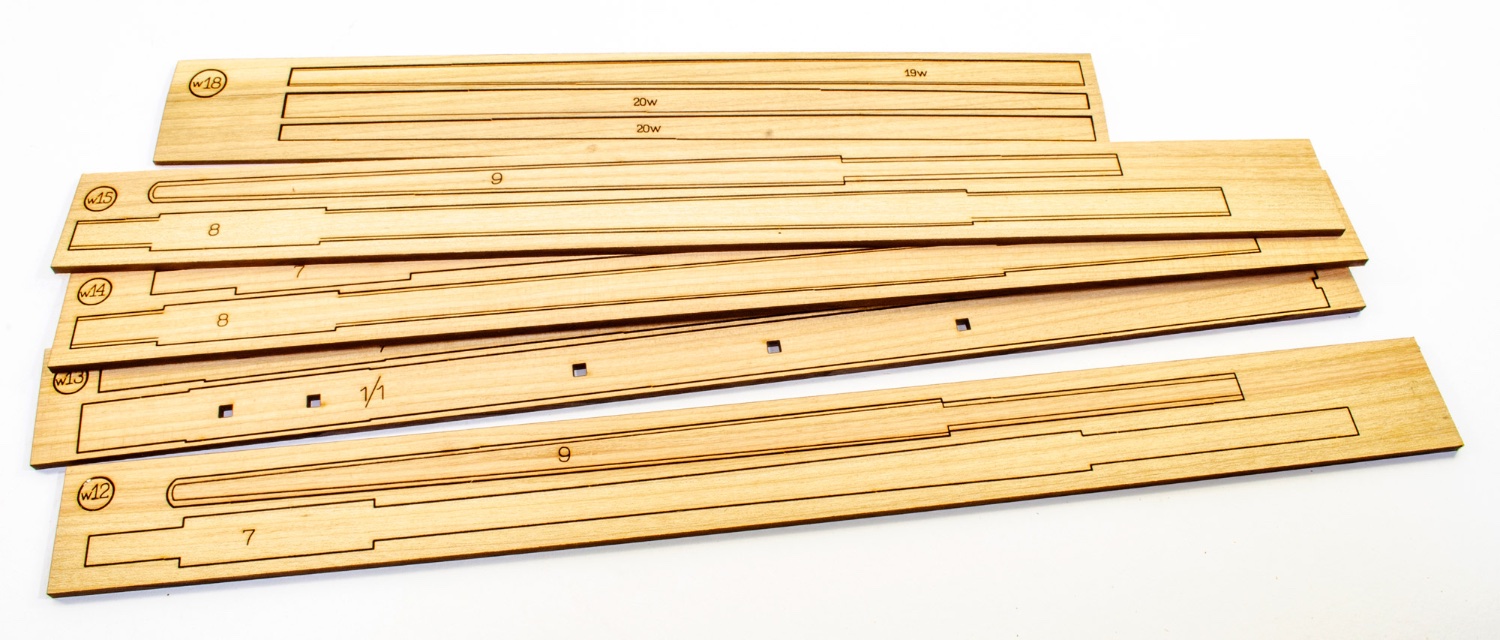
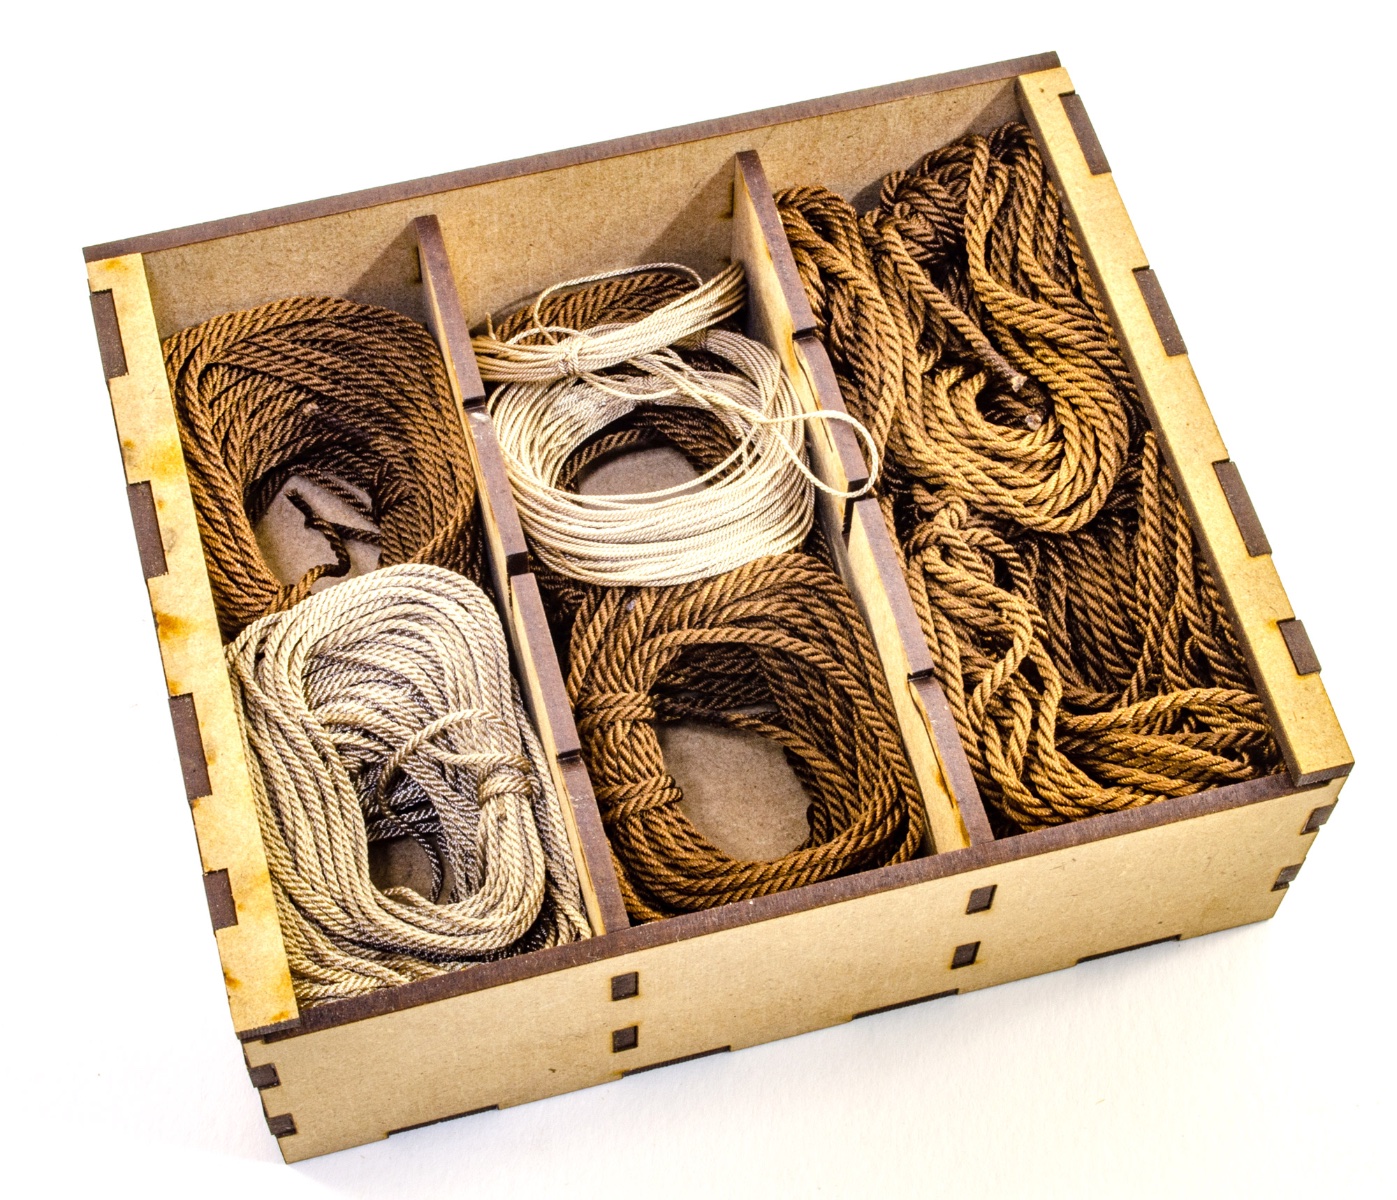
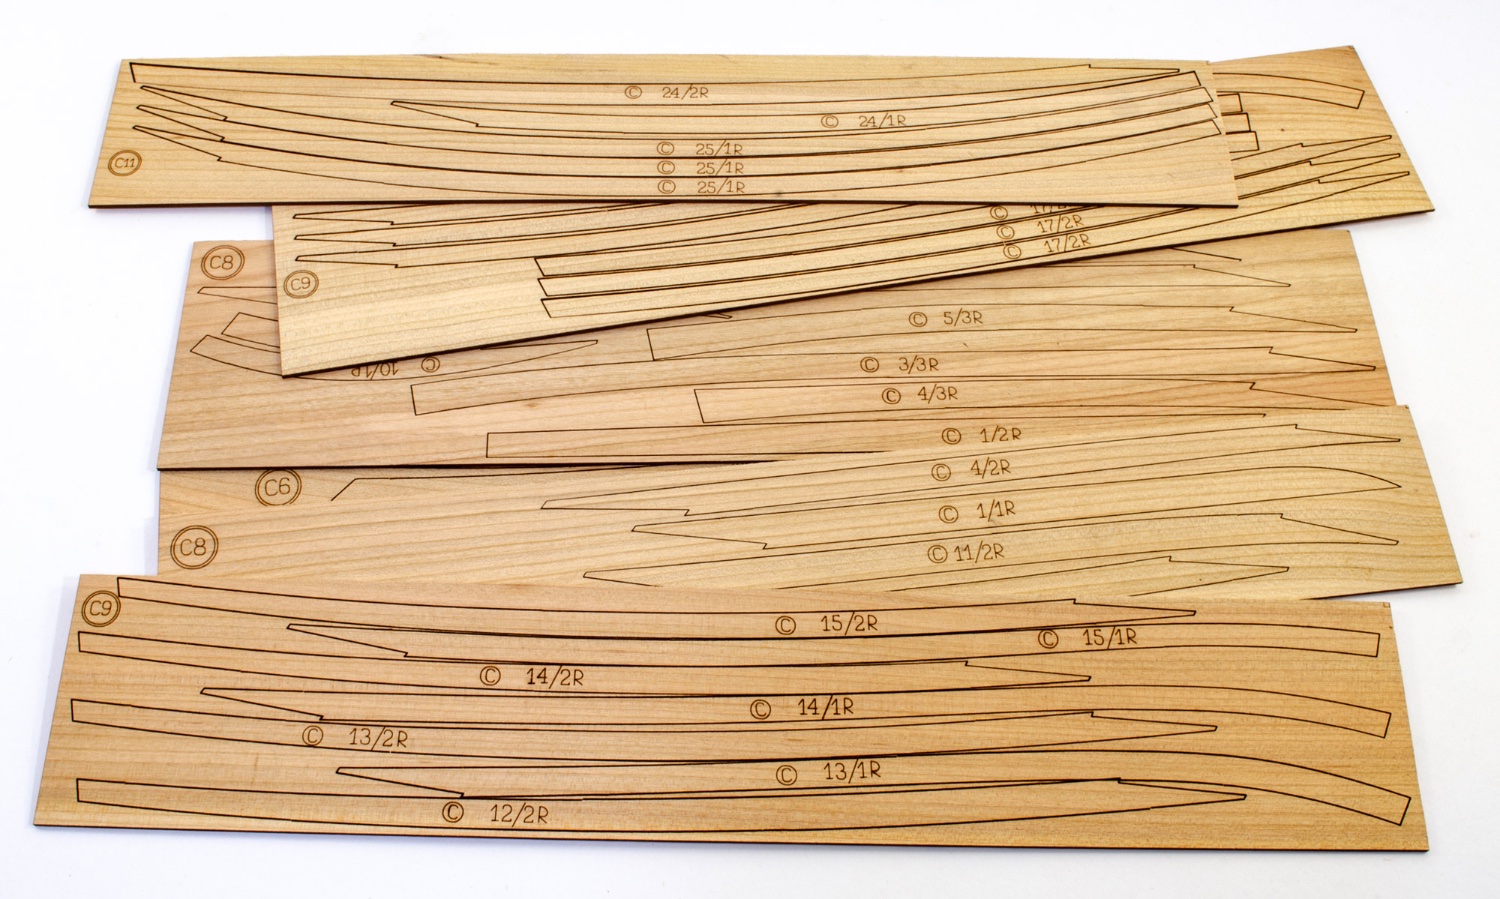
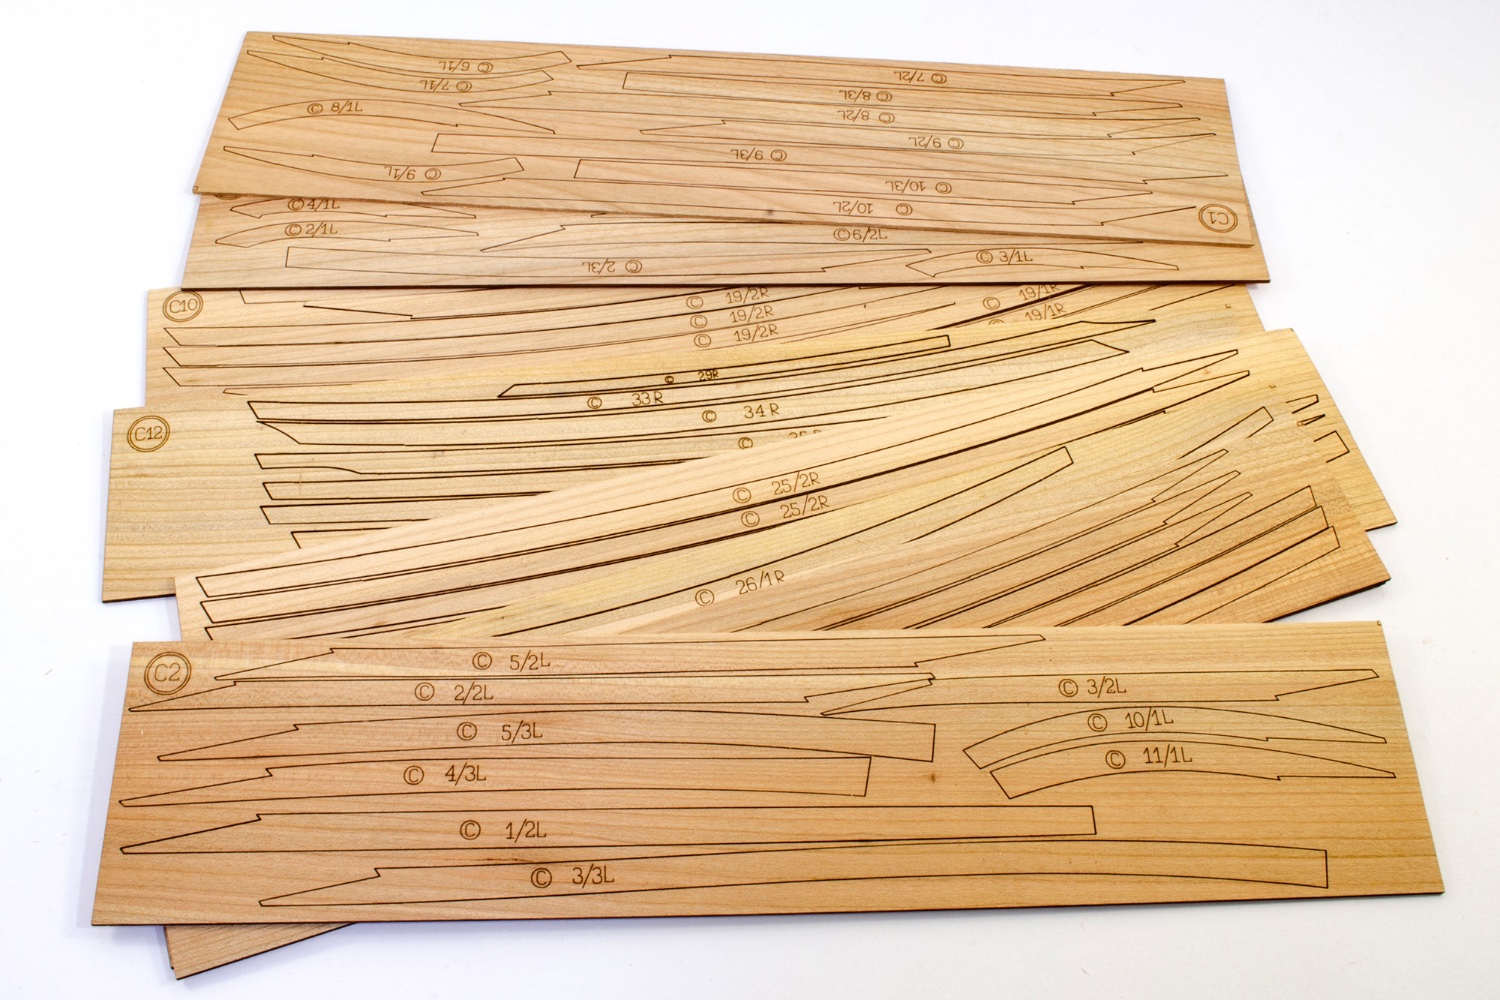
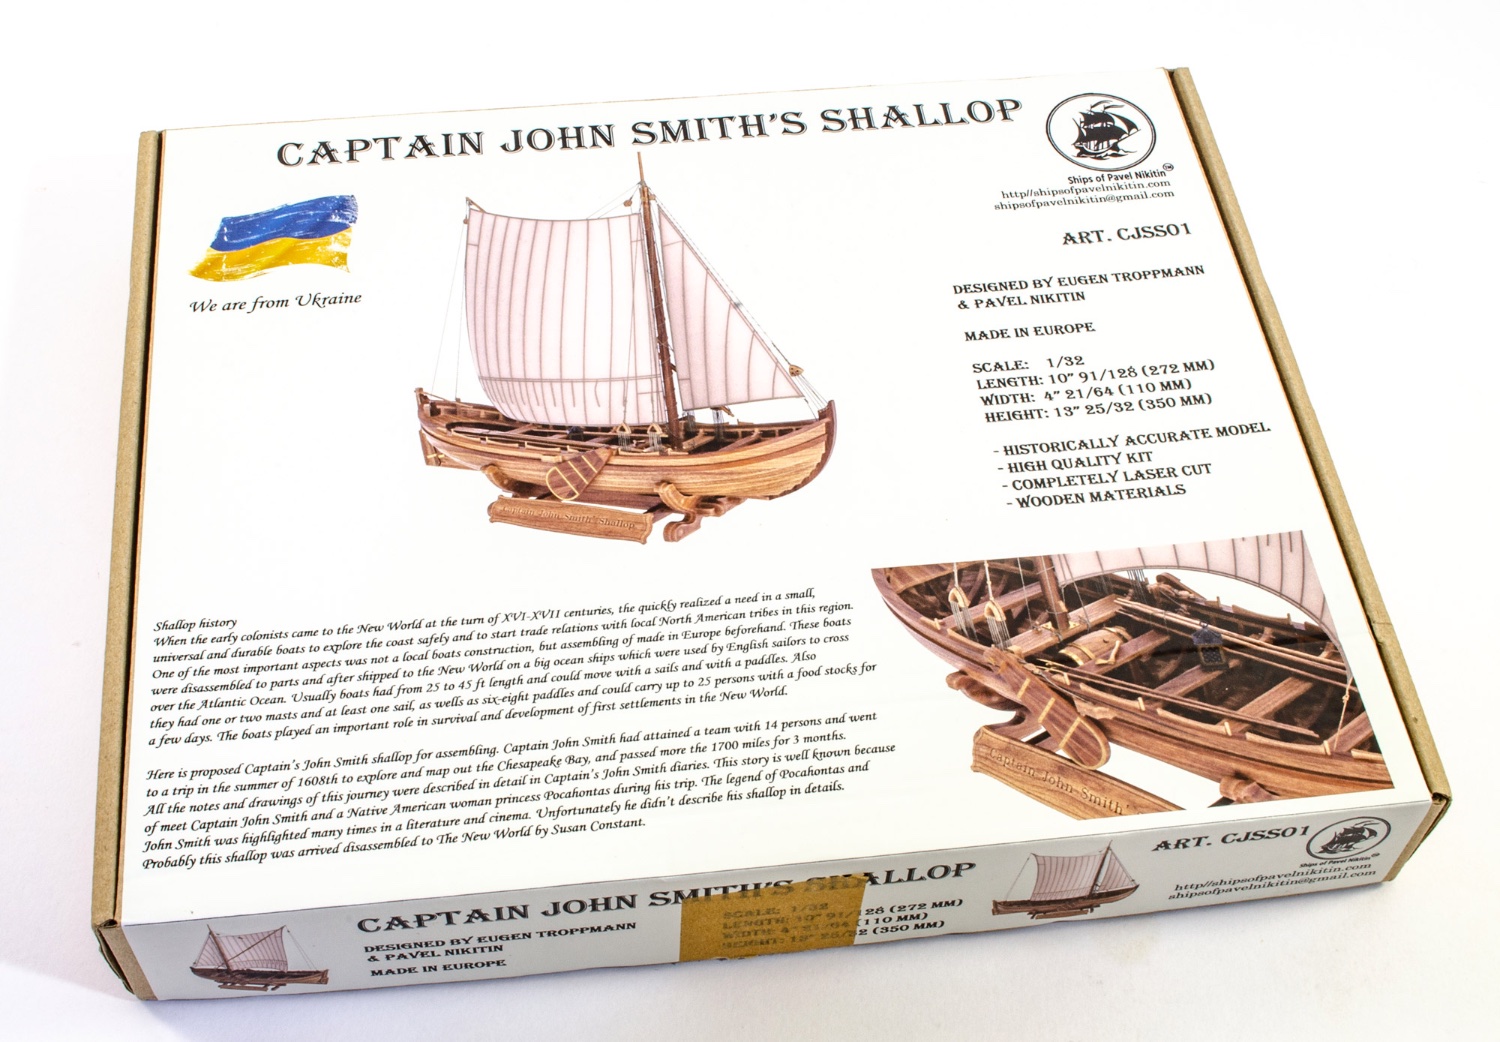
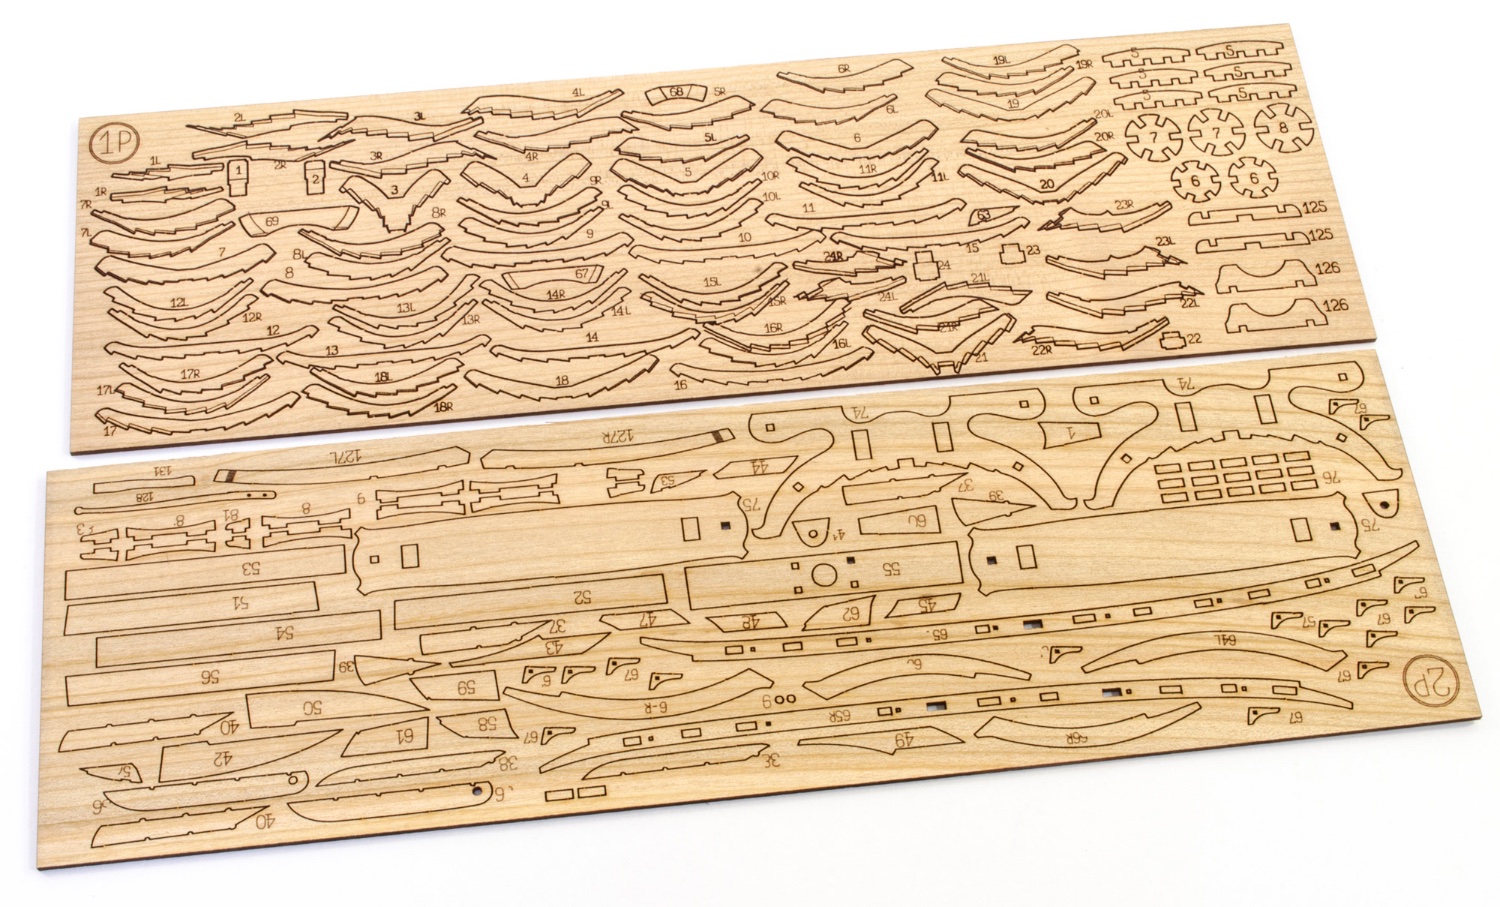
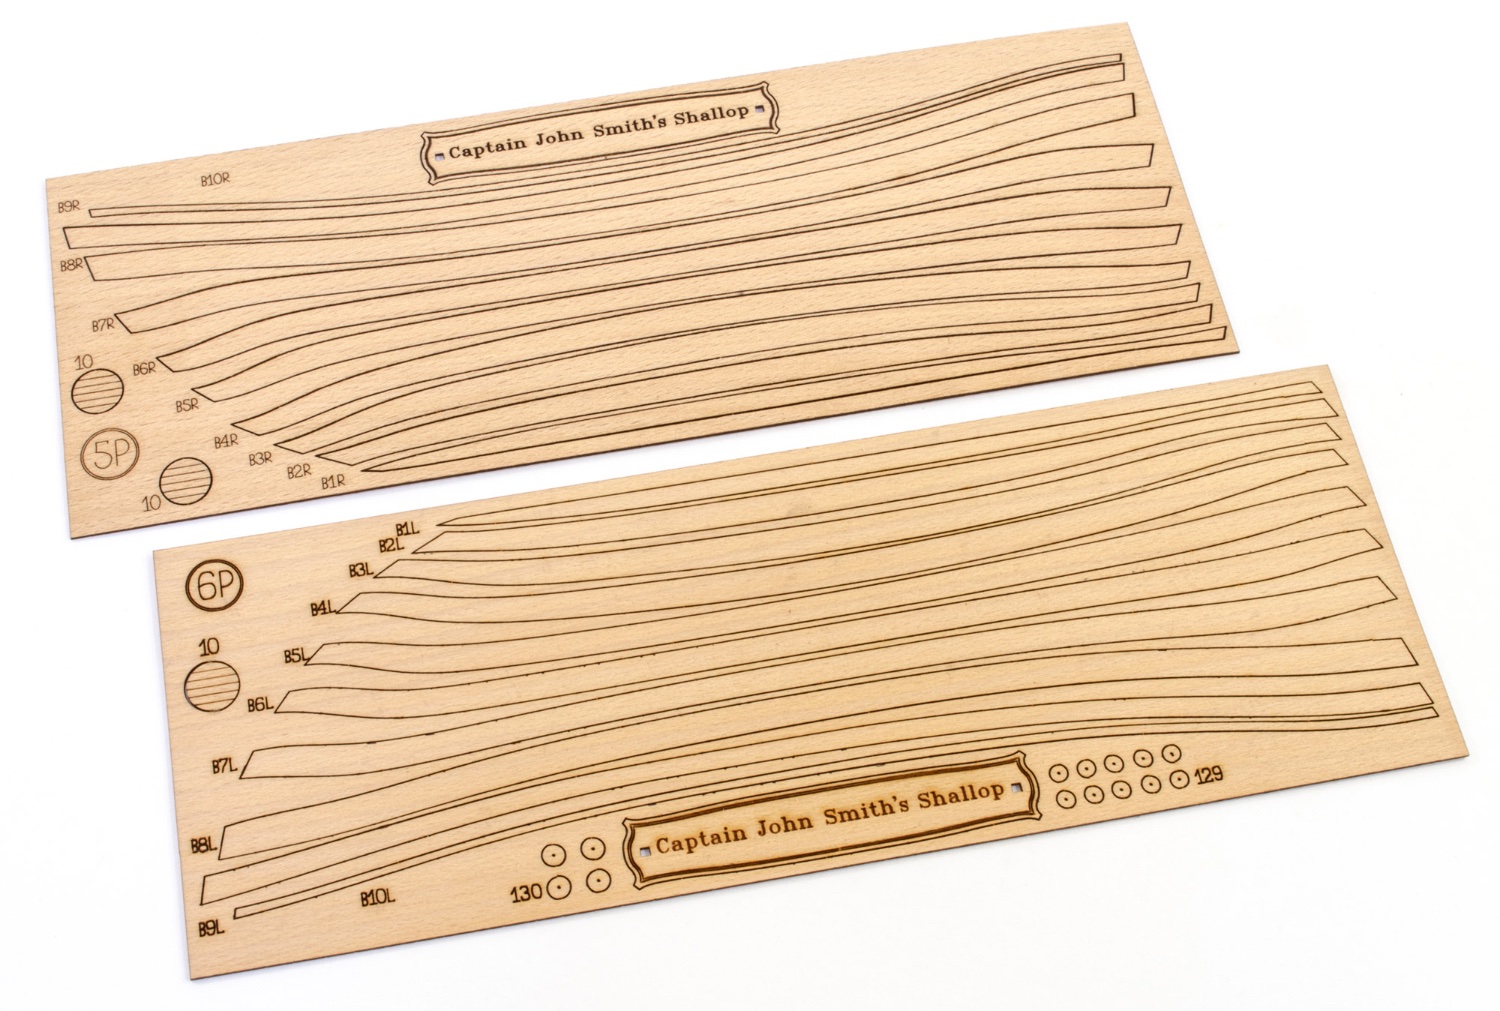
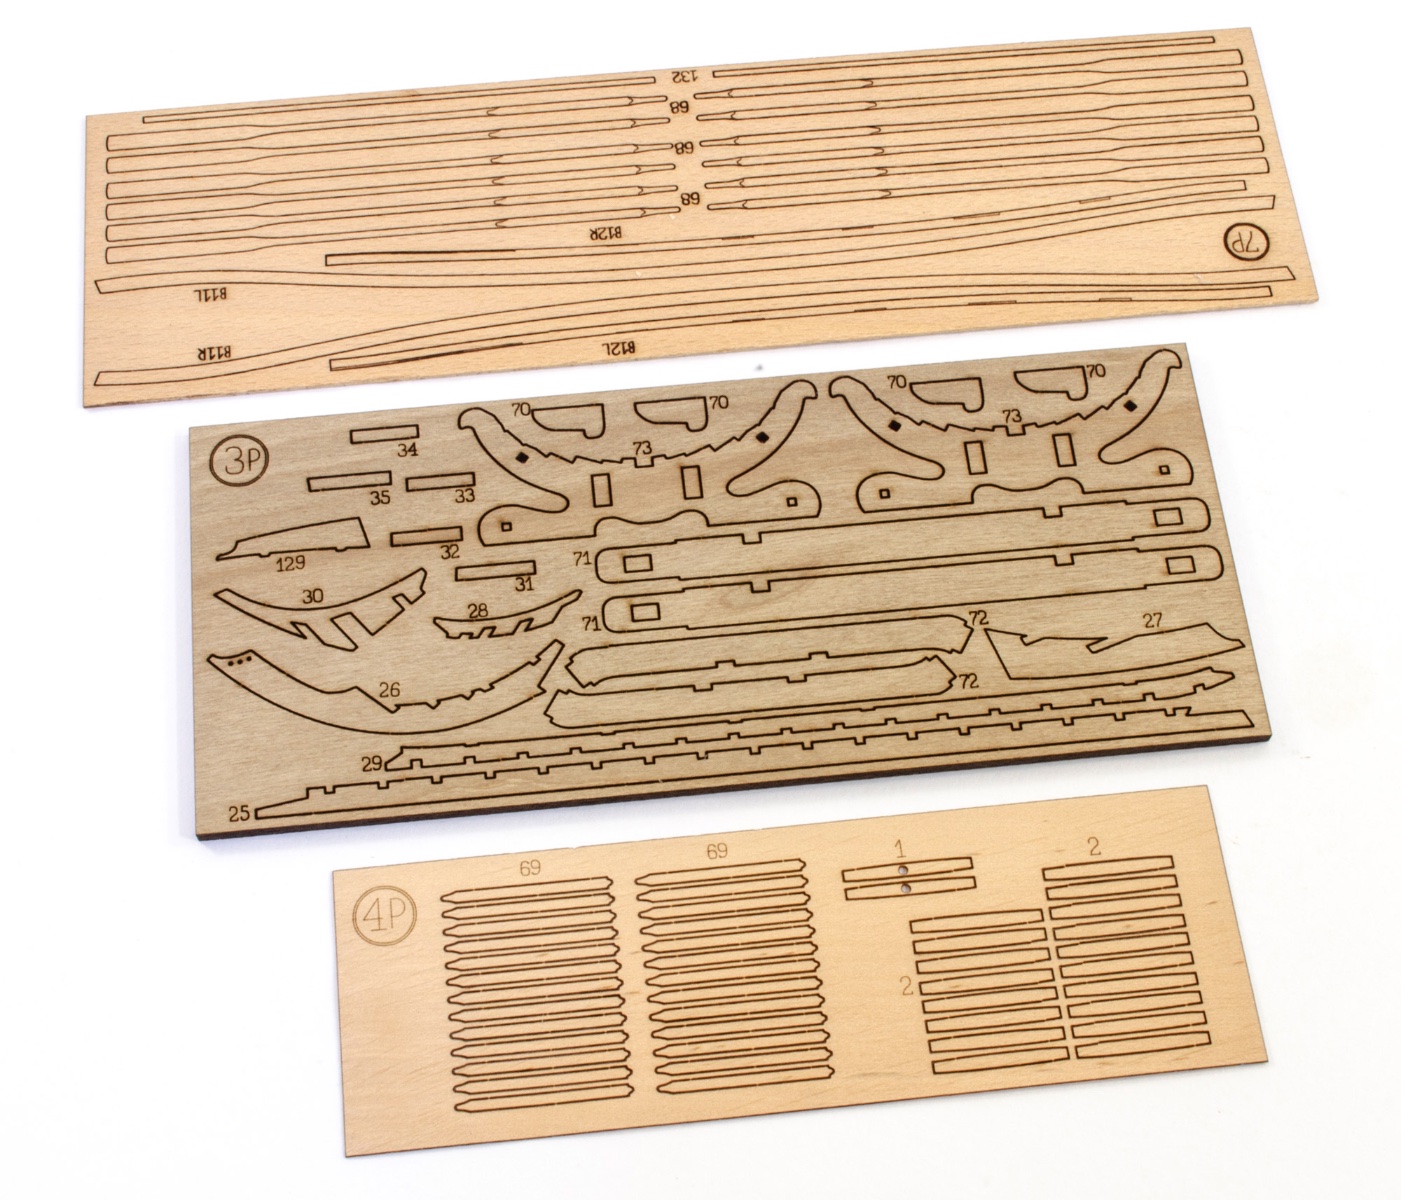
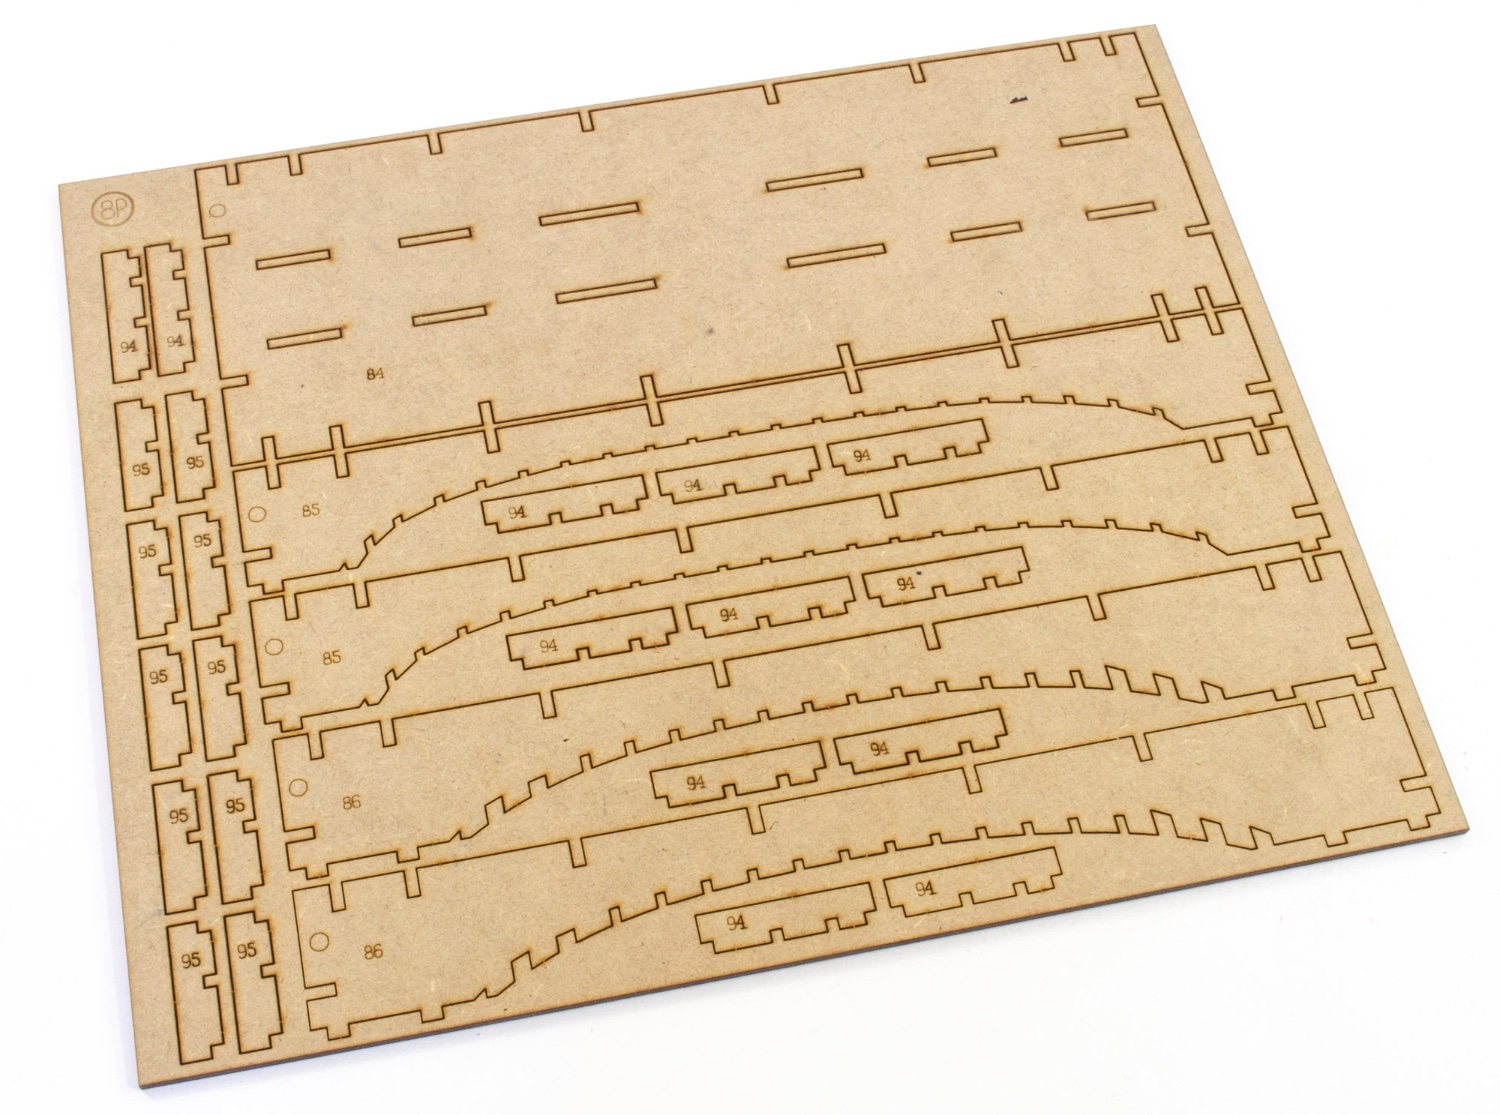
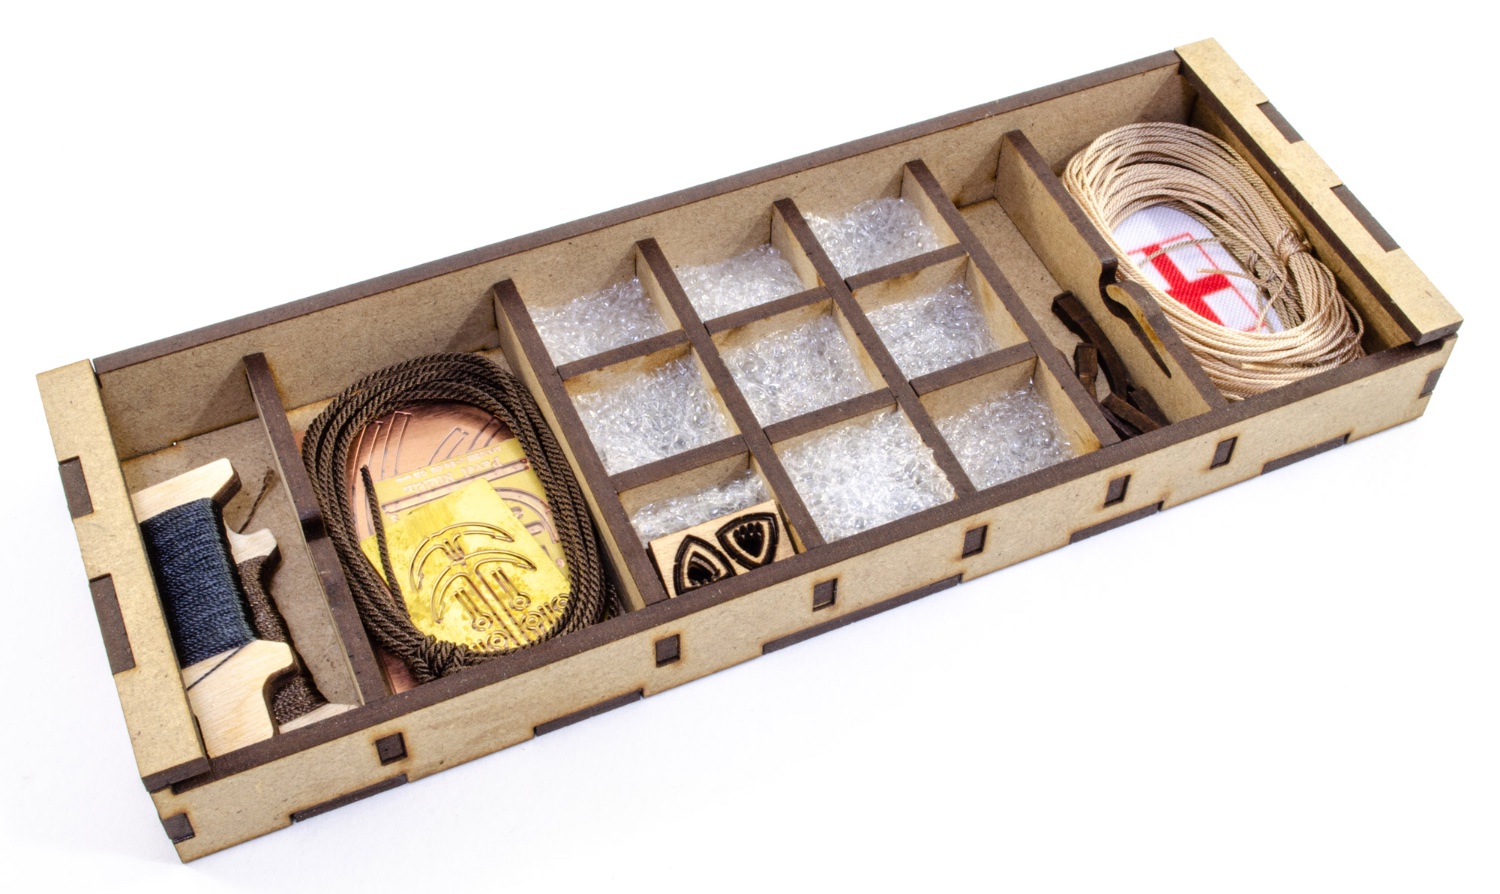
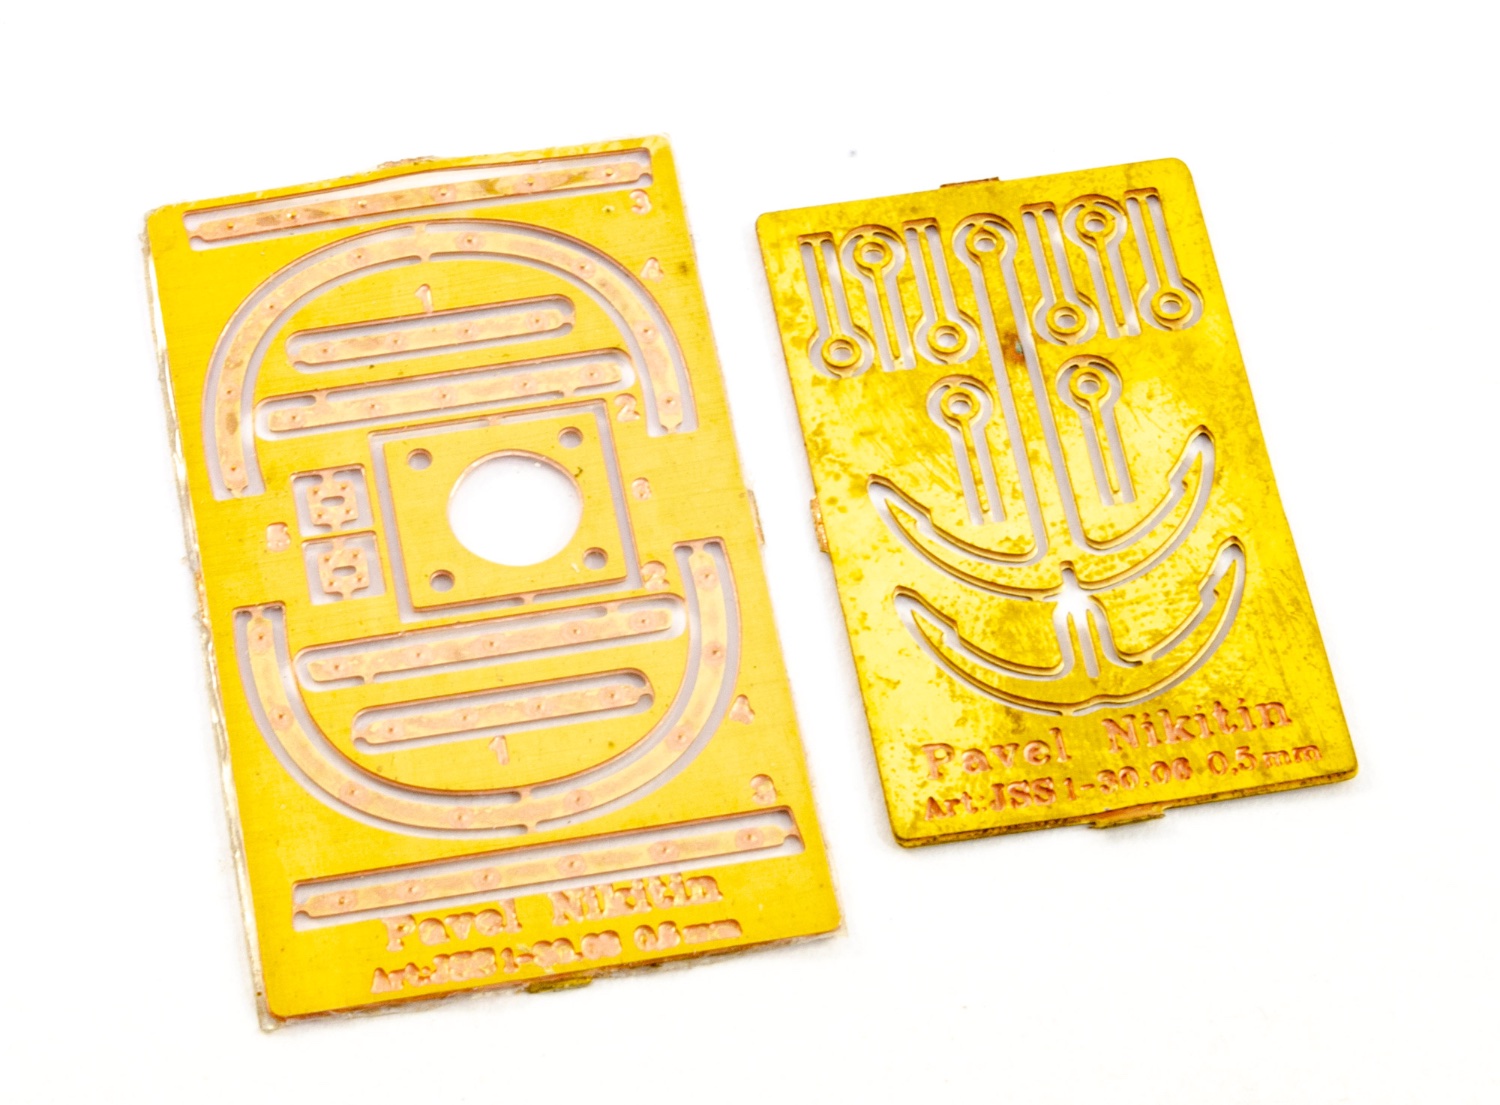
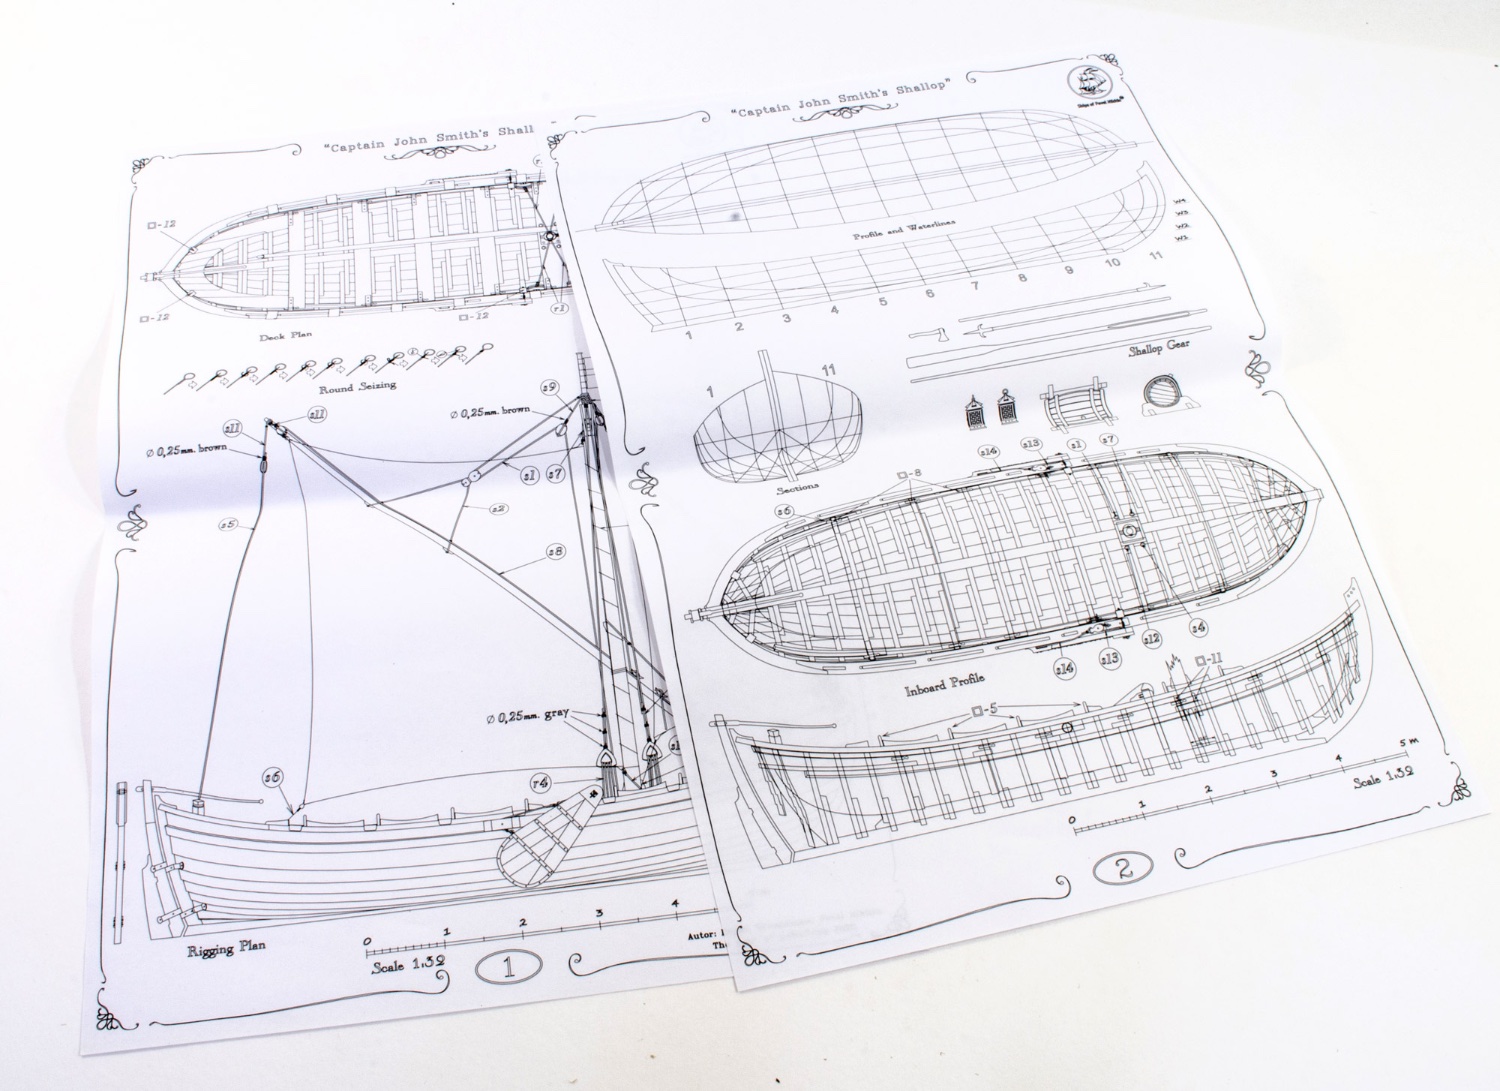
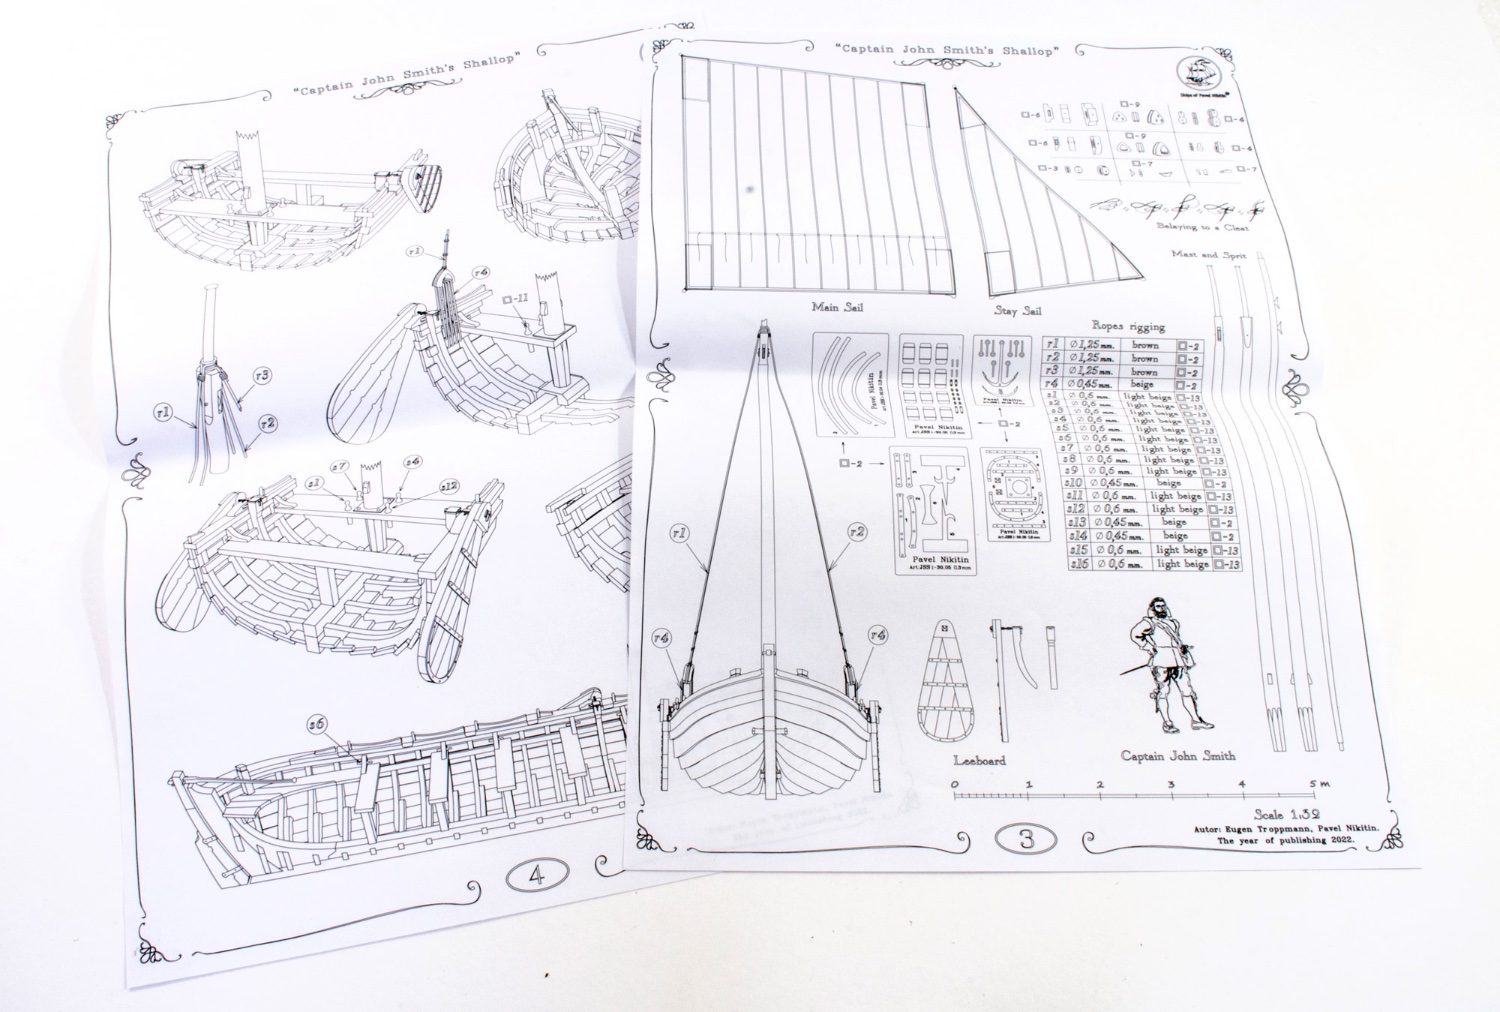
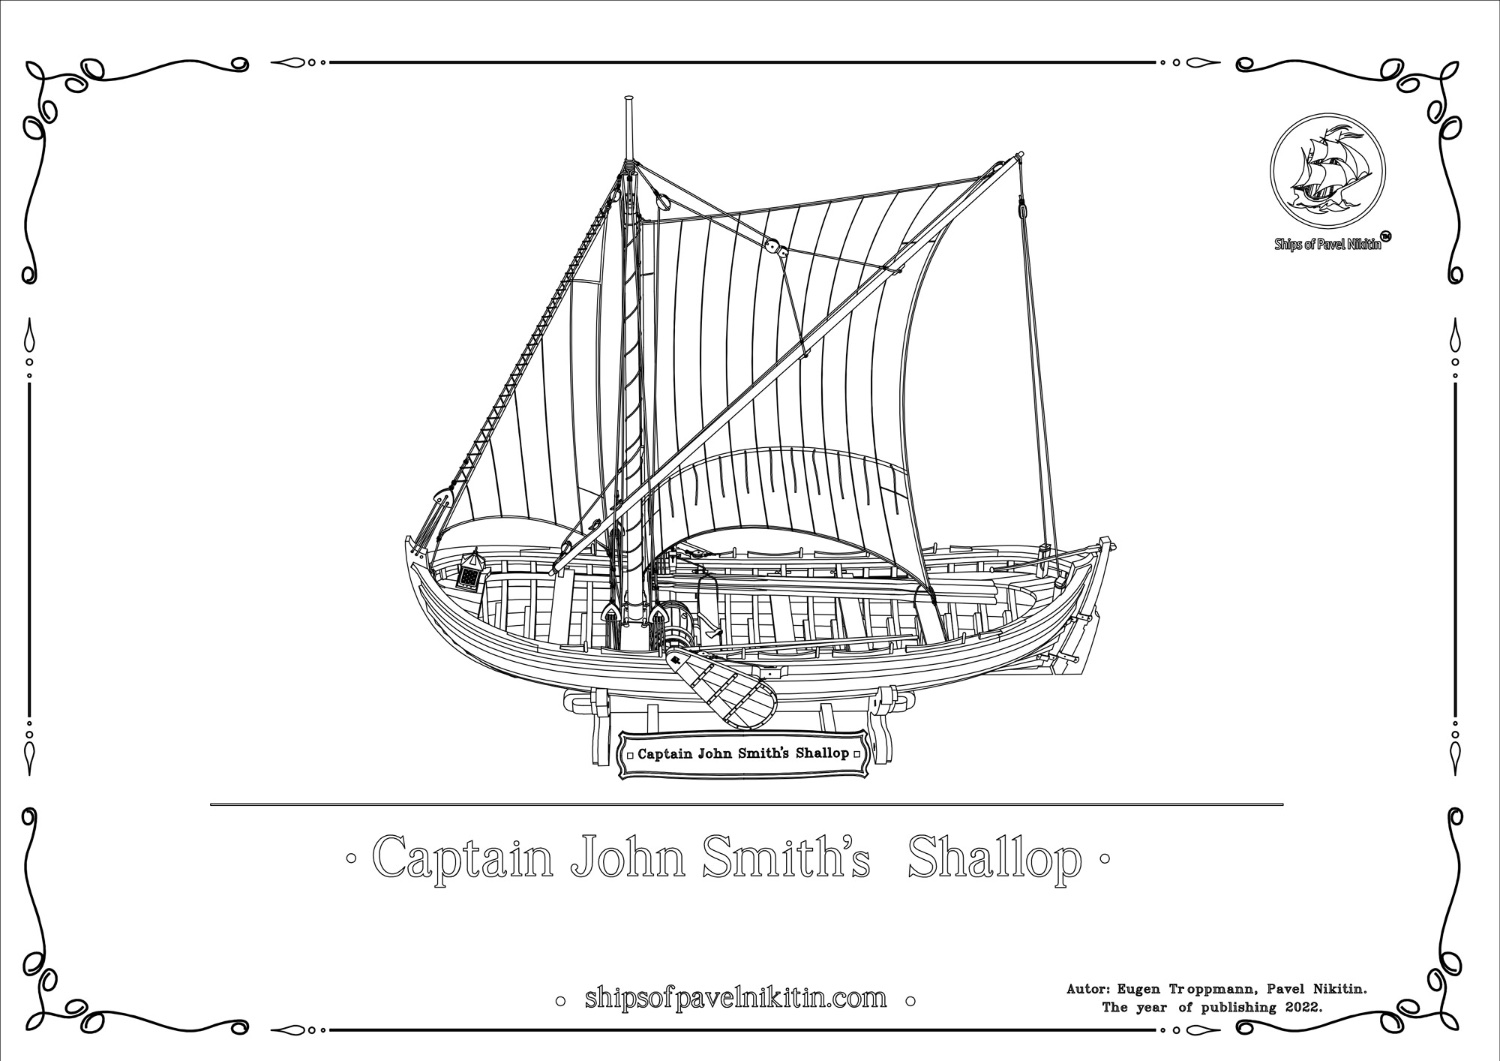
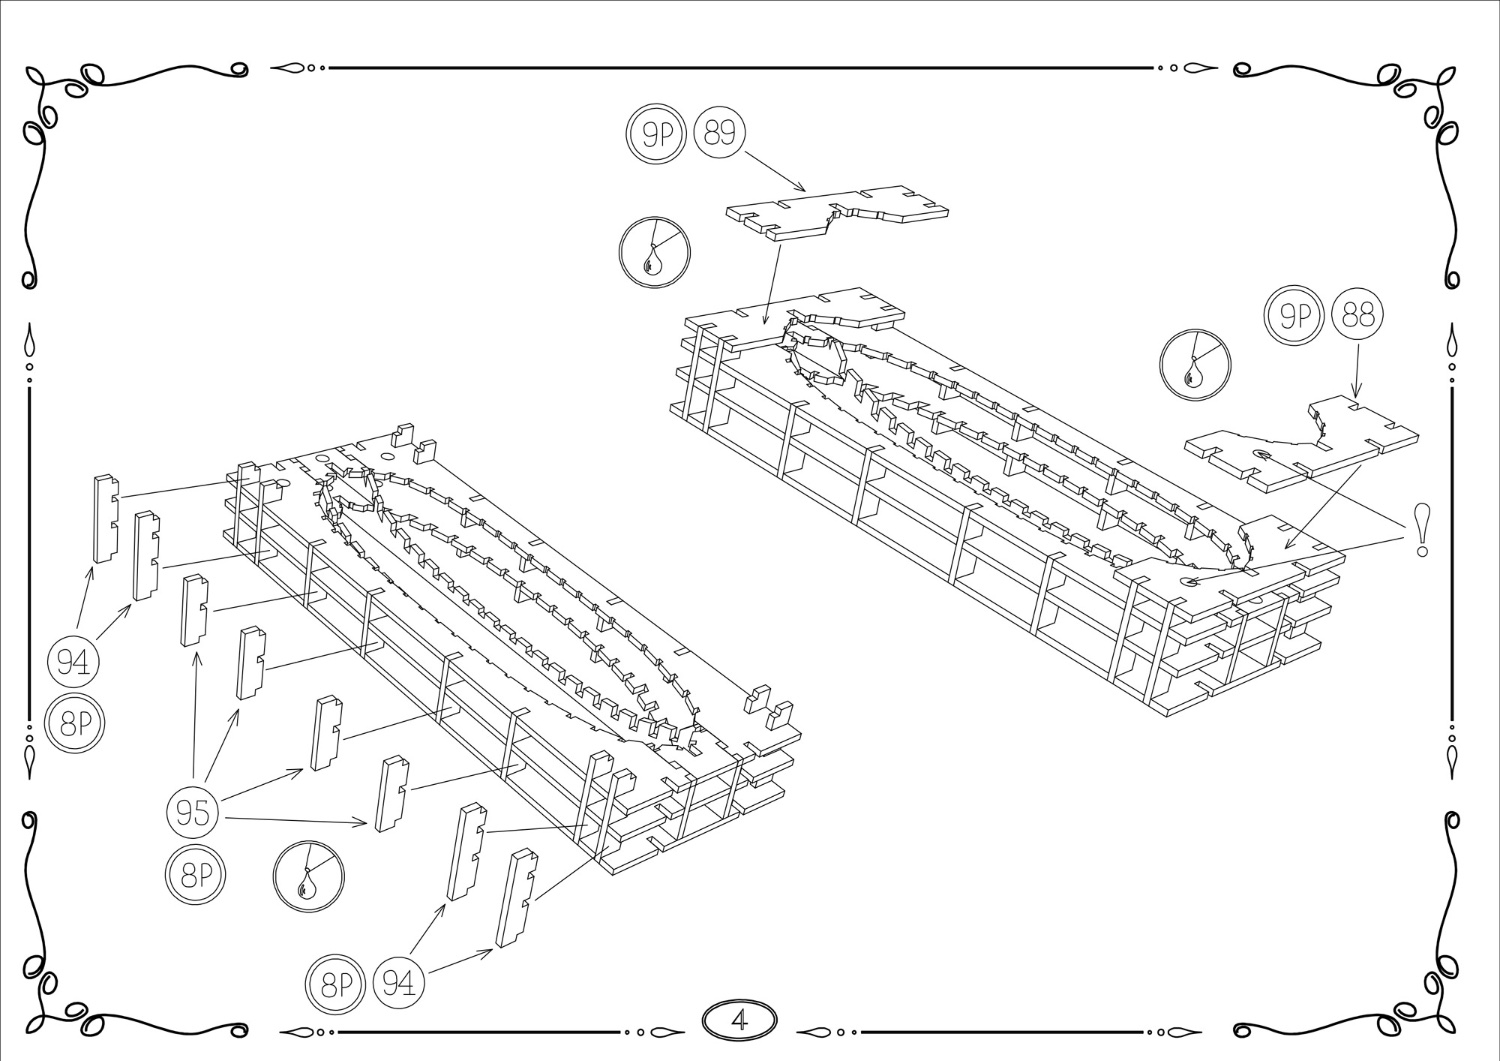
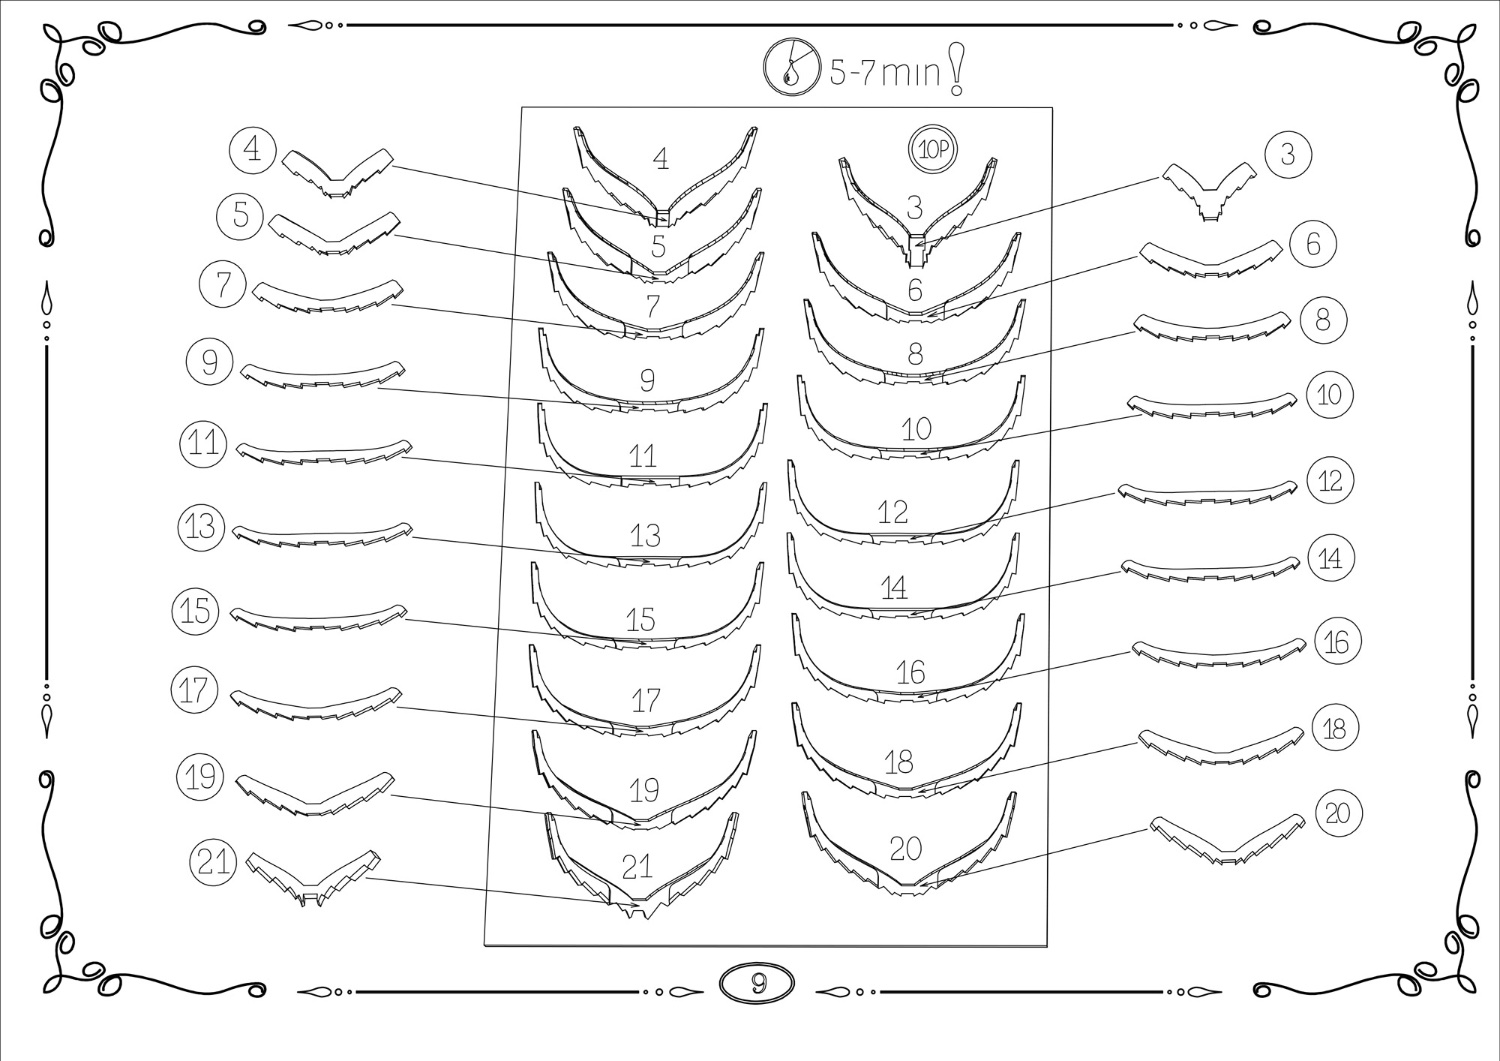
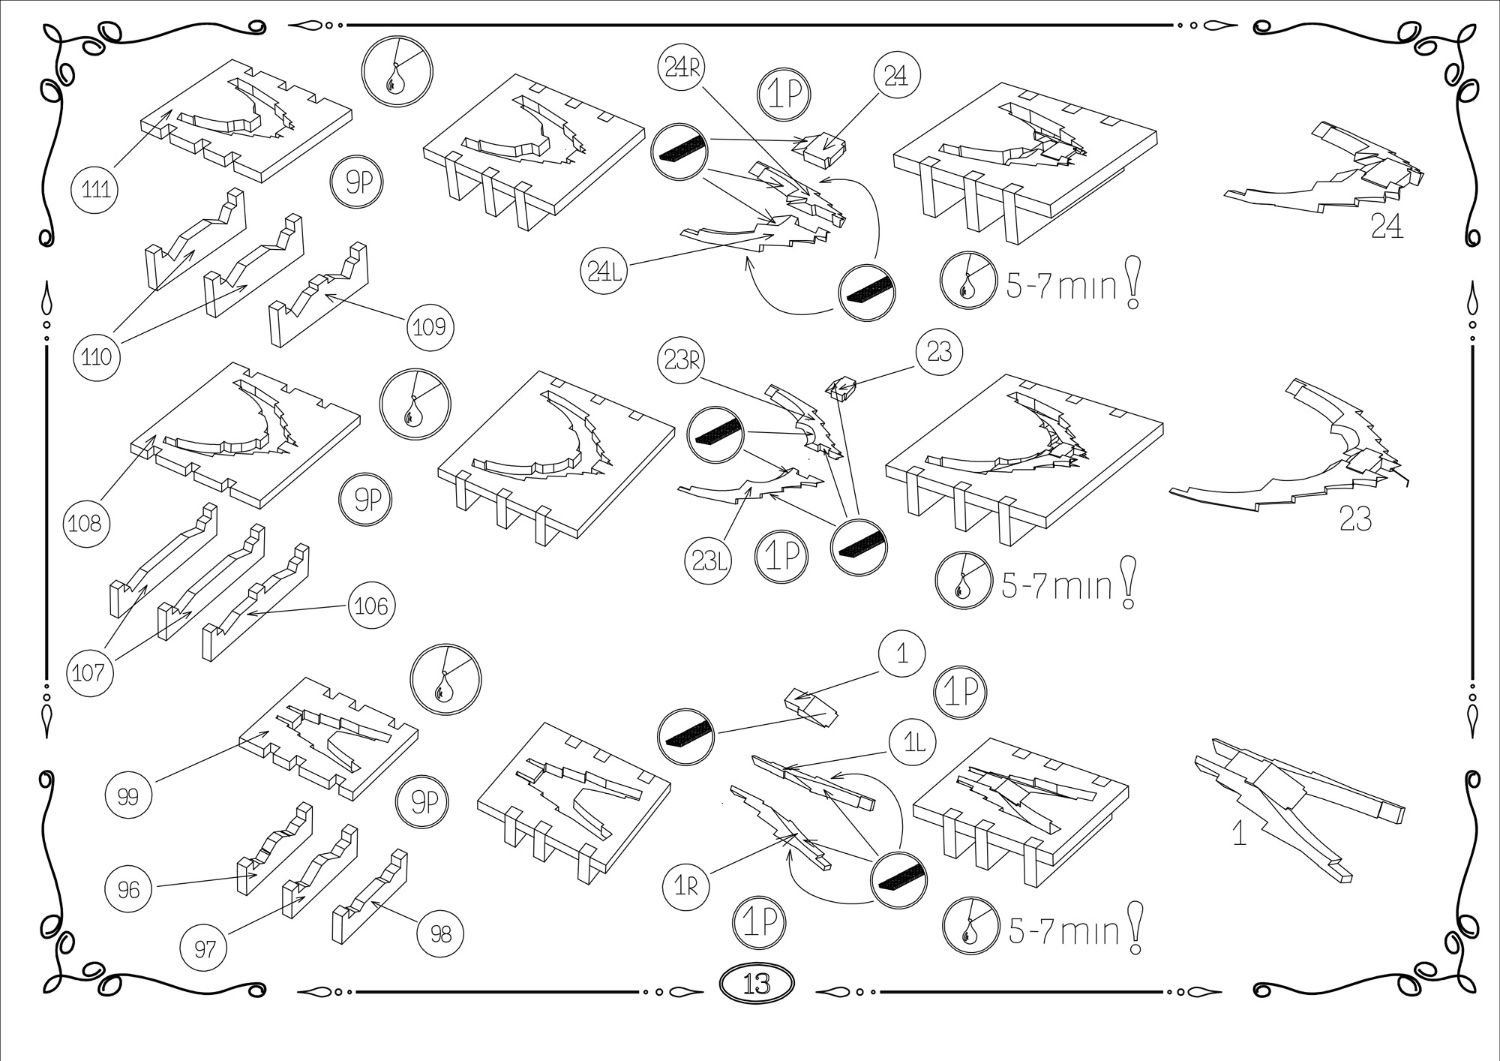
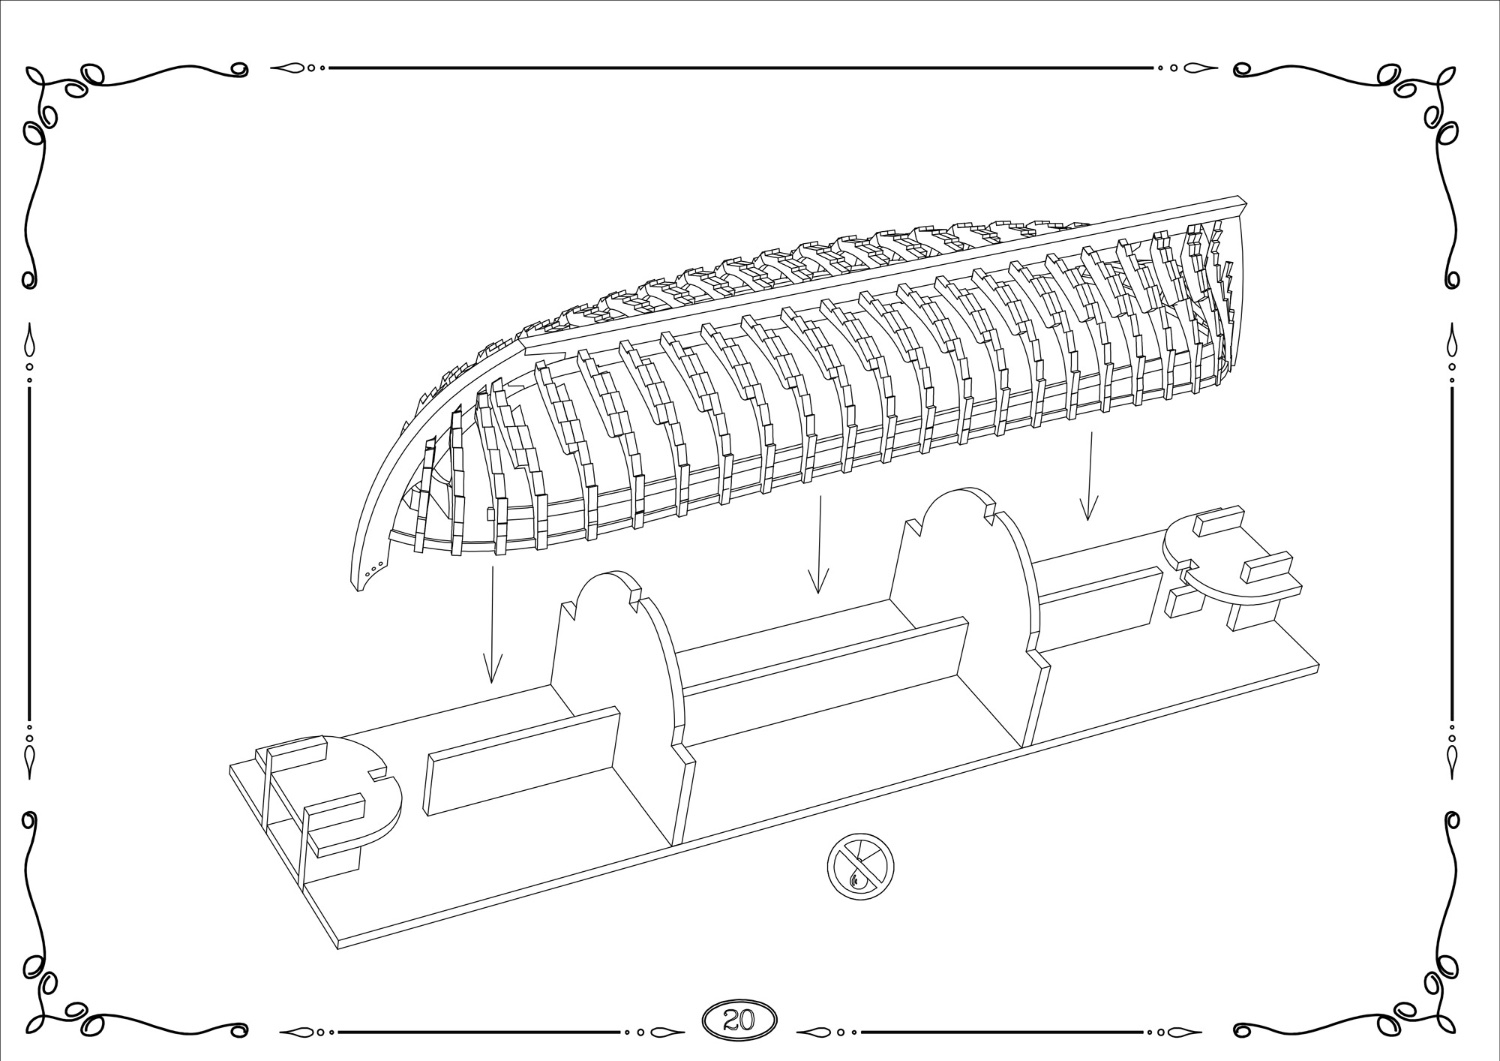
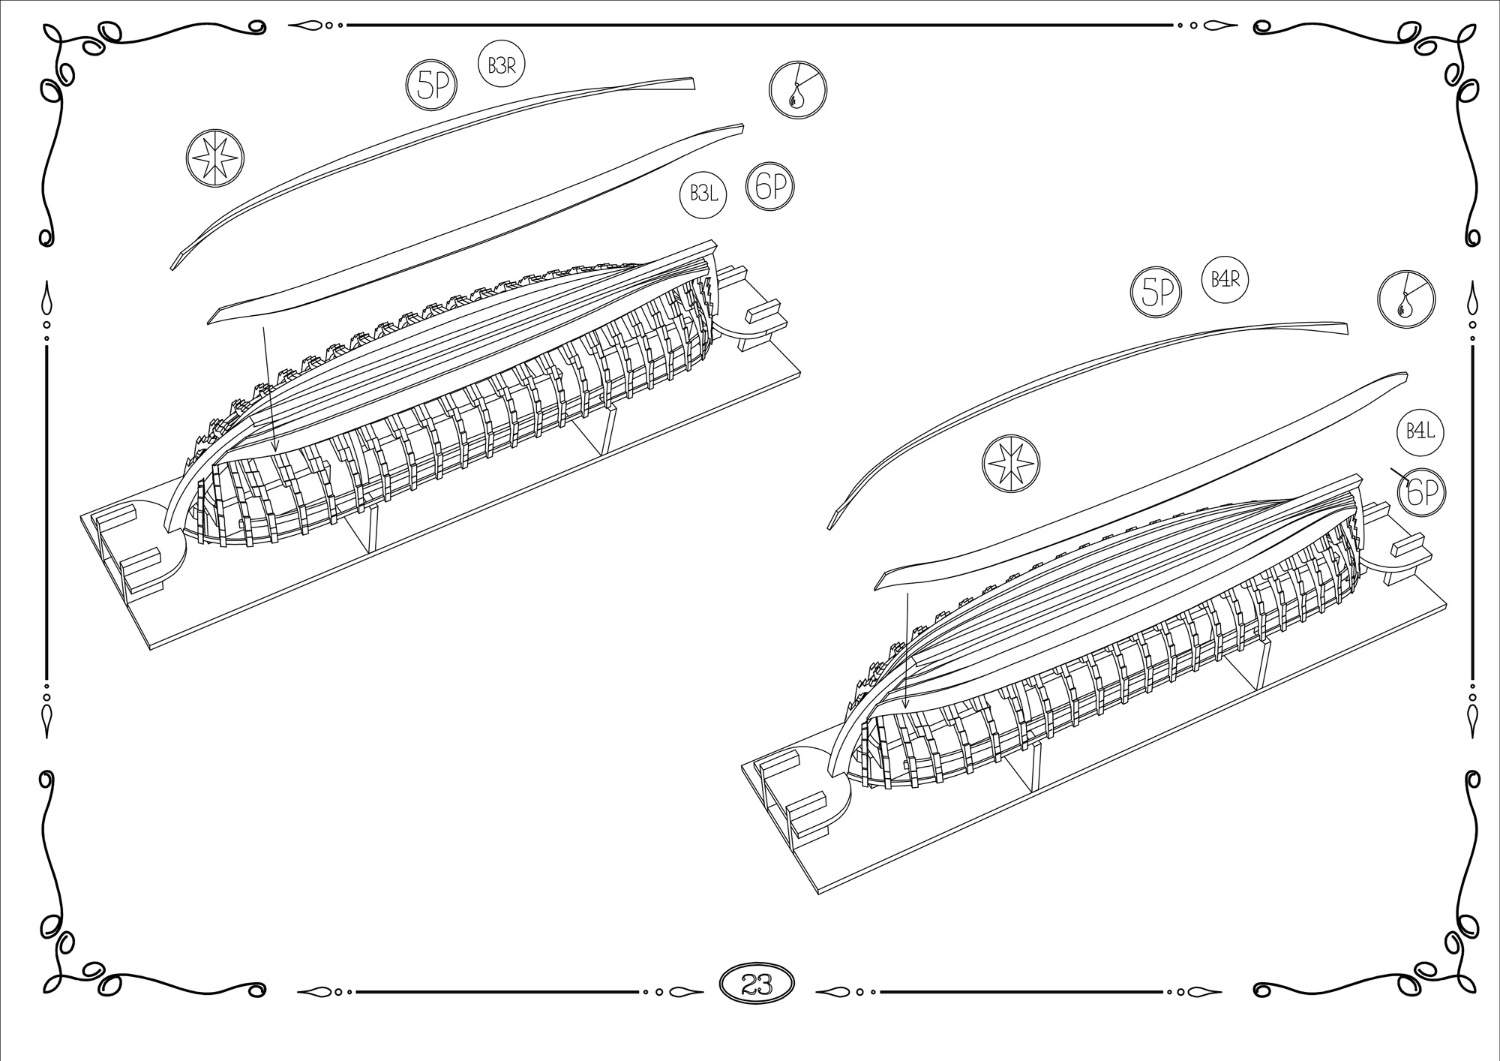
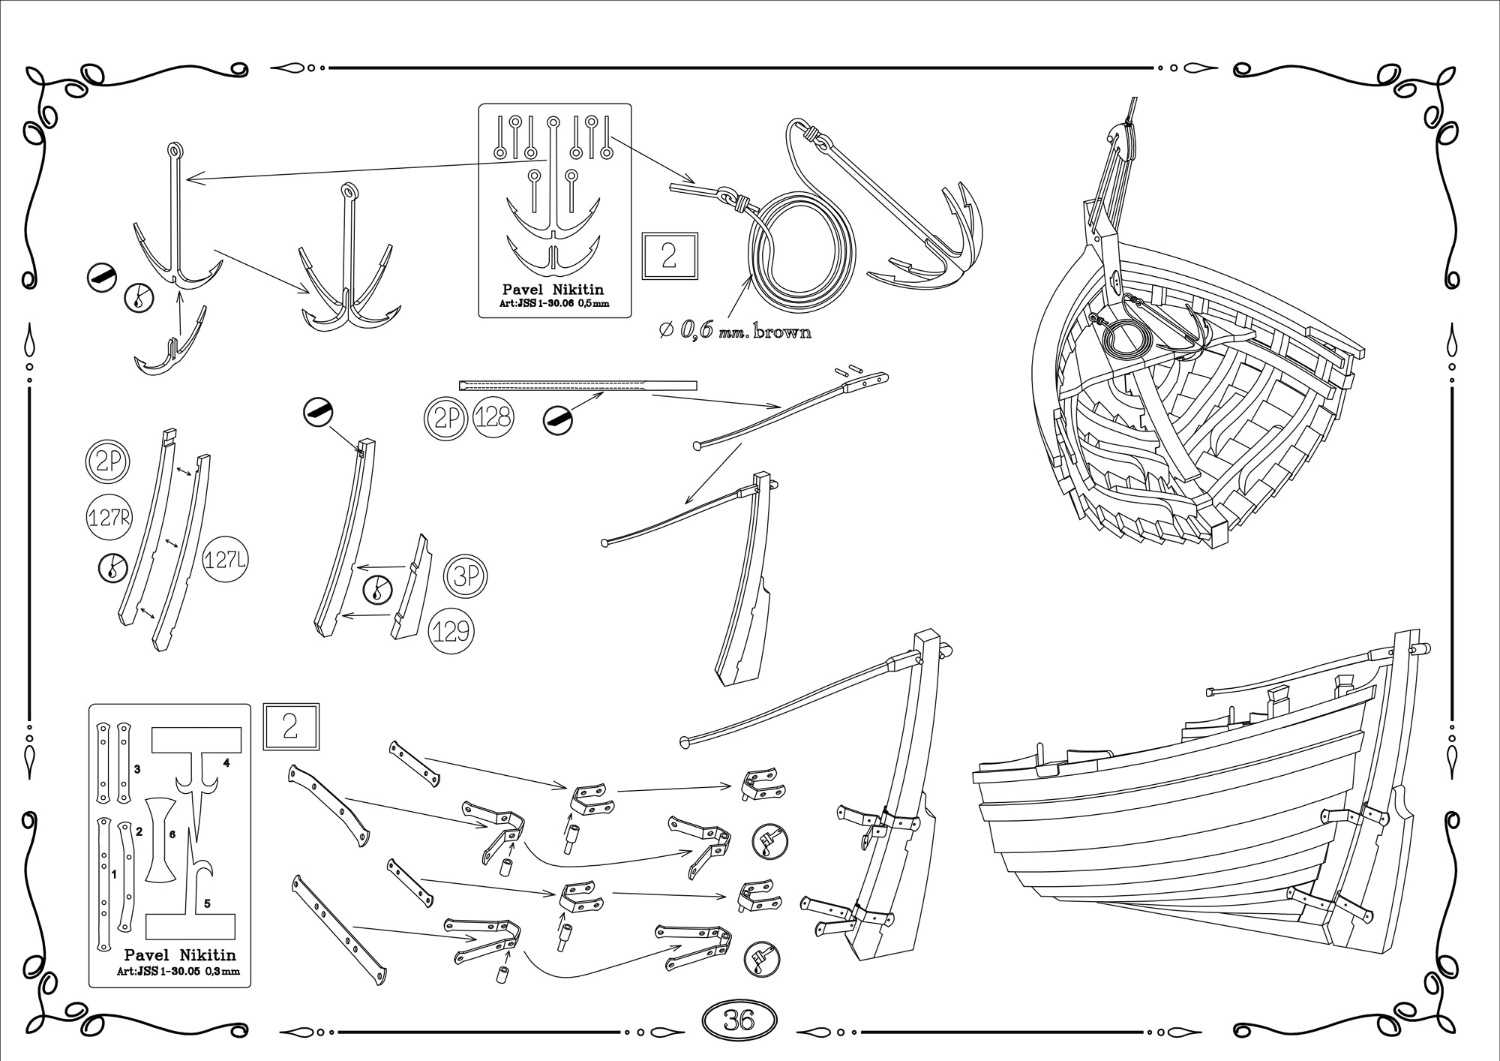
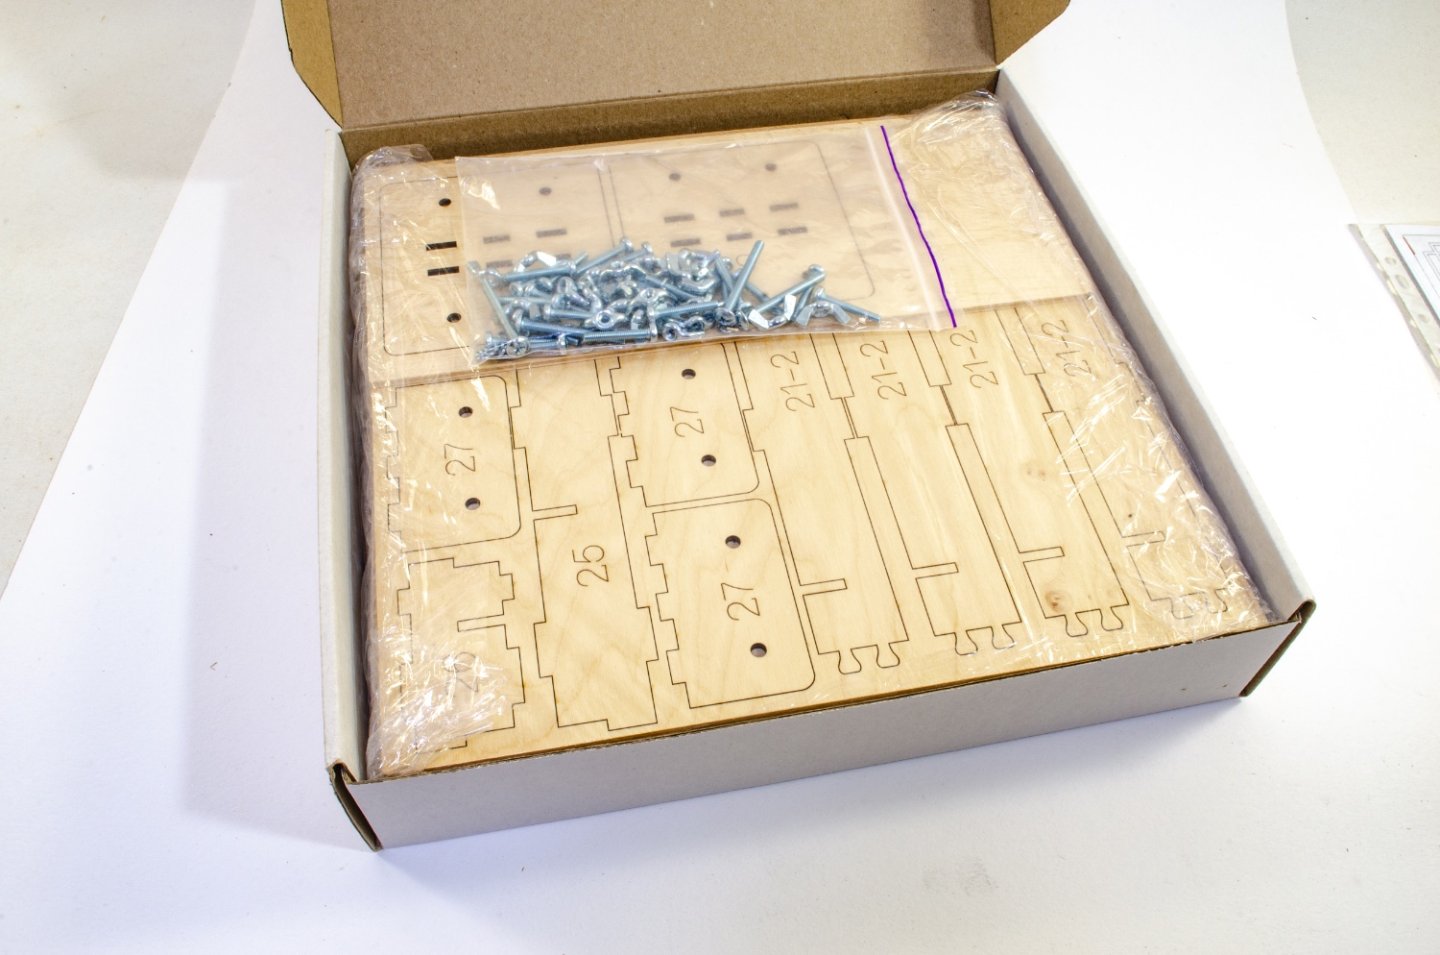
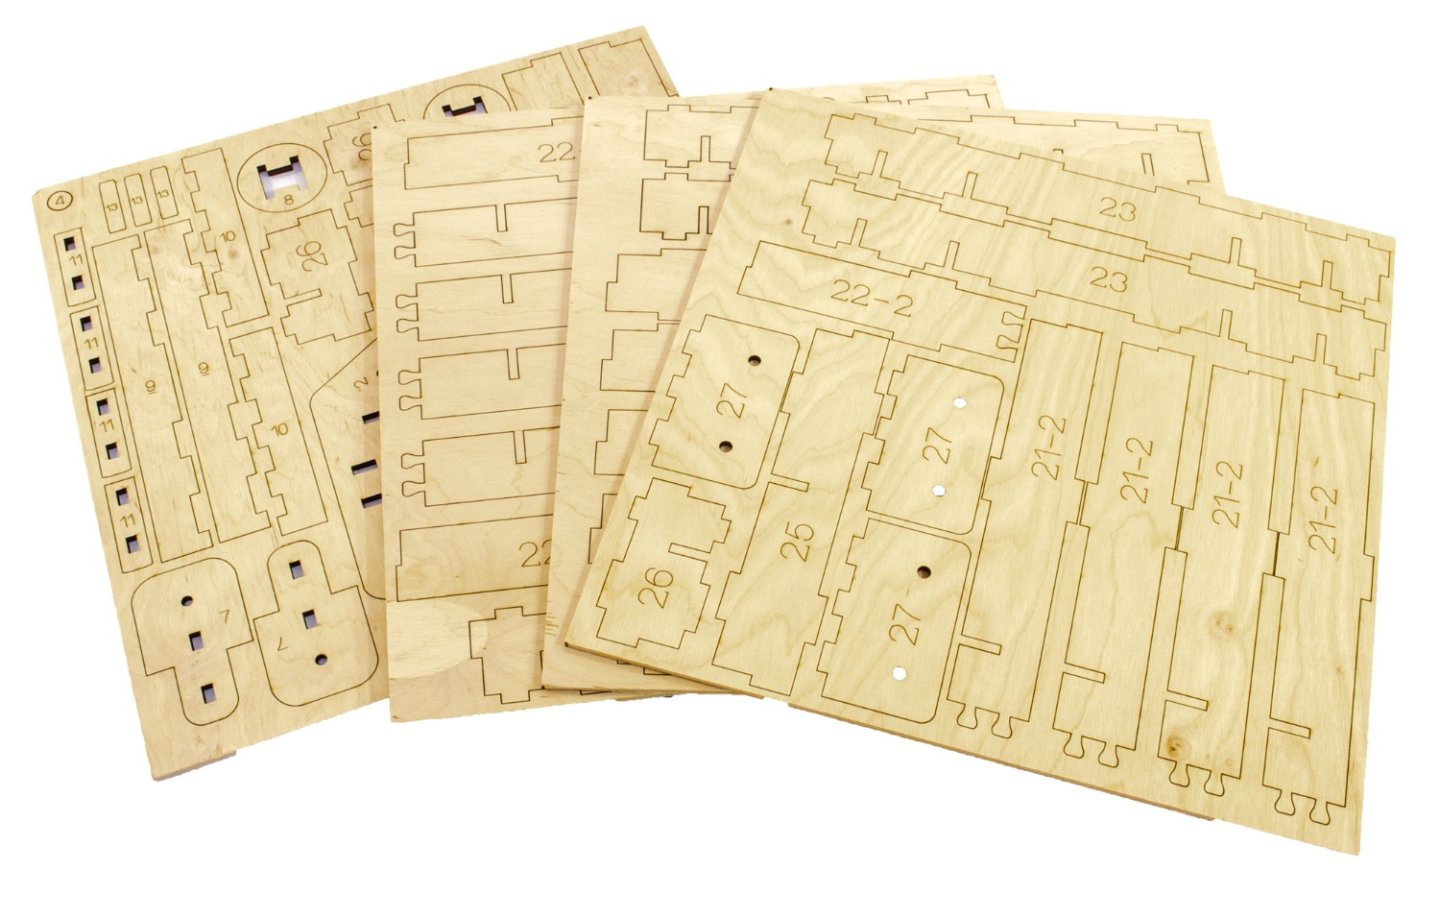
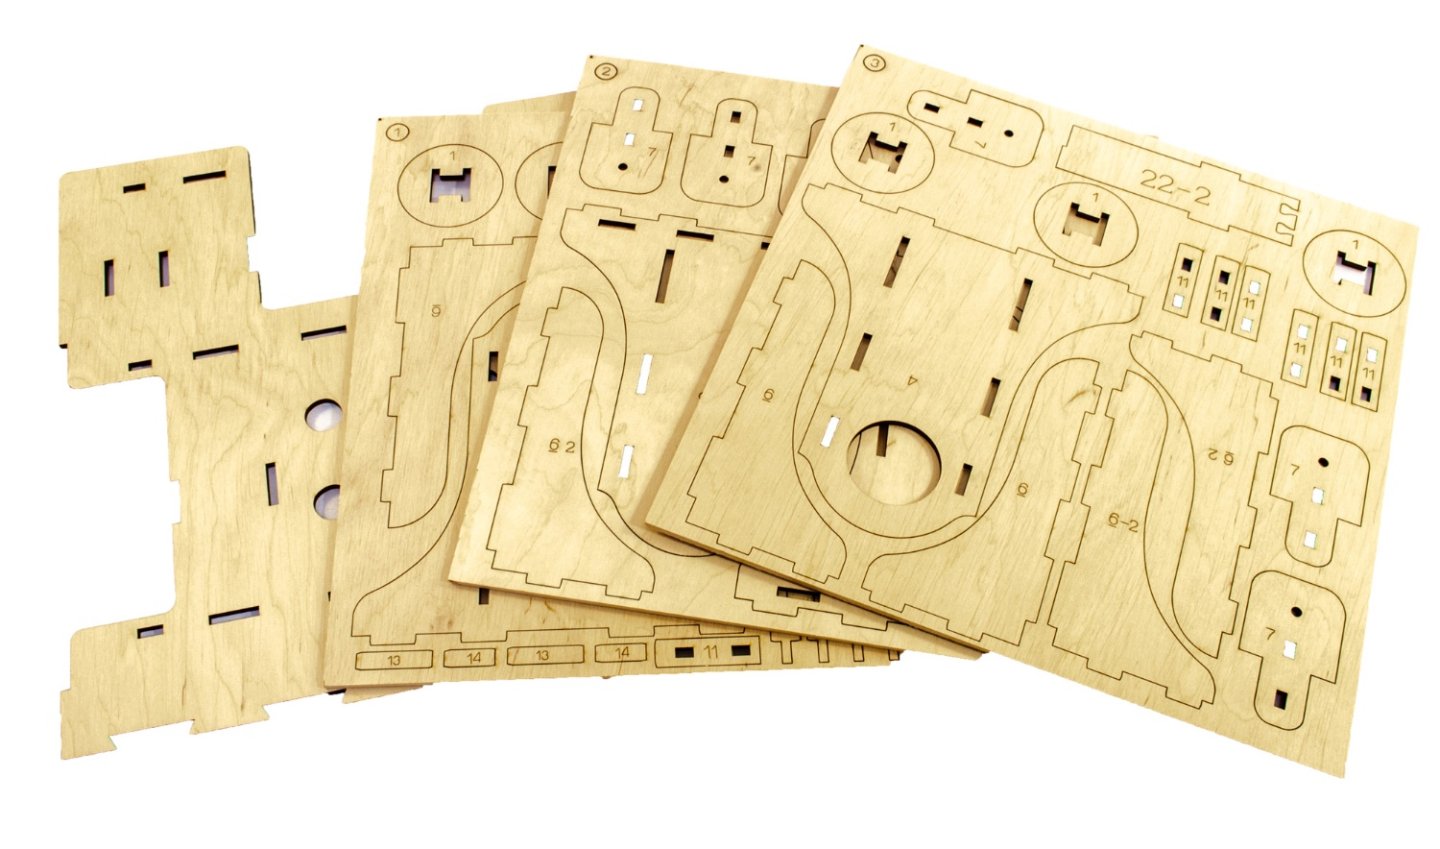
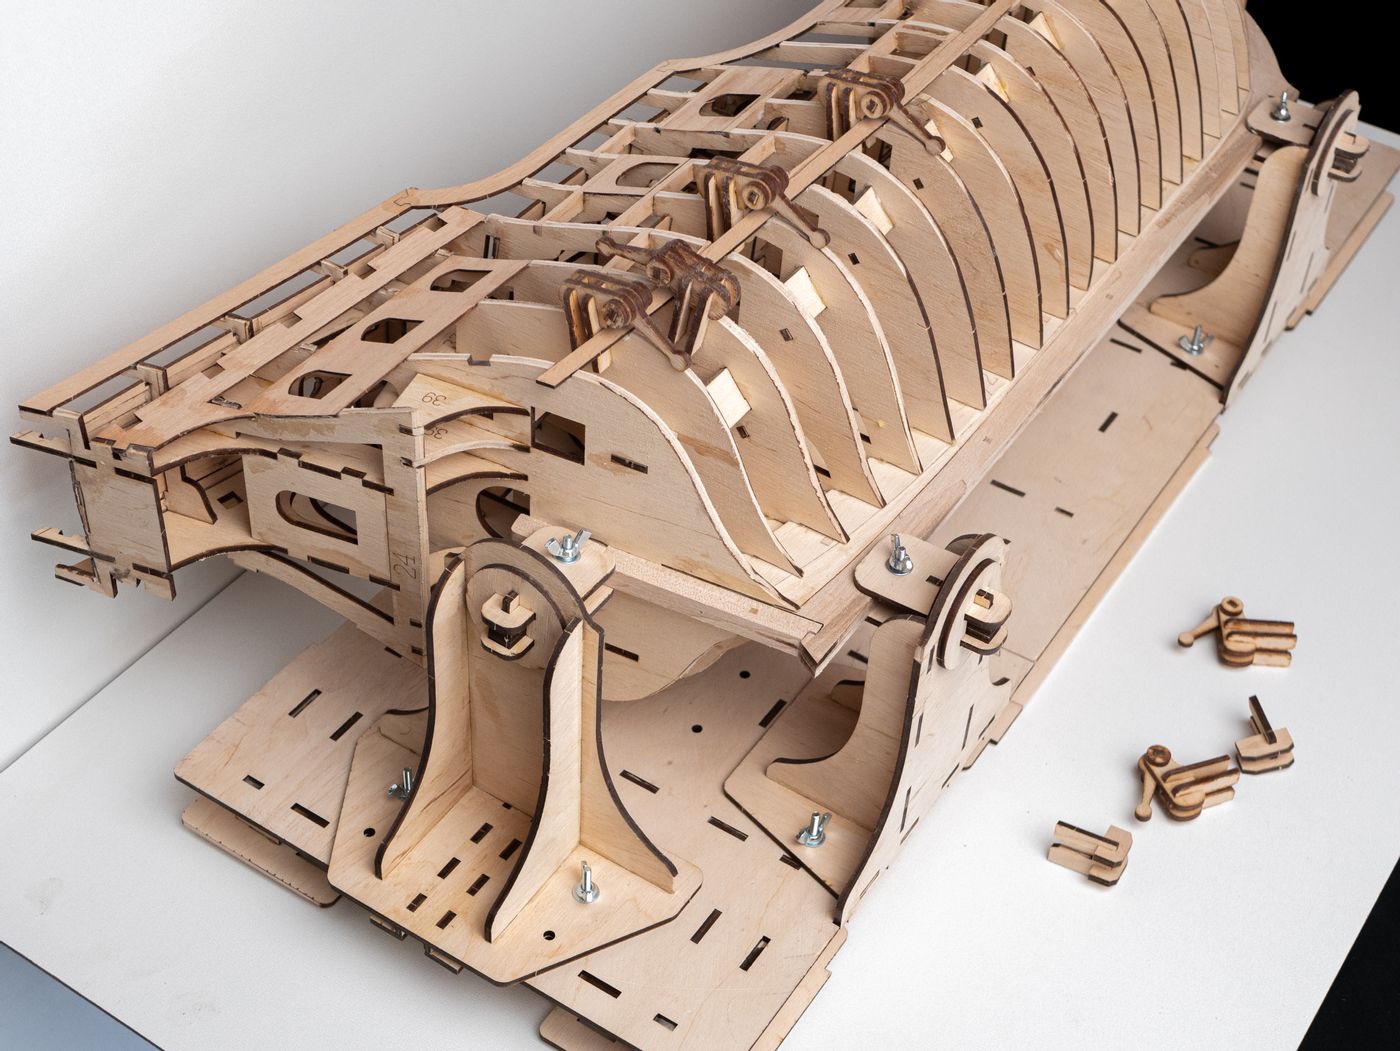
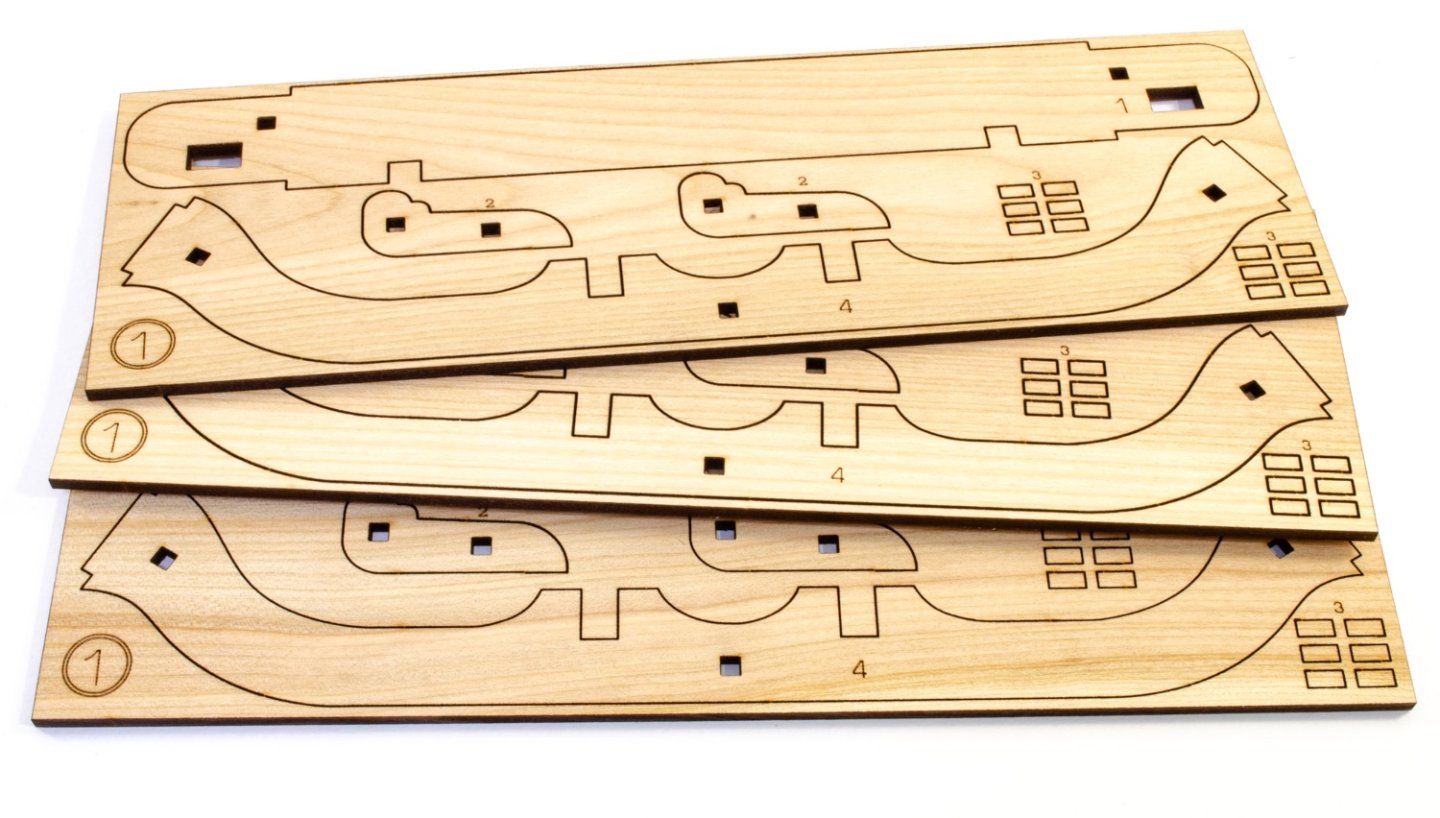
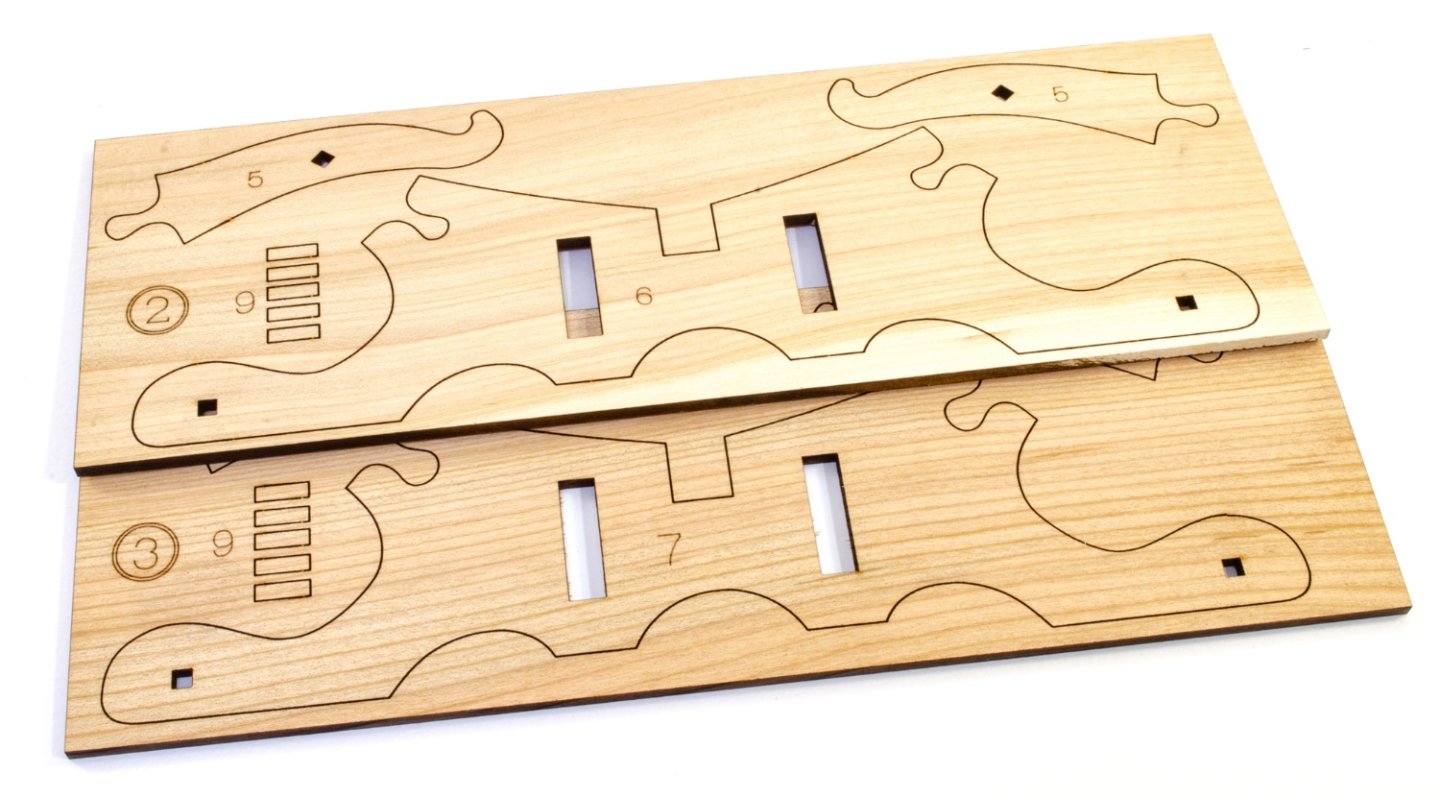
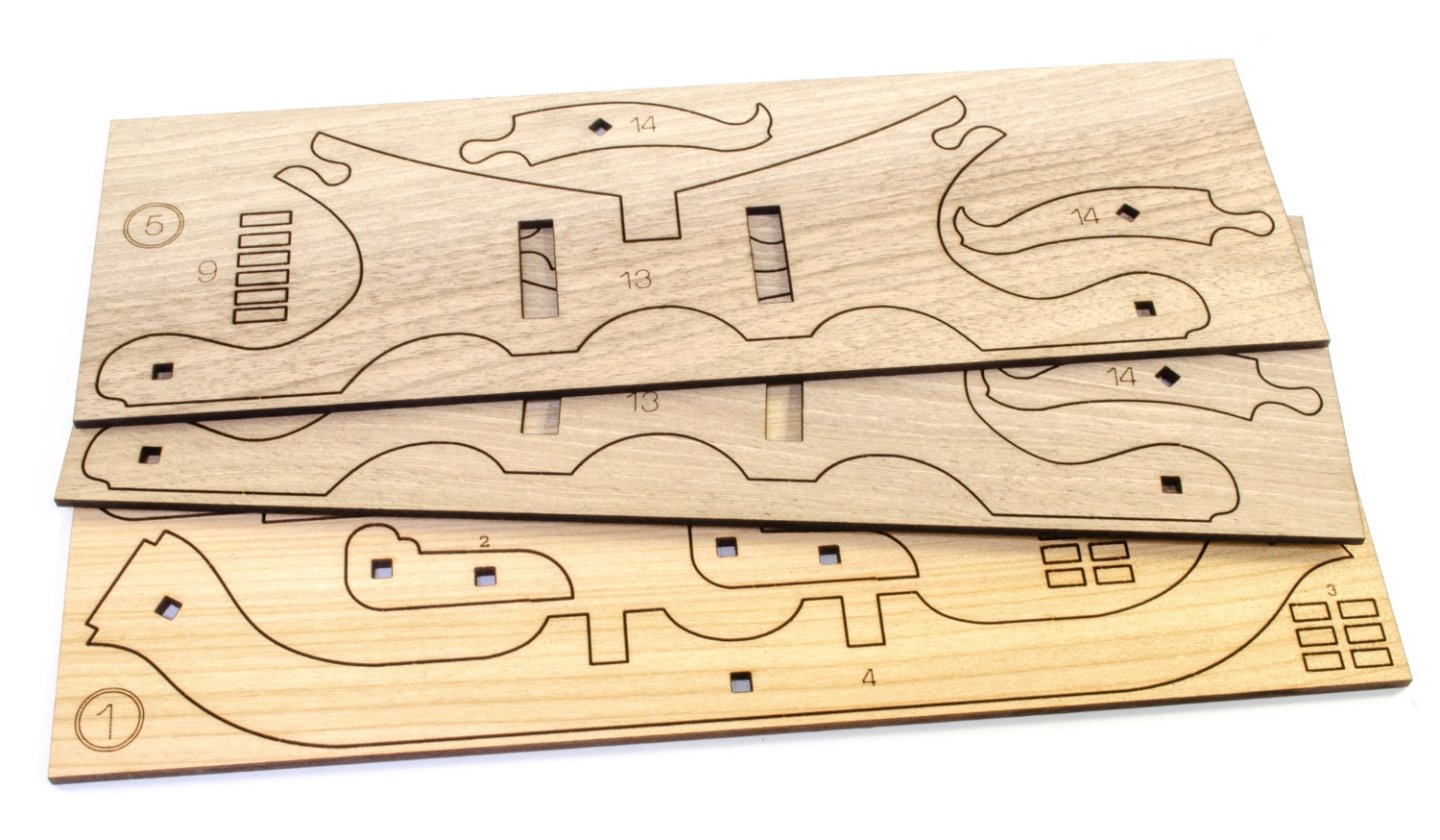
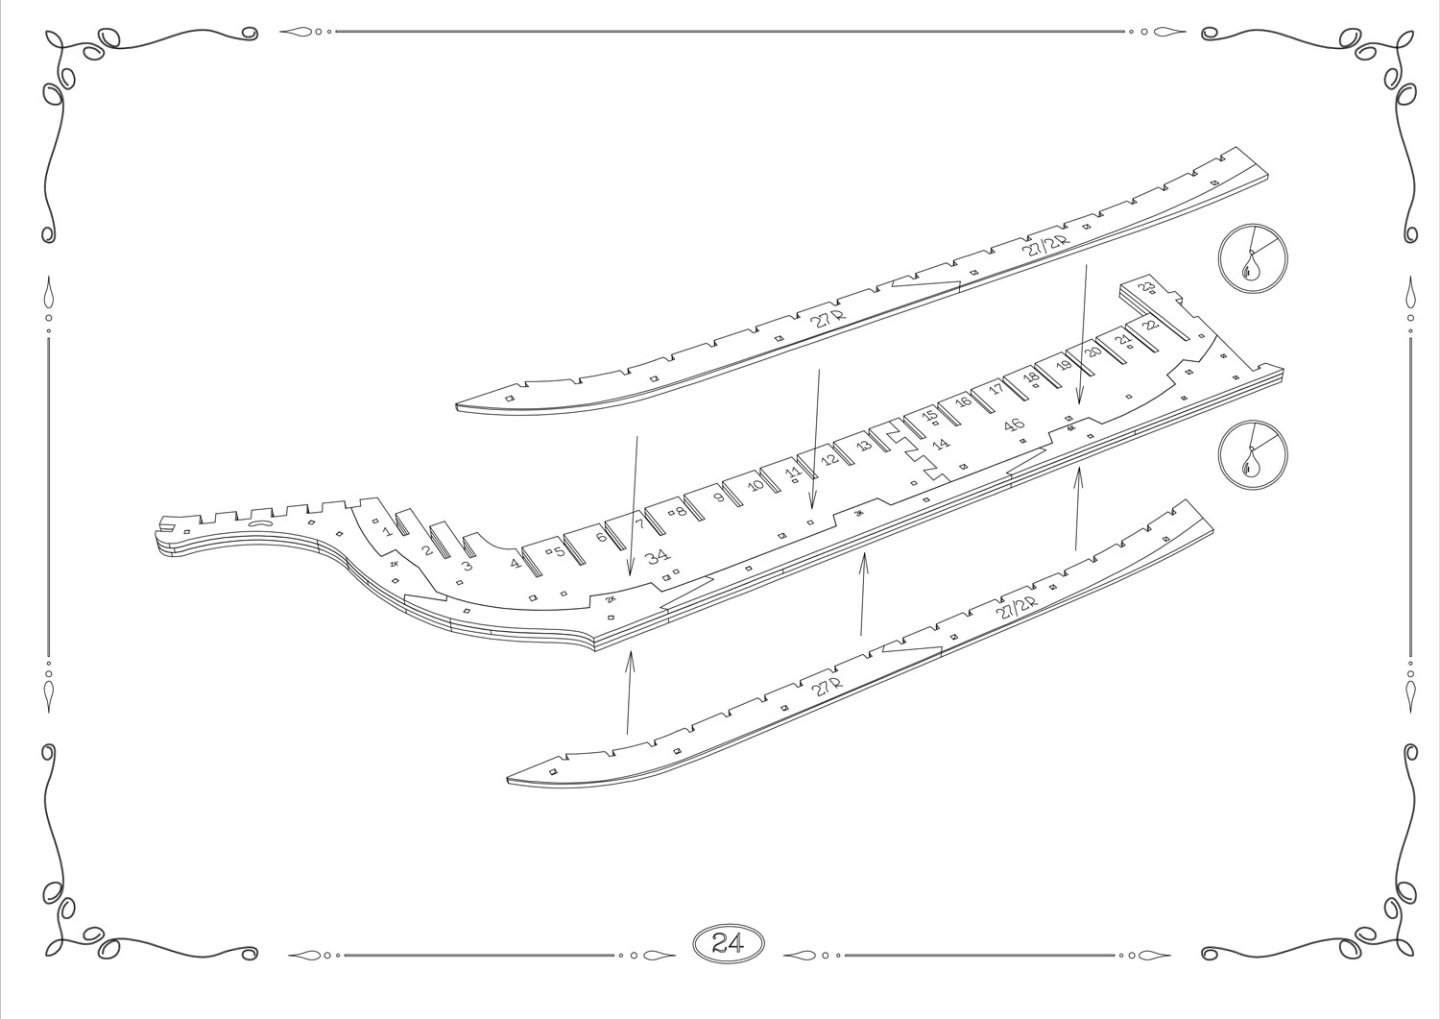
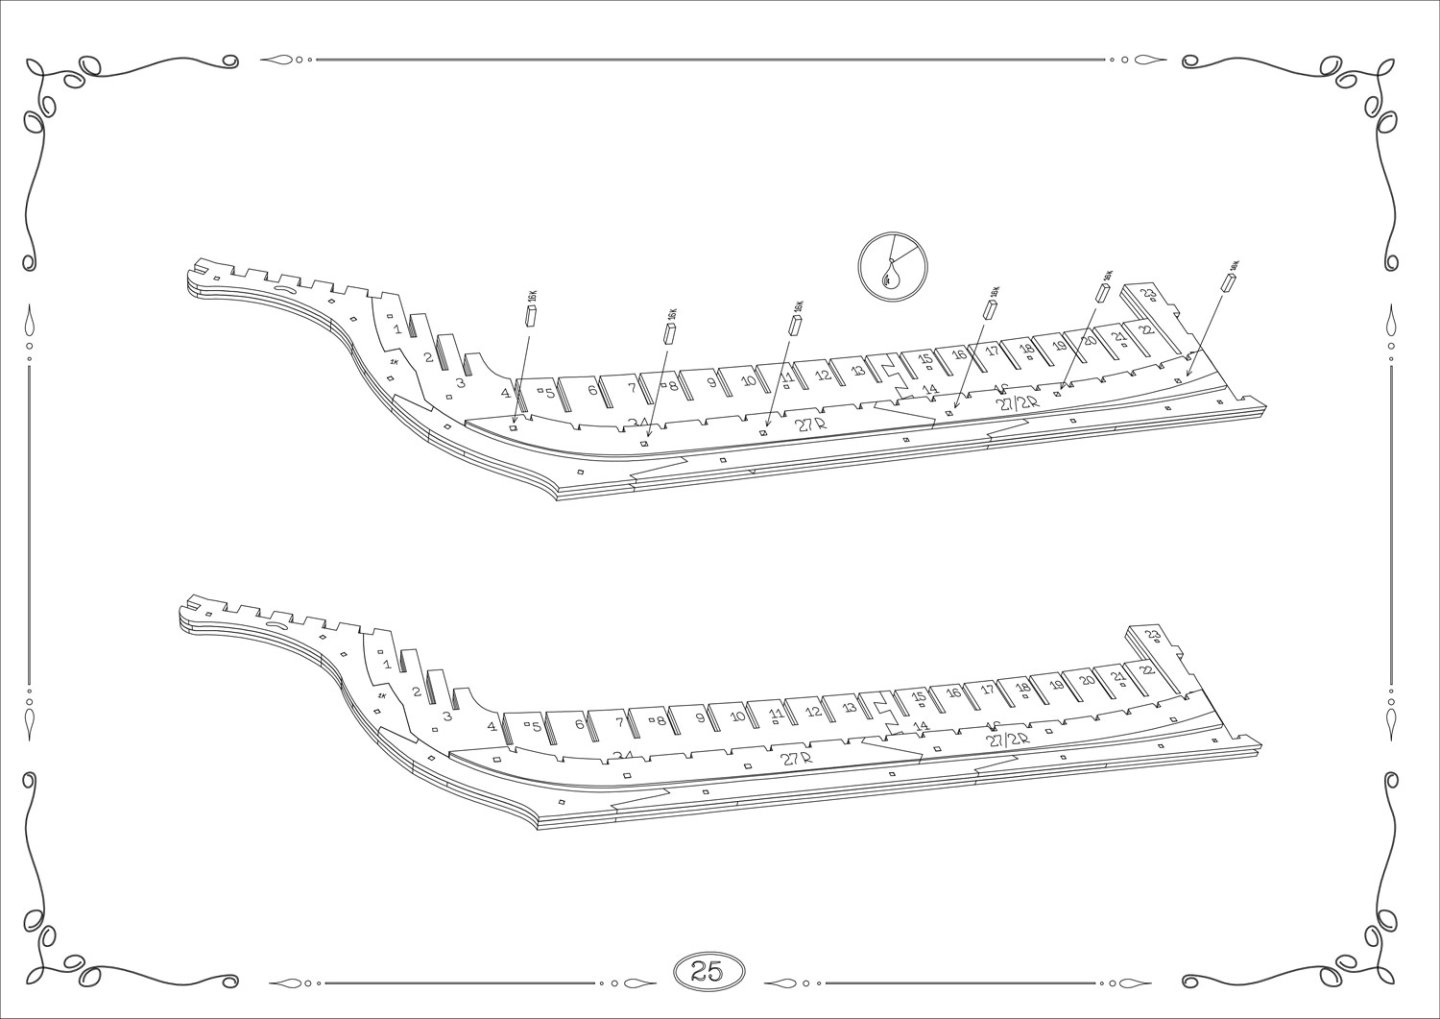
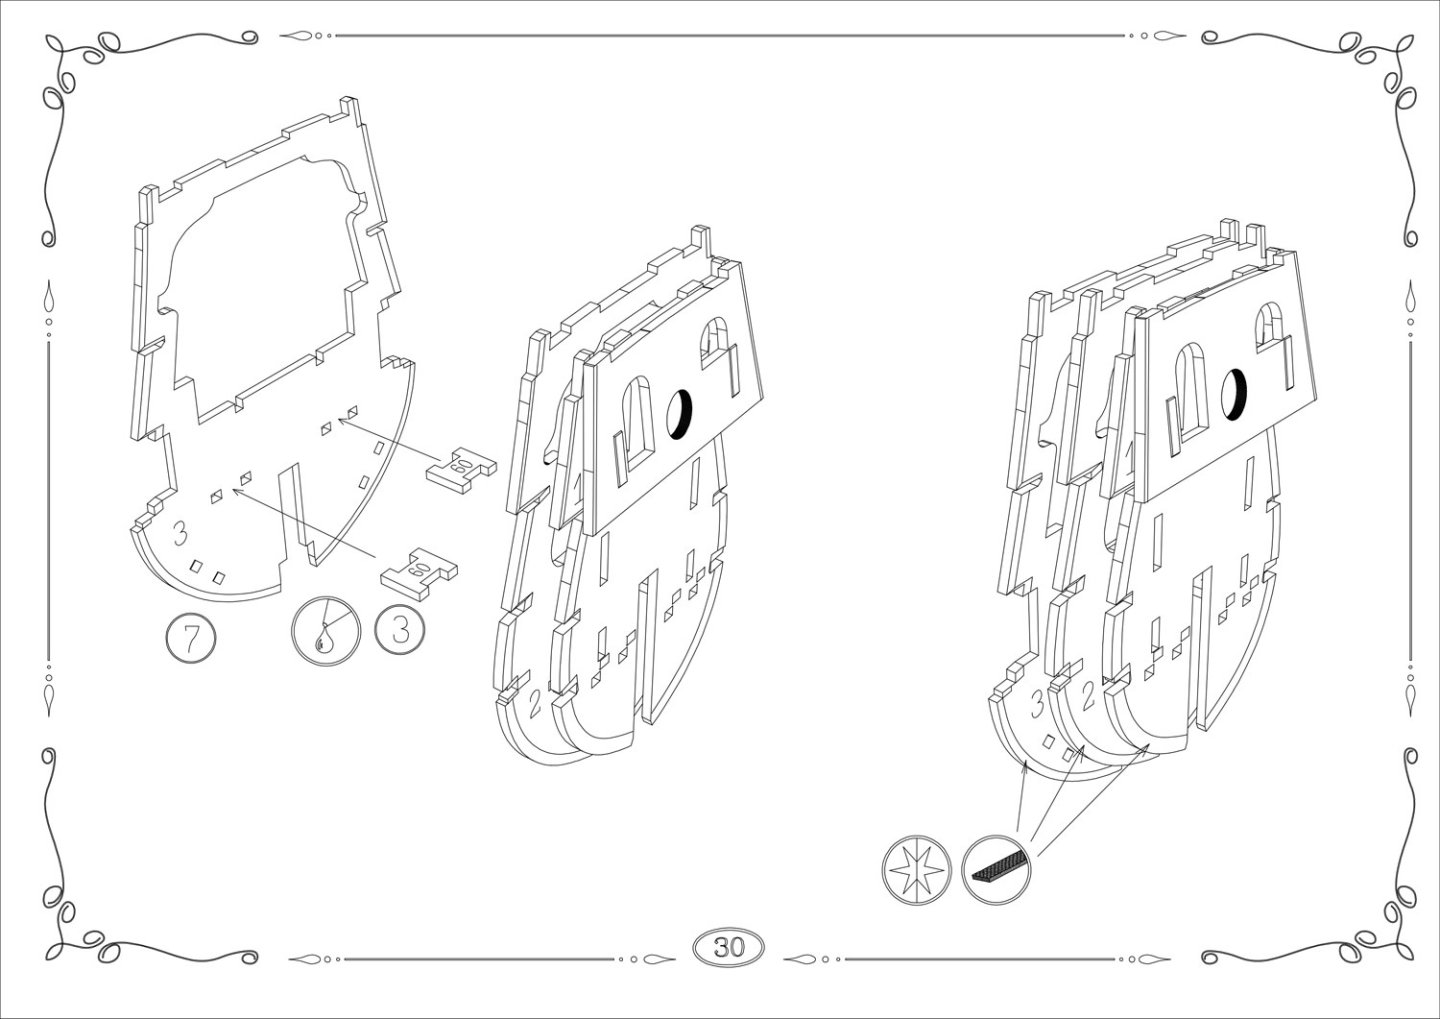
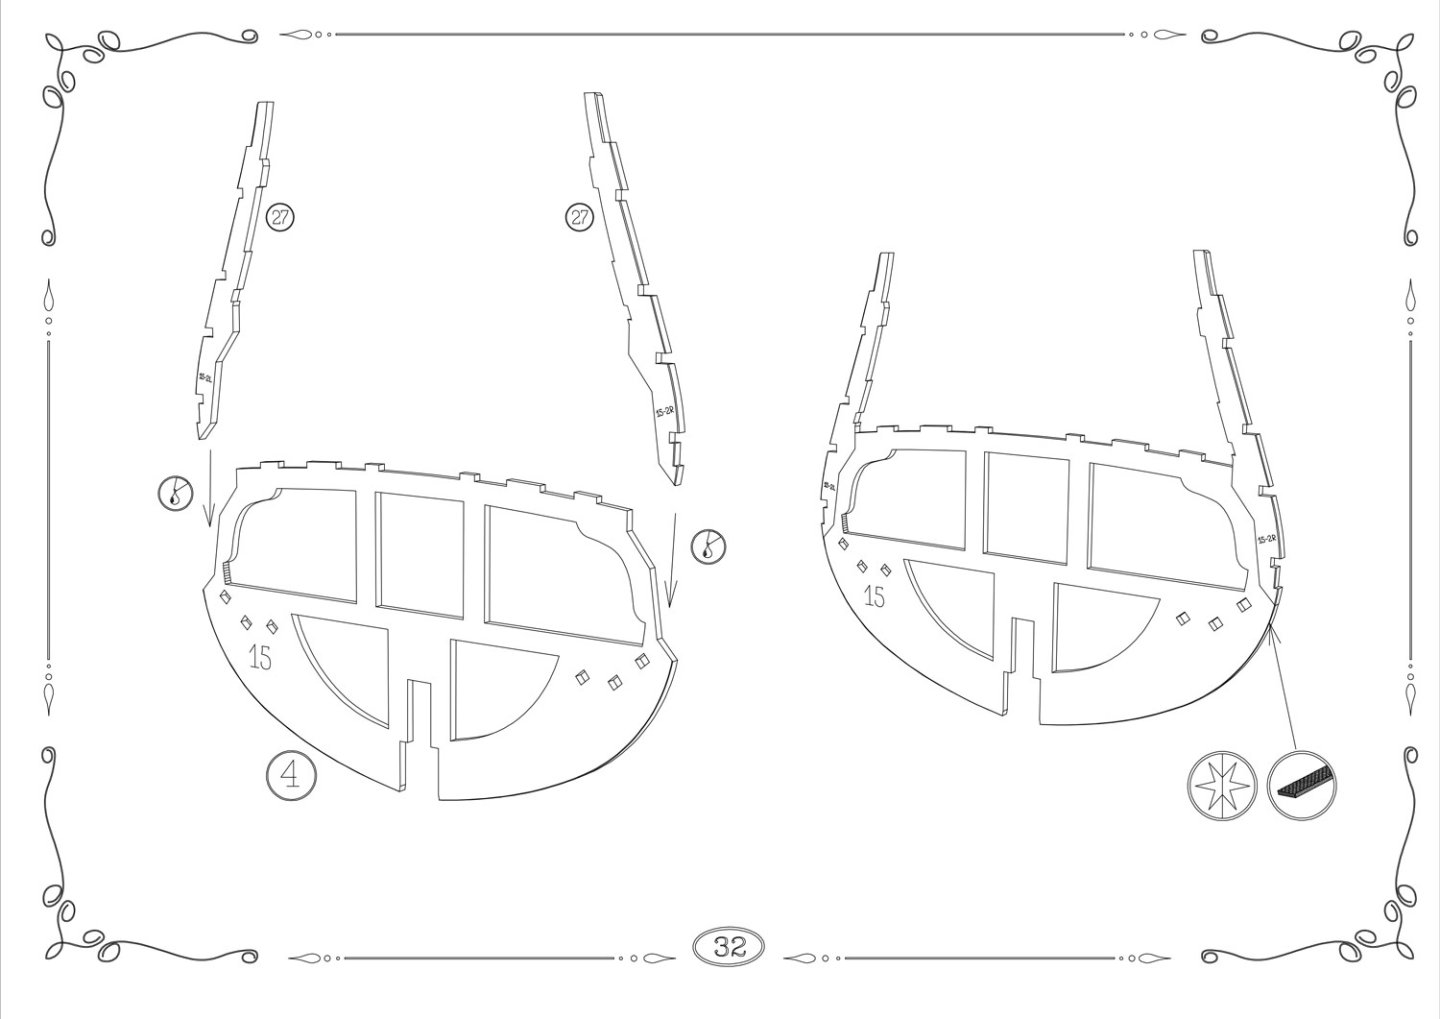
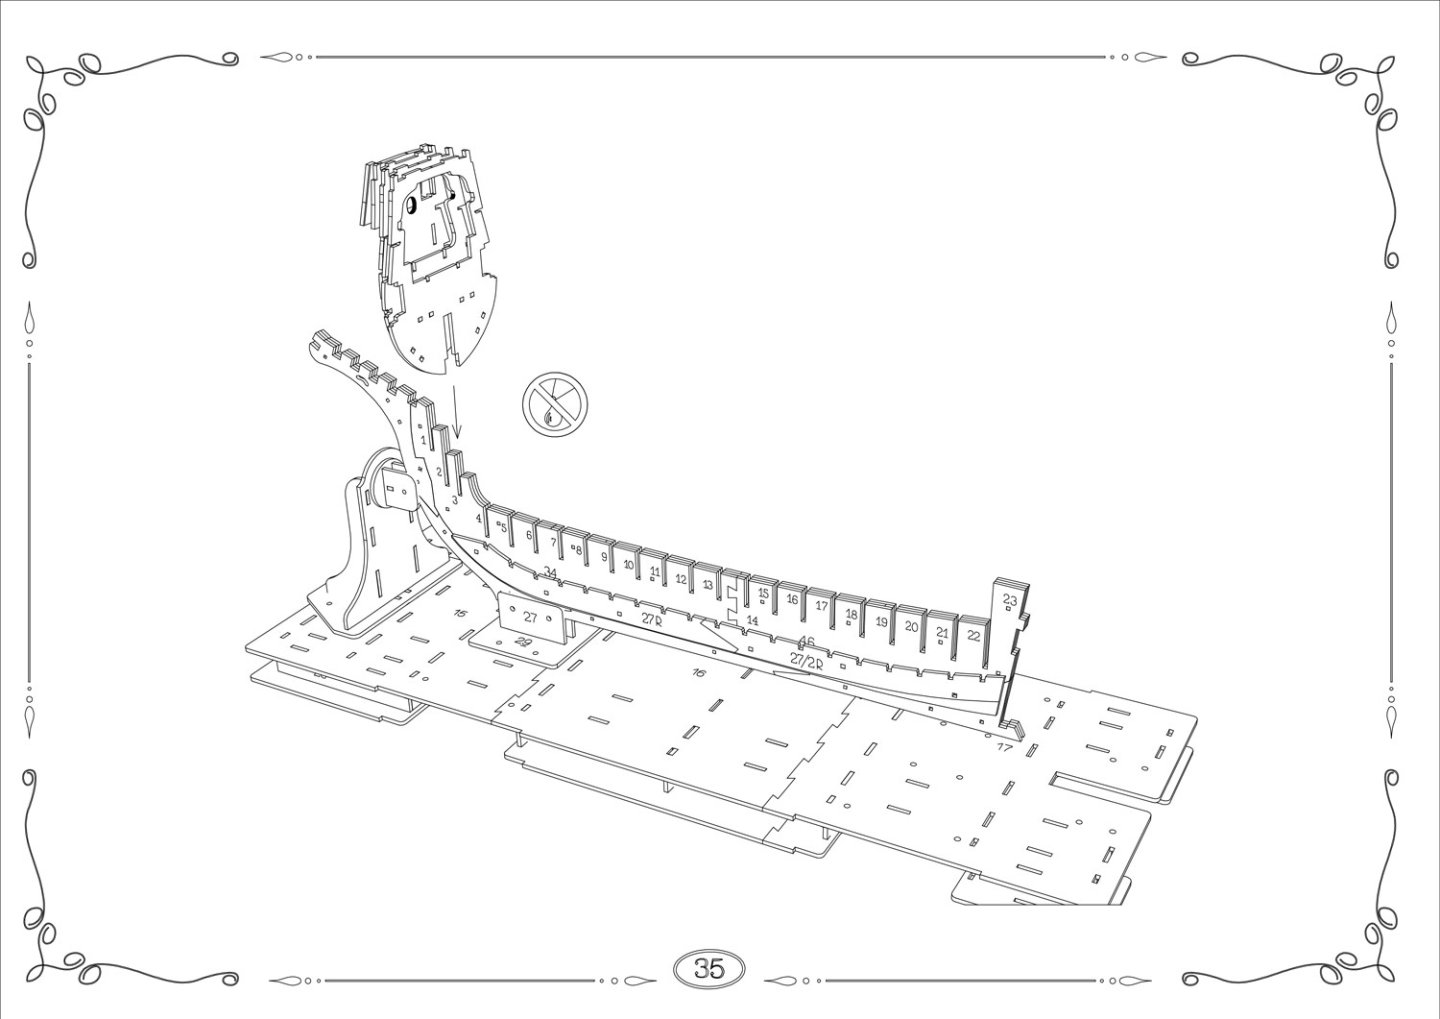
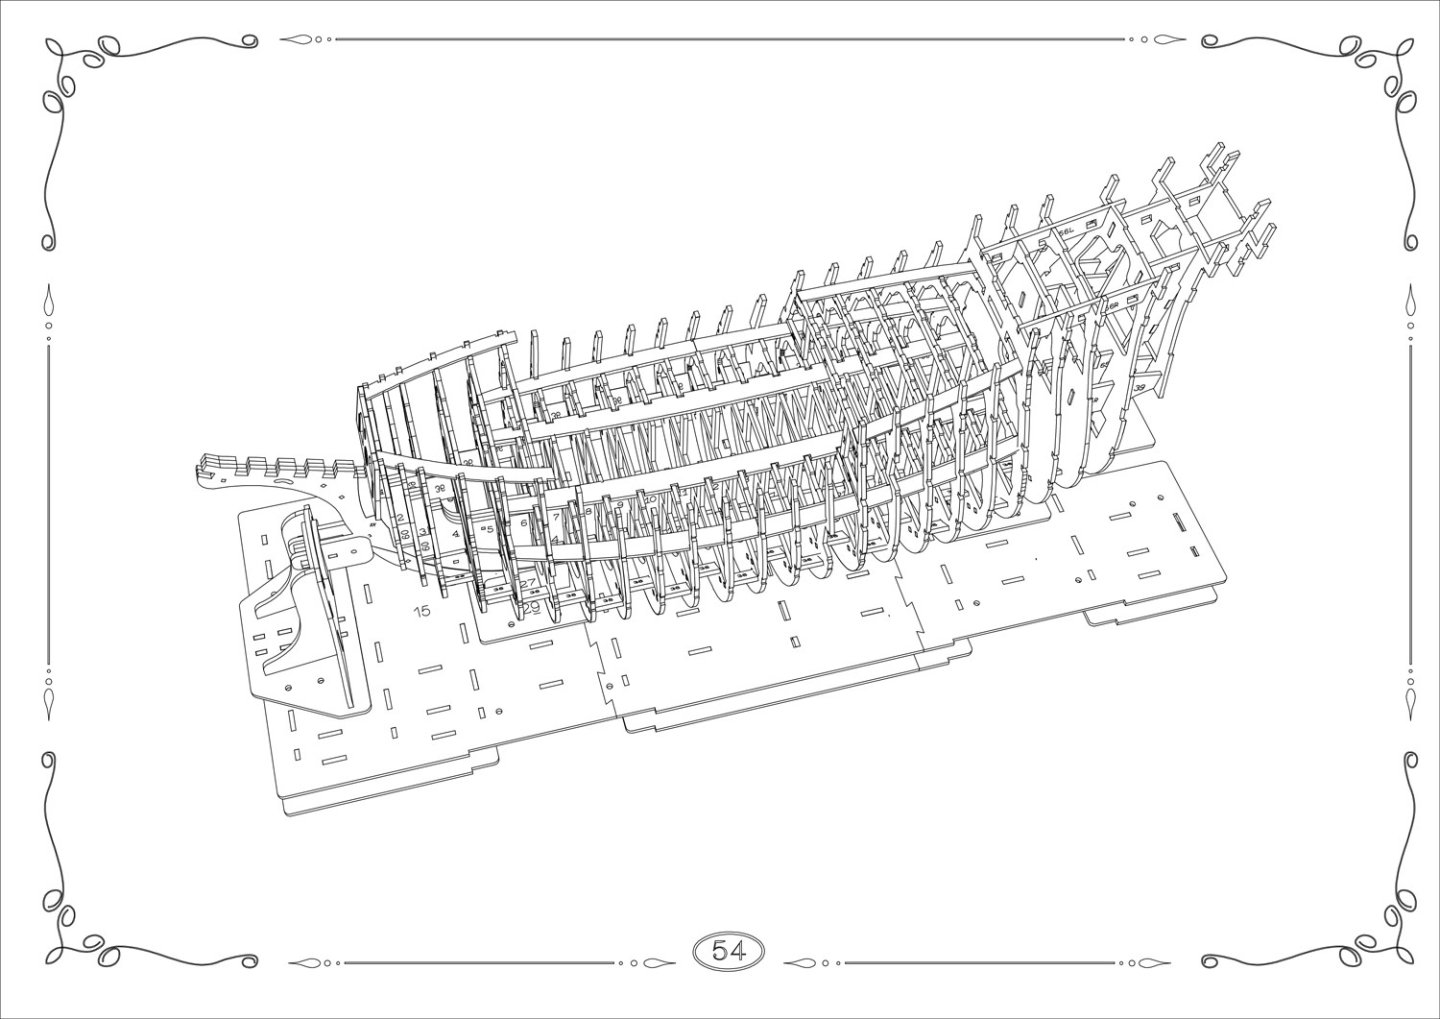
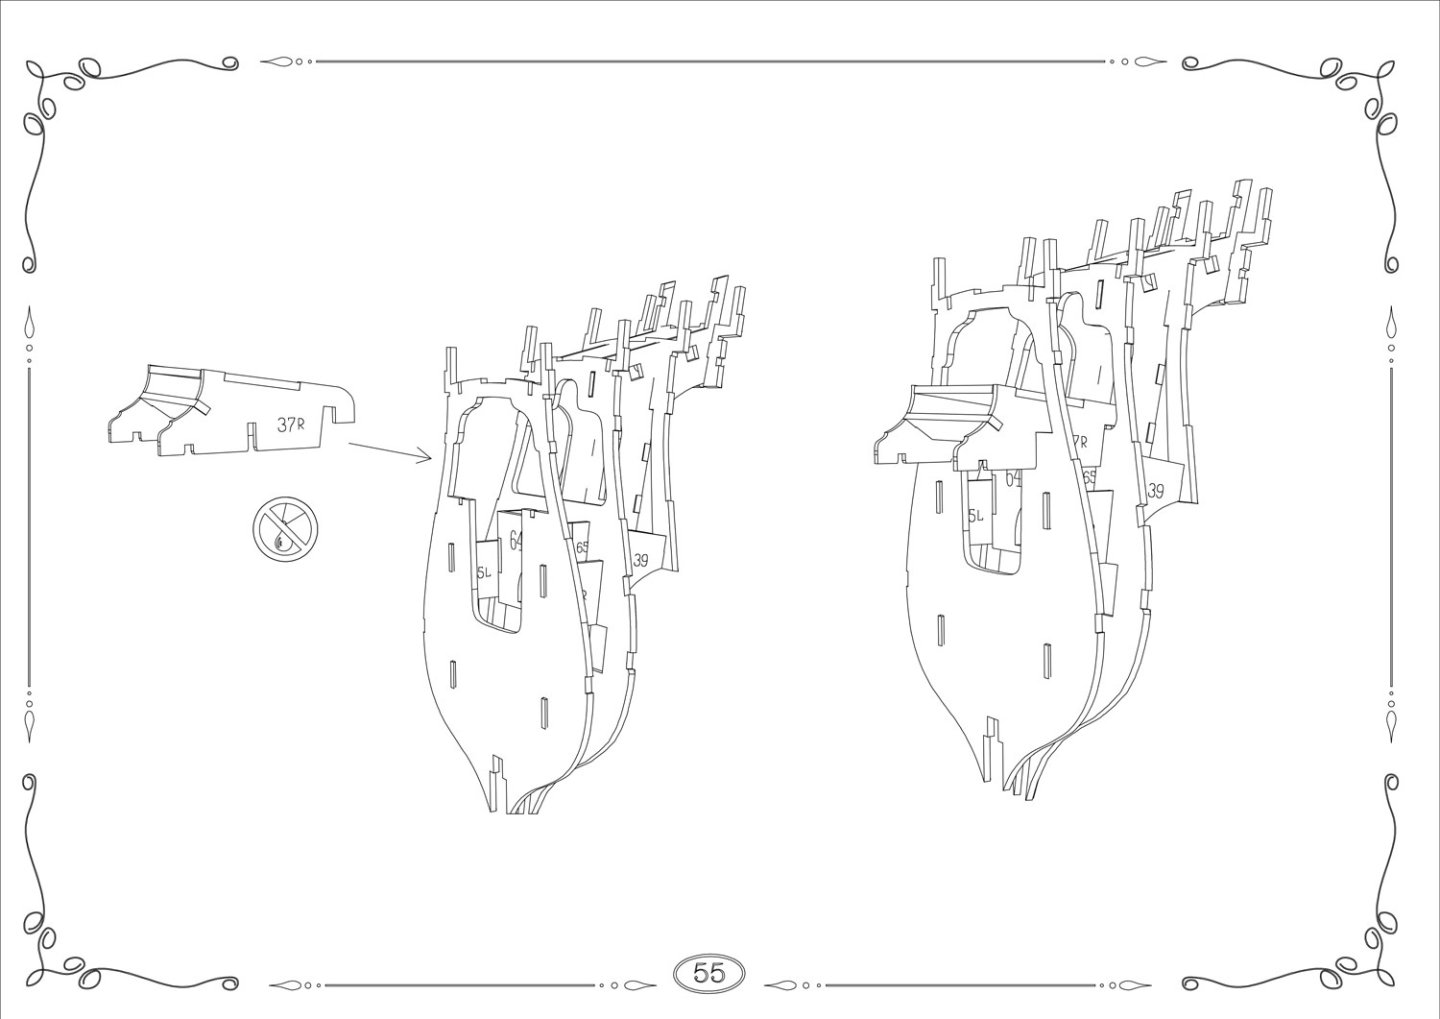
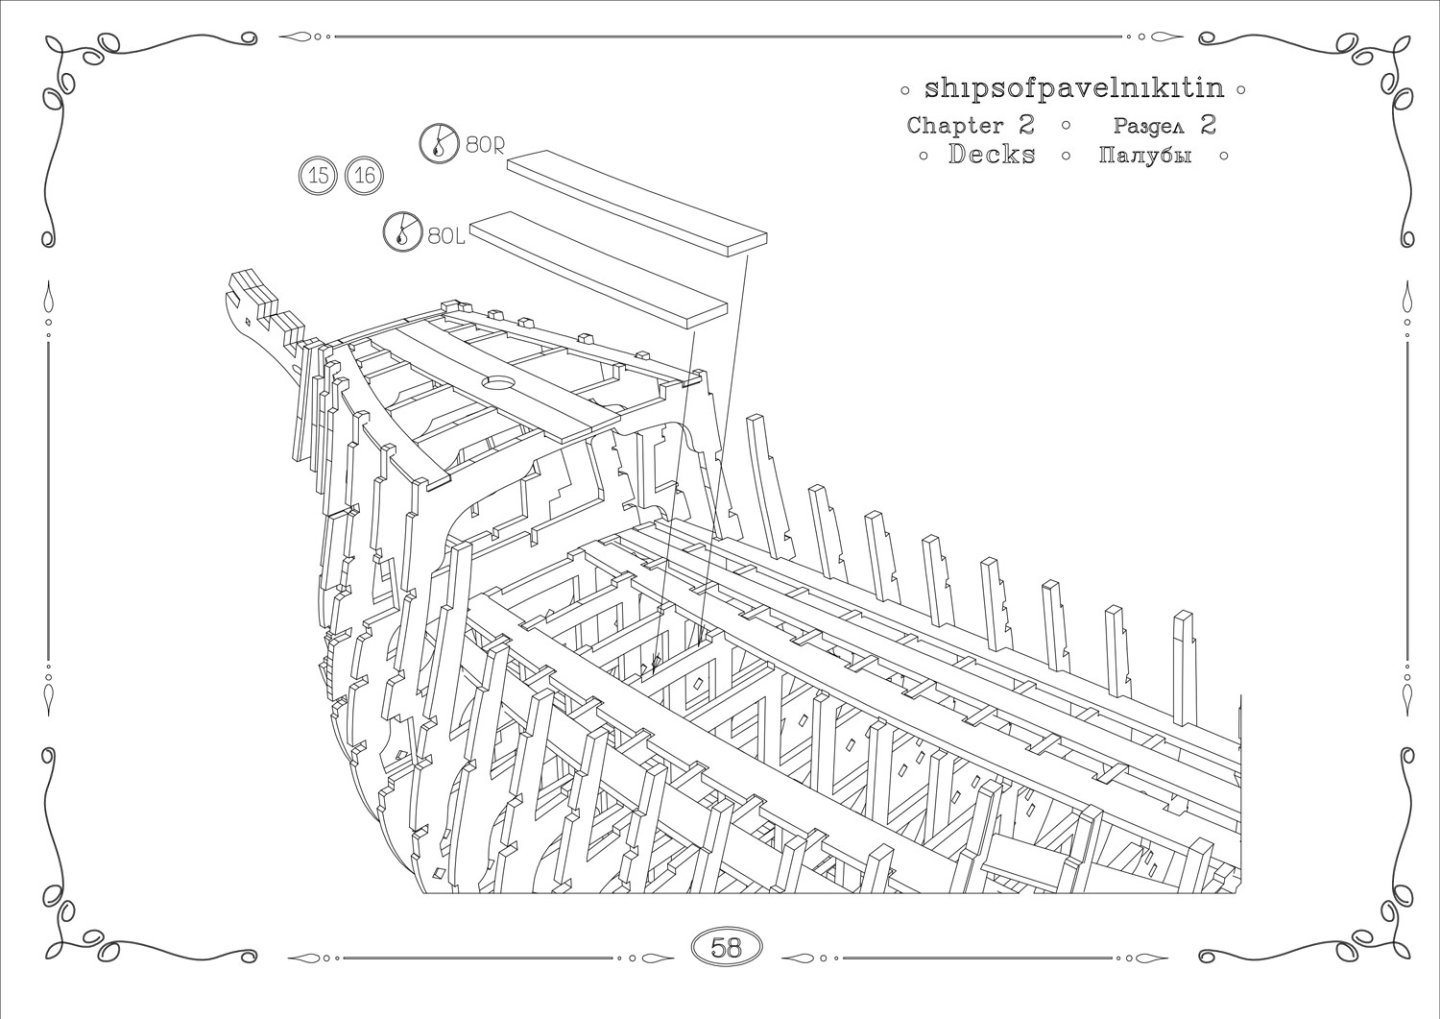
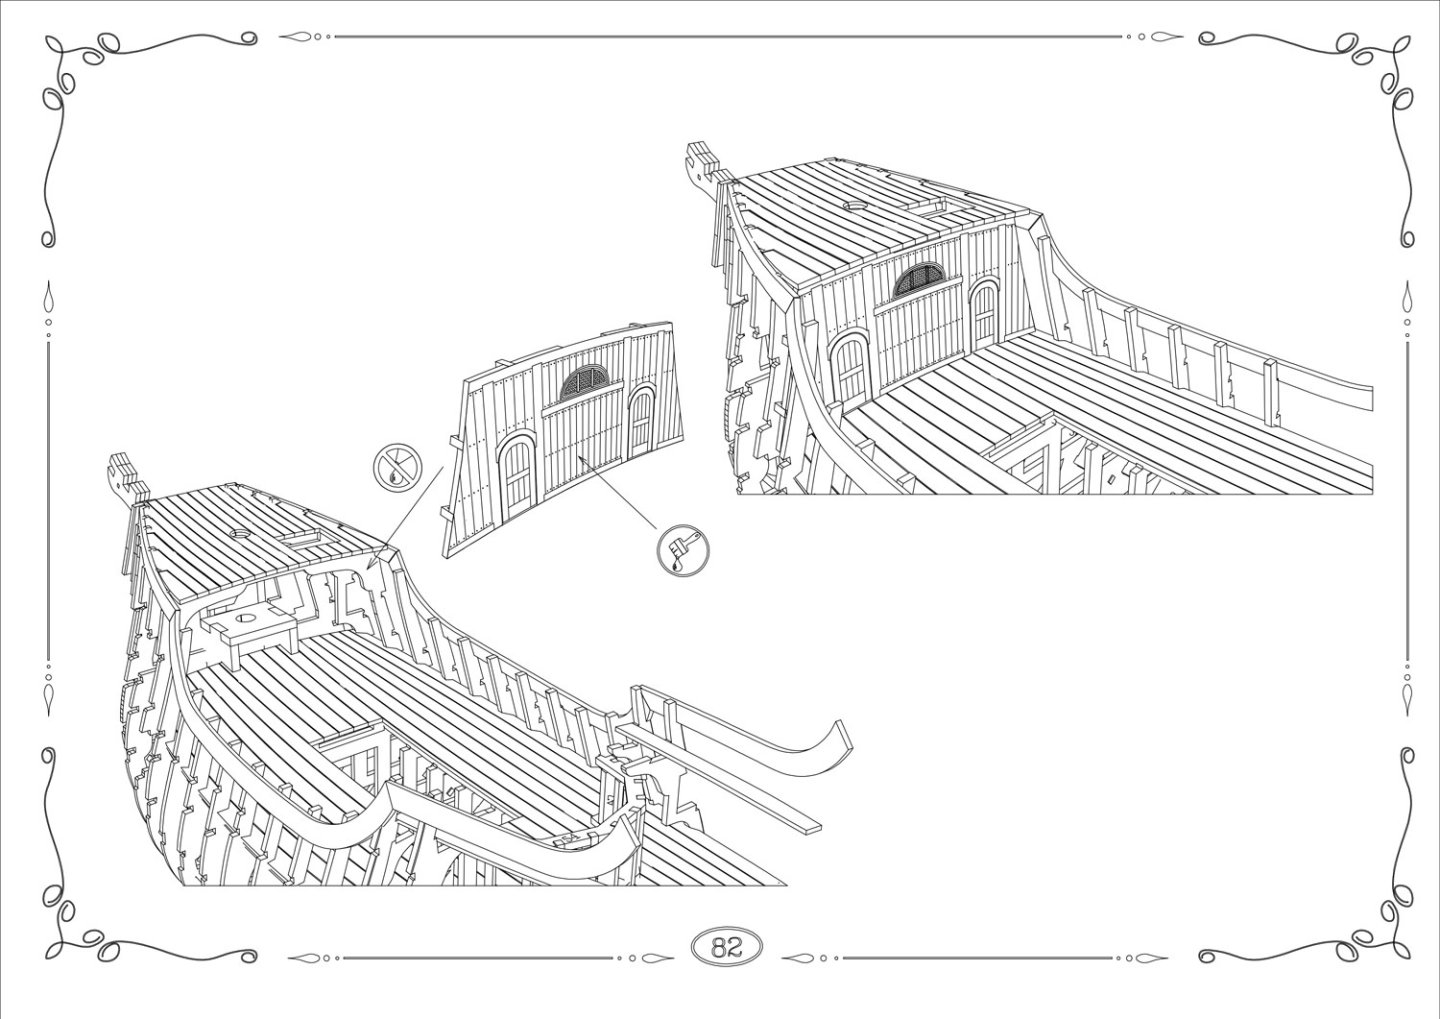
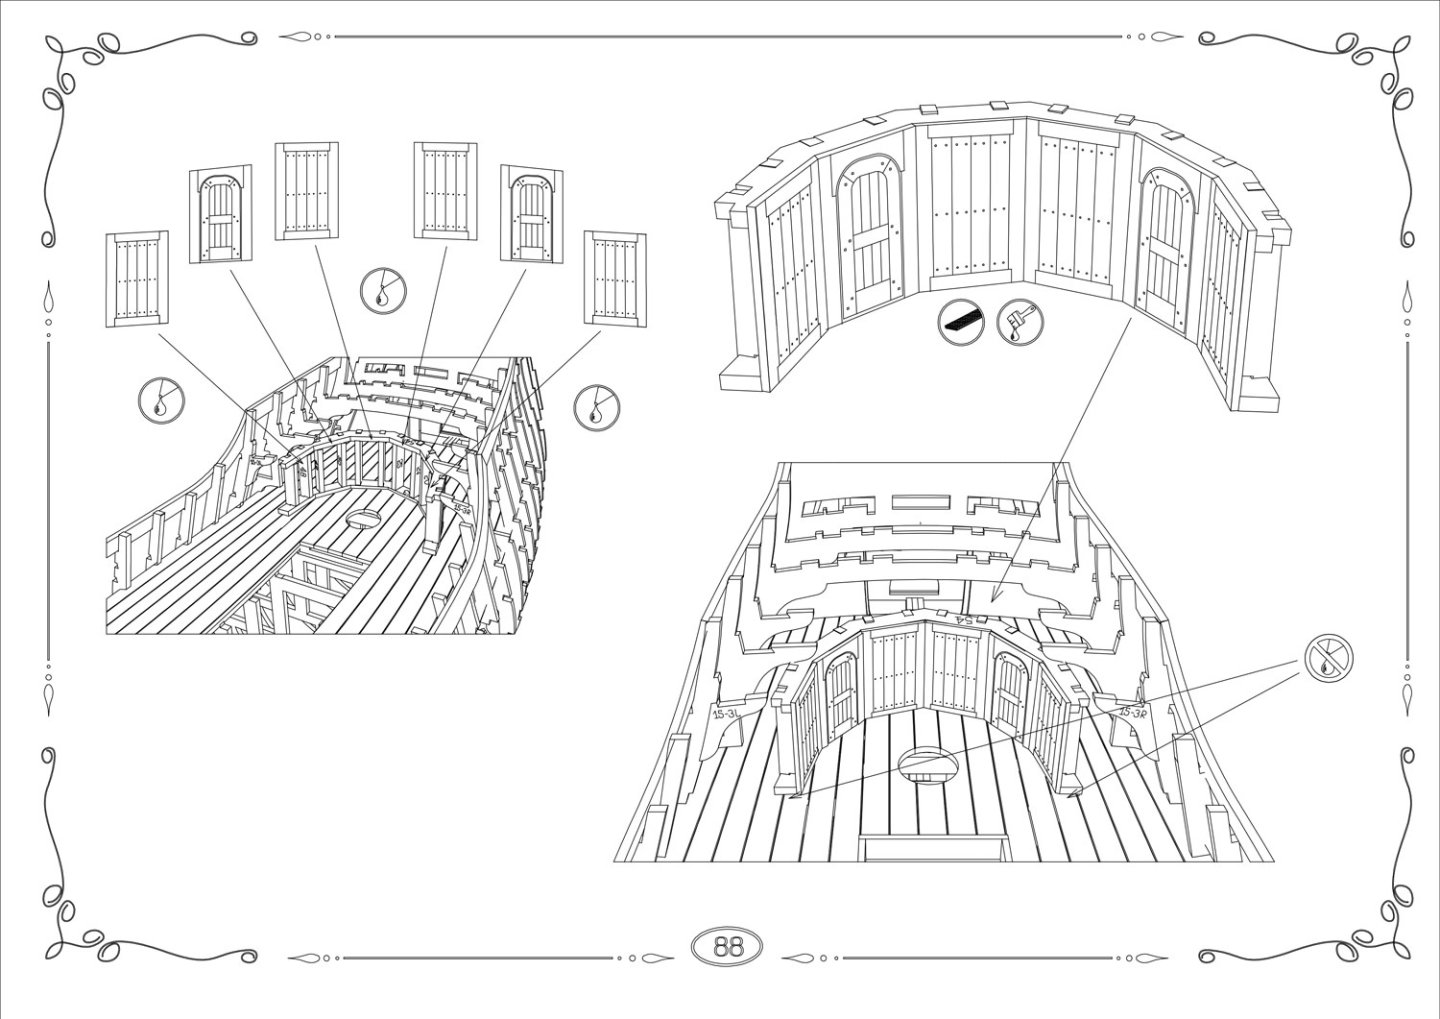
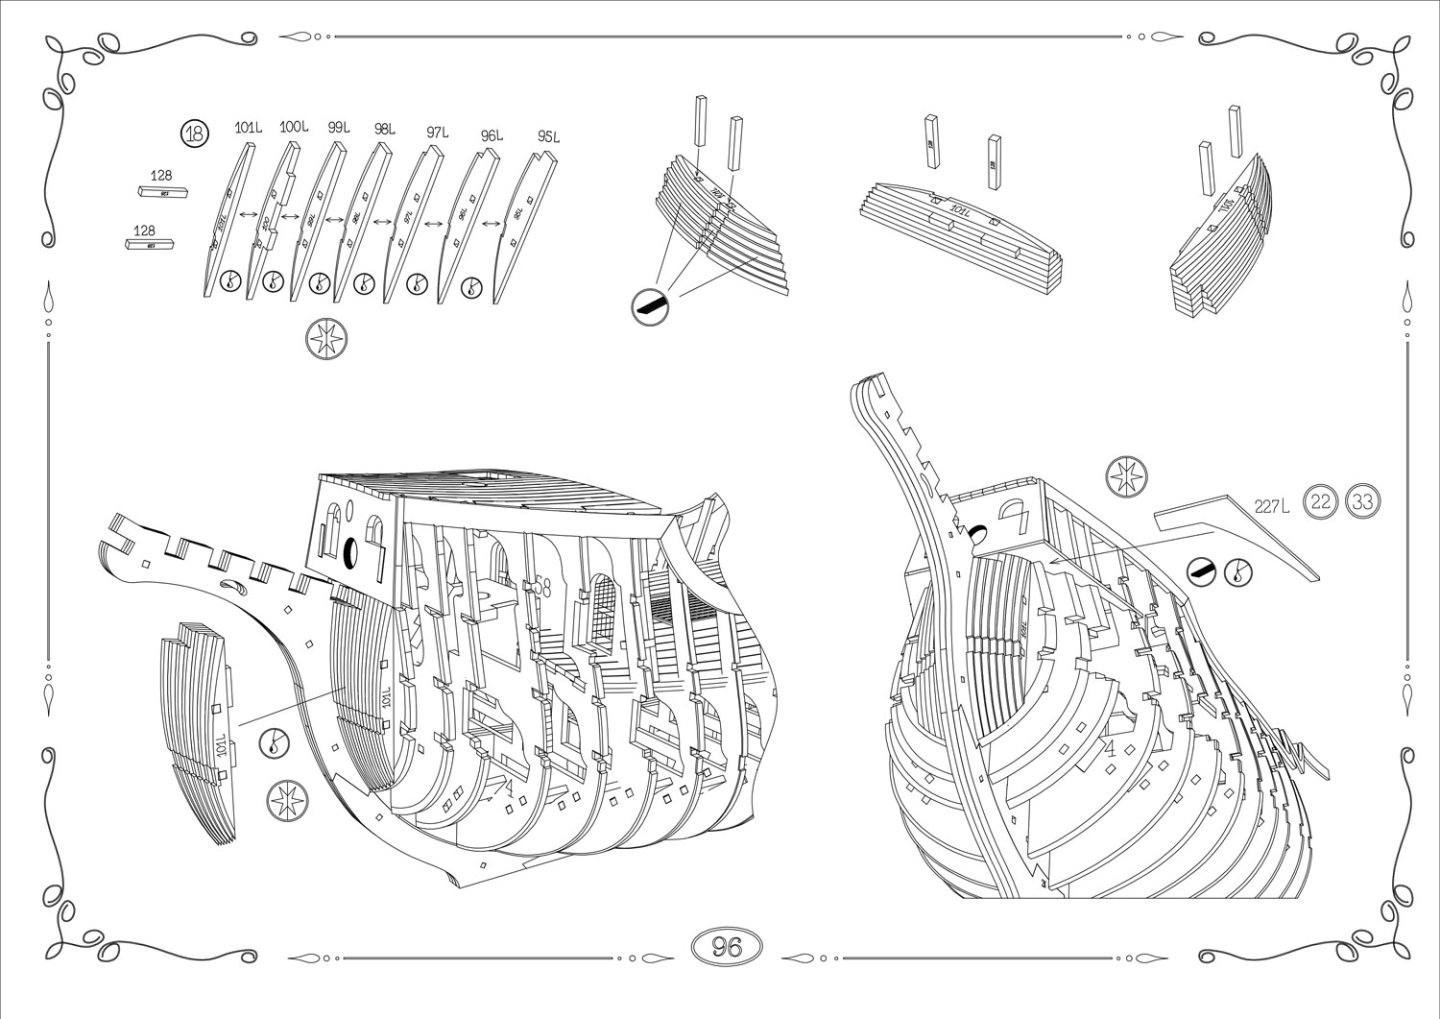
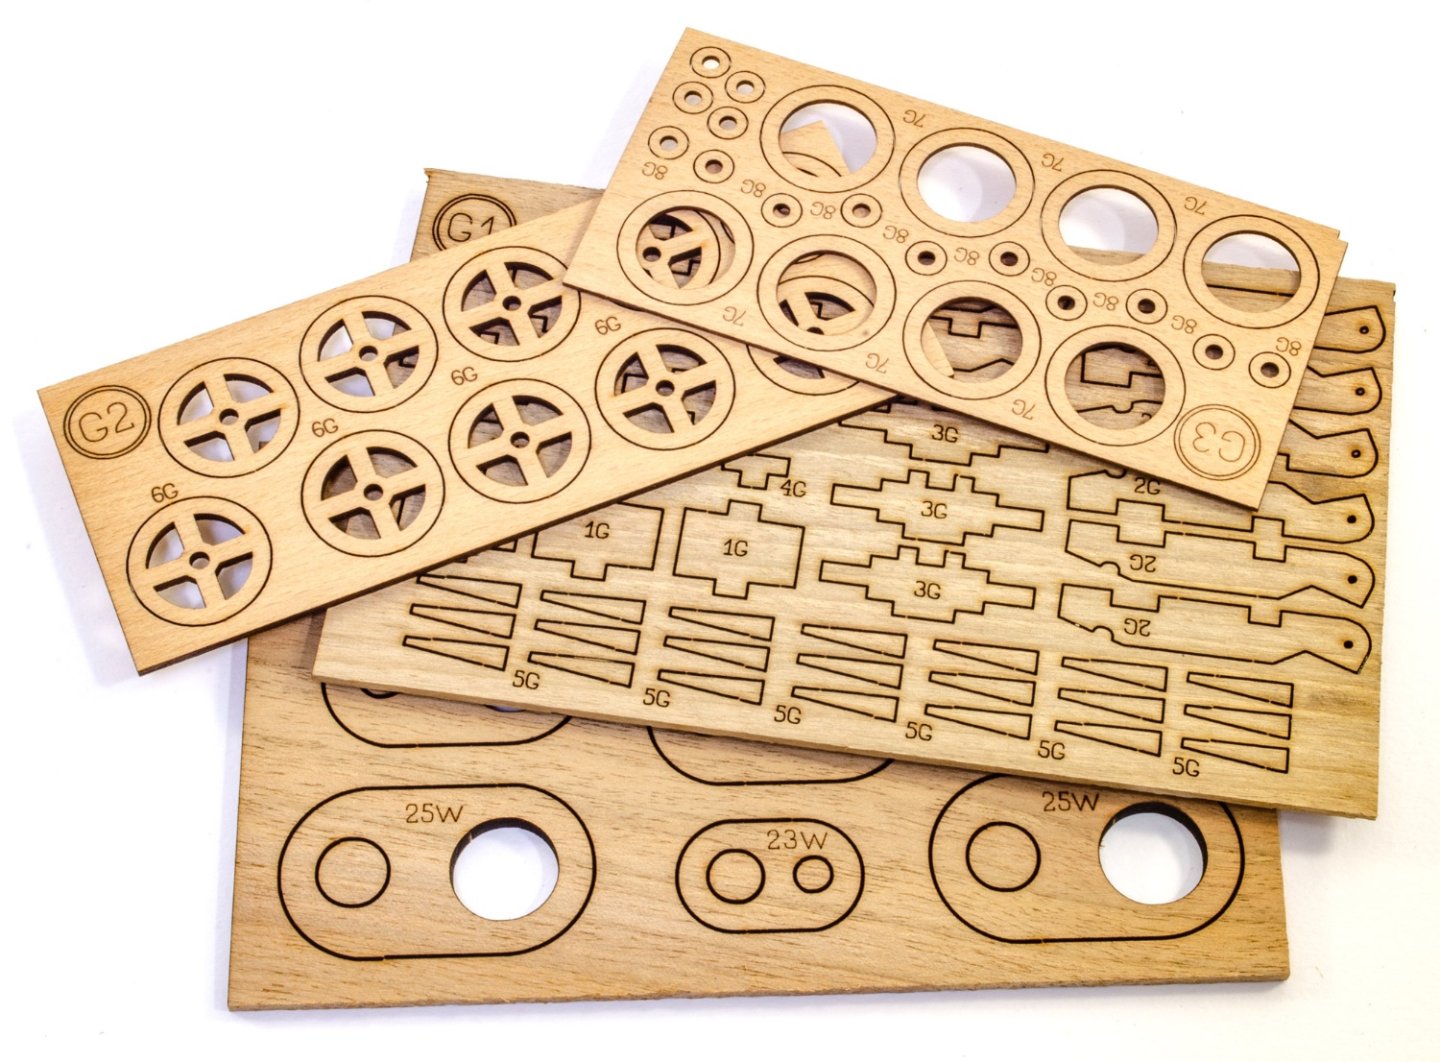
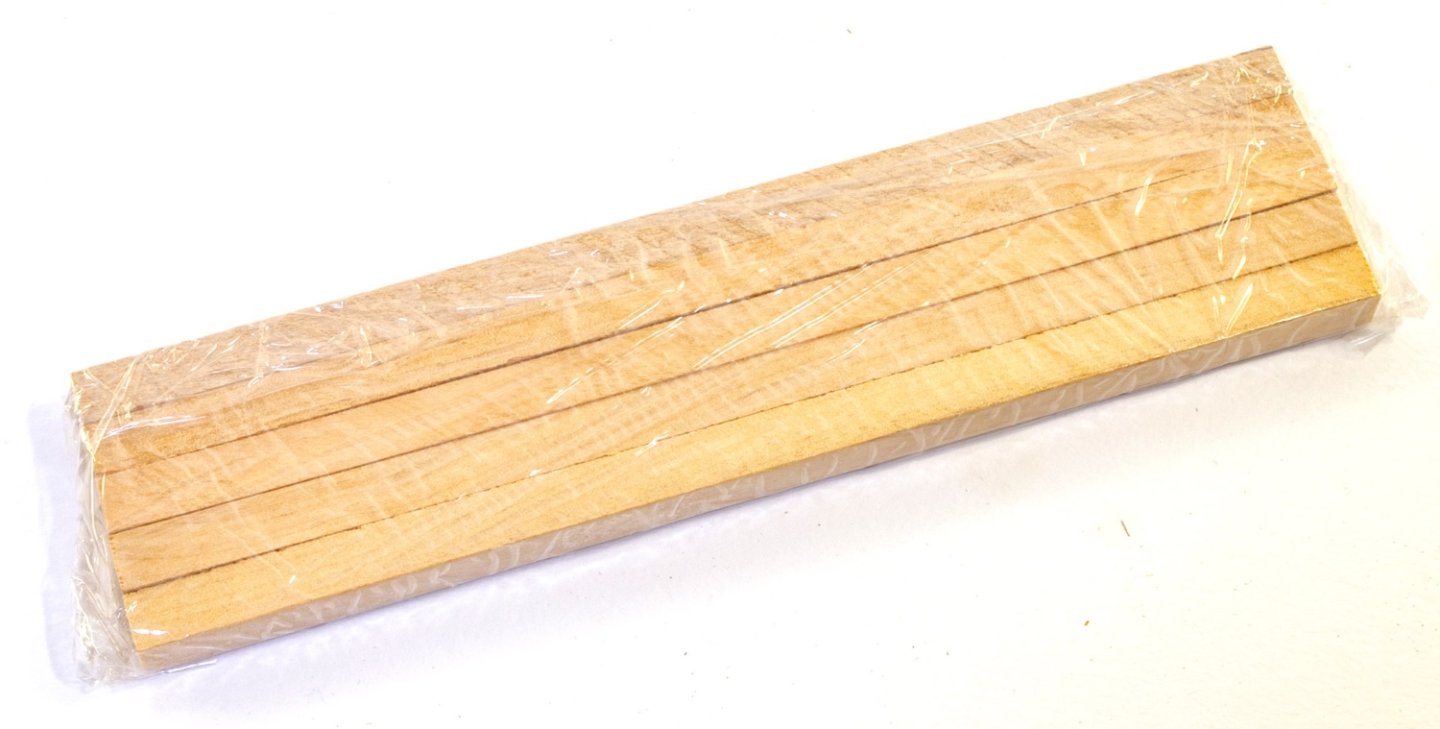
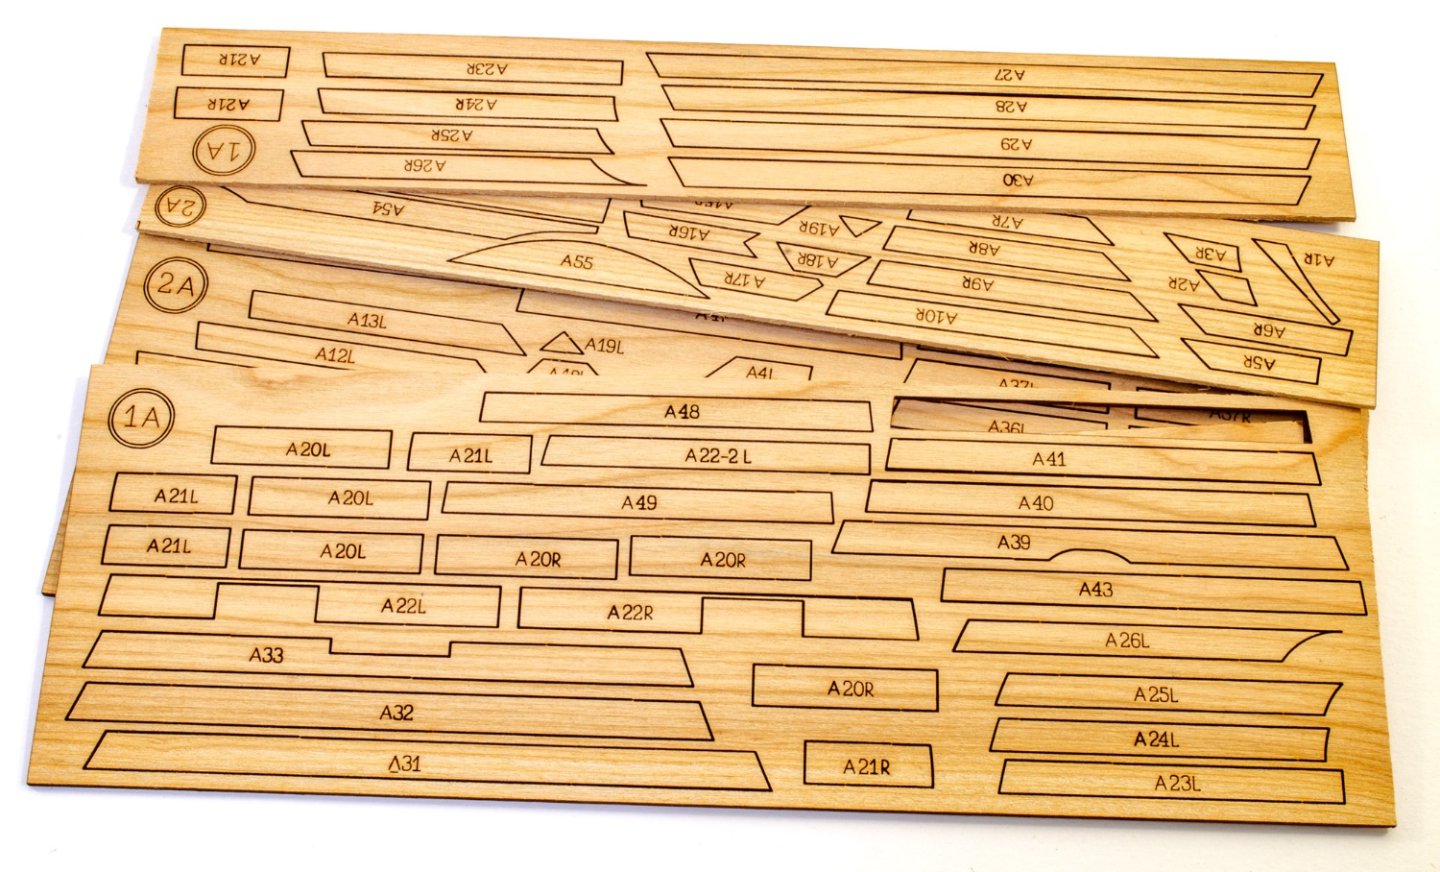
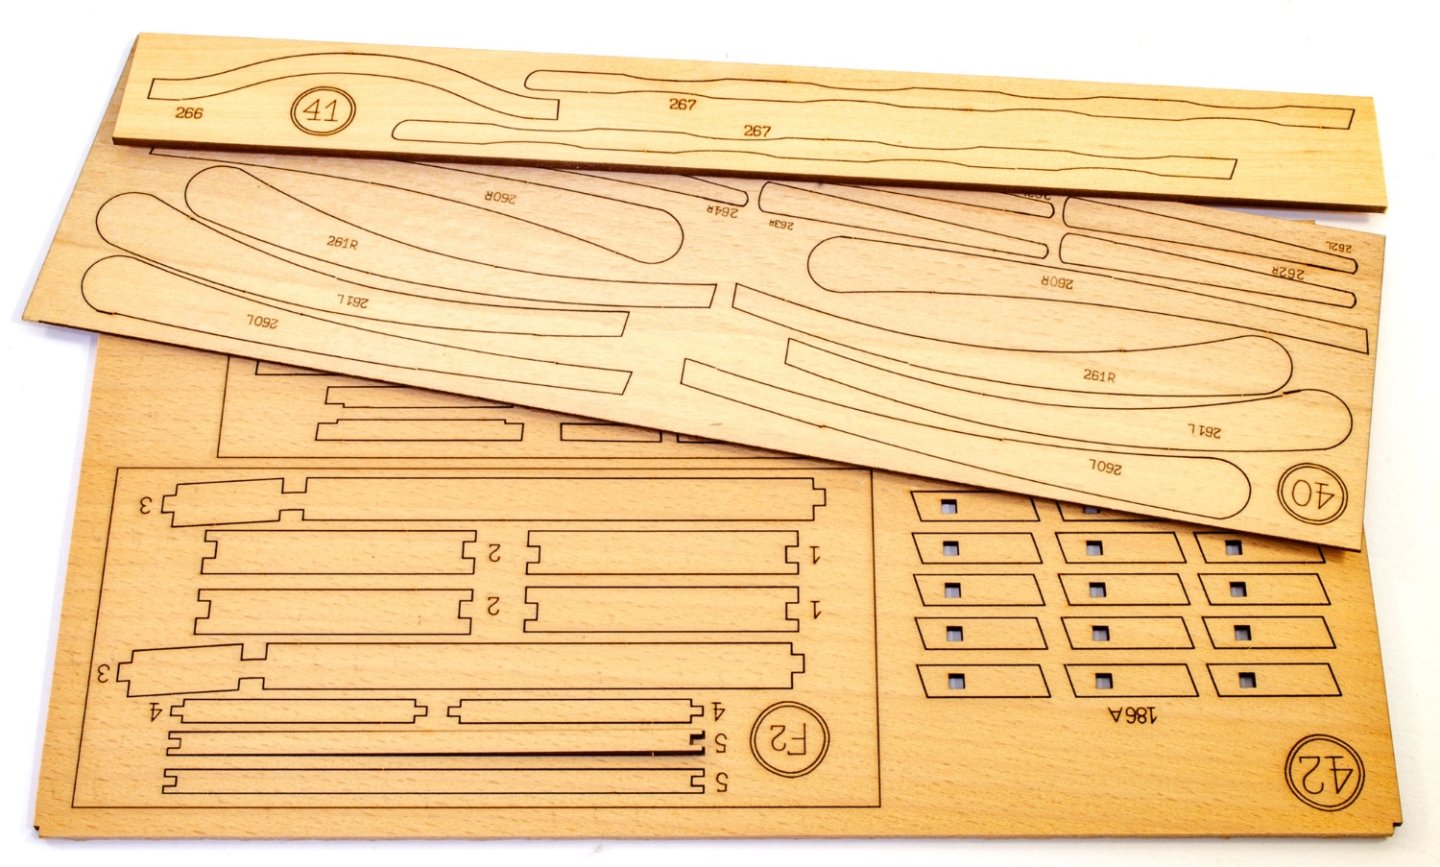
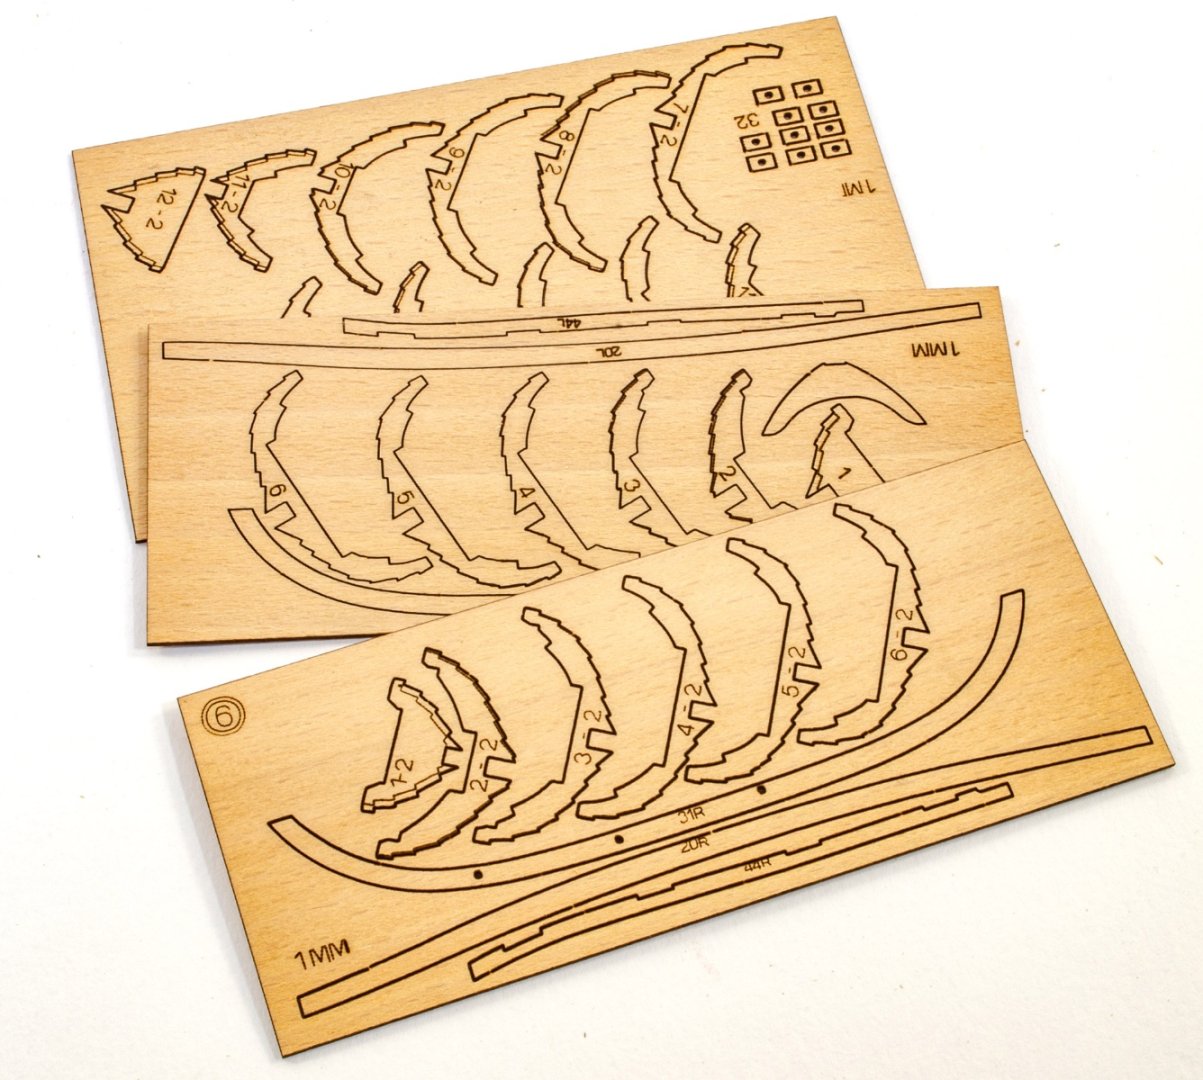
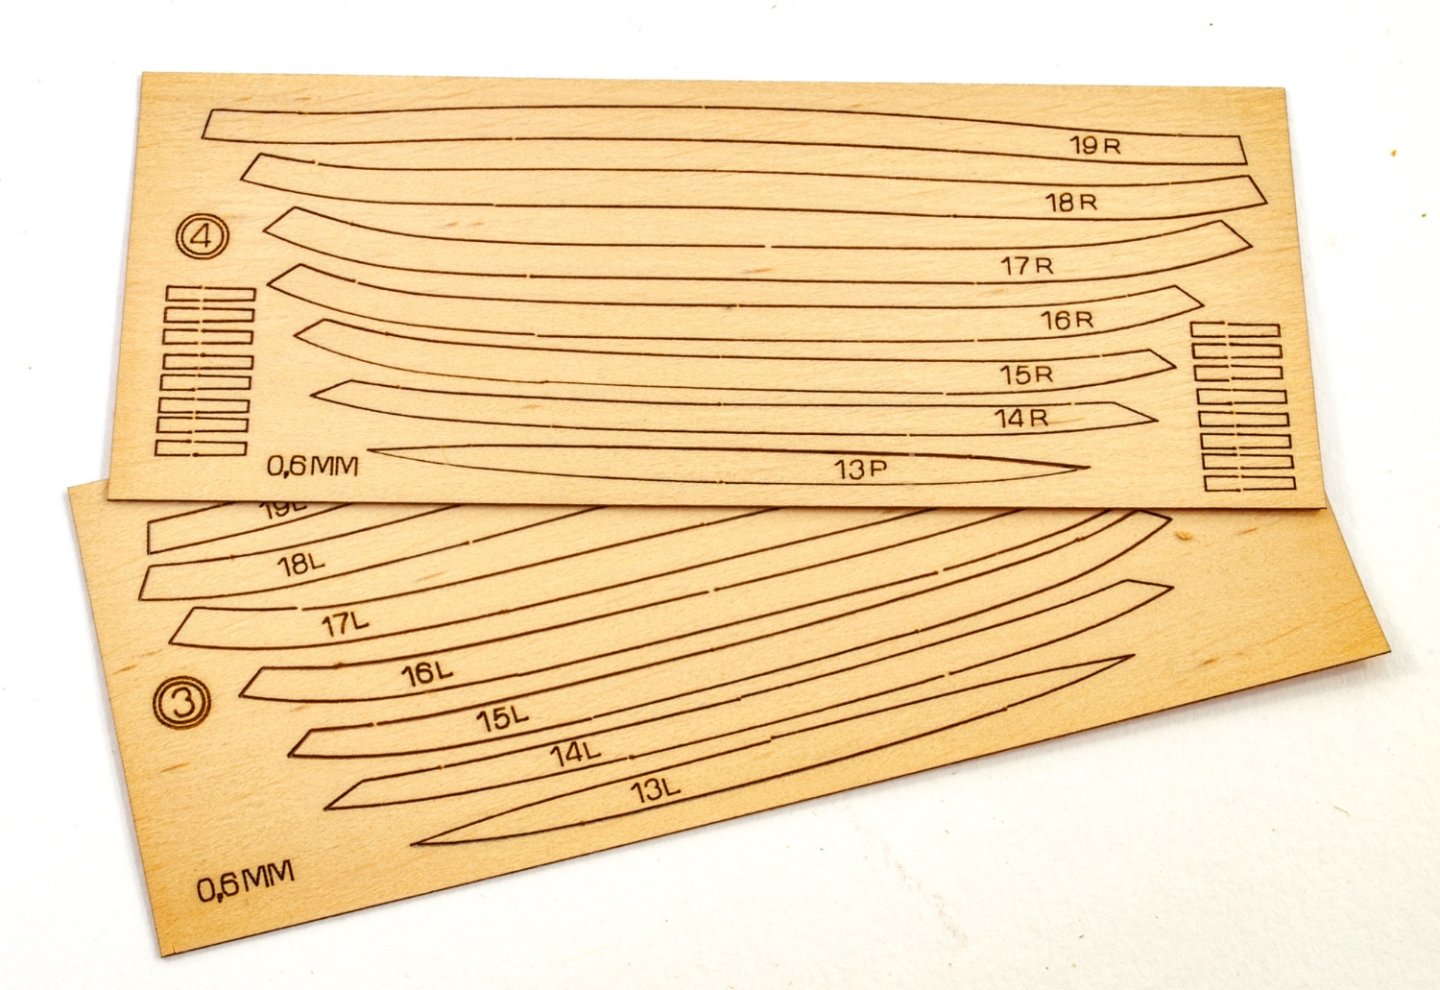
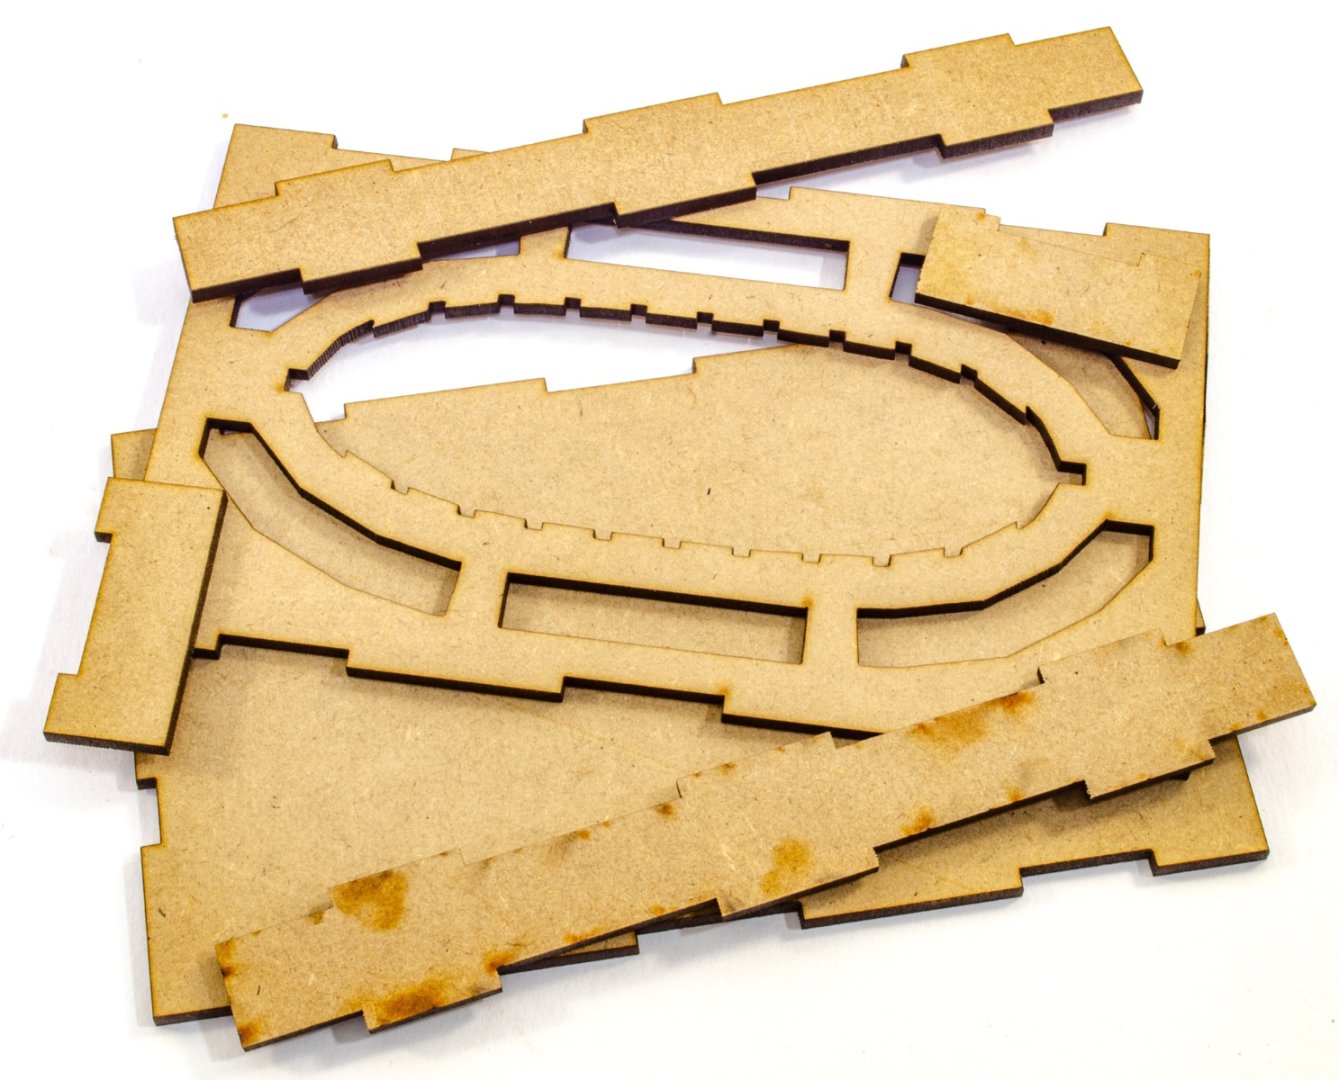
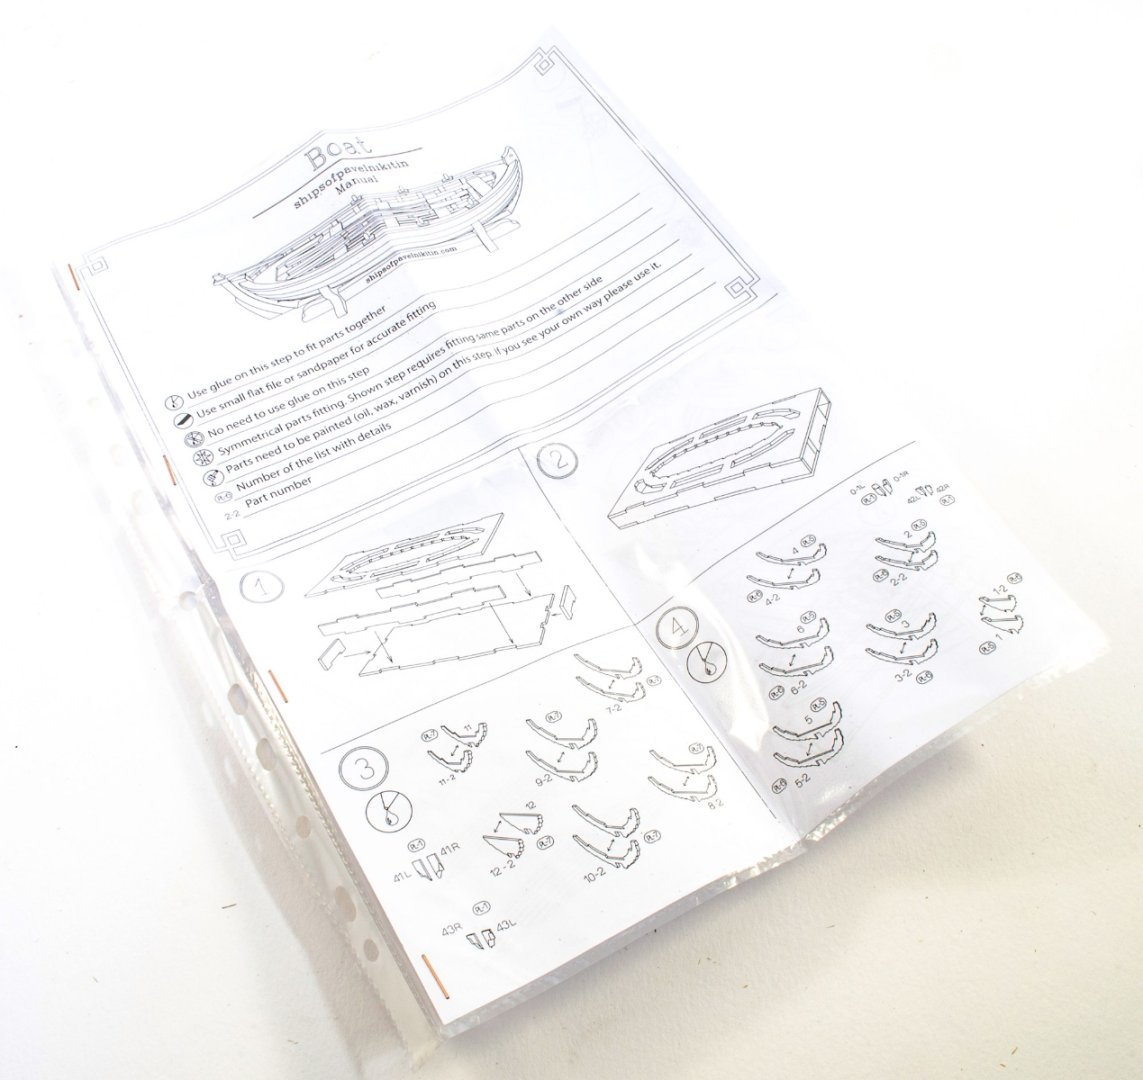
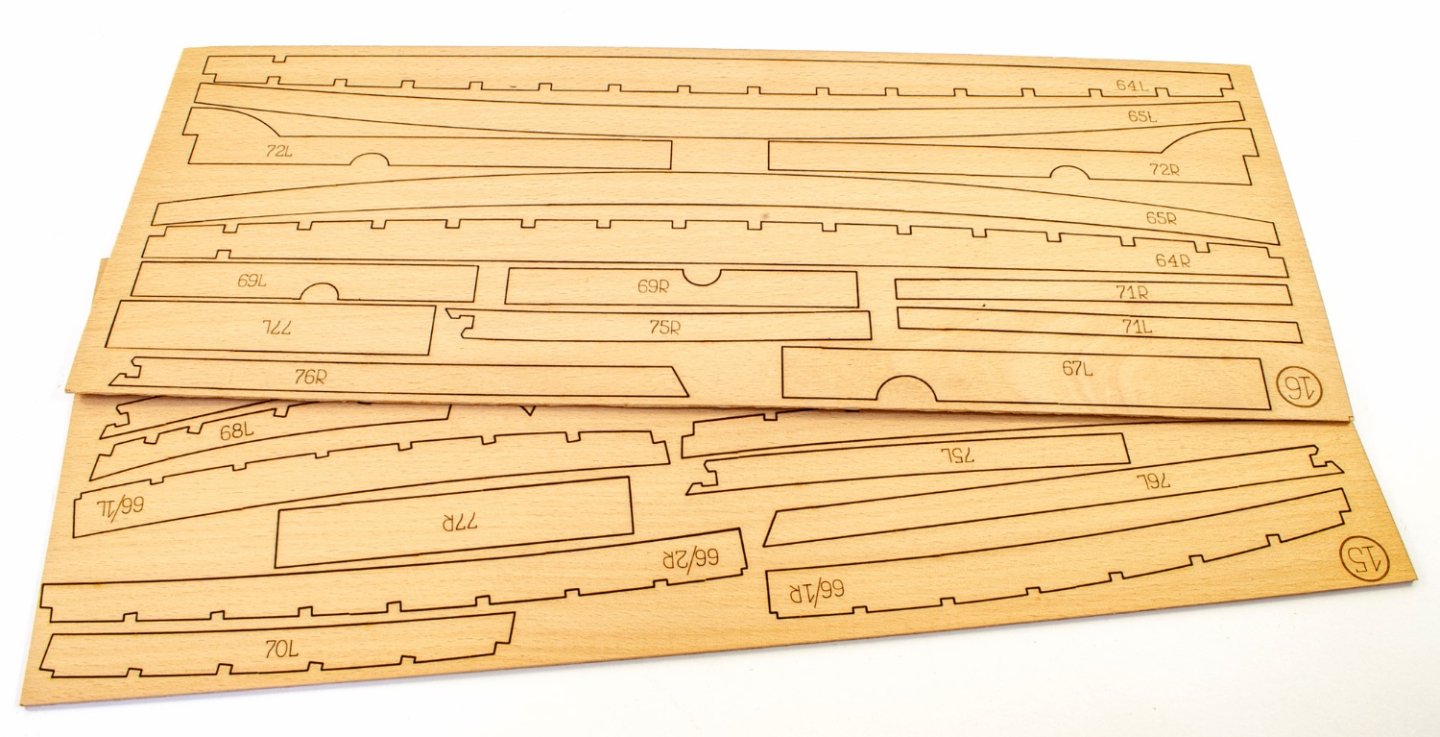
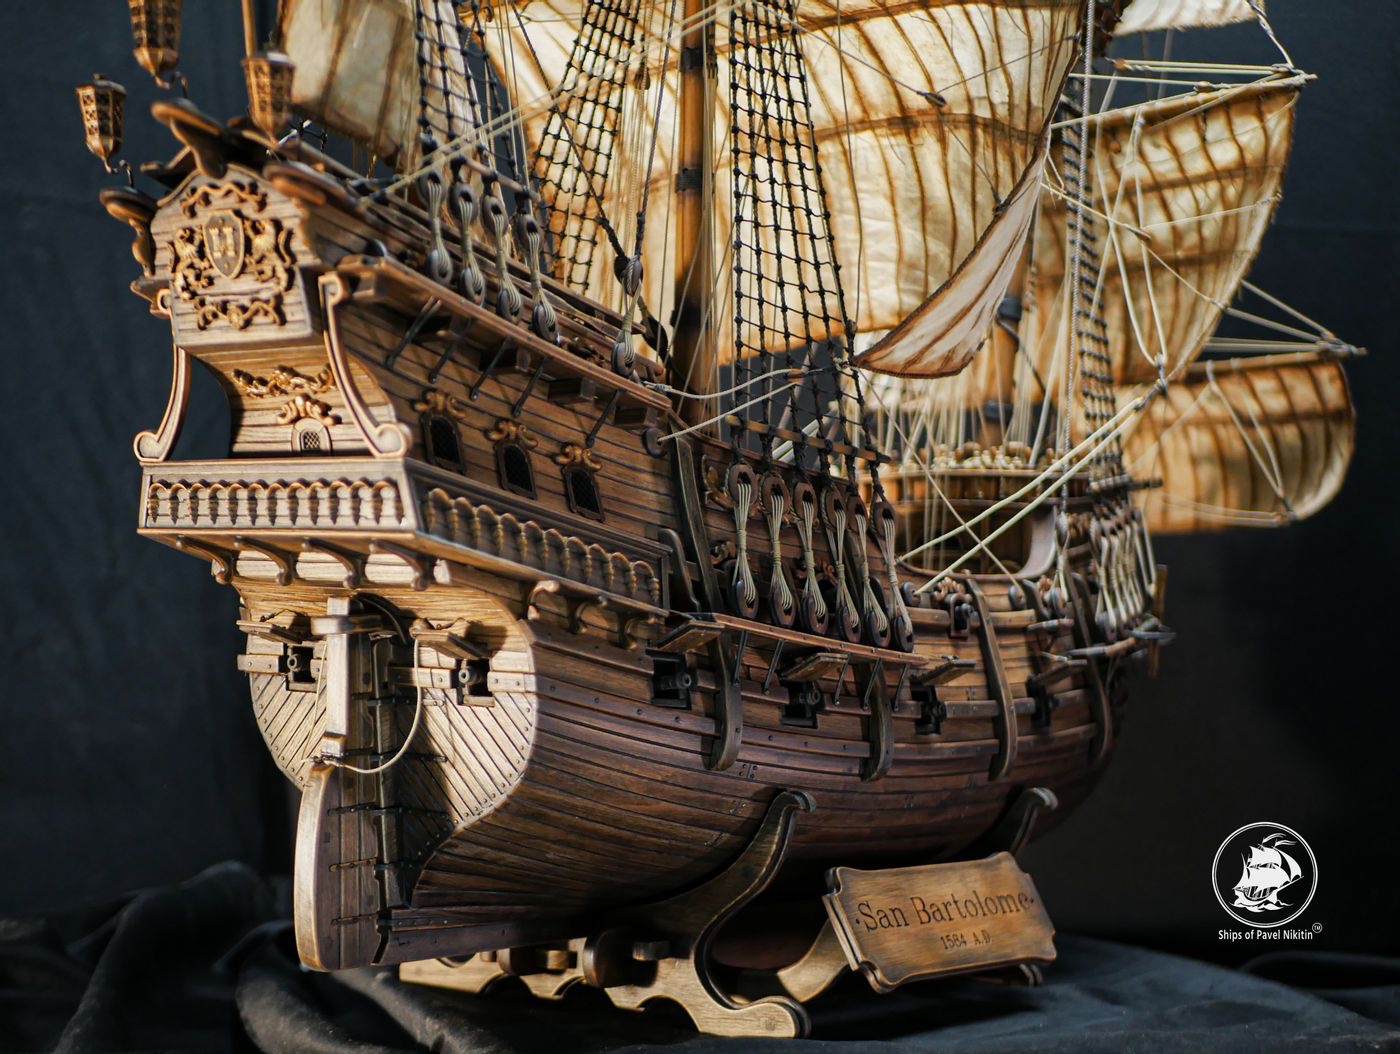
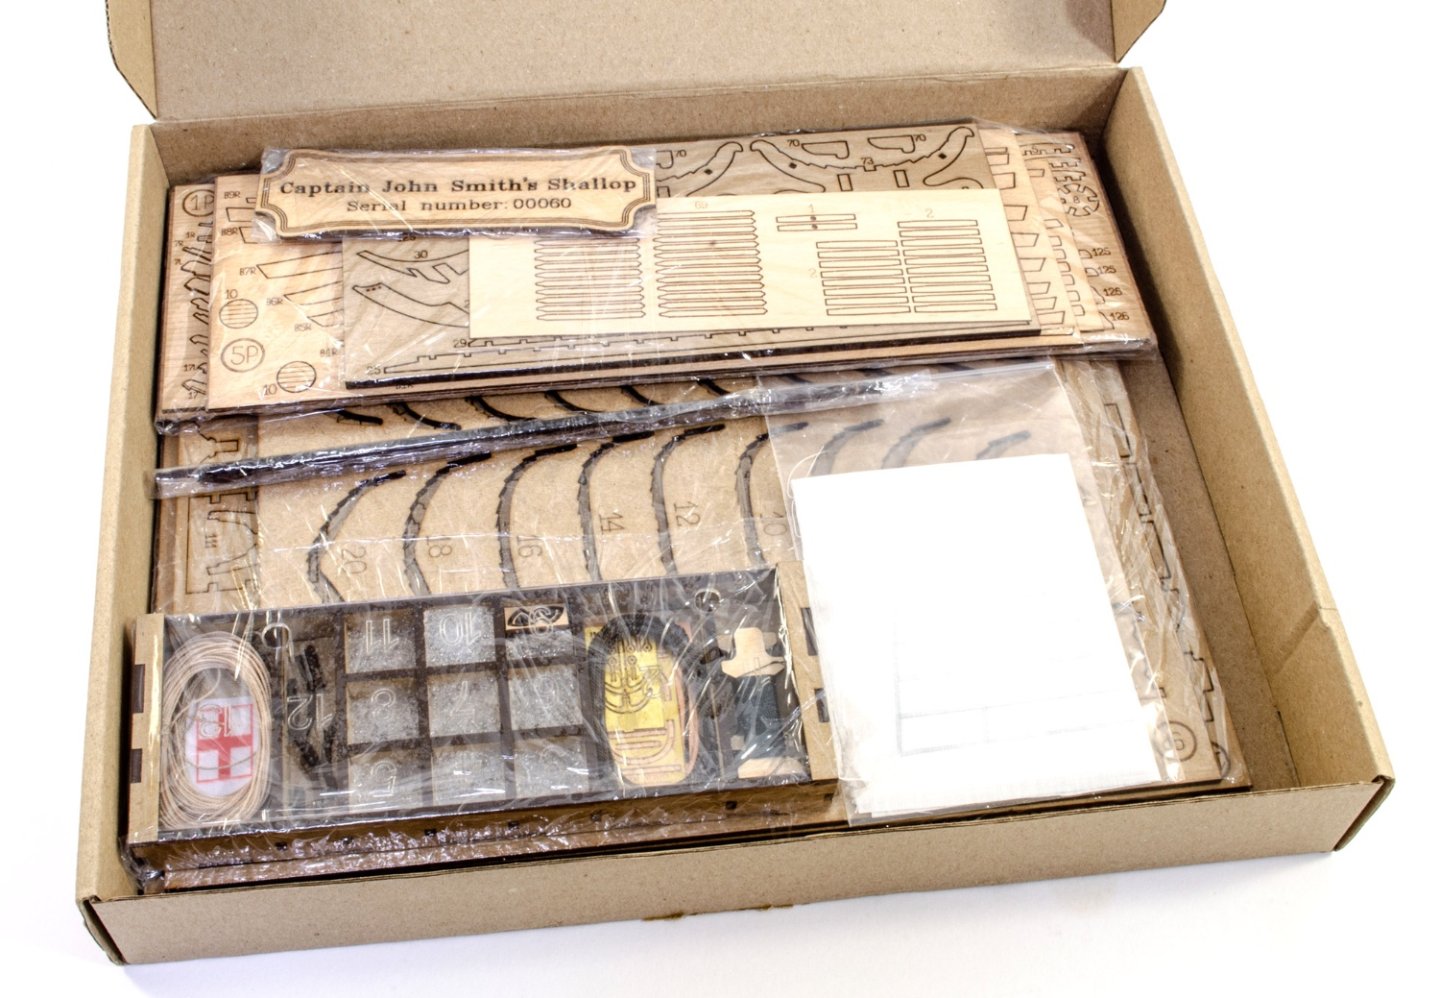
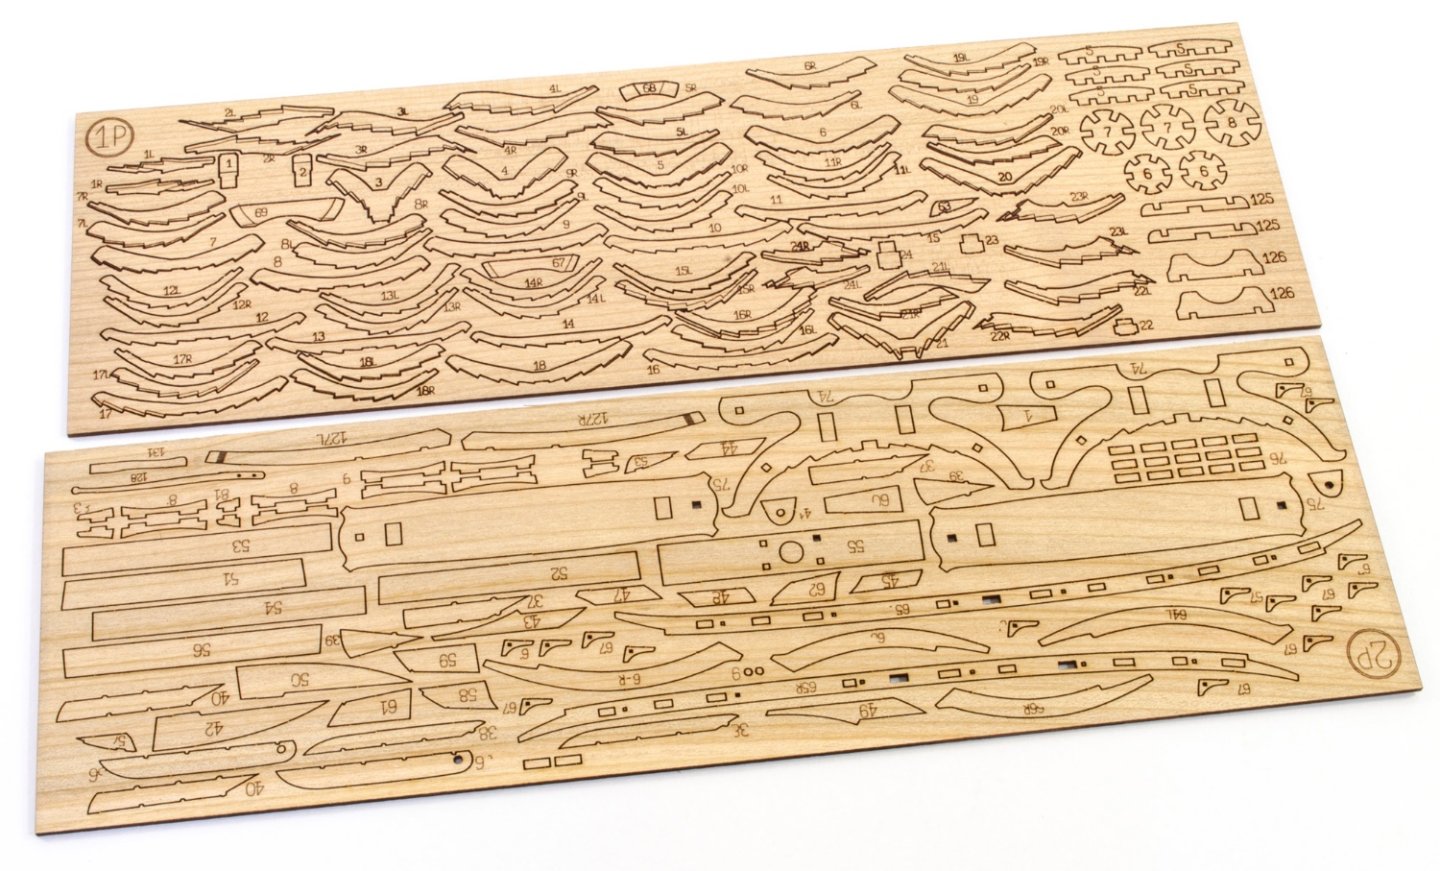
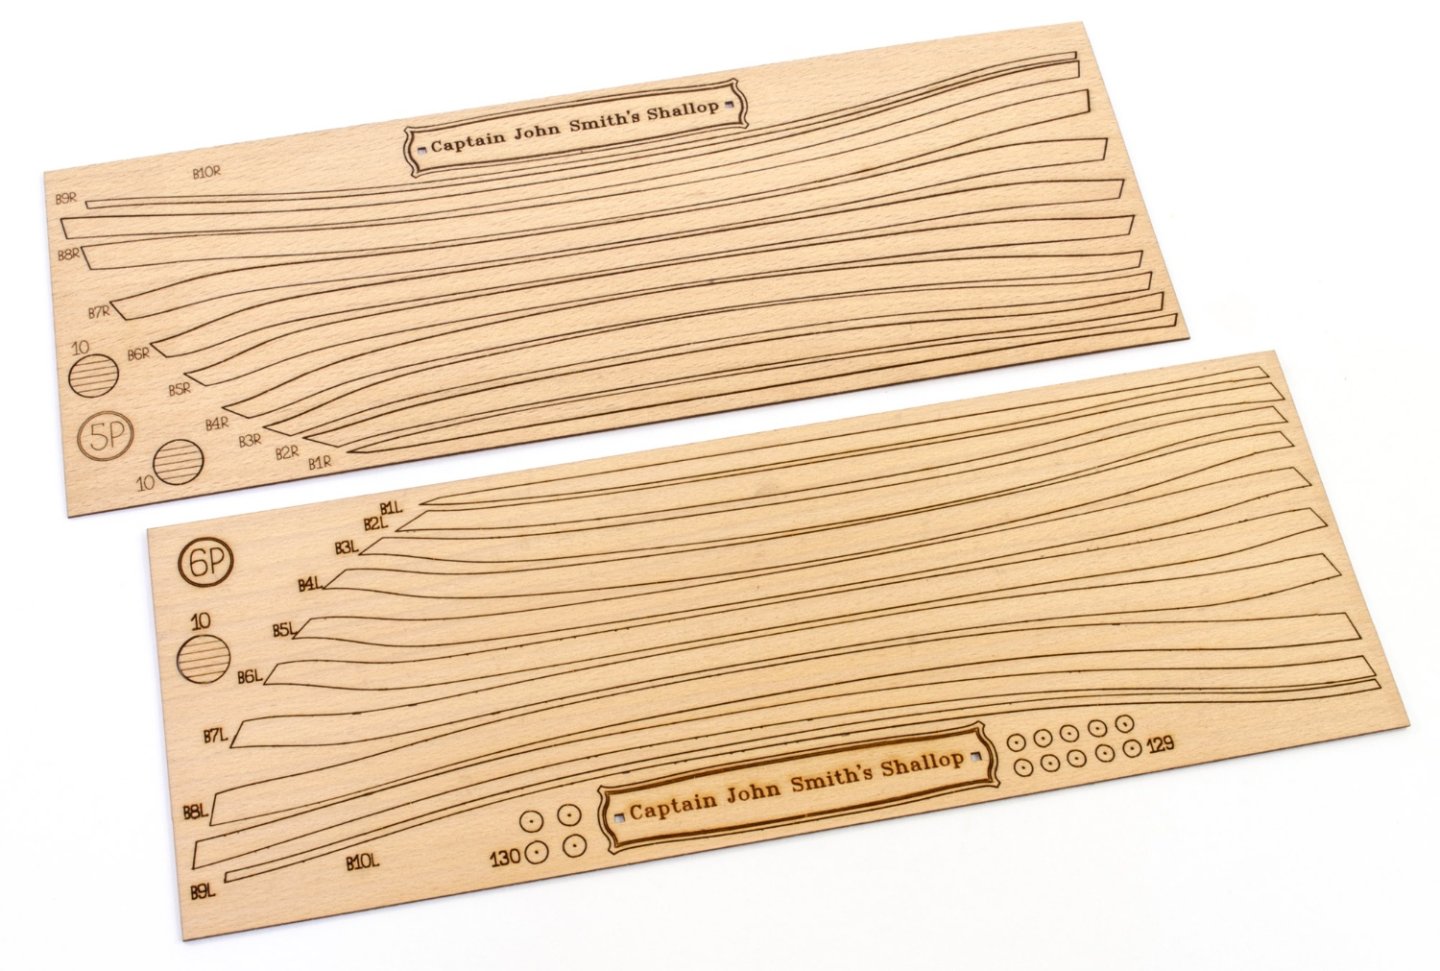
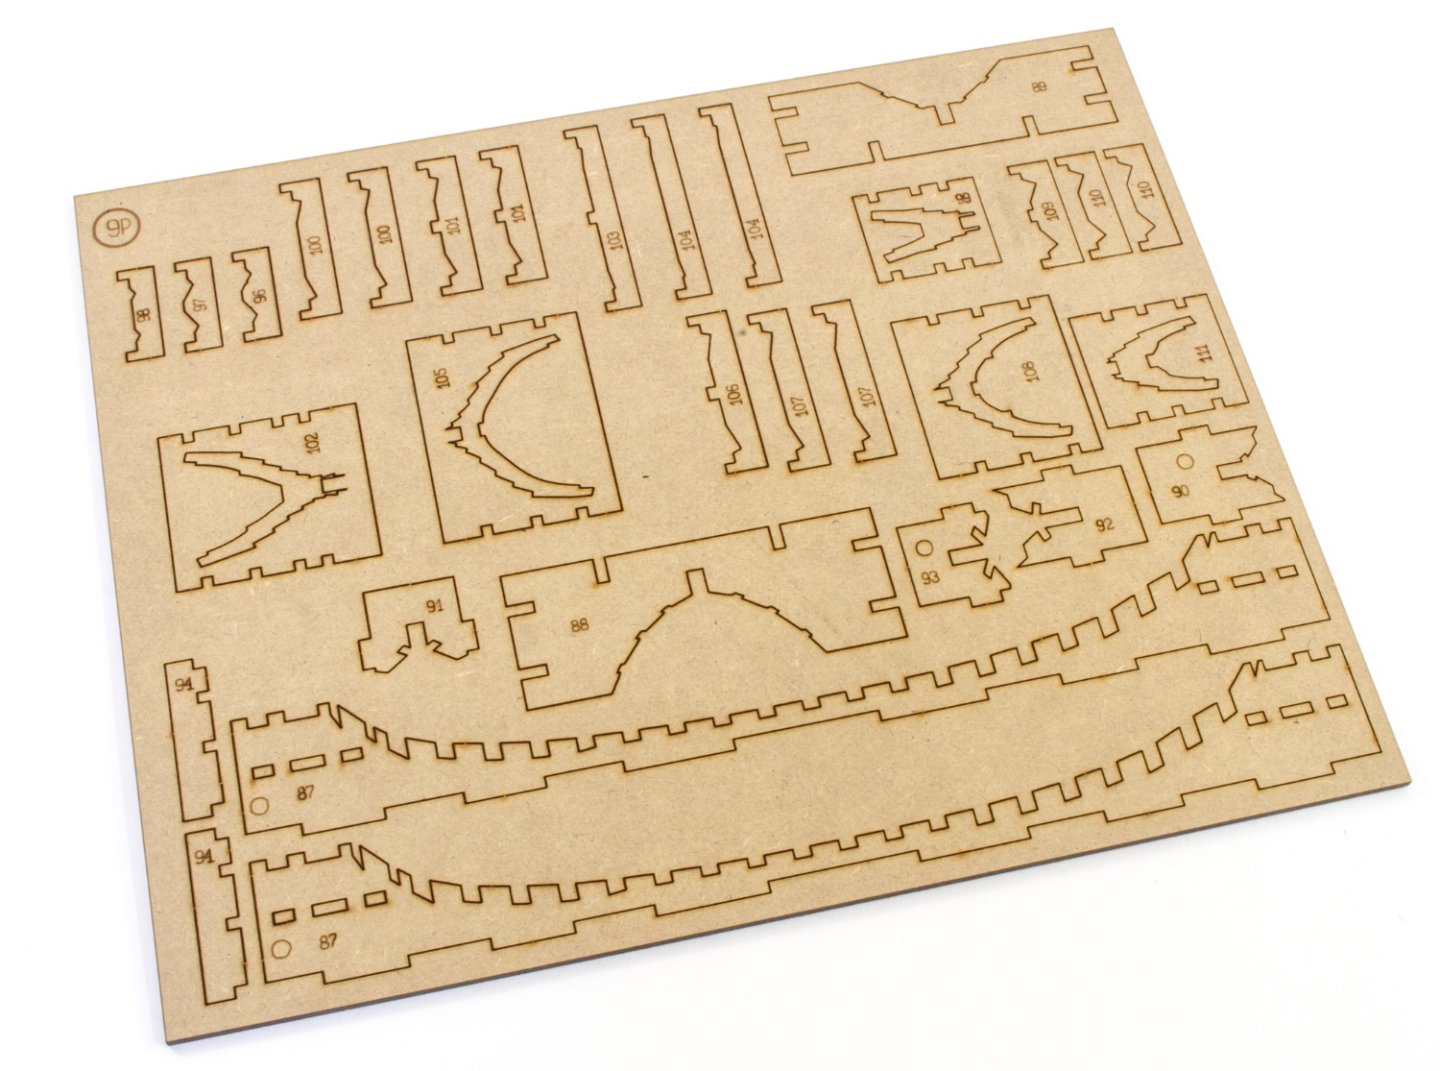
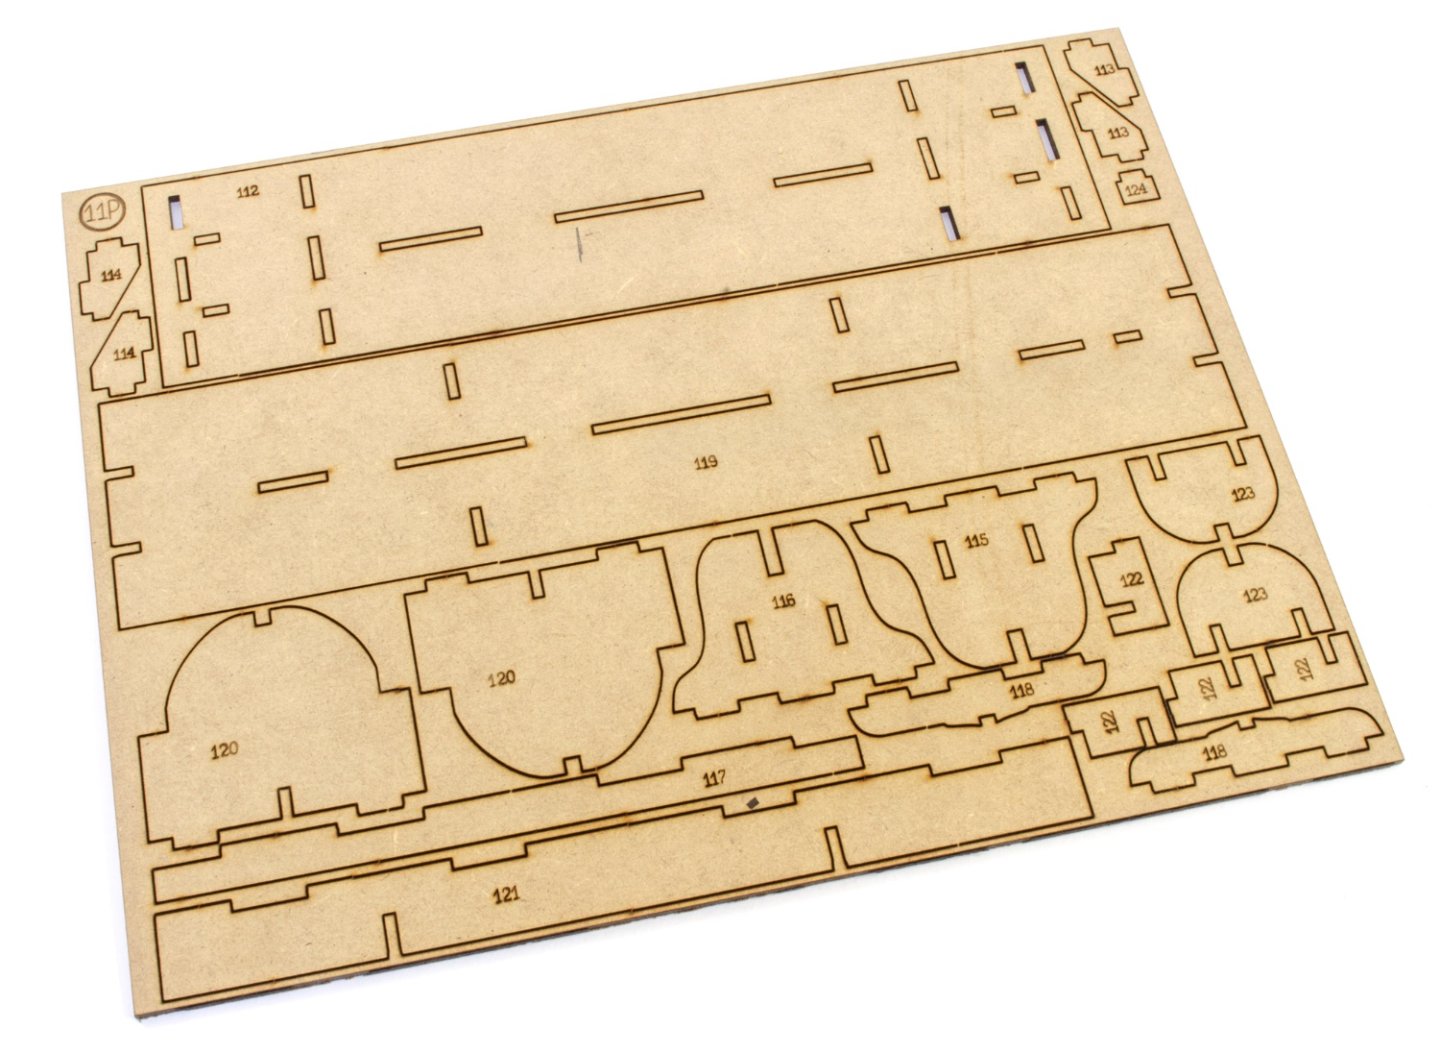
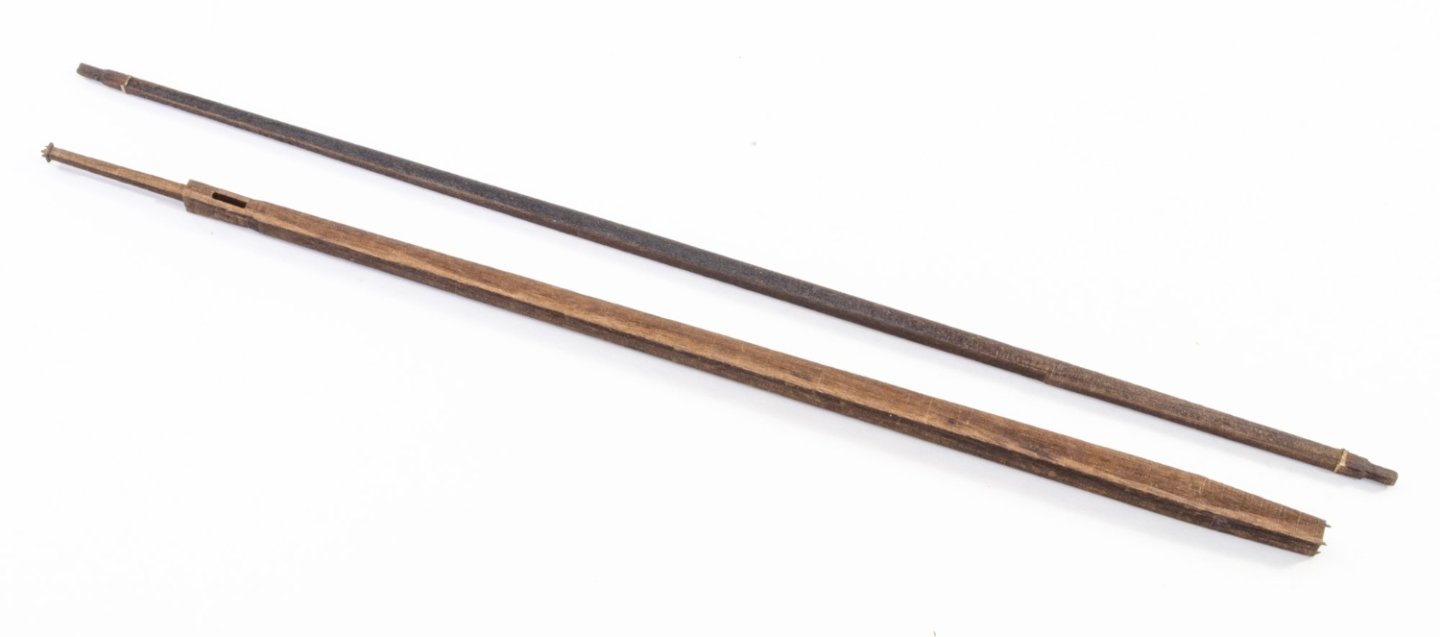
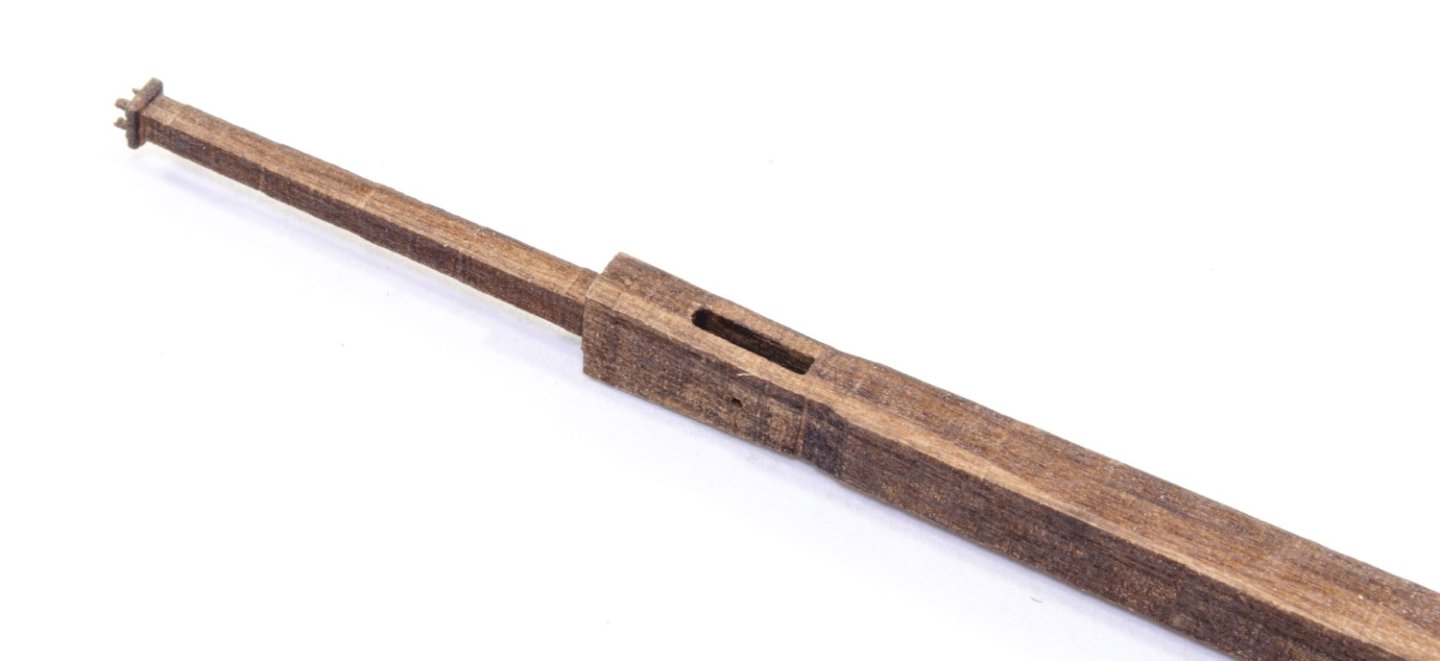
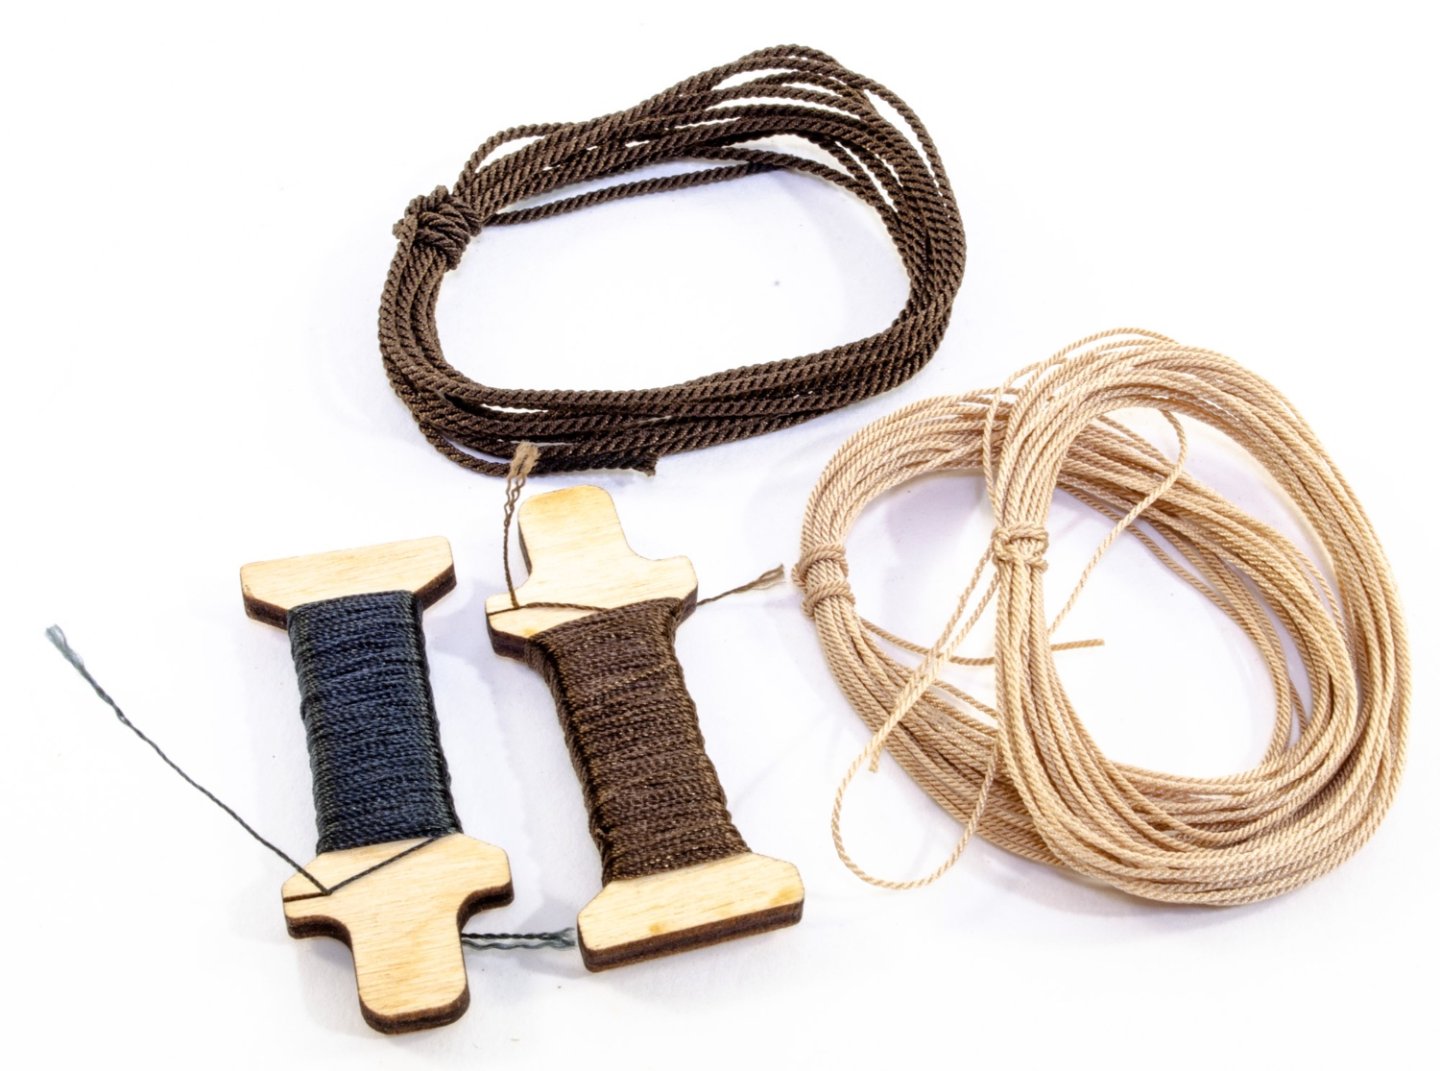
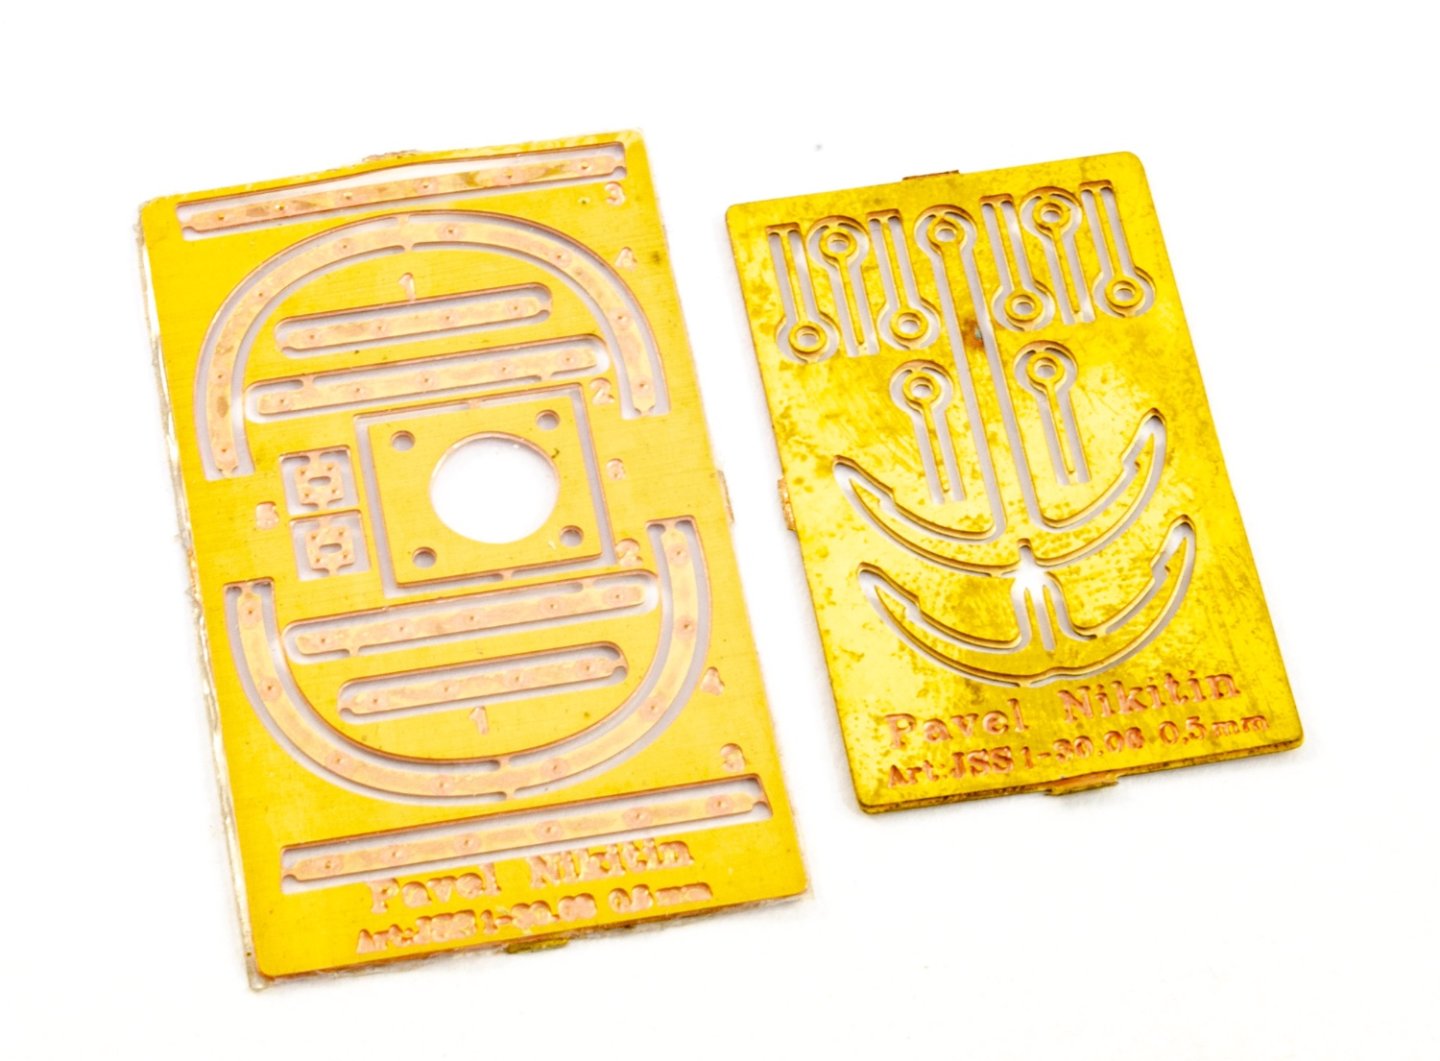
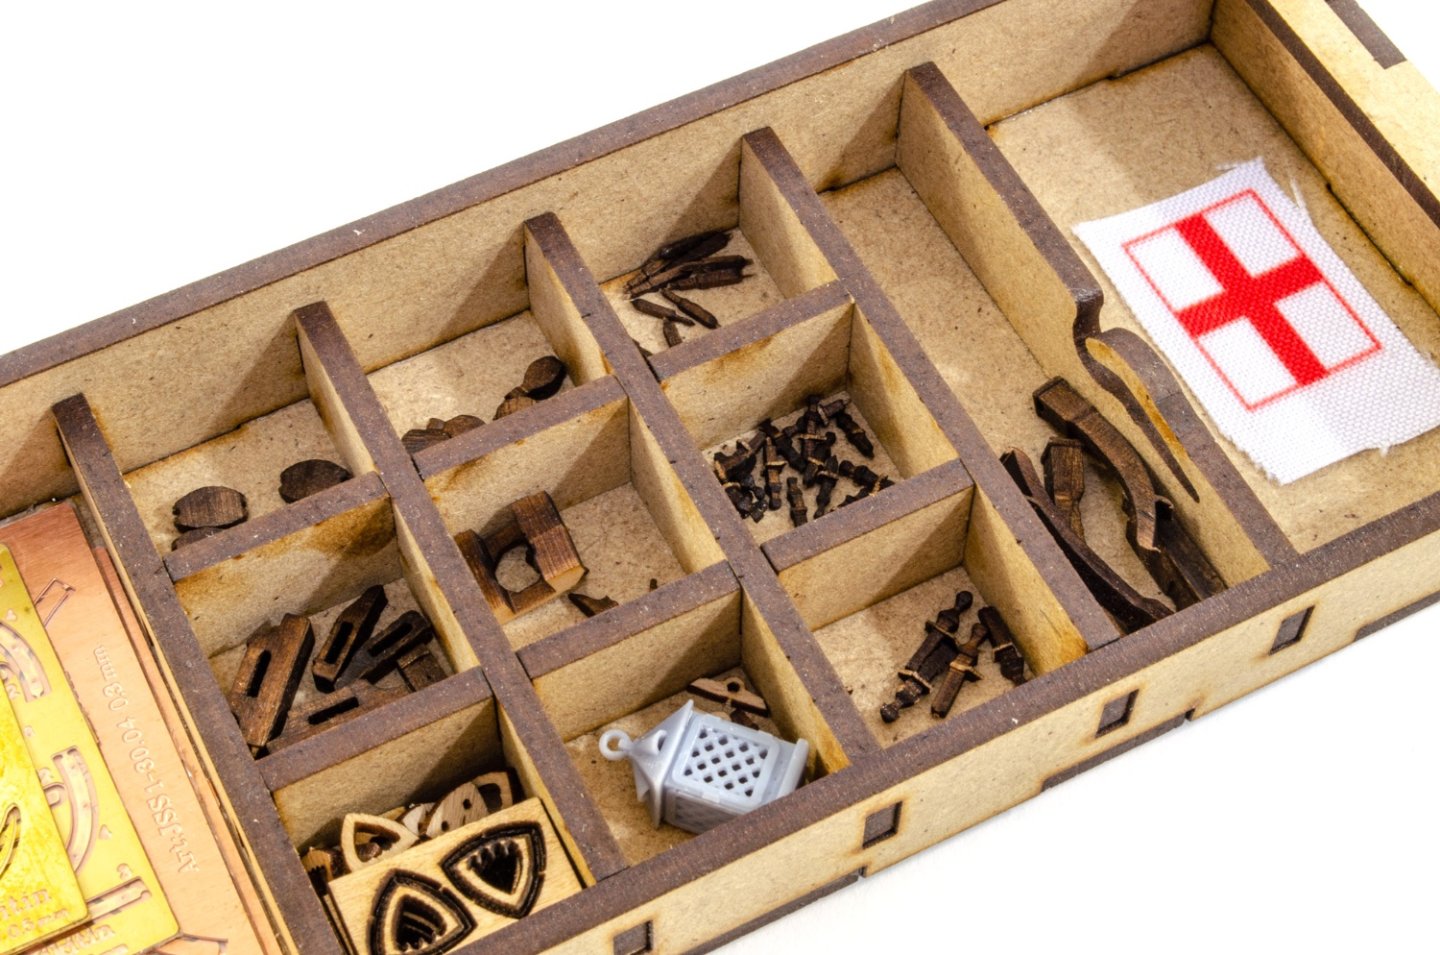
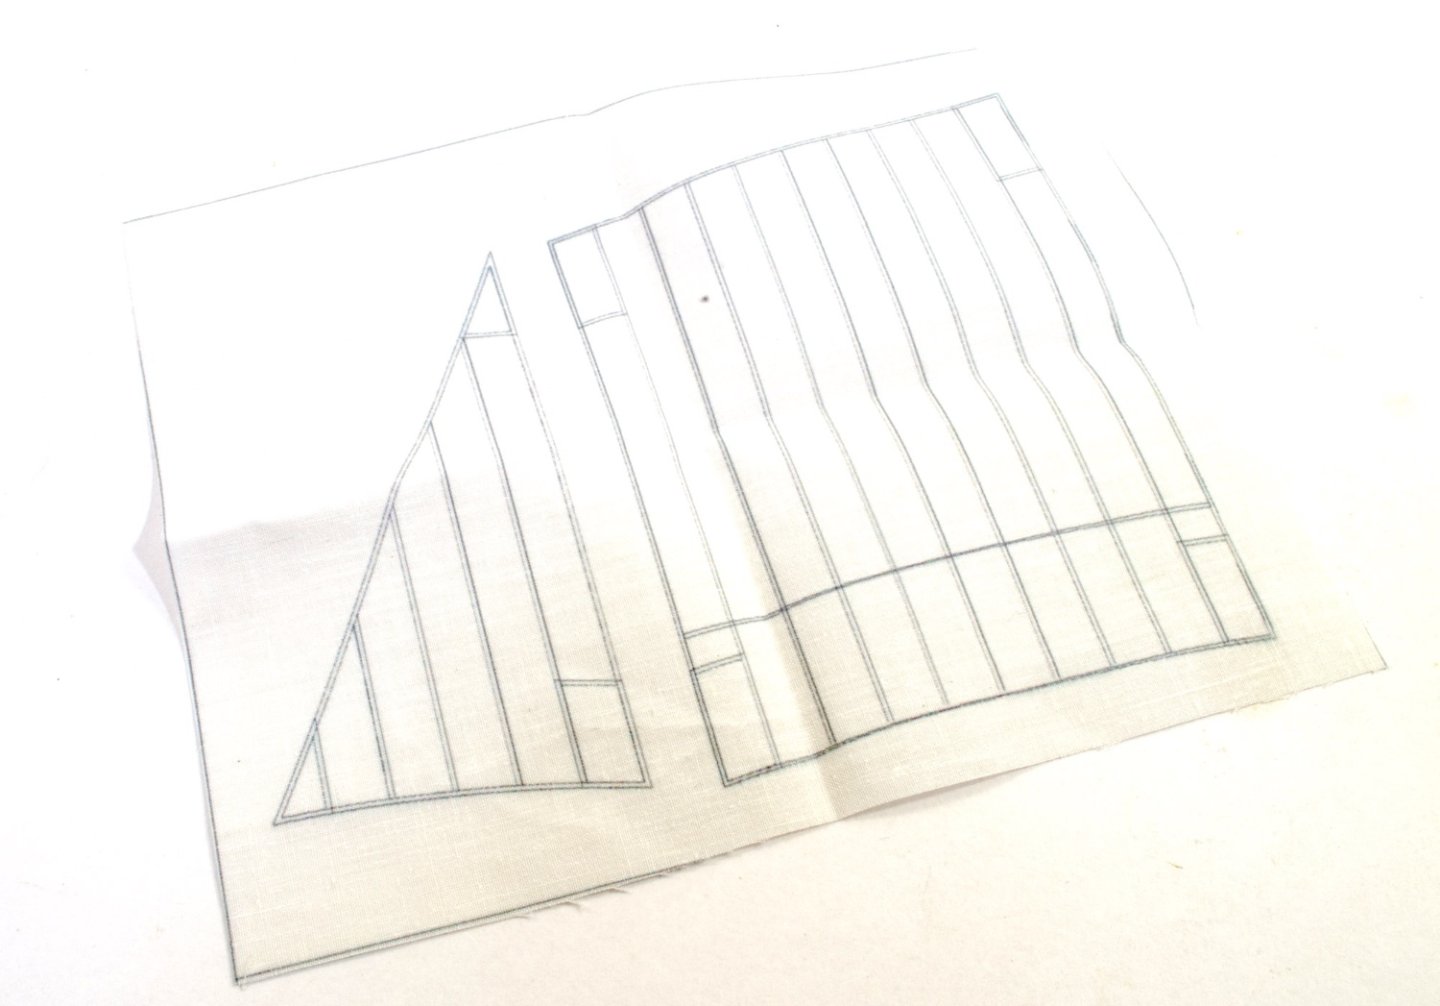
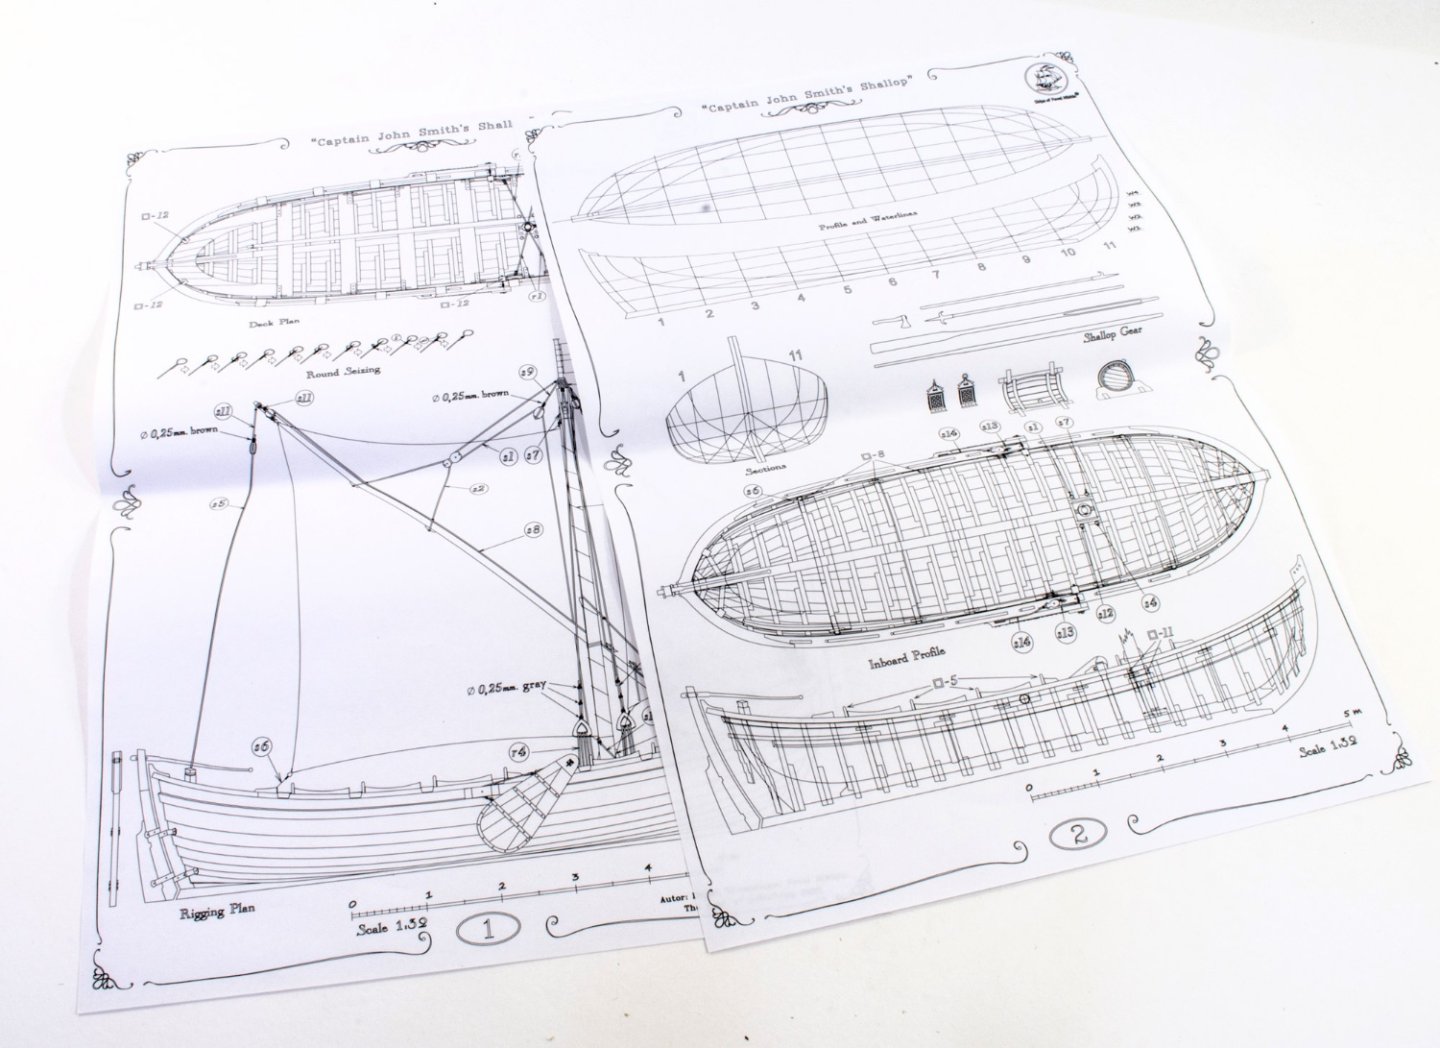
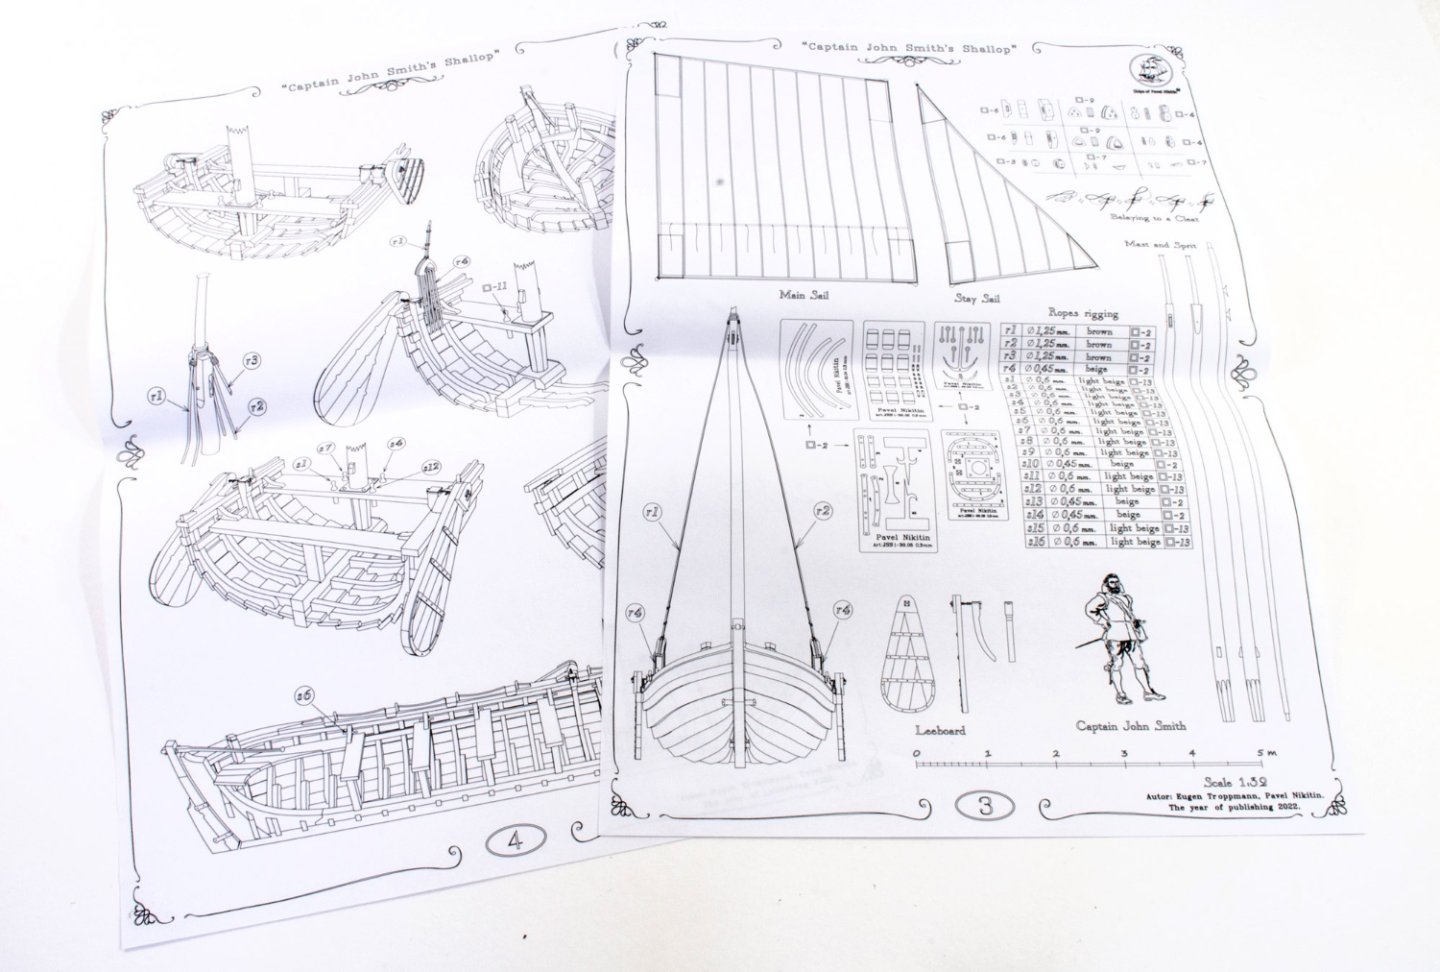
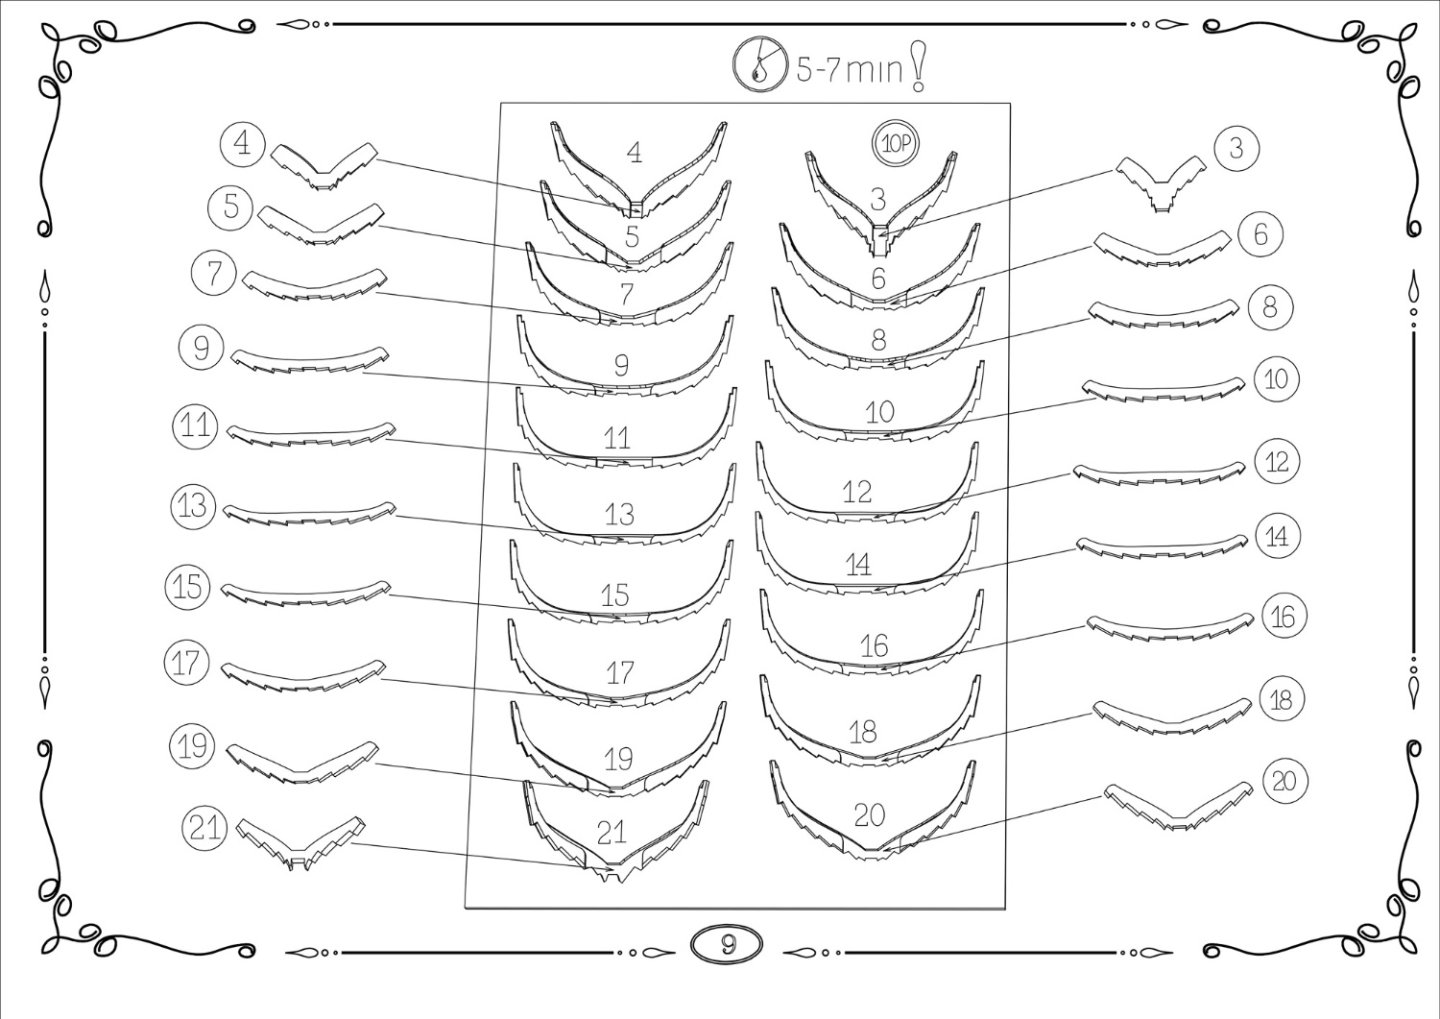
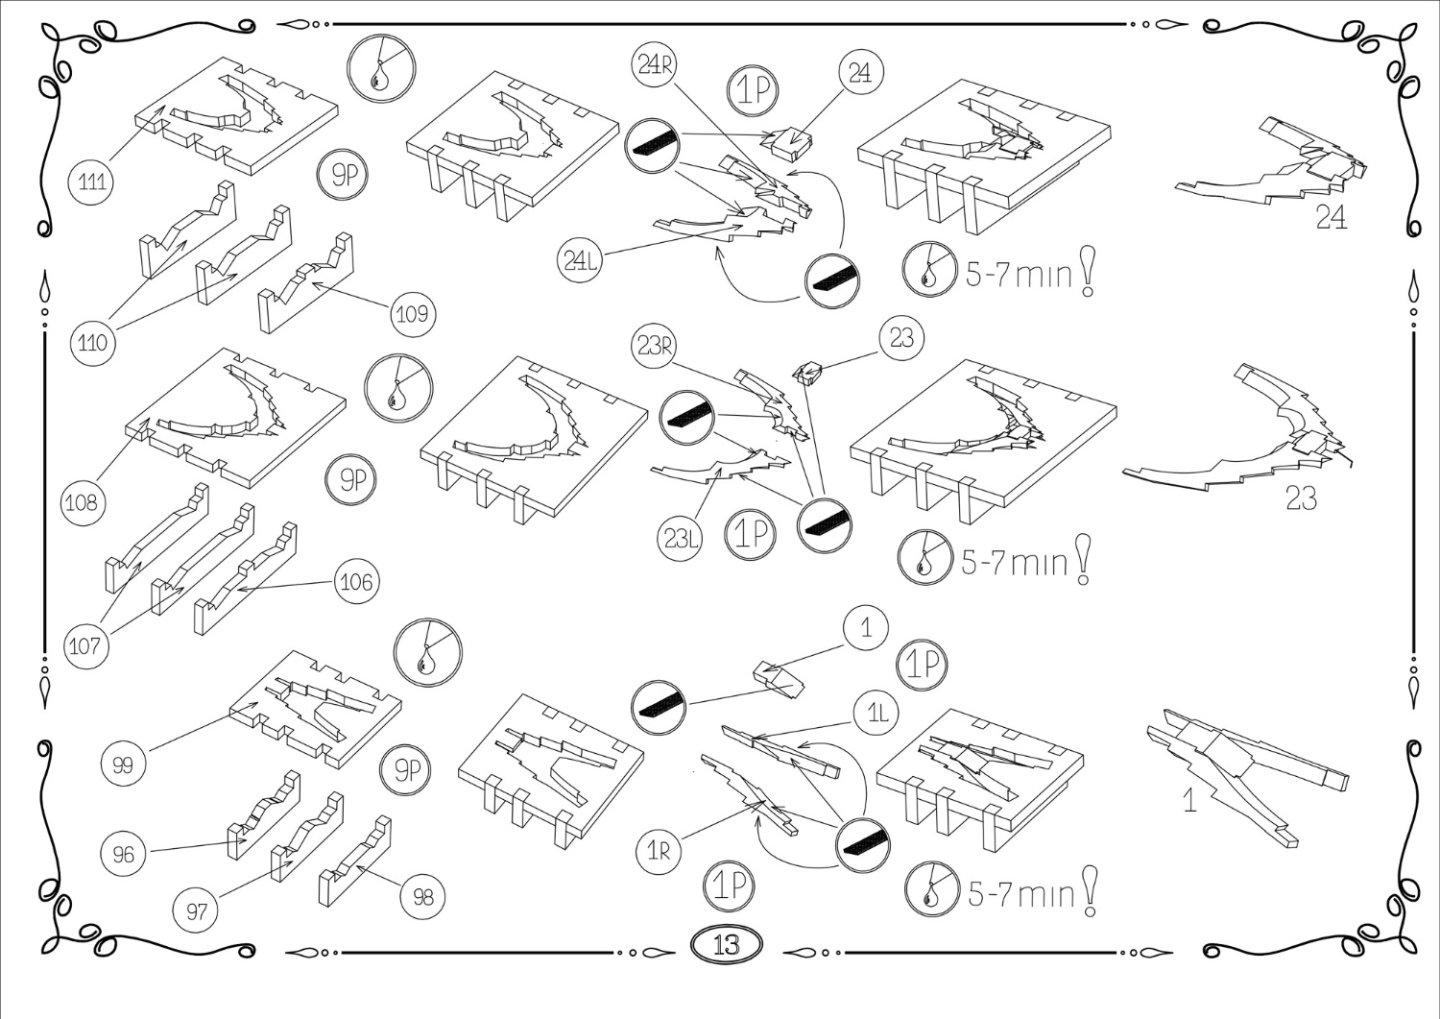
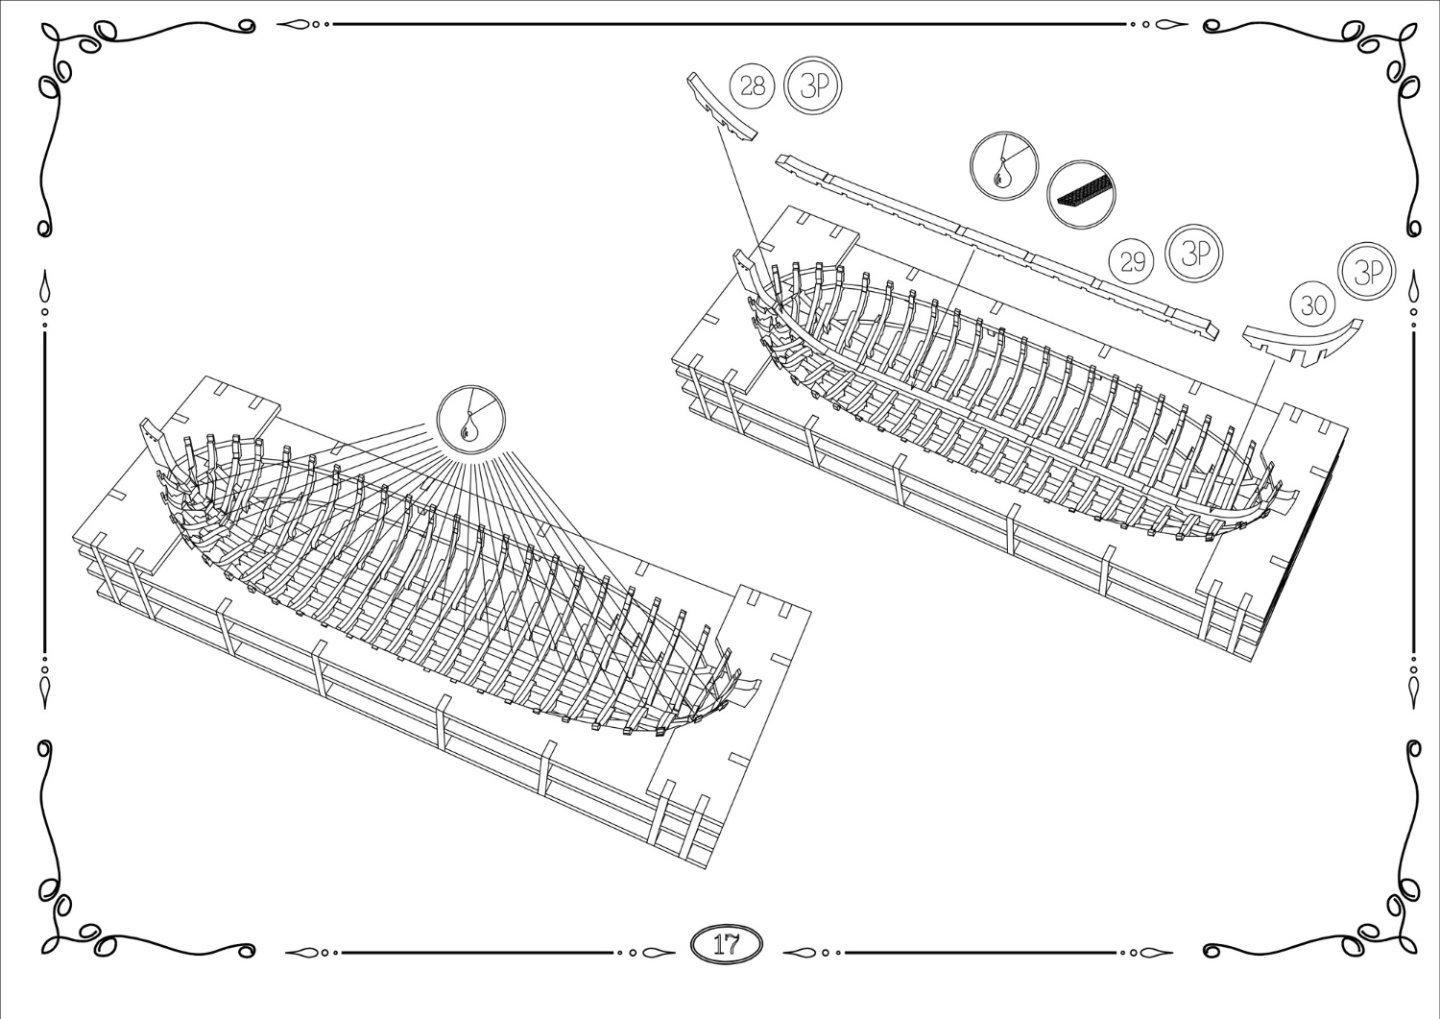
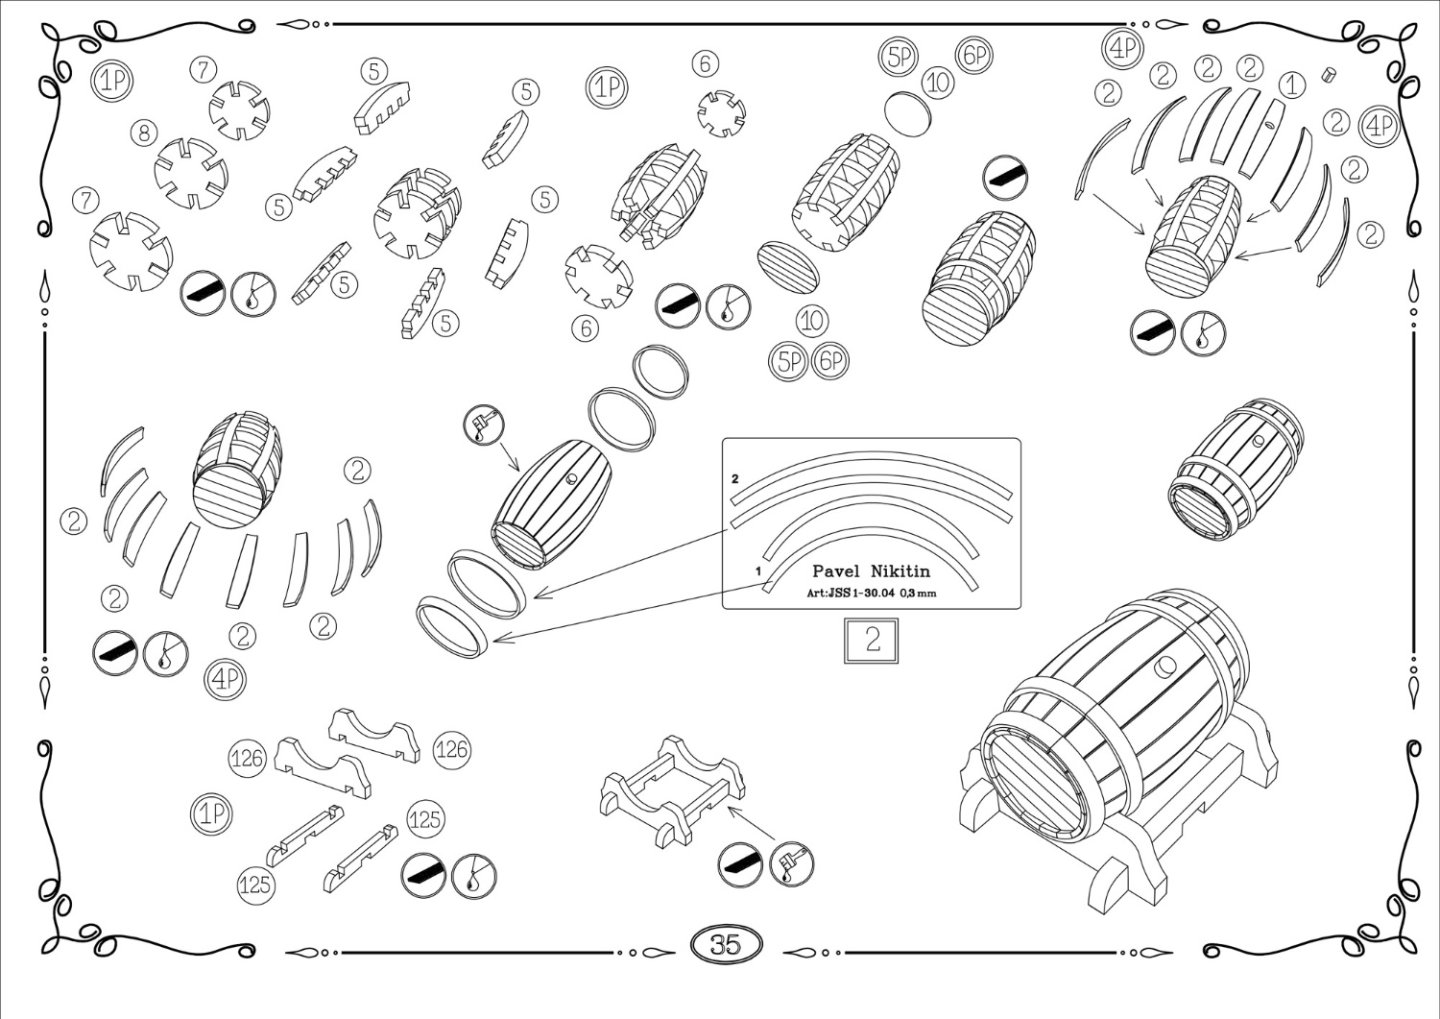
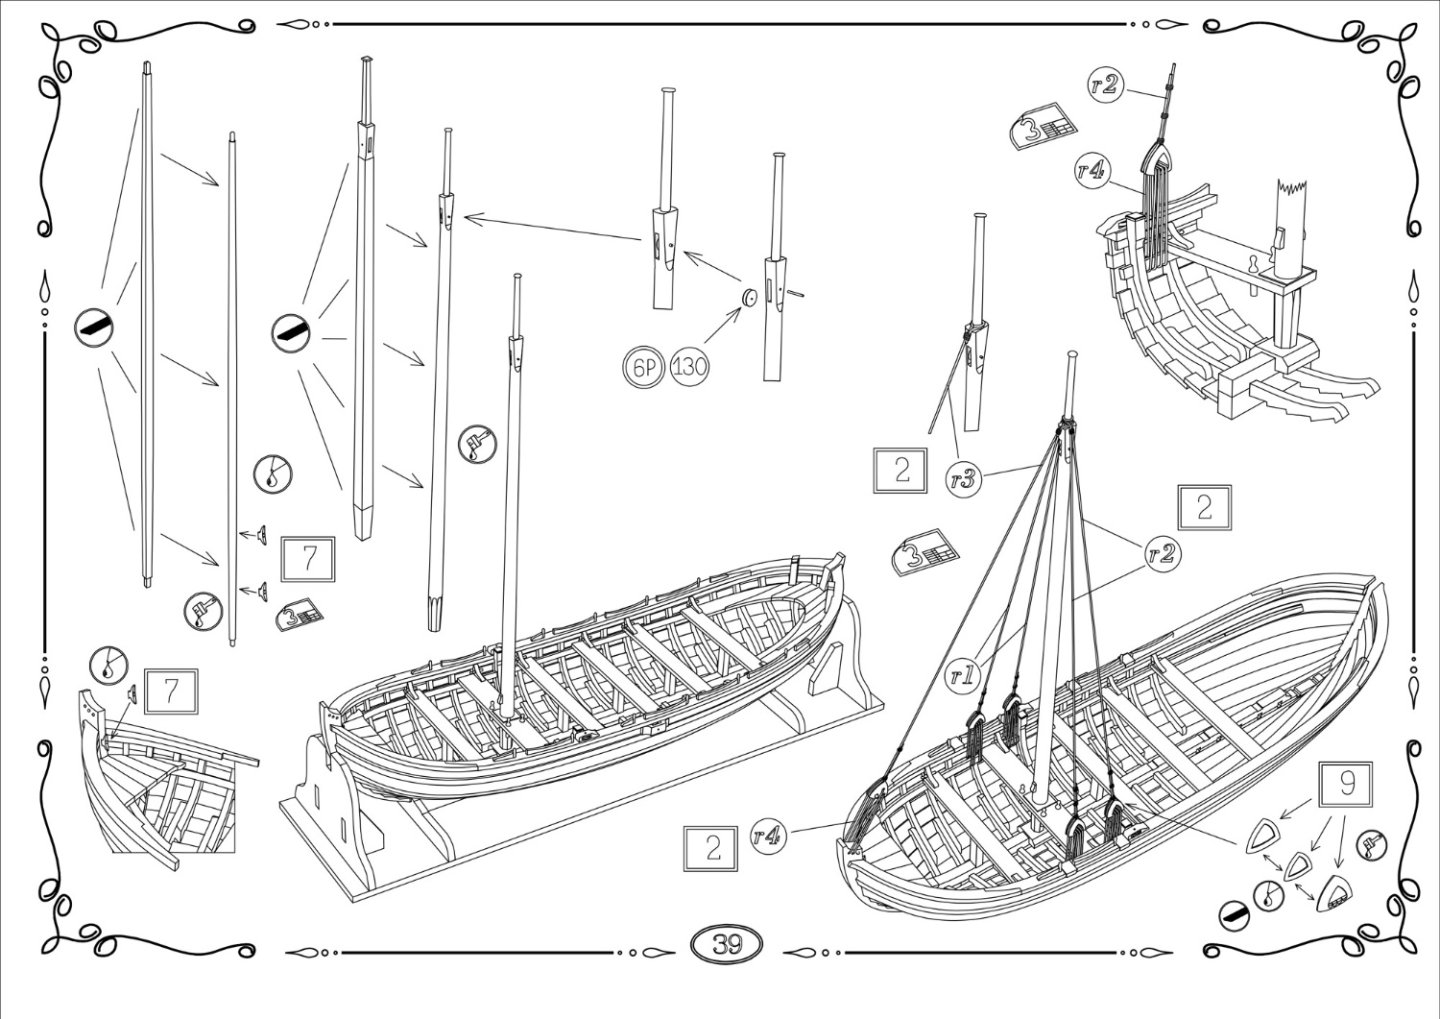
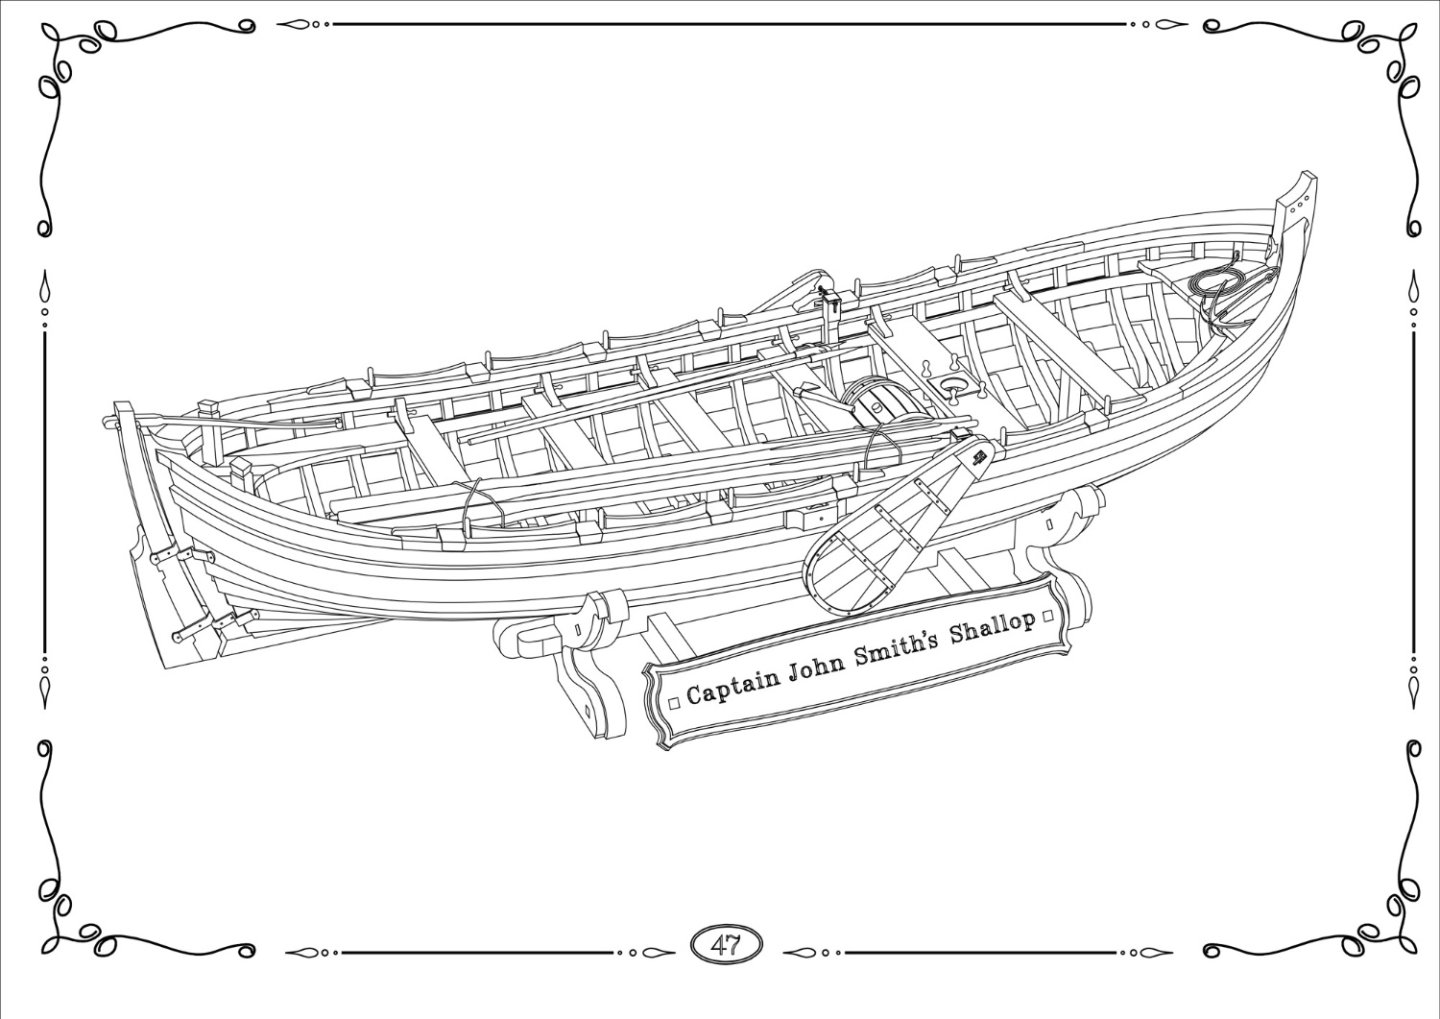
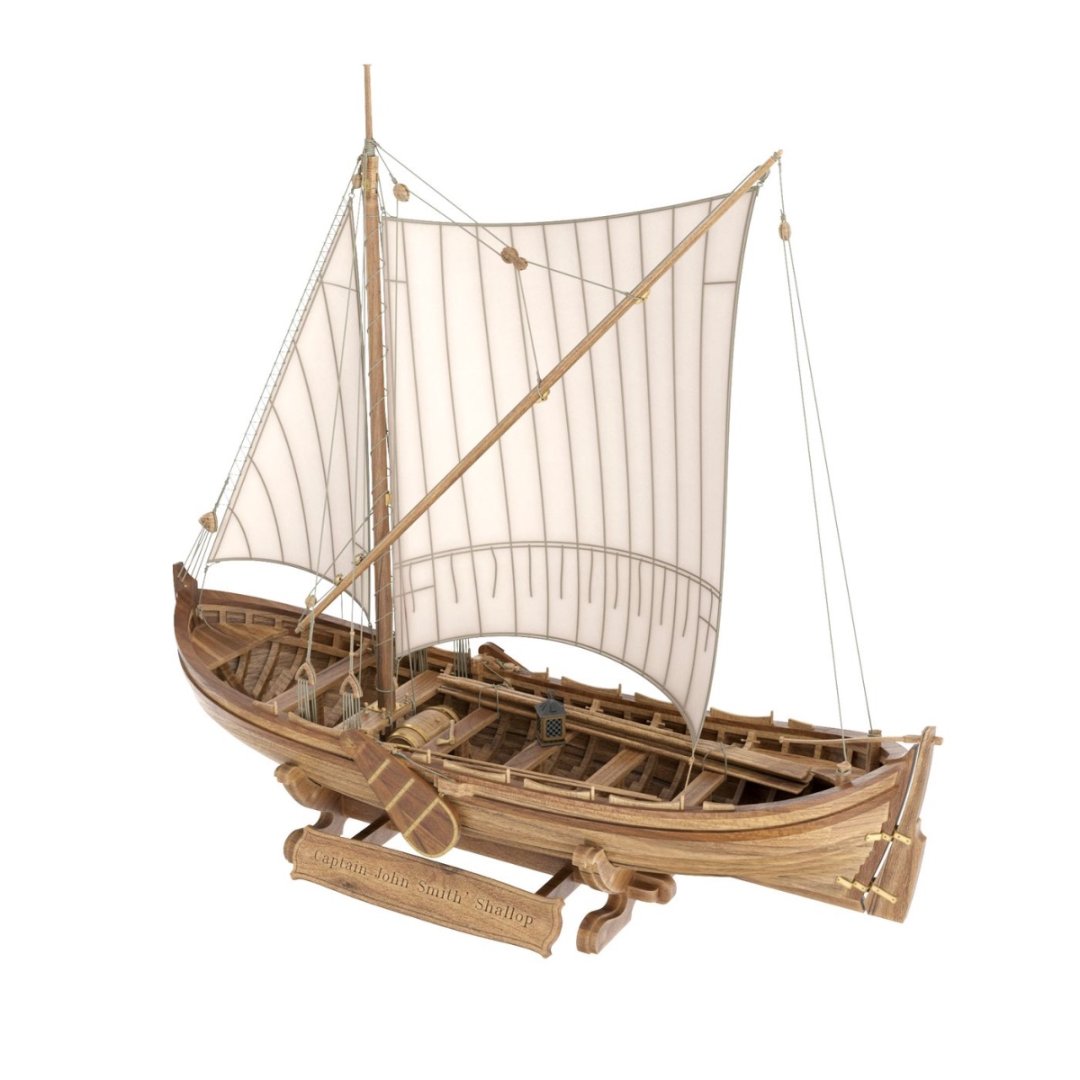
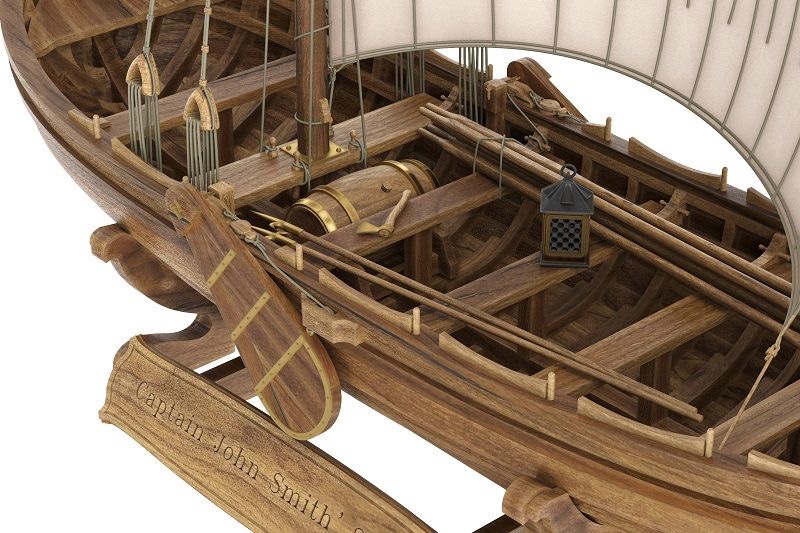
1:32 Captain John Smith's Shallop Catalogue # CJSS01 Ships of Pavel Nikitin Available directly for €98.56 When the early colonists came to the New World at the turn of 16th-17th centuries, they quickly realised a need in small, universal, and durable boats to explore the coast safely and to start trade relations with local North American tribes. One of the most important aspects was not local boat construction, but the assembling Europe-built vessels beforehand. These boats were disassembled and shipped to the New World on the larger vessels used by English sailors to cross the Atlantic Ocean. Boats were usually between 25ft to 45ft in length, and utilised both sail and oars. They tended to have either one or two masts and at least one sail, as wells as six to eight oars. They could carry up to 25 persons with a food enough for a few days. The boats played an important role in survival and the development of the first settlements in the New World. Captain John Smith sailed with a crew of 14 persons and set out to explore and map out the Chesapeake Bay in the summer of 1608. The crew sailed more 1700 miles over just three months. This story is well known because of the meeting that Captain John Smith had with a Native American princess, Pocahontas, during his trip. The legend of Pocahontas and John Smith has been highlighted many times in a literature and cinema. All the notes and drawings of this journey were described in detail in Captain John Smith’s diaries. Unfortunately, he didn’t describe his shallop in detail, and all we really know is that it arrived in The New World, disassembled aboard the "Susan Constant". The kit Pavel Nikitin is probably not a name you’ve heard of before, or at least much. Pavel is a Ukraine-based designer, designing and producing model kits with the assistance of Eugen Troppmann. This is a typical cottage-industry operation, as are many other contemporary companies, but the current situation in Ukraine means that these guys are working under the hardest of conditions in order to fulfil the kit orders they’re currently getting. From being sent, the packages I received took only around 10-12 days to arrive here in the UK, after an understandable holdup in Kiev. Captain John Smith's Shallop comes in a relatively large-sized box that weighs around 2kg. That seems quite heavy for a 1:32 shallop, but the reasons for that will soon become evident. The box label depicts the finished model in two photos, showing the boat with deployed sails and also a lovely interior detail shot. For your own info, this little boat in 1:32 has these dimensions: · Length: 272mm · Width: 110mm · Height: 350mm All kit parts are laser-cut, as you would generally expect for a modern kit, and all the sheets supplied in this kit come wrapped in numerous sheets of cellophane to protect them. Here you can see exactly what you get when the box is opened, minus the plans and instructions that I moved for clarity. The kit itself is manufactured in several types of timber, namely walnut, cherry, alder and beech. All sheets are nicely clean cut all the way through, and the grain lends itself to the scale of the model. You’ll see here that the hull frames are provided in sections, with the clinker plank elements clear to see. There are also bevel marks to make sure the hull is properly faired for later fitting the pre-cut planks. And here you see those planks, but from 0.6mm wood, so they’ll be nice and easy to manipulate into place. How do I know? I’ve been watching Olha Batchvarov’s series of videos on YouTube, clearly showing how this model is put together. I’ve included a link to her series of Shallop videos in this article. Other parts on here include components for the barrels. The inner seating at bow and stern comprises of individual planks that make up the whole part, as per the real boat. Even the side paddles are built in the same manner, adding to the finished realism. Here you see parts for the keel and display stand on the middle, thicker sheet while the other sheets contain inner strakes, oars and barrel staves. Now, that kit weight. There are numerous sheets of MDF in this kit which go to assist the building of this little boat, and this one is very useful. Those hull frames you need to assemble are assembled inside the cut-outs in this sheet. This will ensure you get 100% correct alignment of all the parts. This MDF sheet contains parts for one of the THREE jigs that are supplied to help you build the boat. The first jig concerns the initial framing onto the multipart keel. This setup is very common with plank on frame model kits. Another sheet contains more frame assembly parts and also more parts for the framing jig. Now, this jig is what you sit the hull onto so that you can plank it. The hull sits on this upside down, making the jig a sort of assembly buck. Being clinker of course, planking starts with the garboard and works upwards (or downwards on this jig!) to the gunwales. A third jig is included which the planked hull sits into so it may easily be fitted out. The jig materials far exceed those to build the boat, hence that 2kg kit weight. This is a feature which isn’t normally included in a kit, and that’s a pre-cut, slotted mast and gaff. These are assembled from sections that have been glued together by the company. They are pre-tapered and you just need to round the parts off to complete. These guys also make their own fittings boxes out of laser cut MDF, with a sliding Perspex lid that’s engraved with the part number of each compartment. Small foam pieces are pushed into some compartments to stop the smaller, more fragile parts from rattling around. This box contains rig cord which is actually quite nice in quality and not shop-standard as in many kits. Three frets of copper photo etch are included, as well as two brass ones for the many detail parts within the hull and for masting. Here you can see various rigging blocks, 3D-printed lantern and other laser-cut, shaped parts. A small flag is also included. A good quality sail material is supplied too, printed. This will need some work in adding the boltrope etc. FOUR sheets of large plans are supplied, showing the hull detail, masting, rigging, fitting out, etc. Instructions A 47 page A4 manual is also supplied, ring-bound with clear plastic covers. The type of illustration is a beautifully detailed line-drawing style that clearly illustrates every aspect of the project, and with all parts numbered clearly. No drawing is ambiguous and everything looks very simple to build. Conclusion This is such a wonderful and beautiful little kit of a significant boat. It won’t take up much display space despite the scale, and the price is very attractive too. This certainly isn’t a long-term project but the finish certainly seems to belie that fact. Head over to Pavel’s website and support this young company, especially at such a difficult time. I’m very sure you’ll not be disappointed with the package you receive. My sincere thanks to Pavel Nikitin for sending the kit that we’ve reviewed here on MSW. Click on the website link to buy yourself one of these kits.


-
I always find these fun to build! The flying transom was probably the trickiest part of the build. That was the last of the previous ship's boats I built. Currently on a 24' cutter for Indy, again using 2mm (approx) by 0.8mm strips.
- 106 replies
-
- 1
-
-
- Admirals Barge
- Vanguard Models
- (and 1 more)
-
None specifically, as they all do the same in providing a key into the metal surface. Check these: https://smile.amazon.co.uk/s?k=etching+primer&crid=VQQ2M7JBR9E6&sprefix=etching+primer%2Caps%2C142&ref=nb_sb_noss_1
-
I prefer to use a good etching primer and then spray matt black. For me, I've found that many blackening finishes are easily damaged, more so than primer/paint finishes.
-
There's no guessing game. Just an early development that will be named in due course.
-
I don't think this one is up for a guessing game. Sometimes it's nice to have a surprise (and no, that's not a clue).
-
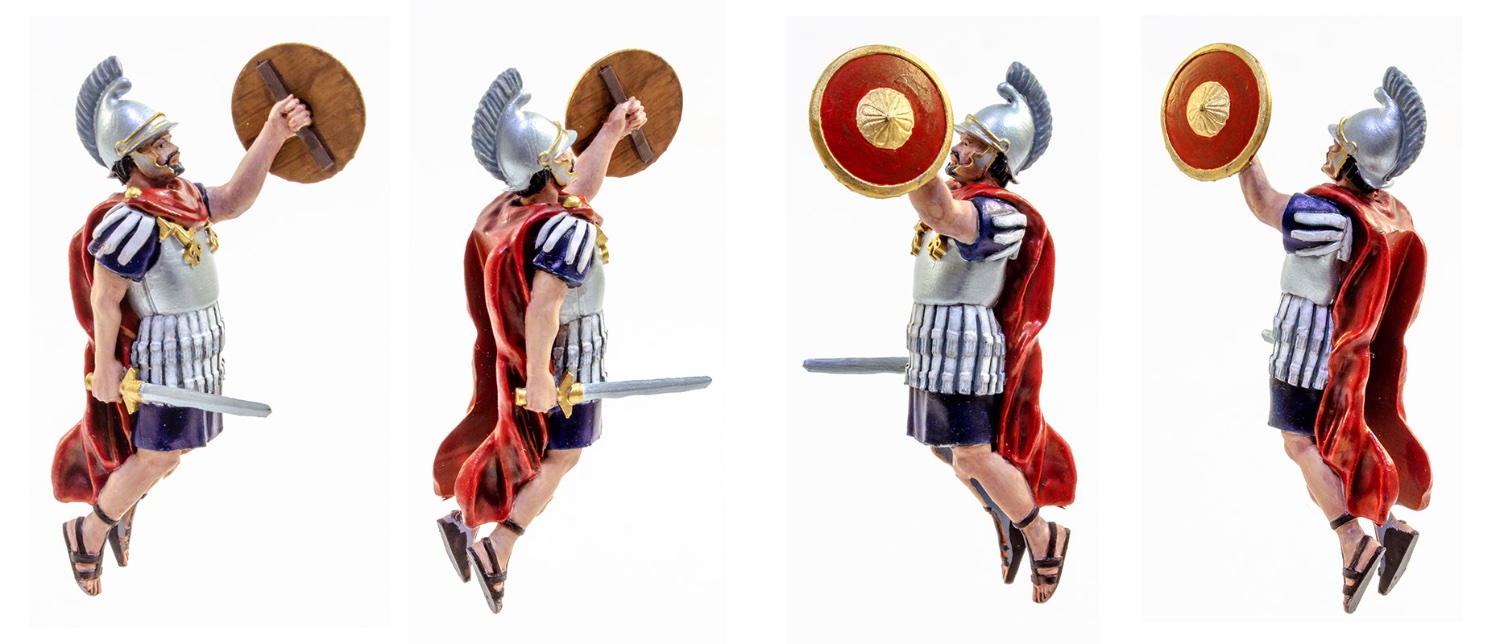
Having a new figurehead painted with bronze coloured armour.
- 488 replies
-
- 3
-
-
- Indefatigable
- Vanguard Models
- (and 1 more)
-
Here's a small update...very small! This is Indy's figurehead, albeit still needs some touching up. Again, this was done by my friend, Mark. He's far more patience (and ability!) than I have.

- 488 replies
-
- 28
-
-
-
- Indefatigable
- Vanguard Models
- (and 1 more)