James H
-
Posts
6,133 -
Joined
-
Last visited
Content Type
Profiles
Forums
Gallery
Events
Everything posted by James H
-
 Ok folk, I'll be resurrecting this one in the next week or so. There won't be the usual white backdrop pic as the manual is complete. These will just be workbench photos with my phone, except for the final images. I expect this to be done before the end of July.
- 488 replies
-
- 13
-

-
- Indefatigable
- Vanguard Models
- (and 1 more)
-
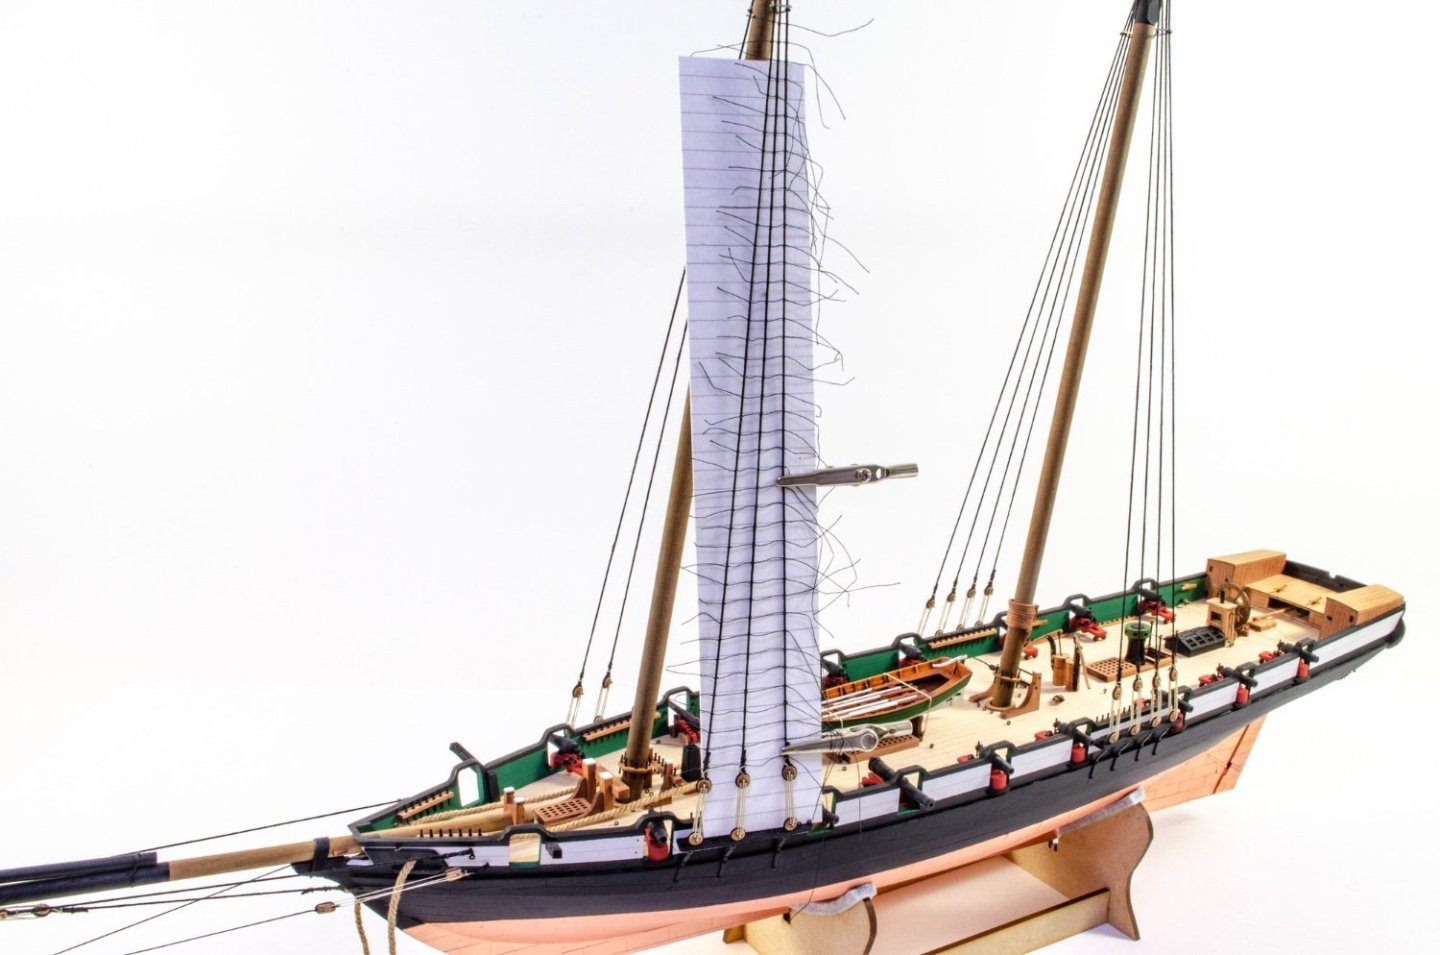
A card template is made to aid adding the ratlines. I have drawn lines on these, 6mm apart. Upper shrouds are now fitted. And then the rest of the timber is built up. Yards, spars.....whatever you want to call them. I knew at least one guy who thought it was a big deal. The anchors are 3D printed and have pear stocks with cartridge paper for the iron bands.


- 80 replies
-
- 22
-
-
- Grecian
- Vanguard Models
- (and 3 more)
-
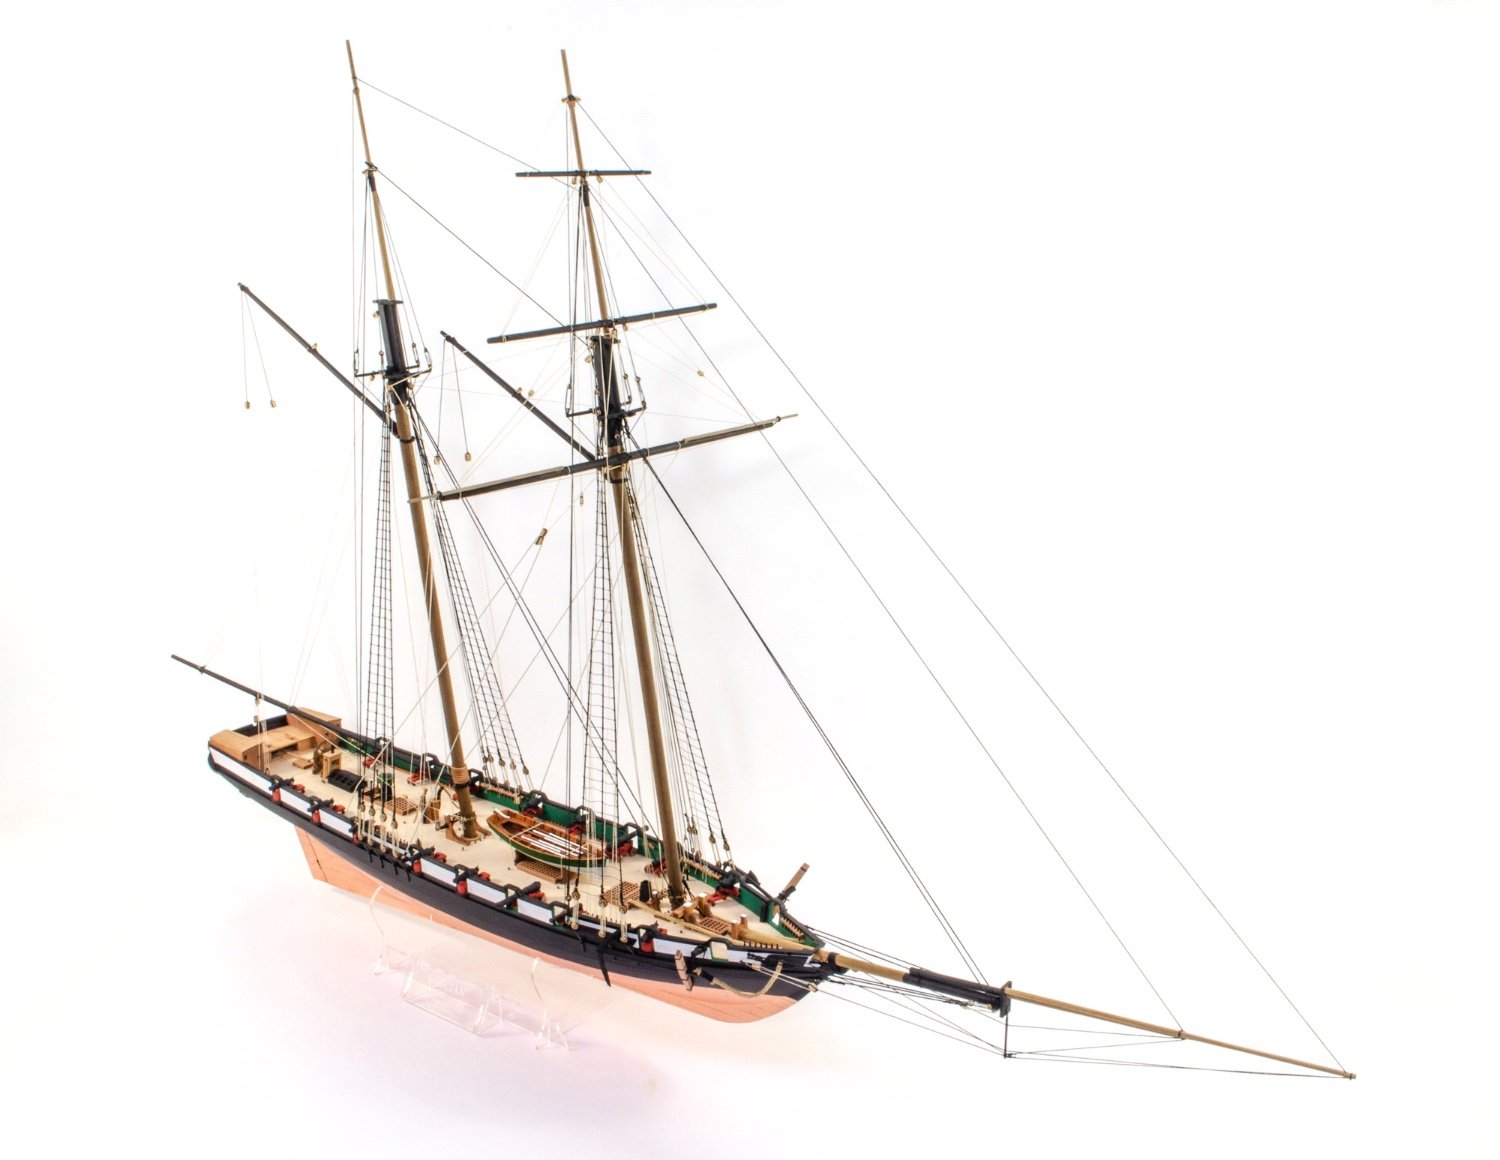
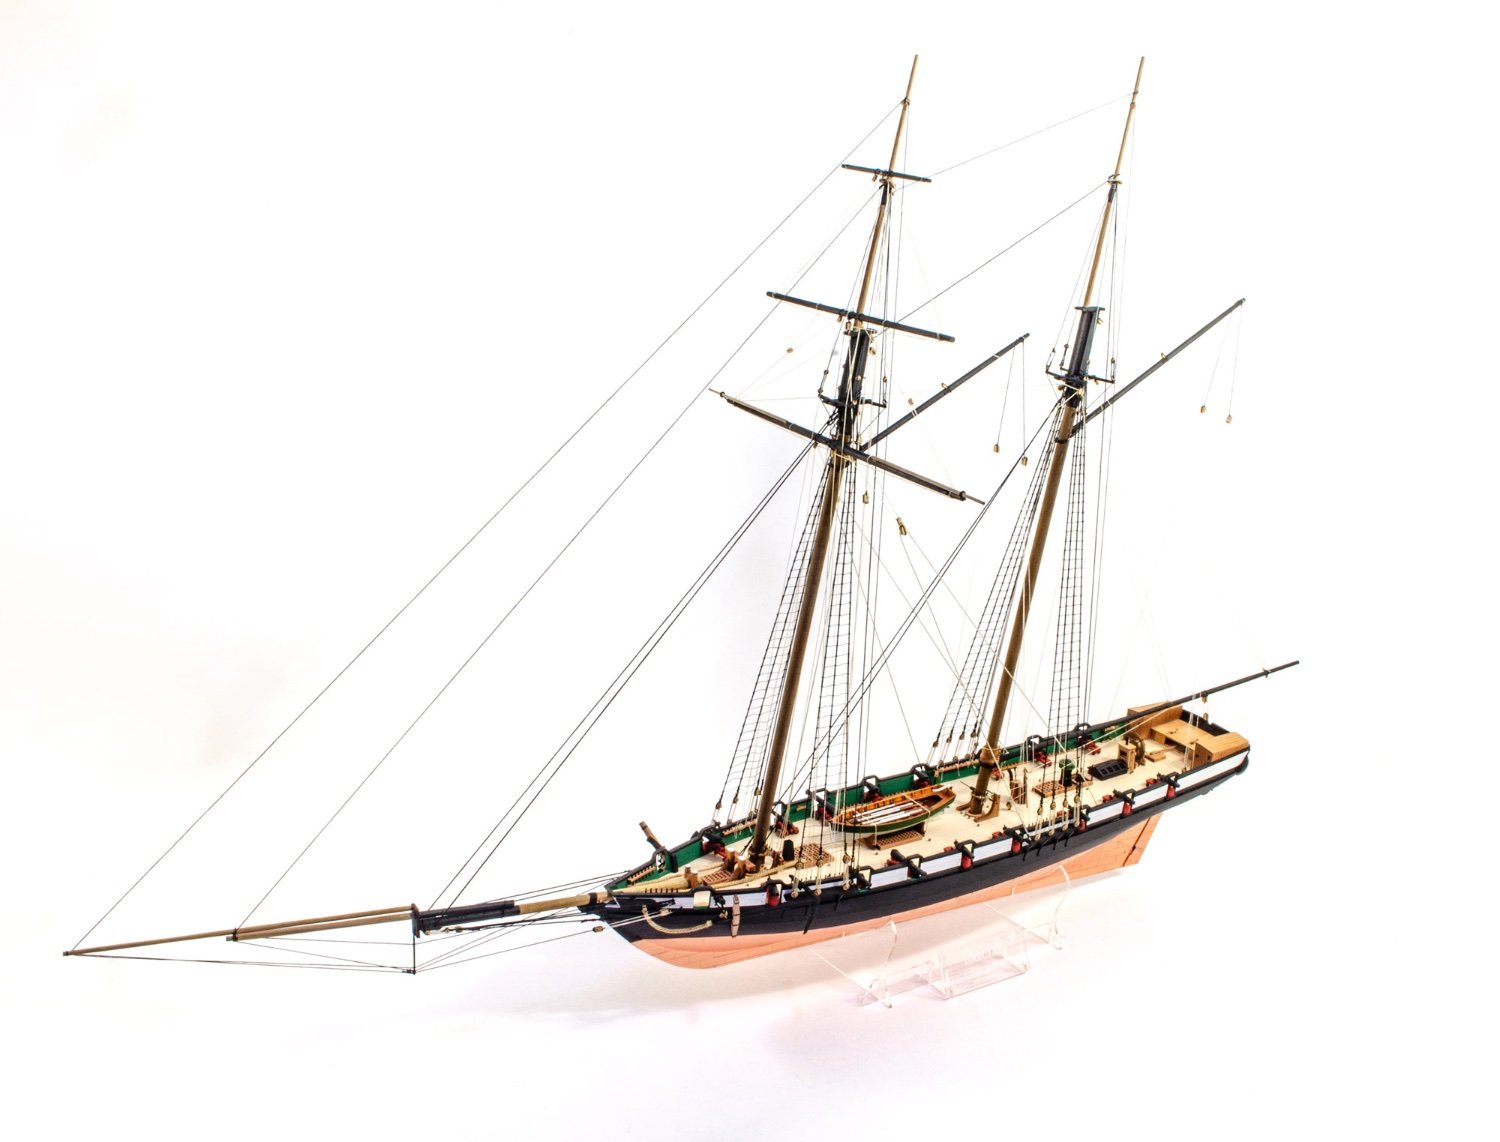
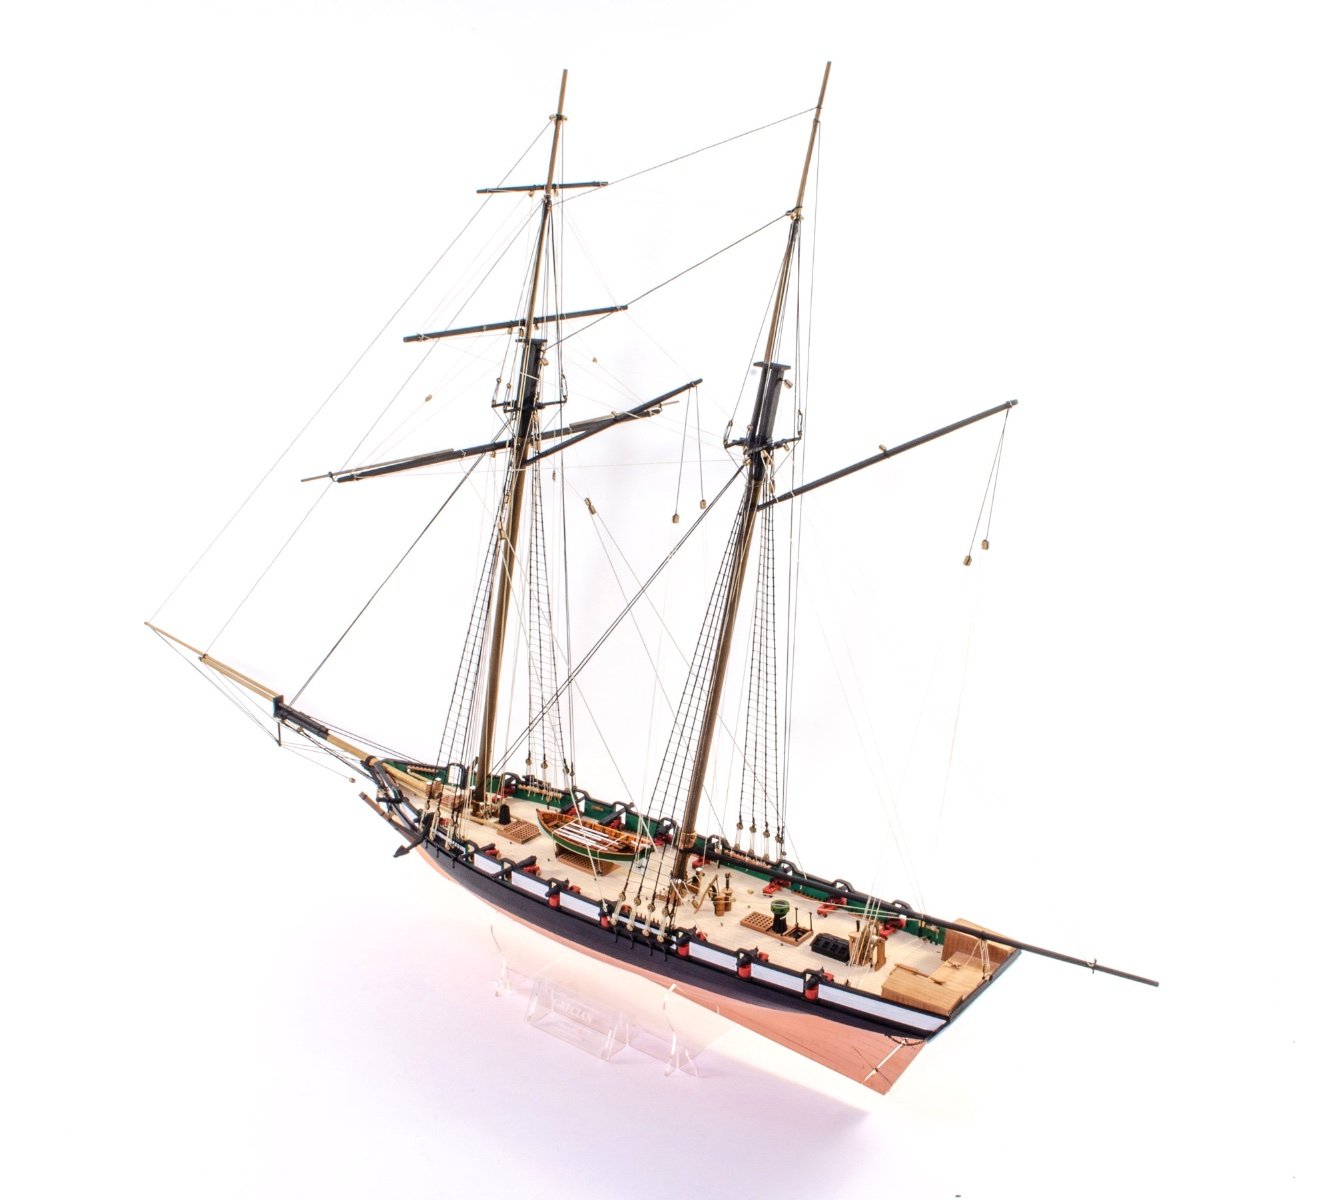
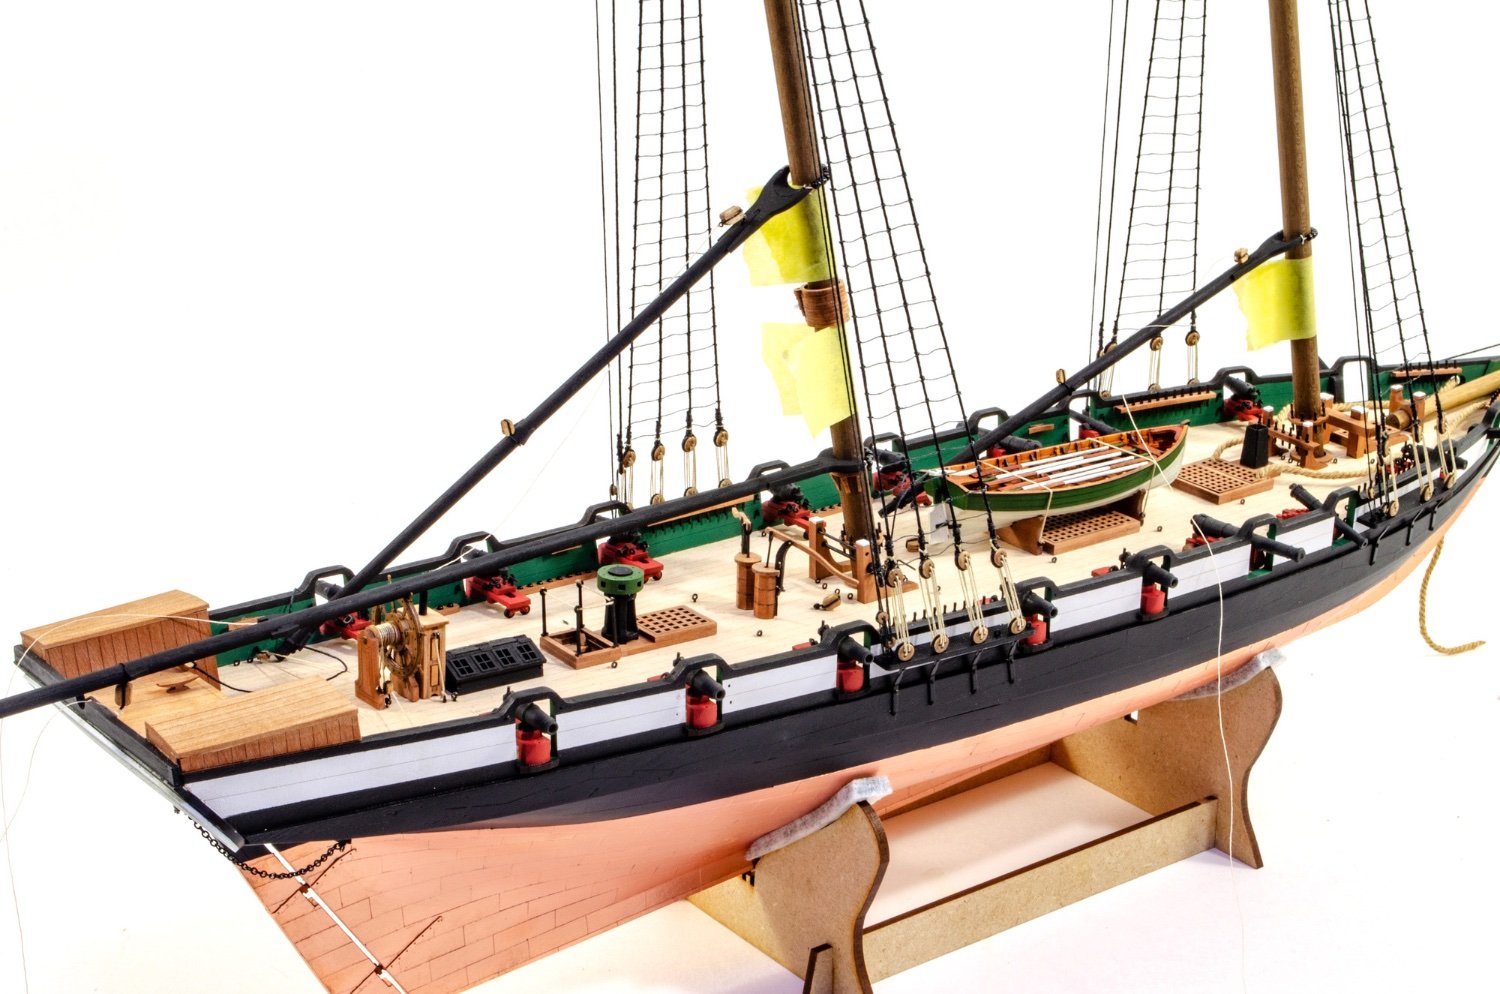
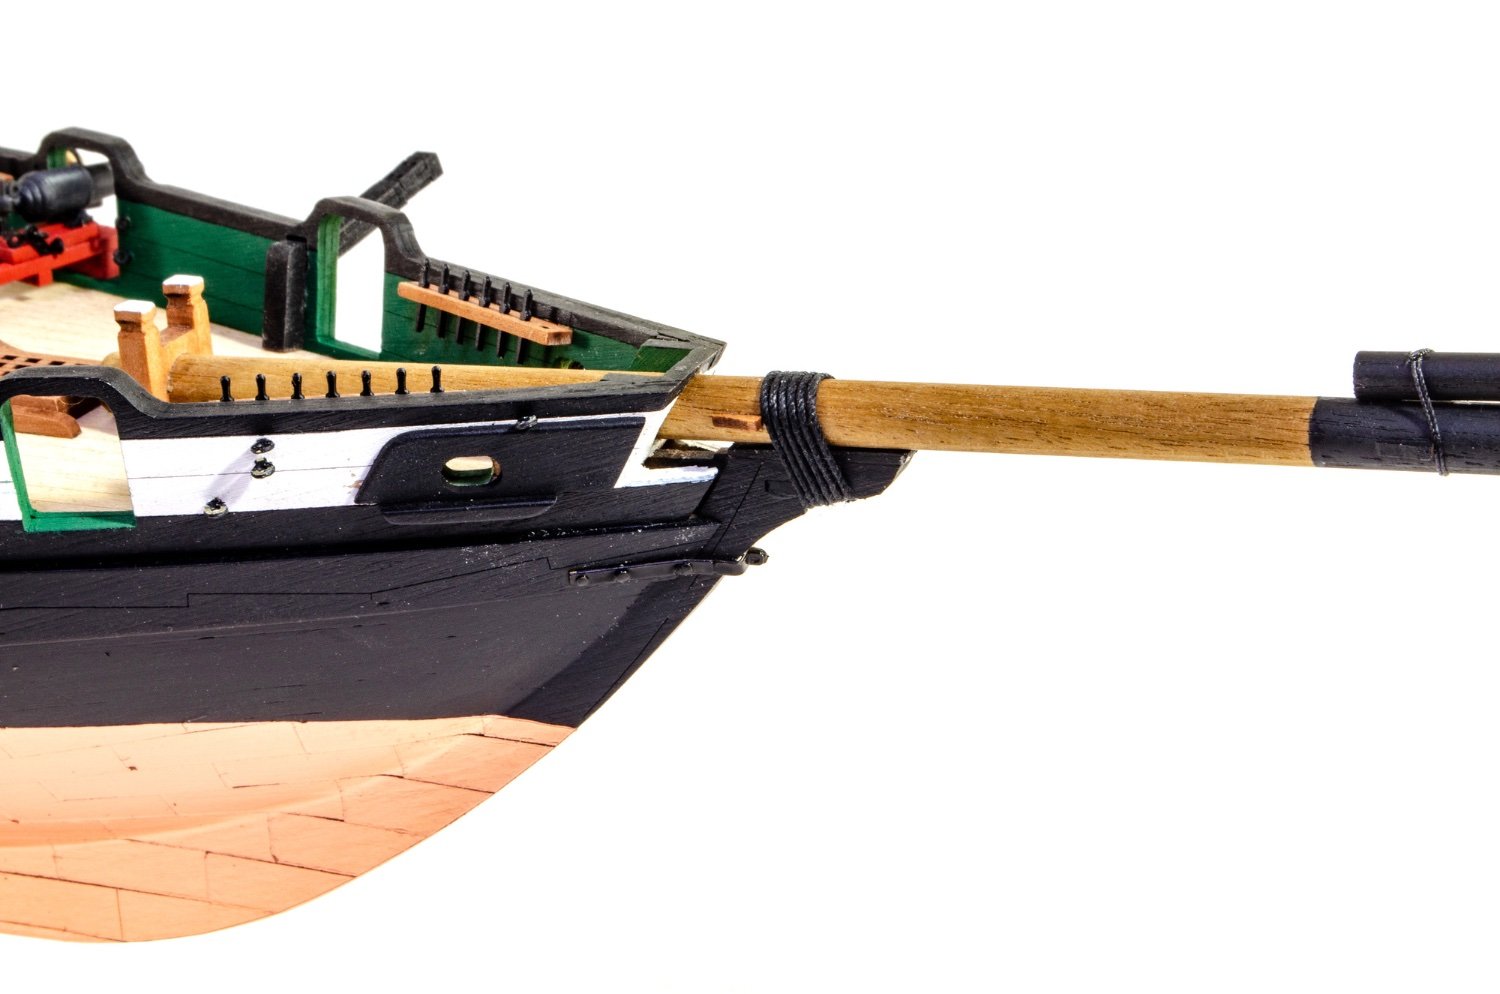
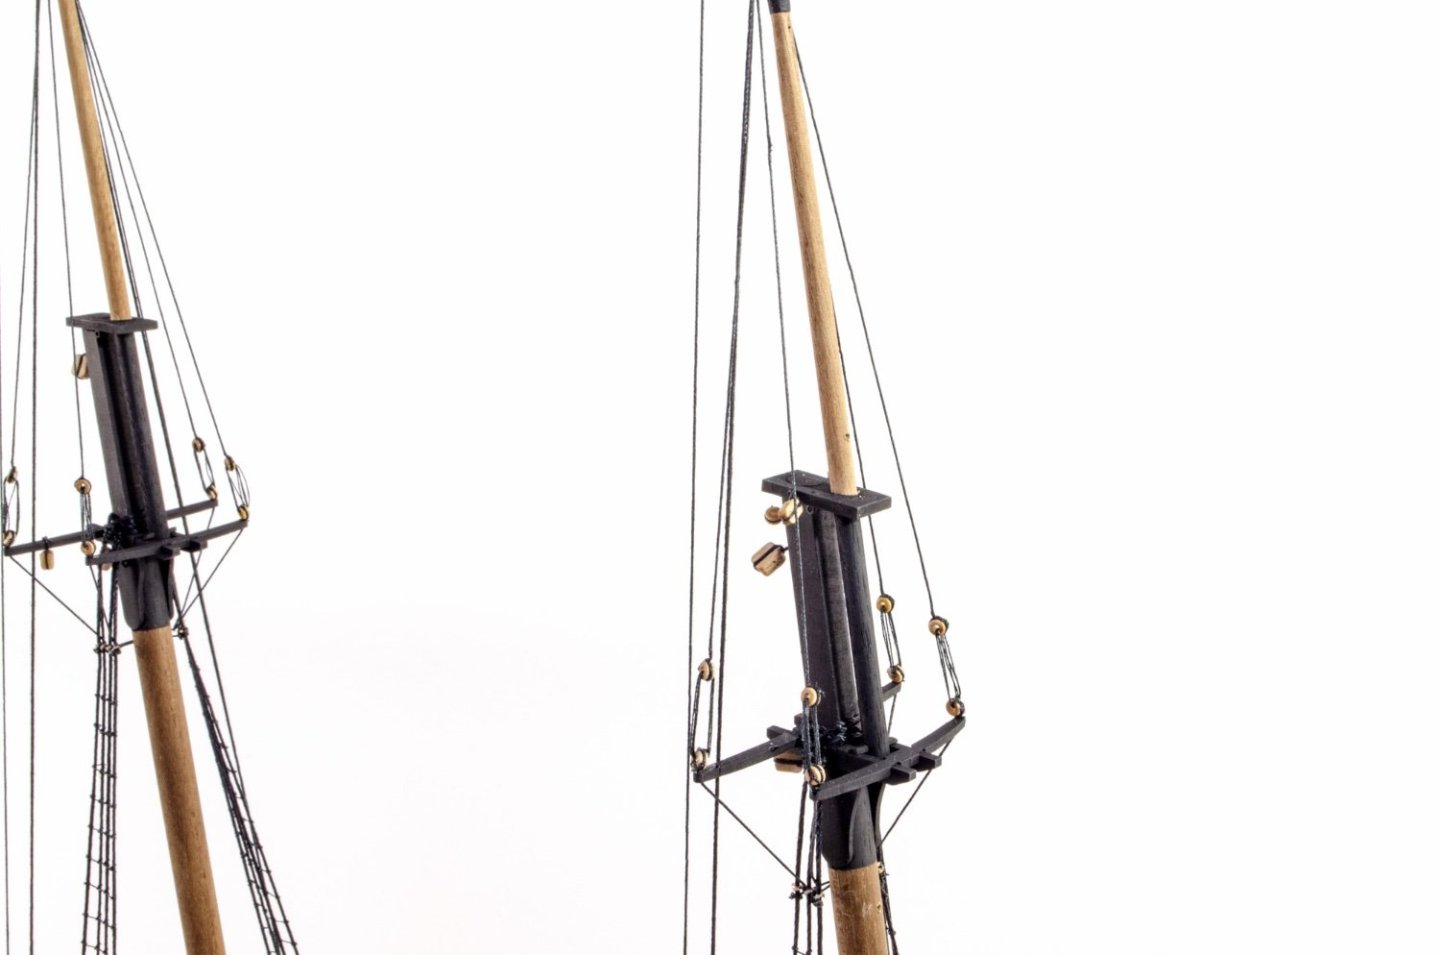
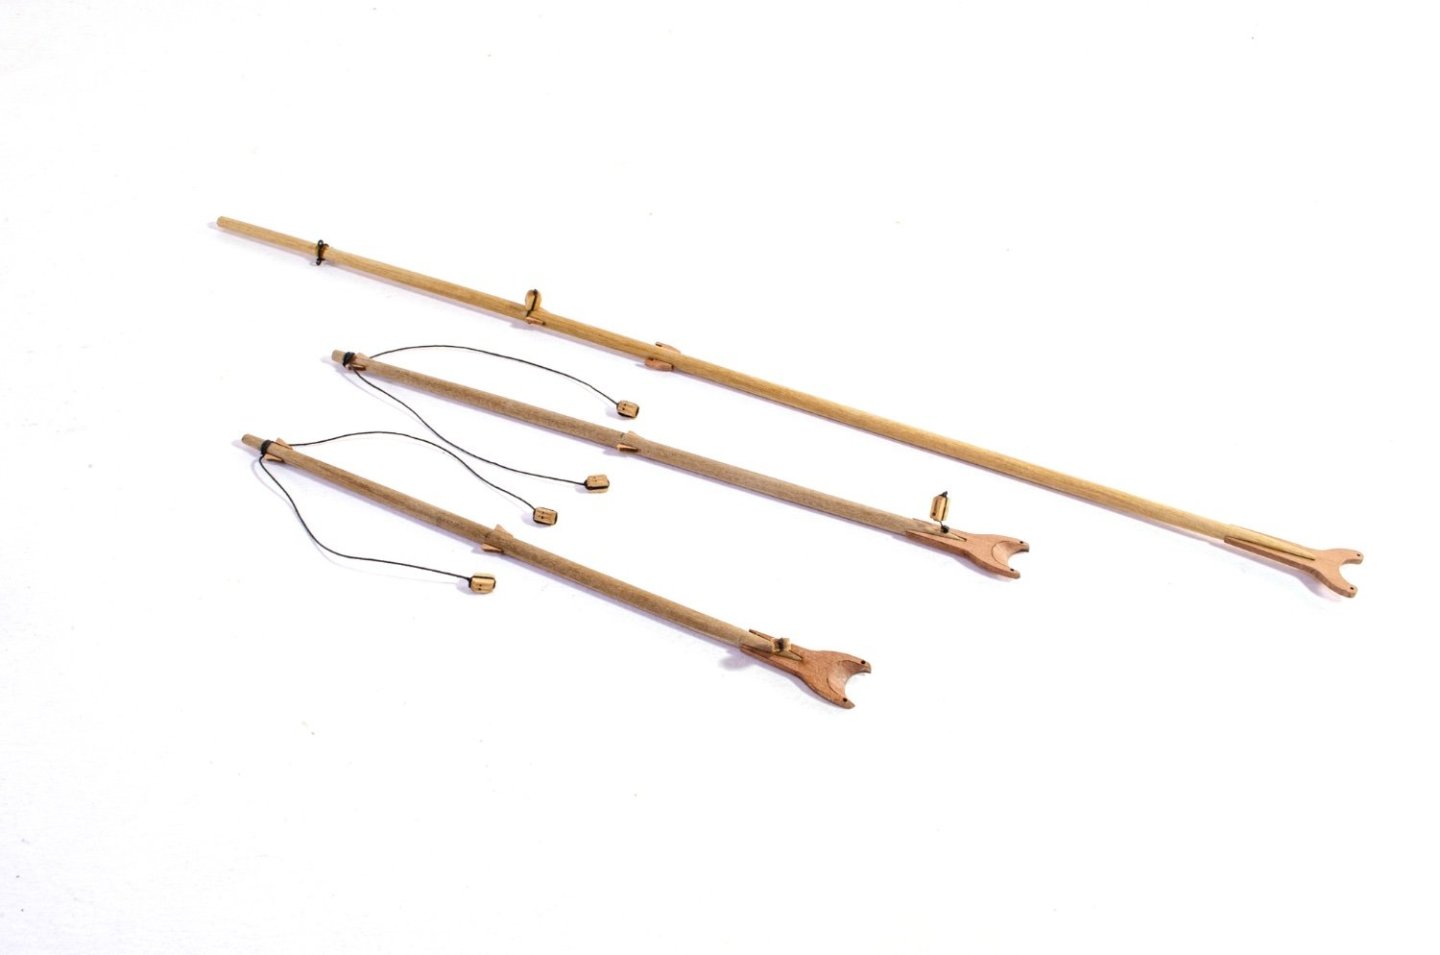
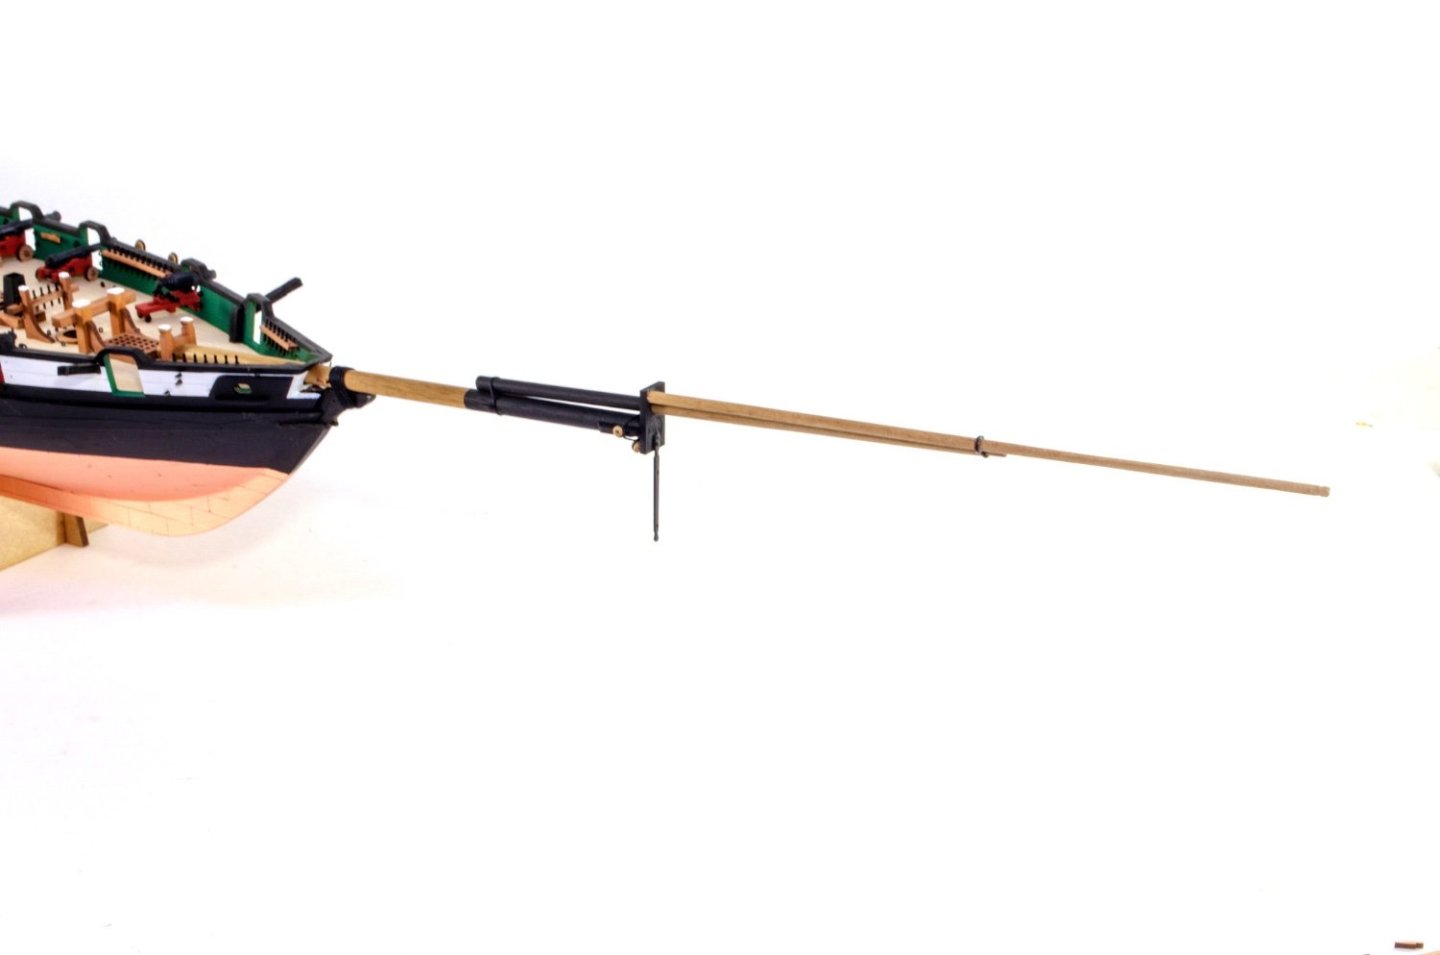
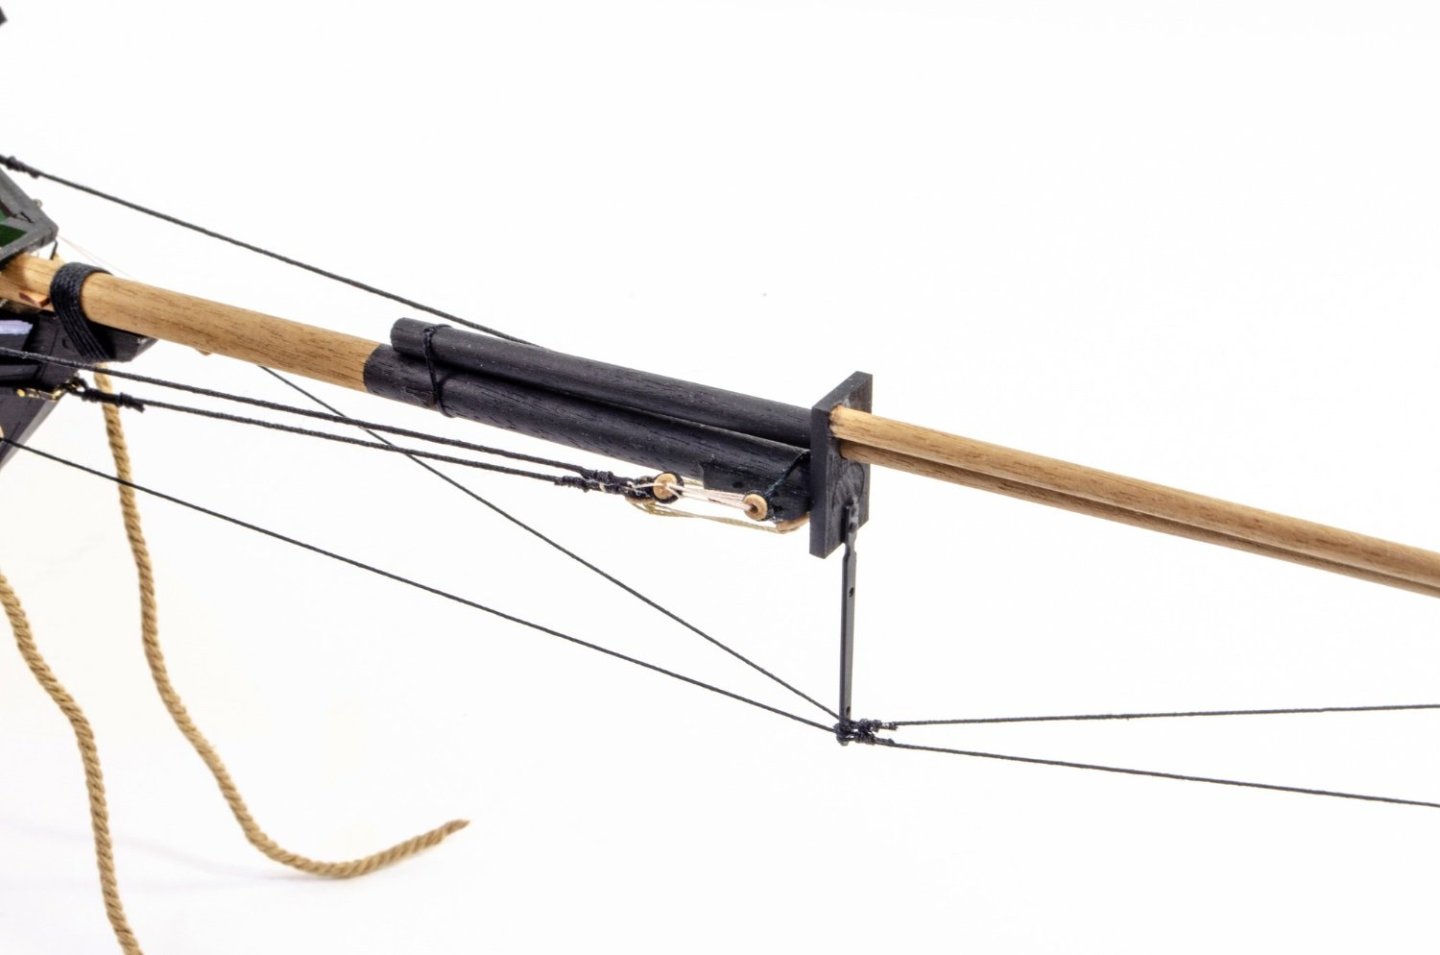
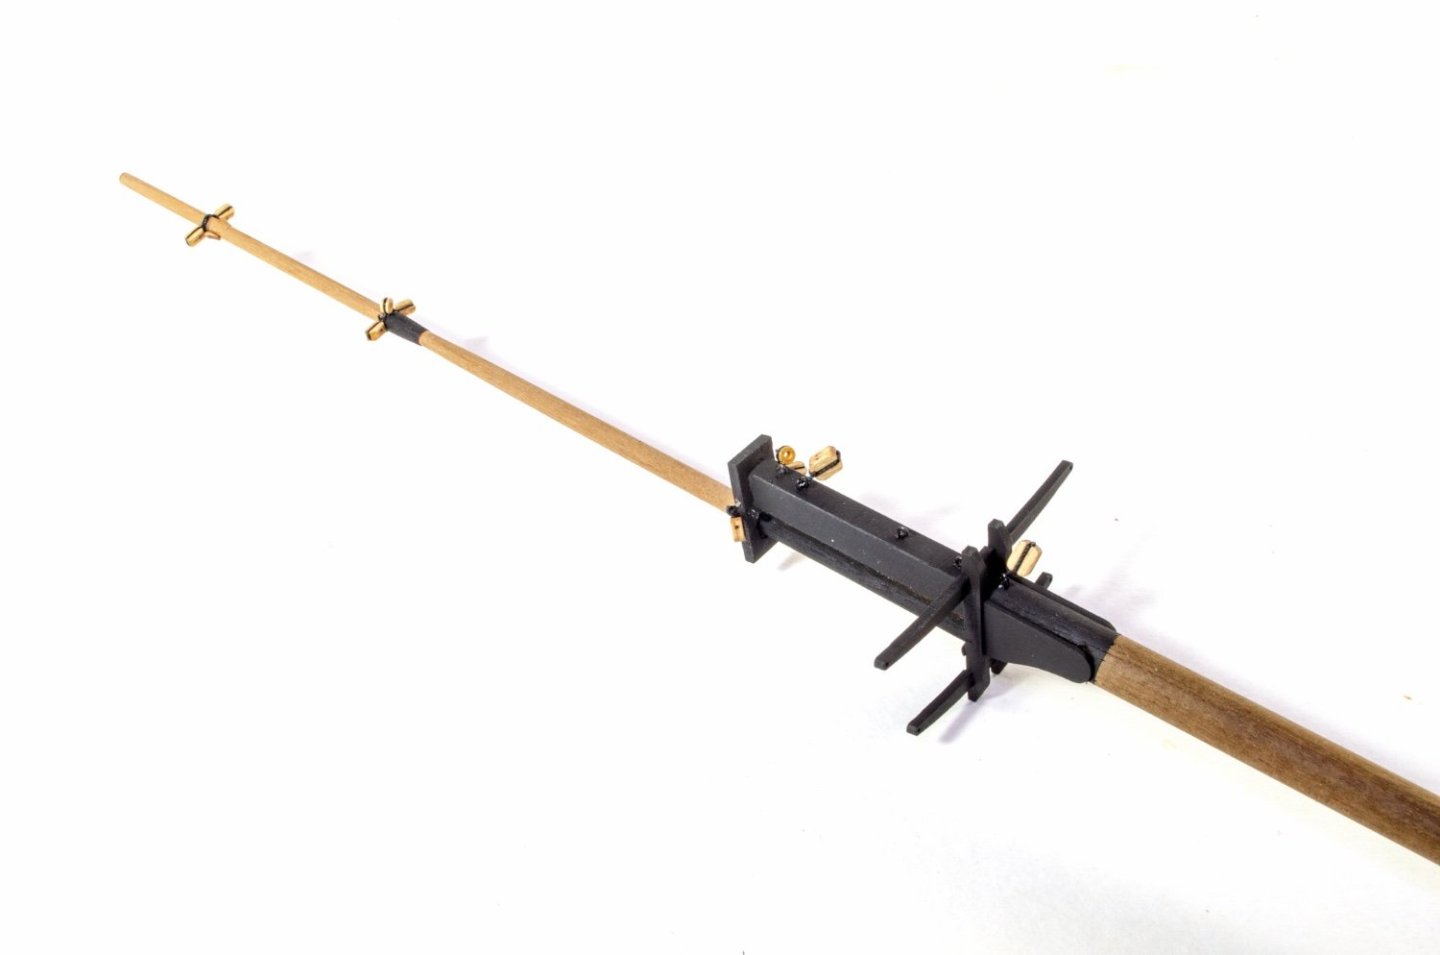
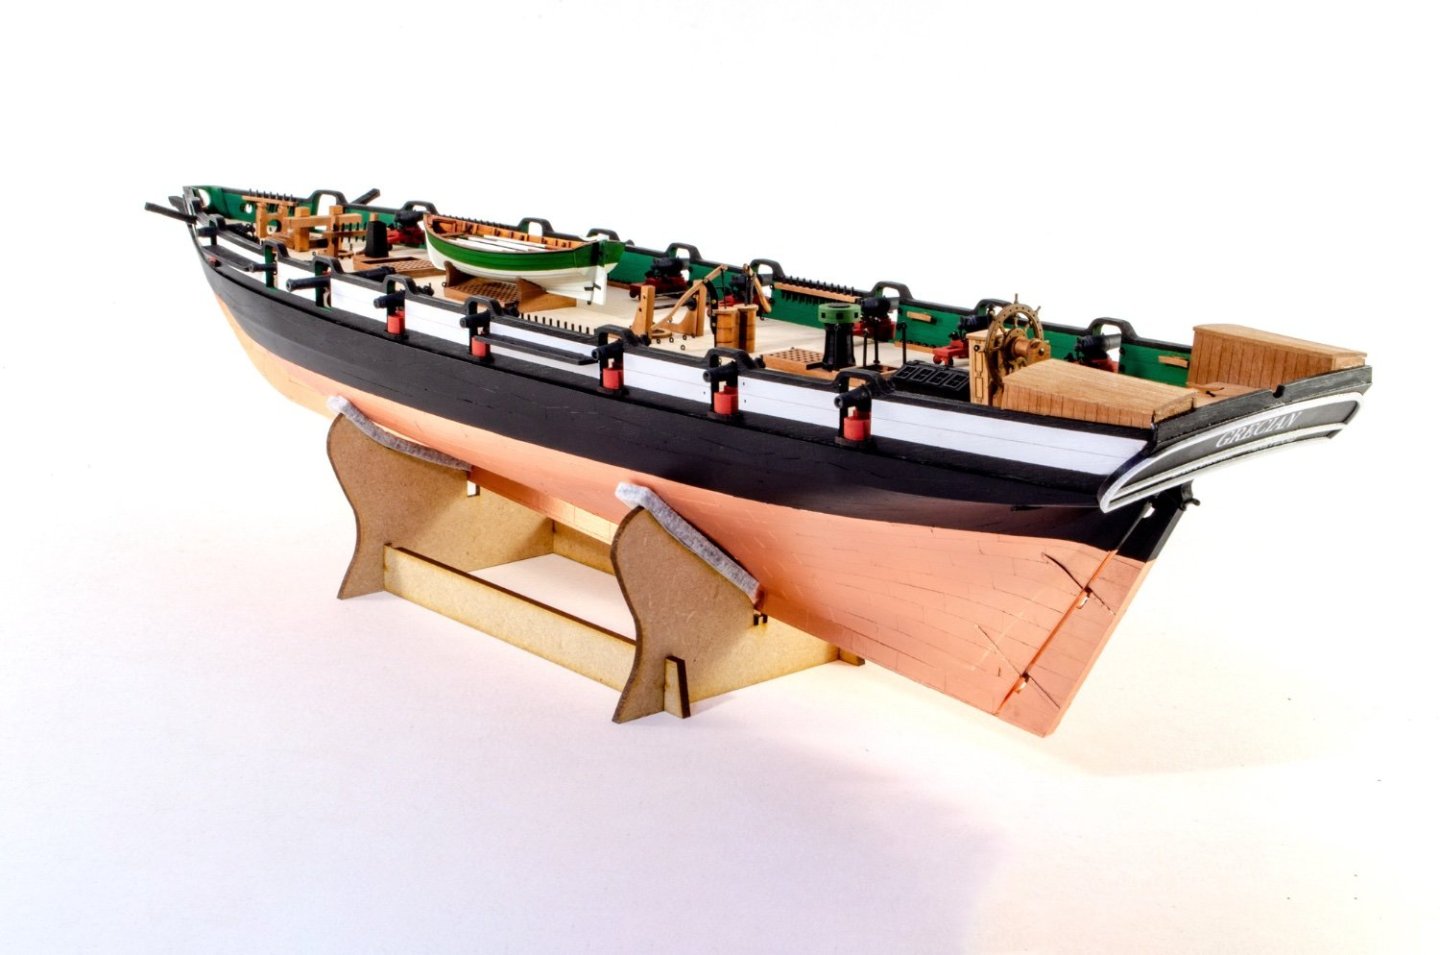
The final updates. The last week has seen me build up the mast stuff and rig Grecian. She now sits complete on my bench. First up is the bowsprit. This is a very simple structure with hardly any tapering of parts. The assembly now slots to the hull and the gammoning is added. Grecian doesn't have a spritsail yard, making her look quite sleek. Still lots of cord to rig this area though. Mast work begins with the crosstrees. These are then slotted to the shaped lower mast sections, and then fitted out. The mass are now added and the shroud lines attached. Once complete, they are tied down with even tension via deadeyes/lanyards.


- 80 replies
-
- 18
-
-
- Grecian
- Vanguard Models
- (and 3 more)
-
I admit that I always find those lower mast sections to be a chore!
- 426 replies
-
- 2
-
-
- Vanguard Models
- Sphinx
- (and 1 more)
-
I doubt that the masts would be perpendicular to the deck. Sure there should be an astern rake, even if only a few degrees.
-
That really looks superb. So jealous that you did this without stealers...
- 587 replies
-
- 5
-

-
-
- Indefatigable
- Vanguard Models
- (and 1 more)
-
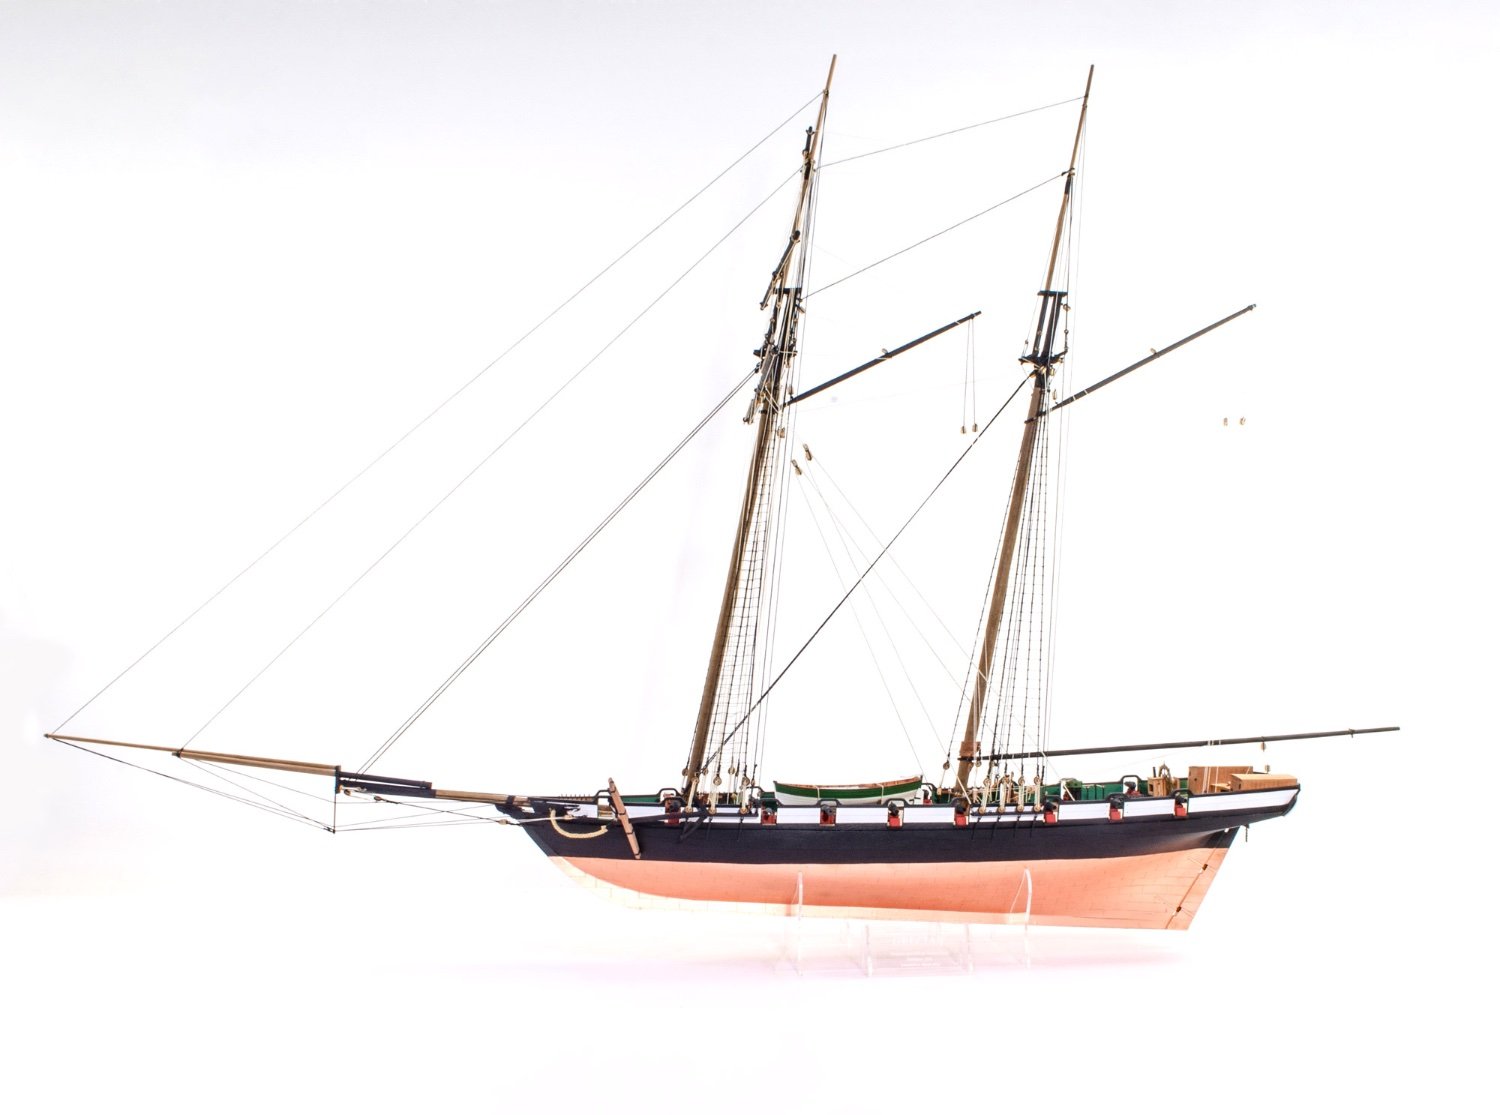
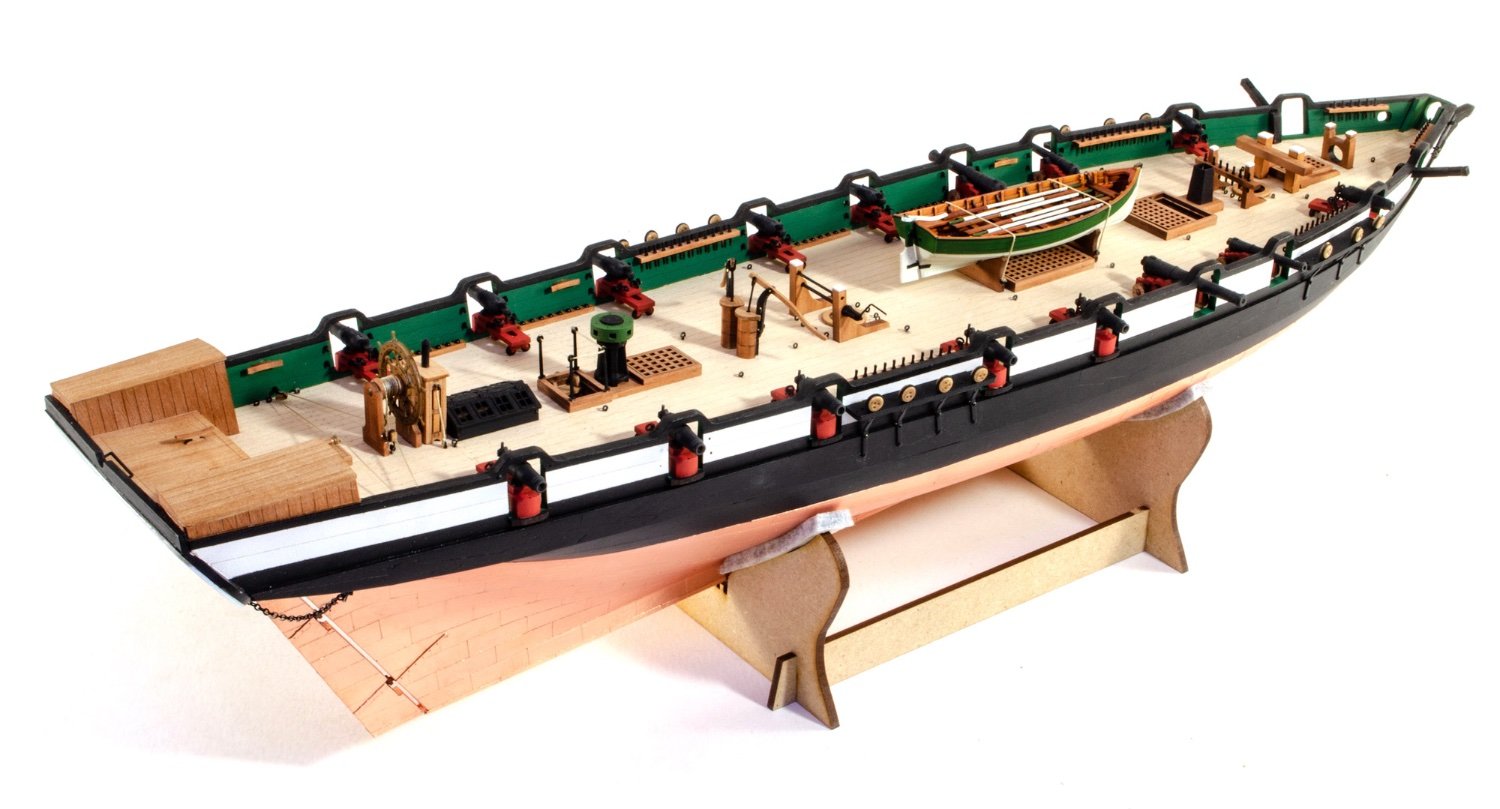
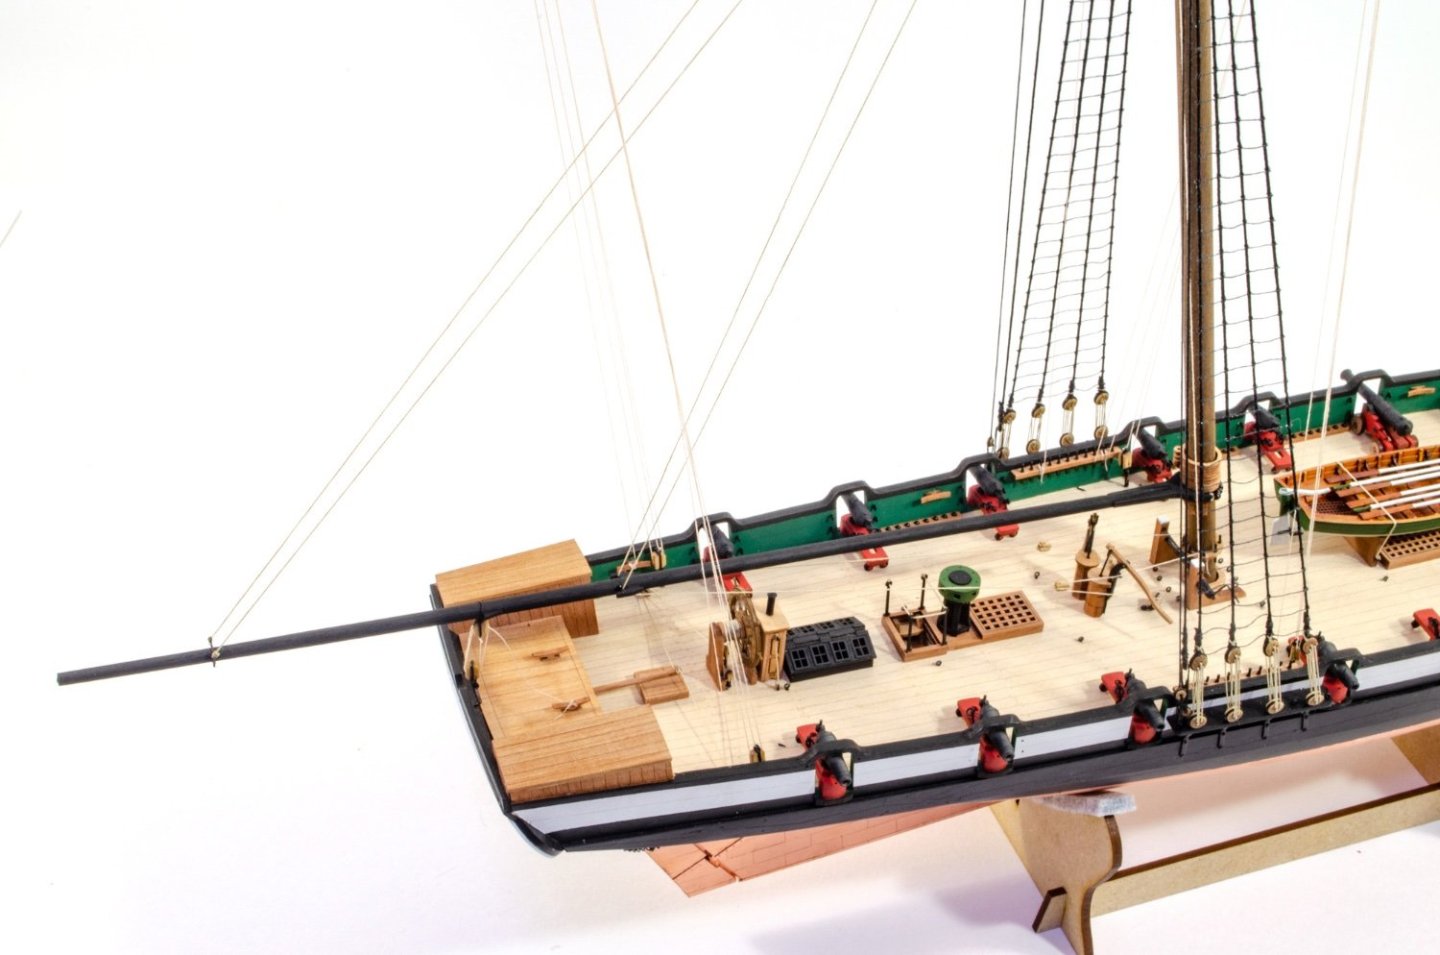
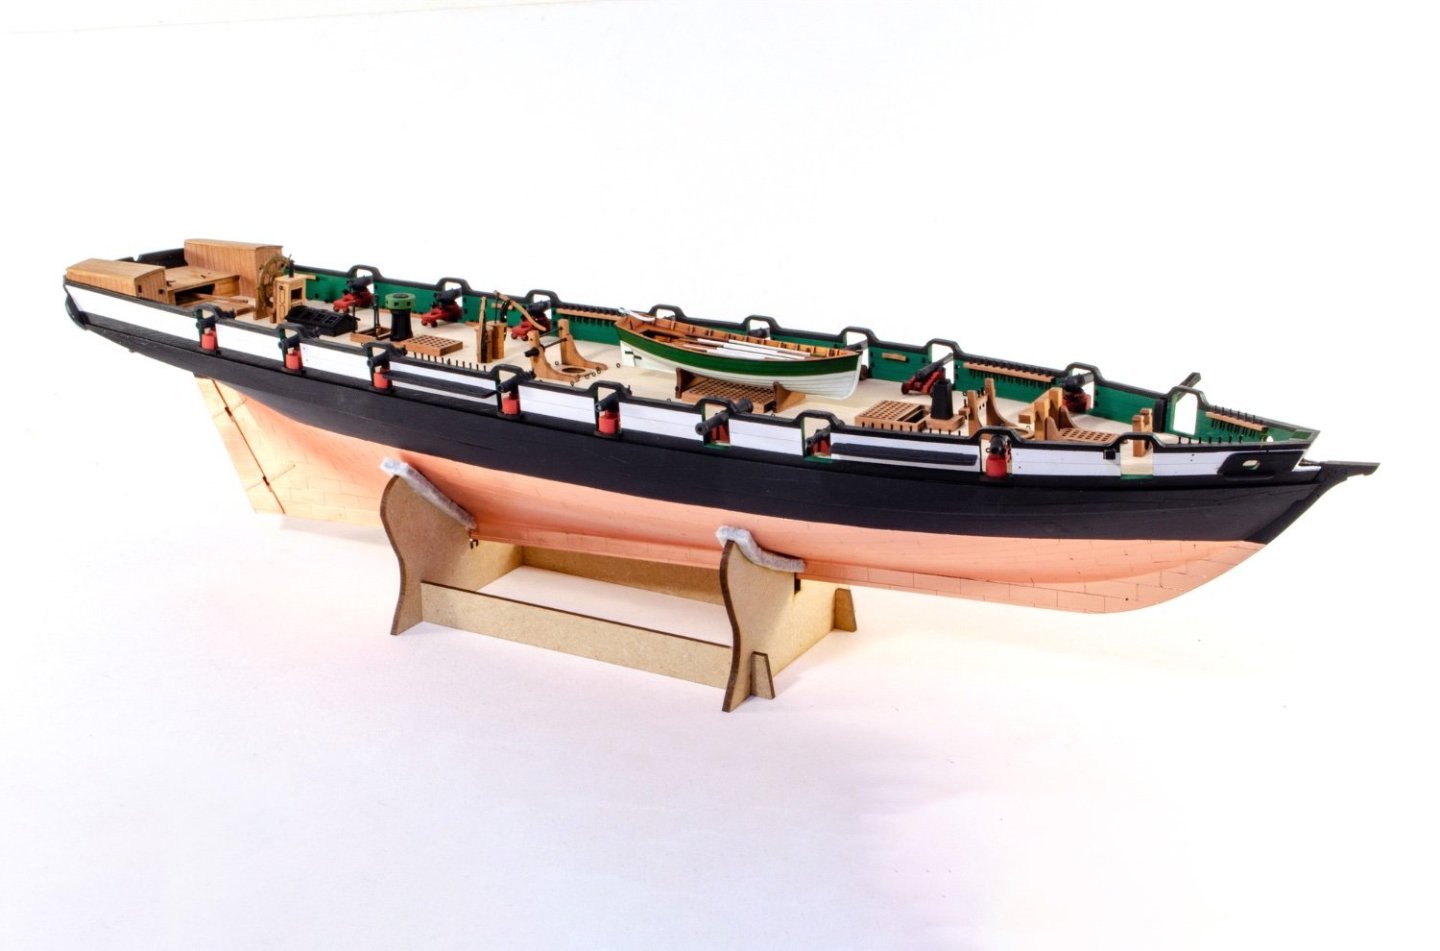
I did promise a small update, so I can. now show the hull completed. There are a few things on the deck that need a little rope. The main one is the rudder tiller which is wired up to the ship's wheel via a simple block system. Also needing rope are the ladder hatch opening and the ship's boat. The chainplates/strops on Grecian are single piece PE parts. These are prised apart to pop the deadeye into place before being closed up again with tweezers. There are only 14 deadeyes/shrouds on Grecian, making it a perfectly simple intro to ratlines. This will be a breeze to rig. Rudder chain installed... And now the completed hull photos. Next stage is masting.


- 80 replies
-
- 24
-
-

-
- Grecian
- Vanguard Models
- (and 3 more)
-
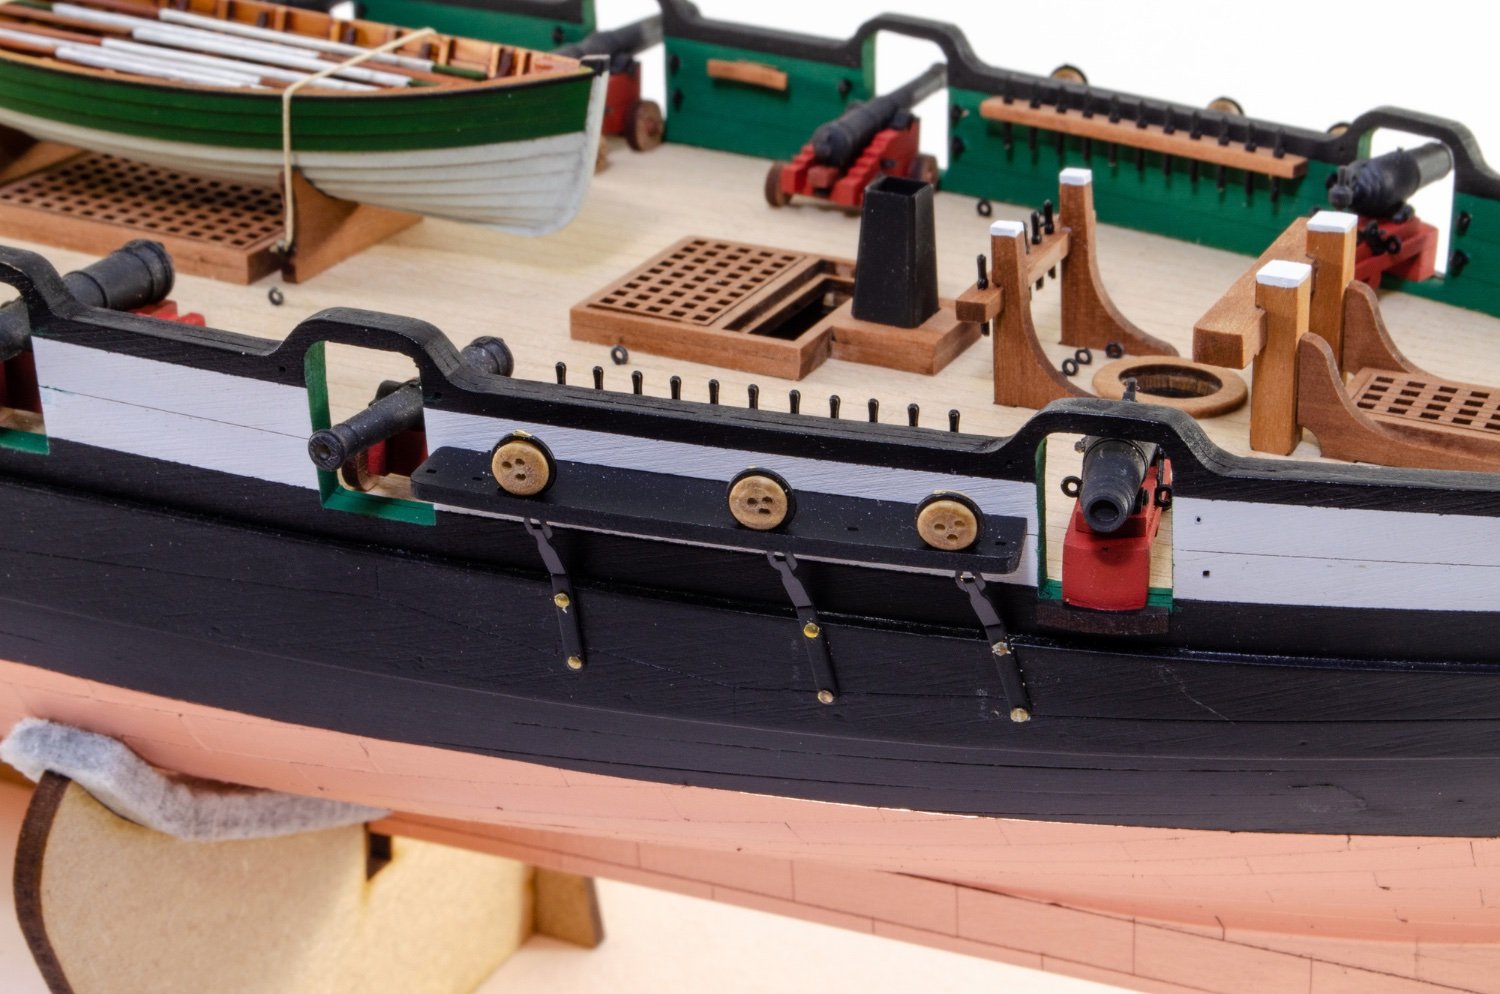
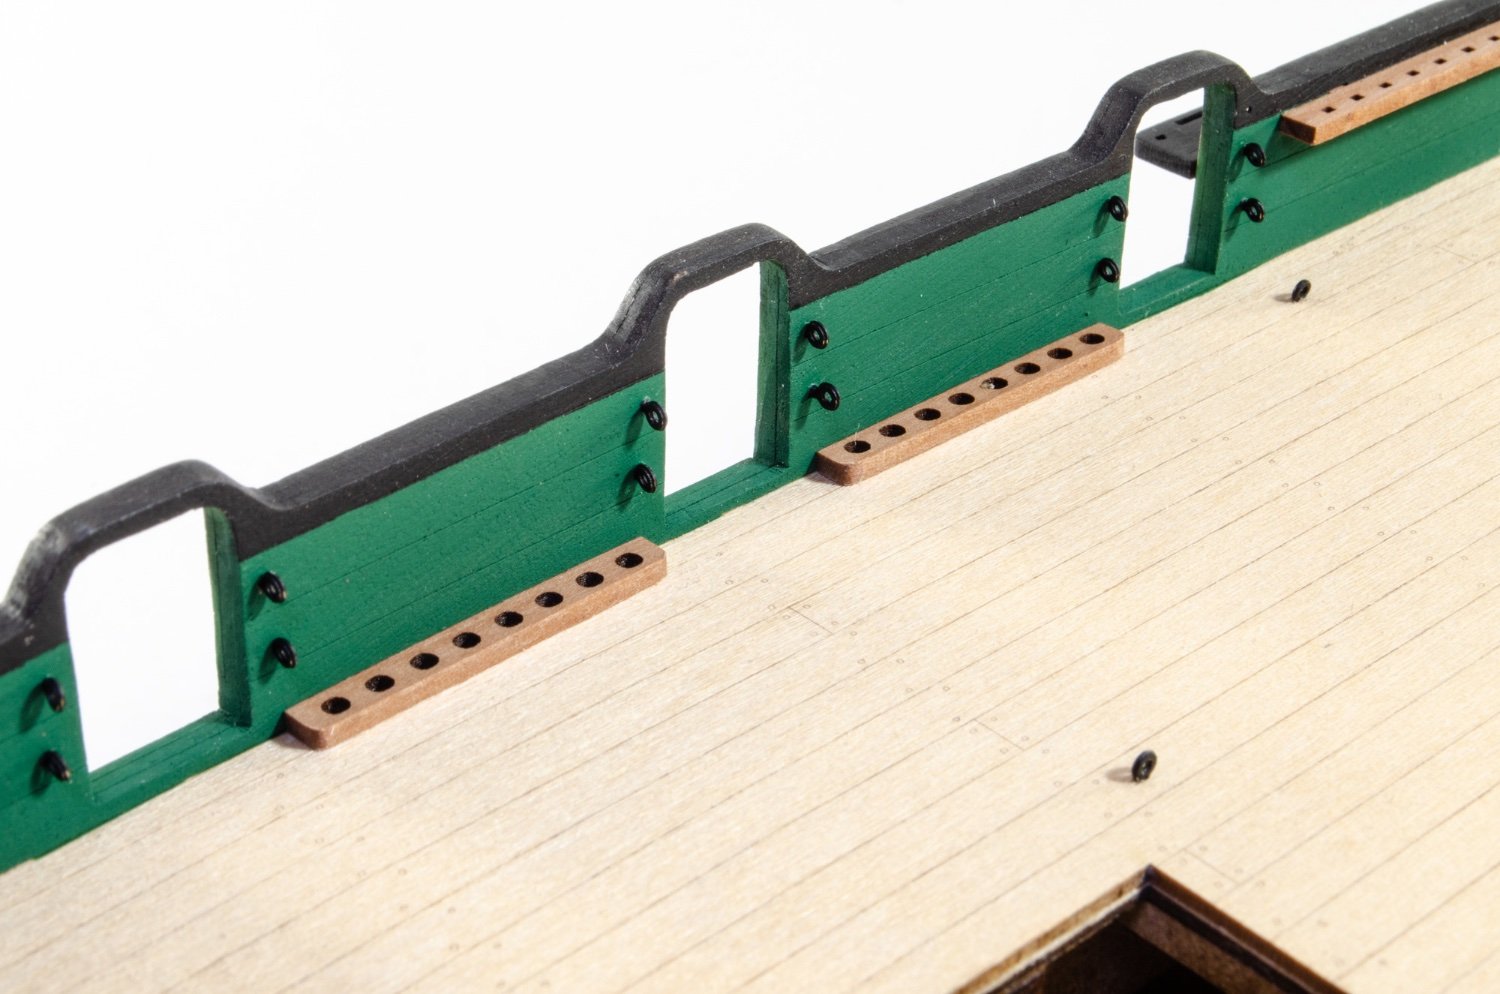
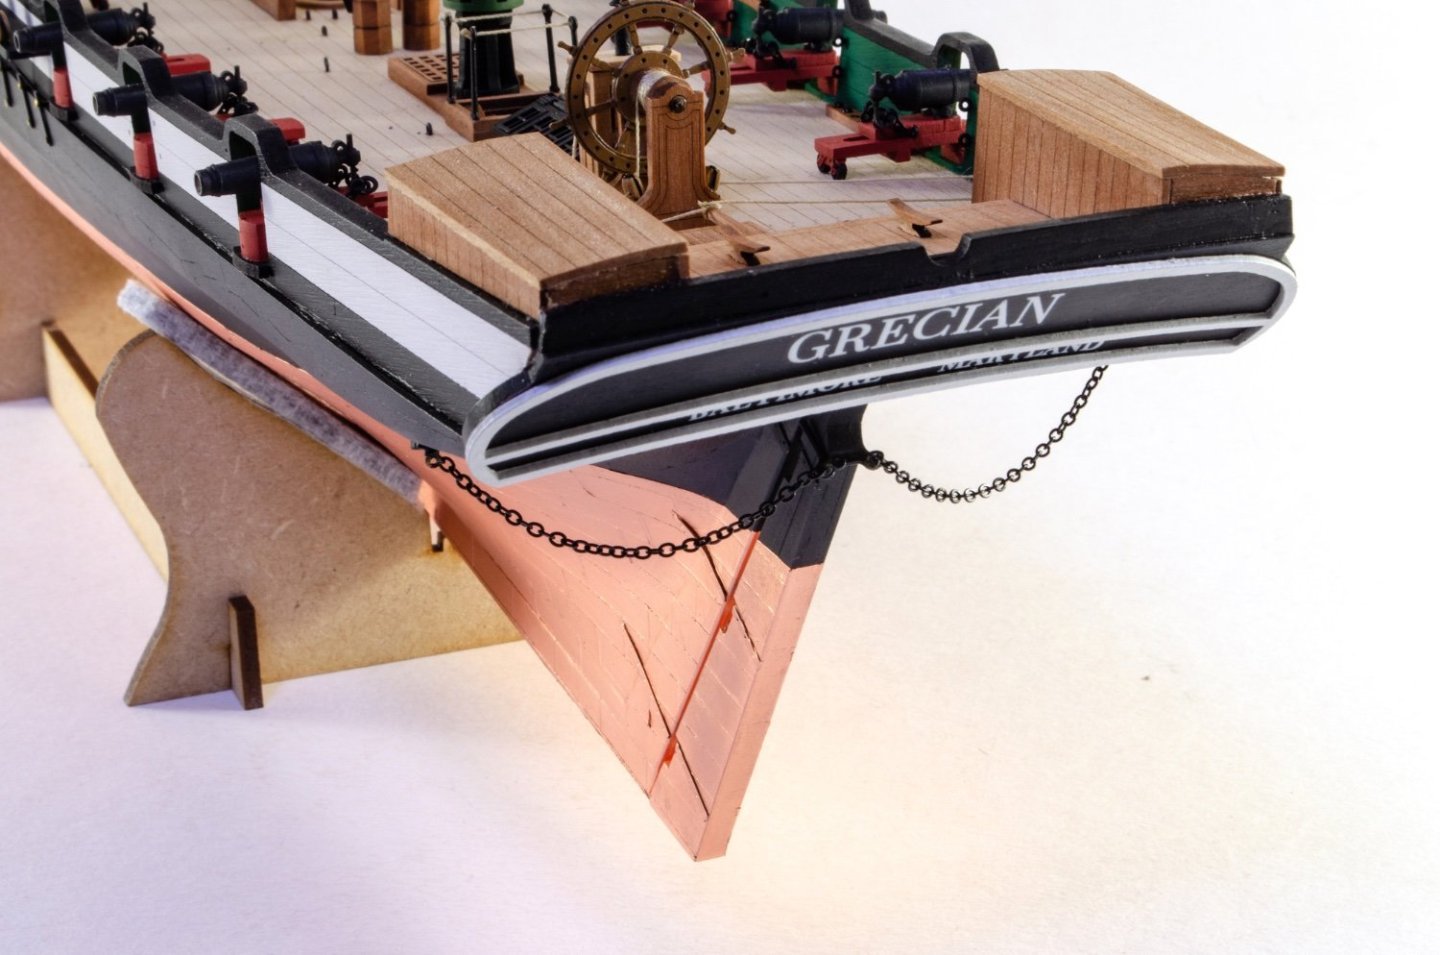
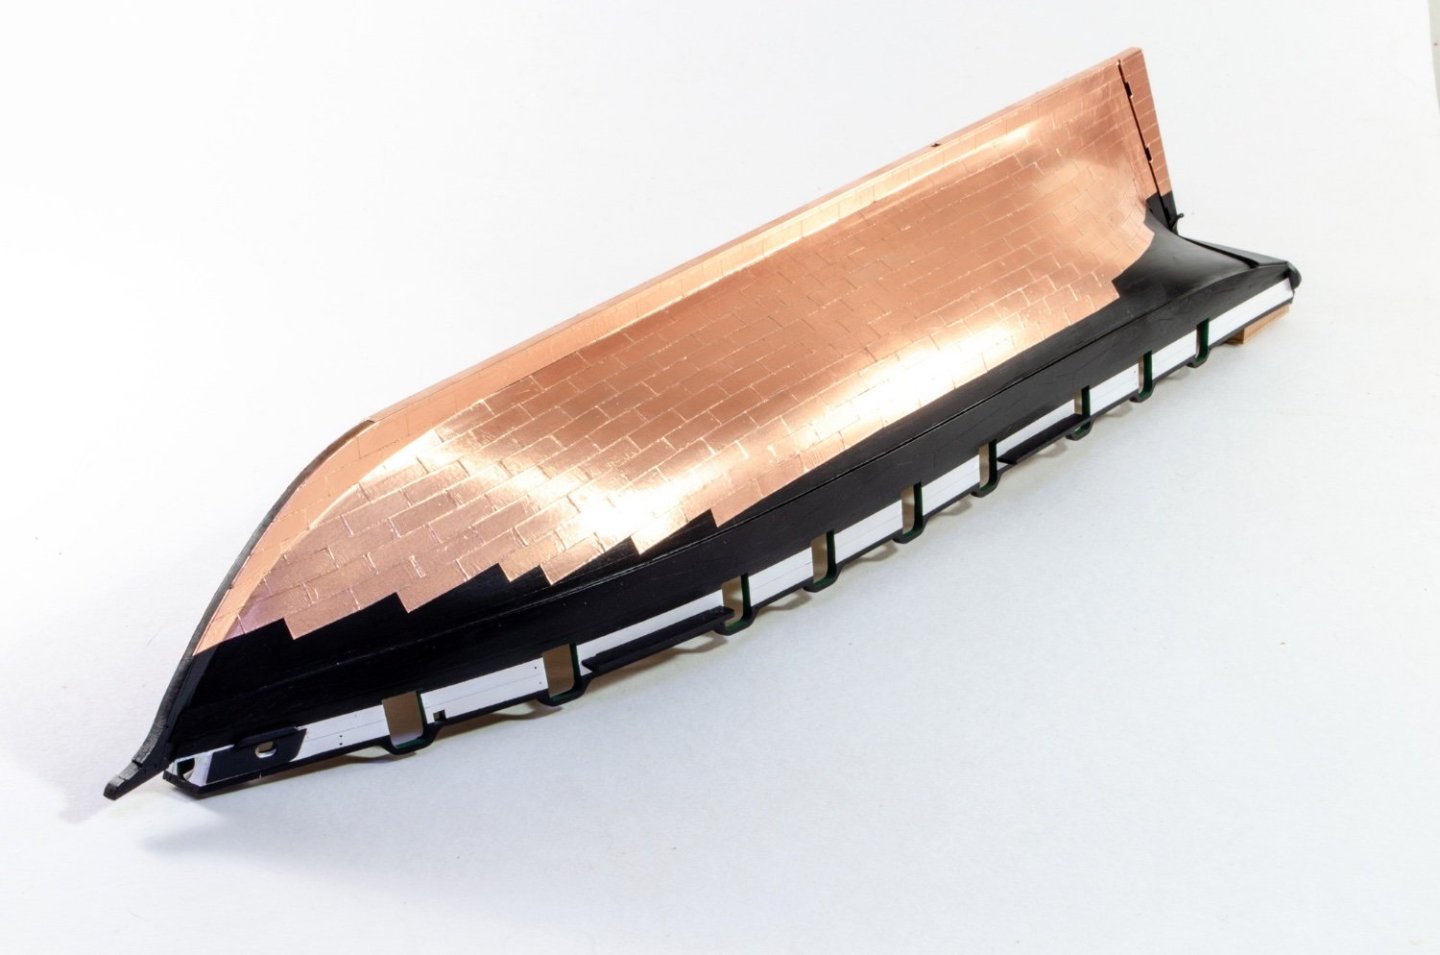
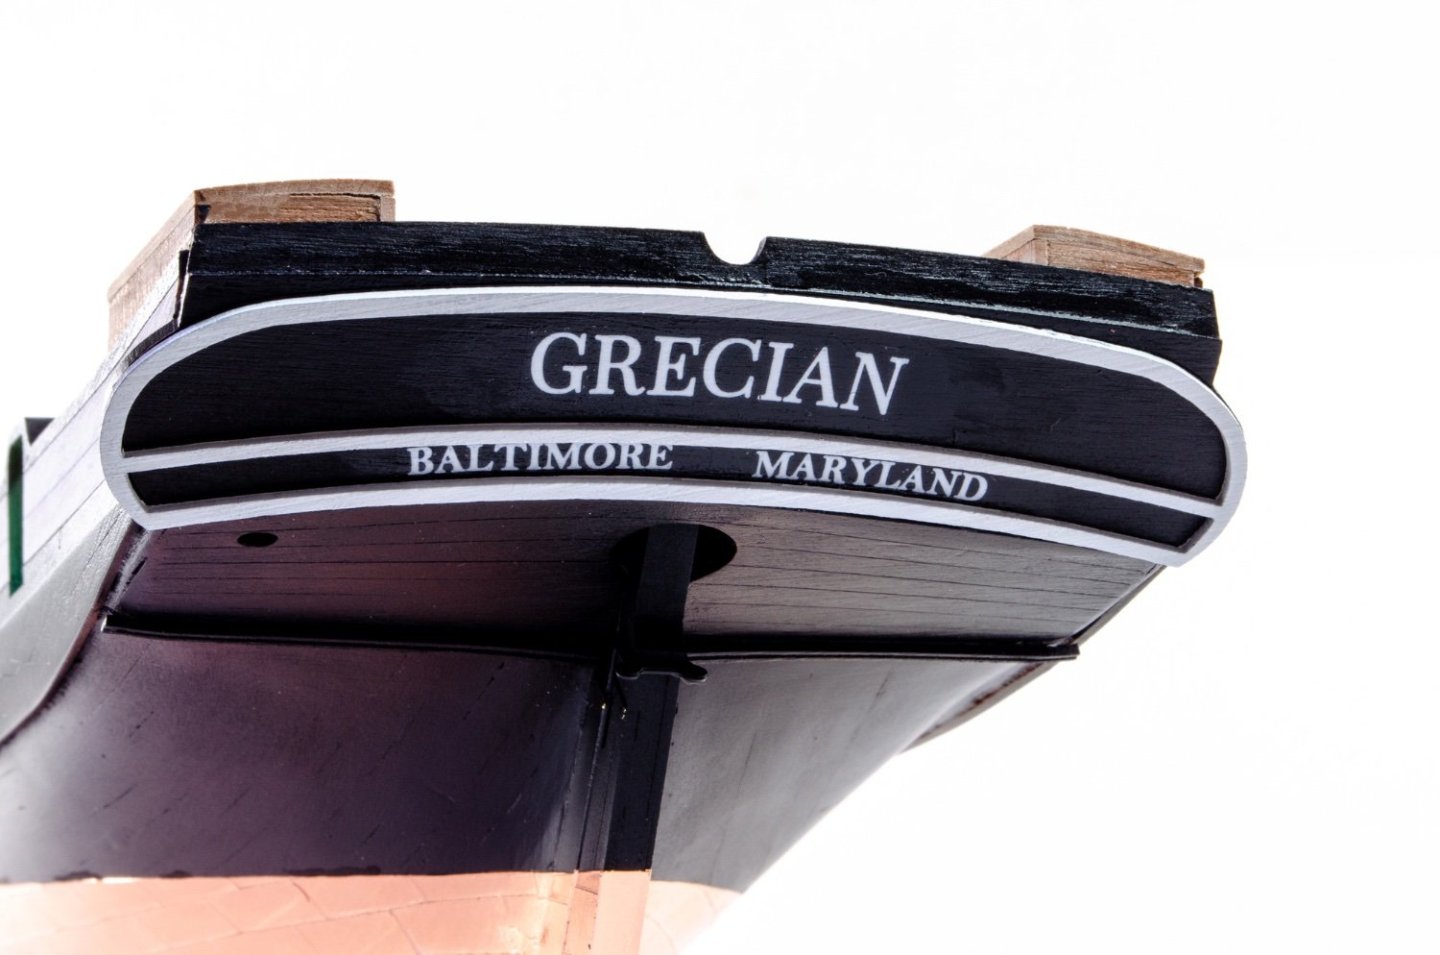
I've actually forgotten to add a little info too. The outside channels have slots into which they fit, so no pinning whatsoever. That also goes for the inner bulwark belaying racks which have a tab and slot thing. I just made sure that I masked the contact area before I painted the bulwarks. Here's some pics of the coppering and the stern.

- 80 replies
-
- 25
-
-
-
-
- Grecian
- Vanguard Models
- (and 3 more)
-
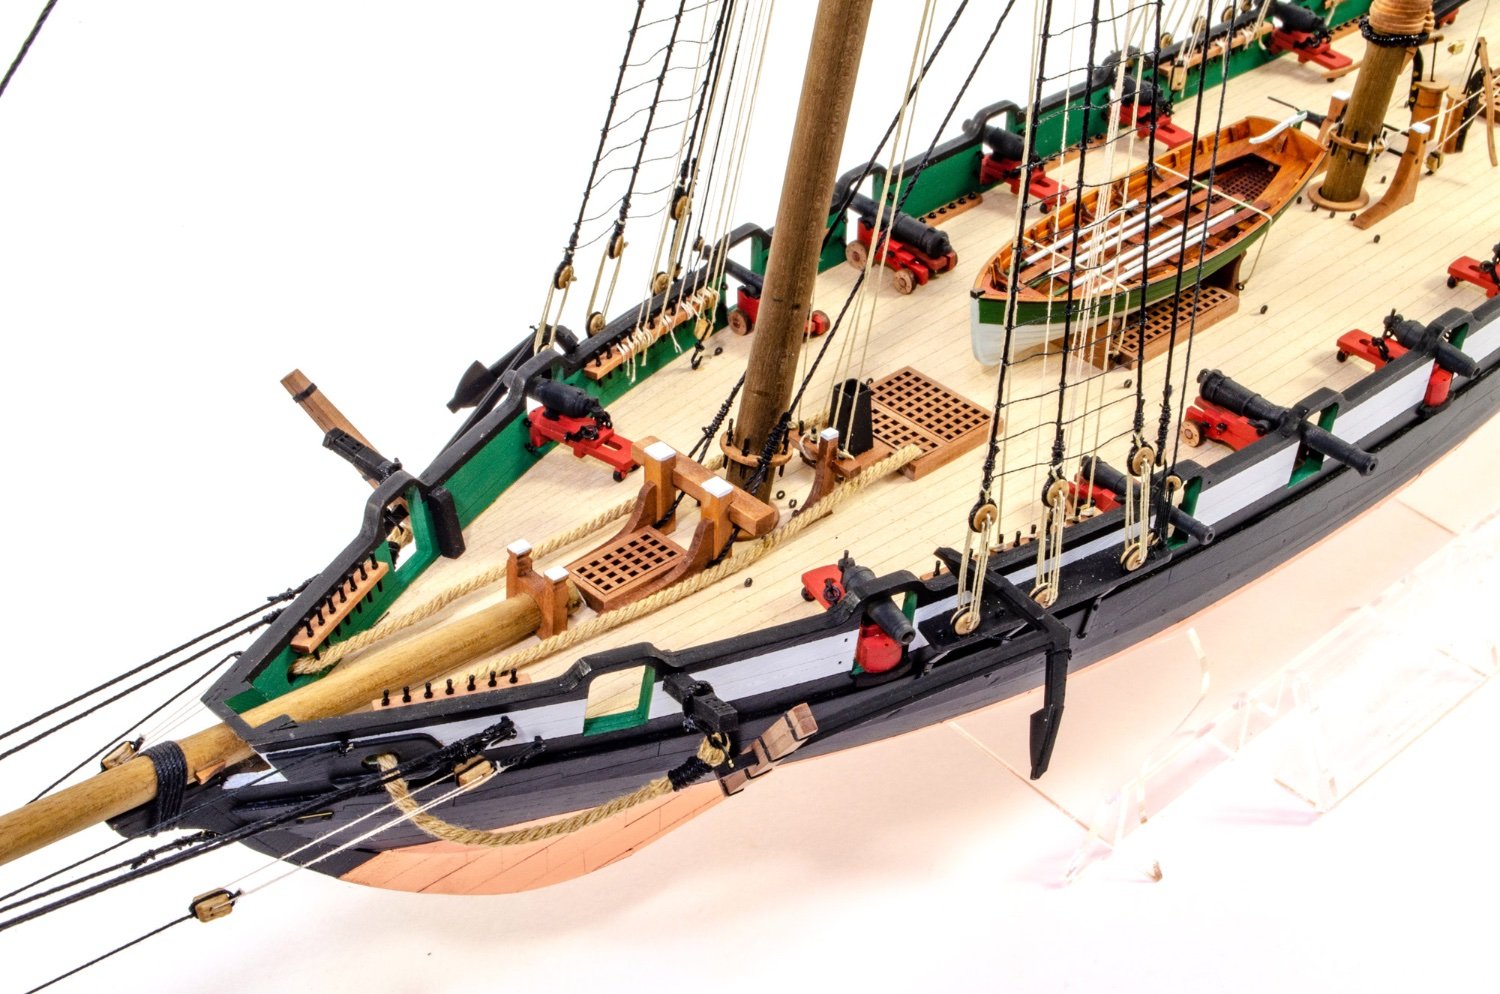
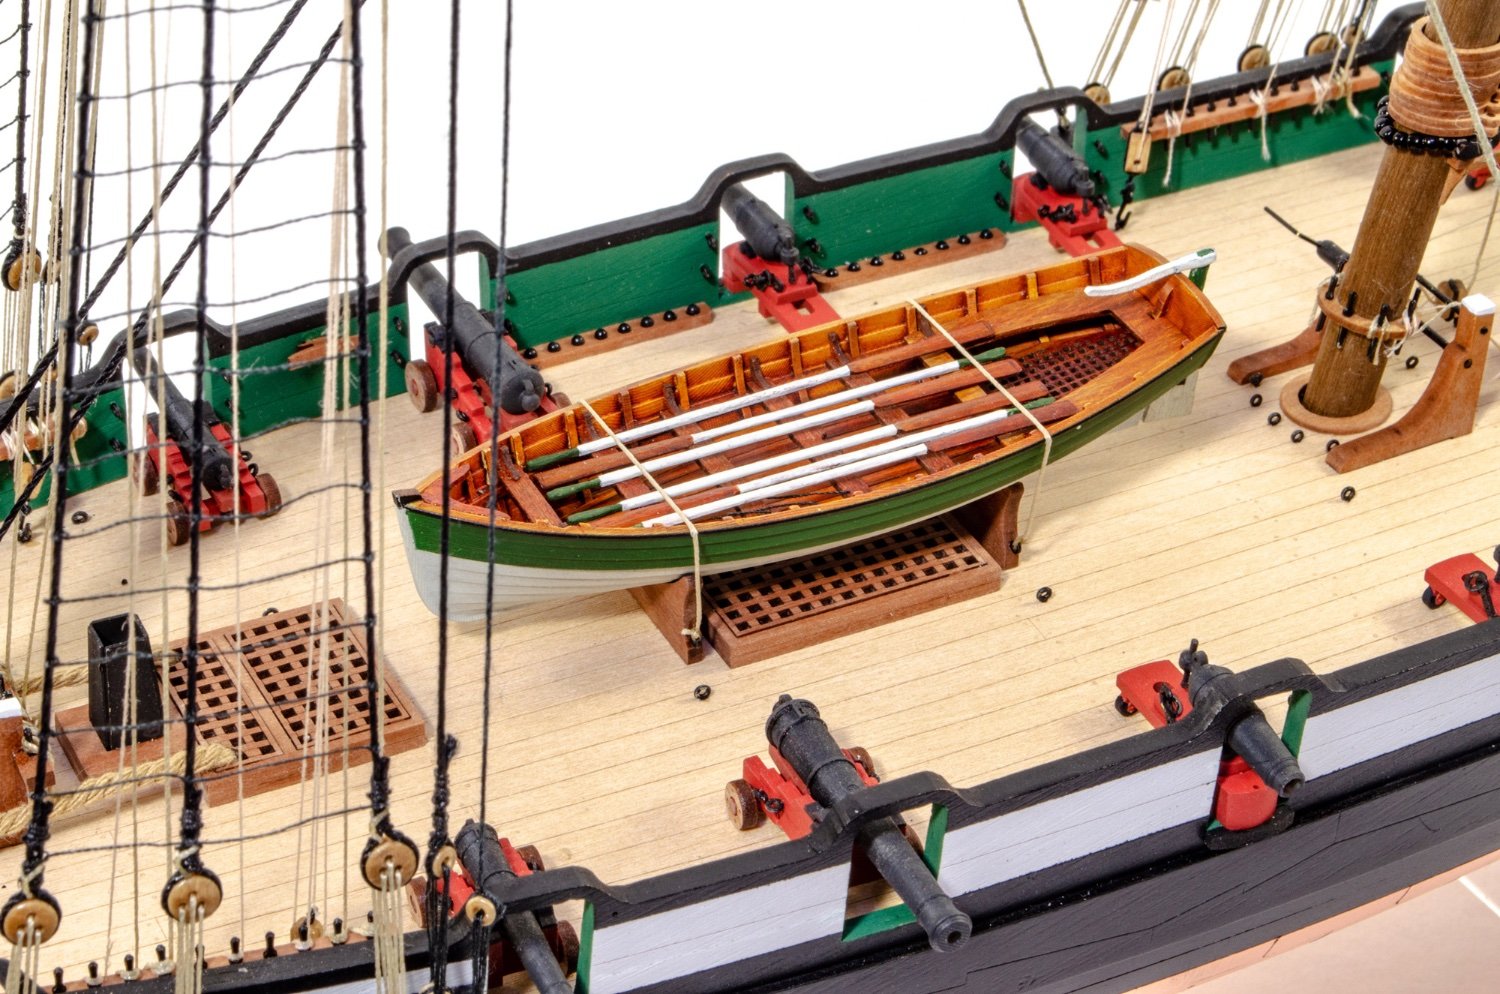
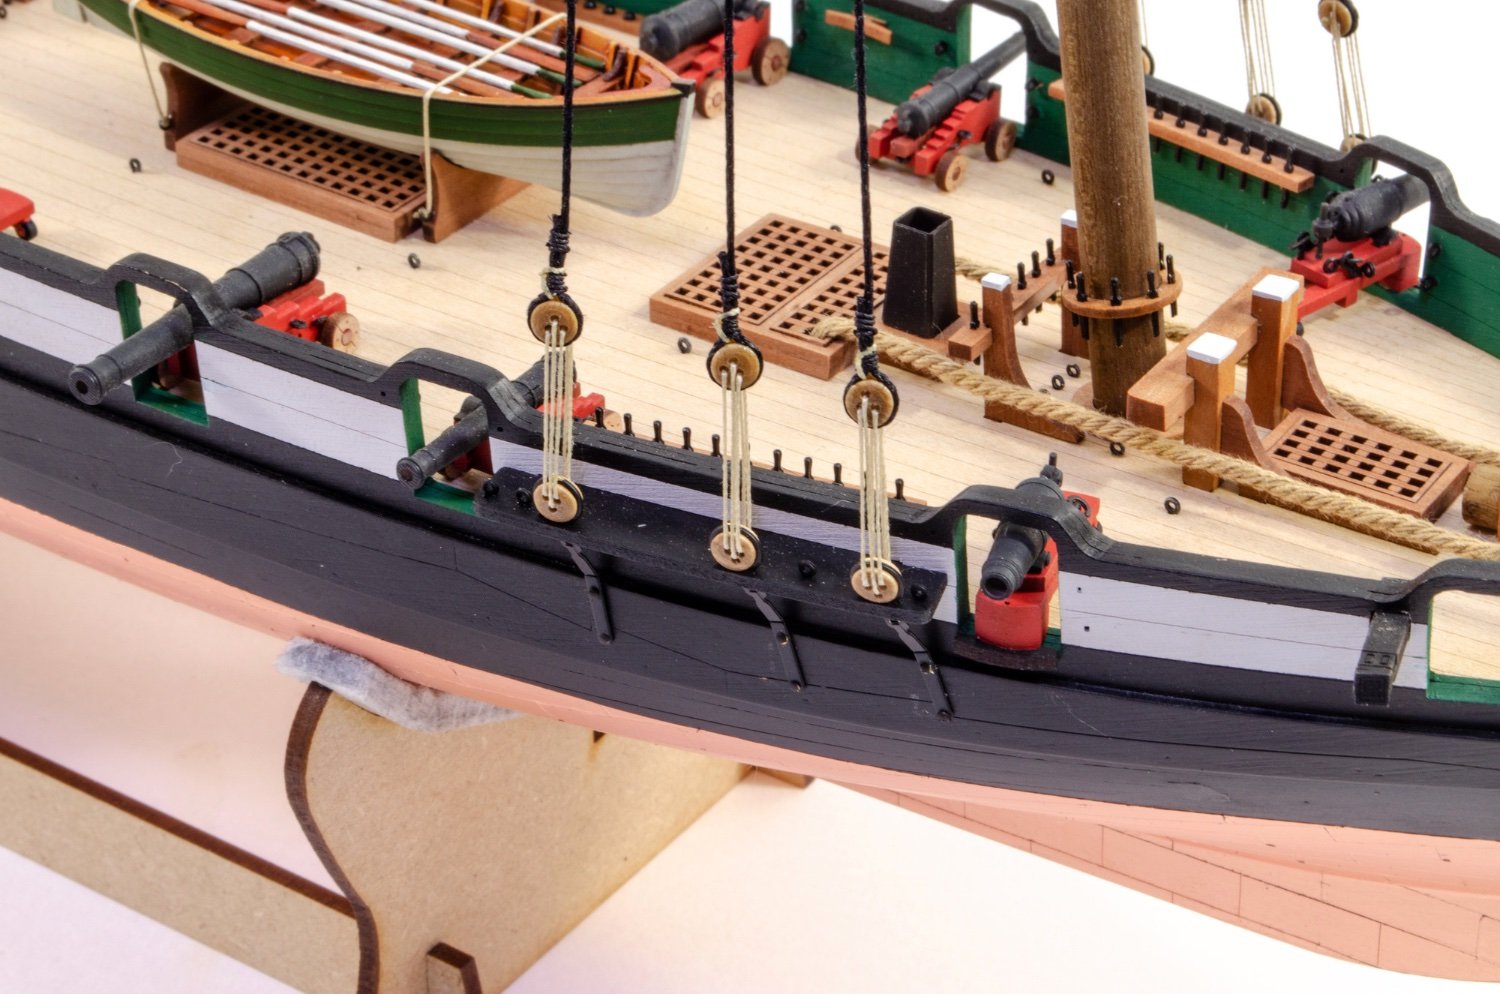
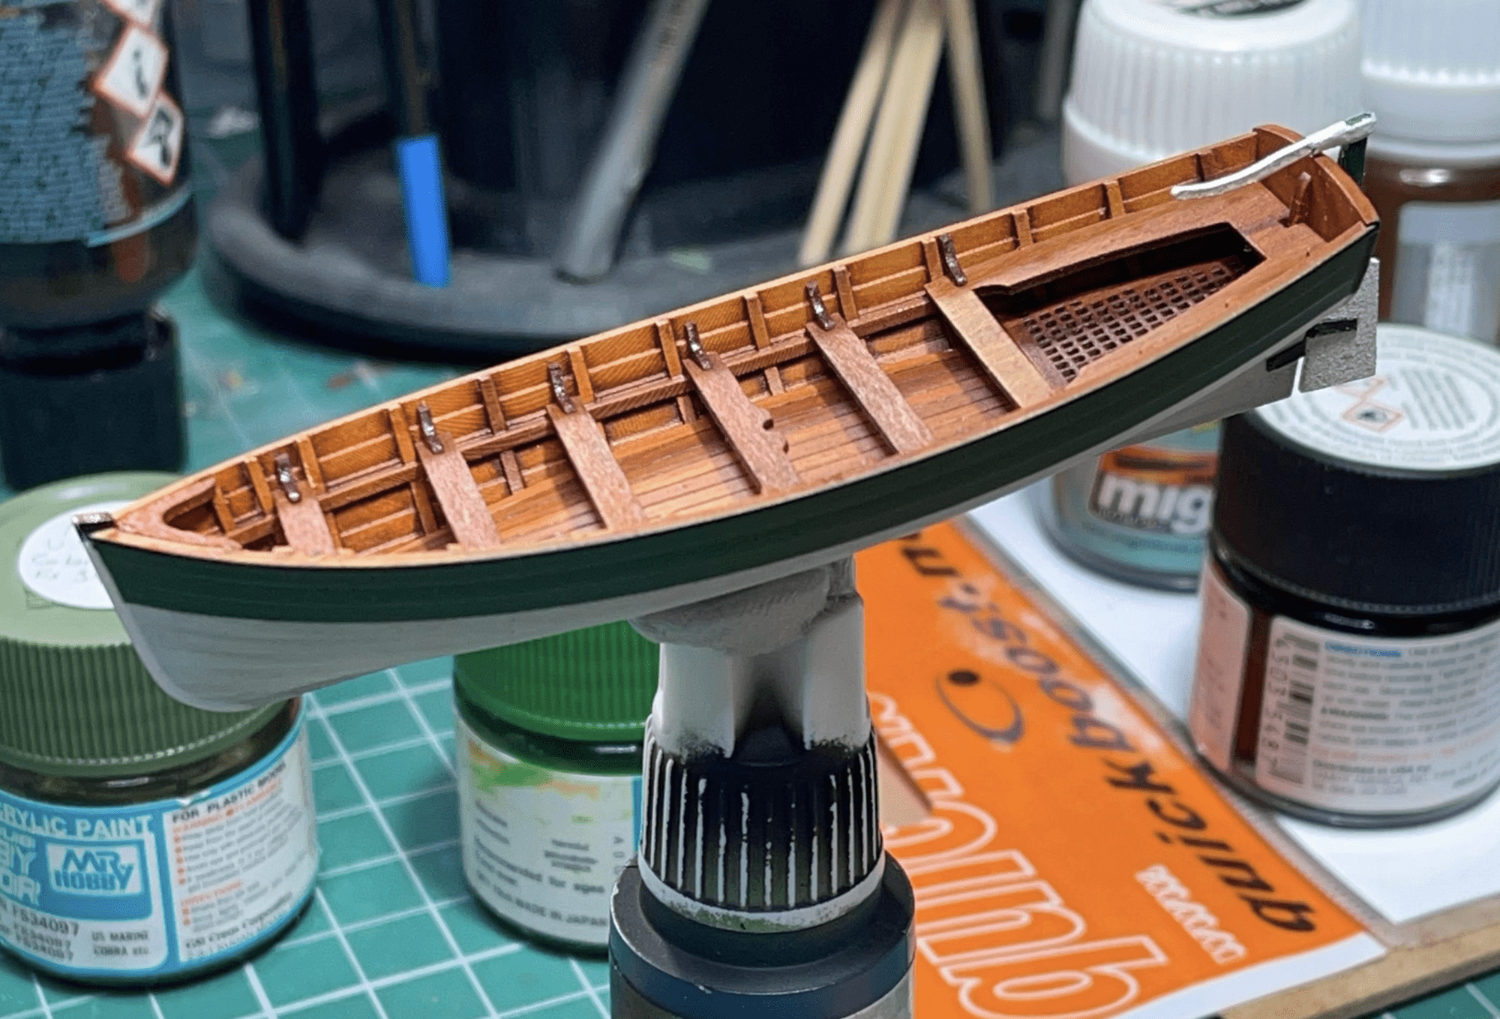
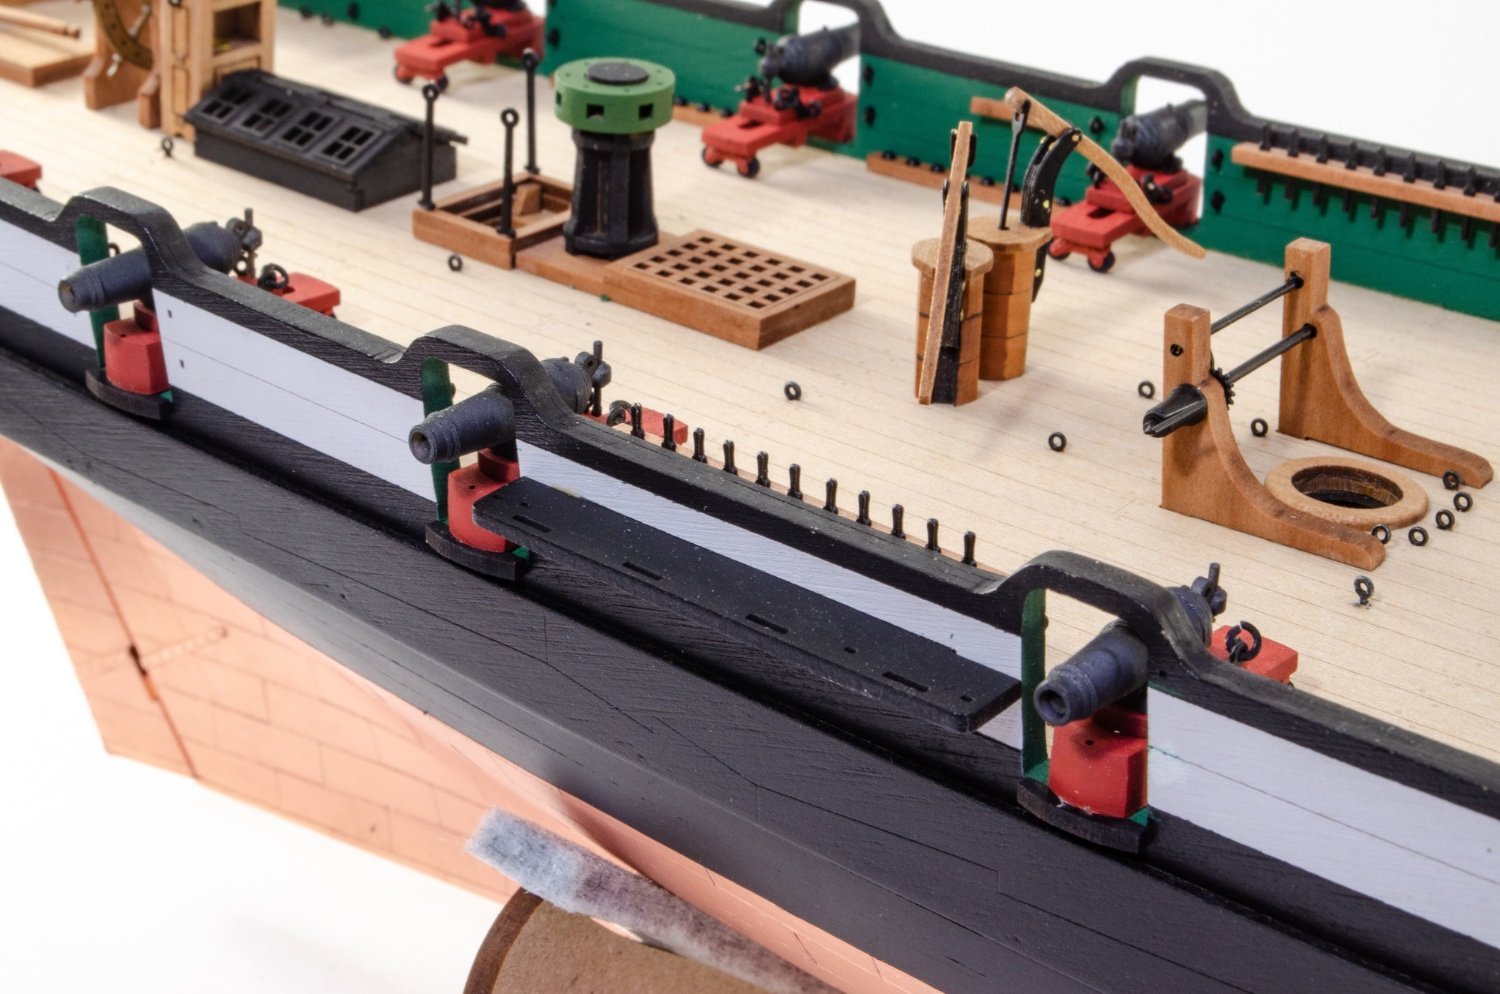
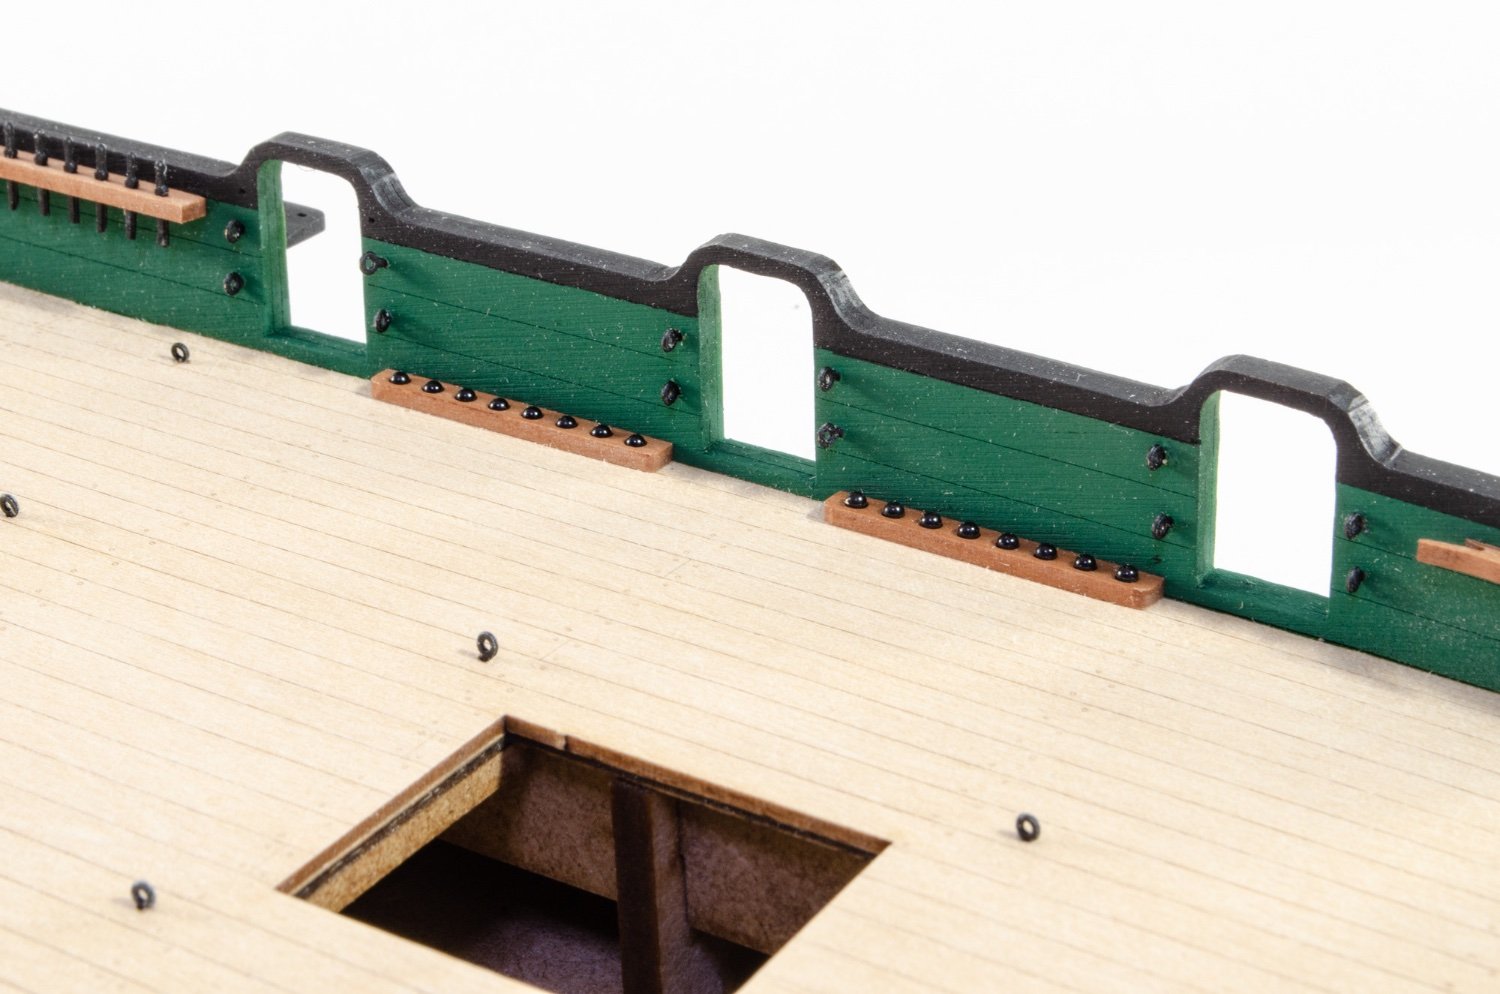
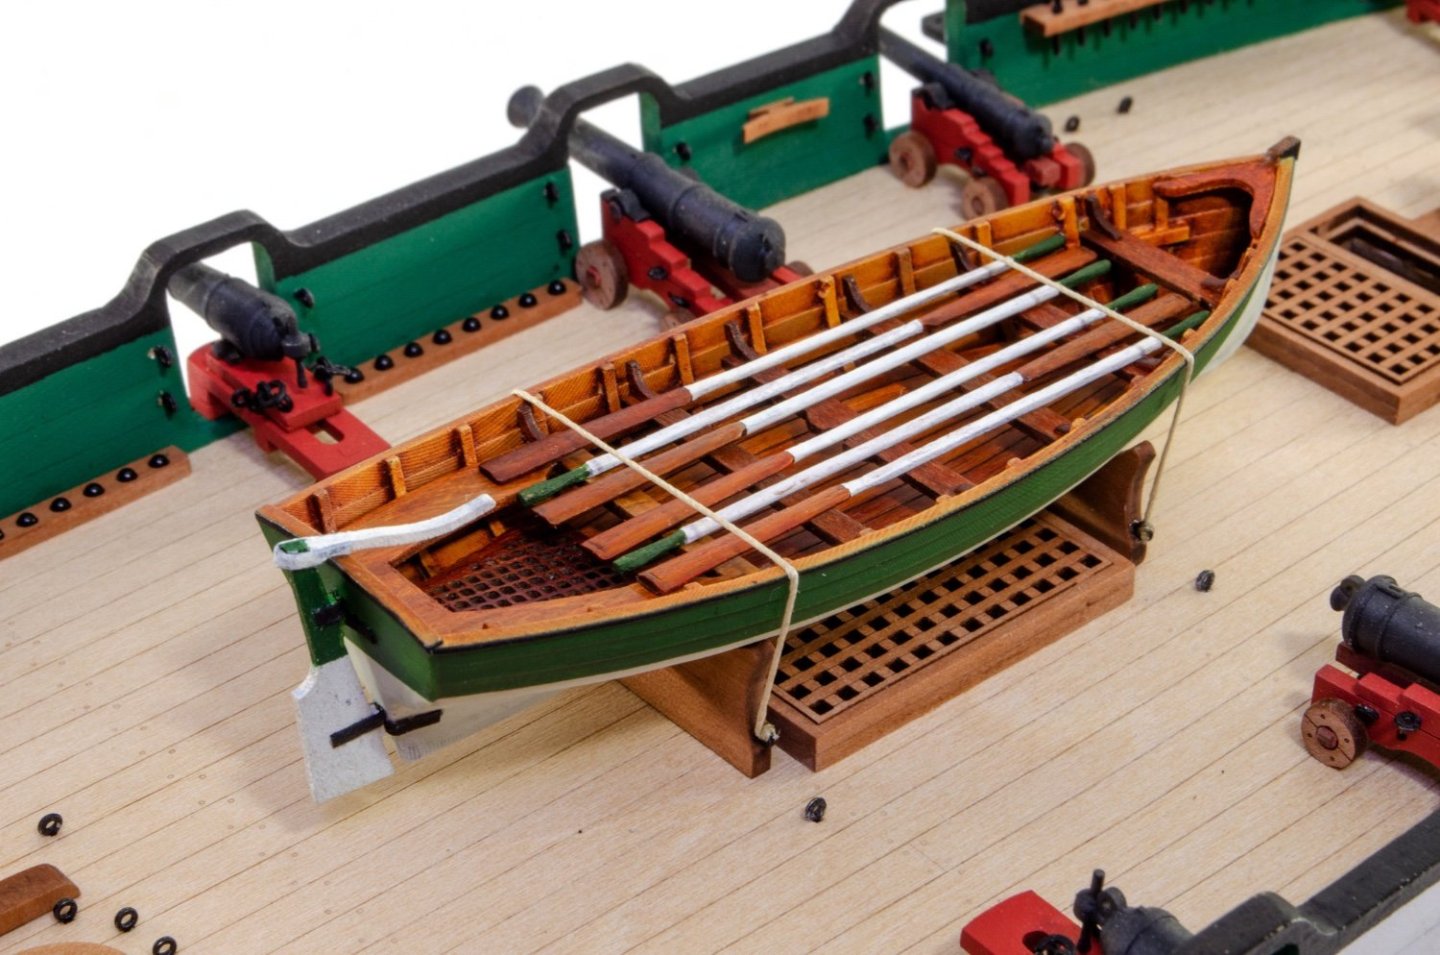
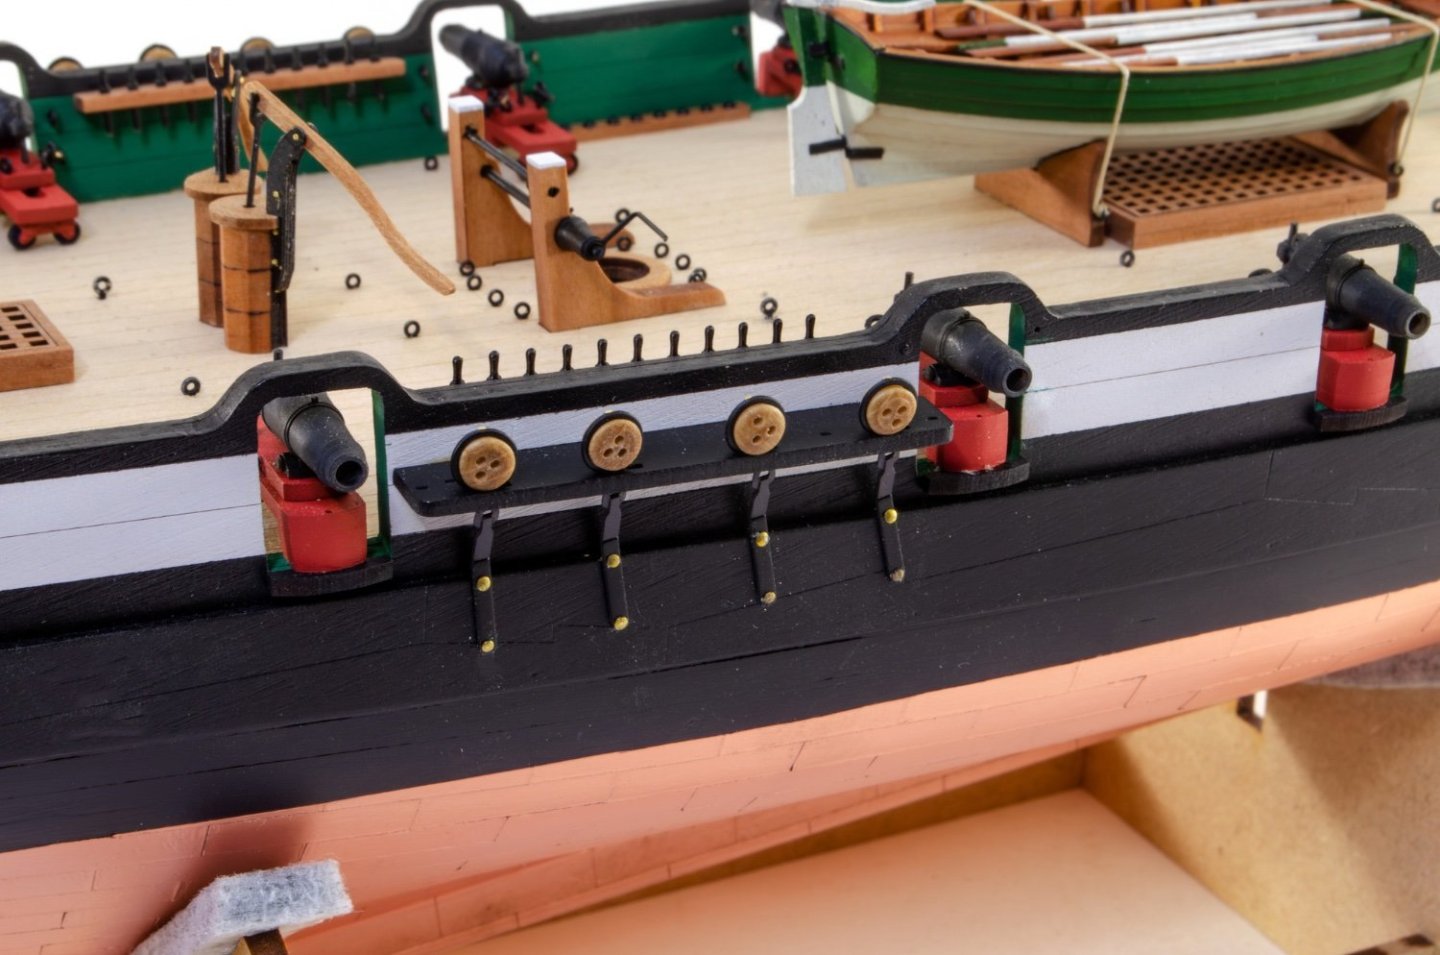
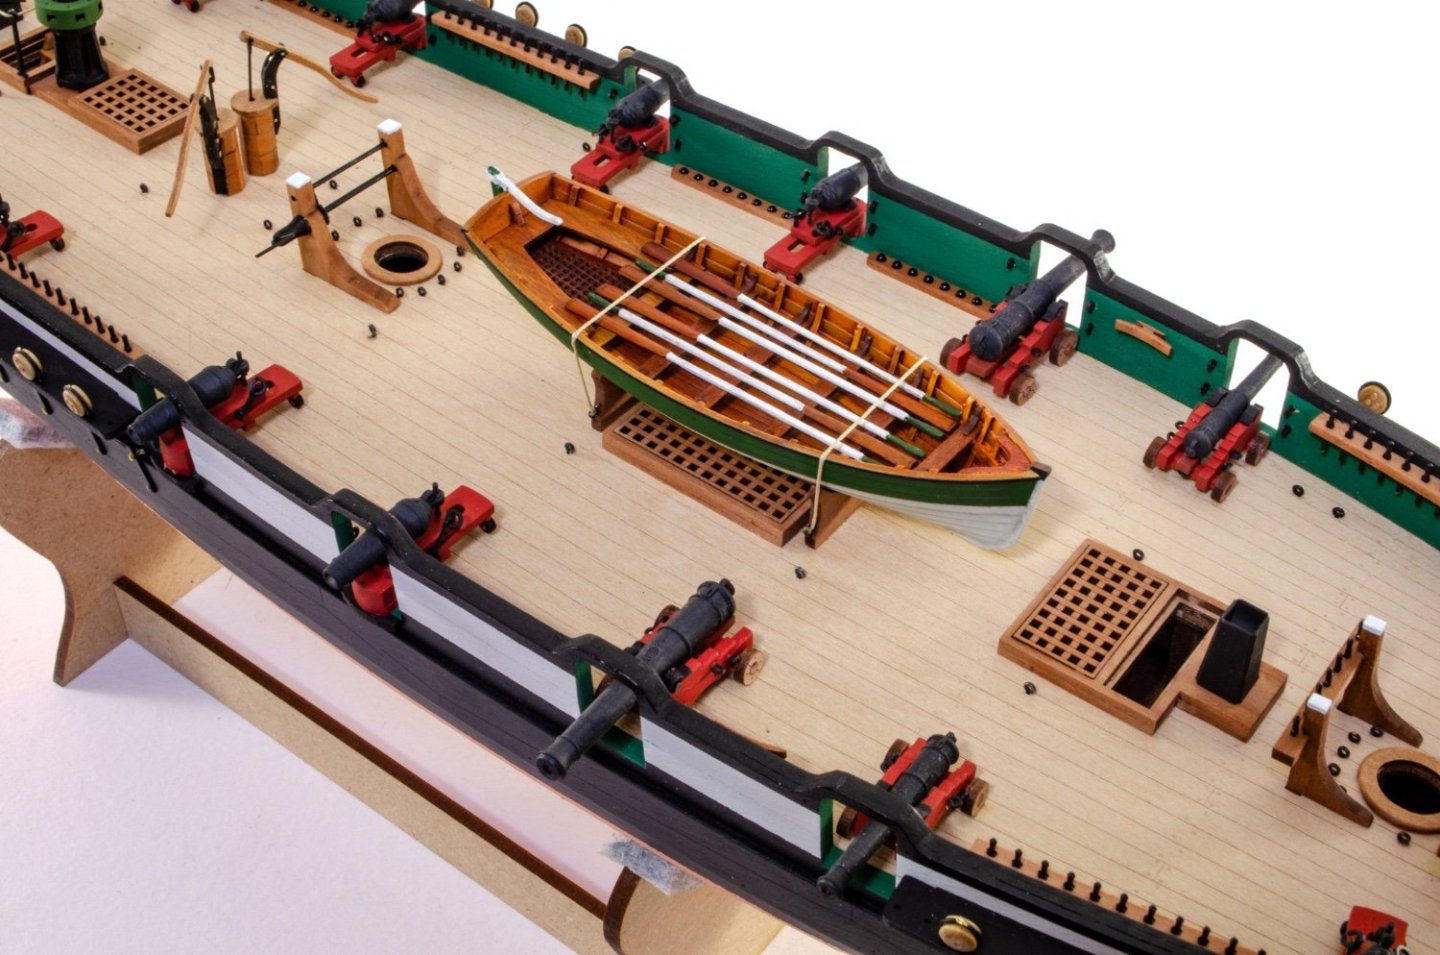
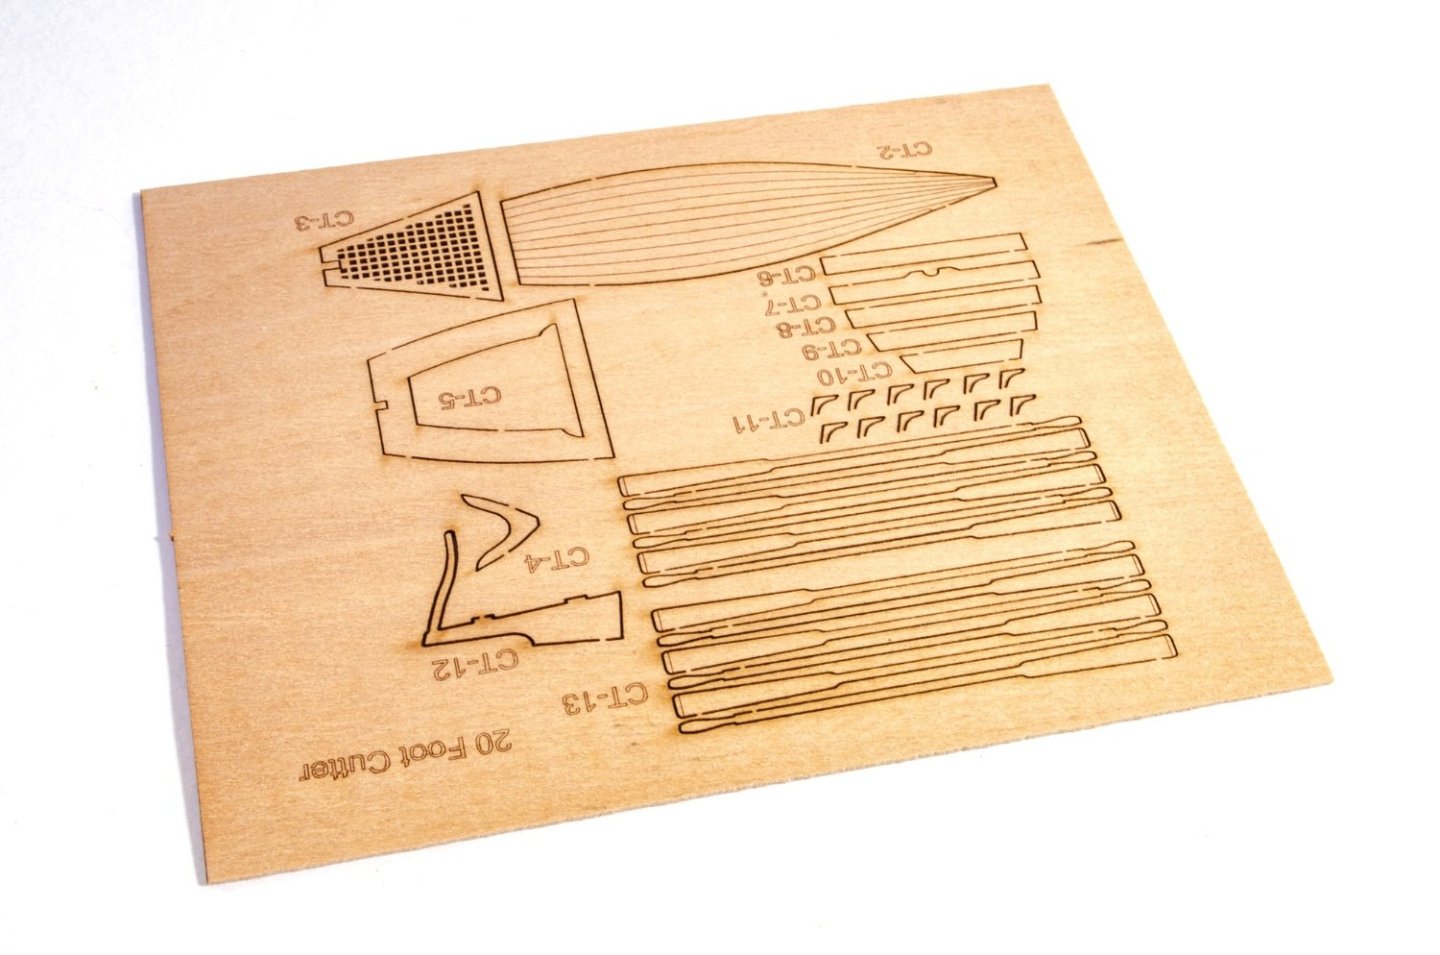
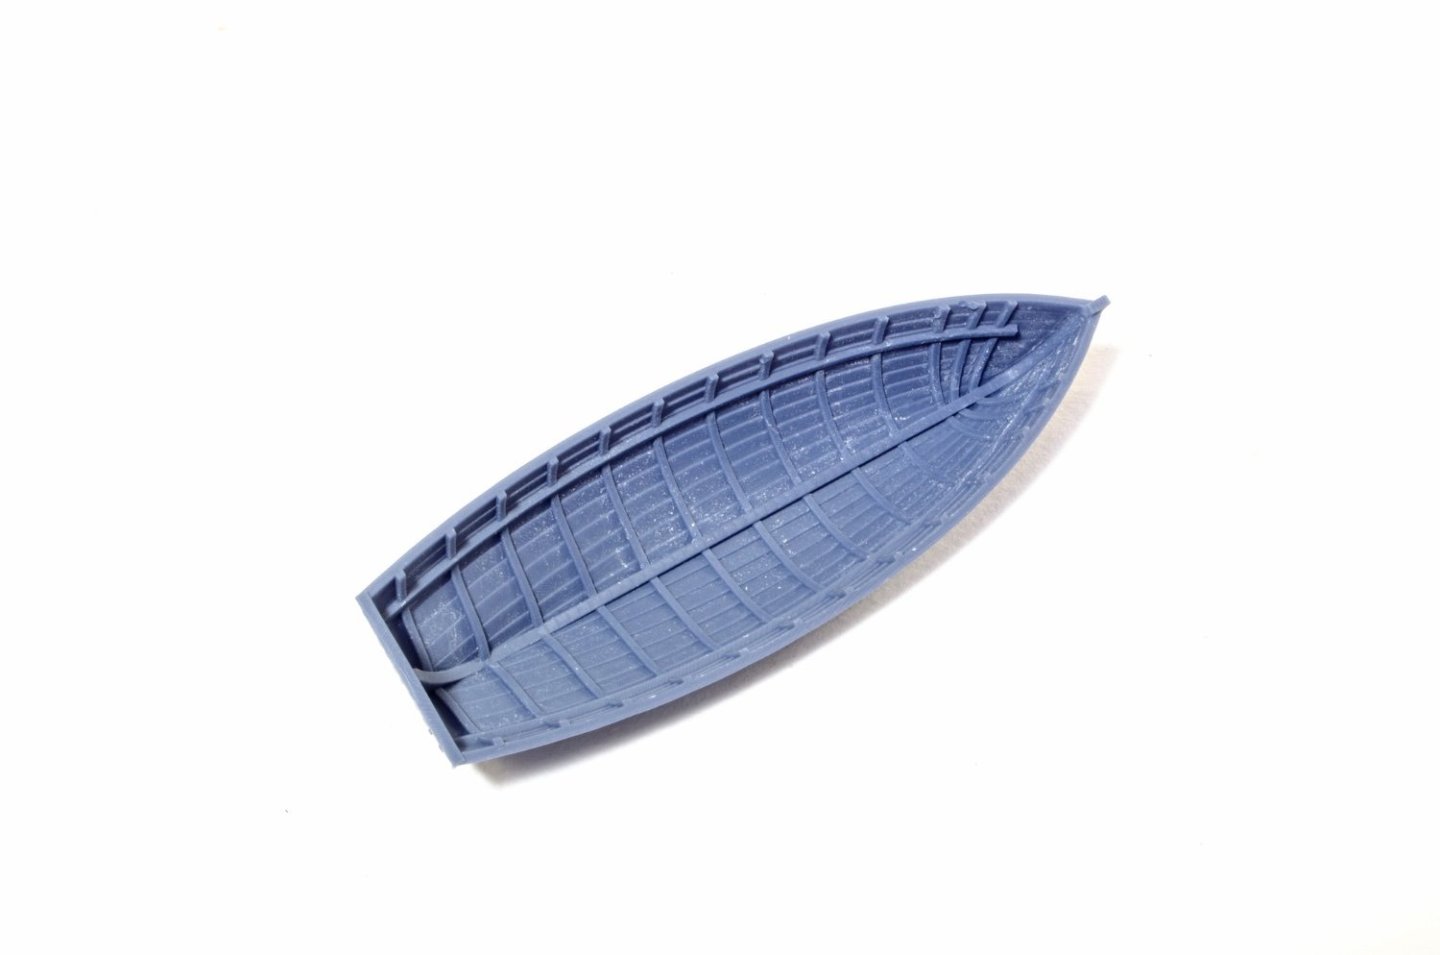
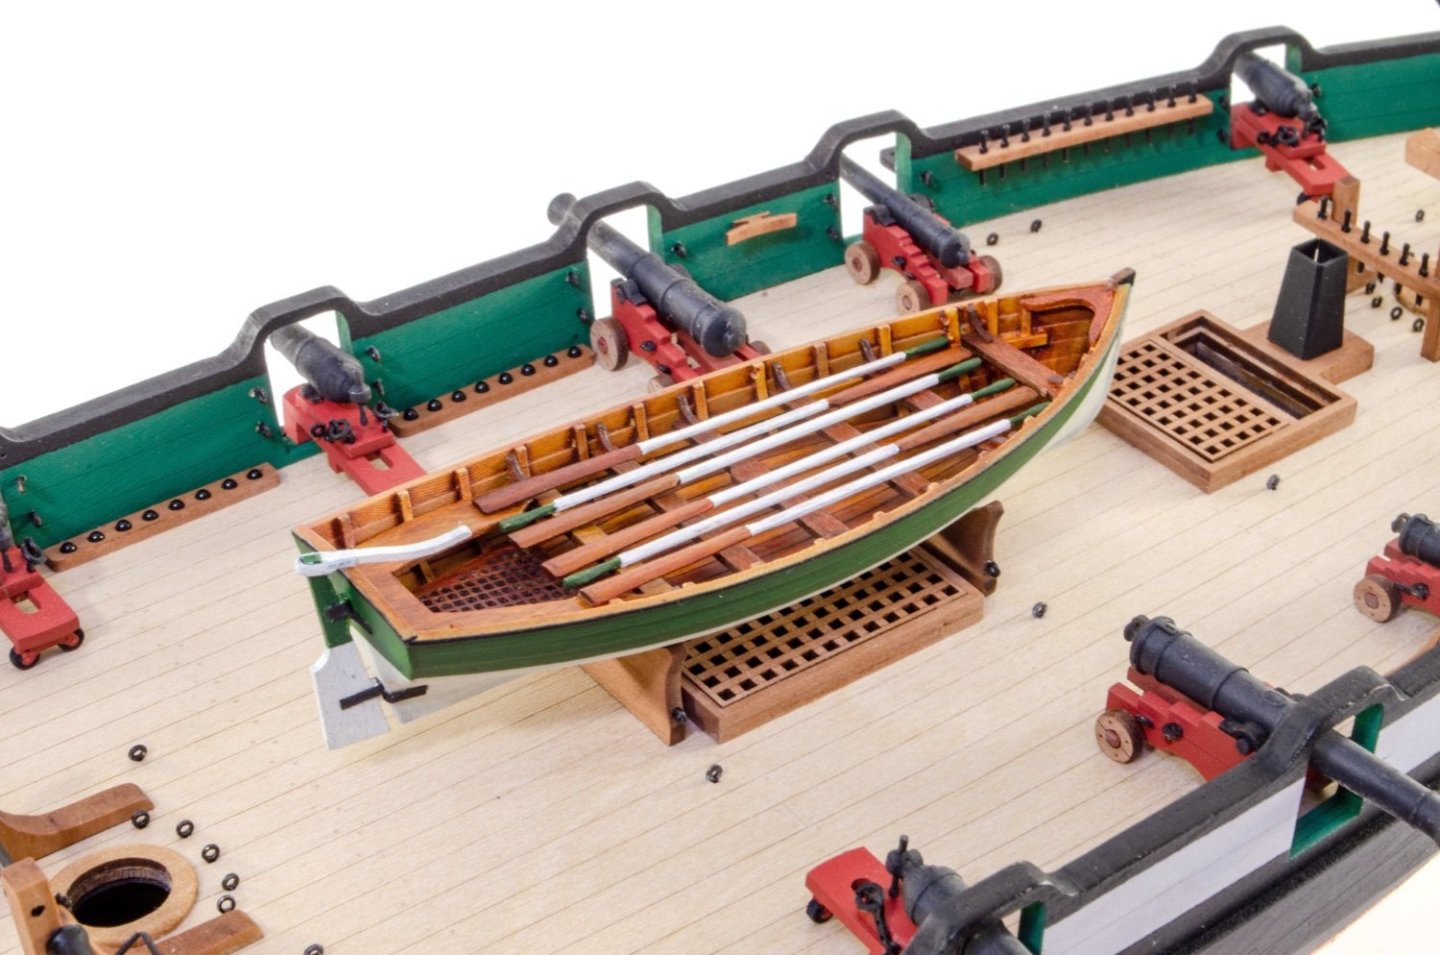
And finally, for today. Stanchions on ready for cord, which I'll add when I do the next update. Grecian comes with a LOT of choices for armament. Carronades feature heavily and paint is scraped away from where these are to be fitted. There is a small shelf on the exterior for the carronades, hence the paint removed. Next two 6 pdrs and two 4 pdrs are added. Here is the supplied 3D boat, with timber parts, nicely painted by my friend Mark who does my figureheads and cabin furniture. And here is what Grecian now looks like! It's chainplates etc. for next update, and maybe the bowsprit too. Soon..


- 80 replies
-
- 31
-
-
-
- Grecian
- Vanguard Models
- (and 3 more)
-
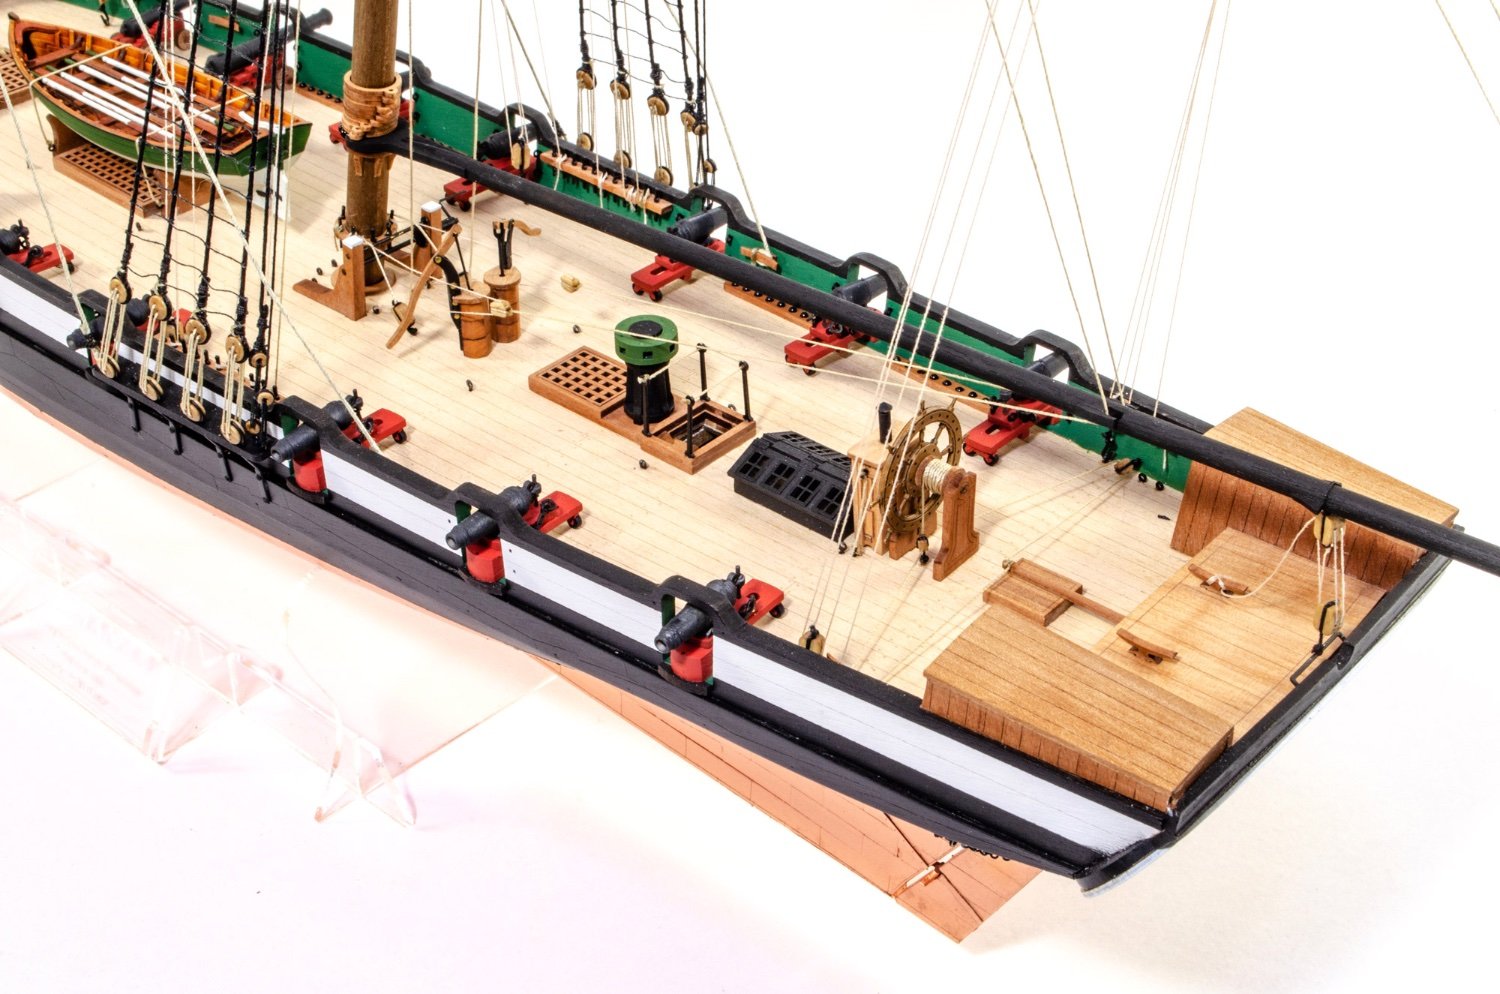
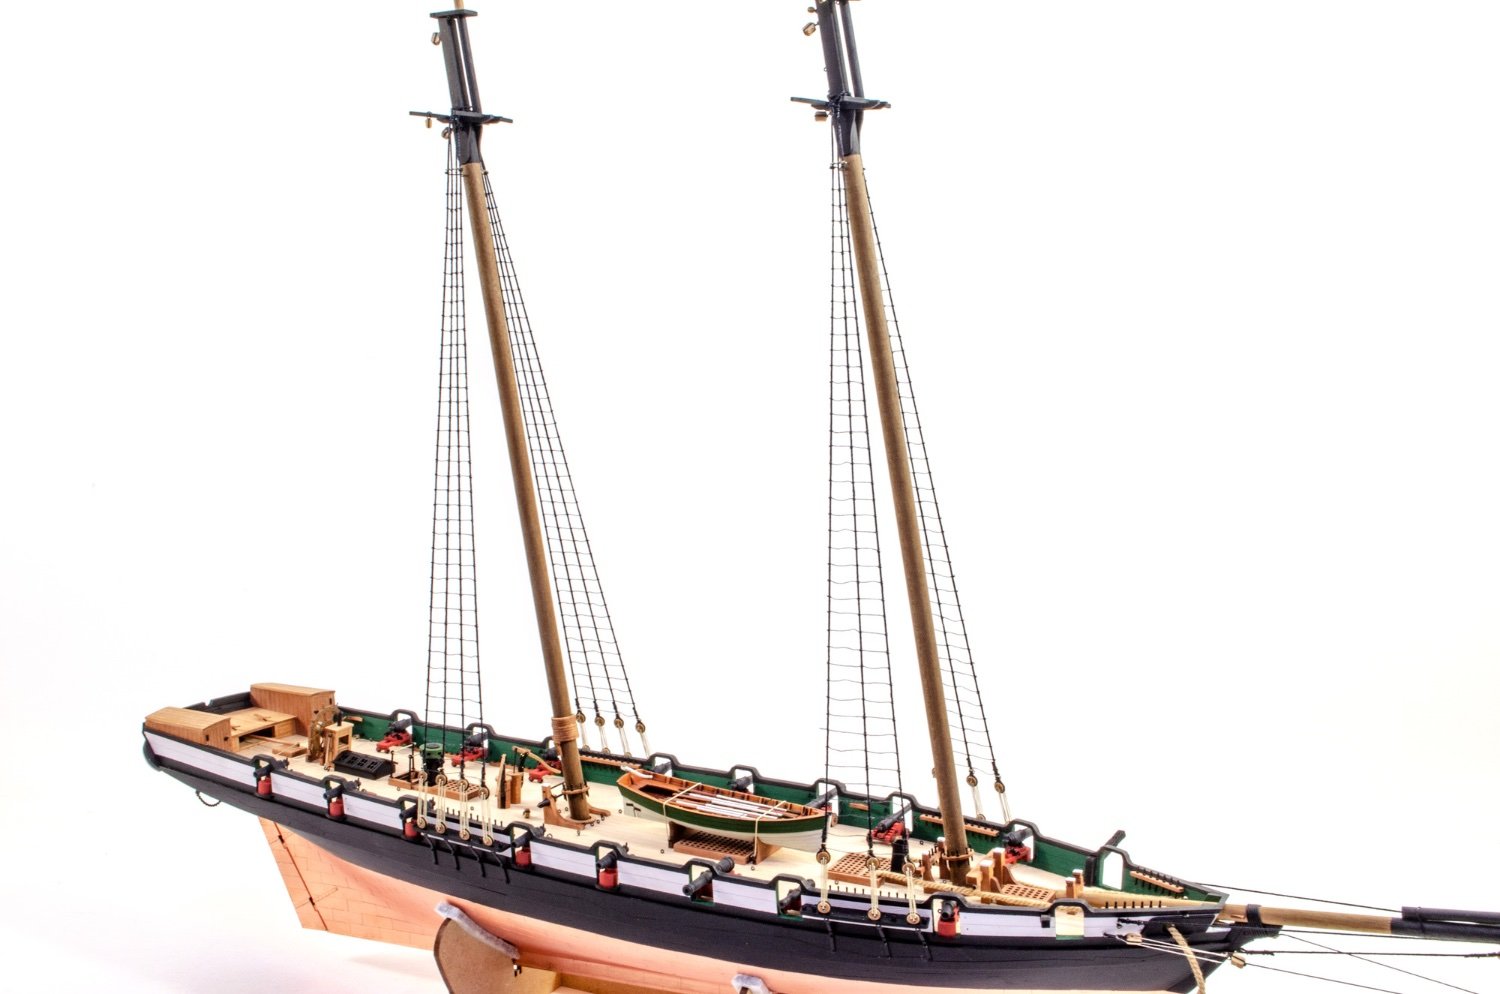
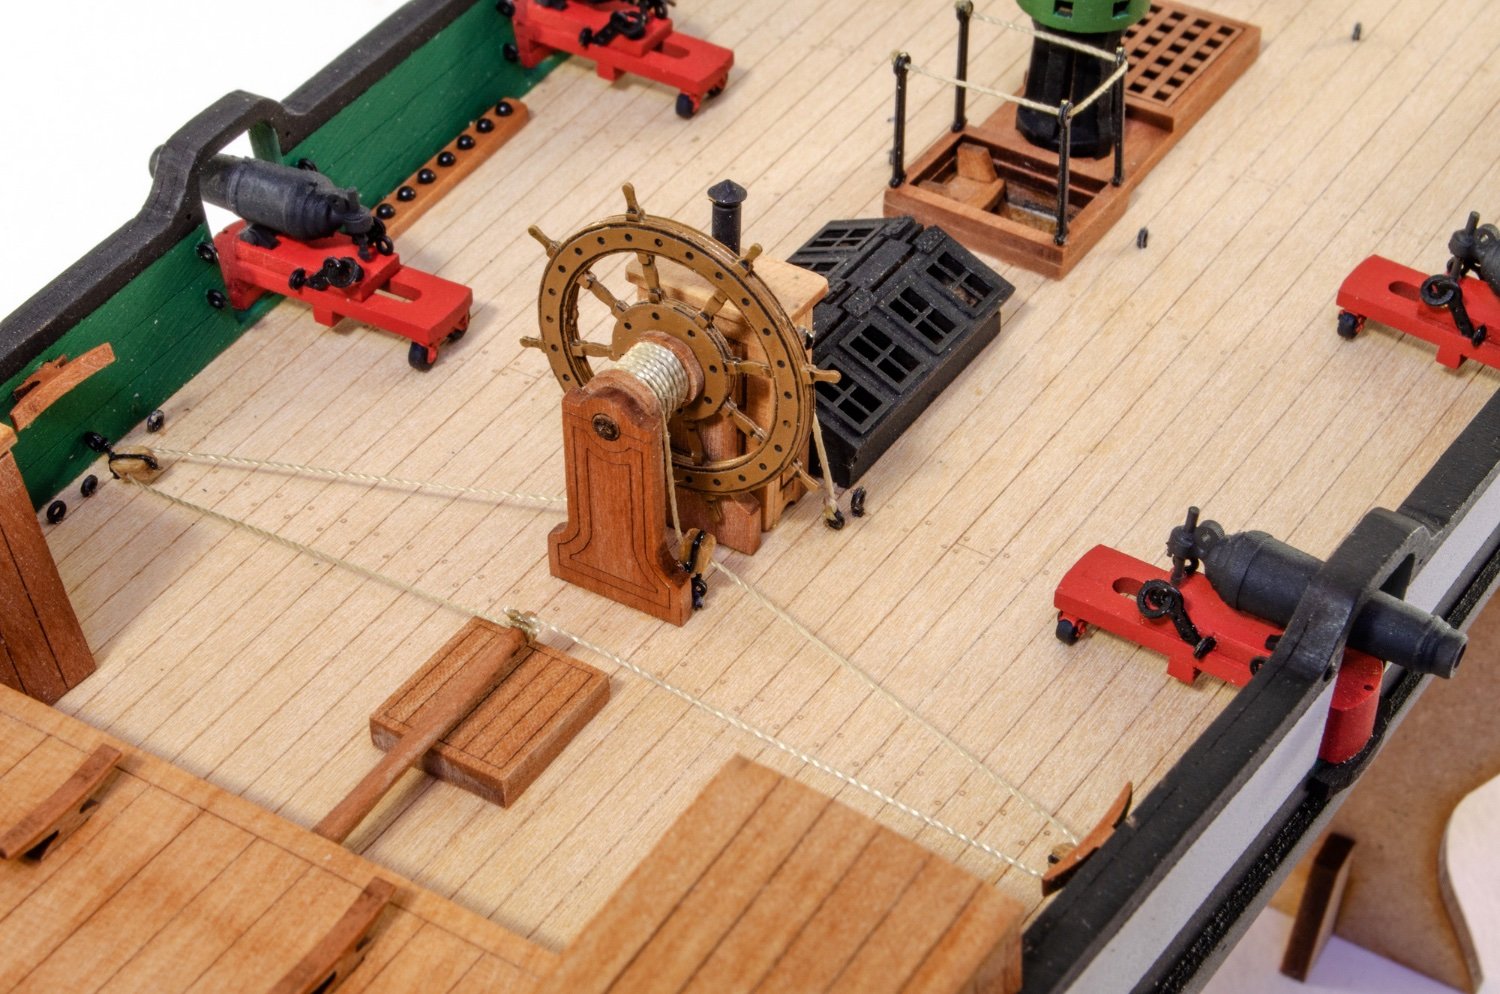
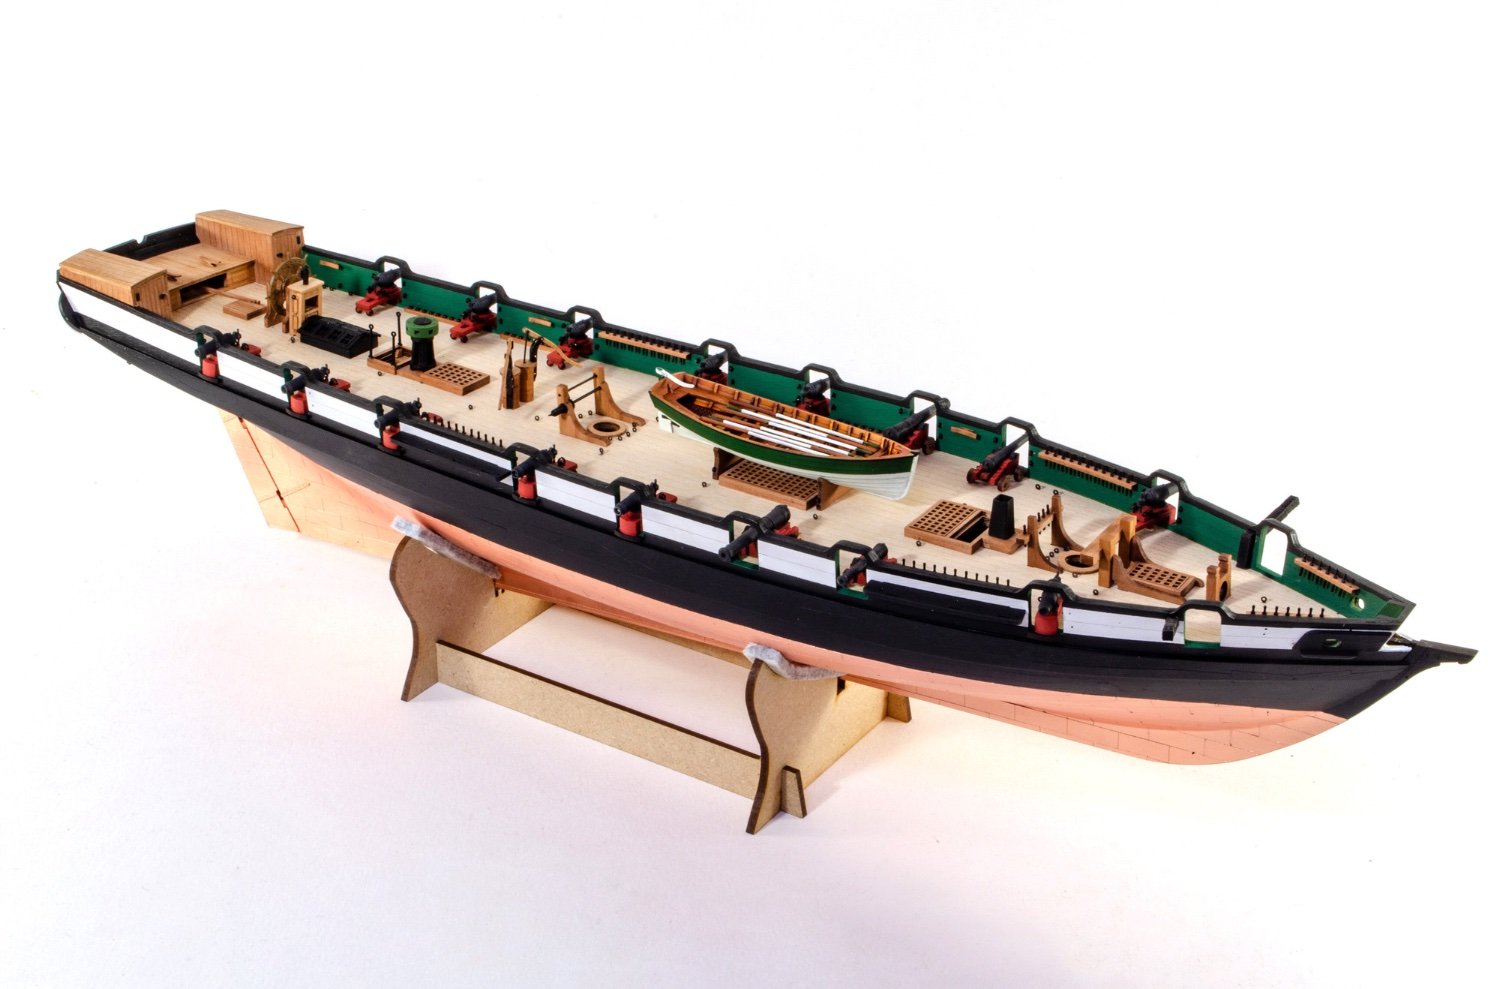
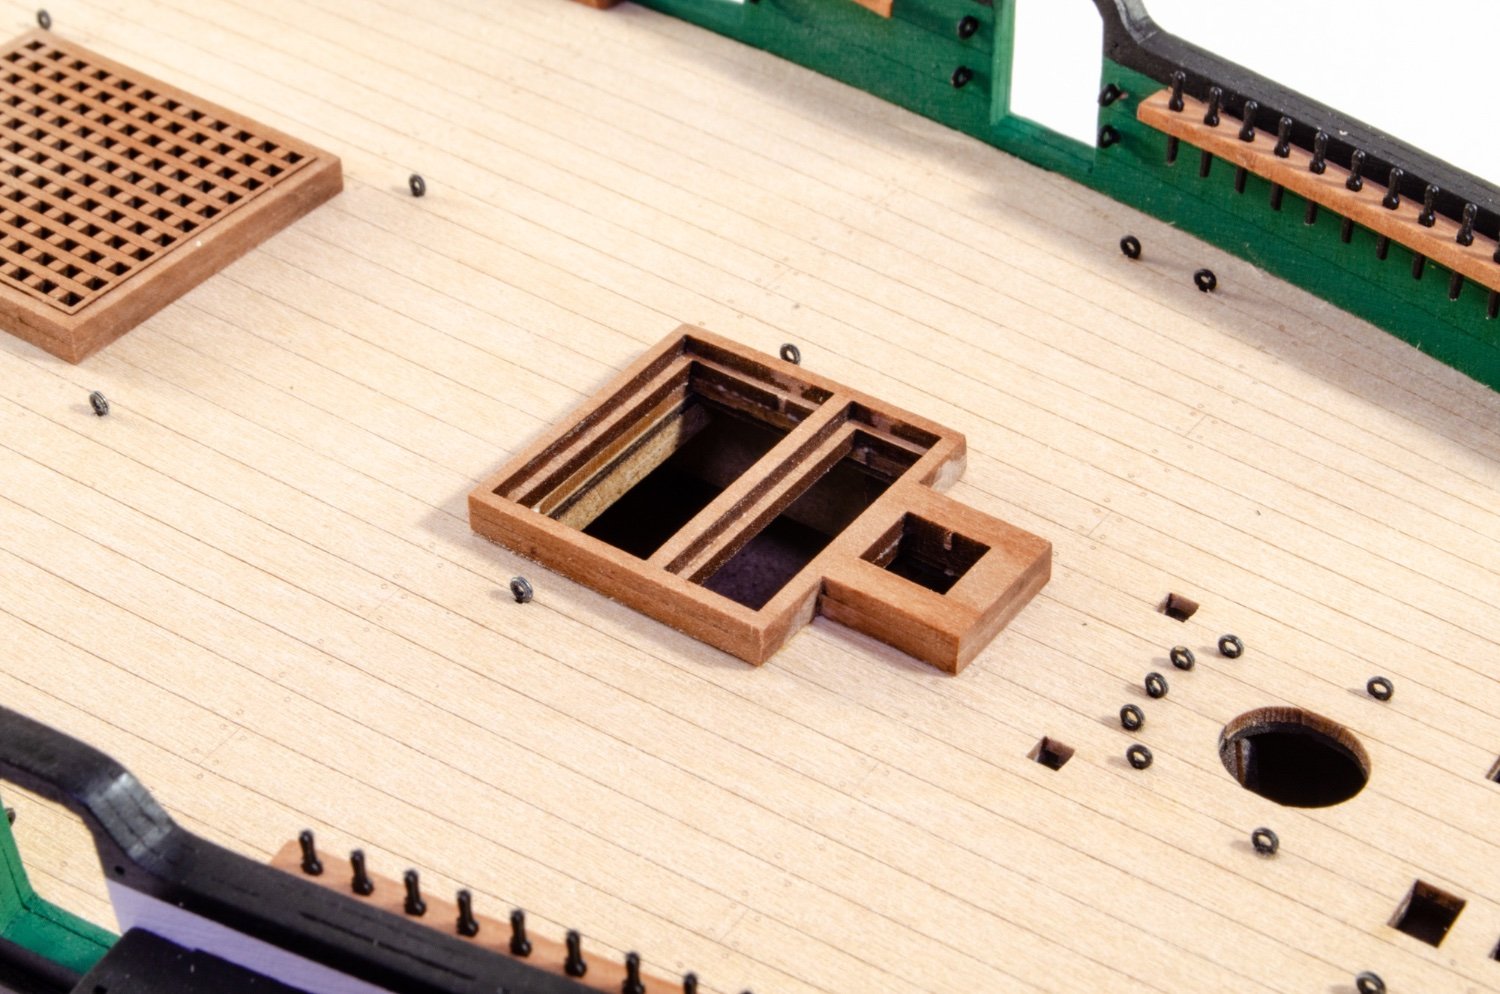
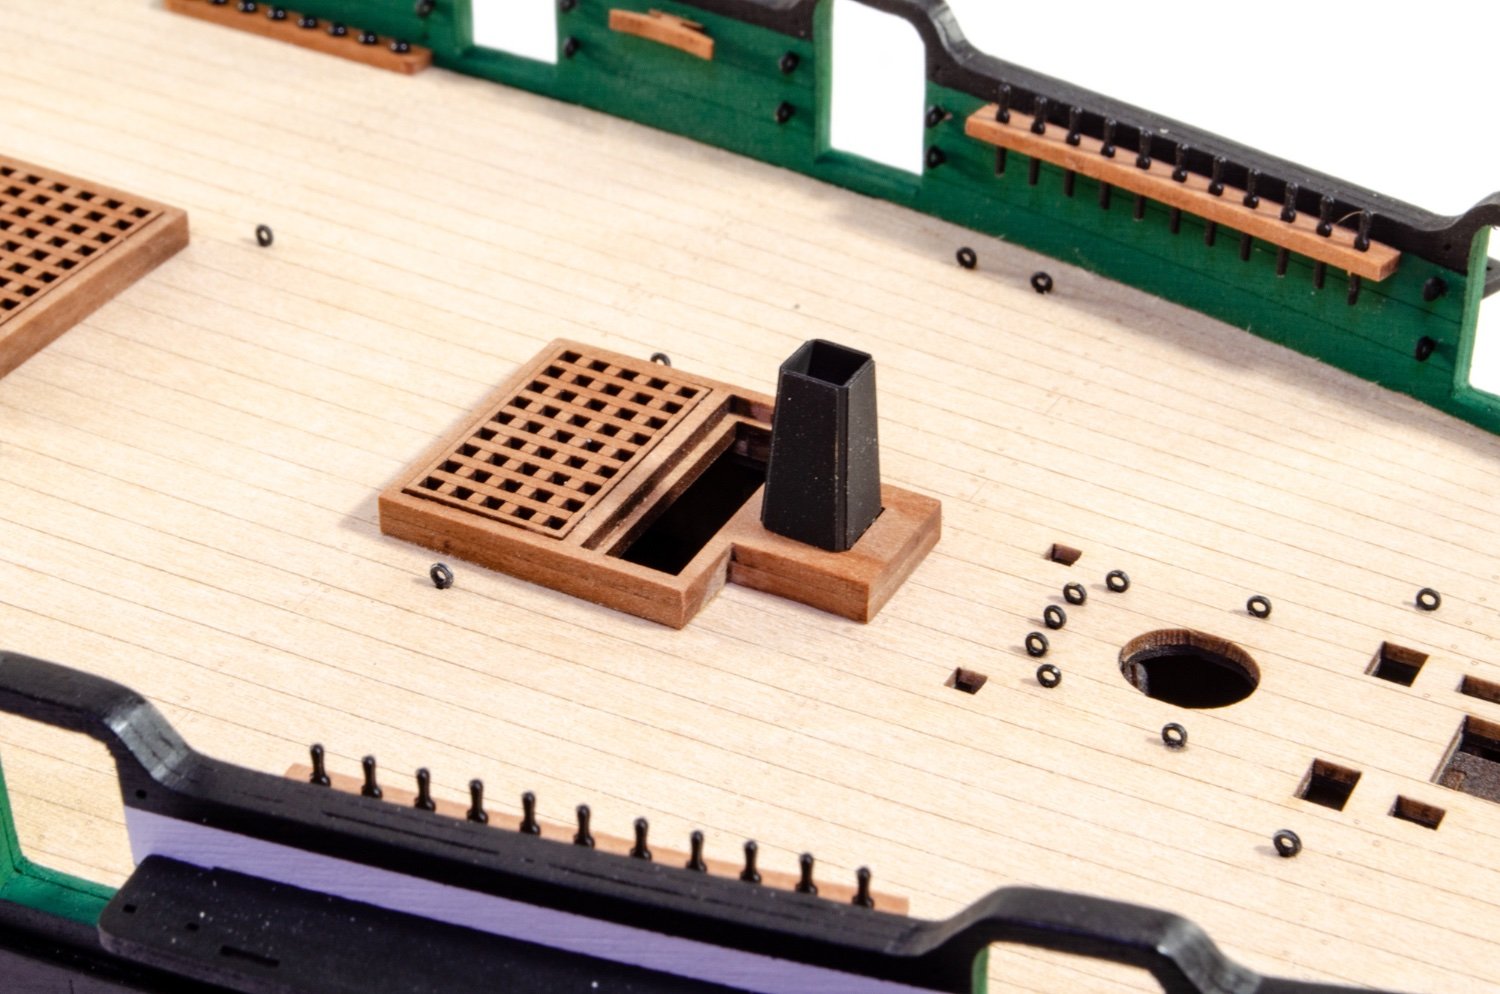
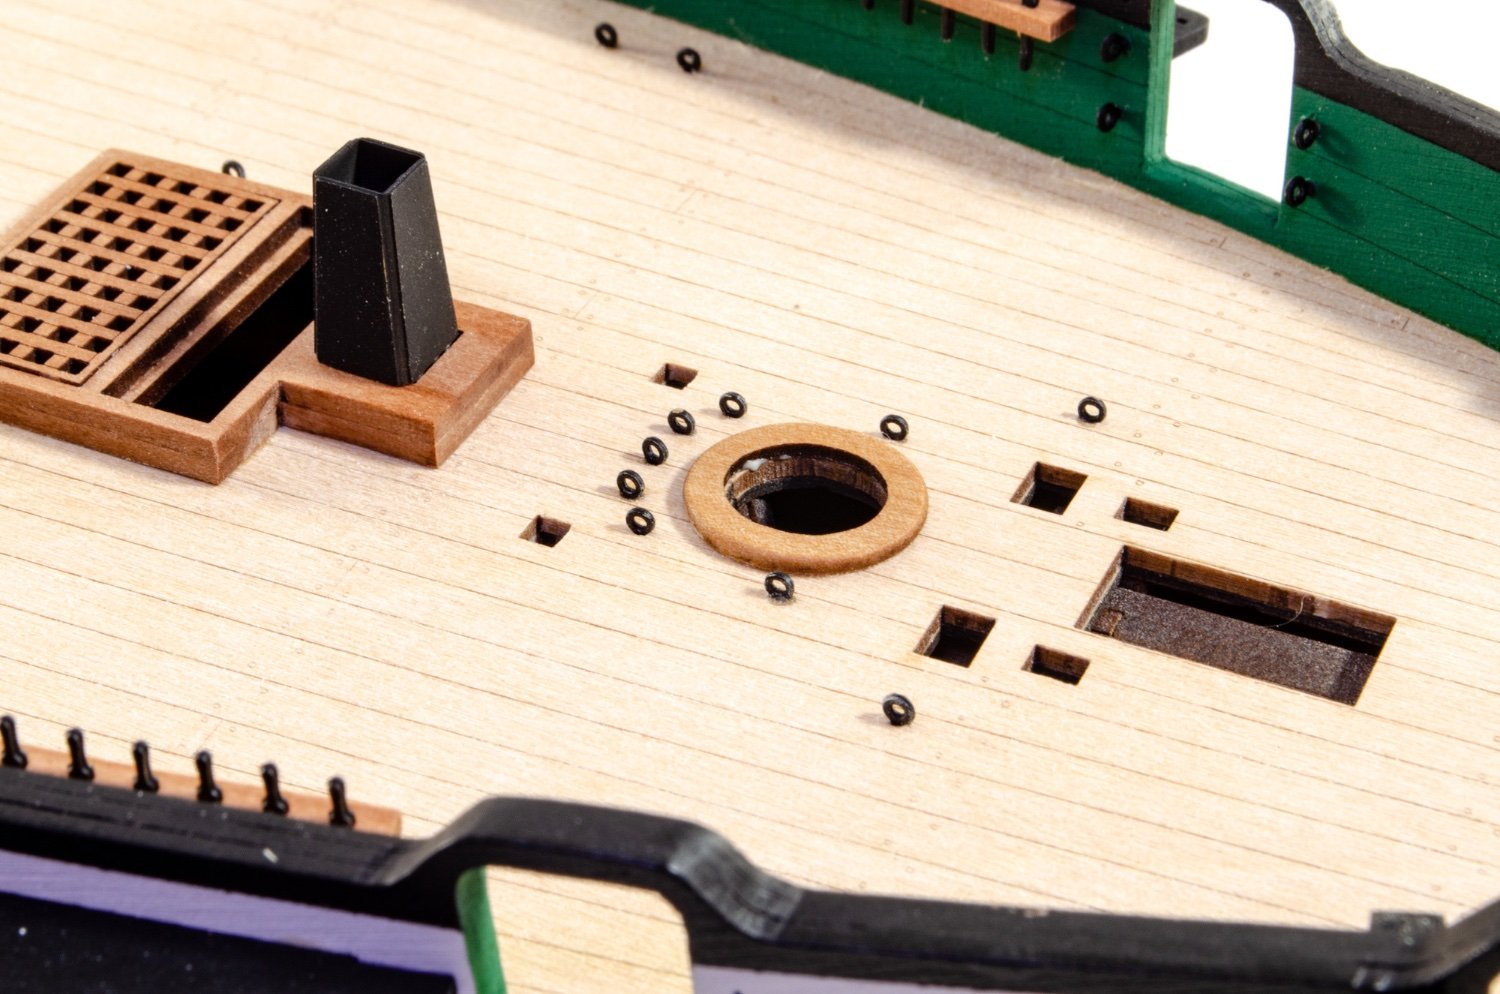
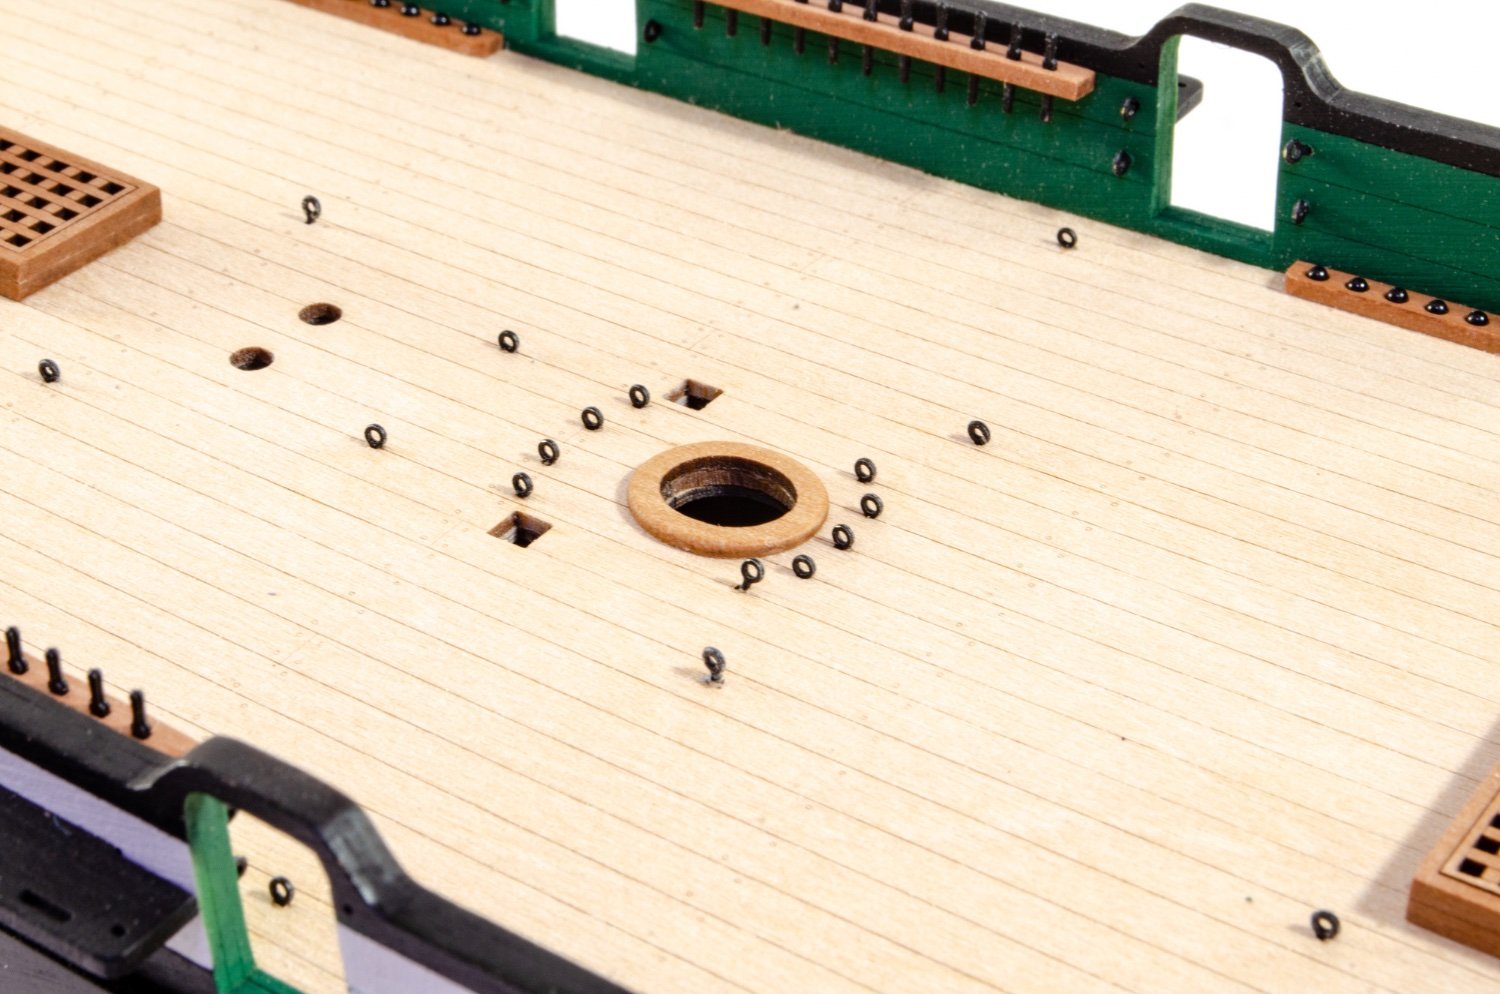
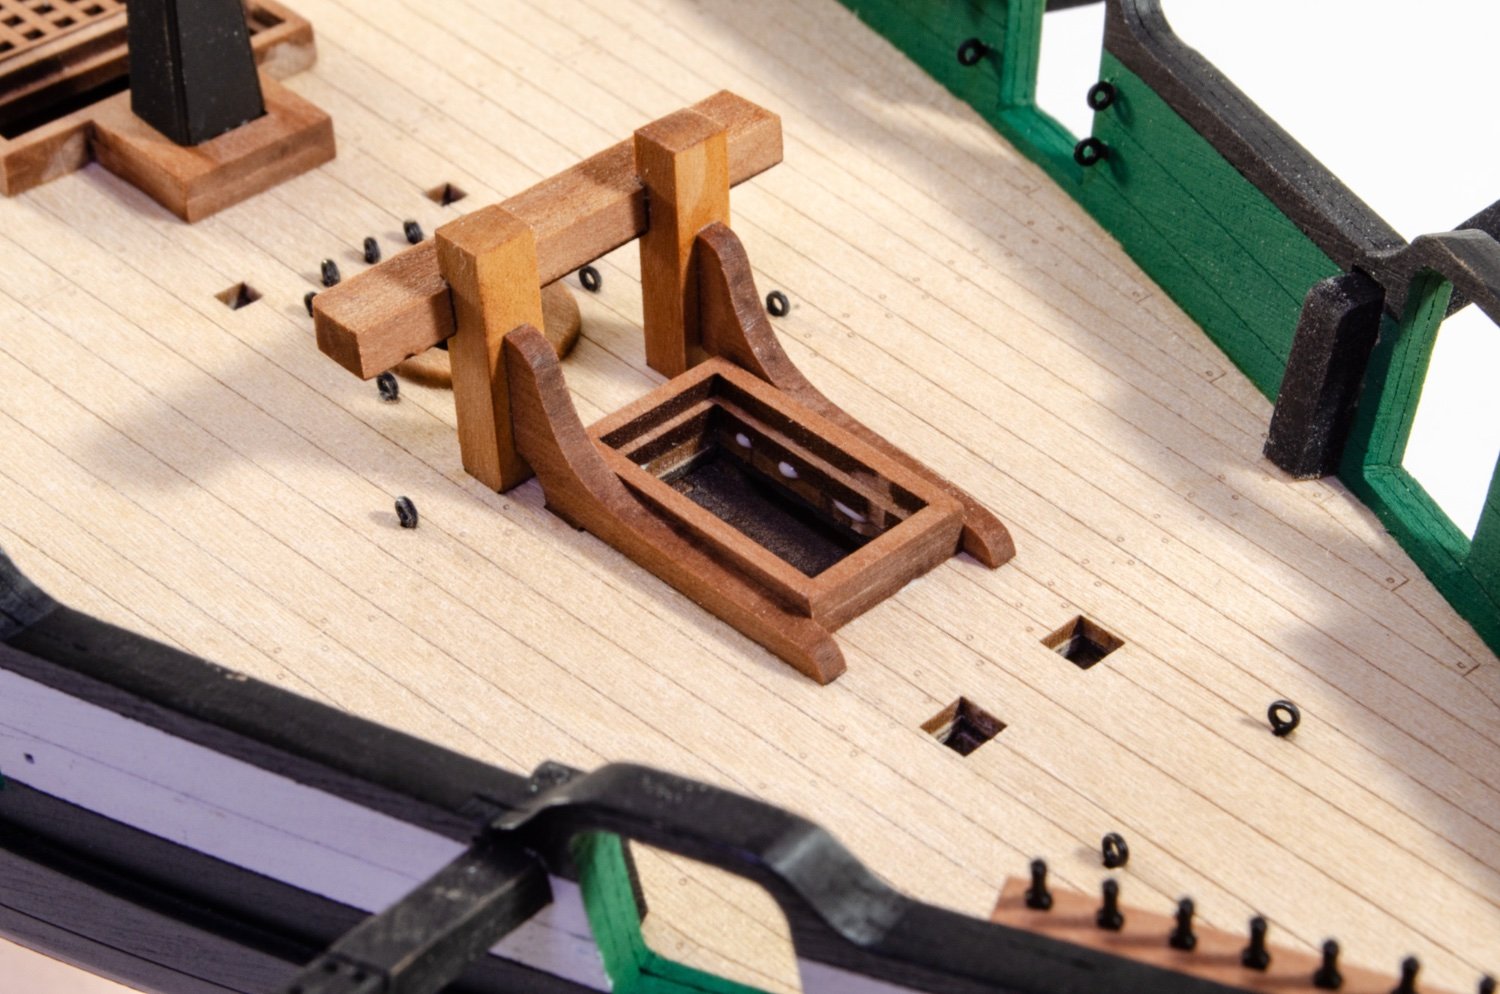
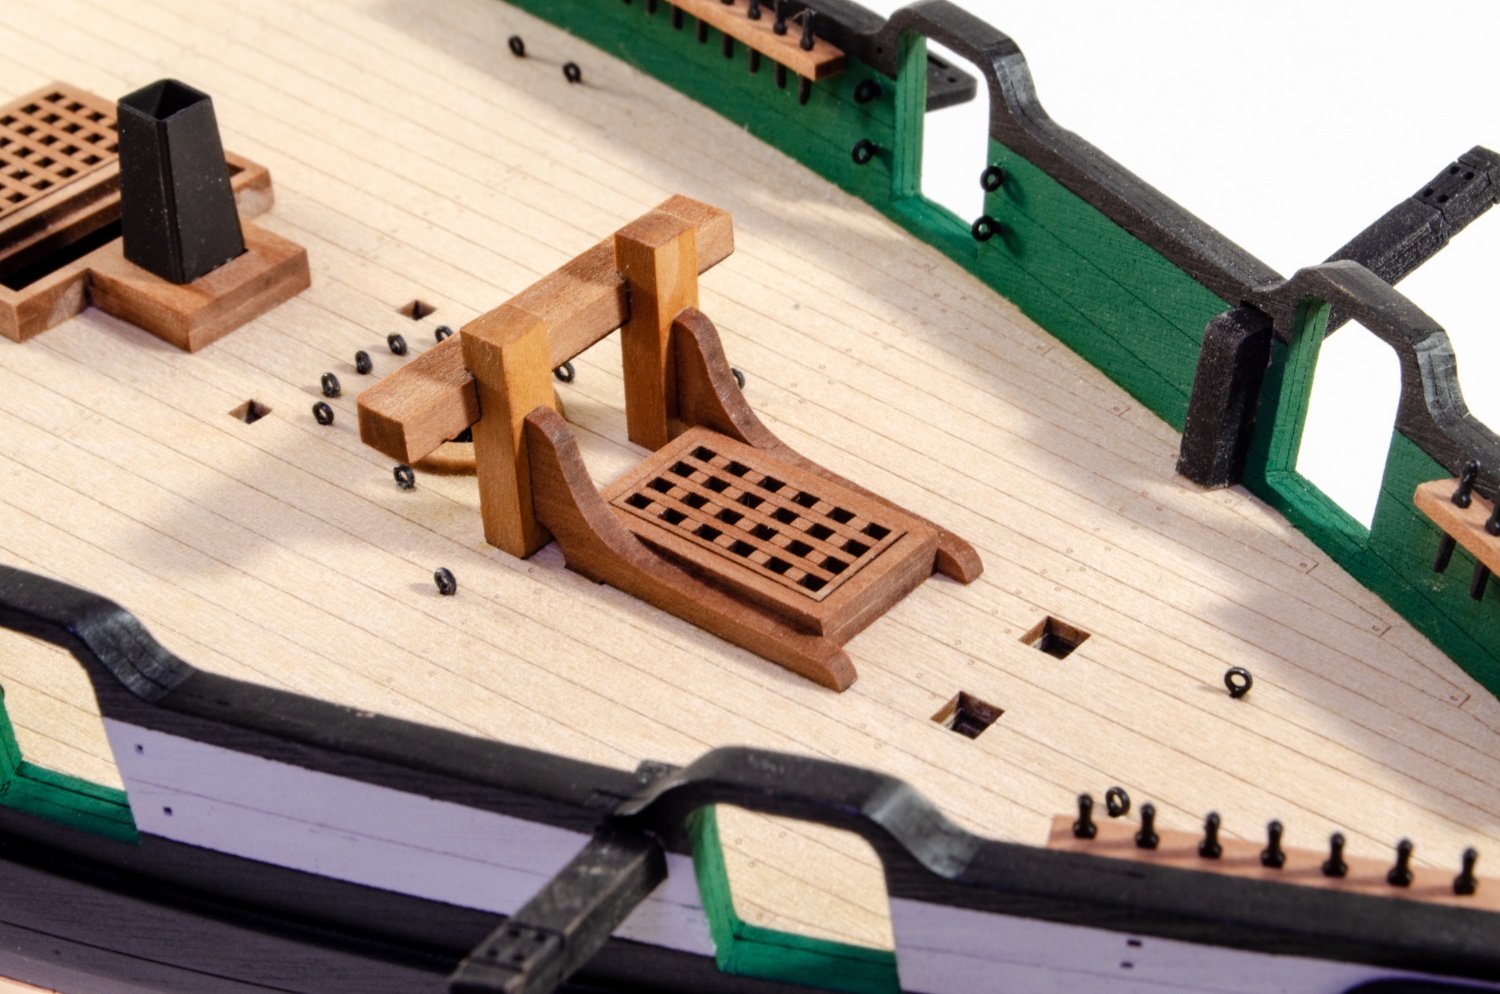
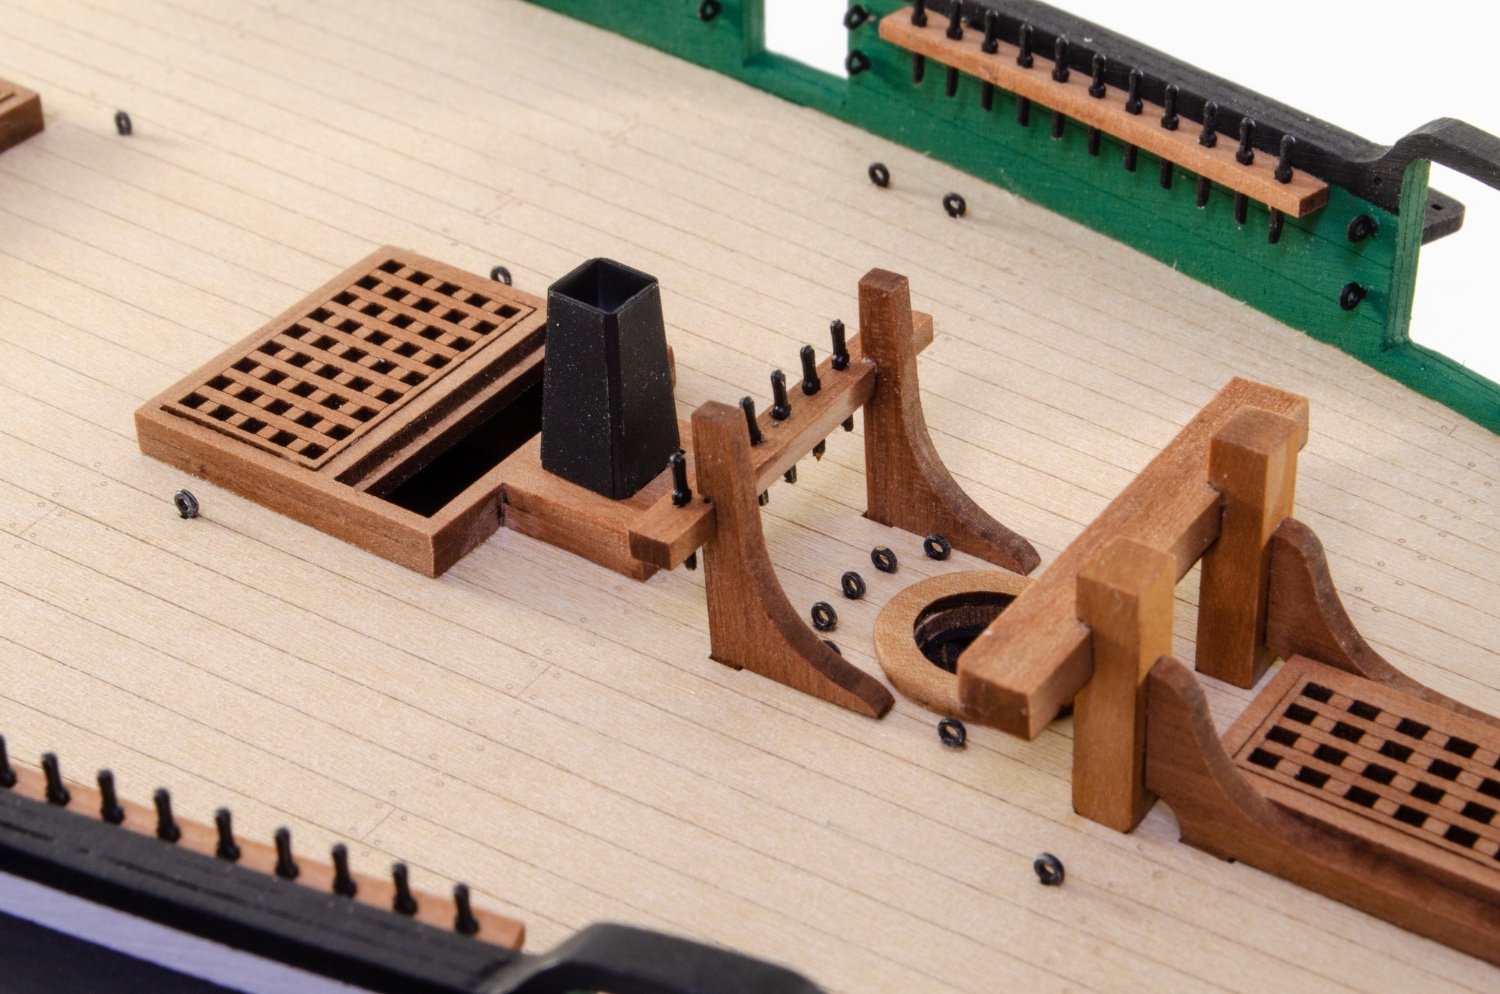
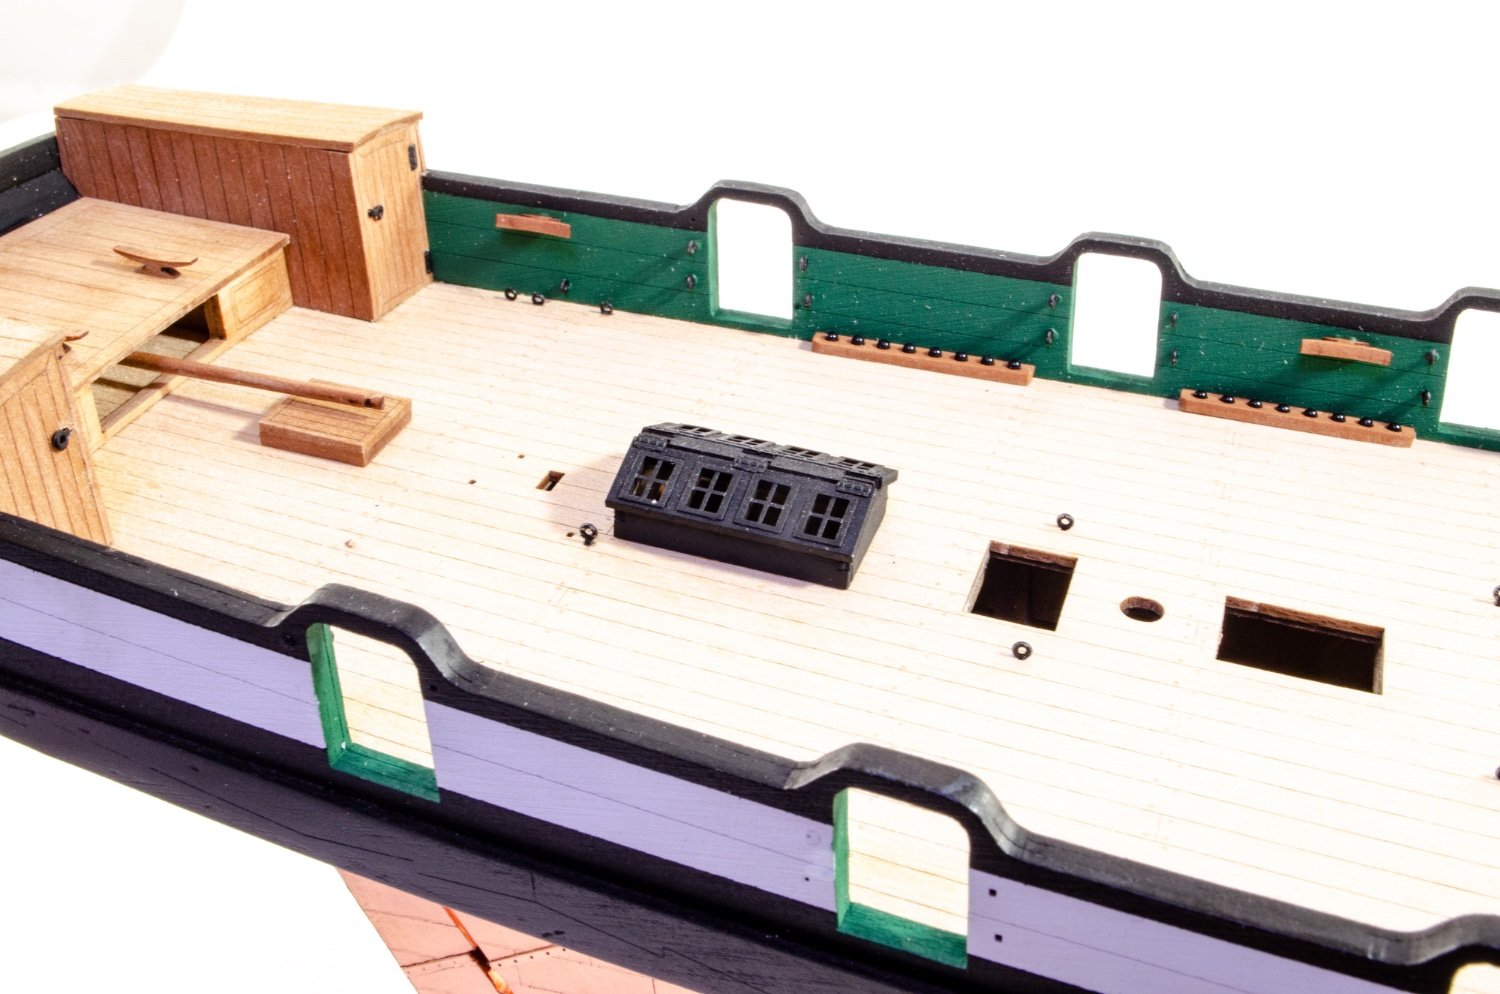
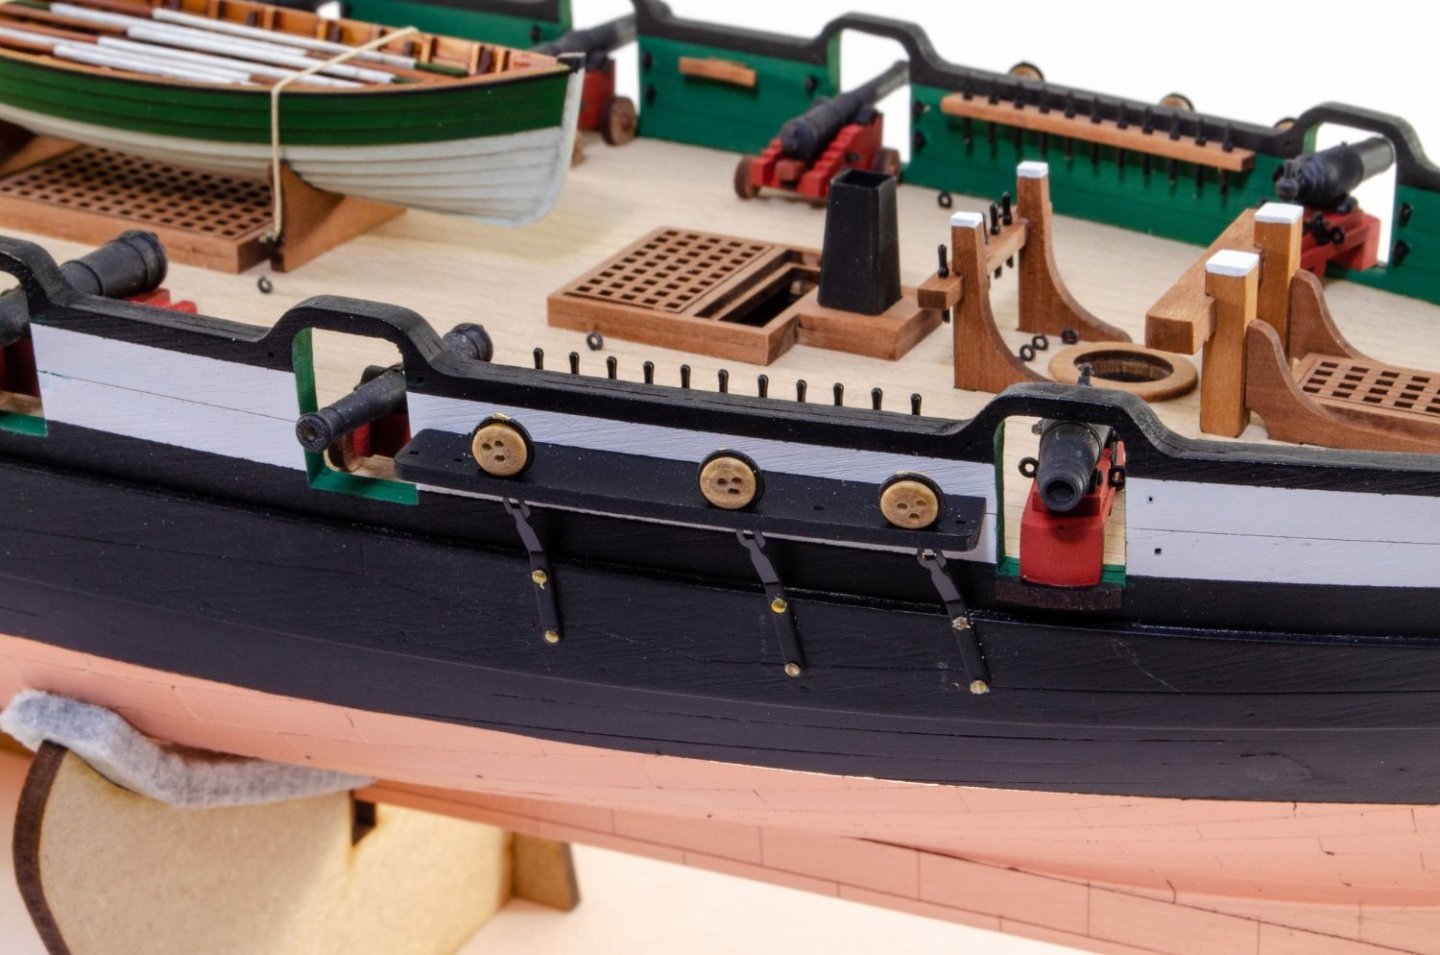
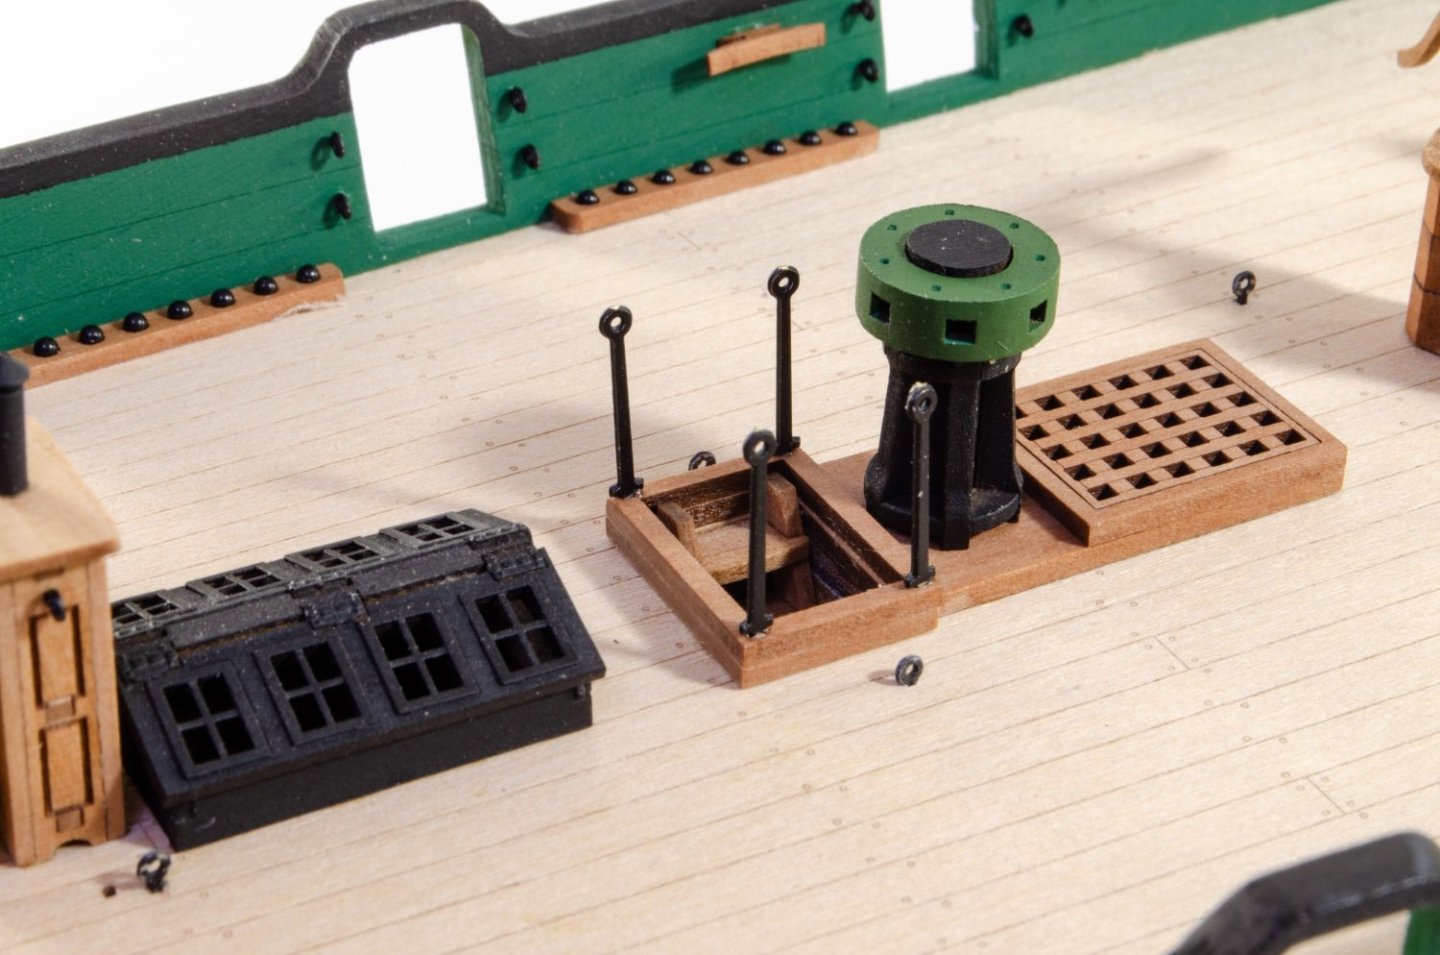
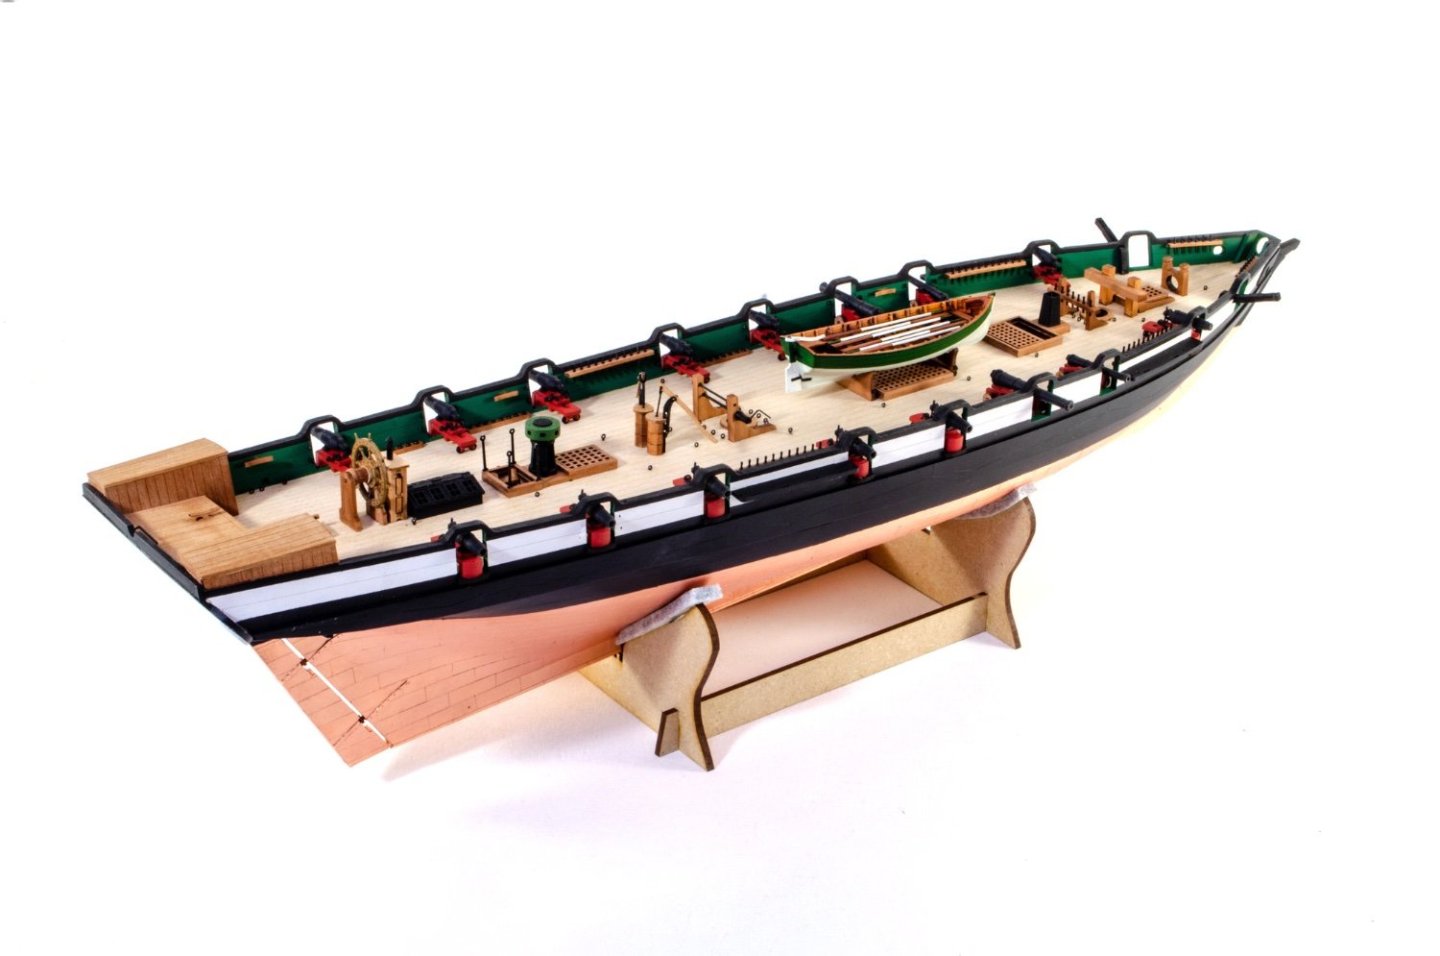
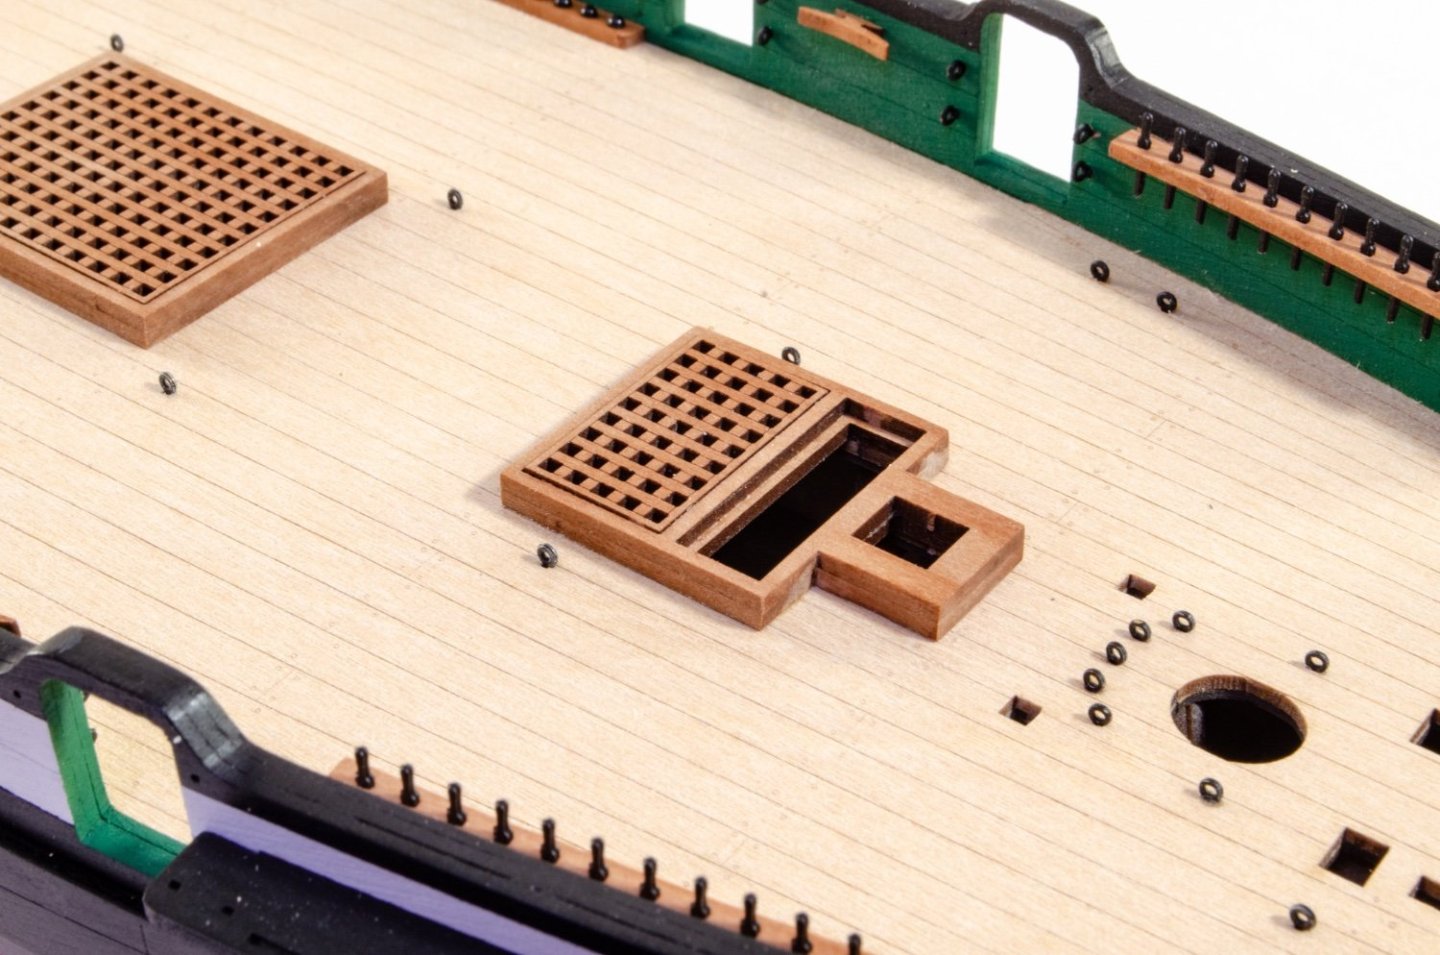
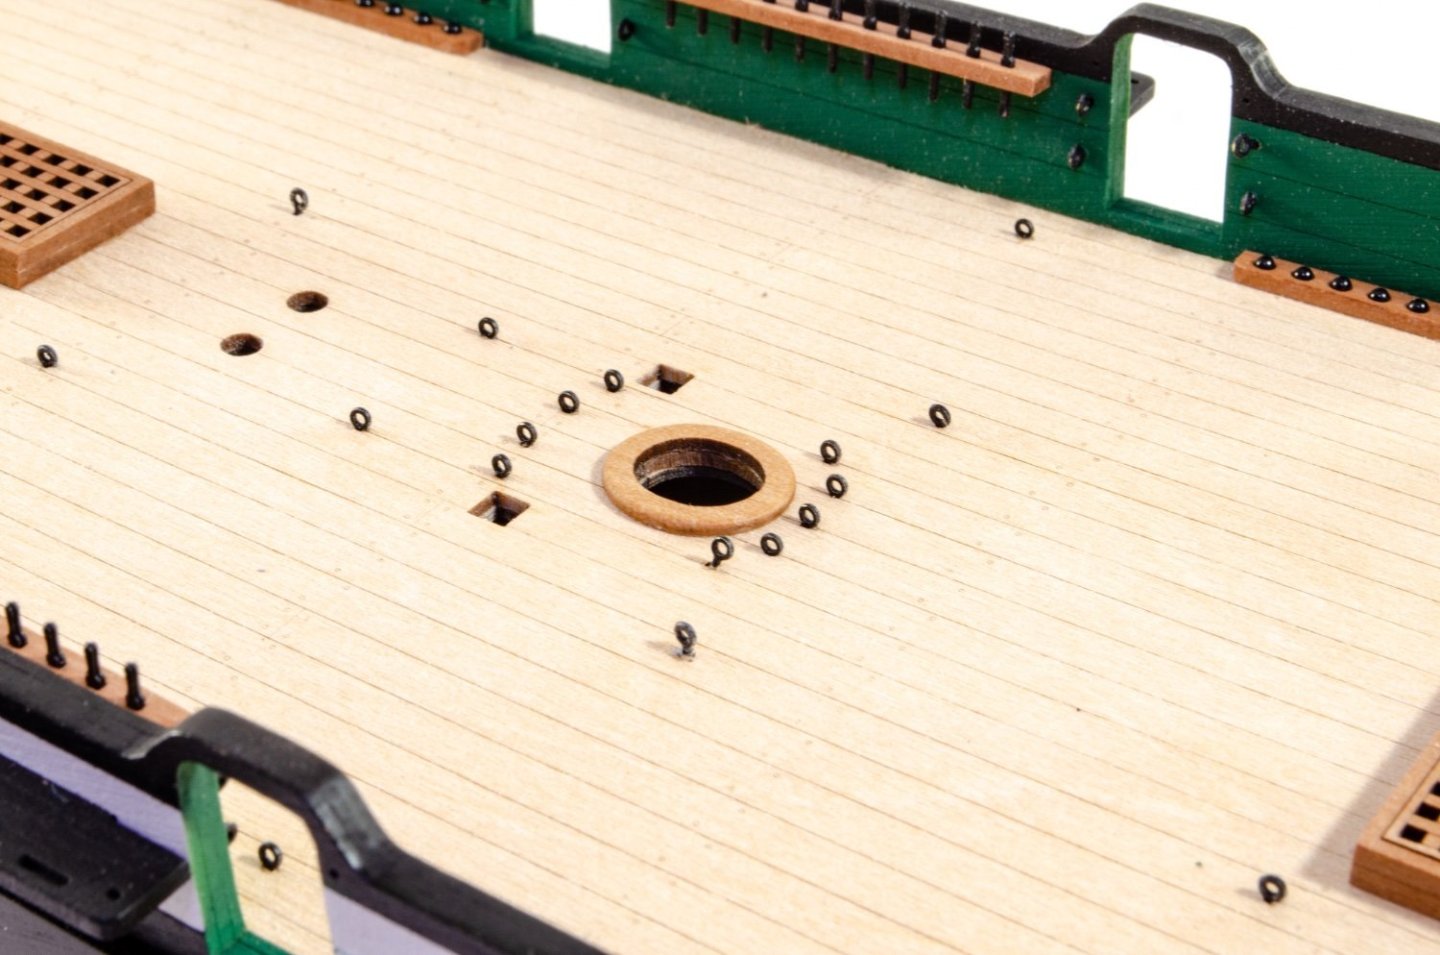
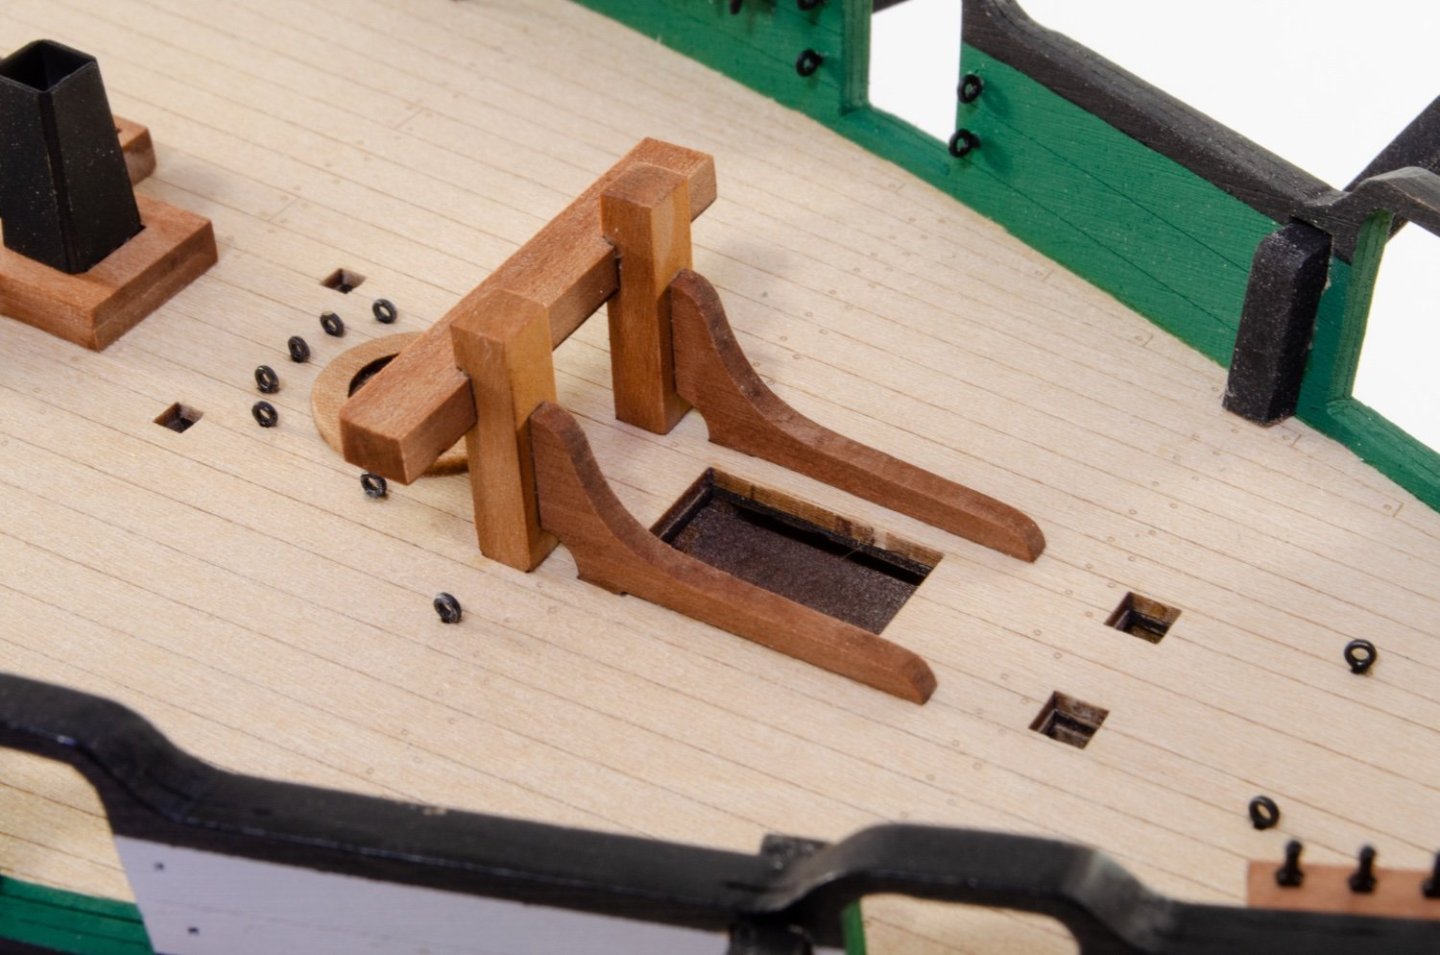
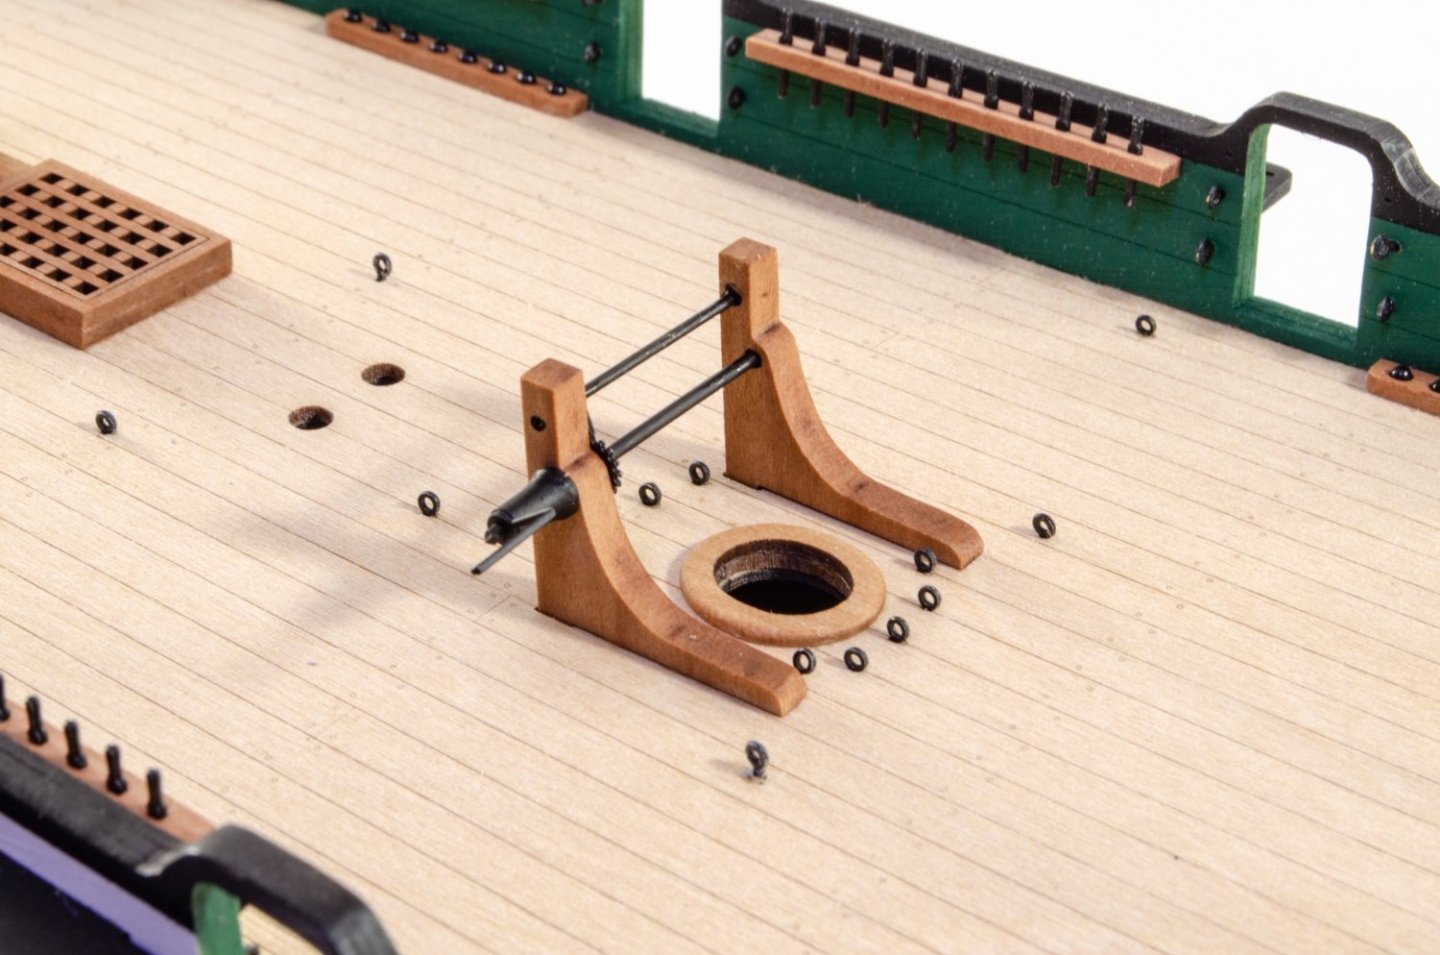
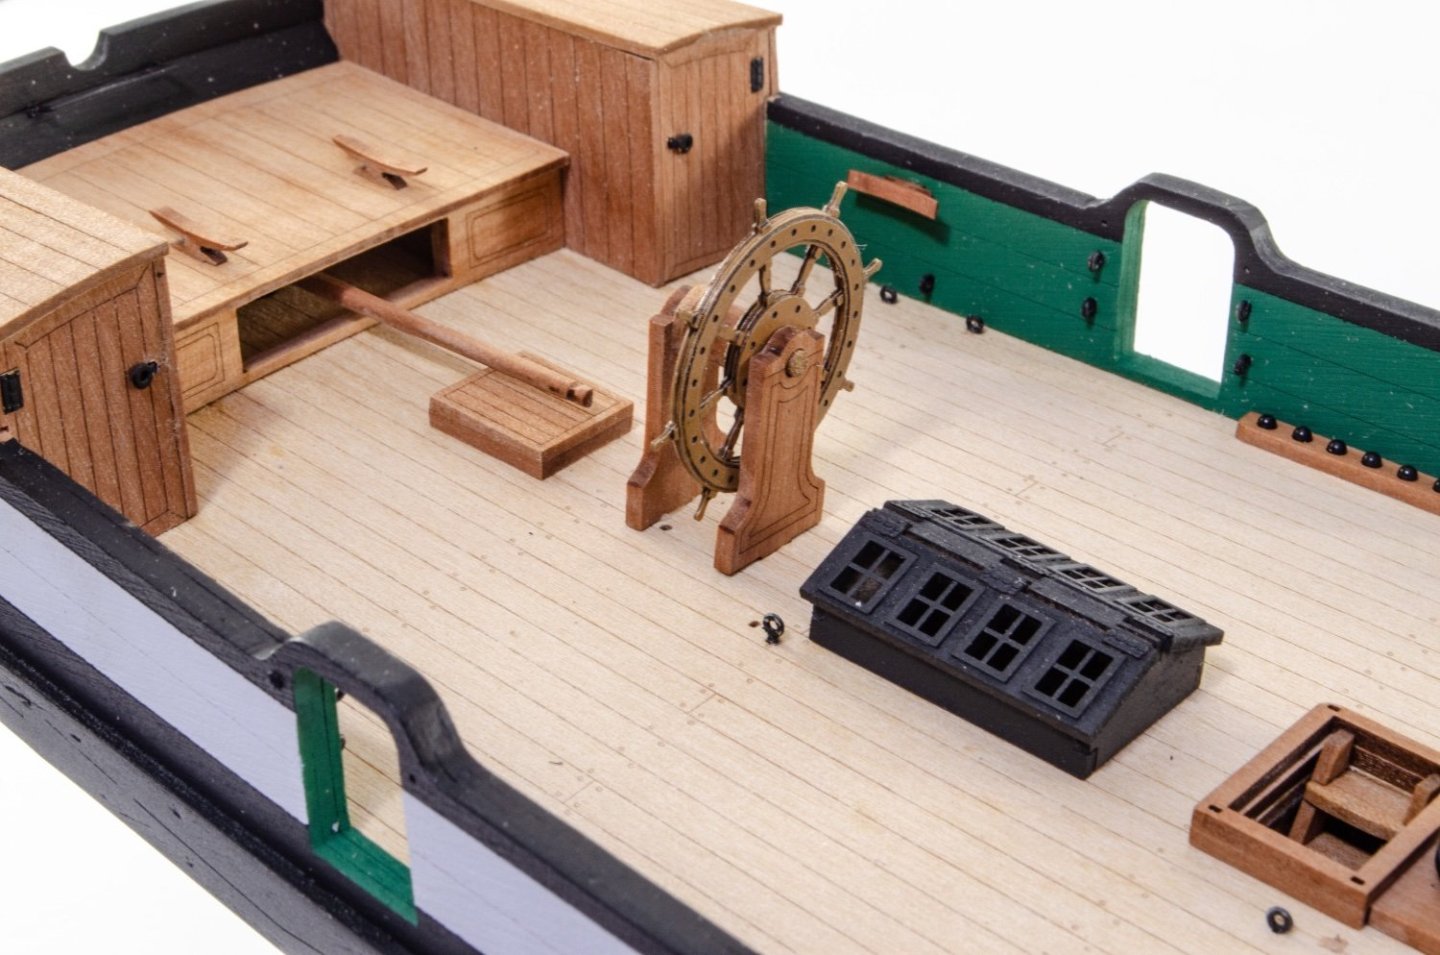
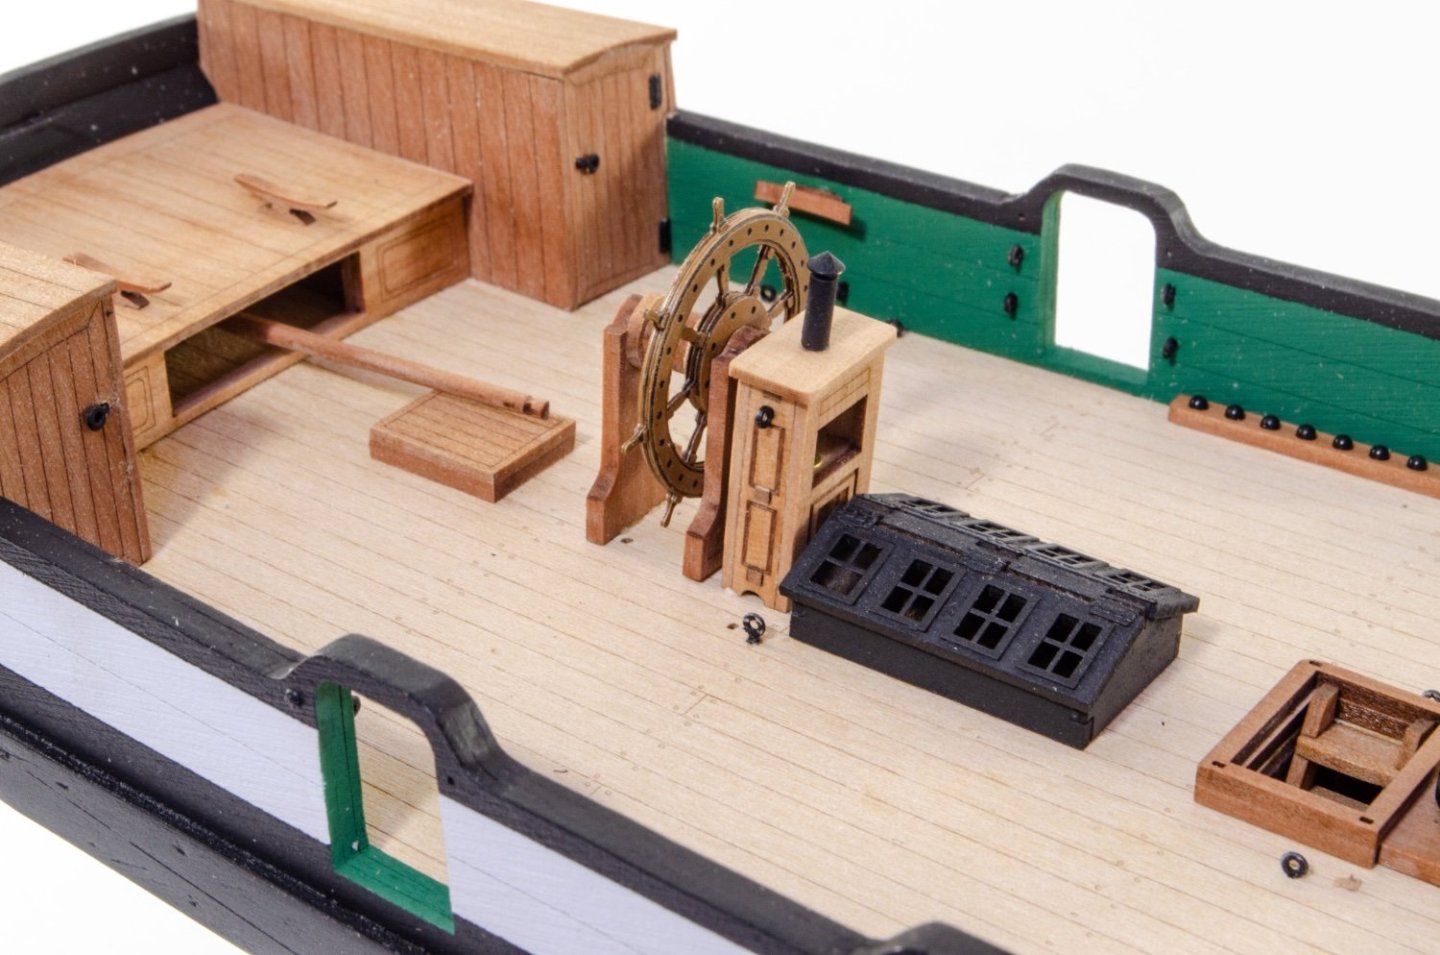
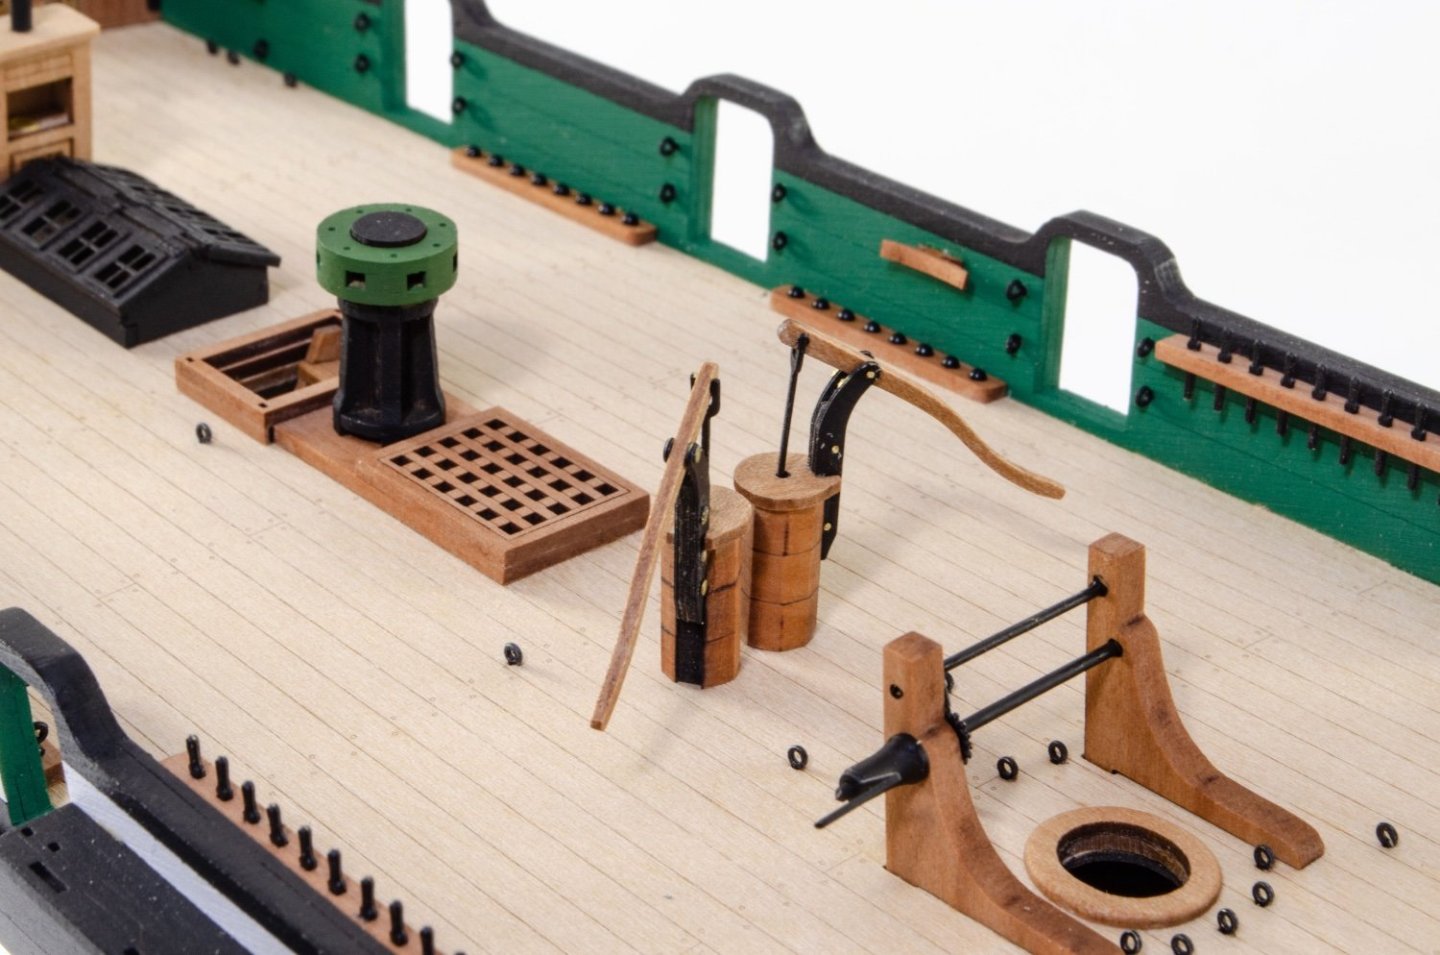
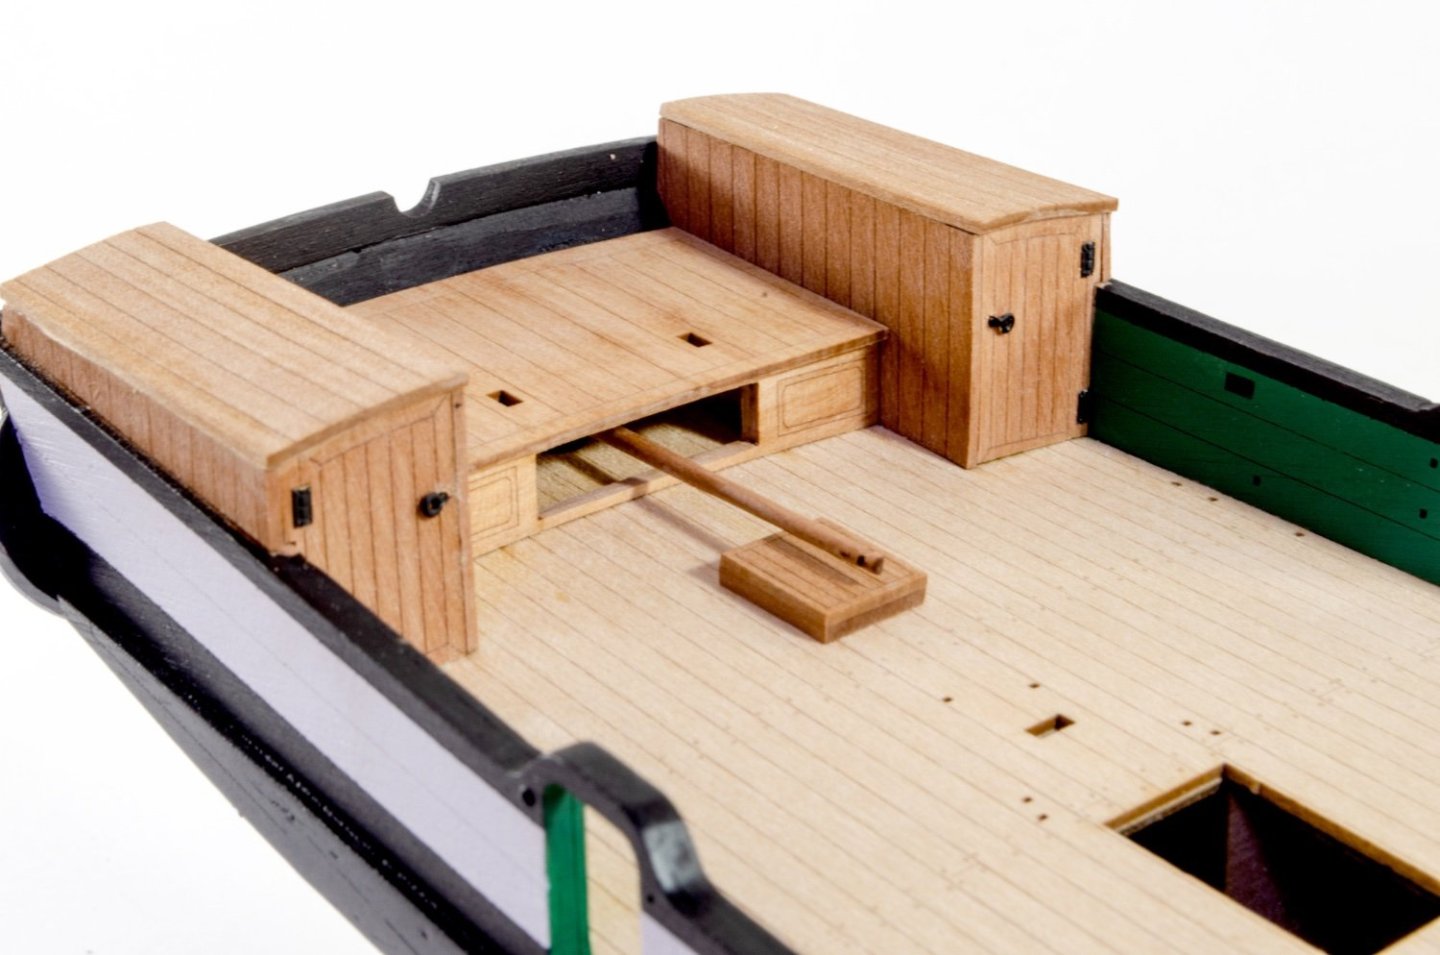
Continued. More hatches... And a small smoke stack. Mast bases now down before the deck gets too cluttered. And now some of the other bitts (pun intended 😋) Grecian has a nicely 3d printed boat and here's the cradle which is now permanently glued in situ. The wheel is in, but the rudder tiller and wheel will be rigged for the next update in a couple of days. No chain pumps on Grecian Hand pumps are now fitted. ...more in a moment.


- 80 replies
-
- 20
-
-
-
- Grecian
- Vanguard Models
- (and 3 more)
-
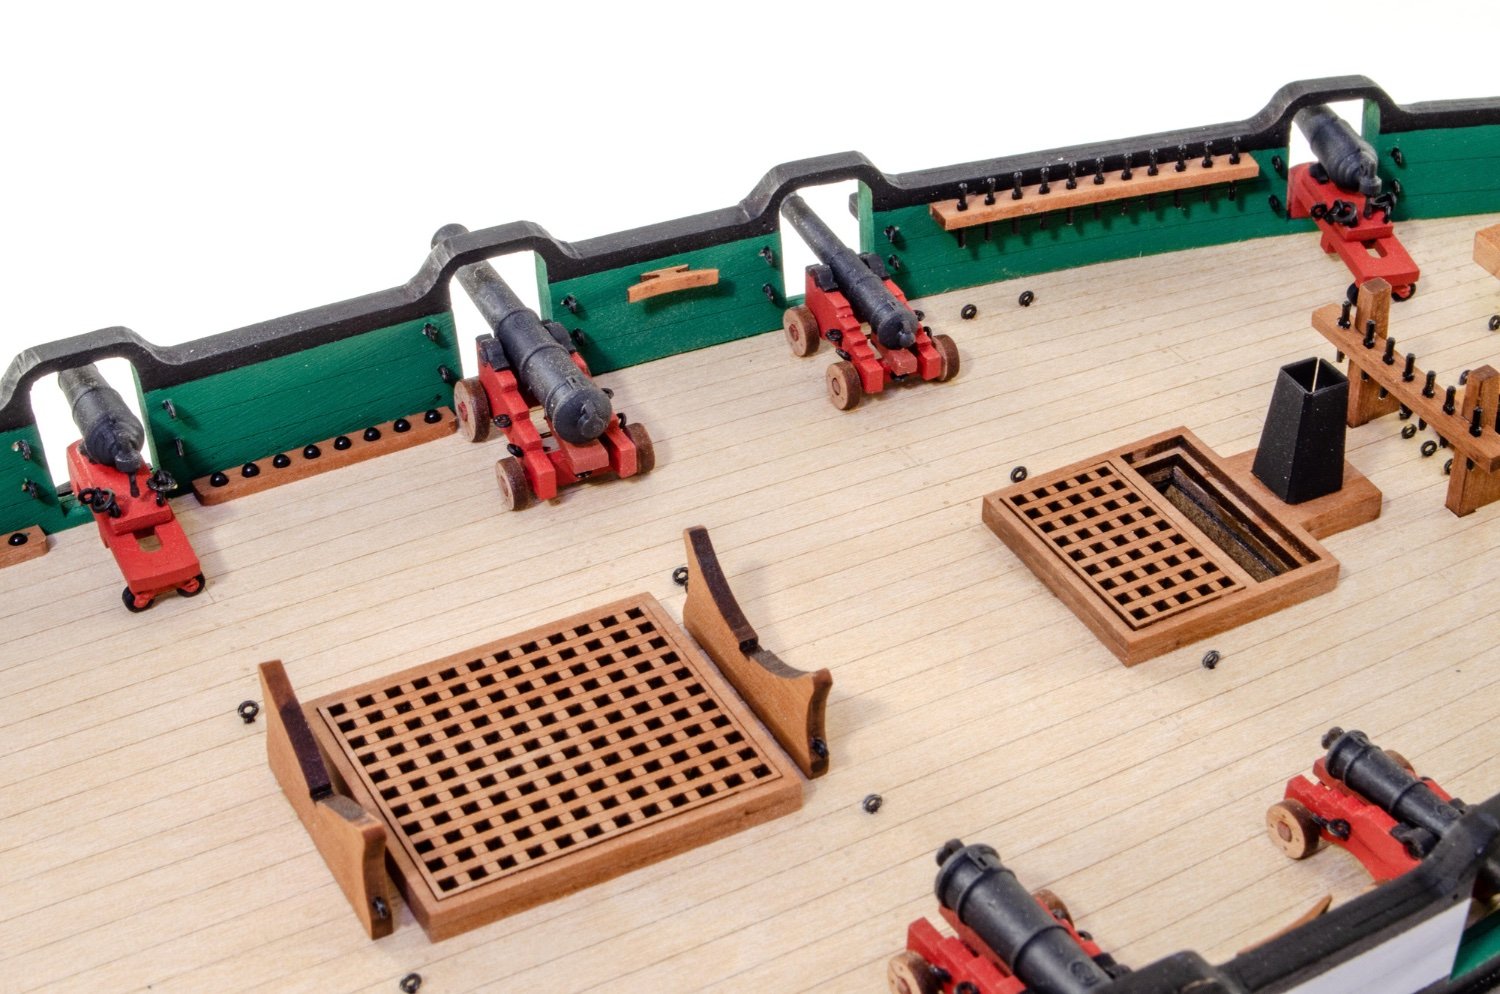
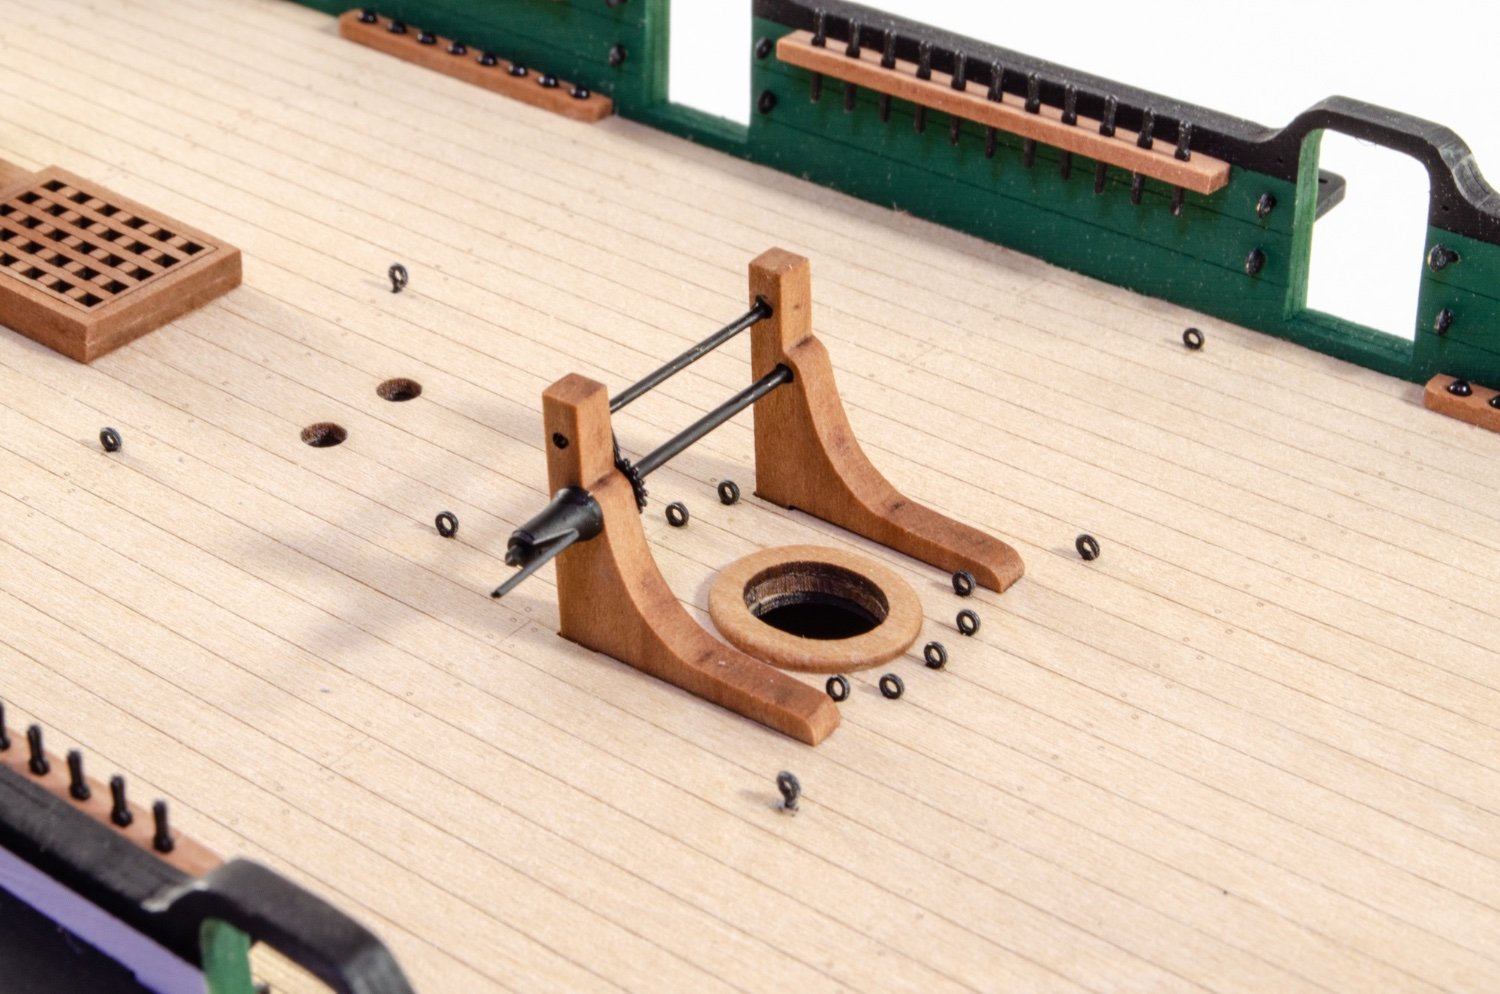
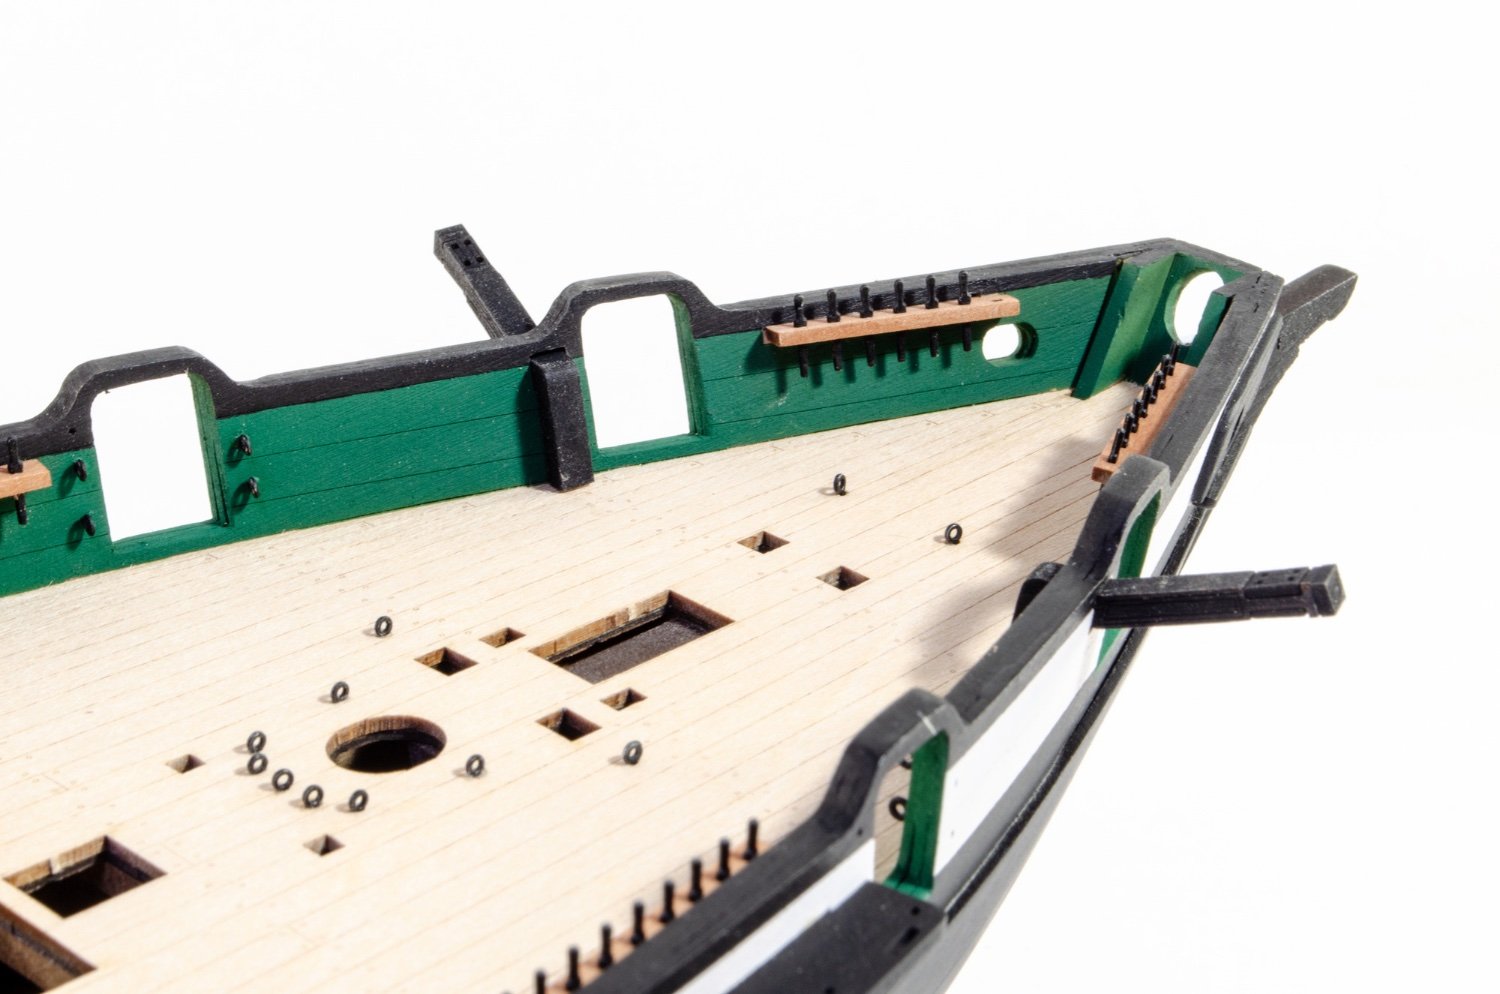
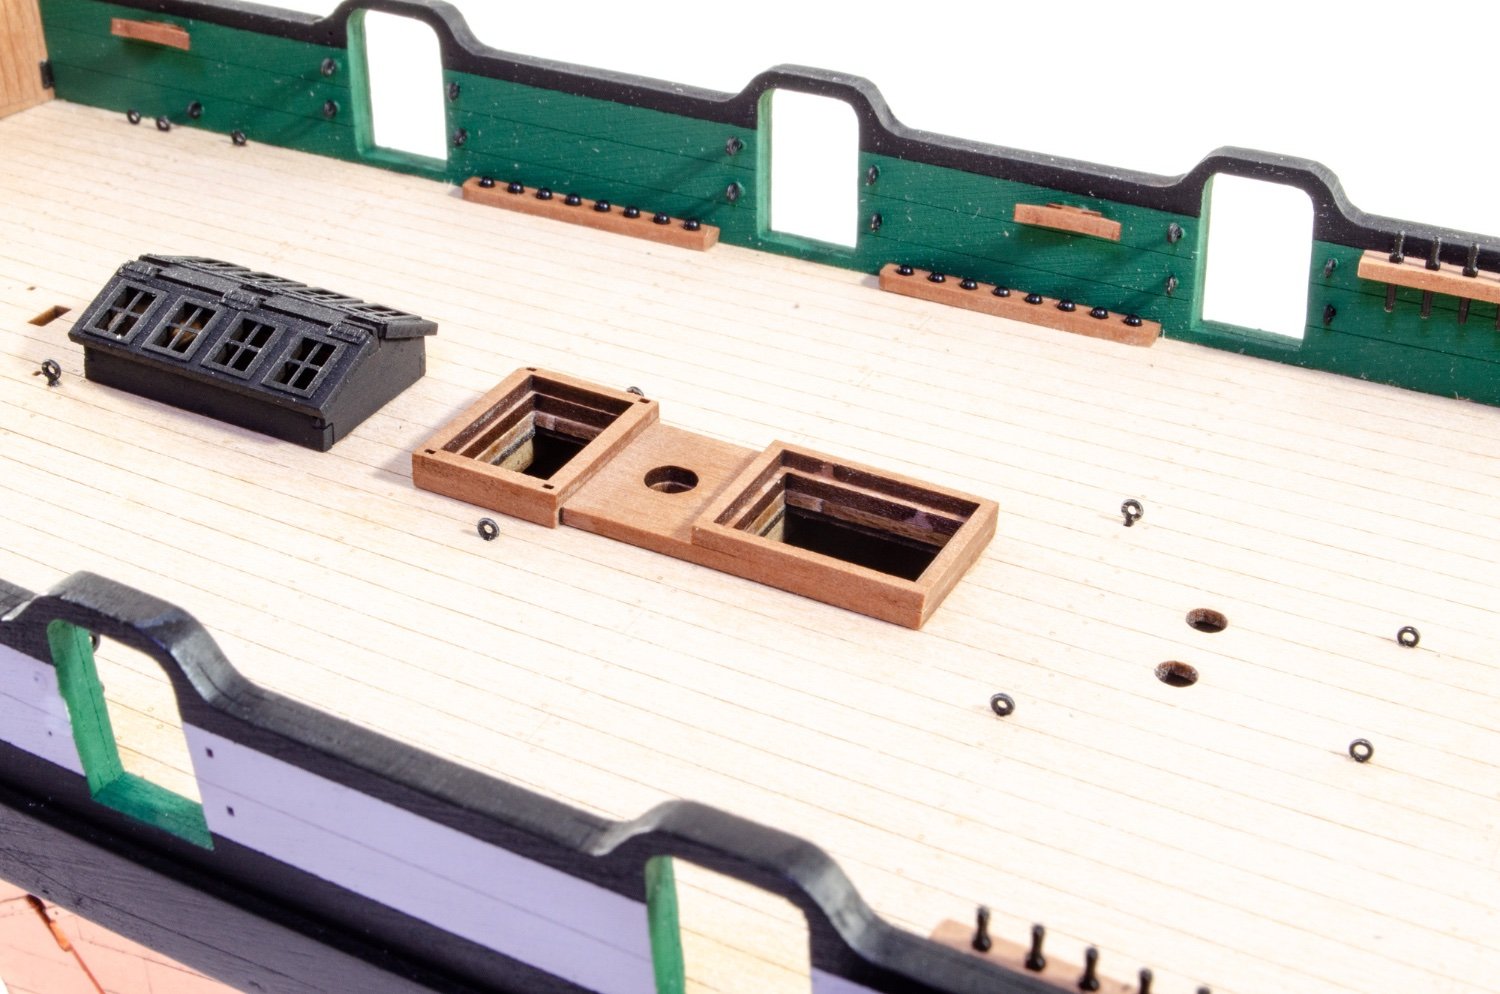
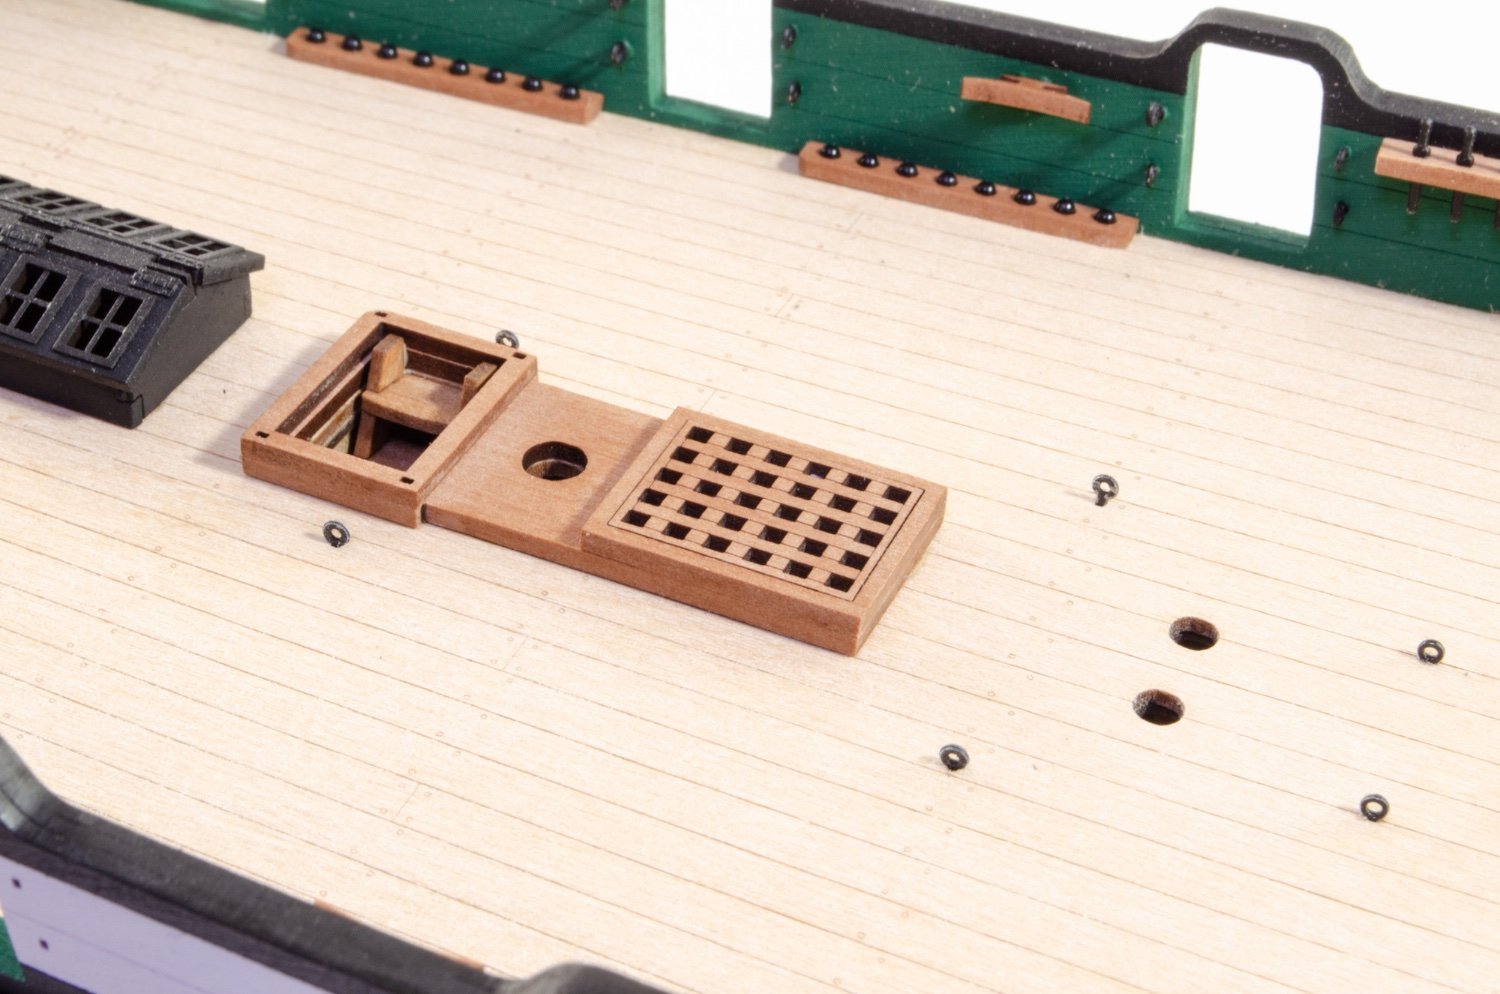
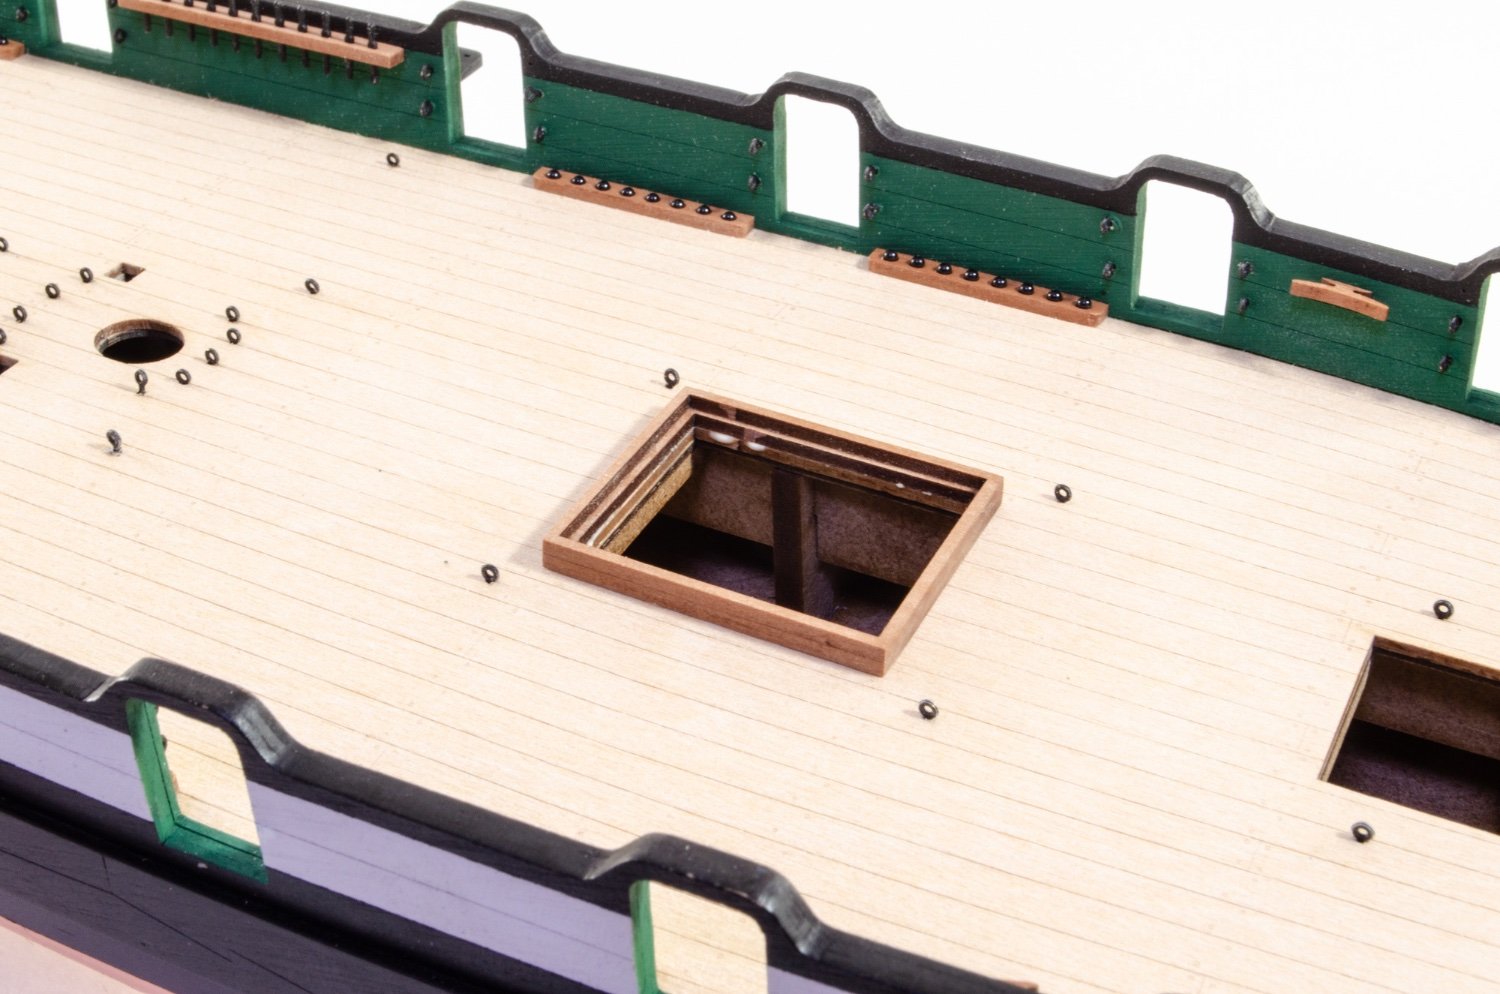
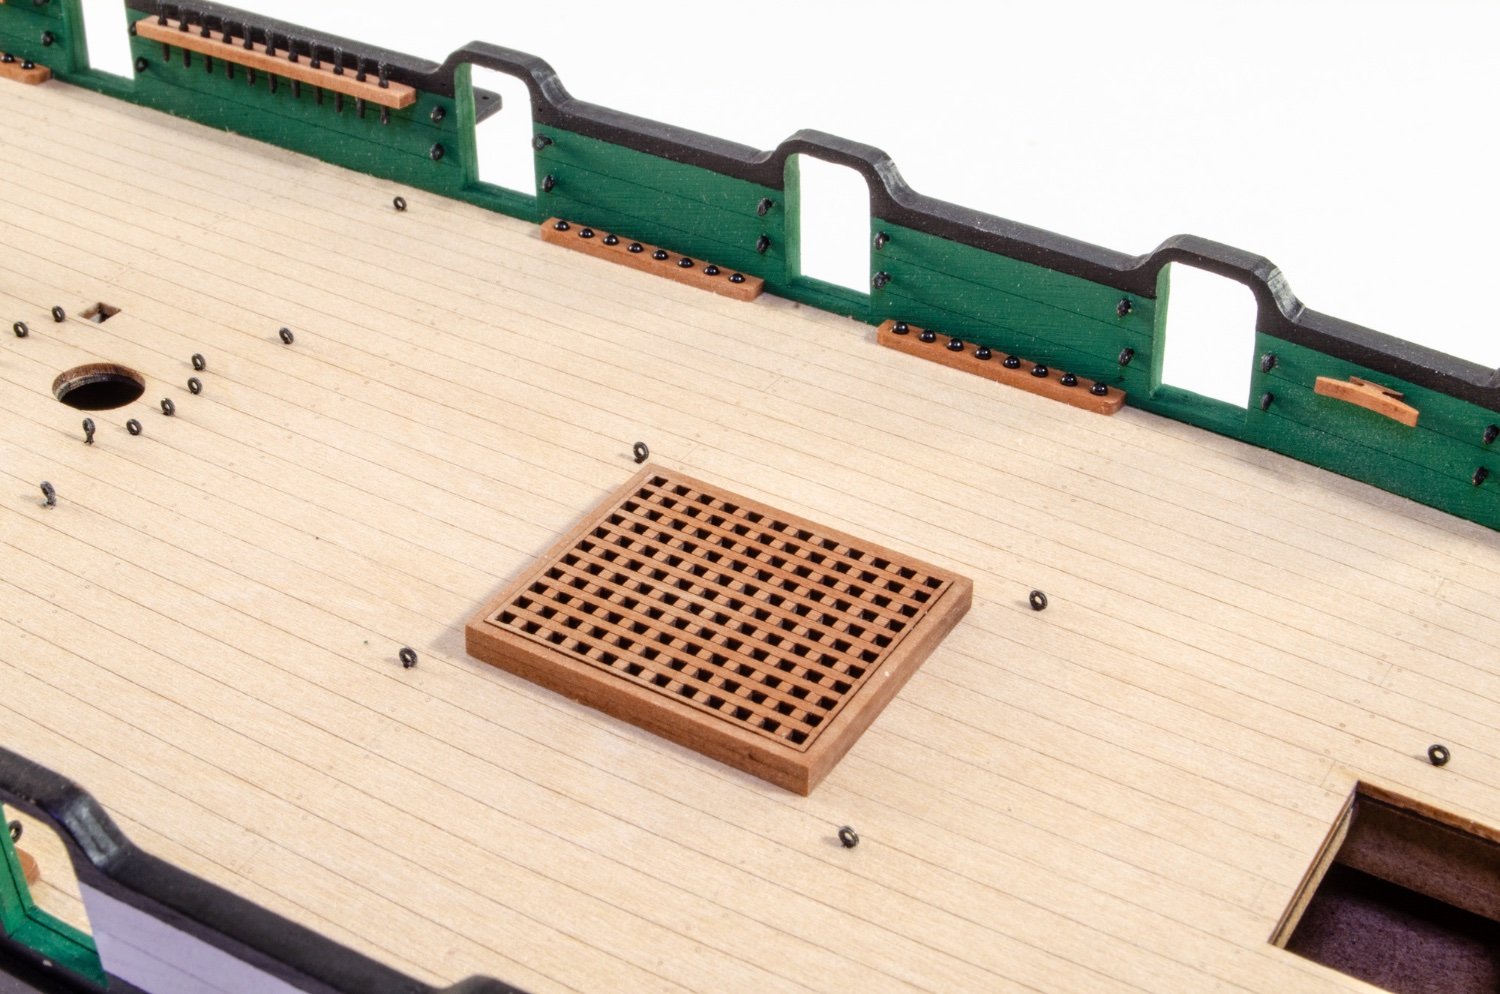
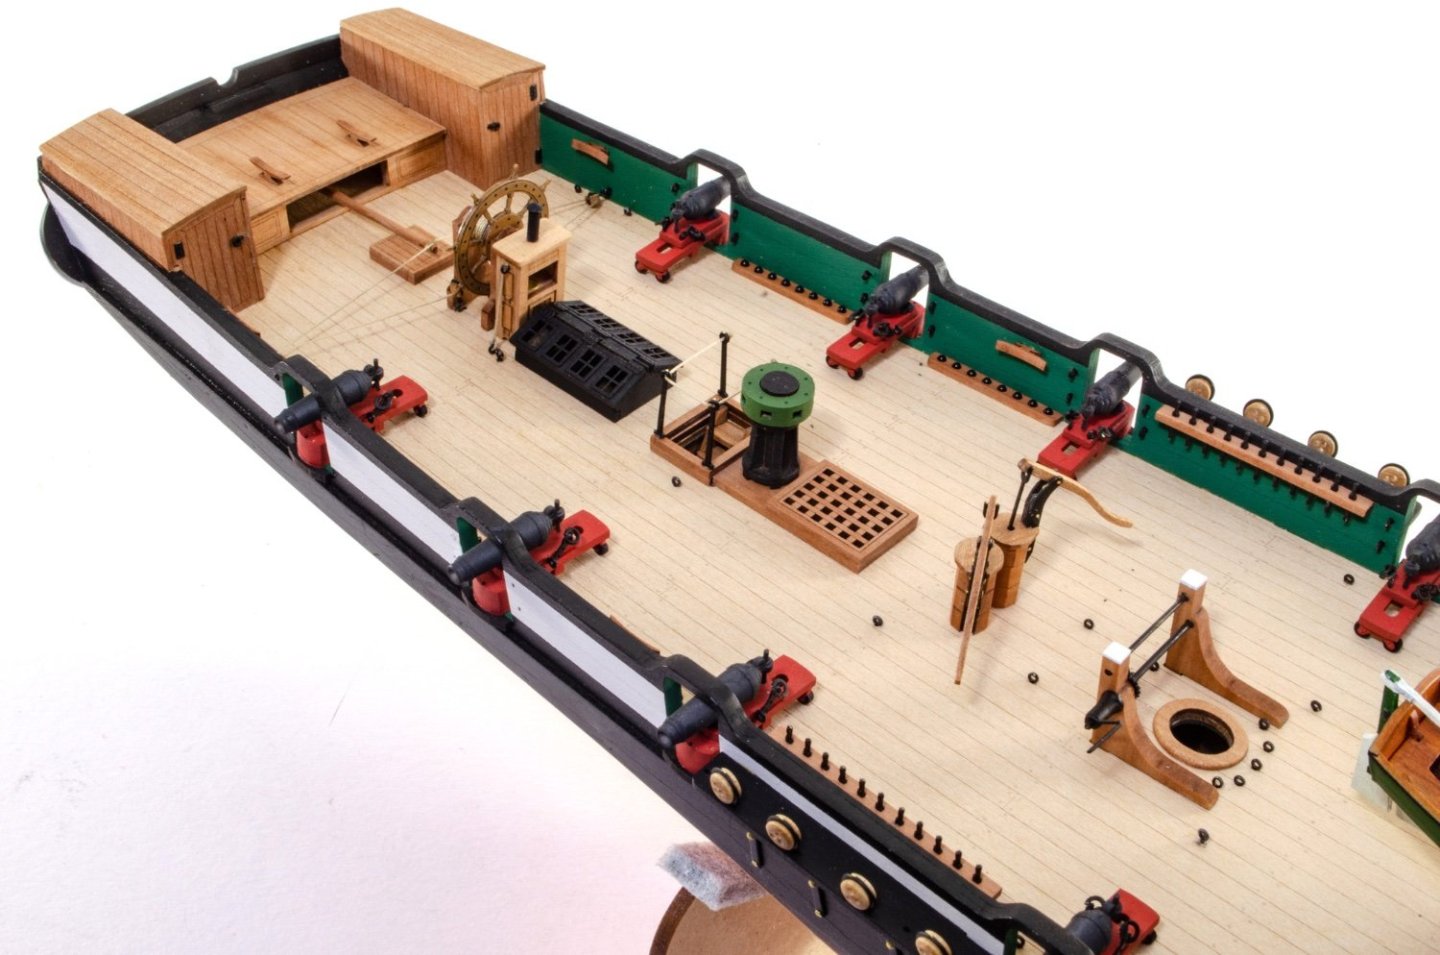
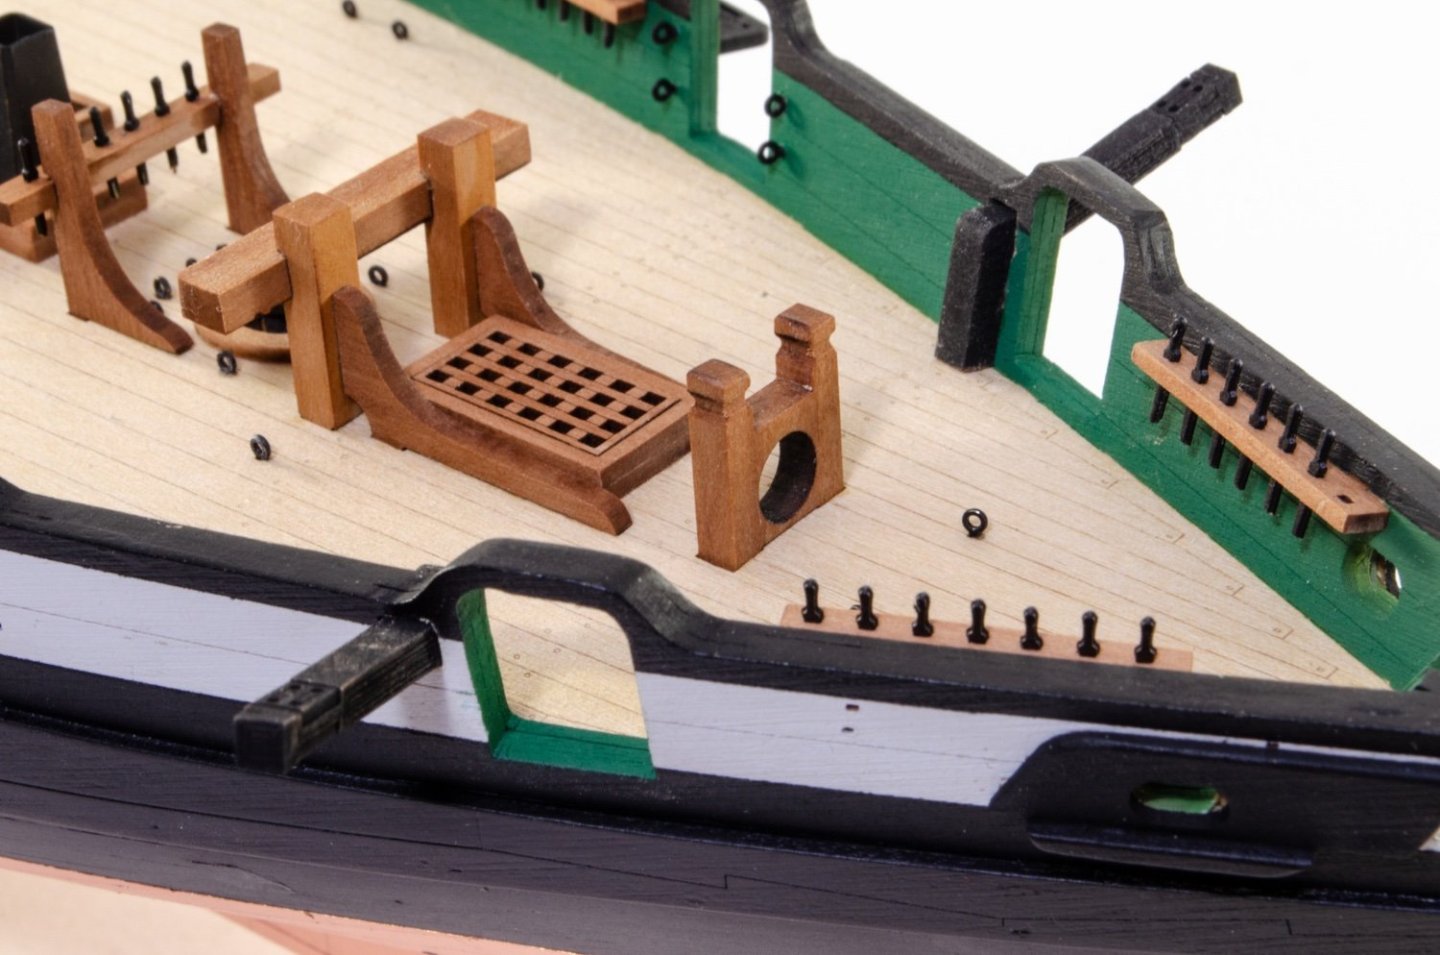
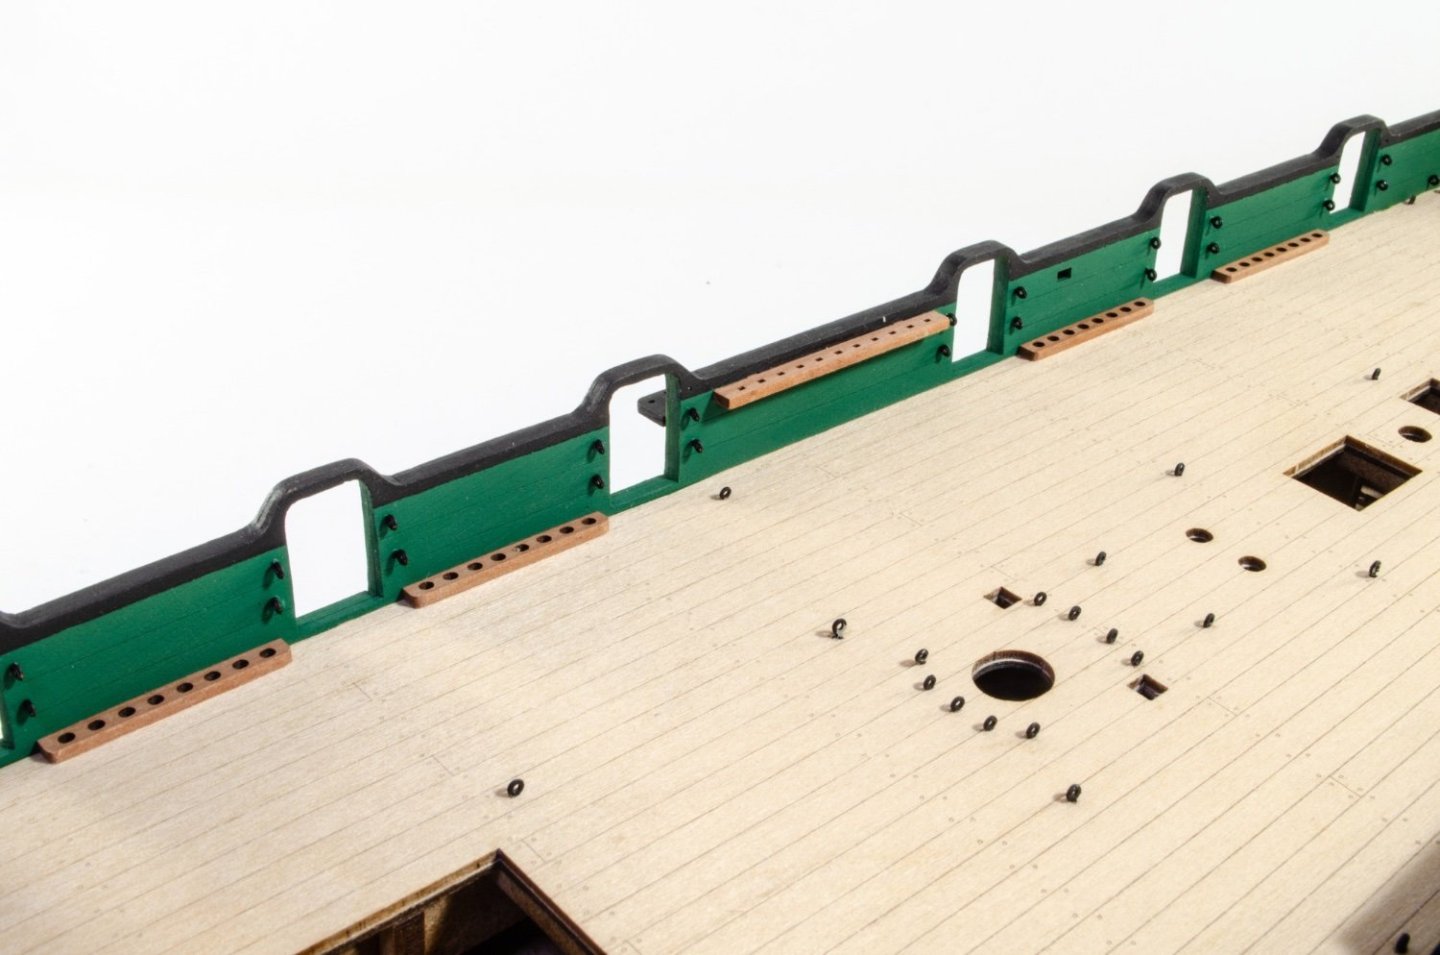
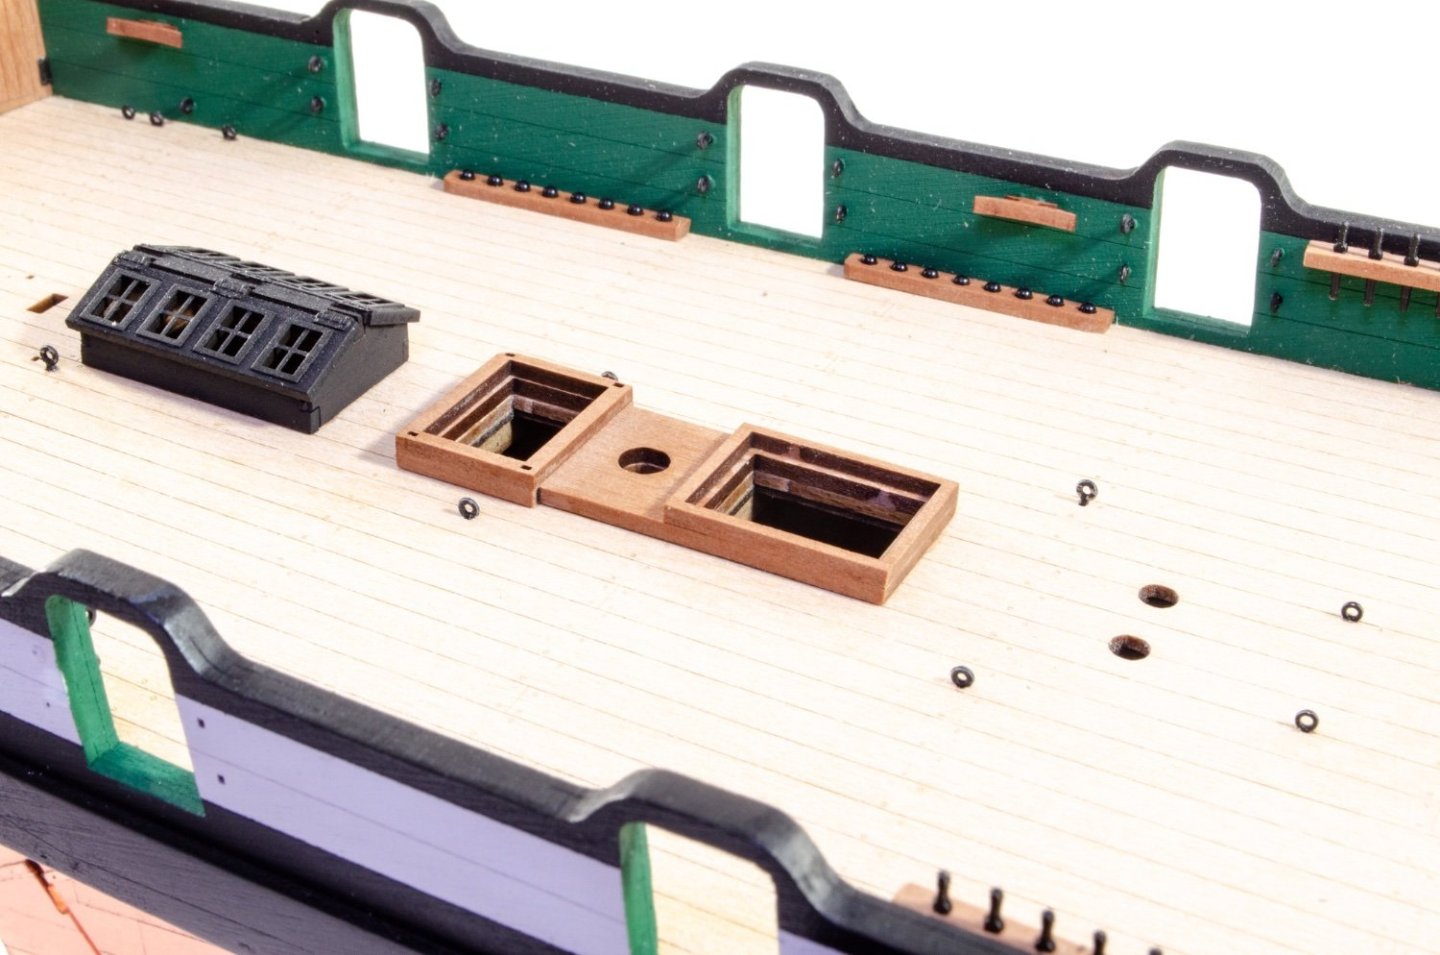
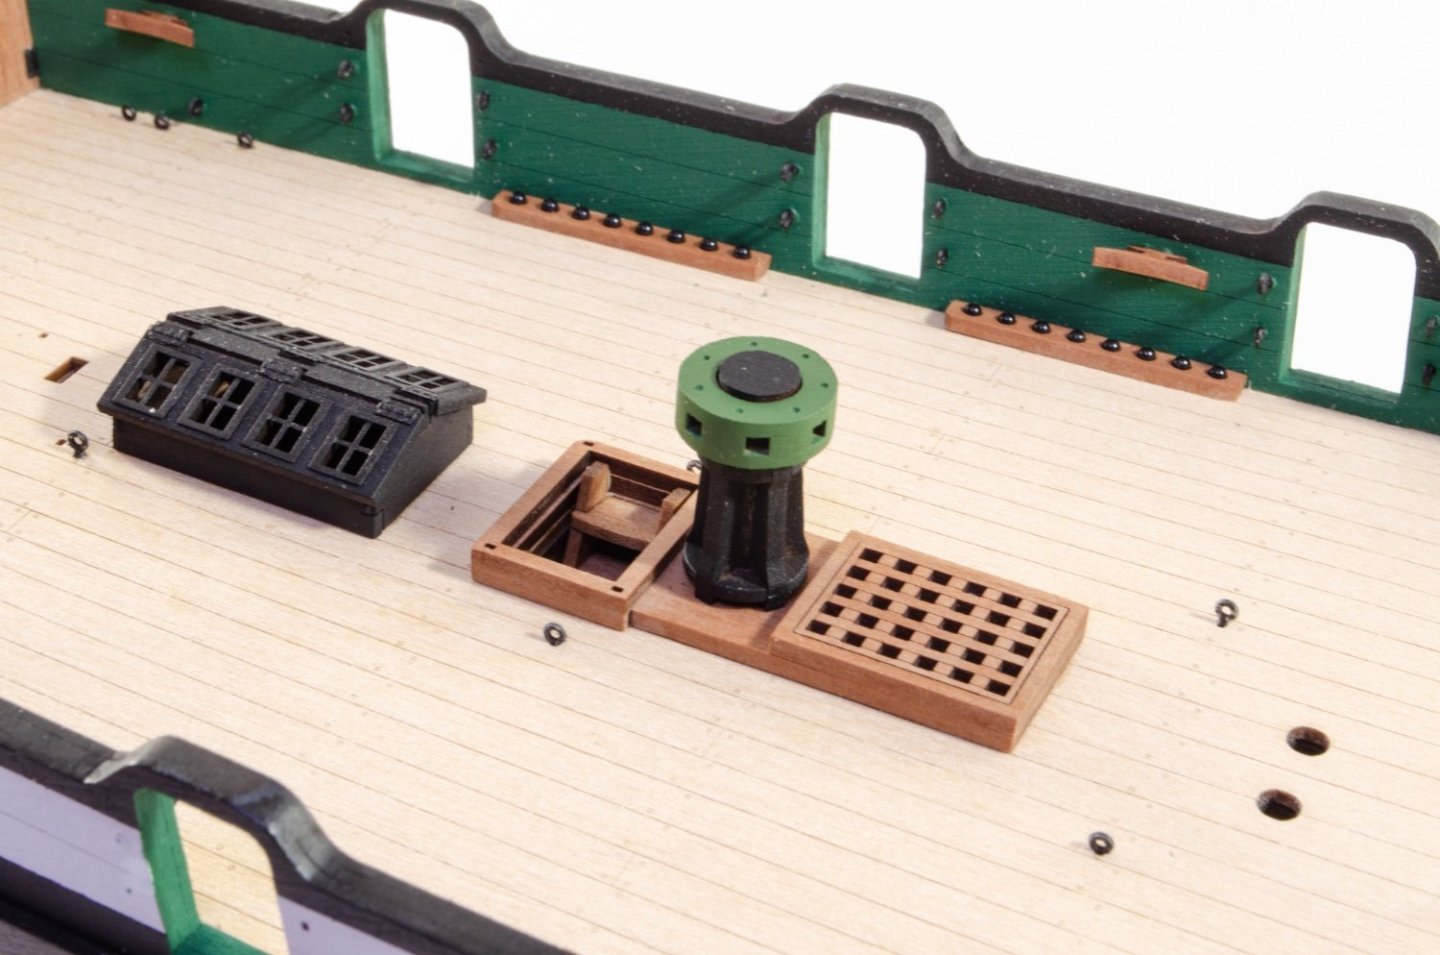
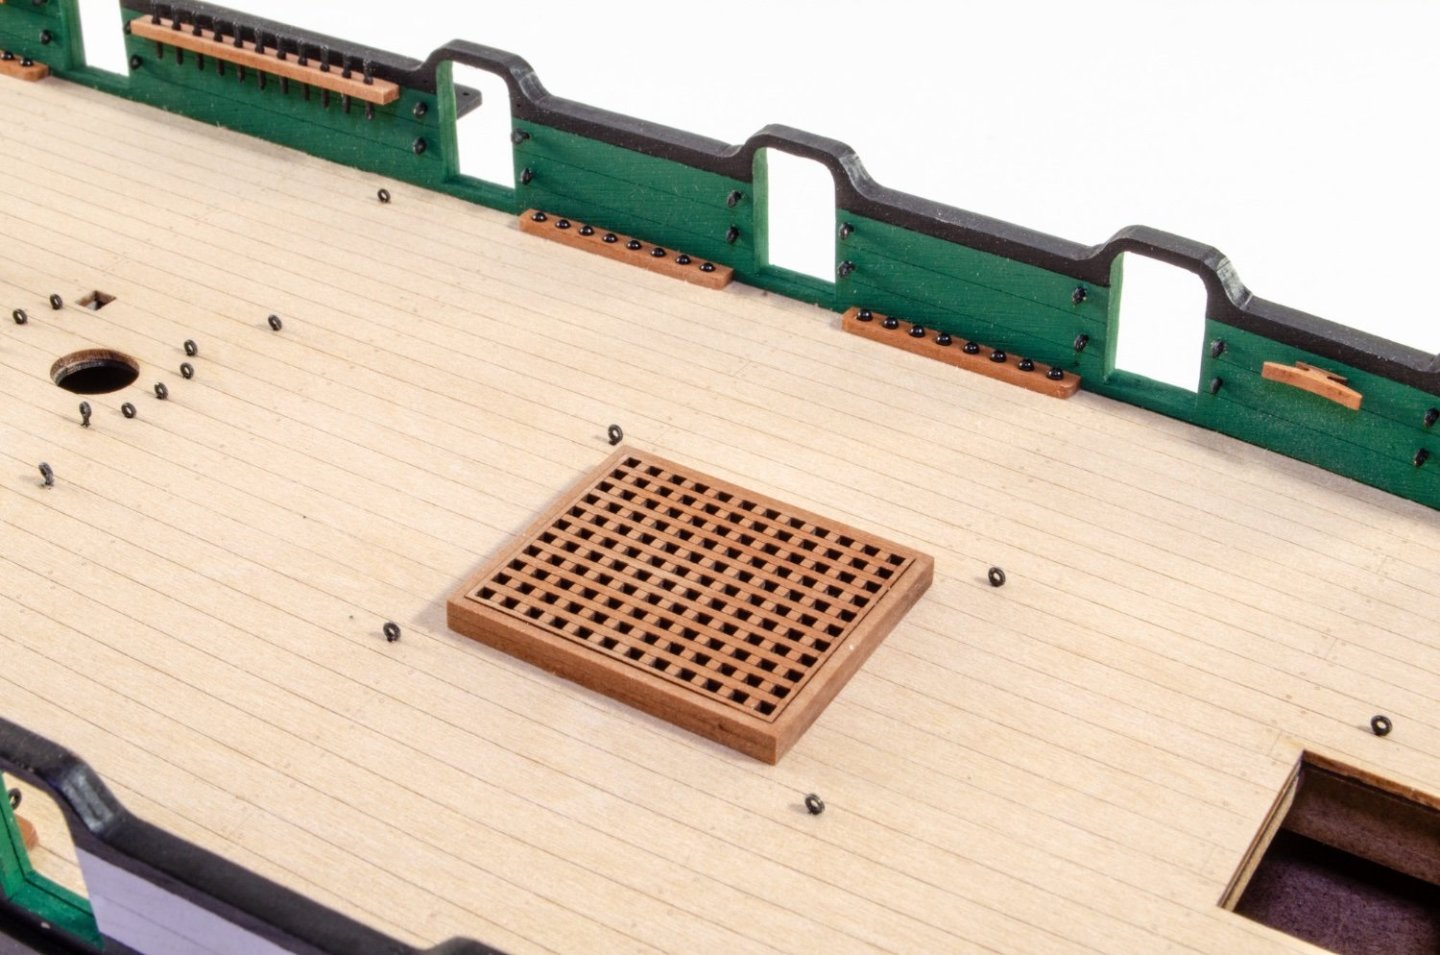
I'll do this update in 3 or 4 parts due to the number of photos showing the deck and bulwark fittings being added. Here we go! Most of these are self-explanatory, but let's take a look. First, as I've processed the pics, I've realised I didn't resize the coppering pics. I'll add those at the end (out of sequence). In this photo, the rudder tiller has been added and the small deck section, plus the bread hatch. The ironwork is now fitted. This is one of the most time-consuming parts of fitting out. A nicer smattering of these around both the bulwarks and deck. And now the shot garlands. Followed by cleats. Al those belaying racks need pins. These are PE, painted black and slotted into the racks. A little brushed varnish secures them. The garlands are now furnished with 1.5mm balls, again, glued into place with a brush of varnish. The catheads are a multipart assembly that allows for engravings on all faces. Very simple to build and these just slot though the bulwark holes with minimum effort. The pre-made fittings can now be added, starting with the skylight. The the grates/coamings, ladder etc. Capstan now present.... More in a moment....


- 80 replies
-
- 26
-
-
-
- Grecian
- Vanguard Models
- (and 3 more)
-
Fitting those parts can be nerve-wracking as so much relies on correct positioning. Looks good too me though. And to see you set the top stern fascia and made sure it sat correctly above the bulwarks too. 👍
-
You want to try building a dozen of them 😆
-
I've never tried them, but it surely can't be as harsh as resin or plastic.
-
The green does take some getting used to! We took a lead on the colours from the USS Consitution. The belaying pin racks will be in natural, as will the bitts etc, but with white caps, so quite unusual. I'm coppering this thing at the moment. Well, I will as soon as I've had something to eat 😋 I've gone from liking this build to loving the ships and the appearance with this scheme.
- 80 replies
-
- 7
-
-
- Grecian
- Vanguard Models
- (and 3 more)
-
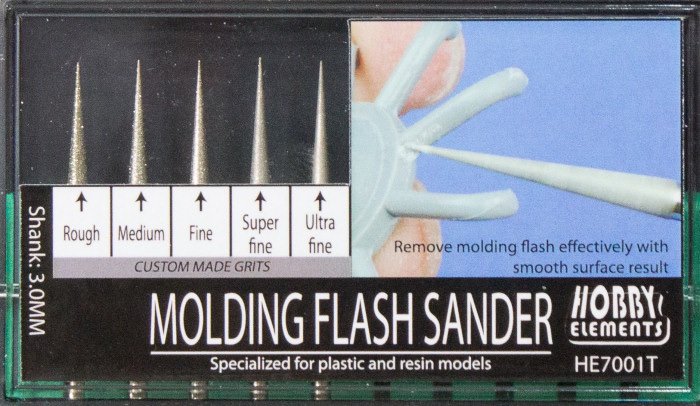
I don't know how these will be with metal. I use these for plastics and resin and they are unbeatable.
-
I would never be in a hurry too! Happy just to see others use it.
- 587 replies
-
- 2
-
-
- Indefatigable
- Vanguard Models
- (and 1 more)
-
Box is tough and that doesn't look too shabby at all, especially the tuck.
- 587 replies
-
- 3
-
-
-
- Indefatigable
- Vanguard Models
- (and 1 more)
-
Damn, I should let you do my first planking. I don't get within 10% of being that neat!
- 648 replies
-
- 6
-
-
- Indefatigable
- Vanguard Models
- (and 1 more)
-
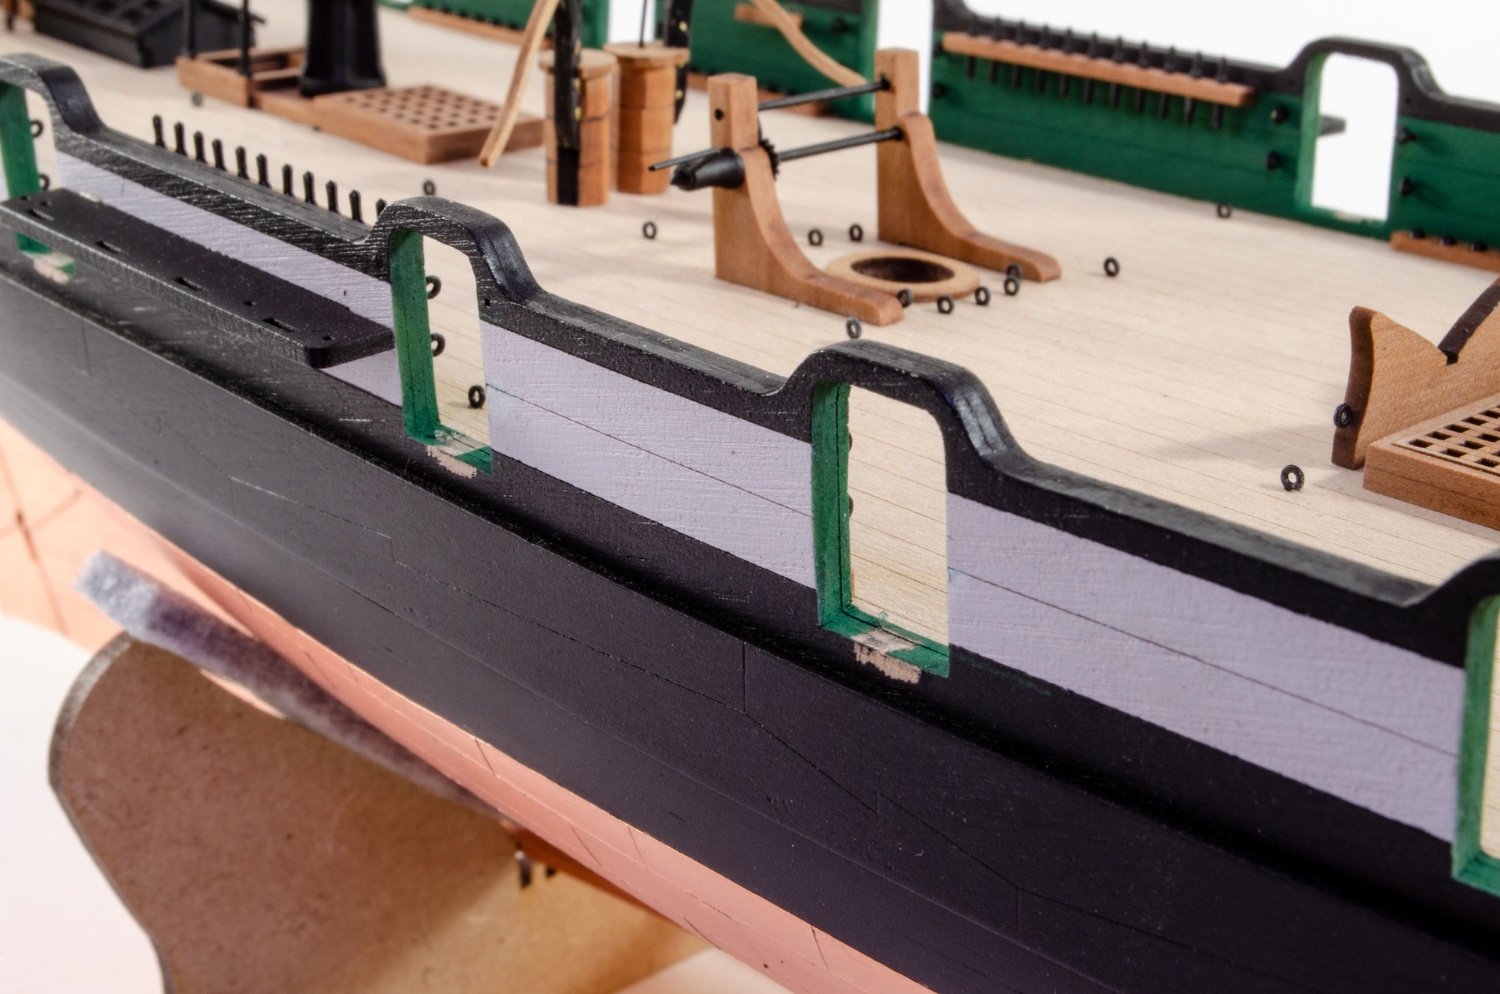
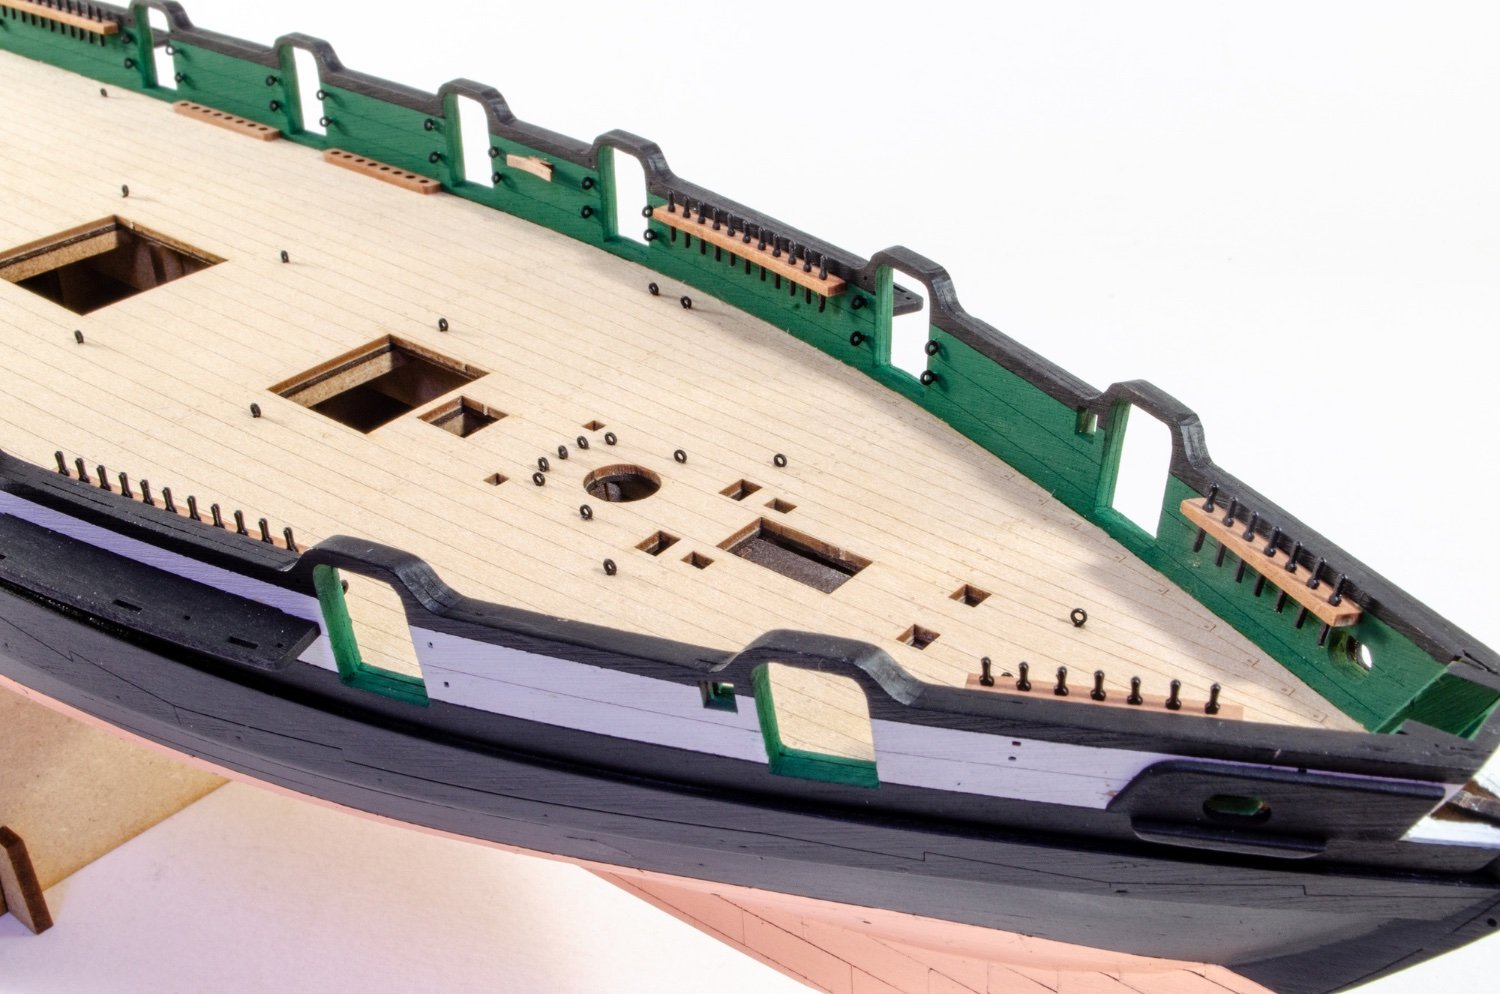
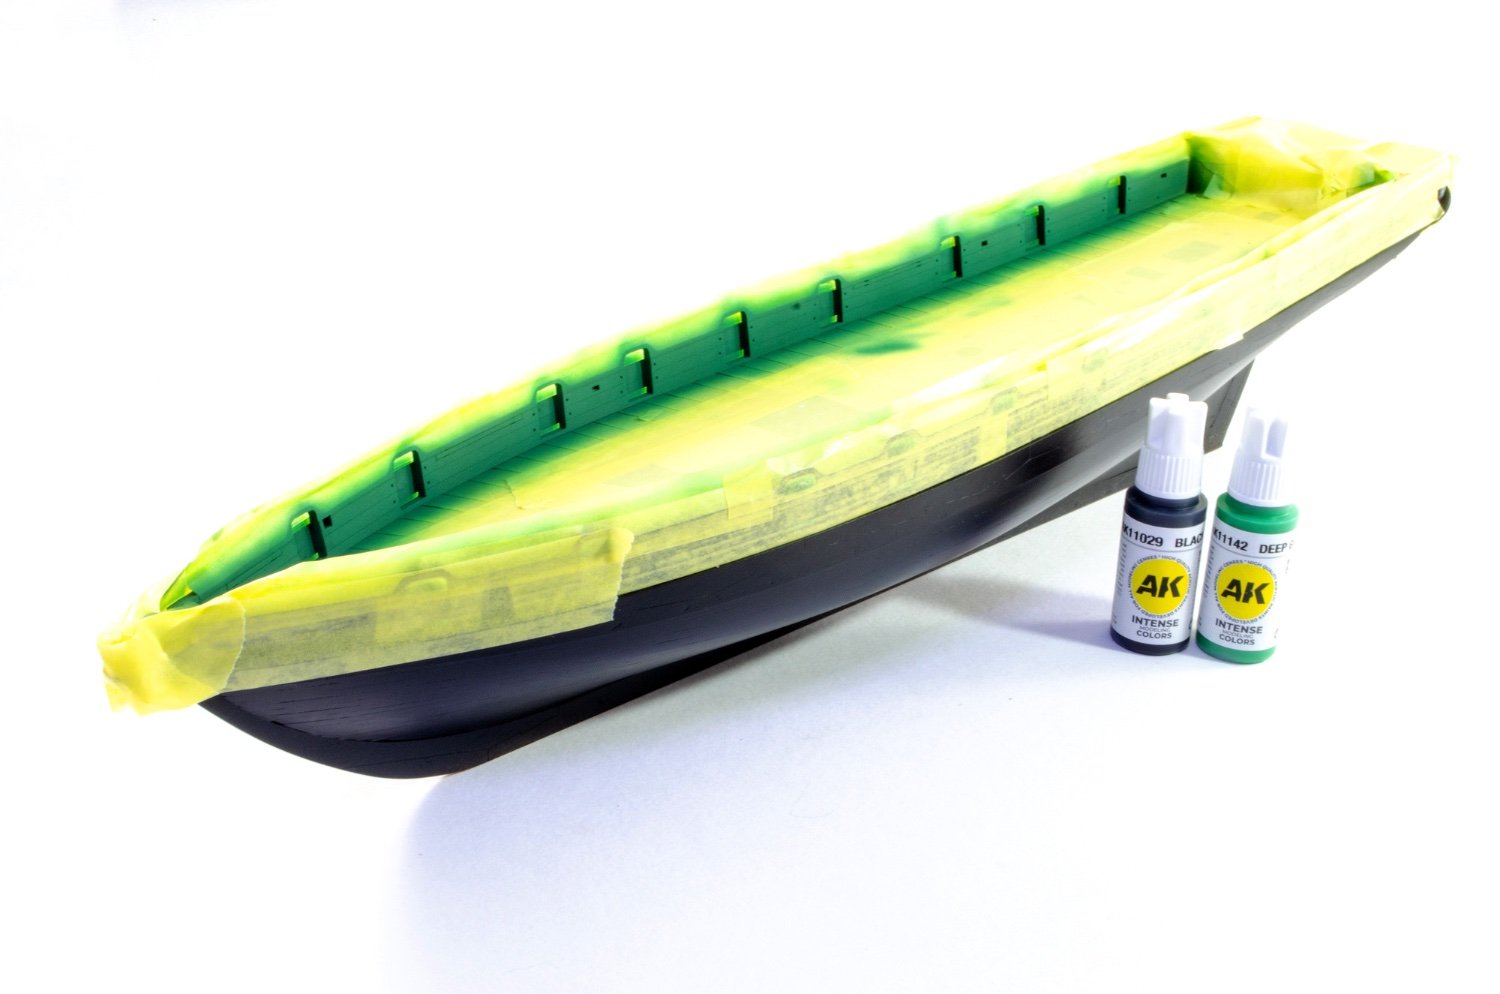
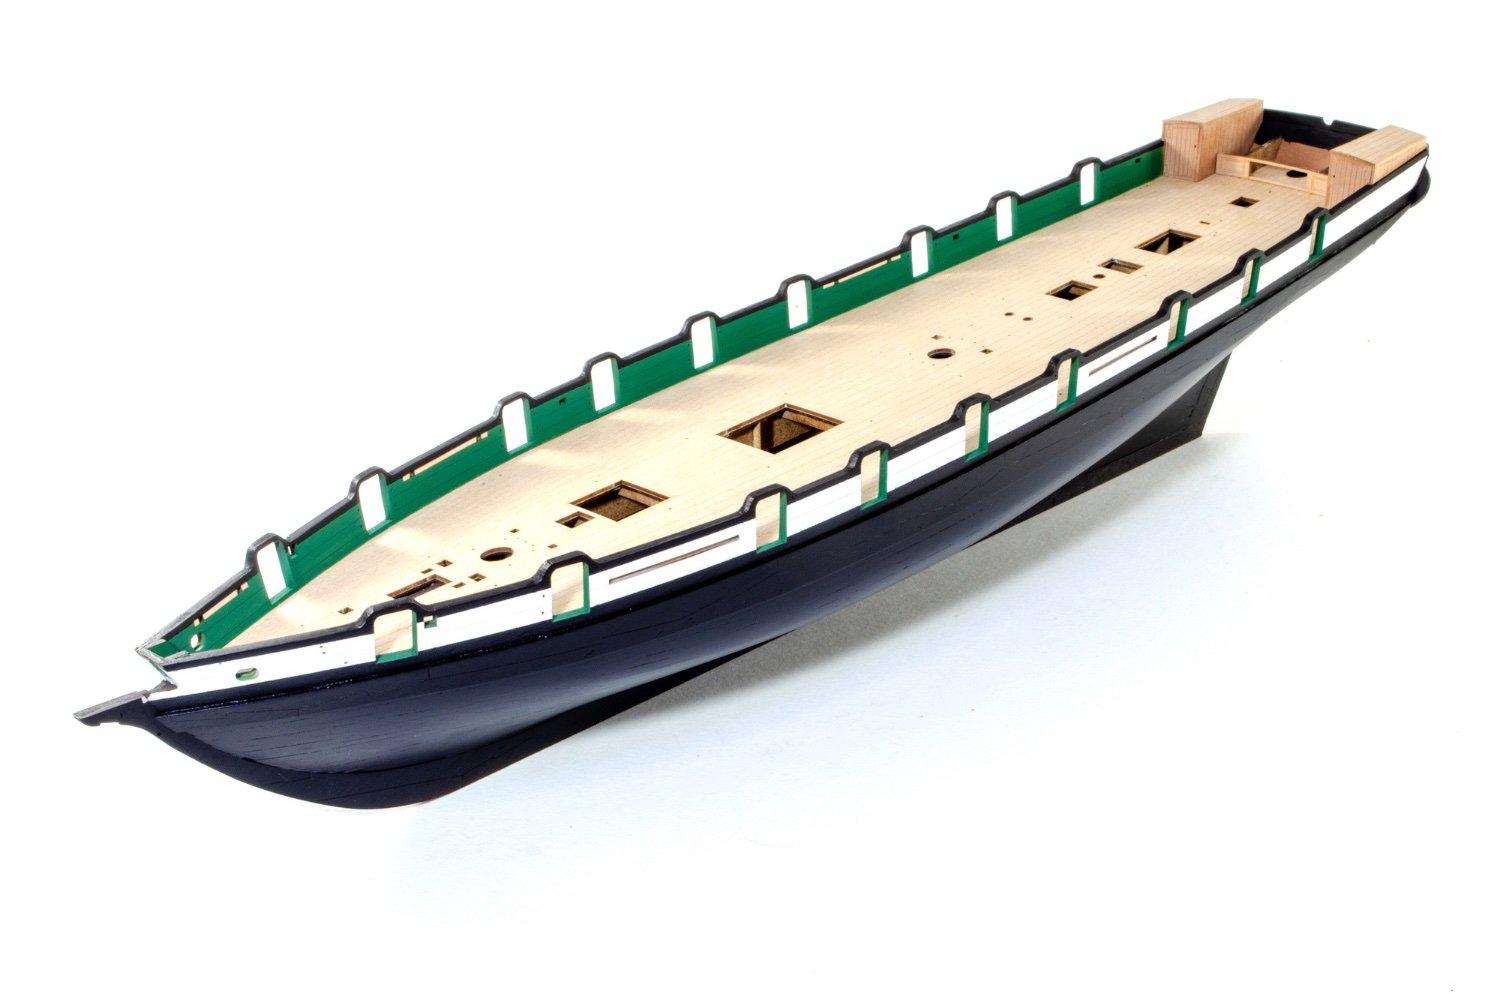
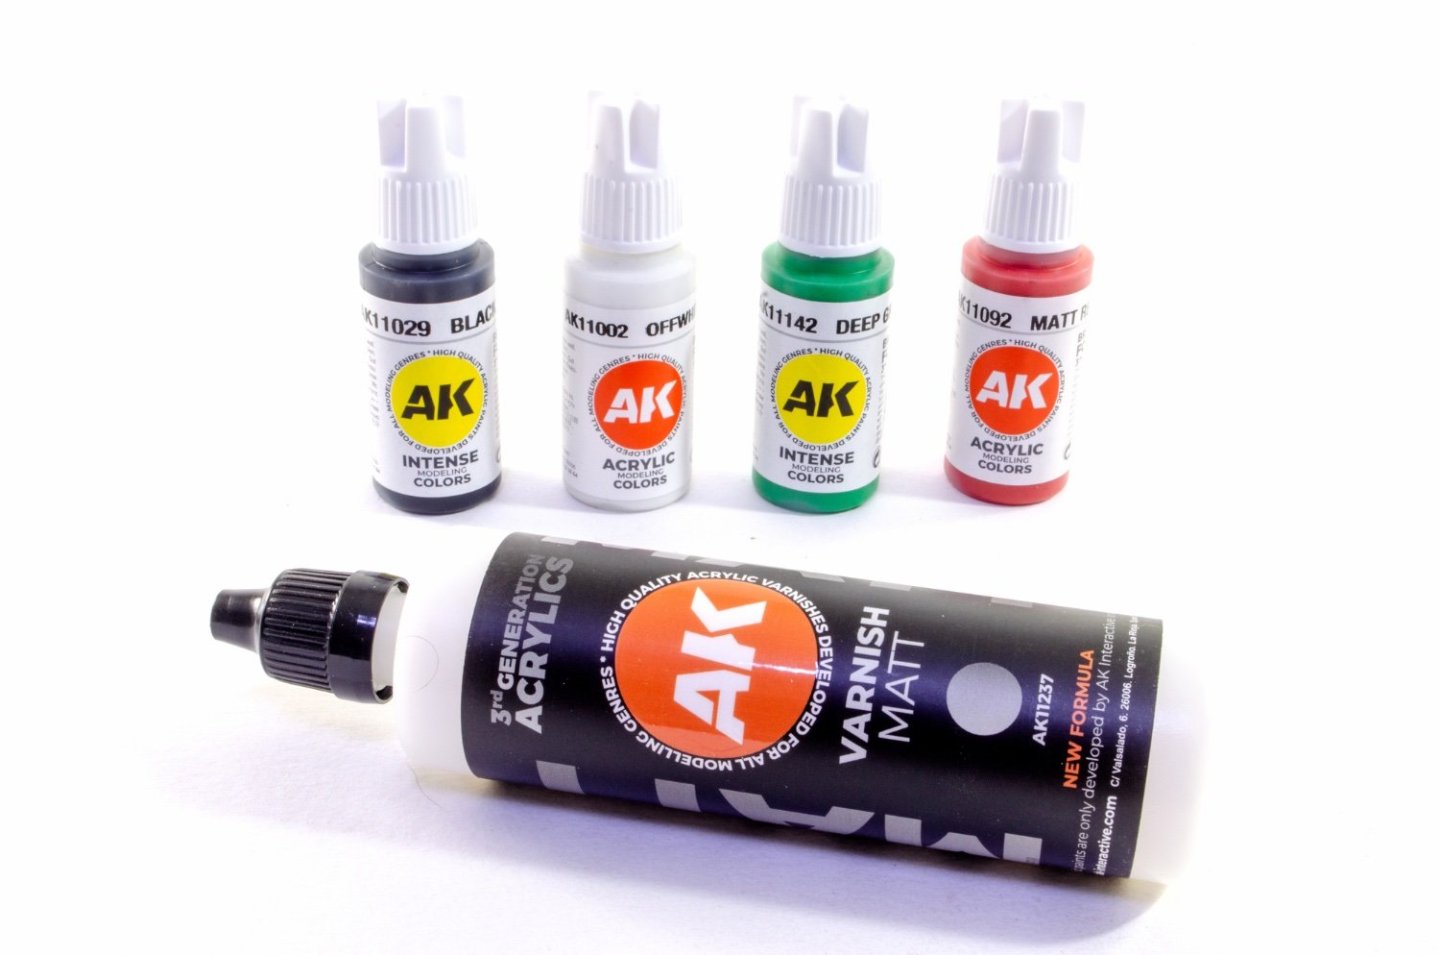
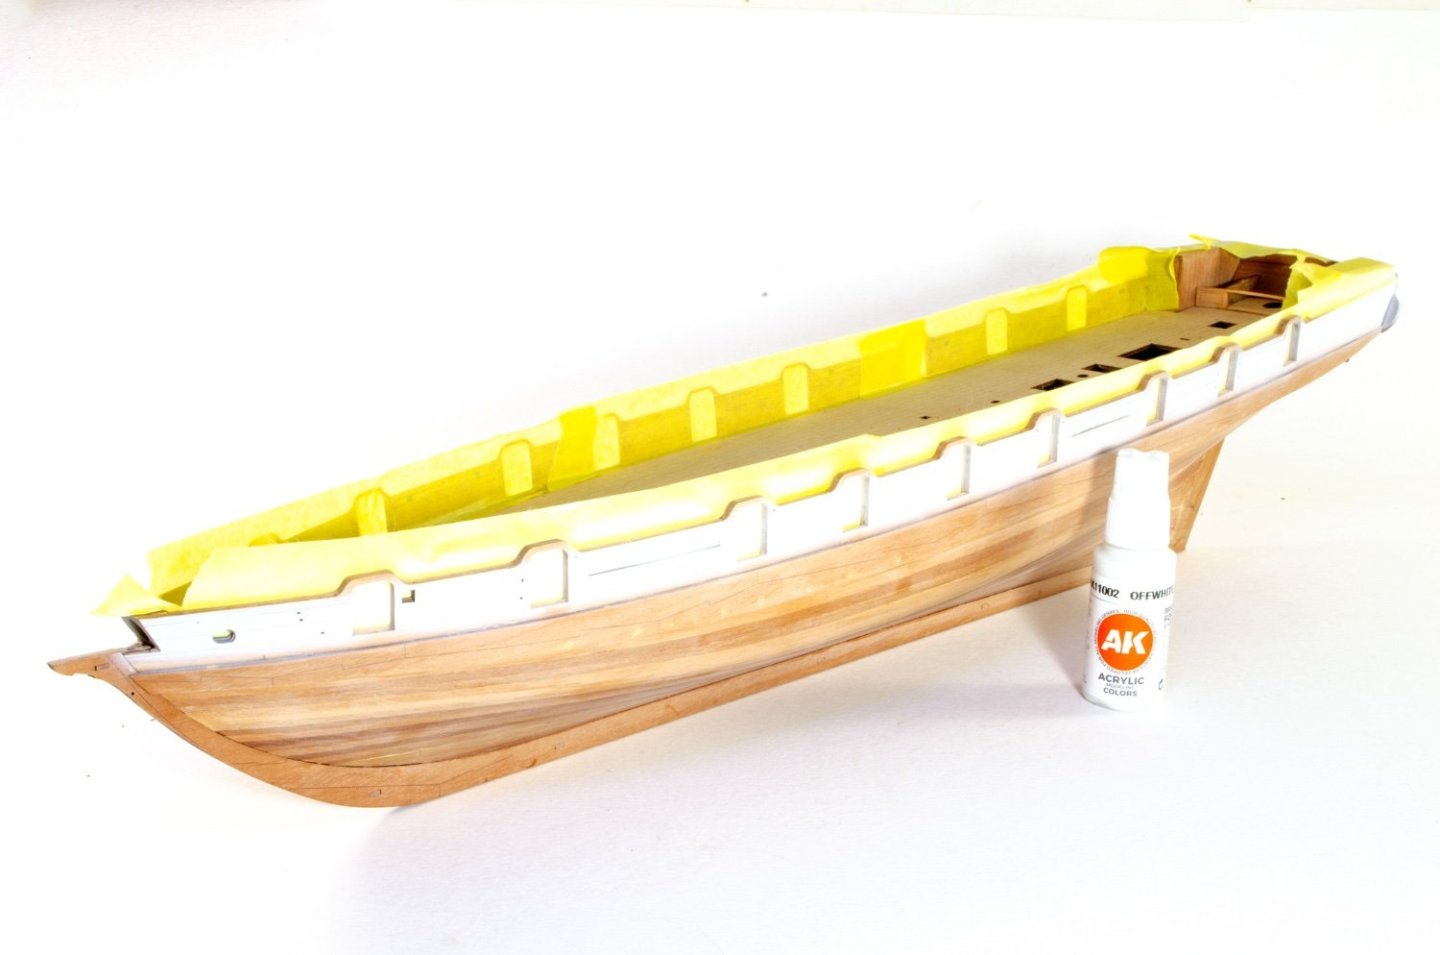
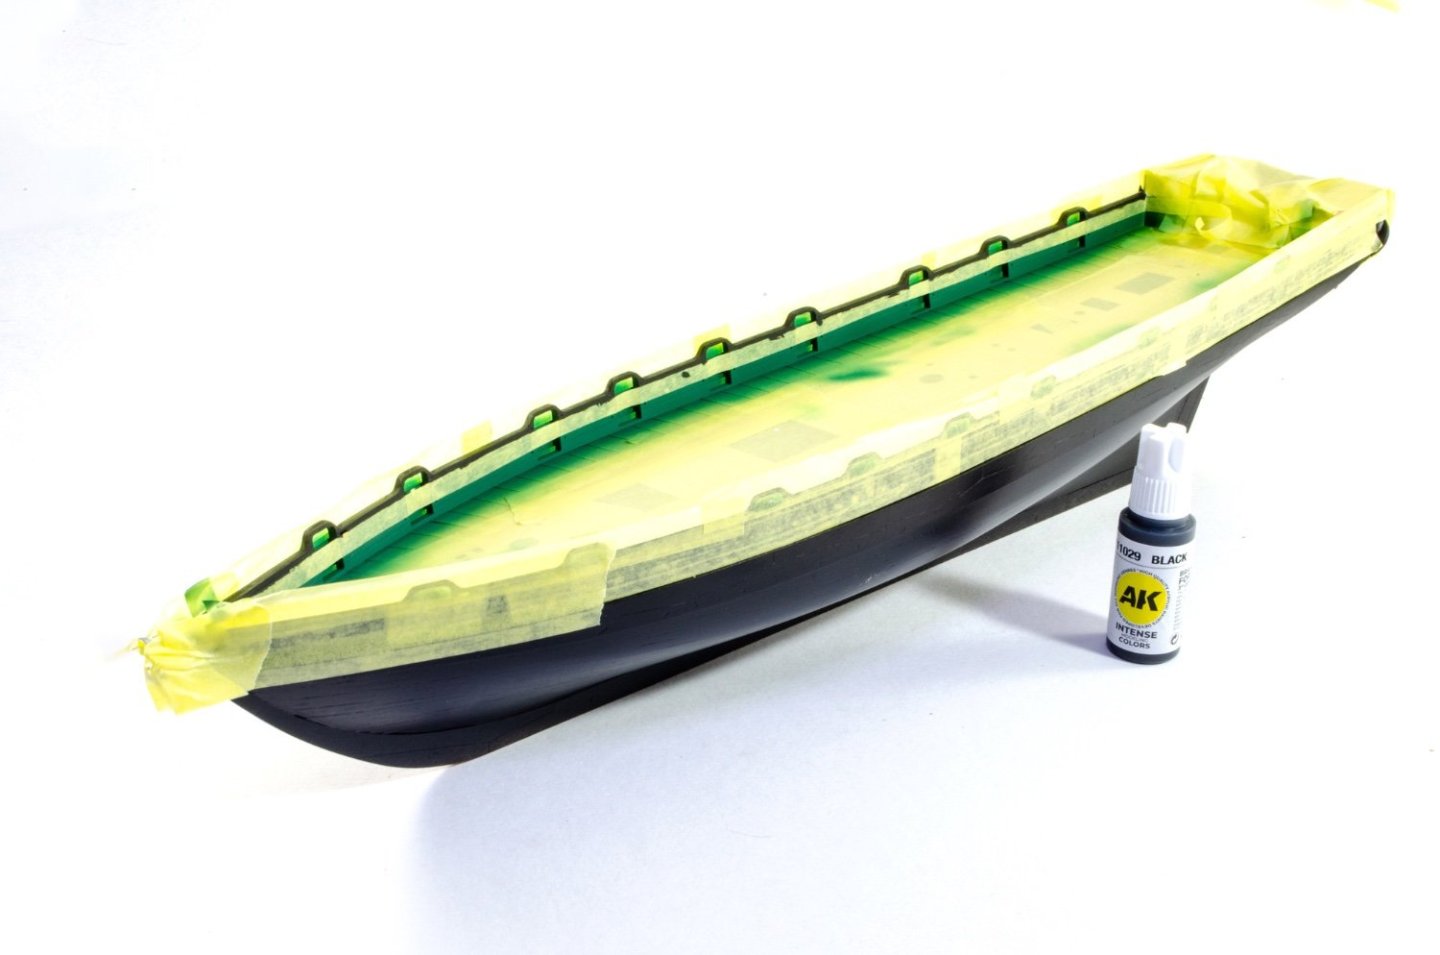
Just a quick update before I soon hit the copper. Te hull is now more or less painted. A few touch-ups here and there, and there will be a flat coat afterwards. I added the sheen simply because it's less likely to mark when handling the hull. All paints here are from the forthcoming Grecian paint set. The first task is to paint the outside band in off-white. This was left a while to cure before then masking it to add the black. Once the hull was painted black, more judicious masking was done so the inner bulwarks could be painted. For this, I mixed about 95% green and 5% black. The upper edge of the green was then masked and black paint carefully added to the upper section of the bulwark. The finished paint job looks like this. Notice that I had masked off the slots for the channels, and also the inner bulwark positions for the various rails. Off to cut a few more copper tiles!


- 80 replies
-
- 28
-
-
-
- Grecian
- Vanguard Models
- (and 3 more)
-
Lovely work so far. That looms real clean! For the wale tapering, I did this fore and aft, and not by too much. It was something done for aesthetics that Chris suggested I do. It isn't represented on the plans, to my knowledge.
-
Looking fabulous. This one doesn't look too far from release now.