James H
-
Posts
6,139 -
Joined
-
Last visited
Content Type
Profiles
Forums
Gallery
Events
Everything posted by James H
-
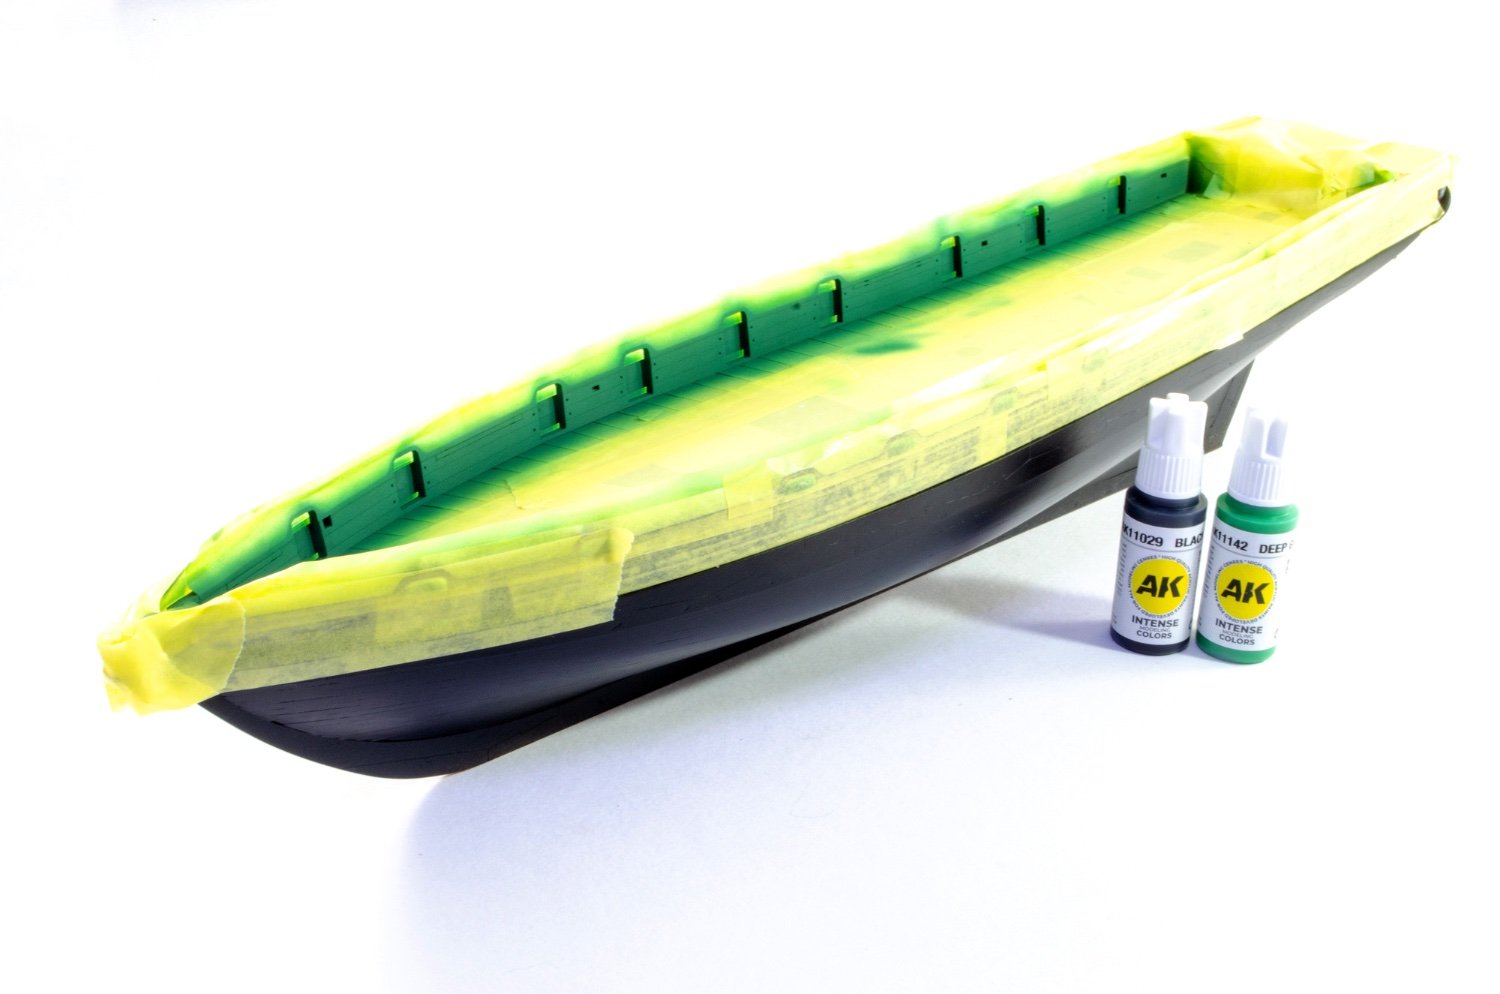
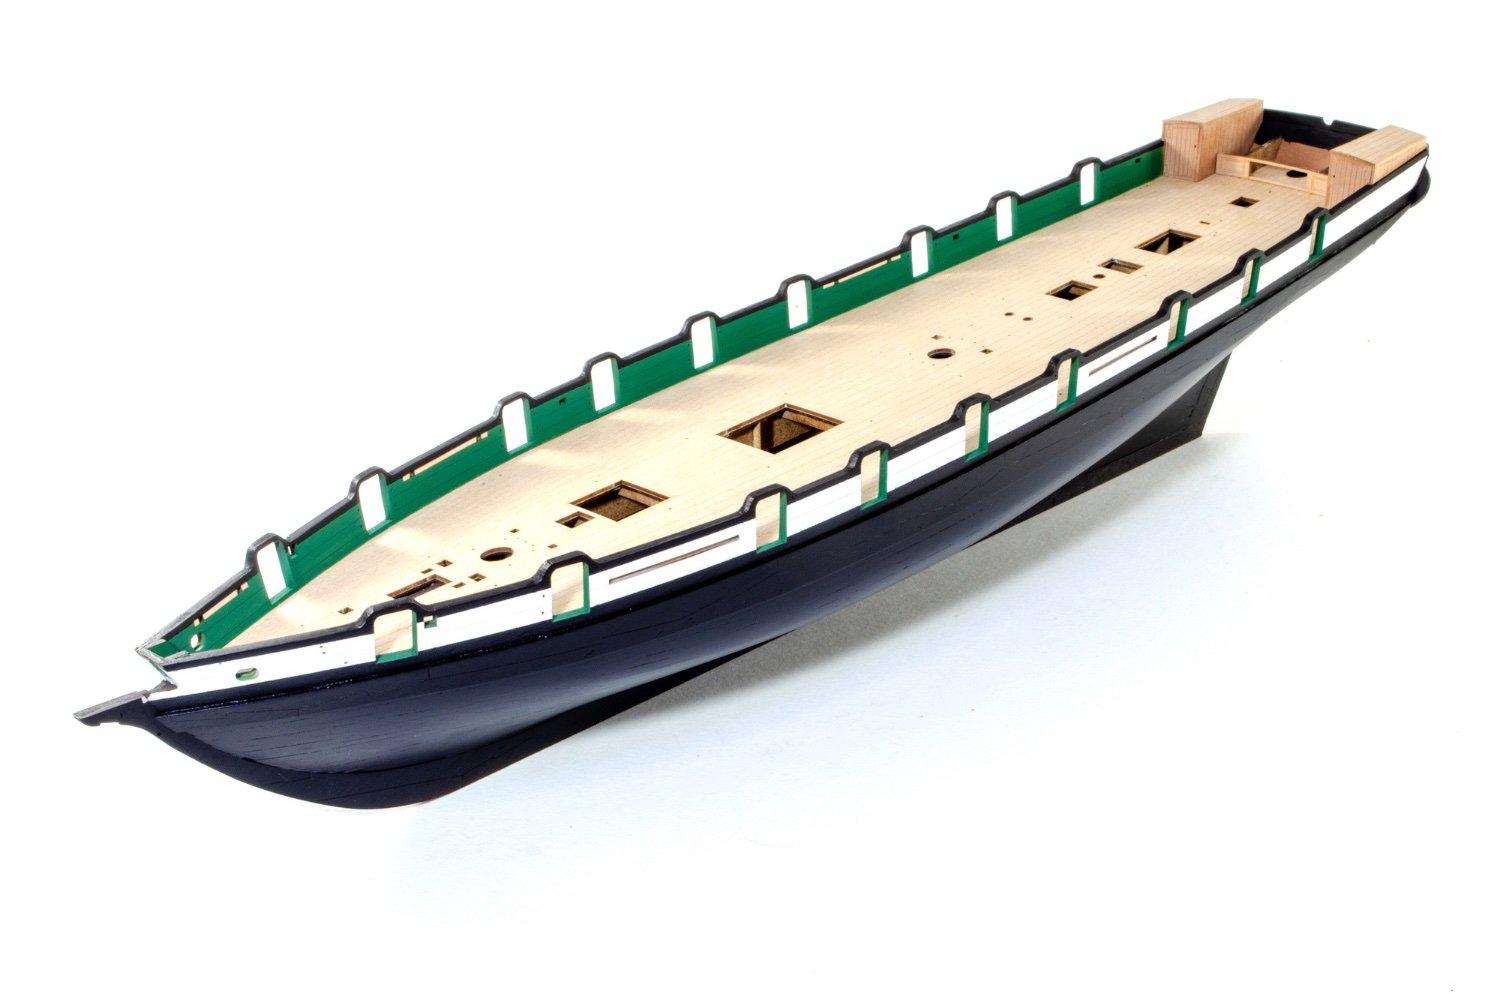
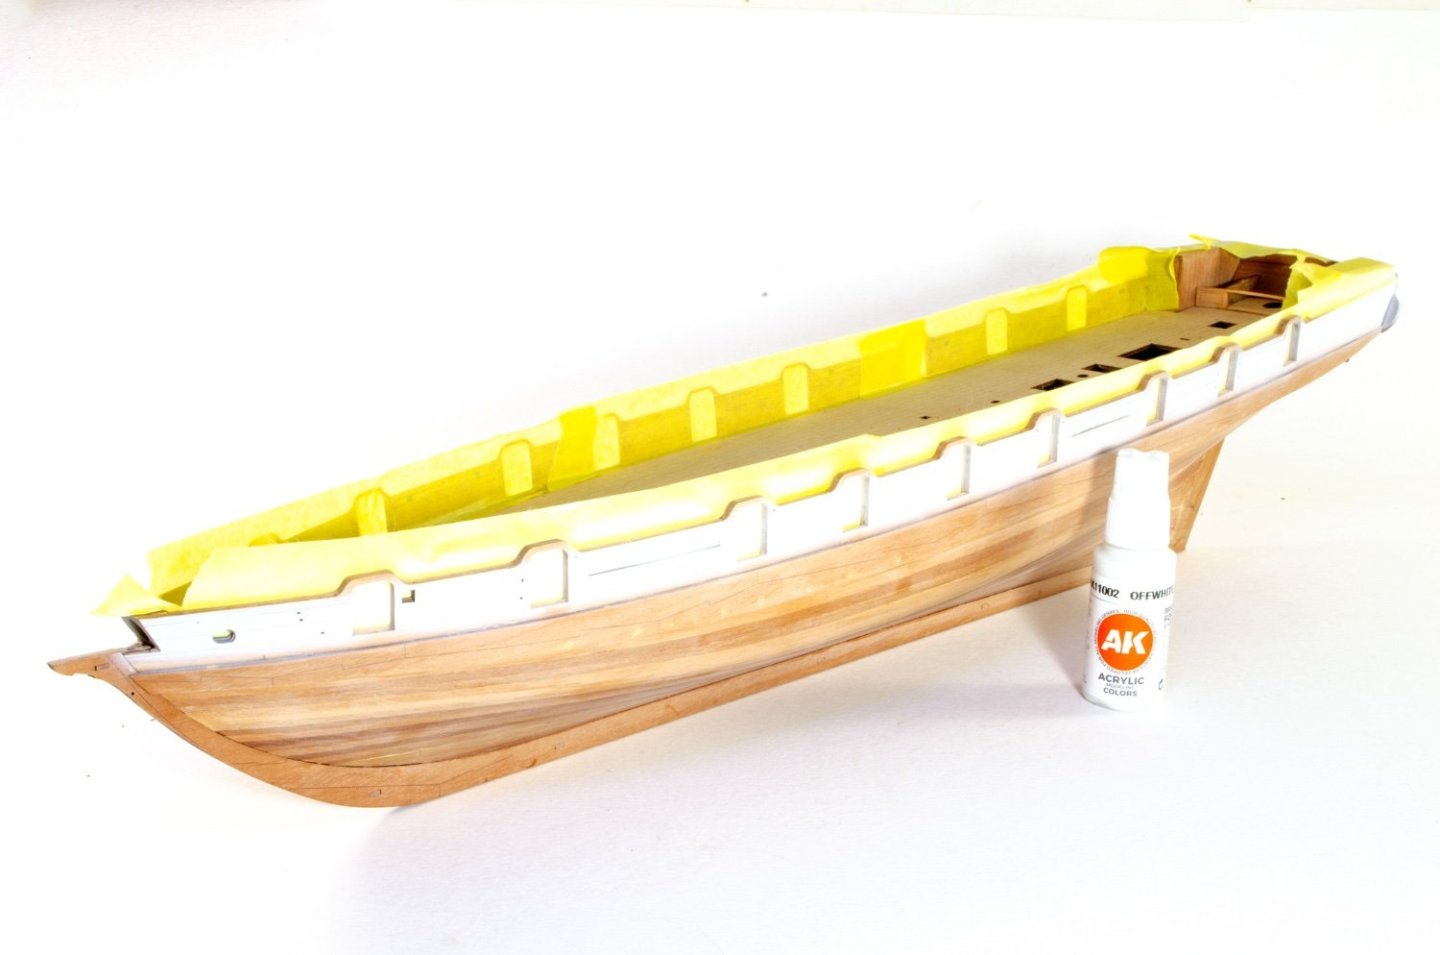
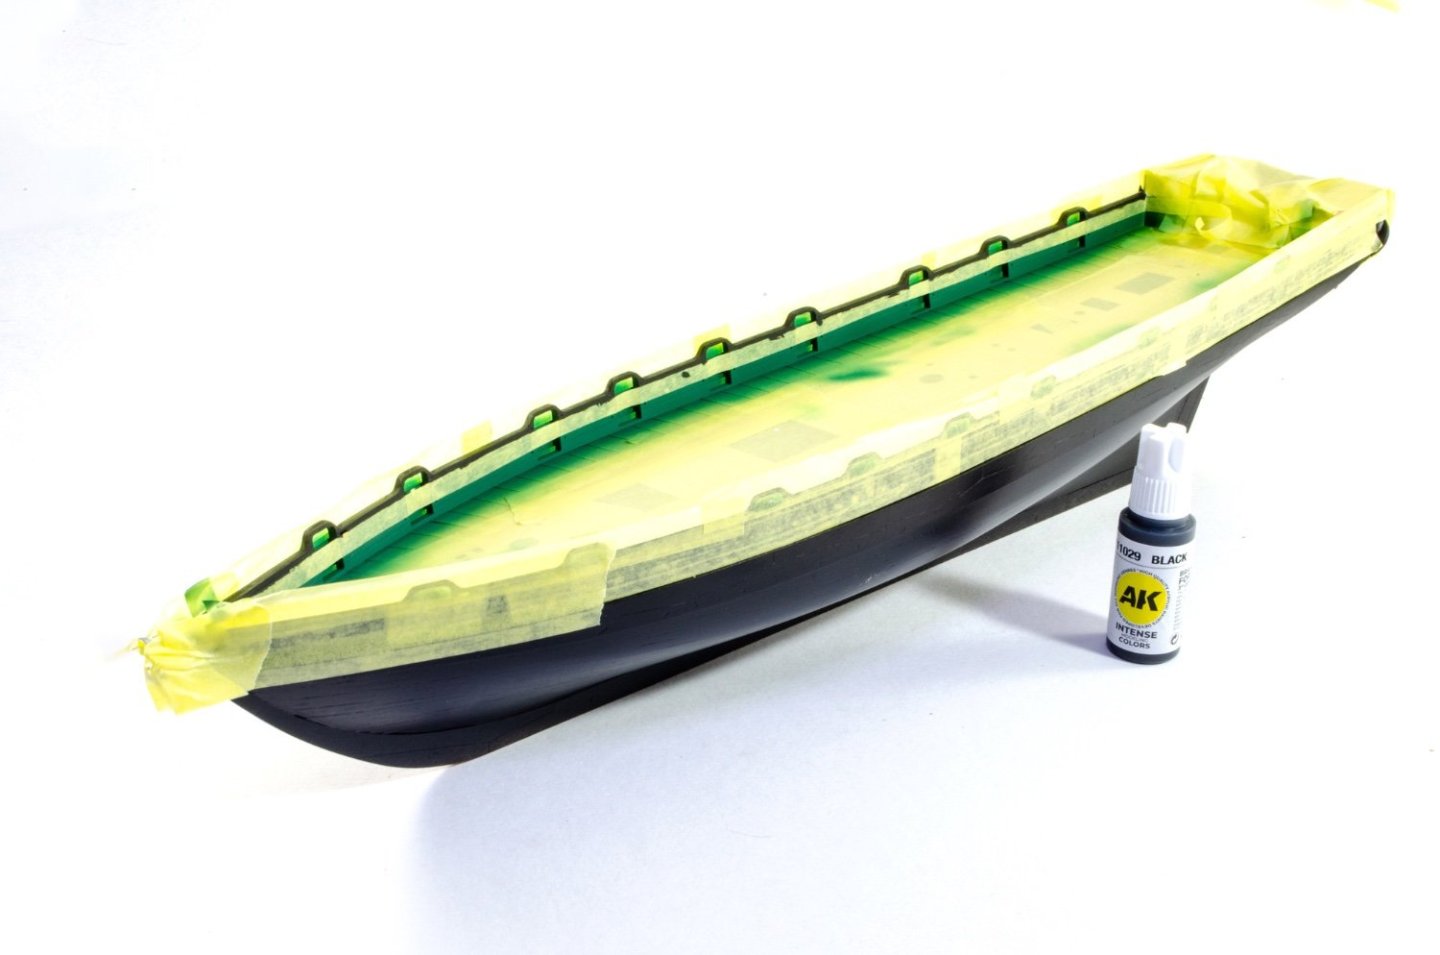
 Just a quick update before I soon hit the copper. Te hull is now more or less painted. A few touch-ups here and there, and there will be a flat coat afterwards. I added the sheen simply because it's less likely to mark when handling the hull. All paints here are from the forthcoming Grecian paint set. The first task is to paint the outside band in off-white. This was left a while to cure before then masking it to add the black. Once the hull was painted black, more judicious masking was done so the inner bulwarks could be painted. For this, I mixed about 95% green and 5% black. The upper edge of the green was then masked and black paint carefully added to the upper section of the bulwark. The finished paint job looks like this. Notice that I had masked off the slots for the channels, and also the inner bulwark positions for the various rails. Off to cut a few more copper tiles!


- 80 replies
-
- 28
-

-

-
- Grecian
- Vanguard Models
- (and 3 more)
-
Lovely work so far. That looms real clean! For the wale tapering, I did this fore and aft, and not by too much. It was something done for aesthetics that Chris suggested I do. It isn't represented on the plans, to my knowledge.
-
Looking fabulous. This one doesn't look too far from release now.
-
bulkhead bevels
James H replied to Woodshipguy's topic in Building, Framing, Planking and plating a ships hull and deck
Moving topic to correct forum area. Please don't use 'Build logs' for general modelling questions. -
Dust masks and respirators.
James H replied to Bill Hudson's topic in Modeling tools and Workshop Equipment
Remember though that EVERYTHING is classed as a carcinogen in California. The air you breathe, the food you eat. Prob even MSW. Hell, even my guitar came with a 'classed as a carcinogen in California' warning. -
At least if you start with this colour, then it's easier for folks to choose to paint white than it is for someone to replicate the original colour.
-
The second one down as it's a close match to the timber.
-
The magazine is out this Friday 14th April, in print. It can be bought now as a digital edition. This will be a two-part article. She also made (a part) the cover:
copyarticle-2.jpg.0e367324d8c7d17a87c7ed4fcdc21f3a.jpg)
- 488 replies
-
- 26
-
-
-
- Indefatigable
- Vanguard Models
- (and 1 more)
-
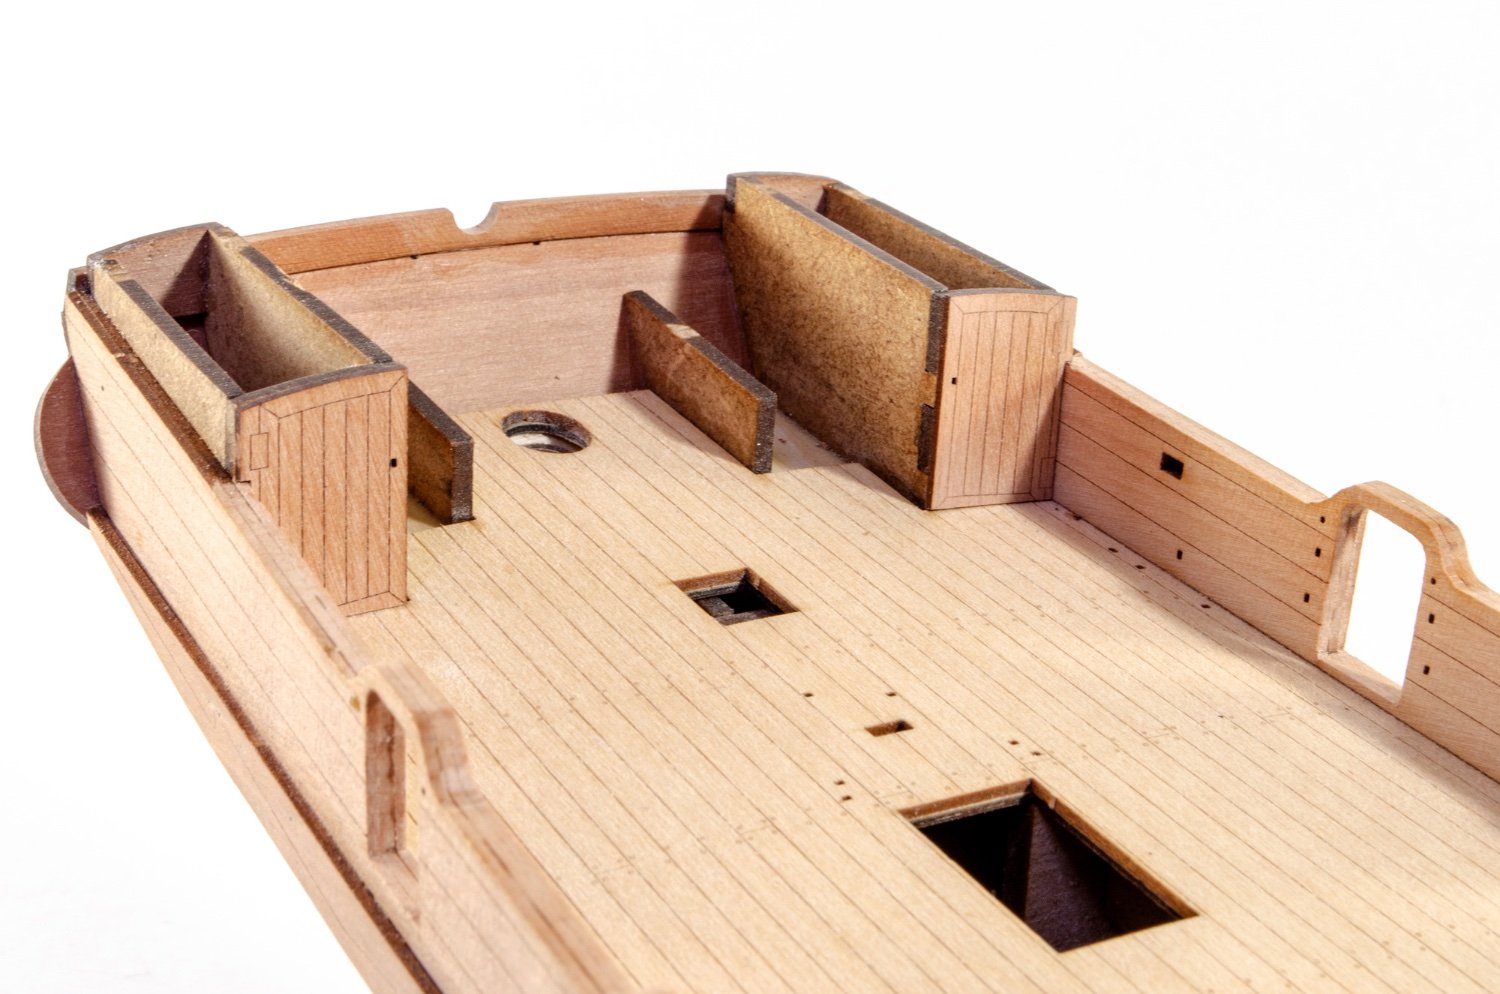
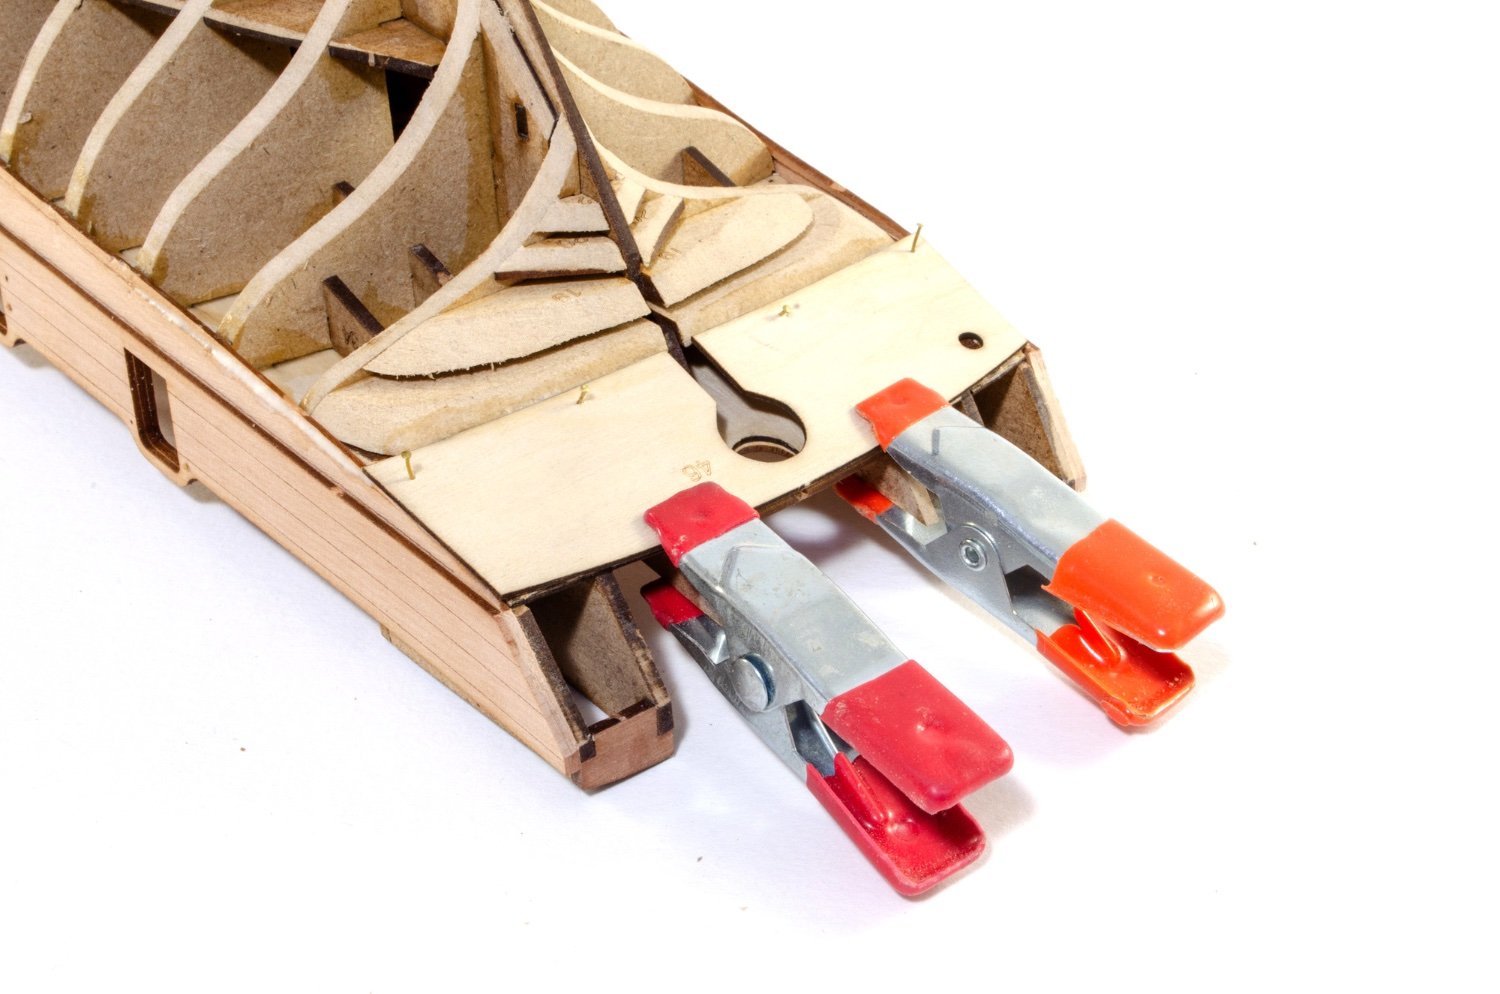
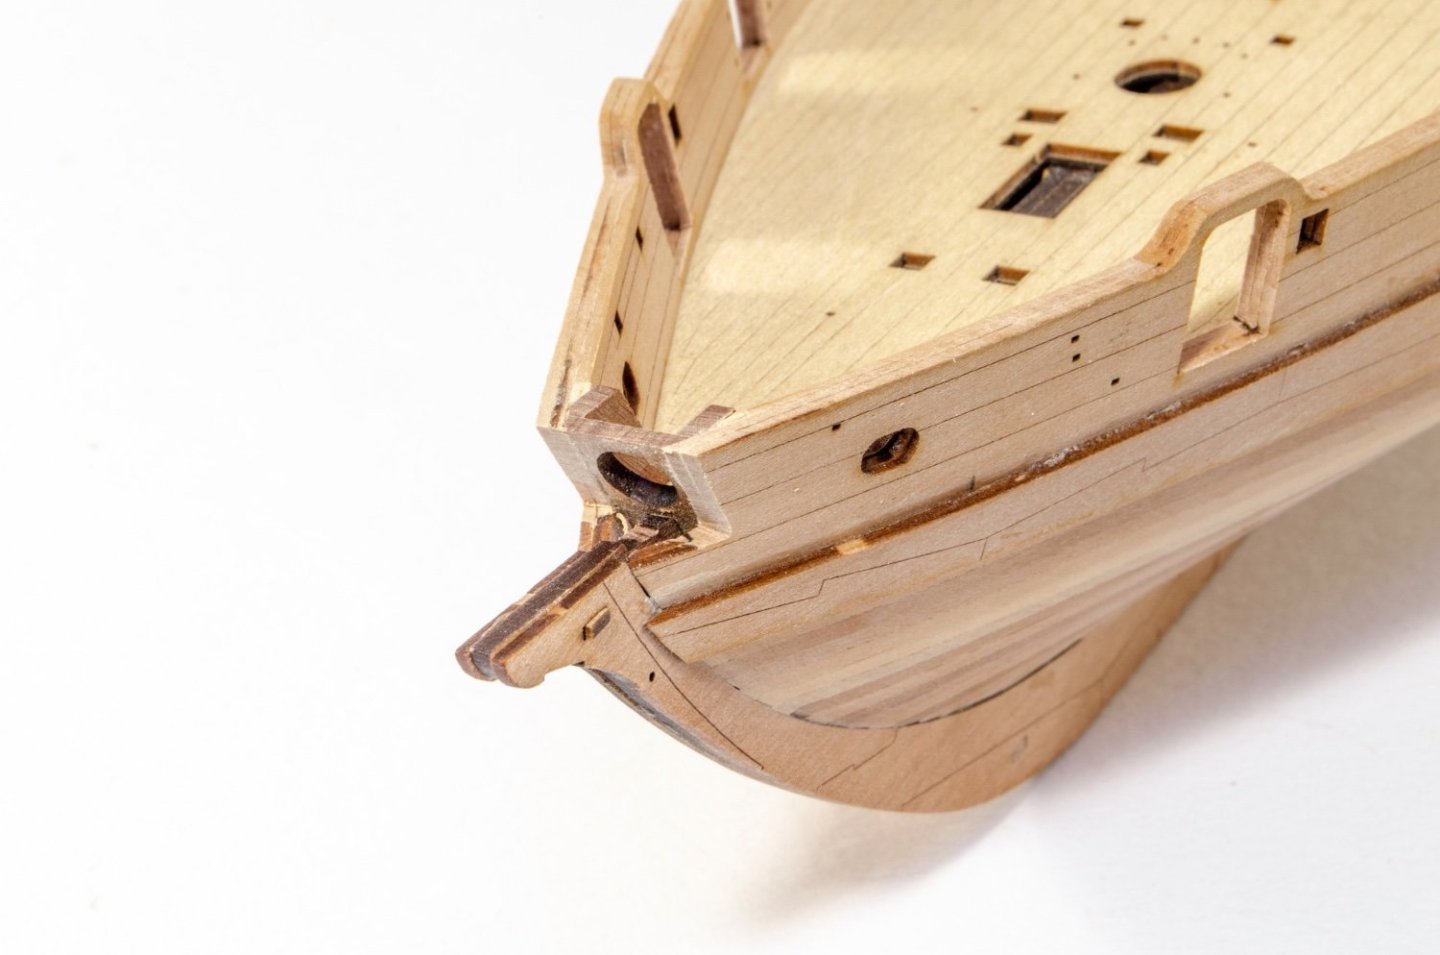
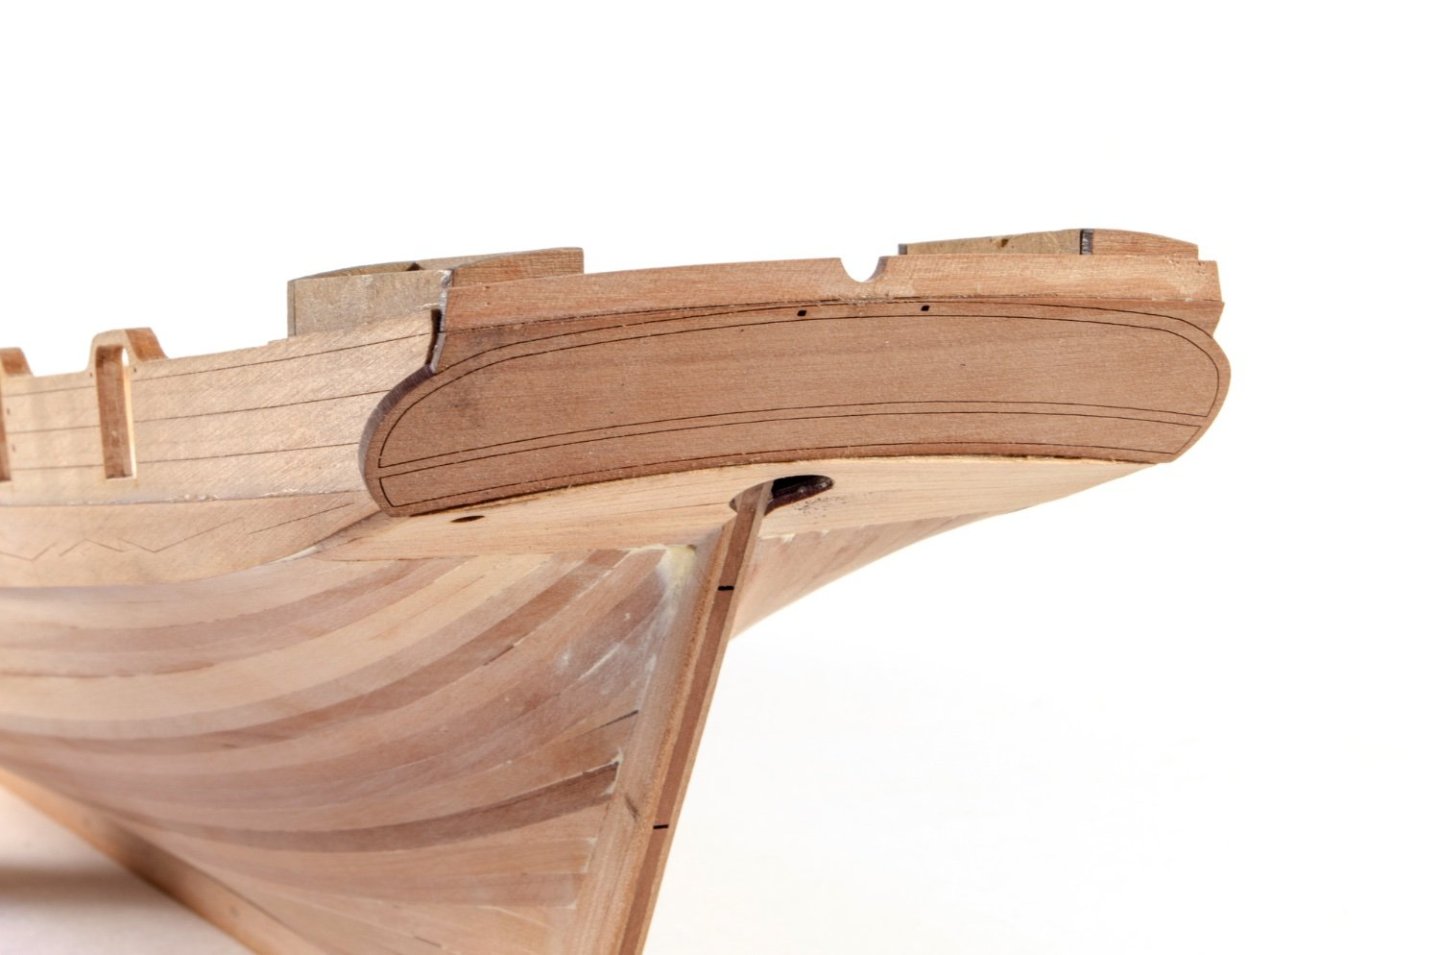
...Continued. All gun ports are now cleaned up and the tops of the bulwarks sanded. The hole for the bowsprit entry is also cleaned up with the bulkheads being cut back to the same position. Also note the single-piece Wales have been installed. Before the stern can be fitted, the tail end is tickled with a rough stick. And the MDF structures at the stern can now be sheathed in pear, making them look far prettier. The rudder tiller exit fascia is now built and fitted. ...and Grecian now looks like this. Gorgeous lines.


- 80 replies
-
- 32
-
-
-
- Grecian
- Vanguard Models
- (and 3 more)
-
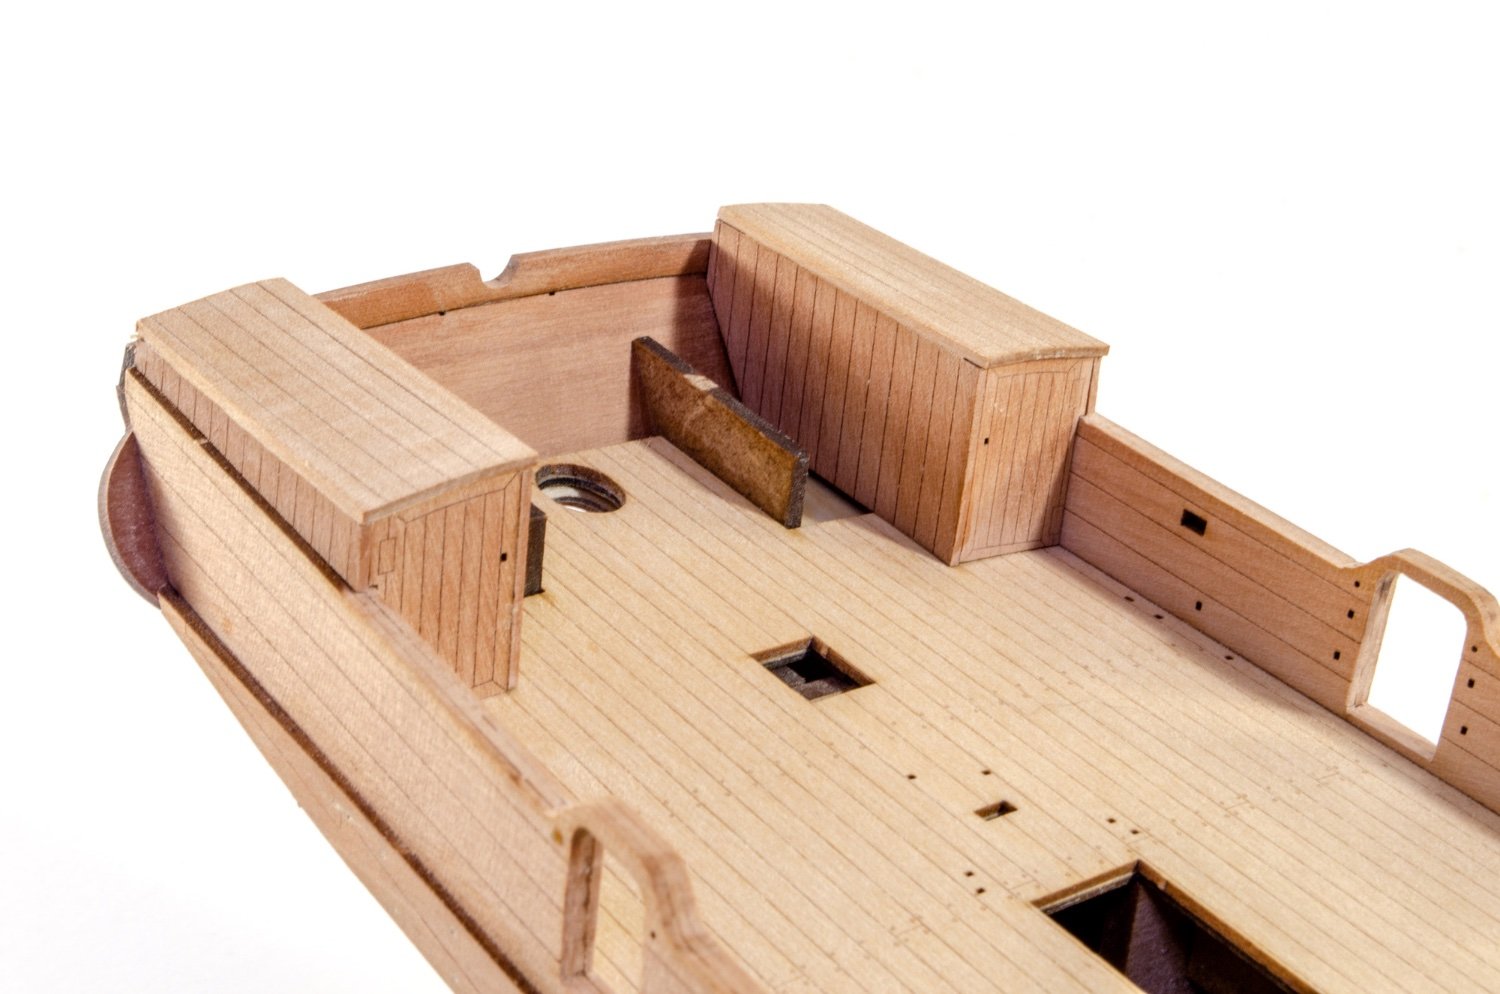
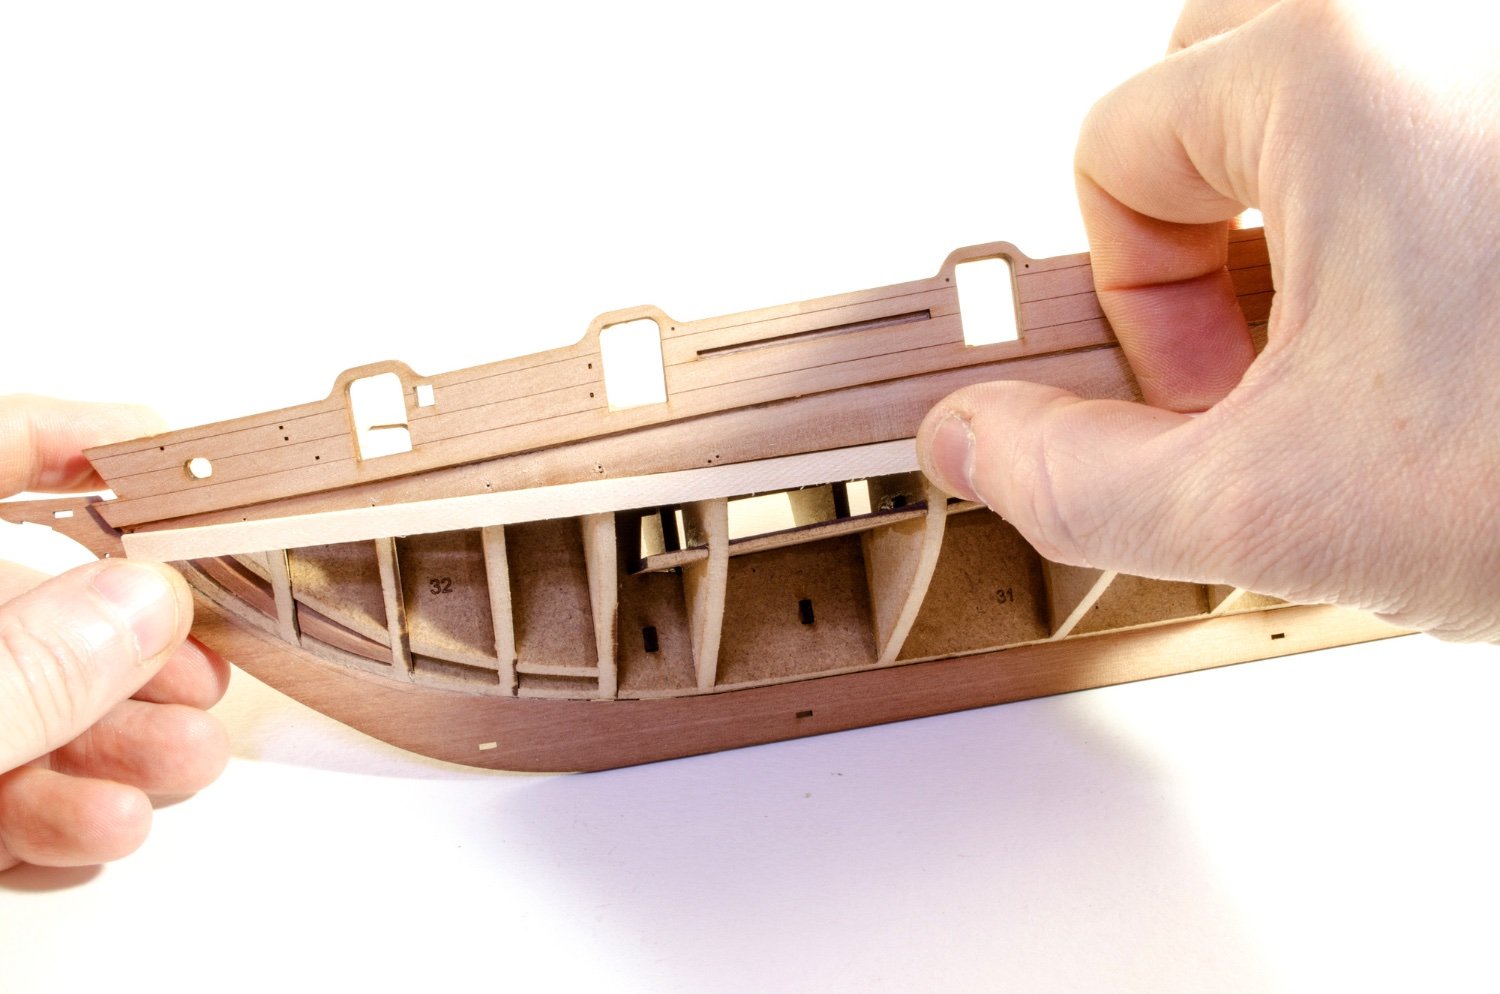
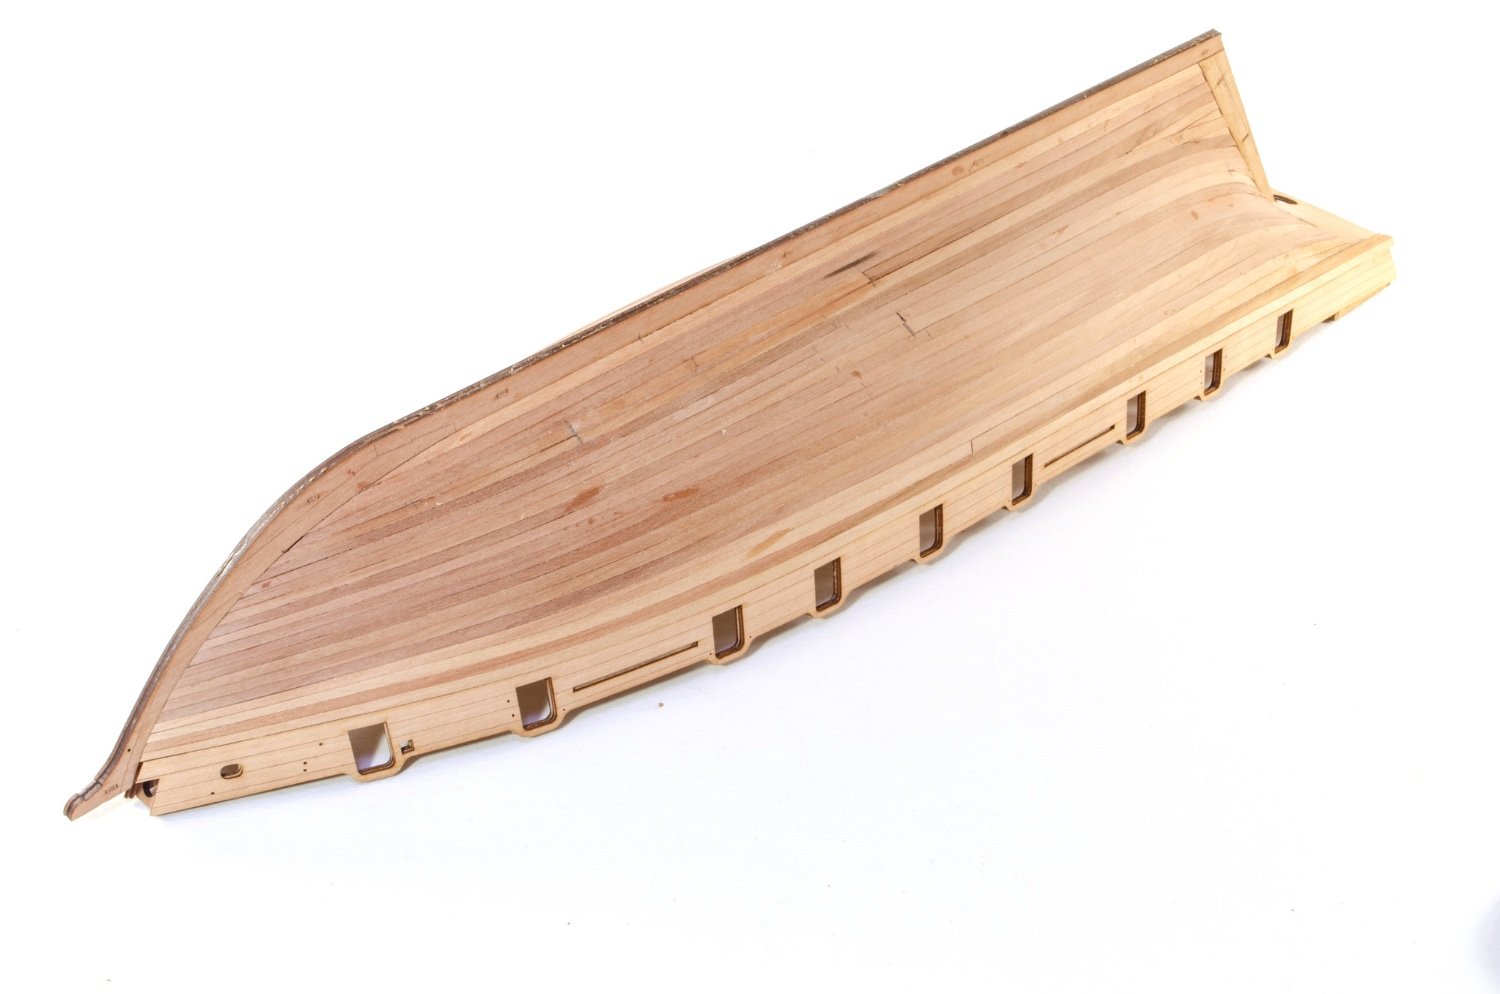
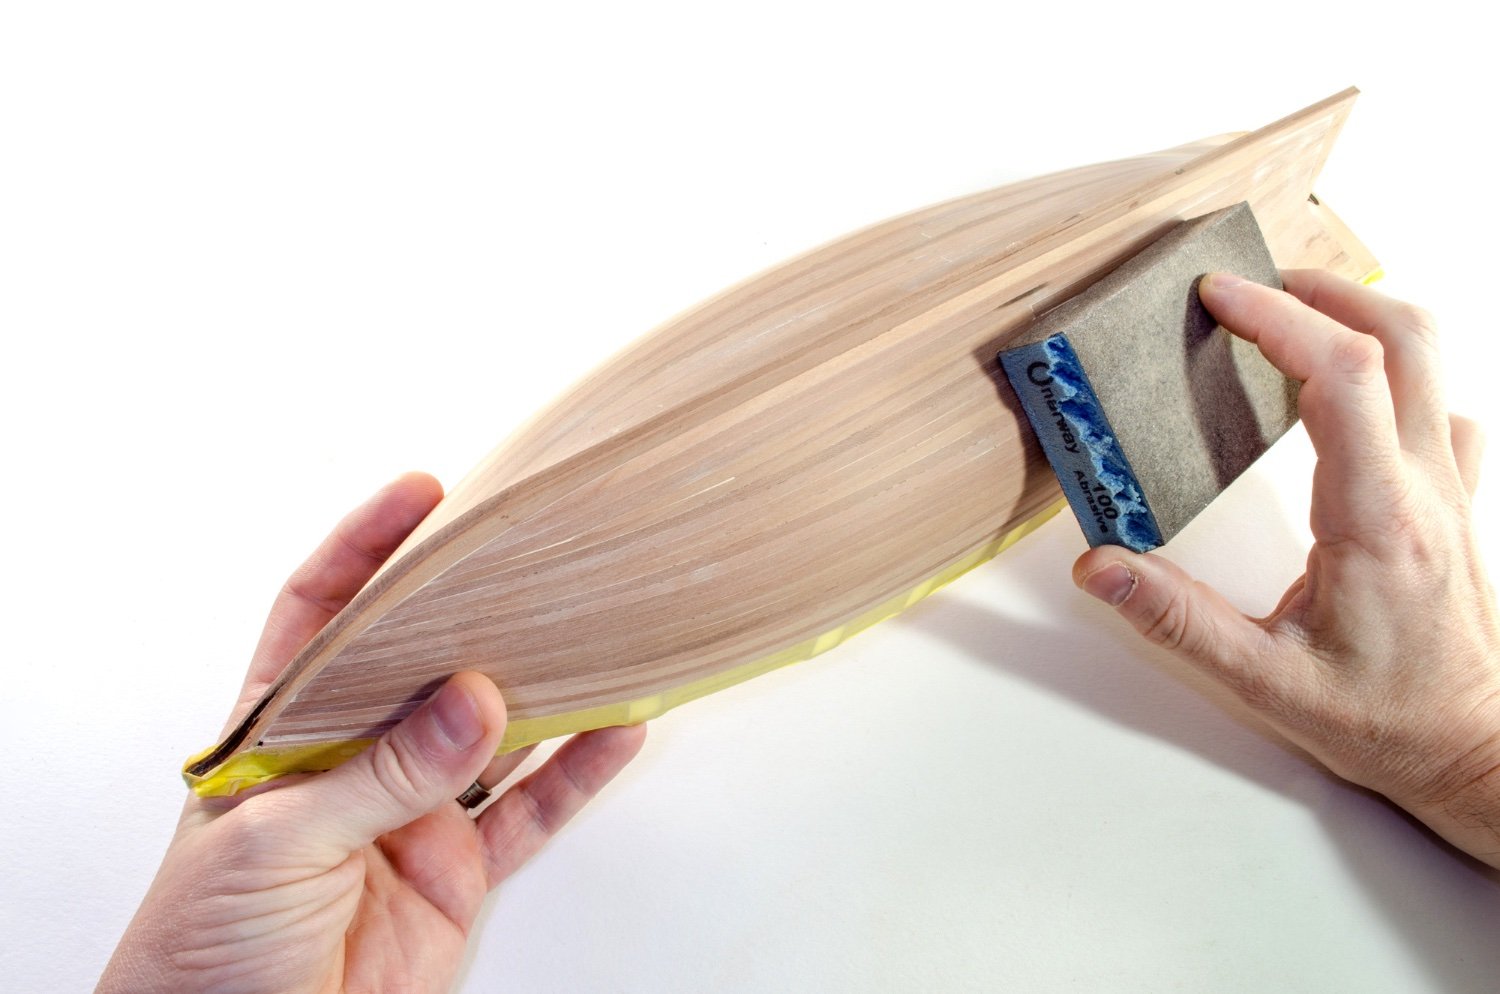
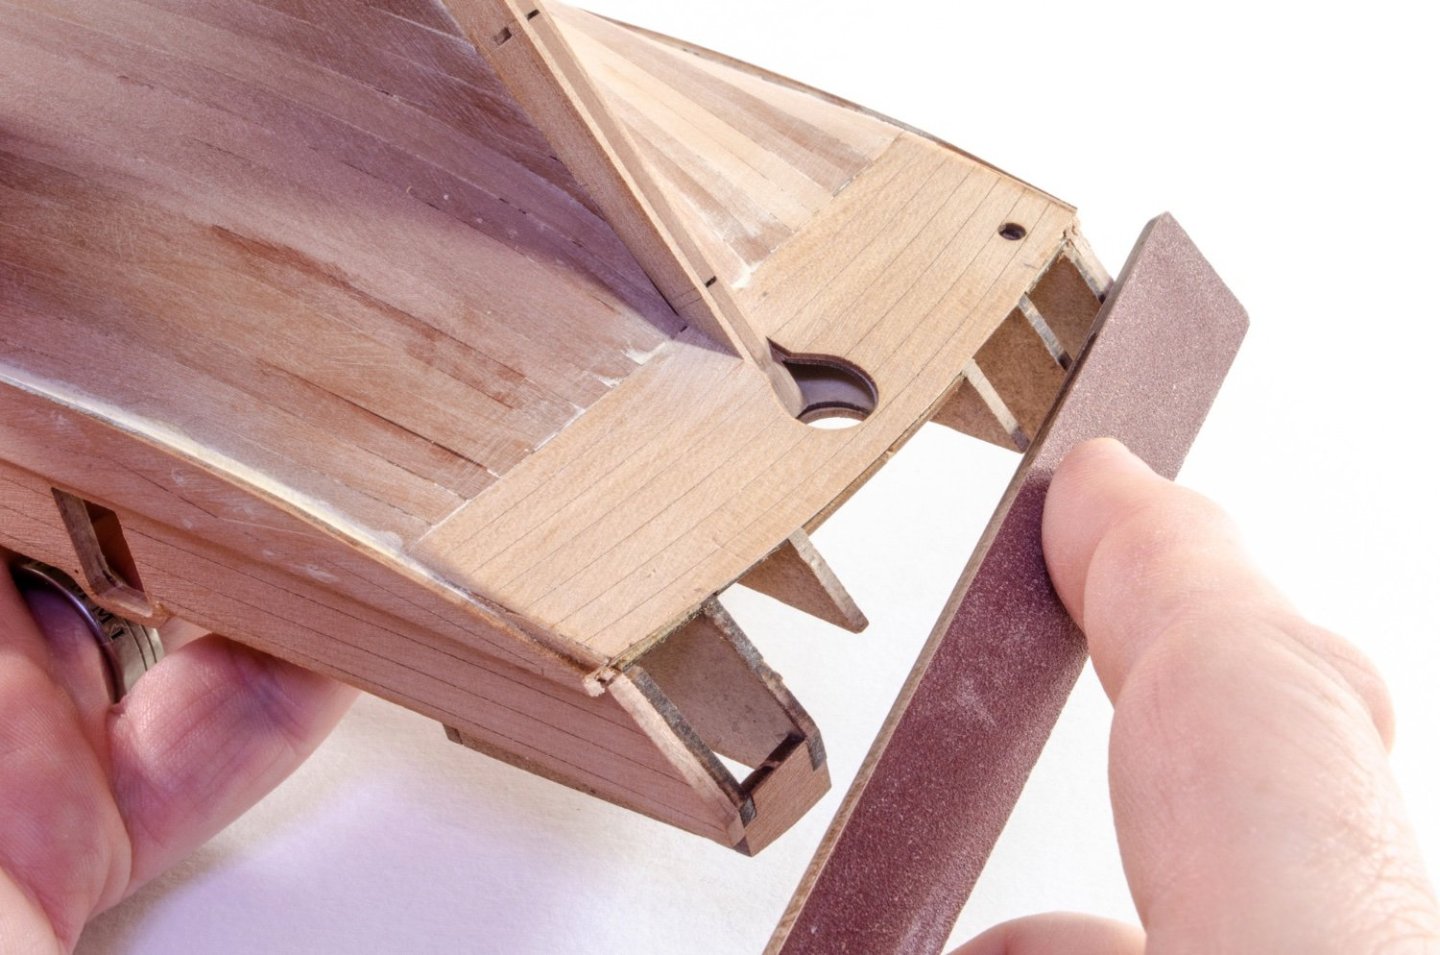
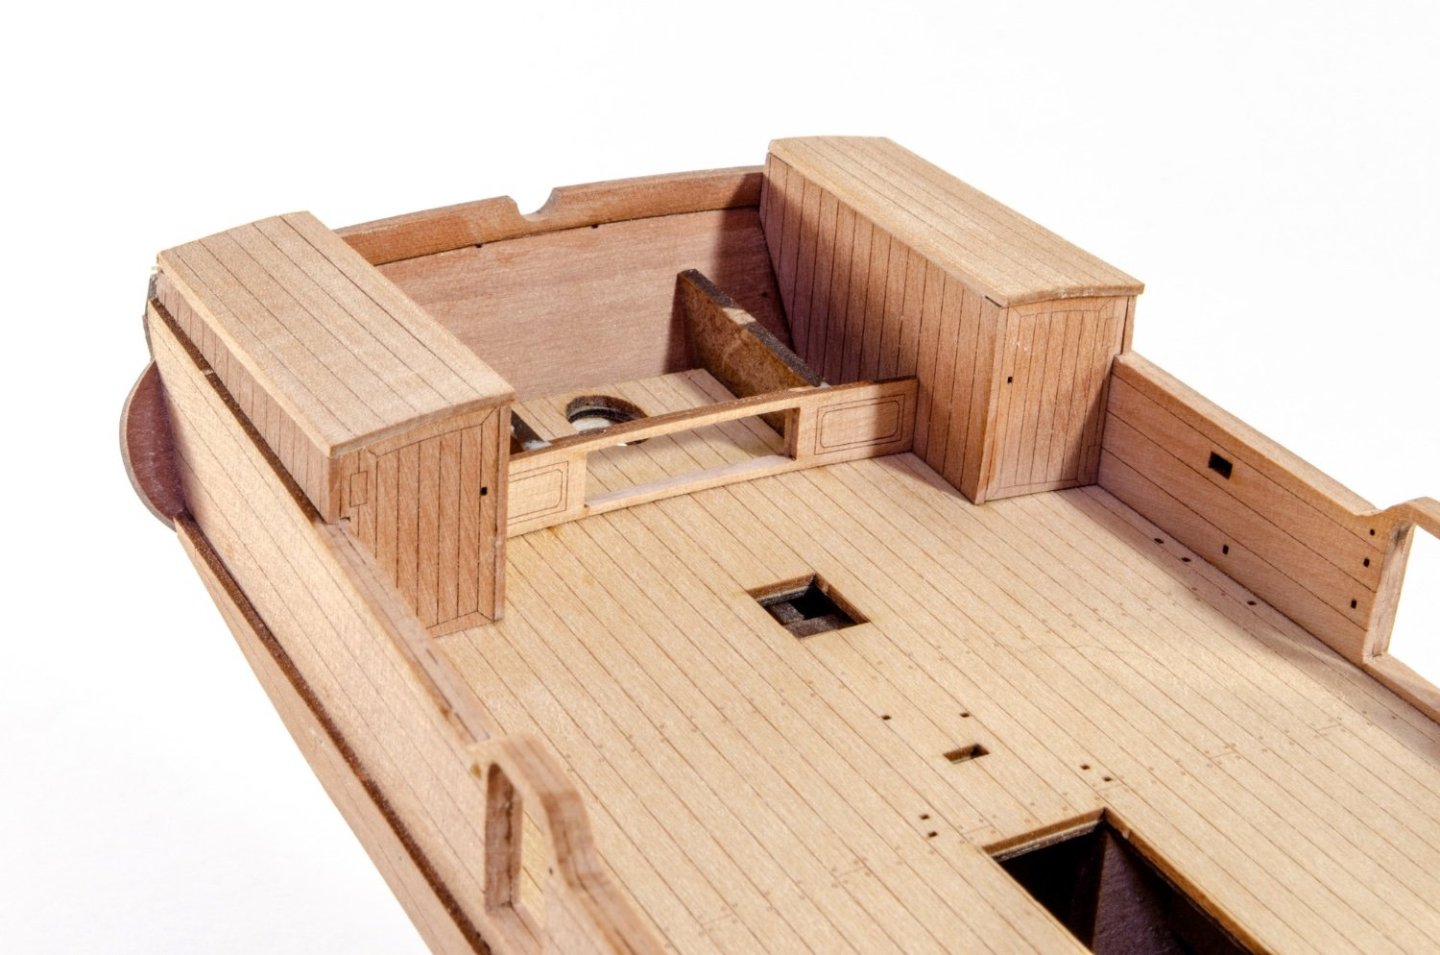
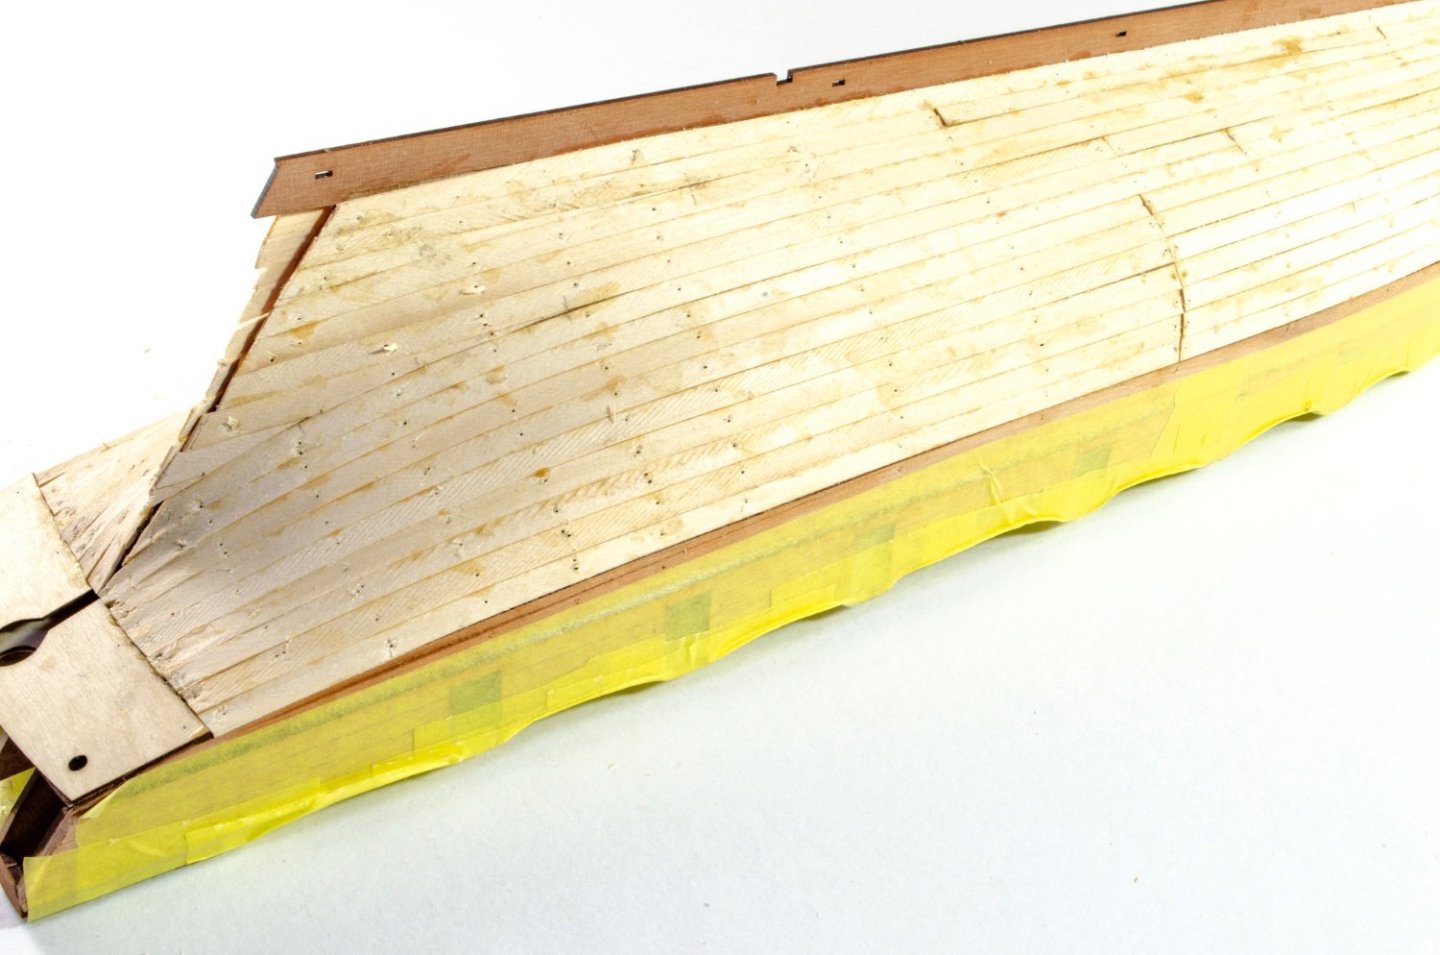
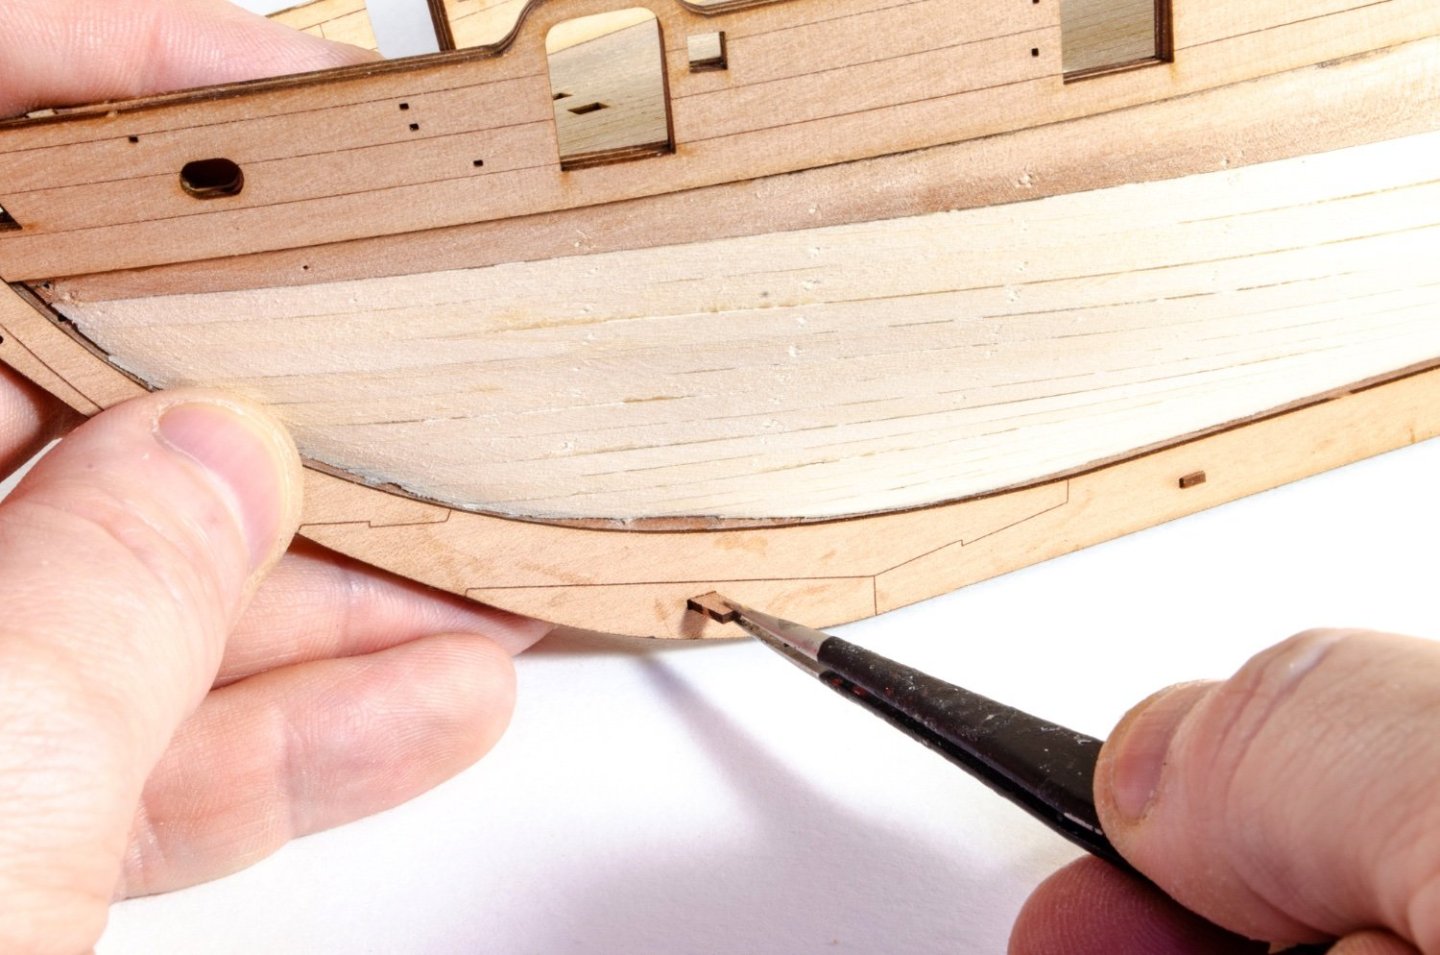
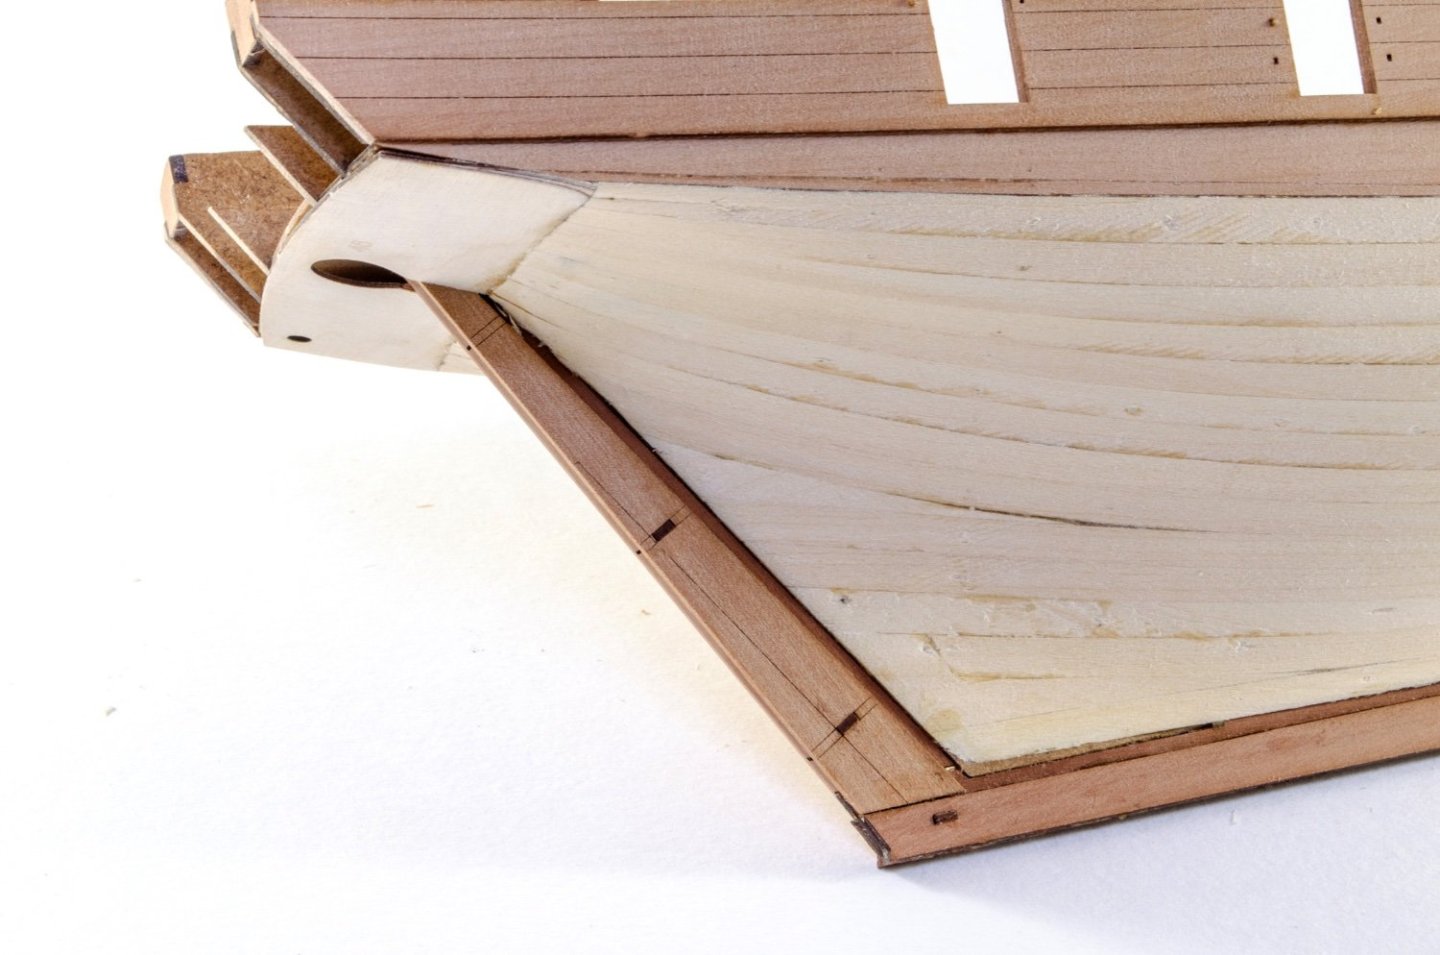
By popular demand...an update! Before the planks could be added, the inner lower counter was glued into place with both pins and clamps holding it until dry. The hole on the left side denotes the ablutionary facilities escape hole. The job of adding first planks could now start. A reasonable amount of taper at the bow, but none at the stern for this one. With the lime planking complete, the keel is then faced on both sides with engraved, 1mm pear. Location pegs are there to assist with getting the parts in absolutely the right place. This is all then thoroughly clamped until set. Adding these parts has created a rebate which will help with the second layer of planks. The rudder post is now built up in the same manner, then glued into position on the hull. Gluing the post in place allows us to correctly glue the outer lower counter. This doesn't need to be soaked, but just make sure it's thoroughly clamped while the glue sets! Everybody loves planking, and I'm no exception. I couldn't wait to get all this done and sanded. Now she's looking the part...


- 80 replies
-
- 26
-
-

-
-
- Grecian
- Vanguard Models
- (and 3 more)
-
That nails it! I hope the instructions were easy enough. I do try not to waffle!
- 587 replies
-
- 3
-

-
-
- Indefatigable
- Vanguard Models
- (and 1 more)
-
I was lucky with the prototype in that the hull was to be painted. For me, using pins was acceptable 🤪
- 443 replies
-
- 6
-
-
-
- Indefatigable
- Vanguard Models
- (and 1 more)
-
Hi all, If you get that message when you try to make a post, please simply PM me with the number that follows where it says 'Your IP'. That will be a block of four numbers with a '.' between them. Thanks
-
- 5
-
-
-
Fixed If anyone gets this, just PM me with the 'Your IP' number. Thanks
-
Ok, fixed.
-
Just so beautiful. Wonderful workmanship. She really looks superb.
-
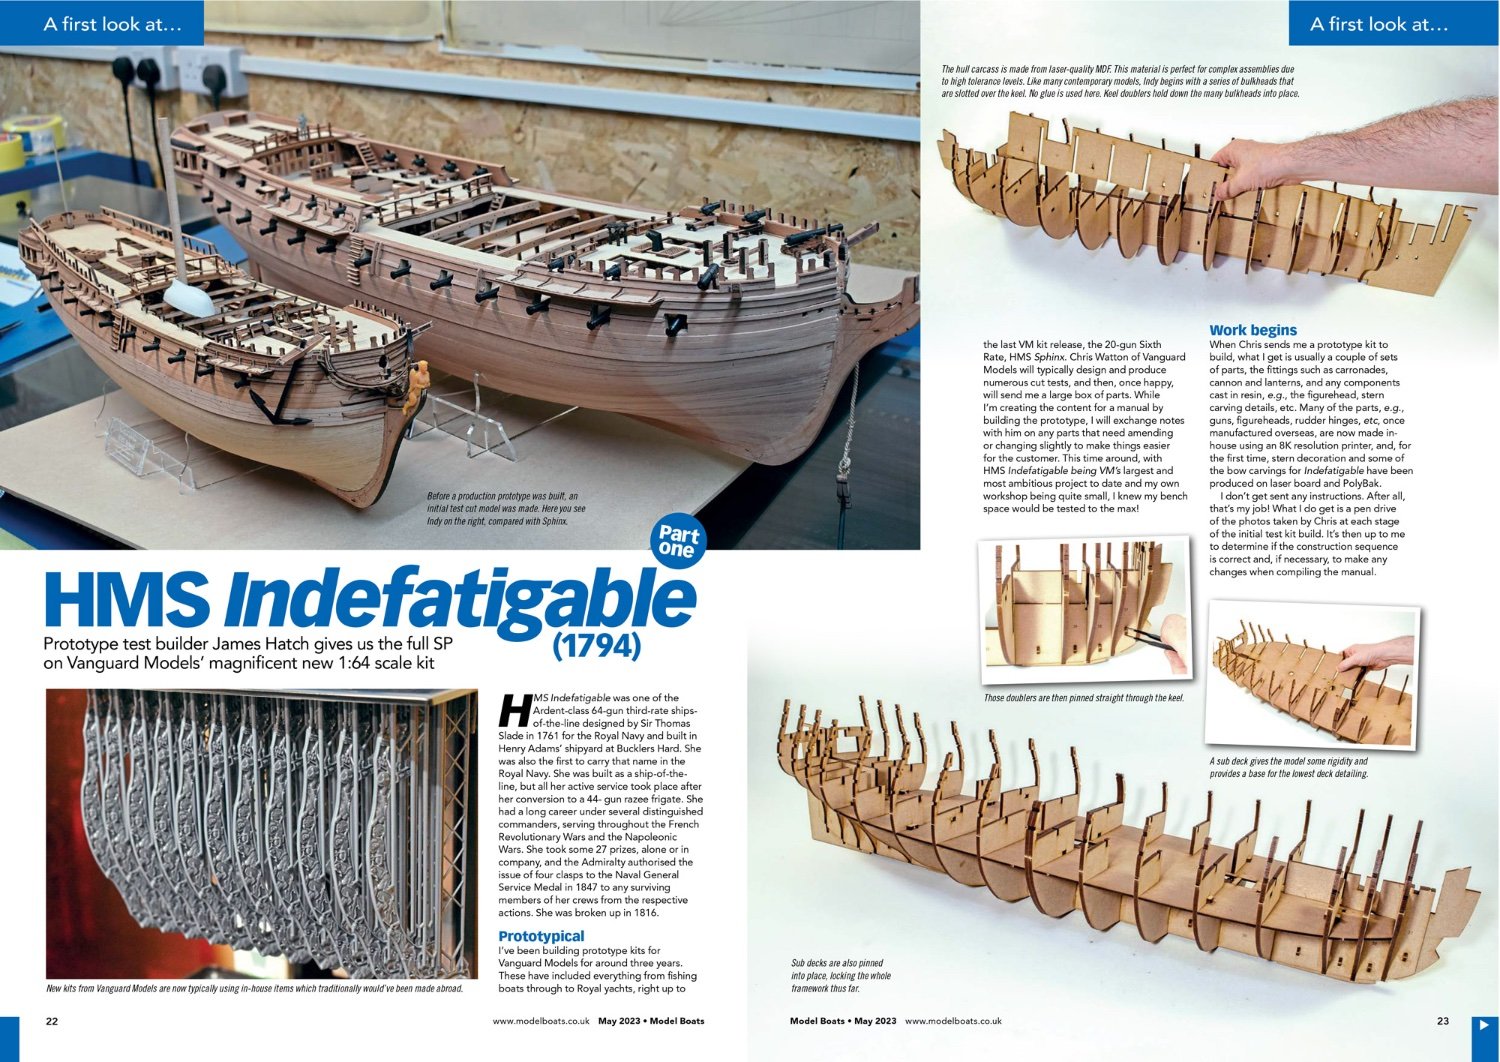
For your info, my HMS Indefatigable build will be published as a two-part article in the Model Boats magazine, with the first part available in this month's mag. It's the Model Boats mag that first drew me into this hobby with Keith Julier's period ship builds. If it wasn't for him, then I doubt MSW would exist, and my interest in this hobby. https://www.modelboats.co.uk Here's the intro pages for Part 1 of my article.

- 488 replies
-
- 46
-
-
-
- Indefatigable
- Vanguard Models
- (and 1 more)
-
That is just incredible. 😍
-
Sorry, I thought you were referring to something else. That part you show last has a lot compound curve in it and the plan can can only show a flat projection and not the curves in that area. The only sanding those parts need is to ensure that they sit on the deck and also underneath Any of the structures that might protrude over that area.
- 488 replies
-
- 4
-
-
- Indefatigable
- Vanguard Models
- (and 1 more)
-
Yes, the lower edge of that pear bulwark sits along upper edge of the main deck gun ports and also aligns with those frames ports in the cabin area.
- 488 replies
-
- 3
-
-
- Indefatigable
- Vanguard Models
- (and 1 more)
-
You really are doing a lovely job with this and I always look forward to your updates.
-
Those planks look great as they go under the tuck.
- 443 replies
-
- 5
-
-
- Indefatigable
- Vanguard Models
- (and 1 more)
-
No, not upset at all. Perhaps a little bemused. This was such a complicated venture, mostly undertaken by myself while I could barely breathe or spend time in the cave. It's likely a reminder of how bad my mind was working at that time.
- 648 replies
-
- 3
-
-
- Indefatigable
- Vanguard Models
- (and 1 more)
-
I get it. I attributed some parts to 3mm MDF when it was supposed to be 4mm. No biggie. That I had to flick between 3 or 4 open pages when writing, plus being badly ill with long covid at the time, it's a wonder I got anything finished. Thankfully all parts numbers are laser engraved too, so it's hard to get wrong. Carry on! 😆
- 648 replies
-
- 1
-
-
- Indefatigable
- Vanguard Models
- (and 1 more)